
Leaderboard


Popular Content
Showing content with the highest reputation on 03/31/15 in all areas
-
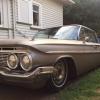
A friend of mine has had a '58 since we were teenagers so I was always keen to get my own american car. He's running Hydraulic suspension
 8 points
 -
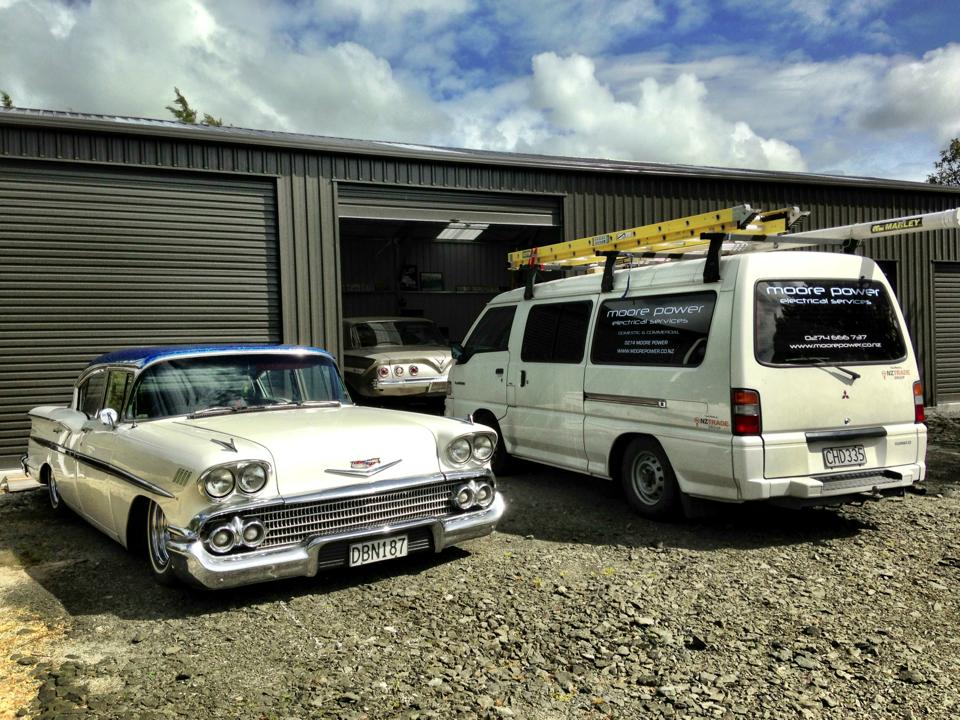
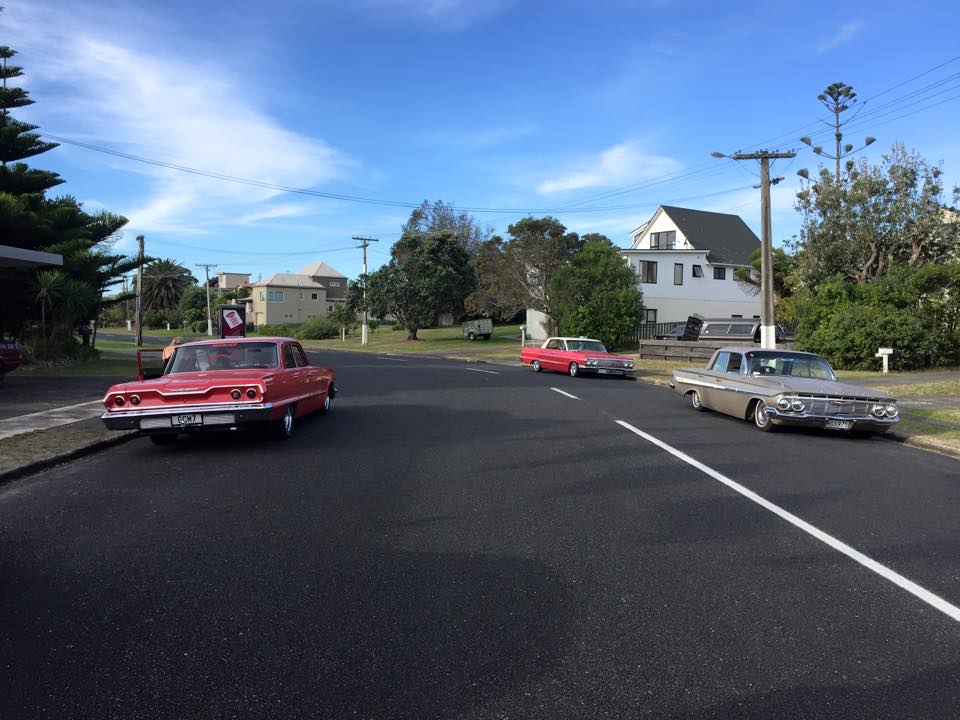
Beach hop '15
6 points
-
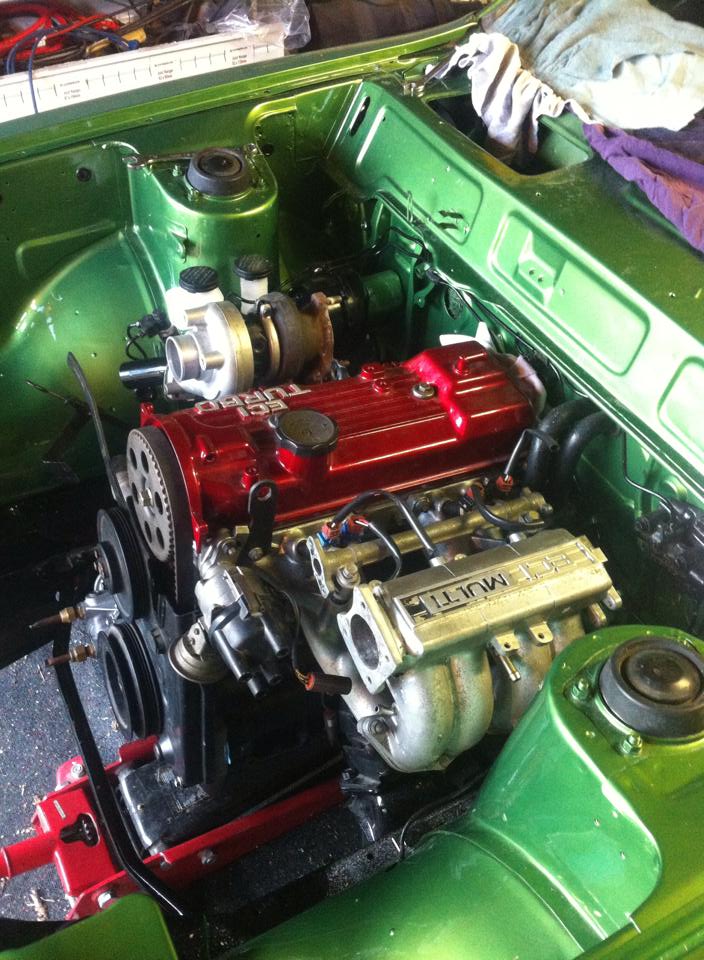
OK. So there was no way that the engine was going to be ready for nats, so I held off a couple months whilst the dollar went everywhere. Clicked the button/called the dude in cali a week before nats and got the bits ordered. They all turned up today, and look to be all there, and in the appropriate amount of pieces that is correct. DORT BITS! Pictured is; 2x 45mm webers headers arp head bolts total seal gapless rings TRP 294 cam with appropriate valve springs rocker arm lockers (to replace springs that let go at approx 6800ish?) steel head gasket lightened factory flywheel oil pump + timing chain bearings, gasket set etc oh and these little beauties, which should pop me up at a nice compression ratio talking about it; //oldschool.co.nz/index.php?/topic/29495-sparkles-bmw-of-supermega-happy-hell-yes/6 points
-
Somewhere around Cromwell, on the edge of the Kawerau gorge, the Do Bros began to take hold...5 points
-
It means Dave's coming and we're gonna rent a red Impala convertible and cover the race.5 points
-
What a busy week on this ! finished Jig mid last week. Drove down to Timaru on friday night to Rickees Workshop with Jonny from up here. Got straight into it after a kfc bucket and a box of Rogue Hops Frame now has 3" stretch and 2" drop. Rickee was amazing with his tube bending & Tig Welding Jonny spun up some amazing bosses for the new handlebars together we notched all the bars and bent up the sissy and 6 bend bars Had a quick mock up yesterday after i cut the frame from the jig. Need to make new axles and spacers to get wheels to fit but overall im well stoked with the result5 points
-
sooo many flat peakers, such JDM as fuck/illicit/hustler/minitruck/driftking/ceffy/rip that shit little Jonny/metallic blue vr4 bro. Still good for yarns with usual boes3 points
-
Over the weekend it was time to do an oil change - and give the old girl a clean - as we were originally racing over Easter - which has now been called off. I've finally got around to putting the correct boot lid badging on.. I had some replica powered by rotary decals made - Added the under bonnet decals as well....3 points
-
Valgas was back Bit wet at times.... This had an injected Holden v8 Bare metal with clearcoat. Amazing. Most popular with 6yo boys. Couch Surfing? Meguiars filming Beach Hop wedding aftermath Bride was late and rain had returned. A few Merc wagons this year. Chevette3 points
-
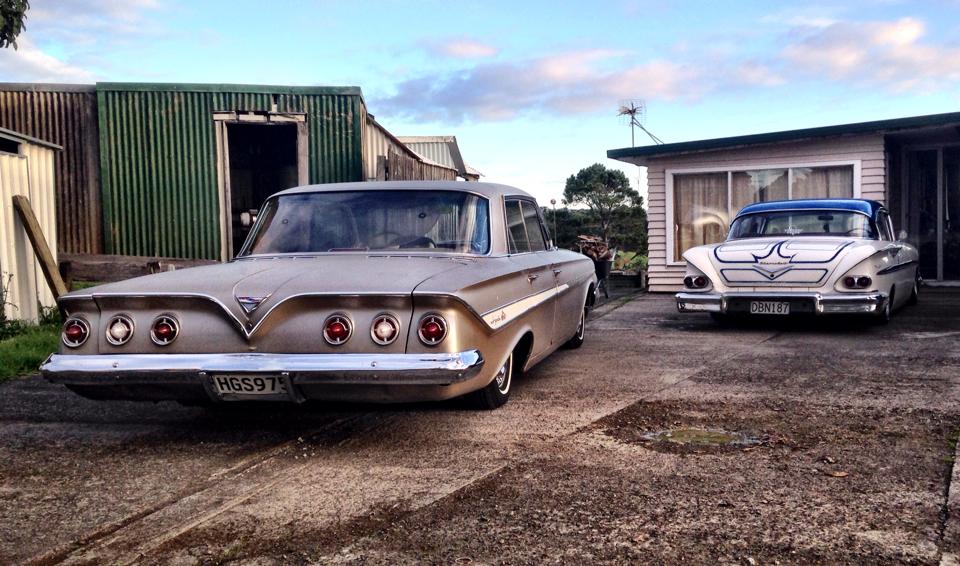
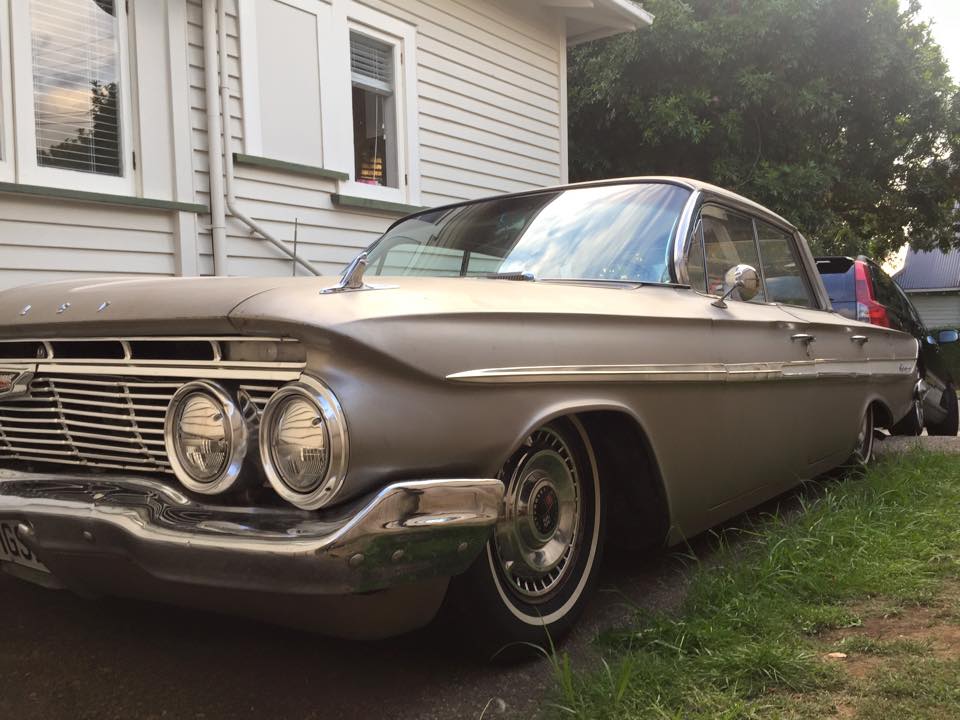
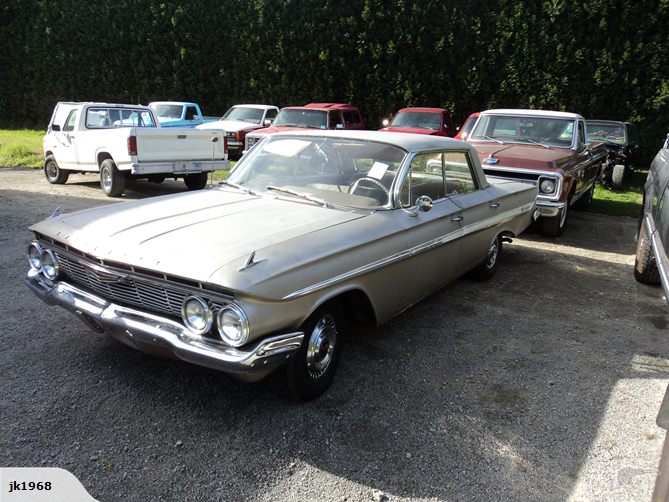
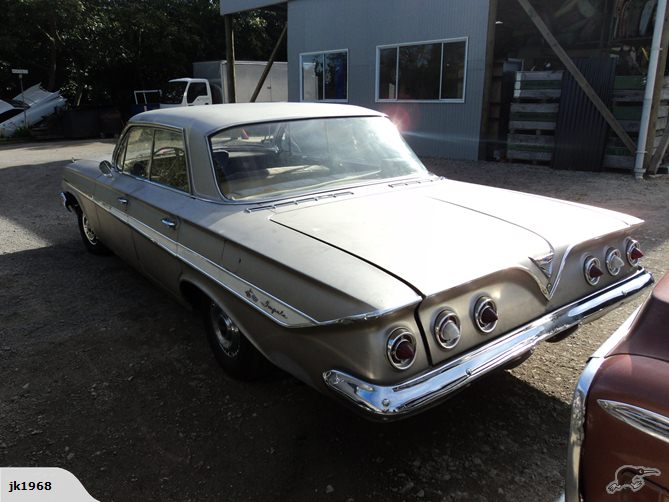
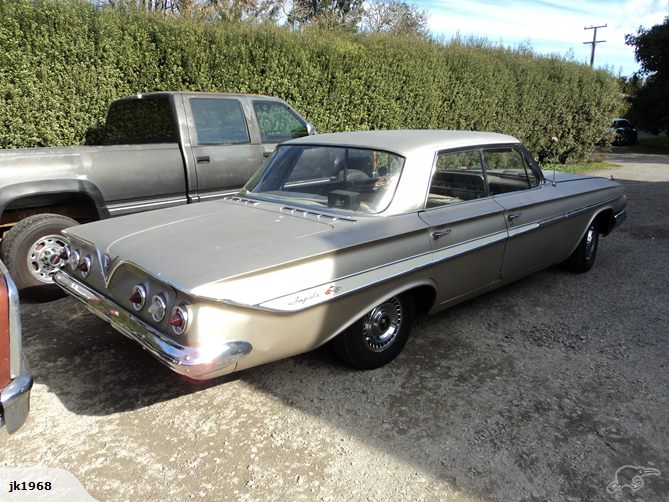
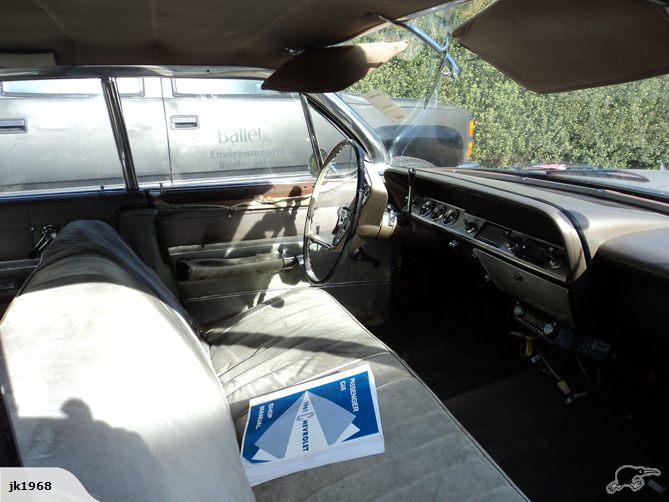
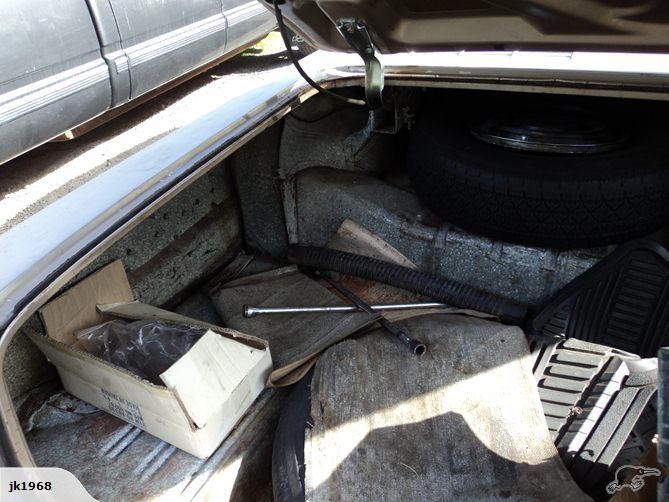
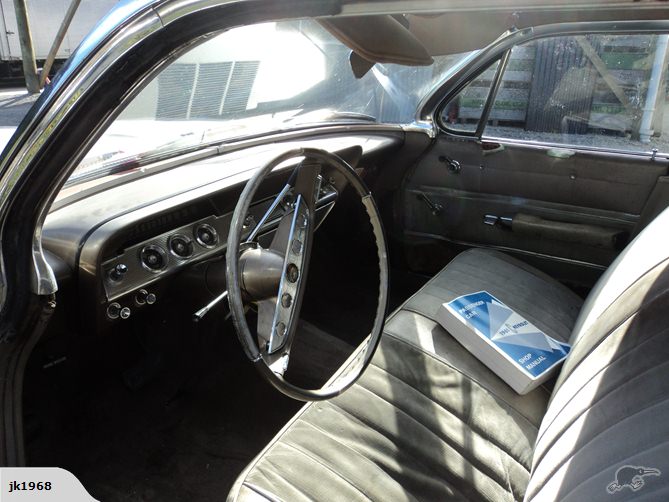
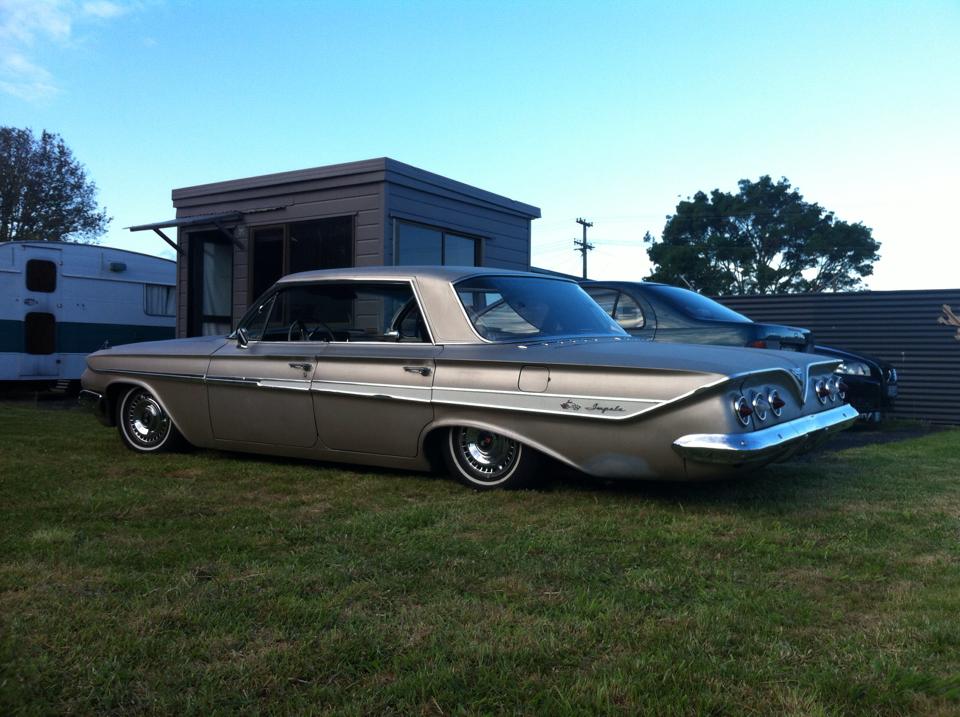
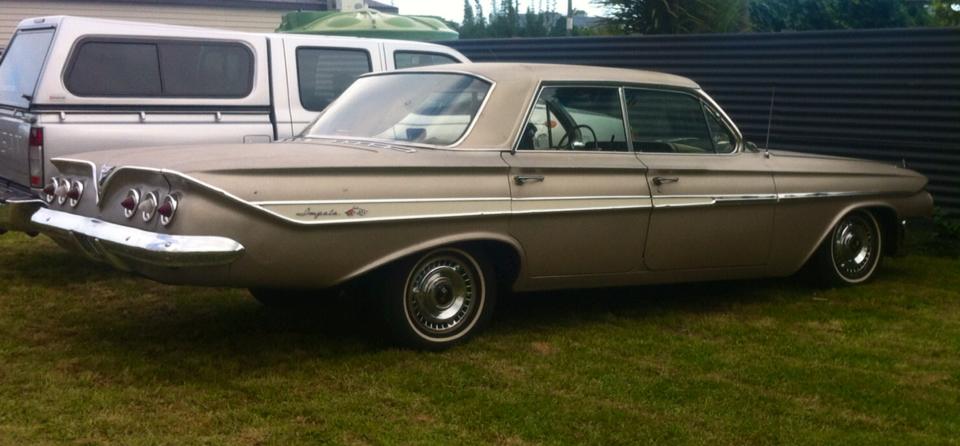
Project discussion //oldschool.co.nz/index.php?/topic/47720-moorepowers-61-impala/ I purchased the car from Tauranga in August 2013 from Trans American shipping. The car is straight out of Las Vegas. It has genuine patina and has been the daily driver of a big guy (drivers seat is worn) who liked football, betting and fast food ( I found hundreds of old receipts which he had lost down the back of the driver's seat) As anyone who has bought an American car would know, they don't really look after their cars in the same way we do. All in all the car was relatively stock when I bought it. I never intended on keeping it stock as it is not a rare car. If it was an original 409 bubbletop, that would be a different story. As purchased...
2 points
-
Forgot to say this is a super awesome car. Looks so right, down low on stockies2 points
-
so i just brought this weapon today. $550 off trademe its had the same owner for 20 years! interior is mint! but shes not exactly nice to look at hence why ive nick named her the boat but its gonna be a good daily driver and it gives me a spare gearbox and also 10 bolt diff housing for the celeste when i get round to upgrading the rear end. got the standard sohc 4g63 motor plans are to give it heaps of low and ive got a supercharger set up sitting in my garage for these engines so will be getting that thrown on in the near future winning! haha
2 points
-
Nothing is more fun to ride then a suicide shift. It is only scary for the first few blocks then it feels natural. Plus it is supper easy with a Sporty. I biult a triumph with a proportioning valve and it was a very bad idea. Since you have to figure in the suspension factor. Once you make the rear ridged then it becomes easy to lock up the rear tire since there is nothing holding down. Not really a big issue but with the front brake linked to it you end up with a Low Side recipe. Because the front has suspension holding down so it doesn't loose the resistance of the road keeping it from locking up. Honda has done linked brakes but the plumb them to go to the front calipar first then pressurize the rear. To keep the bars clean I have ran a BMW master cylinder under the tank ran by small front brake lever for a cable brake.2 points
-
In fact, at $2 a pop I might even get the 2 ohm unit, then in case that isn't big enough, also get two 4 ohm resistors and wire them in parallel which will effectively double the capacity. Shouldn't need more then 20W for a small bike like that2 points
-
So this summer i threw an Accuair setup in the rear of the car while on the family holiday.. using our tent as a workshop. Had it all done in one day and rolled it like that while we were away. Much nicer ride
2 points
-
Put Holden HQ king springs in and rolled it like the past year. Was a bit too low in the end
2 points
-
Have cut out that backing plate for firewall since taking these pics. I will be moving the car up to Auckland this weekend so can get some after work hours done on it over autumn/winter instead of having to wait for long weekends etc to travel. Can't wait. I'll take pics of the trailer voyage and extra stuff I've forgotten while I'm doing it.2 points
-
At time of posting I had 616 views, that's neat! Picked up the motor in the weekend. runs like a dream. doesnt sound like it in this video but it ran nicely. Garage Floor Run Up2 points
-
dont you worry, this shit be pulling the bishes once welded!!2 points
-
One of the most fun parts of a new car project, in my opinion, is is the initial clean out/strip down/inspection and the organising of all the bits into labelled boxes. So just before Nats I moved Rosie (as named by the previous owner) from her corner in the workshop and made a start on the engine bay going from this: to this: Sadly I ran out of time and Rosie was relegated to the corner again as we packed up and set off to the Coromandel (fun times ). On our return lots of jobs needed doing around the property (build woodshed, stack wood, organise workshop, etc.) so it wasn't until earlier this week that I had a chance to continue. I started by cleaning all the mossy green stuff from the windows. Alex wanted me to leave it on for patina but I actually like being able to see through the glass. Here is Rosie looking all shiny in the evening sun: Then I unbolted the seats, removed all the yucky, disintegrating carpet and vacuumed out all the pesky dust mites: The floor is surprisingly solid with only the driver's side needing attention: I discovered this under the rear seat so it seems this panel at least is from Oxford which is where I am from. How cool: I then moved on to the rear of the car. I already knew it was really rusty so was not shocked by what I found behind the trim: The floor is the worst bit: I have carefully stashed away all the trim pieces for future refurbishment. Everything looks salvageable. The other good news is that the rear doors look repairable (I already have replacements for the rotten front doors). So lots to do but at least I know what I am dealing with. It will be good when we have our new hoist installed and I can properly assess the underside. Next on the list is remove the cylinder head and see what state the engine is in (I'm expecting the worst). Now that Alex has his Viva hatchwagon in the workshop I am under pressure to make good progress on my project. I can't let him get his car on the road before mine!2 points
-
Man that's a sweet drawing! Beaver, could you weld a new mount to the tail housing further back?1 point
-
You will just want to check spring diameters. I know hq springs fit 58-64s but not sure about 65 onwards.1 point
-
theres 4 different 71 twincam badges supposidly. and they are all a differnt fit/size. i just got lucky.1 point
-
How bad is it going to look! fuck yeah!1 point
-
Ill talk to Joel and tell him to make an account on here. He will be willing to do a deal.1 point
-
Kurt, havnt you learnt anything.1 point
-
Also, Sold my 14x9/10JA mk1's to speed up car progress. So bought a 14x12 cause its cool. Done lots of RPM tunnel videos. Dropped struts off to be Crack tested today. Talked to engineer for plans after cert, moving motor forward, 6 speed, ITB maniold and shortening the diff are all on the cards. Not all at once (duh) Yeh, shit yarns go here guys --> //oldschool.co.nz/index.php?/topic/47514-ants-tc24-gx71/1 point
-
Drilled guards for fender mirrors. Fellow RIVERSIDE member in japan sent me a TWINCAM24 Front grill badge as a gift. Beats all pressie's for last few years by far. (this specific badge are rare even in japan he says!)1 point
-
The insulation: It looks like arse at the moment, however it will get tucked in nicely before I glue and screw the roof in. It is a woolen batt so will be good at insulating Here is my overhead shelf, you can just see the switches in the RH side (on the underside)1 point
-
I want in1 point
-
Yup, you just need any high wattage universal resistor. Like this http://www.jaycar.co.nz/Passive-Components/Resistors/Wire-Wound/2R2ohm-10-Watt-Wire-Wound-Resistor/p/RR3344 - that one should be sweet, alternatively you just want the highest wattage 2 ohm resistor you can get, if the wattage is too small it will get hot1 point
-
just o0rder one. by the time you fuck around it will already be here1 point
-
This car gets all of the likes. Love it.1 point
-
Thanks man will look into it.Your setup sounds ideal1 point
-
we could do a BBQ at mine....1 point
-
Insulation in the roof, check! Hole cut for extractor fan, check! Camera with a flash, Negative! Tomorrow night.. doors begin to be built! Also I won this on the tard today:1 point
-
This is sweet Shane All this housebusery is making me envious and wanting my own1 point
-
Alright, Iv been living in the old girl for a few months now and its awesome! No regrets whatsoever Iv pulled out the table and chairs to make room for a full sized fridge Iv replaced the 12" subwoofers that are mounted under the couch with some xplod's that I had kicking around the shed Does anyone know anything about this amp? Ripped out walls because they were dumb In goes the fridge, I will try to hide this or paint it or something to hide its uglyness. It may even end up on the other side of the bus then I moved onto my parents property. They will be getting their bus legal soon and hitting the road so there will be much more space then, I just hope we can get my bus into their spot! Its all been about the shower and water system lately, Brought a gas califont and mounted that in a locker (still need to make a flue for it). Run water pipes and drainage pipes, Dad chucked up some wood to attach the lining to and we after work today we started cutting up a old stainless shower cubicle to line my shower with. Heres a pic dump1 point
-
I got the flanges for the hubs finished today and got the hubs assembled, I am extremely pleased with how they turned out. I will be sending them off to be nickel plated this week. Big pic dump of machining the flanges..... First rough out one side Then flip it around and use a boring bar to machine out the inner step Machine the 13 degree taper Drill the hole for the axle and bore to size Flip it around and holding it on the inner step with a live center machine the rest of it down to size Machine the radius in the corner Drill all the holes, I was lucky that the guy in Oamaru lent me his drilling jig All of the flanges finished And press it all together, i made the fits size for size so it didn't take much to push them on And all finished!!! Next is the rear forks1 point
-
Top job on saving this. Great wee cars. Pleeeeeease don't put minilights on it though..yawn ! Ignore the KY fella. He know nothing. You know as well as the next kiwi fella that this needs....... A 12a and....... MODGIES!1 point
-
Well now... a little update. Its started to rain here in normally sunny old nelson and I didn't like seeing the wagon out there filling with water due to no doors (although the fist sized holes in the sills let the water out..) My brother was over this evening so while extra hands were about we pushed the little wagon into the shed where Hannah has been spending a few hours here and there doing her wagon thing. I felt like I was missing out.. not helped by Hannah now giving me grief that I dont actually own a wagon. She claims its just a mere hatchback. Not fair! Once inside I emptied it out. There was a spare tailgate (or hatch......) and the doors off a white car. The tailhatchgate is actaully the original item. Not sure why it was swapped over but luckily its much better rust wise. Still rusty but not terminal. Then I set to picking out all the various bits that old cars collect. So far I found some money as usual...Im now up to 7c. So car now only owes me $599.93 I also found various tiny plastic toys, a key ring clip, a bicycle combination lock - missing the chain, a eraser and a tow ball. Quite a score... The fella I bought the car from cut up another Viva a while back. I managed to score a complete floor plan half along with the sill for the rusty(er) side. It will be bloody handy and will make the repair job so much quicker! The worse of the sills.. The floor/sill for transplant.. Now some might say "why bother trying to rescue such a rusty old car" and my answer would be...well just look at the interior. Check out the mint dash for example... The doors need to be put in place before I start bracing and chopping things up. Not so easy when they were removed by simply chopping through the pins. Vivas dont use bolt on hinges! This I have only just learned. They are instead welded in place and the only way to remove the doors is to 'carefully' hammer the pins out. So I have some rusted in pins to deal with. Fun times. Tomorrow I will have a go at starting the awesome 1200cc power plant. Hopefully fit the doors so it can go back outside and dealwith rain a bit easier and I can sleep easy.1 point
-
DONT LISTEN TO ANYONE ELSE ON HERE. IM EXPECTING TO SEE A TURBOCHARGED STARFIRE. "I don't know who you are. I don't know what you do. I do have are a very particular set of skills, skills I have acquired over a very short time. Skills that make me a nightmare for people like you. If you turbocharge that starfire, that'll be the end of it. I will not look for you, I will not pursue you. But if put any other motor into this car, I will look for you, I will find you, and I will remove it and reinstall a starfire." Hi, Im Thomas. My VK was a starfire powered example, but i regretfully pulled it out and replaced it with a RB30e. I sort of miss it being starfire powered and actually was thinking about turboing back when it was in it. but now its just sitting in my garage. YES I HAVE A THING FOR STARFIRES OKAY. Would be super awesome to hear hectik dose noises and have people be like is that rb30et? and you like nah.... its better...... TURBO STARFIRE ZOOOOOOTUTUTUTUTU1 point
-
1 point
-
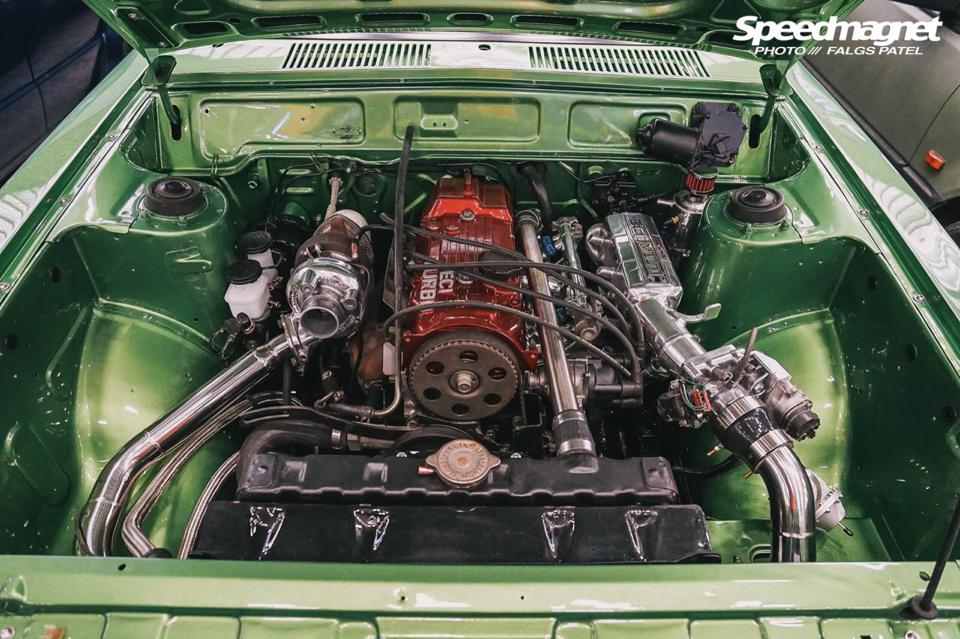
i stripped the motor down and replaced head gasket and all the seals as it had been sitting for so long! motor had minimal mods to it apart from oversized pistons and balanced shafts removed. i ditched the crappy dual port injection set up and brought a manifold off a fwd galant which is mpi and bolted that on. i had to cut and shut the plenum and extend it to miss the dizzy cap. thermo housing is at the back instead of the front so just ran a pipe from housing to the radiator. bolt on mods: brand new td05h 16g with hks rear housing tial 38mm wastegate hks bov and turbo timer galant throttle body vr4 injectors 2" intercooler piping (intercooler hidden) oil cooler which is hidden behind grille brought a microtec lts-8 for it (no throttle control) which works mint!
1 point
-
Some also allow speaker attachments so you can call it up and talk to whoever's in your car1 point
-
Mayte best tow vehicle/towed vehicle combo right there Mayte.1 point
-
I'm just gonna build it how I want it to look and then try ride it tbh1 point
-
Haha I'm stuck in the same situation as you waiting for the revised cooling kit, but beggars can't be chosers.1 point


This leaderboard is set to Auckland/GMT+12:00