
Leaderboard


Popular Content
Showing content with the highest reputation on 02/23/15 in all areas
-
Astro turf plZ3 points
-
Removed the spec/QC stickers from the inner barrels as such (gotta retain these details right?) IMG_0770 by SnoozinRichy, on Flickr They're kept in a book, in the hope they'll stay flat on the backing of an old sticker I found laying about the place. So then it was time to get rid of the grotty old golden hue. One trip to the acid dipper (recommend Kwik Strip, on Patiki Rd if you need anything done!) and a couple of hours with some coarse sandpaper evening out some pits and depressions and these are now ready to have the lips attended to and polished to that mirror shine! IMG_0750 by SnoozinRichy, on Flickr Thanks for looking.3 points
-
i feel like the loose caboose was highly likely the issue, however wont be able to give any closure untill??? some testing time. Iirc there is a testntune midweek at meremere so might go before nats hampton. in more interesting news, the rear diff is now welded and provided double smiles on test drive.3 points
-
Most of the project was done before the 2013 E.D.R. but now I have to repair the jammed forks thanks to the shipping company and make it compliant. Cheers2 points
-
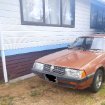
Discuss After crashing my motorbike I have pussied out and bought a car for running to work in. Anyway it is a 1980 Mk1 Golf, would have loved a 2 door but couldn't pass this up. Running a 16V 1.8L from a MK2 GTi and has had a recent bare metal respray in very dark gunmetal grey metallic Plans: New front tyres New carpets Tidy stereo wiring Replace tie rods Tidy/semi-wire tuck engine bay and I'd like to swap out the current VMaxx coilovers for something better and track down a set of genuine BBS rims Advert photos:2 points
-
That's some mighty fine weldin' on that there sump. Looking good. Here's more Taylor Swift because you earned it:2 points
-
Yo Richard you overly handsome rapscallion. I have a CB you can rock for tour and nats. You will have to get an antenna kit for 60 bux off the tard though as i dont have juan of dem.2 points
-
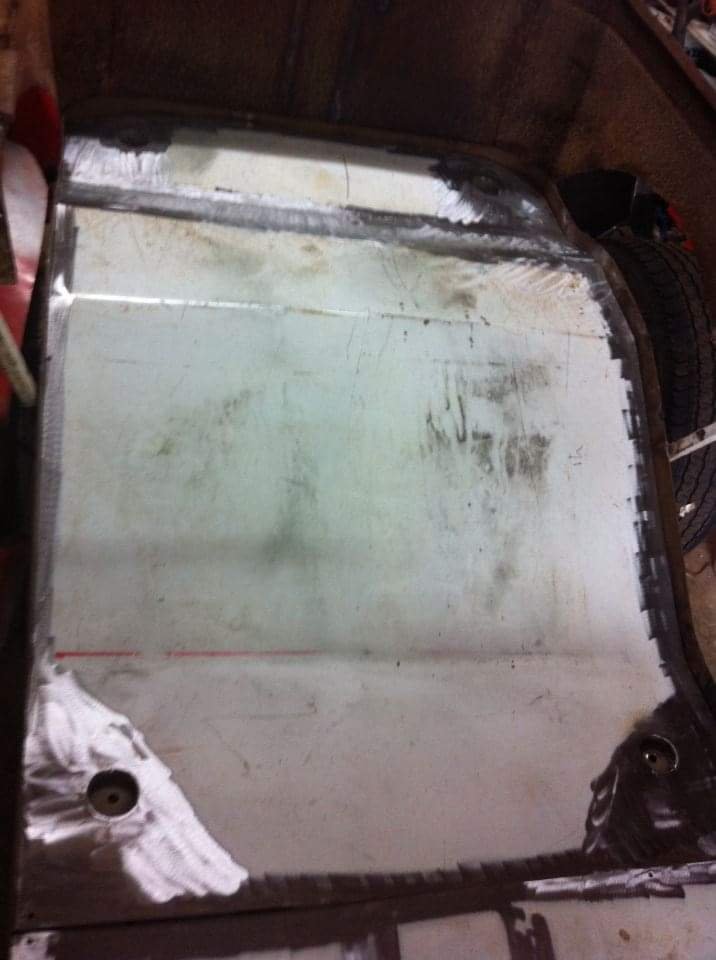
so i got a bored about an hour ago and decided to do this.... looks like my vw was a light blue in its early days of its life. what a prick of a designee the made there hoodlinings. (vw still havnt solved that problem) it looks like someone has been here before as well take a close look and you will see all the dots on the left side have been drawn in and on the right side it is actually perforated LOL here is a photo from underneath haha also earlier today i swapped out the back rest of the beige seats onto my bases so i could have some low back seats they fit up sweeeet as!!! took it for a drive and i have so much more visibility around me now its crazy!!!! so now that the seats fit and look super ugly i better do some upholstery work looking forward to this part. ah thats why i ripped the hoodlining out as well as it had some rips in it and what not. since im advertising Midnight Upholstery on the side i should probably have the inside looking good2 points
-
Sooooo, been a busy past couple months but been chipping away at this. Since I made some big dog radiators for it the nose cone failed to fit anymore. But in true race car you must modify everything with no allowance for body work and then make the body fit. So i ended up cutting the nose cone in half horizontally and adding in about 80mm to lower the chin. Then i fixed all tthe cracks from the crash i had a few years ago, then bogged and sanded then bogged and sanded then bogged and sanded then bogged and sanded then bogged and sanded then bogged and sanded then bogged and sanded then bogged and sanded then bogged and sanded then bogged and sanded then bogged and sanded then bogged and sanded then bogged and sanded then bogged and sanded then bogged and sanded untill it was correct and back to where i wanted it. Then I primed it and wet and dried it, Then I primed it and wet and dried it again. Then i waxed it then i painted it with tooling coat then i fibreglassed over that to make a mould. Then finally today i got to actually make a finished product from it! Its come out pretty good. So i might just run it as is for now. Looks quite cool in white i think.2 points
-
I vote second peephole in the adjacent panel so one for each eye /balance it out..2 points
-
pro tip; always take good care of you cooling system in your paddock car. we have driven my paddock bmw so hard that the wheels have literally fallen off. but the engine still runs like a dream thanks to the VL commie radiator2 points
-
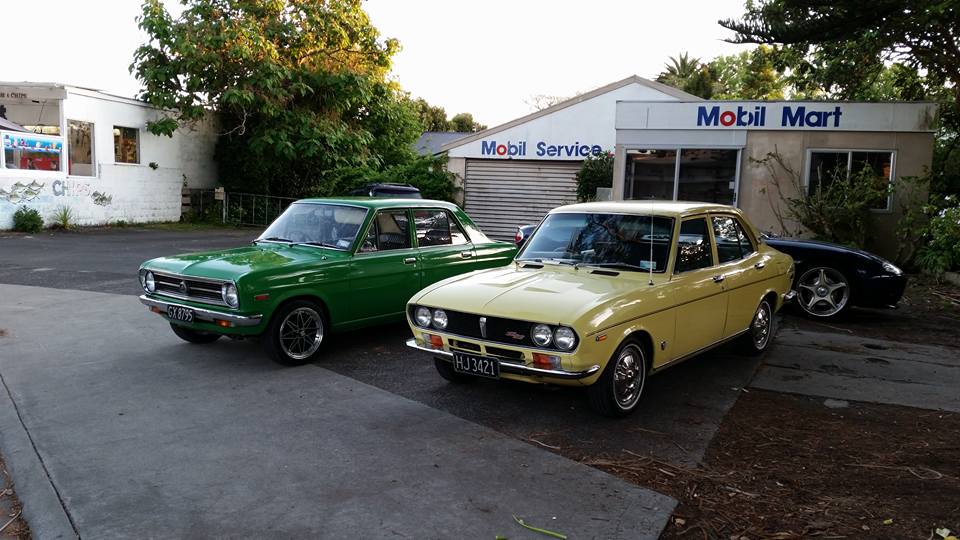
Now I've had a chance to get the car out of the garage, and get some photos, it's time for its own page. This is how the car looks now. I've just spent last weekend reinstalling the close ratio gearbox, race diff, and the fast steering box. The car was also missing the centre dash console, along with the factory guage set, so a new one of these arrived in from the States early last week. So this weekend was to restall the dash centre, the factory gauges, and the additional guages, the heater controls and get the centre console in. I also had to get the decals on. So the interior looks like this now, a vast improvement on the gaping hole SO the car is a 1972 Mazda RX3 Coupe, that has spent the last 15 or 20 years as pretty much a dedicated road legal race car. When I first encountered the car, it was owned by some members of MREC Tauranga, and was running a 13B J Port, and was a class winning car at Taupo at the time. It eventually found its way to Wellington, and was repowered with a 13B Turbo, and the usual Supra box. The previous owner had acquired it as a rolling shell, and had decided to go 10A PP. So the specs.... Driveline: 10PP running around 180hp. Mazda factory 4 speed close ratio gearbox. Mazda factory 4.9 competition diff, with a Mazdaspeed race spec LSD. Suspension: Front is coilovers, with Koni adjustable shocks, and Knightsports Camber adjusters. Wilwood 4 spot calipers, with Wilwood rotors Mazda Factory race steering box - 2 turns lock to lock Rear is cart springs with lowering blocks, and as per Group 2, two forward control arms Brakes are series 2 RX7 - adapted to fit the RX3 handbrake setup - pretty much like the Group 2 setup Mazda 626 RWD swaybar Body At the moment Savanna lower nose cone Aftermarket Fender flares Savanna rear bumper Savanna Geniune accessory Bobtail Savanna GSII rear quarter badges. Body parts at hand.... Savanna Race two piece front Splitter Savanna Race single piece front Splitter Savanna Race rear blade spoiler Savanna Race Group 2 Fender Flares The plan..... I want the car to run either of the two Race fronts, and probably the two piece front spoiler. I'll also have another boot lid done so we can set either the blade or the bob tail. I need to get some molds taken of the fender flares, and then they will go on the car, as well has having the guards chopped out. Then we will look for some 9 or 10 inch wide rims for the car. At the moment I'd like a set of 15 x 10 Watanabes, although depending on price I might also look at the similar Panasport 2 piece rims. The idea is to keep it as a period race car kept pretty close to the Group 2 specs. Ultimately the car will probably end up with a 12A PP, as that is pretty much how the Japanese cars run in the day. The only real difference is the period Japanese cars ran a gutted interior, no bumpers, no headlights and a megaphone exhaust. So we have a few tidyup items to do before its first outing in a couple of weeks. Finish off tidying up the dash wiring Fix a leaking radiator overflow pipe Replace the Fire Extinguisher Gets some numbers made up for the car Get some towing eye decals Time the engine, as its a little retarded at the moment. Discussion Link1 point
-
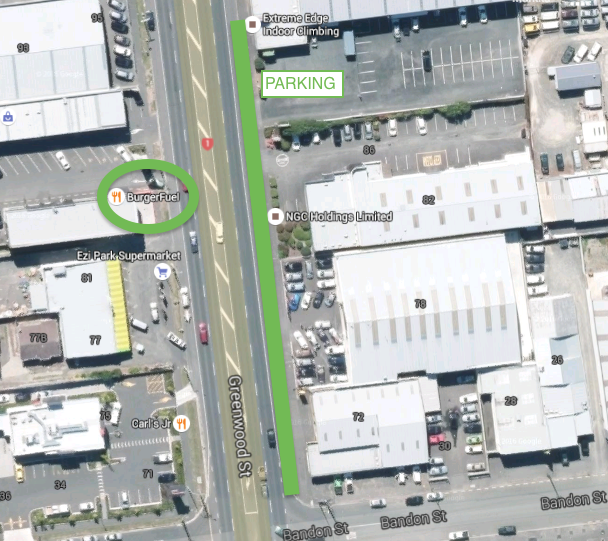
NEW MEET INFO HERE: Hello and welcome to the Hamilton meet! The next Hamilton Monthly Meet is coming up on Thursday May 18th at 7pm The Hamilton Monthly meet is coming up at Burgerfuel Rototuna. Our meets are usually on the 2nd to last Thursday of every month. We'll be at: Horsham downs road, Rototuna, Hamilton Park in the carpark near the restaurant. Usually we'd be at Burgerfuel Greenwood St on a Thursday night. Parking at the side of the road on the opposite side of Greenwood st (between R&S and Bandon St). Where we have exciting attractions, such as, FOOD SWEET OLD CARS YARNS Come along and eat foods, talk cars, meet strangers from the internet, etc etc Cheers Jesse/Yowzer
 1 point
 -
I do enjoy a mk1 golf. Nice car1 point
-
Nice car, well done. I'm not sure about interior bits, but I used Qualitat when I had my VW for all mechanical parts and found them really good.1 point
-
1 point
-
Took it for a small shake down yesterday Oatua Hill climb . Engine been back in for 4 days but I was pretty happy with the way it run . This was not my fastest run for the day but shows it at least going And it was quite wet . First run was 60.5 sec fastest was 52.6 sec but there was still a lot more in the driving I would say Still a few small issues going . Leaking tail shaft . And I'm not sure that its running at its best . Carbs are spitting a little when they didn't used to . Just need to check that the timing is right . And it needs a new Alternator to handle the engine.1 point
-
Might even get you a lifesize cardboard cutout if you get this dubyabee on the road1 point
-
Damn she's lovely. My welding is getting better every time but its still not ideal. I ran over that weld at high amps with no filler to round it off (I ran the arc in a z over the square edge to round it off) It looked better before I did that as was all bright and colorful1 point
-
//oldschool.co.nz/index.php?/topic/34297-cb-radios/1 point
-
We rock 26MHz bei. 27Mhz is aus1 point
-
sweet beans il finally get a chance to check this vw of yours out. i think we are meeting a bunch of guys at bombays around 11. cause its a all weekend thing but il only be there sat1 point
-
ragtop? yea why not. nothing better than a challenge. i couldnt stand it as for my headlining i wont be using a pattern or buying a new one ive got a crazy idea in my head and il leave it till its done to show you all hopefully it comes out as good as i in-vision. and i just check under my benches at the shop and i have a huge amount of off cuts cut pile carpet. how convenient....... i might try do this all before bugjam this weekend but we will wait and see how we go........ will probably get none of it done lol1 point
-
yes! I don't really like the holy hole headliners, this is tweed, little bit custom, little bit hod rod. I like. what you thinking for yours? wanna do the ragtop oneday?1 point
-
fuck. lucky you got off the motorway, no shoulder there! got luck with the rebuild/burning car to the ground in a fit of rage.1 point
-
Oh. Just realised we totally ignored the other question. Doing it up with view to stay here for another decent chunk of time. If we were looking to sell straight away on itd be a completely different style of reno - more along the lines of what Alistair is doing. And we sure wouldn't be forking out for mega shed.1 point
-
I love thing project, makes me want to build one day! go boy go!!1 point
-
my rwd wagon collection is getting there these days isn't it haha r31 skyline wagon and my sigma wagon both a bit of family fun1 point
-
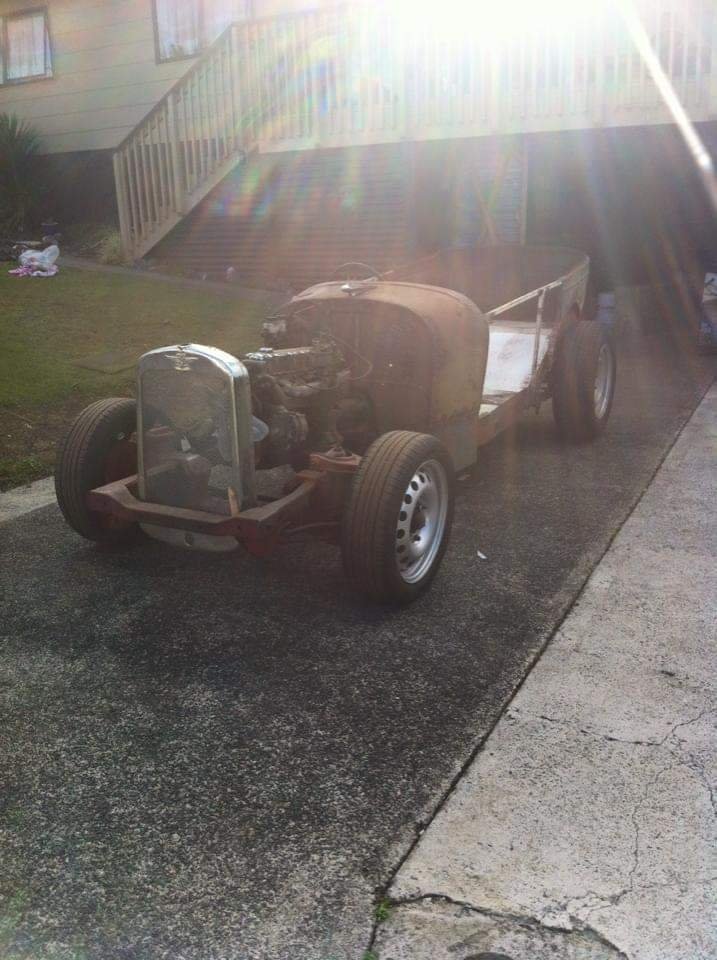
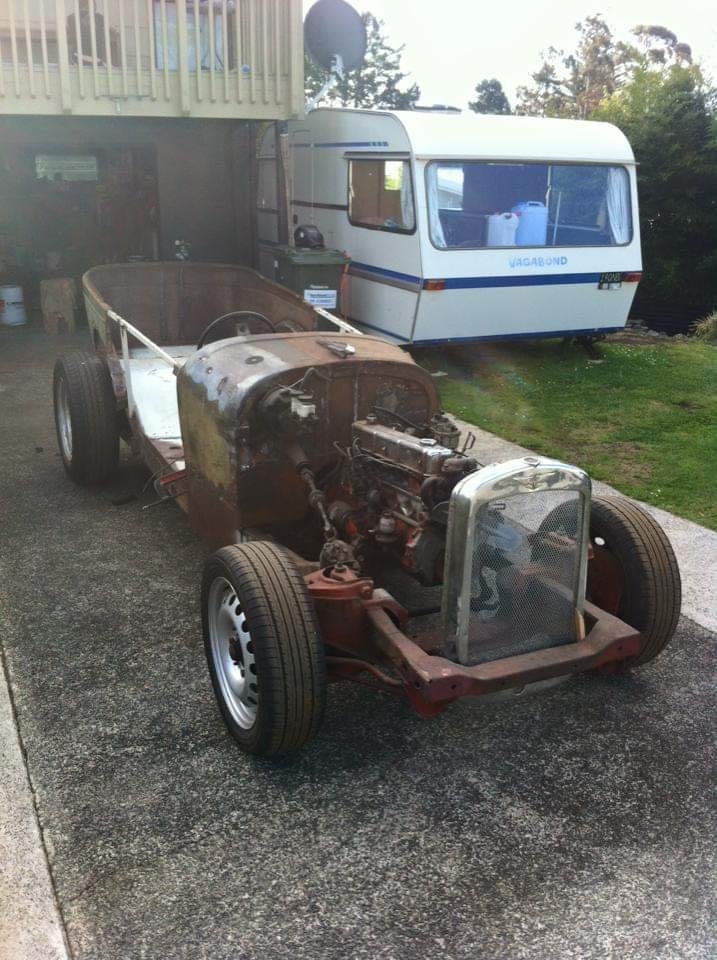
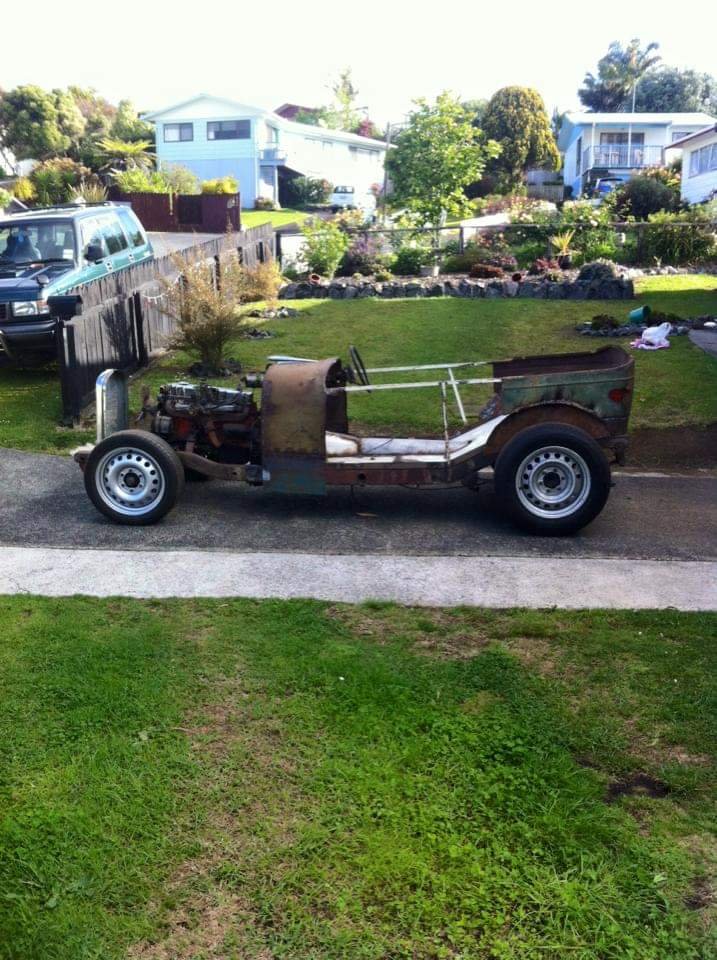
An update,,,,with pictures.... Clambered underneath her to mark out the floor mounts, and found the floor didn't follow the chassis properly, dammit. so chop chop Remember its done with gasless Mig so it looks horrid. Heres the plates that the body will sit on pushed her outside, pics with the new 17" wheels on it
1 point
-
Some slightly better shots now that the sun isn't 420 blazin' Couple of close ups OS reppin' Nissan Prince Kyoto Sticker all up in thurrr.1 point
-
ah sweet yeah its on weds 5pm ill def head down http://www.framautolitedragway.co.nz/events/136-GRUDGE-WARS-III---TEST-and-TUNE-V.html1 point
-
Pft. It's just (about 15mm) above my eye level. Any lower would be child height, and annoying for regular adults. I thought on groove, but Chris gets an opinion too, so it's in the middle of a flat section. Looks fine. Shall put the "no solicitors, including missionaries" next to it, balance it out, just for you.1 point
-
Should have installed it in the groove. Becomes more peeping that way too. Also, probably needs to be a foot or so lower?1 point
-
Your peephole has three slats on one side and four the other. So unbalanced. Otherwise, good work Chris!1 point
-
West Auckland Wheels of Terror. "Evil waits. With the motor running."1 point
-
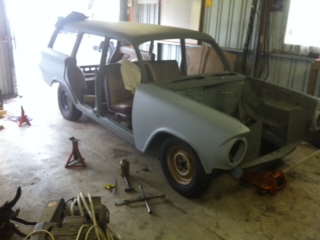
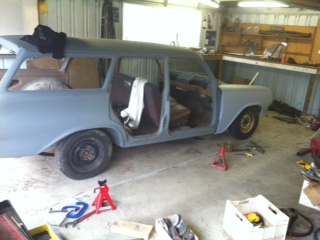
I'll jump now to where the car has got to. The body has been sand blasted. It would have been cool to have kept the original patina by it was rusting too much under the paint and the previous owner had got carried away with PA10 and a brush. The floor pans have been replaced, there is still some finishing to do, the trans tunnel might have to come out to get the 4L60E to fit. The Torana front is bolted in still with the Torana disks. The original 13 inch wheels are there to push it round on. It will get HQ disks and WB statesman callipers. The doors and guards have been panelled and primed. Next stop is the panel beaters, I have a new LHS sill to go on, the original is rotten and wavy. The new one was bent up by a crowd in Wellington and goes right through to the inner sill. I also have a new rear panel to go on. Like all EJ,EH Holden's the original was rotten, no paint from the factory. The factory cutout for the exhaust is gone to give me options for where the dual exhaust will exit. Here is the latest photo
1 point
-
More cage work today. We Managed to sort the dash mounting and cutouts for the forward laterals then moved onto the diagonal in the main hoop with start of harness bar. Harness bar complete. Couple of forward lateral braces. No windscreen bar as it was too short (should have checked it earlier Iguess) So put the car to bed early.1 point
-
Yep that would have been me, just smashed out a Blenheim to Auckland trip since I'm now posted to whenuapai. Wasn't a pilot vehicle for those bikers though haha. I'll do more of a write up on my trip when I get my Internet set up, but that's the furtherest I've ever driven it! And I had so much gear in it I was 25mm off the ground. My exhaust is toast1 point
-
"Don't worry honey, fifty miles isn't that far to walk..." "If only I'd bought that reliable Corolla instead of this stupid heap.." Forgot to add some more stuff I've done with the car since my 2013 update. Went hooning in the hills with an Alfa Sprint: Official flower transporter for my sister's wedding (that was fragrant): Actual groom transporter for another friend's wedding.. Apparently black car + no air conditioning + tuxedo + summer + stress = bad idea.. Signs that your car is oldschool after all: The WOF inspector starts the engine in order to turn the steering wheel (there's no power steering) You could stand there indefinitely watching the panelbeater trying to start it from cold, or you could tell him he needs to pump the accelerator and use the manual choke Anyway, the panelbeaters fixed the rust. Also, new steering wheel today: http://www.axys.co.nz/ben/alfa33/suedewheel3.jpg I fitted my previous one in 2005 and it was always a bit small (320mm), but in recent years its urethane / vinyl surface had begun to wear at 9 and 3 o'clock. Perfect excuse to upgrade to 350mm - now I can see all of the instruments again and park easily in the supermarket with fat semi-slicks fitted. Only the brakes to be done before I can get my WOF for Nats.1 point
-
Some more progress pics: Smooth asss New hide panel for fuel filler:1 point
-
yes but torsen type. im considering welding this week it for unrelated reasons/dohnuts.1 point
-
......."once Manu has collected his cargo from the airport"1 point
-
+1 for chemiweld in a shitbox car you dont plan on keeping forever i got another 6 years out of a civic of my grandpa's cause i couldnt be bothered fixing a BHG, had to put a bottle in every 3 years mates VL went for 2 years with the same issue getting caned every day it does bung stuff up though1 point
-
Yes I am. This proves it. Could have had this blasted and painted black... Wanted to fit it tonight so it ended up the only colour I had. Zinc blue.1 point
-
Got my 2nd lot of injectors fitted and all sorted with no leaks - hoorah! A fuel line from a 20v 4age was the right length for between the rails. I've set it so the second injectors only activate at 4500rpm onwards, and for starters set it to 90% using outside set of injectors. Took it for a quick run and bodged some numbers around so it was 13:1 AFR across the board... But then my fuel map looks whack! I think the peaks and troughs are because there are resonances pushing some of the fuel back out of the runners at those rpms. So I had a look at the injector timing. It was setup so that the end of the injection event is 400 degrees before TDC combustion, for everything. The first problem with having this set statically is that the intake cam advances or retards 45 degrees, so depending on the VVTI it would make sense that this number should be up to another 45 degrees advanced to match the closing of intake valve. This doesnt matter too much with low cc injectors close to the head, because they're spraying most of the time on closed valves anyway. But for this it needs to match the injector spraying with the induction event. so I setup an rpm vs map injection timing table, and added more advance for when the cam advances. This looks to have smoothed out the peaks and troughs with the fuelling back to normal, so that was probably the issue. Jury's out though on whether these extra injectors will actually help make any more power. There's no point in tuning it any further until my IAT sensor arrives though, it falls off tune each time I drive it currently. They're a 1000cc single pintle and make a racket when they are running so it sounds pretty cool. Hah.1 point
-
Because you keep buying the bloody things, that why!!1 point
-
Update! JZA70 R154 from Yahoo Auctions Japan. Massive thanks to Alex and his crew at mlracing.co.nz for getting this to me. (for the same price as I sold my smelly old w55 for) Mrs kicked me out of the lounge, so I took over the dining room instead. New seals, reverse switch, Marlin Crawler bearing retainer, thrust washer (already installed in this pic), shift fork, shifter seat etc - Thanks to kpr for clearing up my confusion. Swapped the LSD back into the supra housing and also put in a Weir performance kit to hopefully help the shitty Toyota LSD lock a bit better The Weir kit comes with shims and replaces the coil spring that pushes against the clutch packs with a solid spacer and 2 spring washers, which has doubled the breakaway torque The reason I went back to the Supra center is because it has an extra mount at the front. These cars tend to rip the factory centers out of the subframe with a little abuse even behind stock 7Ms lol Subframe out The subframe needed modifying to fit the Supra center, here's a pic of the front mount I made. it's basically 4mm plate welded to the subframe with some tube and nuts welded to the top Reinforced the rear section where the diff mounts with 4mm plate Solid diff and subframe bushes Painted bits and installed diff bushes So while the subframe was out I also ripped the fuel tank out and started preparing for the new fuel setup. Walbro 400lph e85 pump next to the factory pump. It was a little longer but wasn't too hard to install. The ID of the pump outlet was slightly smaller than the original Toyota fuel line (but bigger than the Toyota fitting ID), so the fuel now comes out of the pump, through the original hardline, then cut before the original (small) fitting and now has a -8 compression fitting with -8 line all the way up to the fuel rail. I'm hoping this won't effect flow too much using the hardline? Forgot to take pics I also tested the compression fitting up to the pumps relief pressure (70psi?) and it seems to be fine, although a lot of people warn not to use them for injection. It is hidden up above the tank where it can't get knocked and is away from heat so should be safe? -8 ptfe line, was much cheaper than buying a decent 37 degree flaring tool for hardline. Will this be ok for cert? It is mostly protected by the subframe and then plastic covers most of the way up front ID1000s More dining room madness! Wired in an Emanage Ultimate (lol), which was cheap, but some times I regret buying and wish I had gone with a standalone. We'll see how it goes first as I can't afford to change at the moment. Turns out I can ditch the distributor cap and run individual coils with it so may also try that later on if funds allow I also tidied up a lot of the loom and moved some plugs to suit the new inlet manifold, and changed to bosch injector plugs Engine bay looks a little like this at the moment, I had to pull the wiring loom apart again as the plastic bit around the injector plugs didn't fit with the new manifold and looked super ugly, so now it goes underneath and looks a lot tidier I've also mounted a couple of oil catch cans and made lines for them aswell as a -12 oil drain etc1 point
-
Tig skills look titties to me man Very cool thread and good work Will never forget the look on my mrs face coming home to an a15 being rebuilt on dining table hahaha1 point
-
You gunna keep that forever? Or sell it to me at some point?1 point
-
Can I make one suggestion? that you trim the sides of the cowl back to the top of the chassis, Yes get rid of the seats you have the seat set up in my 1927 ford rat rod I have a low bench seat witch was standed for the car, its not required to have head rests on the back I am told,1 point


This leaderboard is set to Auckland/GMT+12:00