Leaderboard
Popular Content
Showing content with the highest reputation on 07/22/14 in all areas
-
8 points
-
Or right, its back on bitches!!!! If you didnt see the first one heres a link //oldschool.co.nz/index.php?/topic/33923-heyholes-1-kz440-bobber-build-off-dannys-gs550/ SO think of two of the COOLEST bikes you can possible think of!.................Yamaha XS650 - bad arse bobber doner, Harley something-a-rather, one of the super sweet bikes OCC make.............WRONG! I think youll end up landing on a GN250!!!!!!!!!!!! FUCK YEAH!! But if thats not you the lesser known Kawasaki W650 mmmmmmmmmmmmmmmmmmmmmmmmmmmmmmmmmmmmmm yeah thats what we talking about............... More to come4 points
-
4 points
-
Bit more progress on clutch slave 1.5 - the master machinist invested a bunch of time modifying the base / inner sleeve and piston of the slave to suit the mounting provision. He gave me a couple of measurements so I was able to crudely carve out a new mount bracket using the rotary table on the mill. (Lathe at work has been in high demand this time of year) The second part of the plan was to ditch the flexi lines inside the bellhousing - and make up some bulkhead fittings one of which included a section of bolt shank drilled to suit the angled design for better access. Yeah I know the feed hardline is a bit long, but lack of a flaring tool meant we had to guesstimate the lengths prior to bending and work from there. Next we jammed the motor and box back together, and the power plant back into the car. Chuck the hoses on and Bam - clutch magic happened. Pedal feels great with the engagement window right about where it should be which is awesome given the mixture of parts involved Oh yeah also i had sorted the reverse wiring last week so we were able to test that system out once the box was back in.4 points
-
Weekend progress was hampered by splitting my thumb open with a hammer. Ouch. Better side shot 18RG picked up Still haven't got fucked wheelnuts off. Might have to pull hub off and drill studs. Cheers Matt3 points
-
Nah I've got a different box now Markku. BLM couldn't repair that box and the gear set is now in Wellington being looked at but it's sounding super expensive to fix. Dad found a factory option 240z 5 speed close ratio box. It probably came from the states but it has very worn selector forks. It's a rally box so has good ratios for both road and track. Dad knows far too many people and already has measured up the box and found out how to repair the forks better than factory. It will be a nice bolt in replacement and also has a shorter shift and is also better in the H pattern so will make finding gears easier also.3 points
-
So today i went about Solving the height of the front... sky high stance Not alot of space at the hall to do much work. Although the did end up having a grinder and cutting discs to use. I brought a pair of standard front springs from a 330 of brocky and loped off 2 coils only to find it wasn't quite my cup of tea. So the coils went back to the shed to lop off one more. I ended up swapping the springs in a big empty car park got a couple looks but now where to do it at the hall... Springs all in looking pretty good maybe the rear needs a little more low but im really happy. Springs are just captiveprobably could lop of another half coil and still be captive so im happy with the height now. Big thanks to felix your stuff you lent me was much appreciated couldn't have done it without it. Cheers So thats how she sits now. Iv just ordered a multispark setup from the us so that'l be next probably.3 points
-
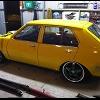
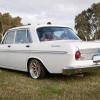
so i picked this thing up about a year and a half ago, i had noticed it at Toyotas in the park (local Perth car show) in 2011 and got to know the owner, when he decided to sell he sent me a message and as i had just sold my hilux in NZ i had the spare cash and i snapped it up. i already had a MS55 that i was chipping away at getting ready for rego but with crowns for me, the earlier the better, and this is a pre facelift deluxe, pretty much my perfect crown. although i'd kill for a wagon or a ute to park next to it. pre facelift in the 2nd gen crowns means you get the round taillights but the engine bay/wheelbase is shorter, they extended it to fit a 6 in in 1966. which sort of leaves engine bay room a little bit tight. when i first saw this thing it had a supercharged 18RG in it, but the previous owners cooked it and swapped in a 22R for reliability, along with a 350 holley to keep things a little cool under the hood. it was sitting pretty high in front, and there were a few rushed bits, and the exhaust had been run under the chassis, instead of through cutouts like it had from standard, because they wanted to run 2.5" and it wouldn't fit. it was on generic 5 spoke 17x8's with high ish profile tires it also had a hole in the bonnet, with a crappy old falcon replica scoop over it which made me very sad. still it was a great price and its not the sort of car you come across every day. or at all. this is it alongside my MS55 at TITP a couple of months before i bought it so the first thing i did after i bought it was to chop the front springs, not to low because the plan was to drop it on the 15x7's with 205/45/15's i had on the MS55. offset on those things says no however, they're 0 all round and the crown is happy to swallow 8" wheels, but only if they're fwd offset. so it sat on the 17's for quite a bit longer than planned. after the front springs got the makita treatment then i ended up tidying a few things in the engine bay to get her a bit more reliable, and just driving it whenever i got the chance. cheers Matt2 points
-
Couple of pics with the better front on.. shit fits a whole lot better now, although I'll have to space the nose cone out a bit as for some reason it sits back about 4mm therefore the guards poke out on either side and the bonnet is very close to the wiper cowling..2 points
-
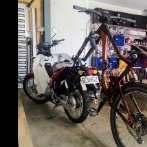
Awesome Dane !! I too have changed my tune . Looking at Hardtailing ! Look forward to progress pics ! Your right about bikes . I've currently got 9 in the space of on small Datsun !2 points
-
2 points
-
2 points
-
How she's sitting as of last Saturday. Hugh's been sorting out measurements for the drive shaft, were trying to get a hold of an early Hilux one but tis a bit of a mission so just going to shorten/balance a later model one. Also have a Hilux diff on the way, once arrived will measure up then sent off to have the axles shortened. The engines also getting built up this week so hopefully next time I check it out, it will be mocked up and dummied up in the huge engine bay. So much excite! Chur, Tai.2 points
-
Done some more things and stuff over the weekend. Made some hori as mounts for the radiator out of a pair of old bump stops, works a treat though. Also finally got round to assembling 2 of my riversides. Will be putting tires on this week. So now i dont have a very big list until it can go to be wired up. List includes: -Modify seat rail and fit seat. -Fit surge tank and buy another pump. -Get new rear half of driveshaft made up. -Buy and fit hoses for radiator. -Get my intake manifold to fit. -Possibly make up some sort of exhaust -Gearbox, engine and diff oil. Coolant. And bleed the brakes and clutch. Probably more stuff i missed but will find out when i get to it. Discussion: //oldschool.co.nz/index.php?showtopic=336182 points
-
haha the entire underside of the 120y is covered in the shit (bump stops, cross members, lowering blocks etc). it means its factory you know.2 points
-
Been a while, done a bit, not a lot. Parted these lips off at work and have new lips arriving next week to make them 14x8.5 (roughly the same size lips as the backs. Cars all sanded just straightening it out out as much as i can. got new doors and boot because I'm in blenheim for 10 more weeks so couldn't be bothered fluffing round with the rust on them. Picking up a shell soon to use for the shells bits of rust, need anything let me know. Best news, i found a full twin round headlight front thats a lot straighter than my flat front. Mock up Also got me leafs back, 3" reset with leaf added. and also a crackless dash, just has little stickers on it.1 point
-
if you need to reduce rear brake, you need a smaller wheel cylinder, not bigger. adjust it coarsely with the wheel cylinder size, and use a proportioning valve to fine tune it. those wilwood valves dont have enough adjustment to fix it if the difference is too great now would be a good time to upgrade the front brakes to vented ones at least, if its going to get driven hard/pass a cert brake test it will probably struggle with solid discs also if the shoes have been contaminated with brake fluid or oil etc they can be 'grabby' even if they have been cleaned, as the shit soaks into the linings1 point
-
Reminds me of the one I built a few years ago.. i Thames van + 307 Chev1 point
-
Well fuck, I can build 2 bikes in the space of one car and it means I can focus on style and fabrication more than just endless sanding and painting.1 point
-
Some of you may know of my desire to get away from building cars and build custom bikes instead. Today I won an auction for these at an awesome price! 1-1/4" and 1-1/2". Just what I needed! Will fabricate up a bender and I'll be good to go. These forming dies for a proper pull-bender cost a fortune new. Next step will be a frame jig once I've made some more workshop space.1 point
-
Yeah hopefully this gearbox will make up for my lack of HP and ill get into the 1.25s. Then we can have some battles.1 point
-
1 point
-
1 point
-
And only the day before you had an old ford bleeding on your nice new garage floor thanks heaps for all the help you put that up fast.1 point
-
1 point
-
1 point
-
1 point
-
Yeah will be staying mattblack for abit, depending on funds. Which im getting are going to be low as haha. Looking forward to getting engine assembled and getting it running. Shouldn't be too far away fingers crossed. Cheers for the feedback guys!1 point
-
1 point
-
Helpful as ever. Imageshack sucks, //oldschool.co.nz/index.php?/topic/34643-how-to-add-pictures-to-the-forum/1 point
-
1 point
-
1 point
-
nice, my father in law had one in the same red until 2 months ago. He originally got it to use as a rally car after his last one was written off but it was just too nice, 40 thou original miles. he repainted it and put some sweet turbos on it. Sat in his shed for years until he sold it this year, man i wish i had the money at the time to buy it, so pine.1 point
-
Hey, After finding out that its actually designed to be adjustable, i pulled out my excessively grabby cusco 2 way lsd. Rearranged the clutch plates to the 60% setting and removed 1 third of the springs which set the preload. The part thats caught me out though! The lsd can be two way or one way, dependin on which cam profile you put the end of the cross gear thing in. I want to set it to one way, but ive realised it can be set the wrong way around... so only giving lsd action under decel haha. Does anyone know if the flat face of the cam profile needs to be pointing towards, or away, from the direction of rotation for accelleration? Cant post a pic to explain at the moment, pc is fubar.1 point
-
Ahhh thanks! I also found some pictures of a T series diff set to one way which had the flat face pointing left. Ive set it to the softest possible setting now, and 1 way. so I figure I'll want to pull it back out to either rearrange the plates, or increase preload or whatever depending on how it goes. So not too much of a drama to switch it back to 2 way.1 point
-
flat should be in the direction or rotation i would think. below would spin towards left (1.5way in this case) /leave it on 2 way.1 point
-
1 point
-
1 point
-
Magic number plate! So I've just about finished my rotisserie for the vw's shell, it's been a bigger job than I thought it would, but it's going to make working on the sills much easier. I started with these basic plan First job was sorting out the rust in the old stand, it had been sitting outside in the grass for age's, the wheels were rusted tight and one pretty much just fell off. feel free to stick this is the fab fuck up thread! lol. I haven't done alot of welding on thick metal like this, took a while to get the setting right. one down. I then had to add 200mm of 60x60 to the red stand, so they would both be the same height. better? I then welded up the front mount to the shell goe's here and the rear one. another fab fuck up. I left the brace and welded up the rest of the frame, I wasn't sure how high the shell would sit once I found a good centre of gravity. what I did find is with the rear mount being so long it flexed, heaps! it would like bounce. scary shit. so I made these braces to the rear bumper mounts. much better. I cut the brace of the rear stand and repositioned it so the frame clears it and it now rolls right on it's side. I'm going to add a couple more braces to the frames and once I'm happy with how it rolls over I'll weld the frame to the stands plate, just in case.1 point
-
1 point
-
ok, been a few days, disconected all the wiring and what not then removed the desk from the cab and of all its wiring, today all the pipe work was removed, she is now an empty shell, ready for some one to win the tender to repair the fibreglass front, (best tender so far is £25k ) have prepped most of the new cab ready for the desk, most of the airlines are in, but need to lift the cab in the air to cut out 2 x 200mm holes on the underside for the air con stuff (as if they need air-con in scotland) had to mod the floor and shit, but she is coming along, still hoping to get the desk back in by friday, but we'll see, kind of waiting on other shit to happen first, no one seems to be in a hurry, i need some earth points welded to the new floor, but the fuckers don't even have some one who can weld ali on site, so it has to be sent out to an engineering firm !!! ffs, useless no floor=no desk= no work to do but i drew a picture of a penis behind the light switch for future generations to find so yeah, might grafitti a random kiwi somewhere as well1 point
-
Got these back from the painters today Been driving this all day today have to drive it slowly .The noise this makes now will cause problems.1 point
-
A weekend of progress! IMG_9539 by Richard Opie, on Flickr Diff fit tested, all the links fit up without drama and it moves freely throughout the full range of movement. IMG_9510 by Richard Opie, on Flickr I between times, I acquired some platforms and springs for the rear. Springs are typical 65mm ID coils, length of 180mm and 200lb/in spring rate. IMG_9550 by Richard Opie, on Flickr The axles returned from the engineers with fresh new splines cut and have also been induction hardened to hopefully negate any chance of munching up splines due to the mighty torque produced by a 4AGE. IMG_9578 by Richard Opie, on Flickr With help again from the masterful sheepers and his magical machine that glues metal together, the next task was to create somewhere for the spring platforms to live on top of the diff housing. This shot shows the rough platform tacked in place so we could work out the right angle to mount it on the diff, due to the movement of the diff being in an arc as opposed to simply up and down. If the platform is angled too far forwards or backwards you run the risk of the threaded section clashing with the coil. IMG_9604 by Richard Opie, on Flickr After much trial and error (which is boring and not worth taking photos of), the mount location was finalised and the mounts welded into position for good. Side bracing ensures they're solid as hell and up to certifier satisfaction. I will point out here I couldn't have done this without the help of sheepers, being able to chop pieces up with an angle grinder isn't conducive to finishing a project within a project like this and without the welding and lateral thinking skills of the man with many Toyota's I'd still be sitting around talking about doing this. IMG_9588 by Richard Opie, on Flickr IMG_9586 by Richard Opie, on Flickr Final couple of shots show roughly the final ride height, the diff is resting on the jack with the weight of the car on it, with the wheel centers in line with the ends of the diff. Not super low, but I'm happy. Easily able to go lower with a simple spring change. Next up - reconditioning the brake calipers, acid dip and painting of diff housing and setting up the LSD in the carrier again for final assembly!1 point
-
1 point
-
1 point
-
Here is my highly efficient liquid fossil to carbon converter. 06 Wrangler Sport with a 6" long arm lift, 35"s and a 1" body lift, Detroit locker in the rear and a OX locker in the front, 4.11 gears and Rubicon "Rock Crawling" ratio transfer case. Doesn't have much speed/power but plenty of torque, there isn't much that I haven't made it through. But now that the kiddies are getting older I will probably look at moving it on after winter and getting something LWB so I can start sharing the fun with them.1 point
-
I got new (used) tyres. Finding it interesting the difference in size between makes/worn. Height Width1 point
-
1 point
-
I finally got to the track on Sunday first time since the new engine has been run in. What a diffrent car to drive . It passed cars that it should not have even been anywhere near and kept up with quite a few not to bad as well. had it on 3 wheels more than a few times. There where a few small issues but nothing as bad a the R8 that lost a wheel down the back straight and the Mclaren that didnt take turn one at all. So thanks to Max here are some photos and I will post a video when I get some more time. It was double entered for the day A ringer from down south helped put it to the test. so it was doing two sesions per hour back to back all day. What do you mean I wasn’t beating him…? so this was the look on Billys face when it took him a whole sesion to get past the little escort even with a hairdryer helping him along. Guest driver that only put the go pro on the roof twice till it went flying but luckly it still went. Pushing hard holding off the turboed Trueno Mule Getting some blueing on the headers so we have decided to build a airbox set up to keep the heat away from the carbs The first problem was the sweeper had taken its toll on the sealent not a major fixed in 15 min with the help of a few others. (The Mule did get it in the end…) Mid afternoon it started to run a little rough so I thought one of the leads had come lose but to my suprise I had lost the clip to hold the cap on off one side so we cabled tied it down and carried on.So all and all the day was great and the car made it home in one piece. There is some bleed on my garge floor but it is a ford thats how they let you know that they are alive. Next on the plan is a 4.1 diff and replacment housing to see if that is where the vibration is coming from a set of 45's ( more fuel is required) and the airbox a new dipstick and a few other little things.1 point
-
So, first pictureless update.. story of my life, things have slowed up a bit as shits been busy, EQC repairs etc plus other shit that for some reason I take on then regret.*sigh.. on a brighter note, scored some 121/rx5 standard alloys just in case for some reason. And I hate running short of cash half way through a build, kind of demoralising, def don't want to sell one the stable to keep up with progress.. dunno if its like it for all of you other car hoarders/addicts but once every month or so I get a small hounding from particular parts of the family about selling cars to finish cars and buy a house etc etc whatever fucking boring.. so much for family support hahaha.. Anyway, once all the craziness has subsided somewhat I'm gonna try to get back on track, especially with wiring the link up, could need a hand for that one.. realistically about 60% throught the build, lots of small things to get me there.. chur1 point
This leaderboard is set to Auckland/GMT+12:00









.thumb.jpeg.384ff72c8d2b0ee0d34a7bdedb55bdcf.jpeg)


