
Leaderboard


Popular Content
Showing content with the highest reputation on 06/16/17 in all areas
-
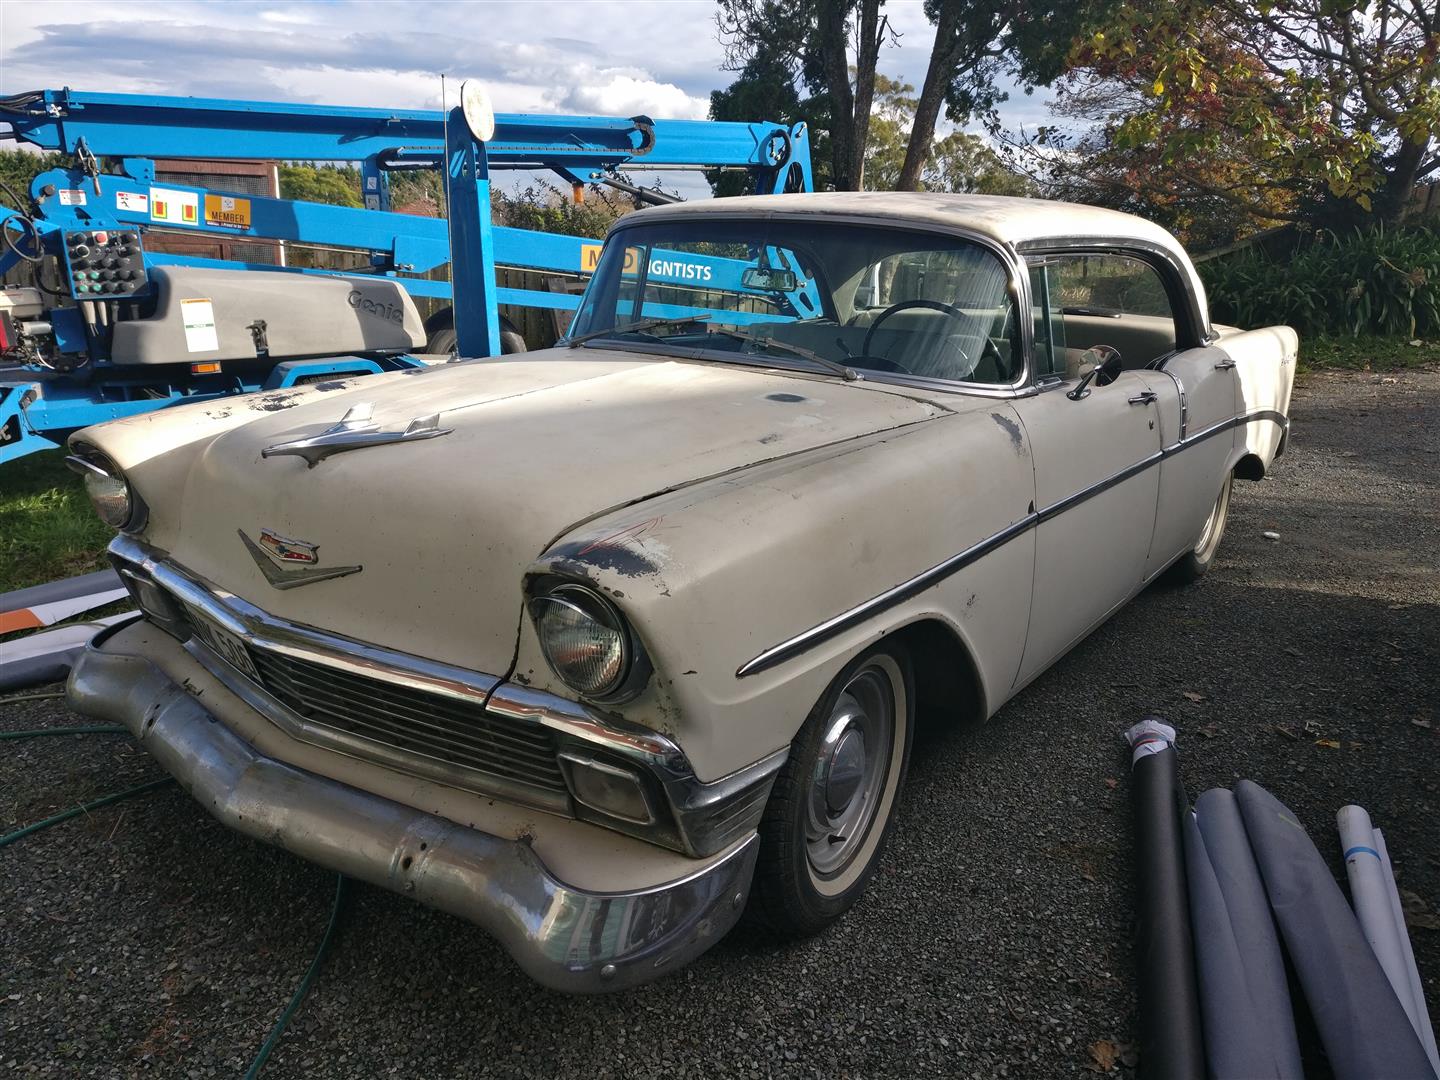
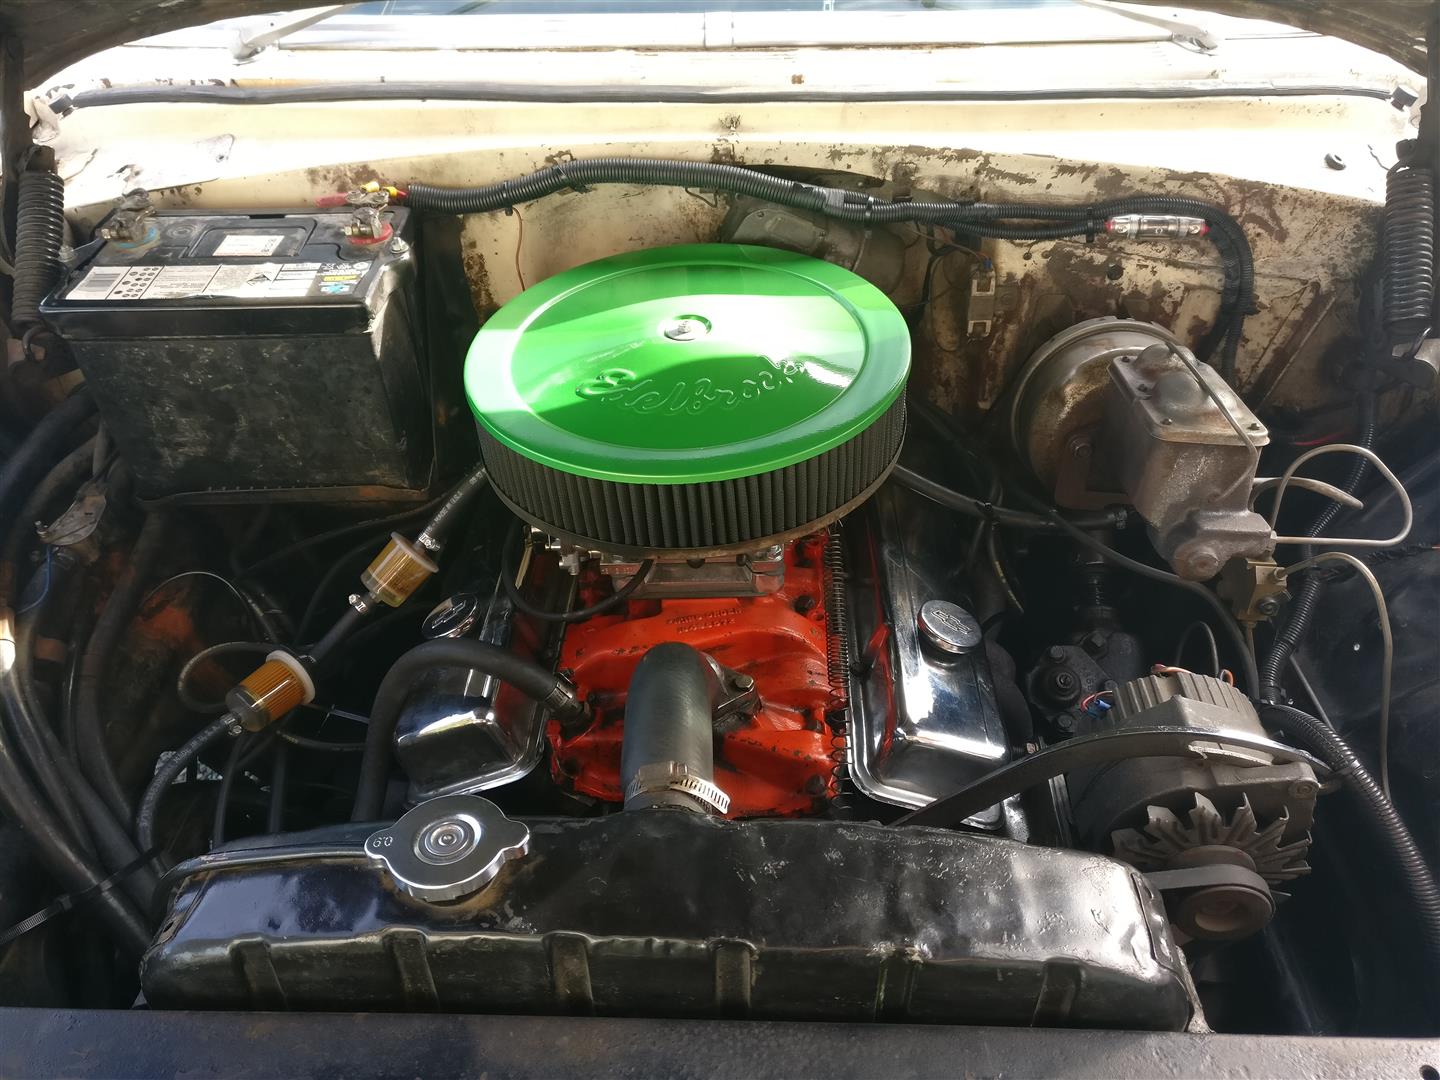
Bought about a month or so ago. Old man's and wanted it in family so that was a yes from me Plans.. Cruise and Enjoy. Running 265 V8, New Edelbrock 500 carby.
 5 points
 -
Discus------------> Well I gone and done it again I bought another Mini. This time I wont be selling it! overview: its a mini the plates are on hold! it hasnt been on the road since 2003! and its got some rust! I bought from a fella down in the catlins, what you see here is all It has Im guessing it was used a a bit of a parts car. the front floor pan has had a dodgy repair in the past Its going to be a big job and its going to take forever to do it its got a 998 motor however its not the original donk! plan is to see if i can get it going and go from there on wether I tickle the motor up turbo 998s are what the poms are doing these days so that may be where I go with this cheers for now4 points
-
Who's coming along to this? Hoping the Rover is ready and road-legal by then3 points
-
Front end rebuild will be the *perfect* opportunity to back those torsion bars off a bit.3 points
-
I wasn't going to start the suspension work for a couple of weeks but I had some time this afternoon and decided to get stuck in. @Valiant was kind enough to send up his homegrown upper ball joint removal tool and I was itching to try it out. I tried to remove the joint with the upper control arm still installed in the car as a couple of members had suggested but it was super tight and I had no hope of moving it. I think this was mostly due to the fact that I was only using a 1/2 inch drive breaker bar and a 3/4 drive adapter. It might have worked if I had a proper 3/4 drive breaker bar. I persevered for a while but I was afraid of slipping and damaging the front wheel arch or guard so out came the control arm and I decided to go big and get some proper leverage happening. The control arm bushes require replacement to I ripped out the guts allowing me to pass a piece of round bar through. Next I held the removal tool in the vice so I could hold the ball joint and had a go at turning the control arm around the ball joint. It took a couple of good swings but I heard a delightful little crack and the joint started to turn in the control arm. Once it started to turn it was easy to remove the joint using the breaker bar and removal tool. After giving the control arm a bit of a clean up I installed the new joint. I had a bit of fun getting the joint to screw in straight but a couple of OS members who have done this job before told me to expect this. After few false starts the new joint started to screw in nice and straight and actually went in fairly easily. While I have the removal tool in the workshop I think I will do the other side so I will see my friends at BNT tomorrow and grab another.3 points
-
The owner of a panel shop I do work for has MANY minis including a genuine Ute ,so he often gets other peoples minis in for repairs ,he gets the panels from England they are here in a week also very reasonably priced ,cheaper than paying me to cut the bits out and make up patch panels2 points
-
This, every valiant I have had has needed everything in the front end doing. i prefer original type rubber bushes over nolathane ones after using both types2 points
-
http://www.trademe.co.nz/motors/car-parts-accessories/personalised-plates/auction-1347006420.htm I read it wrong.2 points
-
It was jammed last month, ended up parked on the grass off the end of the overflow-overflow carpark around the side, and this was arriving just on 10am. Lots too see tho.2 points
-
If you decide to get someone to do it for you go and see All Bumper Repairs on Tirangi Road in Kilbirnie, they don't mind small jobs. I got a tail unit plastic welded up by them, only cost $20 and they had it ready the next day all nicely finished too.2 points
-
Not a fan of the green but got the whole filter cheap, Be keen to sand back and matt black or just rust it up.
2 points
-
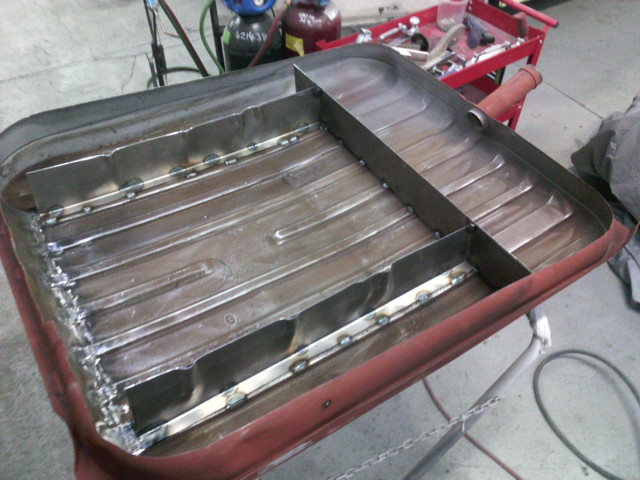
just baffling isnt it.... \
2 points
-
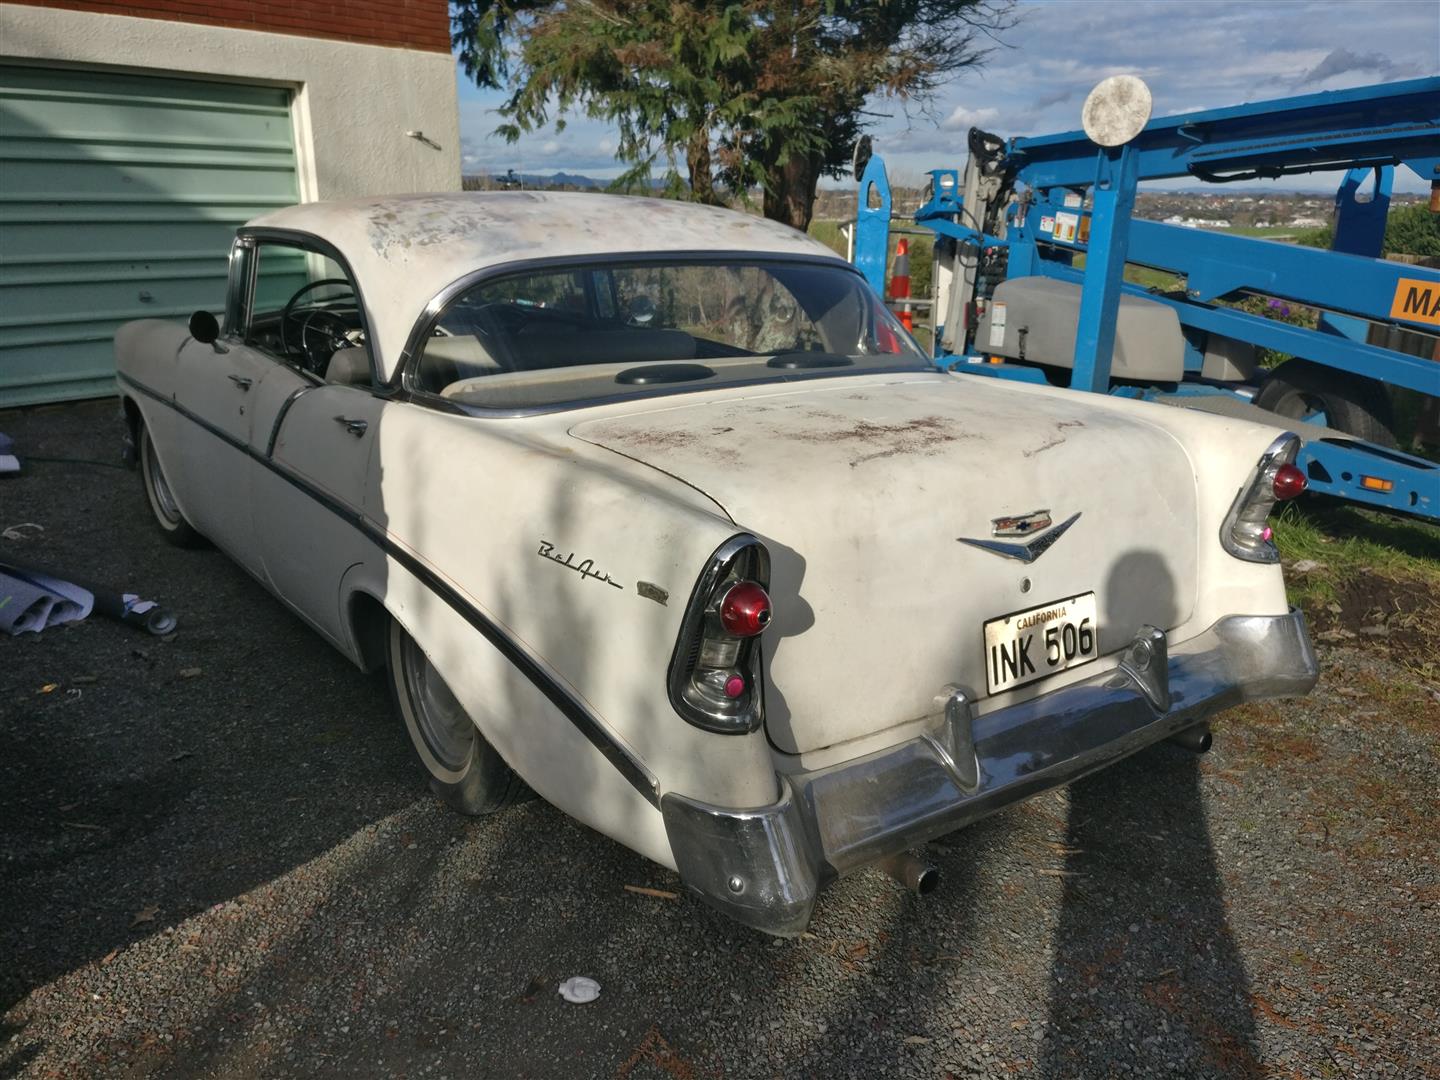
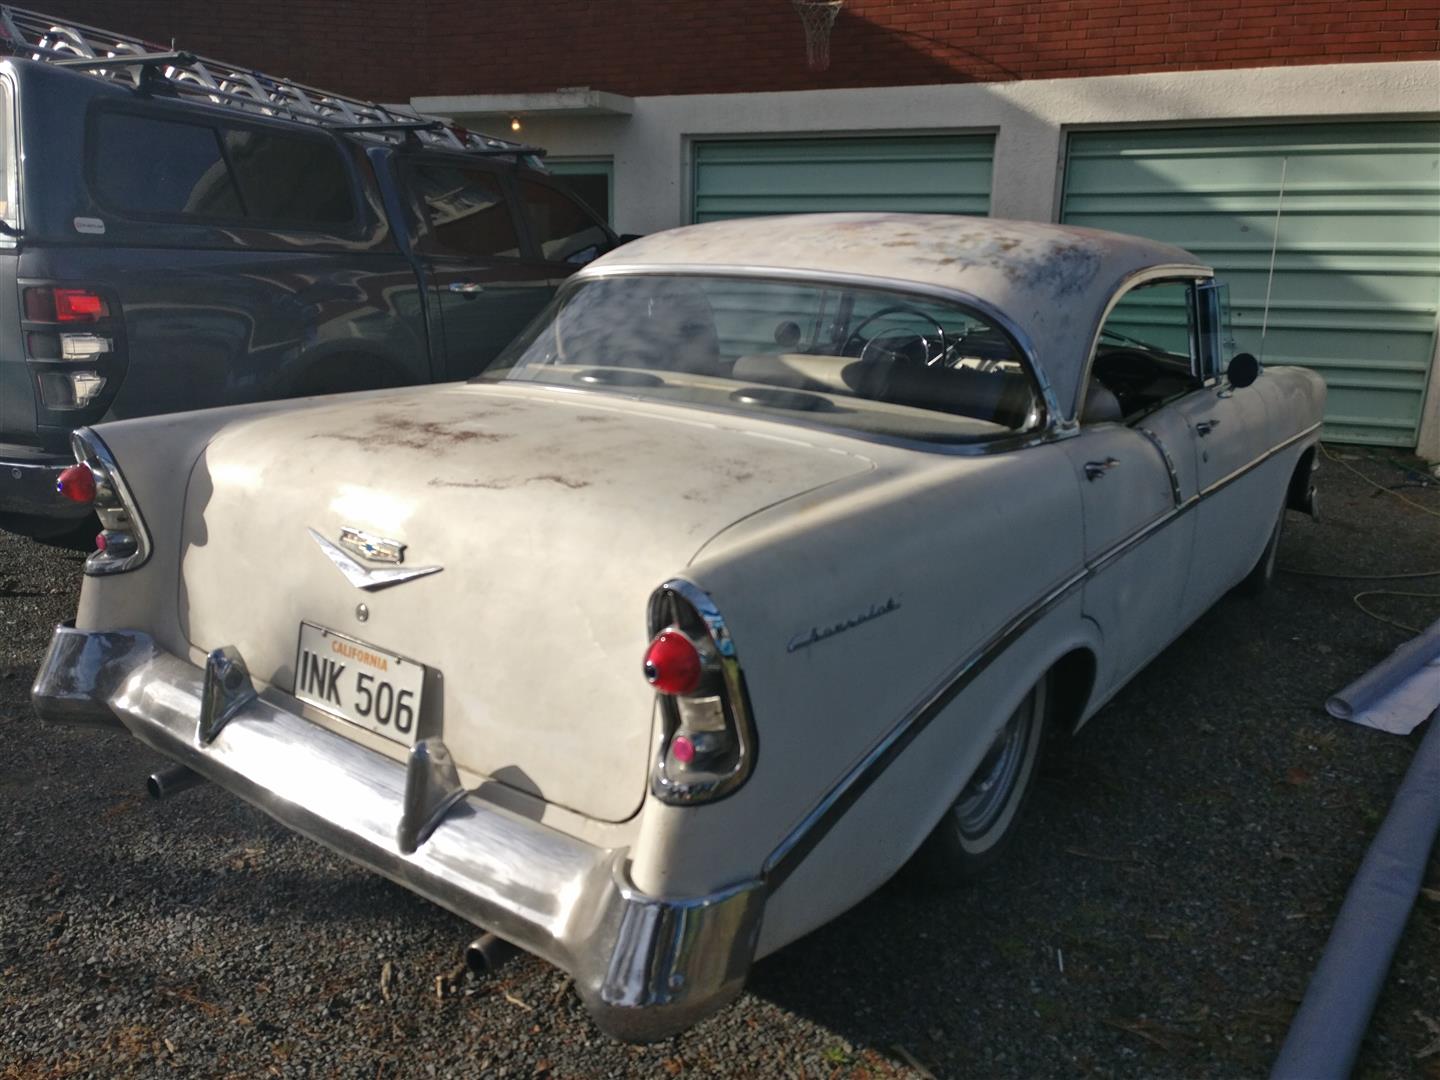
Probably the best looking 56 I've ever seen If you took the hubcaps off it would, without a doubt, be the best looking 56 I've ever seen. That's all I've got.1 point
-
Wednesday 21st APRIL the SECOND TO LAST Wednesday of every month. Save the date 7:30pm onward (but you can turn up earlier) A chance to catch up with fellow club members, talk with people you may or may not have met before and get your mouth filled with meat. Or not meat if you're that way inclined. Burgerfuel, Mexicali Fresh, Ajadz, Subway, Doolan Brothers etc. Corner of Robert St and Hurst St, Ellerslie in the undercover carpark beside Wallis Cycles. See map. The DEAL$: FREE Drink with Burger and Chips Purchase (From the COKE range , excluding mini burgers) FIRST MEET?? If you are new to these meats here are a few points that may help; Most people usually show up between 7:00pm and 8pm-ish. We roll down to get burgers and whatever else is available whenever we're hungry. We sit around either at Burgerfuel or back up top in the carpark and continue the yarns. Remember its always a casual affair, a place to yarn to mates and make new ones. An Oldschool car is not required at all, but if you've got one on the road then bring it and show it off!! Doesn't need to be flash or special, As long as it's special to you And to be honest, only lame people would drive a boring modern daily driver there anyway. MOST OF THESE ARE COMMON SENSE. WE WILL PROVIDE A FEW GENTLE REMINDERS WITH THE NEW RULES BUT REPEAT OFFENDERS MAY BE ASKED TO LEAVE. RULES AND THE BORING STUFF!! Basically these are in place so we have a fun and friendly meet and leave the carpark clean and tidy like we were never there. Take your rubbish away with you or put it in a bin, Use the public bins downstairs not the private ones belonging to the business up top. Smokers please don't dispose of your butts on the ground! Please limit the ALCOHOL consumption. Its a public place and the Police/security regularly stop in and we don't want want anyone getting in trouble, We also don't want people leaving empties around. You are welcome to invite a few mates, but please note you are 100% responsible for their behaviour If you belong to other clubs and feel they might be keen to come check out our meet then that's cool but please see Threeonthetree, Shakotom or BDA780 for permission before inviting them. NO Skids or Reckless/Dangerous driving Park in a proper carpark! If its full then just use a bit of common sense and try not to park too many people in. Newschool cars please park to one side and be prepared to move if we get short on space. I have had to ask Newer cars to move and park elsewhere and will continue to do so. The old cars get first preference for parking. Don't be offended if you're asked to move your newer car to make space for something old. We have to park downstairs. The covered carpark is very small and needs to be OS only,! Use of fidget spinners may incur a lifetime ban/paddlin' If you have any suggestions or input for the meets then PM Threeonthetree, Shakotom or BDA780 Thanks!!1 point
-
Fuck you're a brave man buying a car from the Catlins. That said, it MUST have been in a shed.1 point
-
Also he's got a clubman with a 1.8 Honda vtec I think it was 140kw at rear wheel had turbo etc in it1 point
-
Get a good wheel alignment afterward and it'll be so much nicer to drive.1 point
-
Derped a little with that. Runs very nicely now though. Yet to go for a decent hoon but will report back soon with skid vids.1 point
-
Result! Do the other side while you're at it, do the whole front end even. I bet the lower arm bushes and ball joints are manky too.1 point
-
Sorry its not a new hub, it needs a repair but its usable1 point
-
I did the pinstriping on it when a friend of mine Eddie had it. Way back in 2011. Cool car!1 point
-
I am interested in this also. E34 sumps are hard to come buy and now have e30 tax on them. (ps there is a 7series sump that also fits.) but then you still have to chop it and fit wings to keep the capacity up and not have the sump make friends with the ground. I have seen on youtube where a dude has a scanner that he uses to create images of areas and parts then used it as a base to draw and design the part to fill the hole type thing. IT was the guy the the wheel chair from holigan but yes a sump flange for a m50/52/54 would be great.1 point
-
I was considering that colour, but i'm having difficulty visualising it on an RF. Though i do quite like the understated nature of black and grey. Don't think the cable ties will work, as im pretty sure the fairings ABS. Test piece i did last night came apart with a bit of force.1 point
-
Nice little meet. Nice to see faces again.1 point
-
Skyline has been back on the road since January - but I don't take it out much. Just about due for another WOF actually.1 point
-
I actually might turn up this month1 point
-
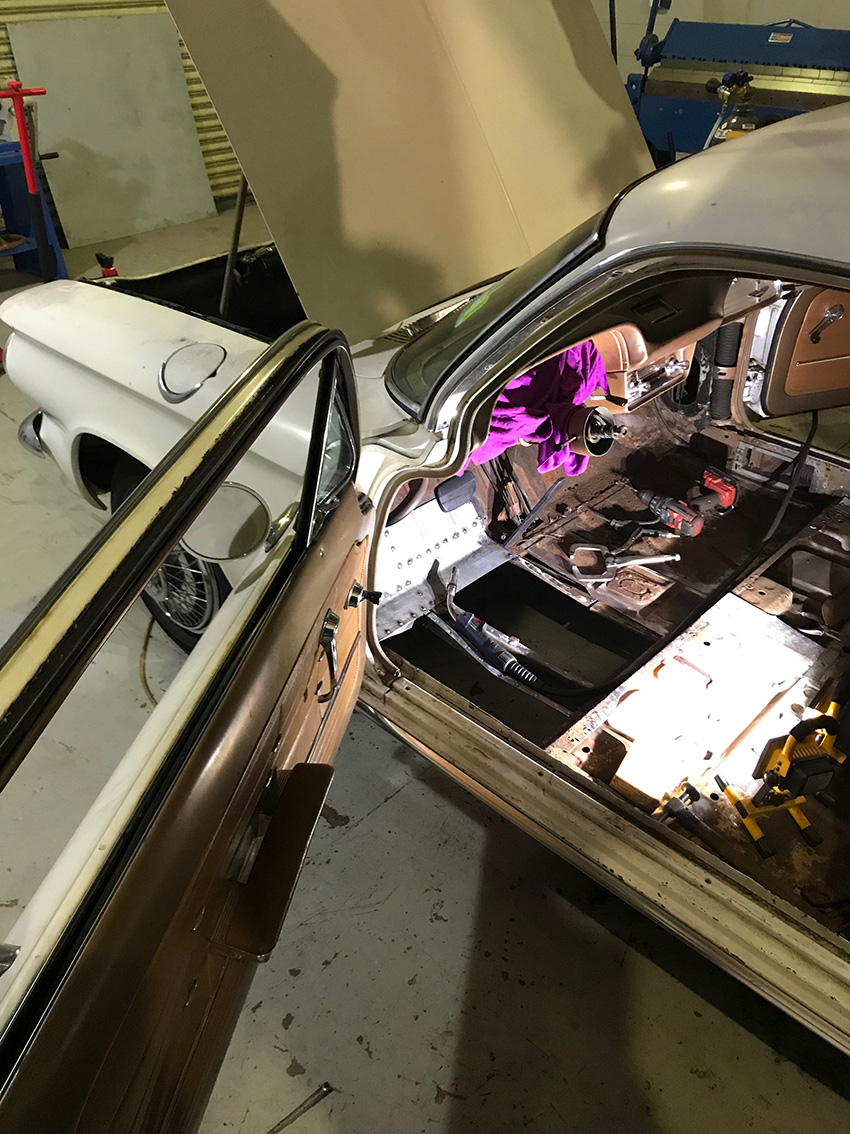
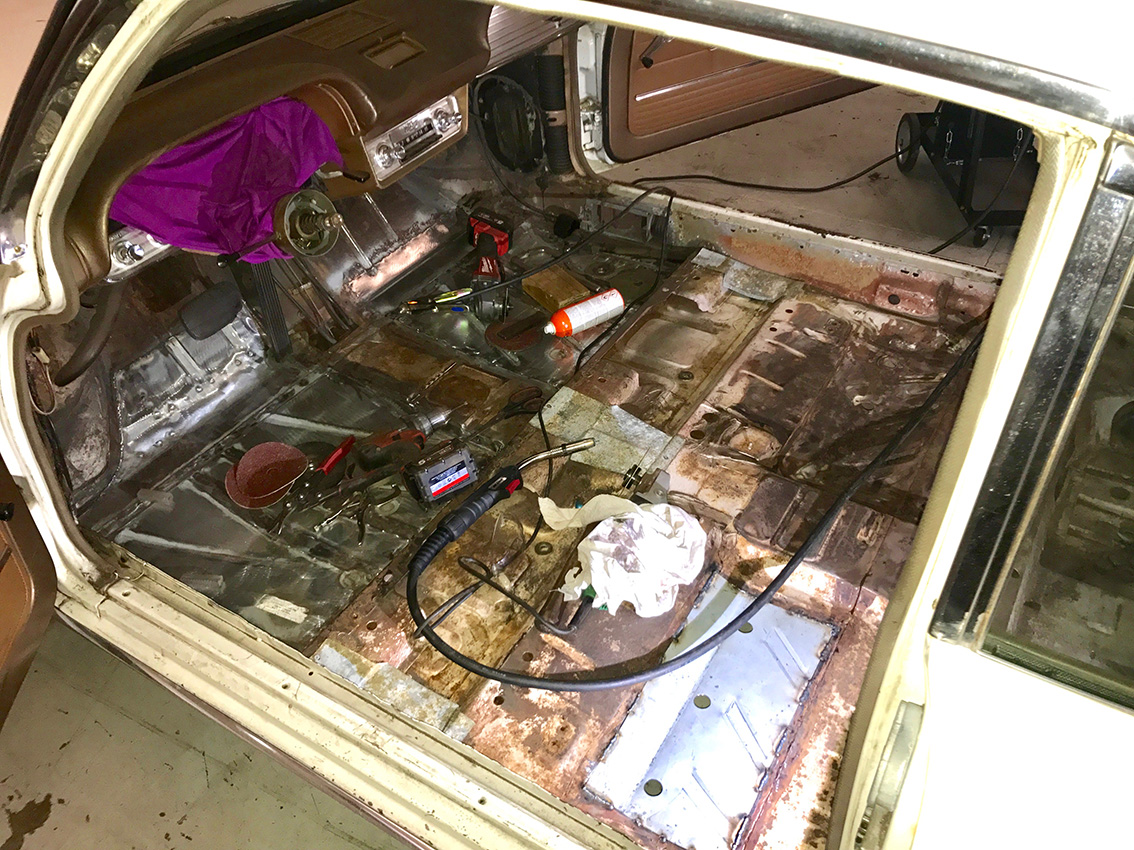
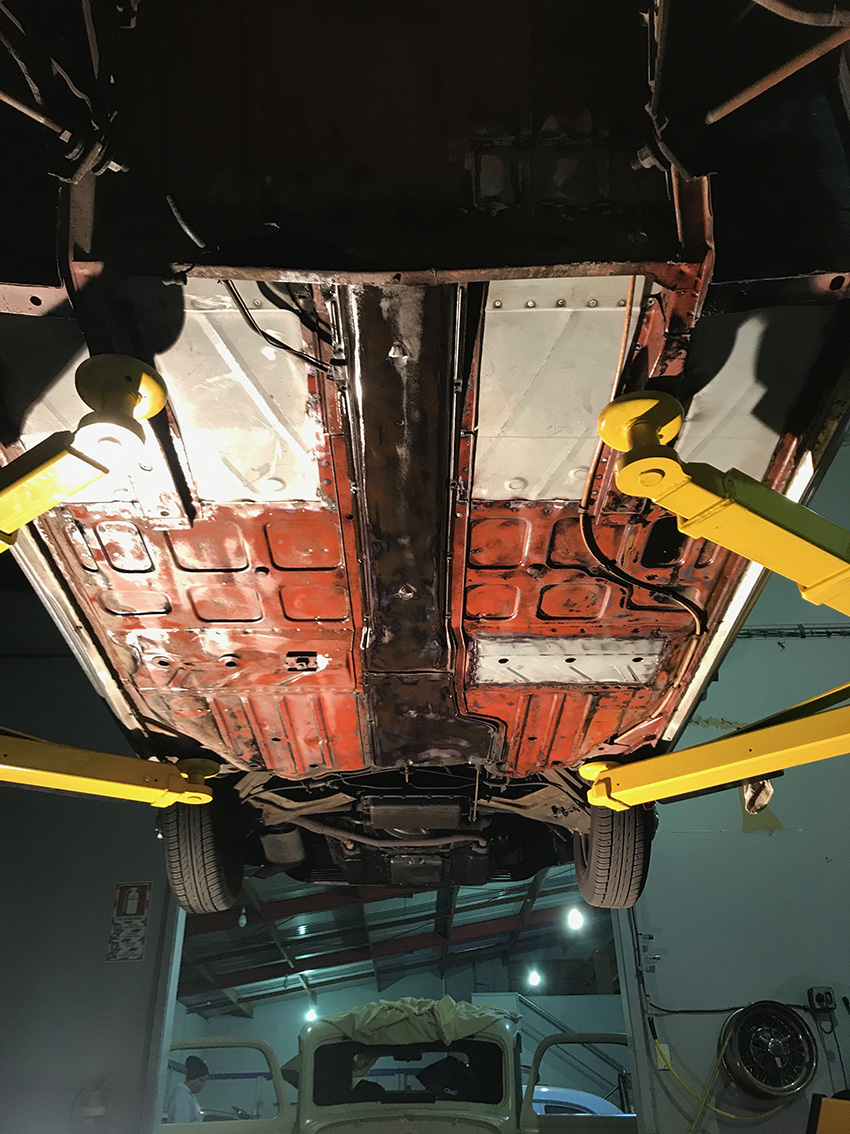
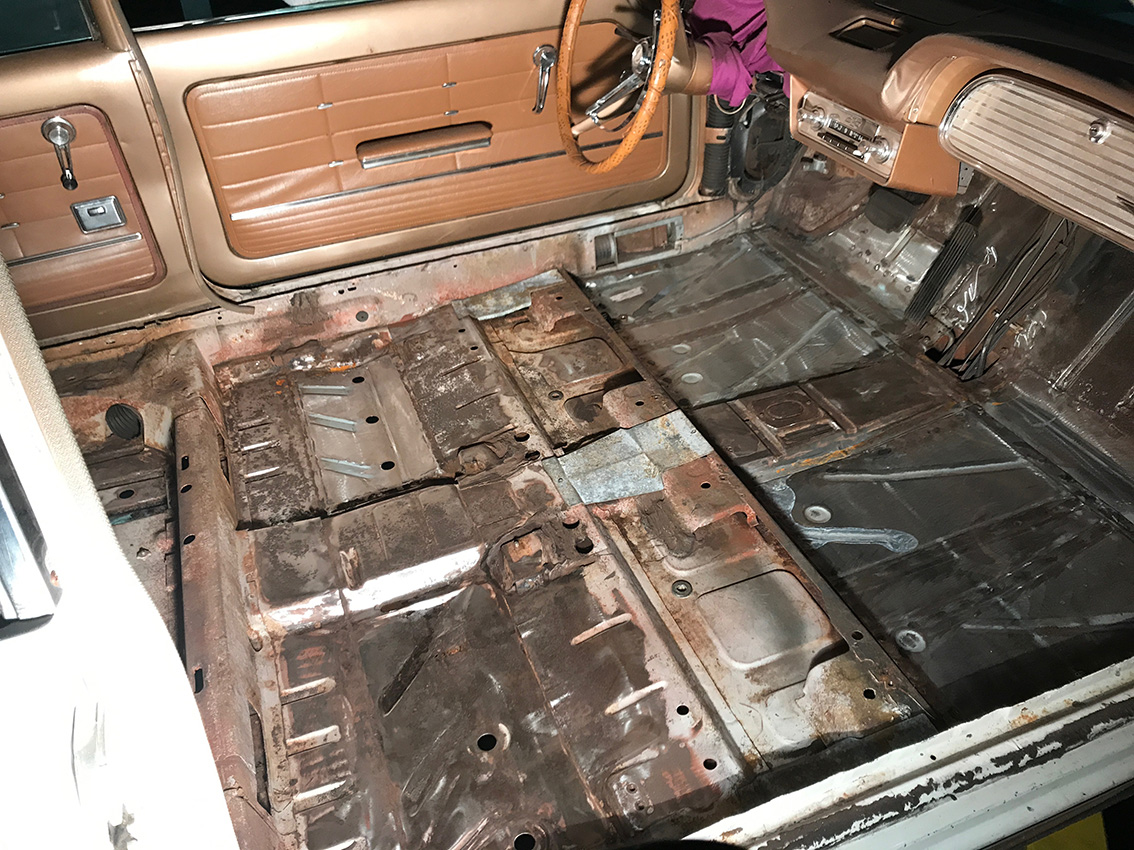
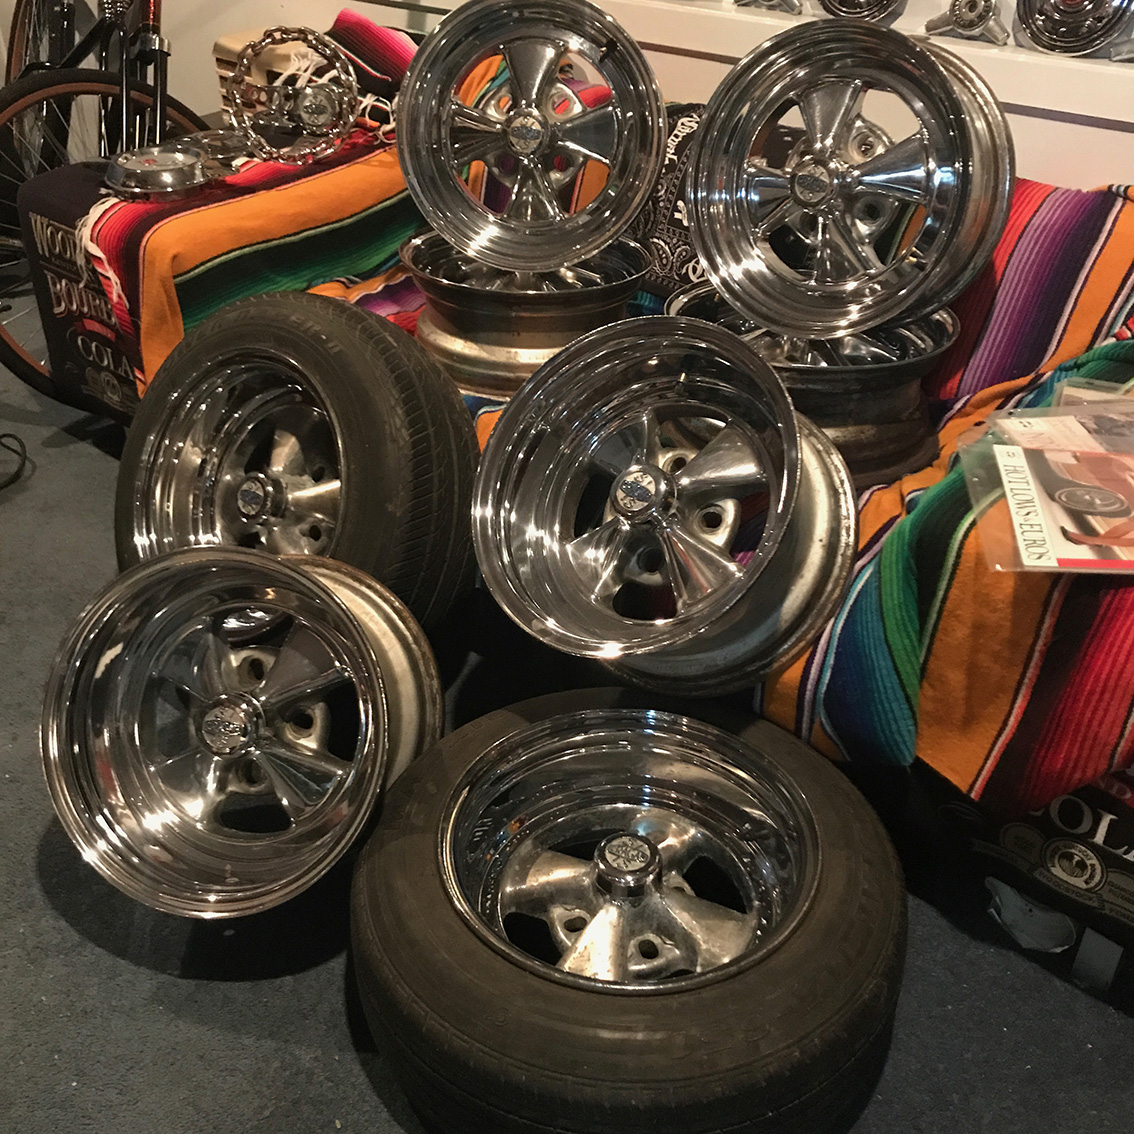
Been doing a bit of work on the Corvair. I took it down to my brothers workshop and they've removed the rust in the floors. Its starting to look good... I got the fun job of cleaning the floor panels of any surface rust to keep the repair certifiers and vinning people happy. Now that the rust is pretty much done with sealing left to do we've been talking with the vinning people to figure out seat belts and what they want. Hopefully go with lap belts. I've been busy collecting 13" four spoke Cragar's. I've found another set; standard offset 5.5" that are in decent condition and have one more 13x7 on its way from America.
1 point
-
I still have a few boxes of assorted metalflake krylon at clearance prices. dm for deets1 point
-
Haven't done much more to the dash apart from fit it into the cab, as I am undecided how to approach the rusty holes under the gauges yet, a bit too many complex shapes! My Dad had a 55 Chevy steering column laying around, so we started to mock it up. The shaft out of that column had been welded in multiple places so we found another column that had a mint shaft and it was also longer so didn't need an extra universal joint added. The outer tube of the column was pretty average, had lots of extra holes, cutouts and had been shortened, so drew a new one up in Solidworks and got it put through the Tube laser at work. It's now made from 2 inch stainless tube.1 point
-
the good.the bad.the gun spat here on the left rear fender.so I stuck heaps of paint over it so I can hopefully polish it out so it sagged here.and when painting inside the air vent I made this mess, looks like I'll be learning to wet sand paint now!All in all I'm pretty stoked and glad it's over, heaps of runs and spots of over spray and areas of orange peel etc..but not bad for a noob in shed in west auckland.looking forward to assembly.1 point
-
Quick update. Boost issues fixed. Gearbox oil changed. Vehicle was also put on the dyno for a tune and managed to pump out 263kw or 353hp at all 4 wheels at 1bar of boost. Was having some issues and was putting out low power when first went on the dyno, found ignition was breaking up at high rpm and also was lazy to build boost. Now it comes on boost low, really hard and pulls like a train May need to go bigger injectors and airflow meters if I want to ramp it up more as I don't have much head room. Will wait till I get used to this power and see if I want to push into the 400s. So far mucho impresso with the power. Will add pictures and stuff shortly.1 point
-
Made some brackets to mount the valves. For some reason the holes ended up too far out so had to slot them a little. They're held in with countersunk screws so it's all still flush underneath (not that anyone will be able to see underneath anyway haha). Played around a bit with the location for a while and decided this was the best. Wasn't really enough room for the compressor to fit in between. Will mount a compressor on each side of the bed, just above the exhaust area. Back to fitting and fixing the rust in the dash now. Cut out the good/un-butchered section of the dash that some idiot tried fitting a commodore cluster in. Glad to finally throw this shit out! Pic for motivation1 point
-
Bench top saga.. About a day after I decided to keep and pay for the dressed mac I'd been accidentally sent I decided for the short term it was too expensive to laminate my bench top.. que Trademe find of 45mm lvl plywood for 140 a sheet, and then subsequent delivery.. I was always going to do some sort of temp plywood bench but I ended up putting a fair amount of work into it. Suffice to say it's here to stay. Cut and test fit, Decided to narrow the kitchen width a bit a and add in a breakfast bar on the island while I was there. (can see my horizontal handles) Epoxied the two halves together using these handy clamps, Needed to find a sink that was small enough to fit with the carcase and tap centers, in my infinite wisdom I moved the taps 100mm to the right before I'd even bought the kitchen, then restricted what I could put in there. Found an insert that was almost right, then cut it up, Set it out, at 11pm at night the only thing I could find to measure the radius of the corners was a half used roll of ecoply tape, turns out the corner I measured was the only one with the same radius add the tape, the other three are slightly smaller, doh! It's also not square.. Cut with a jigsaw, did a great job.. Routed a recess for the sink and attached the clamps I cut off the old insert.. Had to make some minor adjustments to the carcase, Epoxy for the finish coat, soaks into the wood and won't peel like urethane, was gonna oil it but the edges of the ply aren't particularly strong, the epoxy also fixes that problem.. I then partially mounted it and set out and cut the hob hole.. I then had a minor anxiety attack, cursing myself for making life hard with a 900mm hob and worrying about the addition of a thermal block between the hob and carcase, got over it and just cut the carcase as I needed, turned out good in the end, just shows what 4hrs sleep a night does for your mental stability (that and having 4 days to do a 5 day job) Hob test mounted, Late night bench sanding The ply came with an annoying bow from side to side, really became noticeable with the island, so I mounted it bowing back the other way as much as I could in the hope that the epoxy would semi hold in that position, kind of worked.. The epoxy, Did a much better job with this one as I had more time, with the other side I got quite a few air bubbles but as I was doing it in work hours I had to go with it, will sand out back at a later date and do a final coat. The island looks a lot better.. Big thanks to Luke (bling) for easing my mind with regards to the hob and the gas install Cut and epoxied the sides, Then added strand board to the back, I like stand board, it's kind of industrial but not.. Still need to get another sheet to do the kickers and then the kitchens mostly done.1 point
-
And this happened today Man I love this thing
1 point
-
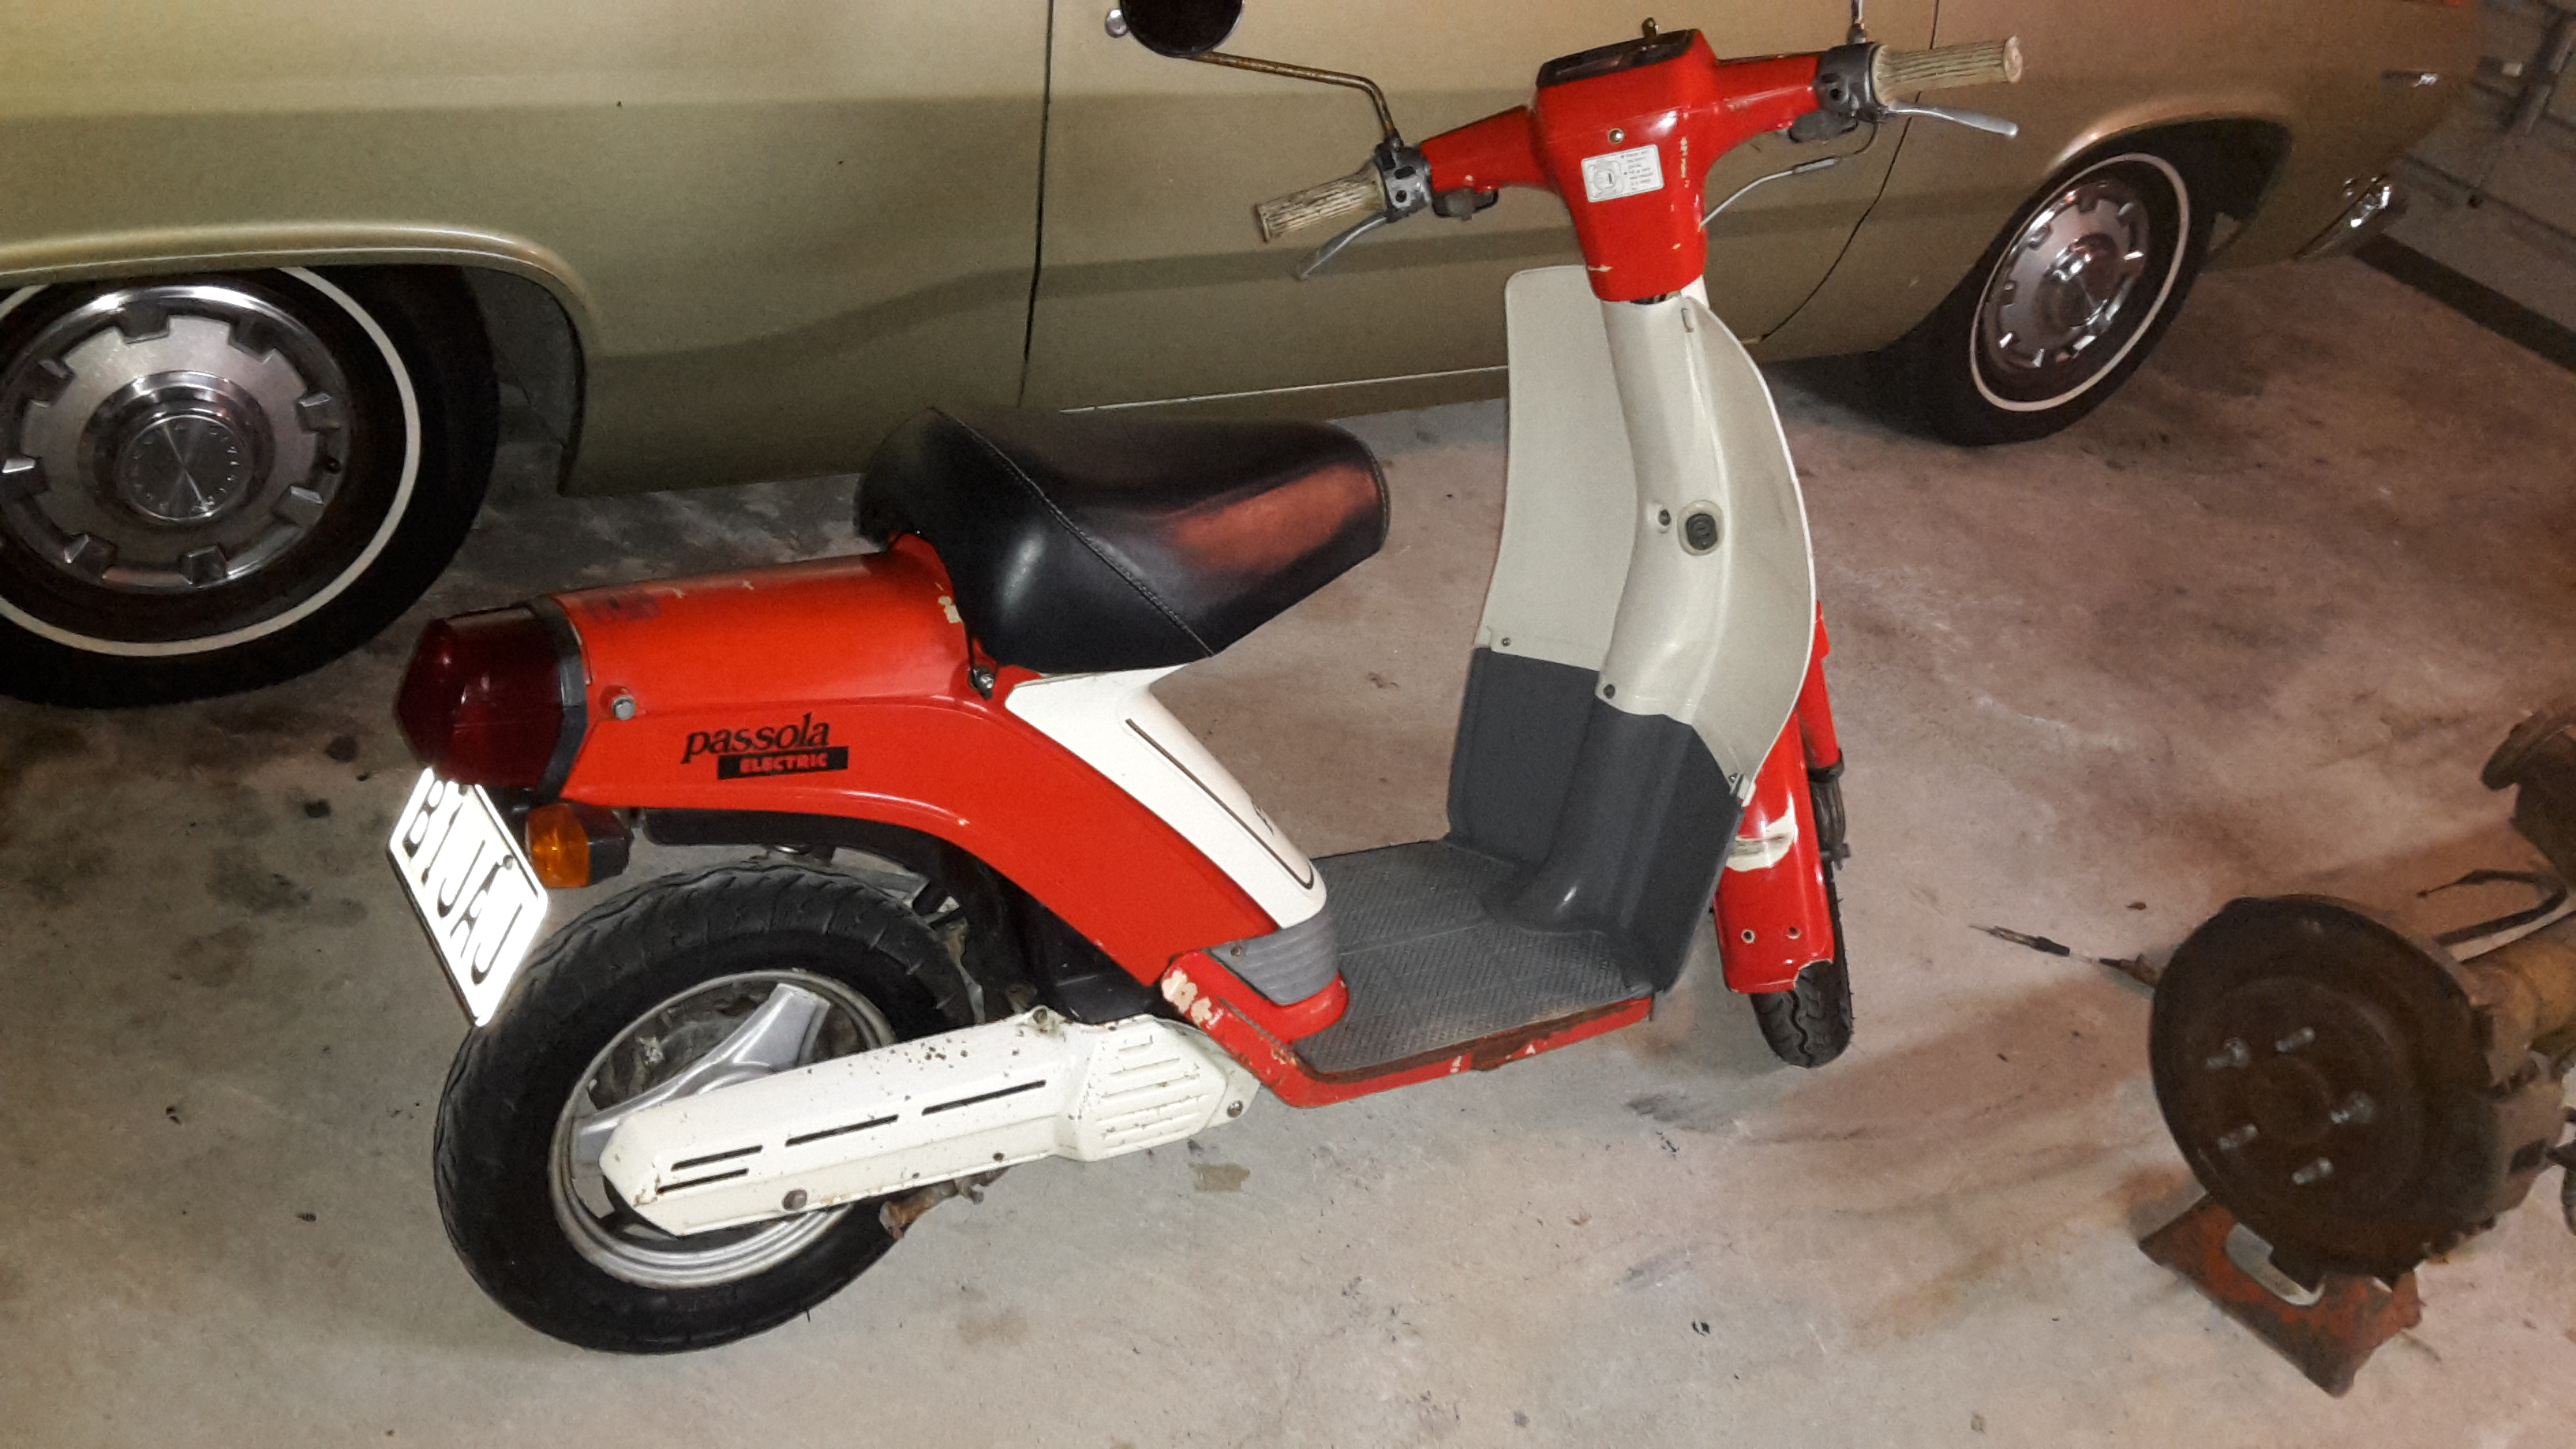
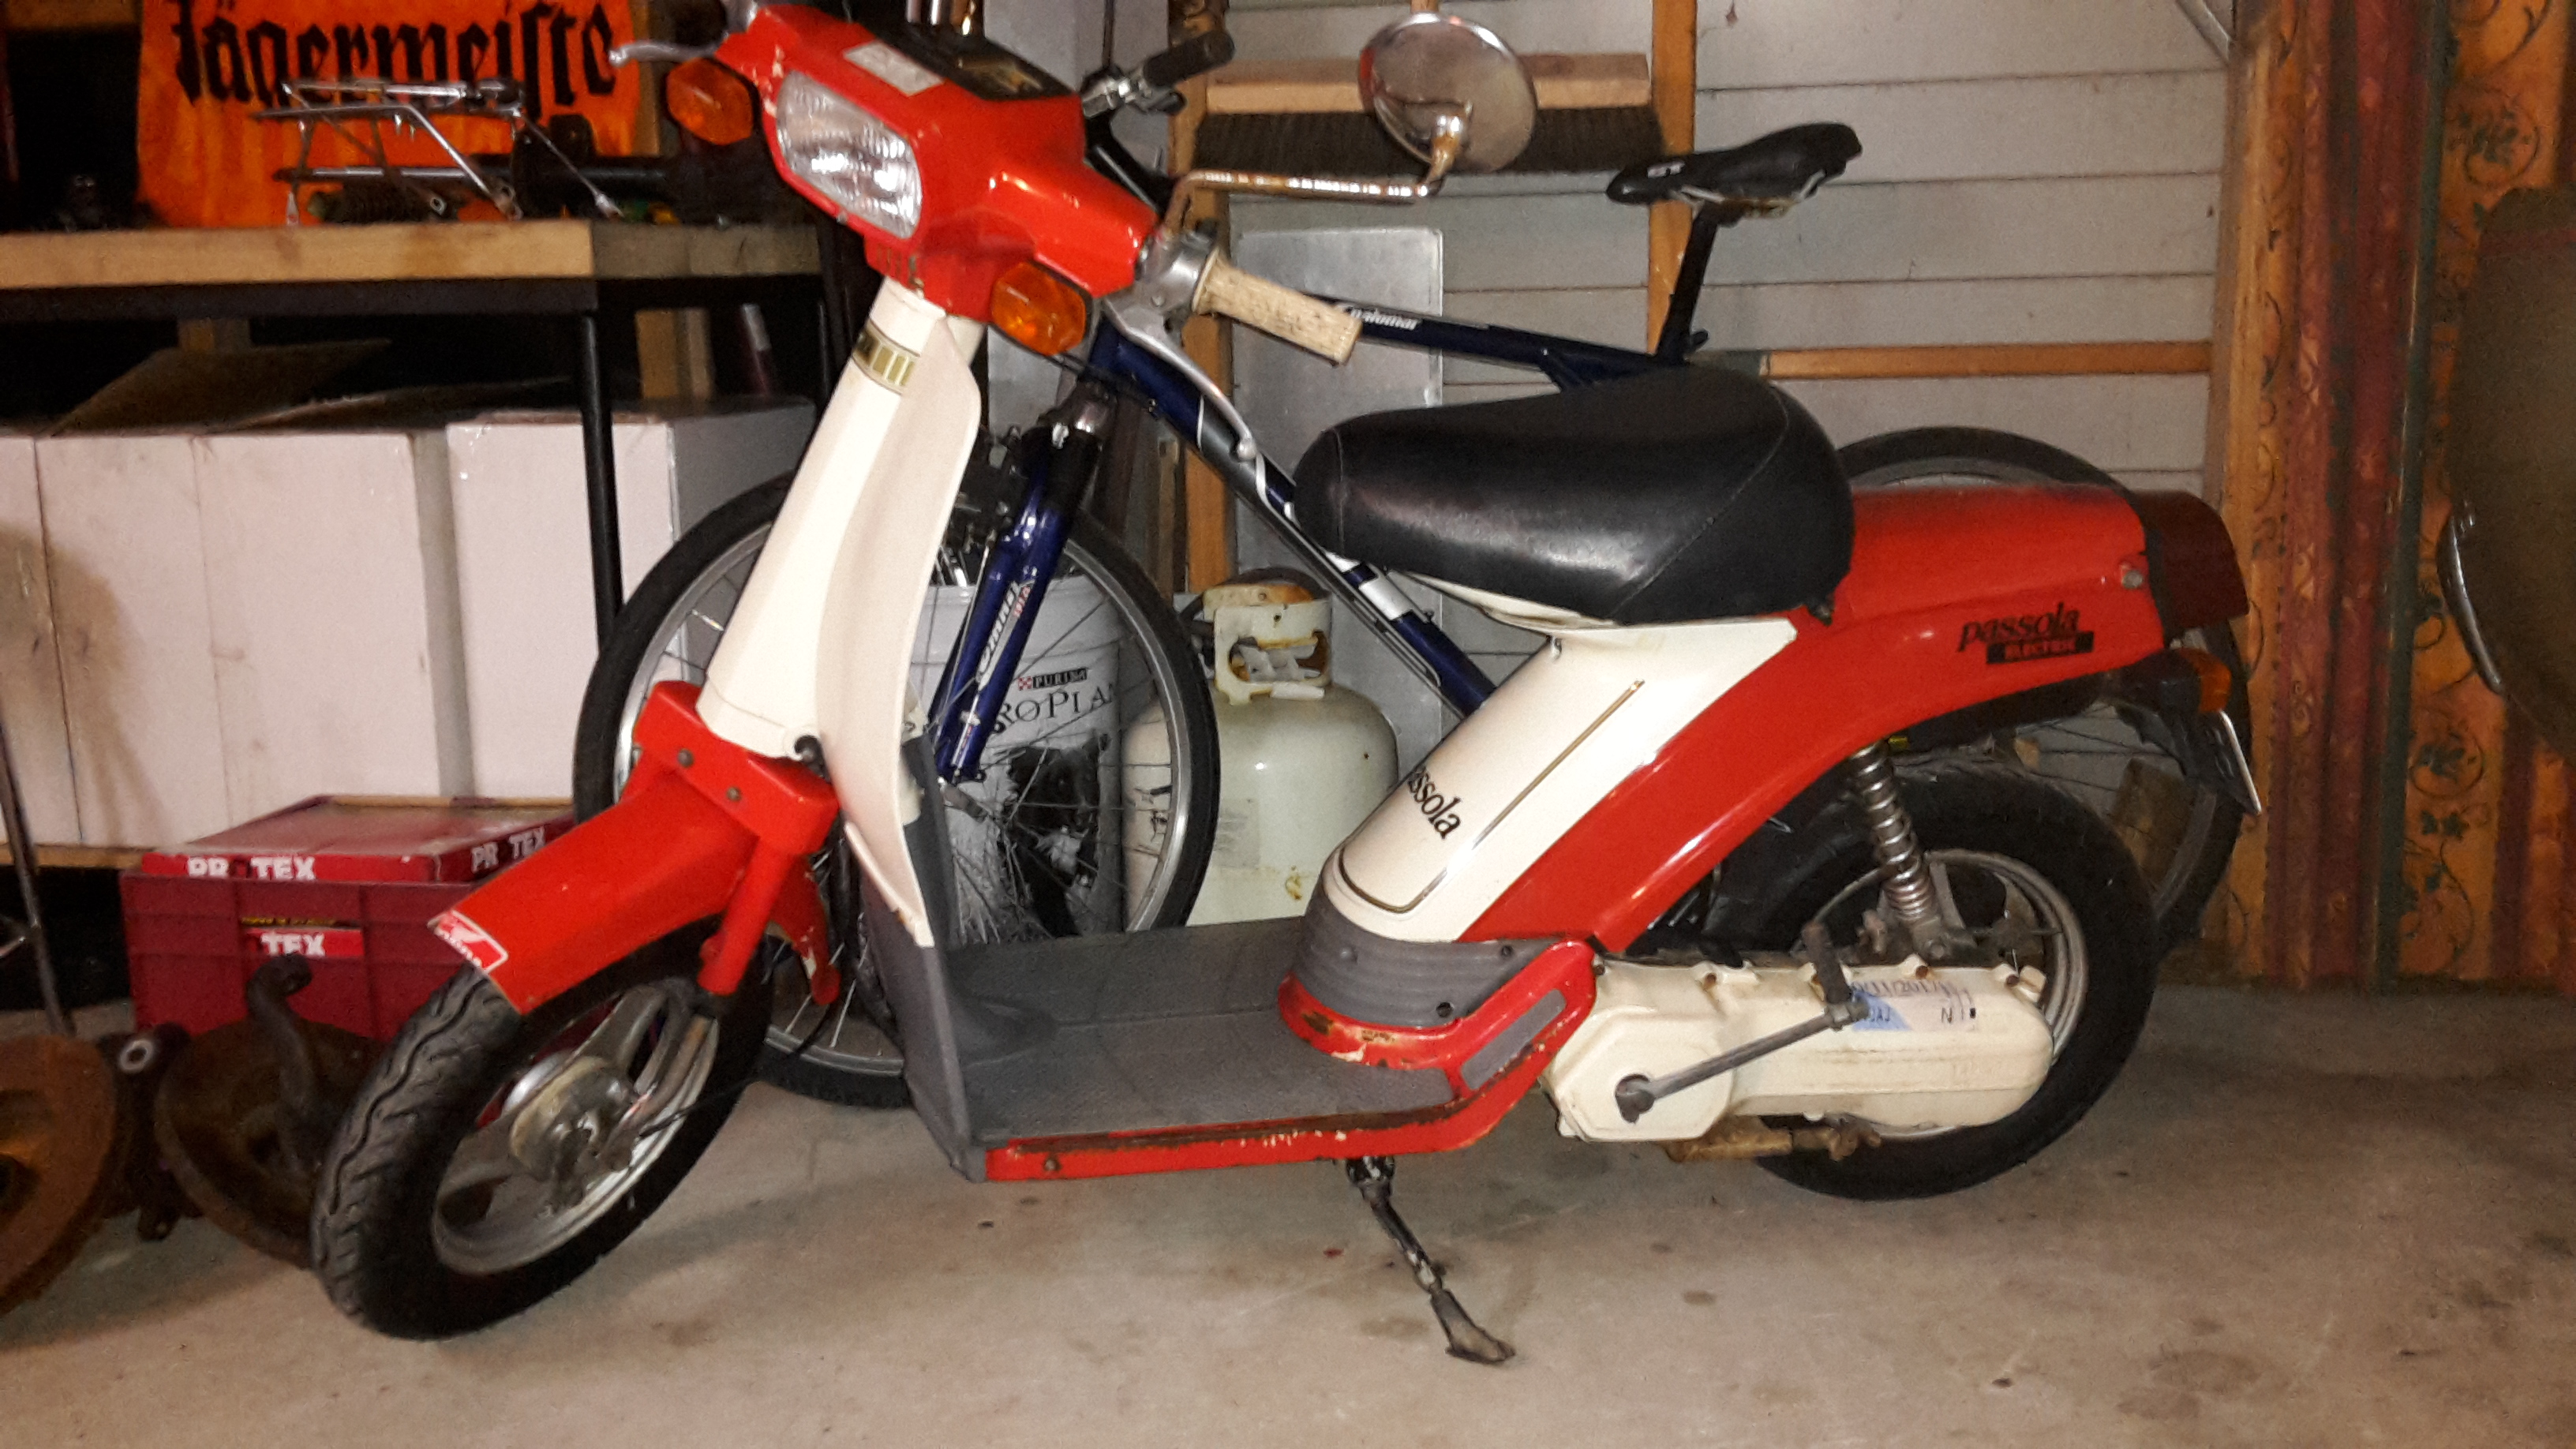
Other end of the engine size scale, I picked up this non running scooter from Scrubb, what a top bloke. I got it home and managed to lose the key somewhere, I disassembled the ignition switch to get that working and it had some water in it, and the air filter foam had fallen to bits so maybe it had sucked some of that into the carb. Anyway after that it started, I fixed the indicators, made a new air filter out of a car wash sponge, cleaned it, and got rego on it. At first I thought there was something wrong with the clutch but it turns out it has a automatic 2 speed. I have had some funny looks when riding it.
1 point
-
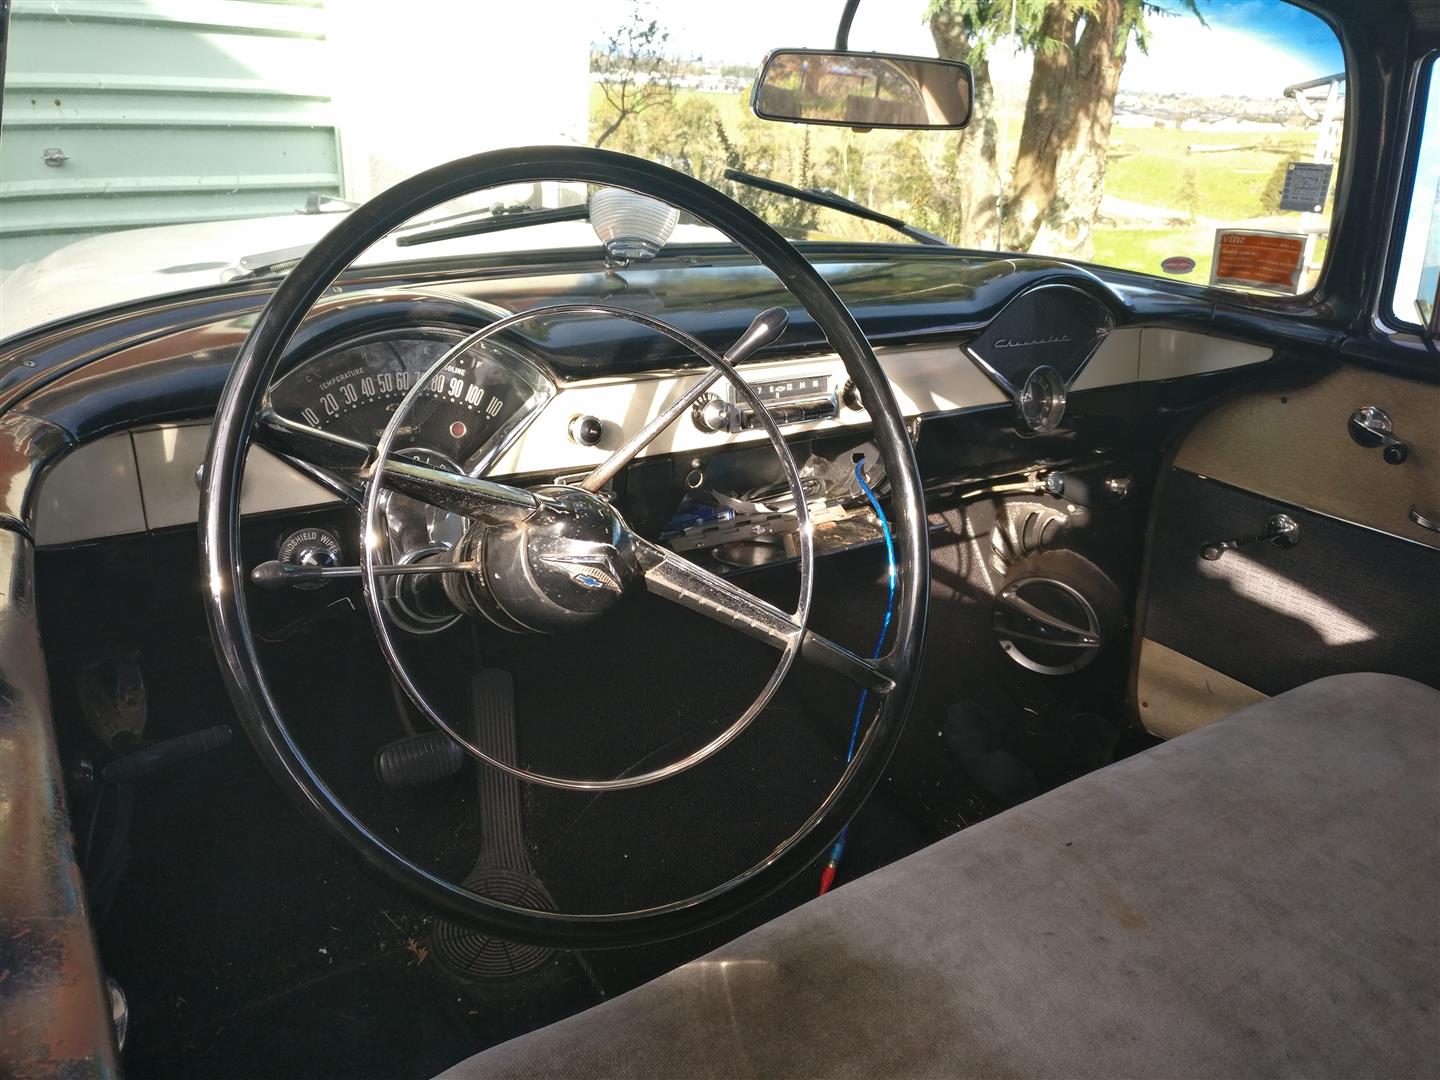
We did the compression check on this car when the old boy owned it. Very tidy and the motor had fantastic compression! We were quite surprised1 point
-
Finished another patch of rust. Hate trying to do them when you can't get in behind with a dolly, makes it difficult. Made up some strap sort of things to mount the fuel tank. Spent a lot of time trying to figure out how to mount it and decided that adding another bar between the chassis rails was the best. The straps pull the tank up against the top brackets, should hopefully hold it in place well enough. Made up a aluminium tray to mount the air tank and compressor in. Being able to draw stuff up in cad, program it, laser cut and use a CNC press-brake is pretty great! It's pretty tight but fits. Will swap the tank to the back as the tank will look better being visible through those holes than the compressor. I'm sure I'll paint it black so it's a bit more subtle. Got the rest of the exhaust tacked together as well. Not sure if I'll change where it exits, because at the moment it sort of comes out between the tailgate and bumper or just leave it as is. I think the whole exhaust has 10-12 u-bends in it now haha.1 point
-
Or one of these1 point
-
You have to remember that the Australian Mitsubishi/Chryslers of that time are often different from the Japanese models they are derived from, as the Australian models had to rely on heavy local content - ie PBR brakes in place of Sumitomo, Borg Warner transmissions and diffs in place of Aisan/Mitsubishi derived items. His wagon will have either the G32B 1.6L or the G54B 2.6L and unlikely to have a Borg Warner transmission like the Australian assembled models. The Scorpion is known as either the Dodge Challenger II or the Plymouth Sapporo in the US and they have the same engine options as the OP's wagon. The turbo sedan wasn't available in the US - their first turbo Mitsubishi was in the form of the FWD Dodge Colt aka Mitsubishi Mirage, also sold as the RA-RE Colt in Australia just minus the turbo engine. Then they got the Starion in 1983 followed by the Cordia, Galant VR-4 etc. The Magna doesn't exist outside of Australia - the 5th generation Galant the TM-TP Magna was based on was sold in the US as a Galant Sigma but it came with either the 2.4 4G64 or the 3.0 6G72 V6. When I was living in Australia I sent a boat load of TN/TP EFI inlet manifolds over to the US for the Starion guys to convert to MPI.1 point
-
Nearly done the transmission tunnel. This piece of the firewall has always annoyed me by how it isn't symmetrical, so cut it out and fixed that. Just need to do something with the little hole on either side where the tunnel, floor and firewall meet. Also built the fuel tank. Drew it up in Solidworks and then lasercut it. Added a couple of baffles that located and slotted into the top. Here it's fully welded, will give it a polish or something one day. The big flange is for the pump, the smaller one is for a sender unit and the small holes are for the return line and breather. I think it's just under 60 litres. Now to figure out how to mount it.1 point
-
Finished the last of the ply yesterday and screwed the rest off, can't see this house moving much in a quake, so many layers.. Paints all finished thanks again to family, then I fucked around in the afternoon clearing everything for the sander, Fillets came up great, I then had a crack at the bathroom vanity, Cut a hole.. goddam oaks hard, chewed a blade or half way through. Also smells remarkably similar to Rimu which also fucks metal things.. Trial fit, had to enlarge the hole slightly with a 40g flap disc still just burns it off.. Two more hole for the taps, And voilà.. not to shabby, Just need to adjust the drawers somewhat.. Sanded the top back a bit as it was a little messy and the two halves of the top didn't really line up properly, not sure whether to oil it or put it back like it was. Checked on the floor sanding progress today, guy doesn't fuck around.. floors all leveled with the filler on already.. also bought some carpet this evening, shit isn't cheap, 6k between the floors and carpet! Should look ok tho..1 point
-
Done the floor patch, just need to do the bit up the side and then there's a few little patches of rust, where the top of the guards bolt to the cab on both sides and a pin hole in the rear cab corner. That'll hopefully be all the rust in the cab done, then I can start on the transmission tunnel.1 point
-
Fuck yeah!!!!1 point
-
Done a little bit more. Tried the x-flow underneath but there wasn't really enough room. Move it back to here and looks pretty good. Can be dropped out from here as well. Resonators go somewhere around here. Ran out of stuff to do on the exhaust since I don't have the pipe or flanges yet, so went and filled in some more holes in the floor.1 point
-
This happened today... Bit of a milestone..1 point
-
Do you happen to have the sump profile for a Bmw M50 engine?1 point
-
Try Imgur. It is an OS problem as I just tried your photo links on an old phpBB forum, a SMF forum and an AMASS forum and they worked perfectly on all. But at the end of the day Photobucket sucks crusty ass. Just playing around with your image links I've been informed that I've won billions of dollars, there's sexy singles waiting for me and it turns out the Lindbergh baby is my grandfather Imgur is easier to use than PB and works well, iforce is super simple and just straight out works.1 point
-
well clutches for these things are expensive everyone in nz was 1030- 1800 ish depending on what kit i thought id be a clever clogs and look at getting one in oz because they would be common as it just so happens there was a ford dealership up the road from where i was staying- $3600! there was a parts place about 2 min further on- $880AU. then i figured i would have to get it back, too heavy to put in suitcase or take in carry on, and i didnt want to get stuck at the airport with something i couldnt get back, so i flagged that idea. got back, found a place in OZ that ships to nz, kit was $600AU, sweet, sold! didnt think about the next bit enough.... by the time it gets converted to nzd, pay for freight, pay the fee for sending $ to australia, get charged for gst, customs fees, bla bla, it owes me $1010 and i had to fuck around going to get it from the airport because the freight company didnt ring or email me to tell me it has already been here for a week and didnt reply to my email asking where it was. SO, for all the other falcon owners on here that need the same parts, the moral of the story is dont be a jew, just go to sterling clutch and brake and pay $1030 for the one that they have in stock.1 point
-
Discovered today that firth fucked the concrete order up and gave me 40mpa concrete instead of 25.. shouldn't snap in a hurry.1 point
-
Big thanks to Dave for delivering the Datsun out to us on Saturday night. We shuffled it into a good position for the morning sun and this morning Hannah and I gave it a decent wash. I wanted to keep all the moss in place but really it was just so covered it wouldn’t help my case when applying for a new registration/test. So off it was washed. I took some piccys first though.. Then wash time.. After it was washed down I pulled the seats out and removed the old carpet. As to be expected there is some rust holes where water has sat between the sound deadening and the floor. Luckily most of the floor is pretty solid as are the inner sills. So patchwork repairs will take place there. I'm sure once up on the hoist it will gift me more lovely rusty areas to repair but overall I am really pleasantly surprised at how well the thin steel on this car has survived! Engine bay pretty good but for a few little bits.. I pulled some of the filler out from the dents and apart from surface rust it is mainly just dents the filler was covering. Not really deep dents either. Someone has tried to make this car look pretty at some point which bodes well for it having had a proud owner. I wouldn’t be surprised if the dents were put there by my mum or dad when ferrying us kids around. It was quite a little hack for our family. The roof is really straight. Awesome! Plus the gutters, tailgate, doors etc are all solid as. It has the original Datsun screen still place and no signs at all of even bubbling around the seals. Happy about that! Whilst cleaning out the inside I scored some more treats as well as money. The car now owes me only $247.95. It would be less if the 20c coins I found were not the outdated ones. One of them is 1980. Could have been mine. Maybe I dropped it and missed out on my 20c sweet mixture that day. Oh really?.... I also spotted that it has already been fitted with top quality hifi speakers. Bonus.. So that’s it for now. With the carpet out the car is now nice and dry inside plus I know roughly what I have to do. But I need to finish the Viva wagon first before I start any rust repairs on this. So it will be pushed out back and brought inside when the time is right. Between now and then I can do my best to locate an engine or hopefully get the original 1200cc one back. Plus look for a disc brake front end and brake servo to suit. Oh..and some nice period alloys as well. Hopefully some turbos or even slot mags.1 point


.thumb.jpeg.e0a4bff61111e0c8c7396950fcc94da1.jpeg)


This leaderboard is set to Auckland/GMT+12:00