
Leaderboard


Popular Content
Showing content with the highest reputation on 04/07/25 in Posts
-
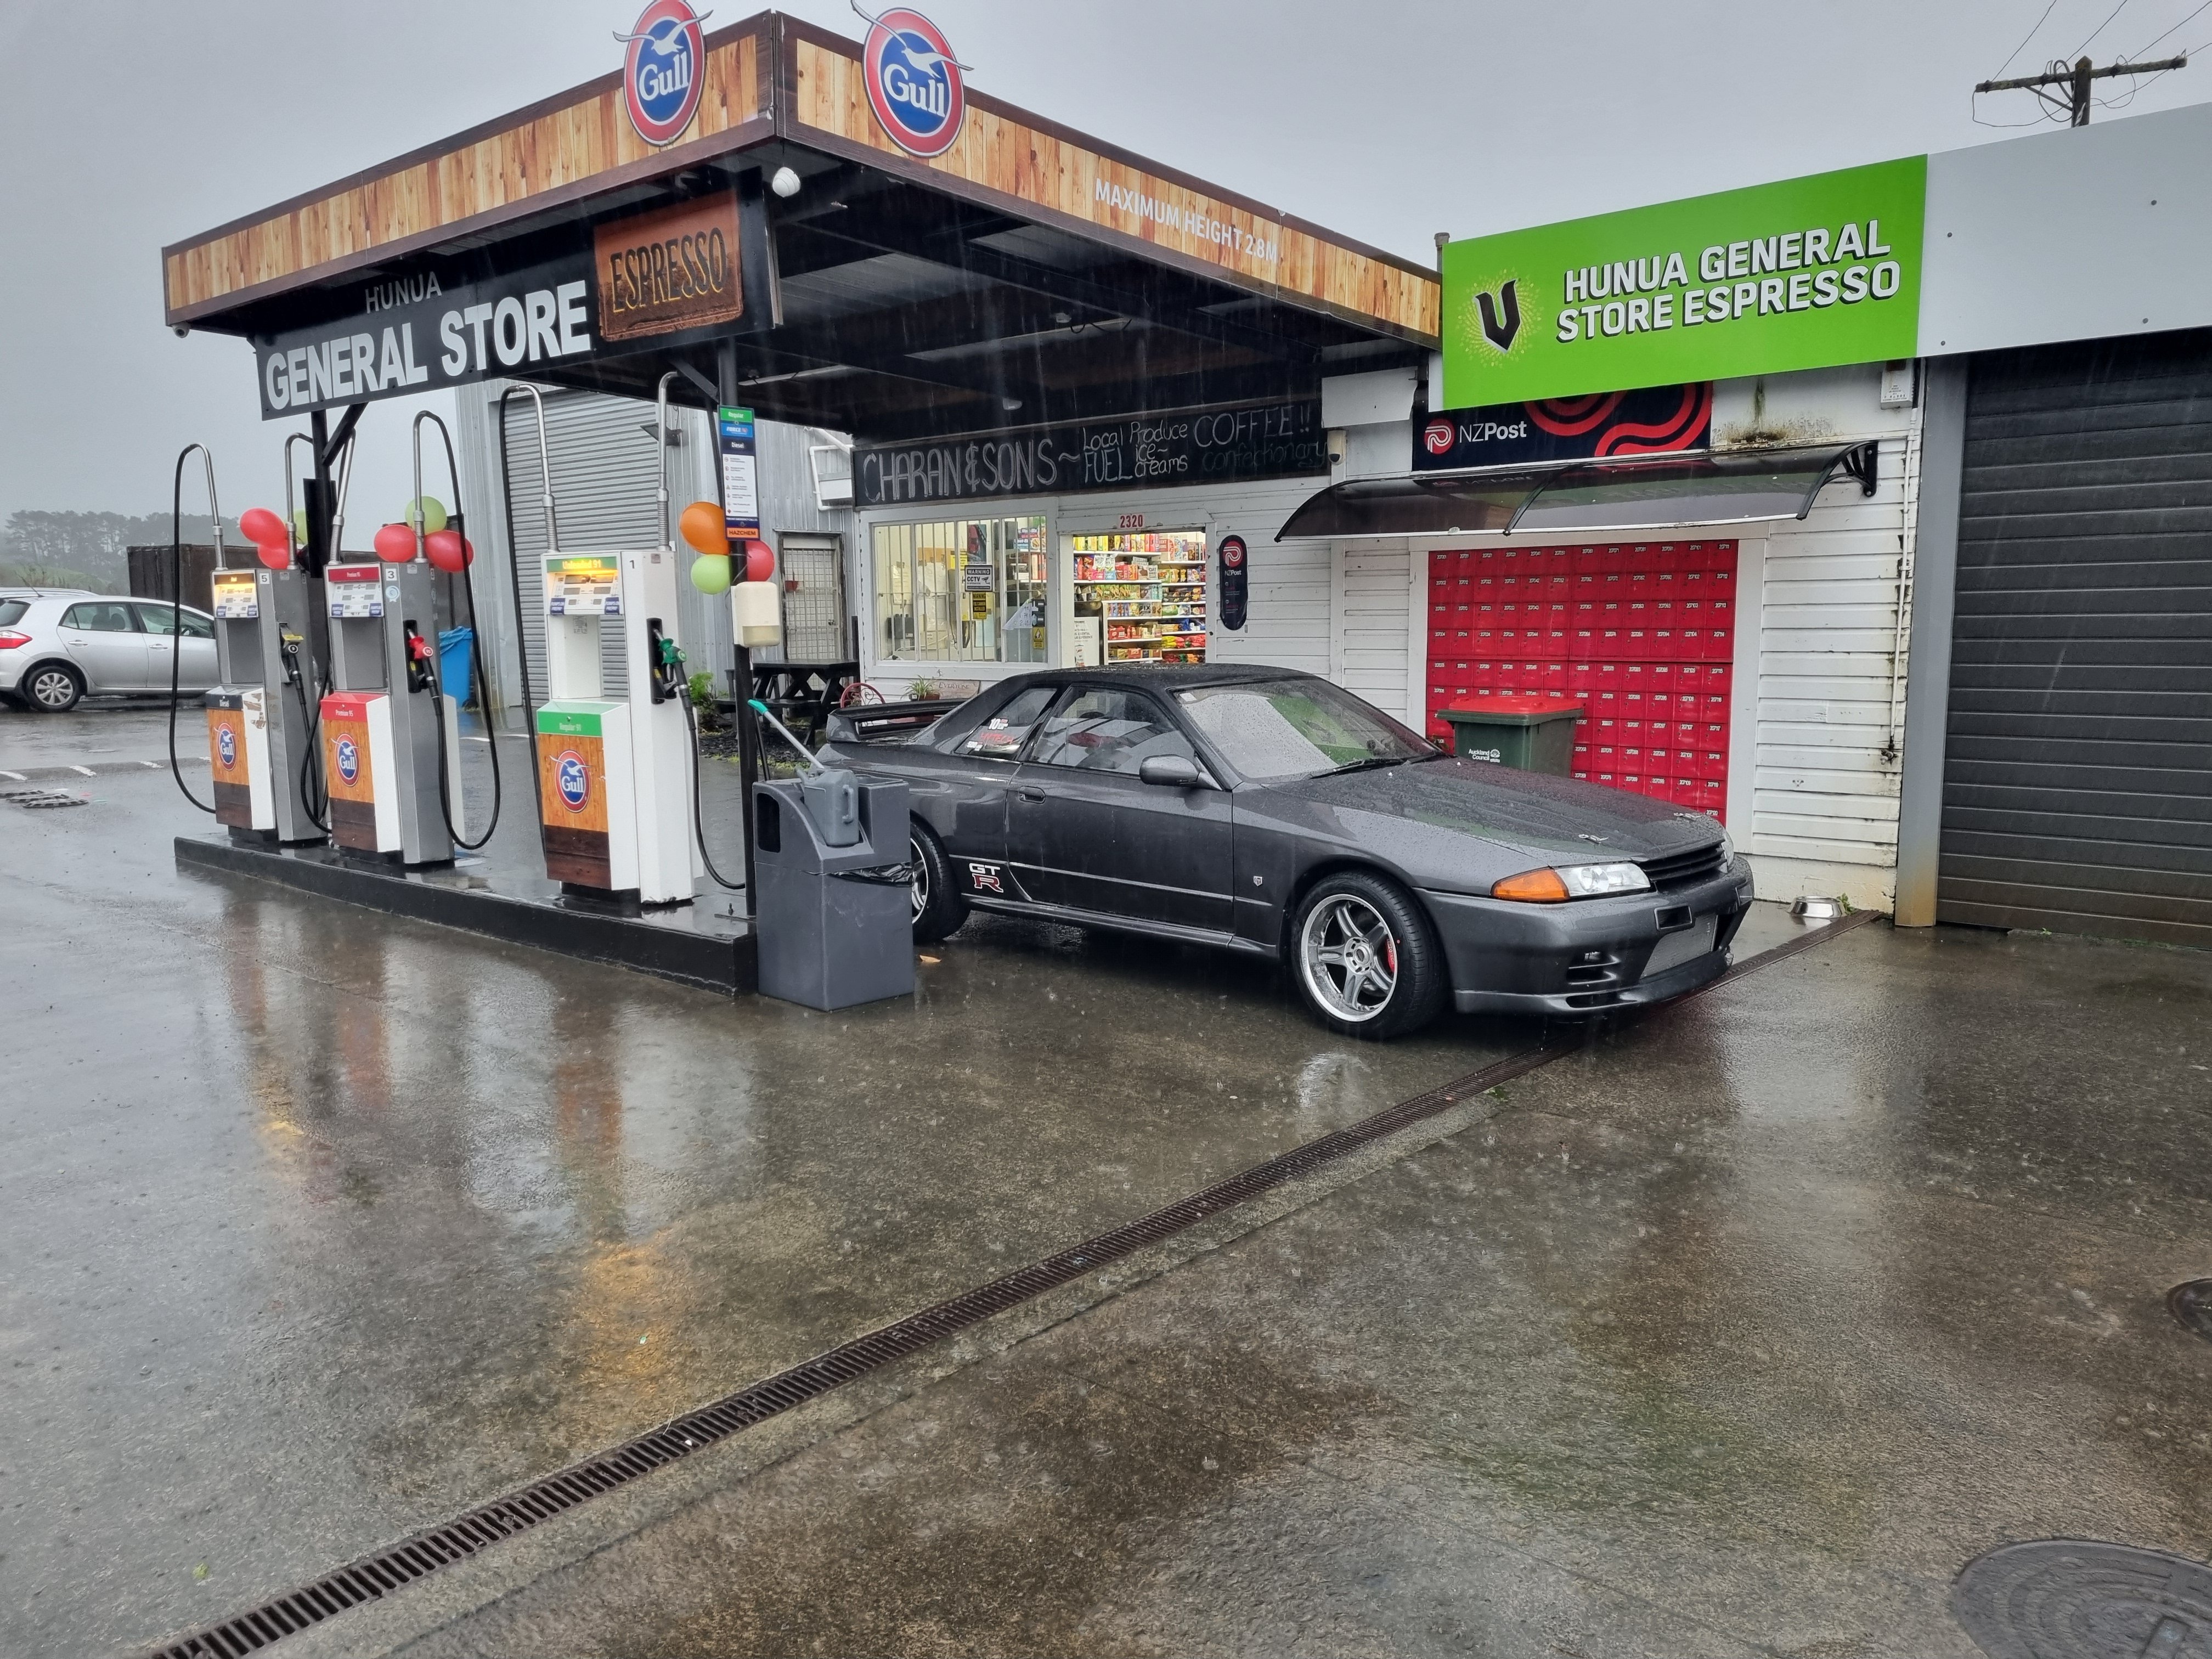
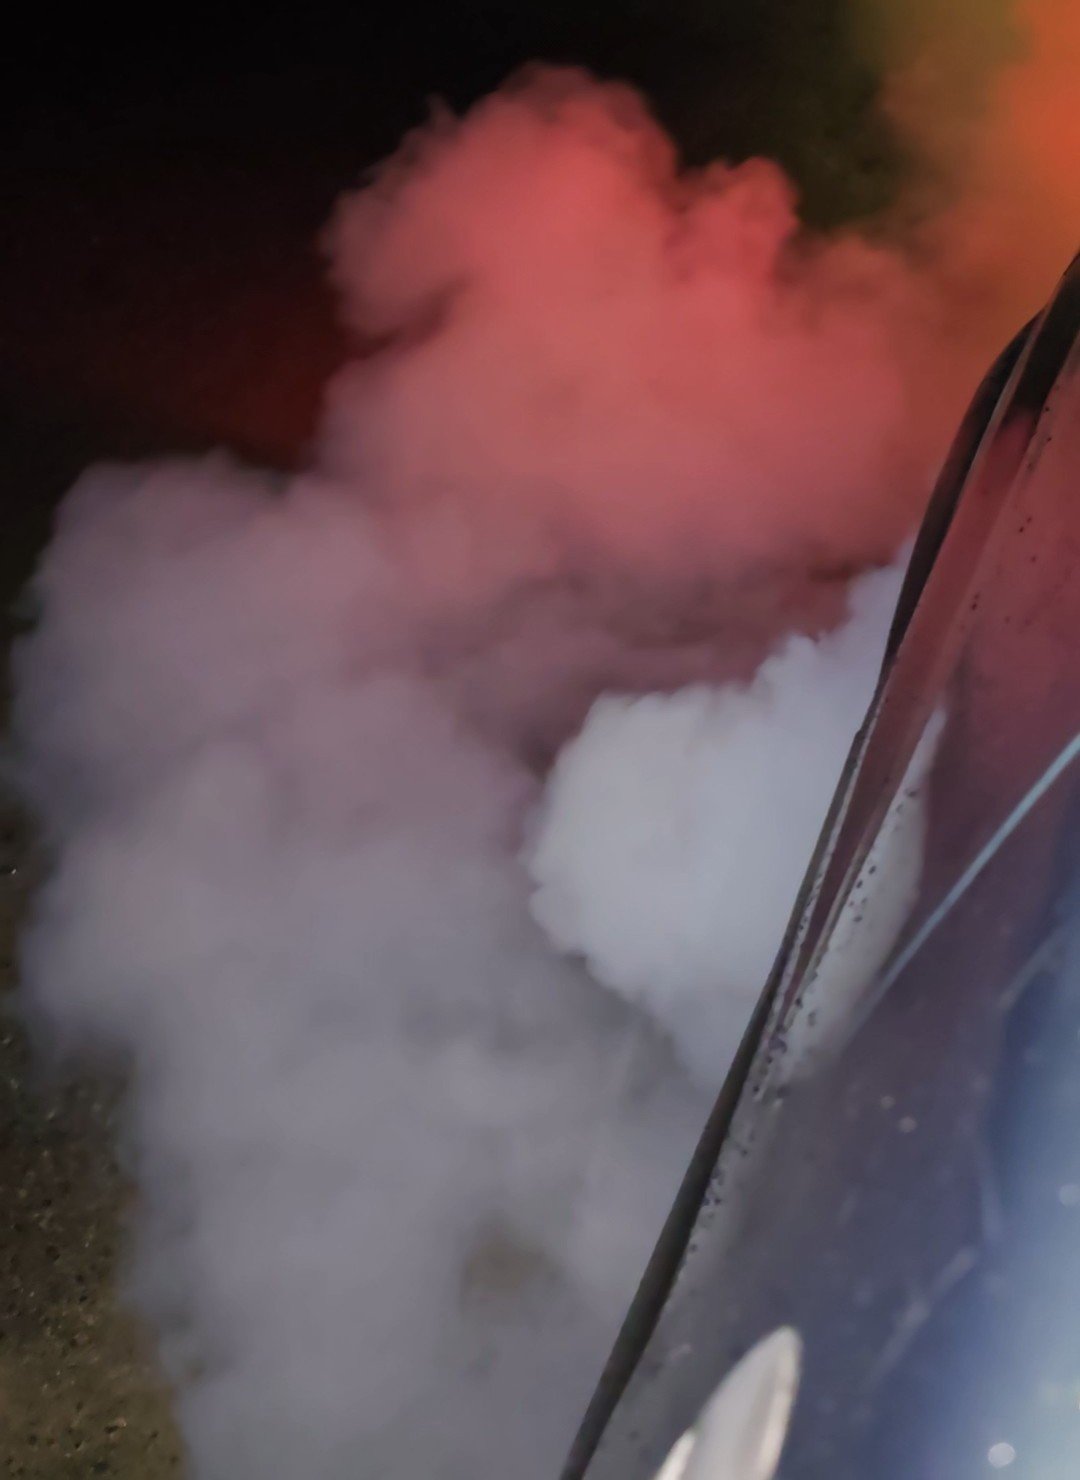
Fuck did i have some issues getting it running. On the plus side I now know what every single wire on the ecu plug does, and that it's properly connected and working, as well as 90% of the entire cars looms. One i got the thing to actually run i thought the sensible thing to do would be take it for a drive. It's still running like a dog but I drove it anyway. Fuck it's choice, even though I've only driven it 10ks in a fucking cyclone I can already feel how amazing the thing is. I'M HAVING A BEER WHO'S WITH ME!!!!!!
 19 points
 -
they do have a lovely selection of pies there good work sheepers, i am impressed at your complete lack of ; lollygagging mucking around lazing about thumb twiddling hesitation dilly dallying goofing off dawdling5 points
-
Feilding people, im planning on taking my fancy datsun to this event, we are staying at he fielding hotel which isnt the most secure of parking places. could i impose on someone to park my car in a secure location where it wont get stolen by the many and various fielding crackheads? thanks team.4 points
-
A pack of arseholes4 points
-
FUCK GO MARK SKAIFE WOOO YEAH KING OF THE MOUNTAIN!3 points
-
Or one of these but change the badge ever so slightly...
3 points
-
no painted floors or violated spiders3 points
-
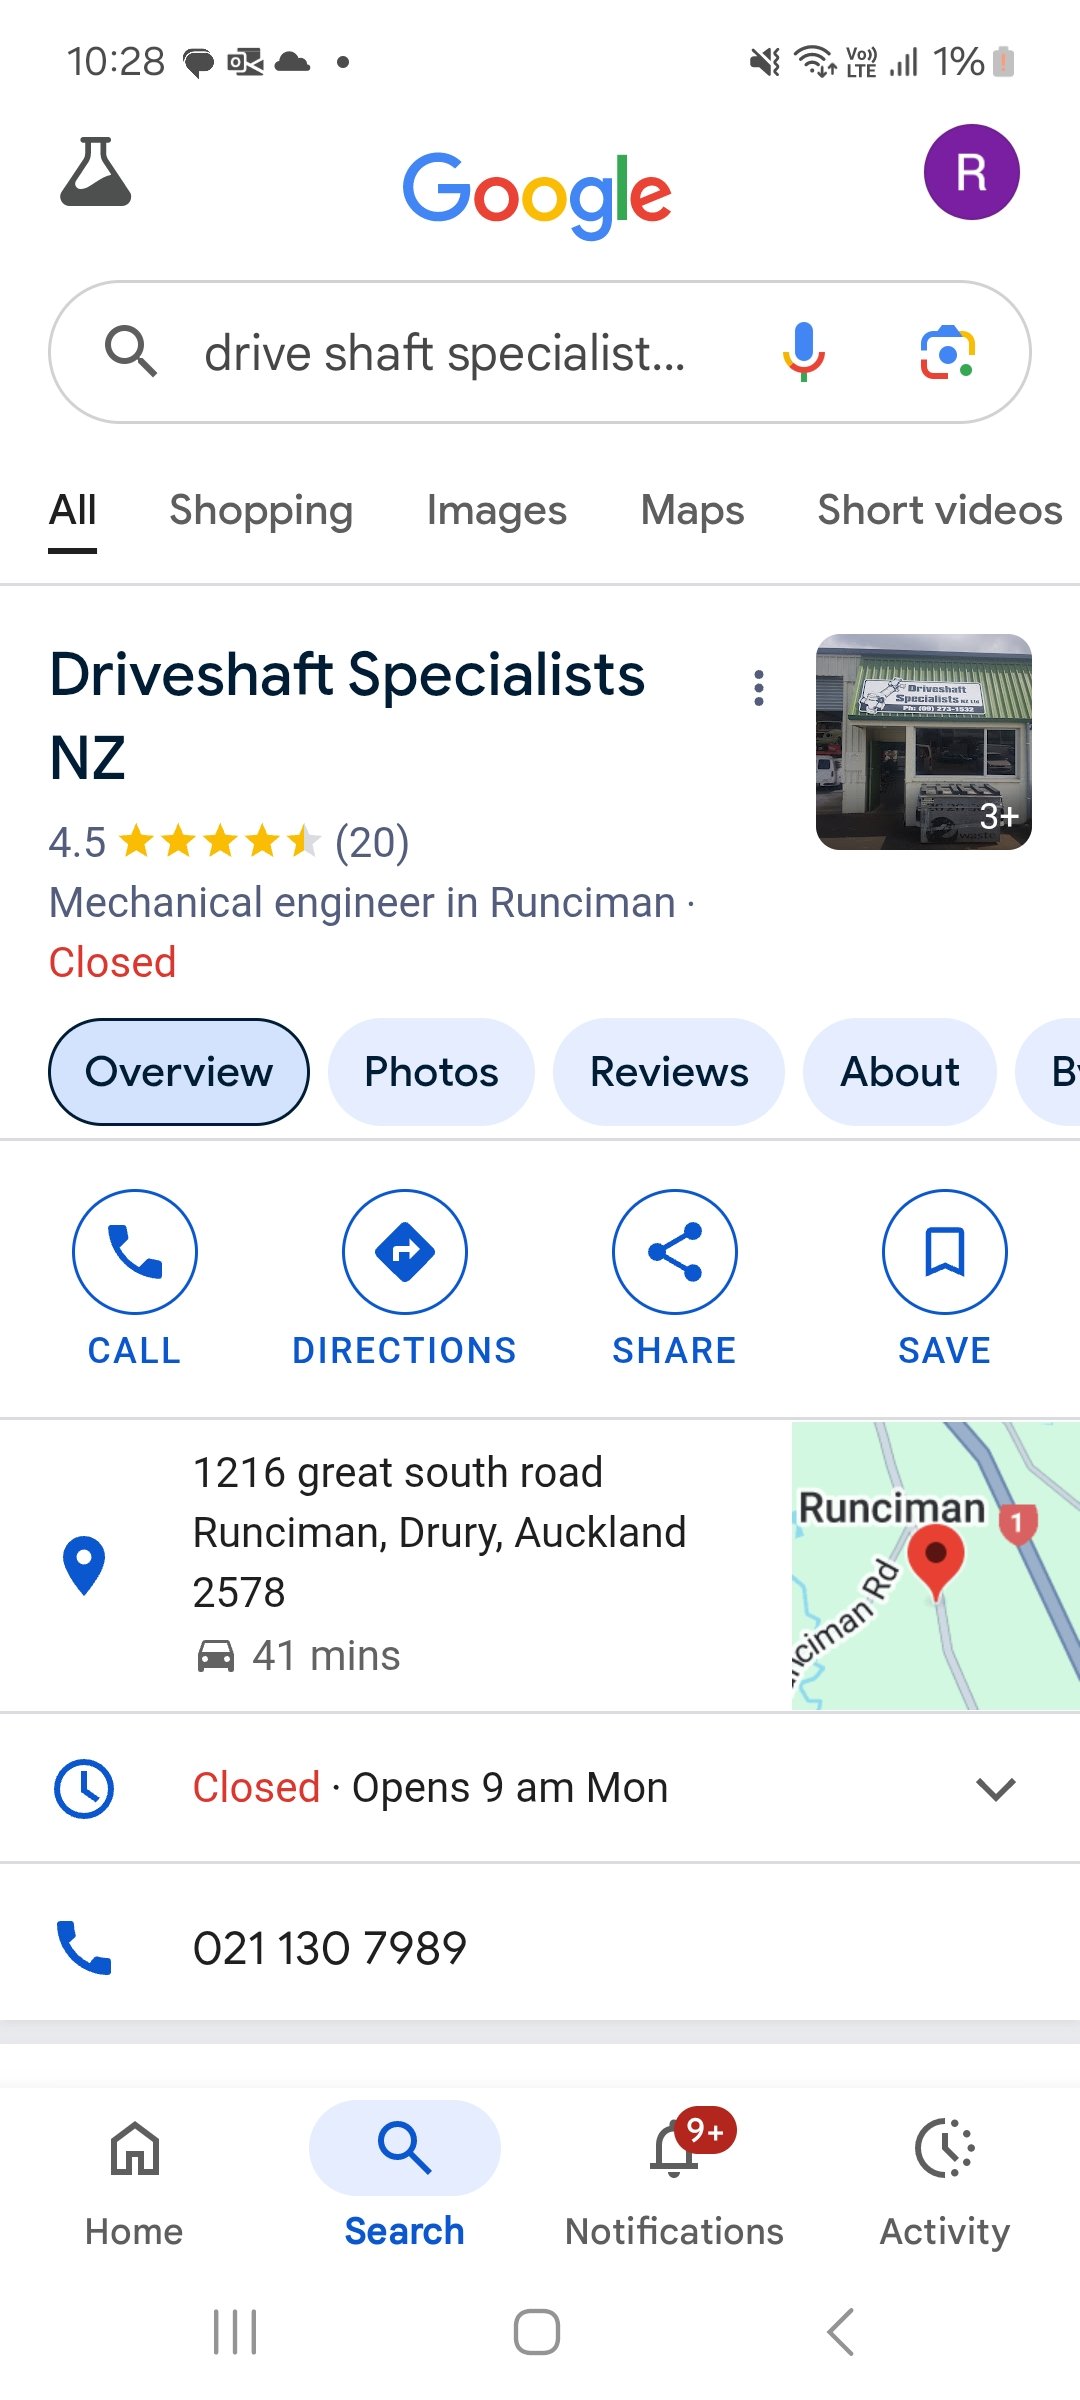
Russell, drive shaft specialists, Andromeda crescent east tamaki is who I usually recommend He's reasonably priced and does good work.3 points
-
The eggball helpers didn't last very long. Gearbox in the back seems to have finished them off The auto box has decided it wants to randomly shift from overdrive 4th to 3rd when cruising down the motorway It may be related to the stationary cooling system test but who knows. I'll service the merc trans and if I have leftover fluid I'll check the mussos level is correct and top it up if needed
2 points
-
Can they leave the lights on at the track though. Just in case.2 points
-
@gibbon
2 points
-
Good work Koro Sheep You dont fuck round thats for sure2 points
-
Christ you just triggered a memory. In my apprenticeship the factory owner had a flash ski boat and he wouldnt even let us look at it. I dont mean lifting up the engine hatch or anything. Literally in it's direction. So when us dickhead kids walked past we had to face the other direction and sort of crab walk. What a cunt2 points
-
how did you get on?1 point
-
Swapmeat. Need I say more? Come for the longest running o/s event. Just like every year, it’s the first weekend of August. A milestone this year - 20 years on the trot so we're going to try jazz it up a bit! UPDATED AGENDA CARE OF LOVECHILD !!! Oldschool Swap Meat - 20th Anniversary Agenda Date: 1st August – 3rd August, 2025 Location: Ding-a-ling Day 1: Friday, 1st August 15:00 – 17:00 Arrival and Registration - Feilding Hotel Participants are encouraged to register early to avoid missing out on exclusive event merchandise. 17:00 Opening Ceremony – Feilding Hotel Welcome Address: Lee Adams from Napier Overview of the Event Schedule: A brief but highly structured walkthrough of all events, meticulously planned down to the last second. 17:15 – 19:00 Networking A structured networking session in which participants are required to exchange at least 2.5 sharns. Optional self-catered dinner recommended but not required during this session. 19:30 – 00:00 Optional Breakout Session: Nu Metal Party Strap in/on and help celebrate 40 turns around the sun for Swap Meat OG Sparkle (Yay for the Beach) Horgan. Baggy dickies and silver chains a must. Note: This is an optional session; however, your participation is strongly encouraged. Party Bus For those participants attending the Friday evening breakout session, transport will depart Feilding Hotel at 19:30 sharp returning from Palmerston North at 00:00. Day 2: Saturday, 2nd August 06:00 – 12:00 Swap Meat – Manfeild Feilding Participants are recommended to assemble promptly at 6:00 AM in order to secure the finest treasures on offer. Participation is pending your state of health. 13:00 Convoy Departure - Feilding Hotel The most prestigious vehicles will be invited to take part in the convoy. Each participant will be assigned a dedicated "vehicle escort" to ensure that the convoy proceeds with optimal precision and timing. 13:30 – 15:00 Breakout Session: Daytona 100, Daytona Raceway Palmerston North A once-in-a-lifetime opportunity to experience the Daytona racetrack! 30 Laps per driver. Teams style racing with pit changes. We are expecting excellent lap times and polite applause. Note: Helmets must be worn at all times for safety purposes, but also for dramatic effect. 15:00 – 18:00 Free Time - "Do Whatever You Want" Experience Description: This is an unscheduled period for attendees to engage in self-directed activities. Some suggestions below; Car Appreciation Stroll: Walk around observing cars in silence for no less than 45 minutes. Consider every vehicle to be a work of art, and nod thoughtfully every 17 seconds. Spontaneous Car Conversations: Engage in a spontaneous conversation with another attendee. Nap Time (Optional but Highly Recommended): Attendees are encouraged to rest, provided they do so with an intention to maximise participation in the Saturday evening events. 18:30 – 21:30 Formal Brown Tie Dinner – Mekong Thai Feilding (Formerly known as Lee’s Family Restaurant) NB: BYO - Wine only Welcome – Seedy Al’s Mum Grace/Karakia Kai: A formal blessing will be said before the commencement of dinner. Please stand for the duration of the prayer. Reflection/Toasts: Lee Adams, Shaun McDougall, Cameron Horgan, Cameron Adsett. The 20th anniversary address will be delivered promptly at 19:30. We encourage questions. Feel free to bring your own light refreshments to sustain your focus. Raffle draw: Don’t forget to pick your lucky number. There can only be one winner. All attendees will receive a commemorative sticker. Important Notes · Dress Code: Formal brown tie attire is required. 21:30 – 3:00 Networking Event – Feilding Hotel Front Bar · After an action-packed day, we invite you to unwind at the Feilding Hotel Front Bar for an evening of networking. Whether you’re sipping a jug of Export, a craft beer, or a carefully curated cocktail, we encourage you to toast to the finer things in life. Day 3: Sunday, 3rd August 10:00 – 12:00 Farewell Breakfast at [Local Café Name] We ask that all attendees maintain their utmost composure during breakfast. A final debriefing on the event's proceedings will take place. We look forward to your participation in OS’s 20th Anniversary Swap Meat event and trust you will embrace the full experience with enthusiasm and professionalism.1 point
-
Many years ago I had one made by Drive Inn in New Lynn. I'll probably have my new one made there too.1 point
-
Also, a bit of advise when dealing with Russel... Although he is a good sort, his default will be the most expensive and overkill drivesahft rebuild. It will be $2500 and be good for 3000hp so instead of letting him decide what needs to be done, you have to tell him what you want and set limits.1 point
-
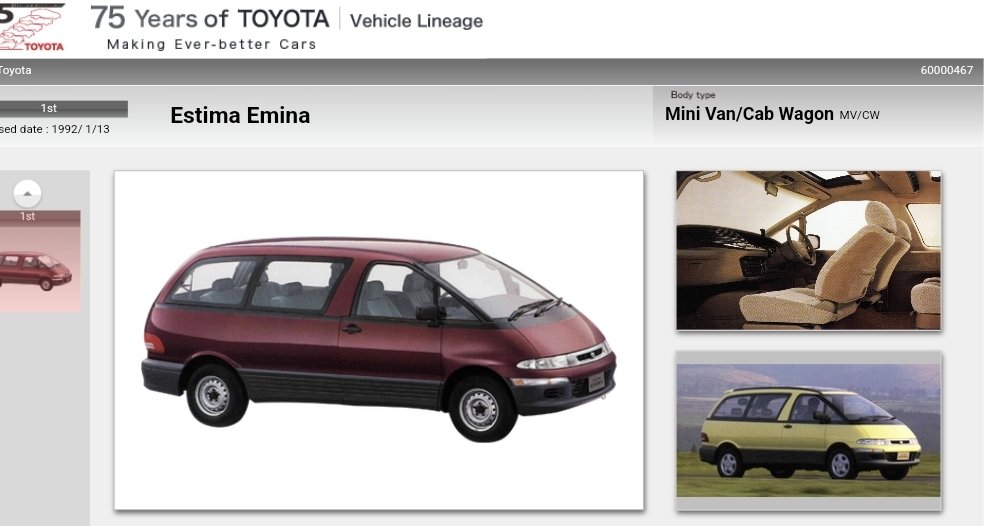
Pleasr use an estima. My 3.5v6 halls ass. 4wd too1 point
-
Bloody good work Dave! Stoked1 point
-
Does it skid the wheel? Awesome effort!!1 point
-
He's moved to ramarama.1 point
-
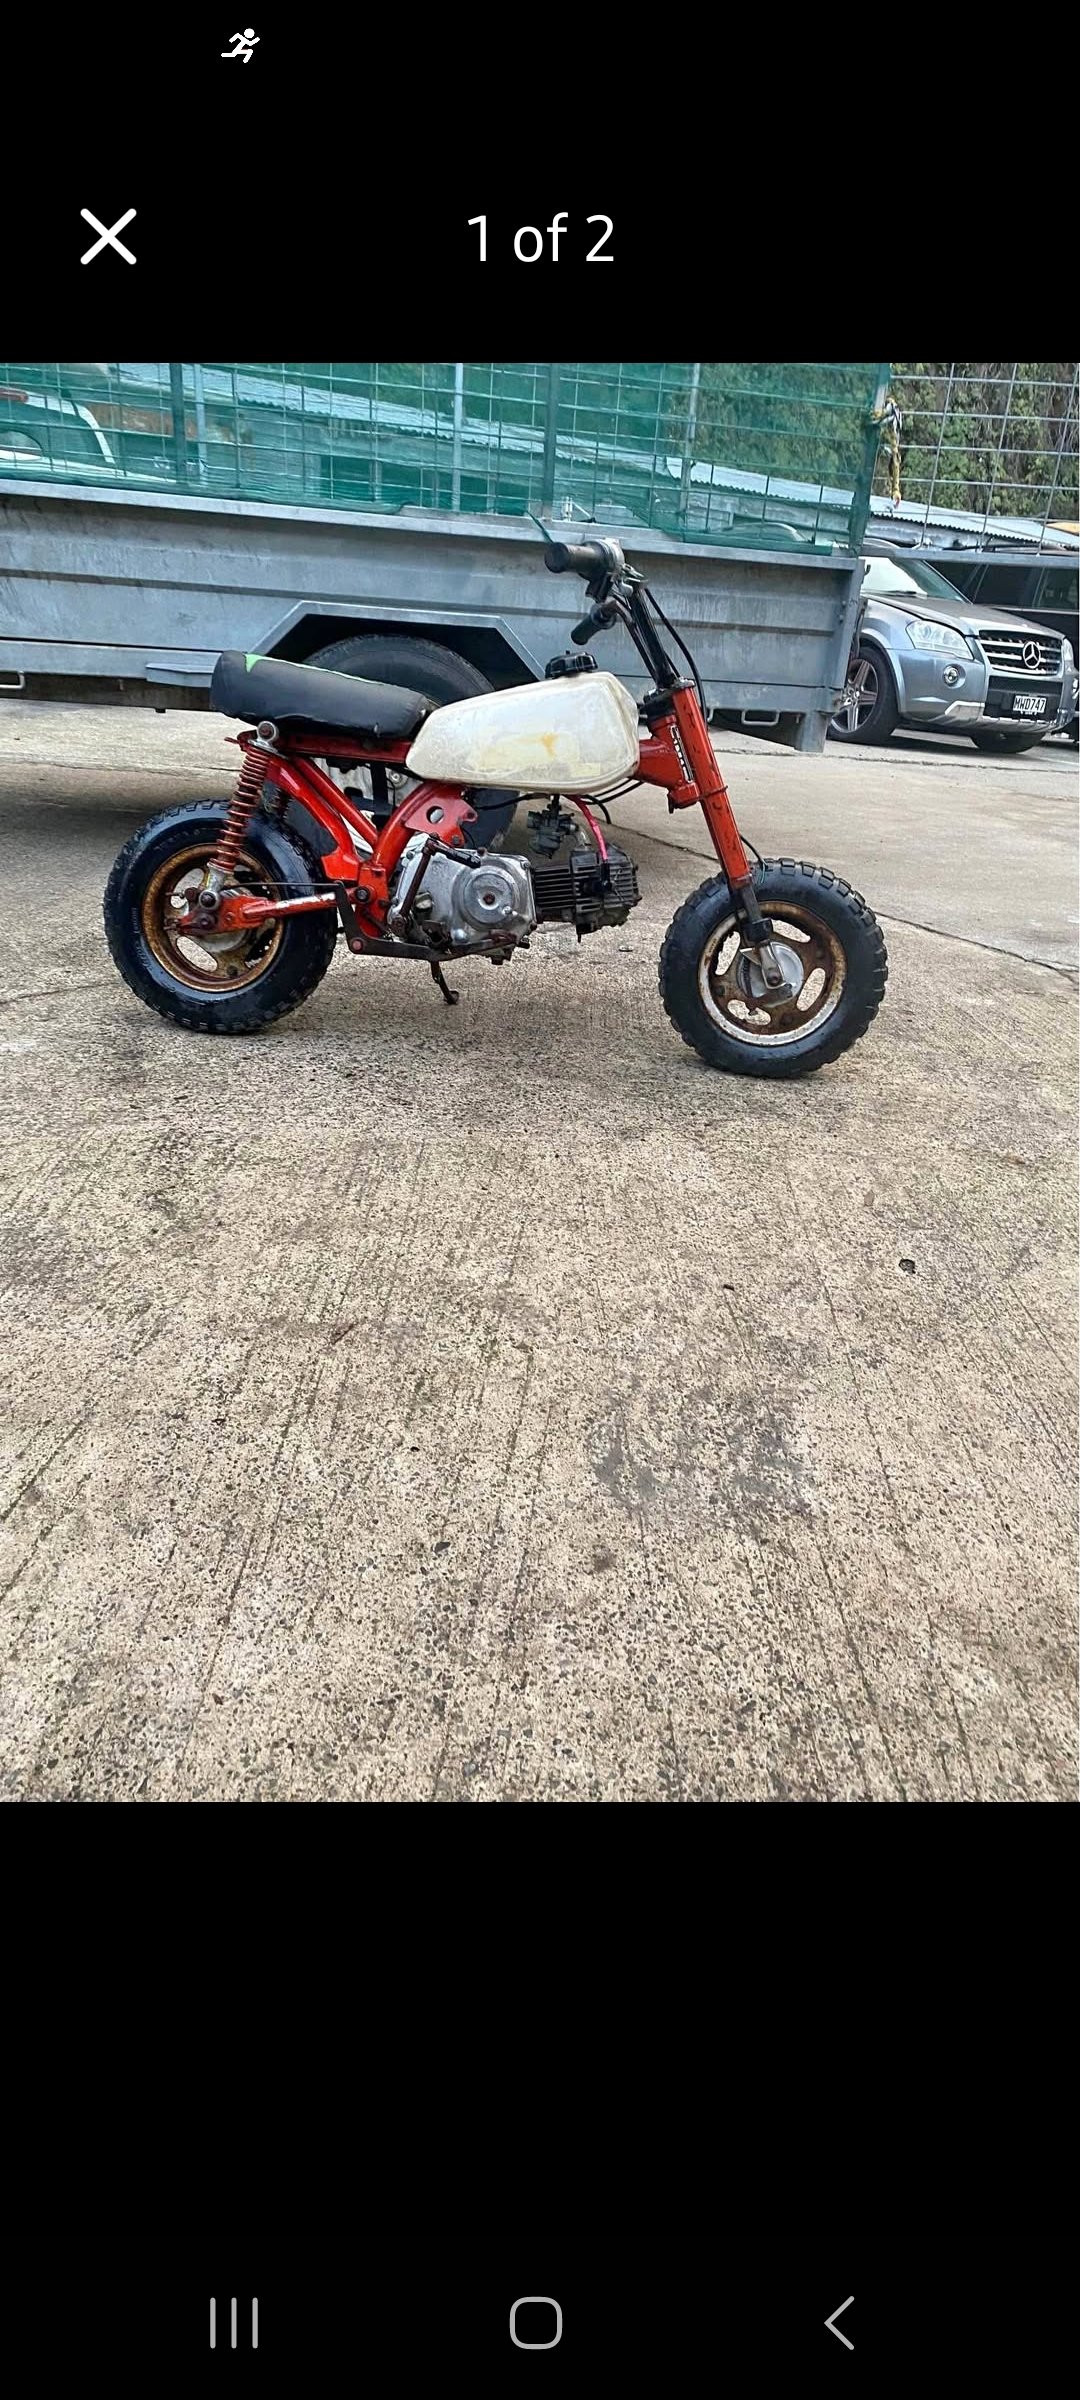
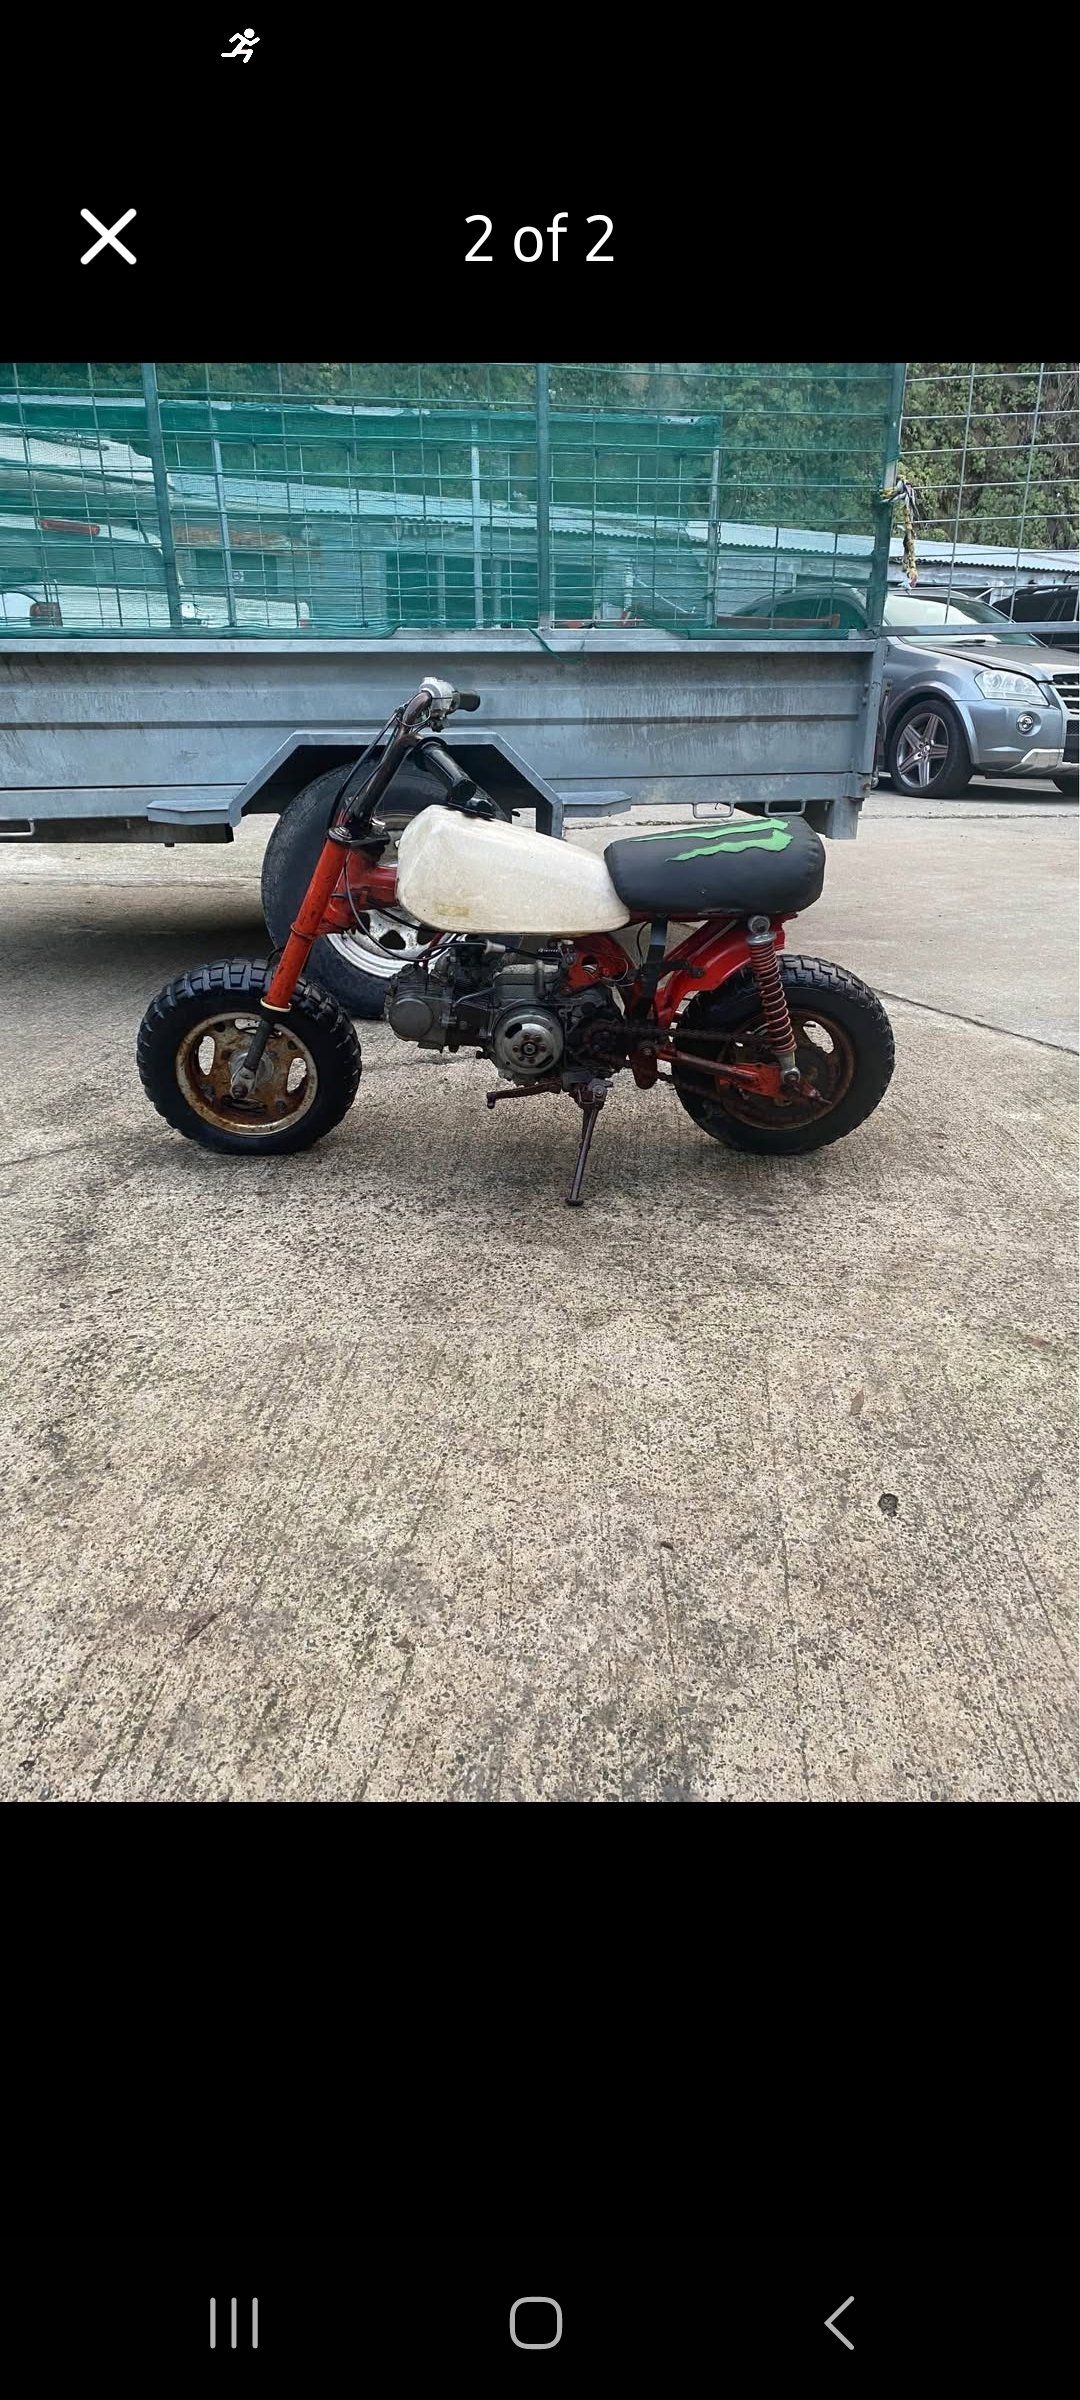
Hi Everyone, as the title states I got a monkey, a Z50R from a chap in chch. Its a bit rough, but it runs. The Z50r never had lights etc so to get this on the road for Syds will be a mish. Plans include: Clean (or replace) Carb and air filter Get the missing bits (side covers, engine side cover) Change the stator to one has enough wires to power lights/ indicators/ horn (12v conversion) Mount above electrics Paint Ride In reality it will probably just be a bike that is left as is and jammed in the back of my truck for a camp ground hack, but I will have much loathing if thats the case I do have a smokey 90cc Lifan I could jam in this but I think that @Hunterkiwi01 wants that for one of his C100 projects.. Pic off marketplace as I get it tomorrow
1 point
-
That agenda looks sweet, so much structure. Although I don't feel it has really captured the essence of the Swap Meet weekend which includes fair amounts of standing around doing fuck all / why are we still here and not going somewhere / the hosts of the thing we just looked at are wondering why we are still loitering here and not fucking off already. And speaking of Essence, that's the name of the cafe for Day 3 activities... Day 3: Sunday, 3rd August 10:00 – 12:00 Farewell Breakfast at [Local Café Name]1 point
-
Nice work man, top fuckin notch.1 point
-
The longest gap between fuel stops is 156kms. In 2024, I did the whole trip without running out. (Unlike this year, when I ran out twice)1 point
-
No idea sorry mate. I know i polished the fucking thing at least 5 times during my apprenticeship though.1 point
-
NNNoooooo............... Im penning a strongly worded letter to my signwriter. (In Comic Sans and Wingdings, of course.)
1 point
-
Recently got a bit more done on the trailer. Made sure it was about the right size etc, and made the up rights/sides. For ease of use and simplicity, the front and back tailgate board things just slide into slots made from angle and flat off cuts, Then I figured out where the axle needs to be, then whipped up said axle on the BIL's lathe, made some mounts and welded it on, As you can see in the background of the pic posted above in the last update, the alloy wheels were very oxidized (they have been outside for years) so I gave them a water blast, spray painted them black, and then buffed the paint off the face of the wheel to make them all shiny again. Slapped some tyres on that match the cruisers, and good to go. Then I whipped up some mud guards. Decided just to make them out of 3mm thick steel and not bother with mounts, and just weld them directly to the frame. Found an off cut of steel, cut the desired shape out, removed the rust, and put them in my fancy press brake and bent them into shape. I don't know why, but I find the little mud guards soooo adorable! Now I just have to cut and mount the wood, paint everything, and its done. Regards VG. P.S. Say hi to your mum for me.1 point
-
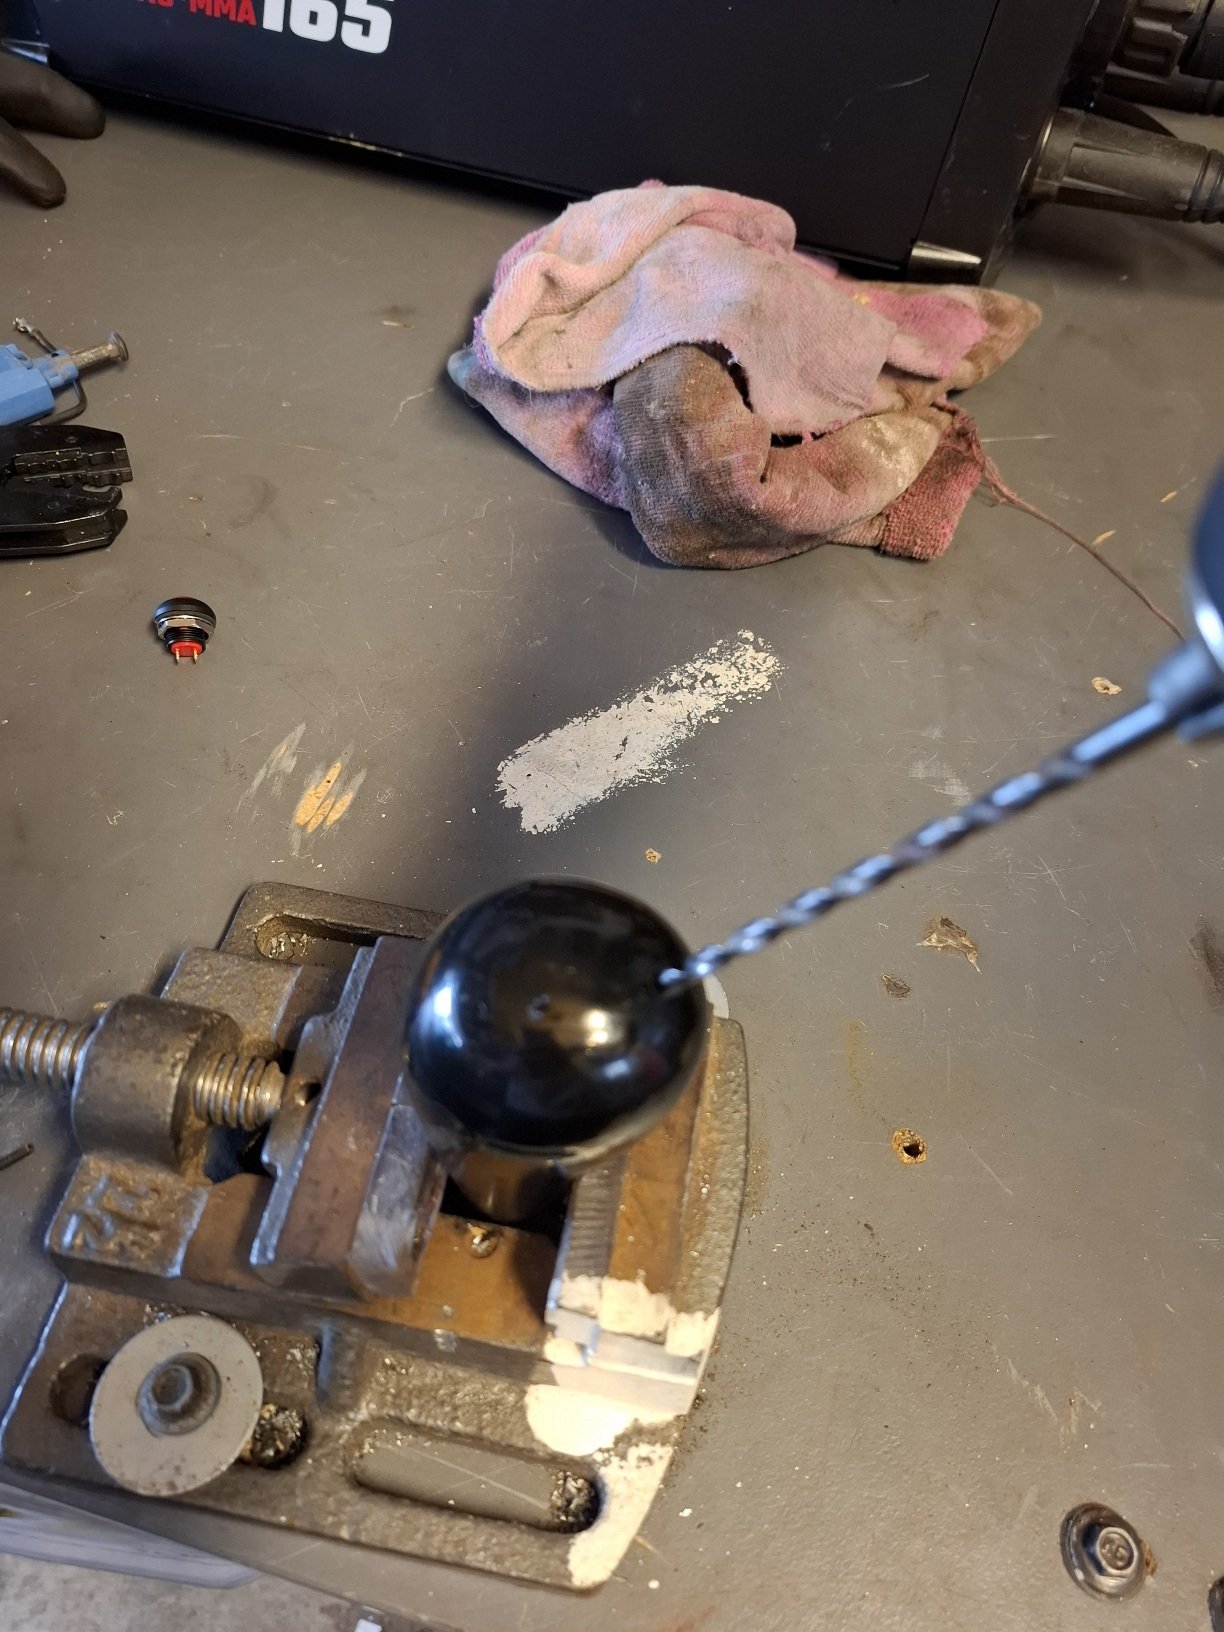
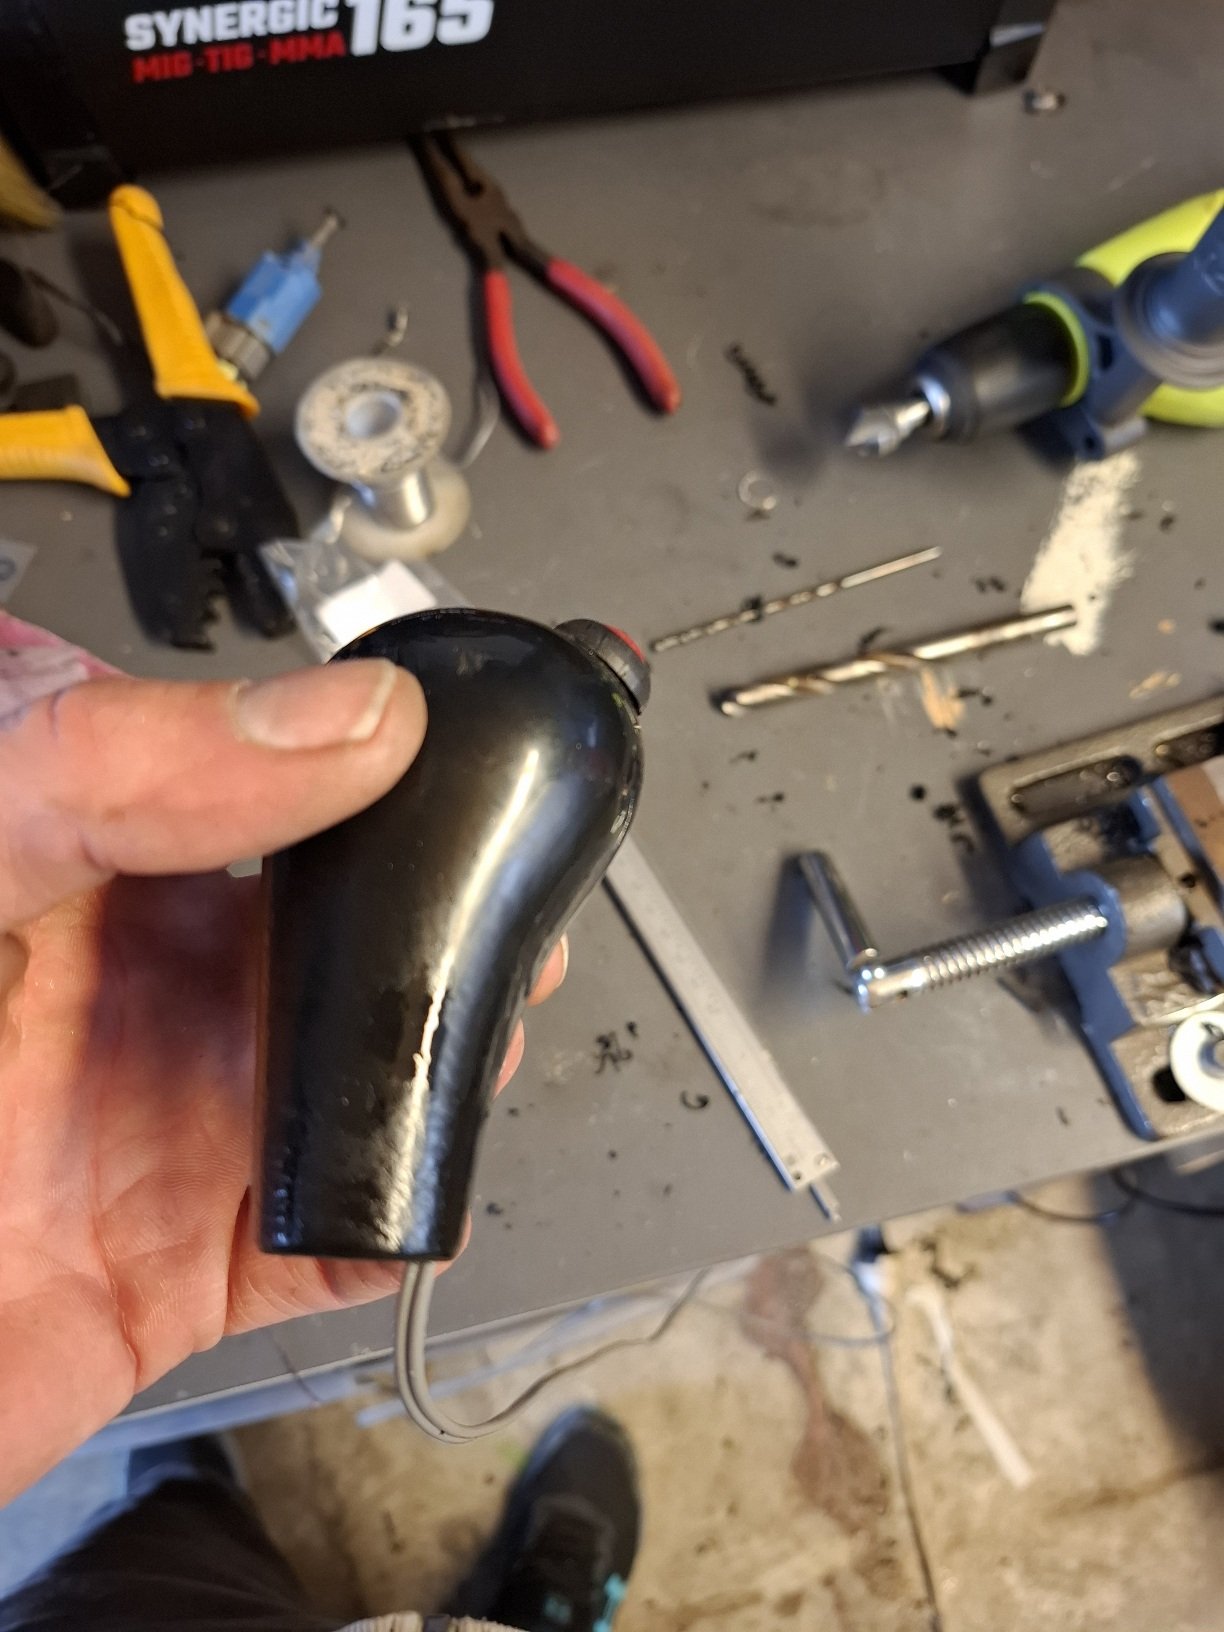
Found rear seat and carpet etc Went to jaycar and got a shift light, and a momentary button for launch control, so when it gets final tune that will be an option, drilled through the gear shift but doesn't interfere in the thread or how you put it on.. you do have to press it in fairly hard so wont hit it on accident shifting gears etc, both go through relays and fuses, i may change it to steering wheel maybe will see how it works.
1 point
-
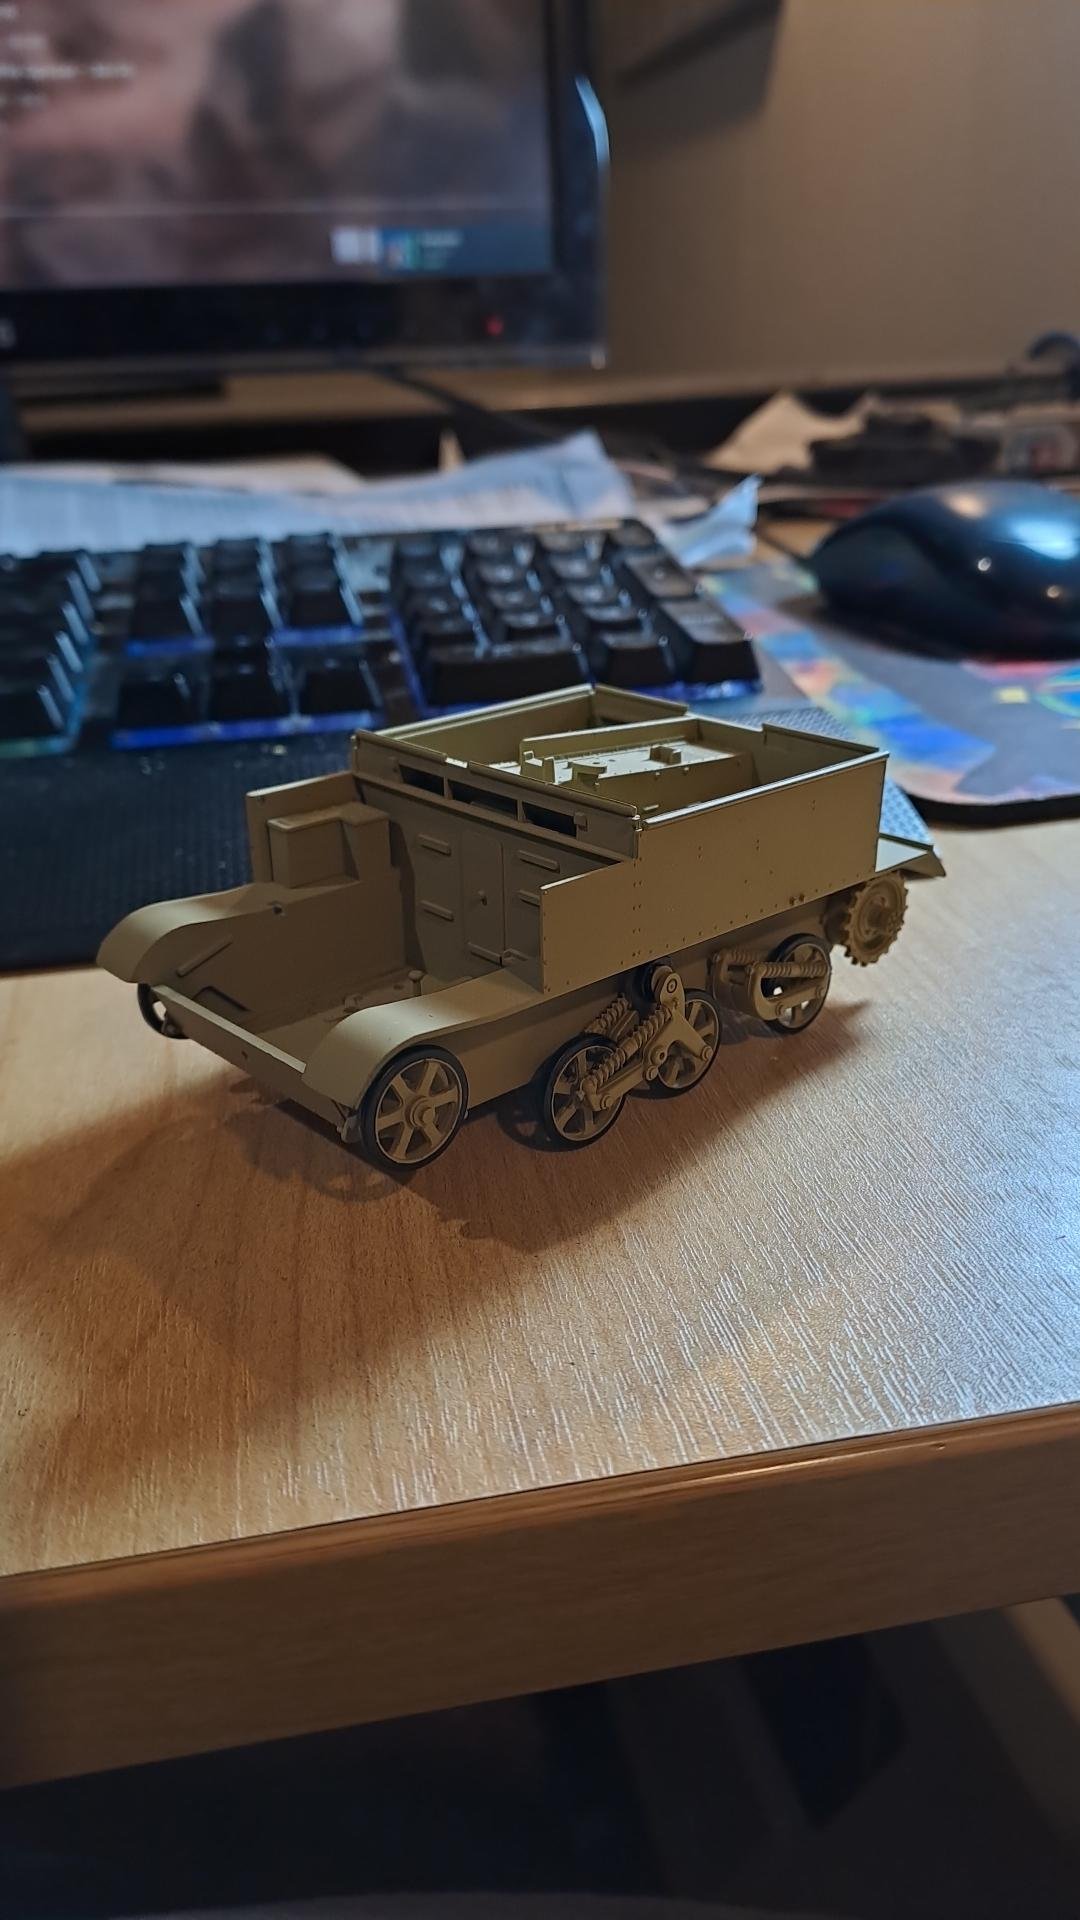
Nice stuff @CarolsHusband. I've been trying to push on too, have been so slack. Last night I managed to get all the wheels and gears on for the Bren gun carrier.
1 point
-
1000% appropriate content choice here: https://docs.arduino.cc/libraries/tvout/
1 point
-
There's been a bit of progress. My paint order for the halftrack & the Chevy's never arrived, there's another on the way apparently. Once the small block for the street racer was completed the lack of detail was a bit obvious. That, and @Indiana_Jones's fancy spark plug leads, made me push on a bit. Fuel line, carb linkage & plug leads on the way. Bonnet will be mostly shut but meh. Also, despite the lack of paint, I got the SdKfz 250 back on track. / d'ya see what I did there ?1 point
-
oh where to begin. this little car has been a part of my life for almost two decades now. one decade where it was driven, and one where it languished in it's current state. Here's a photo from better times such a pretty, poorly designed car. anyway since another car took it's spot it's been relegated to hanging out in the workshop and generally getting in the way (luckily it's tiny). one day I woke up and thought we may as well sell it. so it looked it over, considered the rust in the sills and around the windscreen, how it's impossible to get into gear, how the brakes are jammed on, how the engine leaks like a sieve, doesn't like to start, makes weird noises when you select gears, has crankshaft play... and thought "why just sell it, when I could waste a lot of money on it and THEN sell it?" and so, this build began The plan, aside from a general refurb, is a 1.6L NA MX5 engine and transmission swap. Nothing that I am doing here is uncharted territory. The MX5 engine is considered one of the easiest swaps and everything has been done before is documented... well, everything is anecdotally documented. ie there's a lot of build threads that encompass what I'm doing, but they all seem to skip over the nitty-gritty and focus on the successful bits. I am not a fabricator. I am impatient, and rough, and careless. I'm going to try and make a note of all the bits and pieces that I wish I had seen prior to starting this swap in the hopes that it helps the next guy And if I totally fuck it up I'll just repost all the pictures in reverse order and pretend that I rescued the car from some butcher and restored it
1 point
-
I have one of those already haha1 point
-
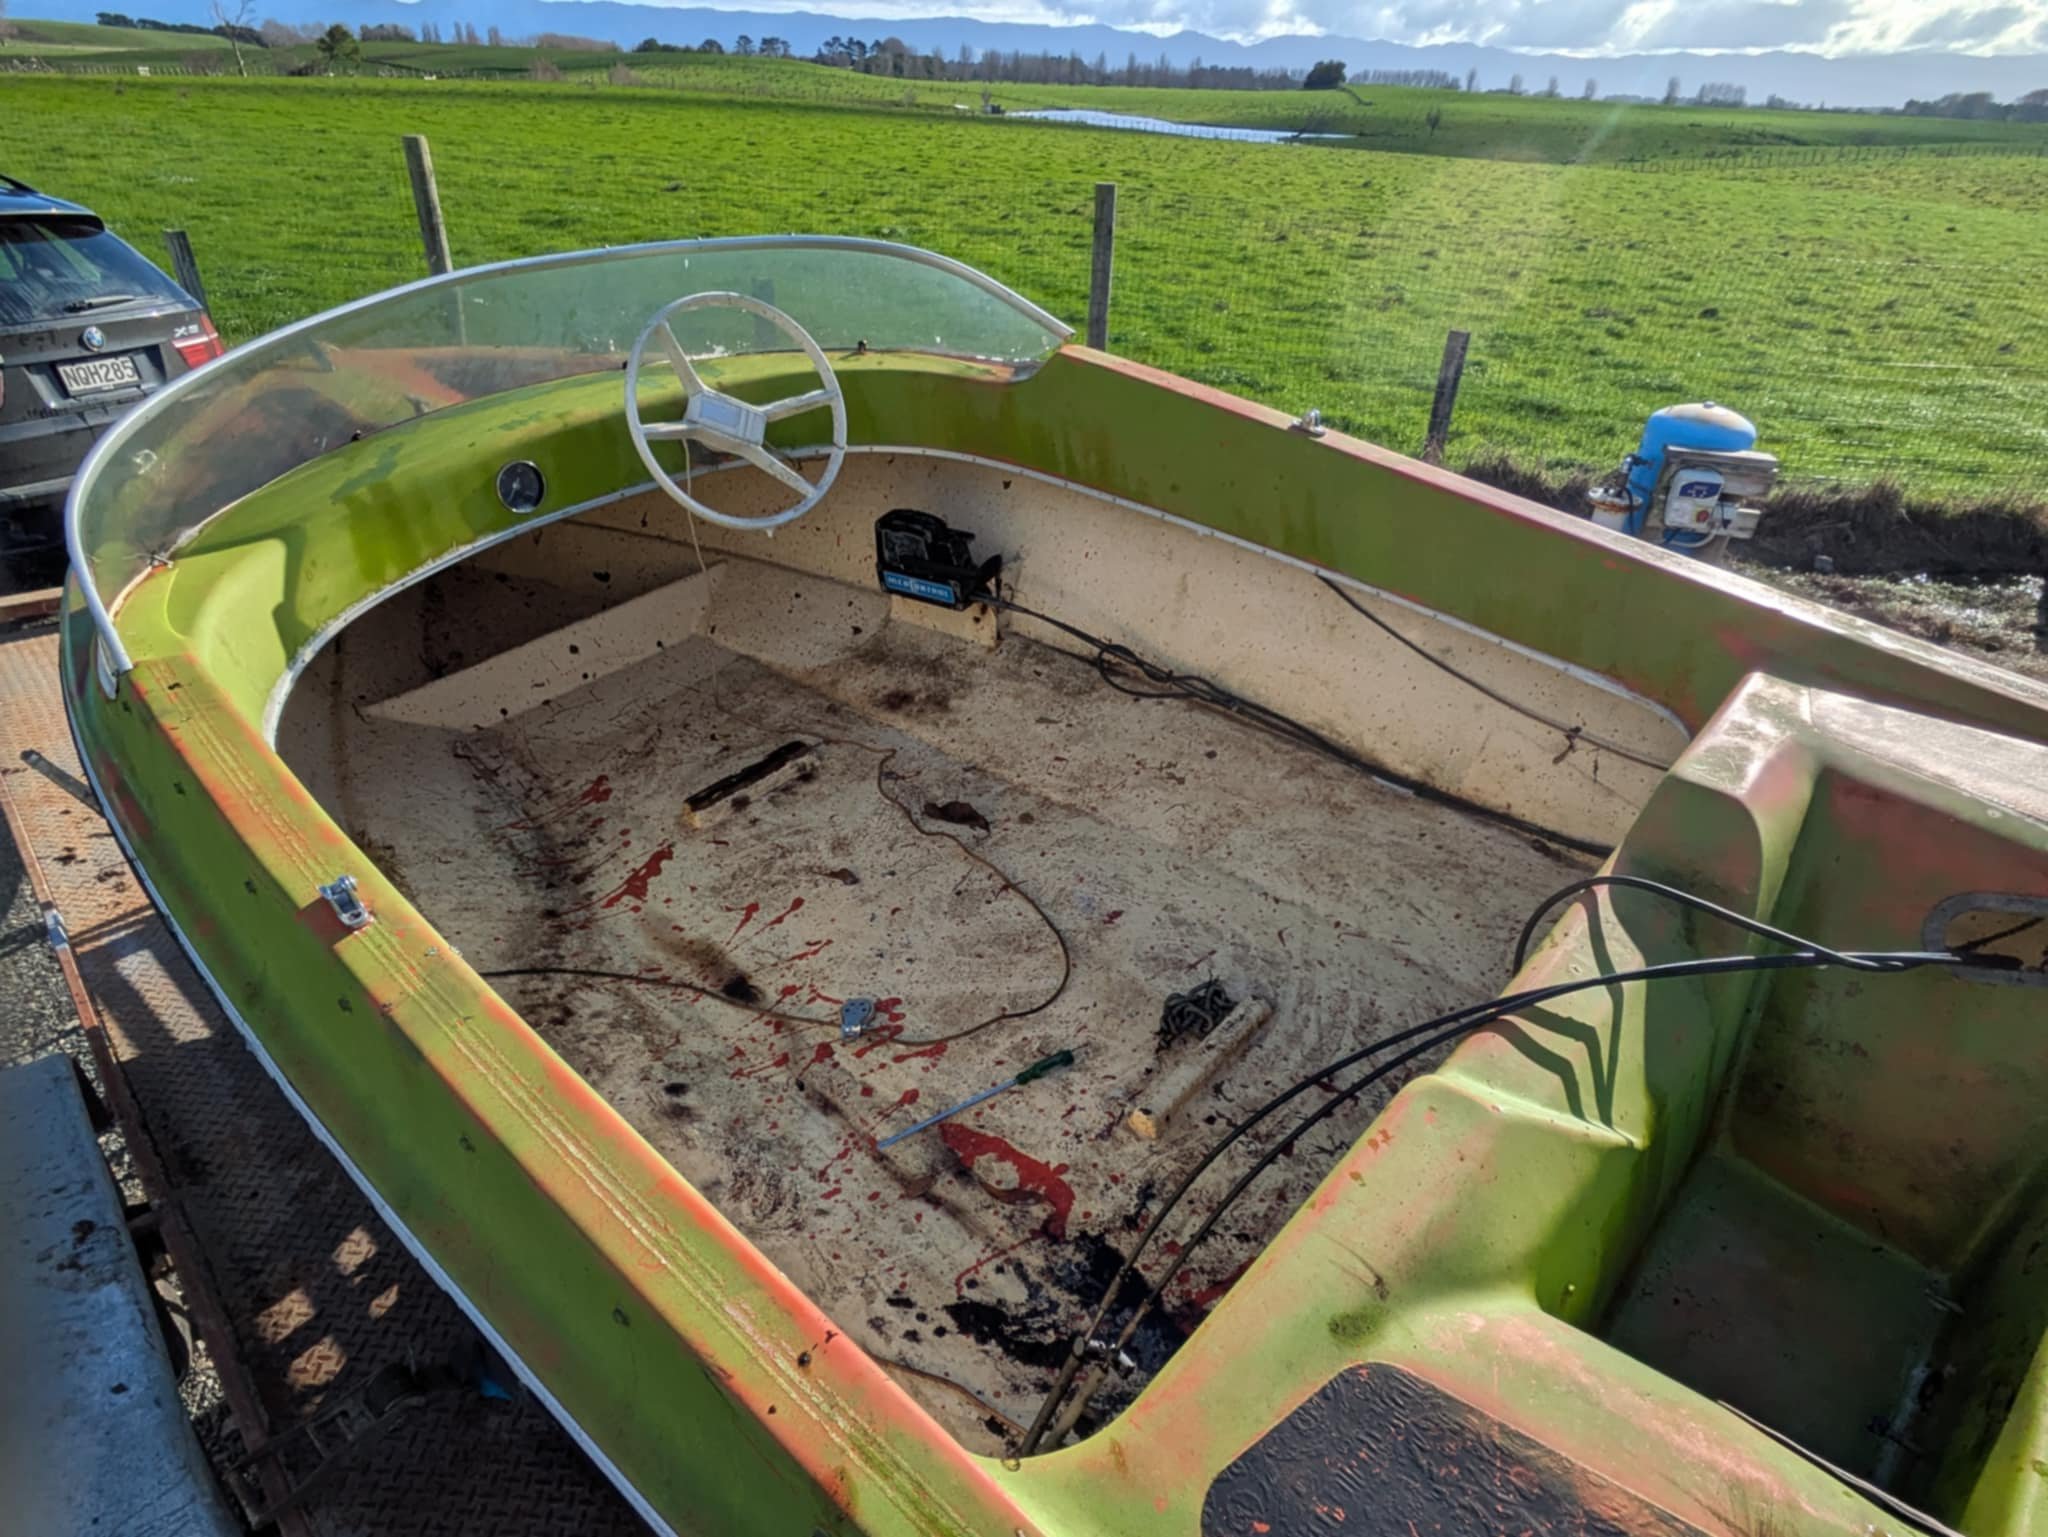
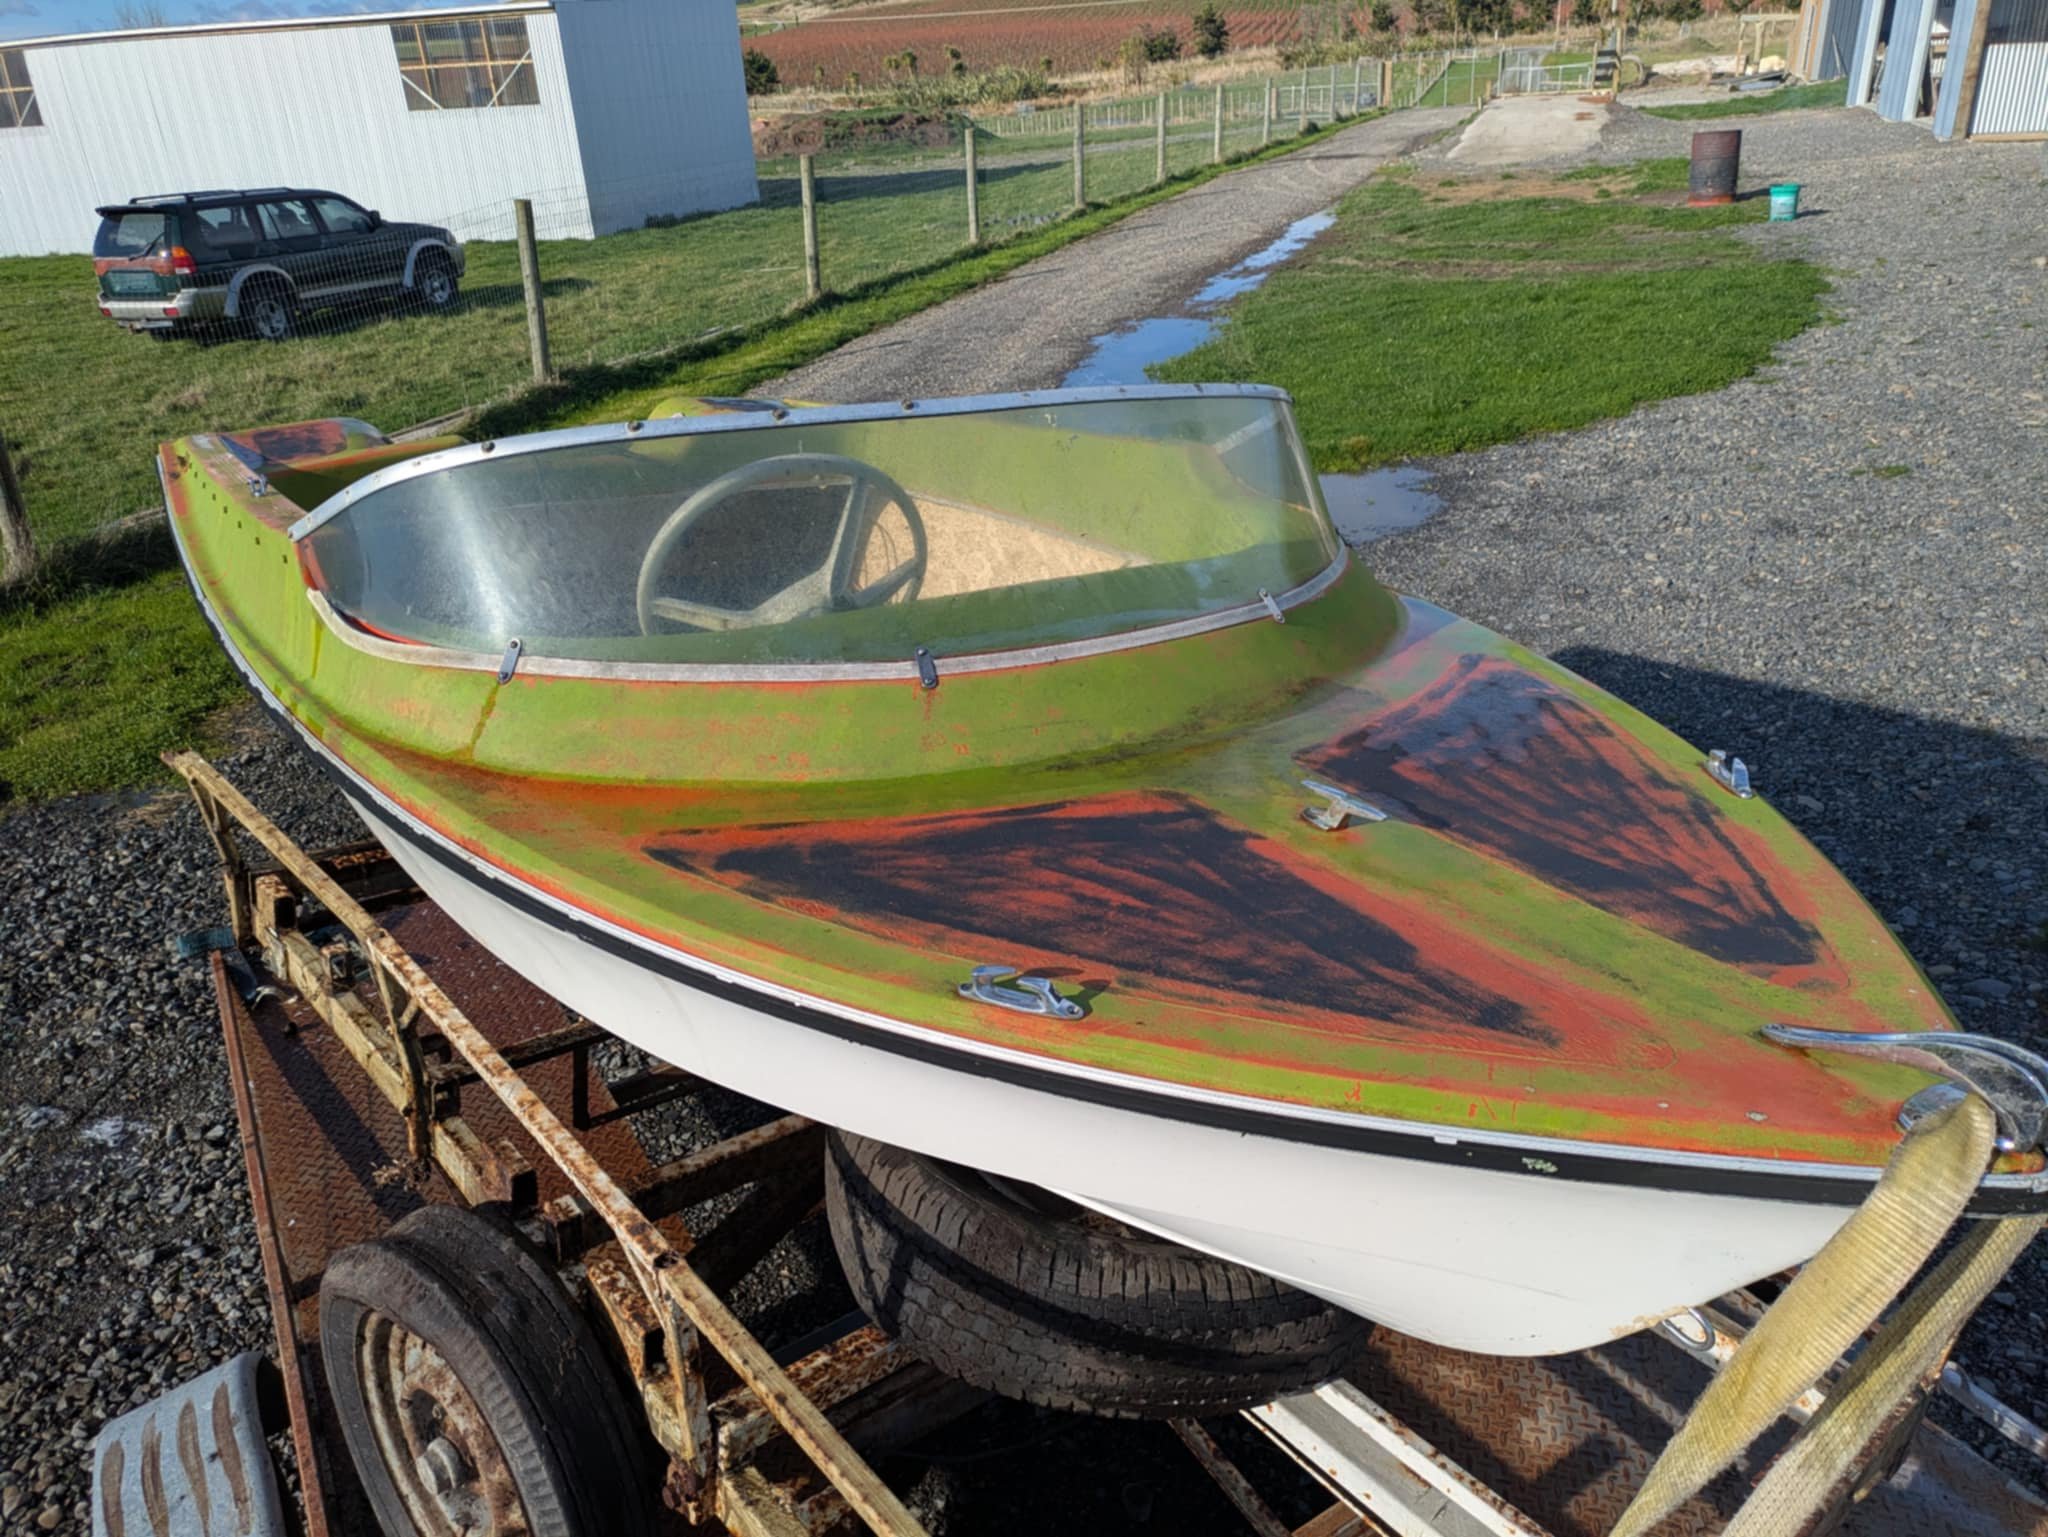
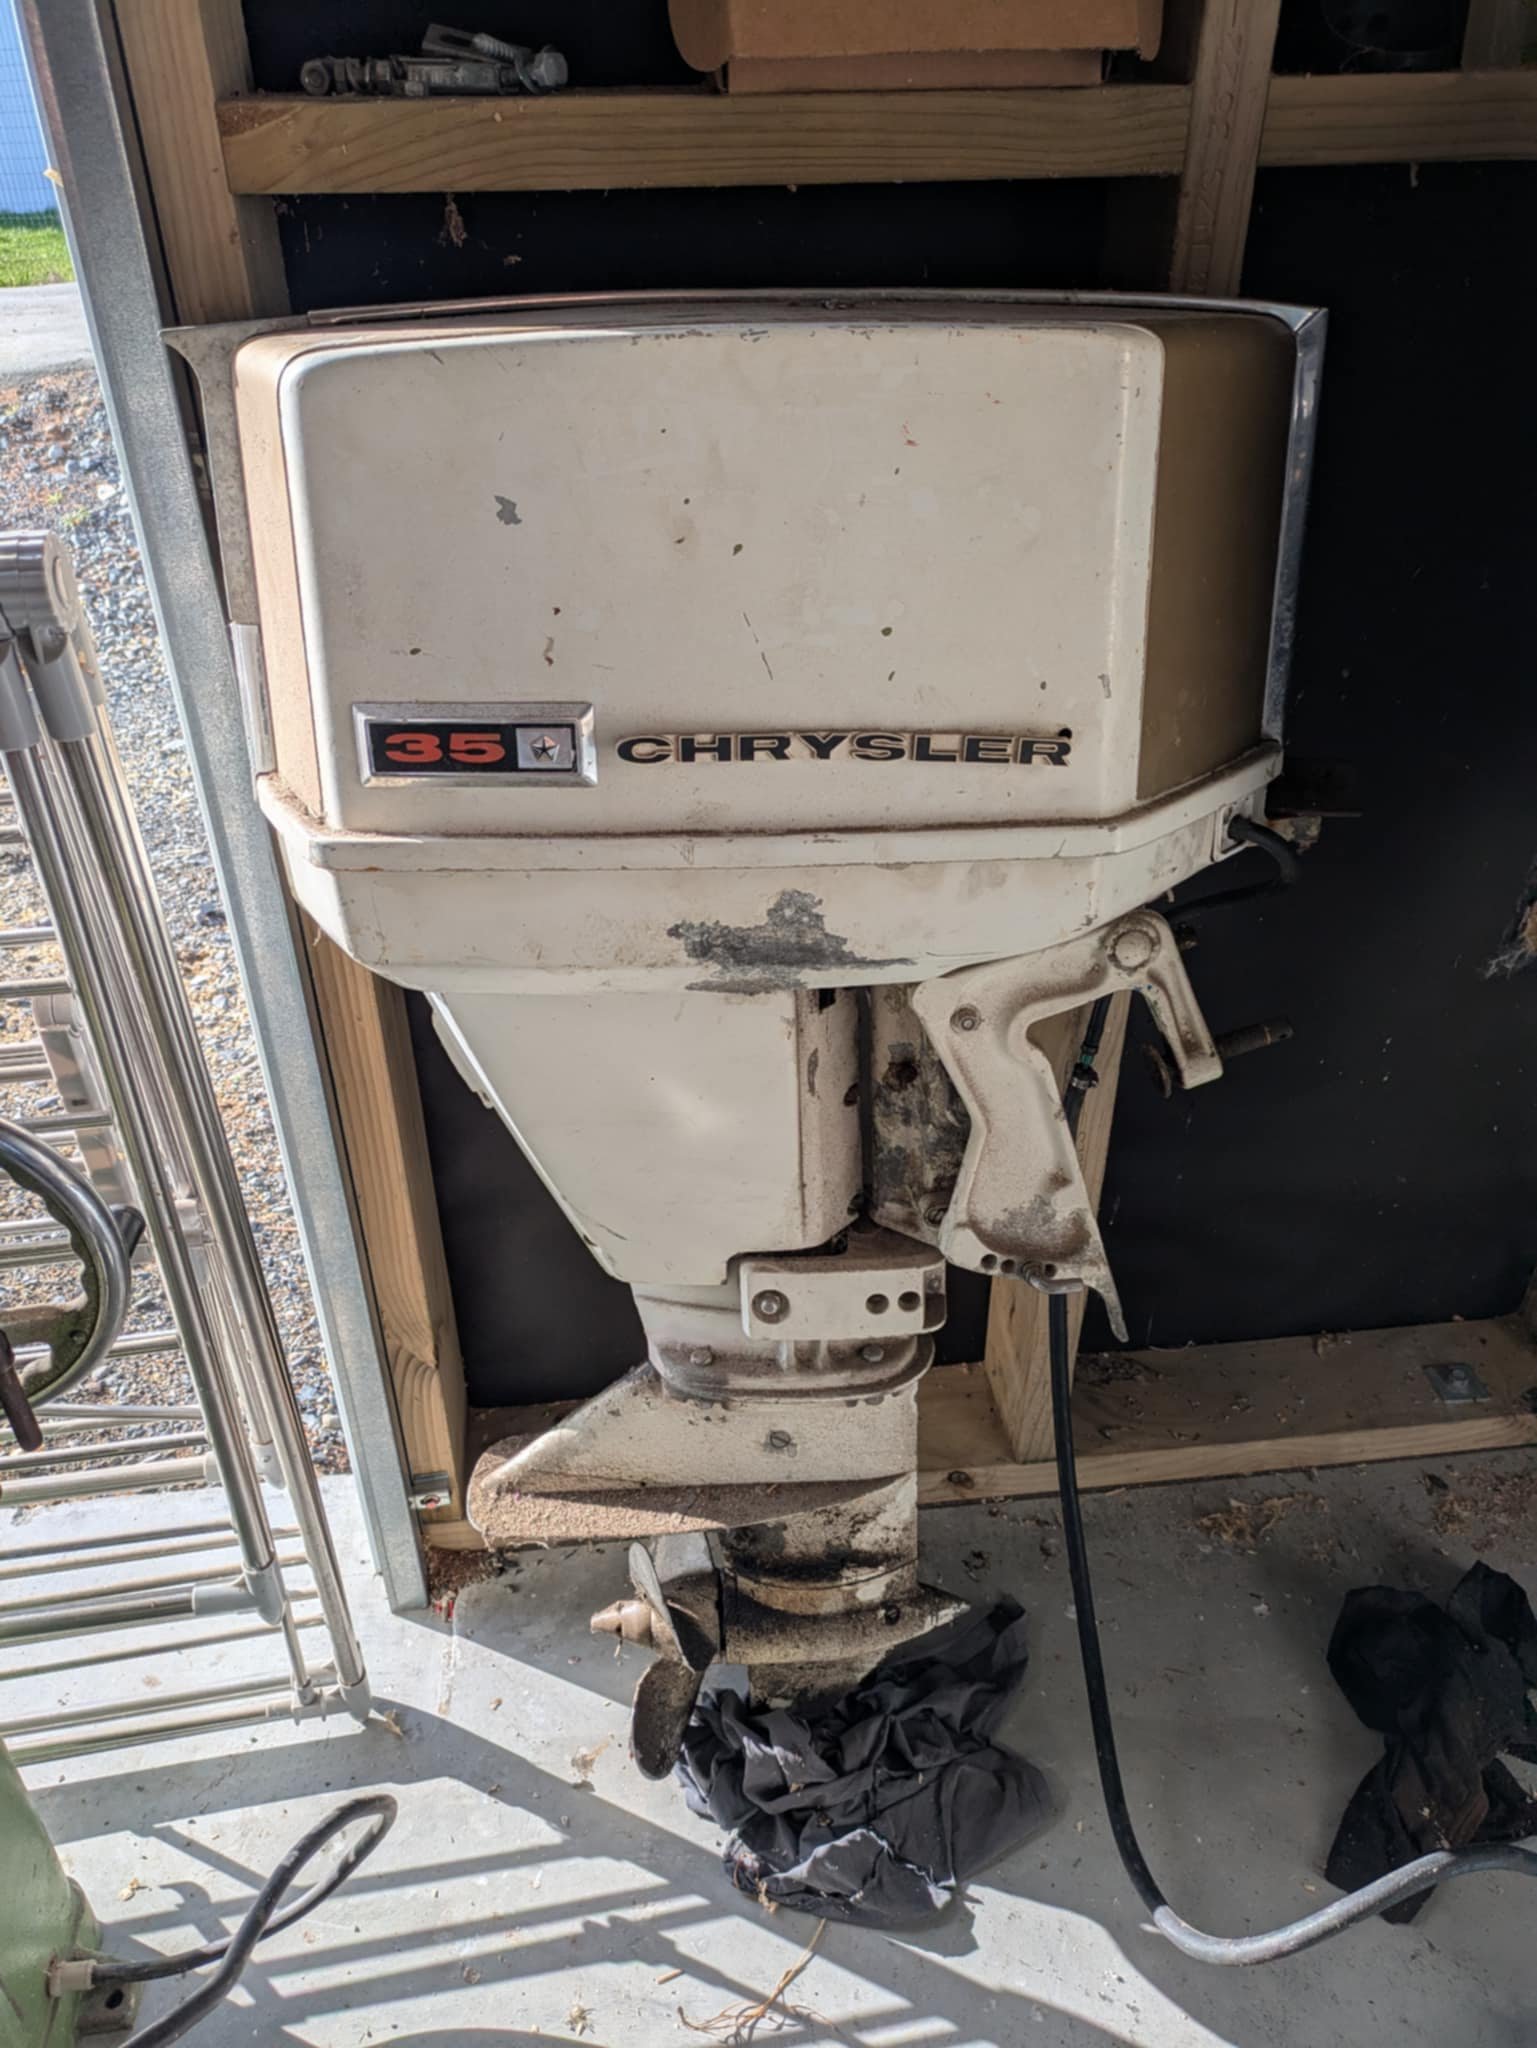
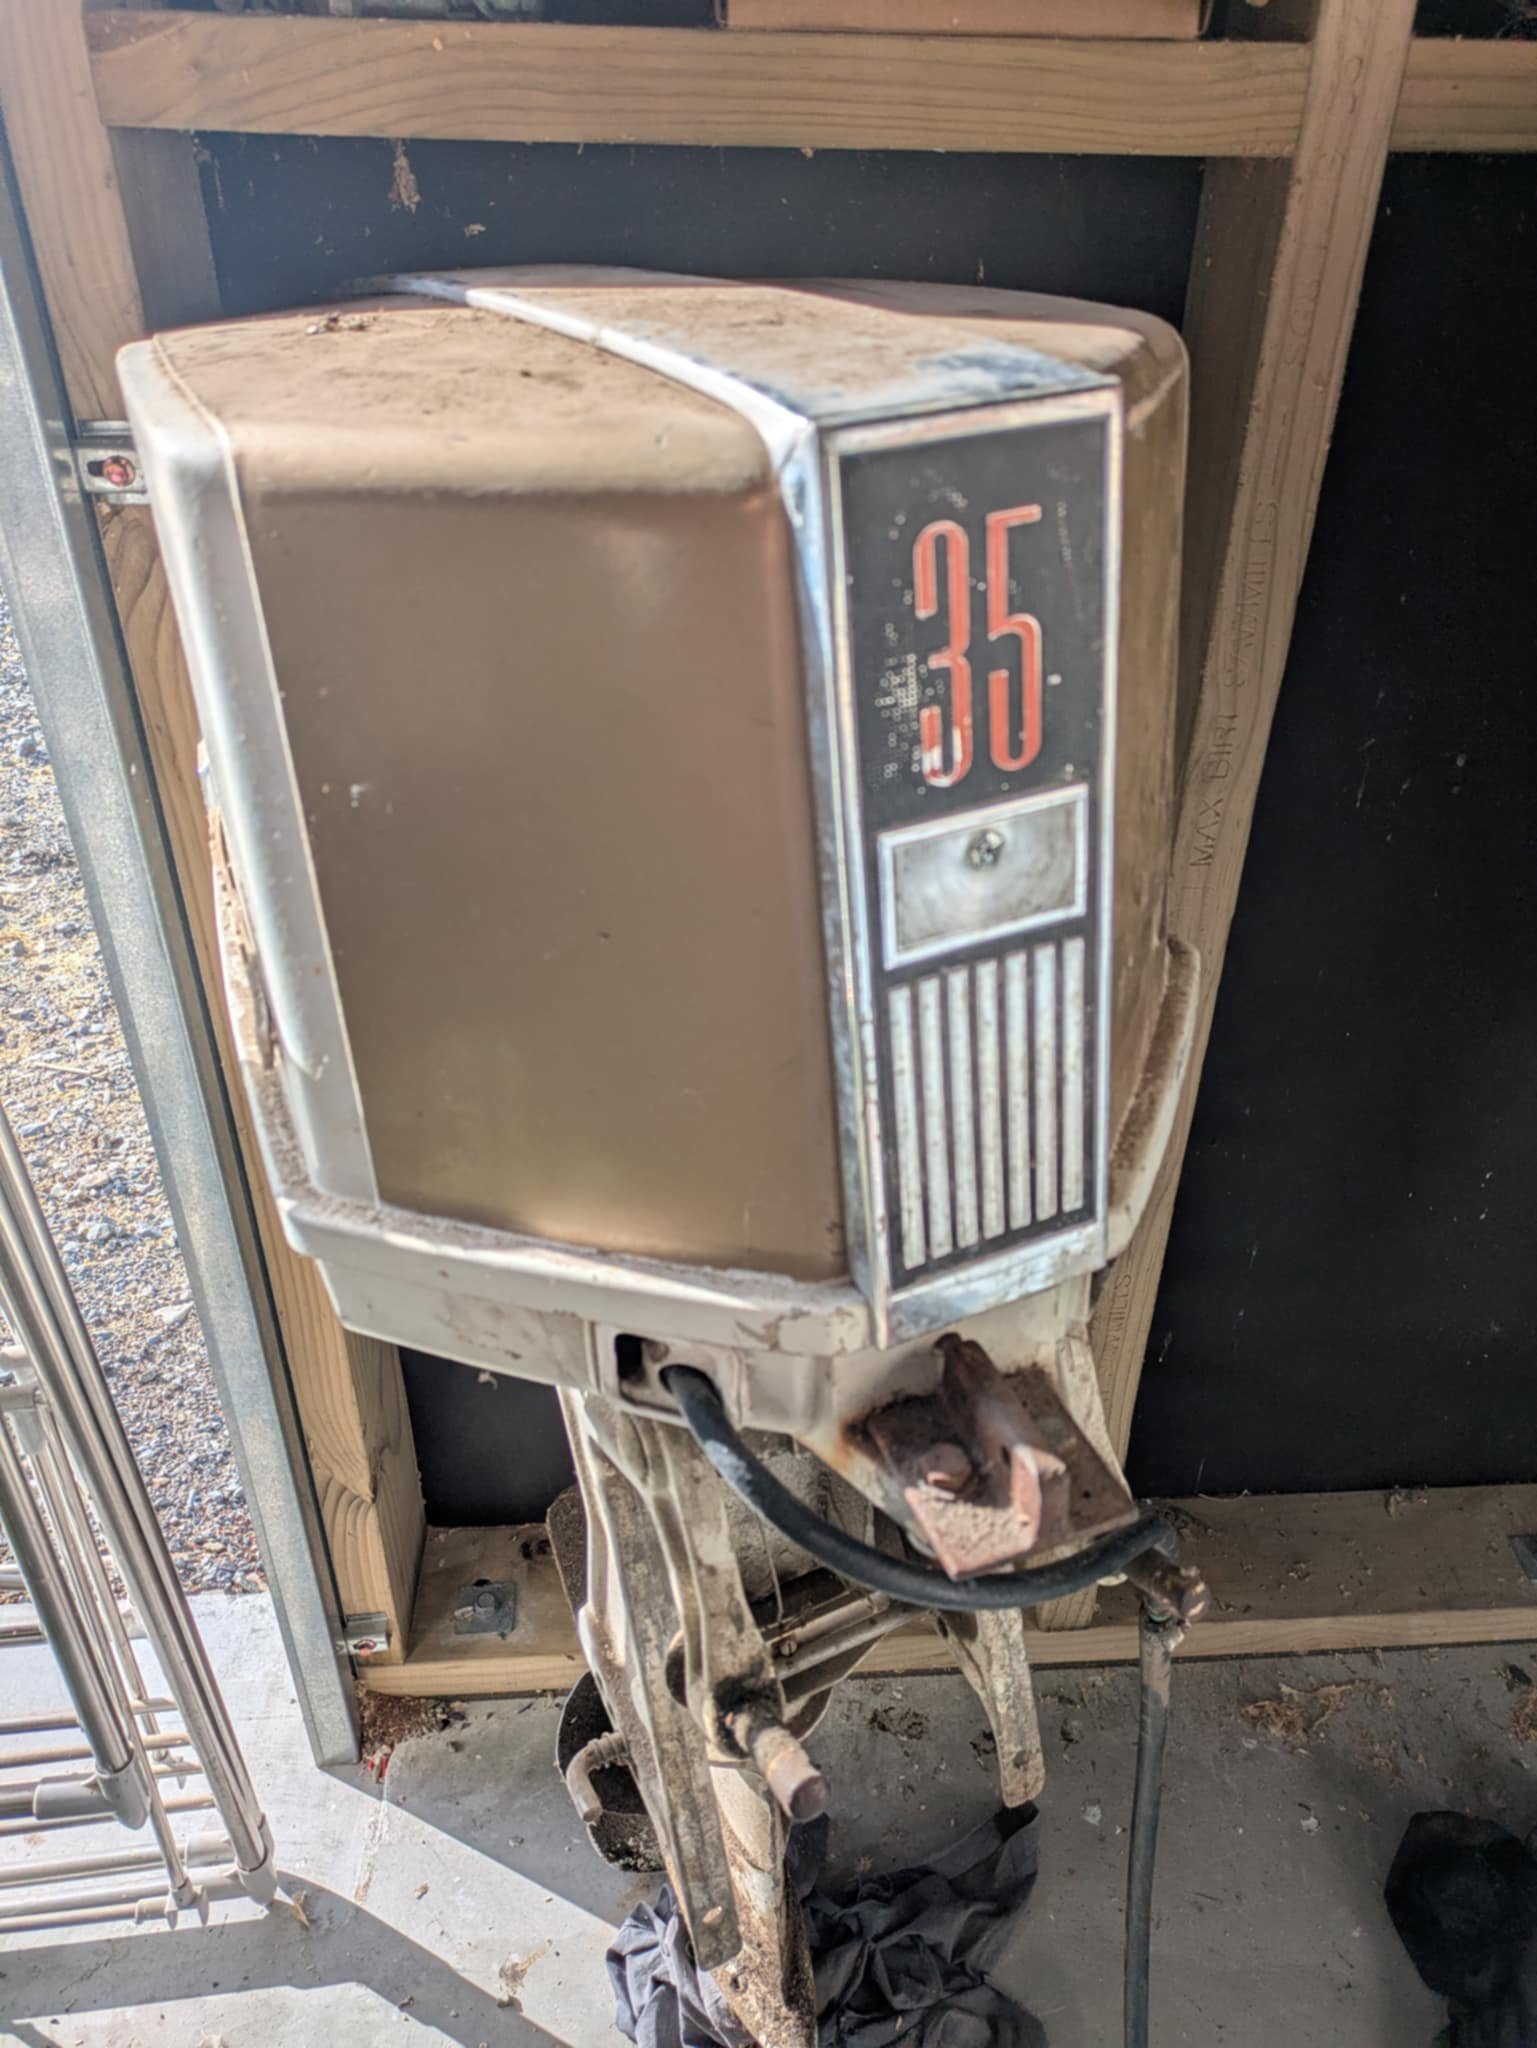
For no reason at all this followed me home. Love it. Mental the size of that engine that's only 35hp too. Trailer already taken to the tip too.
1 point
-
These rims hold air lol
1 point
-
This morning it looks like this...
1 point
-
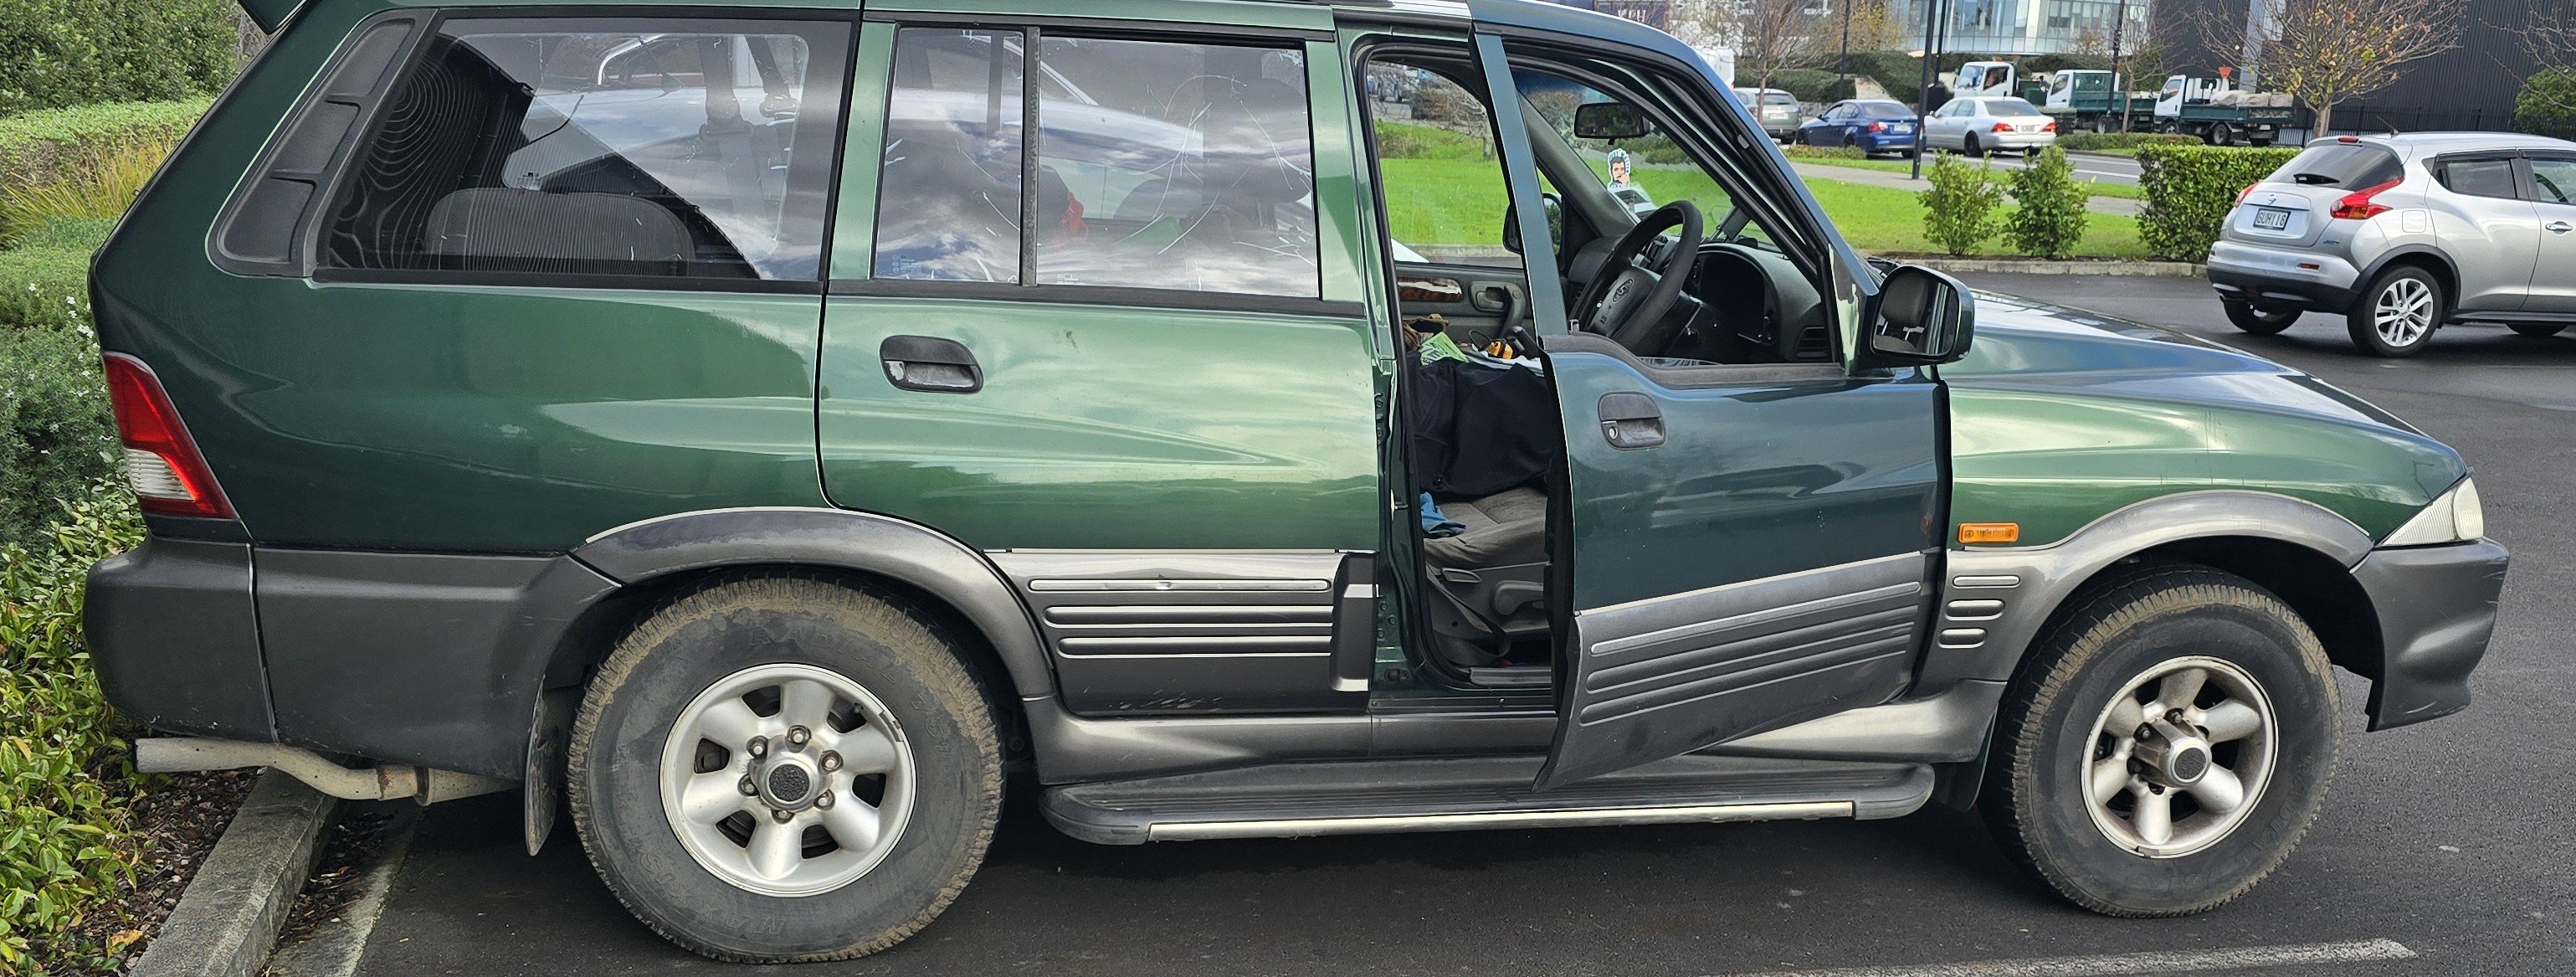
Looks like one of those British market broncos that are not worth as much, so Clean it, get rid of as much rust as possible and seal it up with something that lasts as long as possible, and when it's dried coat it in lanocote both sides would be what I would do in that situation , if the cbf levels are high1 point
-
Or if you need longer, 2m for $4.50 at PBTech https://www.pbtech.co.nz/product/ITPCAP407/Dynamix-C-POWERCR-10A-3-Pin-Plug-to-Right-Angled-I1 point
-
IEC Jaycar have a 90 deg option https://www.jaycar.co.nz/0-5m-cable-3pin-mains-right-angle-plug-to-iec-c13-right-angle-female/p/PS41111 point
-
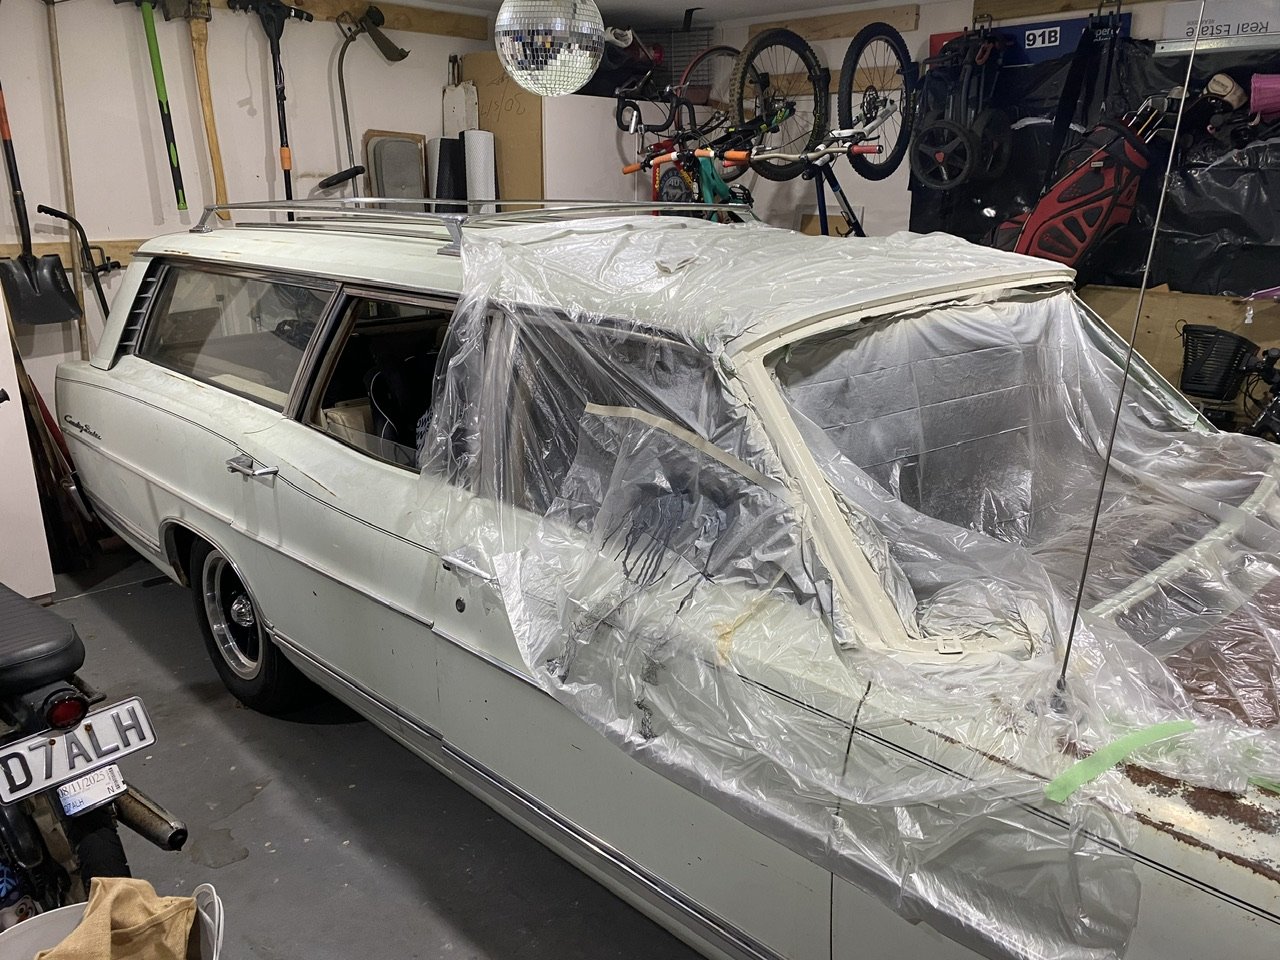
I’ve been spending some time locked in my garage with a heater running and some strong aerosol paint fumes this week. Primed it, smoothed out some pitting, primered again, and sprayed white. Don’t let me forget the clearcoat… I only remembered that as I’m writing this… It’s nearly ready for the windscreen to go back in. I also fitted the roof rack. It’s a proper wagon now.
1 point
-
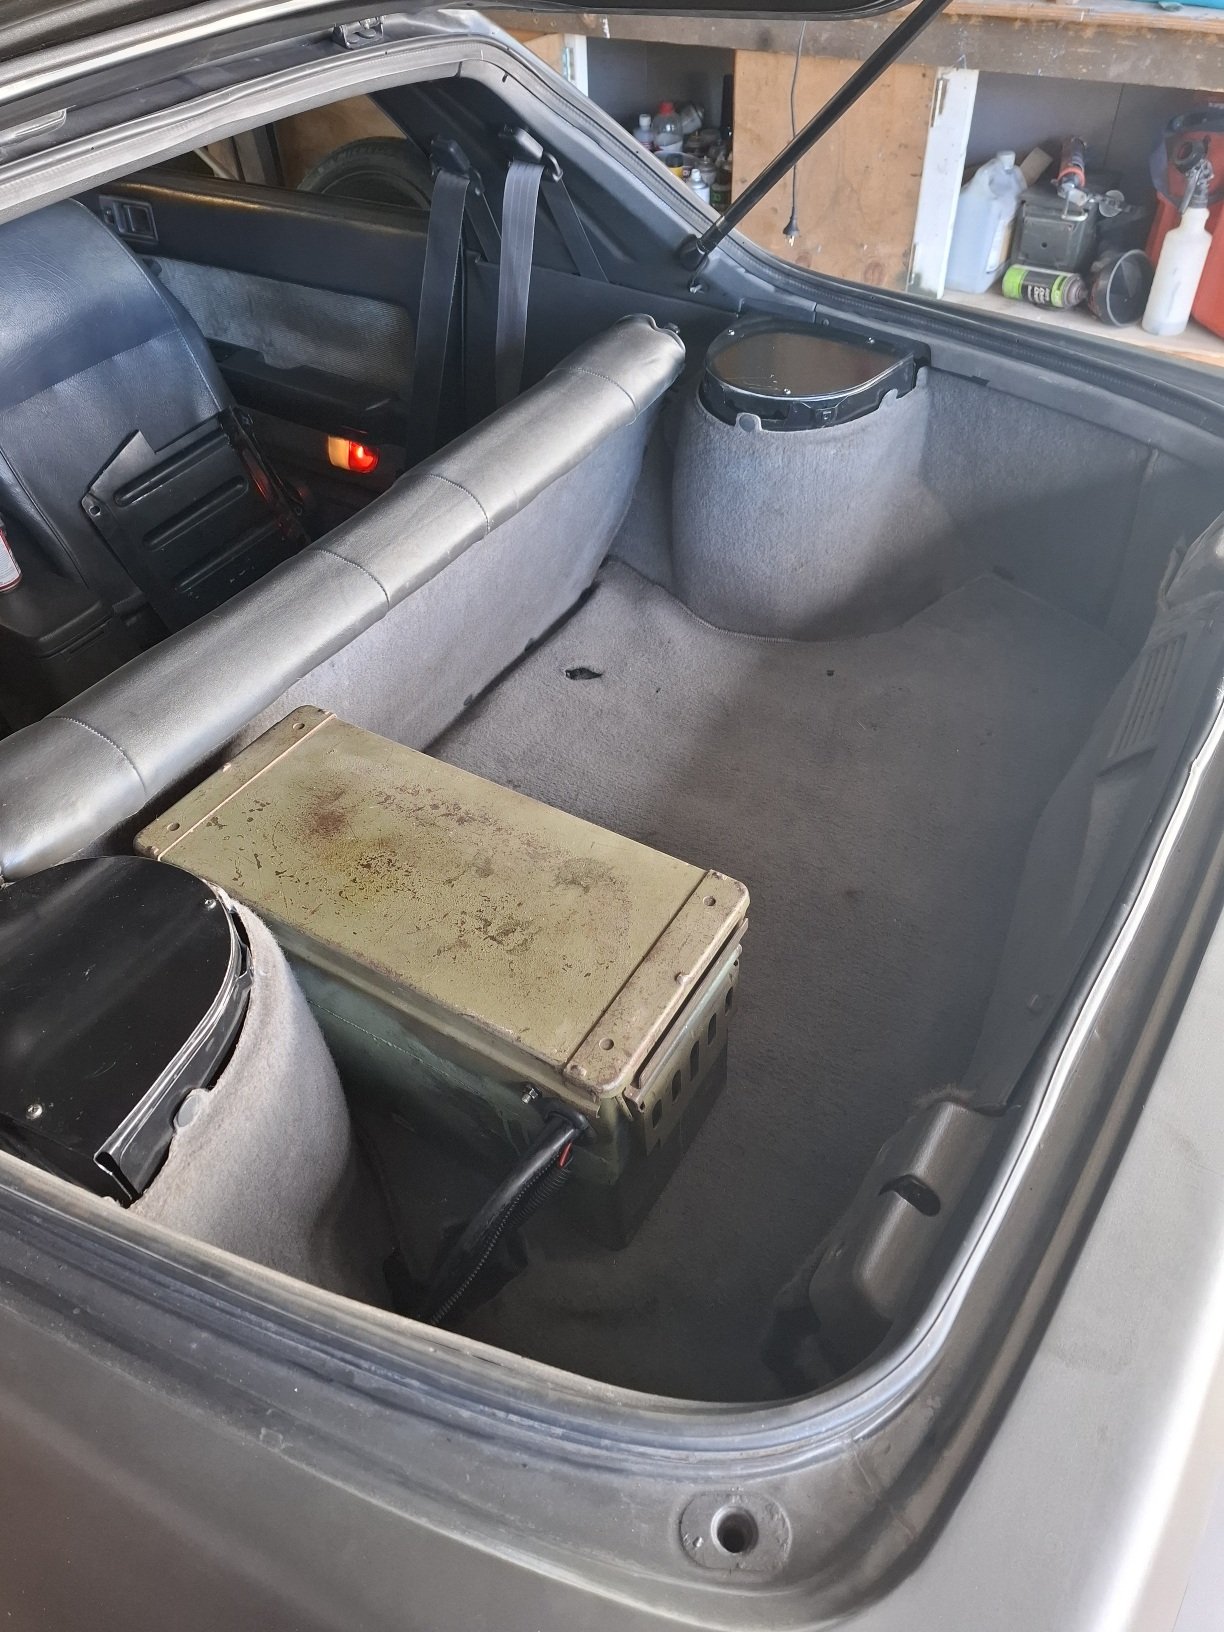
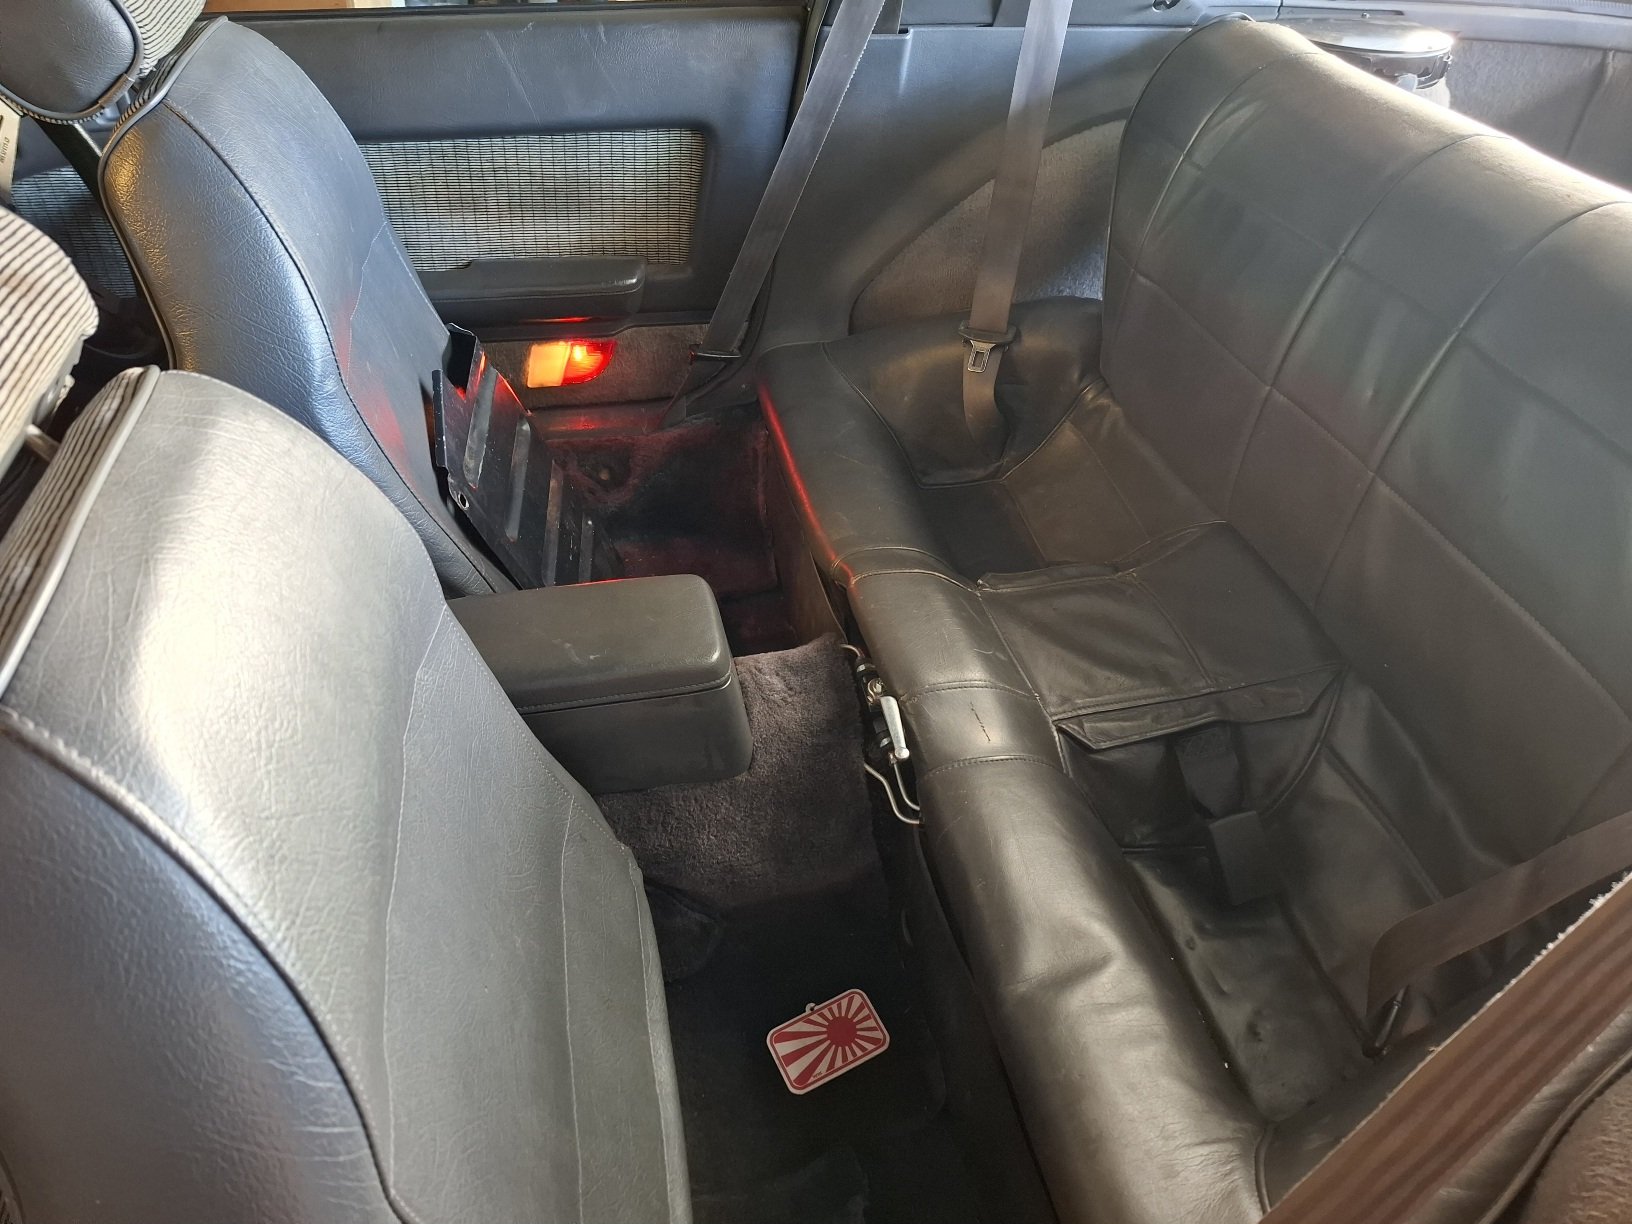
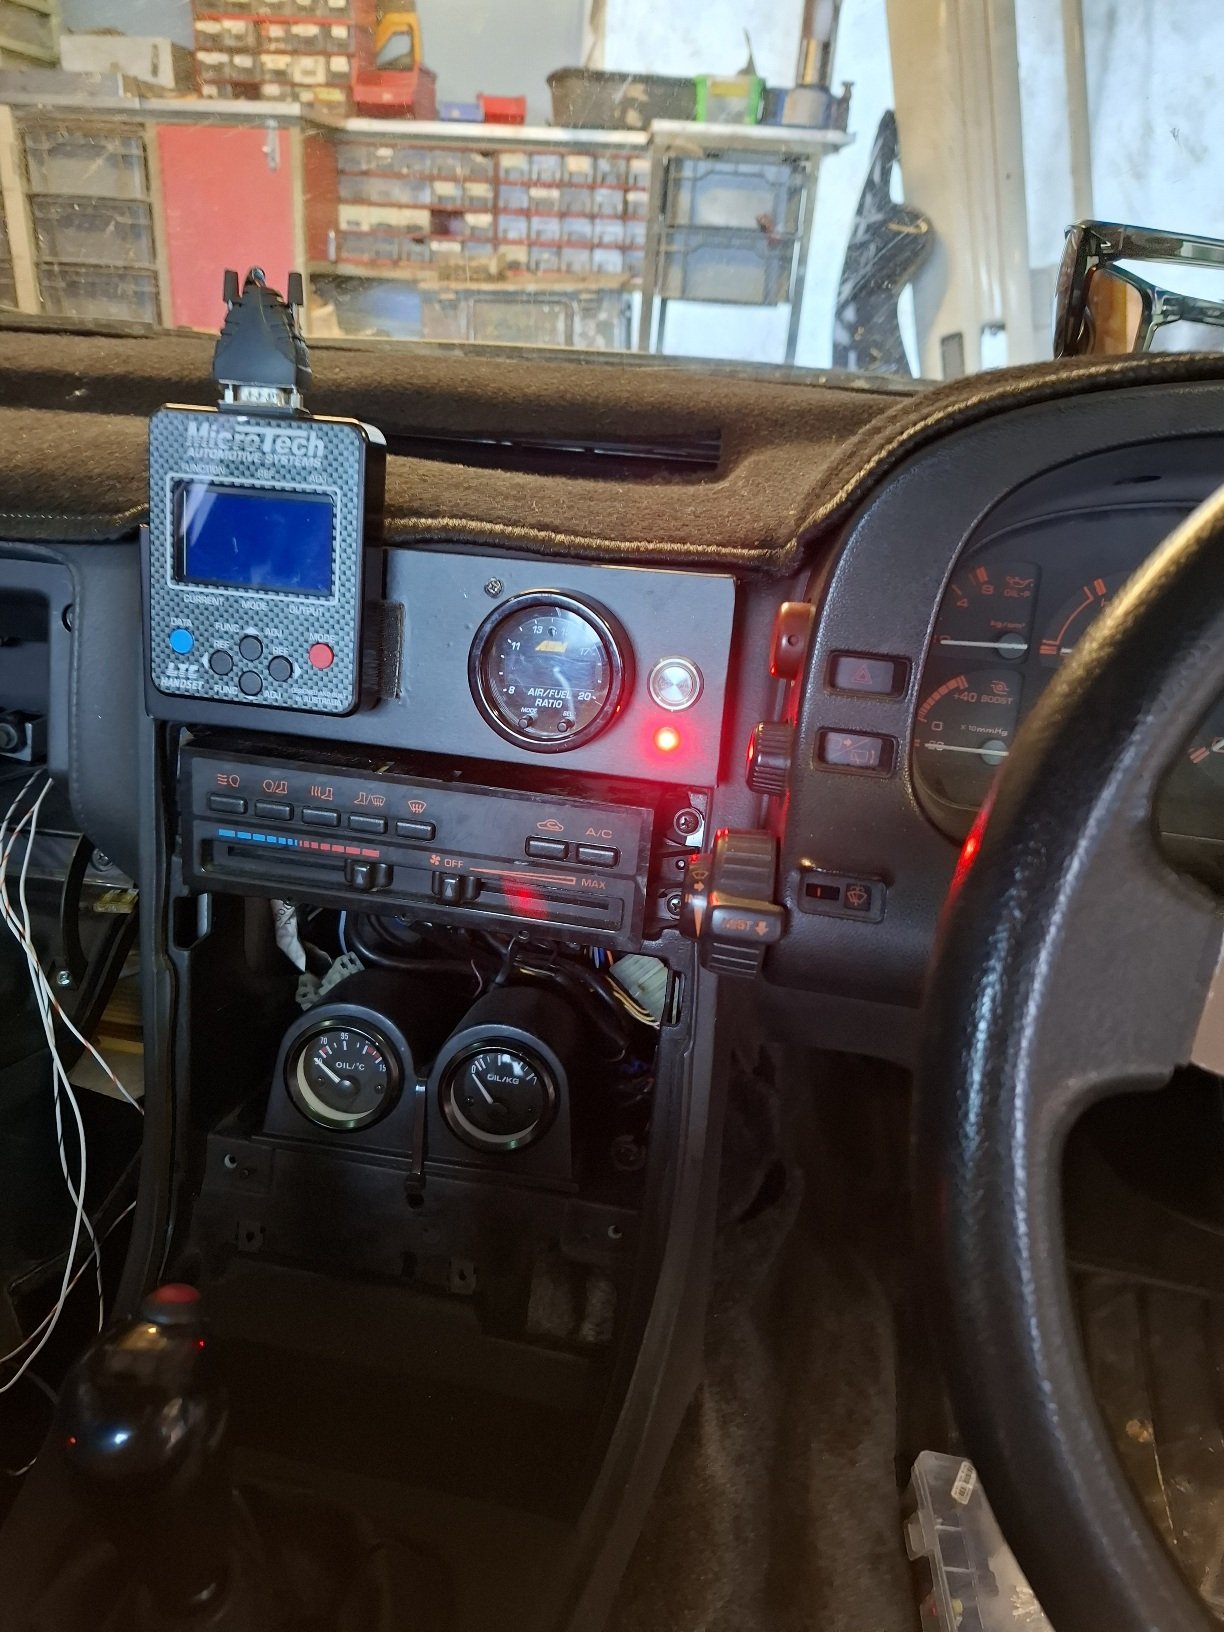
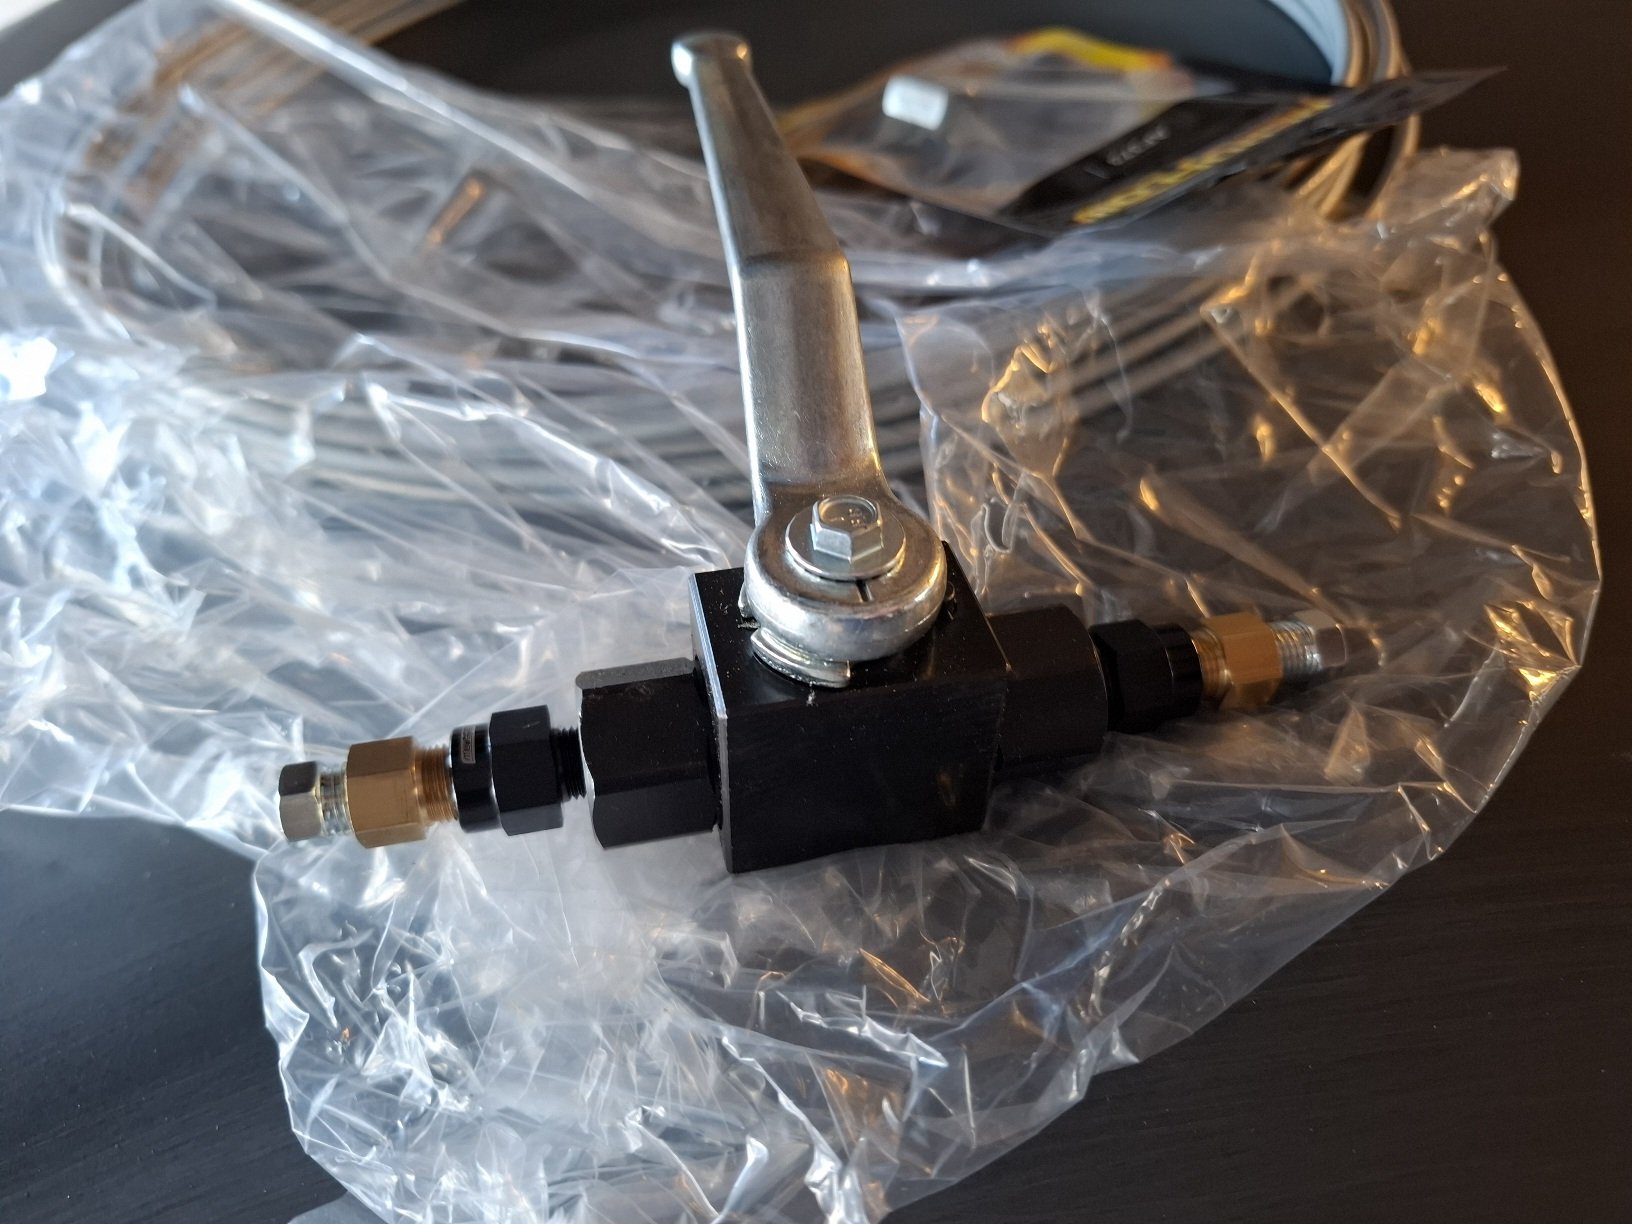
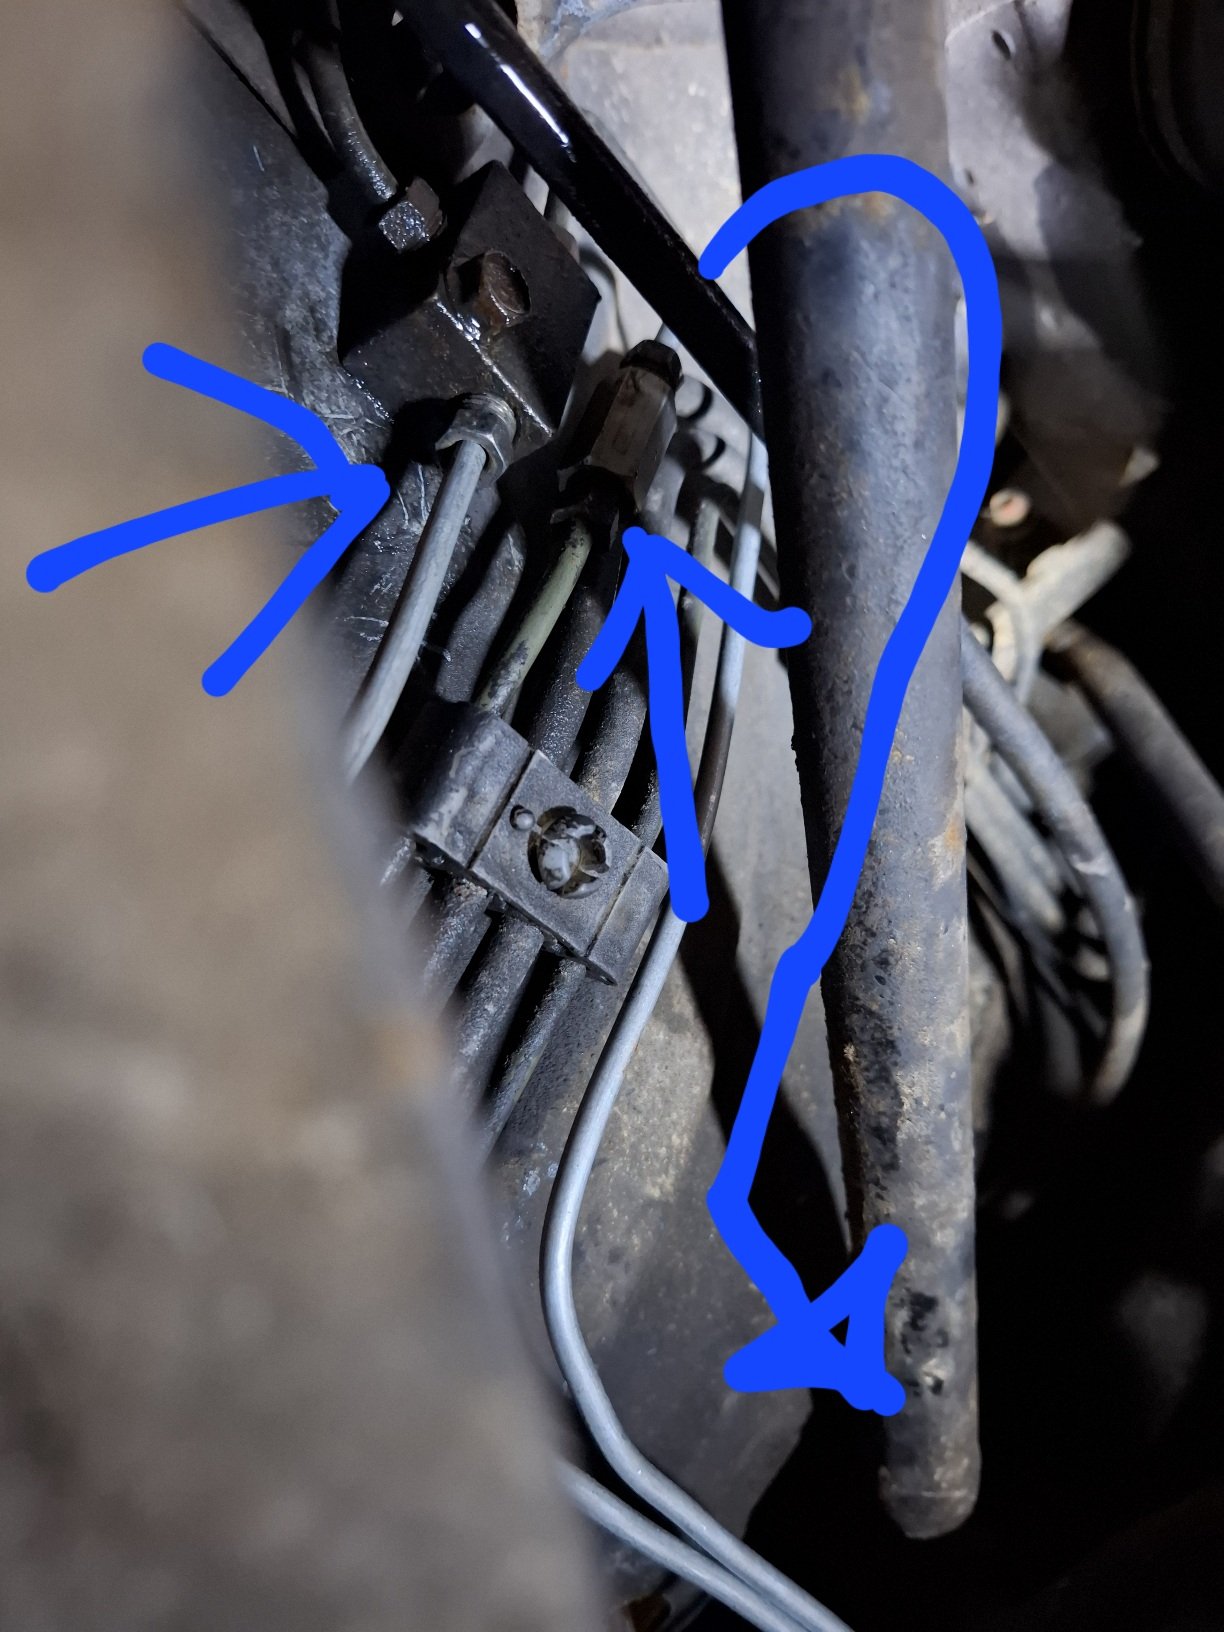
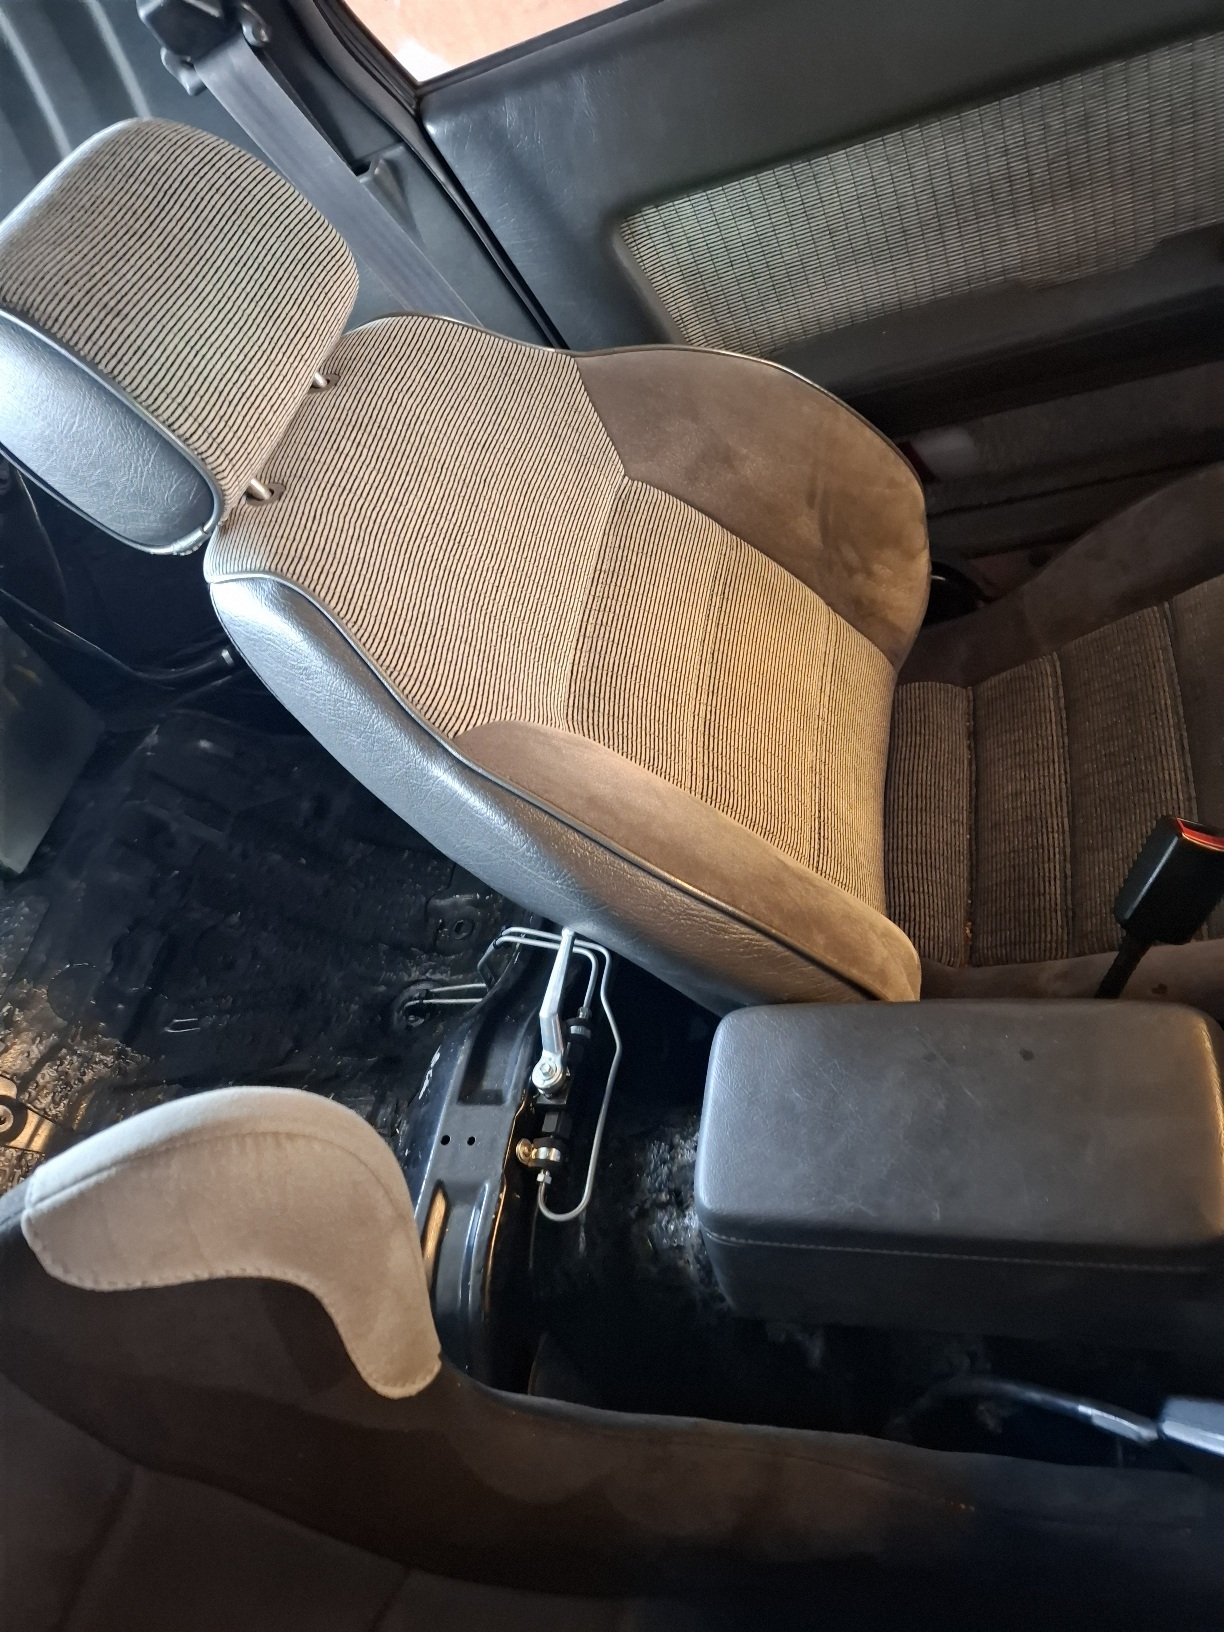
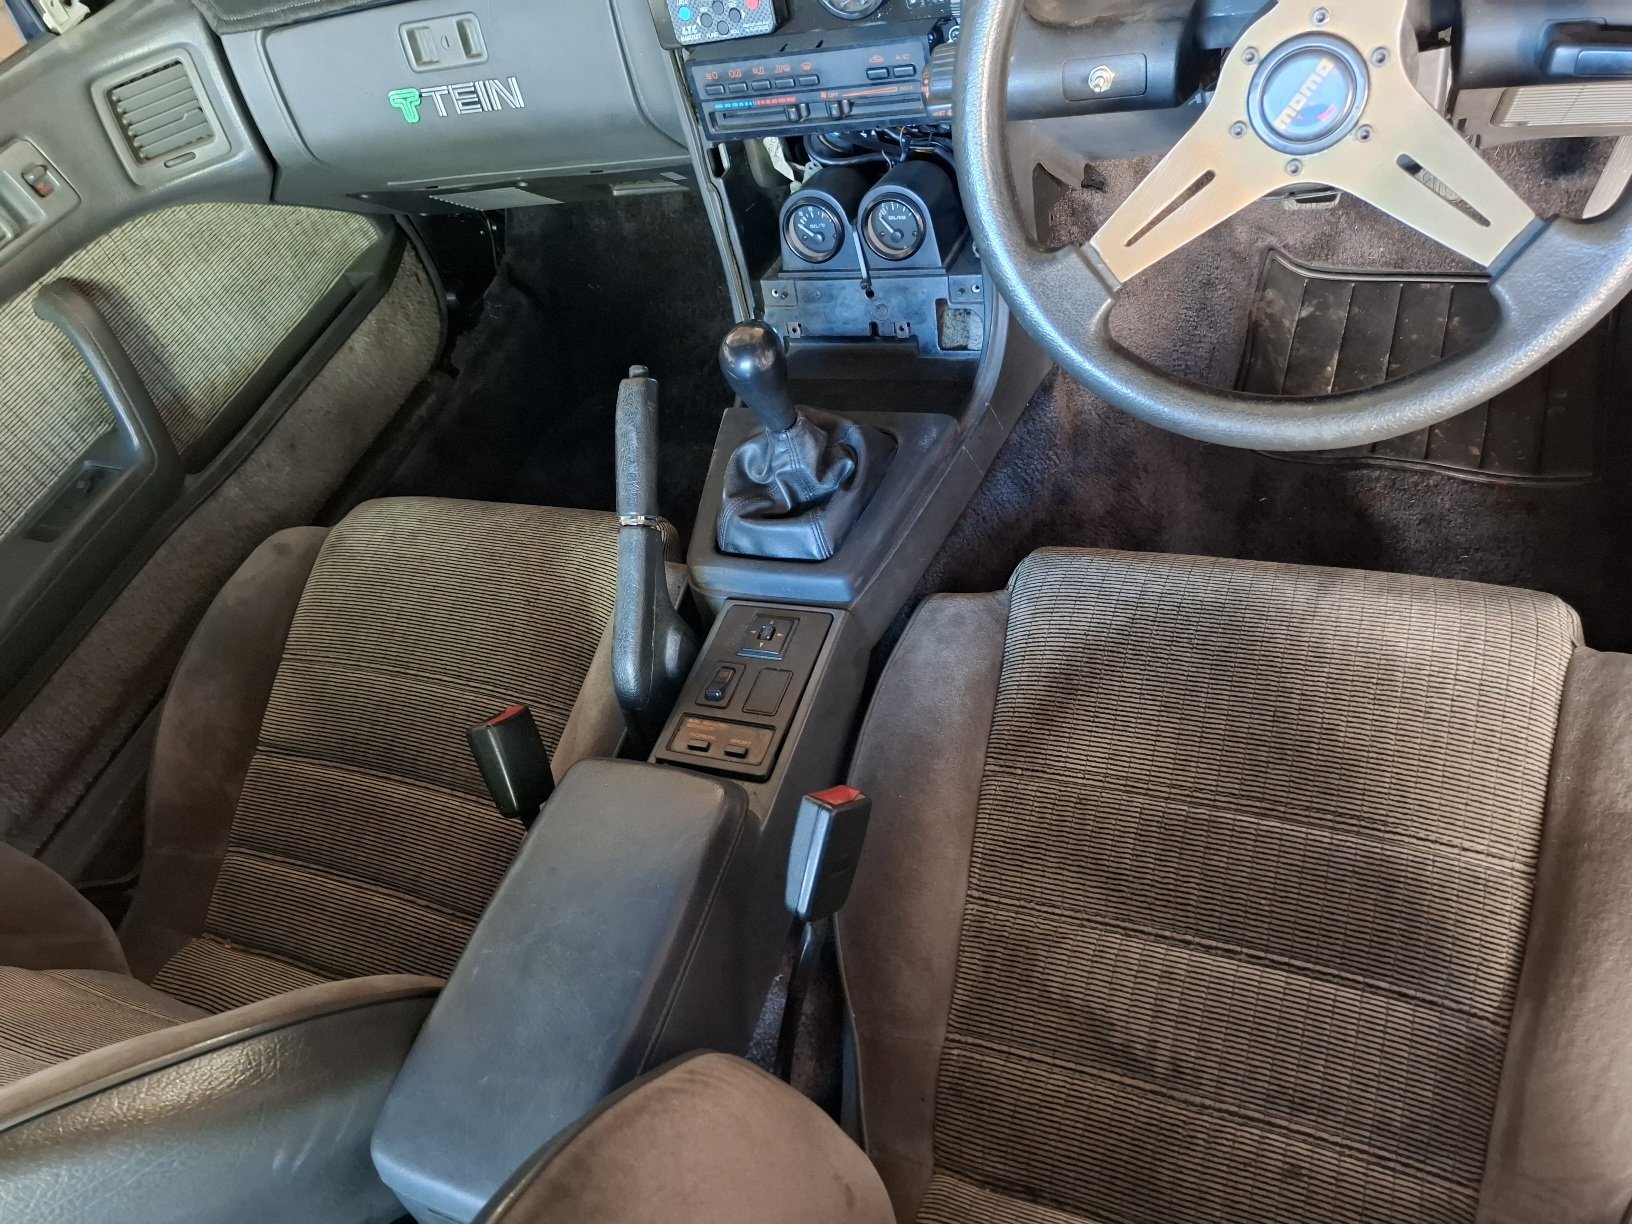
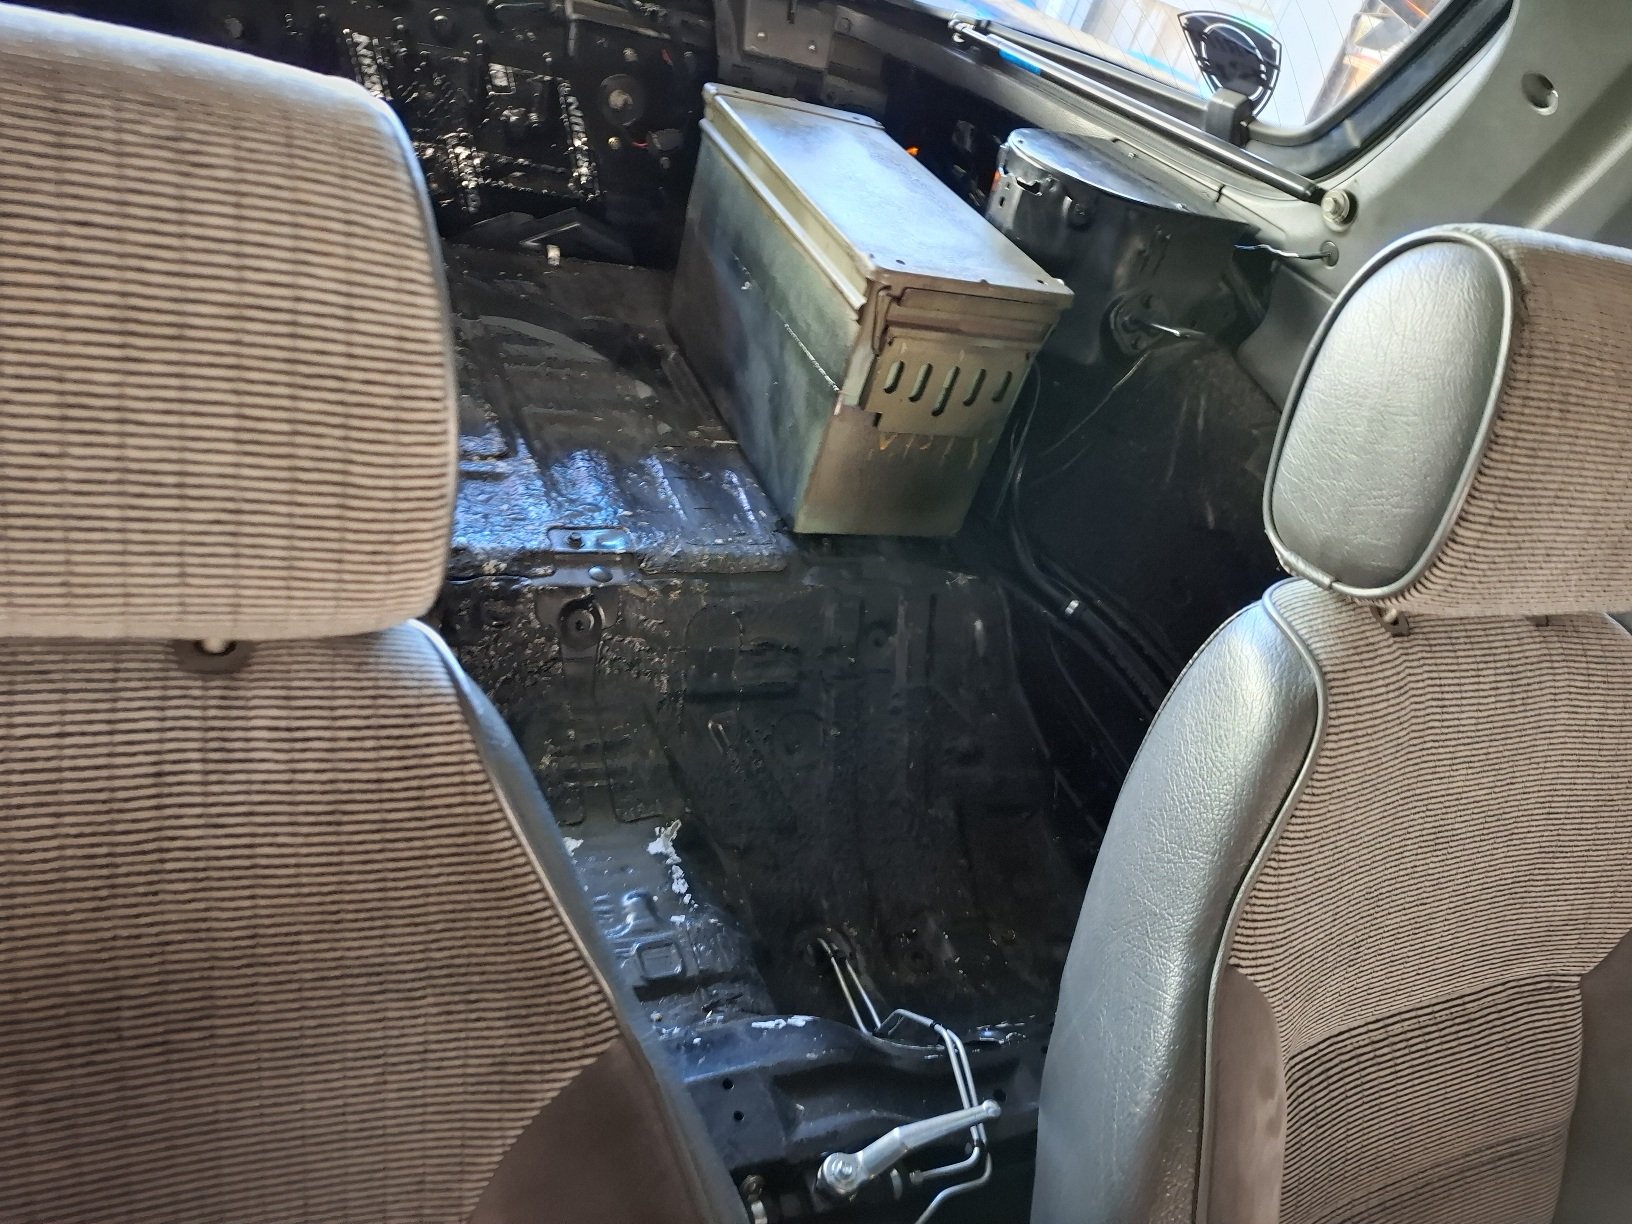
Also got a racetech linelock for drag butnouts etc to not smoke my rear brakes and i prefer mechnical things so no solenoid, it turned out to have bsp threads in it...... ? So i had to get a bunch of adapters to make that work bsp to npt to brakeline fittings, ran the lines through a gromet hole and to the rear split into a m10x1.0 joiner.. the idea being it's fully removable... because it's not legal, but can remove handle to render it un operable and got a front bumper to fix my cut up one, as well as a carpet and gear shifter surround and boot, little more tidy inside because street car? Bumper will have to wait till I paint the car someday because it's white... still looking for a reasonably priced dash facia...rear still needs something, yes my battery box is a sealed ammo box bolted to the floor lol
1 point
-
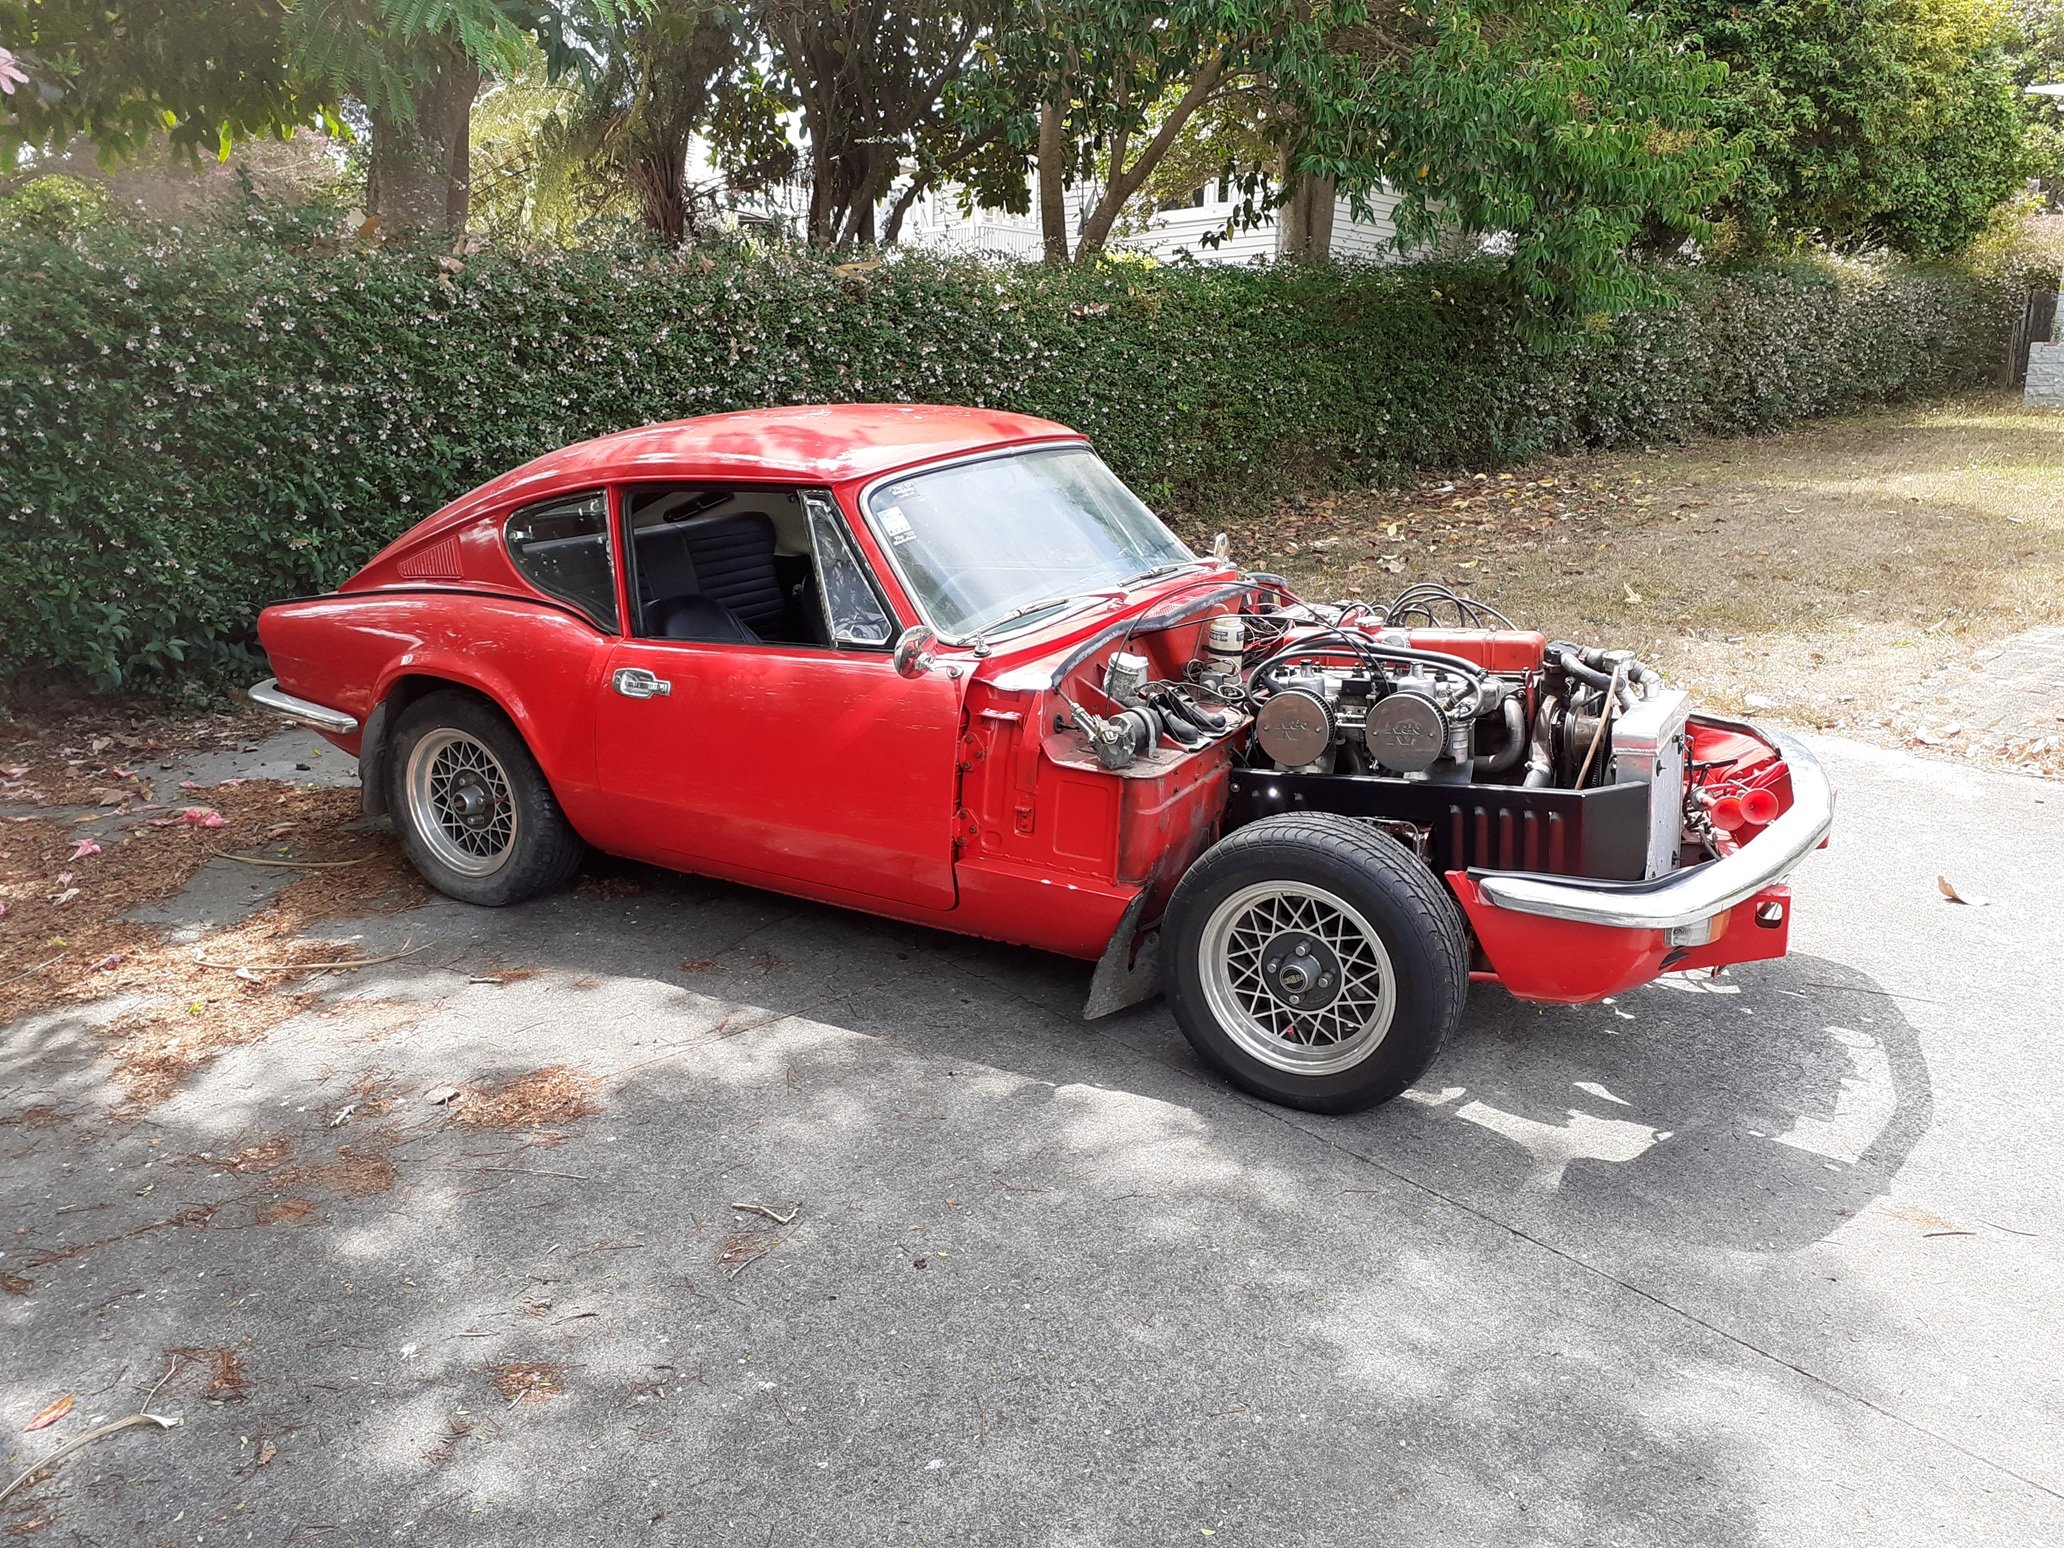
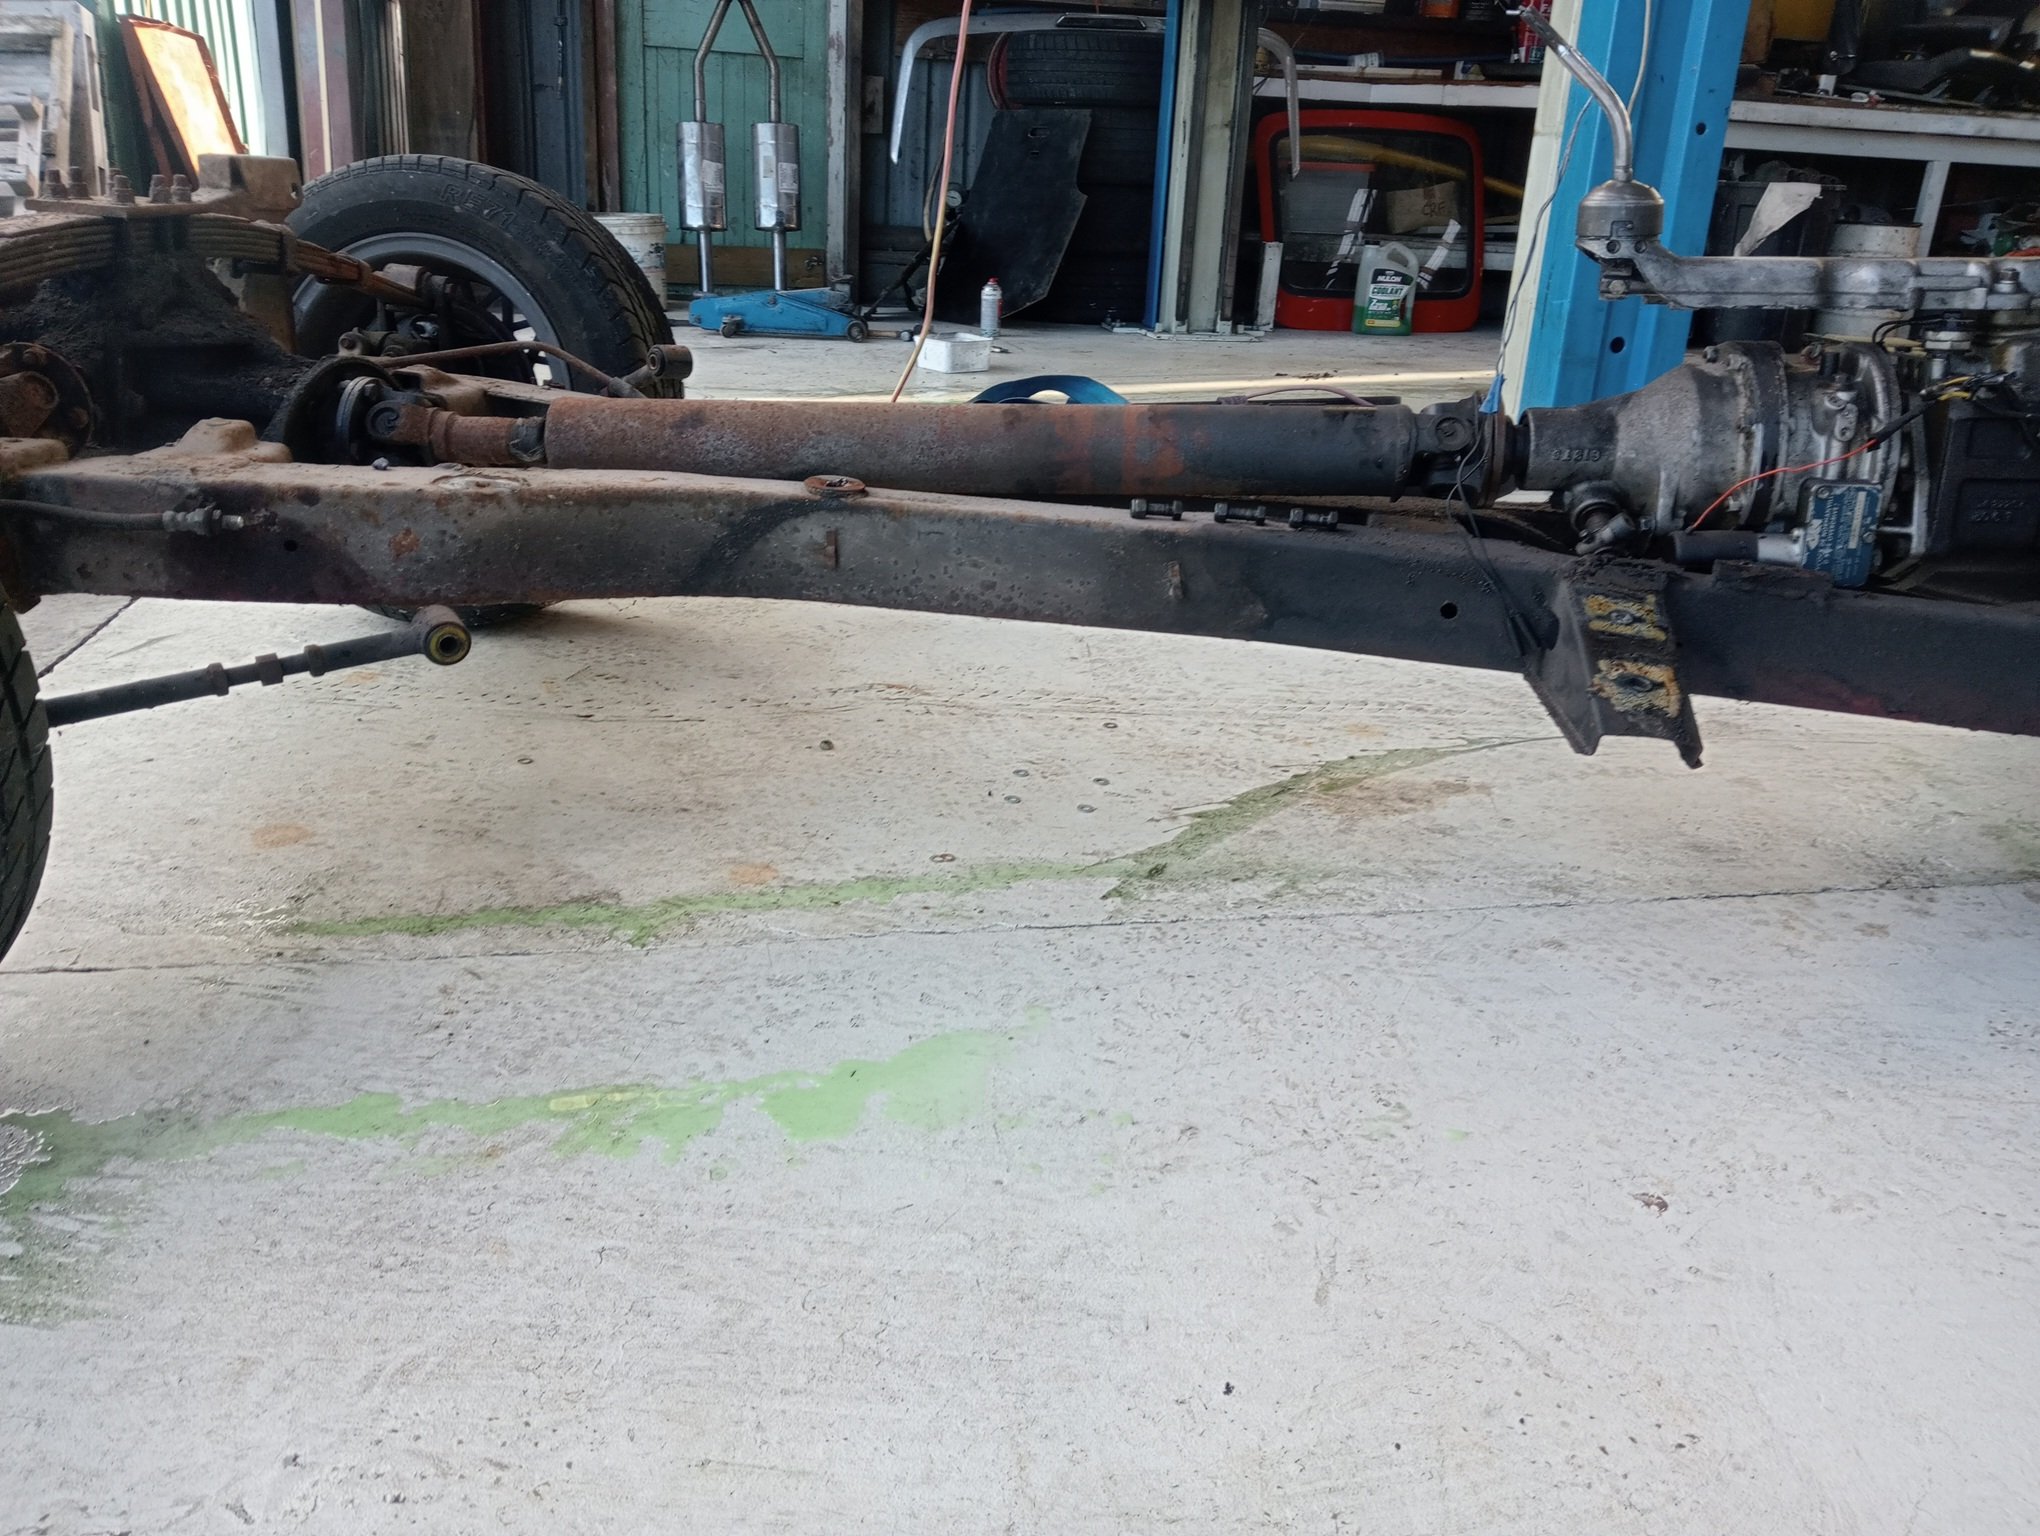
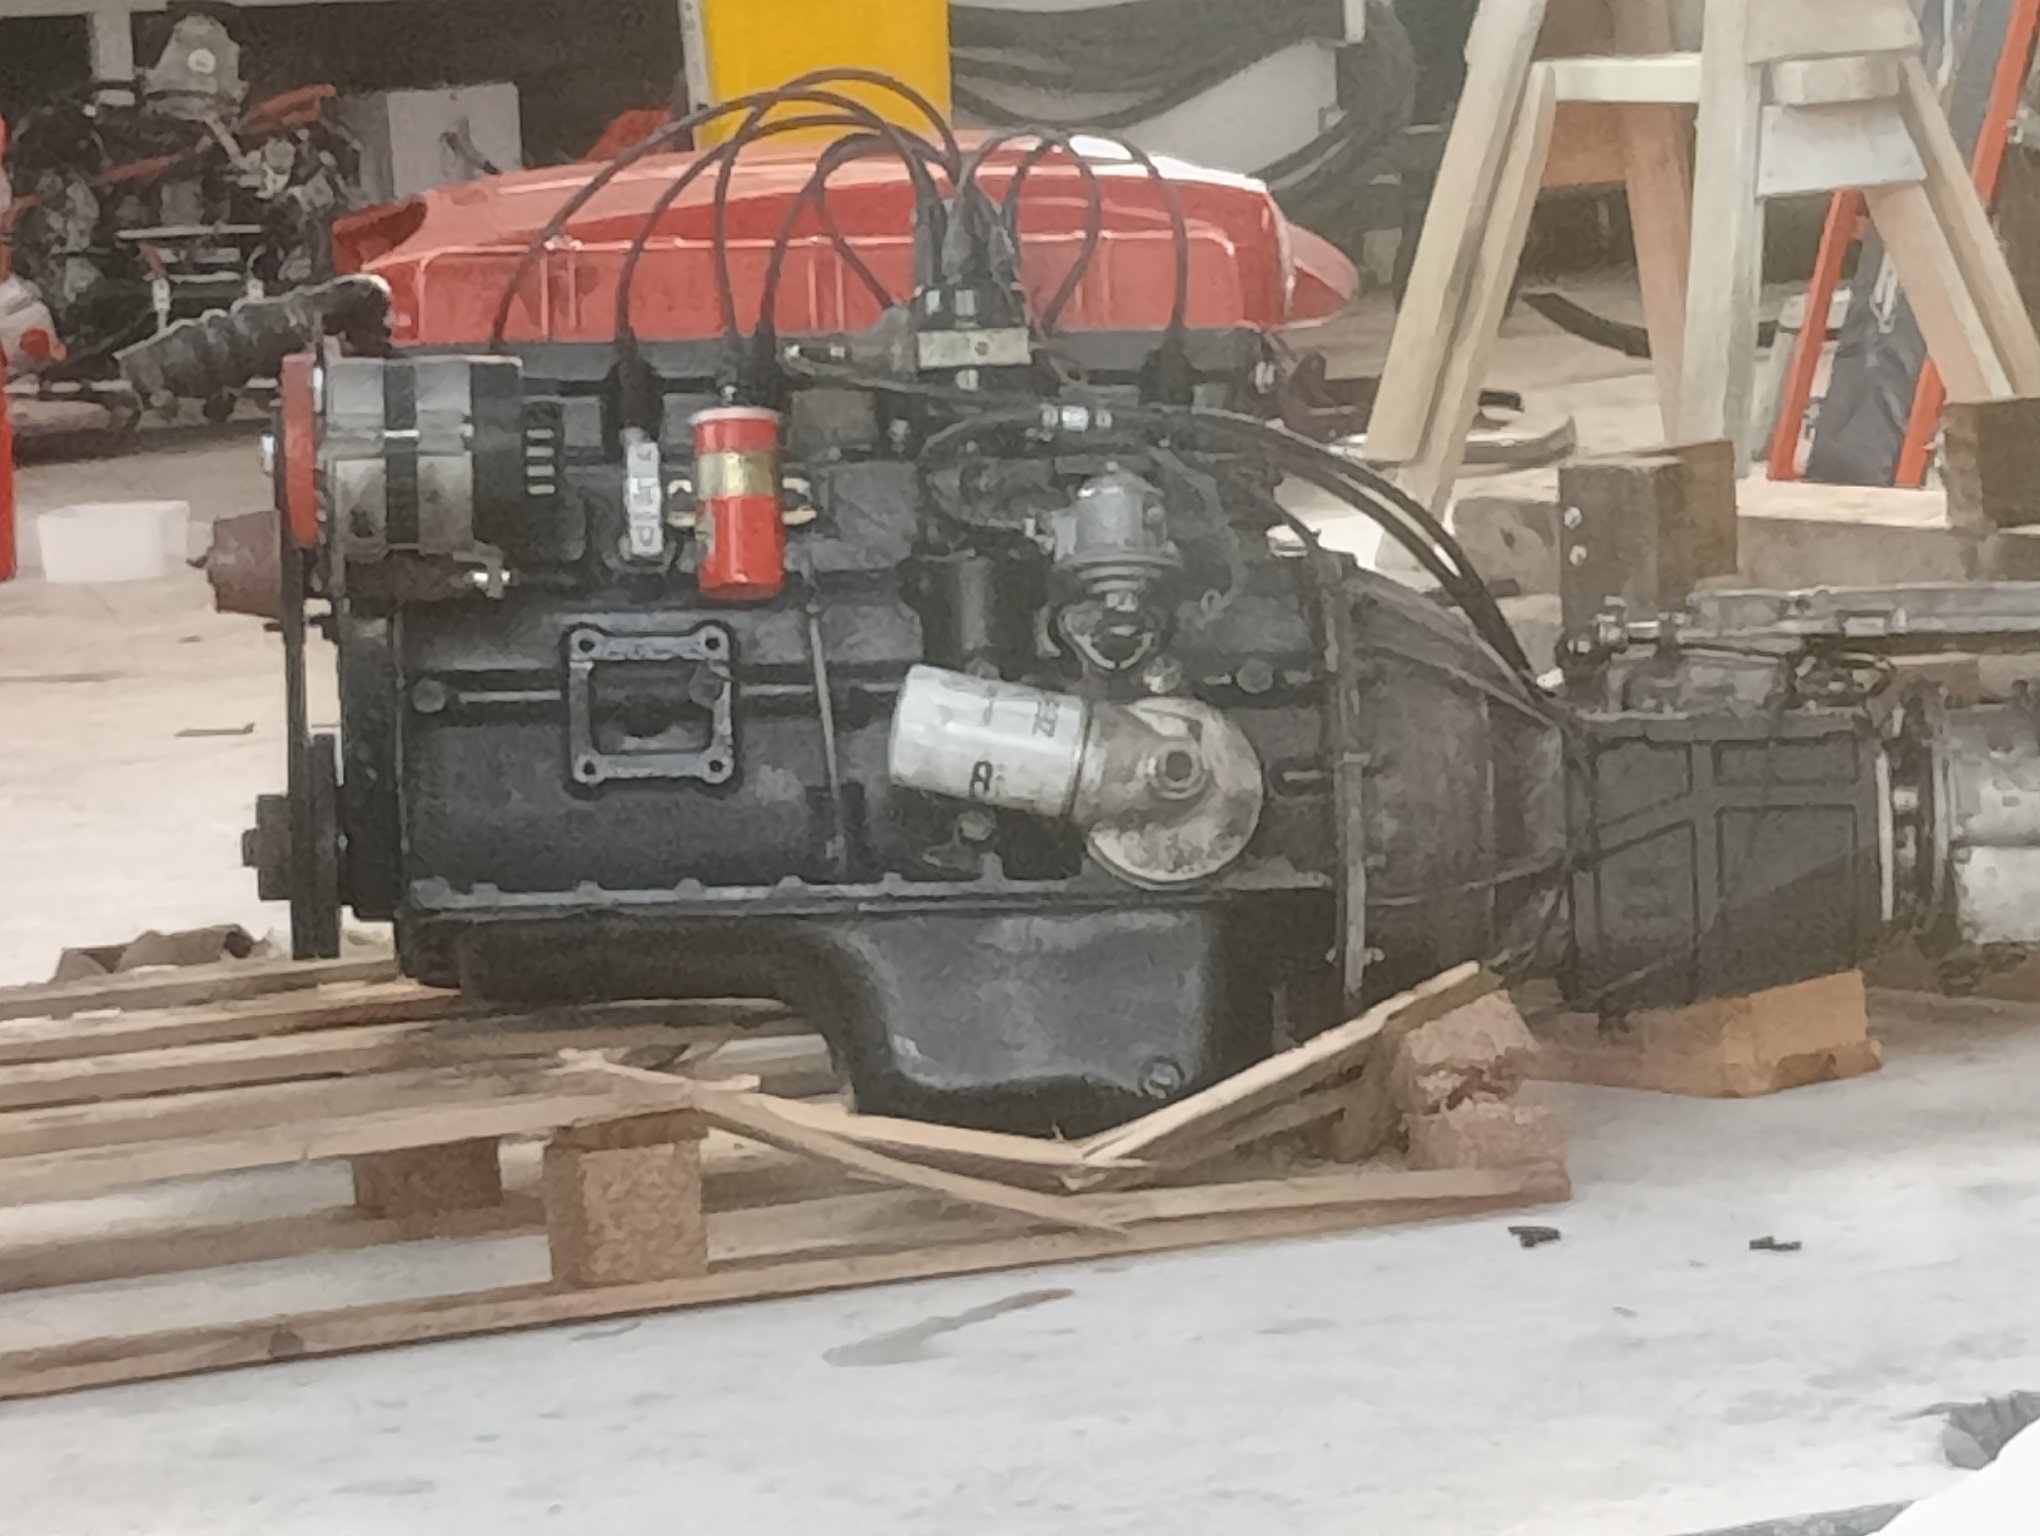
So I pulled the body. I had a GT6 "workshop manual" which was totally useless. Didn't even mention disconnecting the radius arms or rear suspension. I don't actually have a photo of it with the body off and engine still in because by the time the body was off there was pretty much nothing left to remove so I forged on and tore the motor out. only thing I had was this reference photo of the propshaft angle: the motor was then removed and carefully placed on a pallet which it immediately destroyed because it is the heaviest son of a bitch I have ever come across my phone decided to spruce up this photo, I don't know why
1 point
-
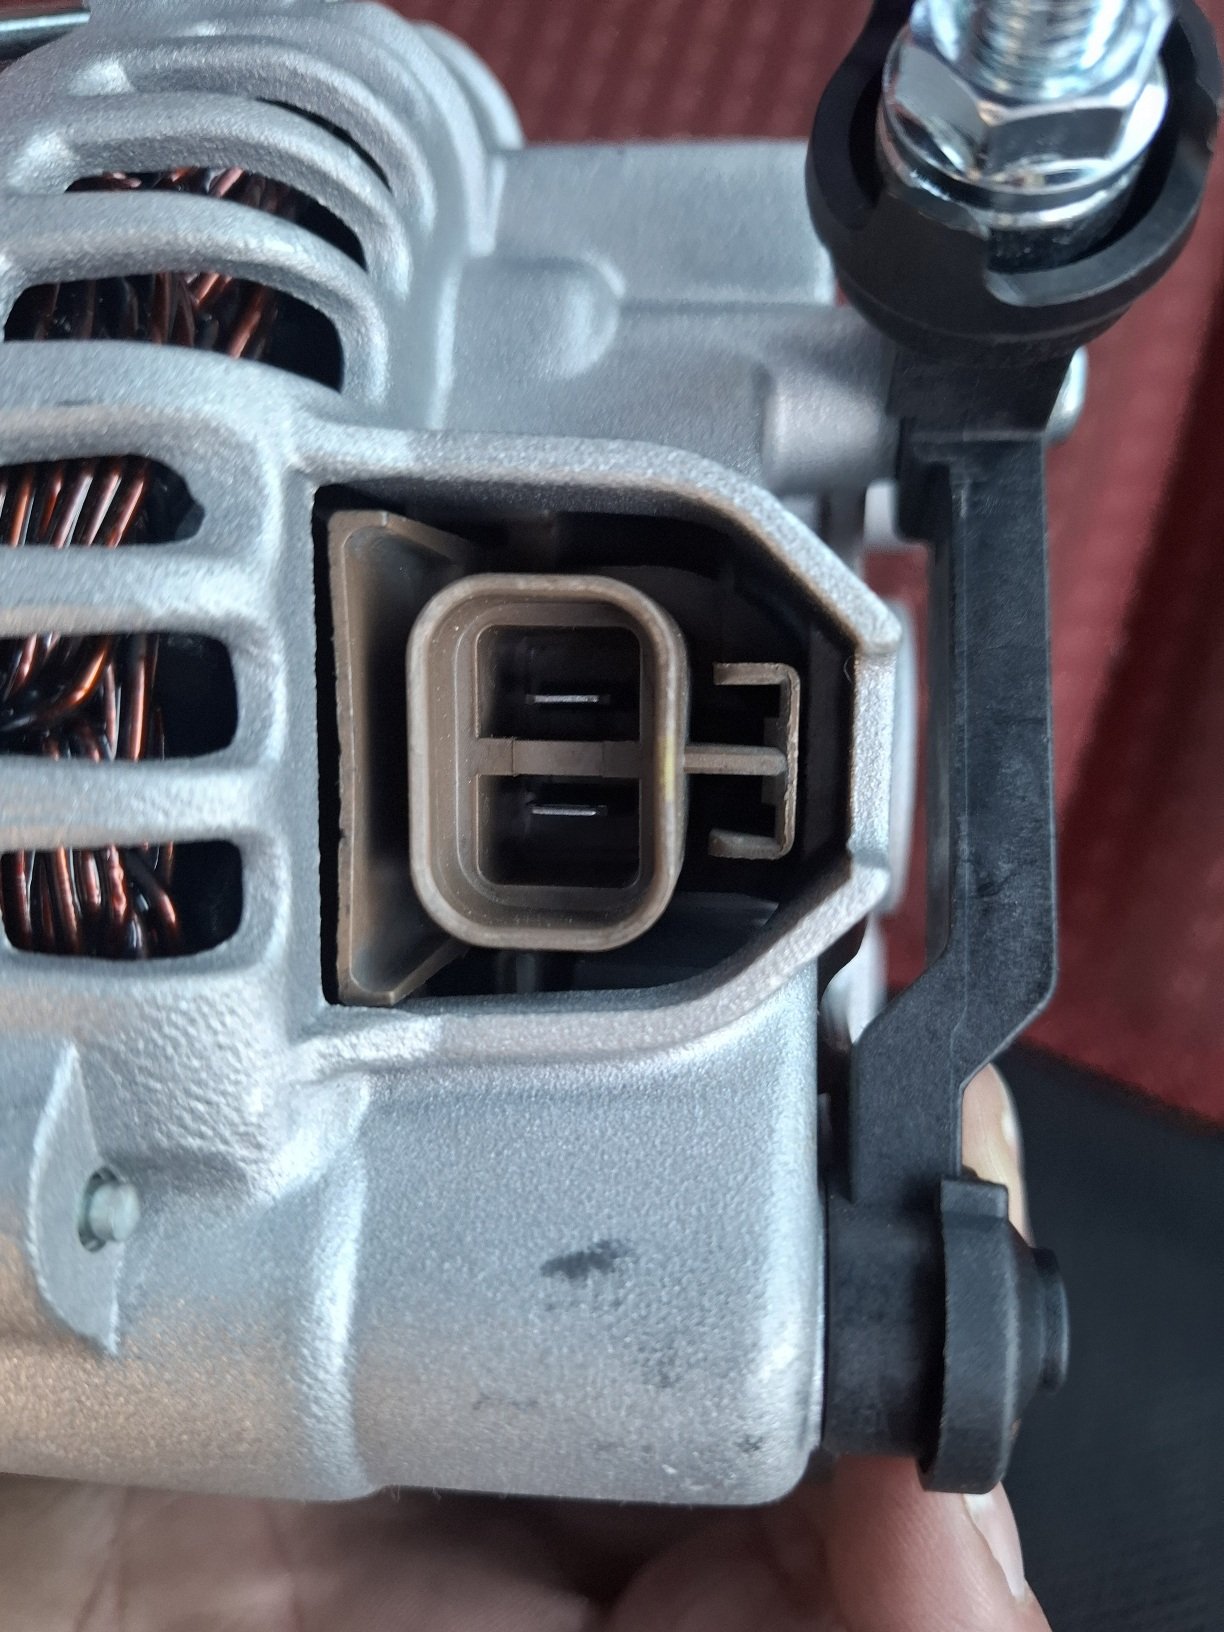
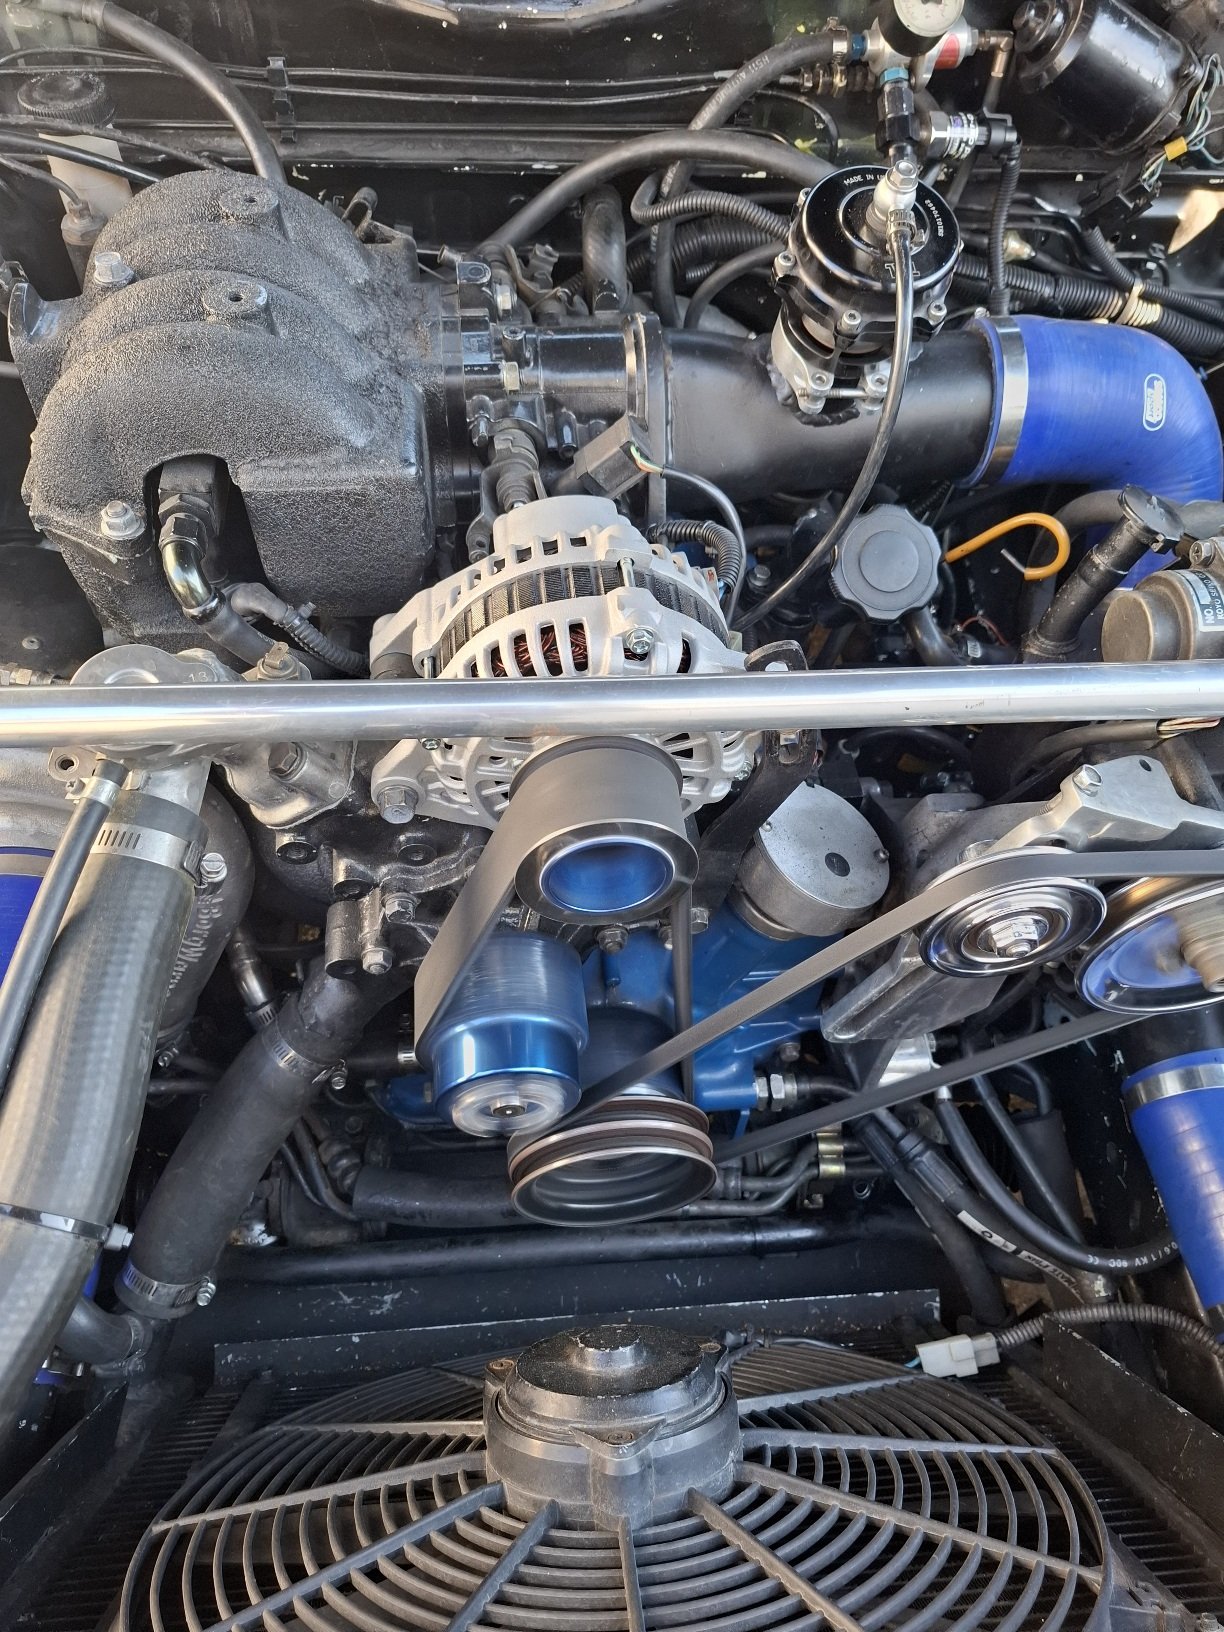
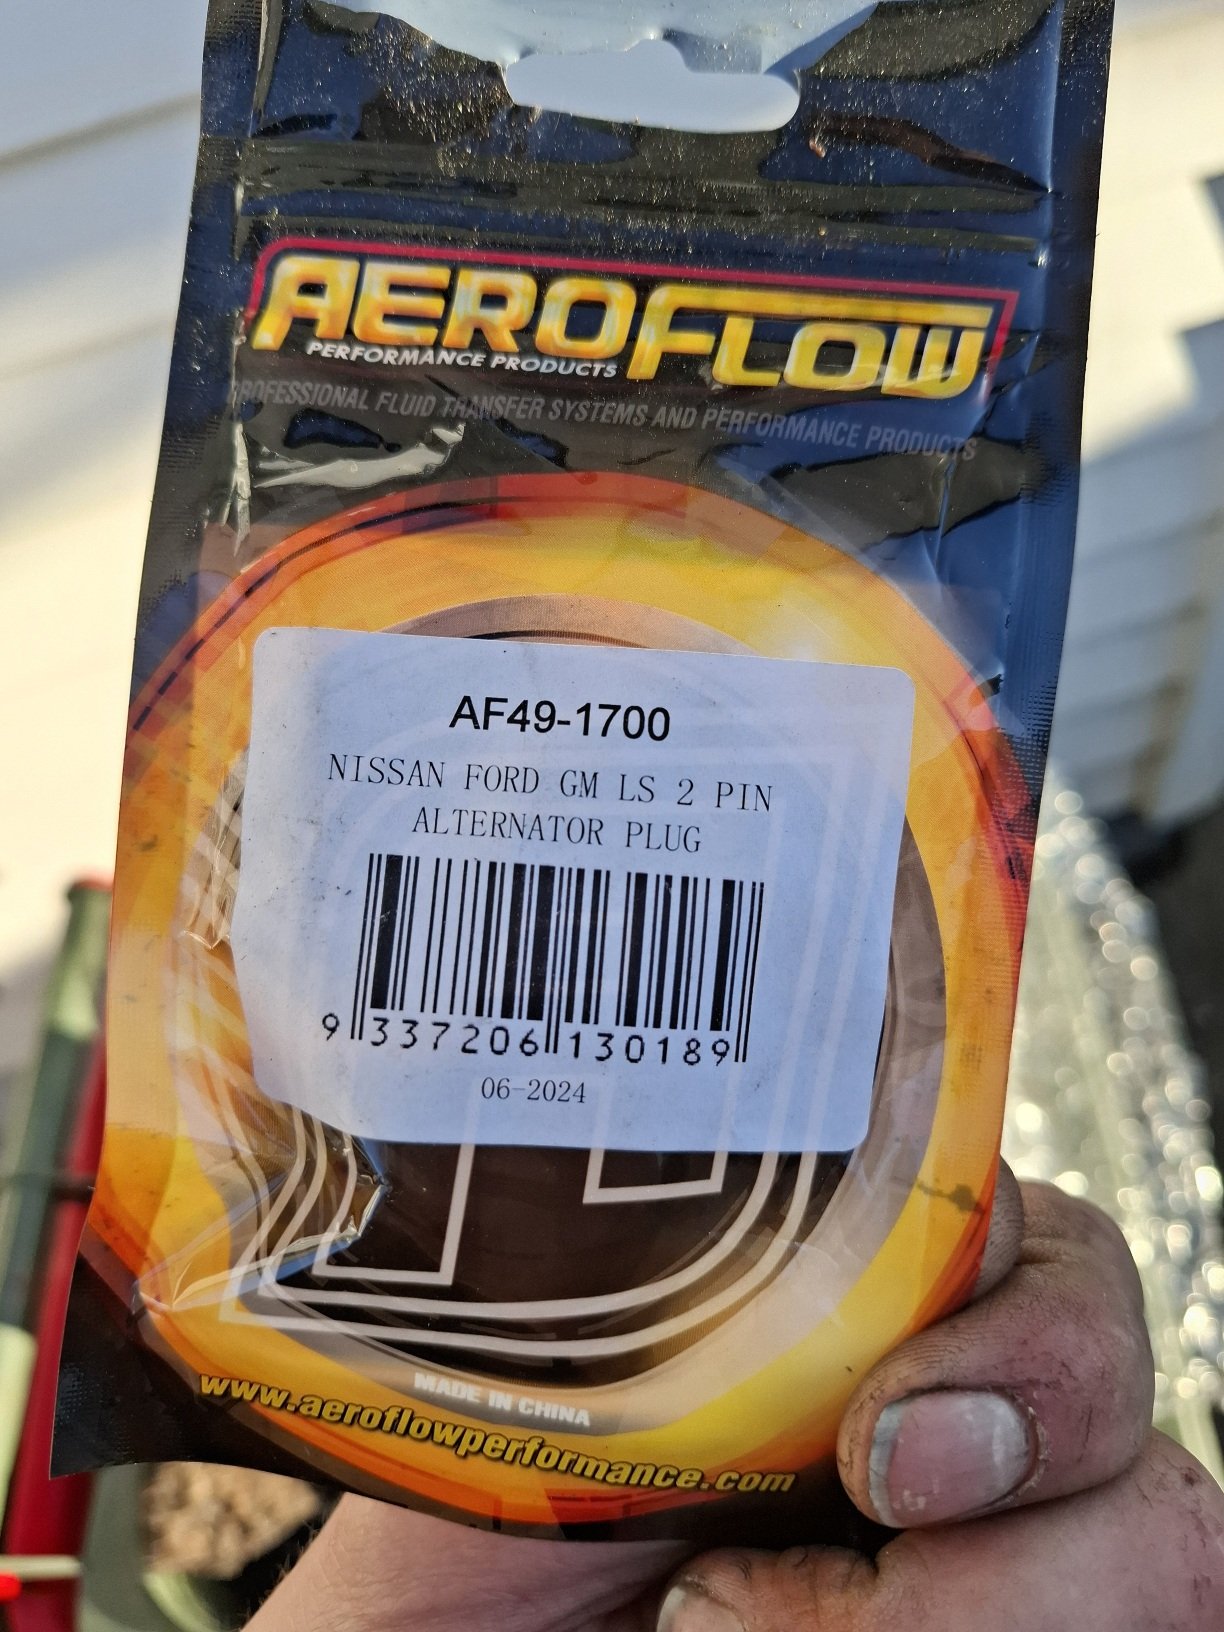
It's just as loud with the louvered core resonator, but not too loud? Lol and I did a fd reman altenator, because the 60 amp one was not cutting it at low revs with fan on etc... all I had to buy was a 90 amp fd rx7 altenator, from strange workshop about 300$, a ls plug kit- (ls, nissan, mazda- share the same style 2pin plug for Mitsubishi / hitachi alt )- from a aeroflow supplier- about 6$ and attach it to my wiring. Drill my pulley out to 17mm, and space pulley out about 6mm ( i used a thin nut, dilled out to 17mm and the hex ground off- because im a hoarder...and it works).. and now it charges 14 plus volts at idle. Not sure if the old altenator was bad or the demand was too great, but now it doesn't seem to have the same issues- stalling at lights etc... Other than that they just bolt in to s4 housings...
1 point
-
I've driven it for around 2.5hrs total now. First drive was almost an hour and no misfire (fuck-yeah-mother-fucker-fuckyou-you-goddamn-intermittent-fucking-bastard-get-fucked, etc etc). So I'm quite happy about that. Took my kids for a drive each (only 2 seater) both loved it and their first experience in something properly fast. 10y/o boy said he couldn't stop shaking with excitement and didn't want to go home and 7yo girl shrieked with glee and giggling, said it was like a roller coaster (she went on the big 'adult' roller coaster at Rainbows End 10 times). Of course I drove it just enough to give them some excitement without being silly. Man it's responsive, even 3rd gear at 30kph it makes boost instantly. I wonder how long it'll be before I want more power. Definitely the fastest I've ever driven, more than my old 220kw at wheels ae92 and that was only 900kg. Getting used to it again, drove to work and found it bottoms out on the stupid gate rail which sucks. Might make some wooden ramps haha1 point
-
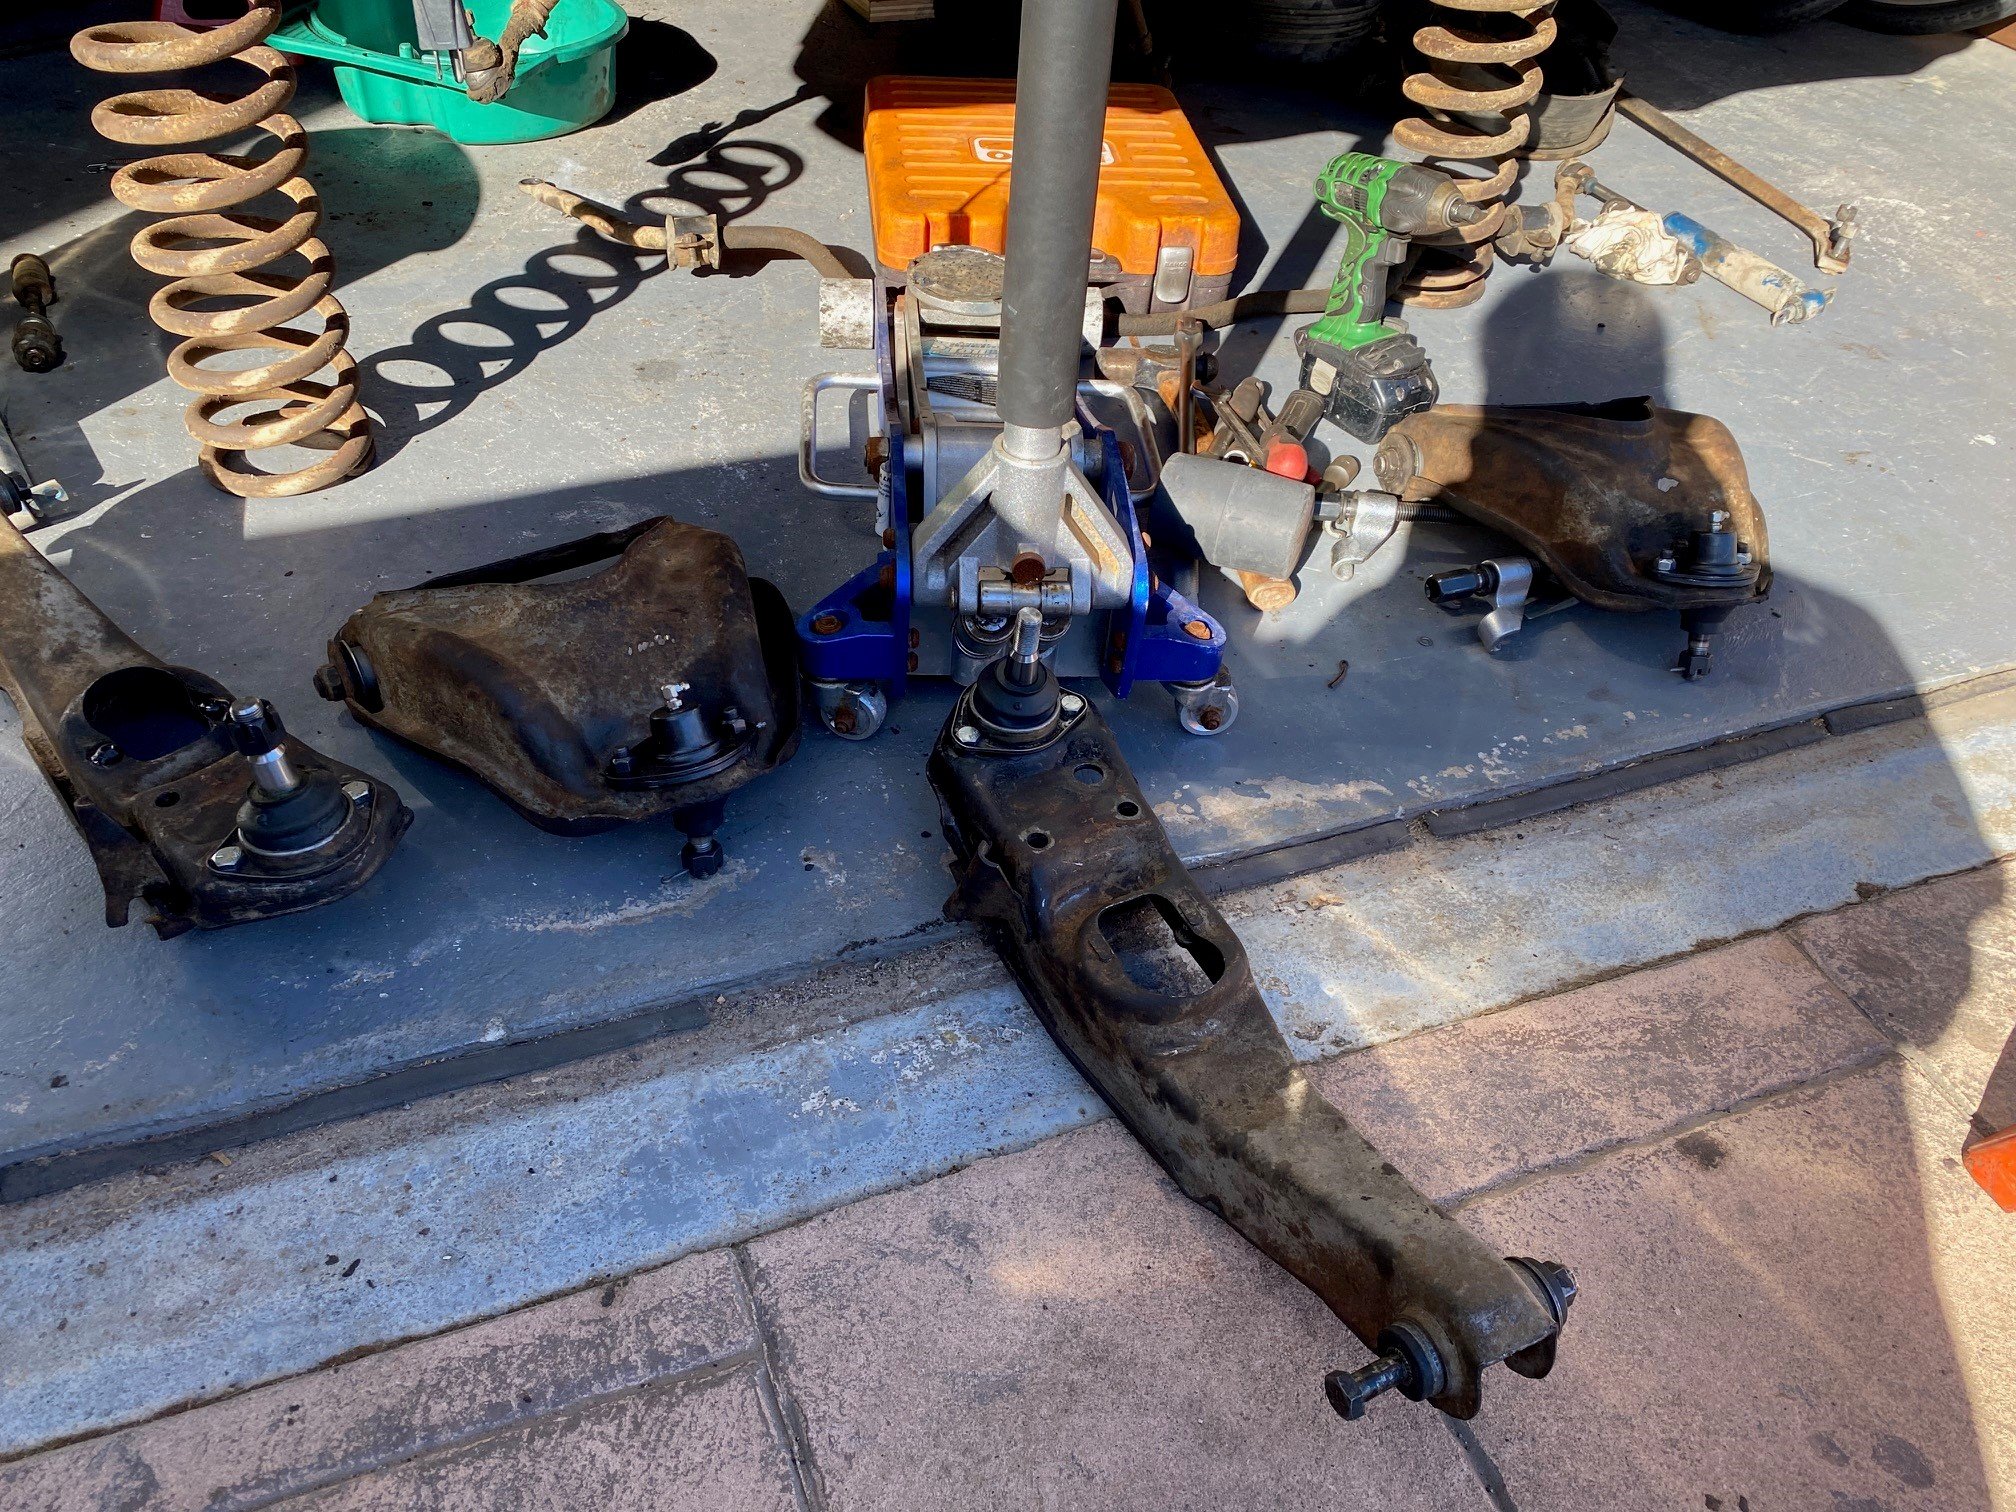
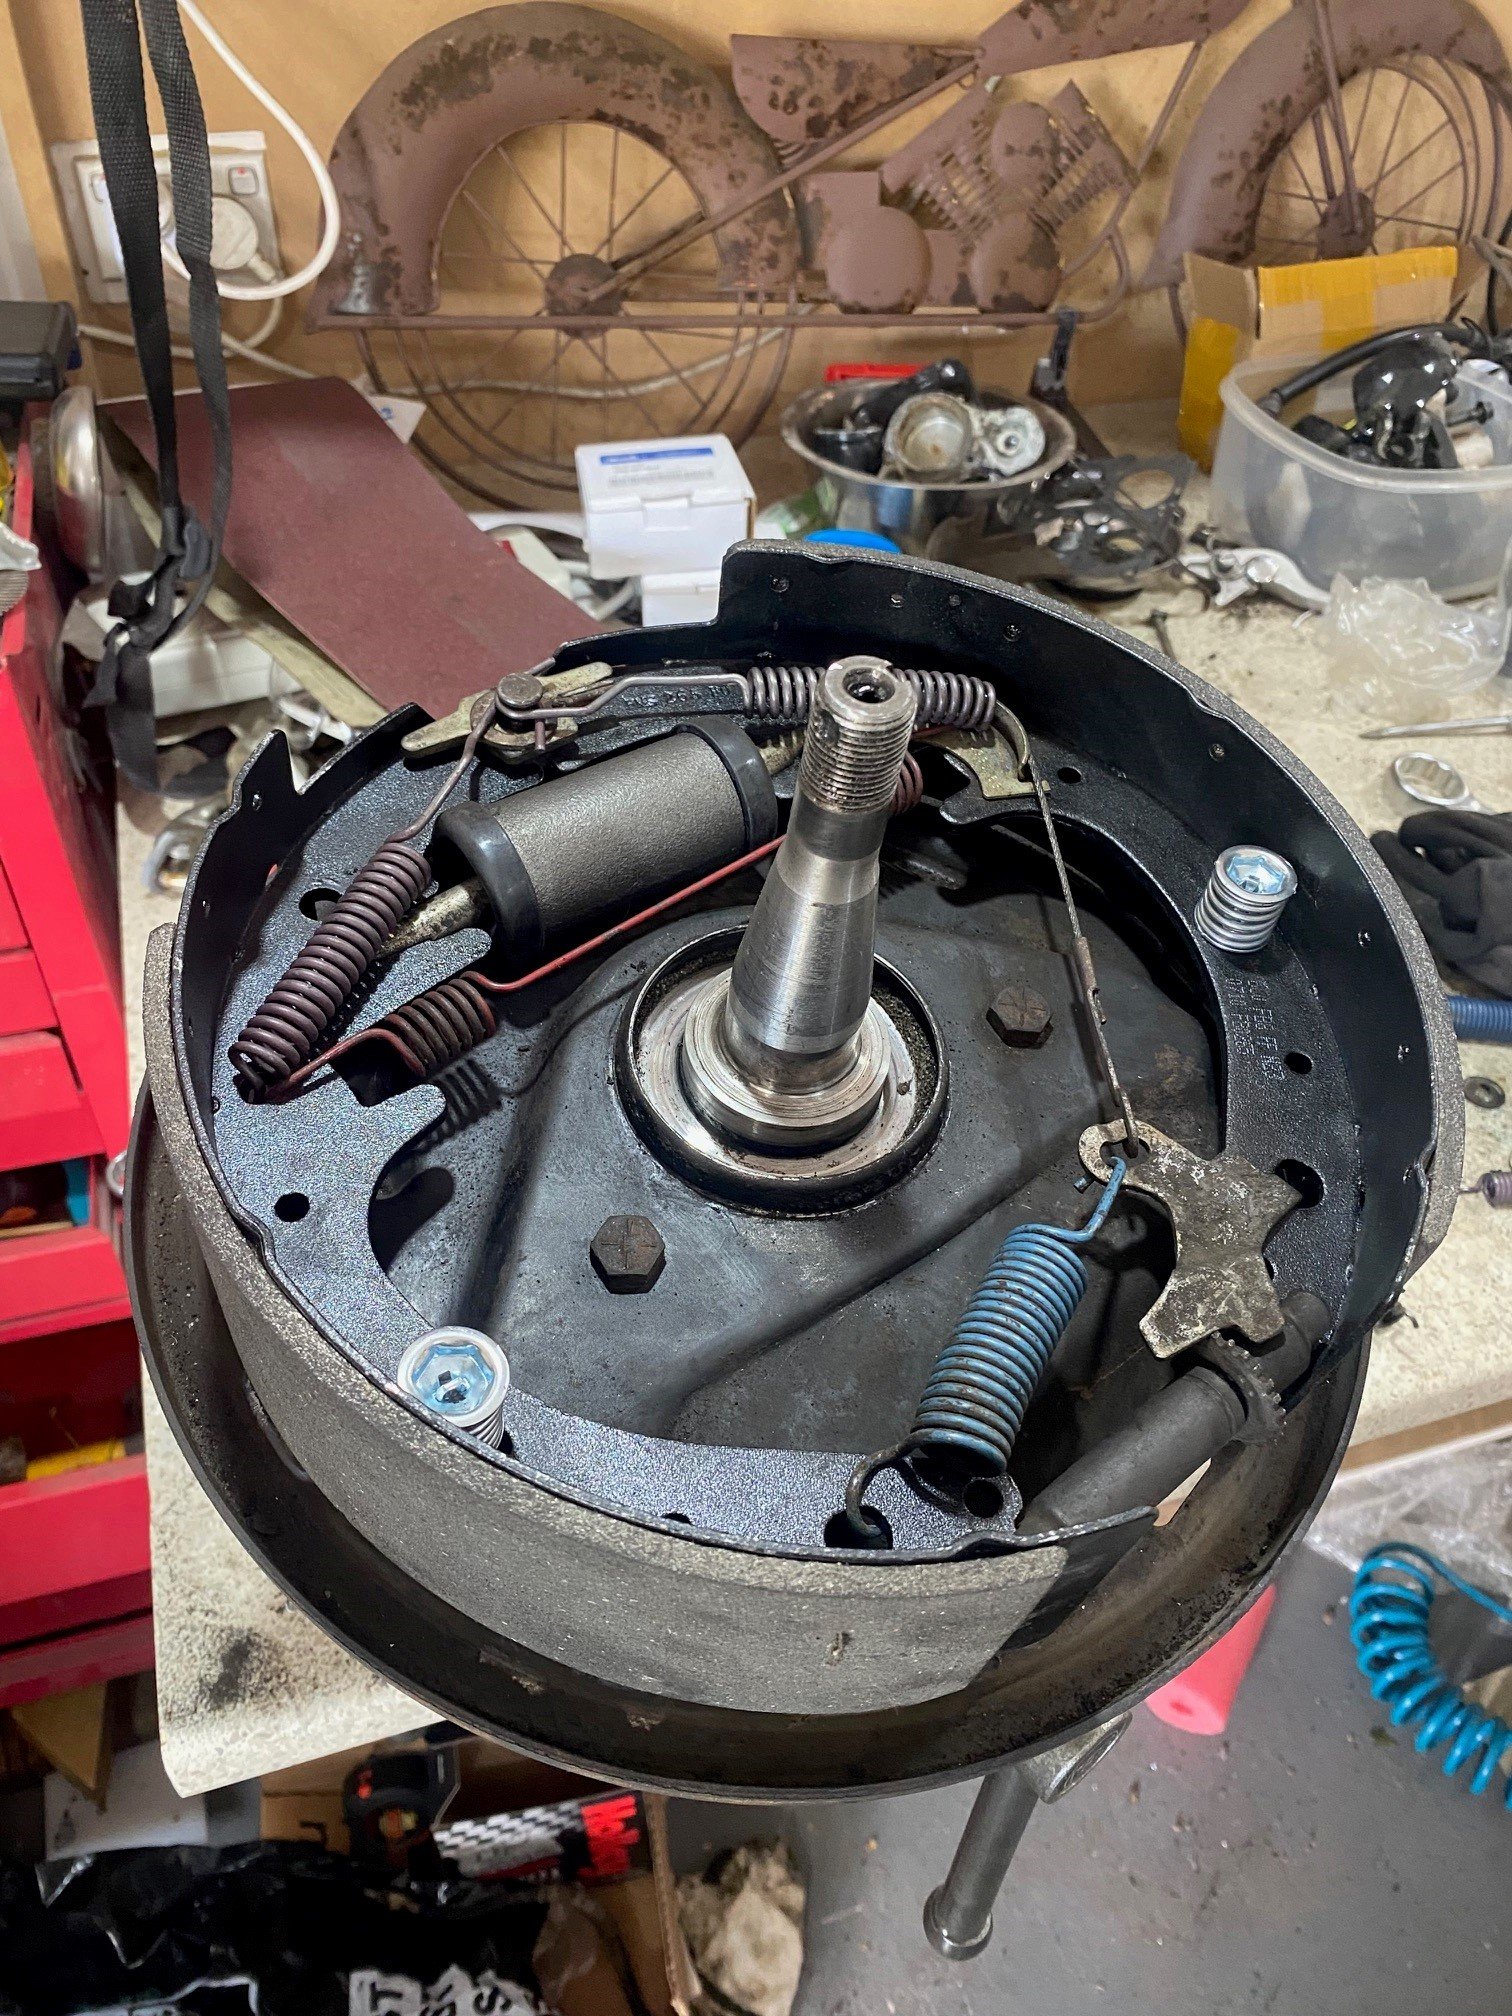
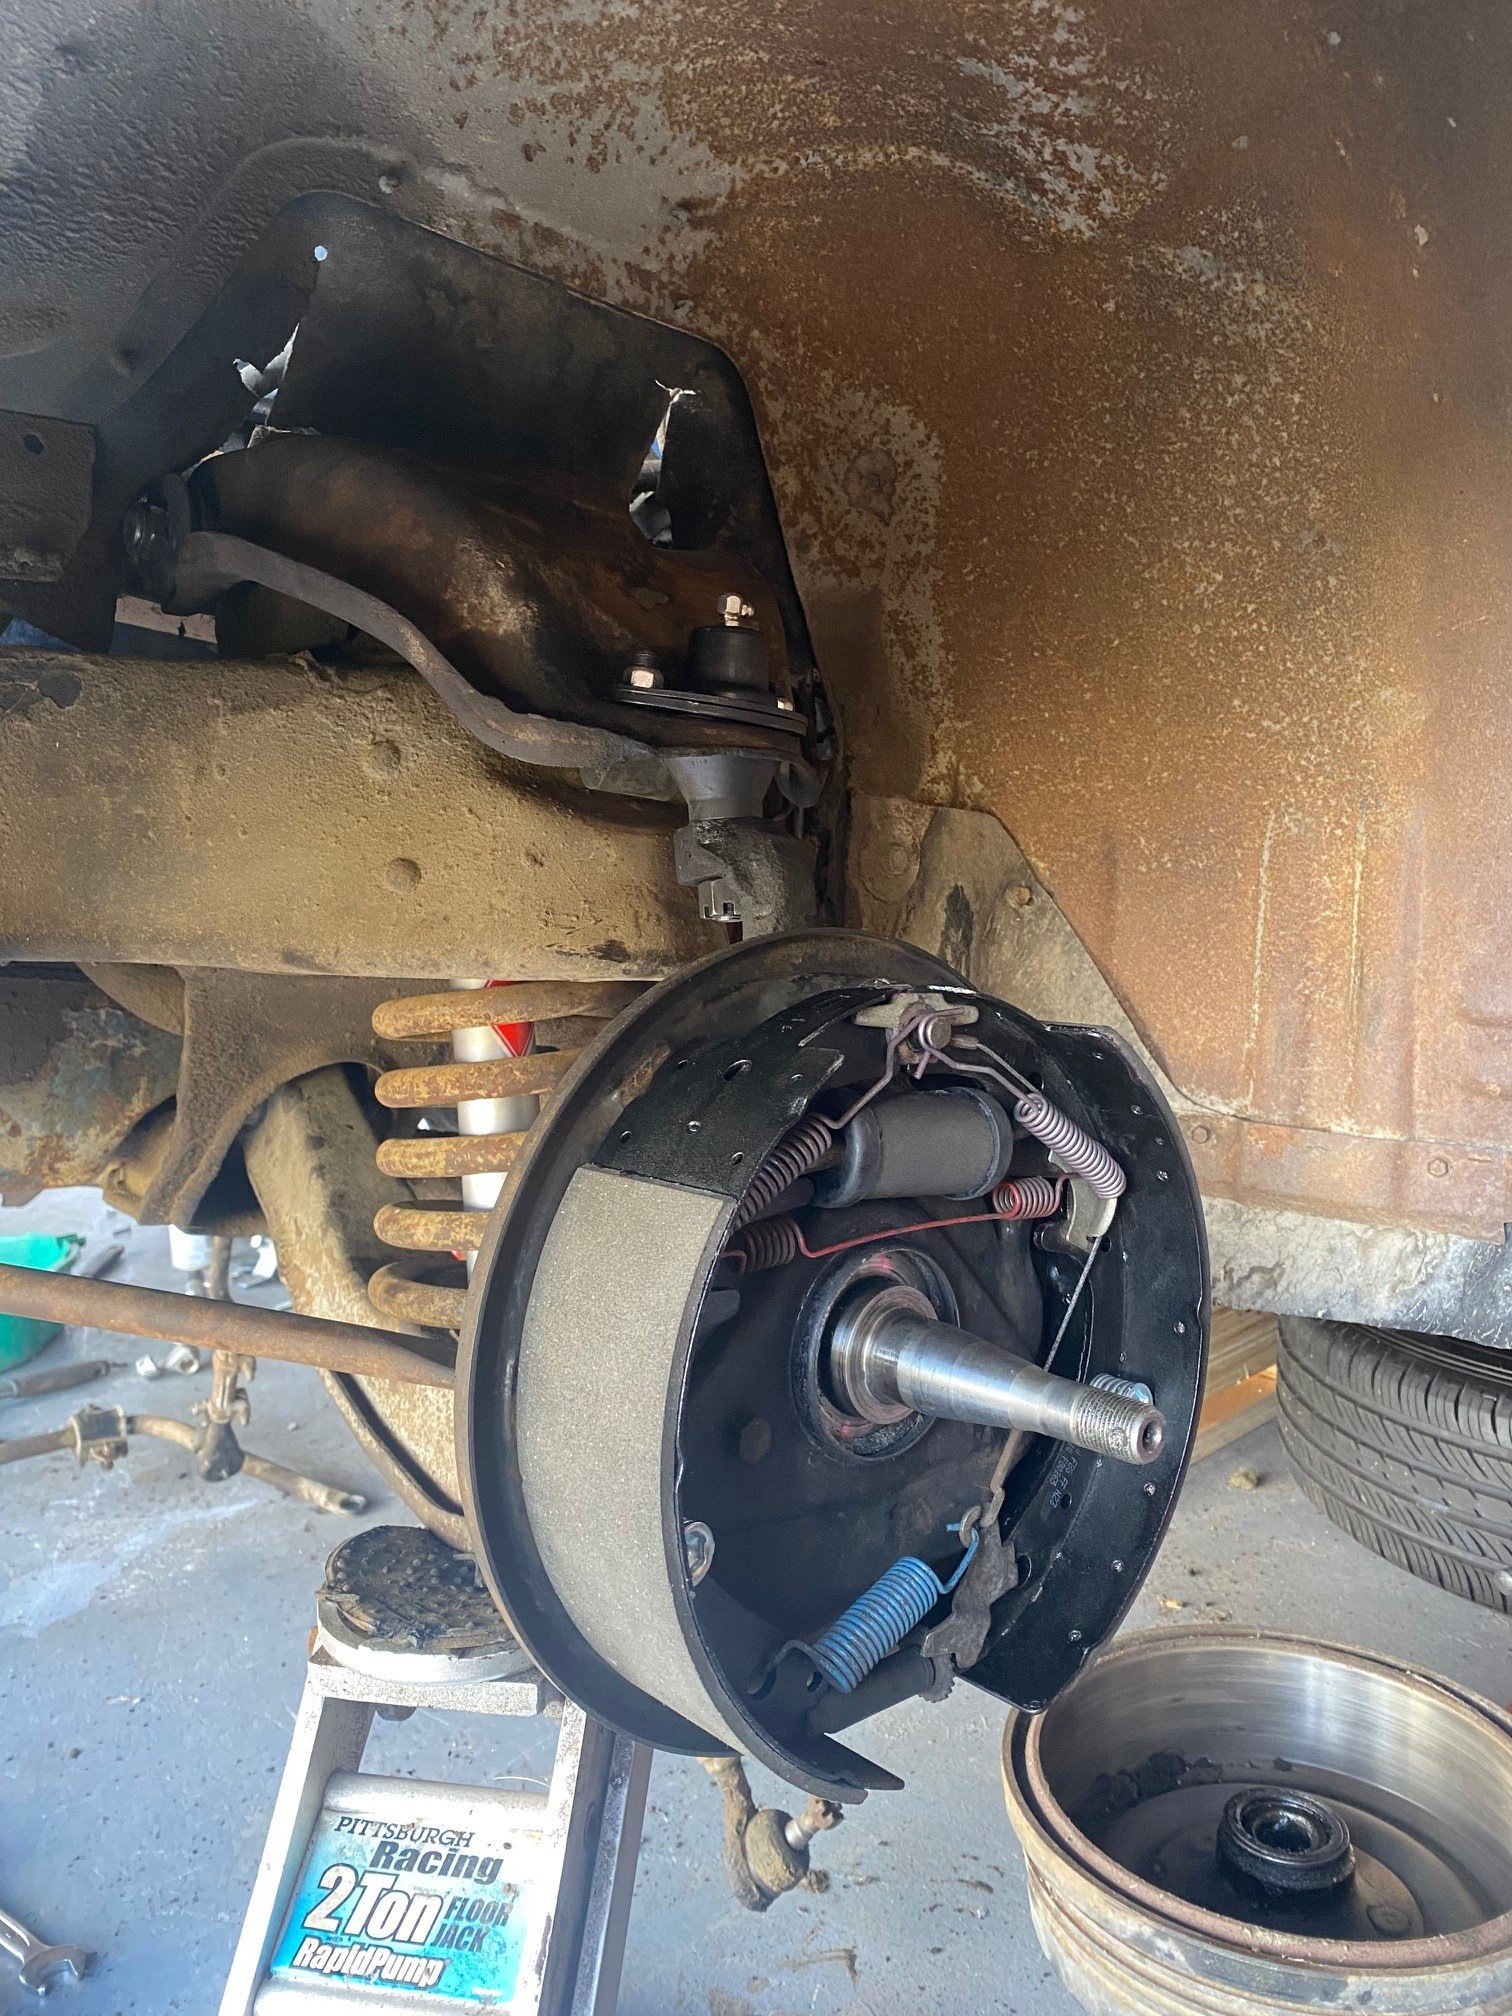
I'm still working my way through the front end. So far I've done the bushings and ball joints in the A-arms, reinstalled them with brand new KYB shocks. I've rebuilt the left front brake assembly. The right one I have had to order a new adjuster cable for, so that's on its way across the pacific at the moment. I also jacked up the rear and whipped the drums off to check if any other parts were missing, and there was a broken adjuster cable there too, so that's on its way as well. The adjuster cables were $4 and the shipping was $34, so I went through RockAuto's shopping list for anything else I could think of that could come from the same supplier without bumping the freight up. So also on its way is: Fuel pump Spark plugs (fuck these are insanely cheap in the USA) Plug leads Wheel bearing seals I was also going to get an air filter, but it must have made the box bigger cos it doubled the freight, so that can stay there for now. I've gone back and forth in my head, and decided not to paint things. It would add a massive amount of time to it to do properly, and I'm justifying it by calling it a "survivor car", whereby it can have shiny new mechanical parts but not paint.
1 point
-
Sooo, I'm now having related fun with my new Win11 install: https://techcommunity.microsoft.com/blog/filecab/accessing-a-third-party-nas-with-smb-in-windows-11-24h2-may-fail/4154300 TLDR: M$ turned off an old sharing thing, and broke many many systems shares. Steps 1 - 5 are: IT'S EVERYONE ELSE'S JOB TO FIX THE THING WE BROKE Steps 6 on are WELL OK, BUT IT'S NO CARE AND NO RESPONSIBILITY Naturally none of steps 5-6, nor 8. to 8.e have fixed it.0 points


This leaderboard is set to Auckland/GMT+12:00