
Leaderboard


Popular Content
Showing content with the highest reputation on 24/12/24 in all areas
-
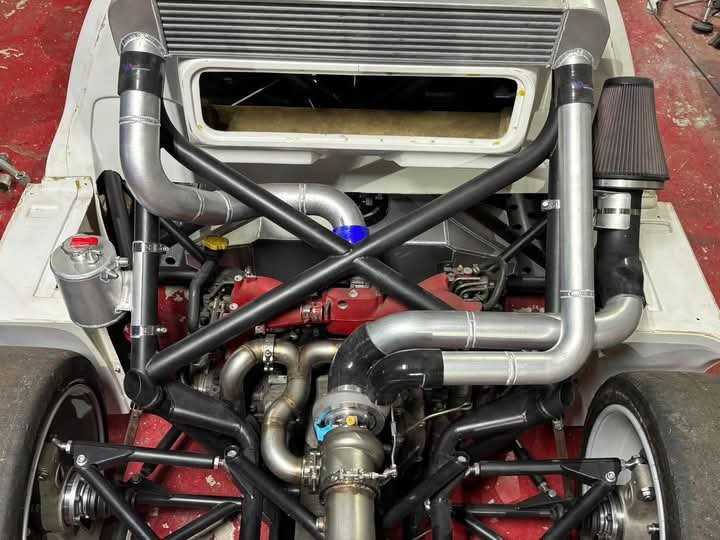
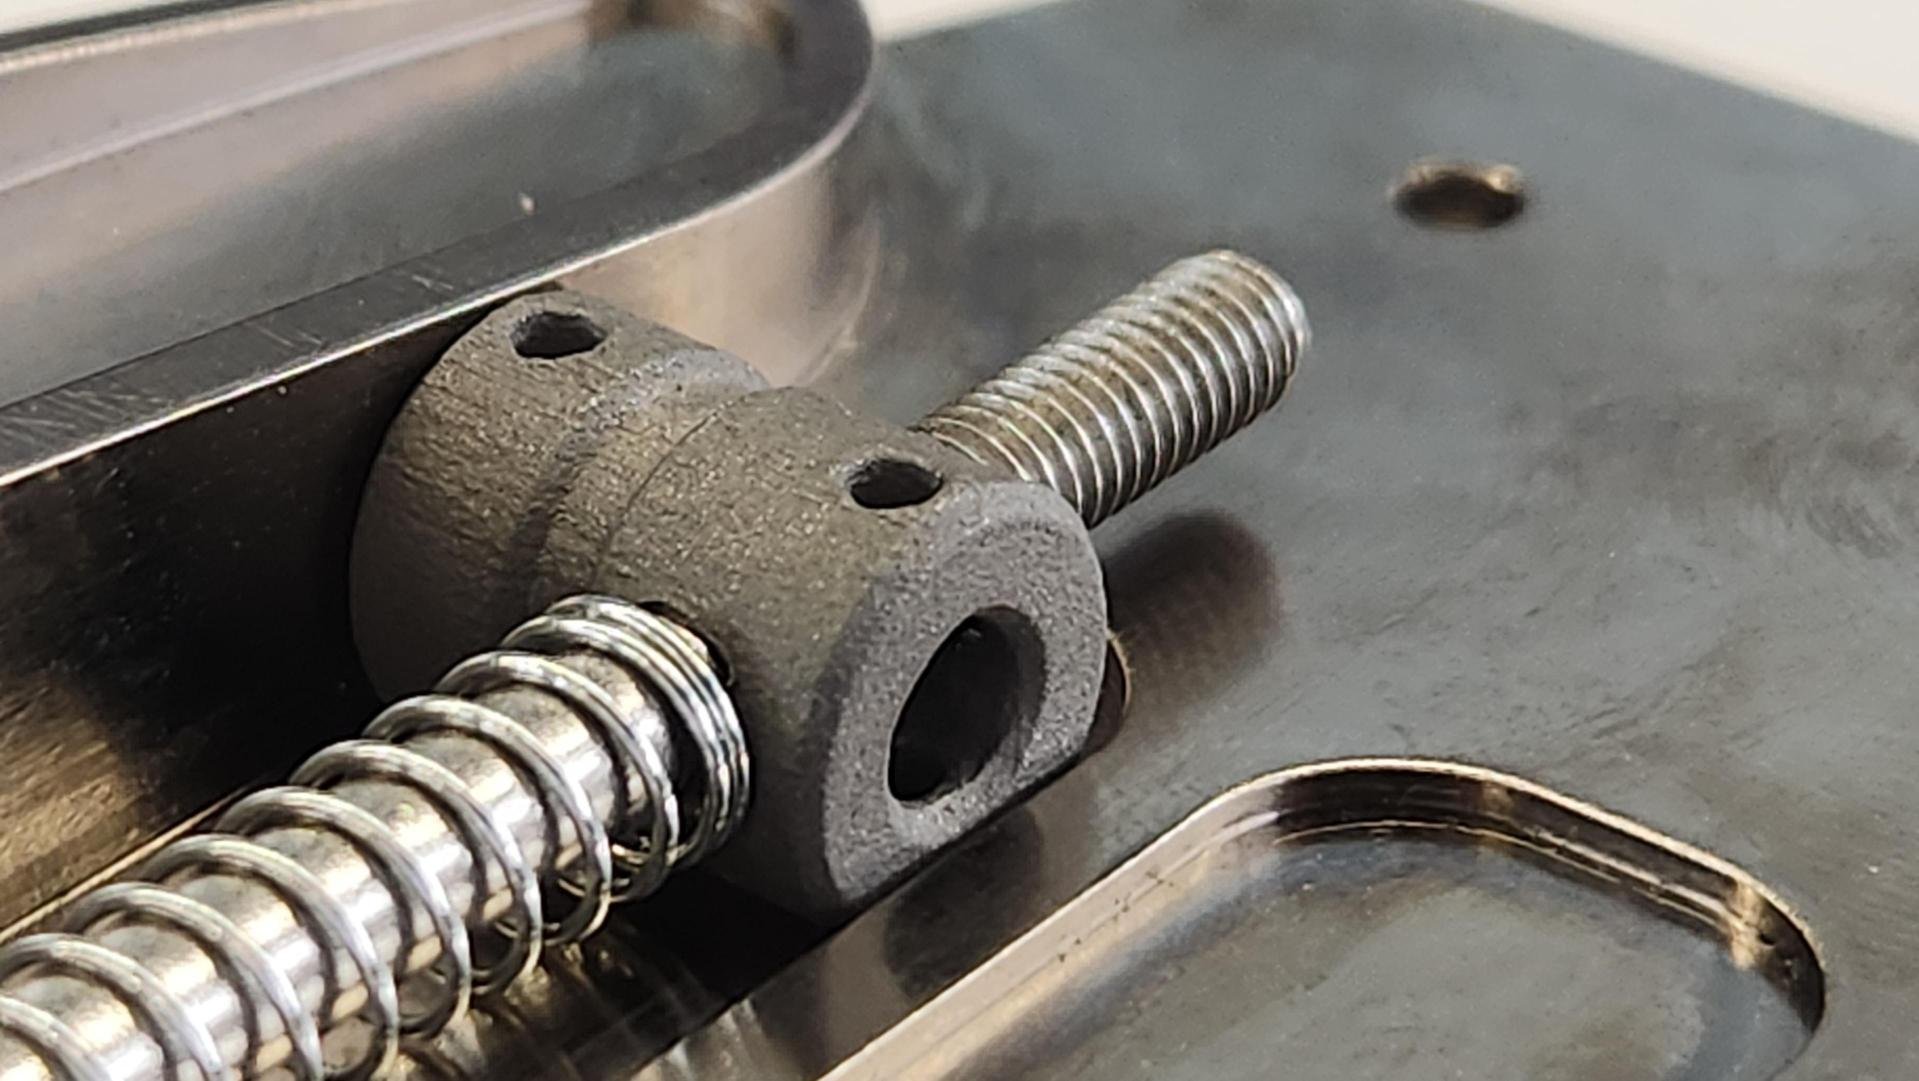
I've been whittling away on various things I wanted to repair or upgrade on the Honda engine before re-fitting it. First thing was the throttle body pulley. Even thought its an off centre progressive design its not progressive enough. So I made another and offset the centre hole a further 5mm. I had to slot the cable outer barrel adjuster bracket further to align the cable entry. I then popped the engine onto the big wheely table. Easy as because I made the engine stand the same height as the table and work benches.. Remember the nice alloy garnishes Id machined to fit on the cam covers where there used to be plastic badges. They looked lovely. For a while. Because on about the 2nd drive the double sided tape decided it didn't like heat and they both fell off onto the road not far from us. I did manage to locate one of them but it had been driven over a few times and looked a bit sad... So I had to machine up some new ones... This time round I painted them alloy silver and then sanded off the tops. They just looked nicer for it. I then glued them in place using some Sikaflex. I don't think they'll fall off now. In place.. Next job was the one I deemed most important. I discovered upon stripping the engine 4 years ago that they don't have very large crankshaft thrust bearings. They don't really need to because there's no clutch forces exerted upon the crank,with the Goldwing clutch unit being on a separate layshaft. It was something I had never thought about before getting the engine and its played on my mind the whole time. I consider it the weakest link. I may well totally be a non-issue but I'd rather see if there was a way I could help it last. There's about .006" of thrust movement stock - measured as such... I had thought it out and came up with a simple solution involving some expensive, hard, slippery engineering plastic designed for high heat. This was sandwiched between the rear engine plate and the back of the flywheel and had just a few thou clearance so being a backup thrust bearing when the clutch is pressed. Help share the load I thought. The plastic thought different. I knew it had decided to leave the party early because I could see its melted edges through the bellhousing drain hole. But how bad it was I wouldn't know until I removed the flywheel.. lol... Ha. So that didn't work as expected then. Version 2 time I've been thinking about this a while. I looked into very large, thin section thrust bearings. Found an ideal item in the UK but it was 1300 quid. Back to my drawing board. I came up with an idea that uses $10 bearings. I needed a big chunk of alloy to machine up. Local alloy stockist no longer sells 16mm alloy sheet cut to size. They want to sell me a square metre. I went to a Nelson based fabrication outfit that has a water jet and the nice fella gave me a bloody large section of 20mm alloy. I only barely fit into the frunk of my imp (so improving the handling no doubt..) Cut it to size in the trusty table saw that has amazed me.. Into the lathe where I created a massive amount of swarf. Milled out some slots.. Drilled some holes. Very critical this one! They had to be bang on. Machined up some tiny pointy domed sleeves for the bearings.. Assembled it (notice I'd even got out my surface table for marking duties) I shimmed it out, testing and measuring until I had about .005" thrust. Just enough so it'll only touch when the clutch is pressed in. Finally in place... The other main job to do was sort out the reason why I had ended up removing the flat six in the first place. That leaking clutch slave cylinder. Even though I had made an alloy plate to support the mounting face it was not burly enough. This coupled with the fact that I had already burst the slave cylinder previous and its was never squished back together as neatly as it could be. So I reluctantly shook the moths out of my wallet and bought a brand new slave cylinder. I than machined down the mounting points I'd added to the Subaru transmission to allow for a steel clamping plate. I don't expect to have any issues with it now ! I then flipped the engine on its end and gave it a clean around the head gasket seam on the oil return galleries. Its always weeped a tiny amount of oil on both sides at these points... Not enough to drip but enough to slowly make a mess and run down the sides. Not very easy to clean and seal with the engine in the car. Now's my chance. I masked the areas.. Then another Sikaflex product was used.. Sealed up.. I'll see how it goes. Another job that I decided to leave was cleaning up the window on the Mandolorian spaceship. Now that's not something you'll hear many mechanics say But its getting a bit oily inside from general fumes, as I expected it might. I undid the machine screws holding it down but it wasn't going to lift off easily. The foam seal has stuck it in place. I knew if I forced it would crack. Maybe a job for another day. ot important now. At least they are still visible and the leds still light it up nicely. Exhaust box had one baffle that was vibrating at idle. Very annoying. So took it apart and fixed it. Gearbox mounts were knocking the subframe so I gave them a tickle with the cutoff wheel and welded them back up. The gear linkage rod linear plastic bush is something I want to improve in the future with a proper linear bearing and some seals. But for now it got a clean and some grease. I also installed a hotter thermostat. Up from 82c to 88c. So with these jobs done and the weather forecast of two days of rain I set about removing the Datsun engine. I timed myself and it took about an hour because the rear valance has to be removed. swapped the driveshafts across. About 45 minutes because bearings need to be swapped too. I might get some new bearings so both axle sets have their own. Then bolted the Honda in place. This took 15 minutes. Smug faced me then realised I'd forgotten to attach the first part of the gear shift shaft. Whoops. Back out, fit shaft, back in. Plugged everything up and went for a starter turn to build up oil pressure. But starter kept blowing the 10amp solenoid fuse (I'm so glad I actually made a circuit just for the solenoid now!) I'm not sure what was happening but I took the starter out stripped it, cleaned it, pondered it, reassembled it and it then worked fine. Now a engine turn over. Whir whiiiiiir whiiiiir whiiiiir. Something wasn't right. It should turn over quicker than that! Took the engine out again. Removed the box. Engine was hard to turn over. Removed clutch and flywheel to discover that the clutch bolts were just protruding through enough to rub the alloy thrust bearing 2000 plate. Whoops. So I clearanced the plate, flap disked the protruding bolts down. Reassembled and all good. Bolted the lot back in, tested the starter and this time its turned over fine. With the clutch bled, the fuel lines etc attached I started the engine. It started up mint just like it was running yesterday. Tested the clutch. The thrust bearing 2000 rollers made a sound not unlike a noisy clutch release bearing and initially I was thinking 'well that won't do!' but they soon settled in. Still a noise but I know what it is and why its there. Better then potentially wearing away the crank thrust bearing So with the engine all back together and in place... So we went for a drive. Coolant still doesn't get as hot as I'd like to see but it could be that the pump controller had reset to the default so I'll have a play there. Otherwise get an even hotter thermostat. The engine runs fine. The new throttle body pulley makes for much easier driving off from standstill and smoother when crawling through our local village with the many speed humps. But the fumes from the exhaust getting sucked into the cabin when we lower a window is terrible. Its the number one fault now. I have tried blocking off the through flow vents sited just above the rear window but its not fixed it. The gearstick base plate has a gap - could it be possible there's a low pressure zone under the car and the gas can creep forwards along the tunnel and enter there? I'm going to design and make a new exhaust muffler setup. I'm still not happy with the exhaust sound and low rpm, it still drones and only really sounds like a flat six when above 3500rpm. I know these Goldwing engines can sound much better. More Porsche. Less Cifero. Possible benefit will be less fumes if I go side exit exhaust. The Datsun has a side exit and its much better with regards to fumage. I'm also not entirely happy with the look of my current exhaust box either. So I have taken some measurements and will start doing some design sketches along with more research.15 points
-
Already have a head gasket set and new valves delivered to me while I'm in Melbourne for the Xmas holidays and will piece it back together when I'm back. A few weeks back I fitted some RS-R 'Down' springs I ordered from Japan a while ago, as well as refitting the missing fog lamps and bumper grills. Not slammed but definitely better than the sky high look it was before, and the ride is much firmer too.
 8 points
 -
And finished machining, put immediately into its case because im terrified of marking it before the finish goes on. I have plenty of finish sanding to do, and then a lengthy and involved process to apply the gun stock oil i have selected. but i wouldn't want it any other way, something this beautiful deserves the love and attention. I had better get to practicing so that i may actually be deserving of such an instrument. Once again, i cannot thank Nick enough.
6 points
-
Well picked up the car yesterday from Rocket. Dan and the team have done a killer job. Ended up being quite a list of stuff to do: - Modify gearbox mount to suit Tremac TKX gearbox which required raising the tunnel 50mm to get angles right - Raised driveshaft tunnel 50mm to get clearance -Modify driveshaft to suit TKX tailshaft -Raise under rear seat area an behind fuel tank for diff head clearancing -Make intake manifold, with custom DBW mount -Mount airbox and modify intake feed to line up with airbox -Mount pedal box and reservoirs remotely in windscreen cowl -Modify diff and rear shock mounts -Modify exhaust to tuck it more - Few other minor bits and pieces Because we had raised the tunnel and diff head area there wasn't much extra work to allow the car to be a heap lower. So we ended up notching the rear rails, notching the inside edge of the rear tubs, modifying the rear tubs (Factory half the tub is flat and half tapers down approx 3 inch from the centre to the outer guard lip) so its flat across the top. Now have heaps of clearance at the height its at and nothing rubs which is awesome. Really happy with the outcome, car looks a heap better at the height and starting to come together real nice. Few bits and pieces to do over the holidays then back into it next year!
6 points
-
I couldnt help but lay some of the hardware overtop to see how its gonna look. Bloody amazing is how! i am tossing up very lightly staining the pickgard area before the oil goes on. 50/50 at this point.
4 points
-
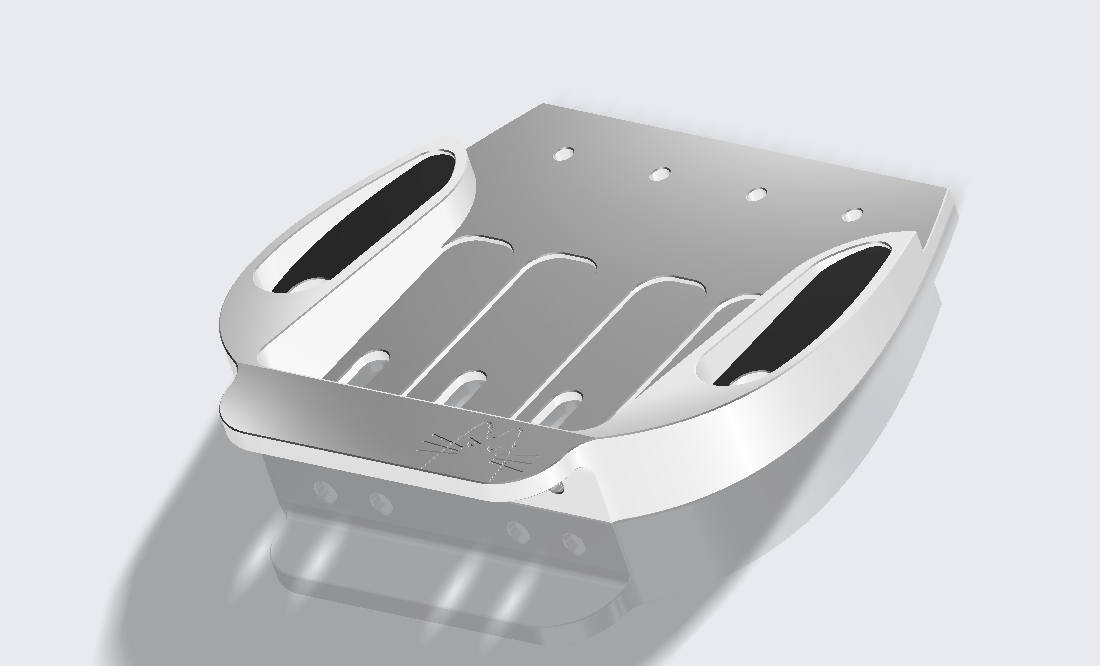
This pic is from the seller's ad on the tard. The water pump leaks a bit quite a lot, hence the drip tray under it. The seller has supplied another (equally old) water pump which is supposedly in good condition. I will fit it at some point. Still need to take a drive to Te Anau to retrieve the loader arms and bucket. Anybody got any helpful suggestions for polishing the rust off the hydraulic ram spears so they don't chew up their seals when I start using them? There doesn't appear to be any pitting, just surface rust. I do have some spare rams off another loader that may or may not be the same so will look at swapping them over if I can't clean up the ones that are on it.4 points
-
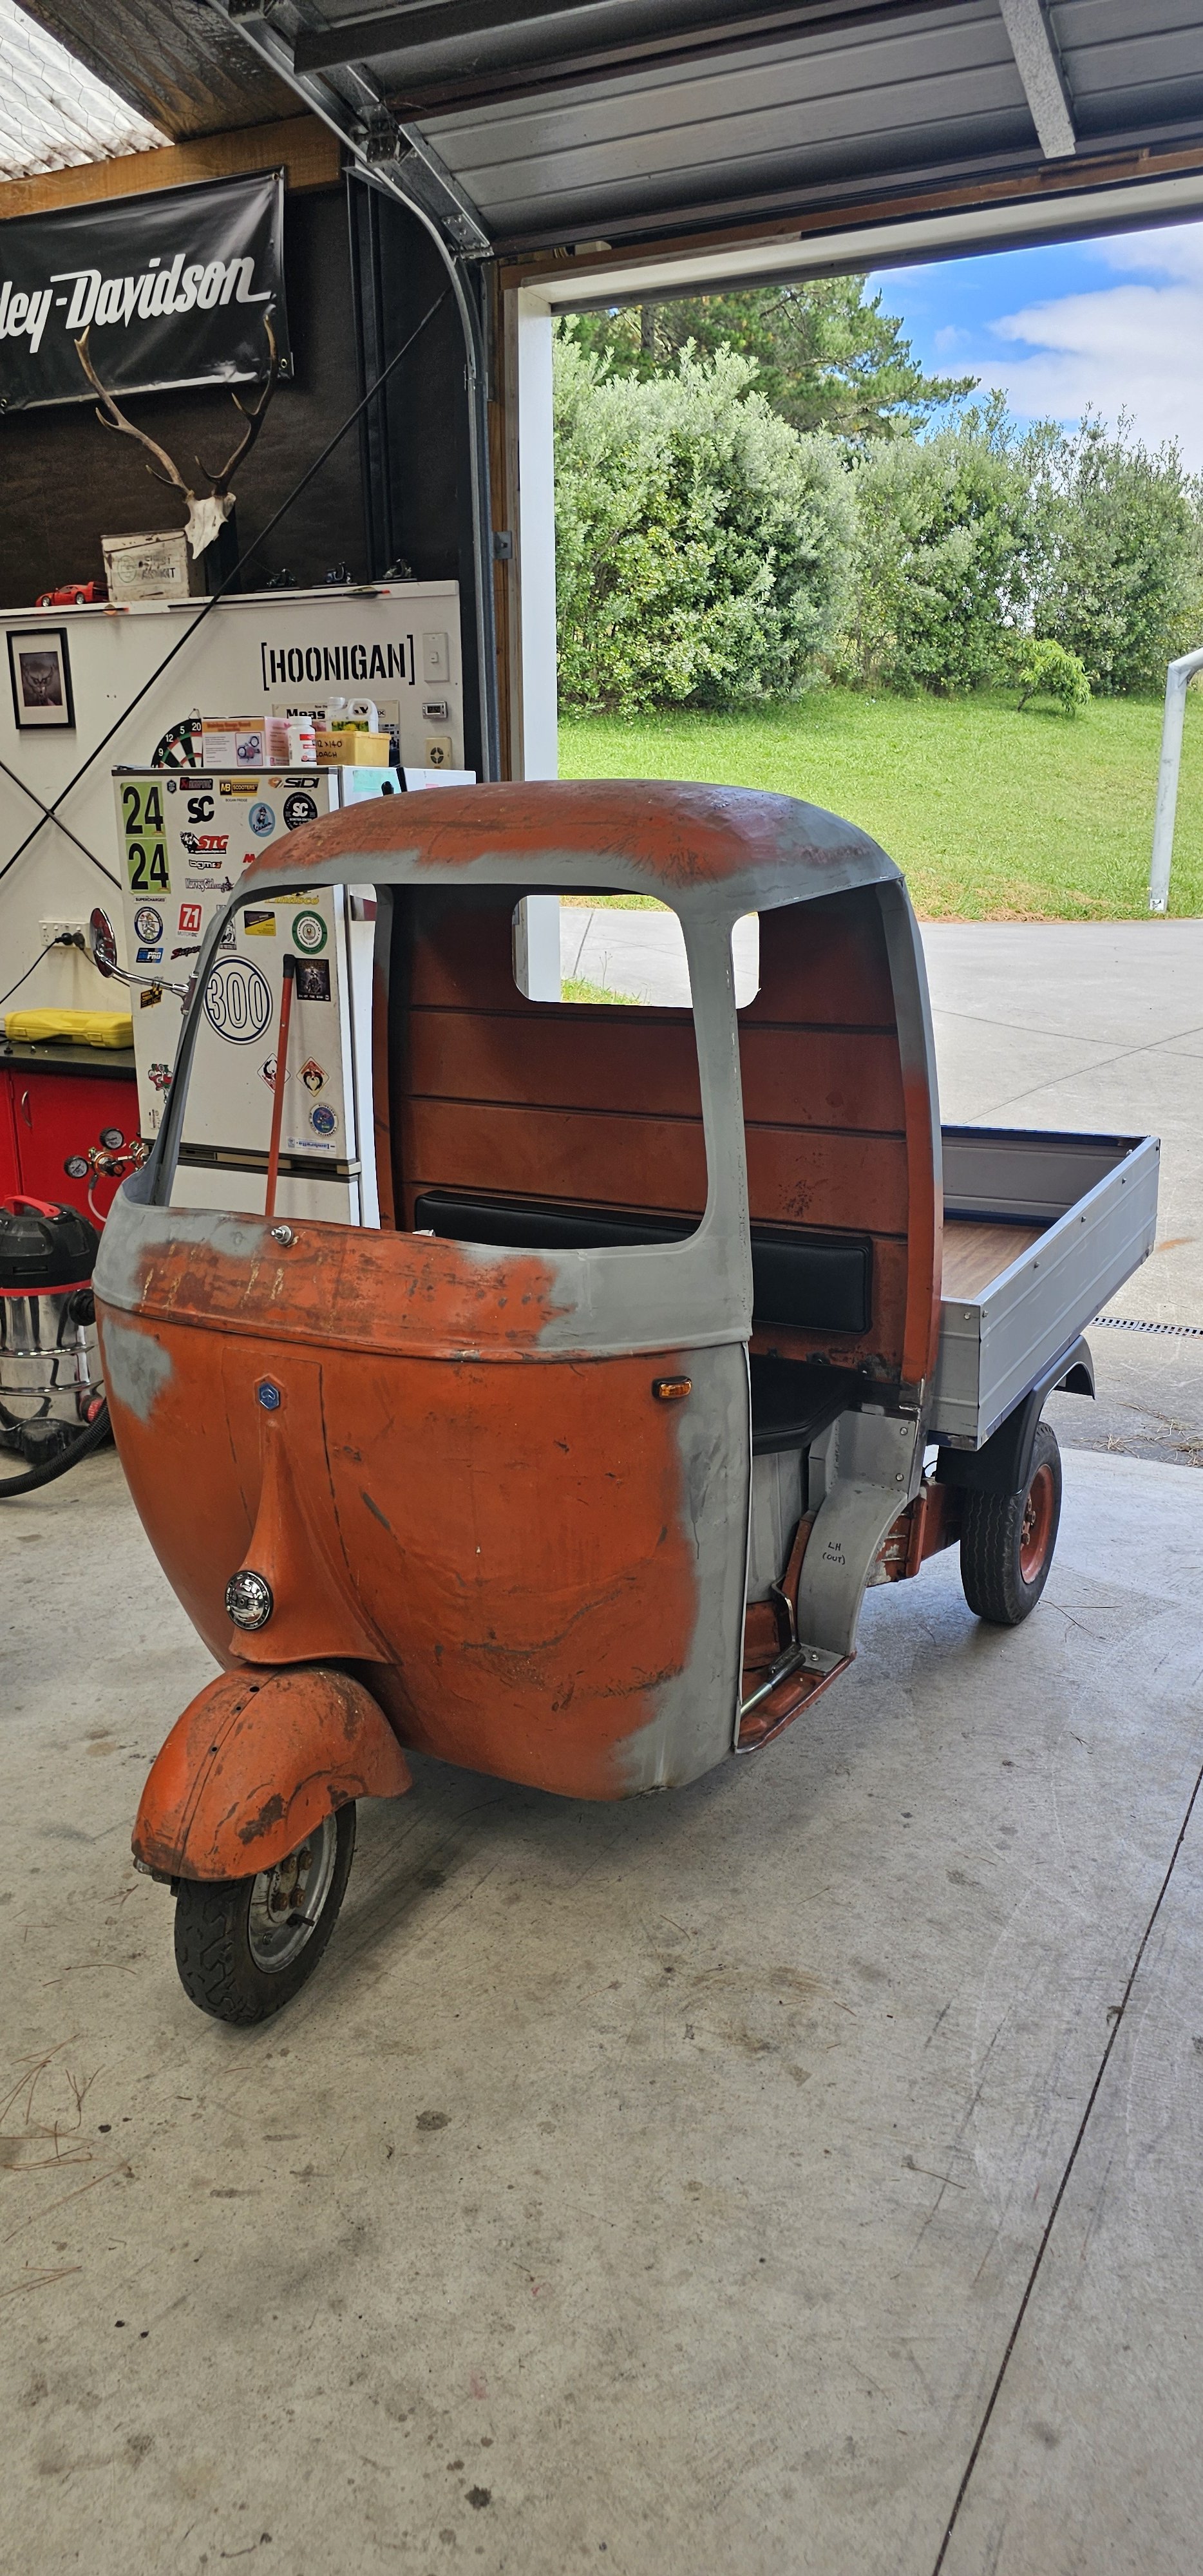
Chonky You can see why Vespa is wasp, and Ape is bumblebee in Italian.
4 points
-
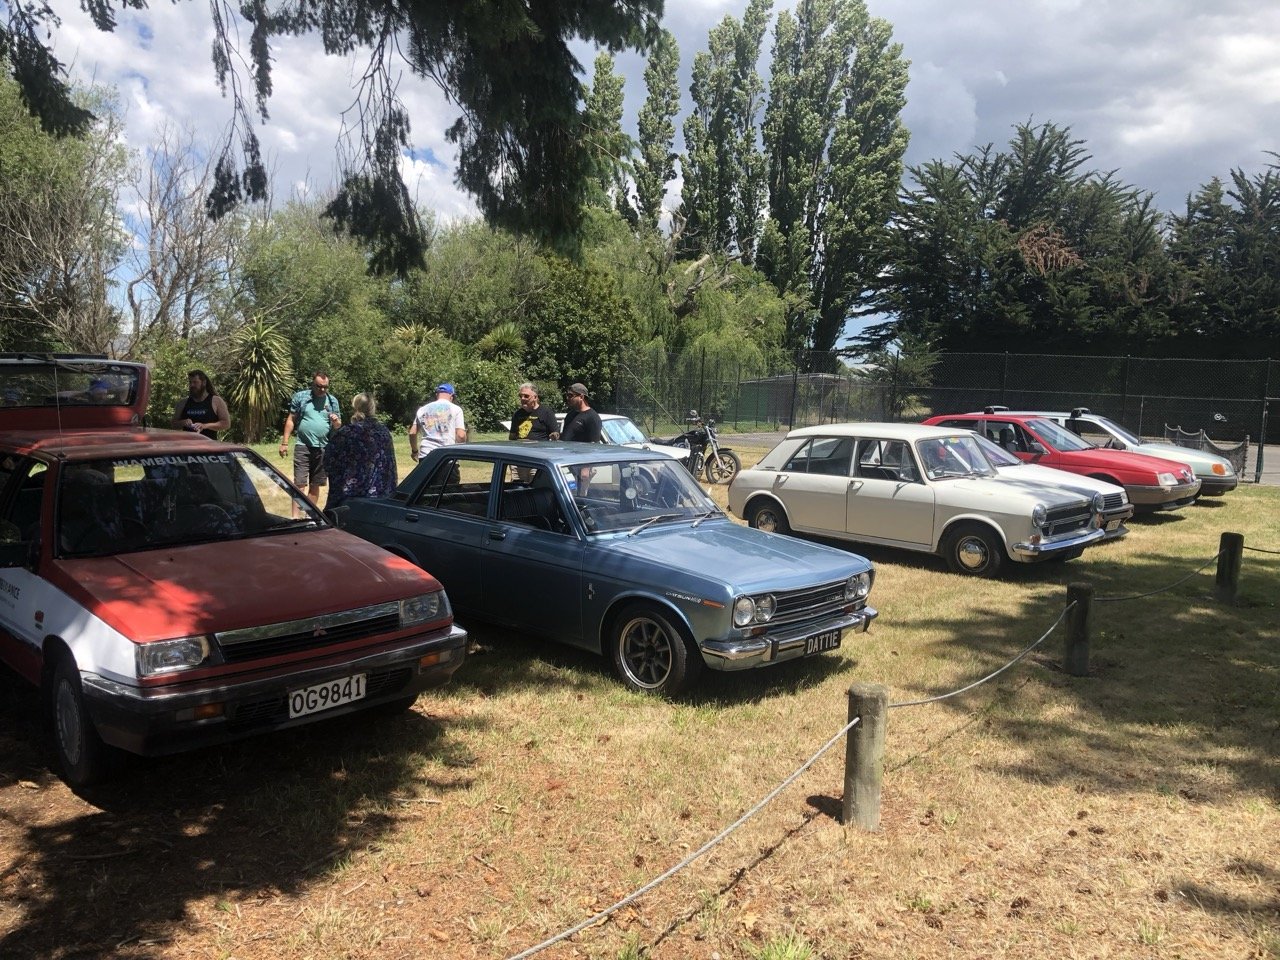
Back in our bogan days:
3 points
-
Let go of your wallet.3 points
-
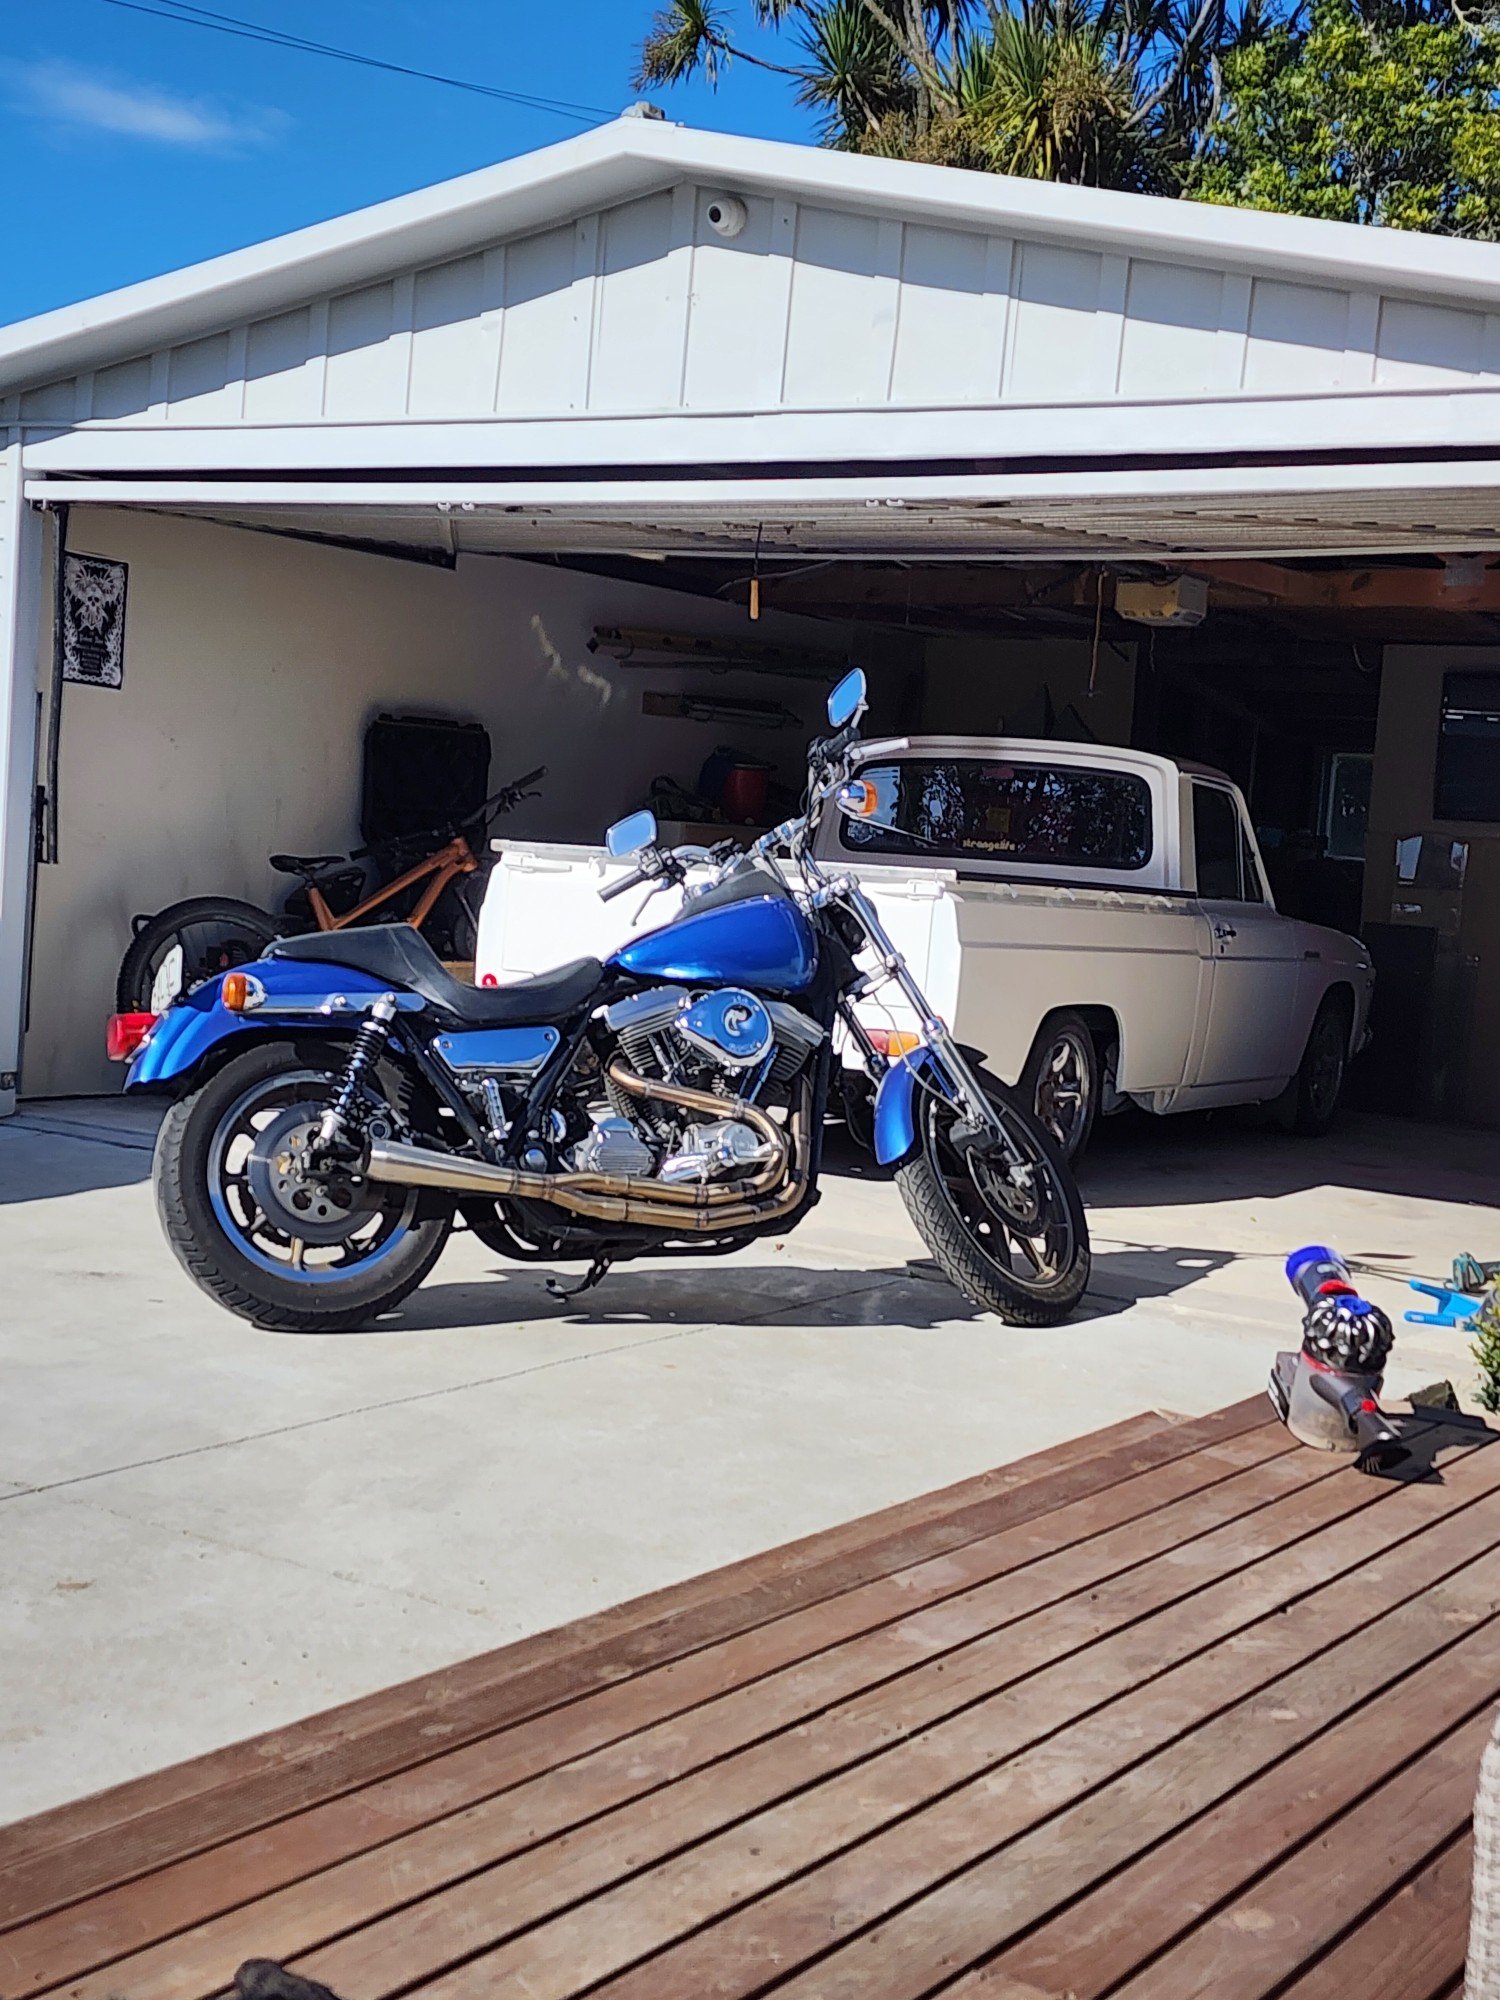
Sold the DRZ on the weekend, and went to look at this. I mean I bought it because I'd already sold myself on it, in my mind. Because that's how we emotively buy vehicles. It's a 2019 350 EXC-F. Big tank, switchable maps/TCS, 136hrs, and.... short guy low suspension (there's a theme here). A few other issues but nothing major, just KTM quality gripes and some cosmetic things to sort. Overall pretty chuffed. Goes like fuck, revs to the moon, will no doubt cost me a packet and get me into lots of strife off road. Ideal. Good photos to come. Already ordered a few key accessories and booked in a suspension revalve/spring to suit my heft. 2019 KTM 350 EXCF Phone (5) by Richard Opie, on Flickr3 points
-
I've already done it three times. It's more effort than you think, and assuming they're still doing jalopy racing, it kinda helps to have an engine that's running properly. I was more thinking about going along as a spectator.
3 points
-
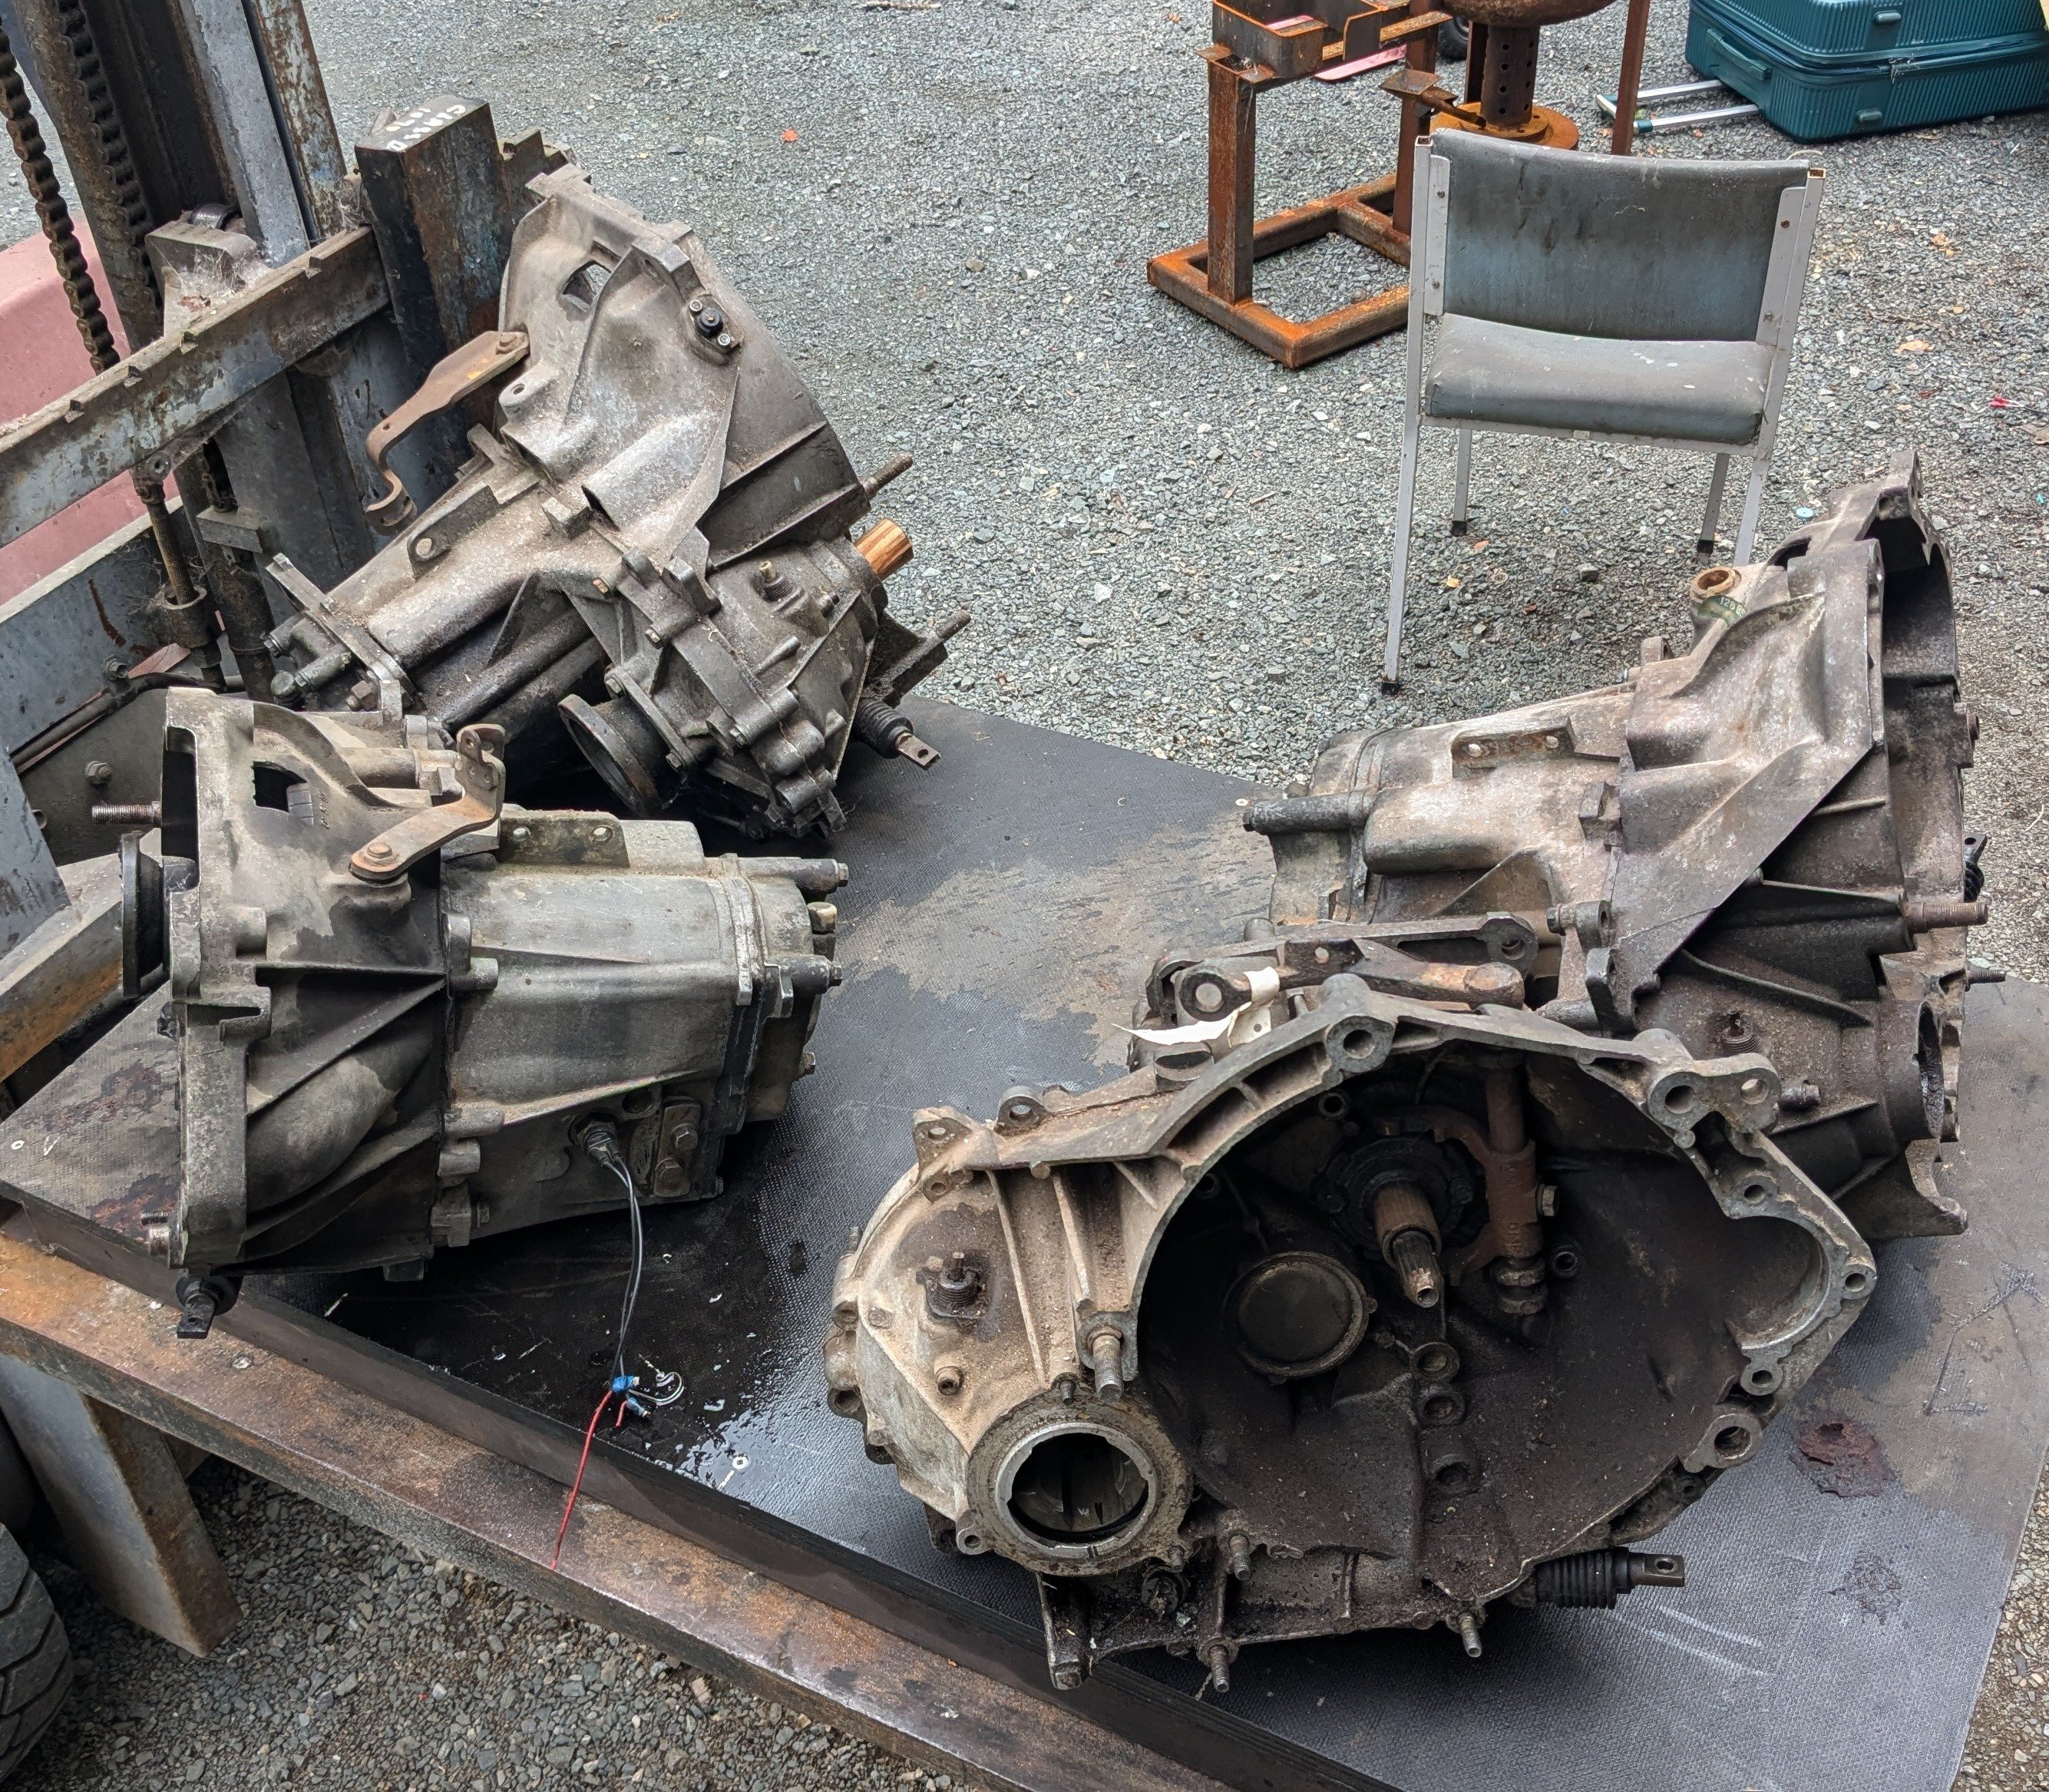
As it's kindof the hols for me I figured I may as well implement my gearbox backup plan, there will be family stuff today, but later this arvo I'll take a situational. Edit; did the deed. The old box casing was still leaking a bit even after Alex welded it, but this was probably my hacked bung design IRL. Then there was the broken keyway situation, so I swapped those bits out of the second spare box. The non broken gear cluster had different bearings but they swapped over fine. I might check the diff backlash but maybe Ill just send it.
3 points
-
2 points
-
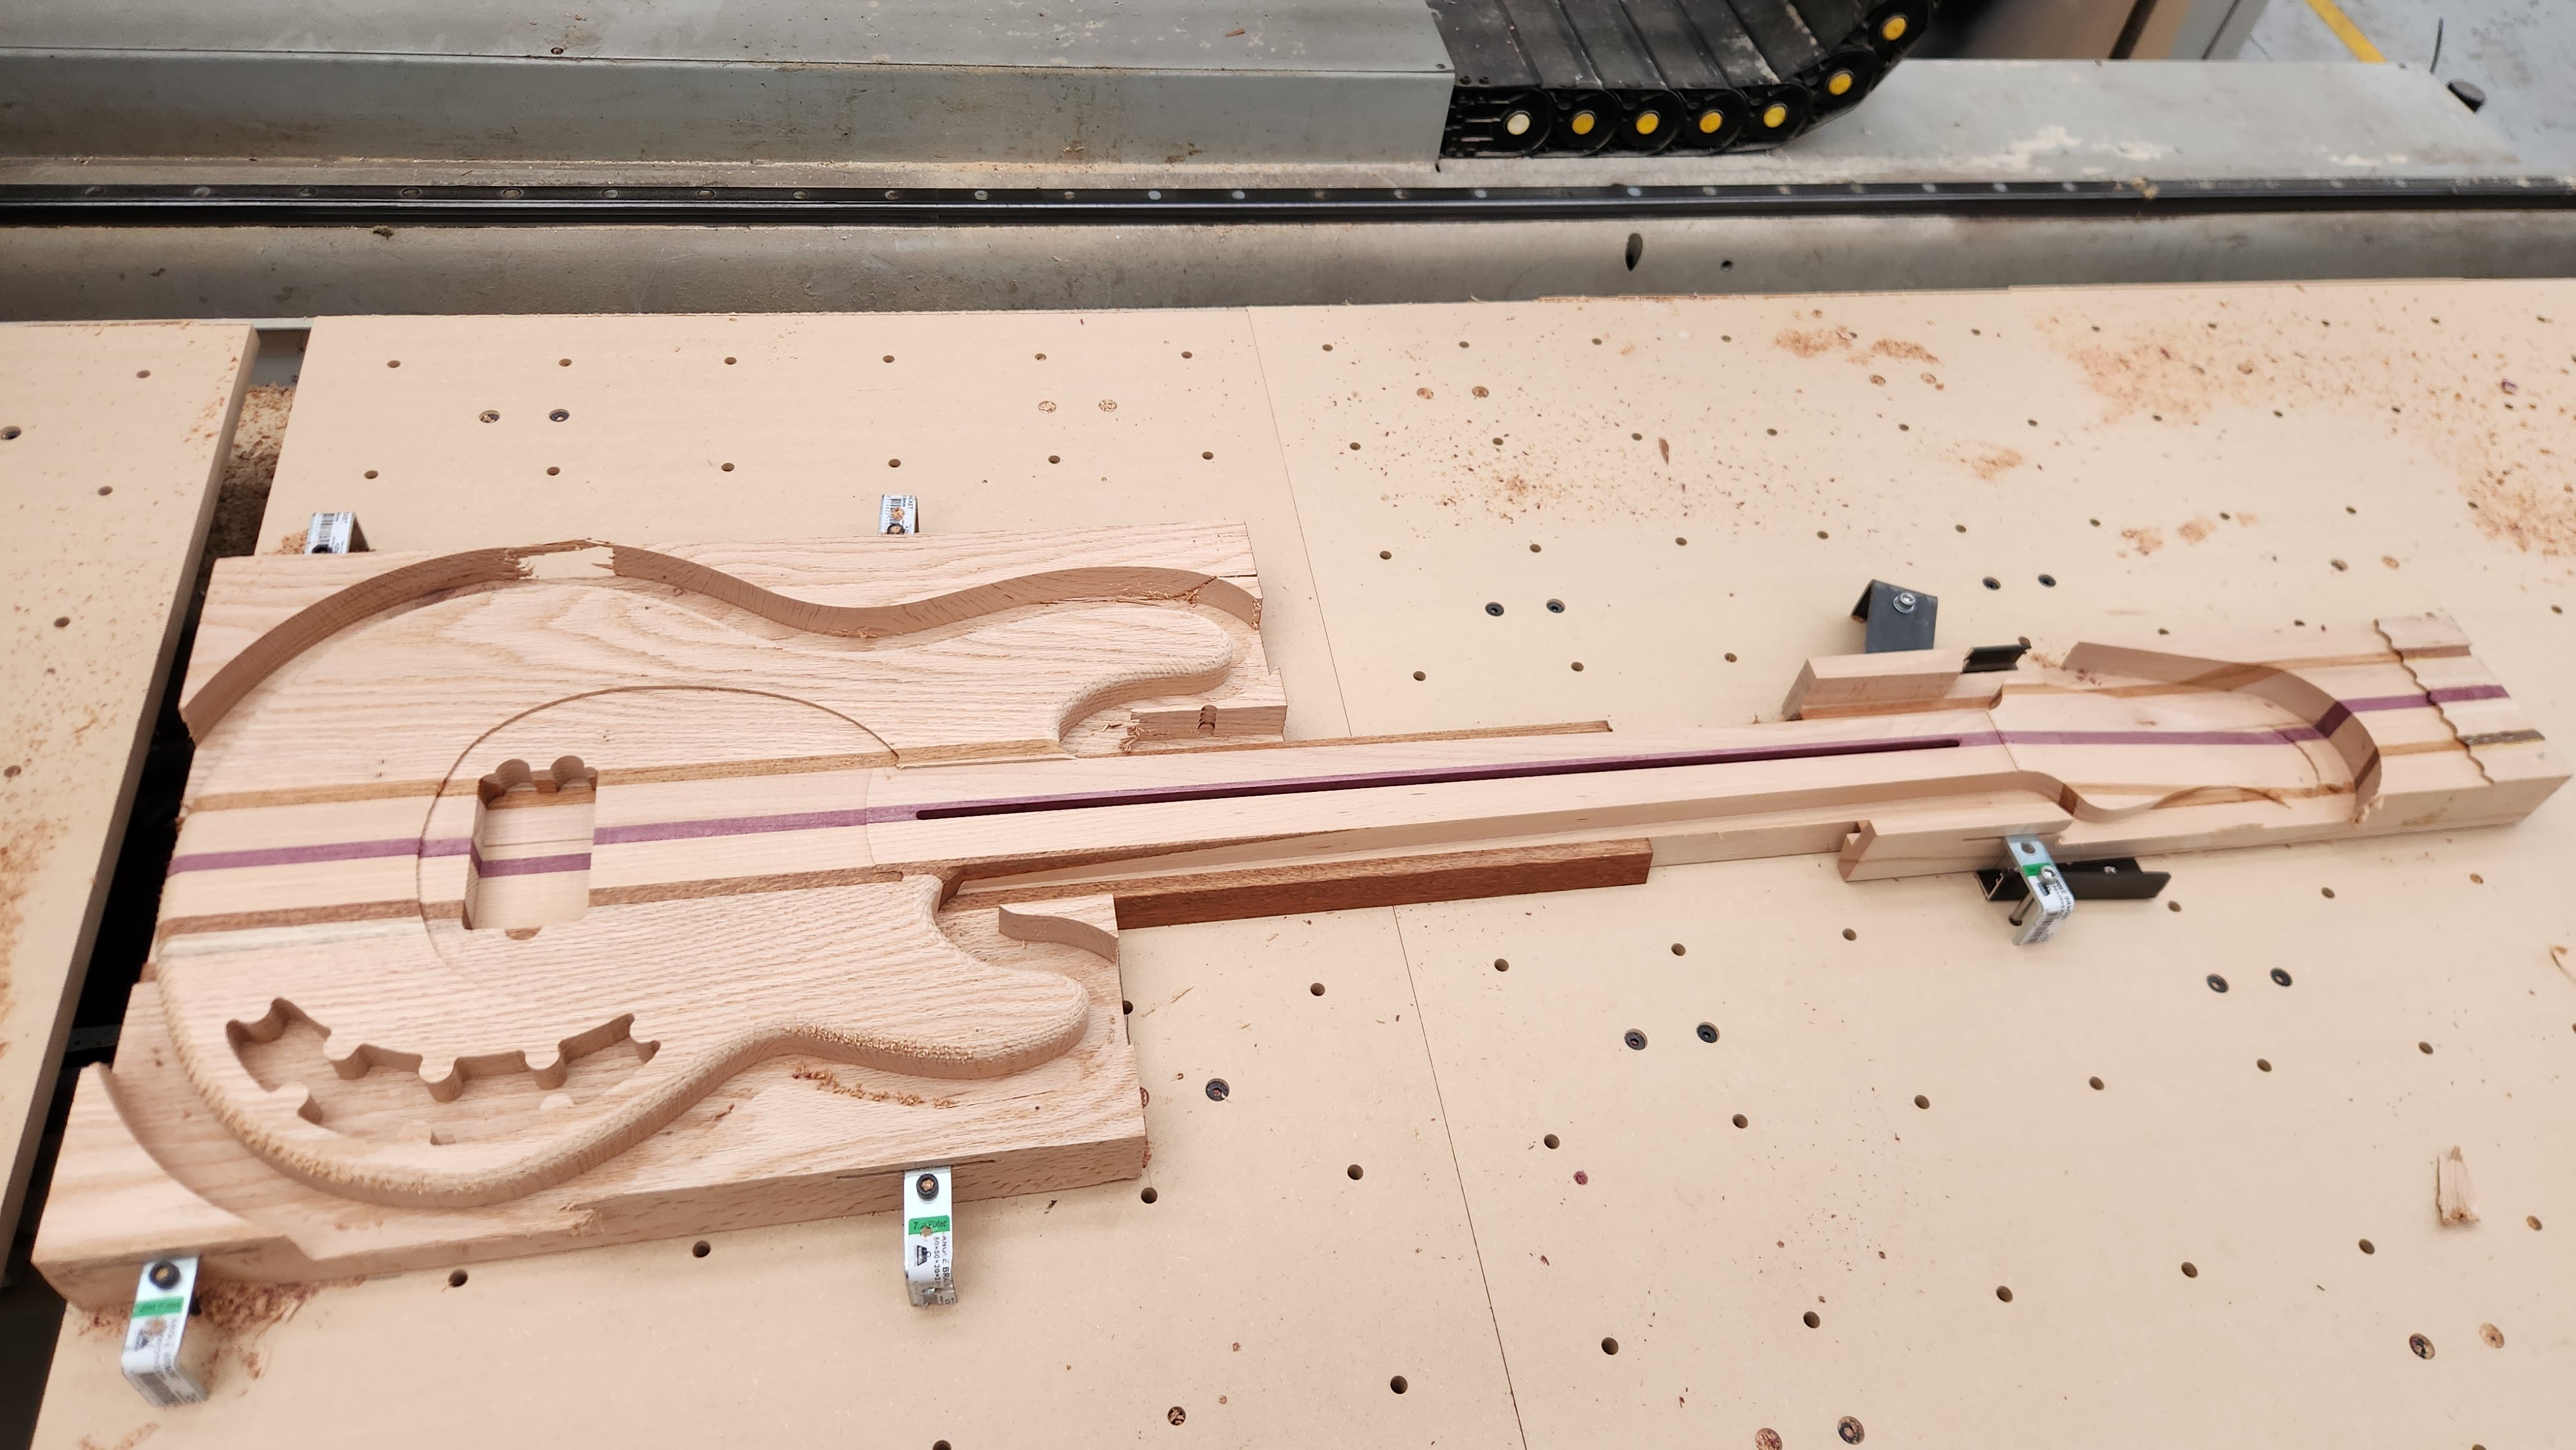
over the last couple of days @NickJ very generously operated his awesome and massive CNC router, aswell as handleing the programming for the cad model i put together for my Stingray. we first cut one out of MDF (which will now make cool shed art) and then set to attacking the hardwood. It looks incredible. i have no words to describe how happy i am with it, and without the help of others, this wouldn't be possible.
2 points
-
Nah still have it . Havnt been riding it a huge amount but going to ride quite a bit over the Christmas break2 points
-
Hang on, we just went thru this with Pog Pumped mini hydro? Cobble up a huge cheap brass and iron battery out of scrap? Crack H2 and store in a rubbish-bag/gasometer. I hear the (other) nerds over in EV/Climate reckin old Leaf batteries are good for houses (Don't need 60kW). Charge your neighbours EVs and make CA$H MONIES?2 points
-
You would scarcely believe it but I have a van update. I had a wof booked today, I was going to take my daily ute in but thought bugger it, i'll take the van in - it needs a good run and i'd rather the ute didn't fall due just before xmas. Didn't fly through but pretty good for a 70s BL product that has been essentially parked up for 6 years. Brake lights weren't working - the switch had died during hibernation. It exploded into shards of mediocre 70s plastic upon removing the wires, I had a spare - 3 whole years newer so swapped that in. They didn't like my radiator blanking cap as gas cap - So I guess i'll find a fancier radiator cap, the filler neck is literally a radiator neck - leyland build efficiency. Only other things were headlight aim and front brake imbalance, they are discs with sliders greased & pads changed maybe last year or the year before with practically zero mileage since - I think they just need a bit of exercise. Should get a sticker early in the new year with any luck
2 points
-
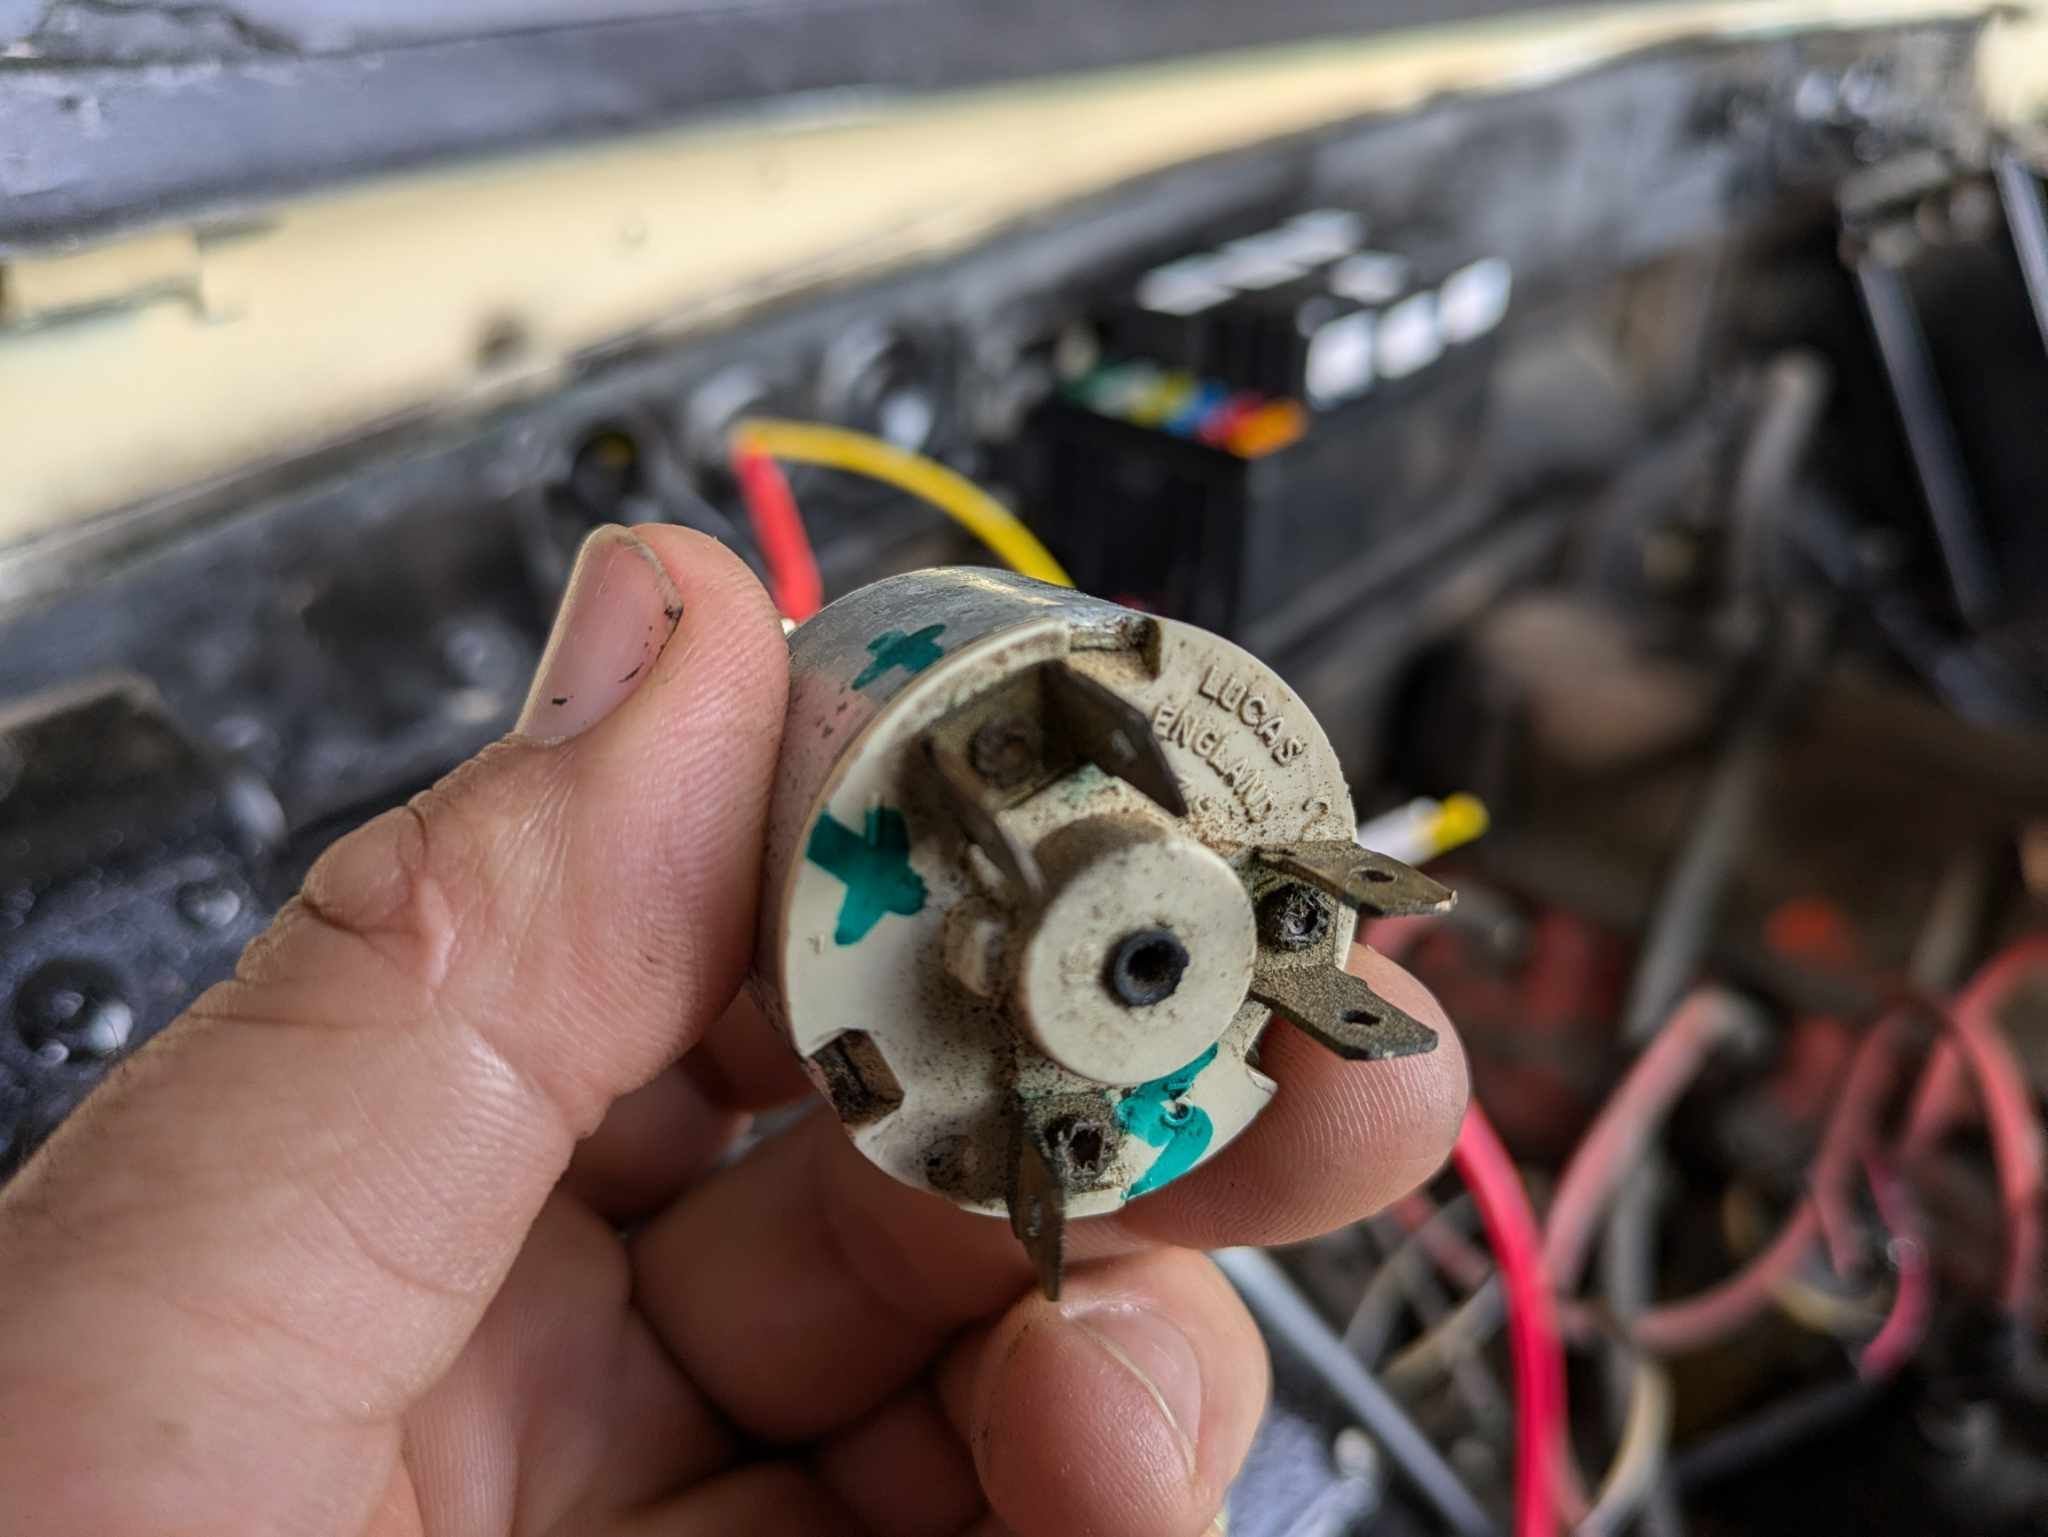
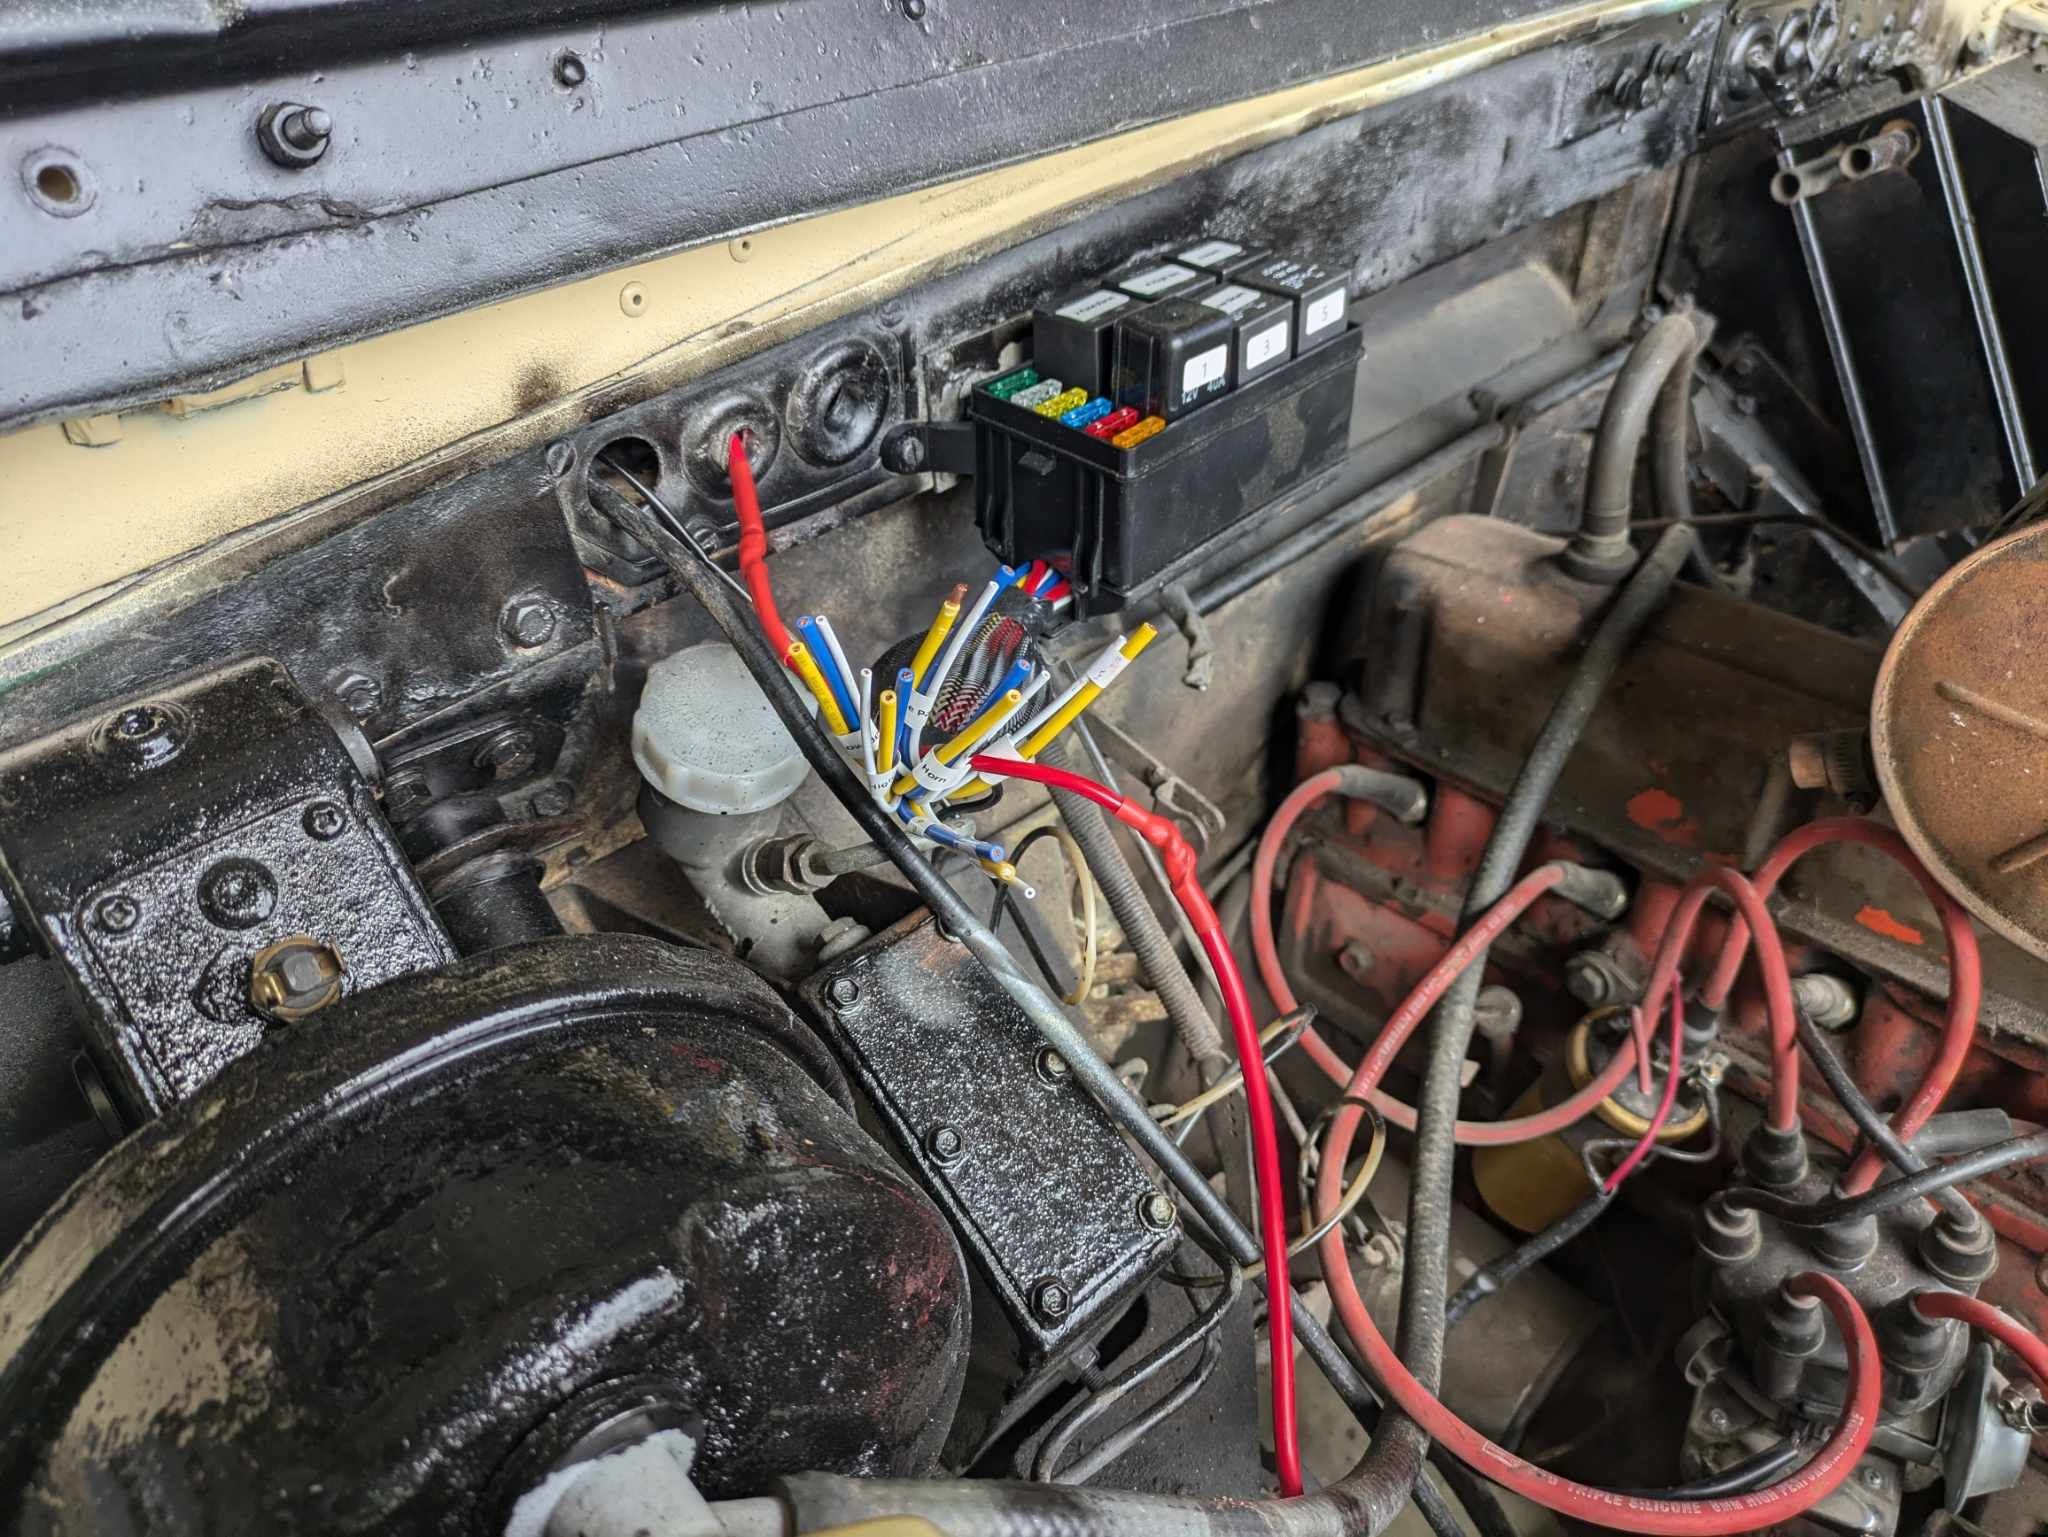
Pulled my back a couple of months ago (herniated disc) and triggered it badly on the weekend so am on light duties in the shed. Which is my excuse for having a bit of a mind blank this morning. Just sorting out the wiring for the ignition switch so I can get the Landy started to park next to the boat to work on concurrently. Just trying to think what else I need coming off the ACC switch on the key? Thinking coil, gauges...anything else whilst I'm down there? As an aside this is how I do my looms these days from scratch. I use a relay block in the engine bay coming from a circuit breaker and then a fuse block inside the cab for the basics. Dirt cheap and the relay block comes pre wired so I mostly just have to run trigger wires through the dash really.
2 points
-
Well this was todays effort And buttoned up after a few hours.... It started just fine and appeared to have gears so after tea I took it for a quick spin, but it is good news and bad news. The good news is that the vibration appears to be gone and it is running well.... The bad news is that the gearbox is not super happy, it does have all the gears but its a little bit crunchy into third. But this is kindof expected for these boxes and it is a bit better than the old one. But this one is additionally crunchy down into second, plus as a bonus 5th has a high pitched whine that is almost a whistle. I guess I may have fucked something up or missed some wear I have a backup plan to just fix the issues with the old one if this one doesn't sort itself out with a bit of use, but its just a bit boring to have to swap it out. Ah well. In other news I got an oil filled pressure gauge off AliX and this has fixed the needle wobble, it is showing just over 2psi so I'll narrow the return hole a little bit to bring the pressure up slightly.2 points
-
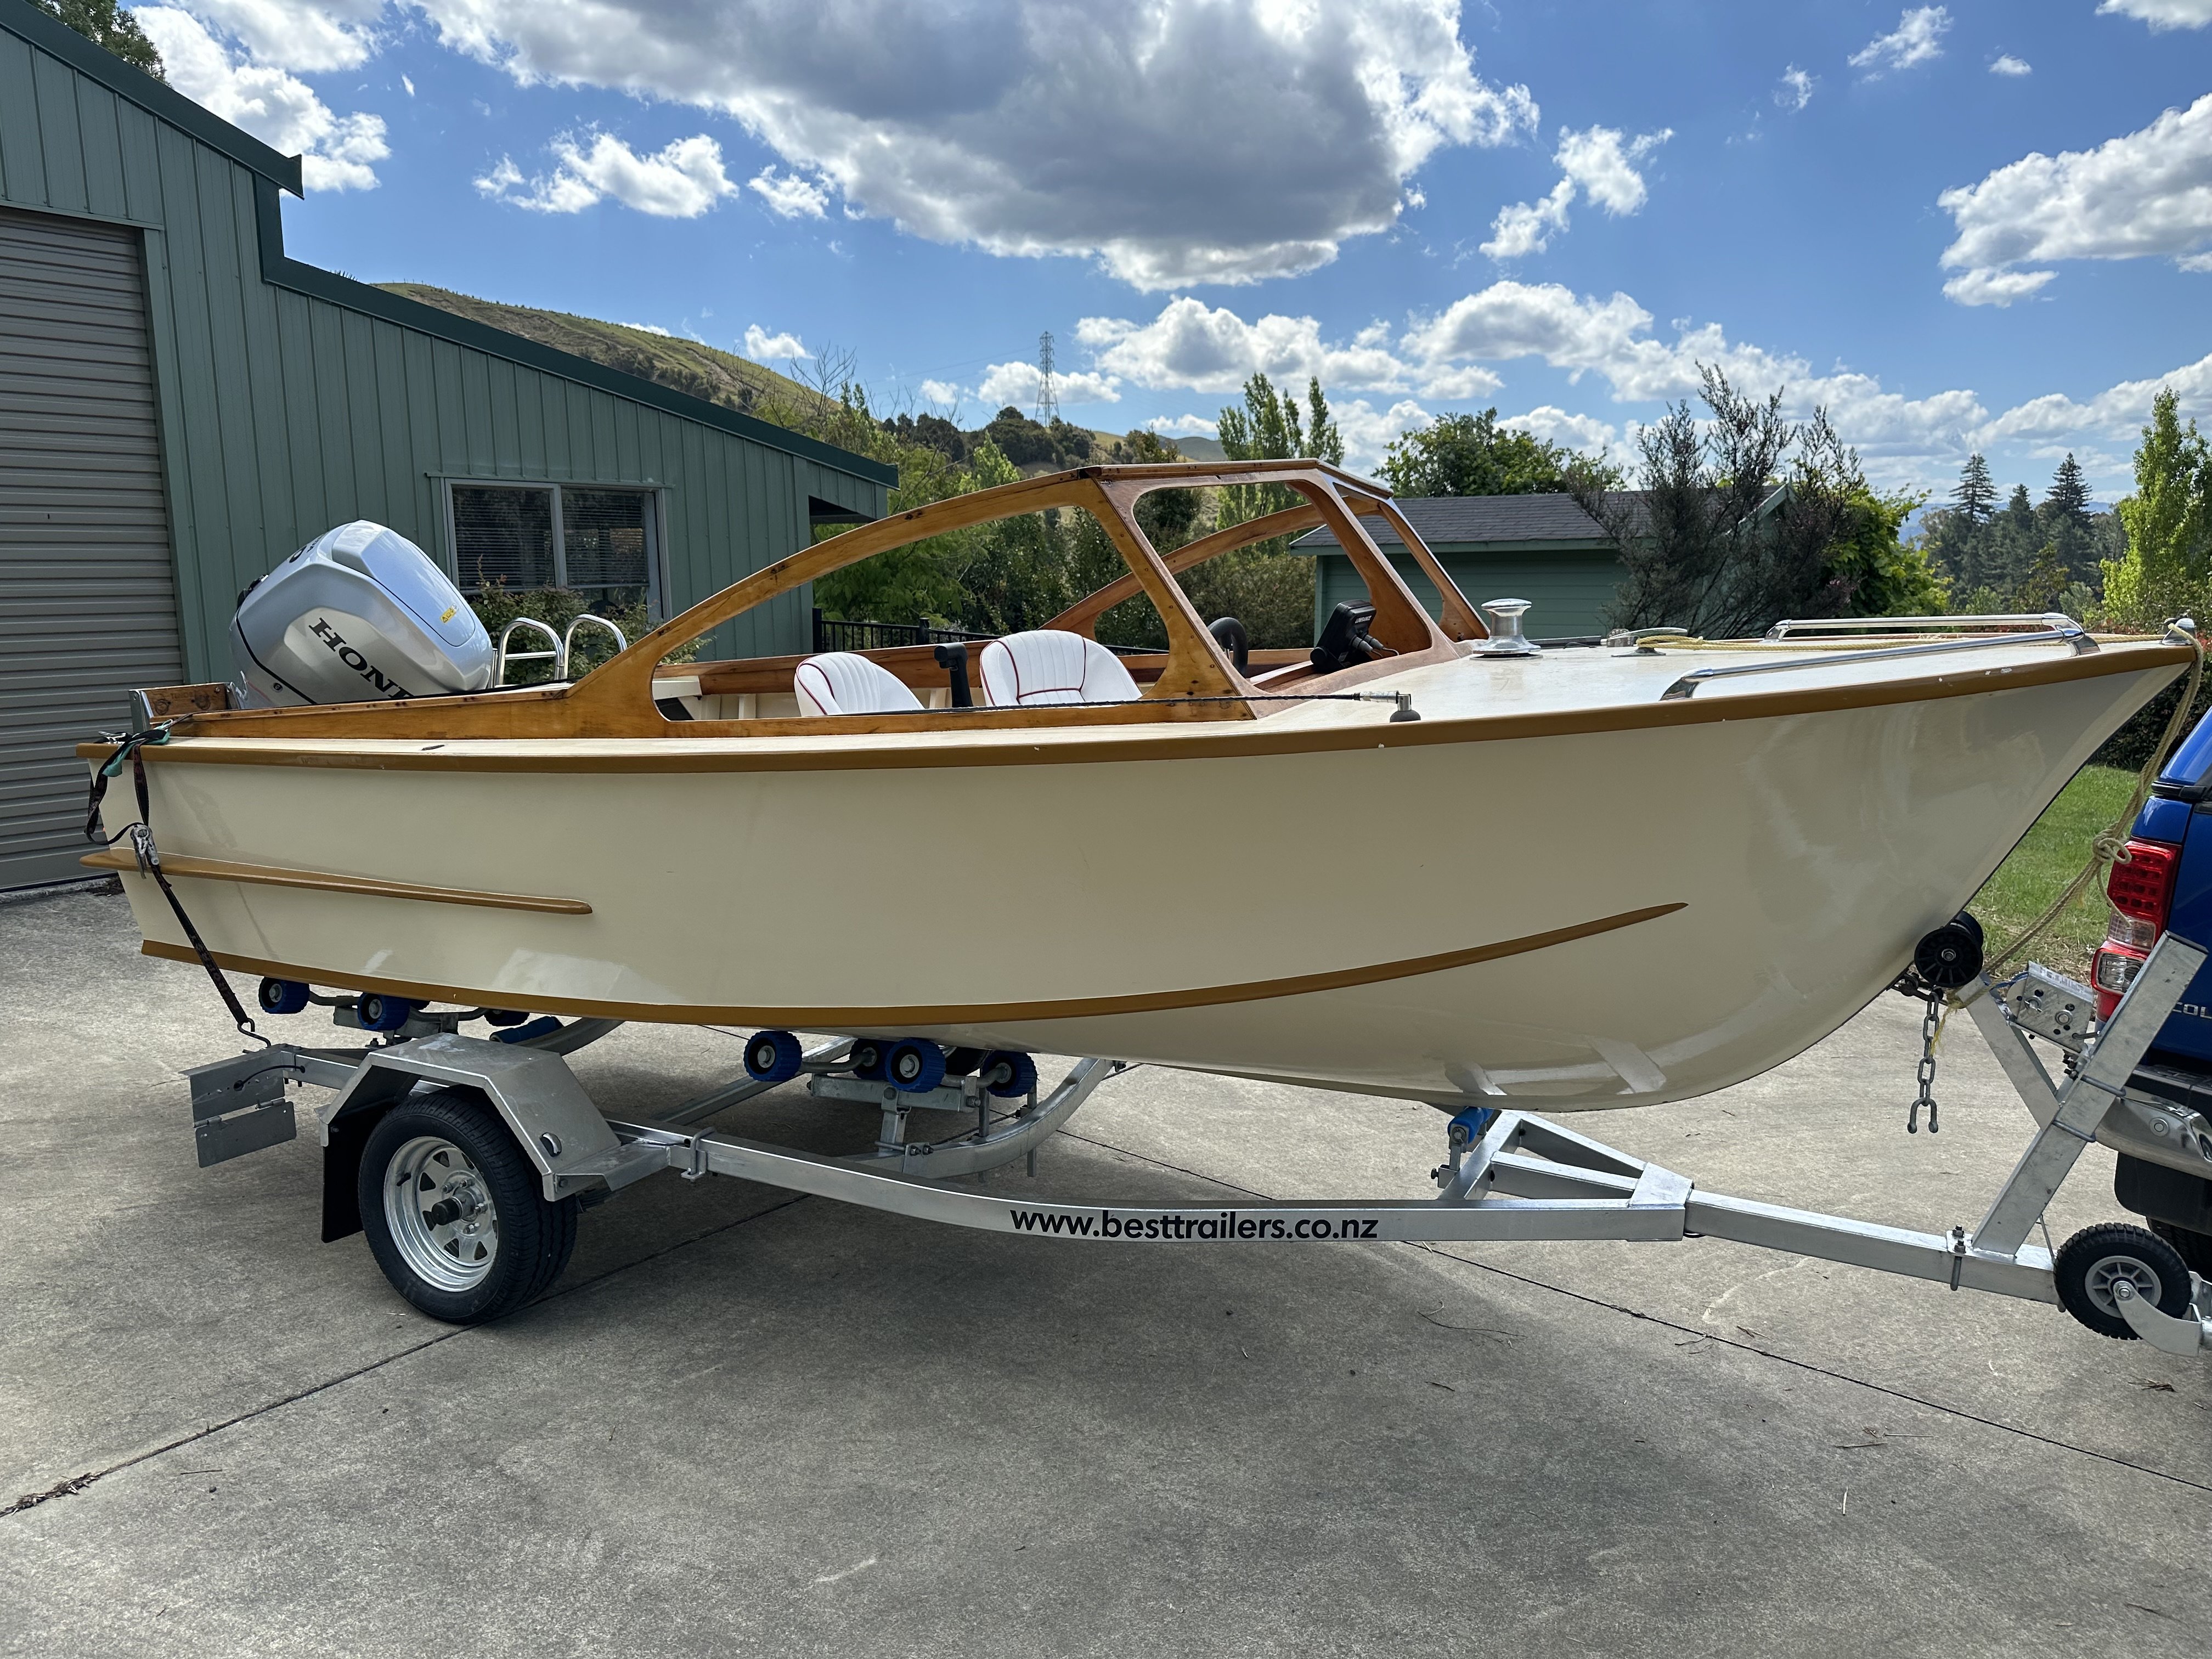
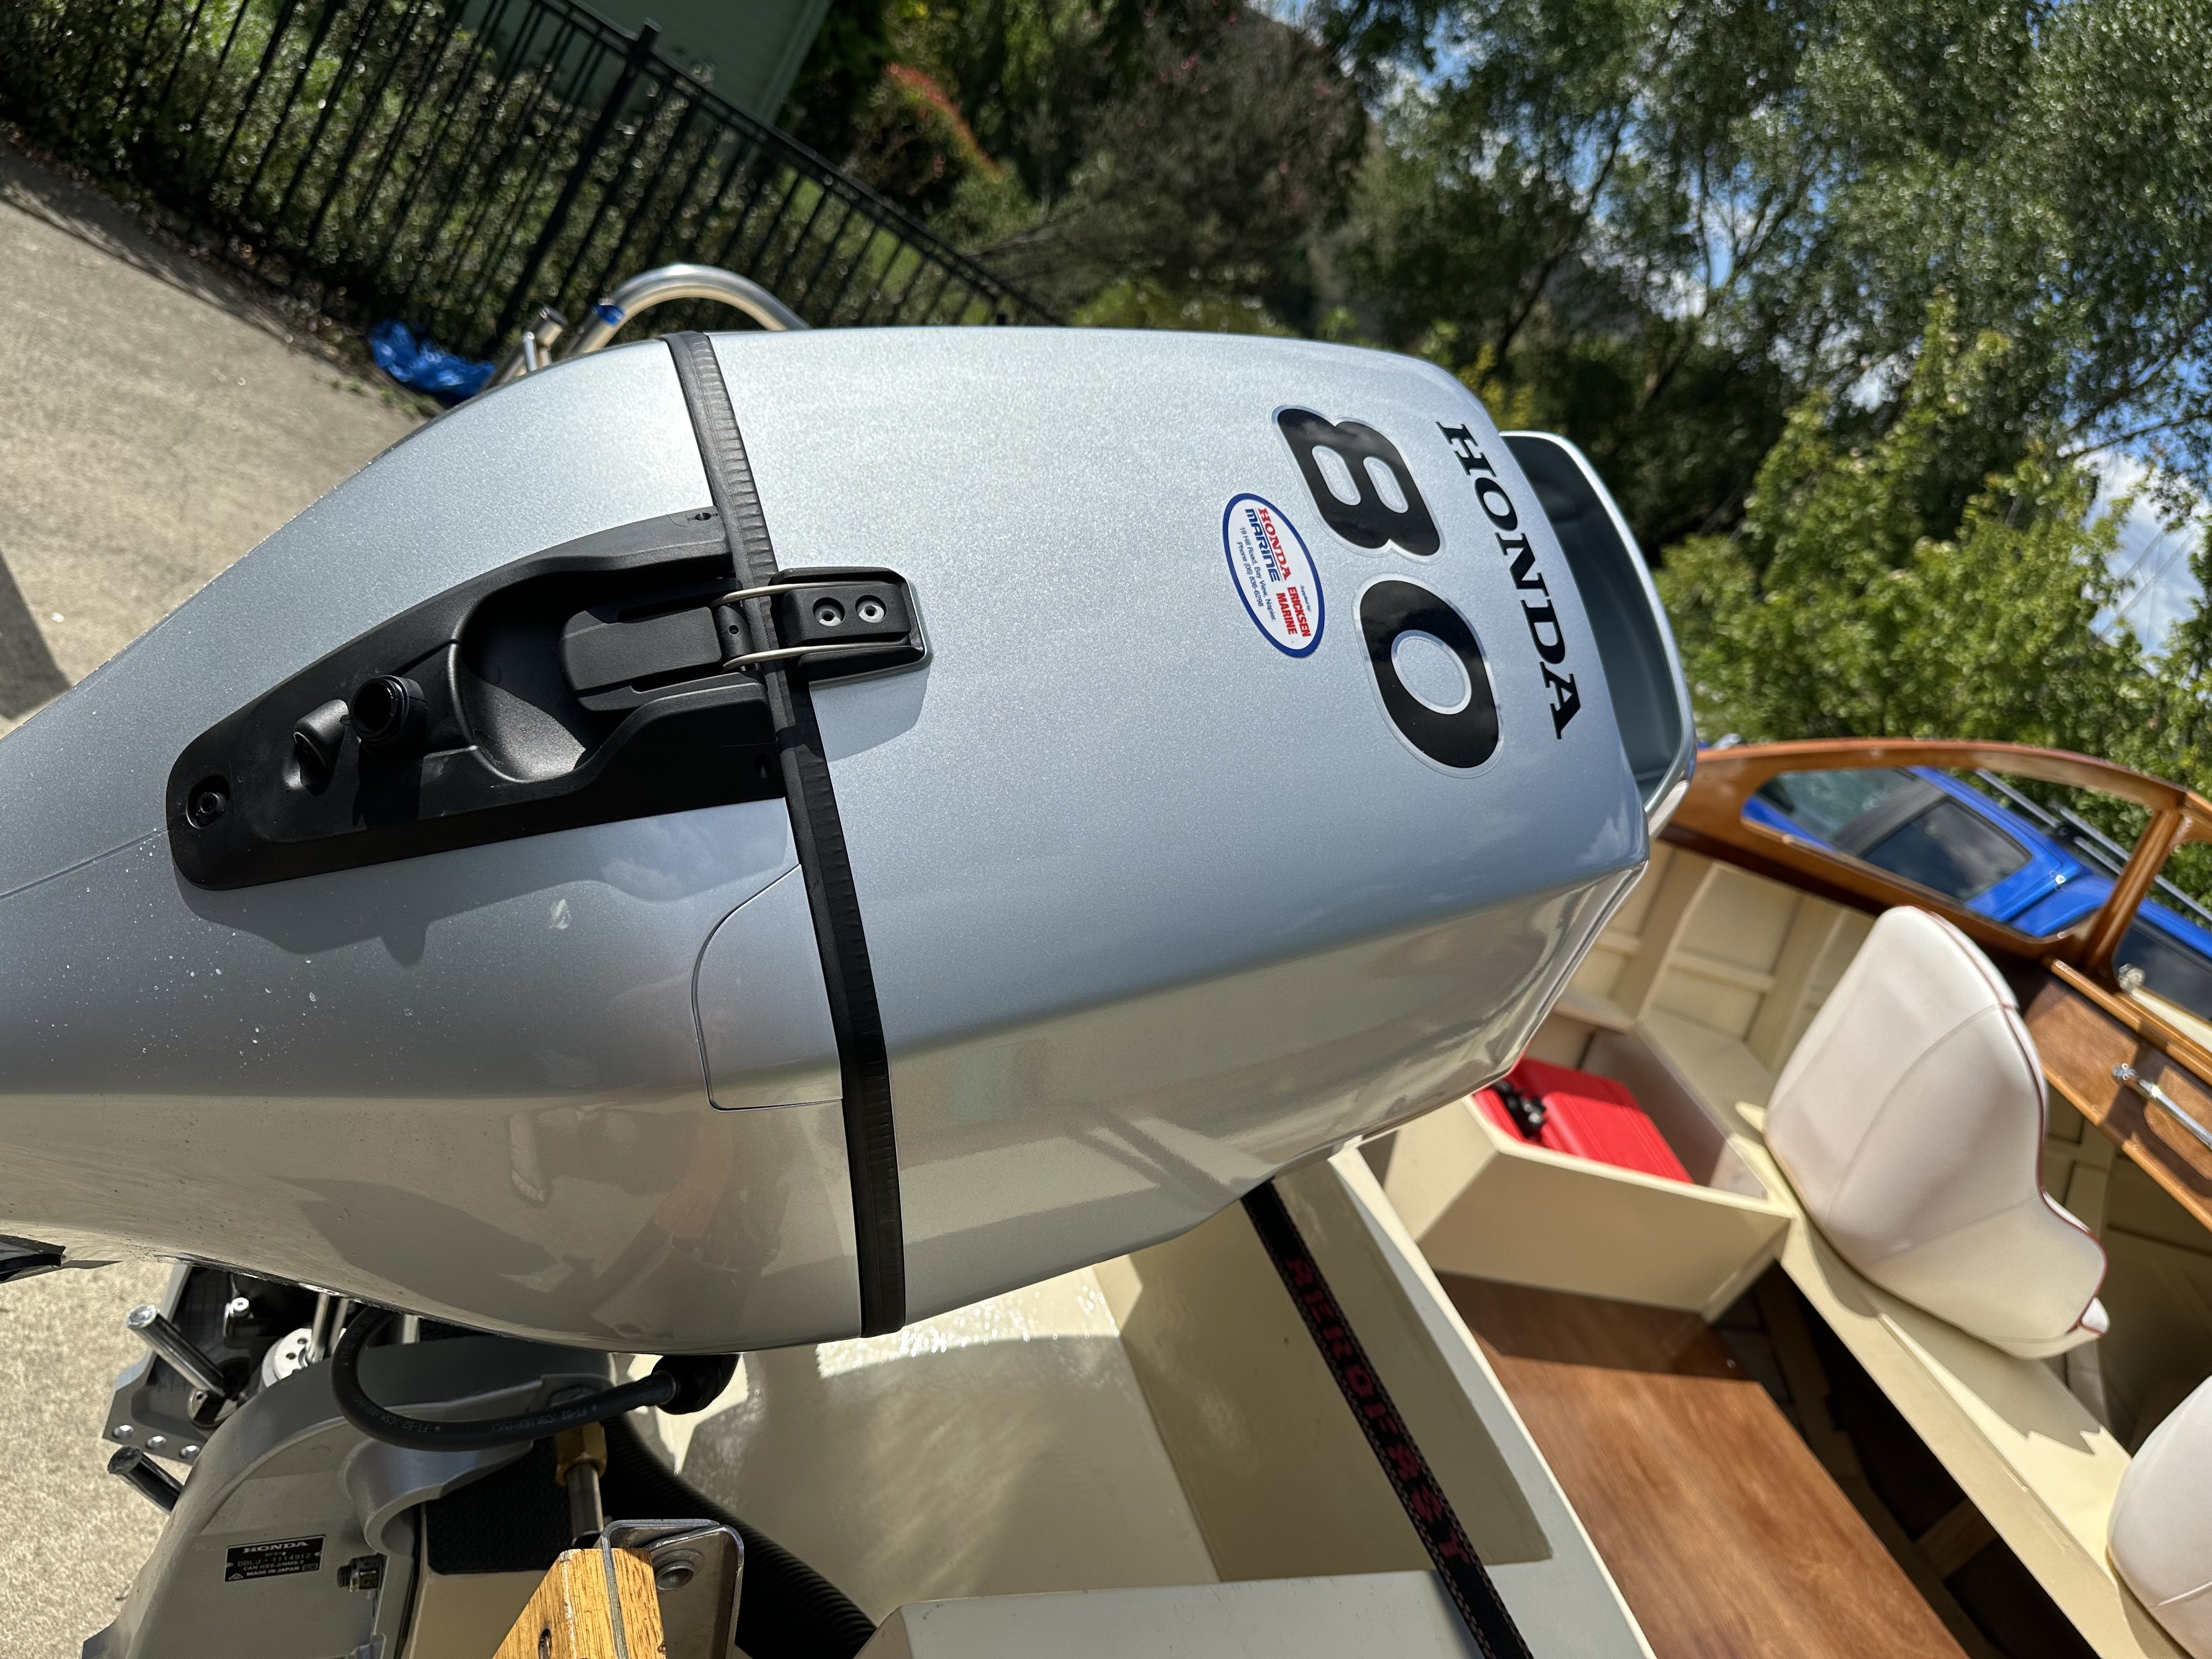
Its back. Ericksen Honda made it happen. Once he found a trailer for it he went to Auckland to get it as it couldn’t be freighted before Xmas. I think he picked up another engine for another boat as well as it wasn’t going to get here before Christmas. He certainly doesn’t muck around. I wouldn’t hesitate to recommend them. Anyway, they took it for a test run in case they need to raise or lower the engine or change the prop. They said with a big grin on their faces that it goes really well and at full power it gets a little bit on the scary side. Now to fit the windows and finish of a few other things before I hit the water. Happy as.
2 points
-
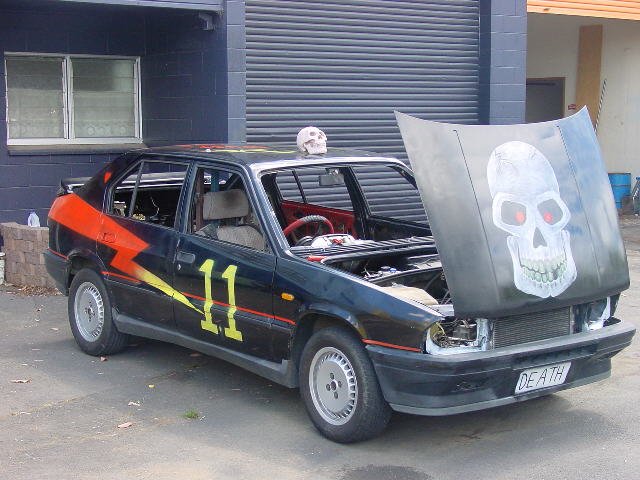
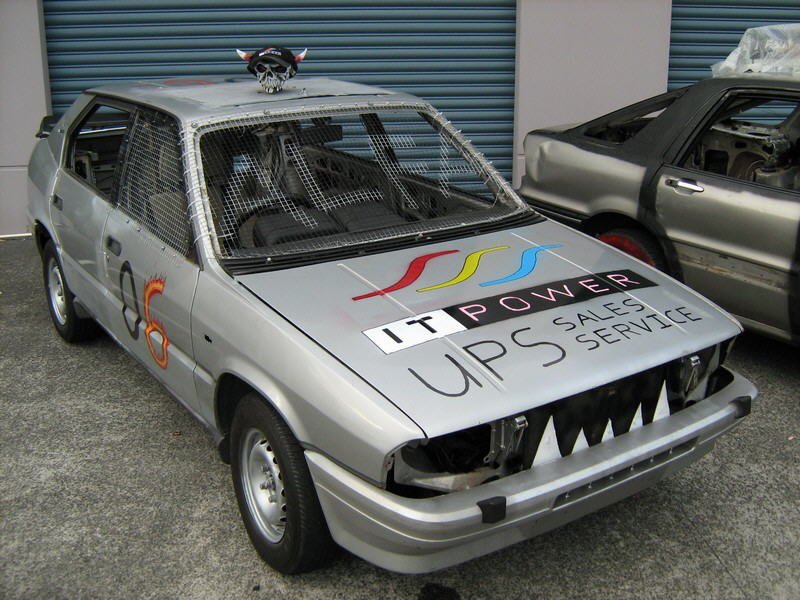
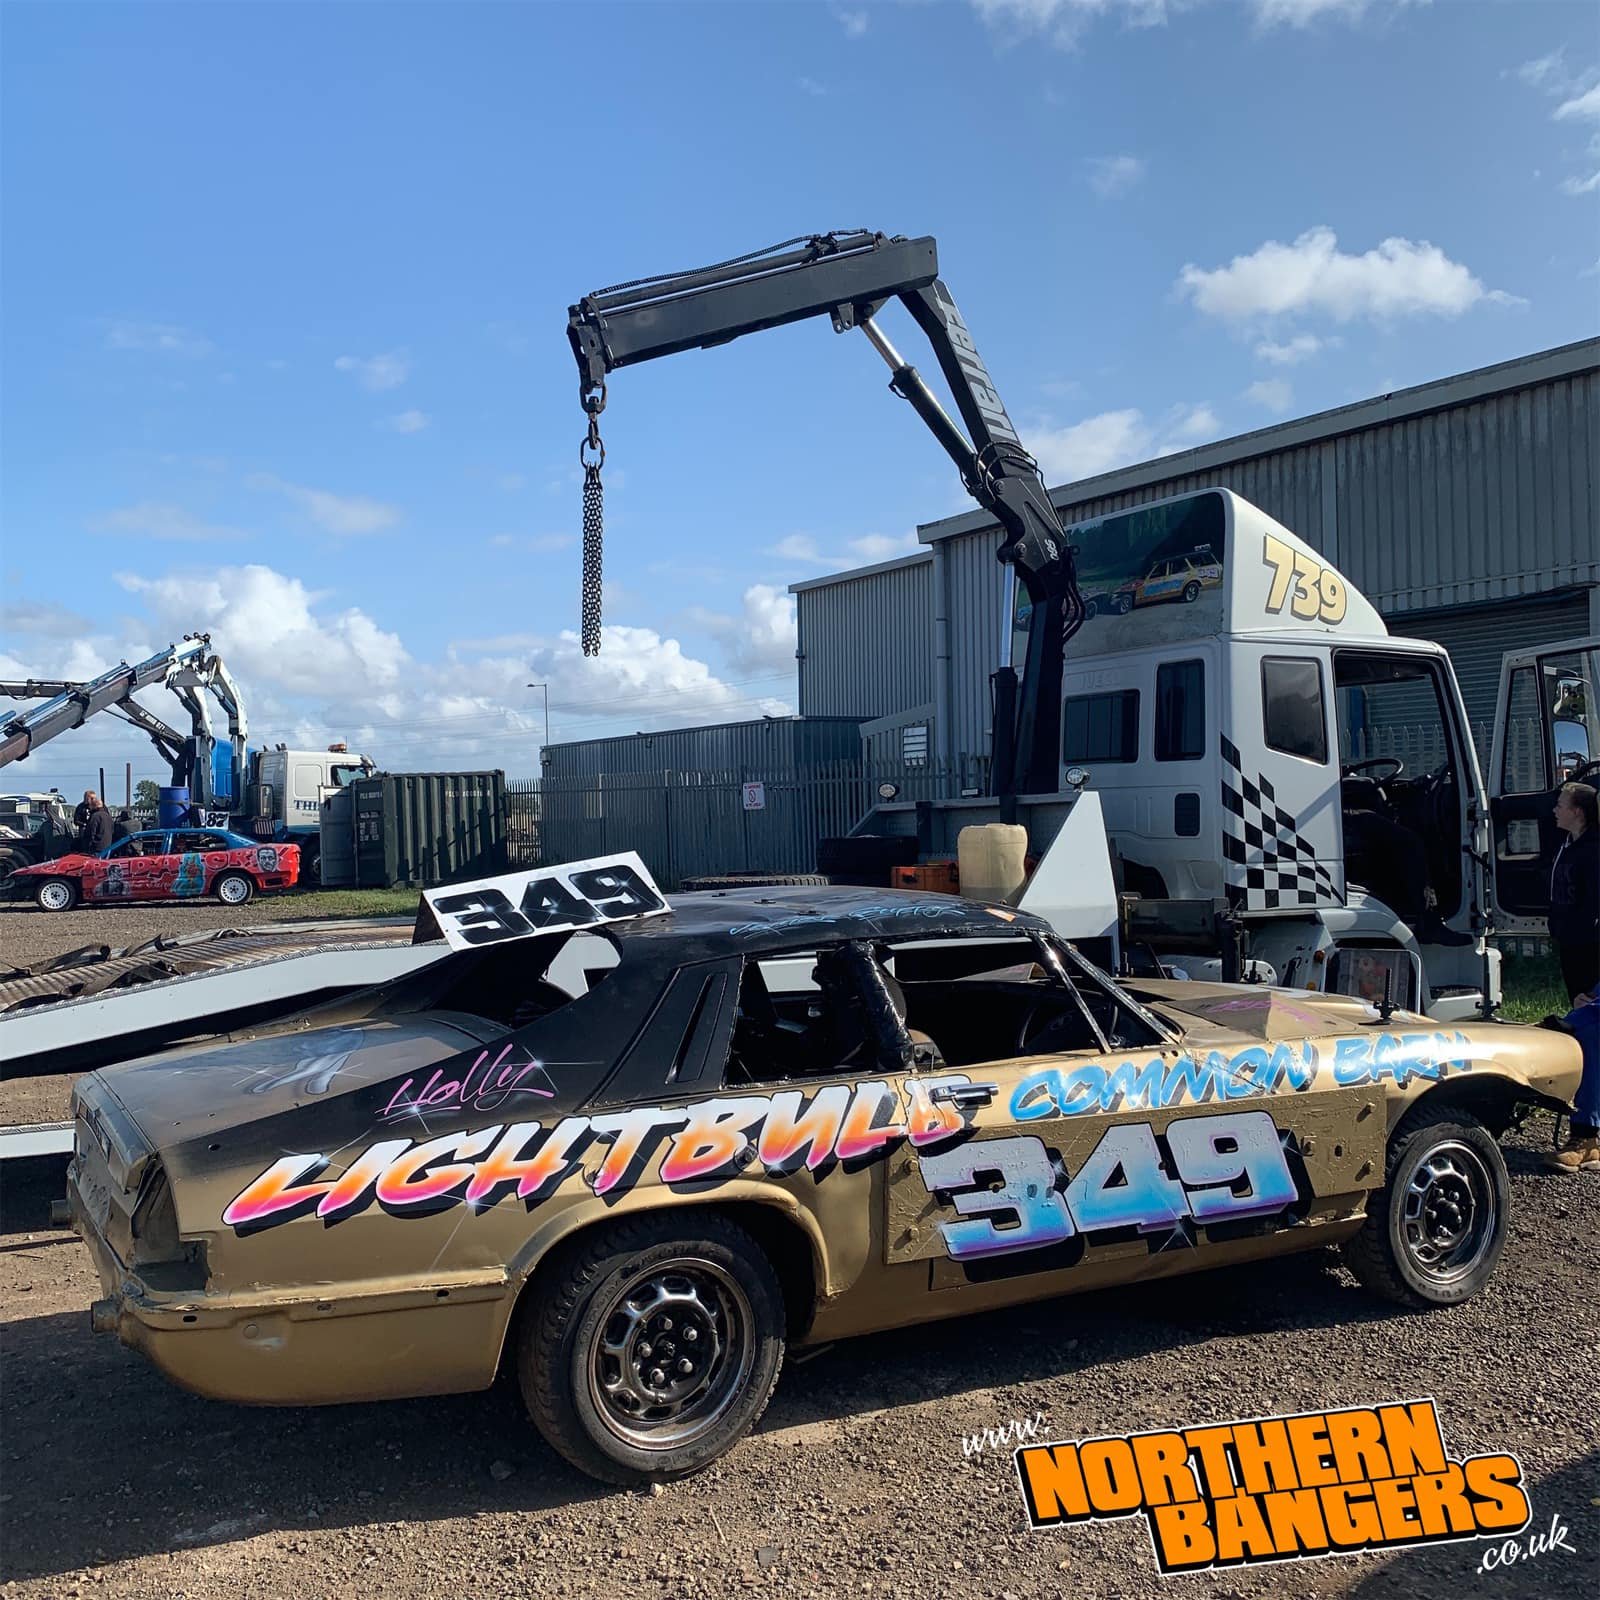
Been in a few derbys. Won once. Good fun. You want a fwd carby car. Late 80s early 90s. Rip out all wires, dash, everything, and just wire alt, dizzy and starter. A small engined thing is good. Move radiator across to gbox side and long hoses to allow it to stay plumbed in after some re-modelling of the front. Make sure the front guards can't get pushed onto the tyres. Lots of psis in the rear tyres. Cut exhaust short so it sounds like your giving it death. Cut out heaps of metal so the car bounces off everything. I think a honda odyssey is one of the best cars currently. The mechanicals are protected so they last. I seem to recall they are not allowed at some tracks.1 point
-
@fuel how long you in Melbourne for and what part? Keen to grab a beer?1 point
-
You're going about it all wrong nick, you need to just put some big resistive heaters on your fence and aim the heat from the sun away from your property.1 point
-
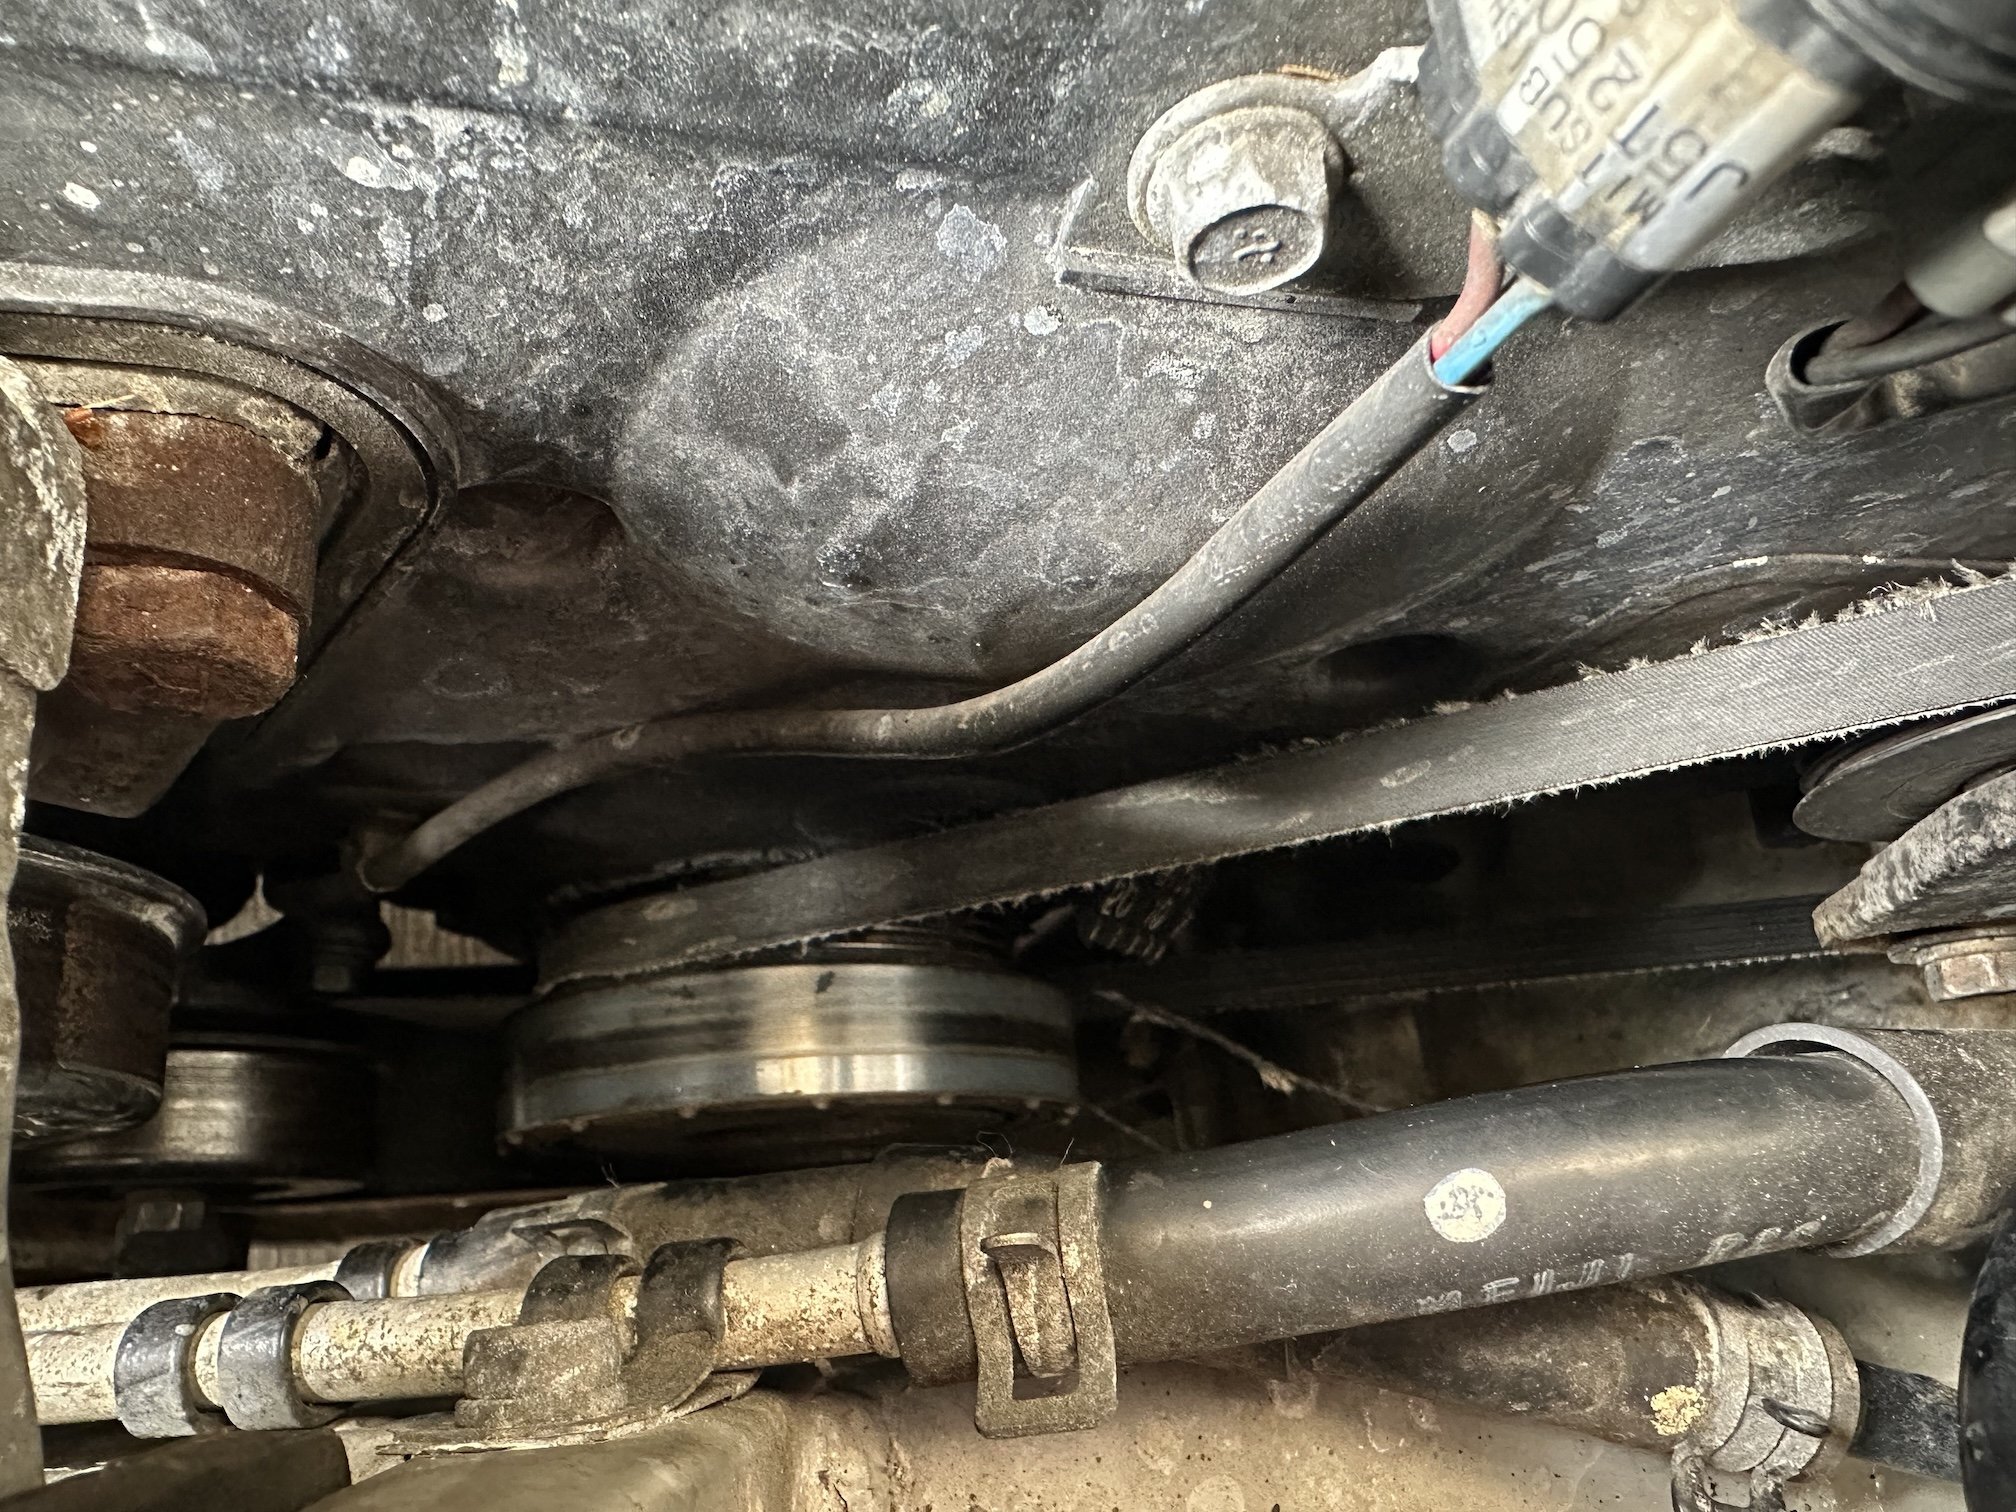
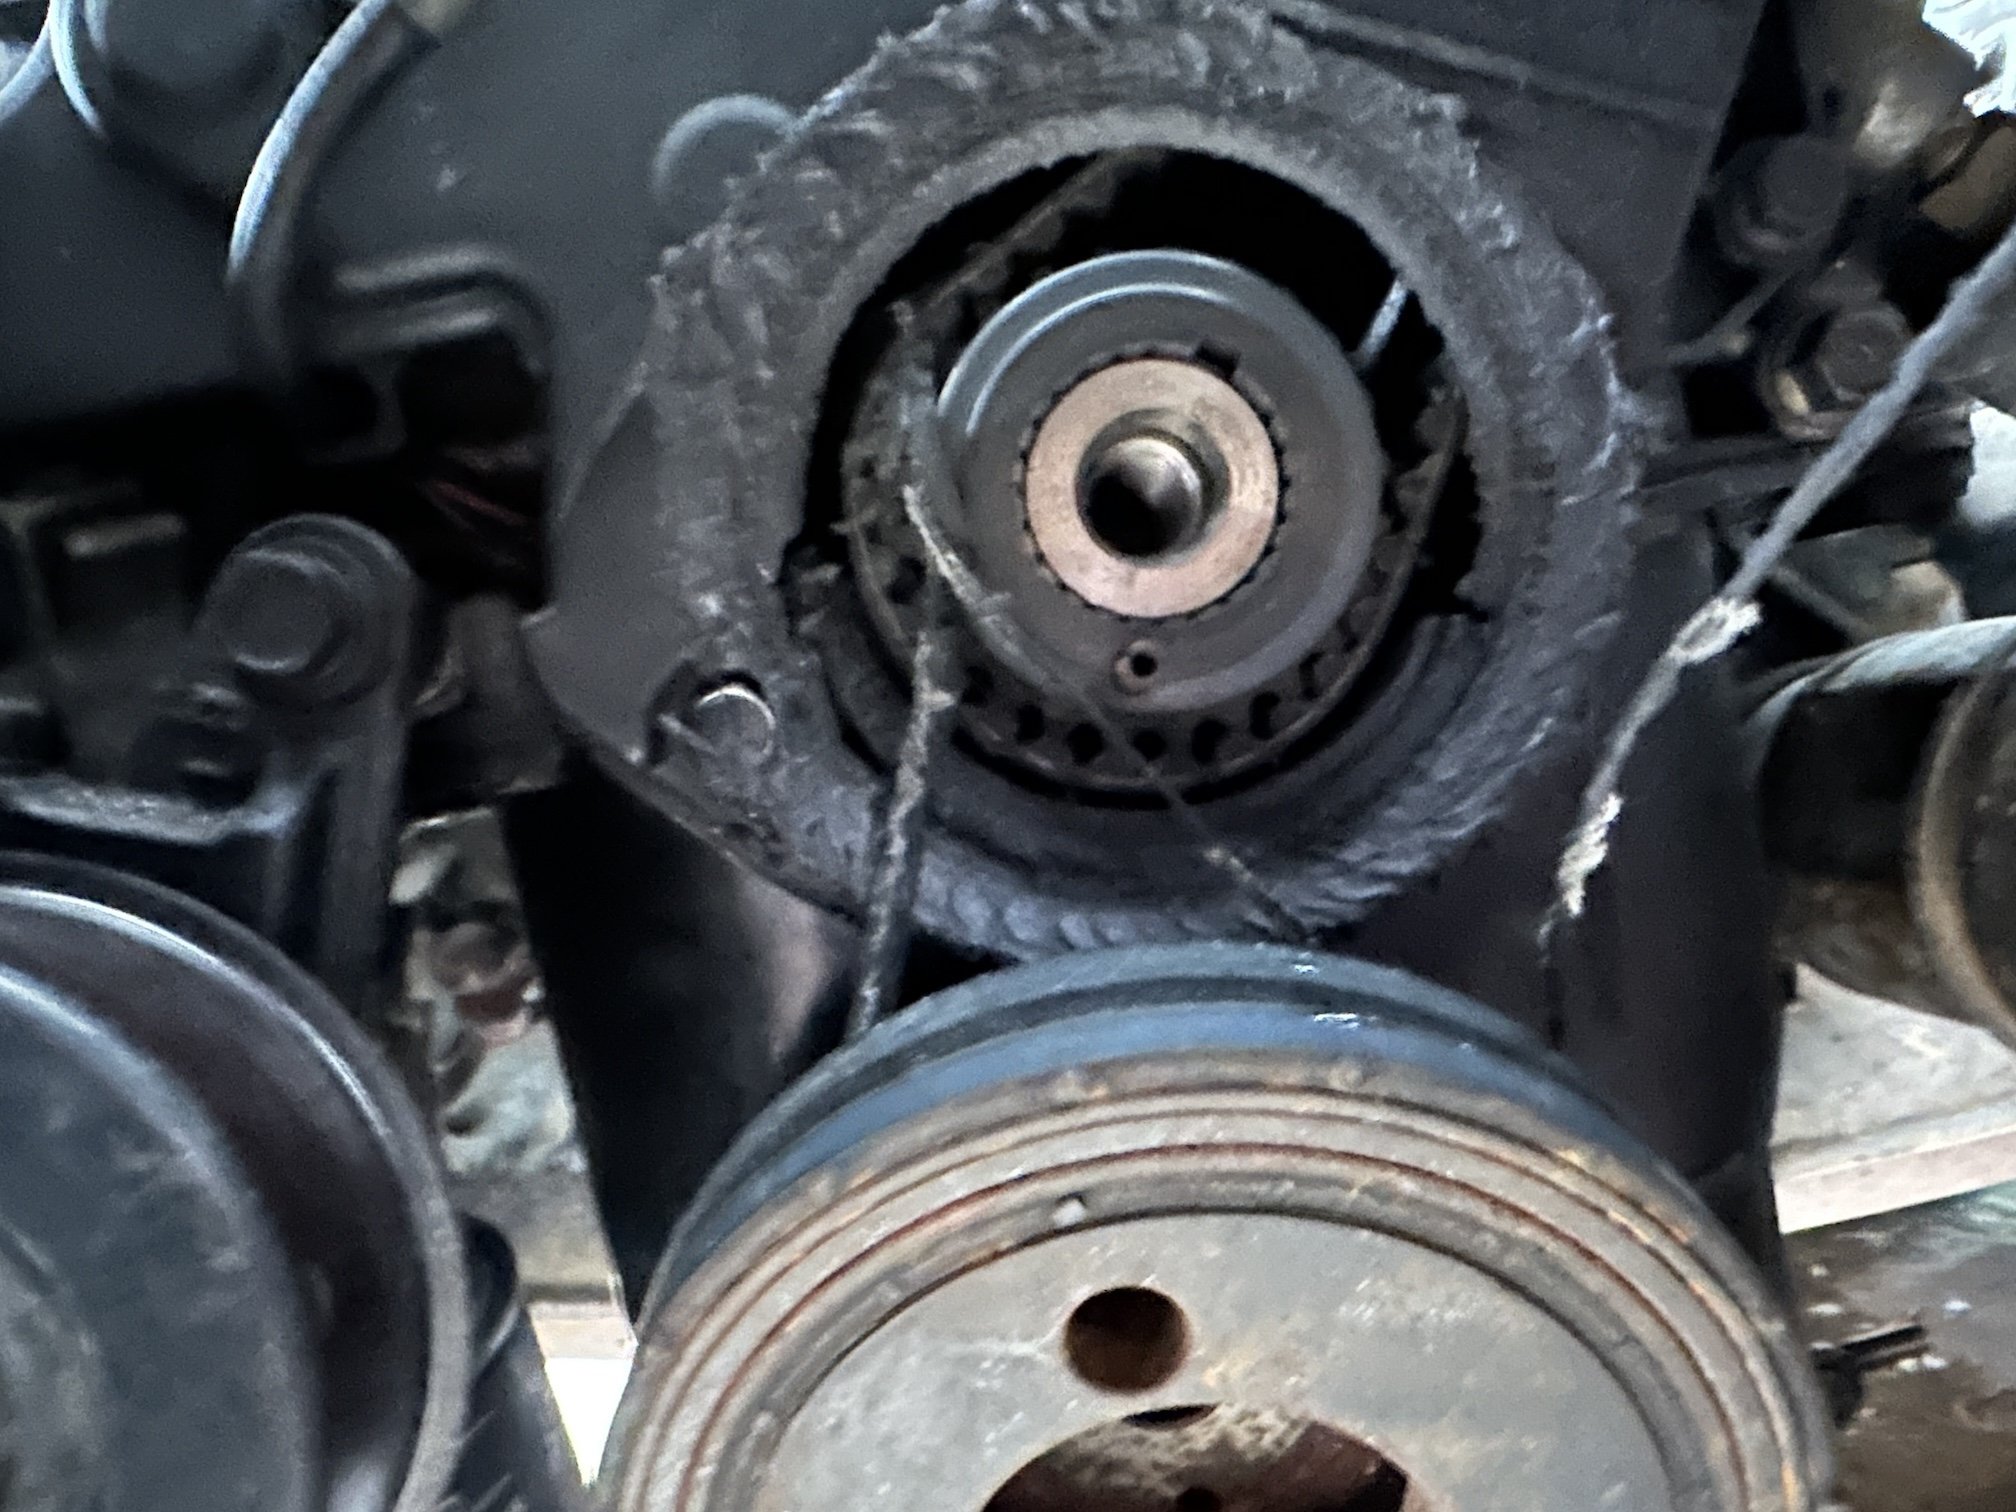
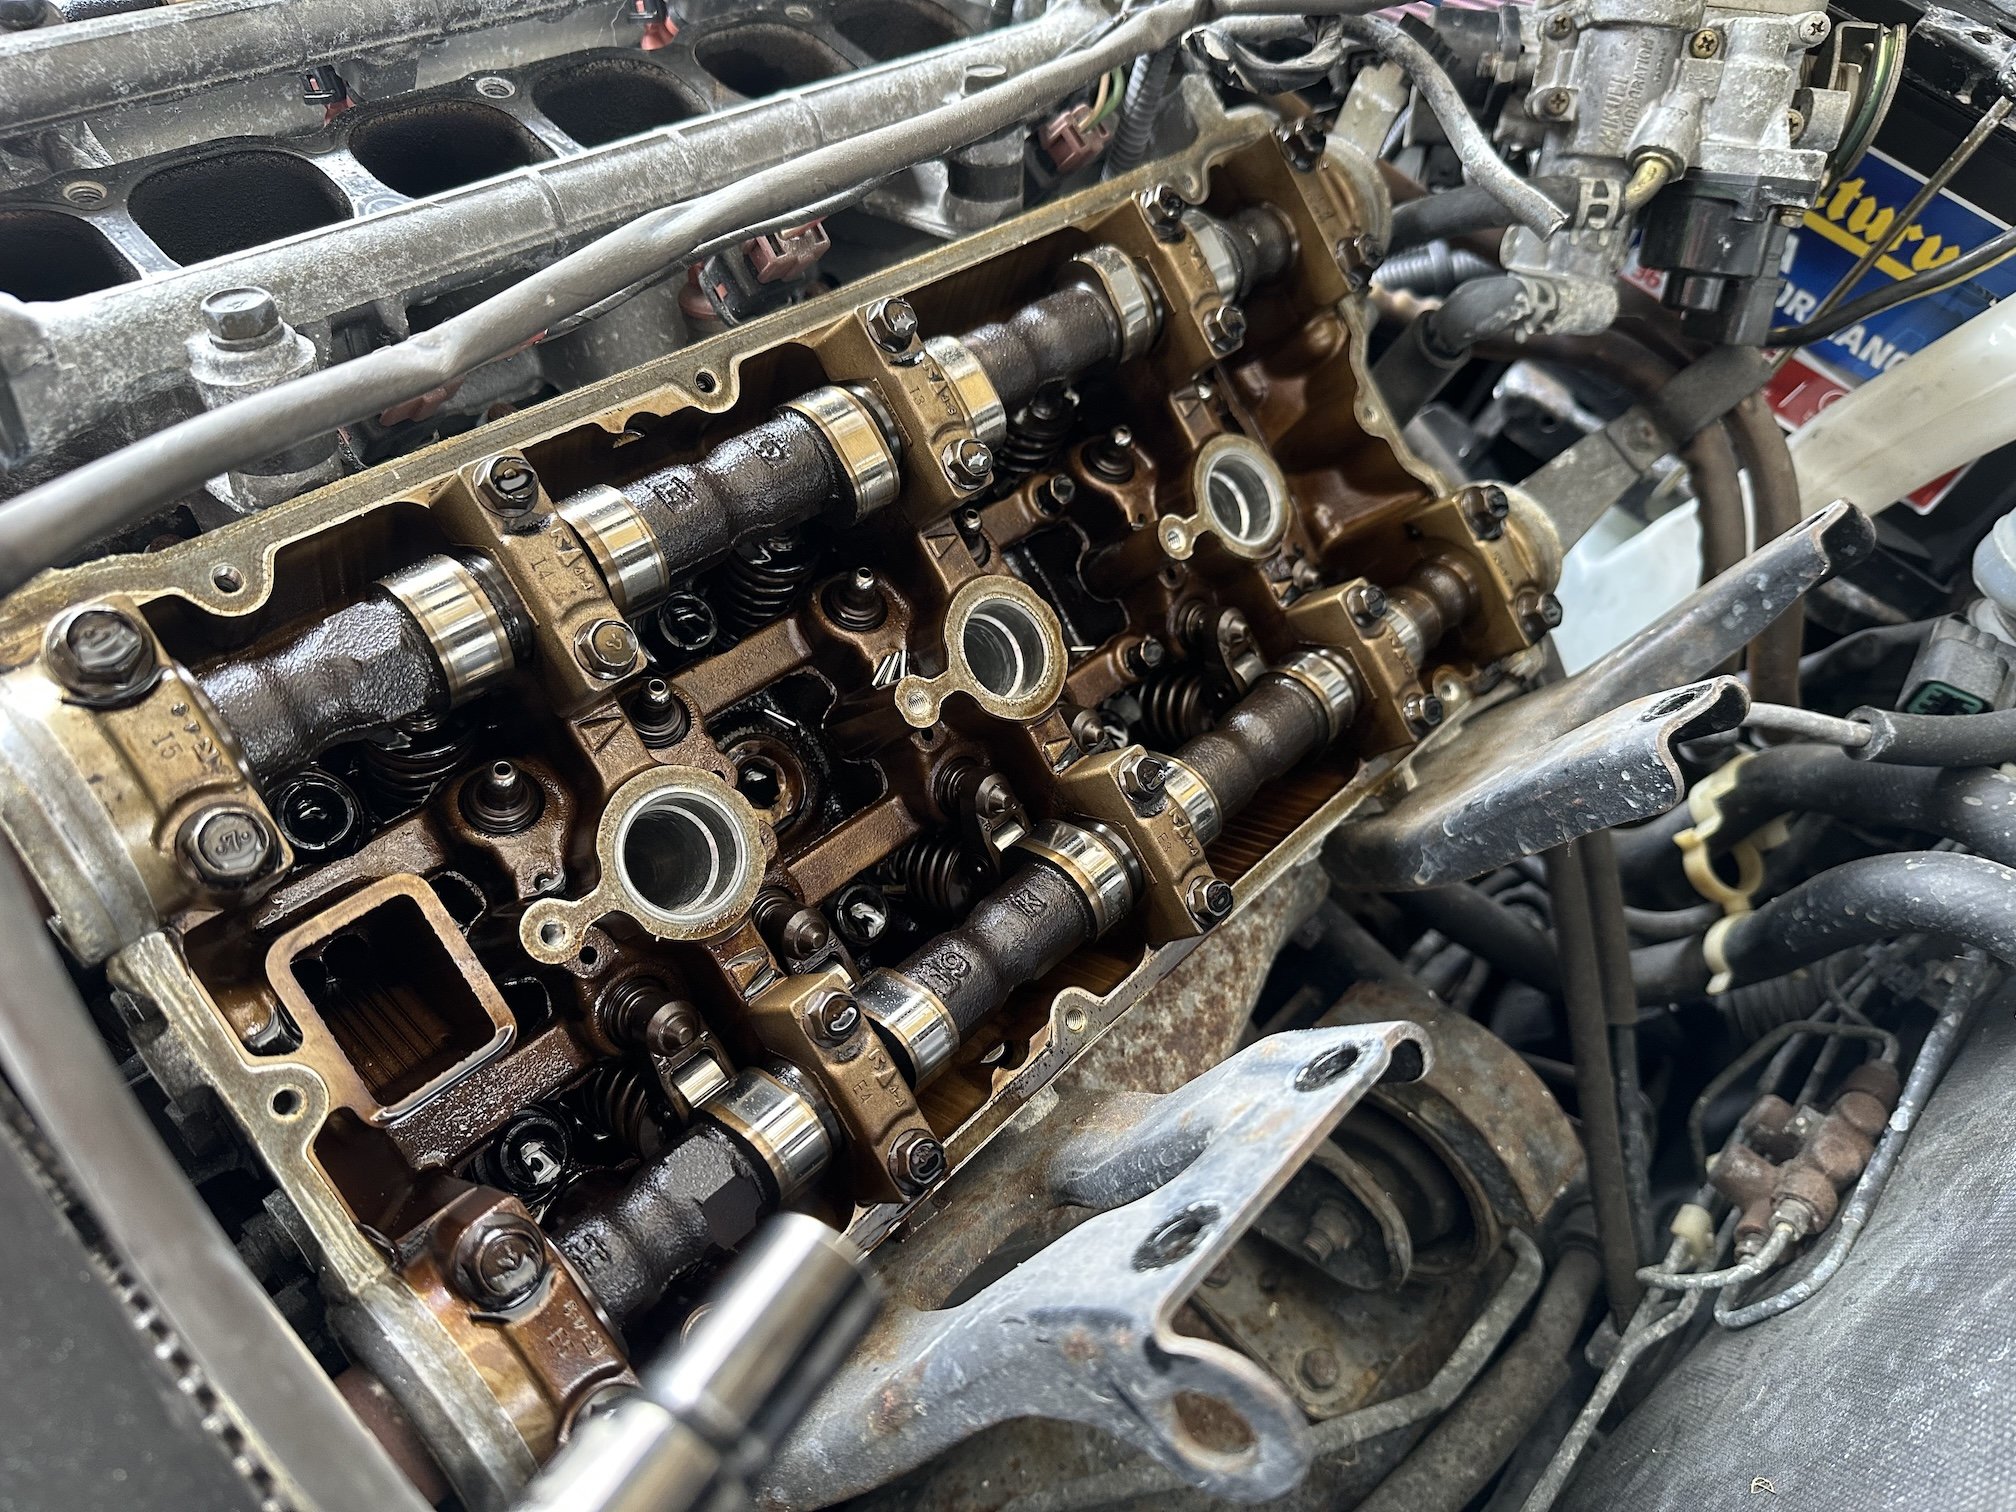
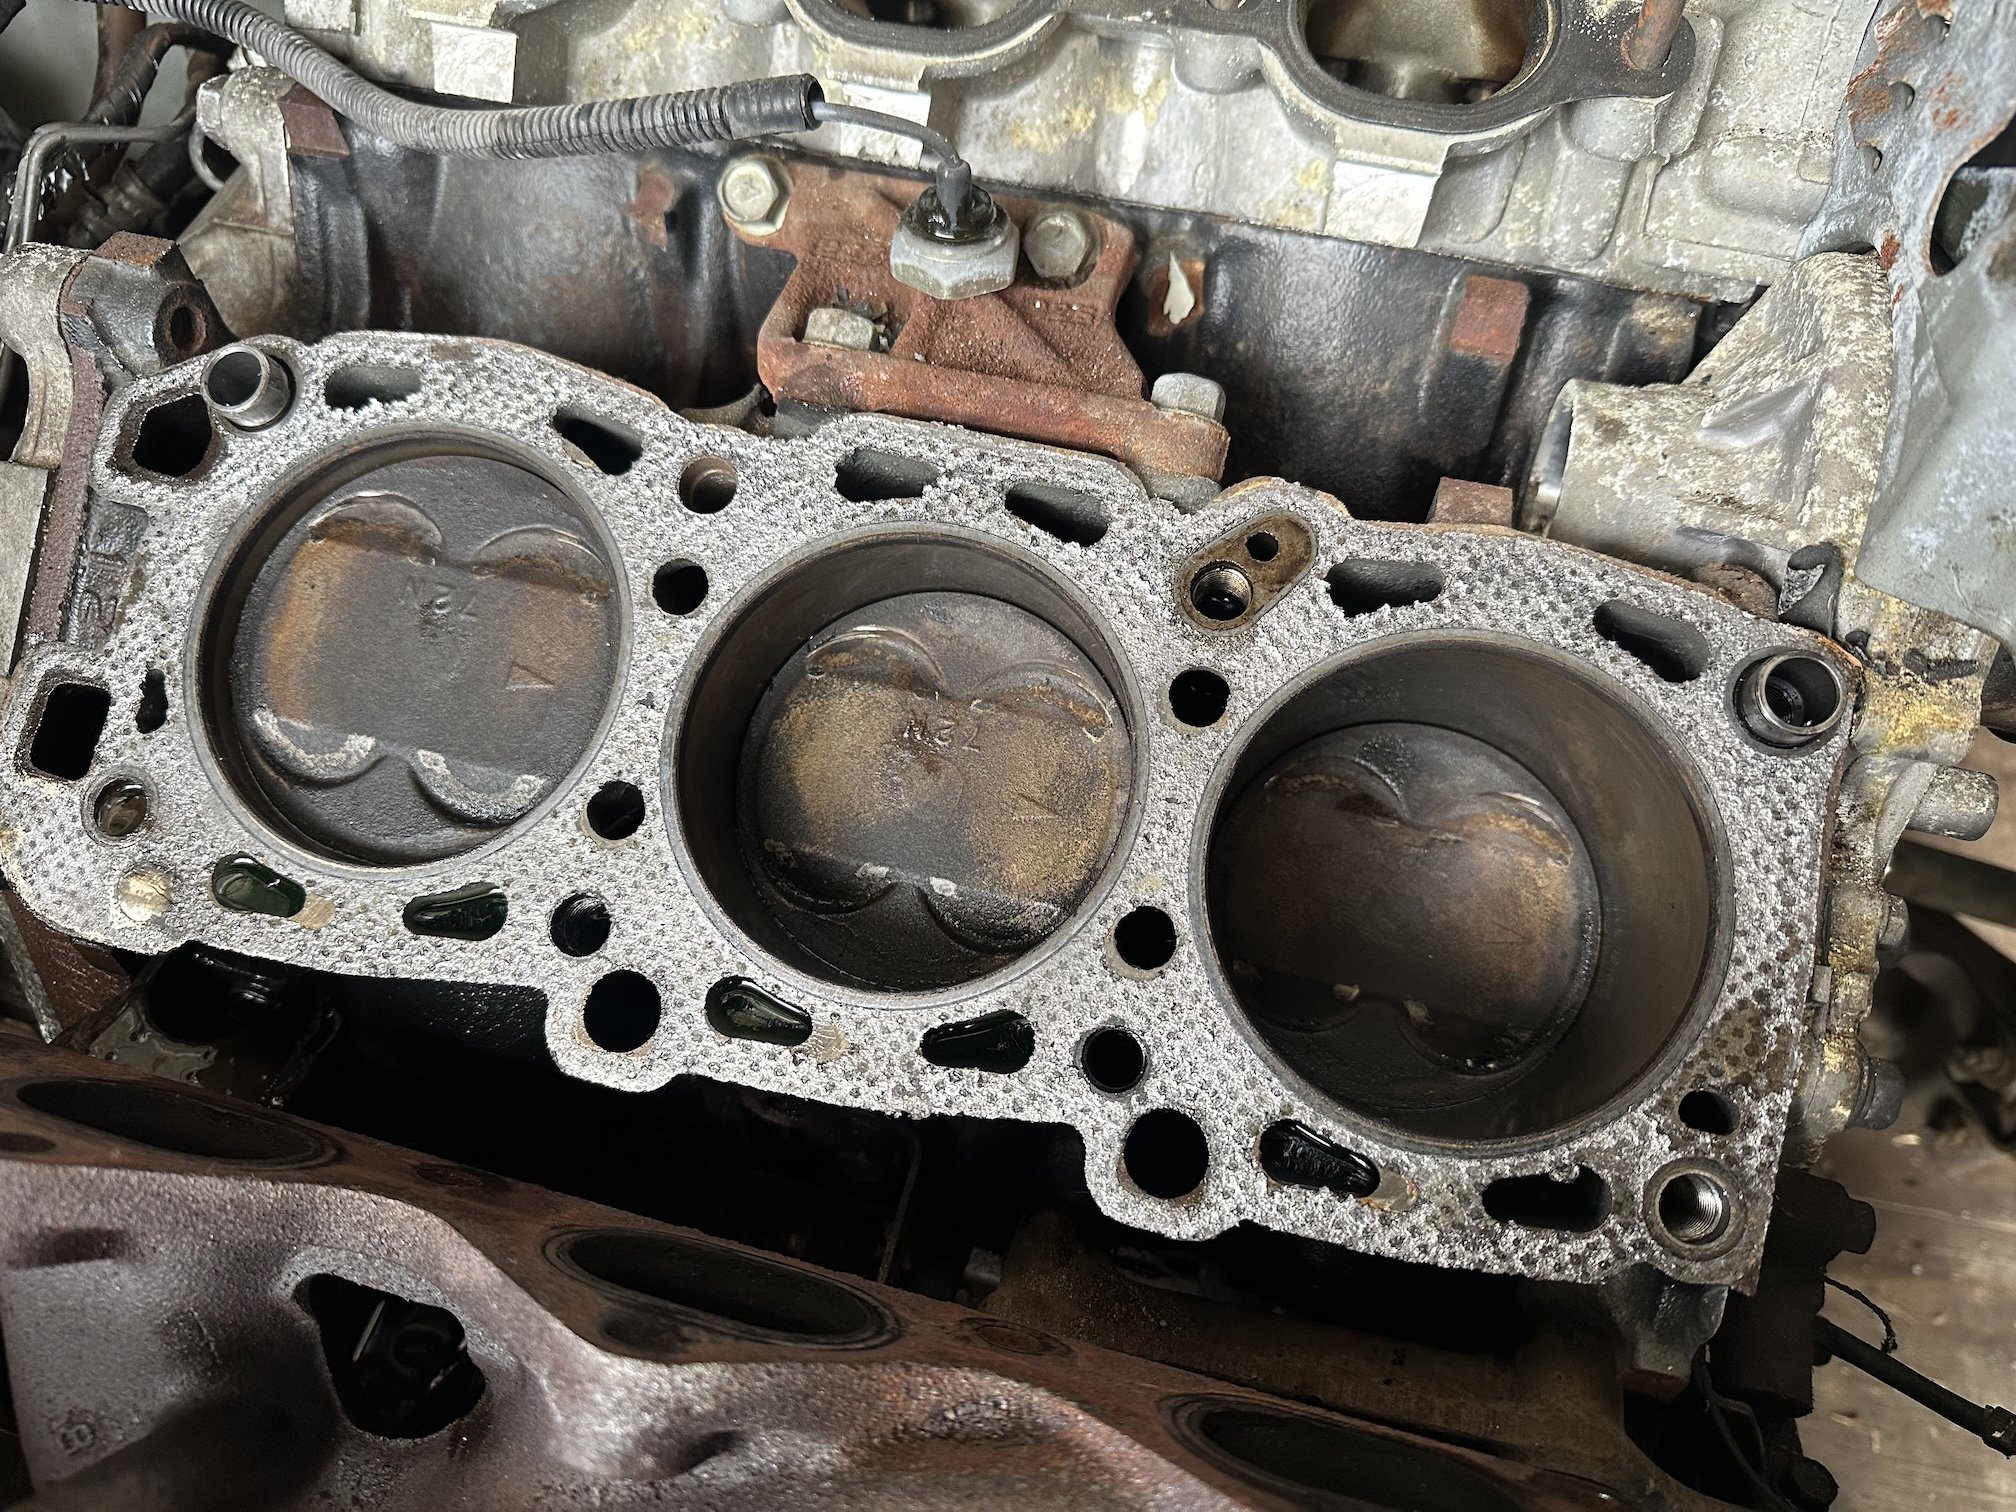
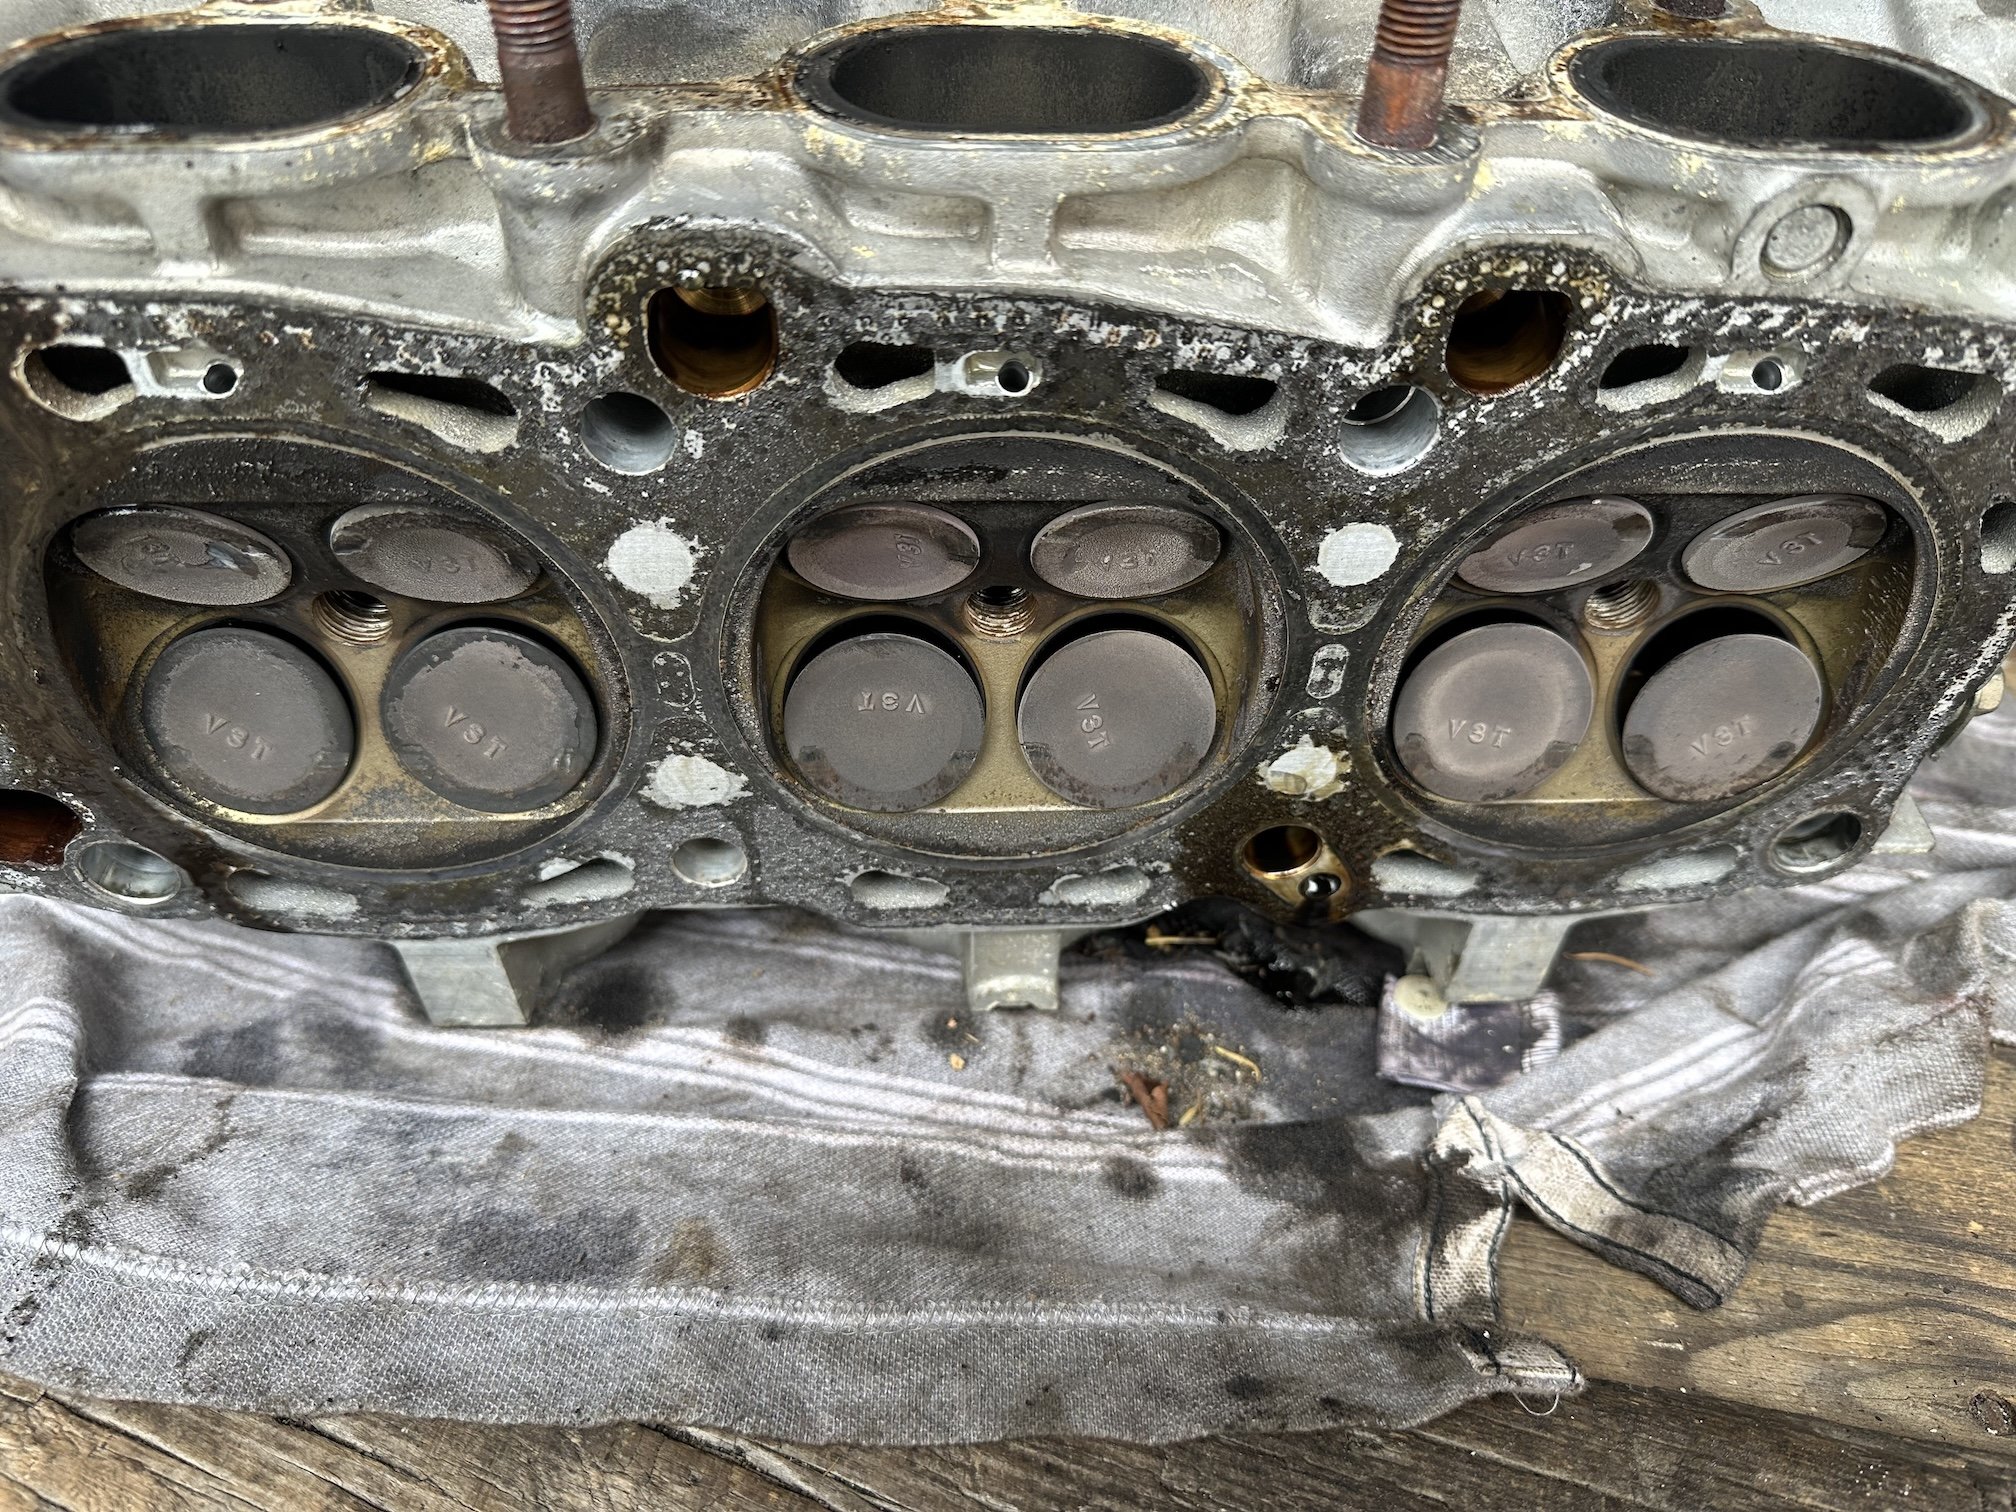
Carnage so far is 24x bent valves (got lucky that the pistons just have light marks on the crowns), 4x damaged rocker arms, 3x head bolts that I stripped or partially stripped, 1x lower timing cover and of course 1x harmonic balancer that caused all this mess.
1 point
-
So Santa this year bought me 24 bent valves, by the way of the harmonic balancer coming apart and sending a strand of the alt/AC belt under the timing belt around the crank sprocket. And this was the harmonic balancer that I replaced about a year ago too. Lesson learned - I should have gone with a new balancer rather than another used one which is prone to failure.
1 point
-
yep, but i'm in the city, don't have an EV and really don't want to get into homebrew BMS systems, i'm plenty skilled enough at generating fire without badly cobbled together batteries in a dark corner. If it was possible to go Solar panel, inverter, heat pump, it could probably be a useful item to us.1 point
-
Don’t have much use for hot water in summer though, if not for AC use our power bill is barely above lines charge1 point
-
i still cant lift my left arm behind+above my head from that event for some reason - highly reccomended.1 point
-
But what about non wof moopeds Headlights on if built after 1980. Use hands if no indicators or brake lights
1 point
-
Time to do it again?
1 point
-
As well as the compressor, there would be other things that are unhappy, like it may not get a chance to scavenge the condensation from the catchment tray, and cycling the clutch more often than necessary would probably reduce lifespan.1 point
-
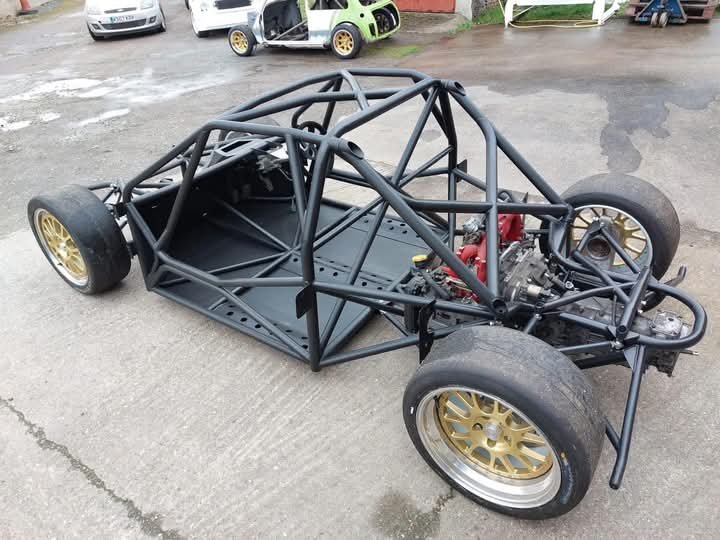
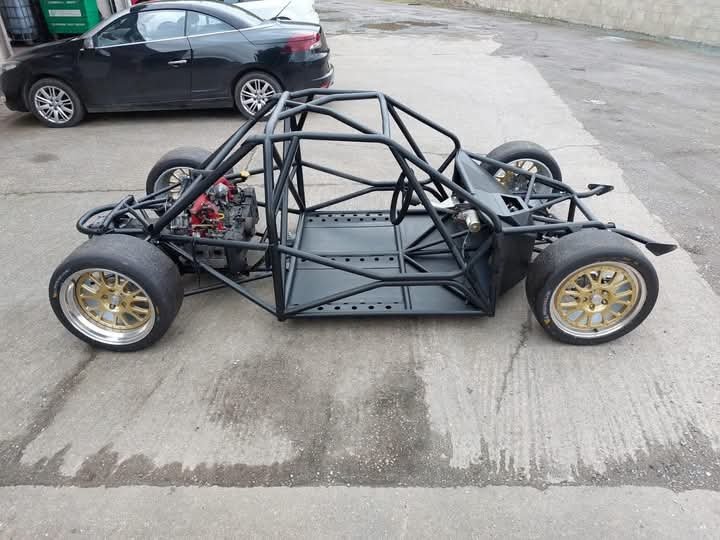
Sweet spaceframe mid mount subi set up, guy has a RS2000 body on it, reckon a bug would be cooler!?
1 point
-
Got her tucked up inside, with the dregs from an Argon tin I cut down the trolley from the Datsun Rotisserie and rebuilt it to pick up on the Niva jacking points, can now wheel it in and out of a corner of the workshop. Drained all the fluids and spent some time underneath figuring out the needed works, short is not much, but plenty enough. All set now to start stripping the suspension to replace all the rotten rubber bushings and whatever else arises. Worst realisation is that its in much the same condition as the Datsun was 3 years ago........
1 point
-
Made another one to try and compliment the other beside the fireplace, this is my favourite for sure. Figured out the black chemical reaction now. Already planning the next one.
1 point
-
It turns out the car barriers at that site have multiple flaws1 point
-
To be revealed at 4nR Nats its painted now1 point
-
Fuck yes! Period correct piping trim seat...fuck yes!! Very skilled work (not me).
1 point
-
Got the head back, all looked good they said, but they gave it a skim on general principle. The haynes manual said the tappet clearances should be 0.4mm inlet, 0.5mm exhaust, this seemed a lot and when I did a check they were less than half of that. Odd. The design is robust but quite a pain to change the clearances on as it has a seperate cambox cover with shims sitting on top of the cam follower bucket. So to adjust clearances you need to set it all up and torque the box on. Check the clearances and then calculate the required shim thicknesses. Then disassemble it all, swap out the shims etc etc. There is a tool to compress the valves without dissasembly but I would need to make one and I CBF. So when the gasket set arrived I set it all up, torqued it and checked the clearances which were all bang on 0.15mm inlet and 0.25mm exhaust. That was a lot of shim difference. The boys at Mean Machine suggested that I look up what the cam datasheet said and lo!, that said (more or less) 0.15/0.25. So I left it all as is. Then I set to bolting the bitch back together and getting the box back on after fitting the new axle seals. I also decided to put a cambelt guard on as now the fuel return line was sitting 15mm away from the cam pulley. Unfortunately none of the guards I had would fit a tipo engine, so I made them two part and called it good. Tomorrow I'll fill the tranny, bolt the crossmember on and chuck it in, then hope I havent fucked anything up.1 point
-
Also Honda NZ had run out of 75hp engines so Erickson Honda got them to supply a 80hp for the same price. So I got another 5hp for free. Yippie
1 point
-
Yet all you get is lowballers or people wanting to swap a boat that looks like it would quickly become a lake bed ornament.1 point
-
A lil bit back I was ordering some audio stuff and a mate wanted an amp tacked on to my shipping, so what else was I to do but tack my own impulse buy onto my own shipping? I wanted to get back there anyway to tidy up my temporary twisties from hardwiring my dash cam. So once again the stereo comes out... Ugh I agonised about what constant +12v to splice into, but all of my candidate wires just gave me a bit of pause either because the wire seemed a bit thin or it was a critical circuit. So in the end decided to just use a fuse tap. Reliable, reversible, and a lot less stress about choosing the right circuit. I think I went with the horn one in the end. Have to do a quick test before final install of course... And once again the front seat makes it way into the back I was originally going to run the wires along the sill, but after laying everything out I would have been just barely too short. If I'd spliced into something on the driver's side I'd be fine, but in the end I'm happy with the route I chose - it just involved getting more of my arm blind feeling under the carpet. The wires won't rub or catch on anything. The bum sub is secured using hook tape - it isn't going anywhere! I'm no car sparky, but I'm not really happy with the job the electrical place did installing my stereo last year. I think now days I'd have given it a go myself and done a better job. But it's not egregious and I'm probably just hyping my own non-abilities up. At any rate, I soldered my twisties; first soldering since I was in high school, but it's done. So okay fine I'm almost certainly hyping my own abilities up. But they're solid and won't go anywhere. I taped them up with fresh electrical tape to blend in with the rest of the work I also tidied up the routing of many of the wires and also added some labelling. The new sub goes pretty hard. I had the equaliser a little too bass heavy... .... Crazy how much just a little bum sub can change the listening experience in a car. --- I was ordering some amayama stuff for the MIL and decided hey might as well put some cheeky other stuff in the basket... As is tradition, I copied KWS' mirror mod. Basically I'm swapping the mirror out with a different but similar OEM model that has a dipper switch (84703-81A14-6GS + 84782-76G00). I also splashed a bit and got a new wiper stalk from a Jimny with adjustable intermittent wiper speed (37310-74P20). KWS already detailed the mirror swapping process and all you need is a screwdriver. The wiper stalk is also pretty easy. First, the steering column bottom cover comes off with one screw and a light pull. Of course there's tape on it. The stalk is held in with one screw that is obscured by the steering wheel; fortunately, turning the wheel 90 degrees gives access to it. There's also a clip holding it in. The top column cover is very flappy at this point and you can easily get at the clip with a flat head. So strange that they wouldn't just ship this variant on the alto. How many cents did they save not doing so?? Installation is the reverse, clip and screw it in... replace the column covers... Not much movement otherwise. She's still our daily driver and is doing great, trying to spread the gospel of the tiny 660 car wherever it goes.1 point
-
Guide coat primer like the rotary gods always intended1 point
-
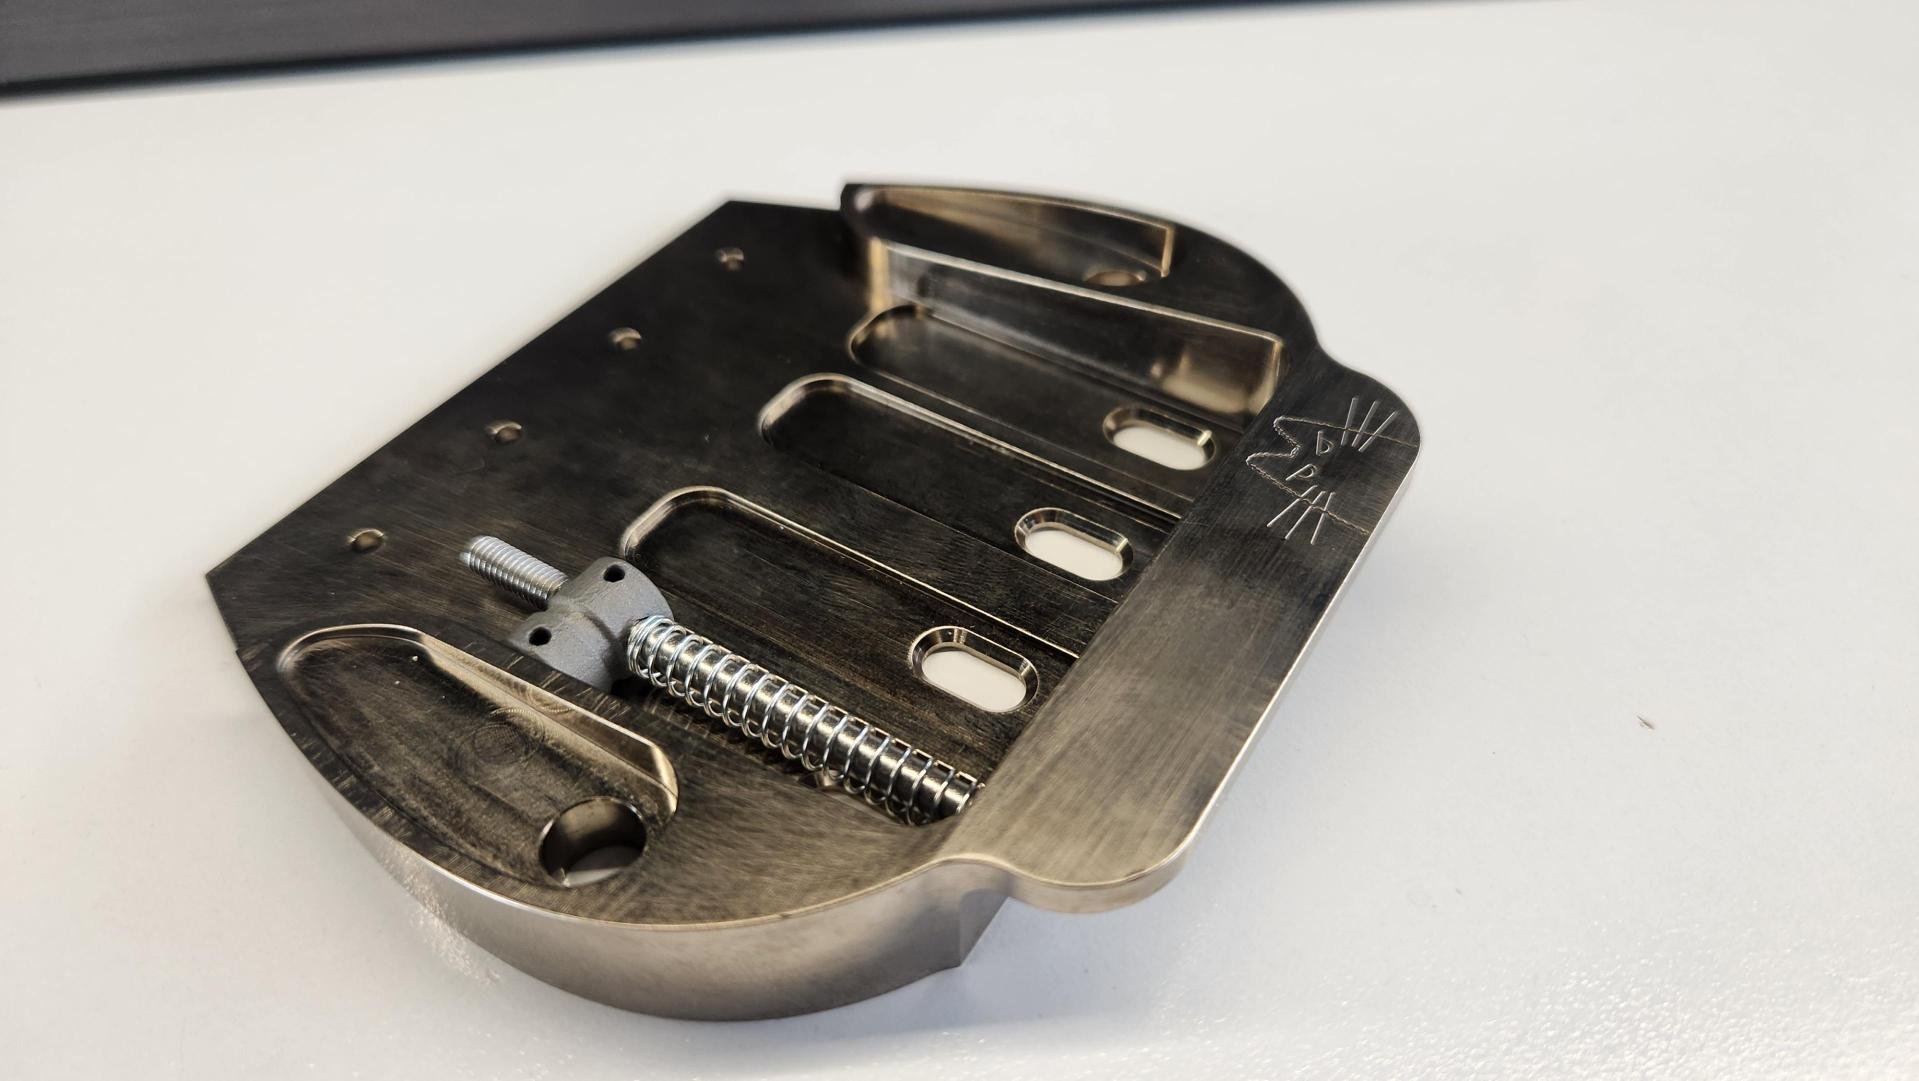
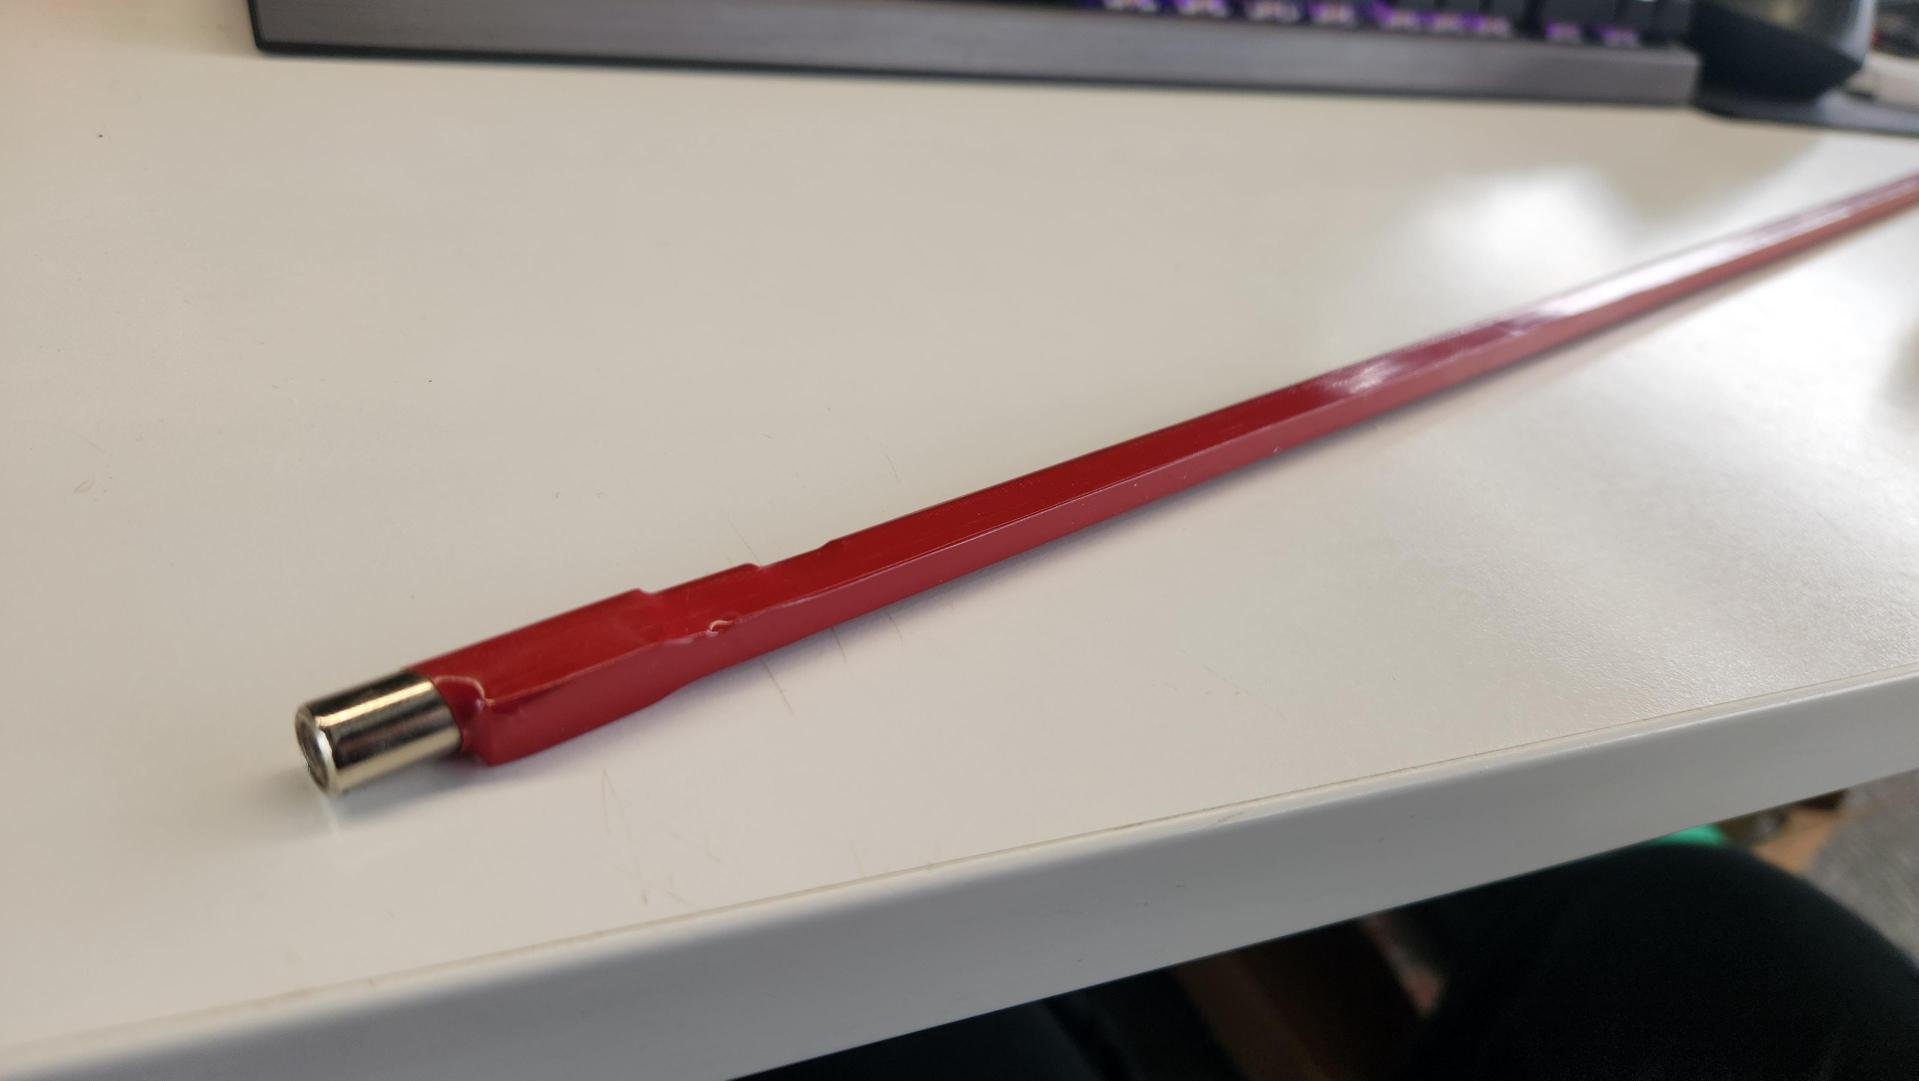
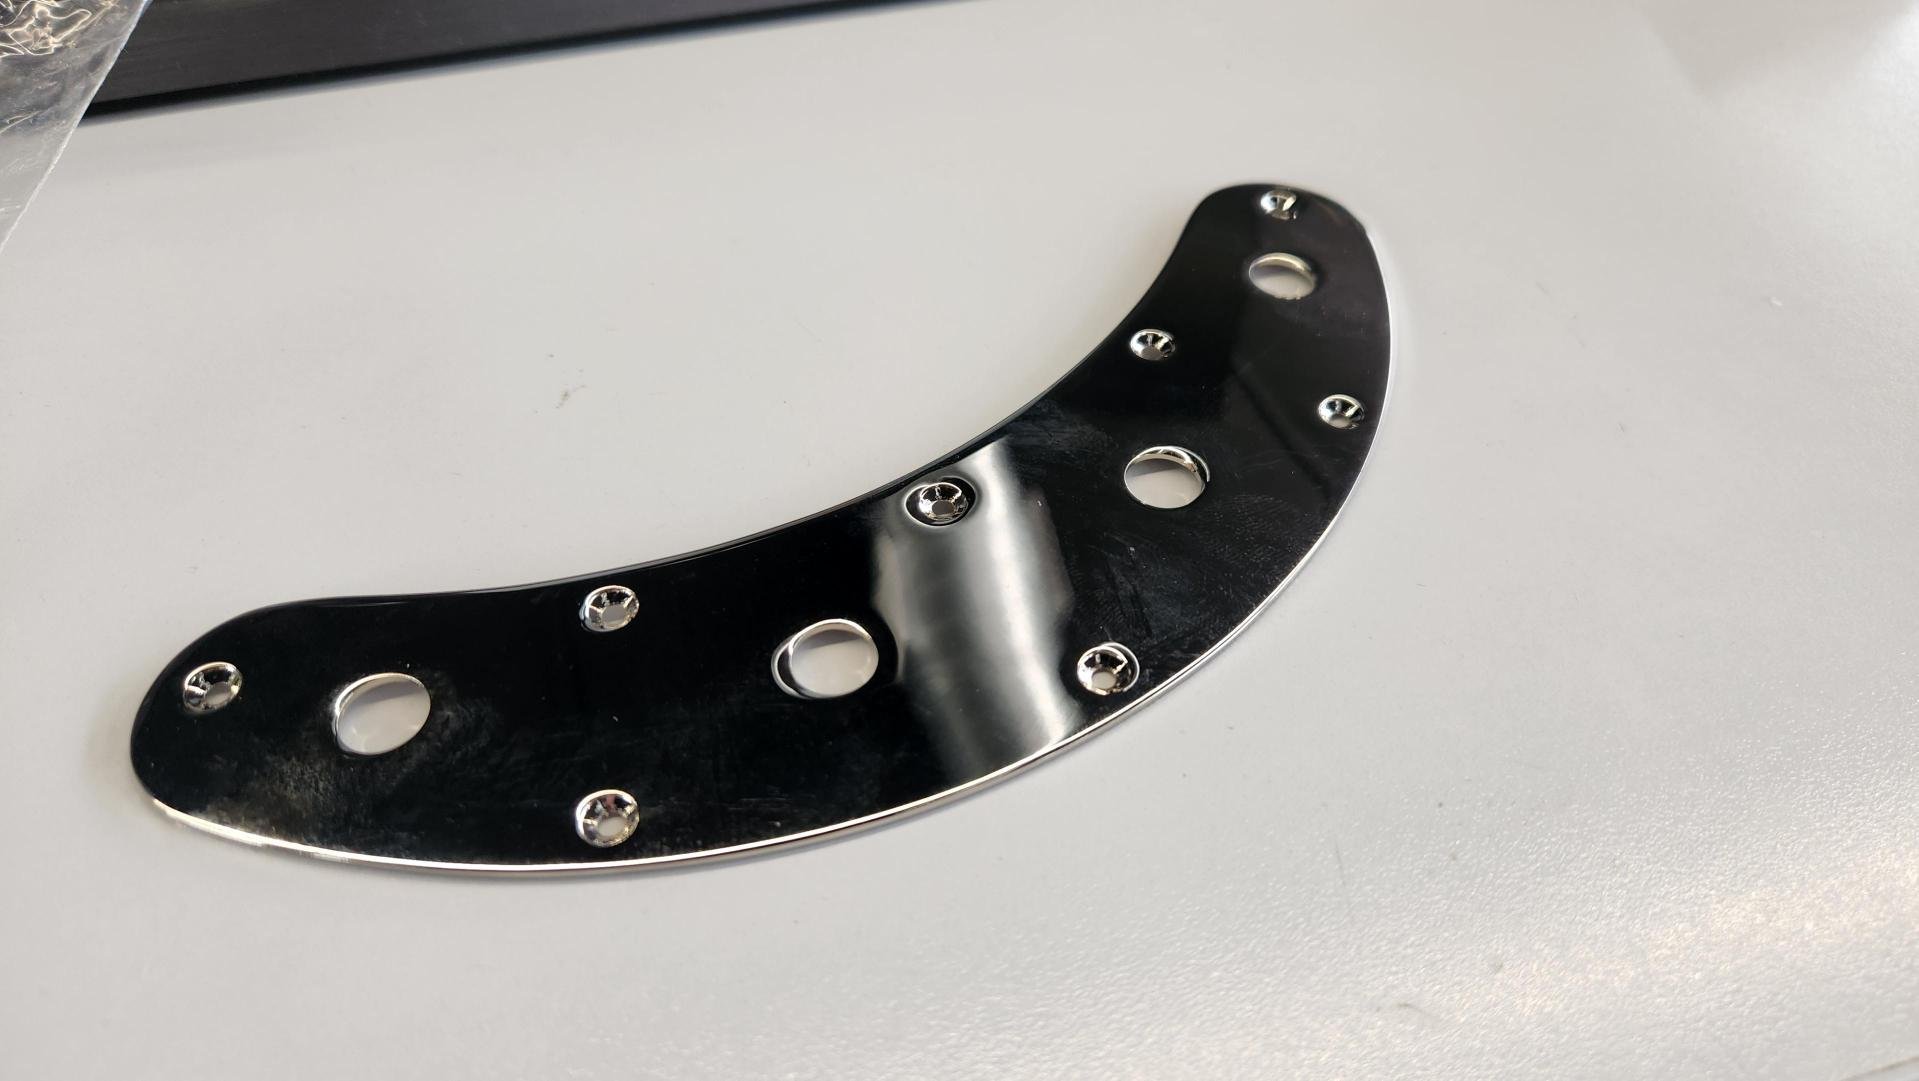
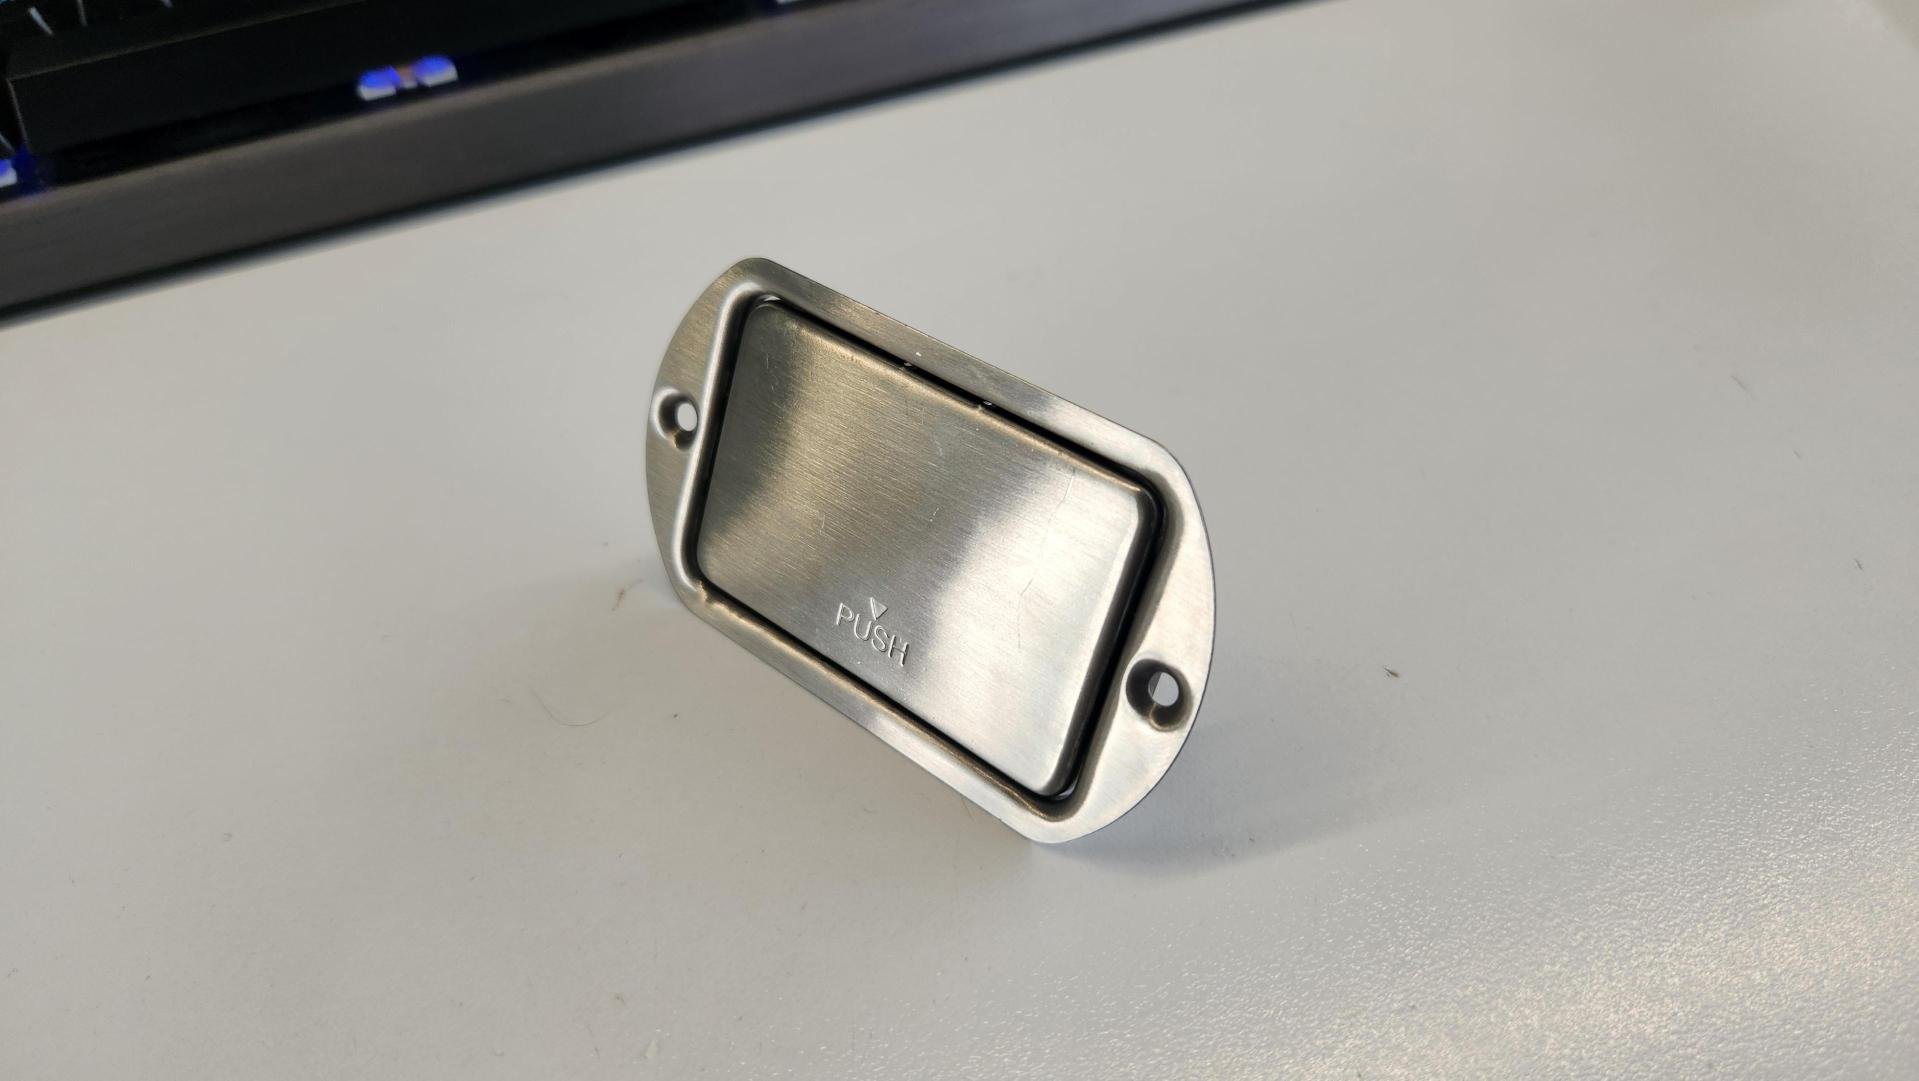
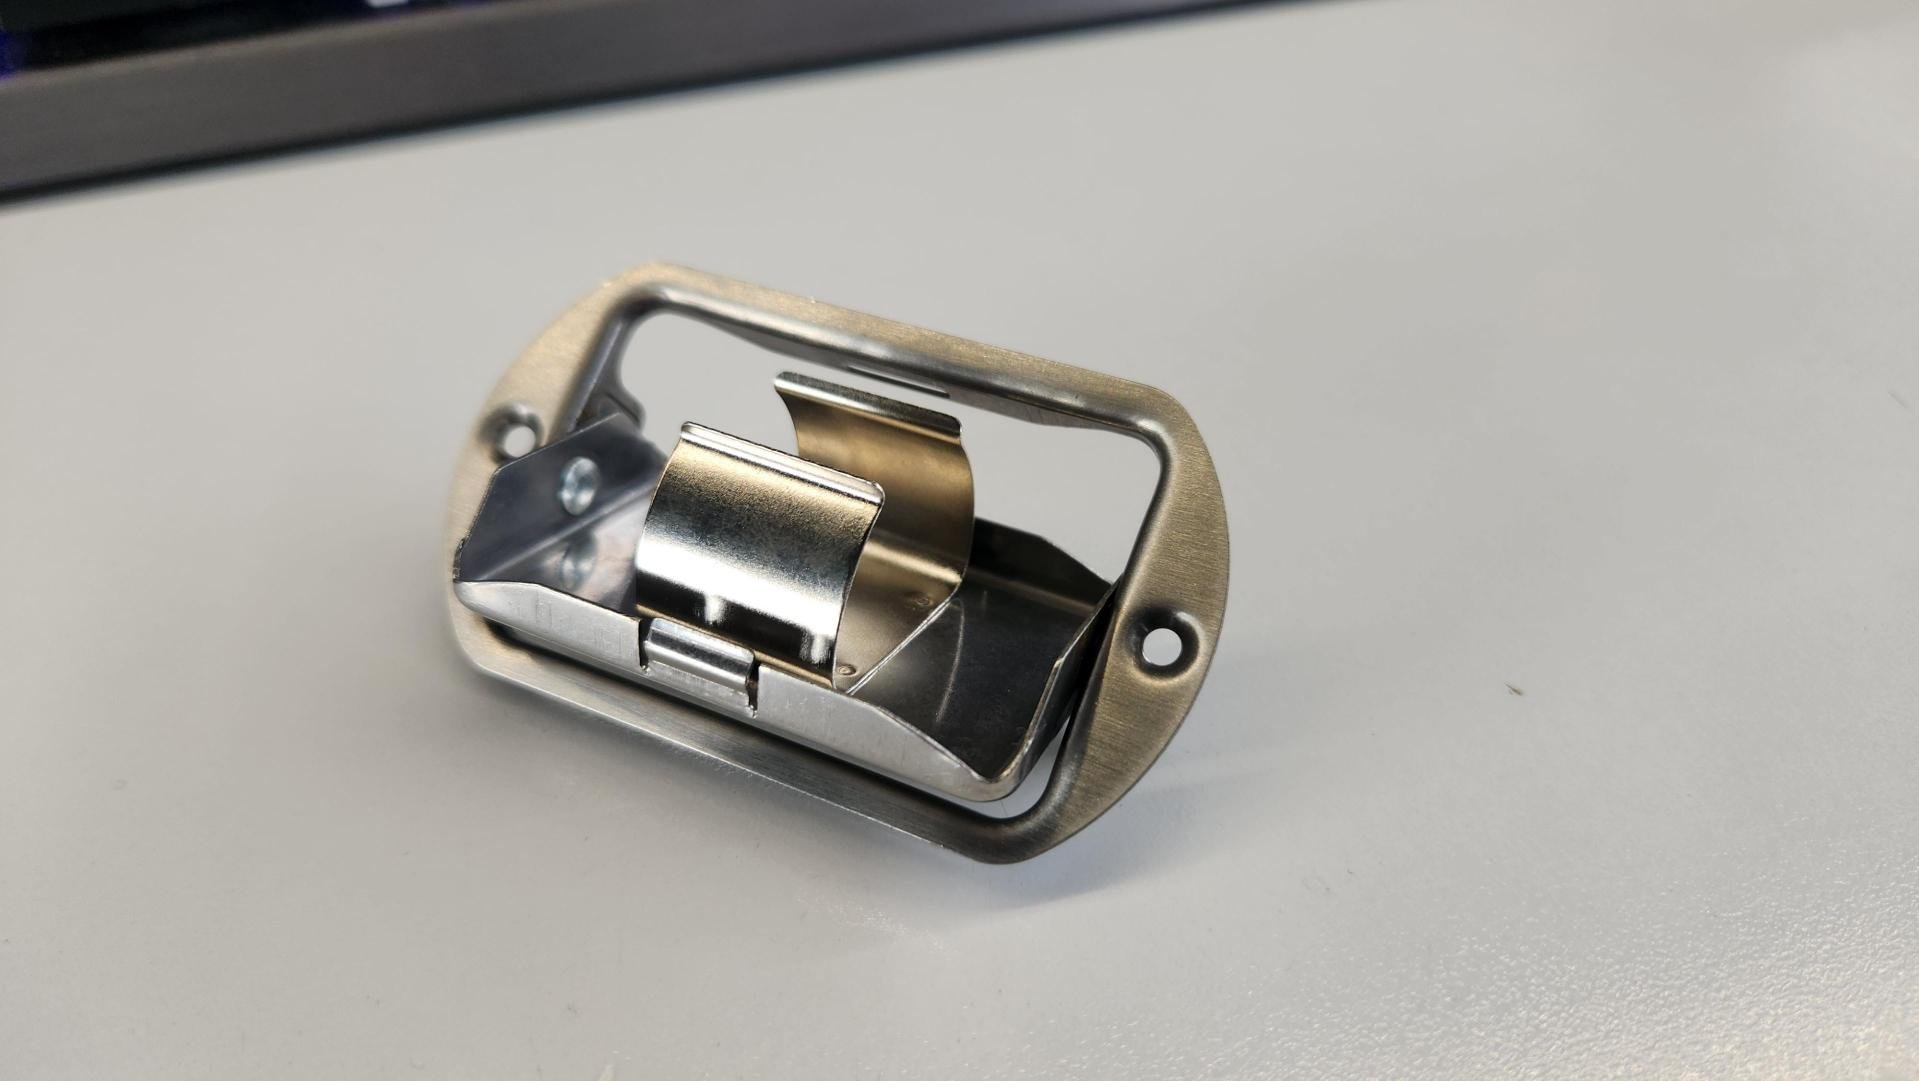
Third and final update for today, my custom one off bridge came in and boy am i stoked. this was the right choice and i love it. the surface finish wasn't super polished before plating (because i didnt pay for that) but its really only notible on these close up photos, im 95% sure i will leave it as supplied and once furnished will hardware and strings it will all just look pretty and remain a real center piece to the instrument. Gosh i love it. My 5 year old daughter who loves making noise with me (little digital drum kit) just about died from adoration of the cartoon. As you can see the adjustment screws are too long. this is just what i had on hand. i also need to clearance drill and tap all of the adjustment threads and source some M2.5 brass grub screws, probably from aliexpress. I think ill leave them "as cast/printed" on their own they look a bit rough but next to all the shiny the contrast really works. i also will paint the two recessed bolt areas with black wrinkle, which was always the plan but does happen to be where the machining marks are that i wouldn't have been happy to live with, win win. you can also see the four holes for the mute pad kit, which you can buy from Music Man... if you live in america... didnt notice that part before i included it. It remains to be seen wether i fork out for freight forwarding the kit or make my own.
1 point
-
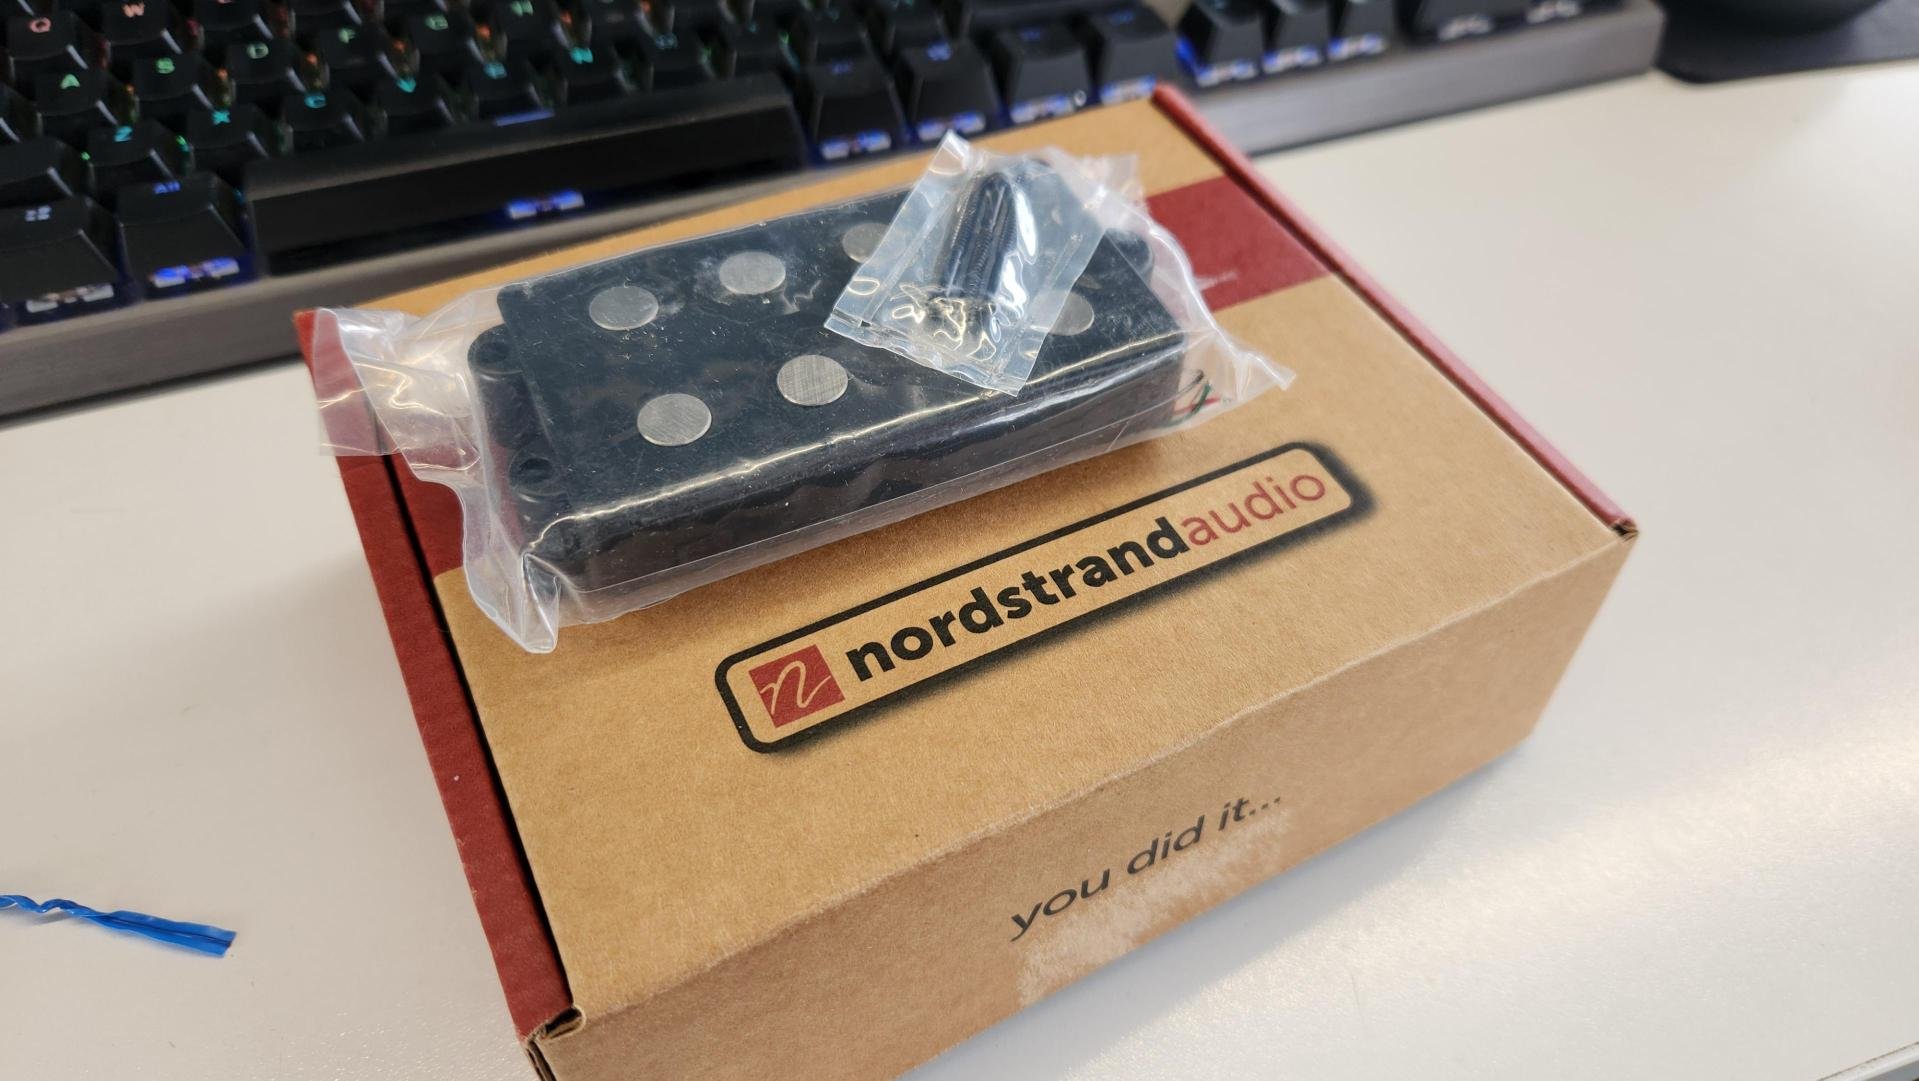
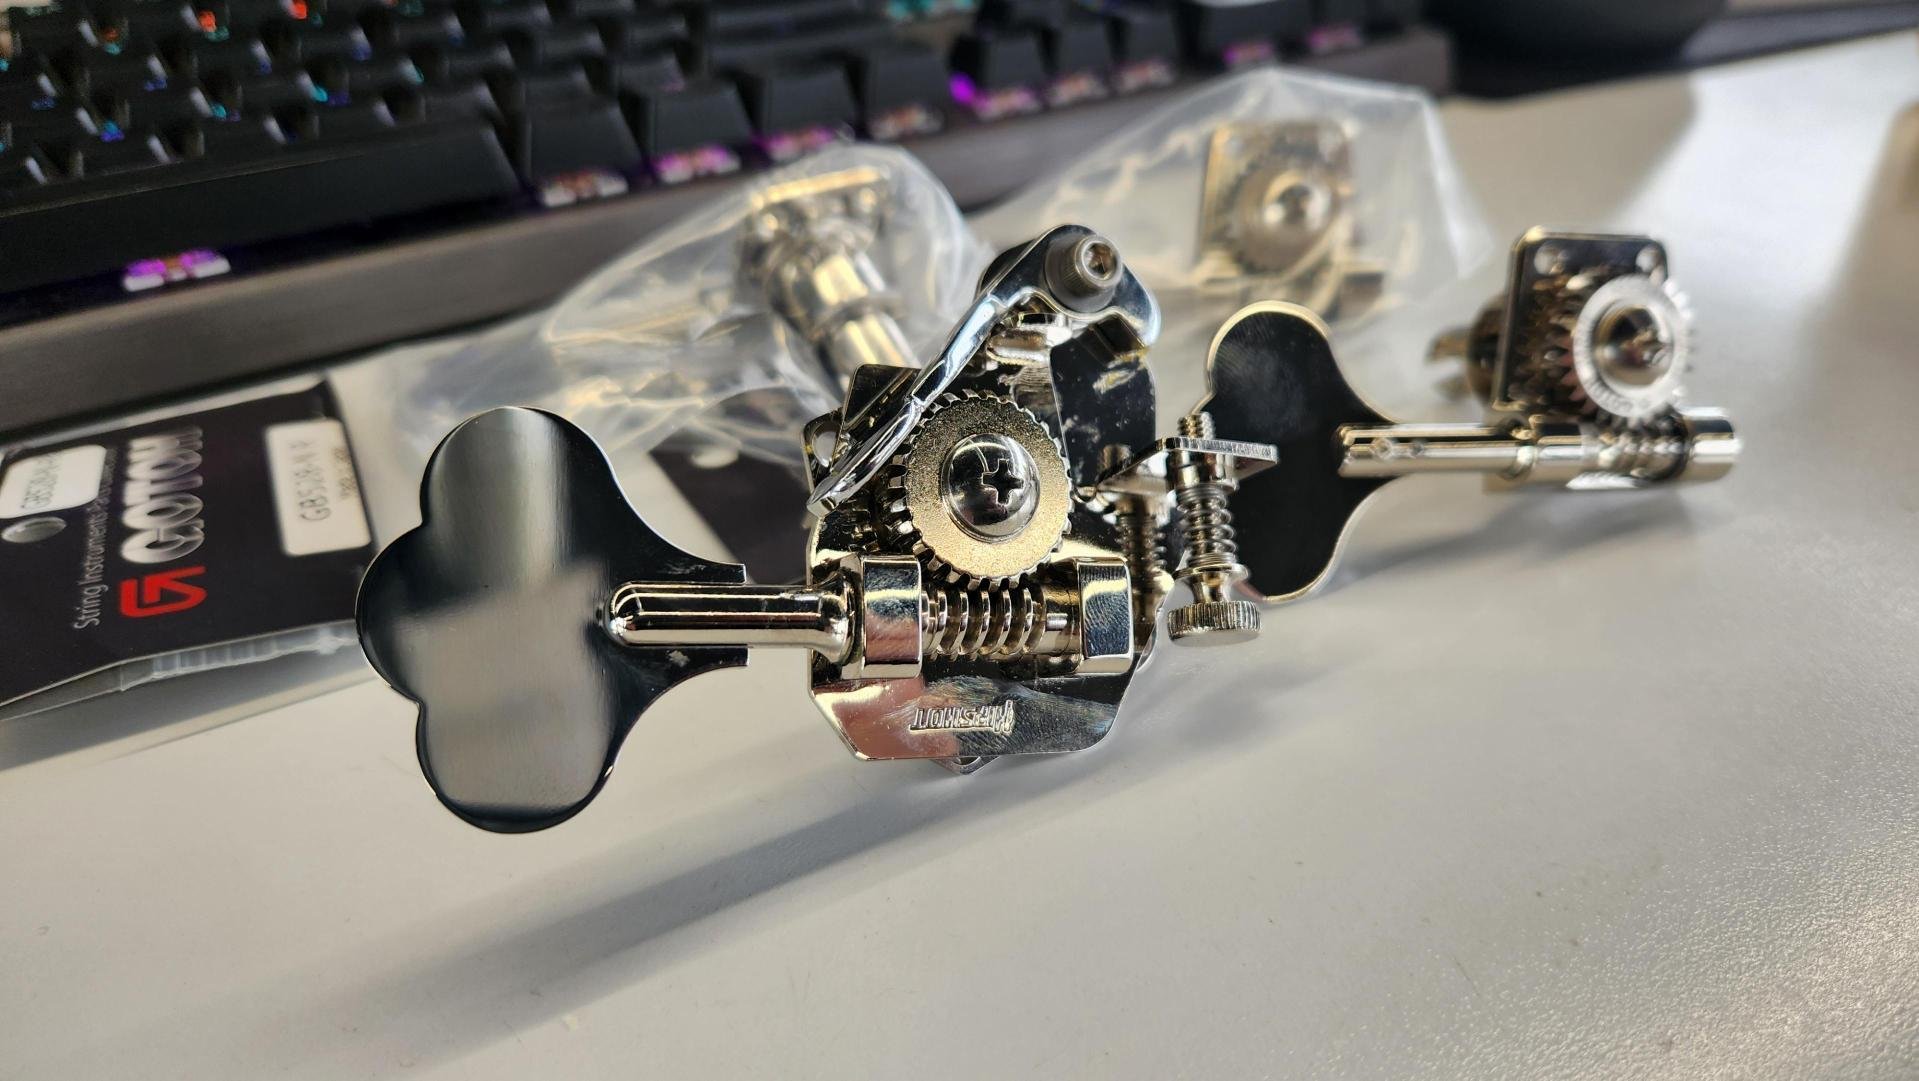
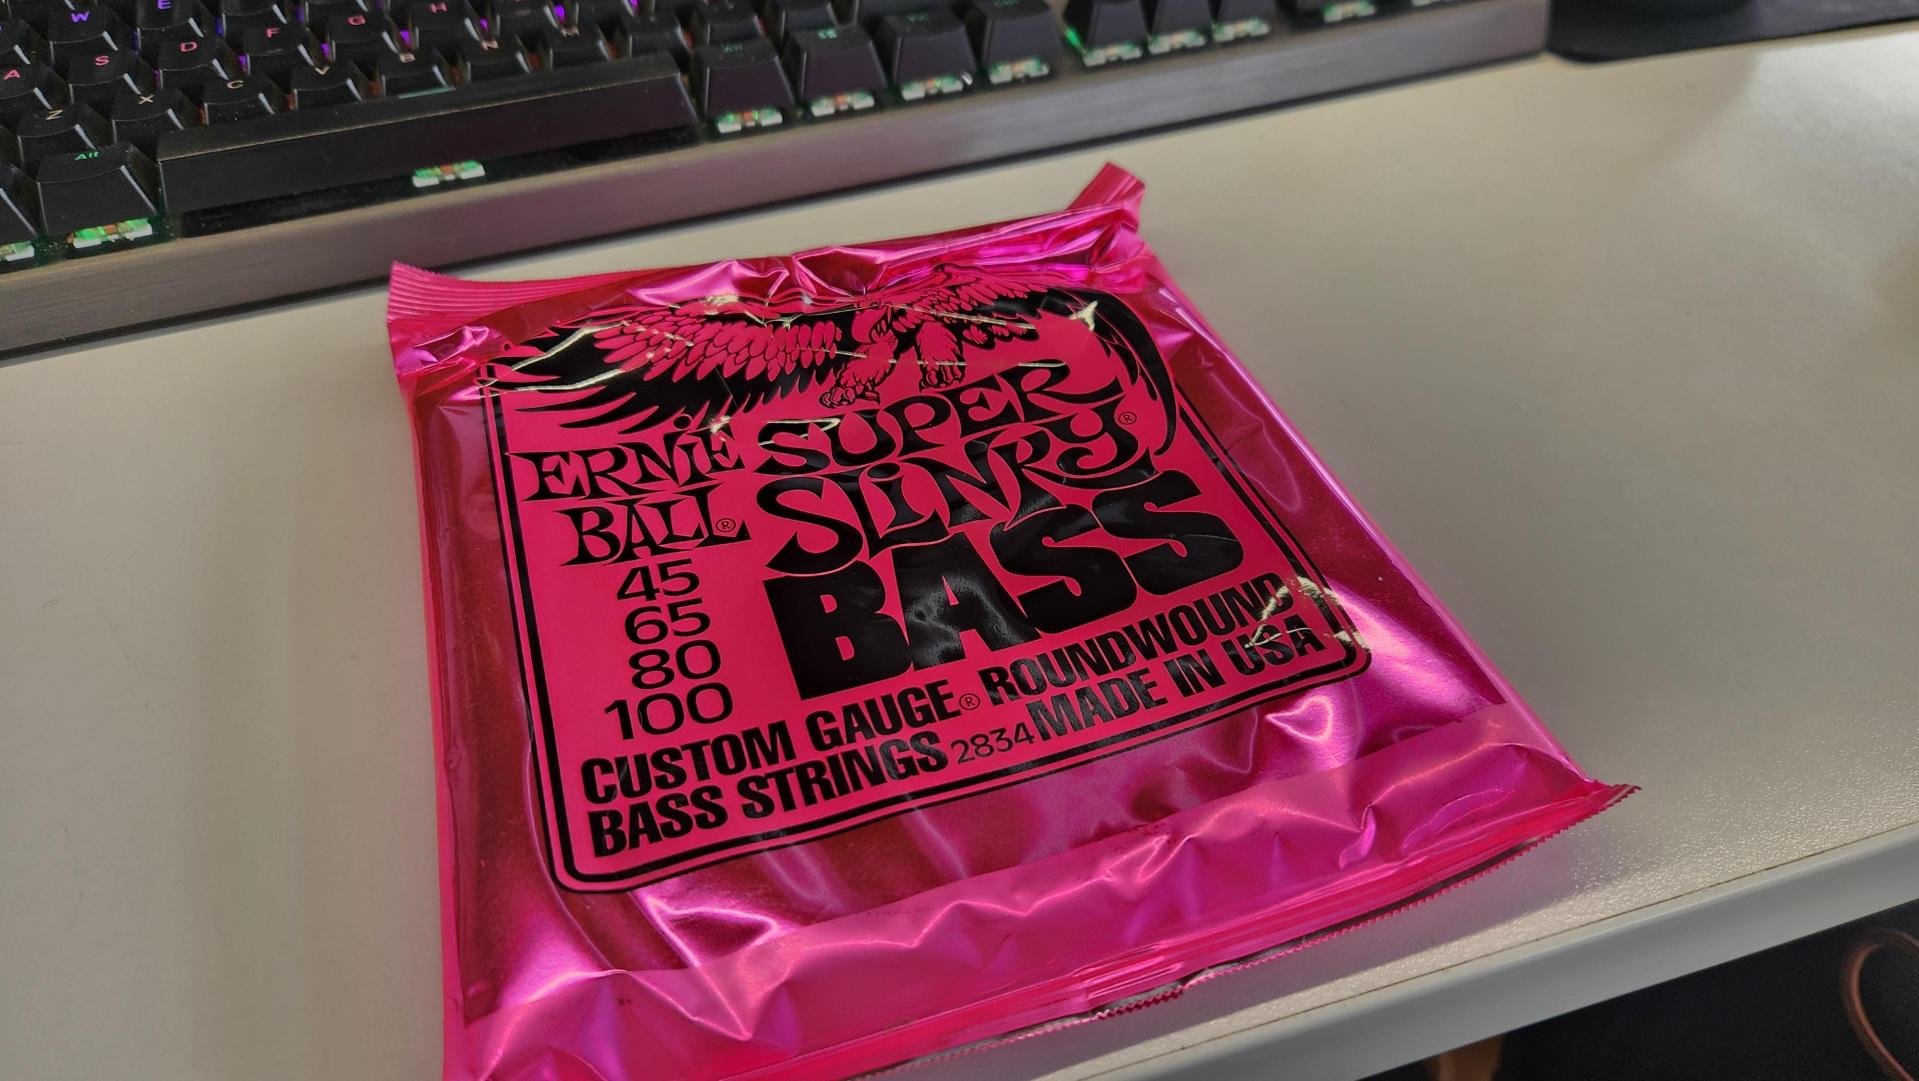
And heres a long and expensive list of things ive bought. however the amount of money ive spent is still less than buying the cheapest good quality instrument from a shop and this (should) be of far far higher quality. the most important first. Nordstand MM4.2 Pickup. This is one of two options i found for recreating the original sound faithfully (in conjunction with the correct preamp - more on that in a later episode) The the tuning machines. Gotoh Res-o-lites x3 and one Hipshot drop D tuner for the e string. this is unnecessary but i really wanted one. it allows you to pretune the E string to D and lets to flick a lever back and forth for the two tunings. just cool. Gotohs over Hipshots for the other 3 because they were substantially cheaper and look the same, still really high quality. StewMac truss rod Nickel Plated control cover Cool little stainless steel preamp battery holder. i dont want any plastic. and a set of standard but correct spec strings
1 point
-
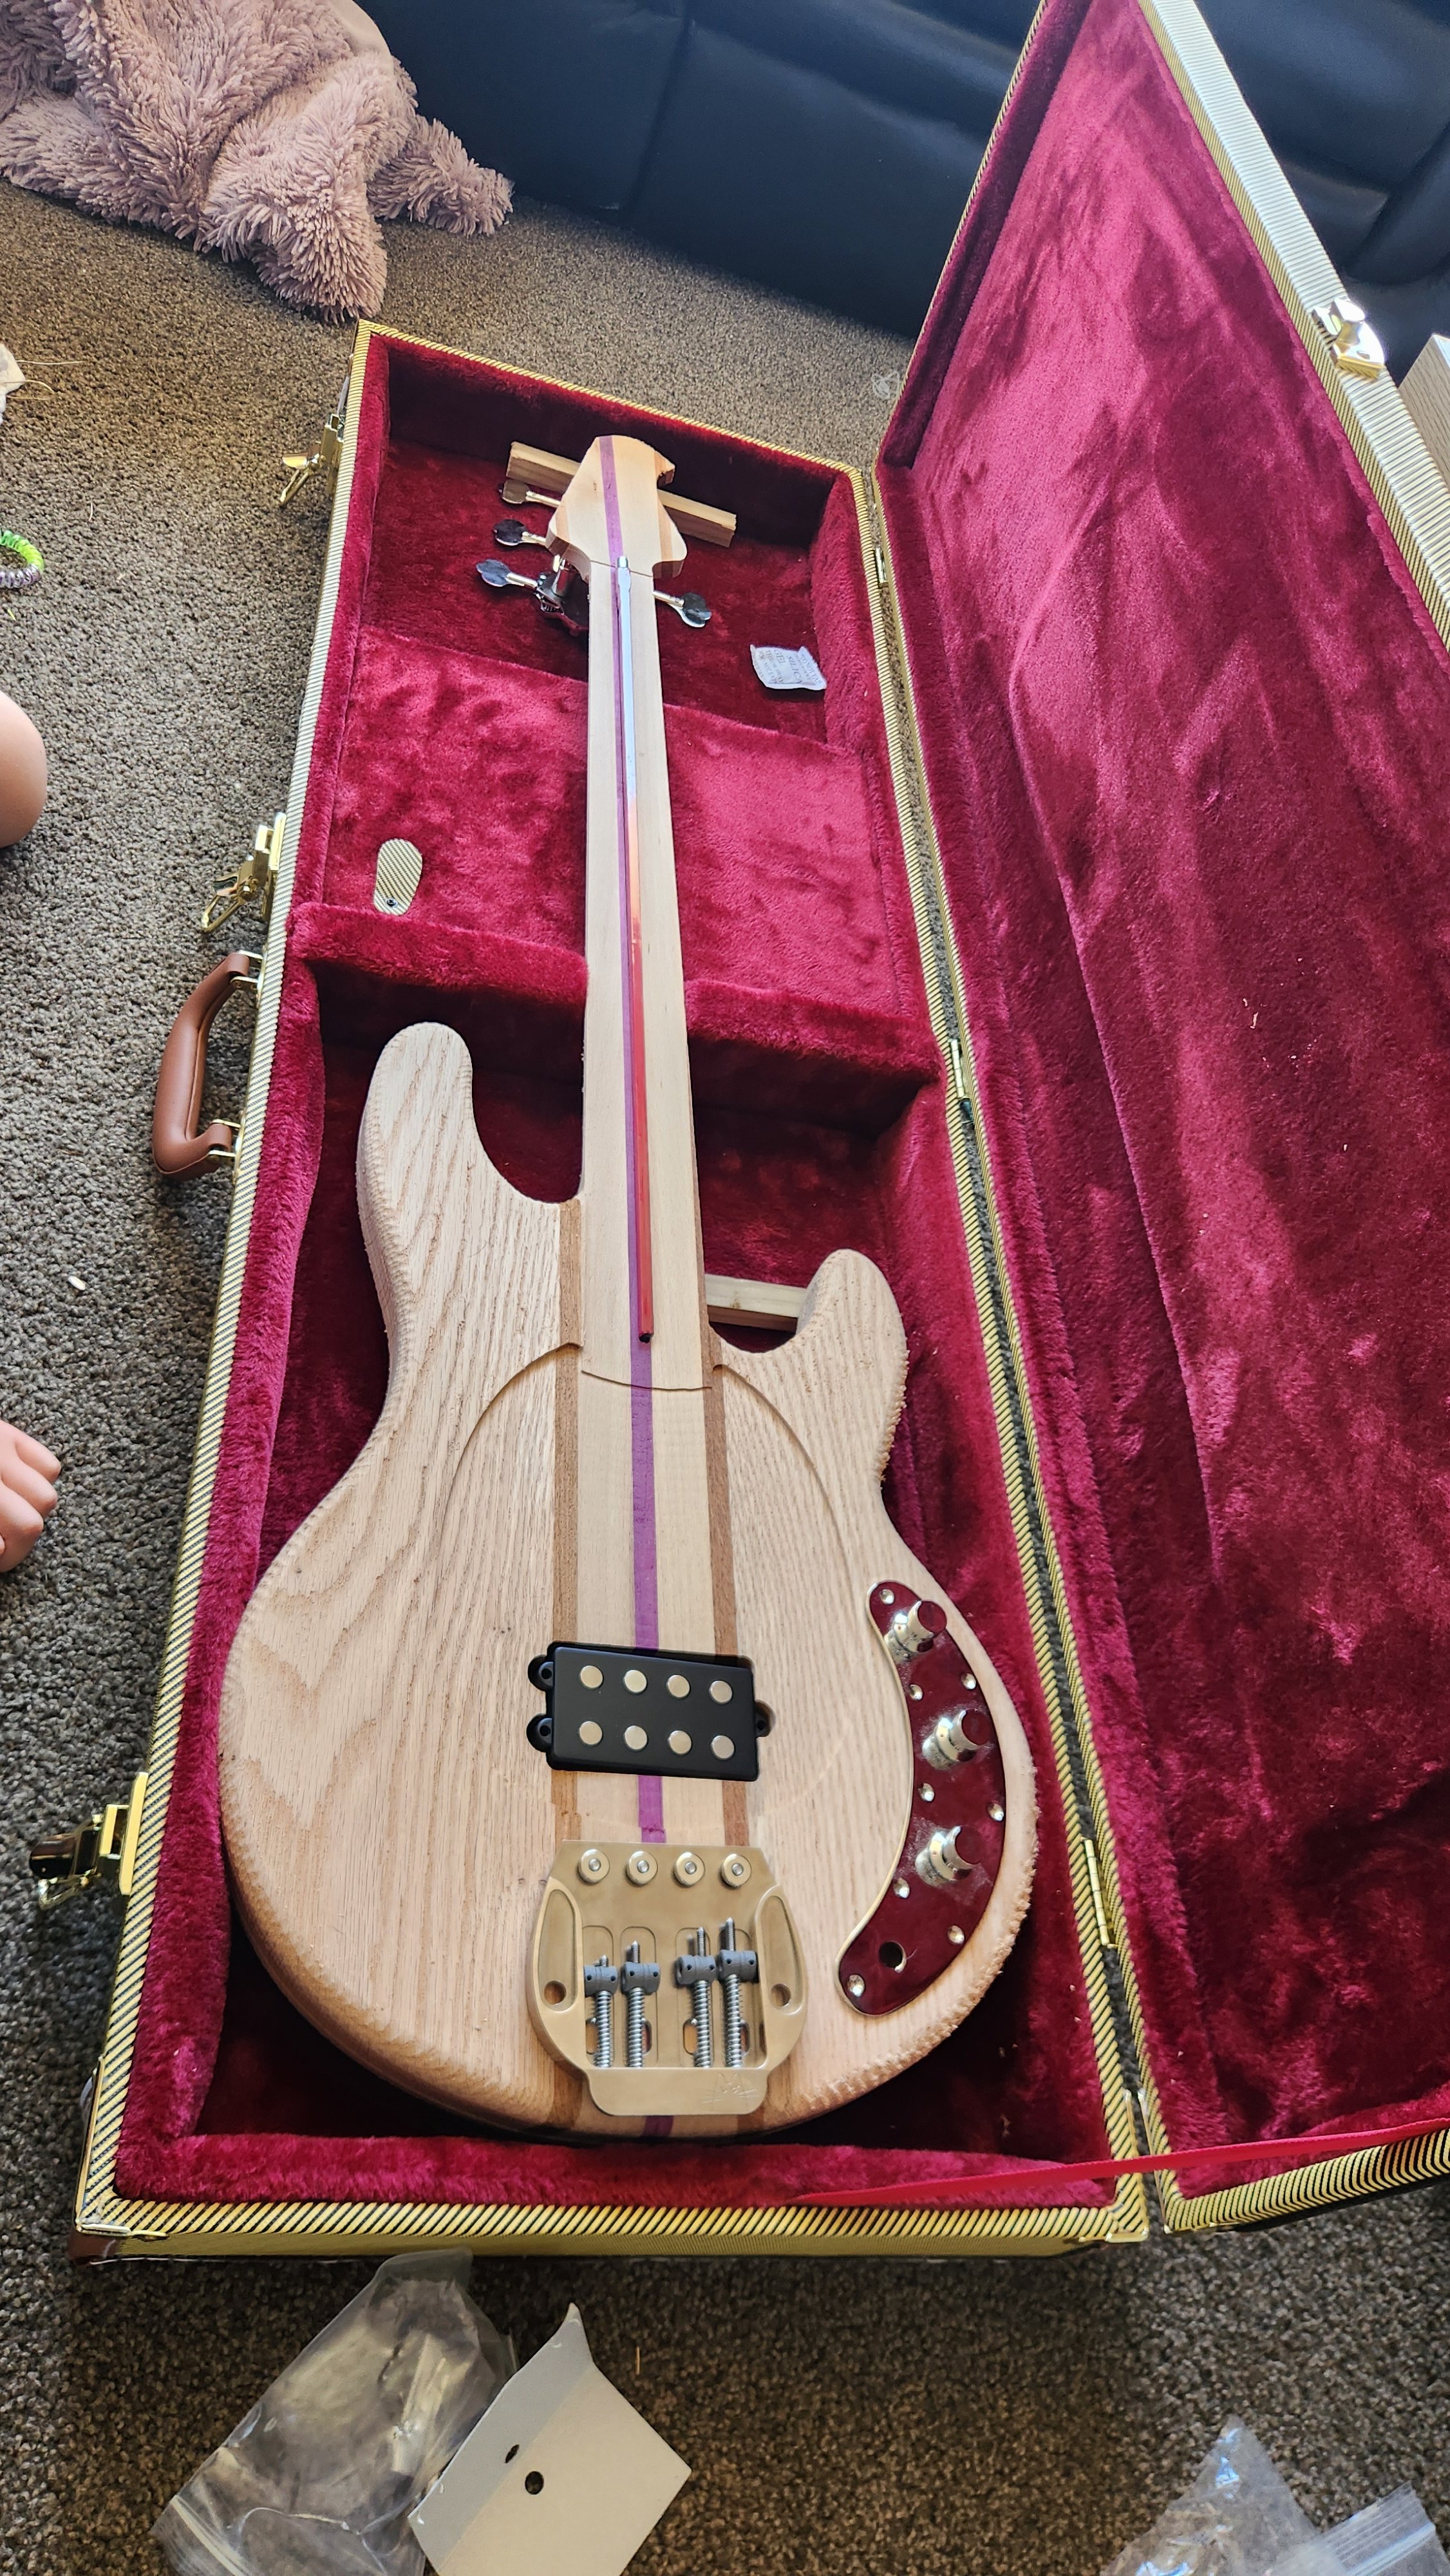
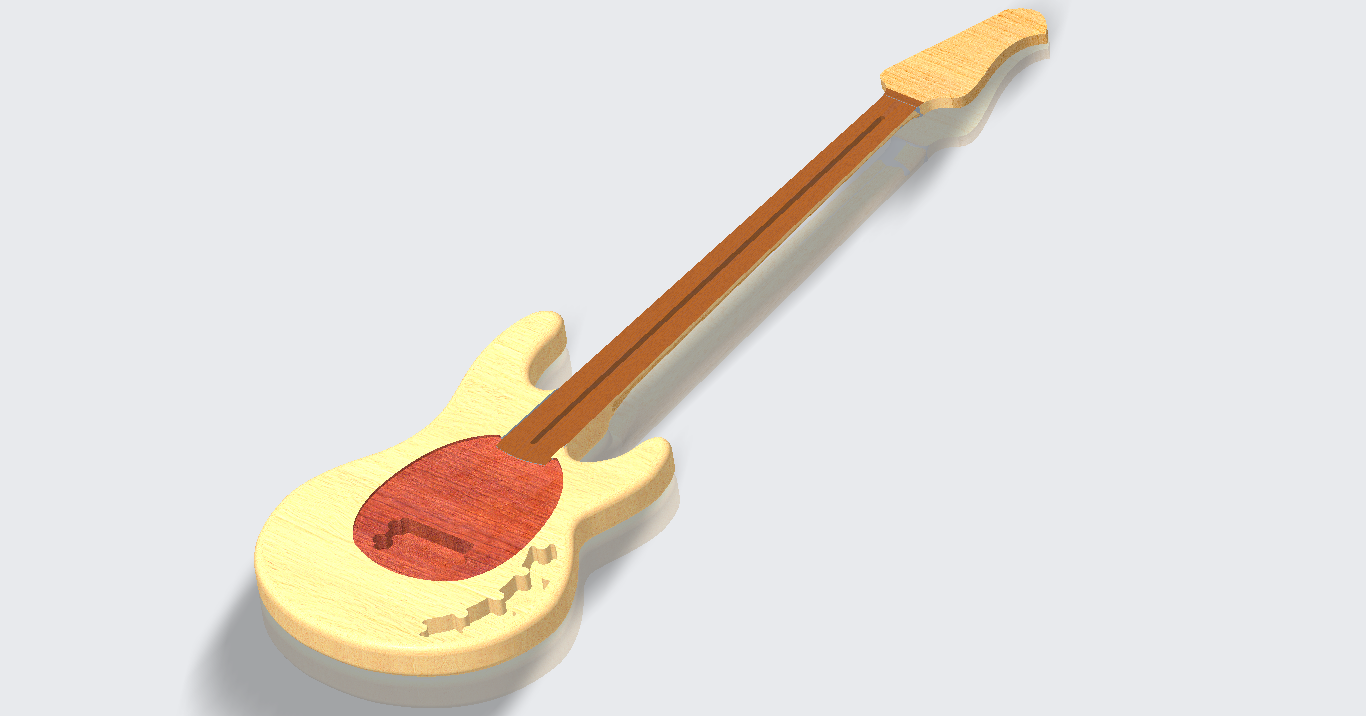
I have been doing quite a bit of work (and purchasing) on this project. Firstly i finalised the 3d model, as seen above. threw some vaguely right colors over it but you'll see the hardwood blank looks quite different. next, i needed a bridge, the part which anchors the strings and affords various adjustments for string intonation. The problem is that i never really liked the orginal StingRay bridge. they were just a pressed steel thing and looks pretty plain, however i felt the overall footprint was important to the shape. i also really wanted something with the mute pads. I couldn't find anything that i liked until i came across this item from Sandberg, however they only sold within the EU and i couldn't find an NZ distributor. So.. i gave up and gave into my desire to just design my own. i took a leaf out of @Roman book and sent the design away for CNC machining from aluminium and nickel plating. i also had the saddles 3d printed from stainless steel This also presented the opportunity to include a little hand drawn sketch of my cat who actively loves listening to the bass. if i stop, she will demand i continue. She is very fluffy which leads to her looking perpetually angry, a great little logo i thought.
1 point
-
So I actually did some work on this van. I fire it up and drive it around the block every couple of months and noticed it was starting to run a bit ropey - the fuel was stale. So I drained and refilled the fuel, and thought while it's out, i'll do a couple of other backburner jobs. Replaced the steering column bushes (identical to early mini, plastic bush up top, oiled felt bush at bottom) and the rag joint. These had been on a shelf in the shed for a rather long time. I had been using morris minor seats which were a bit dilapidated, I had some marina ute seats which had mint upholstery but the frame had entirely rusted out where it contacted the floor. Turns out marina van/ute/presumably coupe lower seat frames are identical to morris minor, I just cut the tubes off the bottom of the minor seats and welded them on to the marina ones and now have great and fairly comfortable o.e seats. The vinyl is a bit stiff so will rub some vinyl stuff into them to make them pliable again hopefully. I have decided I am not really happy with my sticker-murals, next time I have a burst of marina focus I will refinish just that area on each side. I would still like murals, but real airbrushed ones. Ideas include an outsized, leather clad, buxom woman riding astride the boiler of a K class steam engine as it crests the raurimu spiral at midnight, along with a graveyard scene with a gold watched, rotten tweed clad skeletal wrist surging forth from the earth to claw at a leyland 'flying plughole' gravestone, while a hooded allegro and princess sacrifice a morris minor in the background.1 point
-
Thinking about moving this thing on is anyone is interested
1 point


.thumb.jpg.570970b401ac8d26ce9af7c1bf2bd8cd.jpg)


This leaderboard is set to Auckland/GMT+12:00