
Leaderboard


Popular Content
Showing content with the highest reputation on 12/11/24 in all areas
-
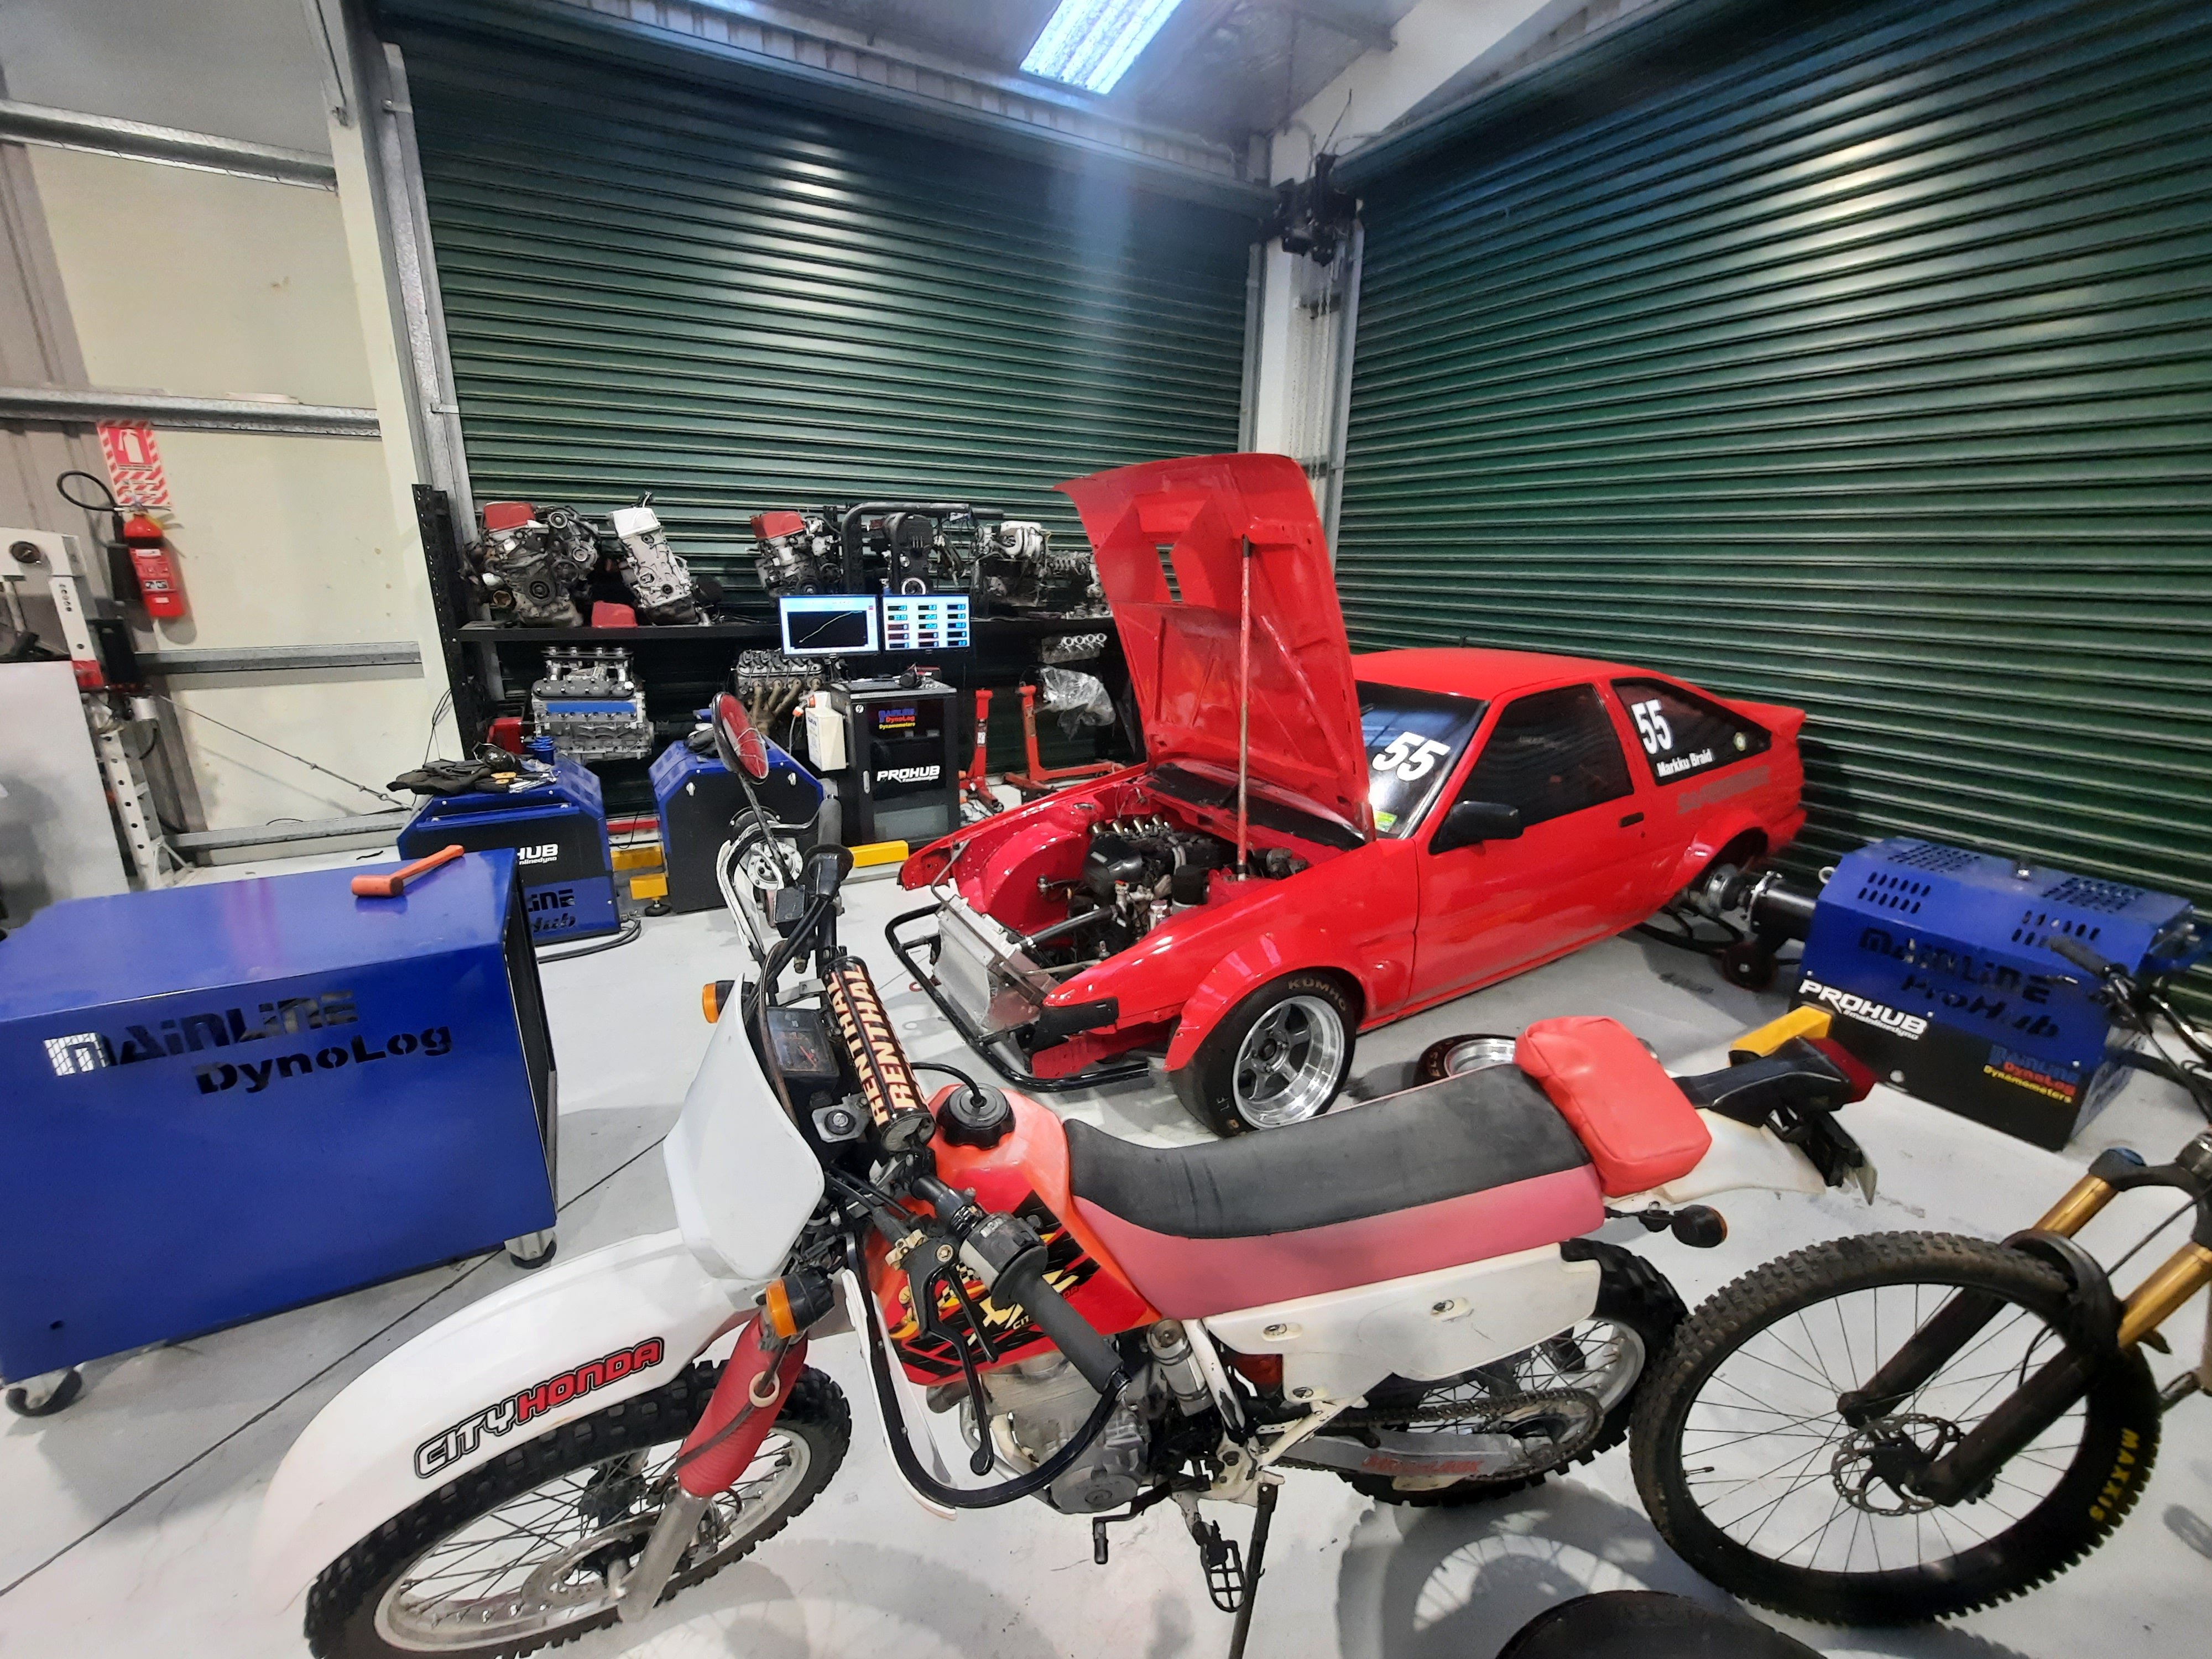
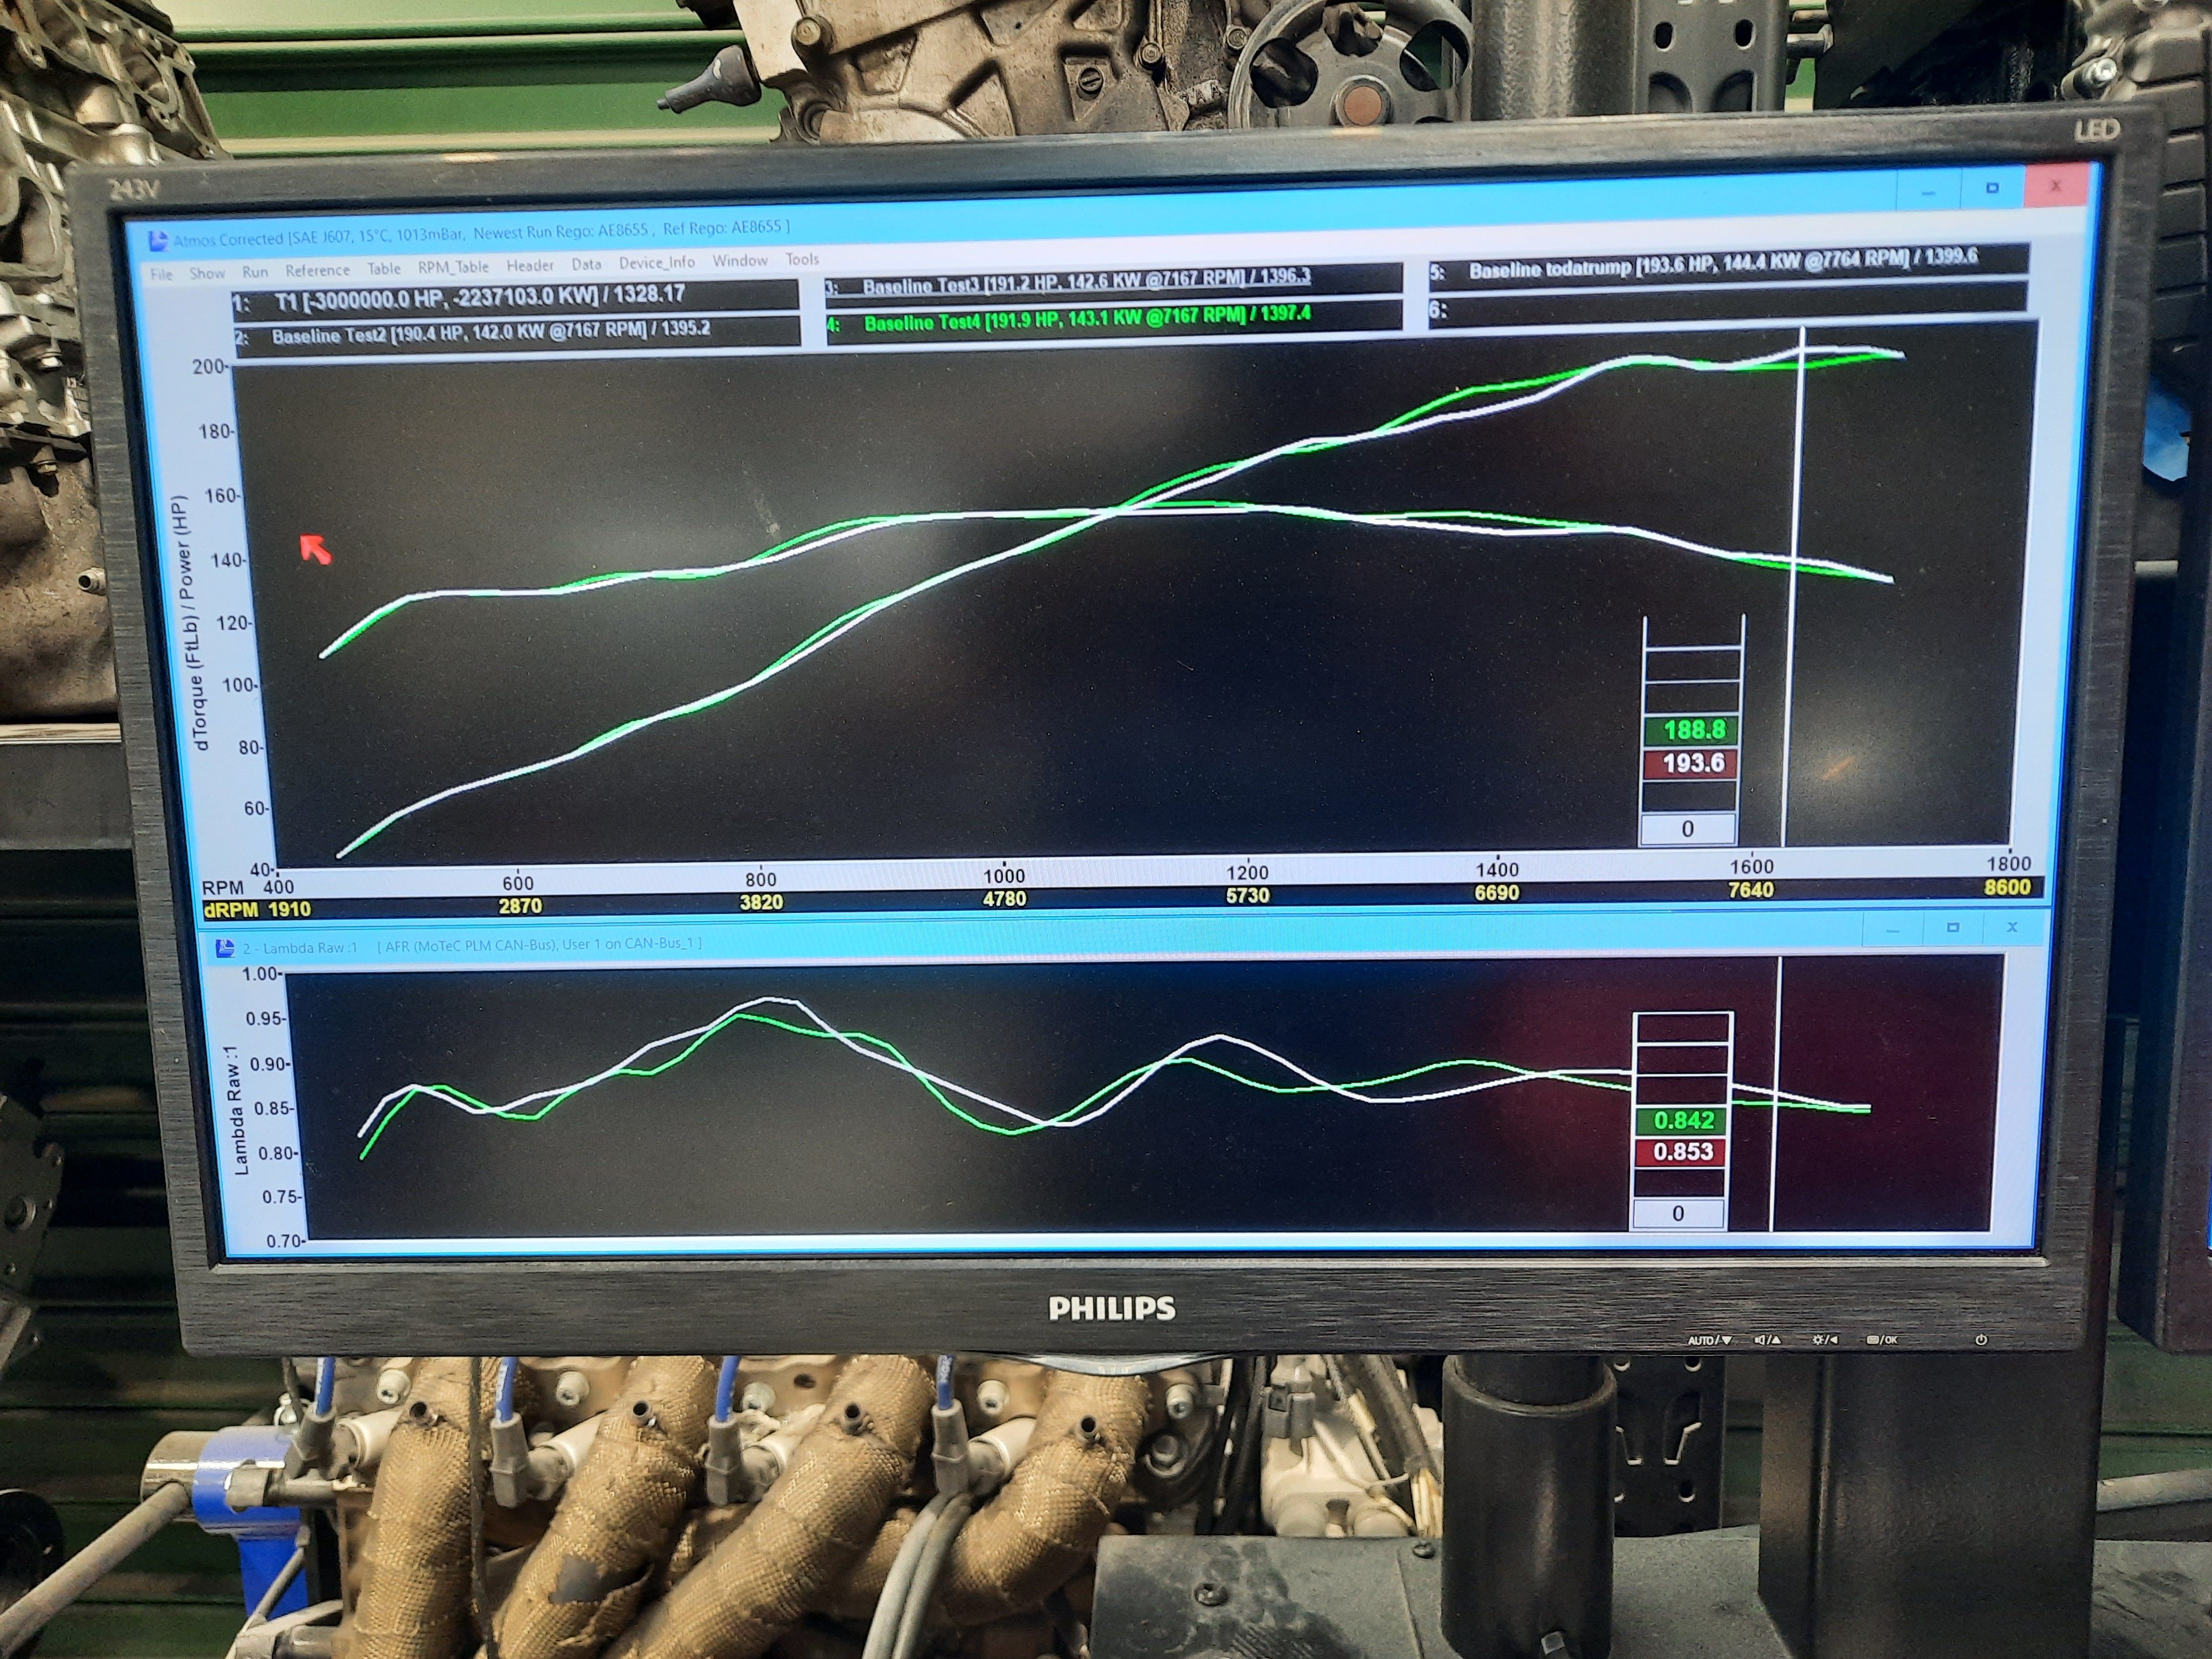
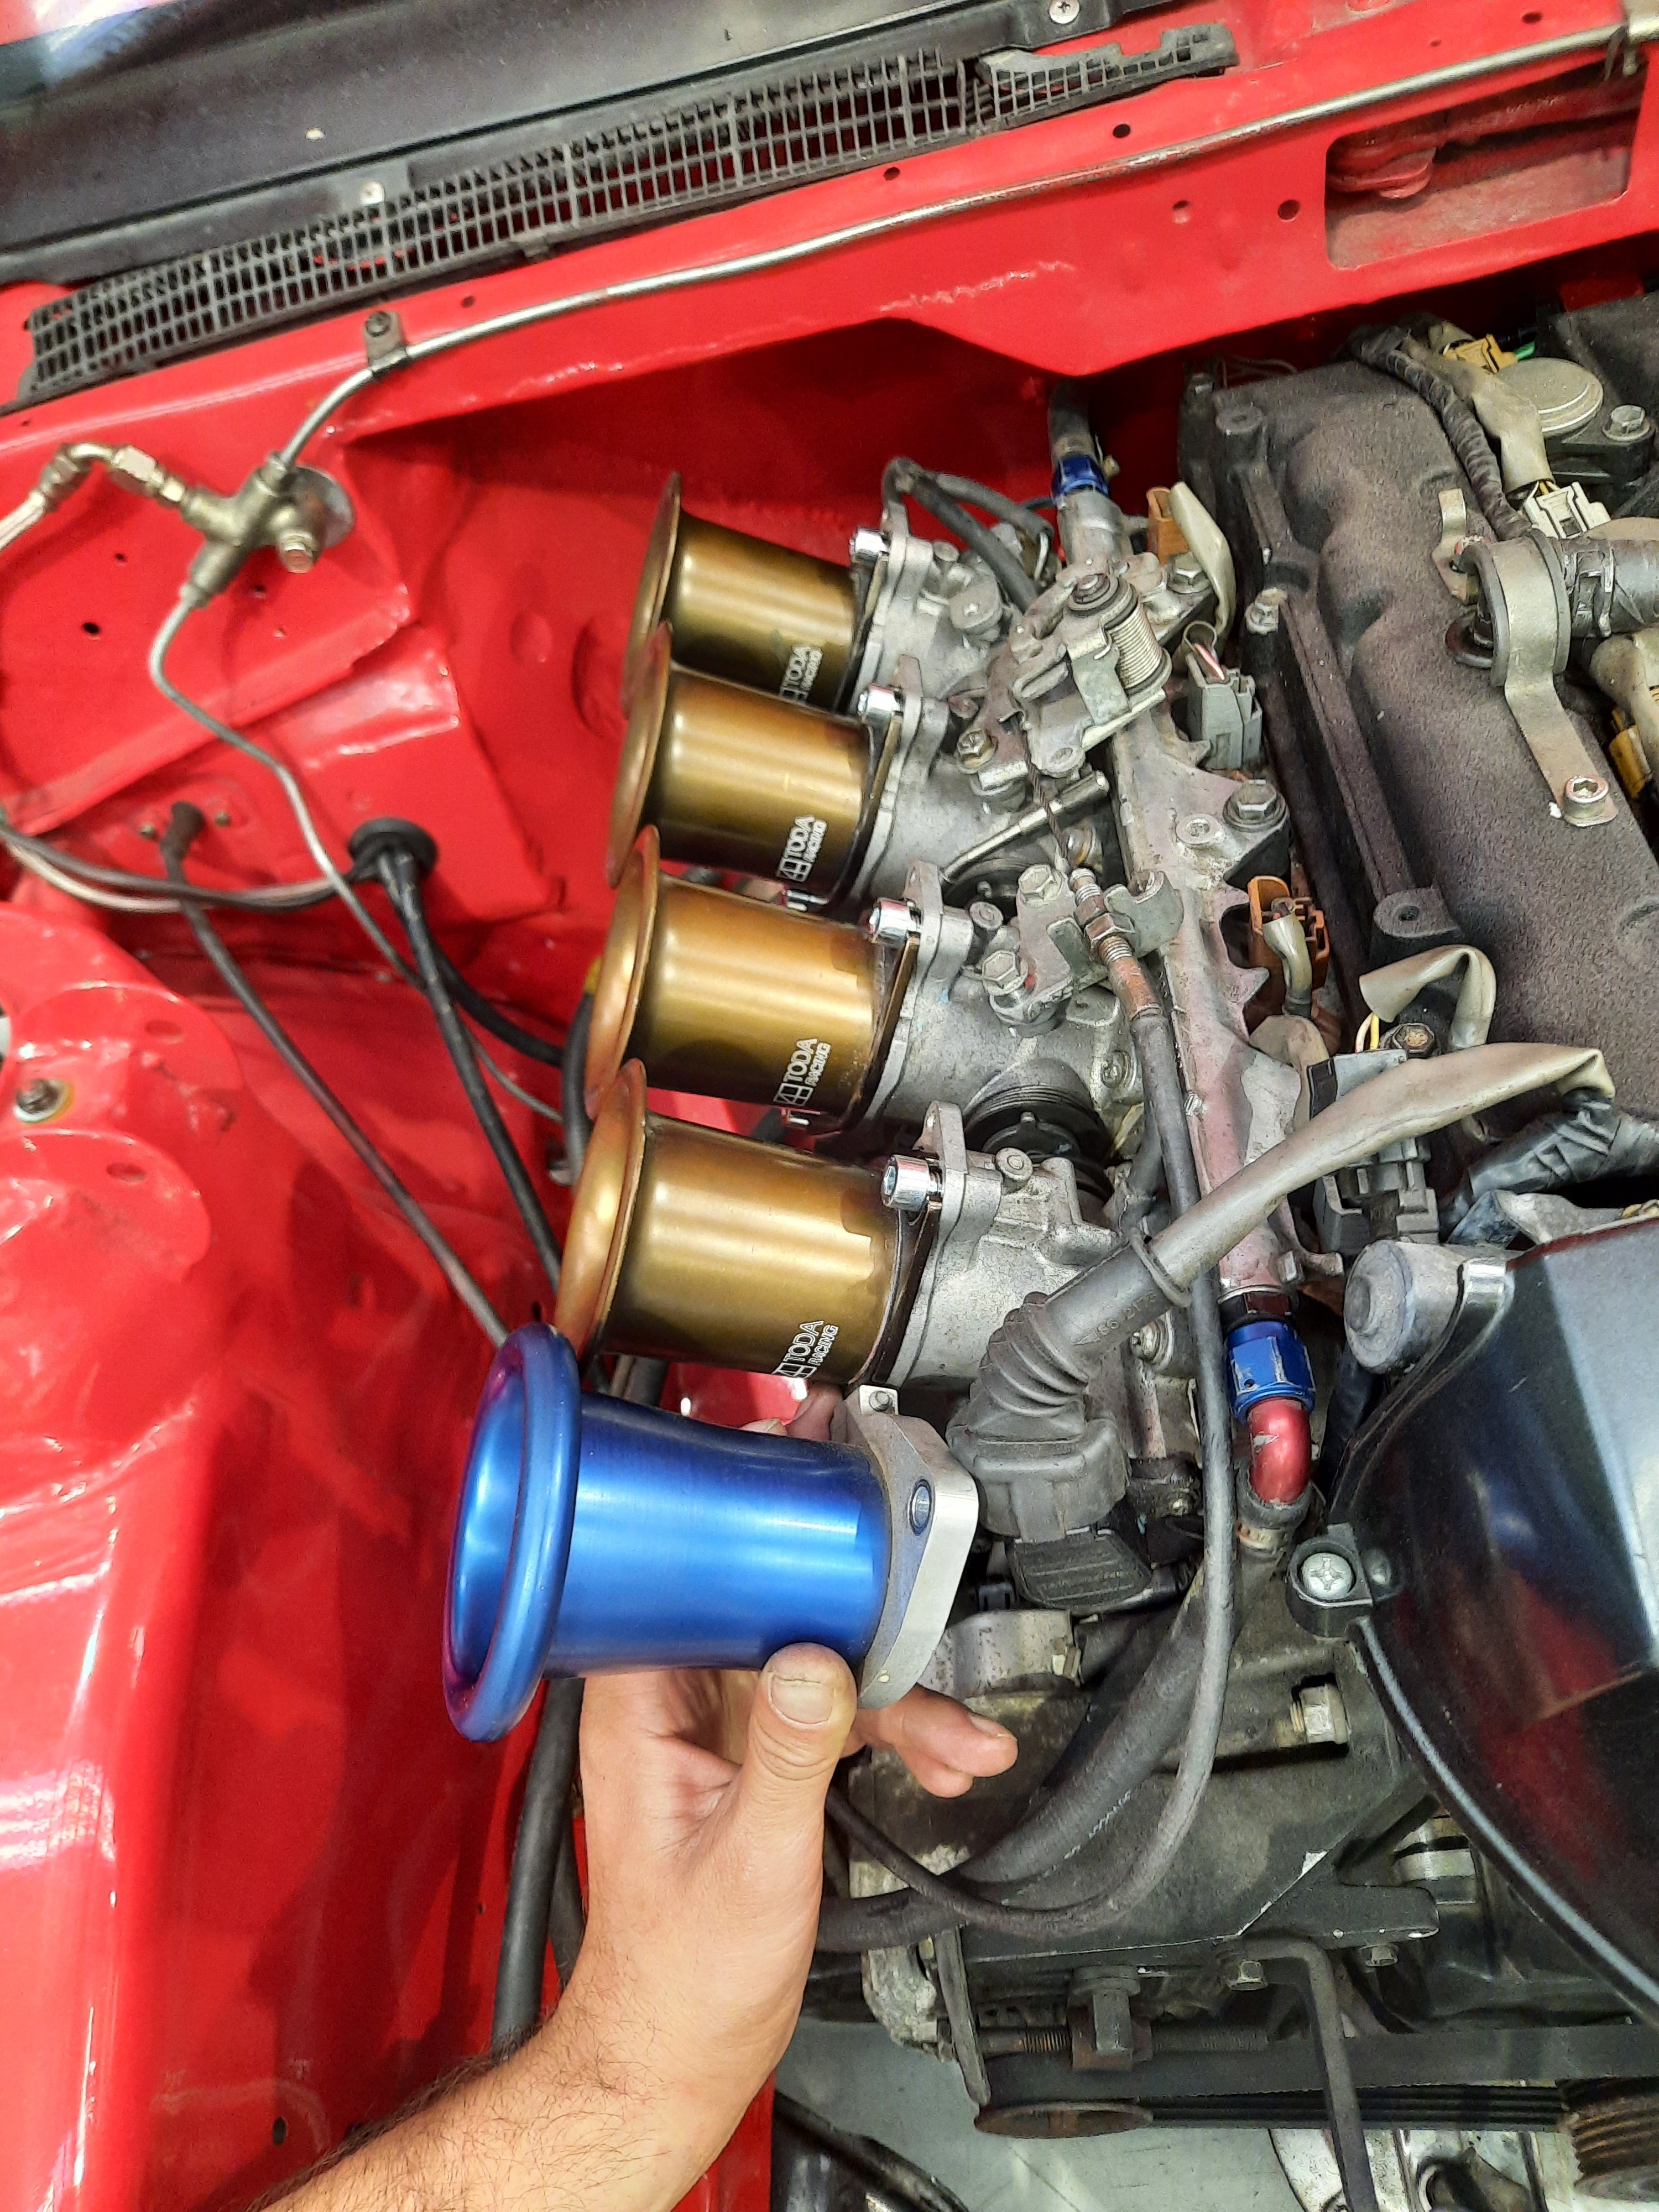
Bolted this thing onto that thing to get a baseline before making a few changes. Gave it a couple of quick runs, then swapped the trumpets from the 95mm blue ones to 75mm bronze just to see what might happen. 95mm trumpets are the green line, 75mm white line. The AFRs are pretty messy and we haven't touched any tuning, just swapped trumpets and ran it again, so maybe the shorter ones will work after some fuelling and VVTi changes? There's a set of 48mm Jenvey ITBs floating around at work and one of the guys has 3D printed a manifold to test. It'll be interesting to see if there's a difference from an extra few mm of throttle plate, and I'll give a few different bell mouths a try at the same time. I'd really like to try 50mm or even 52mm just to see if there's any gains.... will see If I can find a set to try.
 20 points
 -
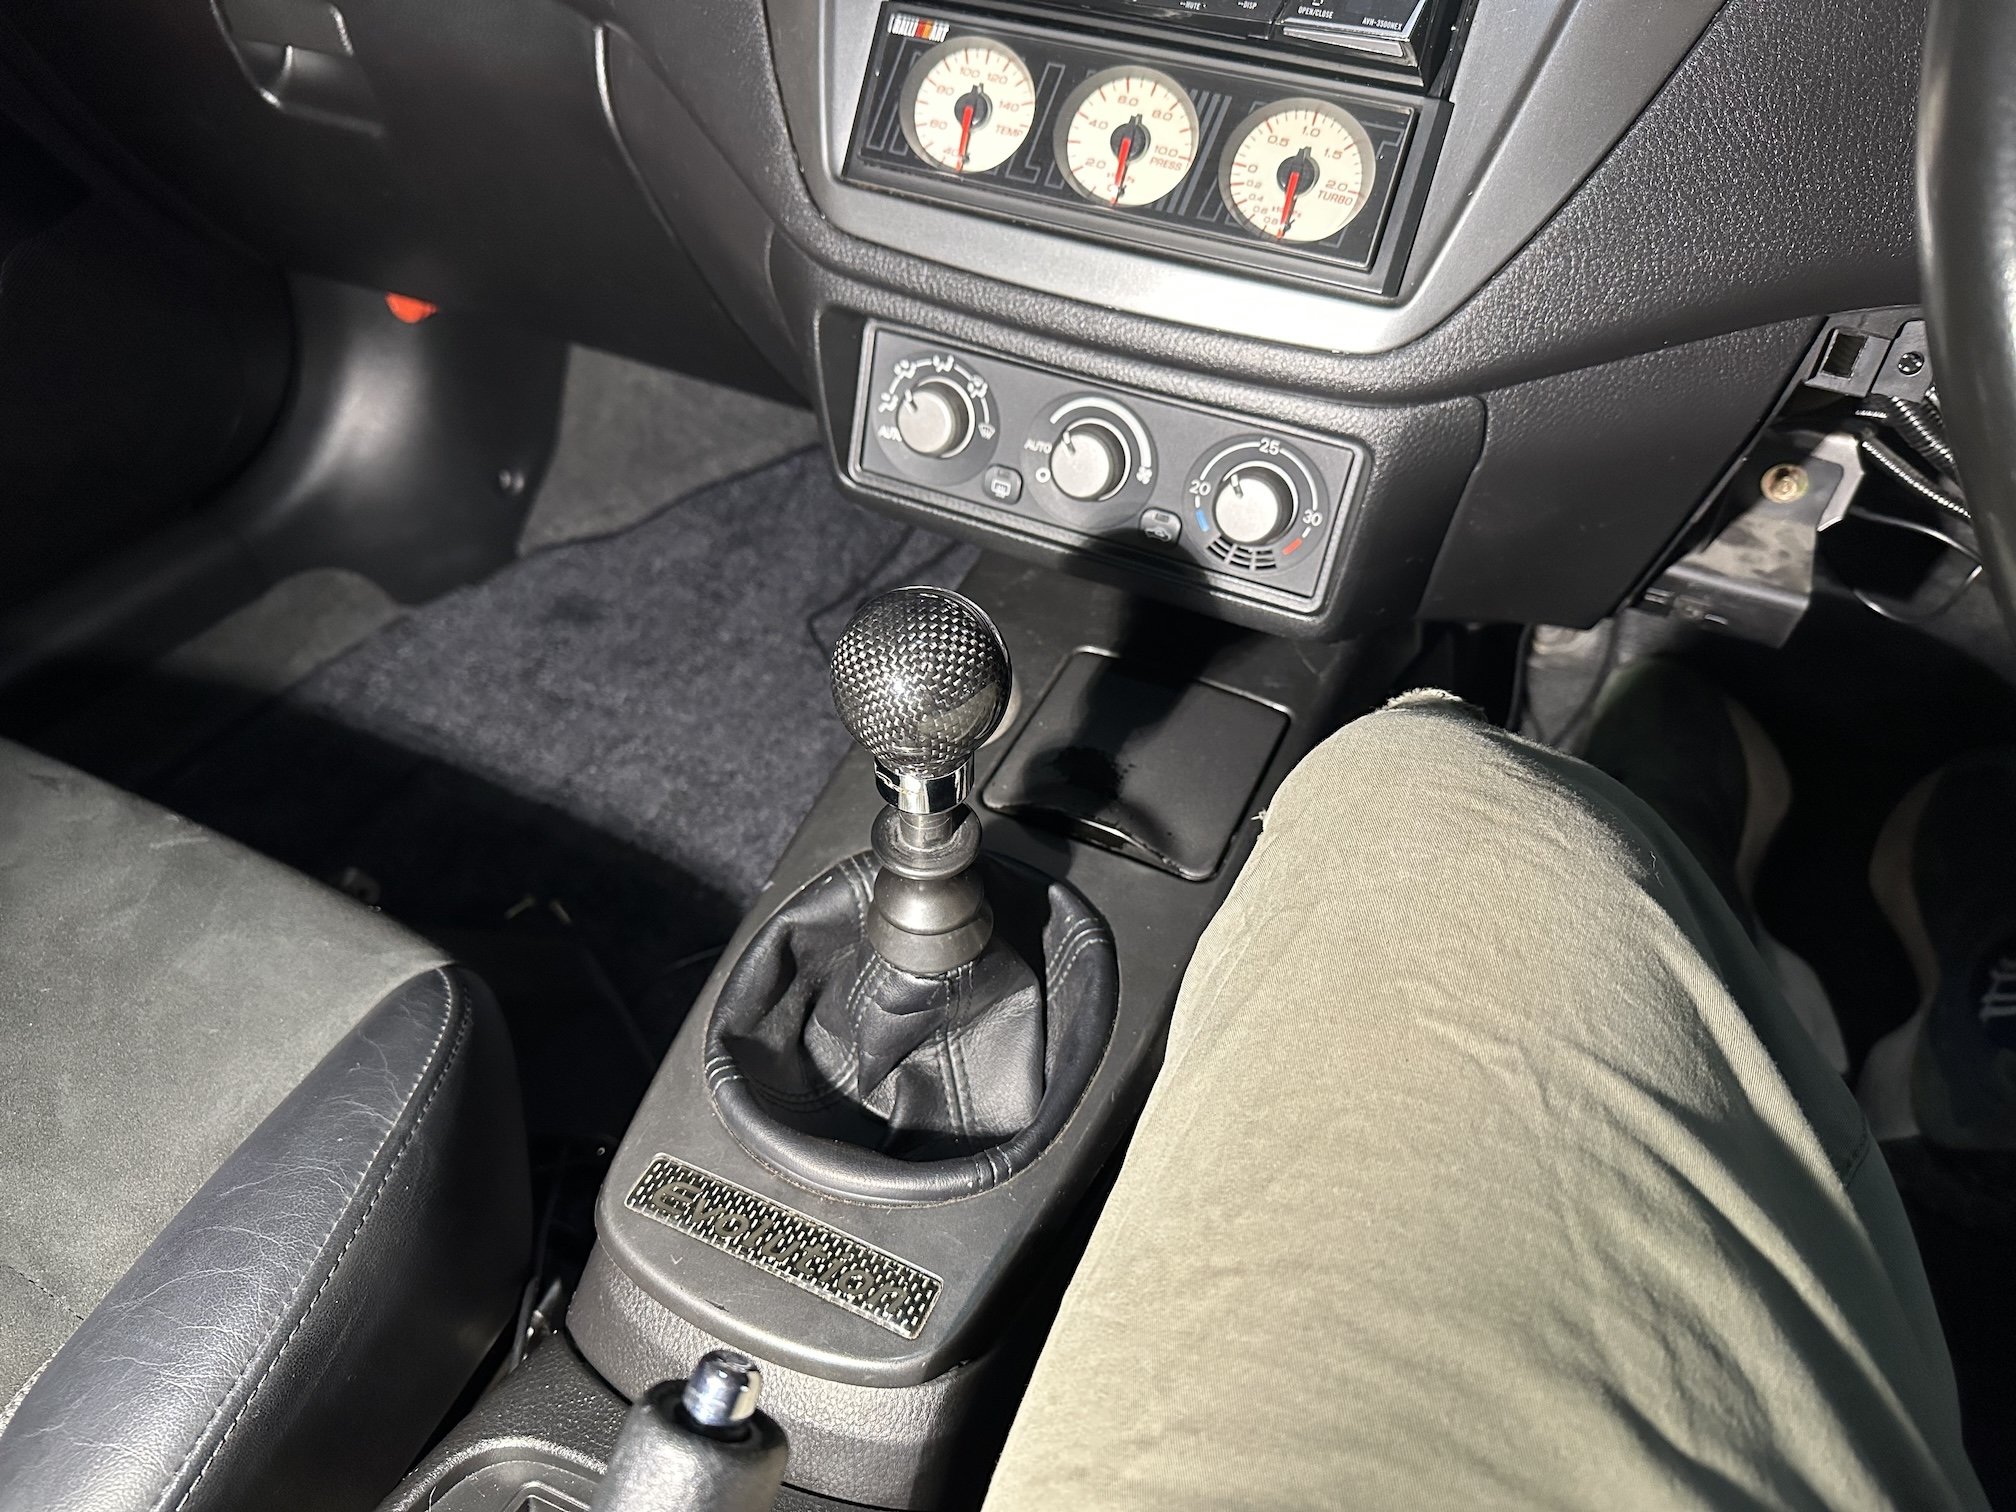
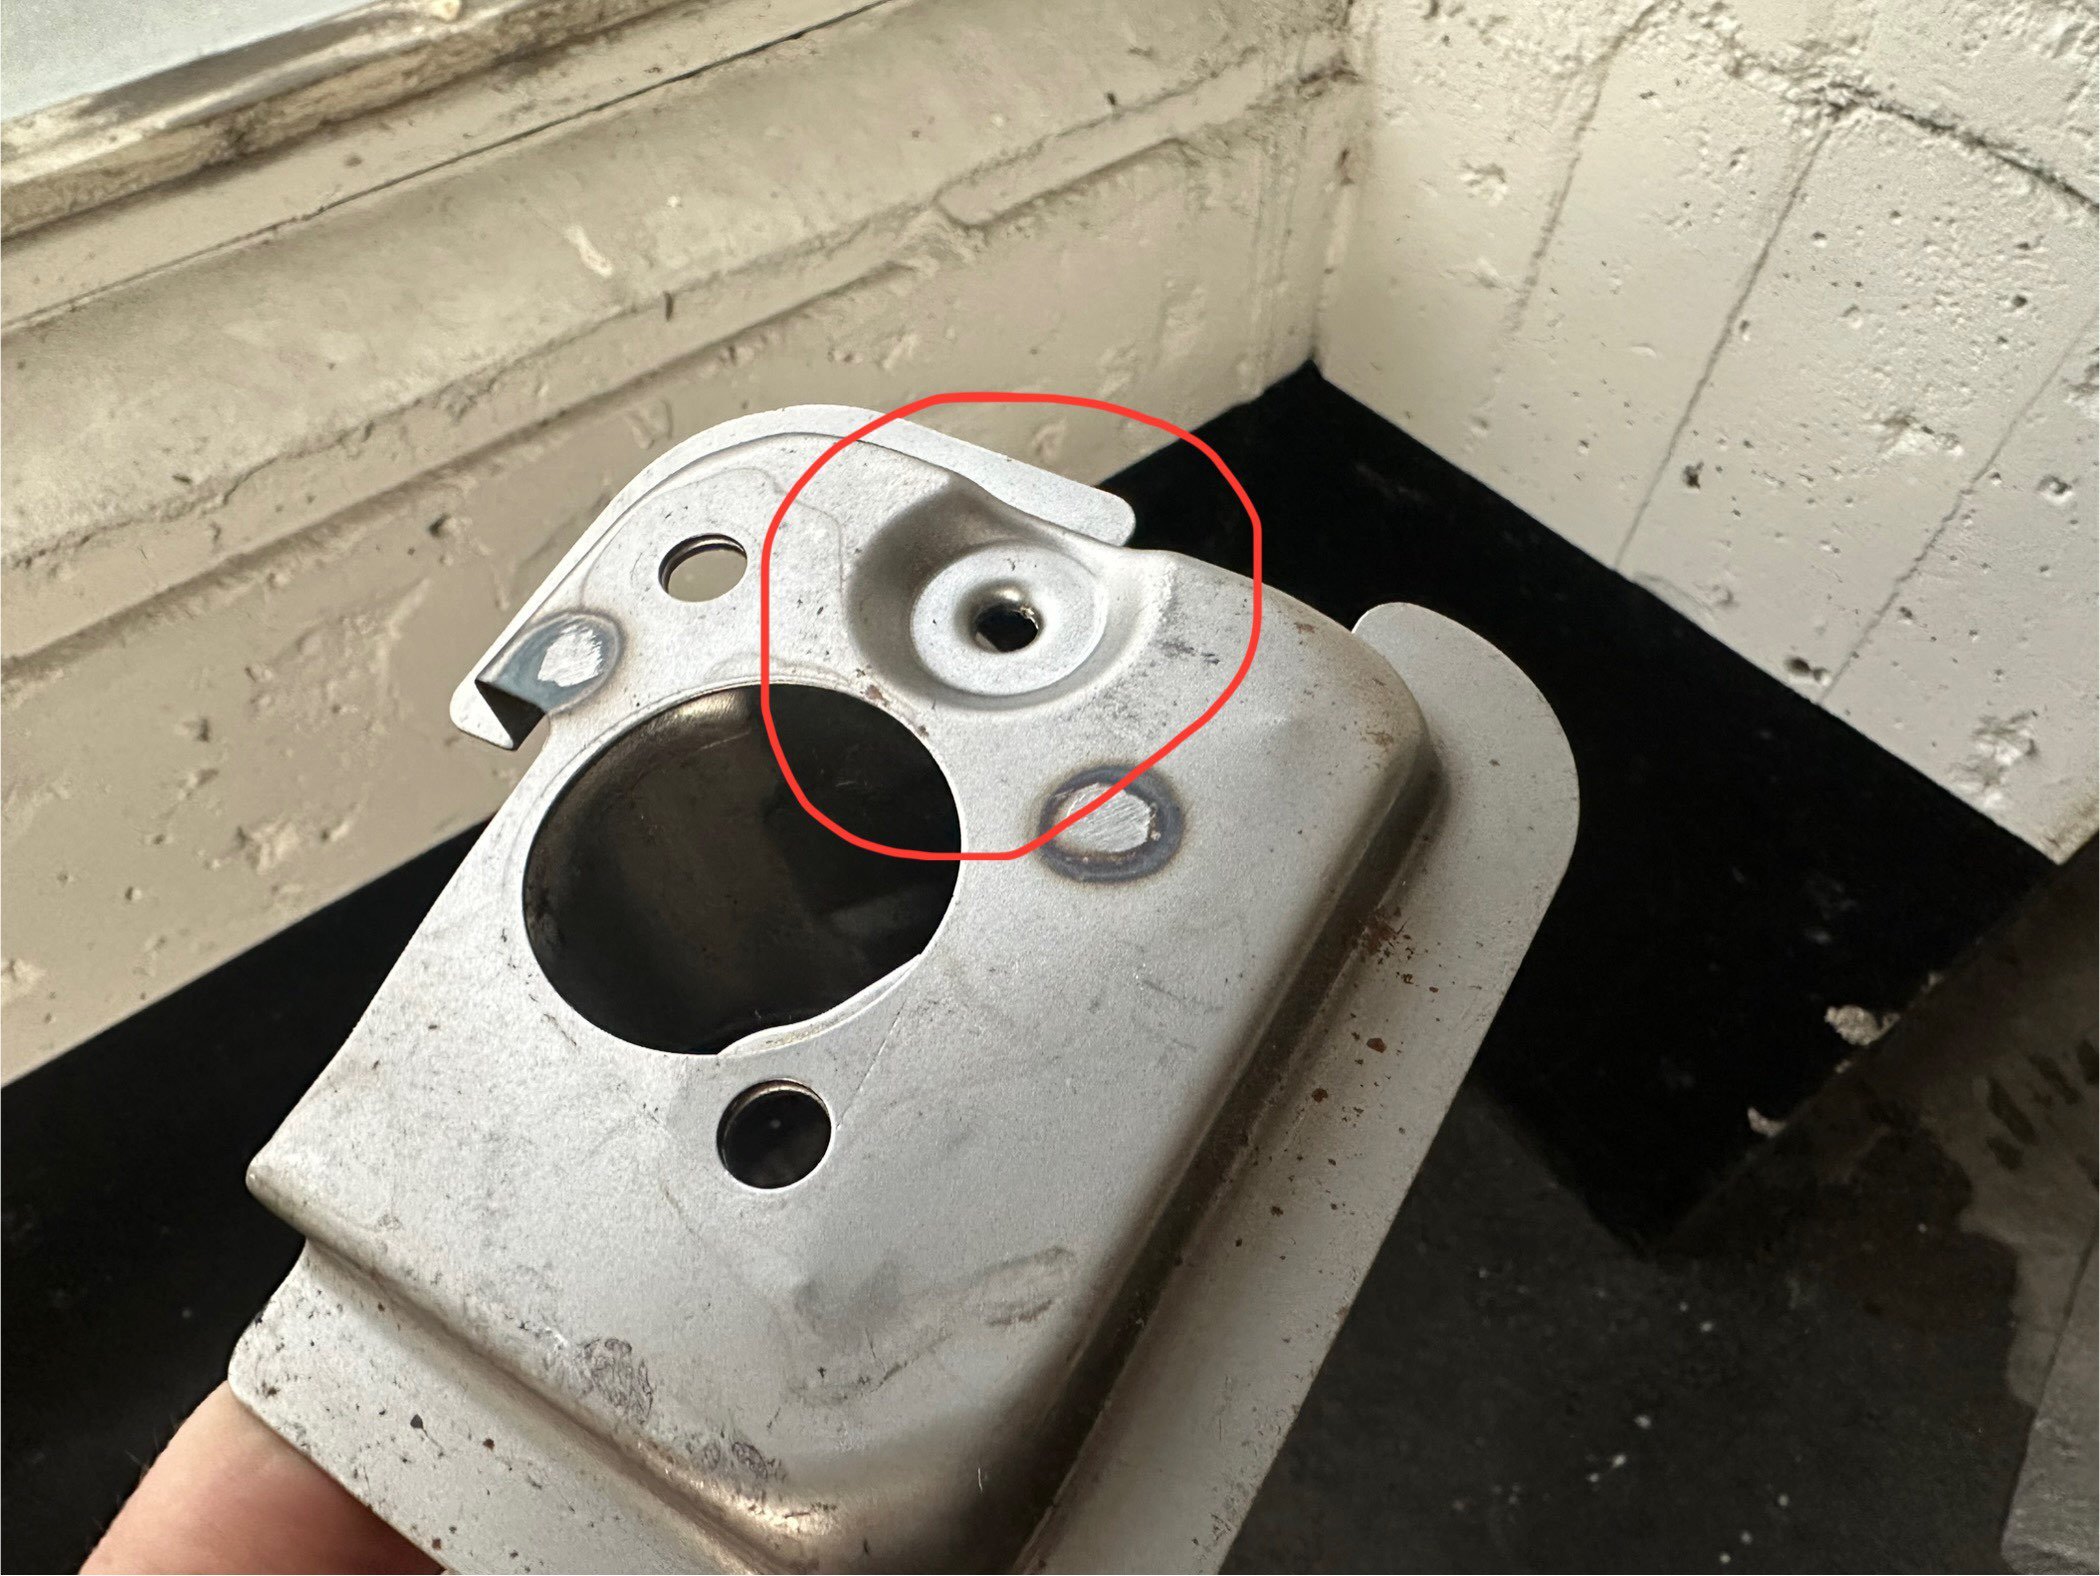
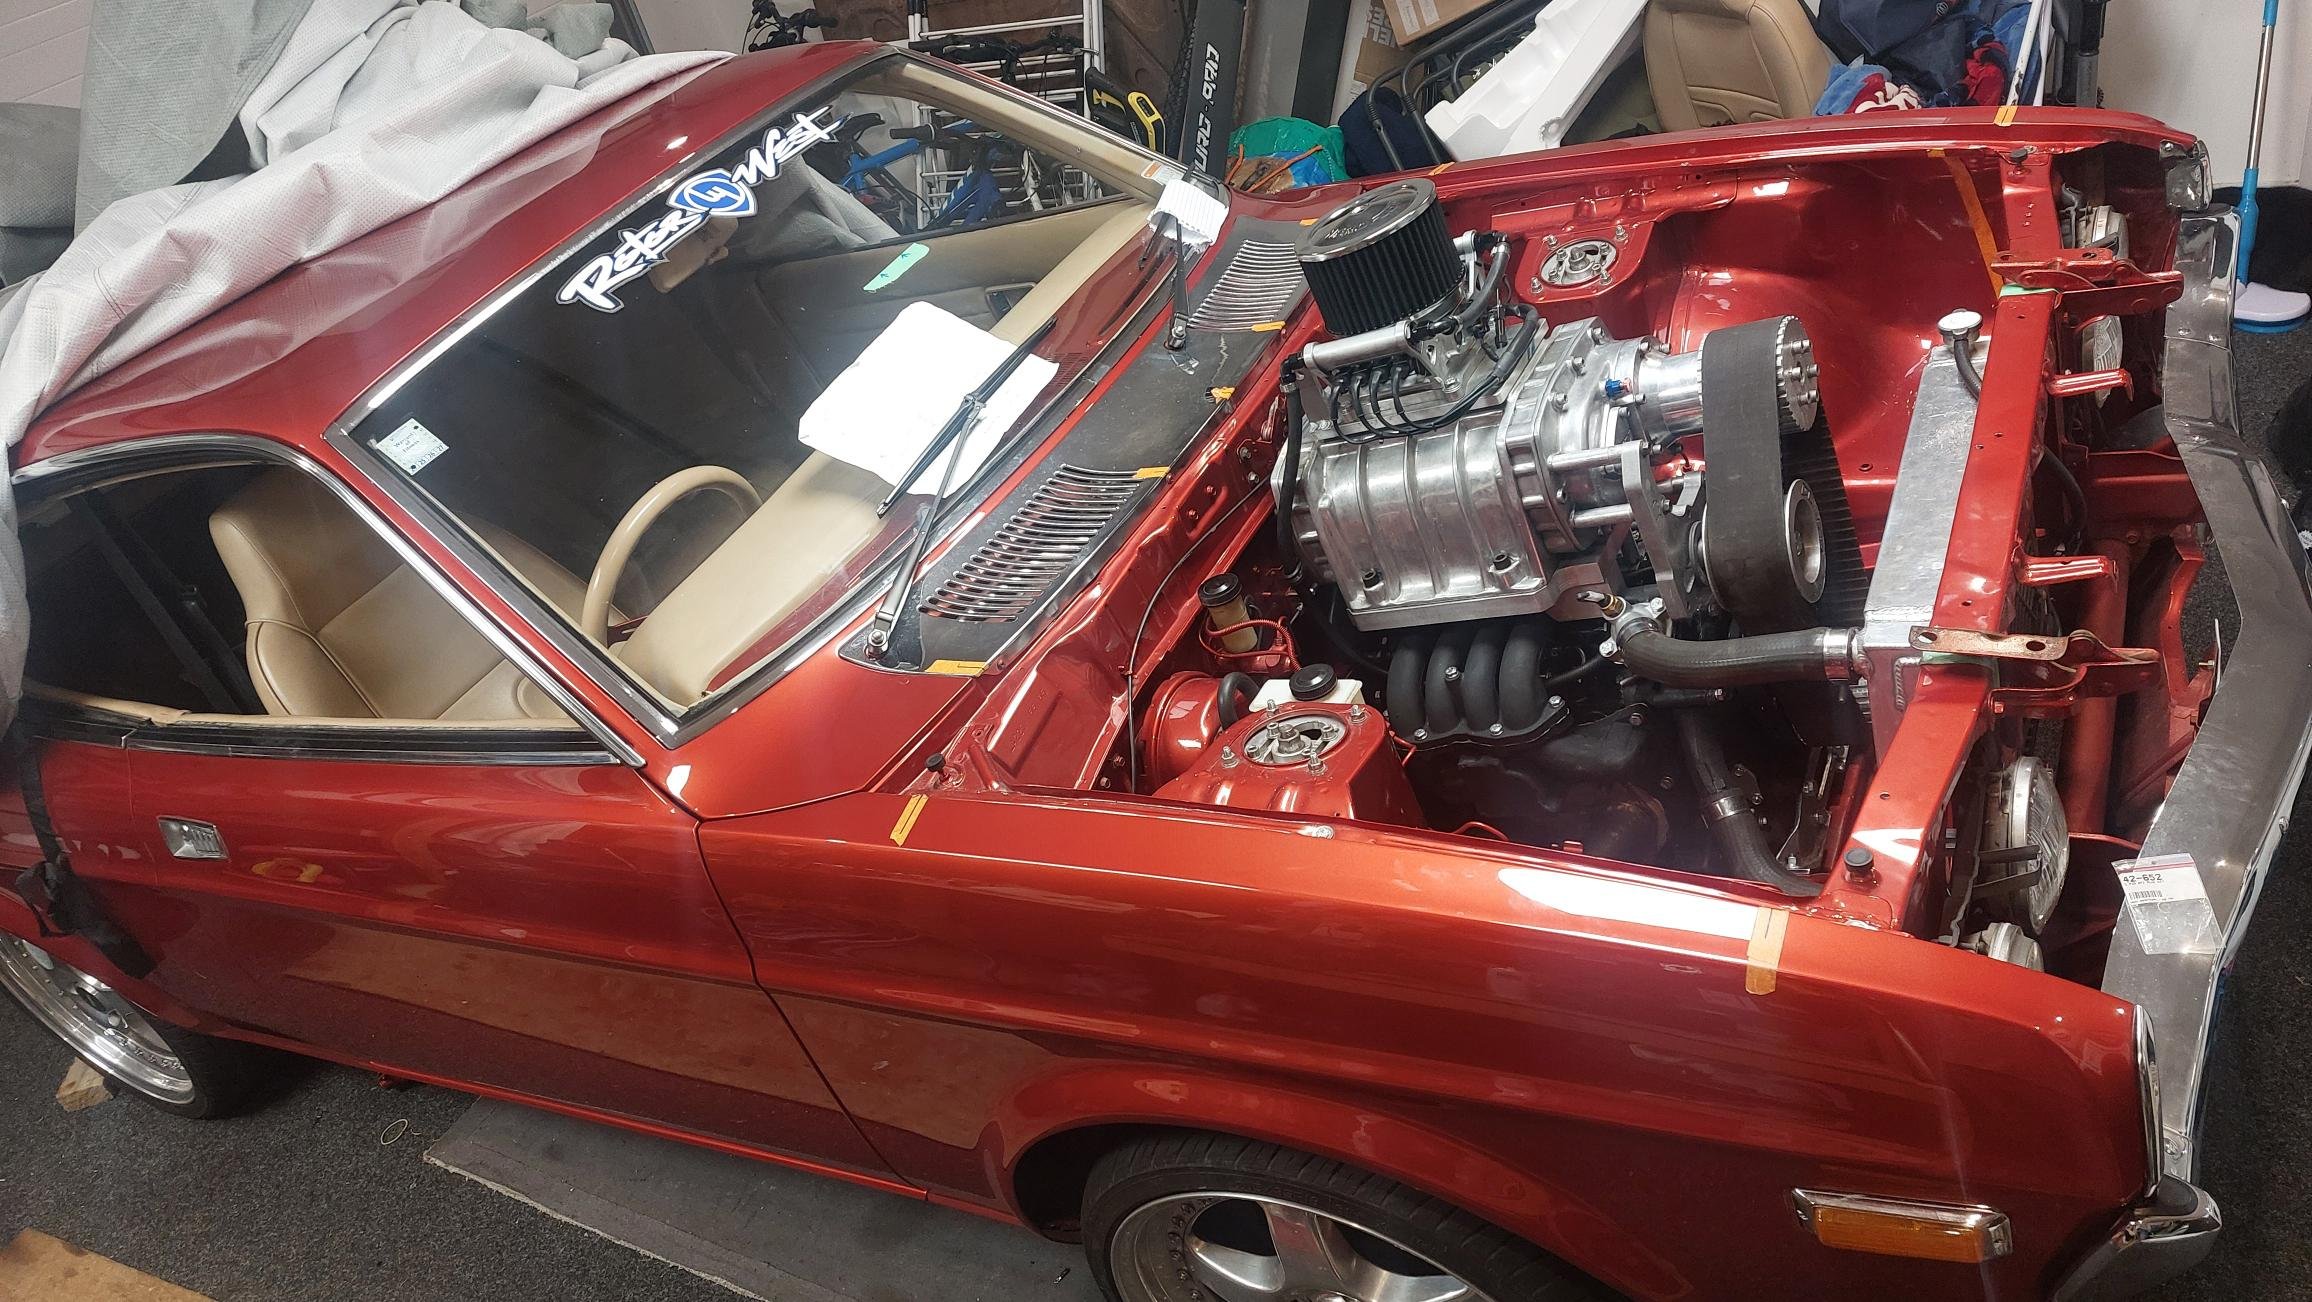
Small update - I temporarily placed the centre console cover and varis CF knob on to motivate me more haha. I still need to paint the cover, and apply new stickers Also turns out there's a little bump on the firewall with a matching recess in the clutch pedal box I can utilise to locate it somewhat close enough
10 points
-
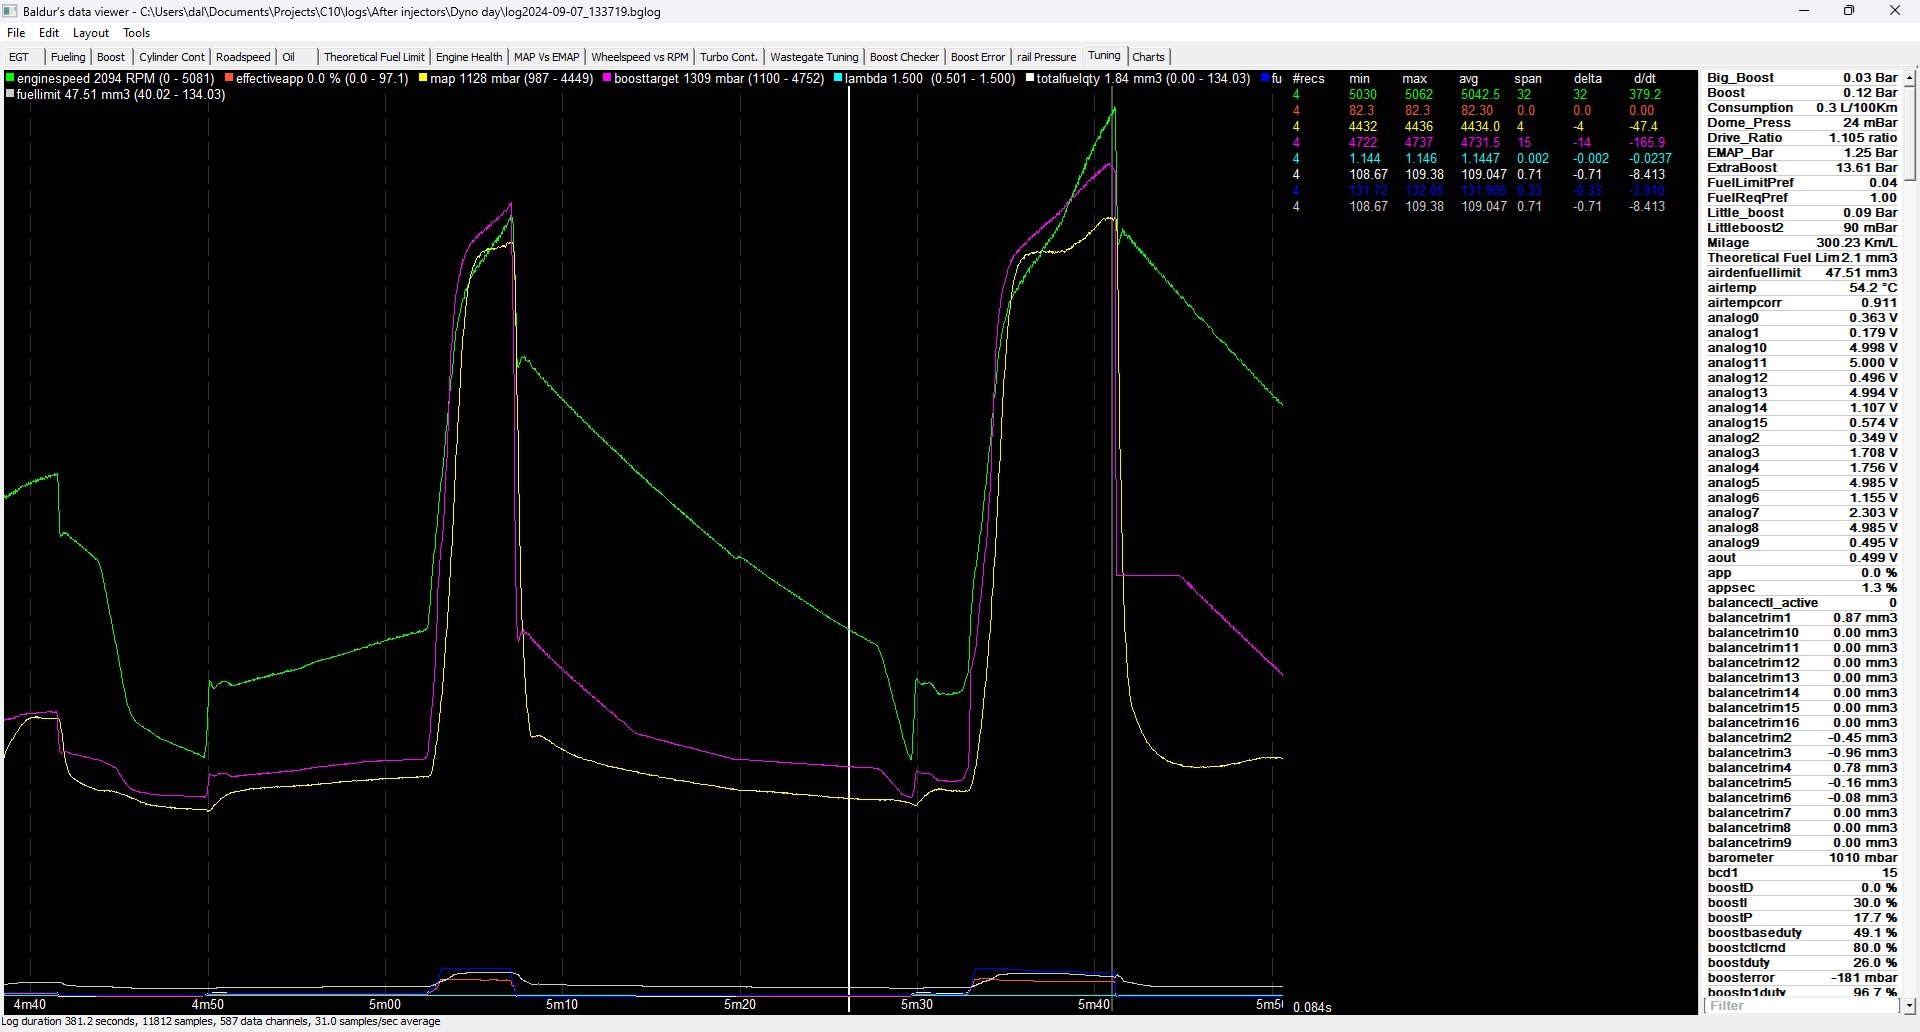
So once I got home and decompressed a bit I got to thinking about the compound setup, It didn't work quite as I would have guessed. Bypassing the small turbo just meant that the small turbos compressor became a restriction to the big turbo, not only that but then you ended up with much less bottom end than possible, The small turbo is the stock 320cdi item and as such is a vnt, this ment that I actually already had very good control over the exhaust, So I ended up plumbing all of the boost to the top of the wastegate to hold it closed. It was around this time I listened to the HPA podcast with ShaneT talking about the mazworks compound drag car and he found the same thing with that, so at least we had a direction to head in. Around this time I heard that the local tuning shop was running a dyno day so I got to fiddling, and with a bit of street driving and tuning I managed to get the boost table to the point that there was effectively no error, and a peak boost of 3.7 bar in the Race mode. So with that done I headed to the dyno day, I had a feeling at Streetweek it was around 350whp, because it ran 130 in the 1/8 and I guessed it weighed in at 4250 lb, but now it had an extra bar of boost in it and seemed noticably quicker, expectations were high. When I got there is was the usual mix of euro trash that show up to these events, with a couple nice volvos and a w124 I wouldn't mind owning, but I put it on the dyno and it was a bit of a mess, the torque is pretty brutal so it flashes the converter pretty hard, basically once you get on it it just jumps to 4000 rpm and then it pulls from there, but old mate didn't know what to expect so he stopped the run at 4400 rpm, so then I told him to go again, but now the intercooler was reasonably heat soaked and I think he got a fright be cause the next run he only gave it 80% throttle... Anyway it put down 390 hp and 924 Nm at the wheels at only 3.4 bars of boost which I thought wasn't too bad. Recently I have been fighting low rail pressure, but I think I found it yesterday, the hp fuel pump in the surge tank wasn't running because the nuts on the bulk head connectors had come loose after 2 years. I think over winter I will rebuild the manifold in mild steel to try and combat the warping and to remove the wastegate, that and fit a real intercooler because the chinese one isn't good. Oh, and I bought a nitrous system...
10 points
-
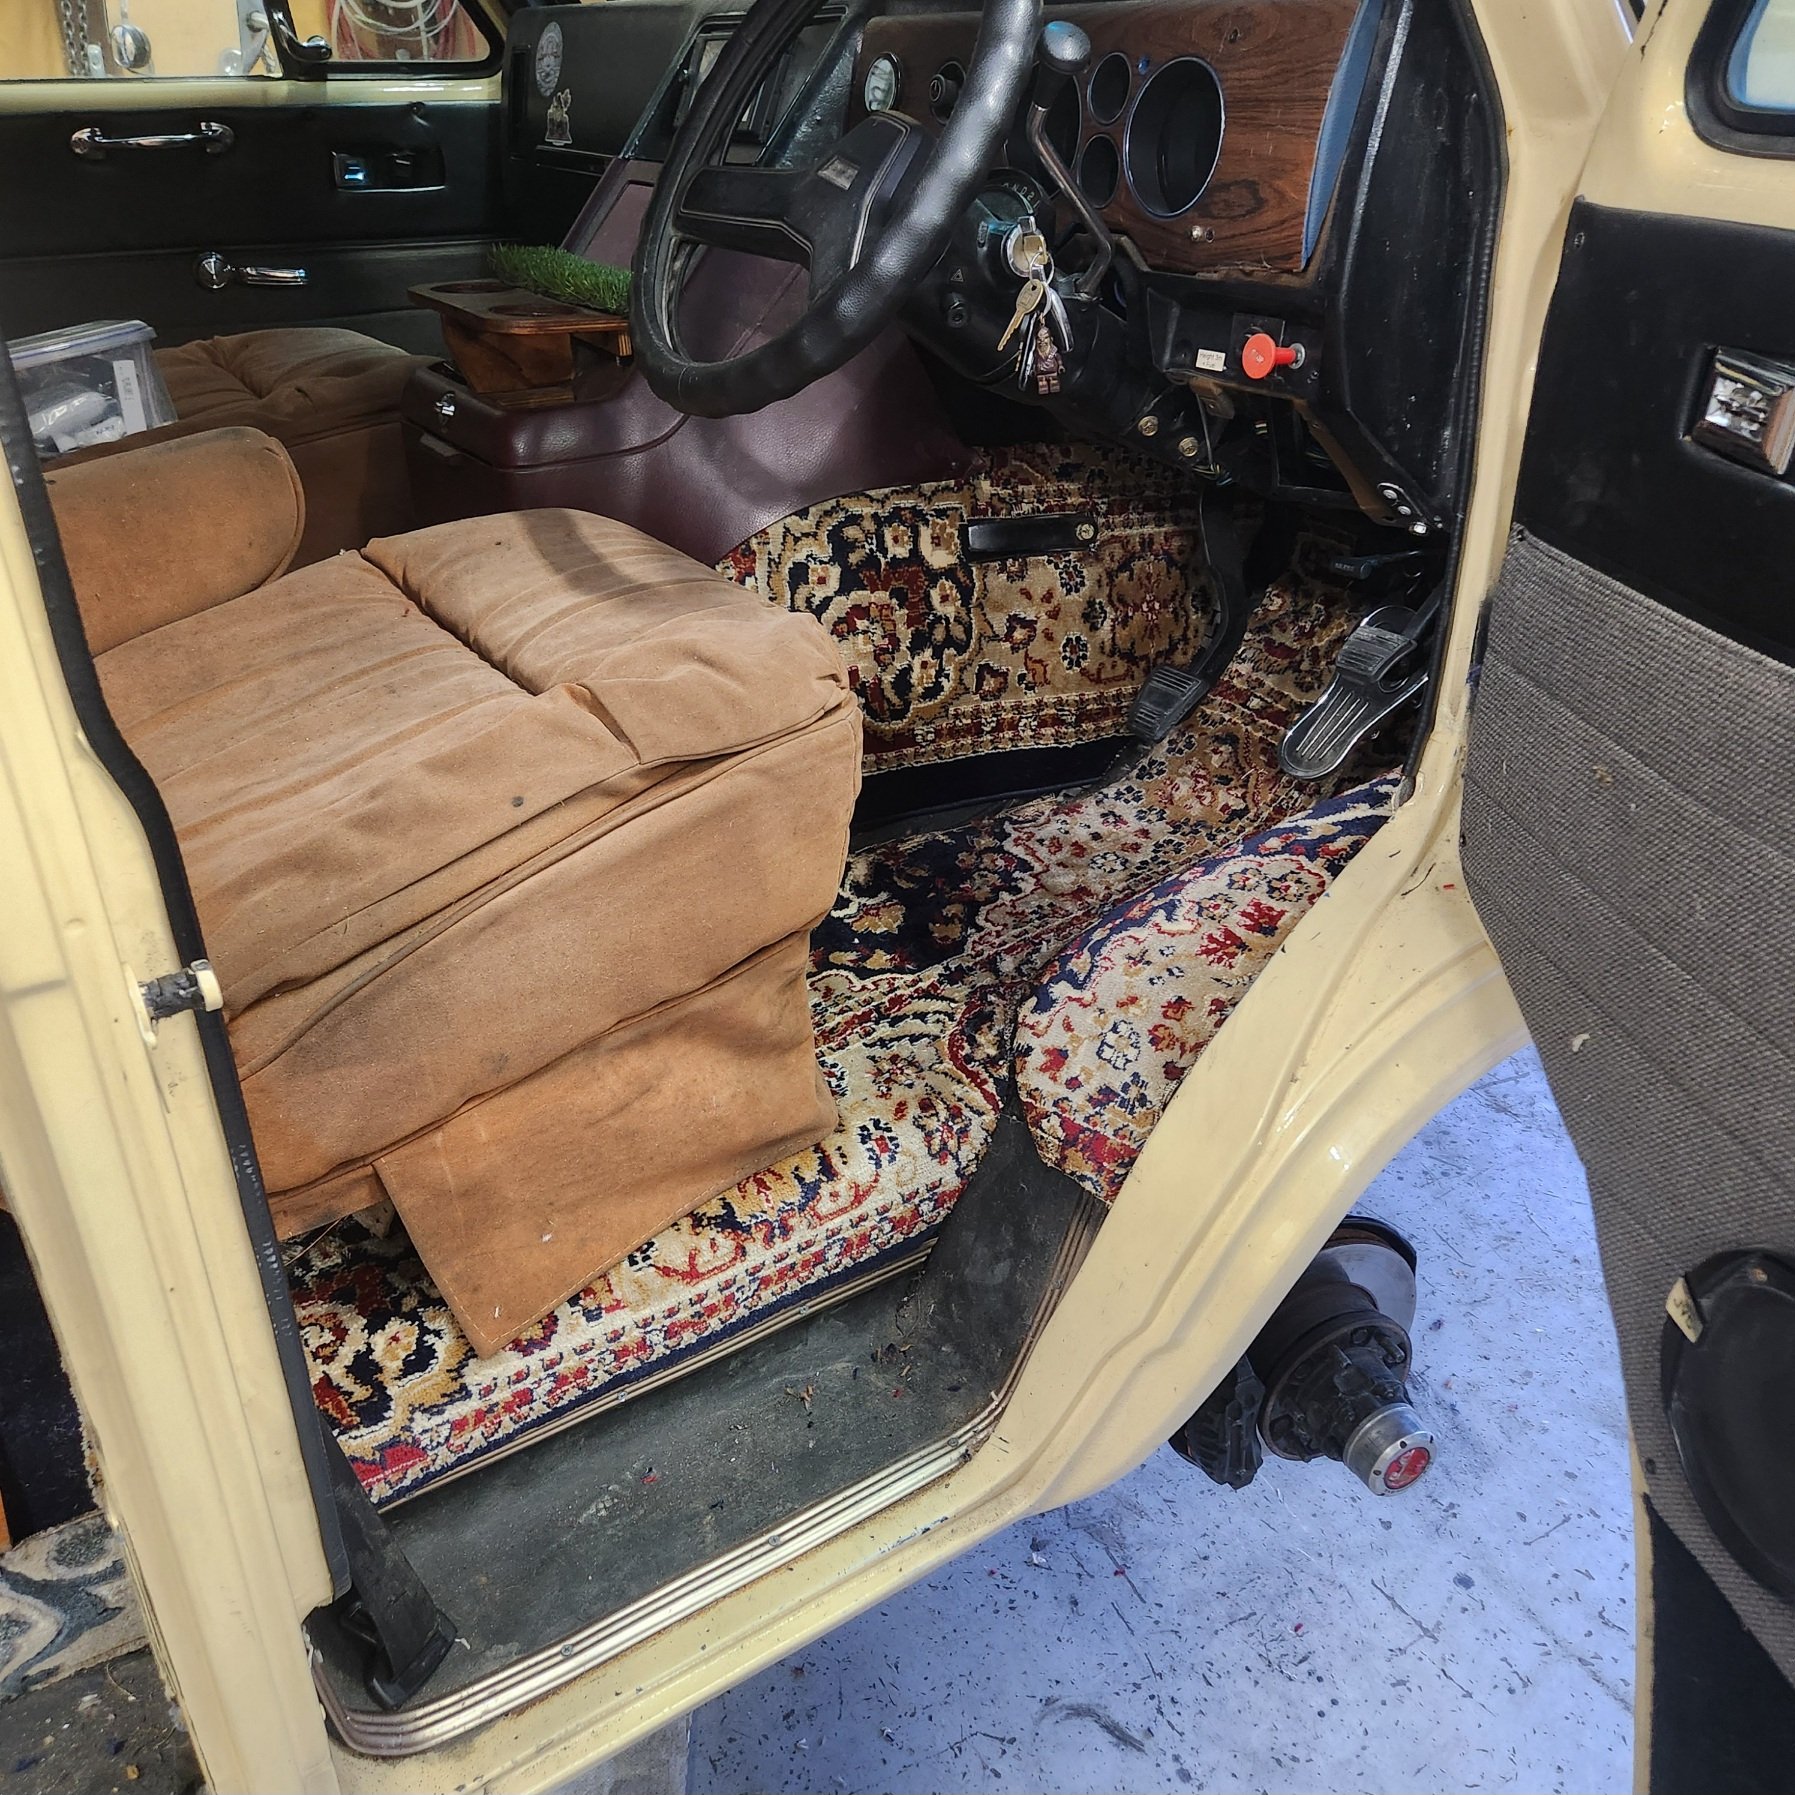
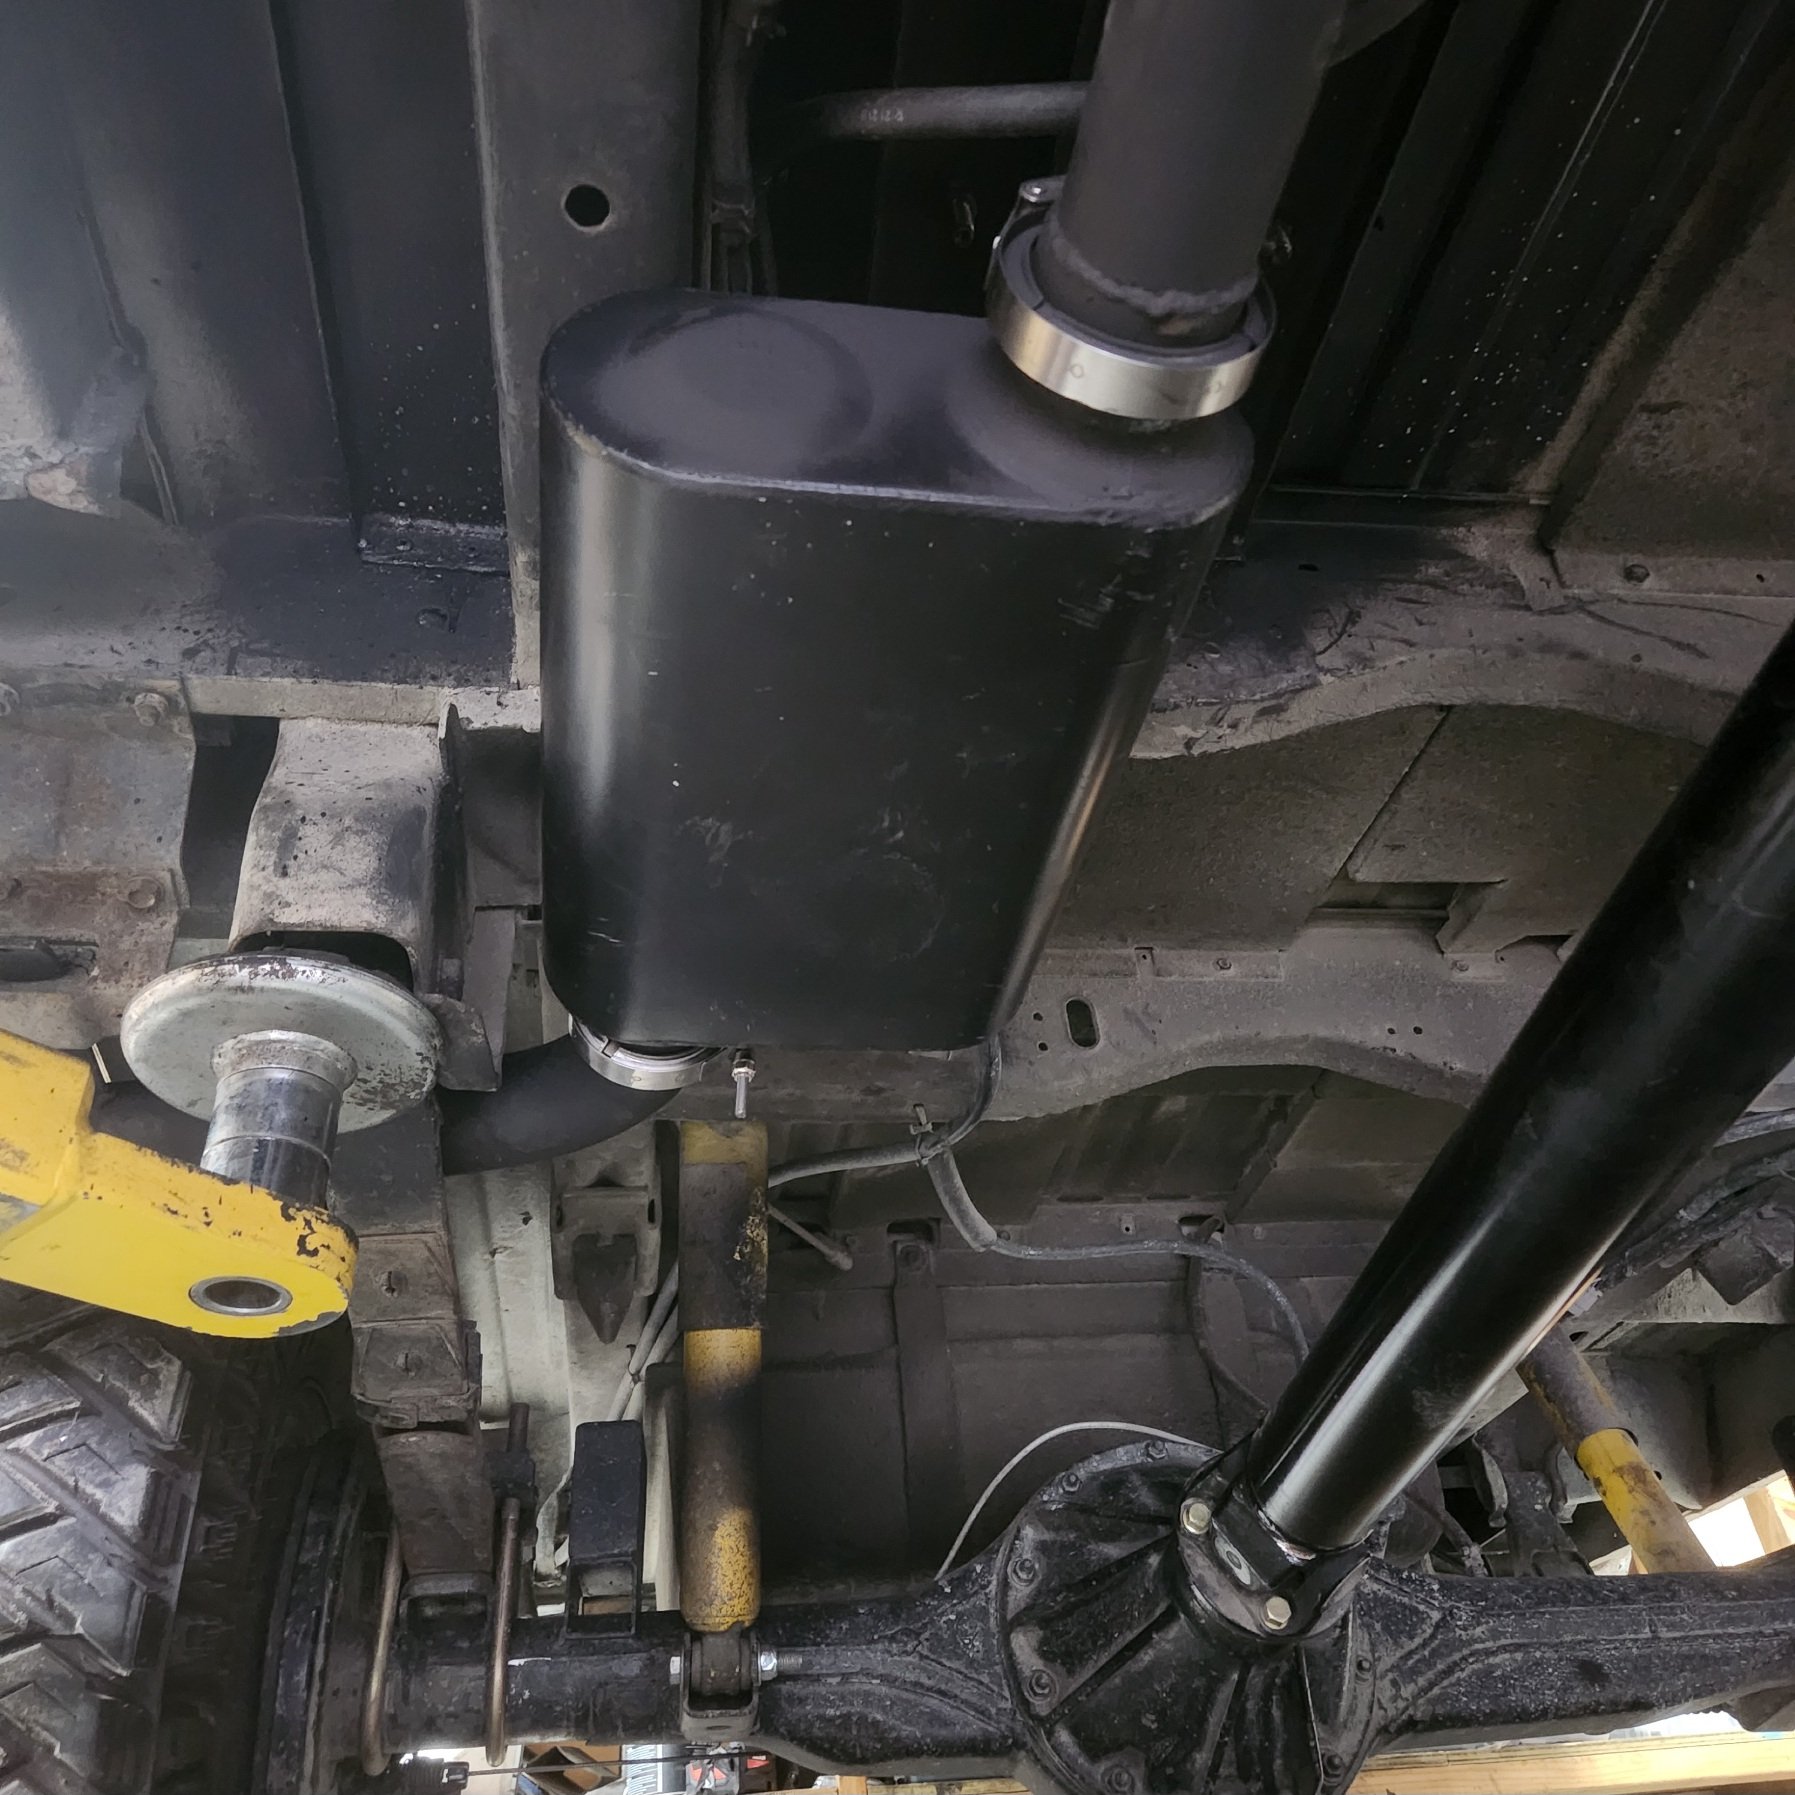
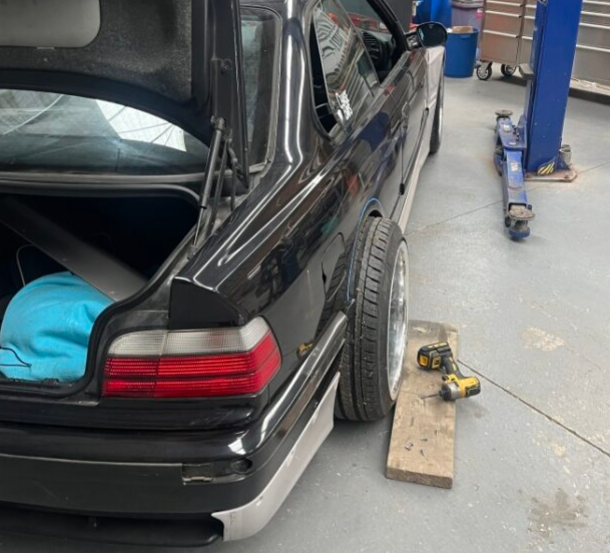
I got the last couple of cert jobs done. Stupid muffler which actually makes it sound way more pleasant Another run to spotlight for bottom a bottom shelf polyester rug to redo the floor And changed the chev prop valve. I put an adjustable one in as well but didn't end up needing it. These GM ones are a pain in the hoop. It has a flow stop shuttle in it in case of a line breaking which makes bleeding them tricky. Vacuum bleeder wouldn't do it so had to do it slowly on the pedal. But the new one works and the residual pressure valve is doing it's thing too so I kept the 1" bore chev MC in the end. It won't quite lock the front but is stopping good. It has a powerboost unit which hydraulically boost brakes from power steering pump which works a treat. Recheck Thursday , it's steering and braking better so hopefully it'll get through.
6 points
-
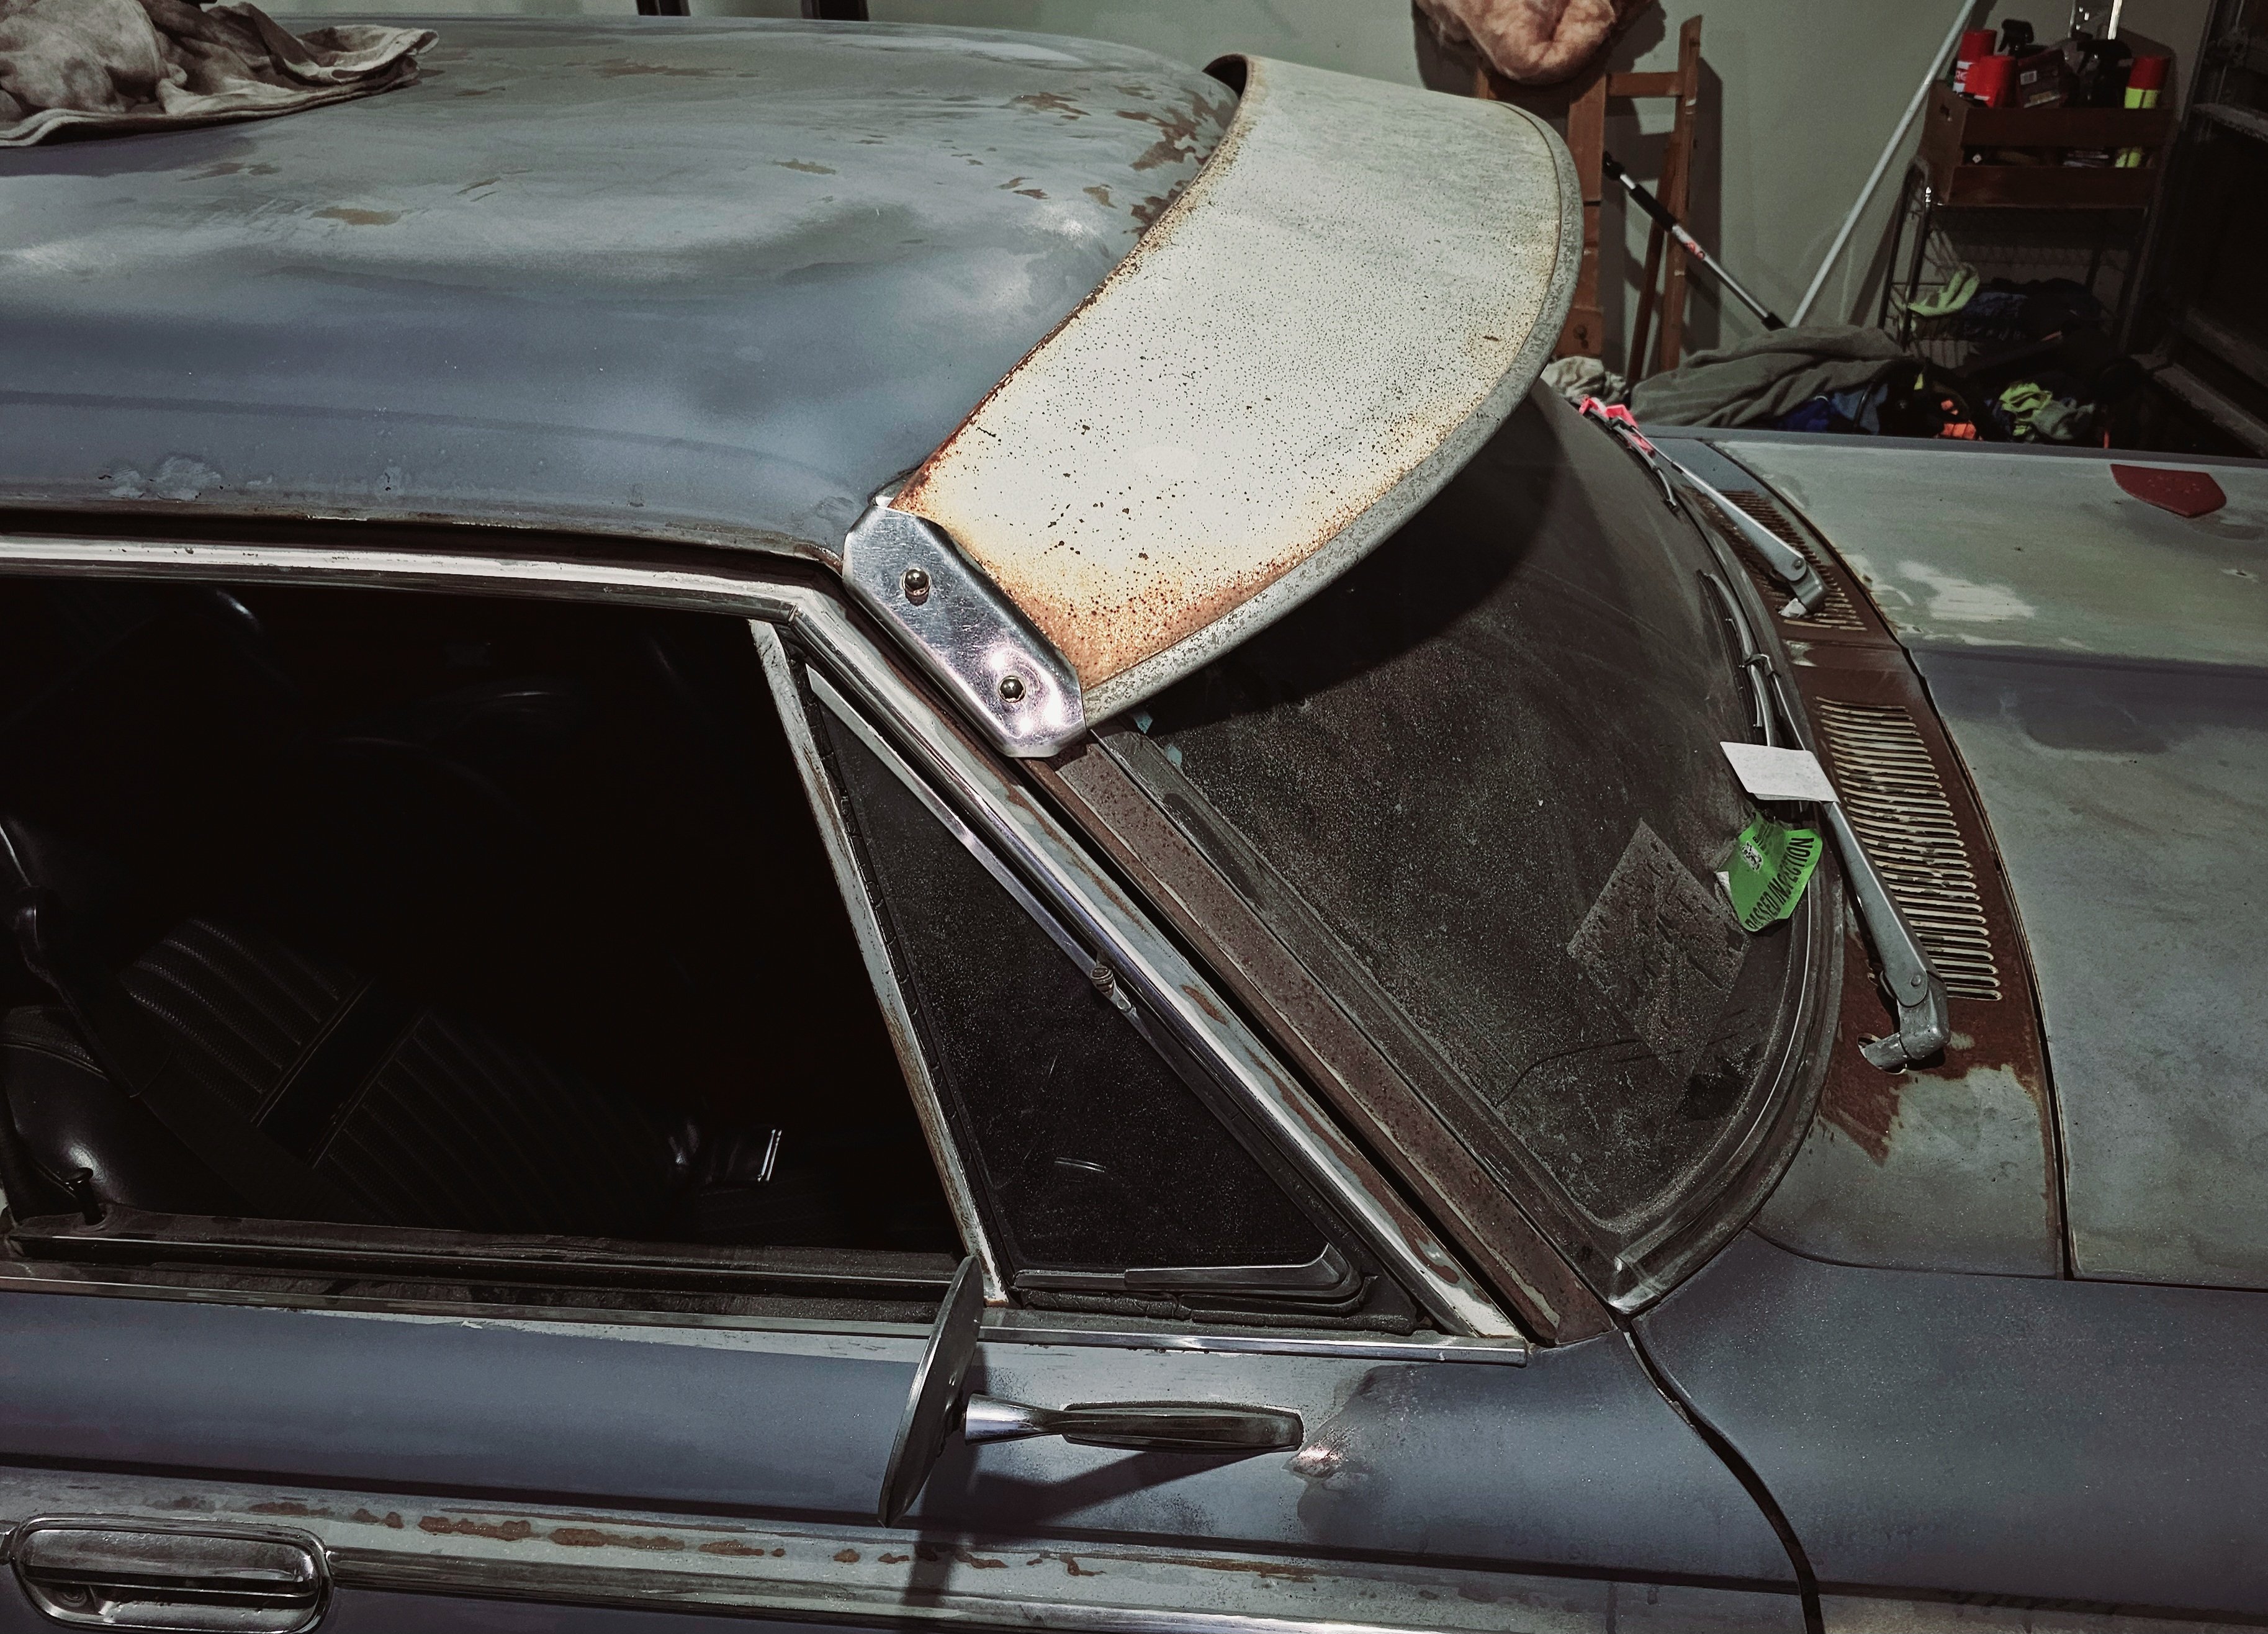
Also I have been test fitting the rear spoiler and the front visor that came with the wagon.
6 points
-
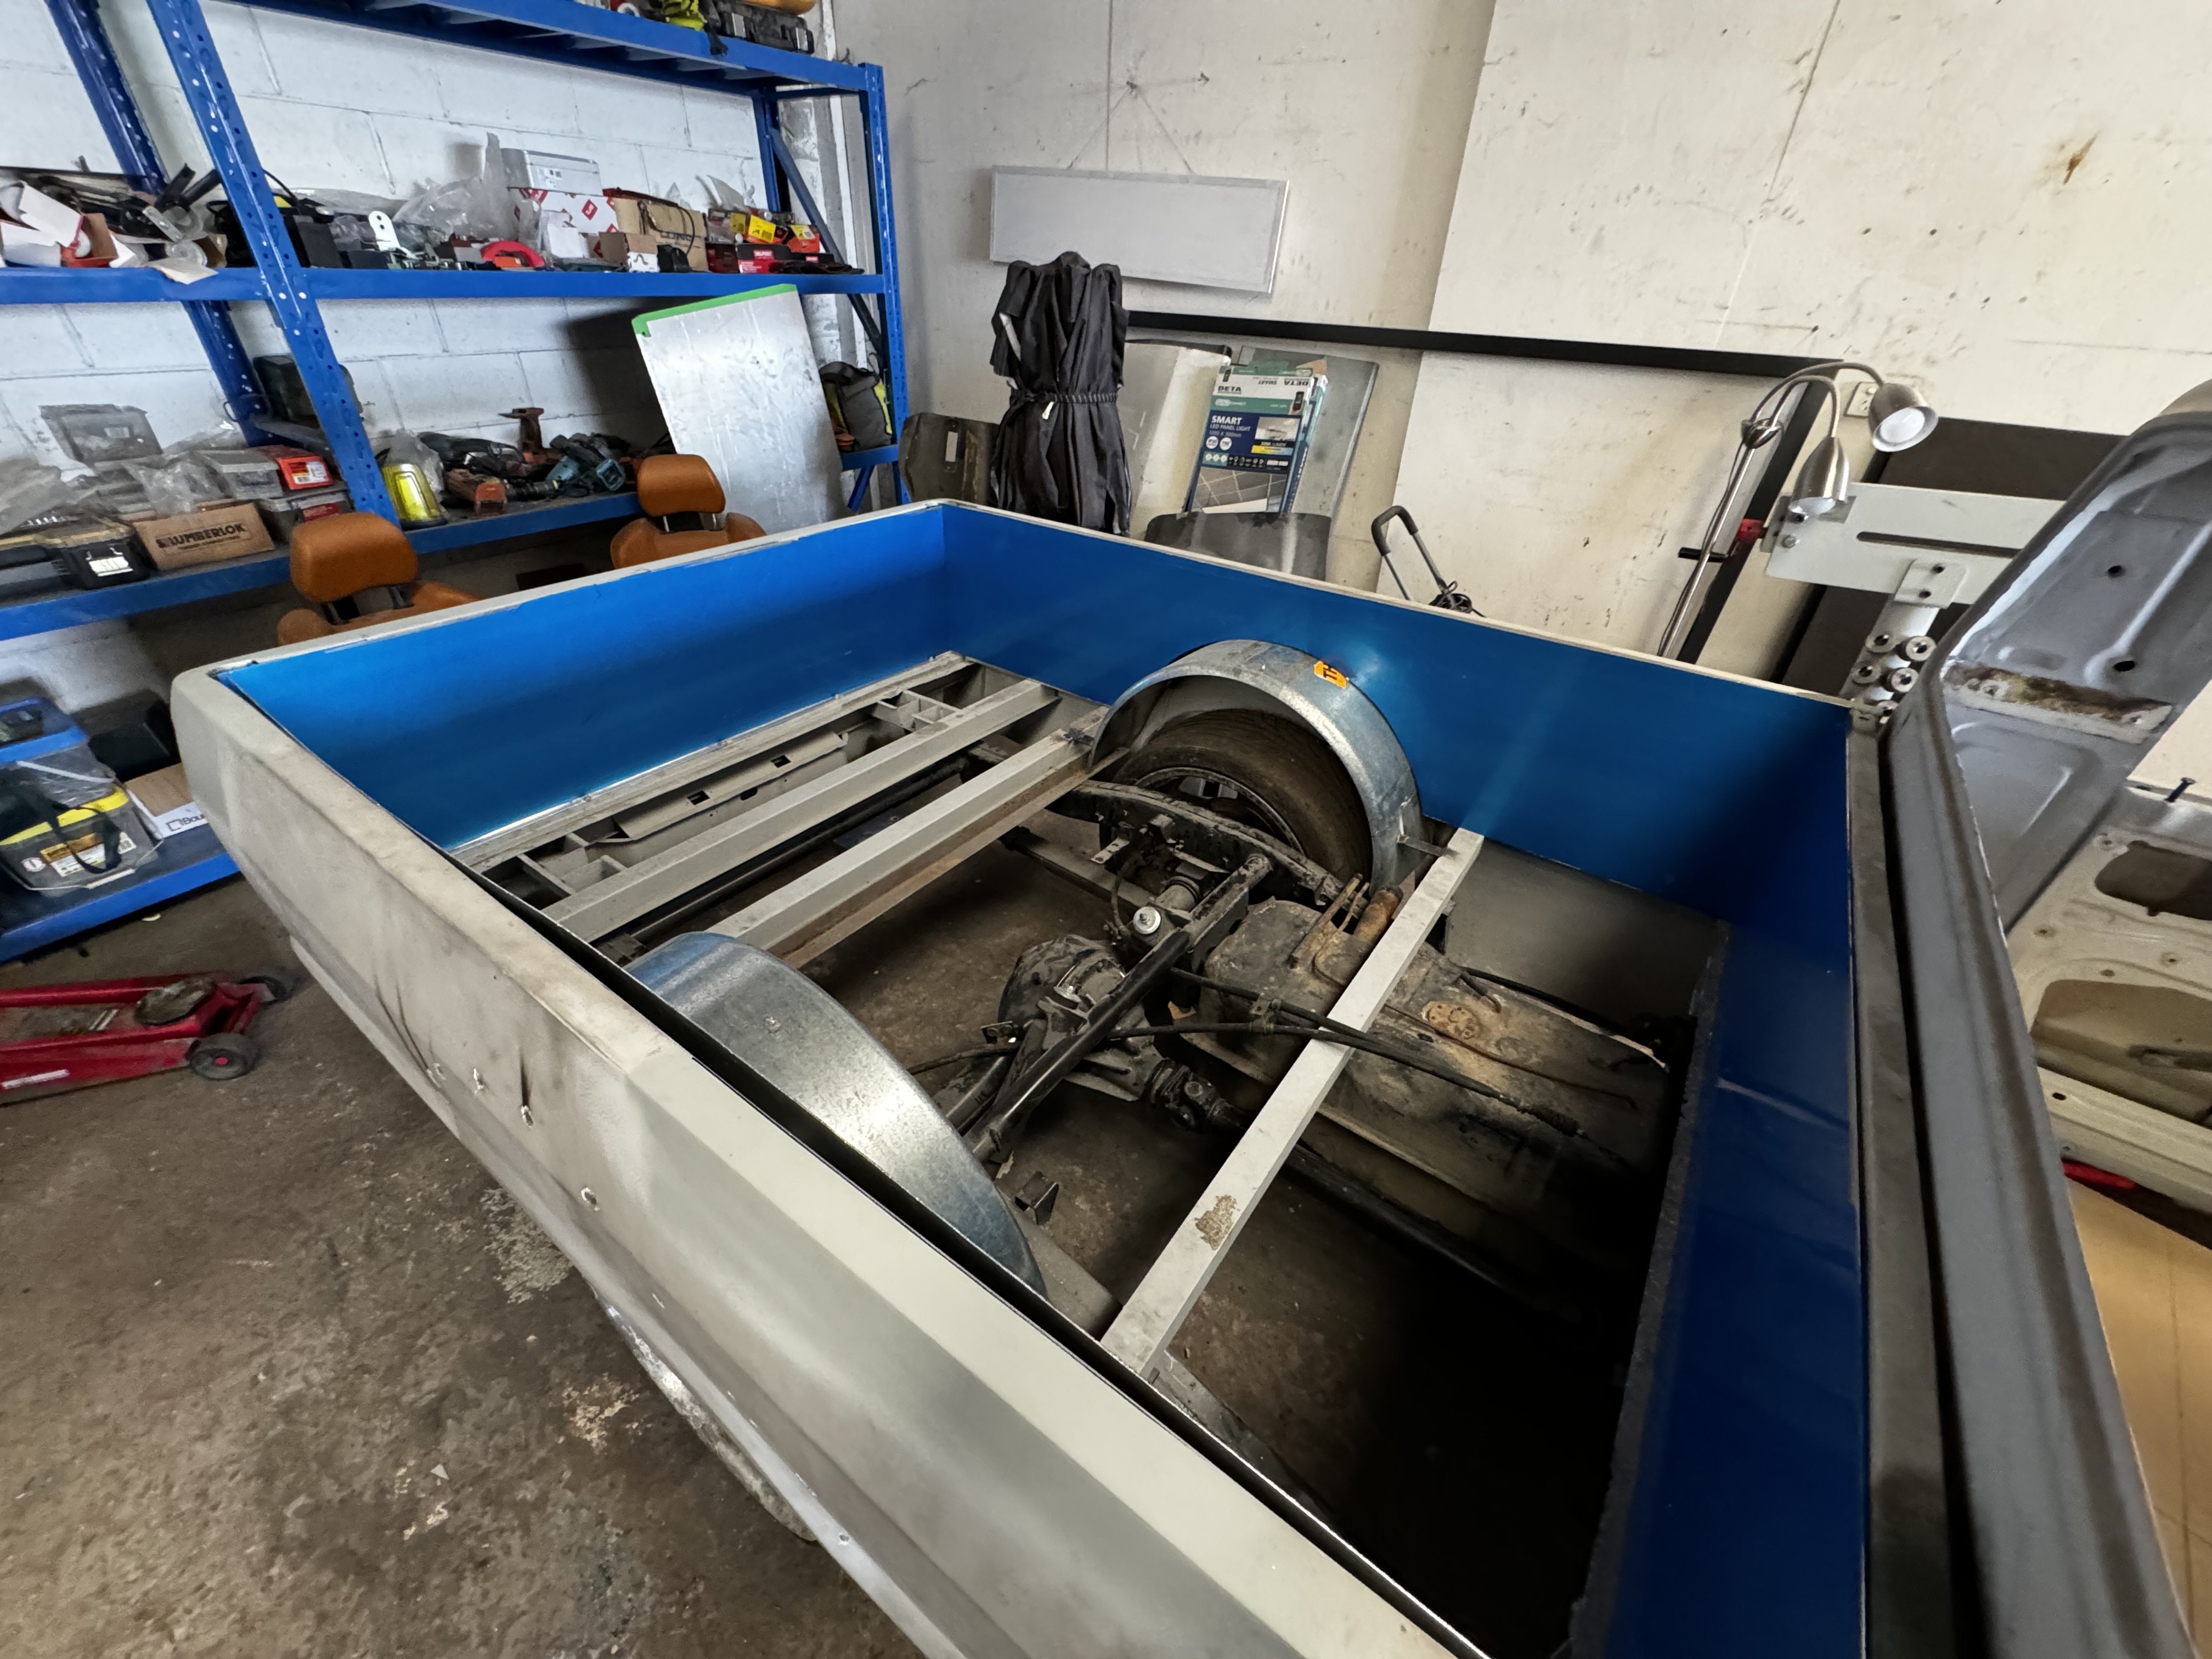
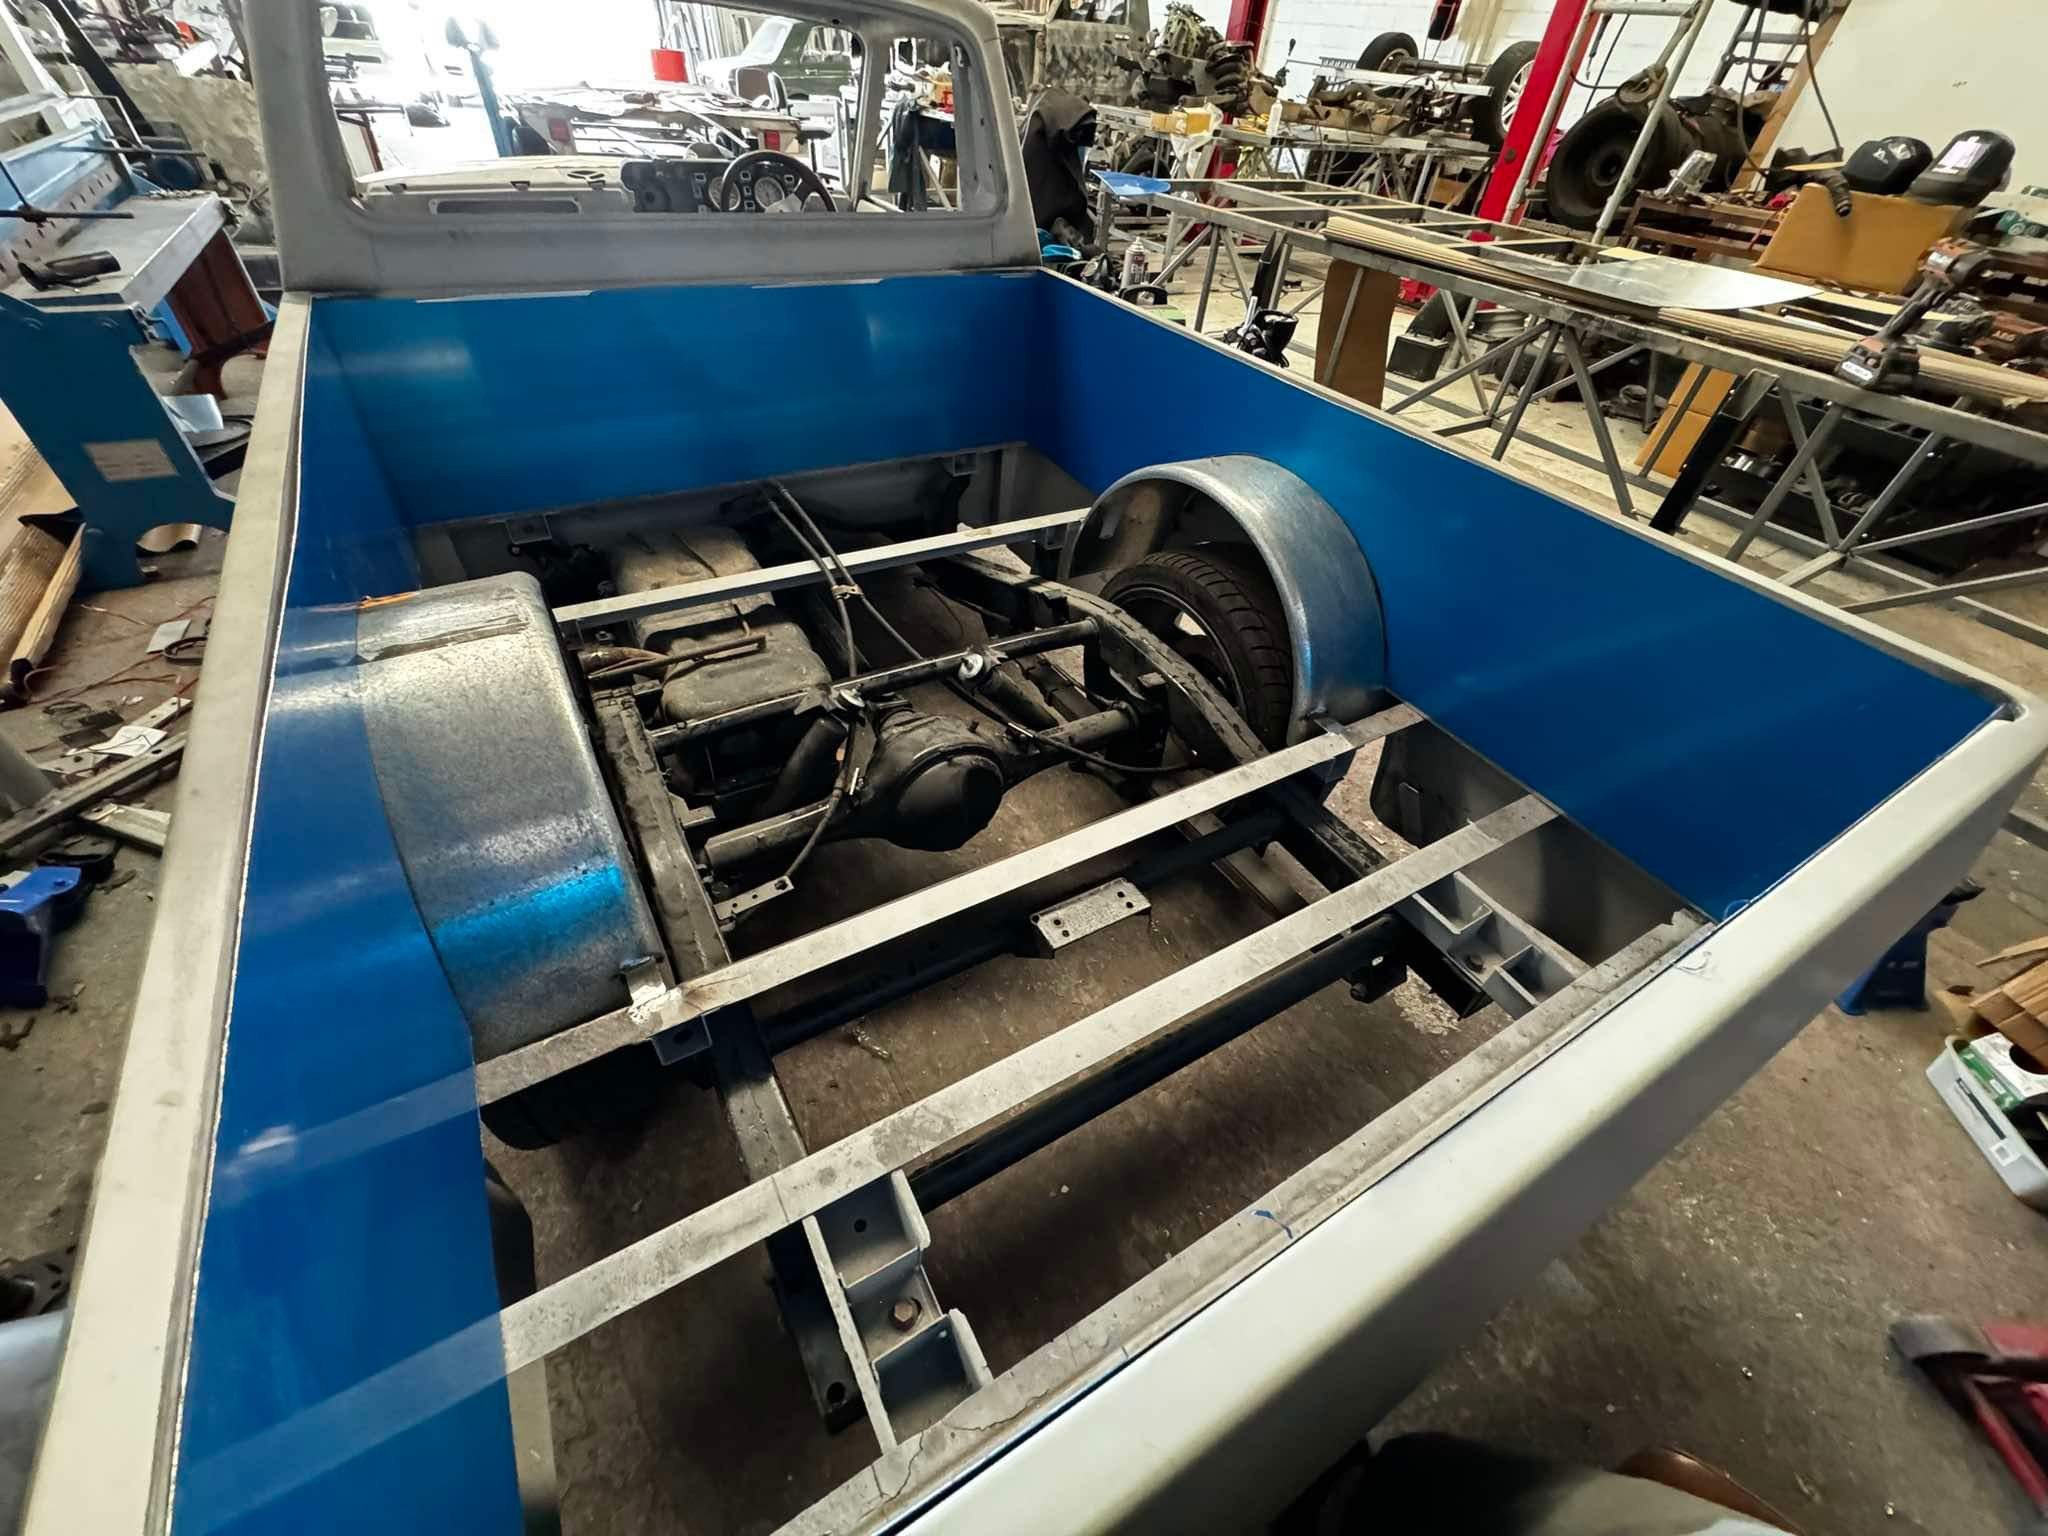
Did some stuff today. inner deck panels made up. then scribbled up some lines and had a go at beadrolling. labourer decided to go 100mph into the corner and completely fucked I’m my entry, corner speed was way off and I binned it. retest. but then the next 2 were pretty mint. will do the last side panel tomorrow morning then remake the mangled piece tomorrow night. also note the handbrake cables in this pic. Brackets are attached to the diff. i will have the forward brackets attached to the driveshaft hoop once that is done. then I just need to source a low profile handbrake lever. the Primera one I have sits about 250mm high. but there’s plenty of clearance between the d shaft and tunnel for it to run.
6 points
-
A couple of solid days work and she runs!!!! Mounted fuel tank, plumbed up last of fuel, and water meth systems. wired in pumps, made up throttle cable and mounts, refitted rear brakes and new lines, all fluids done, brakes and clutch bled etc Cranked to get oil pressure up, checked all fuel fittings for leaks then a mate came over with his Microtech handset and punched a few numbers into the computer and I turned the key...... HOLY SHIT - it caught us all unaware!, it literally fired up into a 3000rpm idle on the first 2 second's of cranking, had to scramble to keep it under control. Its angry, I mean real angry!! , once idle came down it just pulsed its head off, instantly we now know I have to solid mount the motor, it was shaking side to side so viciously we had to turn it off to set the idle, couldn't get near it Unfortunately I couldn't take it around the block as we found the new alternator not charging which will just play havoc with the ECU, pretty sure as it doesn't have a dash charge light, we have to wire one in to excite the alternator. It was getting pretty hot too, I had kept the fans wired as per the BP it used to have, but will swap it over from a manual temp sensor to the ECU to be able to set the temp to a lower point so the fans come on earlier, I may look at upgrading them too. Super stoked with only a few things to rectify before tune!
6 points
-
"FUCK THAT AWFUL NOISE, I'M HANDING MYSELF IN"4 points
-
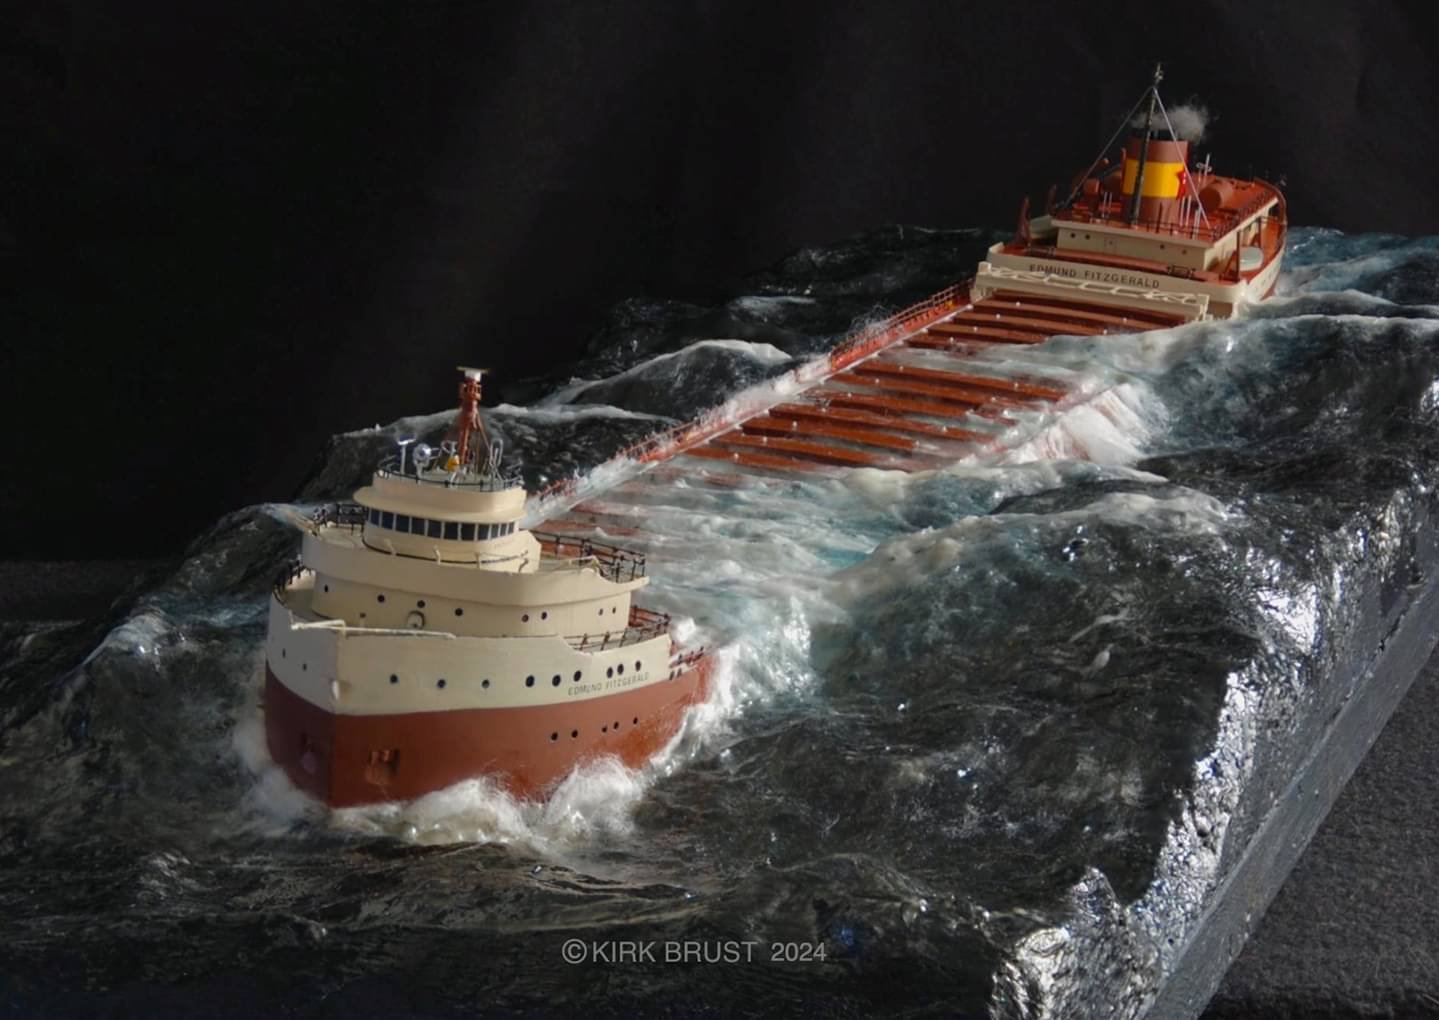
Some incredibly talented people out there. The ill-fated Edmund Fitzgerald - Presumably appearing somewhat as she did before she went under and was immortalized in Gordon Lightfoot's song.
3 points
-
So many people don't understand this! Trying to explain to customers that cooler is not necessarily better, consistant temperature is the goal.3 points
-
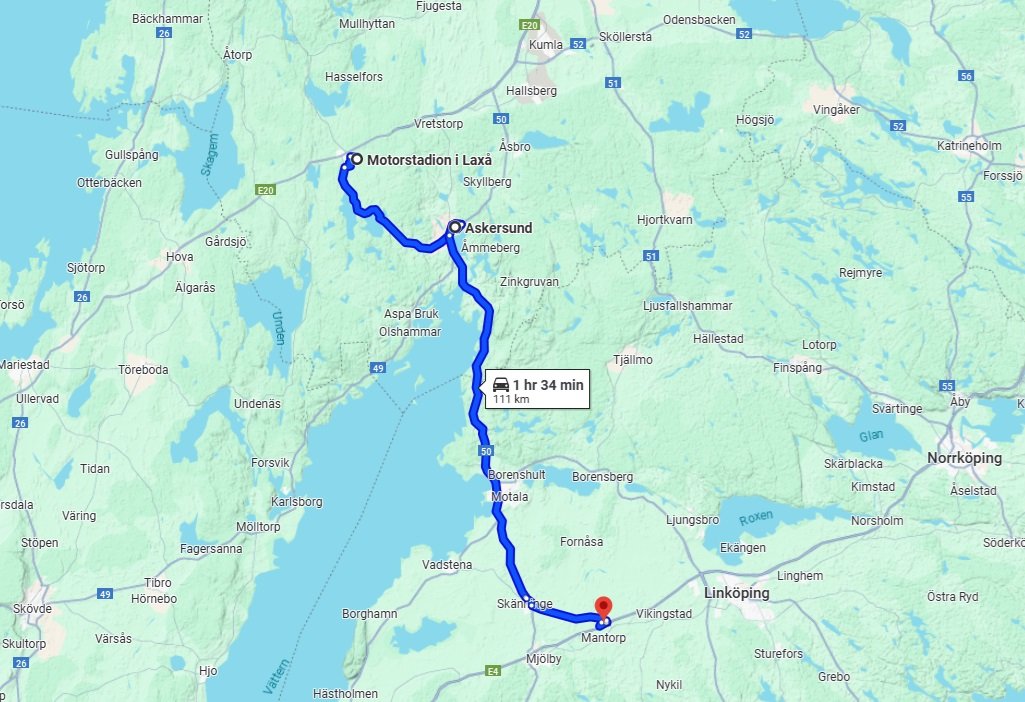
Looking at the map again, can we add a side quest, of using the harmonic thrum of two dozen little bikes, to flush that guy and his kids out of the bush?3 points
-
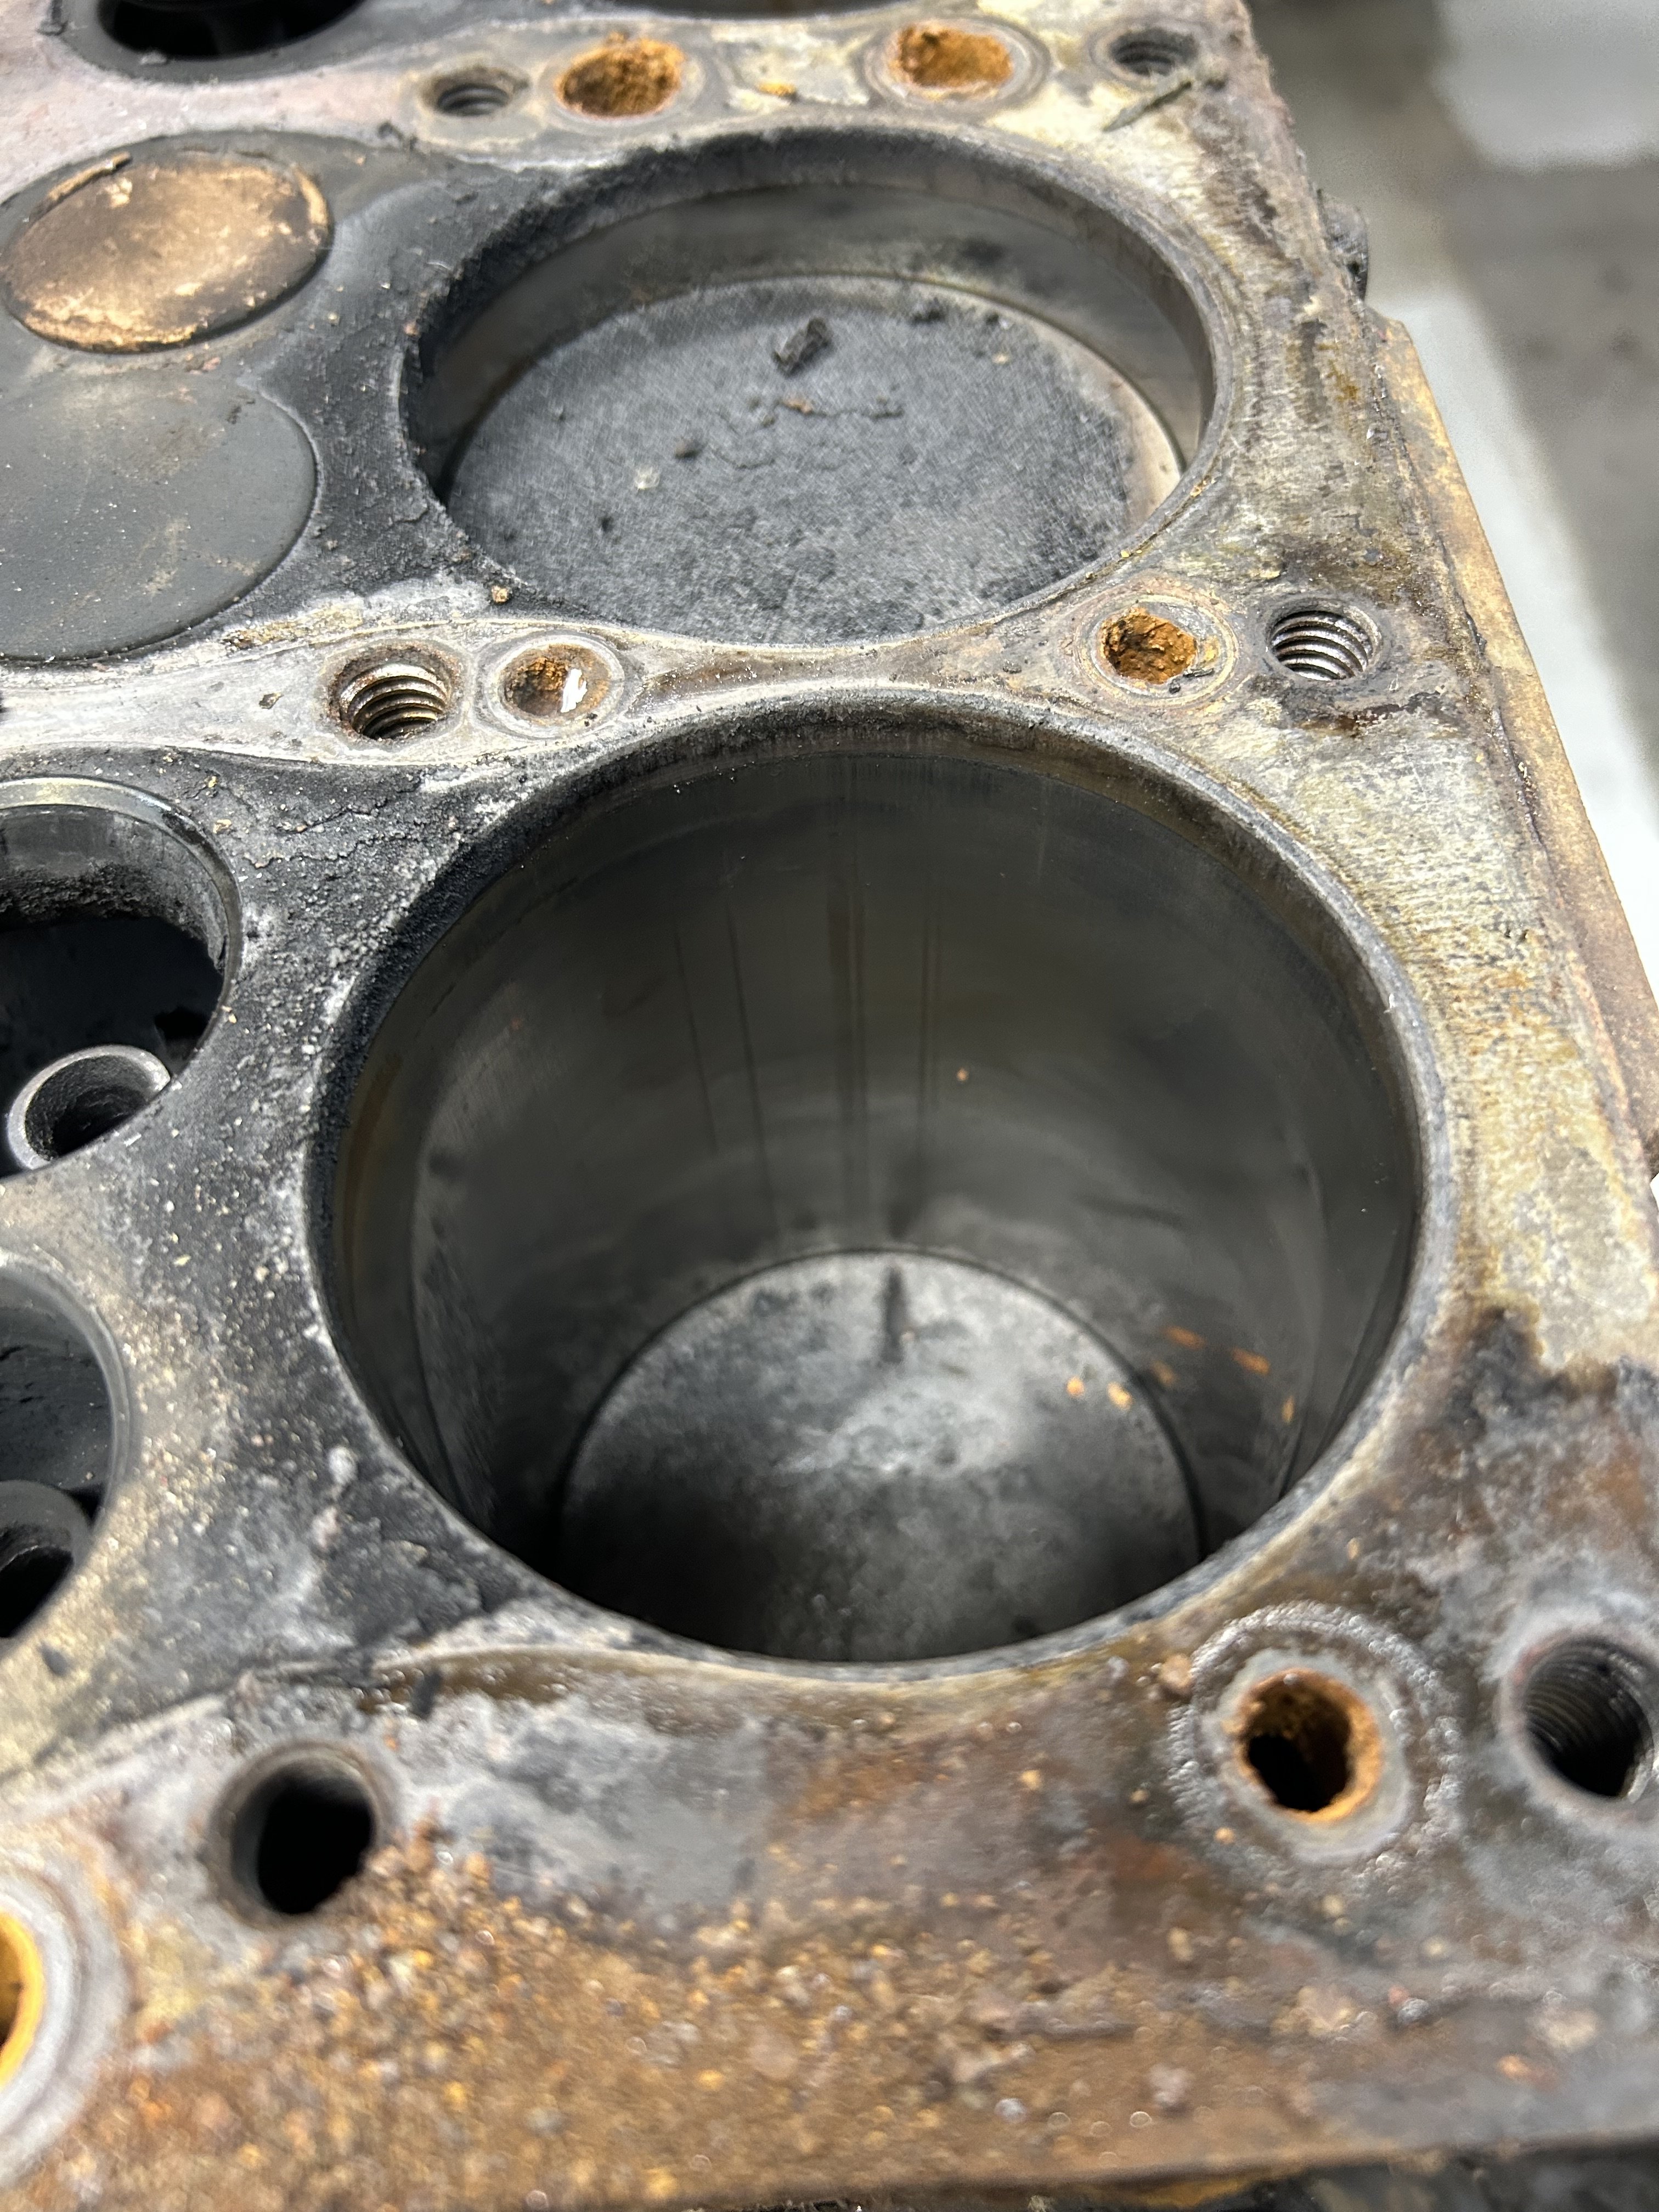
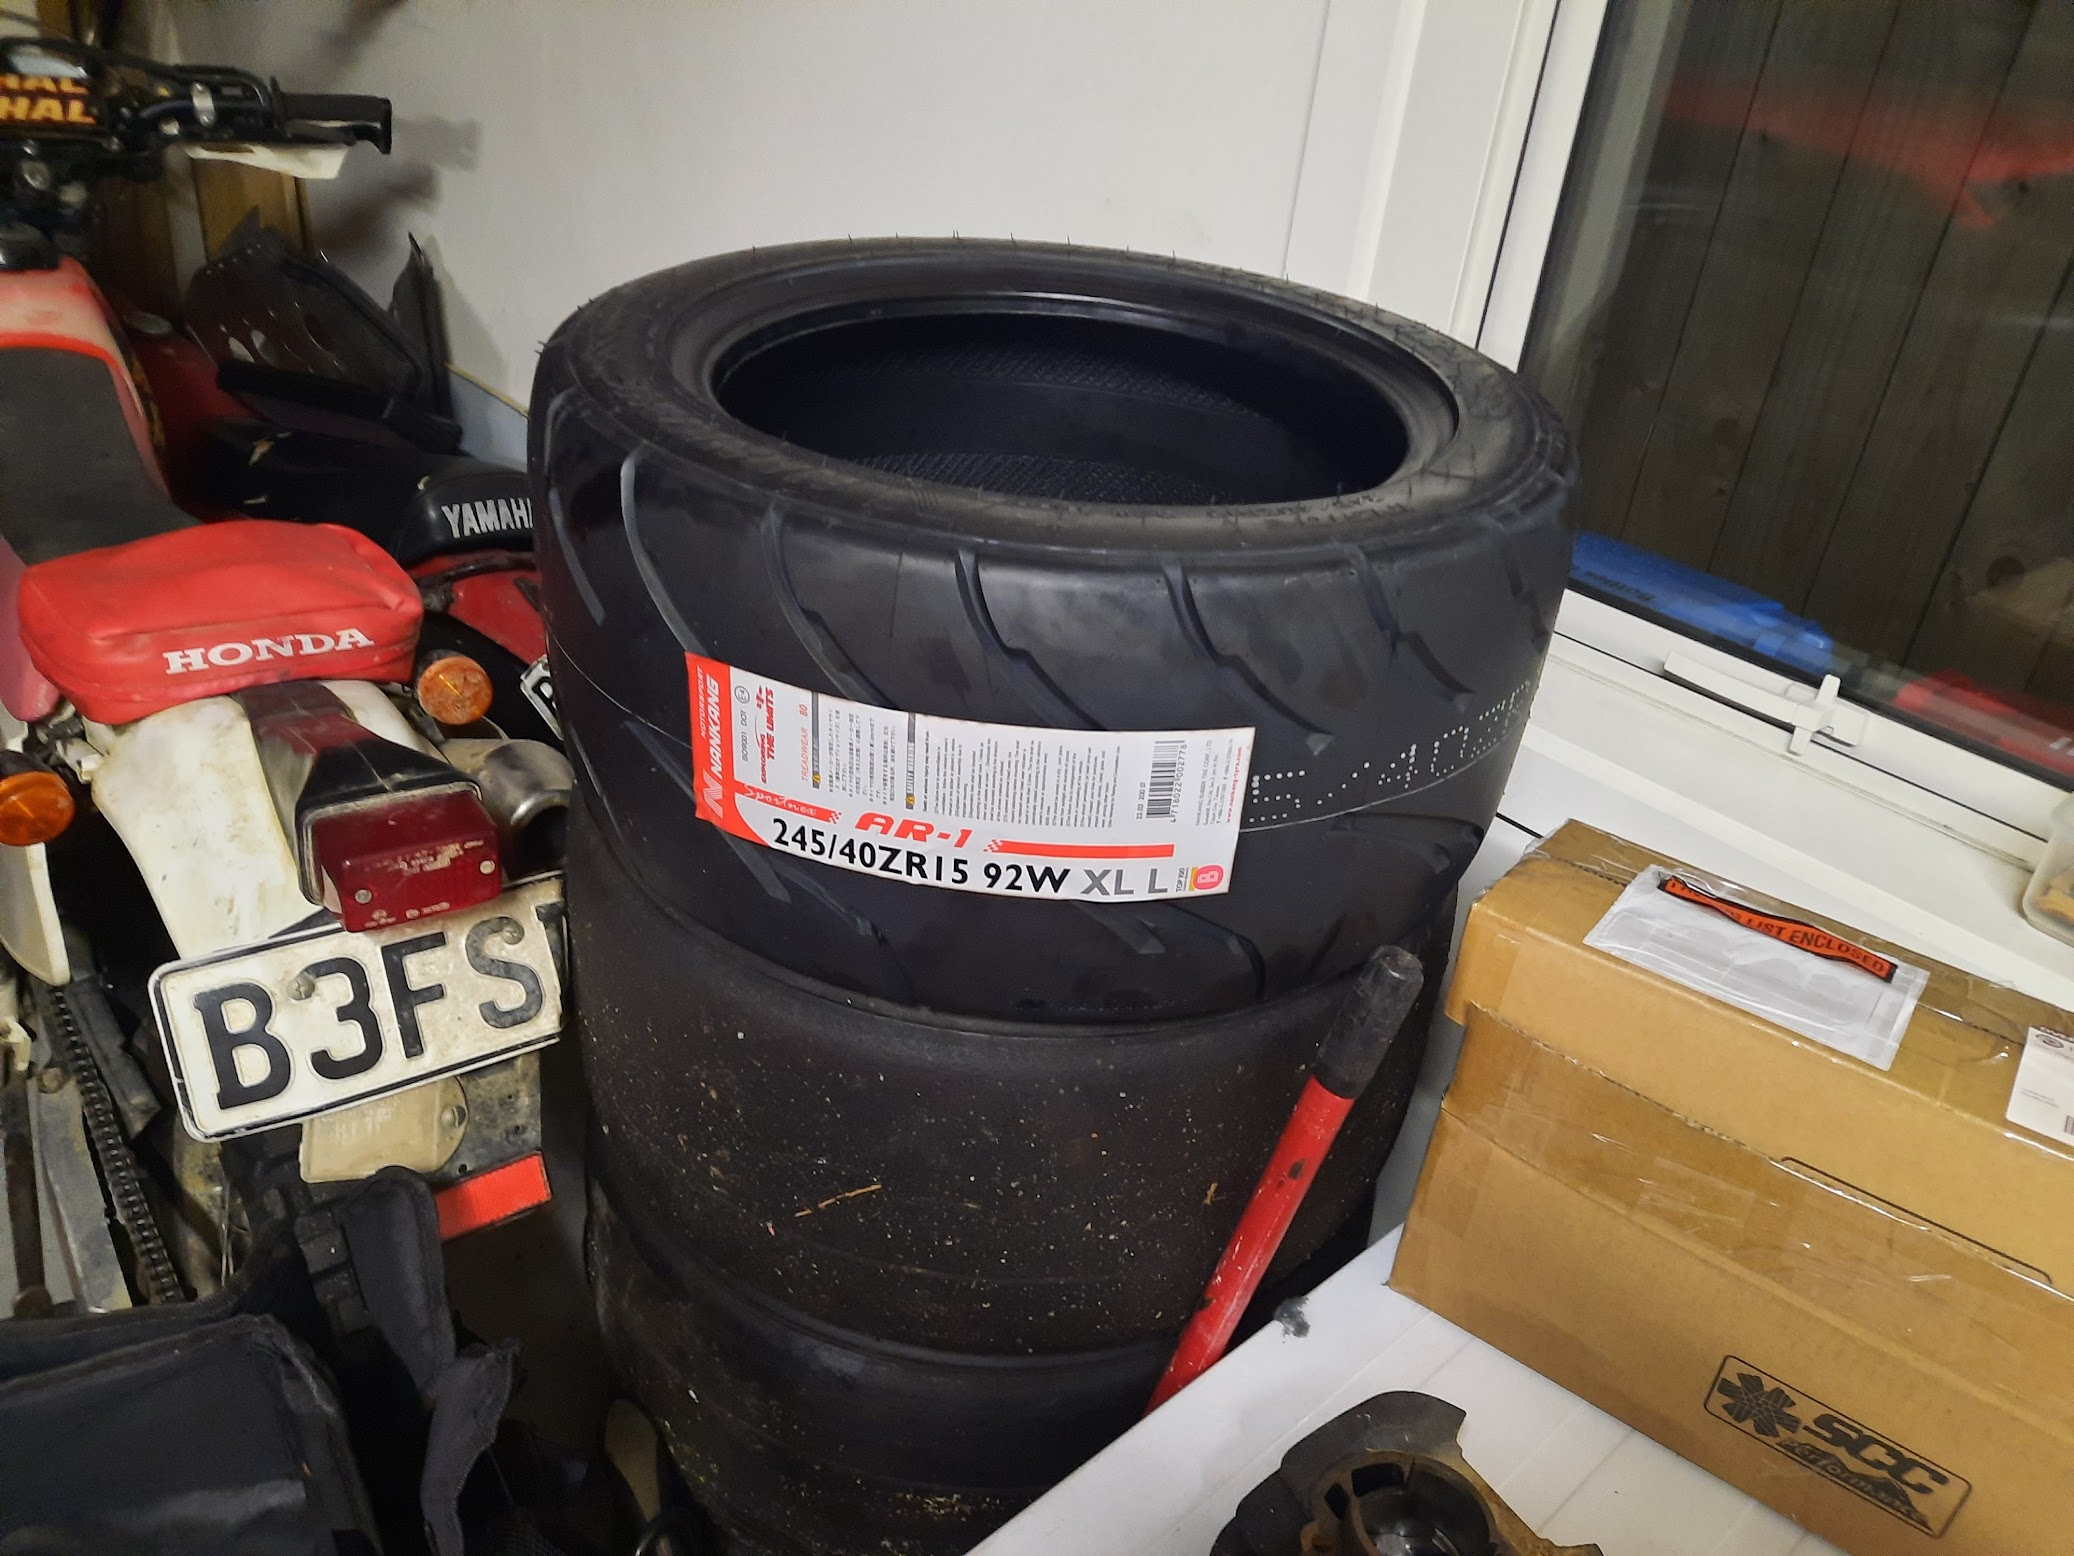
Unfortunately - a fair bit of wear from the pistons at some point, can be felt by finger nail on all 6 cylinders, some worse than others but didn’t get too many photos when with the engine tonight. if anyone can put me on to an engine rebuild kit for the 3 7/16 inch bore size, would be greatly appreciated! Can find a few for the smaller bore size but not sure I can for the larger just yet. Also note the wear to the valves - some missing some of the metal around the edges like the one top of picture
3 points
-
Yeah none turbo and just going to run it like this for now. It won't be a daily driver and I just want ti be able to move it around under its own steam and see how it actually is while we fit it out. And mainly see if the ld28 is as bad as the previous owner claimed and see if ut ahits its self... as it will only happen once ...and then its getting a Ford straight six. Christchurch is pretty flat ...but would like to think it will go up a hill 😆2 points
-
Try an extra 100mm on top of what you have, if you can fit it. then move 20mm at a time either side. vvti can shuffle things a bit. but getting the intake length dialed is still worth it. My long intake (compared to what everyone else runs) still works best, even revving to 10k with vvti See how it moved the bumps up the rpm range with the with the shorter runners. going longer should pull a stronger one thats currently out of reach down the rpm range, try get that to bang on where it wants to naturally make peak power. then use the vvti to hold the peak longer. you will likely find if you only go say 50mm longer than current. it may get worse before it starts to get better2 points
-
We're working on this. Pretty sure we'll have a support vehicle ! Stop and listen for the echoing of 2T nangs off his massive forehead?2 points
-
Wouldn't say deep but going to have to figure something out! Once the engine has been stripped down a bit more and tested for cracks, I'll report back. Timeline TBC2 points
-
Just put 8.11 litres of BP's finest in there this week actually.. not that it needed it. Headed to Berm busters this Saturday for a shake down with a new recruit. That reminds me.. I'll have him fill out a form!2 points
-
Less than 3 weeks to go - get excited. How's everyone's rigs looking? @iwanttobeamole still got last years petrol in there?2 points
-
You'll really want to run the transmission through a seperate cooler first then through the cooler in the bottom of the radiator. It's to regulate the temperature. The trans wants to run at the same temperature as the motor so the sepedate cooler will take the heat out of the oil the the radiator can regulate it back to operating temp. Running the trans cold is as bad as running it hot2 points
-
There’s 200cc worth of carbon on top of the pistons2 points
-
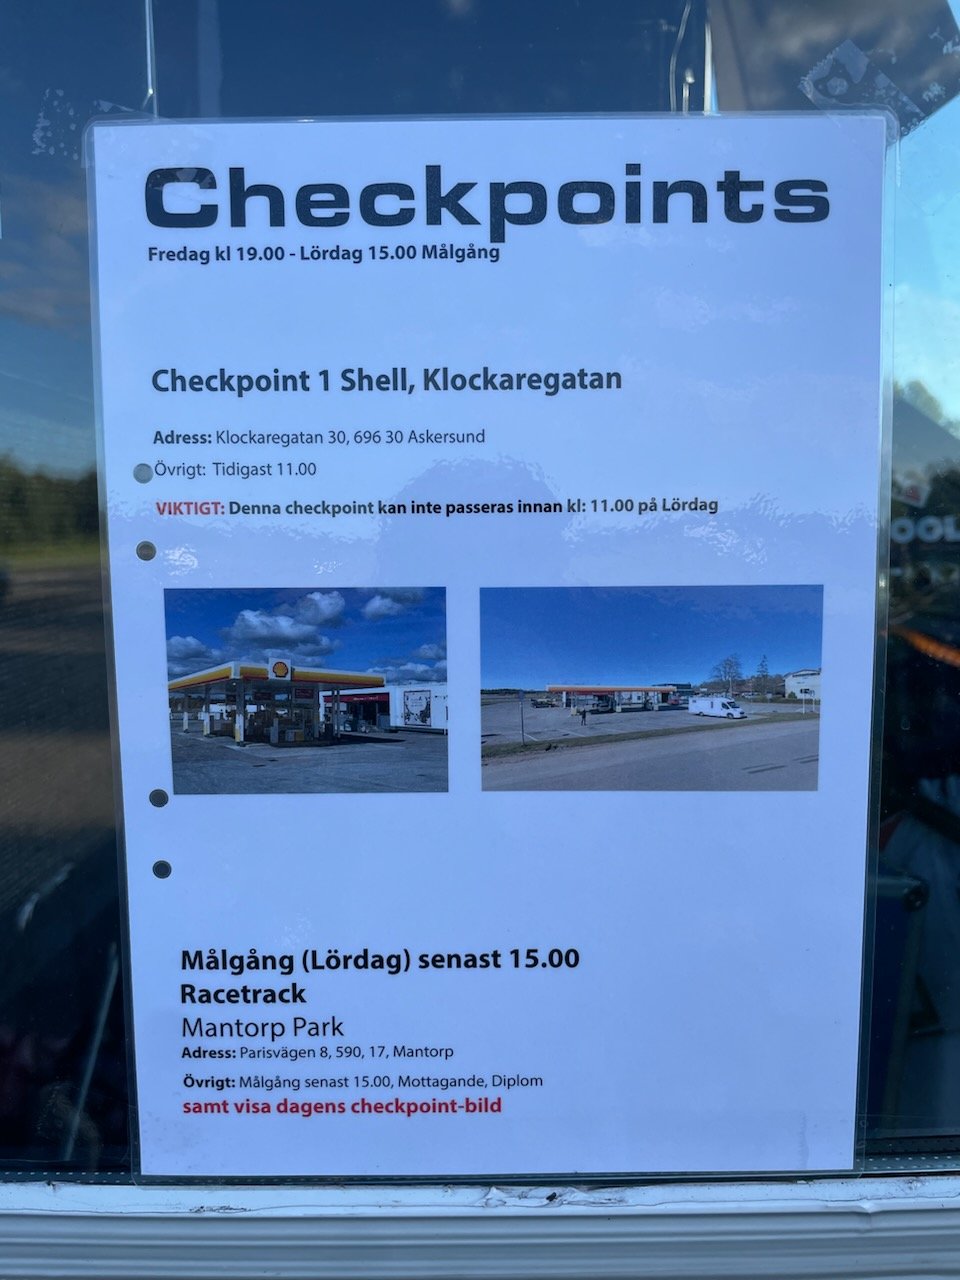
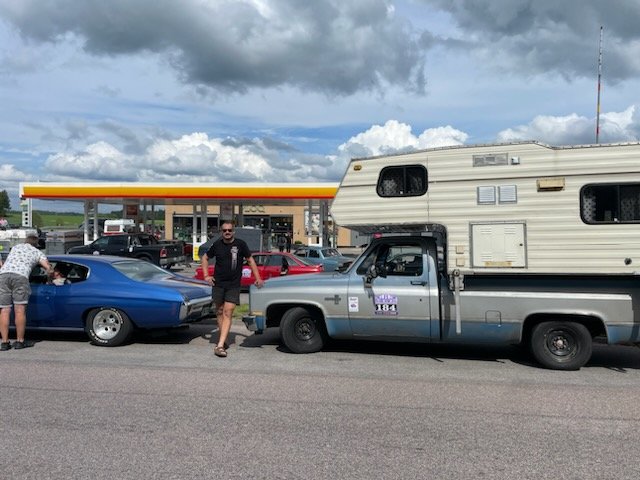
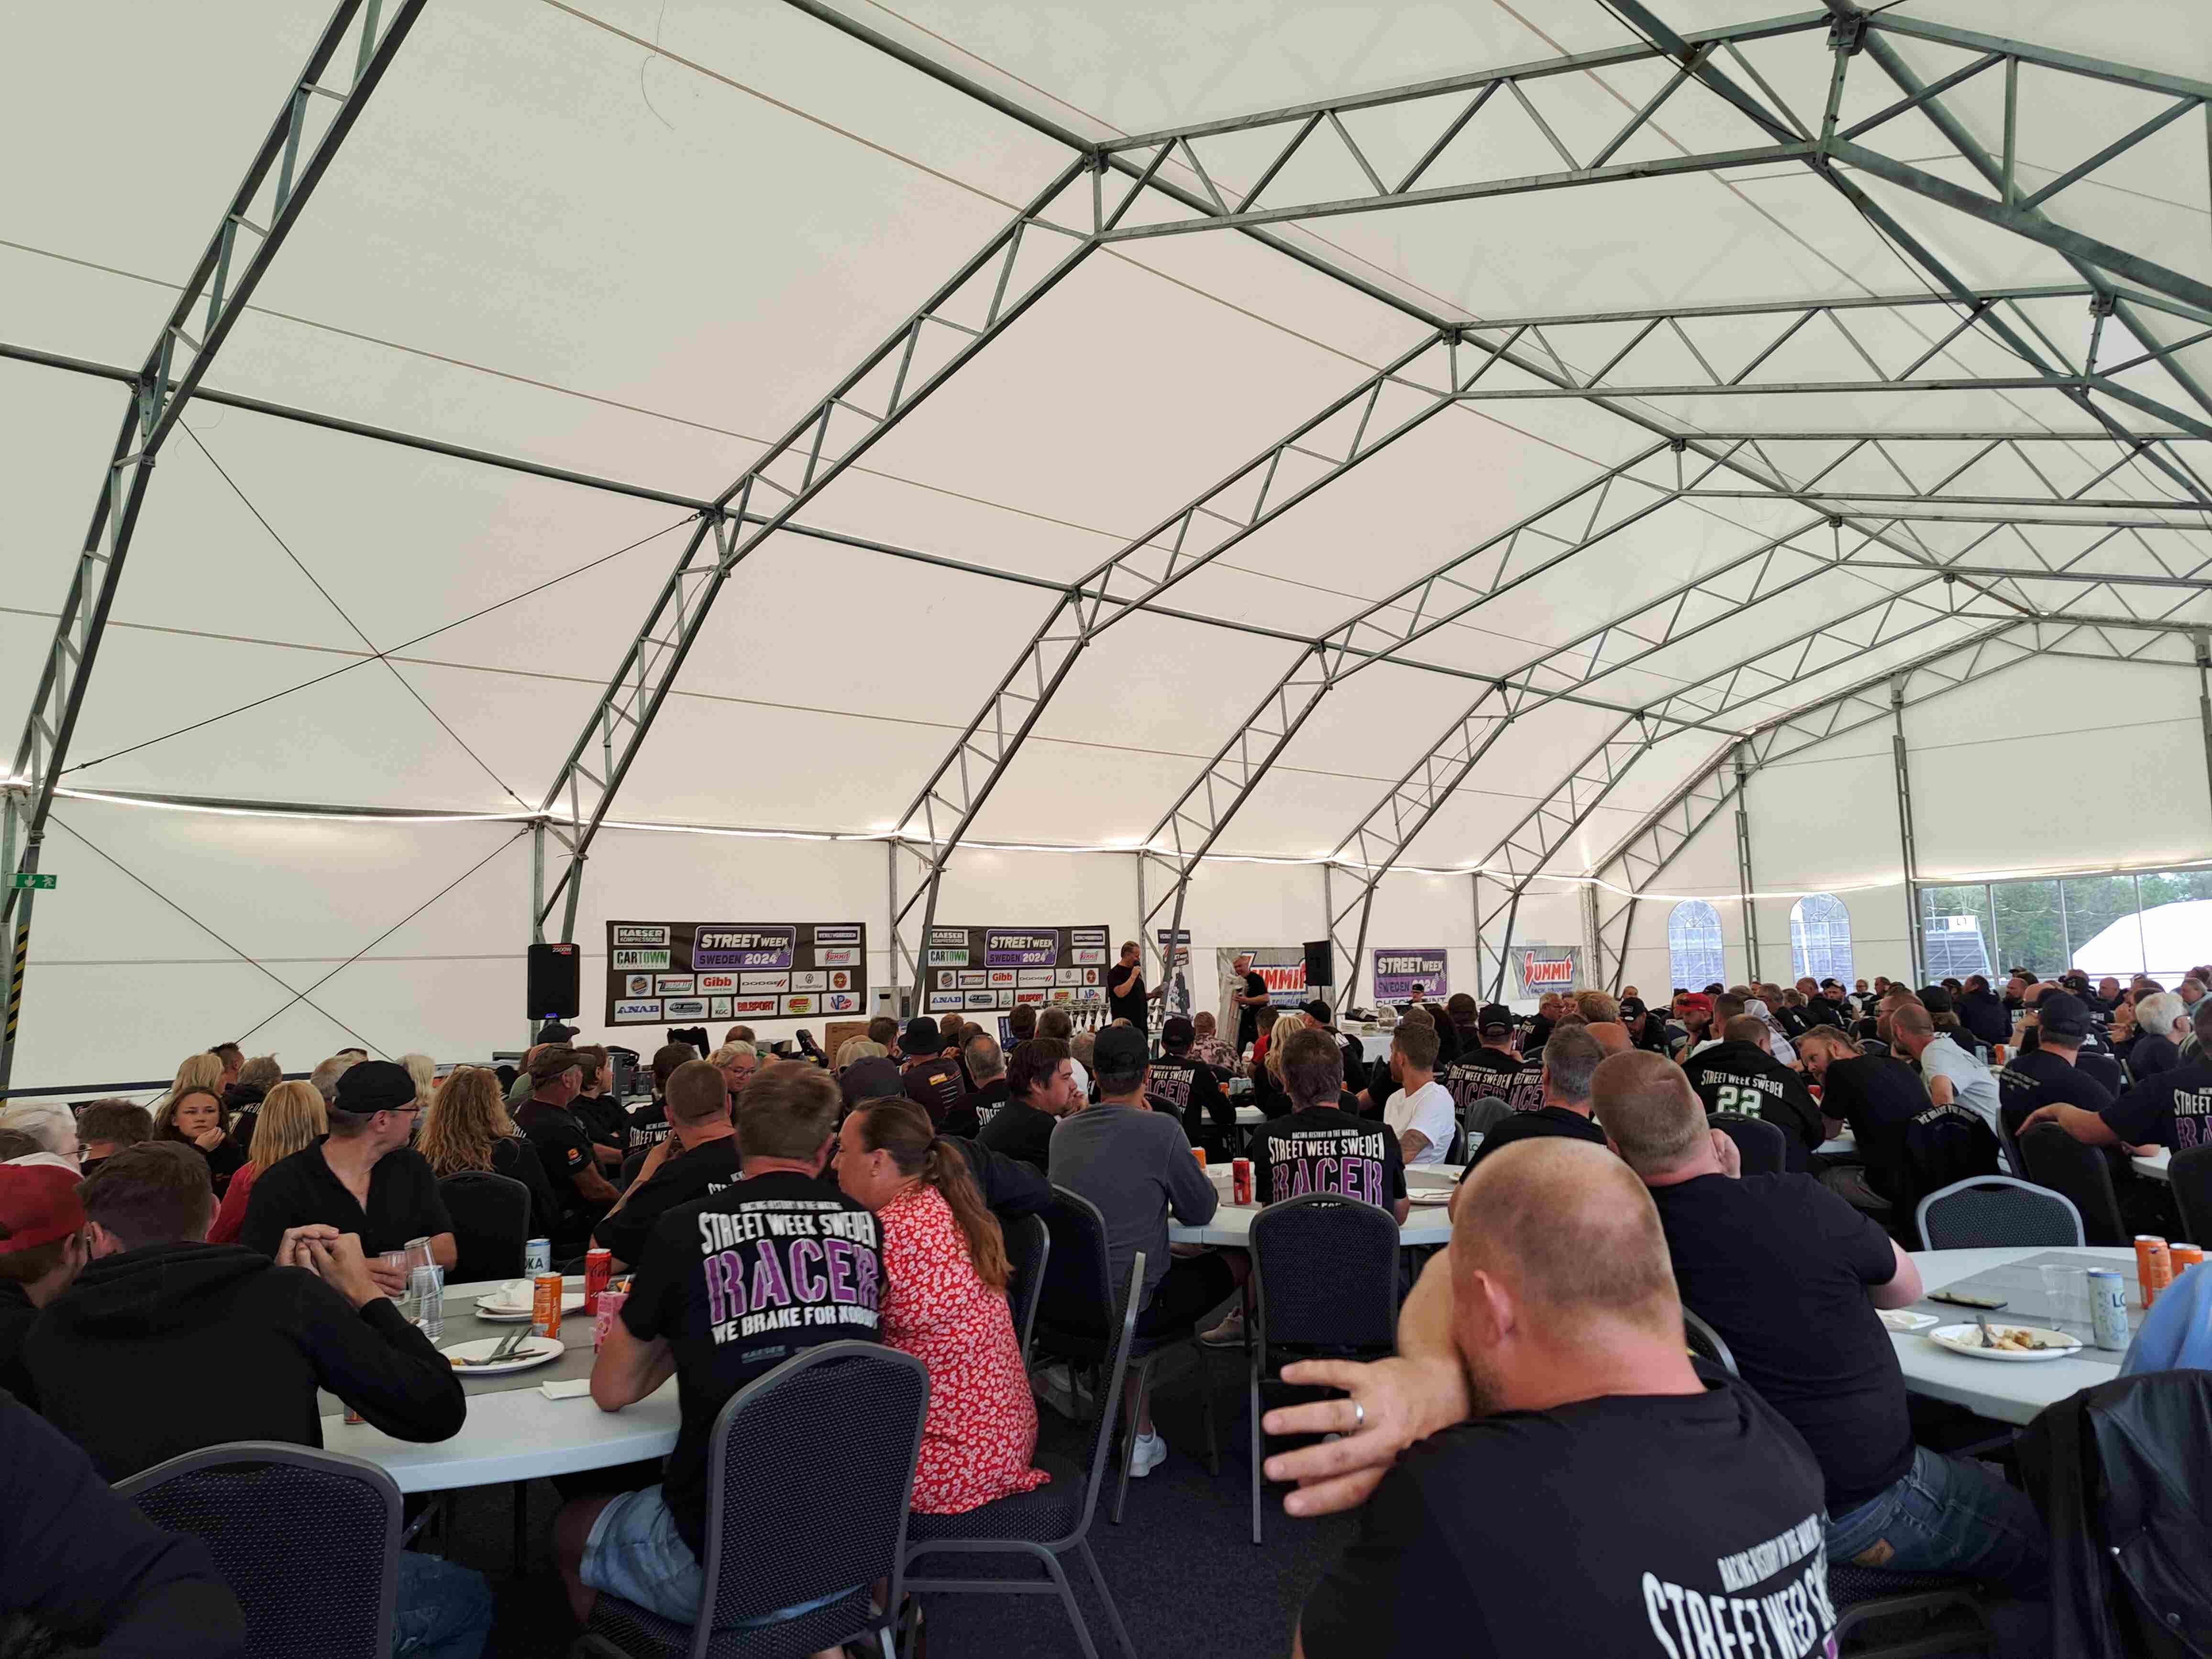
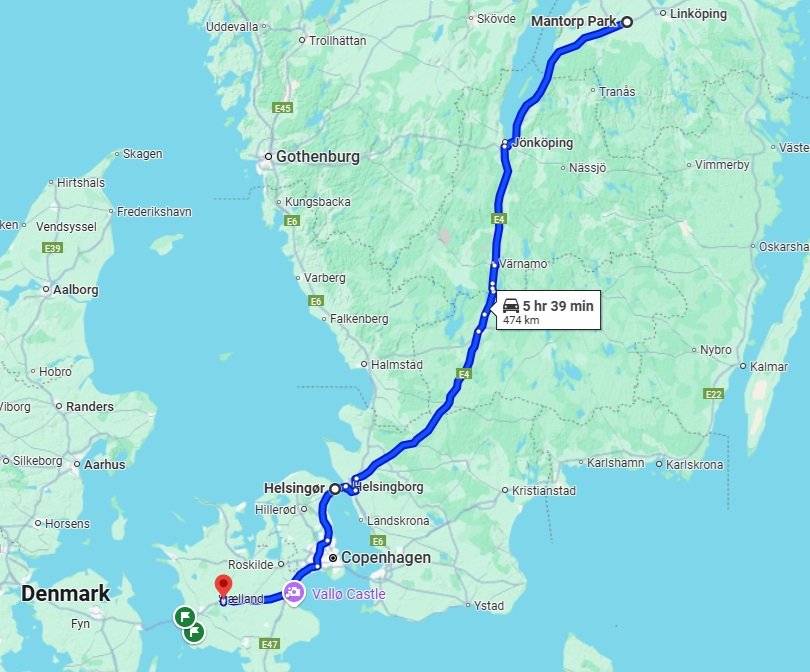
Day 7: Mantorp So we packed up and hit the road to get back to the starting point, there was a prize giving and sit down dinner. TBH it was a bit of an anticlimax after the week we had endured but it was sweet to finish up the week in one piece. In the end we came away with an award for the best transport car setup, the organisers loved that we were carting the house around with us, and we were the first truck camper setup that had competed in Street Week, so while we didn't come away with a place we did come away with a bunch of memories and a hell of a good time, as well as the new friends we made along the way. After dinner we hit the road and knocked out the last 6 hours to get home. To say work on monday was a drag is an understatement...
2 points
-
Look at my massive semi I have three more somewhere too. They should be good for the Coronet Peak Hillclimb in November.
2 points
-
Chase cam from the City in run 3. Skip to 1.05 to see a hairy moment passing a Mini.2 points
-
there is a 3 7/16 bore, makes its the 237cui that link i posted has up to 60 thou oversize. once you get someone to clarify that will be enough then you can go further. if the bore is needing to go bigger you will need to look to resleeve it if possible and got back to stock dia with new stock pistons which they also advertise. there is honestly a truckload of piston manufacturures out there, just a matter of finding one that has stock or will make them for you at a reasonable cost. sealed power is another brand name that likely will. try icon also. any of the others are likely more $$ but may have an old set in stock?? wont know till you get a bit mroe data. the machine shop will be able to sort the valve seats too without too much trouble. just get more info for us, so we can assist you the best way possible instead of pushing the cart in front of the horse. seems bearings, and other parts all available too so you shouldnt be in too much of a bad shape to get it going, i didnt look at the costs though but there is one thing i will say to you right now. chevs are cheap. fords are expensive and mopar, well hope you have deeper pockets.1 point
-
Berm Buster on the CB?1 point
-
Interesting.... I'm not an auto guy so thats good to know. So run it through the trans cooler to cool it and then through the rad to to try and maintain same teml as engine.....thats doable1 point
-
I think you need to clarify a bunch of data. All the machine shop should be able to provide. What is the block cu in. what is it likely to require to clean up? then can figure out the piston availabilty range. there is a metric buttload of piston manufacturers out there and from the small amount of looking it appears there is some about but no point getting too serious without knowing what it is going to require at a minimum. They can measure the grrove depths and use that plus bore size and advise what it will likely need at a minimum.if they cant provide you this ort of info then take your engine elsewhere as they aren't that clever. This is a very simple motor but quite different to the new stuff which does need to be treated and handled like it too. So you want to find someone that is capable / expreienced with these old girls. check this, if it is the 3 7/16" bore. UEM Pistons1 point
-
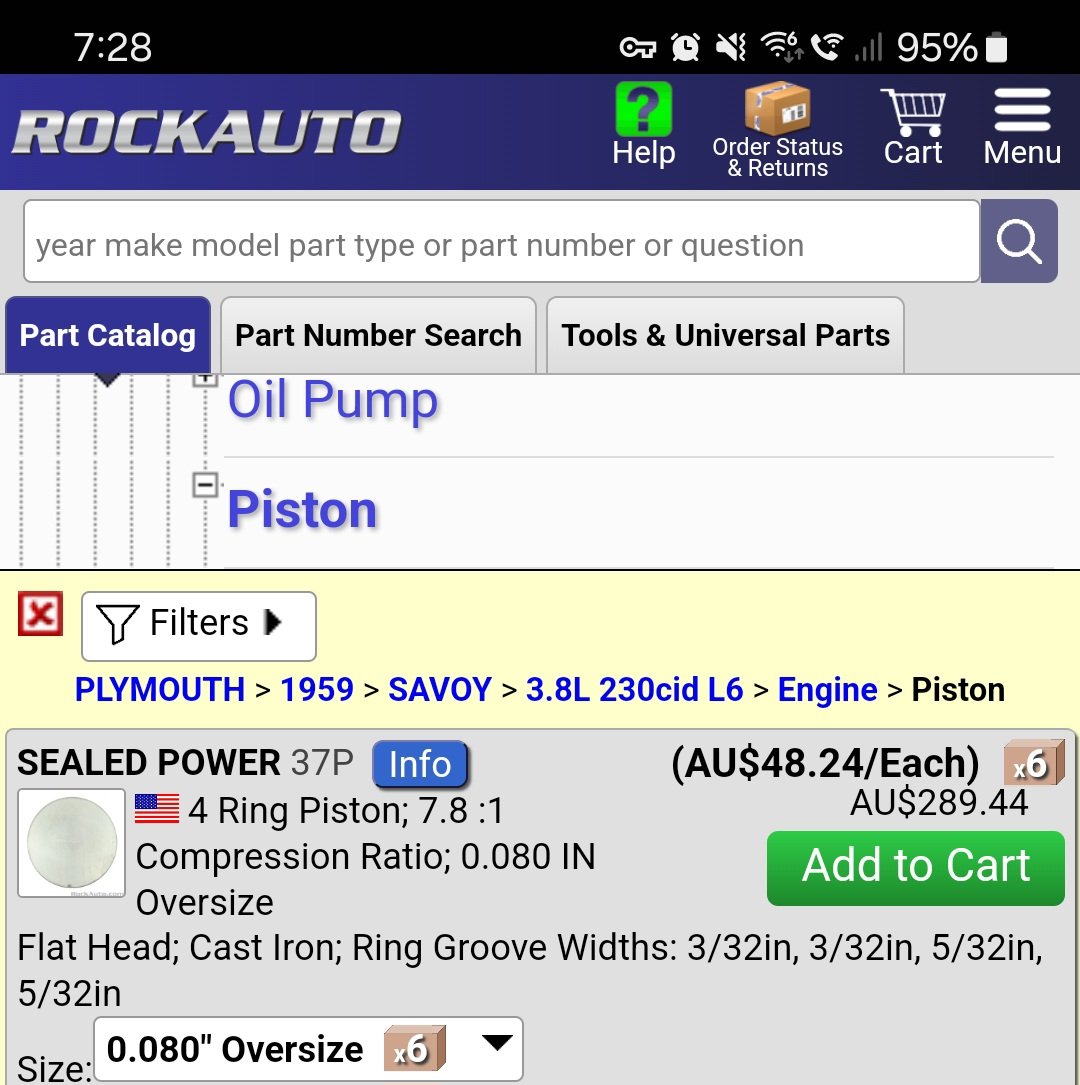
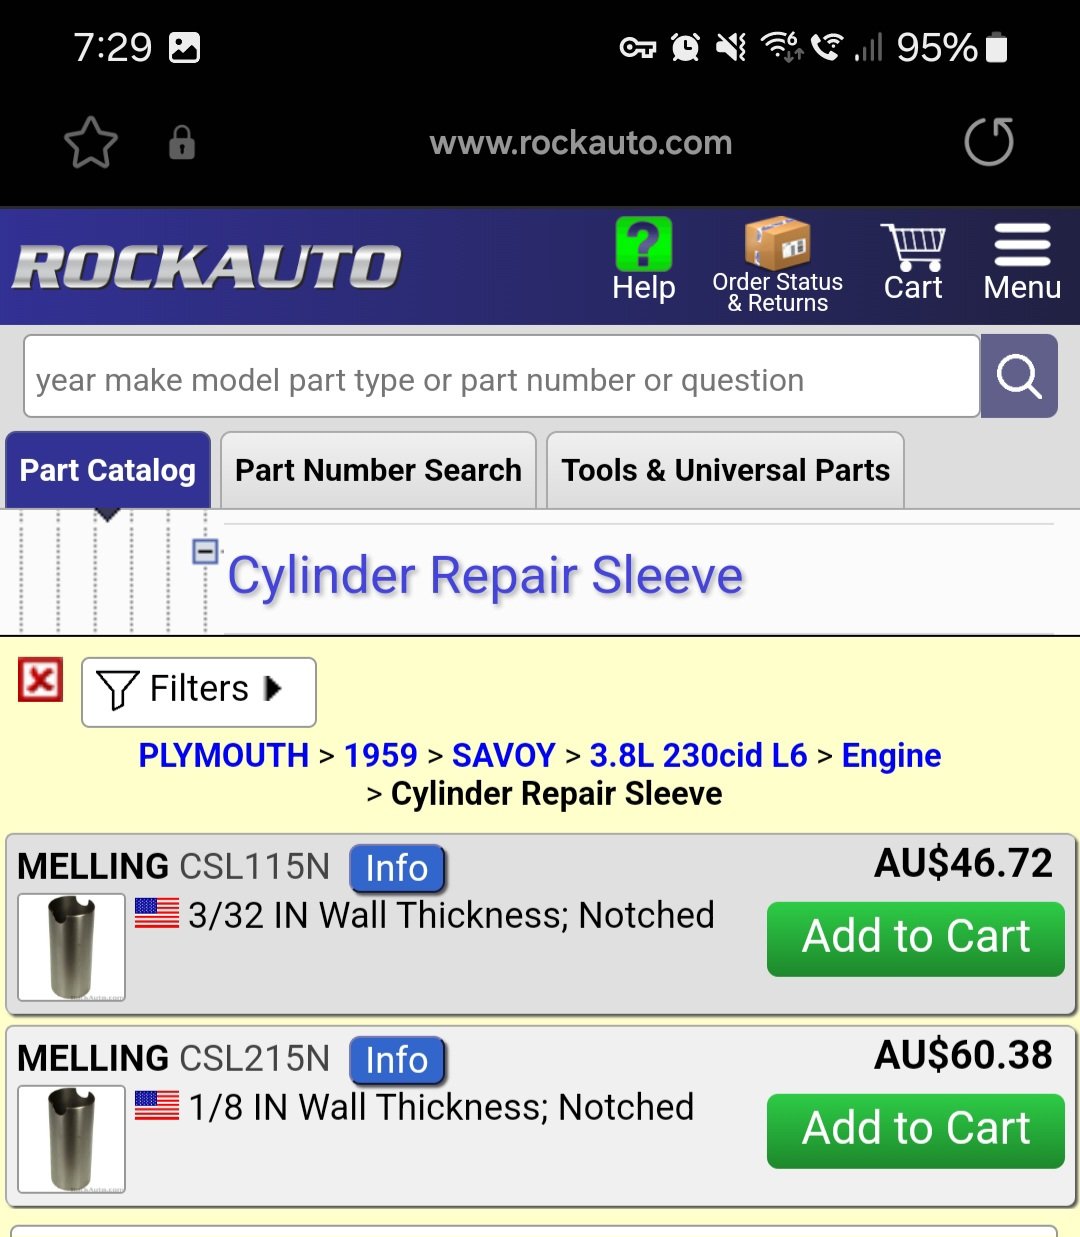
If yours is the 230 sized motor Looks like the biggest oversized pistons rockauto have are 0.080" oversize They do have sleeve repair kits too They also have standard sized valve seats. Looks like they are running short on new valves. Not much oversized stuff left Summit racing has some options but alot of it is special order Summit racing link (searched based on the 230 engine size 3.8 etc) Summit racing link 2 (specific search based on Clints comment that its the same engine in the Savoy) Are you sure you want 3 7/16" pistons? As that's over 87mm Factory bore 230 3+1⁄4 in (82.6 mm) The bigger displacement engines has that size tho so possible it's been bored out already? Or is a 237? Apparently the Canadian and American based flathead 6s are different. 3+7⁄16 in (87.3 mm) Larger pistons https://en.m.wikipedia.org/wiki/Chrysler_flathead_engine Looking at the pics/info and I'd double check when you order but looks like new pistons are all the newer 3 ring design so may even be an upgrade
1 point
-
If you're running an automatic, I'd really recommend plumbing up a separate trans cooler. Taking it away from the radiator was worth about 5 deg C drop in coolant temp on mine. Might well be needed on a turbo.1 point
-
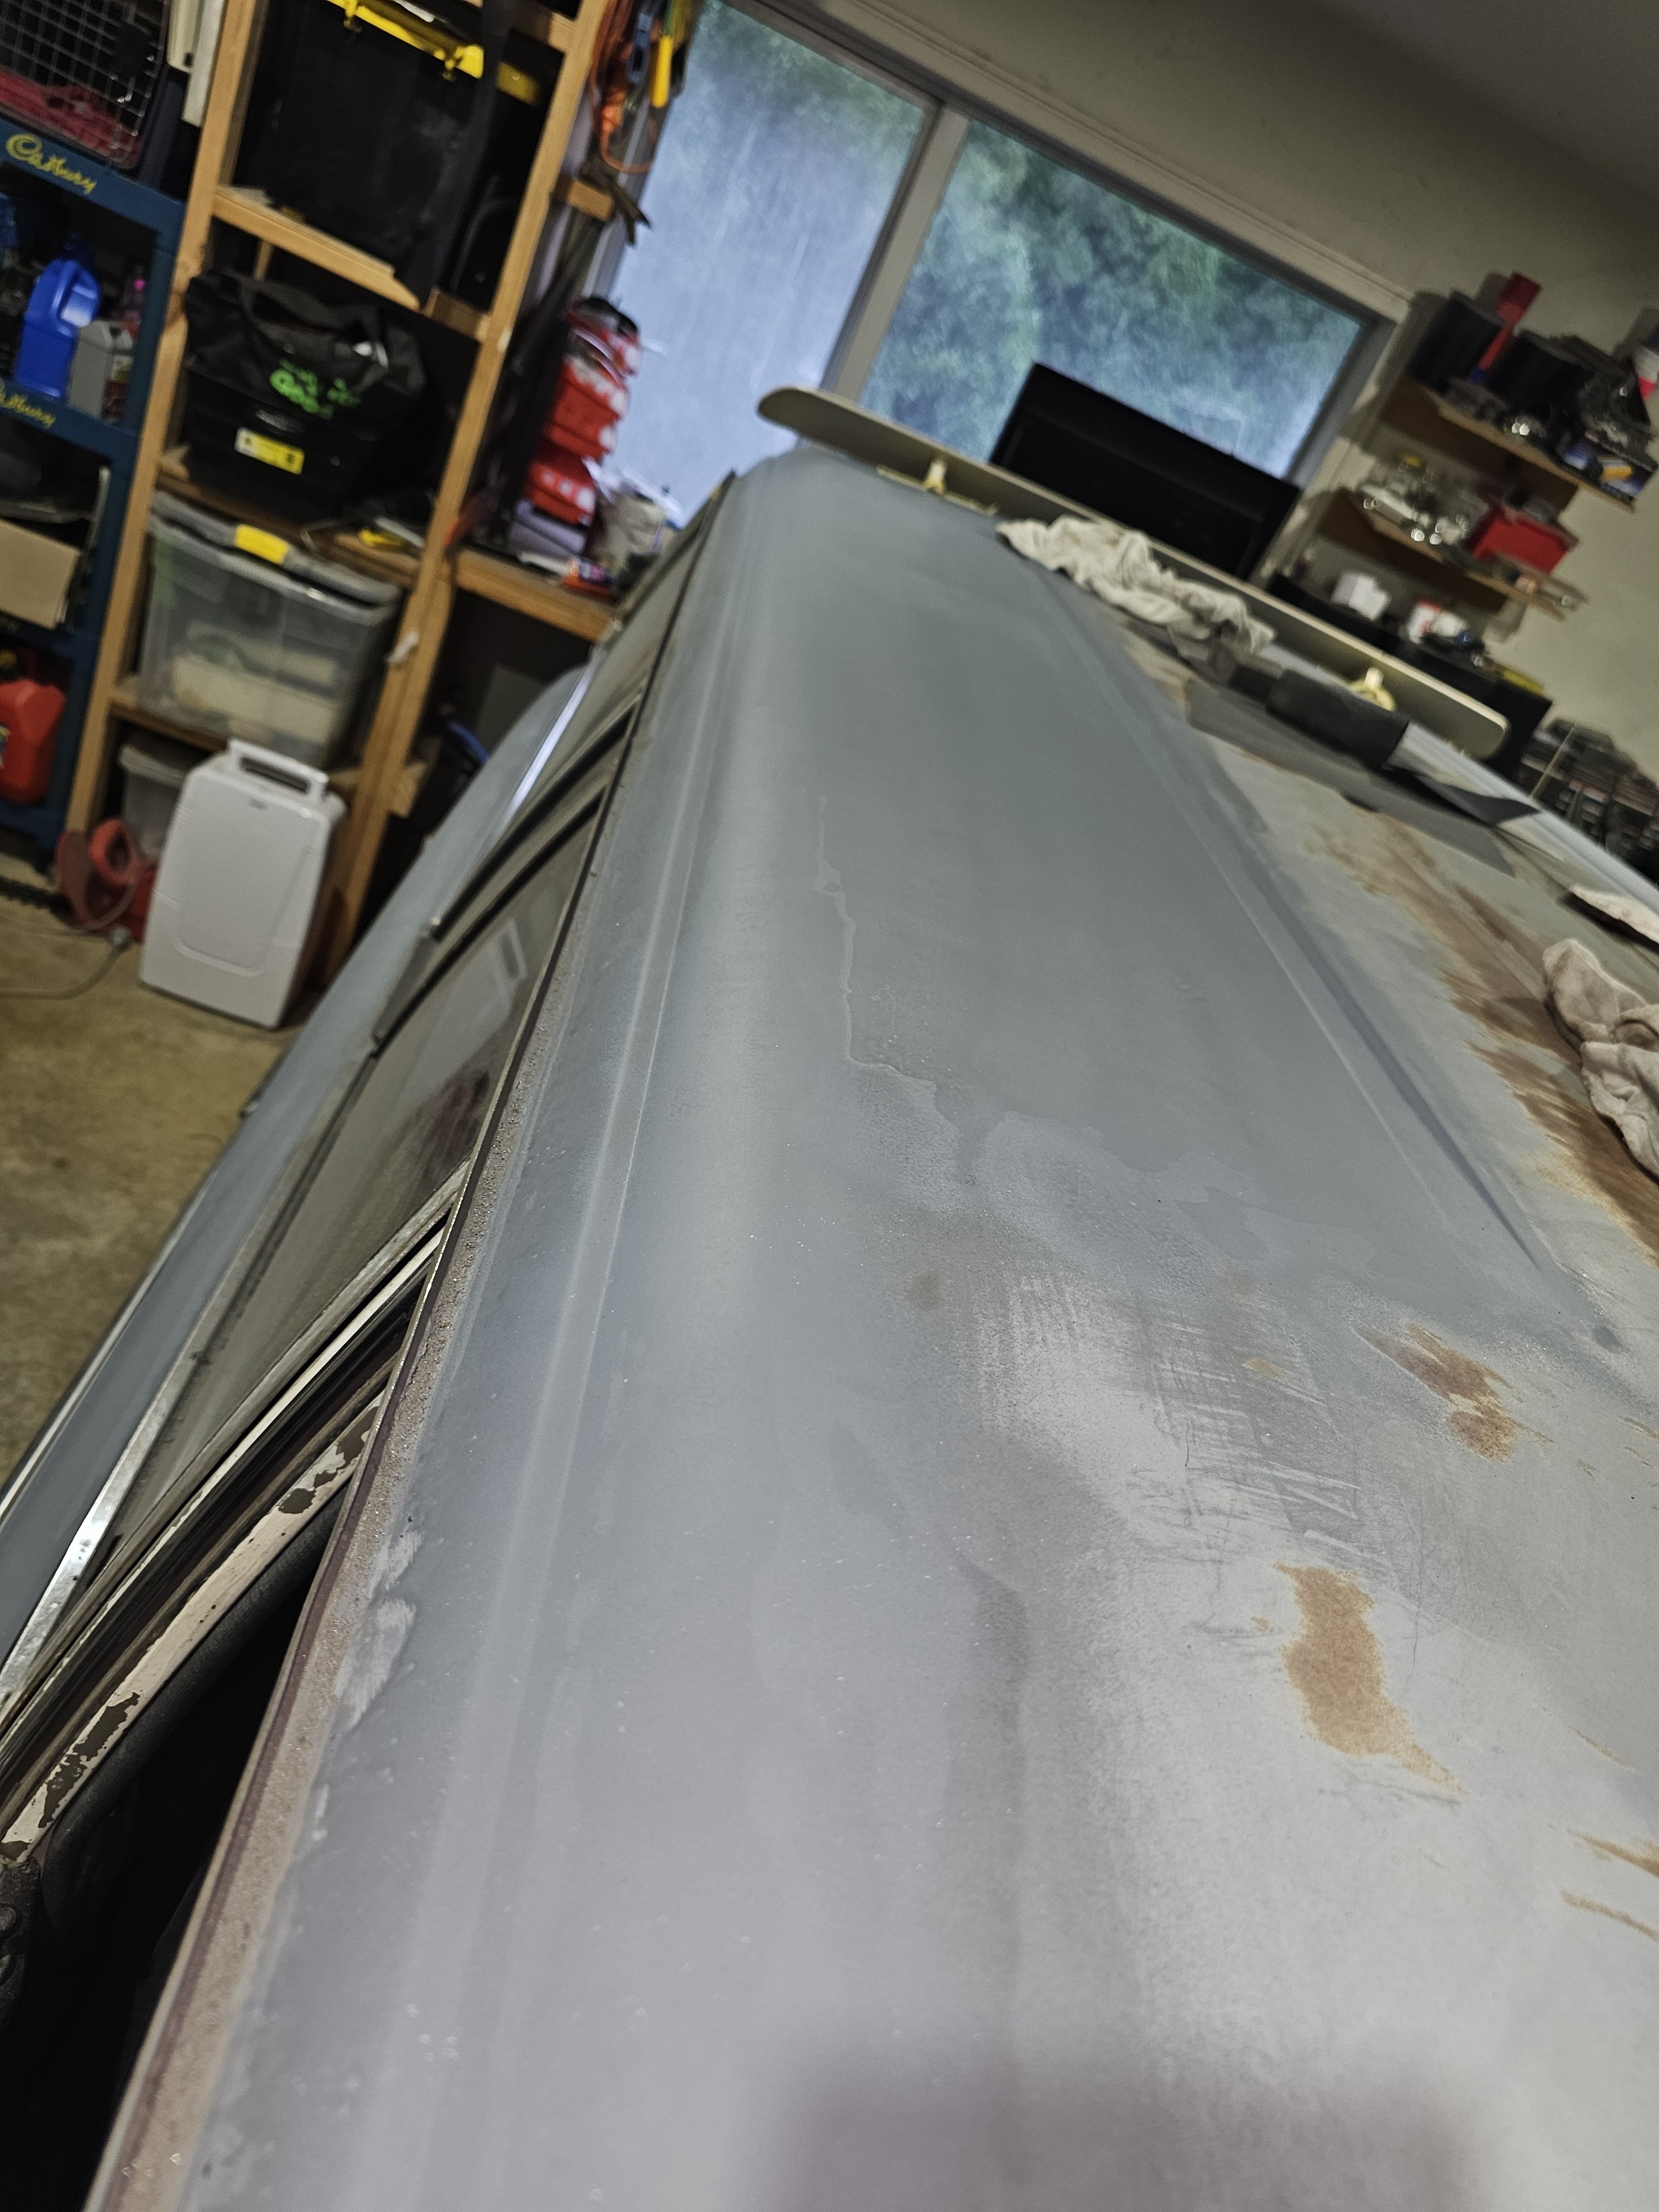
Currently stripping the wagon back to bare metal and etch priming as I go along. Only found a couple of small areas that will some work done as there has been some previous repairs not done correctly and there is a few pin holes and some areas where bog was chucked into a small hole.
1 point
-
I'd never commit such fraud, get outta here1 point
-
Does your car even require a cert seeing as your loosing power going from the mighty 5k to a 4age?1 point
-
Definitely will be running an intercooler if that makes a decent difference1 point
-
I had a lot to do with brake boosters in the early 80’s working for an authorized PBR agent in Queensland and then setting up a booster repair department and training staff for APPCO Brake & Clutch on my return to NZ. The original VH44’s were built by PBR in Australia; they were prone to push rod seal failure which is the archilles heel of most inline (Hydrovac) boosters. The casting and the aluminium used on the slave cylinder wasn’t very flash and yes the bores did wear. On the plus side they were cheap to make, readily available and in their day were a big improvement on the earlier style of boosters. We were originally re-sleeving them in brass using an interference fit but then stainless steel sleeves became the norm and they were glued in. The problem with re-sleeving was that the circlip groove that retained the push rod seal bush was cut into the sleeve and once in a blue moon the sleeve would crack where the groove had weakened it resulting in the total loss of brakes - in a single circuit system! I recently fitted a new aftermarket (presumably Chinese) VH44 to a mates MGBGT. Being a suspicious, cynical old bastard I stripped it down for a look-see and found it to be quite a faithful copy that did not vary in any way from the original. I obviously had no way of knowing the quality of the rubber components but they looked the part and I suspect most of the brake seals we buy this day come from China? Have to say when fitted, I was pleased with the result. My advice would be to pass on the remanufactured one and go with the cheap Chinese knockoff. I’ll also point out the 1st link in your post, (Hawkswood Car Parts are a great company by the way) is not a VH44- it’s the English Lockheed equivalent that was fitted in NZ to a million and one Hillman Hunters and many other Pommy cars. Slightly less boost and the plastic control valve assembly just clipped together and did not grow old gracefully! Hope this helps.1 point
-
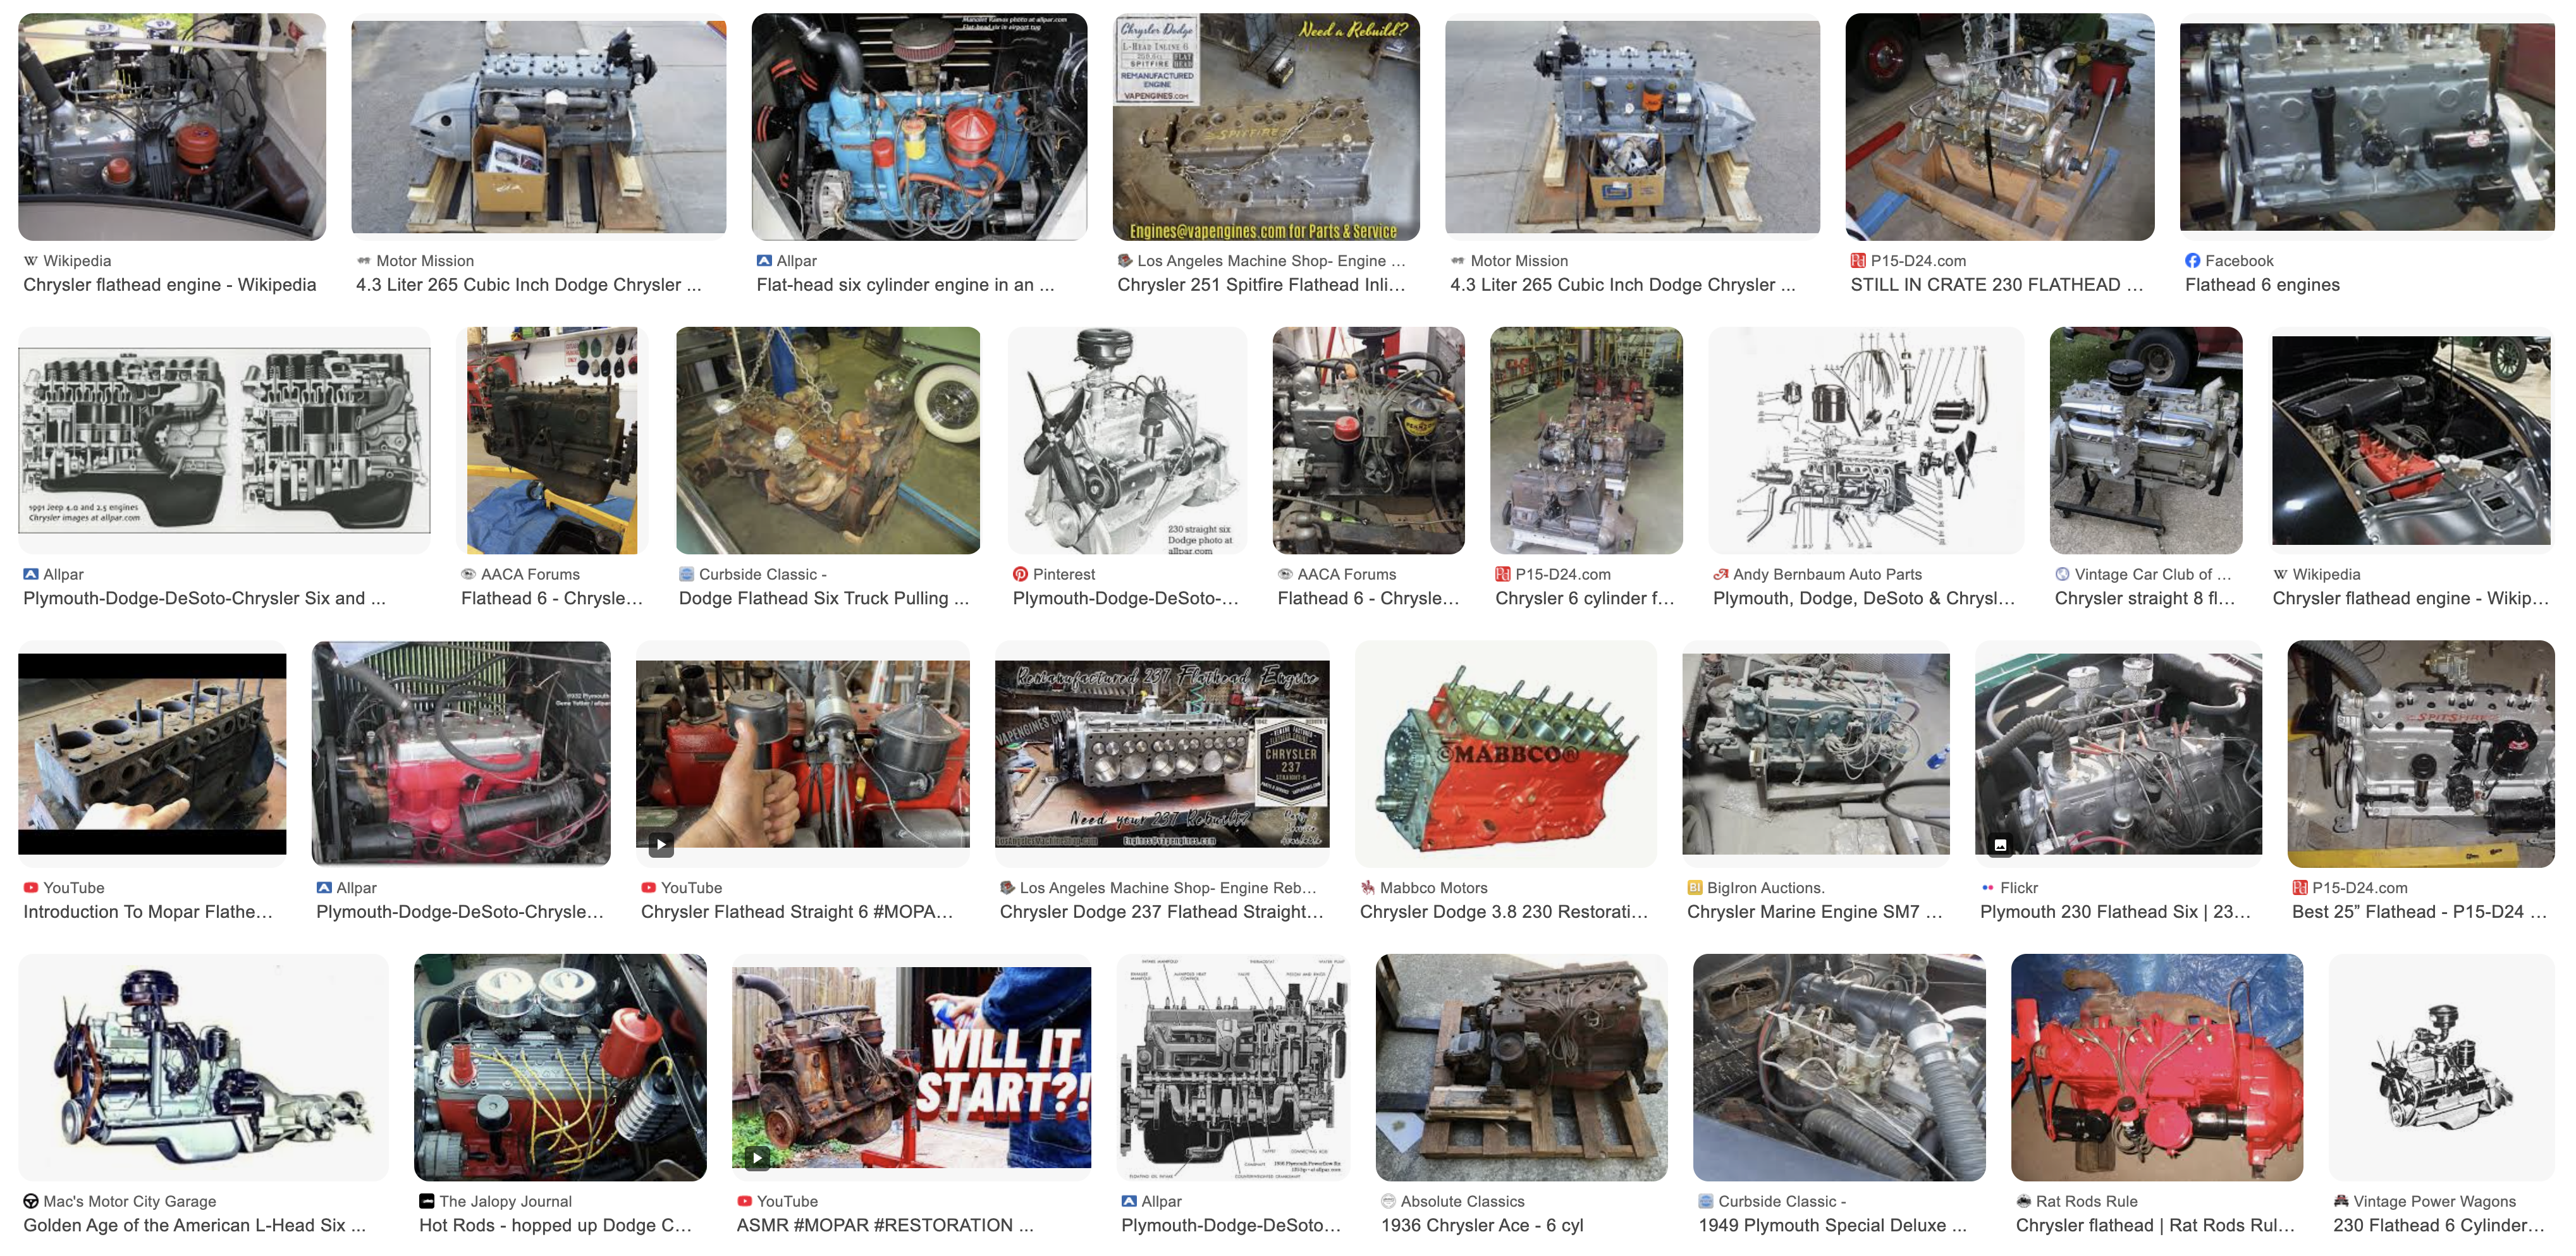
It looks like they came in a bunch of different colours. Google image search "Chrysler flathead engine" and you'll see more.
1 point
-
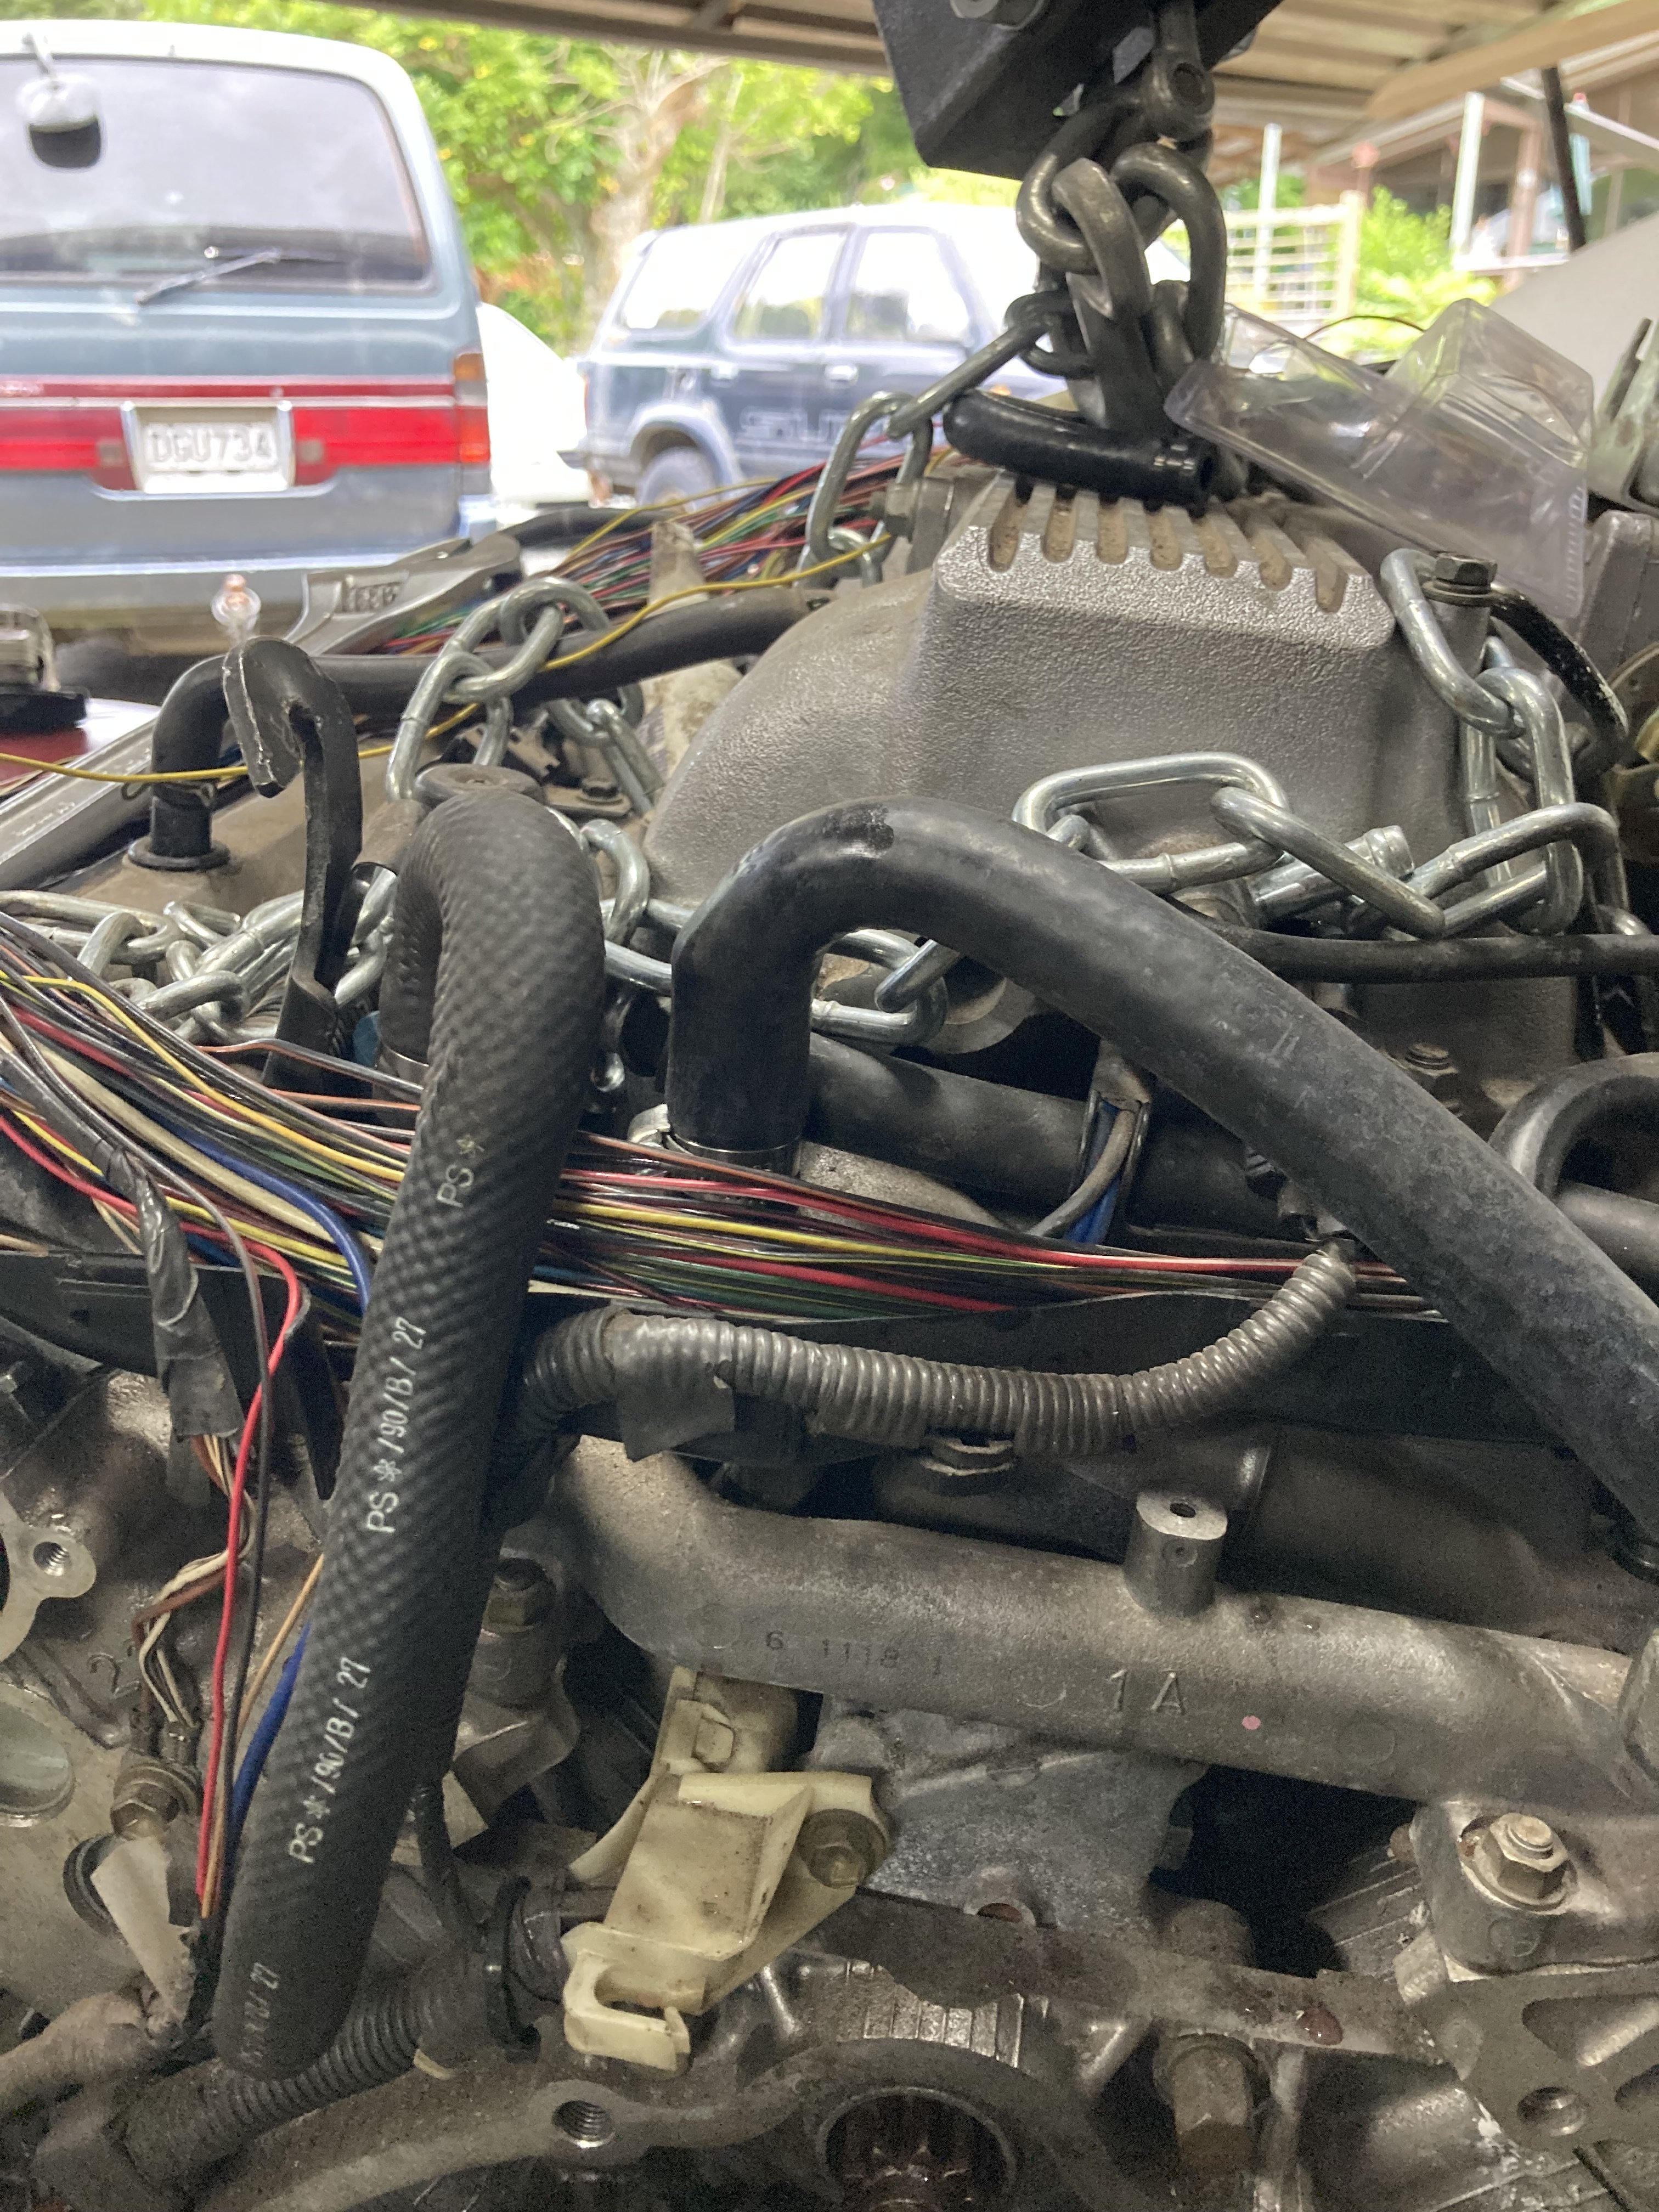
While I was procrastinating with the sump I got the heater hoses all ready to go. Hopefully I should get able to trim and connect them up in the car and if I'm really lucky find the firewall grommet for the heater hose. Luckily coz of the size of the engine the majority of the sins and ugly hoses hide behind the engine. Eventually I'll pull the engine back out (hopefully out the bottom) and repaint the engine bay and heat shield a bunch of stuff.
1 point
-
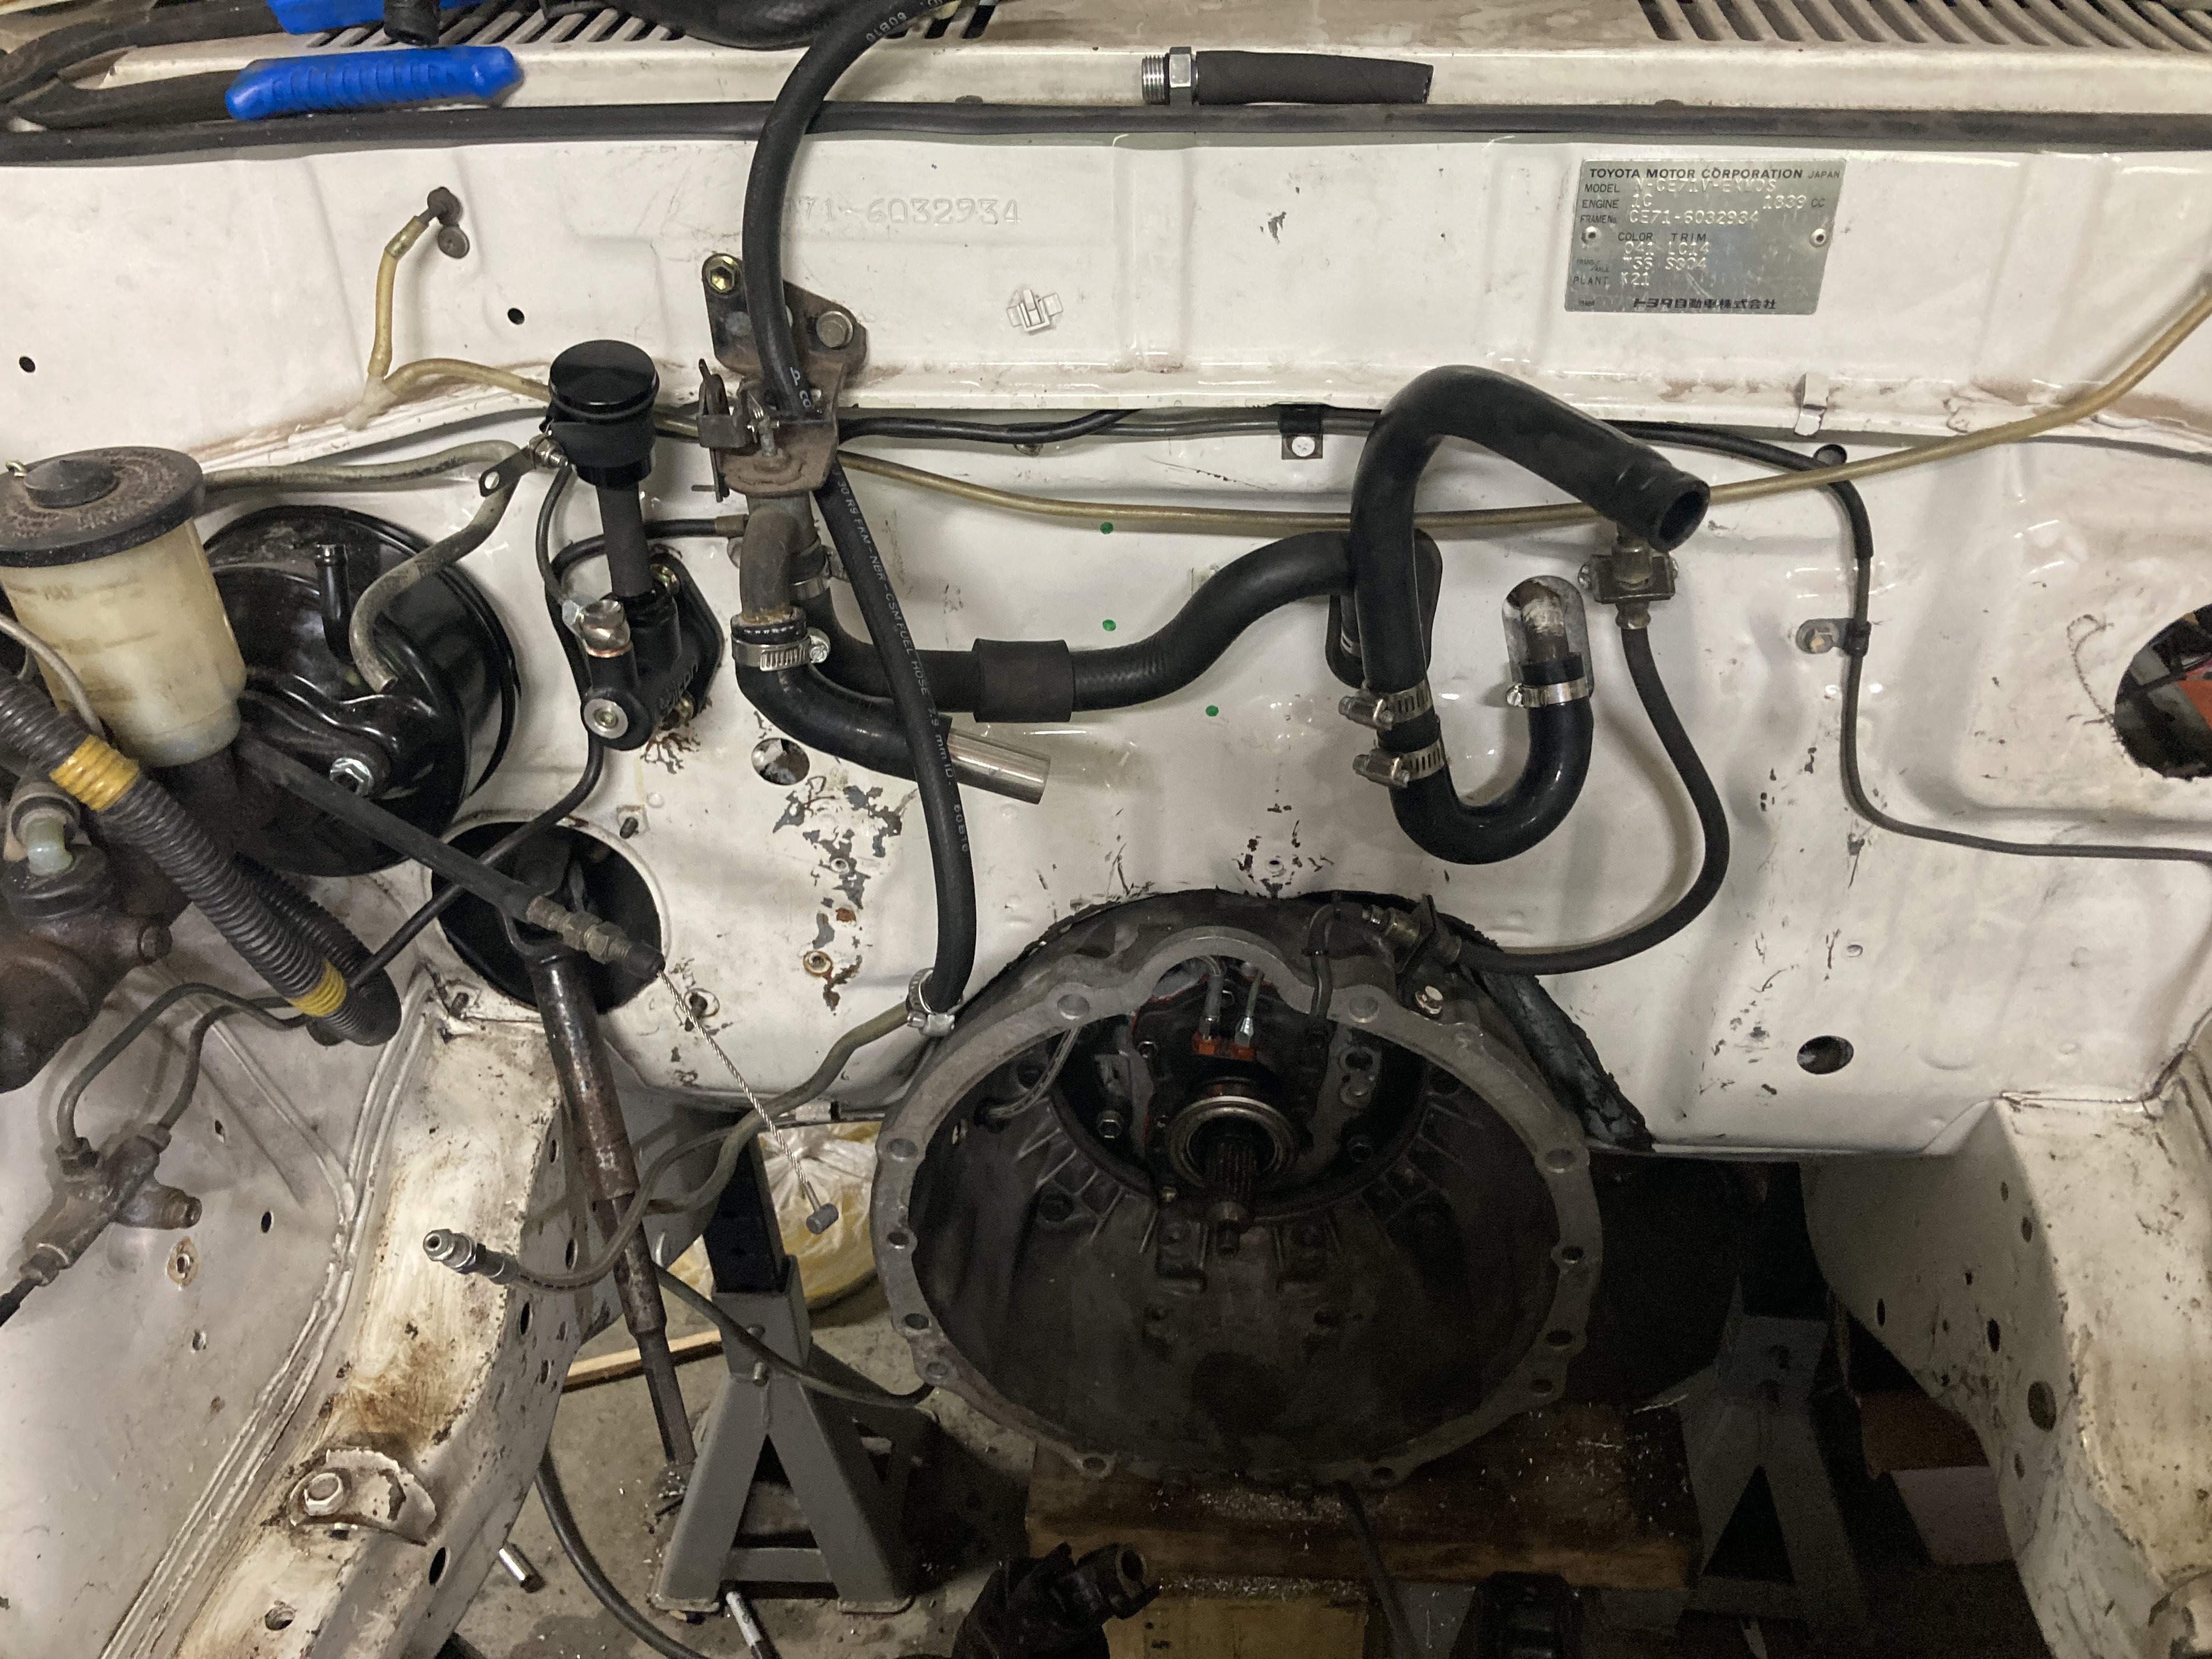
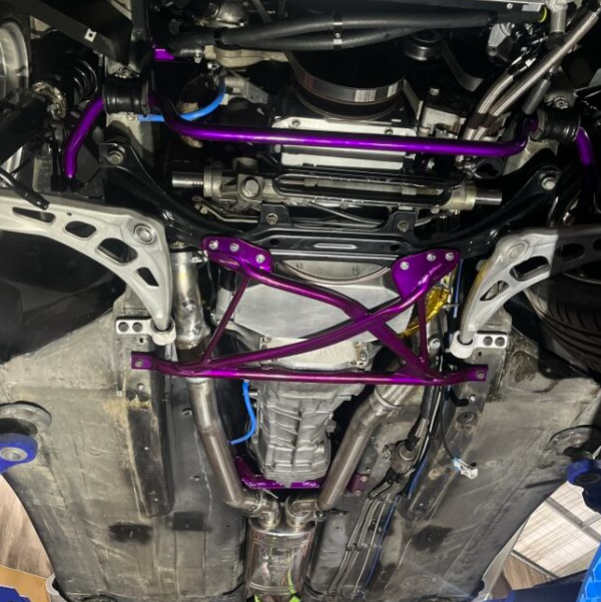
Putting a list here to keep me on track - Engine bay: Remove airbox & intake piping Remove front bumper & under tray Remove cold side intercooler piping & battery tray Remove north/south crossmember brace and front transmission mount Drain transmission & transfer case Remove auto transmission cooler & lines Remove starter motor & heat shield Fit clutch hydraulic hard line across firewall Remove rear transmission roll stopper mount Drop front section of exhaust Remove front driveshafts Disconnect ACD pressure line and let drain out Unbolt and slide away transfer case Remove flex plate to torque converter mounting bolts Remove main transmission mount Drop transmission & torque convertor complete Remove flex plate Remove front section of driveshaft Remove transfer case Fit flywheel & loctite/torque flywheel bolts Fit clutch & pressure plate assembly Swap over the ACD piston and bearing assembly from original transfer case to new transfer case Refit transfer case (with new seals) Refit front section of driveshaft Fit manual box Bolt up the rear roll stopper and main gearbox mounts Slide transfer case onto gearbox Reconnect ACD pressure line Reinsert intermediate shafts & front axles Fill gearbox & transfer case fluids Refit starter motor, exhaust & crossmember brace with front roller stopper mount Modify existing or replace brake master cylinder reservoir to connect to clutch master fluid inlet Bleed clutch pedal Bleed brakes Fill up gearbox & transfer case fluids Refit intake, battery tray & intercooler piping Refit front bumper & under tray Perform ACD bleed procedure Start engine and test through gears ??? Profit Interior: Remove centre console & shifter/cable Remove brake pedal & gear lockout cable Remove key barrel lockout cable Refit manual shifter/cables & console Drill holes in firewall, find/attach clutch pedal bracket and fit clutch pedal assembly Fit manual brake pedal Fit manual console cover (after repainting and applying new stickers) Attach clutch pedal bracket to firewall Eventually replace auto speedo cluster & dash loom with manual one (they are so expensive, will stick to auto one for the time being) Wiring: Bypass gear selector inhibitor so engine can start Wire up reverse lamps Sort out speed sensor situation (manuals have a regular speed sensor on output drive whereas autos calculate speed in the ECU based off individual transmission gear speed sensors)1 point
-
1 point
-
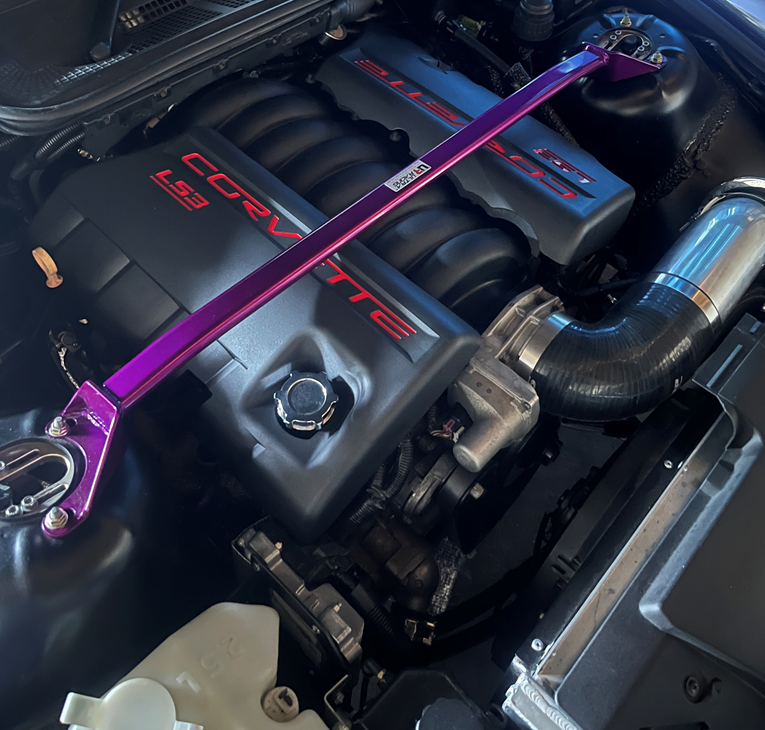
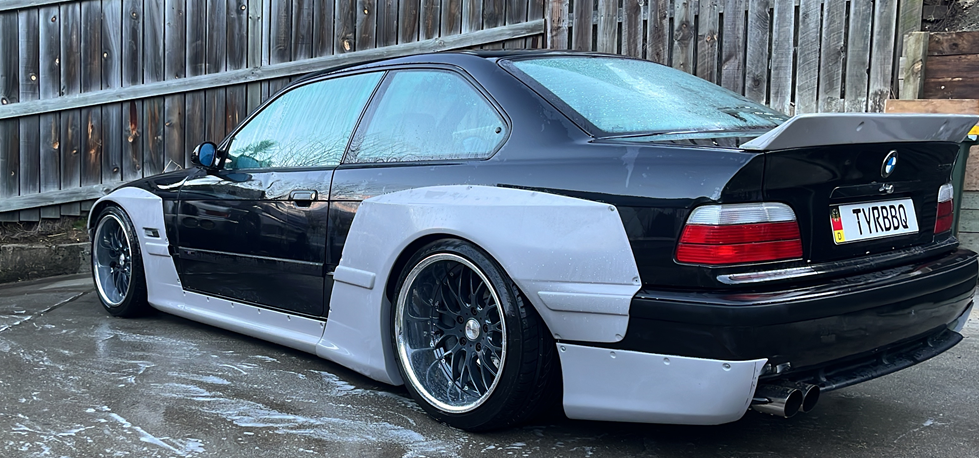
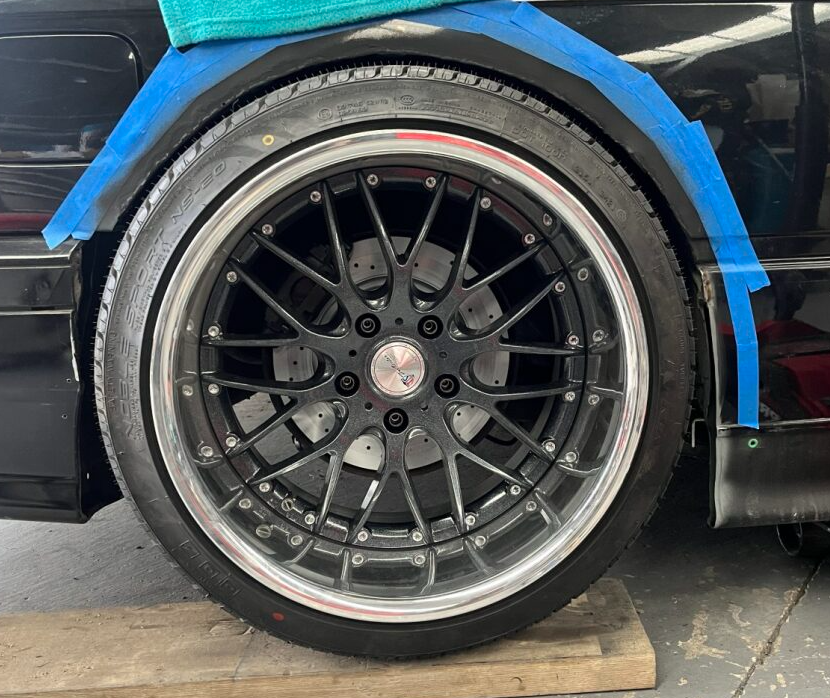
A lot happened in the past few years. Still dont have aids though, so that's a good thing. Anyway cert next week. Thought I should be a GC and update in case anyone wondered what happened to this. L98 died on the dyno. The australian supplier sucked and never did the cam sprocket bolts up. Engine rattled itself to death. Bought an LS3 and put a big cam in it. Makes 340rwkw. Put a replica rocket bunny kit on it. Was a lot of work. Now has 18x9 / 18x11 riverside STM. Also has air cups in front cos its very low. Air cups are very fun, all the psssh of airbags but with coilover handling. Has 2.5" twin stainless zorst. Just needs panel/paint and a shakedown really. It's pretty quick for a road car. Impossible to not wheelspin in the wet. Next time I would go for a smaller cam - it's pretty gutless from idle considering how big the engine is.
1 point
-
Or align 6 cylinders in a row, take capacity out to 4 litres, and add twin cam head with variable cam timing.1 point
-
Hi folks, this call goes out to those who are happy to own a pre 90 4x4 vehicle and have a sweet spot for the rugged designs and builds of those pre computer era vehicles. I've been living in the Eastern Bay of Plenty since late 2015 but have not found a group or meeting for those trucks yet. What I'm hoping to create (or find) is a small group of like minded people who meet at a regular basis somewhere overnight (for example a basic DOC campsite) for a yarn and maybe, hopefully also check out some public or private tracks in the region. And that without ripping these apart... Axle articulation, difflocks, knobblies and winches are all there to avoid wheelspin where possible- some people seem to forget this. All brands are welcome be it Jeep,Suzuki,Toyota, Lada, Nissan or Landrover. I'm sort of fed up with the brand dependent thinking, all vehicles have their pro's and con's. I have driven a modified 1974 Landrover for more than 300K kilometer all over, including twice through the Sahara and back - but I am now very happy to steer a 1986 Landcruiser as my daily transport. I love both. What I really don't like is today's modern, macho and aggressive image of 4wd's which is also affecting earlier builds. Overly lifted, fat tyre equipped show off buggies in my views. So if any of you is interested to have a beer or coffee (or whatever your favourite camp drink is) and talk about old school 4x4's while enjoying the company of the owners and vehicles... please post here – maybe we can create a cool and friendly group. Aiming to have the first meeting before New Year's at the Whitikau DOC campsite adjacent to the Motu Road / Eastern Bay of Plenty. Anyone interested ?1 point
-
I'd be bored otherwise1 point
-
Been honing your skills eh?1 point
-
Anyone who's owned an LD powered vehicle
1 point
-
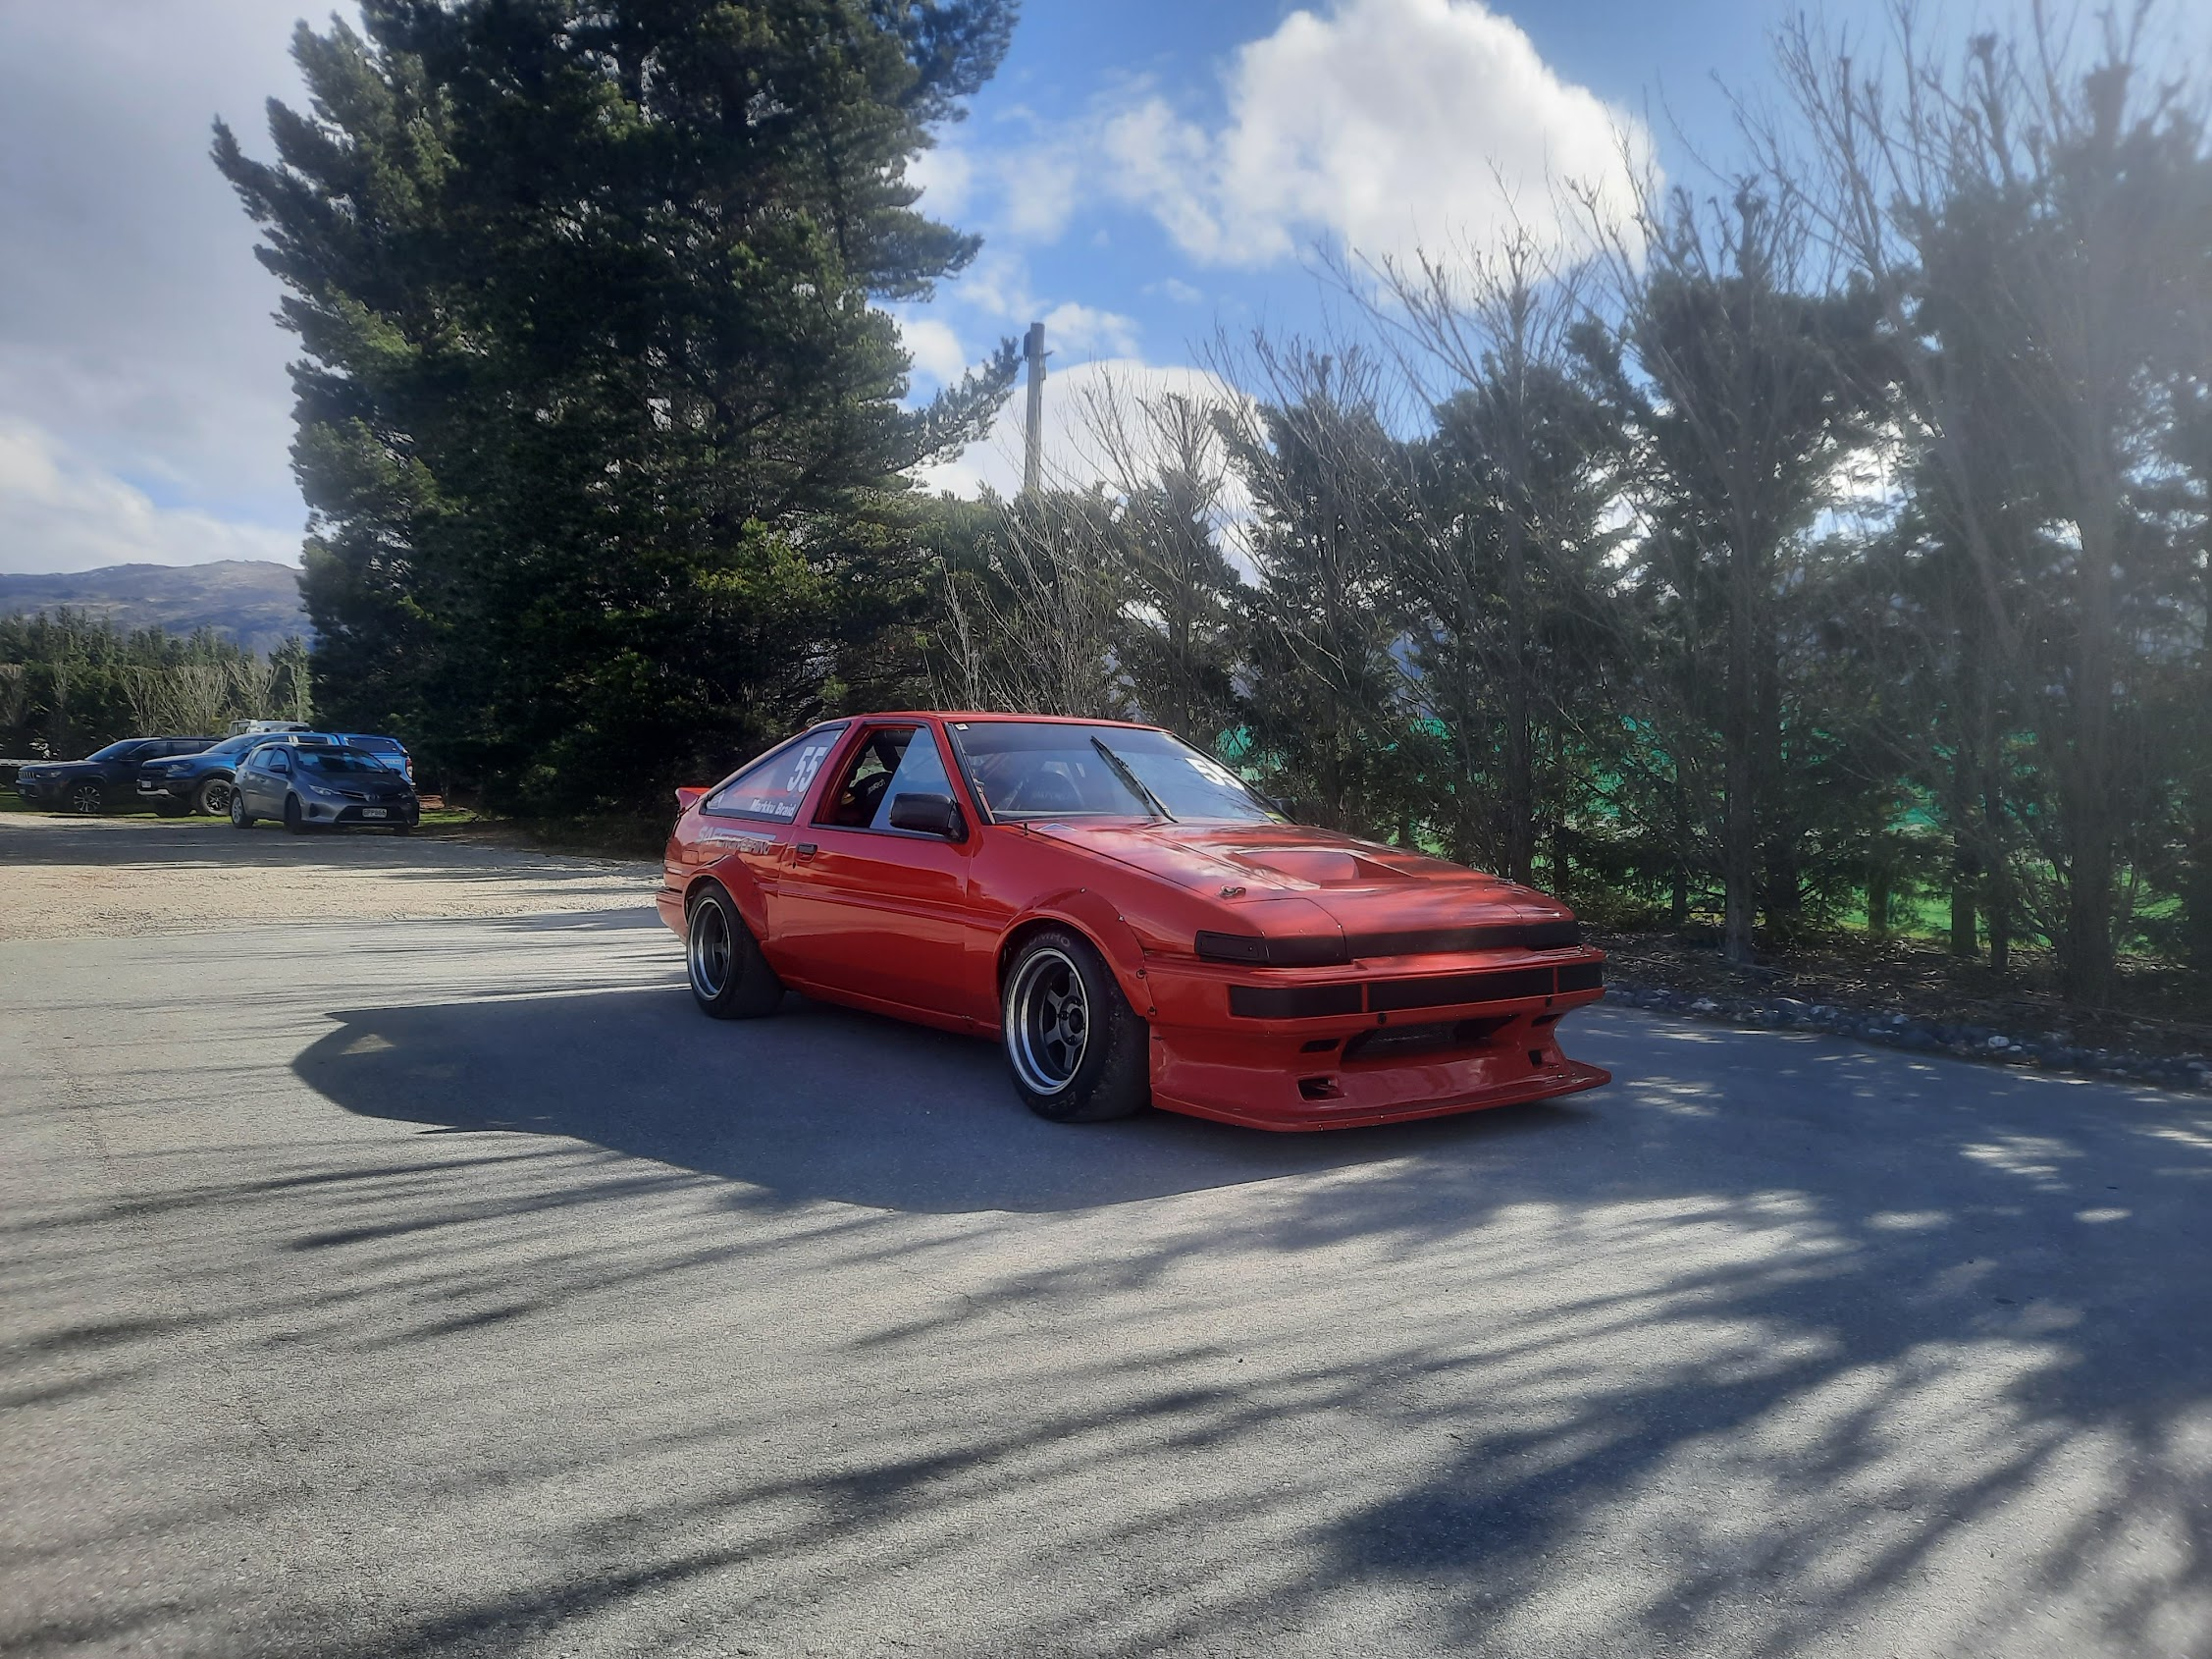
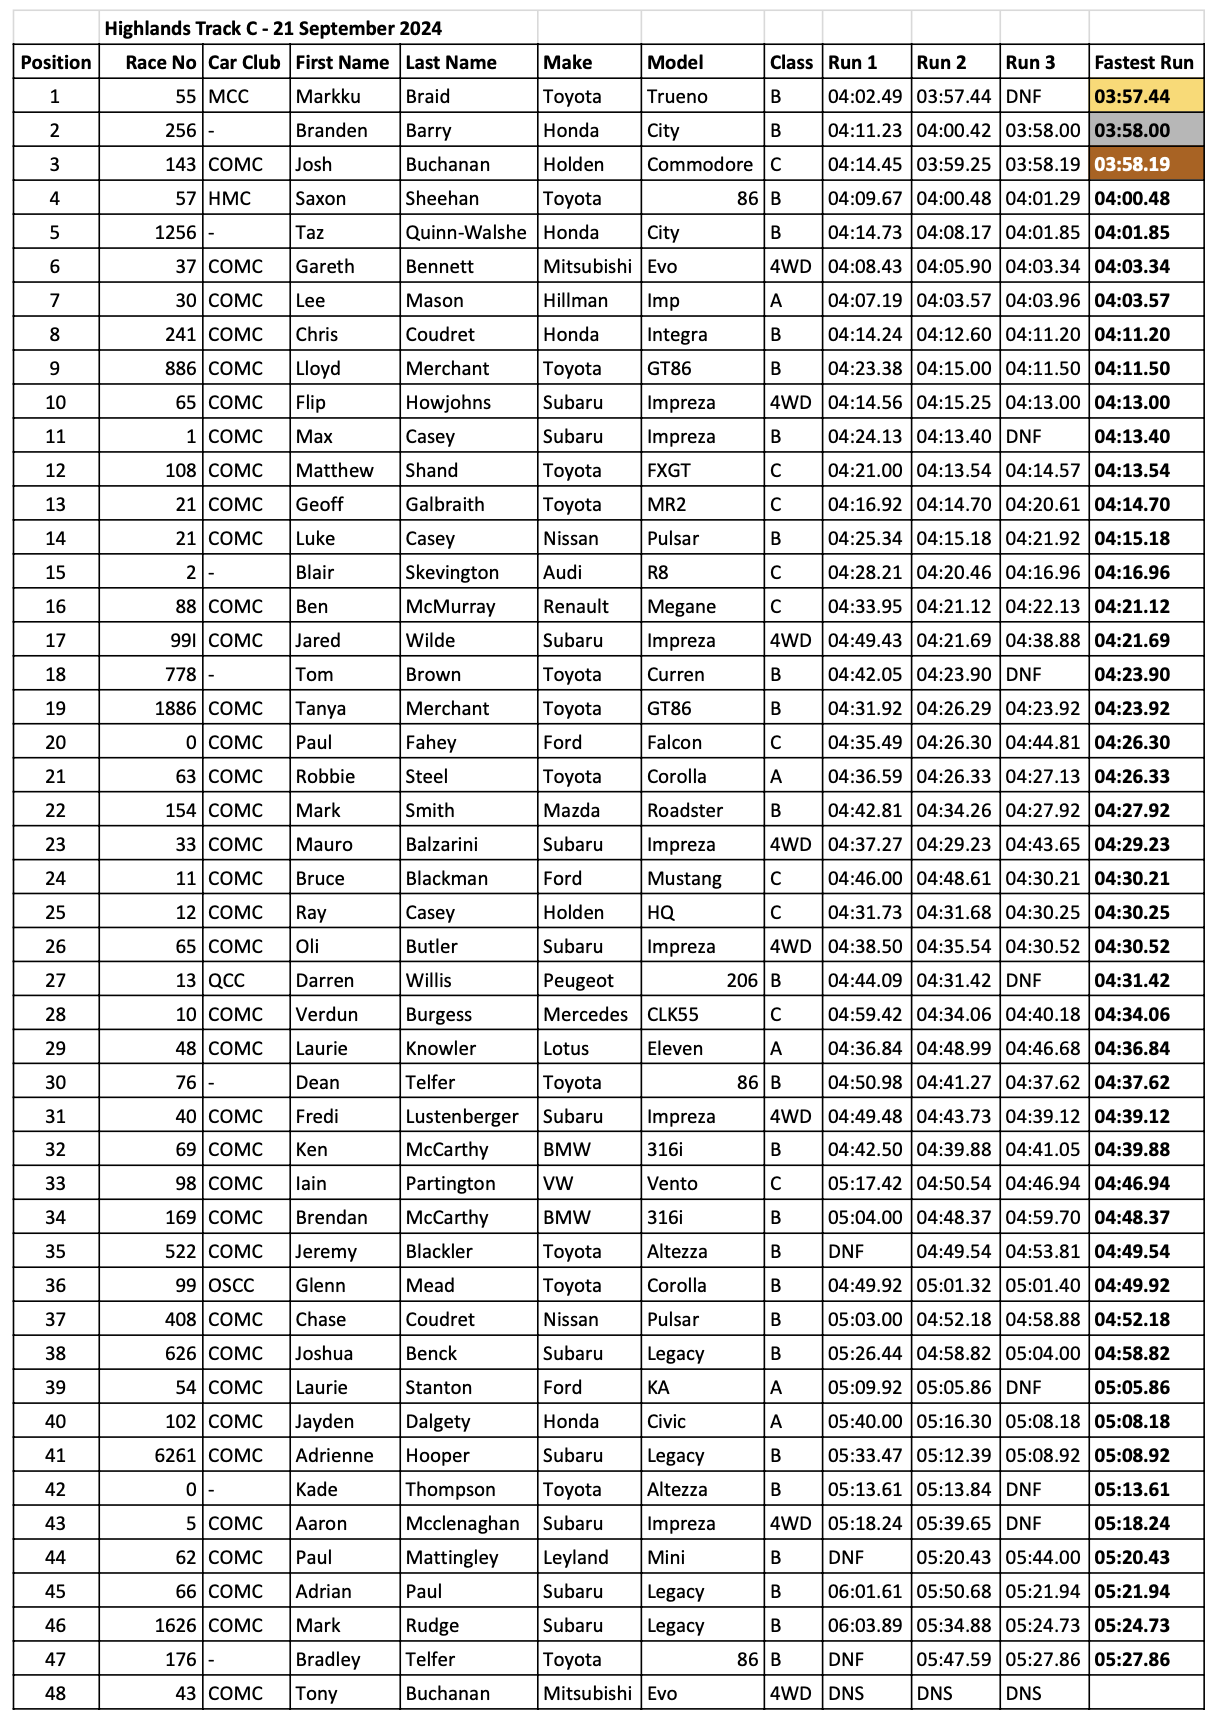
Took this for a run at Highlands on Saturday. The Central Otago Motorsport Club run a sprint on Track C each year. It's reverse direction with the addition of the whoops and an extra corner through the forest, so there aren't many straights and it favours good handling cars. Suits me! It's a pretty busy little section of track... I'd say it's the coolest format of any sprint I've done in ~20 years of motorsport. Here's an external view: My workmates Brandon and Taz were running the B18CR City, which also suited the track really well. We ended up 1st, 2nd and 4th out of the 48 entries. Not bad There's a couple more videos on my YouTube channel if you're keen to see more: https://www.youtube.com/@truenotch/videos
1 point
-
Also in "Today stuff shows up for my Corolla" @di0n received the thread for my interior today The plan is to do my door cards in a similar fashion to these FJ45 ones he did, but black and with the orange stitching to match the FXGT steering wheel. I'll design and cut the cards and get him to deal with the stitching side. I've got some ideas for map pockets and armrests too so I'll see how I go. I'm thinking I'll do a detail section with a black basketweave vinyl too
1 point
-
Max showed up this afternoon with my sump which he has had modified to fix a leak and clear the steering rack better. I've drawn the lower pan flange in fusion and I'm going to try and design a wider slimmer winged pan to give me some more ground clearance and try and get the sump up in line with the crossmember. He's also had a 4age throttle body flange welded onto his 2T intake manifold so we can use the 4age throttle and it's corresponding TPS so I'll update his thread soon hopefully
1 point
-
My new reservoir showed up from Ali today, so I threaded it in and realised I couldn't open it under the pinch weld on the firewall. So I went and got an adapter to screw it into the AN3 front port instead of the AN4 rear port Now it fits nicely in front of the pinch weld.
1 point
-
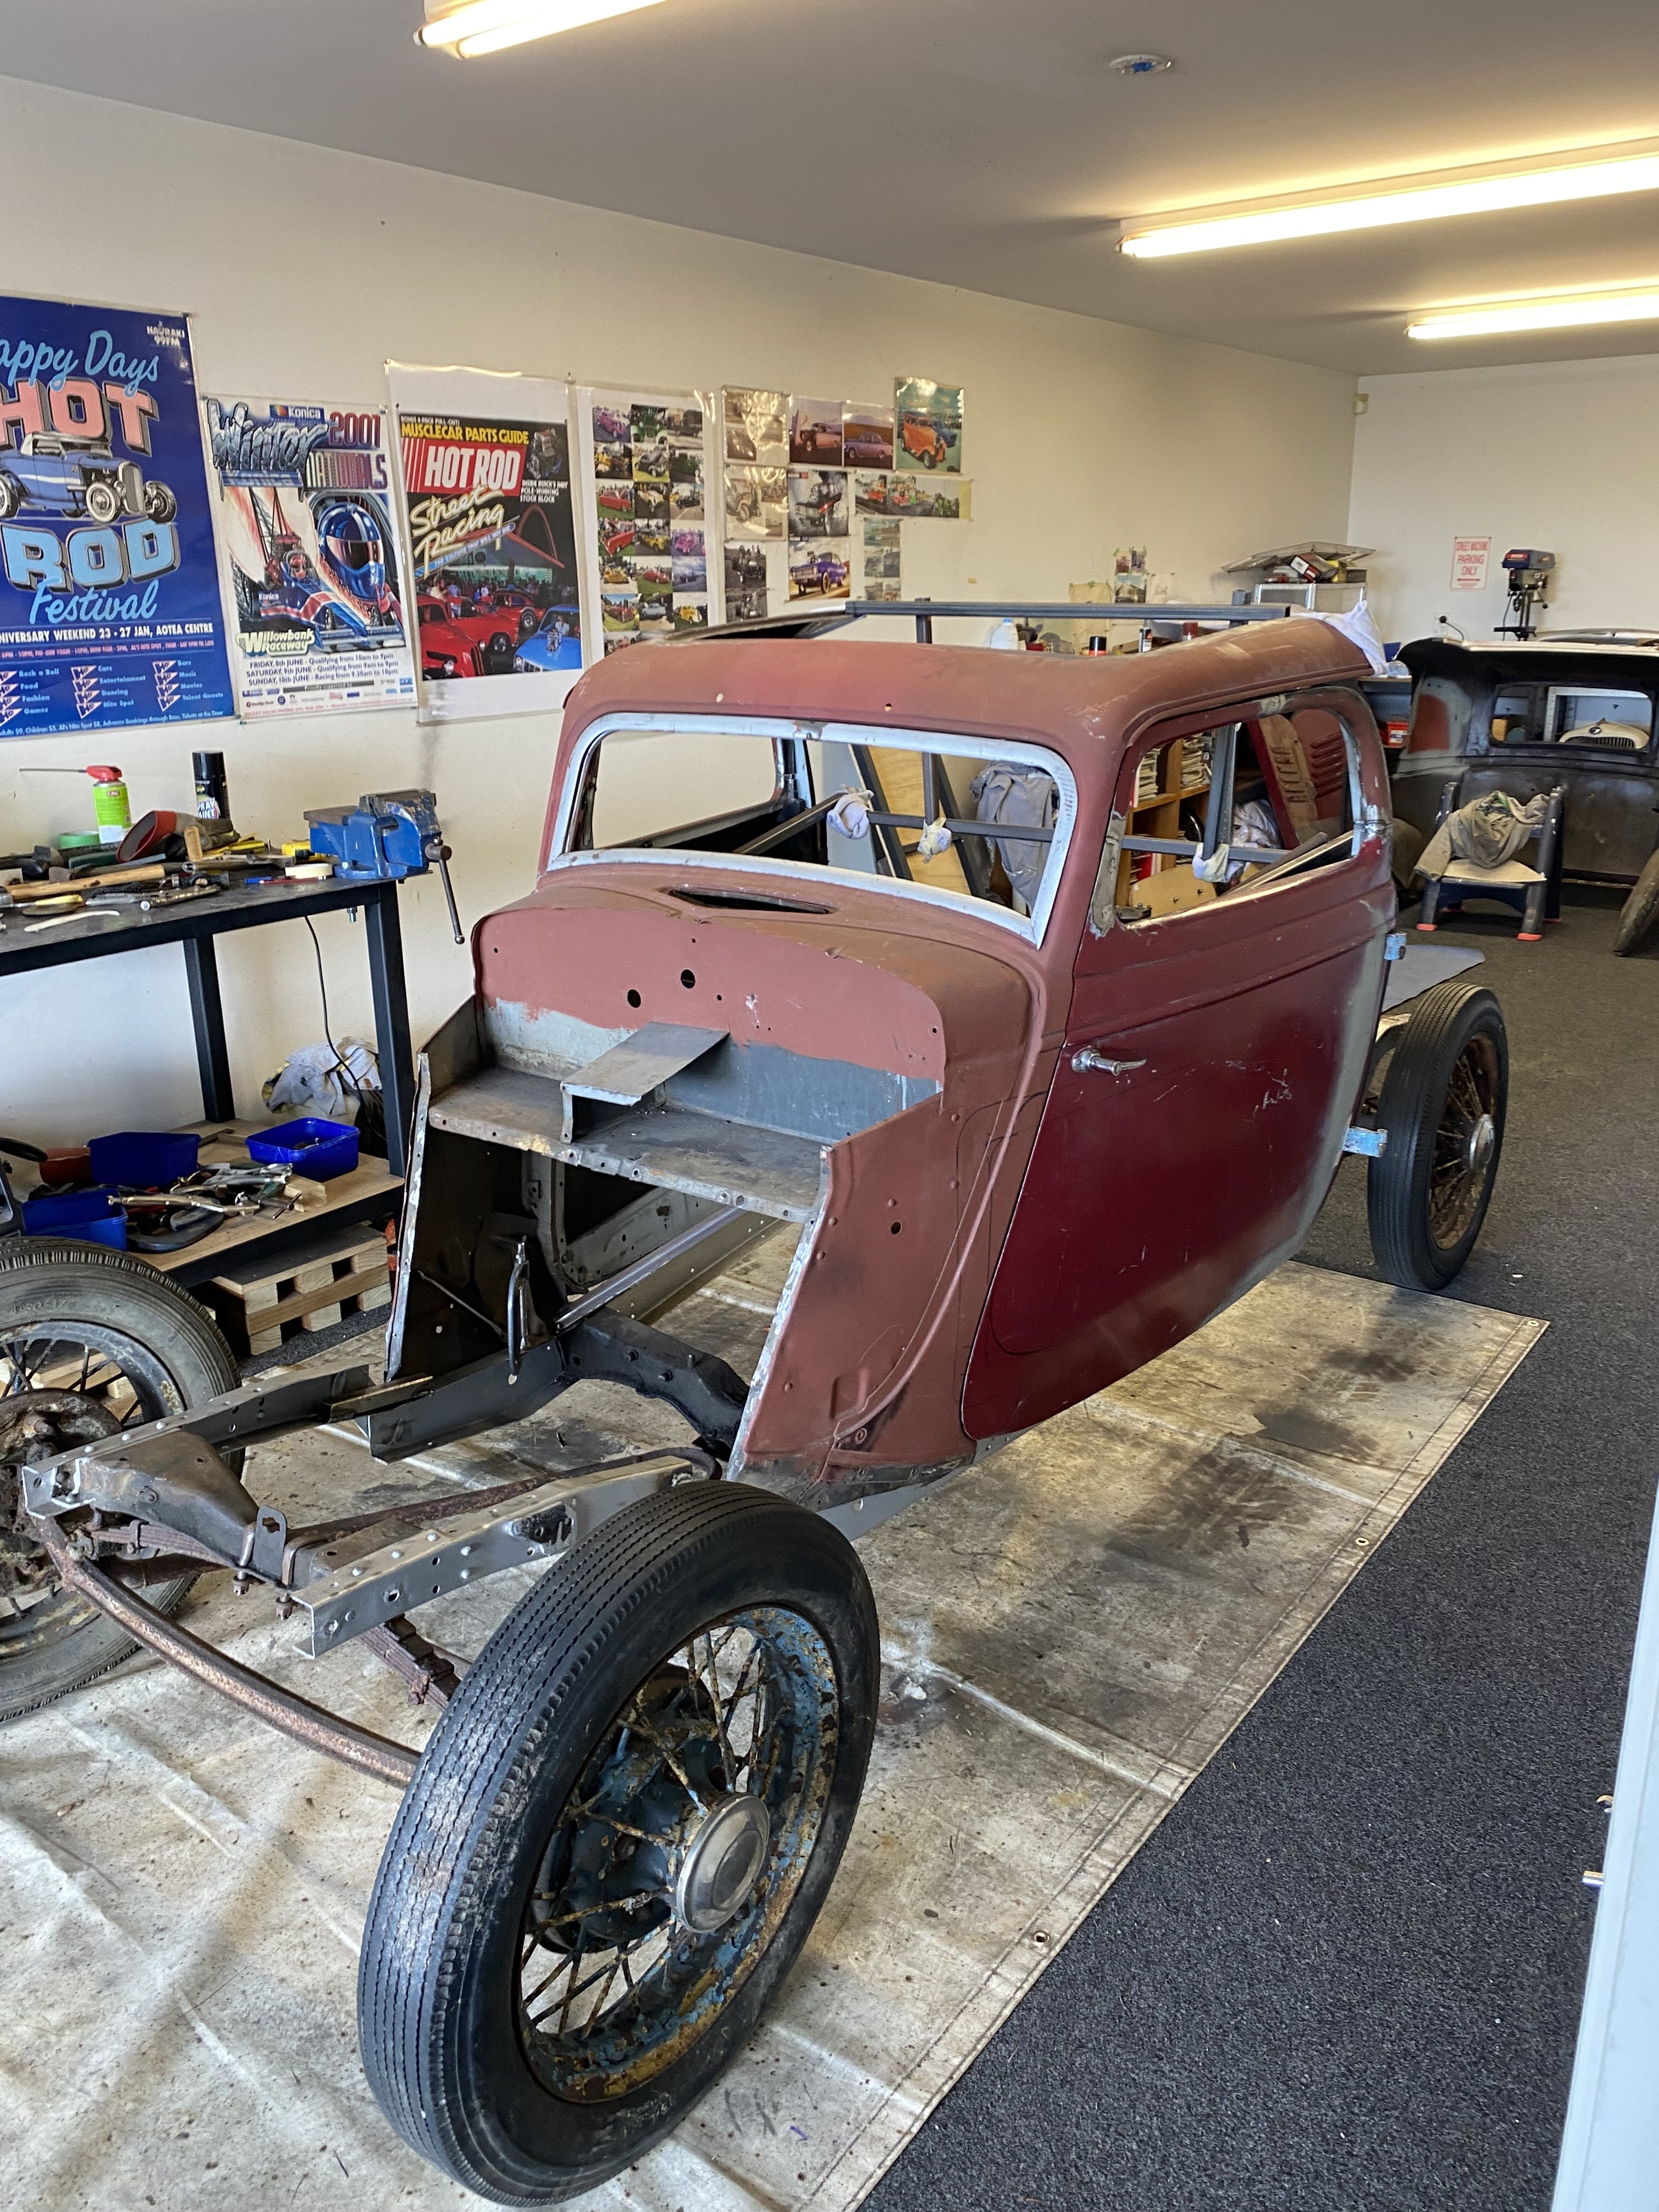
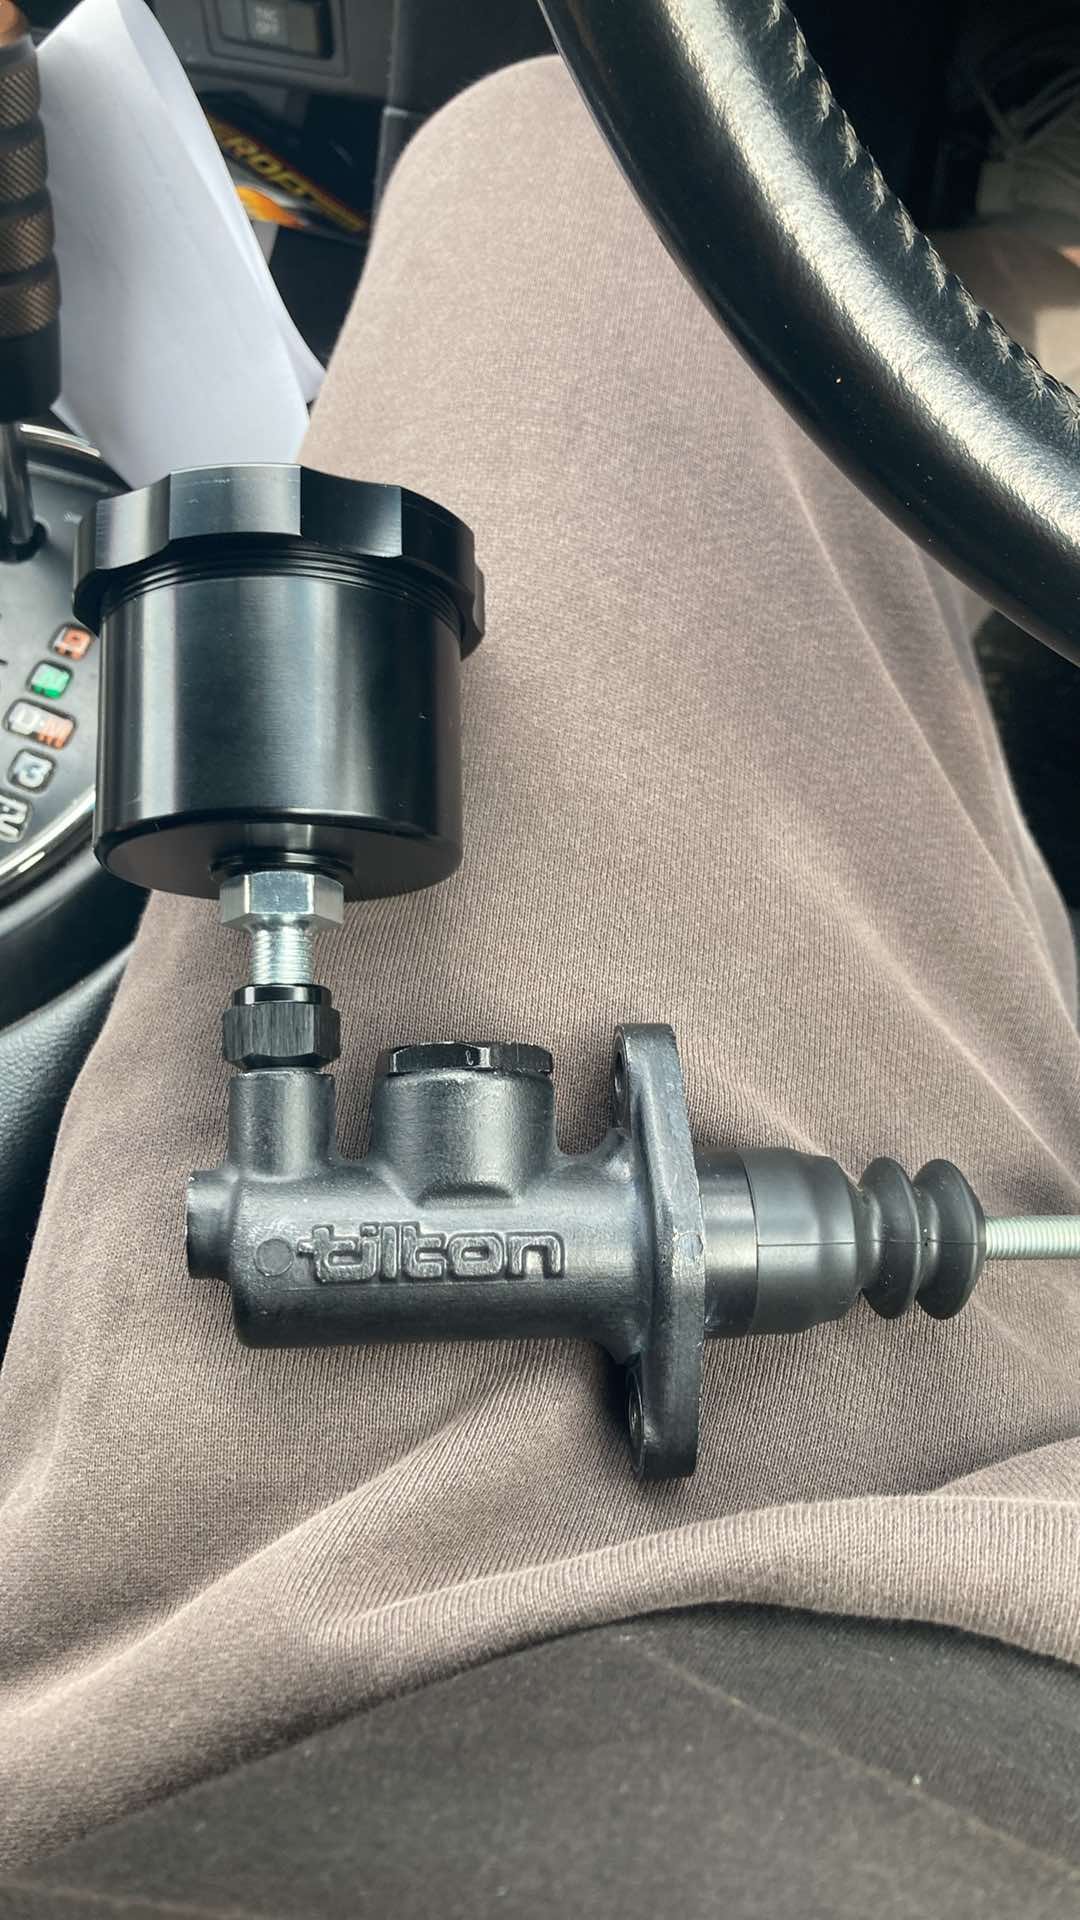
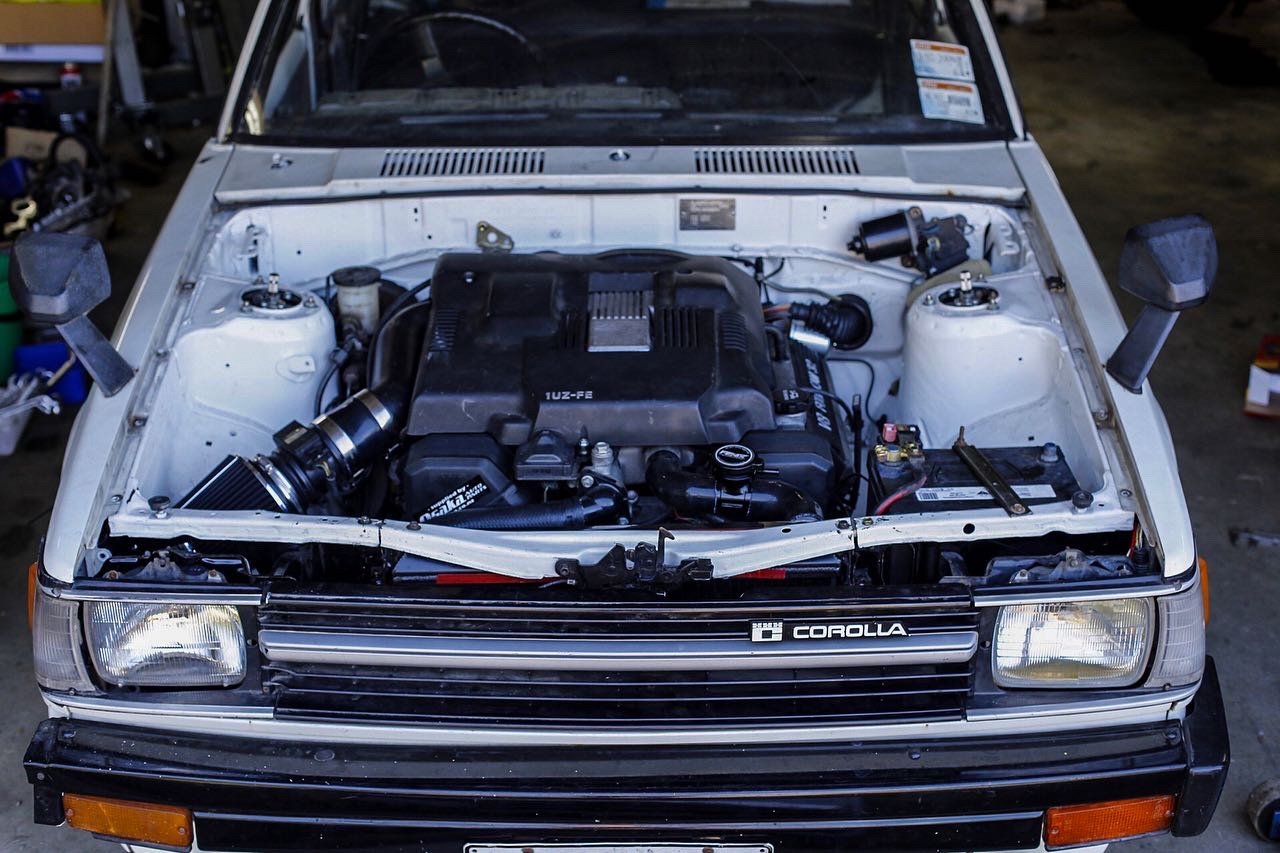
Discuss here Ok, so I bought this off @di0n sometime in 2012, needless to say, things haven't progressed quicker. It now has more engine than it ever needed and is in 1800 pieces, but sometimes @Dudley talks me into working on it. The engine is hopefully out for the last time at the moment while I do some bits and pieces like moving the brake and fuel lines out of the tunnel and making sure I'm gonna have enough clutch master for the hydraulic release bearing. The current spec list is: 1986 CE71 Diesel Corolla wagon. 1995 UCF20 second generation 1uzfe Factory 1UZ auto bell housing with an adapter plate Factory-fitted W56 (I think it's a 56) from behind the diesel 3S-GTE flywheel with Hilux Surf clutch Quartermaster hydraulic release bearing Tilton 76-series stubby clutch master with Chinesium reservoir Shortened factory driveshaft because the gearbox is pushed back to get the engine as low and far back as possible. Ex @sheepers Crown diff with Altezza LSD head with the KBM treatment. AE92 FXGT rear calipers and non-turbo S14 discs Ex C's Garage reset leaves and shocks MRP Wilwood kit Chinesium smaller brake booster MRP front Coilovers Early Evo/GSR Recaros on Bride rails A Racetech drivers seat on a Scarles bracket. Factory ECU Siemens fuel pump on the end of the factory fuel feed in the tank. 14x6.5 Starsharks with Direzza ZIIs
1 point
-
Ling post, but I still remember how you looked in the next day. There's people in palliative care who don't look that sick. (Made me feel heaps less hungover )1 point


.thumb.jpeg.e0a4bff61111e0c8c7396950fcc94da1.jpeg)


This leaderboard is set to Auckland/GMT+12:00