
Leaderboard


Popular Content
Showing content with the highest reputation on 02/23/24 in all areas
-
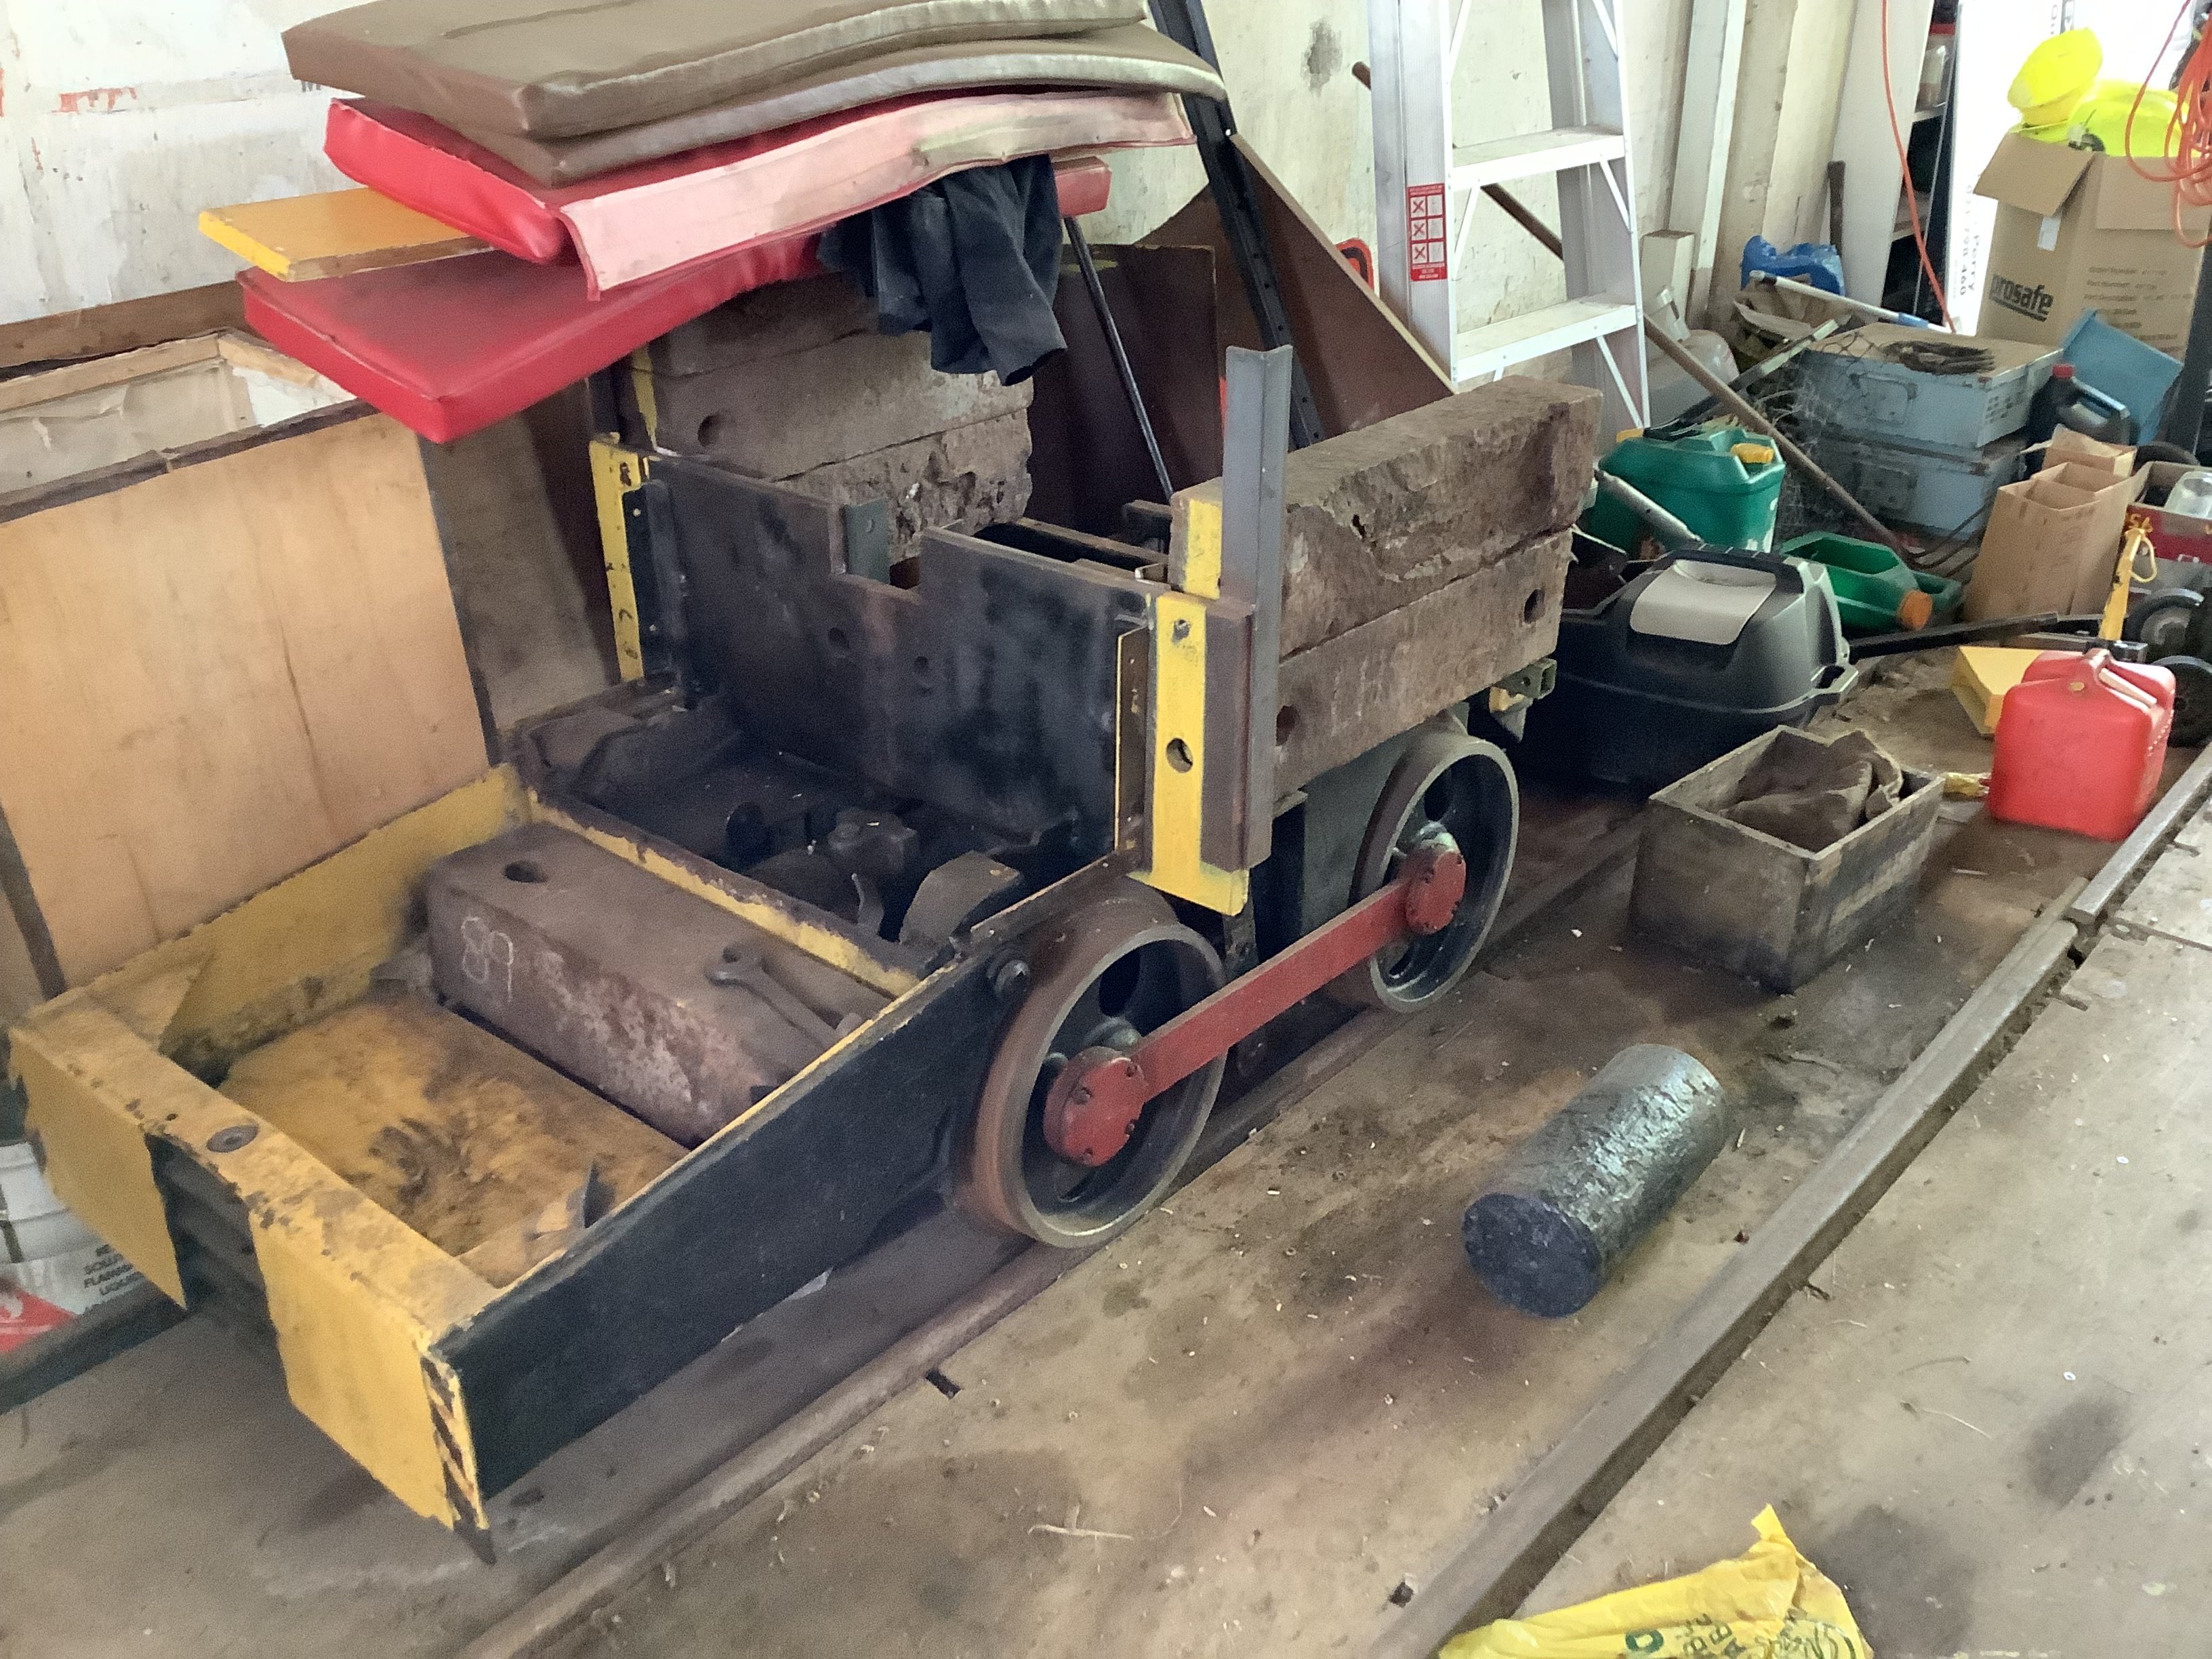
So as was bound to happen eventually in my terminal spiral of railway barrydom, I have scrounged myself a tiny 2 foot gauge locomotive. It is the same wheelbase (and length with the operator stand folded up) as a minecart, so it can be put in a liftshaft in my future illegal underground goldmine. Its a "battery electric vehicle - winstone & rogers model 5" and could have been built anywhere from 1937-1982. It has been stripped of all its electrical gear, and has nothing but the final drive left. The final drive is a worm gear reduction box of unknown ratio. I intend to get it running and stopping, using either battery electric (forklift?) gear or petrol hydraulic. I would rather electric just for the silent operation aside from the flanges screaming and joints thudding at a thundering 3.1mph..
 9 points
 -
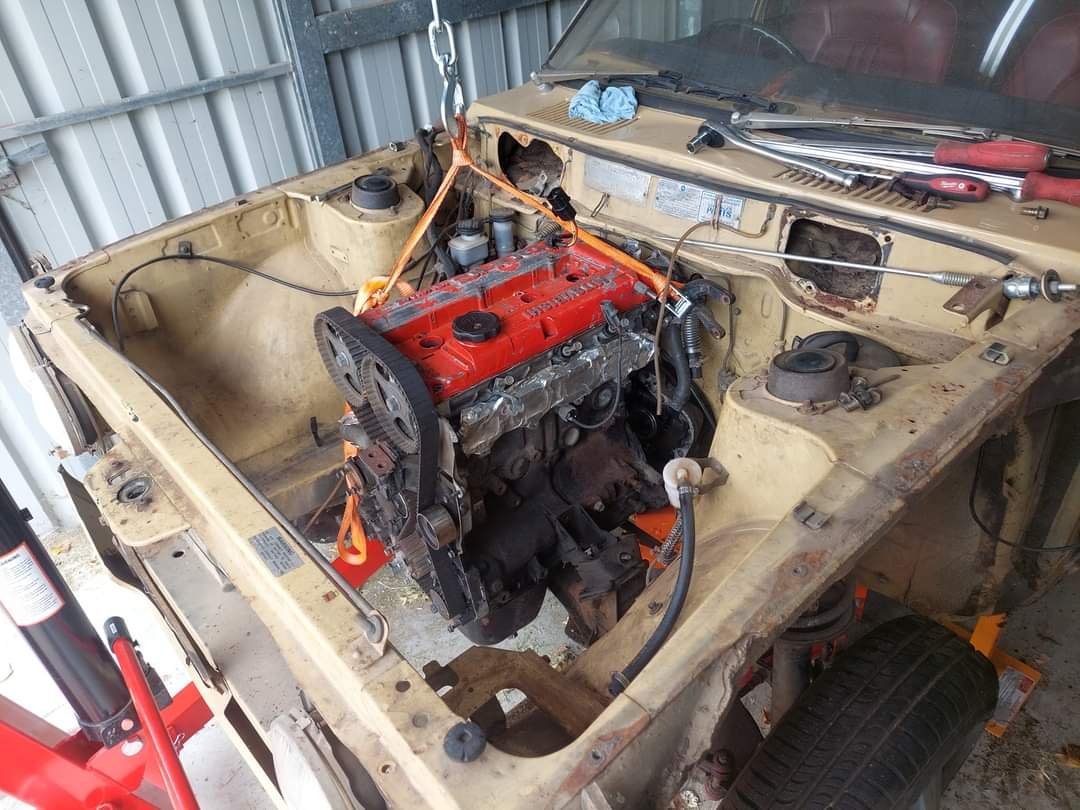
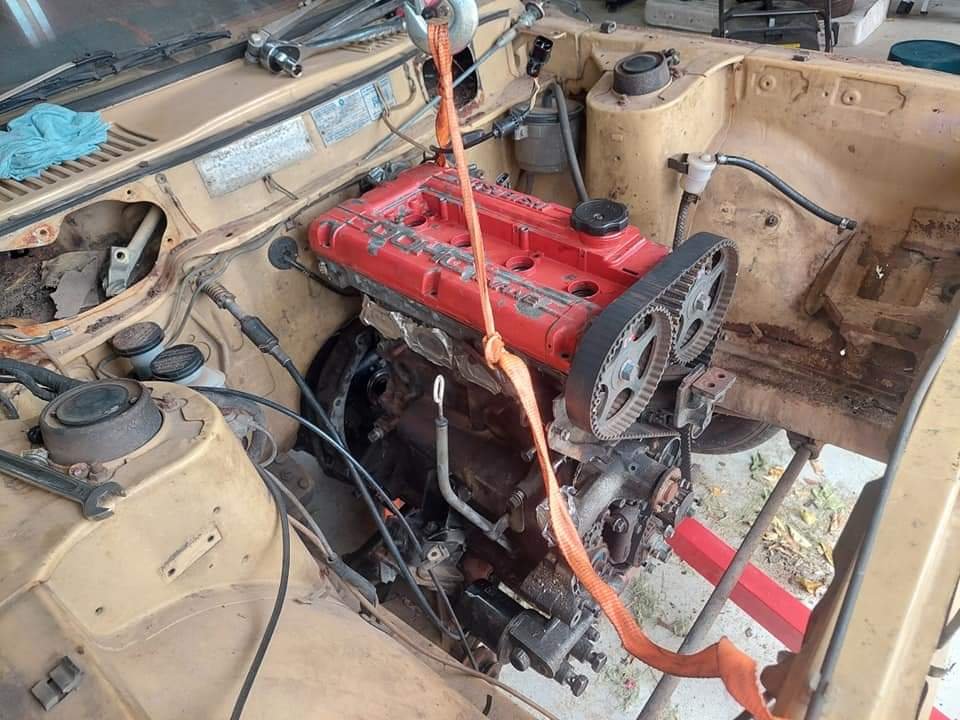
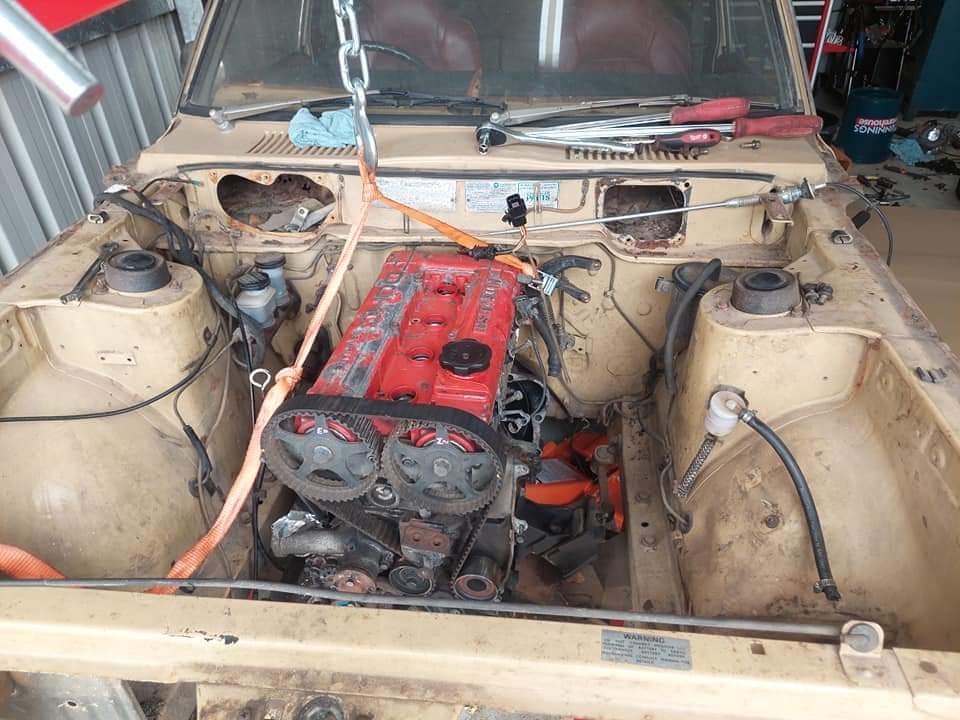
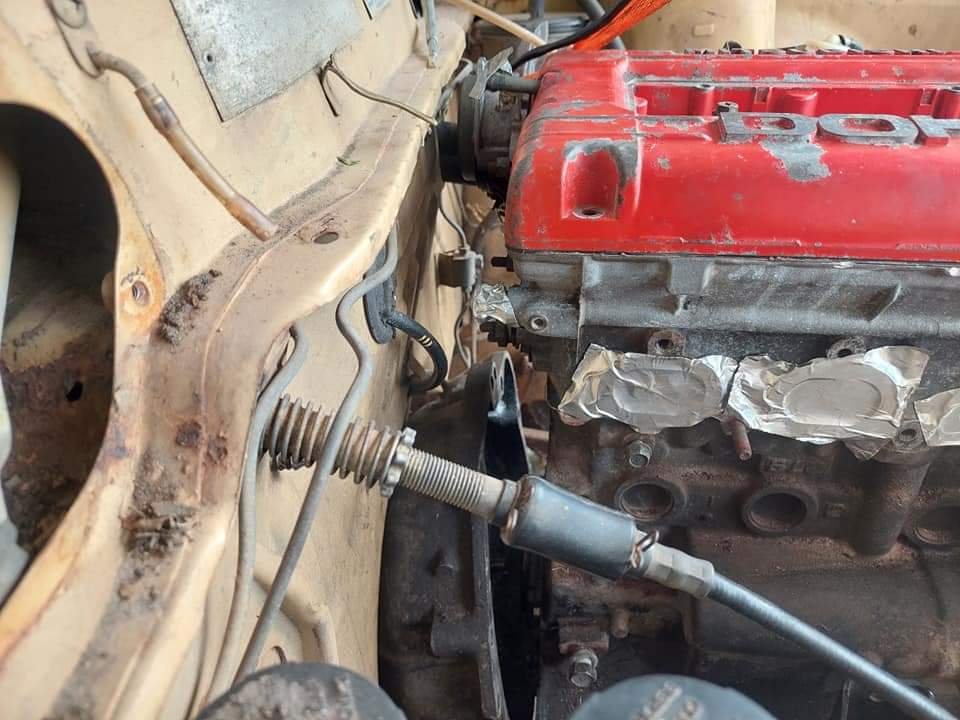
Ha. So pretty much the day after I had cleaned up that old alternator up and got it running on the engine the second hand replacement for my original unit turned up in the post. It came with a 3 month warranty so I'd better check it works before stripping the engine of its ecu etc. Started to fit it and oh.. Poos. It wont fit. So I took it apart, along with the original.. Discovered its just the front housing that's different and I can swap them across.. So while its apart it would be rude not to clean all the parts up and polish it all (tempting fate just a bit...) Fitted to the engine and started it up. Yay - it works and it looks great, which is really quite important given its right there, in the middle on display. I'll keep the other one in storage just in case I need it one day. Now I could strip the engine back down, removing all the cooling, wiring and fuel lines that I had installed just for bench testing. Then I removed the transmission and put the engine back onto the engine stand 2000, stashing it away because its gearbox tinkering time. This Leone transmission has a few little issues that need sorting out in order for it to run in reverse rotation and not potentially turn itself into an expensive insinkerator or coffee grinder. I could probably get away without doing these modifications because the box is overbuilt for the application but I wanted peace of mind. Remember I had acquired the two gearboxes, 1600 and 1800 items, before getting the engine. Ages ago, in fact 4 years ago I think!!! I had wanted to know if it was feasible to run these boxes in reverse. This pic I posted up way back then gives a good idea on what's going on inside... I had already worked out some of the issues back then and knew what I was up for. With more study I found a couple of other areas that need addressing. Here's another bit of wonderful scribbling I did this evening.. The pink arrows show the new axial forces that are being imparted onto the main (driver) shaft and pinion (driven) shaft. The circles are areas that I think needed attention to make sure it doesn't throw it toys from the cot. 1 : the blue circle. Under high torque loads this area could possibly create the sound of nashing teeth but with much messier consequences. The top left one being the third gear driver wants to move to the right and clip the teeth on the bottom right second gear. In normal rotation they would move apart. There's 1mm of clearance there which is probably enough tbh. But I wanted a bit more and had already worked out how I could get it with no other issues and just a bit of tool making. Which is fun. 2 : The yellow circle. This ring was no going to take thrust loading. It is a strong ring and has a deep groove but I wanted to make sure there was no way it could ever shift. 3 : the green circle. In this area there is a thrust bearing that also acts as a neat little oil pump and squeezes oil through the gear hubs/bushes. Under the new loading the thrust aspect is removed but I still wanted to it pump oil and it was going to be the wrong shape to do so in reverse rotation. So I set to work and checked off each job. I made a bolt holder for ease of reassembly - several different sizes and lengths. Once apart I started with the gear side clearance. First off I needed to split the mainshaft assembly down. 4 years ago I had out of interest tried using a puller on the spare 1600 box, which shares the same layout and design but with smaller parts in many cases. The puller didn't work. But this time round I have the rather handy workshop press I made. I just needed some extra tooling to do this job. Starting with some press plates... Allowing me to carefully press the shaft out... Because I'm not posh (or rich) enough to own a surface grinder I needed to make one. Yes its a bit basic but it will work. I made this... Which allowed me to do this.... I ended up with this gear having the 0.5mm more clearance I wanted. Super happy with the result. Now onto number 3 - the little oil pumpy thingee. I went to my friendly engineering workshop in town and got a big lump of 4140 steel. I drilled it out... Machined out a ring which had to be an exact width. Just in case it needed finishing after the hardening process I made an abor to take it.. I carefully machined it to the right profile, cut the sides down and filed the shapes in, just like the original but in reverse. Happy it was going to work I heat treated it. I have not done any heat treating for over 25 years since I spent a fair bit of time in the blacksmith department while doing my apprenticeship. But it wasn't a super loaded critical component and just had to have a durable hard surface. I didn't take any photos. Hannah was there helping as I carefully heated it up with the oxycet to the austenitic stage and agitated it in some lovely rice bran oil (because I can be posh sometimes) then slapped it in the oven to temper it... Following morning I polished it. It came up sweet and the old file test showed it to be as hard as the oem item. You can see the reversed design here... Here's a little vid I took showing it in action... While stripping the mainshaft down I was also pleasantly surprised to discover that this 1800 box has needle bearings in all of the gear hubs unlike the 1600 box which uses bushes on the mainshaft. So oil starvation would not have been as much of an issue but I'm still really happy I did this modification. Last issue to sort was number two - that ring on the bearing. It would hold fine I'm sure but if could make it bulletproof then why not - it's just a bit of extra machining. I started with another lump of high tensile steel and machined out a ring to suit... This fits over the other ring and then the main thrust plate that sits over the bearing was machined out to suit my reinforcement ring. Its all held in place by the end housing which I have yet to fit. All the potential issues covered I set to cleaning out the casing and then started reassembly. In doing so I discovered that the original axle seals are sided on these boxes. They have those helical lines on the lip surfaces which aid in pulling/pumping oil back into the oil side of the lip ( the lip does not actually touch the steel when the axle is moving and in fact runs on a tiny bed of oil) which I had not realised before I'd bought plain lip seals from an engineering supplies. This pumping capacity is shown to be twice as high in helixed seals. Subaru fit left and right handed items. But I'm running mine in reverse. Luckily the originals were in excellent condition anyway so I machined up a stepped tool, popped them out and swapped them to the other side. The diff axle seal surfaces came up good after a clean. Cute little diff.. I'm now about ready to put some 3 bond gloop on the case half and drop the other side in place. Its looking all very nice, clean and shiny in there...9 points
-
https://www.trademe.co.nz/a/marketplace/toys-models/models/cars-trucks/classic-cars/listing/4569132446 @Indiana_Jones @Thousand Dollar Supercar
7 points
-
Have being doing a lot of stuff recently to try get this ready for beachop. The doors now open electronically with the small spring loaded knobs next to the window. And lock using the factory lexus Remote. Door Rubbers are all on. Window rubbers are all glued up. Bitumen sound deadening in the doors. Is much more of a pleasure to drive. Even with the door cards off. Reversing Lights added and wired in. Have moved on to version2 of the boss air struts. Such a better product. No welding the bush onto the bottom, they come with a threaded boss on the bottom and a range of Threaded mount options. Also a 1/8 female npt hole for the air supply. Instead of the Hydraulic style male fitting and hose they had before. Made it to the last southwards Cars and Coffee in Kapiti. Excellent morning out with lots of cool cars to see. Matts & mine were easily the lowest cars present. Had forgotten about the 1954 210 inside. Was a nice surprise. Have also put a false floor in the trunk. With a 4 channel amp beneath that. On top of the space saver. Wired into the parcel shelf speakers and ready to wire into the front door speakers this weekend. Have an infinity Bluetooth Amp adapter to wire in, instead of a headunit. (despite costing more than a decent headunit) Also next up is to get some gas struts onto the hood. in place where the springs would of been. As at highway speed the hood likes to lift and float around. And is quite disheartening at 100kmh.
6 points
-
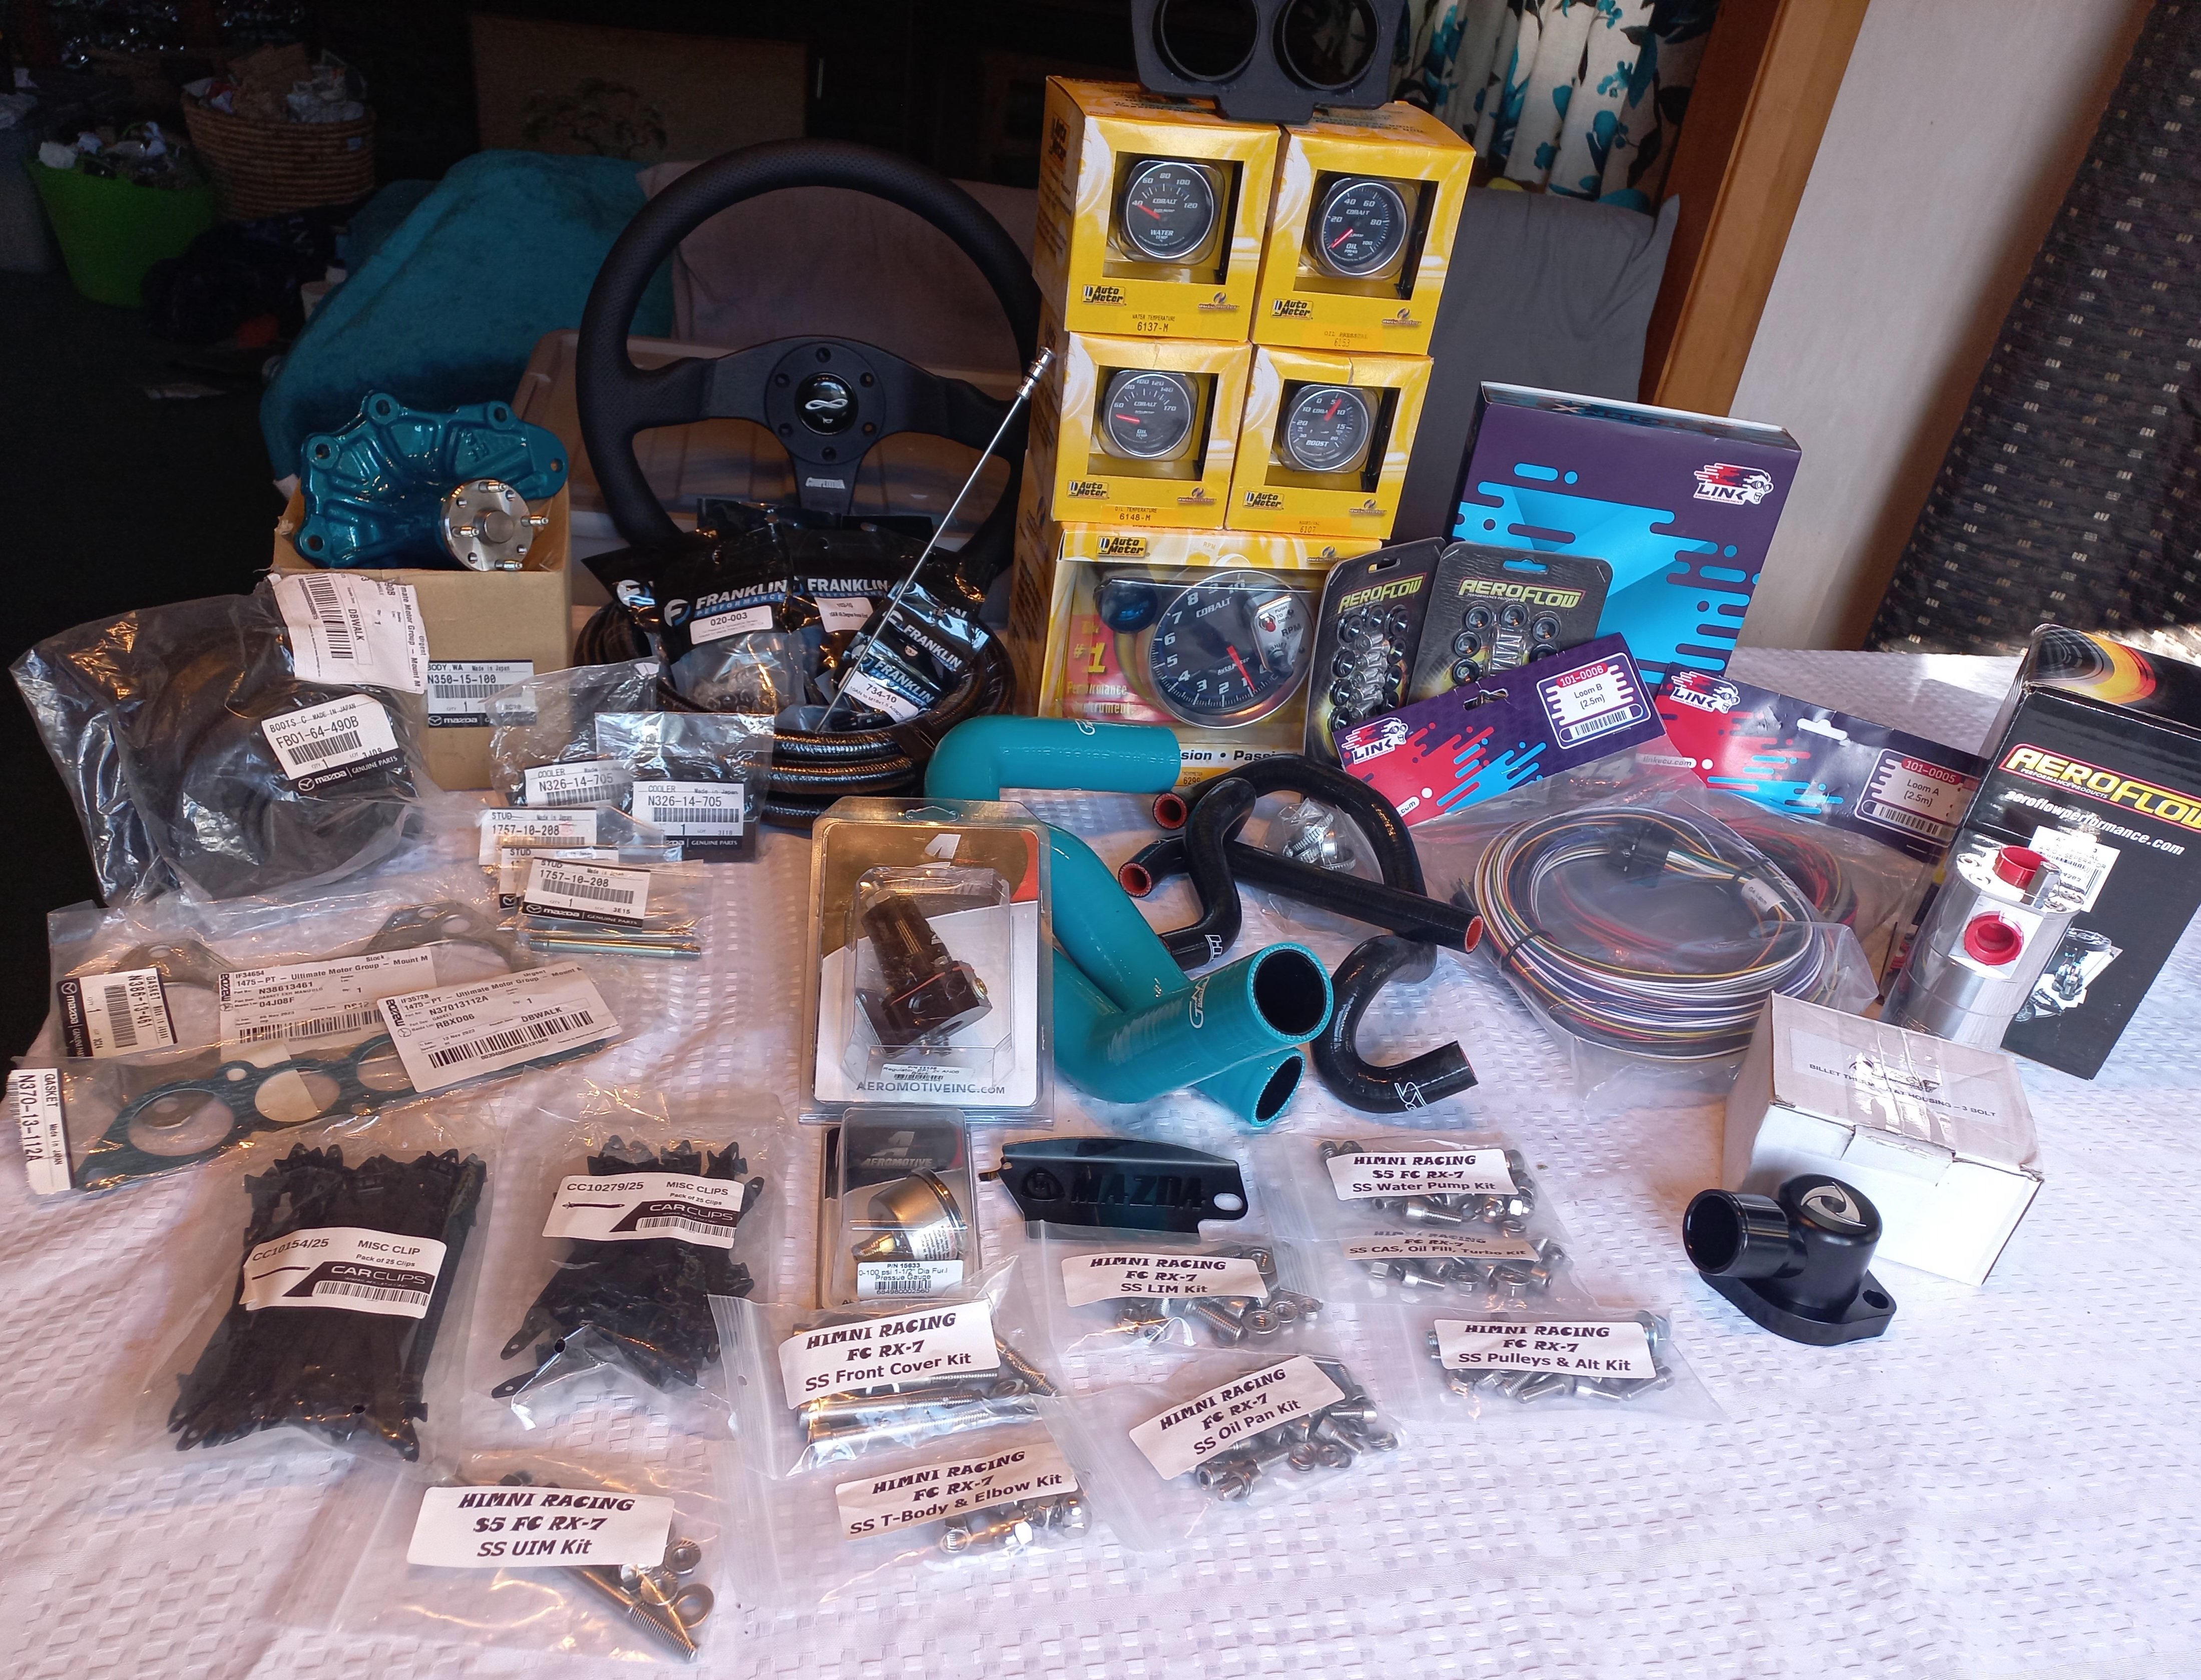
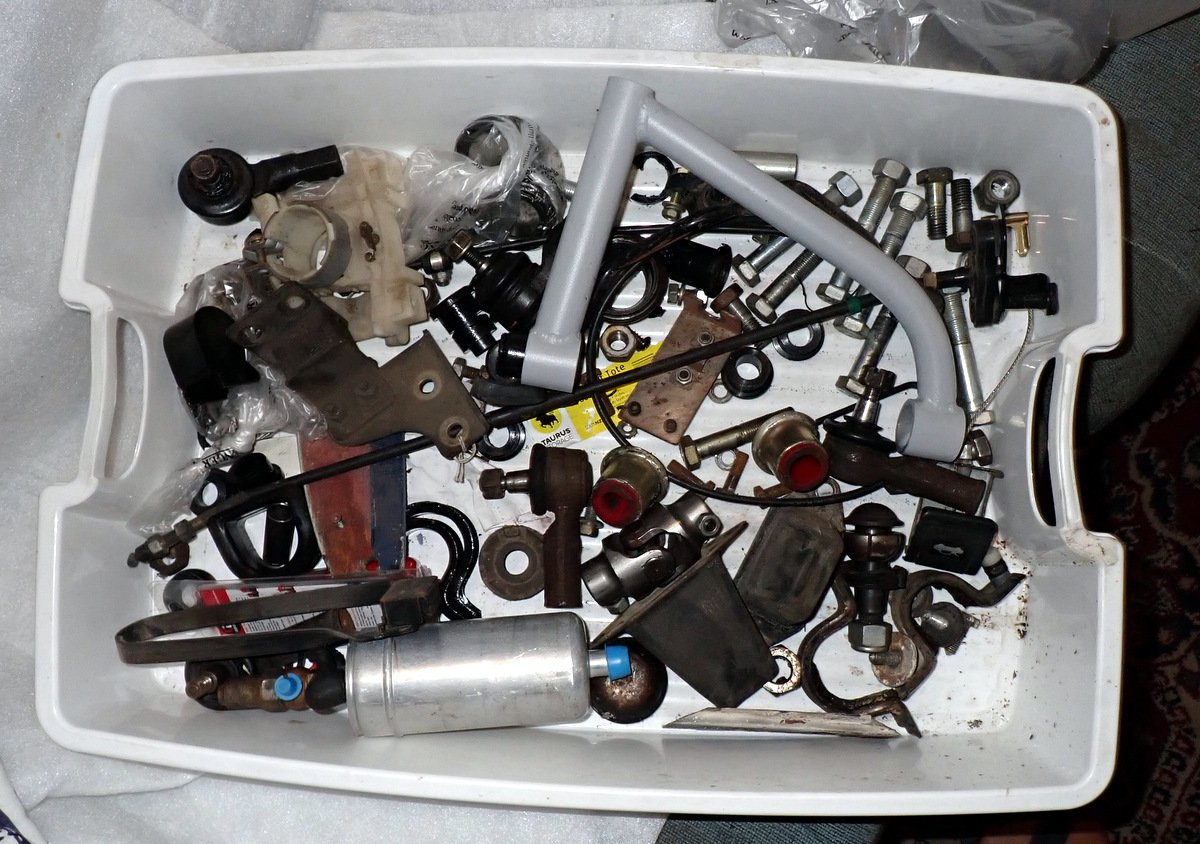
Whilst waiting for builder to start the keg build, I been buying a looot of parts. He started the rotors last week (all new side seals need clearancing x12) then he onto stacking. Bought the 'infini' momo centre cap so many years ago..got the wheel to suit now, Infini was the top spec JDM version of the FC but also badged to the BF mazdas of the day? Mazda OEM, Franklin, Aeroflow,Link,Pac,..try my best to use only kiwi sourced stuff, but the US & AU has supplied a few trinkets that only they do...example is 3D printed gauge holder ontop of the gauges, deletes the ashtray flap which has never been used.. Currently in contact with Vinny fab in chch for some bespoke items further on the build. Anyways, pics of stuff from the bin..
5 points
-
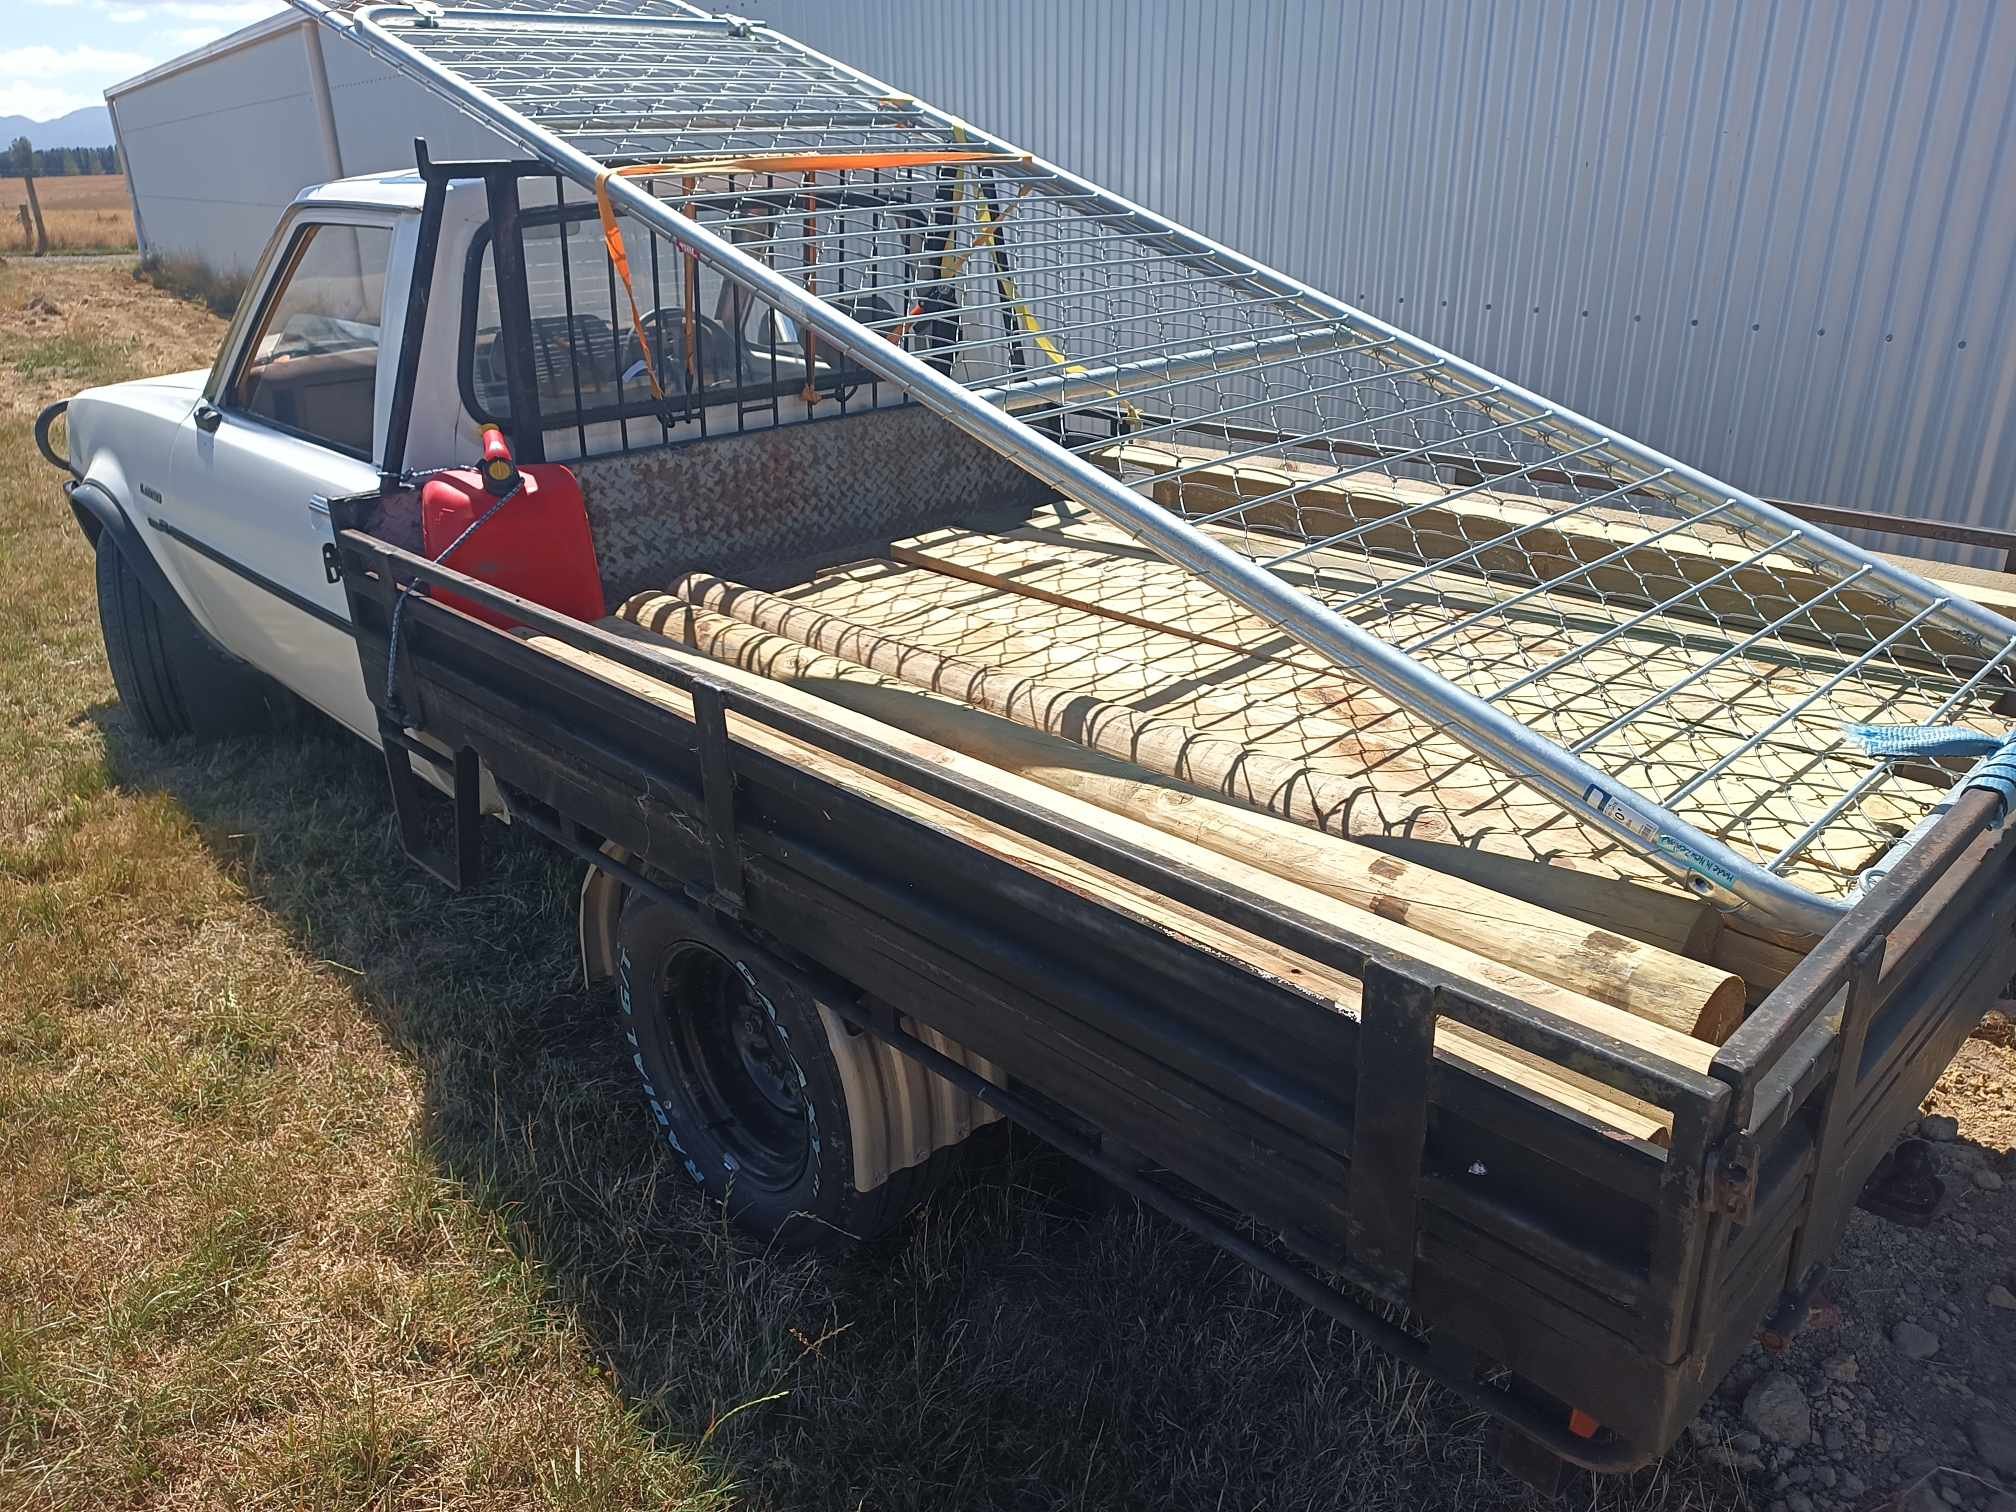
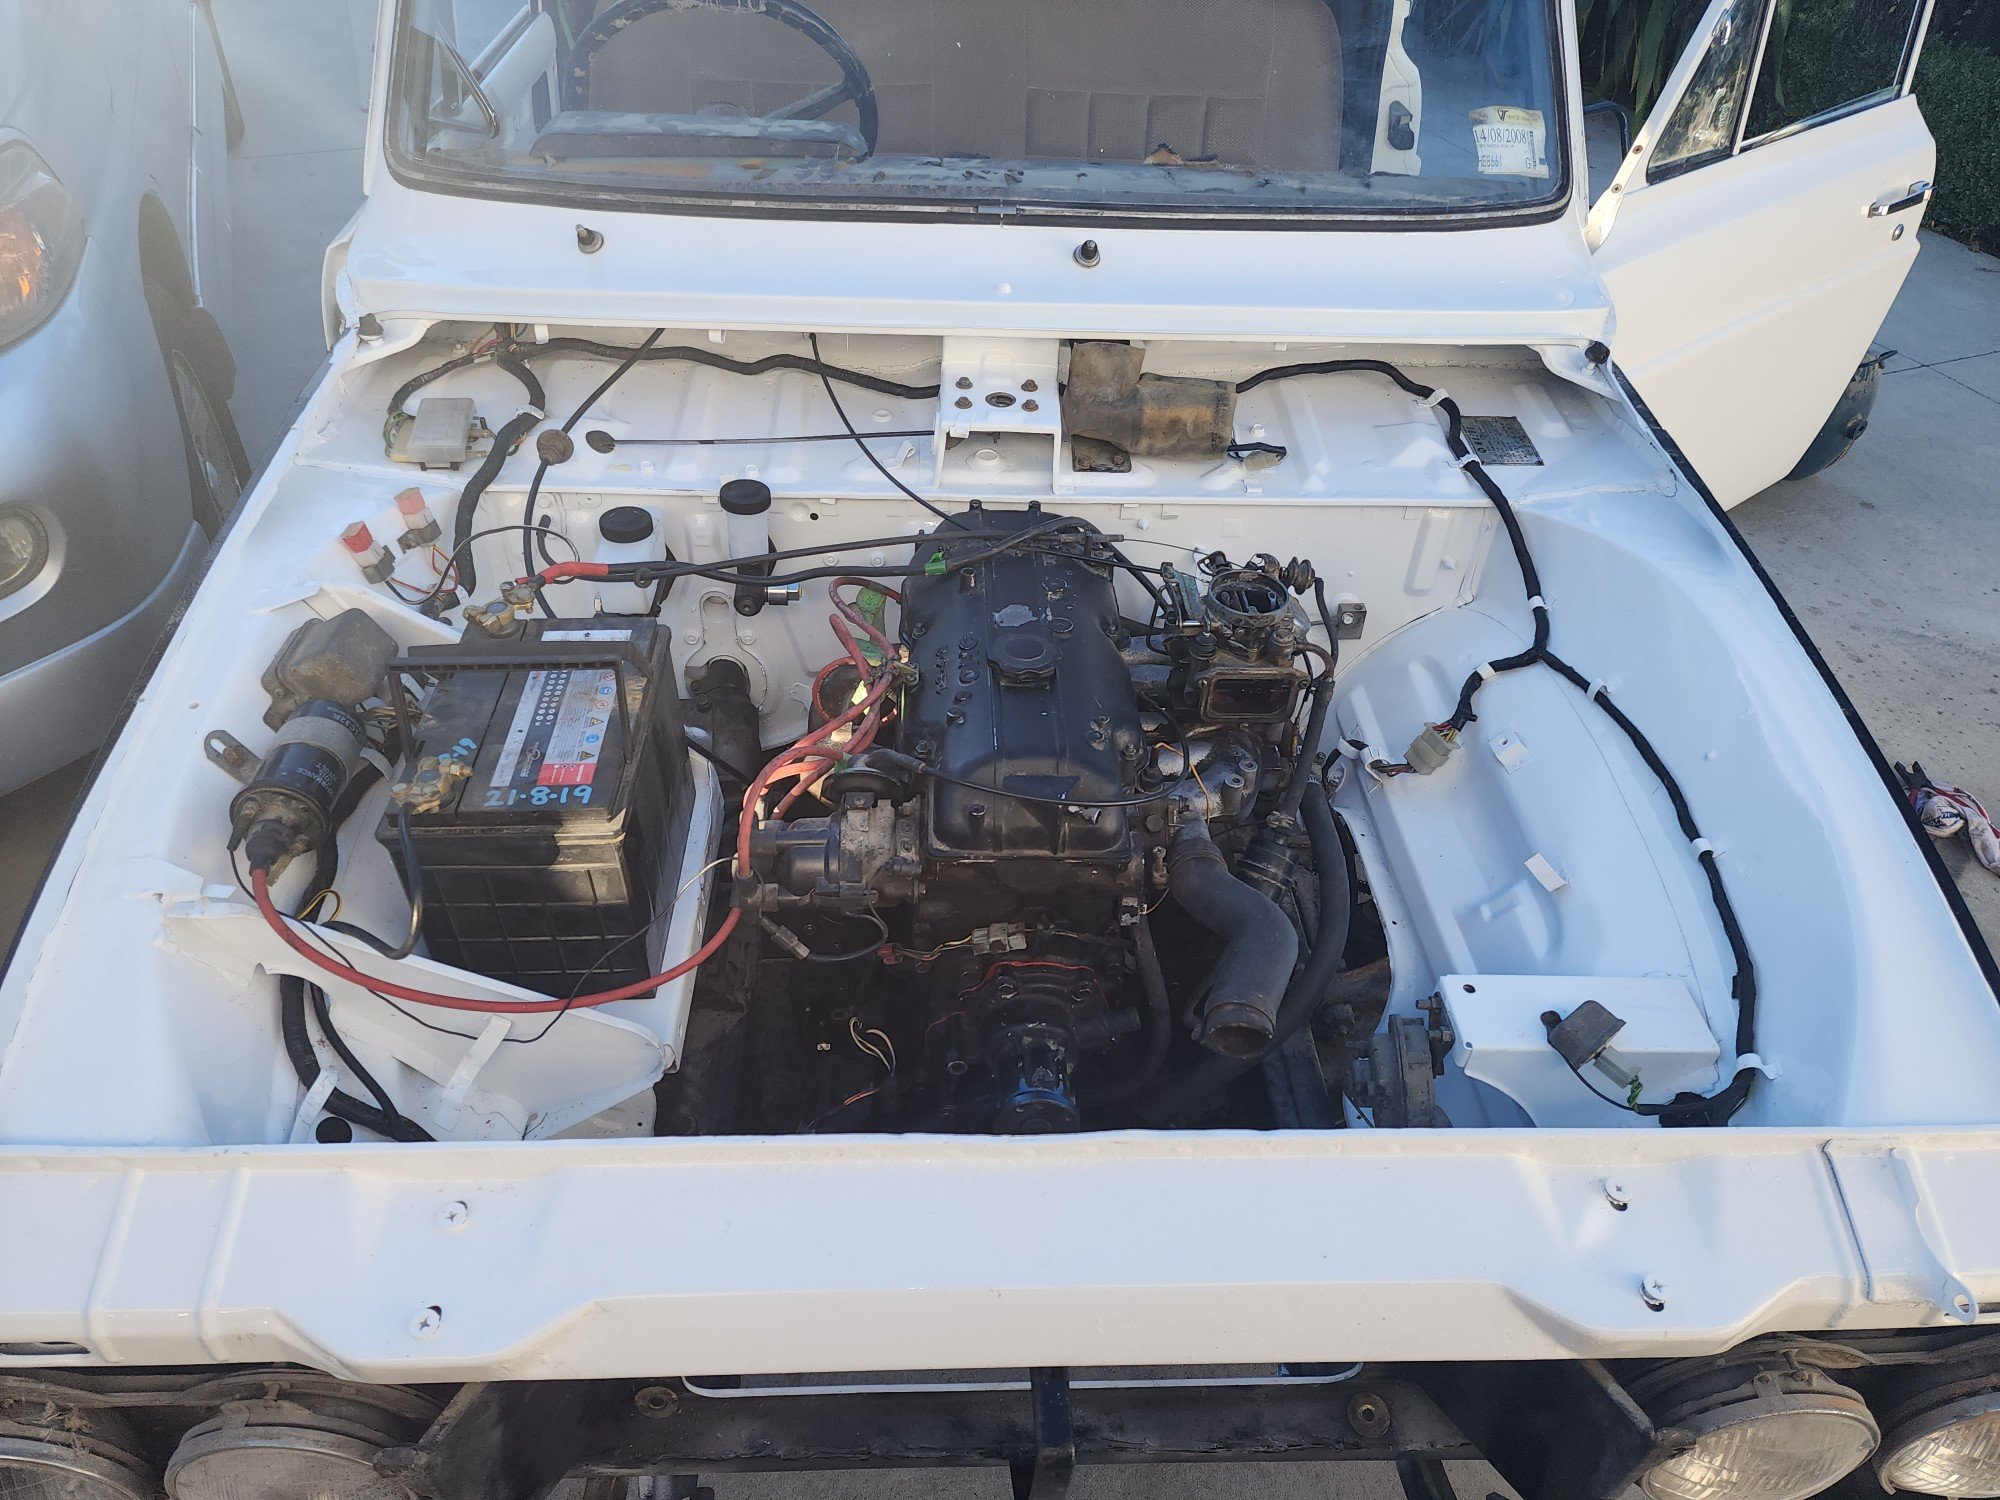
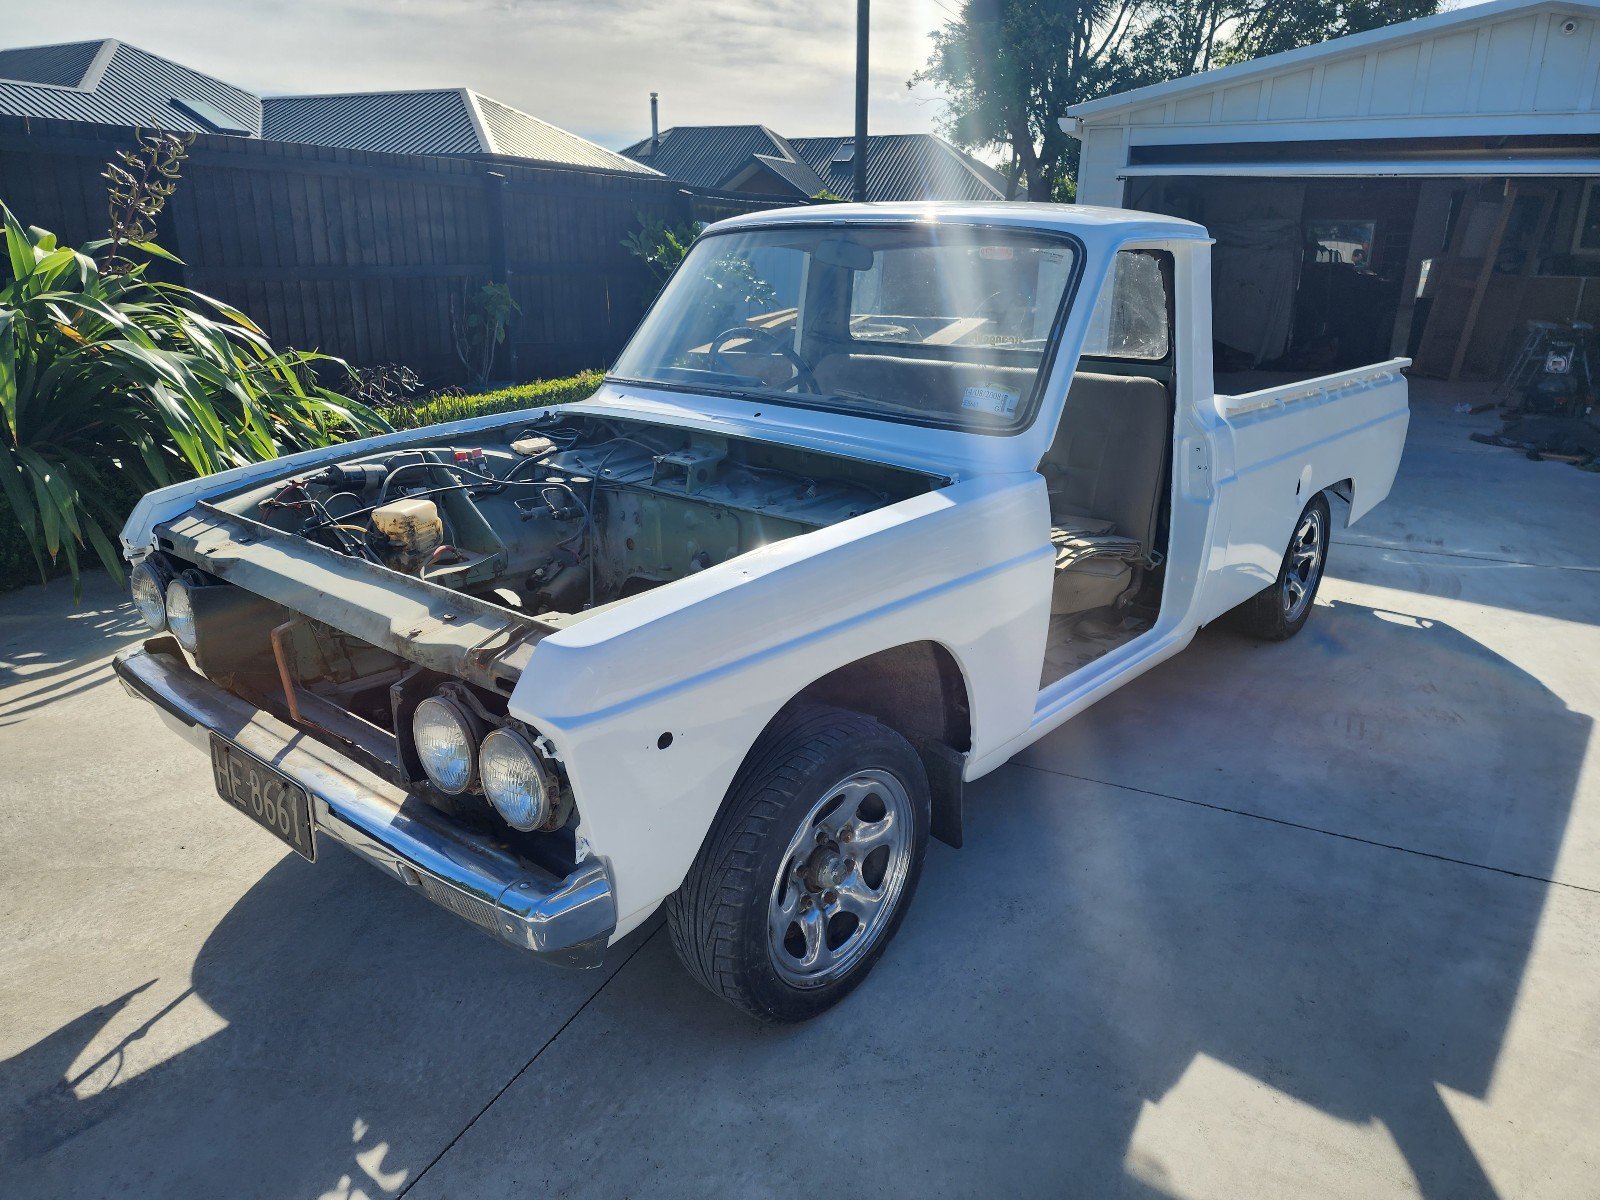
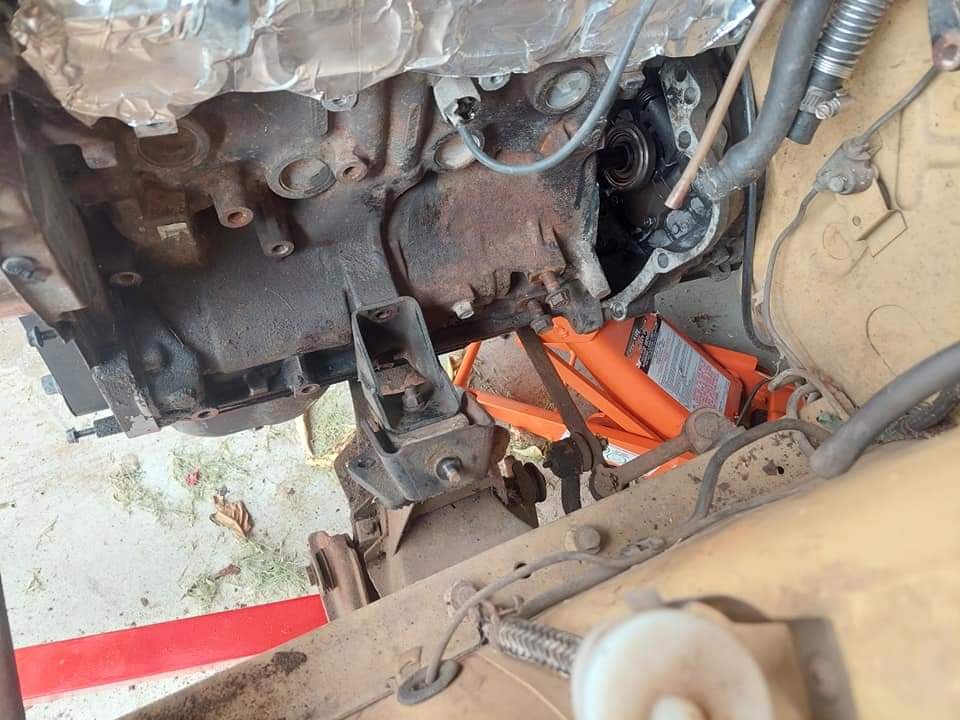
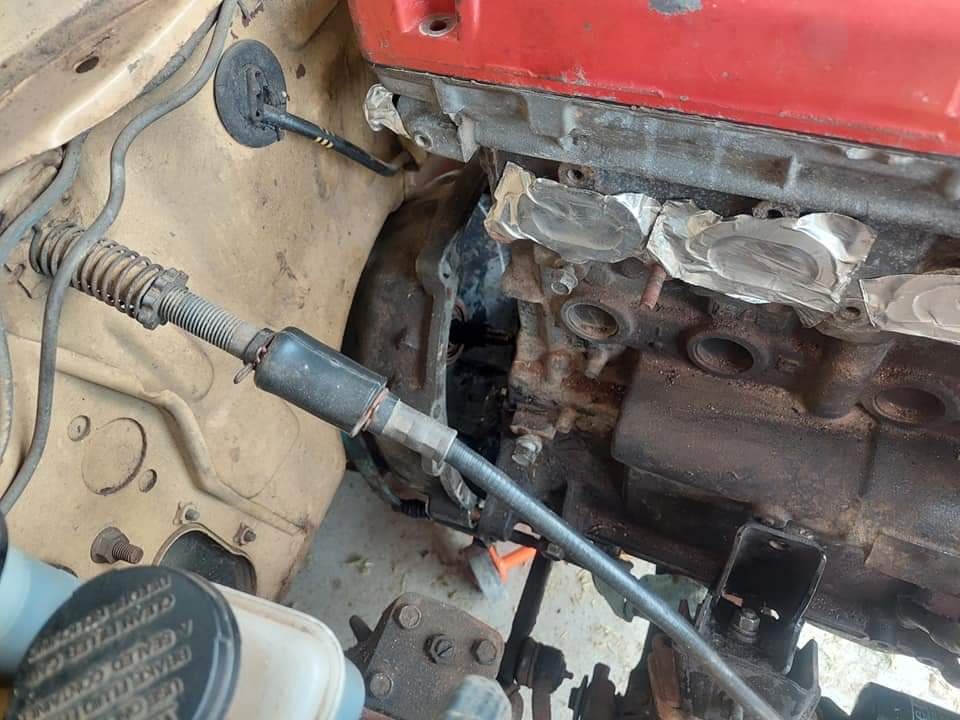
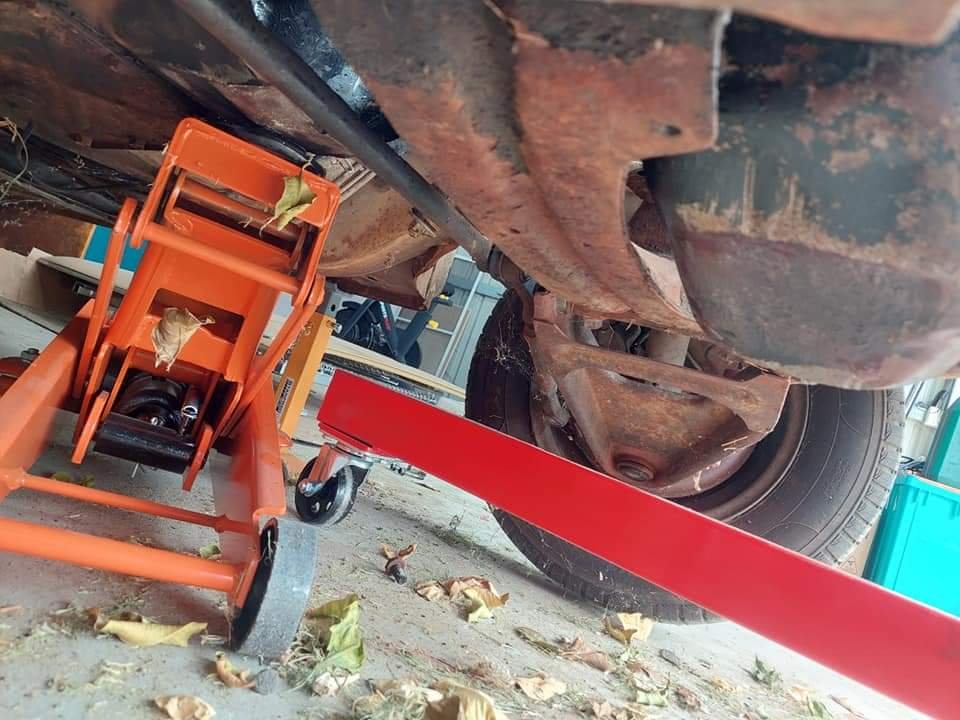
Passed the wof no worries. But rather annoyingly I took it for a decent spin today to get some light fencing supplies and by the time I got home the replacement power steering pump was making the same noises as the one I shitcanned. Which is pretty frustrating as it is apparent that something is causing it to eat pumps and I have no idea what. It seemed to be a little slack so I tightened it up and although it fixed it at low speeds it was still there when turning. Gah. Might have to look for a manual box as this sounds like a project!
4 points
-
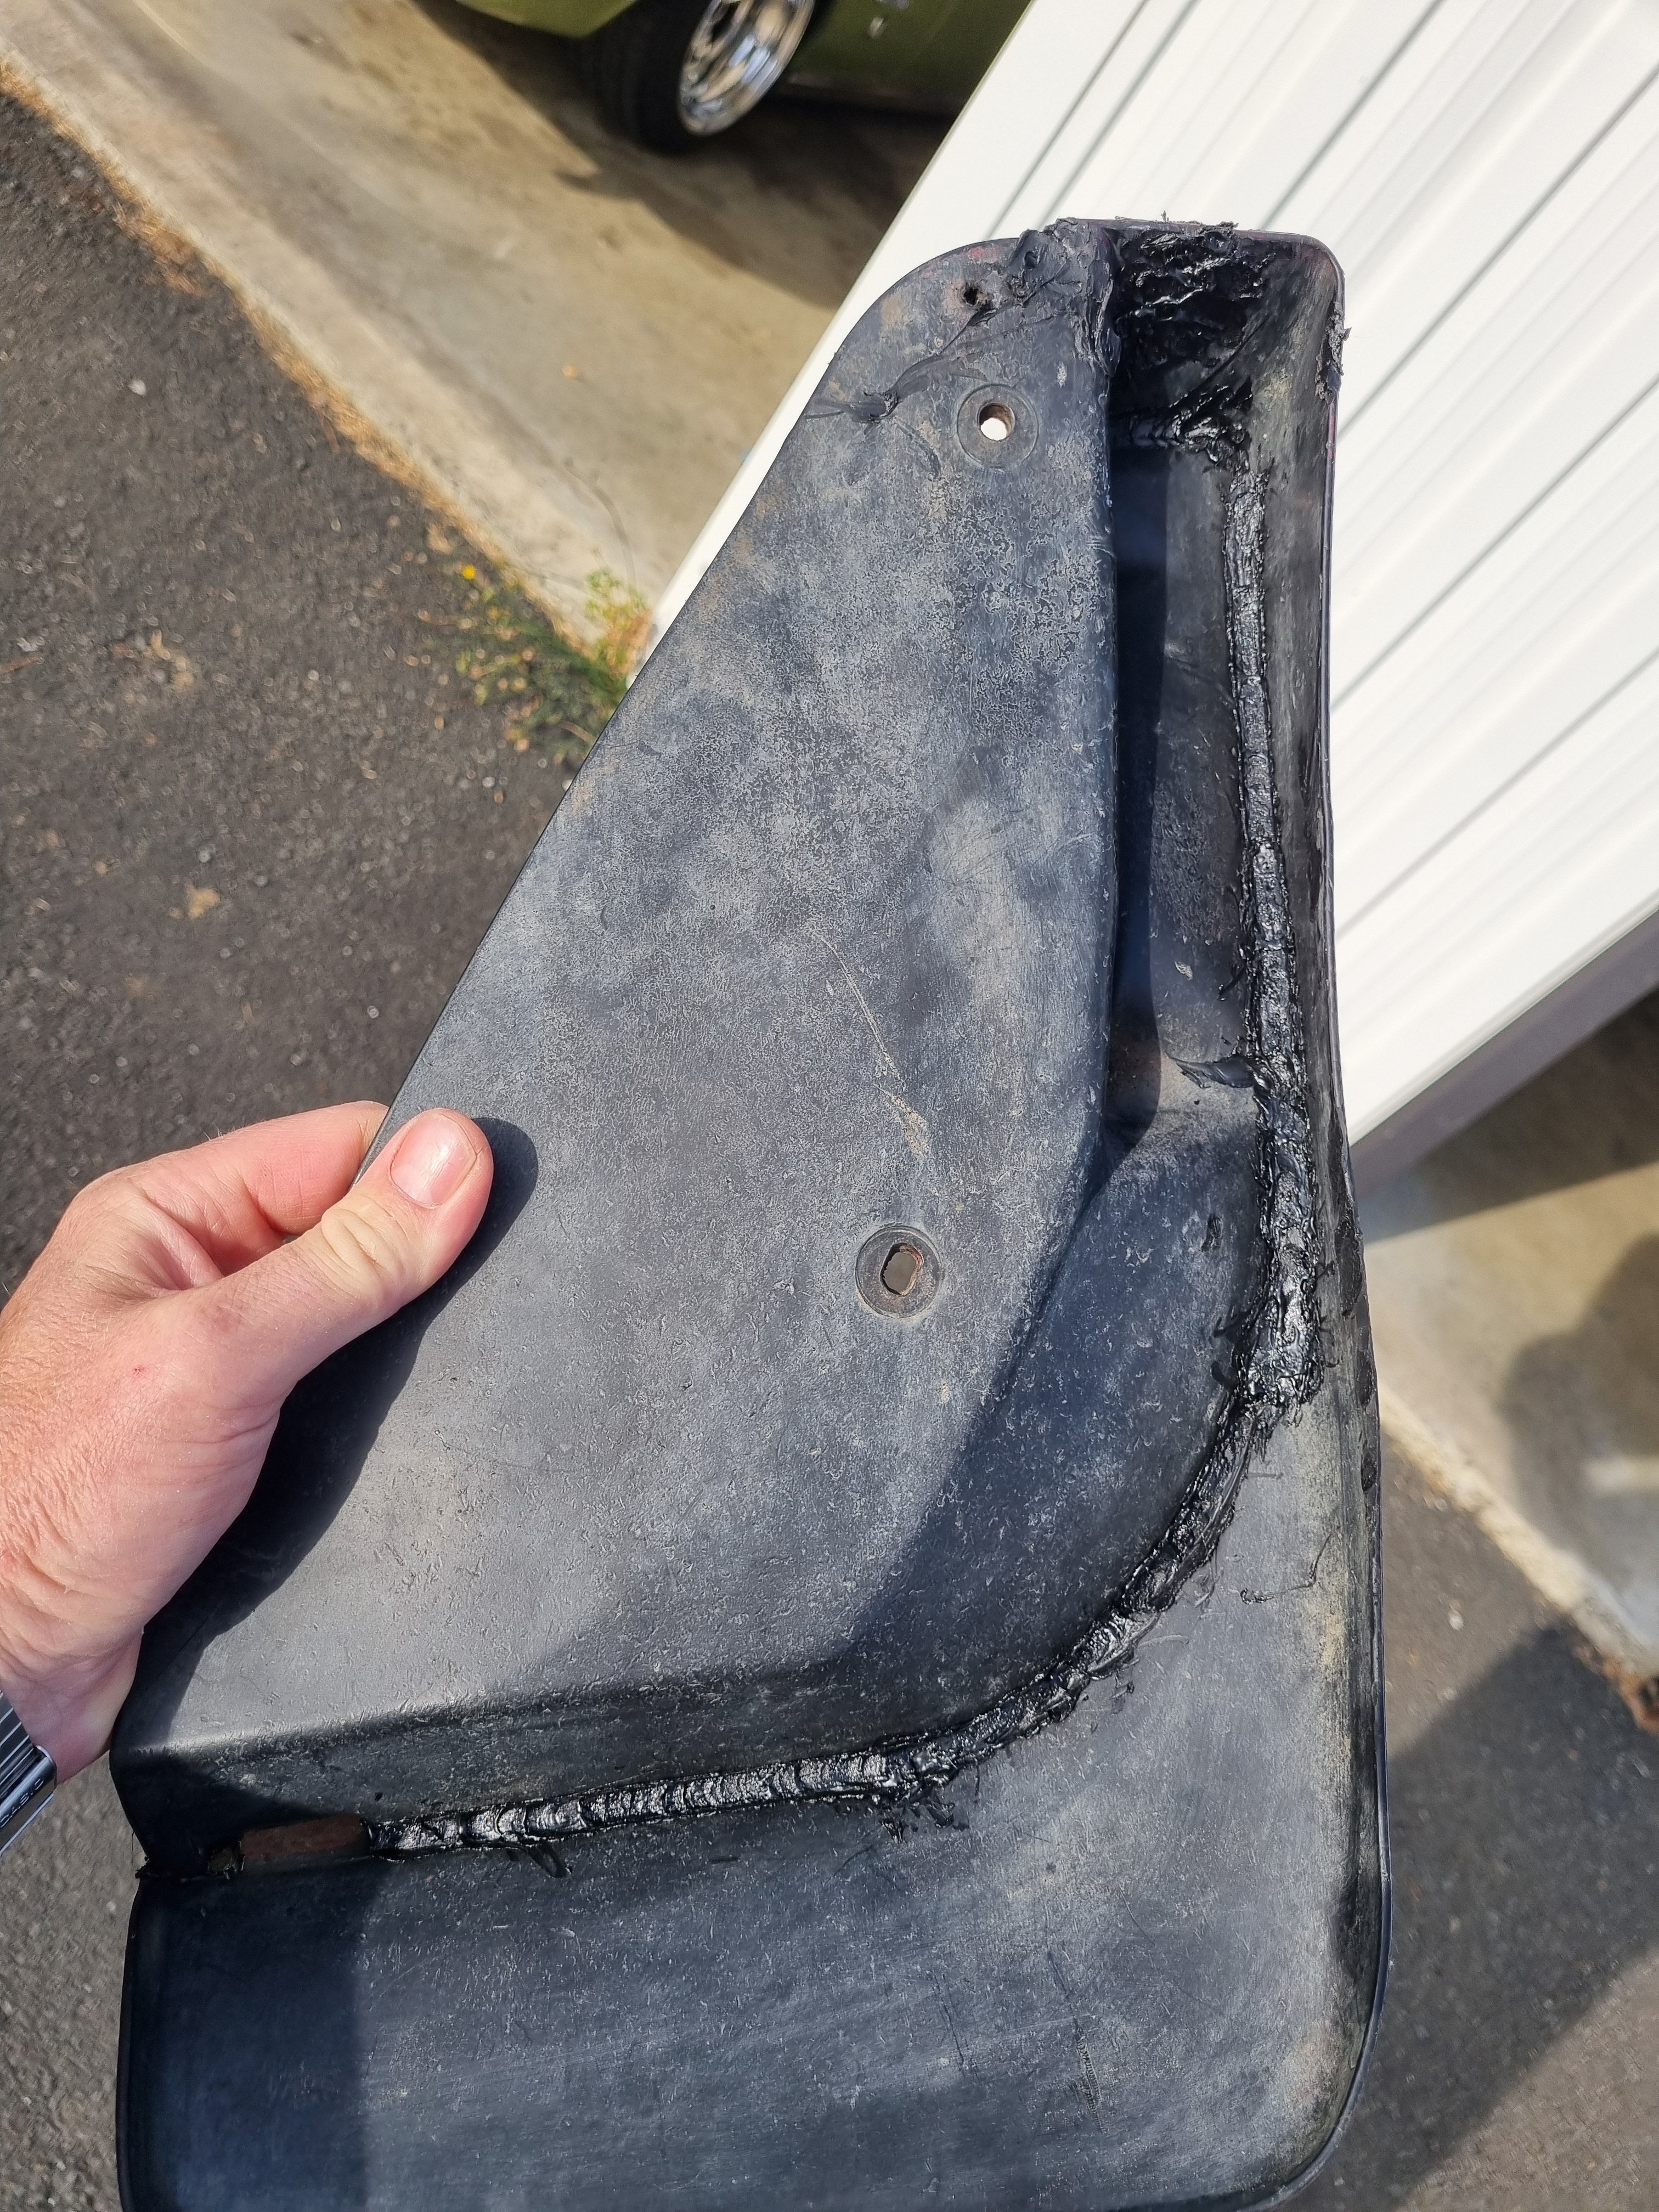
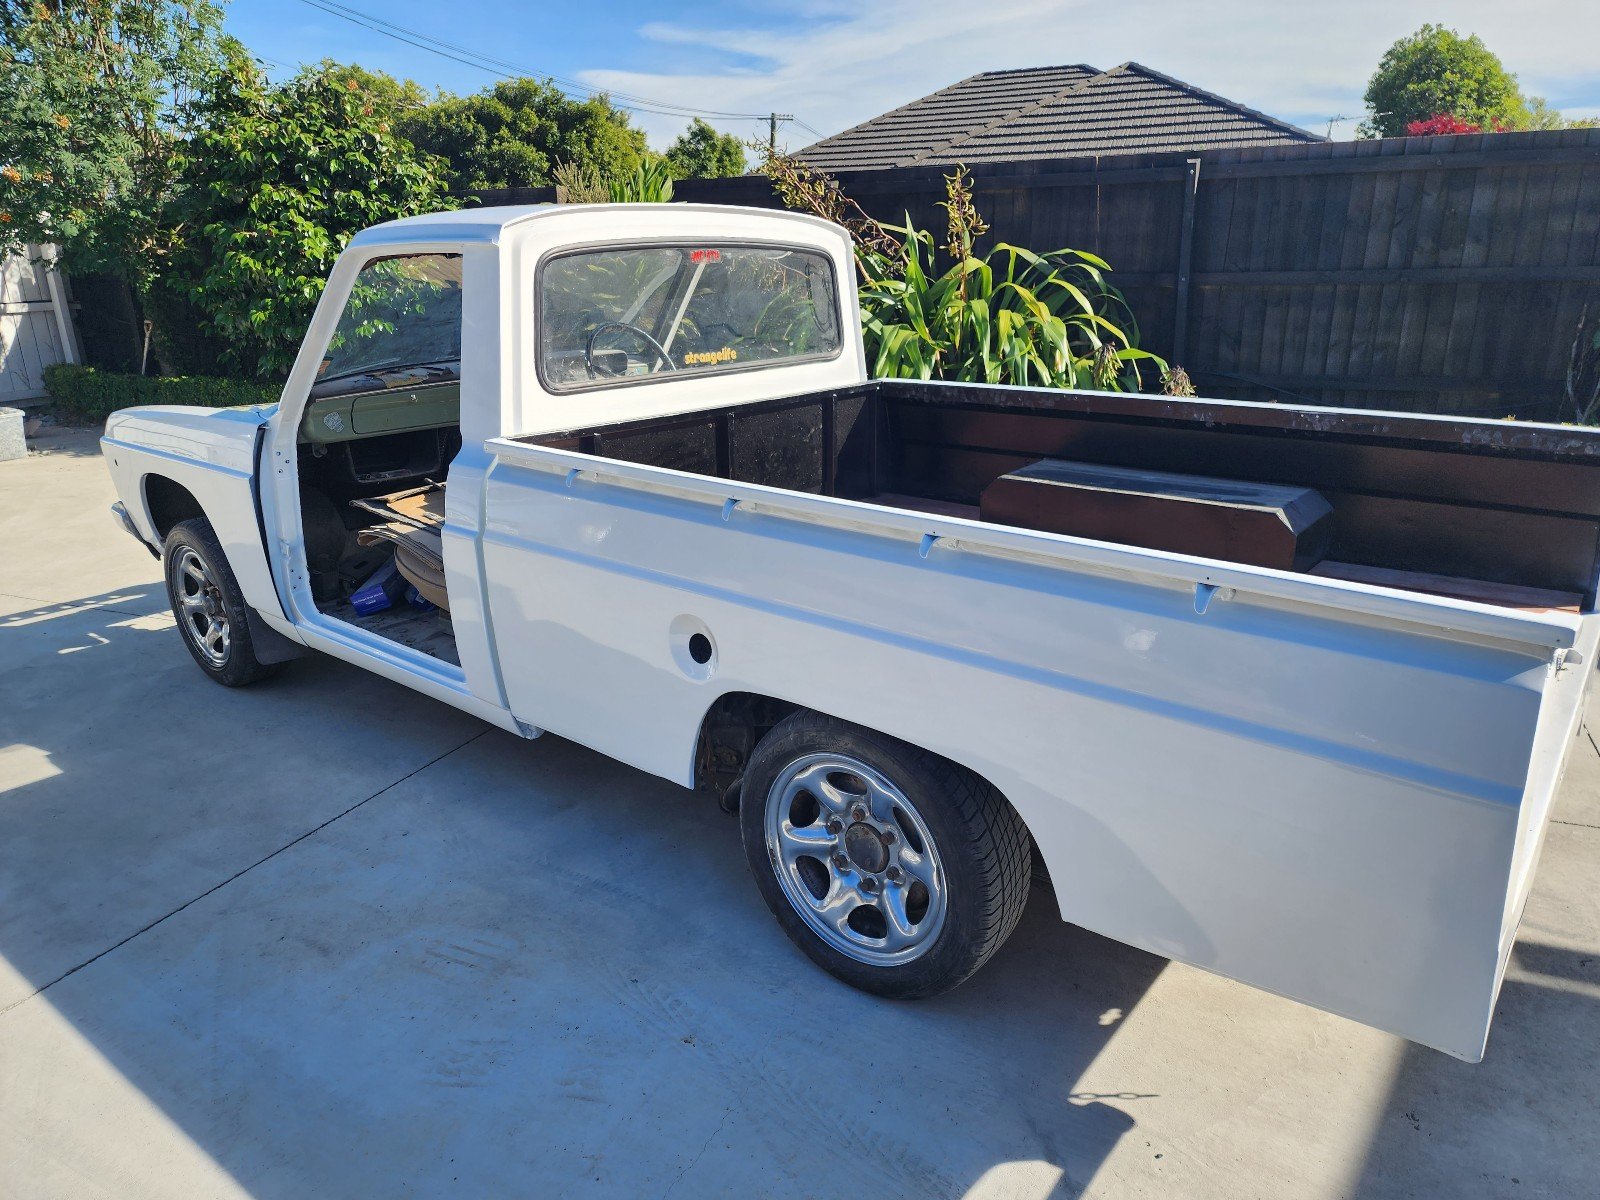
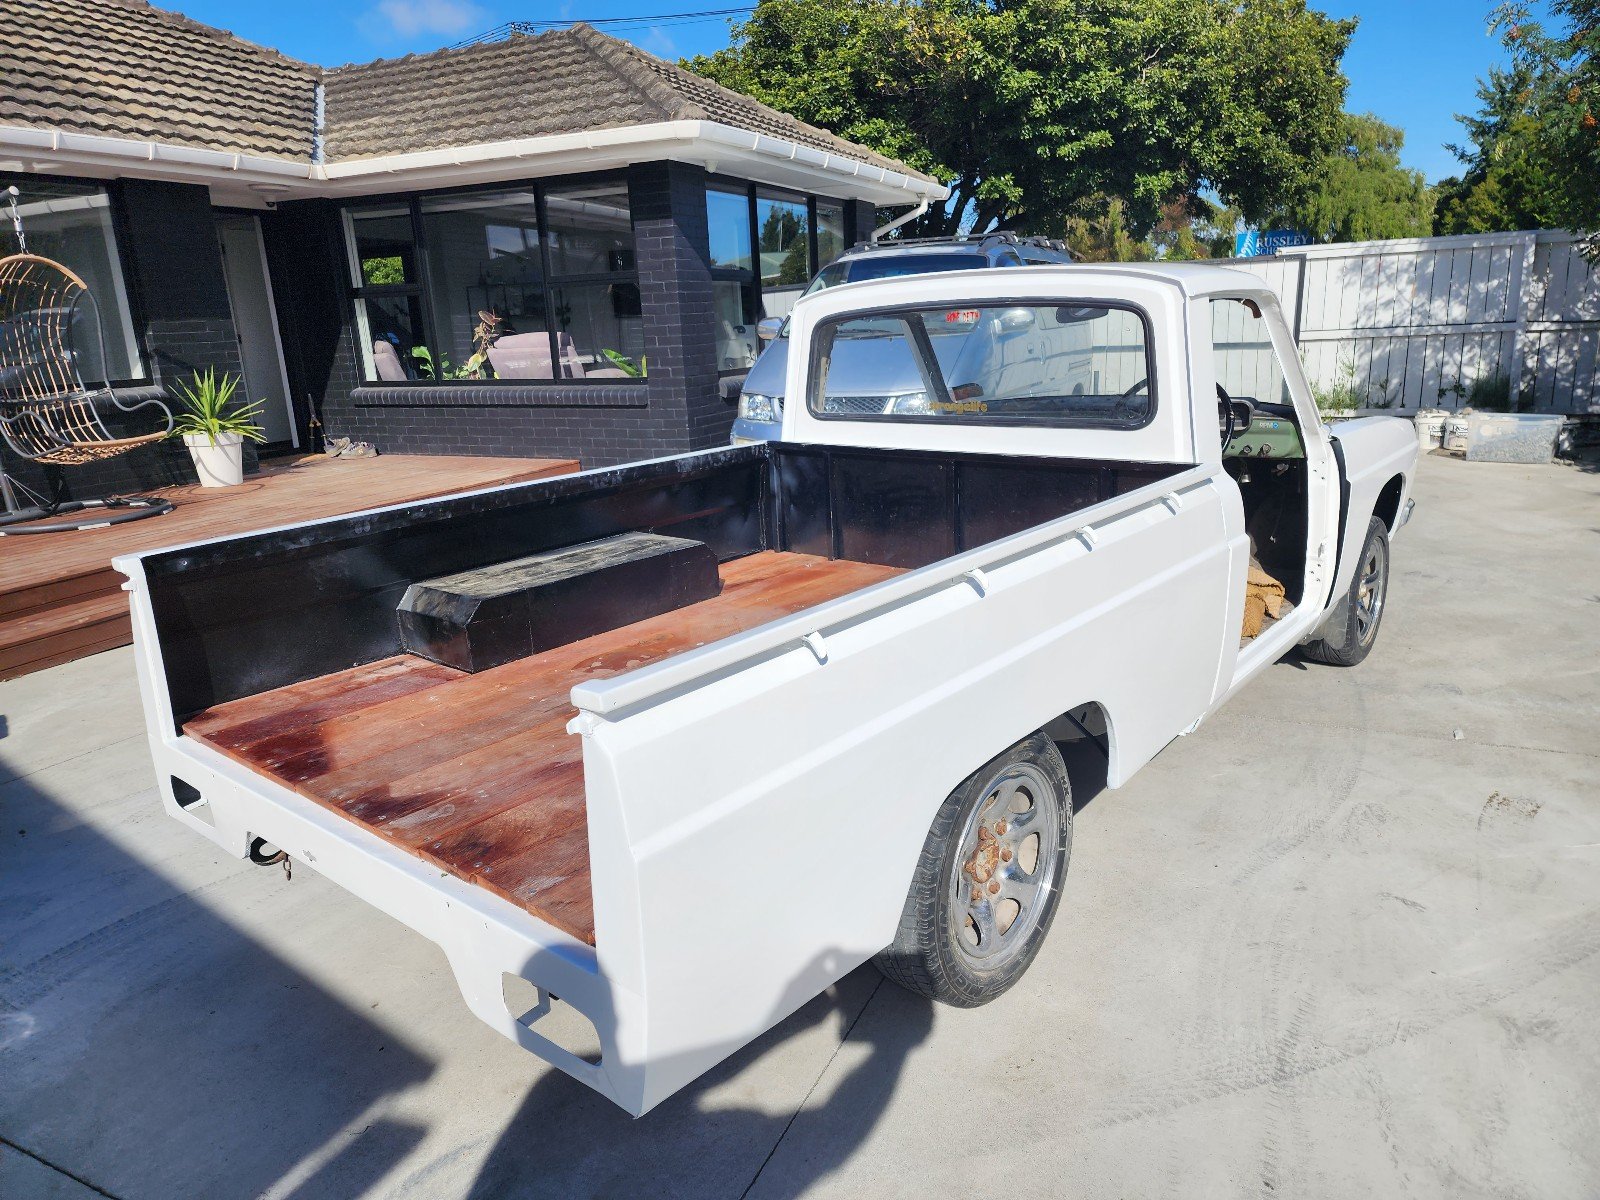
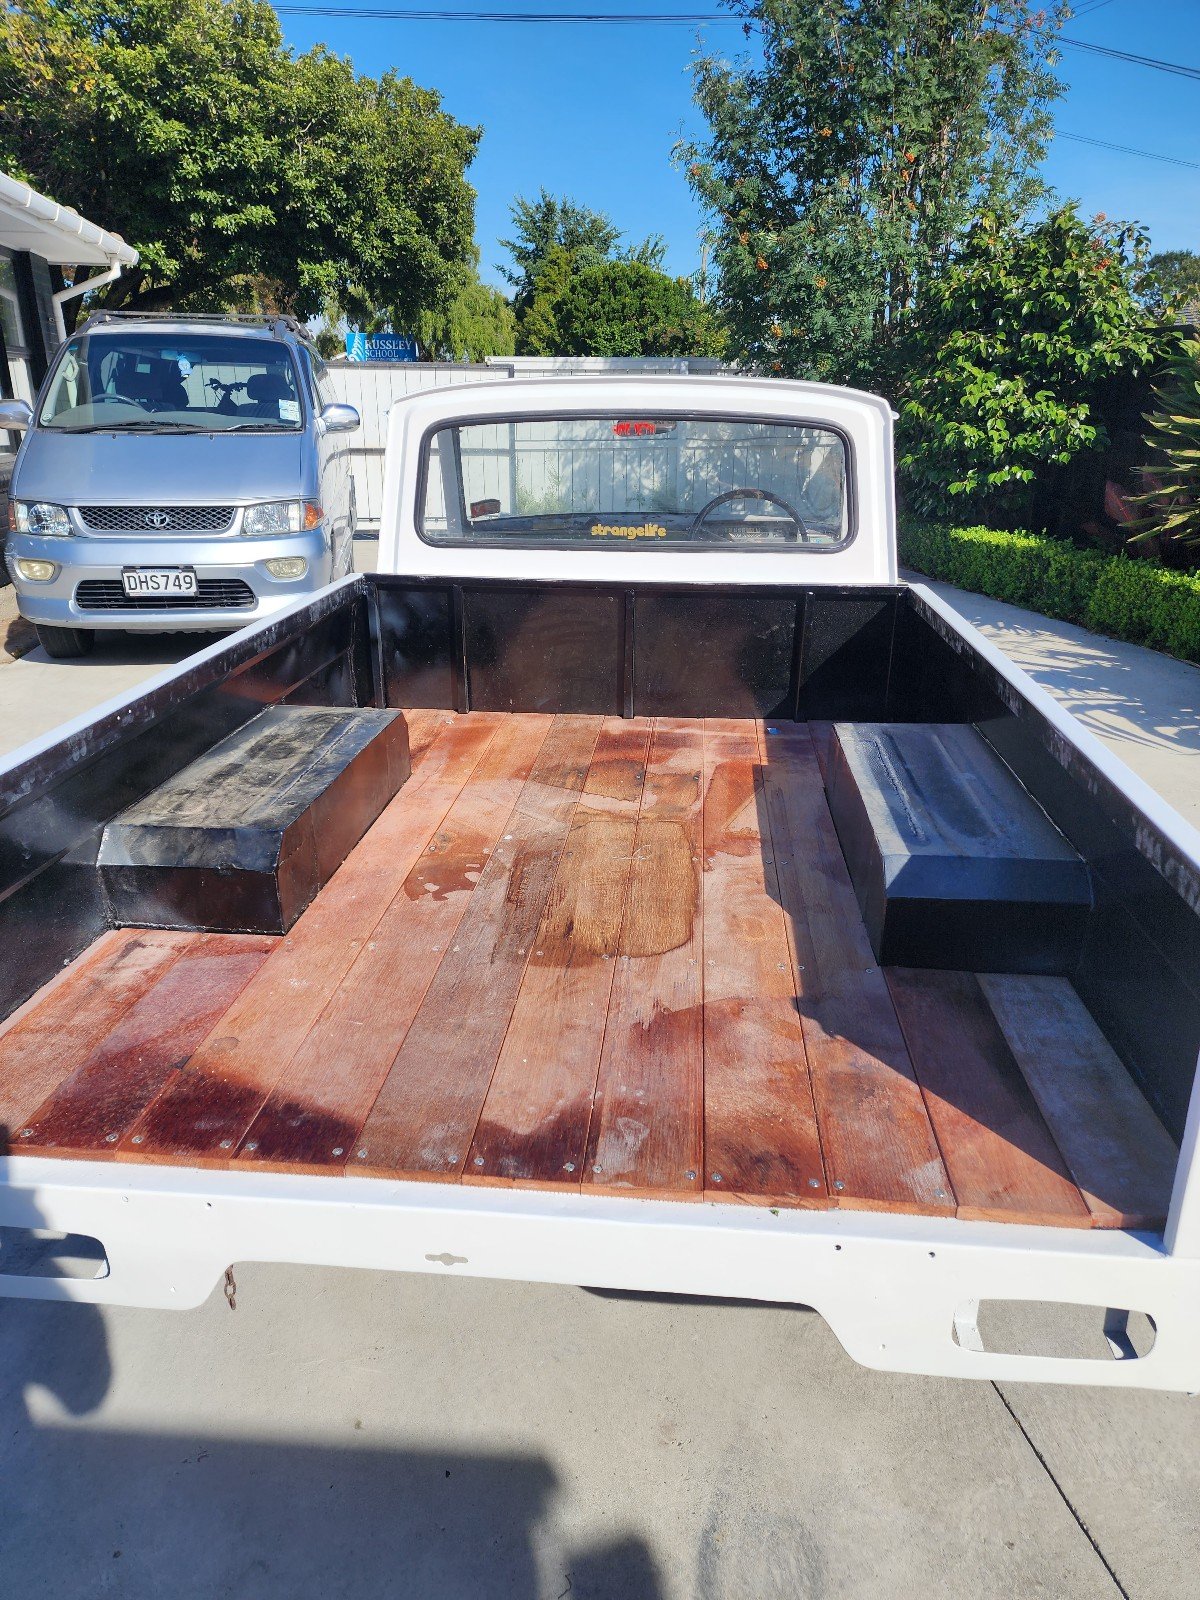
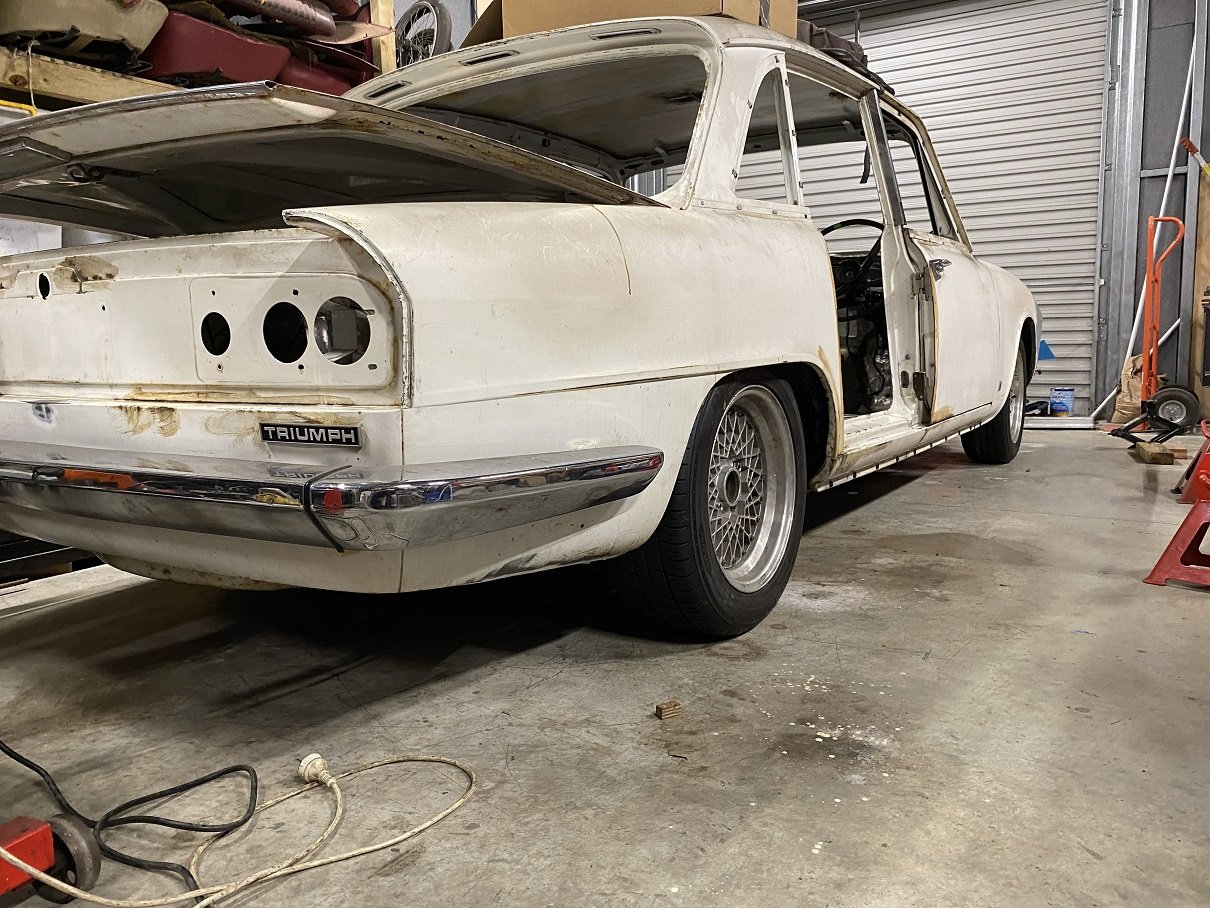
Also shit I forgot to mention that I put the rear bumper back on. This was harder then it sounds but basically I pulled all the brackets apart, soaked them in evoporust for a few days then painted them all. I beat most of the dents out of the side bits and then bolted it all back in. One of the mud flaps was broken in two so I welded it beck together with a soldering iron using cable ties for welding rod. Is it good as new? No. Will it last a thousand years? Also no But it's back on the truck and works until it doesn't so I'm calling it a win.
4 points
-
Body painted, trunk and hood should have been done today. Popped up the road and collected the rear bumper and other parts from the panel shop. Plan is to be all back together for the Beach Hop.
4 points
-
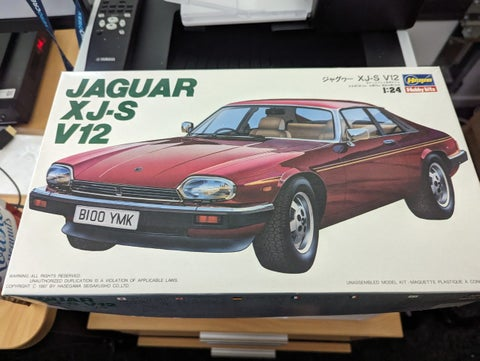
Oooo.. I built a couple of model cars as a kid, and an aerosol of colour-matched paint came with my XJ-S.. But if I can't get around to working on my real car, what business do I have building a model of its V12 sibling? @fuel here's one for you: https://www.trademe.co.nz/a/marketplace/toys-models/models/cars-trucks/classic-cars/listing/45759440073 points
-
I lived there for a while and I only got slightly stabbed a couple of times.3 points
-
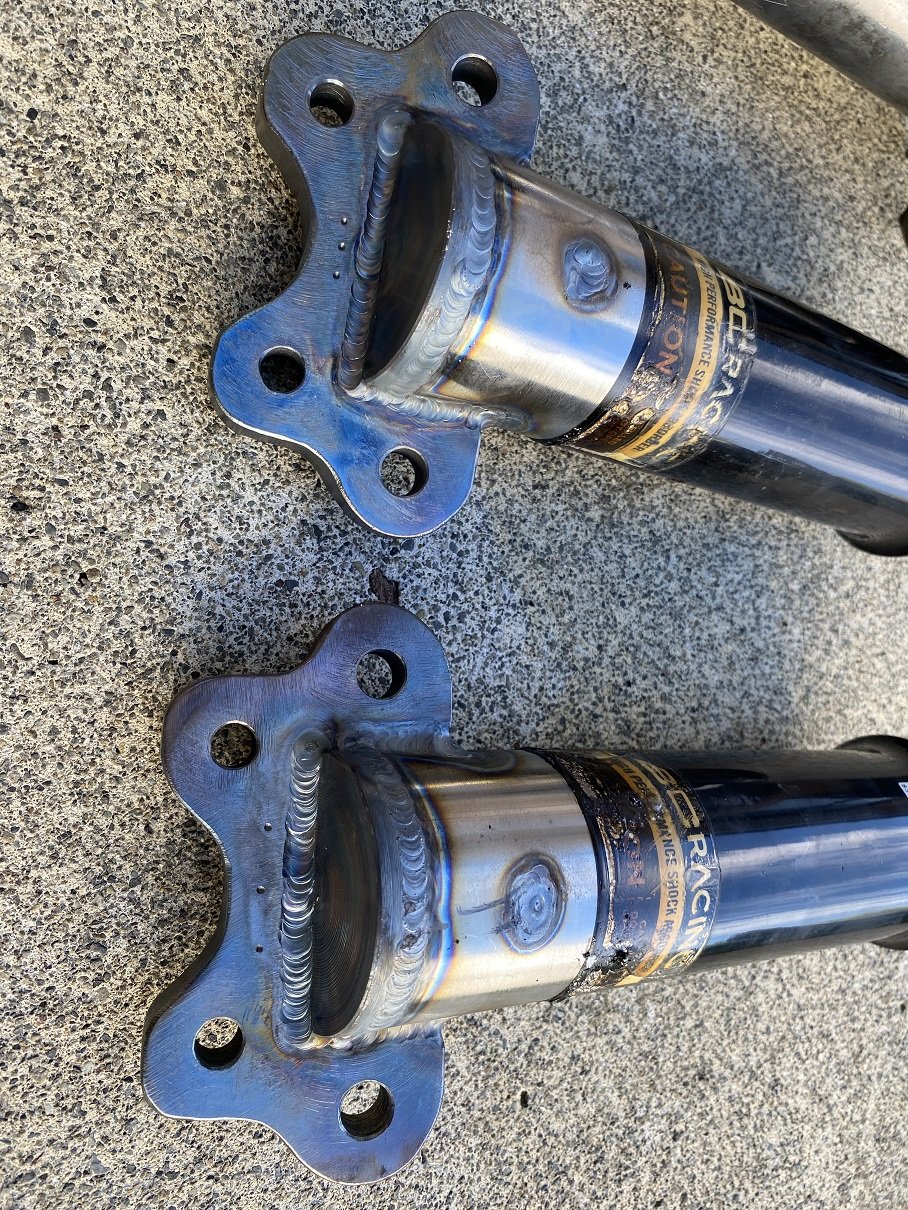
Albert the NDT man in Wingate has tested the welded struts for cracks. Took 10 minutes. He has an electromagnet and a solvent containing iron particles dyed with a flourescent dye so they glow in a UV light. He puts the magnet across the weld and sprays it with the fluid. The magnetic field aligns the iron particles which you can see under a UV lamp because of the dye. Any cracks will cause misalignment because the field goes around them. So I've got a certificate that says it's passed. YAY!3 points
-
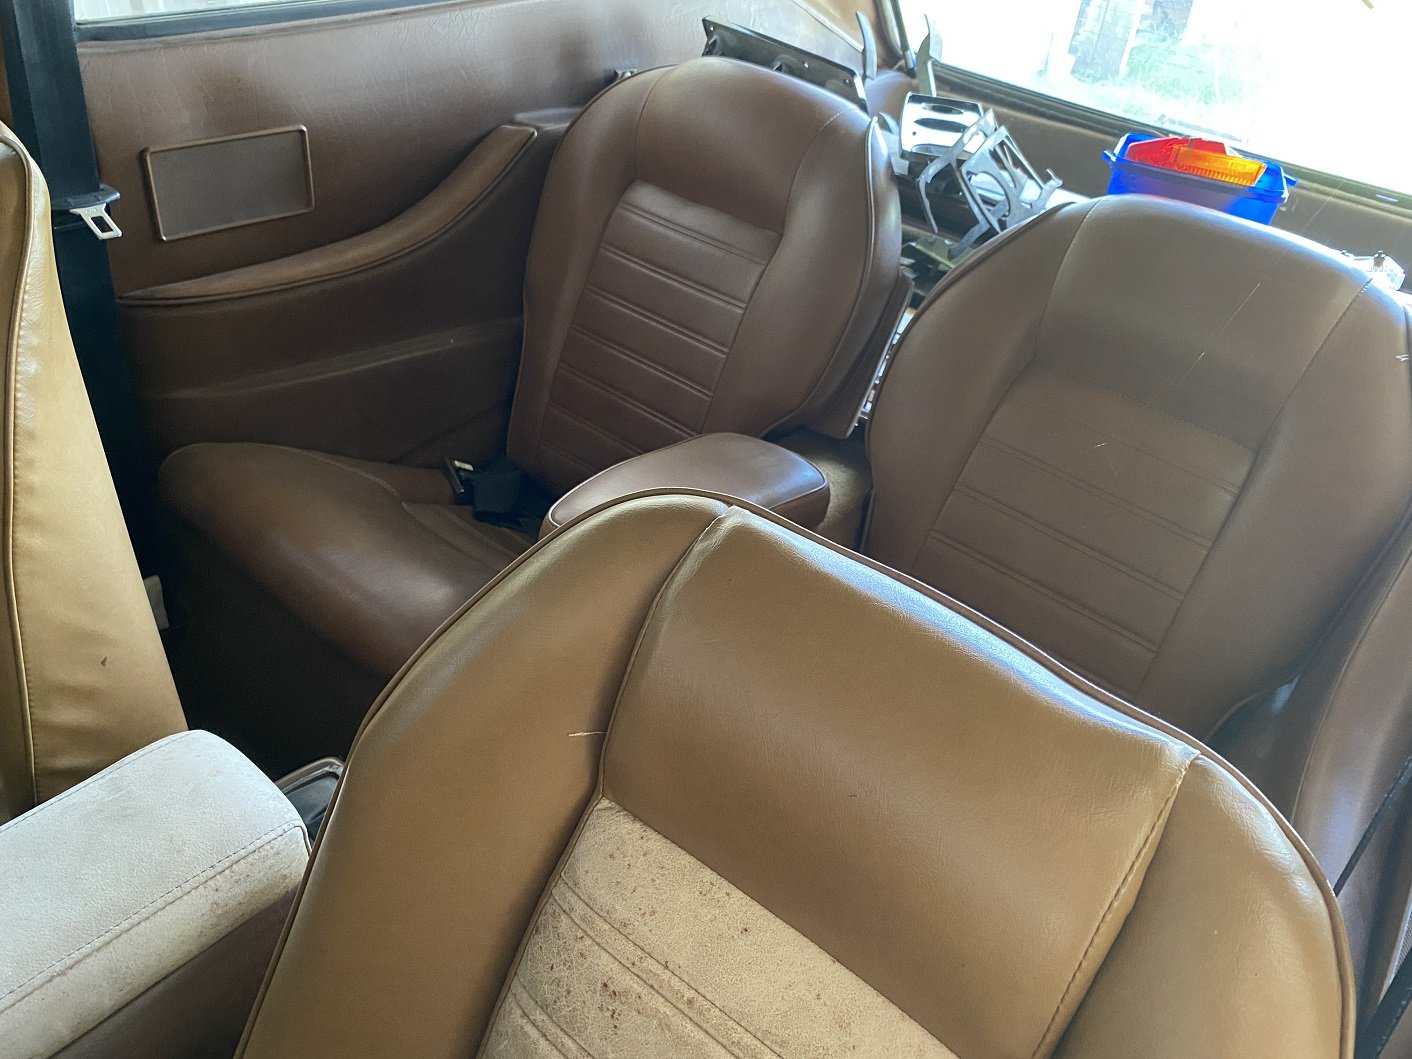
Back in the country means back in to work on the ol' 86. Firstly, the time has come to get the front bumper repaired. So, off it came and off it went. The plan is just to make it structurally sound again, I think there are too many hairline cracks to warrant a full resto on it. If it's structurally sound and painted, i'm a happy man. The bro's cracked in to it! When i've previously removed the dash, i found it not possible to take out the dash clock surround without breaking it into 30 pieces. This has been an eye sore for years and luckily toyota still make them new Next was to install the JSP coolant overflow/oil catch can combo unit. 10x better than the previous solution. I will hook it back up to breathing back to the engine, I just need to acquire a -10 120 Degree fitting so that it can point down to the ground a bit more as using a 90 degree will make it hit the bonnet Turbo water lines installed. I need to order another -6 90 degree bend fitting as I didn't order enough, luckily I had a -4 premade hose sitting about which works fine, but it's 90 Degree to straight end hence the U bend to where it connects to the back of the head. This will be resolved shortly! Tidied up the NASA heat shield for the overflow bottle, I will get a beanie at some point for the turbo but hopefully this is sufficient for the interim. I've also misplaced some U Channel moulding I was going to install around the folded edge of it so that it wouldn't be possible to cut into the rubber line to the windscreen jets. it'll turn up.. Clean! Gave the interior a clean, still need to address the small rip on the drivers side seat.. I've always wondered where the handbrake light loom was situated in the car, I assumed that it was just that I was missing the wires and it never had them. Turned out in my spares box I had the spare loom, plugged it in and we now have a light. something that isn't that helpful just good small win For 10 years i've put up with using a wooden stick to hold the hatch up. FLOS.ie have new gas struts so in they went. much satisfaction TODO: - Replace oil pump. I'm having lower oil pressure at higher RPM's than I'd like (with a rebuilt bottom end), so i've got a spare oil pump which has the SQEngineering pressure up spring unit to hopefully address that. If that doesn't resolve the issue i'll be getting plasti gage out to measure the cam cap tolerances as I can't think where else I would be losing pressure the way that it is. - Recheck pinion angle since the 15" rims and slight height differences to bring back to 1.5 degrees both sides - Pull out gearbox to replace the output shaft speedometer worm drive. The plastic gear for on the speedo output is stripped, and without knowing what the worm drive it suits, better to pull it apart and replace it with the correct stuff which I now have. - Maybe try cert?2 points
-
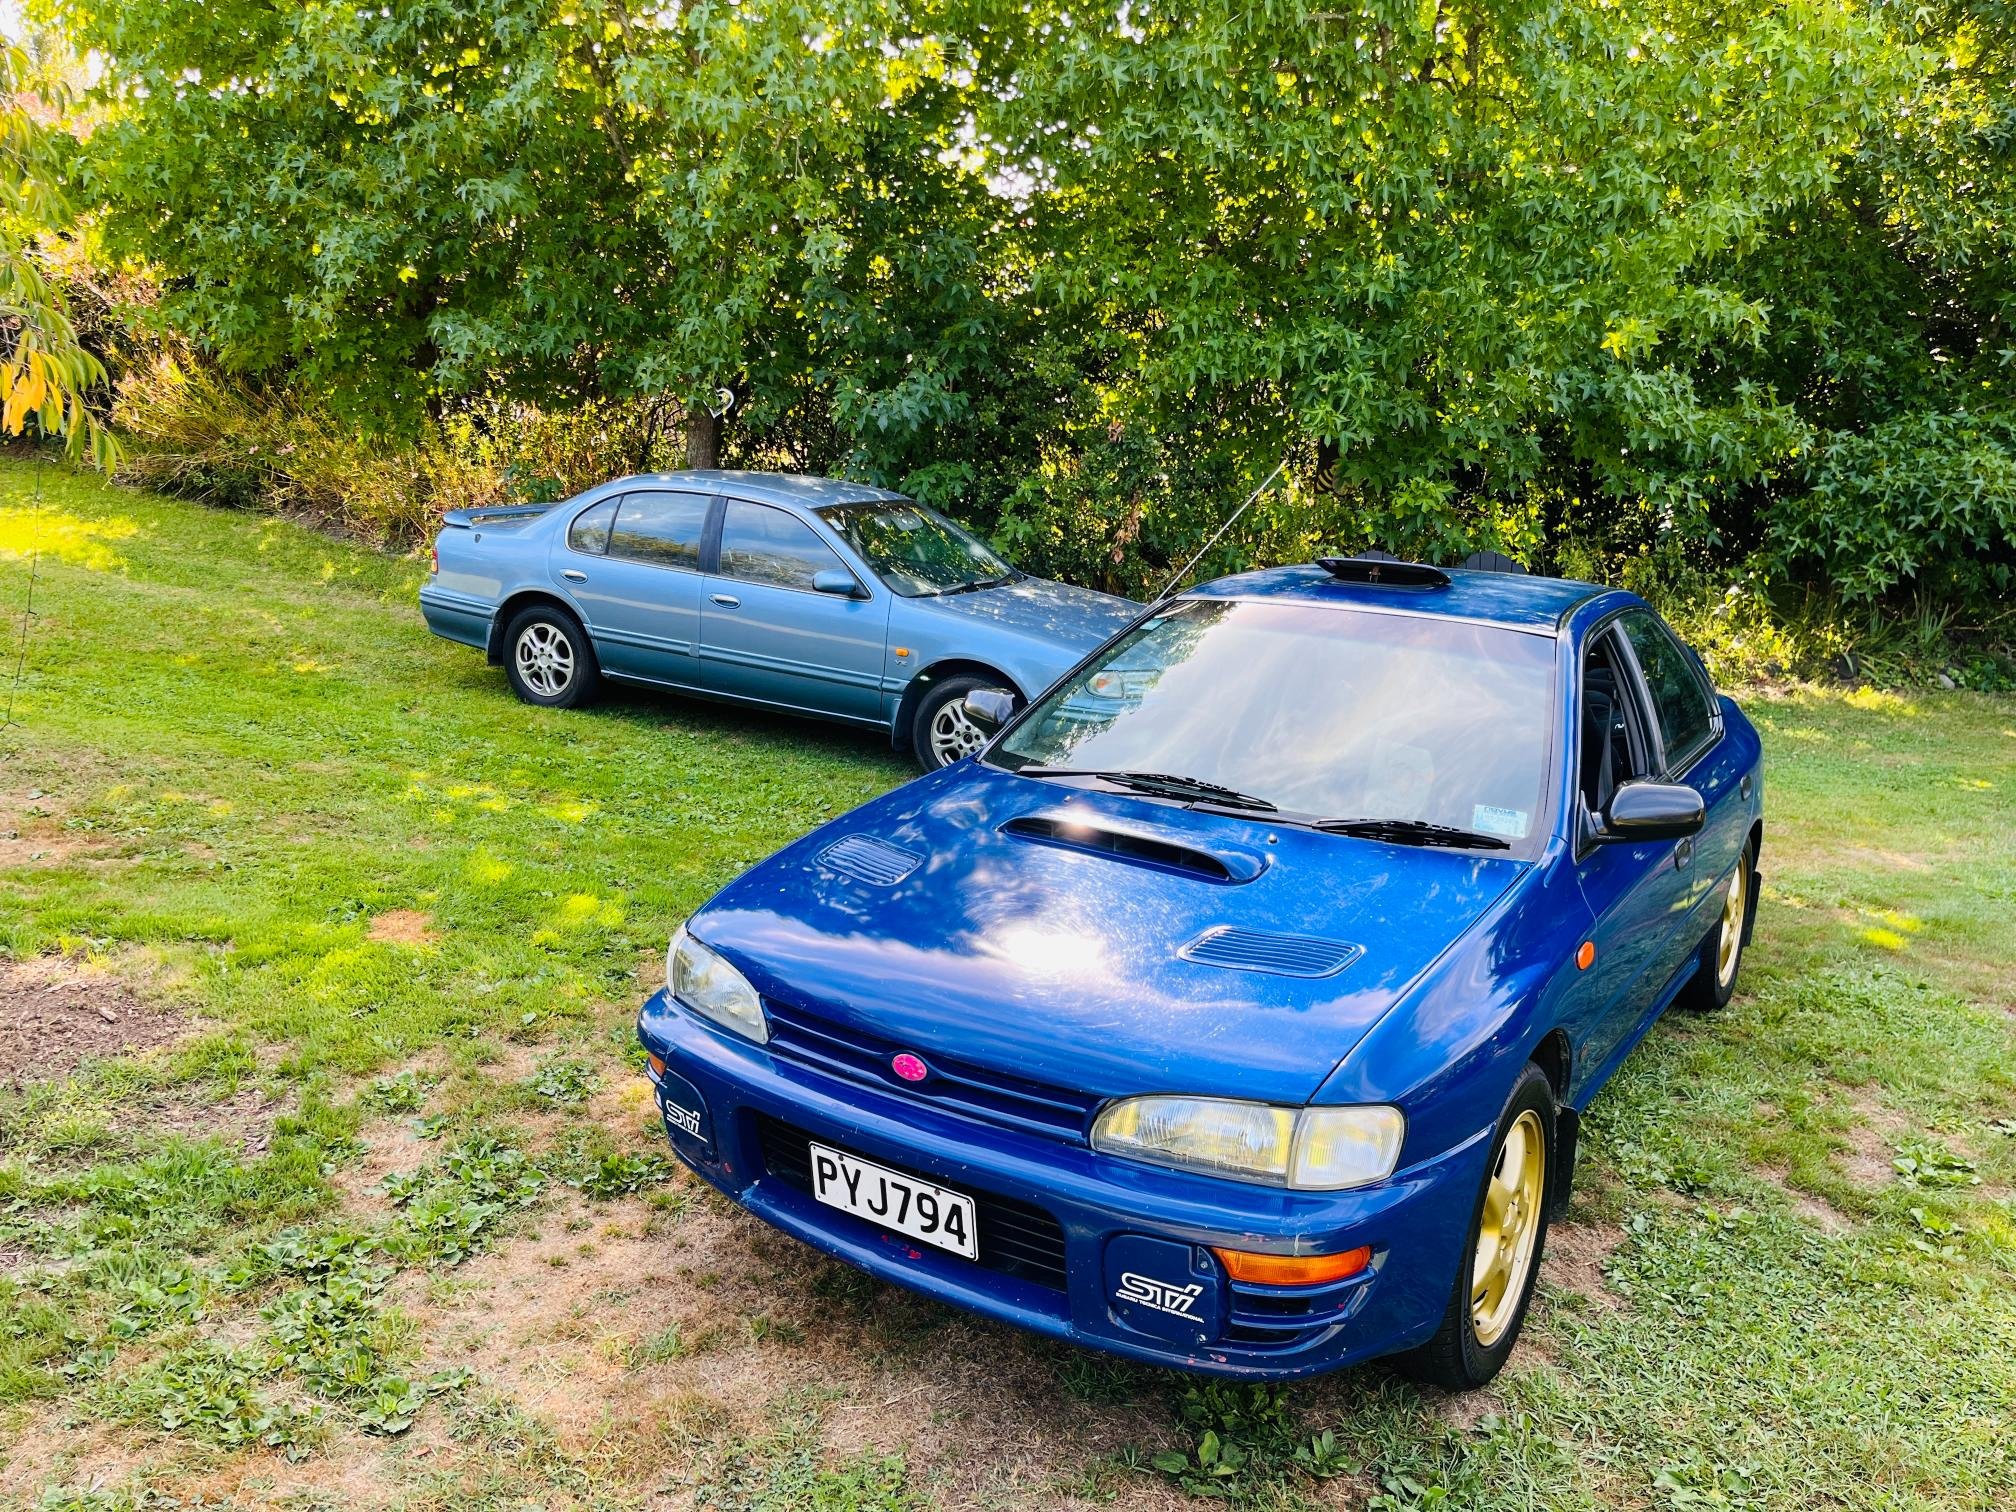
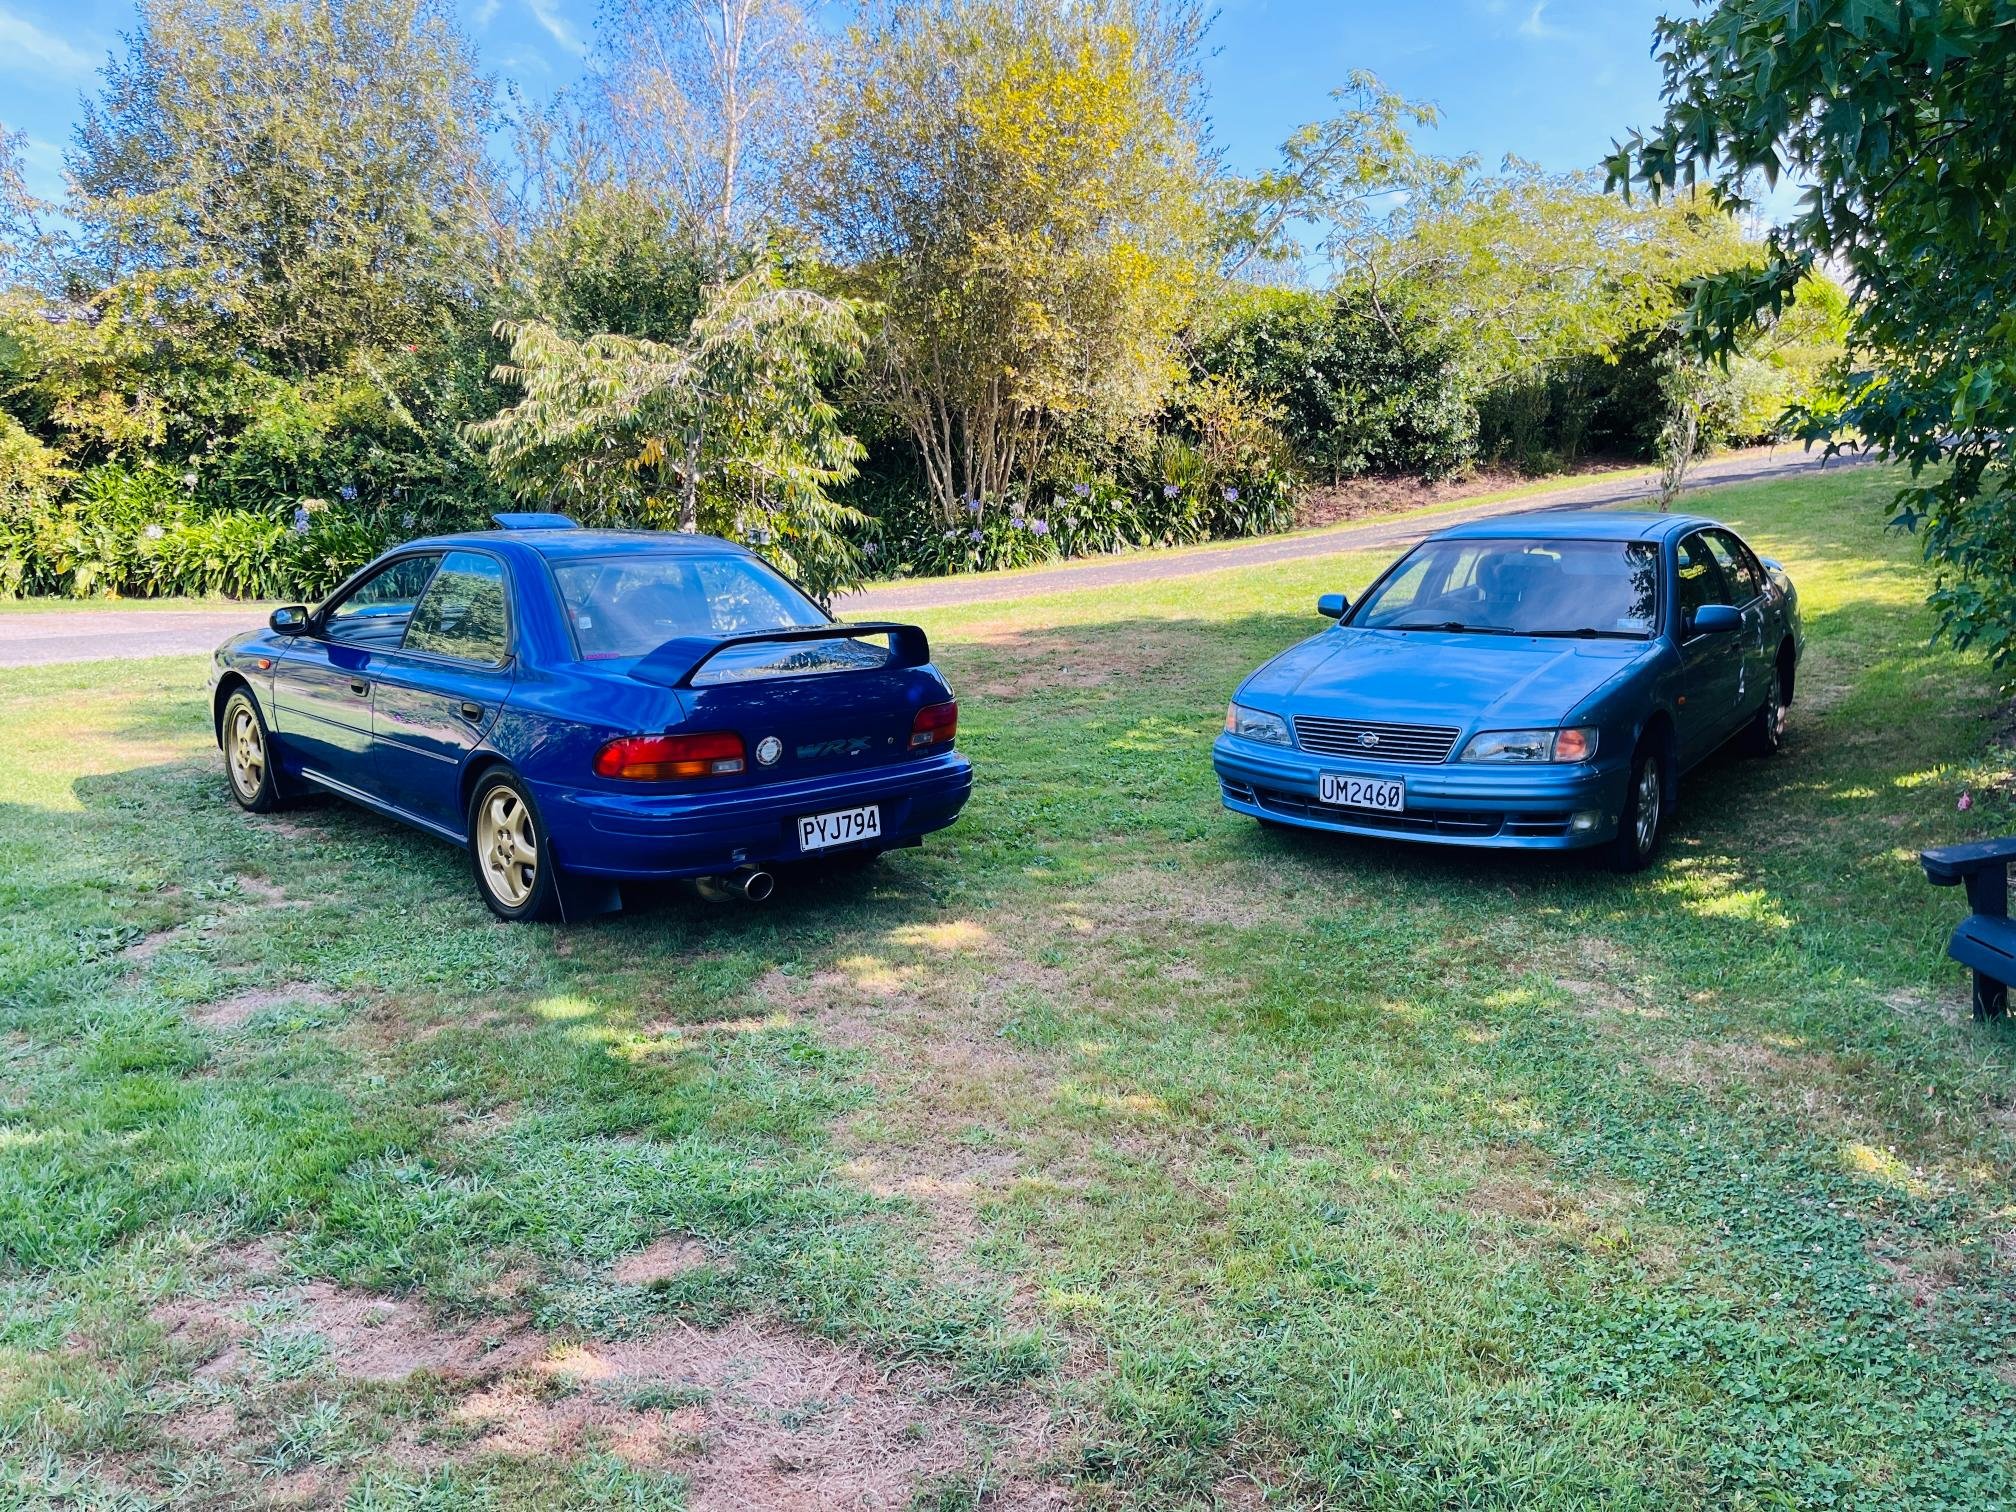
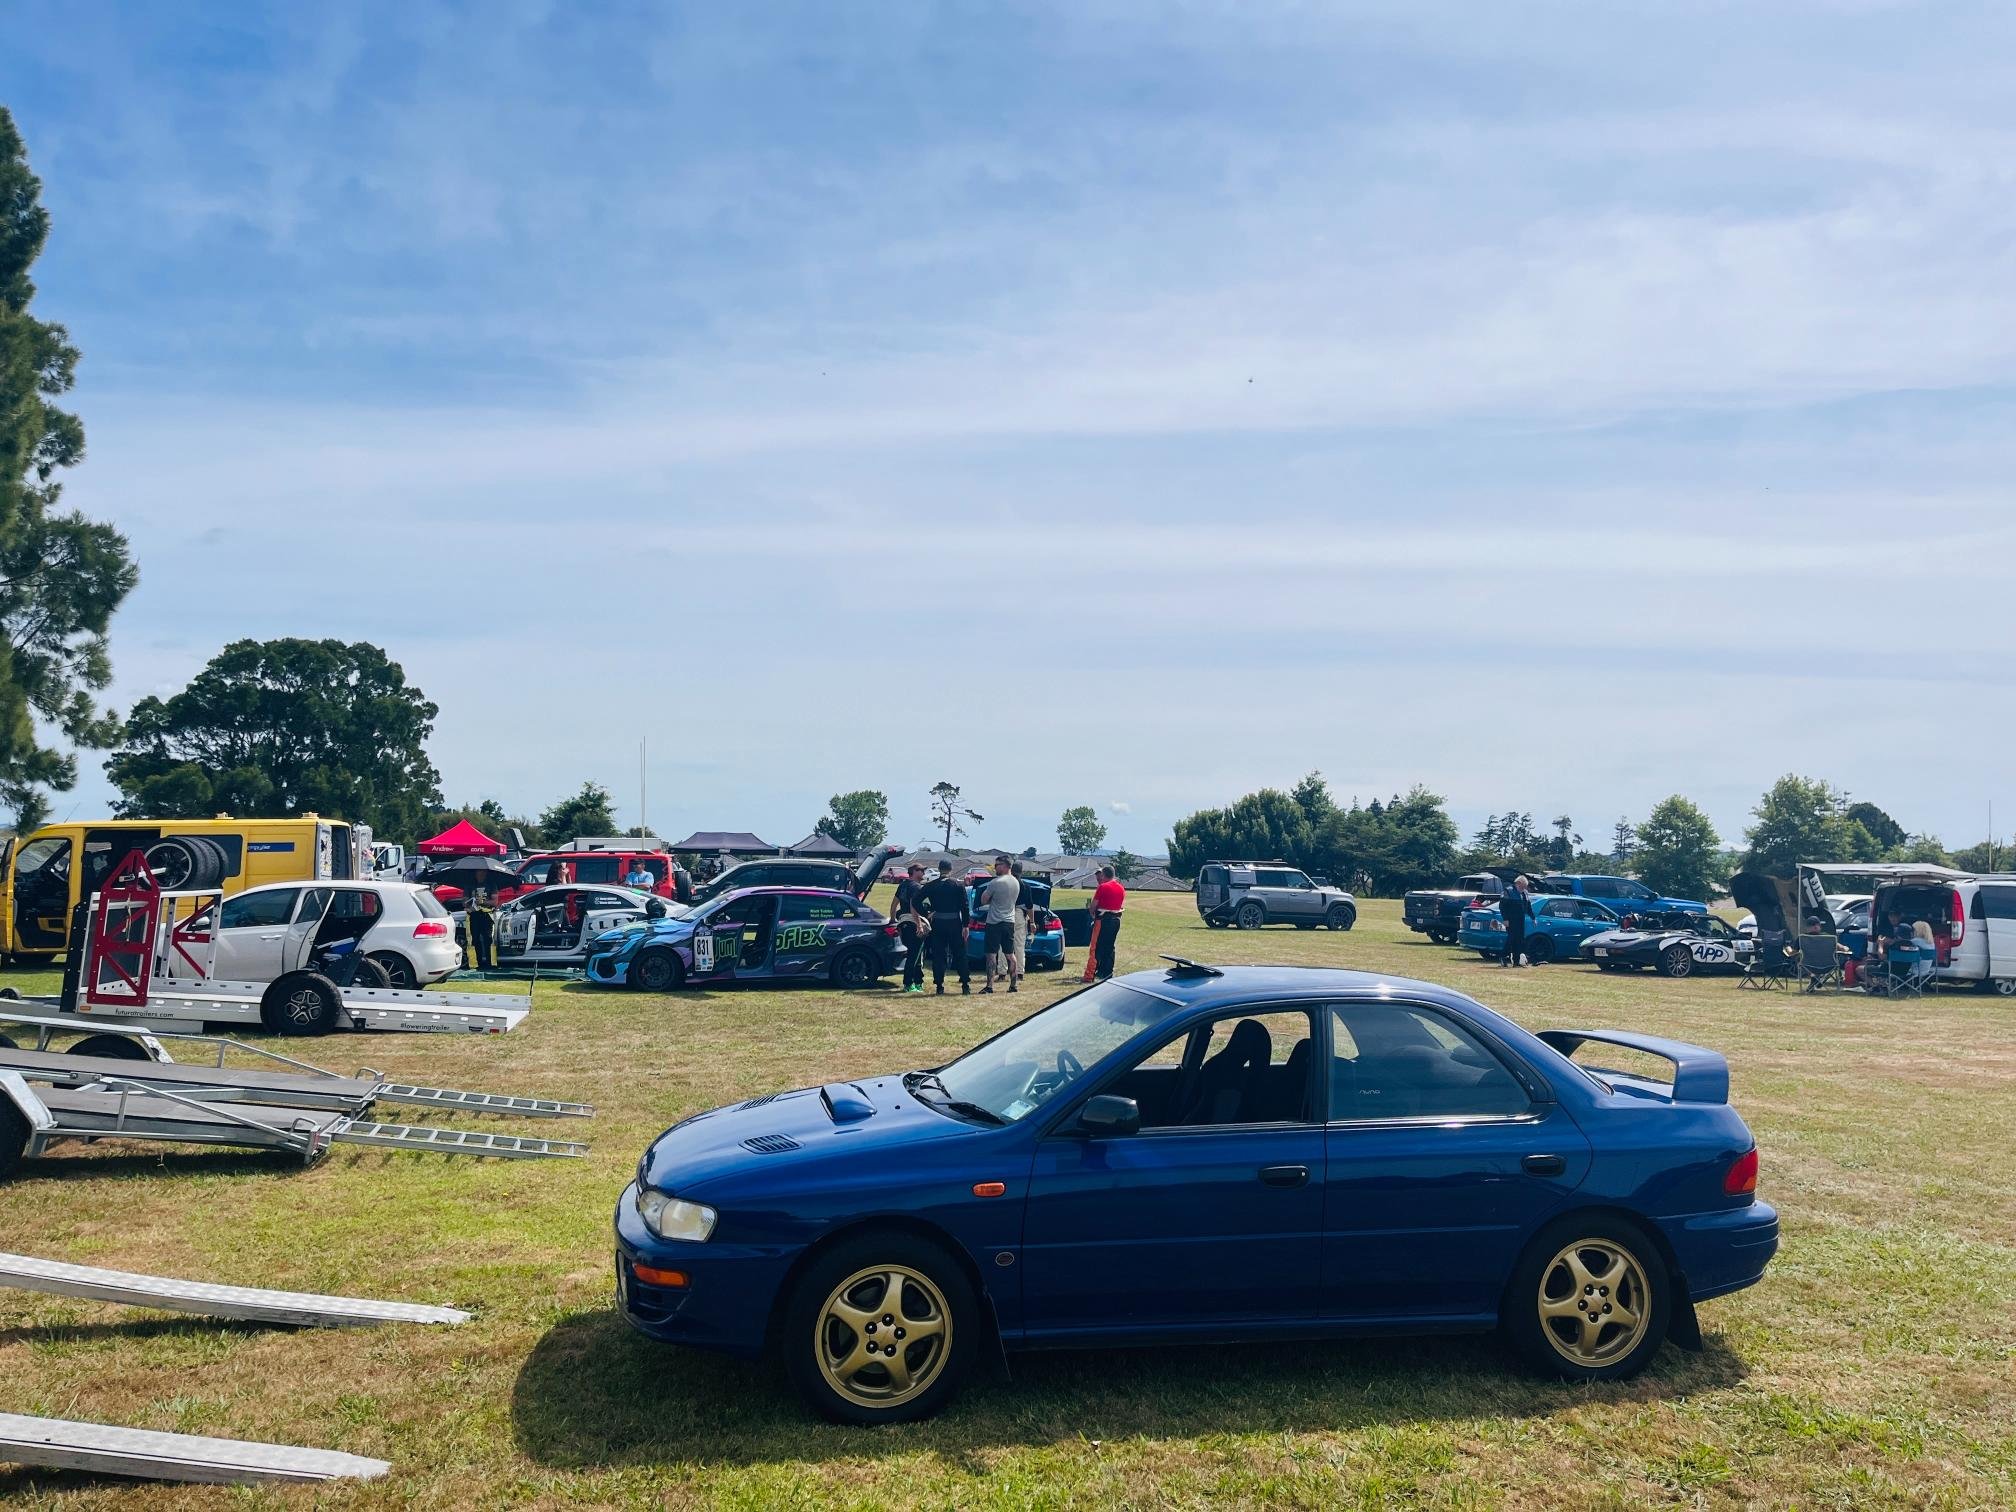
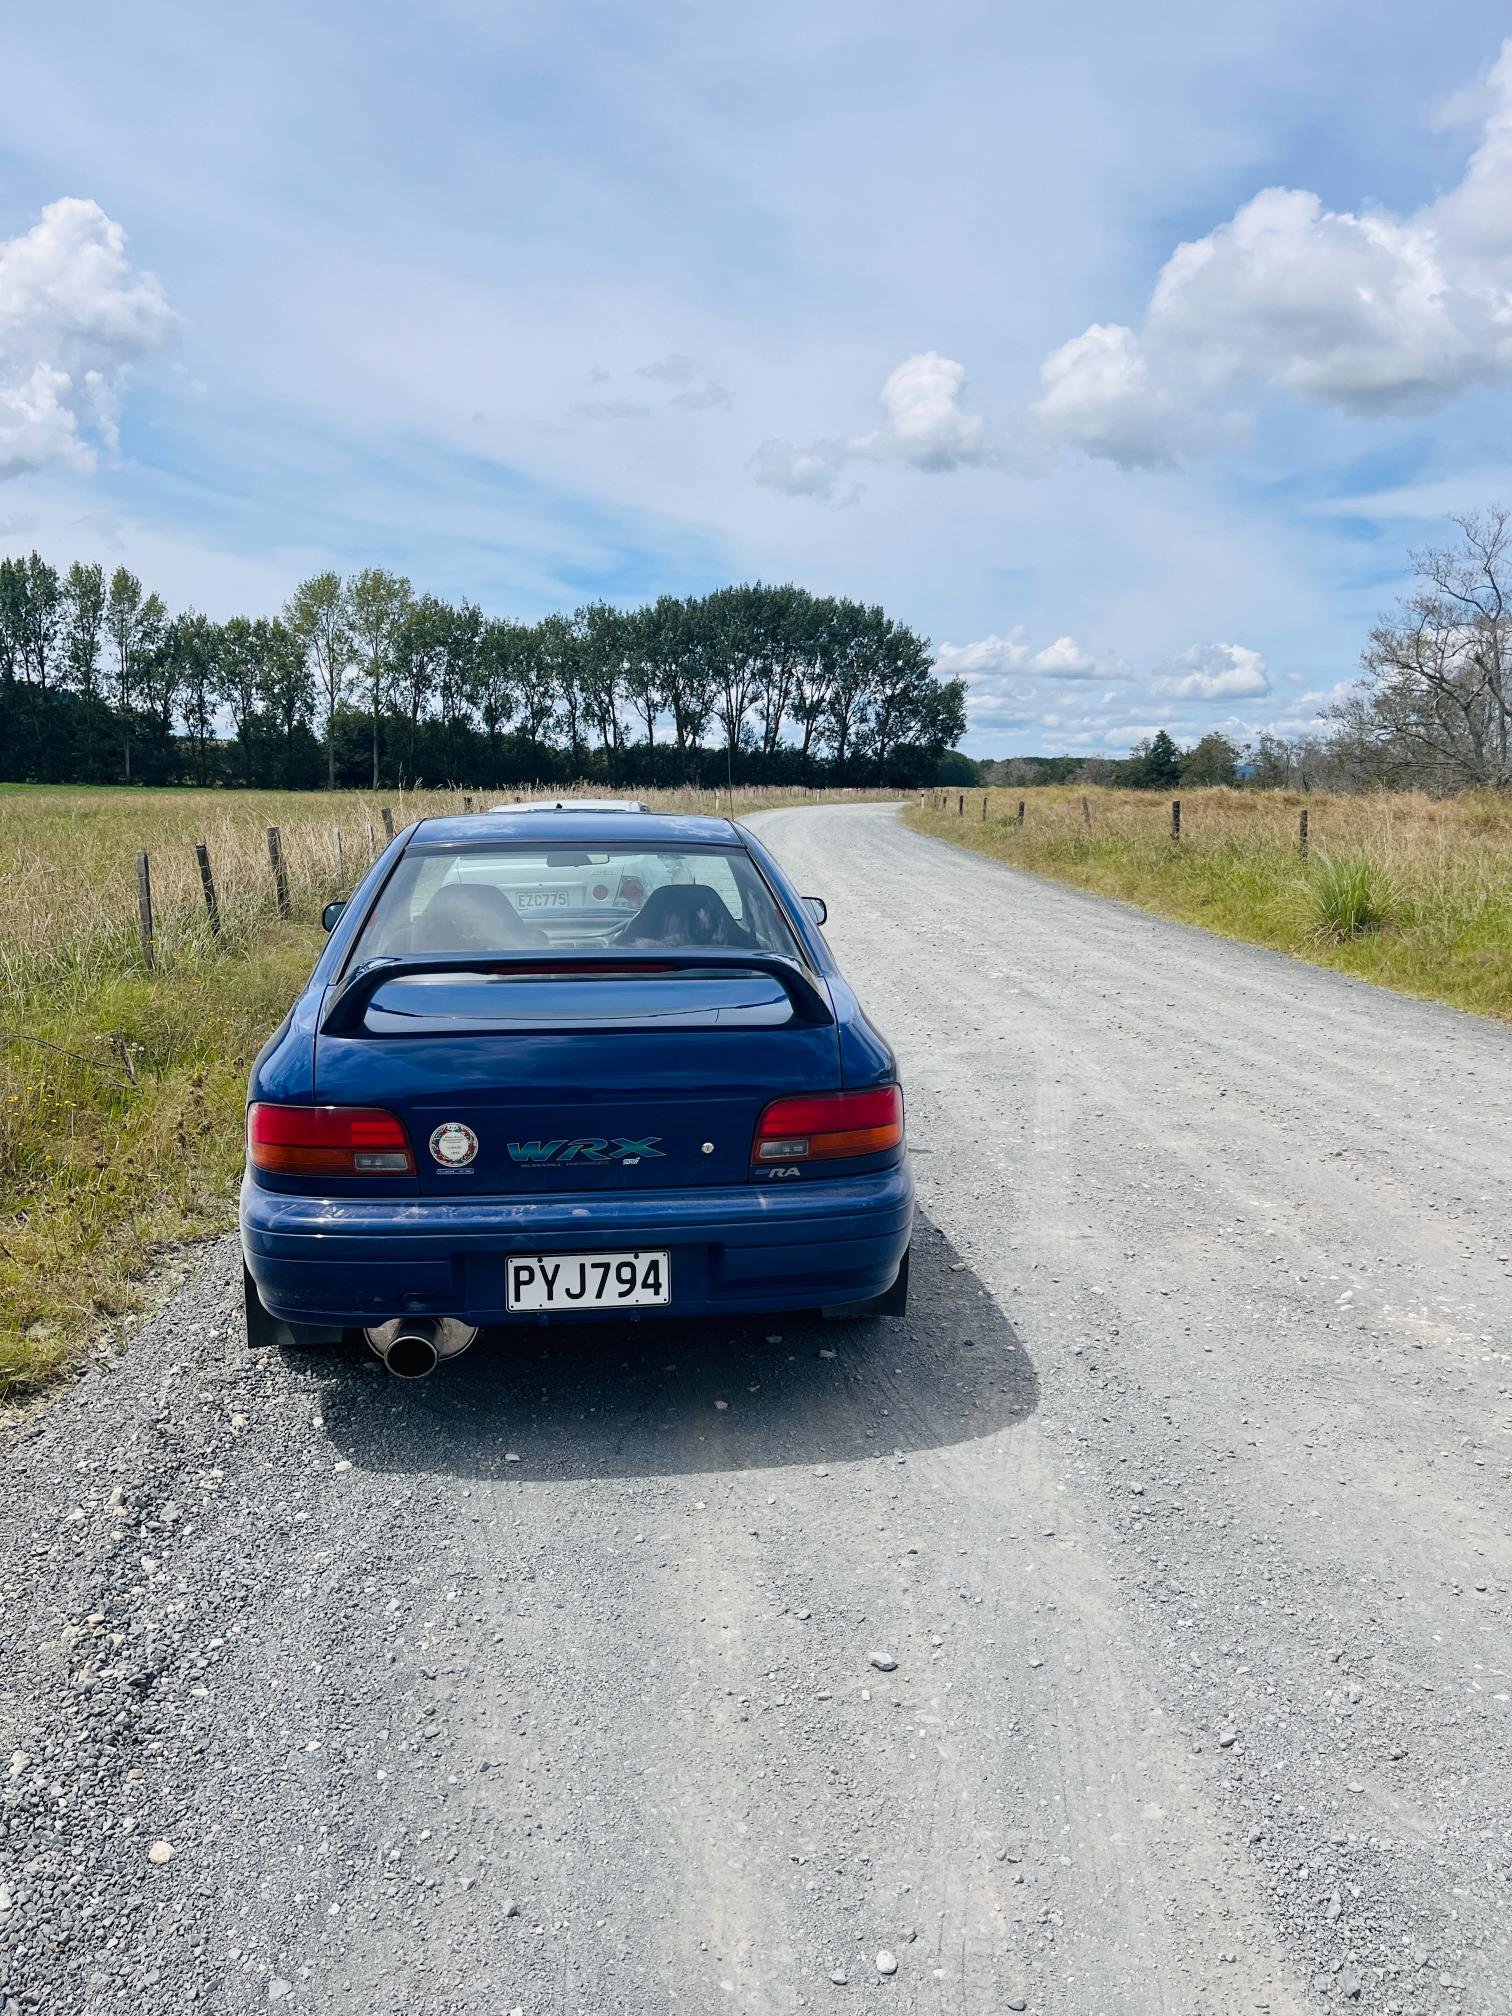
Been driving this bit lately for a few events/occasions. Maybe a bit much - watching the kms. Perhaps two of the finest cars built in Japan in 1996?? Prove me wrong. Got out to watch some Targa in North Waikato over the weekend. Did a quick reece over one of the roads and wow when you get in it, this thing is a beast. Wound the diff up and it just glues to the road and clunks at low speed. Steering is super precise, gearbox is perfect which makes for a lot of fun carrying speed through corners. Very impressive for 1996, a modern car would need 450-500+ hp to keep up with the 1180kgs of 90's engineering. Unsurprisingly, the brakes suck but that's a later issue (has a slightly leaky master cylinder and rusty booster). Its done 240kms so its to be expected. New exhaust makes it a pleasure to drive on all occasions. Can hear BOV & wastegate doing their thing now which is cool. Car feels at home in the service park. All the old Targa geezers were fizzing. Found a gravel road to test out some launches. Goes better on gravel than tarmac Going in the shed for a while now. Need to give it a clean/wax and get the Speedlines repainted.
2 points
-
As a Jeep owner I concur that letting your kids grow up with a sentimental attachment to the brand would definitely constitute a form of abuse. Theyre better off on drugs.2 points
-
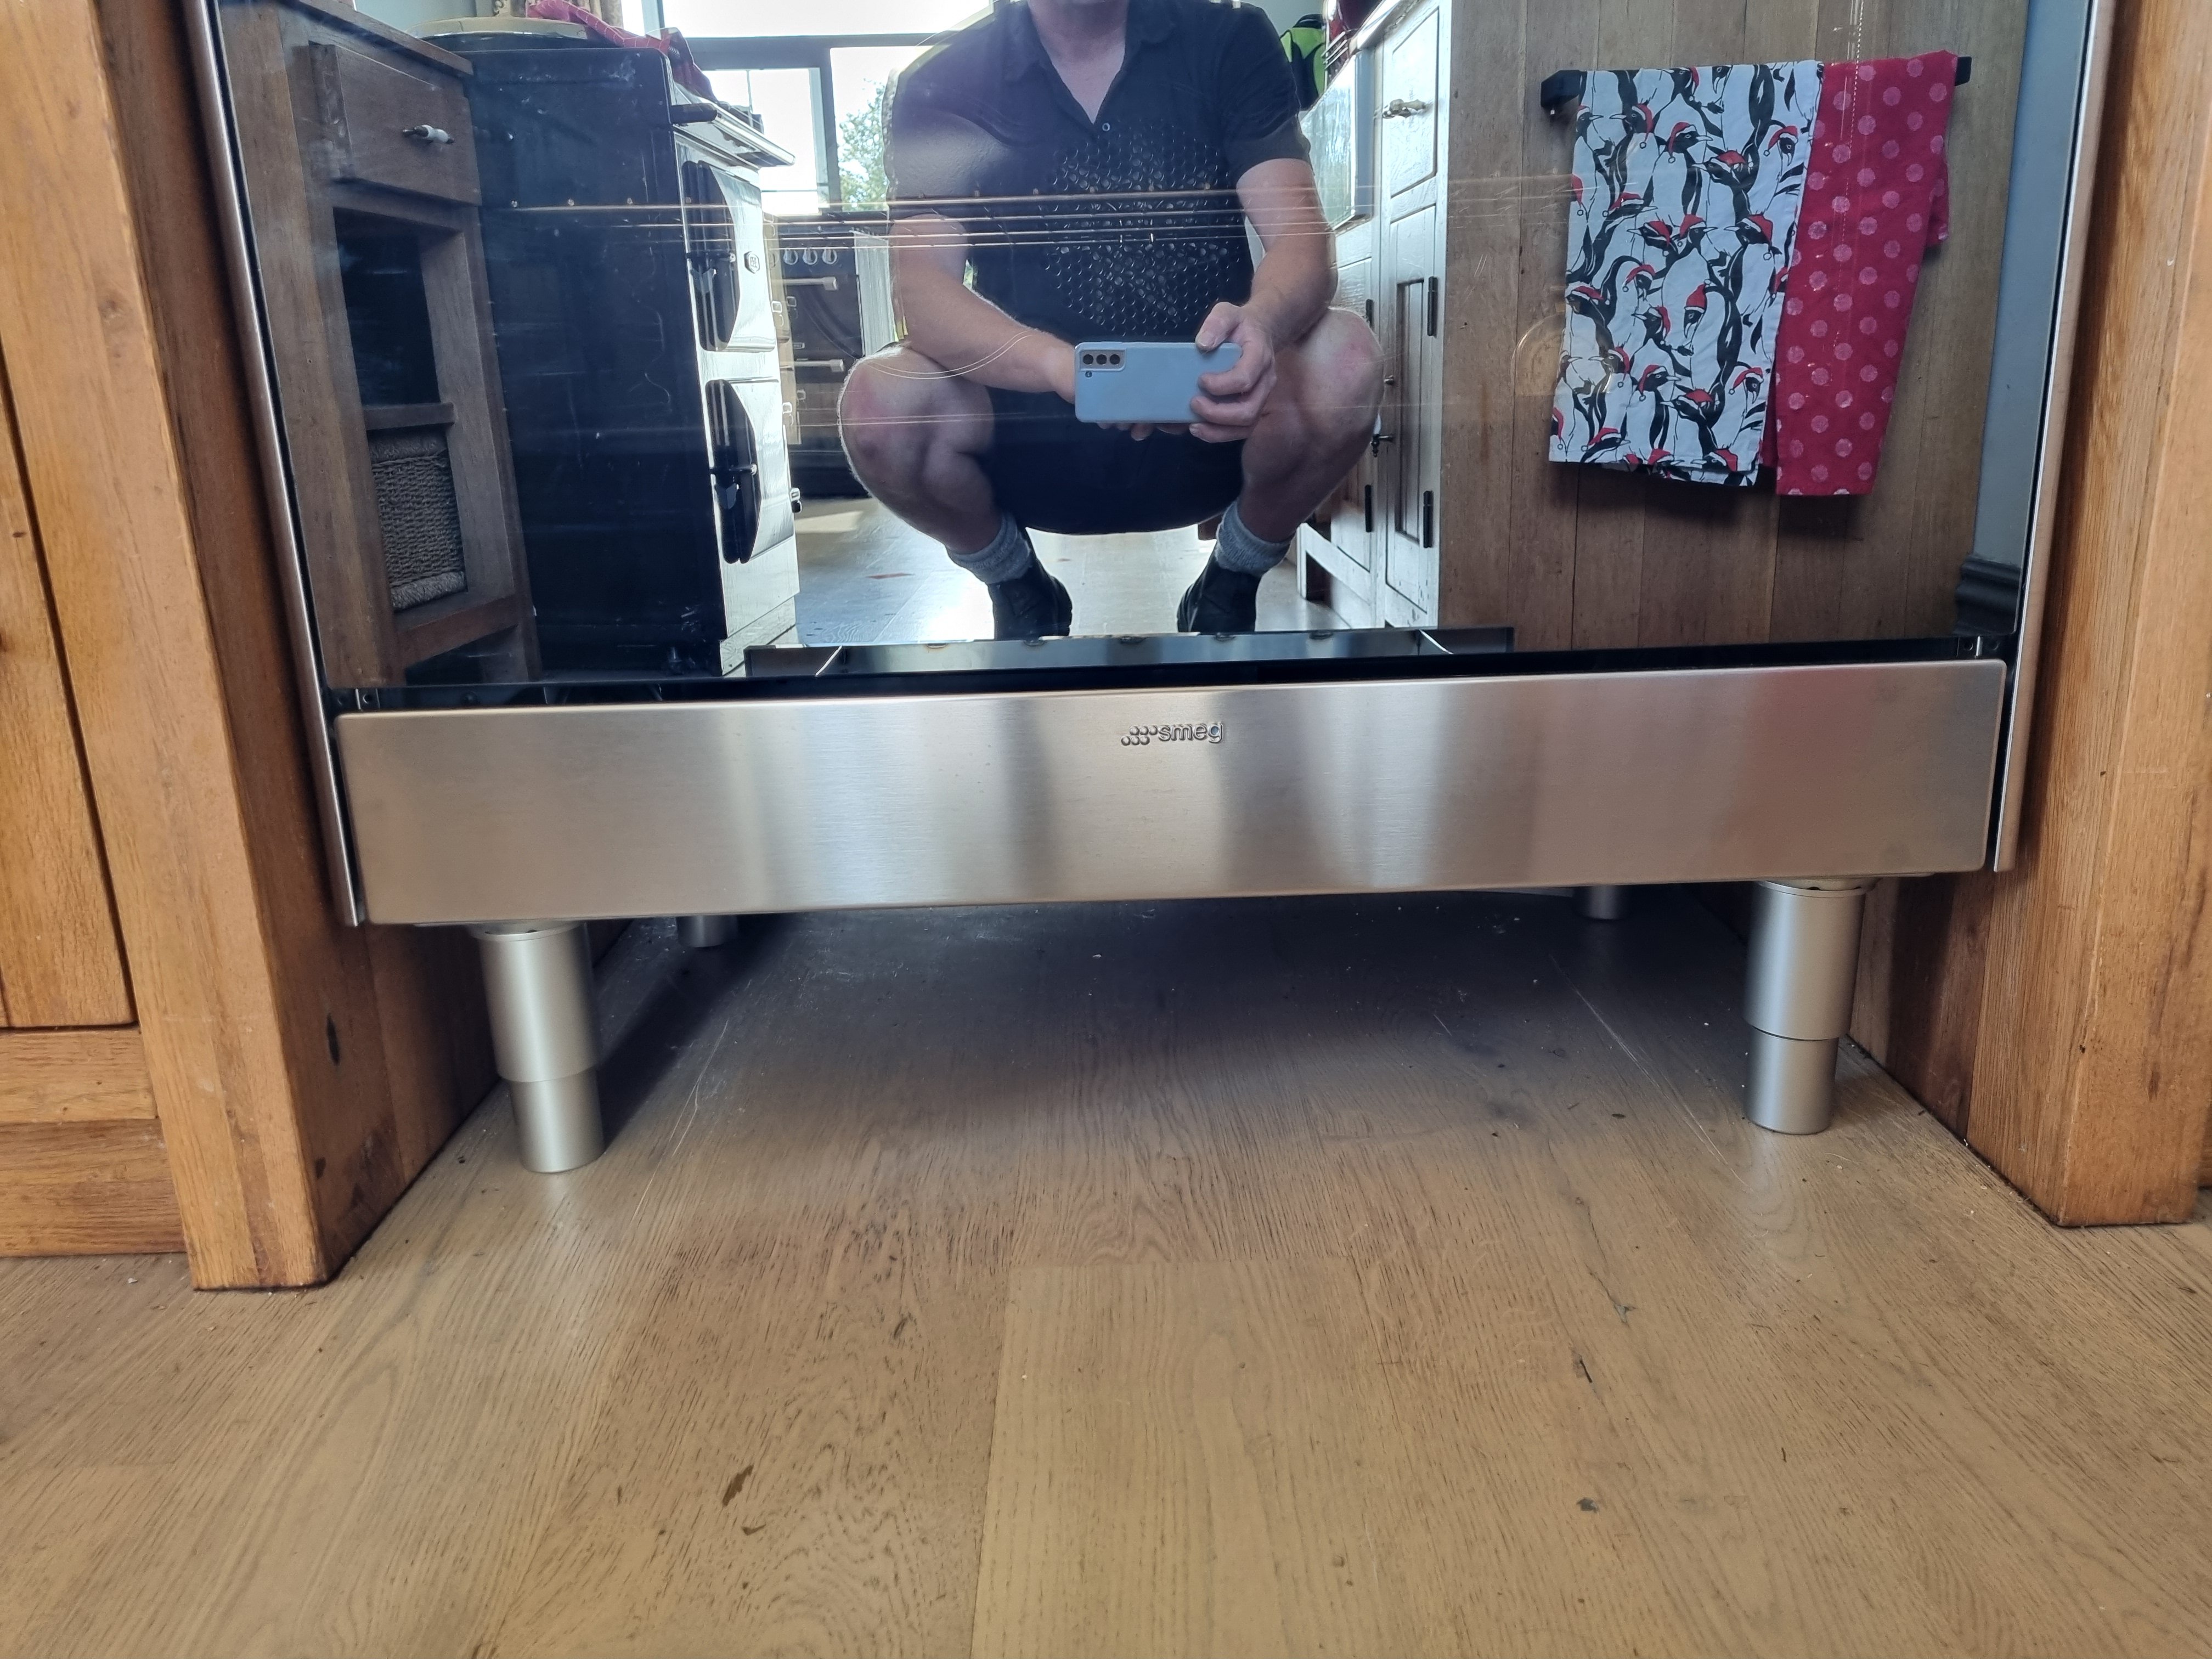
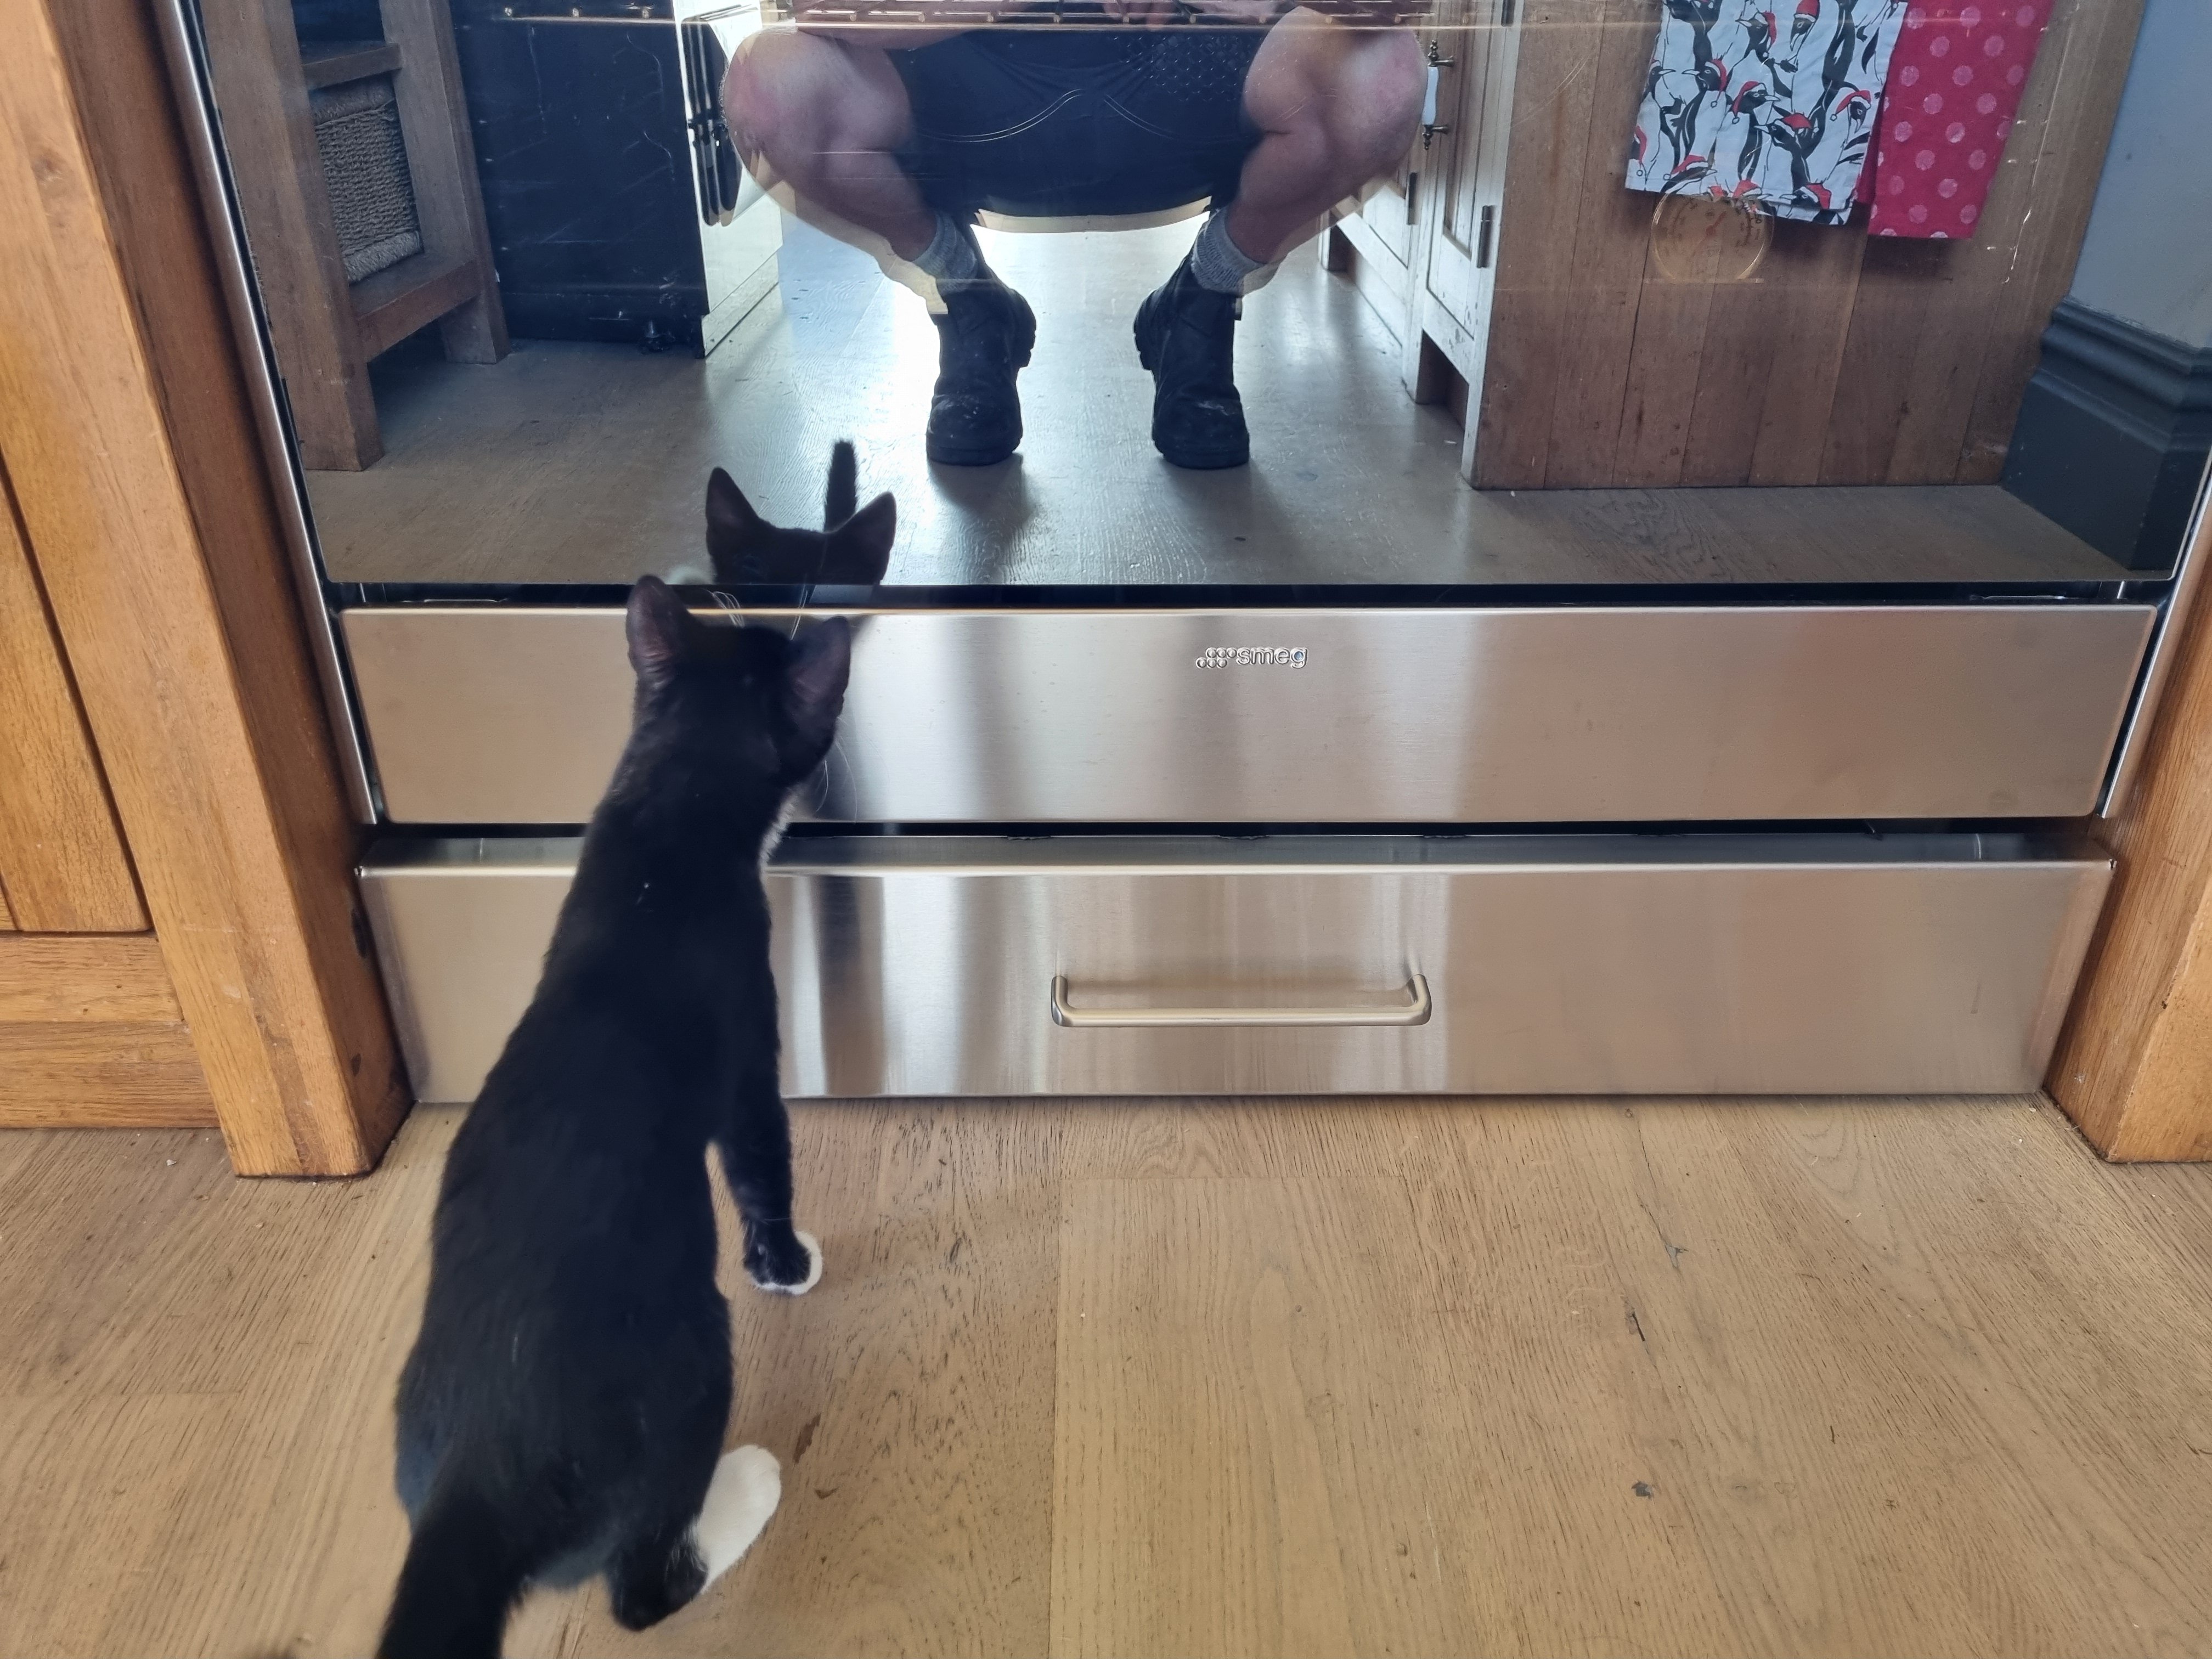
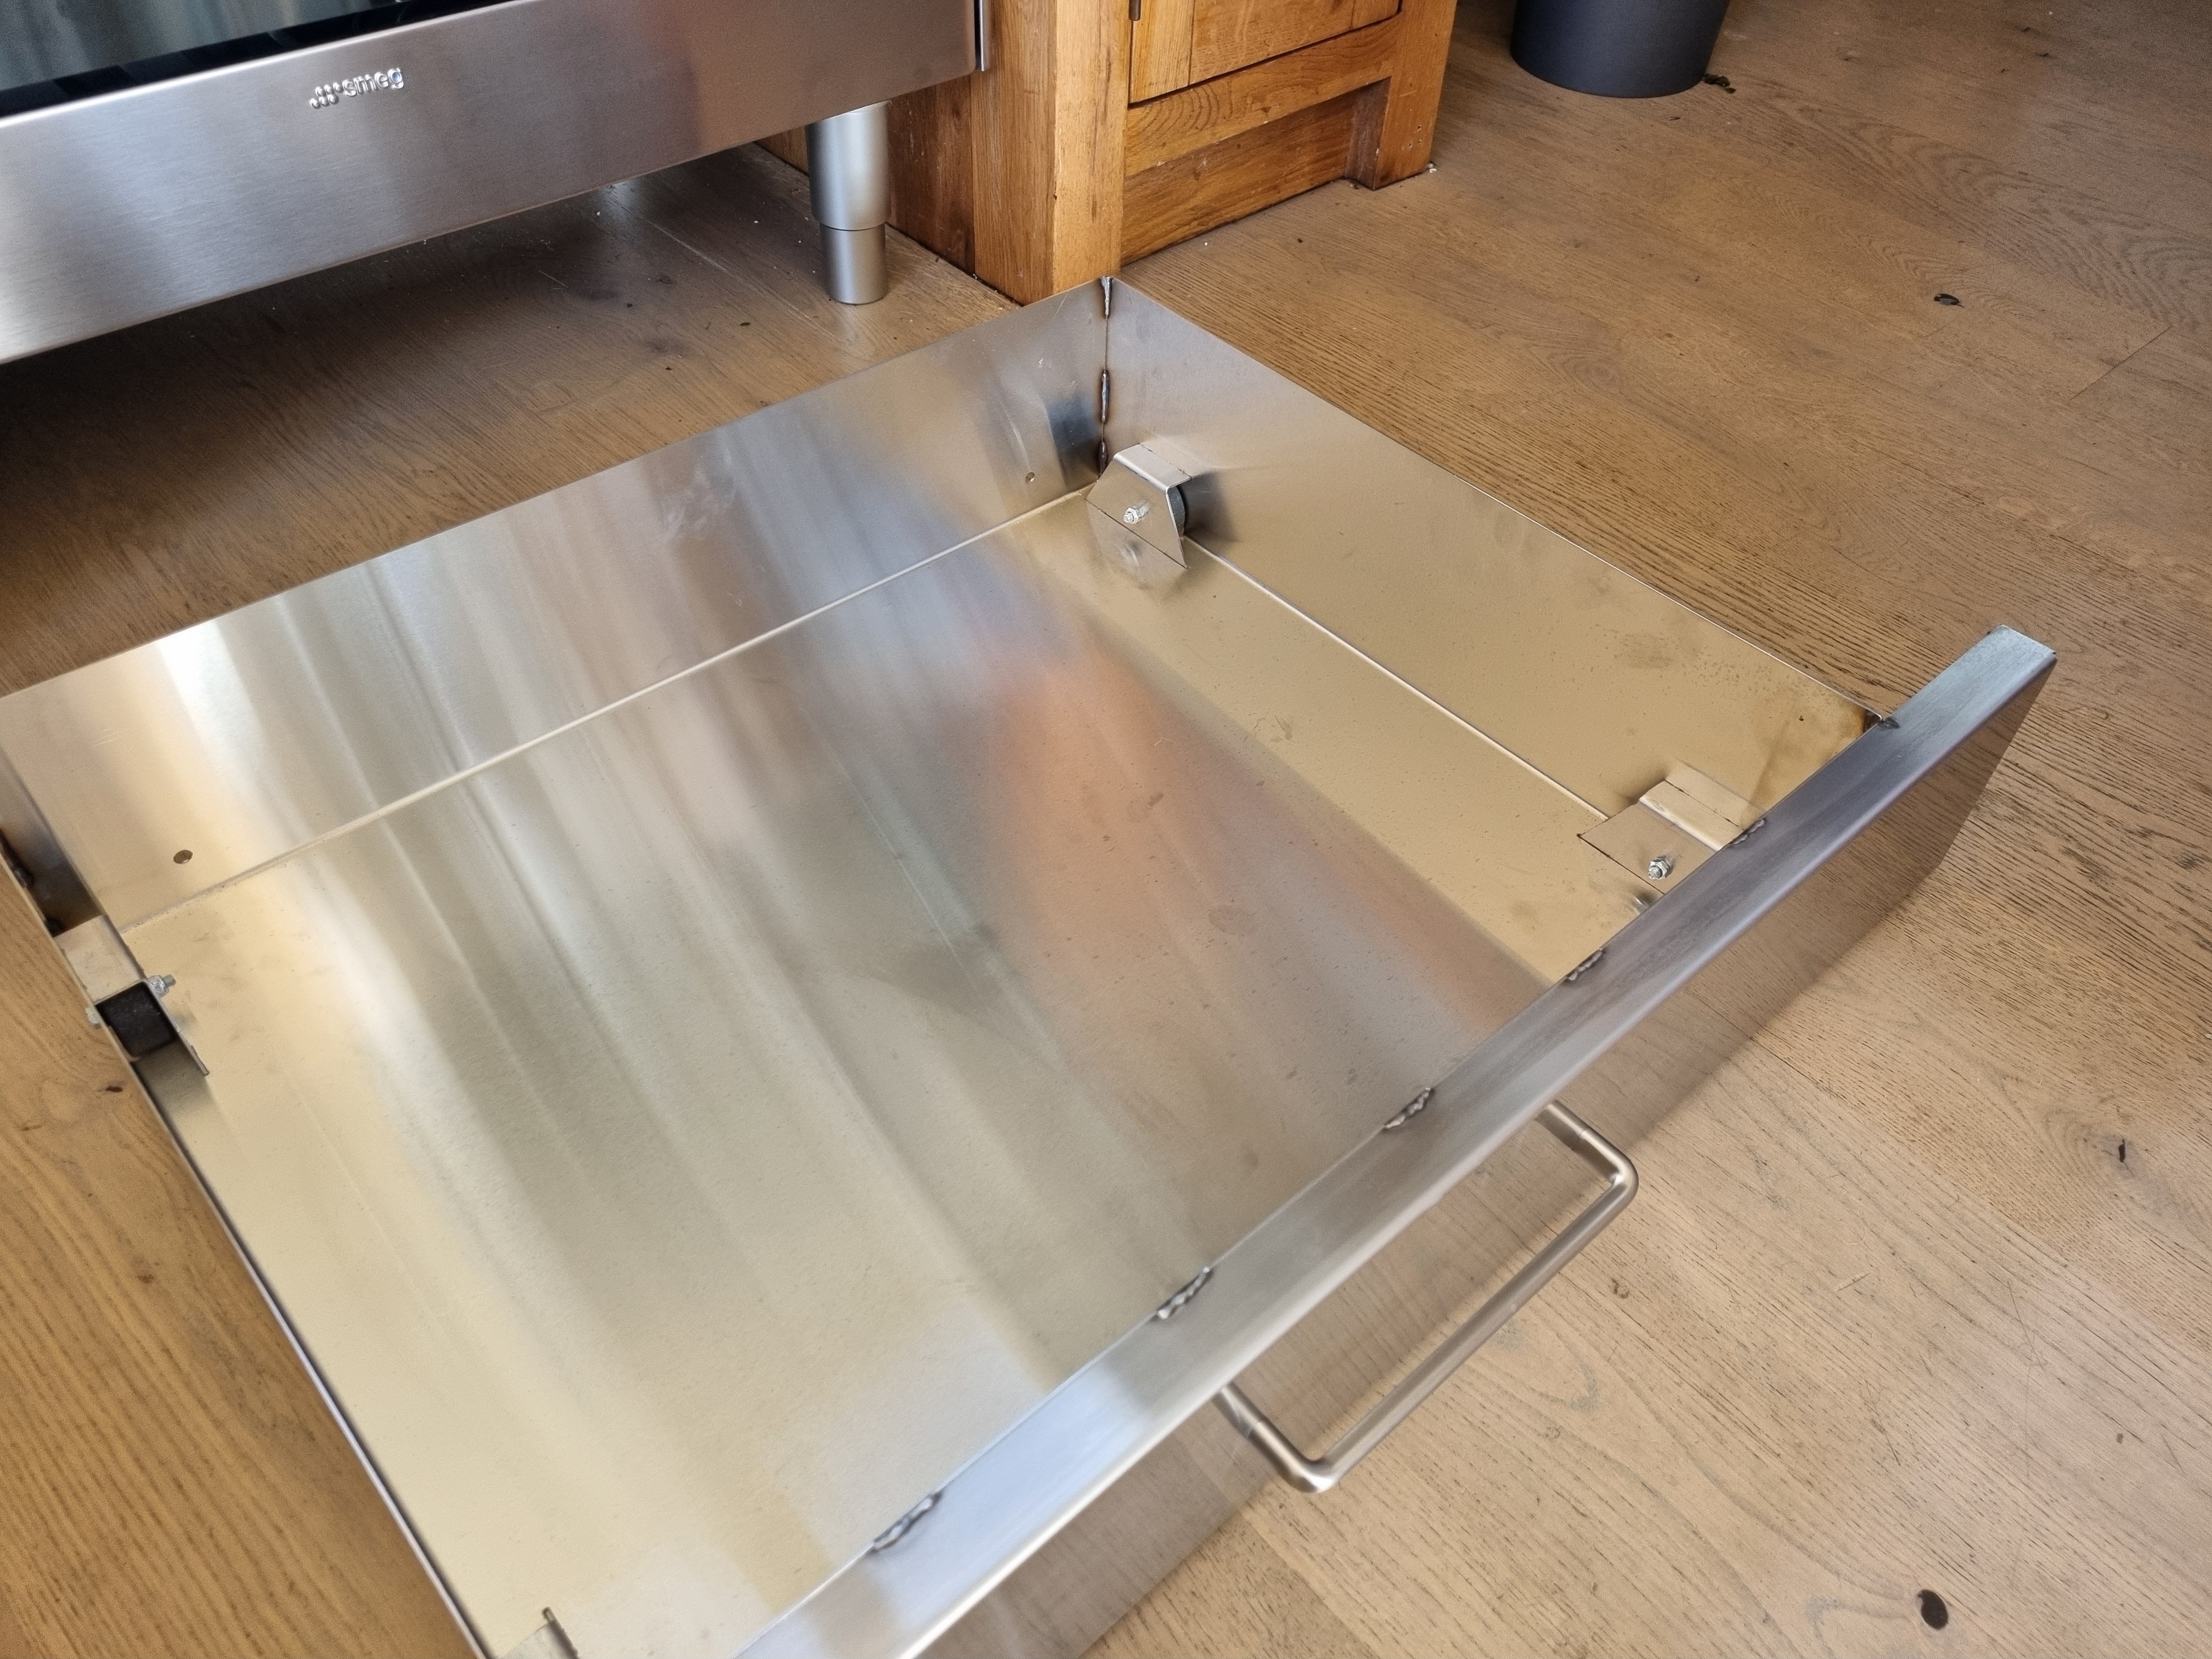
Our new oven came with a huge waste of space under it so I drew up a drawer with wheels on the corners and I got it cut and folded. Then I welded it together. Its designed so the wheel brackets slot into the sides and base but it doesn't need welding, that way I can change the wheels if I ever need to.
2 points
-
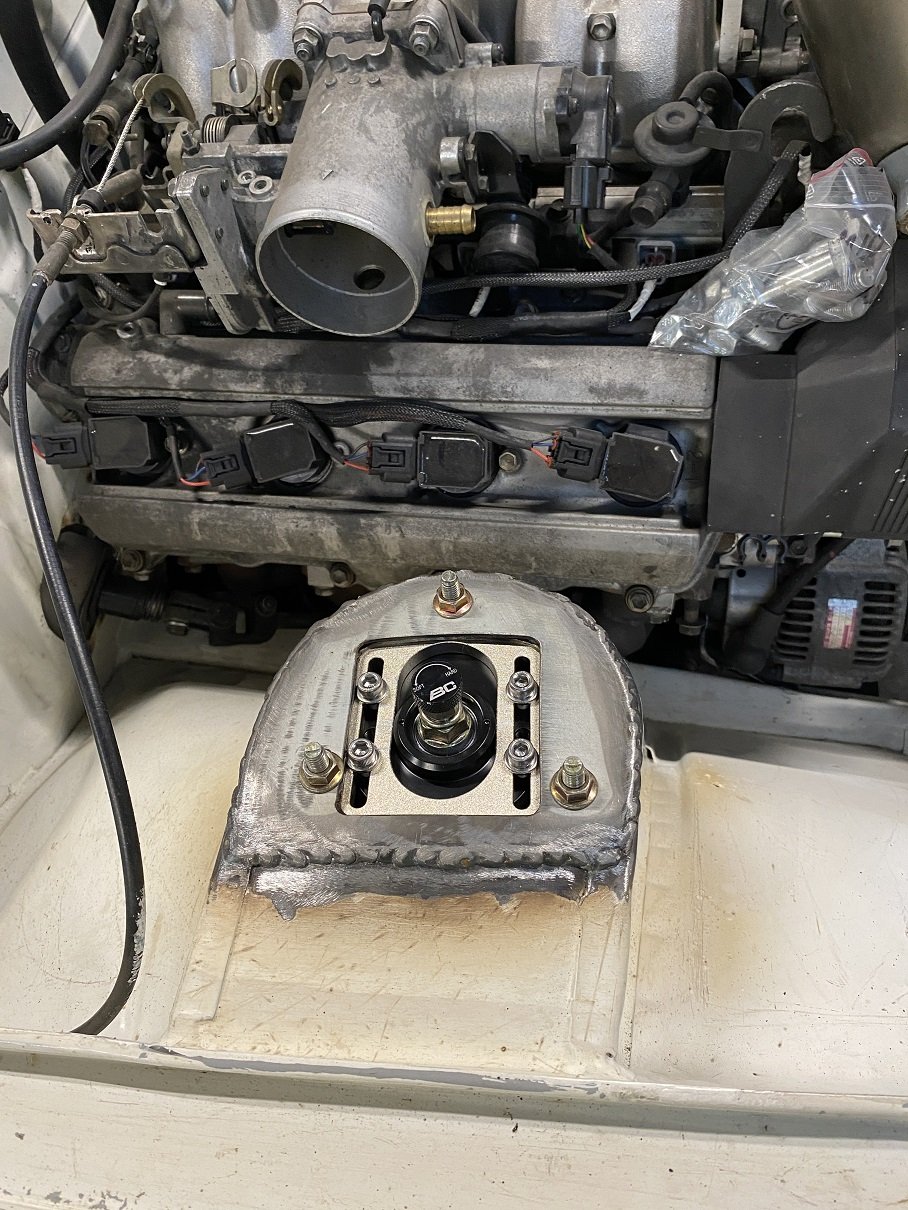
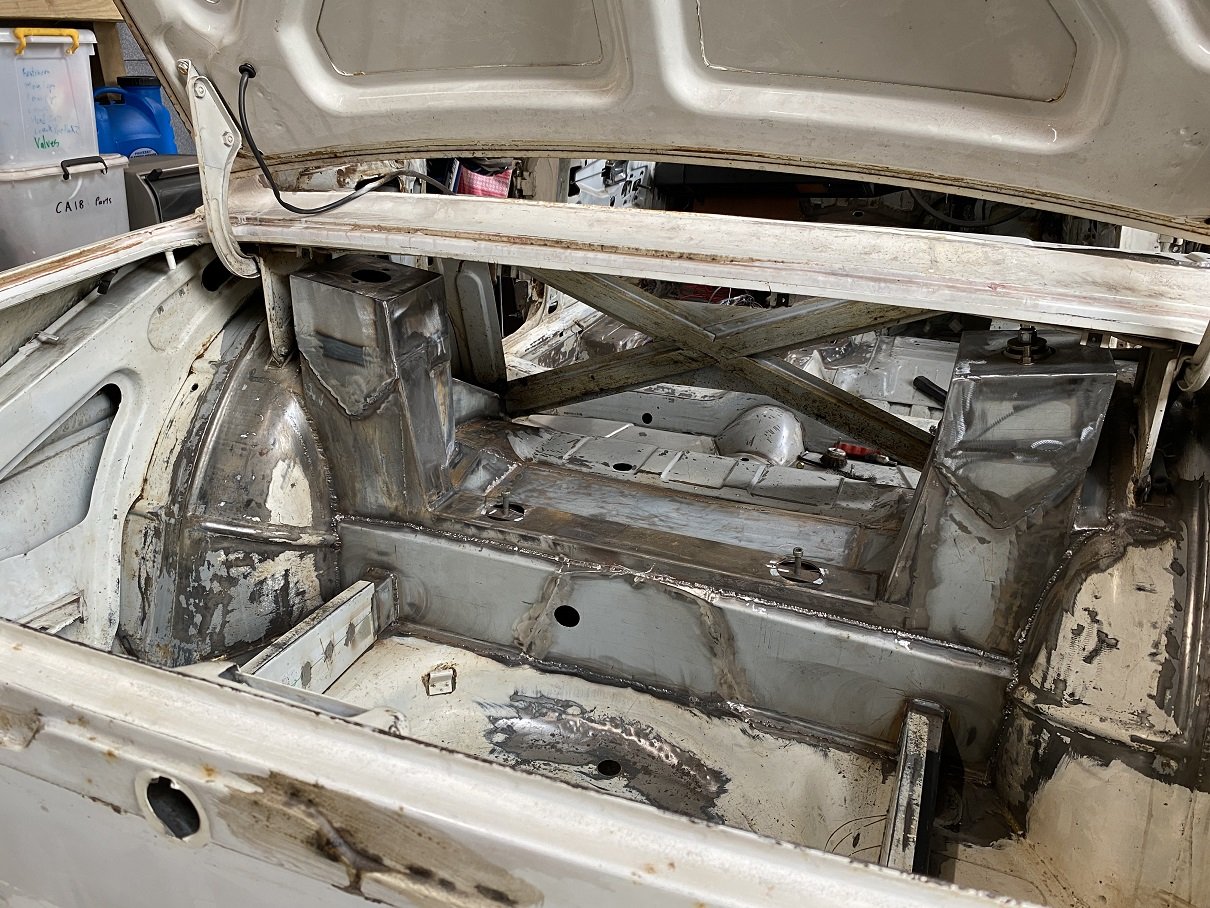
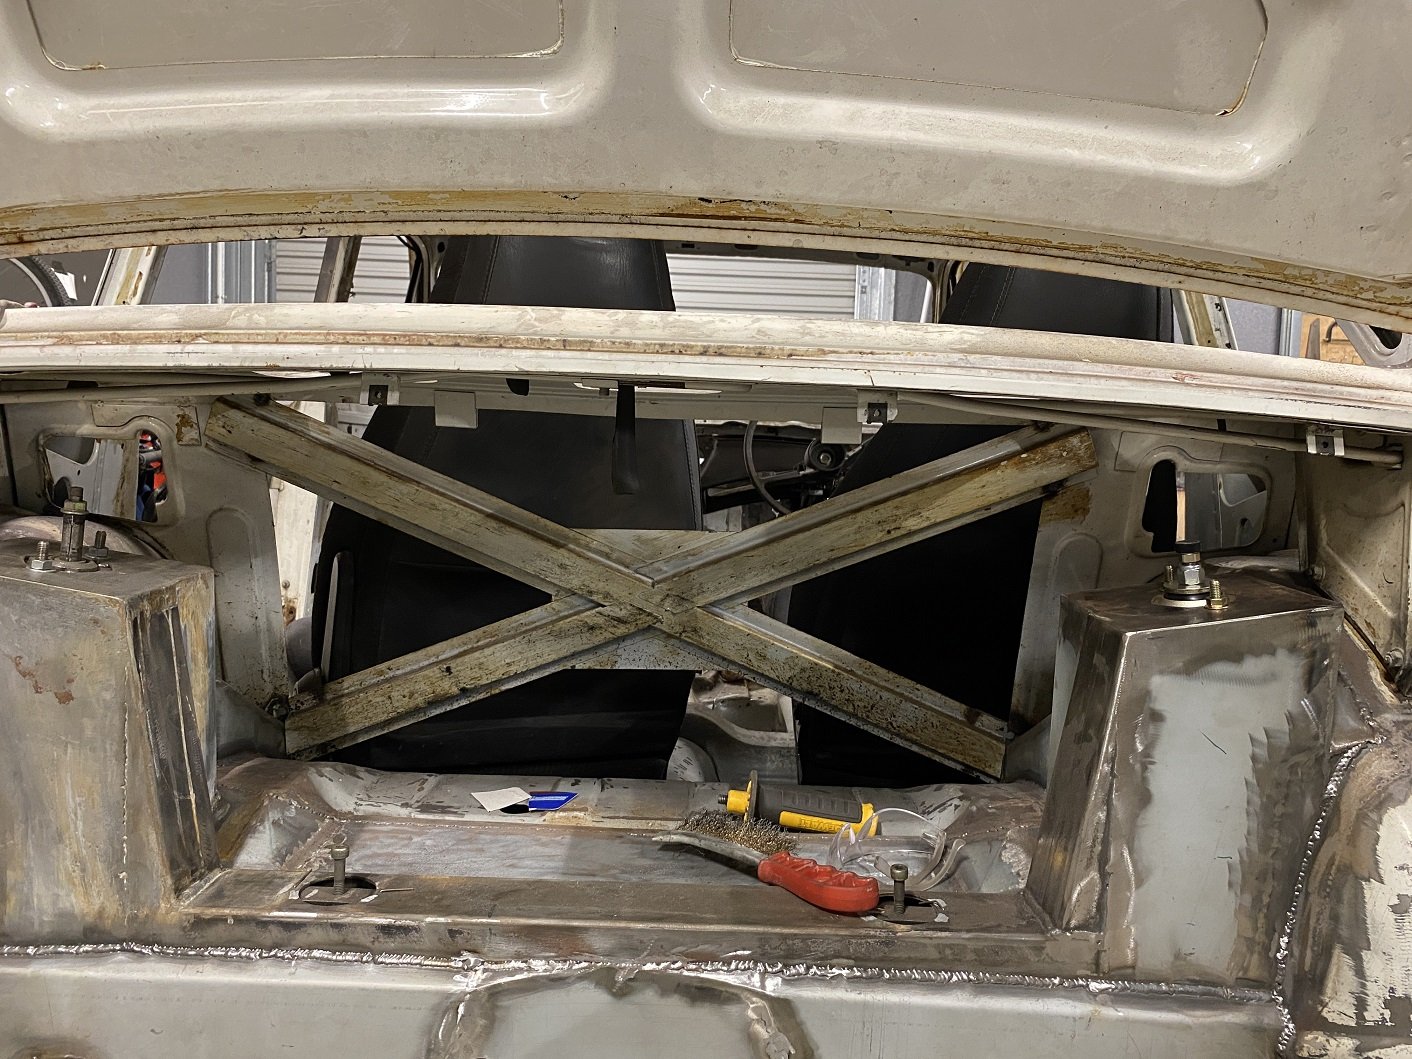
I sent in my design approval forms for the LVVTA Technical Advisory Committee in late Dec. Their next meeting wasn't until Jan. Late Jan. At the end of Jan it was posted back to me and the design was approved. So THE NEXT DAY I went to may certifier's favourite welderm Graeme Kidd in Upper Hutt. A couple of weeks later, he'd done it. AS SOON AS I got in the gate at home. I put them in the lathe and sanded off the burnt sticker and powdercoat. They still need to get NDT tested in Wingate. Graeme says it's a crack test. But I could not wait to try fit them. I had already modified the top plates and the strut towers the previous week. Using a straight edge and the angle thingy in my phone, it's got 0 deg camber at ride height with plenty of adjustment in both directions. They ended up 10mm shorter when installed than I'd calculated. So that's a bonus, the adjustment won't be totally bottomed out at ride height. On it's own wheels and suspension! I can push it around! It's 10mm lower at the front here than the back. I may raise it up that 10mm so there's a bit more travel. The springs are 6kg I think. I was expecting them to be WAY too hard, but If I bounce on the guard it doesn't feel massively stiff. The engine needs to come back out now so I can redo the engine mounts on the chassis in thicker steel like the cert man said. And to weld in the lower steering column mount. I should paint the exhaust manifold while it's out, it's getting surface rust on it. And one of the front split rims has a leak, so the tyre needs to come off to redo the sealant.
2 points
-
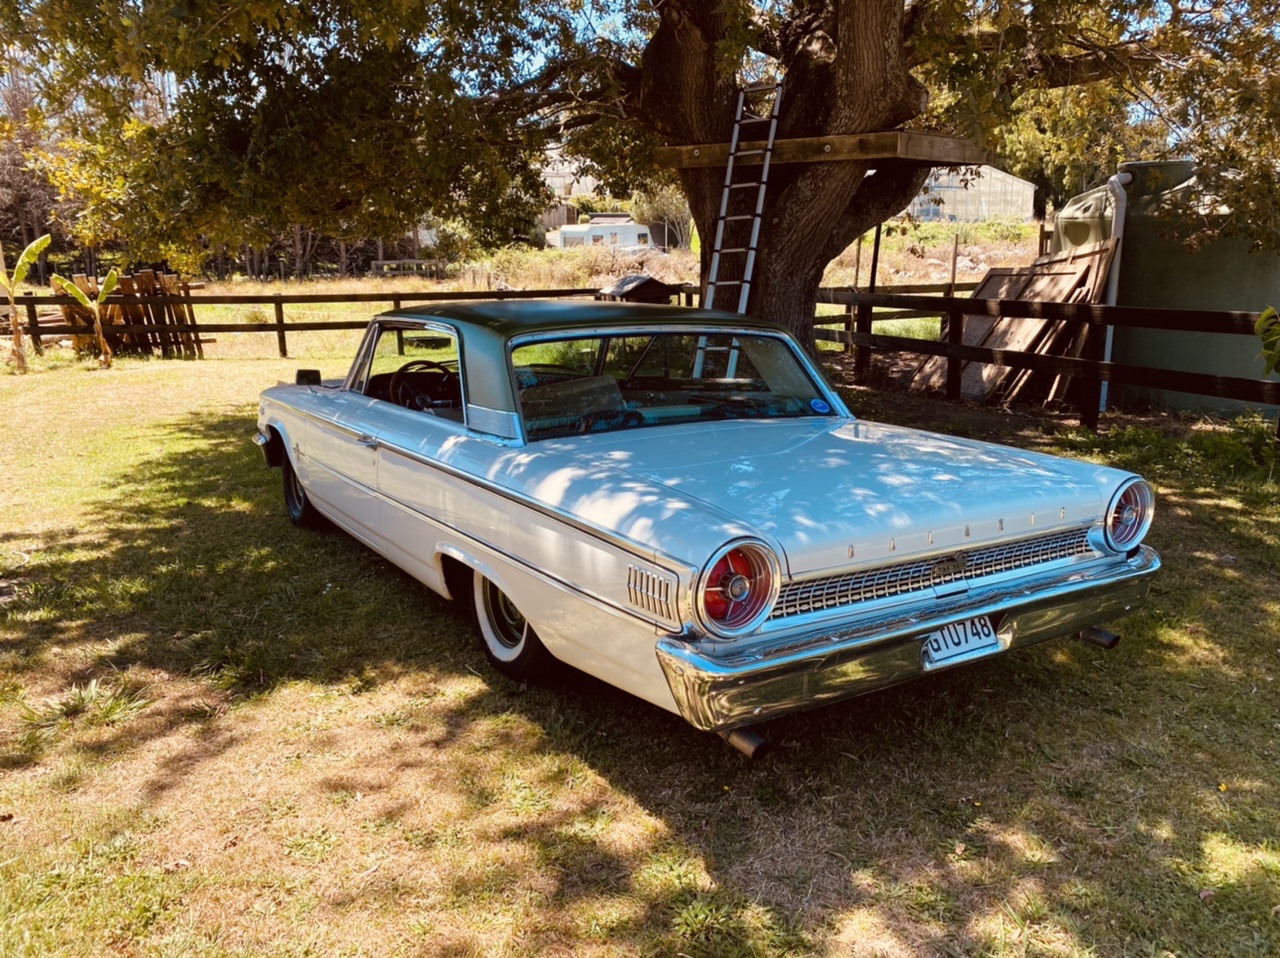
Well, here is my new old car.. so stoked!! I've had my eye on Mikes car for a couple of years now when he started to look at selling it, but never been in a position to pick it up off him.. until now! When he chucked up another post trying to sell it last year I knew I needed to make something happen.. so after a few back & forth conversations, I flicked off the Commodore and it all fell into place. To say I’m happy with it is an understatement.. it ticks all the boxes I had for what I wanted a car: US LHD, 50’s-60’s, bench seats, big block, 2 door... now this is more my kind of car. Here is a link to Mikes old thread, but I’ve decided to start my own to document my Galaxie journey..
1 point
-
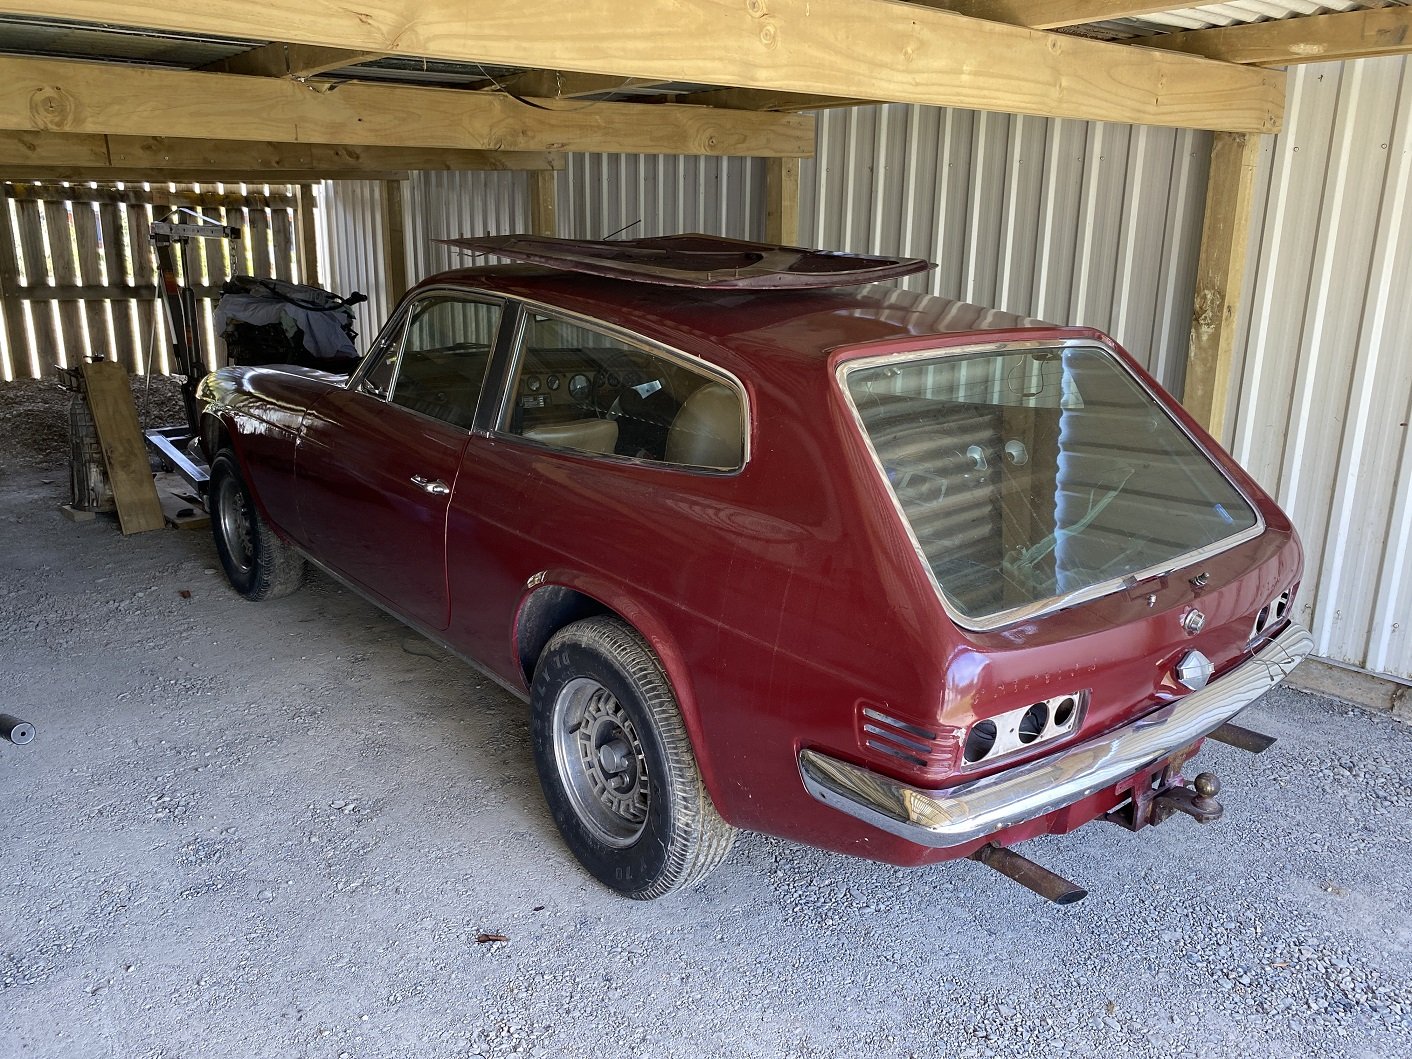
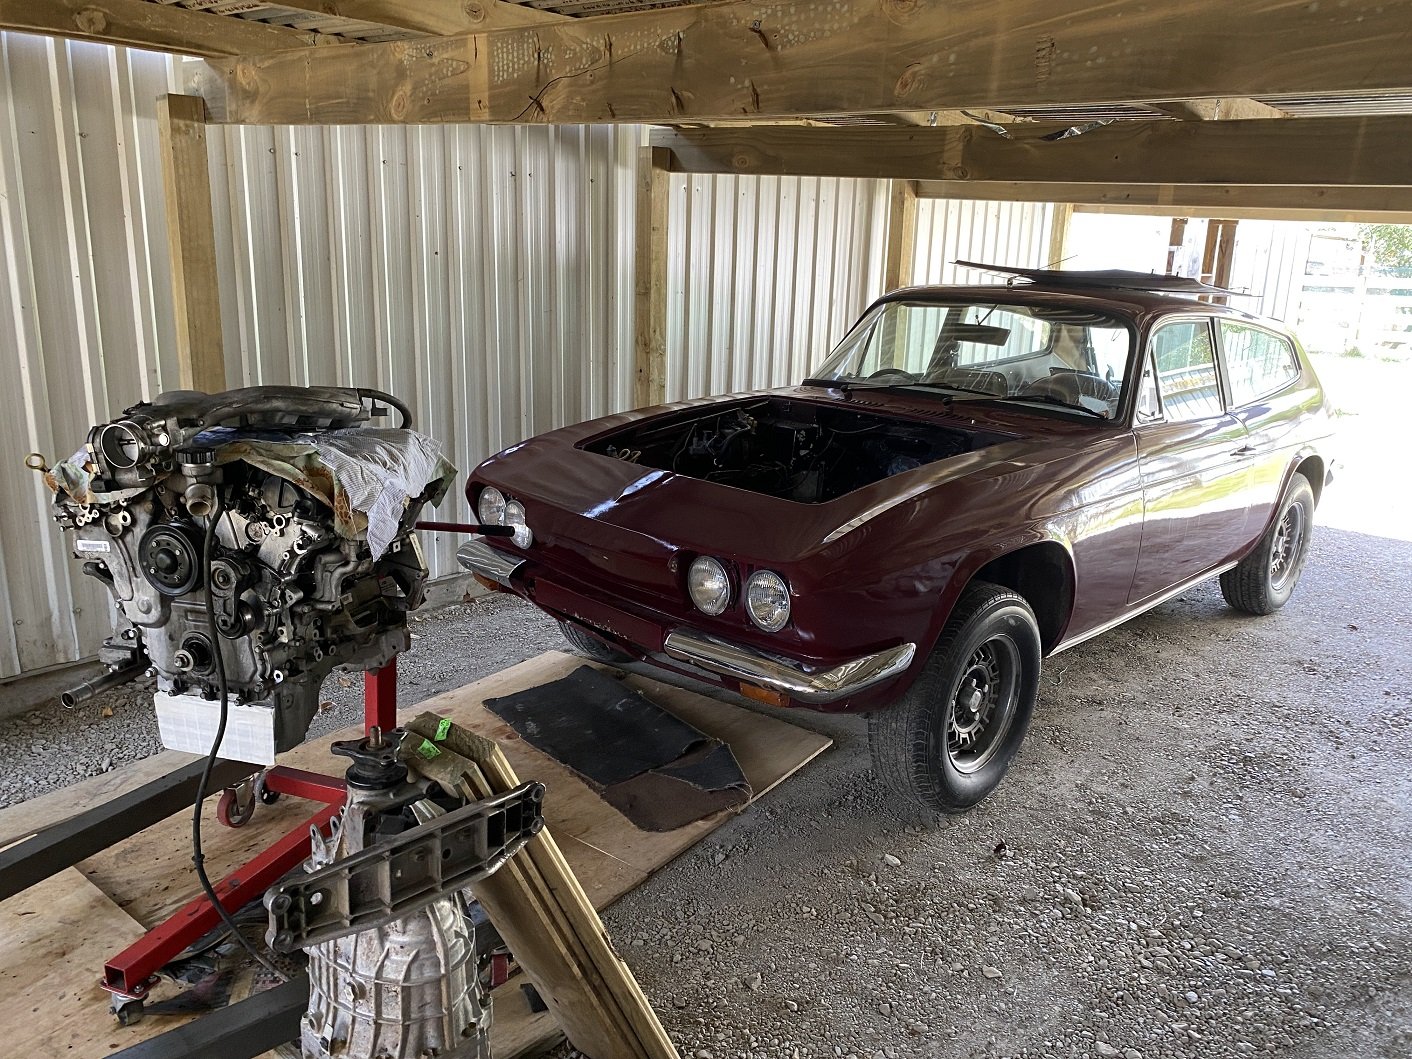
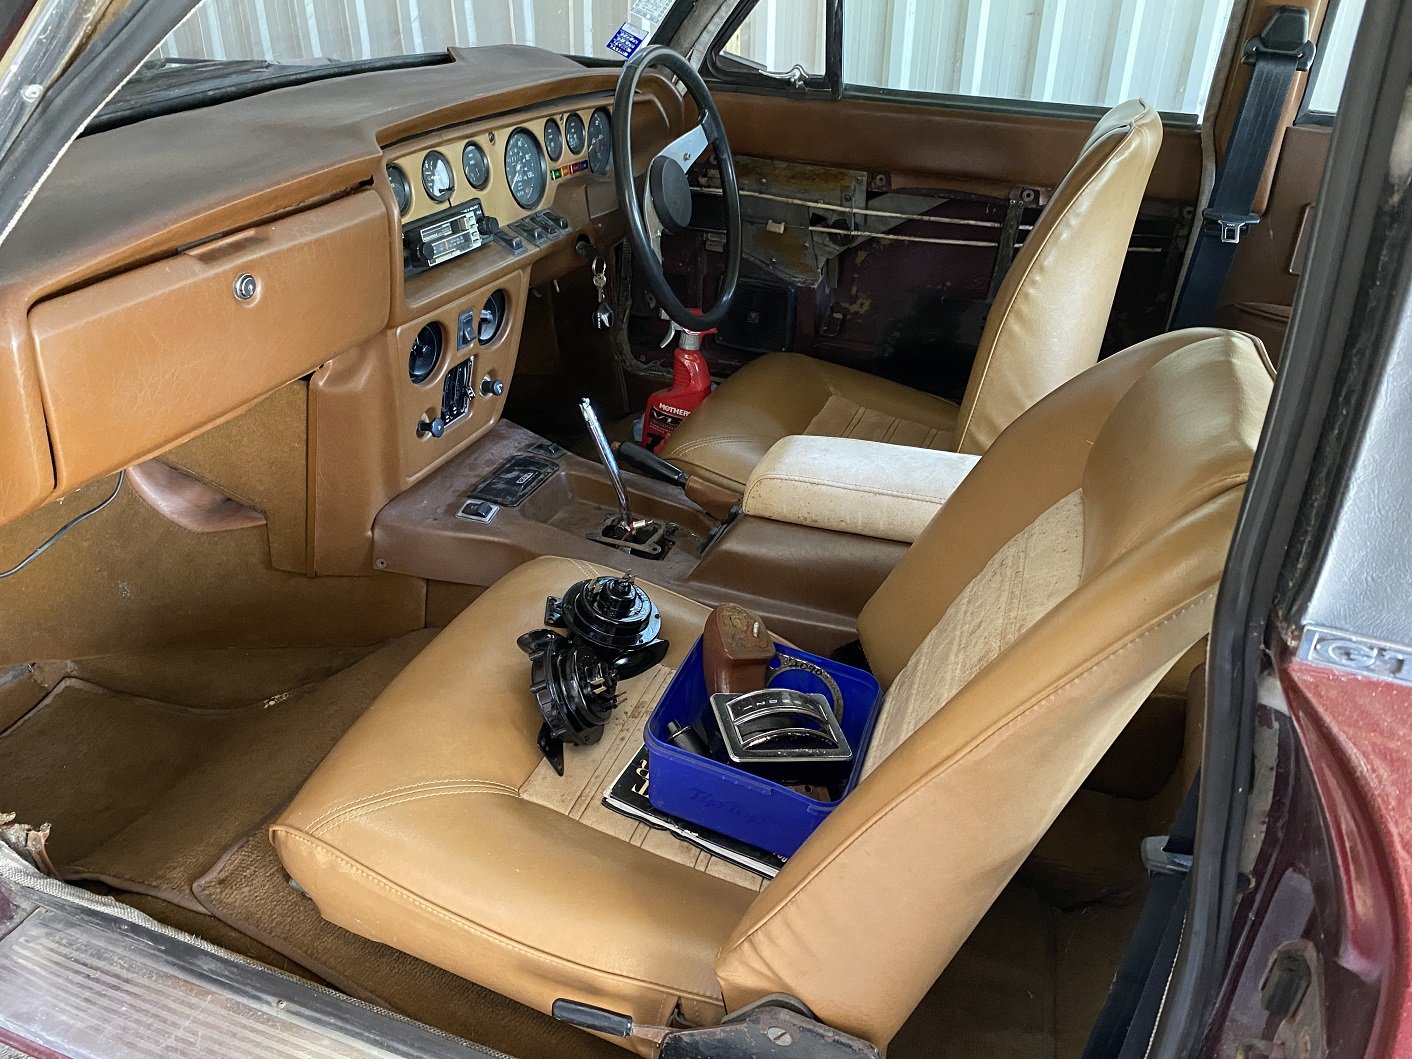
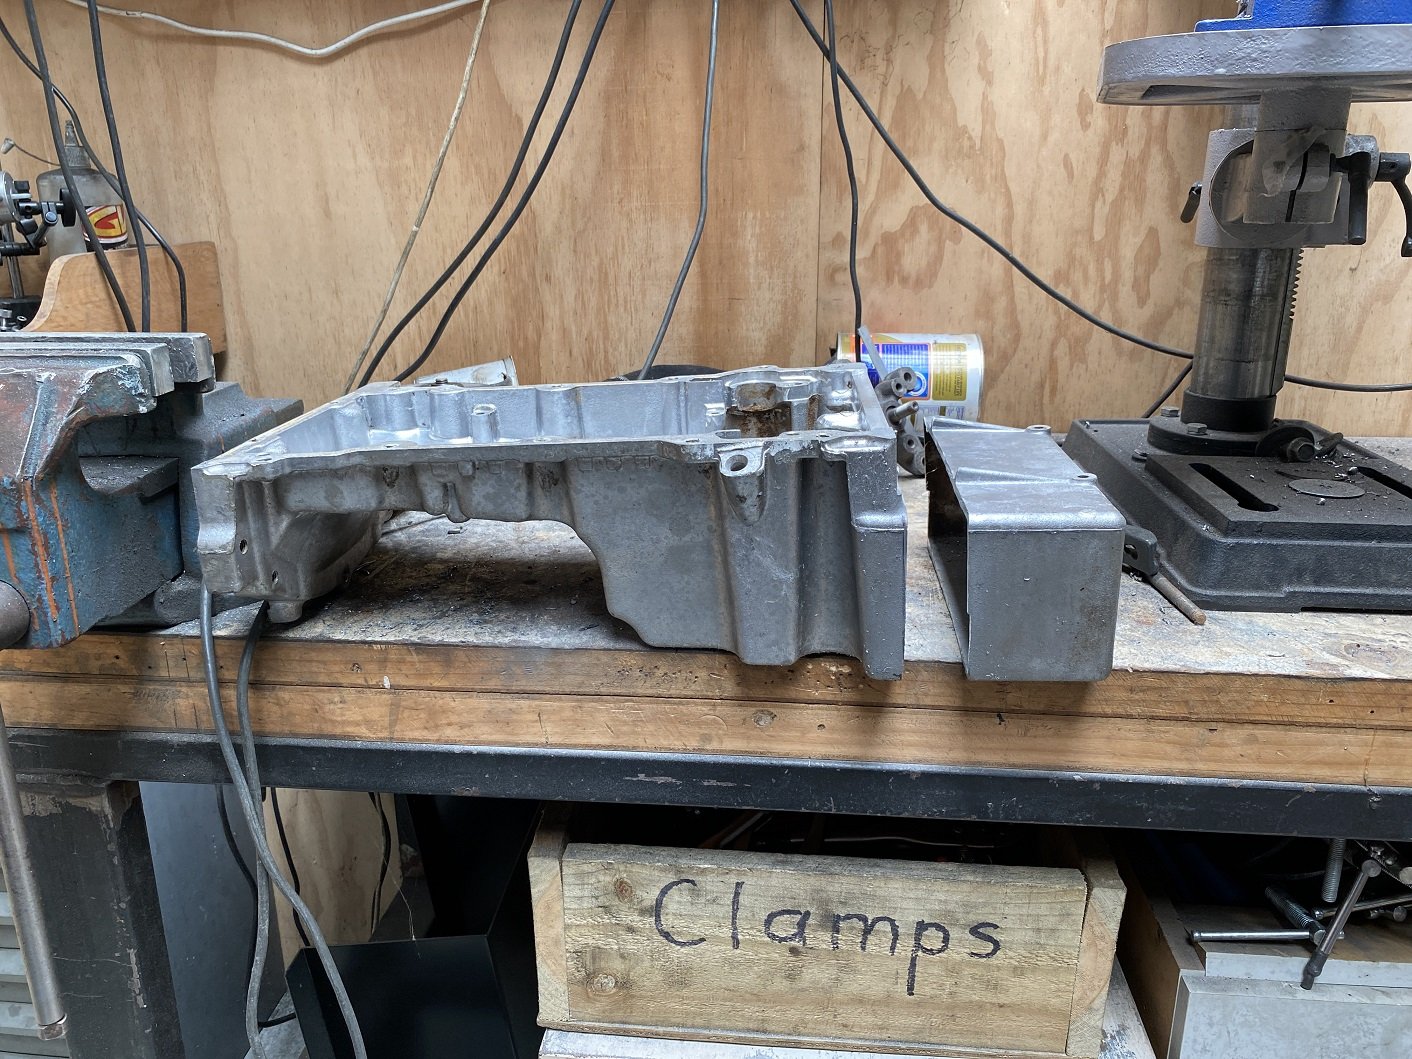
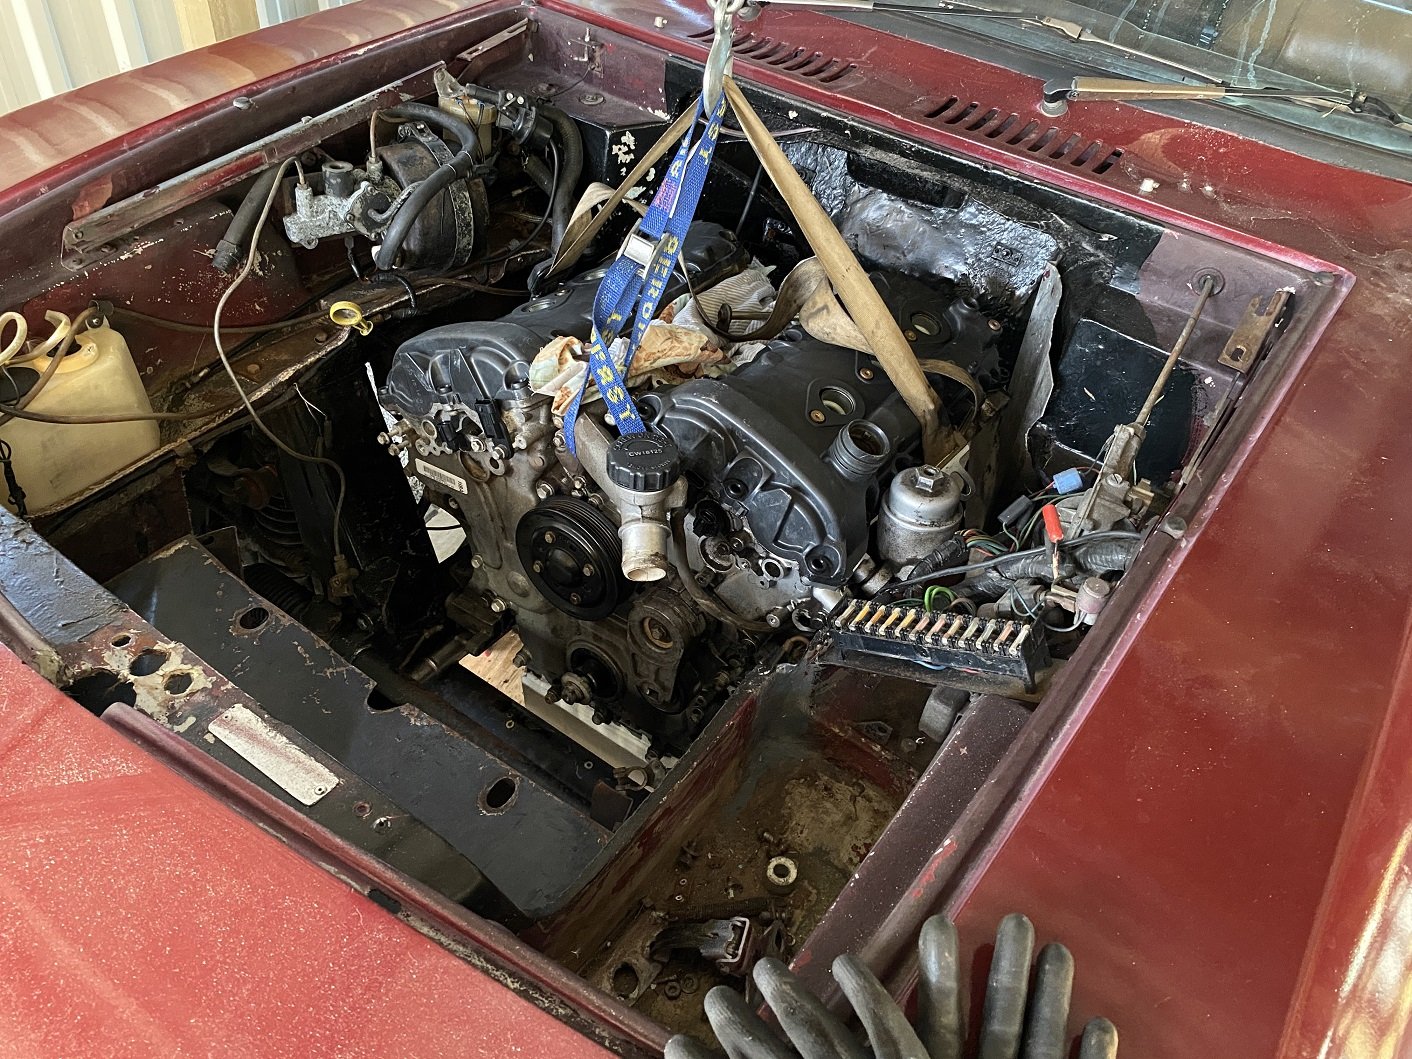
@dmulally twisted my arm... not very hard. But this is mine now. I had to build a lean-to for it to live in because my garage is full. Needs and engine and gearbox. I figured a 175kw Holden 3.6 Alloytec with a 6spd manual should be the business. Damo had a V6 Ecotec in it previously so I assumed there was a fairly good chance it will fit. These engines have issues with the breathers blocking up if you don't change the oil when you are supposed to. The breather is hilariously tiny and so are passages in the baffles in the cam cover, so it's REAL EASY for it to block up. Then the heads start filling with gunge that causes issues with oiling and timing chain wear. The engine I got has this issue so it may be stuffed... but it was cheap. soooo. I got a gearbox from an importer in Auckland as well as a used aftermarket Exedy one piece flywheel and clutch(OEM is a dual mass flywheel). I'll have to run an aftermarket ECU. I looked into using the factory ECU but as far as I can tell, you cannot easily get it to work without also having the matching body ECU. A brake light lens is broken but they are available from UK. The "SCIMITAR" badge letters and the emblems are missing. Damo thought he had the letters, so maybe they will turn up. If not, they are also available from UK. The door is apart because I was trying to get the electric windows to work. ELECTRIC WINDOWS!!! Turns out it was a bad earth under the bonnet. Being a fibreglass body, everything had it's own earth wire and they all run back to the same spot under the bonnet. I also fixed the horns, just chucked them in the ultrasonic cleaner and they started working again. NEWS FLASH, the engine didn't fit. But I did some sump surgery and now it does. Only a oil level sensor is in the front portion, so no need to move the pick up pipe. I'll make up the missing capacity in the rear section. There is a big bracket for the alternator and some coolant pipes on the right side that I'll need to relocate to center the engine. The alternator may need mount backwards out the front of the engine. Otherwise, it seems to fit without issue. Oh and FUCK ME, the front pulley is on TIGHT! You have to pull from the center hub because the outer is rubber mounted. My big puller would not fit so I got a smaller 100mm one. It was not happy. I don't expect it to be able to remove that pulley more than 3 or 4 times before the threads are destroyed. I left it off because I'll need to inspect the timing chain at some point.
1 point
-
if you need me to measure mine up let me know, had it made a year or two ago in AKL, its on a mk1 panelvan but i dont think that makes a difference, and its pinto1 point
-
Enough of that nonsense (press the sleeve out of a GN and run the piston in that in the standard cylinder to maintain std head) I went and picked up 2 engines tonight. One complete and supposedly running, although backfiring (has a China pod filter on it) and a second junker parts engine. Guy had lots of other parts, but I refused, because putting decent parts on this is a slippery slope to a 100hrs paintjob1 point
-
I’m not sure if it shows up in pics but I had a bit of drama with the trade me special sanding discs I have. they literally clog up, then drag the hard bits of paint and redistribute it over the sanded surface. Good thing I had found some Norton 320s I purchased from SCA but forgot about. they’re decent, as soon as I ditch the 125mm sander for a 150mm I’ll move to quality abrasives Once that was done I filled any pinholes with fine filler. Mind my mess, I’ve lost my thin knife applicator Buzz it down Then wet sanded it with 400+block and paid attention to the edges. After that scuffed the primed panel edges with a red scotch pad and scuff paste, and the blending bits with a grey fine pad the fine pad is used as it’s finer (duh) and creates less scratches for the panels that are receiving clear coat only. If I were to use the coarser pads they would make scratches that would show in the clear. got this outer bit of the sill too as this shows Unfortunately cut through in some areas, my applied paint was so thin, but the paint beneath it was thin too. Makes sense as I got advice from the wrong guy who has like 30 more years experience than me, and the original paint was so faded it was starting to rust in places. Where it’s super small and in a place to be cleared, I’ll touch it up with a small brush. Other places will be re-done. Noticed this mistake on the drivers door I had polished. Previously mentioned guy told me he could paint a car with a litre of paint. I shouldn’t have believed him as I knew better. So now I’ll have to paint the whole rear door, paint the lower bit of this one and edge on b pillar side and blend it out. Hosed and wiped all the dust off, making sure to get in the wheel arches and get out 29 years worth of road crap did a bit of daydreaming, about intercoolers, more low, lips and body kits1 point
-
As far as I can tell it is, its an early 3 bearing motor. Carjam suggests near on 200,000kms and 32 owners - so.. yeah.1 point
-
I keep seeing Max peed in his grods. Is that a euphemism for undies?1 point
-
have updated first post, but here they are again Entries: D van Asch R Begley A Williams G Gaskell A Mealing J Burgess V Findlay R Moffat D Chaston B Simpson S Wallace N Ritchie K Raines H Dawber S Buttle A van Asch S Jensen an email will be coming out to all registered persons this week.1 point
-
She's touch wider than what Honda built I think
1 point
-
New wheels (13x5 from CA Accord)
1 point
-
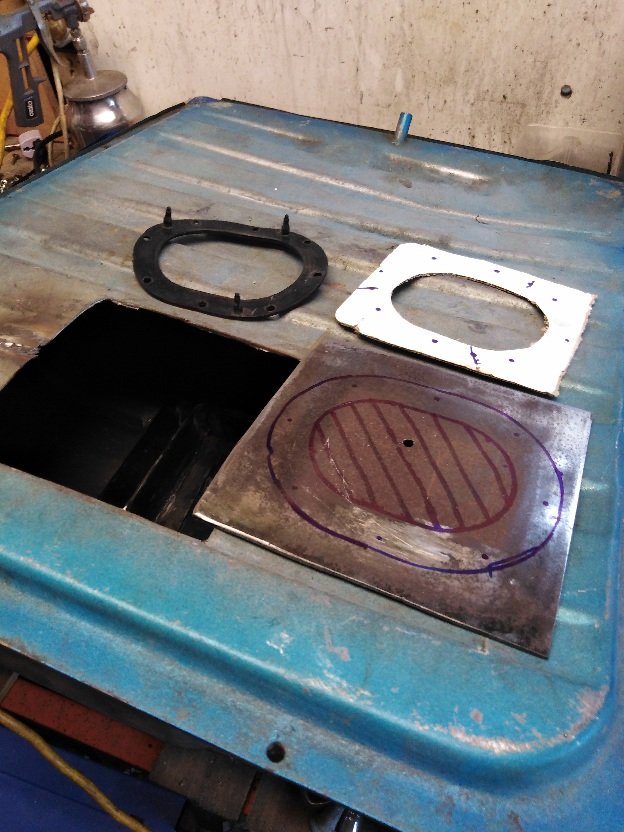
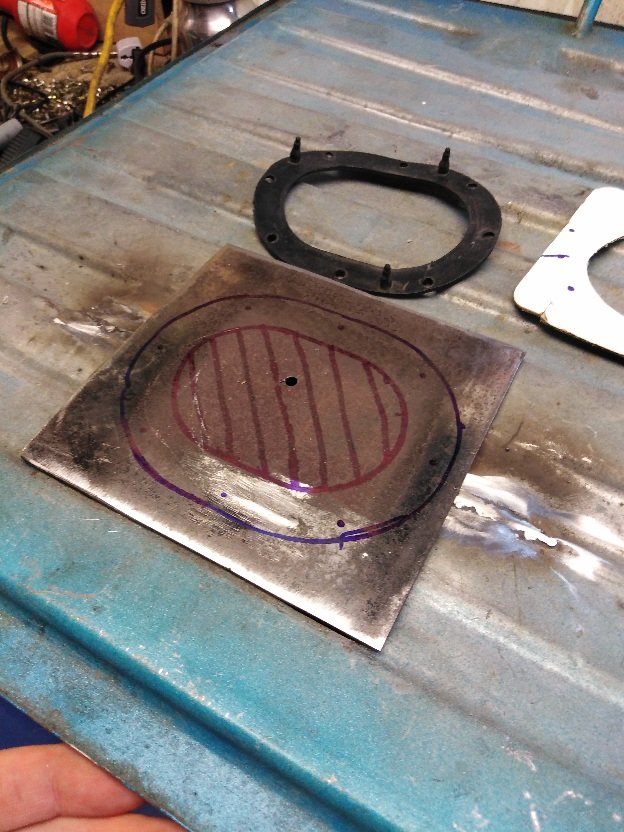
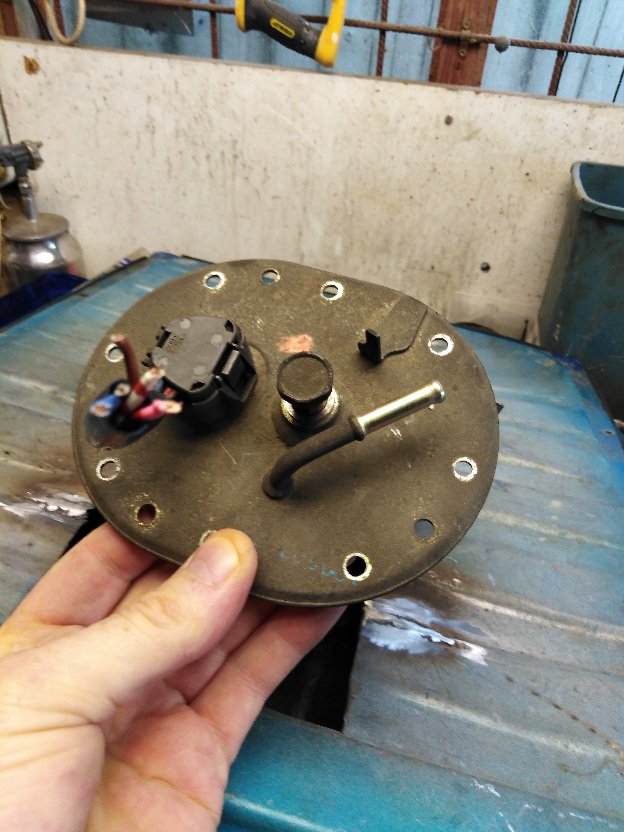
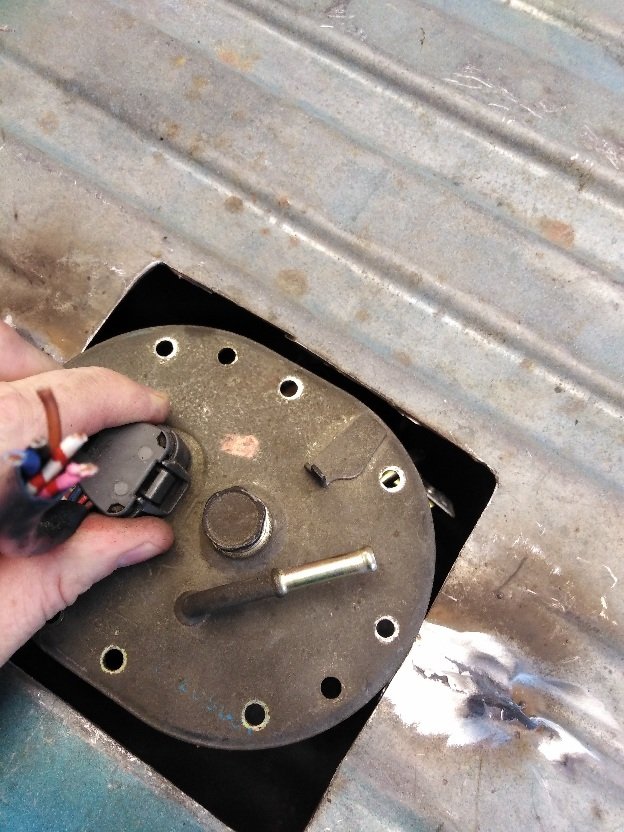
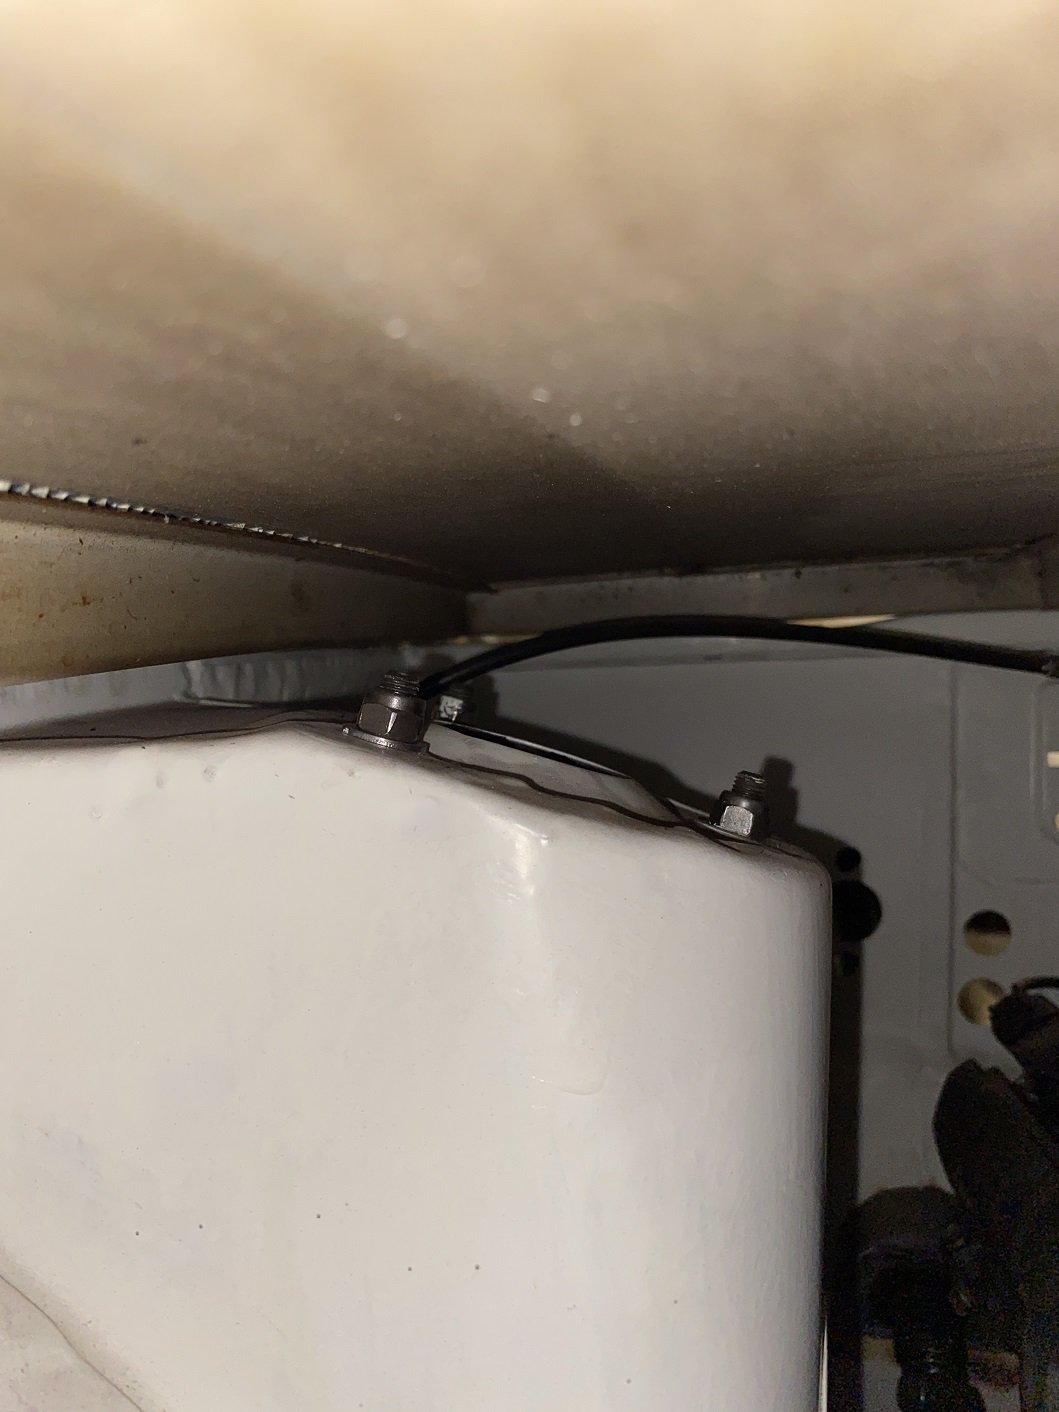
So been a minute since I've been posting on this one, still at it, however as the saying goes life gets in the way During lockdown I fiddled with fuel system and retro fitted the old tank with a drop in system from a toyota of similar Era as the engine, this way it can have more room in boot and remove surge tank clutter...
1 point
-
So I started on the body. Did some CAD modeling, And then started hacking into 18mm ply, Then I took the old temporary seat and floor off, and made a new seat etc. I then started screwing everything together, And where it's at now, The back corners are meant to be rounded, but that's too hard for an amateur woodworker like myself. The floor and firewall will stay on the chassis, and the rest of the body will lift off. The bonnet and front mudguards will be the hardest part to do, but I have ideas, will find out soon if they will work. Oh and I decided to make it a BJ/FJ land cruiser (maybe it should be an EJ?) because the kids cousin has a Jeep already, and because I'm forcing them to like Toyotas, because not doing so would basically be child abuse. Regards, VG.1 point
-
My bike passed its wof yesterday too! The the "organization committee " have been working in the back ground to try minimise the overall fuck ups etc. (Its a group chat, but we dont wanna run out of BBQ food, or beer)1 point
-
Progress is coming thick and fast now. Motor back in . Gearbox back in . Got it running today for a short moment. Seems to run like a champ. Waiting on a new waterpump then I can get it up to temperature.
1 point
-
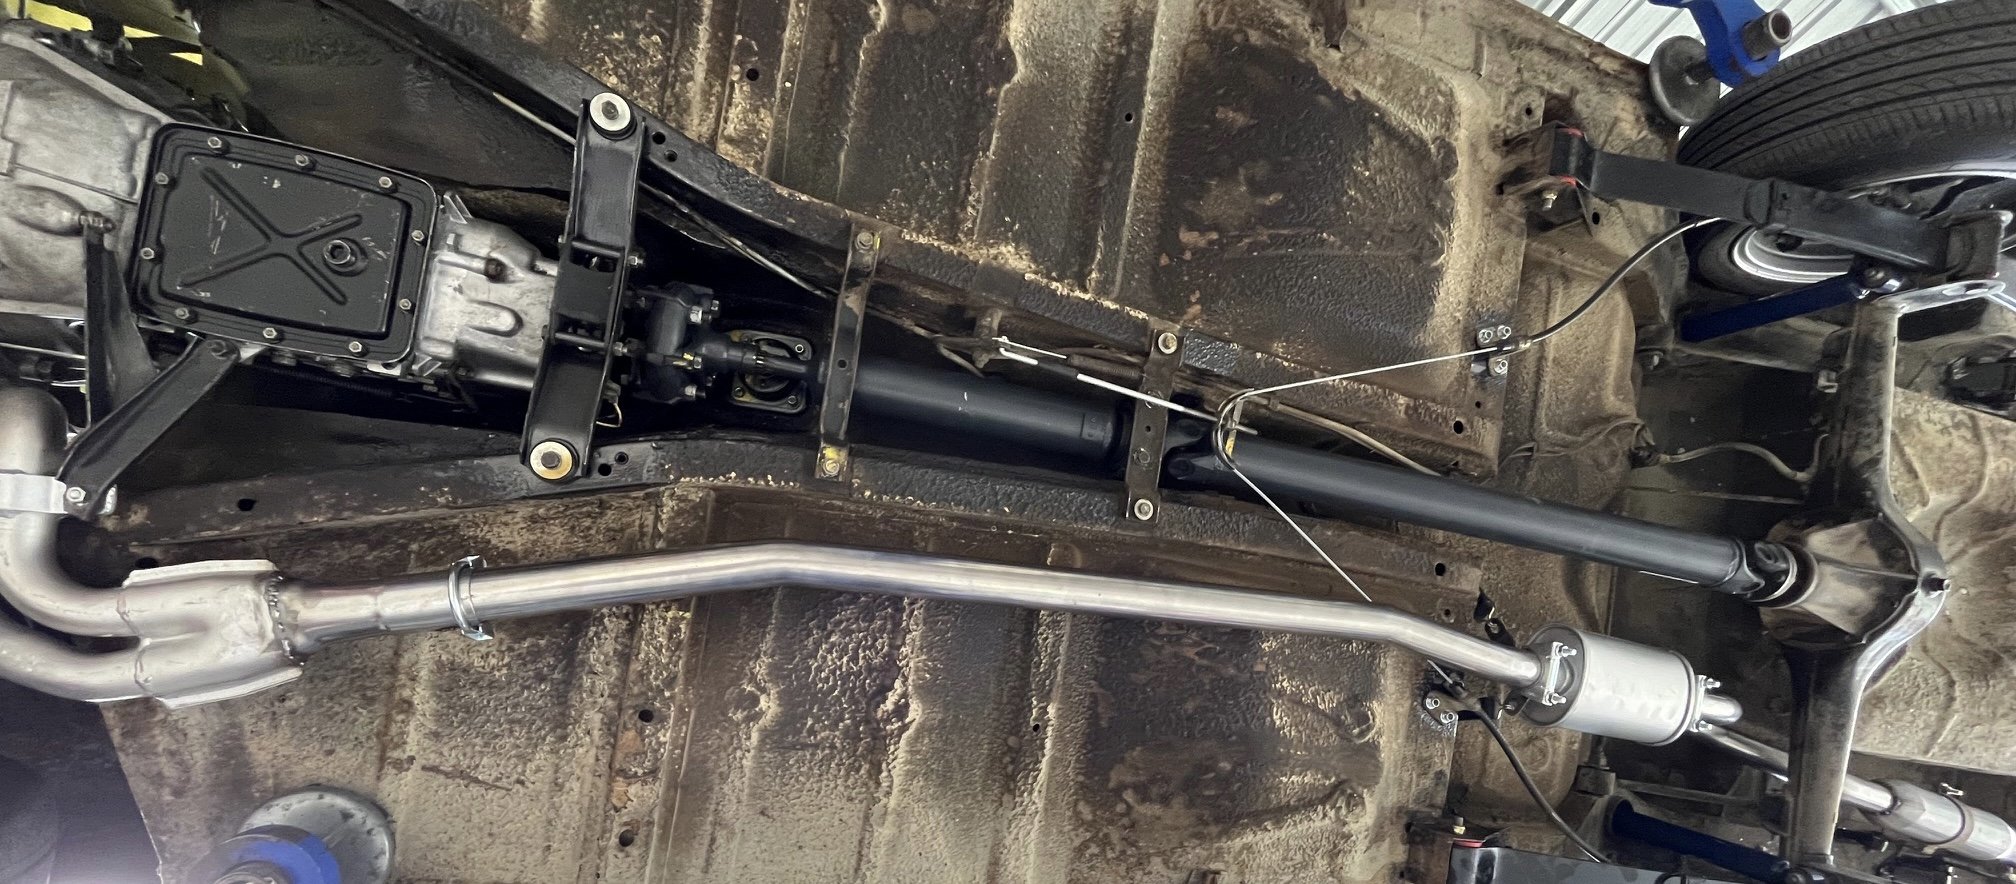
I have gotten as far as I can go with what I have. I’m very happy with the downpipe I bought, the fit is perfect. All the other joints are aligned now, but this leaves the tailpipe exiting at a 5 degree angle. This will be unfixable without tweaking some bends in the tubing. The lowest hanging part has 125mm ground clearance and it’s close to the rear axle so I’m happy with that. I also haven’t been able to avoid a very tight gap with the rear passenger footwell pressing in the floor. I have 4.5mm… is this too tight? Also, every slip joint has a tiny leak!! I’ve run the engine and it sounds quite stout, a bit more bass but still with all the twinky rasp.
1 point
-
Decided I’d try and get my bonnet looking good, unfortunately this area where plastic touched wet clear at my old workspace was not only a run but had a bit of solvent pop Cut through, and the solvent pop had actually gone into/past the base. After blocking and sanding This part of the bonnet will have to be resprayed. I’ll have fun blending it. If it was a colour I was 100% sold on I would respray the whole thing. But racecar (that’s a joke btw). more dust The whole bonnet got 1000 grit DA and then blocked with 800 wet. Before paint I will go over it with the grey scotch, water and scuff paste just to make sure it’s clean and scuffed well enough. Masked up and covered with a bit of g6 I also did my drivers door. It wasn’t too bad in terms of peel, but it did have a bit of dust. I had a small run near the edge, and wanted to try out a technique I learnt from The Gunman on YouTube. it basically involves covering the run and adjacent area with the fine 1k glazing putty, and sanding starting with 320 wet moving through the grades to about 1500. it looks like I cut through on the edge, but didn’t, this was old paint flaking. I almost called this a win but I cut through with the denim pad. Probably a tough first try being right in the edge lol. Will just dab a tiny bit of paint on and not speak about it But the denim pads are pretty good! I questioned my use of the wool pad after as I couldn’t see any obvious swirls or marring. They go hard for what they are. Out in the sun:1 point
-
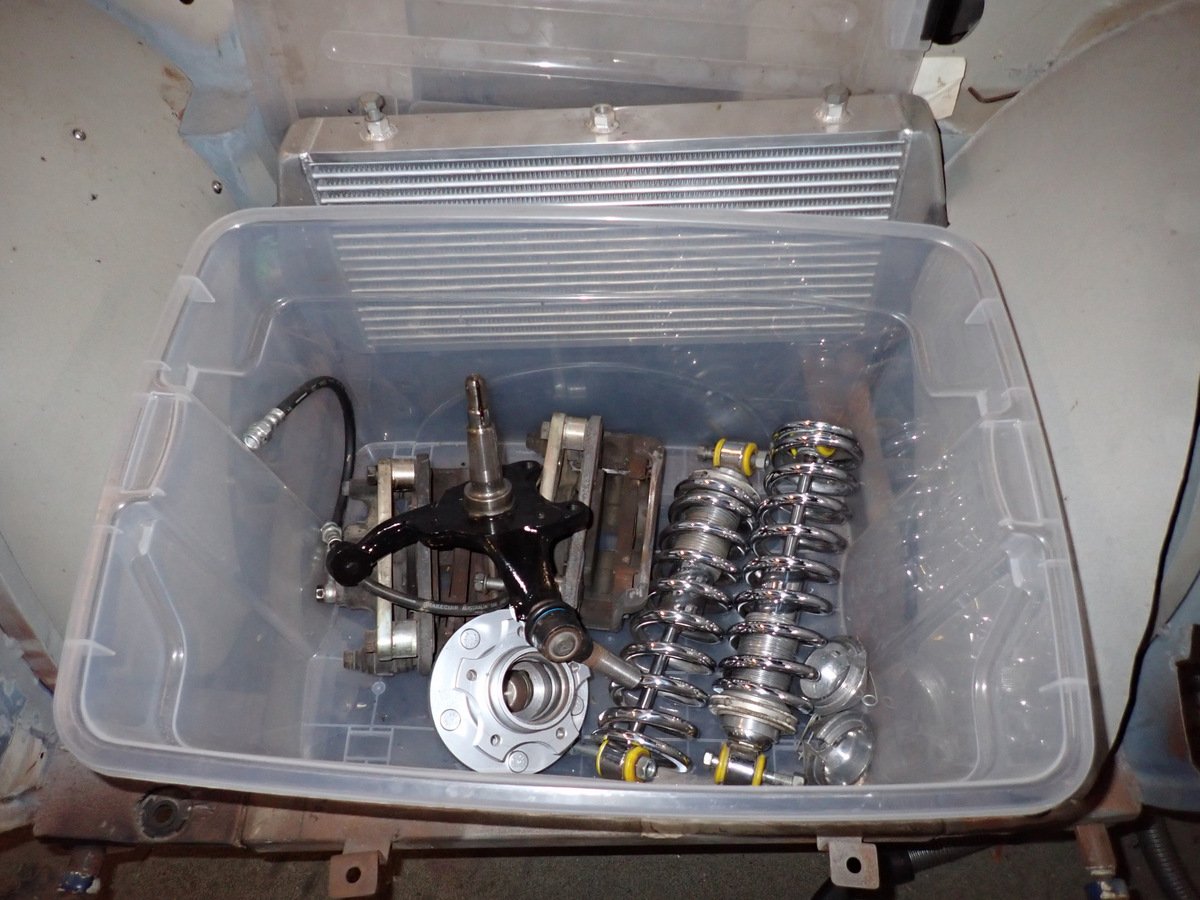
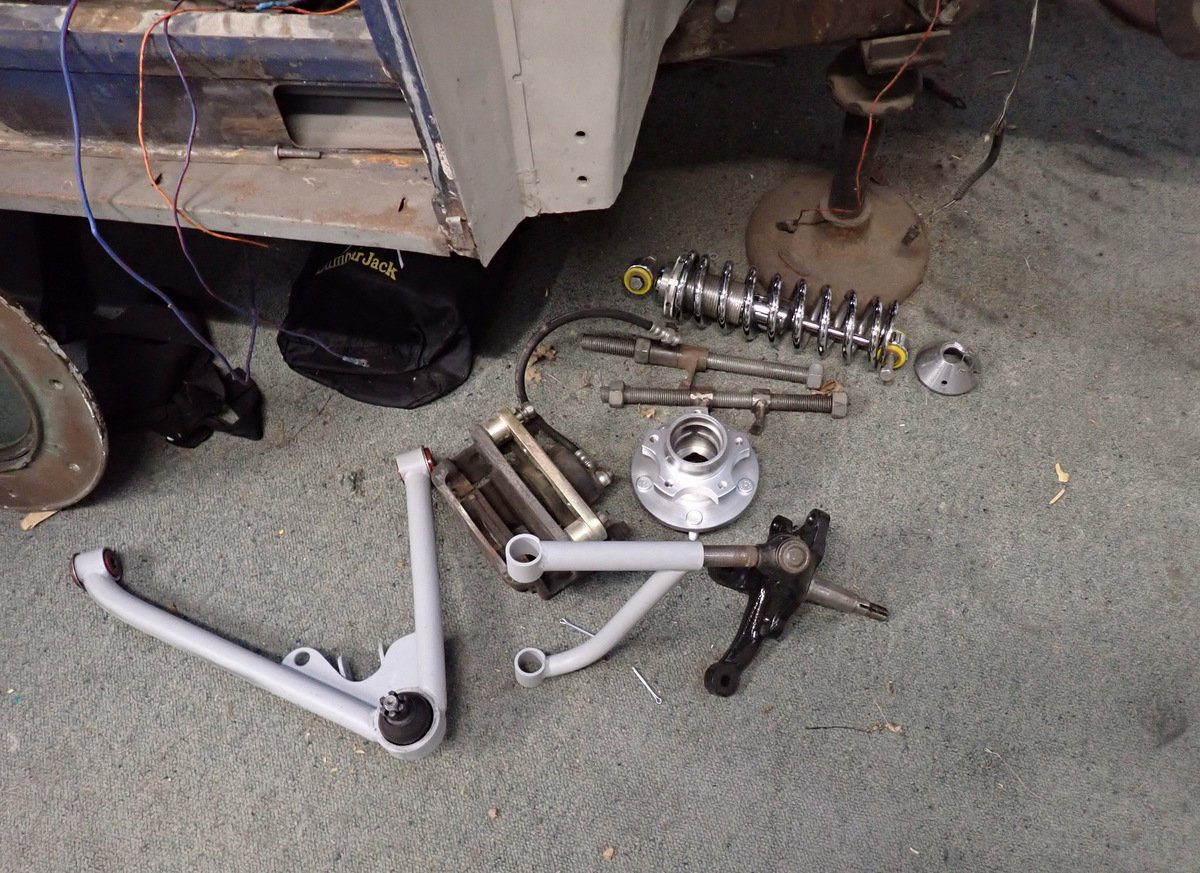
Annual-ish update? I need to get this at least rolling to move it. Bought some new lower ball joints - I think the reason the old ones crapped out is that the come with no grease in them (facepalm) Managed to break a 1" chinese cast press plate using my 10 ton chinese press when trying to get the second one together. It was a bit out of alignment, so probably exceeded the point loading. Visited a friend to straighten up the press tool, then used his press to jam it together. Went in easily. Hope I can remember what goes where, it's been a few years
1 point
-
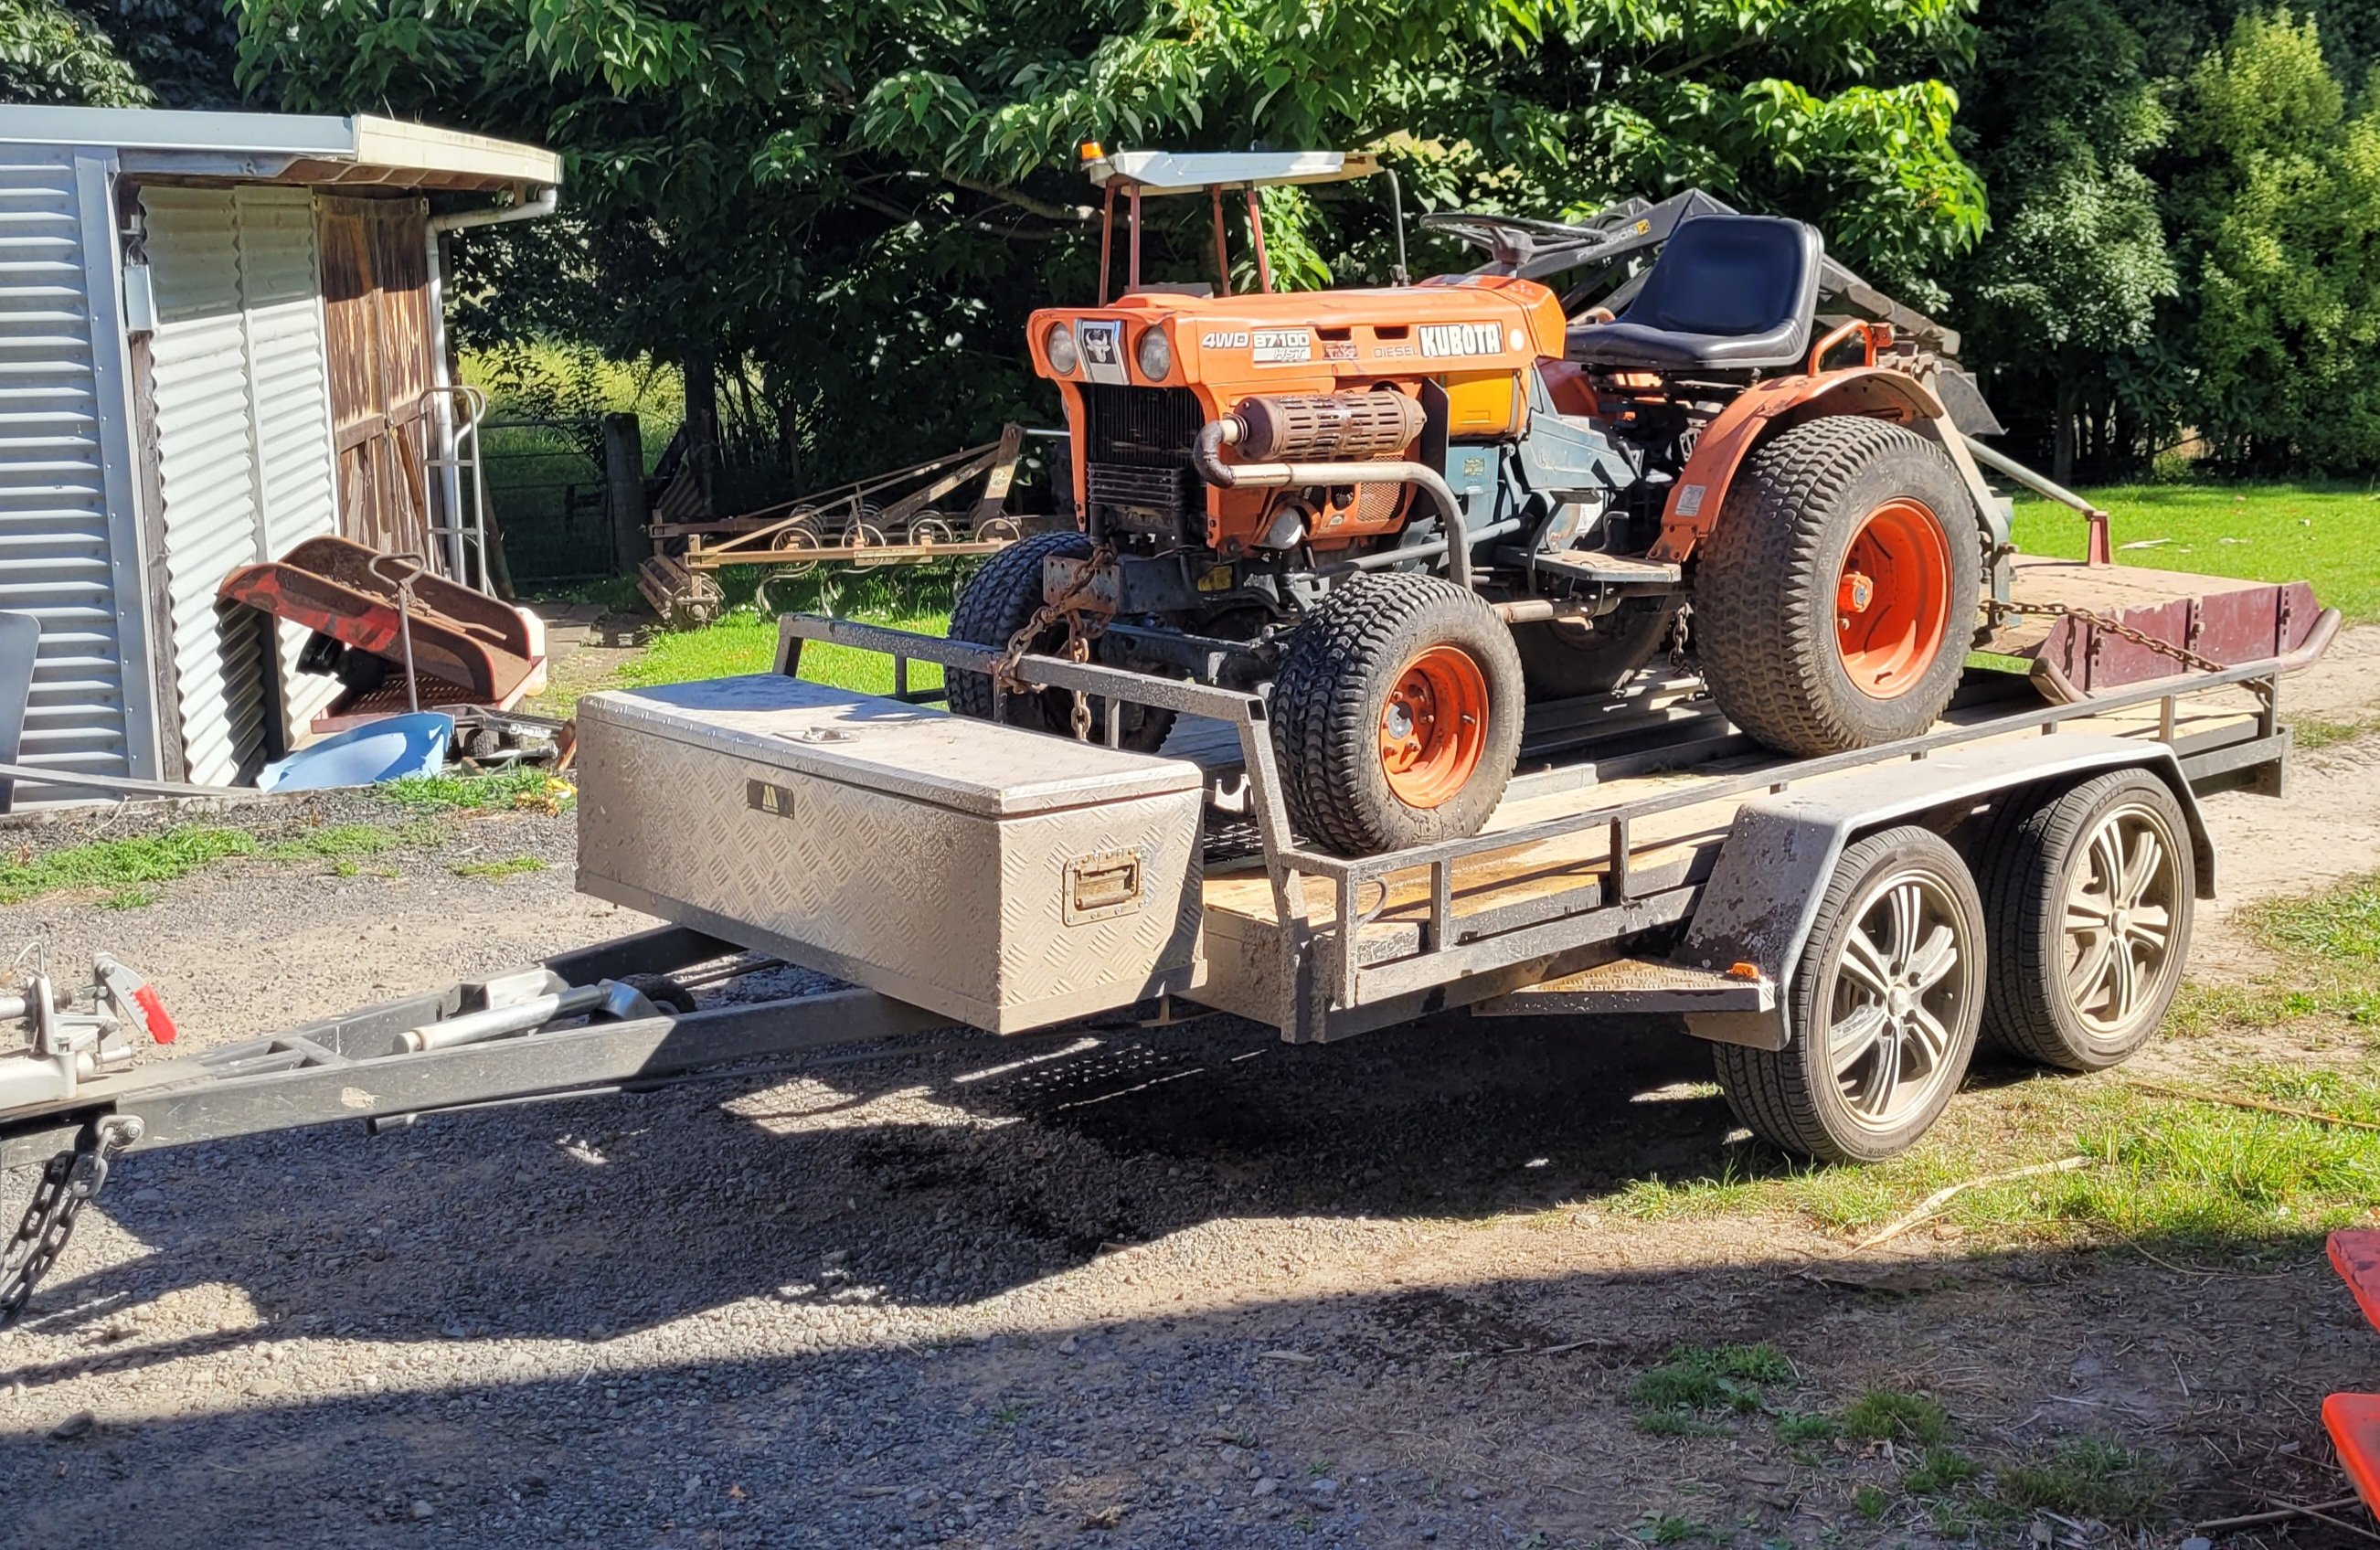
Recently finished this trailer designed for side by side, small tractor, Two quads etc. Engineer mate suggested doing the bulk of the welding from side to side with minimal welds running front to back, which allows the trailer to flex just a lil bit. Seems to be working so far.
1 point
-
Thread dredge from a million pages back. I do still have this . Went hard over the holidays and got a few panels painted. Made a start on the deck ages ago. Still a bit to finish off.
1 point
-
Couldn't help myself.. The mounts off the 4g52 were pretty close so figured I'd just mock them up and and hoist it in to see how far off everything is. Mounts need to come up slightly to drop the engine a little and also shift about 20-30mm back. I'll probably chop up and modify the block mounts (or make new ones). And clearance at the firewall. Will need to reroute the brake line as it's too close to the cas and will need more clearance. Sump clearance. May need to trim the crossmember a little but might get away with it. I'll try get engine mounts sorted in the next couple weeks then there probably won't be any progress as our daughter is due in Feb. See how we go anyway. Chur
1 point
-
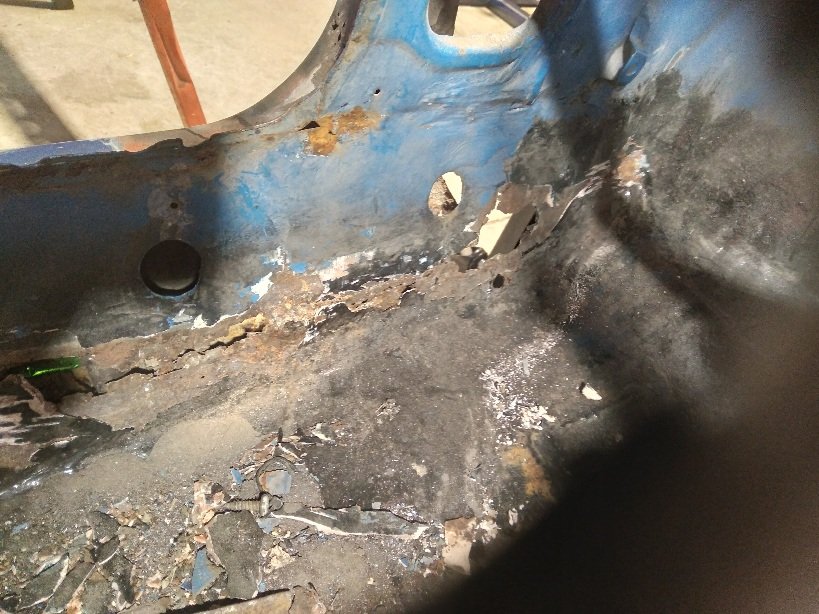
This is inside the escort looking at the inners sill and the corner below the A pillar. I am a bit concerned how it has opened up once I've started working on the A pillar. I'm thinking about what to do about it and how to go about it. I know I'll have to replace it but unsure of how to go about it.
1 point
-
I've had the same issues buying things from companies in Straya. It's a pain. Personally I'd be finding a stock replacement Toyota clutch kit, or even just the cover that was the right diameter for the flywheel, then get the flywheel redrilled to suit that kit. I suspect something for a HiAce or similar would fit the bill. Failing that, could you get the cover set up dead center, drill and tap the incorrect dowel holes so you have a 6 bolt cover and have 3 new dowel holes drilled.1 point
-
She goes 100mph just sitting there. Pretty stoked. I picked the engine up a few days ago, the guys at Kennally Cams did a brilliant job. I've just been putting the shiny parts on. The bellhousing and clutch kit arrived from Dellow Conversions. On the whole I'm happy with it. The bellhousing is perfect, but I'm a bit worried about the clutch assembly they supplied and would appreciate any input. They supplied a kit to mate the engine to a w57. Pressure plate, clutch, slave cylinder, bellhousing etc. They modified the pressure plate that they supplied. The original ford pressure plate has 6 bolt holes plus 3 holes for dowels that are on the fly wheel. The one they supplied has 6 holes total. 3 line up with bolt holes and the other 3 have been drilled out by them where the dowels go.. But over sized so the dowels no longer locate the pressure plate. That is one of the holes they drilled out. This is it sitting on the fly wheel. I have just had the engine balanced. My concern is that without the locating dowels (they are useless as the holes are now too big) the 3 bolts alone won't locate the pressure plate exactly in the center necessarily. They guys that built the engine don't think it's a good idea to run as is. What are your guys thoughts? I queried Dellow, and they said yeah, nah, it's sweet. Also, the front cut for the radiator suport panels seems to have fallen through. I think the dude literally died. No answer to calls, txt or email. And the shop (kiwi auto) is chained closed. Cheers for any input! John.1 point
-
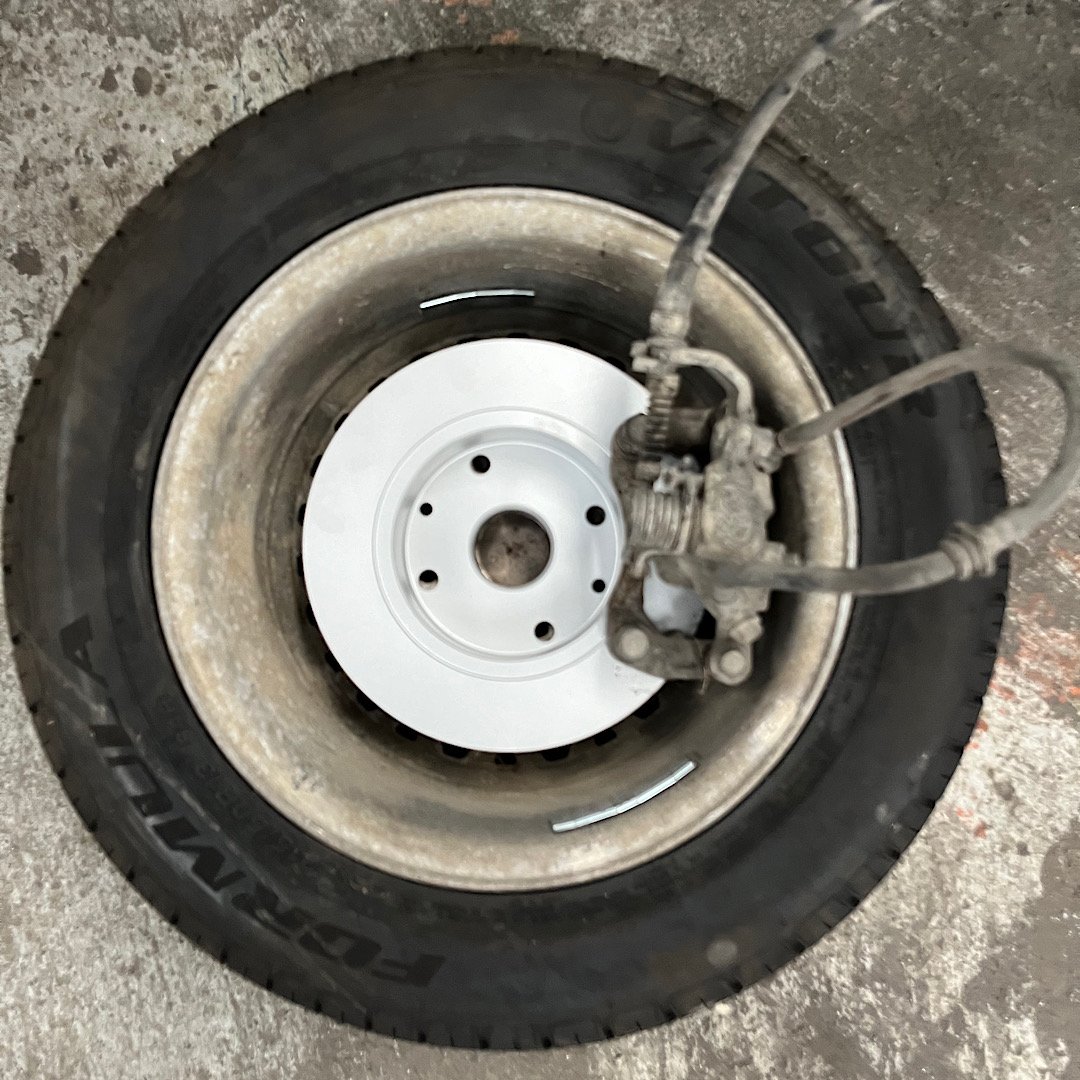
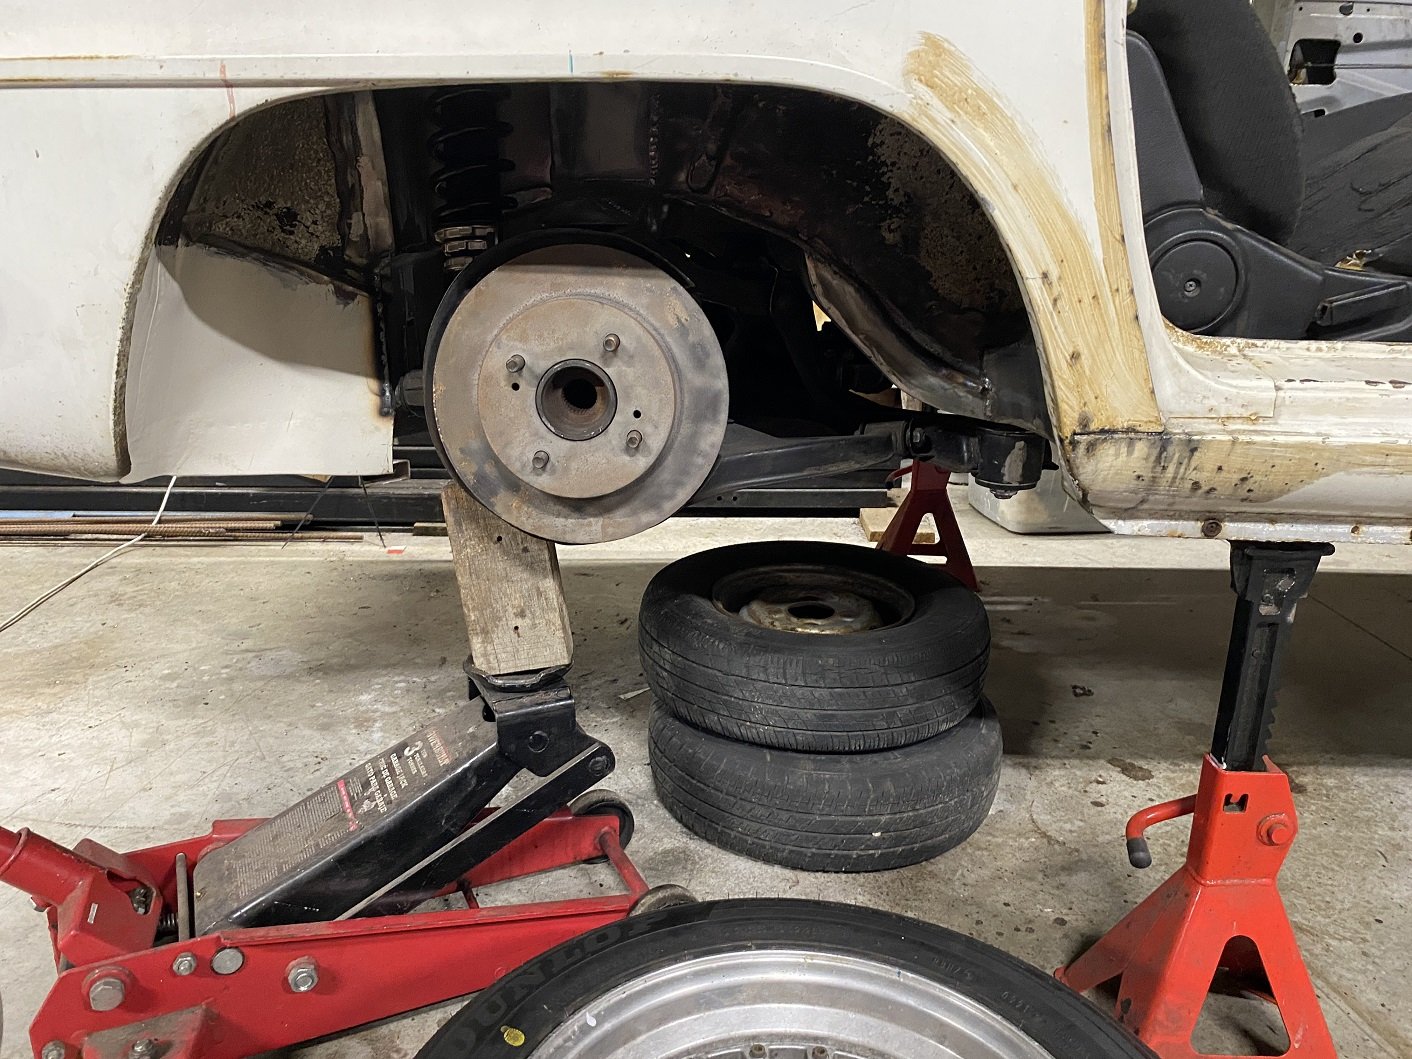
Rear disc swap almost complete. sourced a set of caliper adaptors to run the Primera calipers, and uses a s2 rx7 rear disc. this fits the red rolled axles perfectly and gains all kinds of clearance to run the 13”s. only have to machine down the axle centres to accept the rx7 disc. Bonus is the rx7 allows the hotwires to fit really well. just need to sort the front discs out to get vented discs on it. not much point trying to go bigger, just more efficient
1 point
-
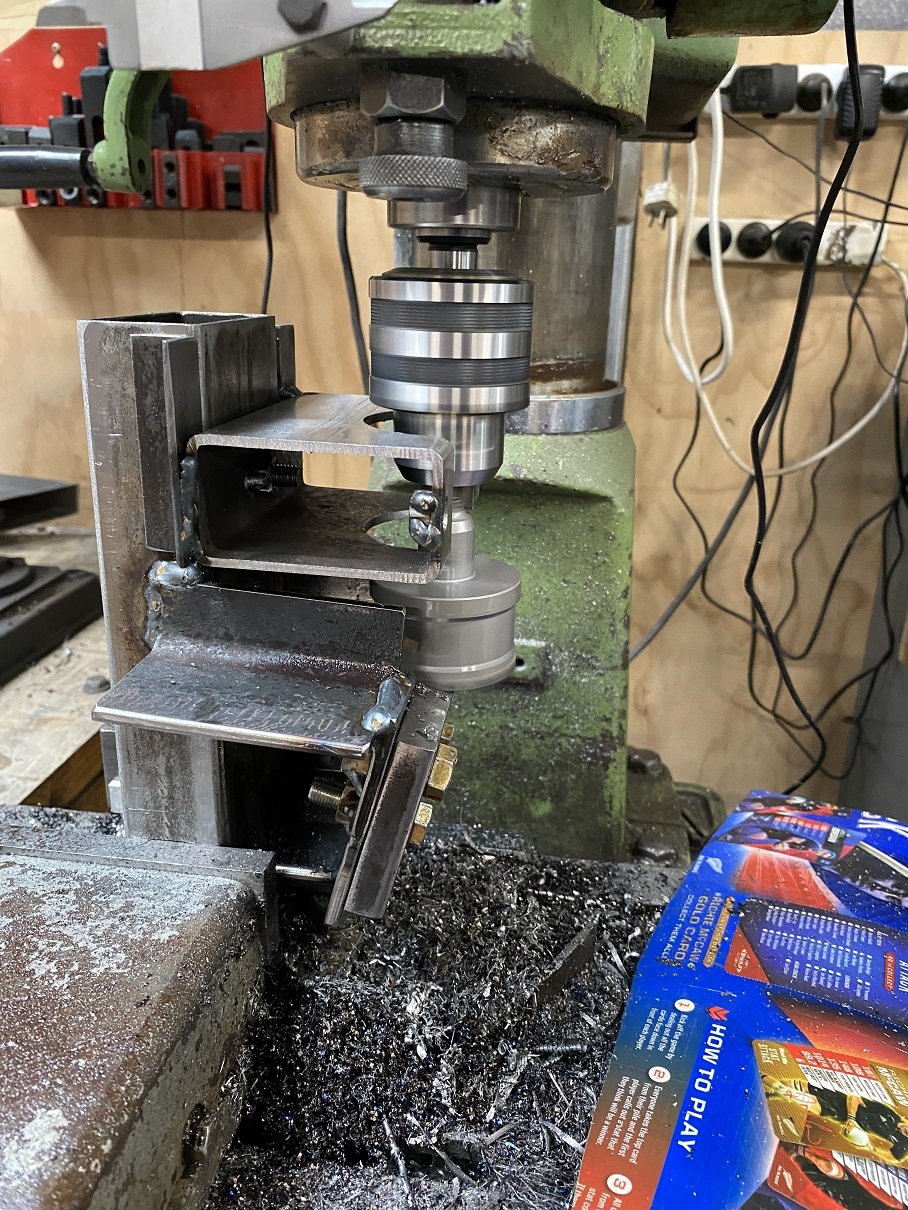
Well, the holesaw in the mill kind of worked, right up until I tried to push it too far and it jammed, chipped a tooth and bent the holesaw shaft. I finished it off with the vertical bandsaw and powerfile.
1 point
-
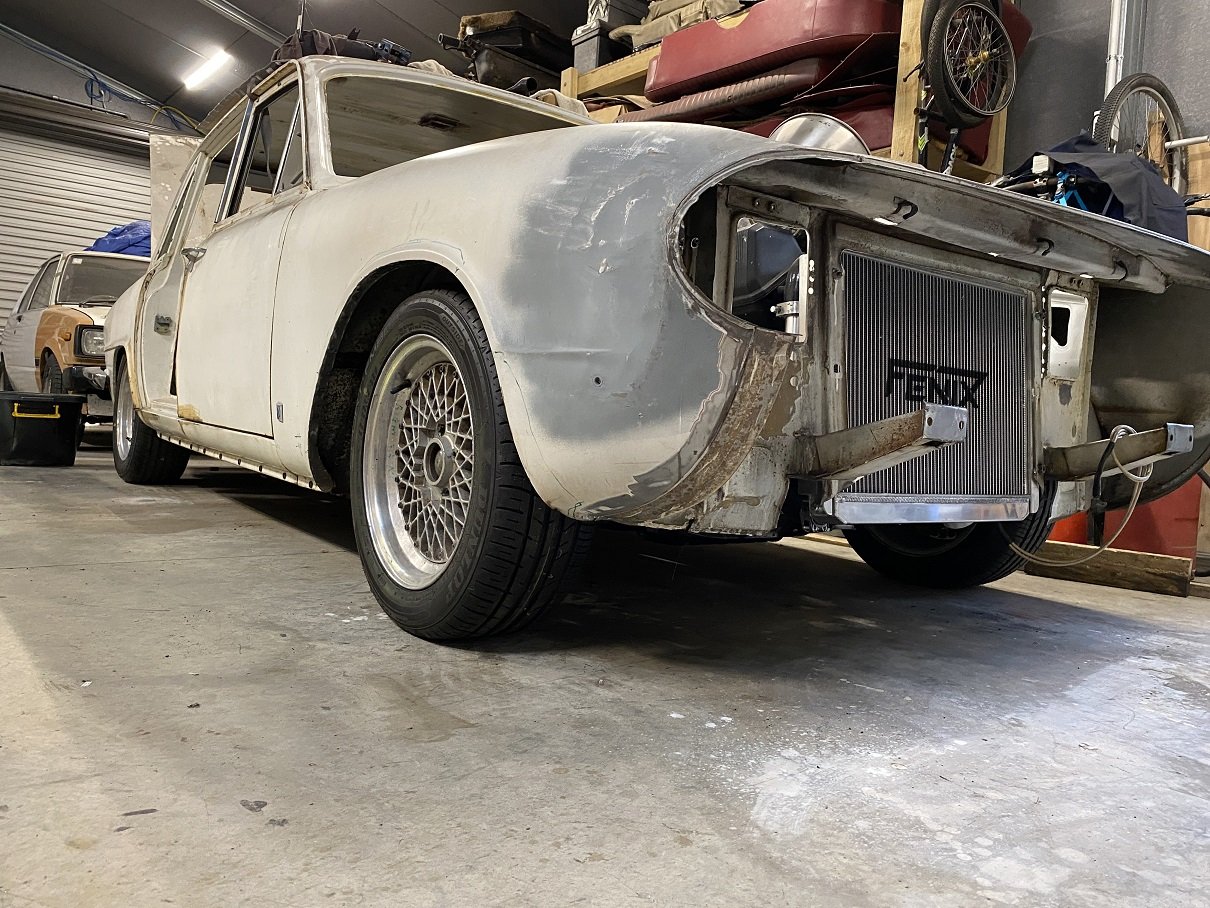
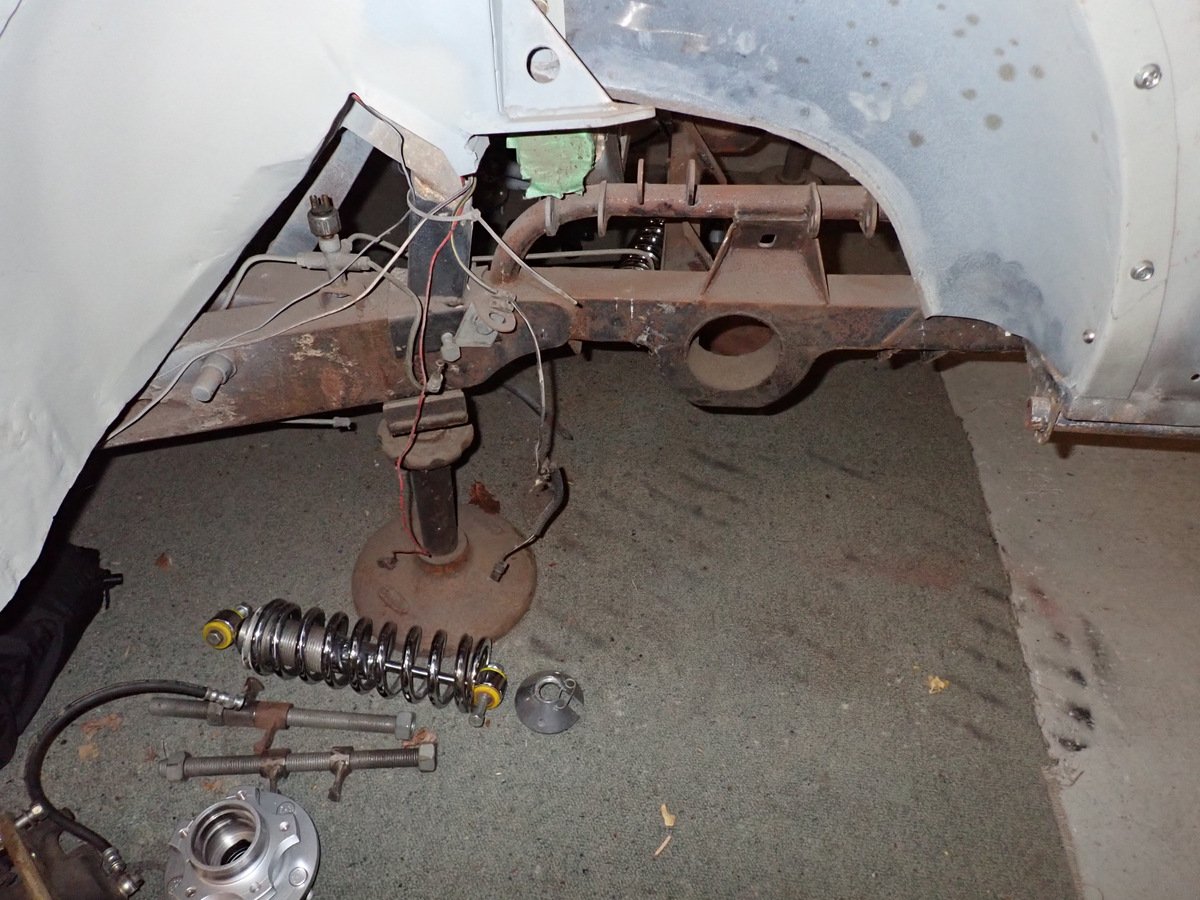
And the other side is done. I took it down off the axle stands to see how it looked. The subframe MIGHT, be 5-10mm closer to the left side..... or it's a 70's British car and it's not symmetrical. I have allowed for some misalignment by not welding the mounting studs in, they are just clamped by those two cap screws. So they can be moved around a bit when it's on a wheel alignment machine, then they can be welded solid. The front is supported by the jack, no springs or coilovers up there yet. The front arches are just SO ENORMOUS. I've measured the ground clearance of the front cross member and it's 180mm........ factory height.. .. But the sump is another 50mm lower. I'm not worried about the sump since it's it's in line with the wheels. The gearbox cross member has 130mm clearance, I'm a little concerned that it might catch on those really tall speed bumps like they have in Upper Hutt. I could probably trim it down by 20mm, but the only way to make it any lower profile is replace it with a heavy bit of 10mm flar bar which just seems so crude.
1 point
-
Coming to a cinema near you, this century.
1 point
-
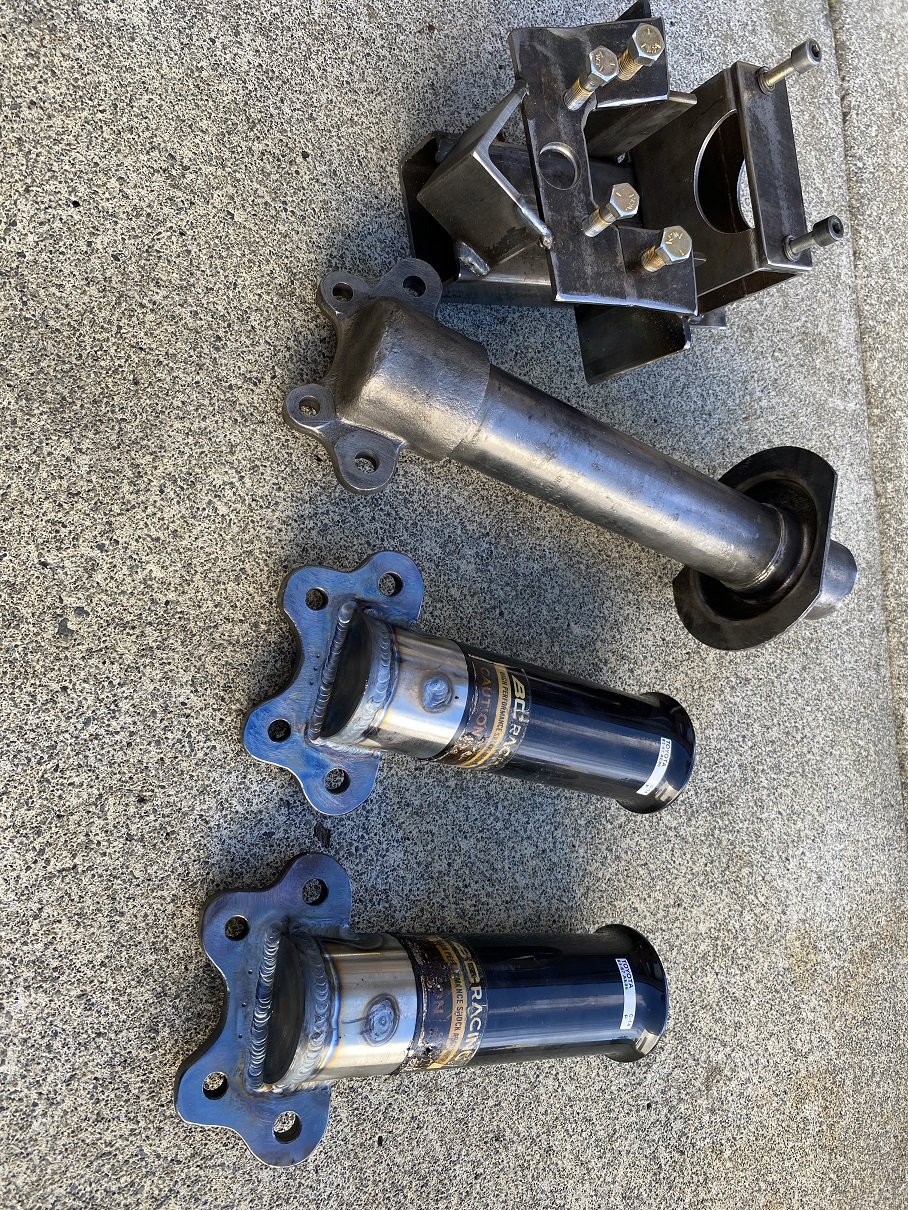
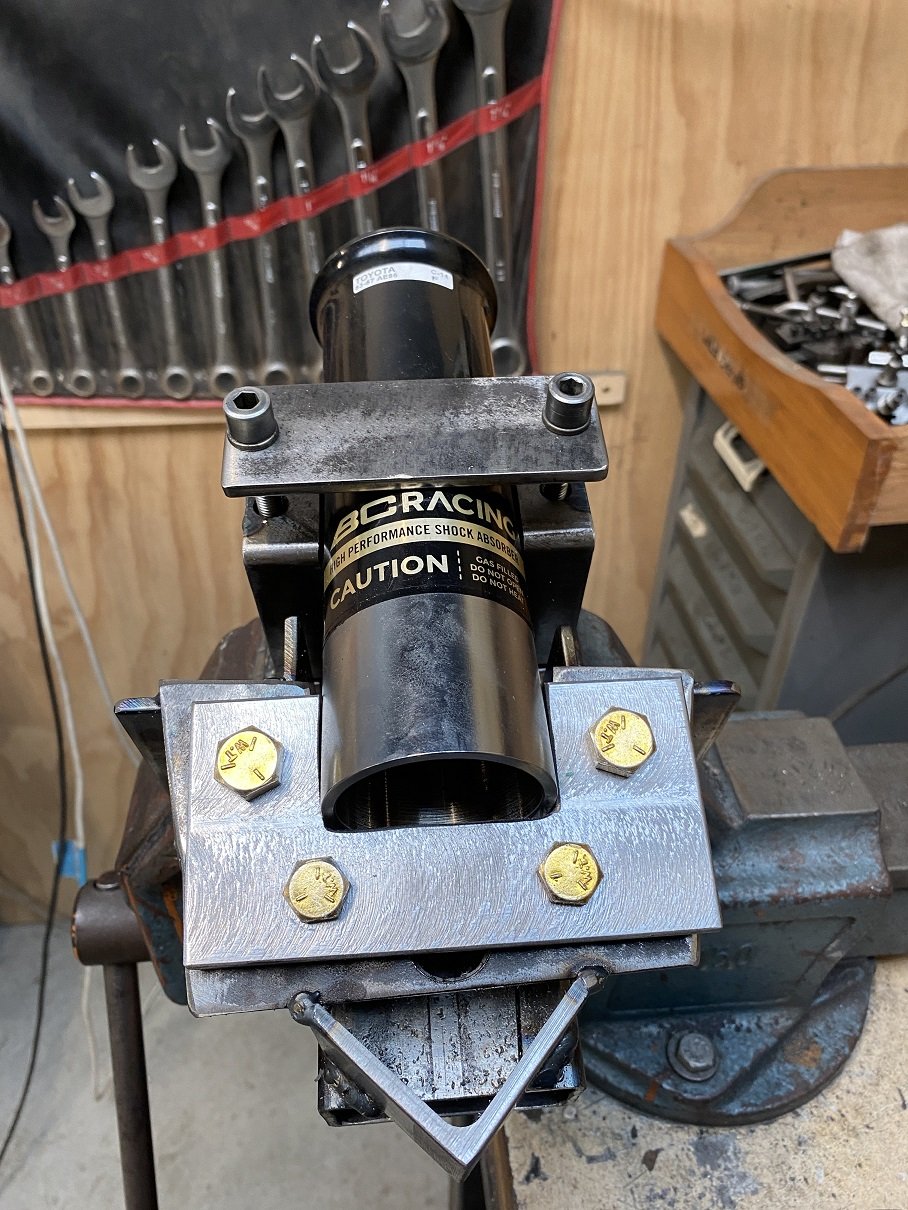
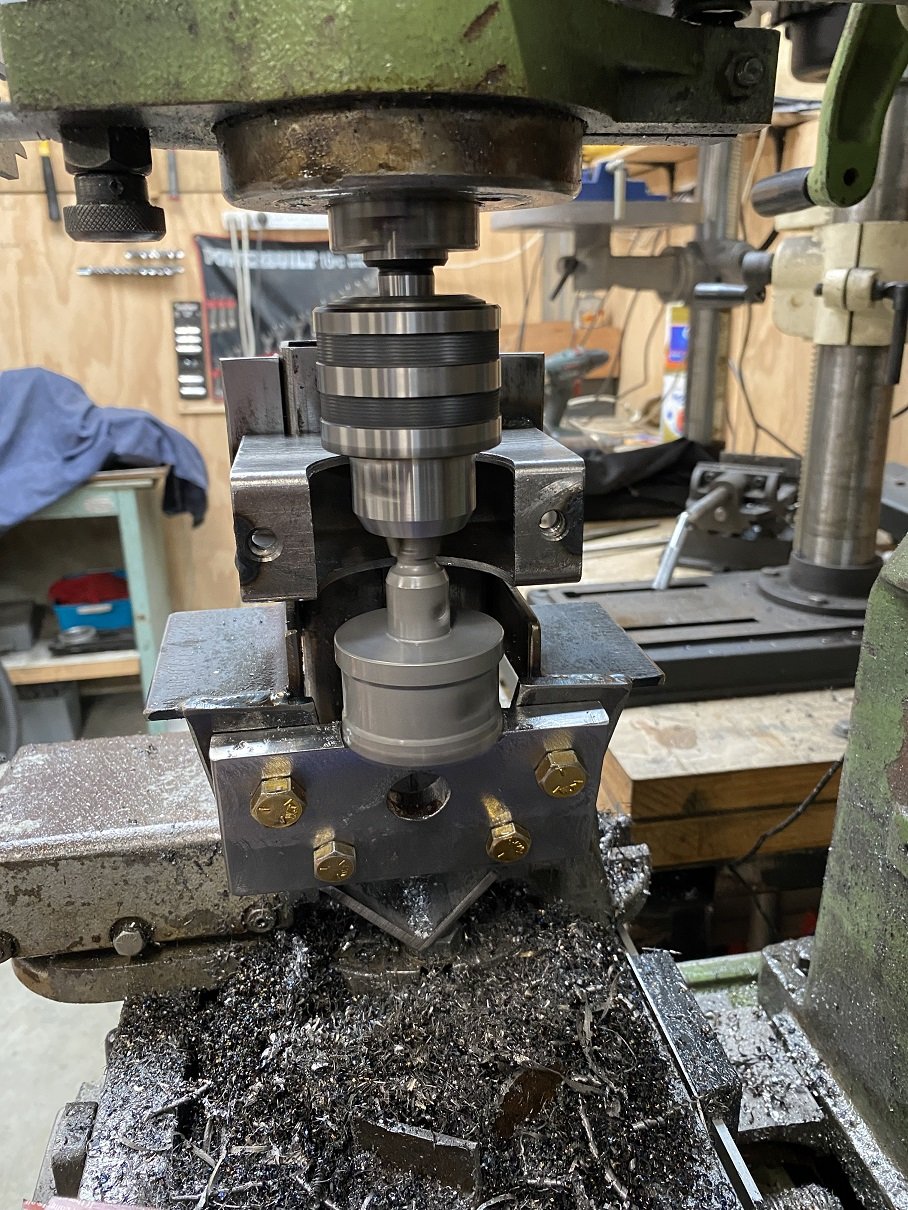
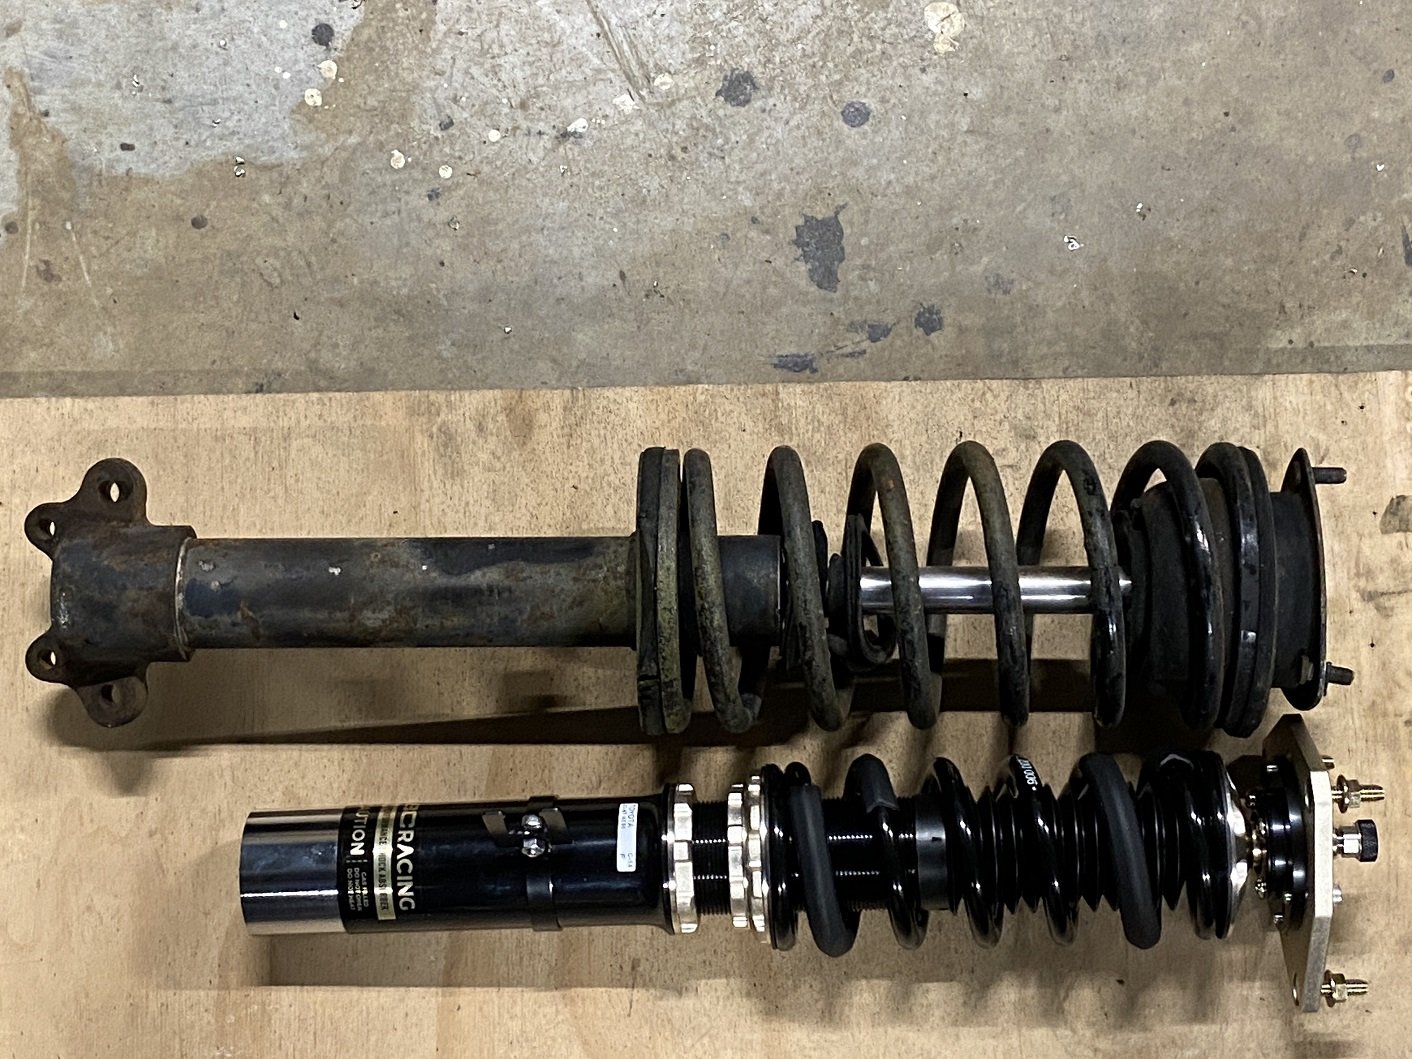
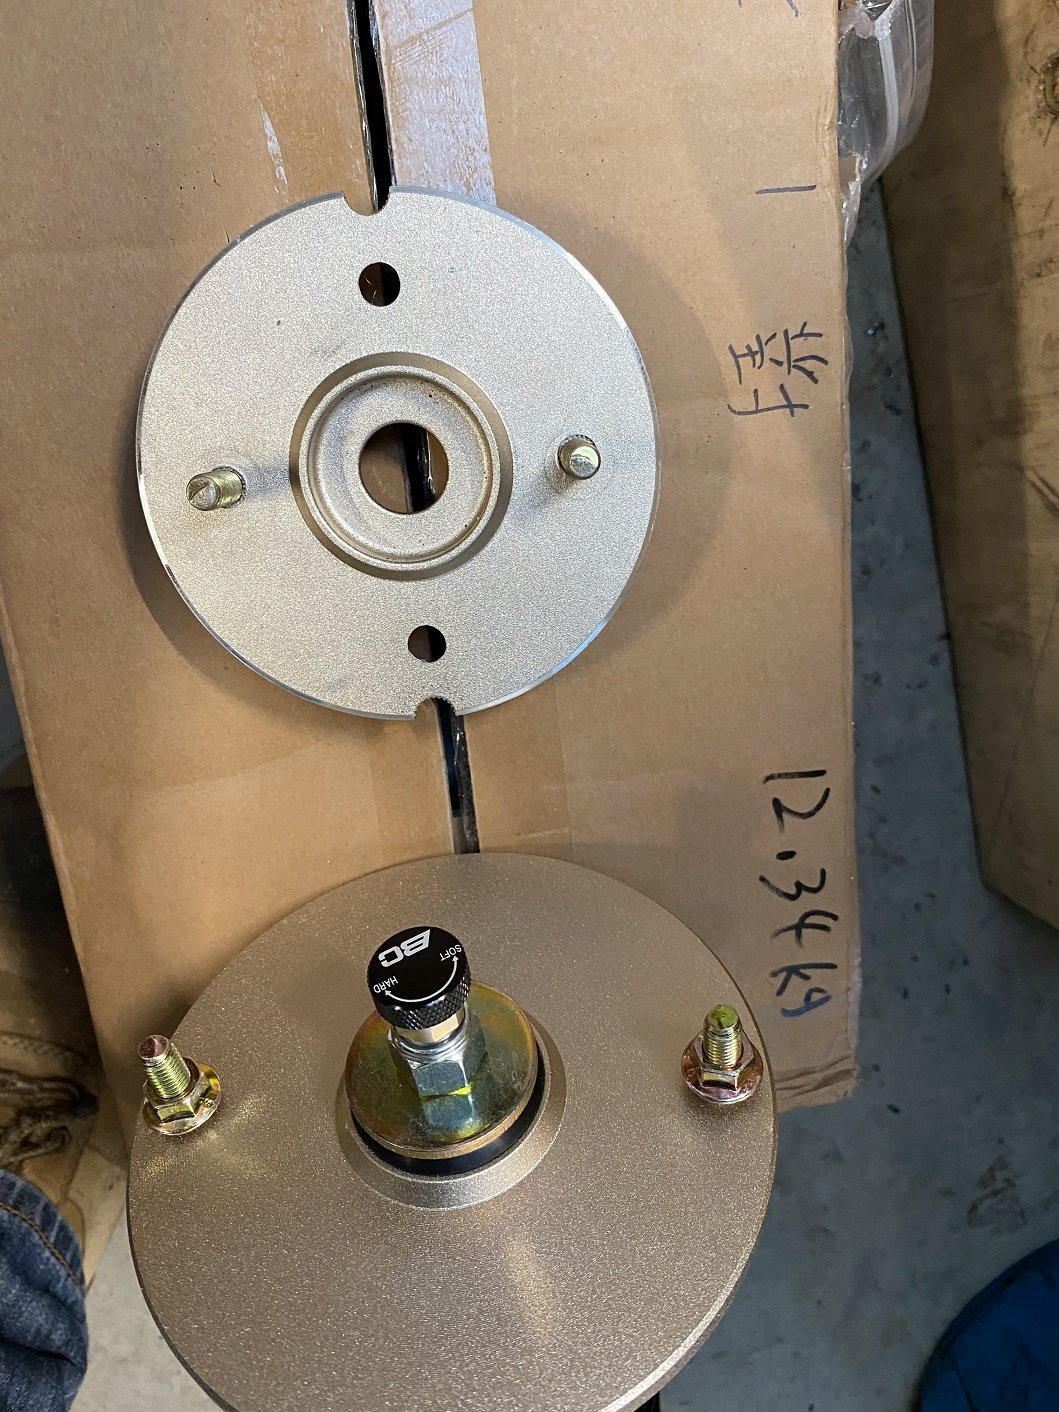
I split this up because I couldn't fit all the photos in one post. I also thought I'd get some weld-on coilovers or the front struts. Through pure random guessing, the first strut I looked at was for an AE86, I found out the od of the AE86 strut is 51mm. I measured the od of the Triumph strut with a micrometer and got 50.85mm. So the weld-on coilovers should fit my strut tubes. So I asked the supplier if they could get the id of the weld-on bit and the length from the top of the mounting plate to the bottom of the weld on bit when the body is adjusted as short as possible. "I need to to be no longer than 460mm". They emailed the supplier, BC in Taiwan I guess. The id is 51.1mm, so that's all good. And the shortest length was 459mm. Not stocked, order from Taiwan. But something must have been lost in the translation. The shortest length was 480. There's no way to make it any shorter. Where it welds to the original strut tube, the weld must be at least 10mm from the casting and at least one diameter length of the original strut tube must be up inside the weld-on bit. That's ~51mm, but with the damper screwed all the way into the weld-on bit, there's 55mm left for the original strut tube. I thought I could maybe turn the thread off the bottom of the damper, so it would fit down past the threaded section and into the original strut tube. But on inspection of the damper, that's not an option. Here it is with the original strut. Like this, it's actually 10mm shorter than the original strut at full droop, but on the car the original strut needs to be 30mm shorter to prevent the inner tie rod on the rack from binding. So it's 20mm too long. I thought I could probably use the same solution for the front as the rear. I'll have to modify the top plate of the strut tower to allow for the camber adjustment to clear anyway. So I chucked the bonnet back on to see how much room there is. 40mm is how much higher I could go before those nuts hit the bonnet. Will that be enough?
1 point
-
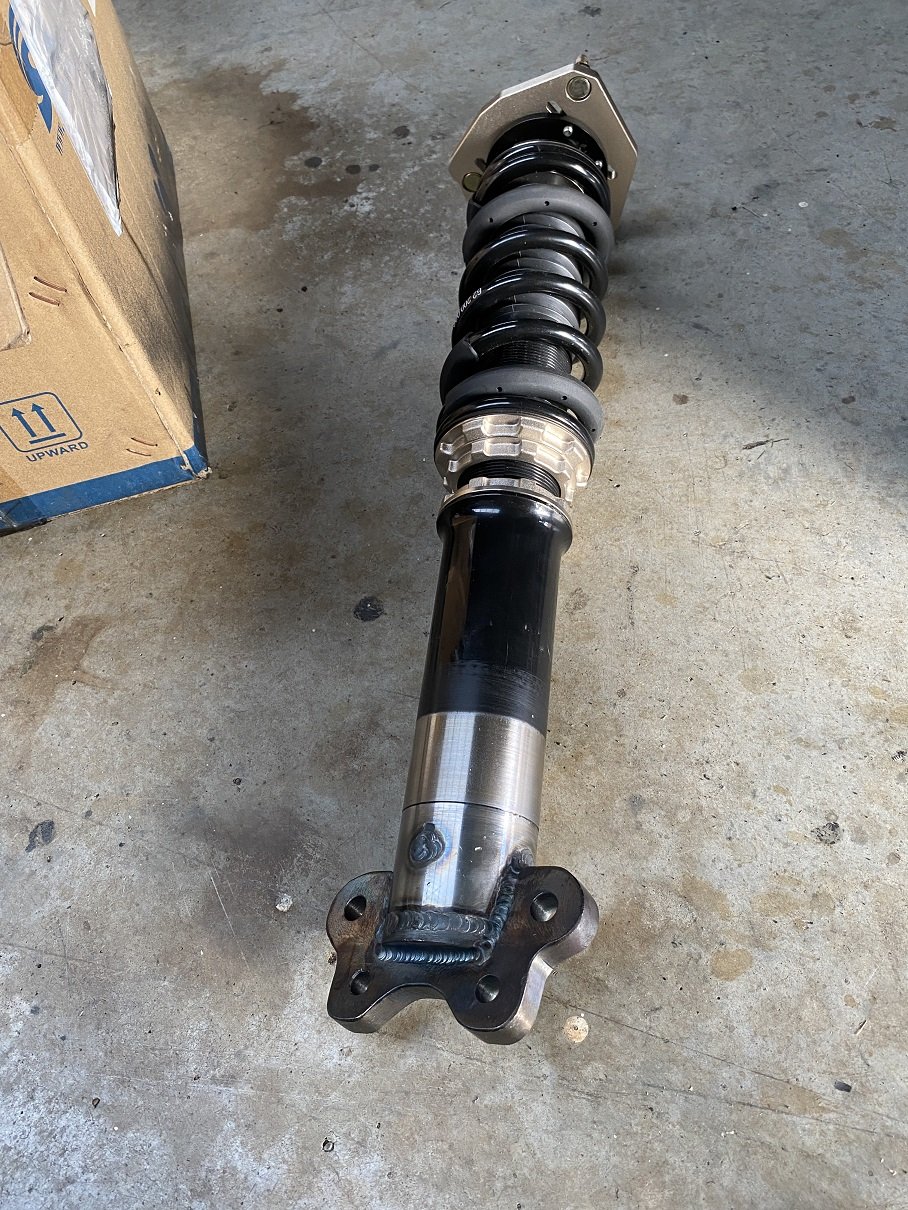
So I thought I'd look into getting two new coilovers for the rear because the Teins I mocked up with were old and knackerd. I went with BC racing because they would sell me only the rears and they were just barely affordable but still decent quality. The subframe is from an S14 Silvia, so I'm like "sell me S14 Silvia rear coilovers", assuming, these fit, so those will fit. Not stocked, order from Taiwan. "I'll put them in today. these will be the easy ones". They were a little longer than mine when the strut body was adjusted as short as it would go. "It'll be fine, a little more droop is not a problem". Oh, damn, maybe the teins were from an S13.... The Teins are 79mm pcd and the BC are 116mm. Those big top plates also don't fit in the strut towers I made. "No worries, I'll just make new stud holes and turn down the plate". The extra holes are because I didn't notice my 11mm drill was bent and because I had to clamped down in the mill, it made a 12mm hole. Well, that problem's fixed. Now to install the coilover. This is where I plan for ride height to be. The wheel center is actually the same height as the top of the sill, but the photo angle..... Buuuuuuut, to get to that ride height, I had to wind the spring platform right down...... and the coilover is basically out of travel and on its bumpstop. Fuuuuuuuuuuuuuuuuuuuuuuuu. So I was thinking that I'd have to look into different BC dampers that are shorter. The damper body is LONG, more than twice the travel. How much was this mistake going to cost me??? After working on the mini instead, so I could feel I had achieved something on the weekend. I realised.... my strut towers are totally custom fabricated, I could just make them taller! There's at least 80mm there that I can raise it and still get to the adjuster knob. The idea I had so I don't lose the reference of the strut tower top plate is to bolt spacers to the existing bolt holes, then build a new top plate off the top of the spacers as well as the top portion of the strut tower that would slide over the top and overlap the existing strut tower top. I'd then use tek screws or something to attach the new top to the old top. Then I can cut the old top off, refit the new top, using the tek screws for alignment, then weld it inside and out. Wheew! I supposed I should work out if 80mm is going to be enough.....
1 point
-
Just sat the rx3 bonnet on it for effect. sat here enjoying some colds snacks and thought, yup I’m digging this. needs more low, lots more low, like all of the low
1 point
-
Tried a 5mm spacer under the rack. I think I'll leave it there, the rack tube is about 5-6mm away from the sump now.
1 point
-
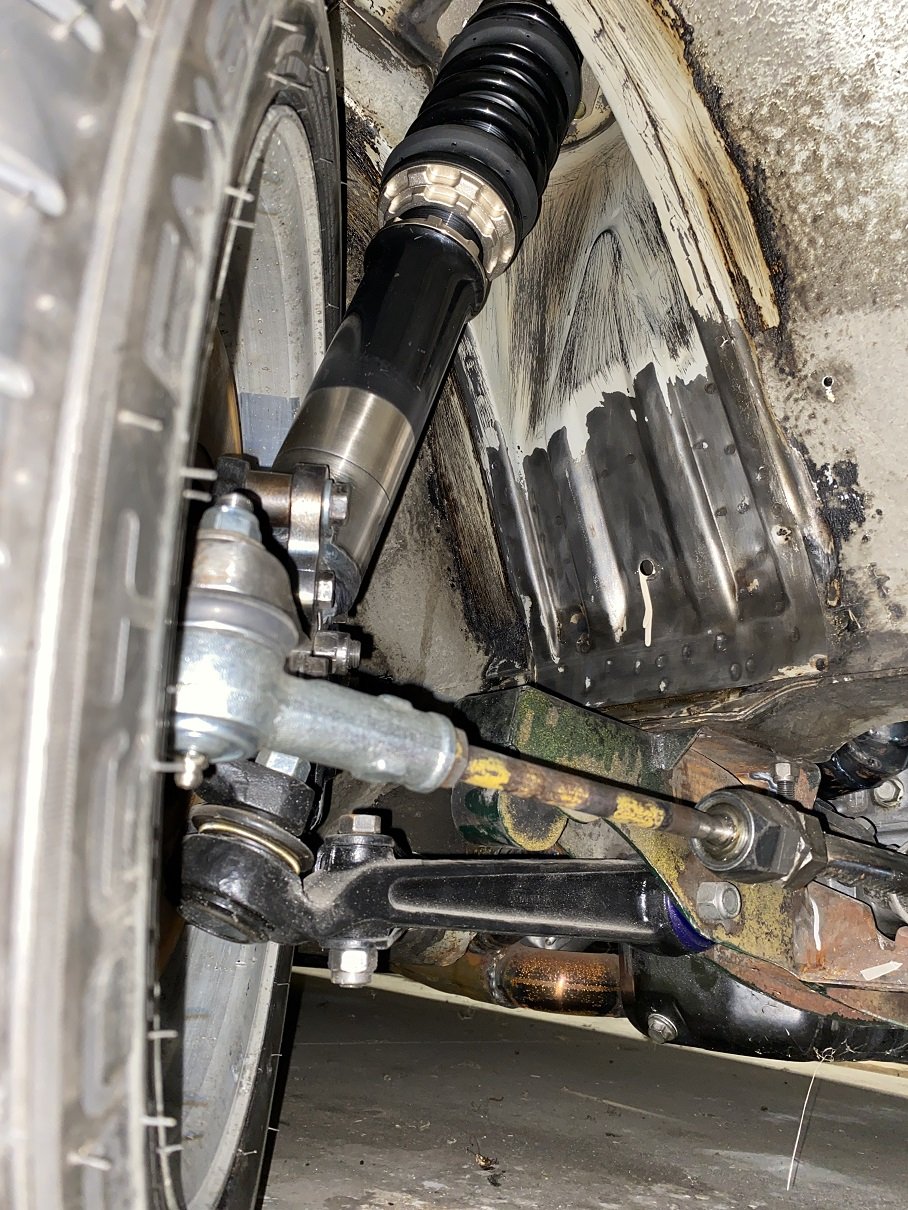
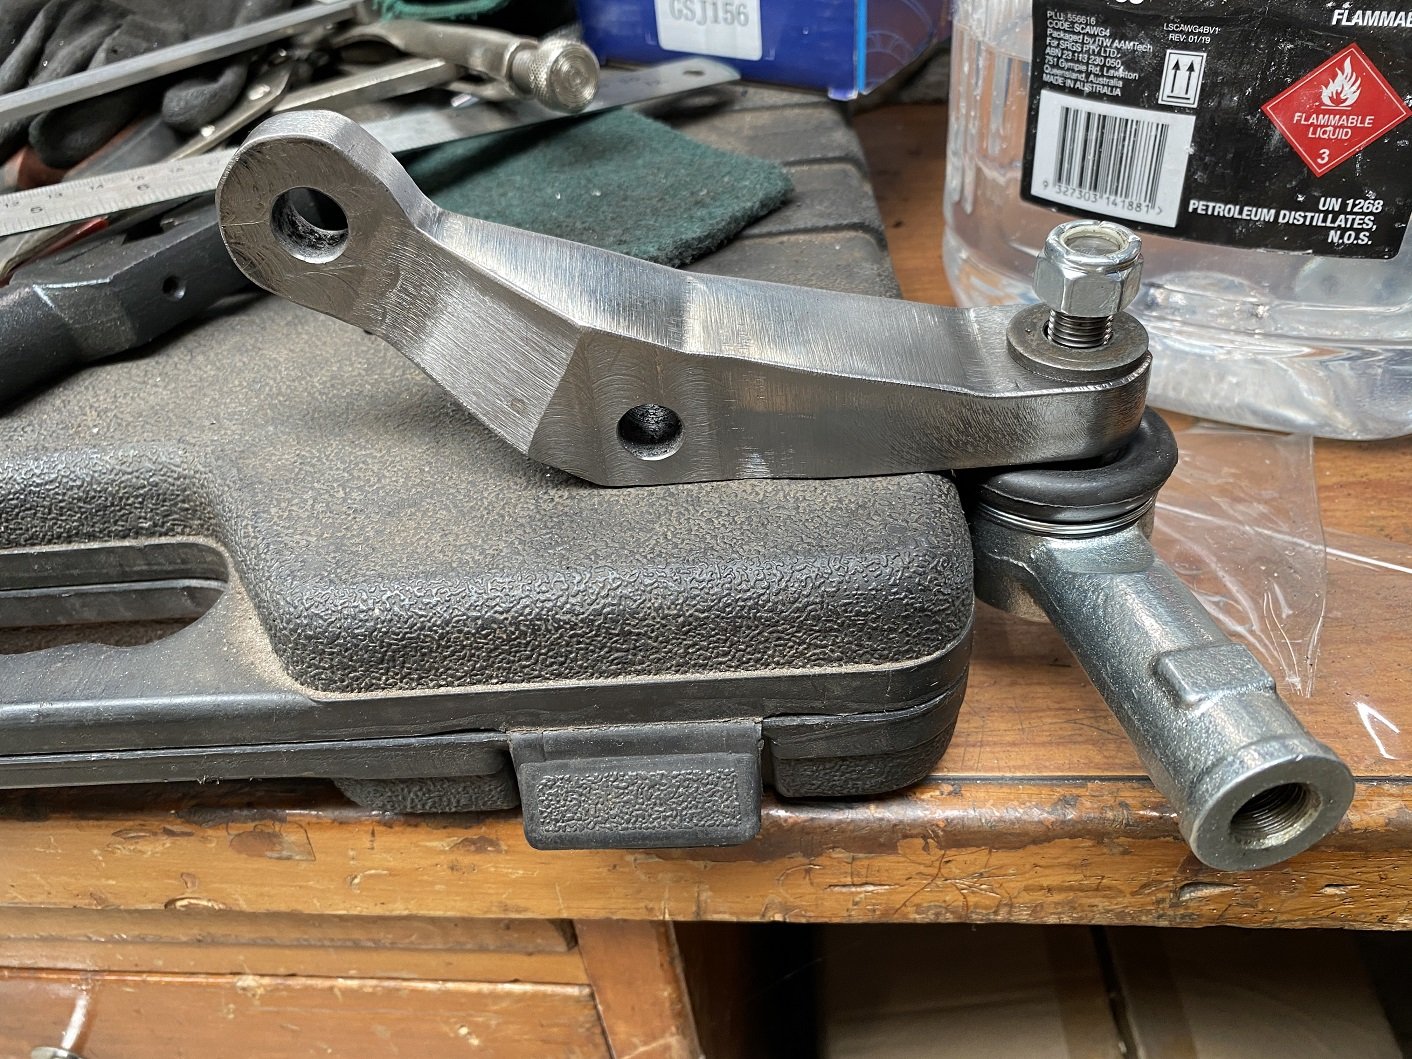
And the right side one is finished! It also fits! Both installed. This would be where full droop needs to be, any lower and the inner tie rod ball joint binds. There's another 60mm of travel to get to ride height. I guess I need to sort out doing a bump test now.
1 point
-
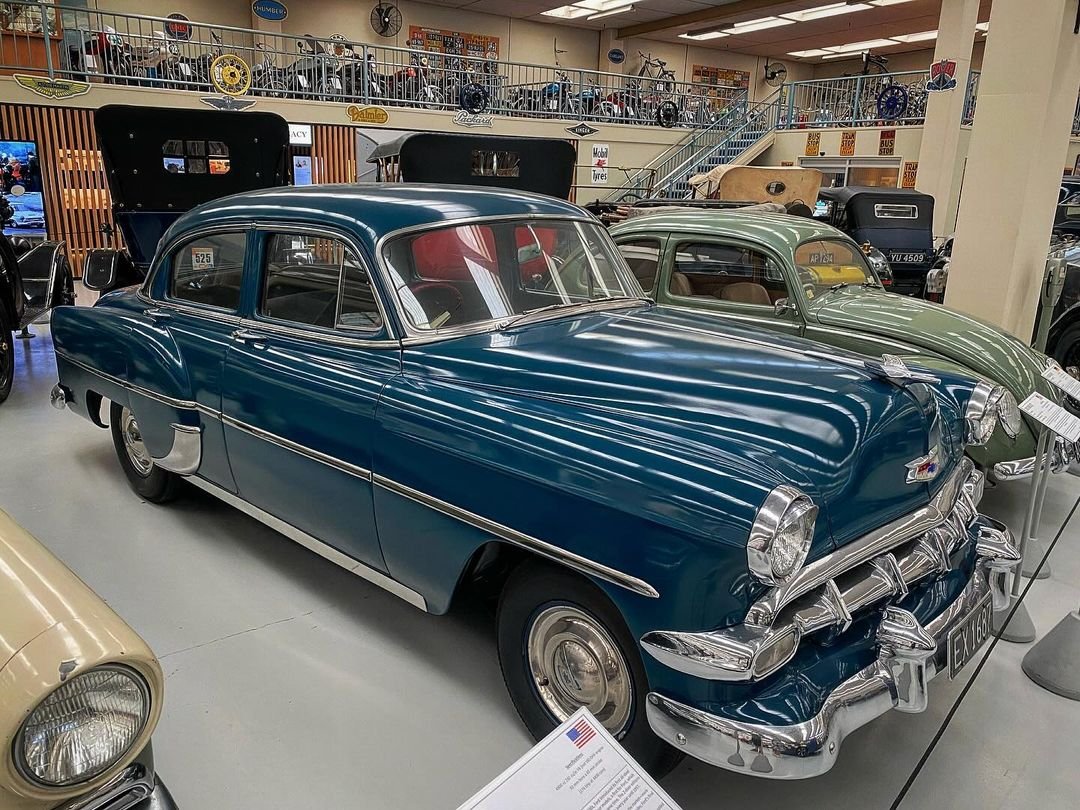
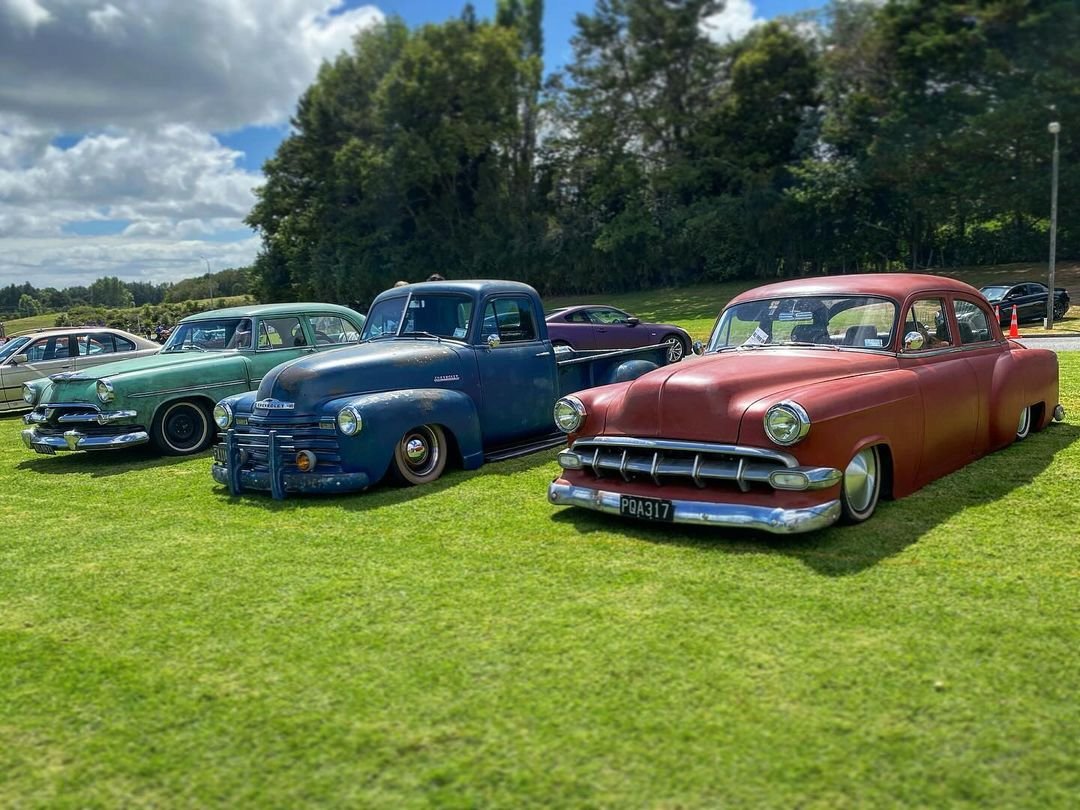
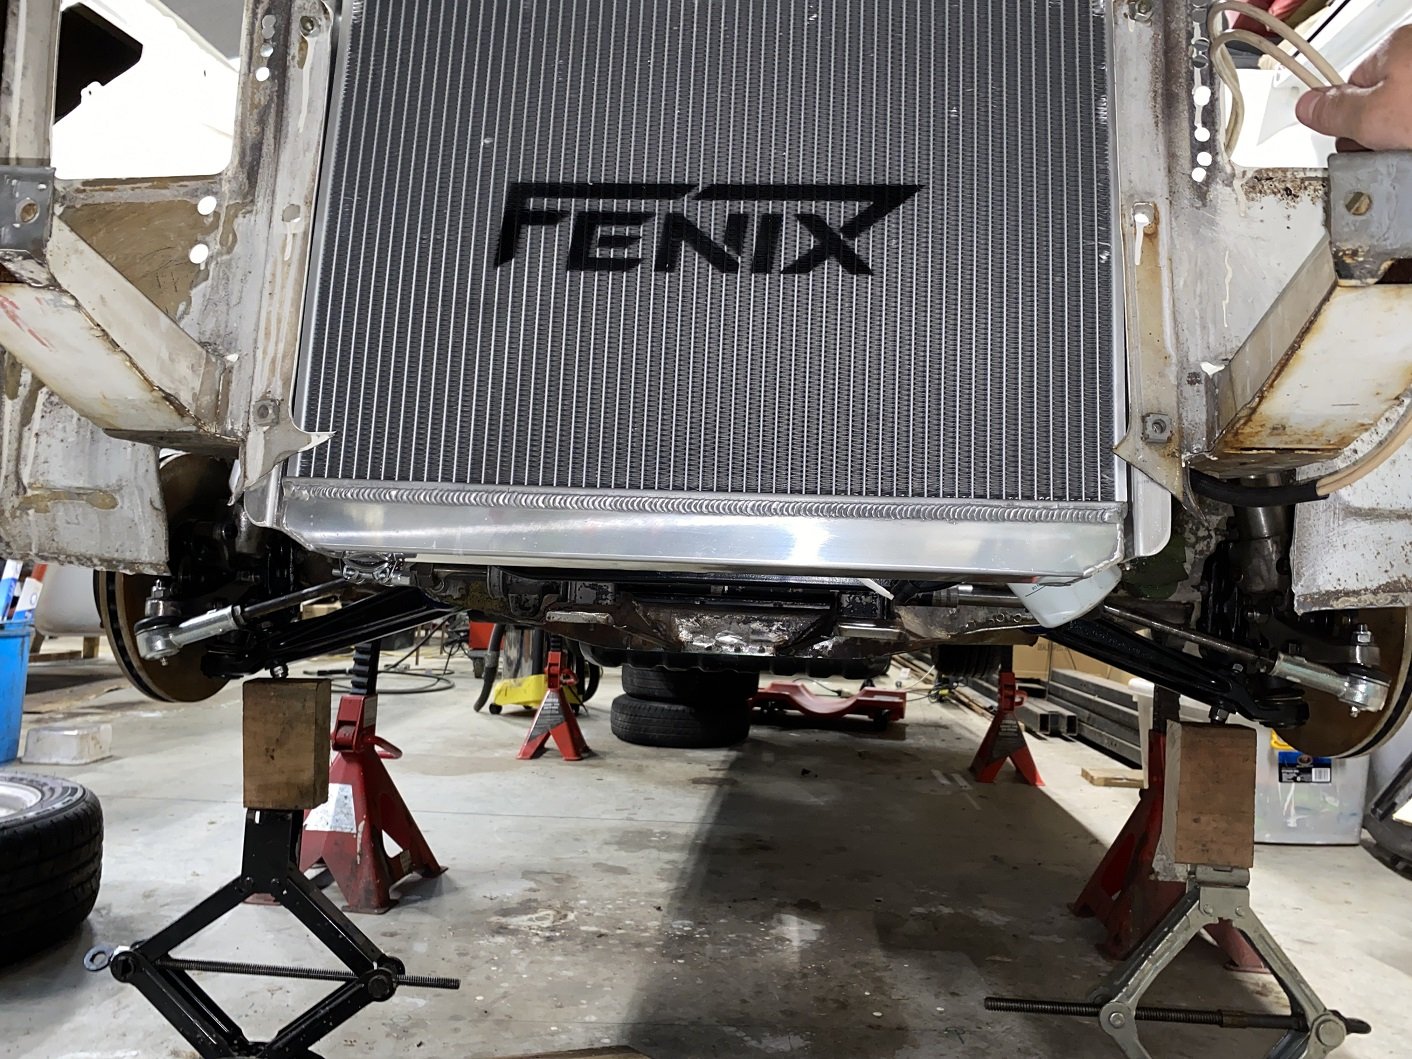
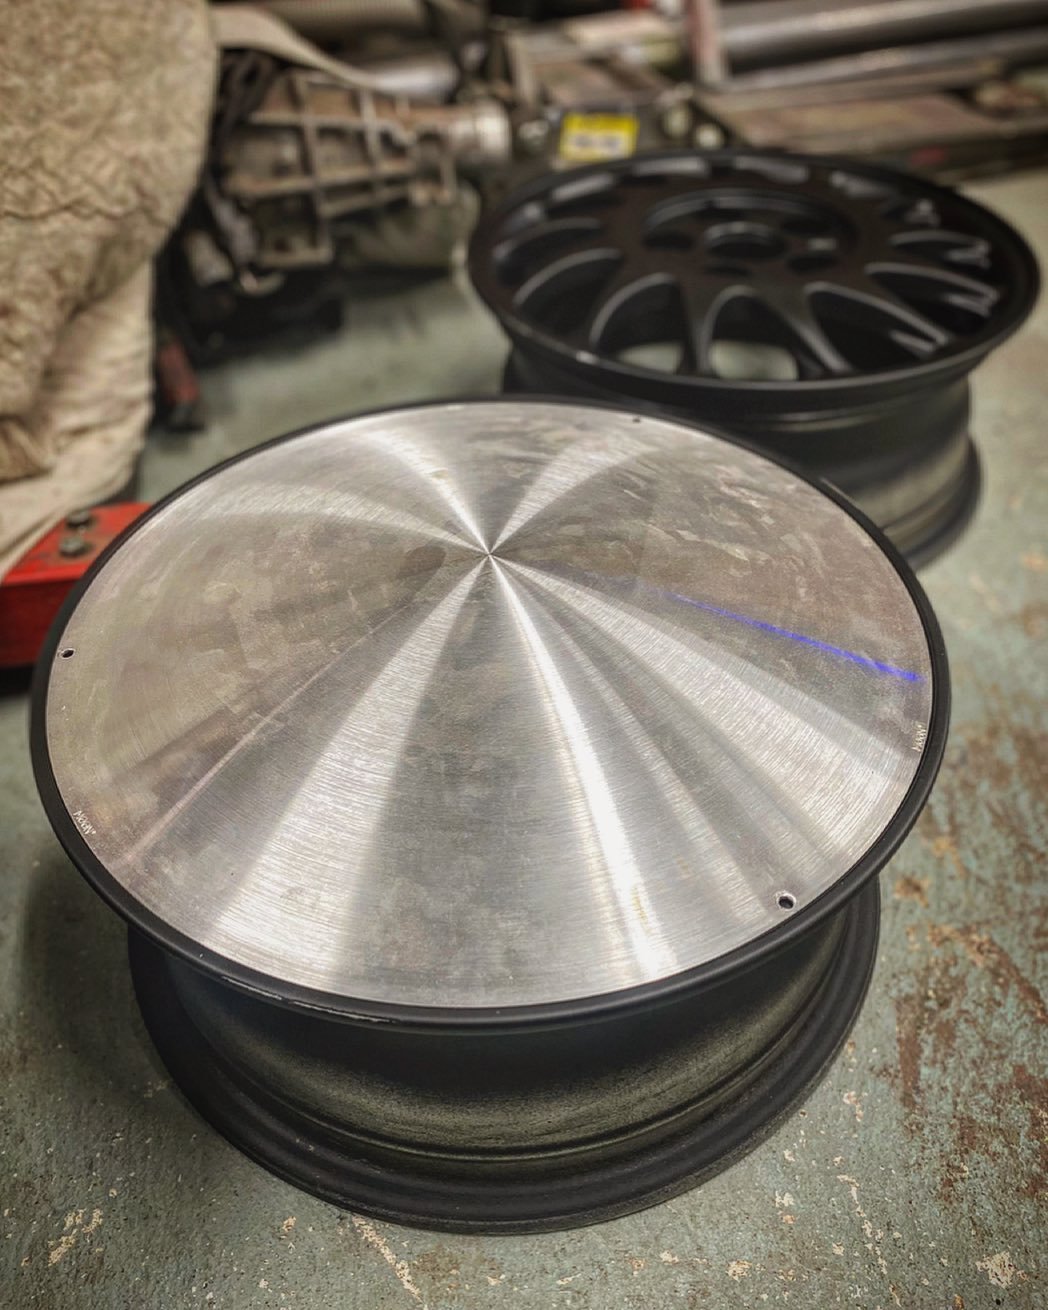
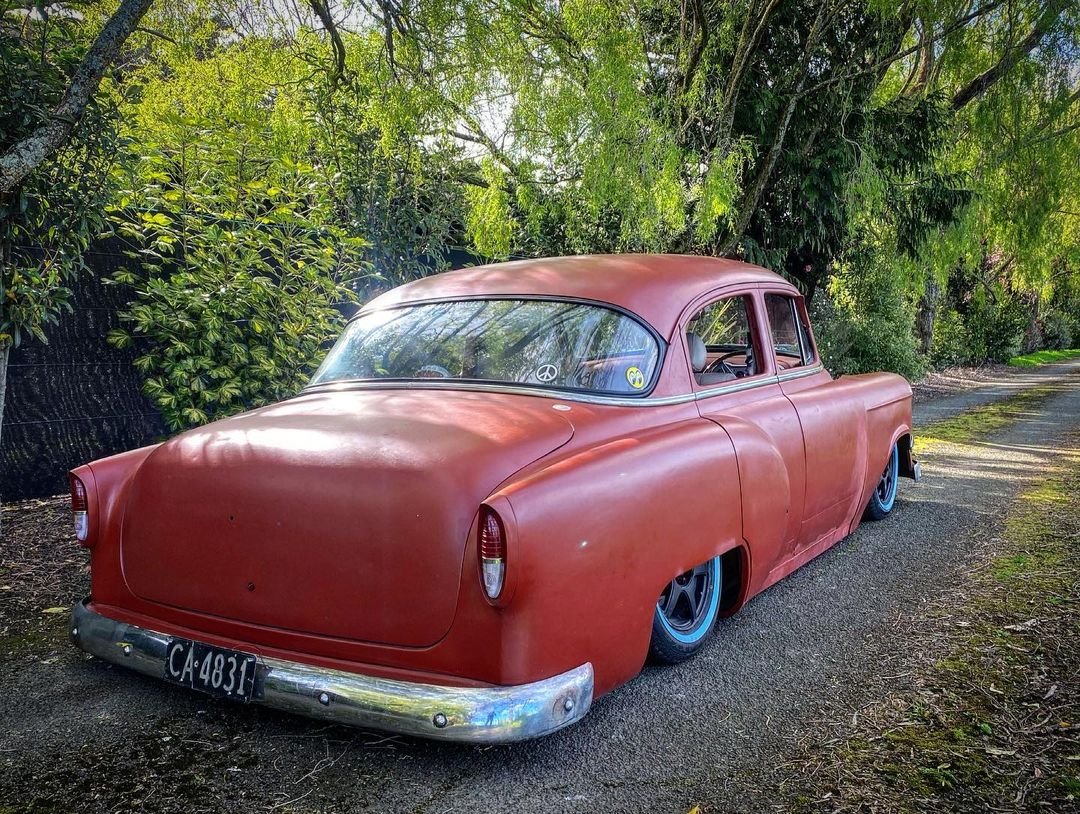
Been Driving it a bit. Fixing a few things. Ran some new Shielded instrument cable for the air bag sensors. As they were giving quite noisy readings due to interference. Also picked up some new wheels for the Chevy to sit beneath the moon discs. While most strive to find the lowest possible offset with the most dish, in a rim. Not this car. These are +58 15x6 from a JDM Toyota Progress. Progress happen to use the same brakes as early ls400. So the calipers fit beneath these beautifully snug. And tuck the tyres in beneath the guards plentiful to allow for that extra angle in the steering while low on the air suspension.
1 point
-
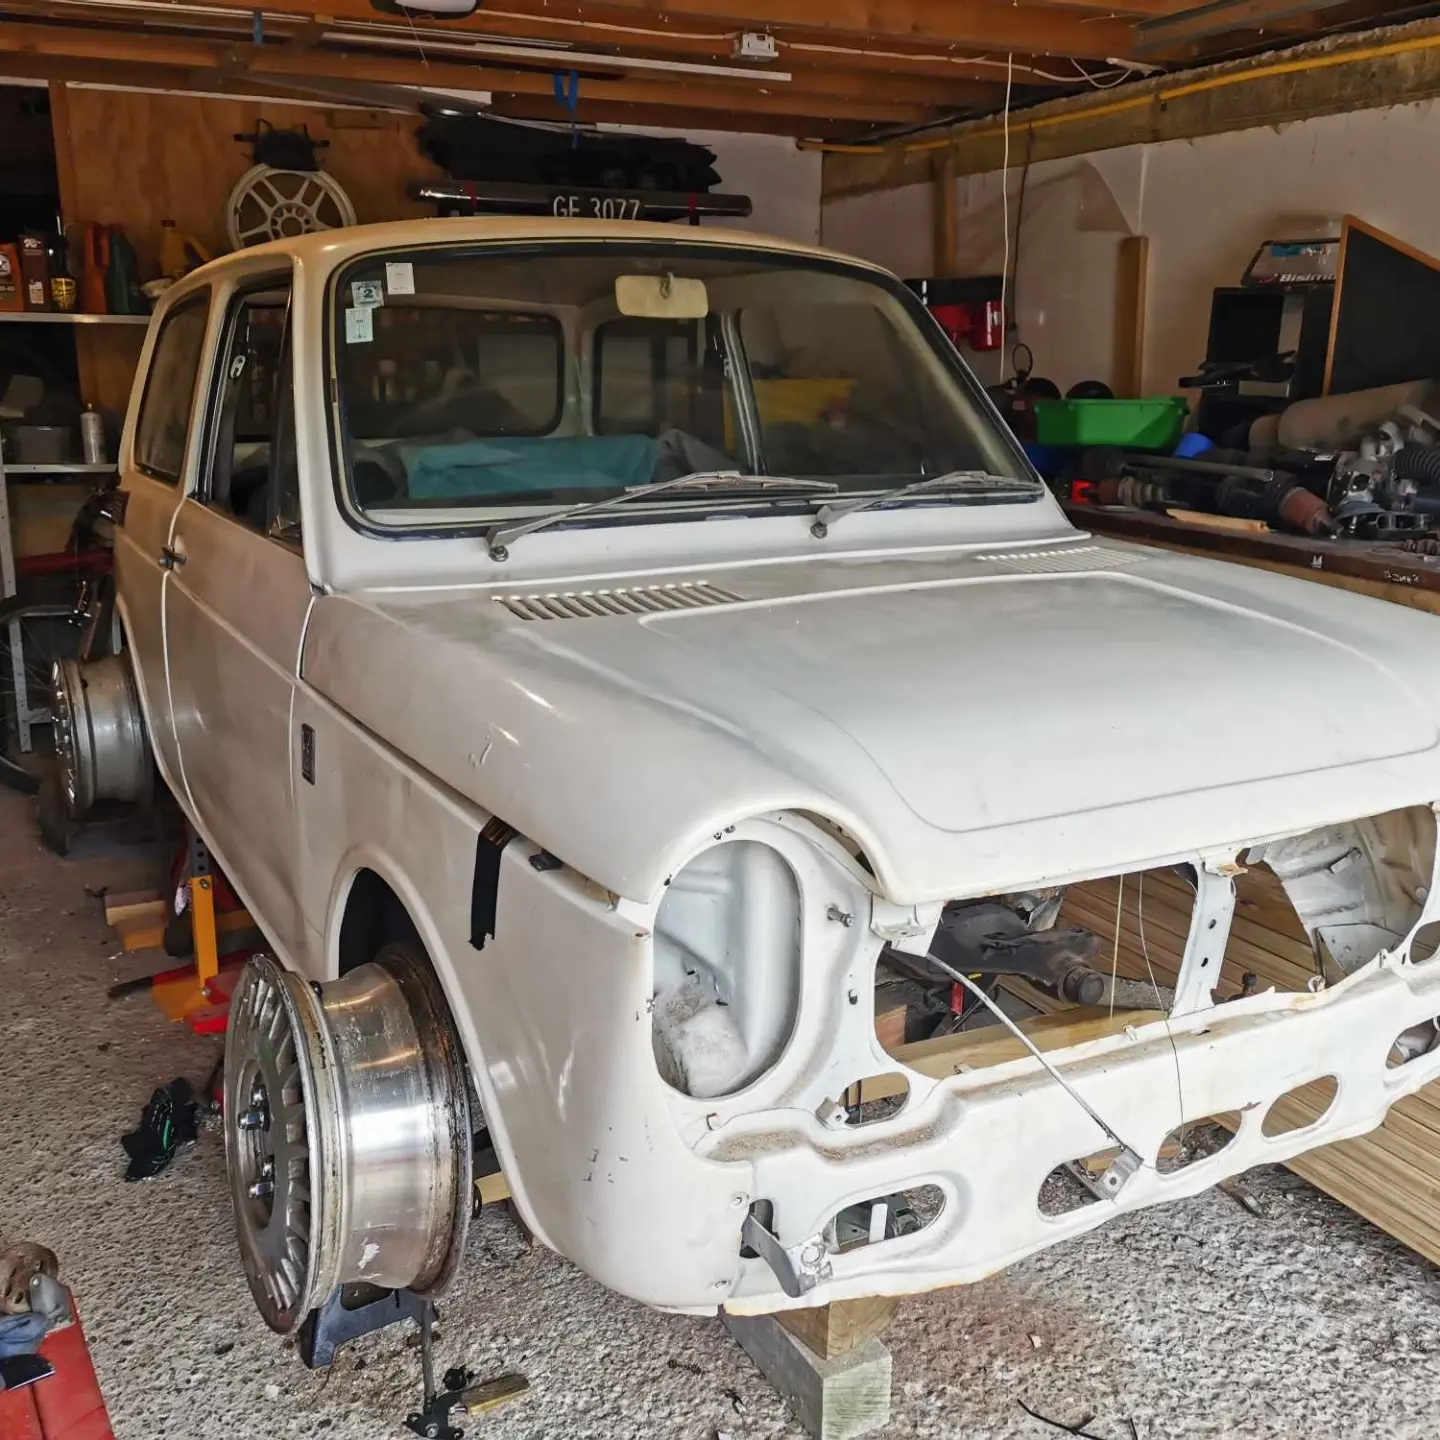
Things recently happened as I remember them: 1) Wife gave birth to future slave labour option 2) Donated above green N600, finally out of the garage weekend just been. Hopefully the new owner will give it another lease for life. 3) N360 got it's brakes all redone, new rubber lines, new pads, master cylinder rebuilt, everything lubed up and nice. Still have sponginess in pedal, need a vac bleeder I reckon 4) N360 took a little visit to Honda Wellington dealership as part of a promo. Car got a decent wash, polish etc. Now that garage is a little more empty, not that I have any time still, I still have a few things I can work on, still need to find door and window rubber seals and bleed brakes etc. I suppose might have to wait for Spring at this rate...
1 point


.thumb.jpeg.384ff72c8d2b0ee0d34a7bdedb55bdcf.jpeg)


This leaderboard is set to Auckland/GMT+12:00