
Leaderboard
.thumb.jpeg.384ff72c8d2b0ee0d34a7bdedb55bdcf.jpeg)


Popular Content
Showing content with the highest reputation on 02/06/24 in all areas
-
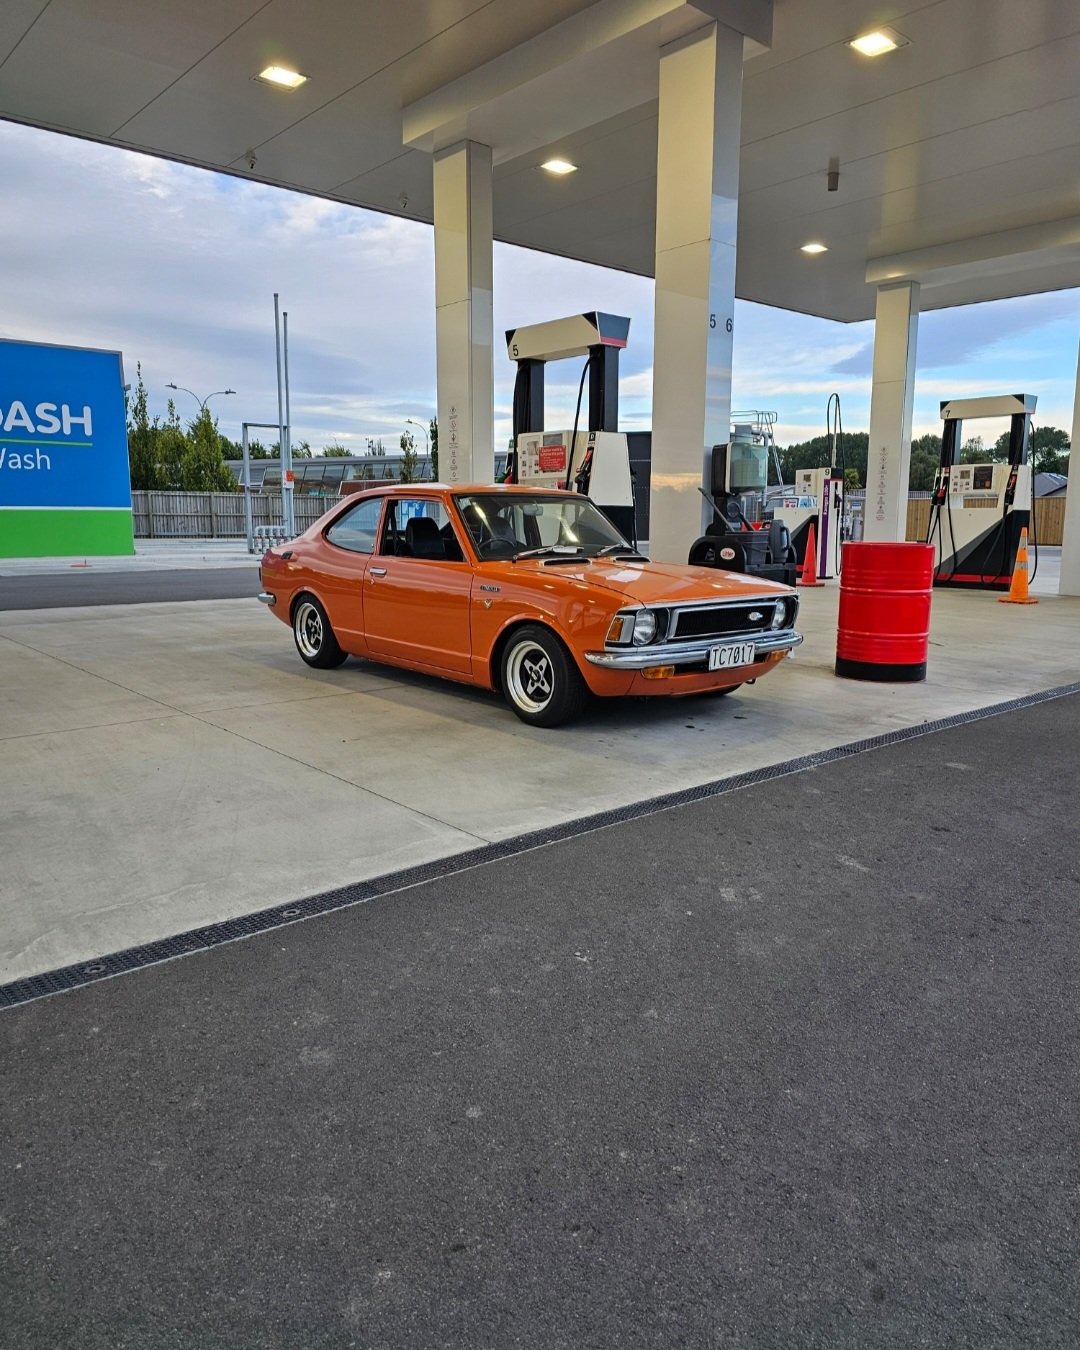
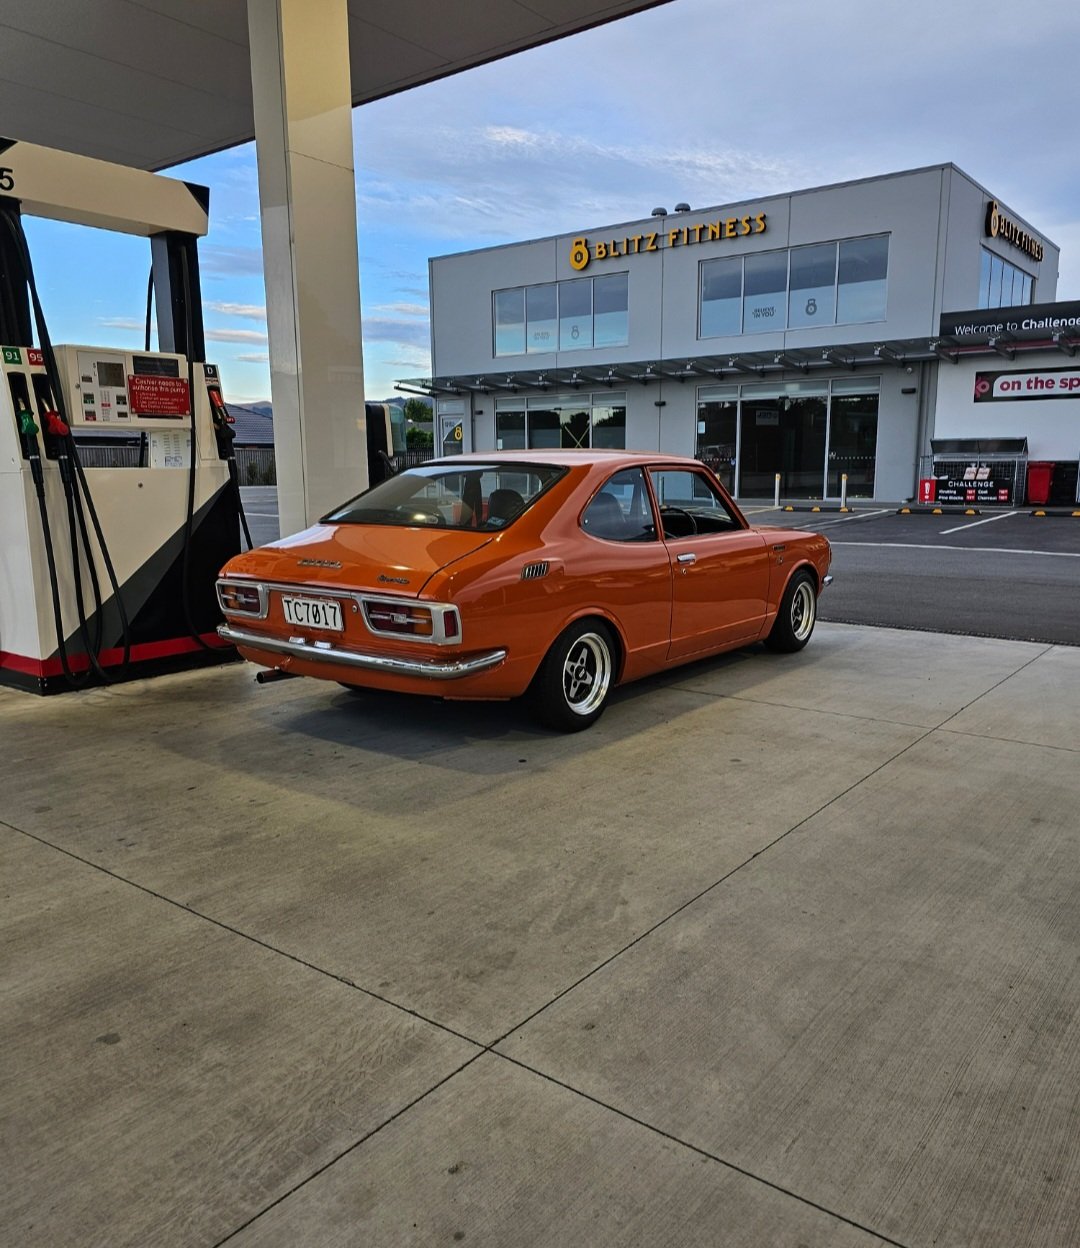
With the Weather being so beautiful lately.. been getting the datto out more and more... All the hard work is paying off and falling in love again. On a side note.. there's two events on this weekend.. Saturday. Hamilton Car culture at Minogue car park. Sunday. Morrinsville Motorama. I'll be attending both.
 10 points
 -
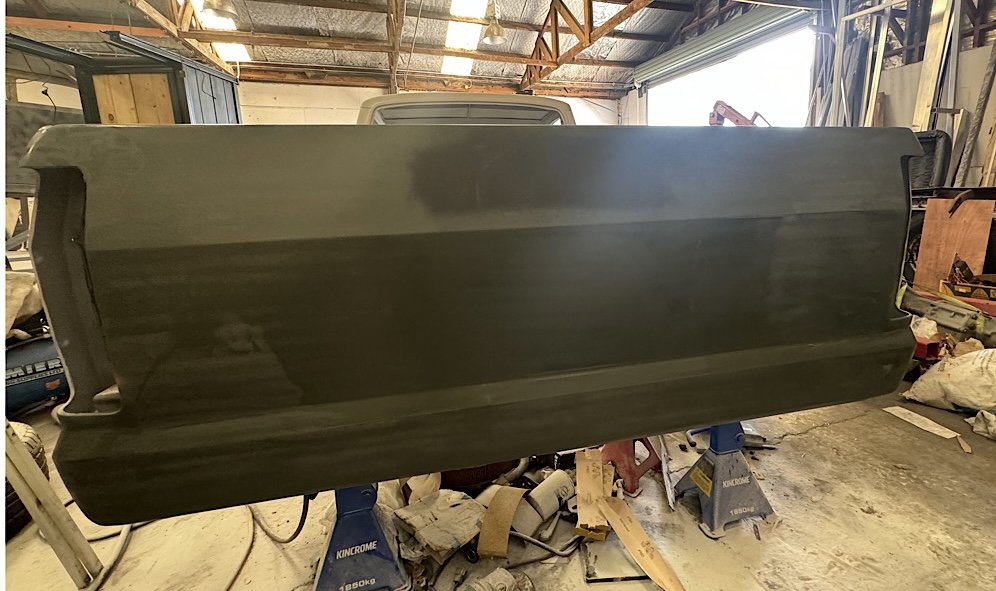
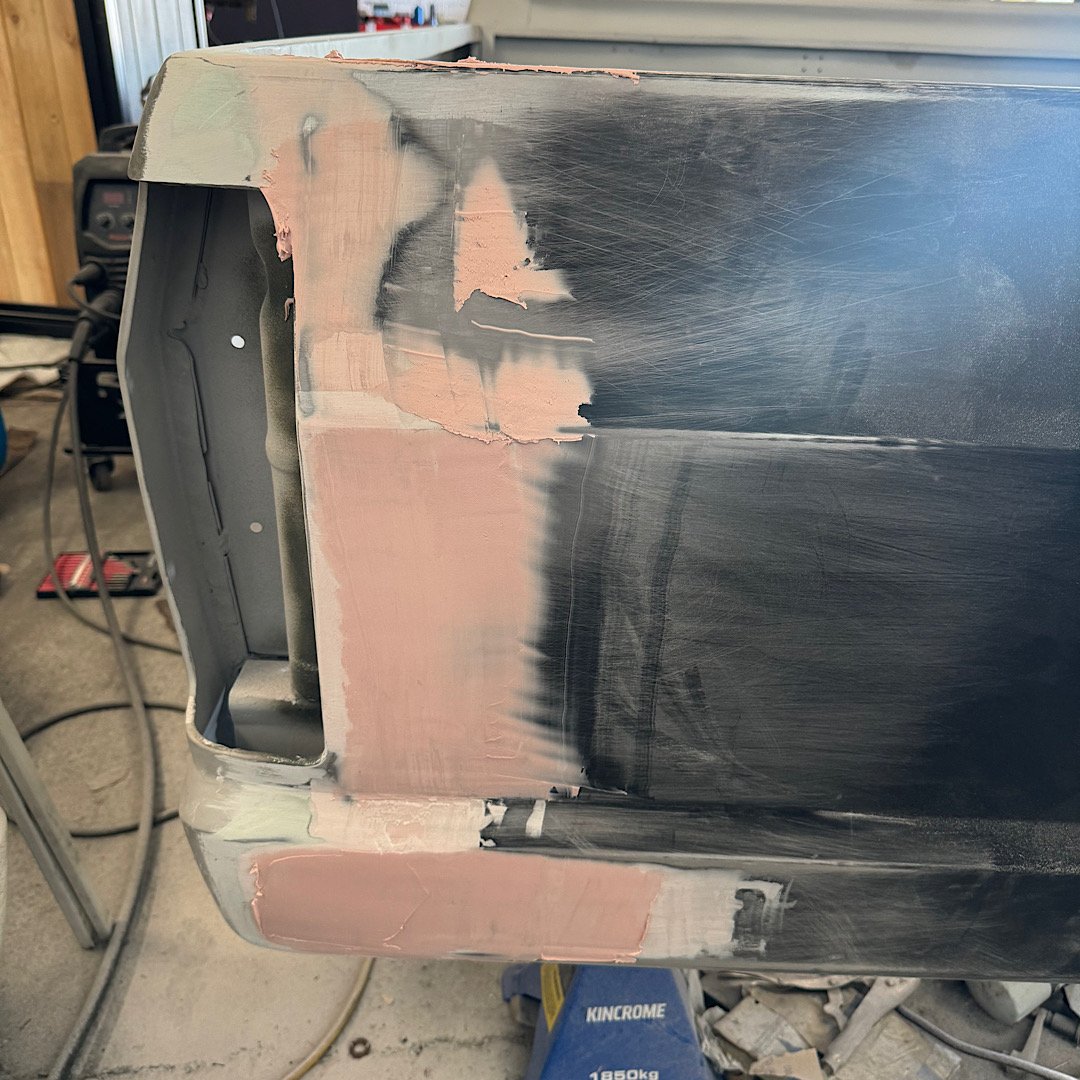
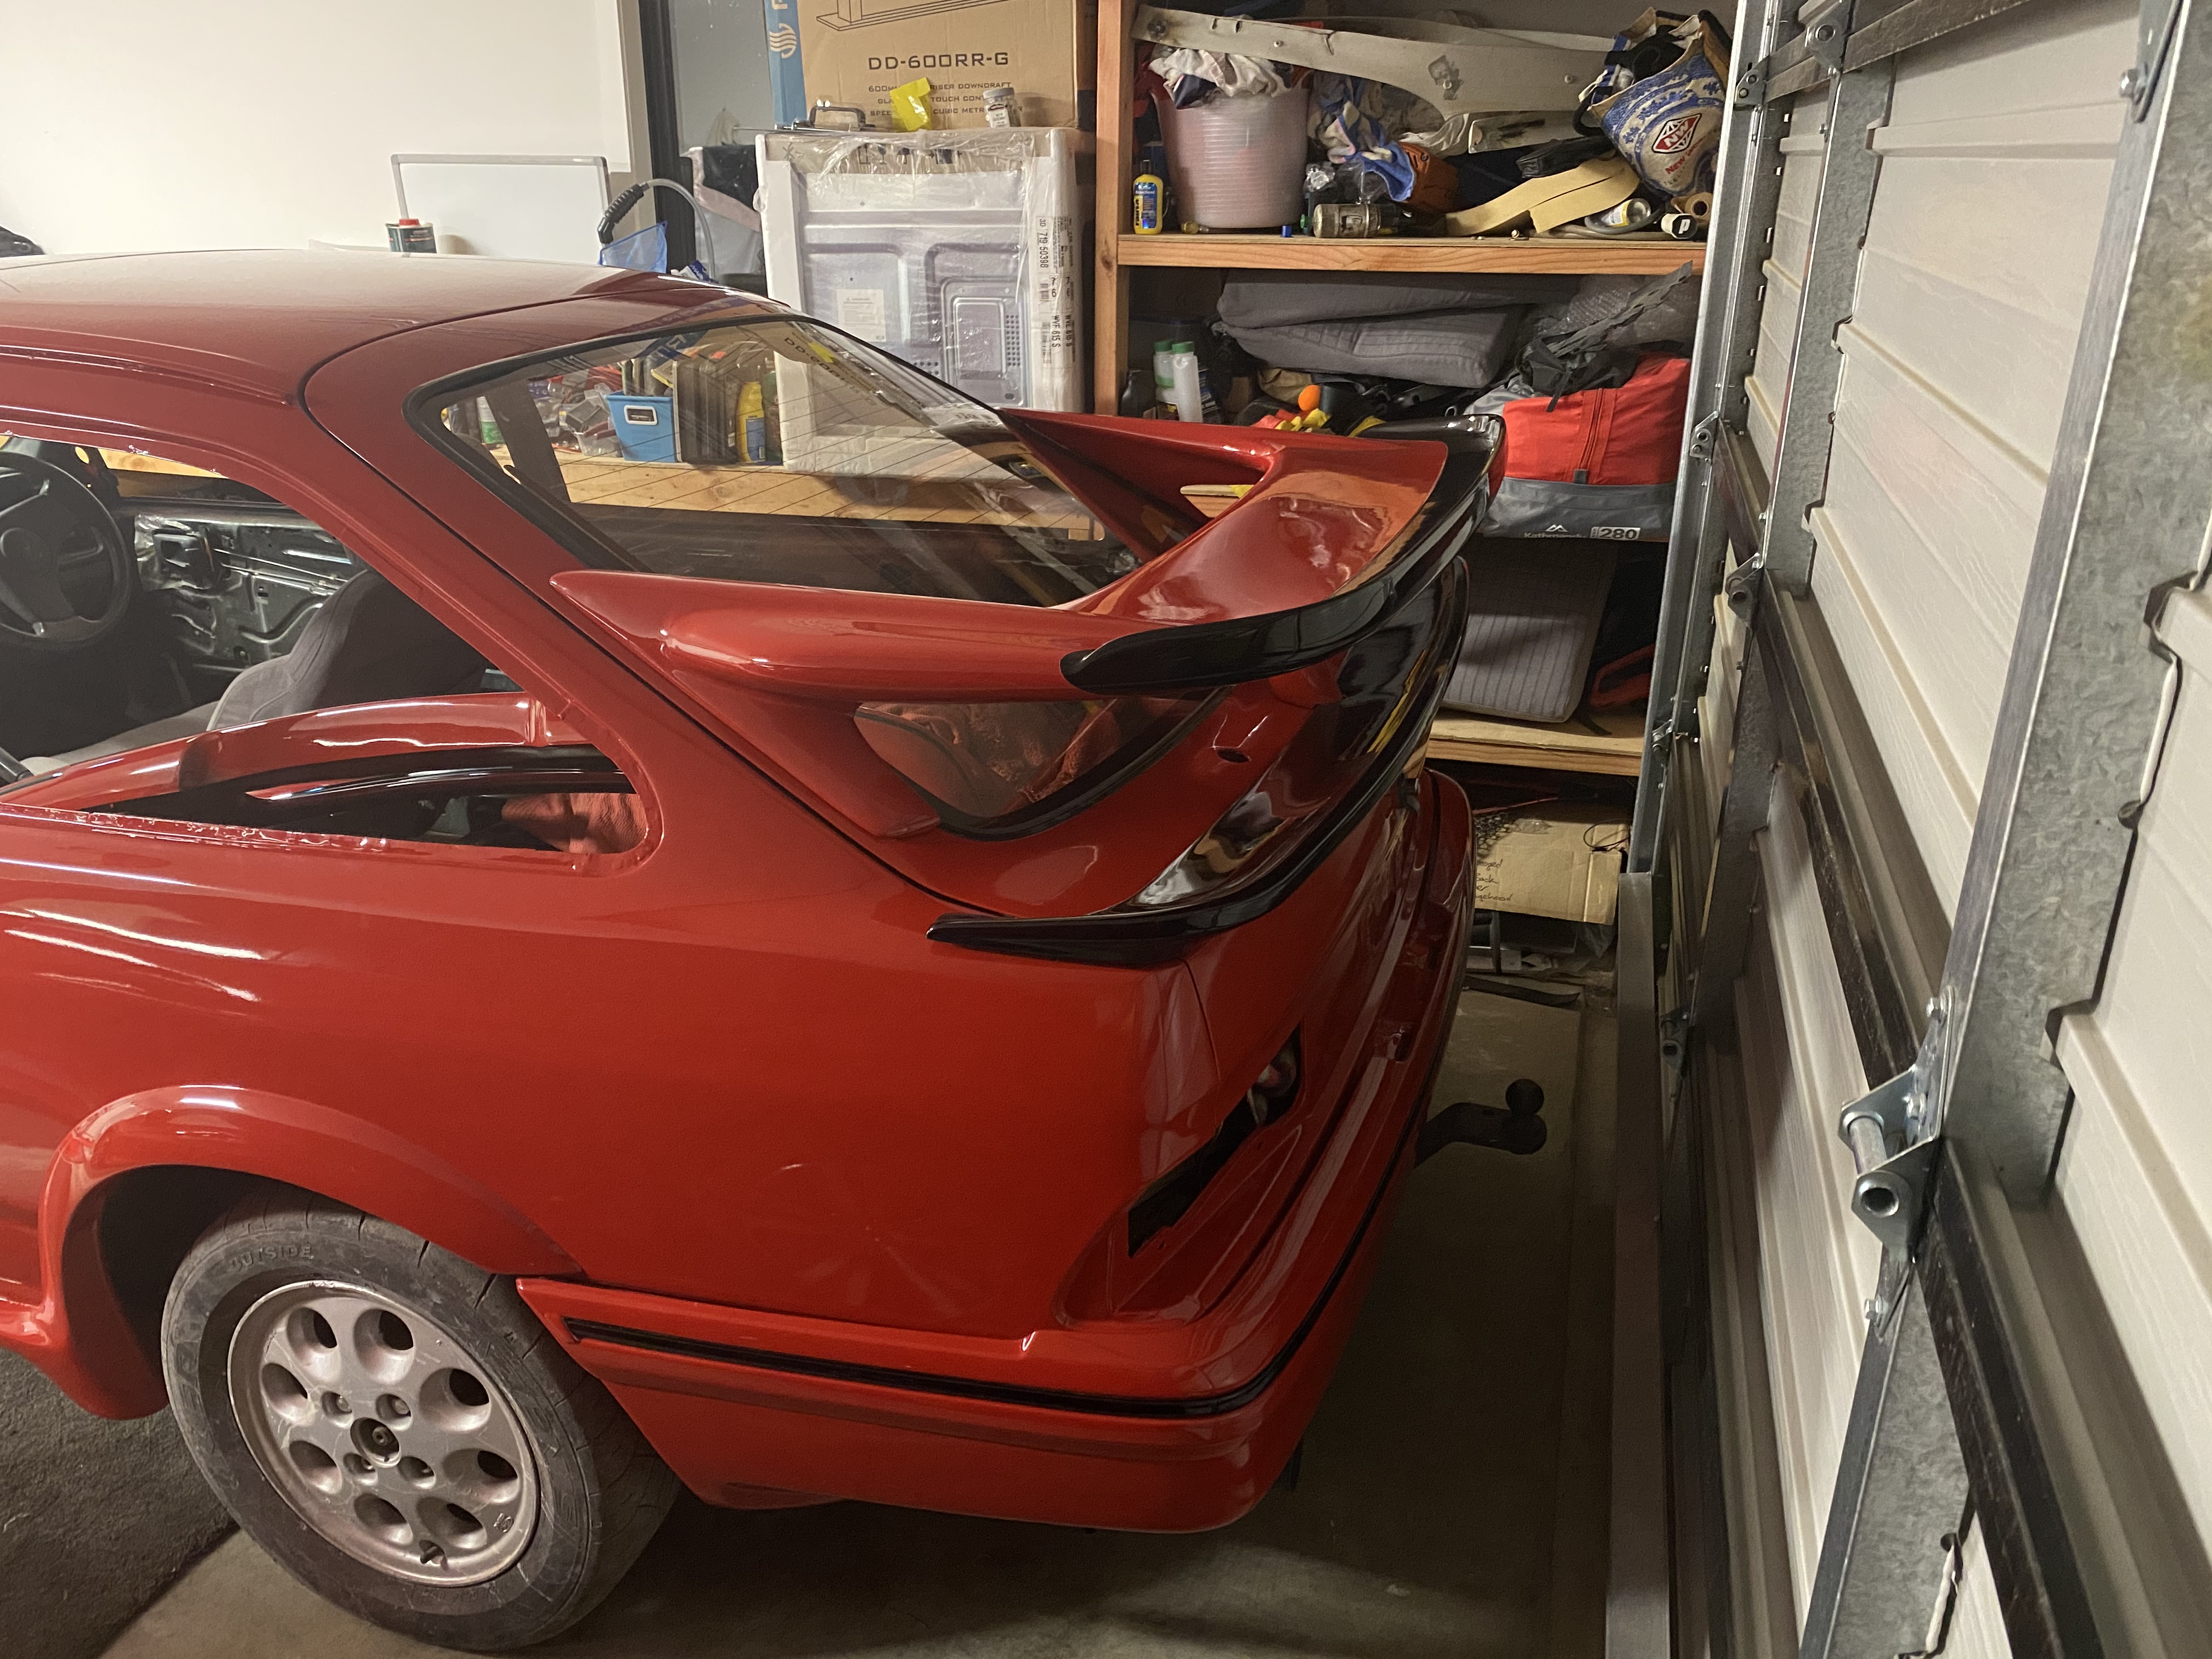
Tailgate 99% done. only have some minor fiddling to do on the concave fold line. Might need to make a shaped sanding block for it. then sand out the 80g scratches ready for a filler primer. i also played with spacing the balljoint to achieve a better angle. tried a 9 degree wedge (achieved by washers). this got the crossmember to 20mm clearance. id be happy with that, but still don’t like the idea of the bj being close to maxed out. so I decided to pie cut a set of arms (I have a spare set on the parts ute). cut it to gain a 10 degree change. balljoint sits neutral at ride height and very nice at full lift and full slam. crossmember is on its tits. Now it’s time for some c notch action. with the frame currently sitting at 90mm with the diff on the frame, a 6” notch should be sweet. I will set bumpstops to max out to the legal scrub line or whatever it’s called. think it still equates to 50mm clearance “legally”. doesn’t need to be smashing the frame into the ground. I needed to get the body into final prep before I head to Japan next week. So pretty stoked so far.
10 points
-
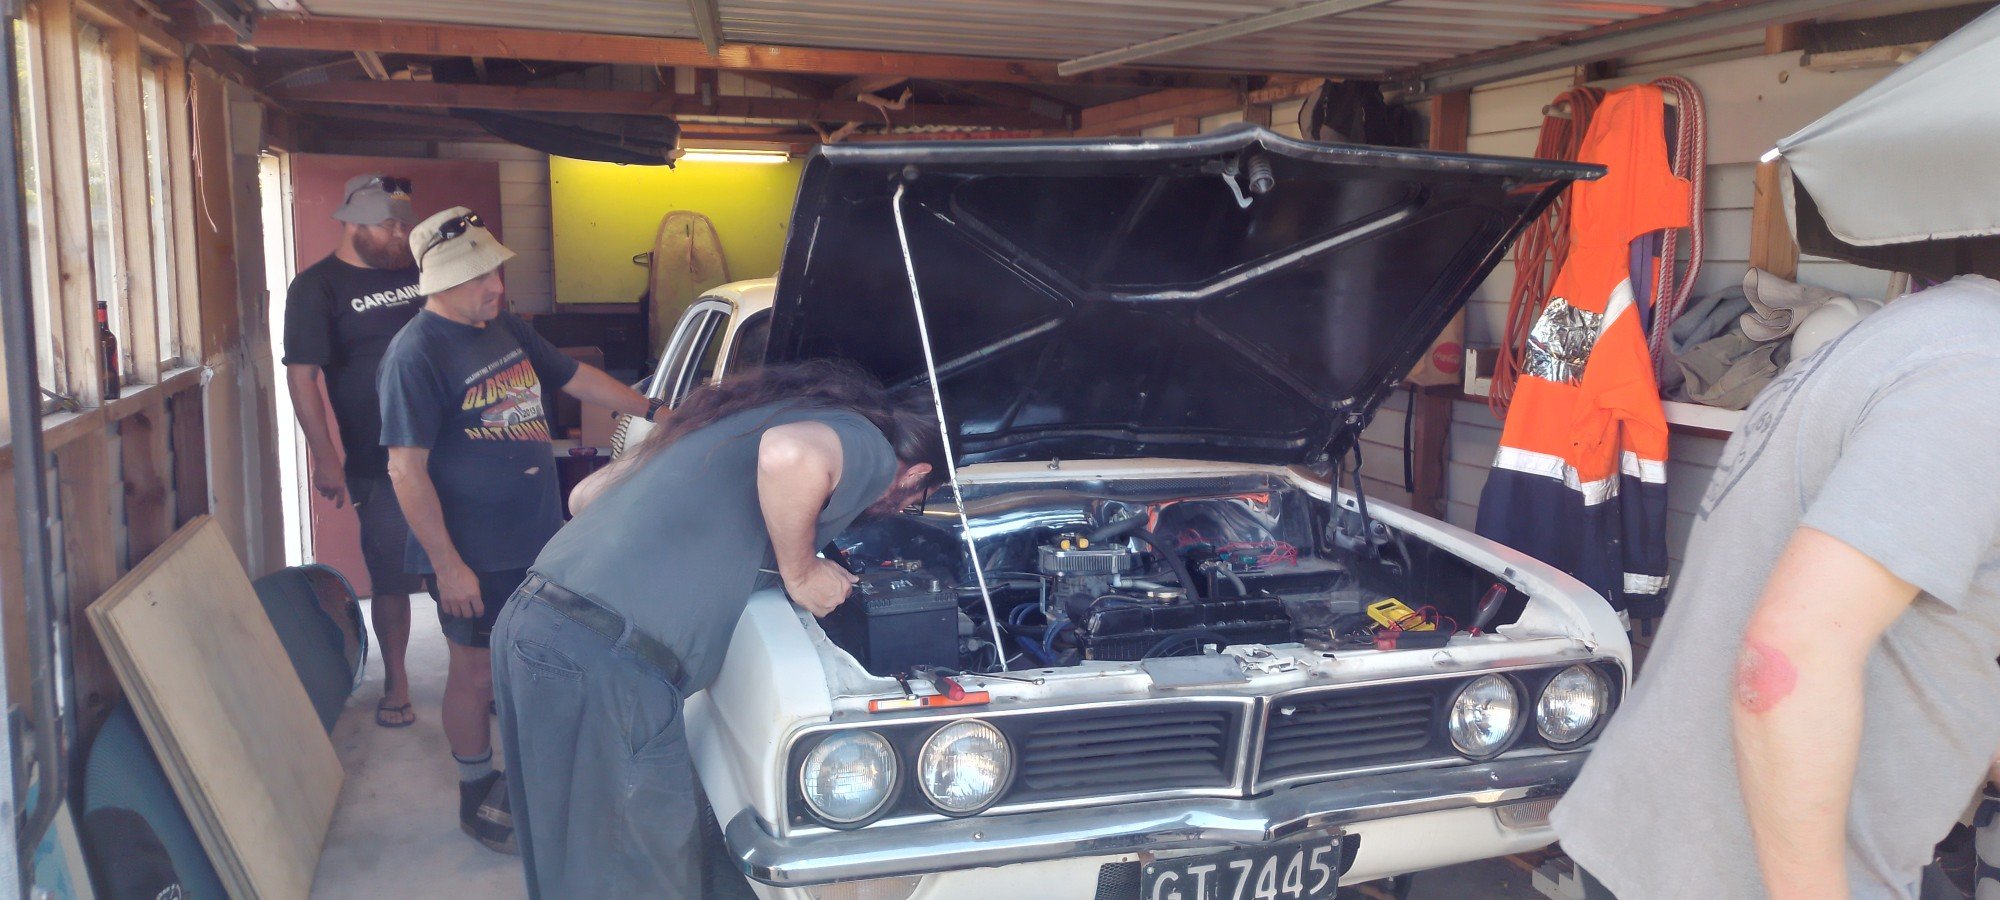
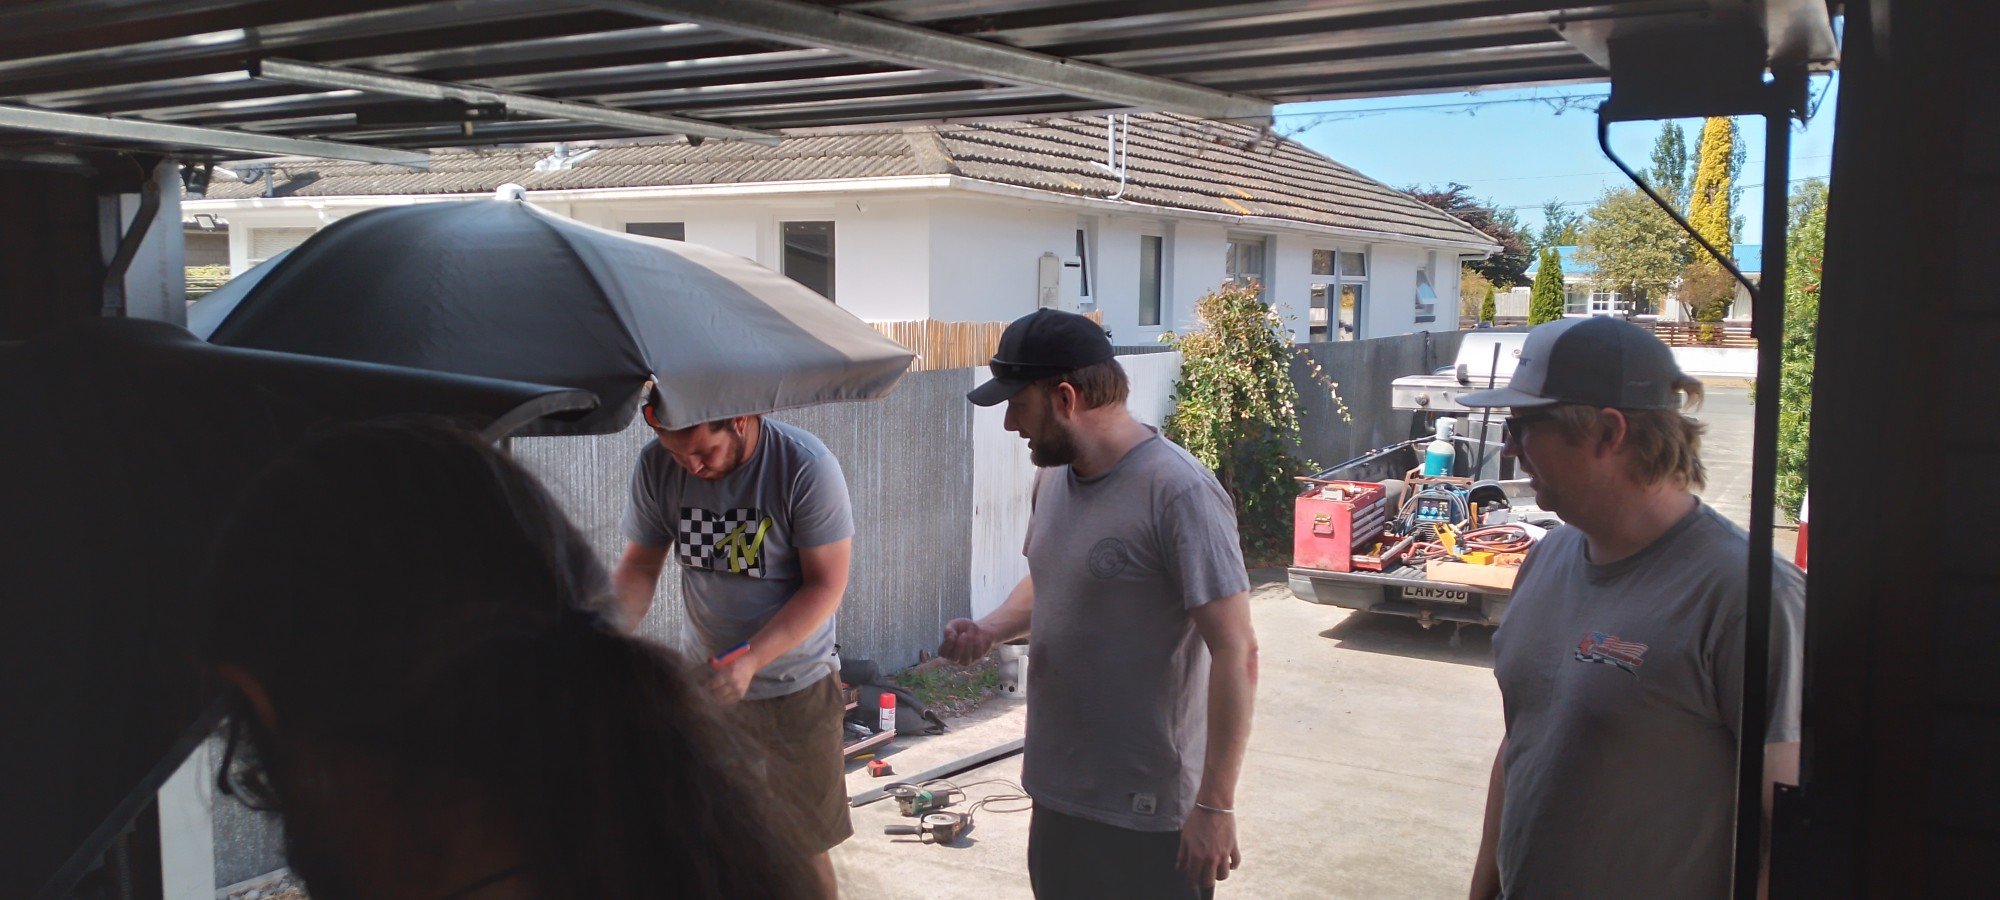
New digs, same shit Getting a bit fatigued of the old girl. Being putting off certain jobs due to time constraints and possible skill issue. Decided best course of action is screw the rust, I need to drive this Acquired a second g200w off @CUL8R in much better condition. Need to spin some broken bolts out and give it a good clean down, after I'll buy the needed gaskets and assemble then drop in the hole. Can atleast start the motor in the car before sorting the gearbox. Speaking of gearbox have one lined up ready to be pulled just outside of Amberley, just waiting on the right time to go out and grab it plus find some pocket change in the couch cushions. Anyway here's some photos for the thread
7 points
-
Had my 1st drive of it tonight that where I'm currently upto wof is booked in for Friday so fingers crossed
6 points
-
Progress on the Marina has been slow. I had hoped it would be on the road by now, but that's not happened. The good news is that any progress, is still good progress, and some headway has been made. I have really battled with the heater box and dreaded trying to fix it. In reality, getting it into a usable state wasn't that hard. Negative mindsets can be a real pain like that. According to my records, I removed the intake plenum box way back in October 2021... that's how long it's taken me to get around to sorting it. The heater/blower system is completely bespoke to the Aus/Nz spec cars and differs greatly from how the UK ones are set up. This was obviously due to the local content requirements of the time, which meant a percentage of the car had to be made locally and not imported. This car came with the heater box in the boot, so I've never seen it fitted to the car. The plenum box, which is mounted up under the cowl panel behind the dash, was in place but full of dirt and old leaves. Not a good sign. I removed the grille and then set about removing the screws that hold the plenum box in place. Once removed, the whole box just drops down. It was pretty well full. Took a lot of vacuuming to clean it out But the main reason it needed to come out, was to fix this The metal has ceased being solid and became a crunchy powder. Here it sat for a couple of years, until almost 2 years to the day later, and I pulled it out to have a better look. This involved lots of cutting and drilling, to remove the spot welds and remove the rusty remnants. The gaping hole in the side is obvious, but there were also a lot of other areas that needed attention too, in harder-to-reach places After cutting all this out and cleaning it up as much as I could, I absolutely saturated it in Brunox to treat the rust and seal it off. Because my car is a poverty spec Deluxe and doesn't have the face-level fresh air vents in the dash, I opted to just completely remove the tube for that function on this side as it was completely rusted out and the idea of refitting the tube was doing my head in. I started with some good old CAD Converted it into metal, and tacked it in place I didn't fully seam weld it, I just didn't see the point when it was not structural I seam-sealed the area to seal it and used Newtech body filler to smooth over the welds and fill the holes in the top that I couldn't get to with a welder. Newtech is a fibreglass-infused filler and pretty strong, so should do well enough at keeping the air and water inside the box. Everything got a coating of black zinc on the outside, and the inside was flooded with epoxy primer and then black zinc. I remembered to refit the heater resistor Someone had cut the wires for the heater resistor when removing it, so I crimped on a pair of nice new terminals, so now I can unplug the resistor if I need to With the plenum box done, it was time to test-fit it with the heater box. Before that though, let's travel back to 2021 when I tested and refurbished the heater box The heater box was already out of the car, so the first thing to do was see if the fan actually worked. I connected 12v and turned it on. Sure enough, it fired into life with no signs of any issues. I then set about splitting the box by removing all the nuts and bolts around the perimeter. The whole box is moulded fibreglass. This gave me access to the fan and heater core. I cleaned out years of detritus and pulled it apart further The heater core looked ok with no obvious signs of leaking The direction flap is a little less good The flap is actually made of two layers of metal that sandwich some sort of felt material that creates the edge seal. After cleaning it wasn't too bad, just missing a bit on one edge. Not the end of the world. I didn't want to just refit the heater core and cross my fingers, so I bodged up some hose and fittings so I could pressure test it. I filled it with water and pumped it up to 15psi (just above the rad cap pressure) I can't remember how long I tested it for now, but I think it was a couple of hours and it didn't drop pressure at all. It could spring a leak once it gets hot, but I hope not. I rust treated and then black zinc painted everything inside the box I reassembled it, with some new foam on the diverter flap (to seal it when it's closed), and it's been gathering dust since. Well, today I pulled it all out and put it together. This is the Aus/NZ spec heater assembly The air enters the top of the plenum via the vent in the cowl ahead of the windscreen. It then enters the plenum box and gets sent to the heater box via the C shape duct on the side (the other hole is the face-level vent outlet for the higher spec cars. This is blocked off on my car. The air then passes through the heater core (all air does, the heater valve controls if the core is hot or not), through the fan and down to the ducts at the bottom of the box. The circular outlet would be ducted to the windscreen vents while the large cutouts are the "feet" vents. The heater selector only has three settings, Feet/Windscreen, Windscreen or Off. There should be a heater valve attached to the box too, but mine was missing and the only spare I have I don't trust. They're very expensive heater valves shared with some classic Aussie Fords (hence the cost), so I will likely just have a manual heater tap in the engine bay to turn the heater on and off. For now, I just have the heater bypassed. The test assembly was a success, so I contorted myself into the car and started refitting it. The plenum went in easy enough, once I turned it around so it faced the correct direction. I used a ratchet strap to hook into the plenum box just to give me something to lift it up from the floor inside the car while standing outside, as the screws to secure it go through from the outside. The vent grille could then be refitted, with some nice new screws Next, it was a case of fitting the heater box to the underside of the plenum. This turned out to be a bigger pain in the bum than expected. I fitted it all up, nice and easy, no issues, and then realised I couldn't fit the C-shaped duct in afterwards. So out the heater box came. I fitted the duct to the plenum first and then squeezed the heater box into place. This took an awful lot of wiggling and jiggling to get into place, from both sides of the car. That was the easy bit though, the hard bit was getting the cable for the diverter flap into place. This is in the drivers foot well, so I squeezed myself into there and hooked it up. Next, I connected the blower fan wires, connected the battery and hit the switch. Nothing. Hmmm. I tried again, flicking the switch a few times and suddenly it sprung to life. I guess sitting around unused for a couple of decades does that to a switch. But both speeds work correctly now, so I'm very happy I still need to buy some ducting to duct it up to the windscreen vents, but for now, it'll do. Following that success, I felt it was time to fit something else the car hadn't seen for many years. For the first time in my ownership, the car has steering column shrouds I did have to relocate the ignition switch though. Turns out it's not meant to point down; the previous owner just didn't clock it to the column properly (and disabled the steering lock in the process) when the switch was replaced. It fits perfectly now, and the steering lock even works too. Makes way more sense having the key where it is, it was always hard to see and use when it was facing down. We're getting much closer to being able to take it for a WOF check. I need to refit the quarter window, which I'm procrastinating because I haven't done it before and I'm sure it'll suck to do, and then fit some door cards, seatbelts and the other seat. In the meantime, I scuffed up the new sill and gave it a quick shot of paint Theres a low spot on the rear quarter that I want to address before I put any more paint on that. Might do that this weekend.5 points
-
And some more:
5 points
-
While I waited for primer to cure I made a start on *all* of the dust and orange peel in the painted panels with wet 2000 soft block, then menzerna aggressive cut compound, carpro denim pad and wool pad. I probably won’t paint like this again: got It flat, all the dust appeared to be taken out End result: im happy with results, but I think there is dust in my base, as it can be seen. Old workshop was dusty. Perhaps I should look into “colour sanding”.5 points
-
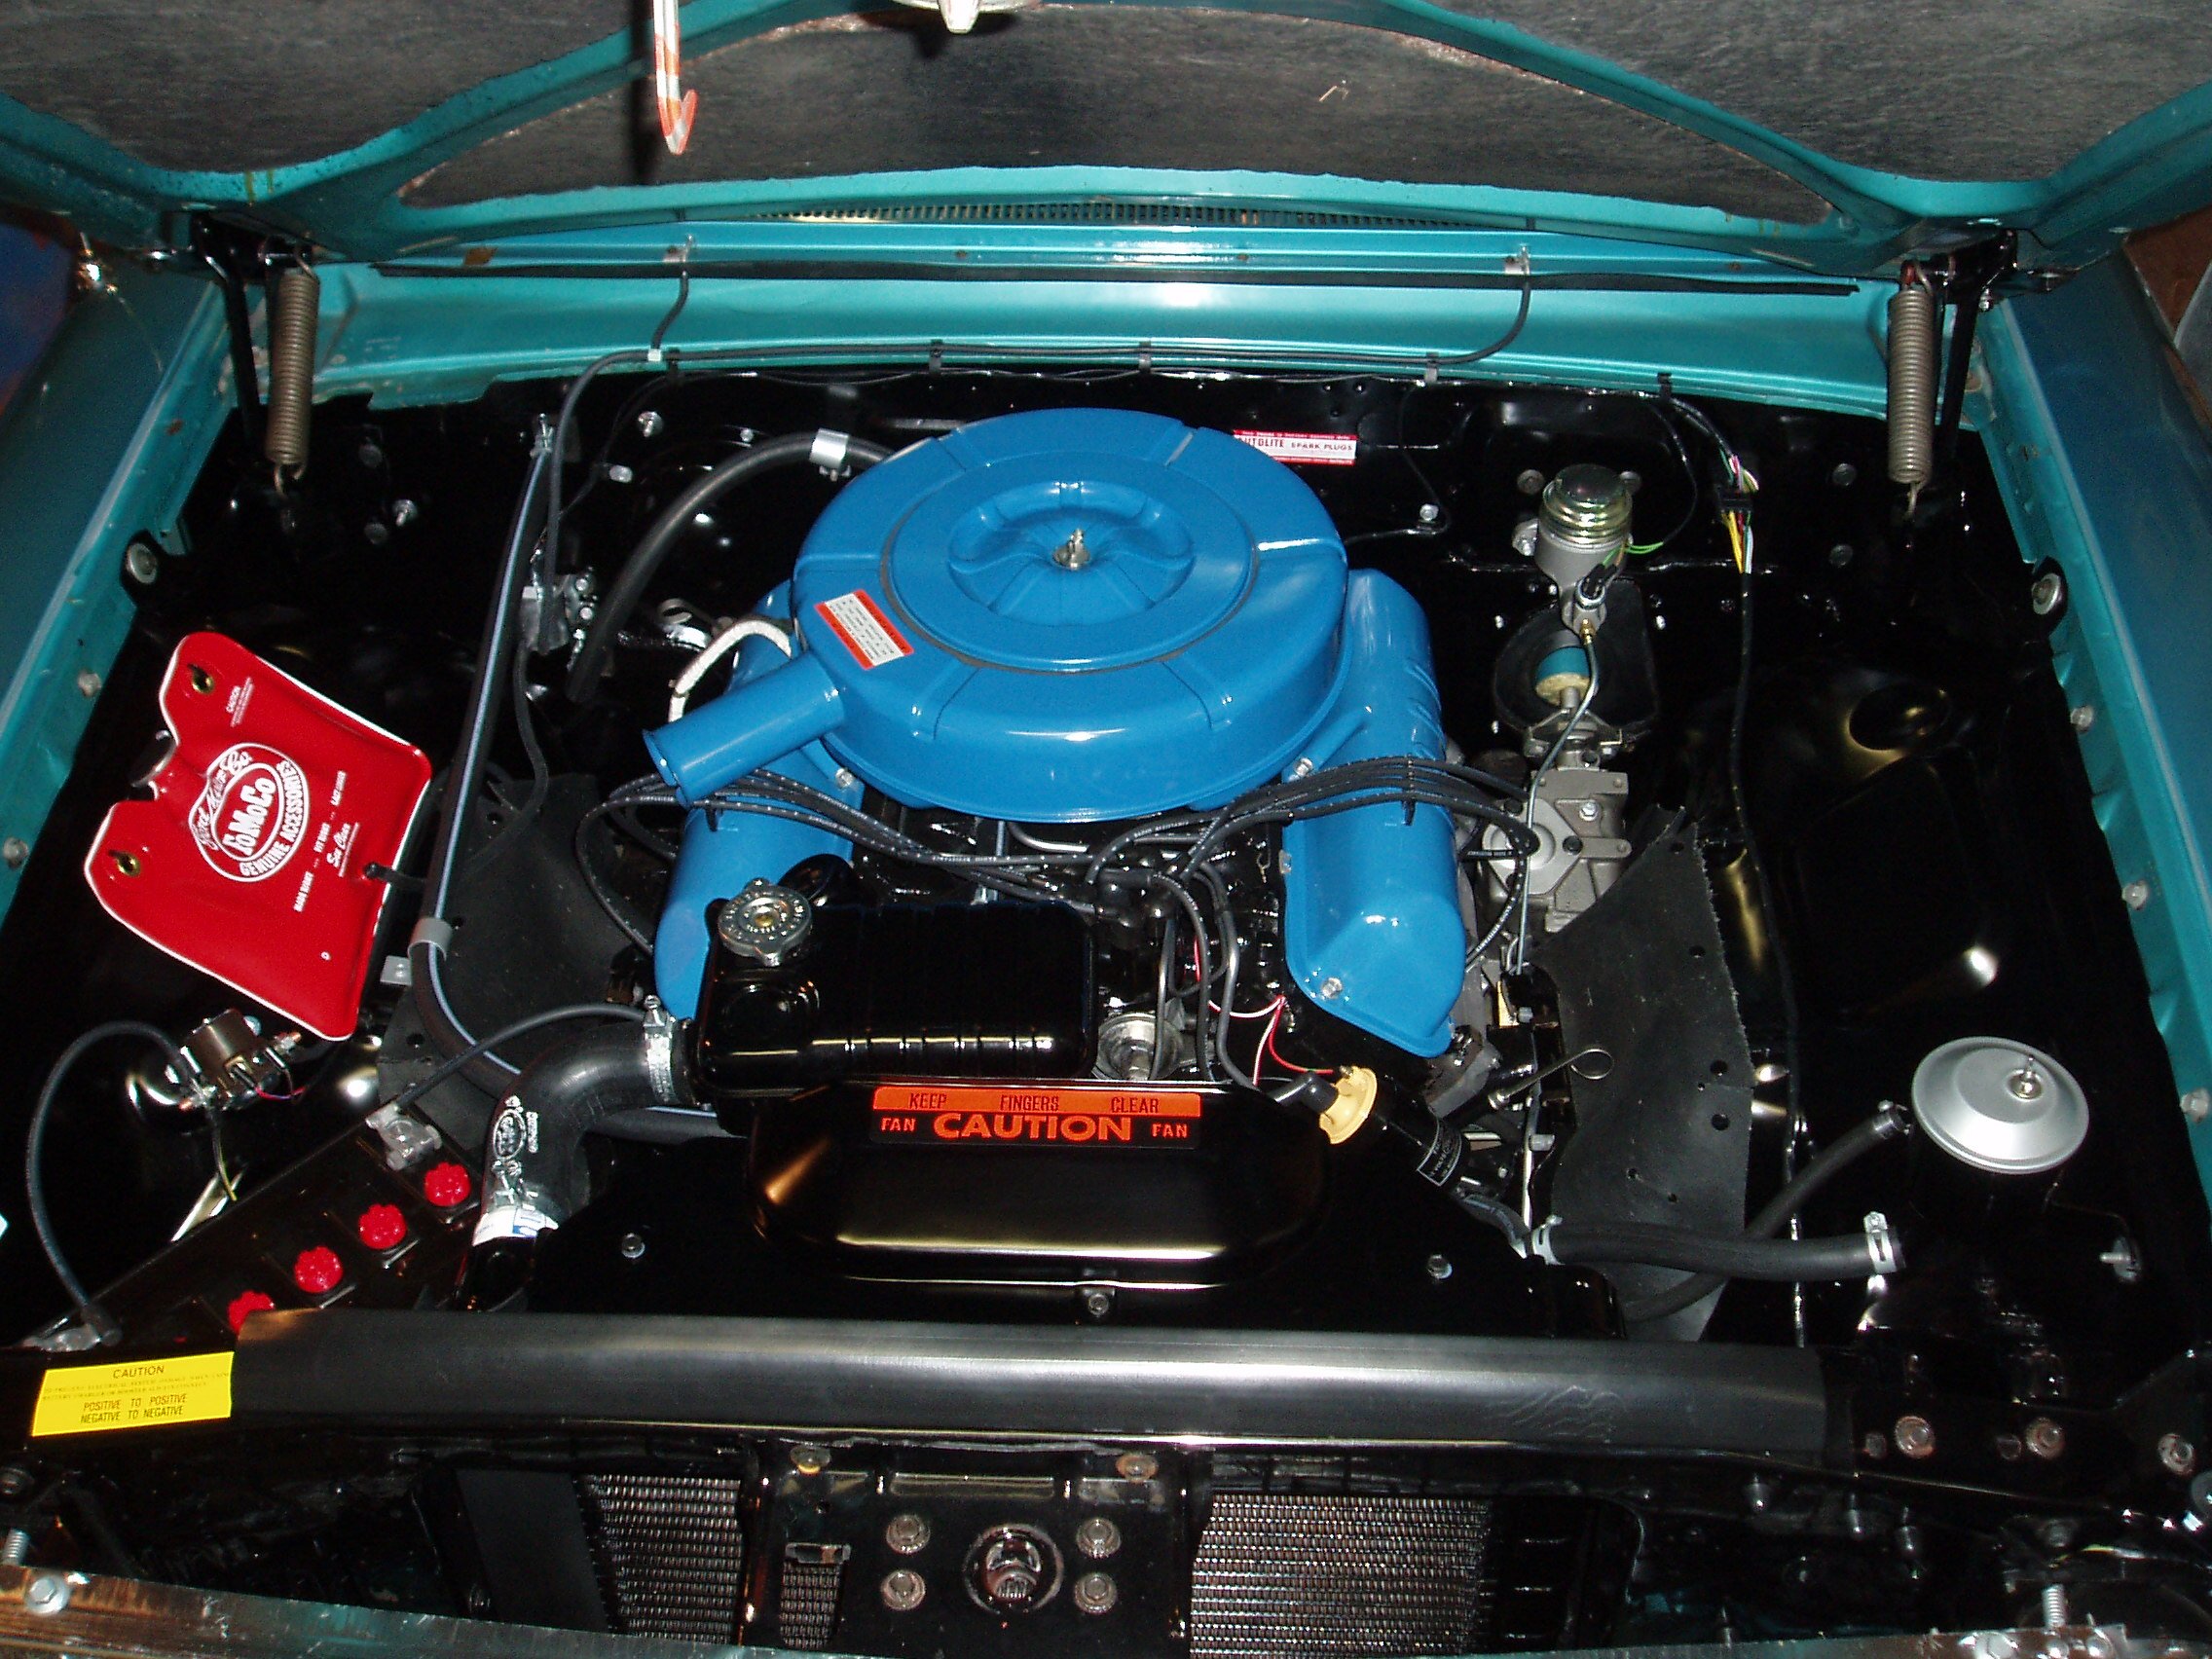
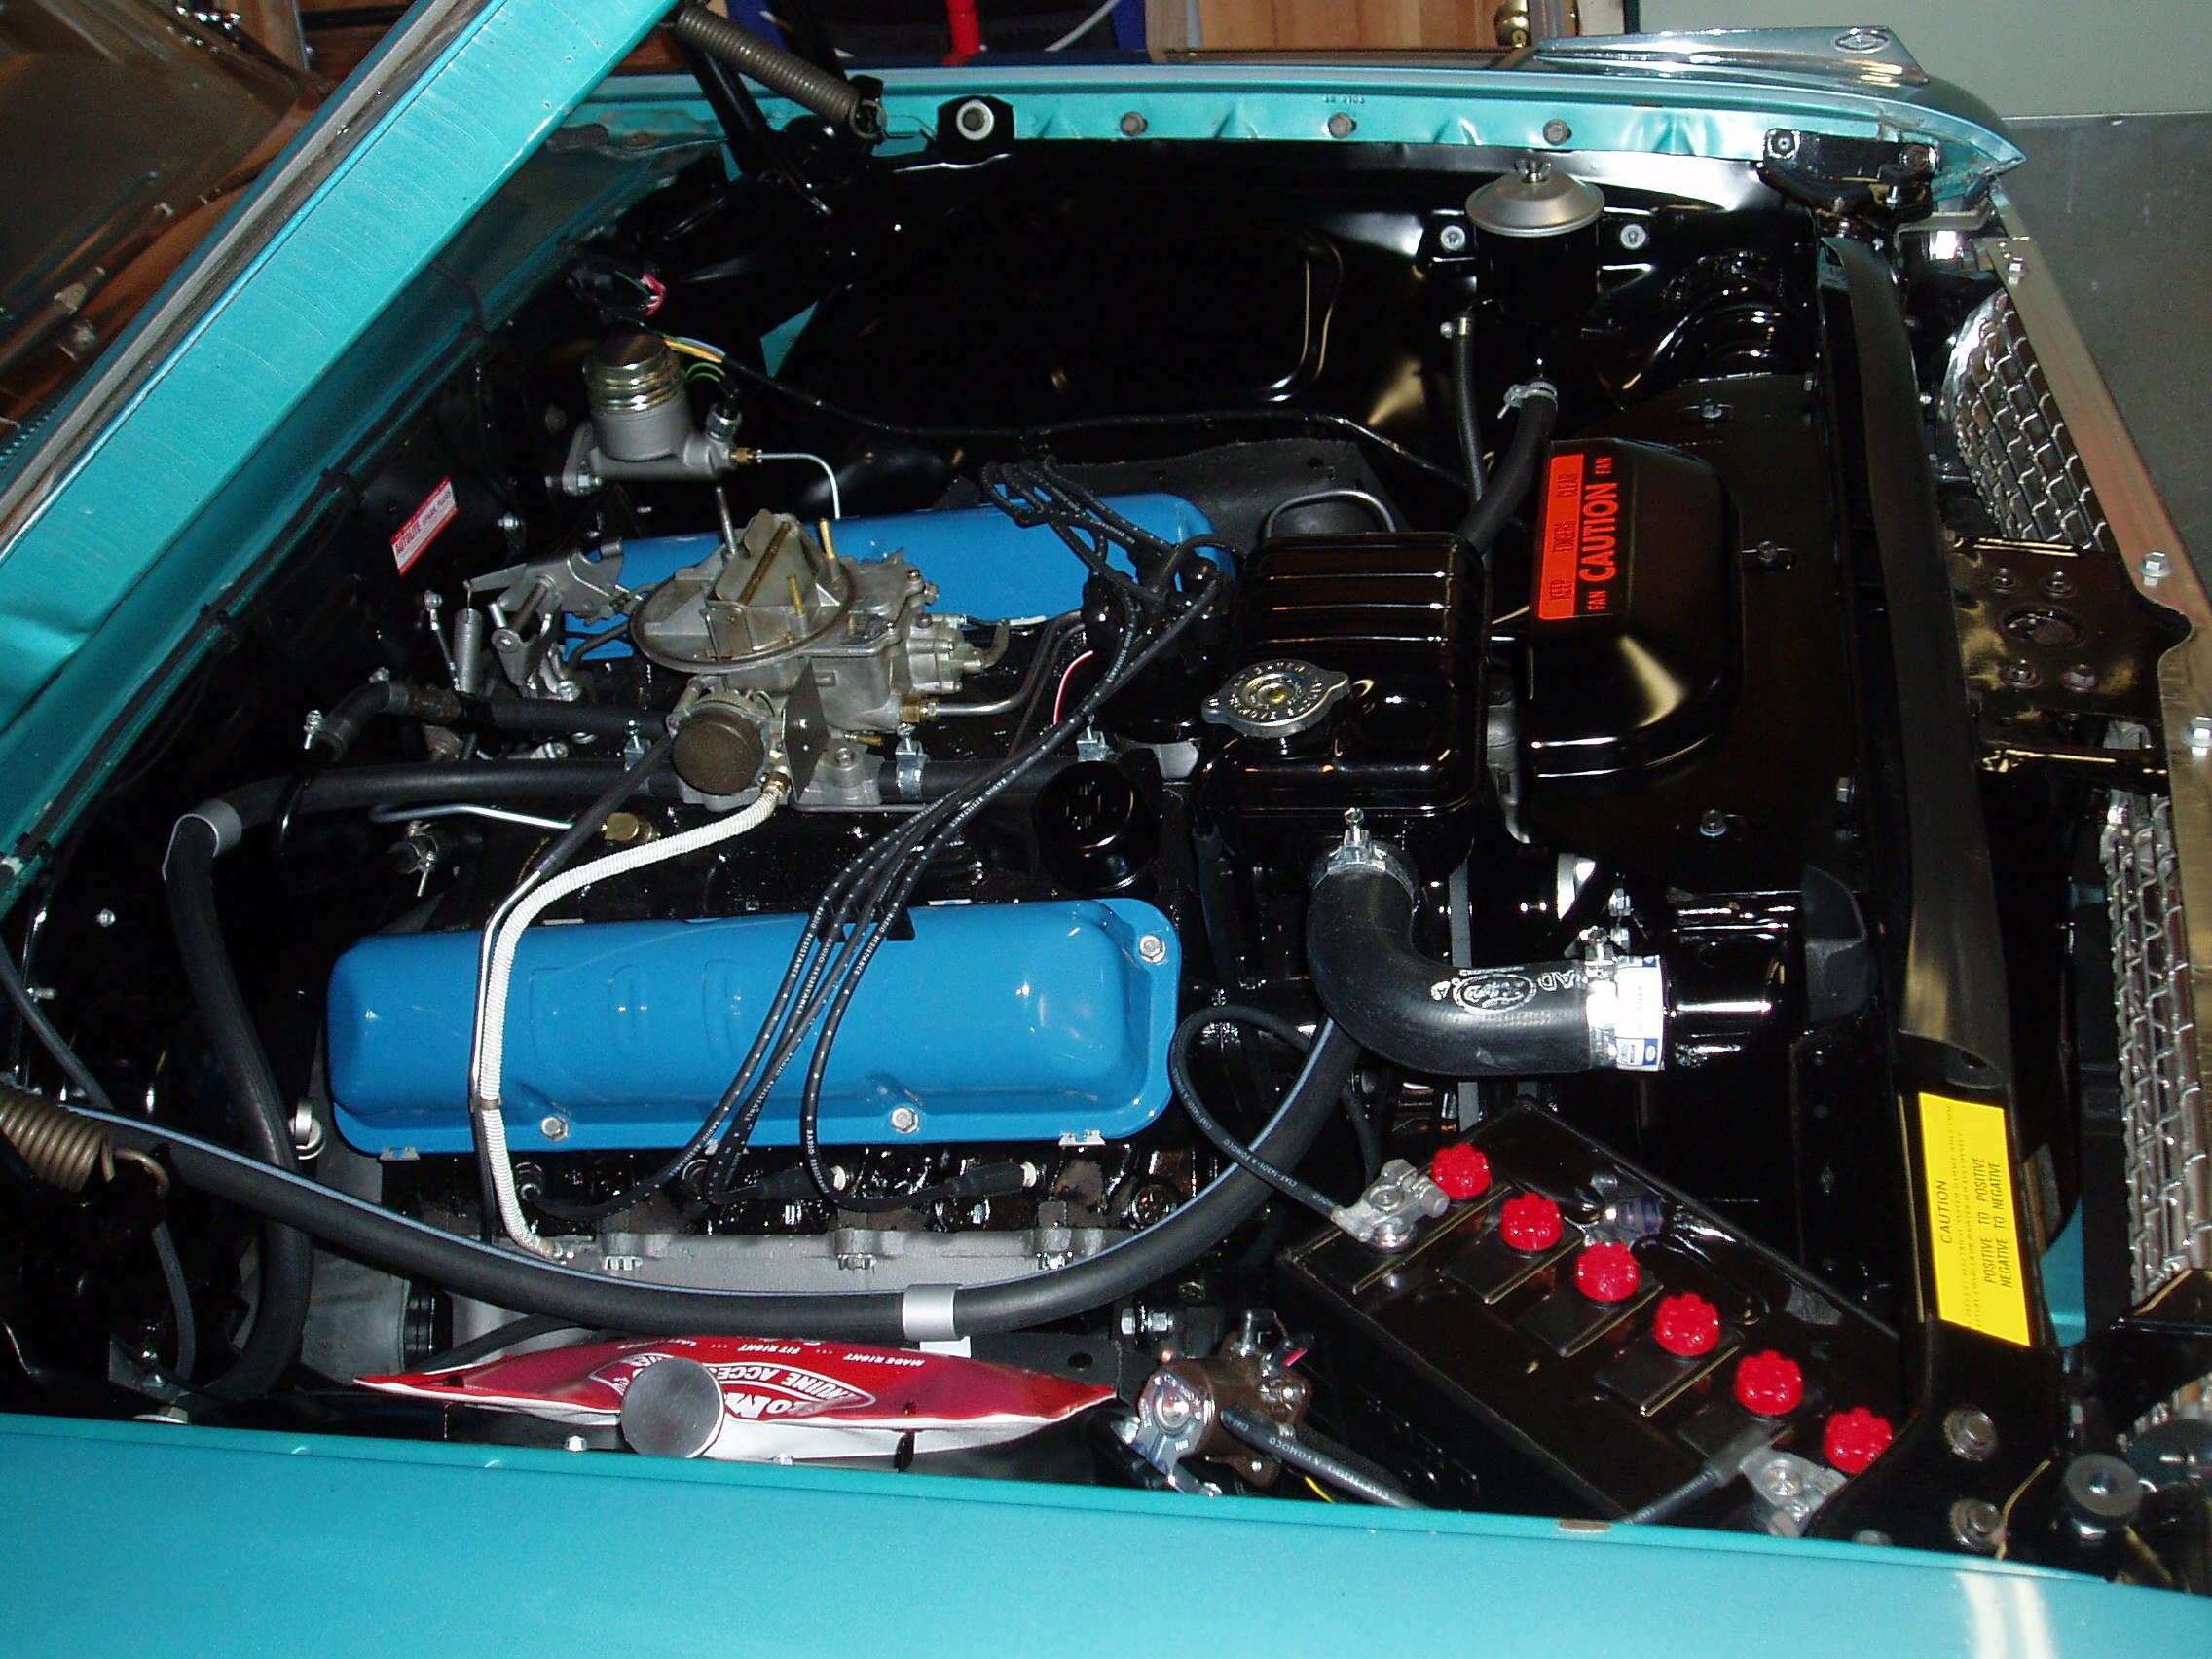
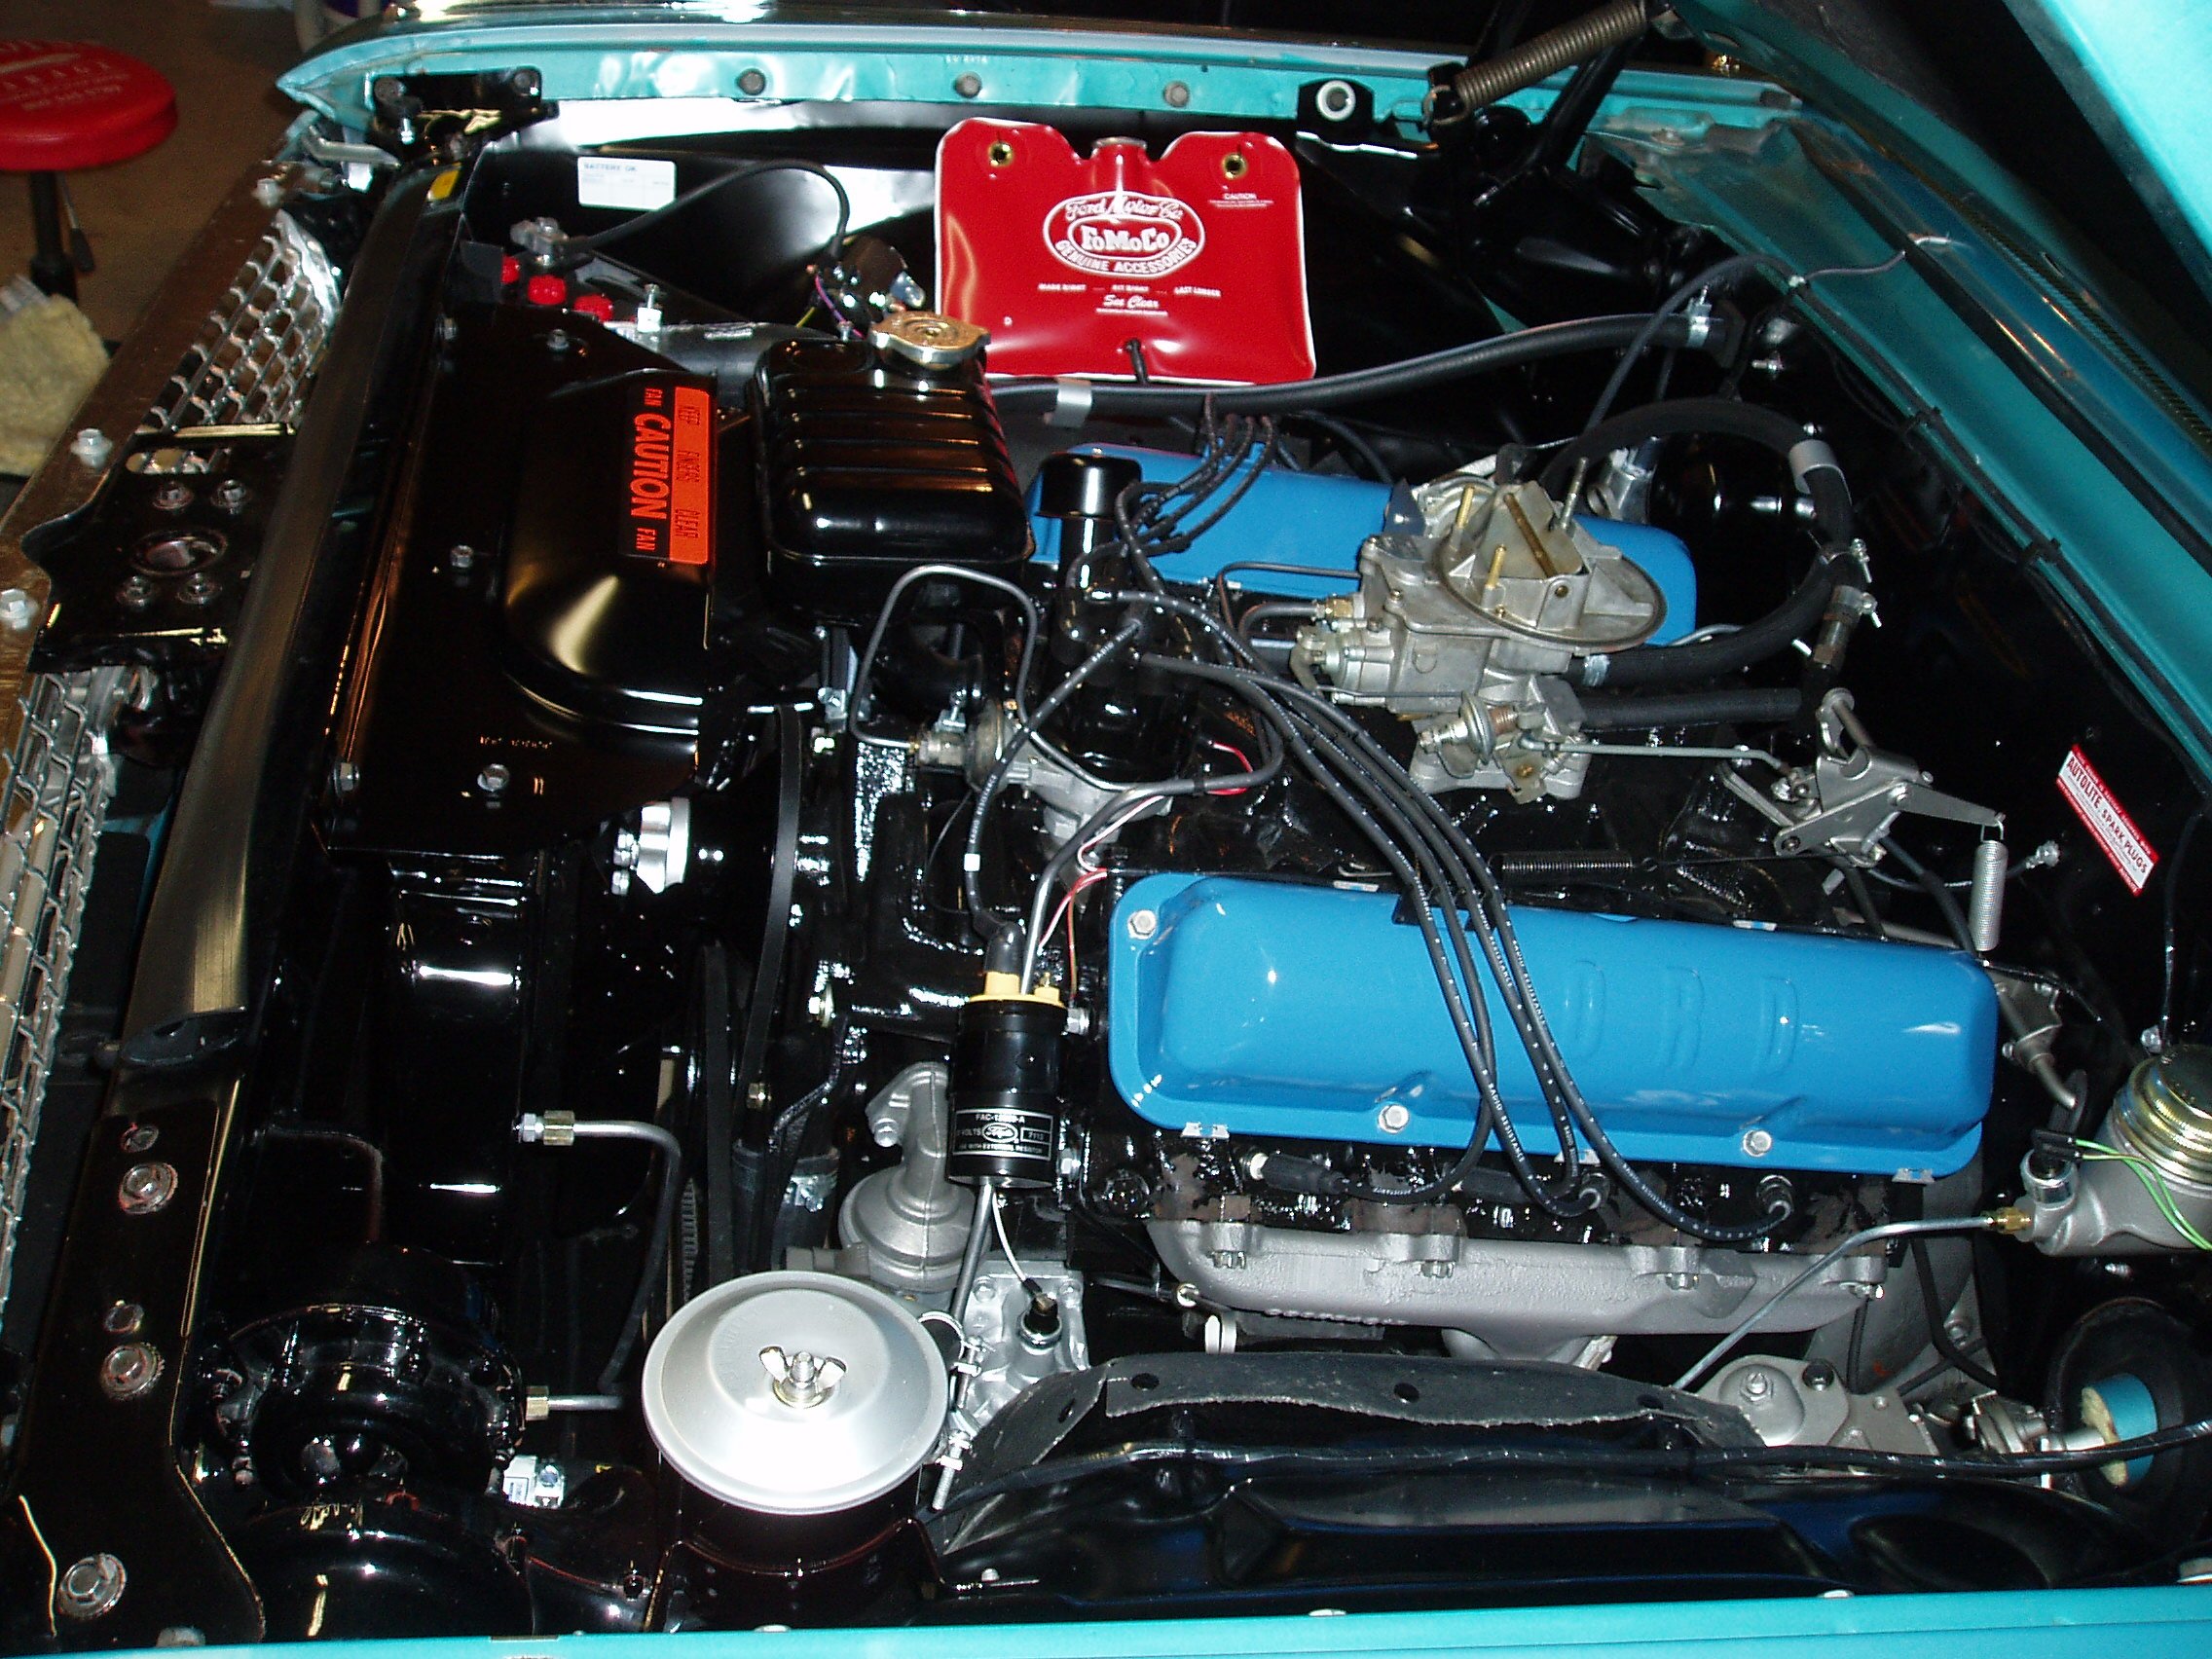
Love those 63 Galaxies! Keep em rolling. I have similar, a 352, 2dr boxtop, 500 XL, family heirloom, 335k miles and still running smooth and strong. Engine pic from last overhaul 18 years ago. Watch out for that darn secondary hood latch. I painted mine striped but it doesn't help much to prevent the occasional ding on the scalp!
4 points
-
So went around the local bike shops looking for a jet, no one had anything, but one place could get it in, and at half the price of the only ones I could find on the net, so ordered that. While waiting for the jet to show up I knocked some jobs off. Had a rummage through my parts (not a euphemism) and found a set of springy foot pegs, a mirror and mirror mount, and cut the back part of the rocker shifter off as I can't use them (I'm too long in the legs) Taped up and covered the exposed wiring, Went to change the foot pegs, found the old ones were welded on, so cut them off, I then cut the stand, rotated it around to the correct position, and added some length. Also adjusted the shape of the shifter and put some new rubber (hose, lols) on it. Gave those items a paint, and wham, I ran out of jobs, so had a go at making the front mudguard less grot. Tried the heat gun method, then a bit of plastic polish. It got rid of the white, bit is now shiney pink, lols. My jet showed up today, so slapped it all back together, hope to test it out tonight. Oh, also slapped the new tyres on, removed the rear brake hand lever, and moved all the combo switches over so my std thumbs can reach the buttons. How she be currently. I have a lead on the front and rear racks, once I get them I'll get new indicators. Also the front brake lever doesn't have a brake light switch facility, so hope to find a cable spec, right handed lever, with a mirror mount and brake light switch in it. Probably not common. Regards, VG.4 points
-
Front end painted and re assembled
4 points
-
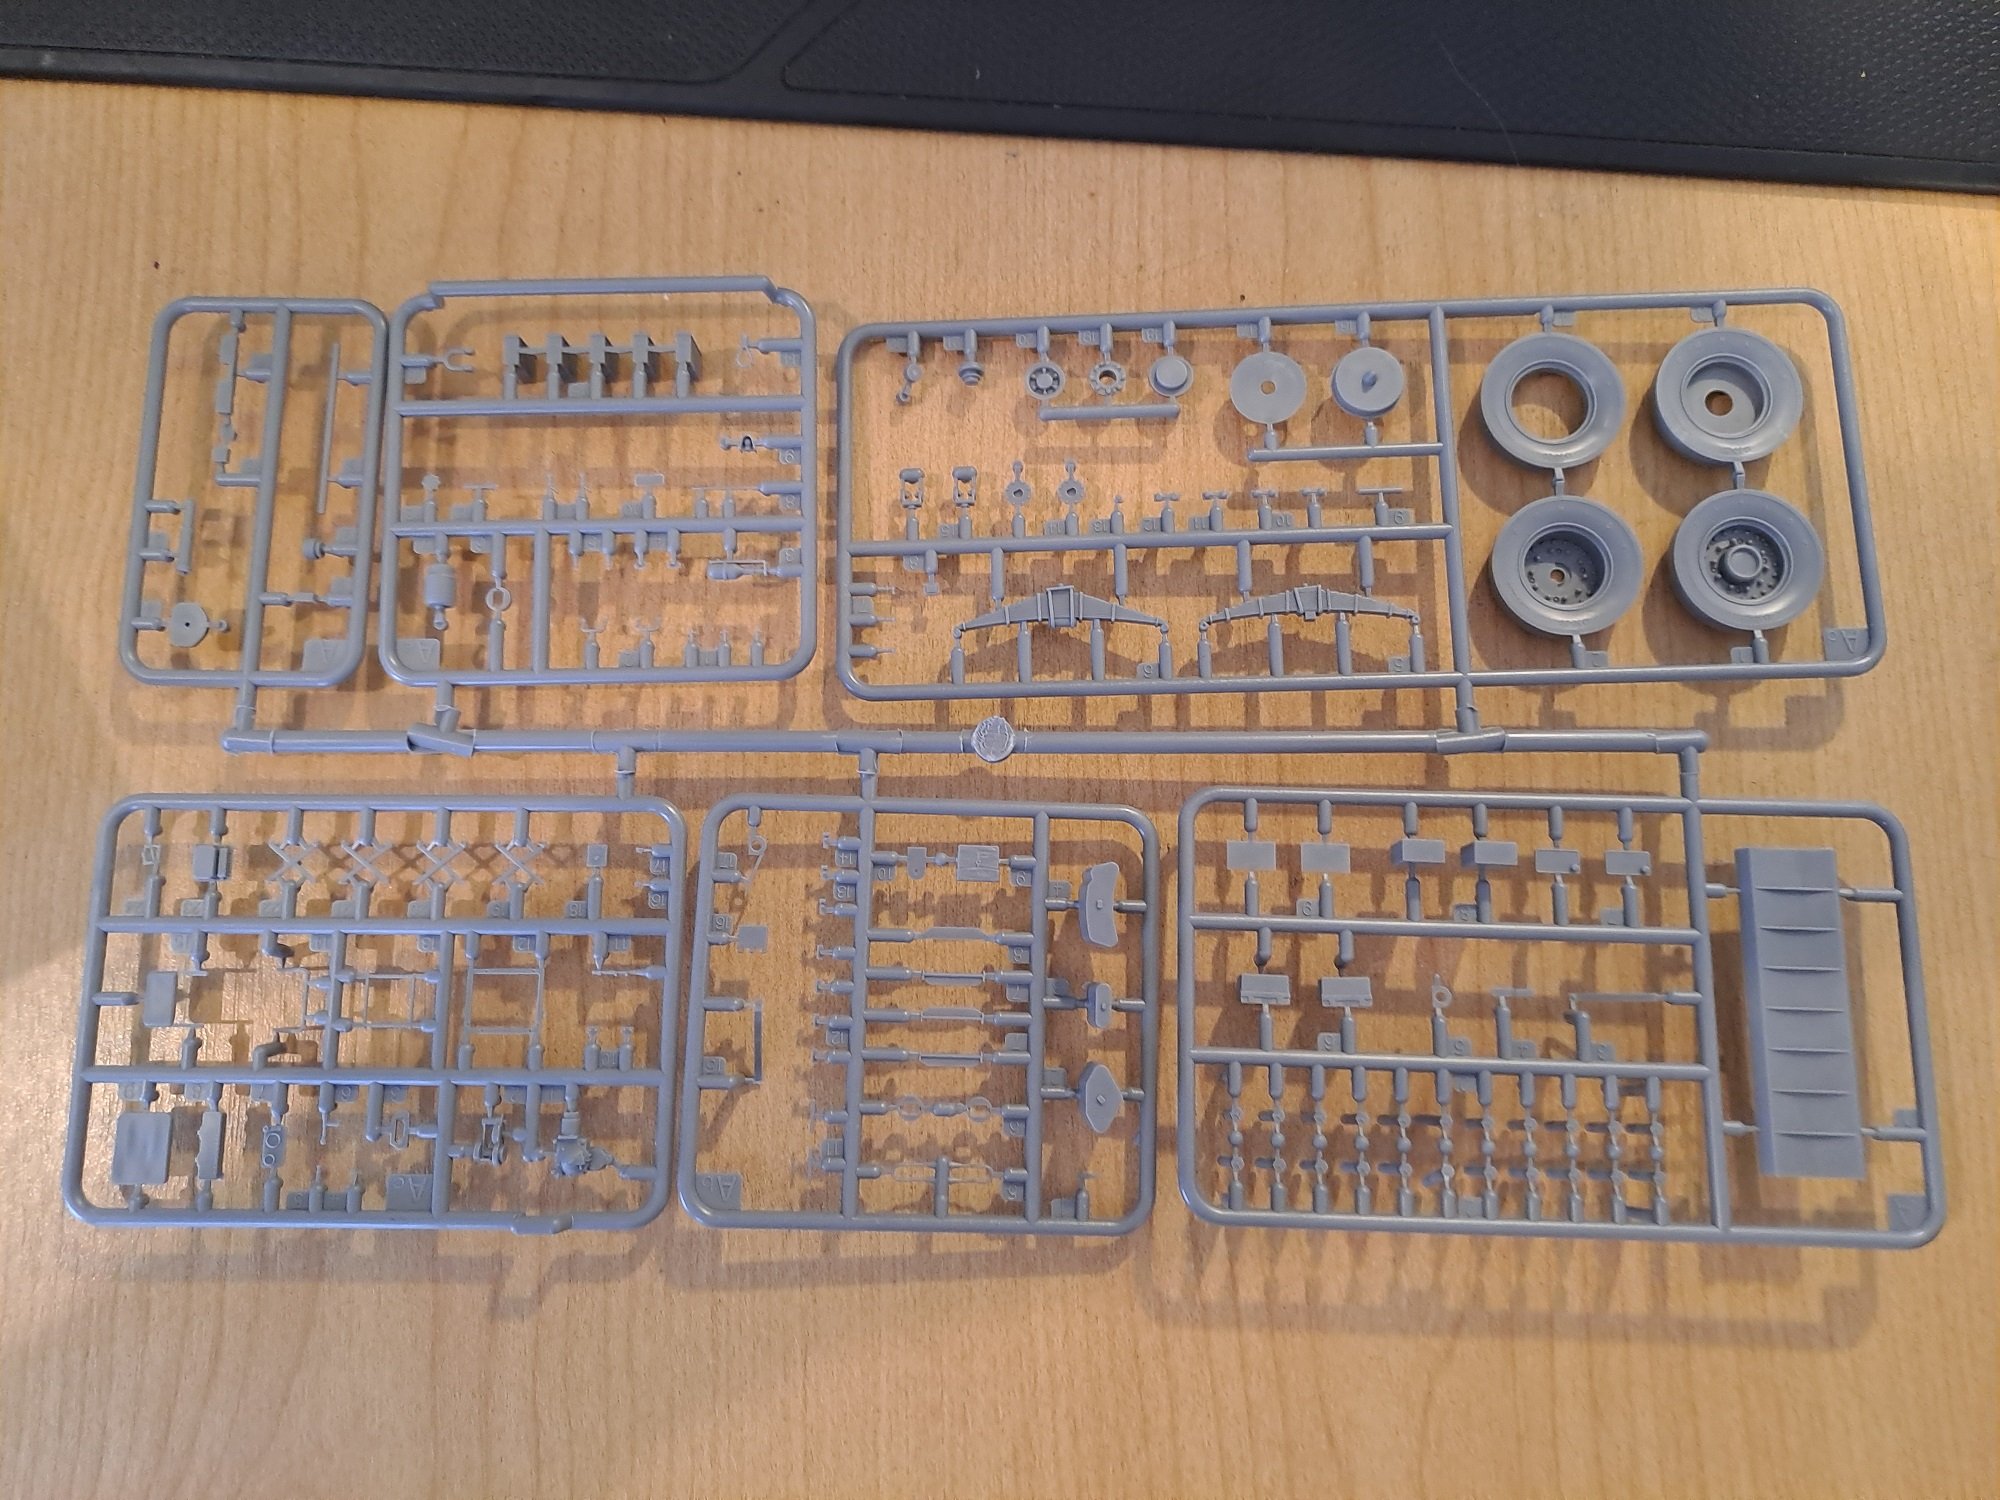
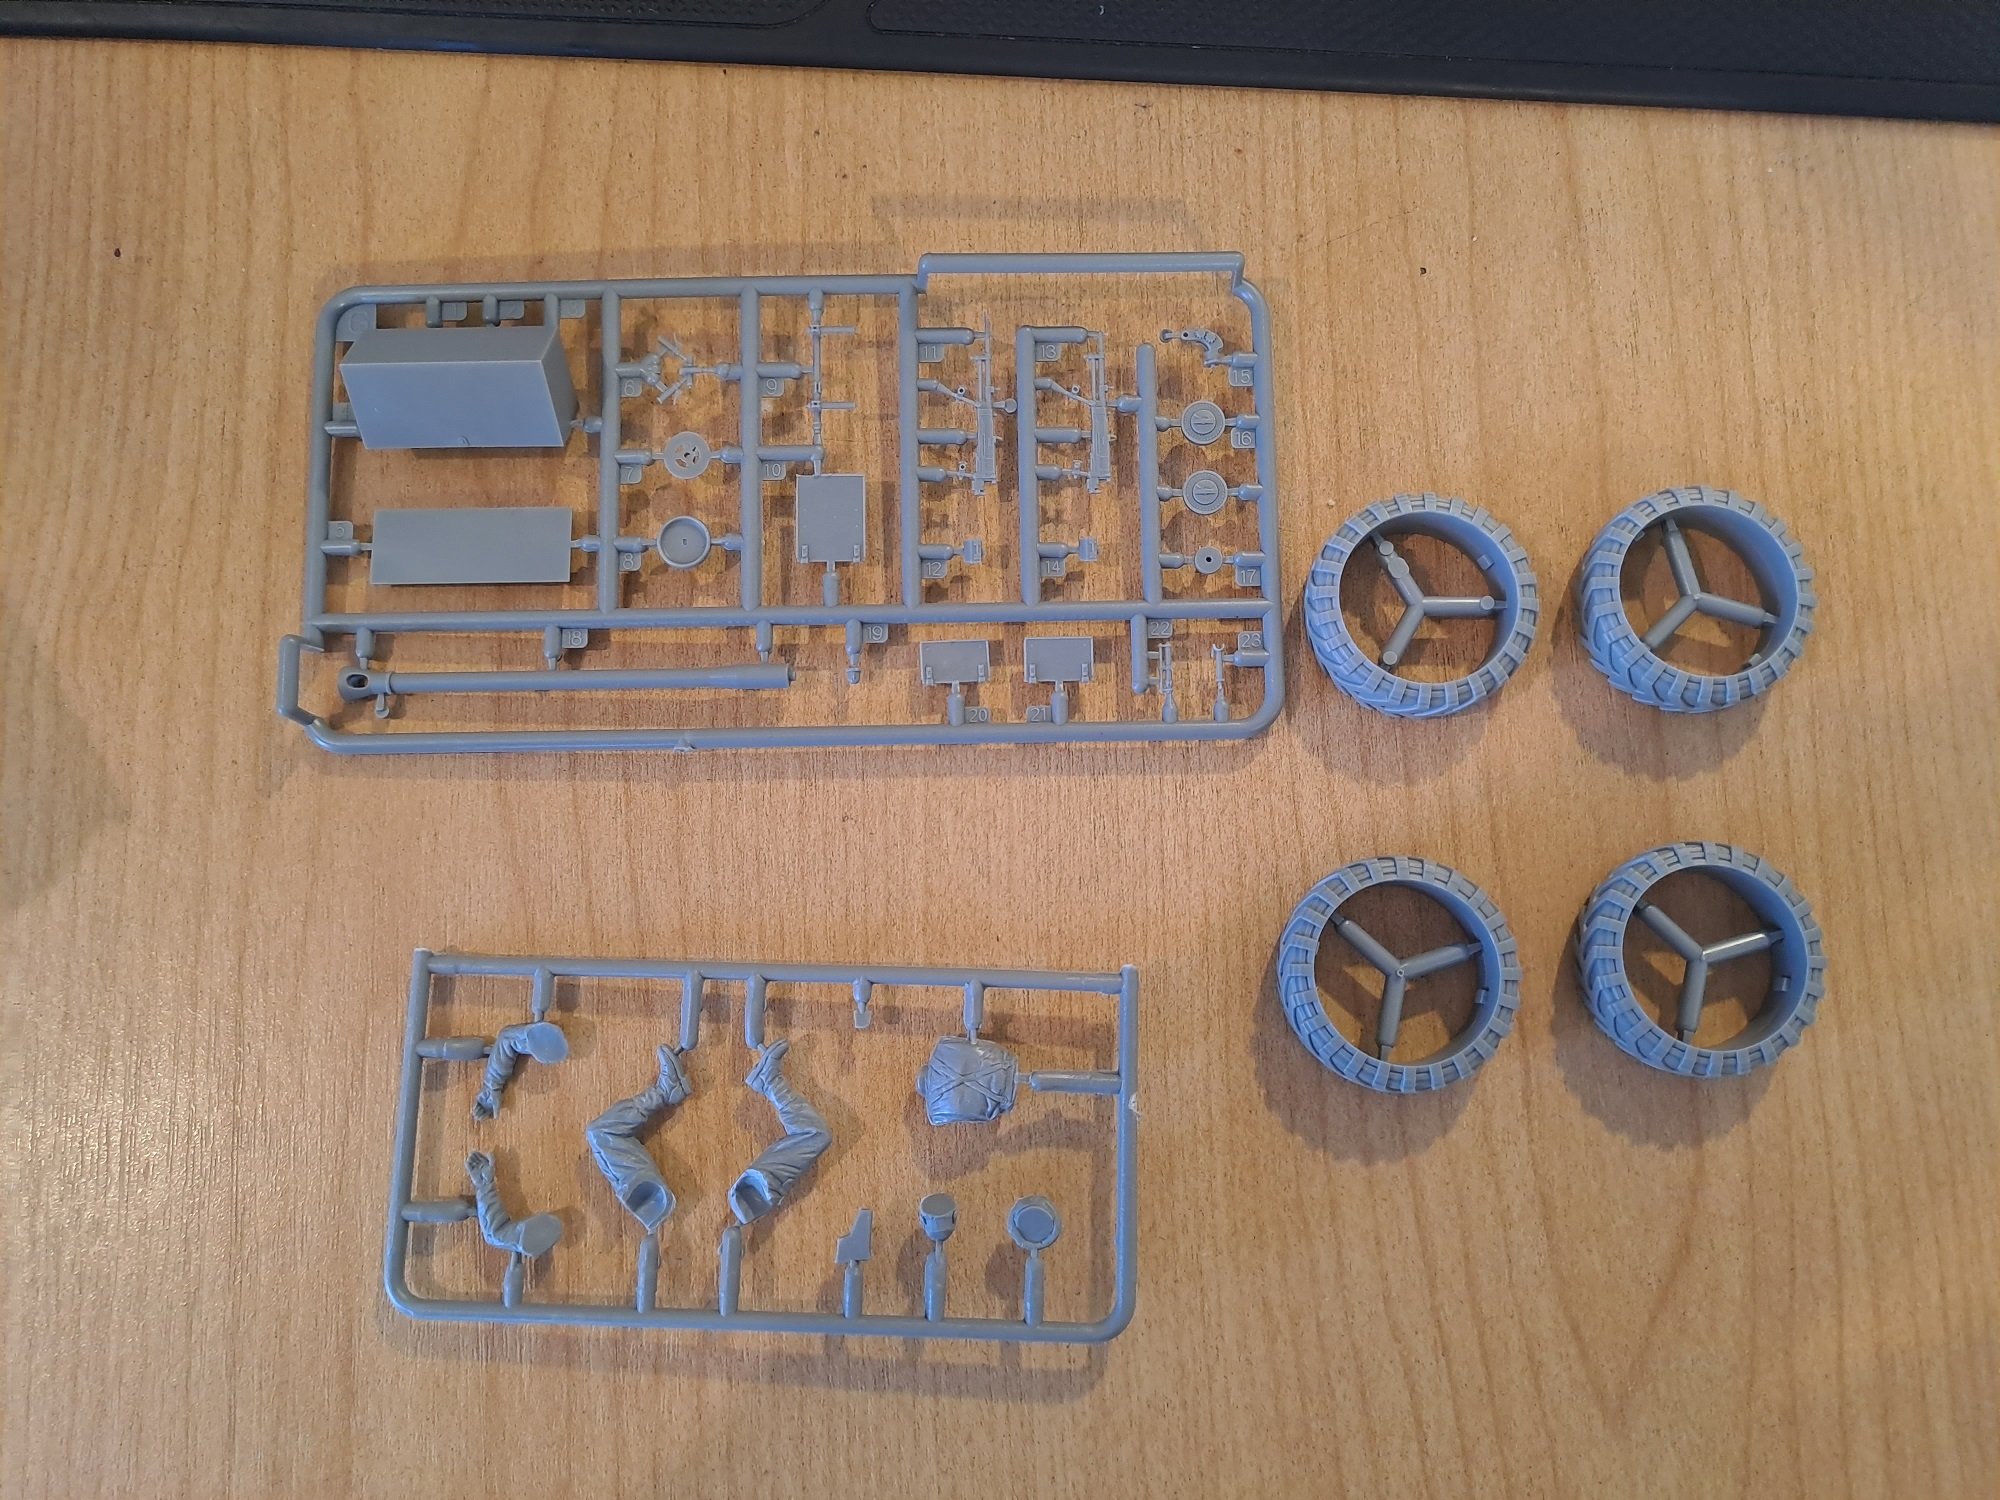
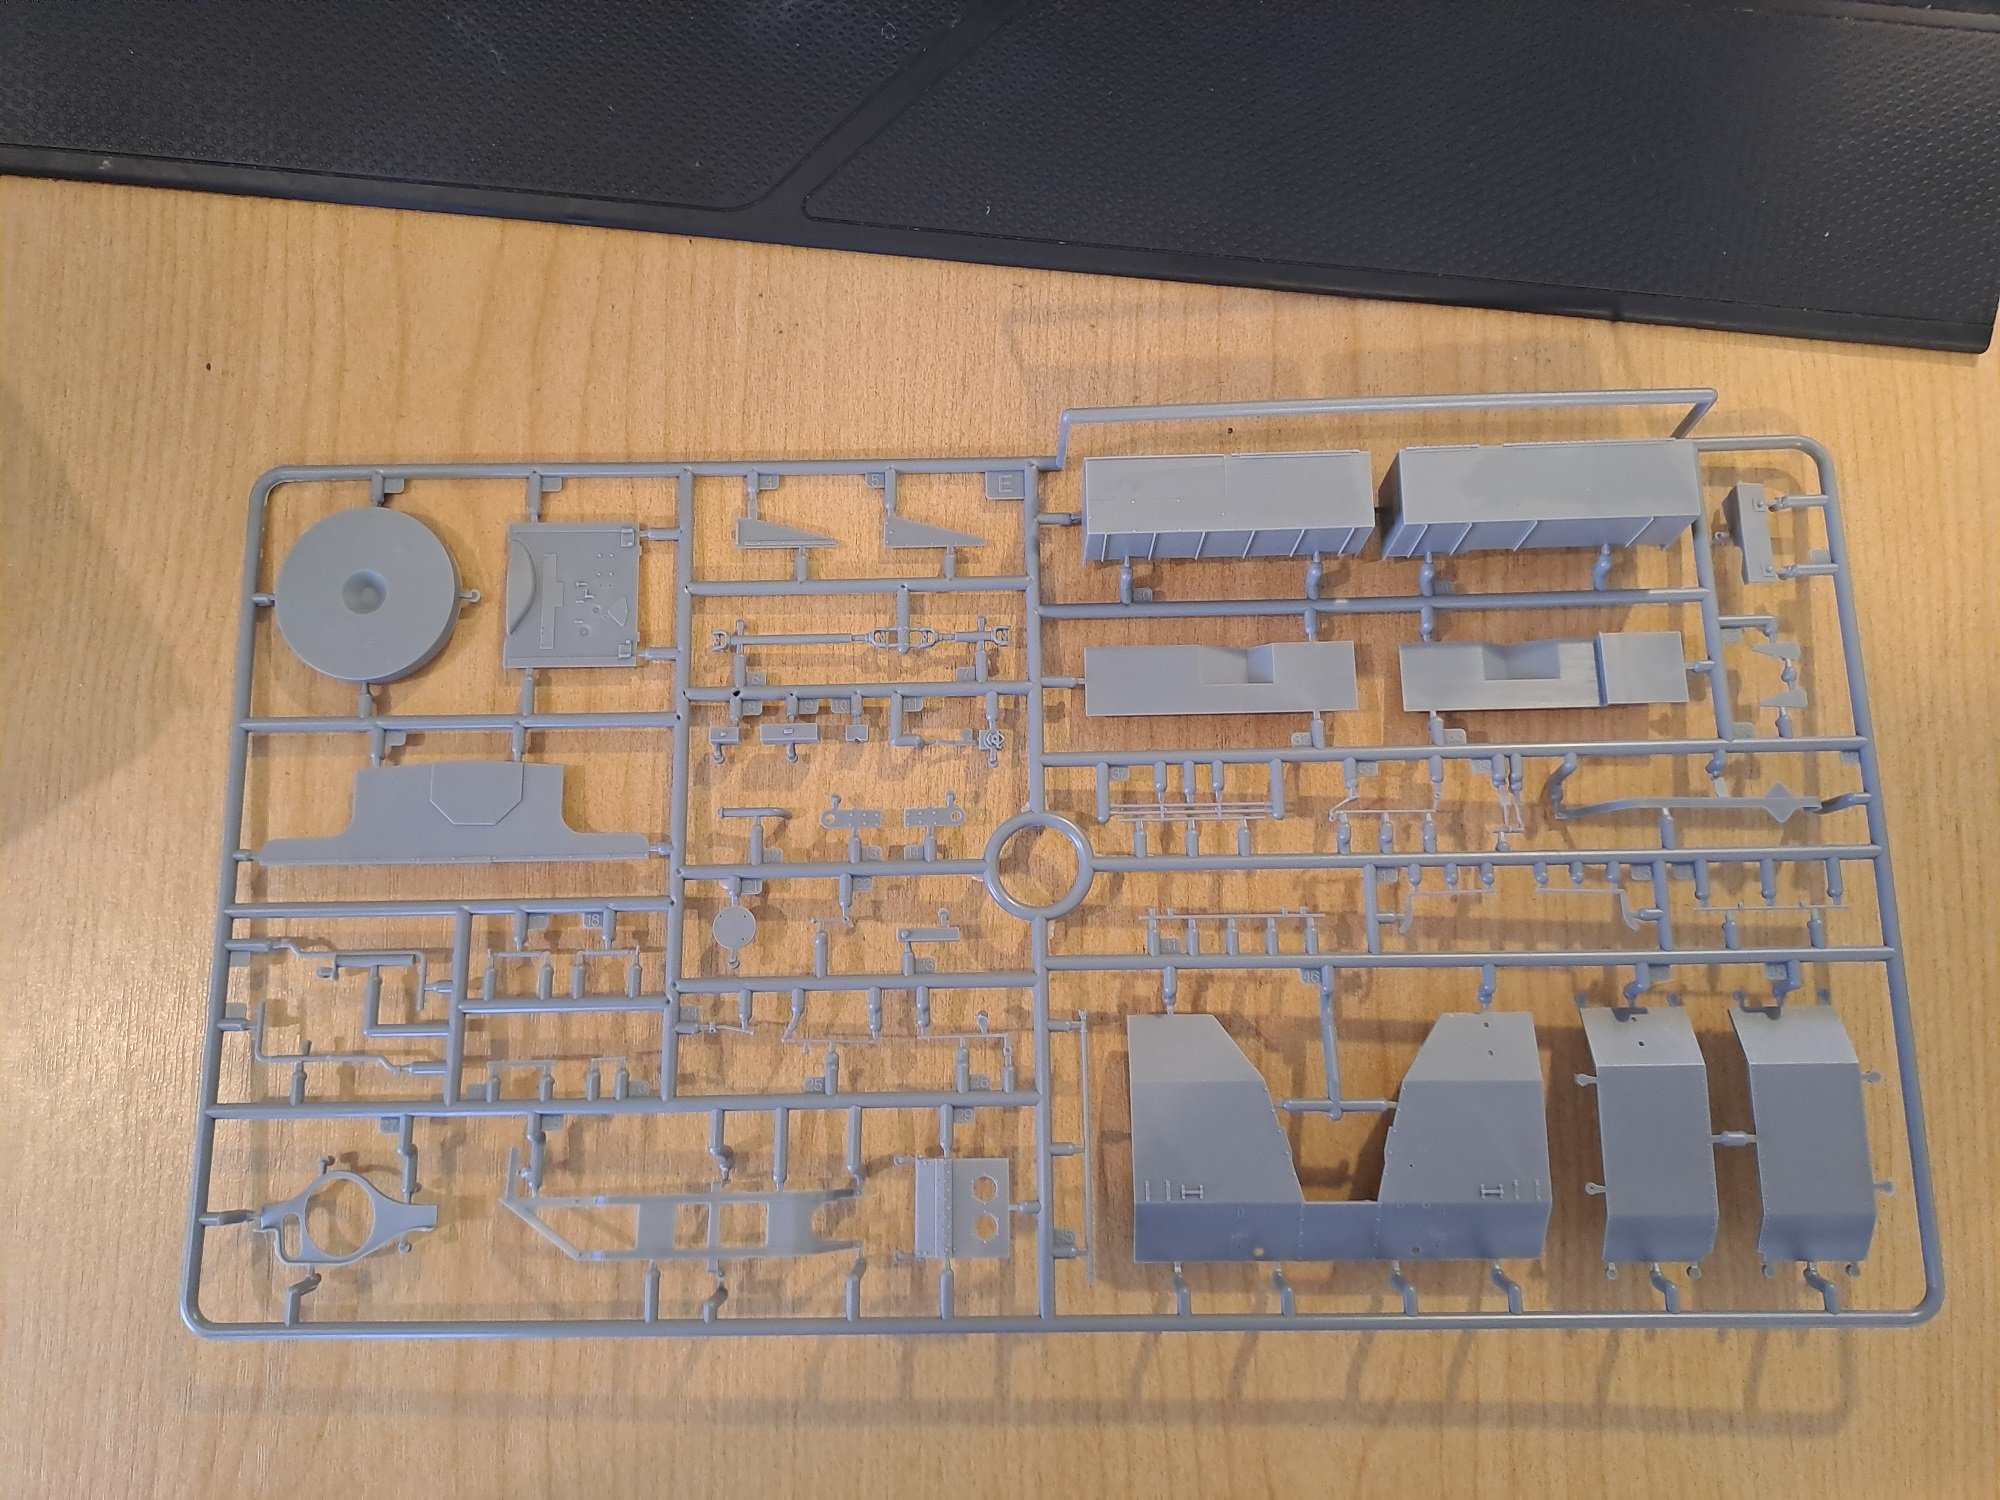
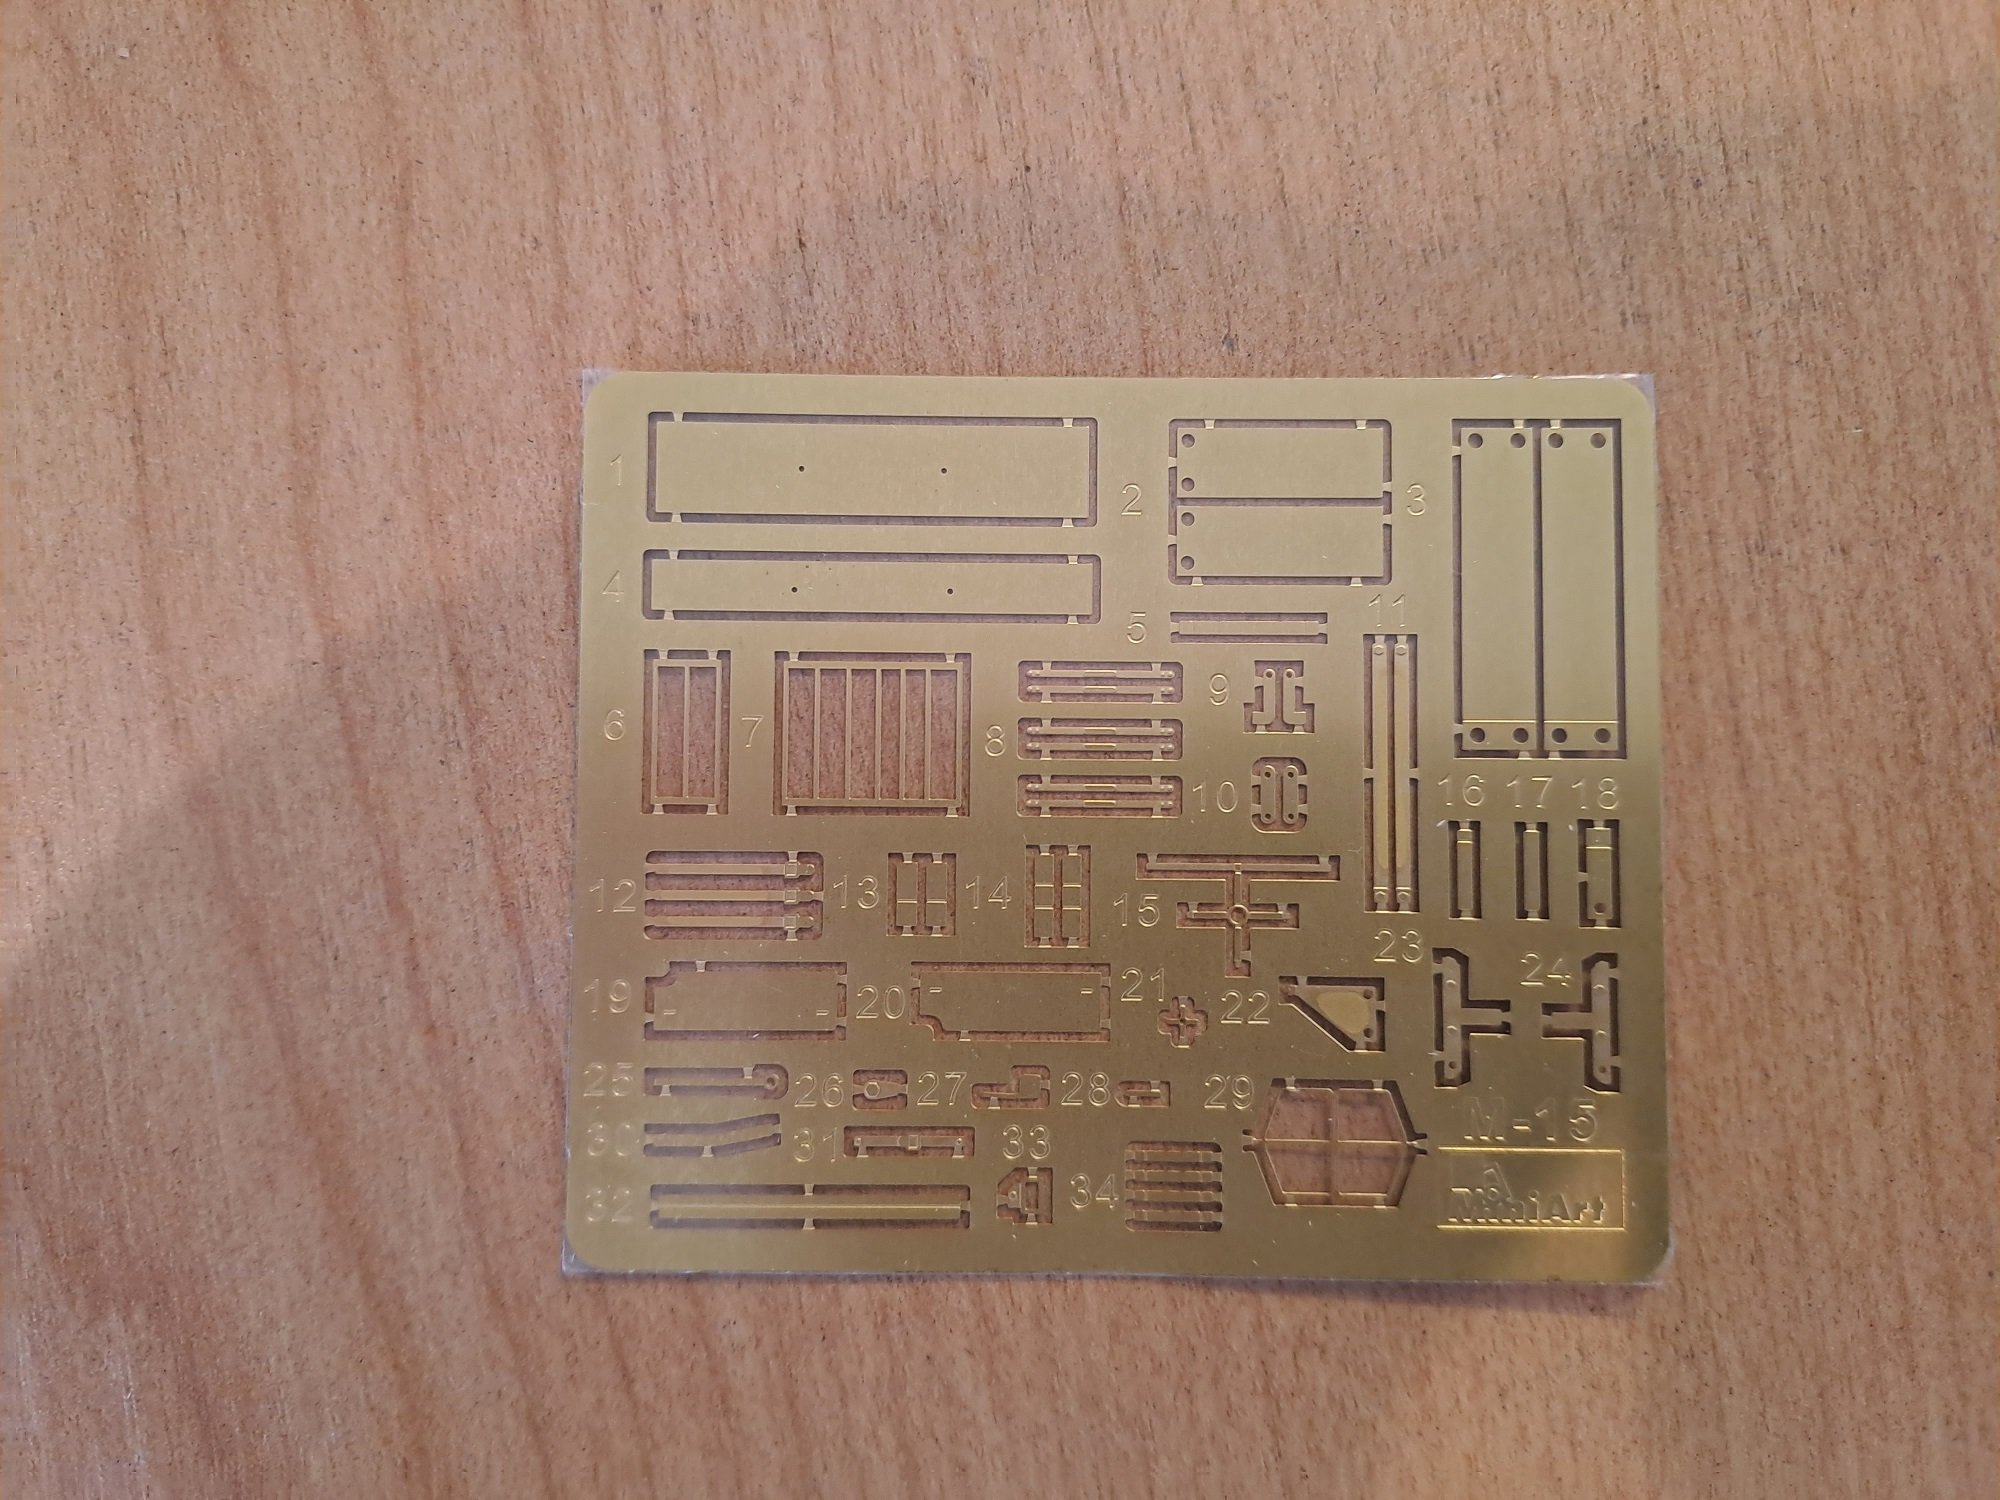
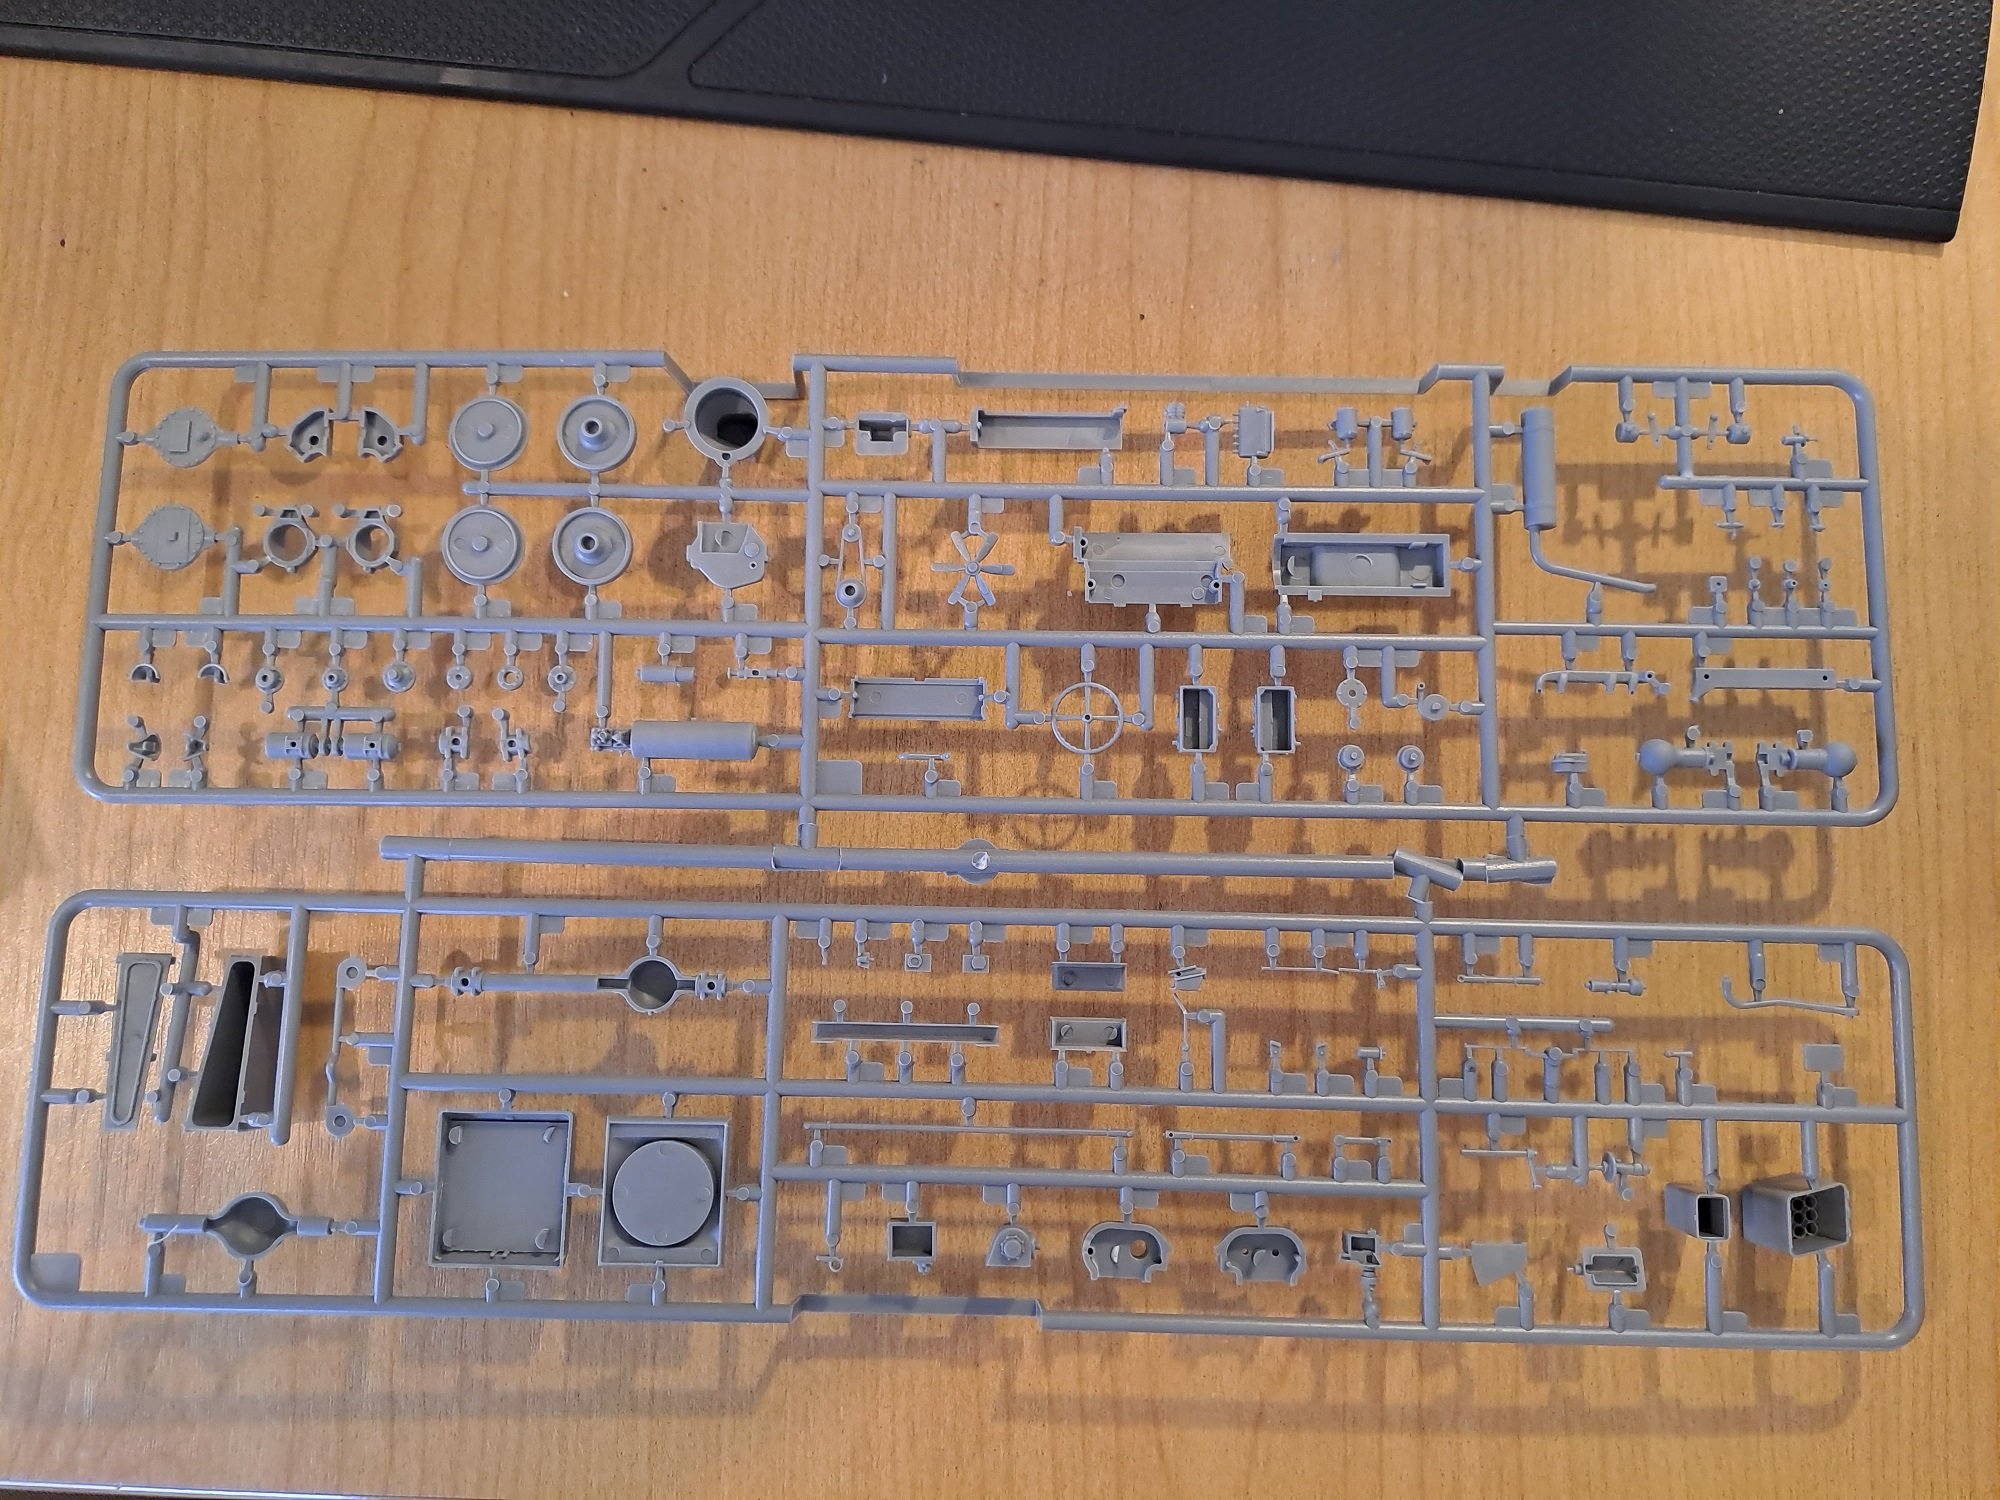
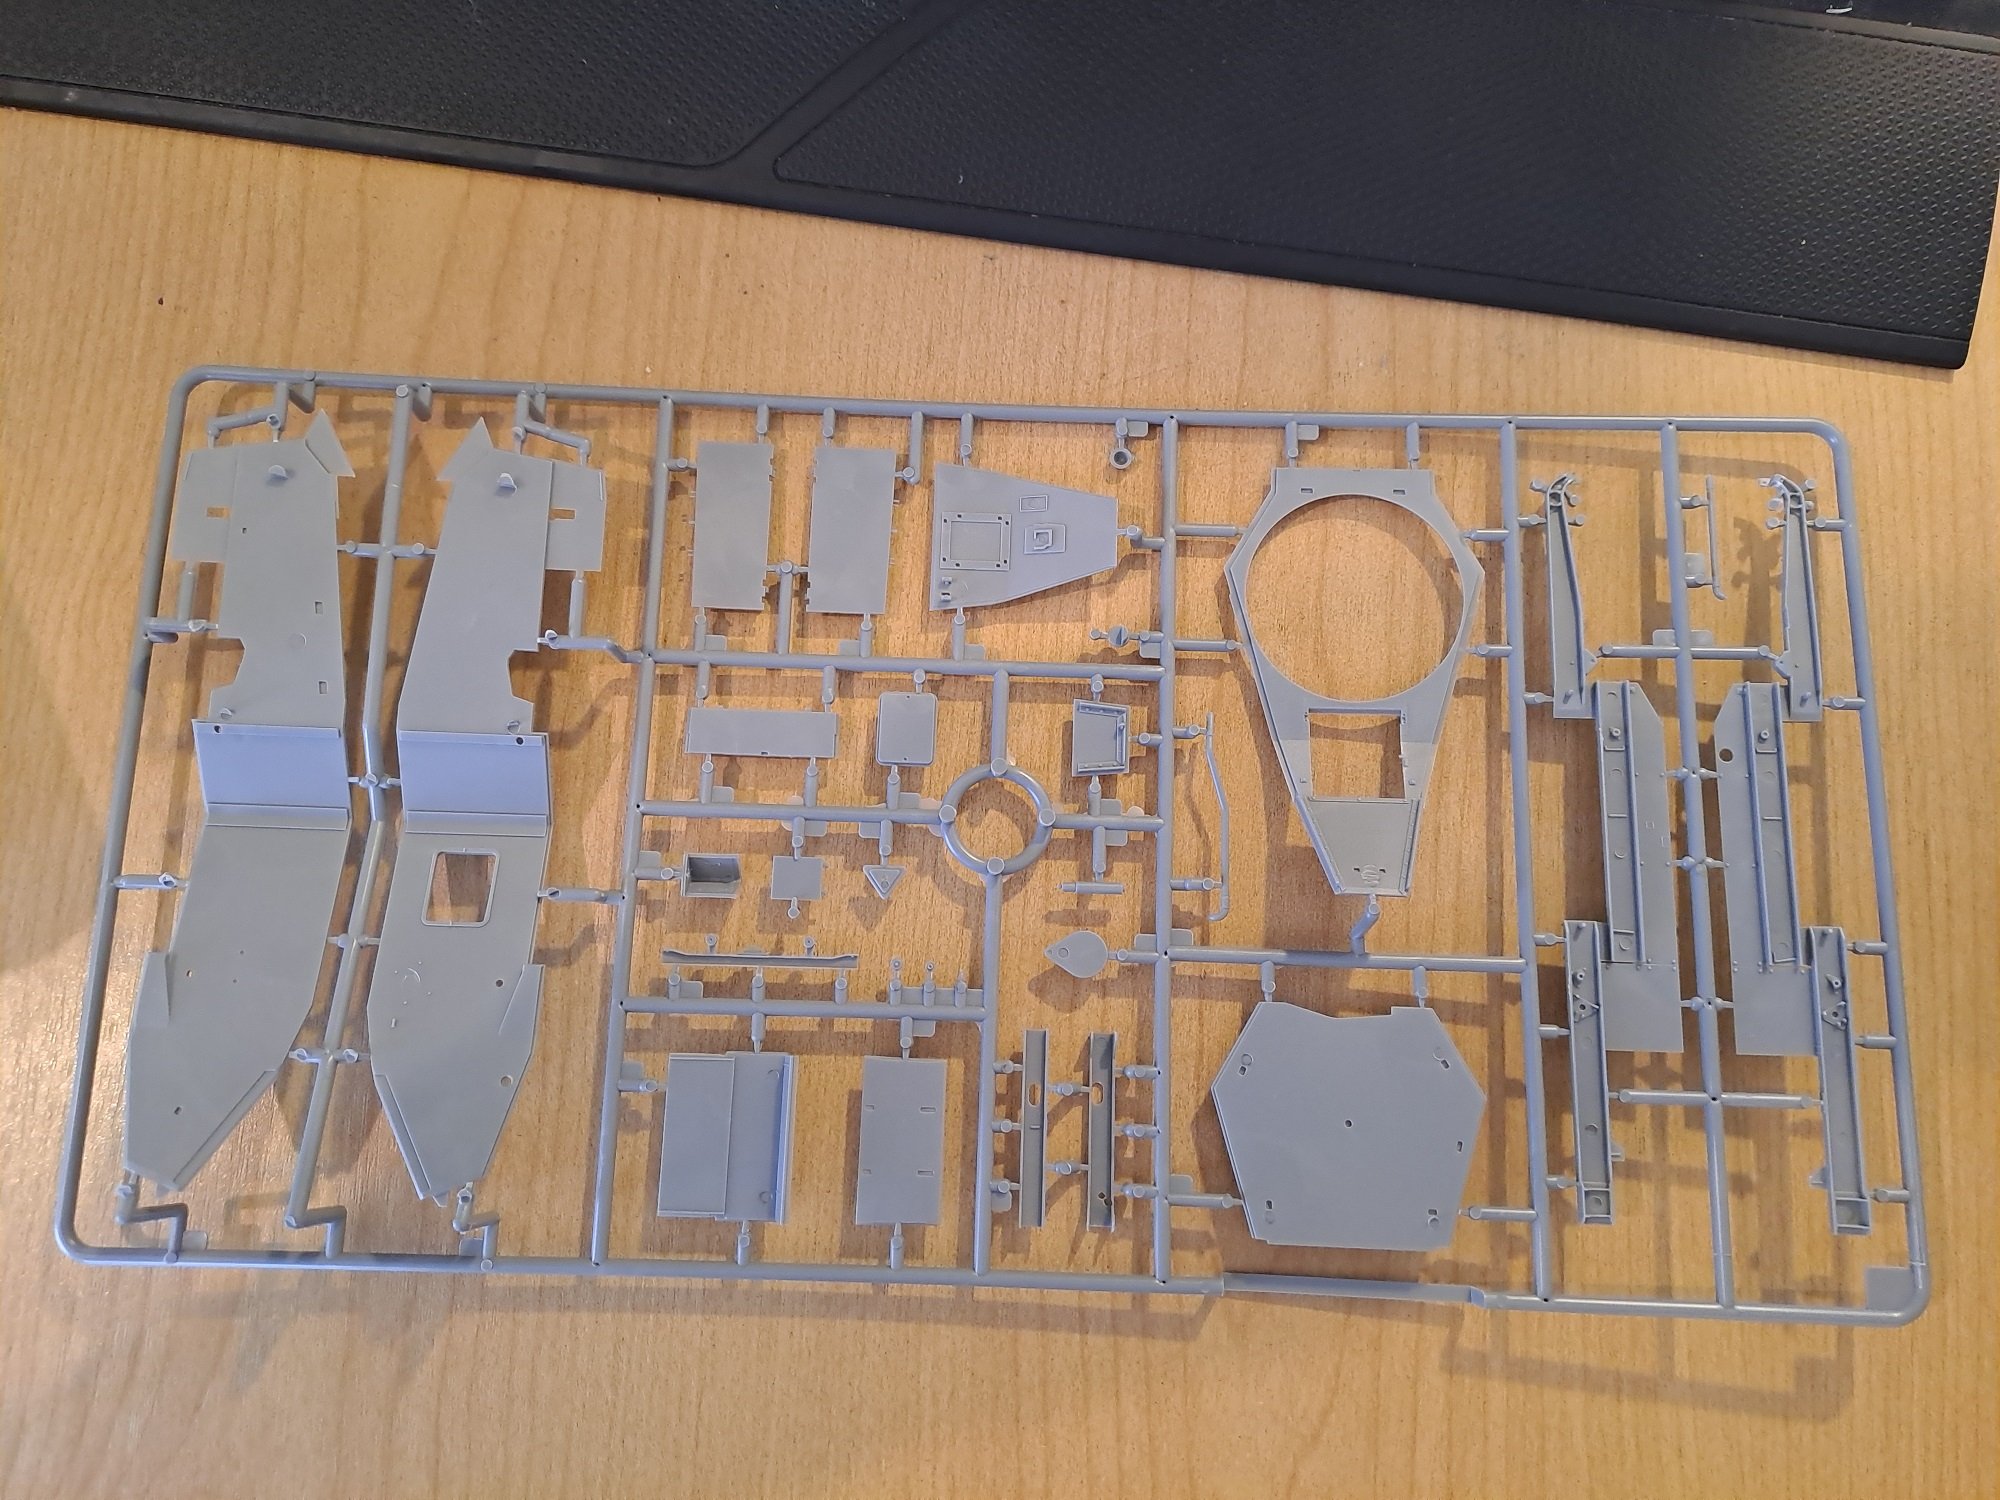
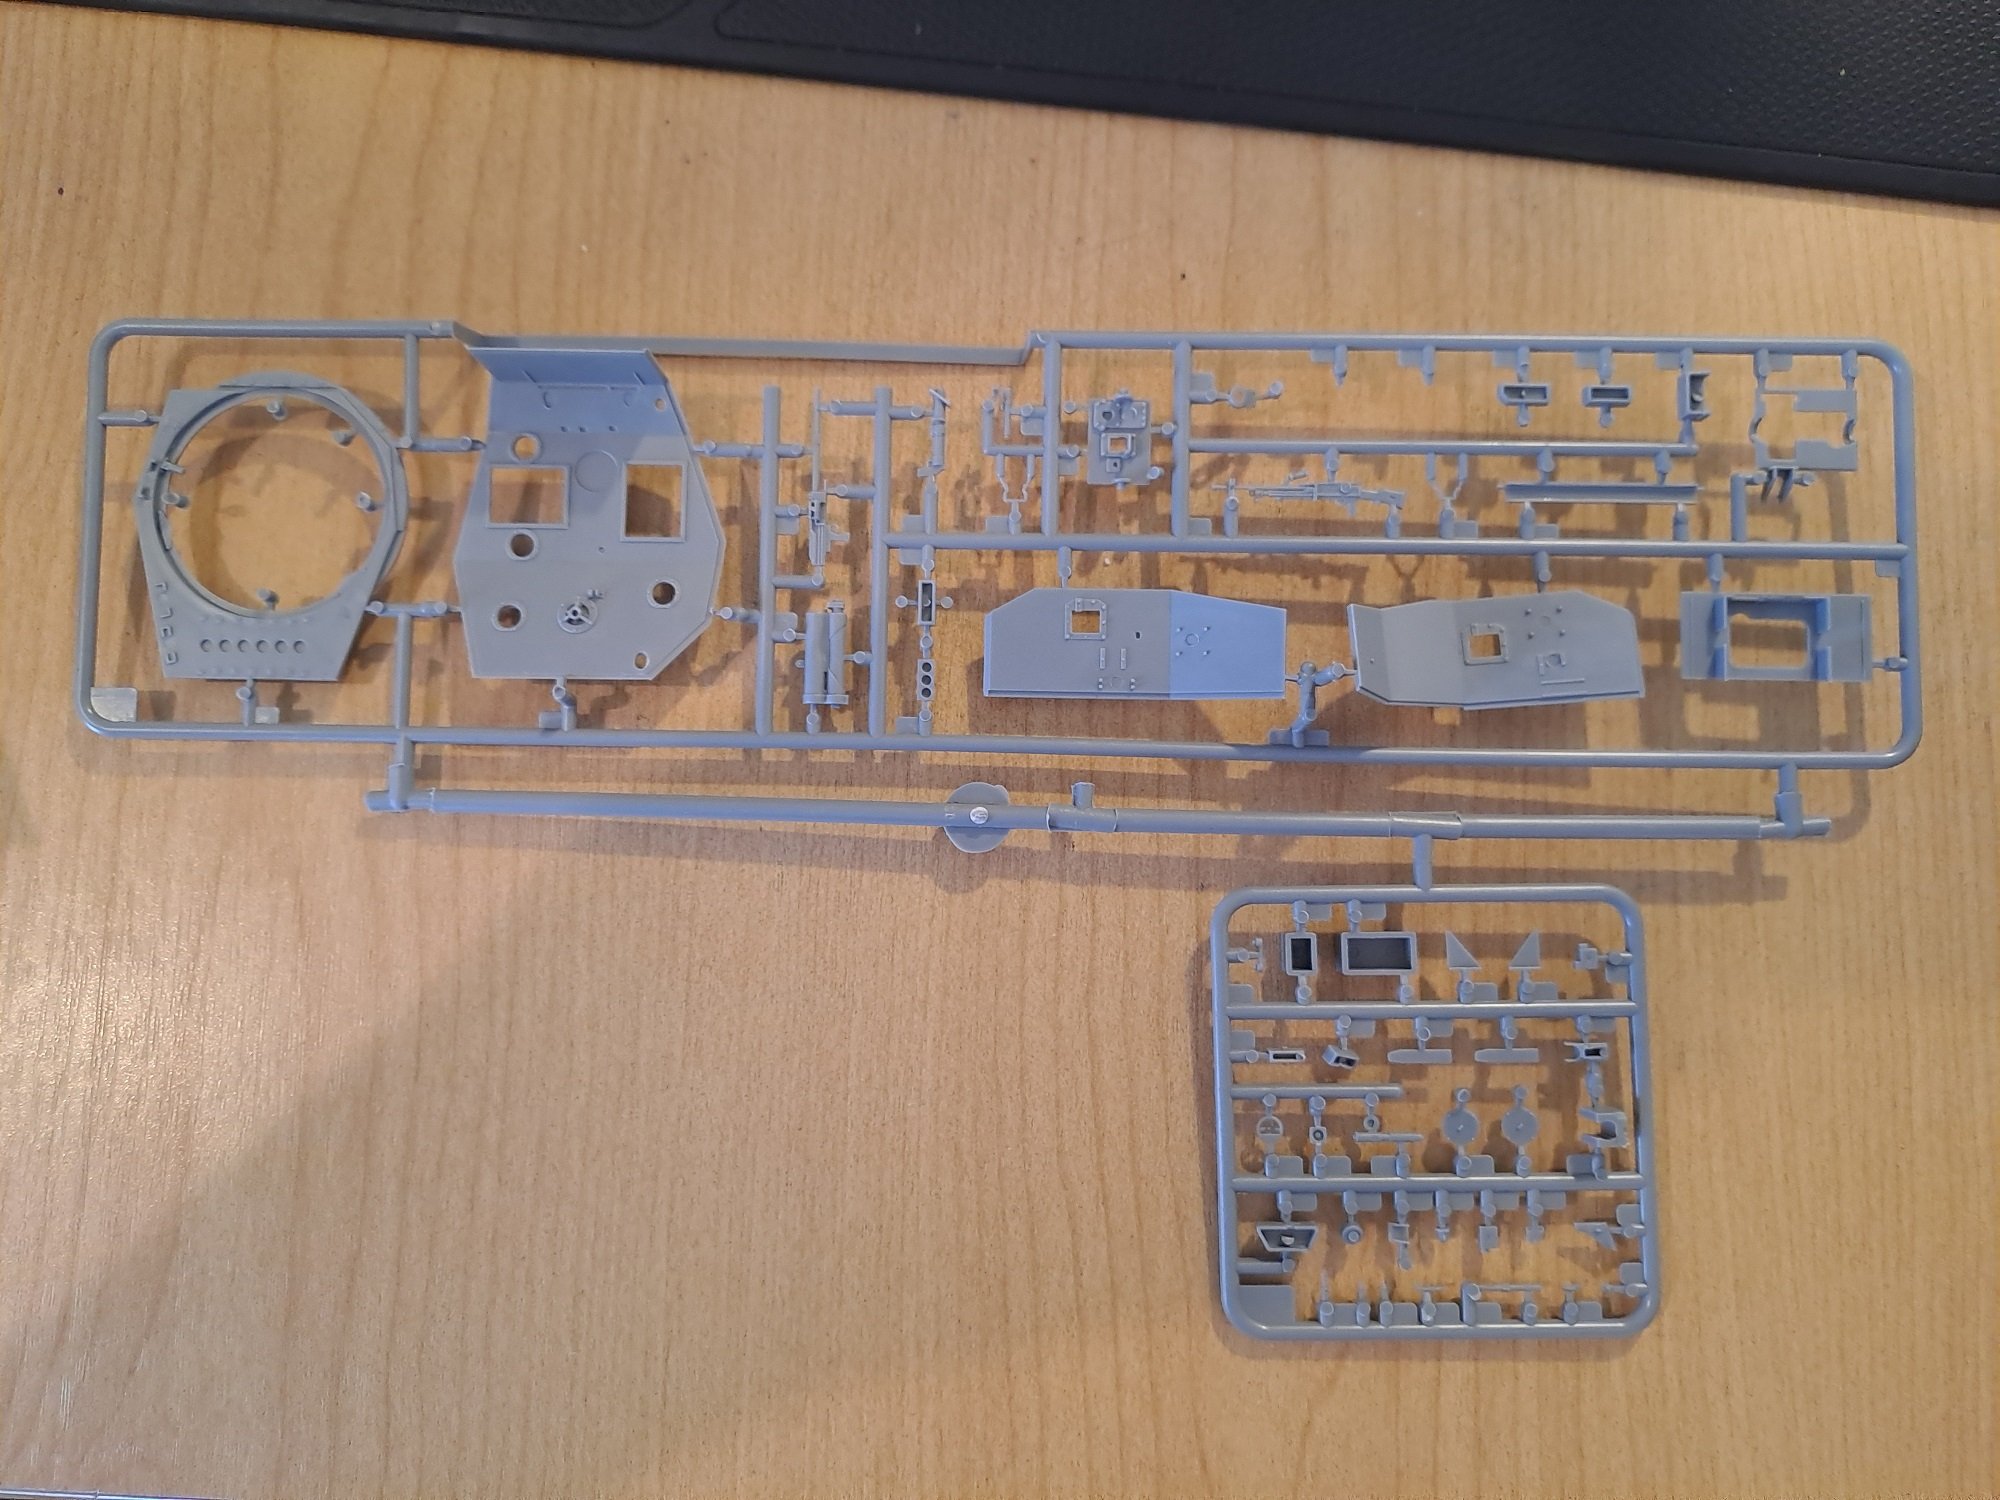
That half finished Flakpanzer IV Wirbelwind kit I've got stashed in the garage, must be taken from the regular Panzer IV mouldings as there's about a million parts on the sprues that aren't mentioned on the instructions and wouldn't work on what's supposed to be a mobile anti-aircraft battery.3 points
-
Holy cow. I think I'd have a few bits left over. Bought a couple of Tamiya halftracks the other day, they have about 30 parts.3 points
-
Here we go:
3 points
-
Been a while I very nearly got knocked on a WOF before drag day as my rear tyres are down a bit on tread some life left but not much. I bought some 275 tyres to see if they might fit as I want meats out the back. Fluked these BMW X5 m Spec rims in 19x9 front and 19x10 rears off market place today for basically scrap value. They should look mint! Can also chuck a 255 up front as well. Turbo stuff not on hold as such just doing my bit with small stuff like catch cans and power steering reservoir and radiator over flow relocations. Meanwhile its nice driving it.
3 points
-
Good effort guys. Awesome to see this thread. If you need any Viva specific guidance or leads on any parts feel free to get hold of me. Message me on here or @RUNAMUCK and @- i5oogt - both know how to reach me on the telephone.3 points
-
Thank you so much to everybody that came. It was great to see some progress and just really nice seeing everybody have a good time. I really appreciate it. I will get a new battery this week, was there anything else that needs to be done? I will try and source the corner Cover things for the rear window. Once again thank you everyone3 points
-
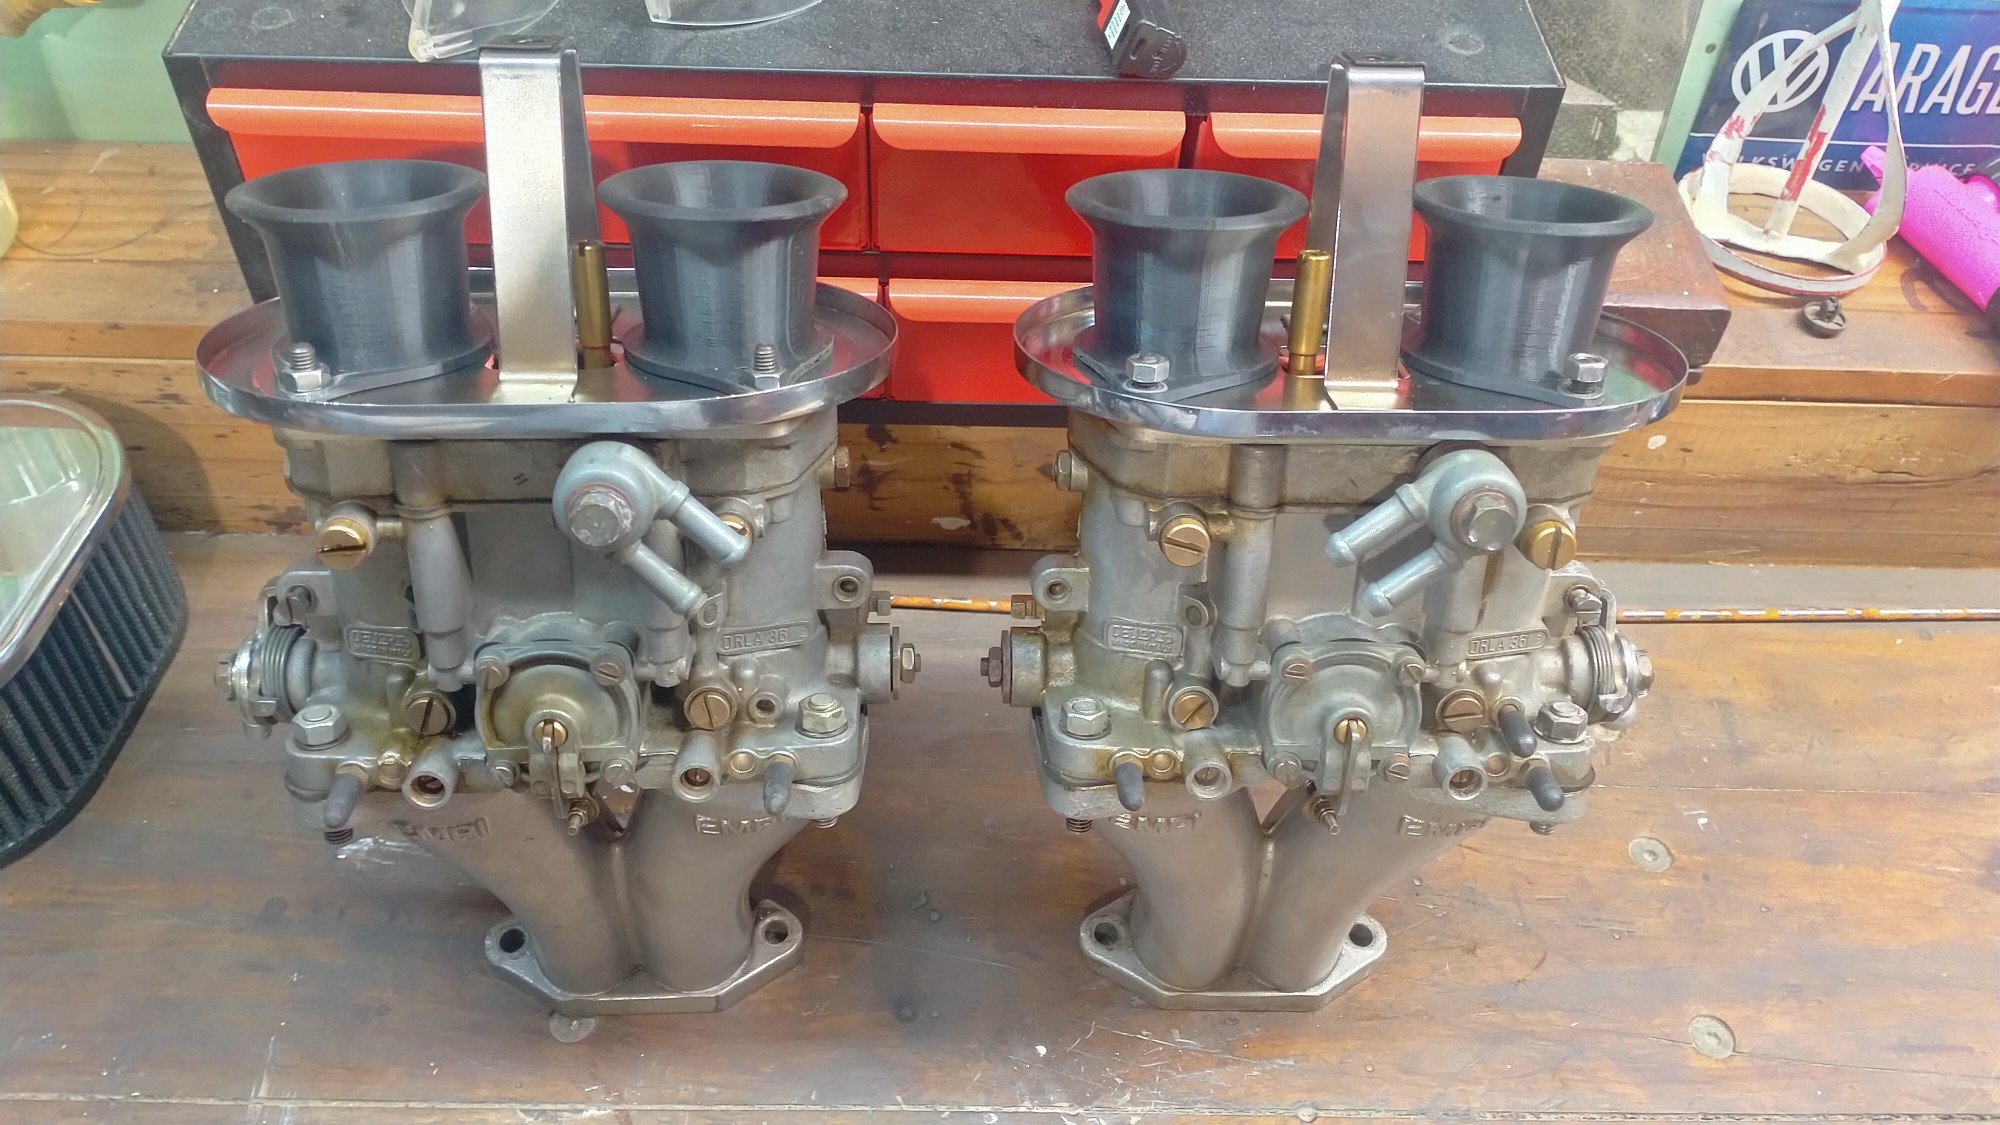
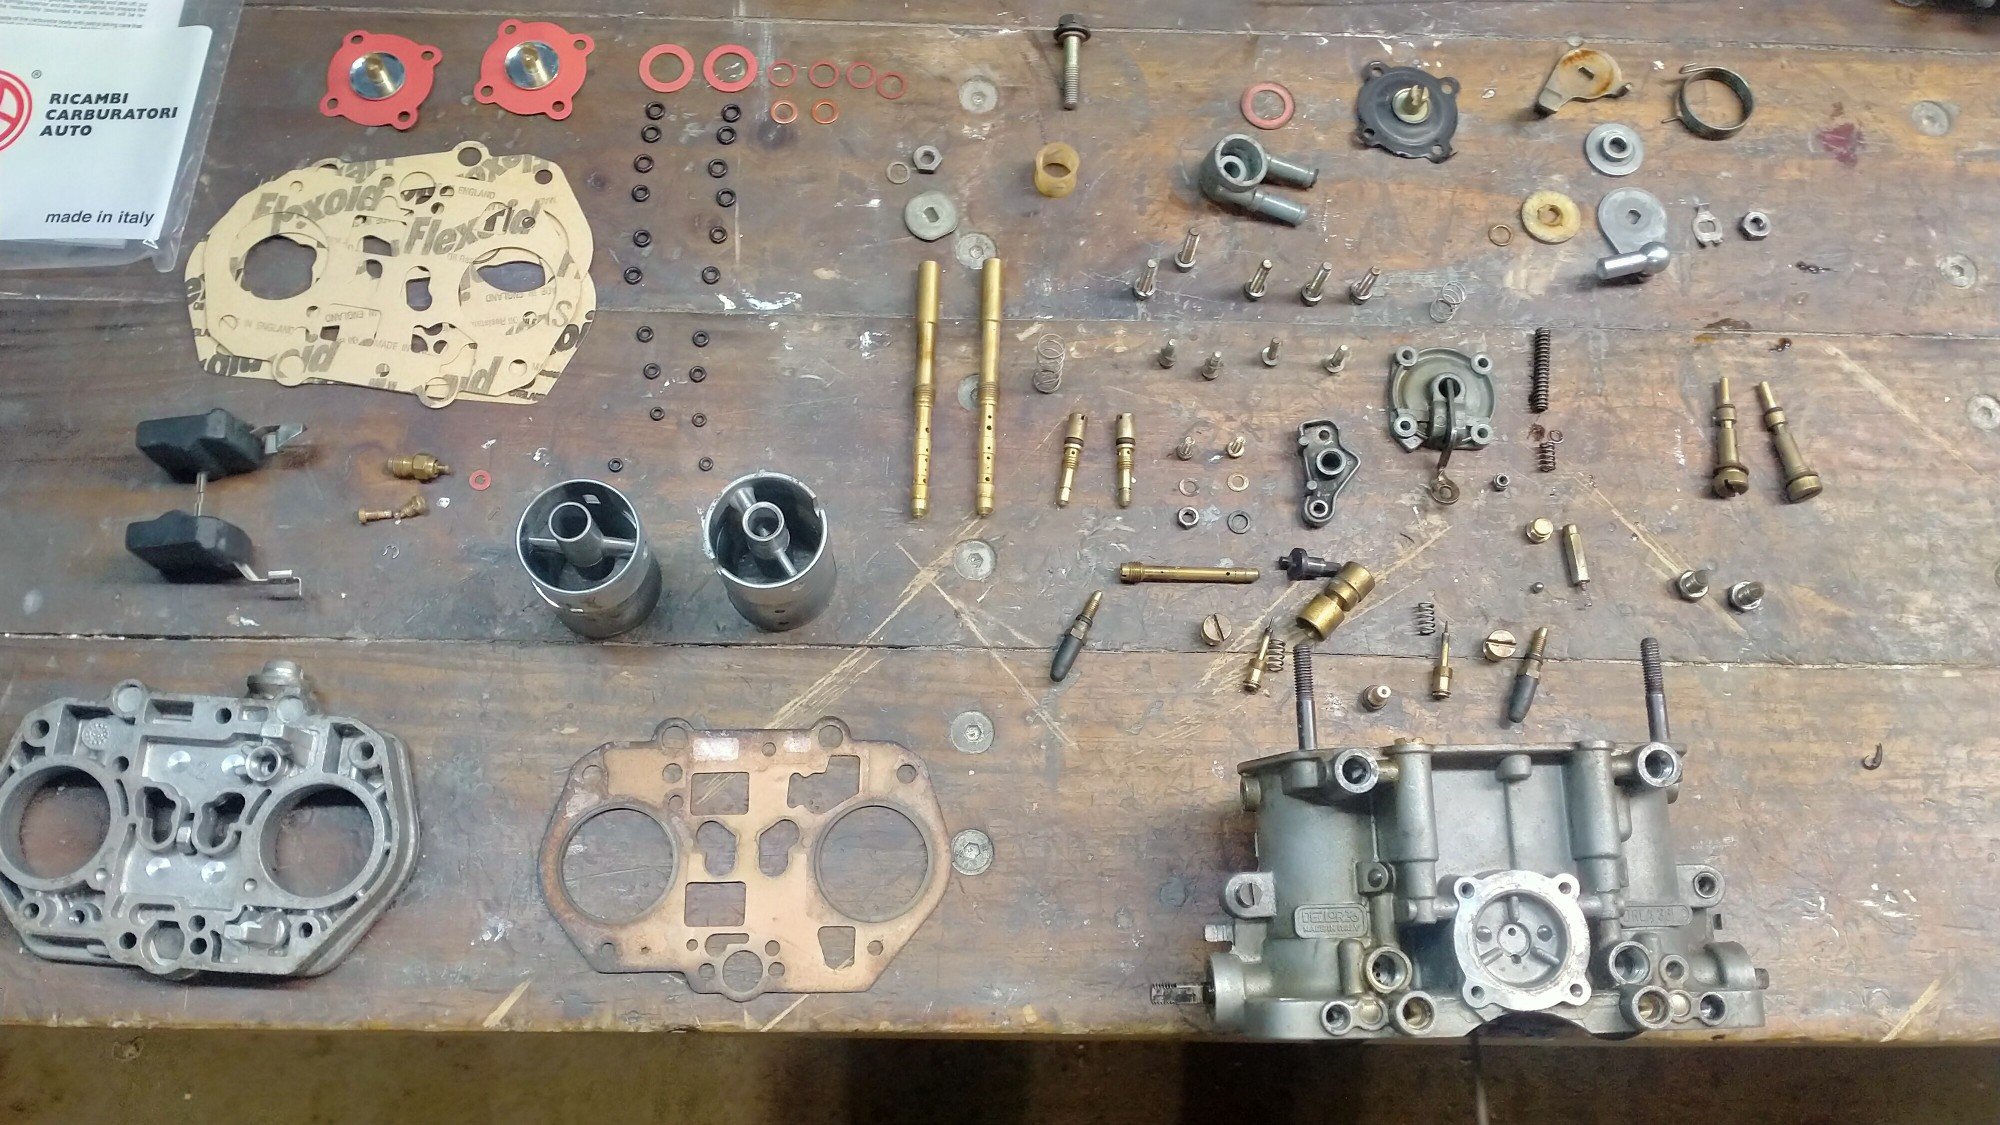
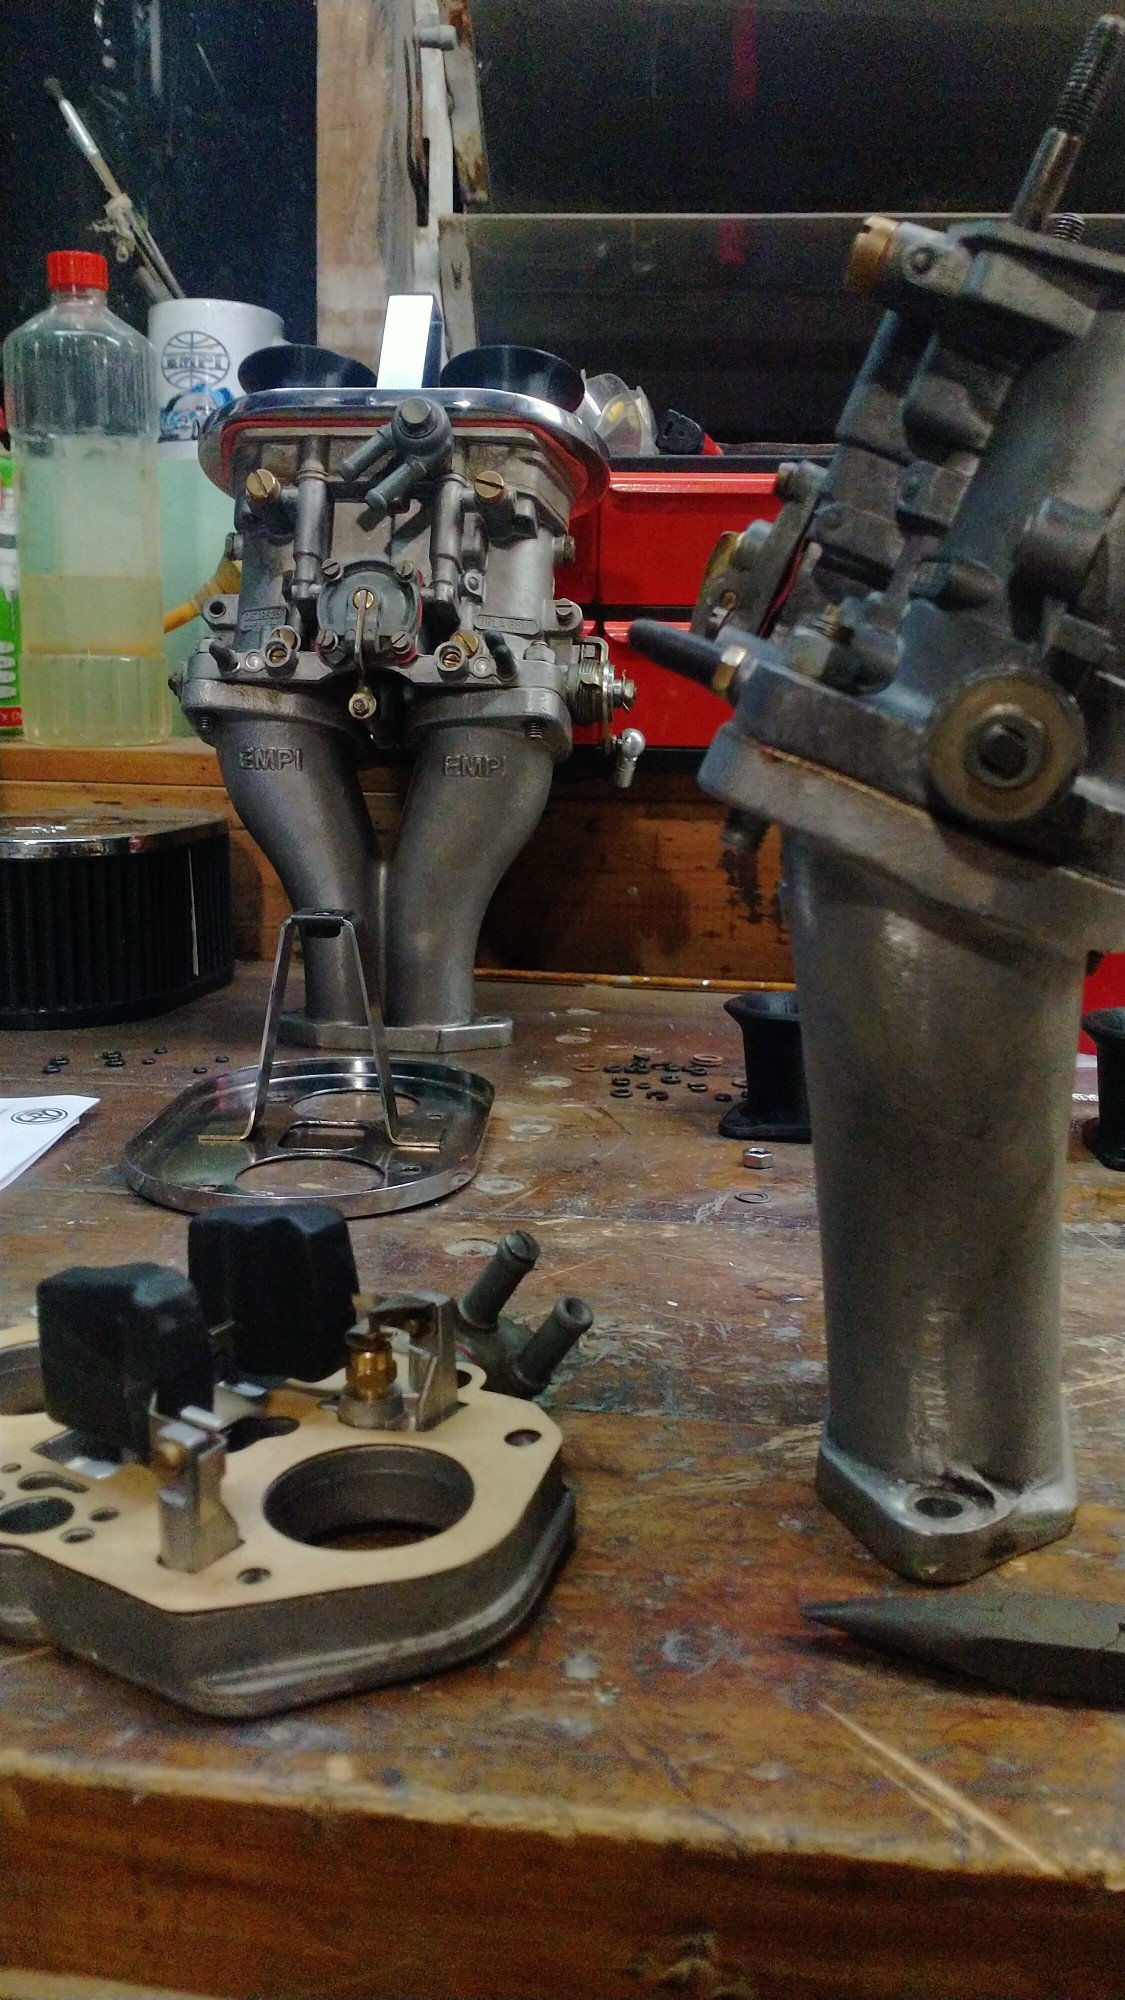
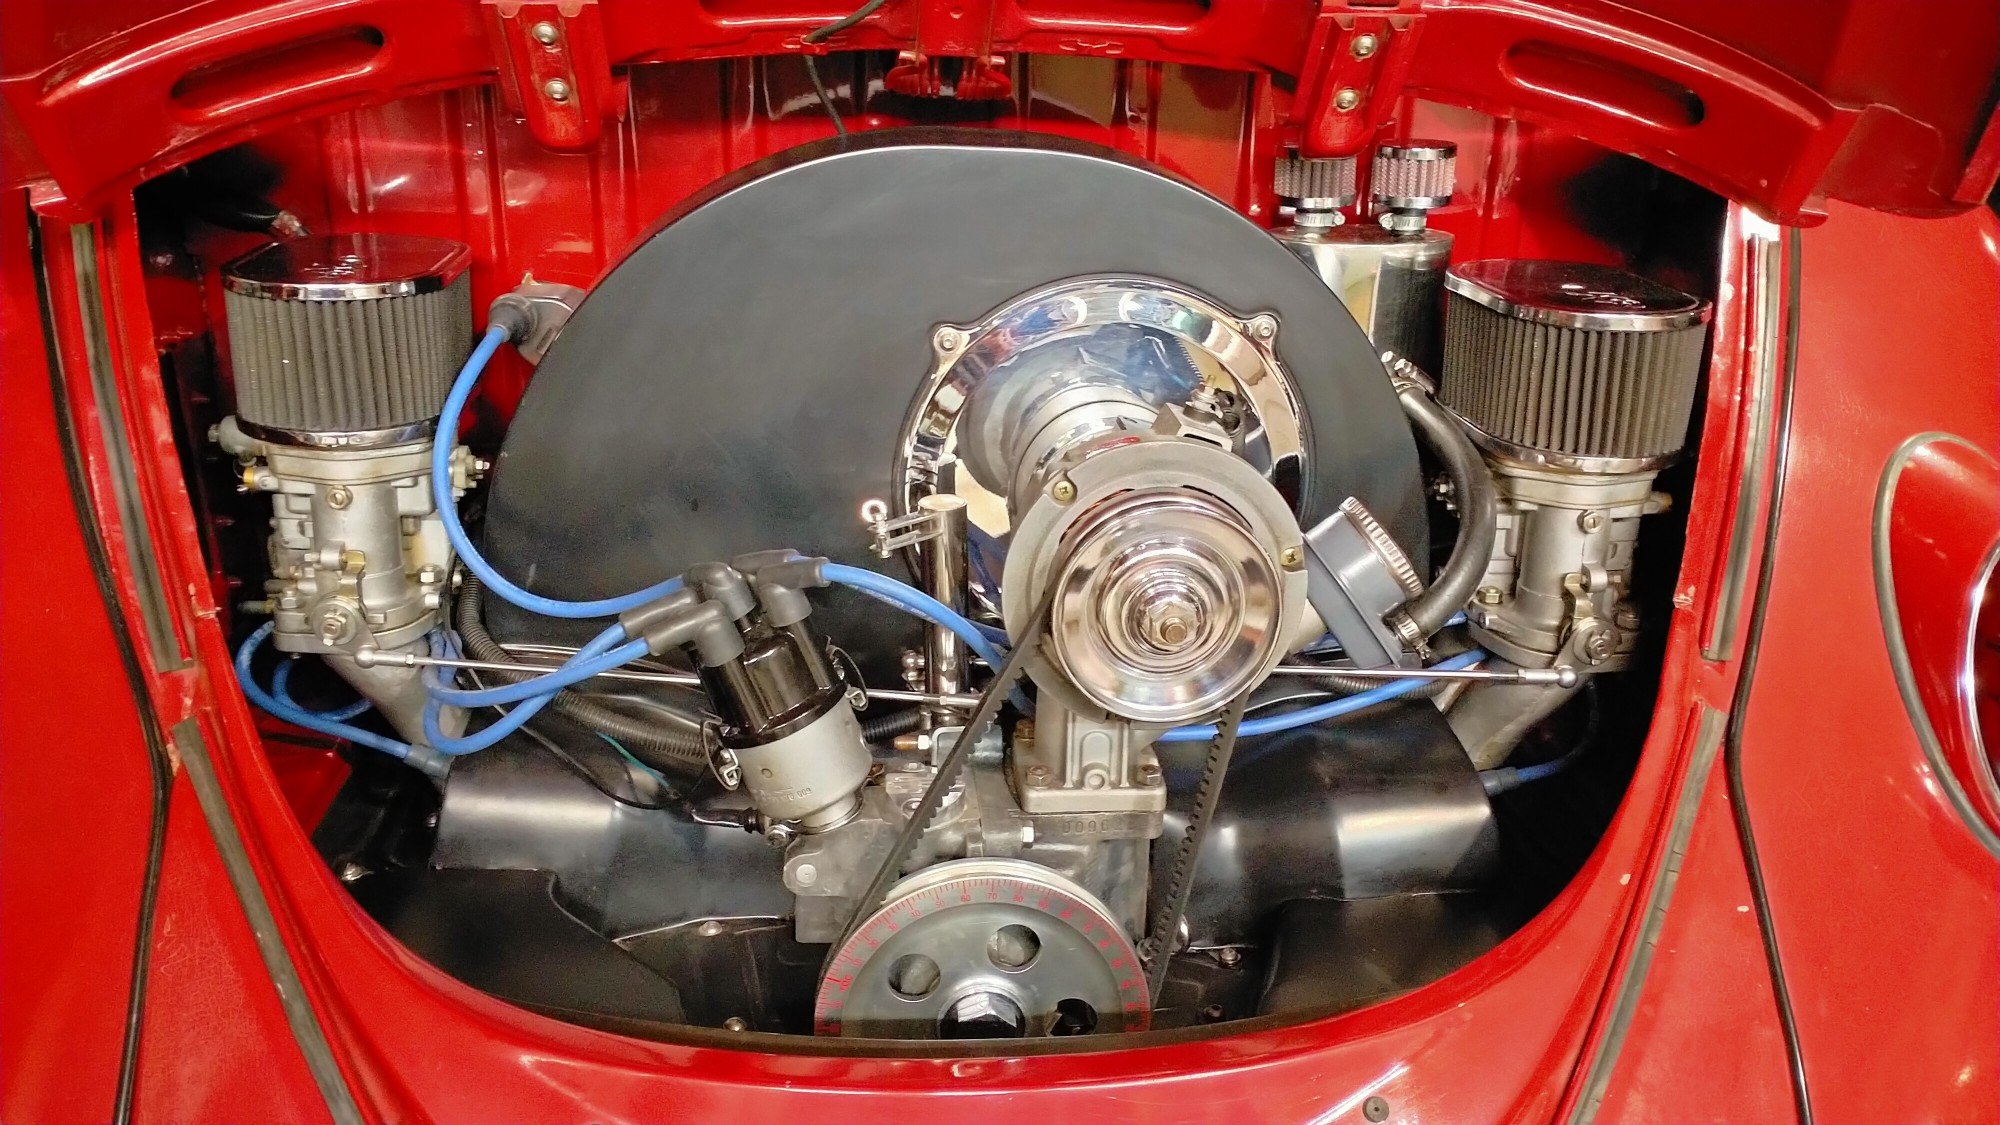
Gentlemen, after a good six months of neglect, general wear and tear I finally had time to service the VW. Living outside had not been kind to some of the so called stainless steel. Was to embarrassed to pop the hoop open at Kumeu. It been driving okay, it runs hard but it's that traffic speed, just puttering along off idle, it just didn't sound right, but fine when accelerating, something was a miss. One of the projects at work is up Silverdale so popped in the see the carb Barrys at Weber specialist, got a complete rebuild kit for the Dells. Alfa Romeo, very fancy, much racing cars. Having been through everything else the carbs are the last thing needing sorted, I don't think sitting for nearly two years on a shelf whilst I built the motor and various other life admin got in the way, helped. Borrowed the ultrasonic cleaner from work and cracked into it about 8:30, Friday night. Fuck there are a lot of very small parts in a 36mm DRLA Dellorto, and I've got two. many hours later and into the early morning I was nearly finished, didn't want to stop half way and forget where something went or lose a tiny jet. Had to stop drinking so I could concentrate! In a very rare occurrence I got to spend nearly all weekend just working on the car and not the house or the yard or visit relatives or anyone. After forgetting to tighten half the screws on the right hand carb, it started and ran pretty good. So took the time to sand back all the rust and polished it all back to a mirror finish, cleaned and wiped everything. No excuse for a ugly engine bay. Carried on adjusting the brakes, always amazes me how much a badly adjusted handbrake affects the overall performance of the old drums, seems to take up a lot of slack in the system. Popped the valve covers and set the rockers and checked the headstuds were tight still. Just need to grease and adjust the front end and actually change the engine oil and the maintenance will be up to date. Continued playing with the carbs, the access windows I put in the rear wheel wells make this easy and actually possible. I'm pretty happy with how's it's running now, so much nicer to drive, smoother, quieter better performance, more responsive. Maybe the tiniest flat spot just off idle, but nothing like the spluttering bullshit I've been driving around. Much nicer at motorway speed, just cruises.
3 points
-
....Between them2 points
-
I'm currently in the NZ Datsun club but seems local guys are too afraid to get out for cruises.. I do travel alot for Auckland events. Keen to meet locals who wanna go for drives etc etc. Maybe even help keep up to date on events etc Facebook Jason Sayers or Instagram DatJaseNZ
2 points
-
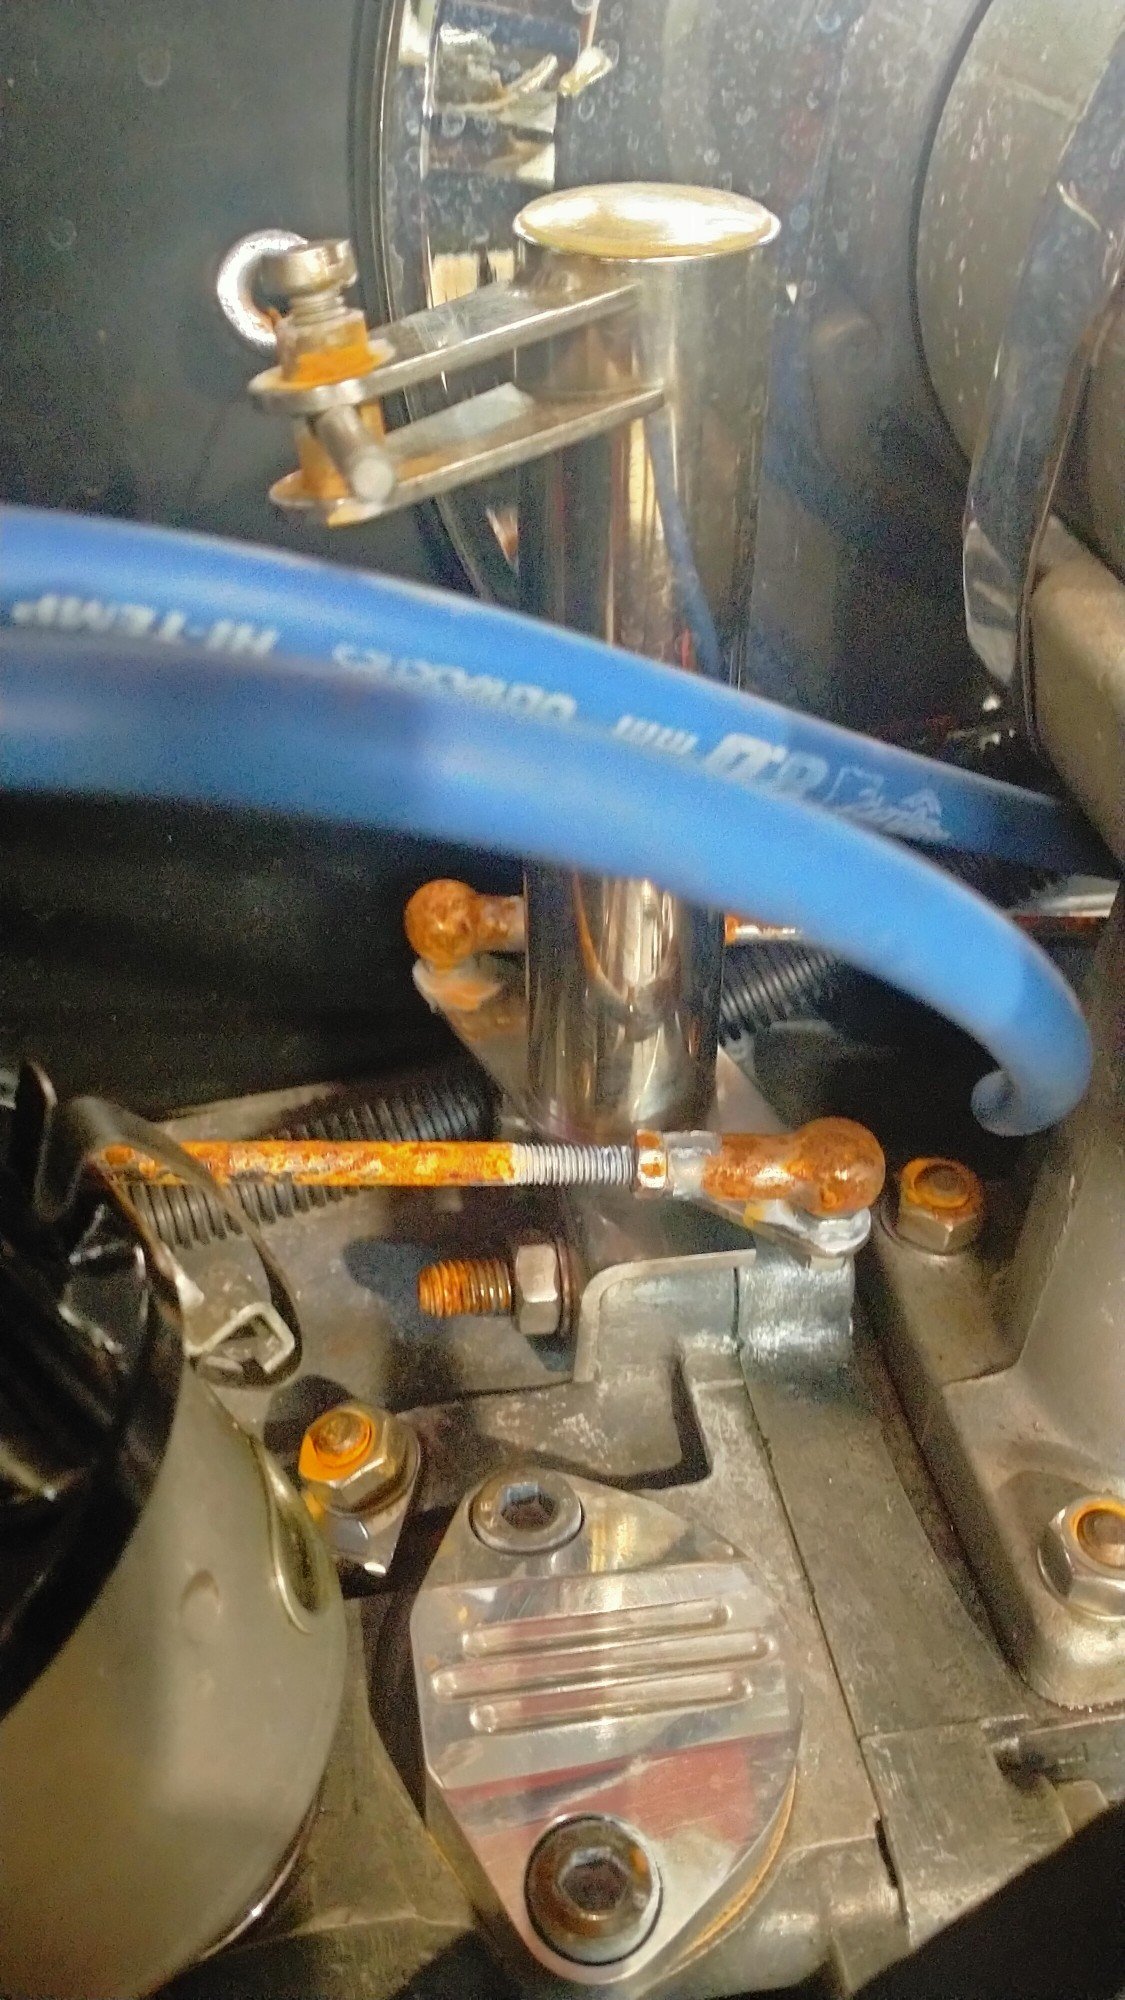
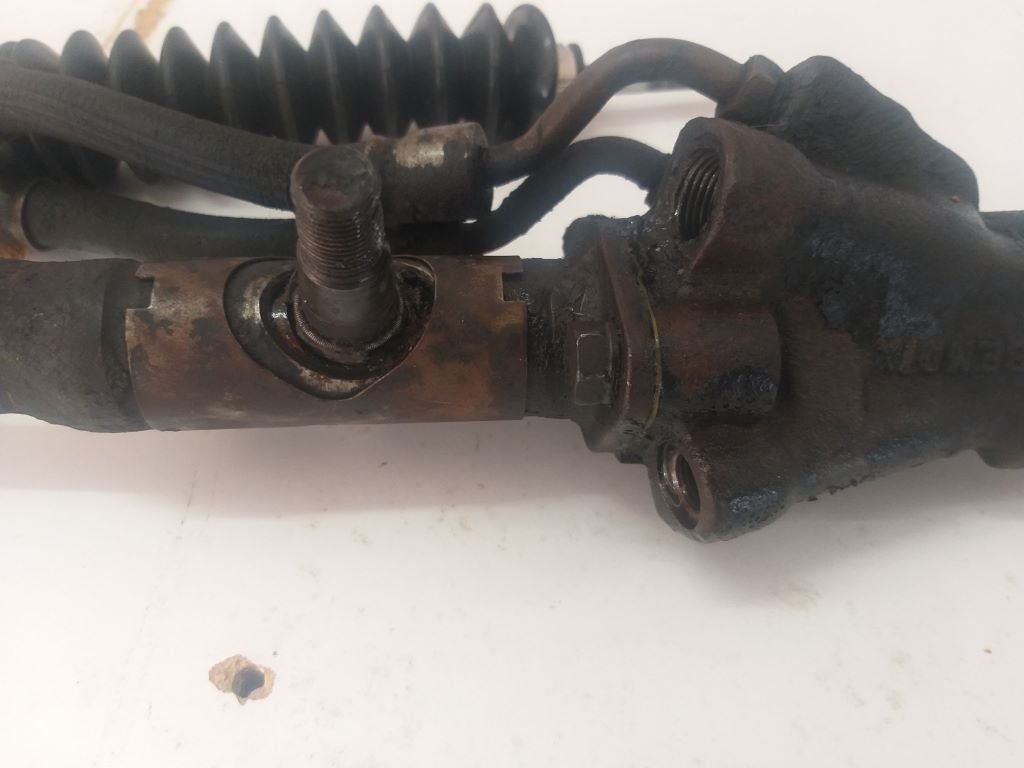
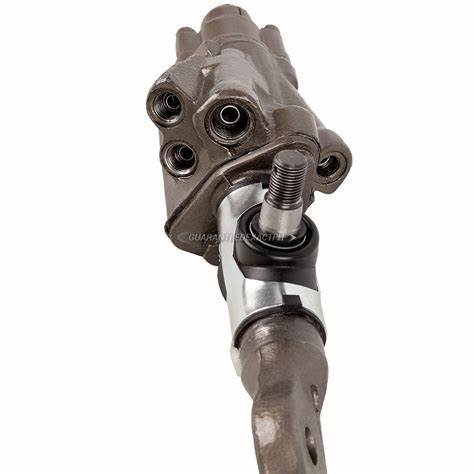
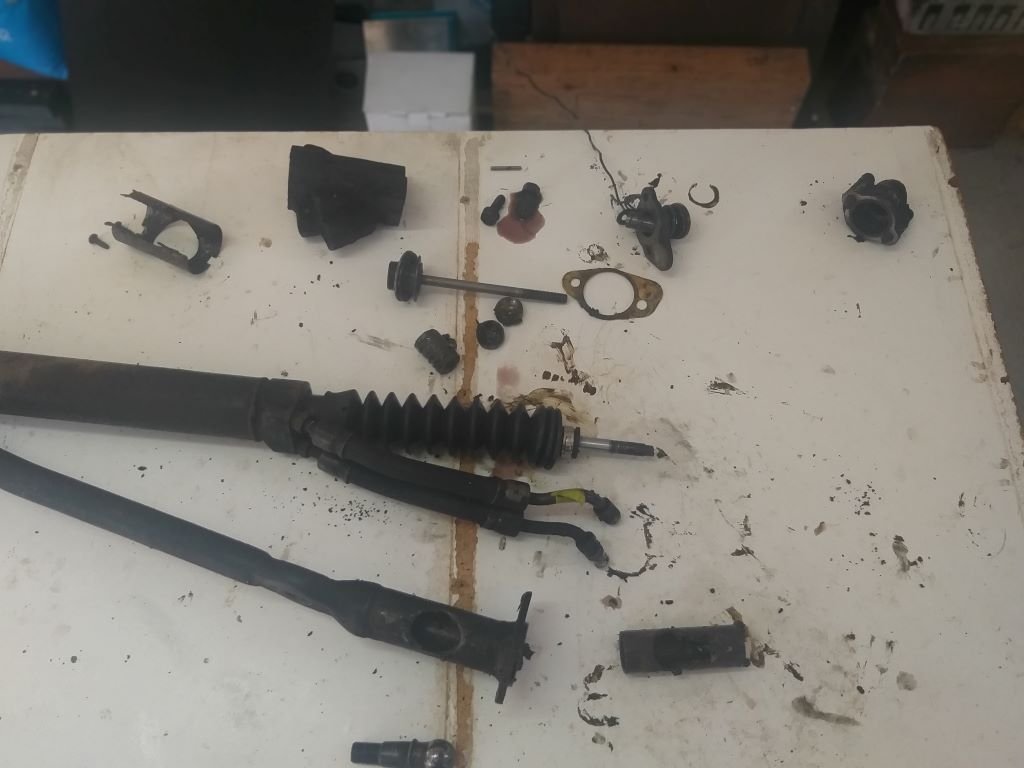
I've been trying to track down the source of an intermittent steering "clunk" for a while now and yesterday I finally got a chance to chuck the Muzzy up on my mate's hoist for a good look see. It didn't take us long to identify the source as a worn ball joint on the power steering valve -this being the only ball joint that I haven't replaced thus far. Using a photo off the web the offending ball joint looks like so: So first thing this morning I pulled out the centre link that incorporates the power steering valve and ... yep... my ball joint is well knackered: Ended up ordering a steering valve ball and stud rebuild kit from Sydney Mustang which is winging its way to me as we speak, but I thought I'd get a head start by stripping the nasty thing down. Gave everything a good clean and now I just need the new bits to arrive.
2 points
-
How good!
2 points
-
Decided I’d try and get my bonnet looking good, unfortunately this area where plastic touched wet clear at my old workspace was not only a run but had a bit of solvent pop Cut through, and the solvent pop had actually gone into/past the base. After blocking and sanding This part of the bonnet will have to be resprayed. I’ll have fun blending it. If it was a colour I was 100% sold on I would respray the whole thing. But racecar (that’s a joke btw). more dust The whole bonnet got 1000 grit DA and then blocked with 800 wet. Before paint I will go over it with the grey scotch, water and scuff paste just to make sure it’s clean and scuffed well enough. Masked up and covered with a bit of g6 I also did my drivers door. It wasn’t too bad in terms of peel, but it did have a bit of dust. I had a small run near the edge, and wanted to try out a technique I learnt from The Gunman on YouTube. it basically involves covering the run and adjacent area with the fine 1k glazing putty, and sanding starting with 320 wet moving through the grades to about 1500. it looks like I cut through on the edge, but didn’t, this was old paint flaking. I almost called this a win but I cut through with the denim pad. Probably a tough first try being right in the edge lol. Will just dab a tiny bit of paint on and not speak about it But the denim pads are pretty good! I questioned my use of the wool pad after as I couldn’t see any obvious swirls or marring. They go hard for what they are. Out in the sun:2 points
-
Il get it out of the shed one day, don't rush me2 points
-
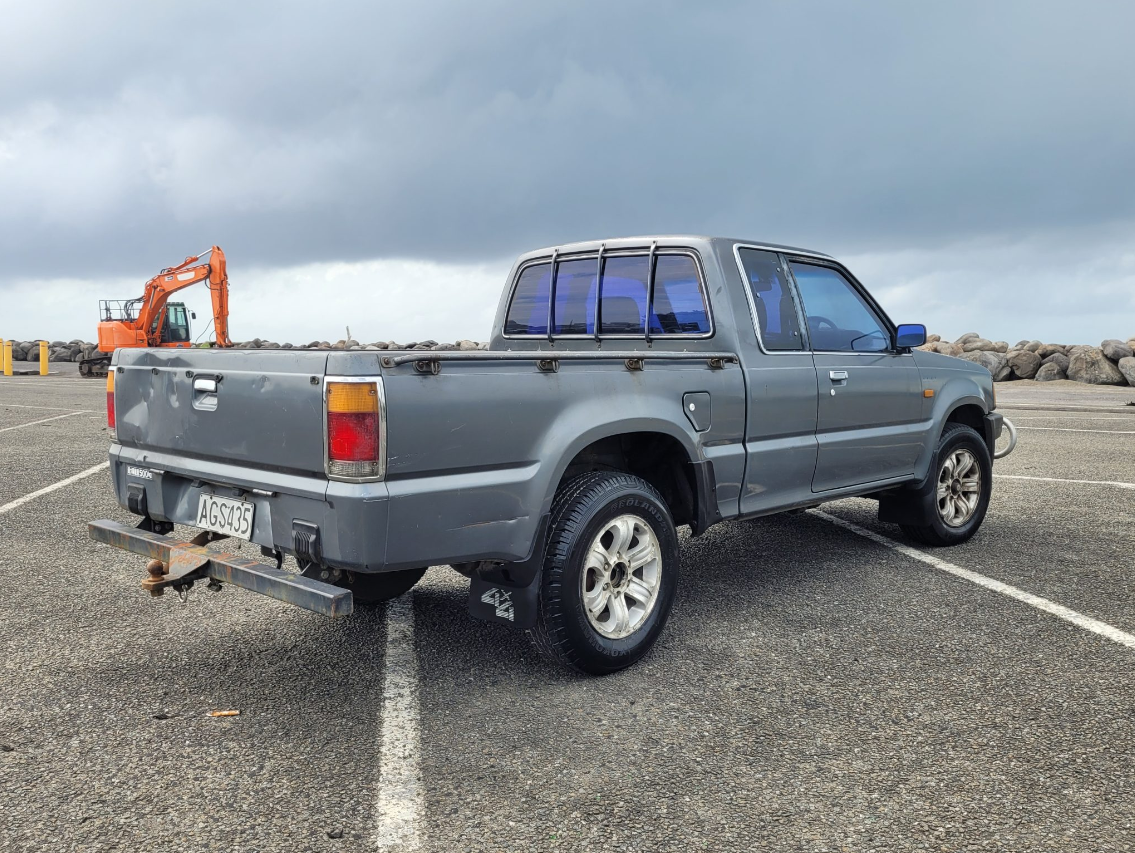
I reckon thats a Mazda/Courier tray, based on fuel flap side & shape
2 points
-
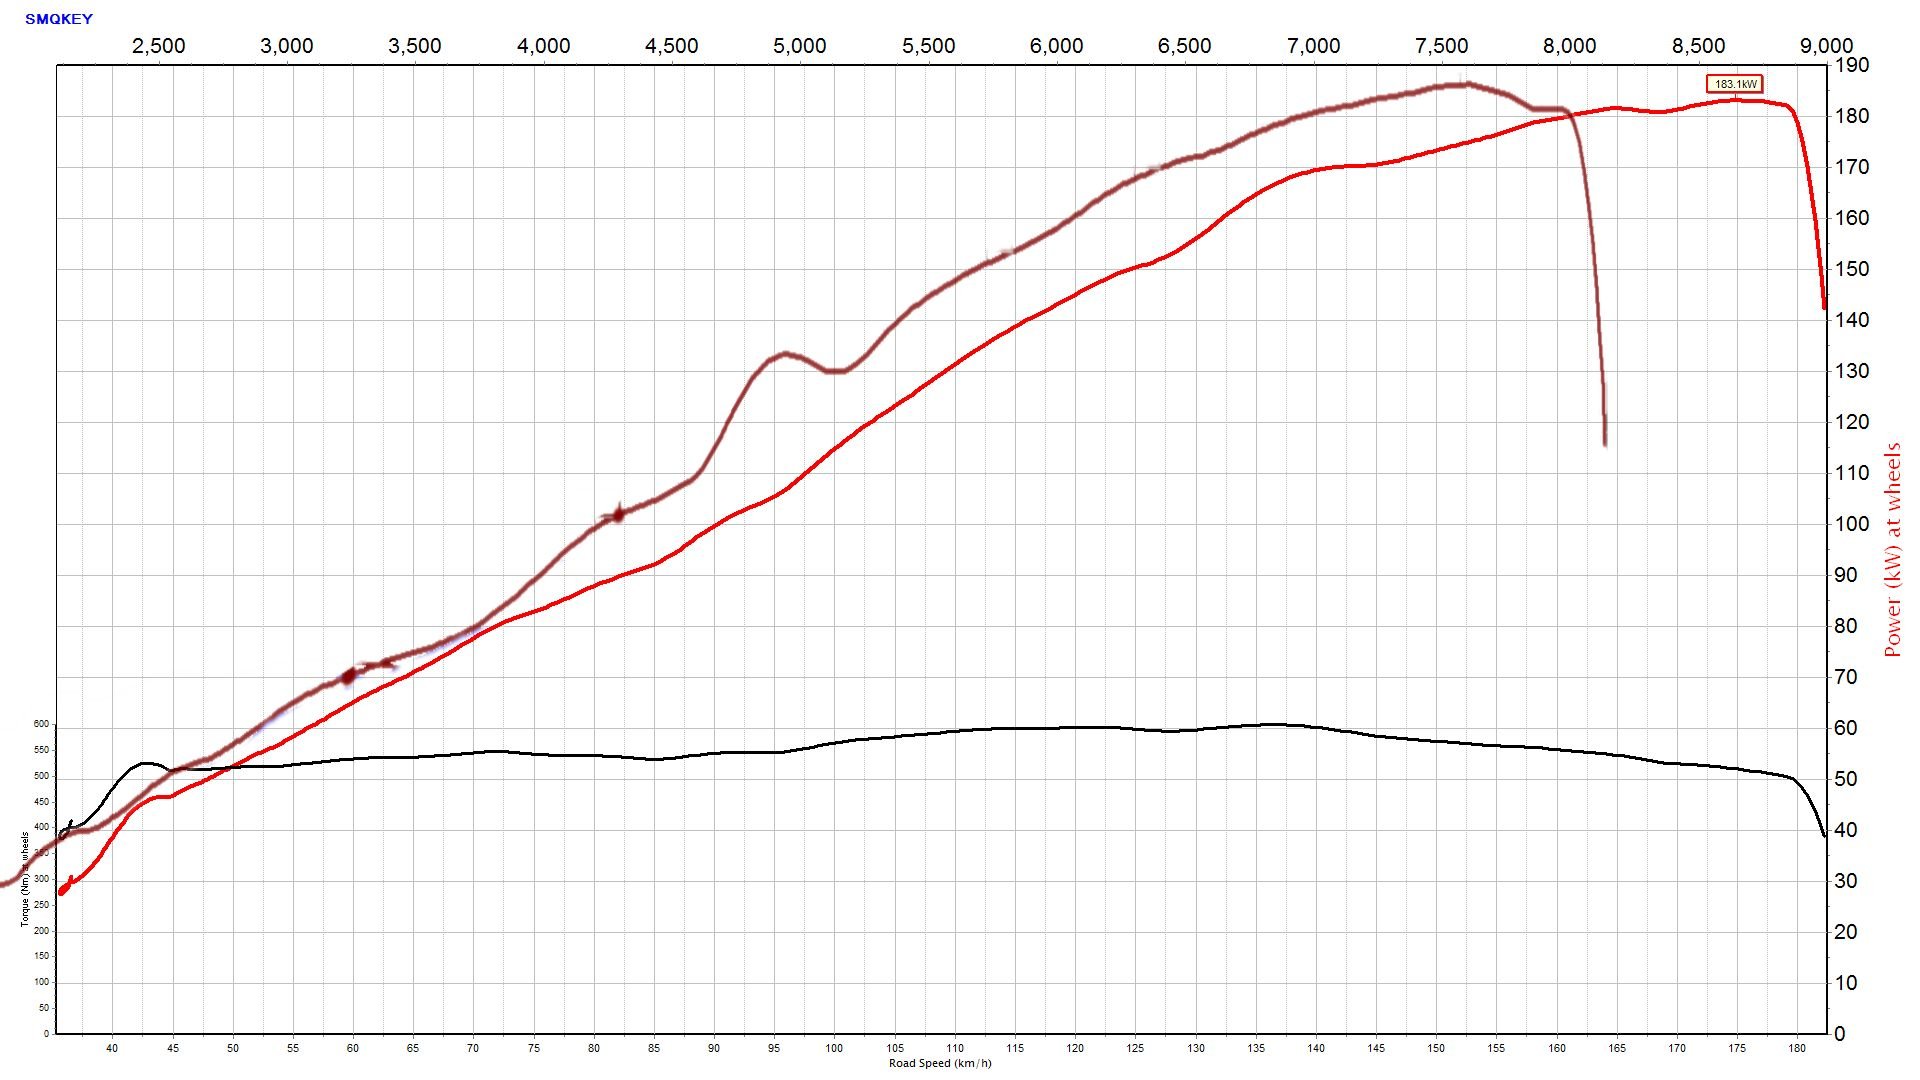
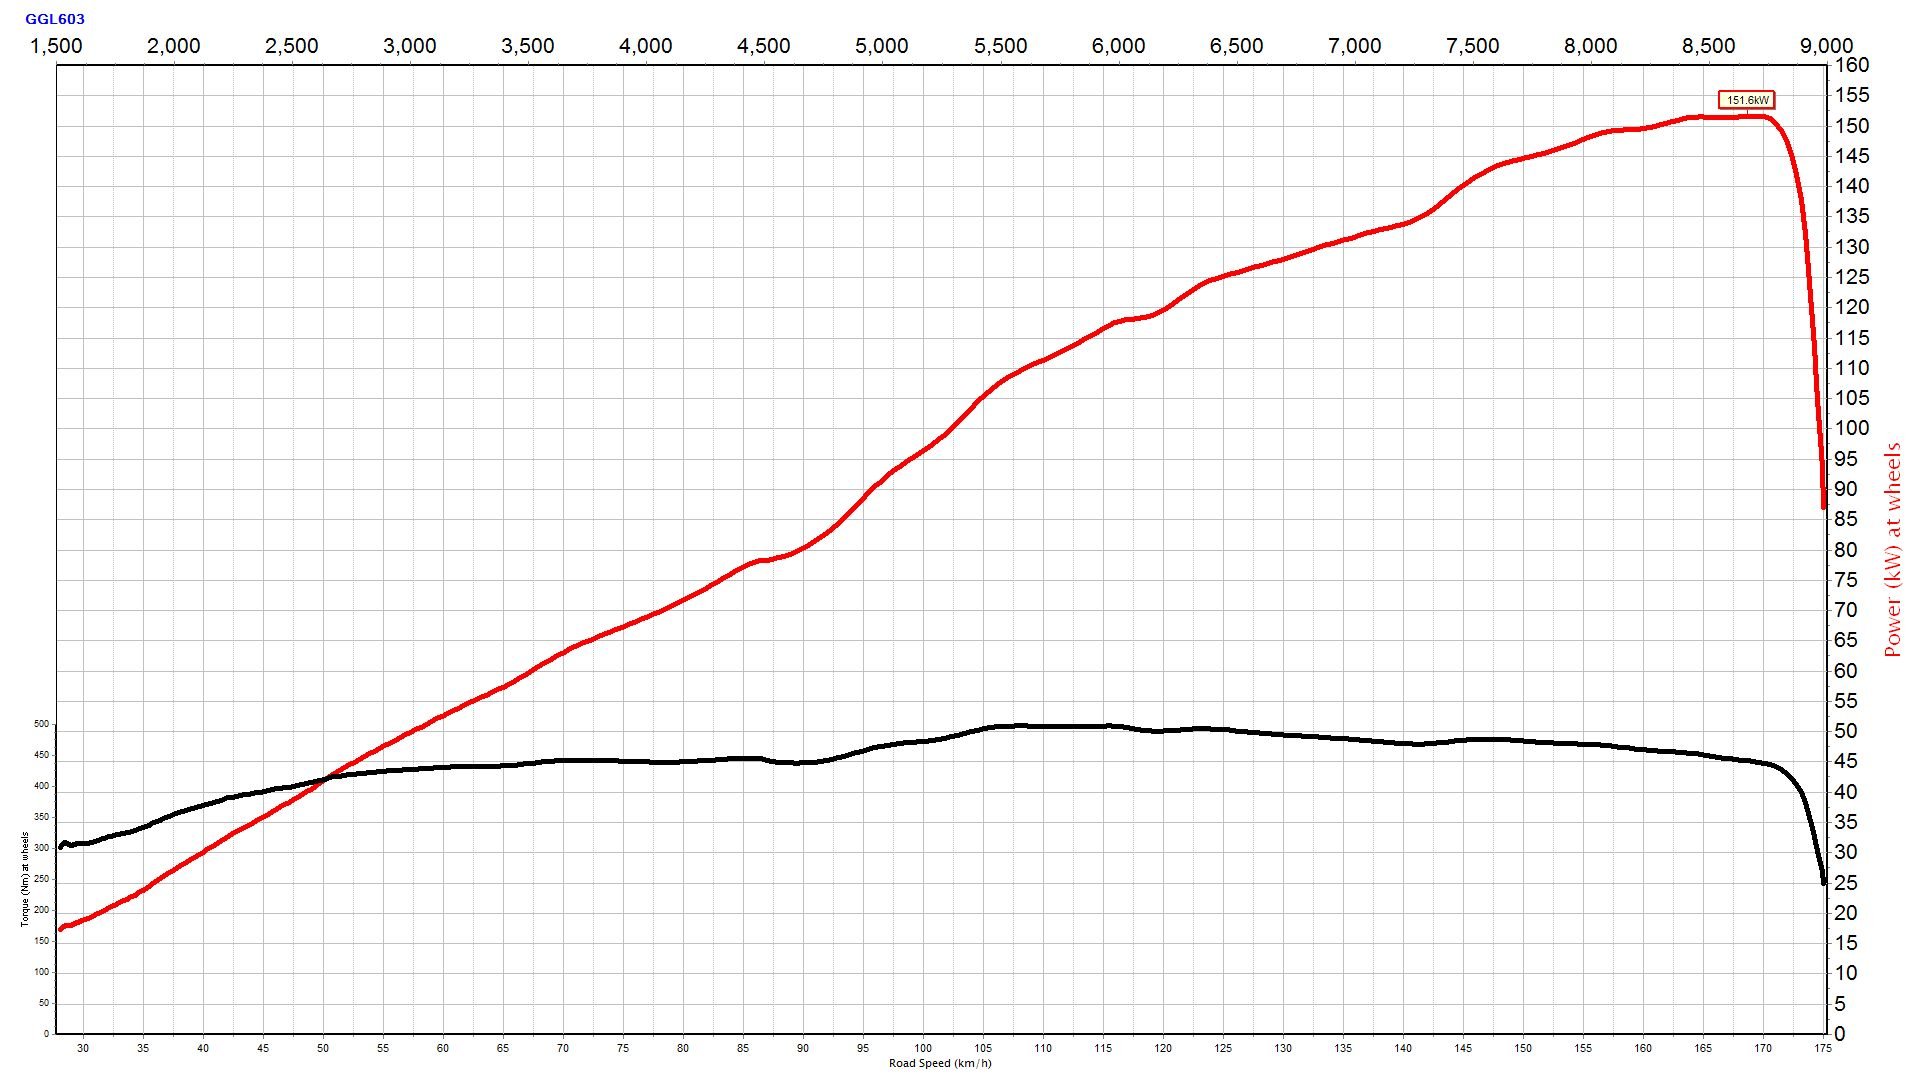
probably not, just come in for a tune. But i sold the intake off the ep3 , to another guy with a k24. k20 head and stage 3 cams, so better head and bigger cams. Done the initial tune on my dyno when it had a skunk2 ultra race? intake. which is the red below, and the ep3 k24 in brown. He lives quite far away, so remote tuned it to get the afr right when he swapped to my inlet manifold. had to add a lot of fuel through the middle and some up top. so probably pretty close to the ep3 power curve now. Don't see why the k20 wouldn't do the same thing. the heads flow good and have plenty of cam from factory, so good gains in getting the bolt ons right. this is the k20
2 points
-
Yeah bro, I didn't realise you were on the forum. Last I knew you had Chris doing some repairs and he told me what had happened, Really sorry to hear man and fingers crossed you're able to get some sort of mobility back. If I was still crimes I would defo have been there to help out.2 points
-
Also first test ride was a ooge success, runs really well now, and all the little changes have made it much nicer to ride. I just need to grease and adjust the head set bearings and that's about it. It's quite talkey, but does indeed max out around 90/95 on the flat, seems like it's running out of revs, so might try one of the smaller cogs and see if it has enough grunt to pull 100+. Pretty happy with it tbh. Excellent.2 points
-
probably fine long as the bends arent super aggressive. assuming you are still using the 47mm throttles. probably best to have them on the shorter manifold, then can taper up in diameter sooner Interestingly i just tuned a k20 on my dyno. had really short intake with big plenum and big short headers. done as expected. made 202hp and weak through the middle.2 points
-
I've got about 8 waiting, but I'm sure there's 2 more I'll get soon. Or maybe 3. Probably going to give tanks a miss though (except for 1 more, or maybe 2) as they're mostly air in the middle. I know Takom do some full interior tanks, including a Bergepanther. So maybe 3 then. Sigh.2 points
-
I'll see if i can get some photos of the parts tray soon. Yeah i have a 1/35th bren gun carrier i got a couple years ago from acorn models (just grabbed it because i was pinning for a model but wasn't going to actually build it at the time), thinking of doing it north Africa spec, similar to what my grandfather would've driven (i believe he was stationed in Palestine in 1945/46). Mate of mine who is a huge modeller told me the number of kits a man owns is 'n + 1' lol.2 points
-
Ambush camo stencils on order, let's see what China has to offer. Also went to the shop to get some more paint for the Bren gun carrier.....and this happened.
2 points
-
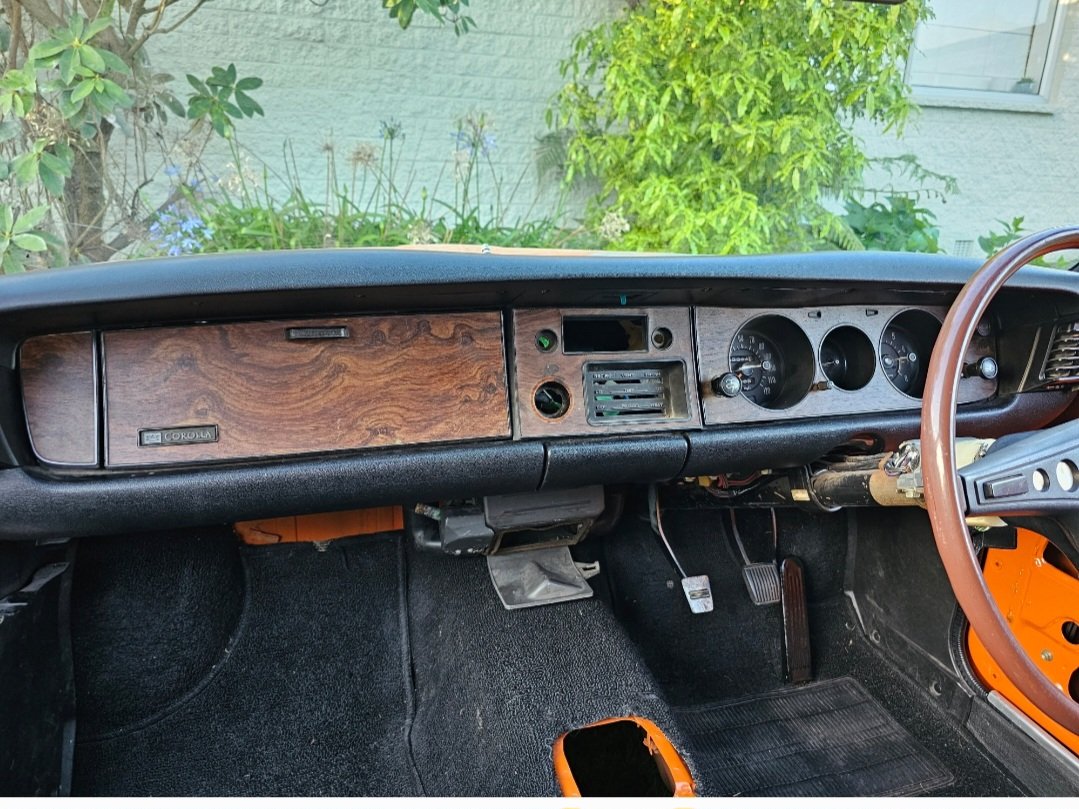
Rev counter and early wood grain dash panels found to replace the non rev counter and black dash panels
2 points
-
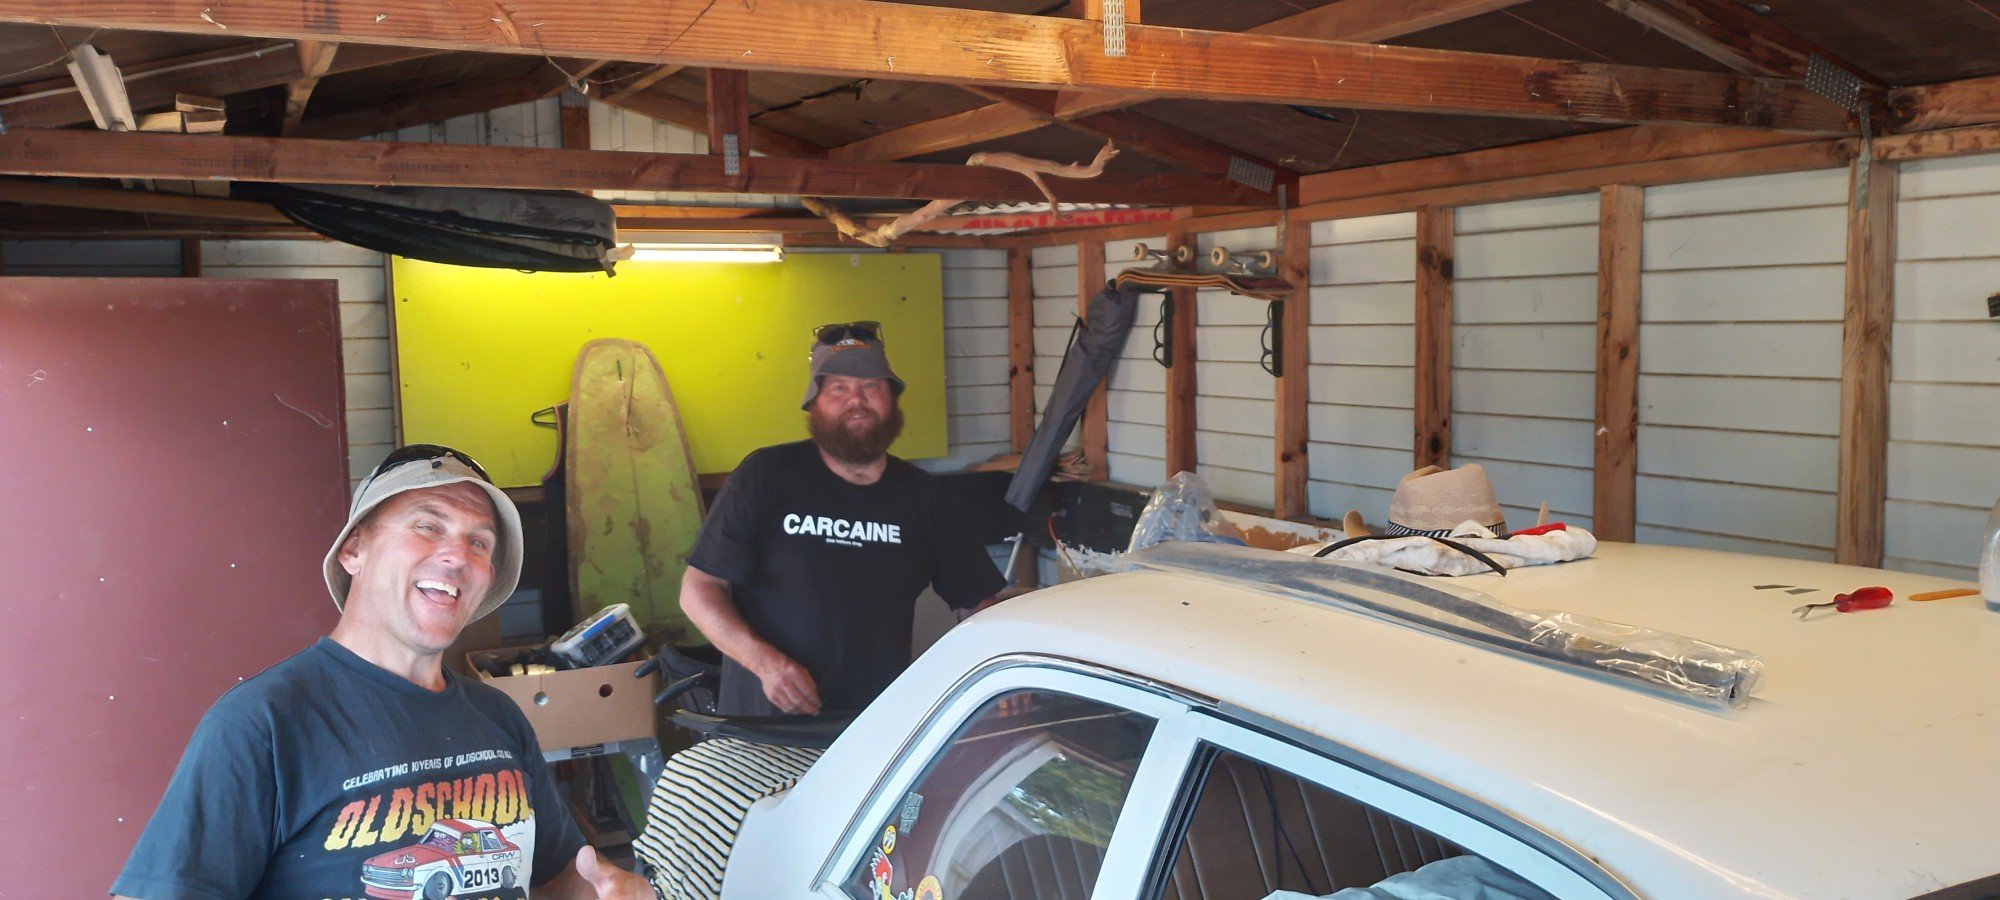
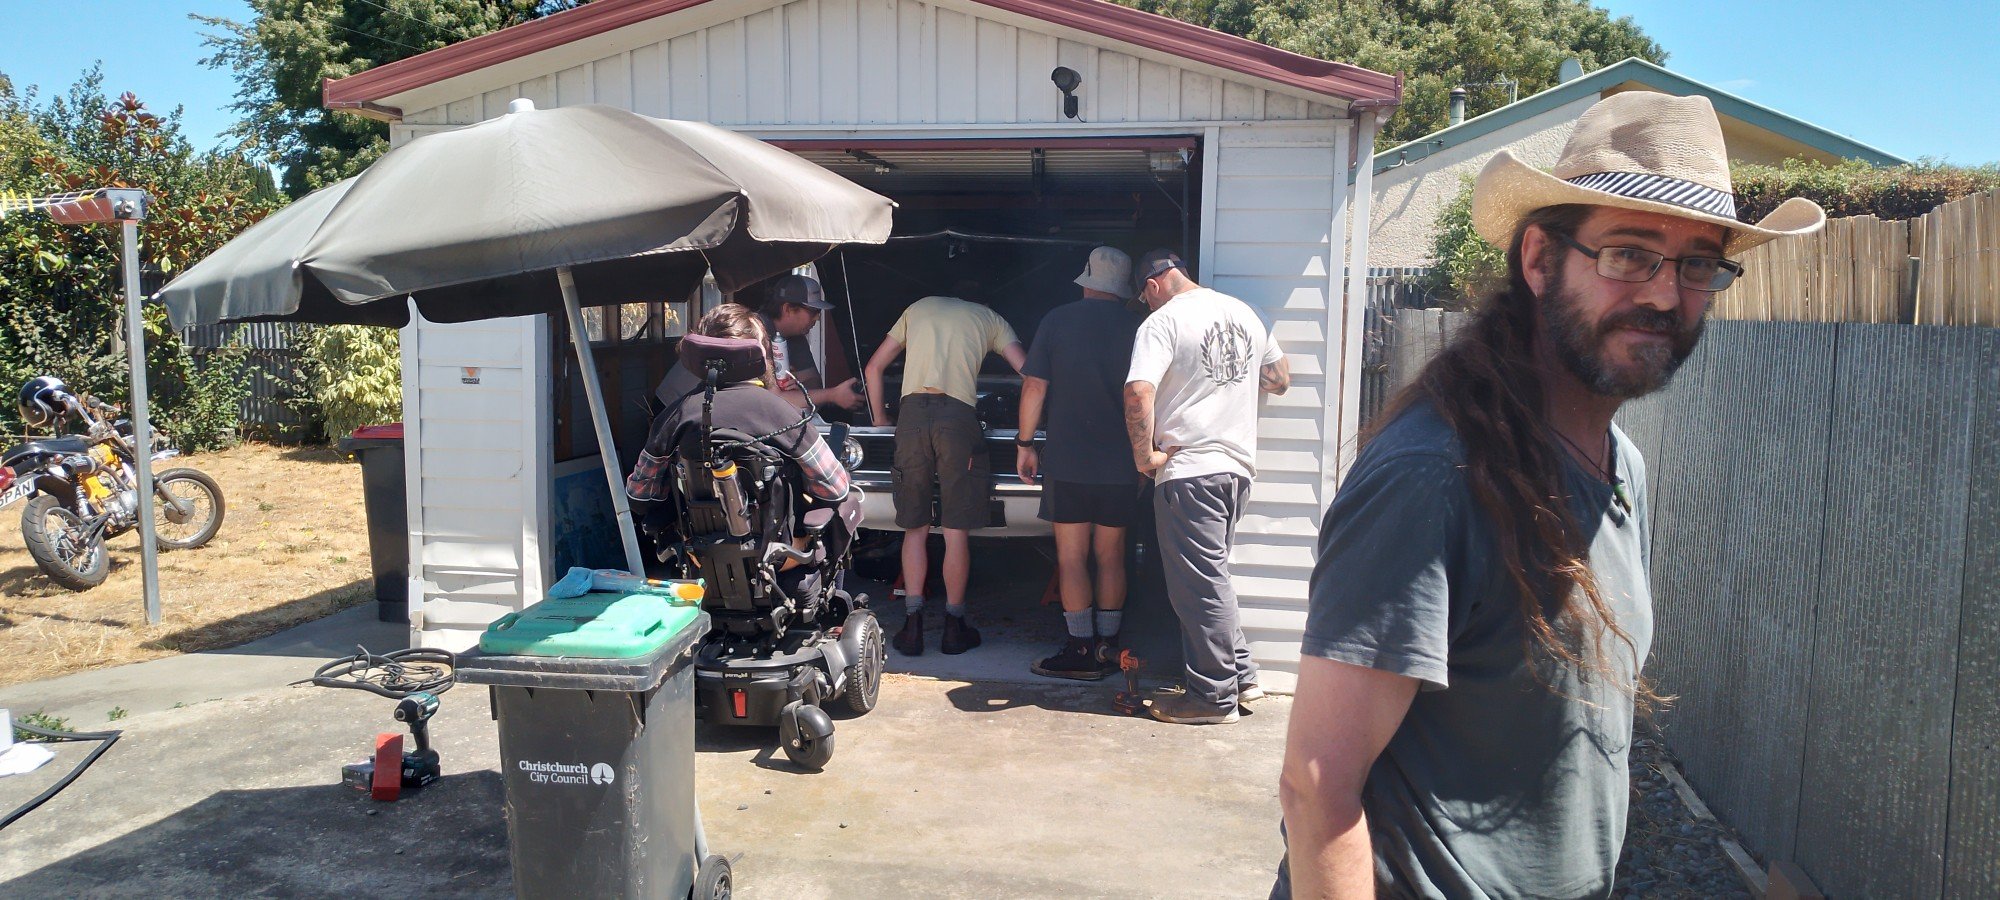
Cheers to everyone for today's efforts. What a great laugh and catchup. Got a bit done for @daveyc123 also. Legends.
2 points
-
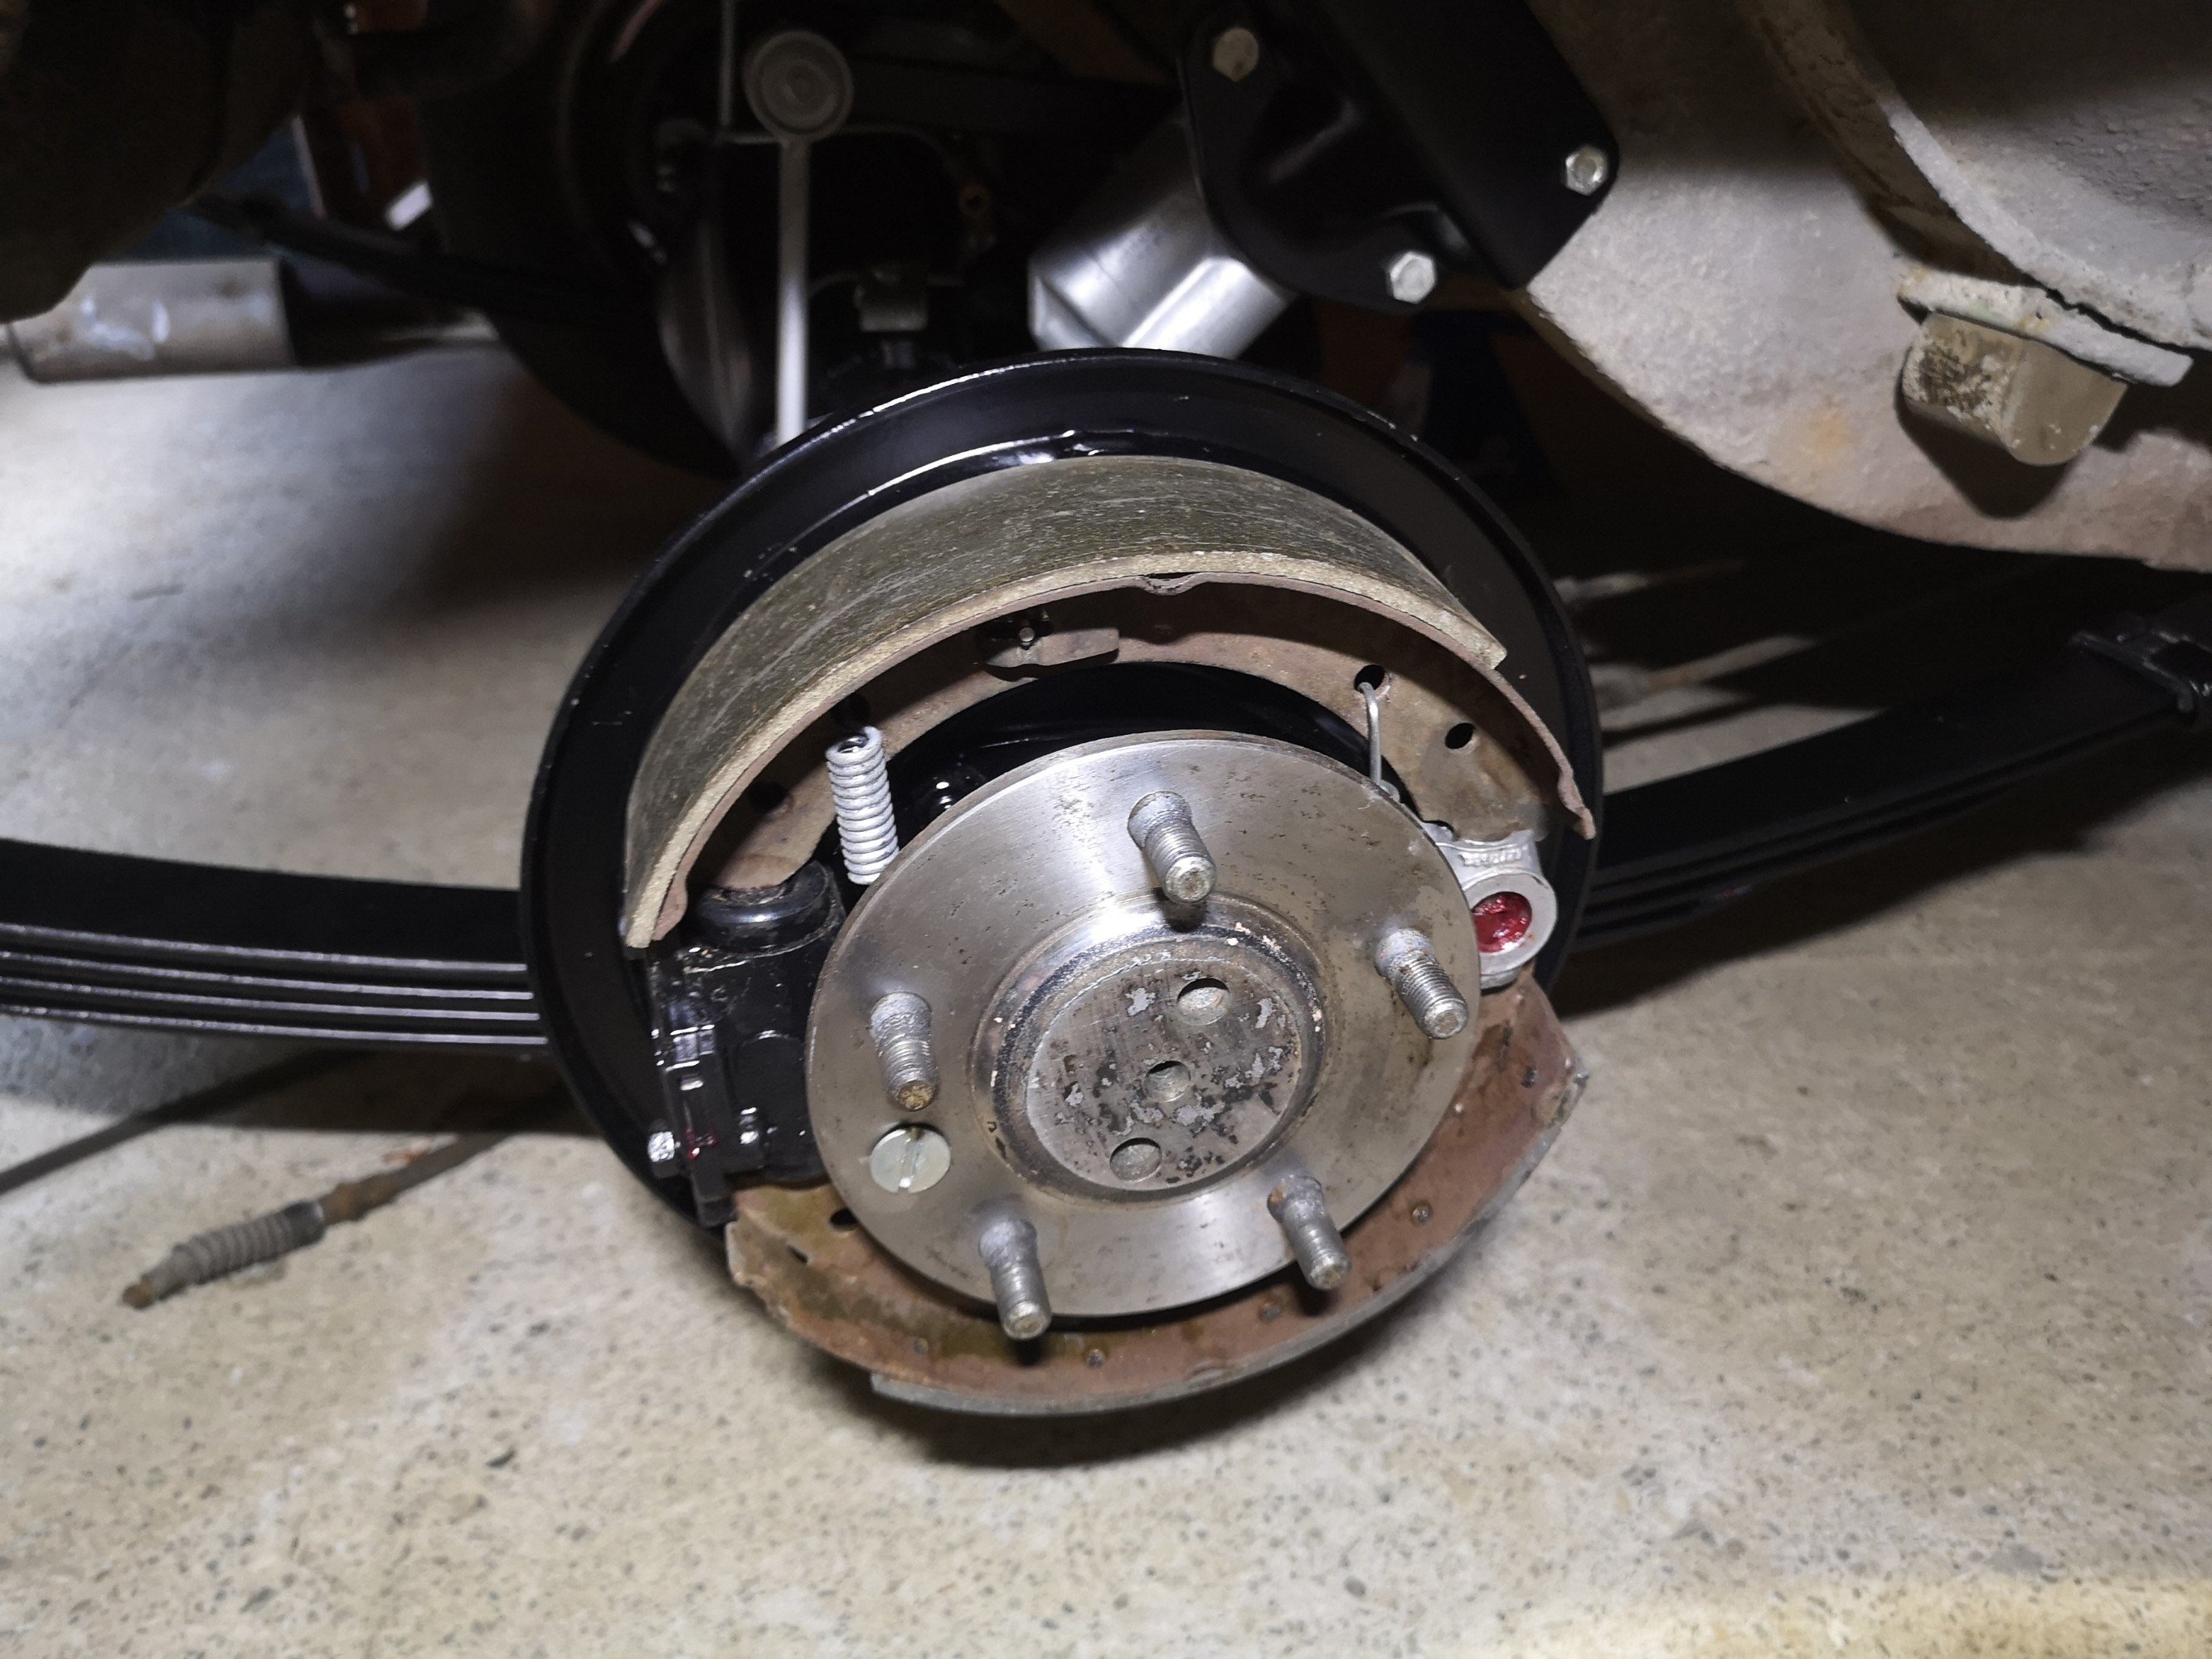
Put the shoes and drums back on today, my mates at the platers also managed to lose one of the shoe retaining pins which is a cunt, went to a brake place in Nelson yesterday and the closest they had was from a falcon but 4mm to long. Broke it trying to modify it so I barried one up of of a split pin for now.. Also upgraded the oil in the dampers to 40wt and they're much better. Put my other rims on and straight away they hit the innner guard which sucks a bit, after I took them off I put the helper springs on to see what difference they make to the spring rate and it's way better, suits a touch higher also, so I'll clean up the u bolts and put them on.. Looks so much better tho, can't wait to do the front.. Been meaning to do this for about 6 years..
2 points
-
Now I had an engine that starts and runs for half a minute I wanted more. I needed a makeshift cooling setup. I had a spare Nissan March radiator and fan kicking about so that was called into action. I whipped up this beautiful bit of carpentry artwork.. Using a collection of spare hoses I connected the dots between the engine, the electric water pump and the radiator... I started filling the system with coolant mixed at 35%. Remember this bit. It comes back to haunt me later. The whole system wouldn't fill up due an airlock in the coolant pipe from the opposite head. There was no way this was going to shift. The standard goldwing cooling system has both top pipes meeting in the middle at a thermostat block so they just bleed the air straight out naturally. I needed a nipple. I looked in my collection of various sized nipples and other brake fittings... Found this small nipple which was perfectly formed and a lovely size... I needed a boss to inset the nipple into. I machined one up and tig welded it carefully onto the top of the coolant pipe, in a discreet place tucked away behind the alternator so the nipple isn't immediately on display unless you look for it. Now with the nipple cracked open the large airlock was able leave via some clear vinyl tube. This allowed almost 1.5 litres more coolant in. With the water pump in override mode and twisted sideways I was able to bleed the pump out and the coolant was circulating fine. Next step before running the engine for an extended period was to sort out the O2 sensor positioning. Luckily a nice stainless boss from ali land had turned up so that was welded in place ... I was very happy that I could run the sensor cable around behind the oil filter, completely out of harms way and about as out of view as I could hope for. There's no hiding the ugly sensor sticking out of the exhaust but that's just life. The exhaust also required a token amount of silencing so I popped the old motorbike silencers outside on the truck deck and painted them with black high temp paint, mainly so I wasn't looking at ugly rusty things.. I also had to do a little bit of extra wiring. The water pump and its controller, the O2 gauge and not to forget the remote unit for the mandalorian spaceship interior lights.. I also wanted to slot my throttle cable adjuster base so I could easily remove the whole cable outer and inner without fuss... In the mill with a tiny slot drill... I made a hand throttle using a spare mountain bike brake lever and a bit of suitable alloy tube. But I needed a tiny solderless nipple for the cable end. My tray of bike cable adjusters and such what had nothing small enough so I machined one out of brass and used a 3mm grub screw... Now I had some basic throttle control without reaching over the engine. Time to start it up which happened without any fuss. The coolant system worked fine and the engine rose to temp quickly and smoothly. The fan kicks in above my for now setting of 98 degrees. I intended to tune the idle first, once the engine was hot and not using any of the warm up tables etc. But the idle control valve was still passing a touch too much air even when 'closed'. I wound the idle bleed screw in to its stop on the throttle body but still it was idling at 1200 thereabouts. If I blocked the iacv inlet with my finger the revs would drop to circa 700-800. I could also hear a very tiny vac leak from the spaceship window (plenum lid) Bloody mandalorians with their terrible glazing skills. Tightened the lid bolts down and its not bad. Main issue really is the idle valve. I might just make my own like I did with the Mazda V6. Rip the guts out from a stock Mazda item and machine a suitable body to take the solenoid and valve head. Another issue far more critical that really had me feeling quite low was this... Coming from here... Coolant gallery at base of the head gaskets on each side. It's not dripping but weeping and only once up to temp. I was gutted. I had to travel over to Nelson city that afternoon in my Imp so while there I popped into the engine reconditioners I know there and explained the problem and showed them the photos. Instantly they said I shouldn't have done my first fill with coolant. Apparently it creeps very effectively through any tiny gap before the head gasket has sealed and its slippery/slightly slimy consistency stops the paint on the gasket sticking to the surfaces. All is not lost though. I was instructed to drain the system of coolant, flush everything through thoroughly with clean water and let it dry. I did that last night. I then ran it a couple of times this morning with nothing in it for no more than 30 seconds, allowing it to cool between. Hopefully this will have dried it out and help it seal. Then I was told to just run it with water for a while and see how it goes. It might be ok. If not then they have a kiwi made product called sealwel that many kiwi/aussie reconditioners use with troublesome gaskets. He reckoned its not failed them. Worst case scenario is a pair of new head gaskets. and no coolant when setting them ! I might just order the gaskets just in case so I'm not ever in a position where I have to wait later on down the road if the above doesn't work. So yeah. I hope its ok and I've plenty of other things to do anyway. Like sort out the alternator that seems to be defective. This one. I need to either fix it or find an exact replacement because the spaceship has been built up to it and there's no room for anything bigger/longer.. I have also chopped the throttle body spring back a half coil for more tension on the throttle shut. It wasn't closing completely by itself against the strength of the engine want of air. Oh yeah I took a vid ...2 points
-
I got these off aliexpress for peanuts. They might be too big? Id happily donate a pair. (Ive secured them with baby cable ties before to hold them in place due to their oversized-ness
1 point
-
O S Nats are on in March, there's a cruise to a museum in Cambridge that's worth checking out1 point
-
https://themetricnut.co.nz/store/index.php?route=product/product&product_id=1724&search=Relay1 point
-
I got rid of this when middy was away, she didn't see it. 2 days later: I want a baby Weber...
1 point
-
This insane thing has a full interior... Dude at the shop asked me to make an offer, so it's not really my fault.
1 point
-
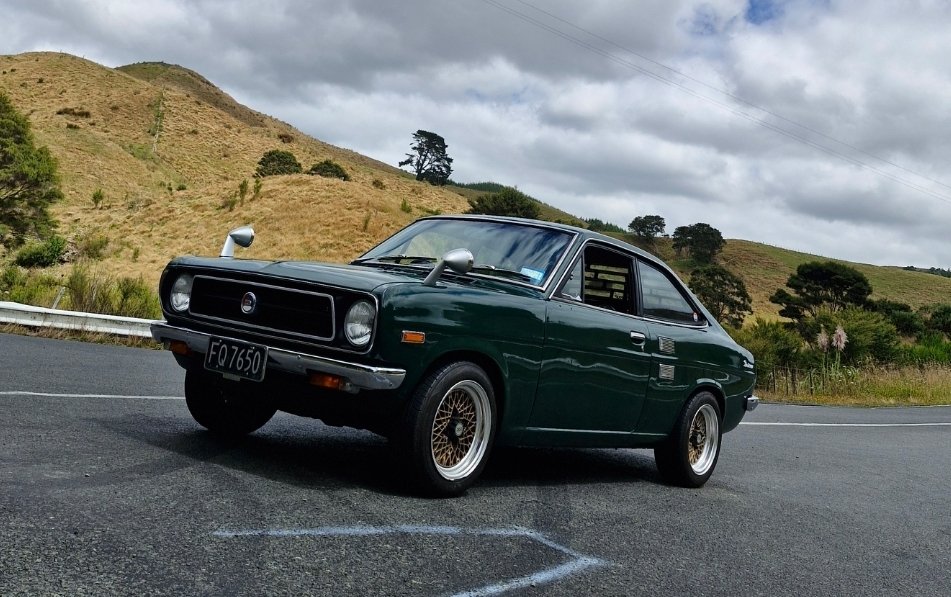
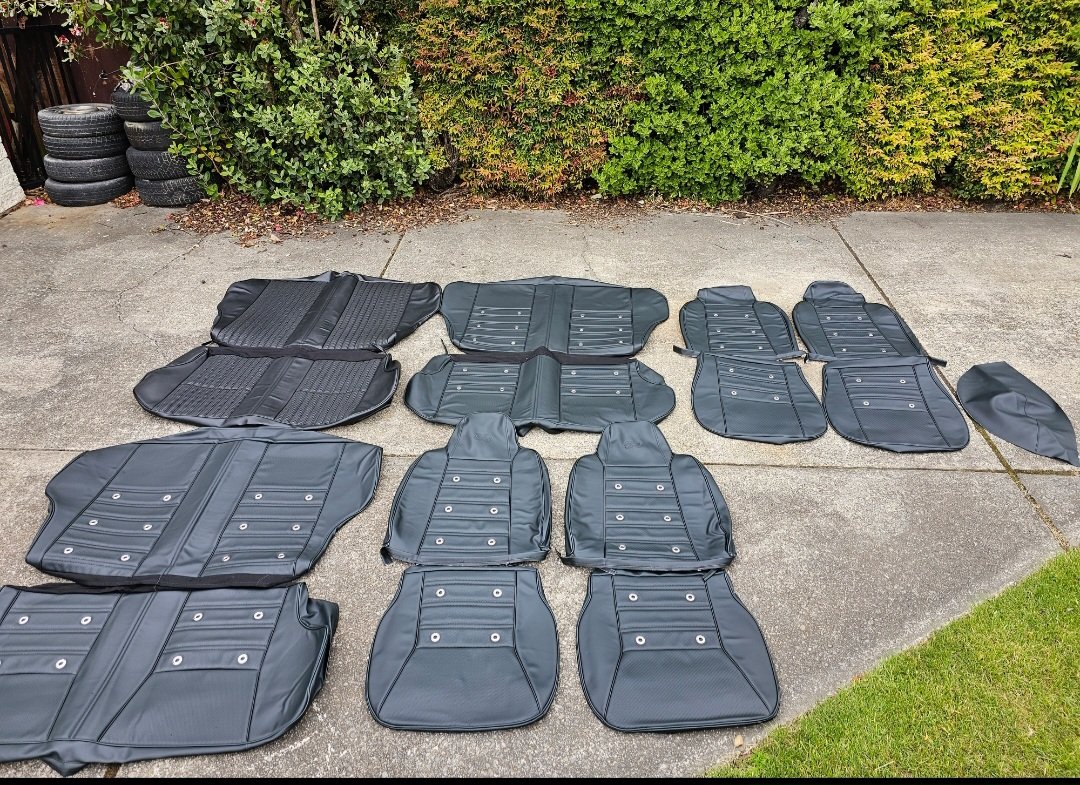
Te27 style seat covers for later use and seat covers for a freind Andy's ke25 and ke20
1 point
-
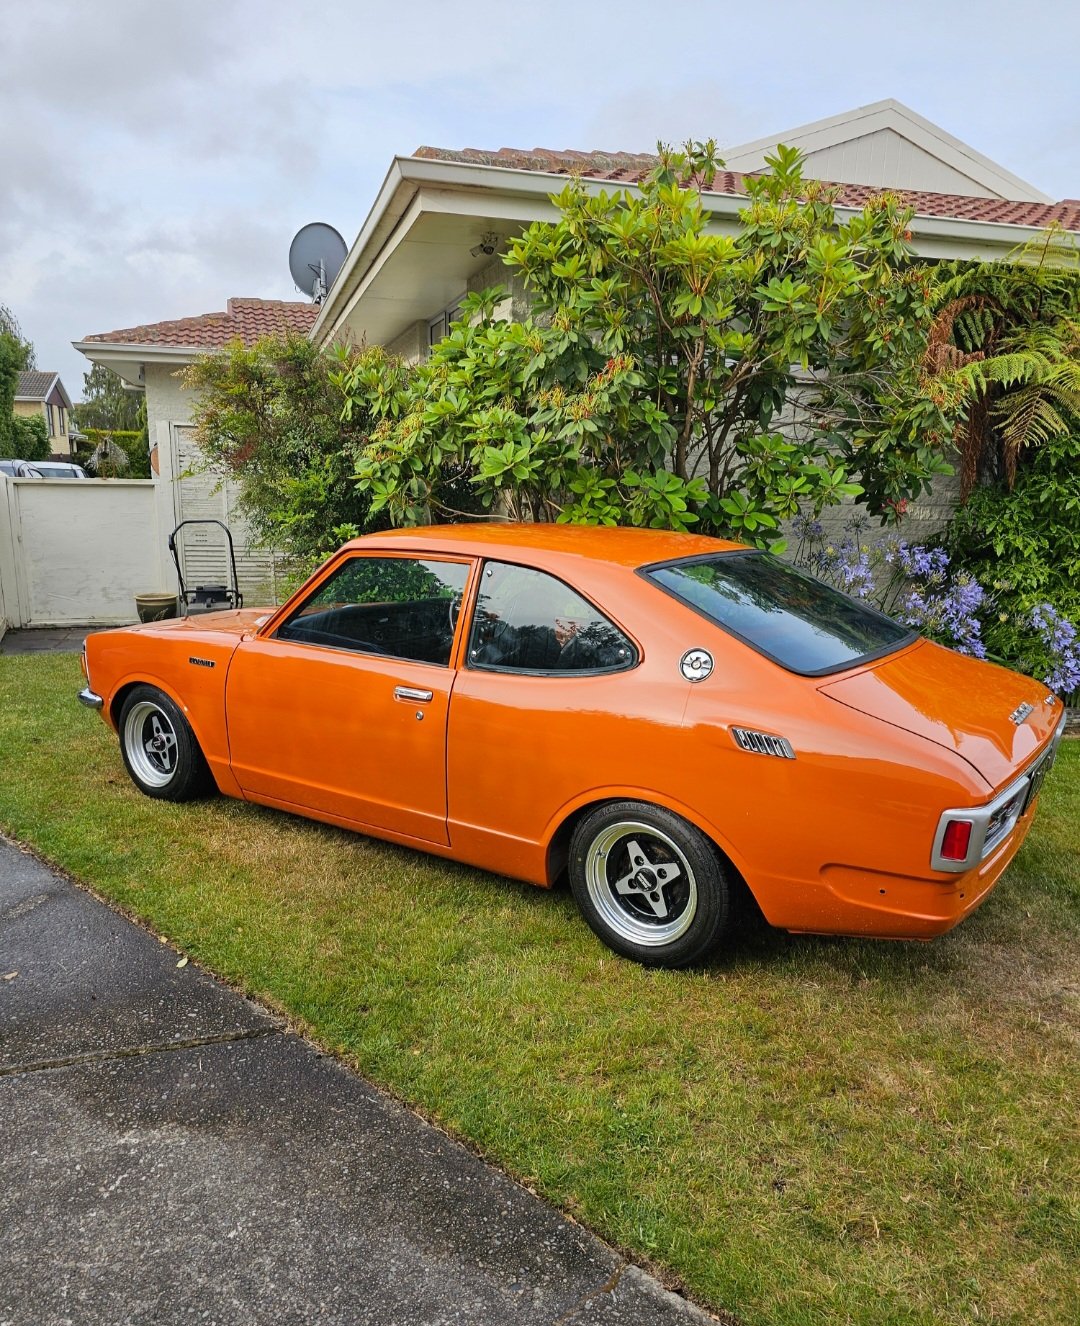
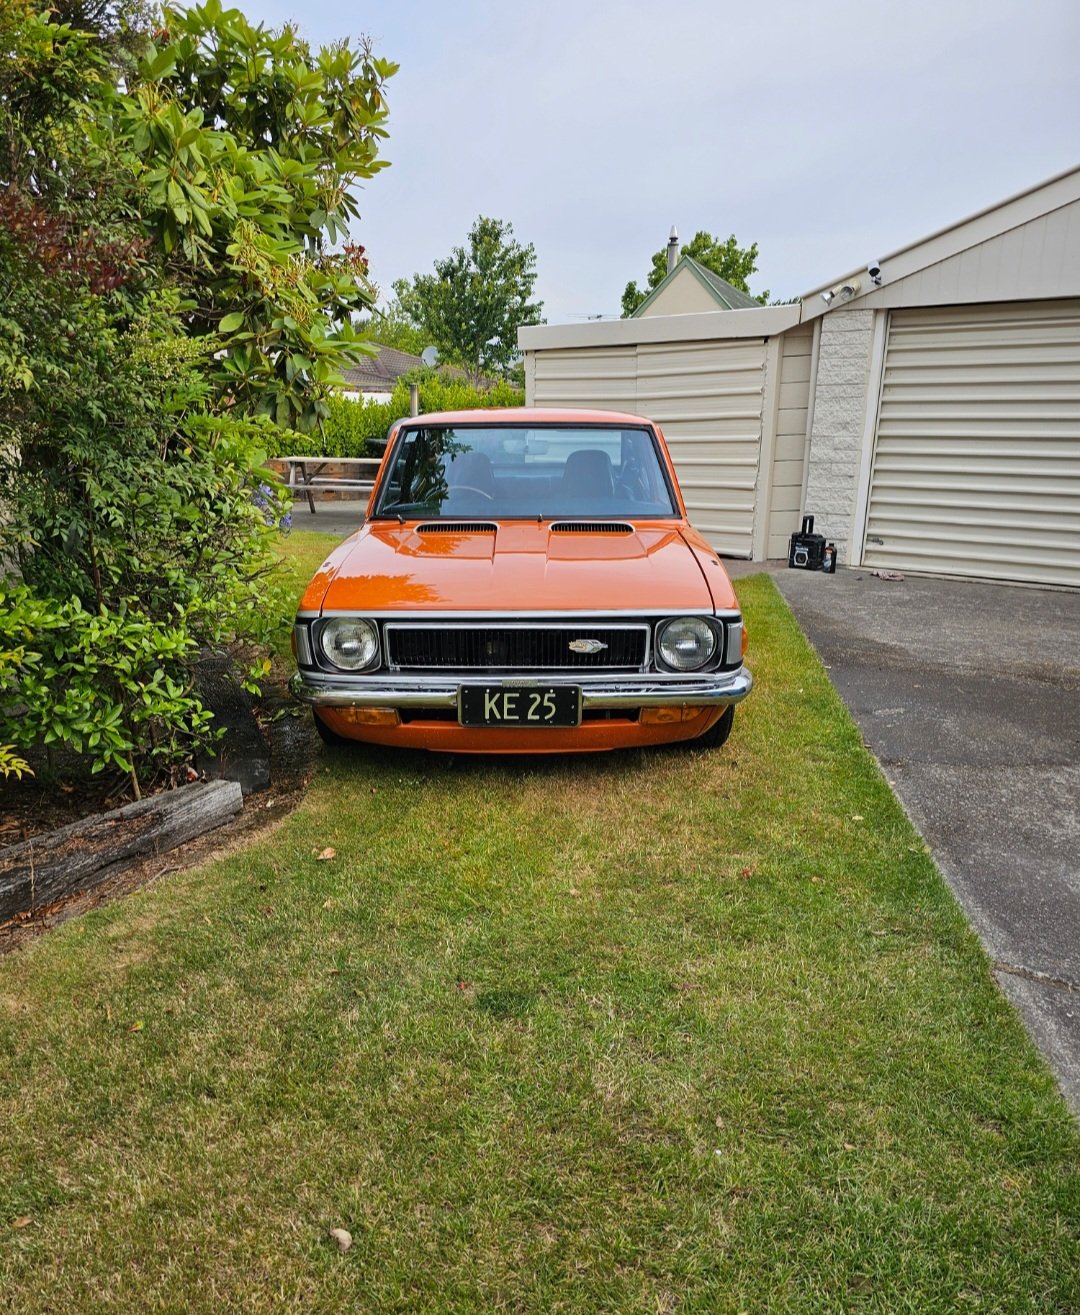
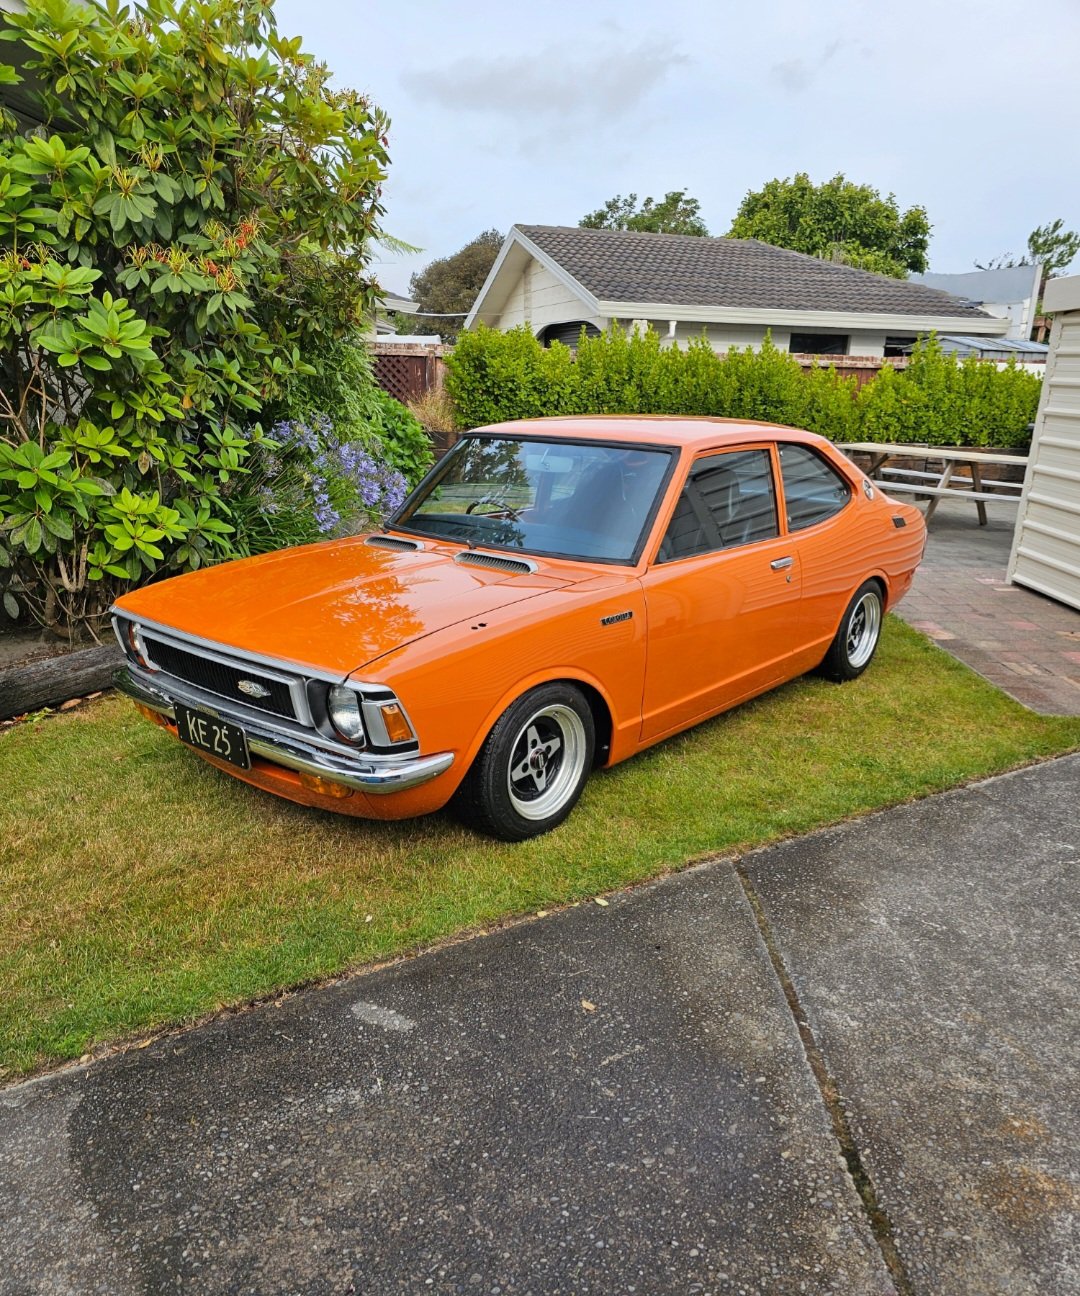
Got offered some nos ke25 parts couldnf say no to those even though it was the day before leaving to go to Japan
1 point
-
Wow this is amazing. What a spot. The driveway looks like it would be perfect to hoon in a AW11 too! Super stoked for you and look forward to seeing you live out your best life.1 point
-
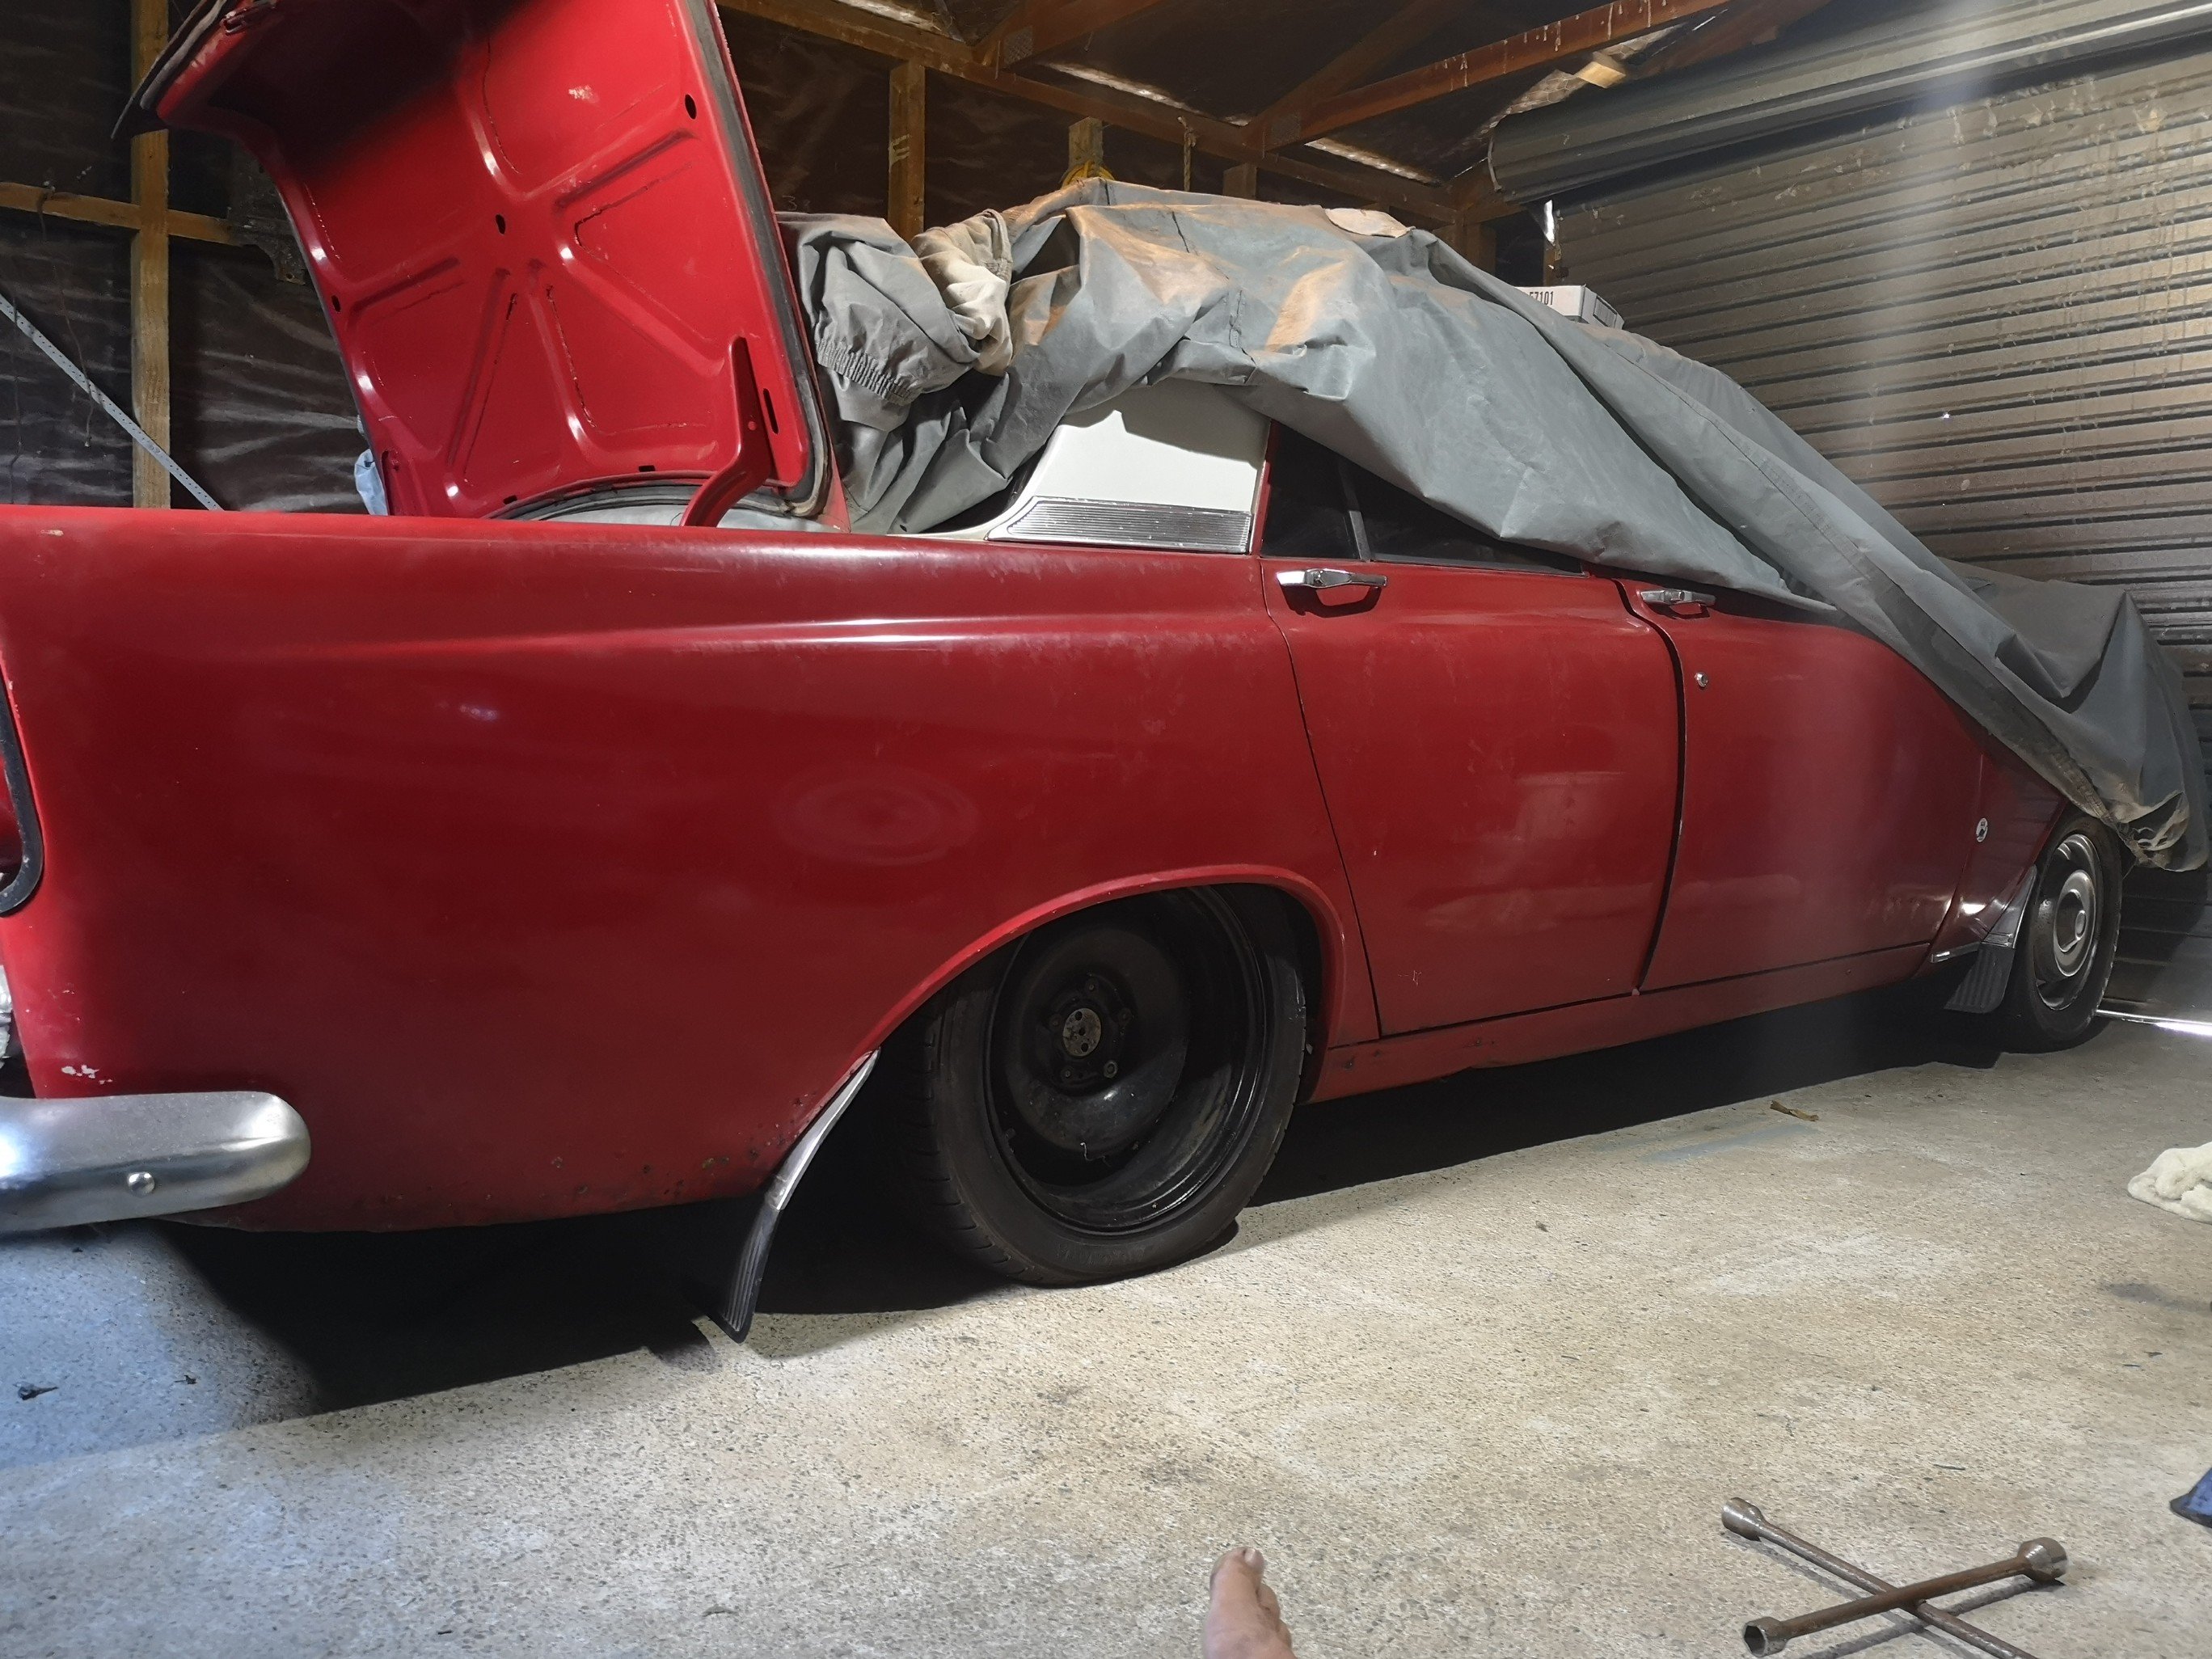
Well well well, another day of progress, well , a couple hours anyway. knocked the nubs off the welds, etched, then set about throwing mud at it. actually hasn’t taken much except where the previous body guy has just filled instead of pulling the corner out to align with the other side. not much left to finish the filler off, used about 400gm of filler with most of it going the floor after sanding. almost ready for paint. Just need to see if I can “delete” the inner guards before I lay colour. No pint going back and doing it after paint.
1 point
-
Bench testing continued. The sump was now holding oil. Phew. I fitted the old smiths mechanical oil pressure gauge that was originally fitted in the imp race car. I mounted the gauge to the temporary coil stand. With the engine cranking over it was seeing about 20 psi. The oil level would drop in the sight glass and after a minute or two it would be back to the old level. I was happy with this. Next on the list was to check the idle control valve was working. Its a 2 wire Bosch style pwm type unit. Very common, simple, reliable and hence used often in megasquirt installs. Its basically a rotary valve that is opened against spring pressure by a solenoid windings when current passes through them. The ecu earths its ground wire in a series of pulses, the quicker the pulses the more it stays 'open'. Simple as I thought.. but.. this is where I discovered that I had bought one of the units that is actually 'closed' at about 30% duty cycle. A failsafe on cars that use these for closed loop idle control (aircon/powersteering/epic sound systems etc etc) If the valve fails then spring pressure actually takes it to a slightly open state so the car cant stall. But I'm only using the valve for open loop at start up. So when its closed I want it to be closed. Luckily I was able to pick out/burn/pick out/burn/pick out the tough as epoxy that was holding the valve stop adjustment screw in place. I wound the screw in until the valve was closed with no power. It still passes a tiny amount of air but its much better. I'll manually adjust the idle bleed screw on the throttle body to get the fully warmed up idle where I want it when that time comes. Which was going to be soon I thought! Next thing to check was that the crank angle trigger wheel VR sensor and the camshaft half moon hall sensor were both putting out satisfactory signals. Opened up the composite logger on tunerstudio expecting to see nice clean signals. But there was nothing. My heart sank. Oh here we go.. I took off the cover on the main board plug and checked the connections there. I then popped the volt meter, set at AC volts, onto pin 1 and 24, wound the engine over and got about 2.0 volts. I don't have an osillioscope and only have an old megastim 2.2 testing unit which won't create the required rpm signals I needed for testing. I wasn't quite sure what to check next so I started a thread on the megasquirt forum. Got some bits of advice but in the end I rang a mate in Richmond who has a lot more knowledge with megasquirts and has helped me out in the past. Organised to go see him the foloowing day. In the meantime I checked the hall sensor. I had never been able to find confirmative details on the polarity of the hall sensor even though it was a really commonly used unit among many a citreon/fiat/renault etc. I finally found a factory service manual online for Fiat ducatos which had a pin out of the sensor. Turns out I'd got my polarity wrong and after swapping the wires around at the hall sensor plug I now had a strong clean cam signal. I also made a mandrel to hold the old honda 12-1 trigger wheel in the lathe. Then I made two jigs. One for the spare goldwing VR sensor, like the one I'd fitted to the engine. The other jig was to hold a Mazda V6 VR crank sensor of which I had a few kicking about and had used them with no issues on the Viva. I spun the trigger wheel up in the lathe at various speeds and took voltage readings of both sensors. The readings were very similar but I still couldn't tell what the actual signals are like. The next morning I drove out to mates place and he set to work on my ECU. He compared the board to his spare Ms3x. looking for any differences. Remember I had bought this ECU secondhand from someone on trademe and was told it was working. I had swap some of the circuitry jumper wires to suit my application. Once he was happy there was nothing major missing on my board he got another spare ecu he had and ran up my sensors in his test bed to confirm they were putting out a good signal. Then we (well - mainly him, I just stood about and learned) systematically went through the VR circuit looking at the signals on his osiloscope. Discovered that transistor U7 was faulty so he kindly swapped out the known good item from his MS1 which I'll find a replacement for him. After that he found a loose, terribly soldered resistor in the circuit- when it was wiggled the signal would appear.... re-soldered that and hey presto - clean signal. Lots of other pins got re-soldered too. The Goldwing pulse generator/VR sensor puts out a much weaker signal that the Mazda crank vr sensor. we double checked them against each other and the Goldwing item struggles at slow speeds (cranking type speeds) so I'll swap over to the Mazda item. When I got home I quickly tried the repaired ecu out and now there's a good rpm signal but it drops out of sync but I took a log anyway. Then started making a new bracket to suit the Mazda sensor. New vr sensor in place and wired up. I then had to remove one cambelt, which is so easy to do on these engines, remove the trigger wheel, file off the old key and weld a new one in place to suit the mazda vr sensor position which was now bolted in the other set of holes Honda used for the original 'pulse generators' as they call them. New trigger wheel key peg.. Finishing that lot got me to this point when trying it out that evening... The red spikes indicate an out of sync situation and no rpm reading but at least the log was clean, consistant and rythmic. Something wrong in the settings, not interference. I tried changing various trigger settings but no luck I was tired so off to bed. Following morning I discovered that when I was changing the trigger settings I didn't spot the prompts to power cycle the engine because I was still on the diagnostics page. So none of those changes took place until the very end when I had actually set it back to the typical default settings. This time a power cycle after changing the capture to falling edge and I got this lovely log... Yay!!! Now I was ready to check the ignition coils and then the base timing. What else could possibly go wrong? Coils all tested fine and the sparks were nice and clean looking. I then marked the timing mark on my custom crank pulley and tested the base timing. I was out by 4 degrees. Pretty happy that I had got my trigger wheel so close. Simply changing the trigger wheel offset value in the settings by 4 degrees had the timing marks line up bang on. Engine start up time was here! I went to bed happy, excited and somewhat nervous about what could happen, or not... So this morning it was time to roll the engine out on the table to the front of the workshop, throw some fuel into the mix and see what happens. I set up the garden hose just in case, taped my phone to a light stand, started recording, tentatively went for a start and this is what happened... Wow!!! Faaaaaaaaaaaarking awesome! What an occasion. What a milestone. Such relief and much giggling with joy. I couldn't believe it. First start on my own custom built engine and it sounds bloody amazing! That was starting on a basic universal base map loaded onto the ecu so I was really expecting a lot more mucking about with the starting settings to get a clean start. I was stoked! I tweaked the cranking settings slightly and now it would start on the button after a few cycles... I can only run it for a few seconds as there is not a drop of coolant in the engine. So my next job is to set up a makeshift coolant circuit using a spare Nissan micra radiator and setup the Davies Craig electric water pump. I can test for leaks and then I can really have a good crack at setting up a nice clean starting and idling tune. I'm so happy! Alex.1 point
-
To get this rolling.. date is set, yet to lock in venue and facebook event. This annual car meet is held every 3rd Sunday of Jan in Auckland NZ. Next one is 2024 on: Sunday 21st January. 11am - 2pm. Venue: Massey Uni, University Ave, Albany, Auckland. Tiered parking area. Facebook Event https://www.facebook.com/events/737185678294319/ Google map Admission is free. Spectators welcome, please park separately if not bringing a nostalgic ride. The event is aimed loosely toward pre 90's Japanese and Euro vehicles. But this is not strict at all. Bring what you've got. Have a yarn, check out other rides. No booze, no skids, no loud stereos, no animals, no drones, no stupidity, keep it legal, keep it safe, that's all we ask. Due to covid in the community, please be respectful of others, keep your distance, cough into your elbow, wear a mask(?) etc. Cruise to Event: If people want to cruise together to the event. The usual spots to meet are 10.15am at Greenlane Mc'D's carpark or old Westgate shopping center outside starbucks (tenpin bowling) carpark. leaving 10.40am which is dictated on the day by the people in attendance. (Gather yourselves together and make the call). See you there! And please, use sunscreen ps, if you unintentionally lose a child, please post on the FB event page (to be added) or pm organisers via the facebook event page so we can arrange a search. There is a facebook page setup for organising these new year events, so if you have facebook, follow that and you should be notified of the events as they are made. https://www.facebook.com/profile.php?id=100087478003206 I also have a web page with past, present & future details on jap-olds.nz (no https or www preceeding it for some reason). or https://toycrazy.net/gallery/classicjap/classicjap.html if that just wont work. More details soon -Mark
1 point
-
Hmm thats a shame. ok how do i get across that it's 3rd sunday of jan, has been since the start. Same (usually) weekend of kumeu hot rod show. Posted thread here in november. Have a website stating future event dates jap-olds.nz . Have a facebook organising page here for the meets (follow it to get notifications). And yes the venue booking and a fb event page is often last minute but its gona be on the shore. what else should i be doing? Next new year event date 19th Jan 2025. Put that in your calendar
1 point
-
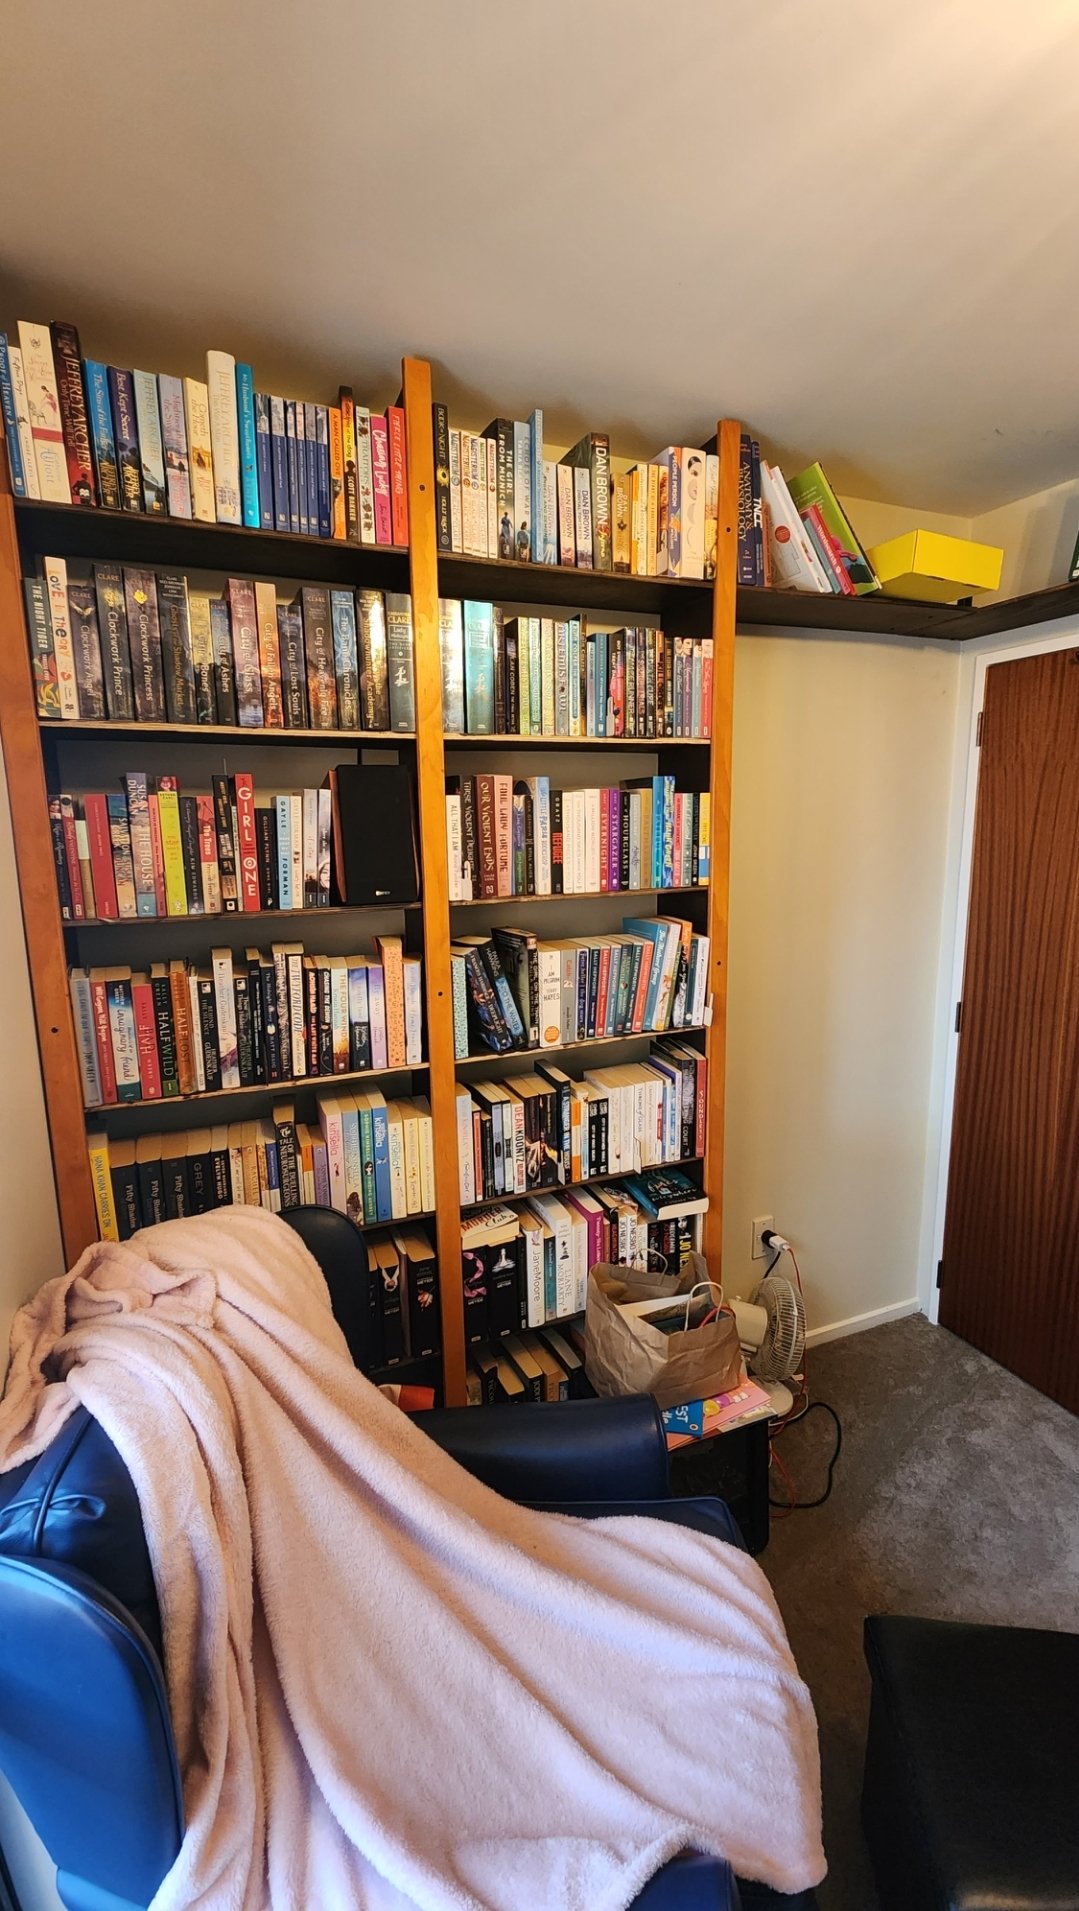
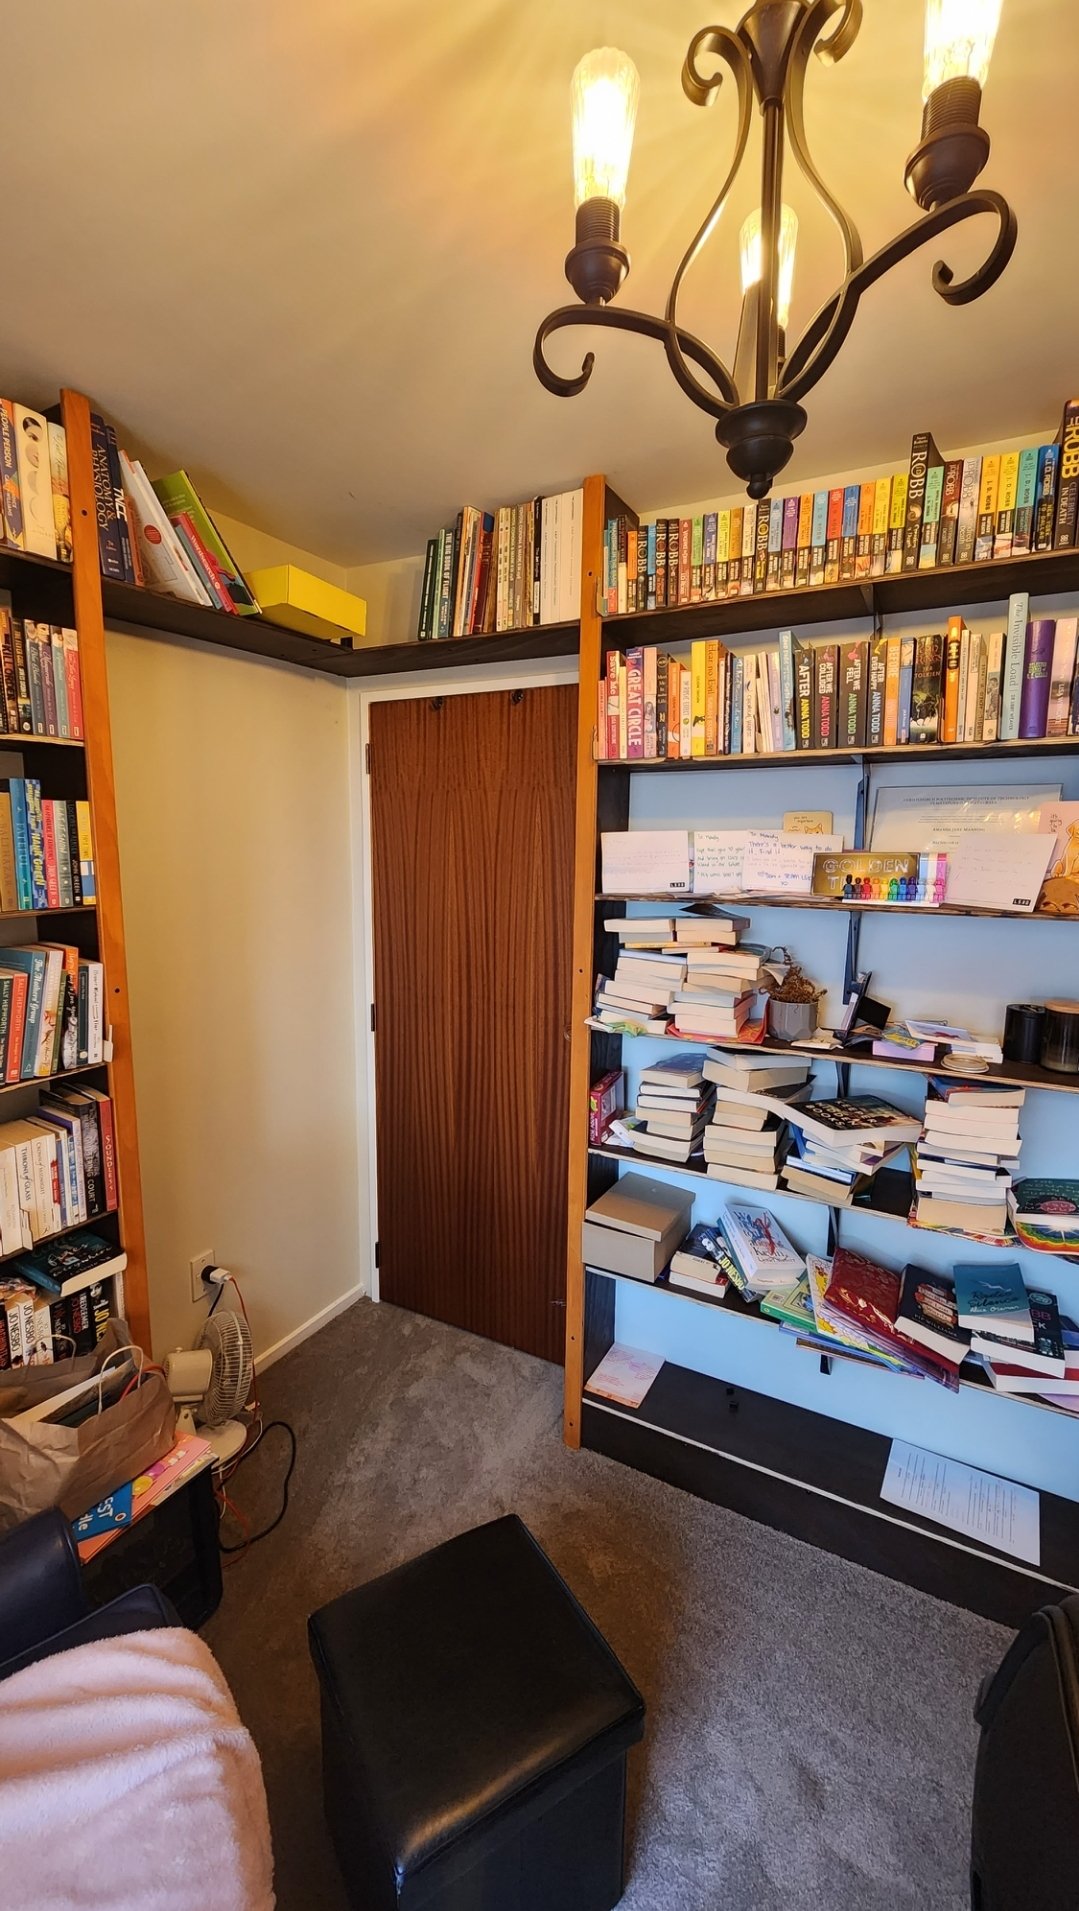
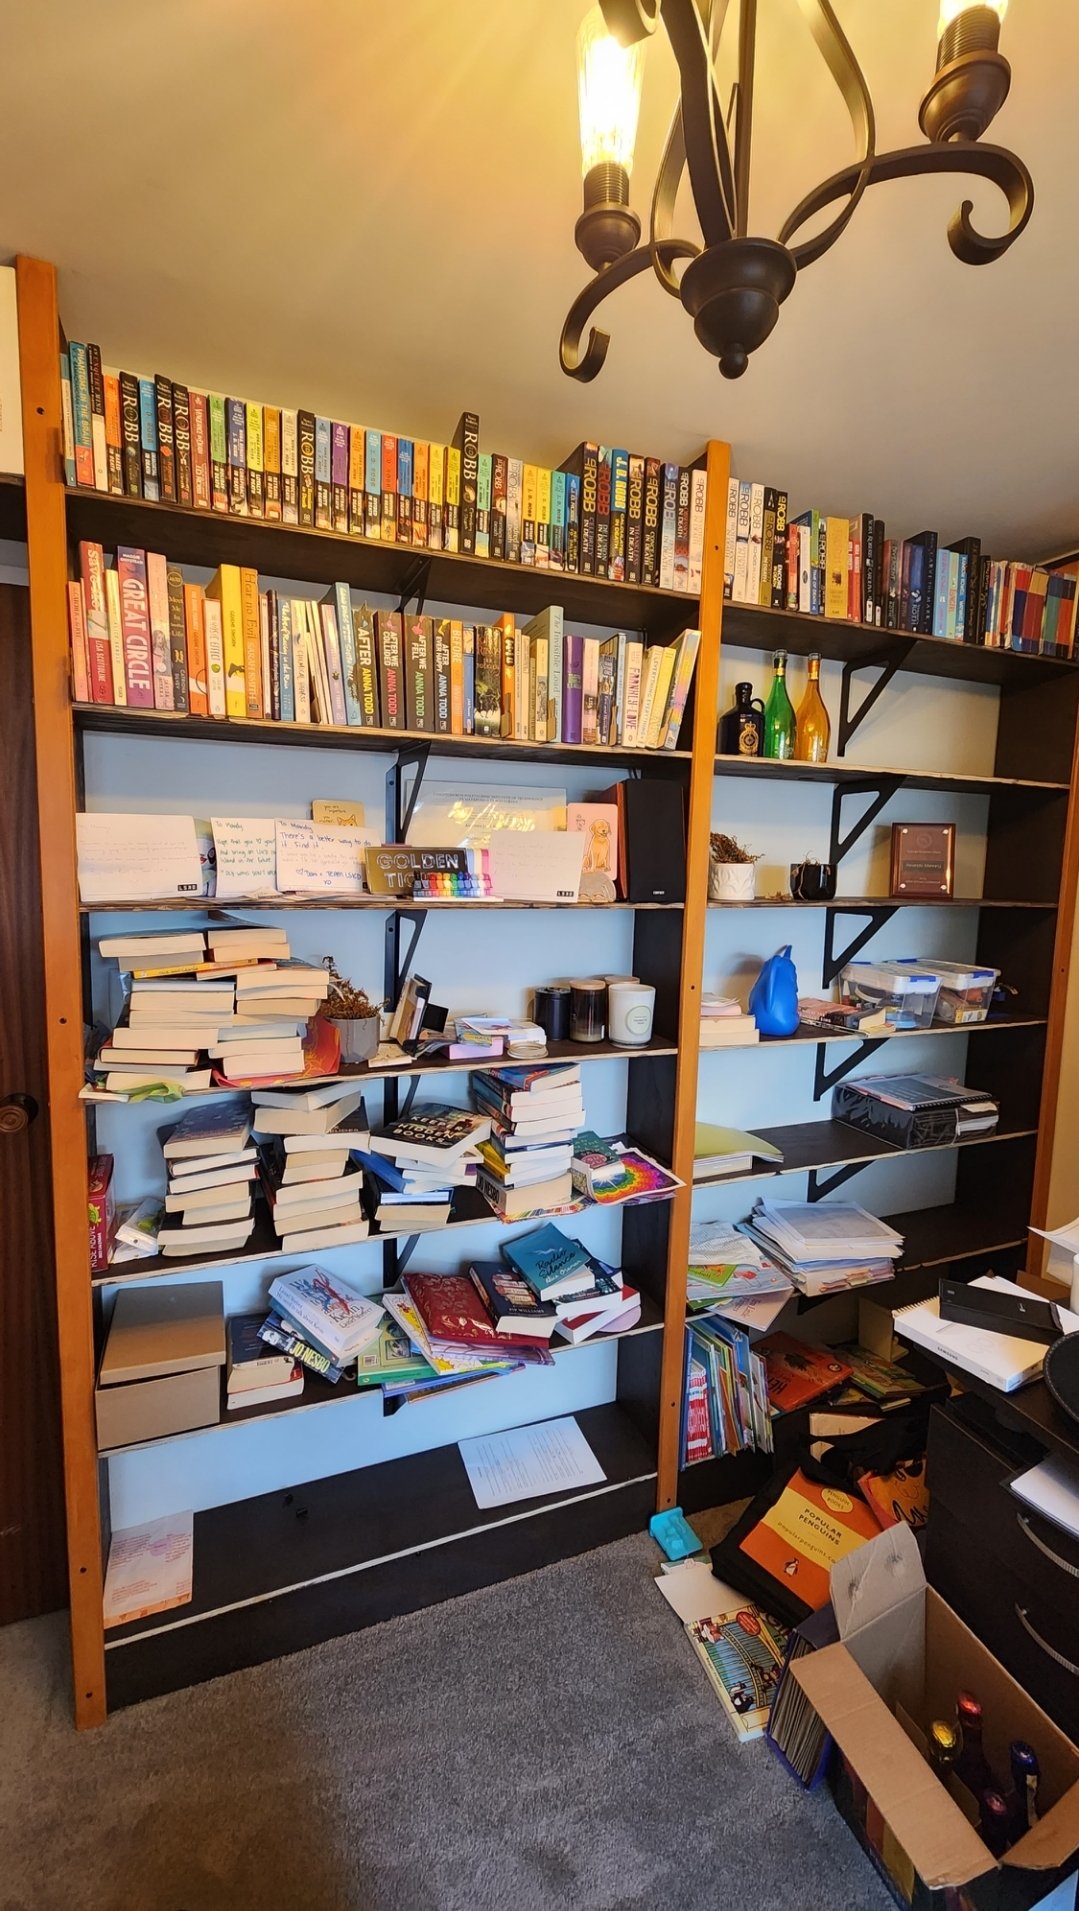
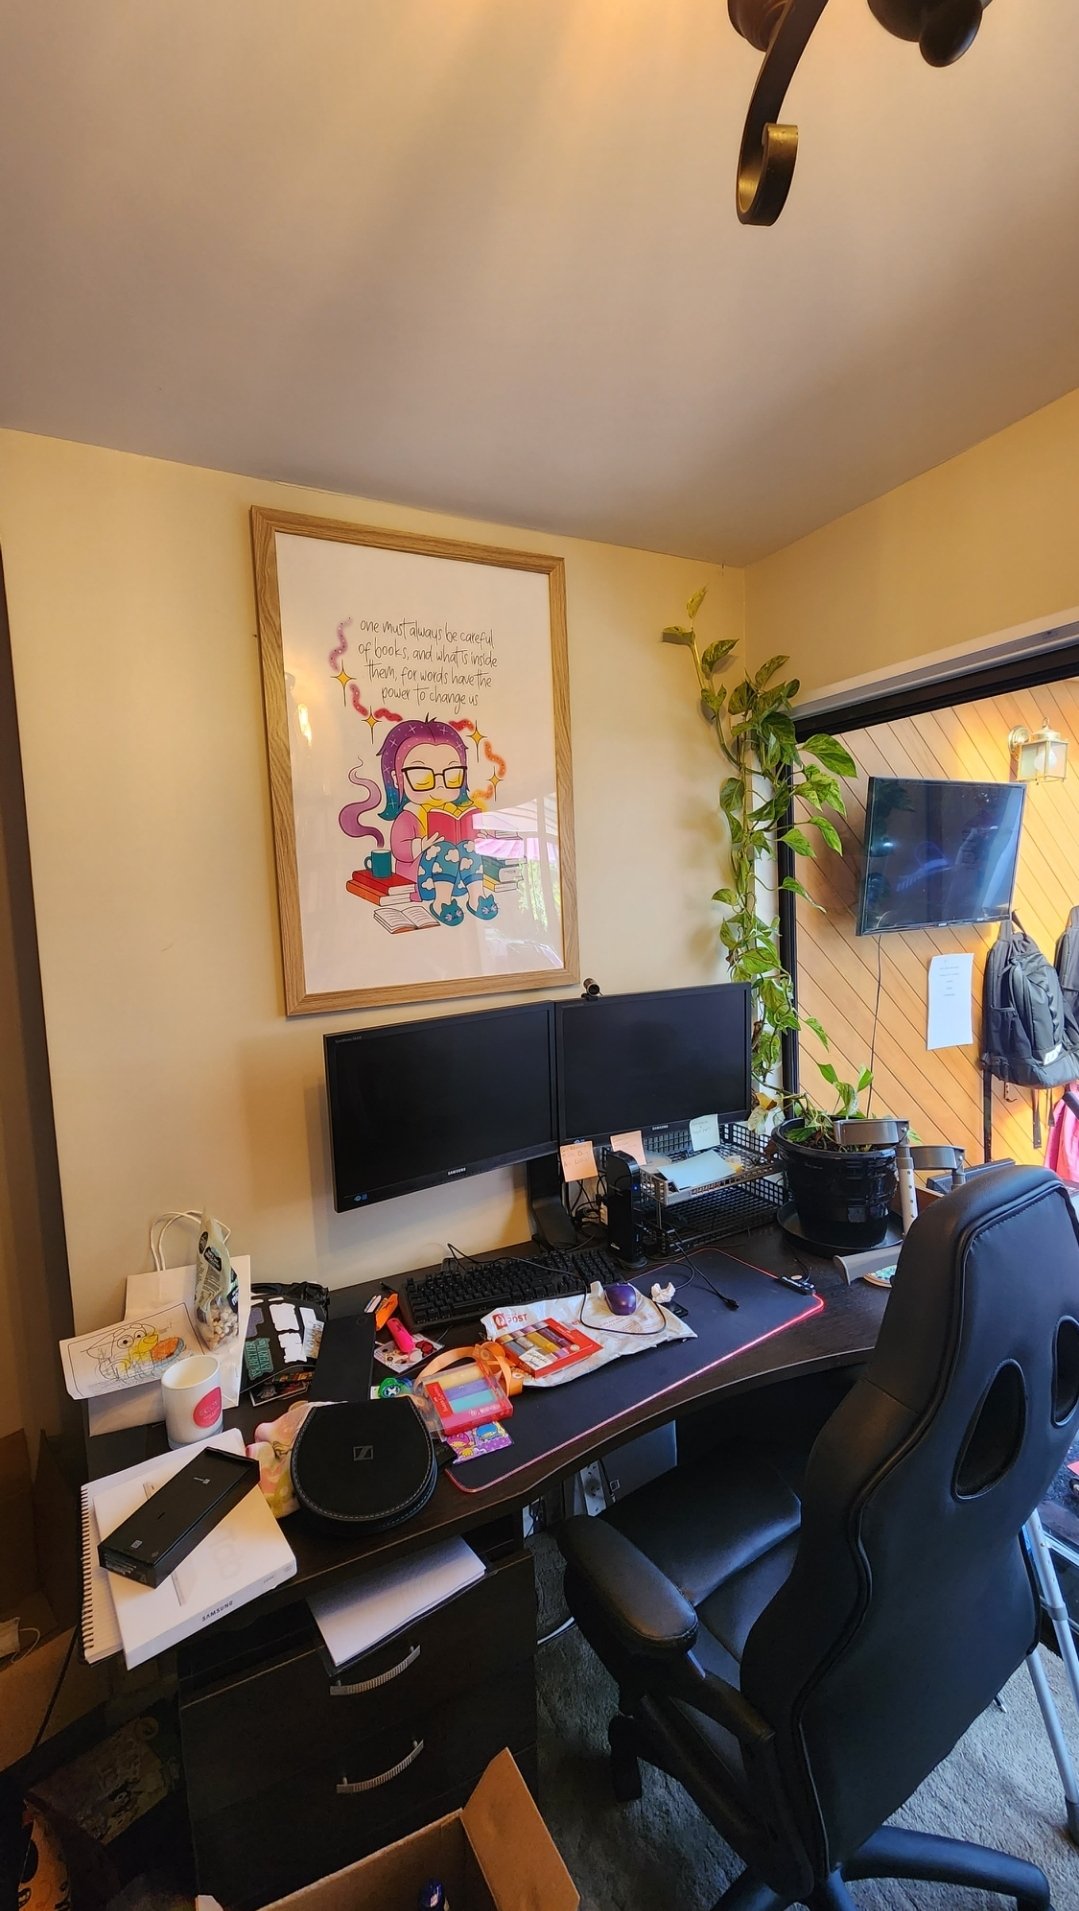
Reminds me that a while ago I asked about having library shelves machined. Well I decided that I wanted to do it all by hand since I'd always told my wife I would build her a library (not assemble her one) It's kinda messy at the moment because she's part way through post grad studies and there are a bunch of new books that need filing which means moving every book lol The large framed cartoon was designed (and tattooed) by her tattoo artist to resemble her, I also turned it into a stamp. It's not quite finished, I need to decide on what I'm going to do with the shelf edges, and I'm on the hunt for a structurally sound but old wooden ladder to fit with a rail. I'm quite happy with how many husbands get in trouble when their wives see it. Makes for an excellent space whenever I get to work from home. The work office sucks, our library is quite possibly one of the nicest environments I've ever been in (when not in messy Xmas holidays mode)
1 point
-
1 point
-
Compression test came out with 195psi in Cylinder #1 (Suspected no issues) and 200psi on Cylinder #2 (Suspected issues). So no compression issues there... Re-did valve lash, some were a bit tight and some were a tad loose, gave it a tickle anyway but have still not been able to get rid of the tapping and rattling in the top end, may just have to live with it, or maybe convert back to hydraulic lifters as I am not revving the thing to the moon like I originally envisioned... Valve stems all looking good. Few minor things to tidy up: Front engine covers to keep the grime out Mount catch can Maiden voyage to wellington this weekend!1 point


This leaderboard is set to Auckland/GMT+12:00