
Leaderboard


Popular Content
Showing content with the highest reputation on 09/11/22 in all areas
-
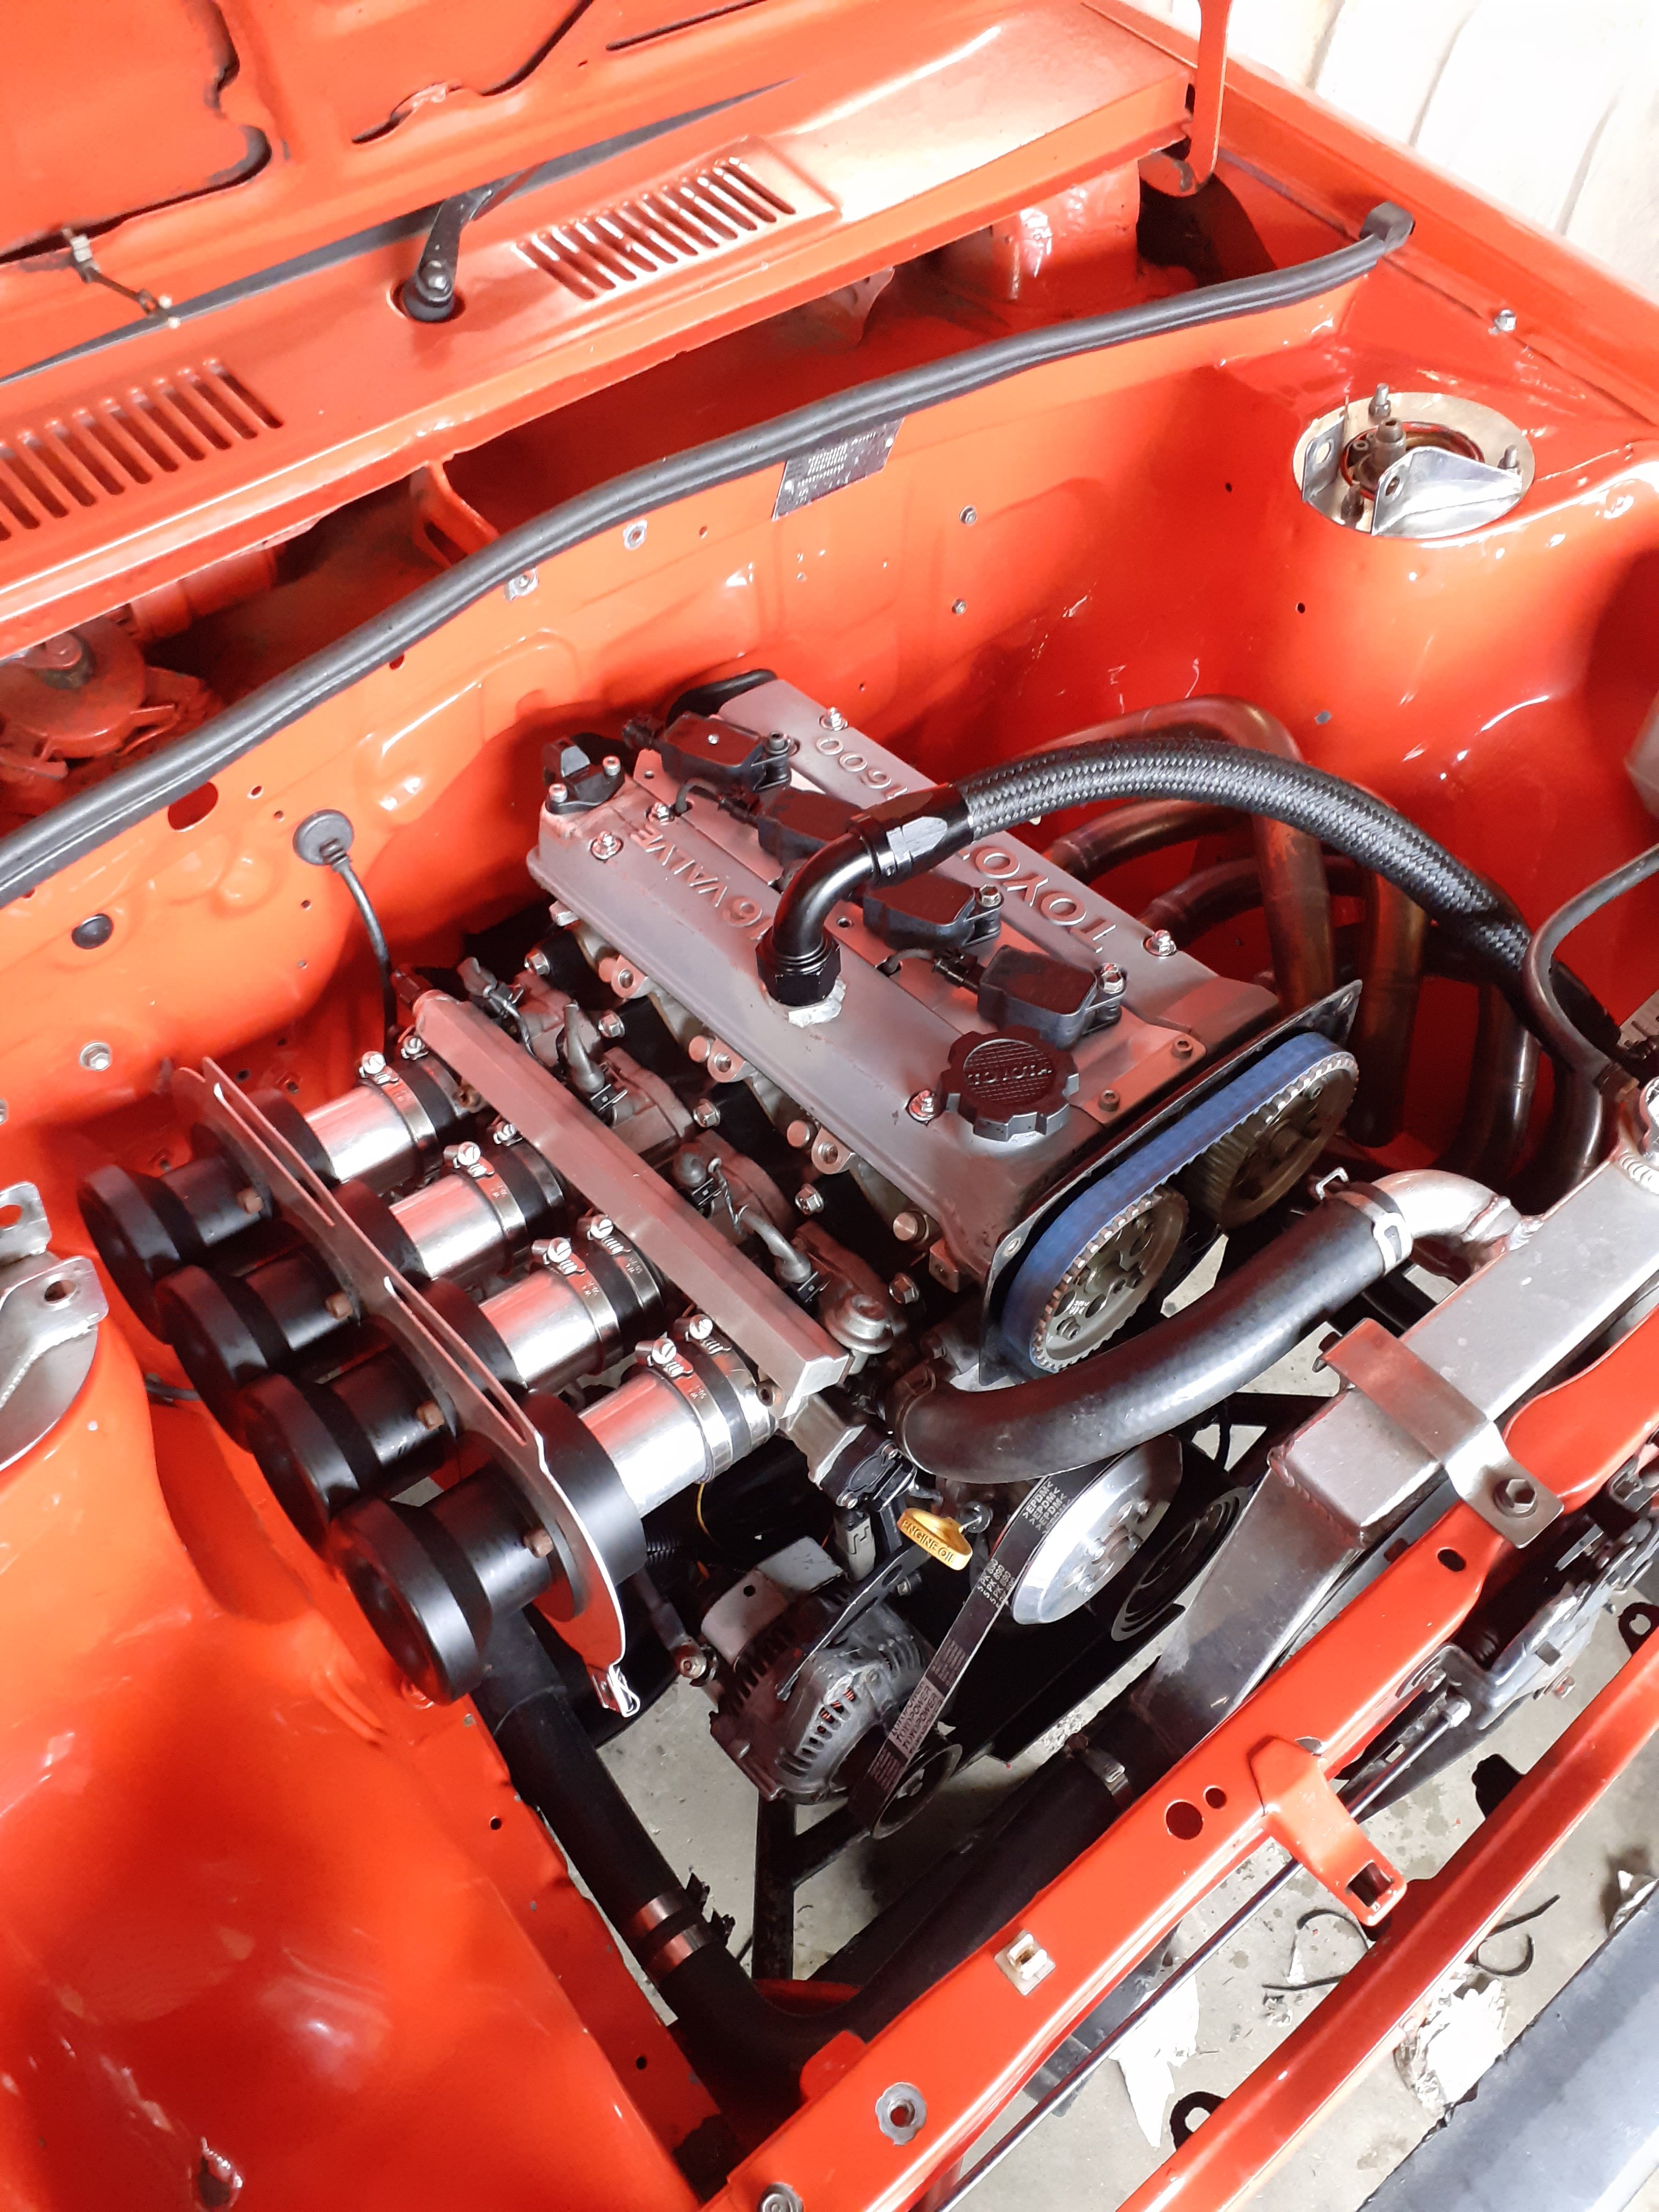
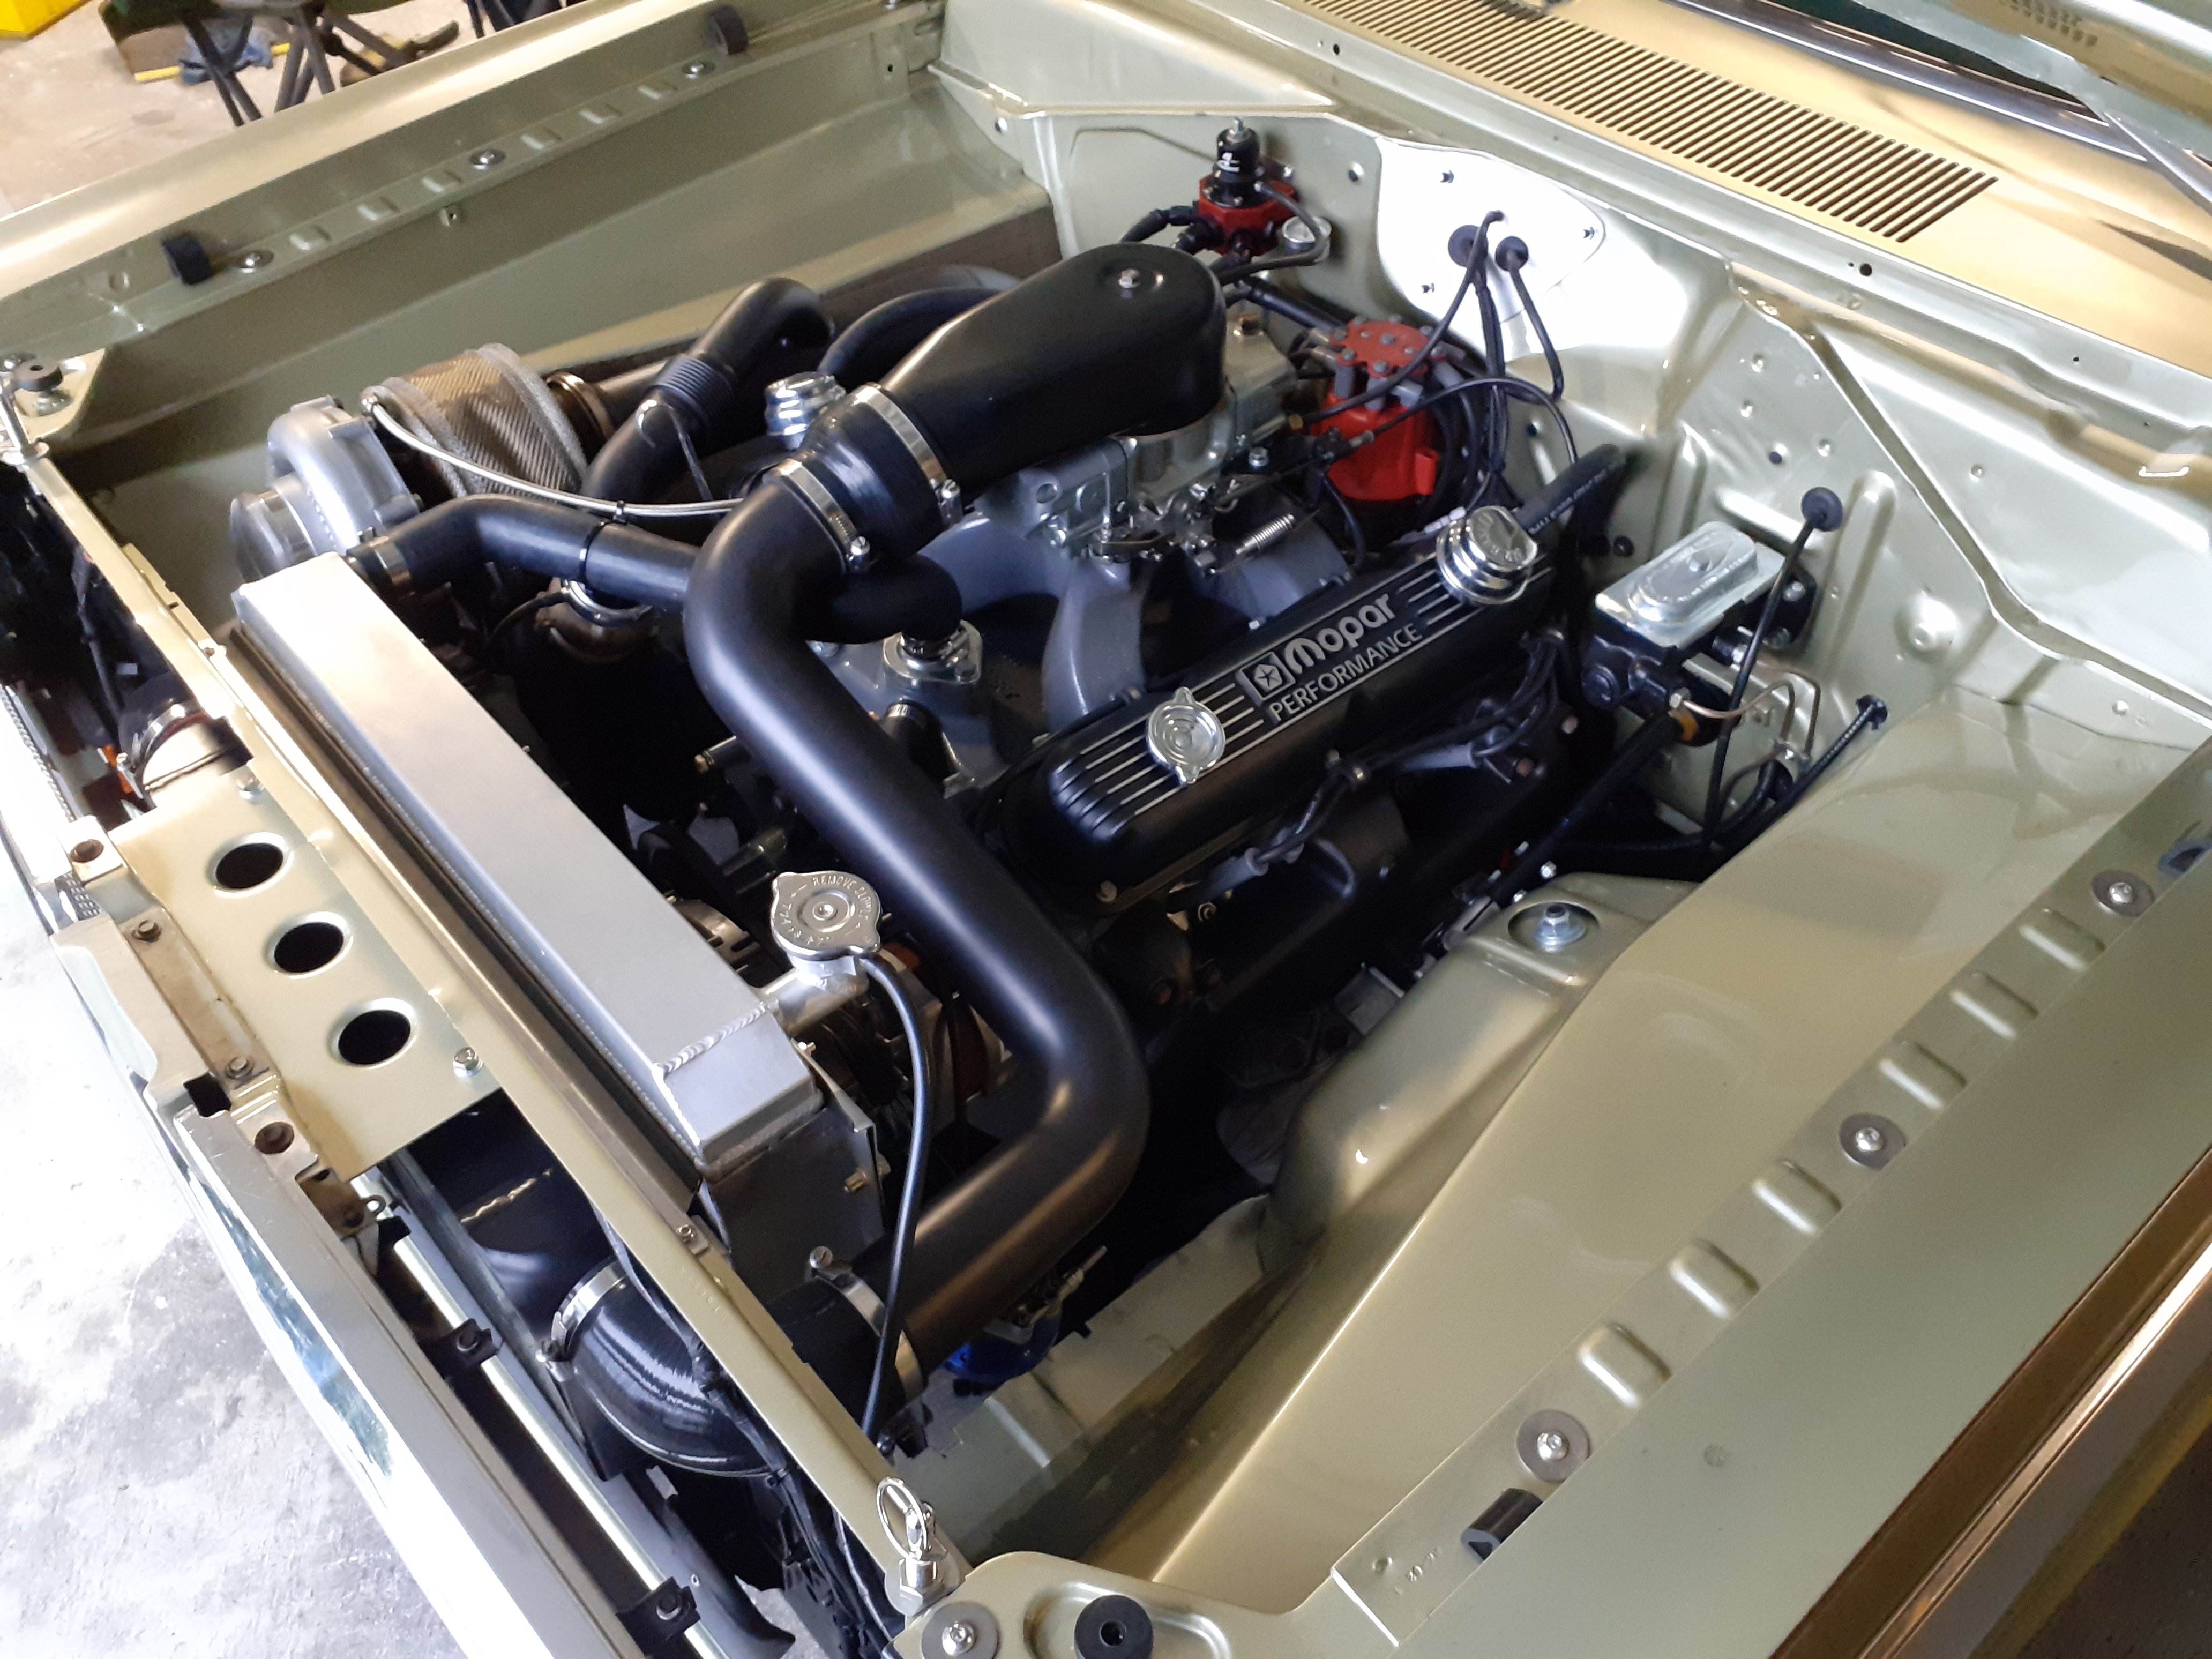
Good engine back in and running, think it has a little intake leak. but other than that all seems well so far, after sitting almost 2 years. Have only pushed it back onto dyno rollers and ran it through the gears. which seems good so far also. clutch feels pretty much the same, nana as. can take off in 3rd on dyno. Next need to set the cam timing (was using cam gears on turd, soo all screwed up) on dyno and probably do a little tuning. I haven't had current headers on this engine. they were good for a touch more power over the other ones on the turd. unsure what they will do on this engine. Then can see if the gearbox wants to play the game.
 18 points
 -
18 points
-
So, Final update. Fitted the new slipper clutch to the mag part of the magdyno. Bike now makes 22v at fast idle when bridging the Field and Output terminals - Perfect Connected up regulator and bike now charges battery at 13.5 - 14.4v at fast idle. - Perfect Case closed13 points
-
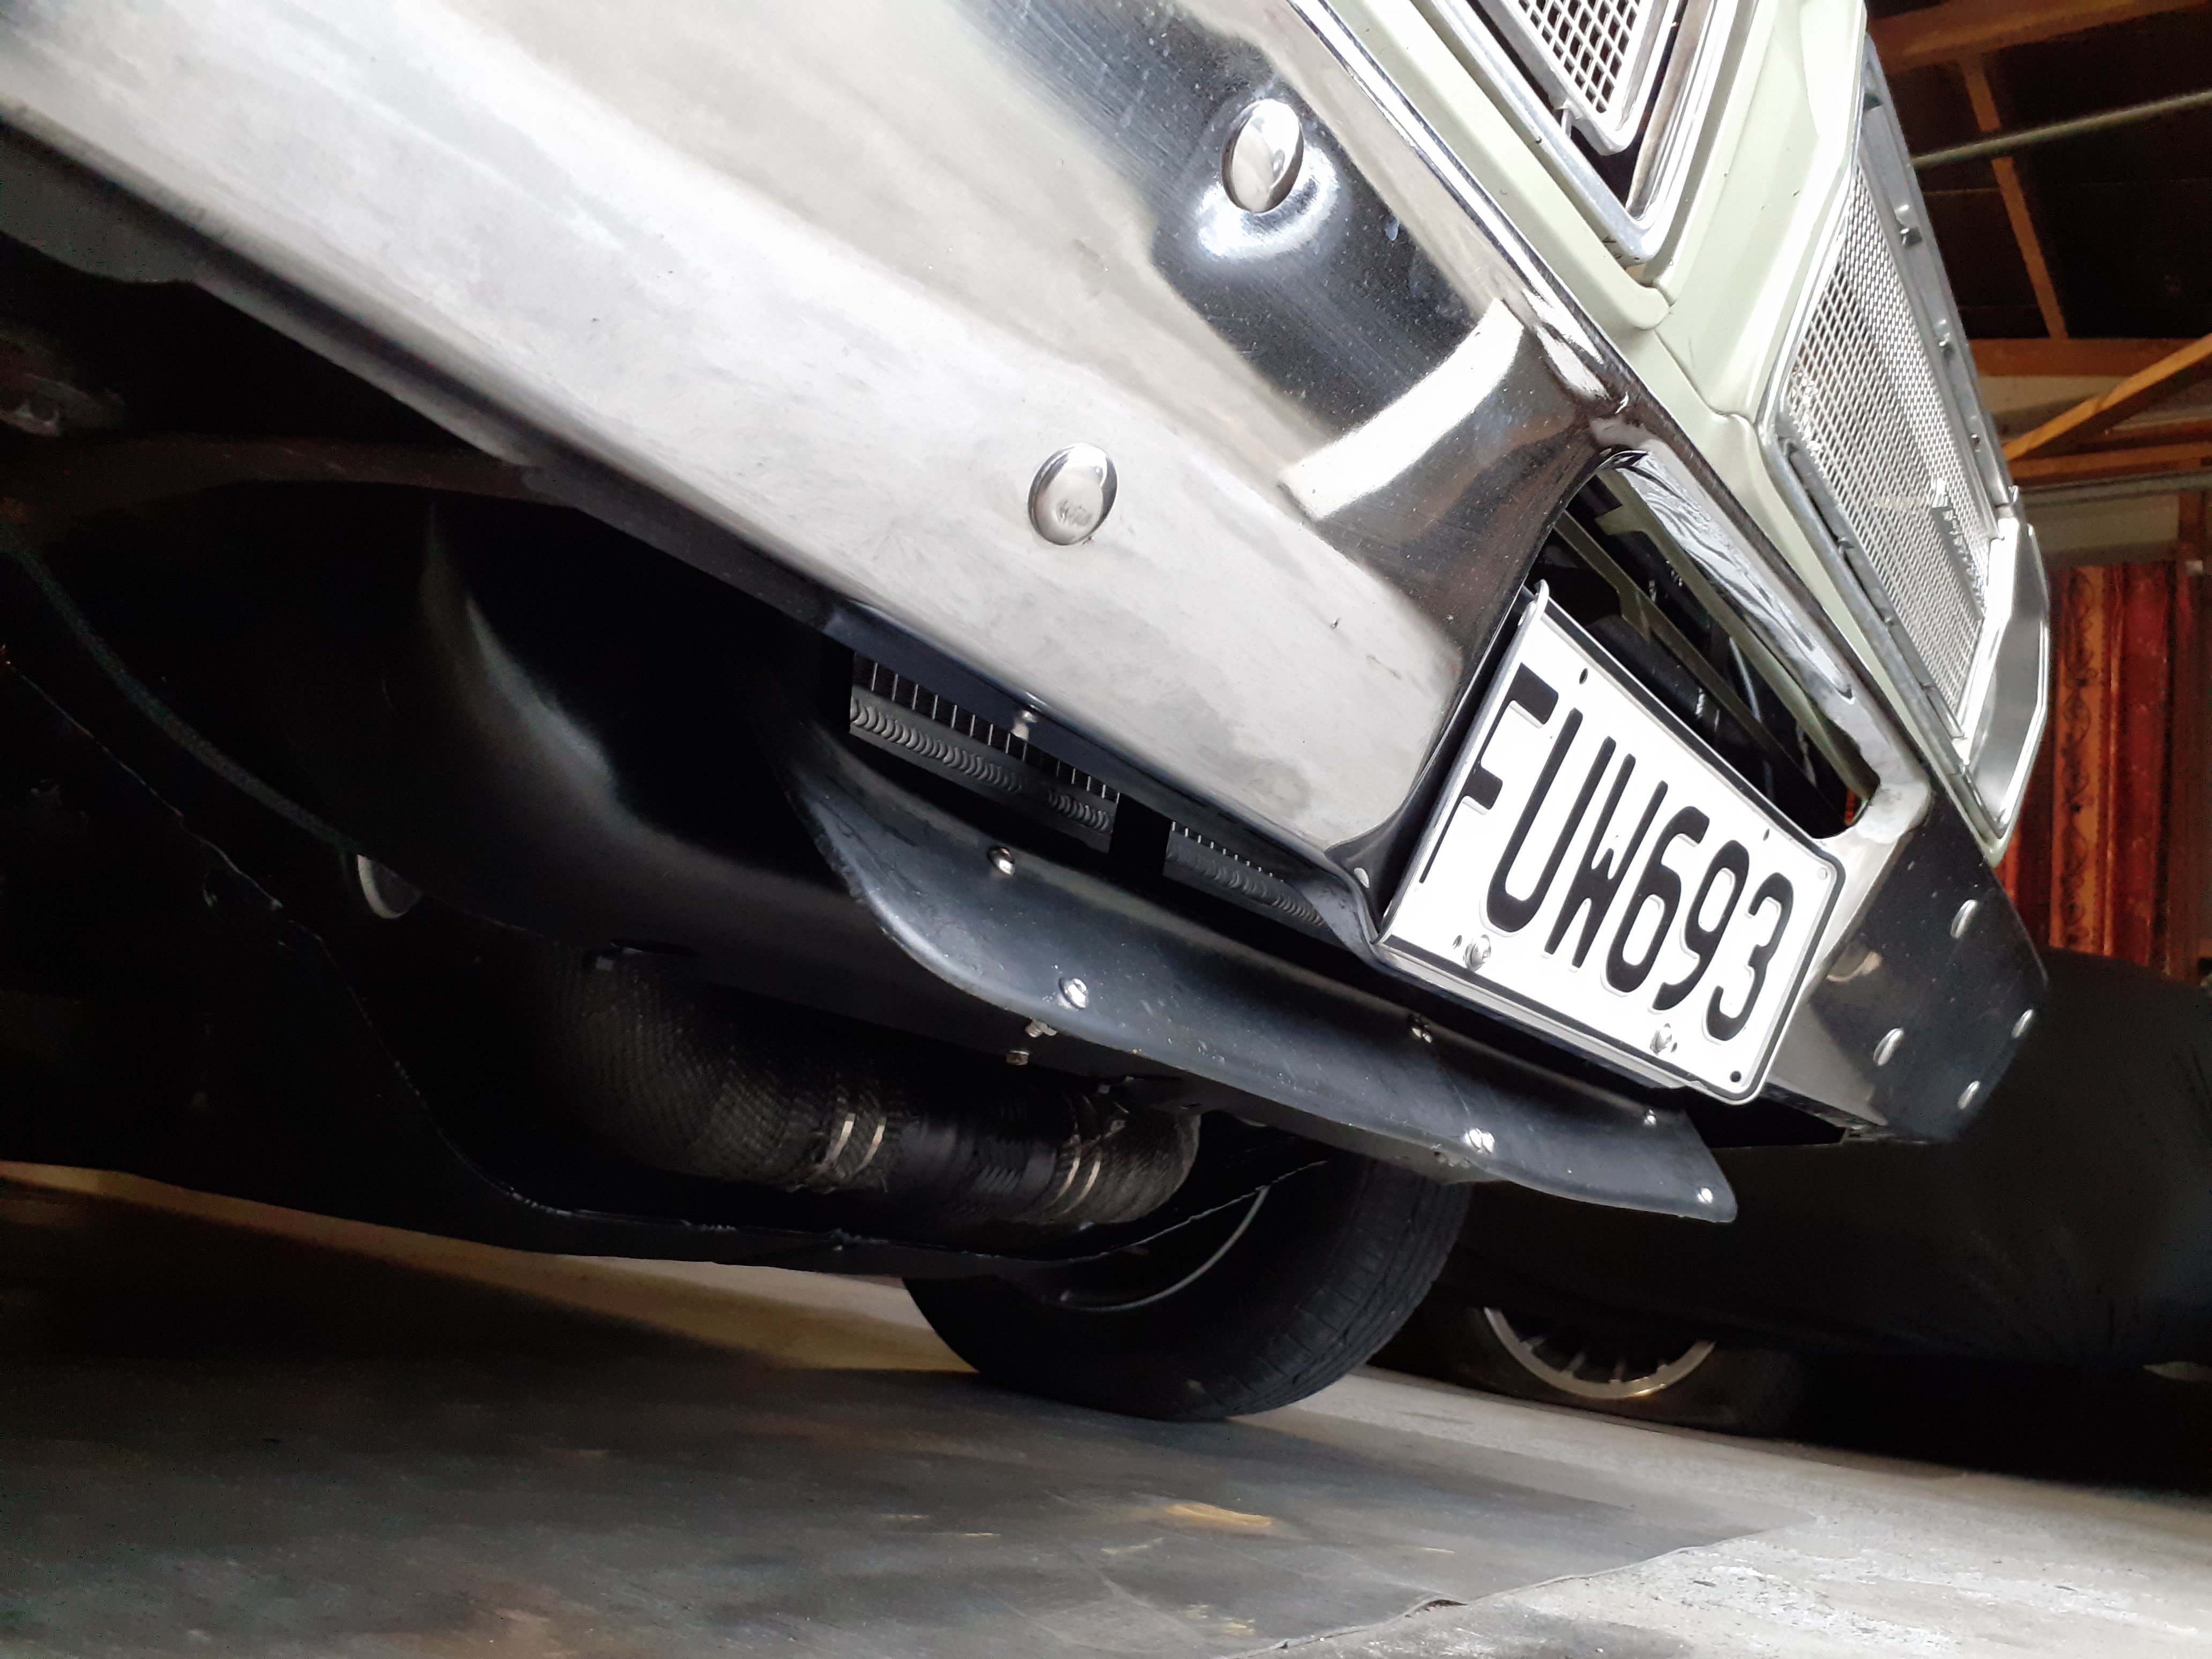
Alrighty then I think it's good enough for now. I'll see what it's like when summer comes but at the moment I can drive it all day and it hangs around 170-195 depending on what I'm doing So final stuff done= Flowkooler pump (I'd forgotten but it already had a high flow pump but I think the flowkooler one is better) Wrapped the crossover pipe in itchywrap No thermostat (barry) Bypass restricted to 6mm Two 11" spal fans on a shroud- originally I sealed it around the whole radiator and put holes in the bottom and made rubber flaps like an oem type shroud, I put a gopro in the engine bay to see what the flaps did at motorway speed and they only opened a little bit. So I put a seal just under the fans and removed the rubber flap, so the fans cover the top 2/3rds and cool that bit Also made a lip spoiler thing to direct air up to the bottom 1/3rd of the radiator which in my theory helps cooling at speed. This is a tester and I'll probably try to make a better looking one
12 points
-
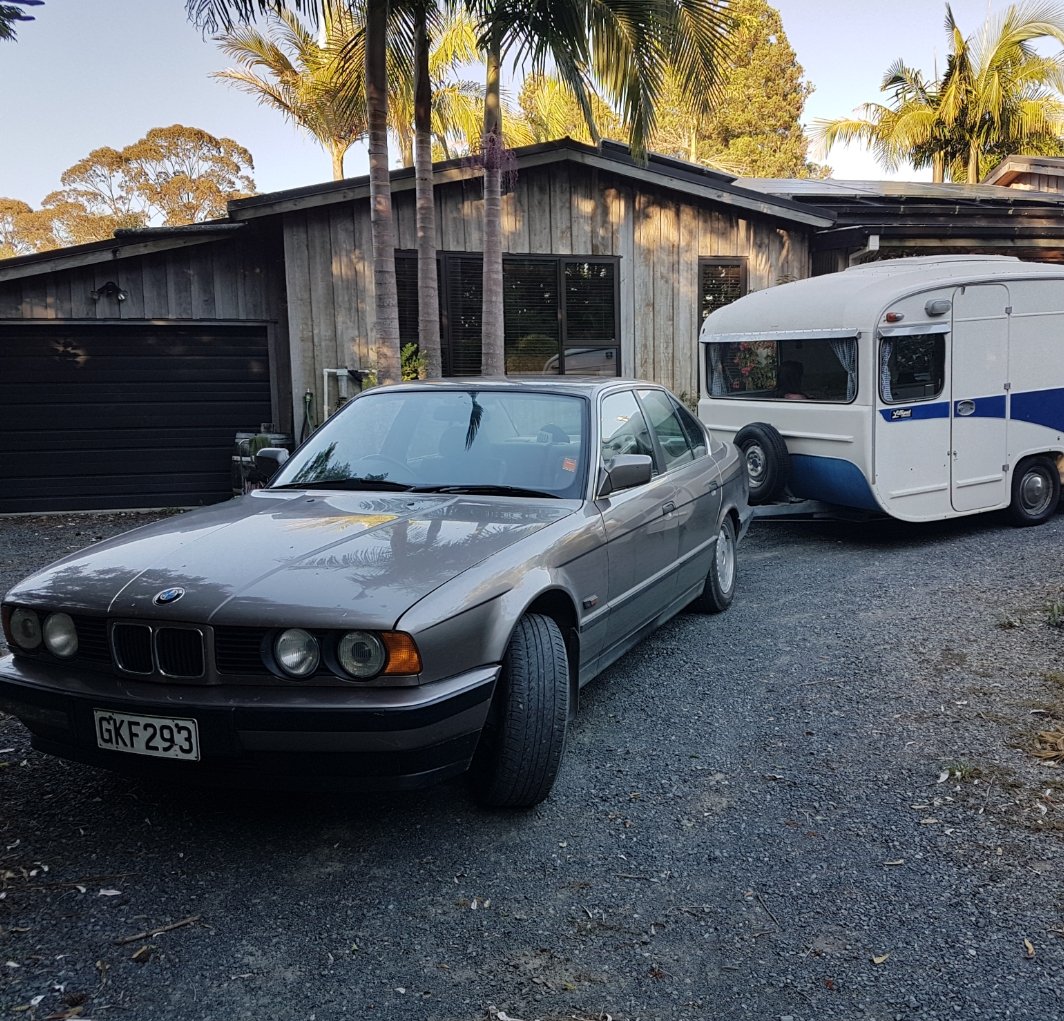
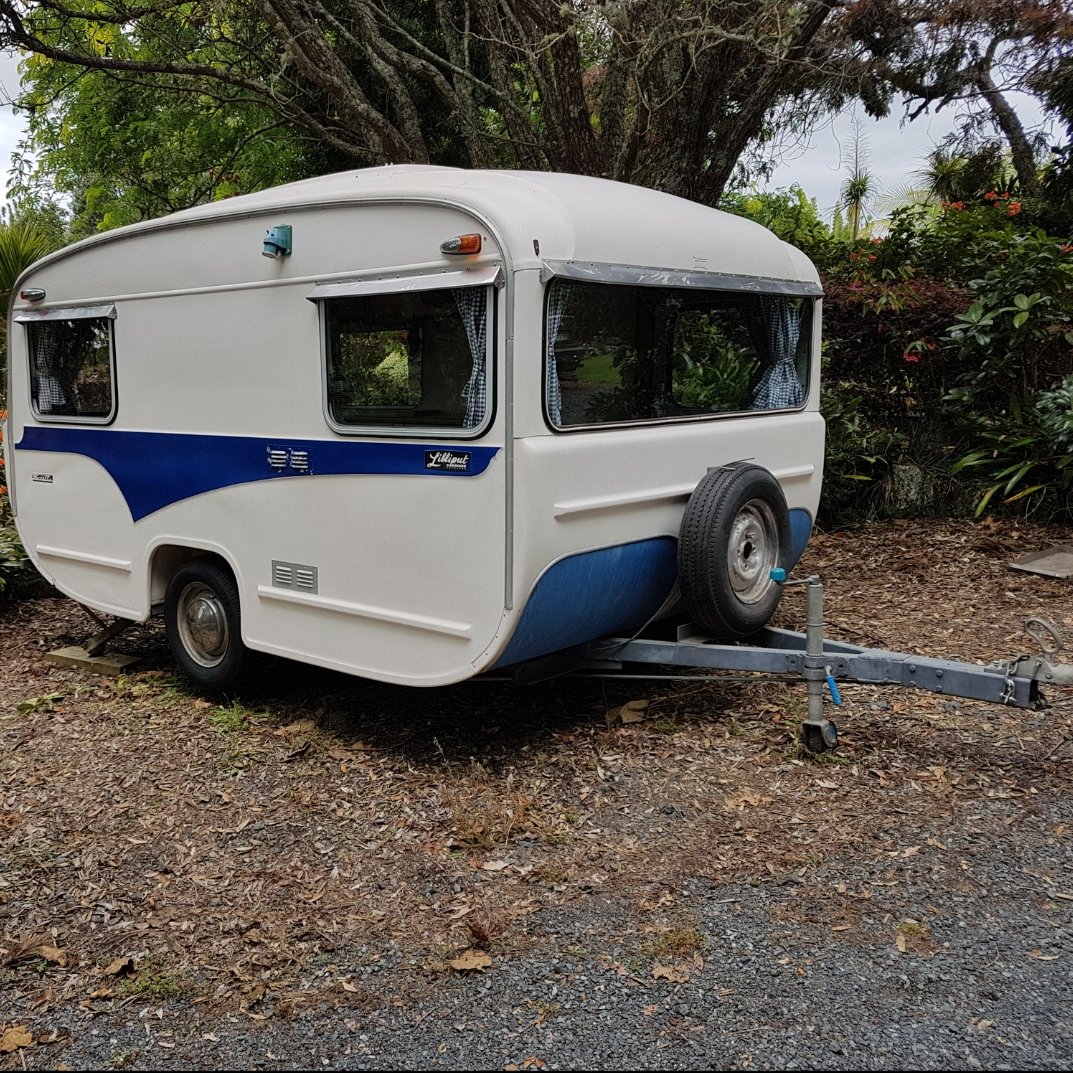
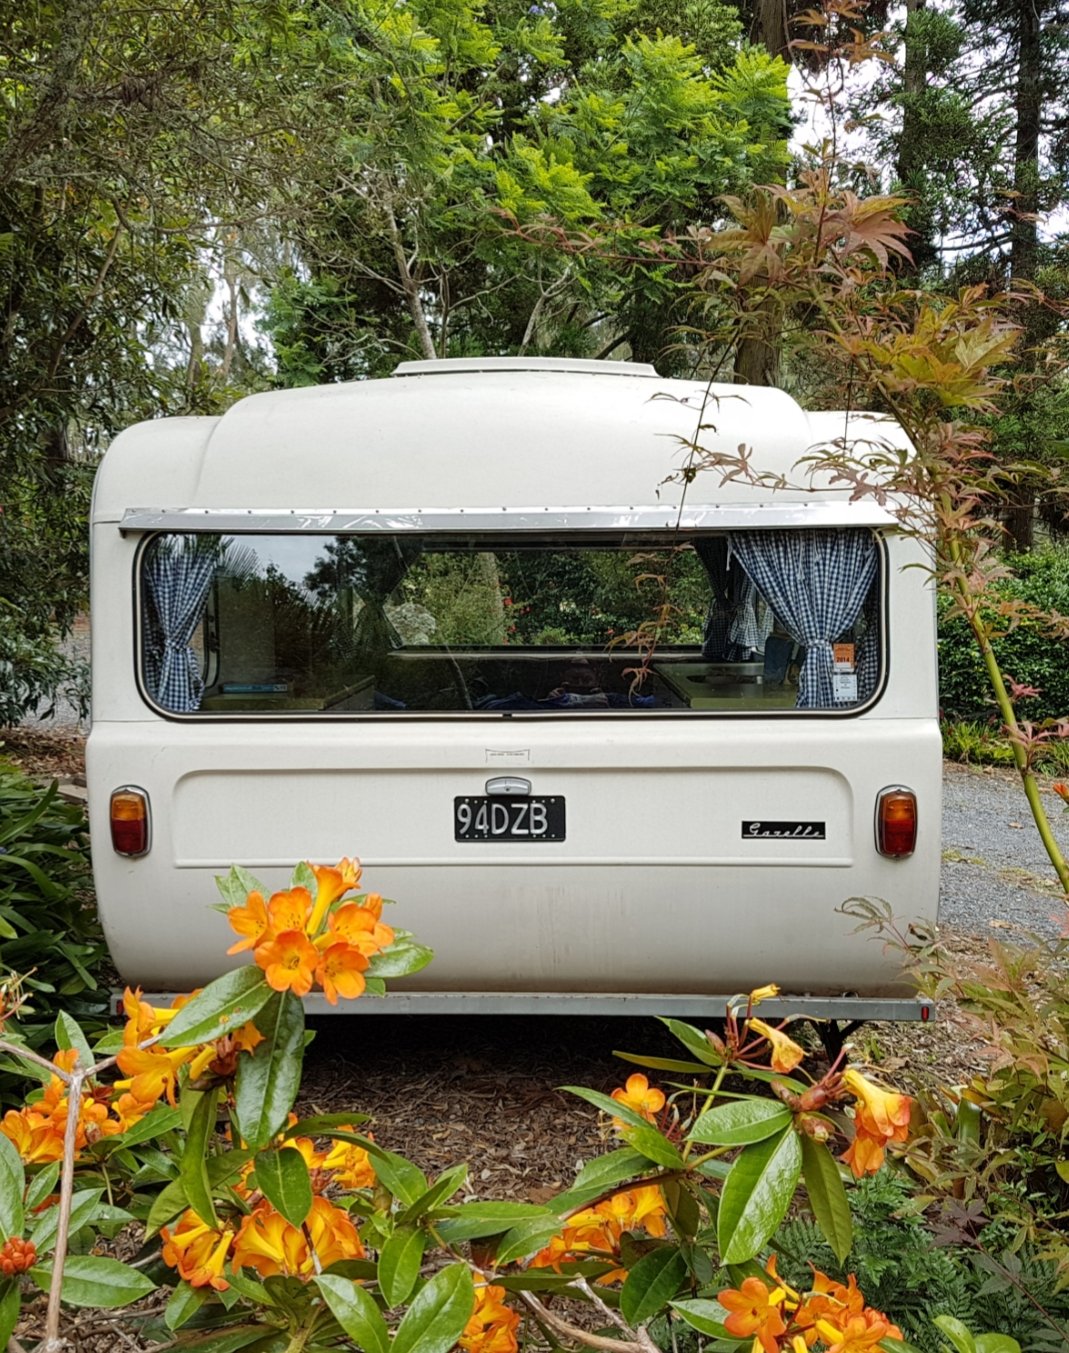
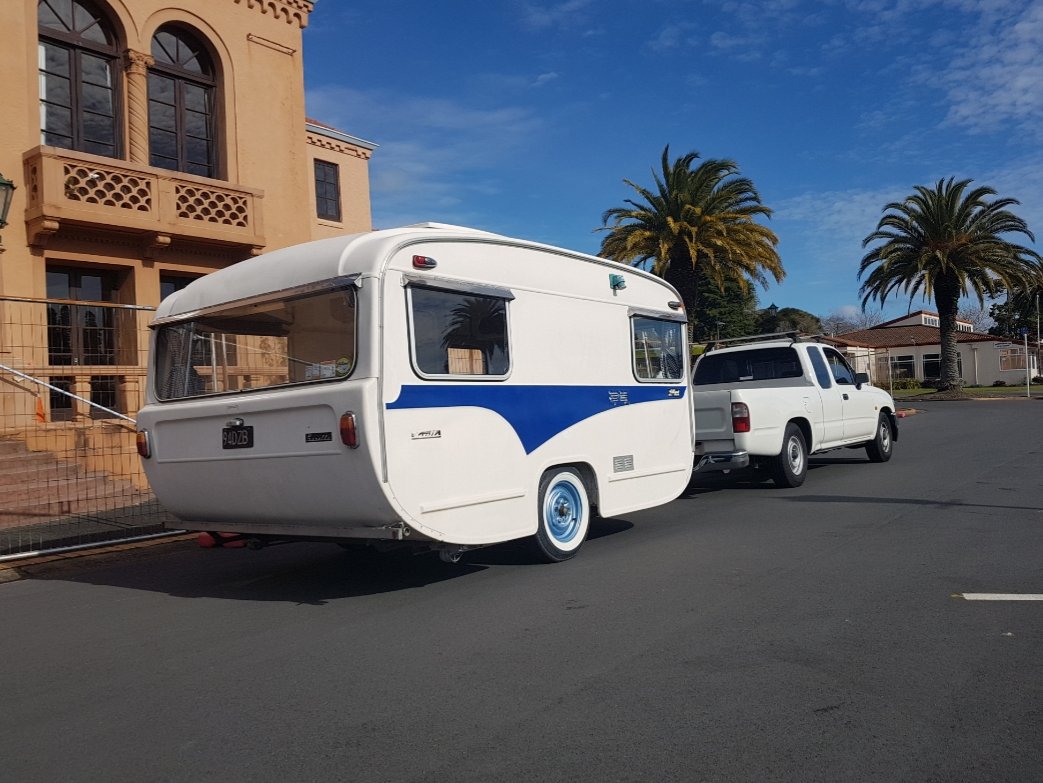
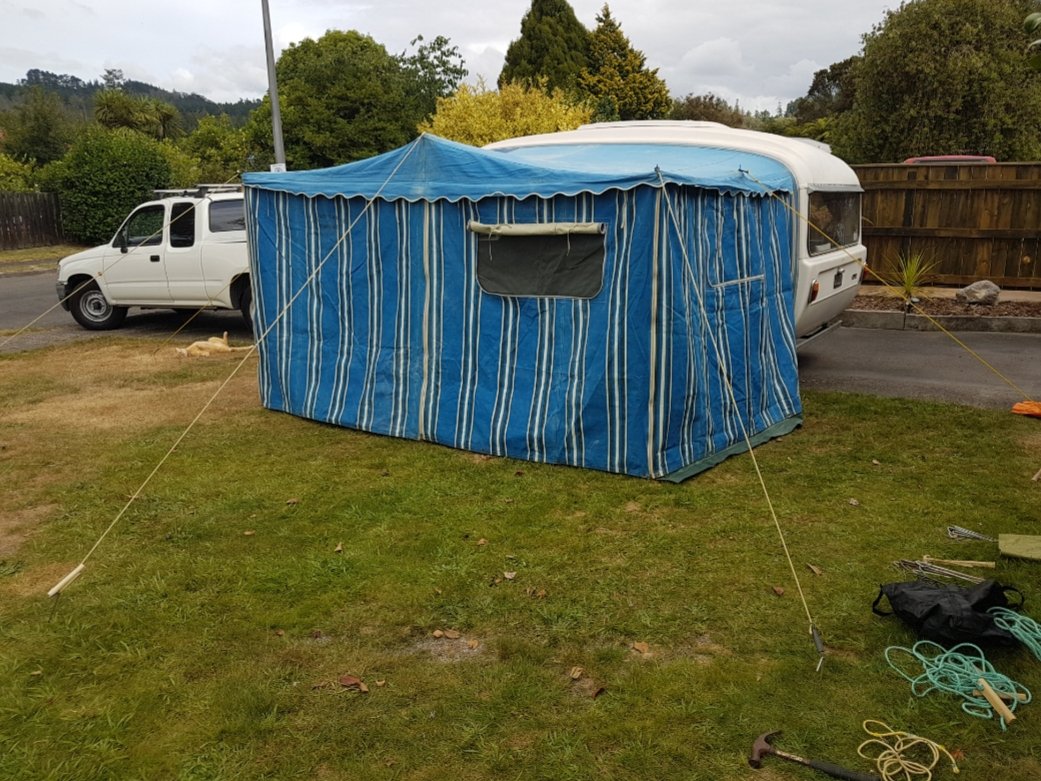
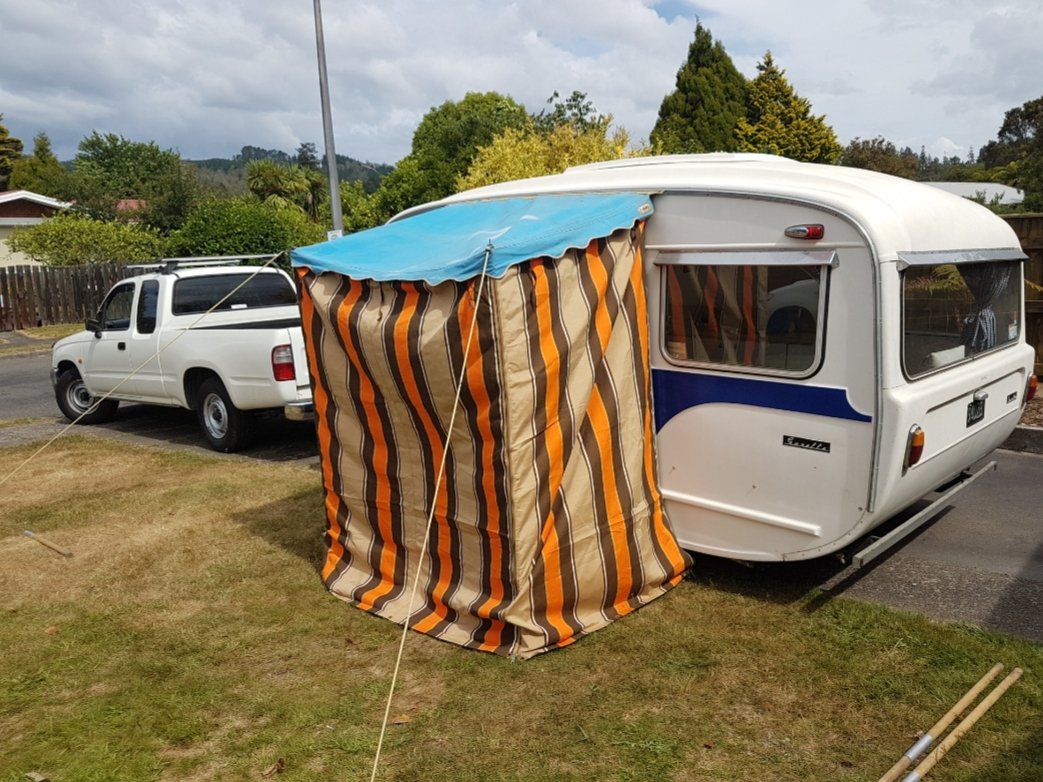
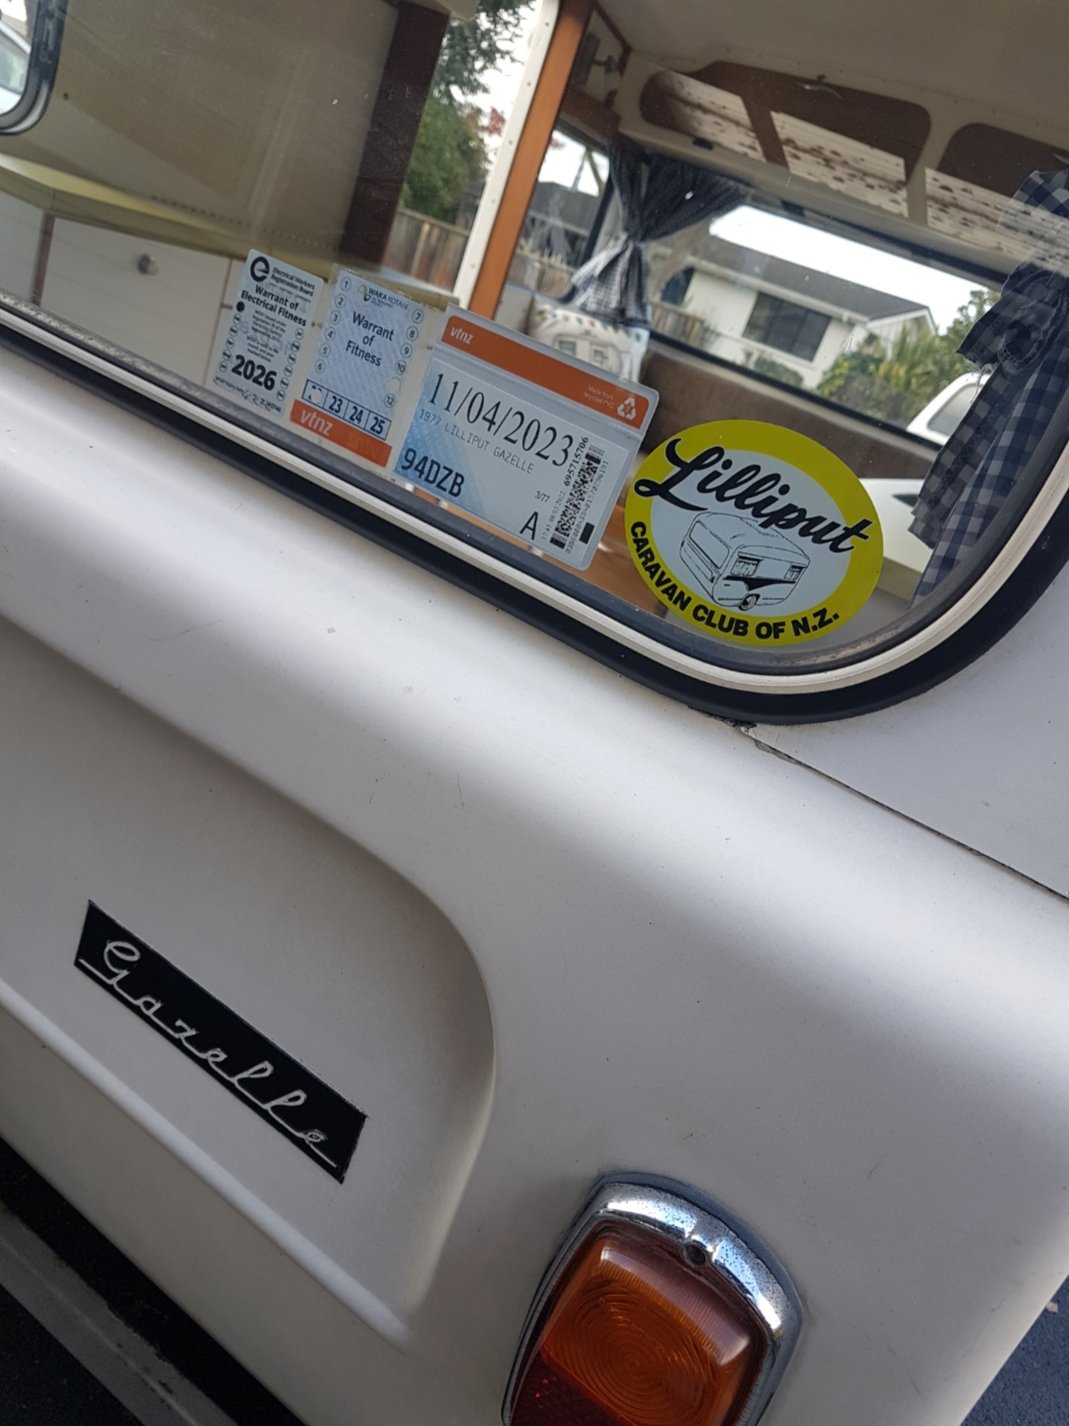
Here's my partner's and I new weekend get away toy and project, a New Zealand made 1977 Lilliput Gazelle. In recent years we have started to get into weekend travel and camping in our spare time. A few years back we hired a camper and explored the South Island and love it!, and later years resorted to a good old fashion tent for a roof over our head. We always envisioned to have our own set wheels whether that be a campervan or a caravan. So rewind to 2021 this popped up for sale. My uncle decided to let it go as it had been living in a shed and not being used. Previously it had been used as a promotional tool for his vineyard. During the peak of covid with the likes of border controls and such we decided to make the purchase mid year, but actually couldn't collect it until Christmas time of 2021. As an added bonus part of the deal it came with my late grandmothers old 1988 5 series BMW. So my partner Elisa and I flew up to Kerikeri, hooked the van up to the BMW and made the journey back to Rotorua, with smooth sailing along the way and no issues. I'll add some history on these Van's and more photos along the way as I compile this thread. Thanks
11 points
-
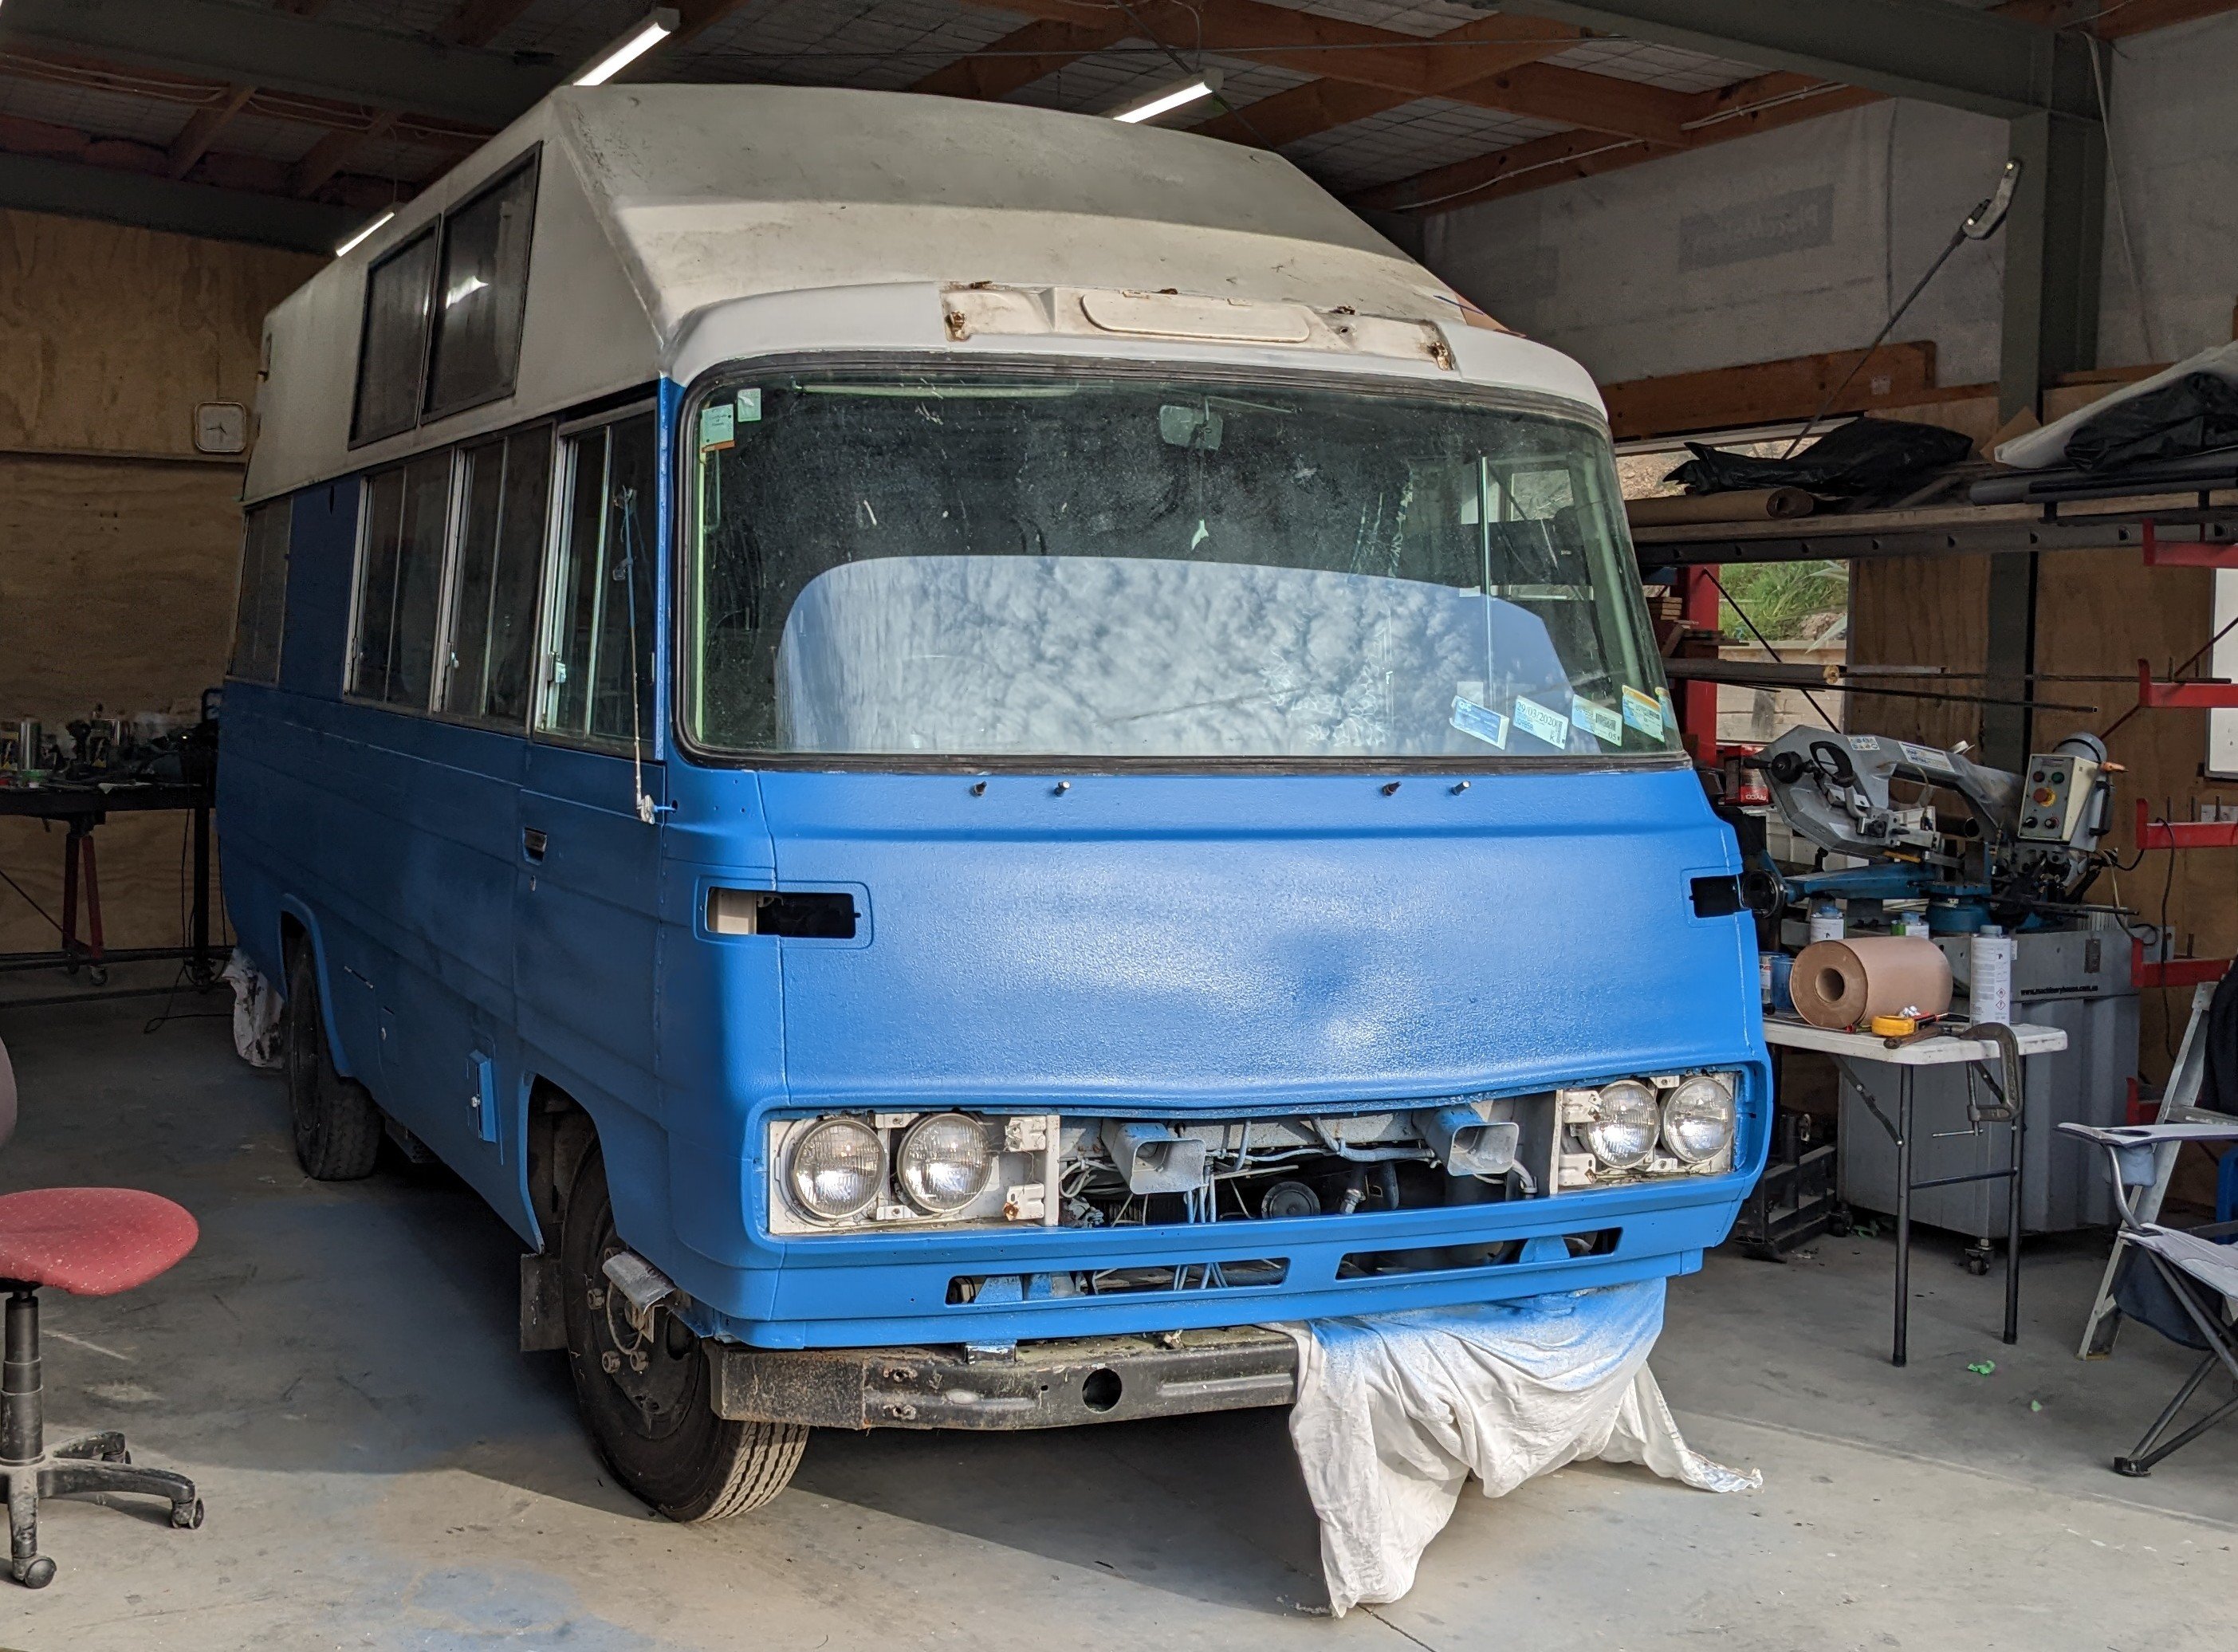
So i have painted some of the bus in bedliner. This has not gone as well as it could as i am clearly the wrong person for the job. Firstly it became apparent almost immediately that i did not have enough bed liner, in fact i will need 1.5x more at least to finish it. Then the colour choice is questionable, this is because I colour matched it from memory. So it is not the same blue for some reason, but it doesnt matter as I decided to paint all of the body of the bus. Hence for reasons that will become apparent the bus is now called Smurf. Then there is my spray gun skill and how this is affected by stress, and i can tell you that stress negatively affects my skill. And i have almost no skill to start with so this isnt an ideal situation. And I was stressed. So anyway, I painted the bus. The good news is the the ugly is covered up nicely (except for that dent that i didnt bother fixing lols). The bad news is that the variation in texture is amazing. So much so that i think i might do a final coat with a roller to even it out, although the nose is kindof convincing probably cos i had decent light. Stupid fucking paint bollocks. I should have known not to get involved in that shit.
10 points
-
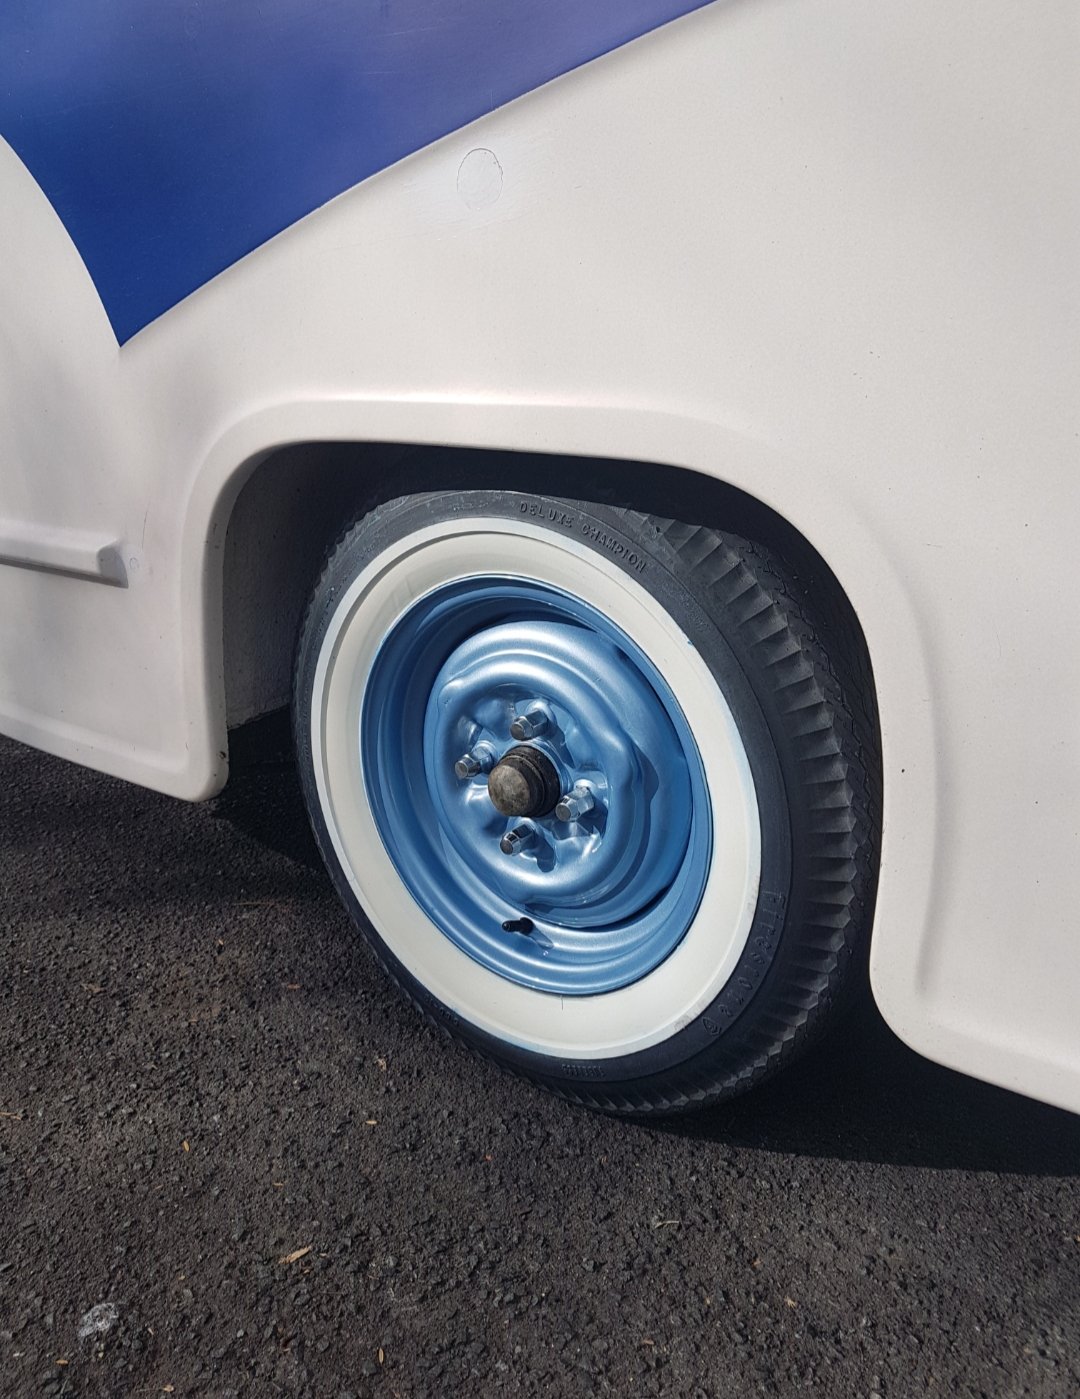
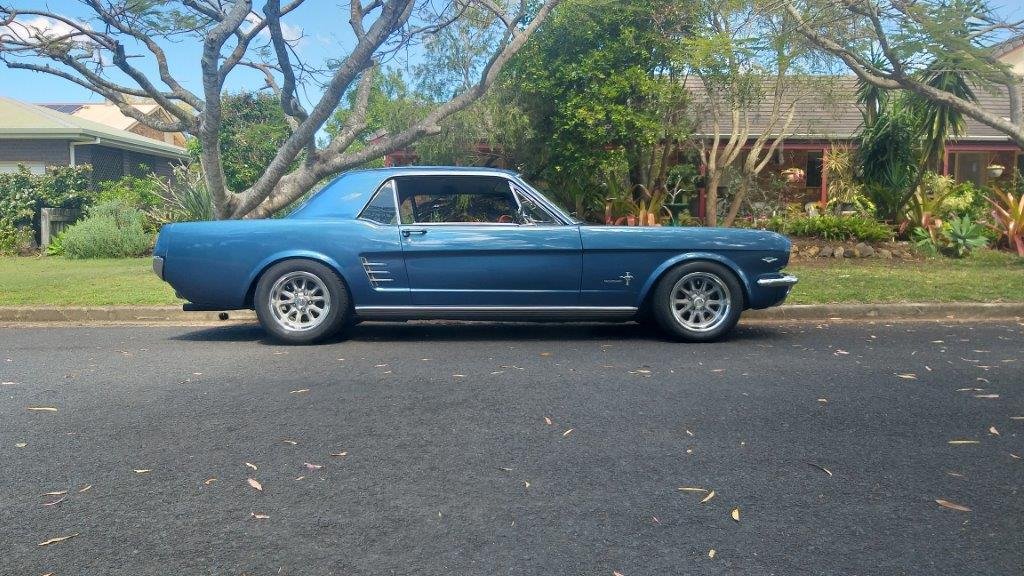
And here's where I'm up too on the Lilliput. A fellow club member who is also a member of the Stragglers Rod & Kustom club. He brings in these 13" cross ply genuine Firestone white walls to suit the factory Anglia and similar wheels these Van's have. So I picked up a set including a spare, pricey but pretty cool! I didn't want to have them fitted to the tired existing wheels, so I sent them off to be blasted, and then painted. I chose a factory 2018 Toyota Corolla colour hue called "blue mist" Pretty stoked on the results and glad a went with that color, its obviously modern but has a period look to it. I'm kinda heading in the direction of a patina/period style build with the van. Ideally the next plans I'd like to have the orginal navy blue strip repainted to match the wheels, the chrome light covers colour matched to the stainless? window shades as the Rotorua sulphur eats away at the chrome finish and I'm over polishing them. Then the exterior buffed/cut to get a shine coming through and then a few other things along the way. But that's where we are up too at present, feel free to drop a comment or two and I'll keep this thread updated along the way. Chur!
10 points
-
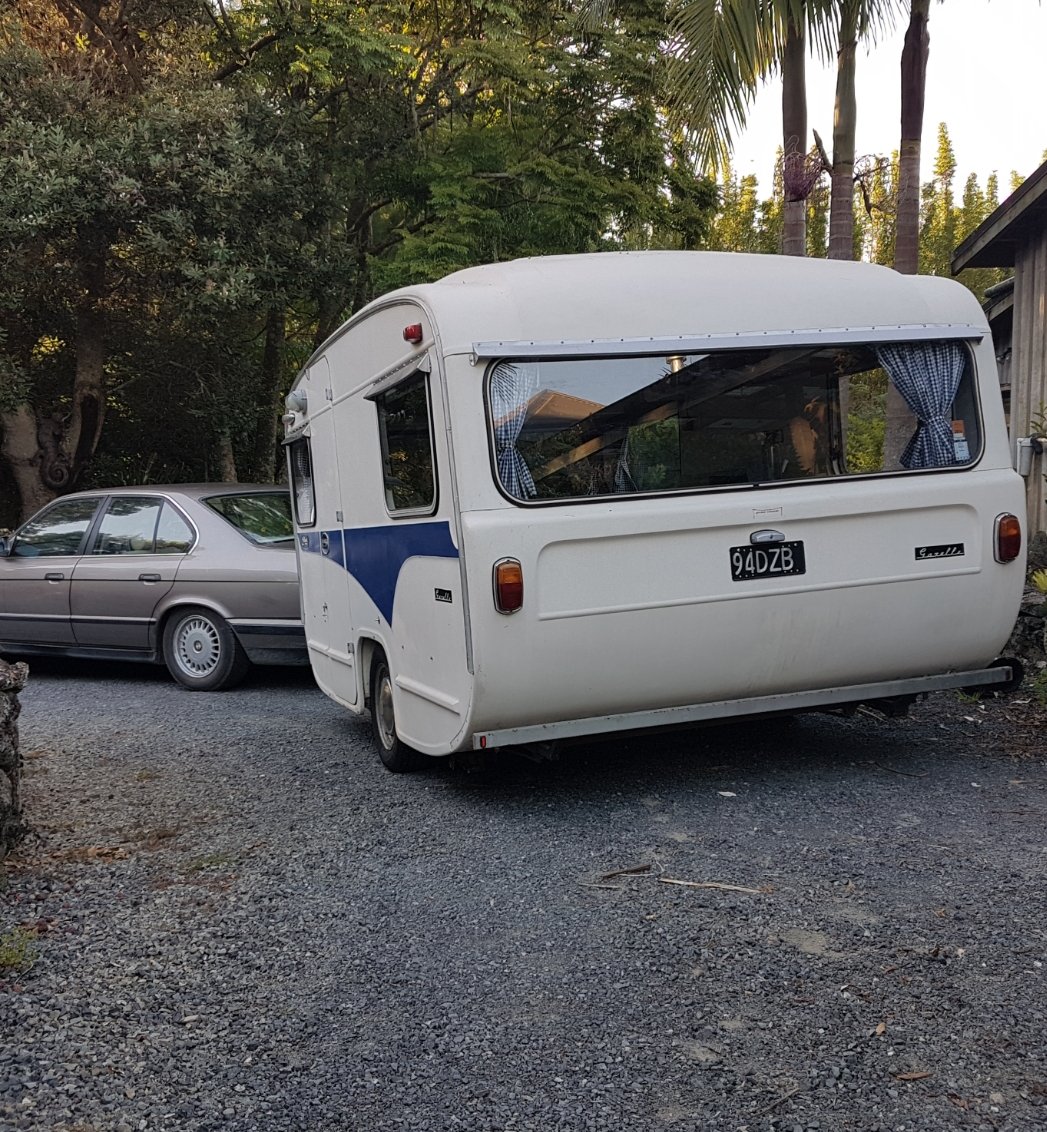
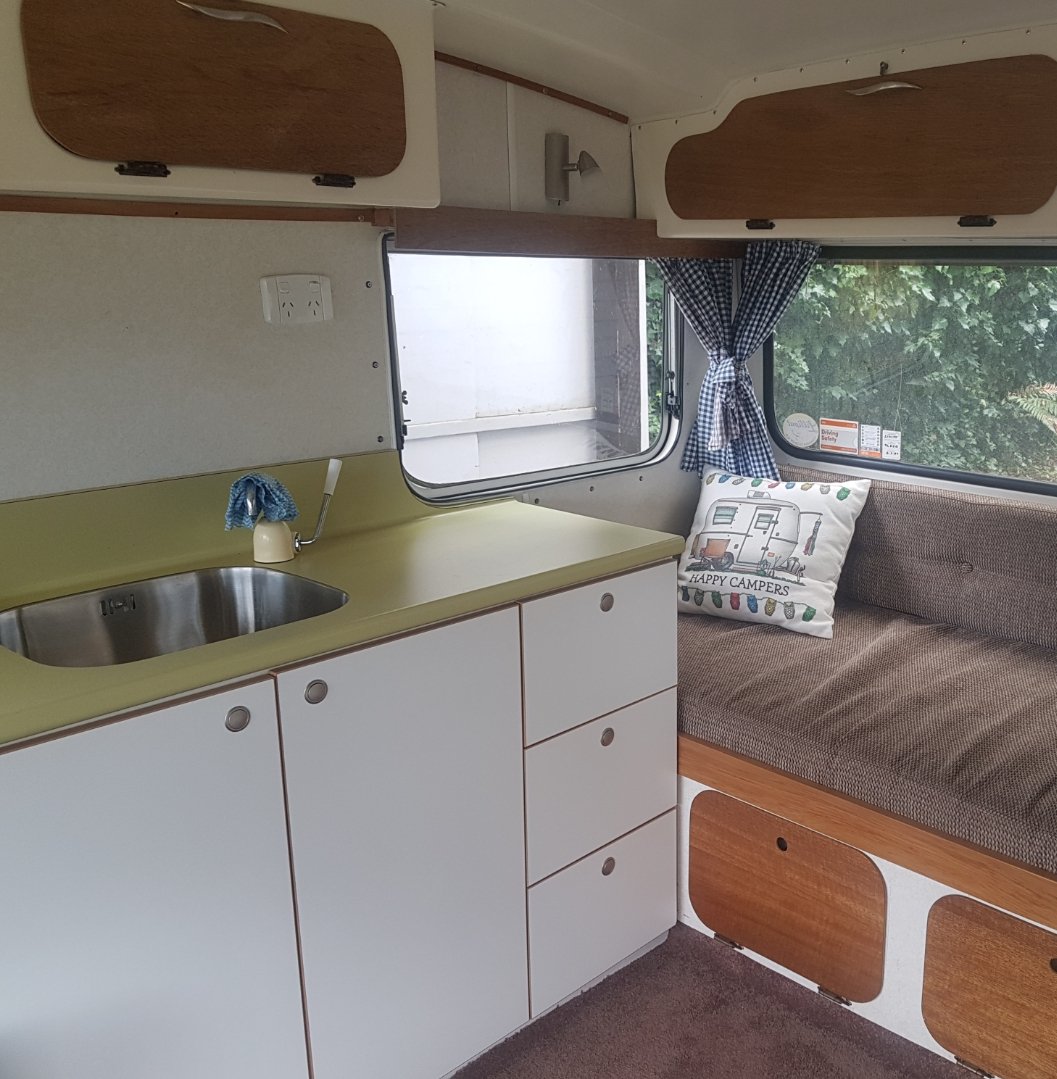
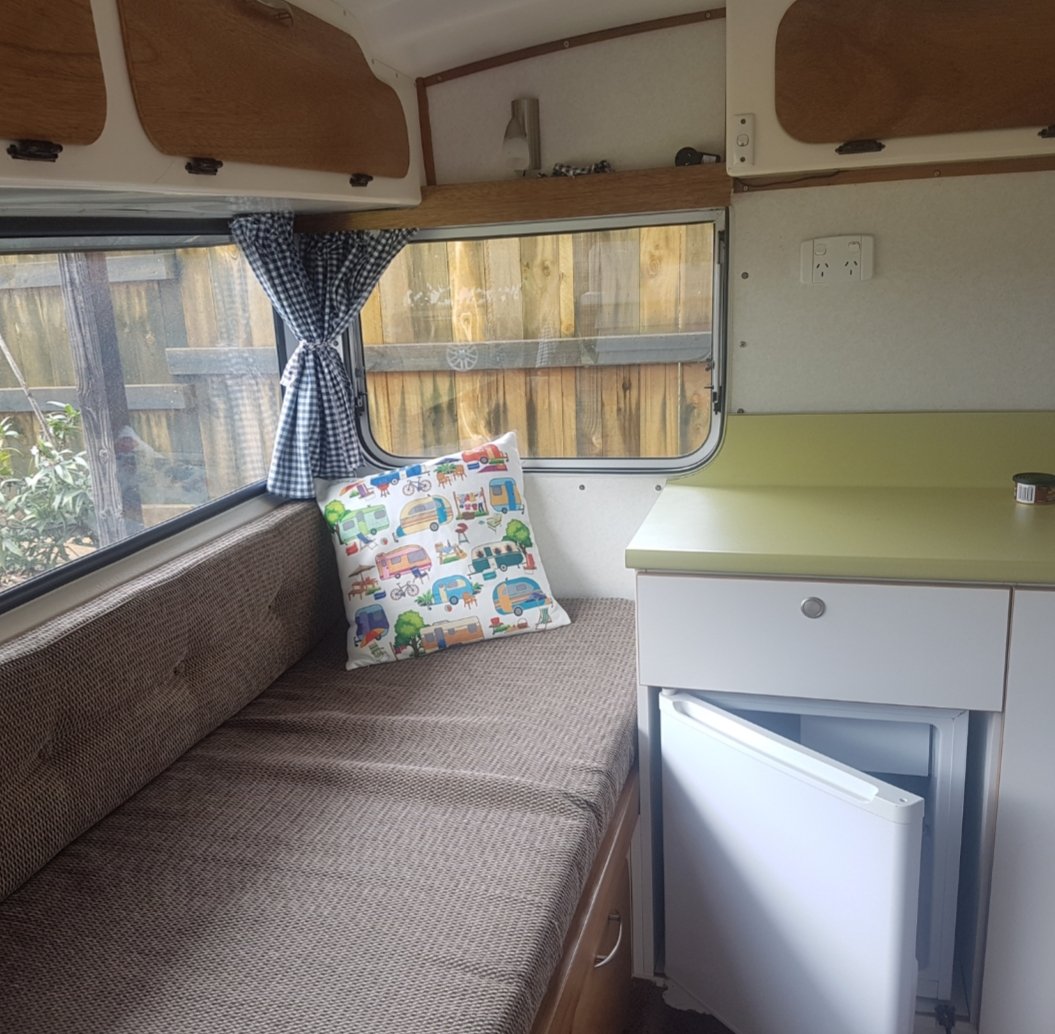
Overall it's pretty tidy, the exterior is original right down the gel coat, but its showing its age. The interior has been redone and is presentable. As an added bonus all electrics work and the fridge keeps the fake beers cold! The chassis underneath is good, but the draw bar has been fucked with and slightly extended and looks a tad funky, but its functional and tows well. I've got a mate lined up to help me tidy it up and replace it. So I've since sold the BMW and put the coin towards the cost of the van which worked out well, it had to go as I was starting to get sentimental with it and my yard was getting busy The tow vehicle now is my 05 2wd petrol Hilux, which does the trick. The Lilliput only weights approximately 500kgs so the 3rz pulls it along well. The Lilliput came with two sets of awnings for either side, one for a shit house/changing shed arrangement and the other as chill/cooking etc set up
10 points
-
If I had given it the welly up my driveway that could potentially have ended in tears. Quickly pulled that sucker out with a pair of tweezers and chucked a locking nut on it so hopefully that won't ever happen again. On the plus side I managed to take a few shots of the Muzzy while it was sitting outside my neighbour's place waiting for a drink.
9 points
-
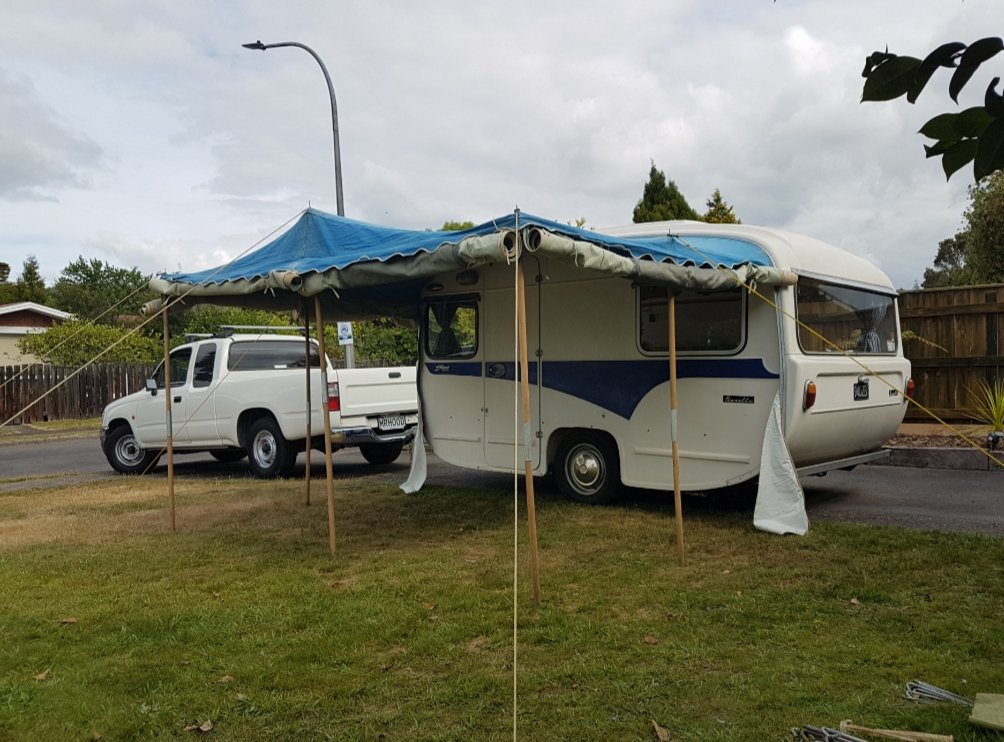
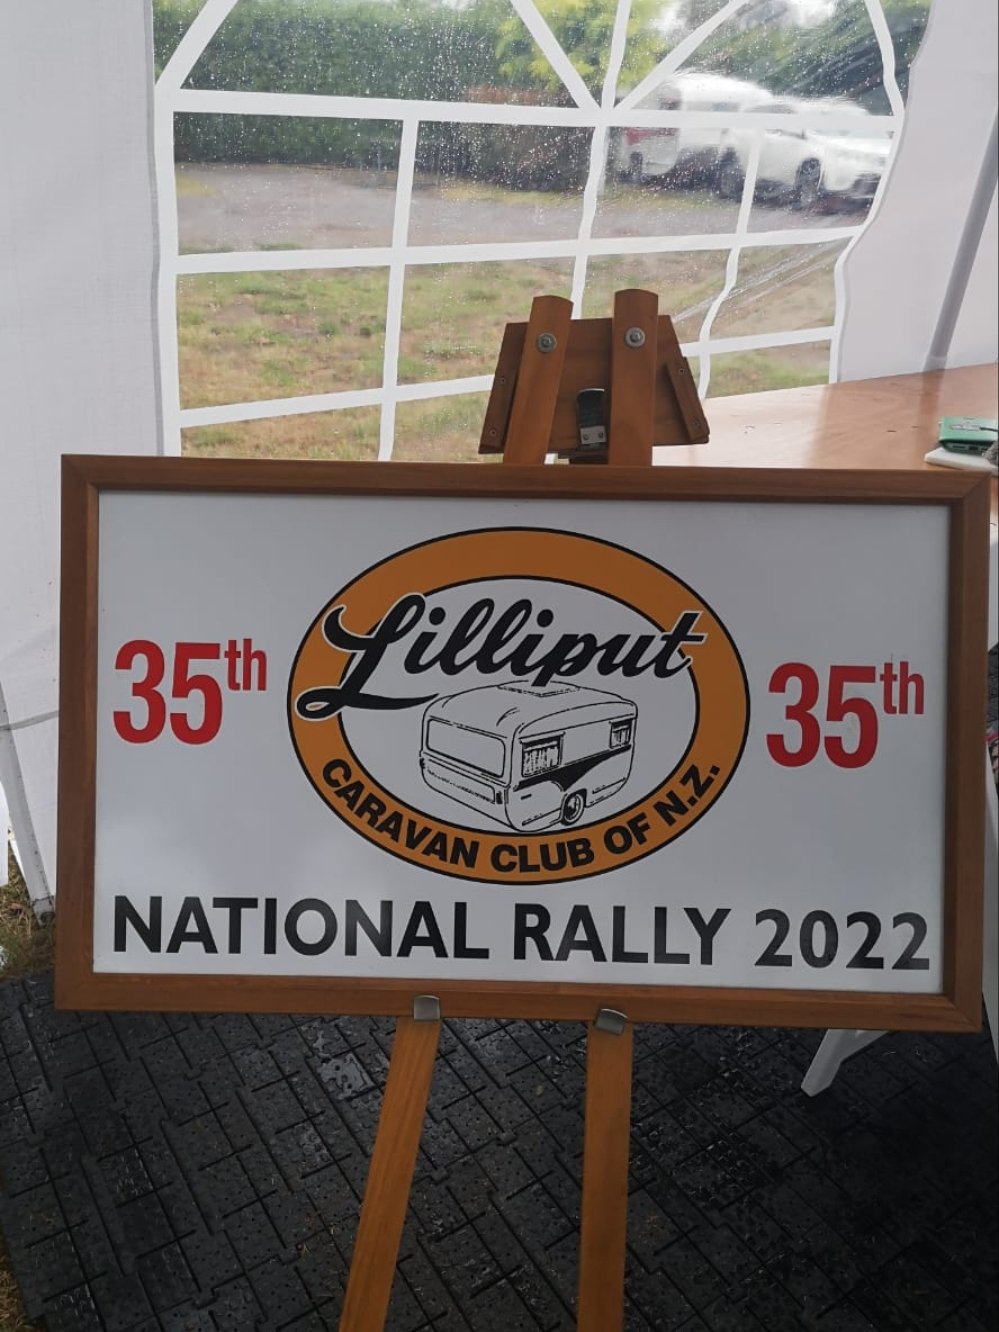
To date we've been on a few adventures, Onaero beach near New Plymouth. Cooks Beach in Whitianga and Taupo for the 35th National Lilliput club run which we signed up too and became members. I made this decision to hopefully network with fellow enthusiasts, make some like minded mates and to get some ideas for our own van. The rally was an awesome weekend away, the weather wasn't on our side and certainly tested our tolerances as a couple when erecting the awning in the pouring rain haha but we got there in the end. The van stayed dry with no leaks, but not so much for the awning which later onwards I have since waterproofed.
8 points
-
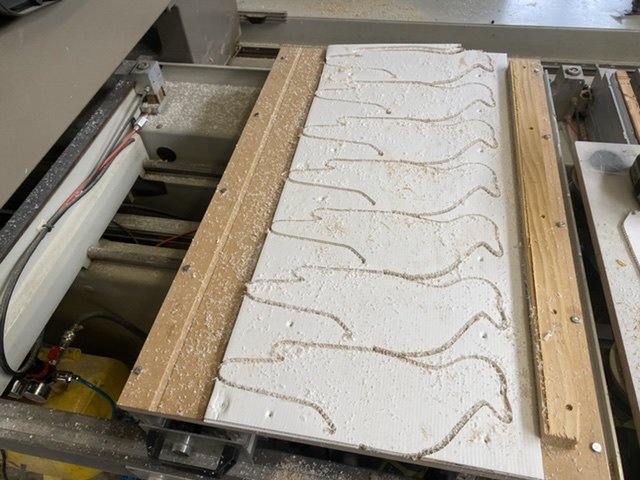
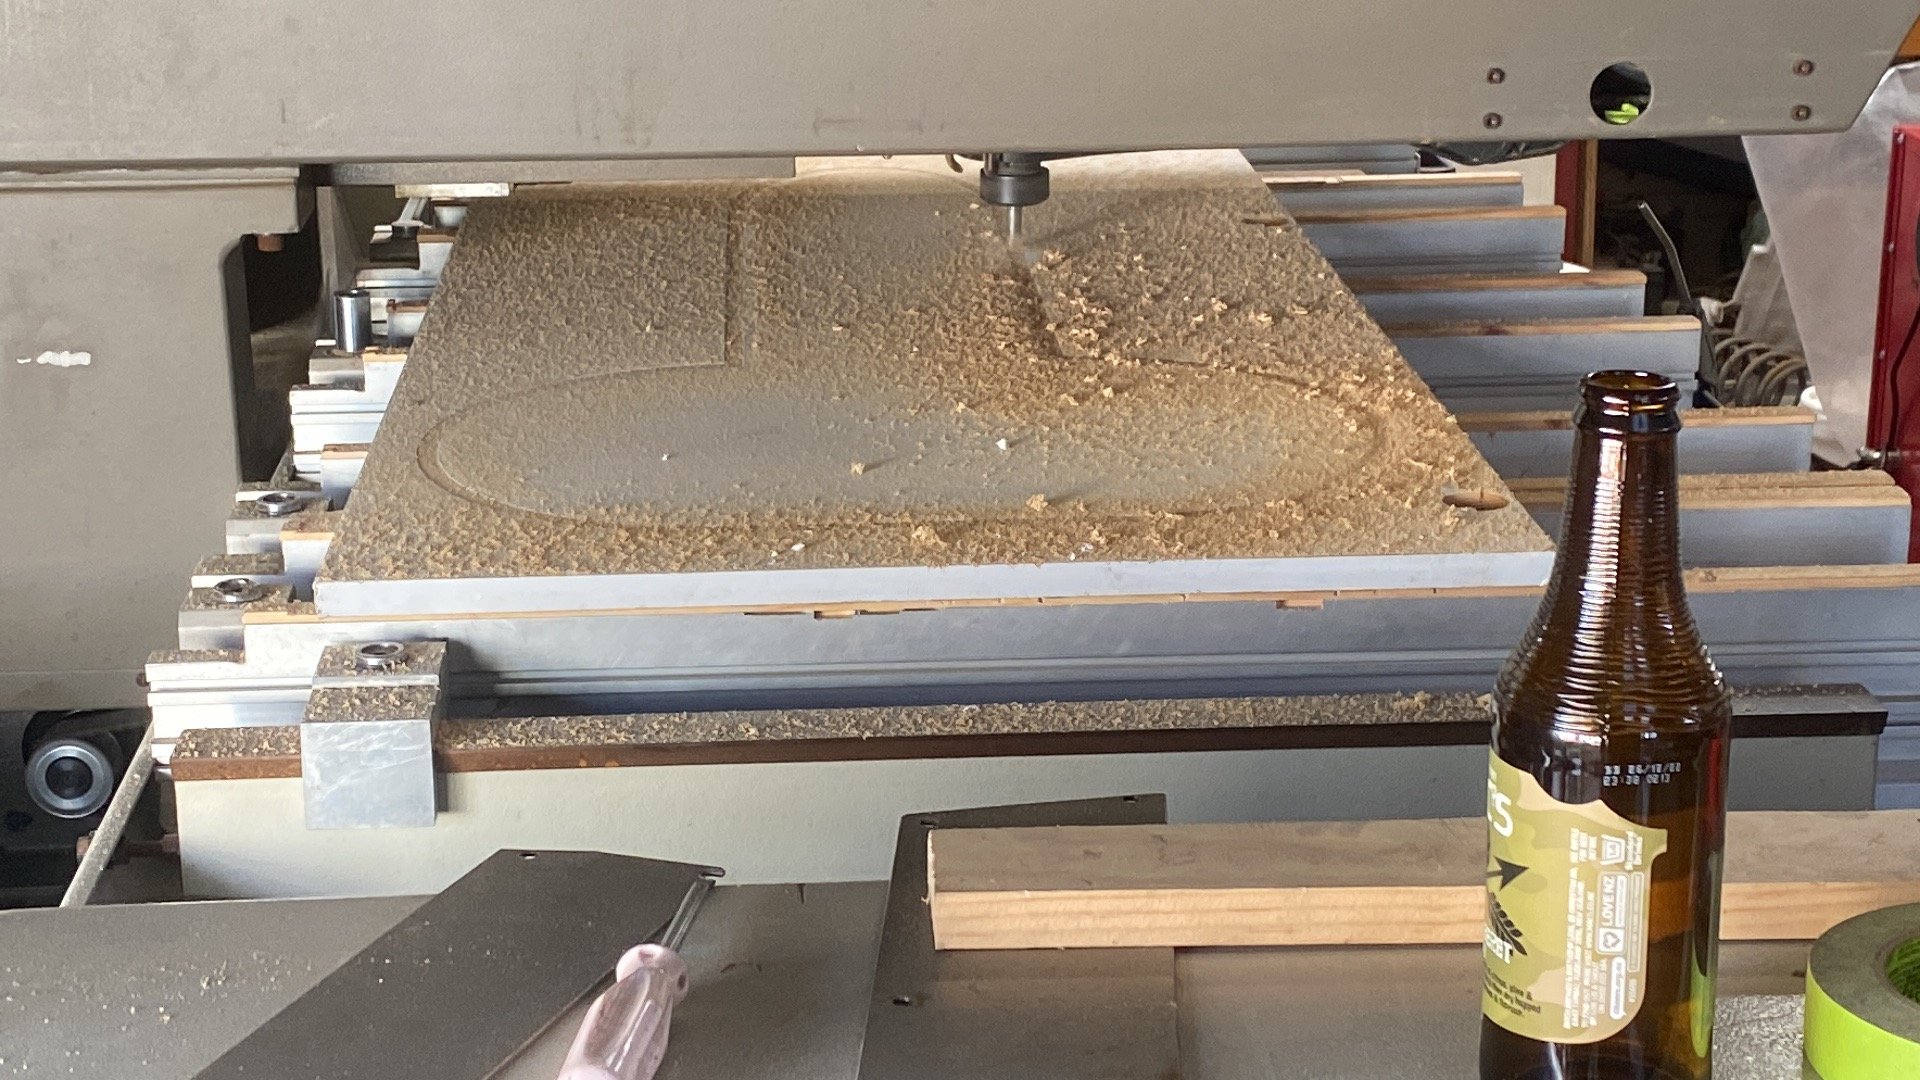
Mate called asking if he could borrow a jigsaw to knock up some decoys. Jigsaw? Pffft, bring the corflute over.
7 points
-
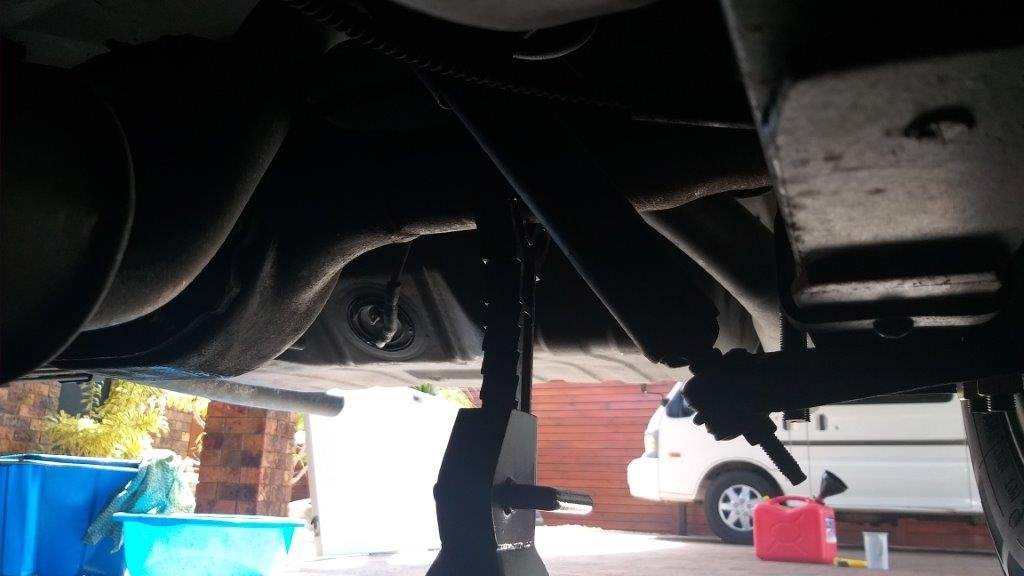
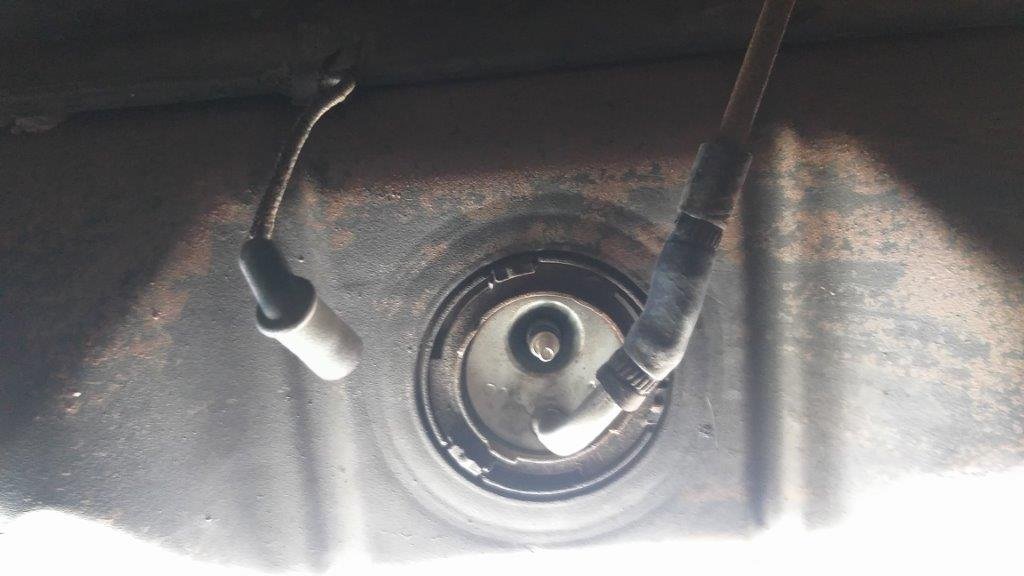
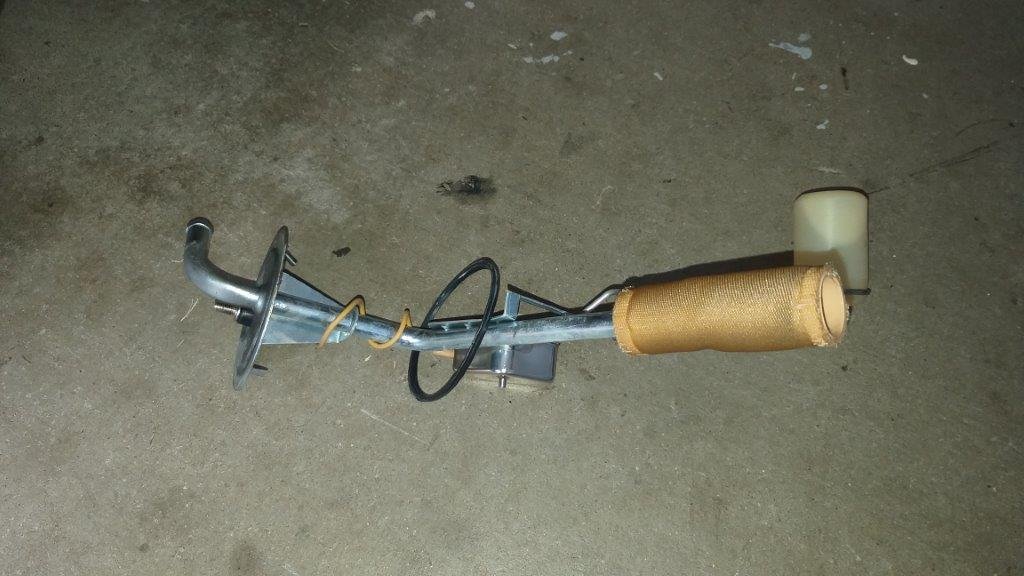
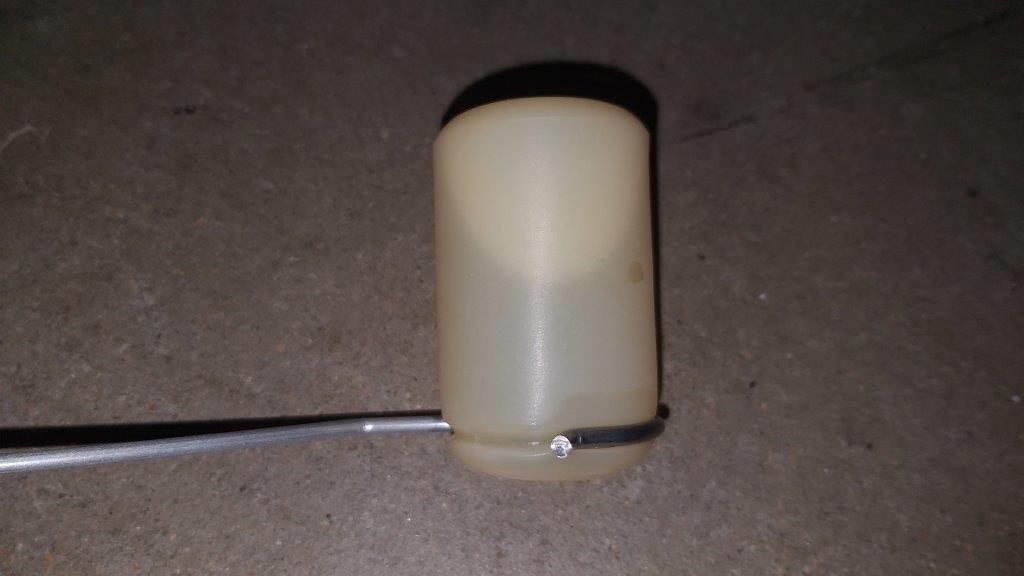
Woke up to the perfect morning for breathing in petrol fumes, so jacked up the Muzzy's arse to get the fuel sender unit out. The tank still had about 5 litres sloshing about in the bottom, but luckily I had a clean bucket close at hand and I managed to drain that off without incident. Popped the sender unit out and as you can see from the photos below its a fairly new unit. Took a close peek at the little plastic float and the cause of the non functioning gauge was instantly obvious :
7 points
-
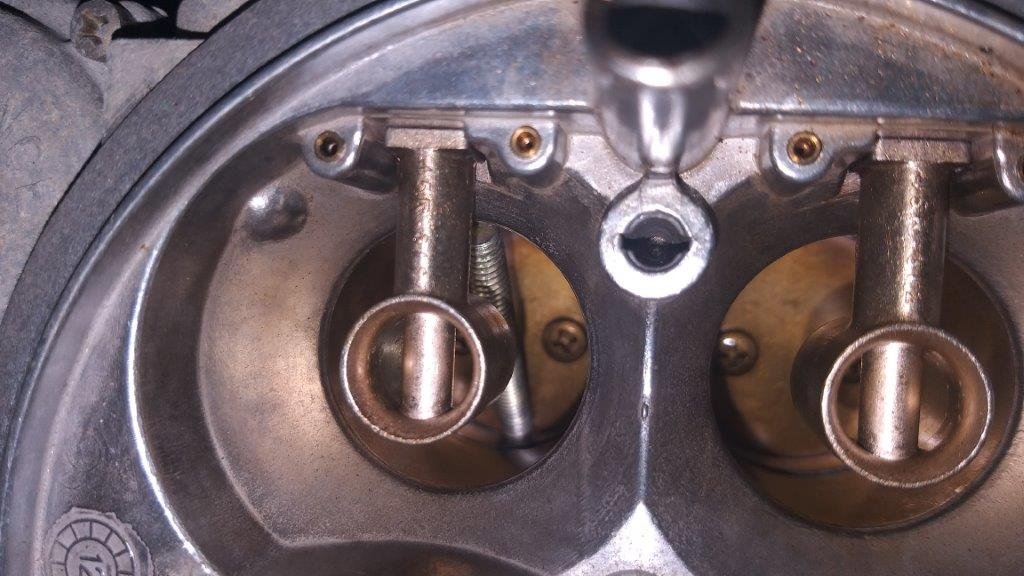
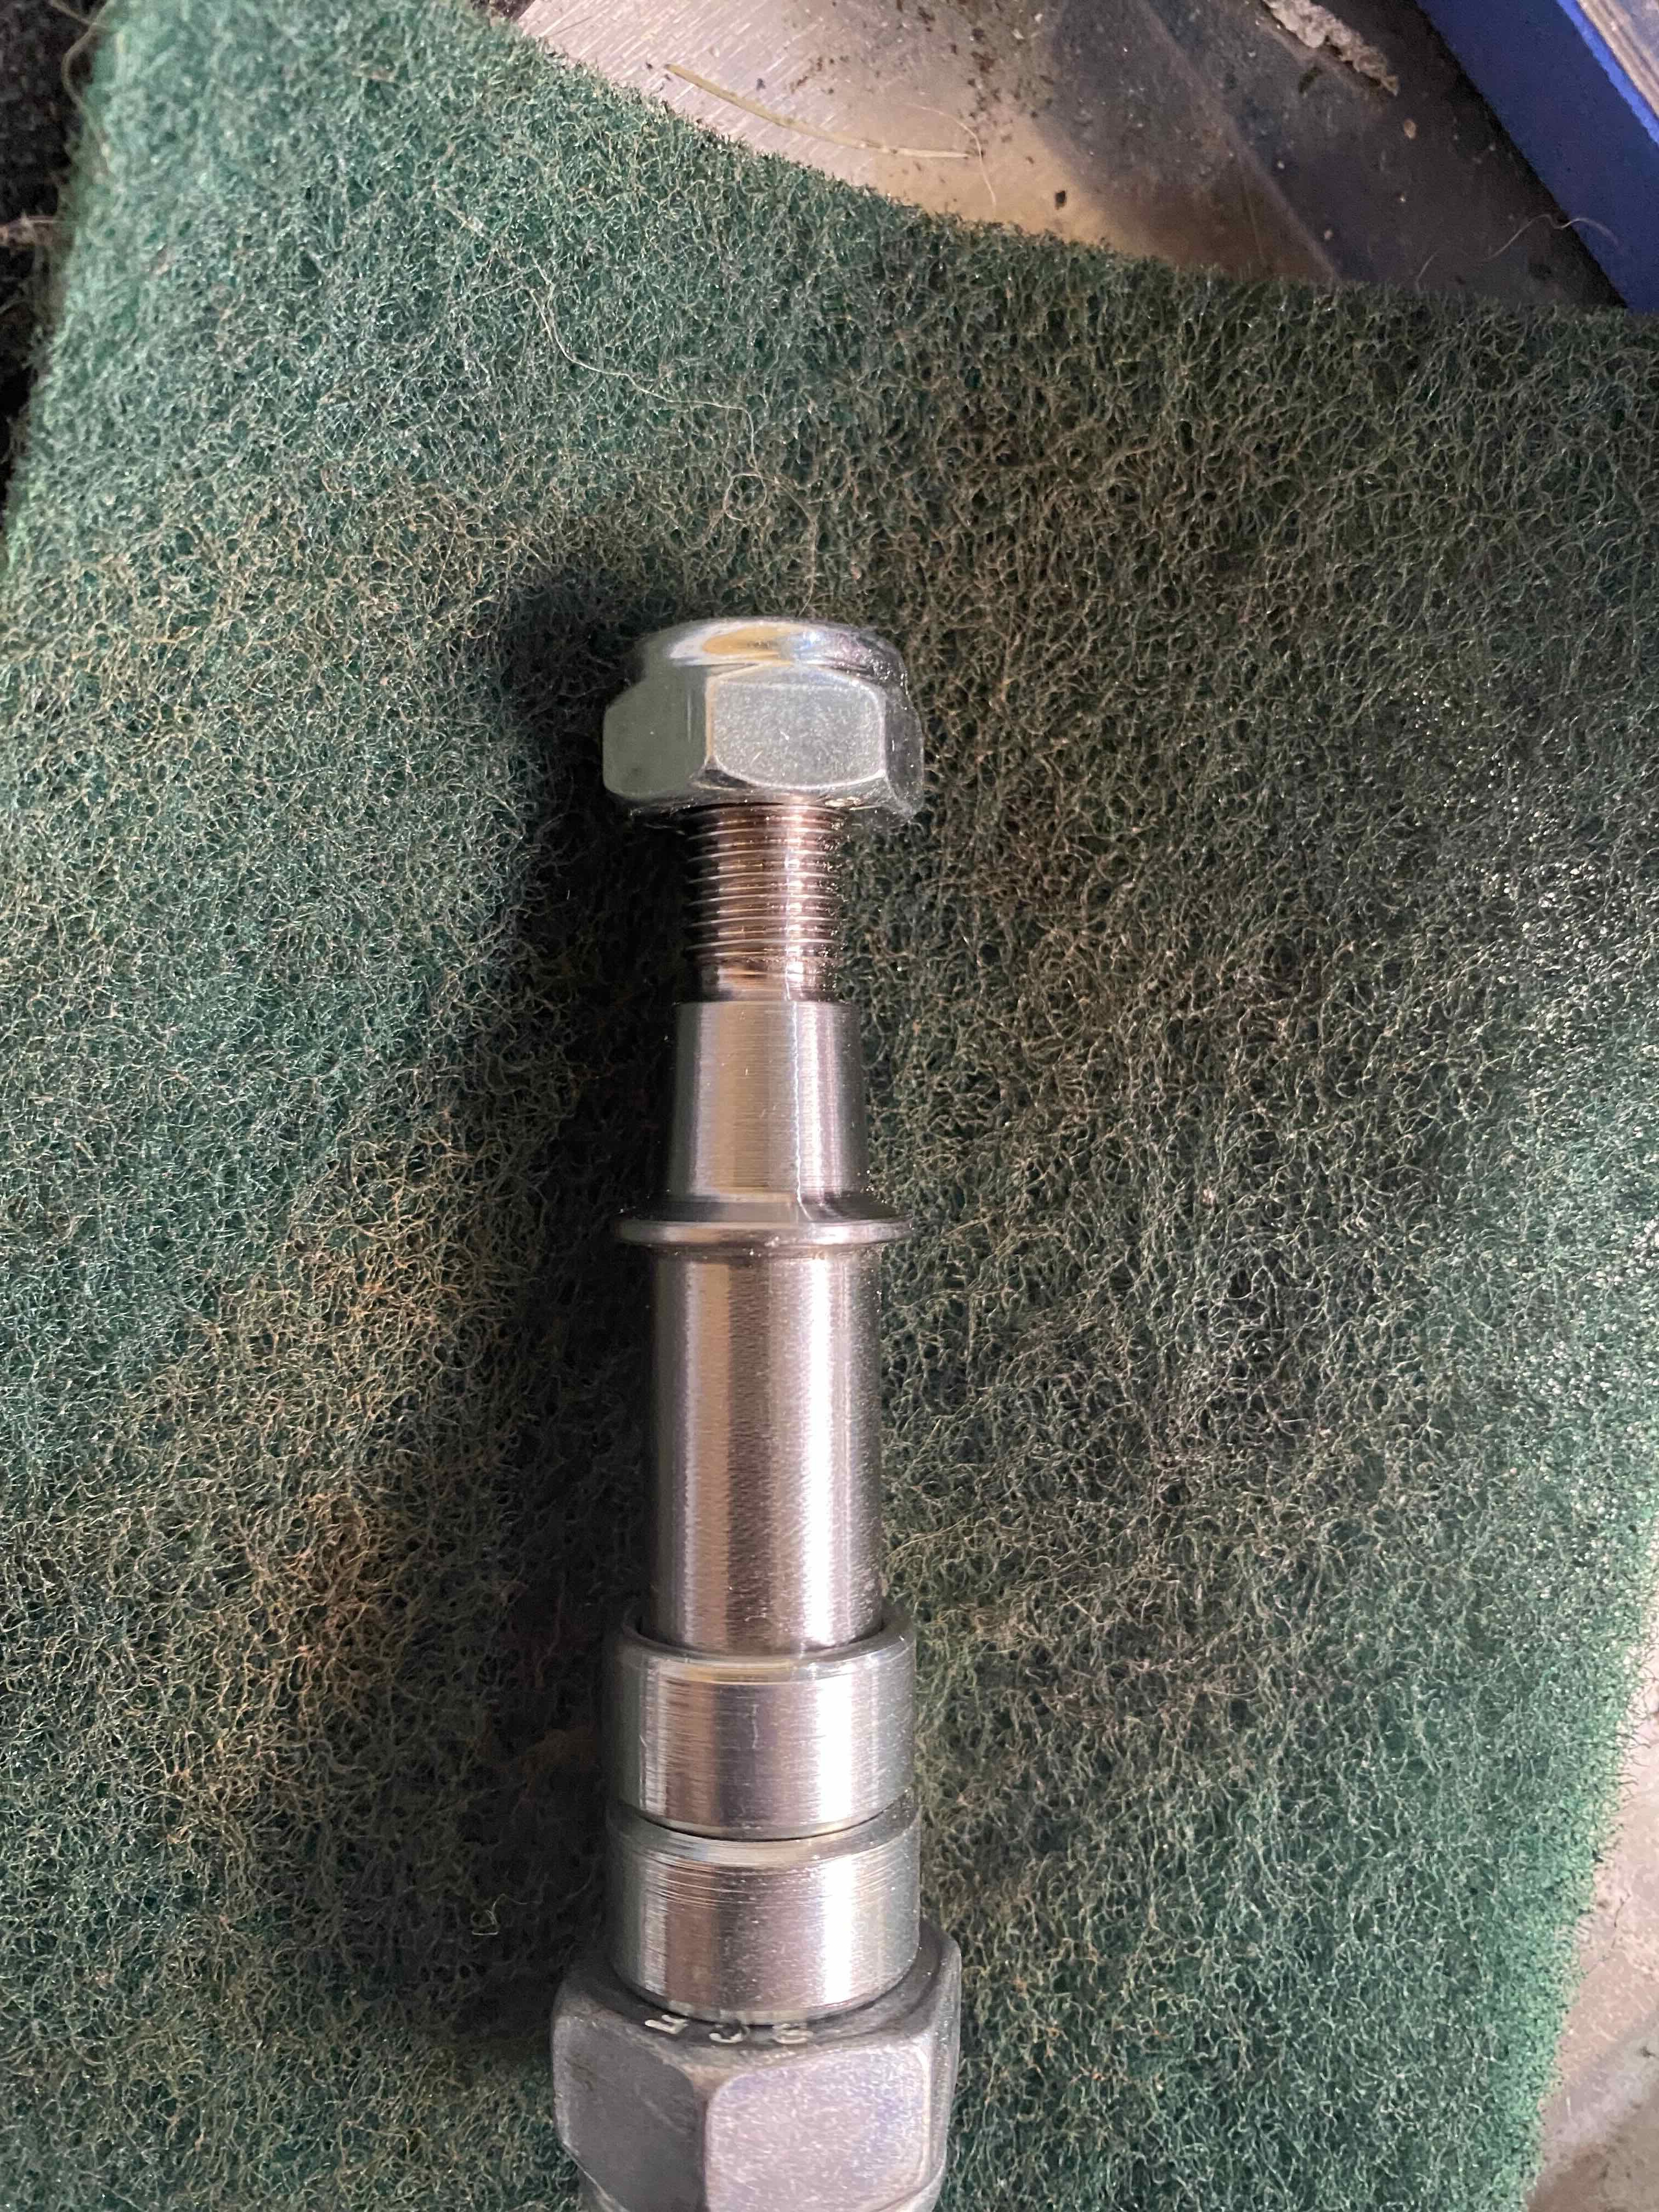
Jeez, I dodged a bullet today ! So, my fuel gauge hasn't worked from day one and earlier in the piece I traced the issue back to the tank sender unit. The good news is that the sender unit sits on the front side of the tank so at least I don't have to drop the whole tank to get the sender out. The bad news is that the sender unit sits on the front side of the tank so you have to drain the tank if you don't want to enjoy a 98 octane shower. As a result I've been putting the job off for a while, but now that the Mustang is almost about to begin duty as my daily driver it's time to address the issue. So this week I purposefully let my fuel level run low and then today I spent a good part of the morning cruising around the neigbourhood trying to run the tank dry. Yep, I know endless cruising around in a rumbling V8 is a thankless task, but someone has to do it. After a bit I started to get a hesitation on turns so figured I was close to sucking fumes. Headed home and managed to finally run out of gas two houses from our place. Bugger pushing the car home so I walked home and got a litre of fuel that I had put aside in an old milk bottle. Tipped the litre into the tank and thought I'd prime the carby with a few drops to make the starting easier. Removed the air filter for the first time ever by unscrewing the big center wingnut and carried it home together with the empty milk bottle, then back to the car which fired up easy enough and I idled her home. Back in the shed I figured I'd refit the air filter, but when I came to fit it the threaded rod that the wingnut goes onto was missing. My first thought was that it had dropped on the road while I was walking home, so I walked back down the road keeping a beady eye out for the threaded rod, Nyet, no sign of it. Retraced my steps home and checked out the shed floor where I had placed the filter. Still no luck. Checked the valley between the inlet manifold and the rocker covers. Nope .. not there. Got my torch out and took a gander down the carby venturies and guess what :
7 points
-
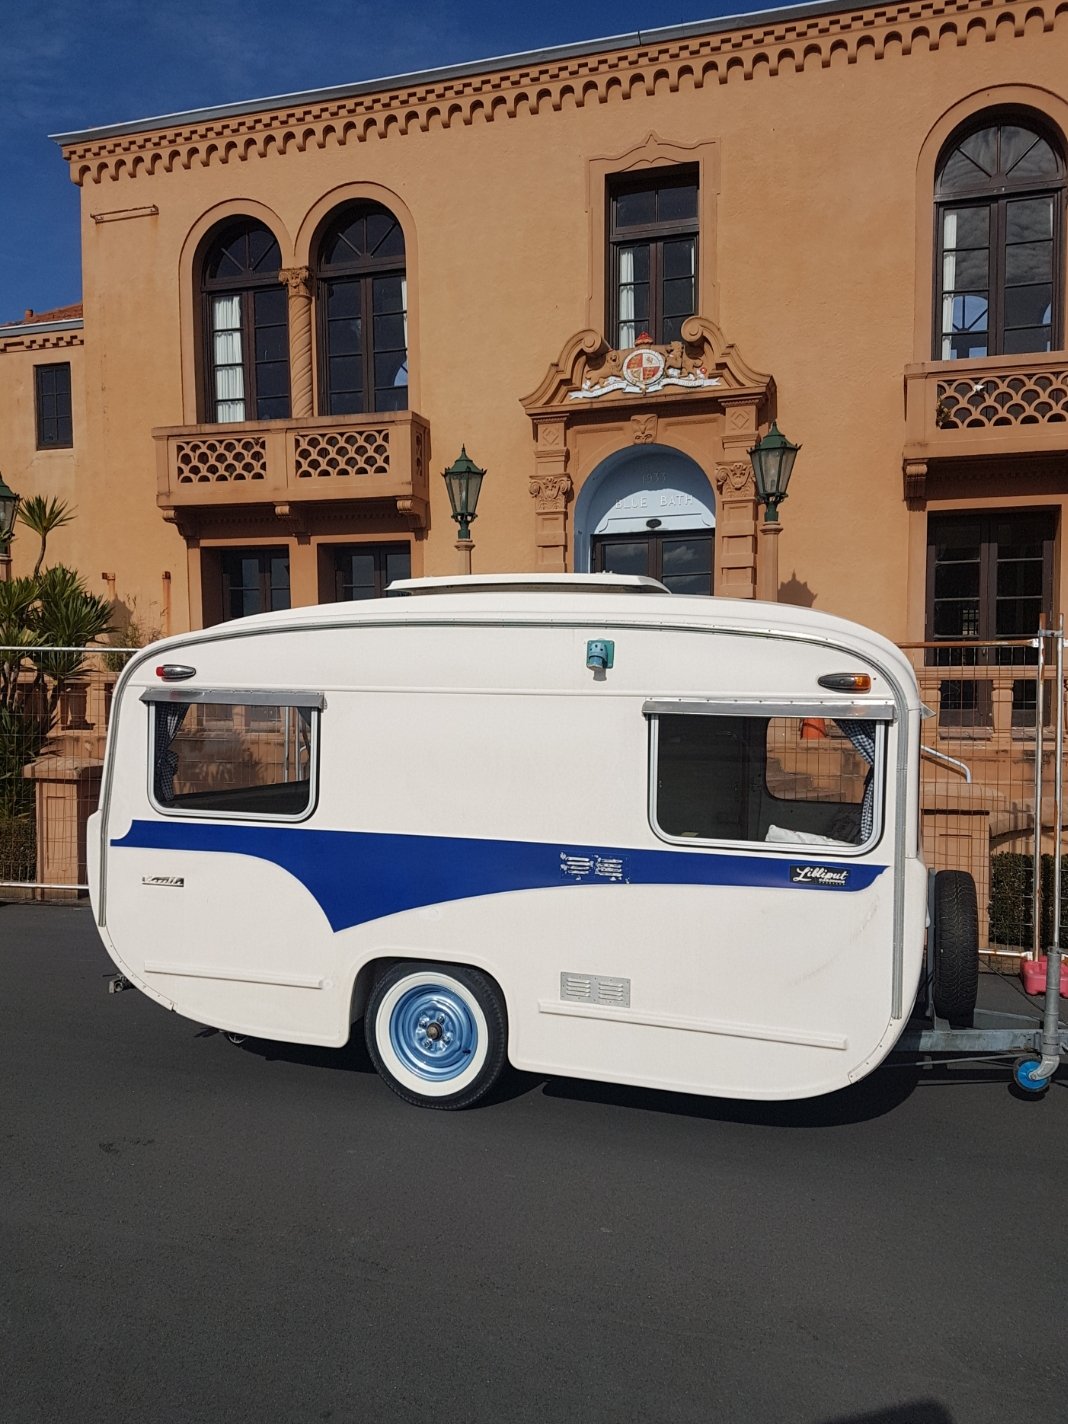
So prior to our ownership, little was known on the history of these Van's and how iconic they have become. Briefly they were designed and built in Auckland by Bruce Webster in the 1960s and through to the 70s. They were constructed in different variants from a 10ft, 12ft, 12ft 6", and the 10'6' Gazelle which was the last model and most common. Approximately only 300 odd were ever built, and the cool thing is all of them are uniquely different. Construction materials consisted of Ali over ply, and full fiberglass. Our Gazelle is the full fiberglass with a plywood floor and steel frame. Back in 2017 and earlier a thorough investigation was done to track down as many of the surviving vans out there as possible and to document the history and to share photos and knowledge of each and everyone of them. All this information and knowledge was complied and featured in a coffee table style publication called One Mans Dream, the unique world of Lilliput Caravans. Our's is featured in there too from the previous owner/s, cool! This book is available to purchase and is possibly found in your local public library, well I found it in the Tauranga library
6 points
-
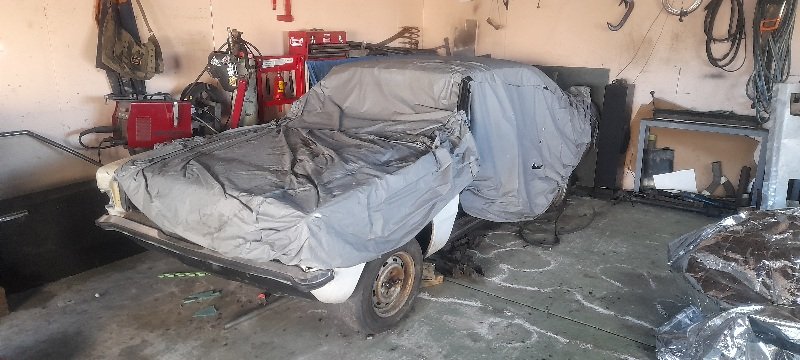
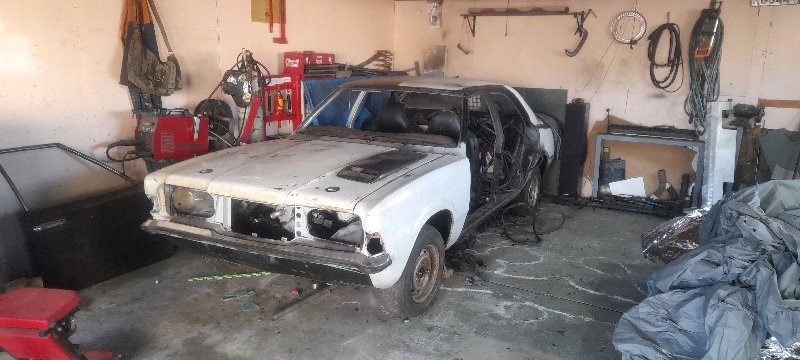
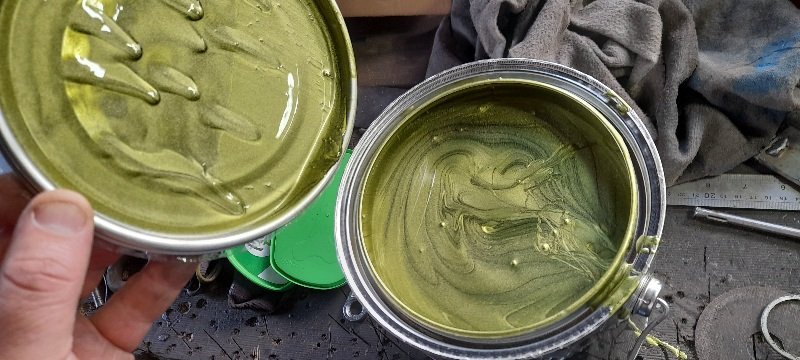
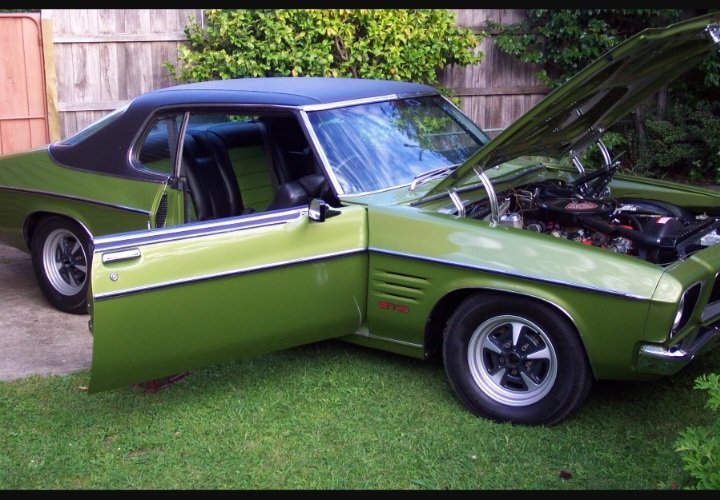
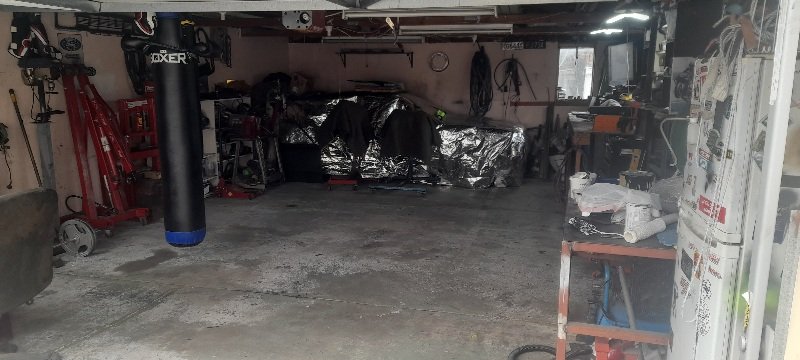
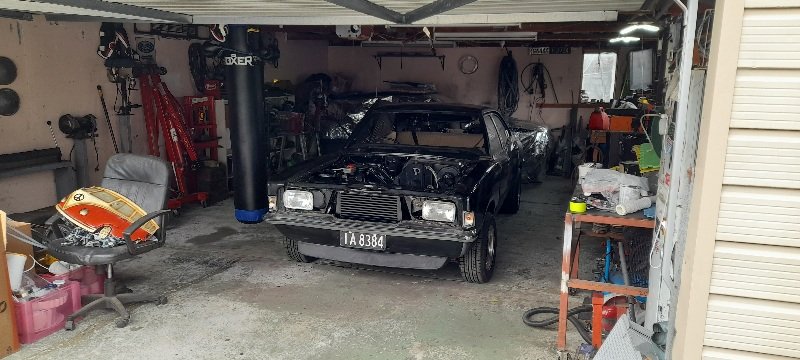
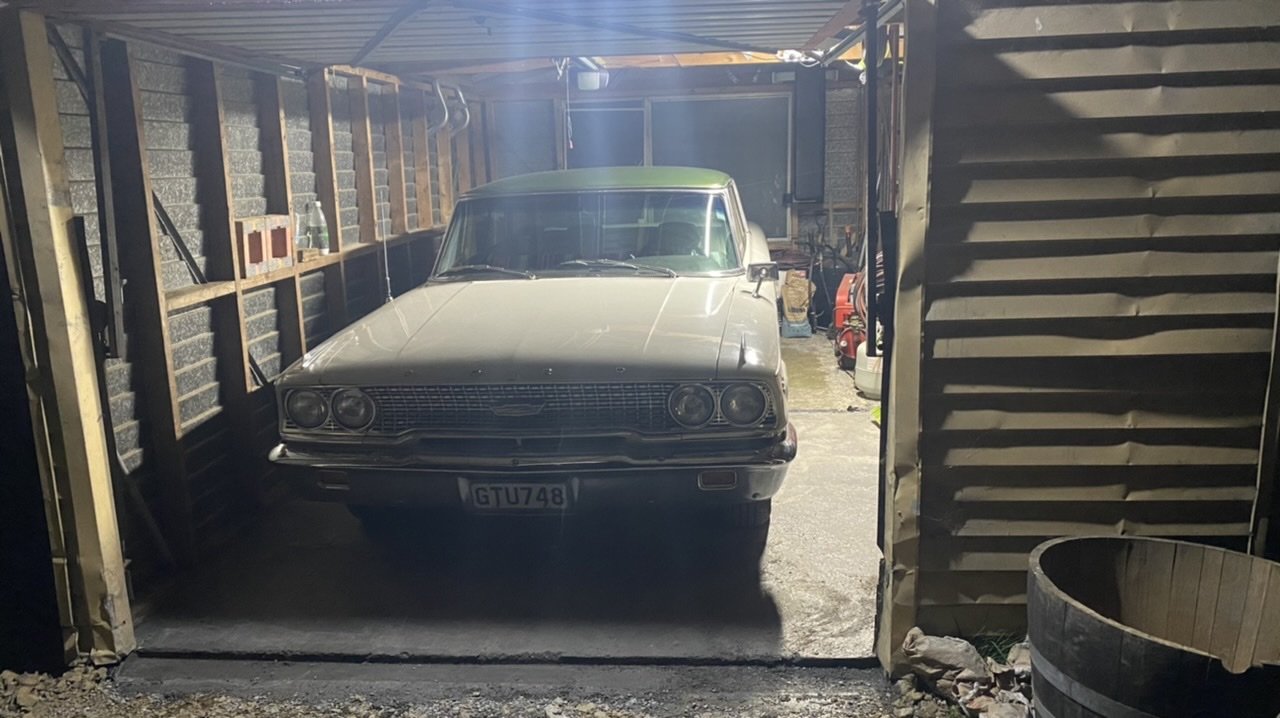
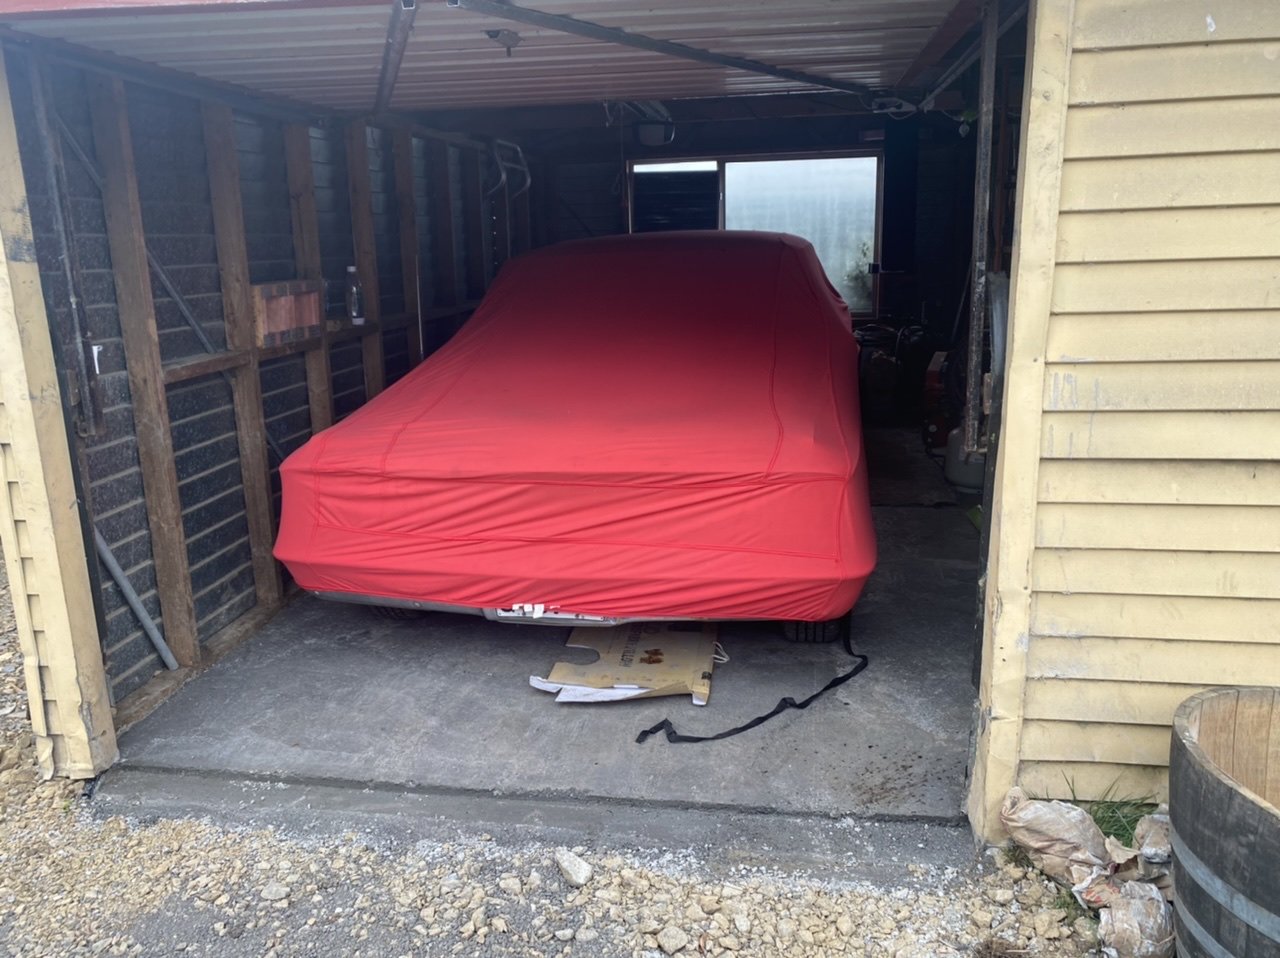
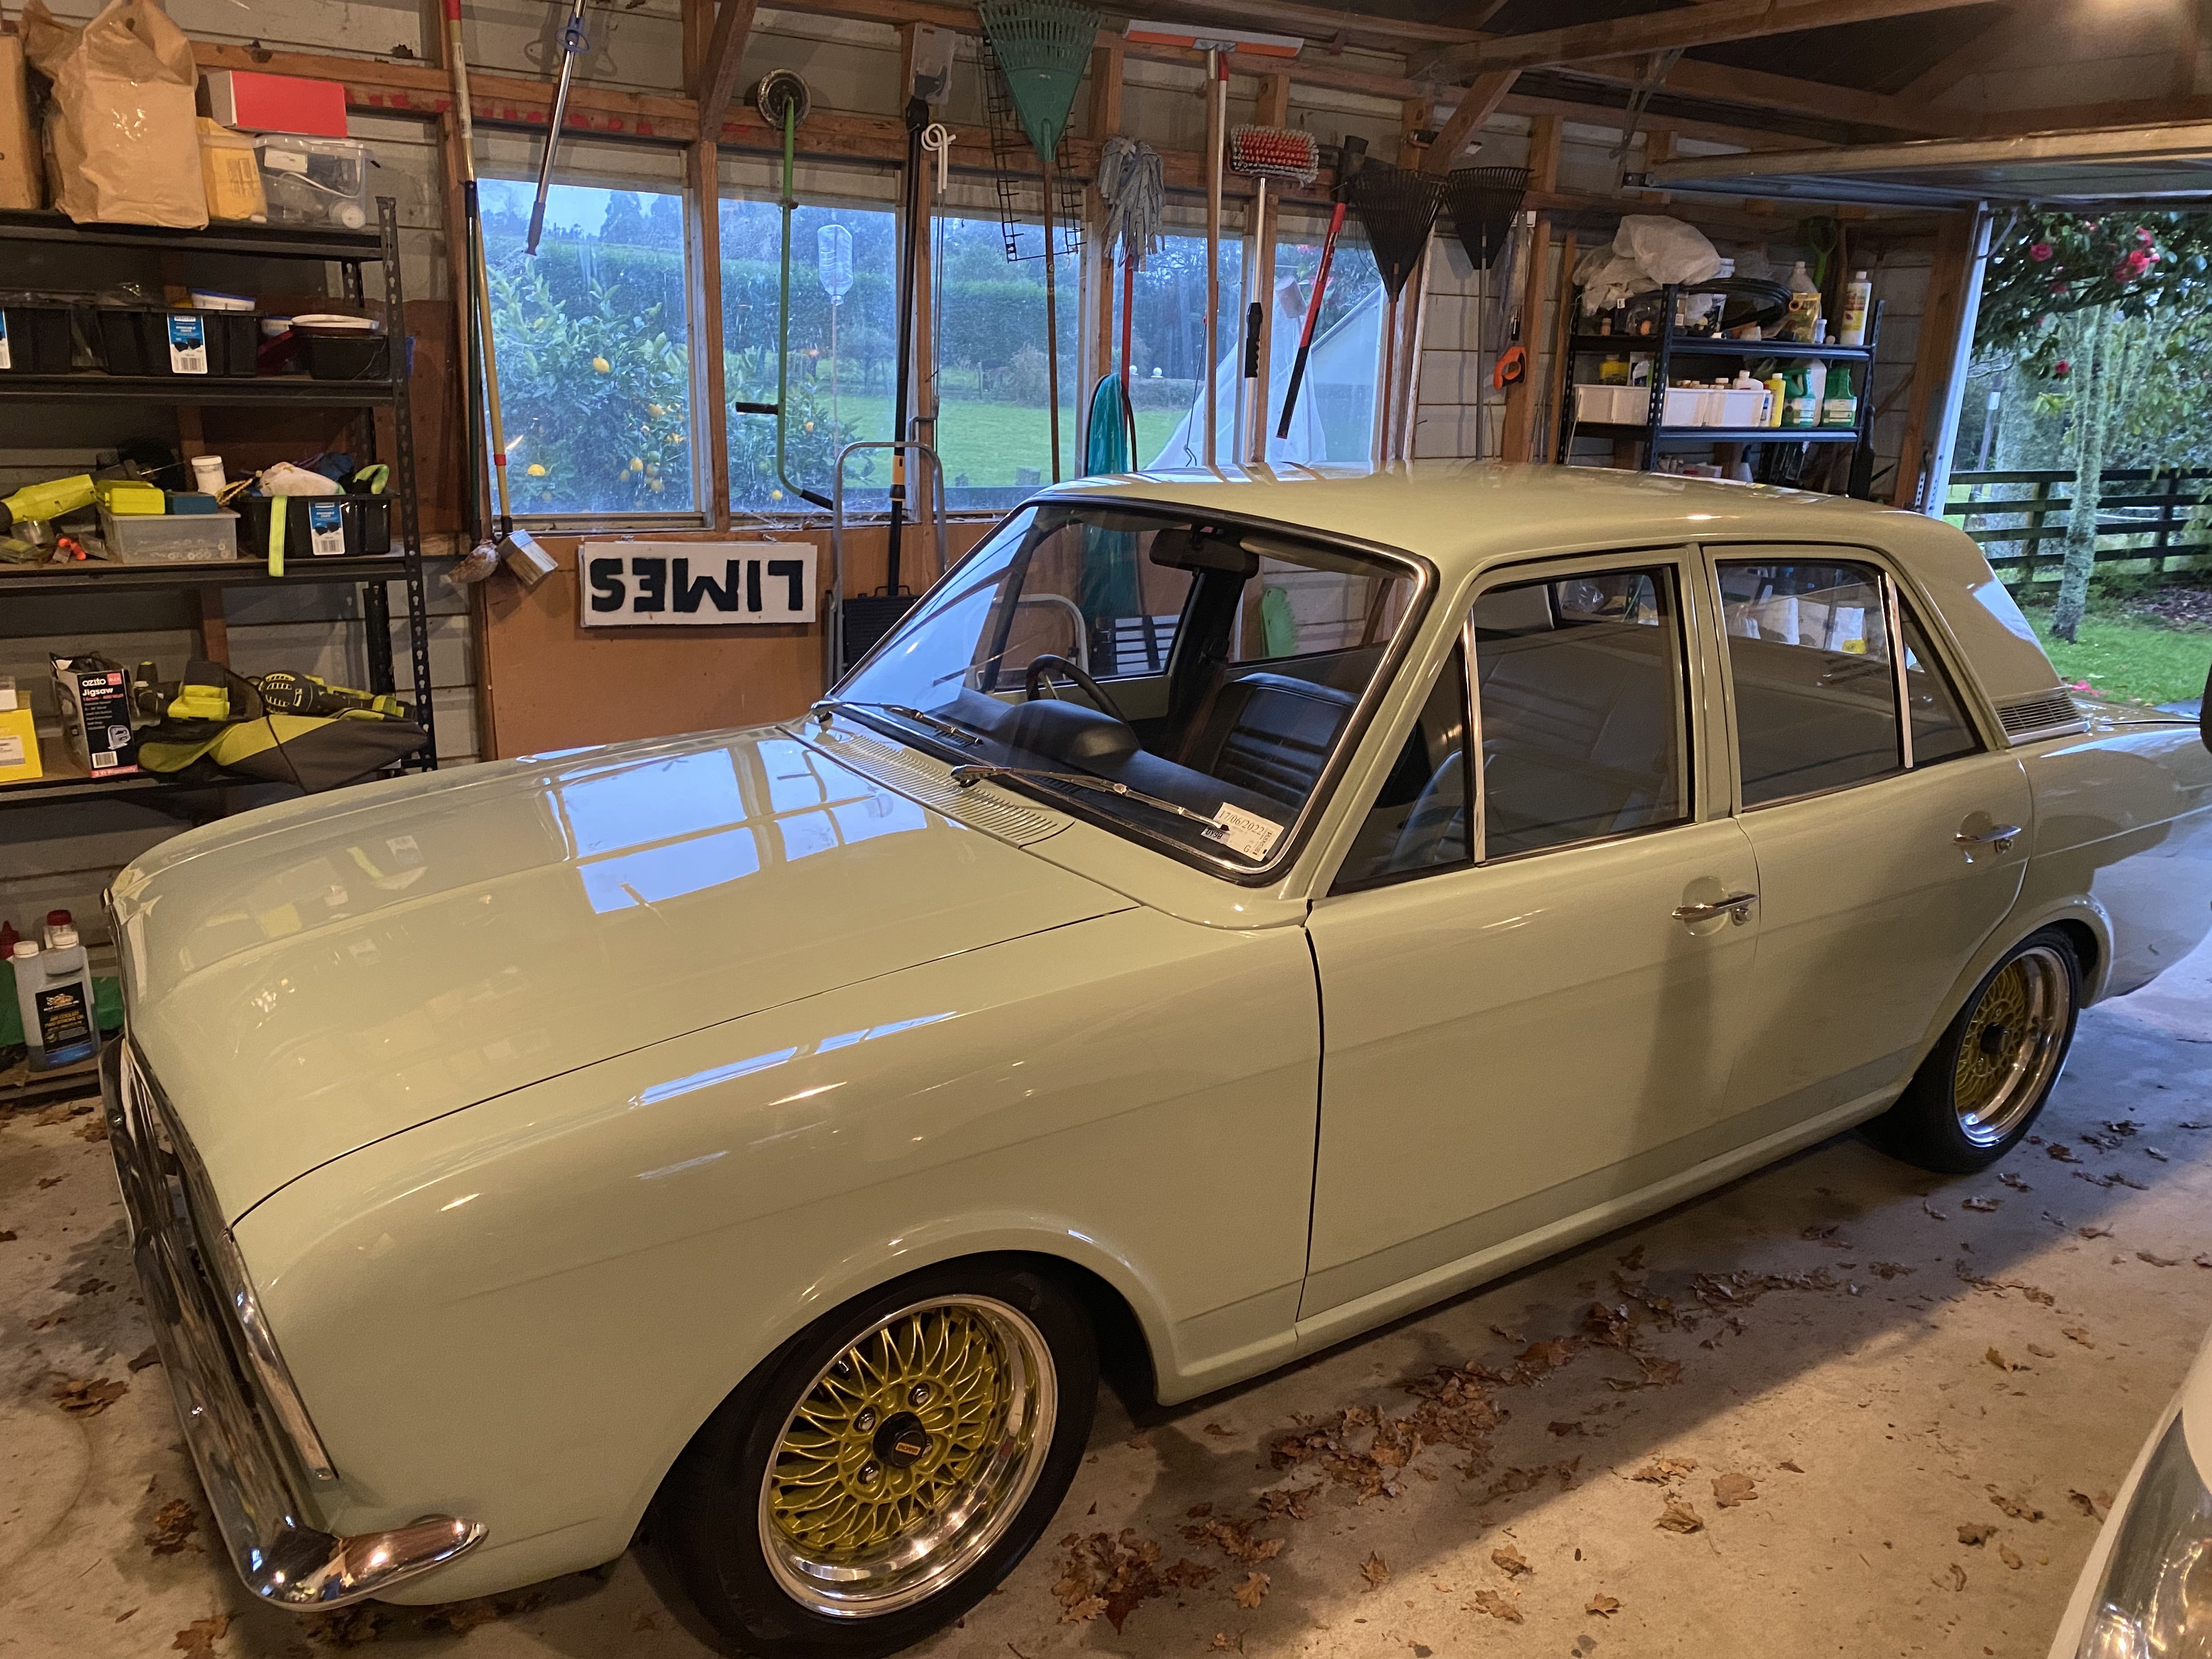
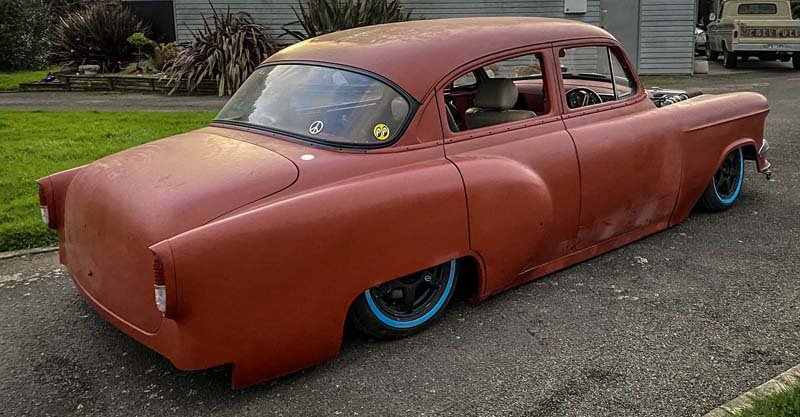
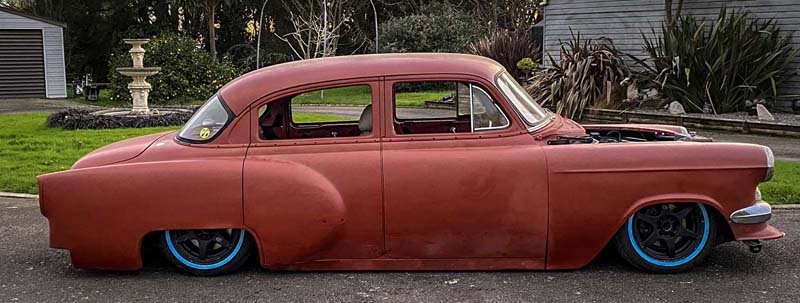
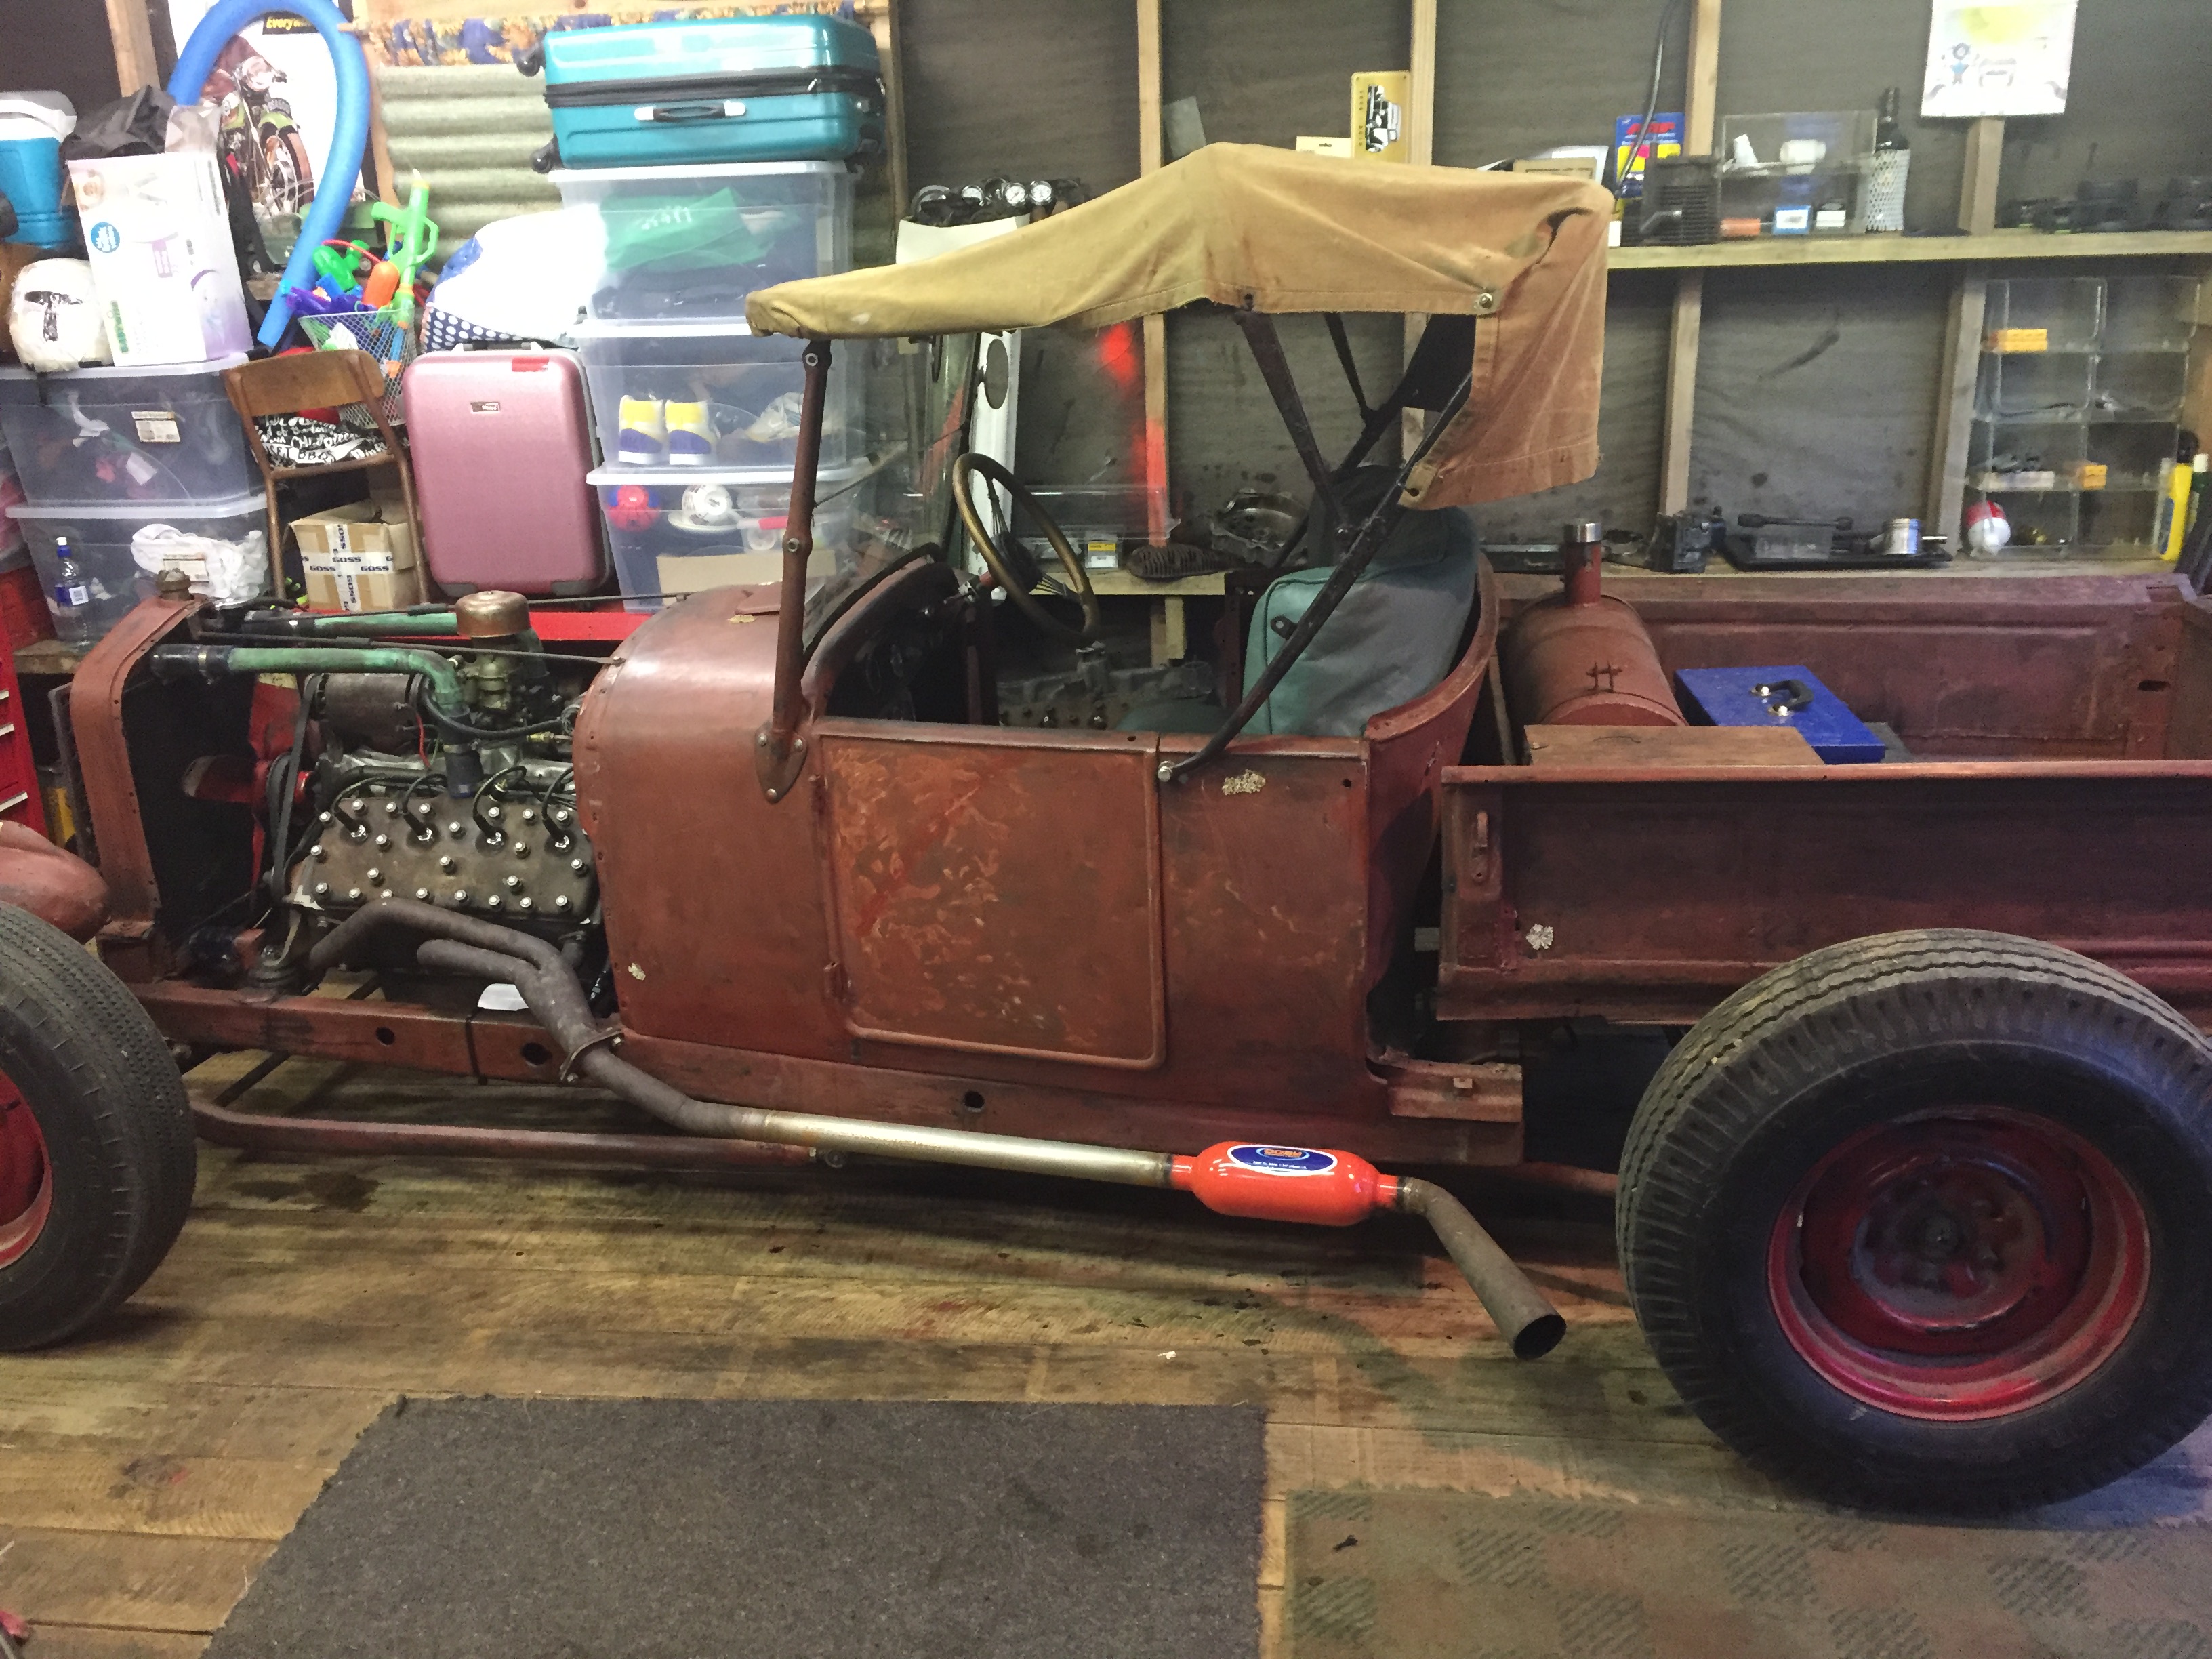
well dues to postage issues and time delays I'm not going to have this running and tuned but end of next month.. so I have decided to pull her apart and paint her now instead of next year sometime.. just do it now and once she is all together and running she's all done just need to get legal.. as for colour I allways wanted green like ford furniture green .. but then started looking at dark metallic browns ... and yhe fucking bang just like that ..a xu1 torana pulled out of a petrol station last week and sat behind me .... and I instantly thought that's a stunning green.. so I got the paint and supplies to start the job.. 1970s holden lime green metallic I also decided I need more room in the garage to be able to start doing body work and pull all the panels off the car. moving the white to the back of the garage was the best way... been years since a cover was pulled off this one. and after a shit load of hours this weekend I'm almost trade to start pulling panels off. body does need a fair amount of work but I won't be digging to deep.
5 points
-
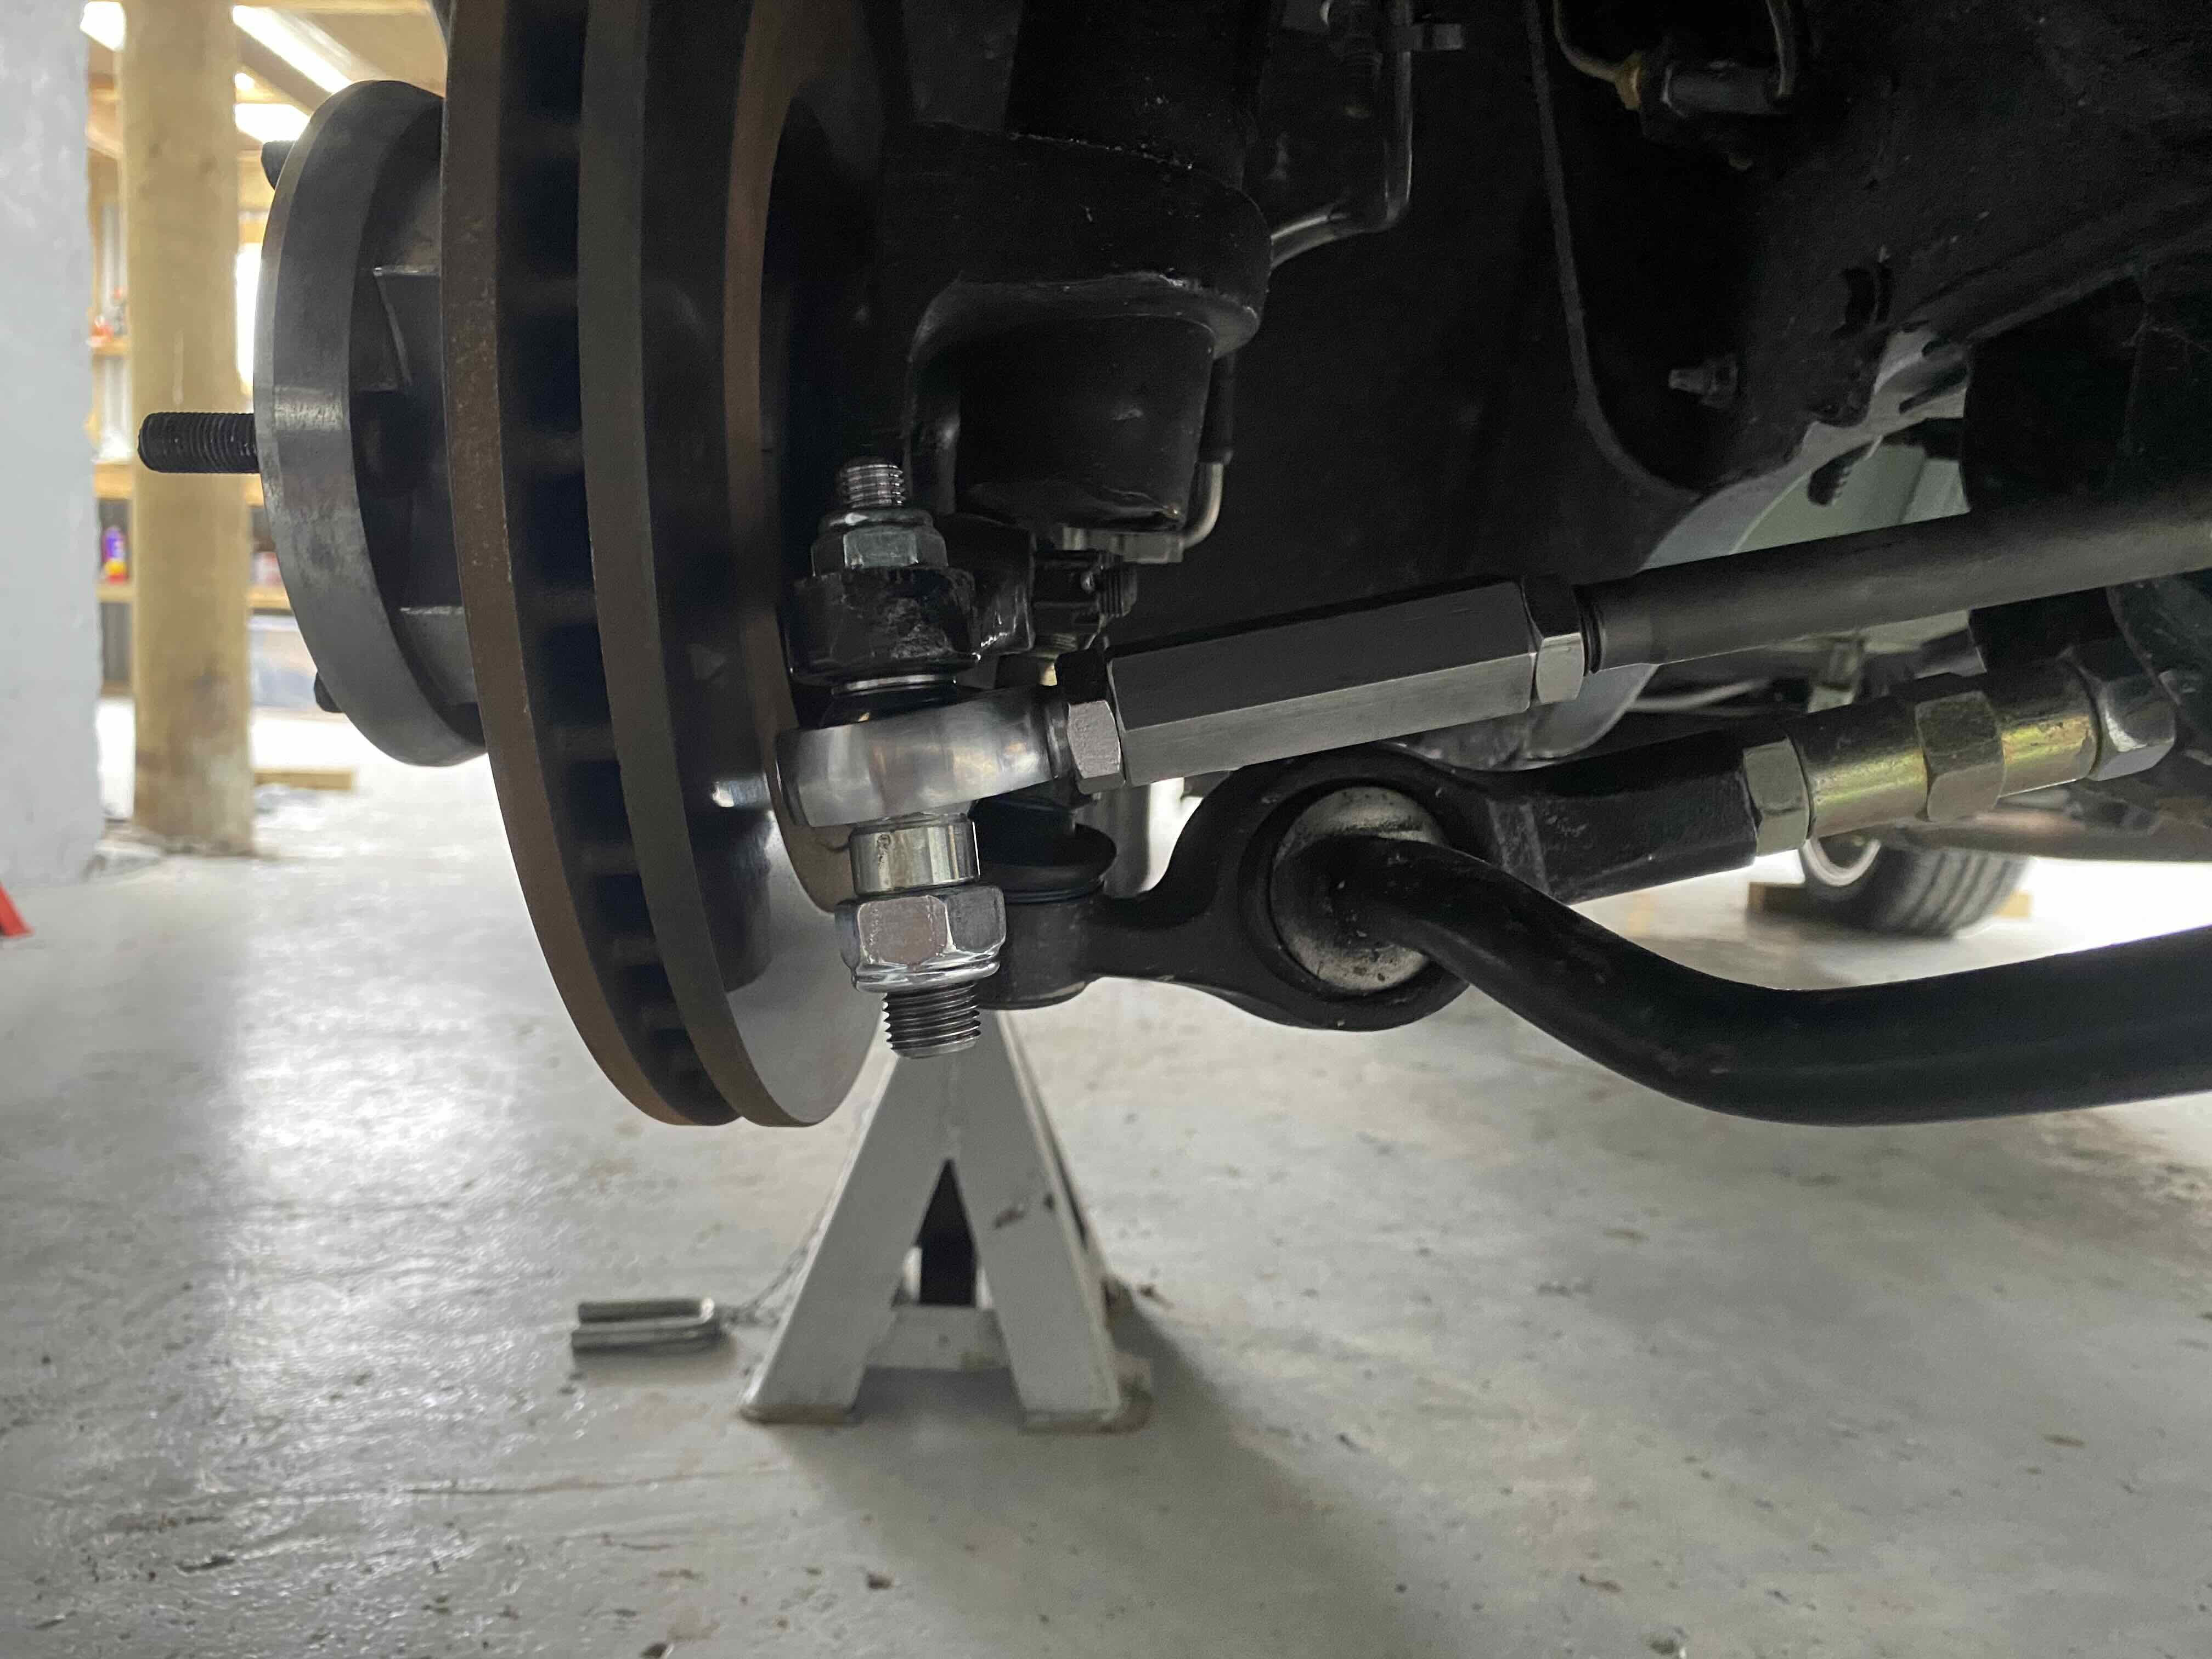
Rod end conversion bits all sorted now and fitted. Booked in for final alignment and bump steer check on the 19th and then will be on its way south for cert in Levin. Took it for a pre-cert wof type check at Douglas automotive week who gave her a really good going over and there don’t seem to be any obvious face palm issues that I’ve made/missed- bump stops required for rear, and heat shields for my surge tank and front brake pipe. I was having trouble with the handbrake working, previous master for the rear was pushing too much fluid so the shoes were adjusted to get a passable pedal feel but meant the handbrake wasn’t really working. Tried a smaller master for the rear And seems to have sorted the hand brake and given better pedal feel. Not too much left to do now, need to sort bolting the spacers to the Simmons wheels, bump stops should be too far away and matching tires for my other set of wheels. Hoping have it all legal by labour weekend for a bit of a road trip.
5 points
-
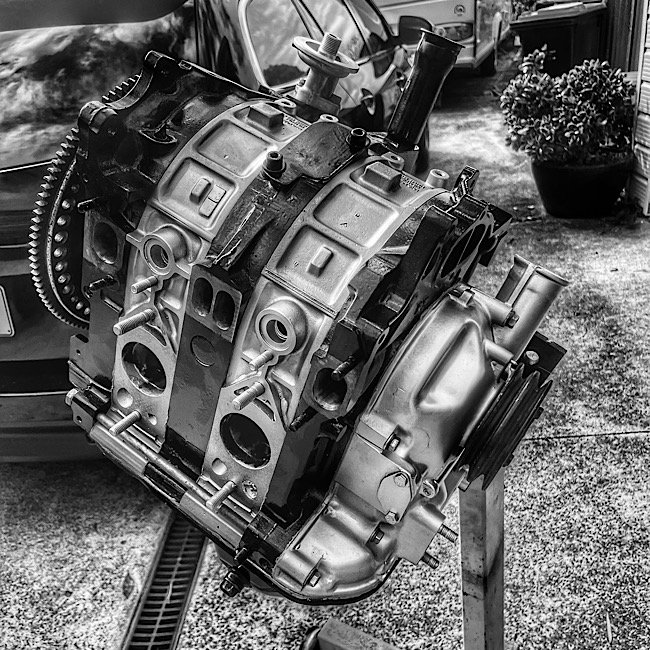
Omg omg omg it’s baaaaack. this has some epic compression. need to get hold of some 20mm frost plugs to fill the coolant passages at the intake, torque the flywheel bolts then bang it back in.
4 points
-
Next thing to sort out was tuning. I wanted to get this and the cooling sorted before I get it certed, because I didn't want to have to redo cert if the carb was going to be too hard to get right and I end up swapping to efi I rebuilt the carb when I swapped the motor in. When I had the whole setup in my VG I had a guy in Australia modify the carb to work better . From memory it was pretty good apart from a little flat spot at one point It's taken me a while to re learn about carbs and turbos again as there's a bit of mucking around getting them to work right I had some issues with lean backfires where it would pop back thru the carb at light throttle which was a lot worse than it was before . I swapped the old adjustable blow off valve back onto it as the one I put on it this time was a bit weak and would blow off early, with a carb turbo it's quite easy to have boost above the carb and vacuum below it, so the valve would open and leak boost which I think was doing wierd stuff to the carb So that made it a lot better Also put bowl vent extensions back on And had a fiddle with the boost referenced power valve. This seems to be where the solution is if I can adjust this a bit more finely
3 points
-
Finally made a start with making the shifter boot work. Did some cad work with the crv and orthia shifter surrounds Traced it onto some metal I'll need to bend/make some brackets for the wider section as the screw holes are a different height.3 points
-
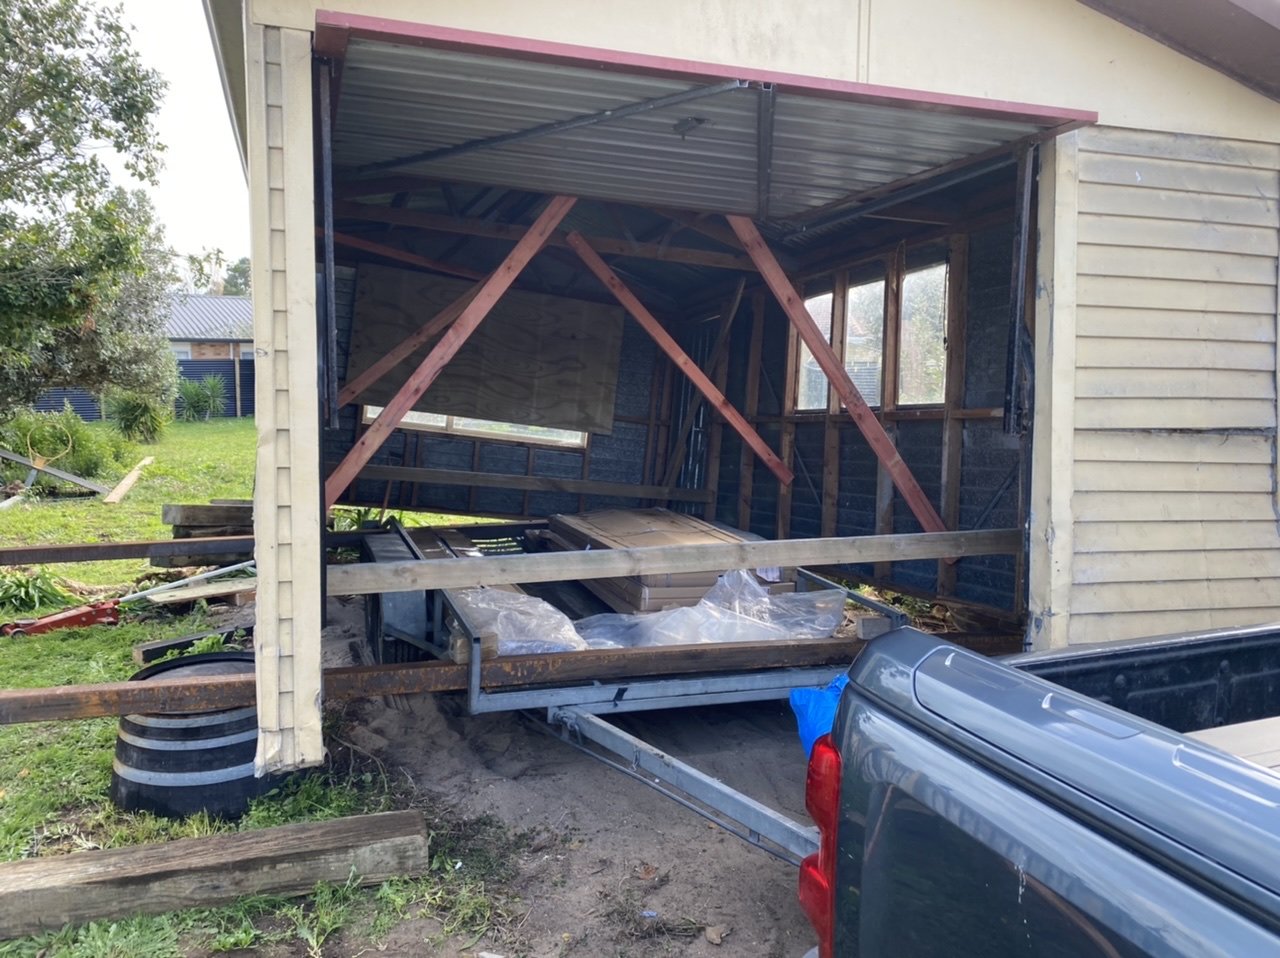
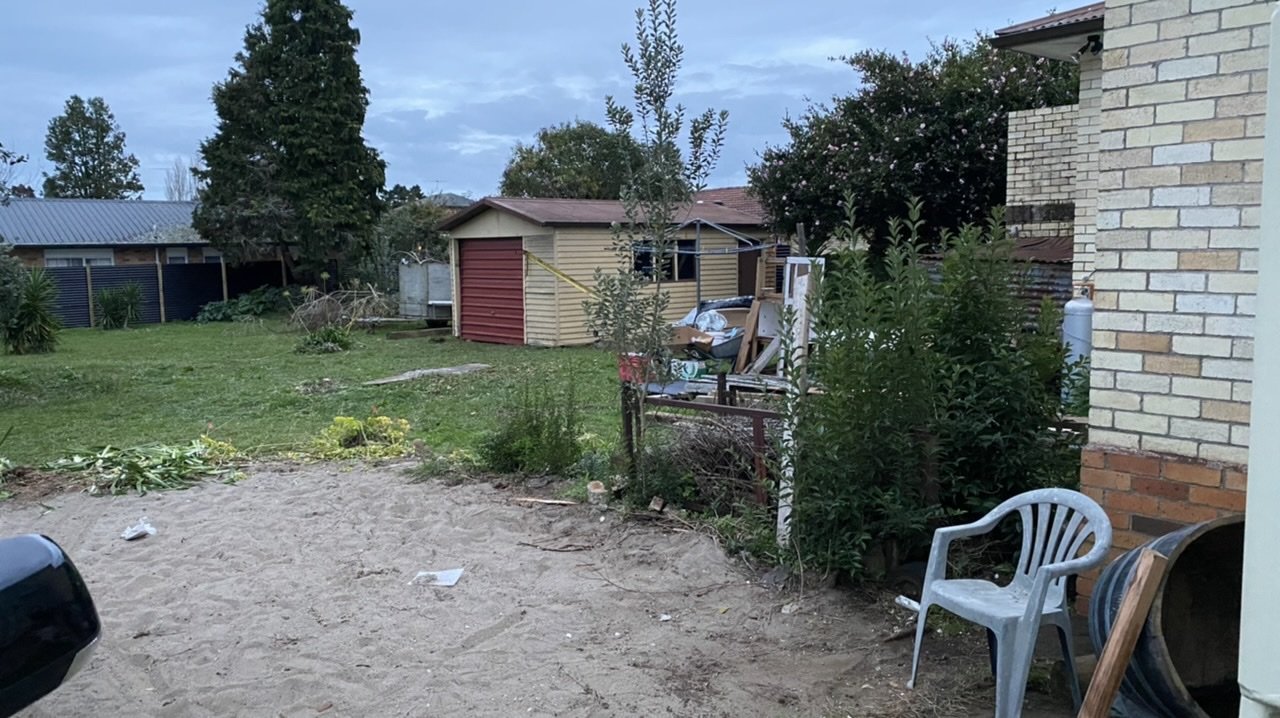
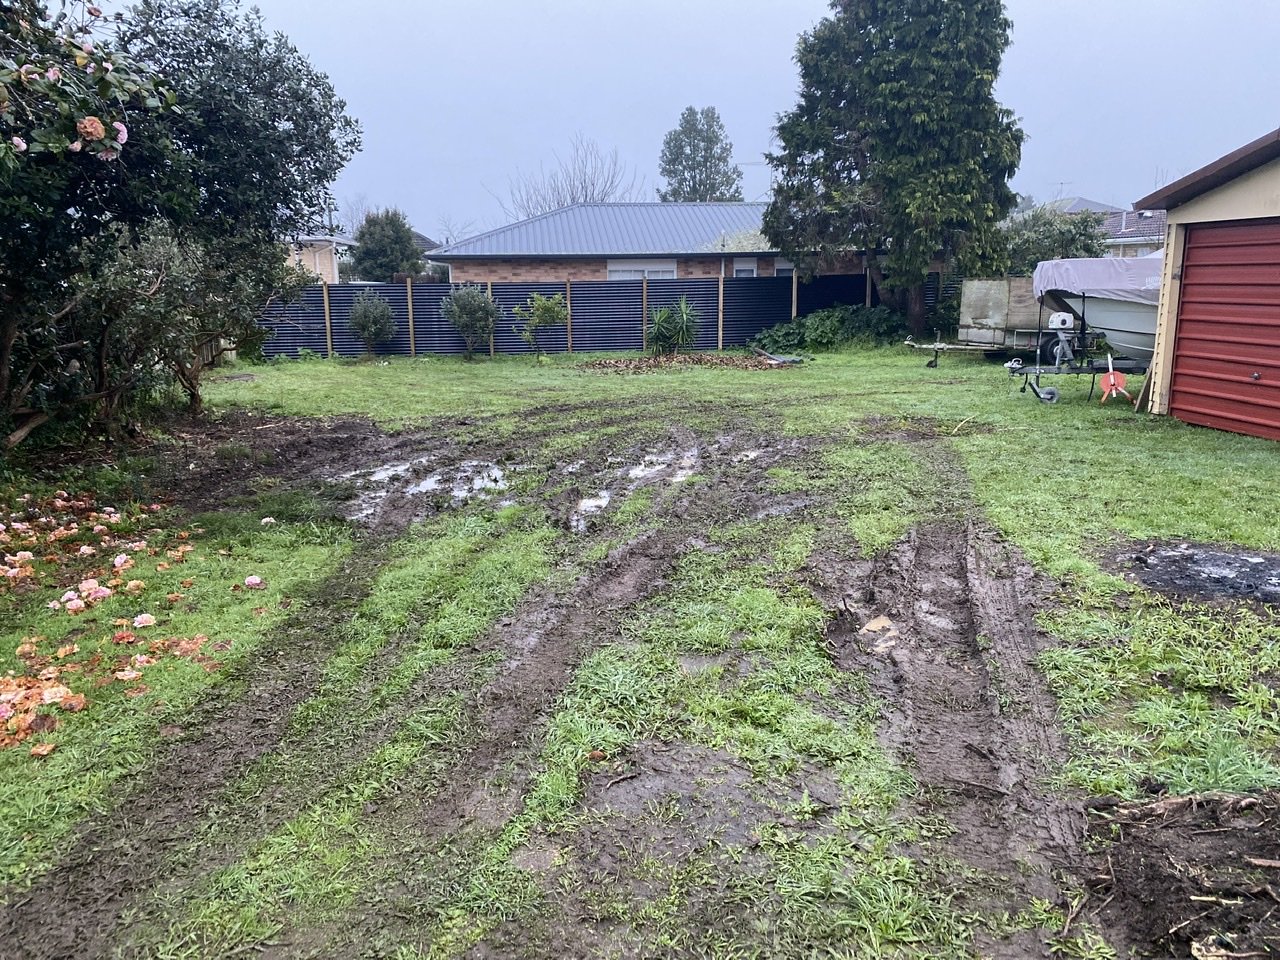
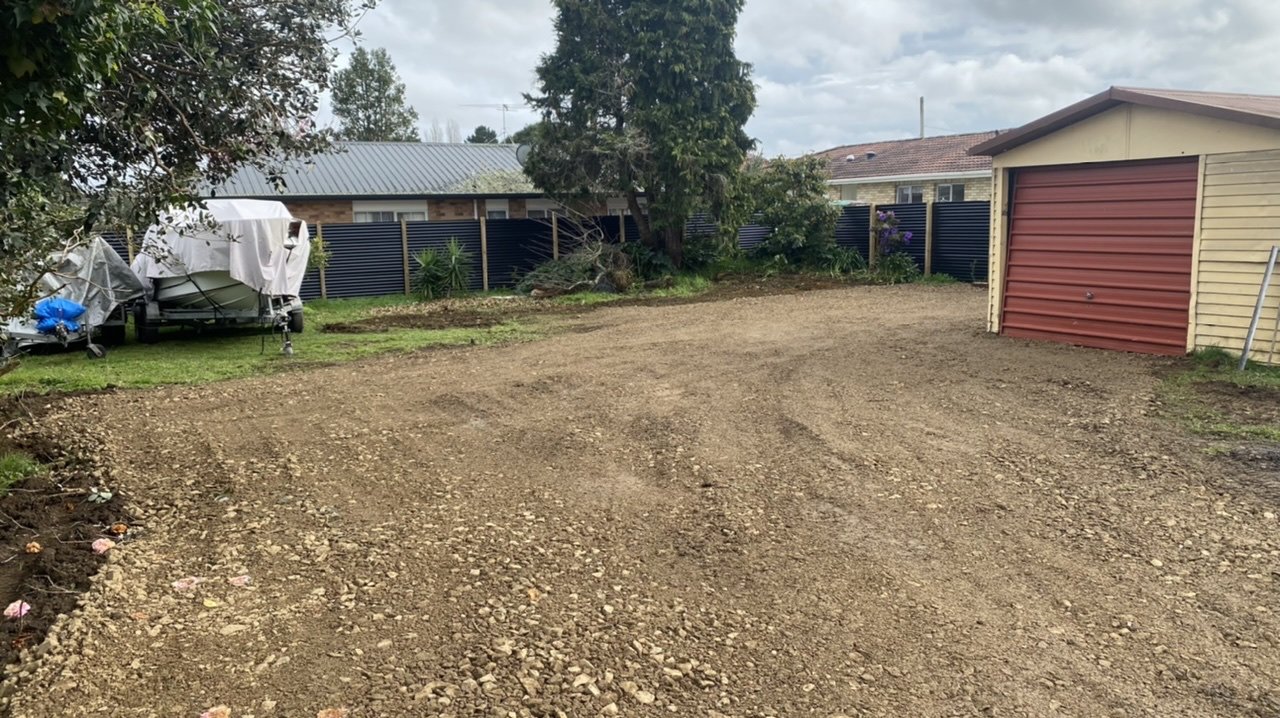
Not much happening, but a scenery change for the car.. been sitting up at the parents since my breakup early last year, been a year since I moved into my rental and finally have a garage secure and dry enough for it to park. Firstly it involved moving the existing garage around the back as it’s current position didn’t allow good access for all my other stuff I needed to move from the parents place.. the old man and I braced and jacked it up to put on the car trailer and back it into its new spot.. Next required some GAP65 to be laid to reduce the mess. I love my grass, but I love my toys more Then some rough and ready concrete laid I’m sure the old girl was not happy going from relative space and luxury of my parents garage.. to this.. so much so, she decided to shit the bed and start leaking out of the PS pump.. So that’s my first fix now she’s back home (wasn’t supposed to be).. PG Hydraulics have already rebuilt the control valve and PS ram so they might as well do this for me as well.. then I’ll get the leaking manifold sorted before taking it in for a WOF
3 points
-
Ahhh yeah I guess that miiigghhht help at the drags but not going to be useful for sustained hooning. I guess if you do the maths, if you were drawing full 60amp from alternator, and it was outputting 14 volts. That's 840 watts Then if its something like 25% efficient at converting mechanical energy into electricity, would be 3.3kw draw on the motor. I guess that is a decent amount! However, looking at the logs from the drags, my voltage drops by quite a lot with high rpm anyway. Maybe it's alternator rpm based reduction, maybe its belt slip, maybe it's Maybelline? Not much interesting stuff to report otherwise at the moment, as I'm just busy trying to fix some maintenance issues. Needs the front ball joints and a tie rod end replaced. Some better brake pads ordered as well, as I'd like to do some trackdays this summer hopefully. I will try get a better radiator too, as this one has had 200,000km worth of bugs smash into the lower 1/3rd of it. I'm waiting on parts that should hopefully arrive in the coming week. My big goal at the moment is to try get it all ready to attend 4&rotor drags and possibly the trackday part which is about another 6 weeks away. It looks like I might have a work trip to Australia the same week though. So fingers crossed that gets postponed or brought a week ahead so I can see how it goes.
2 points
-
And it's silver. Only one coat and hopefully it sets enough before it starts raining It's not perfect but it's not rust now and it'll be covered by the seal and the glass so shouldn't draw any attention come wof time.2 points
-
Always found doing big patches easier than trying to do spot repairs and Always blended in better, can be daunting chopping big parts off the car rewarding as though when a big part goes back on. Try to round your edges where possible you'll end up with more manageable distortion, as in mark your square hole saw out your corners then chop it out with a grinder if your dealing with flat panels. Dont try hit the whole car at once do the easy bits first then the hard bits won't be as hard by time you get to them. Do a side or area finish it before moving on to anything else or you'll end up with with a shell full of half done repairs.2 points
-
"See Sandra, I'm not crazy! I saved us $7 with the mill today."2 points
-
Seeing how alternators seem to be a pretty decent drag on the engine, can you program an output on your ecu to turn off the alternator above 90% throttle and 3000 rpm? Would be interesting to see if it makes a measurable difference on your virtual dyno2 points
-
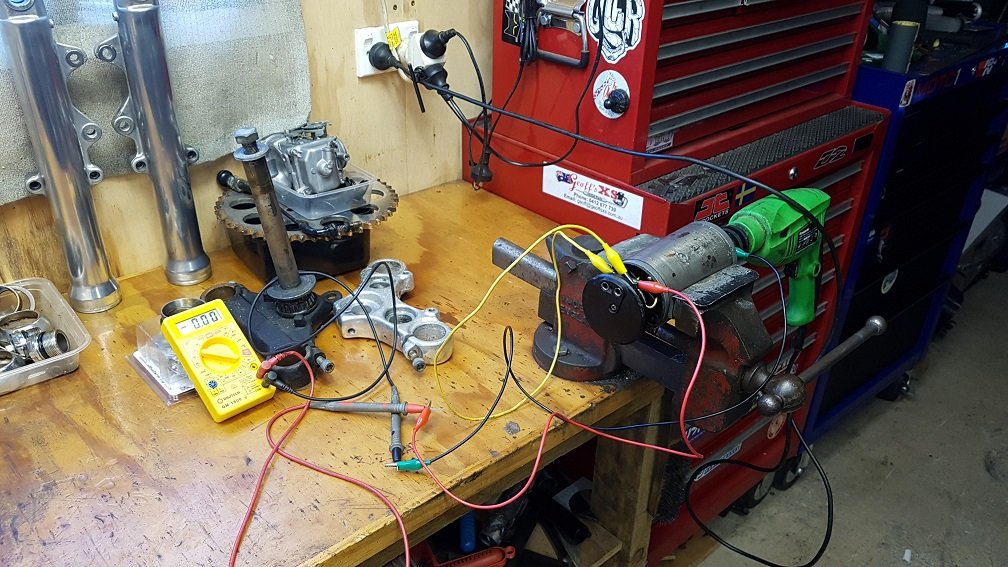
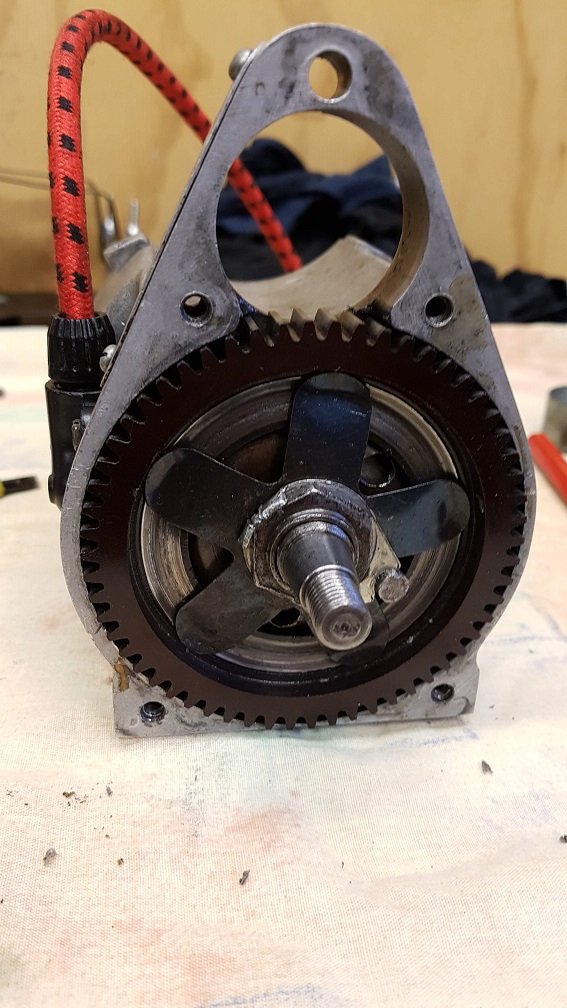
For anyone that is following. I think i may have cracked it. I pulled out the dynamo again to bench test with my old Harley regulator. I setup some mickey mouse setup with my drill: Thought i'd try running it unregulated with the drill. I get 2 volts on the D terminal with nothing connected. This is good, and this is what it has been doing. But if i connect the F to the D and give it a spin. I get 20+ volts out. Wooh, this is what i have been expecting all along. I did a bit more mickey mouse wiring, and got it charging my battery at 13.6 volts on the bench. Not bad for something build in 1949. Cool. So the generator is A OK, and producing healthy voltage at a relatively low RPM of the drill. Perfect.. But why doesn't this work like this on the bike!!? I know there is a slipper clutch inside the magneto, this is incase your dynamo locks up, it doesn't bust all your timing gears etc. The metal disc that the stars ride on looks very worn. And its concave... This doesn't look right (well i thought this was how it was meant to be when i had this apart last time) Turns out its meant to be flat: So it looks like this has been slipping as the dynamo loads up. I could feel it loading up with the drill so it def starts to work harder when it starts generating! I have ordered a new one of these slipper surfaces. Hopefully it gives enough clamping force for it to run like a champ. I'll also use the Harley regulator, as i tried it with the magic box modern solid state one and its as dead as a doornail. Lets go back to tried and true 30s tech.
2 points
-
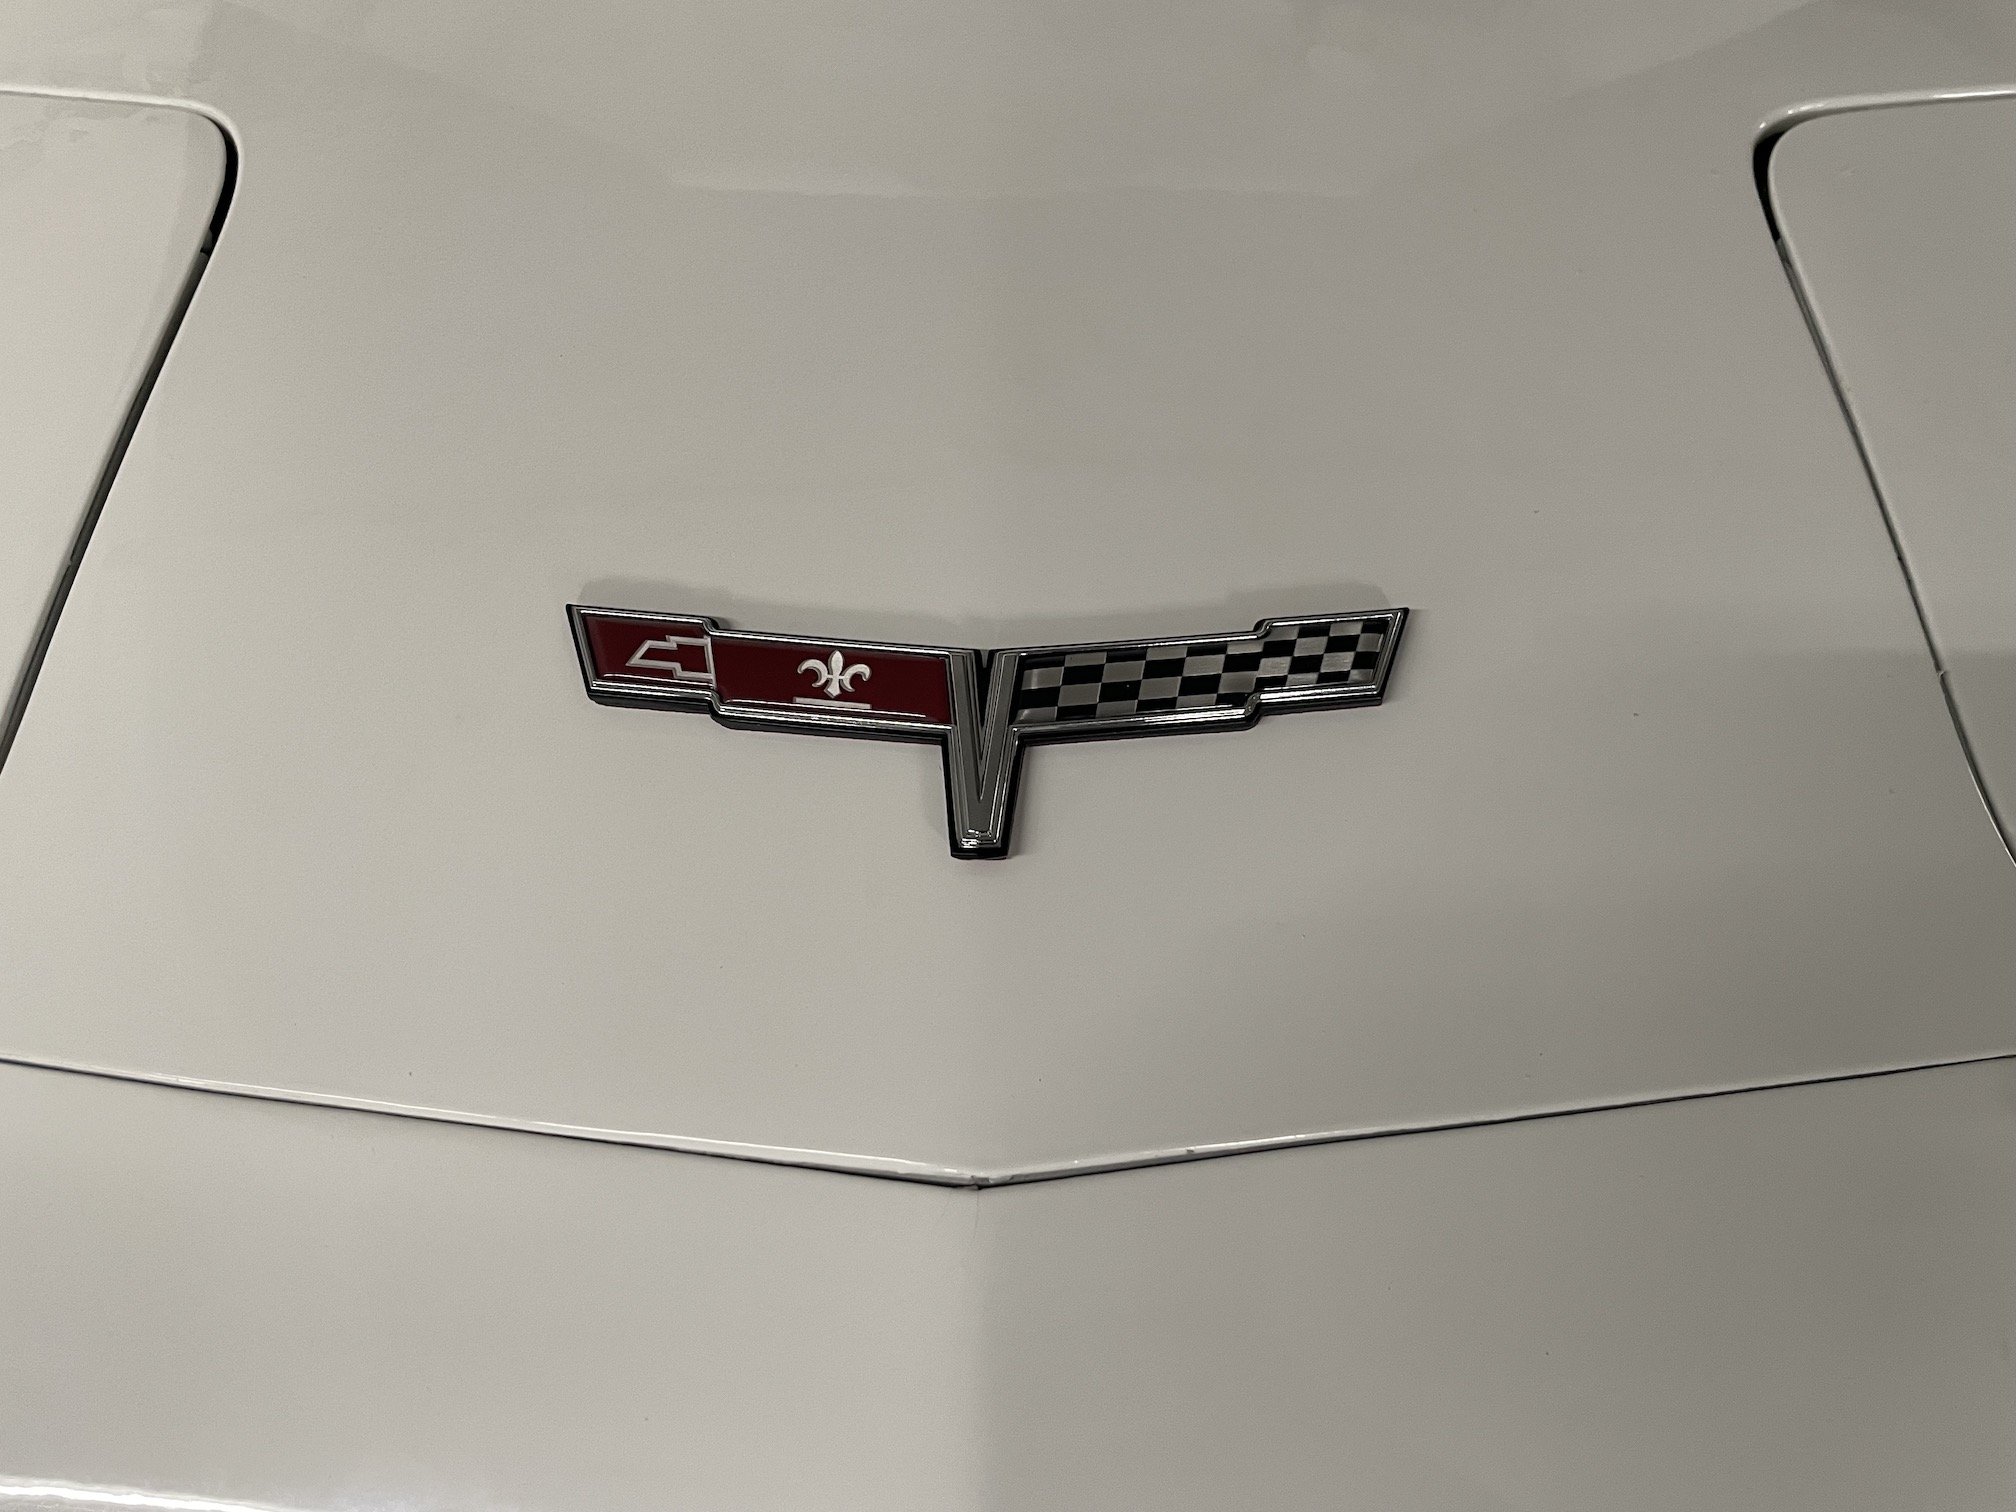
So I failed at the first hurdle - has a bit more bump steer than the alignment man is happy with- it’s not terrible but border line passable. The rack conversion I have is meant to be zero bump steep but it seems the only bit I supplied is the issue - the mk1 Capri struts. Turns out there a multiple versions of bolt on steering arms for Capri/RS2000 and the version I have is the flattest/least drop.I did track down some tarmac steering arms online that look to be what I’m after but the left hand side is out of stock until next year. So instead of faffing around trying to get hold of second hand steering arms that might work the alignment man has decided to make a start on sorting out rose jointed ends so he can dial out all bump steer- he’s got the tidiest mk1 Escort I’ve seen in a long time so I can’t really argue! Have still been driving her a little bit, went to the Rotorua swap meet/mud fest this morning and picked up a neat mint rear boot badge. Got carried away on cleaning afterward, washed, clay barred, polished and waxed. Not a bed way to spend a rainy afternoon- should invest in a DA rather than doing it by hand though. Hopefully not too far off getting the steering sorted and the on to cert.
2 points
-
I am going to have to remove the engine and take it back to the guy who built it, its losing oil pressure totally sometimes, i have 2 gauges one befor the oil filter and one after, both are showing the same pressure and some times it fluctuates dramatically, the only thing I can think of is the oil pump drive on the back of the cam witch is pressed on has come loose. I pinned both of the gears in the pump. I should of got him to pin that one. I dont want to pay him any more money, I have had to take the heads off and fit new gaskets because he didn't seal the studs.1 point
-
I bought one from the tool shed for around $30 on special. I've never actually used it in anger yet. At work I have a Fluke (or flume? Idk) which I use for measuring ground temperatures when doing ice inspections. I dunno what that one cost, but I was told "it wasn't cheap" by the guy who did buy it. They both seem to work the same. (Never done a comparison side by side)1 point
-
showing my interests in utepooling to wellington and riding bikes in the south island1 point
-
I like having you on this ride Richard. When you're there, I'm not the guy everyone is waiting for.1 point
-
Tbh, I just want to come down. I'm happy with whatever you S-Islanders come up with.1 point
-
I think bmw (maybe others too) do this a bit to improve fuel economy. It kicks the alternator in when the engine on the overrun or when battery voltage drops to a certain level..1 point
-
I use electro-galv (E.G) at the shop. Its not actually that galv shit like garden sheds are, its just the grey coated stuff. Has a loooong shelf life in Auckland humidity. Ocassionally I'l use raw cold rolled as its its a bit nicer to work with when shaping and its easier on the file, but for what you are doing e.g will be fine. Just match the thickness as best you can. If it measures 0.9, use 1mm. The stamping process of panels can thin it out a little as it gets stretched. U-pol Weld-2 copper weld through primer is the nicest stuff I've found to use for flanges/overlaps over the years and one of the few that can tig through without it turning to shit. Can get it from Linkup Paints. Unless I'm closing off a boxed area, I just d.a repairs to dress it up, prepsol it, then brush on some Epiphos until the job goes off to the blasters or the paint shop takes it and preps for epoxy themselves. Once I know that area is 100% repaired I'l drench seams in Brunox, either with a spraycan if its accessable or mix it 4:1 with thinners and spray it through the Air-boy gun to get it up pillars/sills/rails etc. Just drench it til it dribbles out over the floor, then ya know its coated plenty until cavity wax time. Resene Durepox is my current Epoxy of choice. Its expensive, but is one of the few thats not porous over time. Used to use Protec Epotec alot. No complaints with it. Sikaflex MS Bond has been a good seam sealer. But best to check with whoever is going to paint it as they may have a preffered sealer. Linkup Paints sell HB Body 900 cavity wax which does the trick. It comes clear or brown and comes in a can or a cartridge for a Shutz gun. Only cavity wax once job is 100% painted and buffed otherwise it makes life a pain in the ass.1 point
-
and the fuel door badge was much easier as it's just two bolts Disco Fred:
1 point
-
Cavity wax is the modern version of fish oil. Theres not really a bad cavity wax tbh. They all do the same job. But that's a very last job. Once no more paint needs doing as it can cause problems with fish eyes1 point
-
I keep forgetting to look1 point
-
Been Working on Front and rear bumpstops. Didnt want them/ didnt work inside the airbag. So a bit of engineering to get some externaly on the lower control arms. Here she is after driving outside.
1 point
-
As part of my continuous programme to improve Lucas, I wanted to get the tailgate lock working. The latch and release worked, but the key wouldn't turn. I don't know if the central locking worked on the tailgate yet, I tend to lock the car after the battery is disconnected and it's not a major for me if it isn't working (for now at least), but since I park the car nose down in my driveway, it'd be nice to have the peace of mind that someone can't just open the tailgate up. The key goes into the lock fine but doesn't turn in either direction and makes no attempt to lock. Looking at the lock, I suspect someone has tried to screwdriver it open at some point. Dicks. With the car in the garage for other work, it was the perfect time to strip the end off the tailgate and investigate the issue. First the outer trim has to be removed, this is held in place with about 6 screws, two of which are under the number plate lamp lenses. The parcel shelf makes an excellent workbench. With the plastic trim off you have access to the lock assembly Found some surface rust, which I later treated The handle assembly is secured to the lid with two nyloc nuts and washers recessed into the inside of the lid With those two removed, the whole lock assembly can be pulled free of the tailgate. If you have central locking, you will need to disconnect the actuator rod, which is a bit of a pain, but release the metal clip and wiggle and jiggle until the lever twists free. A tip for refitting is to slip the locking tab onto the rod at the same time as you slide it through the hole on the handle, It's no real surprise the locking mechanism doesn't work, the whole thing is gummed up with dirt The lock doesn't look so great After a quick clean with just some household cleaner and water Interestingly, after a clean, the lock started to work, albeit it was really stiff and hard to operate. The act of turning the key in the barrel moves this C shaped tab left or right to lock and unlock It's quite interesting (to me) how the lock disables the handle. The yellow/white plastic in the photo above is the cam that uses the curved edge to press against a lever on the catch to release it (the cam would rotate downwards in that photo when the handle is pulled). Turning the key in the lock physically moves part of the mechanism (orange arrow) so that the exterior handle is disengaged from the rest of the mechanism. The C shape tab on the end of the barrel pushes and pulls the plate attached to it, sliding the mechanism across. The central locking would have been simpler in its operation if it had just acted on the same mechanism as the key, but no, that would've been too easy. Instead, the central locking actuator pulls on the rod on the other end of the handle assembly, in the opposite direction to the key mech Pulling on that rod disengages the handle from the mechanism, by moving another part of it away from the actuating cam (orange arrow again). Annoyingly I never tested what happens if you lock or unlock with the other means (ie. lock with key, unlock with central locking); I might have to see if I have a spare to play with. Anyway, with everything working as it should, I wanted to refurbish the lock barrel. I sourced a better condition barrel from a local SD1 supplier and planned to rekey this to suit my keys. The barrel is held in place by one small screw on the rear Do take care when you remove it as there is a ball bearing and spring under the actuating plate The barrel can then be removed The donor barrel was in good, used, condition Whilst my original one was covered in old grease which resembled a grinding paste with all the dirt in it This isn't my first rodeo with rekeying a barrel; I did the same job with Project Rolla, where the ignition barrel had been damaged. I carefully removed all the wafers and springs from the donor lock I cleaned the inside of the lock barrel up, and refit the cleaned springs The old lock was pretty grim. The wafers were sticky and the first one is completely jammed down. You can see how bad the face was damaged I removed, cleaned and transferred all the wafers over from the old lock to the replacement, one by one. I tried all of the wafers from the donor lock in the number one spot to see if I could replace the one that is jammed in the original lock, but none of them were quite right. You can see the number one wafer is sticking out on the underside, all of them stuck out to some degree, which would stop the lock from operating. It also sits low on the top side too. They should all sit flush I could have filed one of the wafers down to make it work, but in the end, I removed the number one wafer and just left it. There are still 5 more, and it's probably easier to break a window than to try and pick it (please don't). A light coating of white lithium grease will keep the barrel lubricated, whilst all the other moving parts got lubricated too. Now everything works very smoothly indeed. Before reassembly, I also removed and cleaned the catch. It was disgustingly filthy A quick clean-up and grease and it was ready to be refitted I'm yet to refit the tailgate trim, but the catch and lock mech have been reinstalled and work perfectly. I wanted to treat the tailgate surface rust before refitting the trim, so I have done that and it's currently curing. That's one more thing fixed on Lucas, and I'll be glad to finally lock the tailgate.1 point
-
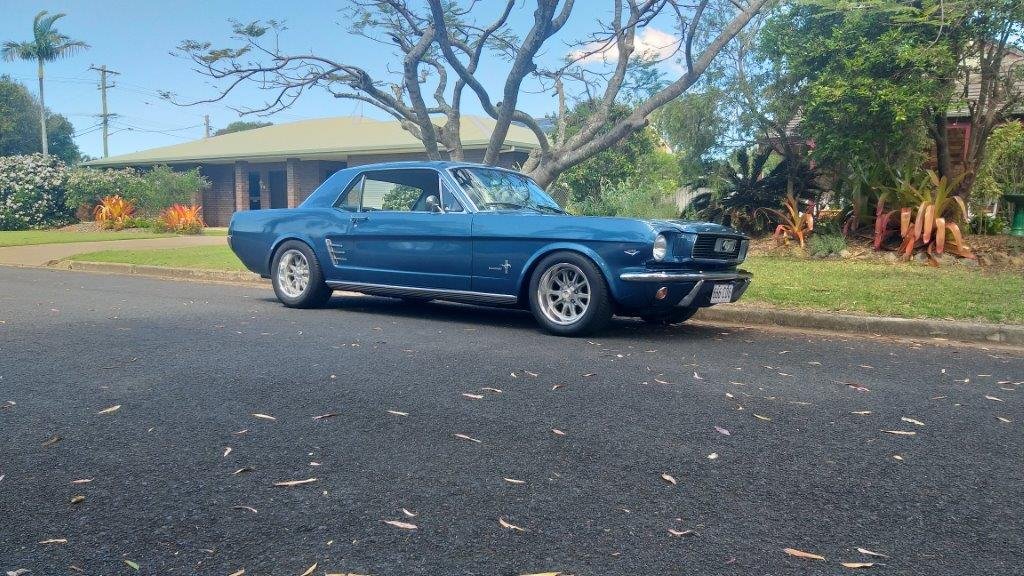
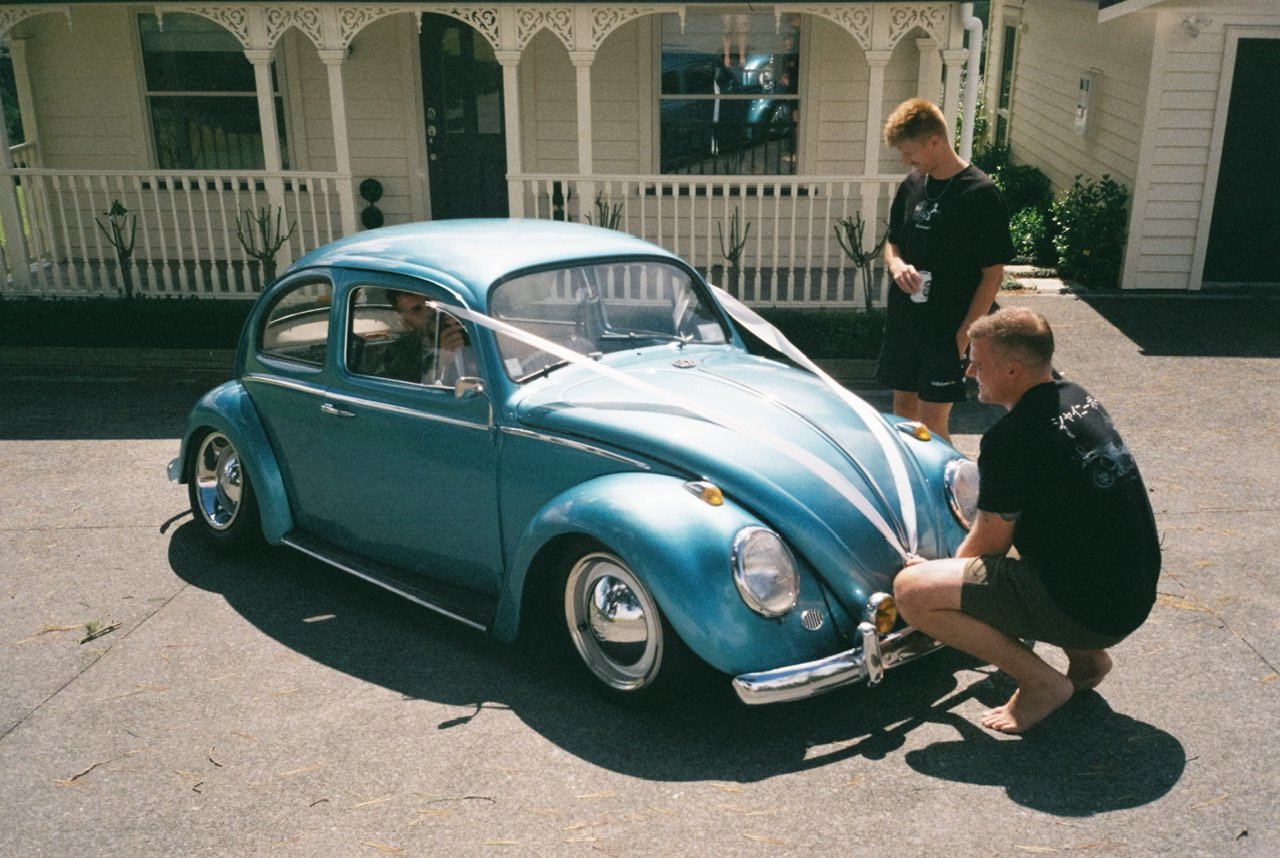
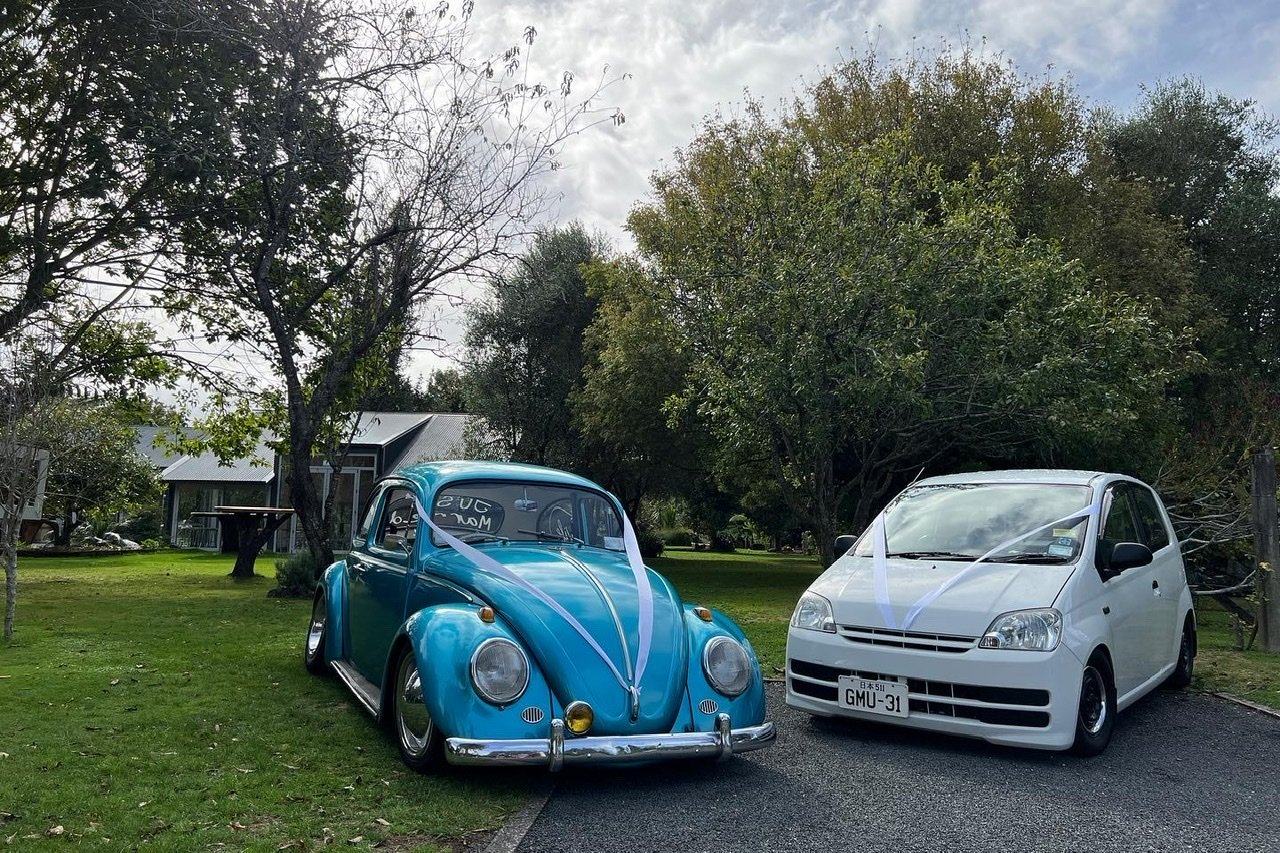
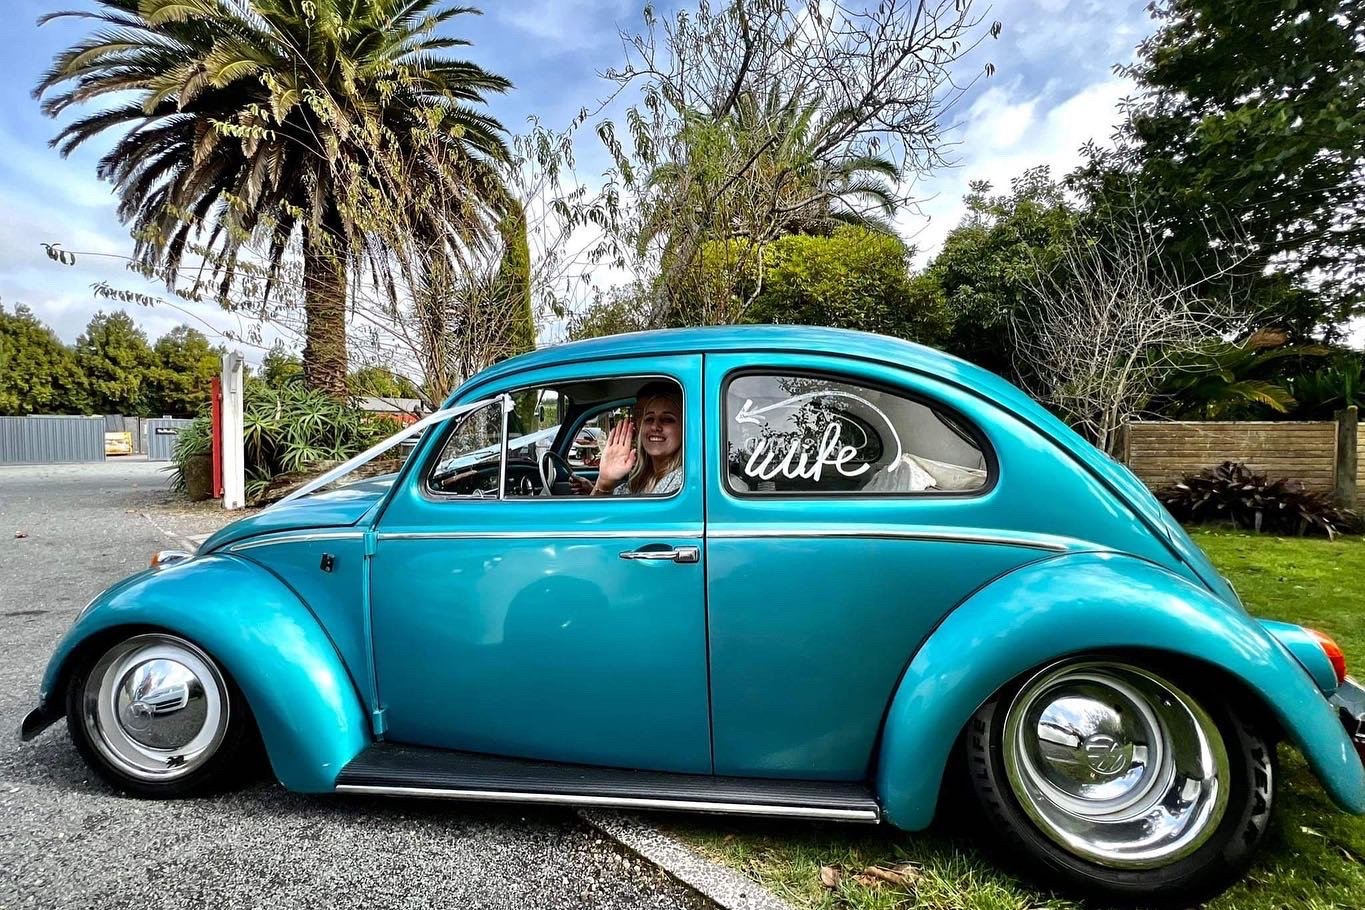
Put some ribbons on it, what a combo!! Polished up well. Did some more polishing on the day All set for the big exit and off to start the honeymoon the next day!
1 point
-
@GuyWithAviators took a beautiful rolling photo on the way to my wedding - which is now framed and on the wall in the hallway
1 point
-
2015! Frig.1 point
-
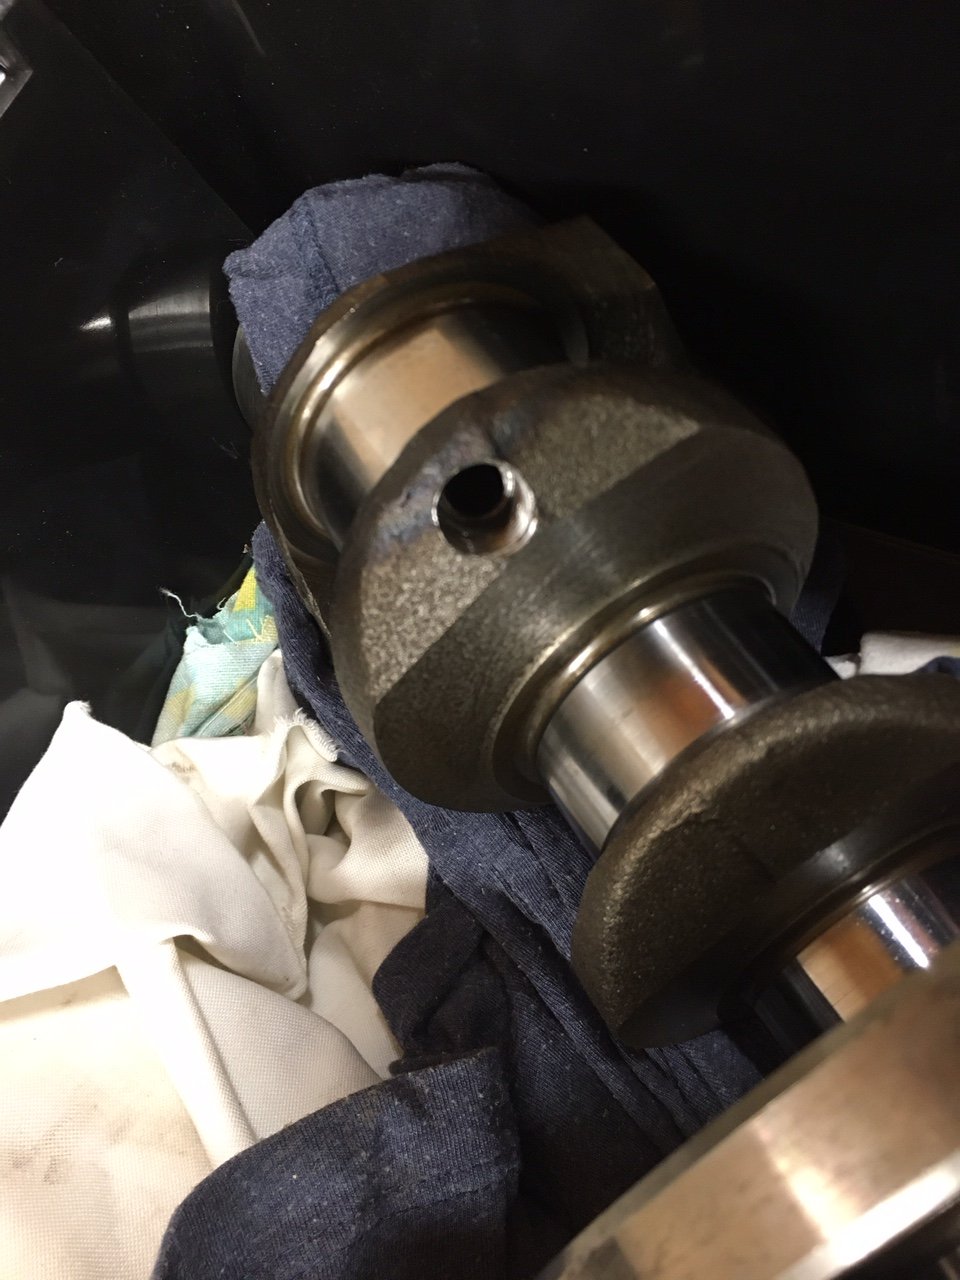
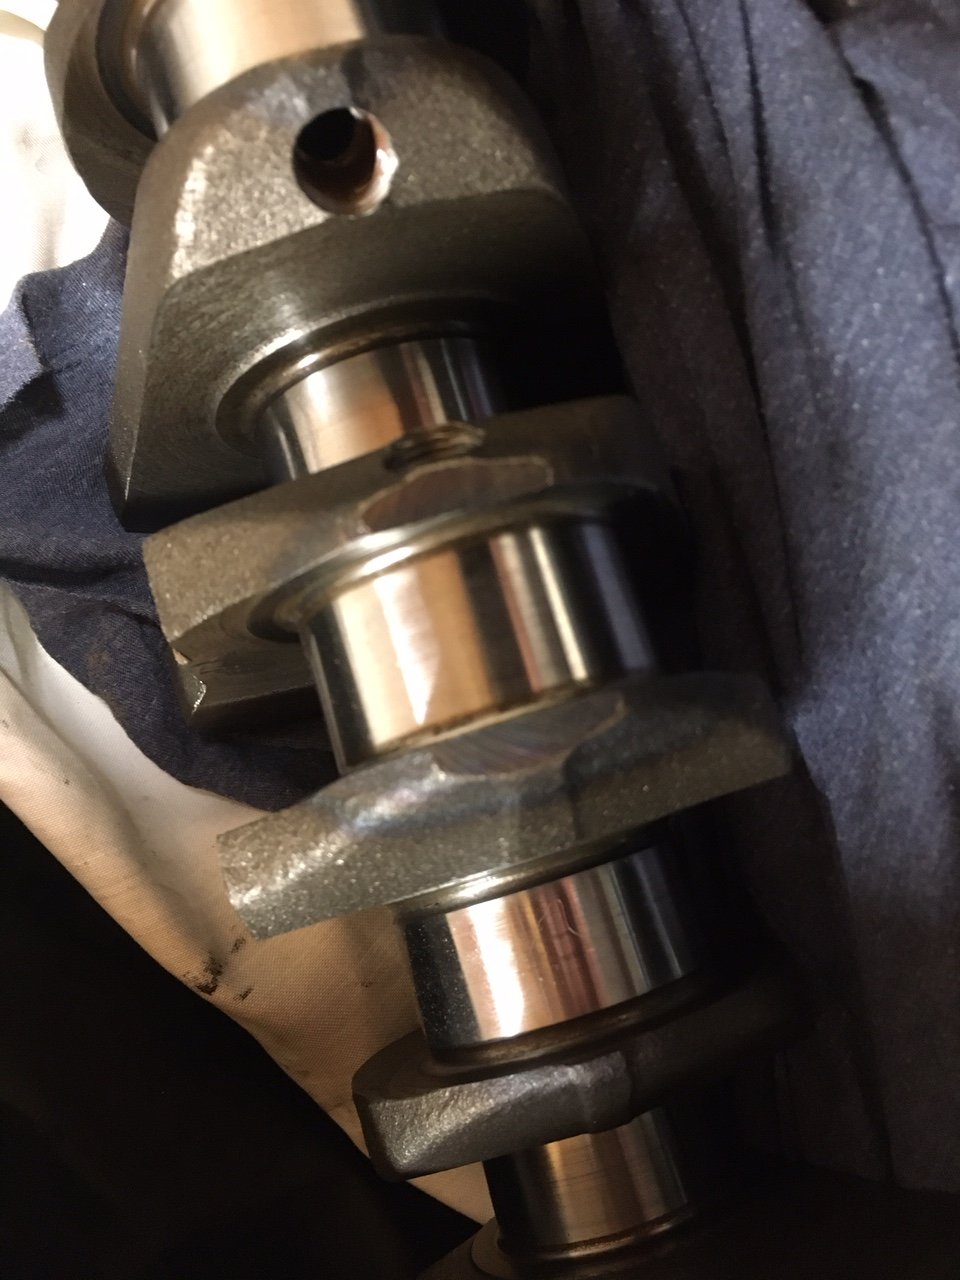
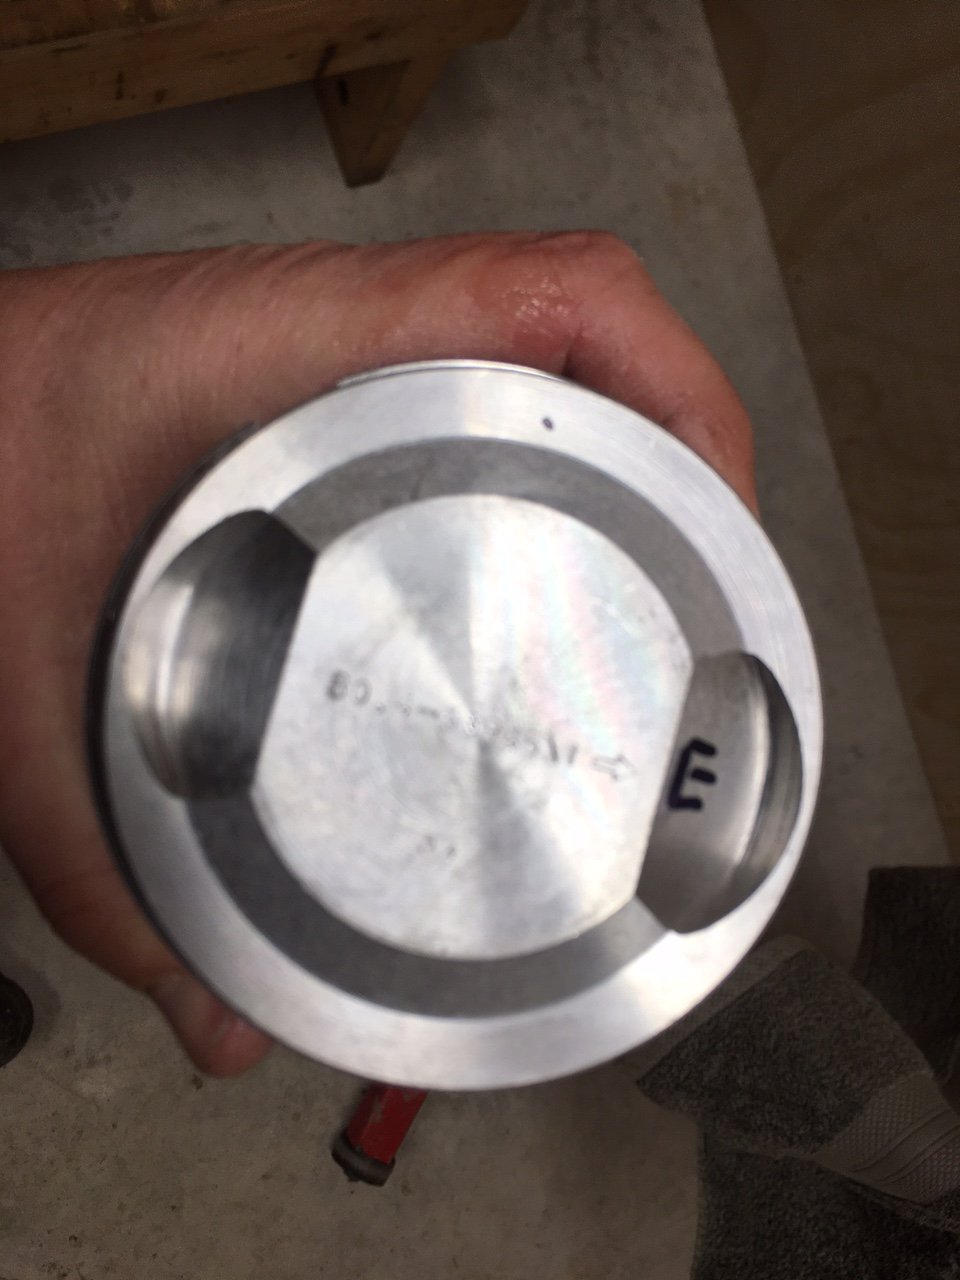
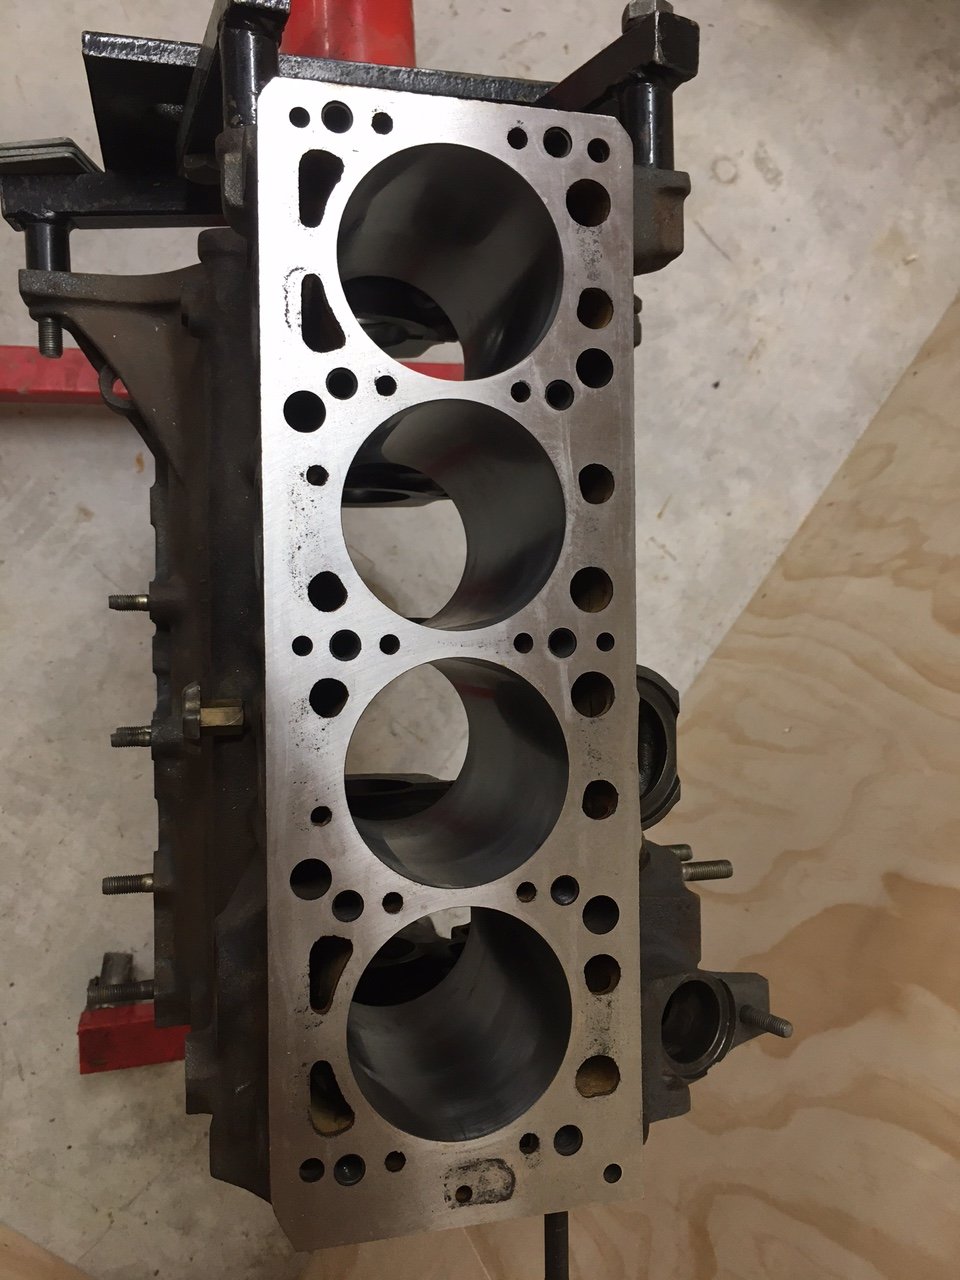
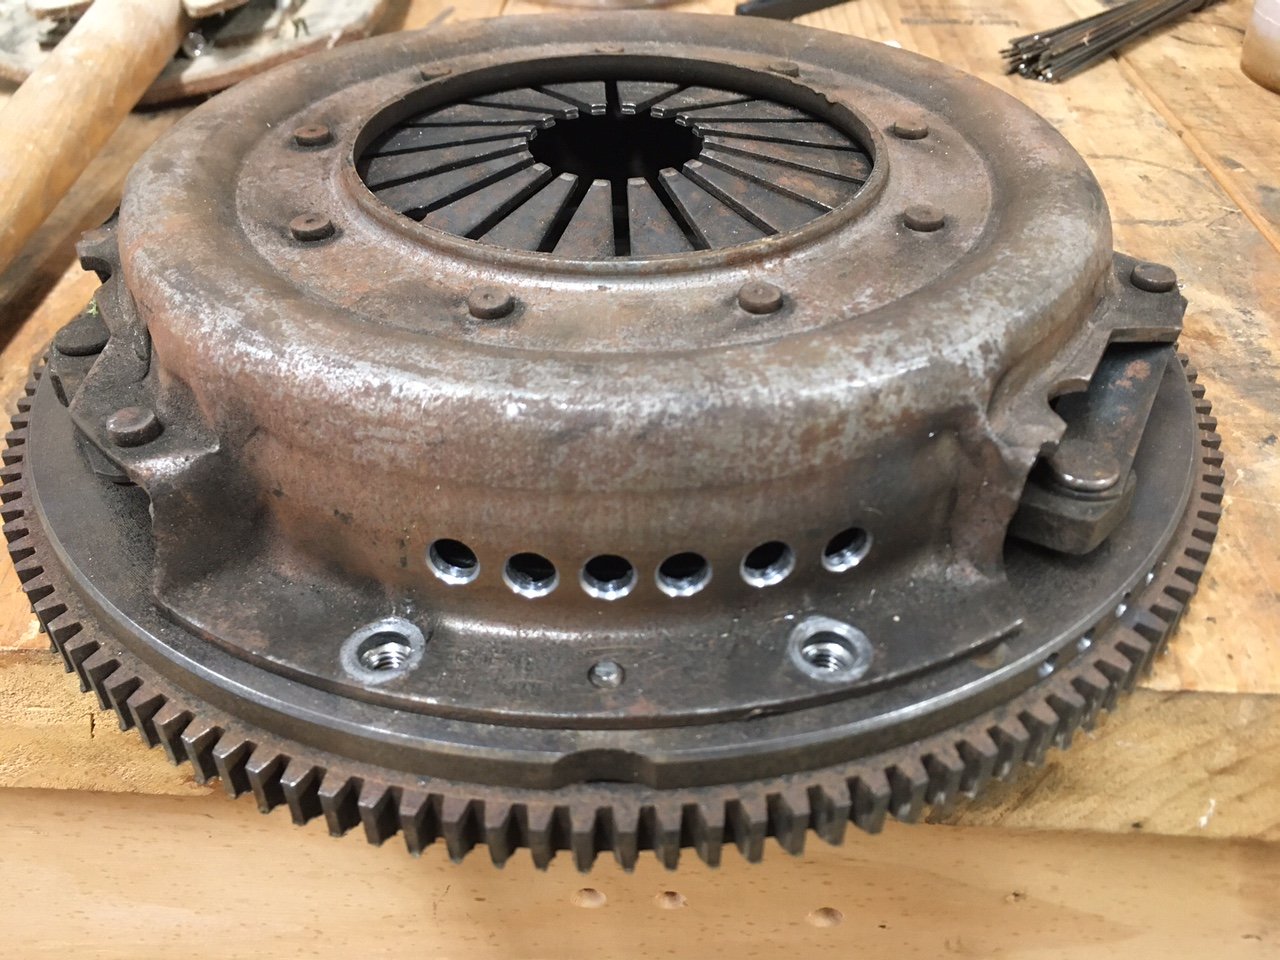
The bottom end has come back from the machine shop! There’s a bit of cleaning work for me to do, as the block didn’t get hot-tanked. The rationale for this was it would destroy the auxiliary shaft bearing which they didn’t remove because they couldn’t be bothered. They did remove the gallery plugs and gave it a good manual hose out though, and he reiterated several times how much crap was lodged in there! The deck has had a very light skim. The marks still visible can’t actually be felt by my sensitive fingers. It has been bored 0.4mm oversized. The crank has had the journals polished and also had the gallery plugs removed (full of crap also) This meant the holes had to be drilled and tapped for new modern replacement plugs. This apparently ruined his tap because the steel is so hard! Go Fiat!! The crank has also had some weight ground off to balance it. It didn’t need much apparently. Shiny piston The rods were balanced too. 6 grams between the heaviest and lightest ex factory. All spot on now. Looks like number 2 was the lightest as it has nothing missing. The flywheel and clutch cover were also balanced. The flywheel was pretty good, just 4 small holes drilled. Clutch covers aren’t that well balanced evidently because swiss cheese to get it right! I have only had time to gap the rings on number 1 so far, and they were bang on the low end of the spec range out of the box. If all the others are the same I’ll be happy as.
1 point
-
It's been an afternoon of working on Lucas today, with the intention of sorting the fuel tank once and for all but ending in a bad discovery. I noticed when the car was still on the transporter for delivery that the fuel tank wasn't looking too hot, and sure enough a quick peek under the car shows there is a fairly significant dent in the rear of the tank, denting it upwards. Worse than that, was that there seemed to be a lot of moisture/melting paint in a couple of spots on the underside. Yay. Tanks for the EFI cars are borderline unobtainable, and no one is reproducing them, so my only real option was to work with what I had, or try a source another good used one, which was fruitless. I've been putting this off for a bit because I haven't had the motivation to roll around under the car on the cold garage floor, but today was the day I couldn't put it off any longer. I got the car in the air, and sure enough, the back of the tank has a nice dent. It's hard to tell in the photo but the whole back of the tank is pushed up a CM or two with some rippling and creasing along the back edge. You can see the dark damp spot on the inner edge, along with the one in the middle of the tank I lowered the rear seat, lifted the carpet and exposed the fuel sender I wanted to see what the inside of the tank looked like (if it's rusty, it's trash) and see if the dent could be pushed out, so using a hammer and flat blade I removed the locking ring and removed the sender. The sender had some surface corrosion on it, but nothing major. The inside of the tank was a massive relief though; the tank is shiny and silver, no obvious rust. The exception is some flakes on the bottom of the tank, and the pickup swirl pot has a covering of rust flakes on the bottom (the strainer was still in place on the outlet). The tank will need to come out for a proper cleanout and fix, but that is a future issue. So the good news is the tank is worth persisting with and I'm not chasing rust holes. With the sender out the dent was right there, below the hole. I tried to use an old Toyota suspension arm to hammer the dent out a bit, but it kept slipping. I would've liked to use something like a broom handle or other length of wood, but didn't have anything on hand. I'm not sure I made any difference. I cleaned the areas in question with brake cleaner and a rag before giving it all a sand with a coarse grit paper You can actually see the two pin holes that are leaking; immediately after cleaning the area, these two spots would have a growing ring of dampness around them. The tank is super low on fuel, it ran out of fuel on the drive when I got the car, and I have put about 8L into the tank since. I've kept it low waiting for this repair, as this allowed me to raise the rear of the car and slosh all the fuel to the front of the tank, away from the damaged area. I started with the weird leak in the middle. This looked like someone had driven a screw into the tank and then soldered around it. I cleaned it up, sanded it and then scuffed it with a file before mixing some steel reinforced epoxy putty up and squishing it into place This stuff is meant to bond to steel and is impervious to fuel, so should seal the leaks, in theory. Next, I did the same to the pin holes and sealed them with the putty too I had to redo the one on the right as it wasn't bonding to the tank too well and had a growing ring of dampness around it. I chipped it off, scuffed the area with the file again, and then using force, smeared some of the putty hard into the area. Once this was slightly cured, I then used more of the putty over top of it. This seems to have worked. The putty is currently curing, and I will lower the car down tomorrow and see if there is any further fuel seeping around the repairs. If not, The area will get some paint and that's the job done. The other issue with the tank was that the breather hose in the rear wheel well had done its dash Strangely I don't have any 12-13mm-1/2" fuel hose on hand, so I'll pick some up on my way home from work tomorrow. It's no wonder the tank was dry, it just either leaked out or evaporated away. Before working on the tank I checked the fuel pressure, just as a matter of course. It's all within spec, 36psi with the engine off, and 30psi at cold idle. No issues there. It was a bit slow to build pressure when cranking, but I wouldn't be surprised if that was due to the low fuel level. The last job I did in the engine bay was to look at the coolant leaks I found last time. I tweaked the hose clamp on the waterpump hose and found the radiator top hose wasn't fully on the radiator fitting, so loosened that and pushed it further on. A pressure test now results in no coolant on the ground, which is a major achievement for one of my cars. The hoses still need to be replaced, but that should keep it happy for now. Now for the bad news. I poked the orange scab on the floor. I knew the driver's side of the floor wasn't in as good shape as the passengers' side, mainly because I could see the "paint tin lid" trying to make a break for it on the underside of the floor. By the way, the reason they are called "paint tin lids"? Because they literally are, people have often used the lids from 1L tins and found them to be the same as what Rover supplies. They are bonded into a recessed hole in the floor and are a massive trap for water. After the success of the passengers side last time, I was hoping for something similar, but with having to replace the tin lid. Sadly that was not to be. I removed the driver's seat, as I needed to lift the carpet further. To do this you remove the two nuts from the front of the rails, these go onto studs And then slide the seat all the way forward and look inside the rails for the four torx T40 bolts (two per side) that have square washers Undo those and the seat will just lift out of place. I tipped it over and into the back seat, but if you wanted to completely remove the seat you would also need to disconnect the seatbelt from the seat. With the seat out of the way I lifted the carpet further and found despite the car being in the garage with the carpet partially lifted for a week, the underlay was still sopping wet in the footwell. I also started poking around at the cracked underseal and orange scabs, and ended up with this under the car Some stabbing with a screwdriver and scrubbing with a wire brush and I revealed this Damn. The hole for the lid has become somewhat overside, with some thin metal towards the inner sill, and another hole formed near the inner sill toward the front of the car. I'm pissed off it's that rusty and the seller swore the car was rust-free, but I'm not too daunted by it (I'd be crying in a corner if I discovered this a couple of years ago). I have a plan of how to fix it already, which will get rid of the paint tin lid completely and restore good metal to the area, but that'll take some time to do since I will need to strip a bunch of the interior out to make it safe to weld. So that's where we are for now. I'm still trying to dry it all out, but I'm tempted to just bin that underlay and use some of the jute underlay I have to make a removable mat for under the carpet, so if it gets wet again I can just pull that out and dry it out. Foam is never a good idea where it might get wet. This whole car has been one step forward and three steps backwards. It'll be a great car once I'm done with it though, I'm sure.1 point
-
1 point
-
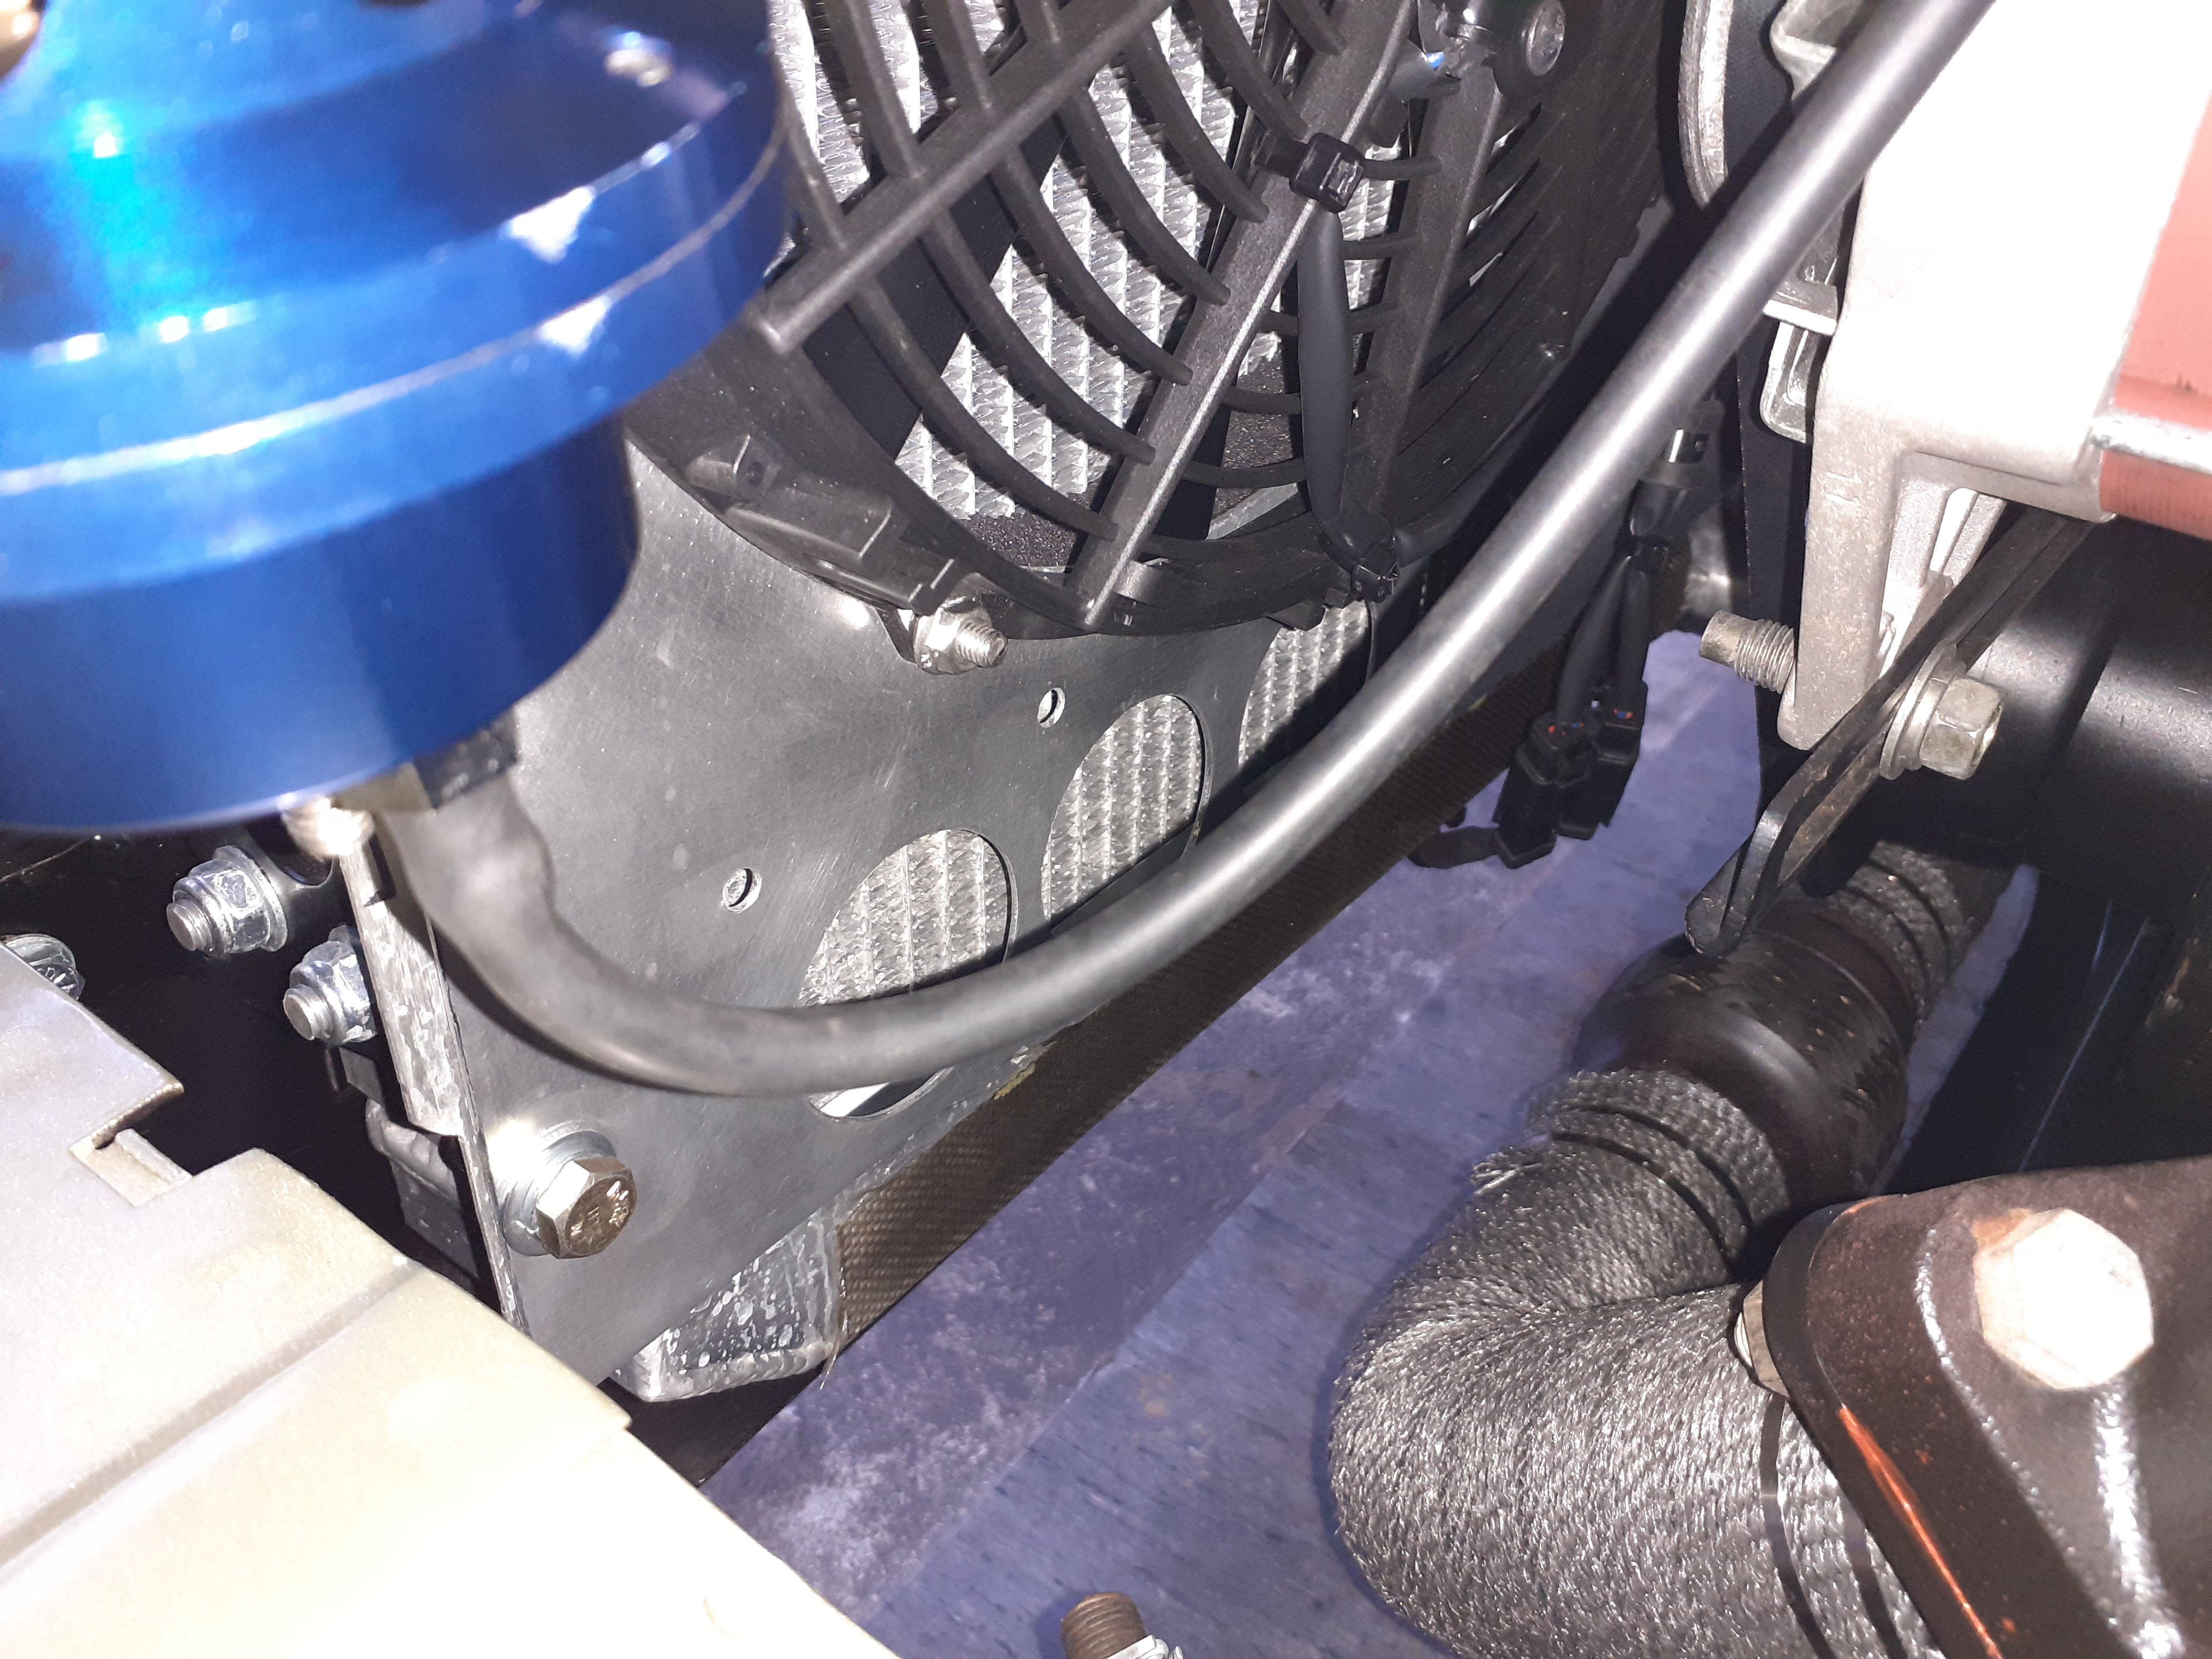
an update to my cooling system woes I was convinced a fan shroud would fix my problems so I came up with an idea of what I wanted, and @RX FORD made me a nice tidy shroud and overflow bottle combo It made it better, thermostat opened at 180, I drove it around for 25min and it went up to 210 and stayed there. When I got home i opened the garage and left it idling for a minute to adjust idle, and it got hot and boiled I resisted the barry urge to remove the thermostat completely , I'd bought a 160f tstat so I put that in, and put a restriction in the bypass hose in case that was making the coolant do laps of the engine instead of the radiator Better again, tstat opens at 160, it went to 180 and stayed there for 10min driving around, I pulled over and it slowly crept up to 195 So it's better, but not fixed. Bearing in mind this is a cool night and just tootling around slowly, it's still too borderline I've got a stock 318 fan which has more aggressive angle on the blades which I might be able to fit if I remake the lower mounts on the radiator. Otherwise I'm running low on ideas. Maybe a small auxiliary radiator with an electric fan on it, or maybe I need to give the intercooler the heave ho as it's not helping airflow1 point
-
It’s got a bit of a cakel to it now, I put castrol edge 25w50 oil and went for a drive
1 point
-
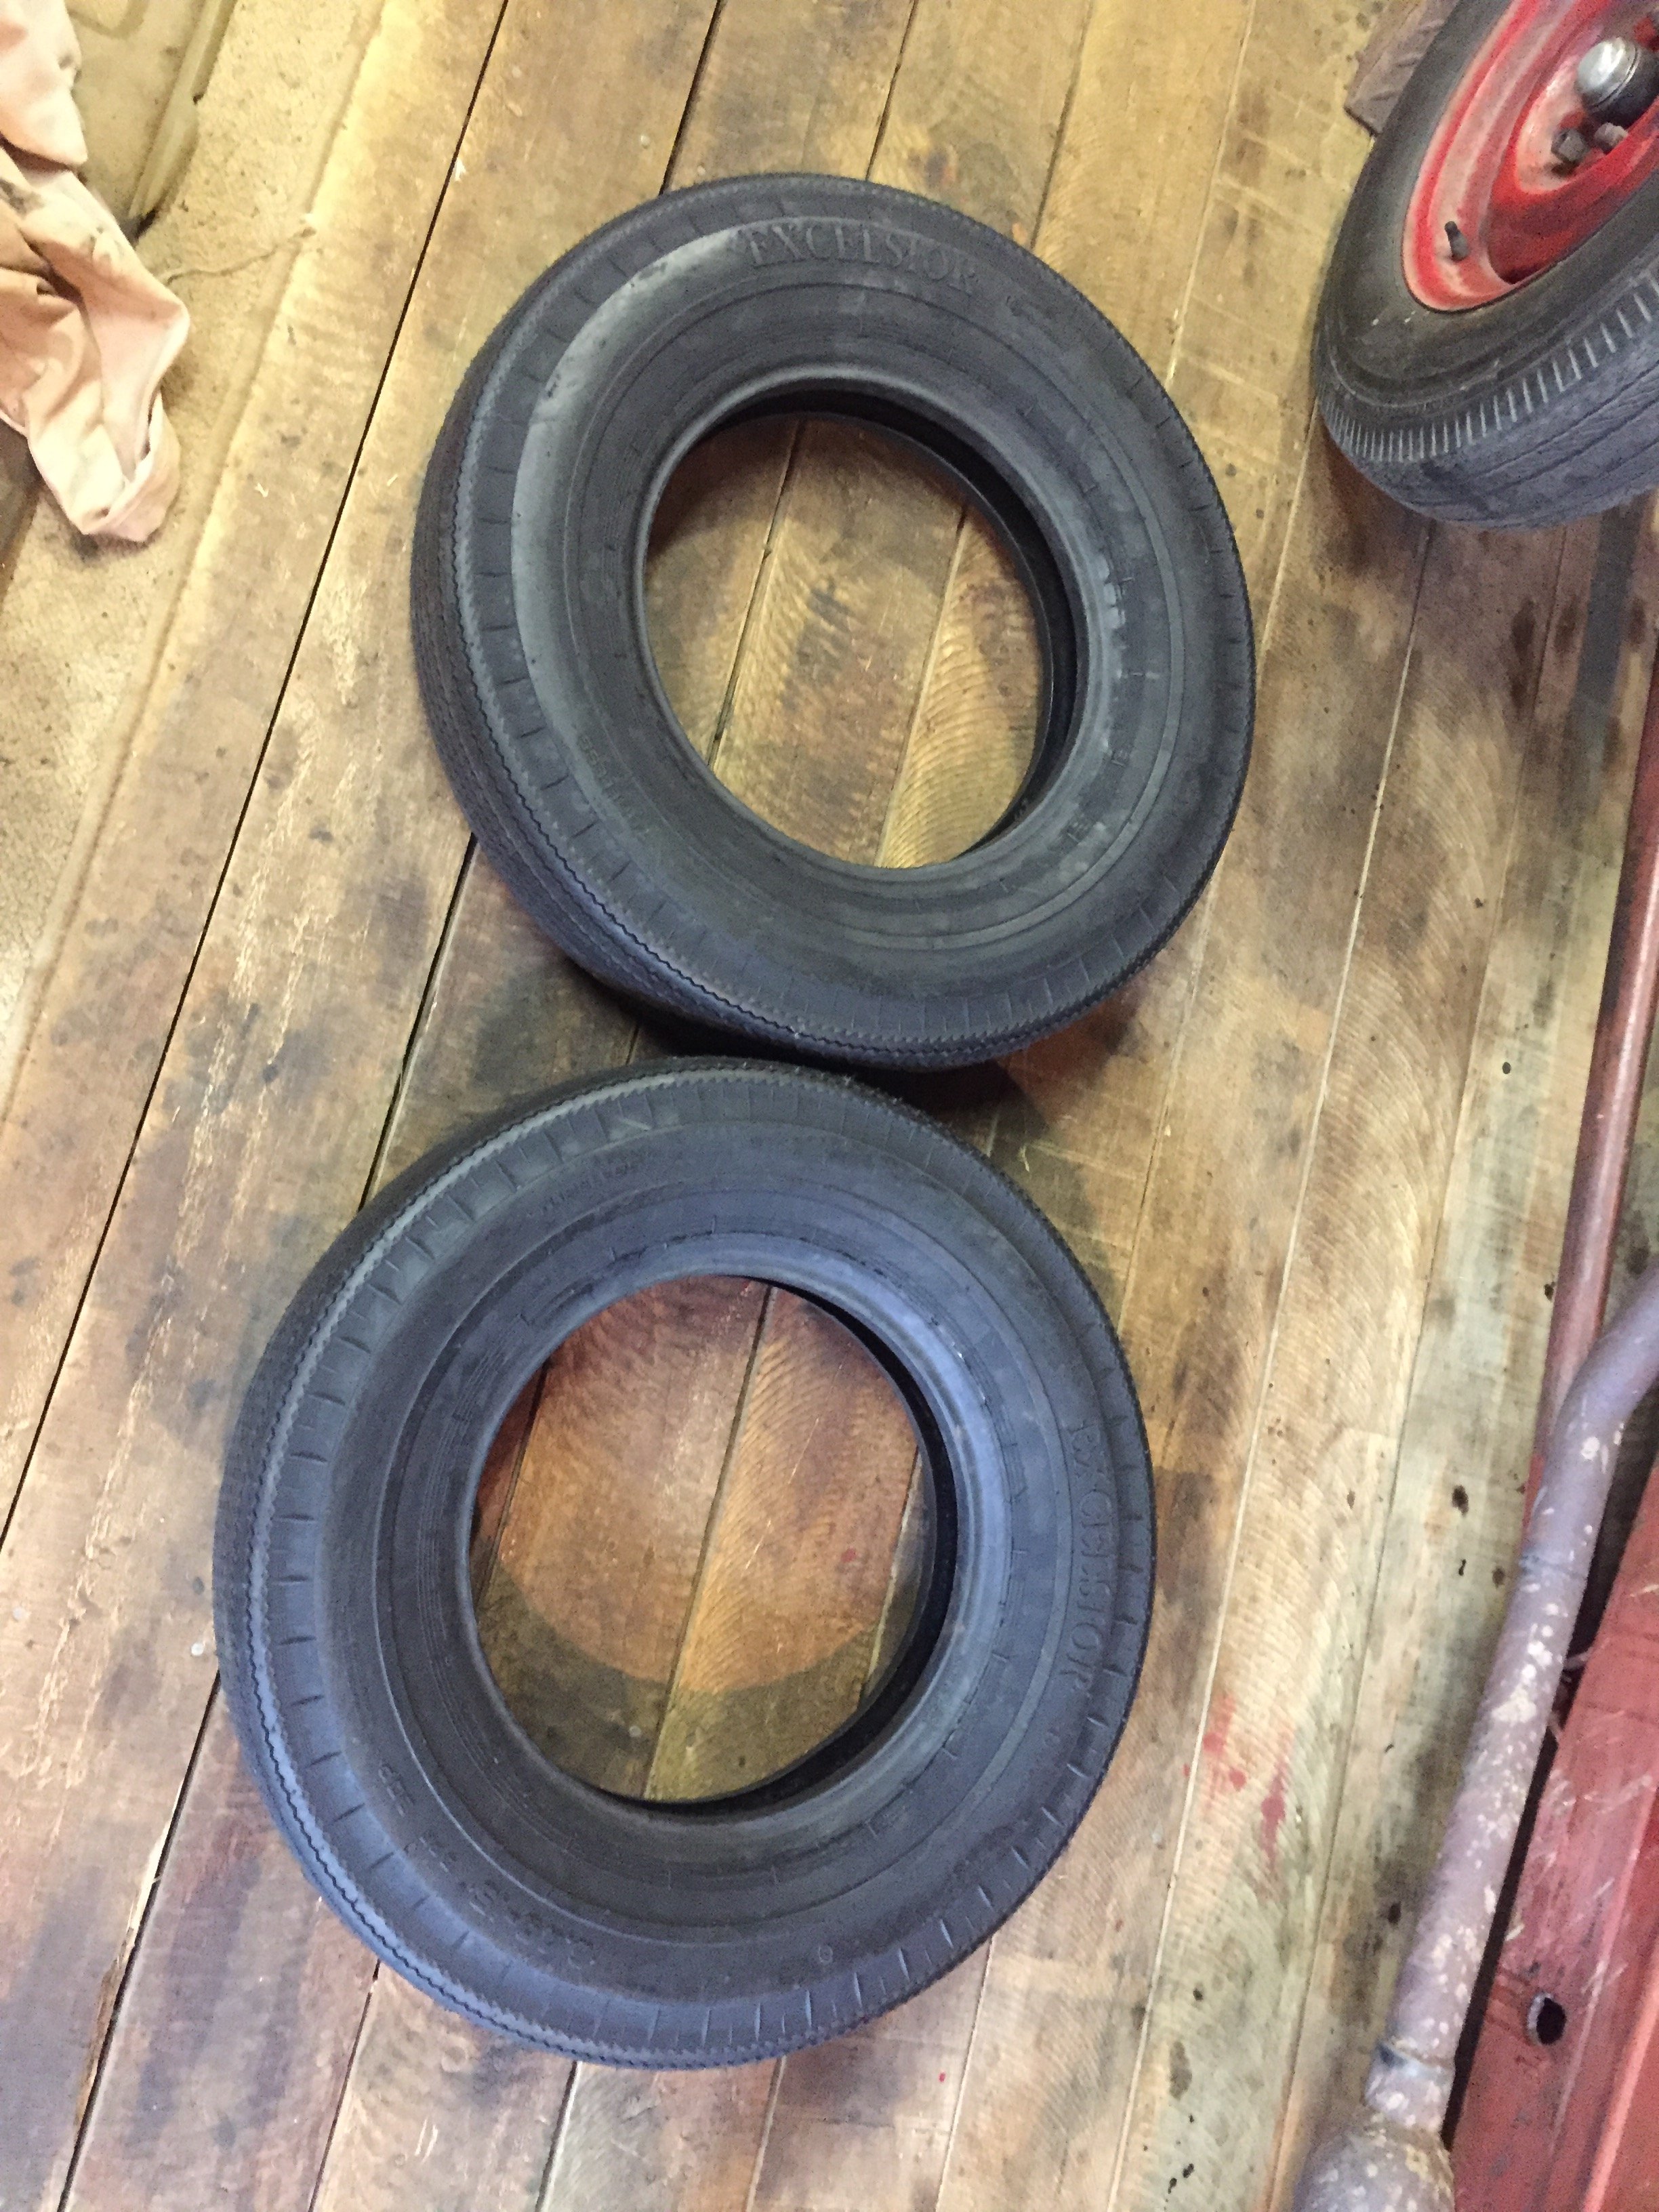
Finally got some front tires, never in my life have I had to buy such expensive tires, the single most expensive item on the car so far.
1 point
-
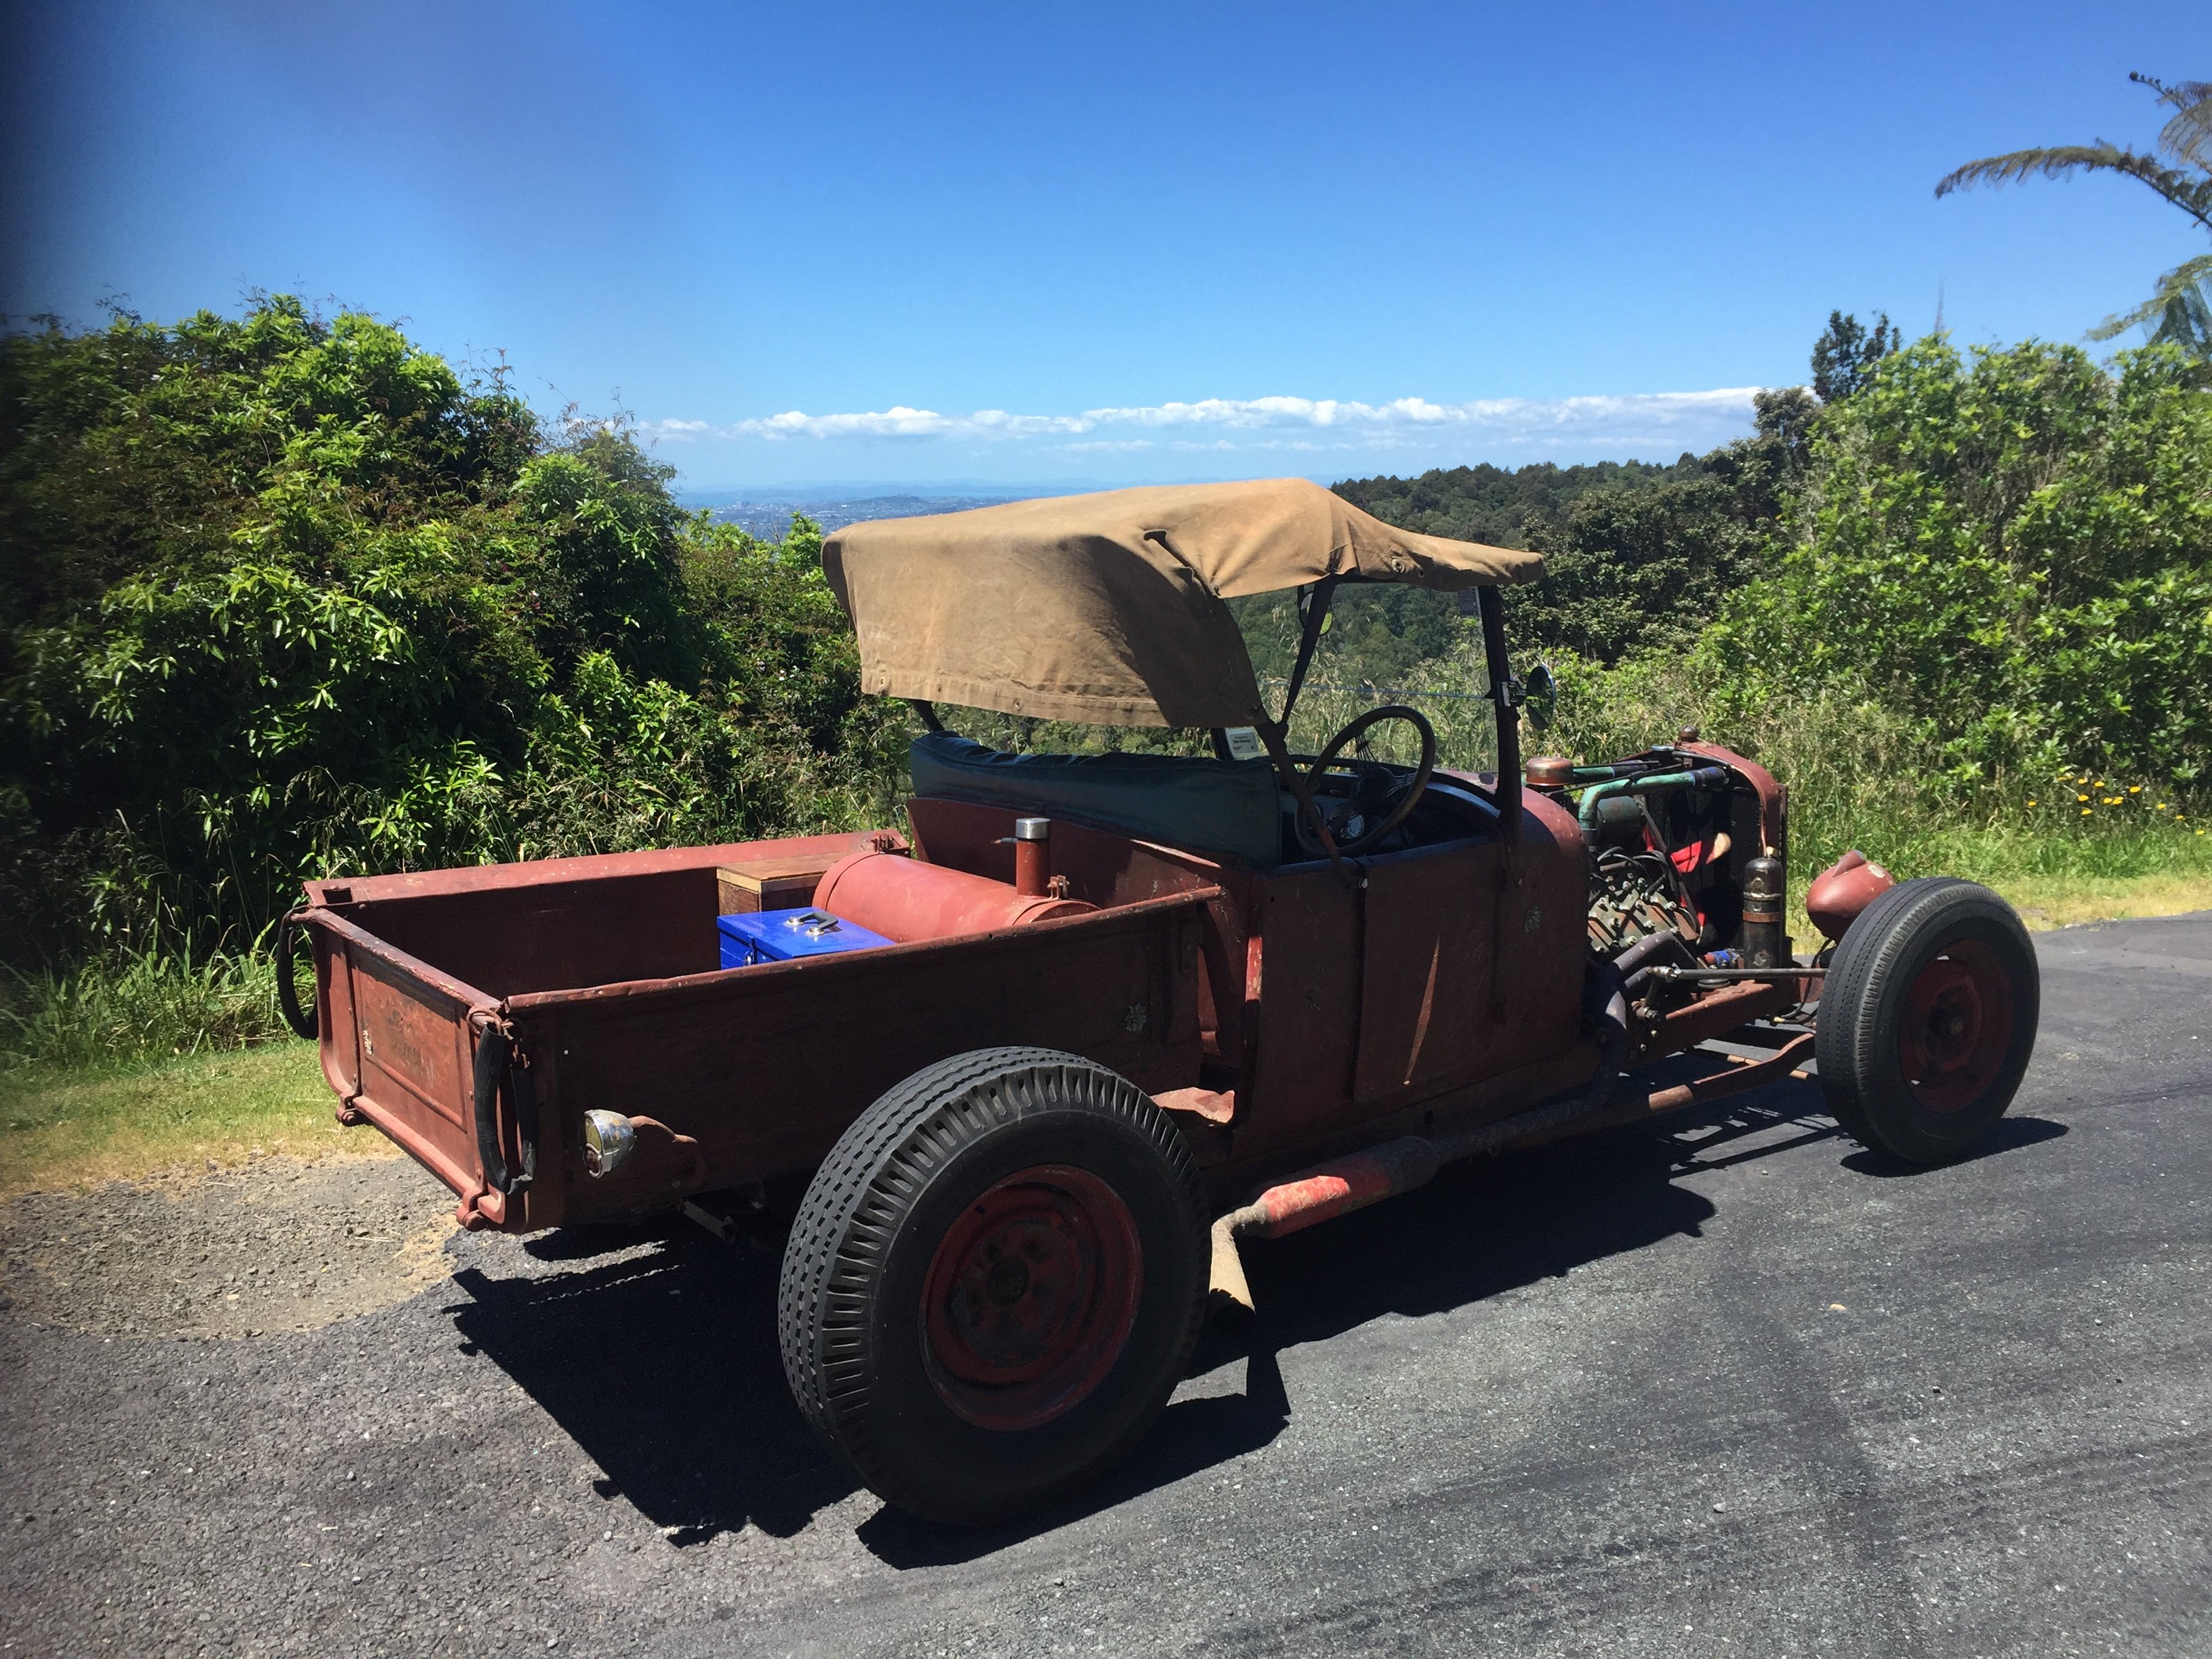
Went for a drive today, it’s going better than ever apart from the hot start problem witch may be related to the worn out ignition switch witch causes a misfire sometimes. Speedo is working well, 30 MPH works out to be about 58 KPH I can live with that, side mirror blew off but luckily it landed in the car, PCV is wonderful, oil stays clean and way less fumes, I am wondering about slotting the distributor for more advanced, I set it max advance all ready and I am running 91 with no pinging. On the hunt for some 600-15” tires, my front tires are old and hard like they are made from stone
1 point
-
Well because I have a couple of updates worth of advance progress to use up before I have to actually start tinkering again here is another 'update'.. So I had sussed out my oil pump drive. Cool. Lets ignore the tensioners for now...mainly because I have not actually fitted the ones I have - this will be one of the next jobs once Hannah and I finish the workshop mezzanine main structure mentioned in the last post. I know they should work but I wanted to skip ahead to other more fun bits. Sort of like eating your meat before finishing the vege. I needed to join these to assemblies together, neatly and most importantly - completely accurately. I had completed some rather fine looking sketches in pencil of how I might fabricate something, along with measurements compiled by the time honoured tradition of starting at set datum points and then using a selection of various rulers, verniers, bits of string, bluetack, tape measures and a bit of eyeballing to suss out the positions of a new flywheel, seal housing, clutch height, starter pinion position at rest and at full extension. It was all going to be made up along the way but I still needed some datums to work to and from. The main thing I knew the position of and that I could not change was the end of the crank and my added on adaptor with its seal landing. I also had a nice flat, square face on the back of the engine - the flange to which the old clutch and gear housing bolted to. I needed to start with that and work out towards the Subaru gearbox. The Subaru gearbox does not really have a full length bellhousing as such. It normally bolts onto another section of housing that is bolted to the Subaru engine. This was fine because I was going to make my own housing extension that suits both the Honda engine flange and the Subaru box, with a depth to suit a custom flywheel and the clutch. But the flywheel offset was not a known thing yet because I had not yet secured a clutch to use. That's another story and I'll cover that with the flywheel. I'll mention now though that I almost made a complete balls up in clutch pressure plate selection. An easy mistake because its not normally something one would ever need to think about when looking at clutches. See if anyone can guess it? Go on - have a go.... Anyway- back to my flange plate assembly. So the most important thing to keep bang on is that the input shaft is concentric with the crankshaft and this is how I did it. I started with a plate of 6mm thick aluminium, cut larger than the back of the engine and front of the box. I made a pretty damn big hole in it with a large holesaw. It had to be much bigger than the rear main seal I had bought to suit my crank adaptor... Then I machined down a big lump of alloy bar to fit into the hole perfectly. I machined it with a large flange so it could be bolted to the plate. Pushed into the plate and then drilled the flange and tapped the holes. The flange was dot punched while on so its always bolted back up to the same holes after removal. I fitted the flange back into the lathe, drilled and bored it out to fit the gearbox input shaft snug... Now I was able to slide the whole lot onto the box. Luckily these boxes have a decent bearing supporting the input shaft so there is no up and down movement (unlike the Imp box which has a two piece input shaft and wobbles all over the place) I machined a couple of centre punches that tightly slid into the gearbox bellhousing bolt holes, enabling my to accurately mark the bolt holes onto the plate... Now I had a plate that lined and bolted up perfectly concentric to the gearbox input shaft. Now to mark and drill another set of holes on the back of this plate to suit the engines flange. I removed the flange and bored it out to slide onto the crank adaptor seal land snugly. With the flange bolted back onto the plate I was able to slide the lot onto the engine, concentric, and repeat the marking process with yet another set of centre punches machined to suit. Then drill the holes to suit... I did have to add a little extension to reach out to one pesky bolt hole that refused to stay within my square... Now I had a plate that was bolted to the engine, bang on concentric, which had another set of holes to suit the bellhousing. I would connect the bellhousing to this plate with machined bars, of a depth that I was yet to finalise. I knew roughly what they would be, around 40mm, but could not confirm this until I had made my flywheel and the clutch to suit it had arrived. That'll be in the next update. In other news- I have been a little undecided about which ECU route to go down. I was planning to build either a Speeduino or go with Megasquirt again. I had started buying the bits for a Speeduino ages ago (I already had a board I had bought from @kws and from aliexpress I bought the main arduino cpu the runs it, an ATmega 2560, plus scored some other bits from @NickJ) but I still wasn't convinced about Speeduino for this application, as tempting as the possible sub $200 price might be. My Main reason against it was because I really would like to run this engine with full sequential injection. However the Megasquirt that offered this on more than 4 cylinders, along with a couple of other non big brand name options were just too expensive for what I want to throw at the project. But then last week I ended up buying a megasquirt 3 with an expansion card at a price I couldn't turn down. I'm stoked about this because I know Megasquirt well and I like the support plus I like using Tunerstudio (which is also used for Speeduino but with a couple of features left out) . I'll leave the Speeduino for something else in the future (the quad bike! ) Oh and after having ordered these uprated valve stem seals from Norway of all places in July they finally arrived yesterday. 2 months! Ha. My new headgaskets and cambelts have also arrived so I've pretty much got the bits I need to through it back together when the time comes.1 point


.thumb.jpeg.e0a4bff61111e0c8c7396950fcc94da1.jpeg)


This leaderboard is set to Auckland/GMT+12:00