
Leaderboard


Popular Content
Showing content with the highest reputation on 03/03/22 in all areas
-
yes. tomorrow I'm driving this car to Cromwell and back. probably. was going to go to toyota fest but thats cancelled so whatever, we're just gonna cuze around. spending the first part of the trip walking the Able Tasman track, then down to Cromwell via the west coast. back up through Twizel and Ranfurly to Hanmer. then its onto the boat and back home. ill be in Cromwell for two days (12th and 13th) but all over the show otherwise. not sure if we're going to make it to chch, we'll see what happens. i will be in Frans Joseph for a night too at some point. anywho, id be keen for a beer and a yarn if i happen to see anyone but we'll see how we go.18 points
-
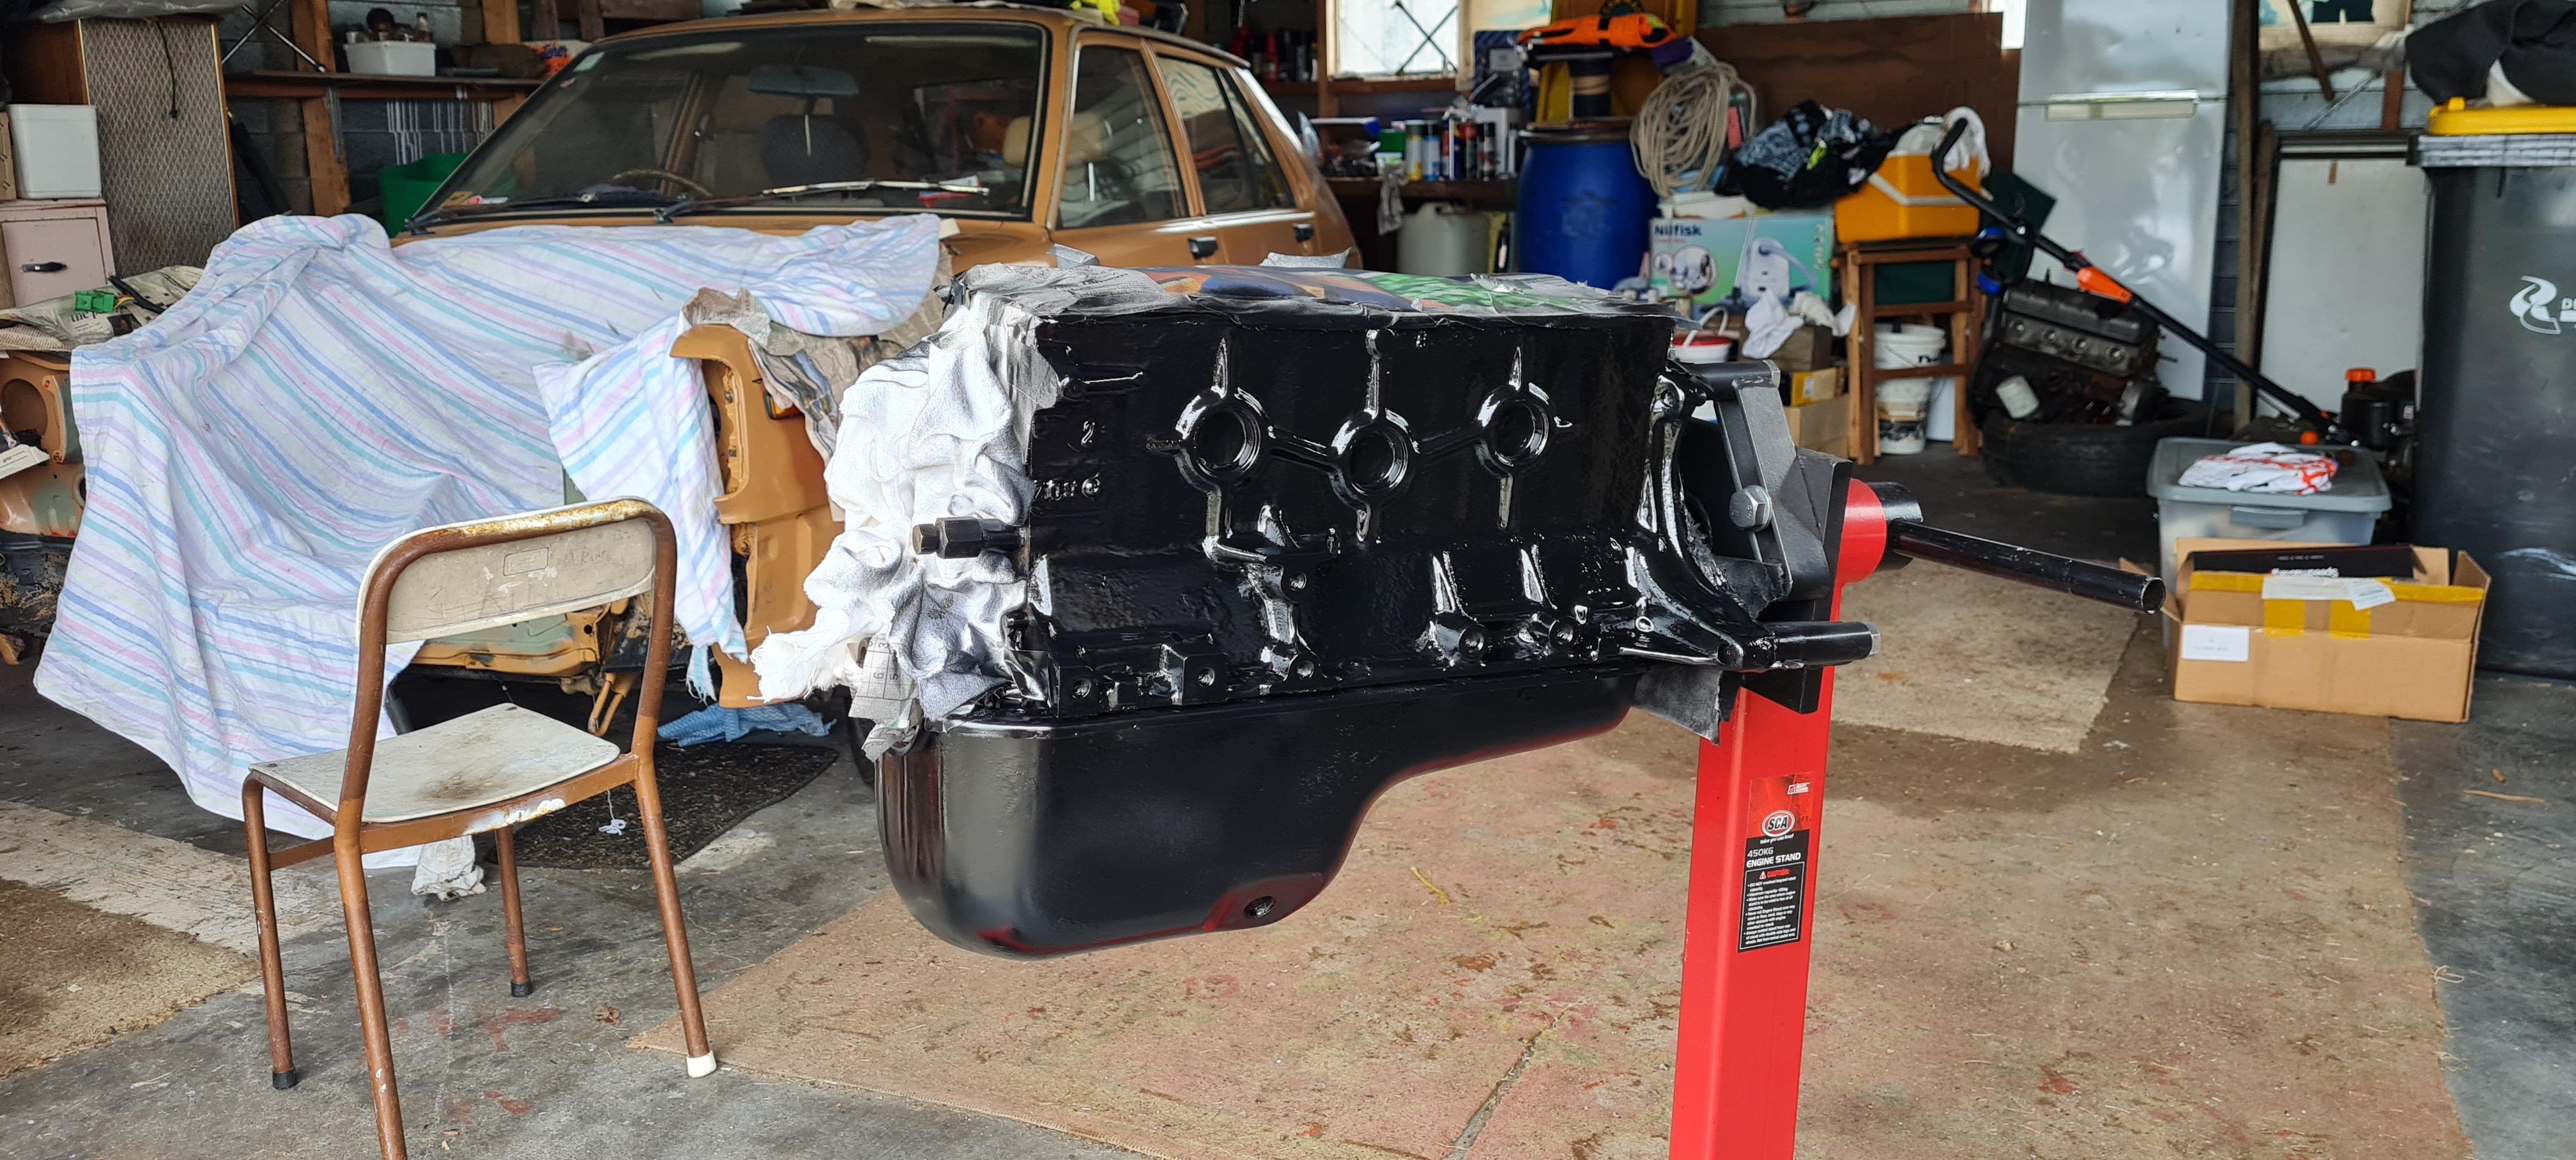
This is actually a good one! Most supercharger setups with a piggyback ECU and no intercooler get around 115hp at the wheels. Which isnt an amazing number. But it just cant be overstated how insanely hot they run with no intercooler haha. In other news, I've previously polyurethane filled my engine mounts. But, I've left the standard rubber in place. But the urethane hasnt bonded particularly well to the rubber, and I suspect the rubber is still actually softer than the urethane. So I think the mounts are slowly getting squishier, especially the rear one which takes the most punishment. So I've decided to hack up my spare one, and recast the pin in a full urethane no rubber. So I cut out as much of the rubber as I could, put it in a little tin of petrol and set it alight. I never undertsood that story in the bible about Moses and the burning bush, but now I get it
 14 points
 -
YELLOW CAR ! / not doing it yellow, it's just the gel coat tub they had open. Seems like a pretty good fit, bonnet has a bit of spare on the leading edge but that'll help with fettling. Happy about arch width/ clearance. Should be good.14 points
-
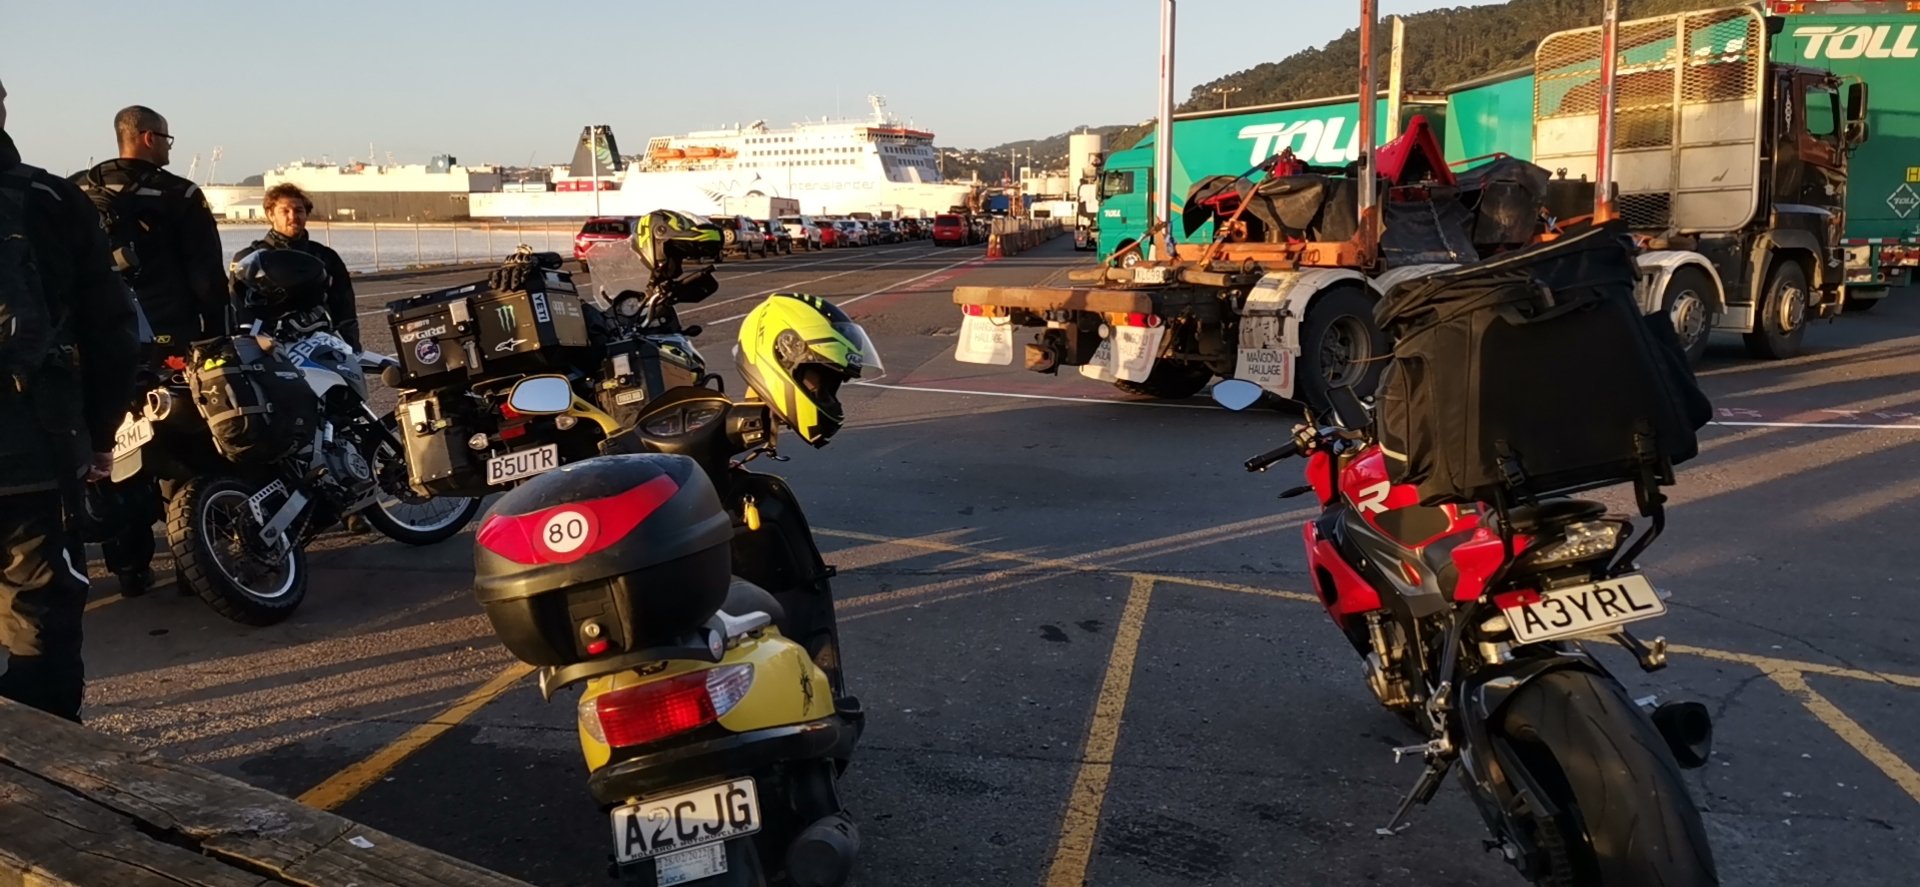
All the adventure bikes are here
13 points
-
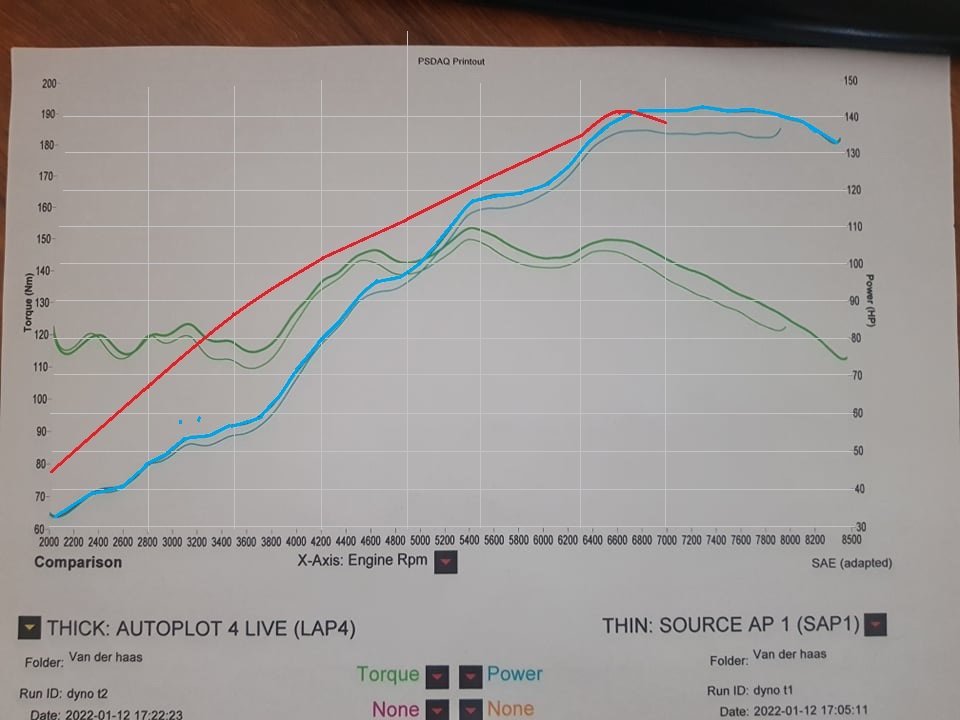
So looking at the dyno chart, yours should be quicker as it has peak power for pretty much a full 1000rpm vs a much shorter peak on the s/c one? What rpm do you shift at and how much rpm does it drop? I'm looking forward to your exhaust upgrade on your prius powered Vitz. There's some words I never thought I'd write9 points
-
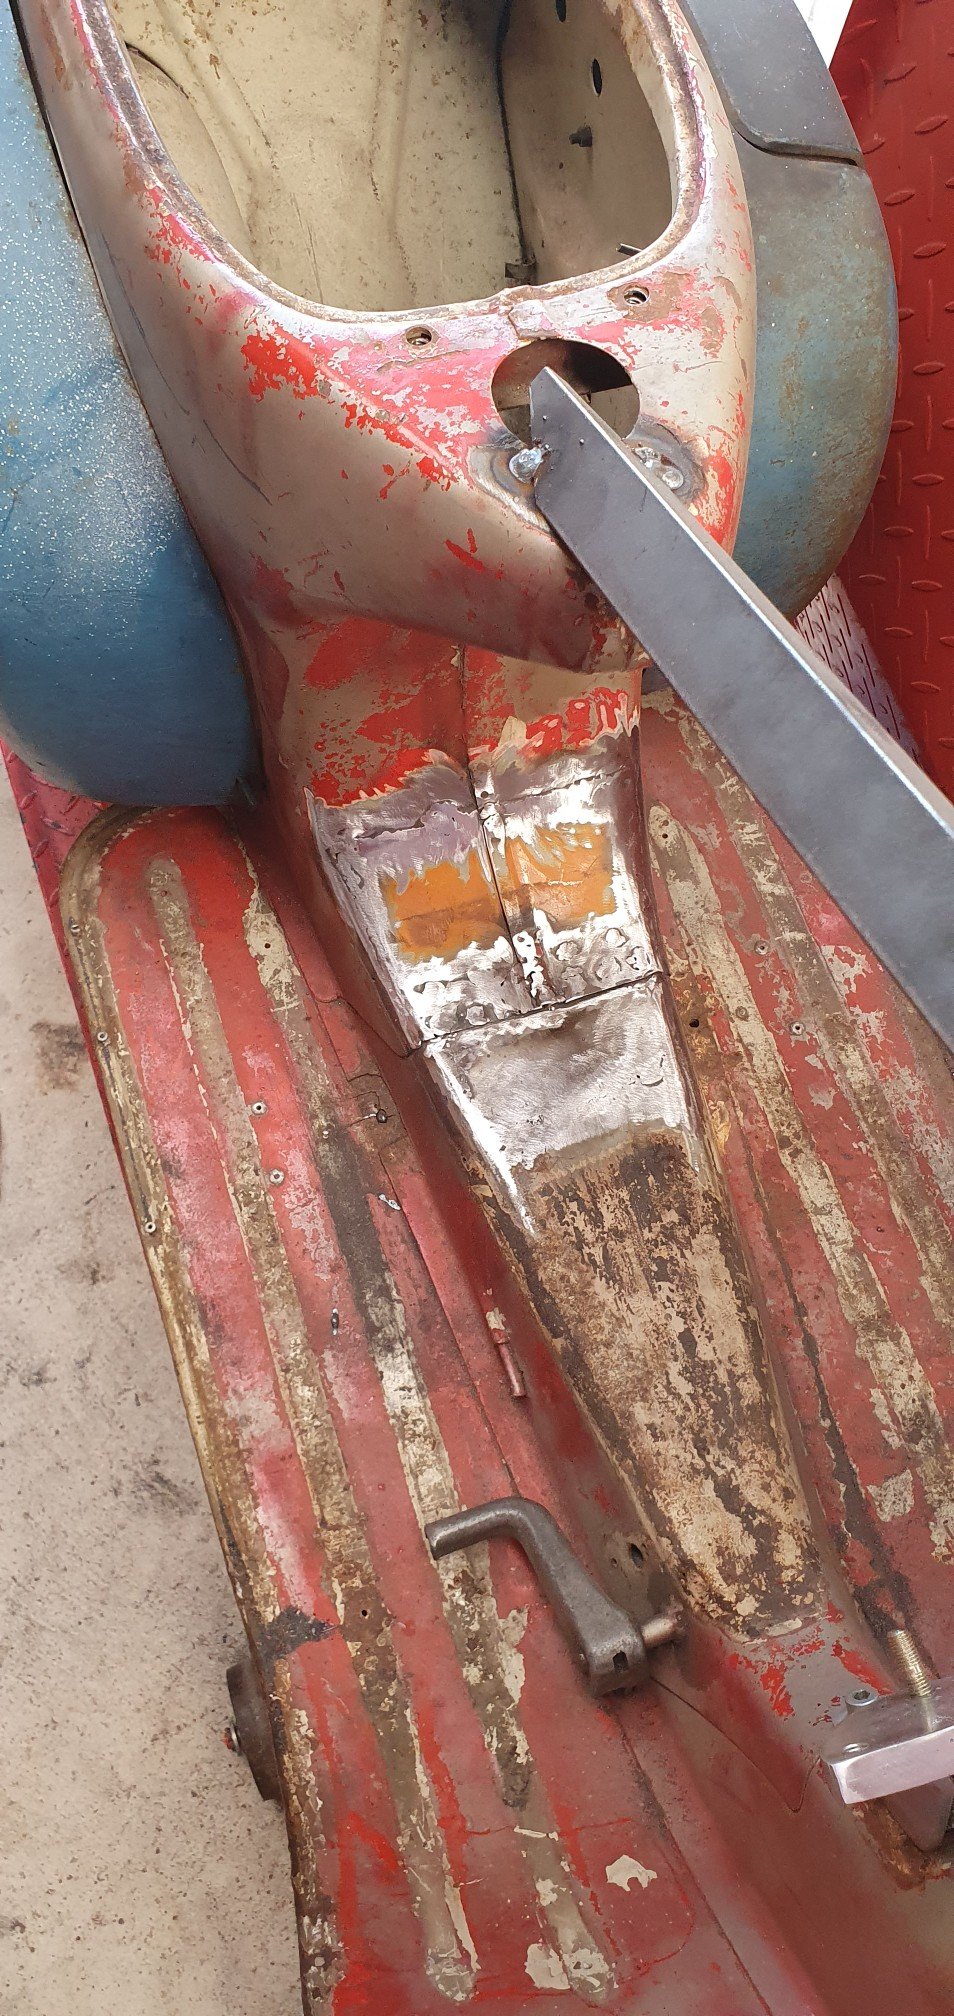
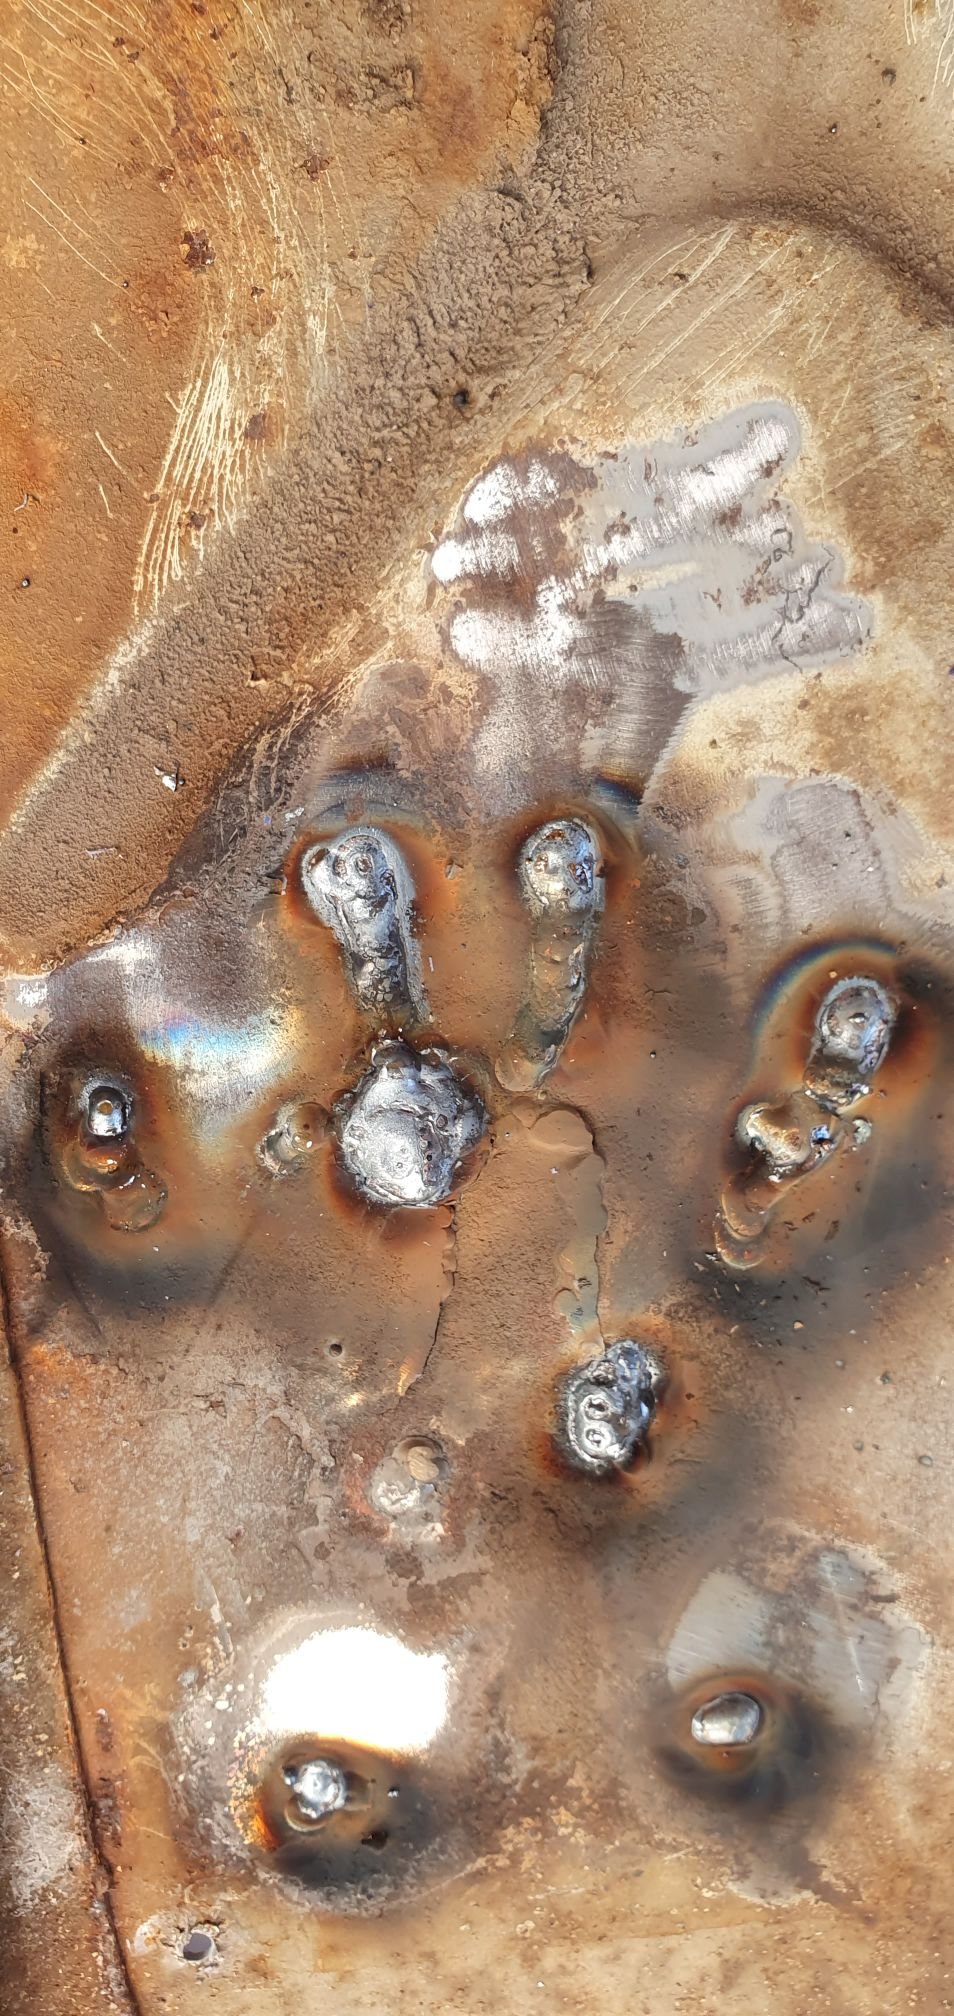
Boot lid and front valence done as well, we’ve reached nudity milestone!7 points
-
Bought some frame rails! They're attached to a car though so I guess we own that too now.6 points
-
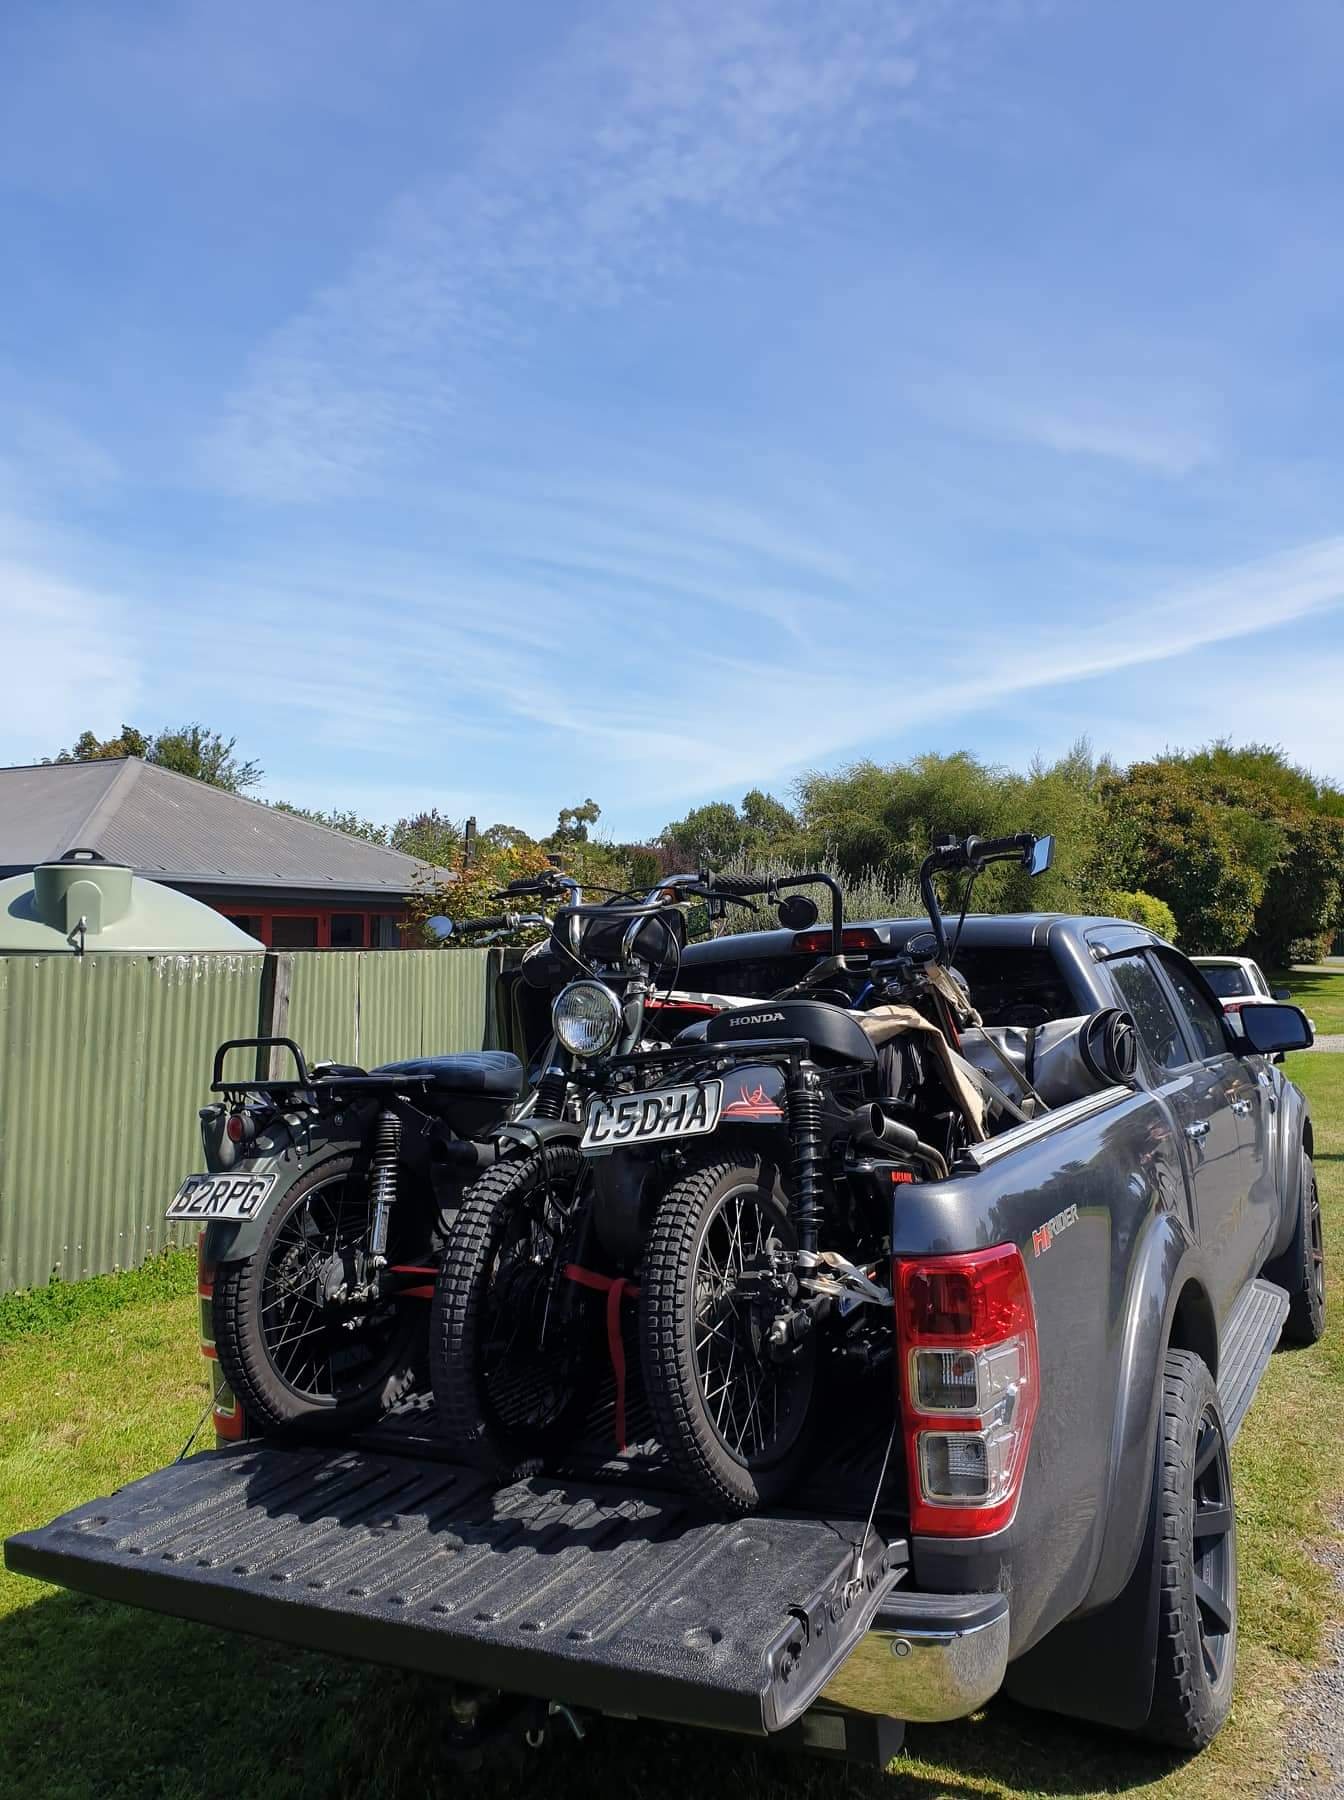
5 x CTs heading north!
6 points
-
She's looking pretty minters!
6 points
-
toque curve just some math. would look like this.
5 points
-
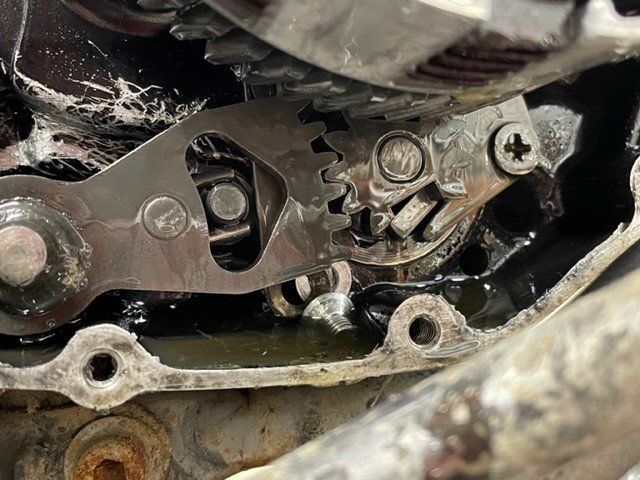
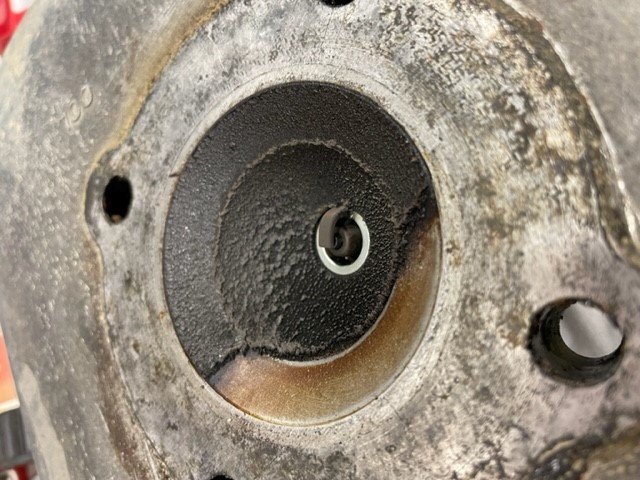
So this nearly survived another Eastcapescapade in November. The gearbox locked up about 5km short of the finish, so it got loaded on the trailer and I rode bitch on the RGV150 to finish the ride on a bike. I finally got to pulling it down and found the same issue that I had riding into Gizzy the year before. The selector retaining screw had wobbled out. You can see all the scratch marks where it had jammed the mechanism. I put this back in with lots of loctite so hopefully it won't happen again! I had been getting worried about the engine during the ride, I had convinced myself there was a bearing on the way out, so I whipped the head and barrel off and gave it all a good wriggle, but everything seems to feel nice and tight. Plenty of oil deposits in there though! I'll be using a better quality oil going forward I think. I've cleaned all the carbon off everything and have just been waiting on a new set of rings to replace one I bent I'm quite looking forward to getting it nanging around again. Hopefully I'll have it back together tonight!
5 points
-
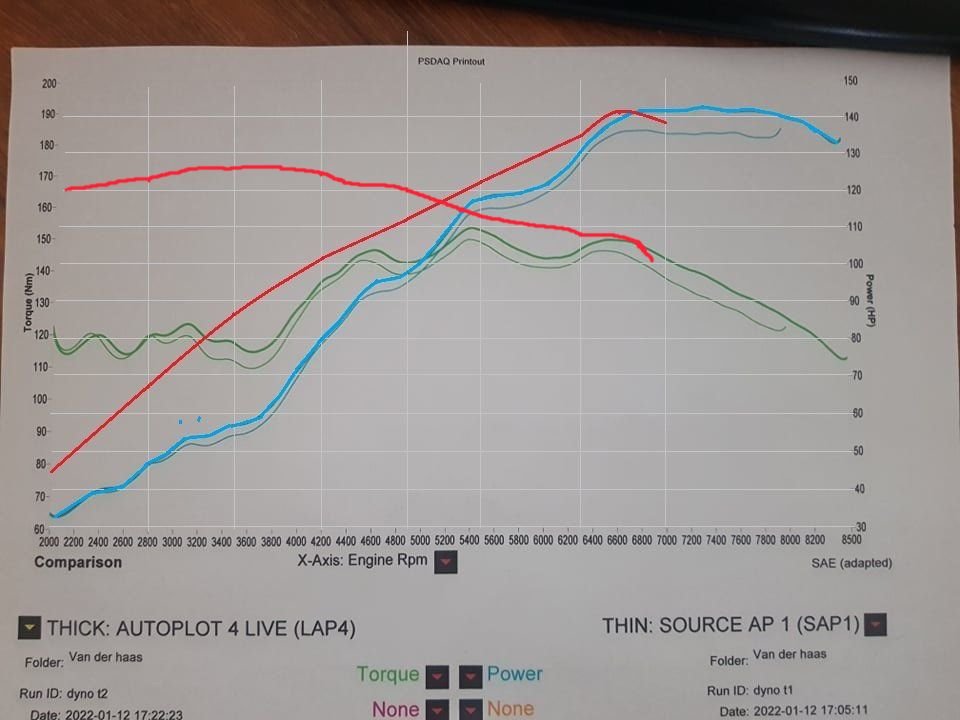
One of the chaps in Australia posted up dyno of his supercharged 1NZ results. So I mspainted a comparison (Happy now, @Stu?! ) (His red, mine blue) Pretty meaty through the midrange! Supercharger has about 35hp more at 3500rpm. But then runs out of puff before 7k and he's got to change gear a lot earlier. He's planning on taking it to the drags. Will be interesting to see how it compares!
5 points
-
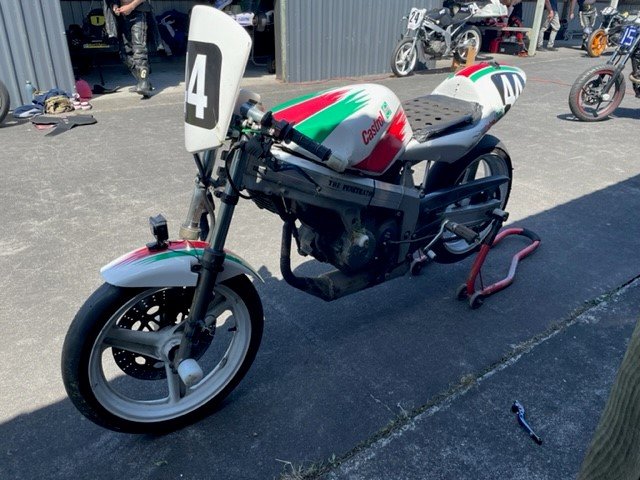
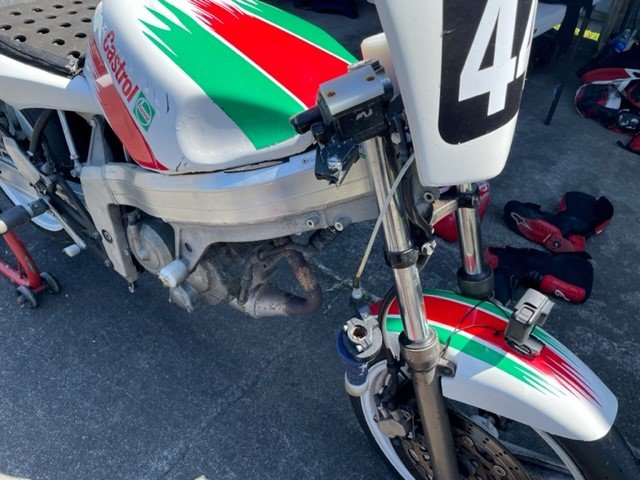
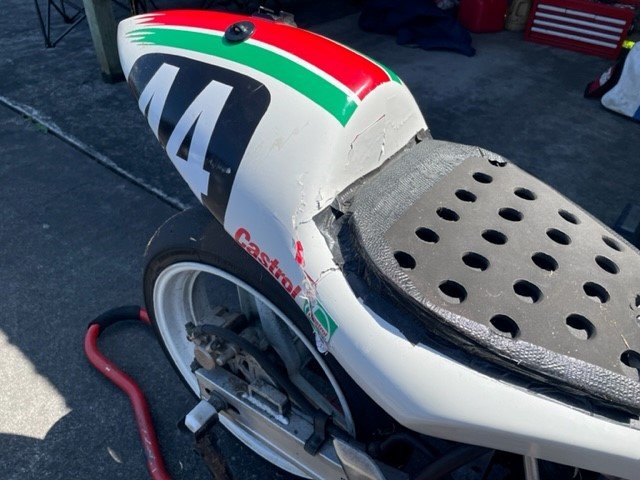
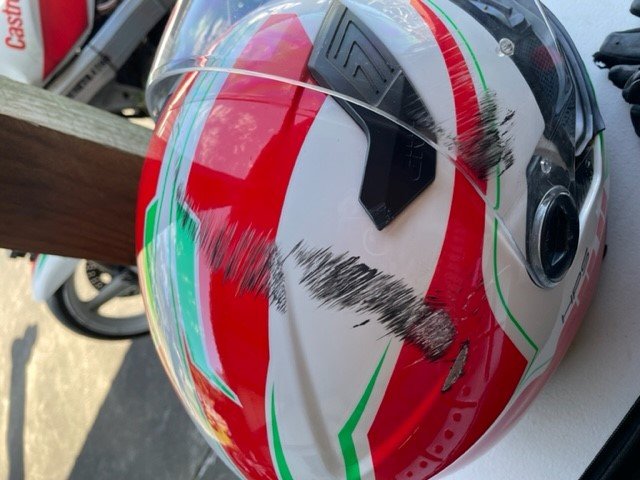
Bike has been going great. I didn't get in as much racing last year as I would have liked on account of having another baby and renovating our house. Last weekend was my first outing since september. We had one of our best turn-outs with 14 bikes, which made for some really great racing. I got 2nd in the first race from 2nd place start. 2nd in the second race from starting near the back. Reeled in the young fella that was leading to where I could have patted him on the bum as we crossed the finish line. Then the third race... Started on the 4th row. Leading by the end of the first lap. Then one of our real gun riders got past me under brakes, then made a mistake and I got him back. Thinking "I've got a second chance here, I need to brake a little later so he doesn't get me again"... I did this: And that was the end of my day. And the end of that helmet, and the tail fairing, and levers, and clip-ons... The end of that straight is 80km/h, and I didn't get any braking in at all before I hit the ground. Definitely earned a few bruises, but the physio already seems to have fixed my knee with some needles.3 points
-
Make sure you give them back fresh from 3 days spent shimming your arsehole half a mil off a lifan-esque power hammer3 points
-
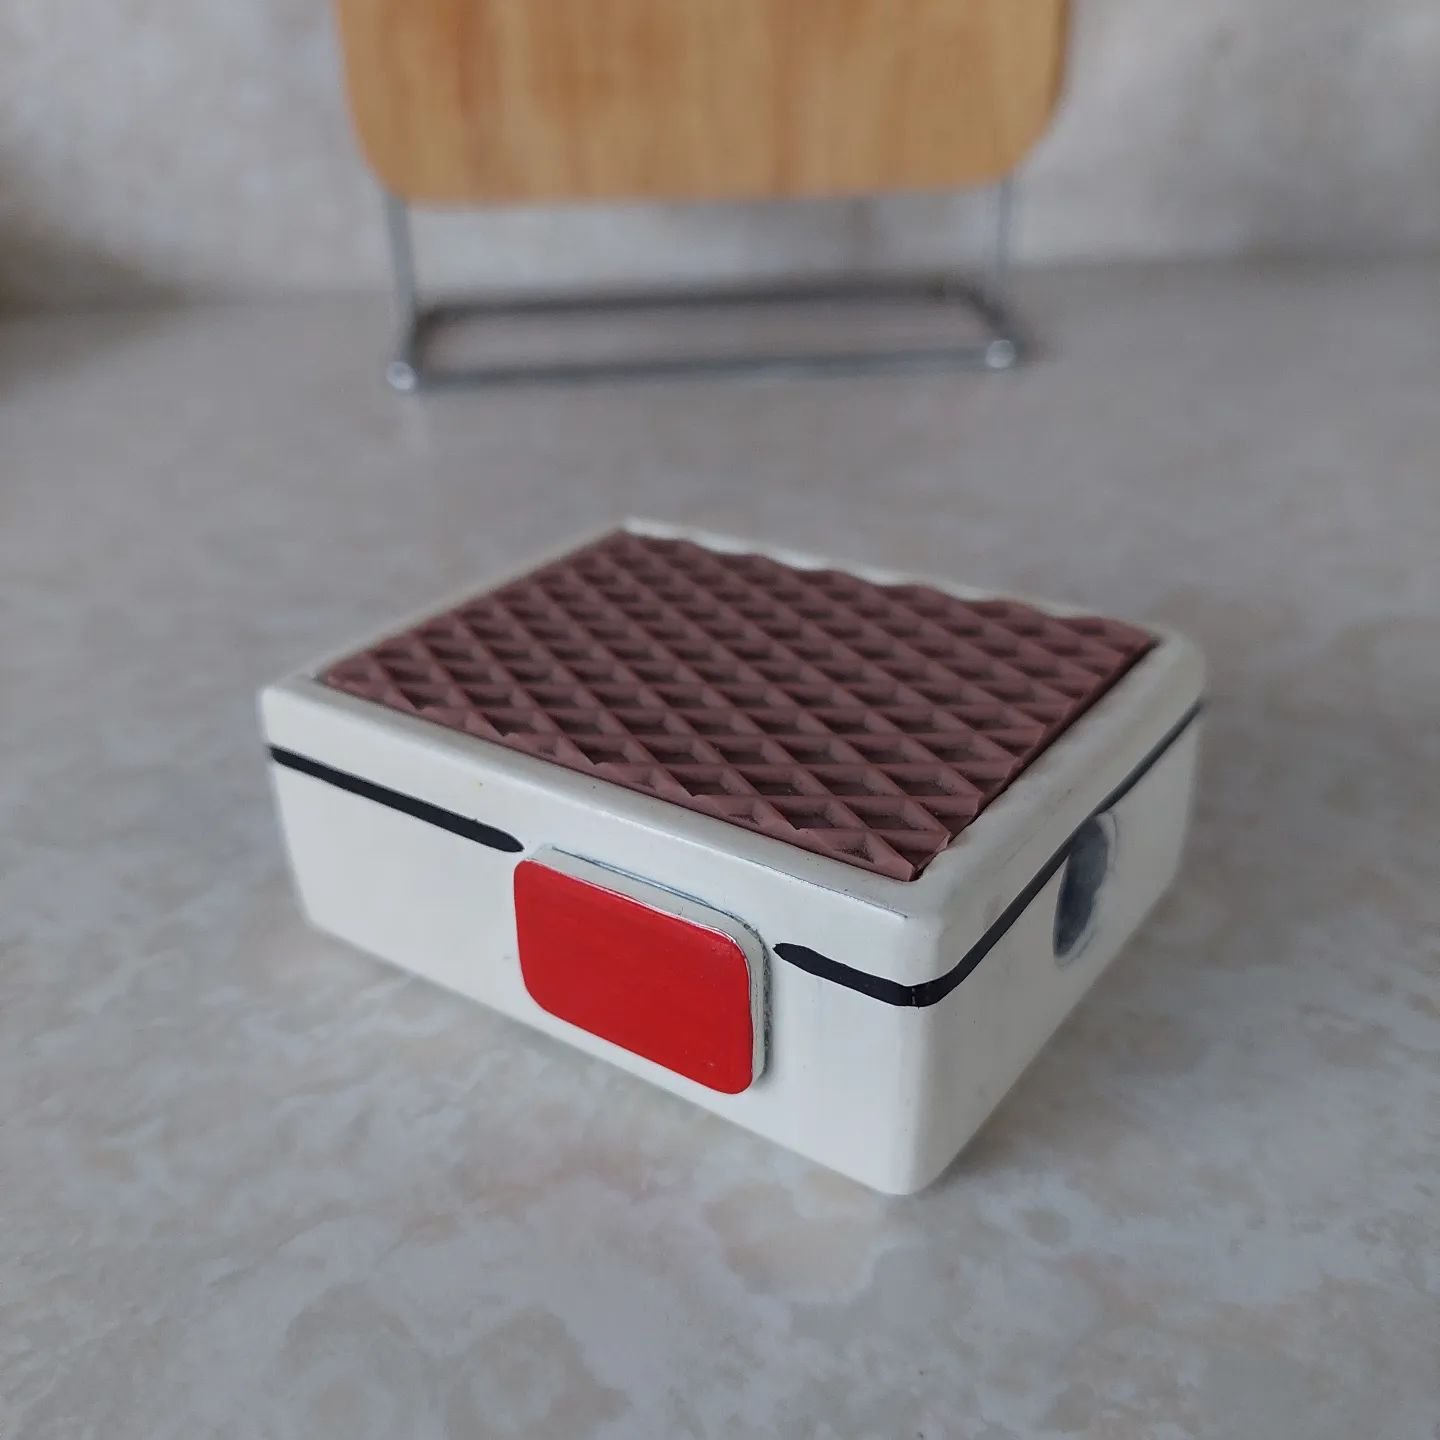
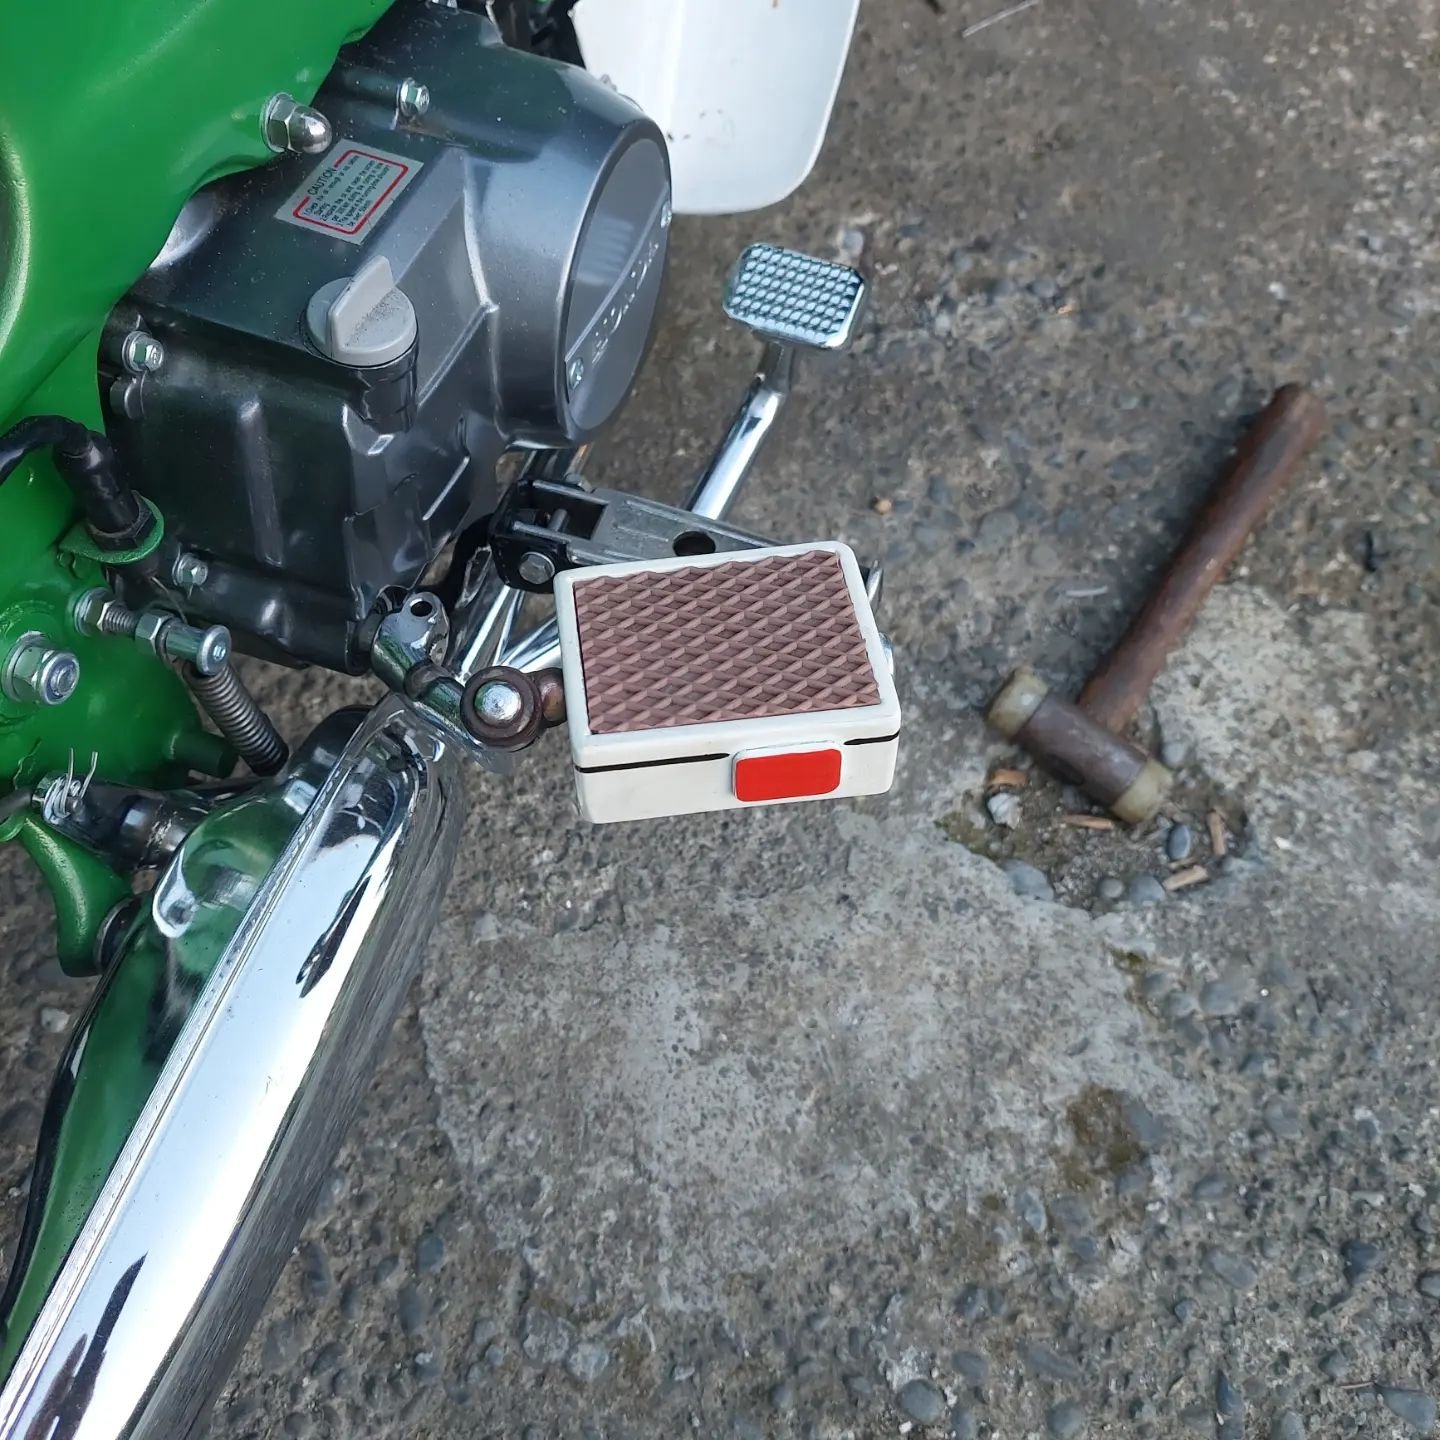
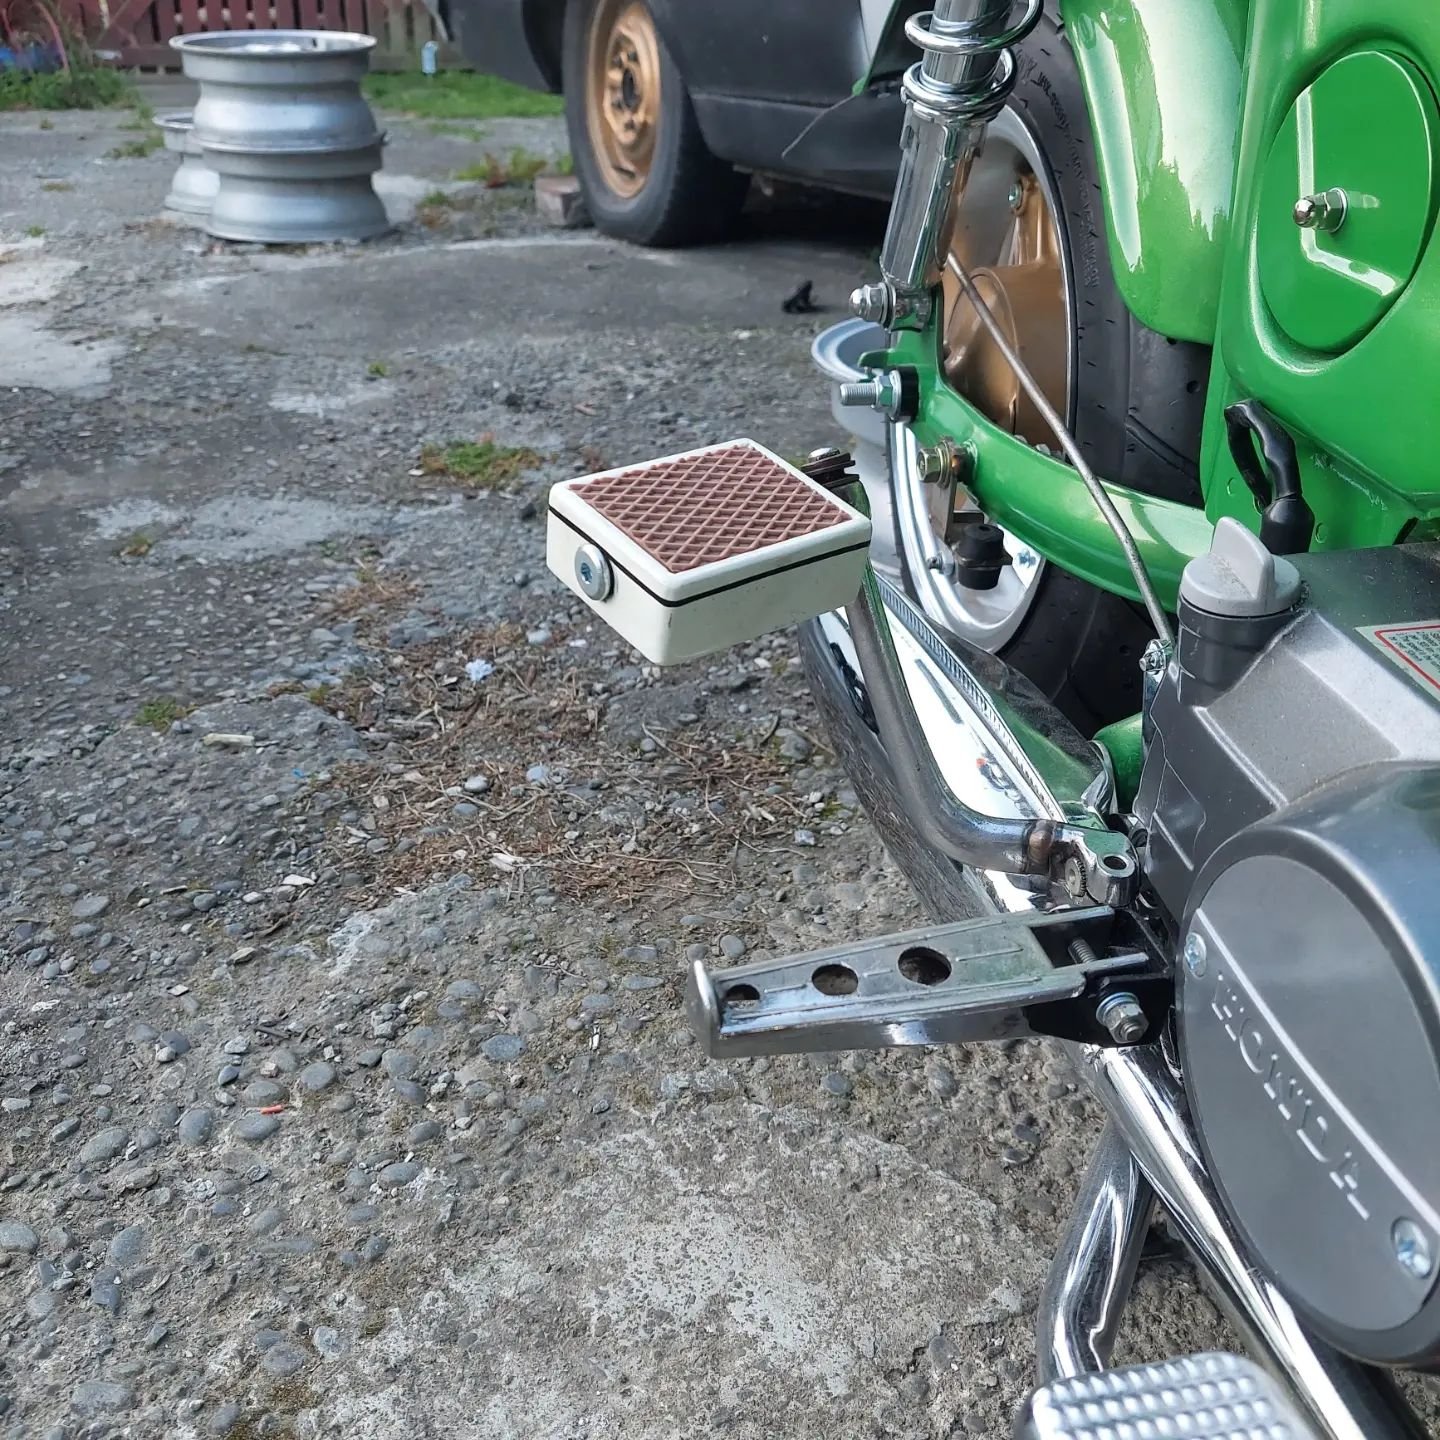
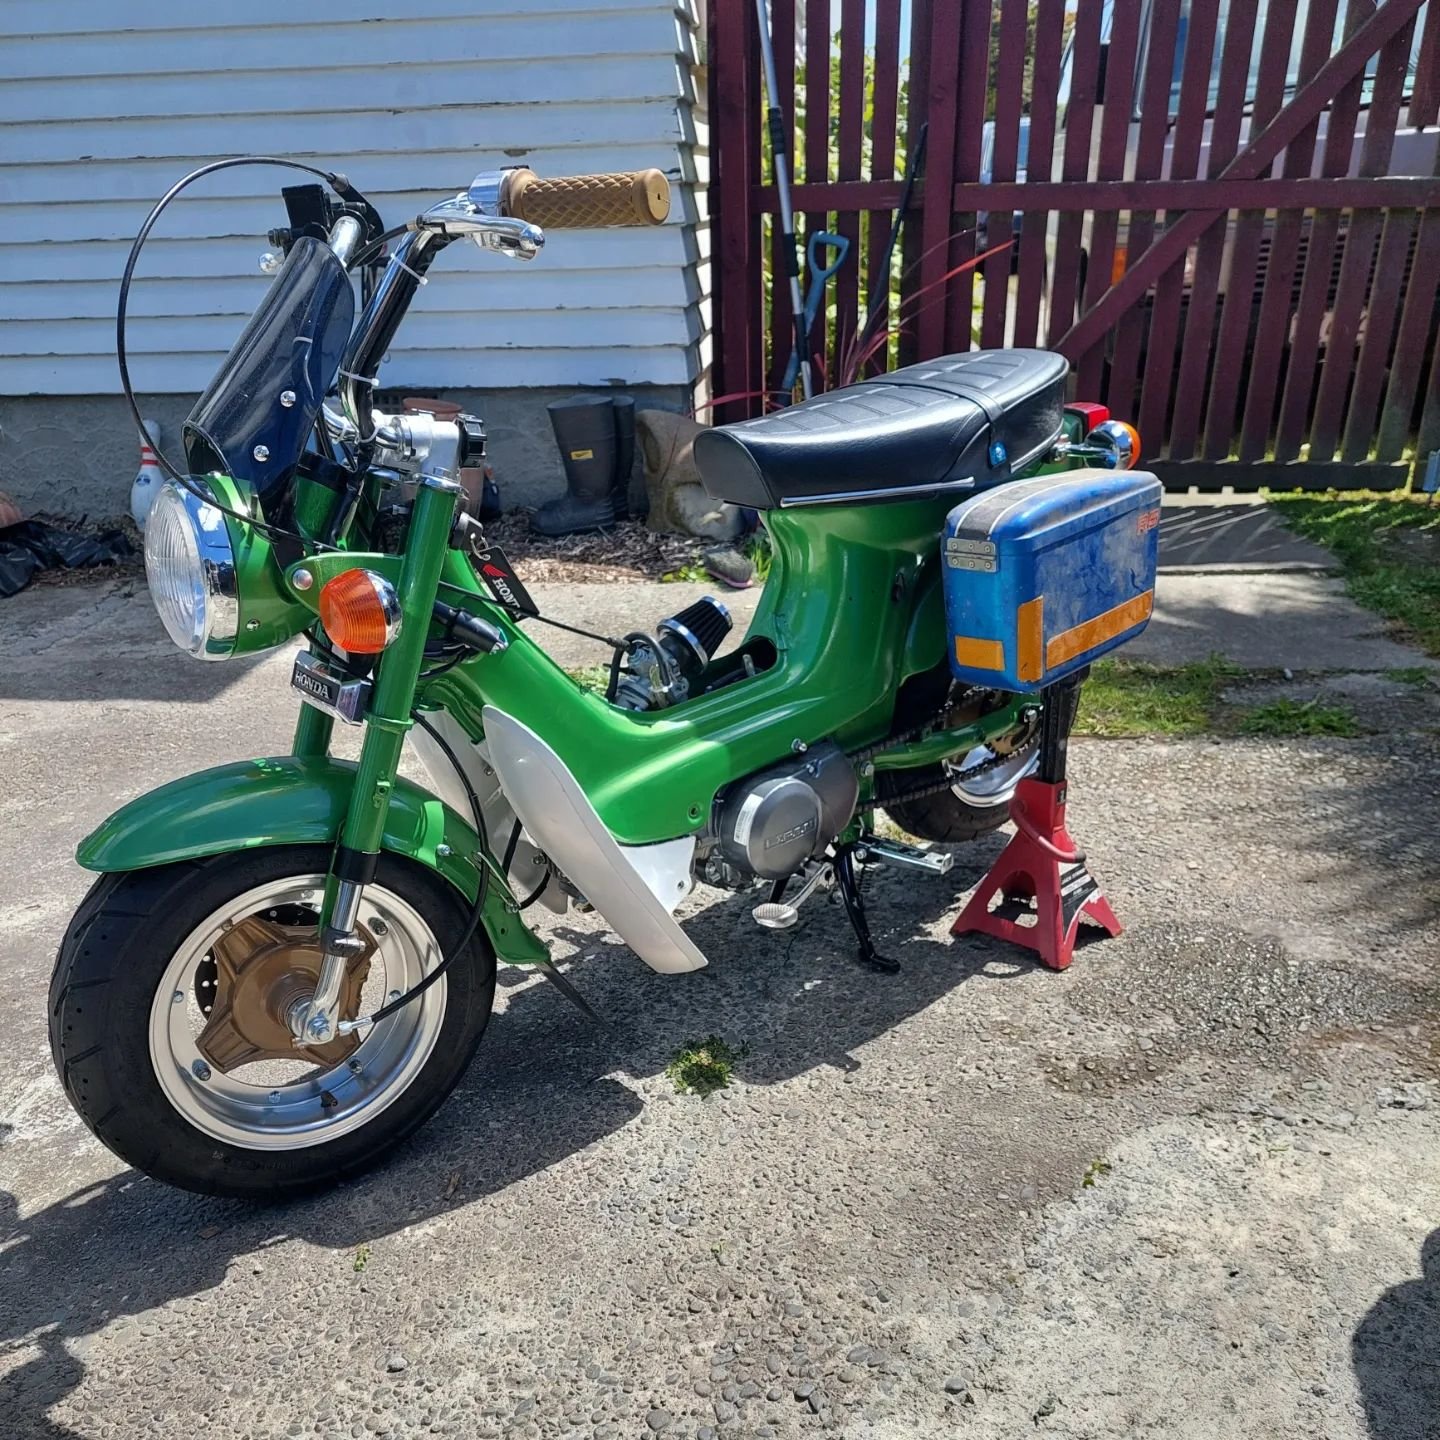
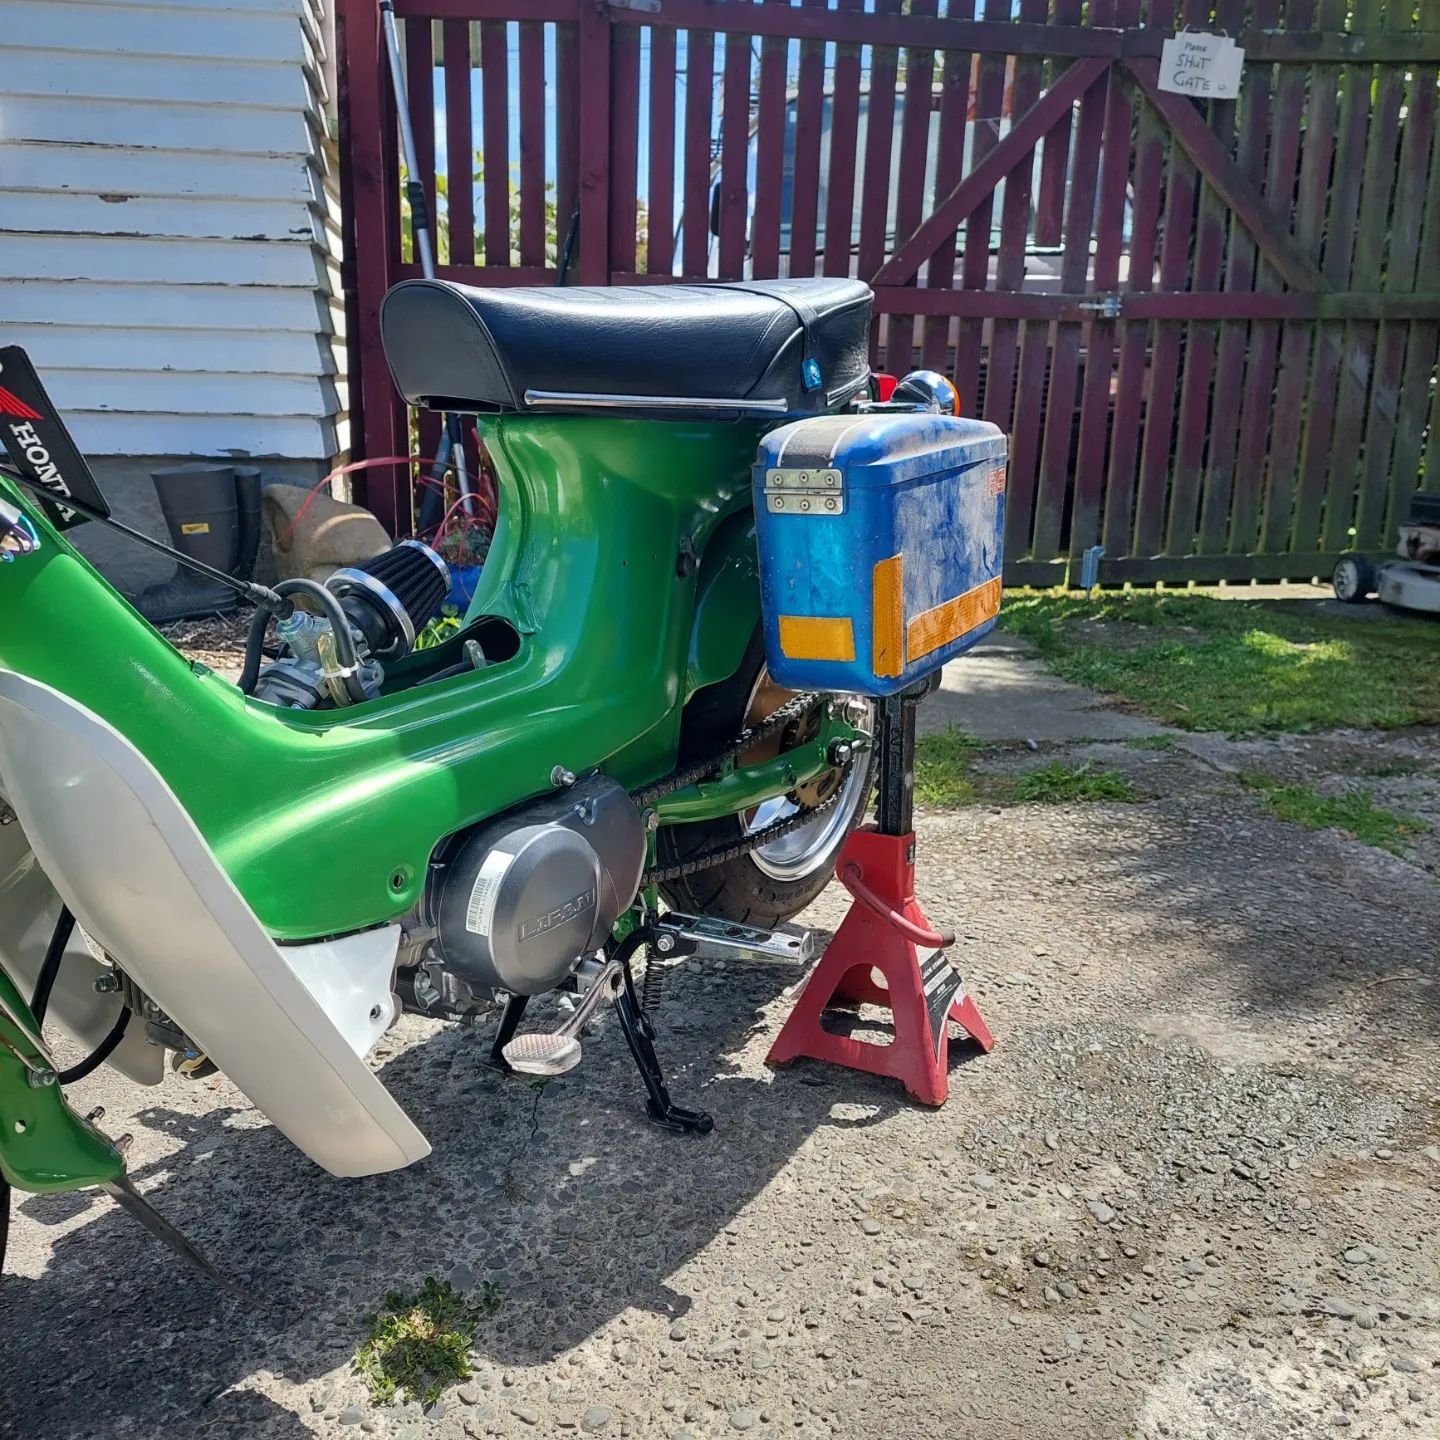
Its normally the smaller jobs that take the longest, but im gradually ticking them off the list. 1st up is the painting of the air filter cover 2nd is the air filter cover. I found some old mag wheel centre caps at work, drilled some holes and put a 6mm rivnut in the air filter. 3rd is the kicker pedal I fabricated out of some flatbar, plate and an old vans phone case i had hidden in a drawer. Lastly I bought some side boxes at the winchester swapmeet last year when swapmeets were actually a thing and you could go to them. Just toying about with the idea of them but Im pretty keen to make some brackets, colour code them and have them fitted ready for syds run this year to store some tools, spares and a few BRB Hazy Pale Ales
3 points
-
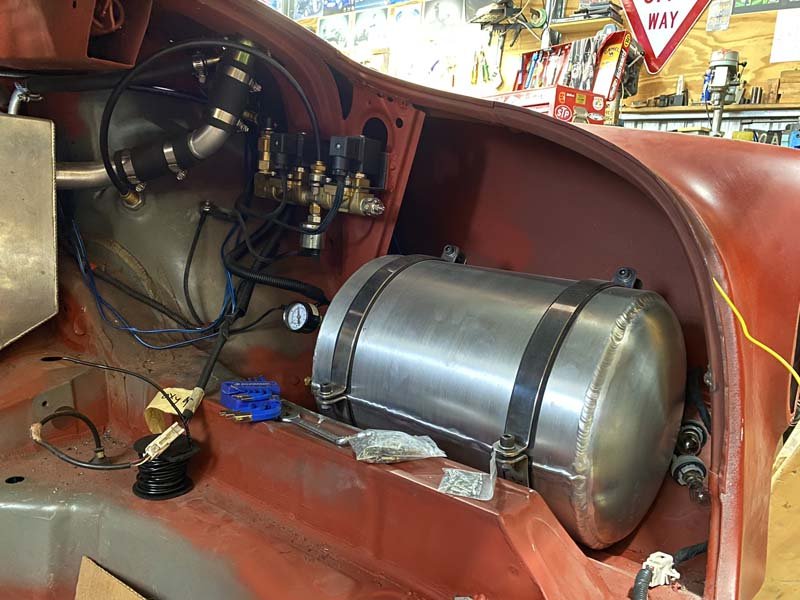
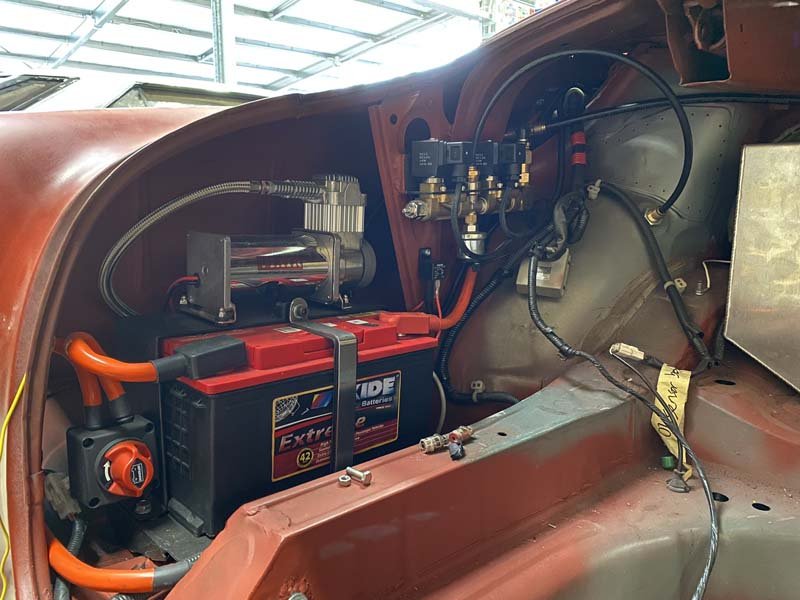
Fitted the rest of the moon discs. To hide the 15x6 alloy wheels. Real White wall tyres will be purchased soon, to replace the snow tyres. Wiring is well underway. Just waiting on a few components to finish up the air suspension side. Battery and back up compressor all mounted and working. New park light lenses on the front too.
3 points
-
2 points
-
Got shitloads done lately. Home for 10 days...yay covid!!
2 points
-
Napa absorbed Ashdown Ingrams, sockburn holds the most stock. Ask for Gav2 points
-
2 points
-
Please keep the header colour scheme2 points
-
On a happier note,
2 points
-
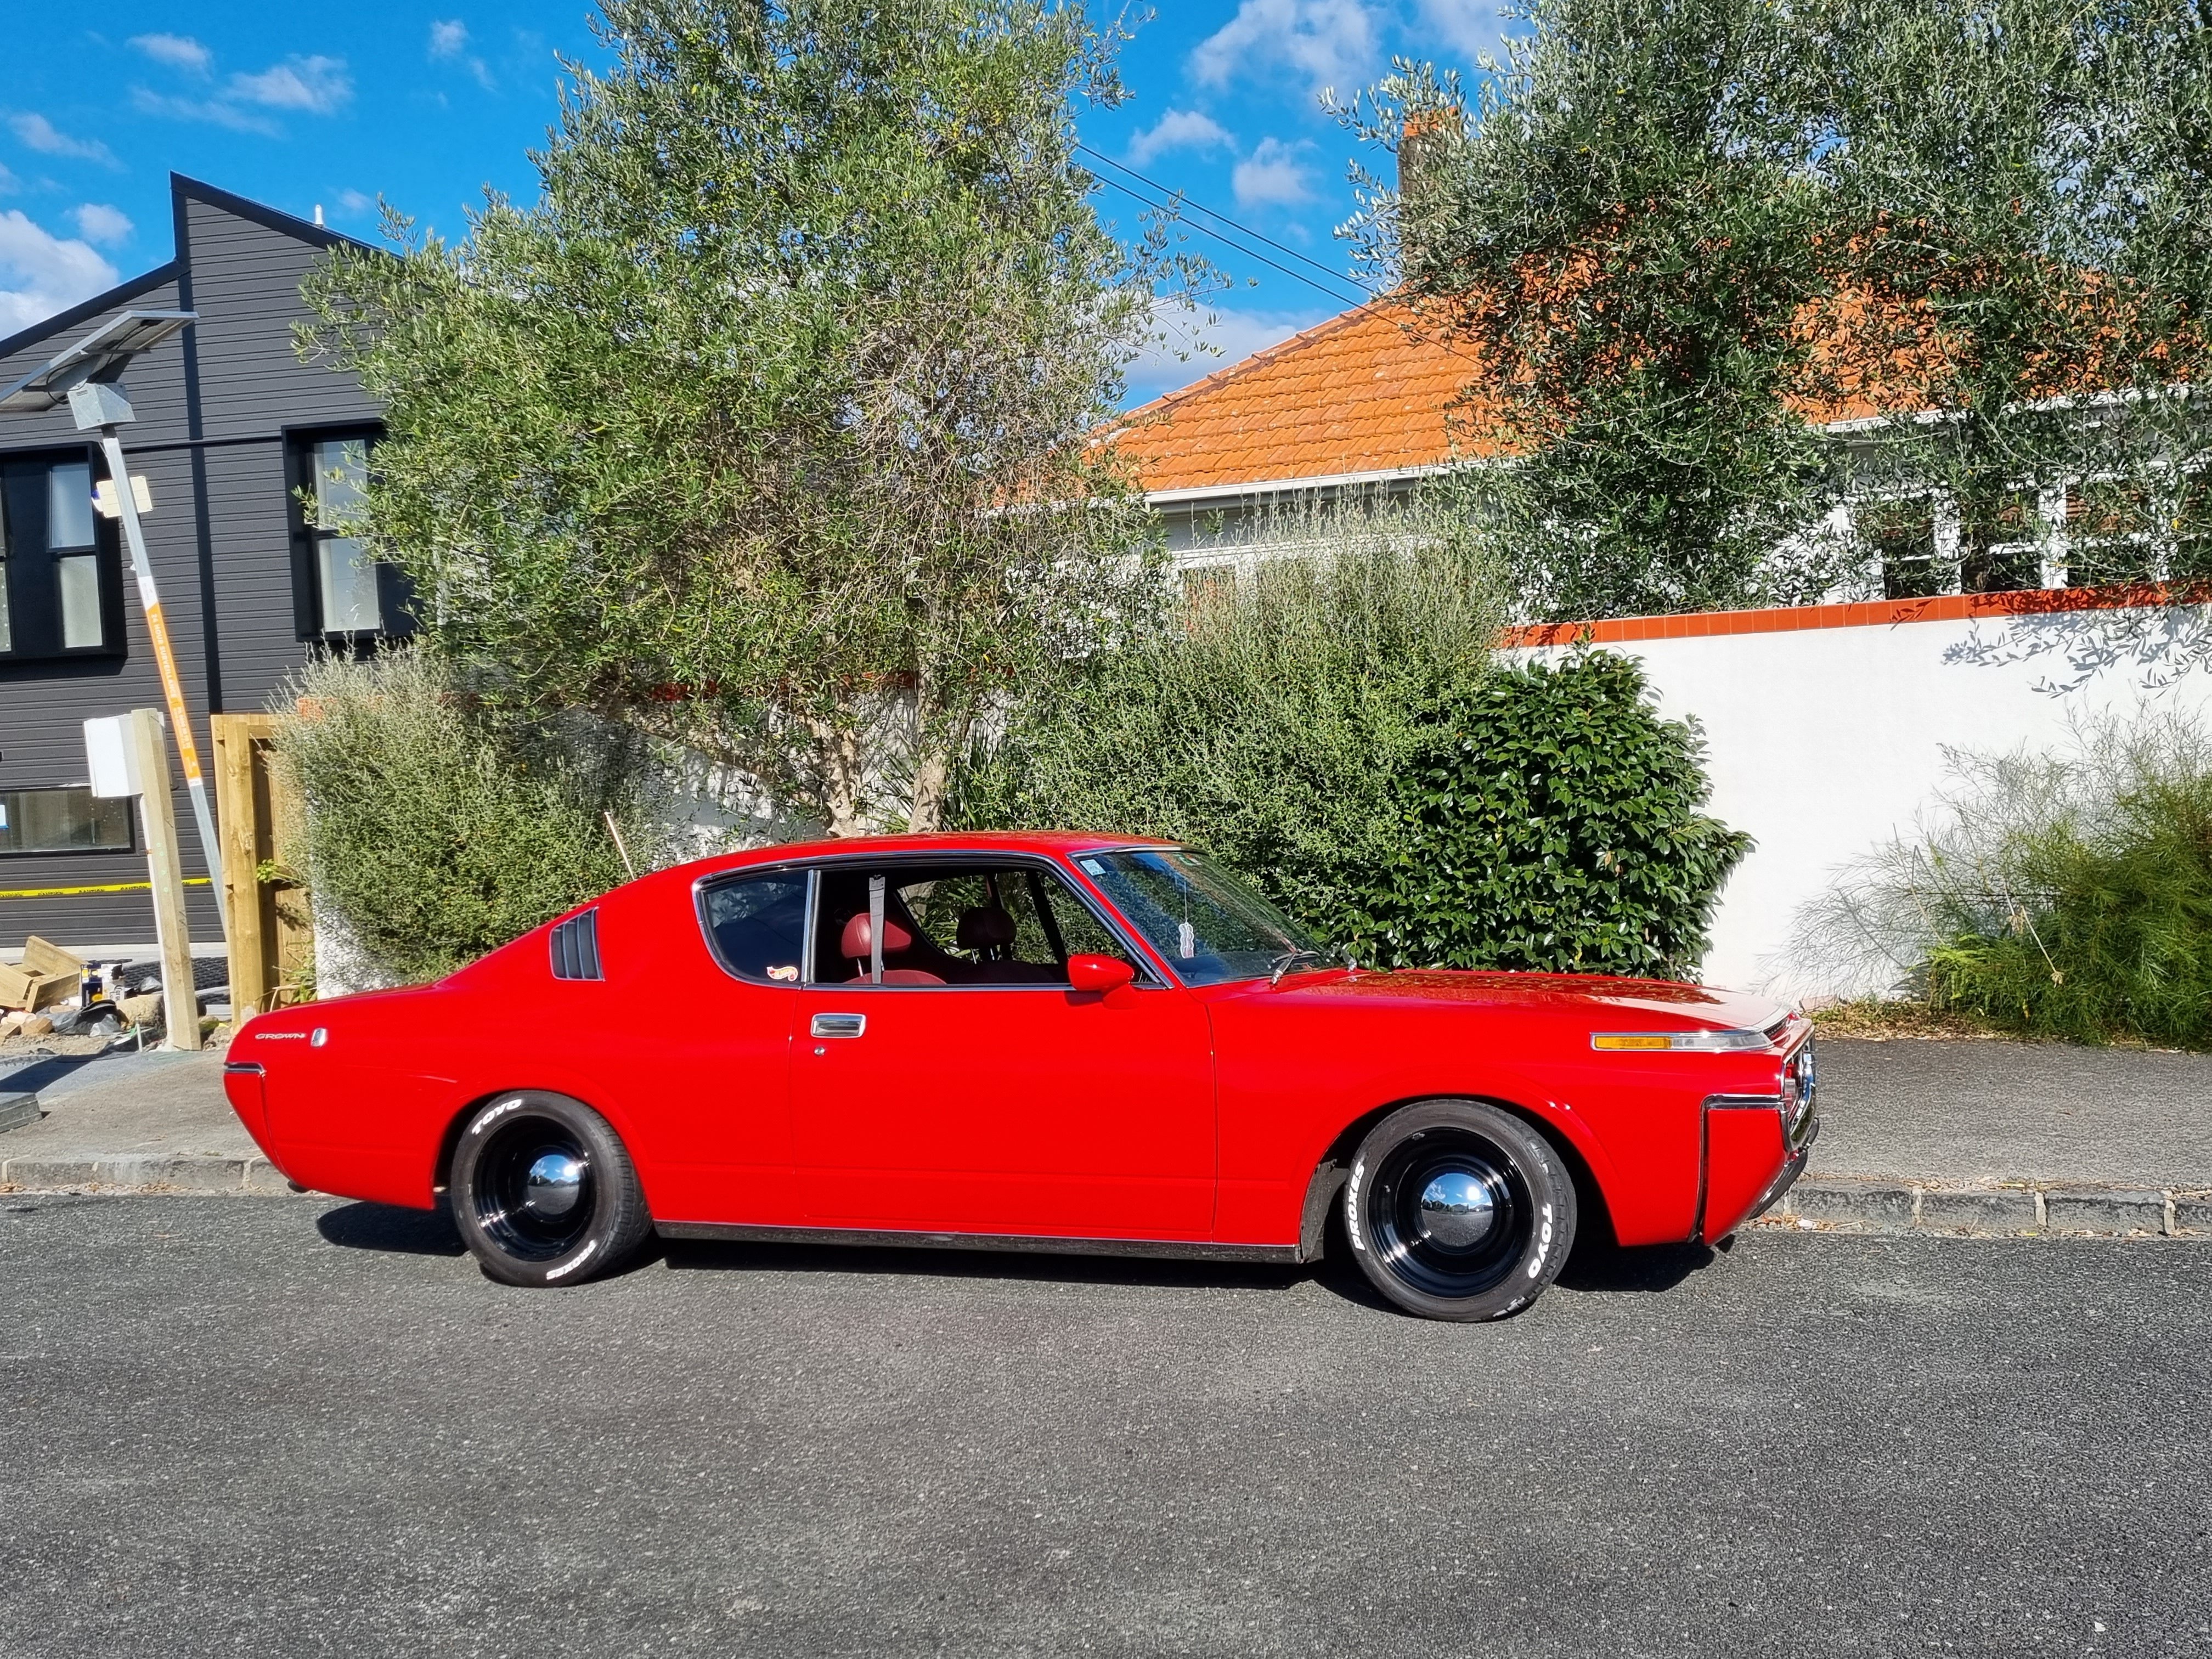
I spent today cutting and polishing the paint There were a couple of areas that weren't finished very well by the guy who painted it so i fixed it. Then I waxed it. Now I can't move my arms. Picture shows car that may be shiny, hard to tell how good it looks from a pic really ..
2 points
-
Went a bit further with assembly. I'm keen to track down an electrical fan to fit into the factory shroud
2 points
-
For my 13.8 run: Launched at 5500rpm, bogged to 4500ish when the wheel speed caught up to actual speed shifted at 9045rpm - on gear shift drops to 6040rpm Then shifted at 9040rpm, gear shift drops to 6725rpm Then crossed the line at 8400rpm in 3rd So yeah for a daily driver it would be pretty hectic having 35hp more at 3500rpm. But at the drags I get to stay in the meaty part of the powerband the whole time. EDIT: With my new 13" setup, the diameter of a 205/60/13 is smaller than 225/50/15 (576mm instead of 607mm) So on the 13" tyre I'll end up crossing the line at roughly 8800rpm instead of 8400rpm. So that works out better than expected.1 point
-
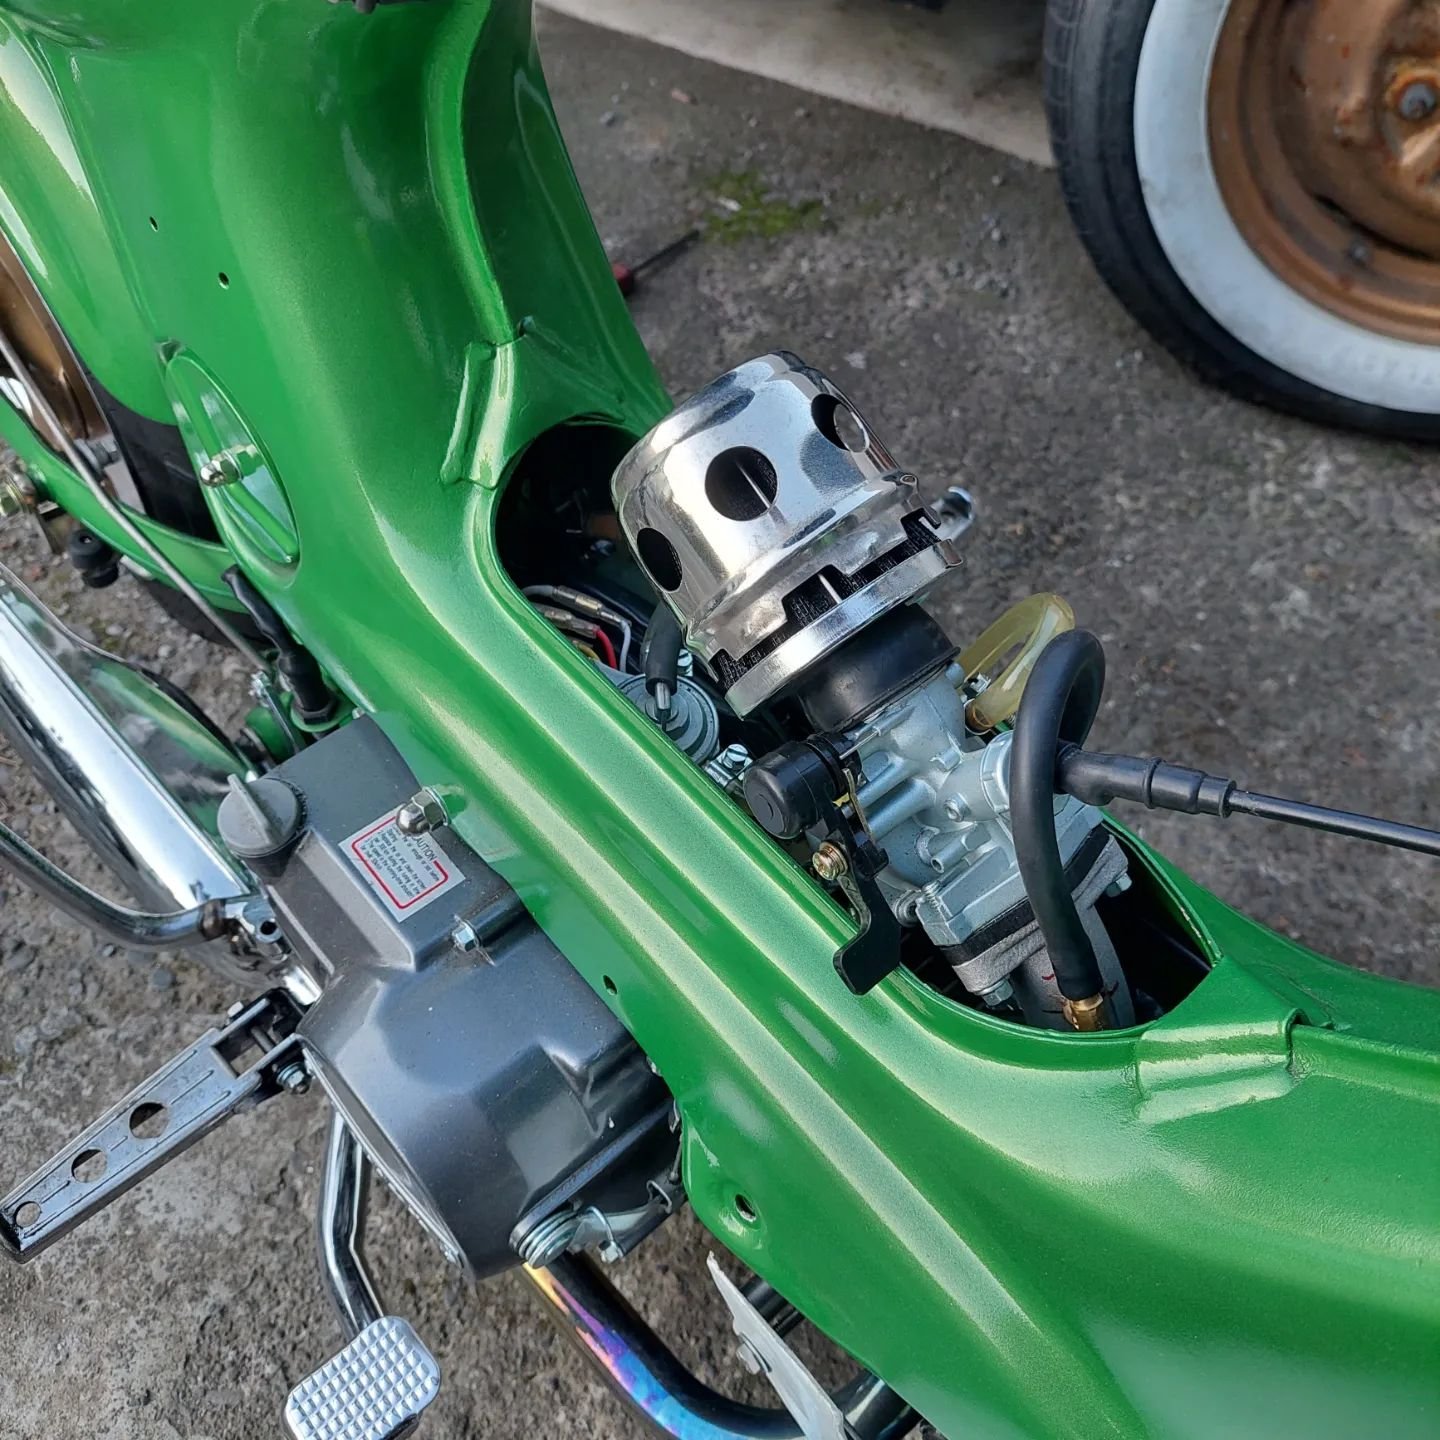
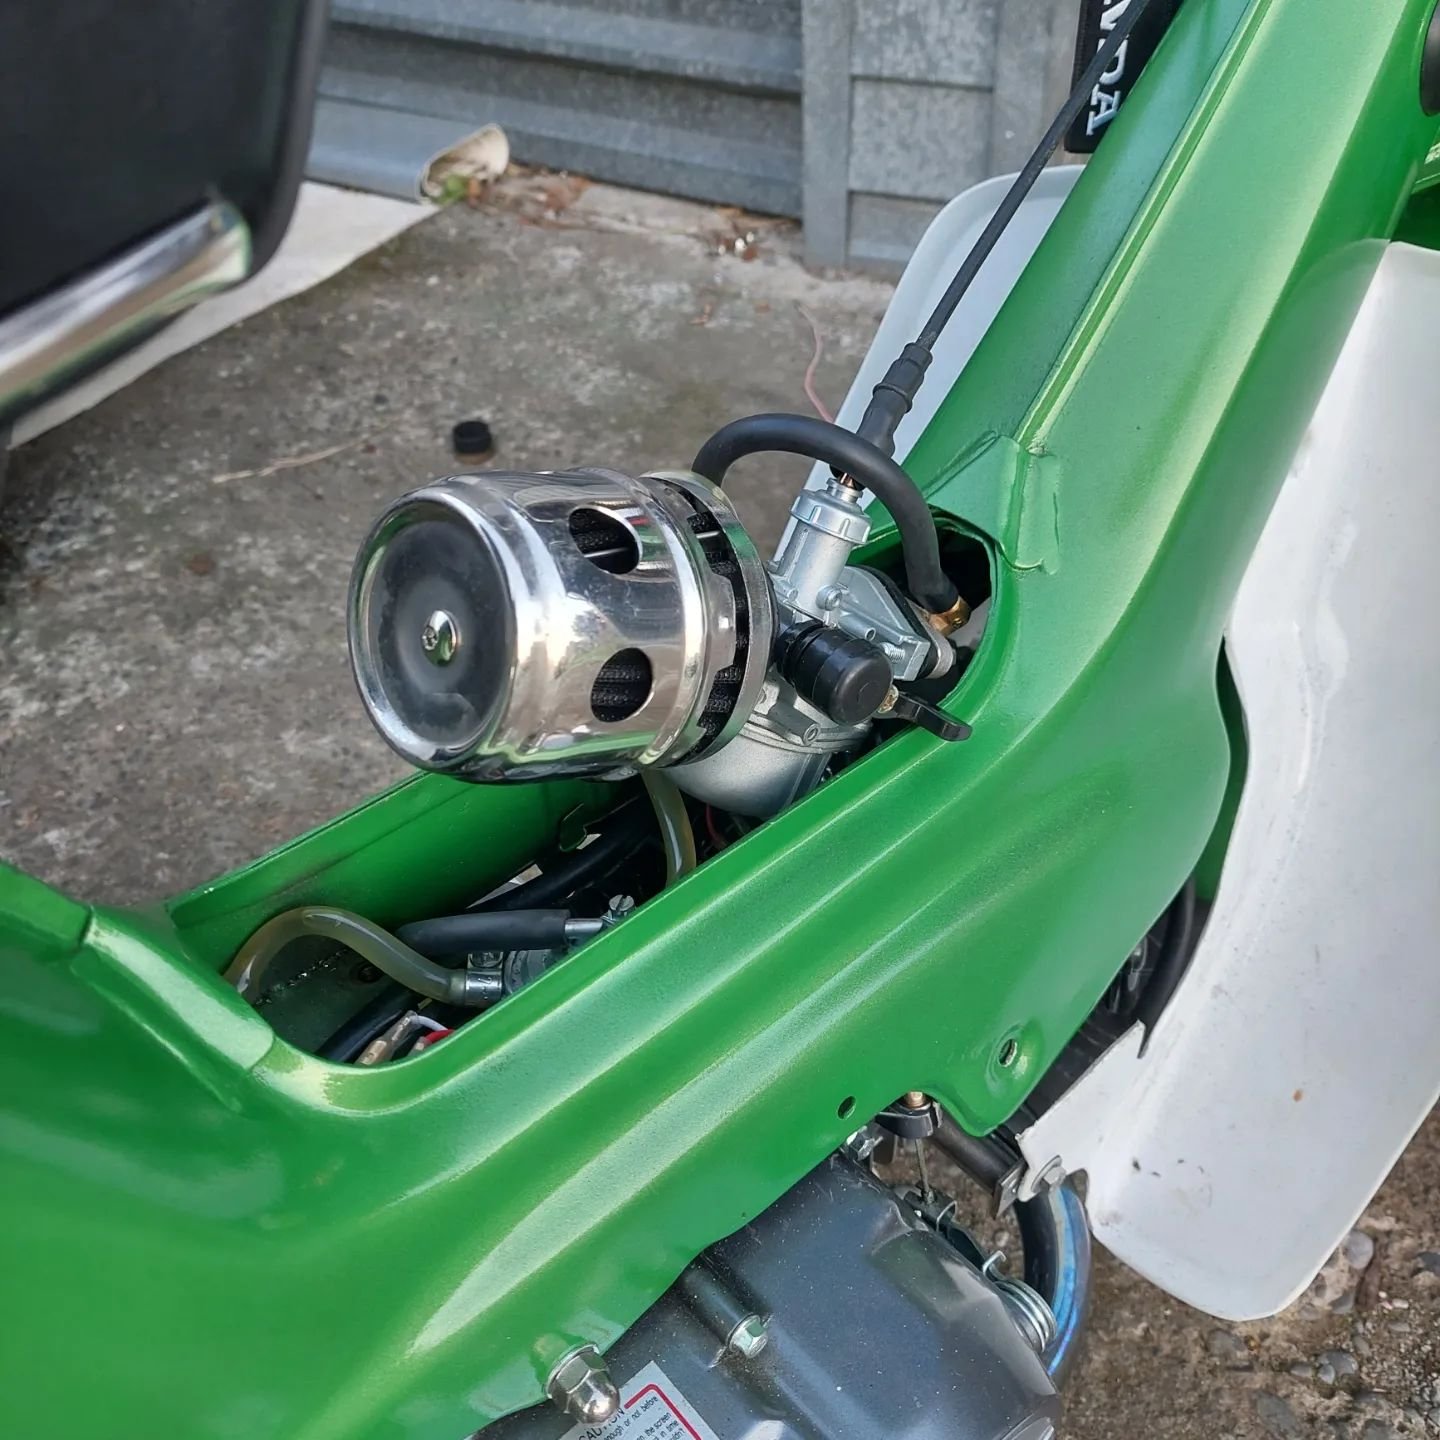
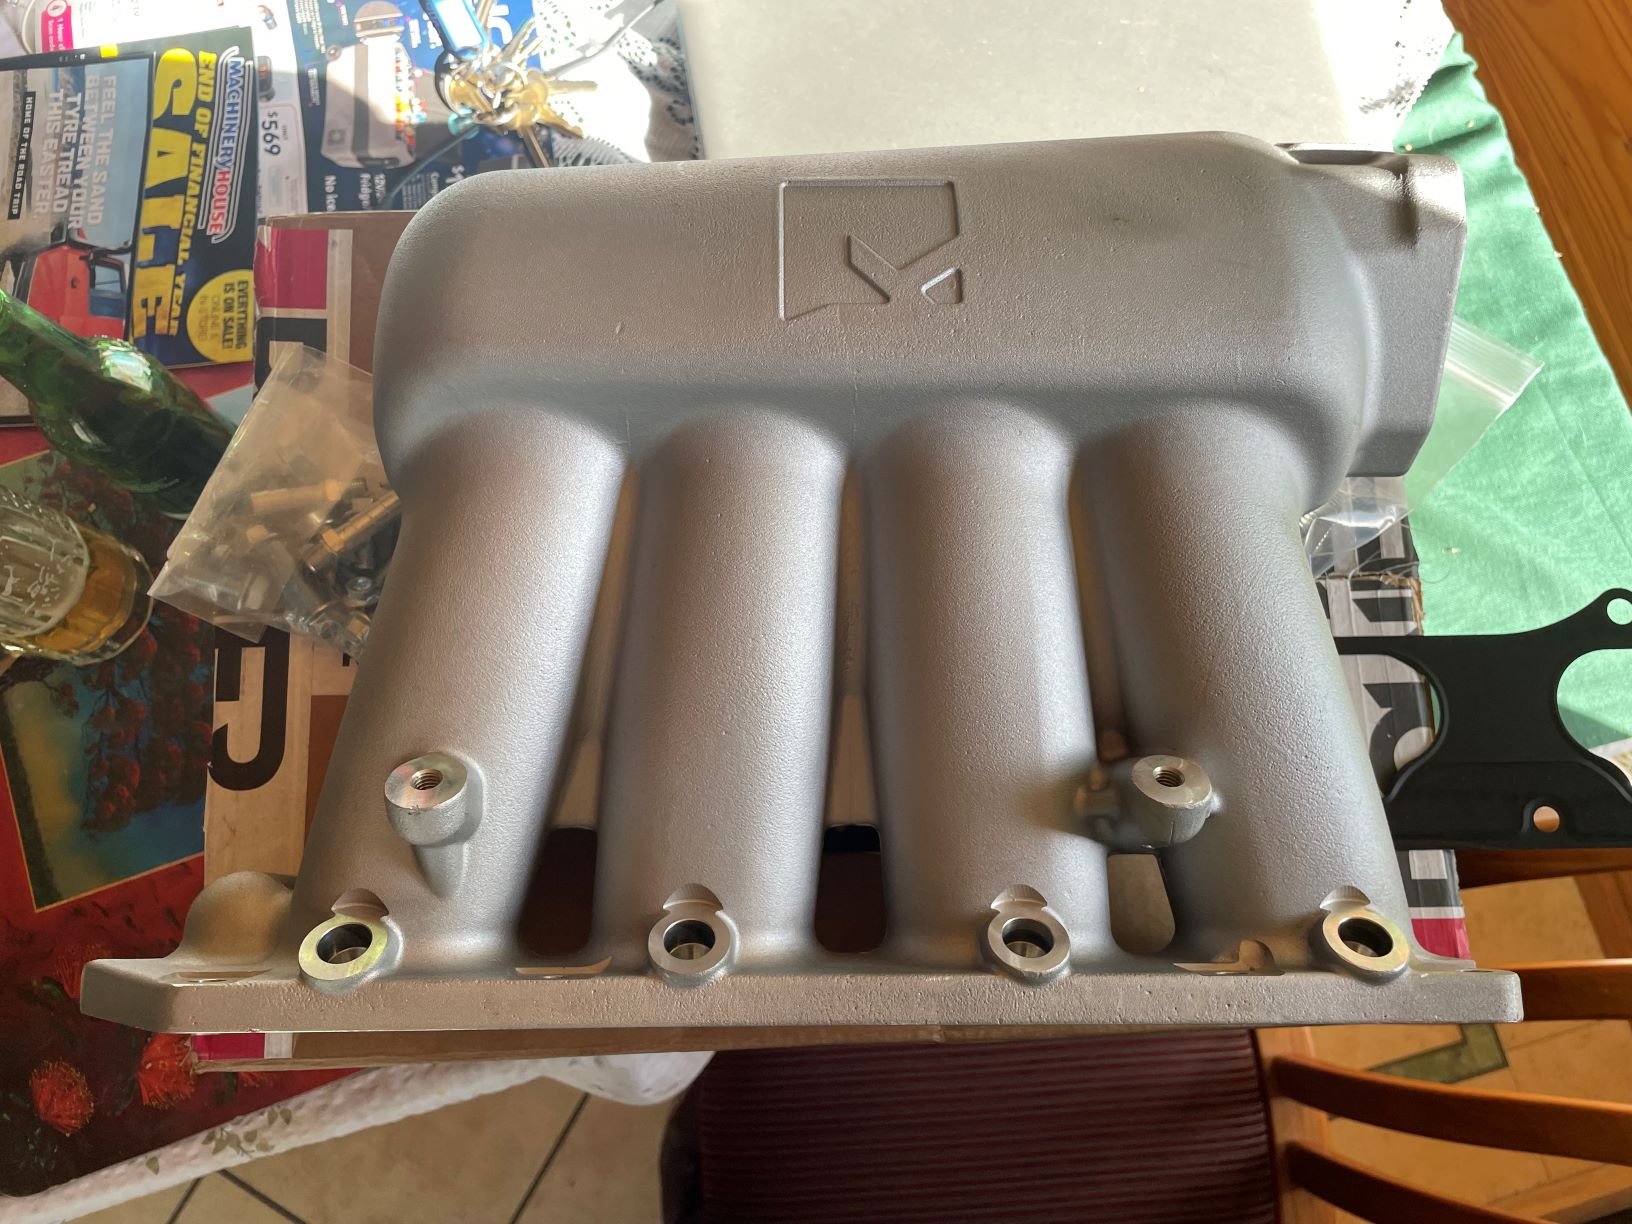
The new K Power intake turned up today. Only took a week to get to me once sent and came straight to me without getting stung with gst etc. Can a moderator move this to the project build and i will start a discussion thread Pleeease. Sorry for getting it wrong at the start.
1 point
-
When you walk the Abel Tasman there's a garage here in Nelson you can use or @yoeddynzmight have space in Marahau, we could definitely organise a BBQ again too?1 point
-
the thread was a great read. I hope you aren't going to give up on trying to get the column shifter set up to work - i get that it can be frustrating at times. am doing a very similar thing on my dodge pickup though rather than use the original shifter I was going to try and use the one from my hilux column and graft the gearlever from the dodge onto it (might need to extend the length while I'm at it) hopefully that will solve any issue of it resting in the 5/R position as the hilux looks like it uses a spring either side of the shift lever to keep it located central. either that or i might bore out the center of the original to match the hilux one I look forward to the updates Andrew1 point
-
1 point
-
Think it's just a coincidence - most of these supercharger kits end up around 85kw mark.1 point
-
There's no such thing as 6.30 on a Sunday1 point
-
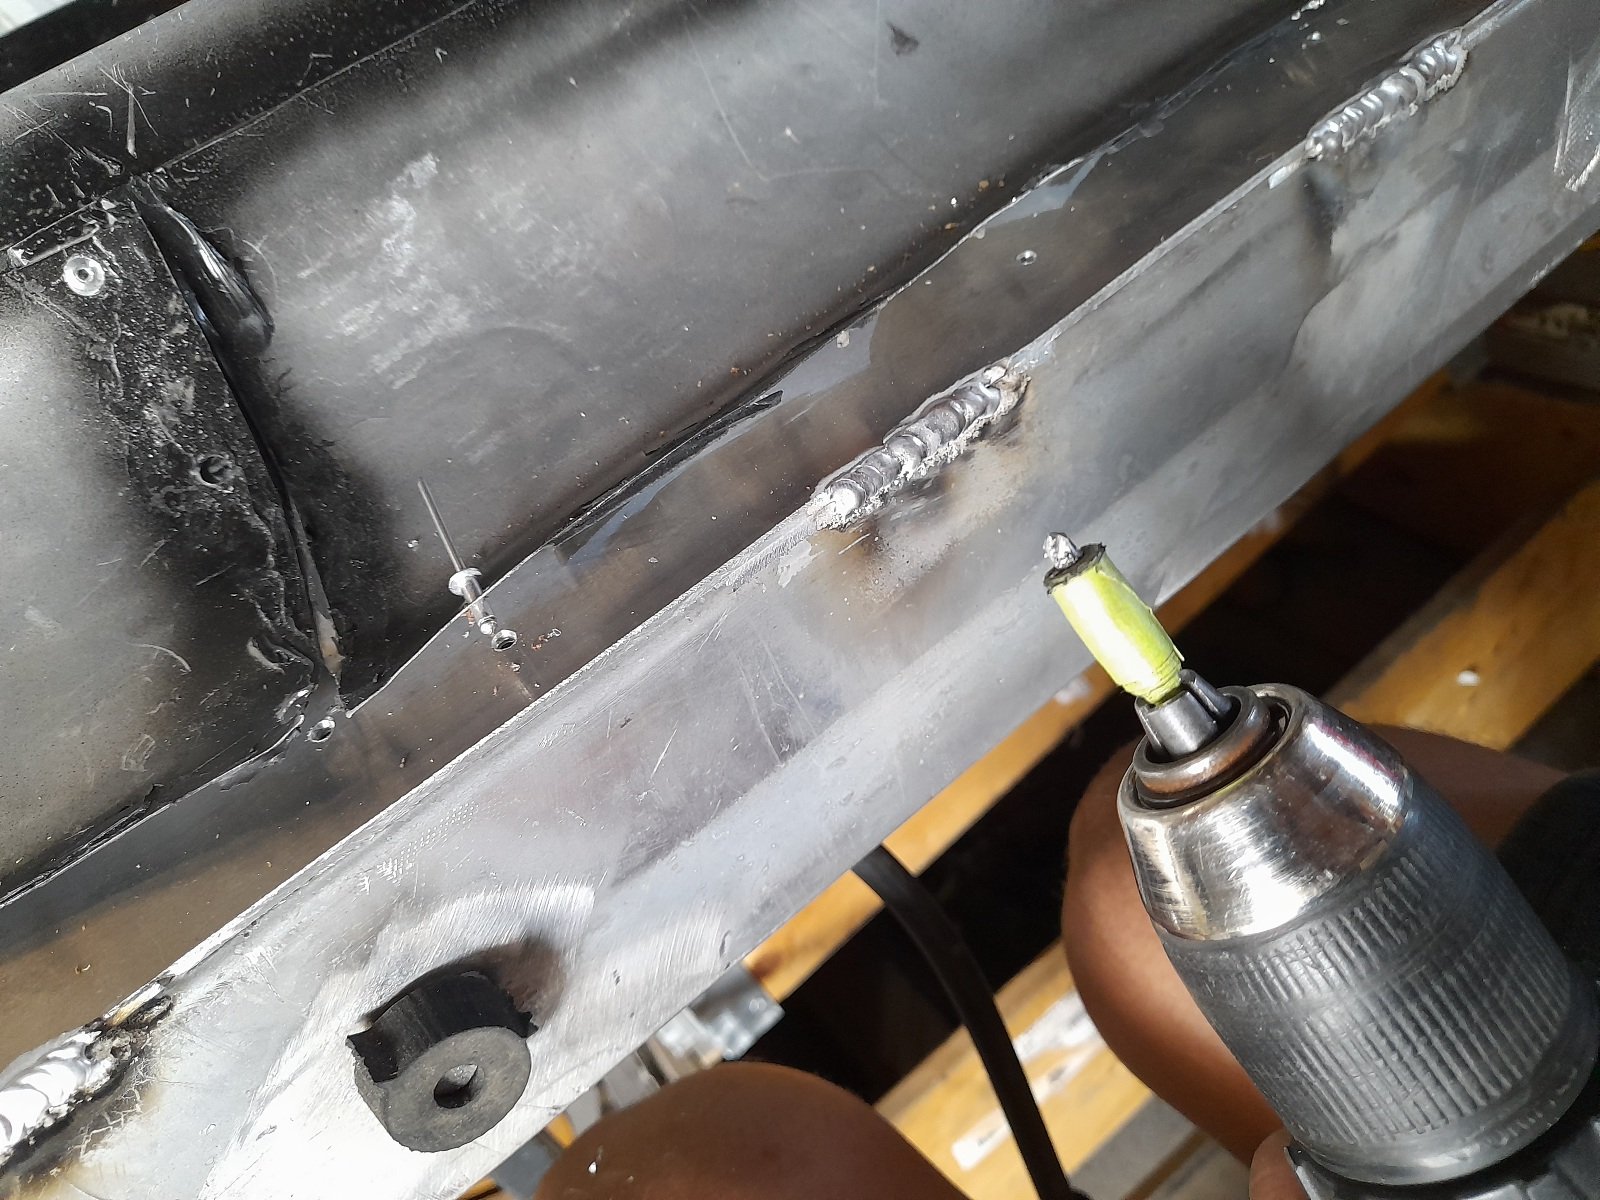
Then got to putting all the stuff from other one onto new one etc etc, this one i welded tabs on so the fans are removable, what a fuckaround for one rivet, anywho i learnded and put tape on my drill piece to prevent exessive penentrating Pressure tested the whole thing with compressed air in a wheely bin full of water and no leaks ! I wanna keep this build thread thing accurate, not taking out all the misfortunes that evidently come with doing this stuff cheapishly ( with me anyways lol) Live and learn, or something like that
1 point
-
I have pined for one of these for like 25 years. I shall now live bi-curiously through you.1 point
-
Caravan barryness has been achieved through joining the Liteweight Caravan Fan Club on FaceStalk, and reading the below cover to cover over the weekend. The book is a pretty amazing story, but what a shit ending to a pretty awesome company! I've made a bit of progress and spent a few hours making the wheels turn. Once I got it jacked up and out of the lawn where it had sunk, the wheels actually turned which was a bonus as I was expecting them to put up a bit of a fight. Shit wasn't pretty behind the wheels but I pulled the hubs apart, cleaned up the spindles, repacked the bearings, wire brushed everything and sprayed everything with brakekleen and then WD40. I've left the calipers off for now but the wheels spin pretty smoothly - enough for now anyway and will replace the bearings and seals later on. No photos of them cleaned up but imagine its about 50% better than what you see. The tires held 40psi of air although I did hide behind the recycling bin when they were pumping up. I didn't have anything other than a tape to measure the stud pattern but I'm pretty sure it is 4x10⁸ as @azzurro mentioned above. So I'm eyeing up a set of turbos on trademe unless something else turns up. Will be worrying about that and new tires once its in the yard at work and I spend more time on it. So for now its down on its wheels after managing to get the leveling supports retracted, and the duratorques seem to be moving too when jumping around inside. The brake lines are goosed so will get a roll of hard line at some point and make some new ones, but the first job is to replace the coupling which has seen better days. I managed to get the coupling to rotate but there wasn't a shit show of getting the thing to release so I could hook it up and try to move it. Have priced one up so will likely make that the next purchase unless I can find a good second hand one. Unfortunately the jockey wheel was seized solid so I lopped it off with the grinder - I'm trying to find a replacement but not having much luck finding a straight replacement as yet but confident something will turn up. I plugged the trailer plug into the car and no smoke escaped which was a bonus, a few of the lights actually worked so I've ordered new ones, thanks @locost_bryan for the heads up. Through one of my work suppliers is was less than $100 for the lot including bulbs. Anyway, next step is to find someone to transport it across town to work and then the real work can commence.1 point
-
Yeah it’s the rust I want seen in person, I’ve had a few old mercs before so know the common places and the bastard of a job. Just gotta see if worth the hassle or wait for something else….1 point
-
1 point
-
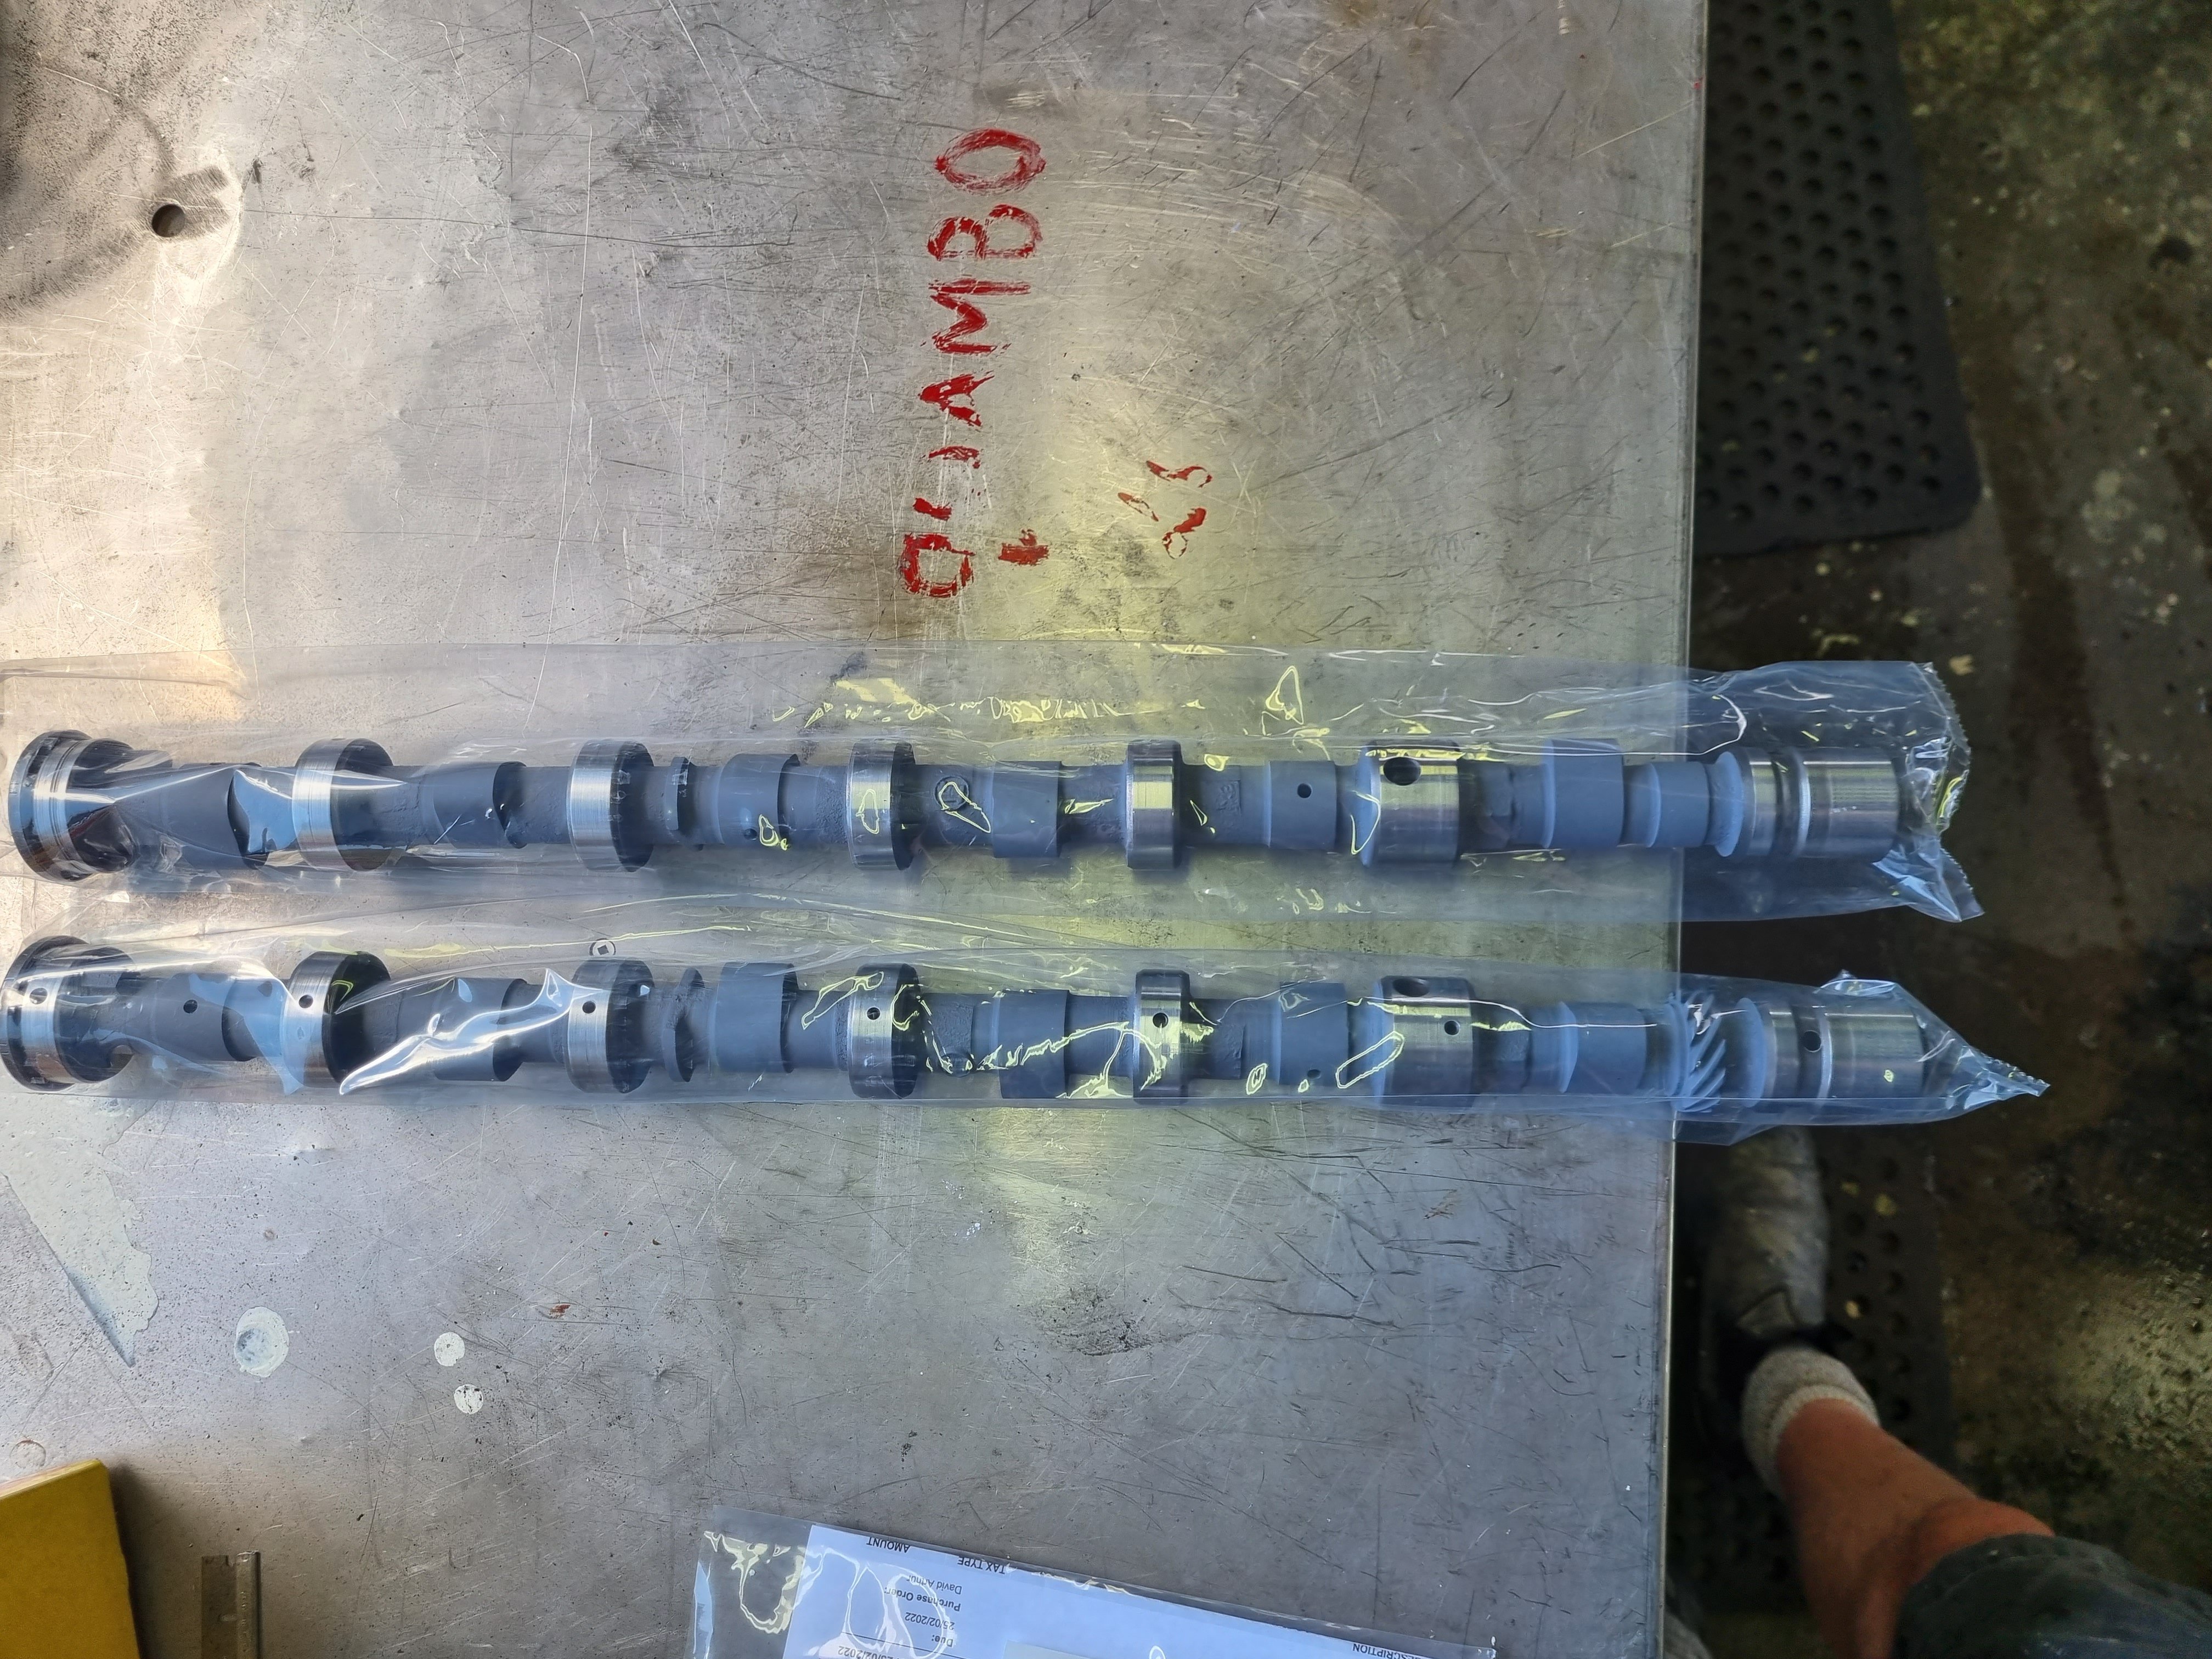
This is what 1400$ worth of cams for a 5M looks like. They have been welded, hard faced, then ground to a specification that should work. Time will tell.
1 point
-
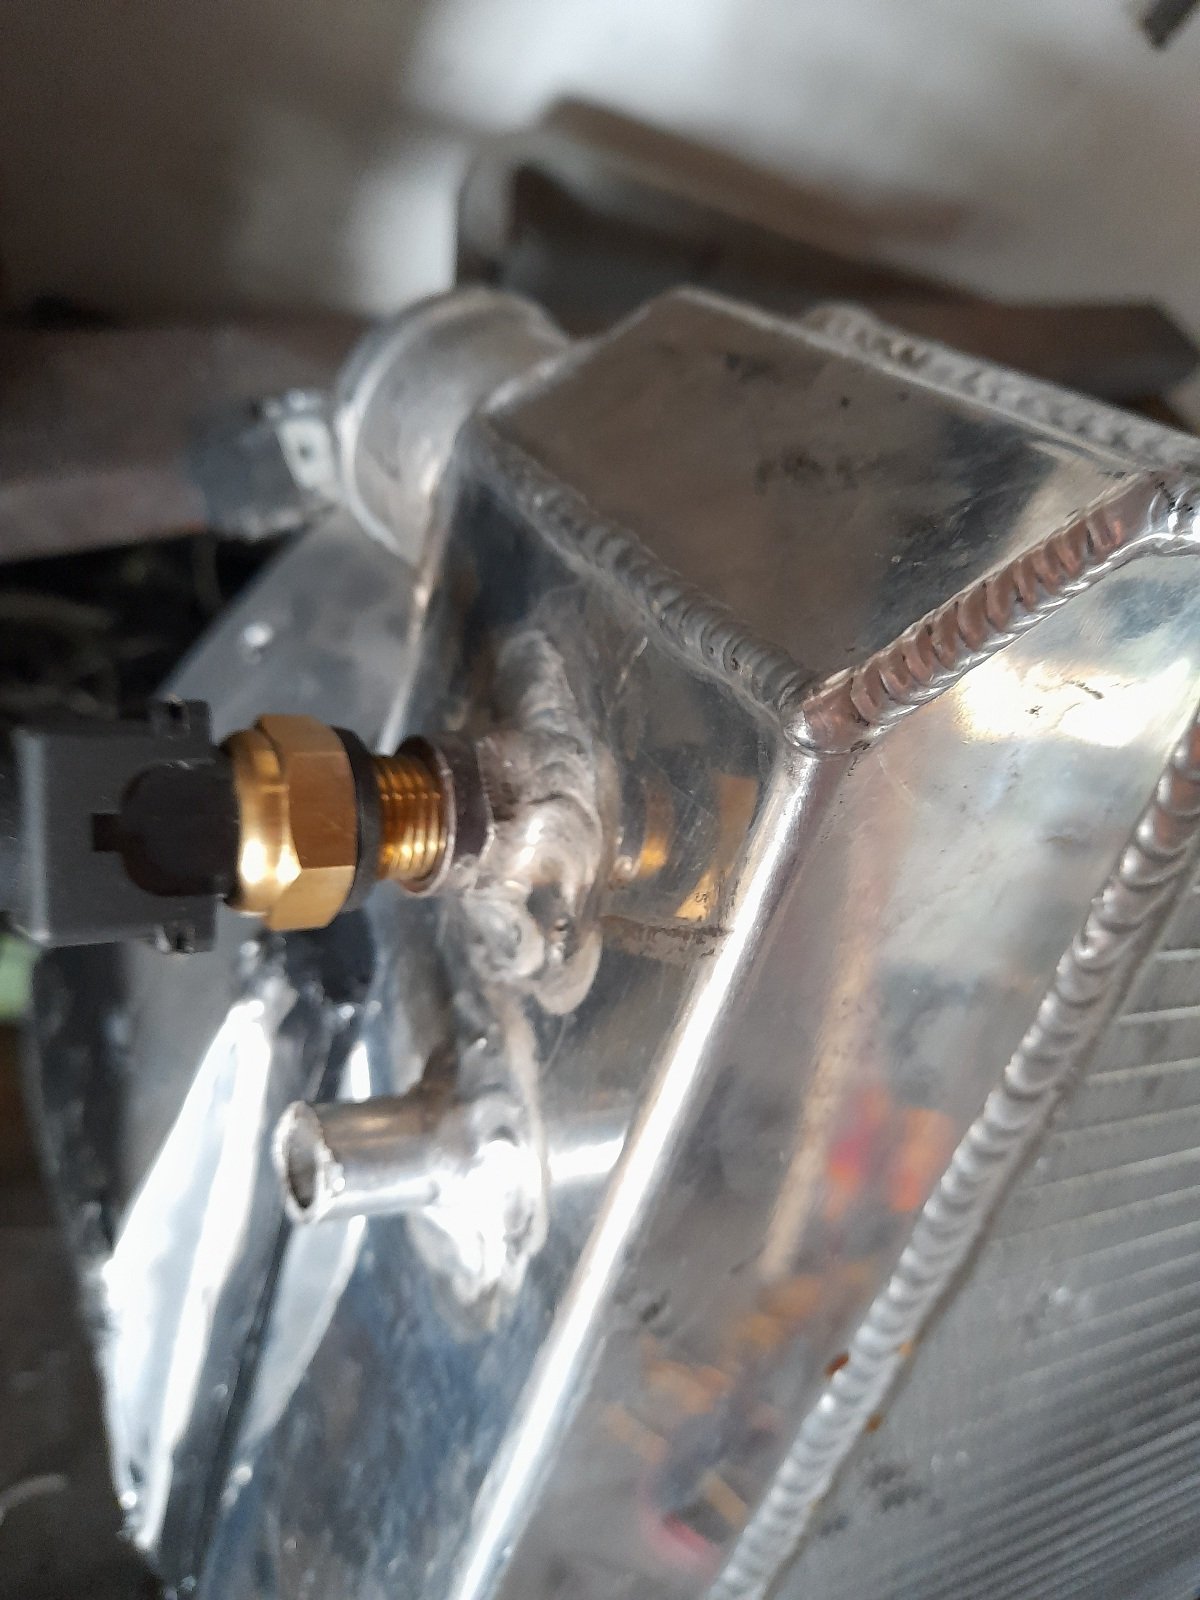
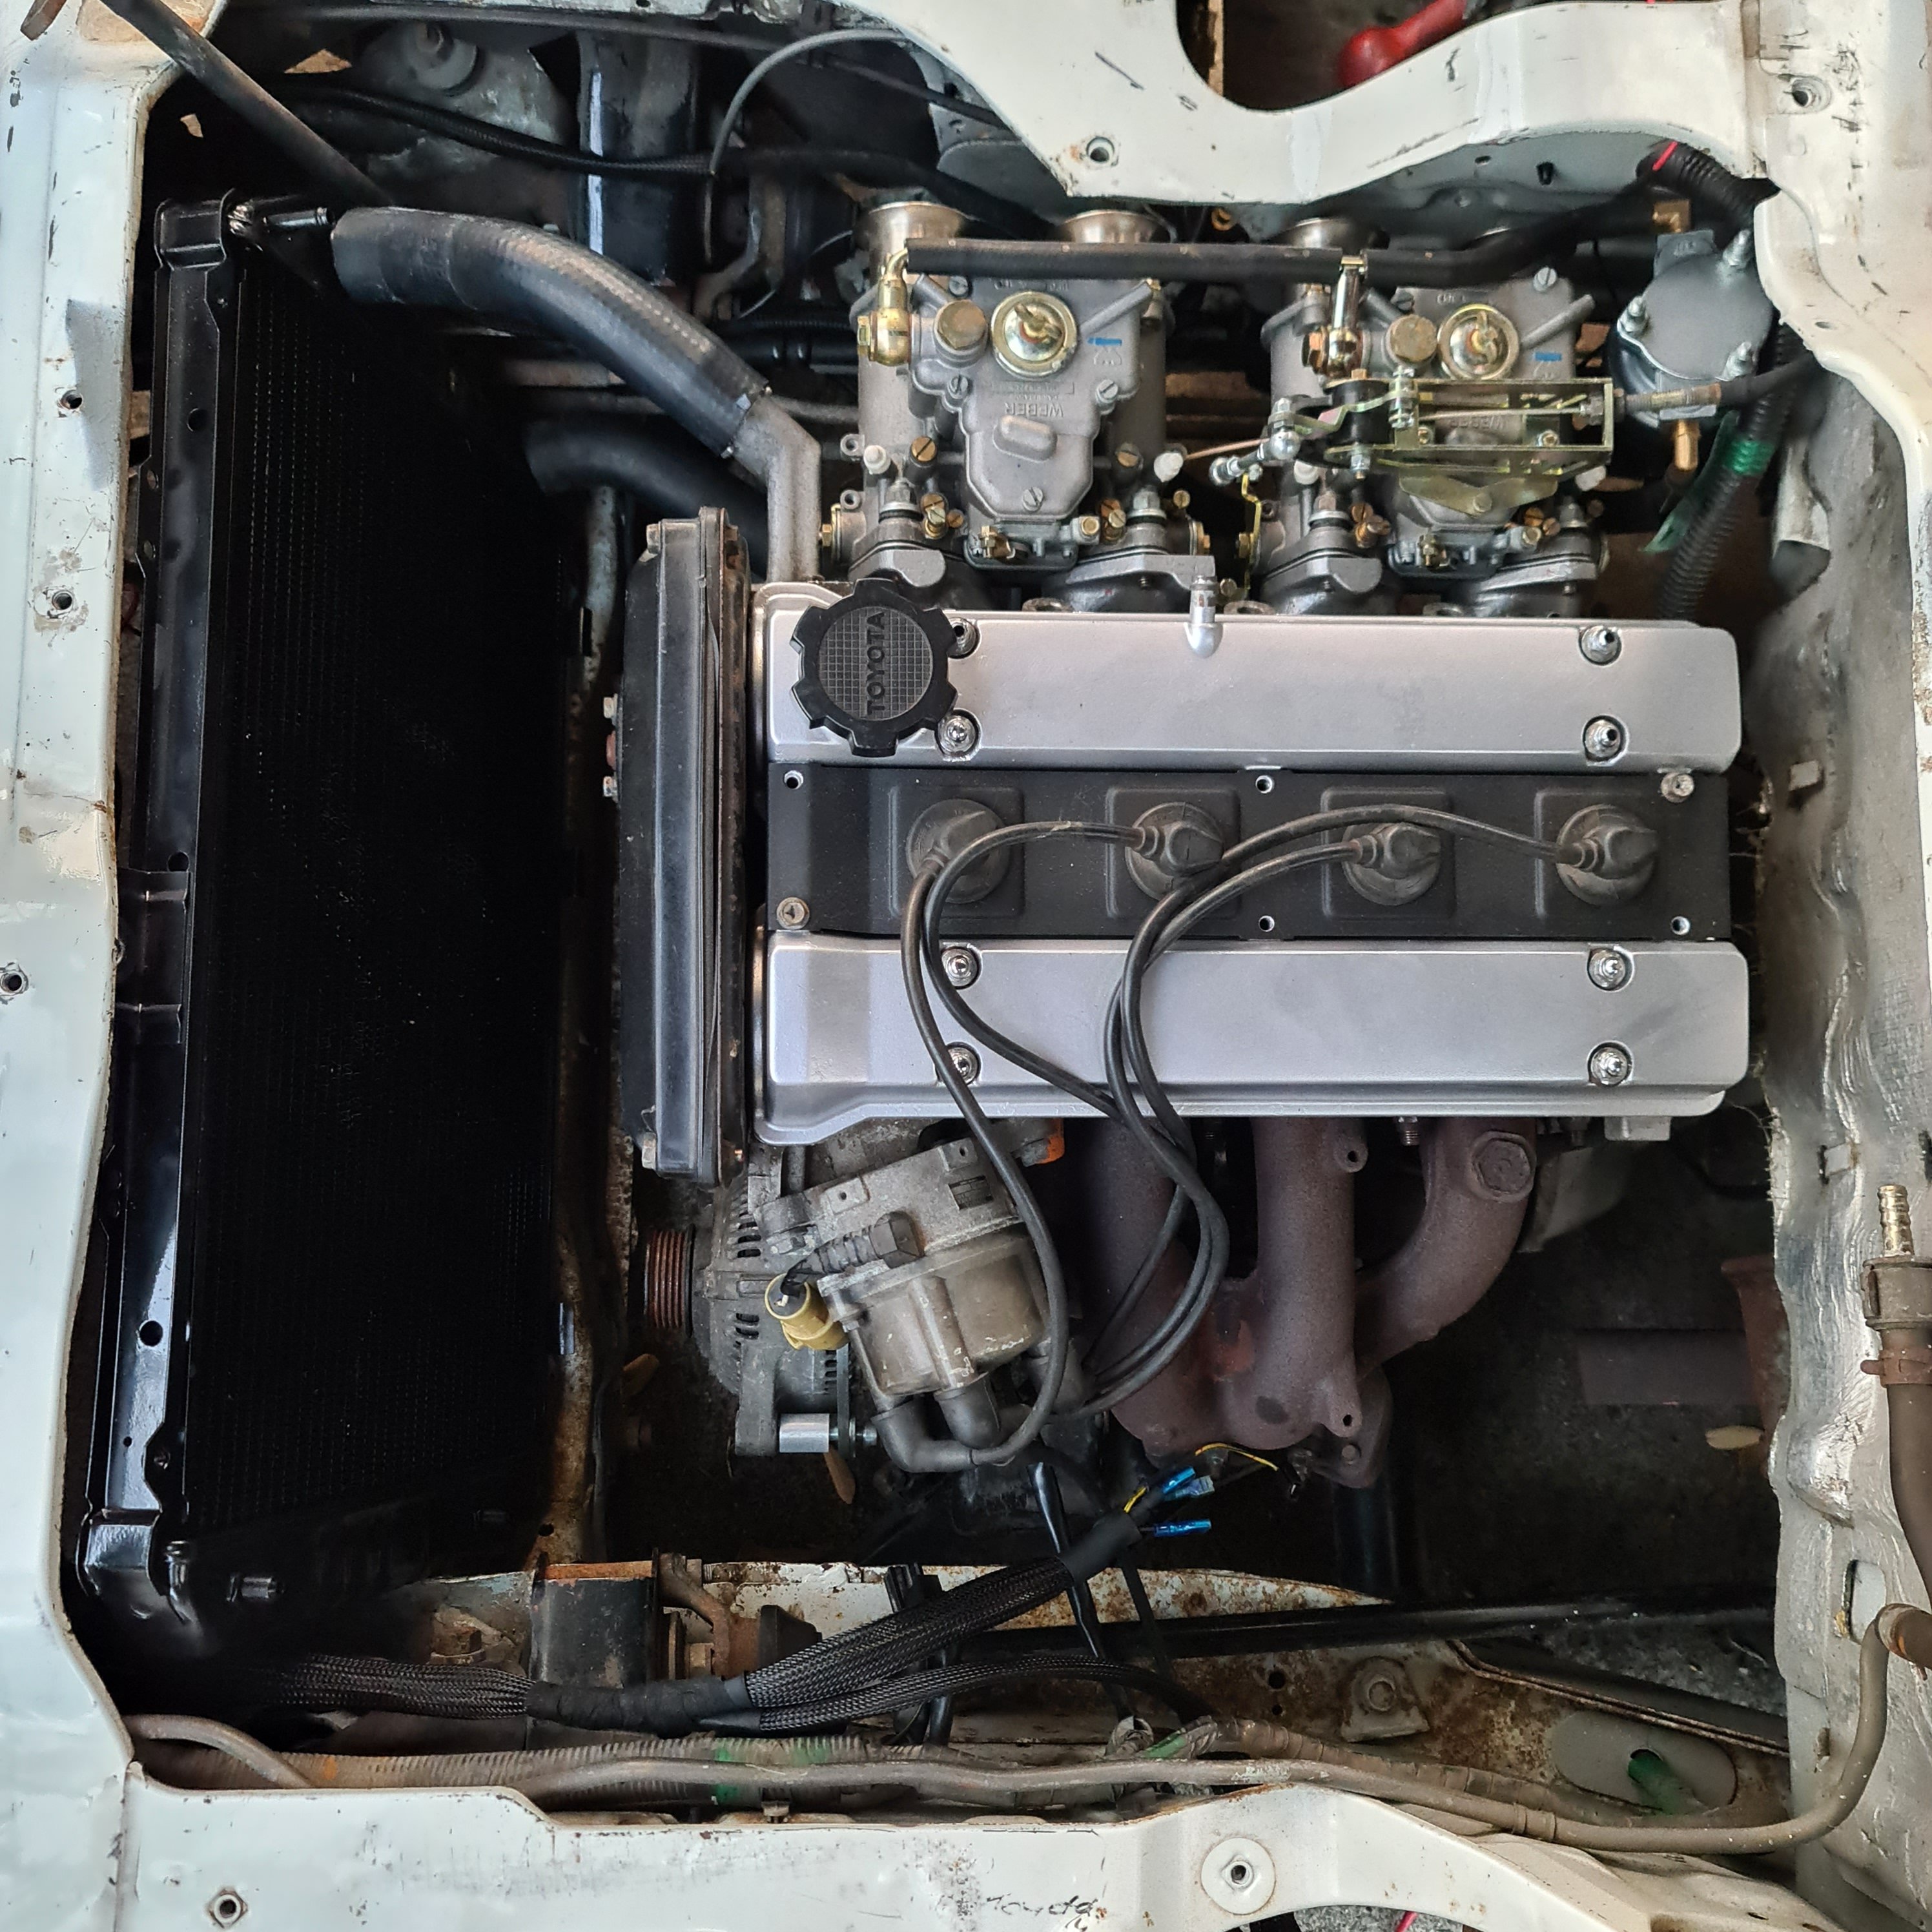
Decided that since I had my money back from parts van I should invest into changing radiator bottom hose to the correct side. I also had them size match to the 4ag as there was a 2mm variation between motor and radiator. Quick plumb up and I am happy with my investment. Of course i need to add my inline remote filler into the top hose mix but you get the idea. Also dropped the heater pipes down to same guys to get them where I want without unnecessary hoses. If it works out they will just go straight across back of engine bay to join either side and one running parallel to the back head outlet.
1 point
-
Just bought new heavy duty heater channels which were on special coz of light surface rust. Can't wait for house to finish so we can move out of this fuckin shed and I can make some dust.1 point
-
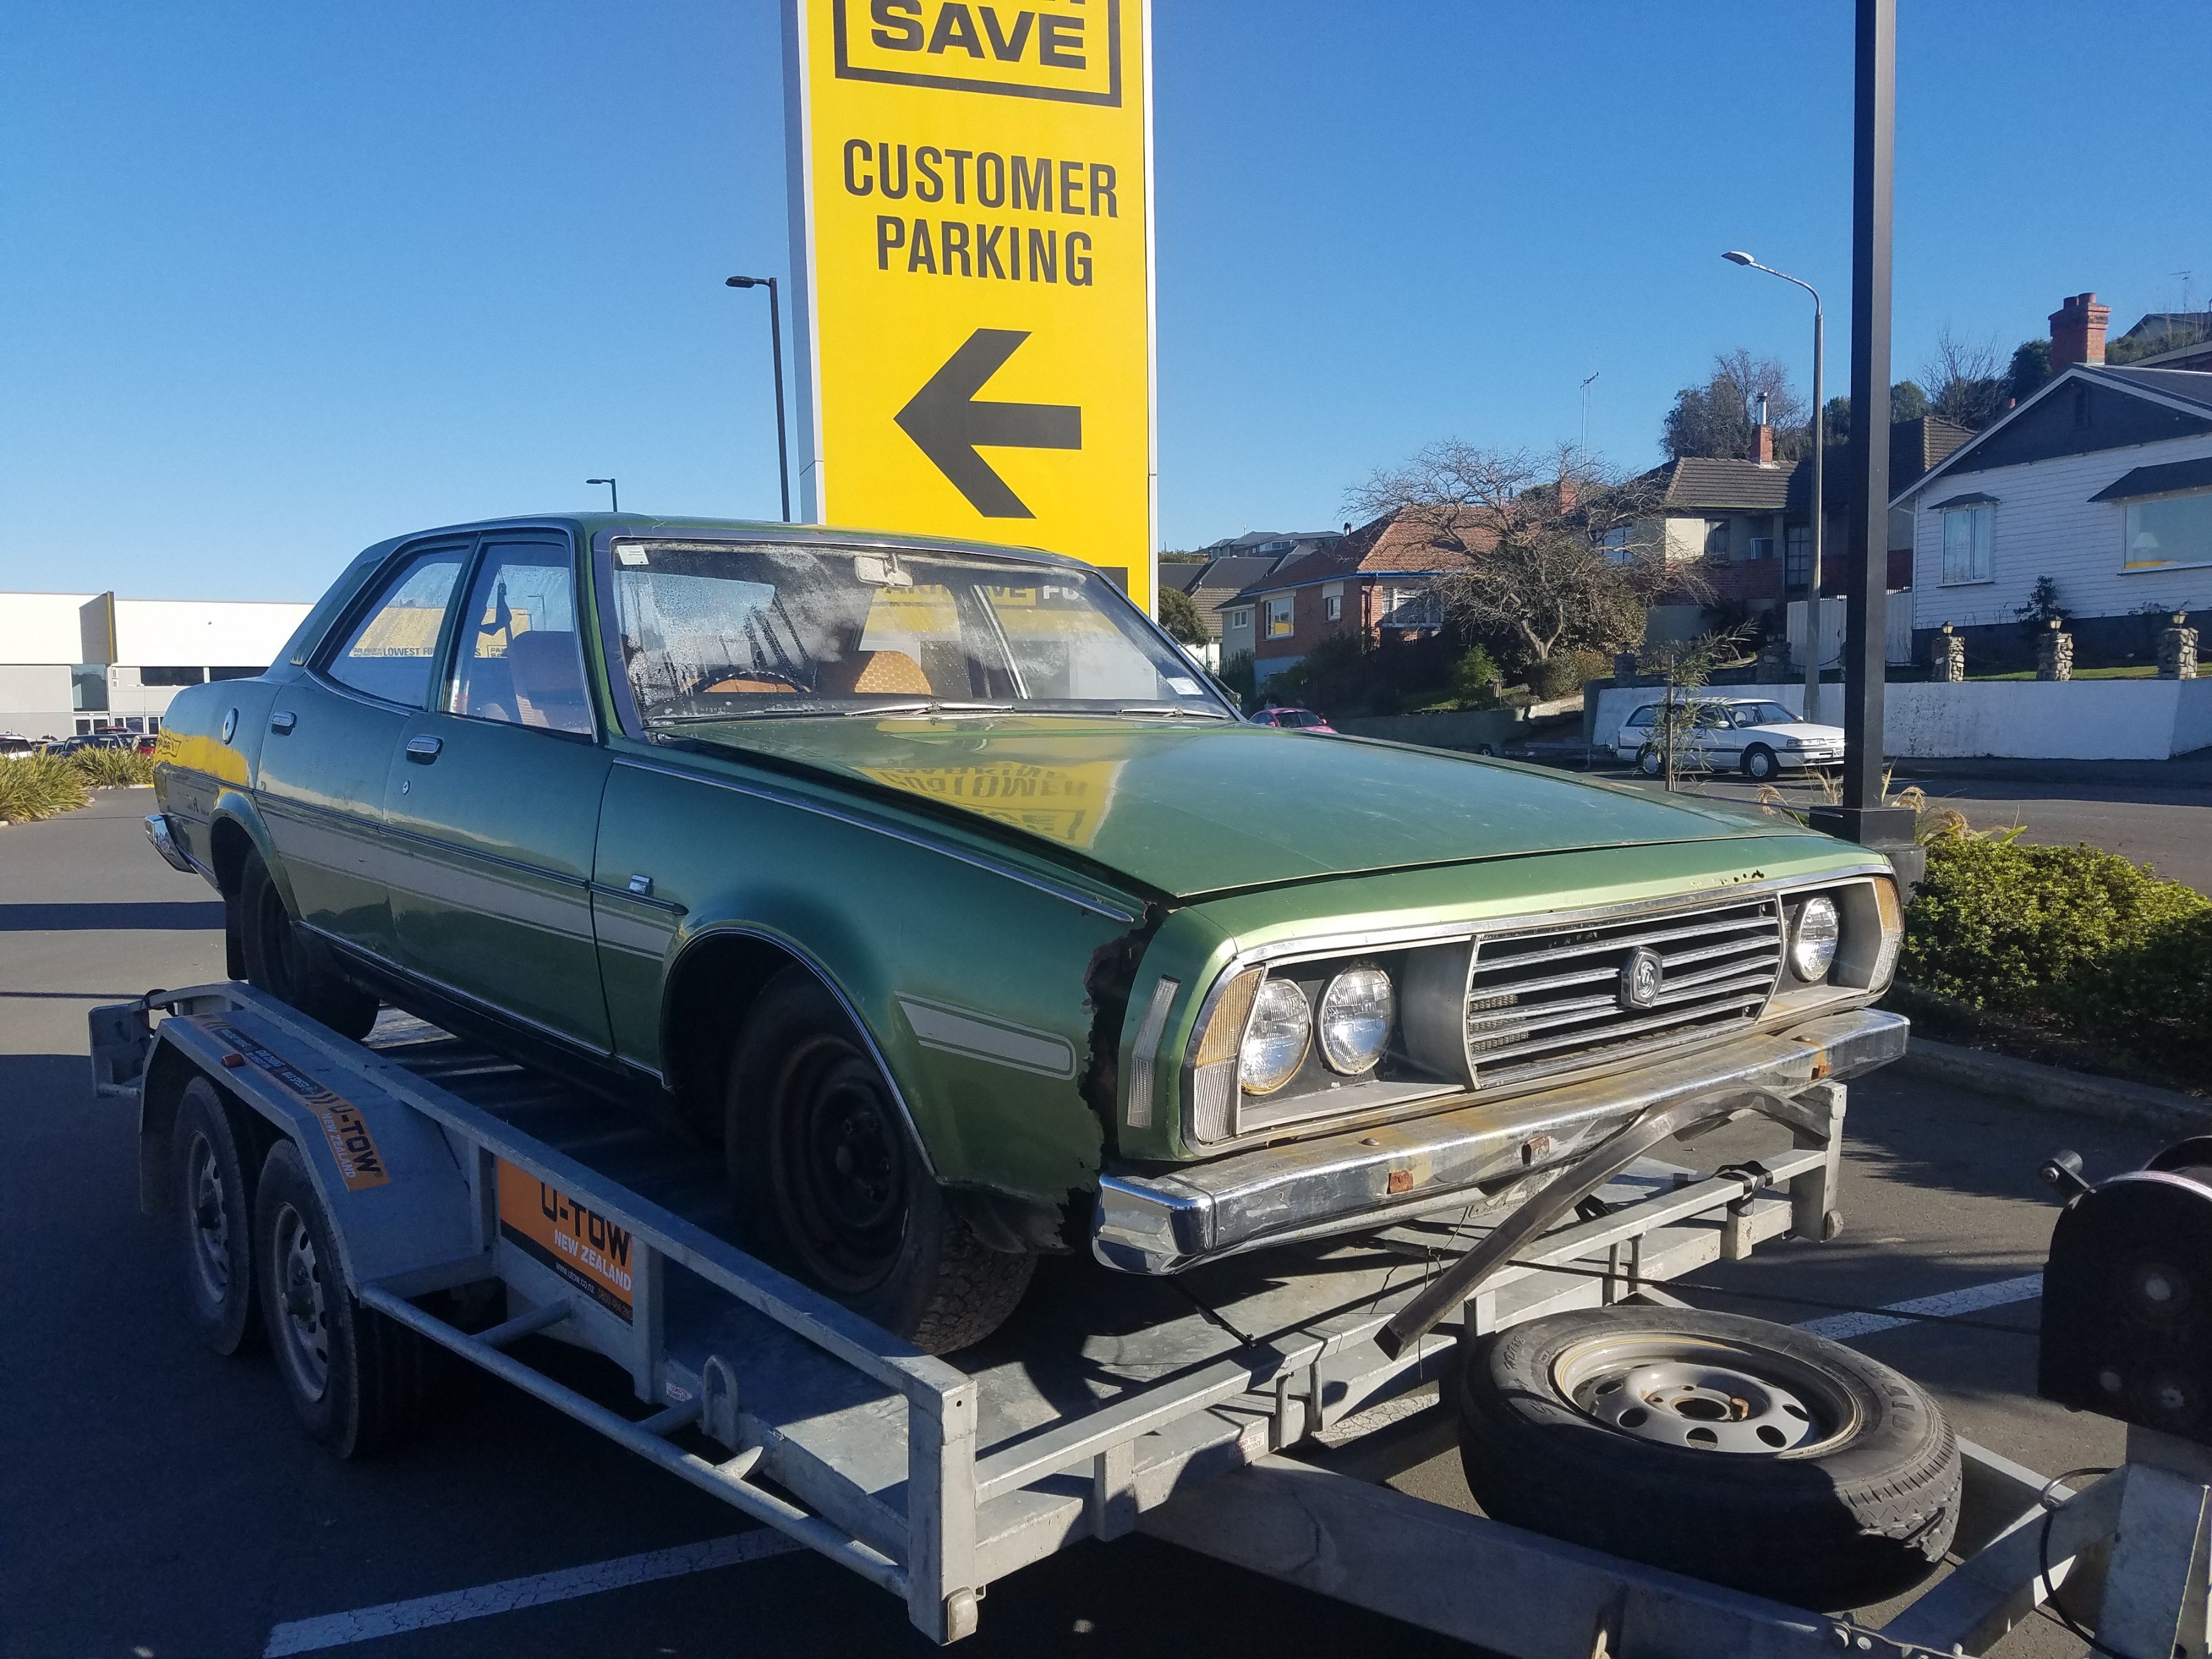
The trip Home. We stopped in Timaru to grab some lunch. Had to take up all the spaces at paknsav carpark. I got lots of filthy looks from people for doing this haha.
1 point
-
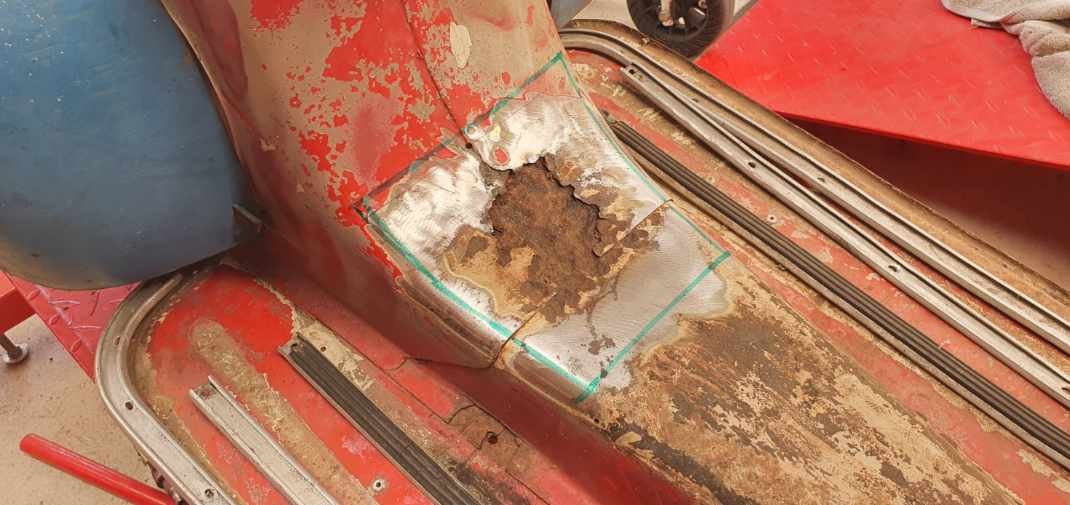
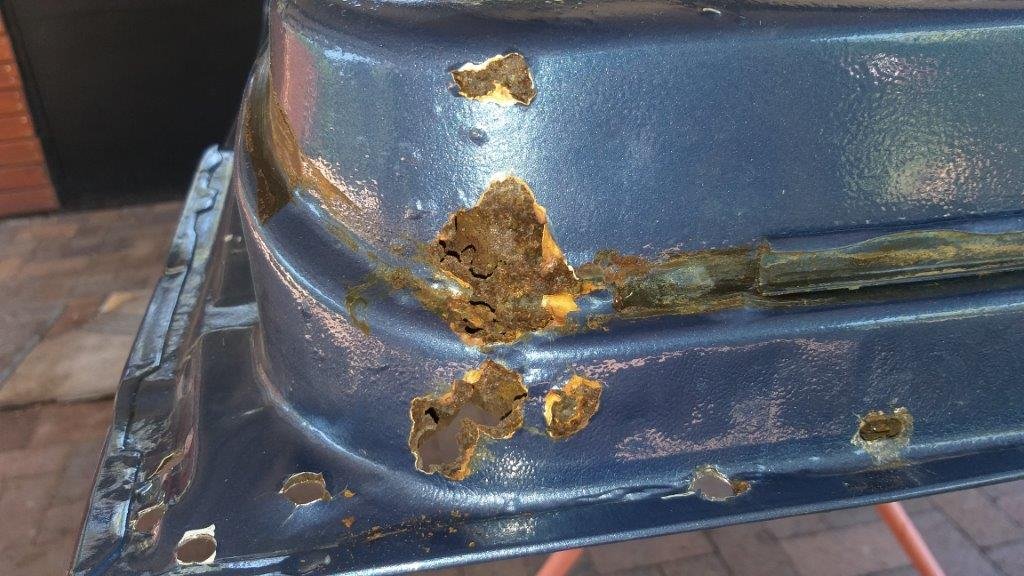
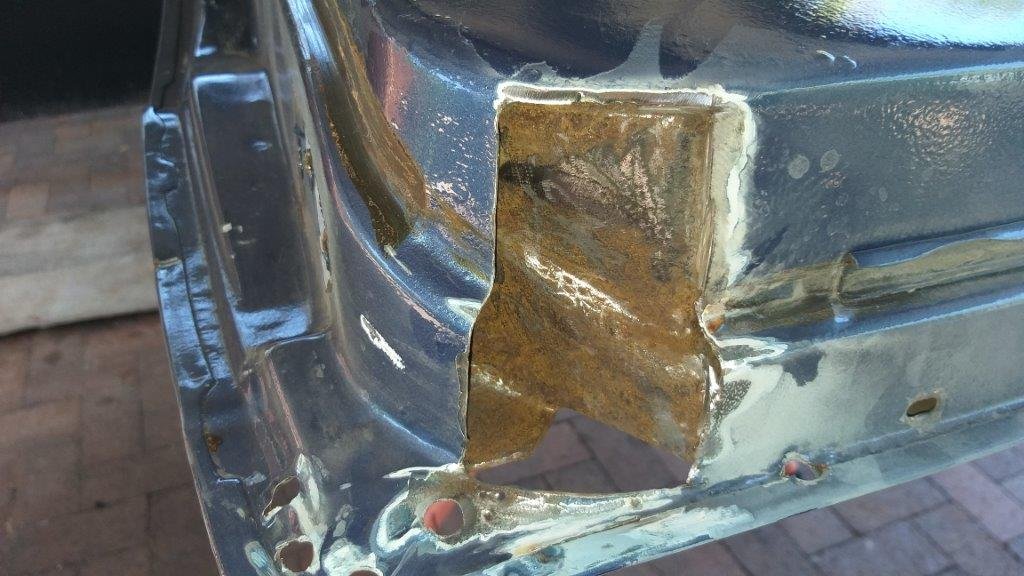
So the underside also looked pretty ugly. Again, I slapped it with a flapper disk expecting to find bog, but again no bog in sight. Cut out the nasty stuff and cleaned up as much of the inner as I could reach and applied a coat of rust converter. I'm relatively happy with the outcome thus far. I'll gut the driver's door tomorrow and then pull it off for some similar treatment. Thanks for looking.
1 point
-
I made a dumb cart! This car has no wheels. The proper wheels are a long way away, so it needs some temporary wheels. Especially because Panel McPanelbeaters will need to be able to move it around. After looking at a bunch of vids I decided to lazily over-engineer a cart out of wood, with two arms to attach it at the back where some of the rear suspension subframe bolts in, and just wedges between the front frame rails to give it some lateral stability. I got some annoyingly expensive M12 bolts with 1.25mm pitch long enough to be able to through some of mitre10's finest framing wood and test fitted them with the help of girlface: Turned on my granddad's old circular saw, put it down and used a hand saw instead, did some shitty drilling and screwing and measuring attempts, and after evolving the original plan a bunch I came out the other end with a cart! Three of the bolts even line up! It's a small cart and the footprint looks quite narrow but it's technically not far from where the jack stands would go anyway, and is quite sturdy. Most of the weight is in the back of the car too, so the cart is located quite far back. For the wheels I selected some nice big 100kg fellas with locks. The finest cheapest that mitre10 had to offer. I hear that the bigger the wheel the easier it is to move it around and the less susceptible it is to bumps. The weight capacity of 100kg per wheel or 400kg~ for the distributed load should be plenty, given that I can lift the front half by myself and the back half with a hand. So of course one breaks the first time it hit uneven concrete. This is also with me moving it by lifting the car from the front end, so there's even less weight on the wheel than normal. Nope, doesn't matter. As soon as it snagged on the crappy concrete while trying to rotate it crumpled faster than a hollow easter egg in the hands of a fat kid. Fortunately the mitre10 service desk guy didn't put up a fight and I got my money back. Then splurged on some smaller but 125kg wheels that looked and felt a lot sturdier. Non-locking but I was already paying significantly more for them. So that's that job sorted, and while I'm still trying to locate some new front frame rails the panelbois will at least be able to move it into their shop and get a start on it. I can sit in it and have girlface push me around, so I'd say we're probably over 70% done with the project now.1 point
-
A few hours rigging up some wiring this afternoon and I was able to get it fired up. Hyperpak was a breeze to wire up and just jigged up something temp for fuel pump. Hoping to spend the next couple days finalizing the wiring with the proper relays with an electric fan provision also.1 point
-
I have fitted the MX5 steering column today, which seems to have worked out quite well. The spline is the same as the Hillman spline which was handy.
1 point
-
Well. 'Murca didn't get back to me so I went with a UK sourced kit. Bugeye, stock-ish wing width & an engine cover with no air intake hump type thing. Should be here in a month. Gonna be simple 60's looking, not some thinly veiled, rear engined, tube framed Trophy Truck Anyhoo, afternoon in the shed. Sayonara shakotan... Wings off Swapped spindles back to stock. Standard right, dropped left. *edit* Just realised pic is upside down, I s'pose. That or I rolled it on the Baja 1000. Gained about 5 inches with the old rear tyres swapped to front. Will aim for a bit more profile to get it level. No suspension lift though. Surprisingly solid underneath, I'll tidy it all up & do the interior next. Gold roll cage, fur headlining and hopefully sort out the "filled" dash.1 point
-
We knew that this was a deregistered car from the start and got into it anyway. Just part of being a noob I guess, but I always figured we'd be able to sort it out down the line.. maybe it'll be a bit expensive but should still hopefully be reasonable in regards to the value of a fully restored Starion. Right...? I called a few panel beaty places and instead of straightening the car out, they straightened me out. It's not fun hearing "oh yeah you can expect about $30k for an average panel and paint job on a car this old". Especially when that's followed up with "deregistered? Okay yeah we can do it but it'll have to be be the Rolls Royce of repair jobs". But one of the nicer folks I called offered to come around and check it out soonish. So I had no idea whether we still even had a project. Anxiety effing sucks. Thinks like sunk cost fallacy was at the forefront of my mind. Was this a lost cause? How much will this repair cost - is it going to be better to just getting a beaten up reg-on-hold Starion and starting fresh with that? How many years would it take for that opportunity to make itself available again? I didn't want to put another second into the car. All motivation just gone. Also the frustration of the legalities of this. I could roll the dice and hope the re-registration people just feel like stamping paper that day, and don't whip out the endoscope or mandate stripping everything back to metal. Yet if whoever had it registered last had just paid the $peanuts every year to put the registration on hold the above repair would be perfectly legal. ARRRRRGH. ---- Guyman McPanelbeaty finally is able to come around. He's a numbers guy so he brings a hammerbeast. I bitch to them about my registration frustrations. Hammerbeast replies instantly with "yeah", throws his hands up, "yeah!" He goes on his own rant. This was a perfectly legit (if ugly) repair back in those days, the style of the time, onion on his belt. Kindred souls. They like the car. It's in pretty good shape rust-wise, they hand-wave the other repairs. They warn me of the dangers to my wallet if I end up going with a darker colour (or god forbid black). What colour should I go with? Not important right now, but this question will be asked a little more frantically later on down the line. But onto the work. I ask them to ballpark the repairs that need real certifying, the bare minimum to just get it back on the road. They guesstimate the work and throw some numbers out. The numbers are acceptable. My shoulders relax. I shake their hands and literally bounce back inside. We have a project! ---- Of course, they're super busy so it won't happen until next year, but I have homework in the meantime: I have to find new front rails and a new radiator mount. There's a wreck in Palmerston North so I started there. "Yeah mate let me check. You need both rails?" "Yes please." "... ah sorry mate, someone's already taken the front cut" Amayama's manager is permanently offline. The image above is from their site. Easily over 50% of the parts I order there end up being out of production, and for whatever reason they don't have the rails themselves listed separately, so I wanna talk to a person. The rails + wheel housing + other thingy are over NZ$1k each to import. if they exist. Bah. NZ's Starion facebook group is small but often useful. Not this time though - I got a name dropped to me but he was out of stock. The Austarion facebook group is much more lively but same deal there. @ProZac's Starion Sell-Up has long exited FOMO territory and is well established in MO territory. I have some more options before I'm ultra desperate (USA + expensive shipping, more mitsi parts websites, from-scratch fabrication) but things aren't tracking great lol. Does anyone know of anyone with a Starion parts car who might be willing to part with their front rails? Motivation's back tho.1 point
-
Approved
1 point
-
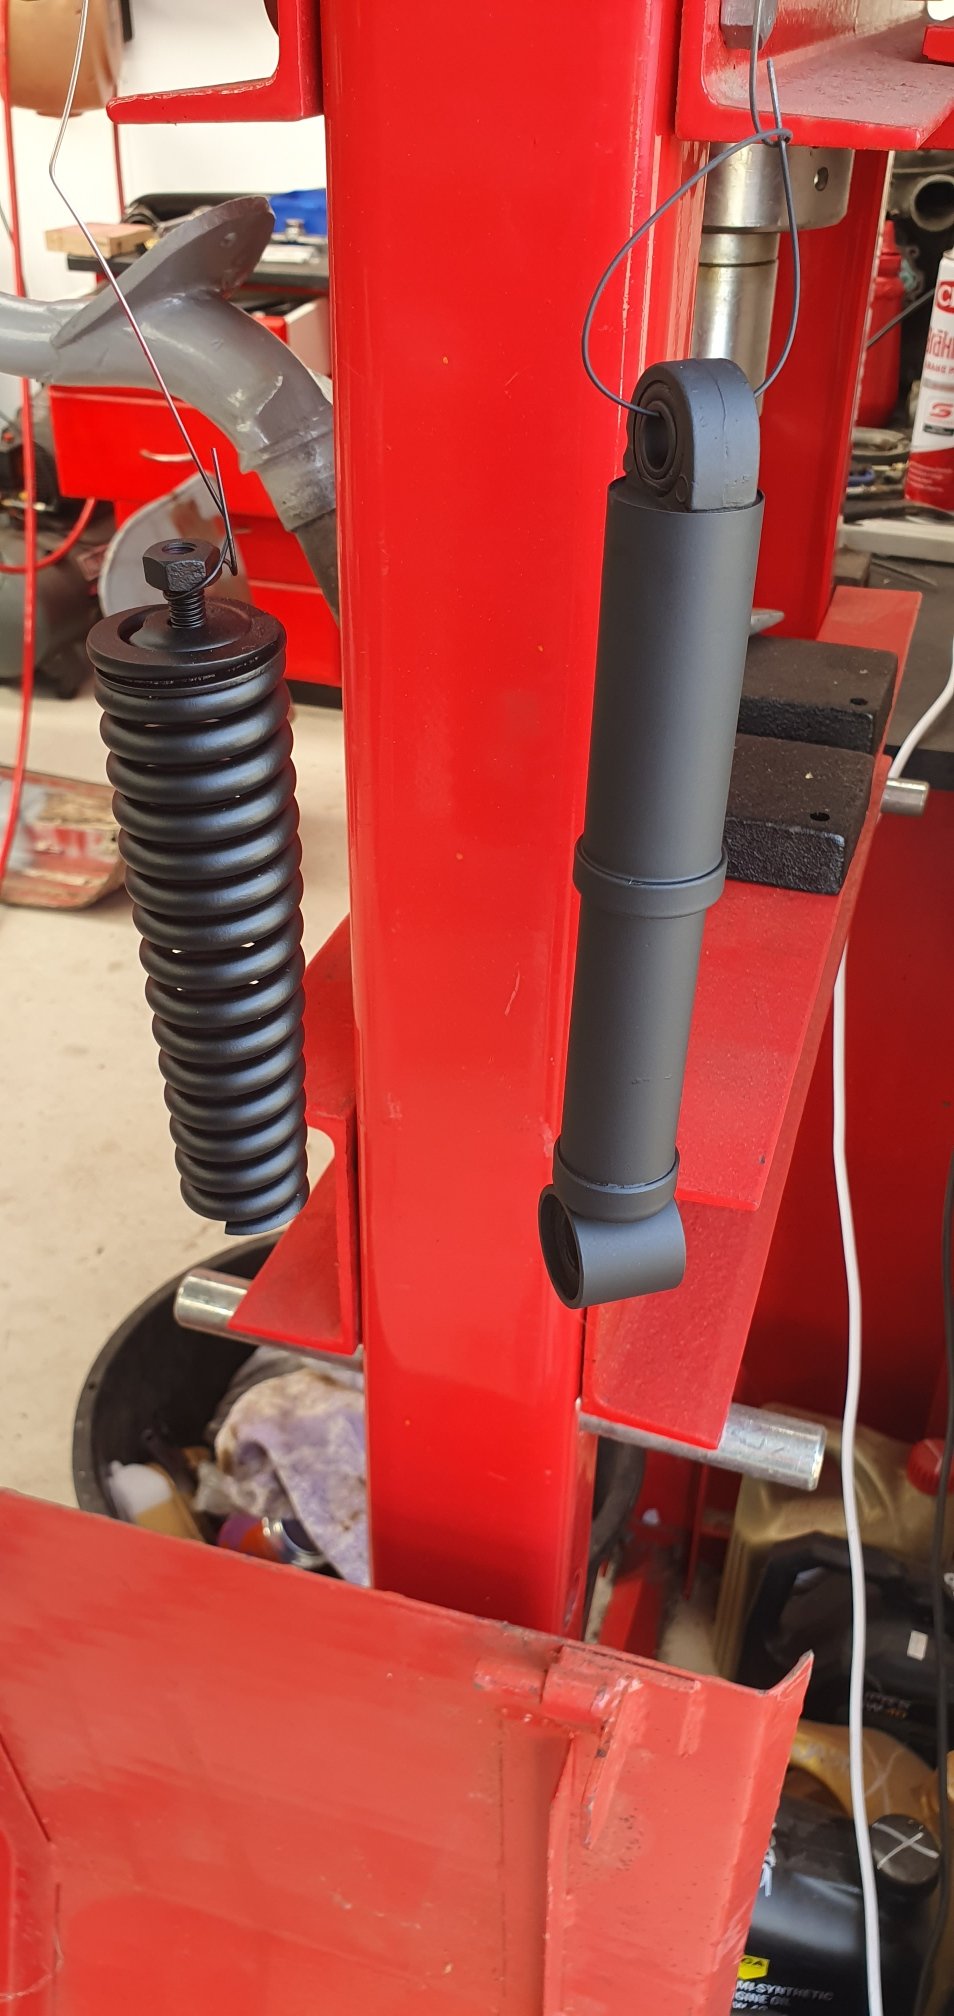
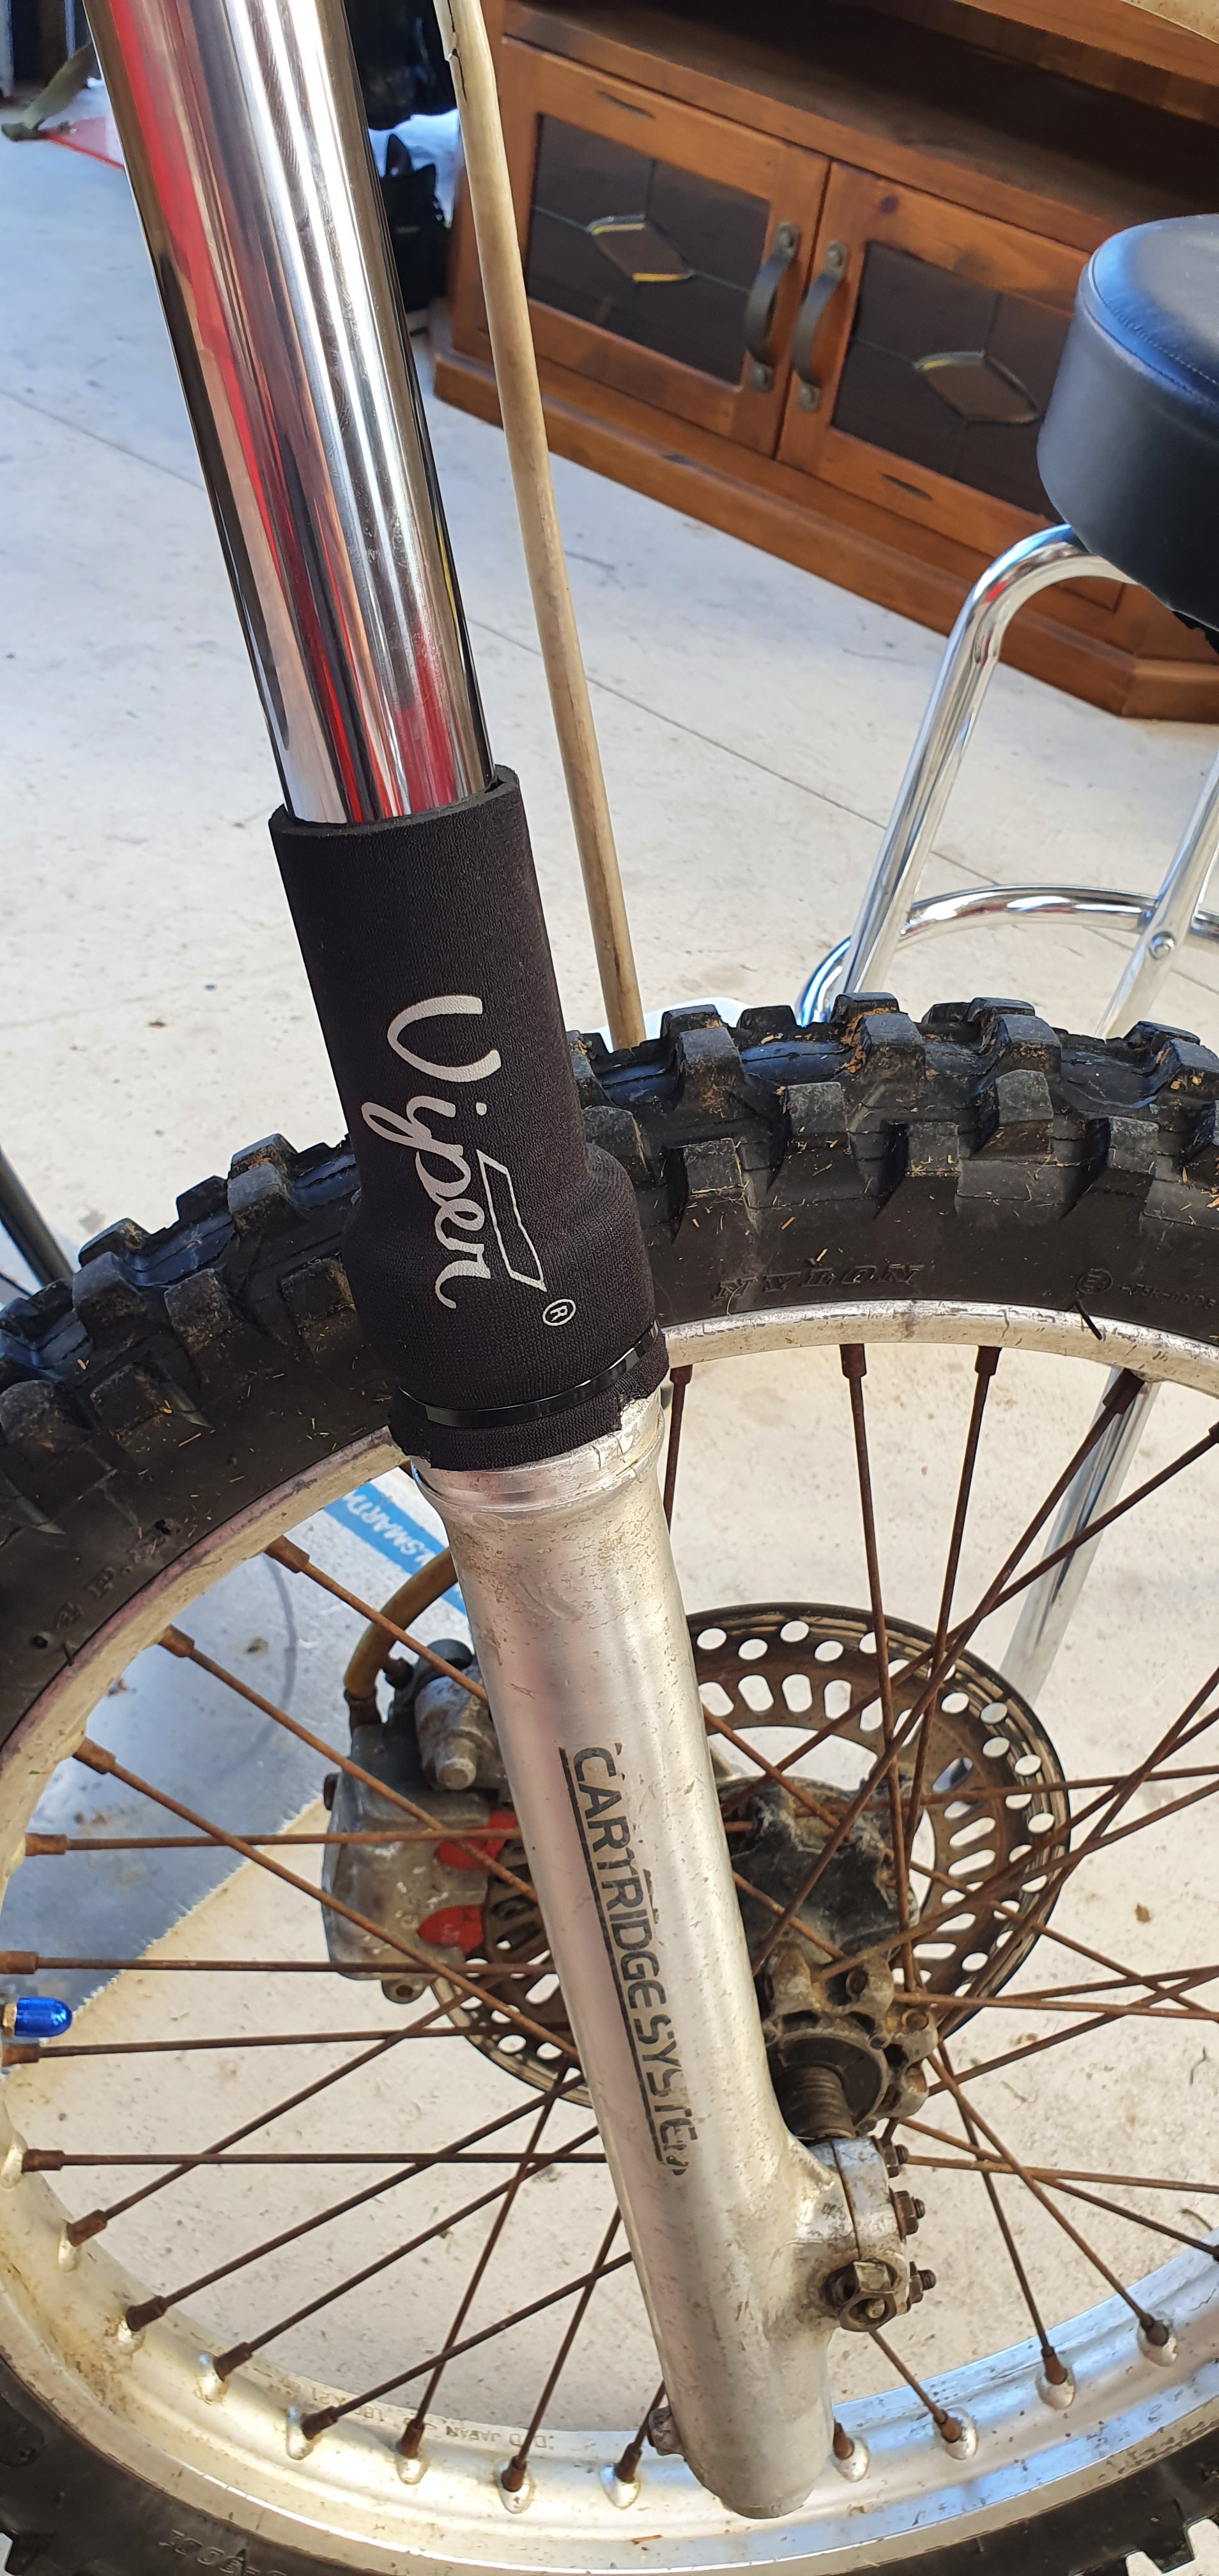
Added neoprene fork gaiters. I think its a good preventive measure to take. Pretty cheap and easy to fit.
1 point
-
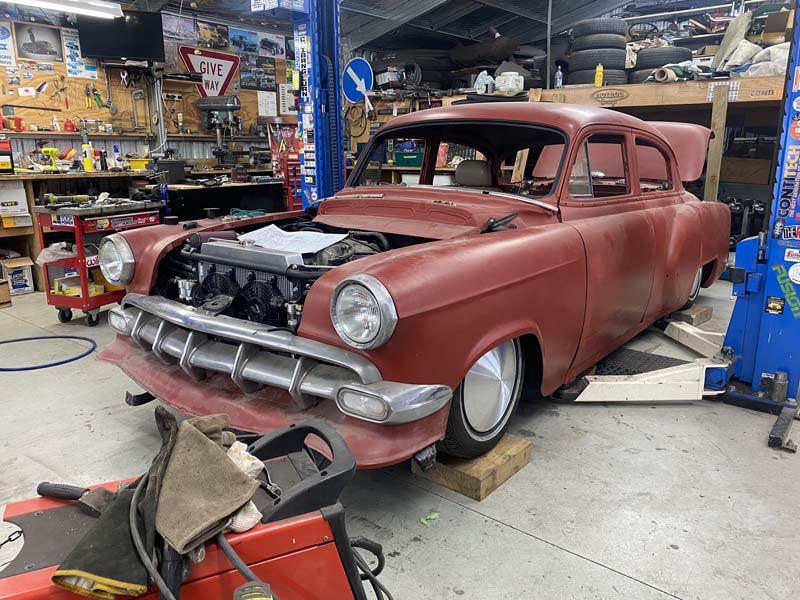
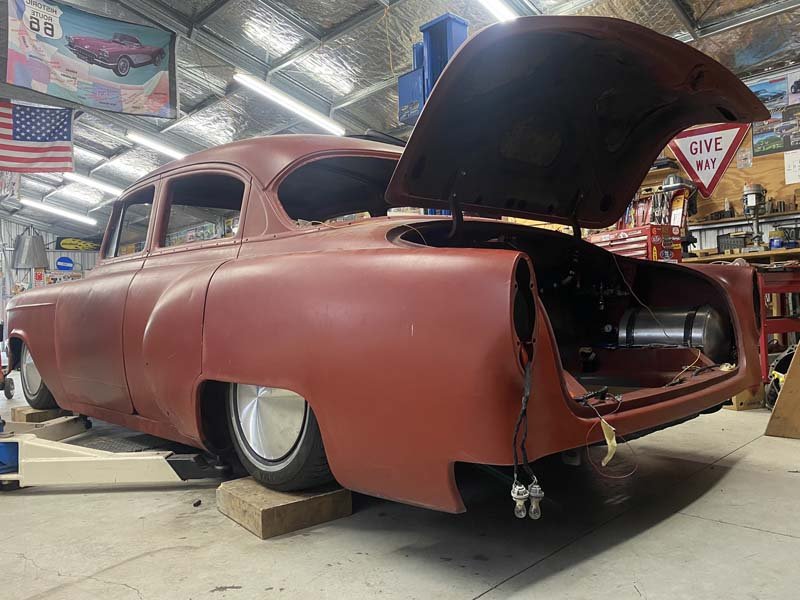
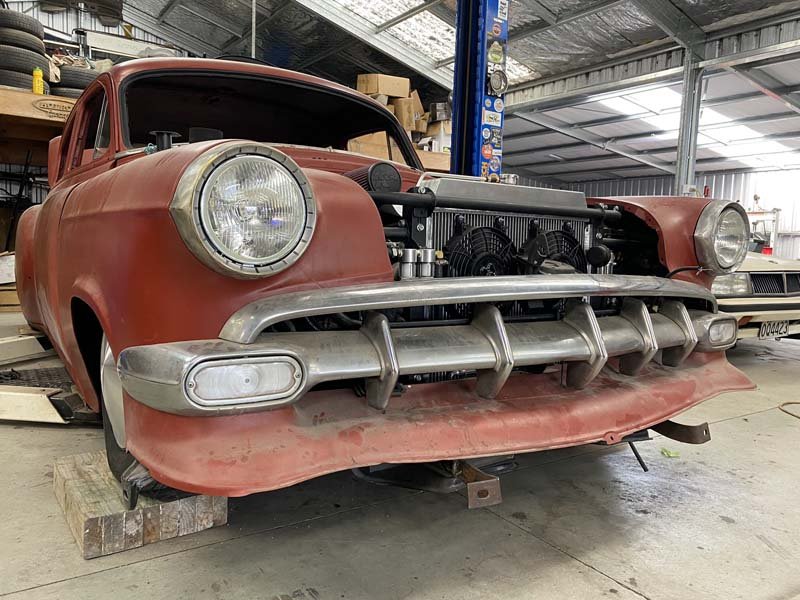
The body is done! Just need to put some sealer on the underside of wheel arches then move onto the front guards and bonnet. Have a donor bonnet that's good apart from one back corner so will slice it off the blue one.1 point


.thumb.jpg.570970b401ac8d26ce9af7c1bf2bd8cd.jpg)


.thumb.jpeg.e0a4bff61111e0c8c7396950fcc94da1.jpeg)


.thumb.jpeg.384ff72c8d2b0ee0d34a7bdedb55bdcf.jpeg)


This leaderboard is set to Auckland/GMT+12:00