
Leaderboard


Popular Content
Showing content with the highest reputation on 19/05/21 in all areas
-
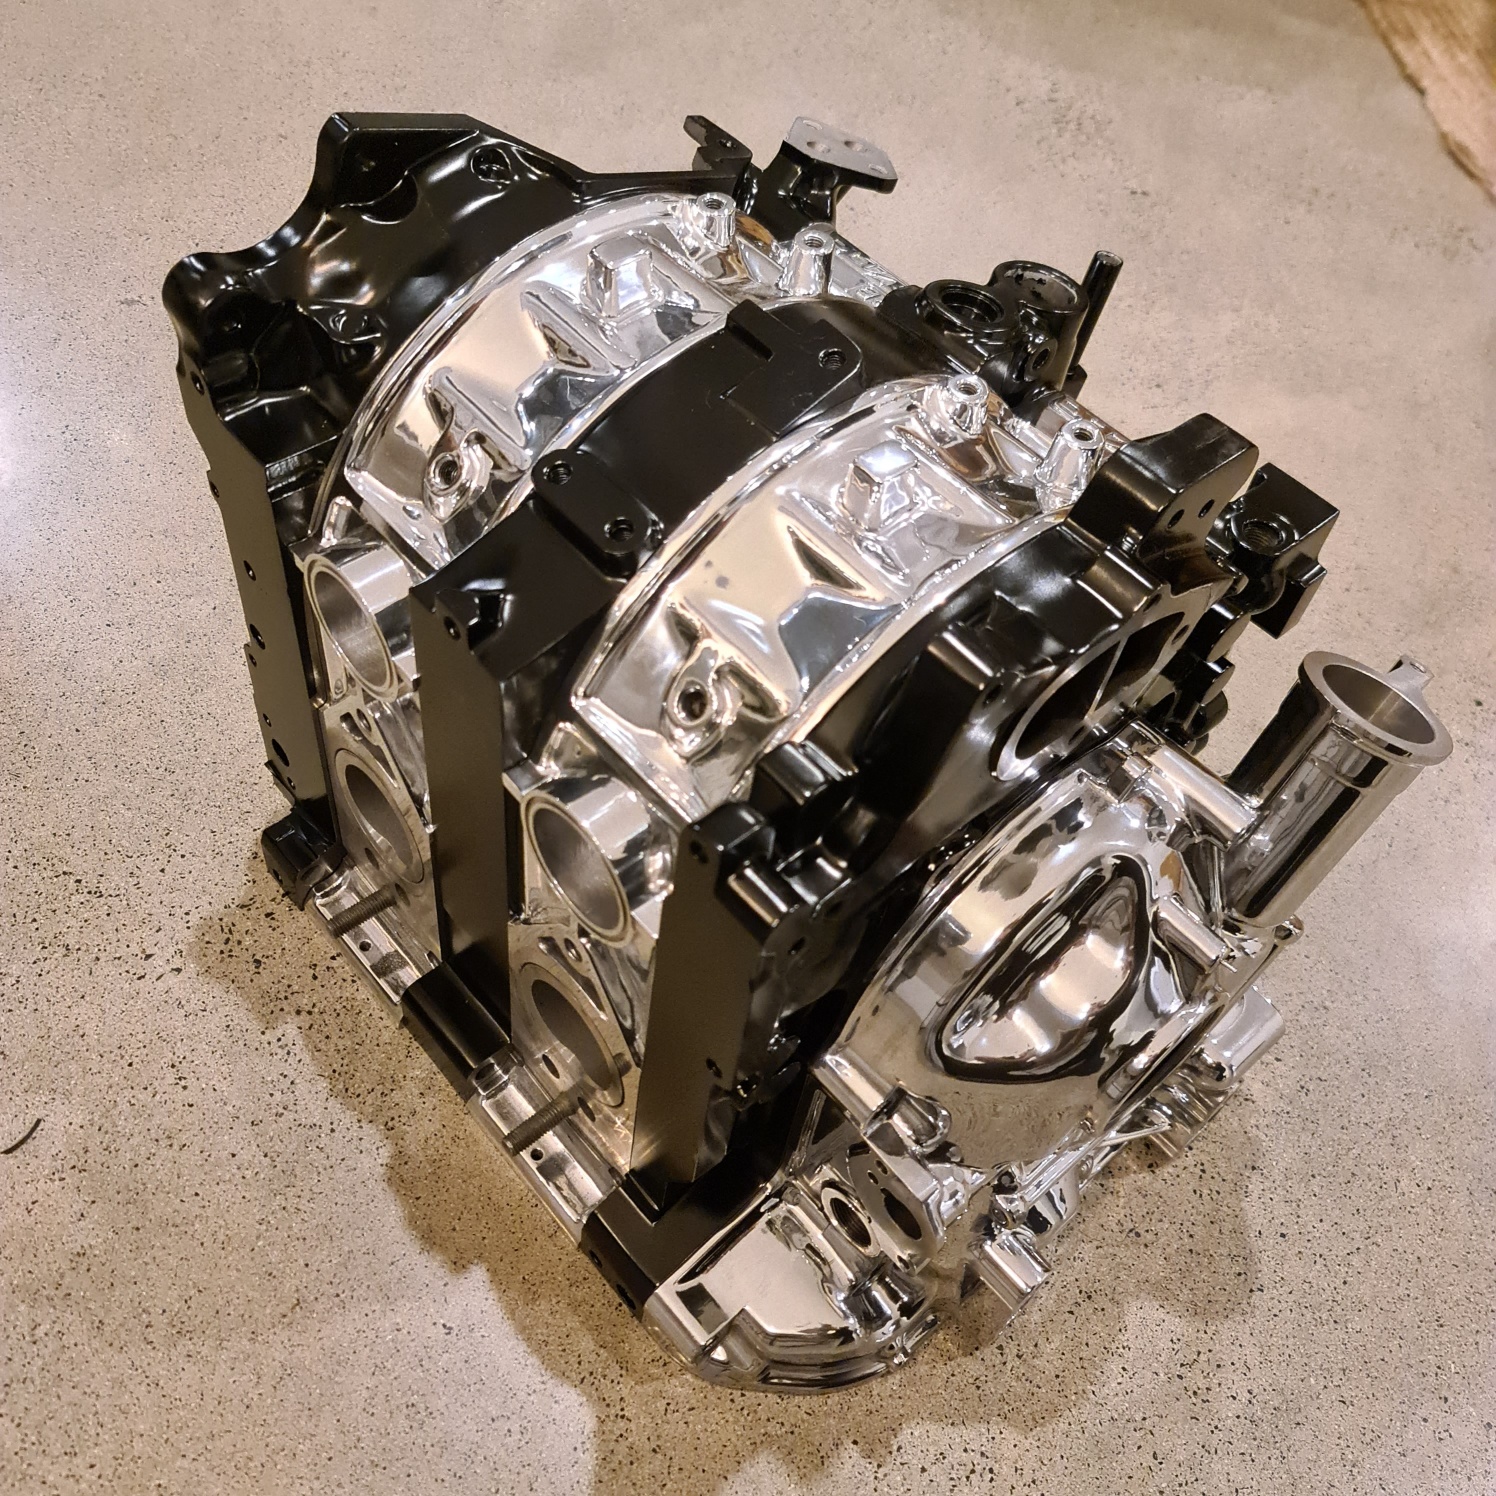
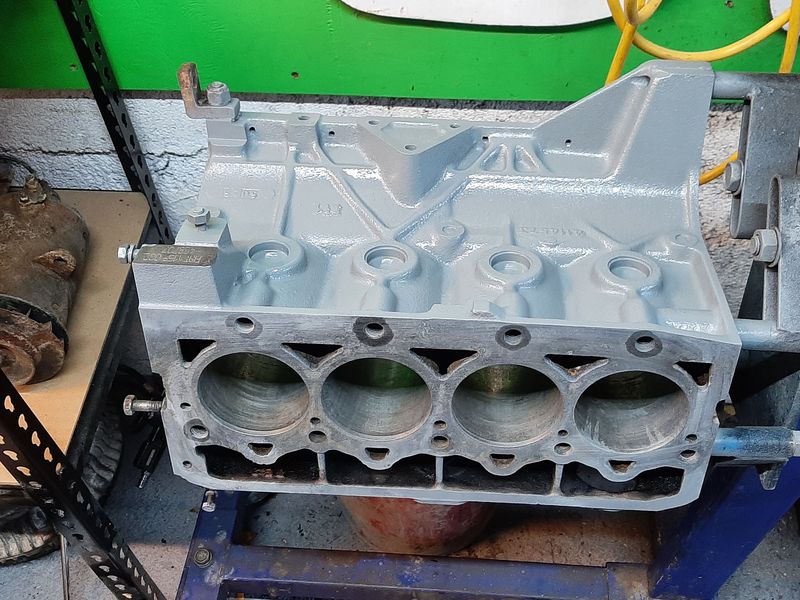
Got my plates back from being smoothed and painted by a mate, Dummied it up with housings and front cover last night and pretty stoked on the outcome. Off to Revolution Engine Services to get assembled, the rest of the parts are ready for assembly.
 18 points
 -
Made a new parcel tray out of some 2mm aluminium and mounted some Pioneer TS-X8 box speakers on it. Also fitted the rear window, just waiting on some new chrome filler trim to arrive, hopefully it fits right. Straightened up the bumpers and bumper filler panels. The filler panels are originally covered in rubber and they had a few spots where they had formed rust bubbles underneath and just looked terrible, so stripped that all off and tidied up the steel panels. Made some mounts for the radiator. Need to get the engine in to see if there's clearance between the fan and engine before I finish mounting the shroud. Finally got the engine back from being built. Basically it's got big cams, CNC ported head, uprated valve springs, TRD headgasket, Toda cam gears, then just all the usual stuff to freshen it up. Will try and get some proper specs soon. Got the throttle body's and manifold vapour blasted and then went through and replaced all the zinc socket head capscrews that everyone seems to send with their aftermarket parts, with some nicer stainless button heads. Gave the gearbox a coat of silver metallic basecoat and then since it was getting some clearcoat sprayed over the top, I thought it'd be rude to not throw some metal flake in too. Need to decide on something cool to paint the cam covers in now!13 points
-
More frustrations The StuScience(TM) Alternator bracket turned up and worked perfectly! So I got the alternator working fine. So I could run the car for longer and take it around the block. The gearbox isnt shifting very well, I suspected air still in the clutch line but bled it again and same deal. So the gearbox might be a bit stuffed perhaps. It's fine when in gear just very clunky shifting. Maybe there were some other parts that are also different with the different box. Will do some homework. Also I'm getting a crazy amount of trigger errors, the ECU thinks the RPM is spiking high. I'm not sure why yet. It's possible I've upset something with my wiring butchery. Or maybe the alternator being close to the crank trigger is causing interference. Or maybe it's big cams/stiff springs/light flywheel causing some trouble. Not sure yet. It's an annoying issue to troubleshoot because there are clear symptoms but not a clear link to the cause. So as frustrating as it is, I just need to keep eliminating possibilities. The trigger scope results look fine, nothing crazy going on. In any case I was happy to go for a bit of a drive around the block, even though its running like crap. When it's not having trigger errors its good though, definitely feels way different ratios with that new box. 4th gear feels like what 2nd or 3rd used to haha. It might be a good idea to ditch my bodged together loom adapter, now that there's no chance of reverting to the factory ECU. Which is a fun-ish job but just annoying it'll take more time. Ahh well!10 points
-
Yay , got the brakes done , the other side was actually easier after a couple beers, found the lack of brakes for the rear, one cylinder let go so thats cool. anyhow started bleeding it... spew. And the new stuff And a couple pics of the interior Chur9 points
-
On the bright side, it might result in more posts in this thread - and I'm OK with that.8 points
-
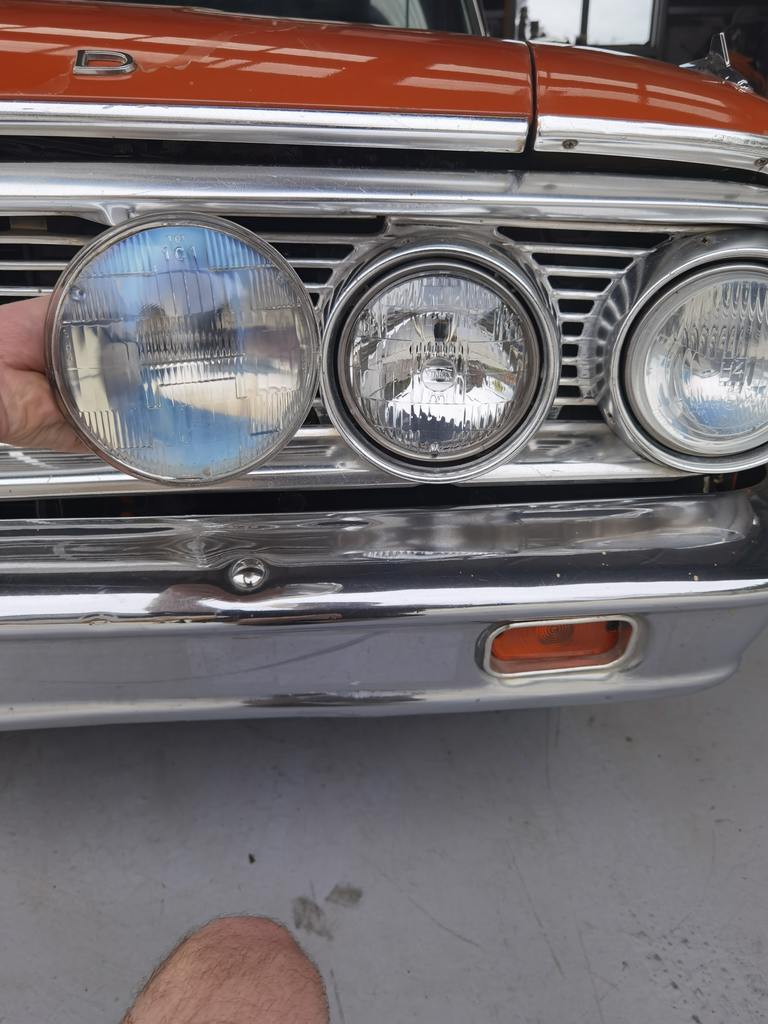
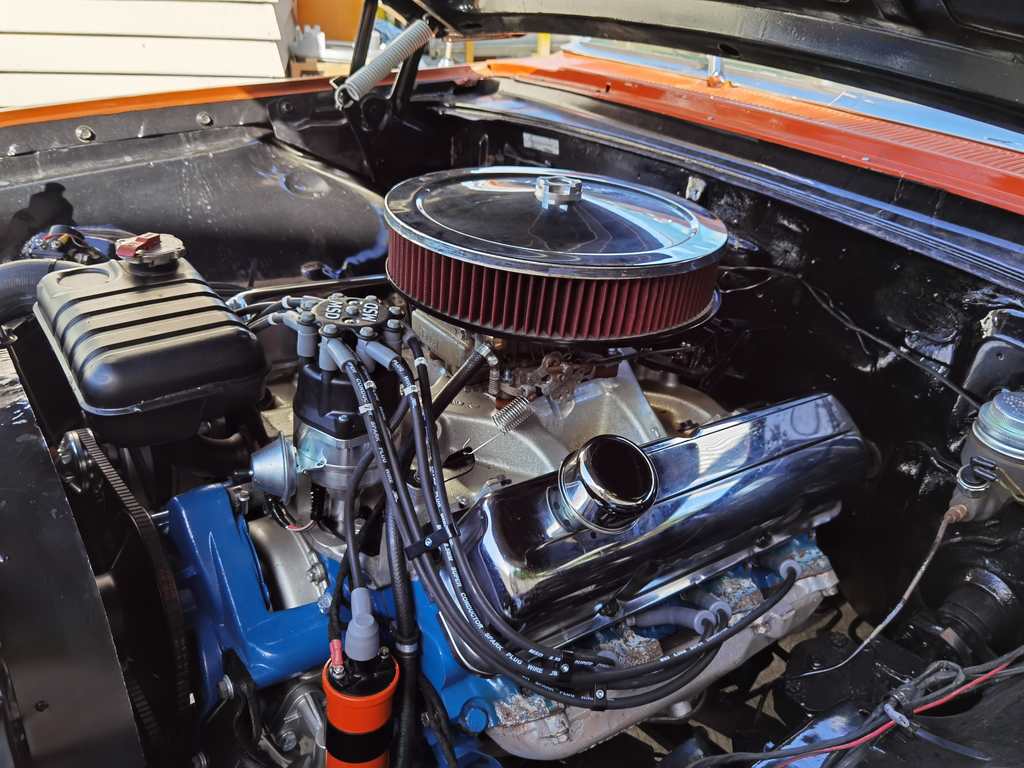
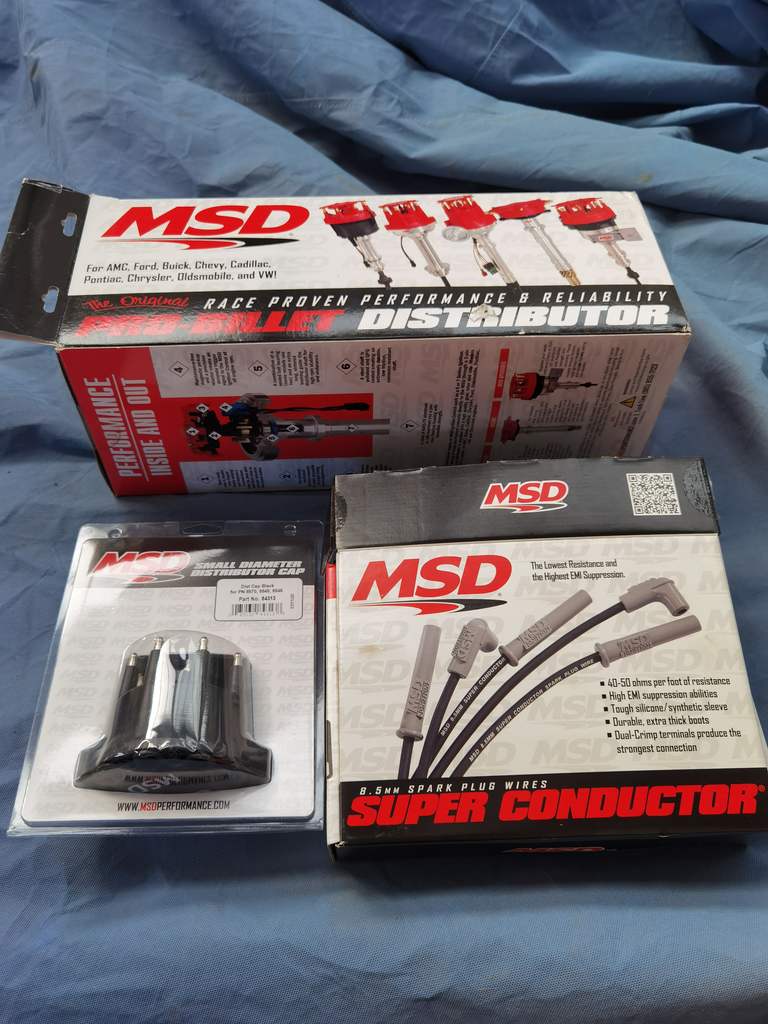
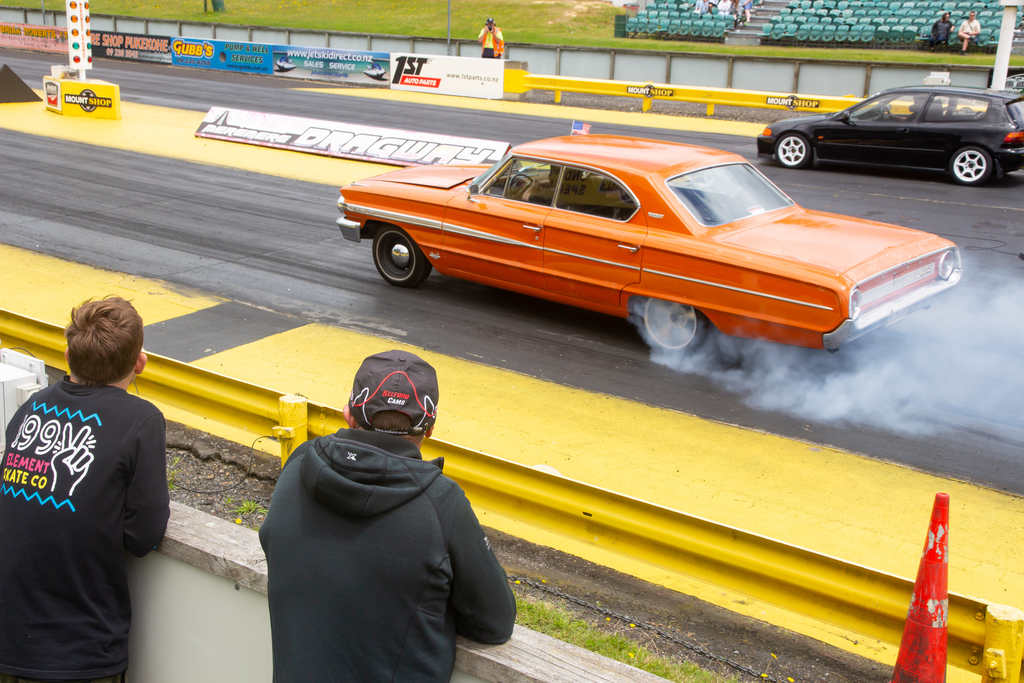
After doing a few miles the motor needed the heads being retorqued After the heads were retorqued i fitted the MSD ignition system i bought. i also bought a black msd cap and leads. And replaced the high beam headlights as both inside ones had clouded over. these current ones were cheap ones from repco but they didn't last. then got the car ready for OS drag day in 2020
6 points
-
I've just gone joined a classic trucks and wrecks facebook group (well fuck me - there's another rabbit warren of shit to look at) and the barries are already barrying furiously.6 points
-
Hi all, I've been meaning to post this up for some time, but was finally inspired to put finger to keyboard after a sharncall with @yoeddynz last night. @PastyDynamite and I bought this for ourselves as a Christmas present, with the goal of housetruck conversion and living the pikey dream. She (the Hino, not Meg), is a retired Hino FF173 double cab. She was converted into a fire engine by Mills Tui in Rotorua, and served time in Bulls, Foxton, Ratana and Kaiaua and racked up approx 43000km in that time. She was listed locally on TM, and it turned out the guy selling her was the husband of one of my co-workers. He owns a heavy/ag machinery sales company, and bought this a couple of years ago and stashed it in his shed because he liked it. Unfortunately his wife didn't, hence the sale. As you might expect from a low-mileage ex-fire truck, it seems mechanically solid and drove really well on our test drive. By the time we took posession, she had been gutted of her pump, but its cradle and rad dials/hardware remained, as well as the beautifully constructed 2700L water tank/gear stowage section. Also missing are the beacons and siren, though there is still a sweet toggle that makes the front marker lights flash in a left-right alternating pattern. Deconstruction started in earnest - without any heavy lift gear we decided to remove as much bulk as possible. We also want to retain as much of the more interesting bare materials for exterior/interior reuse. Initially the pump cradle (all steel) came out in two bits. Thanks to @Goat for the assist and regular help/brainstorming! Next, the hosereel, ladder mounts, tank lid and baffles were removed. After much mulling, we removed the aluminium cladding and decided to split a third of the tank section (lateral to the chassis) off, then tip the remaining two thirds off of the other side. This brings us to the current state of play, where we have a rather stumpy looking doublecab on a bare chassis. Another job that needed doing was repair or replacement of the fuel tank. The old girl is pretty low on ferrous oxide, but had accumulated water in the (absorbable) padding between (steel) tank and (steel) tank straps, and rotted both sides of the equation out. Found a compatible, marginally better nick version from a breaker and tarted it up. On the subject of crusty bits, the cab has a few areas where water has sat beneath chequer plate and eroded the firmament beneath. Meg got to cutting and sticking. We have considered a number of designs for the body and its mounting method. The construction style that seemed most promising was a composite box, a la expedition trucks, chiller trucks etc, as they are strong, light, and really well insulated. Something like this: However, they're also super expensive; we got a rough estimate of $50-60k for the box alone from one place, others that would supply panels for self assembly were cheaper (but not significantly) and would come with the added logistical headache of assembling a monster structure. Back to the drawing board (aka Fusion 360). New-old plan is to make up a simple flat bed, then construct a frame-and-cladding house box on top of it. The old tank body was attached with 6x chunky bolts through the plate bridging the back of the chassis rails, and some monster sprung-bolts at the front to allow for chassis flex, similar to this but much heavier duty: Suspect we'll end up re-using this method for the bed. If it's good enough for a lump of aluminium and 2.7t of water it'll probably be enough for the house module. Some older versions of CADding that I've got screenshotted, the subframe between chassis and body is likely to be quite different to these, but it gives the idea... ...so that's where we are up to! Will update as things progress. Input and suggestions gratefully received! Discuss -5 points
-
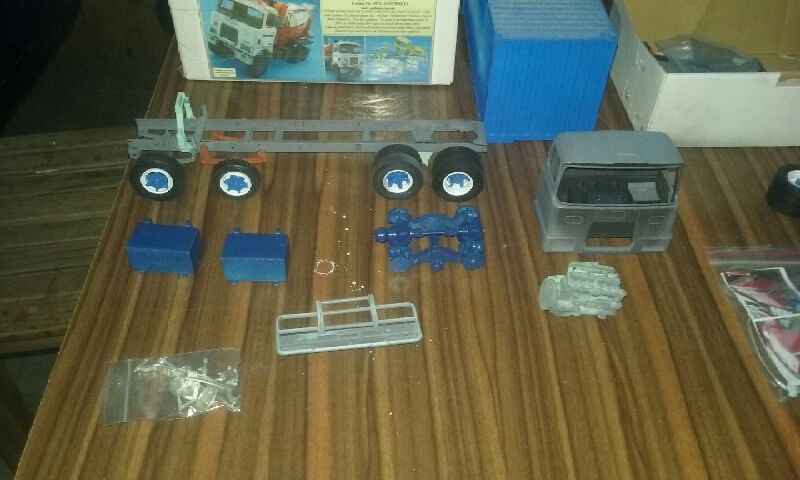
I ordered this last year during lock down, Then life went back to normal. Should really have another crack at it. FR Mack transkit from Auslowe. Mostly resin parts. Uses a freightliner conventional as a chassis donor. Goal is an 8 wheeler day cab Mack with 3 axel trailer in Mainfreight colours.
5 points
-
Barry- meet Barry. Hi.5 points
-
OK as promised... my old collection I have just pulled from storage and dusted off. The Ferrari 246. Bought the kit cheap, apparently never opened, on ebay and discovered the windscreen is missing. Fuck. Will still build it and learn how to form some clear plastic. I think the kit is still available out there anyway. Not sure. Will be neat to have on display because I think they (well actually the non gts version) were one of, if not the most beautiful cars ever built. This Scania I built in my early teens. Its a bit broken and needs tlc but I'll always keep it for display. Funny how when I bought this kit it was a fairly new truck on the market.... Finally my big model truck project. Started with a sleeper cab kit but I wanted to do a replica so carefully chopped the cab down in all directions to suit the TNL freighting skip truck I wanted to replicate... I would ride my bike down to the TNL yard which was a couple of blocks away from home and take photos... "oh hey Bruce- here's that weird kid again, taking photos of the shitty old skip truck"... I also took loads of measurements and did drawings while there of the various bits. I really wanted to get the model as realistic as possible. "fuck me Wayne- that kid is back on that truck and he's measuring things".... Sadly (for me..) the truck is no doubt off the road now I imagine * Interior was detailed as per the original... Now I cant remember my exact age as to when I had last worked on this model. I now know exactly when because when just taking these pics I spotted inside that I had added a scribble on a fake notepad, some initials of me and my old girlfriend, Caroline. Hannah finds this thoroughly amusing .... I am totally looking forward to getting stuck back into these models but, like old Man down south, it will be a 'later on' project because there's so many other things I wanna finish first. I could see the value in some sort of easily movable hobby setup where I could just close a lid and put the whole lot away somewhere safe. Rainy days in winter be the perfect time for this me thinks. * Edit I just looked the plates up on carjam and this truck is still 'alive' Would be cool to work out a way of finding out where it is now? https://www.carjam.co.nz/car/?plate=ky9055 points
-
Touched up around the a pillar and front guard this eveing Will put the drivers door back on and do the doors and back guards at the same time
4 points
-
Righto, so Bess got over the Hedland before I did due to Covid spec lockdowns , no dramas. Old mate from Swan Towing ( the agent) had a chuckle on the phone and said there were very little brakes, I knew they were garbage so let him know I knew, anyway got over here to grab it and he then mentioned it had NO brakes I like " nah man the fronts are siezed and have no brake pads but the rear 100% works. him = " no they fucking dont, we had to stop it by slamming it into park" I was all whatever. signed the paperwork and jumped in... hrmm the pedal doesnt feel good.... oh , it has NO brakes at all . either the front pistons have unstuck themselves and leaked all the fluid out , or the rear cylinders have now siezed too, so it was a very exciting drive ~10k's to the place its staying , all while pulling on the handbrake release lever and using the foot hand brake to slow it down, so lol and it was terrible. So Put the whole brake system minus rotors and master on order from rock auto. Went about giving it a wash outside which got rid of alot of the rust stains and gave the interior some love too , so fucking gross. but it looks 1000% better and have been pouring interior protectant on it ( because i dont pay for it) its making a difference but i will need to re-do the dash and floor mat at some point. Anyhow, brake stufff showed up yesterday, being the smart person i am I forgot to order new brake pads and had thrown the old ones out when cleaning out the back of the FC soooo that sucks. but have new calipers, shoes,hoses,a/c bits, suspension bushes and a couple other bits and bobs, goodness Rock auto is neat! and well priced, the calipers were about $40 aus each , i cant rebuild the fucked ones for that!. In it's new home for now , its the dry season so will dry out all the moisture thats its got from sitting under a tree in brissy New parts!! should keep me occupied for a bit, currently trying to track down some oem spindles to put it back to factory height, they seem to be a bit harder to come by, but aill get there. One side of the cylinder and shoes done! OMG that was not a pleasant experience and if you have a keen eye , its still not right. FUUUU. These will be discs one day because fuck shoes. Thats it for now , will get up a pic of the intrior once the light has dropped a bit, besides the cracks which you cant do fuck all about its actually pretty good , need to go through and identify all the trim thats broken and replace it at some point. I love just stearting it up and listening to it rumble.. sooo gooooood.4 points
-
3 points
-
Wow!!!!....
3 points
-
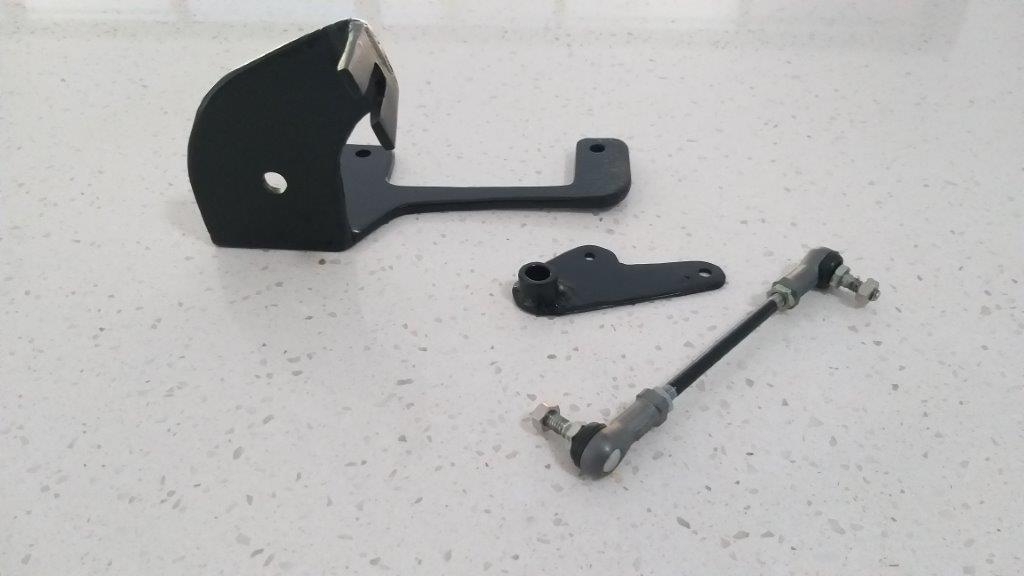
I guess by now everyone is tired of reading about my accelerator setup, so I'll close the subject off by sharing a photo of the new components with a quick splash of paint. I'm looking forward to working on something else tomorrow.
3 points
-
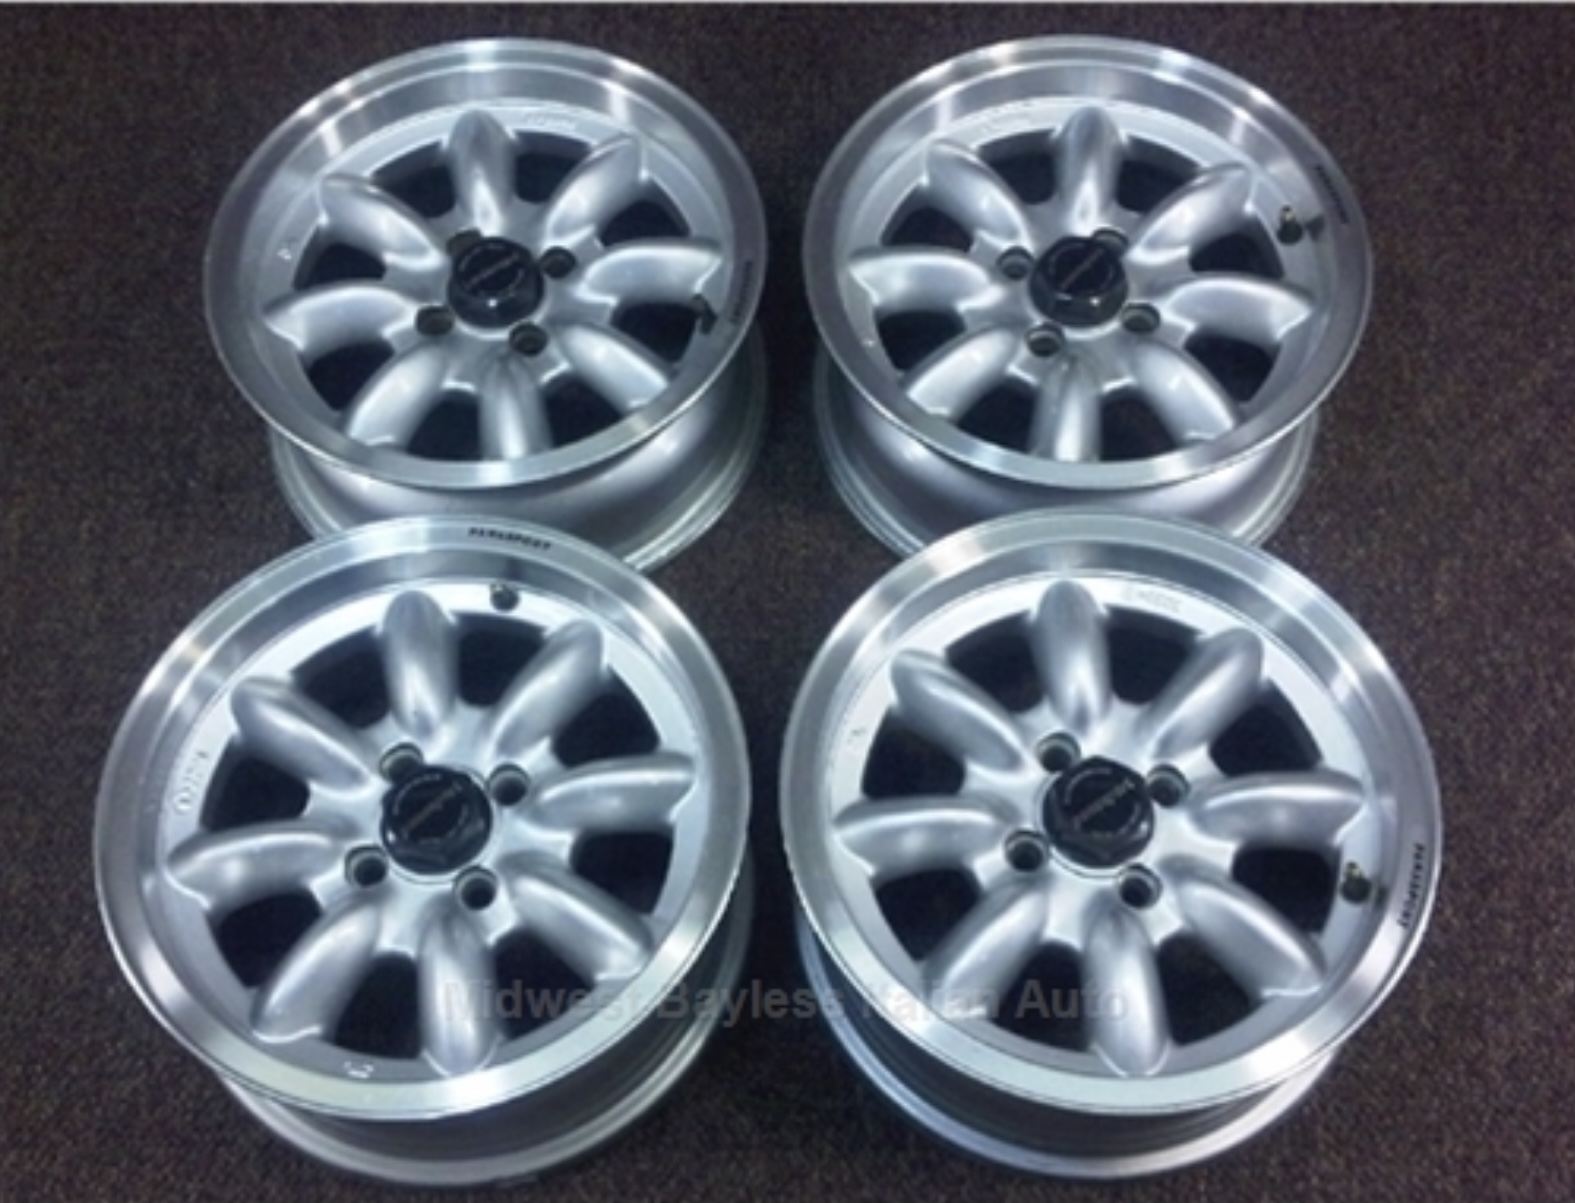
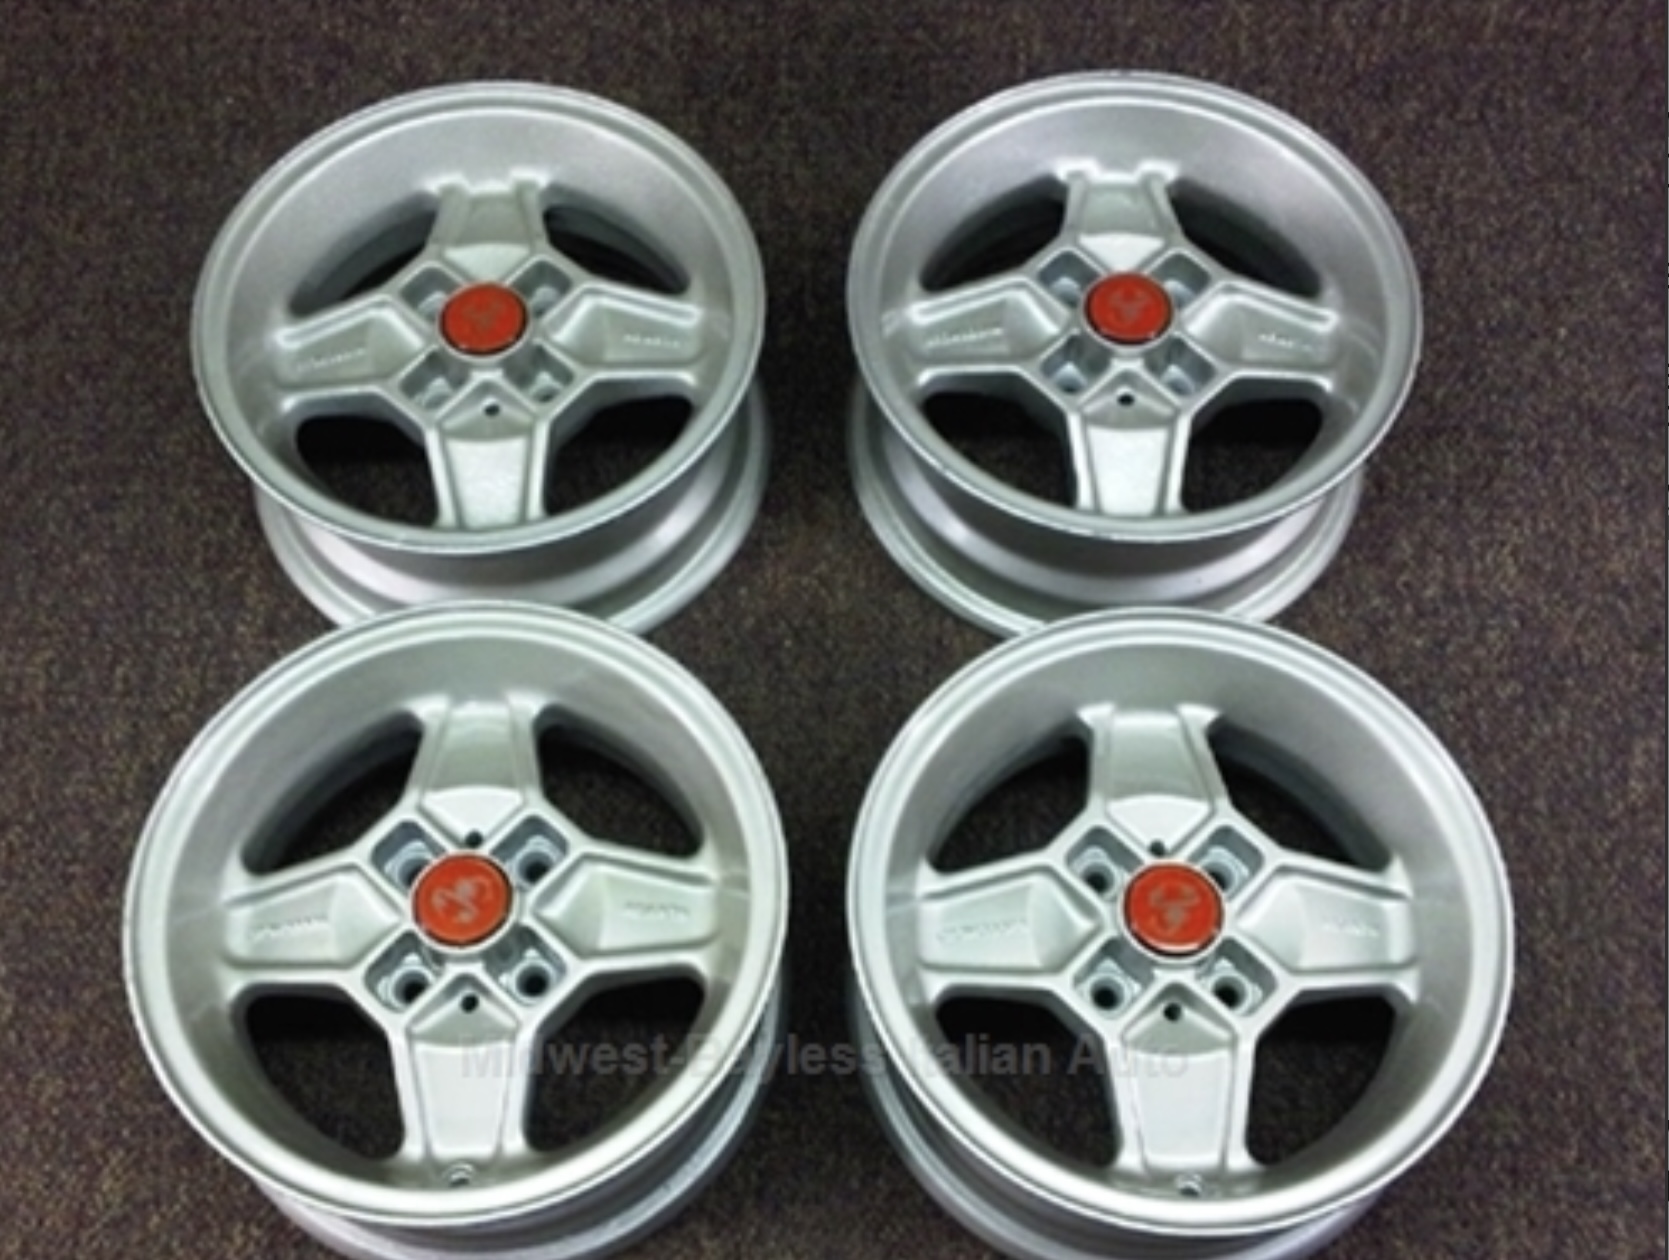
It’s coming home soon! As soon as I can get a trailer, good weather and some time organised. I have ordered a swag of miscellaneous parts from fiatparts.co.nz. I also ordered a refurbed bosch alternator for a 124 Spider from Rockauto with a view to going internally regulated. I am also dreaming of some new wheels. So a Poll is in order.. Panasport (minilite style) 13x6, +10 offset Reproduction Cromodora CD30 (available only in 13x5.5) +7 offset, which is the same as the stock steels I think OR Repro CD66 (13x7) +10 offset. I have a favourite, but I’m interested in your thoughts. All 3 sets are available currently on special from Midwest Bayless and would be $1400 landed (plus local GST probably). A bit ouch, but the cheapest I have found on the internet. If any of you have a lead on local (NZ) wheels I’m all ears too.
2 points
-
Started with the donor chassis and ordered a bunch of custom resin parts to build the truck. Engine, cab, suspension, extra steering axel, and so on are some of the components you can choose.2 points
-
2 points
-
Hmm I have been in a couple 700r4's and they seem sweet as? just a 350 with a overdrive and cable control, buy the cable bracket kit for your carb set it up and off you go? The move is probably a T400 and gear vendors overdrive box if you have the cash.2 points
-
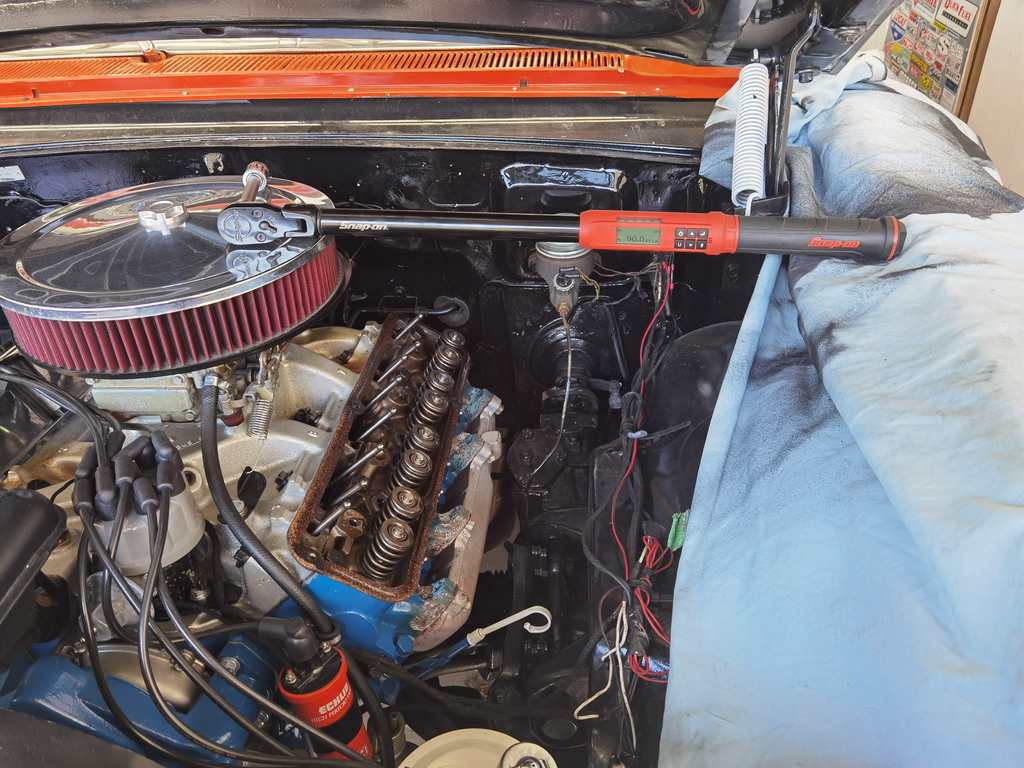
I'm pretty sure @OSM Garage specializes in torque wrenches. He might be able to help you out/sus you a deal.2 points
-
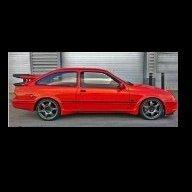
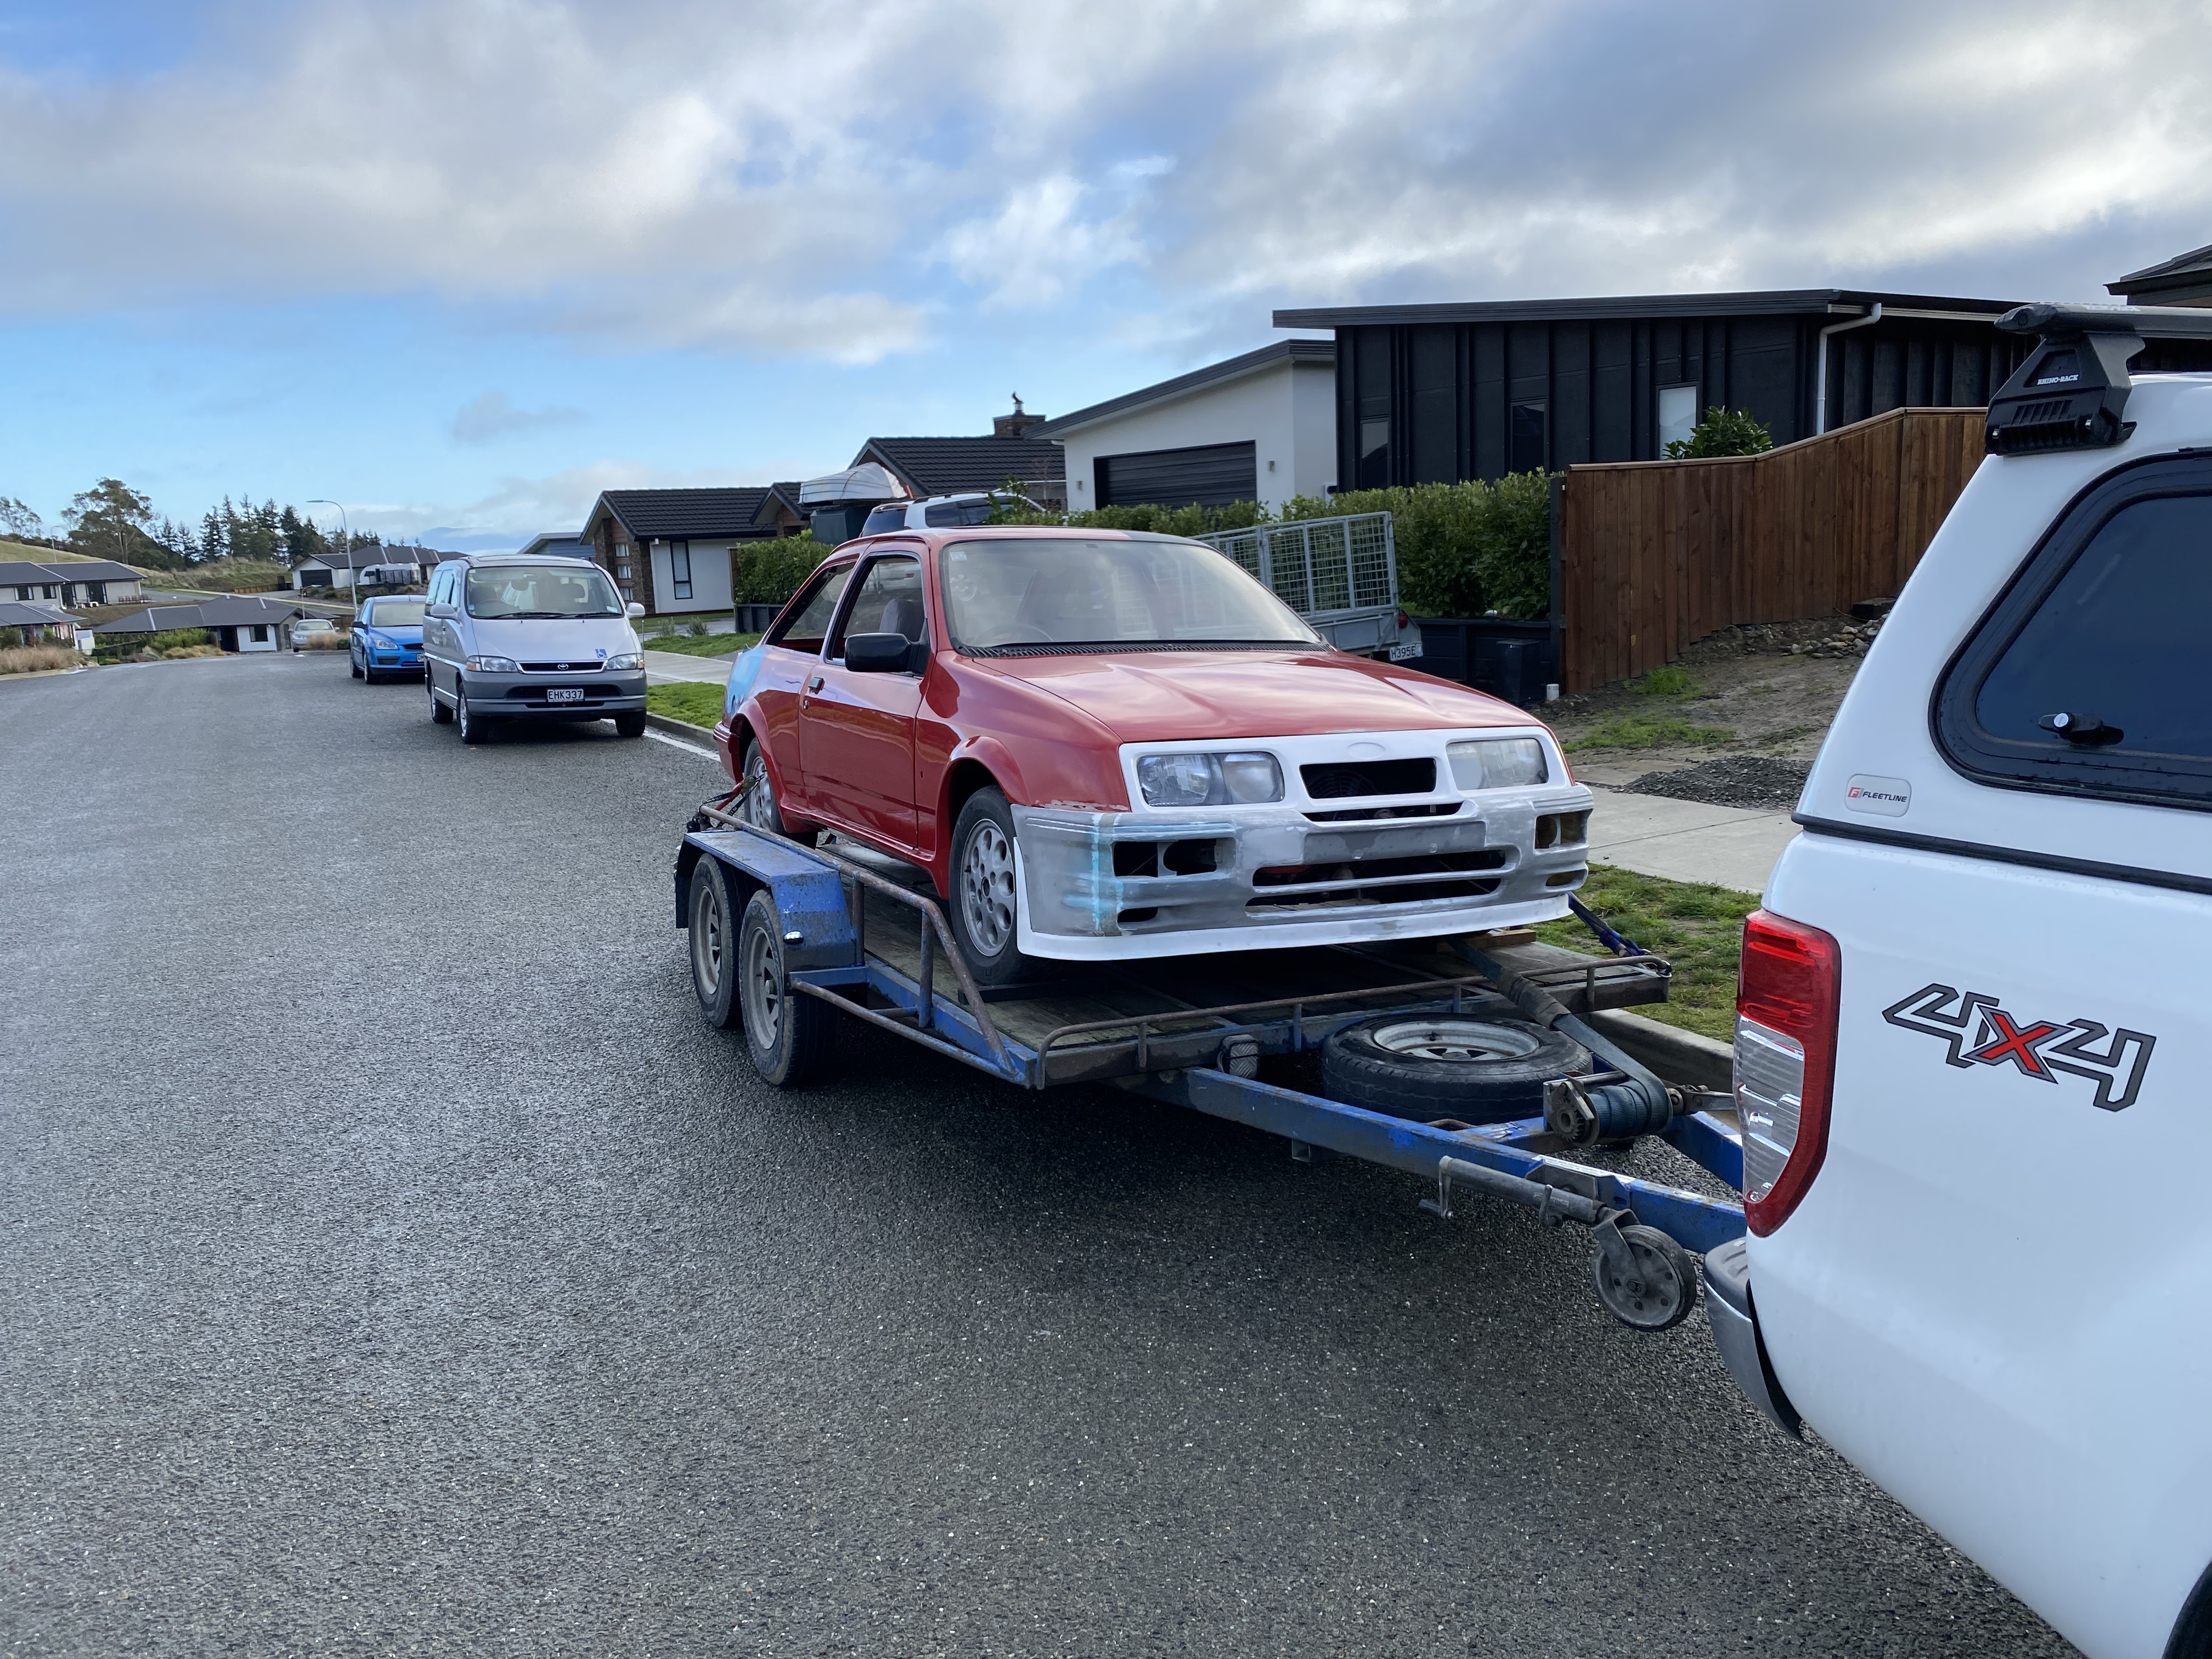
What, an update you say? Well, okay...... After many many miles (trips) in the Sierra the time came to front up for the WoF....and as expected, things werent overly flash.....lots of rust in weird and unusual places making it a health hazard to both those on the road and those inside. And probably to Albanian children as well (somehow). So for the last wee while she has been out at "The Farm" where @JustHarry has been working his magic on it (most usually when he's lost the will to live or wants to take out his anger on something). Noises are being made about it (hopefully) being ready soon for another crack at this mad WoF thing, we await with bated breath. On the minus side, Harry has found rust in a few more previosuly unseen places so it might be a bot terminal. But Cest Le Vie, lets just drive it like we stole it until the WoF guy says we cant (on its 2 litre Pinto and 3 speed slushbox) then go find another one. On a whim I splashed out on these. They are from an ST170 Focus but I fear there might be some shenanigans needed to get them to fit (if at all). For the record they are 17x7/ET49 (and that offset is probably the killer) with some 215/45 feet on them. Now I've read lots of conflicting stuff on the interwebs about what people have got to fit and what didnt, so I guess the best we can do is strap them on and see. Maybe some 205/40's might be better, either way i can see guard rolling in my future. Watch this space...
2 points
-
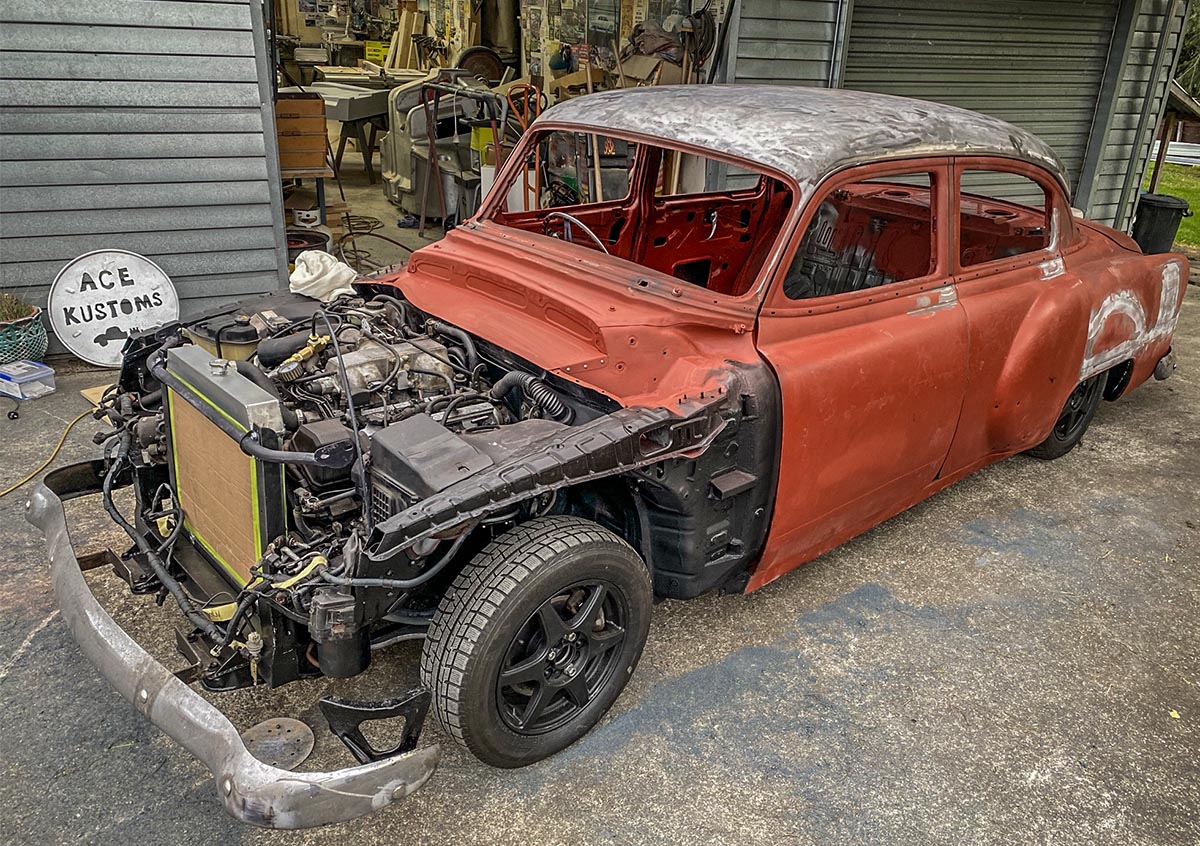
This weekend I fully committed to making this thing happen: The 1UZ is out of a UZS131 so has the right headers, oil pan and angle on the bell housing. Annoyingly the fan is broken, and MAF is missing. Spent a bit of time digging out the Japanese mouse nest from the valley. I've managed to rent a little space on a friend's farm up in Warkworth, seeing as garages don't exist in central Auckland unless you're extremely lucky. My plan is to tidy up the 1UZ on a stand while I continue to tinker with and drive the Crown. When the engine is good to go I'll take the Crown up and start pulling it apart. I'm pretty new to this but I'm lucky to have a few knowledgeable friends, and Bluebear's thread is absolute gold for me.2 points
-
2 points
-
Nice, they probably fit a bit better than the 4AGE ones too. Looks like it has e-throttle? Dreamy. Progress has been slow, it's taken heaps of time to pick the loom apart. Which was mainly just to make the low mount alternator work. But I pulled a bunch of the wiring back through the firewall that's now unnecessary (MAF, IACV, etc) The wiring is still a bit grotty but the motor runs. I didnt fix the old water pump, a brand new one was only $150 so just paid the idiot tax. Good peace of mind to have a brand new one too I guess. Then I've had a few coolant leaks to sort out, nothing tricky but just annoying and time consuming. @Stu is an absolute GC and made me an alternator bracket, just waiting on courier to arrive with it. Exciting! Something funny though, I thought I'd just try get everything lined up and working with the plastic bracket in the meantime. But the alternator wouldnt run... I spent a bit of time troubleshooting before realizing that the alternator usually grounds itself through it's bracket which is currently plastic haha. Hopefully take it for its first drive later this week. The steering is a bit heavy with no PS at low speeds. But I guess I could retrofit the electric assist if it gets tiresome. Or just stop being a wuss.2 points
-
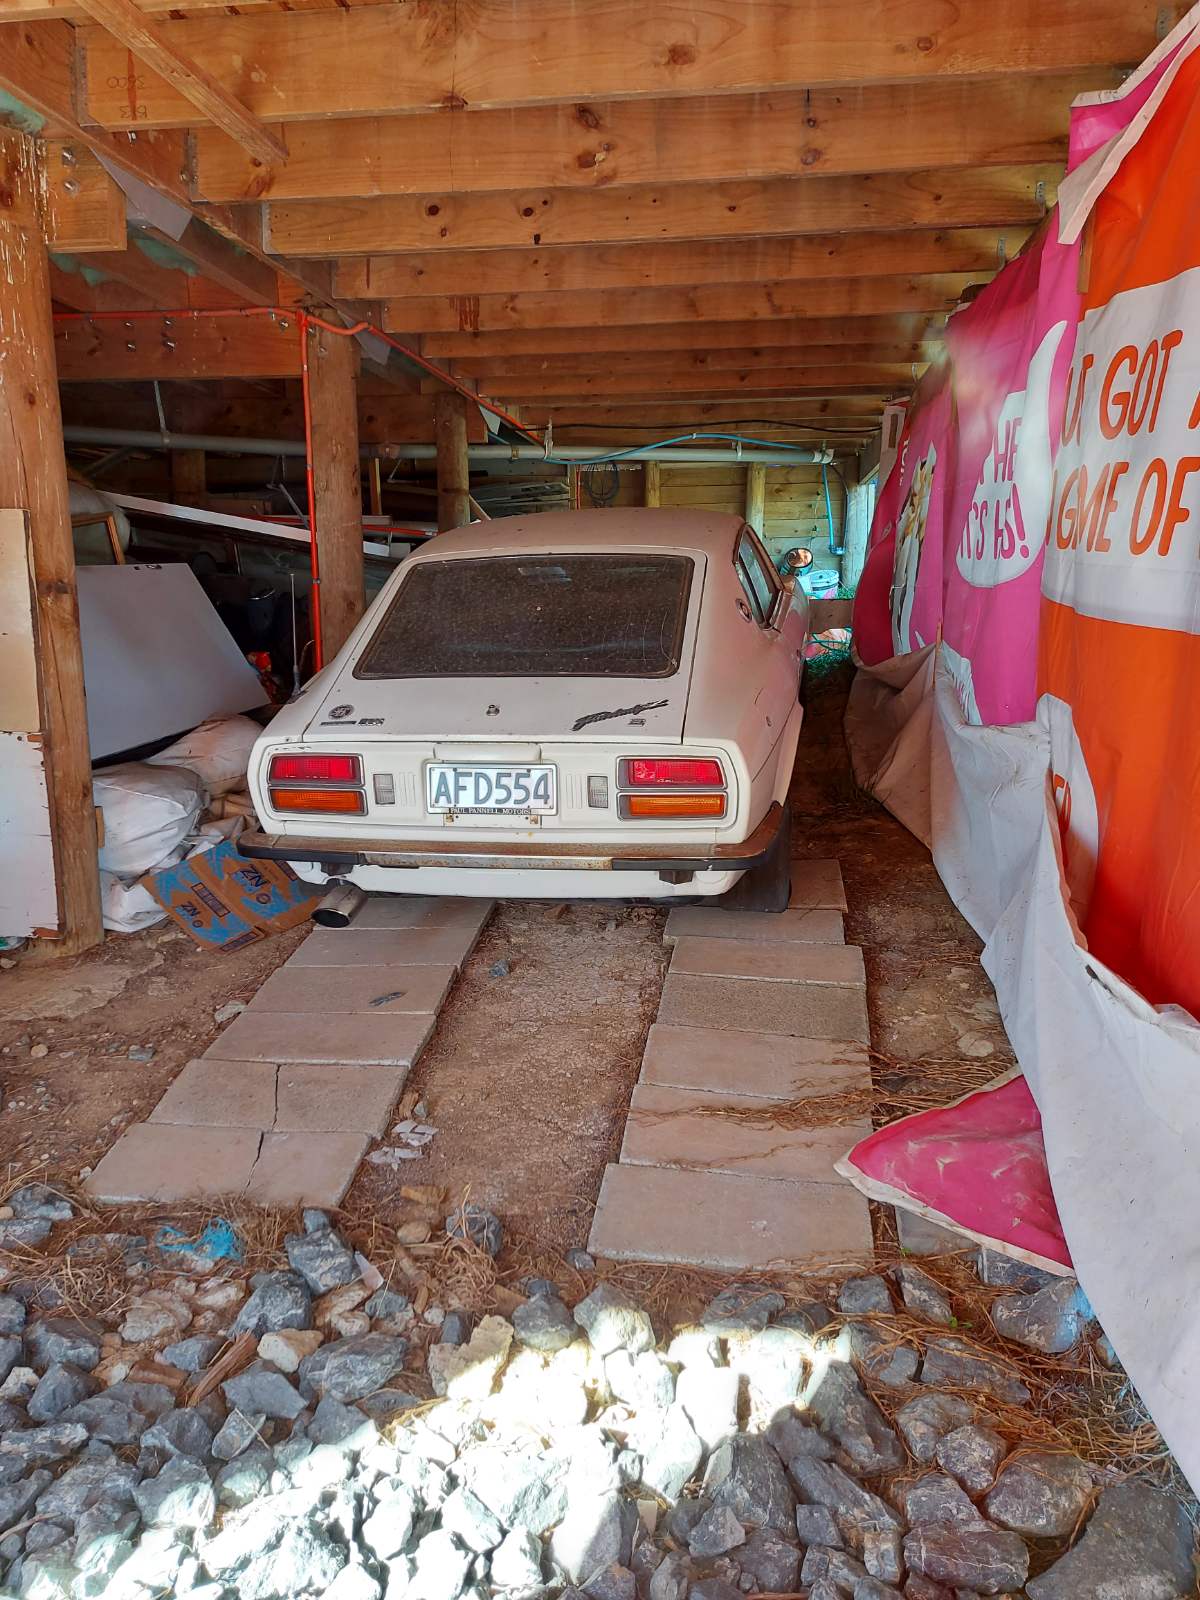
2020 to 2021 / Had to park it up finally / couldnt get a wof. Was focused on the MR2. But aim is to have the 260z's rust removed/repainted and back on the road by summer. Not a garage queen but tidy and usable. This month will start the strip down etc. will post pics as it happens.
2 points
-
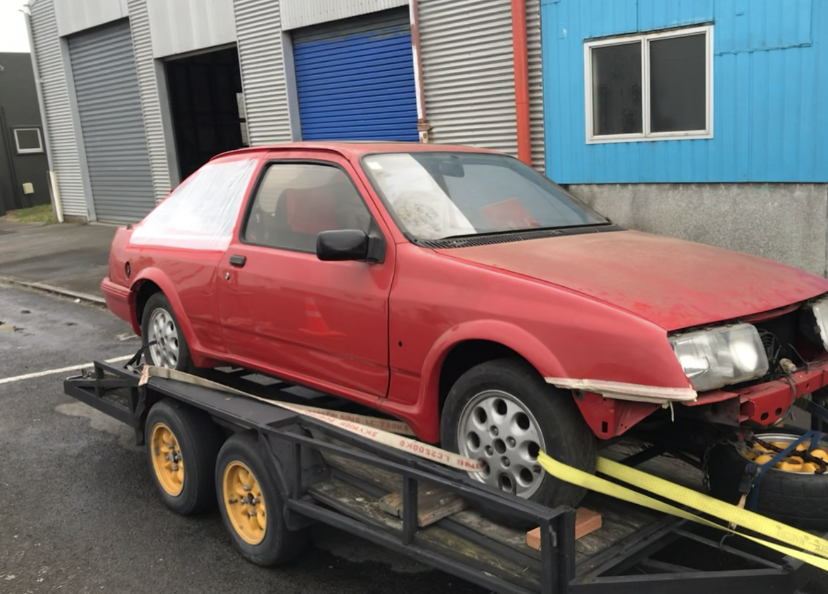
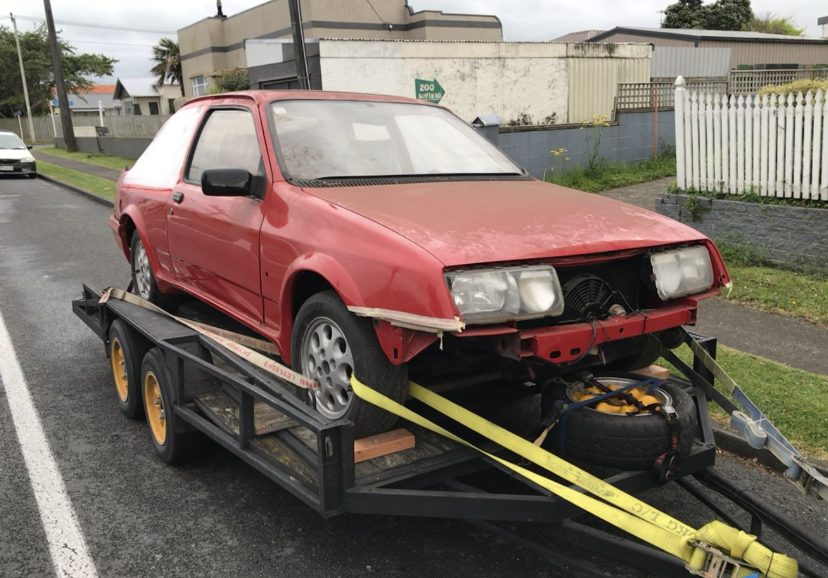
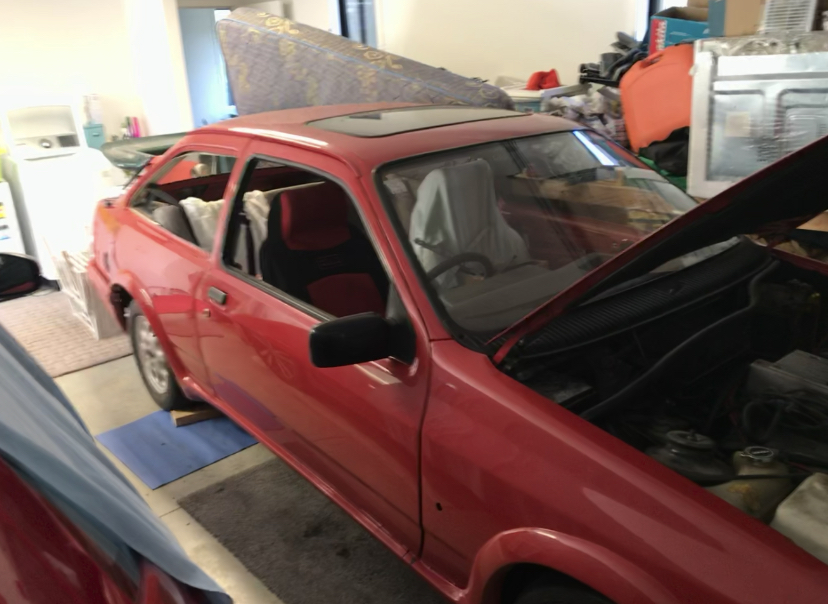
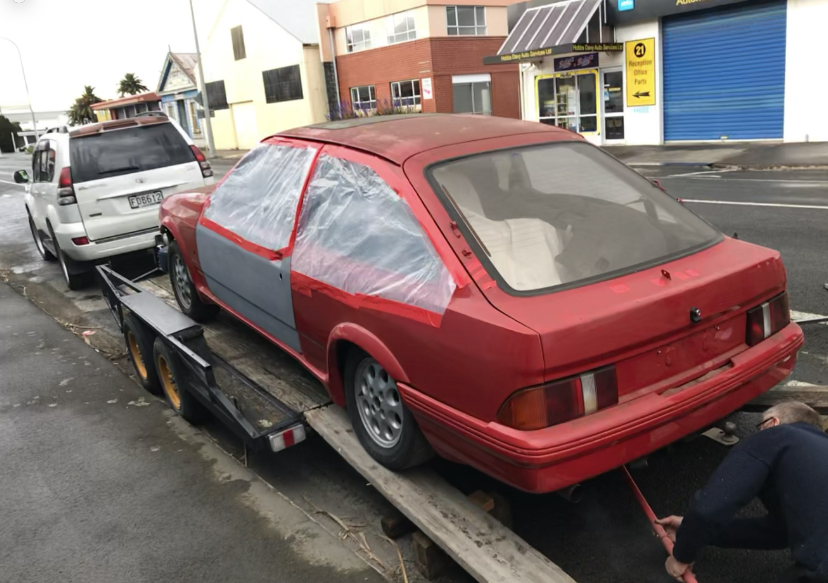
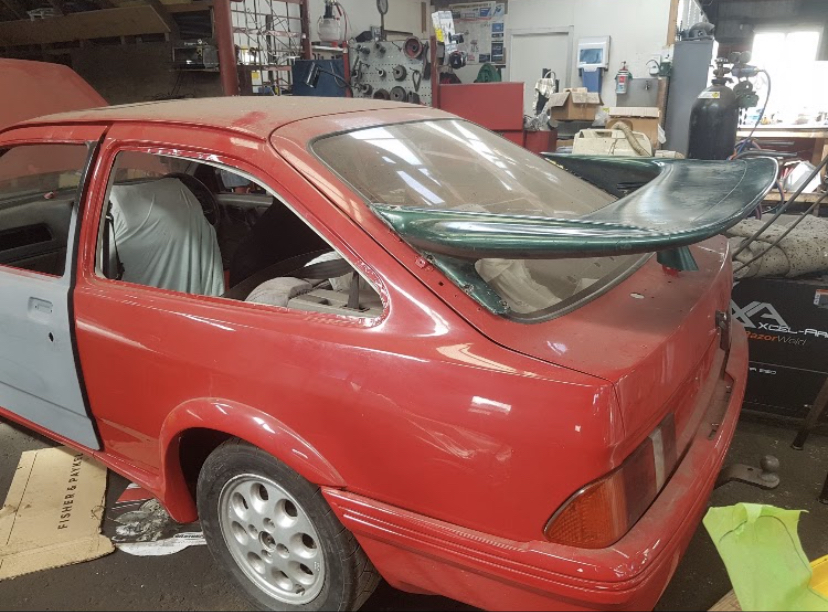
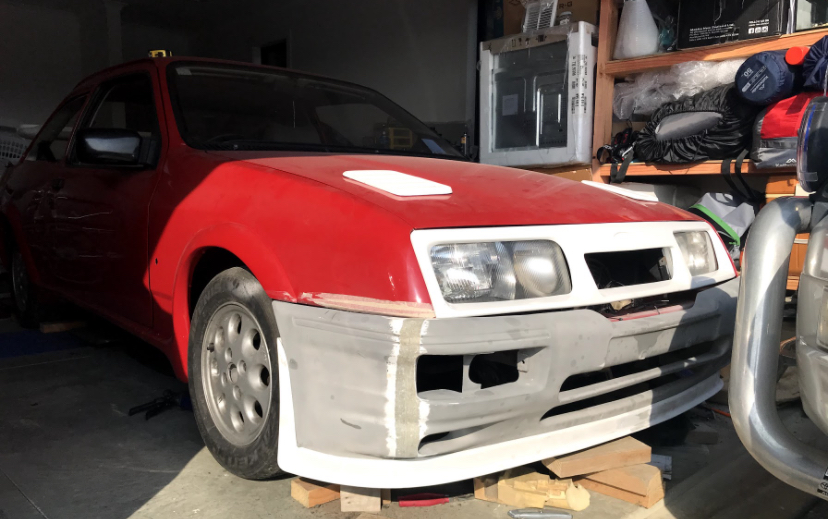
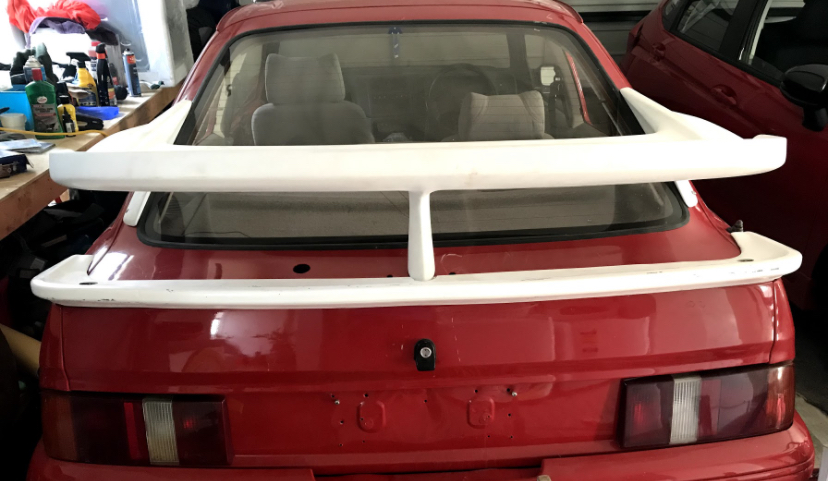
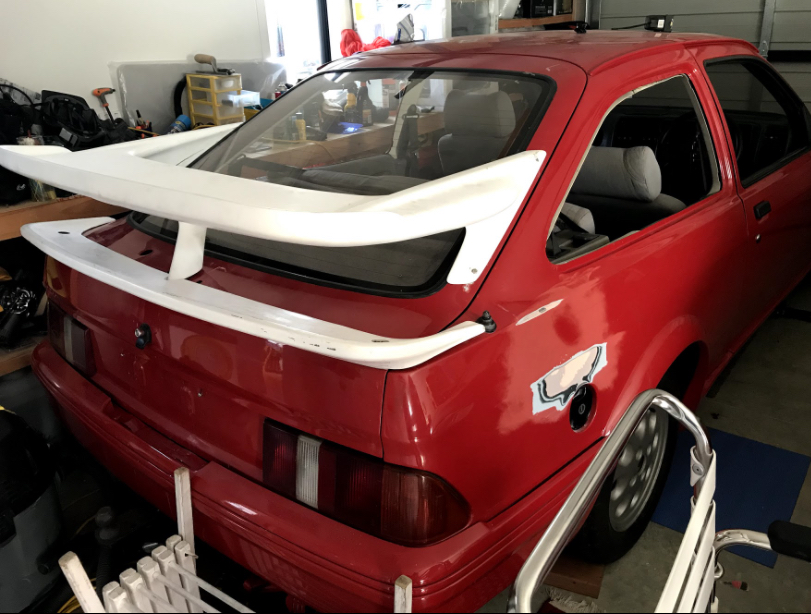
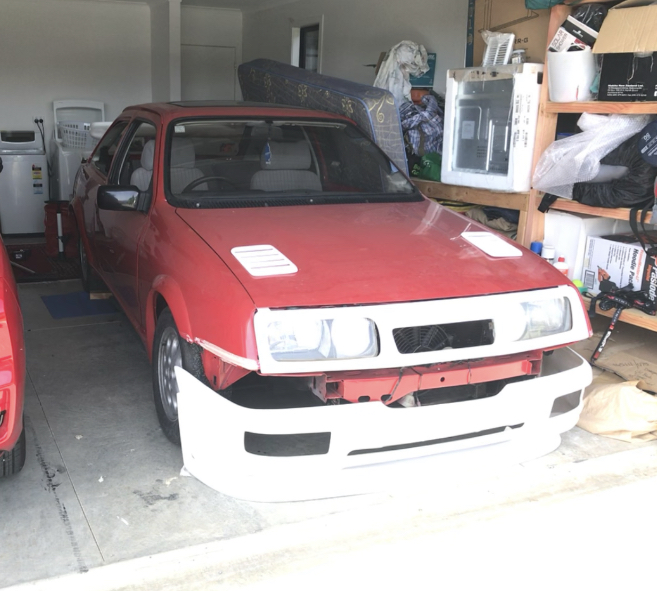
So after getting this home and then taking count on what I needed,I got on line and ordered me a RS500 body kit. When it got here I was quick to UN pack and mock up in place. I found out it didn’t fit to well, Especially the front bumper And the rear wing was badly warped I spent quite a lot of time cutting and fiberglassing and making brackets to hold everything on Plus trying to get all the gaps right on the front bumper. mais you do I spent quite a lot of time Looking for parts on the computer I managed to find a person selling a parcel tray on trade me I told him what I was trying to build and he told me he has 2 Parcel trays and if I want one then I’d have to buy 2 and he also told me that he has a fiberglass RS500 English made front bumper as well.......and because my NZ one didn’t fit to well ....... I’m now the proud owner of 2 parcel trays and two front bumpers. here’s a few pics of mock up
2 points
-
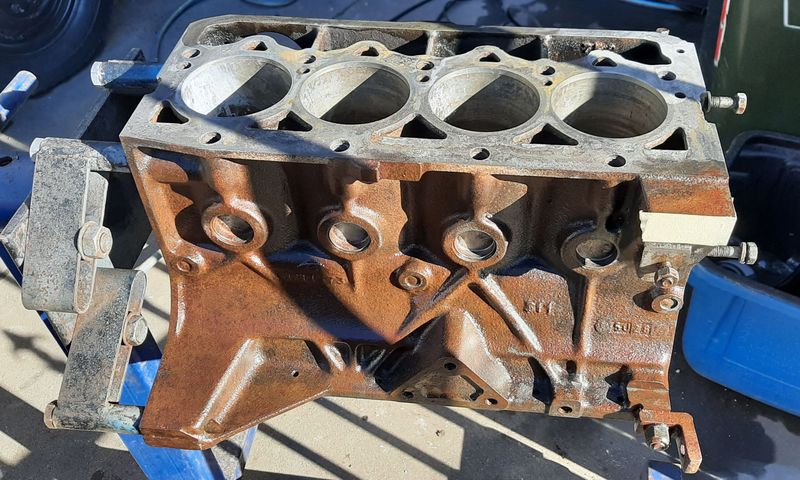
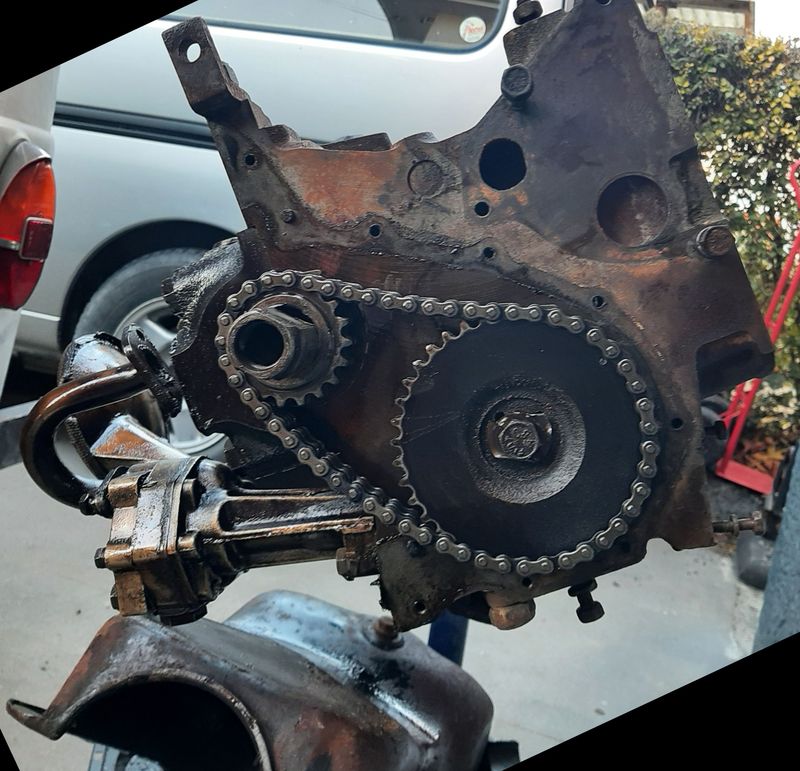
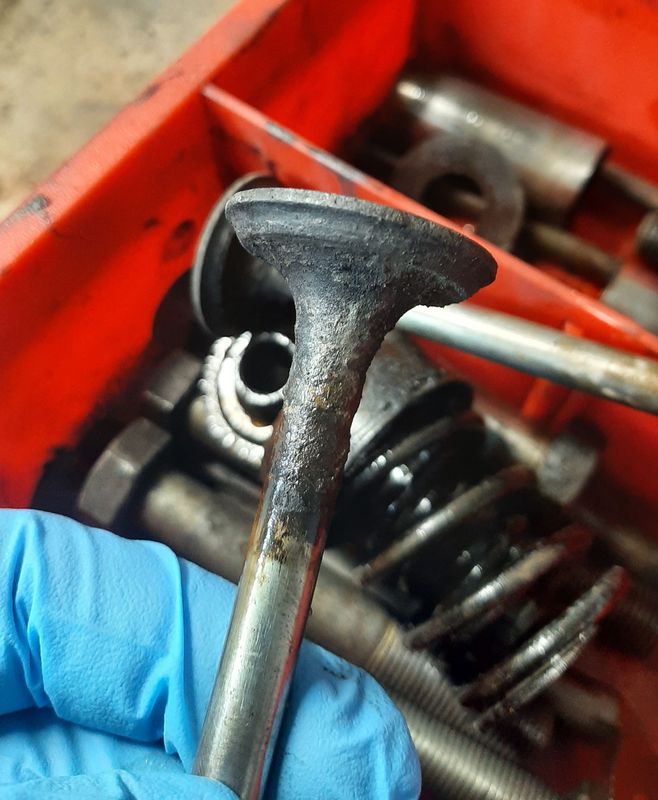
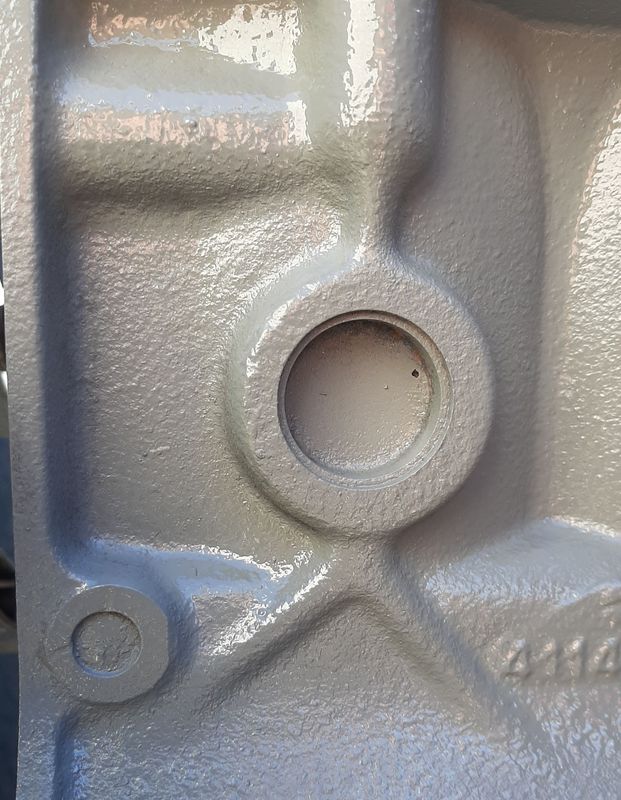
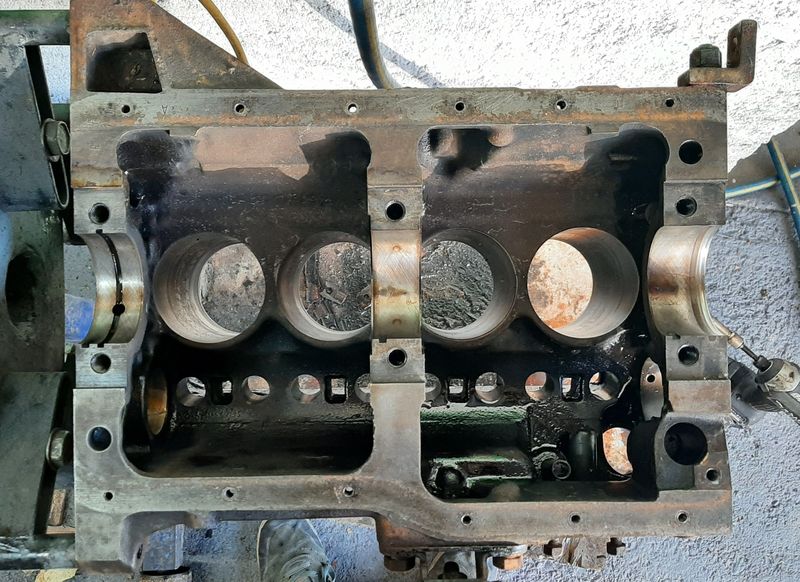
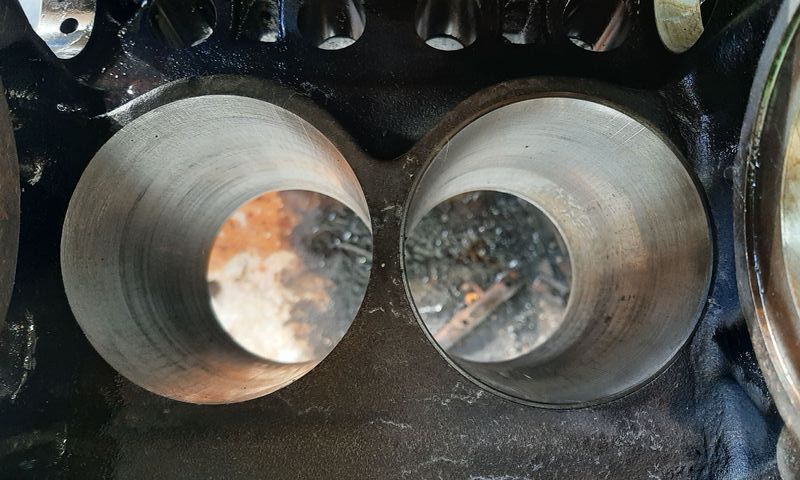
Disassembled the engine a bit more using the lights in a garage after work. Cam chain pretty loose. Is a FIAT stamped one so probably original. The chain stretches a bit over time but the main source of increased tolerance, is the gears themselves wear. The chain had been slapping the inside of the aluminium cover too, and has actually worn a hole in one spot. This will be the source of the metallic crud in the centrifugal filter (which is on the end of the crank nose) Took the head apart, Something ive not seen in any of the old Fiat engines ive dismantled before, pretty bad valve recession on several of the intake and exhaust valves, a couple of the seats are also similarly rounded too. Some of them are also fine. Its pretty weird. Hopefully the head on the engine in the van is better. The block disassembled next, camshaft and crankshaft are good, piston big ends look new, main bearings could do with replacing. Pistons all look new as well, and all the rings freed up pretty easily. Cylinder 3 looks to have a liner installed and the cylinder itself looks the same but has F45 cast on it compared to the other ones which have F35. I wonder if the new head bottom end gaskets and very good condition piston bearings and bores are evidence of some work at some point? Could have had head issues too (dropped a valve maybe?) and they slapped a worn out but 'known runner' on the refreshed bottom end? Anyway, decided this bottom end looks pretty good and given the other engine is seized ill probably run this one, hoping that the other head is in better nick. Bit of a tidy up with some Phosphoric acid on the outside and the water blaster all up and though that to get all the rusty shite out of the block coolant galleries Put some engine enamel on the outside, which is good for at least 10 HP and because its smoke coloured on the outside the engine hopefully wont smoke as much from the inside Dang nang it! Better now than on the first start up i guess.
2 points
-
another cool find VF - 12 -1 ? these are probably the least thrilling bits to see in full. I’ll order some corners for the bottom of the rear window aperture because they are like $30 each and that will give me a good reference to start on. Will have to deconstruct the rear deck and have a tidy up. at least the rear panel is fairly flat /basic?2 points
-
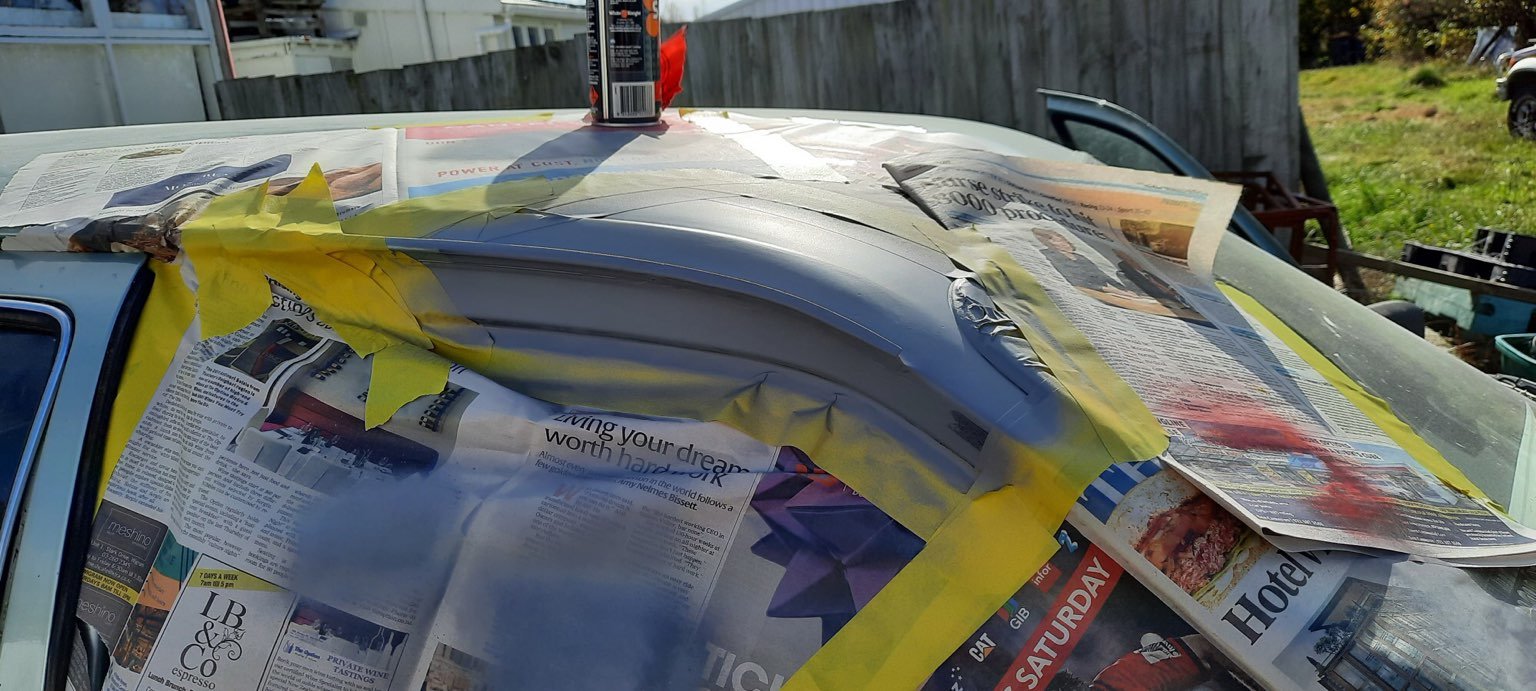
Stripped the many layers of paint off the roof today.
2 points
-
went for a cruze. it was great. 2021-05-16_03-06-24 by sheepers, on Flickr2 points
-
Since the last update work had continued making the studio area a bit more finished looking. Boxed in the ugly steel framework and finished the ceilings. This really made the place feel more like a house and less like a shed... Few more little bits to add, trims around the chimney. Really looking forward to selecting paint colours and getting some colour in there. So we've now moved out of the little cabin and into the workshop mezz. The cabin was getting a bit chilly, the bed a bit tiny now that the cat has decided he wants extra warmth and snuggles in between the pillows. Plus its getting boring walking from the shed after watching a movie, late at night, in the cold or rain, to a cold cabin. So we have continued on at full steam building the frame work and a bedroom. First thing was to suss out the position of the doorway frame before we started the main framework. We rummaged around in one of the woodsheds outside where we had stashed a few old doors. Picked out this one here... We'd bought this and another door for $20 together. Bloody bargain because this door is brand new, never having had any glass fitted nor any door locks or handles. Solid cedar, made in NZ. Would have been an expensive door back in the day... I scribbled some pencil lines on the floor... thus working out where the door would work best because it was going to have three positions it could be left in. Then we started frame work... insulation... Then plywood lining. Now that there was framing in the way we had to get the plywood upstairs another way. We couldn't use the stairway. I knew this was going to be an issue, along with future furniture, fridges, ovens, pianos etc. I allowed for it like this... Sorted I didn't take any pics of the plywood going up onto the walls but you can probably use your imagination. I had an idea on how to frame up and hide the steel framework in the bedroom and also set the drawers in under the kitchen benches so that way we had maximum amount of bedroom space around the bed. Its not a large bedroom but big enough to sleep in! Pretty nice to finally have a bedroom you can stand up in. Opulence for a couple who have been living in vans/housetrucks/cabins for the last 20 years. Bedroom aint finished yet but works. Rimu trims to add, wardrobe to build and some bedside shelves/cabinets. But Kevin loves it and its his go to place to feel all snug. It has a cat door the leads from the kitchen into here, past his doorway. A bit of wiring went in to suit various lights, sockets and we had to work out a suitable doorway point for our boss, sir Kevin fluffcat. He likes his new cat door with a plank he has to walk across from the bank outside.. With a cat hole sorted we brought in one of the two stainless benches we had stashed away outside. One bought cheap for $40 and the other gifted to us by a customer. Sensible choice stainless bench and sink. No pissing about. They just work forever. I cut the splashback down removing the bit with two old wall mounted tap holes and then cut a new hole to suit a shiny new mixer tap... The kitchen is almost finished but for drawers and cupboards which we will custom make ourselves to suit. I'll snap some pics of it tomorrow. Damn its nice to make a cup of coffee/cook without going downstairs or up to the cabin. Not long from finishing this project and I can actually hook back into that flat six sitting on the bench under a sheet Whoop. Oh and also I suppose I could do some more actual paid work, which there is quite a long list of jobs from patient customers up on the whiteboard yay. Shed was well utilised over the last two days. There's a Triumph 2500 wagon that's been with us for over 14 months due to covid lockdown among other things stopping the new owner from collecting it. On Thursday four likely lads flew down from Auckland and after two days of solid tinkering, carb fettling, mild levels of bodging and number 8 wire thinking they got the old girl on the road and took off today to drive back to Auckland. The movie theatre got utilised last night with many old car adverts and classic racecar youtube clips being watched. Fun times.2 points
-
Painted the door window frames in 2k matte black and then assembled them back together. Hatch assembled and back on. Finally found some factory fender mirror, in pretty good condition too! Sanded the tail lights and sprayed them with some clearcoat. Got it off the rotisserie in the weekend, after being on it for 16 months!2 points
-
Been calibrating and repairing these things for about a decade now. Warren & Brown are about as good as it gets next is Norbar then Teng. I own w&b and Norbar, they can be rebuilt parts are cheap and available and are fully adjustable.1 point
-
Hey man yup still working on this gear might be able to source you one on my staff discount. 1/2" drive top out at 350nM for the flash brands its basically because the square drive will shear off. the cheaper wrenches use softer metal so are lower capacity again, cheap or not they all do same job accuracy wise genuinely surprised how accurate some of the cheap wrenches are. In saying that steer clear of Toptul its the brand that gives me most issues. Teng are good but the ratchet assembly are a little fragile if you use them top of the dial all the time, so go overkill when buying.1 point
-
We sell teng at work, most of the stuff is pretty good for the money, but we have a lot of problems with the torque wrenches. Ok for the home handyman, but if you're going to use it a bit, pay more and get something that will last.1 point
-
Probably don't. Build them when you're 70, I'll tell my grandchildren to look in.1 point
-
Ok. Our plans for Thursday are totally up in the air ATM. So what do you weirdos want to do?1 point
-
Pity they automated the lighthouses, the keepers were always portrayed detailing their ships in bottles while the storms raged outside (before they ruined it all by rushing outside to rescue some damsel in distress ). Back in the 70s I built a lot of kits, before I started playing with full size cars. With my two brothers, we built a '40 Ford Coupe with a rumble seat (from a kit called Flower Power), and a custom Model T truck, as well as a dune buggy and a Chevy Nomad and a 57 Impala, and a '60s dragster station wagon (a Plymouth iirc). Also built a Ford F150, an AMC Gremlin, and a whole lot of sports cars including a Mazda RX7 and Porsche and Ligier Le Mans racers. Built a White Road Boss with a fuel tanker (iirc), and a GMC (Actros?) cabover with a furniture trailer. The only scratchbuild I ever did was when I was at high school, converted a Mk2 Capri into an OSCA race car (sort of a non-spaceframe PDL Mustang 2 clone), with handmade box flares and a rollcage made from pieces of the plastic parts frames, and the V8 from an AMT custom Ford Econoline van. I made a trailer from more offcuts of the parts frames, and spare wheels from other kits. The V6 from the Capri went in the Econoline, that would have made a terrible real-life tow wagon. Must ask my mum what happened to them after I left home and she moved house. Probably got some photos buried in a box in the spare room.1 point
-
Can't be that much difference in size.....1 point
-
Hey Alex, you've had long enough to find it. /pics. Kind of got two truck builds in my head, a 70's Kenworth W900 as a prezzie for a mate and the Holy Grail, a needle nose Peterbilt & tanker conversion a la "Duel". Proper PITA job but could be fun.1 point
-
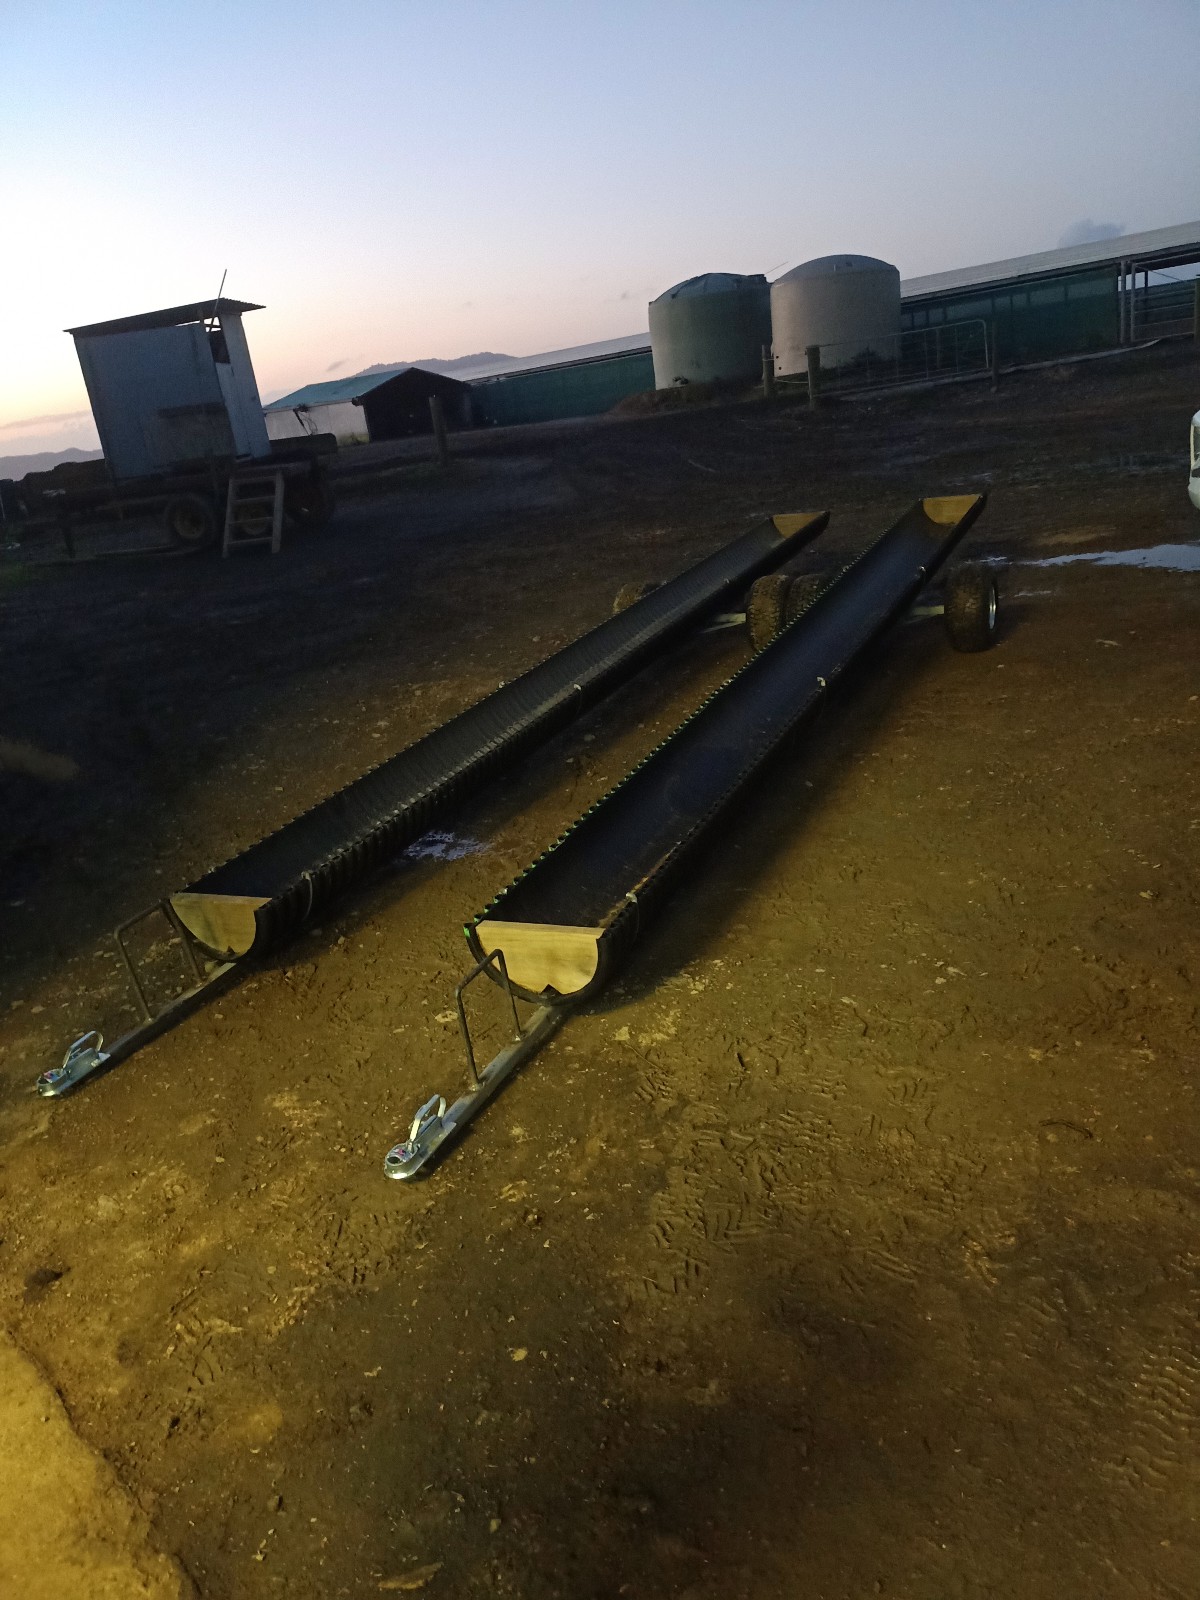
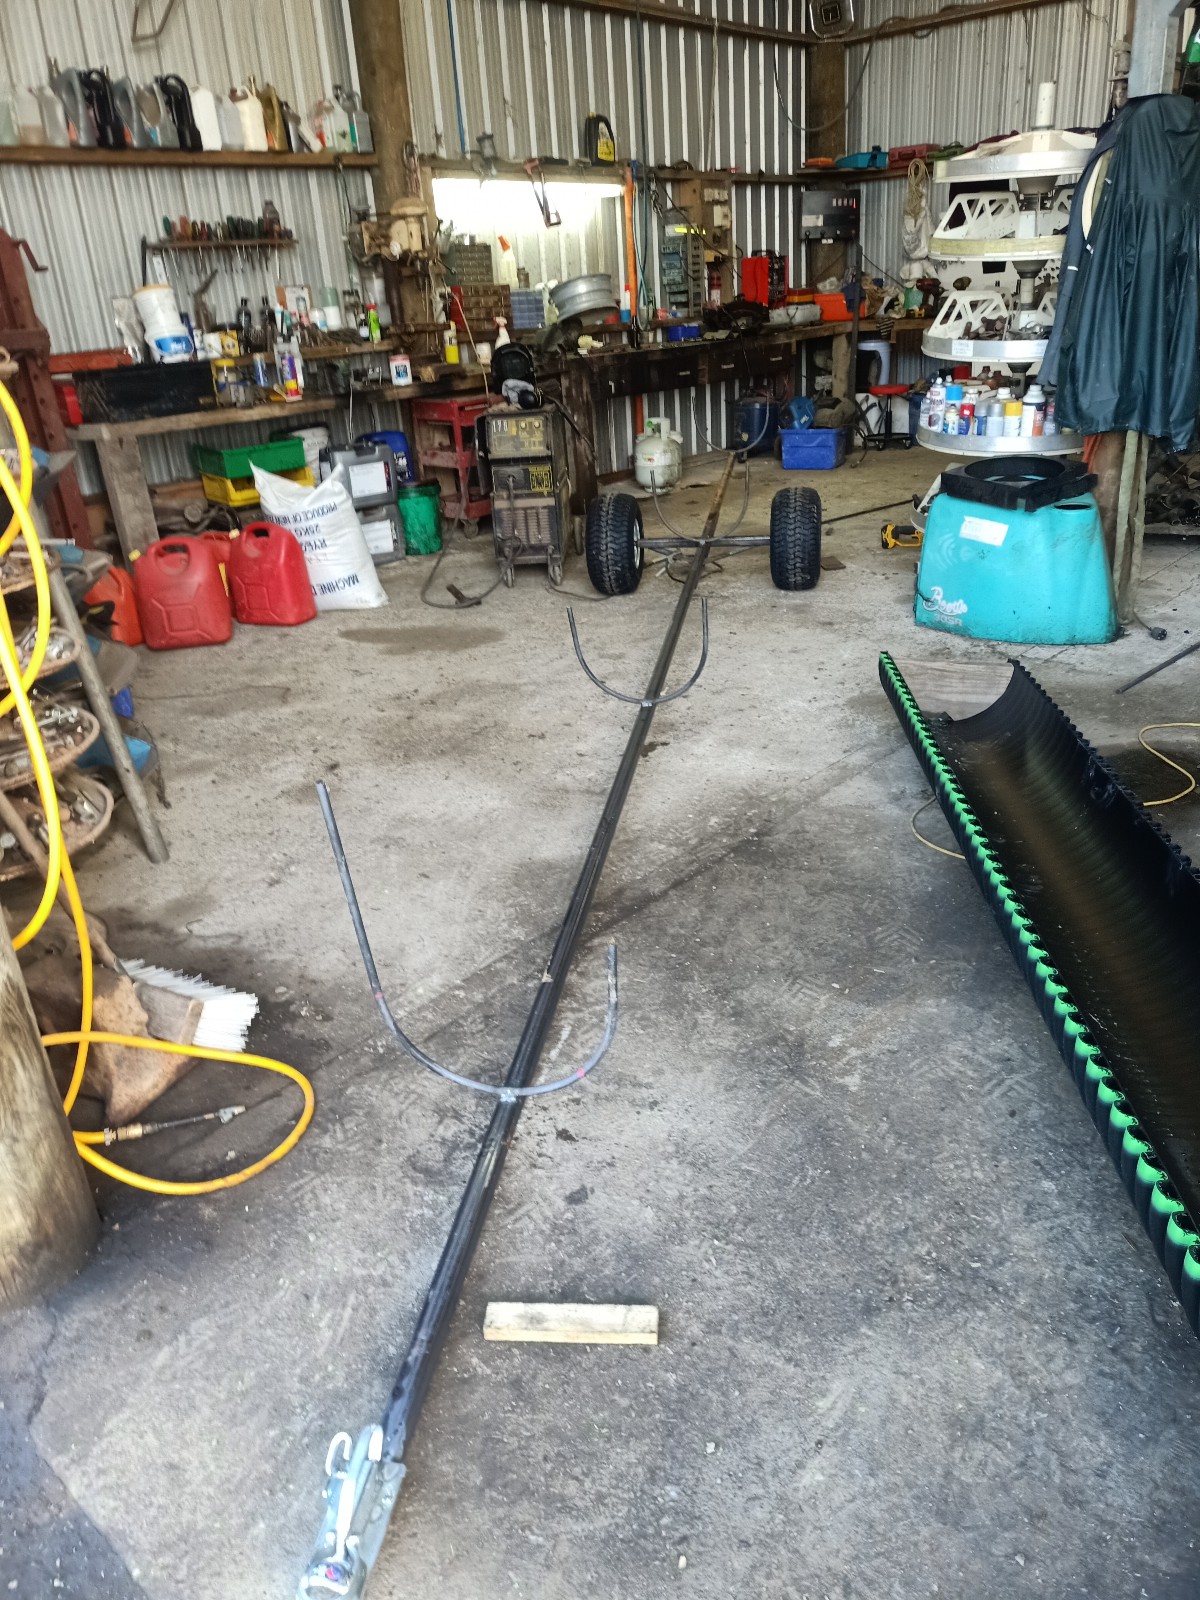
Made these calf feeder trailer things yesterday. Not bad for one day's messing around.
1 point
-
Just me then ? Oh well, I should probably give up the modelling bit & just stick to sniffing the glue and thinners. It's nice. Got an hour in tonight, sunny weather & lots to do is not exactly helping. / pics Going back up-country again in a couple of days so will bring the 1/24 Caddy back & have a bash at that.1 point
-
Hey @CarolsHusband I'll happily listen while you go full Barry on your weathering techniques. That stuff looks amazing.1 point
-
Thread dredge, thanks to @a.craw4d. Ok, so not 1/24, though I did build some & have a couple unmade somewhere. Models is models though 1/35 WW2 stuff was my thing. I had a break from the glue fumes for 30+ years but have got back into it recently. Pics of a few out of the loft... This is chopped down from the longer wheelbase version. Scratchbuilt fuel tank and tyre rack. You can buy the SWB one nowadays. Burned out Opel Anyway, times have moved on and skills displayed on that internet inspired me to get back into it. First bash was this Flak Half-track. Rushed it a bit and didn't really have my eye/hand in but it is what it is. Some bits I'm very pleased with, others not so much. Current build is the last kit I started before I lost interest in about 1990. It's a Bergepanther ARV. I gave up when the rear track idlers kept breaking off so back in the box it went. I'm now using it to practice my weathering & rust, hopefully it will be a bit more subtle than the half-track. I may even end up finishing it. As it was... Repainted it later dark yellow and am now slowly working through ageing it and trying to make it look like metal. So that's enough stupid big post from me, I'll add pics as it goes along. Hopefully I won't be alone on here. Sat on my own, cementing bits of plastic together, waiting for the world to laugh and point, wishing I was a tank commander. Vroom, vroom.1 point
-
Crikey its been a while since I updated this thread. Quite a bit has been built since the last update, in between customers jobs, mucking about buying old Bedfords, playing with bicycle builds and general enjoying summer stuff. Now that its 'late summer' here in the Tasman region and its starting to get a little bit chillier in the evenings we have been cracking into the build so we can hopefully move out of the cabin before spring Autumn arrives. Our bay seems to have a bit of a micro climate and ignores winter here, going straight from autumn to spring and frankly its more nicerer that way I still want to be living in the shed though- its gonna be nicer all round and I might actually then do more work on the Imp 911! So last time I posted we had sort of started the building of some walls upstairs. We got sick of the mess and clutter downstairs and once we had the wall up in the lounge we carted all the boxes of car/bike/workshop related stuff upstairs and stacked them in the lounge. Then we took down the old shelves that all that stuff had been on. Moved the washing machine, folder, guillotine out of the way, put more burly posts up and built the store room. I didn't really take any photos of the process but you can see it in this photo... Its about 1.6m wide and spans half the workshop. Really good amount of space to store lots of boxes on some shelves we built up there. With all the stuff shifted up off the workshop floor we could now make the most of the extra space. We shuffled things around, measured, schemed, planned, deliberated and pondered the layout. Still wanted some shelves but not as big. We ended up with it looking like this... Much better. Really happy with that. Those shelves will soon get cluttered up with a variety of Nissan micra bits as we do that planned swapsies game. Now back to work upstairs. Speaking of stairs...we got sick of clambering up and down from the lounge area using a step stool so we made these... I built them to replicate the main stairway. We picked through the largest bits of pine we had and created some sweet steps. Really stoked with how they came up once varnished. There will be a handrail on the wall side to add in the future. We bought some things. We've never had a new mattress. Time to splash out and get a decent one... (another reason for wanting to shift outta the cabin asap- the cabin only has a double bed and it gets crampped when we have to share it with a big fluffy cat) Also started hunting for chest of drawers etc. Found these slightly art deco styled ones cheap at the recycling centre - $40. Nicely built from solid Rimu. Hannah sanded them and varnished them... We kept plodding away at the build. Annoying when we had to stop to do customers jobs but hey that's life. Walls and ceilings went up. Some free insulation from local friends. Hannah painted some of the walls. Yet to decide on other colours to be used. Bought a nice second hand full HD projector and a new 130" motorised screen. We had deliberated about going the projector route or just get a large telly. Projector won and its amazing! Installed the lovely large 'fill the room with deep smooth base' speakers we had been gifted. Made some burly speaker stands that replicate the posts holding the mezz up. Screwed them to the floor because earthquakes.. but also make sure nothing moves but the speaker cones. Gawddamn its a mighty nice setup to watch movies in now- exactly what I have dreamed about. When I spot a 65" etc TV in the shops now they seem so tiny. Viewing a movie on a projector screen also seems much easier on my eyes than looking at a telly screen. I added more circuits to the breaker box and ran out all the wiring before the walls went up. Always so fun to turn new lights on and have wall sockets to use rather then trailing extension cords. I have a local sparky mate who will be checking/signing it off etc when finished. Get all our bits at trade from him too- LOL at the markup on electrical stuff !!! Pics... Spot the vent added in the top- without windows it was a bit hot up there. Vent works well! Need to make a pretty porthole window to cover it. Some nice carpet will be laid on the lounge floor (oatmeal/Kevin coloured - bloody fluffy cats....) I had posted up some pics in the shed thread of this happening a few days ago... Wow- I wish we had done that earlier on. We've had a window to fit in this spot for ages... My brother had spotted it at the Blenheim recycling centre. $50!!! All cedar sashes and lovely Rimu frame, solid brass mechanisms. Couldn't believe our luck. Hannah cleaned it up and painted the outside in dark 'Karaka' green to match the other windows/doors on the shed. Here in primer... We needed flashings. I didn't want to deal with the main Nelson crowd that we'd used and been mucked about with before. We had a load of brand new gutters that had been left in the bush by the previous land owner, still in the plastic wrap and in the exact same Karaka green we needed. So I decided to use them as material to make our own flashings. We needed a folder. So I built one... It folds 2.4 metres. No good for heavy steel but fine for shed steel, car steel. It will be a handy thing to have for future jobs so it made sense to but a little time/money into making one. It fits neatly onto a large mobile steel bench. Made flashings and fitted windows. Then had coffee looking out into the bush... We will be chopping down heaps of the Kanuka trees we now look at- the block the evening sun that comes through the window and there lots of really nice ferns that we'd rather see come up. So that's firewood sorted for another few years In the last few days we've been adding trim, making another bookshelf to mimic the one we'd made earlier on the other side of the lounge. Wanted some nice timber and found a large plank of what we thought to be old pine. Turns out it was Macrocarpa so that was a nice surprise... Finished that book shelf last night and Hannah varnished it this morning... We uncovered the remaining Rimu stacked outside and brought it up to the shed to process... Quite a large amount left. Most of it cleaned up nice... Now we are machining it down to a variety of shapes for trim, skirting boards, corner cappings, railings. We really need to make the bannisters before someone falls 2.4 metres to the concrete floor below. Wow. Wall of text. I'll try to post up more often so its not such a mission to write/read. Really looking forward to fitting the kitchen/bedroom windows soon and then start building the respective rooms. Then we can move in. Then I can tinker with flat sixes till late and know my bed is only a flight of stairs away - not a cold walk up to a cabin. Alex1 point
-
Yeah man , its proper cancer now. buuut again. the rest is pretty solid. My fault, had the resources and did nothing to the poor thing. When i picked it up of @Camel about Port Macquarie i must have hit the vent to engage the a/c, didnt notice until cruising and the engine tone would change. I shat myself. then realised what was the go. that is amazing. Im amazed at this truck, aside from the mirrors and dumping it . its o.g . all the stickers , all the o.g jacks etc. i love it. Yeah it 100% need some love. Dont really want a show truck but i reckon a bit of love to treat the tumours and seal things and it will be off the chain. 100% want the overdrive , but watching videos to pull these apart and they are so simple so long as you know the couple important parts. i love it. just works. The 350 is lush and have no plans to replace it tbh , given the o.g of it and such i feel it would be rude to ruin it. Diddy did mention a cummins transplant , which i could 100% get on board with. but that soo far down the track , like the airbag route type thing. I know nothing about either of these cars mr. you should share. if that ute of your is anything to go by. they will be off the chain.1 point
-
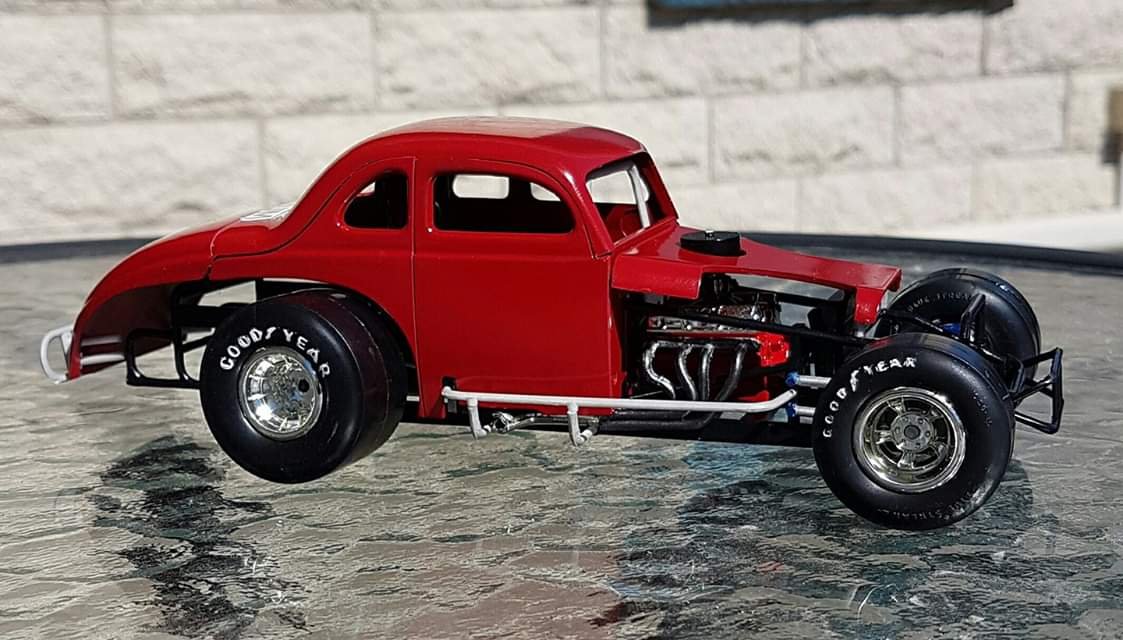
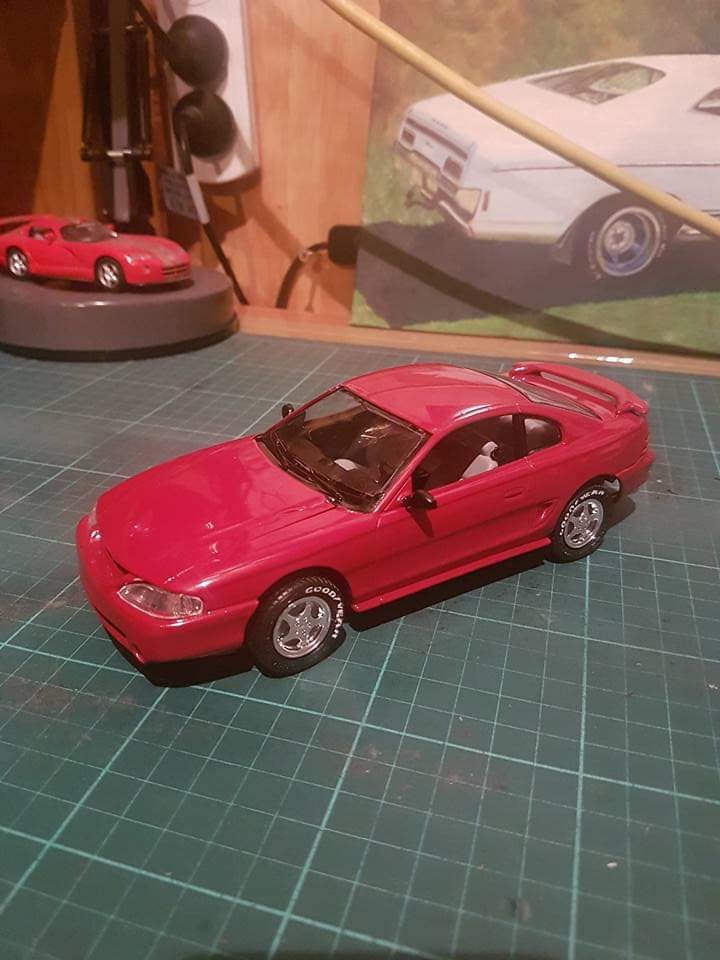
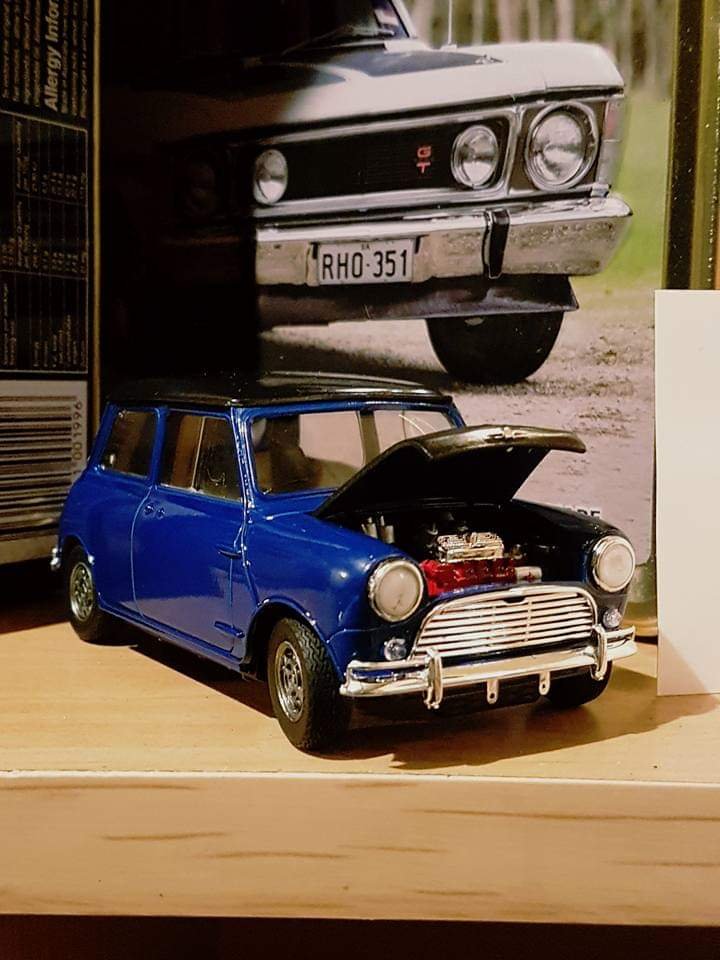
A couple of plastic kitsets that I built last year.
1 point
-
K so progress since last update. started going through getting a roadworthy and found out I needed to get a Lo2 plate or some such, pretty much a plate for L/H drive vehicle. rang up old Earle and had a chat, the way he worded it i just need to get R/H headlights (pretty sure they are). replace the seatbelts to Adr approved items and then make the indicators orange because red indicators is a no no. So, I started with the seatbelts Had to modify the top mounts (original bolt goes into body and i was not changing that) All done. exciting! Then last night (previous stuff was maybe a month back) I set about getting the lights sorted was going down the path of moving the indicators to the reverse light and mount a reverse light somewhere else. Indicators were going to be easy until i realised the indicators and stop light use the same damn wire. so i ran a seperate stop light wire down to the l/h stop light and then over to the r/h one. Yay one job done! then i moved the indicators to the reverse lights and installed amber bulbs. All done, YAY! One last thing, the reverse light. i managed to score a tiny LED lightbar and while it draws bugger all (20w) i had a loom with a relay and fuses so i used that and wired up the way i thought it should. nope. hrmm so i started poking and prodding. then i got lazy and started just jumping wires to see what was doing what when i checked what i thought was the earth, it was totally not the earth (explains why it was working right) i found this out after the wires started smoking, way to slow to move my fingers in time. this x4 But hey got it all wired and working saaaweeeettt. Here is how the reverse light looks in place. Oh that worklight to the left is super lush. x2 20w arlec from bunnings. $70 seems pretty solid and light is awesome. Lights all working, some way brighter then others. So with all the lights working i went for a cheeky hoon around the block and then backed in to test out the light. Fuckin WOW, like WOW! So yeah,that might be a little bit bright tbh but it can stay until i find something better. Now to call Earle!1 point


.thumb.jpeg.b39a639a8ff8a614681c3c9dca730a70.jpeg)

.jpg.091ed17b493ef83833e171888cc2557b.jpg)


.jpg.a0bddca03e865c9856b26d729af0ac94.jpg)
.jpg.eebb4121b89857c01c966e2d6ce0c256.jpg)
.thumb.jpeg.e0a4bff61111e0c8c7396950fcc94da1.jpeg)


ClassictrucksandwrecksofNewZealandFacebook.png.1b3c7805a5d2237eecd7bc5f04cd7432.png)


.jpg.8d8767dea82aa6f5e0b9bf6c3c8509a3.jpg)
.jpg.17b2b0ad65f573451fbd1fa3e157d5c3.jpg)


.jpeg.18481883f6f55edcd0eca7c36d535347.jpeg)


This leaderboard is set to Auckland/GMT+12:00