
Leaderboard


Popular Content
Showing content with the highest reputation on 09/02/20 in all areas
-
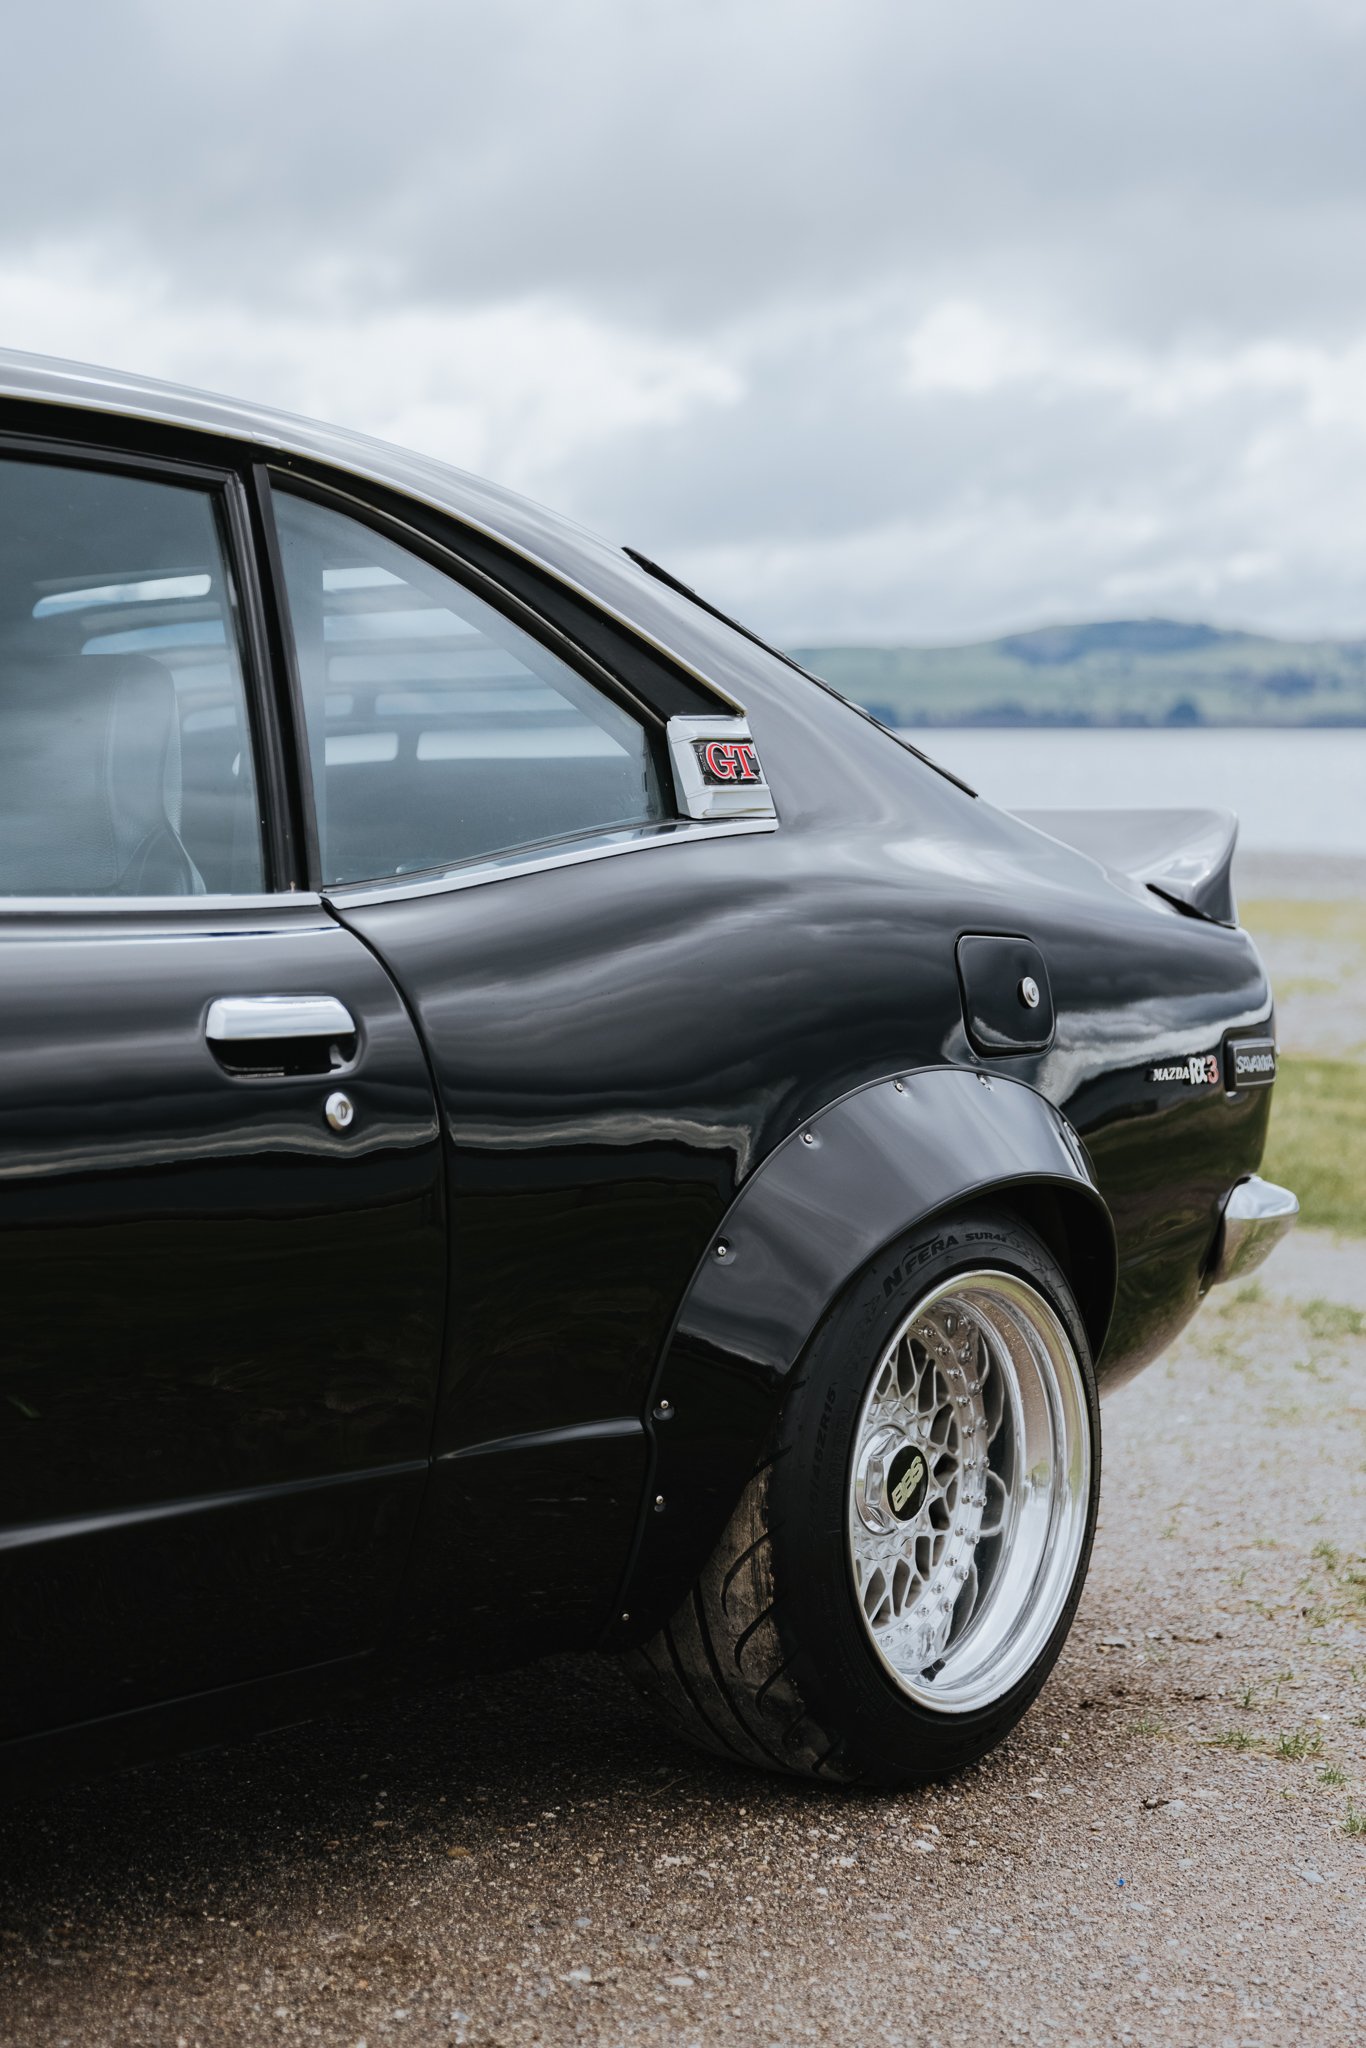
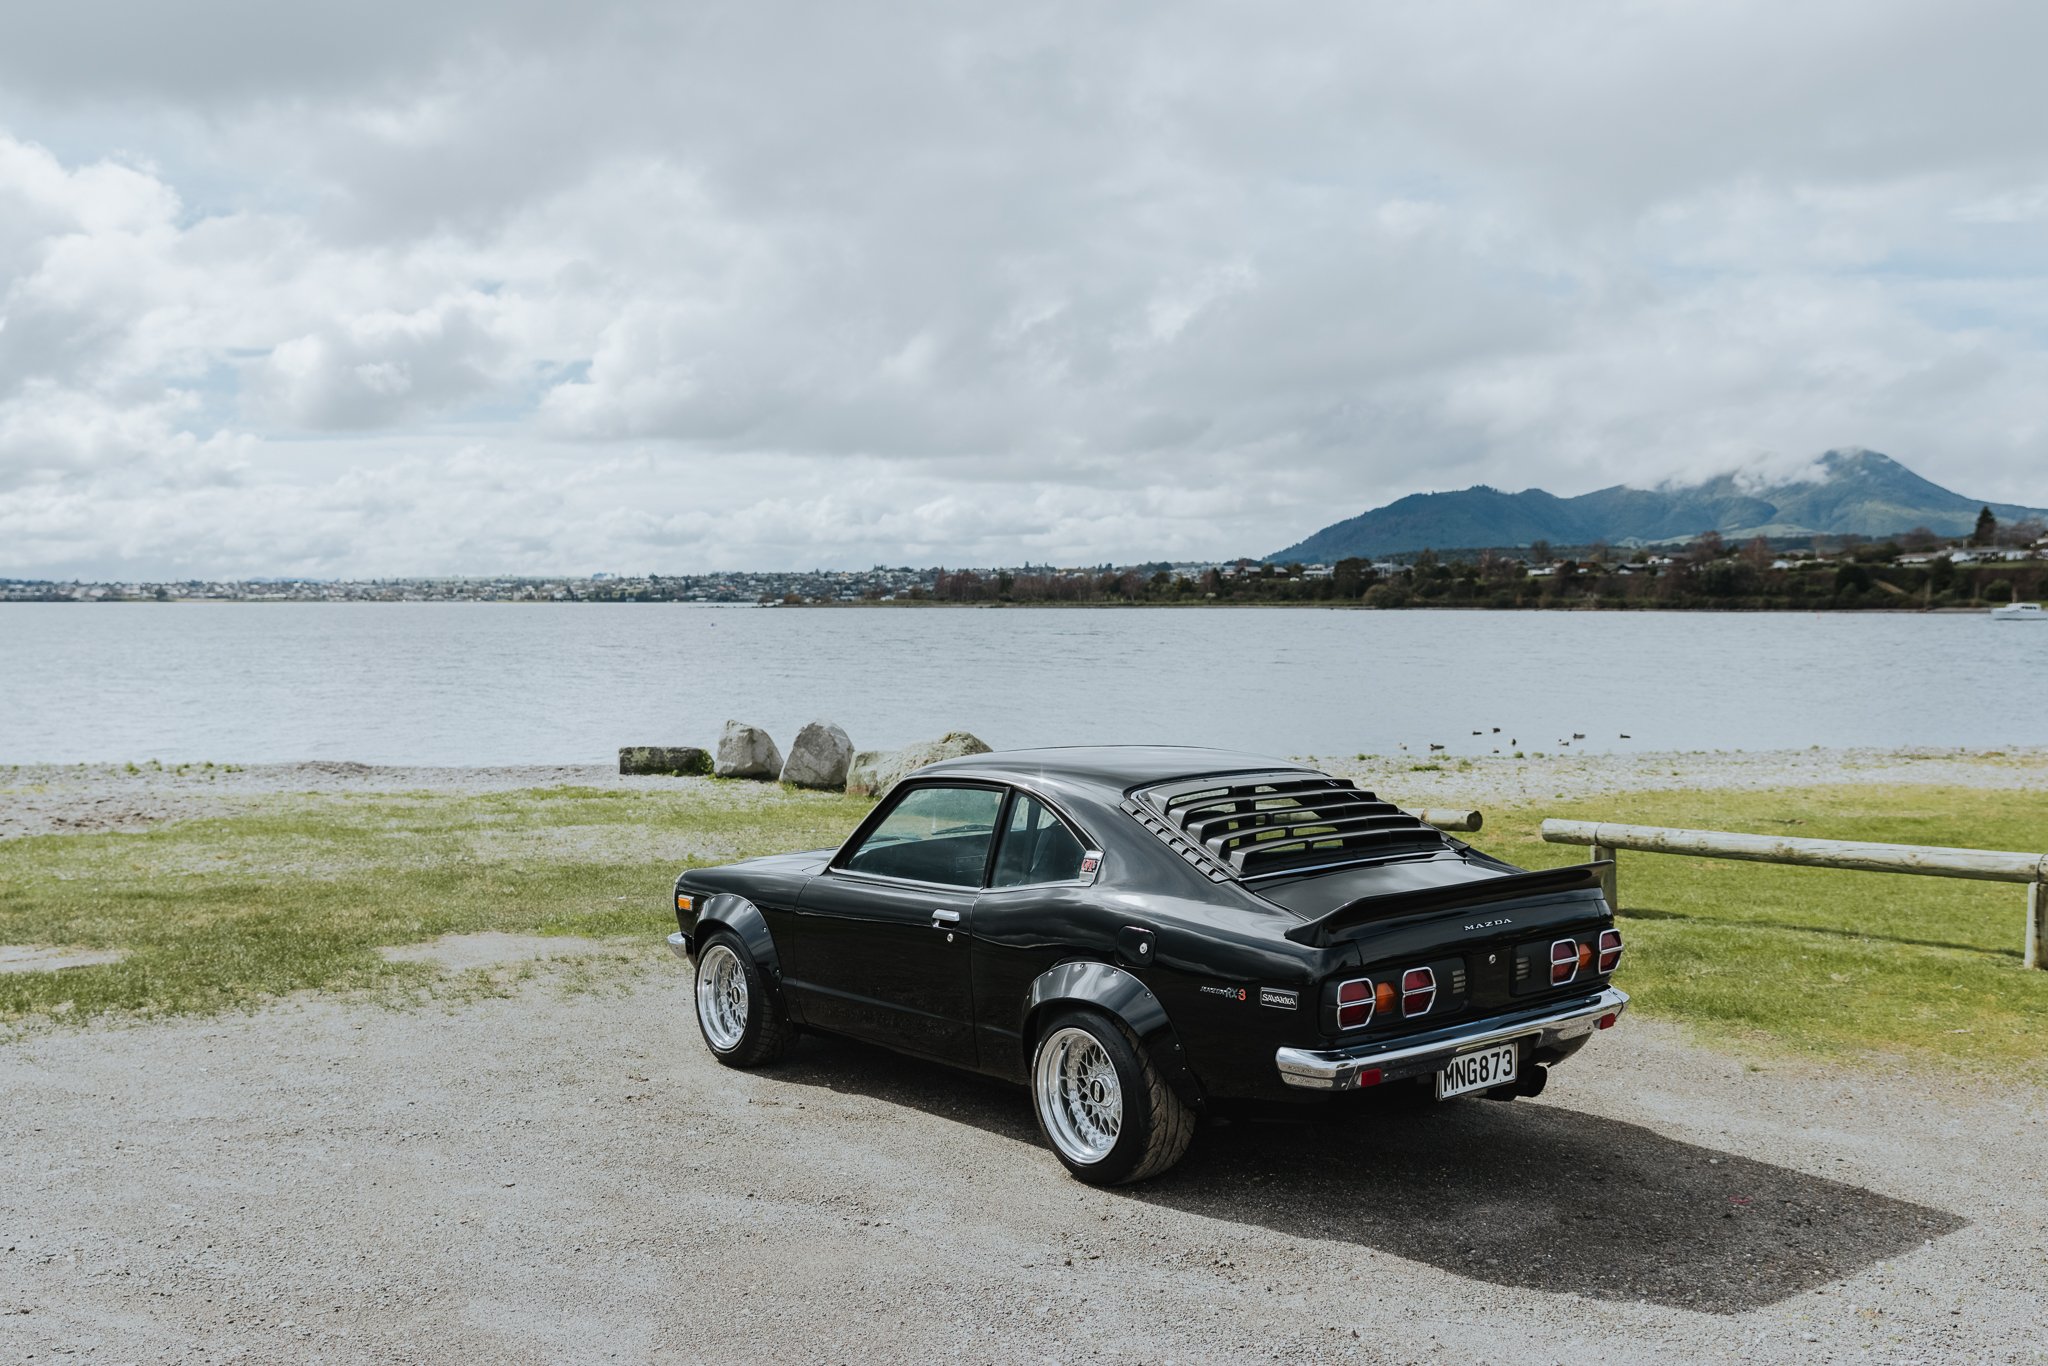
Well thats a wrap, 808 went off to its new owner on Saturday, Got some shots of it done by a mate before it got delivered.
 12 points
 -
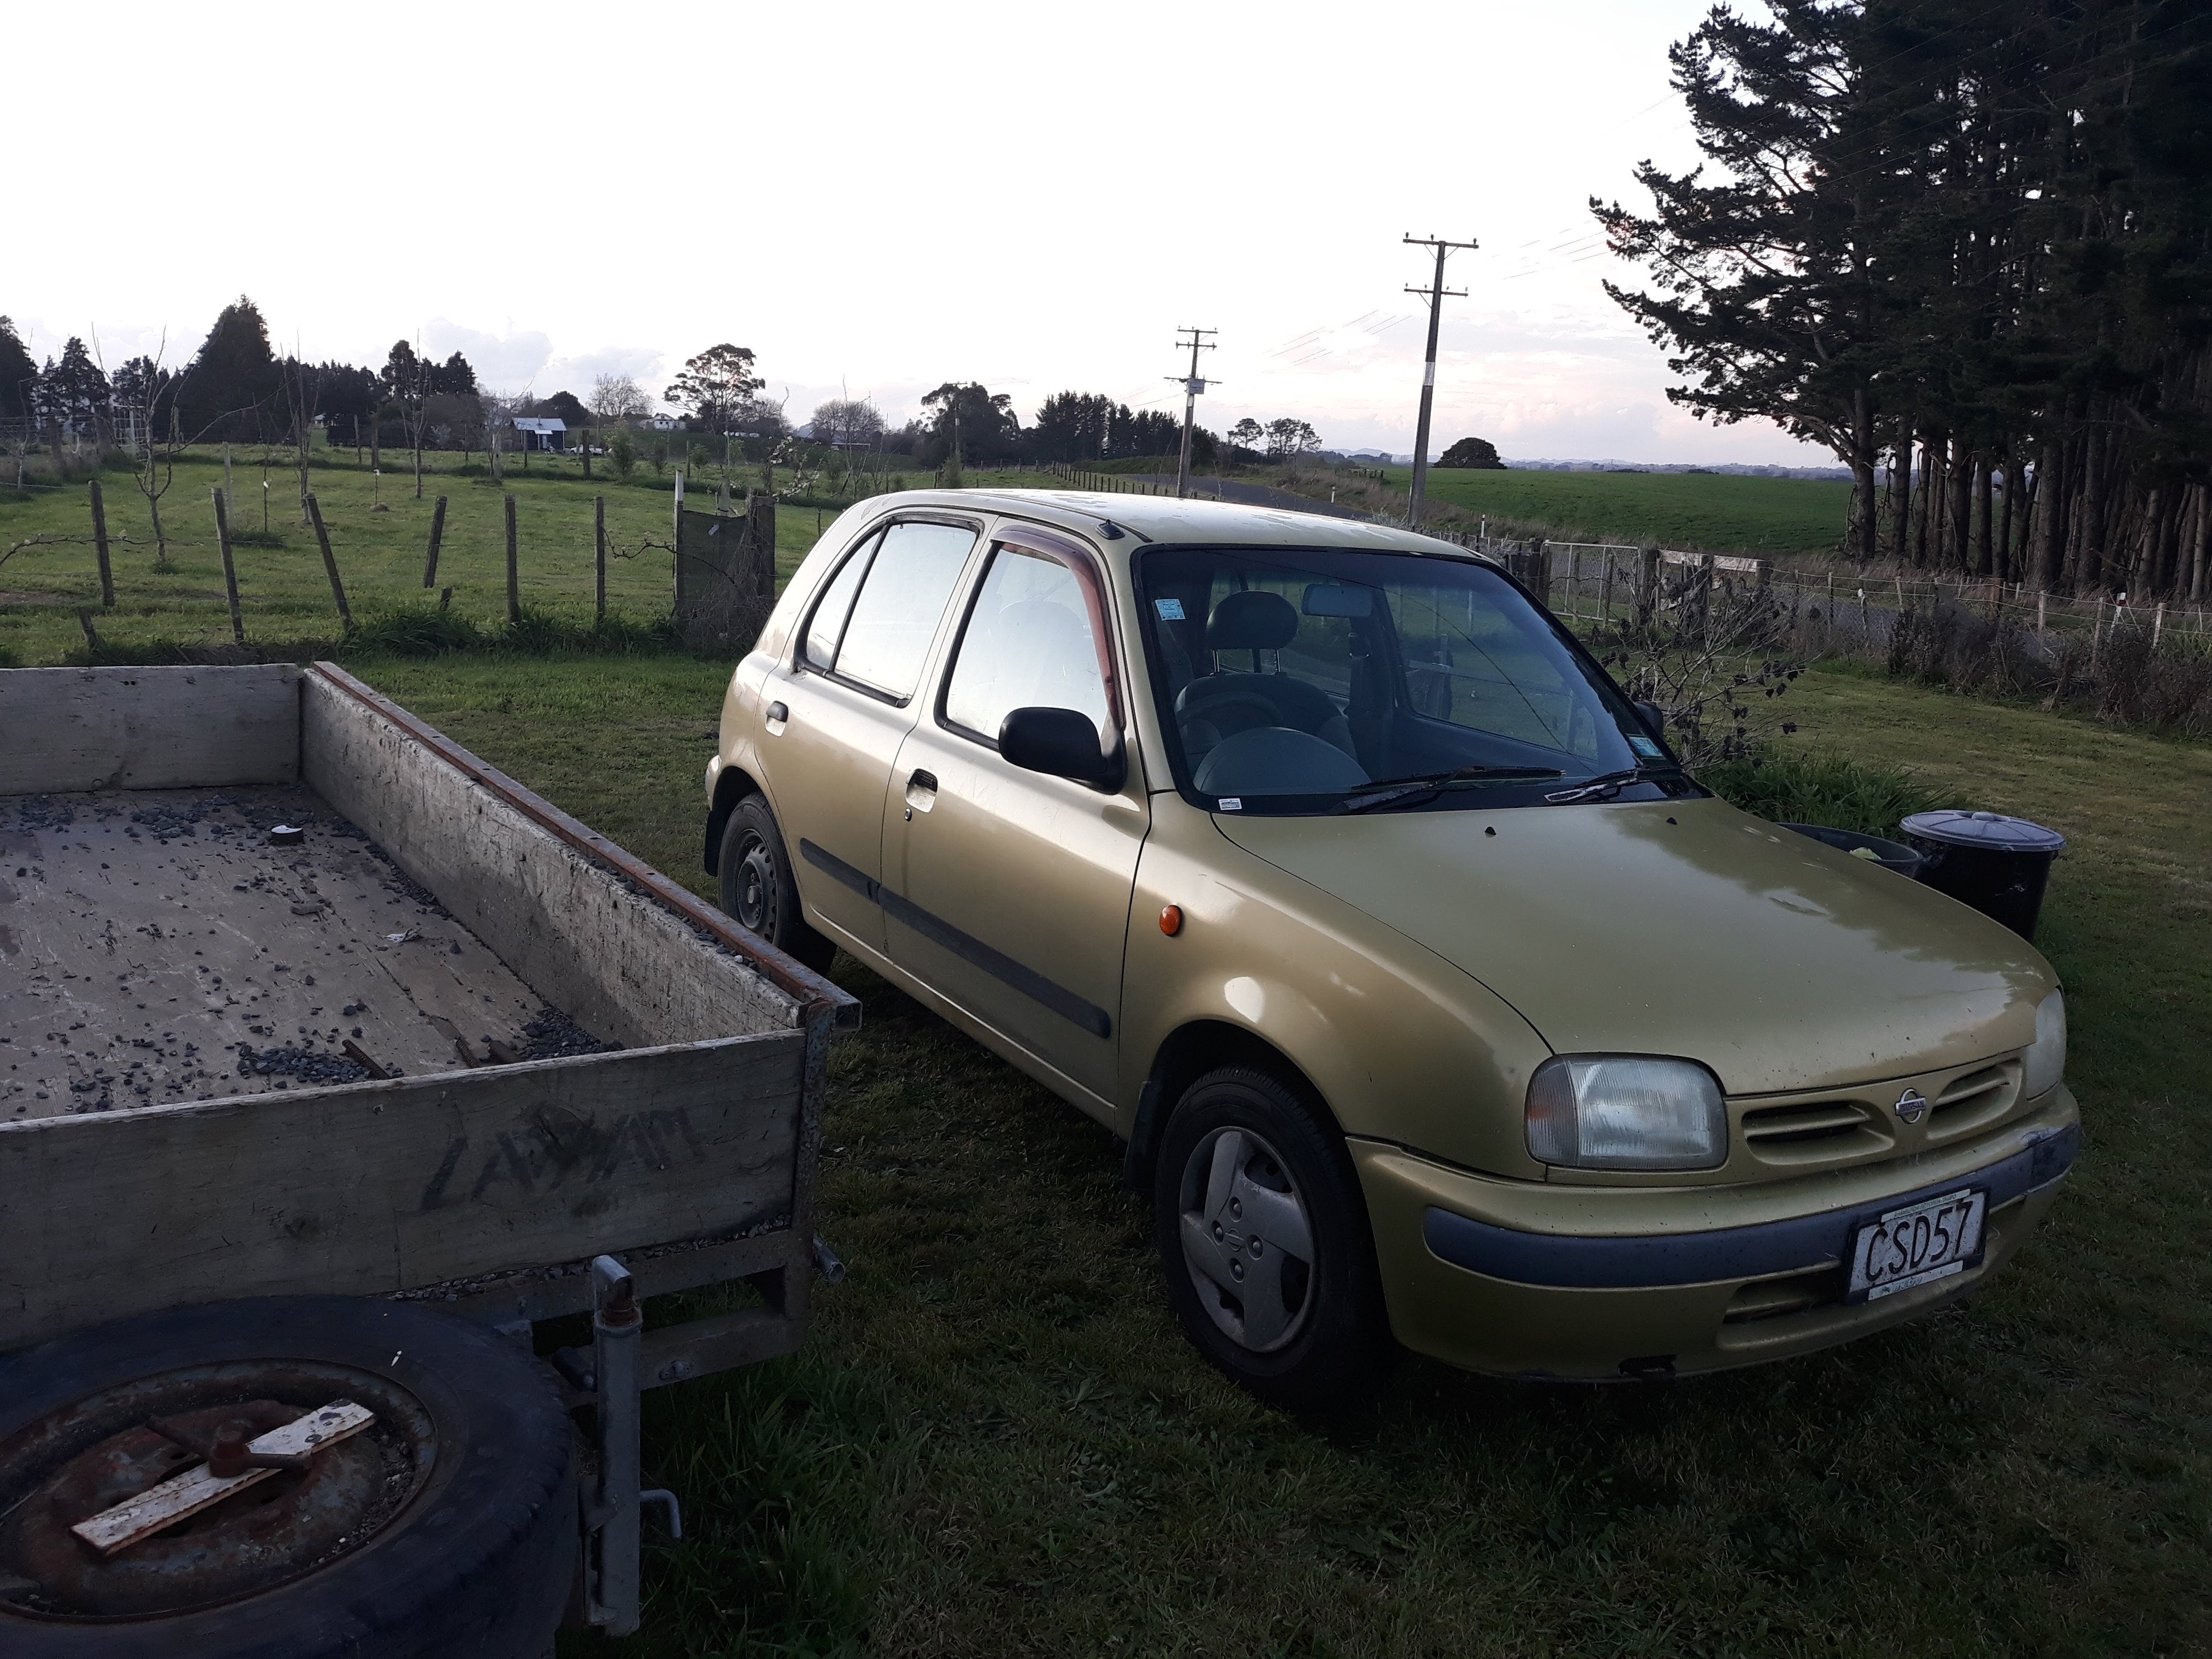
Latest repairs for last WOF. New set of tyres. New tie rod ends. New steering boots. Shimmed rack and pinion to take the slack out of the steering. Wheel alignment. Also replaced the fuel pump last year due to it leaking, (aftermarket external). Still humming along (sorry team, not much for threads on the interweb) Cheers Charlie.11 points
-
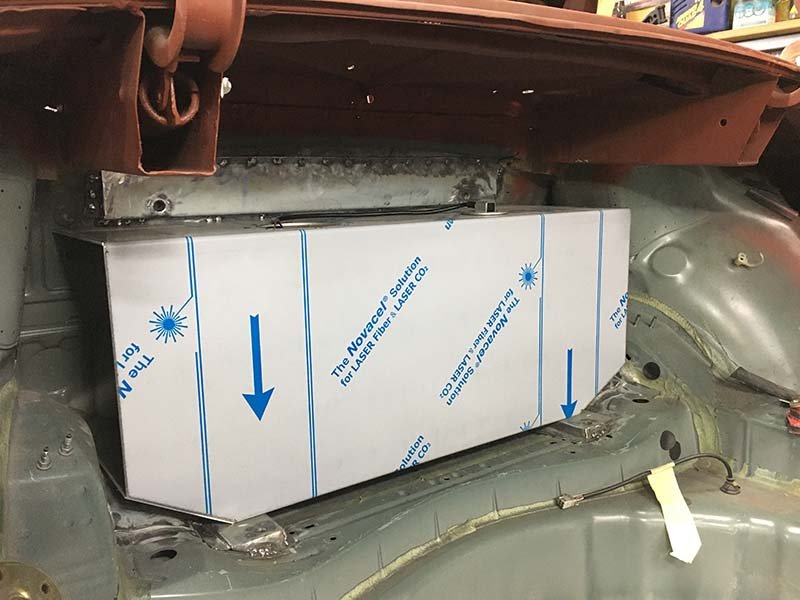
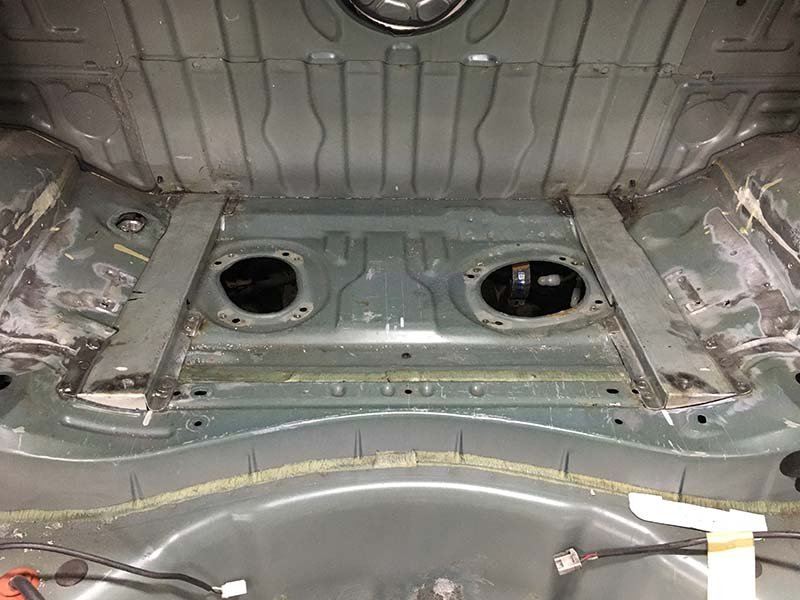
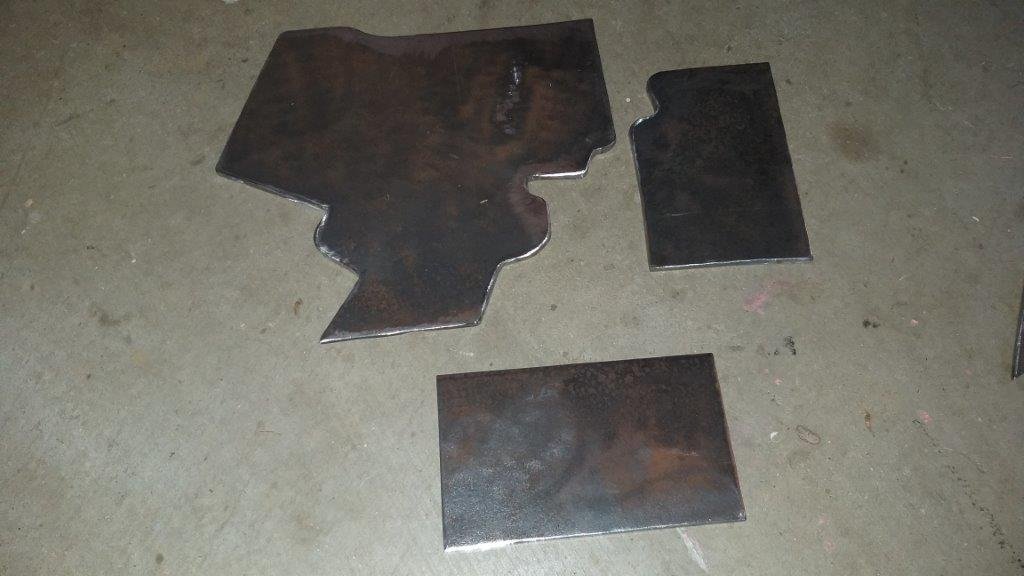
Made some floor flatten'rs for the alloy fuel tank to sit on.
7 points
-
Gotta collect all the little 90's yellow cars. @yoeddynz's post reminded @Guypie about how much he also has always really wanted a 2 door K11. This one came up locally for $600 so he can deal with the 4 doors. Needs a bit of work but runs so that'll be a side project too. No Honda updates at the moment, currently just using it as is. New wheels will be going to our friend for sand blasting soonish hopefully. Honda wheel reveal at 10,000 subs. Slap like NOW (Davie504 reference)
7 points
-
Got my label printer all sorted and some clear to go over the top. Wiring dreams coming true. That semi pro look hopefully, will be working on the front sections of wiring next.6 points
-
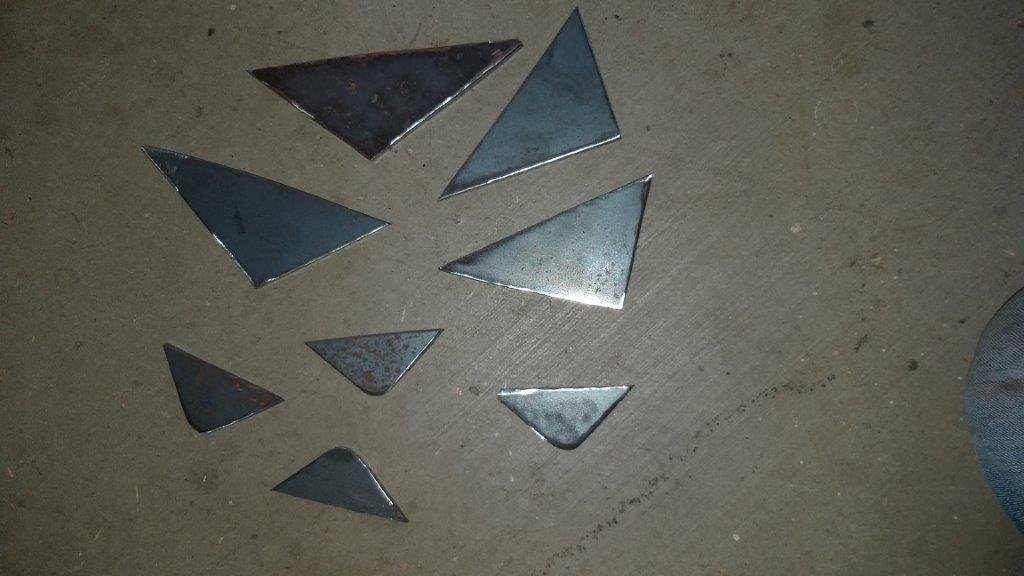
I promised the Certifier that I would build the lower steering mount out of something more robust than my plywood mock up so I spent the morning doing a bit of metal carving with my small grinder of angles. Whilst I was on a roll I chipped out the gussets for the engine mounts too. Looks like tomorrow is going to be a hole drilling day and I can then glue the bits together.
5 points
-
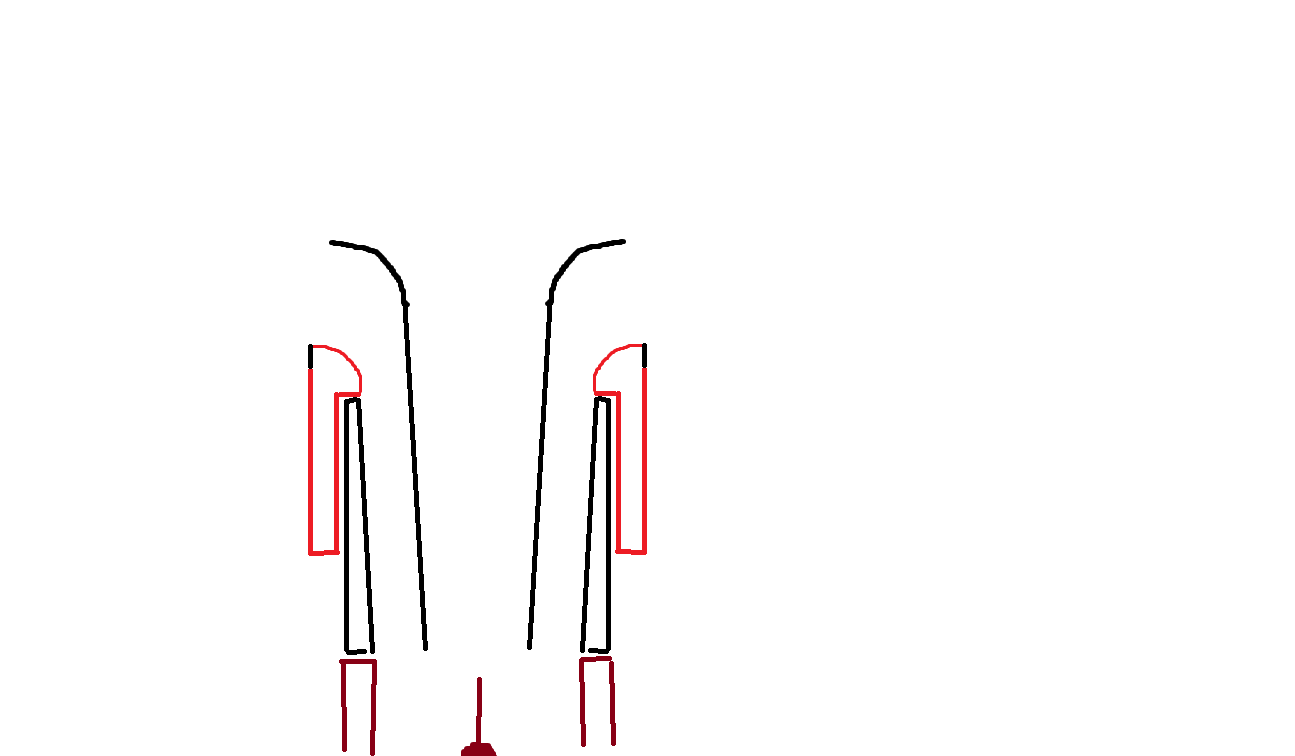
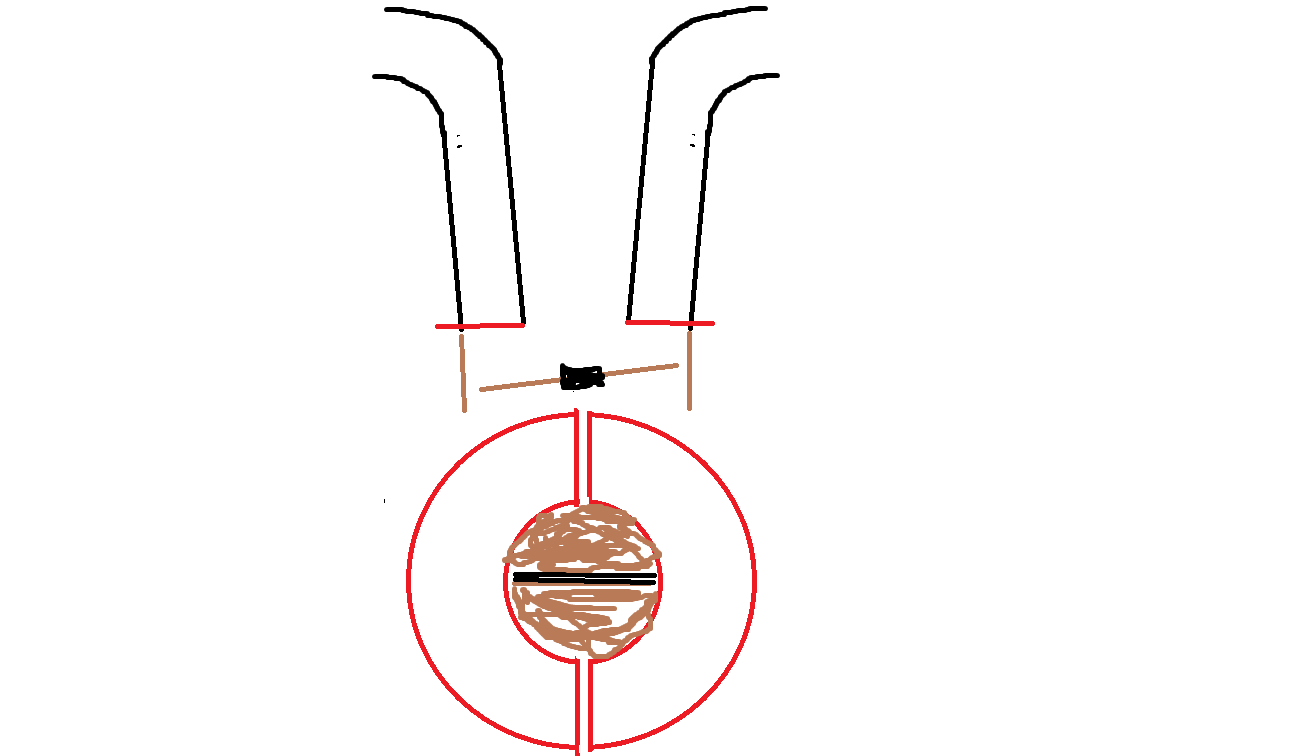
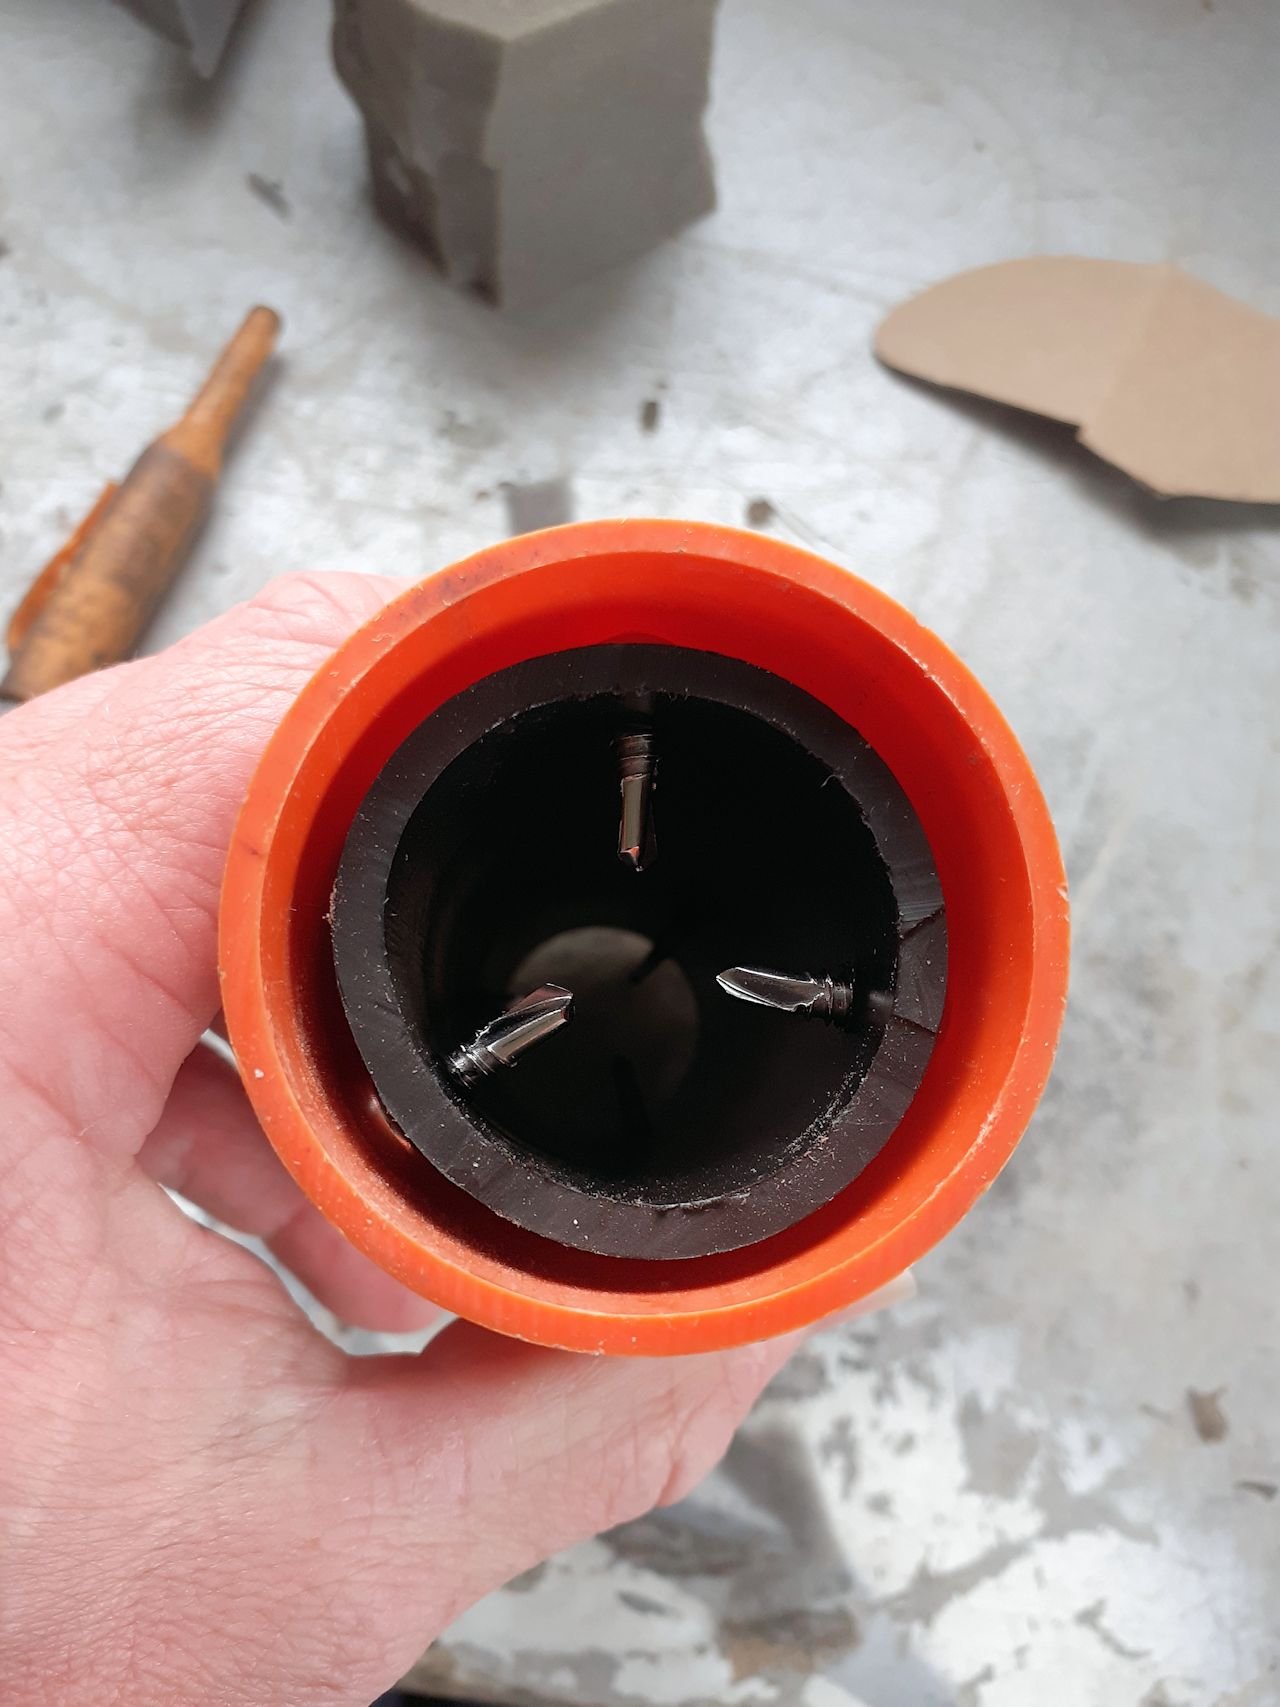
black all fixed , red bit slides up for low rpm position or maybe like a slide throttle setup that sits at the bottom and blocks the outside runner at low rpm . so the runner would be fixed setup and slidy bits would do the work of selecting high/ low rpm inside only both Edit: / TVIS
3 points
-
Progress has been slow, we're planning a decent sized reno on the house, but it also means i need the extra lawn ornaments removed. So with the help of a mate we did another thing Since this photo, i have acquired an engine stand off trademe, then spent nearly as much on bolts long enough with the right thread to bolt it up. Gearbox has been removed, and random sump i acquired (also from trademe) has been test fitted to confirm its the right one. Next steps are to get a fwd oilpickup (and figure out where the dipstick will go as it's on the sump on the mx5 one), get the loom out of the MX5 chassis, and source a gasket and cam belt kits to give the engine a freshen up.3 points
-
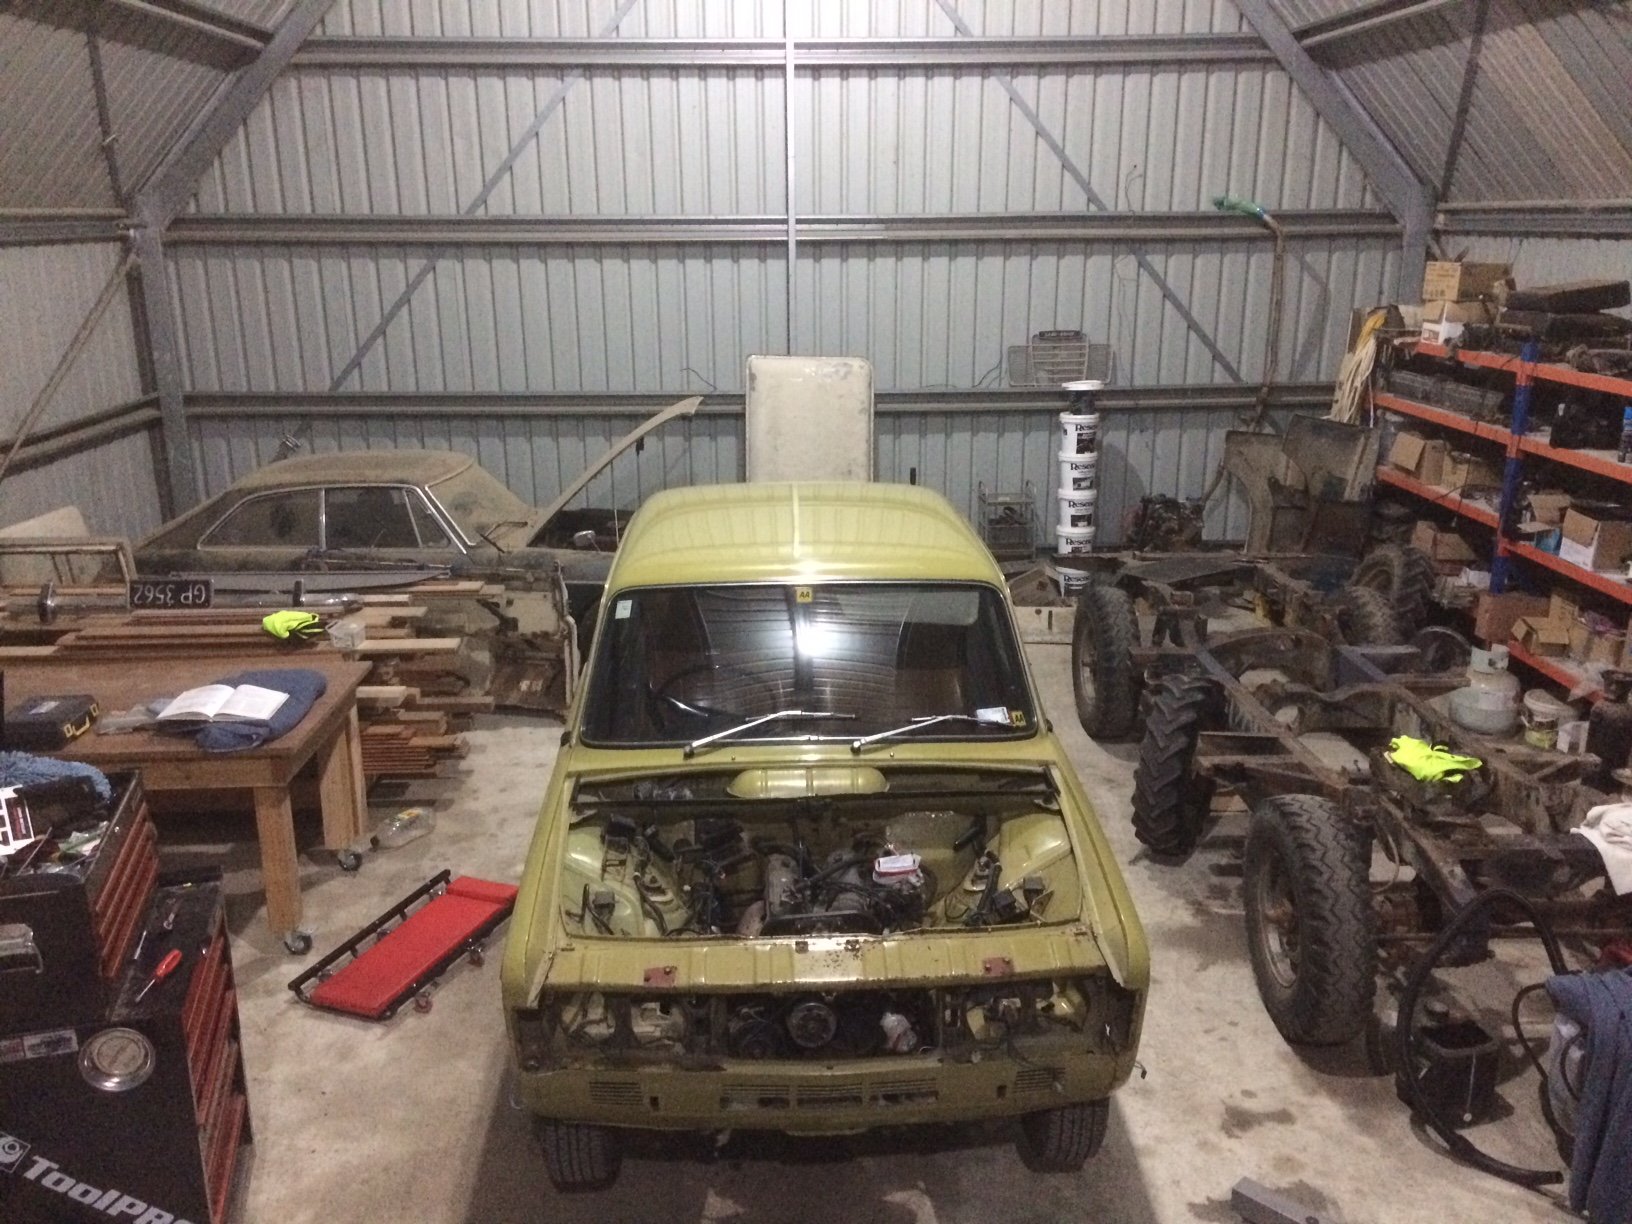
Today I calmly removed the cables from the starter motor, after first removing the oil filter for some better access. The master cylinder and booster are off (master is suspect), and fuel lines disconnected, and exhaust collector bolts have been cracked/now soaking in 5.56. please enjoy an elevated photograph of the whole collection. This pic is extra special since it was taken after sundown, it proves that after a year without, I finally have light in the shed. The neighbour came over with his tractor today, and we attached the approved work platform (wink) and I was hoisted up to replace the 3 blown incandescent 150w bulbs with 30watt Philips LED high lumen bulbs. They work very well. Anyway, this is where I finished: Next step is to dive underneath and attempt to undo the driveshaft doughnut, unhook speedo, clutch cable etc. Not looking forward to it particularly since it’s British car spec filth down there. I’ve heard you need some sort of strap tool to undo the doughnut, but unconfirmed. Also need to puzzle out how to get the gear lever assembly out, as it’s not 100% obvious once the shift rod is unbolted. Hopefully I’ll get to it on the weekend, since I actually have work tomorrow and Friday. Let’s see if I still remember how...
3 points
-
Acquired a new 37 tooth sprocket today for the back as the 31 tooth was too tall. Bodged together all my scraps of chain adjusted up and went for the first proper ride. So so so much better! 60k at 2500rpm it takes off like an absolute rocket from there no slip ,some clutch slip to get going from stationary its doable though wont hurt anything. Moving the wheel back has added 25kg more over the front wheel too so it brakes like a weapon as well now. Would actually call it not sketchy anymore even crawling isn't wandery anymore. Will add a Cvt soon and new chain but its good now to do the milk (almond) and bread run as often as possible. No pics for a change as nothing broke nor did i fall off (or think i would)3 points
-
and iii will show pics3 points
-
and here these are fixed but gives you a idea3 points
-
More goodness underway!
3 points
-
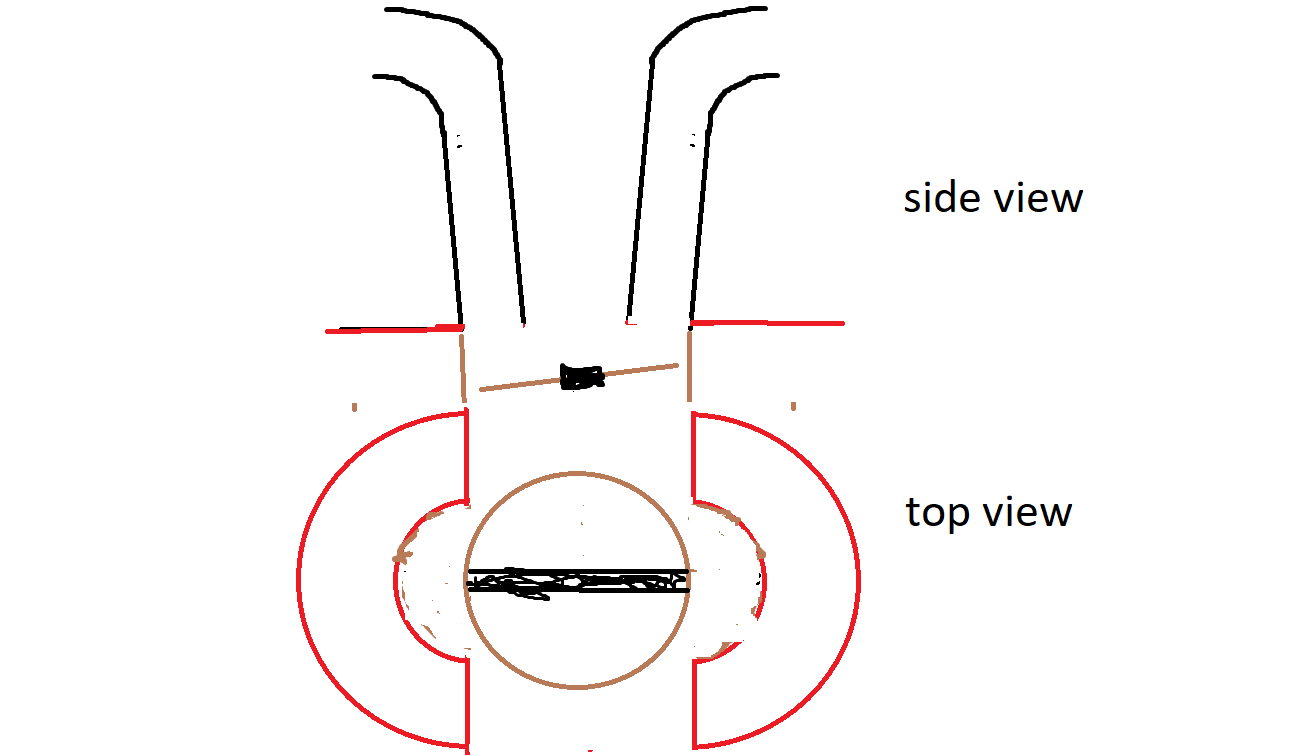
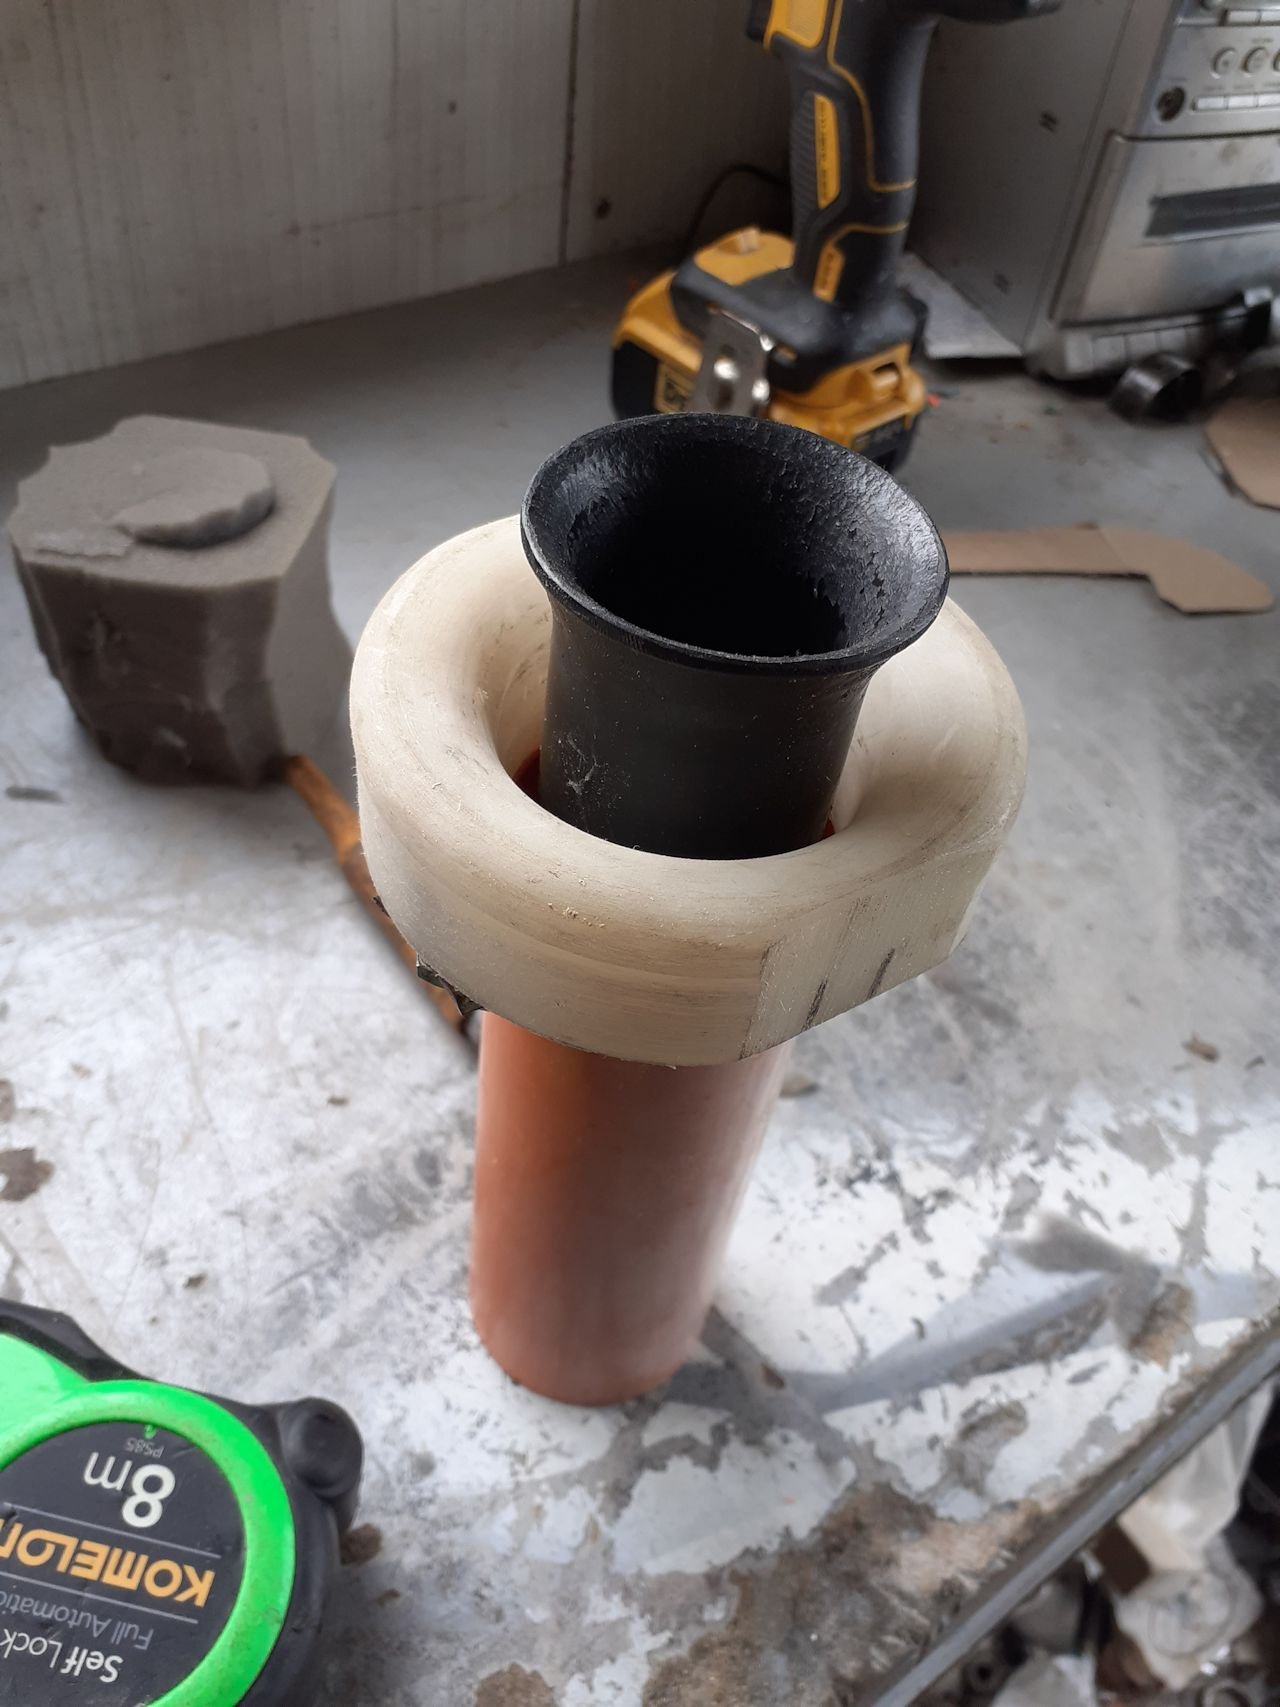
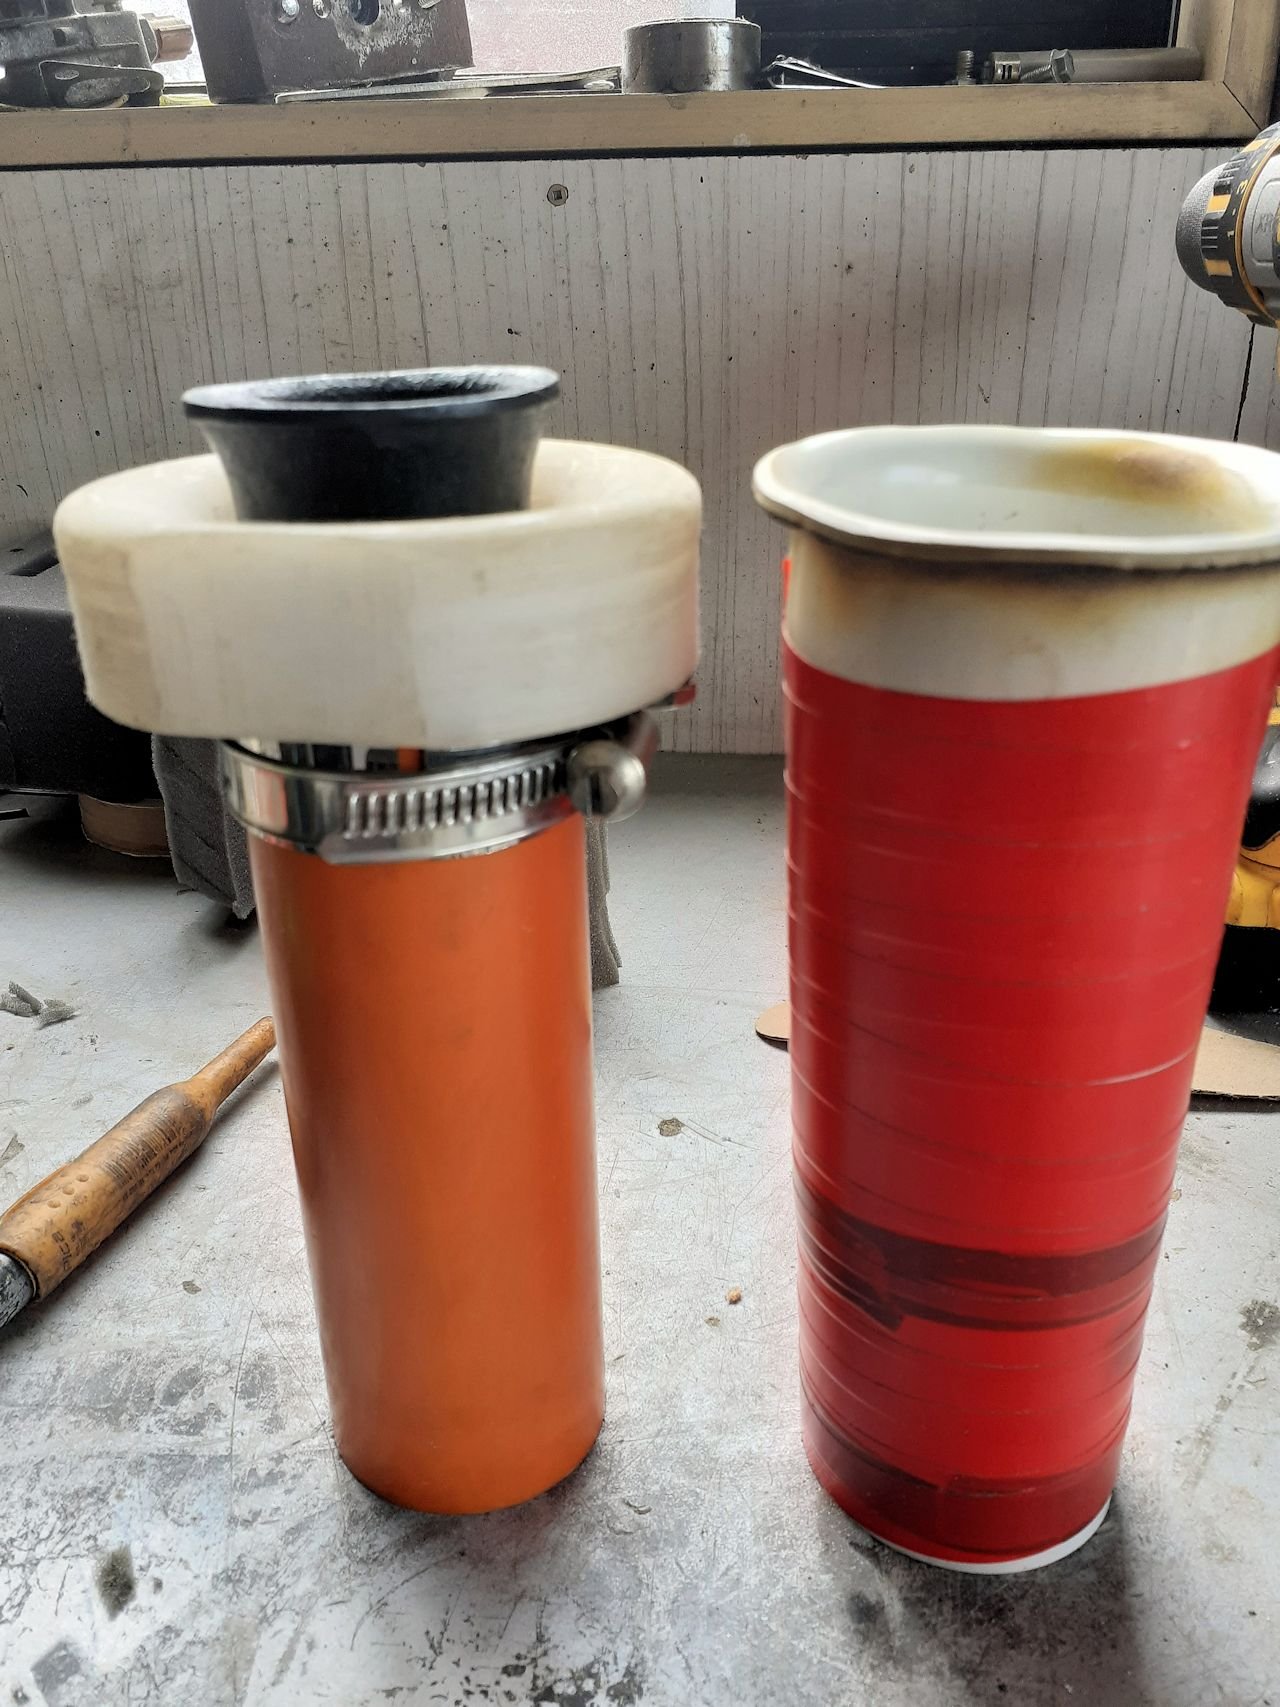
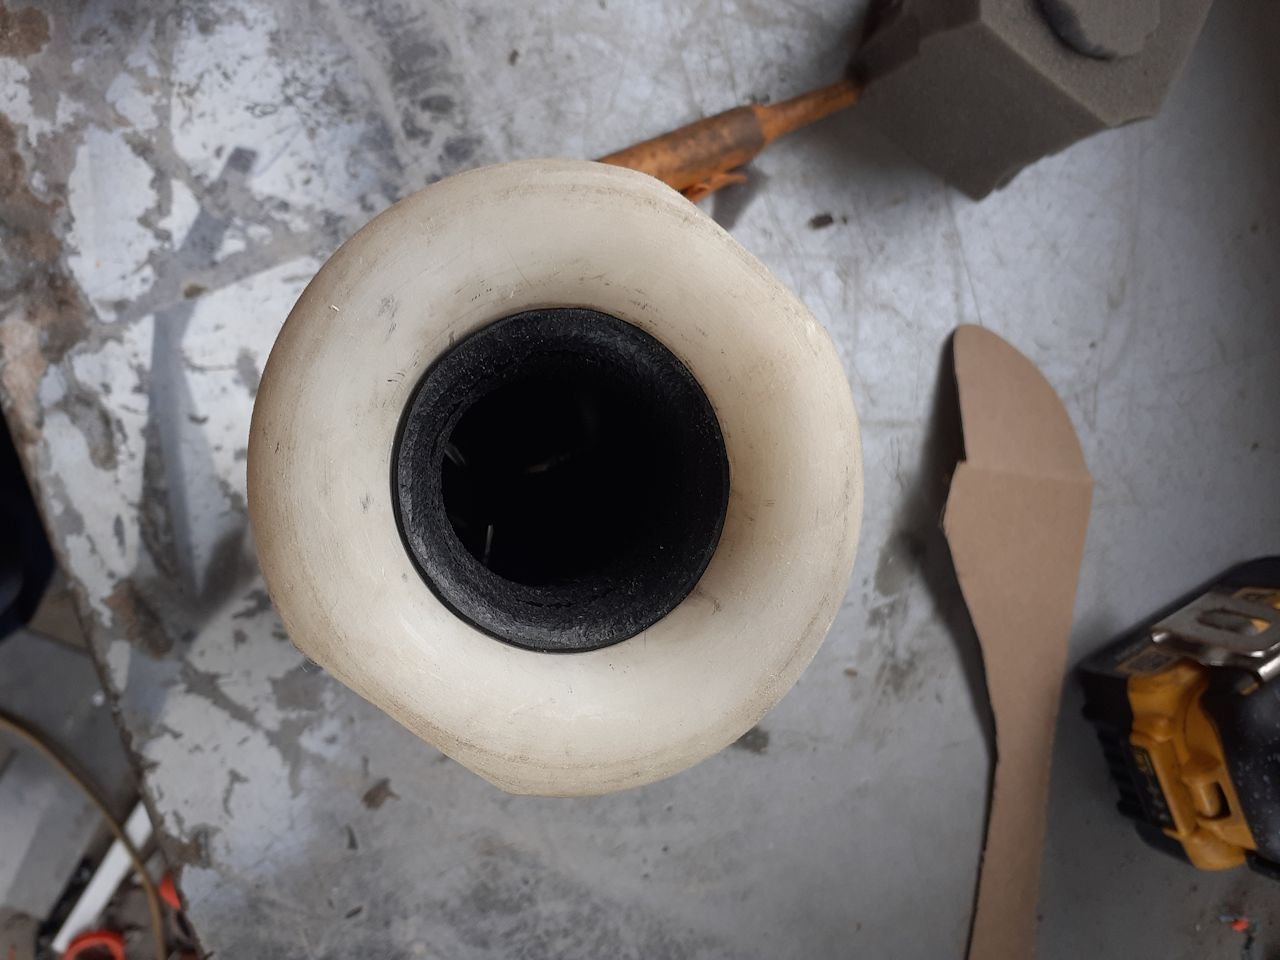
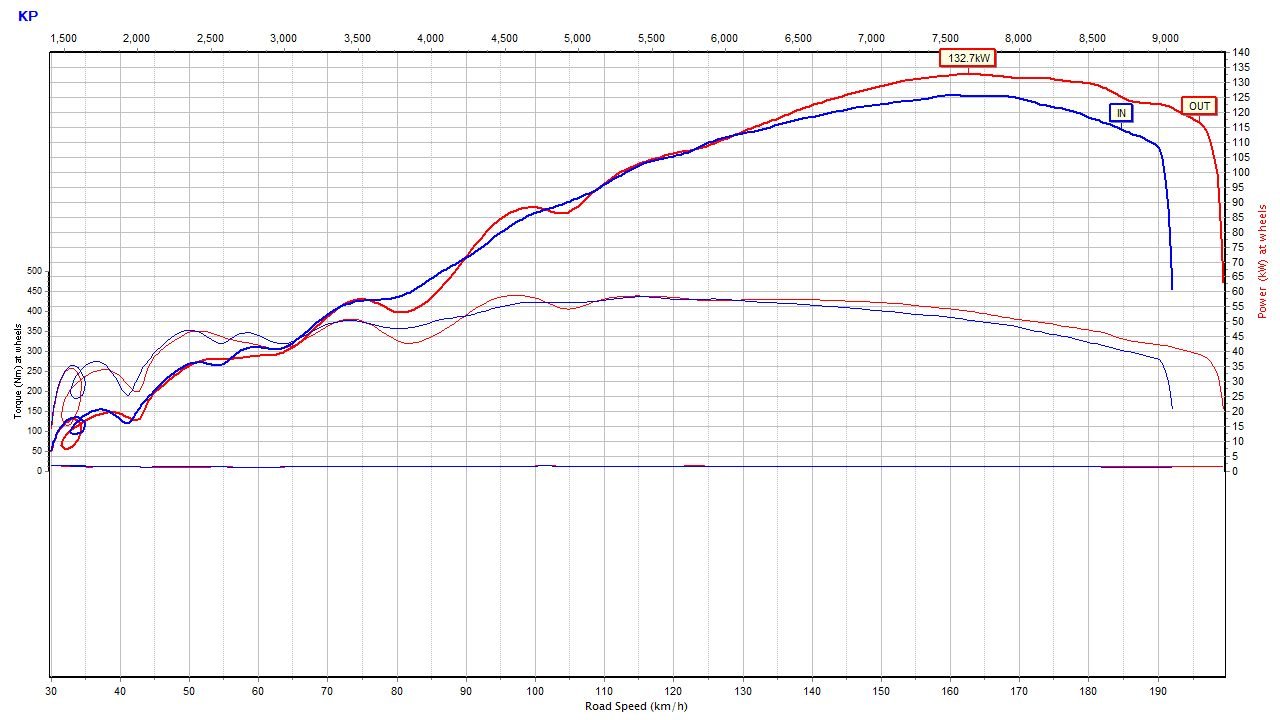
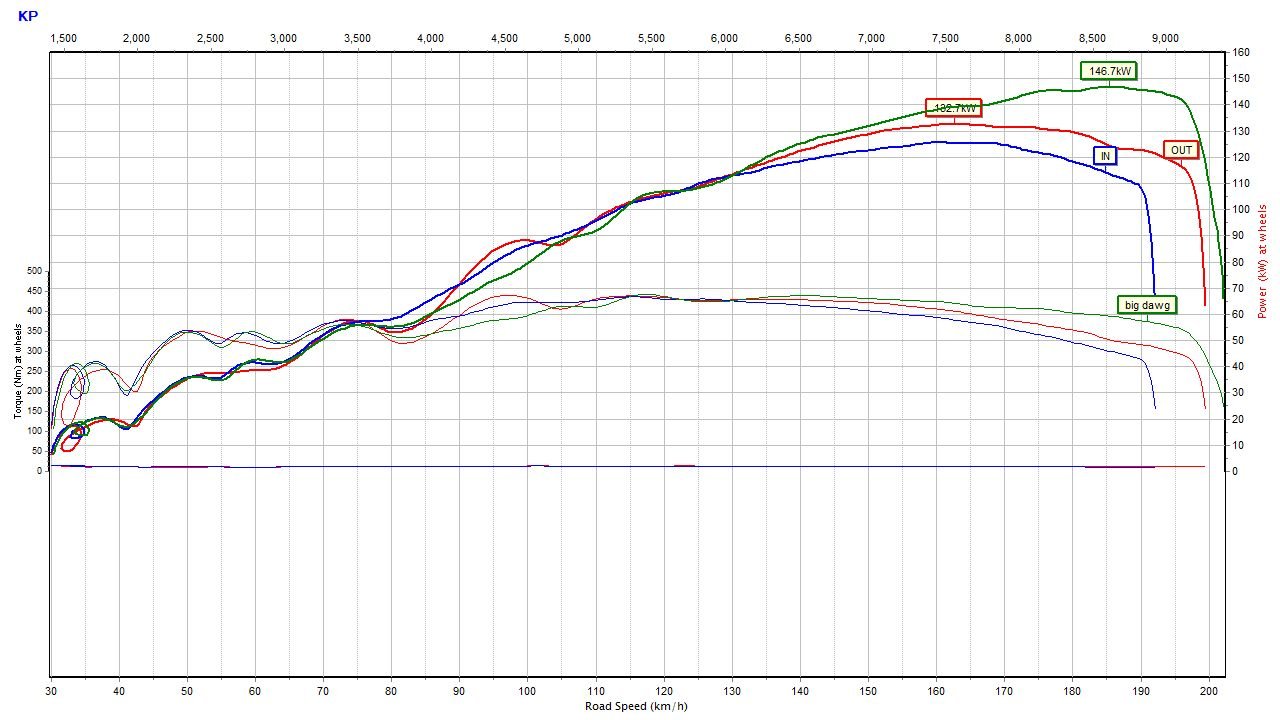
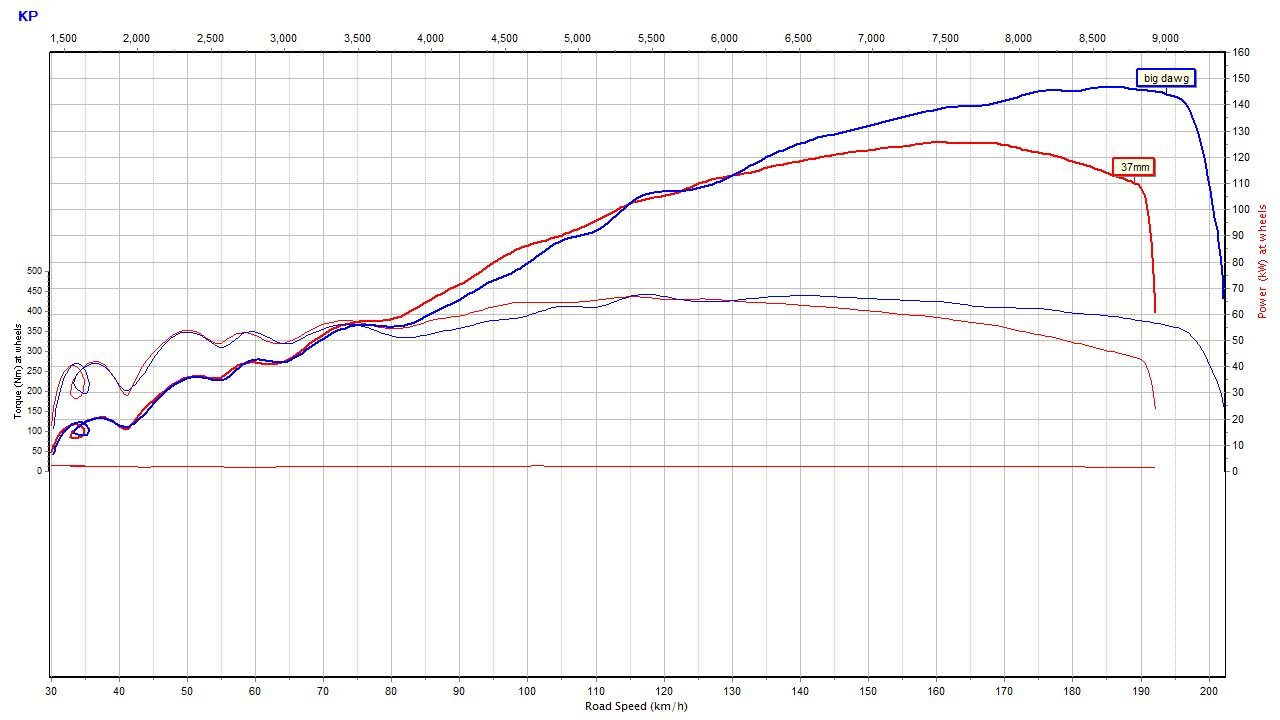
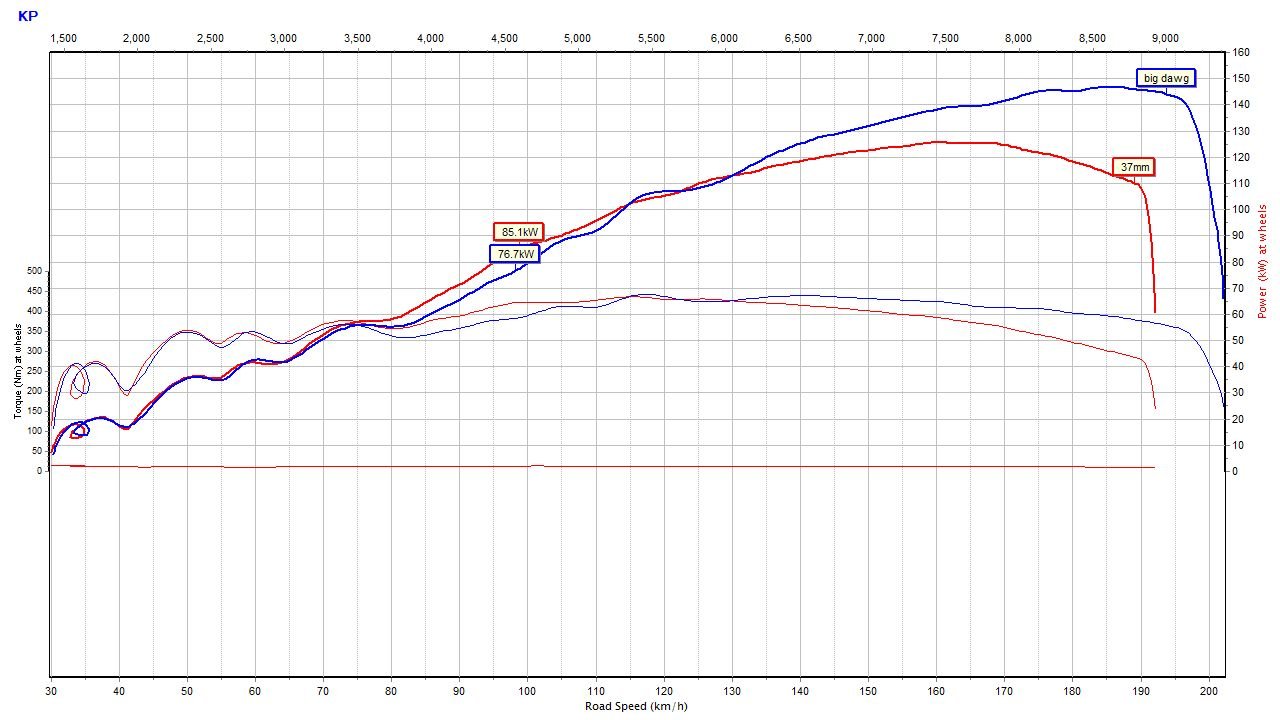
So, black pipe is 37mmm id. orange 51mm. below chart is with the pipe slid in and out like pic one and pic 2 . red being out. blue being in. the pipe wasn't slid out as much as in pic one. but it didn't make a lot of difference how far out it was. What i was trying to do here, is to see if a 2 stage, small then big diameter variable setup is worth attempting. Obviously my pipe sizes are off and the outer would need to be a lot bigger. Since loosing 15kw over normal setup up to, and down low is acting like a smaller diameter pipe still. green line added is the big 51-62 pipes as per bottom pic getting rid of the outer 51mm run. leaving the 37mm in the position of pic 2 vs the big 51-62. Would likely be very hard to combine the 2 whilst having a working mechanical 2 stage without screwing up the flow on the high rpm side. but could be worth chasing with some different sized fixed setups to see if its possible. I would set it up opposite to what i've done here. so the inner smaller runner was fixed. the outer would slide back towards the engine creating a higher flowing shorter path. Doesn't look much in the above chart, so some numbers on this one. pretty decent gain at those low rpm's
2 points
-
Here's a couple of videos from the last 2 events. All of this seat time is starting to pay off now and I am super stoked with how my driving is improving. Had the best day ever on Sunday with a few attempts to link track 2 reverse Matsuri video from last month. Drift Antics from Sunday. (Probably made this a bit long)2 points
-
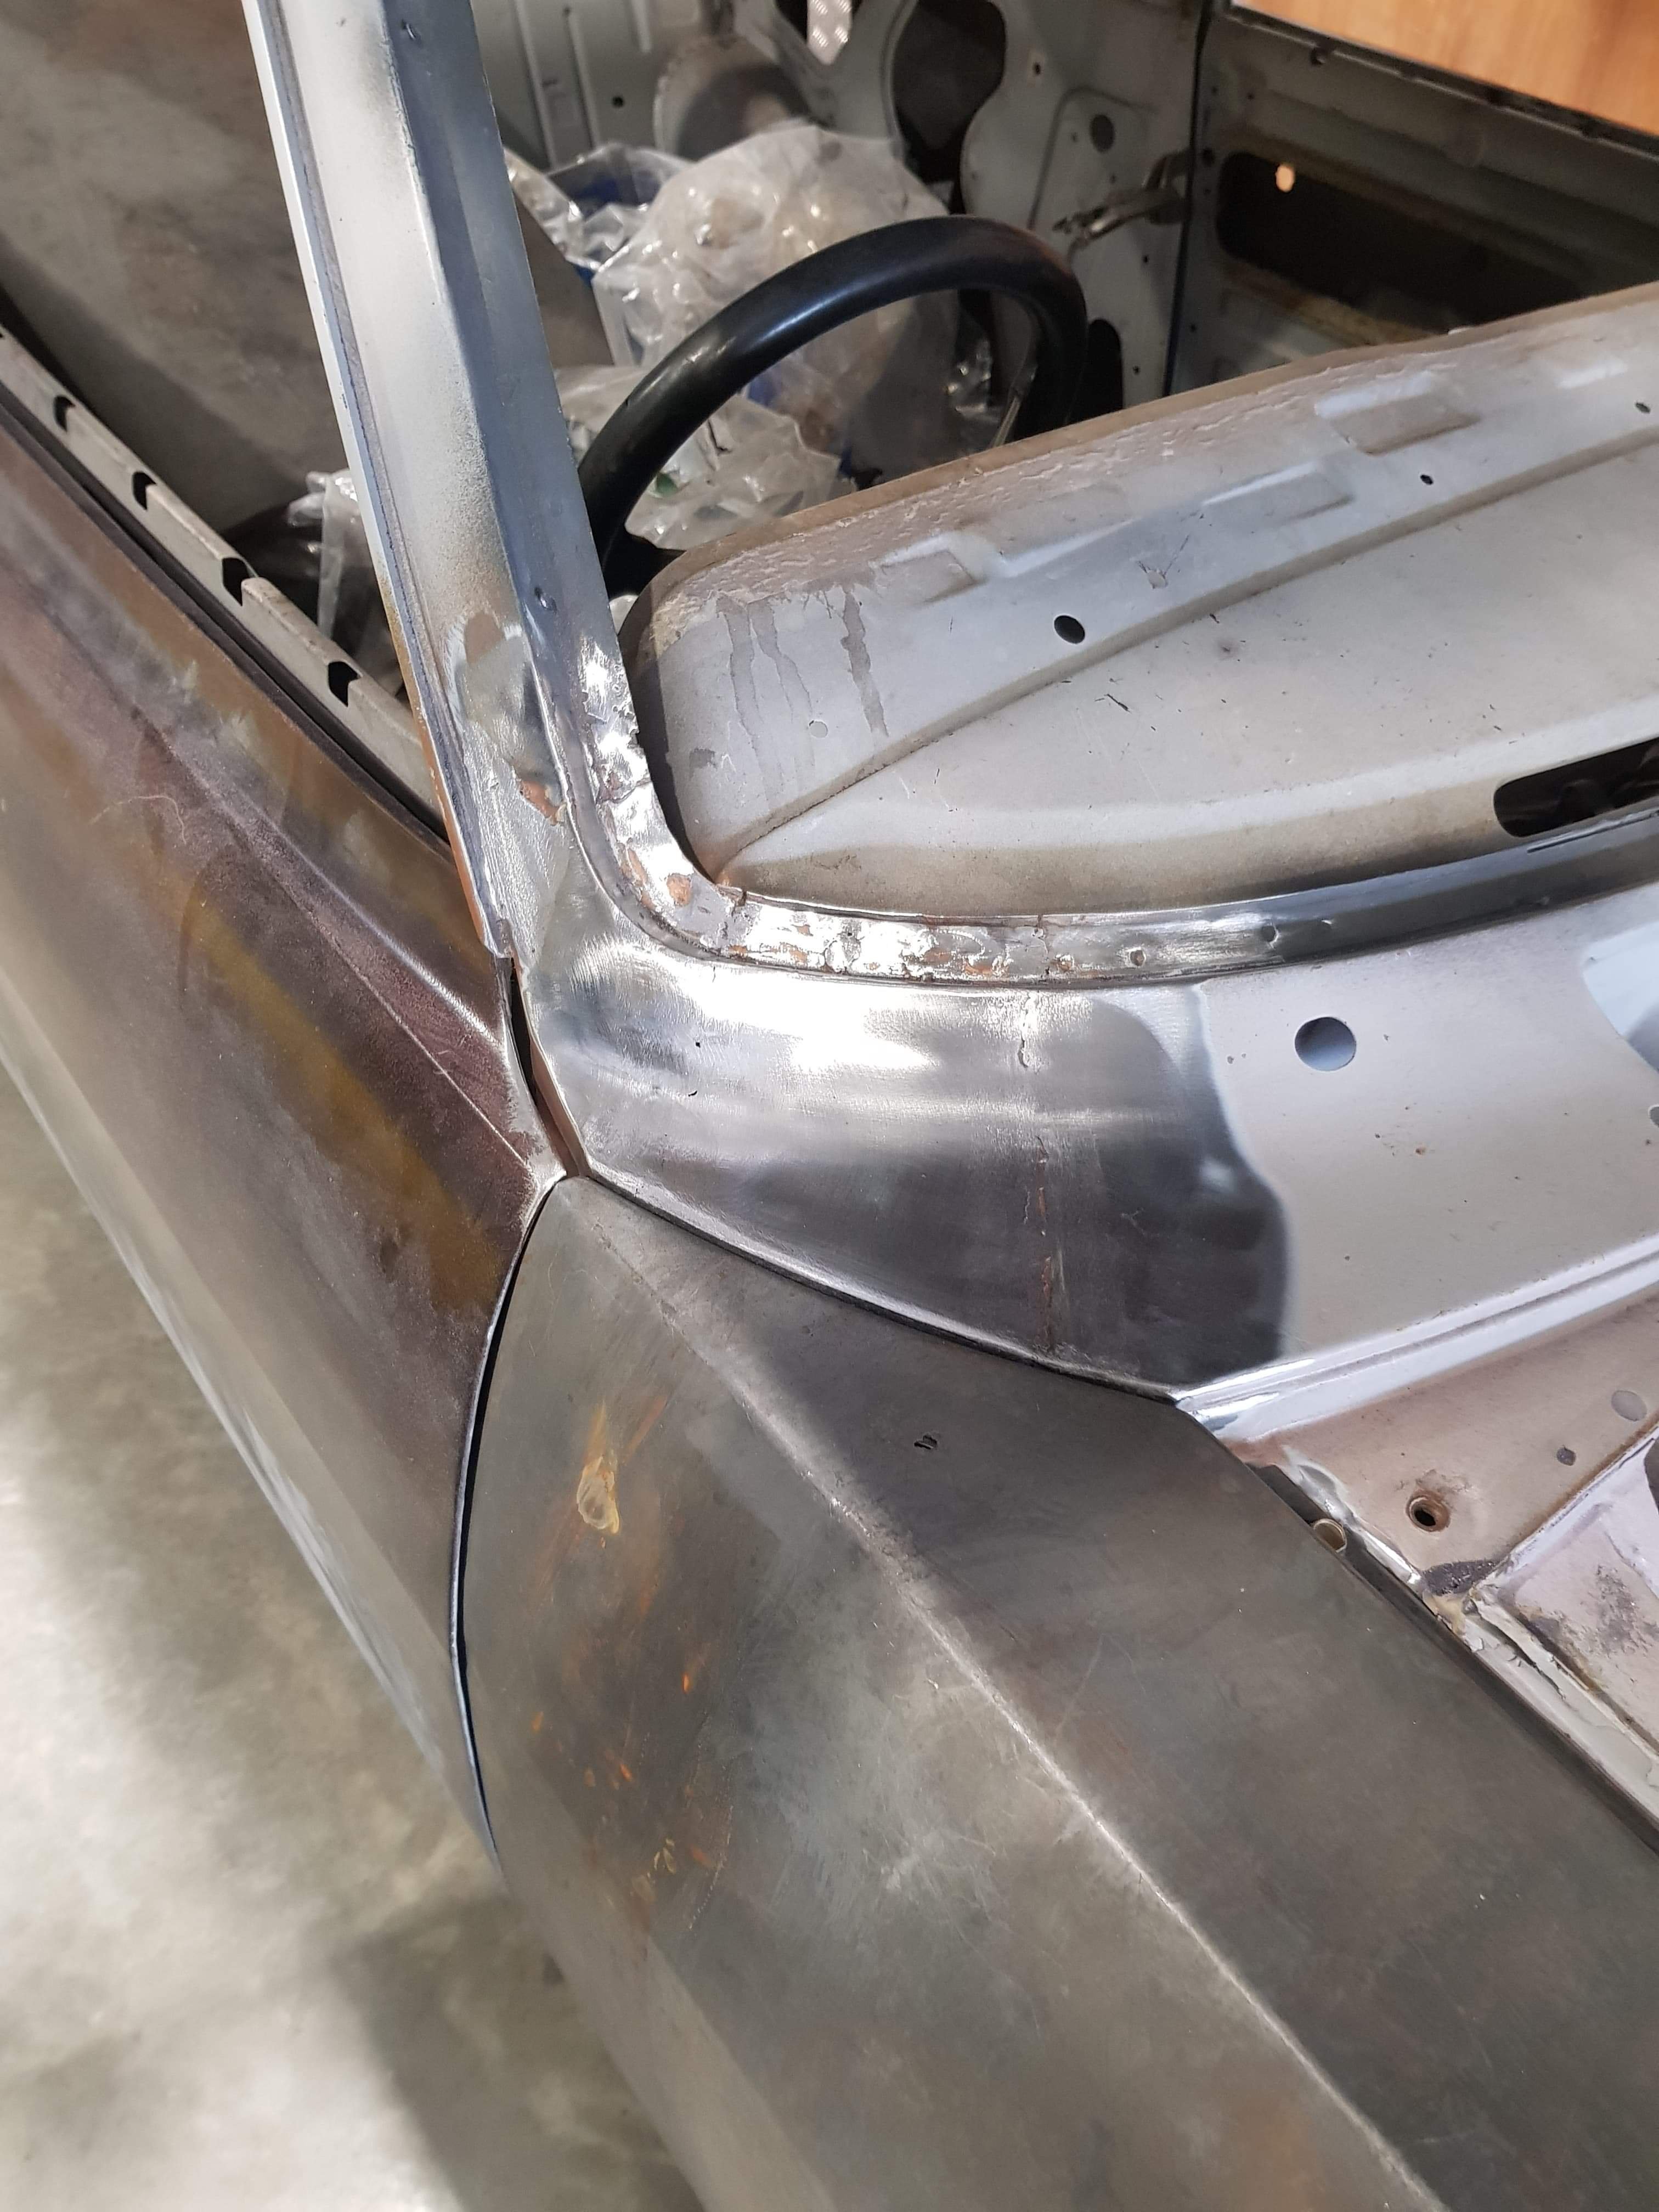
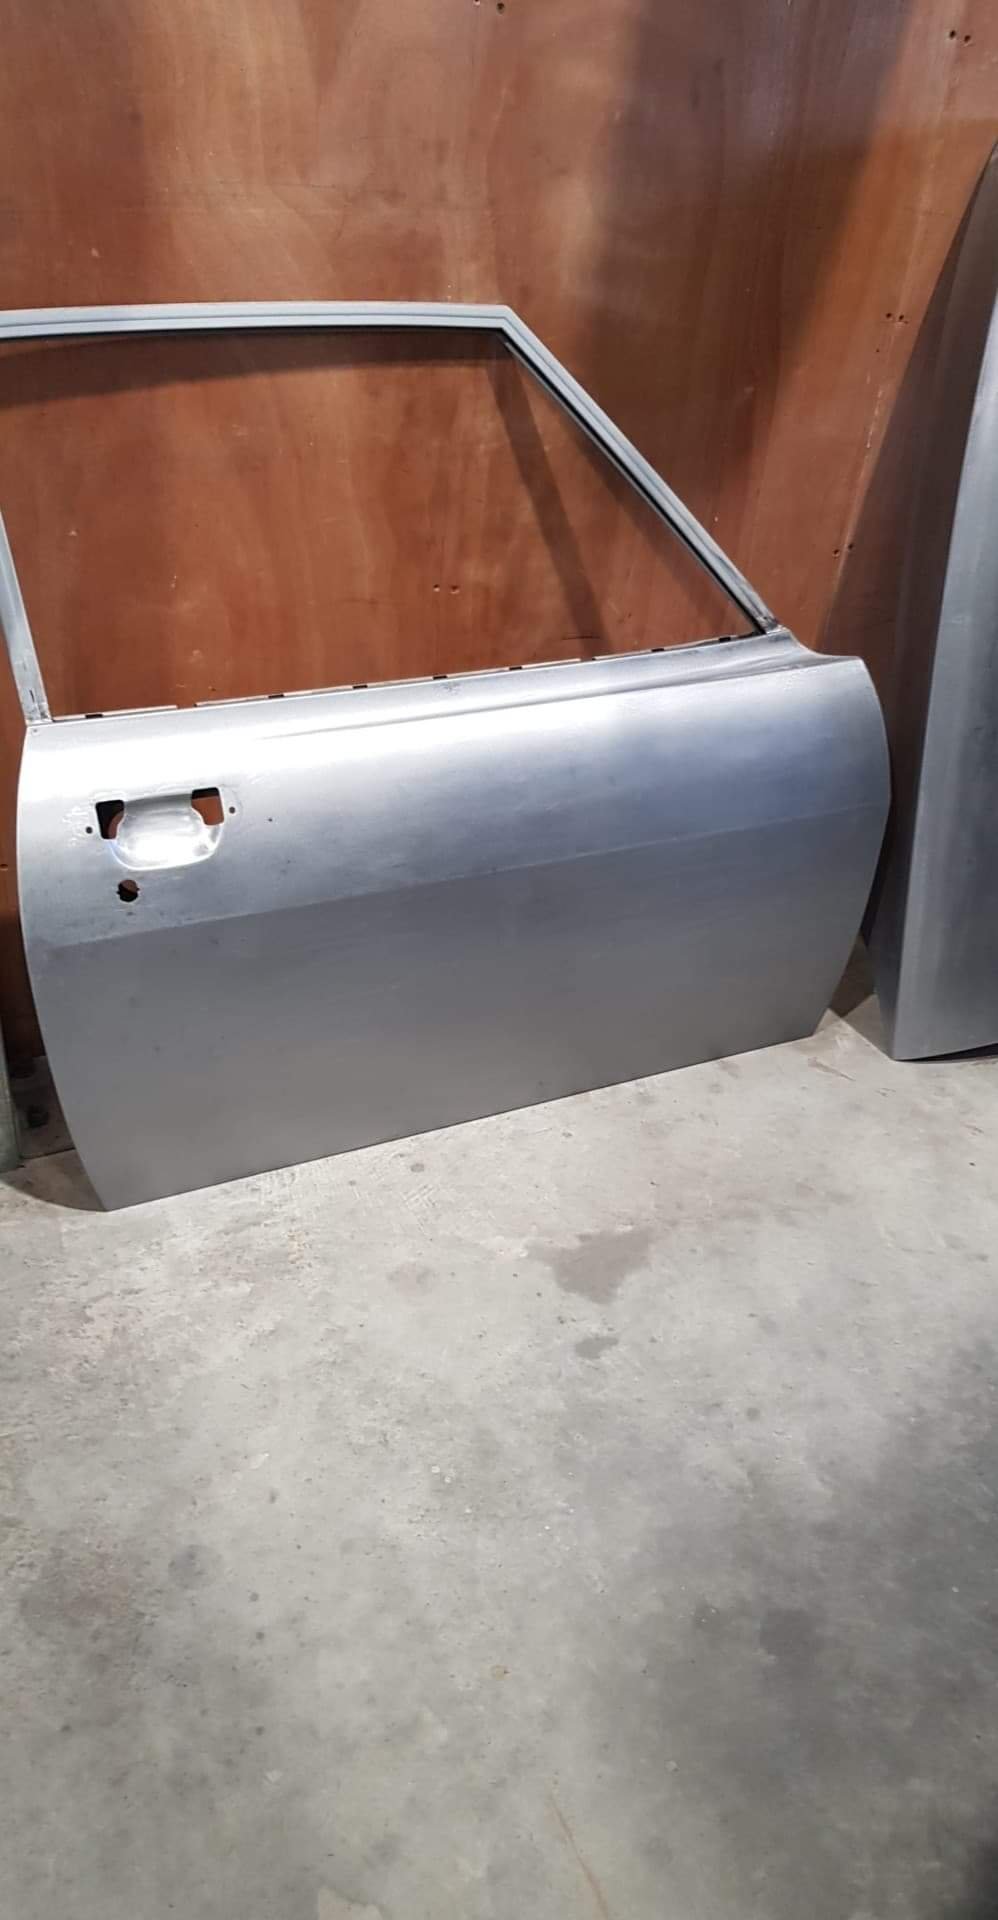
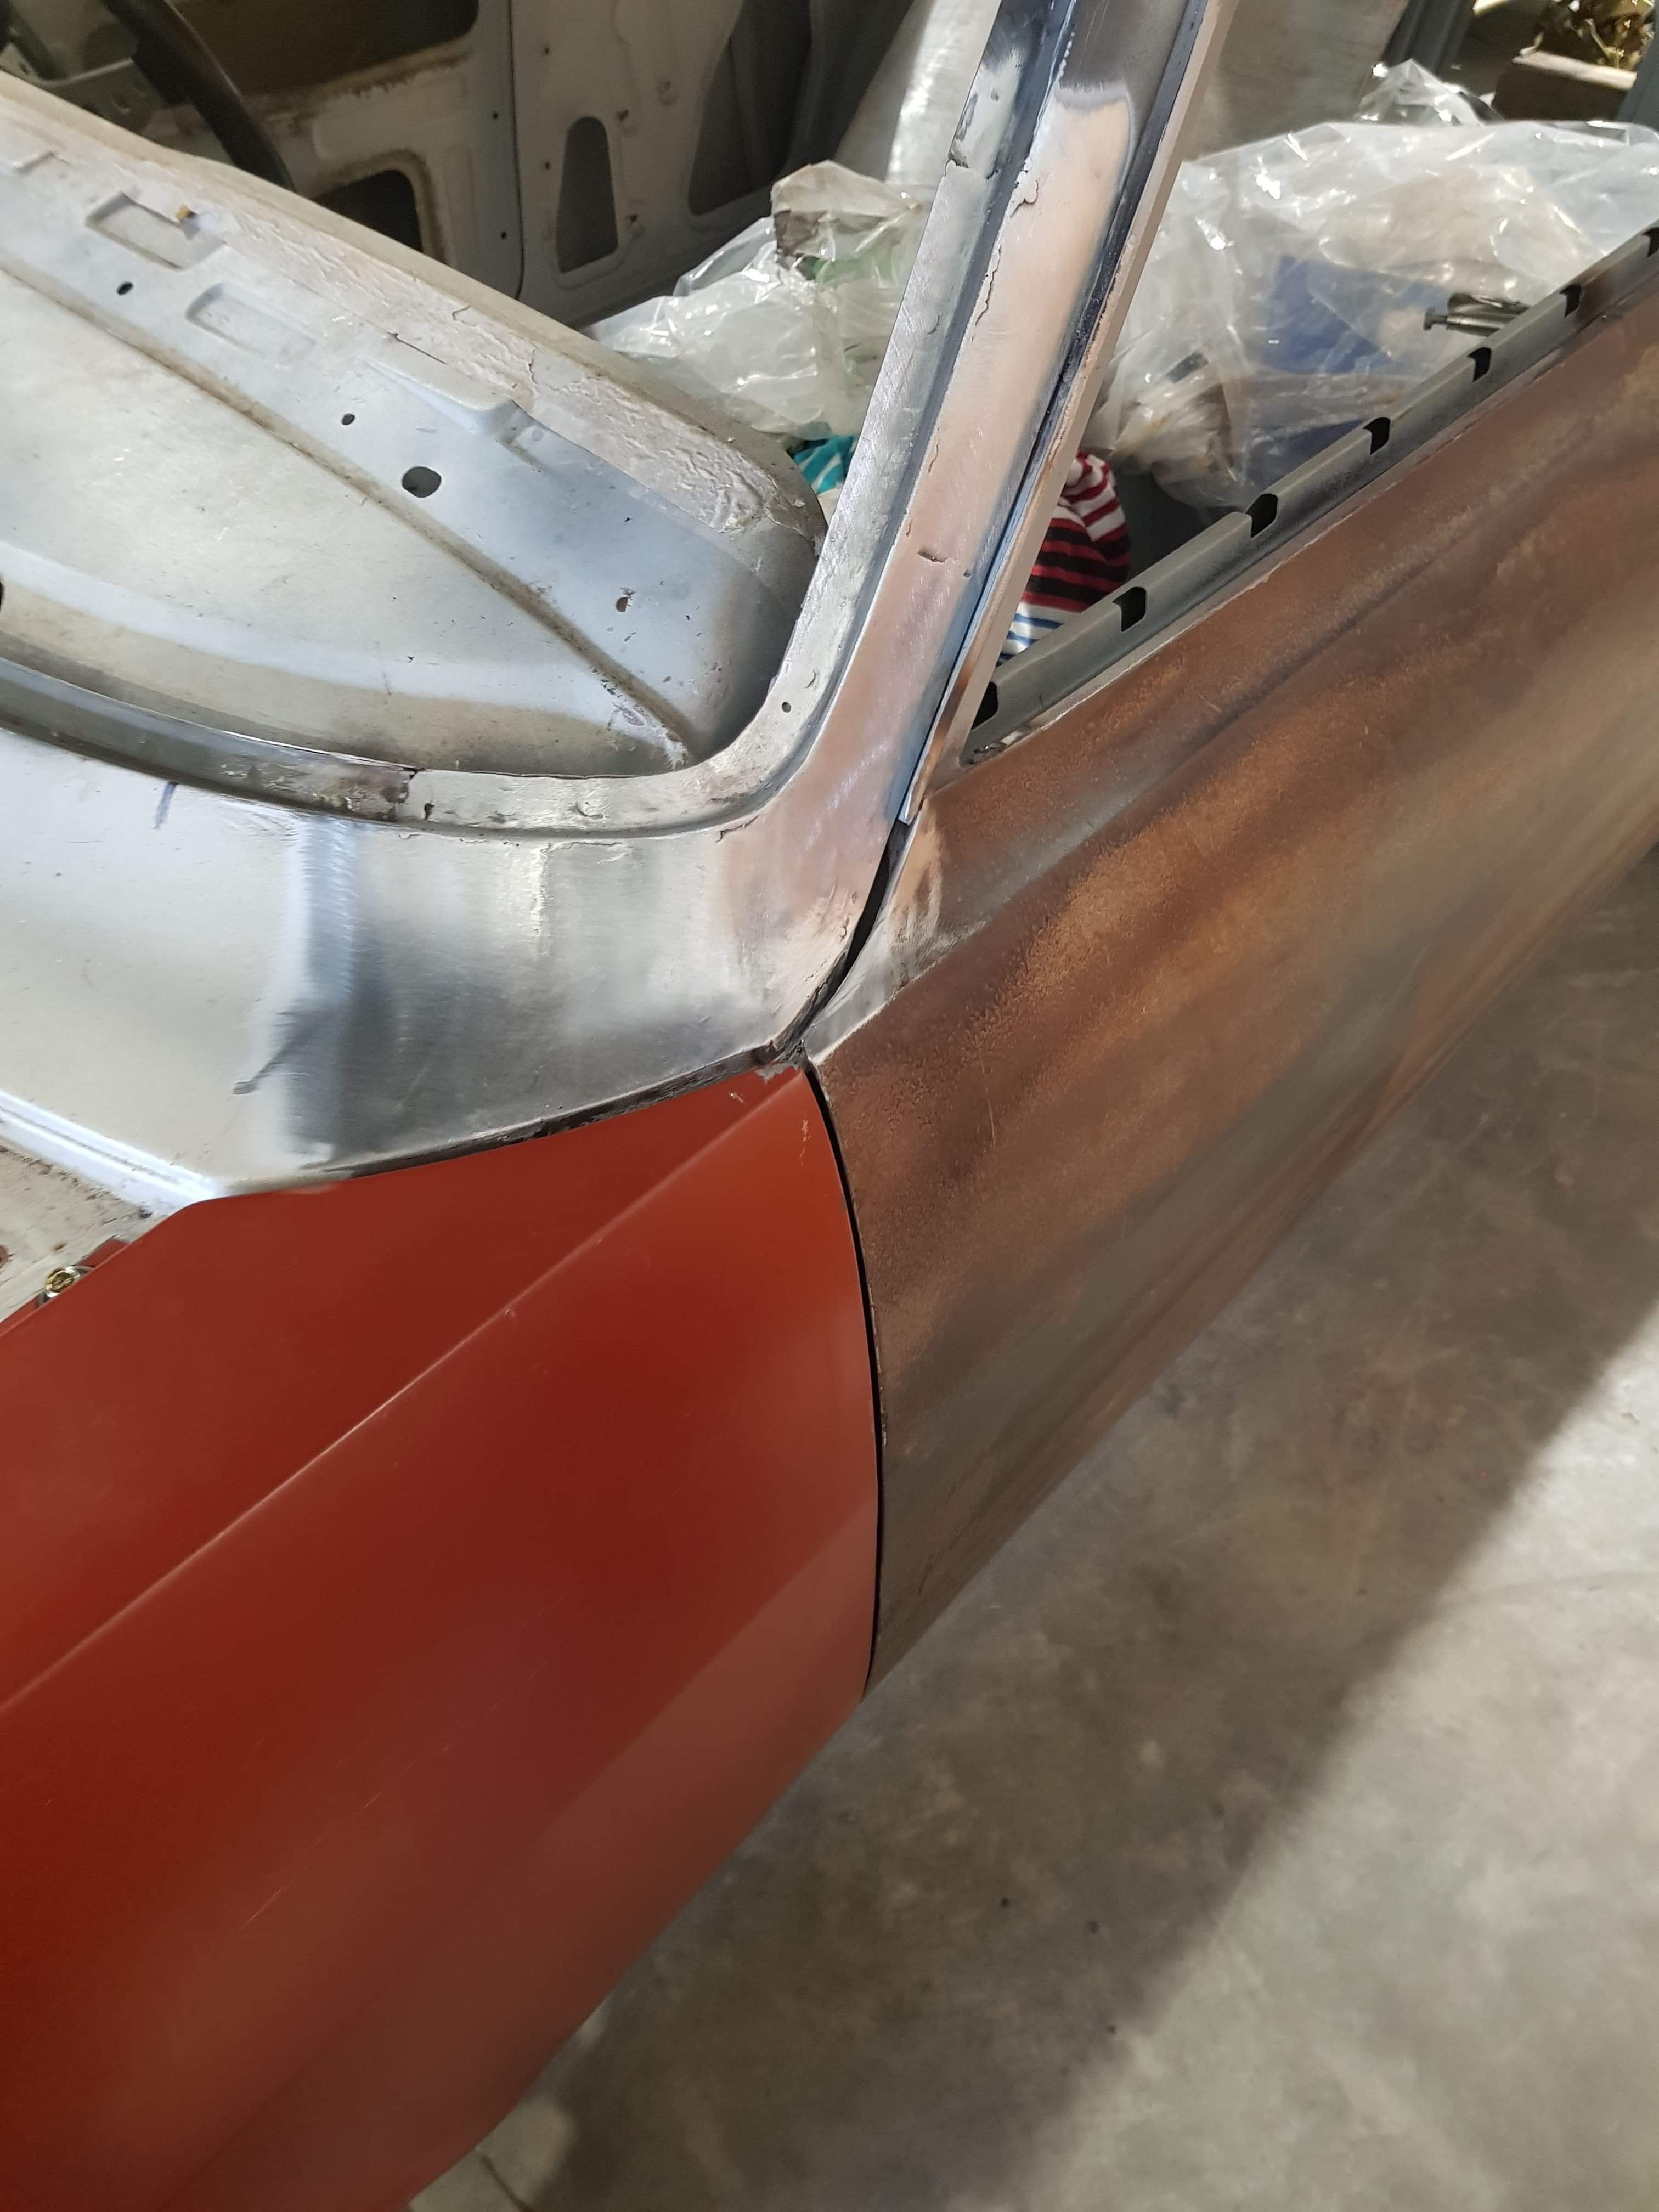
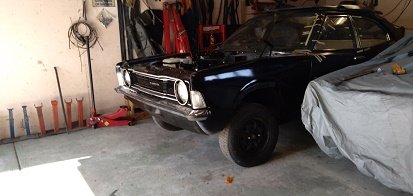
First things first, was to strip the horrid interior, and remove the front end to see what I was facing. It's been off the road since '03, where it appears someone had begun a teardown of the front suspension for a rebuild, but instead gave up, lost some important nuts, and roughly bolted it back together. Front steering joints had been unbolted, which made transporting it a mission. However this problem is fixed, and it only needs some new bushes/brake bleed to be operational. I sourced a brown ute bench seat (ute's have headrests and sedans/wags don't). Much harder to do than I had anticipated! But it's improved it 100%. I also found a premier wood dash facia, and a nice black dashpad that needs some straightening. I took the column apart and have restored all that, ready for reinstallation once my interior is black. Should give a much nicer feeling once I get it back together than mouldy, faded and split brown! Next up, I installed a 202/trimatic that came from an HZ ute. Runs nicely, and didn't take long at all to swap in as most of the engine mount bolts had been lost. The car didn't come with a driveshaft but I've managed to find one which is great. I took a look at my rad support panel to find that rust had gotten the better of the lower section, as they so commonly do with these. A replacement rare spares panel and a few hours later and it's as new. Spent today chopping away at the body, but also got keen to tackle the exhaust and get that setup. @MACKAZ did me a deal on a 2 barrel inlet/headers which is awesome, for now the 2 barrel setup will wait for the future but I thought to fit the headers as a start. However I didn't consider that these (probably commodore) headers may have fitment issues and found that they hit the firewall when I tried bolting them on. Some cutting and welding later and they fit and the exhaust is done. Fuel tank is full of 17 years of water/varnish mix and to be honest I'm not sure the engine enjoys running on it but nonetheless goes. Need to pull tank and drain, the lovely folk at holden didn't install a drain bung for me. The car as it sits. These come apart so easy, it's super good. Painted my steering wheel up and came out better than I thought. Hopefully it doesn't wear too bad.2 points
-
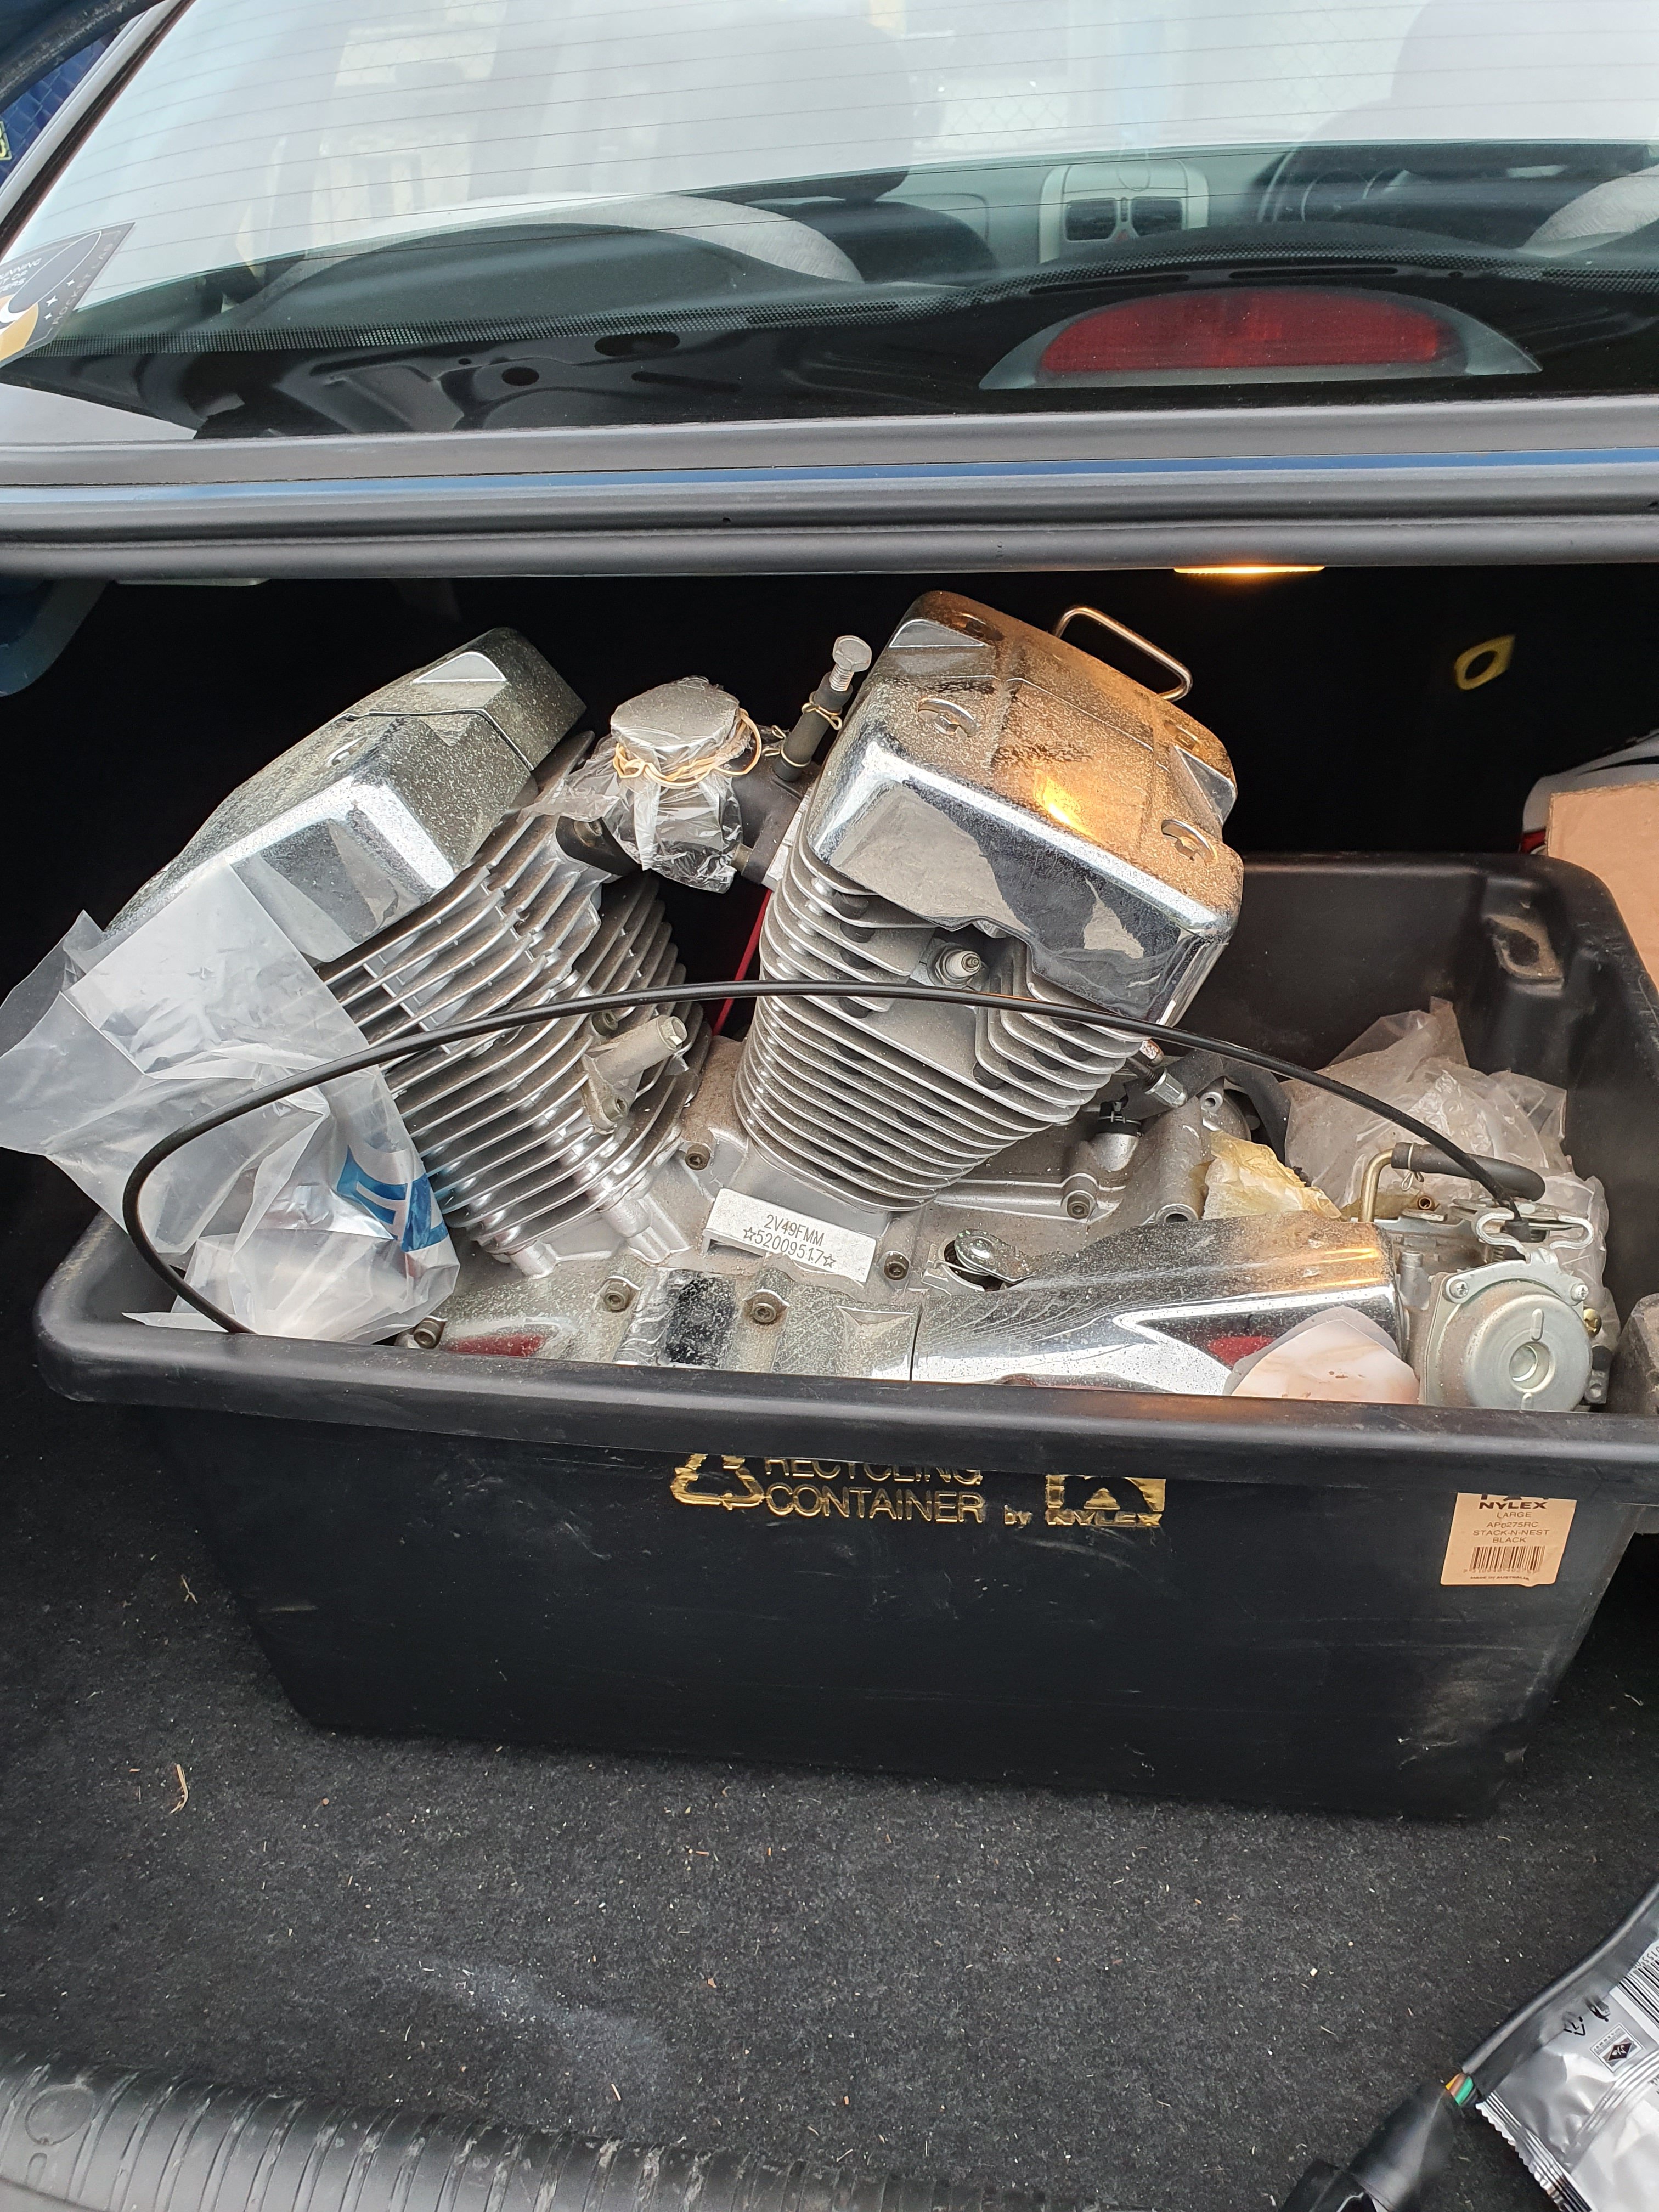
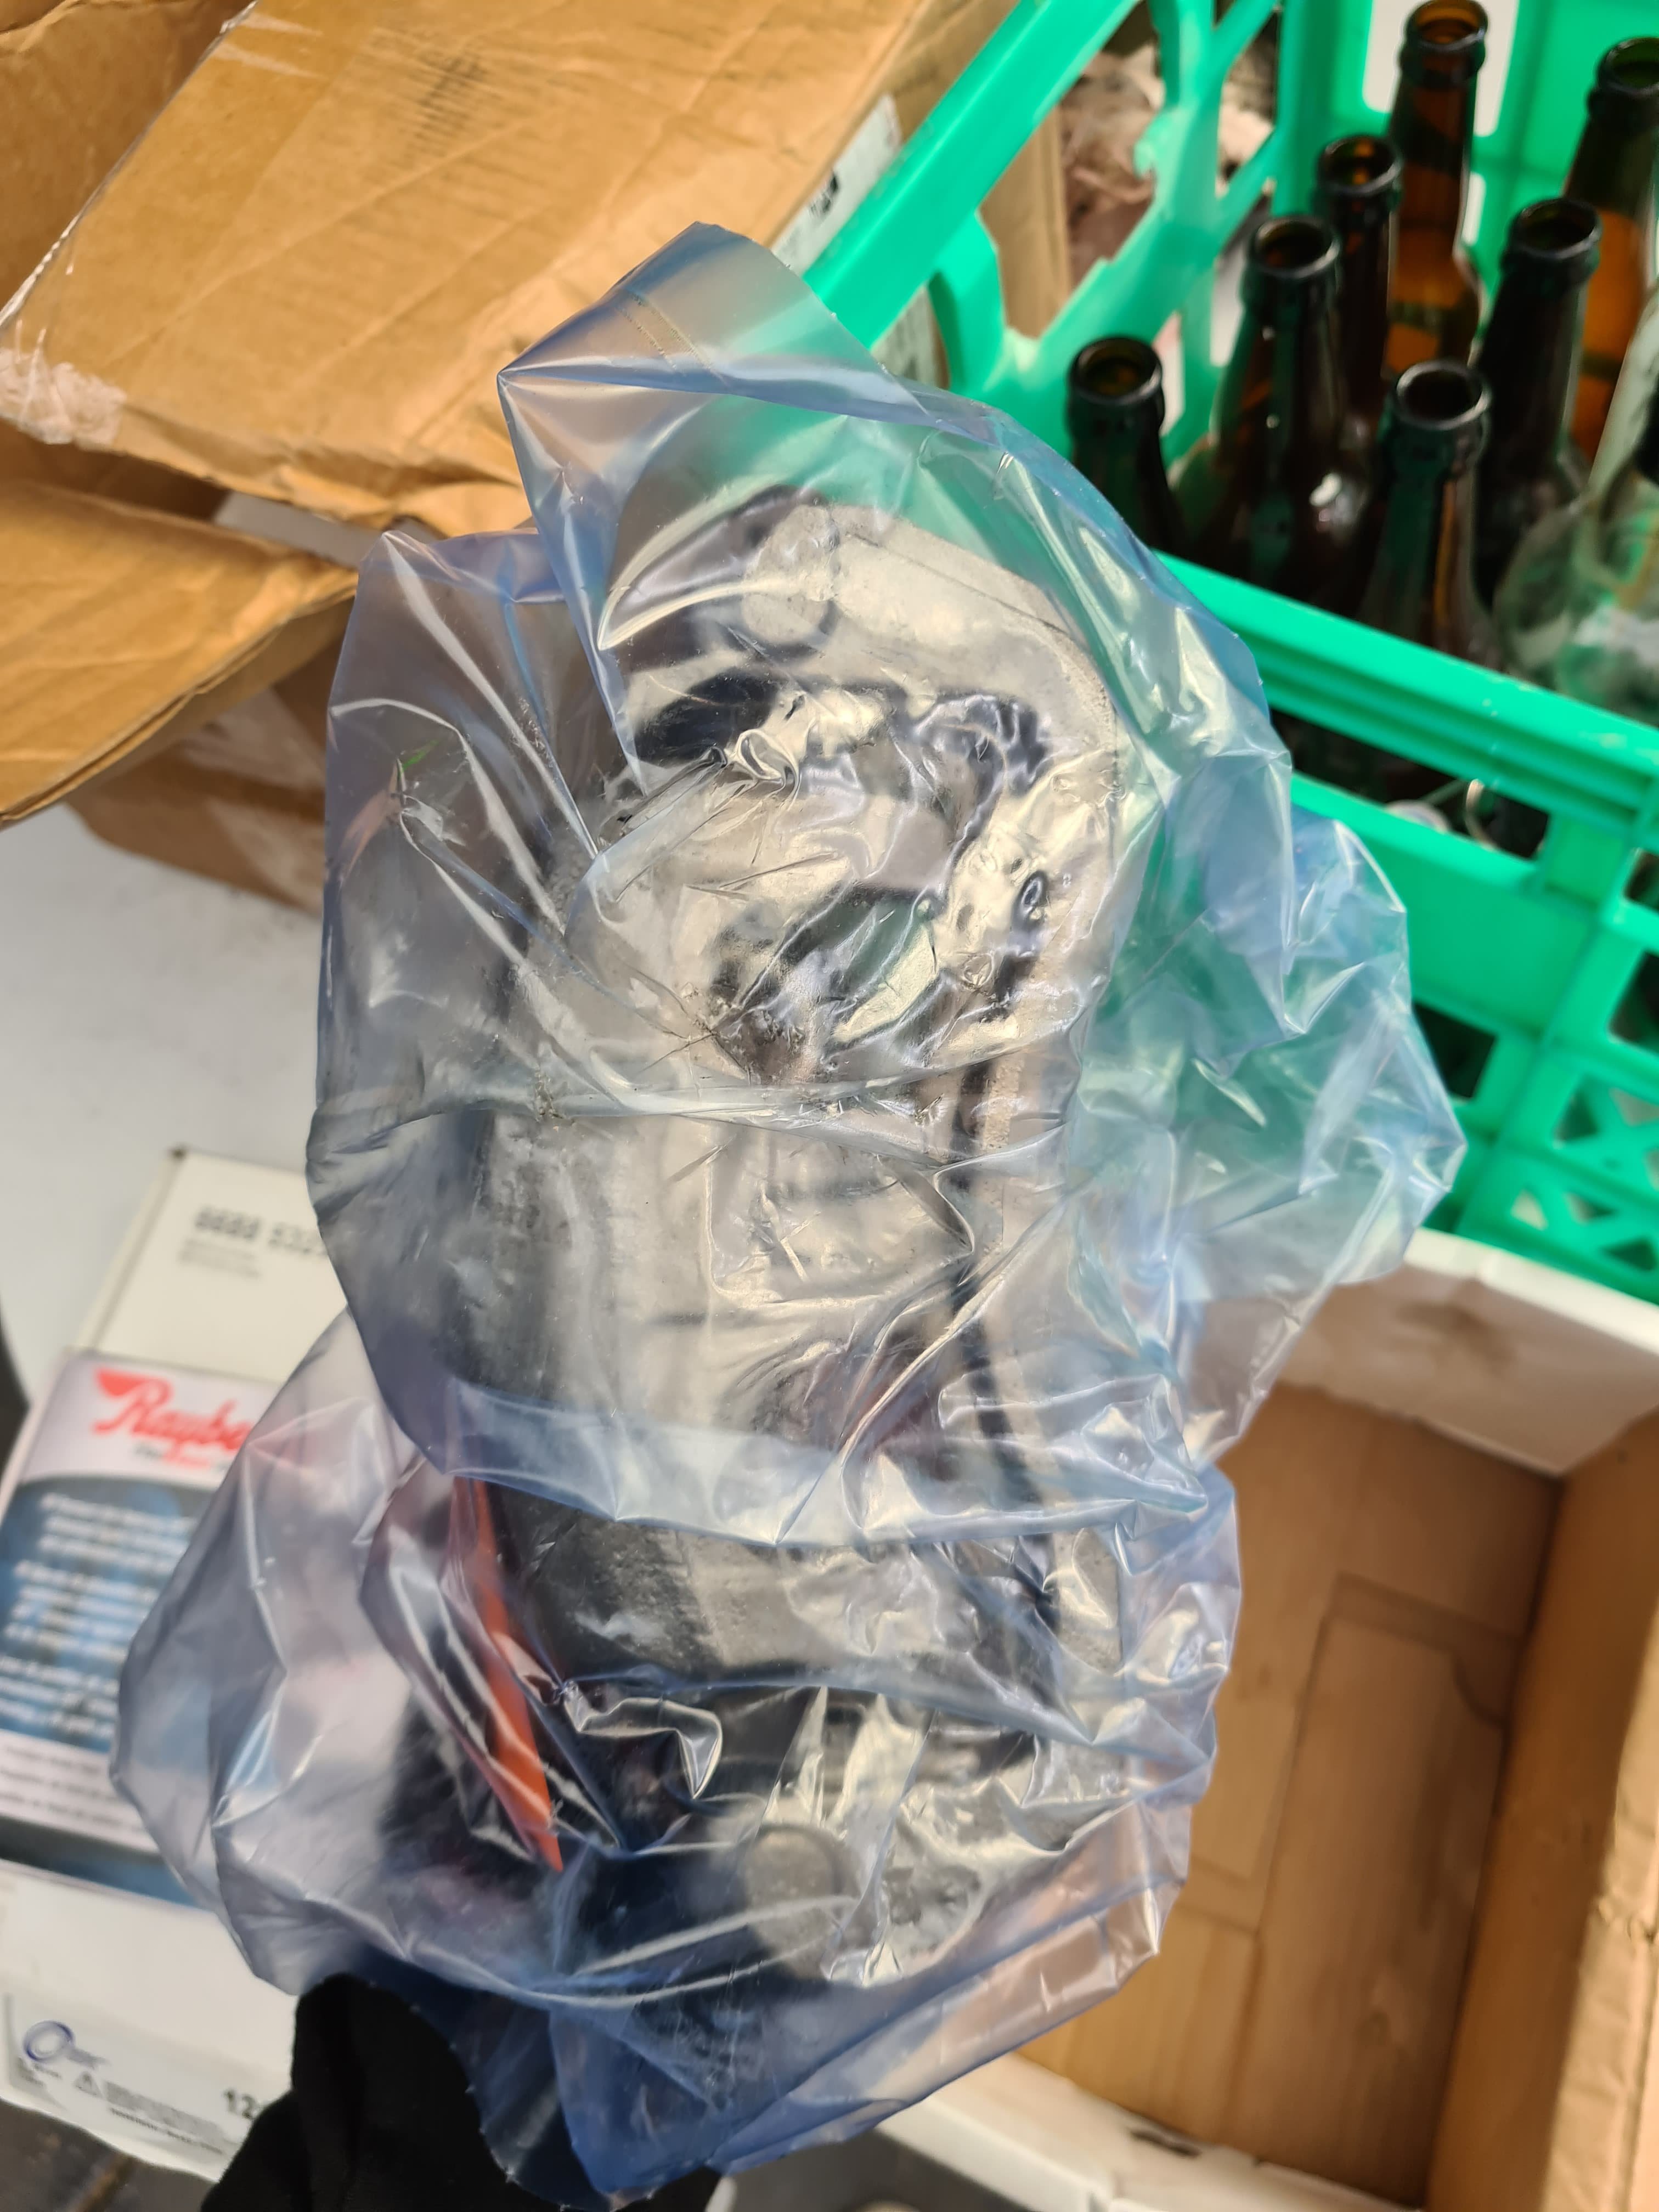
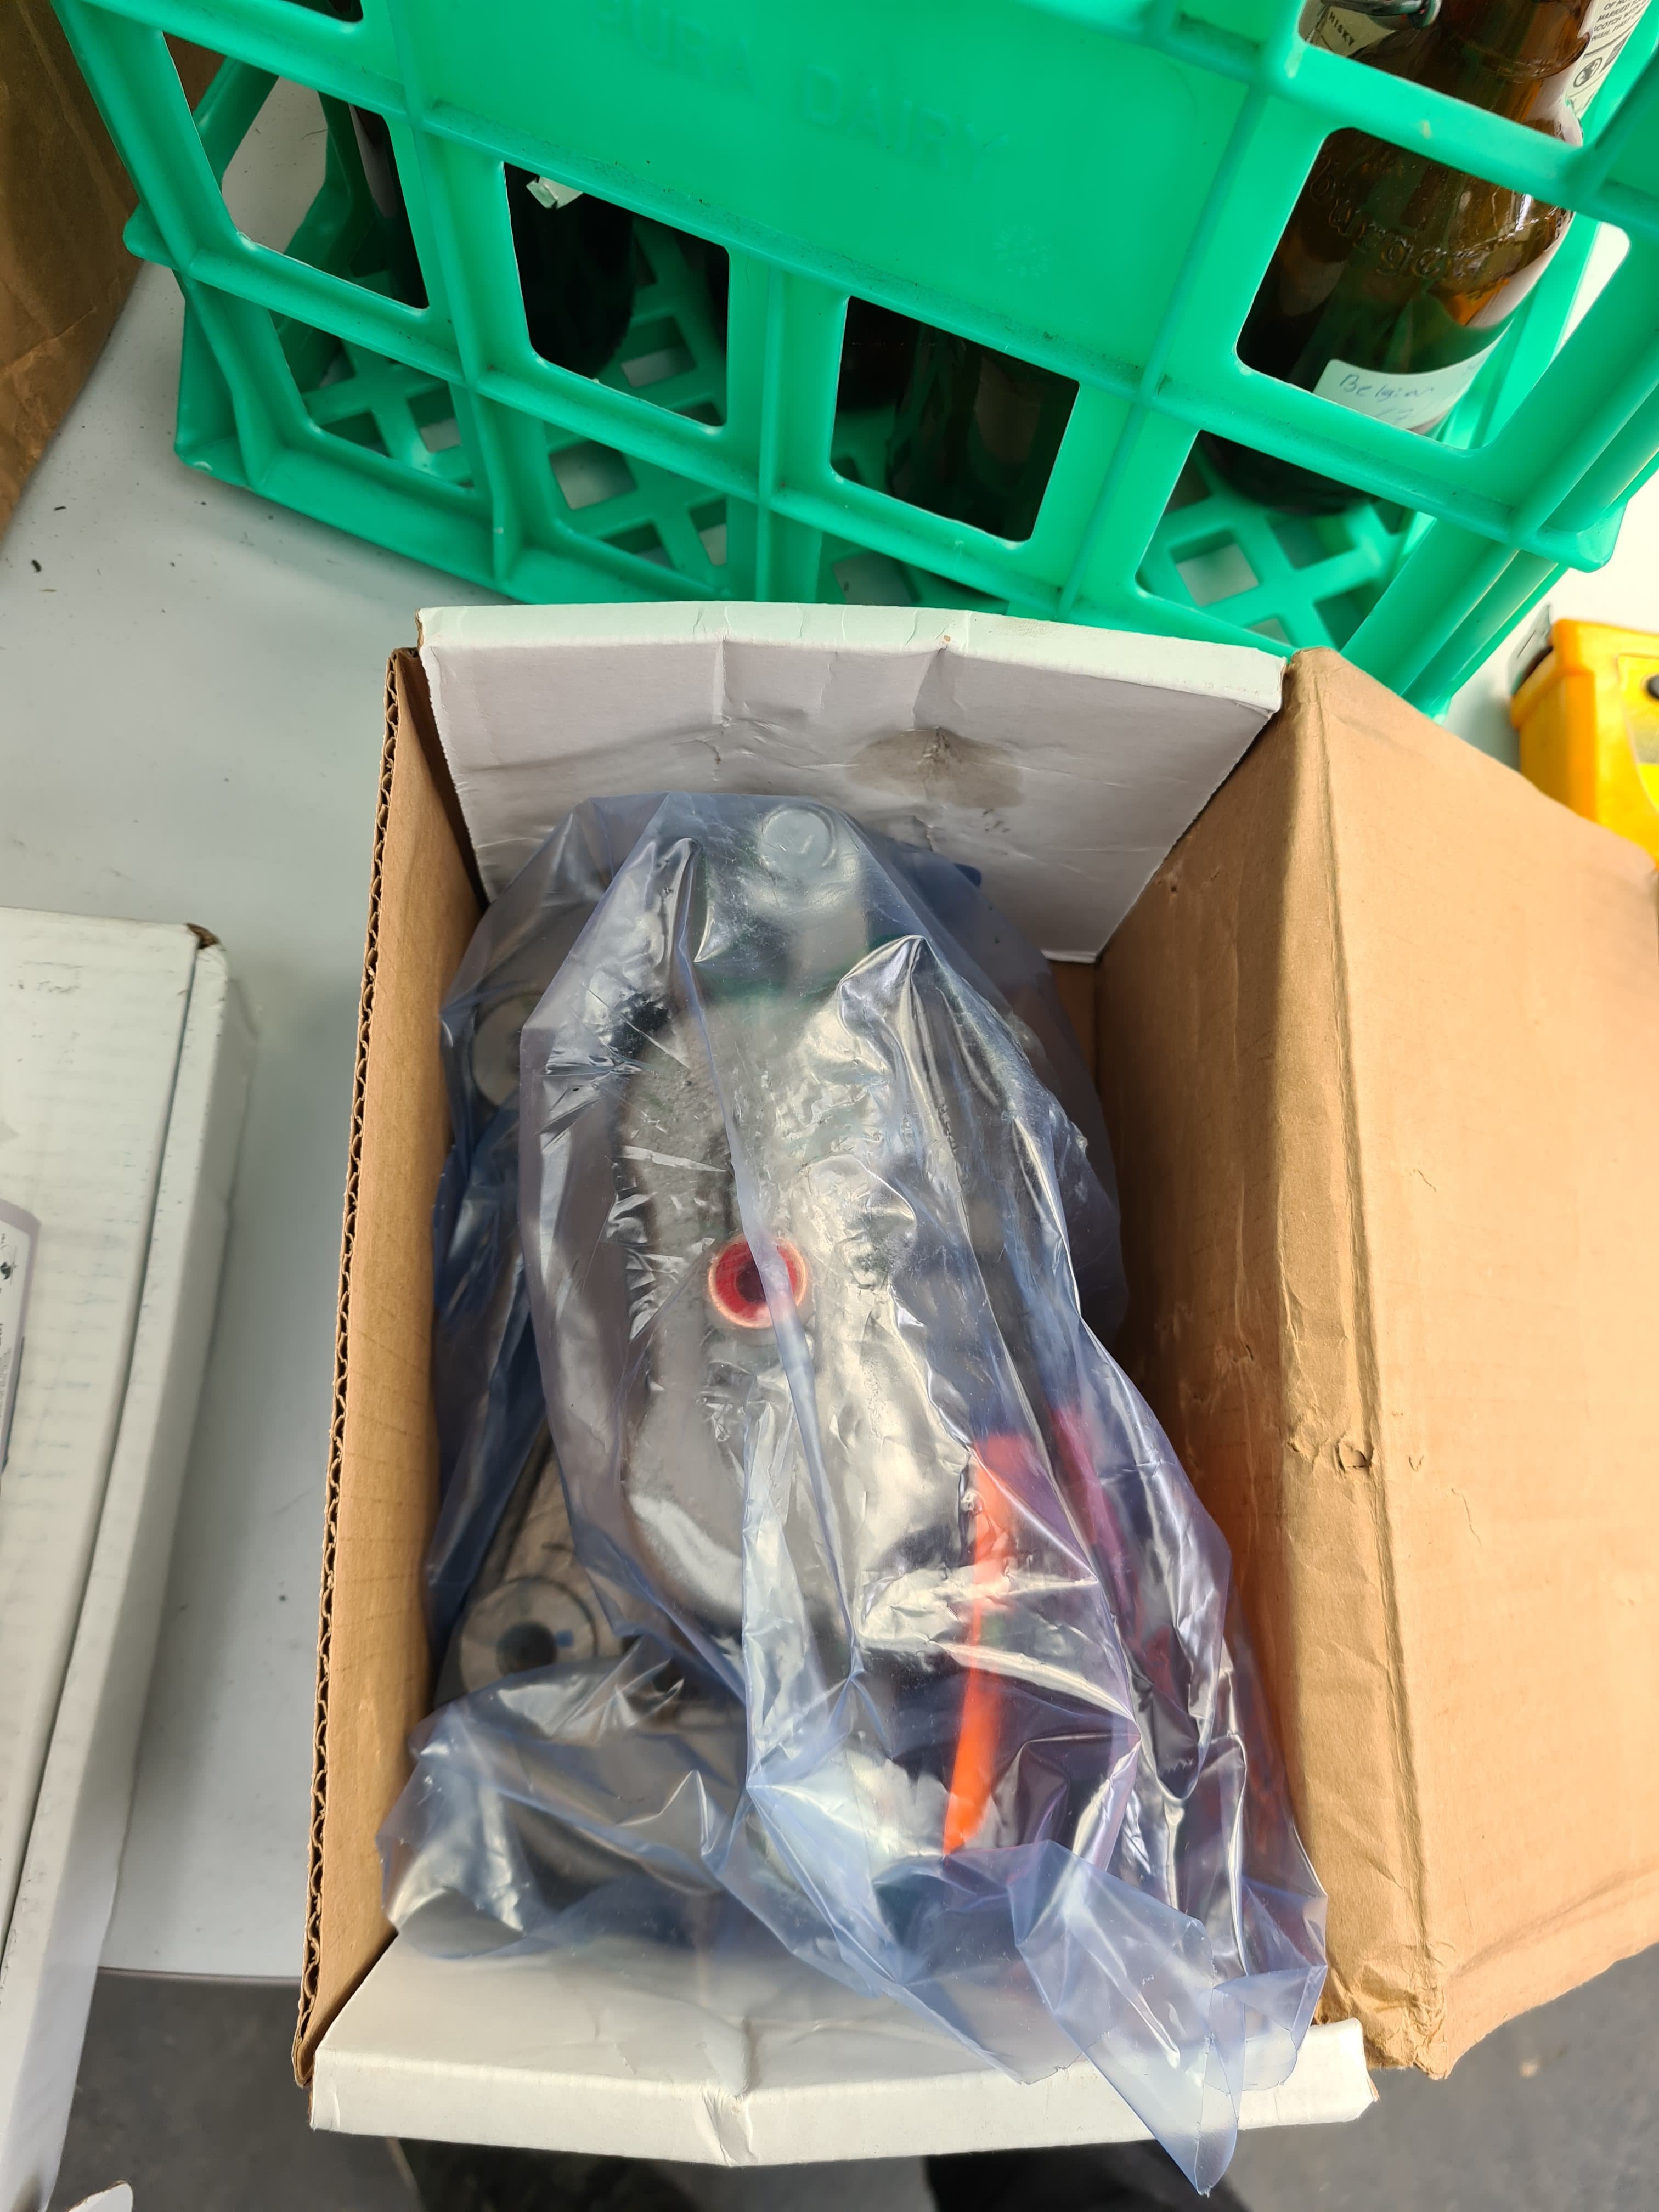
Well this just got placed in my boot its brand spanking new all the parts are still in boxes for my favourite price of nothing. I have no idea what I'll do with it yet suggestions welcome.
1 point
-
Not really, length works at both ends. so does diameter. Trying to combine the 2. on my first lot of tests best length for bottom end was 205mm. best for top end was 165mm. (or dropping way back to 65mm) but gains not worth the effort of a variable setup But combine the 205mm runner with with smaller diameter gives even more bottom end. then if can switch to the 165mm at top end with big diameter will have the gains from the airflow and correct length. Looks more worth chasing.. Would be a 2 stage variable length and diameter runner Would need to retest the lengths for the small runner to confirm. then see if its possible to get the power from the outer runner without the inner screwing the top end.1 point
-
I dont have anythin technical to add than has been already... However my reason for wanting to post was purely to say thank fuck no dick has said to put an edlebrock on it, go way better and never need to tune it again! Argh, i hate those cunts with a passion.1 point
-
Turn key to on position so pump primes up with in line fuel pressure gauge and see if pressure drops quickly or holds for a while? If pressure drops quickly then check fuel injectors. Could also see if any of the plugs are more fouled than others I suppose but this might only show up if an injector really is leaking bad.1 point
-
Was a cool build look forward to seeing whats next1 point
-
Nanged it up to Hanmer for the official unofficial Hanmer meet, was a laugh going up Jack's pass 4 up in it, spent a lot of time dodging potholes and other rough road issues haha. Didn't skip a beat all weekend! Such a great little car, love this thing much more than I should haha.1 point
-
Put it in a Honda cub1 point
-
Some info its a Lifan 250cc The ignition setup would be perfect for the turbo v-twin i have so may try swapping some parts around. The 5 speed box has my mind racing. Type 4 Stroke Twin cylinders, V-Twin, four stroke, air-cooled Displacement (c.c.) 248cc Bore x Stroke (mm) 49.0 x 66.0 Max HP 16.25 HP @ 8,000 rpm Max Torque 13 ftlbs @ 6,000 rpm Compression 10.0:1 Ignition system: CDI (Capacitive Discharge Ignition) Idle 1,300 rpm Starter Kick and Electric Clutch Manual Wet Multiple Plate Transmission Left foot gear-change, five-gear constant meshing Lubrication Pressure splash inner-outer scavenger rotor1 point
-
Morgan cycle-car...1 point
-
Some more
1 point
-
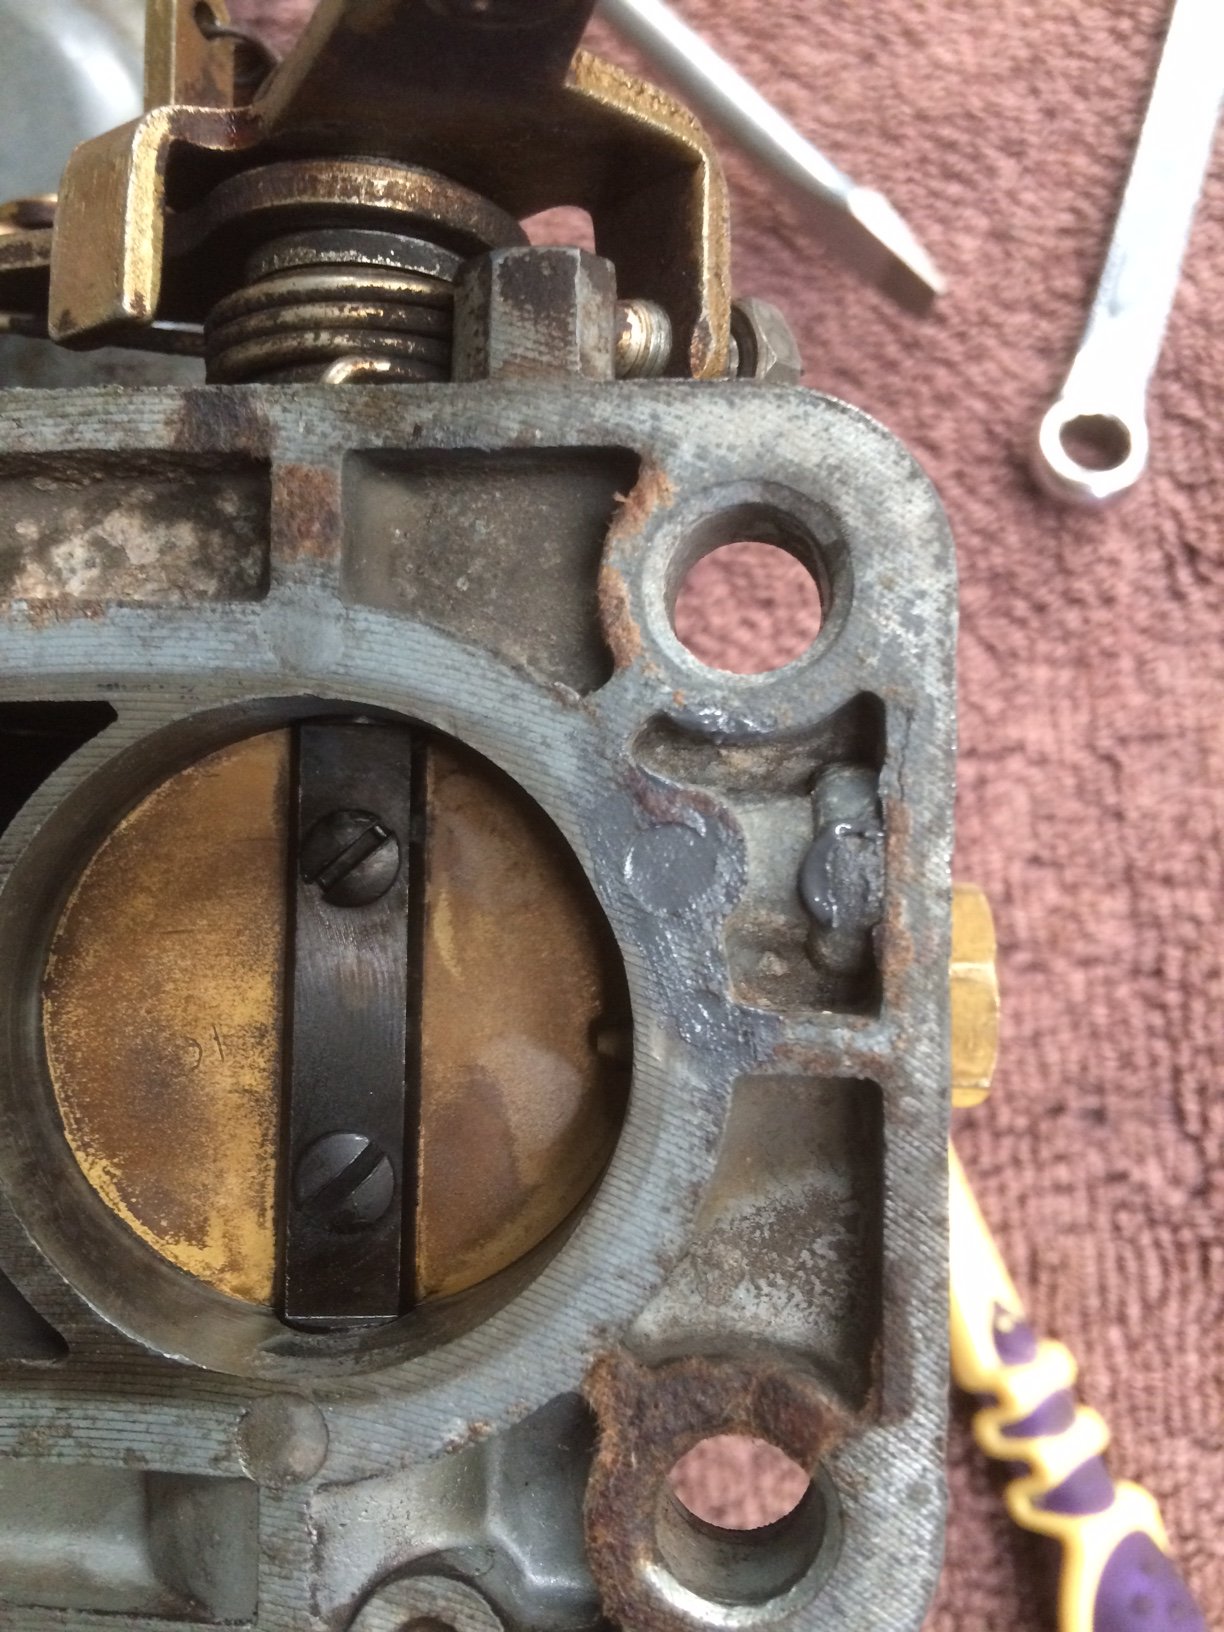
Reassembled carb. Went well until I went to put the base plate on. FUCK!!! 2 bolts short. Tore shed apart looking for them. No dice. Was googling what thread they were and found this NO wonder I couldn't find them, they were never there. So.... Try again on weekend
1 point
-
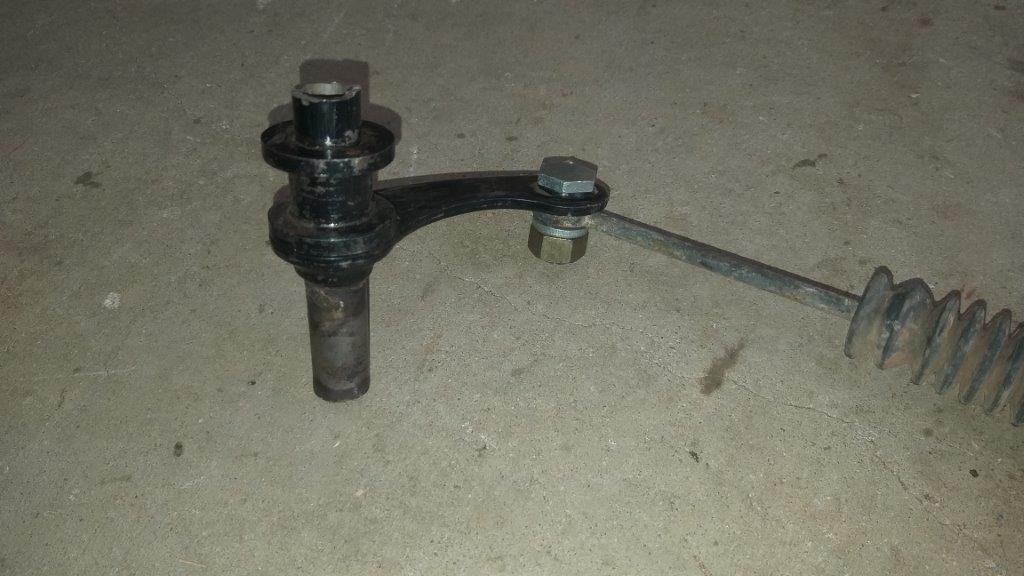
I rummaged around in my box of spare bolts and found a really neat bolt that will work perfectly. It's an old seat belt bolt and the smooth portion of the shaft is the ideal length. Chucked a flat washer into the mix and all I'll need to buy is a nyloc nut so I can leave it a bit slack to aid rotation. Bolted it all together and I'll take the win for now.
1 point
-
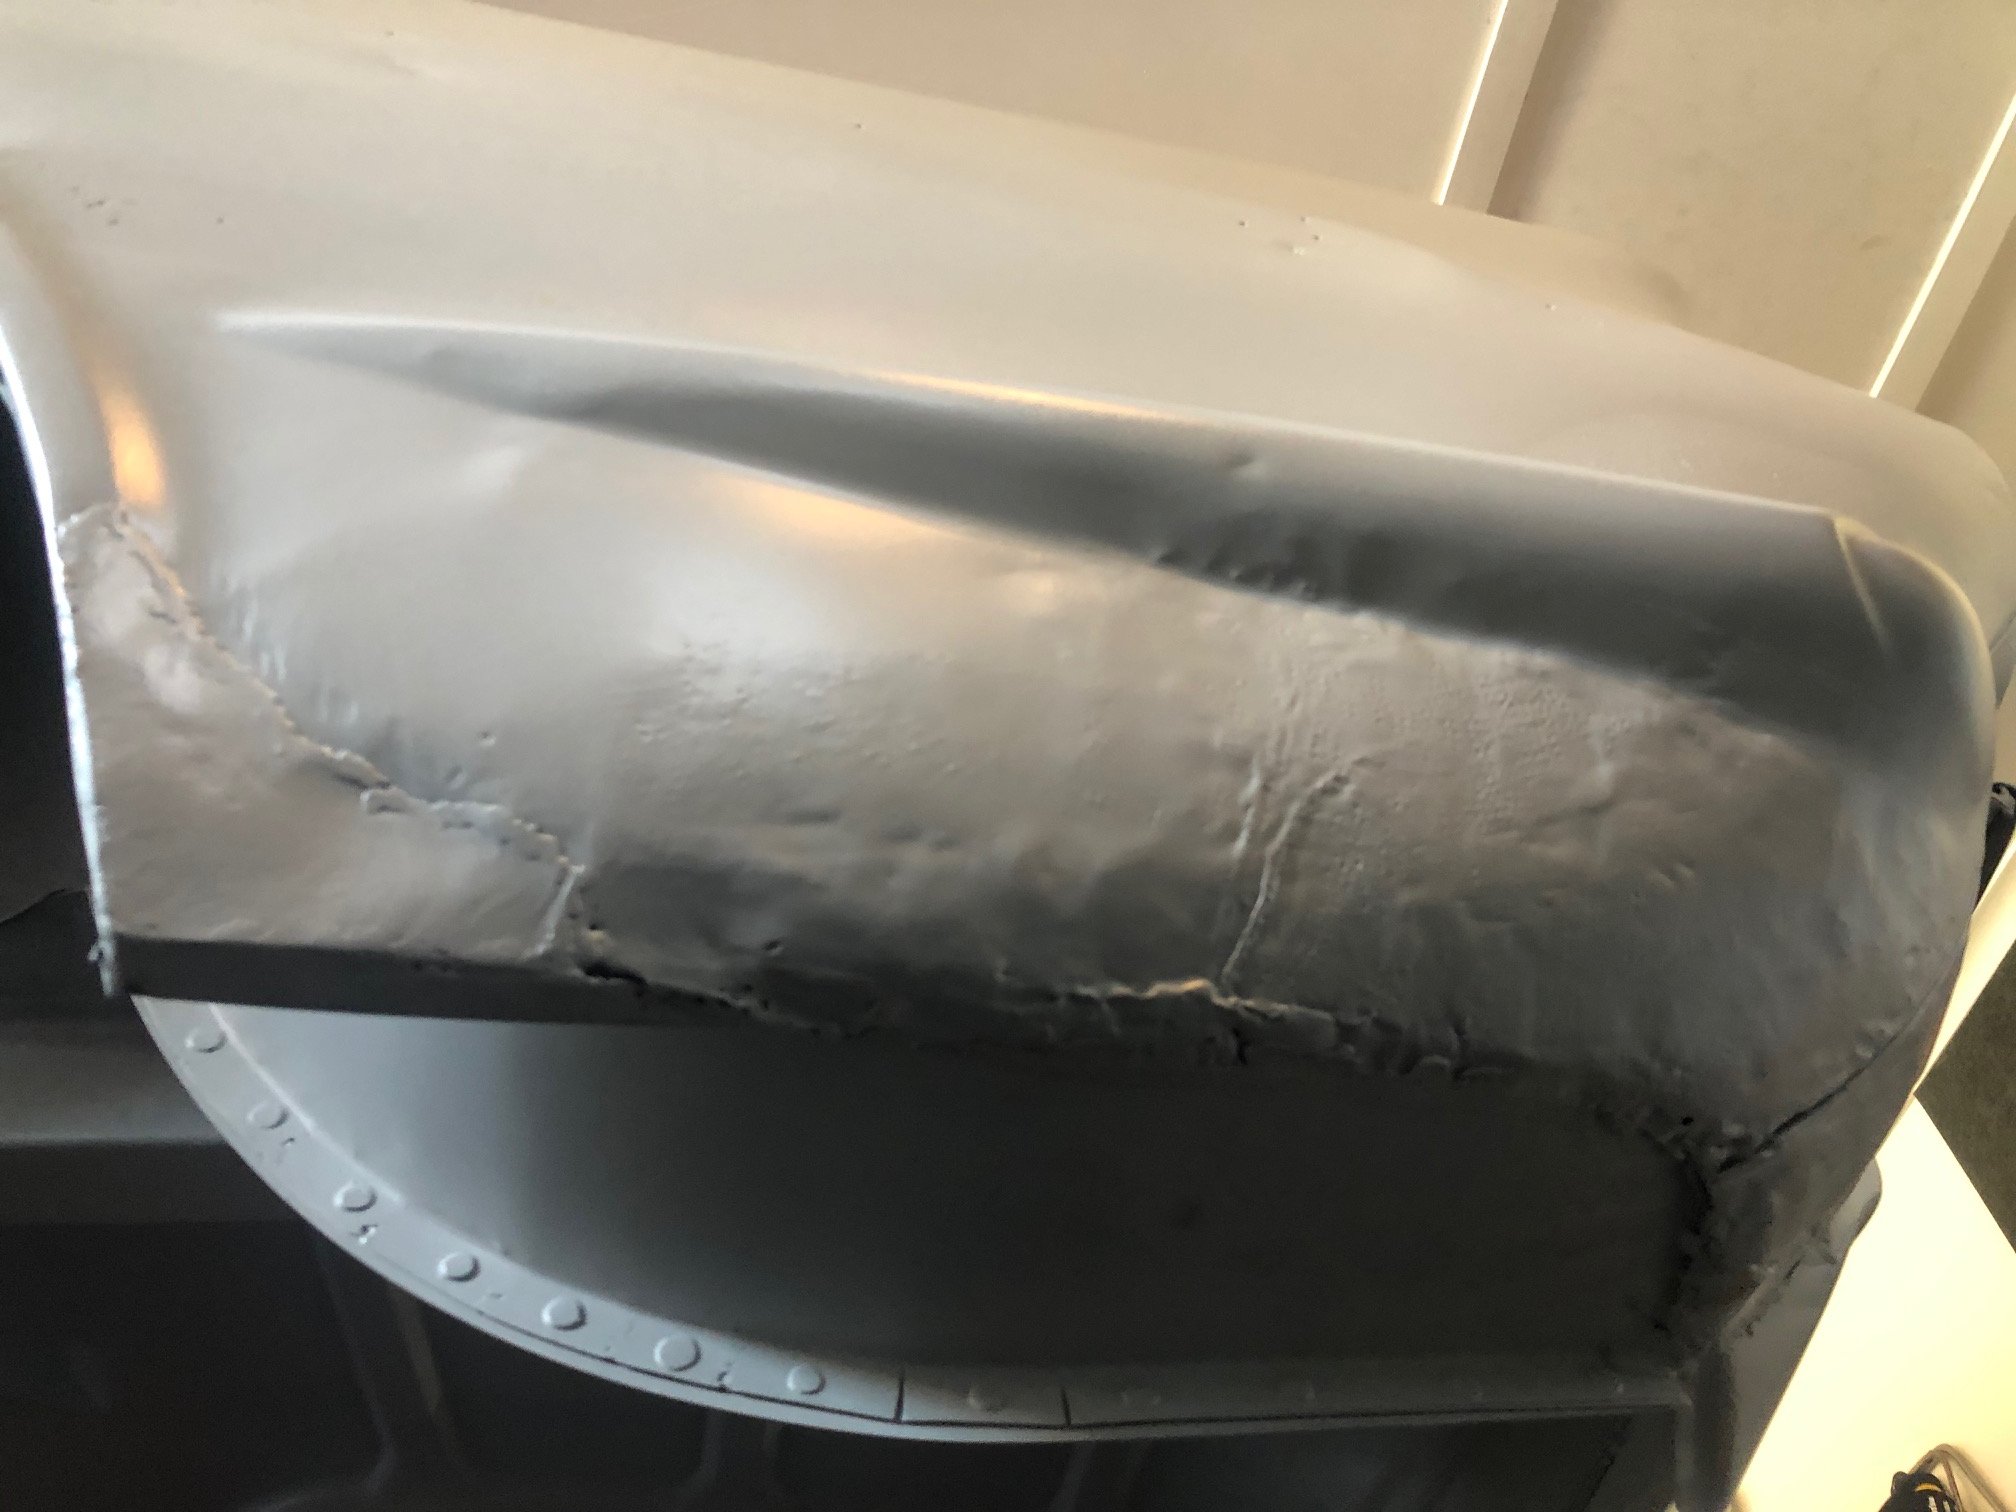
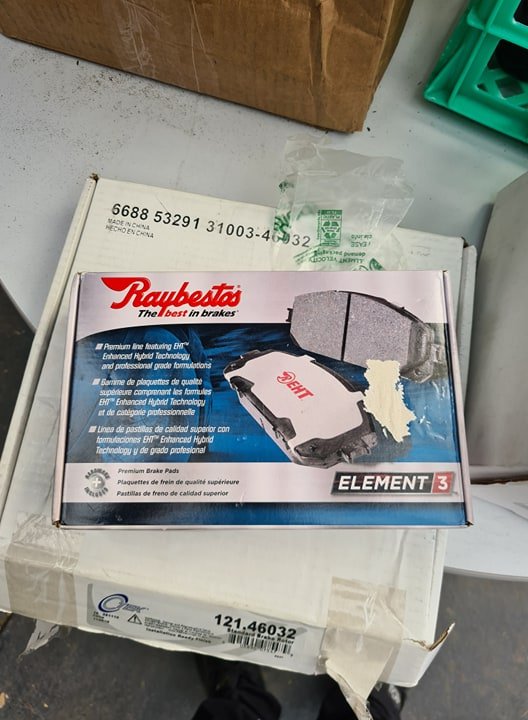
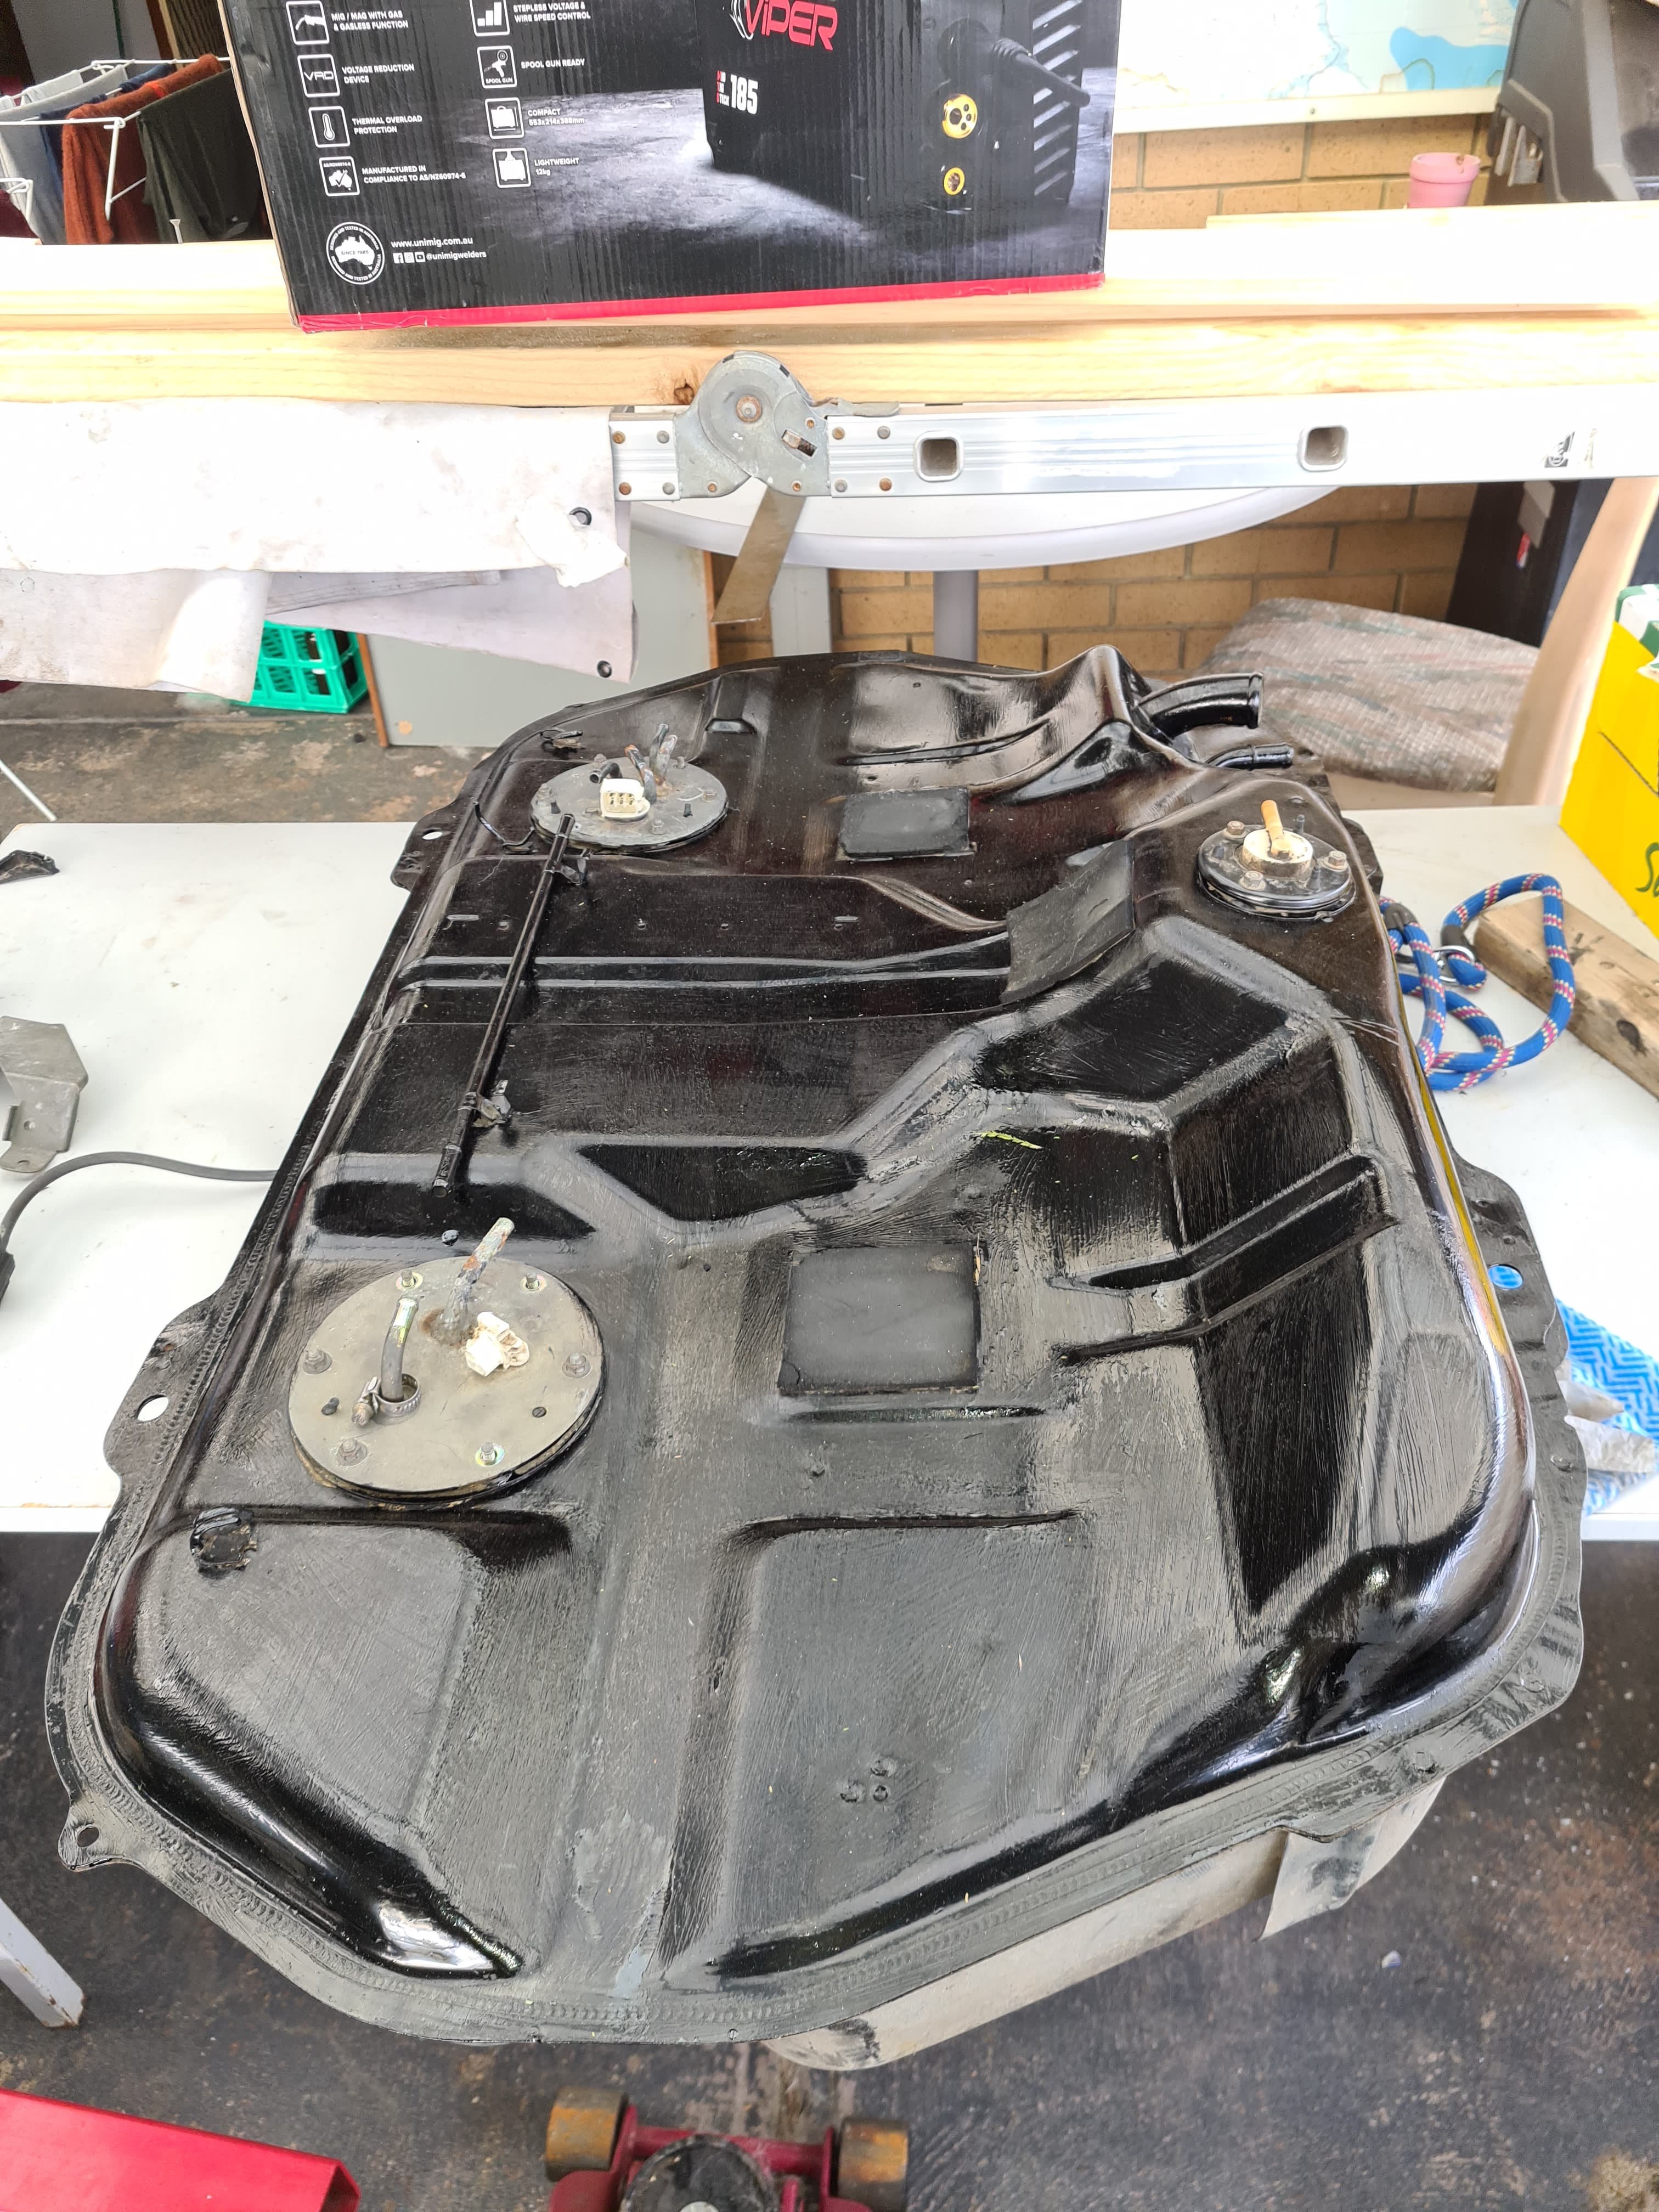
So weekend had some progress Painted the top of the fuel tank, can clearly tell I used a paint brush but itll do, considering getting some 5mm foam from bunnings to redo the old ones but not phased atm probably do the bottom tonight and then do some more of the car underside Mate who pulled it out at his place has misplaced some of the nuts holding the pump and sender units in so ordered some new nuts that I hope will fit The fuel pump has a Bosch 255LPH pump installed so should be plenty of fuel for what I want, and I can always reinstall the surge tank and the twin 044s if need be Had another go at the holes in the boot but think ill pay someone to do it as I am failing and just making it worse, so will leave doing the under seal on that section until that's fixed. Have someone who can come do that and the repairs at the front end but has to wait until after level 4 Started doing the under seal for underneath the diff area and fuel tank, will take a few coats to get it to the thickness I want Rock auto package 1/4 arrived today Front Brake rotors, 1 caliper and brake pads (think they are fronts) checked the bolt spacing on the hub and they should bolt up Not sure if I should have put the money towards a 5stud conversion or not but oh well, hoping I am starting to get the final bits to get this car ready for a RWC Went for the cheapest pads/calipers and rotors as they will only be on the car short term, will go back to the AP racing 4pots later on Also hopping the AP racing lines and banjo bolts fit otherwise ill need to get some for the calipers (already have a set of braided lines for factory calipers but would be good to not need to change them) Sprayed some paint stripper onto the rear bumper support bar and did some more wire wheeling, hoping to paint that this week/weekend as well so I can put it back onto the bumper.
1 point
-
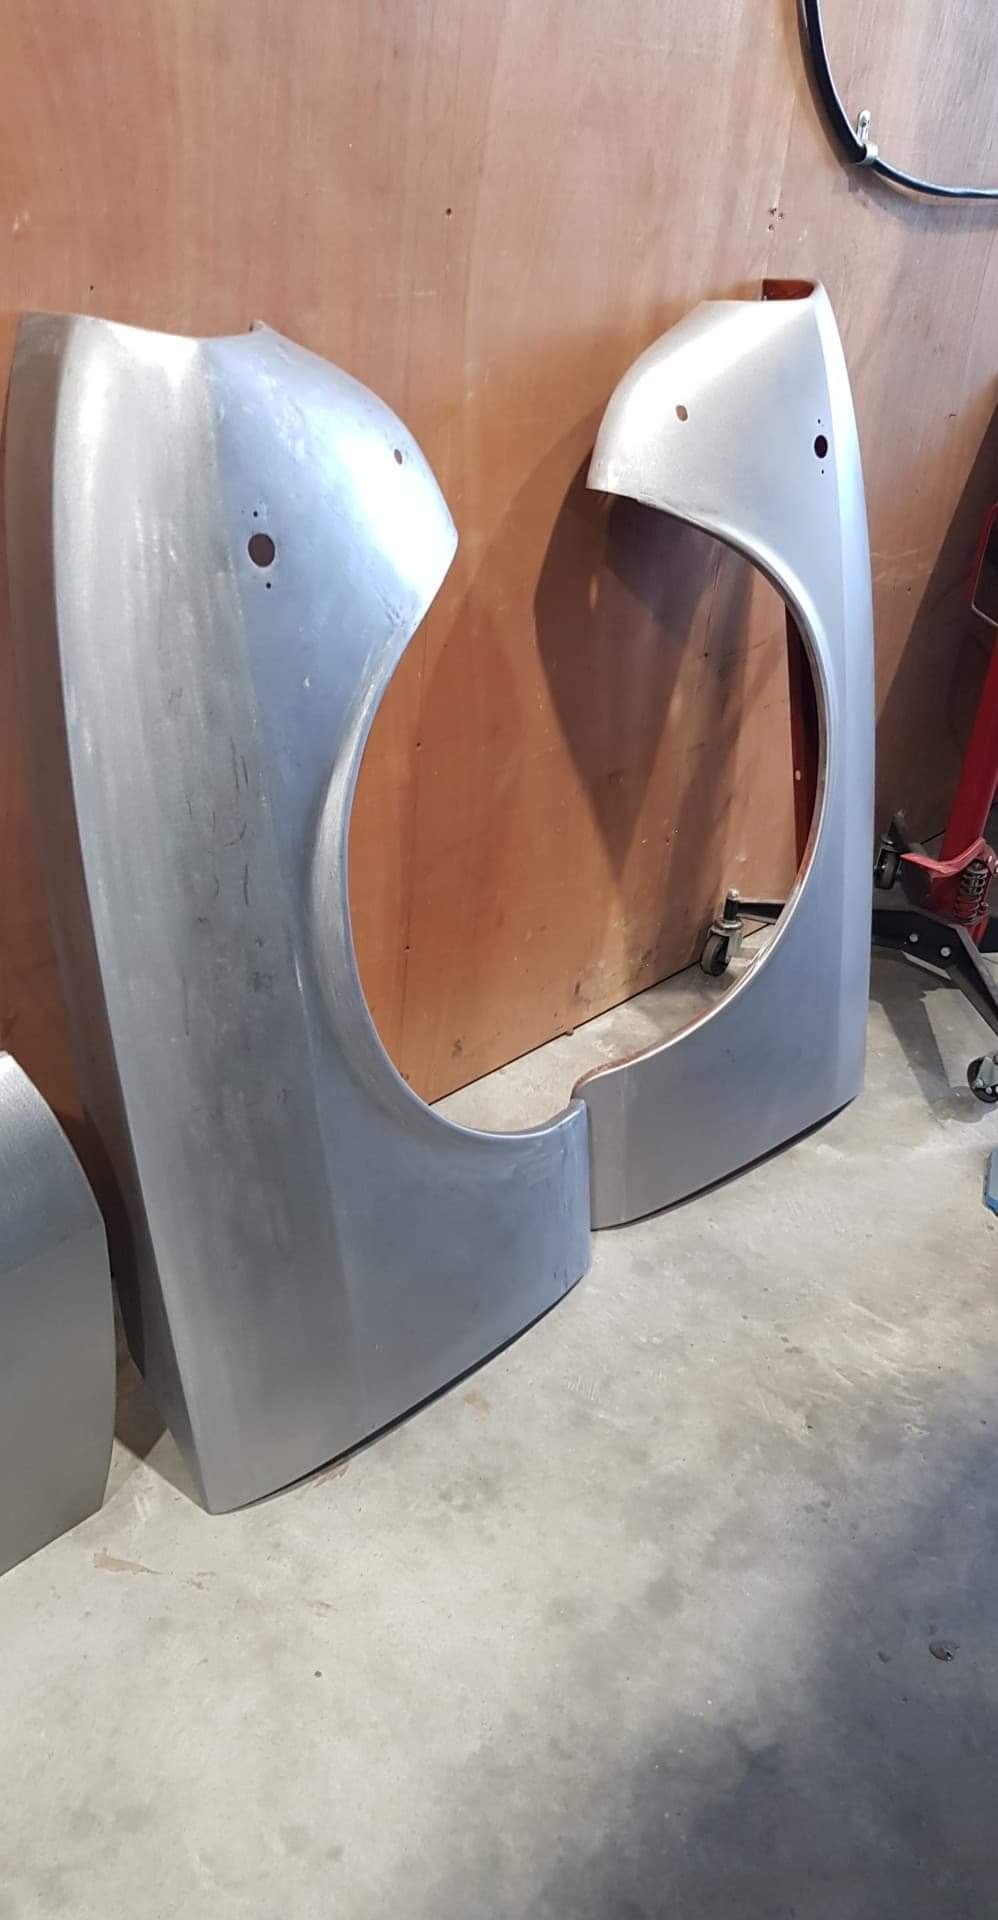
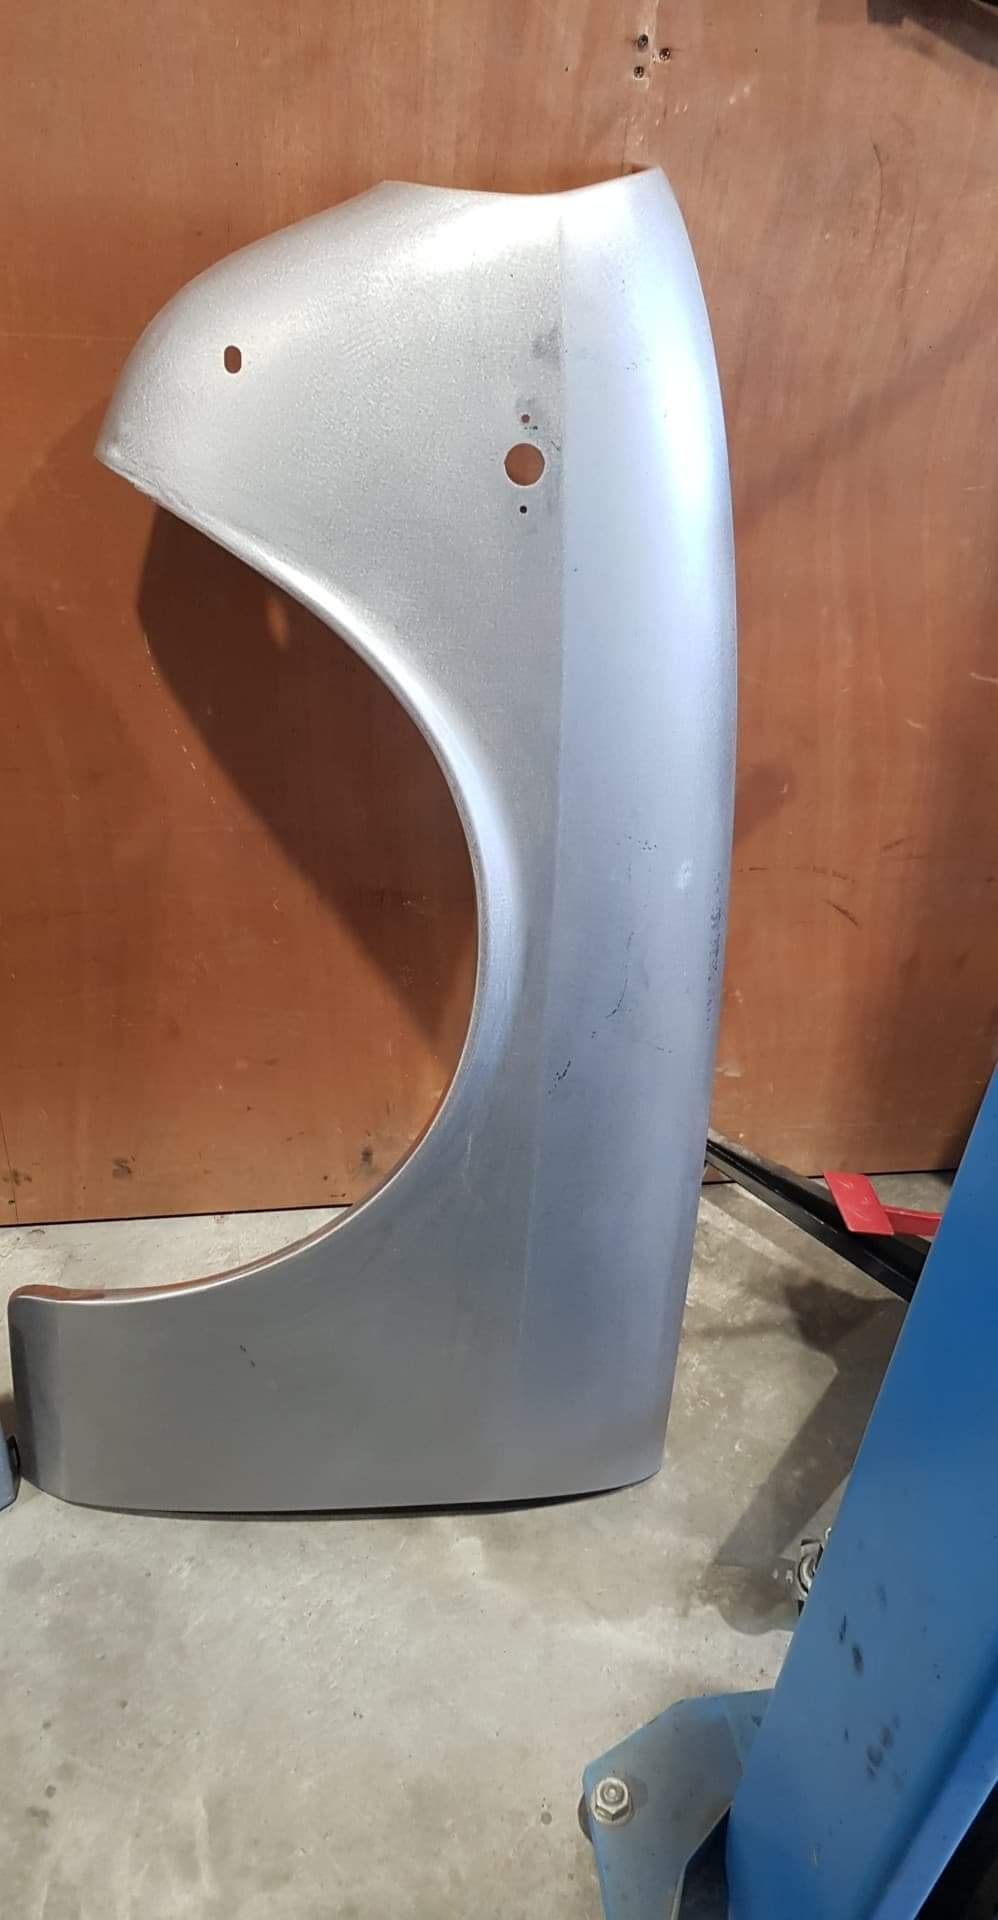
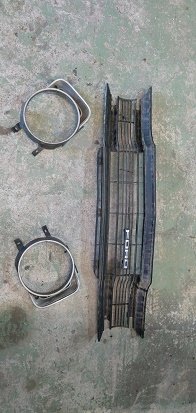
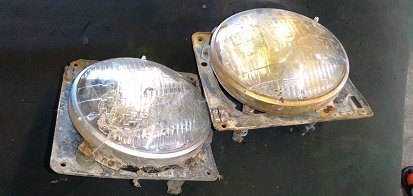
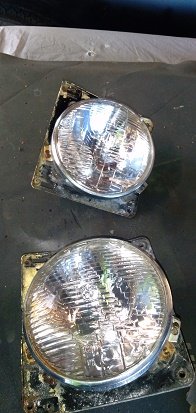
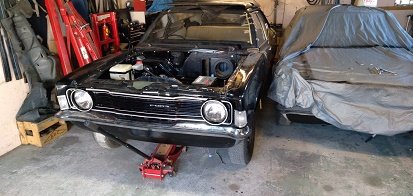
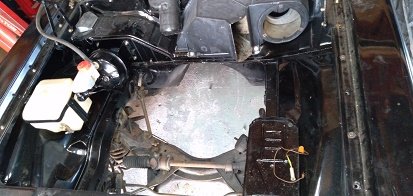
got a few things done .....painted the guards and bolted them on properly , found a horn (that worked ) and bolted that on..got the grill and lights from the rusty wagon and cleaned them up ..painted the grill and light mounts..straightened one of the bumper brackets and bolted that on.....starting to look like a car......oh and some indicators thought i would pull the front subframe out and go over it .....glad i did. it was only held in with 3 bolts ..NO NUTS and 2 out of the 4 subframe to chassis bushes ...also found the steering rack to be held on with 2 bolts (same side) and 1 cut brake hose..and no sway bar mounts......just the sway bar so found 2 new bushes and 2 pretty good ones...bolted the rack on ...put some better hoses on ..found all the nuts and bolts to bolt the subframe back in and sway bar....to be honest all feels nice and tight. even bolted the brake lines on. rear end next
1 point
-
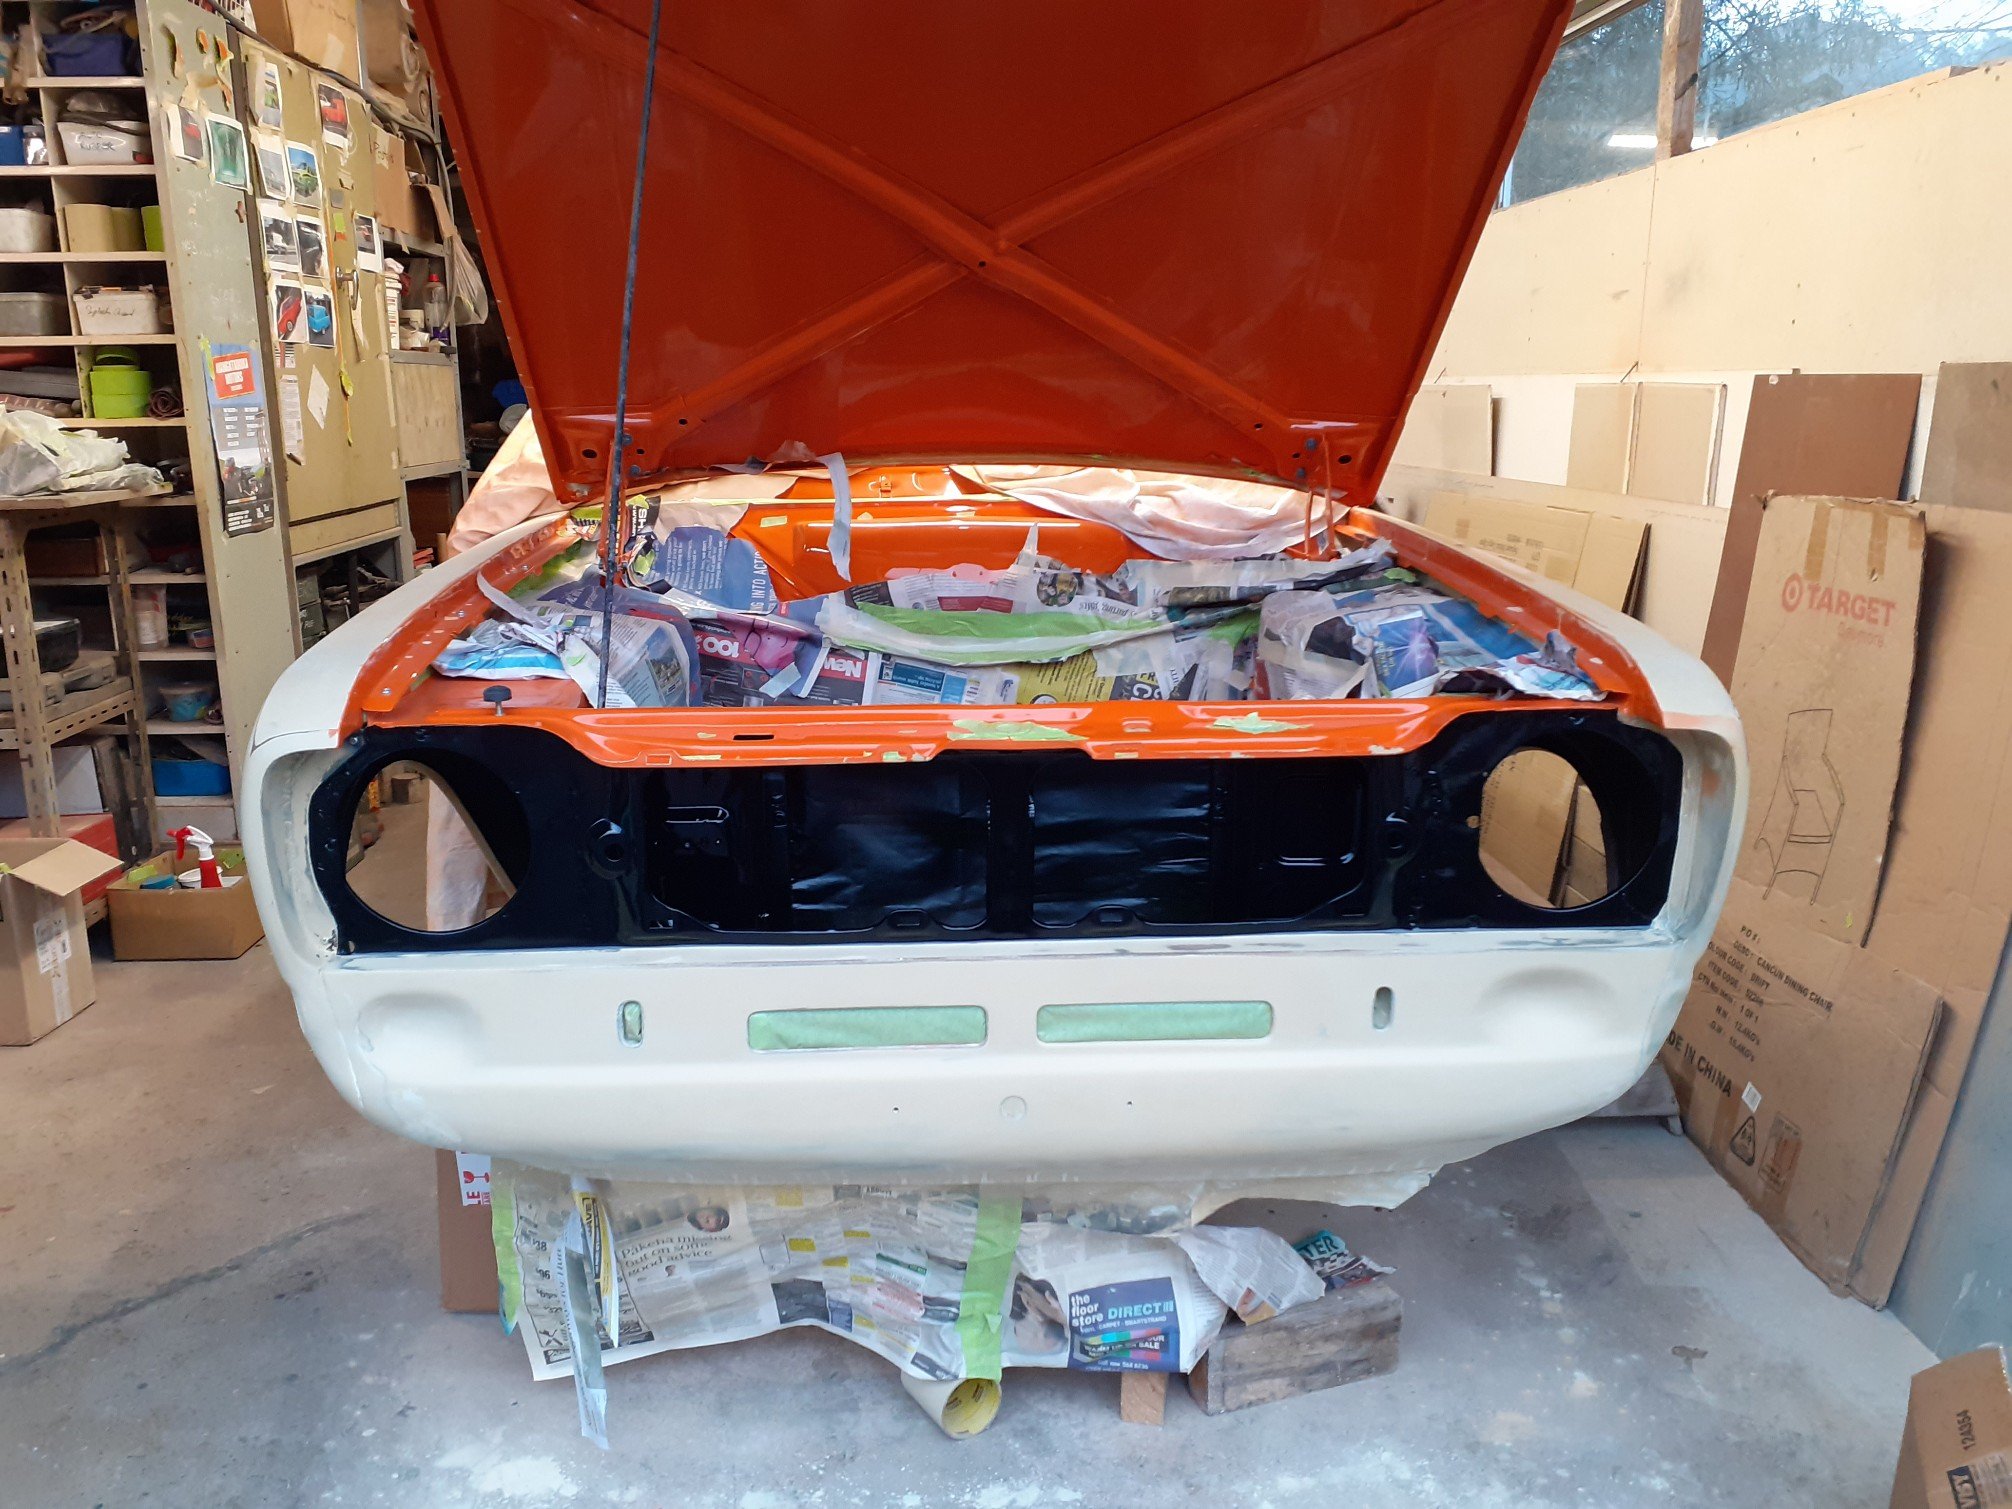
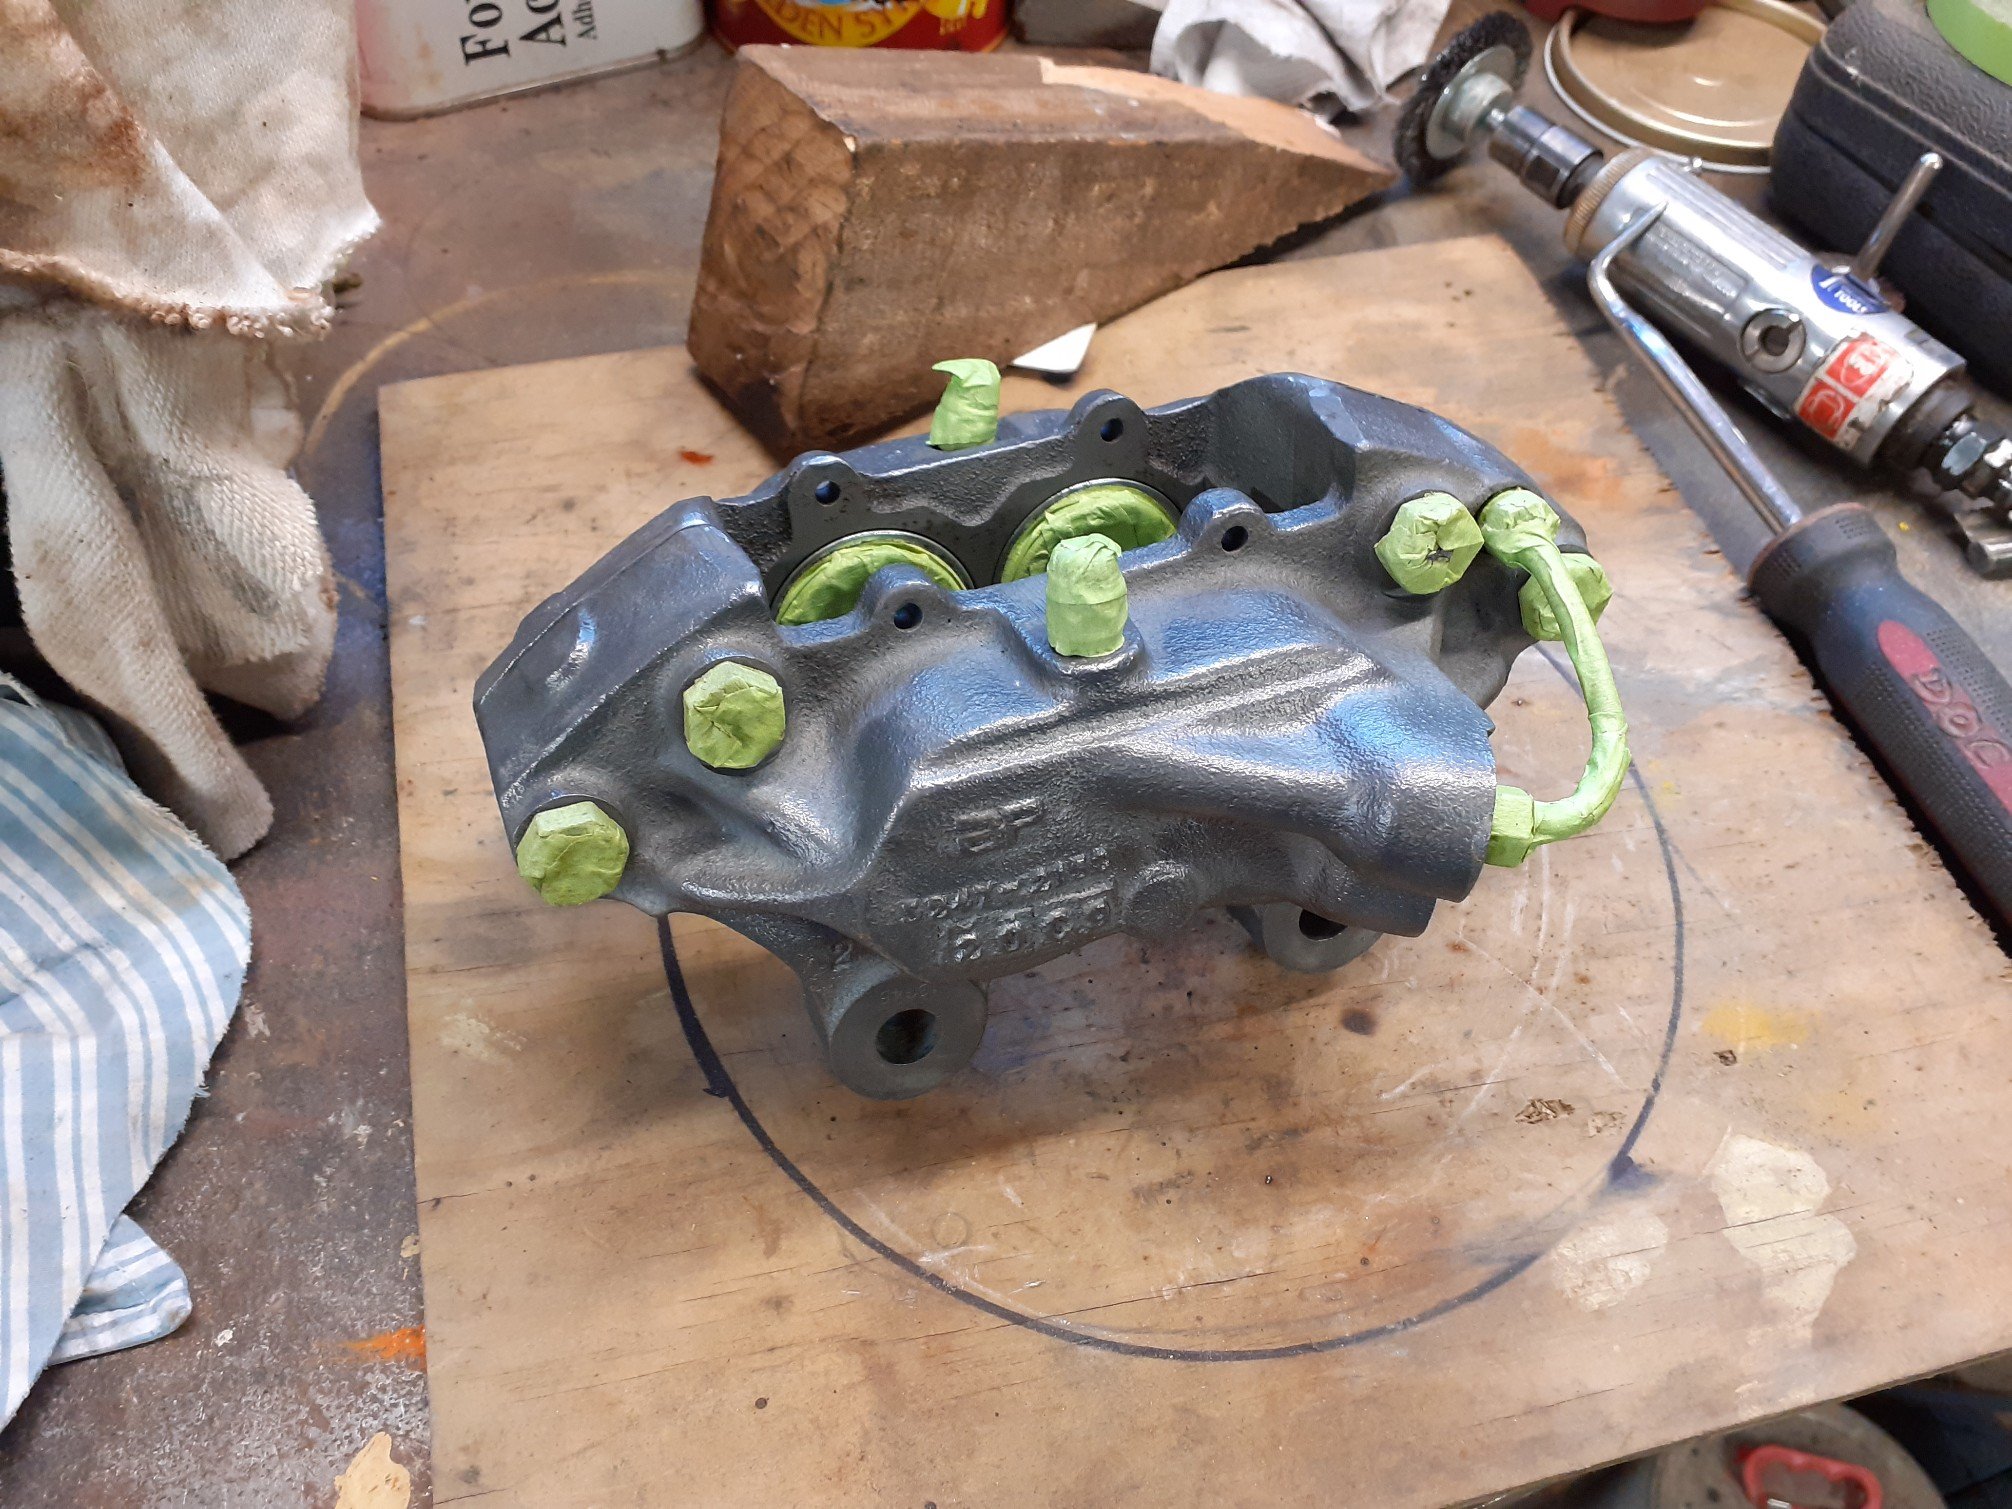
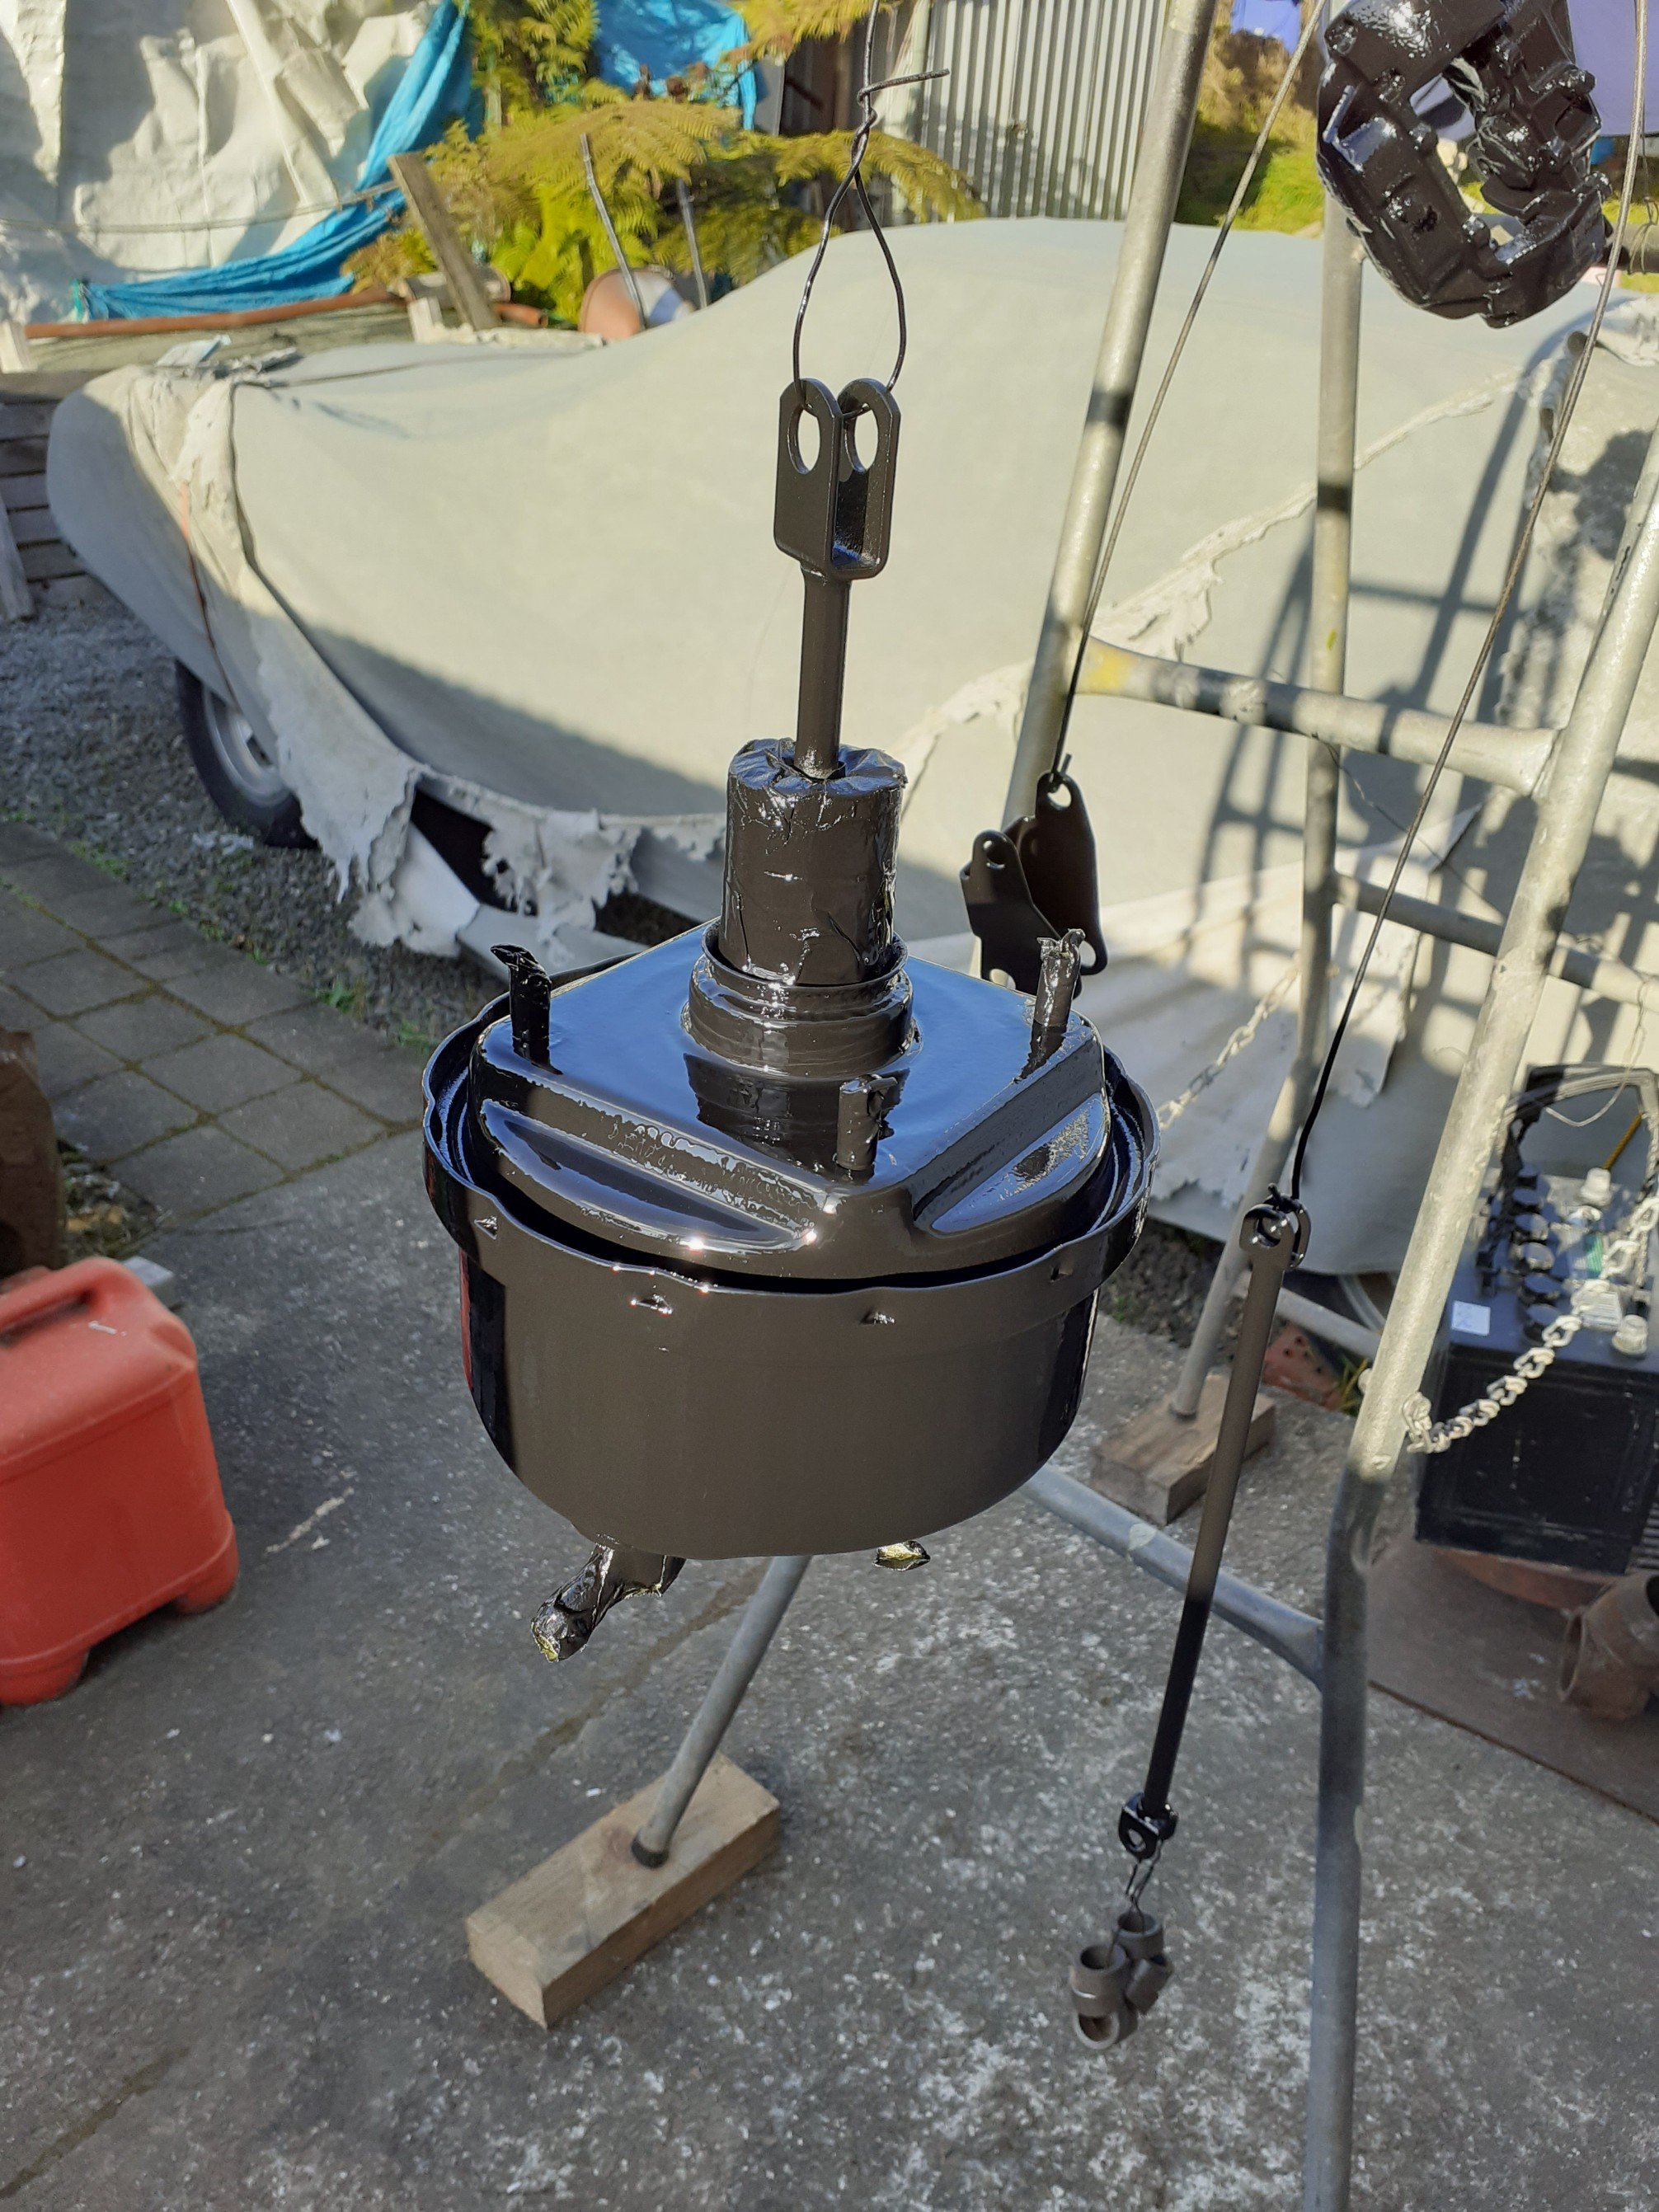
More sanding and prep work. Picked up some rebuilt princess 4pot calipers and fiesta side mirrors. I was originally going to run chrome bullet mirrors but these provide a greater surface area and will match all the black trim. Painted behind the grill black and painted the calipers and brake parts. Is there any performance advantage to ditching the brake booster?
1 point
-
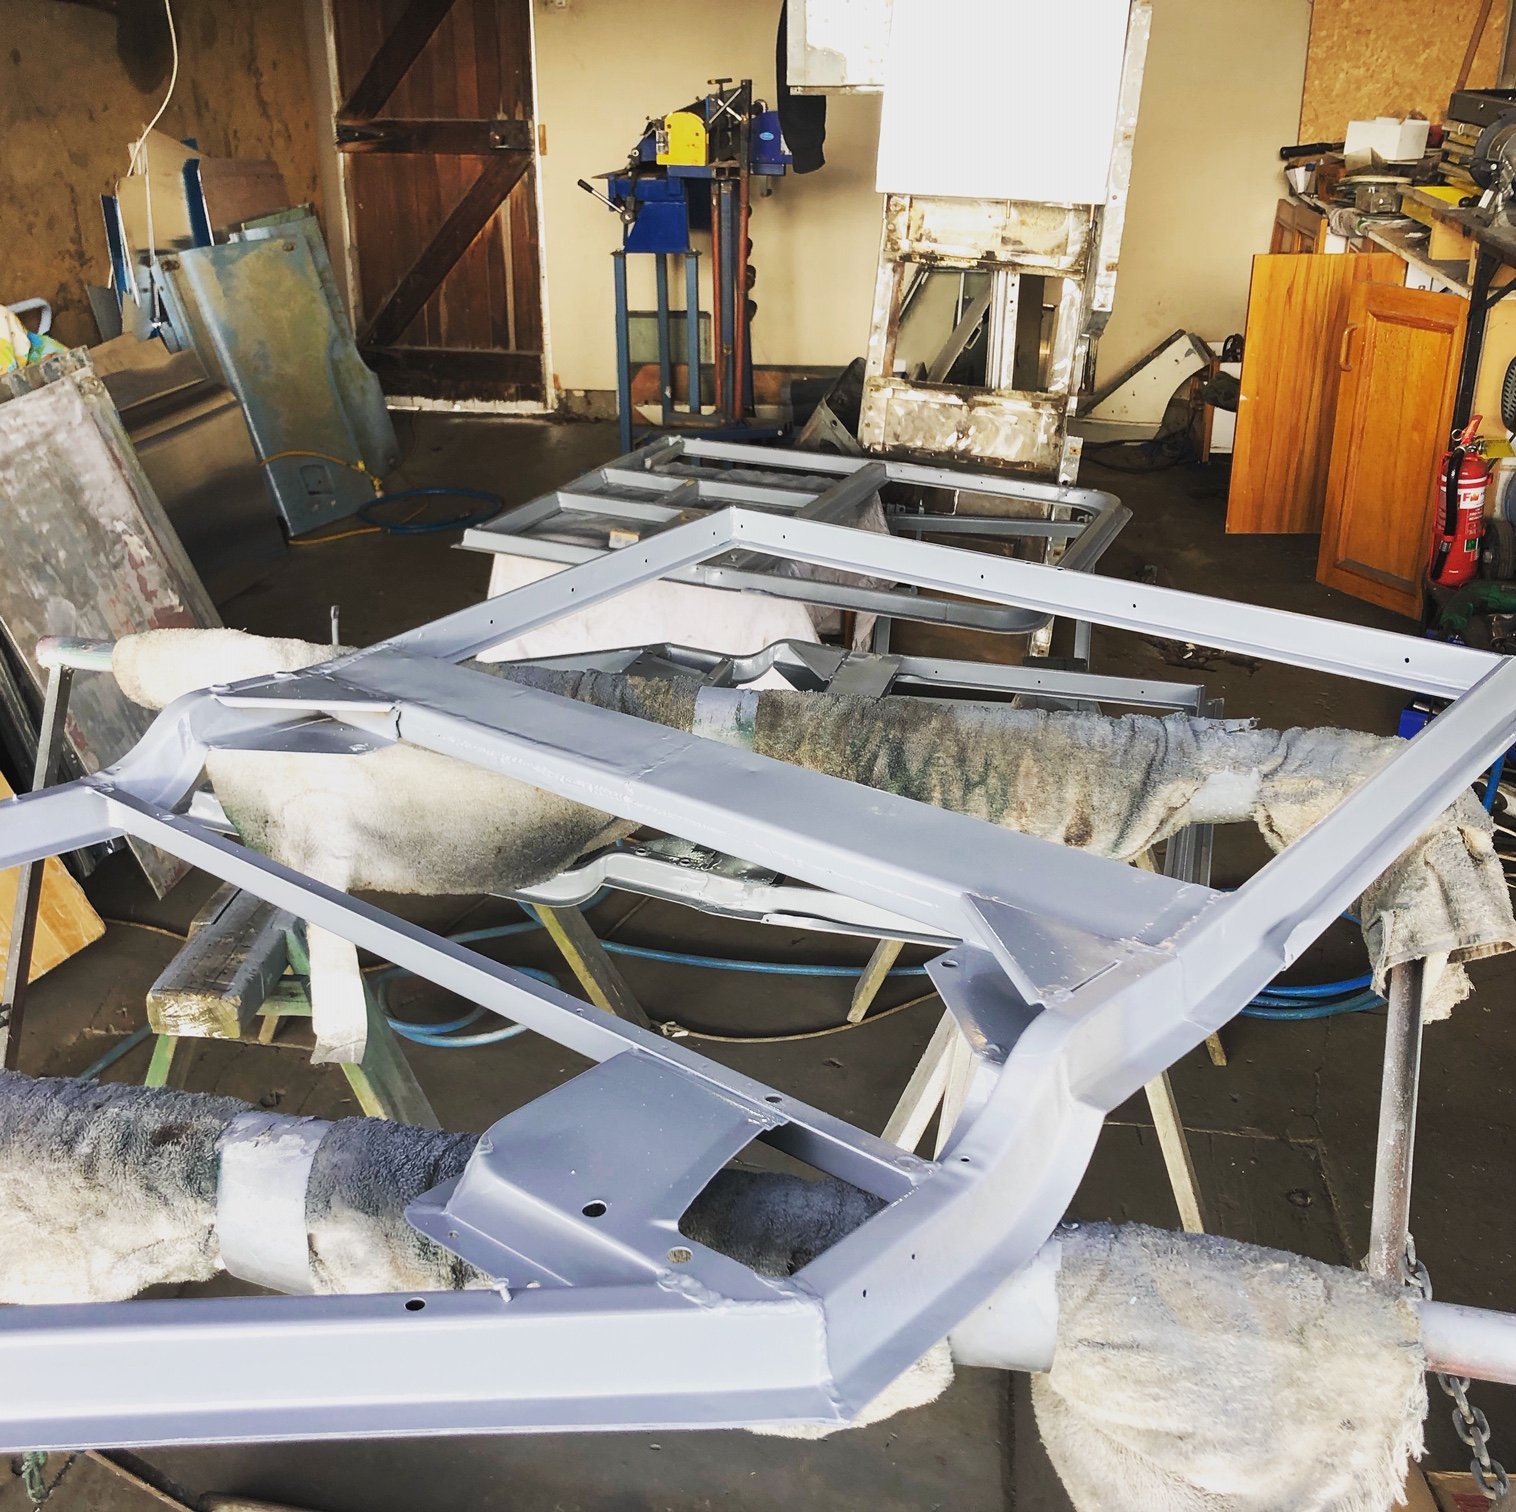
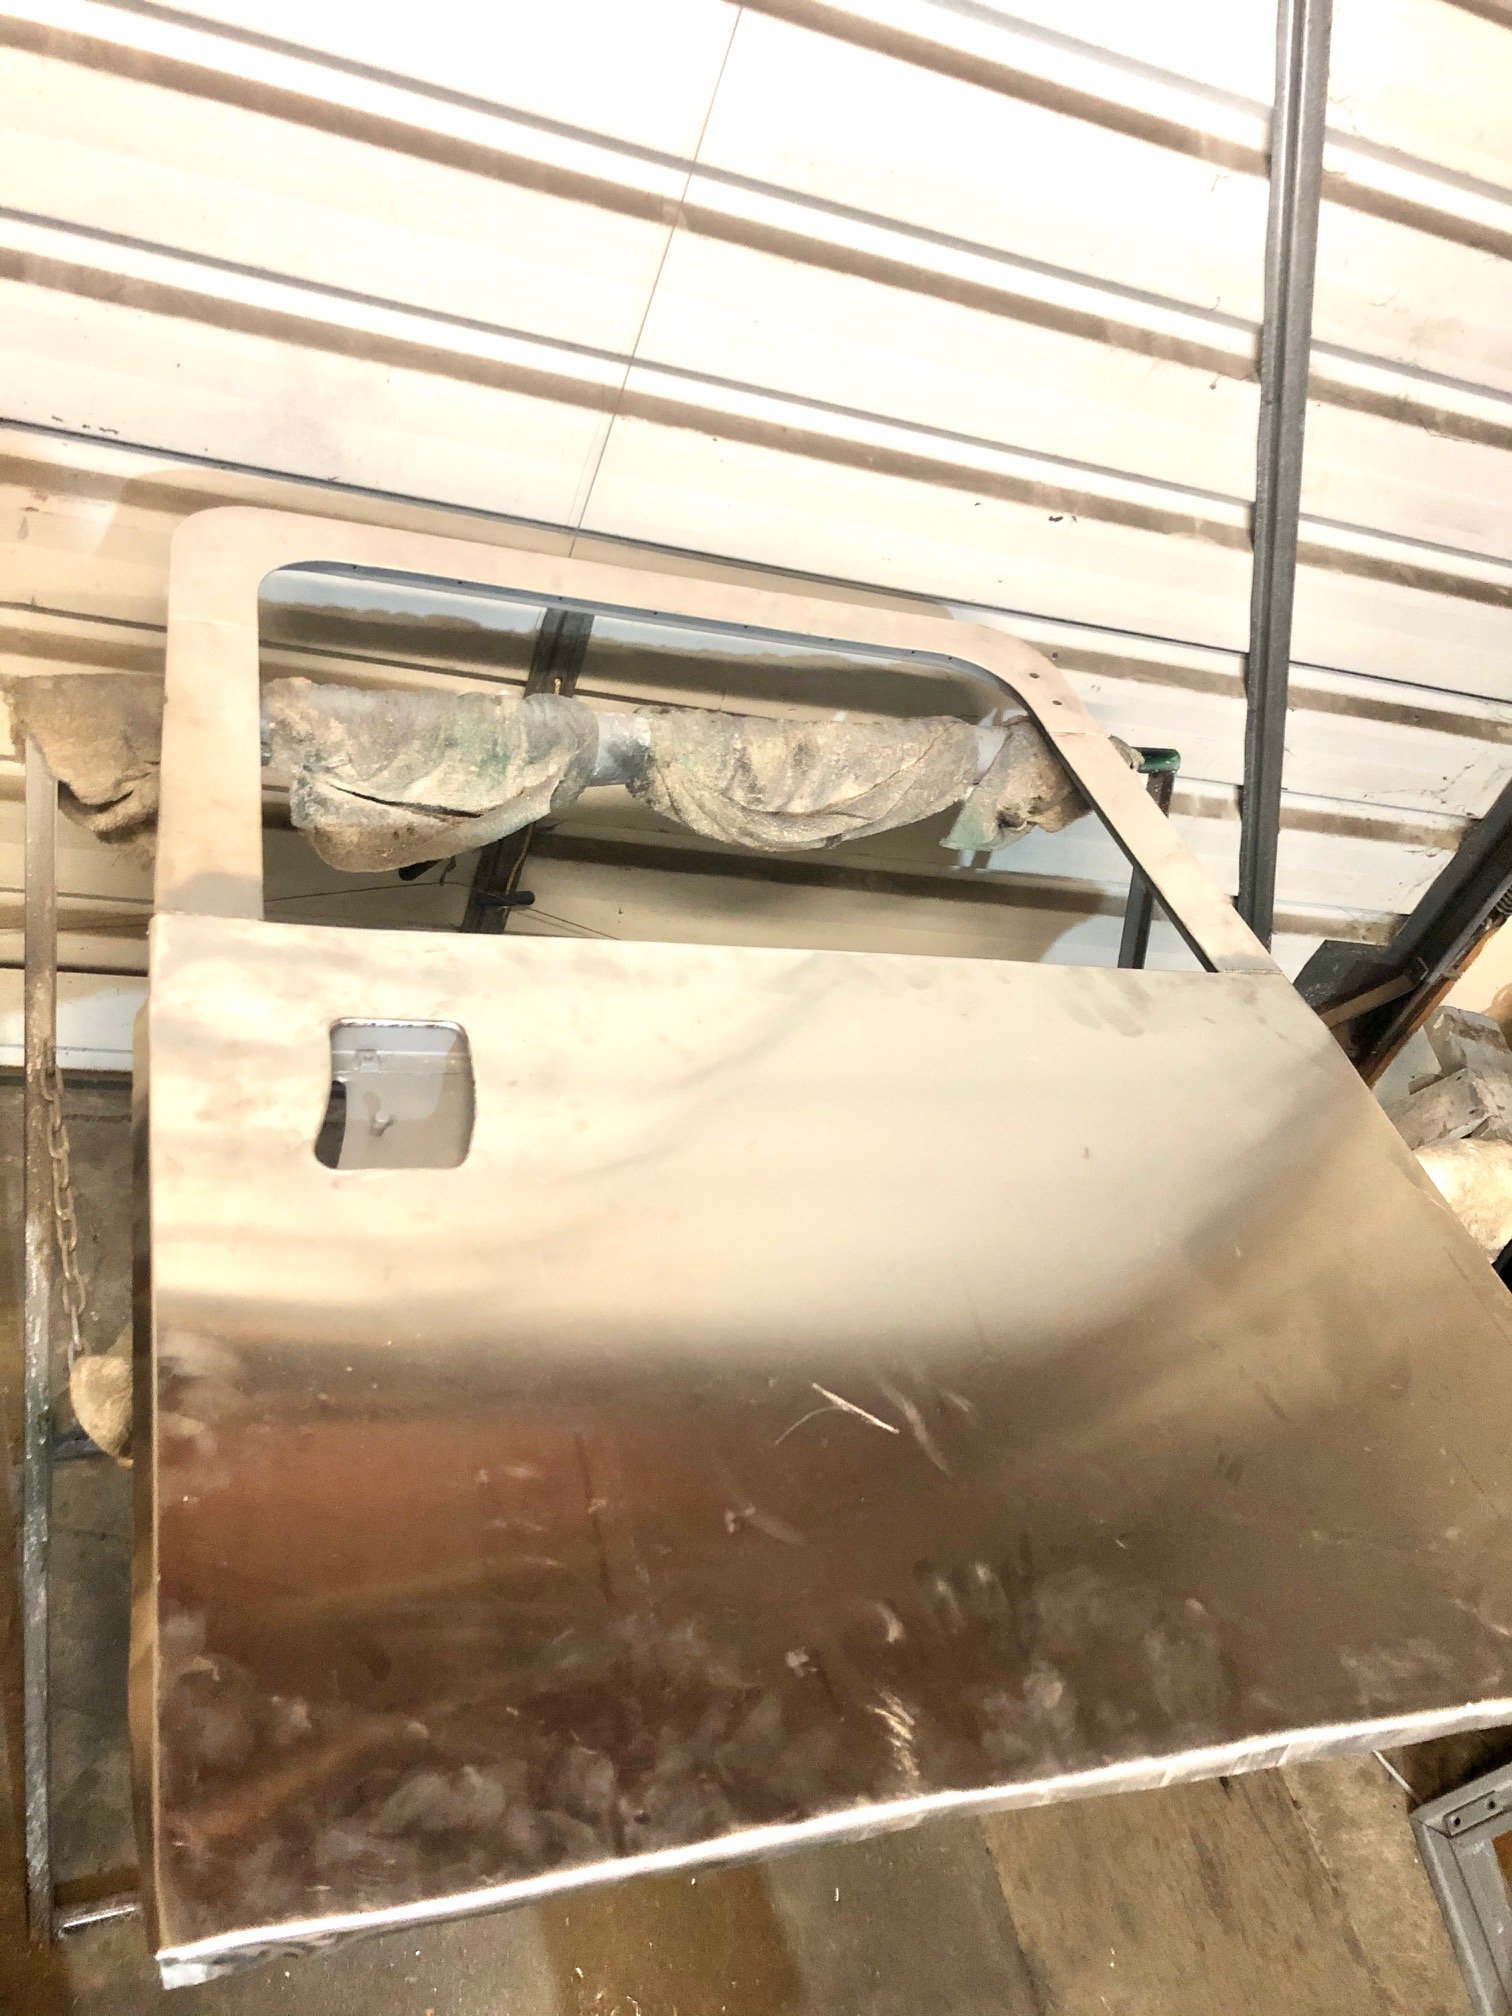
Quick job to get these frames sprayed with epoxy. Using a kit from United paints, suits me well and good $ point. Going to drop into Bunnings today to get some seam sealer but doing any final tweaks to get the skins laying right. I've kept all of the old skins I've pulled off as they make handy patterns for making replacement skins - still making sets for people as I get enquiries.
1 point
-
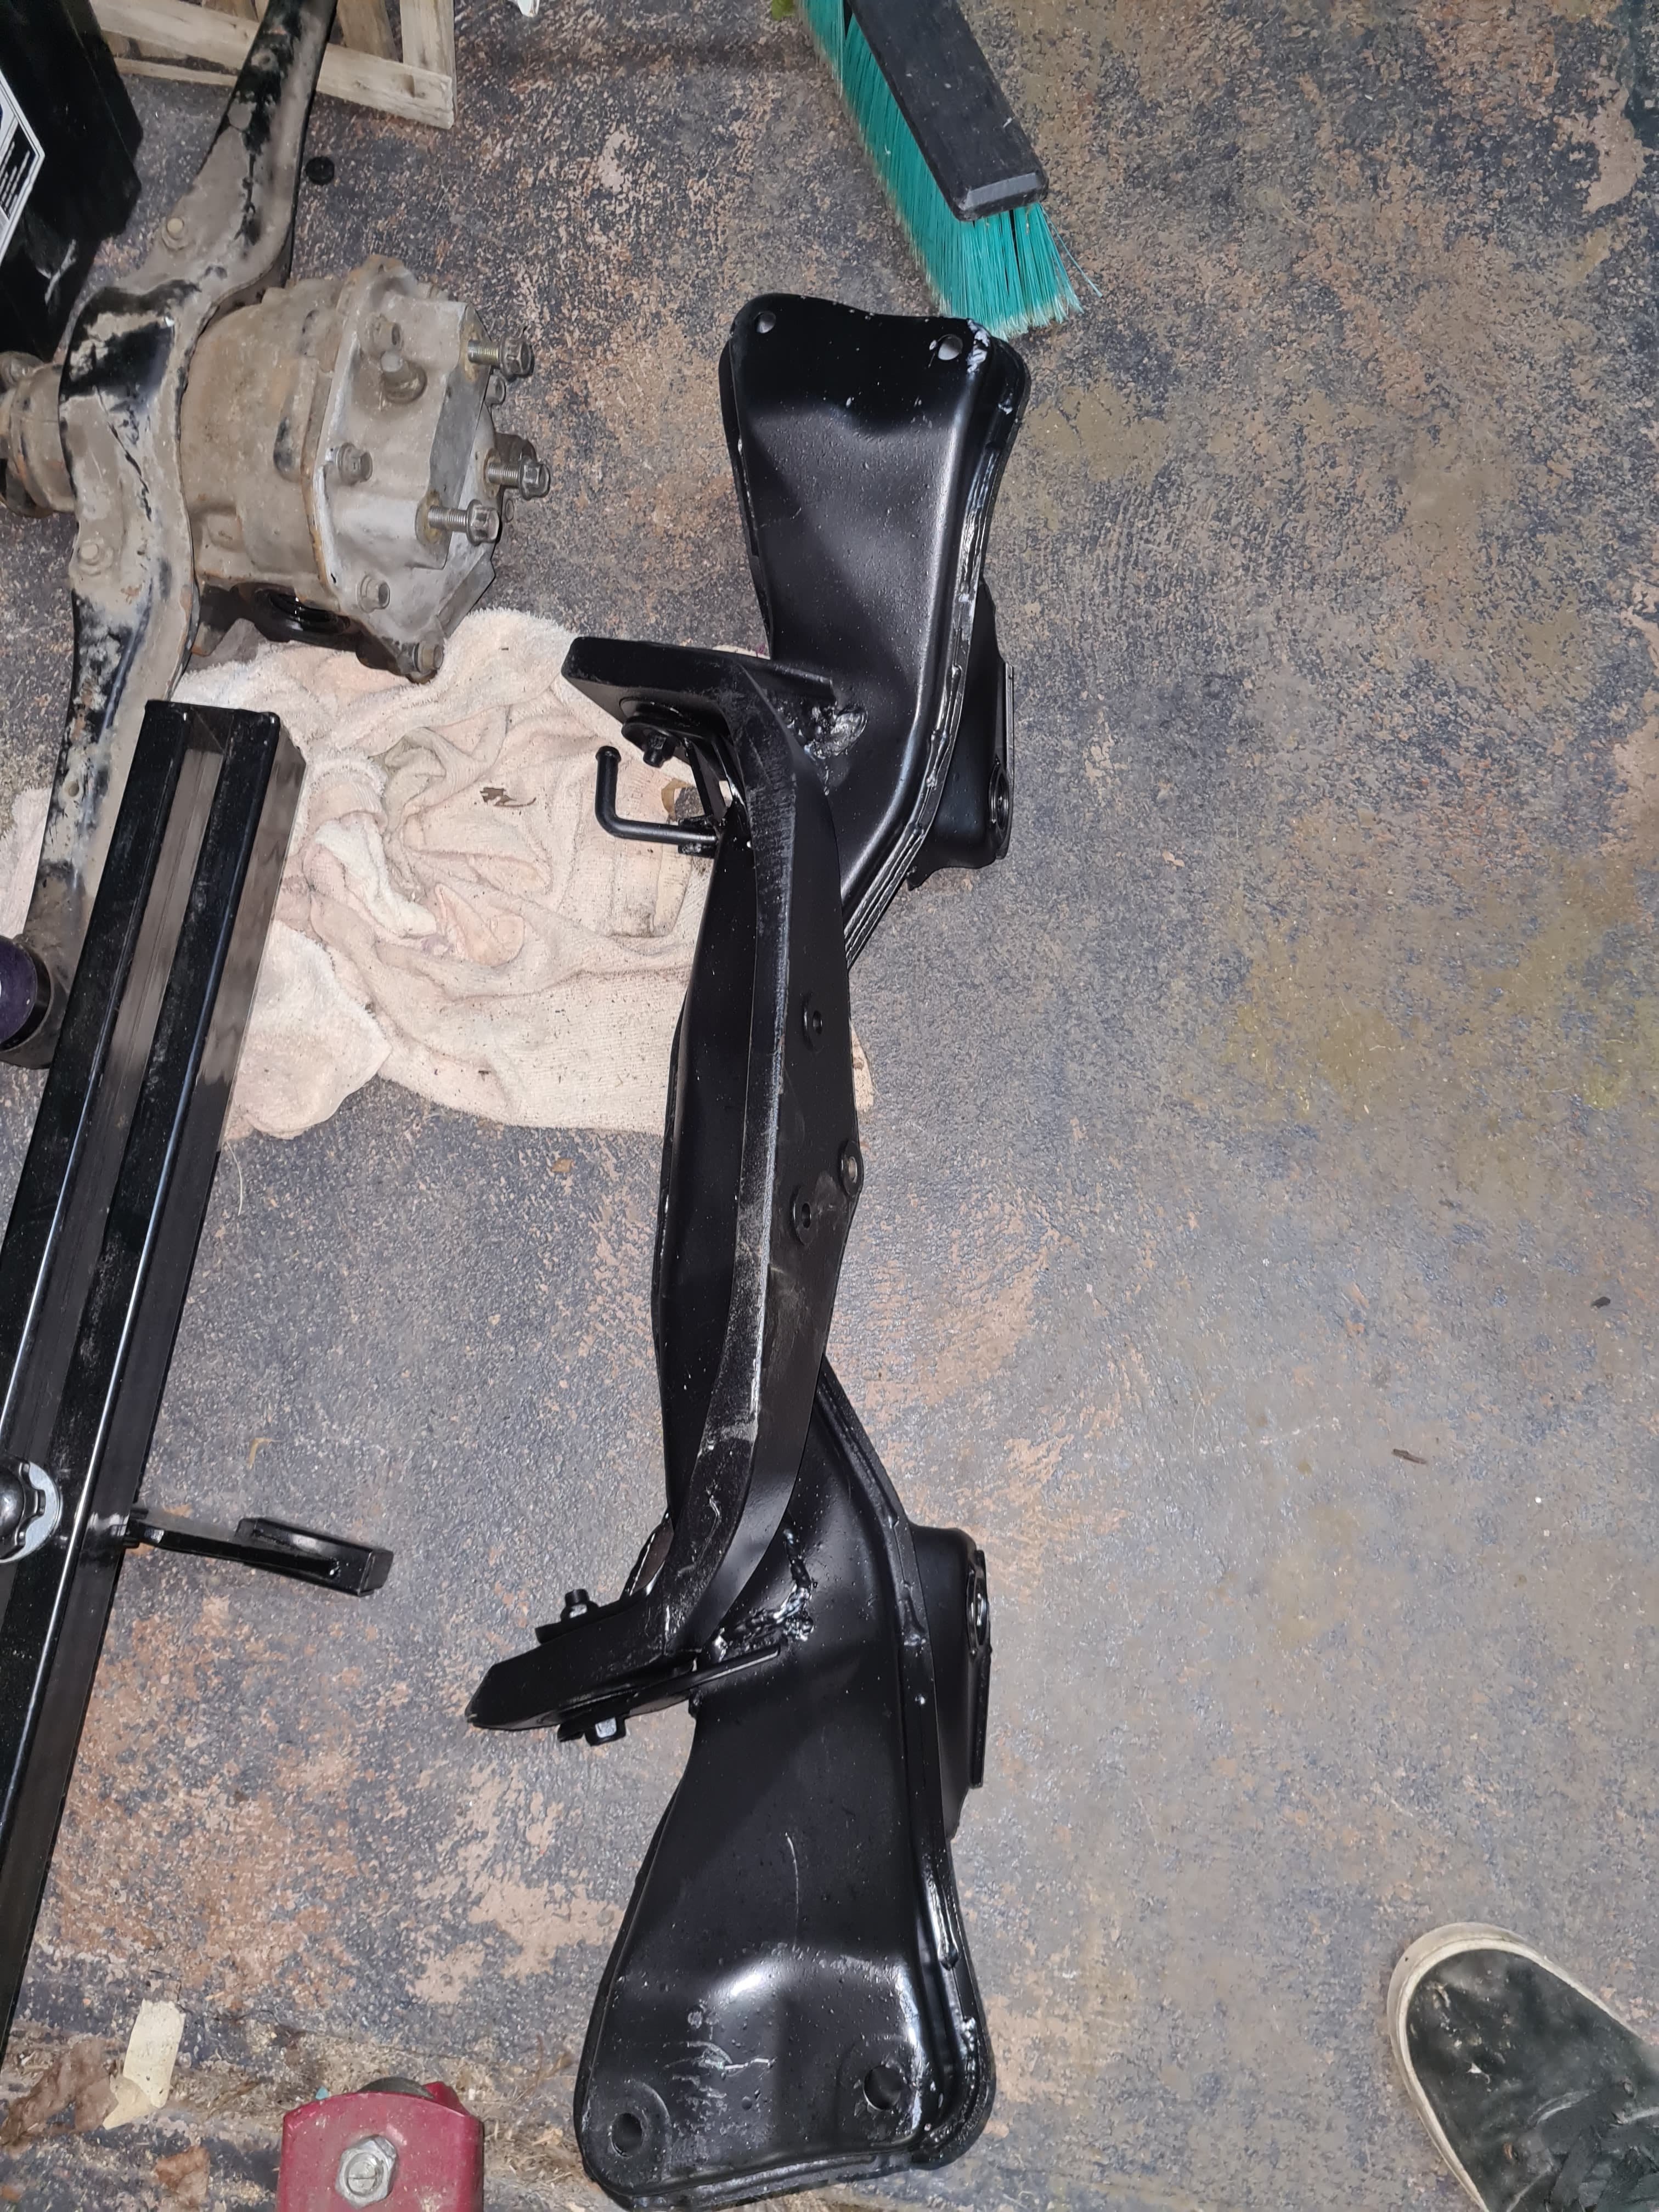
Need to finish off the under seal and paint the diff etc before I throw it back in
1 point
-
And some snaps of back: Bit of negative camber:1 point
-
That's OK, I can just make my own and put your name on it...1 point
-
1 point
-
In other unplanned news im listing this up for sale this week! Wasnt the plan but something else has popped up which means this needs to go to make way for something news. So if you know anyone then let them know.
1 point
-
" Shimano? " you say... Well its not really that exciting. Please don't expect a Heath Robinson like contraption using XTR derailleurs, in the lovely pewter colour that the 965 series came in. Or better yet - some mint deore XT thumbshifters used as tensioners. Oh yes- the bike geek is strong in this one! But I'm jumping ahead again. First off - I needed a way to take drive from the crank while at the same time beef up a problem area. Now have a look at this next photo... See that big splined shaft sticking out. That was the main drive to the original clutch setup that resided in the removed rear casing. It had to go. So I chopped it off. I did have a photo that Hannah took of me chopping it off with a cutting disc (there was no way our bandsaw would have touched it) but I cant find the photo. However- here is a photo of that bit removed and now residing on our shelf of random bits.. Now luckily there is actually a flange on the crank. This was one item I had been trying to check before committing to buy an engine ages ago. I didn't know how think it was though, nor had I confirmed what the size of the six bolts were although I was fairly sure they were 8mm (but really hoping for 10mm). I was not going to be happy taking power off the crank, albeit its only 100 bhp propelling a little Imp and so I had a little think about it. I needed three things here. 1: a decent flange with 10mm bolts for the flywheel 2: a surface to run a main crank seal against because my engine design was going to have a sealed up oil bath for the oil pump drive 3: a larger flange to put a sprocket on. The design I came up with was an adaptor hub to bolt onto the existing flange using the six m8 bolts. But instead of just relying on the bolts to hold it I would machine it to a shrink fit and really make sure it wasn't going to move. Probably a bit overkill but why not. So I machined up this out of a rather large lump of steel (so filling my steel bin with a lot of swarf) It has two axial surfaces to shrink onto the crank- the flange outer and the stub I left over from the original splined sticky outy bit and clamped in place while it cools with nice new stront cap screws. Here I am tapping the threads for the flywheel hub.. Here's a small benchtop oven making things grow in size with heat and in the back ground is a crank just having recieved its new hub... In place and cooling down. Would be a bugger to remove now.. You can see the larger flange to which a sprocket will attach to. Now I needed to sort out a nice flat, removable surface to mount a potential idler sprocket and tensioners on plus an square surface to mount the oil pump driveshaft support on. I cut a piece of 6mm alloy plate in the faithful ( and noisy) tablesaw. I had several useful threaded bolt holes left over from a variety of the original transmission bearing holders, shafts gubbins and shifter wotsits. I machined up a little pointy bit of steel with an offset slot. Then I was able to screw it into a hole leaving the pointy end just proud. With my plate lined up where I needed it I gave the plate a smack with a hammer just over the pointy thing below, thus leaving an indent I could drill through. Repeat for the others and I had perfectly lined up holes... Cool. I could now support the oil pump shaft. I machined the end of it and tapped a new hole. Then machined up a bearing holder like so... Next little thing was to join the cranks rotating motion to the oil pump and make that rotate.... Hmmmm. I had to really think about this one. There was not a lot of room for industrial chains and sprockets. I thought about using a toothed belt that can run in oil like some of the later cars. But apart from the prices (!) they are not available in many sizes and are apparently prone to throwing their toys from the cot. I couldn't run a dry belt due to the bottom half of this area being part of my new allocated sump capacity, not to mention sealing it would be very tricky. So really- chains and sprockets were the best choice. Why 'chains' and sprockets? Not just one chain?... Because I wanted to drive the Honda pump at or as close to the original speed- which is slightly under driven. This way I would be sure that the pressure and volume would be about right. No ifs or buts. I didn't mind going slightly faster because the stock goldwing has a low oil pressure at an idle of 11 psi at 800-900 rpm. I'd be happier if that was a bit higher. With this in mind I had already worked out roughly what gearing I would need to be in a certain range. I had worked out the original gear ratios and then used a gear calculator to play around with ideas... But what chain and sprockets to use? I enquired with so many places and had done loads of internet searches but the answer came to me when I lifted one of my bikes down from the wall before going for a ride. Of course! Bike chain, chain rings and sprockets! At first I worried about the strength and durability but thought about the abuse my chains go through, especially on my singlespeed MTB. I have only broken one chain and it was after it had been jammed. Over about 15 years of being a bike mechanic in several different shops almost all chain failures I had seen were due to something else cause them- unless they were a cheap unsuitable chain. So I went through my varied collection of chainrings and cassettes (I have many) and selected out the ones with a tooth count that would work and fit. I machined up a spare shimano freehub to take bearings like this... Machined out a Shimano mtb chainring and cobbled together a mock up to see if it might just work... It looked good but I was not happy with the 3/32 width ring and sprockets. Even though they will be in a oil bath there was still not a lot of thickness to the teeth. I was not expecting this engine build to do Lexus levels of mileage but I wanted it to last long enough to do some good hoons for a few years at least. I had enough room to go up to 1/8th width chain but no more. I looked into BMX chainrings but very hard to get the toothcount I needed and sprockets were much the same- plus bloody expensive when going odd sizes. So a mate at a local engineering suppliers priced up some american sprockets that I could grind/machine down. Wow- cheaper then shimano stuff and tough as. I bought a set of four and set to turning them down. Not easy- in fact it took ages as they are induction hardened teeth. But I finally took them down from 5mm to 3.3 and they fitted a spare bmx chain I had perfectly. Much more sturdy... I have now got a very durable bmx/e bike chain that has flat straight outer edges on its plates- this will suit my tensioners. I have a couple of tensioner ideas to try and think I have nailed how to make them easy to fit and effective. Remember- I want all of this lots to be super easy to unbolt and swap out. Its all a totally unknown design with regards to longevity so it needs to be easily serviceable. More soon ...... Alex1 point
-
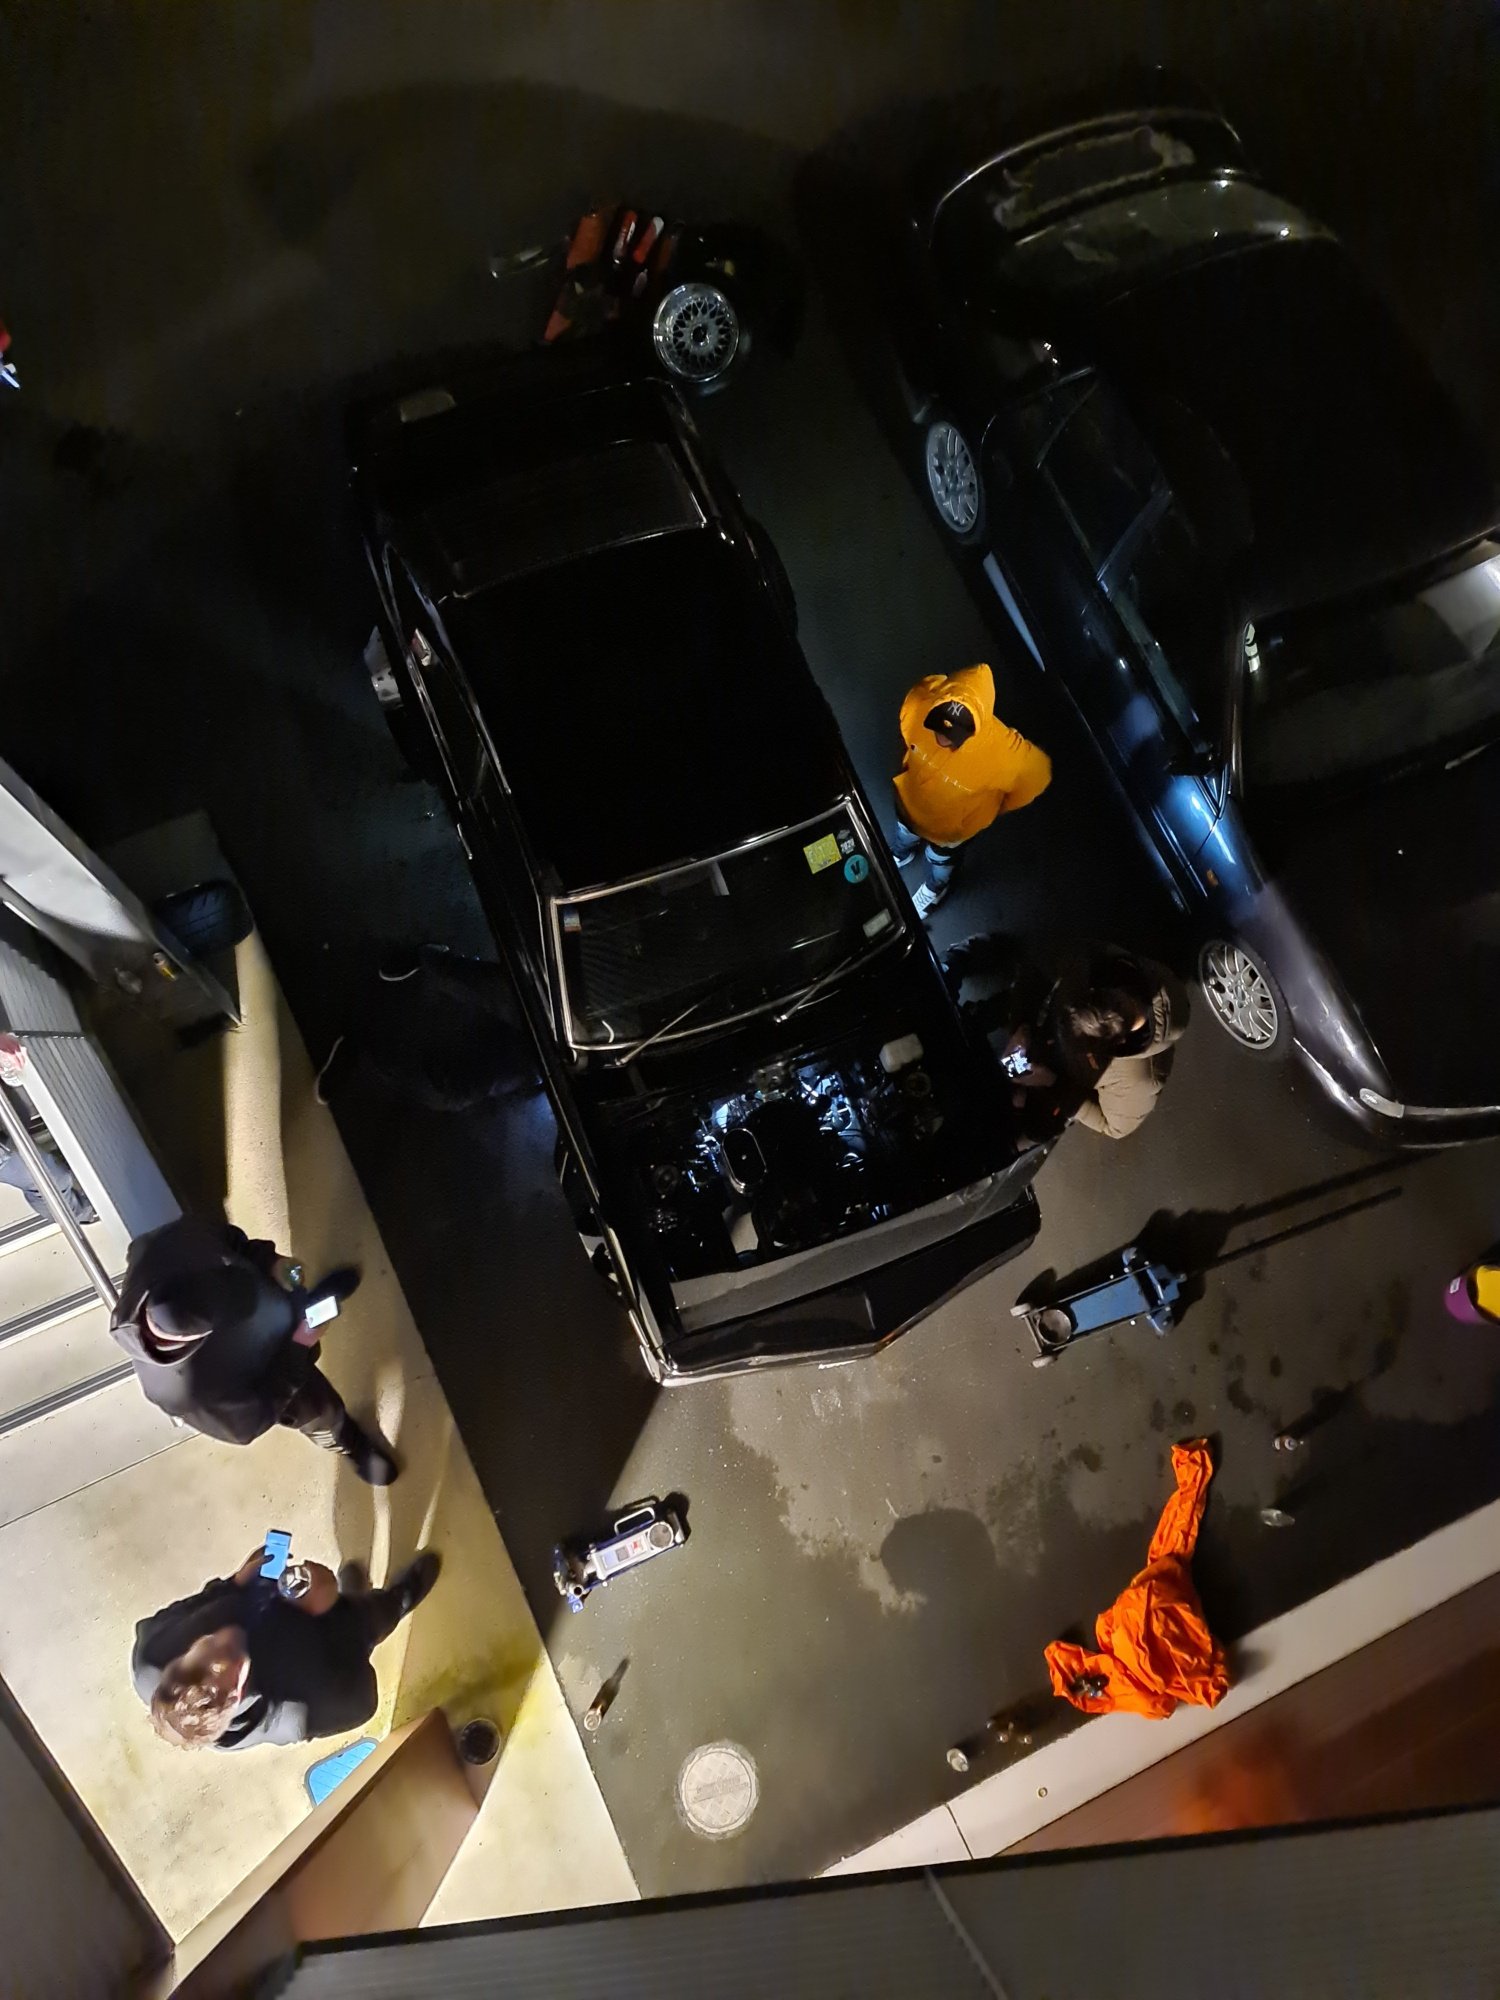
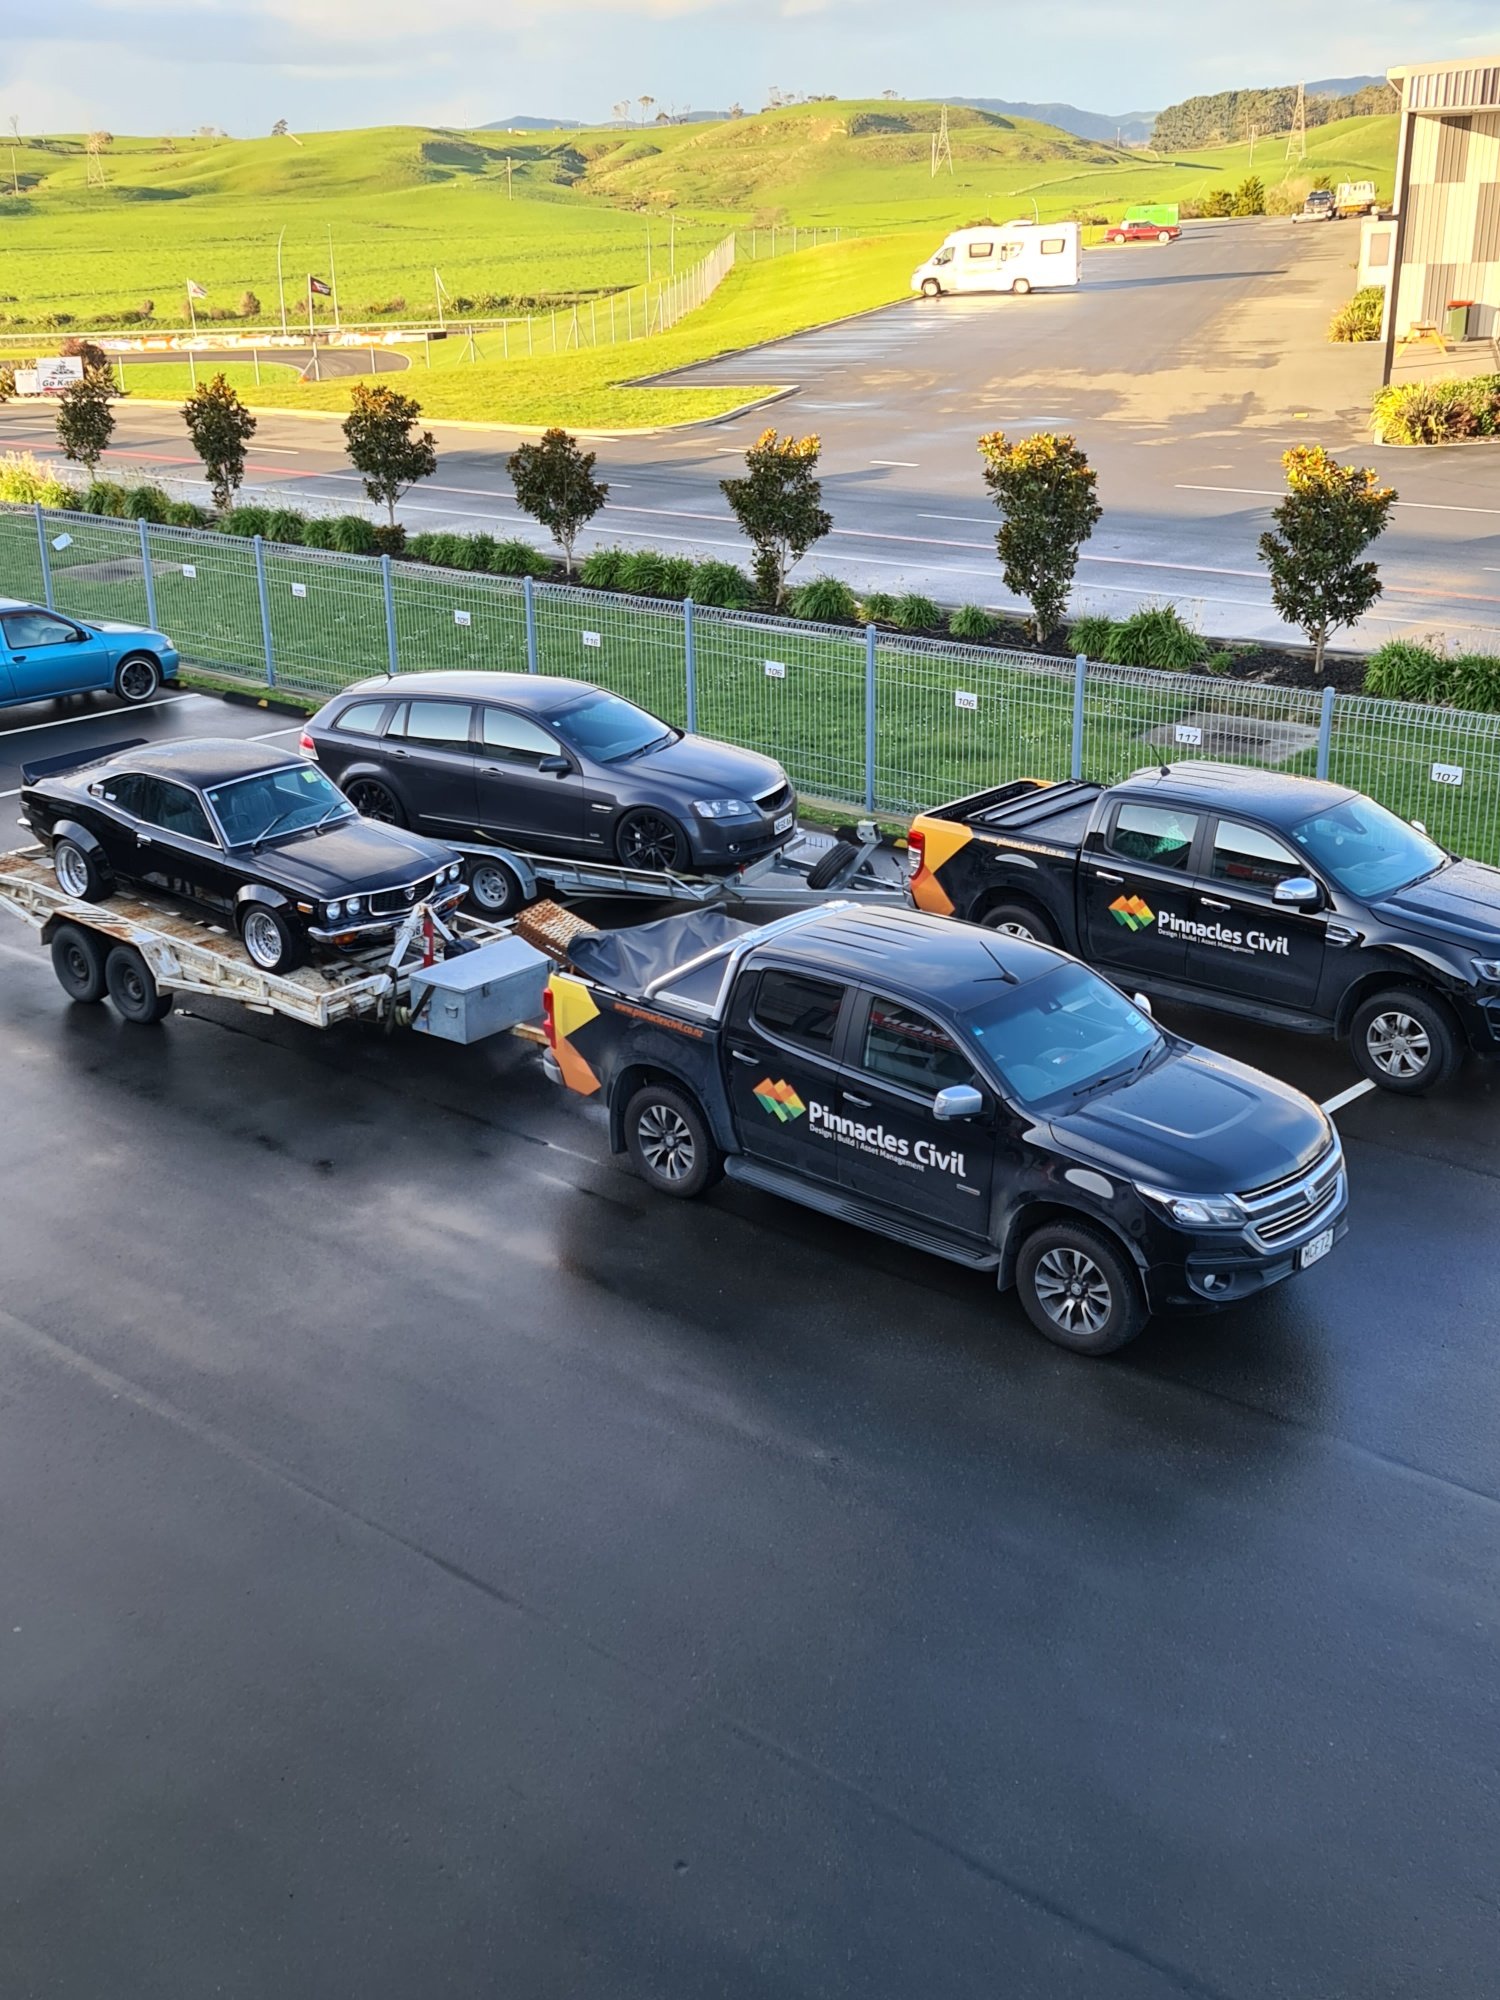
Well we made it to Chrome... Tune by Mark Haynes at Revolution Engine Services on Thursday morning which went well. Car was happy as with some revs in her! Wheel alignment Friday morning on the way to the track. Got out for a solid 40min session on Friday afternoon and car run mint, Had it out all day on Saturday on and off till Roll racing. Went to give Billy in his TRATA RX3 a race and had no clutch. Limped back to apartment and the boys pulled it out in the dark in the driveway on Sat night. Managed to find a clutch in Auckland and another mate shot up to grab it on Sat night. We chucked it back in Sunday morning and was back on the track by 10! Apart from that car run awesome and got heaps of good comments which was cool!
1 point
-
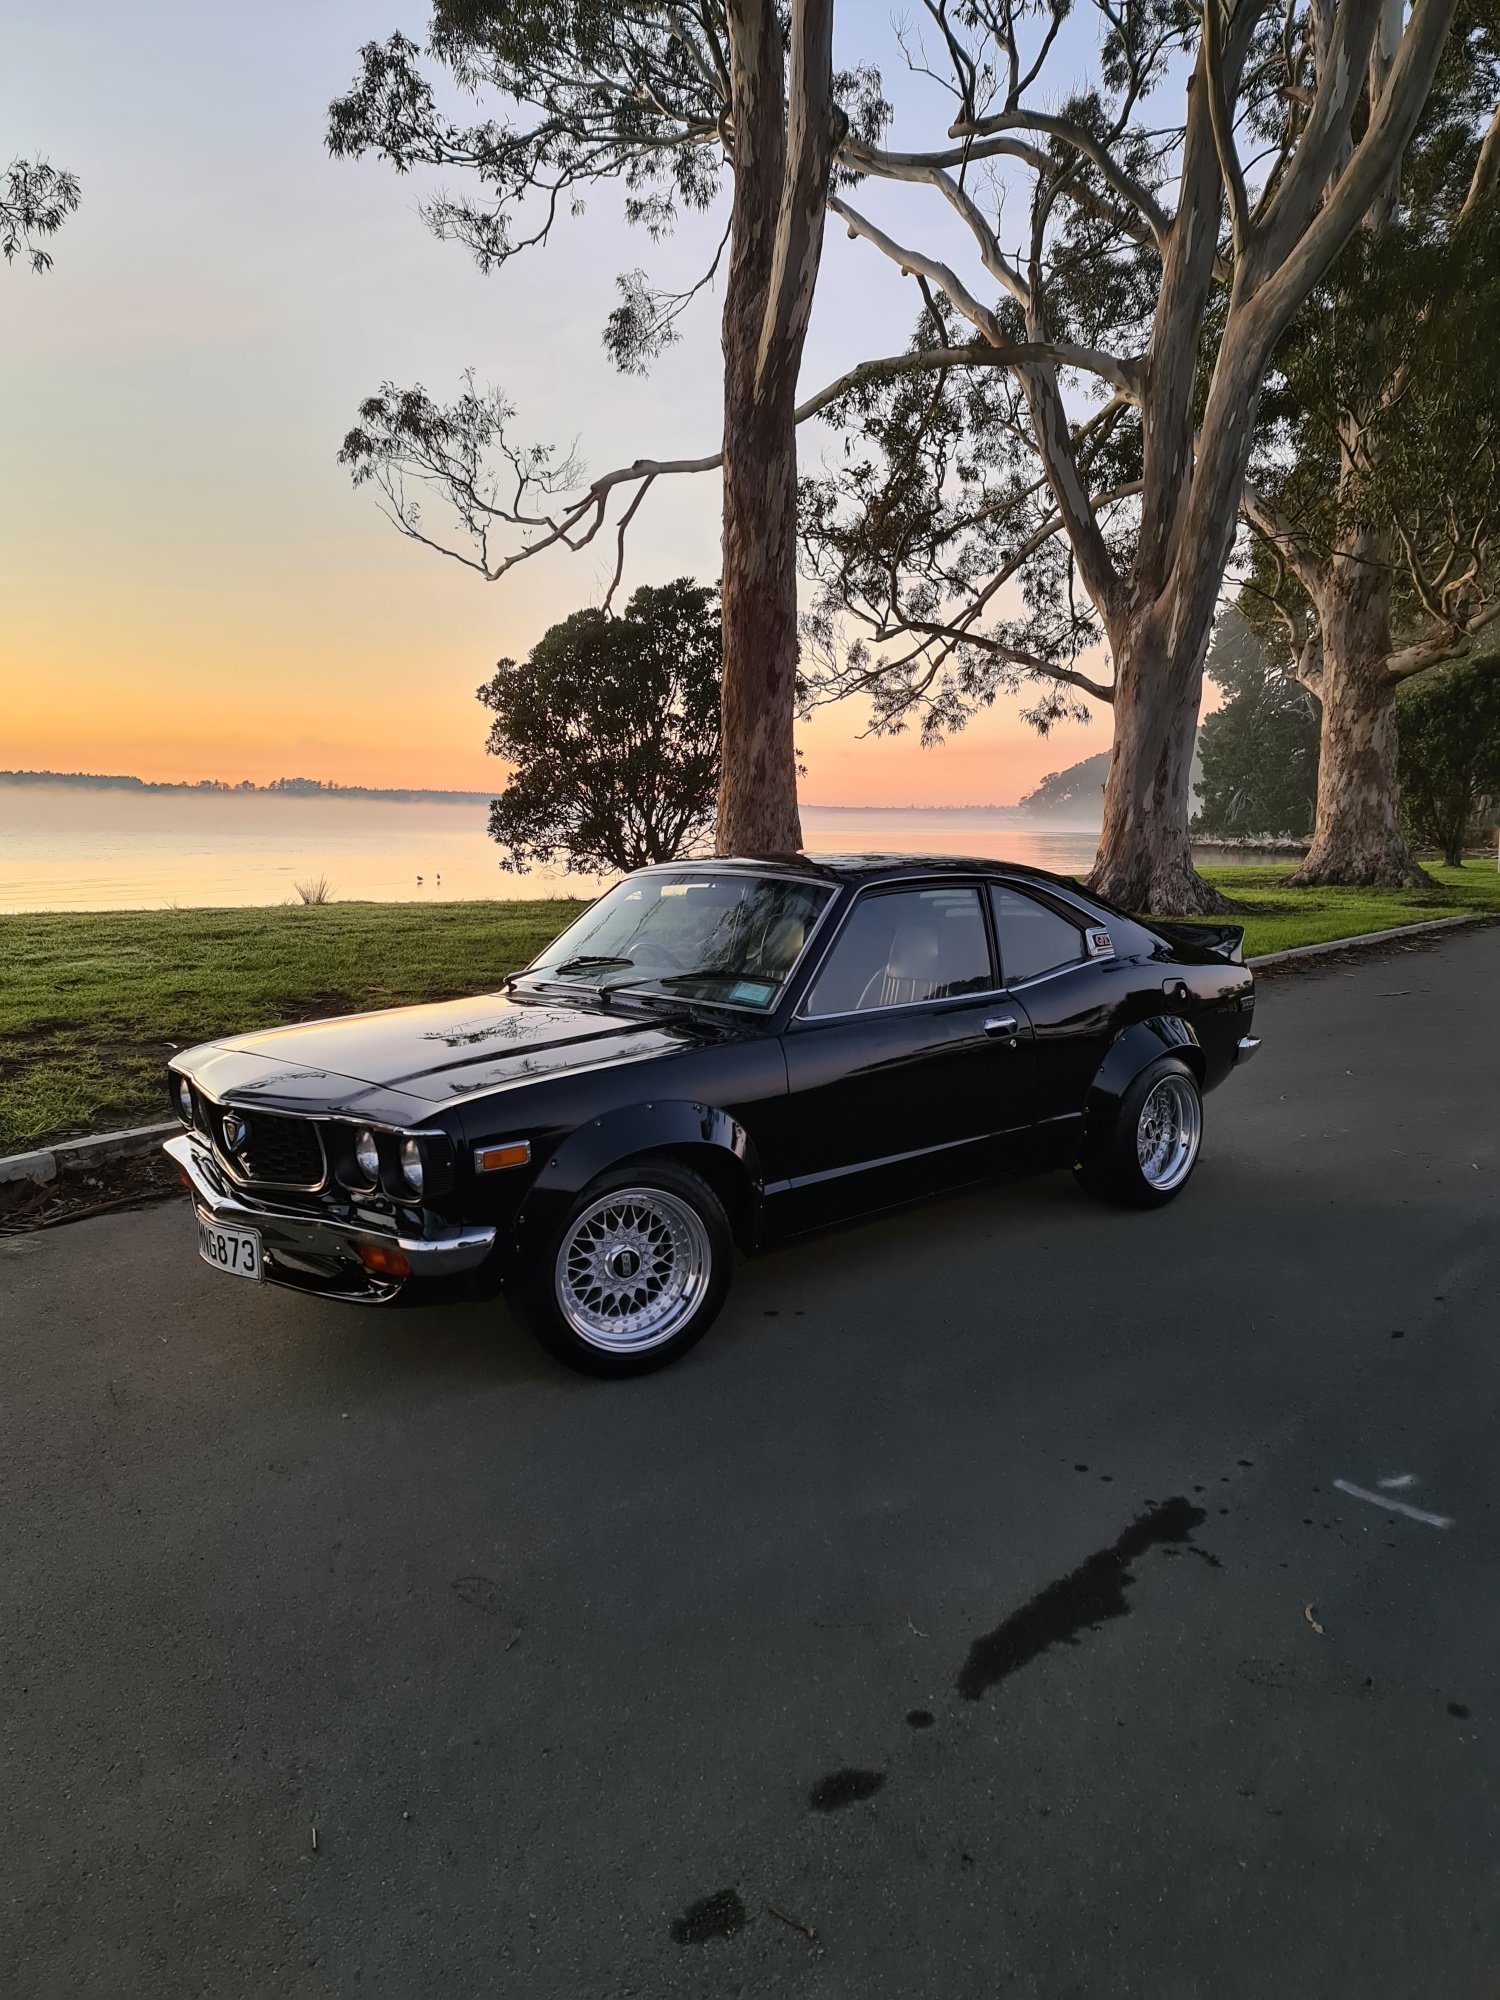
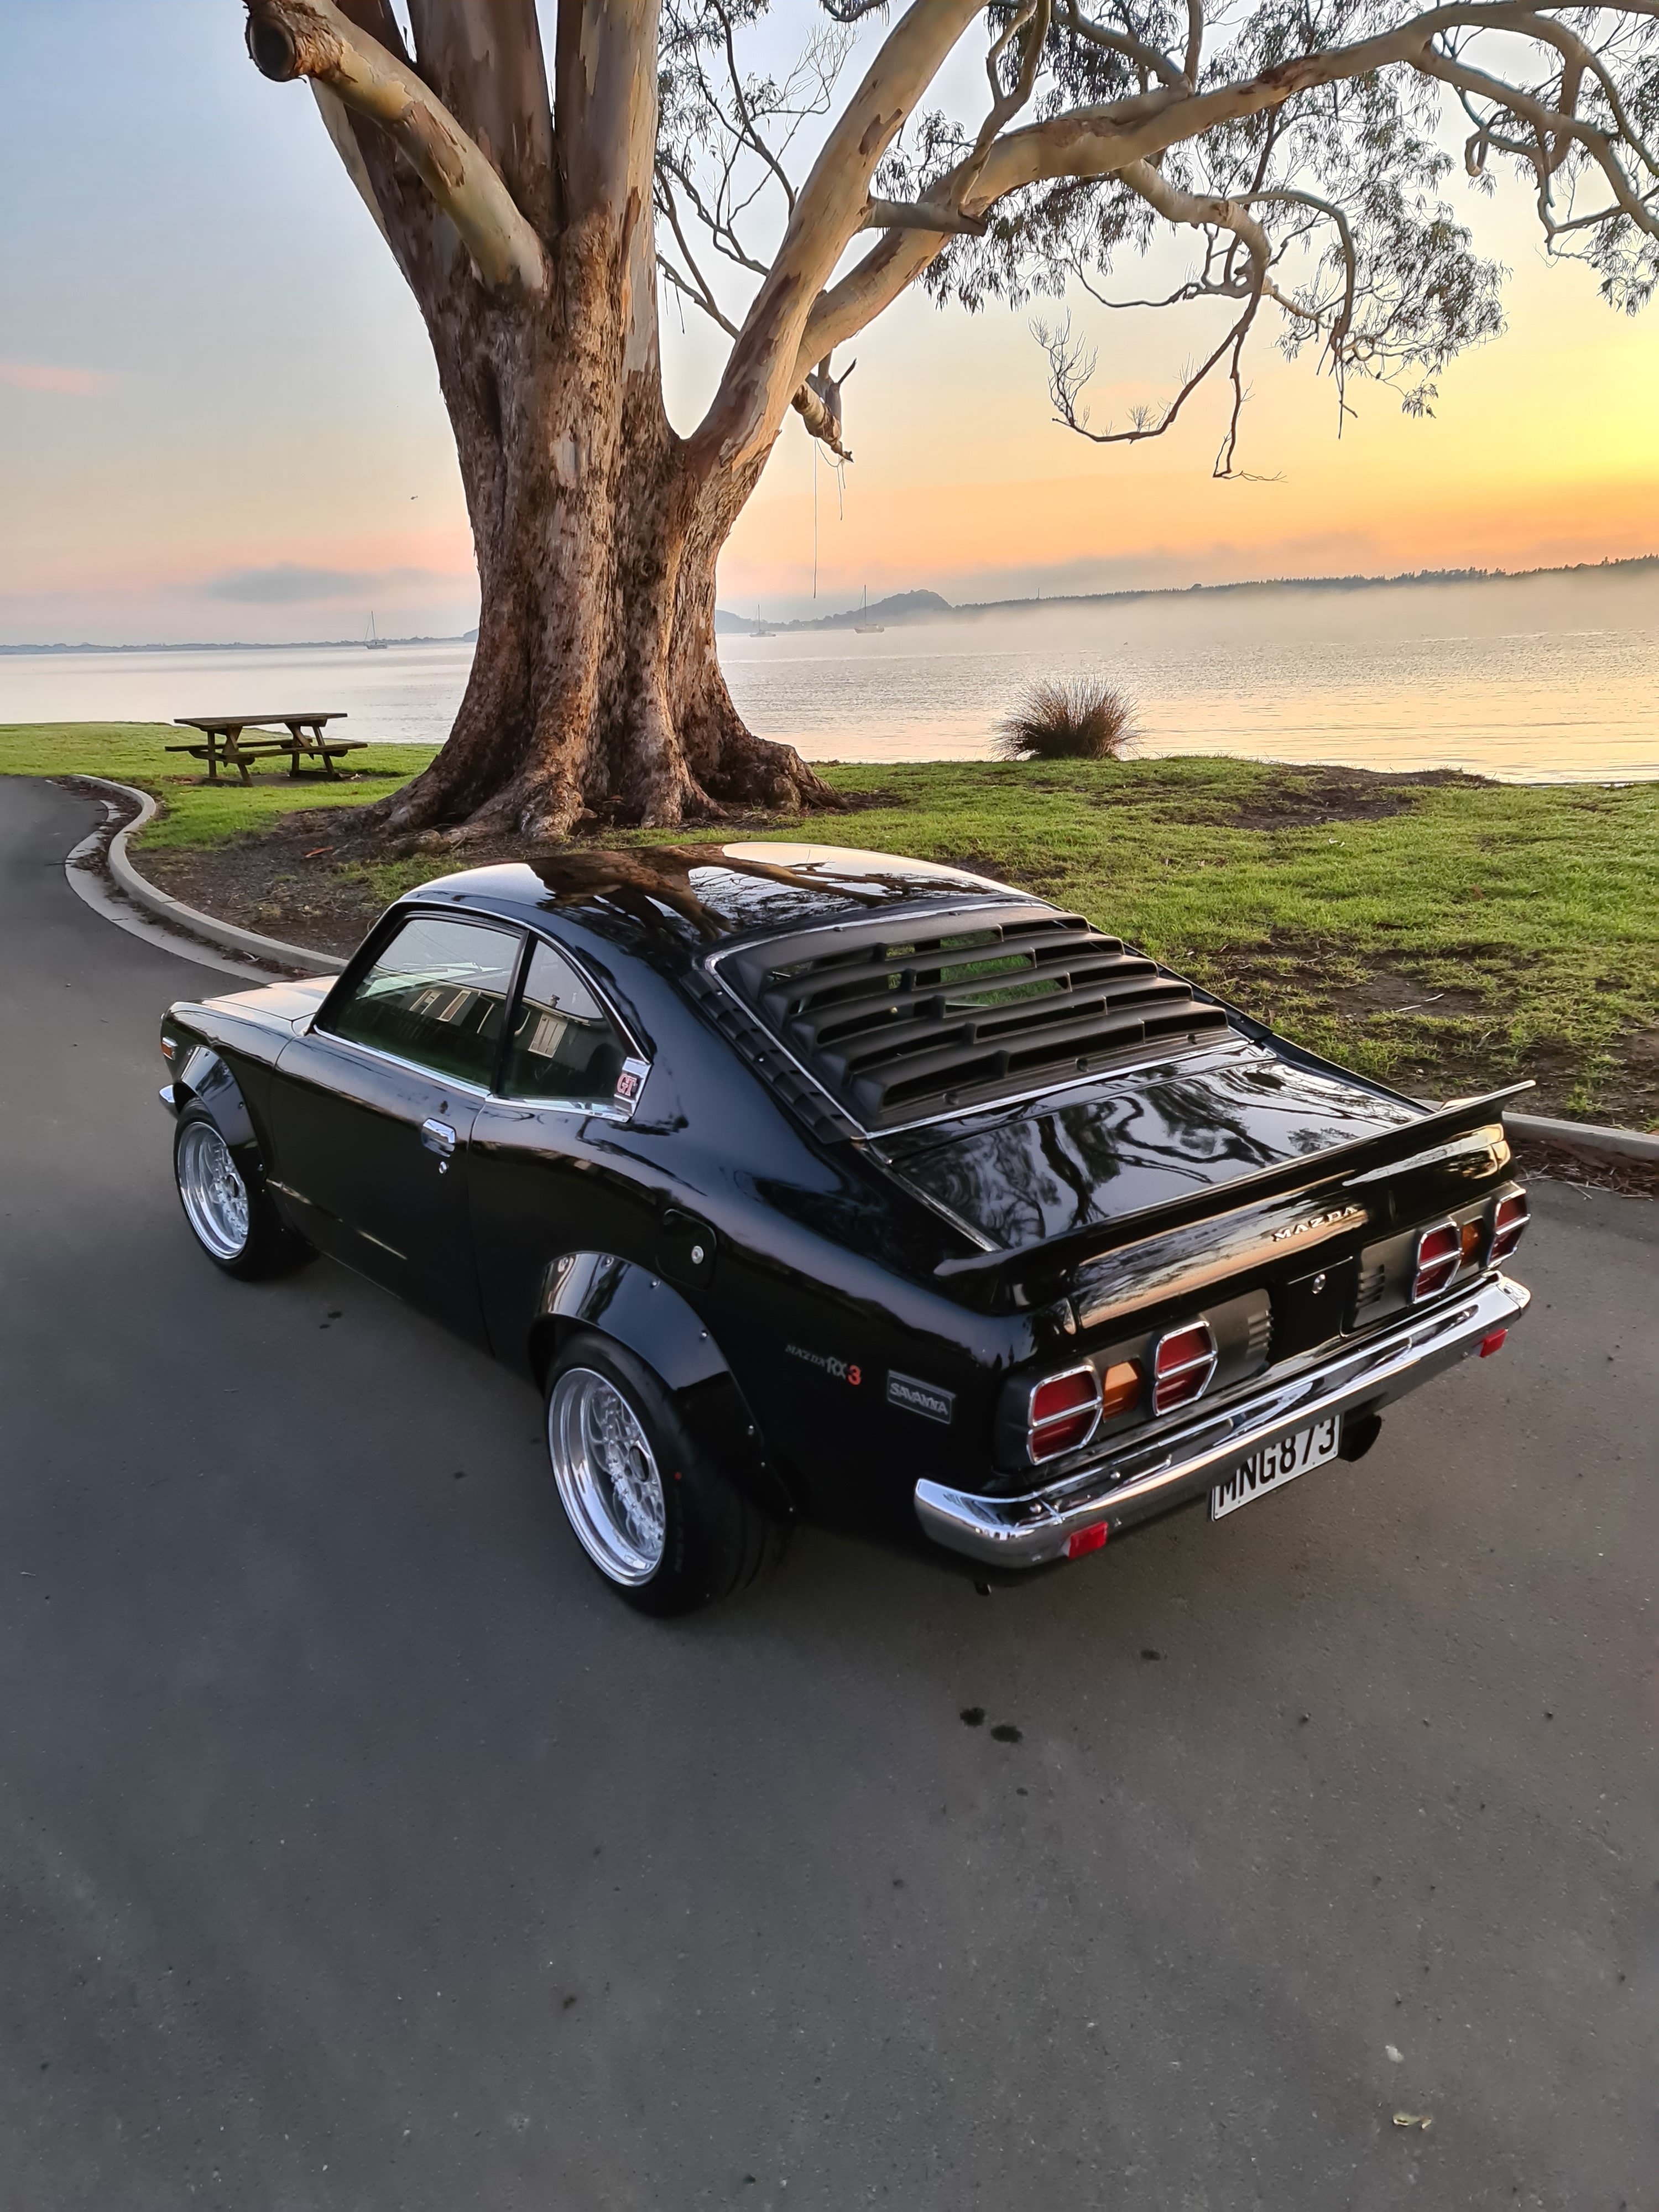
Well here it is ! After working away since picking this up in December last year in a bit of a state here's my version 1 of the Mazda. Car was a mess when I got it so we've been busy in the shed with the deadline of Chrome Expression Session this weekend. Couldn't have done it without a heap of mates an legendary business's! Steve at The Shed Rust Repairs for the rust work Tony for the panel and paint Hayden at Jokers Wild Kustoms for hijacking the car and getting it running while i was away at MCM Marc at RE- Wires NZ for fitting it in for coil repairs ASAP after dyno V1 Mark at Revolution Engine Services for locking me in a last minute dyno tune tomorrow Toby for polishing the wheels and trim Andy Duffin at 3 Rotor Racing for sorting a new spoiler last minute before paint Grant at Cooper Tyres Waihi Beach for heaps of tyre fitment swaps and a last minute pre chrome alignment Jimmy T for painting the dash topper and gauge surrounds @64valiant at Midnight Upholstery for retrimming the dash topper Gav at Precision Workz for redrilling the wheels and fab work Super stoked on the finished result
1 point
-
Here we go, 2 days of dyno testing and even longer editing. @Roman also made some science graphs with the dyno data. maybe he will post them up here.1 point
-
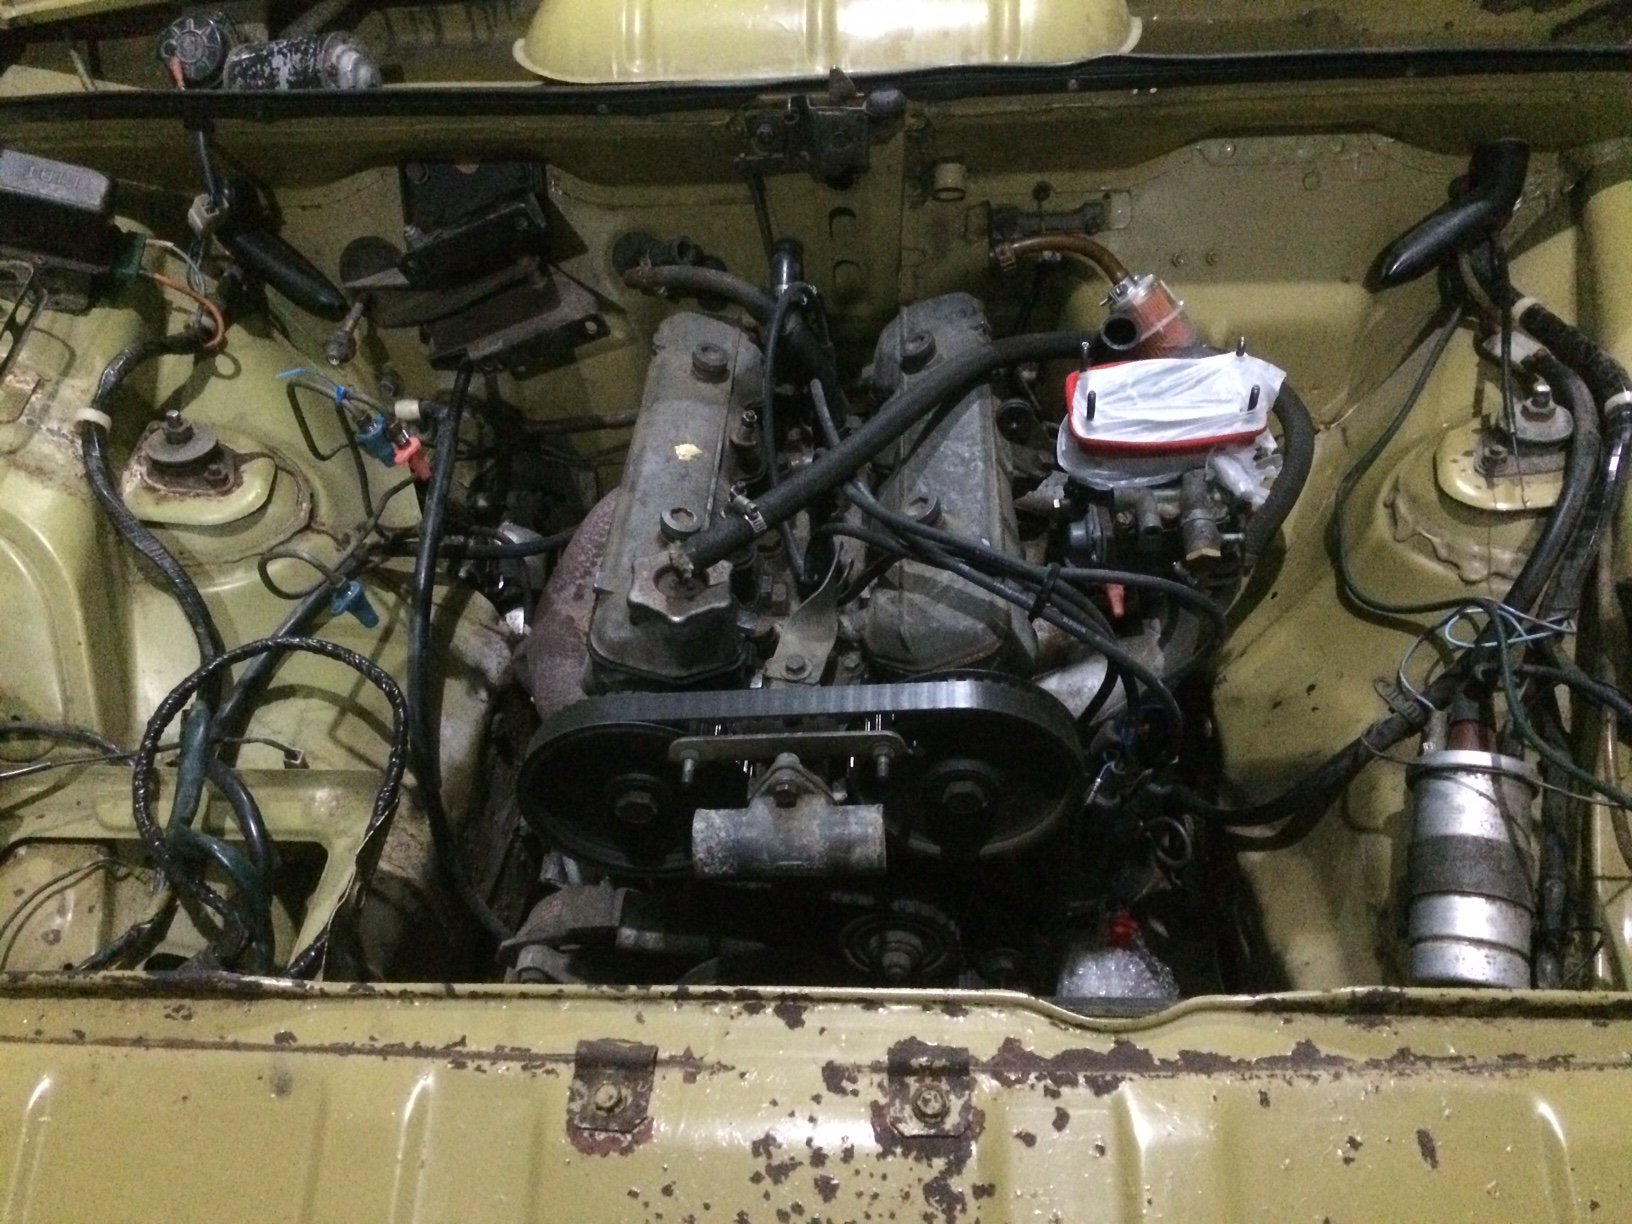
I have not been able to get this thing dialled in properly. Ages ago I swapped out the carb for one I got from @azzurro. It seemed to go well, with heaps more top end, but I never could get it to idle. On the weekend I swapped my old carb back in to have another play. This one had a kit thrown at it be me more ages ago. It’s still rubbish. For some reason the accelerator pump does not want to work, despite new diaphragm and seals. Also, it now keeps spitting back through the carb off idle. Plus, it only shows 12 inches of vacuum at idle, so I have an air leak somewhere I think. I have nothing better to do so I stripped them both and am trying to build one out of the best bits of both. I am using my original carb because it’s kitted, has all the correct factory jet sizes (and the other one has been bastardised in a couple of places so I can’t swap a couple of items), and it’s presumably only got 72,000 miles of wear. The first thing I was suspicious about was the diaphragm for the vacuum secondary, since it never had much top end with this carb. Eureka moment number 1. Ripped as. Swapped it for the diaphragm out of the other which was sound but covered in rusty coloured dust. Gave it a quick clean and fitted. Next, all the jets etc got taken out again and every orifice got a good blast of compressed air, which showed up another problem. When I blew through the idle mixture screw orifice, I could see bubbling leakage through the base of the carb body. Closer inspection reveals some micro cracking stemming from some corrosion. JB weld to the rescue (the dark grey in this pic) Now I have to wait 24 hrs before I can use it. Pretty keen to see if any difference has been made.
1 point
-
We are using these in the cars at work now, but $$$ and you need special chargers for lifepo batteries, we have a couple of the ones they sell and also some Ctek ones. https://www.racetech.co.nz/shop/racing-products/super-b-batteries1 point
-
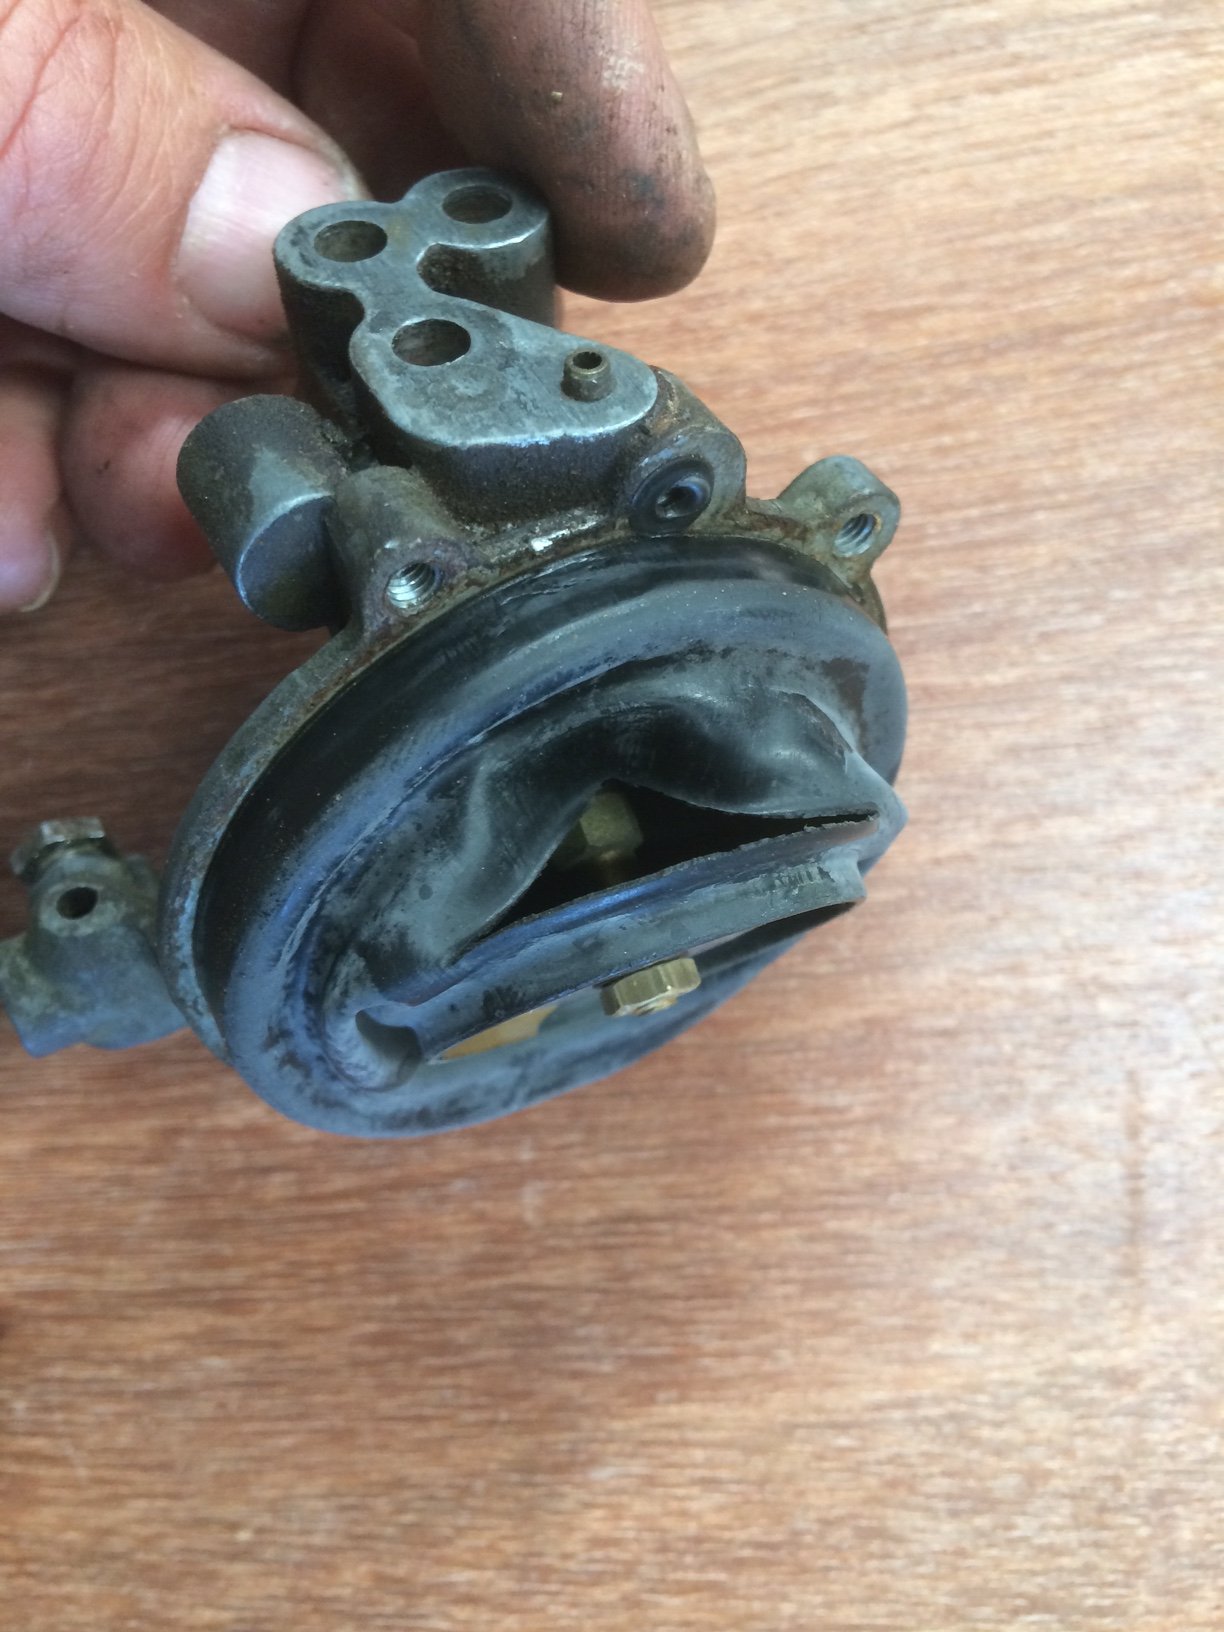
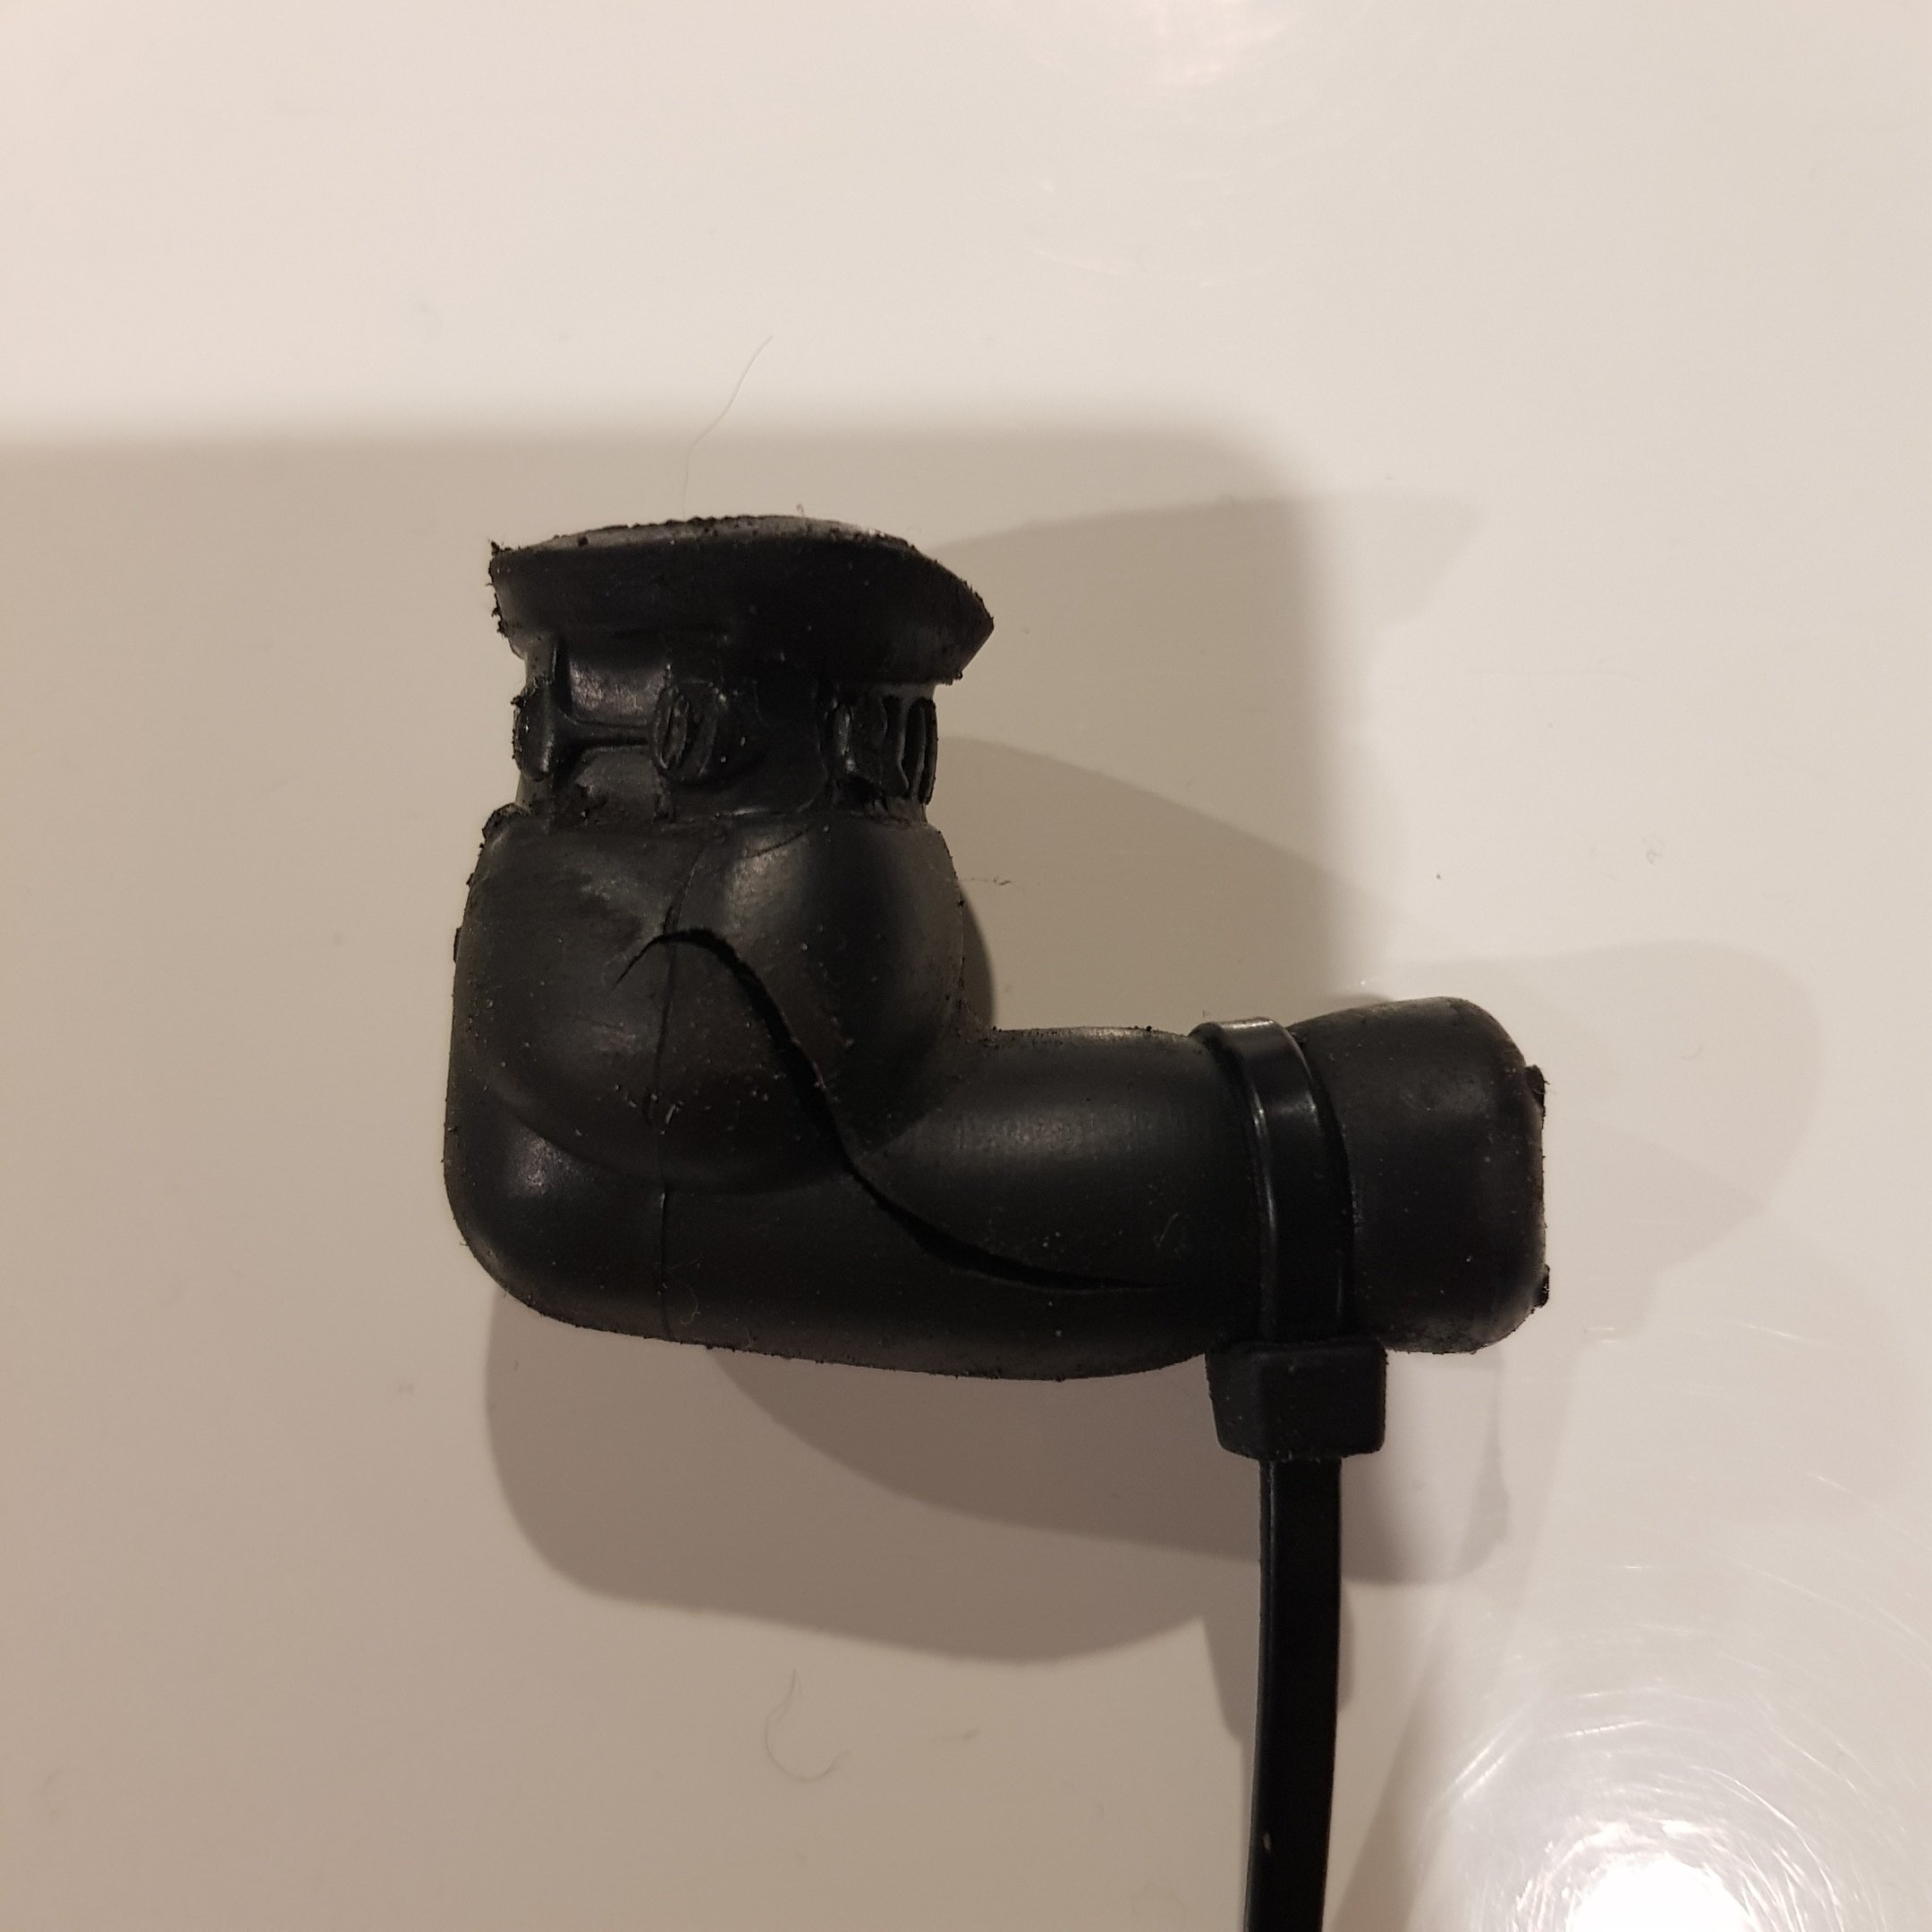
1500 trouble free k's in this stopped at home to a god awful squeeling sound...... mild panic ensues while looking for the source. Some mad cunt had installed a spark plug boot on a boost line as a 6mm to 12mm hose adapter, as you can imagine at 20+ psi it puffed up like a balloon and eventually exploded. One more mysterious check engine light issue sorted. This thing sounds fucking sweet coming on boost now with the rear muffler deleted, Traction control light gets a hammering going through winding roads to work
1 point
-
will try to find some photos of the recent rally we went in, had a guy ask to buy the Viva off me, he would not take no for an answer, he could not understand that something just was not for sale1 point
-
New seatbelts for the Viva. Made in the states and imported by Normanby Upholstery. Great to deal with and you can match colour and type that you need and have them made to order, all with the correct safety standard required for WOF requirements. No hassels.
1 point
-
Job done wasn't too bad I had to buy triple star set to get driveshaft shit off the gearbox which was fiddly as buggery. Now to clean the grease of 2 socket sets the floor the walls and the cat.1 point
-
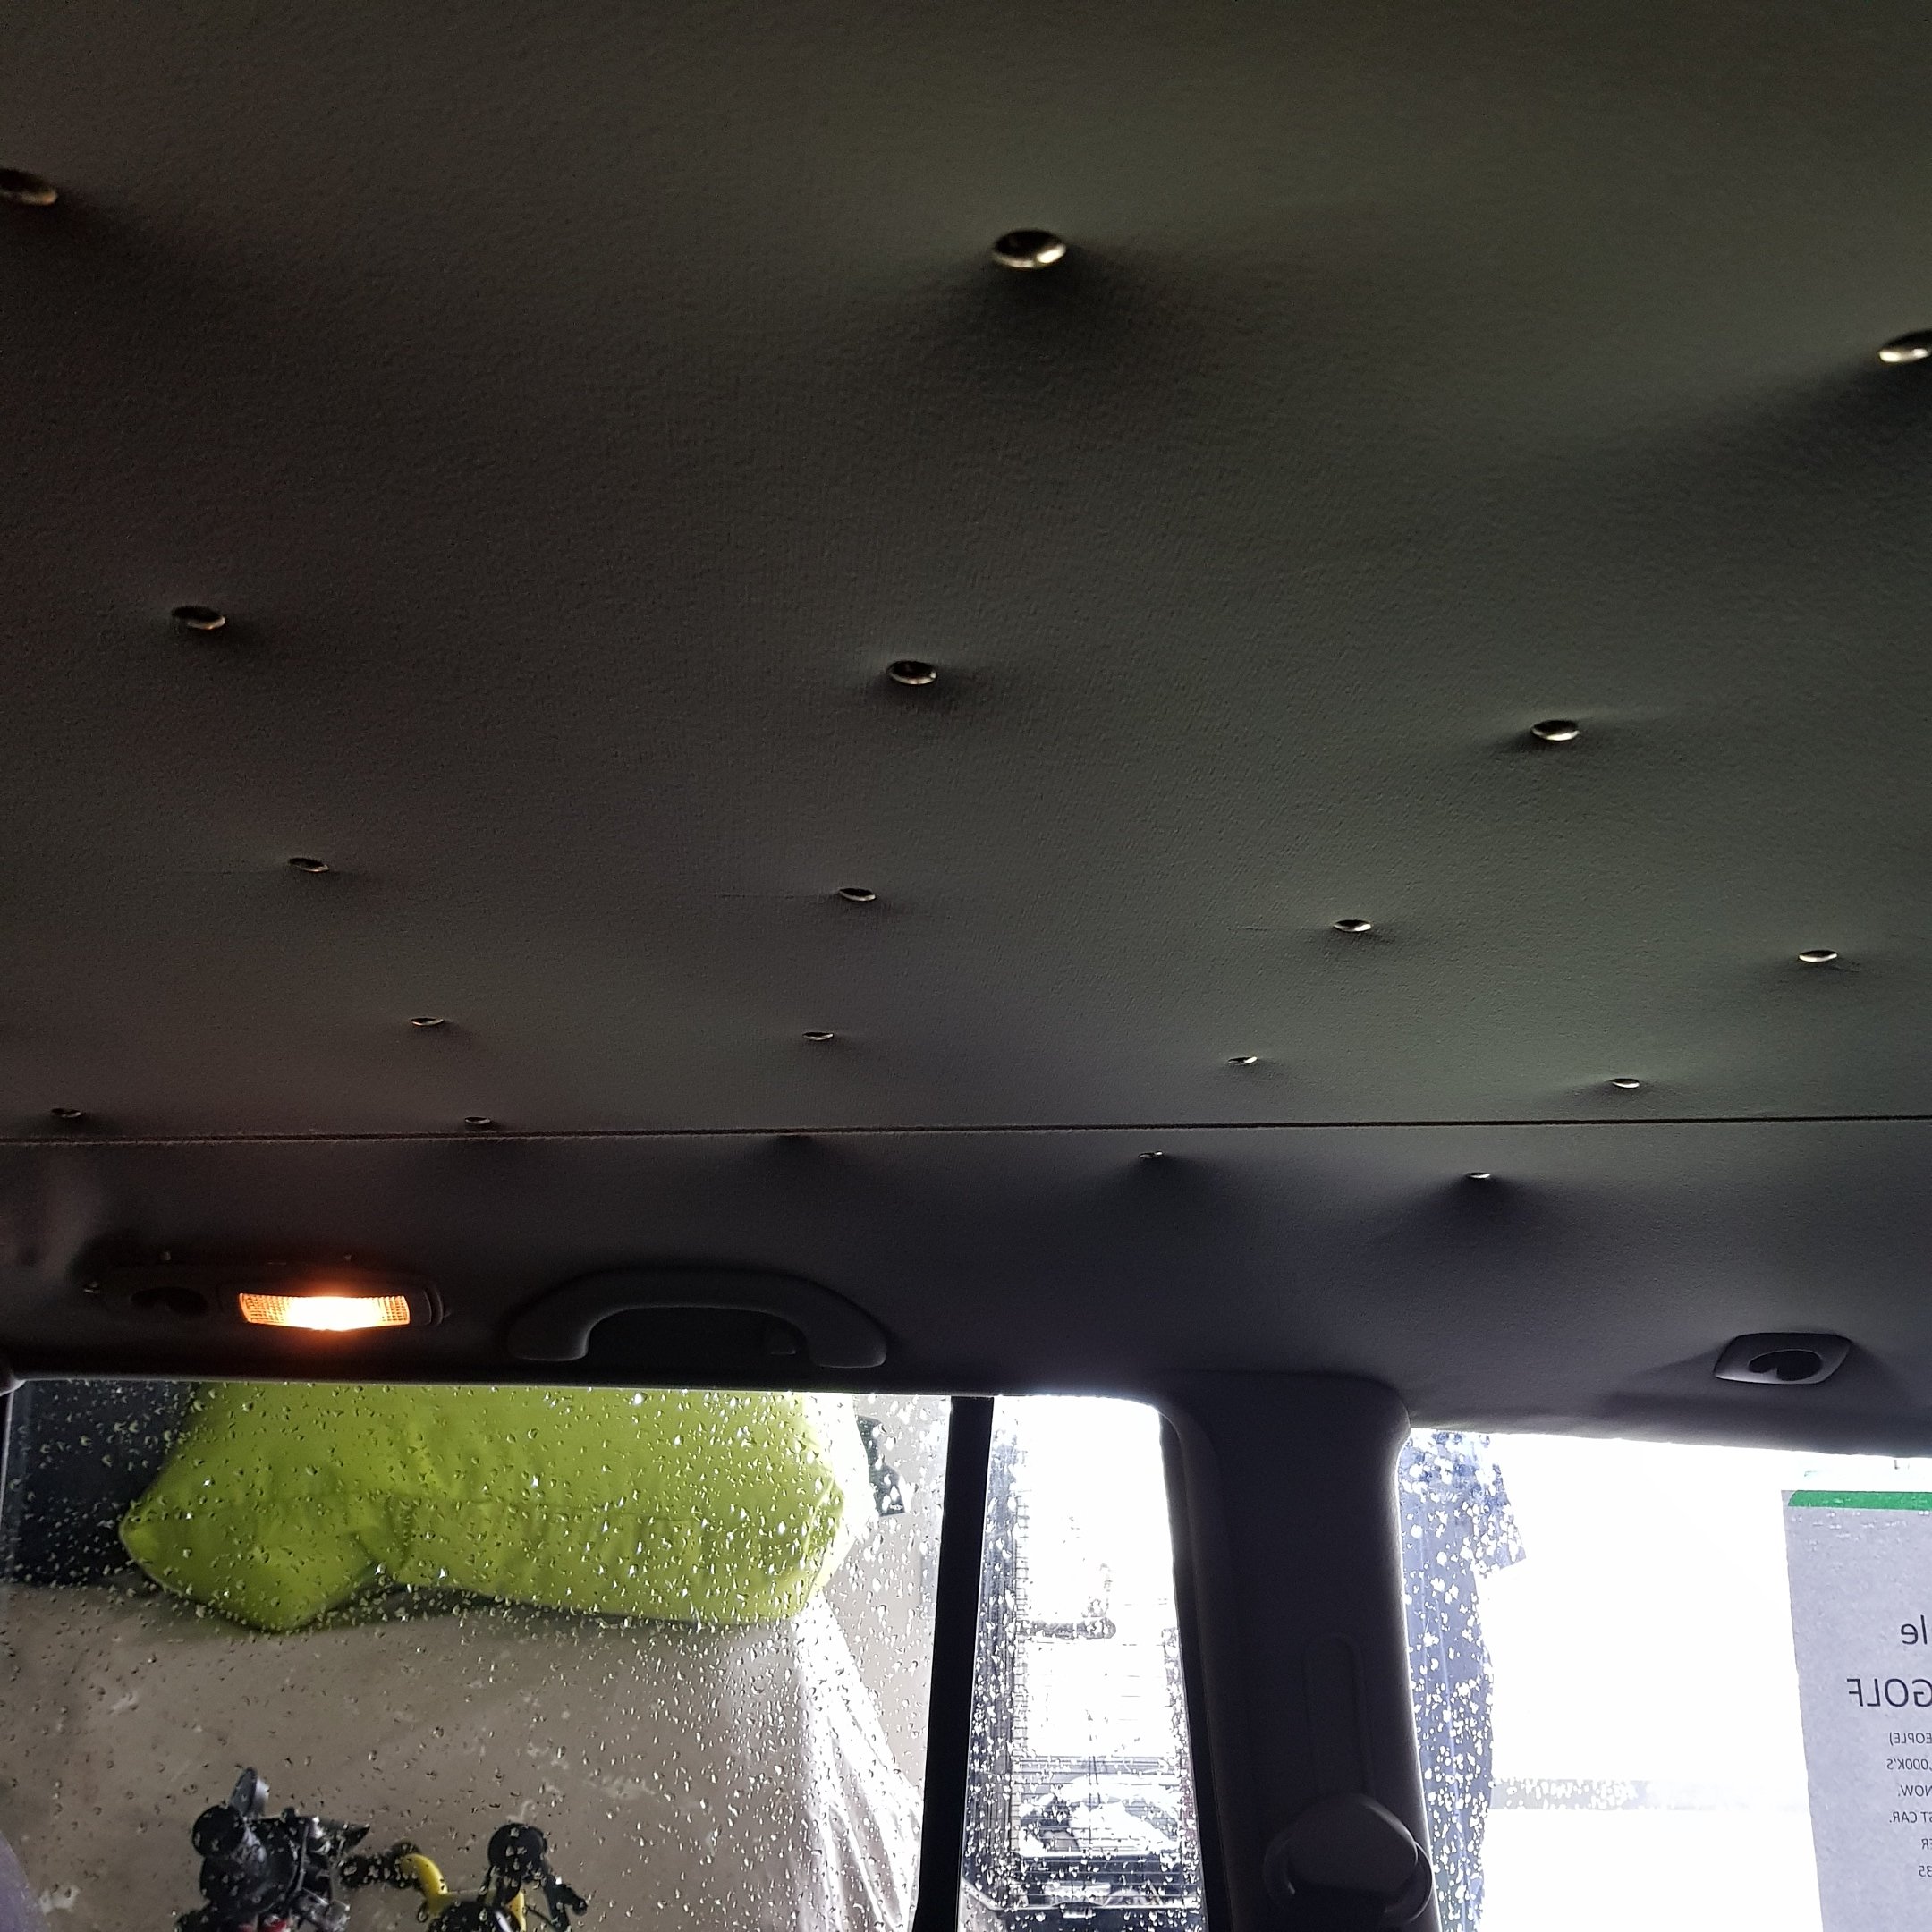
Classy saggy hood lining repair for the outgoing wagon..... brass tacks every 150mm used string lines and everything to space them nicely.
1 point
-
Just to let people here know that Darryl (aka RXSUMO) passed away 7:30 Saturday morning, after a long illness. Condolences to Sandra, familiy and friends. (if anyone wants to post up any messages here, I am sure Admin won't worry)0 points


.jpg.e3f91bfee19c8e93717d40e07f05272e.jpg)
This leaderboard is set to Auckland/GMT+12:00