
Leaderboard


Popular Content
Showing content with the highest reputation on 10/03/19 in all areas
-
Well its been a while since I've updated this thread. Mid July was where I last posted up anything of worth. Little Imp got parked up in the corner of the workshop so leaving anough space for our neighbours to make use of the shed while we took off to England for a decent holiday. Hannah got to catch up with her family, we both did heaps of cycling and running, had plenty of sunshine and beer plus I got to go along to the retro-rides gathering 2019! As I always do I had a fantastic time there and came away with boosted Mojo and lots of ideas. Before leaving the UK I ordered a few spare parts for the Imp... We got back to NZ in September, just in time for the start of spring. The Imp was sitting there tucked away, a tiny little puddle of oil under the sump just like a good little English car should have... First job was to fit the shiny new lenses. Hannah jumped straight into that, an easy but so very satisfying job to do... We then took the steering rack out and fitted the new centre gaitor. Hooray for a rack that holds oil... Having decided I was pretty happy with where the temp gauge needle sits once fully warmed up I carefully measured the resistance across the potentiometer I'd been using to adjust it. I then made a little joining lead fitted with a resistor of the same value. This replaced the adjustable item and should be it for the temp gauge. At some point in the future I may well make a new instrument cluster to suit the dash as I rather fancy having a rev counter in a place that I can actually see it ok. We have been driving the Imp since getting back to NZ as much as possible. On its first journey out since back I got this pic... We've had a few decent trips including a one really neat drive all around the local valley roads and hills, some gravel roads etc. Its so fun to drive. I'm really getting more confident with the handling and how to get the most from it. The engine seems fine and loves a good trashing. The carb is still a bit iffy with that worn out primary spindle still allowing some air to sneak in. I have ordered a new carb from China and will see how it goes. It was cheap enough to try and when I eventually fit injection I can sell the carb on. Whilst out on that really fun drive I got this photo. Shame I only had my phone as the sky was quite moody... After lots of driving I checked the plugs. They look fine with what I think looks to be a good colour... I thought it better to fit the fire extinguisher I bought before our holiday. It tucks away neatly behind the drivers seat... In other news I have been collecting many different parts needed for a conversion to fuel engine management. I just scored another megasquirt one (2.2) ecu plus a full loom and some edis bits - this time from our mate Rob in return for me doing some machining work for him... I need to decide on a few bits needed and also in which direction to go for the inlet layout. Maybe Itbs but maybe a plenum with a single tb. I foolishly dillydallied about when there was a full set of cbr900 ITBs on trademe for $55 including injectors and loom and subsequently missed out on them. At the time I wasn't sure about the suitability but for that money I could have made them work. Not sure on ideal throttle size but they were 40mm each which given the Datsun only has 30mm inlet valves I figure they'd have been plenty. Then I would have had all of the doorts! I'll keep looking... I'll be using a 36-1 trigger wheel, also supplied by Rob. Luckily there is ample room to mount it on the back of the main pulley. Both MS1 ecus I now have use the earlier version 2.2 board which don't have built in VR conditioner circuits. I can make a VR conditioner board and use VR sensor, of which I have many. Or I could use the Edis setup (which has a VR conditioner built in and uses a VR sensor) that came with the MS1, of which I suspect the ECU has been supplied already configured to use. I have never used Edis before. Hmmmm? Its a bit ugly and clunky though. I dont like the quite large ignitor box I'd have to sit somewhere. Or I can go with a Hall sensor but then I'll have to locate one from a wreckers- but what car? As usual I want to do this conversion as cheaply as possible because its just more satisfying for me that way. In my first few casual searches it seems that they are quite pricey and can be a bit frail or temperamental in use? More research is needed, of which I must say I do find to be one of the most fun parts of modifying! Oh also - I fitted a new speedo cable and now have a speedo needle that doesnt wibble-wobble all over the place. How thoroughly modern!12 points
-
Vintage 'grumpy' grumble done busted his shifter10 points
-
Muffler is finished, I think it was ballcock from a toilet.
 6 points
 -
I ended up drilling twice as meany holes in the muffler core before welding it in,
5 points
-
Find a panel better with a reputation for metal finishing. We have done a couple roofs at work. Is a very time-consuming exercise between wheeling up a patch panel/welding/and dressing the roof up. There is a good couple hrs in welding as you can only weld 20mm ish before stopping and hammering the weld area. Will pretty much always need a fine skim coat of filler but when done properly Wil need very little product . Worth it though. Old aftermarket sunroofs are crap/always leak. And detract from total value of the car4 points
-
Genuine Lexus part: $70.00 at discount rate. "Genuine" part from ebay: $54.00 Exactly the same part as above, but not in "Genuine" lexus plastic bag, from ebay: $19.17. Thanks Taiwan!!4 points
-
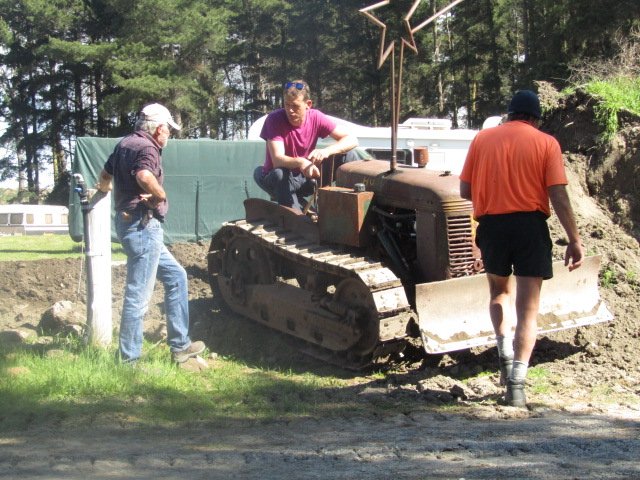
Sharn pic is so good, true old boys can't sharn without a support of some type, maybe in case of oxygen deprivation. I can only hope the Oliver was on high idle and you were shouting over it the whole time.4 points
-
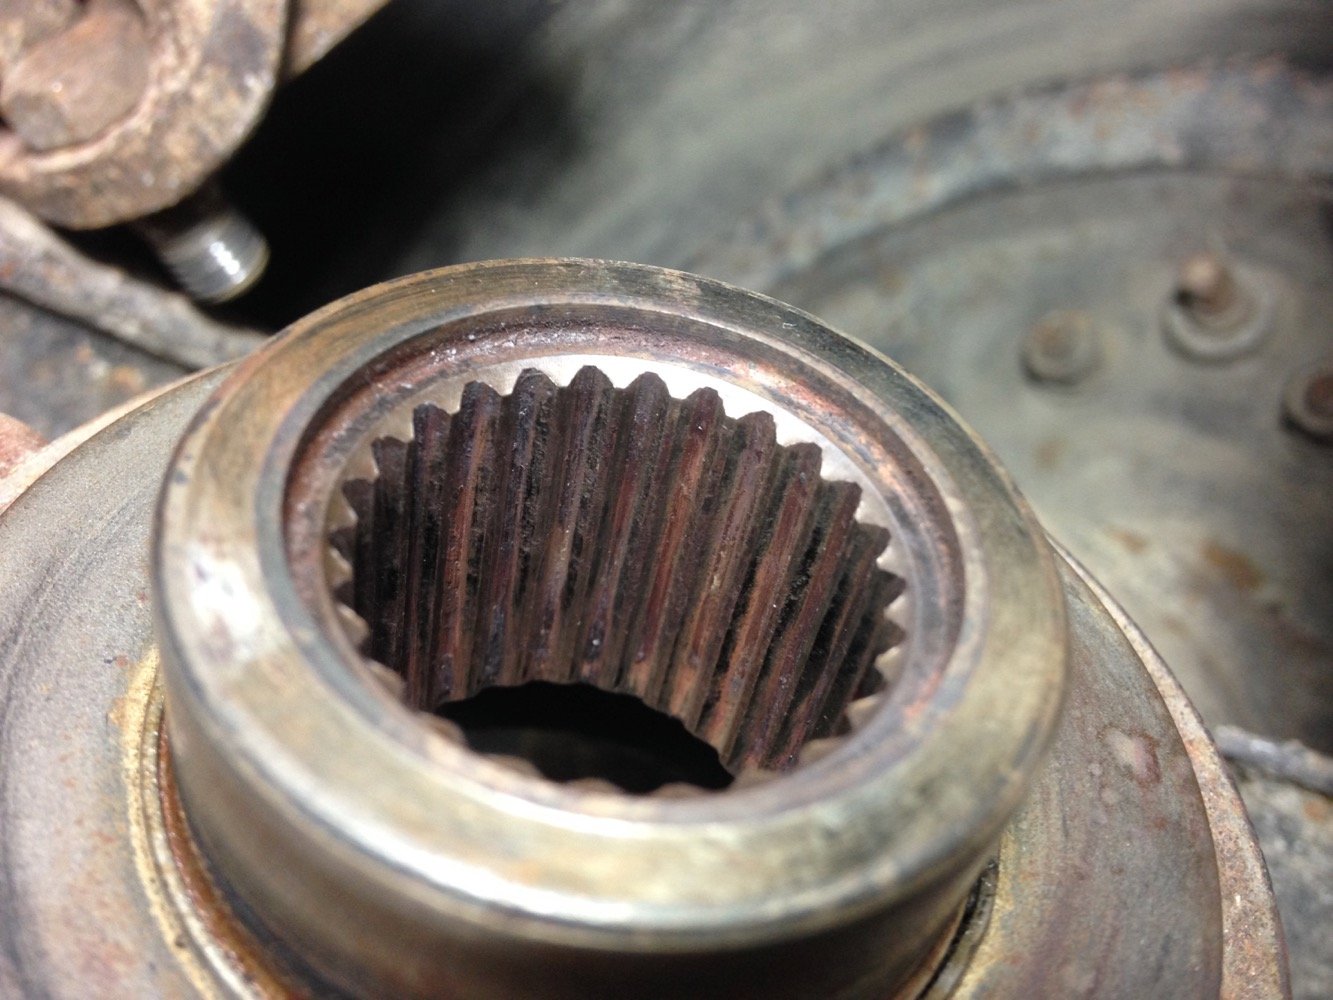
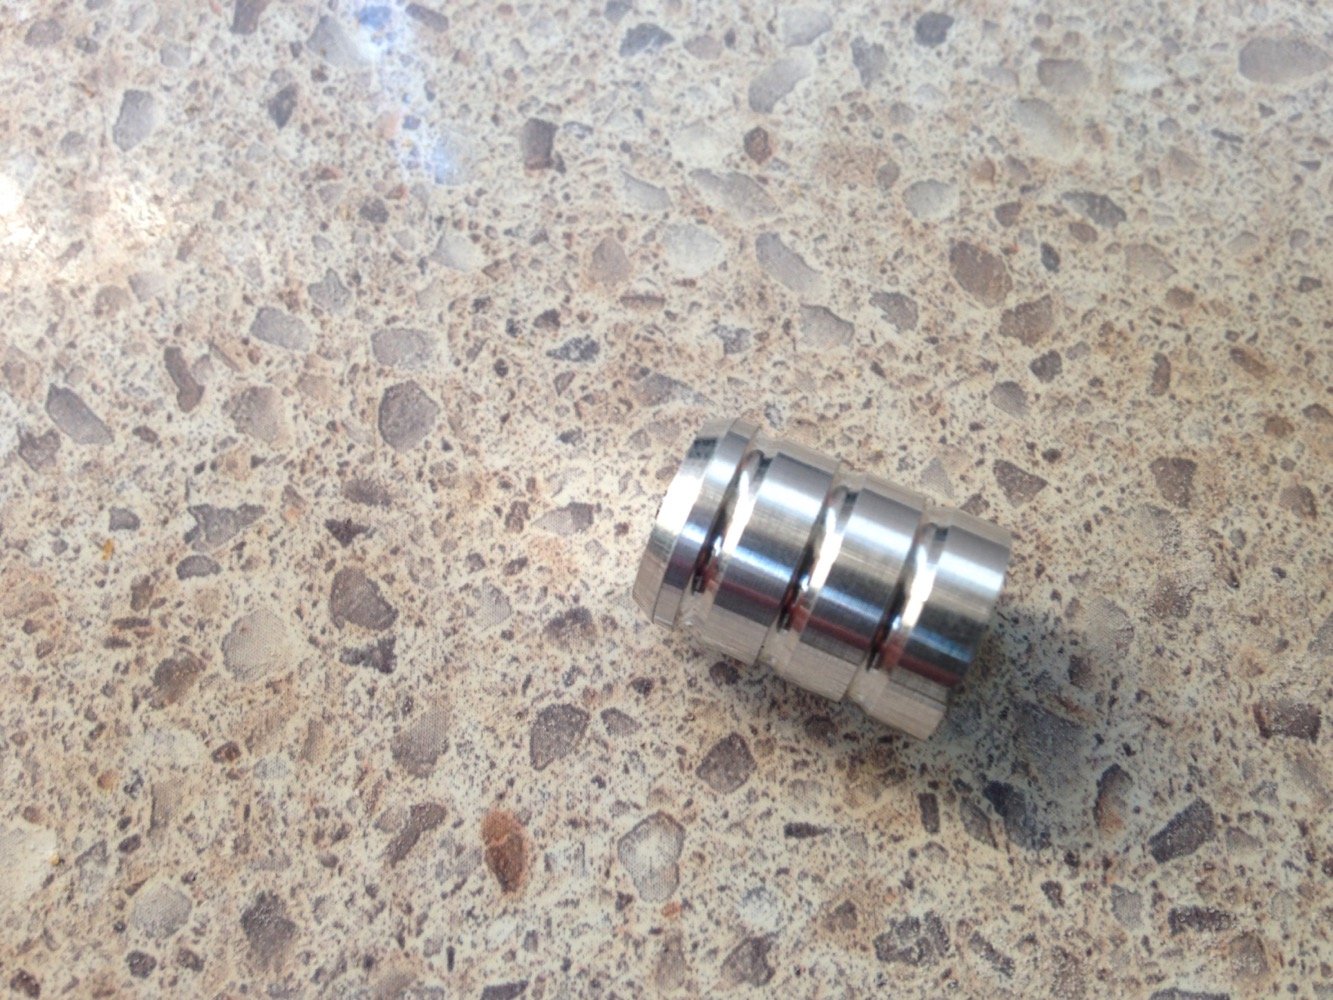
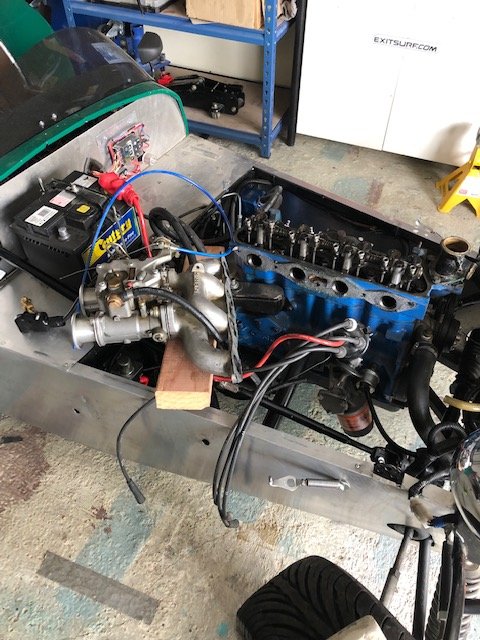
Datsun nats coming up so best drag the covers off and give her the once over.. Lifted up off the deck and gave everything a solid shake, only item out of place was some play in a rear wheel bearing, a closer look put the play in the spline.... Lucky enough it was only loose, caught early enough! a quick clean up and back together. Next on the list was sorting the blanked off water passage, normally there is a circuit running from the head, through the inlet manifold returning to the water pump. From the past race life, the ports on the head had been welded up as the sidedraft manifold didn't have such provisions. The port on the water pump was just blanked off and this hose was starting to perish. I turned up a shiny new ali plug and with a new stub of heater hose dropped it into place. Also flushed the radiator and dropped in an oil change, i'm sure you'll excuse the lack of pics there. With nothing left on the list, arrangements were made for a date with Rocky Auto. Only a few minor issues to sort and WOF status was obtained. Many thanks to daylight savings for the celebratory trip to Governors bay after work.
3 points
-
Playing around with ideas. Though I'm not sure if its worth the effort?
3 points
-
While out and about I got some fasteners today. I've dummied up the front end so I can start on the control cables. I nearly got super lucky with a nifty throttle cable but the Inner was a tad too short. I'll need to get some cable ends for that and clutch. I'll use the nifty handles/switch blocks I have in stock as they look lots better than the fxr stuff3 points
-
^ Just Harry is correct. Welding a large, thin span (like a roof) needs a very careful, patient and skilled person.... but an aftermarket sunroof is yuck, so a delete is a great idea2 points
-
http://datsun1200.com/modules/mediawiki/index.php?title=Hyundai_EFI hyundai uses same manifold2 points
-
actually so many choices haha https://www.aliexpress.com/wholesale?trafficChannel=main&d=y&CatId=0&SearchText=crankshaft+position+sensor<ype=wholesale&SortType=total_tranpro_desc&groupsort=1&page=12 points
-
^Ive got a 1hd ft with 510k and a 1hd fte with 630k on the clock both never had bearings touched Think its early 80 series with 1hd t (12 valve turbo)they had a recall on bottom end bearings. Anyone here got a 70 series with the 1vdt?hows it been to own? Looking at replacing my 100 series with one Ive talked to a guy that worked at toyota few years back and he told me 2010+ are best(solved oil pump issue) and when clutch packs up replacing with performance after market. If i get one wonder if it will be as reliable as my 100,it still pulls like a train after 15 years daily duty in construction2 points
-
Being a bit useless at keeping updates on track I realised that it's nearly 6 months since the last update. In short, the roof lining is in, looks 7 out of 10 and I should have got it done by someone who knows what they are doing. New reproduction bumpers bought and fitted (over-riders in the front and centre section of the rear are the originals re-chromed). Cold air box built and installed. Steering installed, rack fitted with new boots, cleaned and painted,with the original bus sized steering wheel I don't think the steering will be too heavy. I am having a couple of days away at Ohakune with the family and took a trip up to Horopito and got a replacement gutter trim to replace the one I destroyed with the polisher (that will get its own post), knobs for the heater and vents for the demister. Time now to start knocking off the half finished jobs, run some fuel lines and sort out the wiring. Make noise!!!!! Photos to come.2 points
-
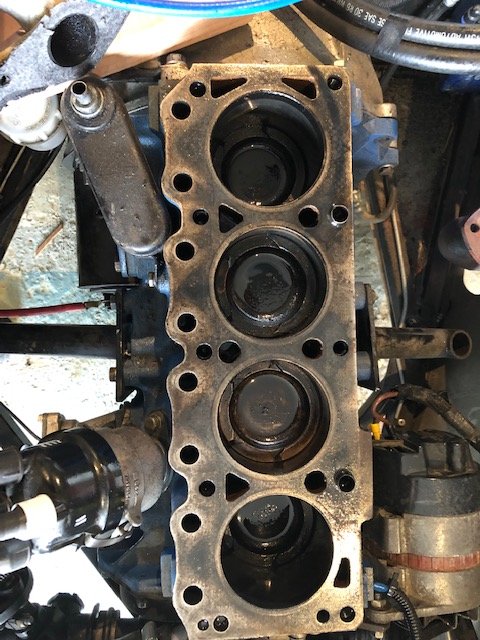
Mmmm, boost ports....mmmmm 3 of them.... plus extra large transfer ports making this a 5 intake port motor, all nicely port matched with good flow. Compared to a standard cylinder with only 2 transfer ports.
2 points
-
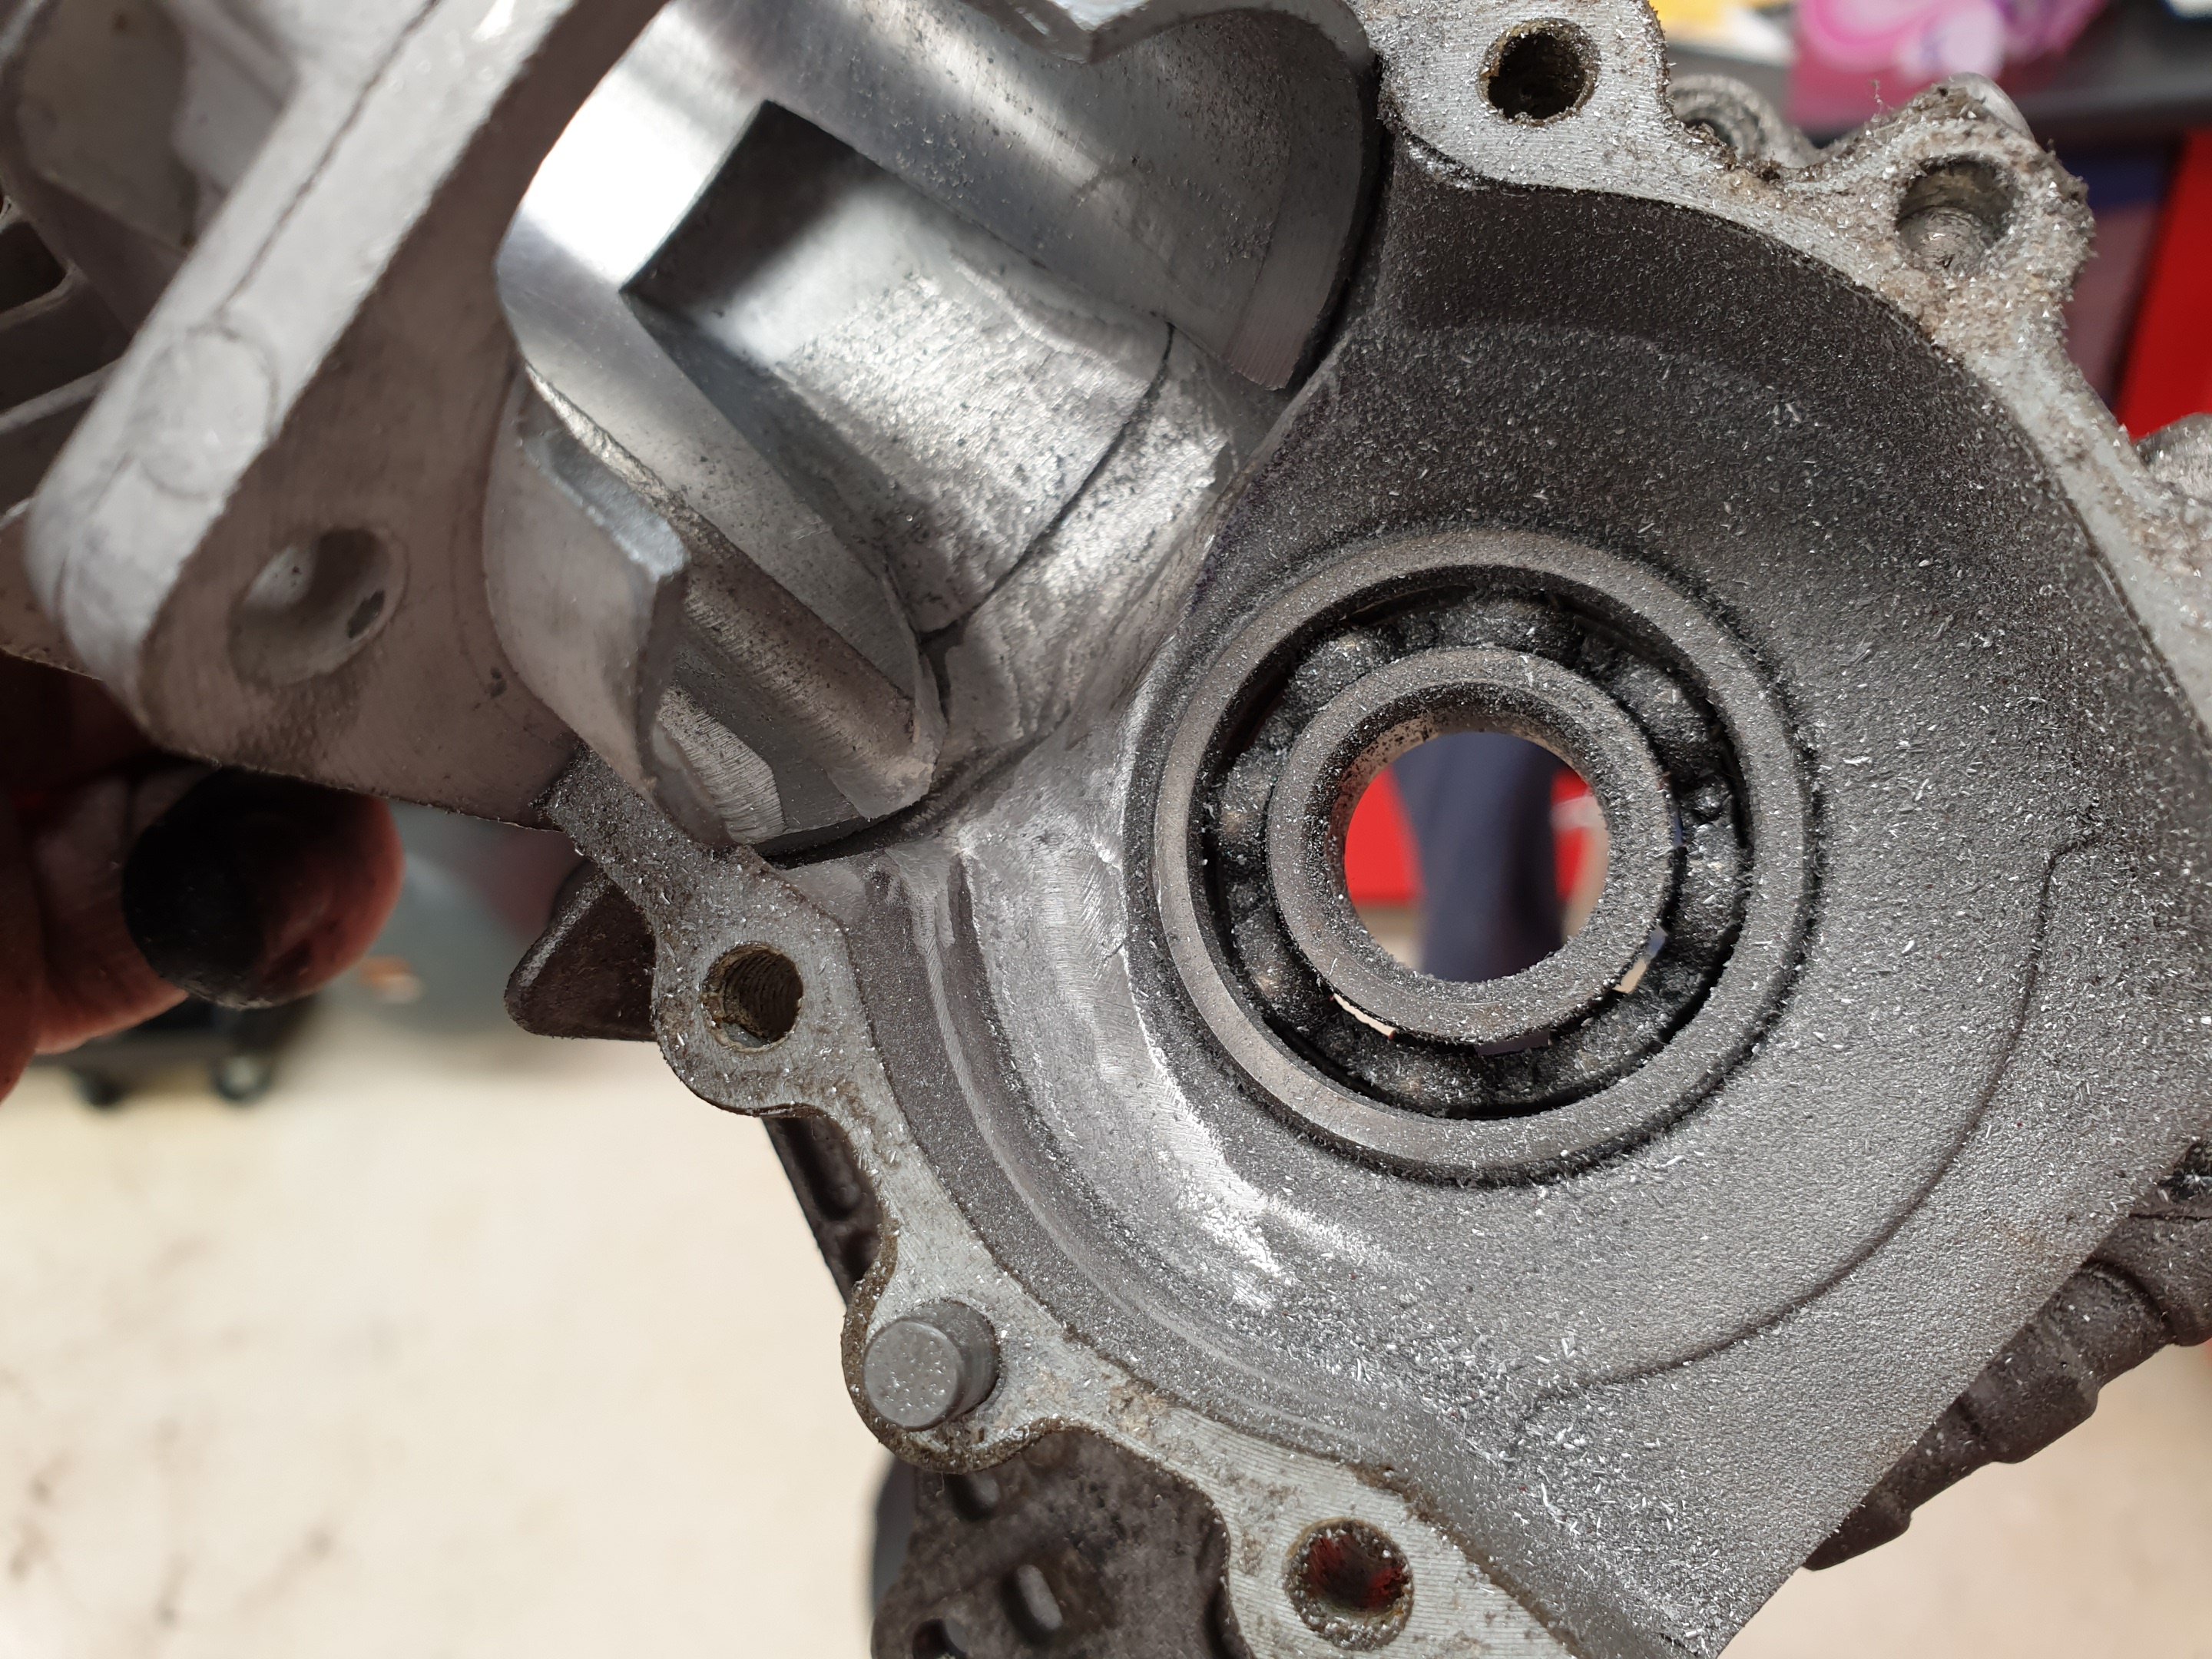
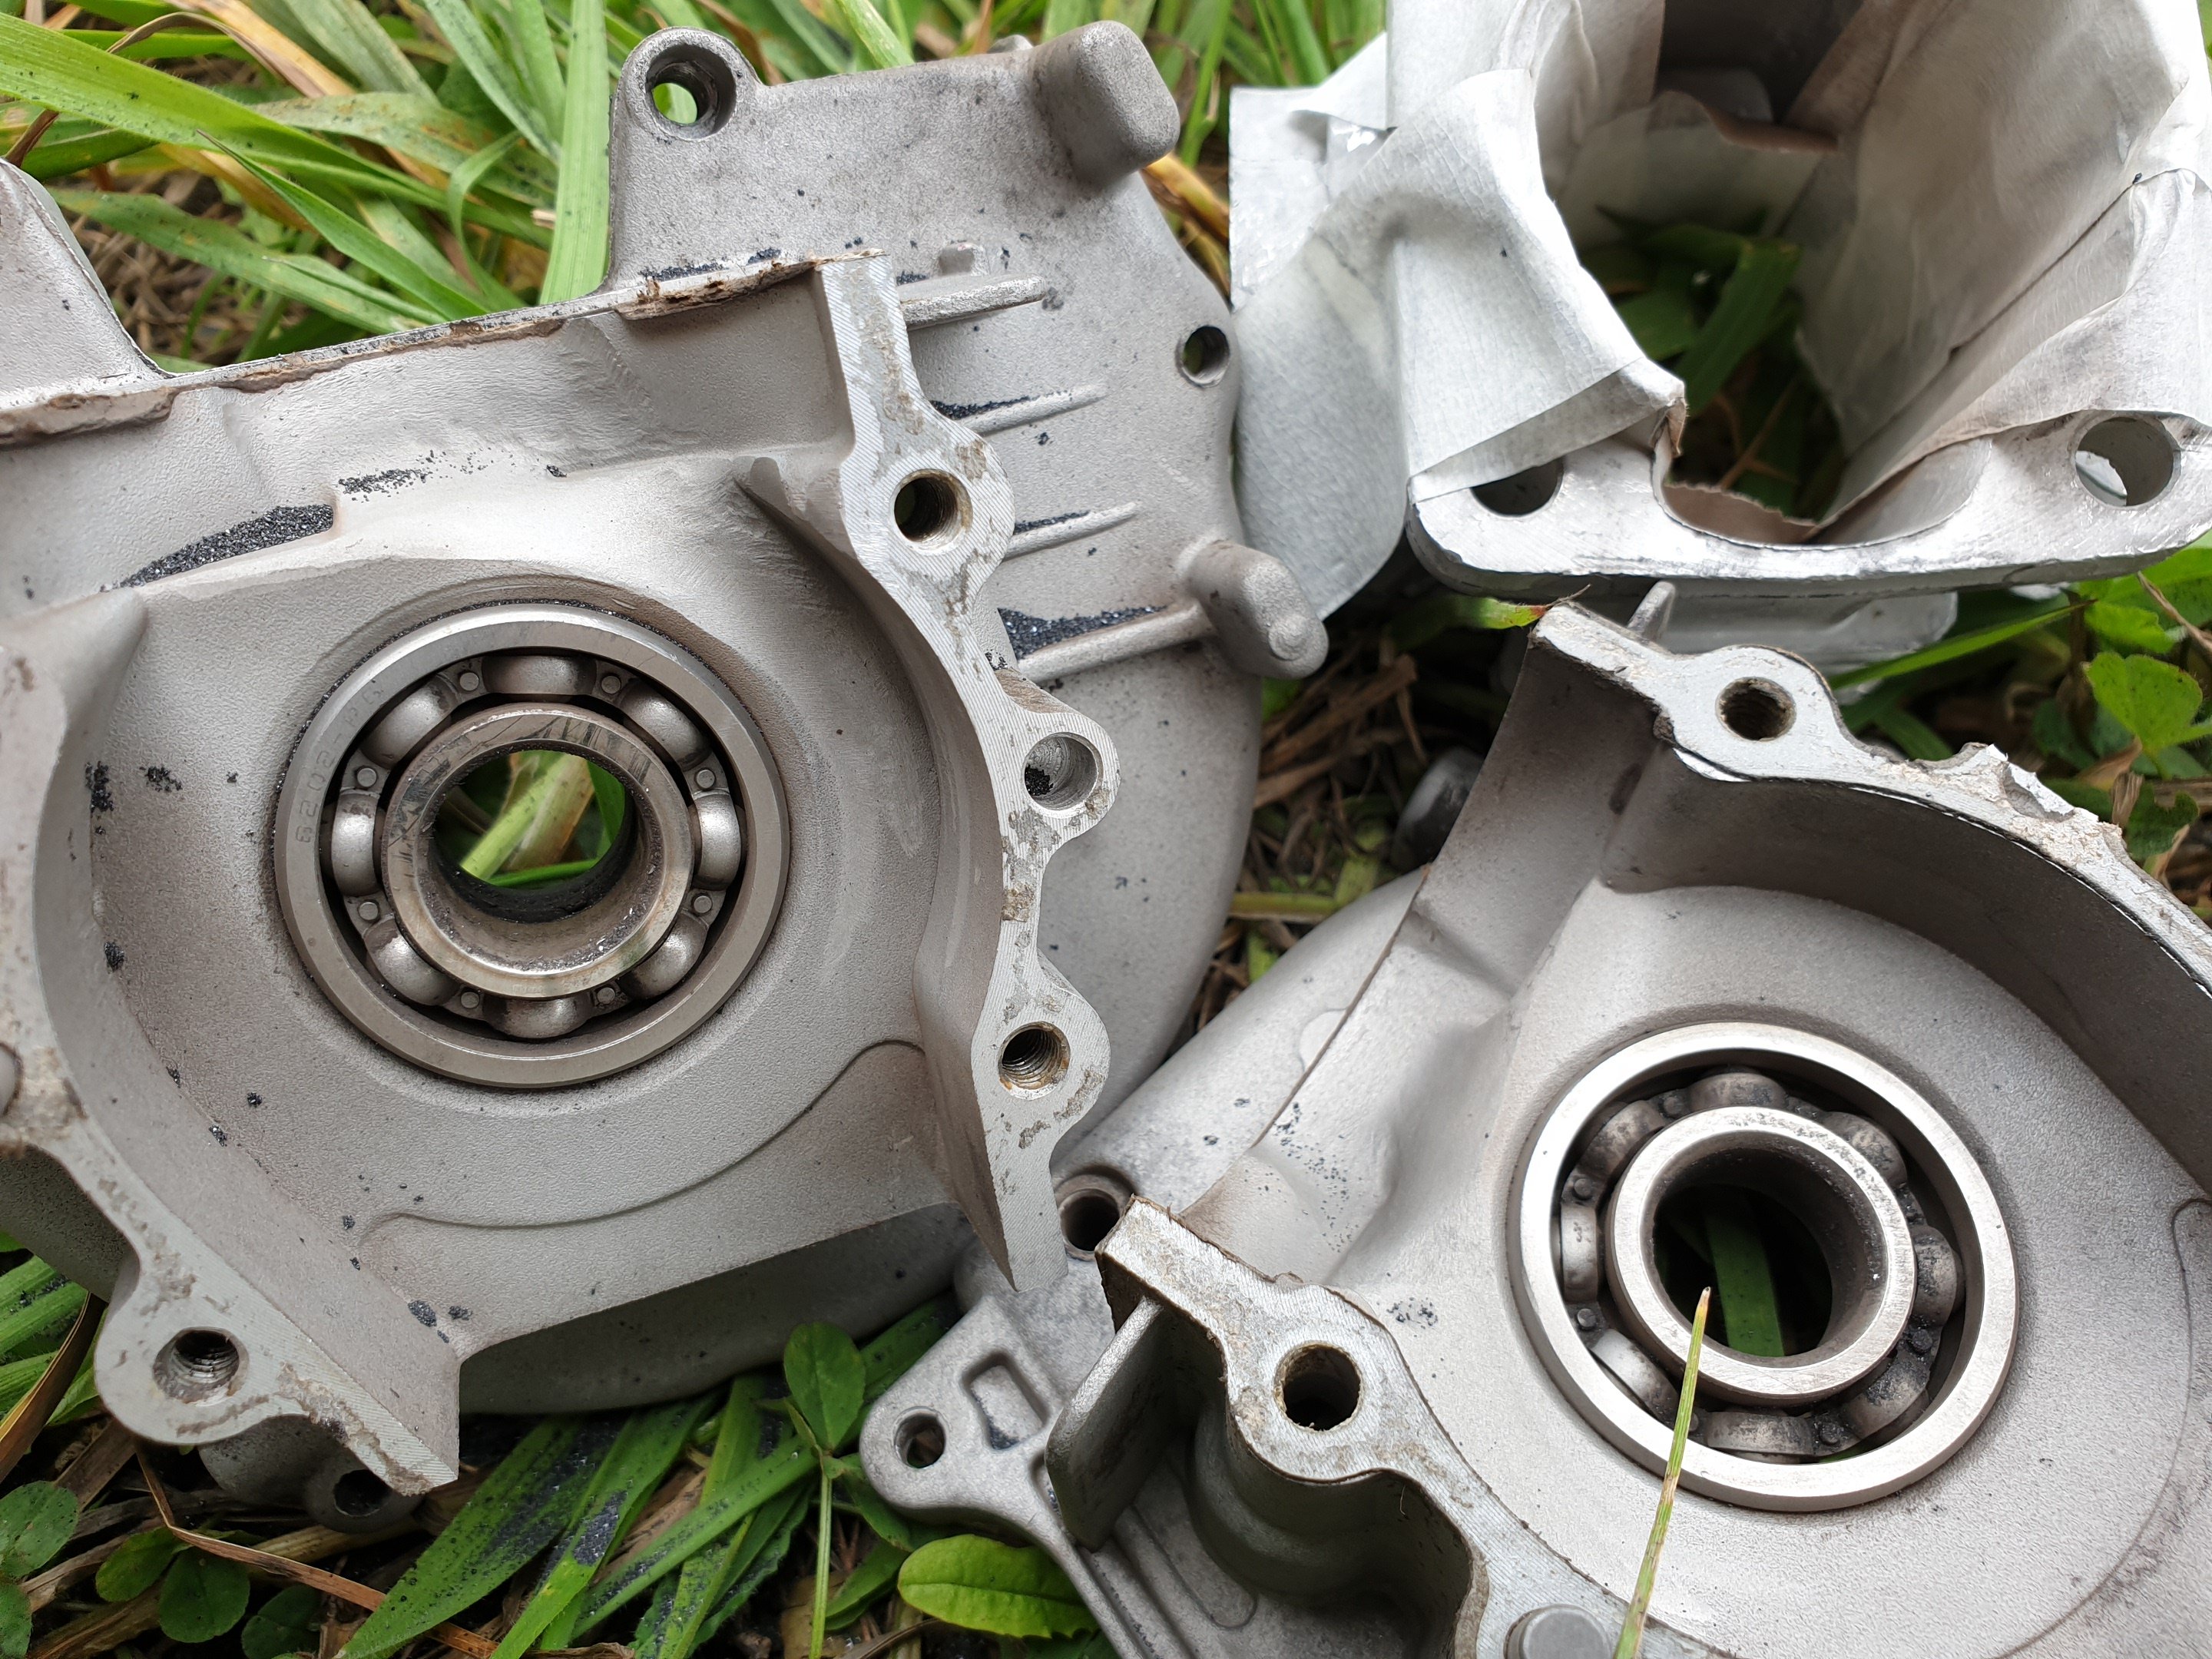
I just got this done during the last 4hrs: Roughly ground in with a dremel, then I tidied it up by sandblasting it. Came out pretty nice I think. Bearings will be replaced...don't panic...
2 points
-
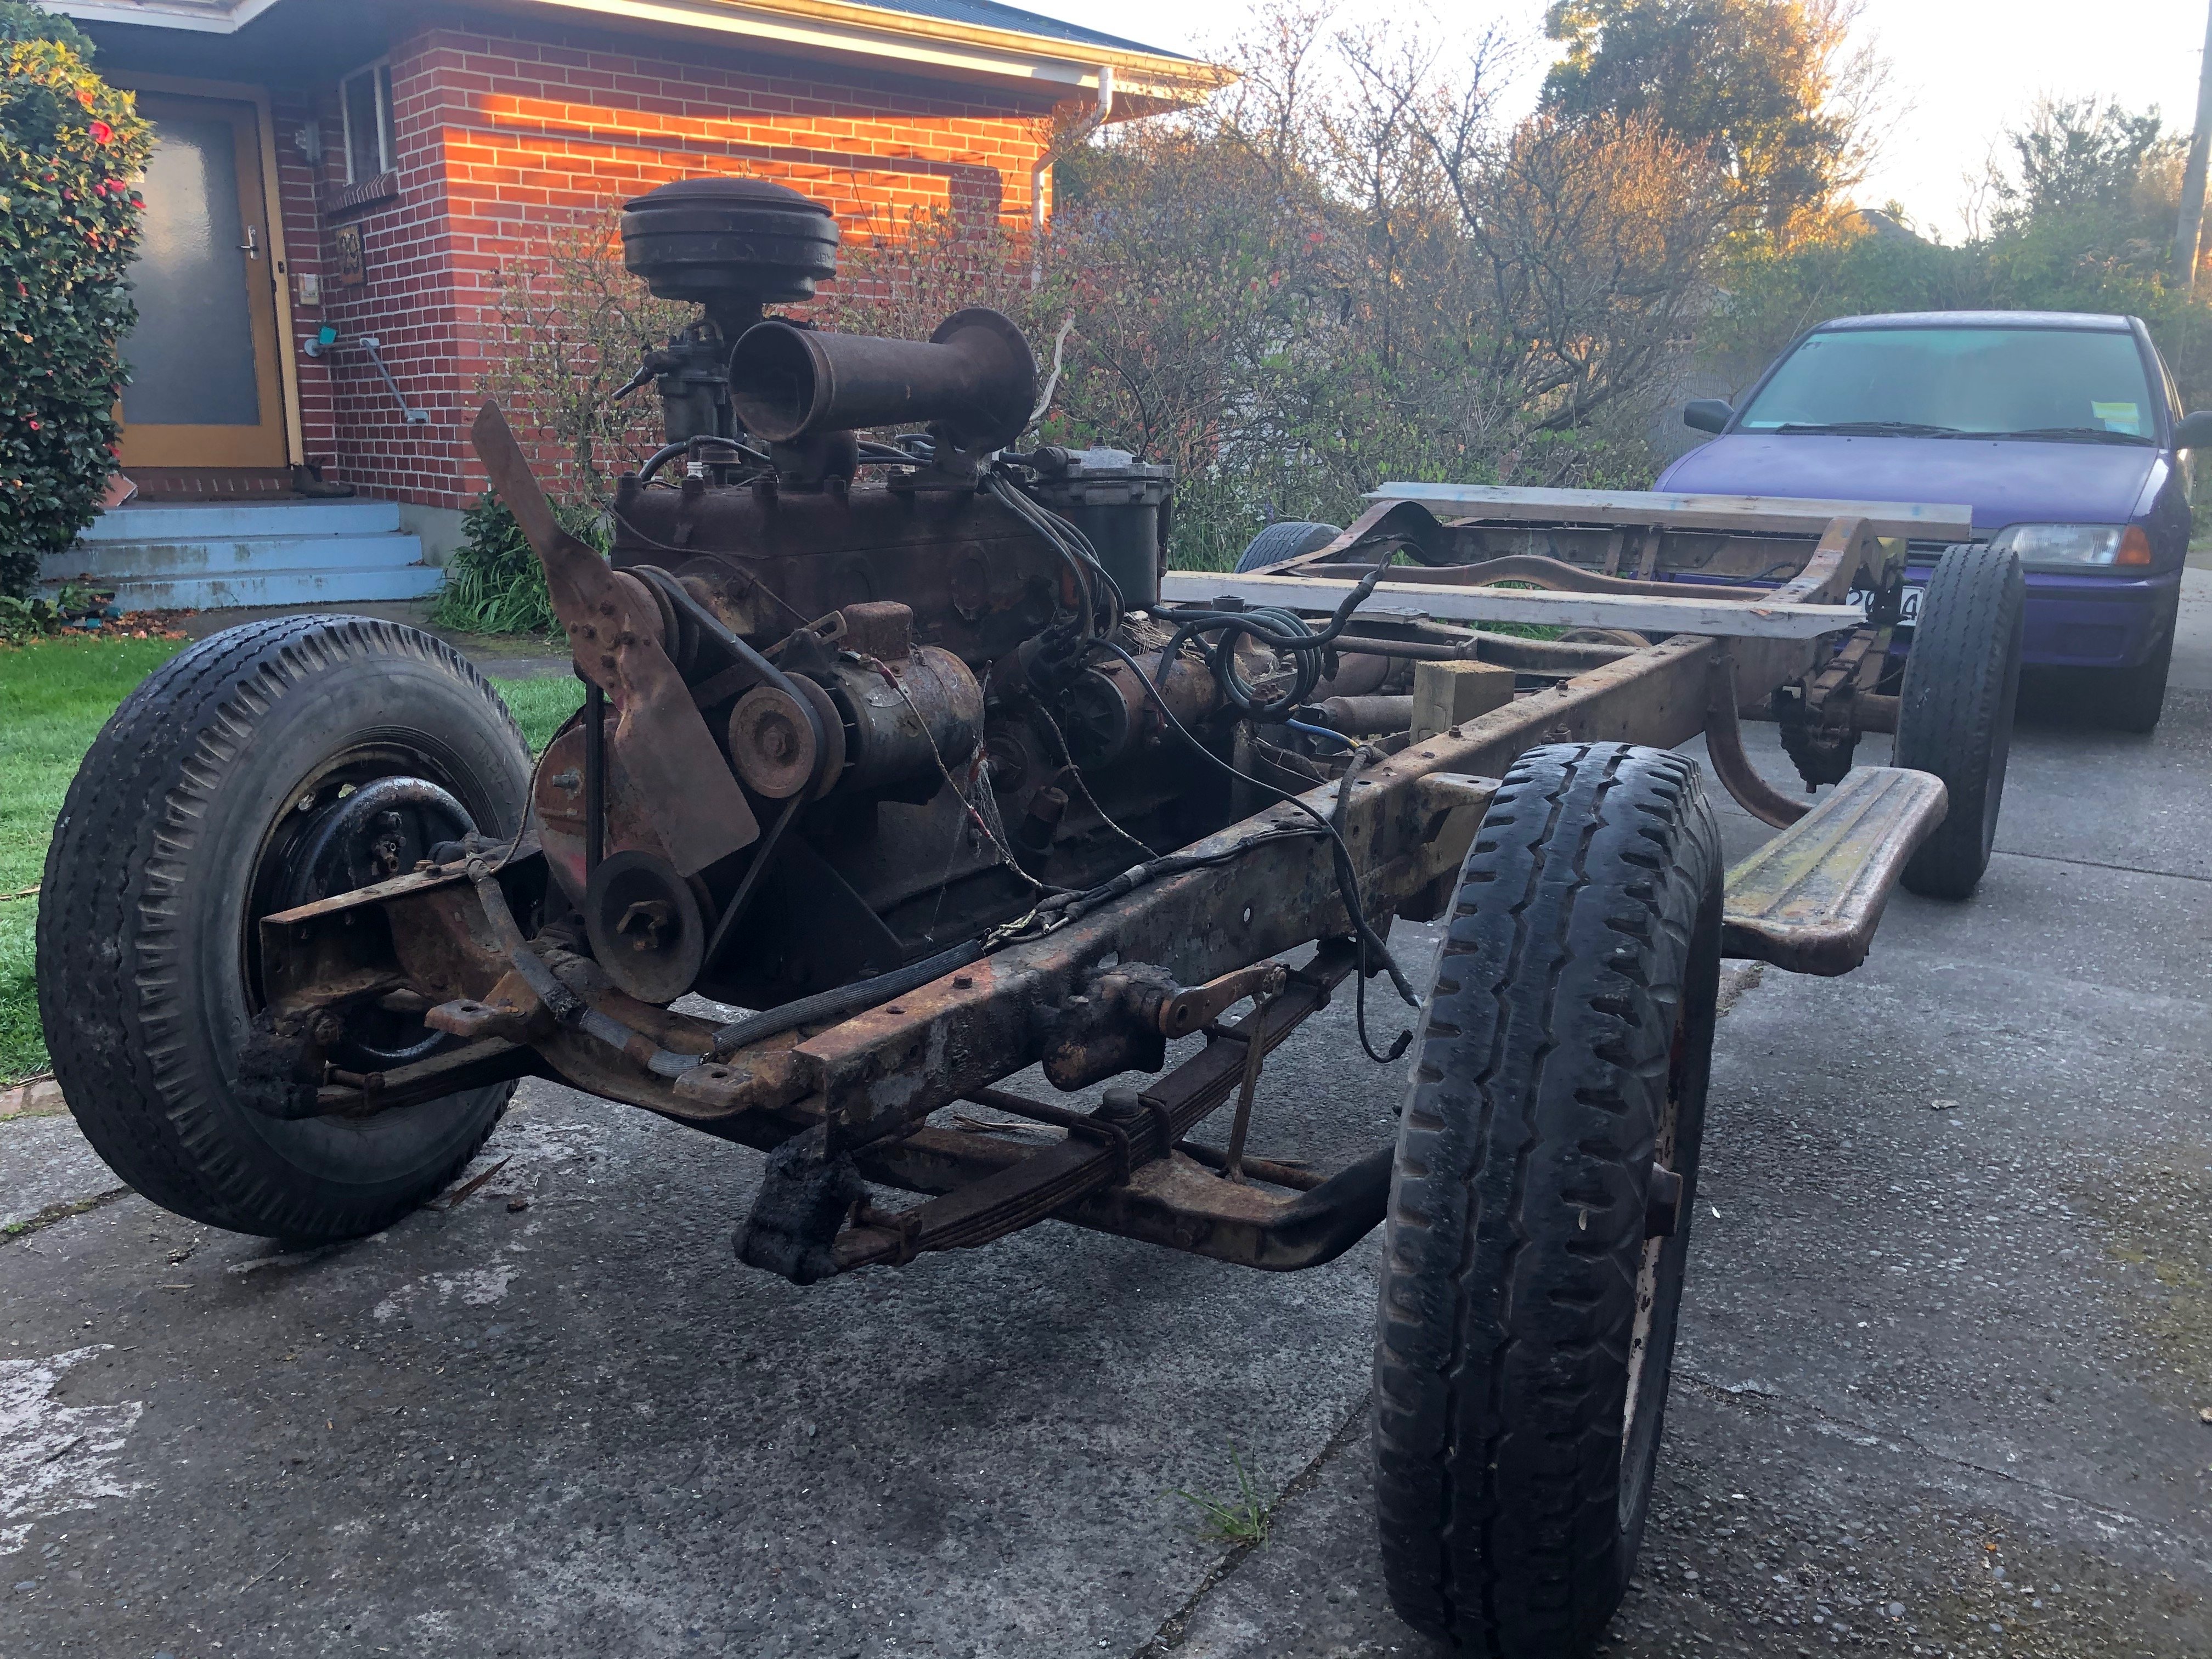
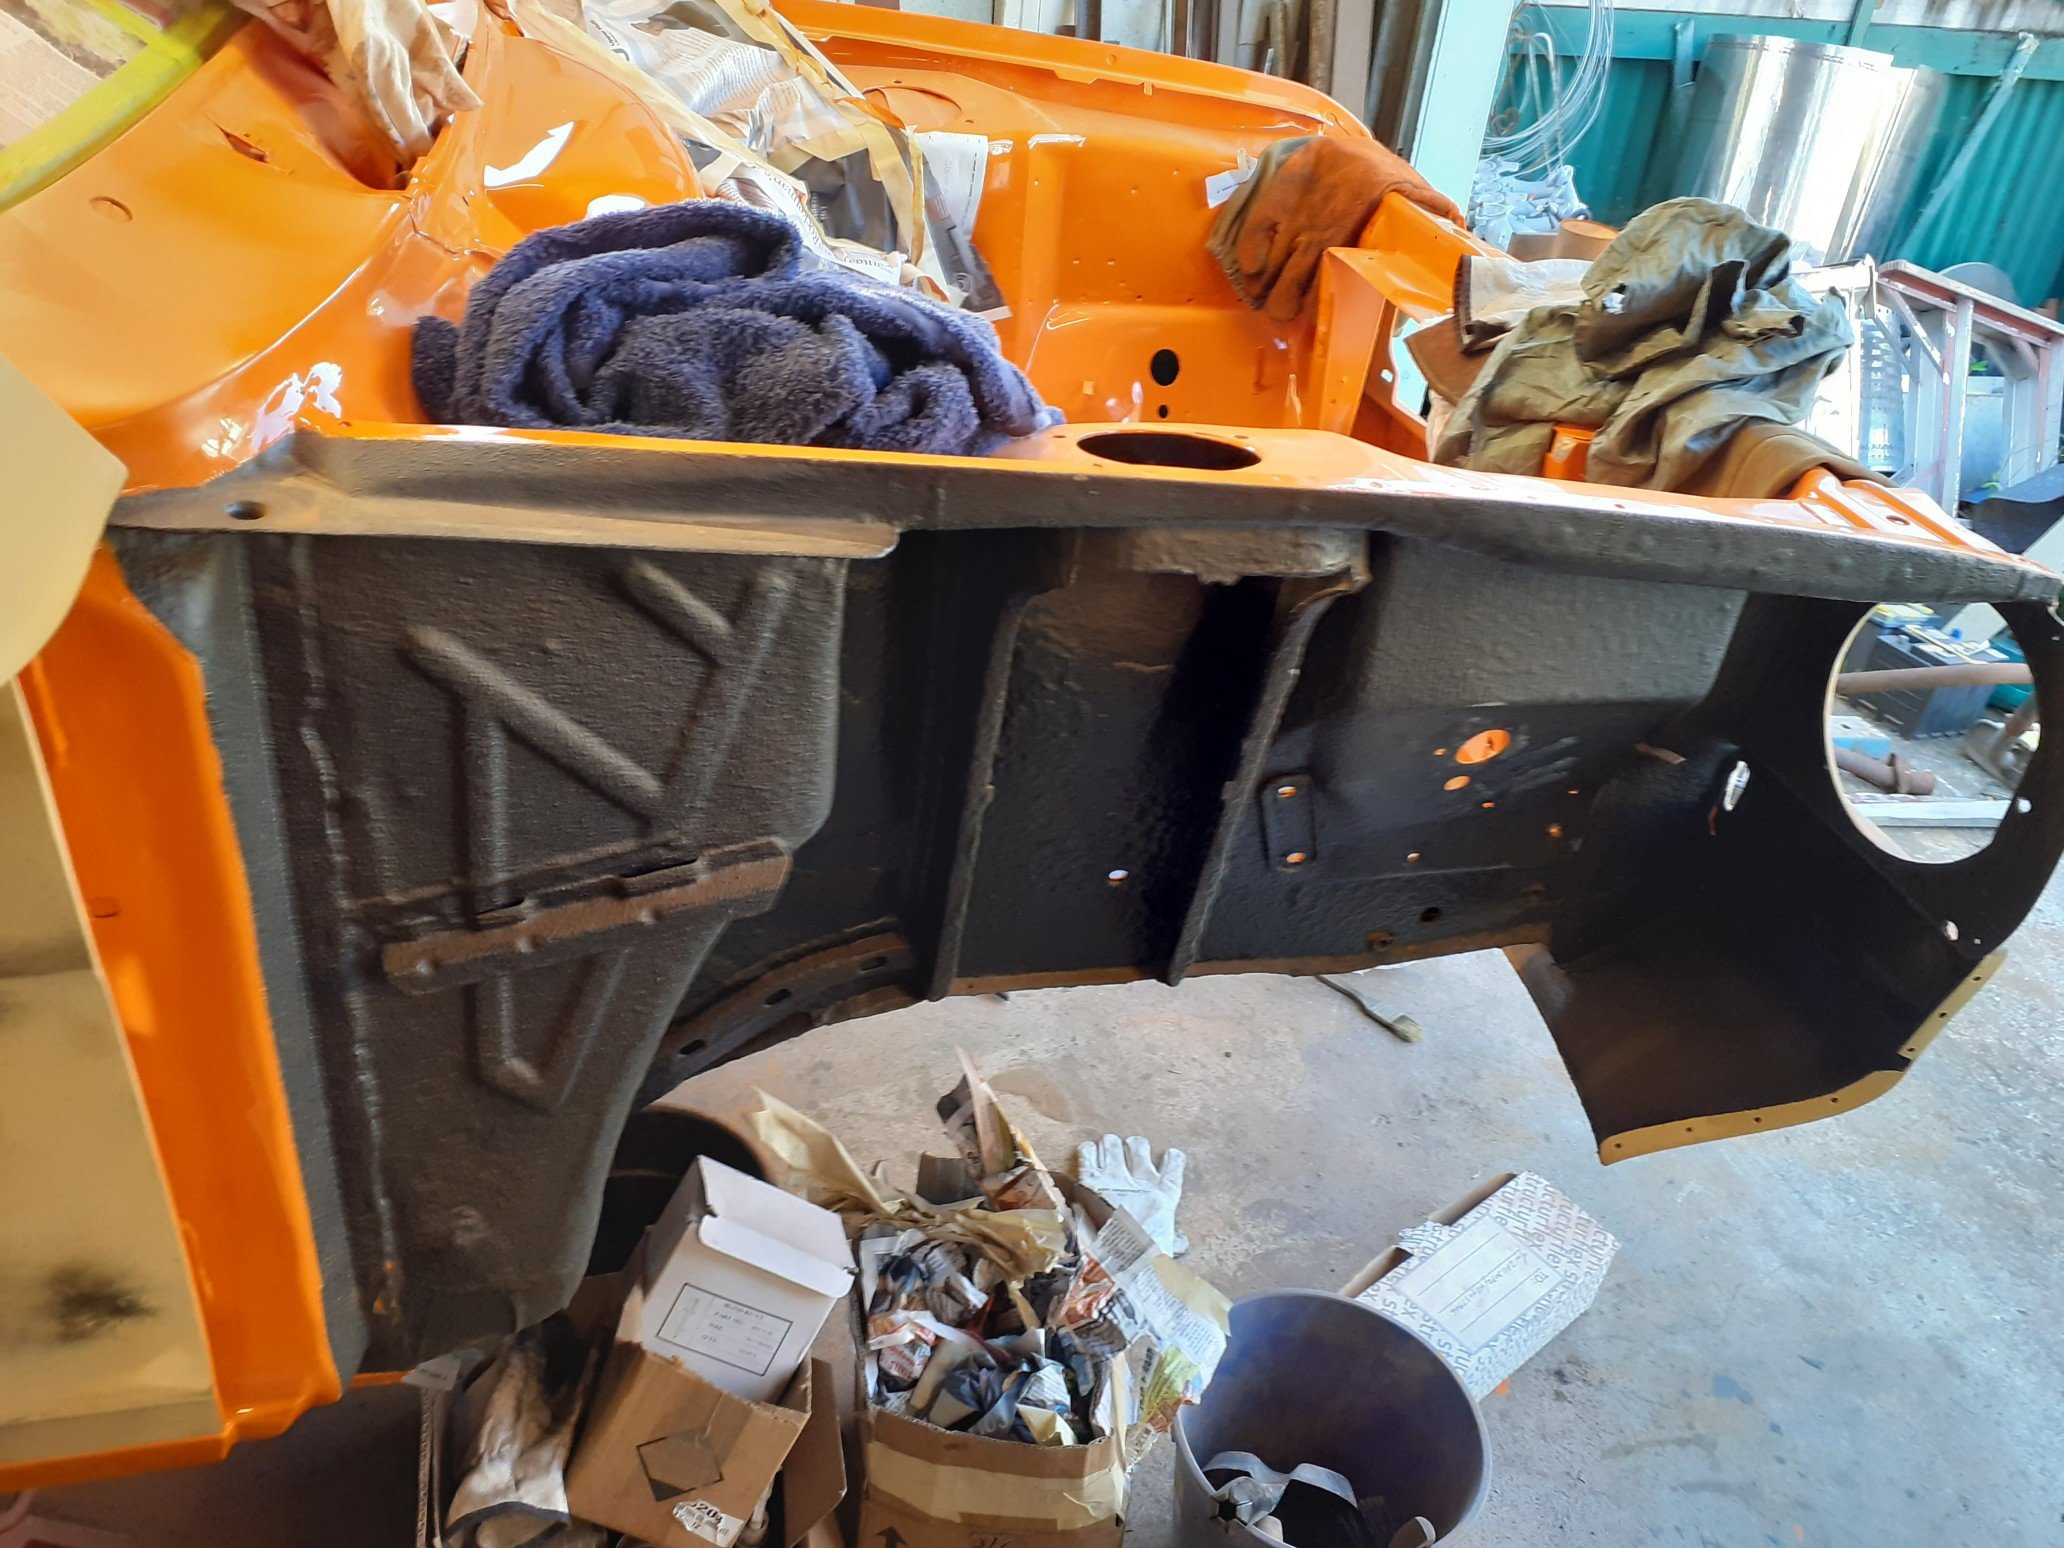
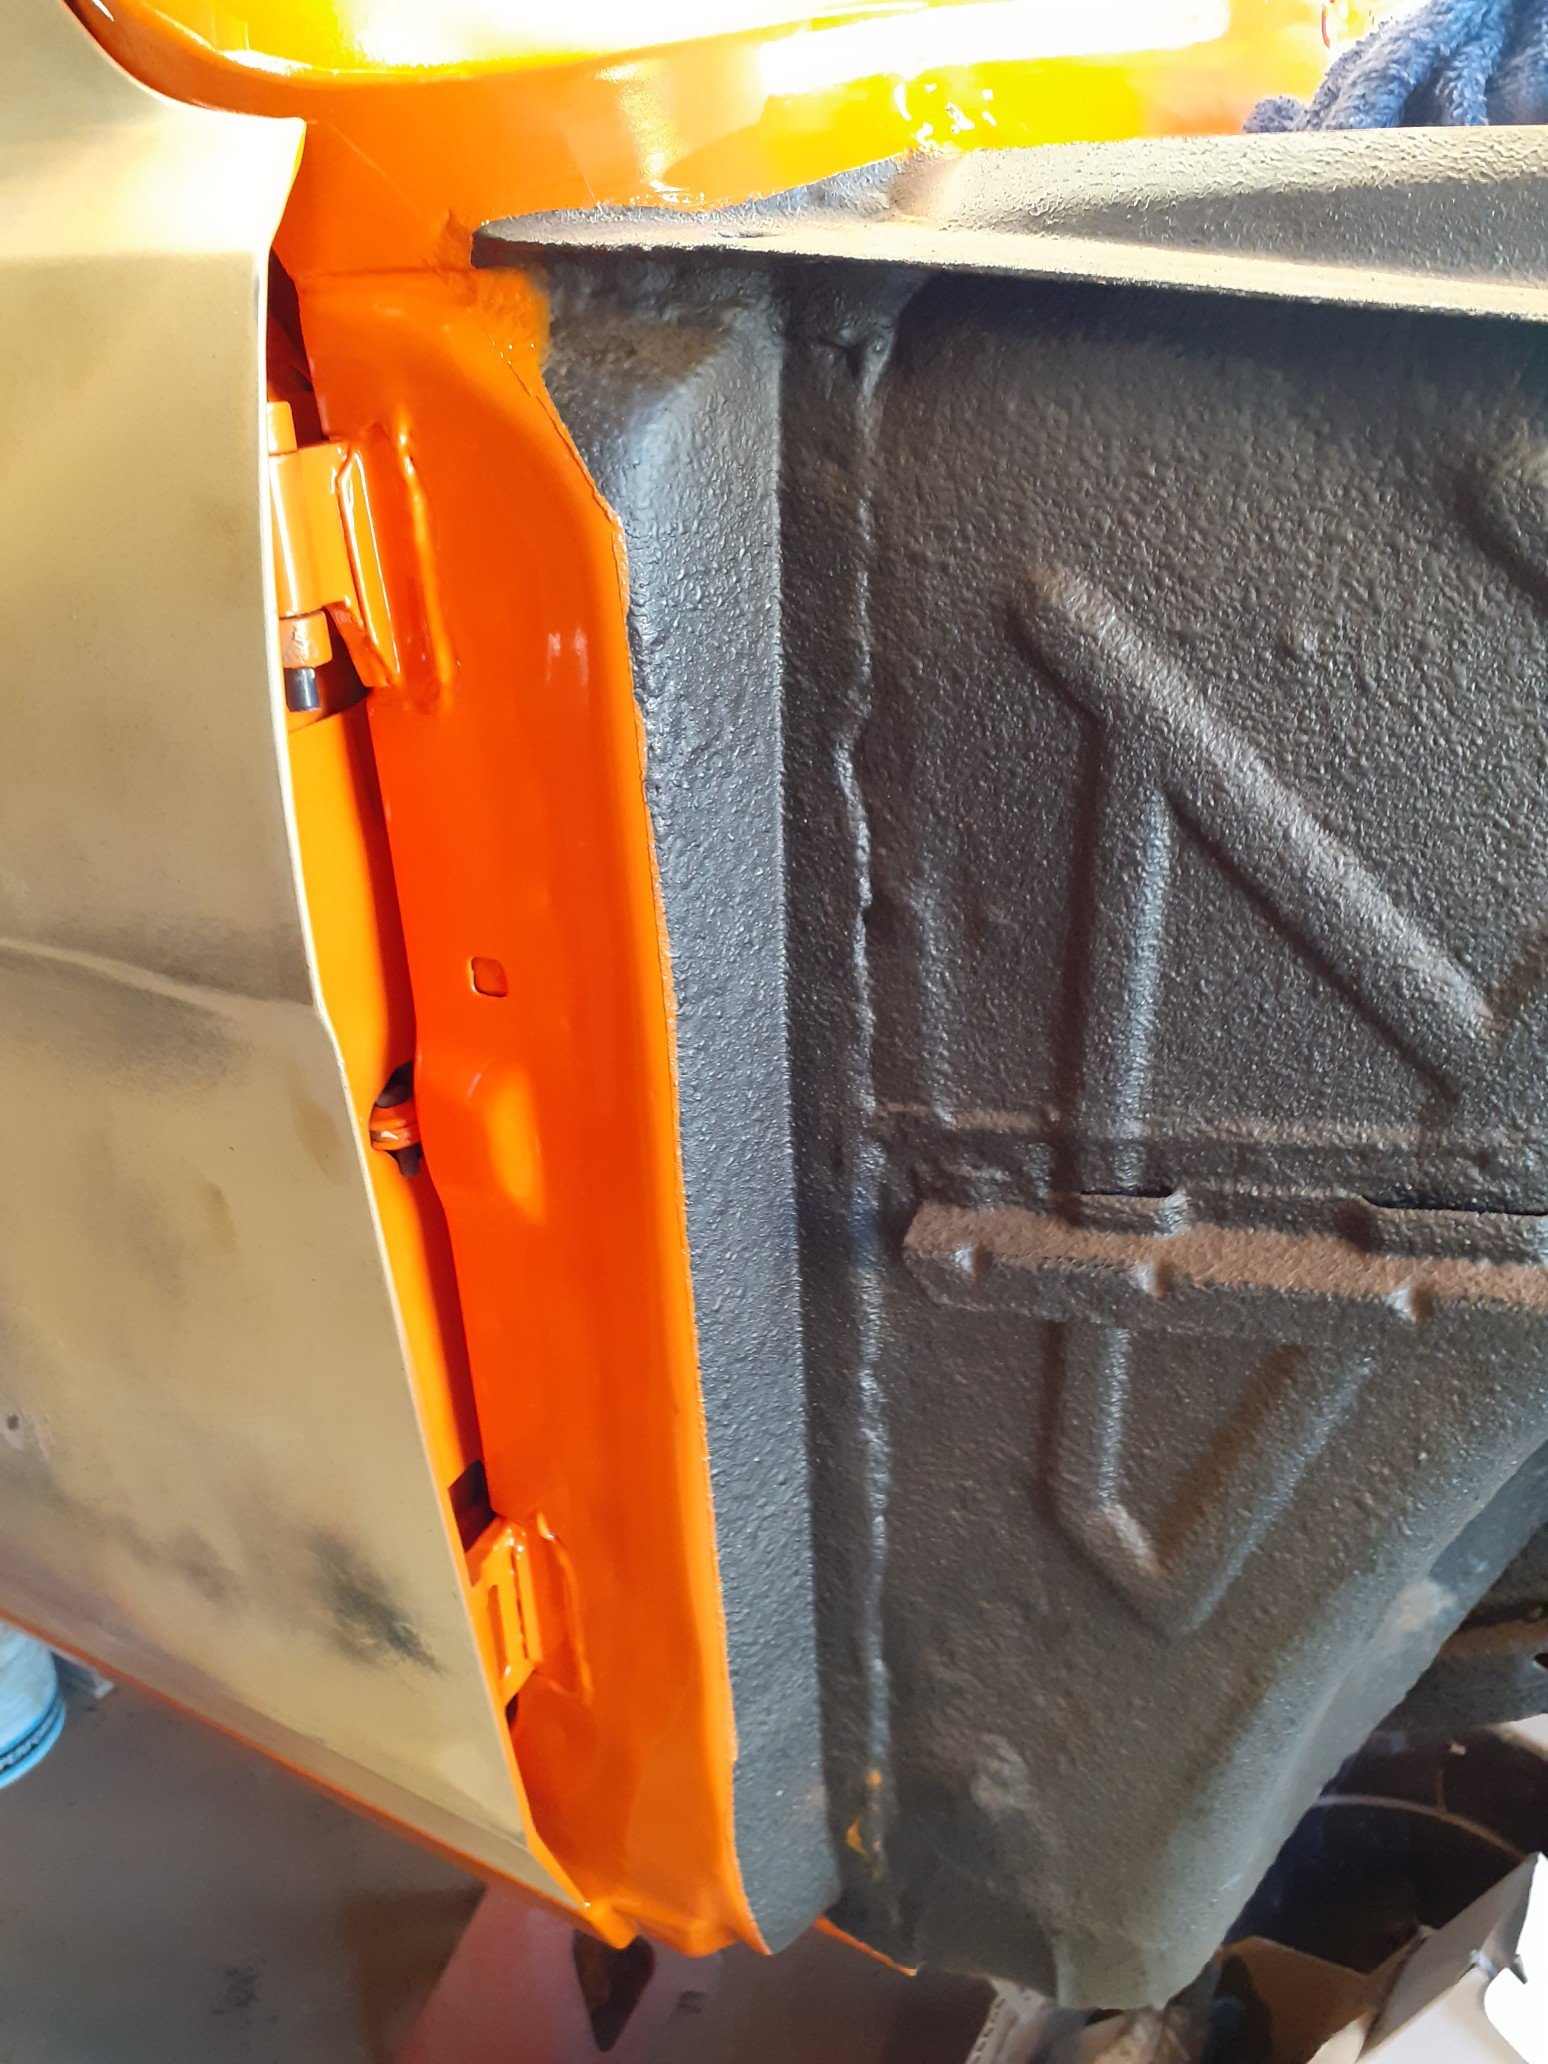
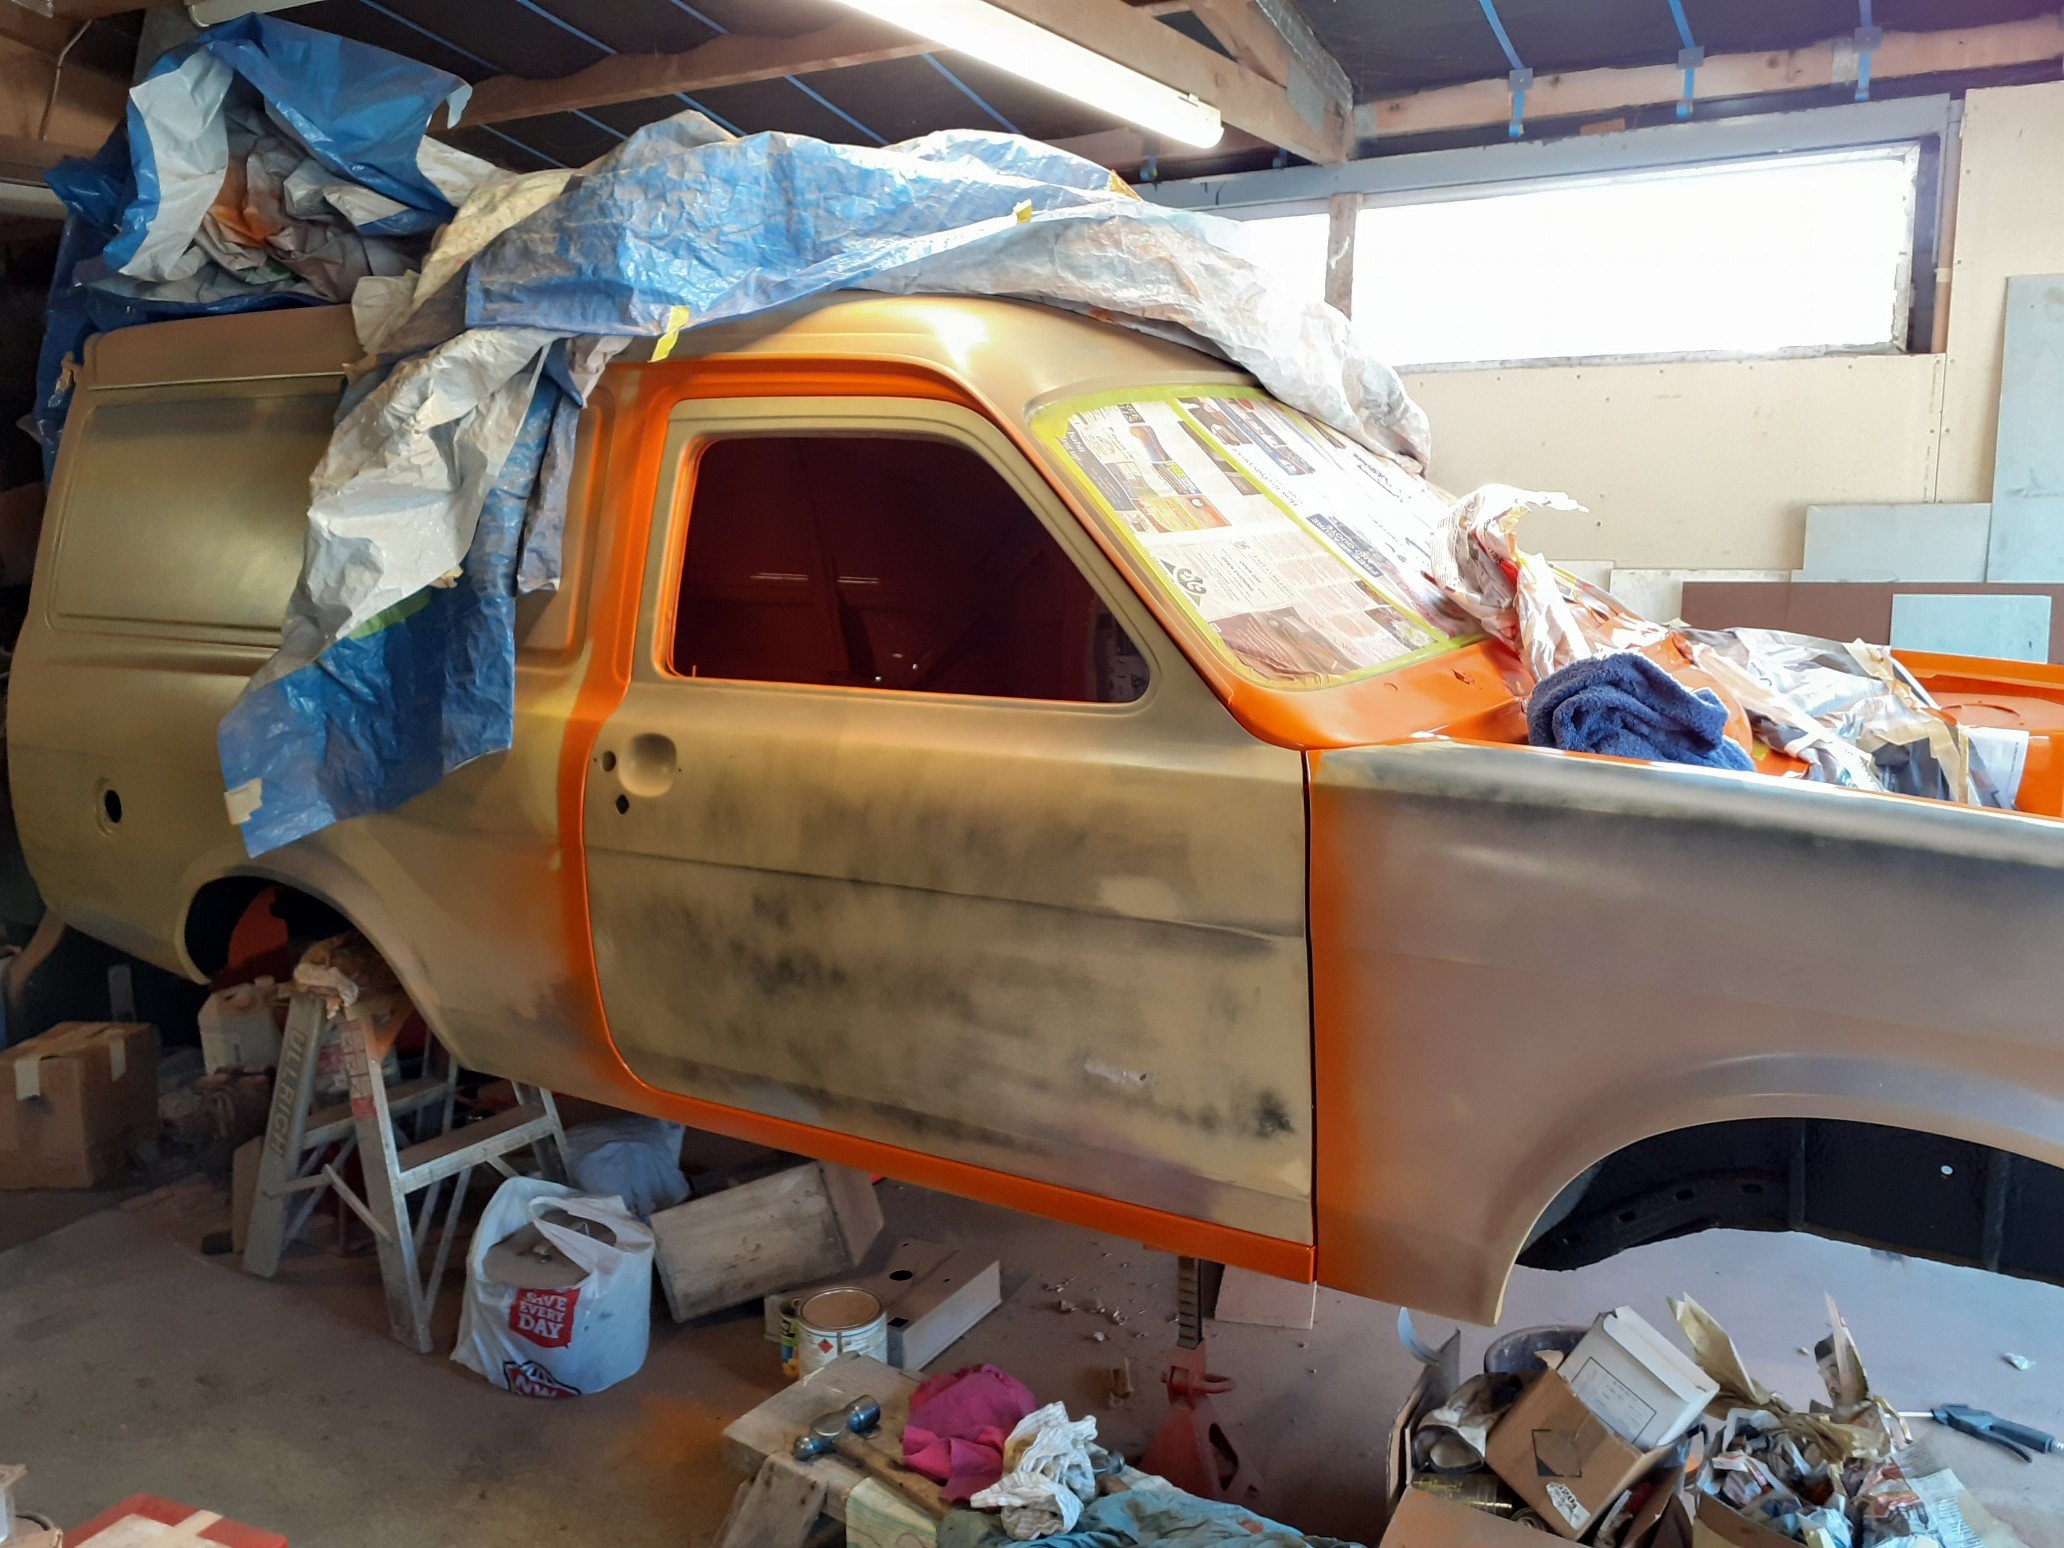
Cab off and away last night for wood rot repair. We are thinking of not painting the cab until after it's re-registered so the chassis tag & WOF sticker etc are undisturbed to make the process as smooth as possible. Now that it's short enough it can fit in the garage and we can hoist the engine out & get the chassis cleaned up. Keen to do some laps in its current state!
2 points
-
take it out. you'll regret it later if you don't. especially when it starts leaking and you can't buy any bits for it. patching a sunroof isn't as hard as people make out, anyone with decent panel skills should be able to sort it. i know a guy but hes eye wateringly expensive. hes very good, i guess that's why hes so spendy. if you get stuck PM me.2 points
-
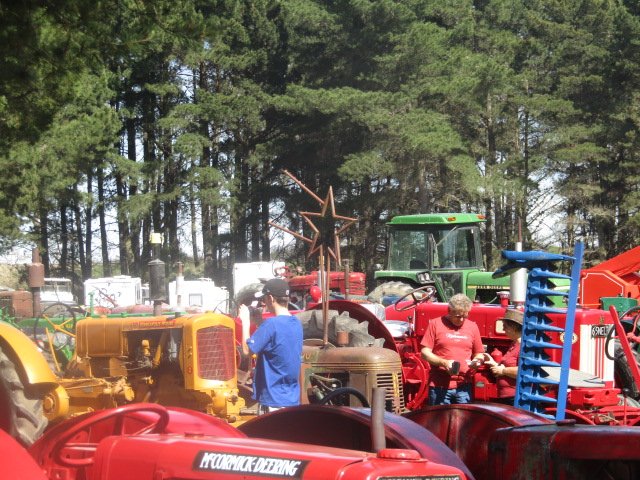
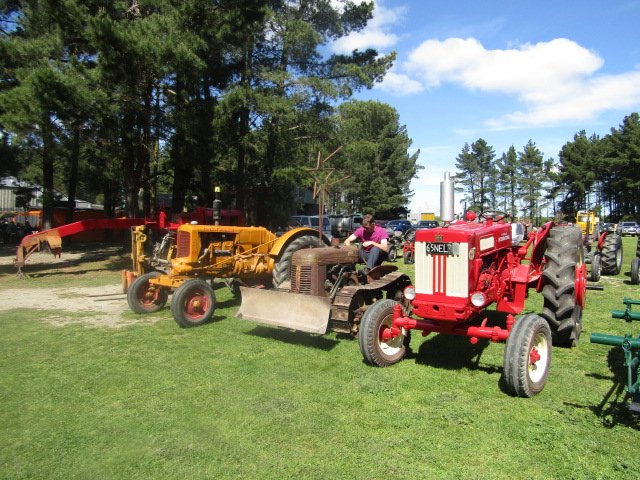
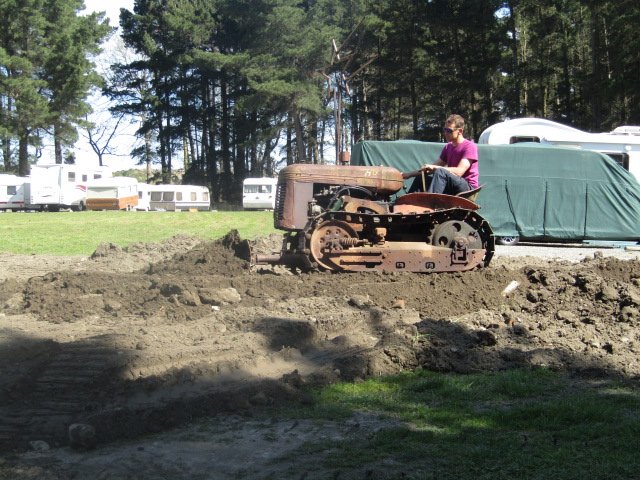
The Mcleans Island Vintage machinery club had its annual show this weekend just gone, It seemed rude not to attend. Ill post pics here, in the tractor thread, and or in the wombling Barry thread. In the show, standing proud Pushed some dirt. Had some sharns.
2 points
-
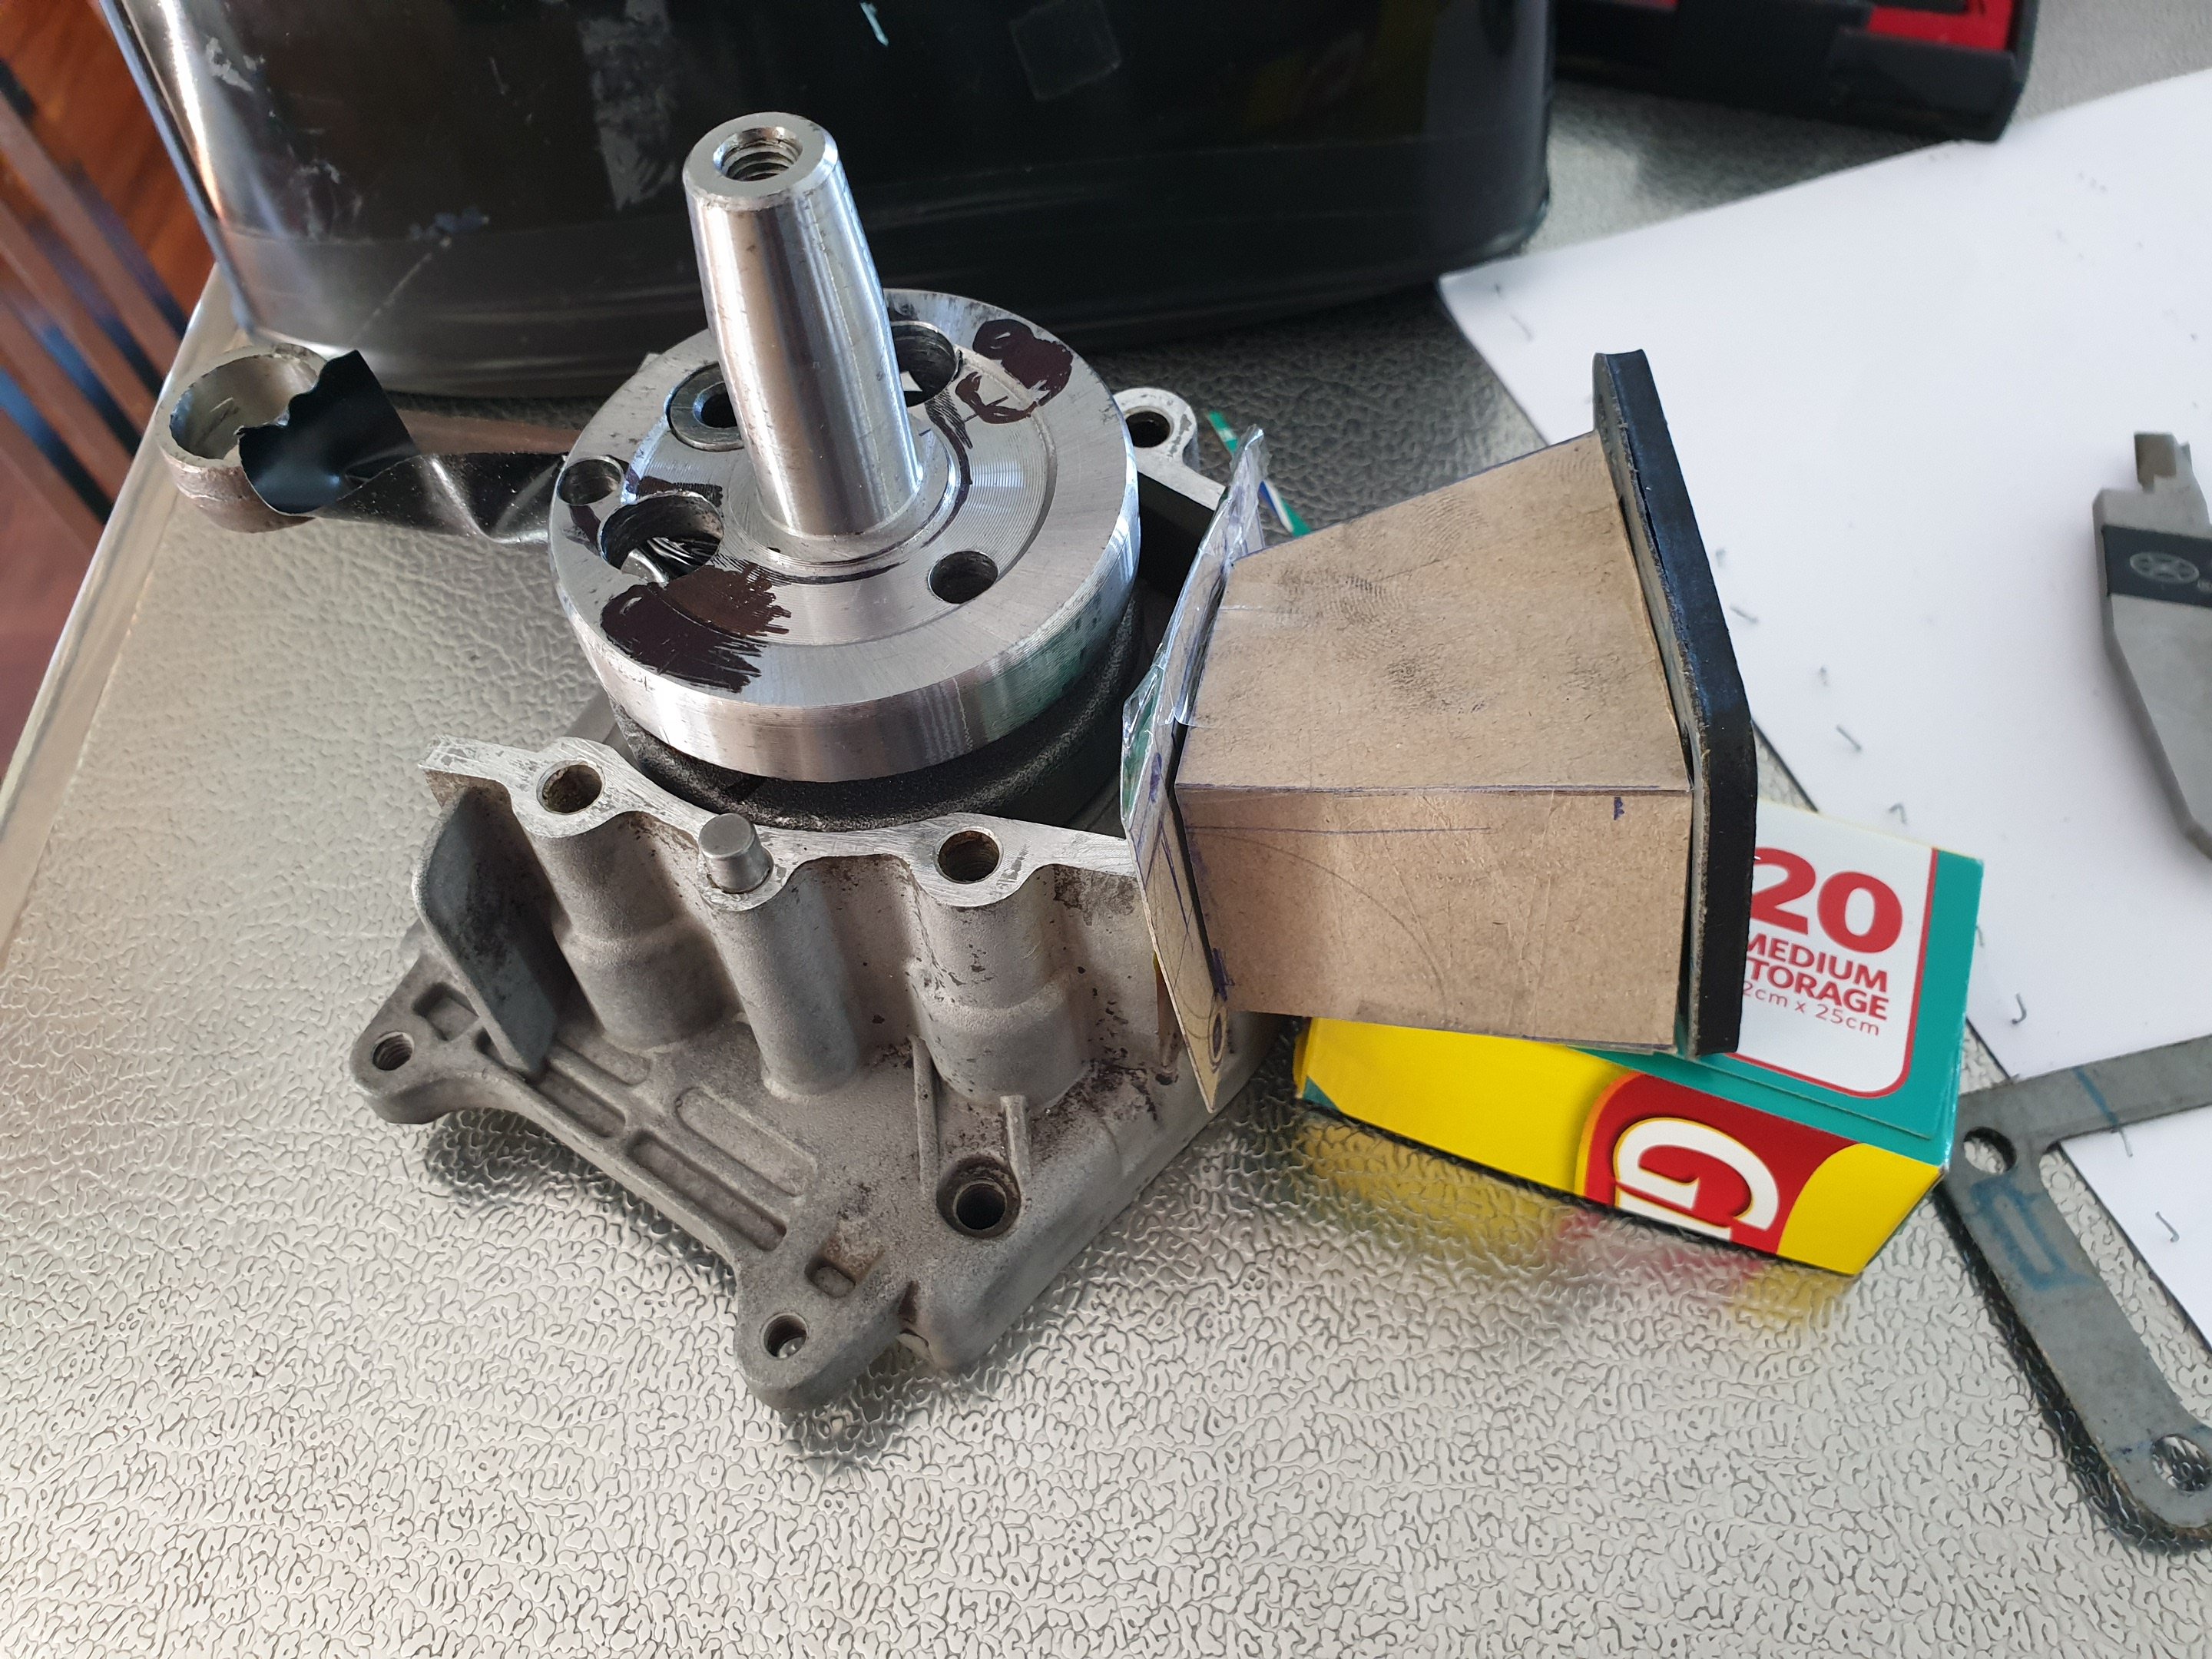
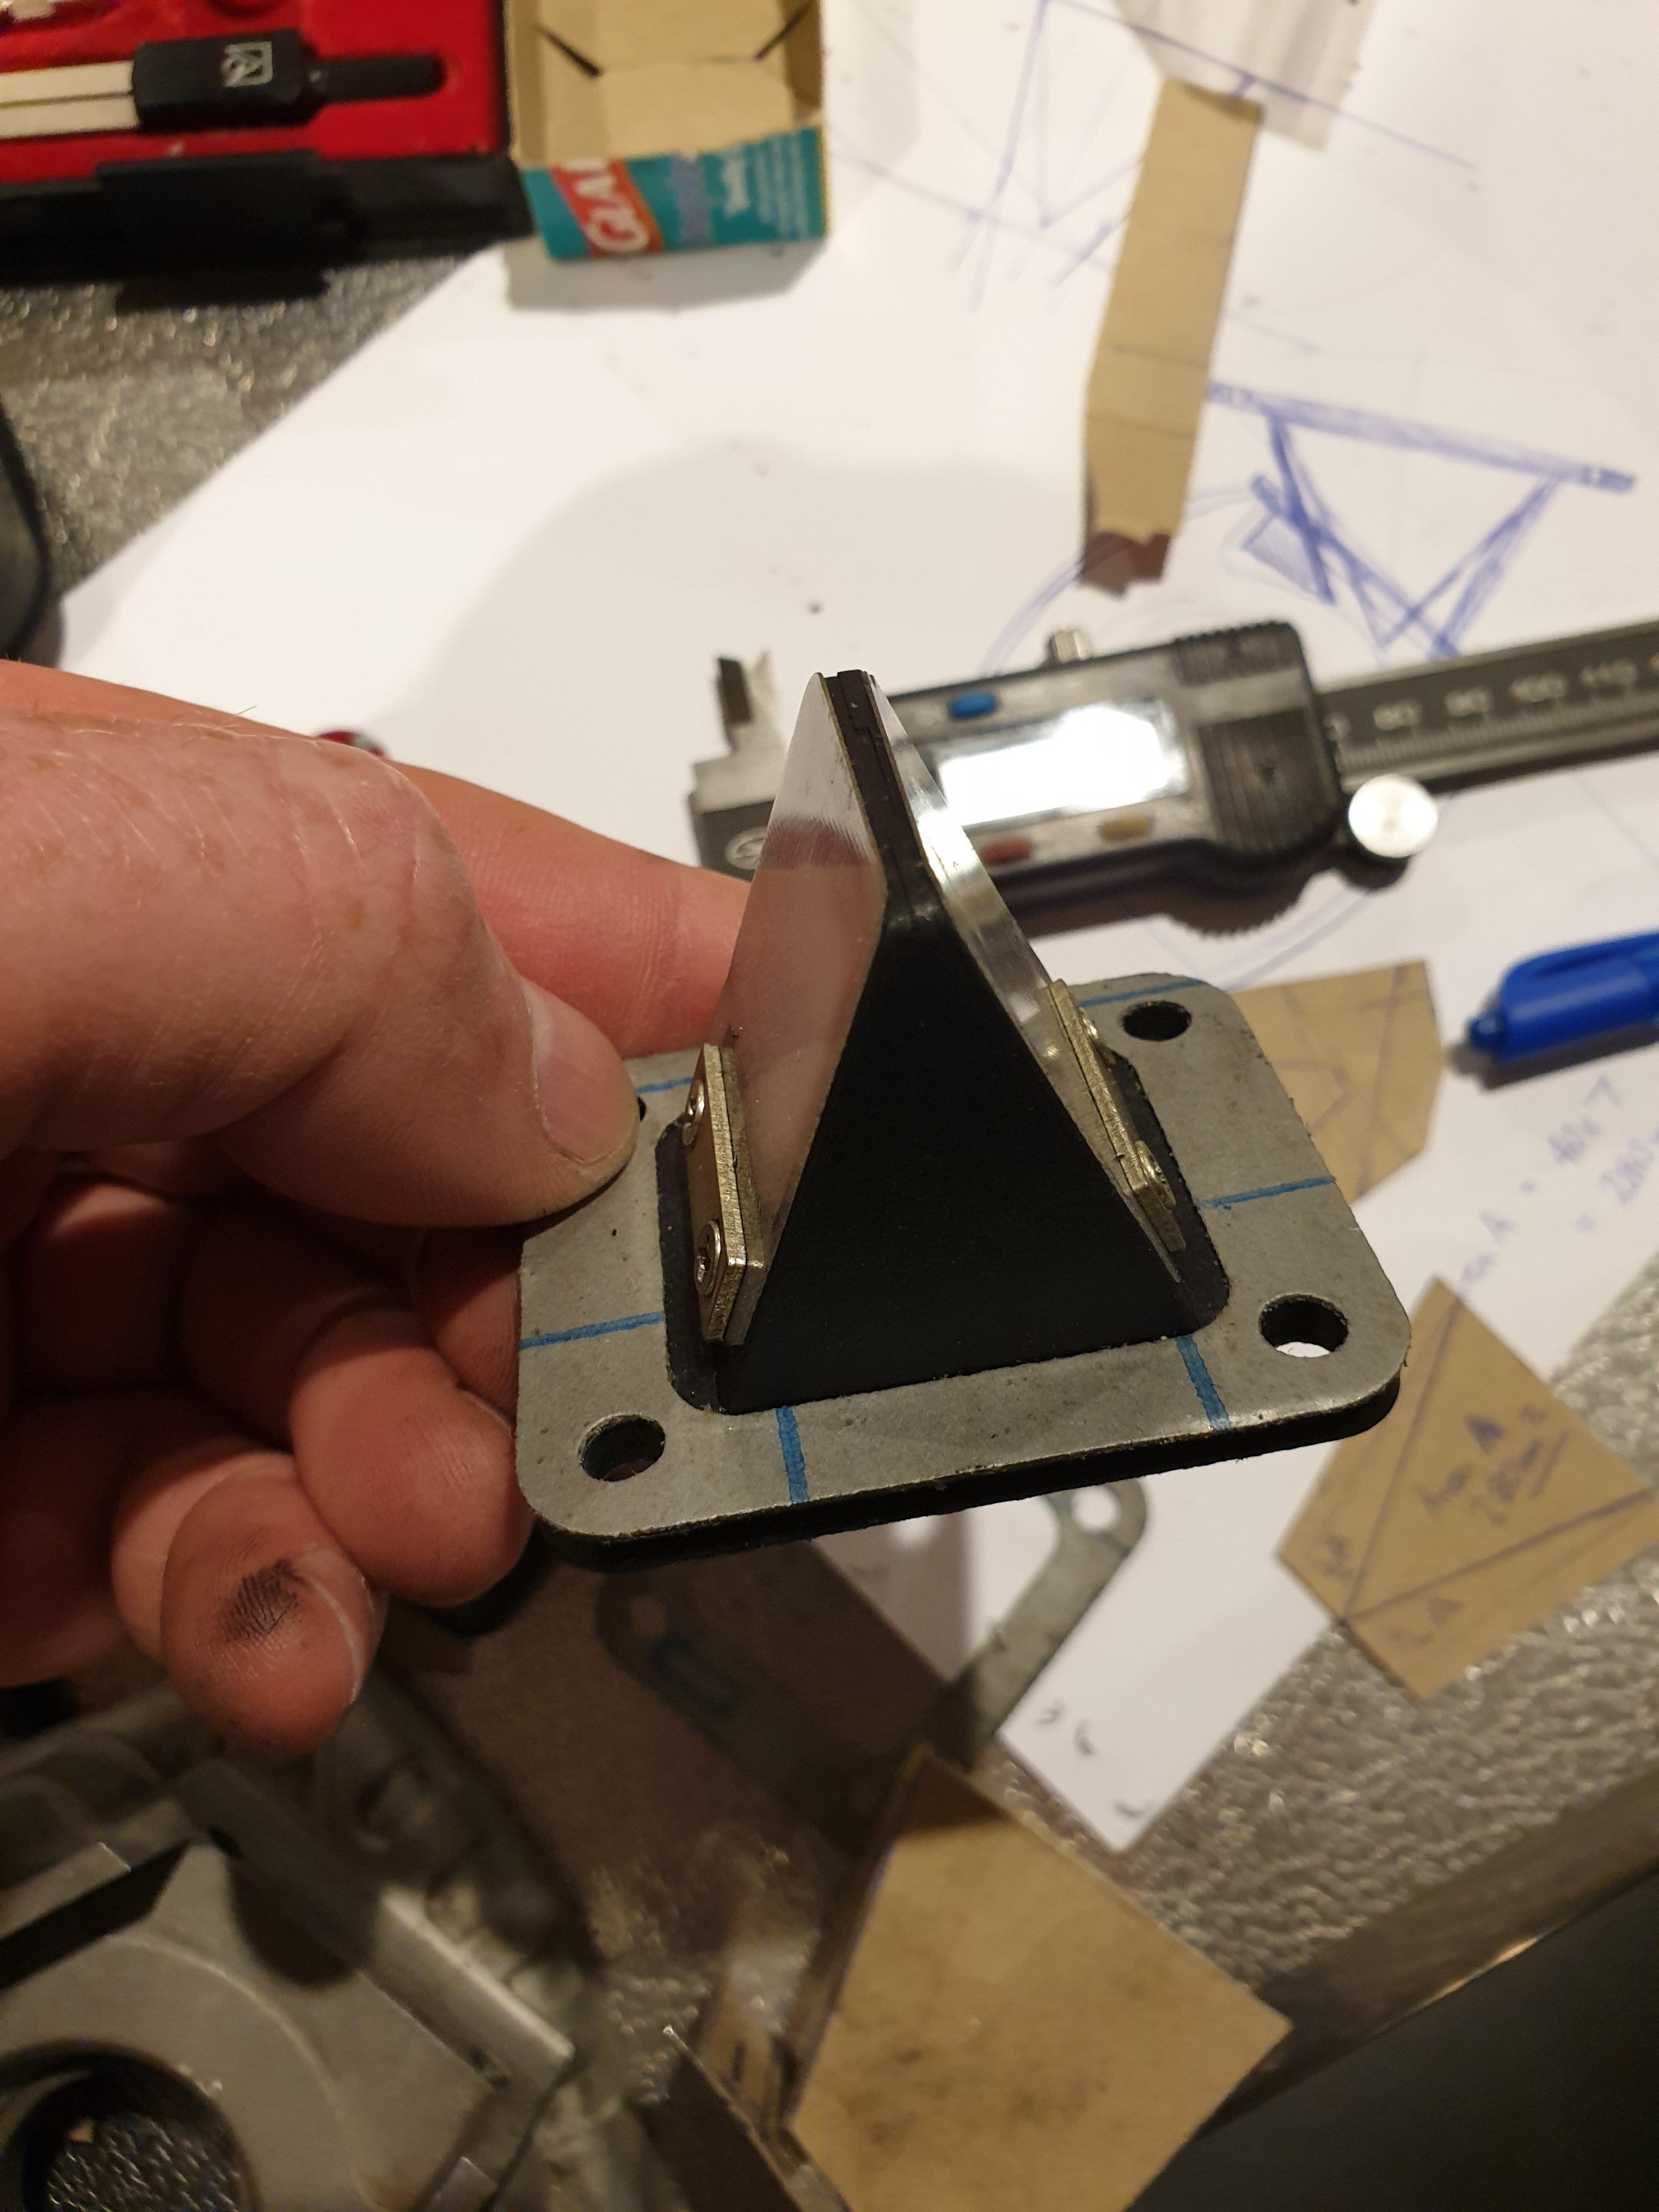
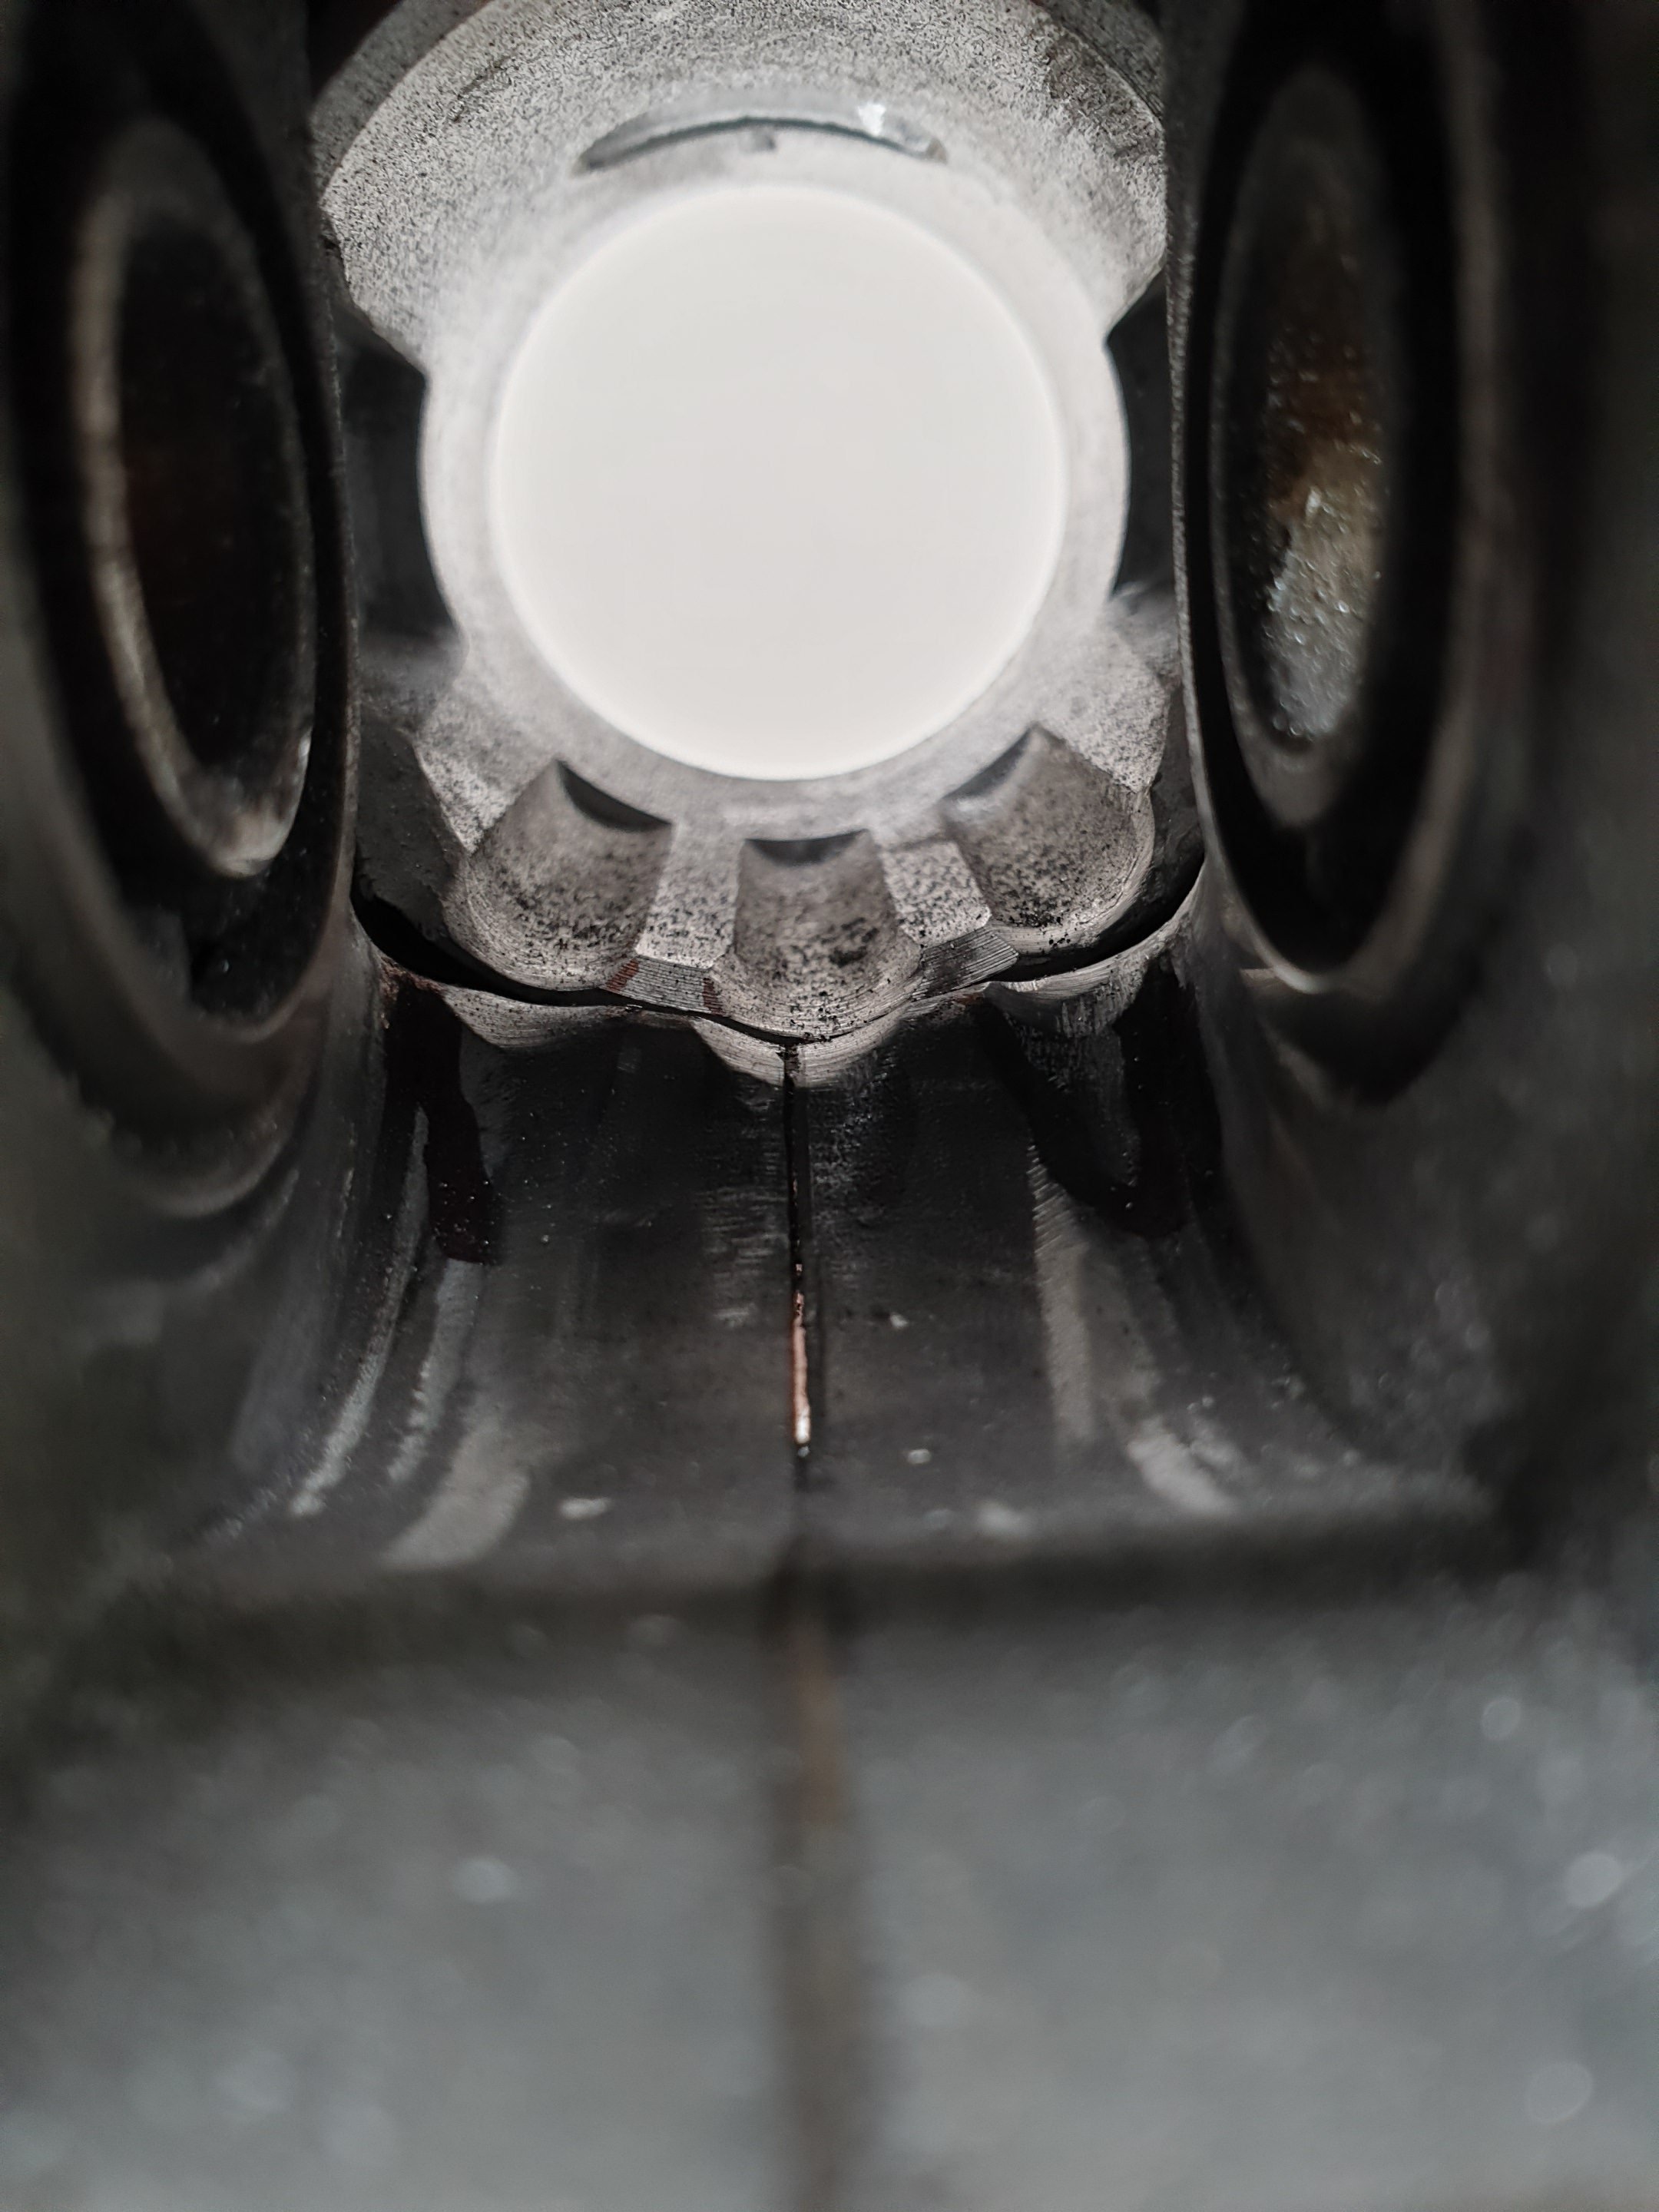
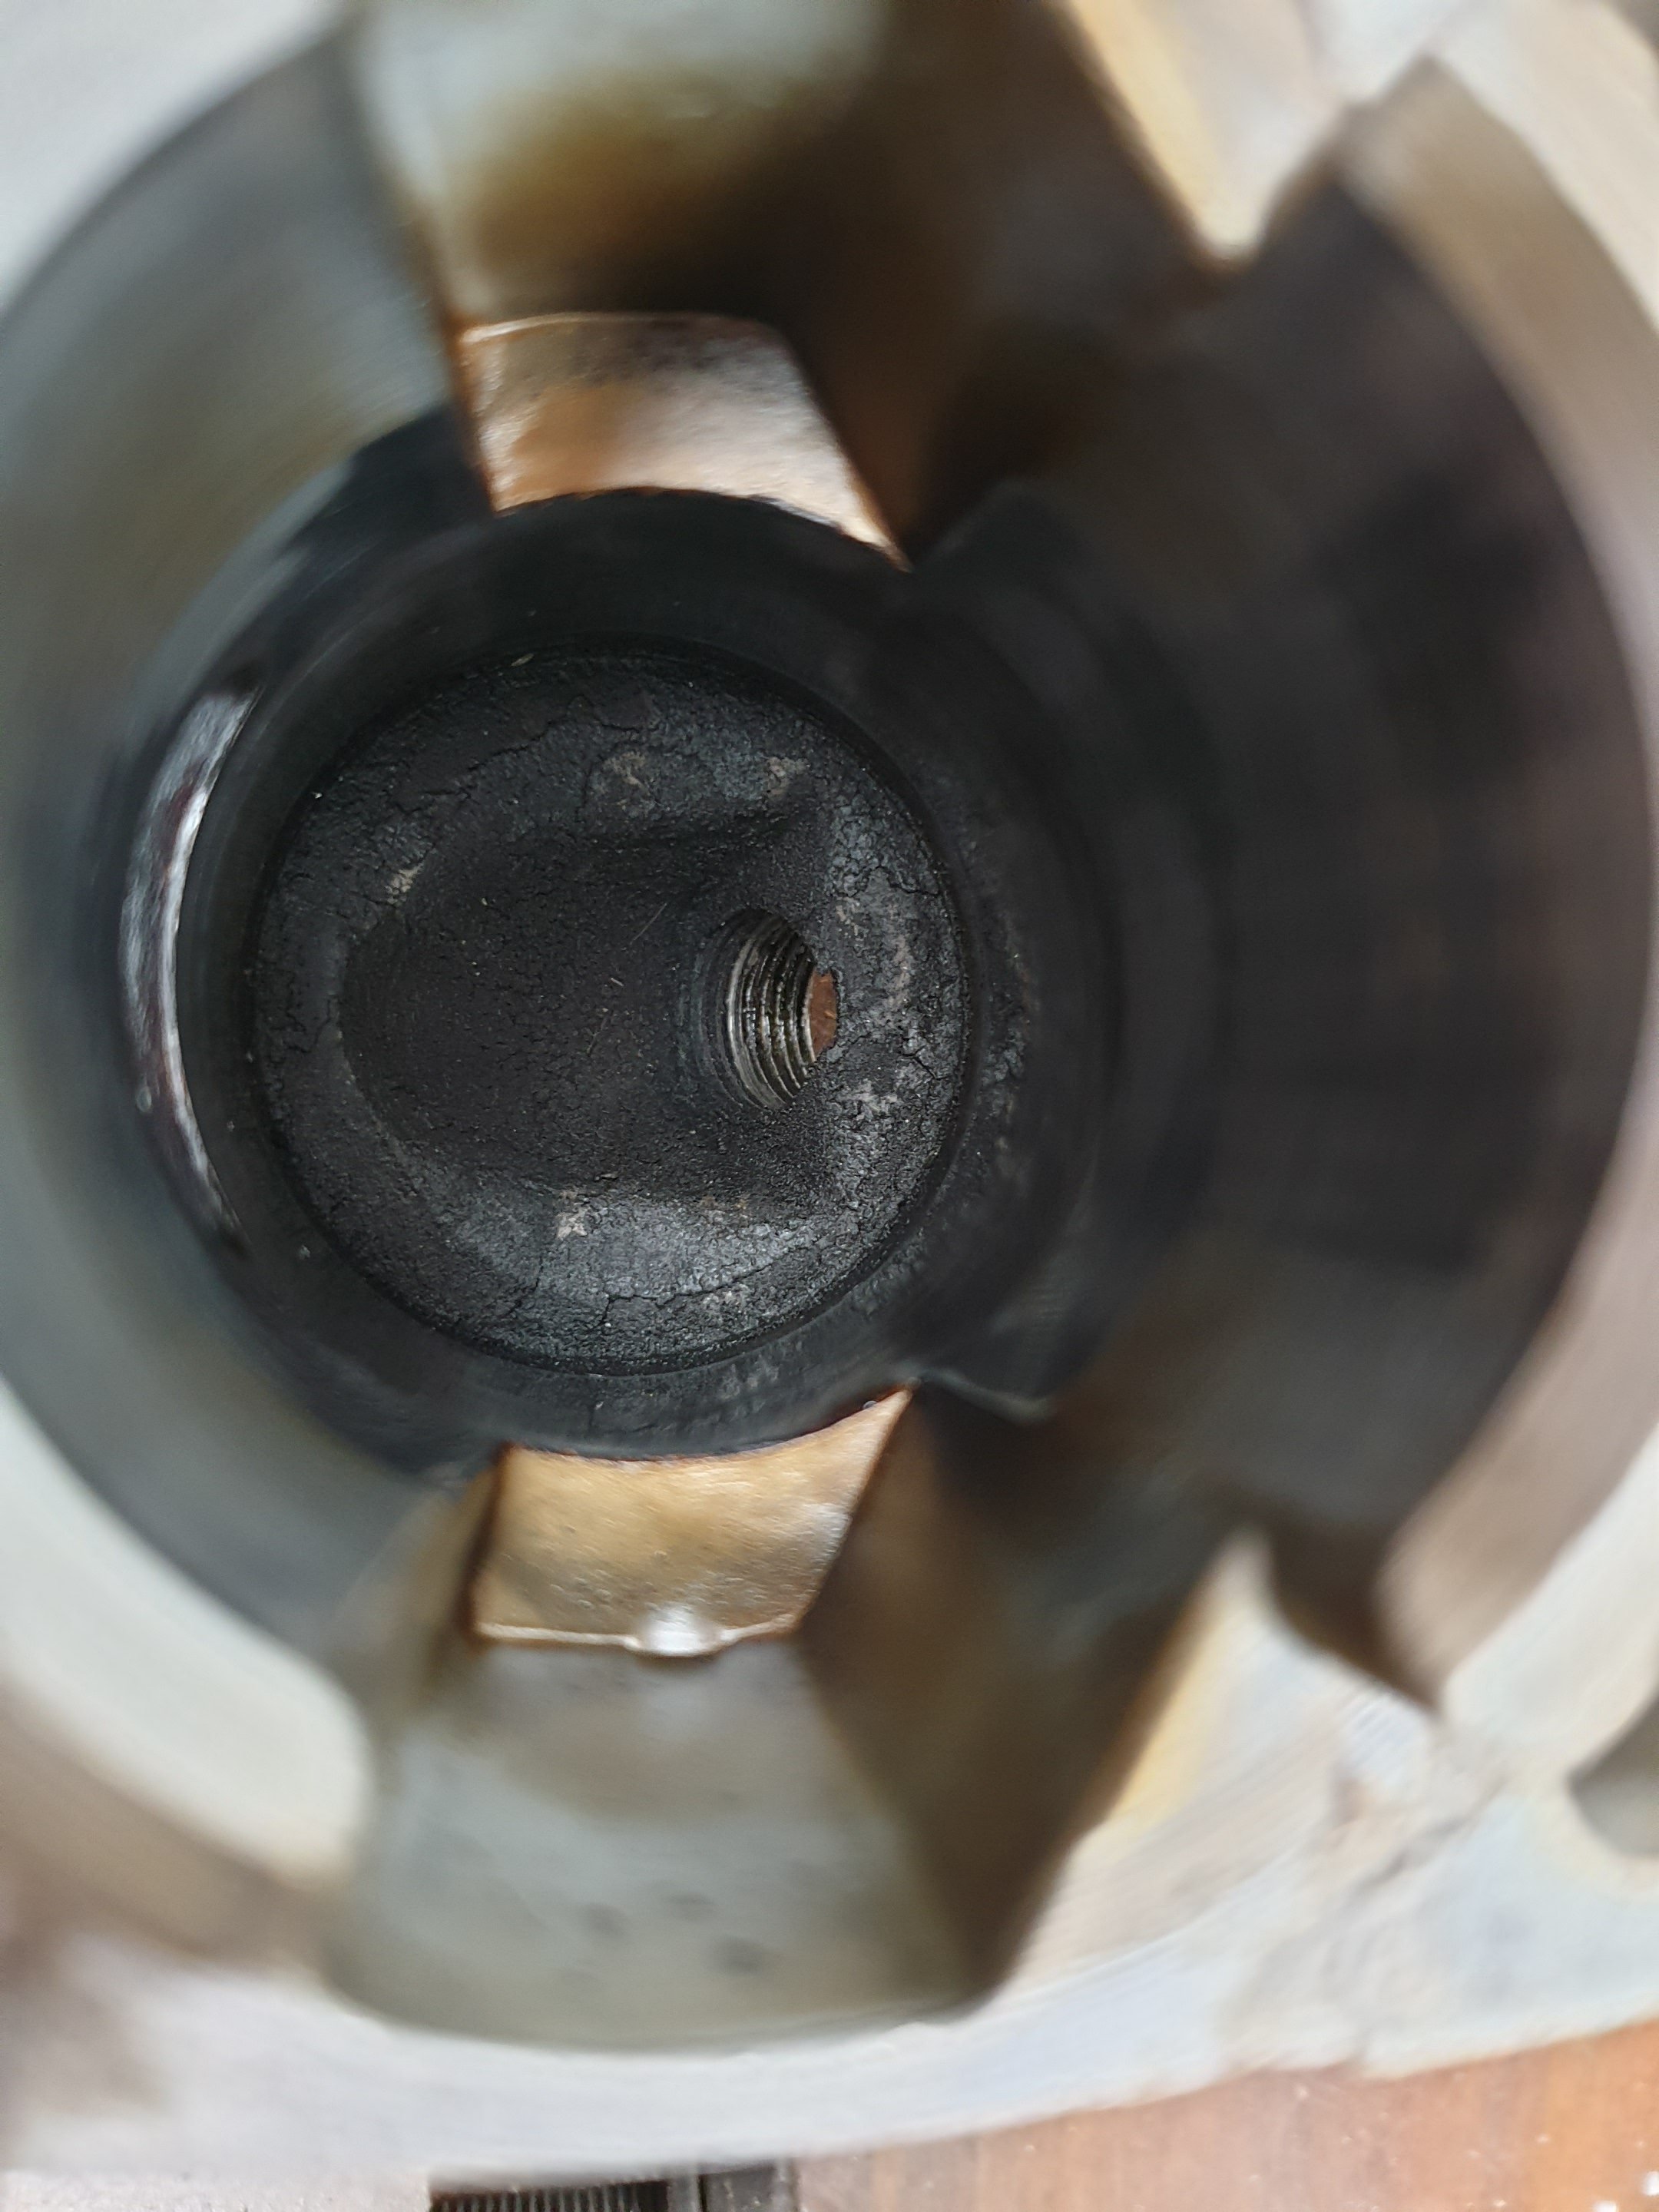
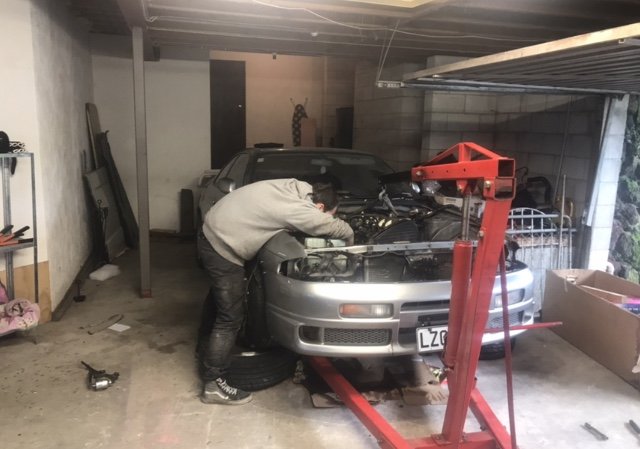
Update time. Firstly there will be no more juggling around shuffling stuff to get the Imp on the hoist, or having to drive it down the slippery grass drive that heads to the back of the workshop to get it onto the hoist. We have the workshop back after having finished building this cabin on wheels. We delivered it to its new home where the owner will continue with the build , fitting windows, door and lining it out. It was a fun job but took up a big chunk of space. Well until we start the next build. We will have a 8 metre trailer to build for ourselves soon once we sell the housetruck. So we could now relax and enjoy the Imp. A few little jobs completed and a fair few miles clocked up. Most important thing to sort out was a leak from the nearside transaxle output shaft. After getting back from the trip to Blenheim it was discovered that oil was coming out from what I thought was the seal and getting spun out off the coupling, marking a perfect line of oil inside the engine bay. So the car ended up in this position getting its trans fluid drained. I removed the shaft, doubled checked the seal land which was fine, checked and tightened the seal by cutting a few mm from its spring because it just didn't feel quite tight enough on the shaft. I also checked the shaft too. The early Imps have a splined shaft that the output spider slides onto and is held on by a large nut. The design went through two revisions ending up with the later shafts being a factory press fit and no nut. I was sure that my late type was fine and solid but just to be sure I cleaned and siliconed the end of the shaft visible from outside. Just in case... Put it all back together, a few drives and the leak was still there. After some advice from a fella on the Imp forum I took the shaft out again and checked it in the vice. It was indeed loose. Loose enough that it could move in and out slightly and had broken the silicone bond so allowing oil to creep past the splines and out. It must have been getting worse as the oil was essentially lubricating the once tight fit of the splines. It knocked apart easily, showing the factory O ring fitted before they press them together. Once clean and dry I tried the fit. It was a touch too loose for my liking so out with the JB weld epoxy. It'll never leak again Yesterday we drove to Nelson and back and I'm happy to report that the leak has stopped ! Yay. Now the only real leak is a dribble from the rear main seal on the engine. I'll change that when I change the worn ring gear in the future. Another job was to sort out some sounds. I like my music and not having a sounds system in a car on long trips is annoying. I had already eyed up and sussed where I would mount some speakers. It seems a fairly common place after having looked at other setups out there on Imps. We had scored a JVC headunit from a customer after upgrading their setup. Then we had scored some speakers from a Nissan Bluebird SSS we had been given and passed on but not before robbing its sounds. I also had some ply left over from lining the rear of the Viva wagon floor. So sorted for a cheap as setup. We made some boxes in the sunshine on what was a cold day.... Later on the sun hid behind clouds so all three of us moved over to the warmth of the log fire.... After Hannah covered the boxes in black vinyl I mounted them under the parcel shelves and wired in the head unit, a neat little unit that due to not playing cds is shorter in depth so fitting under the shelf nicely. It all looks neat enough and sounds fine for the size. Just need to find some protective grills to suit those speakers. Next on the list is to get and active sub and mount it under a seat so we can have some fuller, deeper sound. Another job I had planned to do but kept being put off was to hinge the front number plate. I don't want to mount it any higher and block the grill so where it is makes for a great driveway crown sweeper. Driving along our 500m long stone driveway in a lowered Imp with an even lower number plate gets tiring! So I did this... I'll report back with whether it also swings back at 170mph so avoiding speed camera tickets. The other night we had a lovely sunset and the Imp was looking resplendent in the light. I took a photo.. Next jobs to do are fit some carpet and I'm still really keen on pursuing building a full EFI setup. But its going to be a very busy summer for us so that will have to be a project I pursue in the evenings. Alex2 points
-
Should also add. Someone who doesn't know what they're doing/tries cutting corners with he prosses will wreck a took in no time and you'll be left with. Golf ball to fill1 point
-
Mitsubishi fuel injection manifold has been used on an a15 with a bit of porting work. A15 head fits on a12, with bigger flowing head, then use factory manifold with your own bits1 point
-
Cherry GS100701 is the usual one have used on a few projects with good success. they are nice because you can adjust the gap with the threaded body https://nz.rs-online.com/web/p/hall-effect-sensors/7659321/ you can find them a little cheaper from overseas maybe. or you might find an equivalent on aliexpress for less. that said you might be able to scrounge or buy an OEM style one from an efi car that uses a geartooth type crank position sensor. e.g. https://www.amazon.com/Crankshaft-ZonCar-0031532728-0261210170-Mercedes-Benz/dp/B07W4JZR3V/ref=sr_1_1_sspa?keywords=crankshaft+position+sensor&qid=1570063554&sr=8-1-spons&psc=1&spLa=ZW5jcnlwdGVkUXVhbGlmaWVyPUExWEc5TktGUUEwVkdRJmVuY3J5cHRlZElkPUExMDEwOTIxM1JHUFZVMVQzN09NRCZlbmNyeXB0ZWRBZElkPUEwNDAyMjYyMU5HV0ZUNU9BMFk5RSZ3aWRnZXROYW1lPXNwX2F0ZiZhY3Rpb249Y2xpY2tSZWRpcmVjdCZkb05vdExvZ0NsaWNrPXRydWU= the only thing is you will need to get the datasheet info to find out if you need to put any resistors in the wiring to get it to suit the ecu - you do need to do that with the cherry sensors but it is listed in the documentation what resistance value to use. with an OEM sensor you may or may not - something you would have to figure out.1 point
-
Sssshhh. Just come on up. Ill be there friday till Sunday and stayinf out there for some barry yarns1 point
-
You're a fuckin madman. Keep up the good work!1 point
-
A bit late but...
1 point
-
i havent posted any car ramblings in a rather long time.been here, there and everywhere. but since being home my daily morphed into something rather obscure. its been a long journey to this point with alot yet to come, many good times with much heart ache. one of the earliest photos moving things around when i got home this is the last trip it made with r160 rear end, but did have fc rx7 front end by this point many many axles and 3 gearboxes later i had to do what i do best and go way overboard so changed to a 6 speed box when all this went in and now it should last alot longer. felt reall good on track now it awaits me getting enough spare space for a long enough period of time to get design approval for cert and then have Clint come back and give me a big list to rectify. its been fun but there is a little car that some may remember that needs love again1 point
-
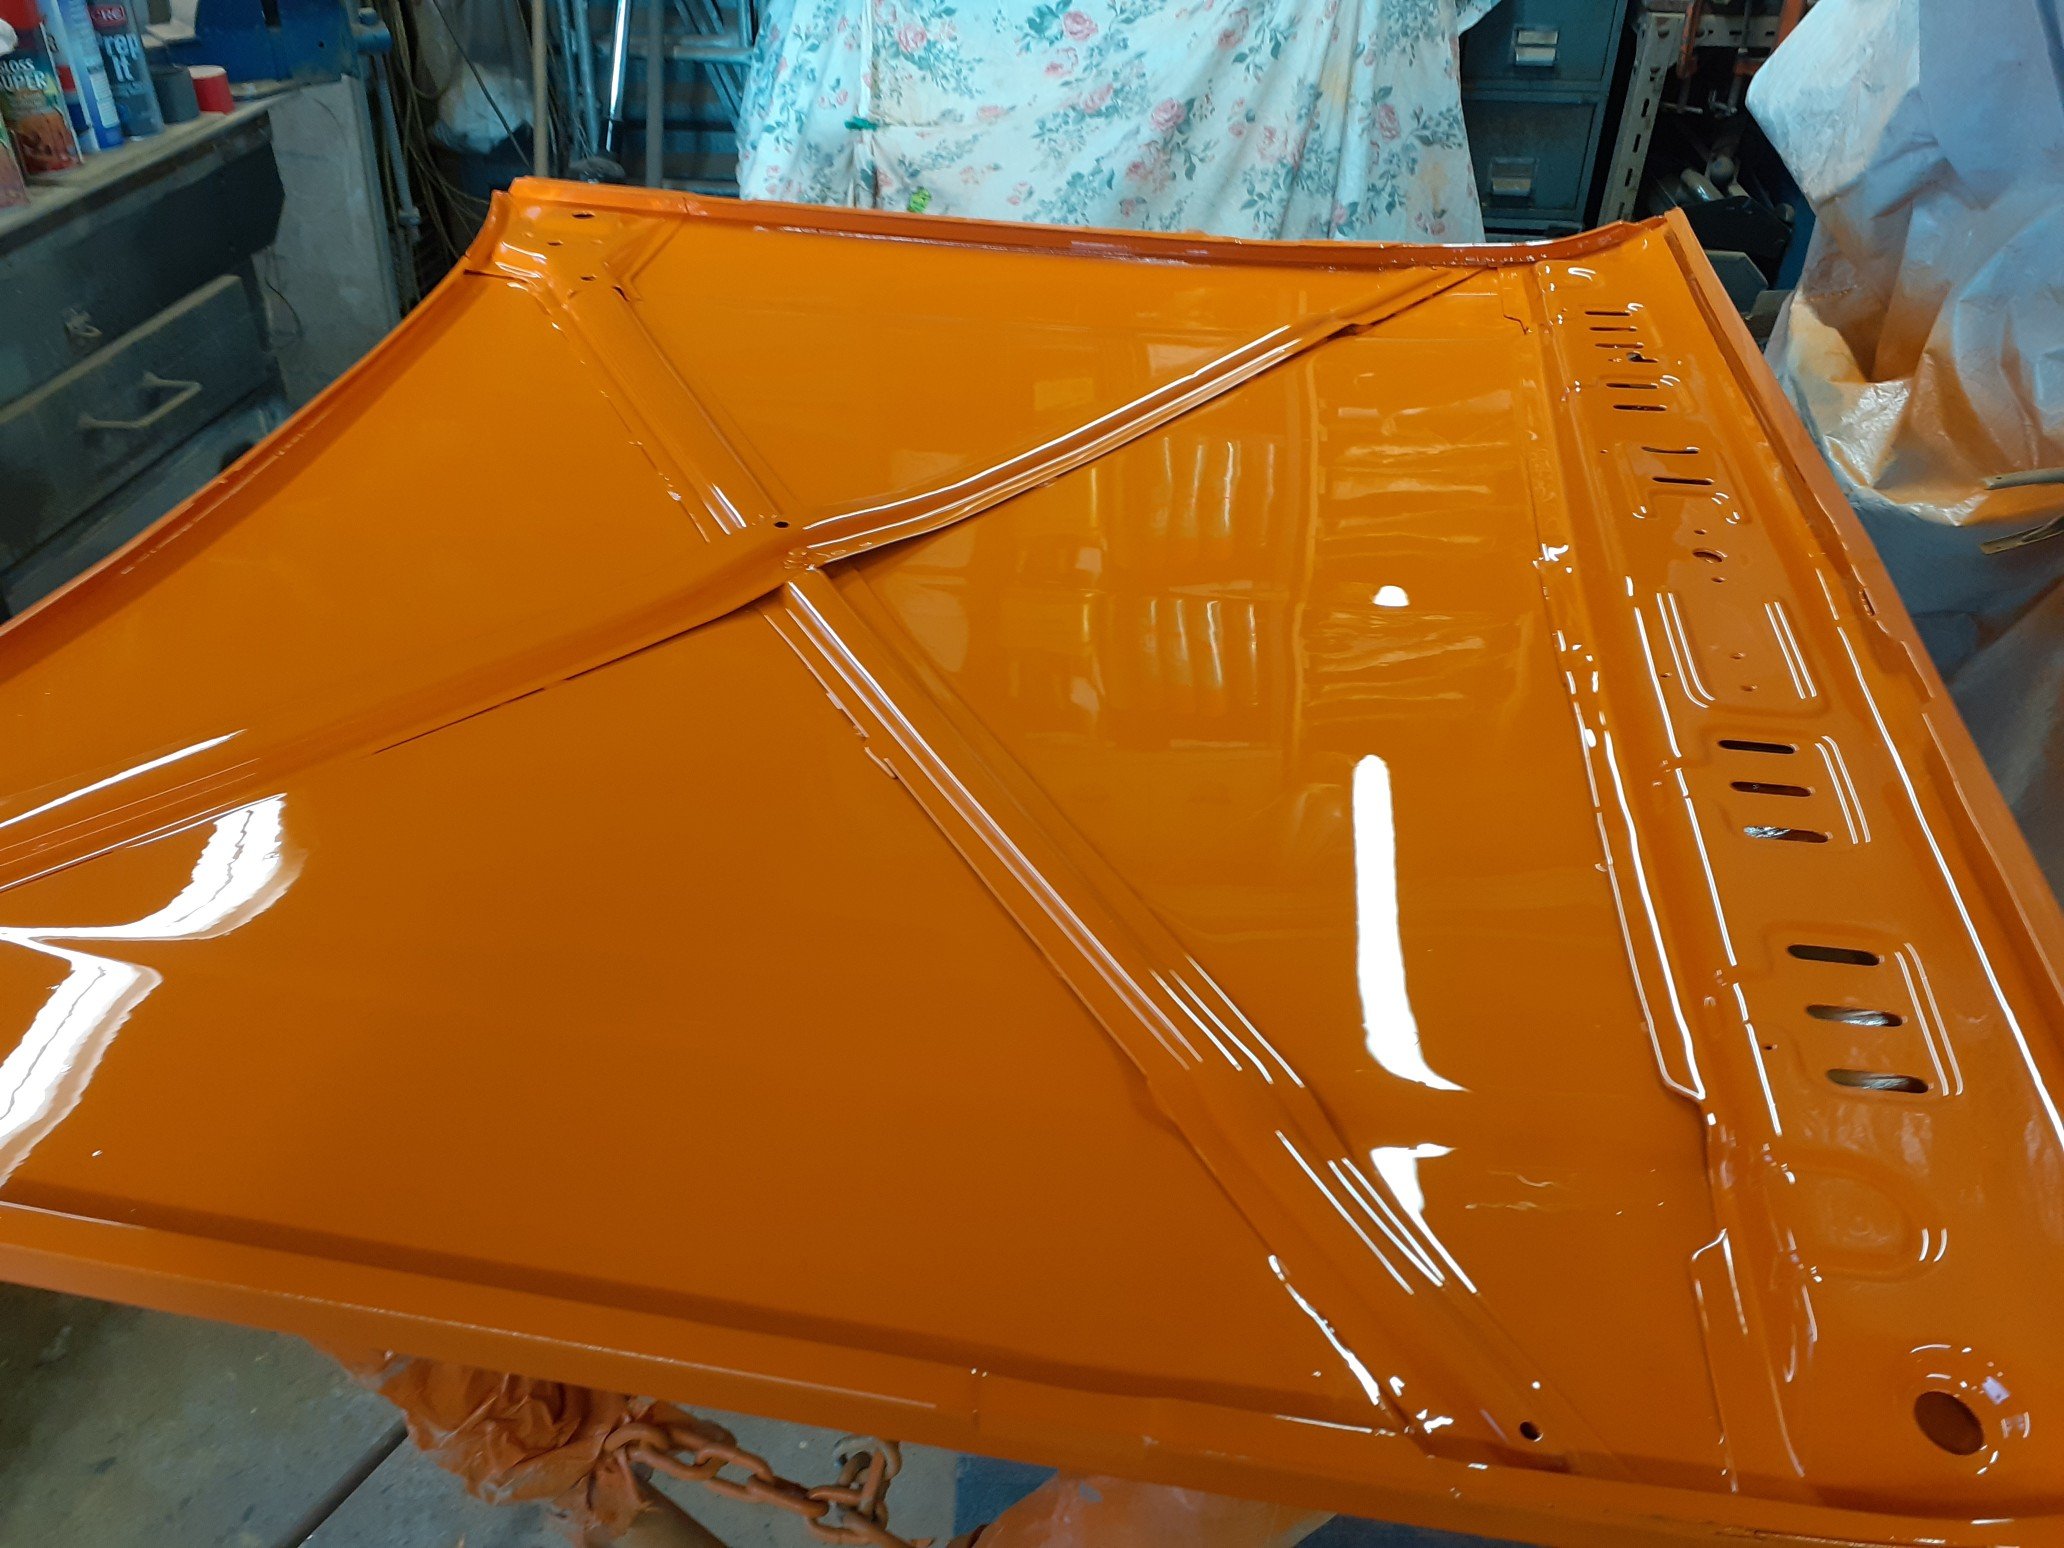
Gtfo rusty leaky sunroof Just a quick spray of colour to seal the primer. I'll give it a sand on the weekend and I'll go back next week to get the rear bumper and the roof painted. I'll do the sanding to save a bit of money1 point
-
What were the reactions from barries like regarding the exhaust?1 point
-
Picture-less update. While i will still need to dial in the auto-advance curve (the orig' relied on a combination of moving a lever to a basic range, and the magnets on the flywheel ramping up the speed of the points opening) it has a notable improvement in fuel economy, partly due to being able to wind the fuel mixture screw in 1/16th of a turn & have the same performance. It's like having the magneto set perfectly. But requires a battery.1 point
-
Curiosity got the better of me, trying to keep busy lately as things are not going so well. hmmm...... The head is still full of rusty shite so will get it hot tanked etc.
1 point
-
You absolutely should build a Harley with a 2 stroke in it.......1 point
-
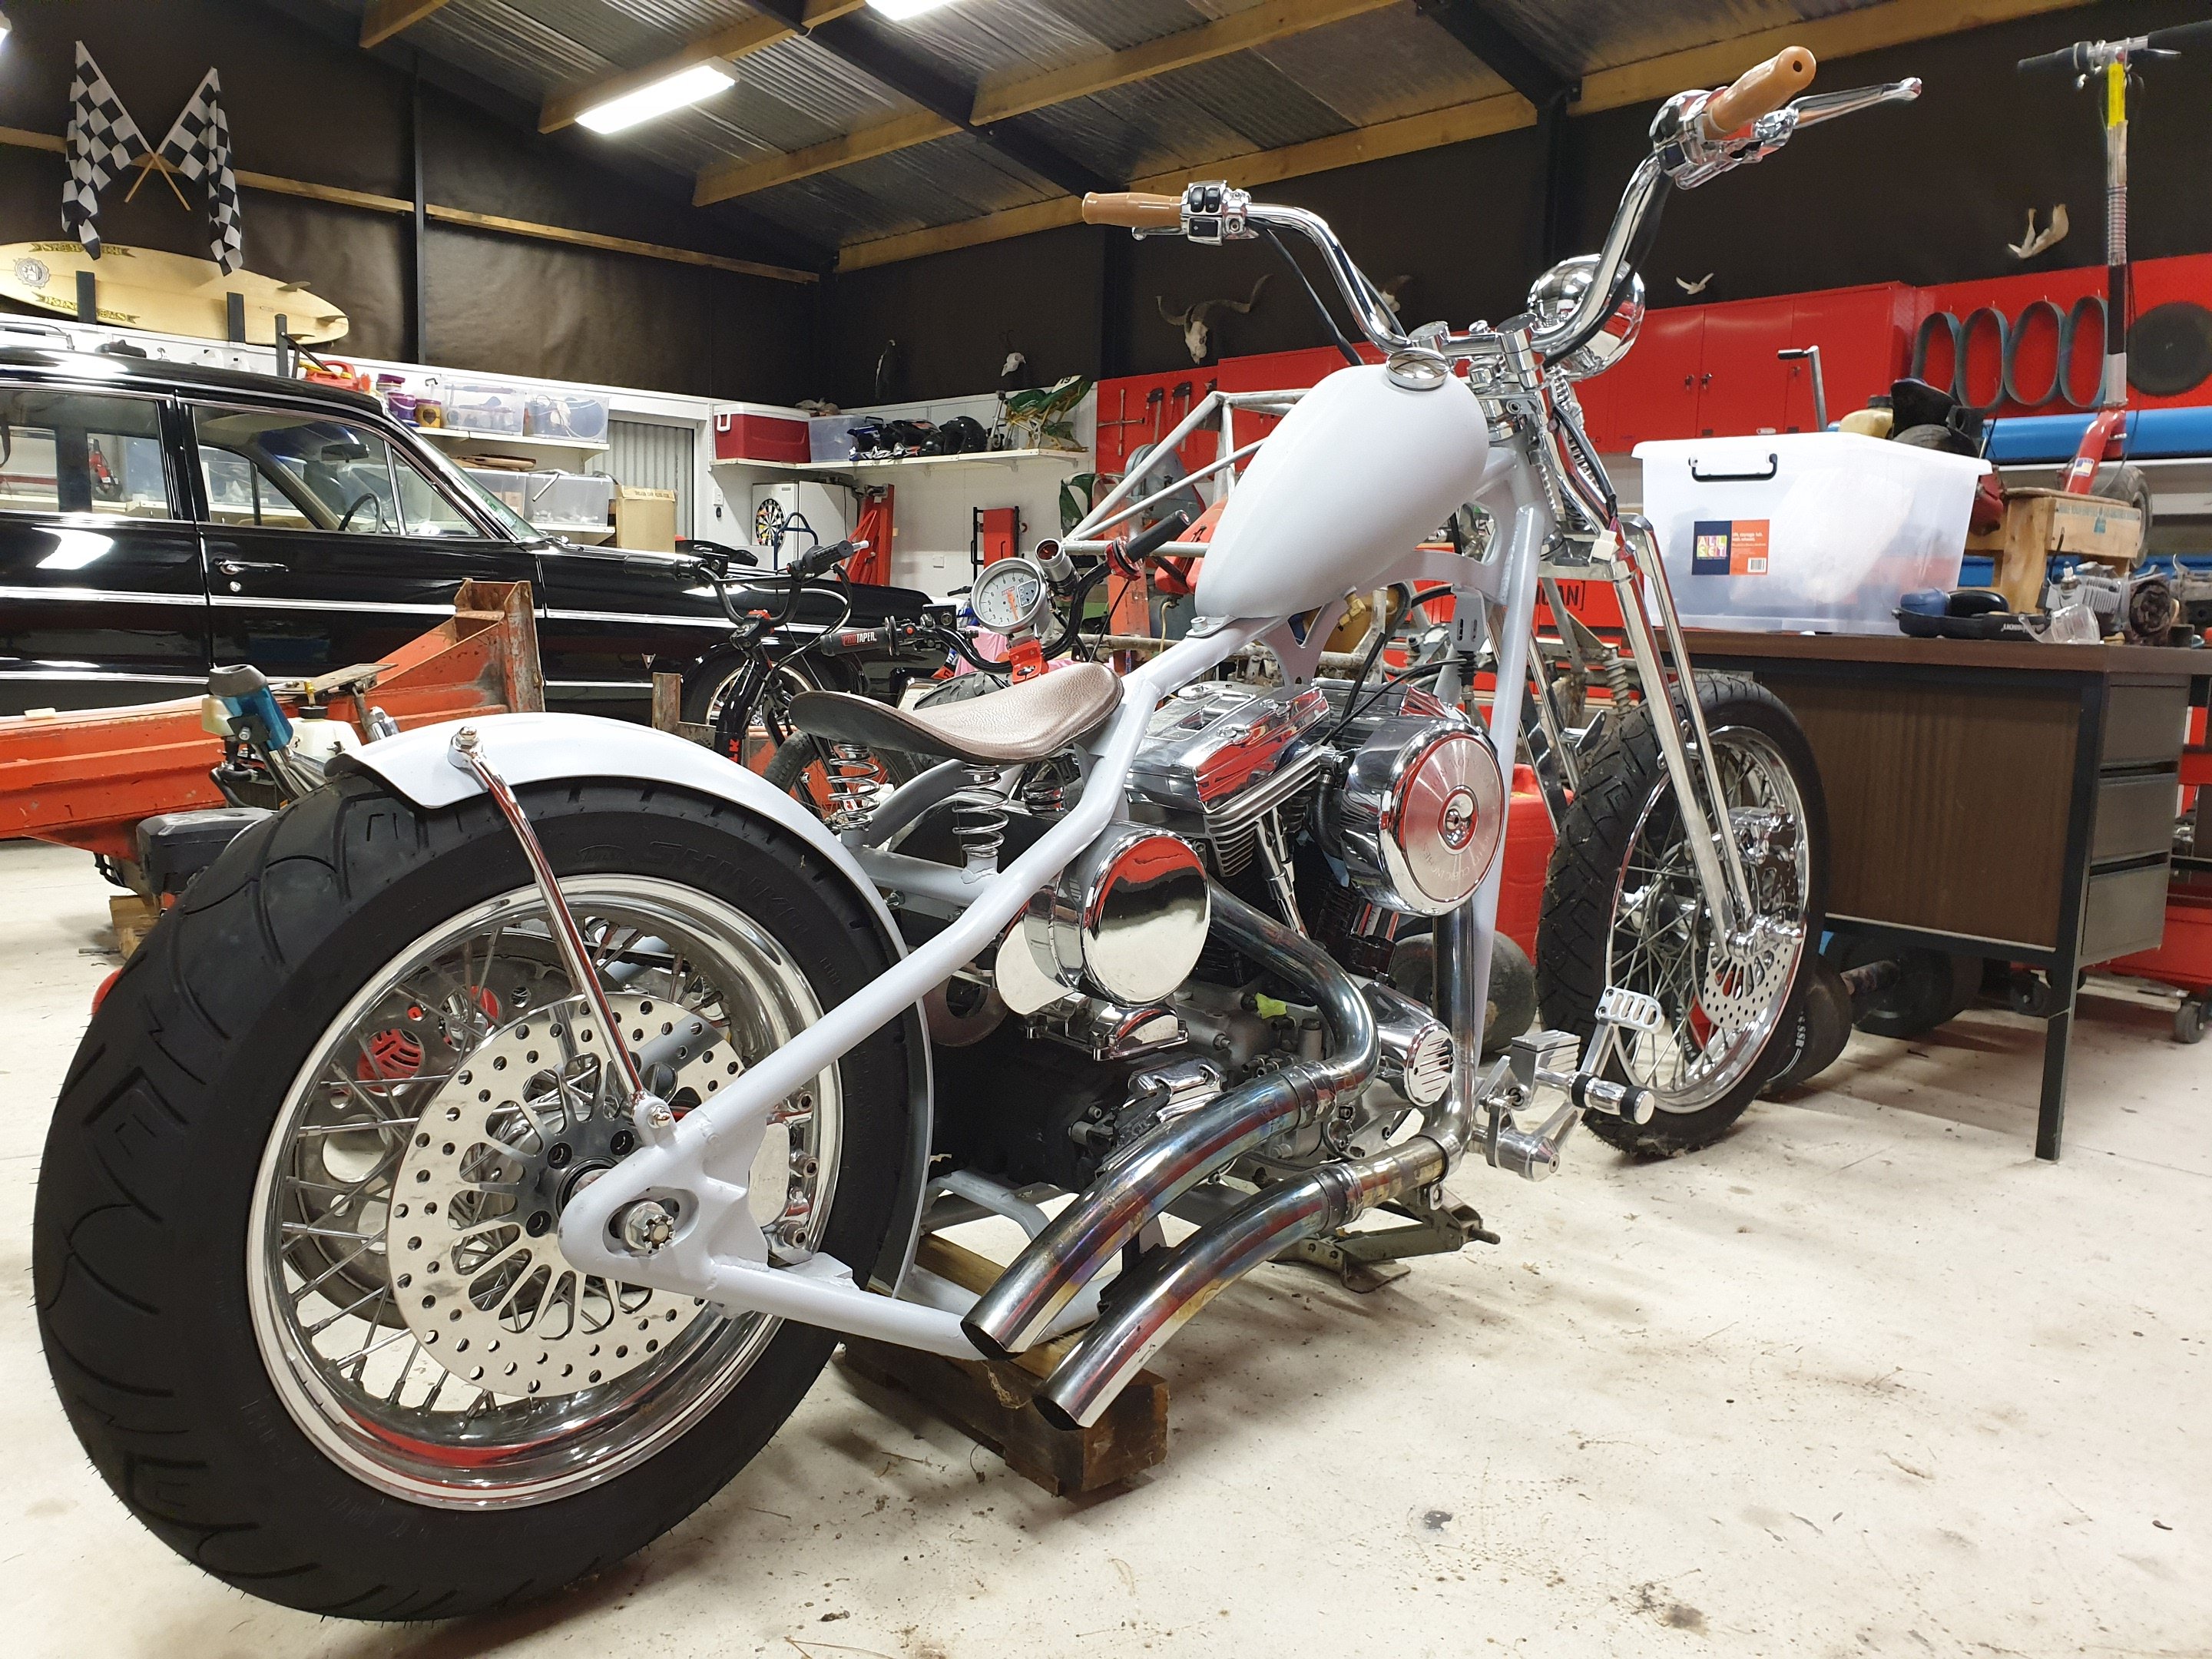
So what other interesting junk is sitting forgotten in your shed?1 point
-
On a random side note, I did a mini spring clean of the shed today. I had accumulated a rather large pile of ever increasing junk taking up a bay for no good reason. Amongst this was a project I rarely look at...so I removed the covers to reveal it for a look... Fuck yeah...seriously...fuck yeah!!! Makes me wonder what the fuck I'm doing spending time on gopeds when I could be putting the finishing touches on this 99% finished harley? Someone kick me in the balls!!!
1 point
-
Have sprayed a few more items. Battery tray, all door jams, bonnet and had redone the engine bay 'bubble' because it was easier to do the whole thing then to fix a couple of runs. Couple of areas had to be touched up as I didnt wait long enough between coats and had solvent boil. Aligned the rear doors for final assembly before paint. Will put some seam sealer around the hinges to lock out any water. Put in the new door pins on the drivers door and sealed in the drivers guard. The sealer is a soft material that will provide protection from the wheel well but wont 'glue' the guard on permanently. Originally the guards are welded on but I've decided to reattach it with sealant and bolts. Will align the passenger door with new pins then I can start prepping the body for paint. Also made up a new base plate for the subframe and welded that on.
1 point
-
That sounds exactly what I don't want.1 point
-
Time for another Triumph1 point
-
2 months later i have all the bits to rebuild the bottom end. the heads are already finished and i have them back. parts, 9 to 1 CR Ross forged pistons (the cunts will not change the value of the parts on the shipping invoice so keep that in mind when deciding to use them or not) eagle H beam rods and ARP rod bolts ARP main cap studs and bolts new genuine Toyota oil pump theres heaps of other shit too but you get the picture. block will now be bored and honed to 88mm. rotating assembly will get balanced and ill get the short block back. then its reassembly time. good days. or maybe not good days. going in to hospital to get back surgery in about a month so that will fuck all progress for a while............... 2019-09-19_07-59-37 by sheepers, on Flickr 2019-09-19_07-59-22 by sheepers, on Flickr 2019-09-19_07-58-23 by sheepers, on Flickr1 point
-
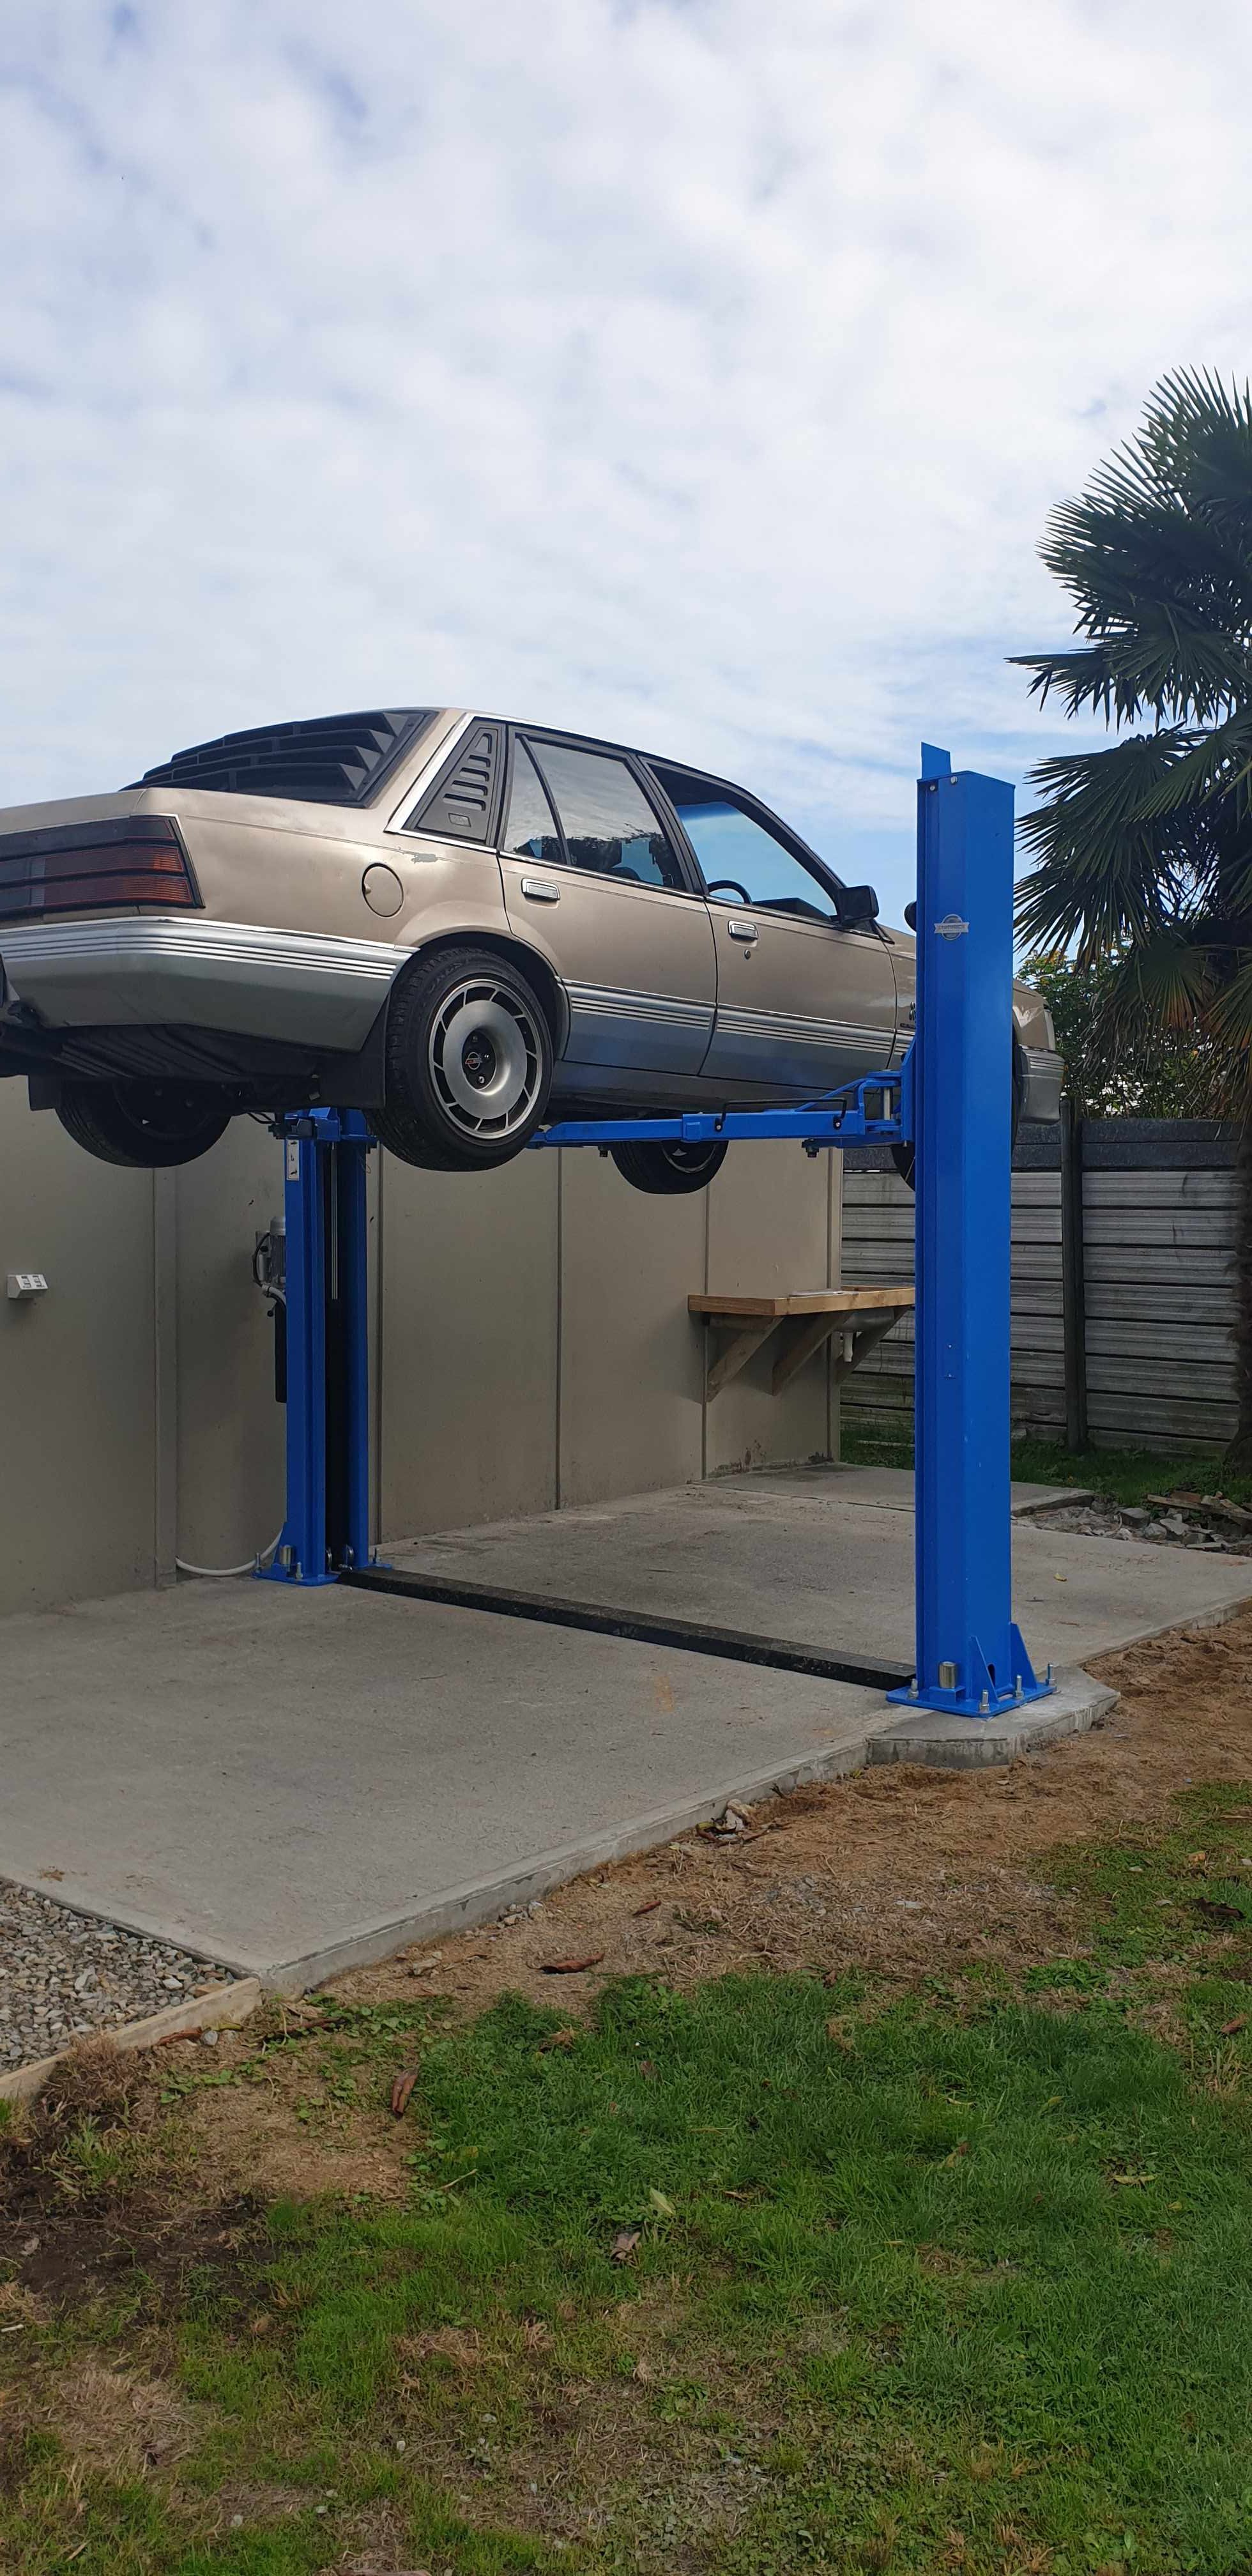
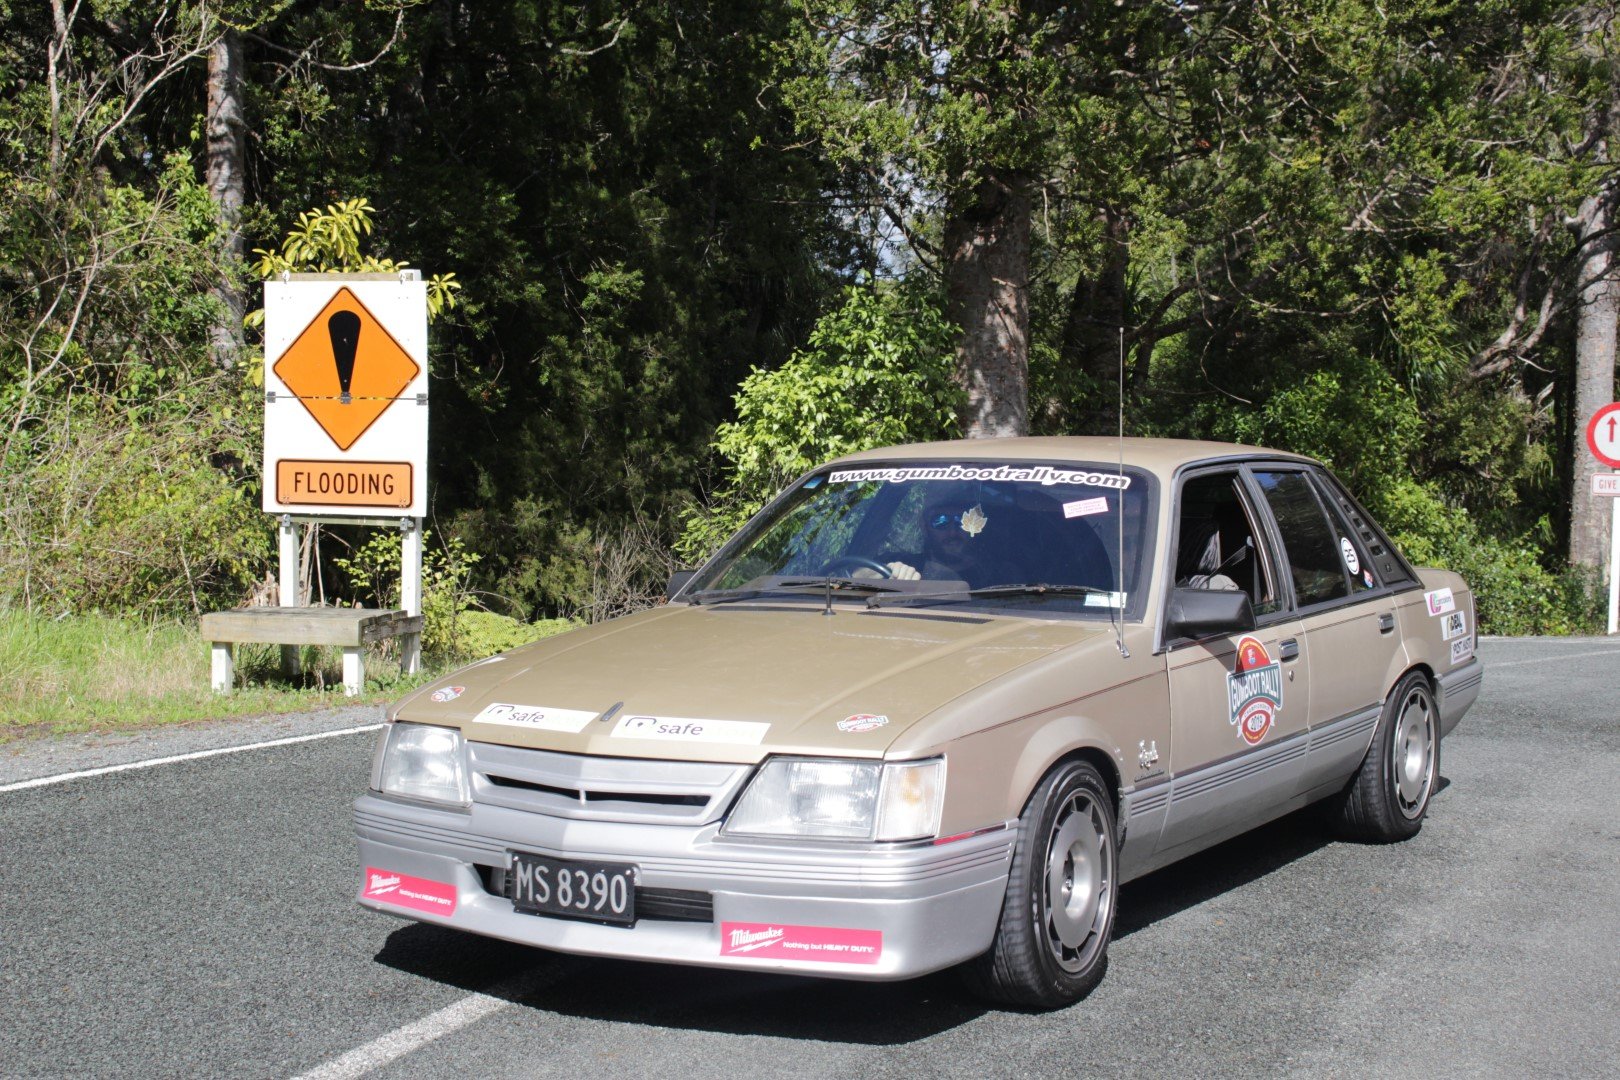
Passed clean sheet thru cert so stoked with that, brought myself a new toy so wish i had done it sooner. Took it up to Protune to chuck on the hub dyno... and my waste gate is too small, spiking 18psi of angry boost pixies at 3500rpm, aiming to run 7psi base with control up to 12psi to avoid splitting the crank from the block, ah well least the tune is now safe till i can fit up a larger gate. Oh also the camaro t5 gearbox i had fitted was stuffed so in a week had a commodore v6 t5 input shaft modified to fit, fabricated a new mount, bolted that up last wednesday and drove 1200km around northland for gumboot rally over the weekend, which Im super happy with how the car went, super responsive and torquey down low even with a low MAP/RPM limit, plus all the Spooley turbo noises
1 point
-
Been helping a mate all weekend. RD28 in small sea faring vessel, Huge hollset and plenty of boost.
1 point
-
Just thought I would update this just so it didn't disappear into the nevernever, but then realised I had actually made progress since I last posted on this thread. So firstly my excuses for not doing much... Got hit by a drunk driver, (he was speeding, no license, no WOF/reg since 2008, etc, real winner), lost control and crossed the centre line at well over 100kmh. Hit us and we did a barrel roll (at least one, not quite sure). Mum and our little dog were in the passenger seat, were mostly fine (Mum headbutted the window) but luckily avoided worse through sheer luck (it didn't actually land on her side at the front, went driver front, passenger rear, etc) and Mum held the dog as we went over so she came out unscathed. I however fractured my spine (roof came down to say hi to my head), luckily nothing too major as far as spinal injuries go (compression wedge fracture in my thoracic spine, loss of about 35% height on one side of one of the vertebra), but meant that I couldn't lift anything for what turned out to be about 3 1/2 months. Stupid thing was I was also reaaaallllly gutted about losing the van too (I know "it's just a vehicle, they're replacable, bla bla") but it was a 92 4WD 1KZ-TE Hiace Supercustom, and was fucking awesome. In really good nick, only 200,000kms on it (not a lot for one of them). Only had it about 5 months. Anywho, have mostly recovered from that (happened mid March), and then the other thing that has eaten my time is the tiny house in the background. Been working on it off and on, a lot of off while I did my study etc, for about 3 1/2 years, and it's finally almost done, move in in August is the goal. Will share photos in another thread at some point once it's finished and looks less like a building site. On to the ute, before the accident, I had actually made some progress and taken a few photos, so here goes: Bought adjustable arms for the rear, RAW shocks, Dobinson 4" lift springs, as well as an adjustable panhard rod, all roughly set up until I get the engine properly mounted and the front done so I can measure the angle on the output of the gearbox to get them equal. Sat the body on, and the shortened tray. Need to lower the cross bar to the height of the piece of timber that's clamped on there. Body is just sitting on the pieces of timber at the moment, but that puts it at the right height for everything to fit Mocked the front end up, tacked together the shs rad support so that I could mount up the radiator and intercooler (which is probably to small, will likely get on same thickness and width, just taller and notch the bumper so it sits in, then holesaw the front for airflow. Have done a bunch of research, small jobs, bits and pieces etc, since then, but not a lot. Once the container is done in the coming month, this will start getting time and money thrown at it again. I desperately need to get some paint on it soon (probably just primer until I have everything properly mounted and can do the bodywork), as the fine rust film on it is getting less fine, and it is a Datsun. A big part of going forward with this is getting the engine (RB25/30DET) so that will require some financing, hopefully in the form of selling my Mitsubishi Challenger. If anyone knows of one, preferably a runner as I don't want to do a refresh on it (for the sake of time/expense) at this stage, let me know. Also need to order some parts from Superior Engineering in 'Straya, so that is gonna cost some money too. Let me know what you think in the discussion thread: Cheers, Hayden.1 point
-
Yeah. I told him that I had discovered his 'art work'. He was completely unfussed. Had a smile. He's a pretty cool chilled old Barry... and he is actually on this forum and has been following the thread!1 point
-
I've owned Larry for just under 2 years, and the first part has just broken. A sad, sad day indeed. RIP plastic shifter gate cover.0 points
-
Yeah it will be put out for sale in maybe November. Its still our house so when it goes we have to move into the cabin until we build a new house that is specific to our aspect in the yard. We had a buyer lined up but he got cold feet with the whole living on a truck thing.0 points


.thumb.jpeg.e0a4bff61111e0c8c7396950fcc94da1.jpeg)
.thumb.jpeg.384ff72c8d2b0ee0d34a7bdedb55bdcf.jpeg)


.jpg.32d40ecd72930f017128c60d4af96c4a.jpg)


This leaderboard is set to Auckland/GMT+12:00