
Leaderboard


Popular Content
Showing content with the highest reputation on 08/26/19 in all areas
-
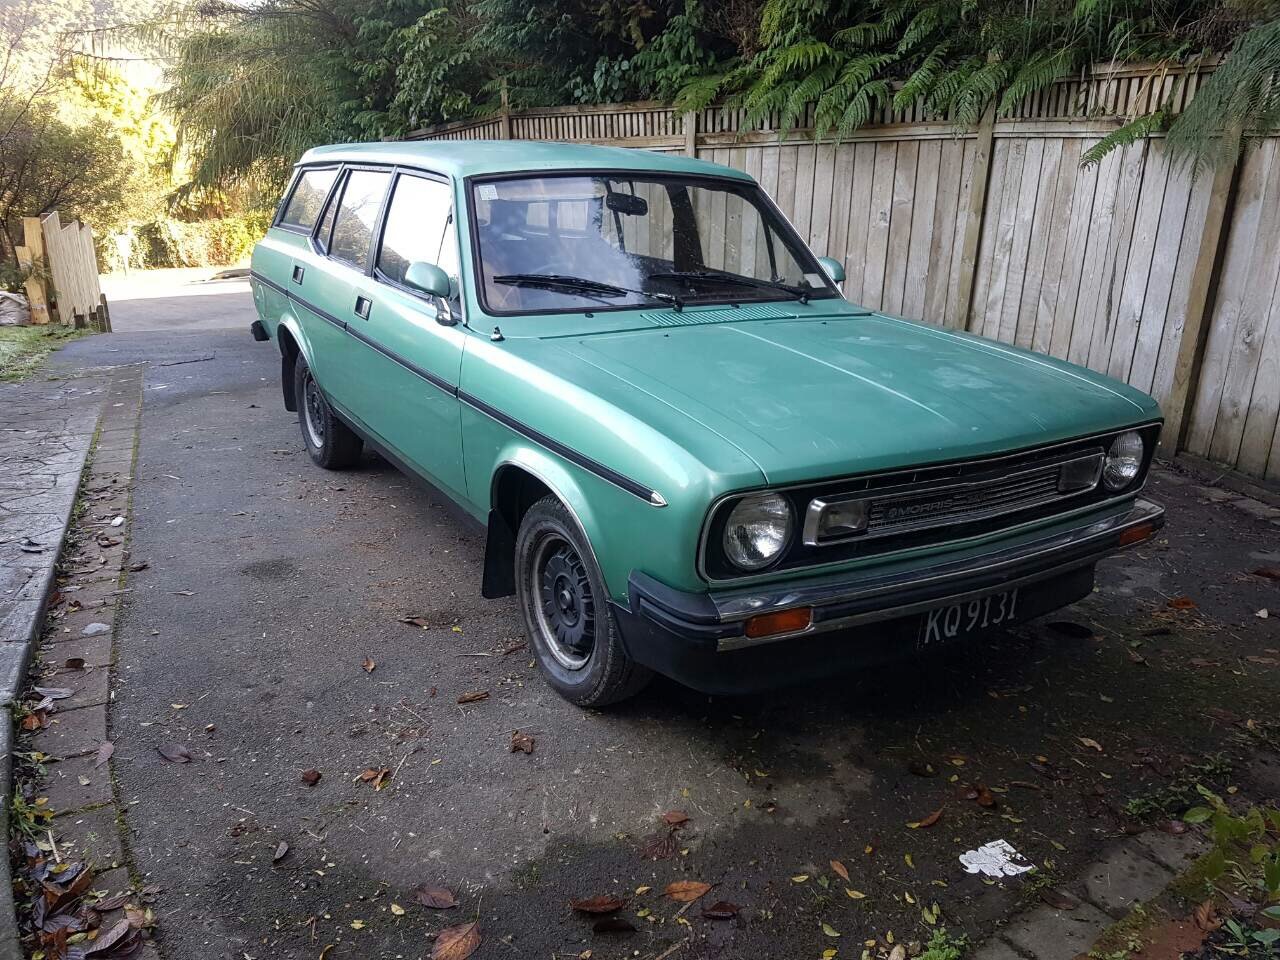
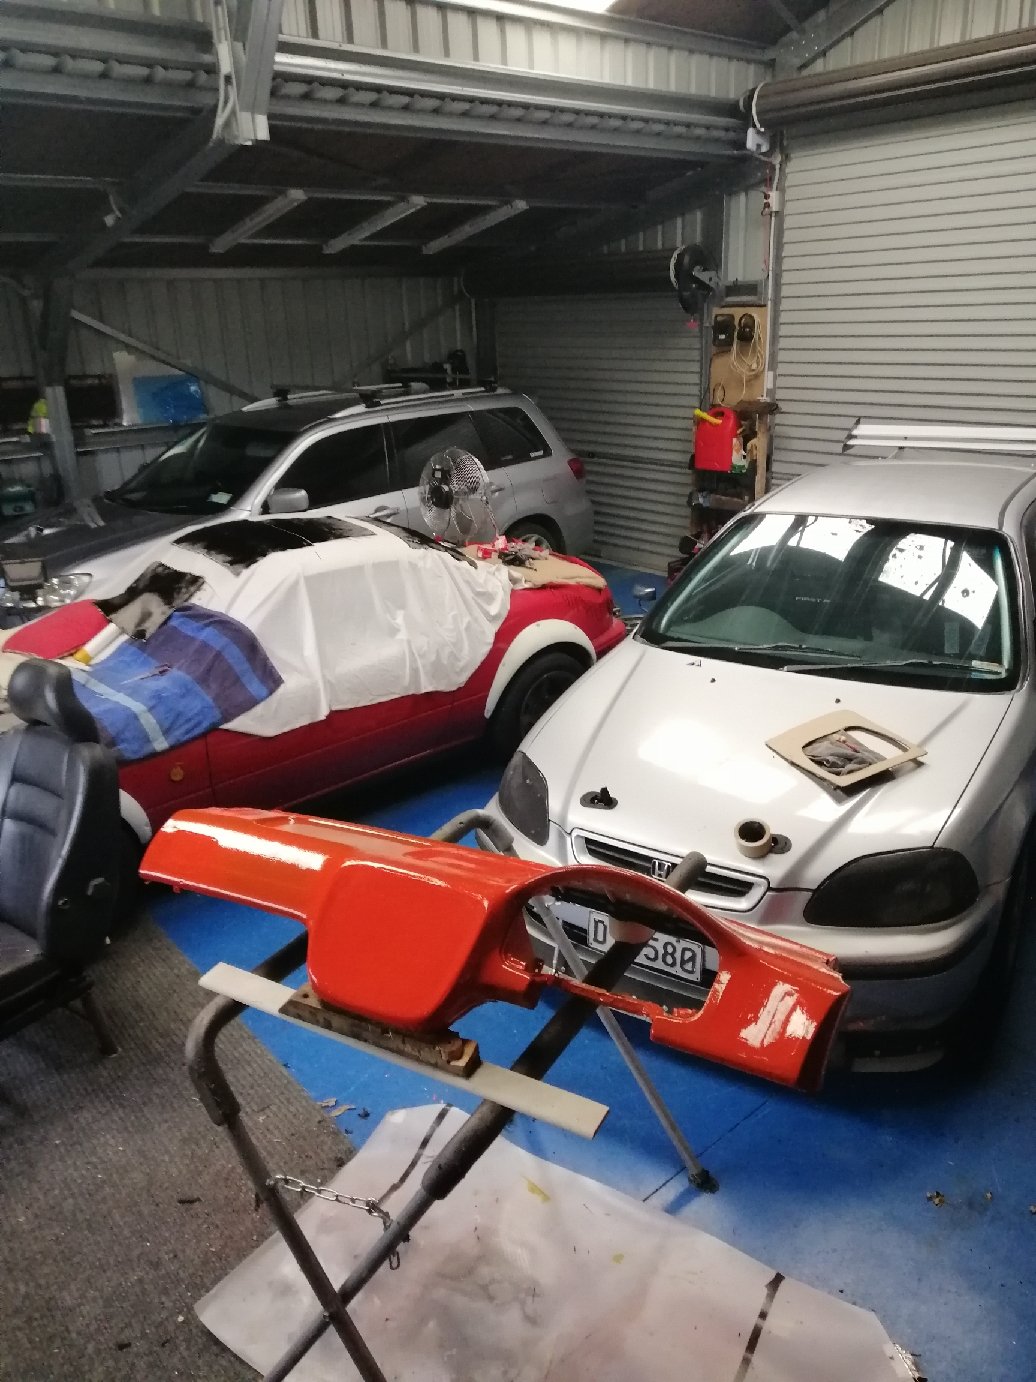
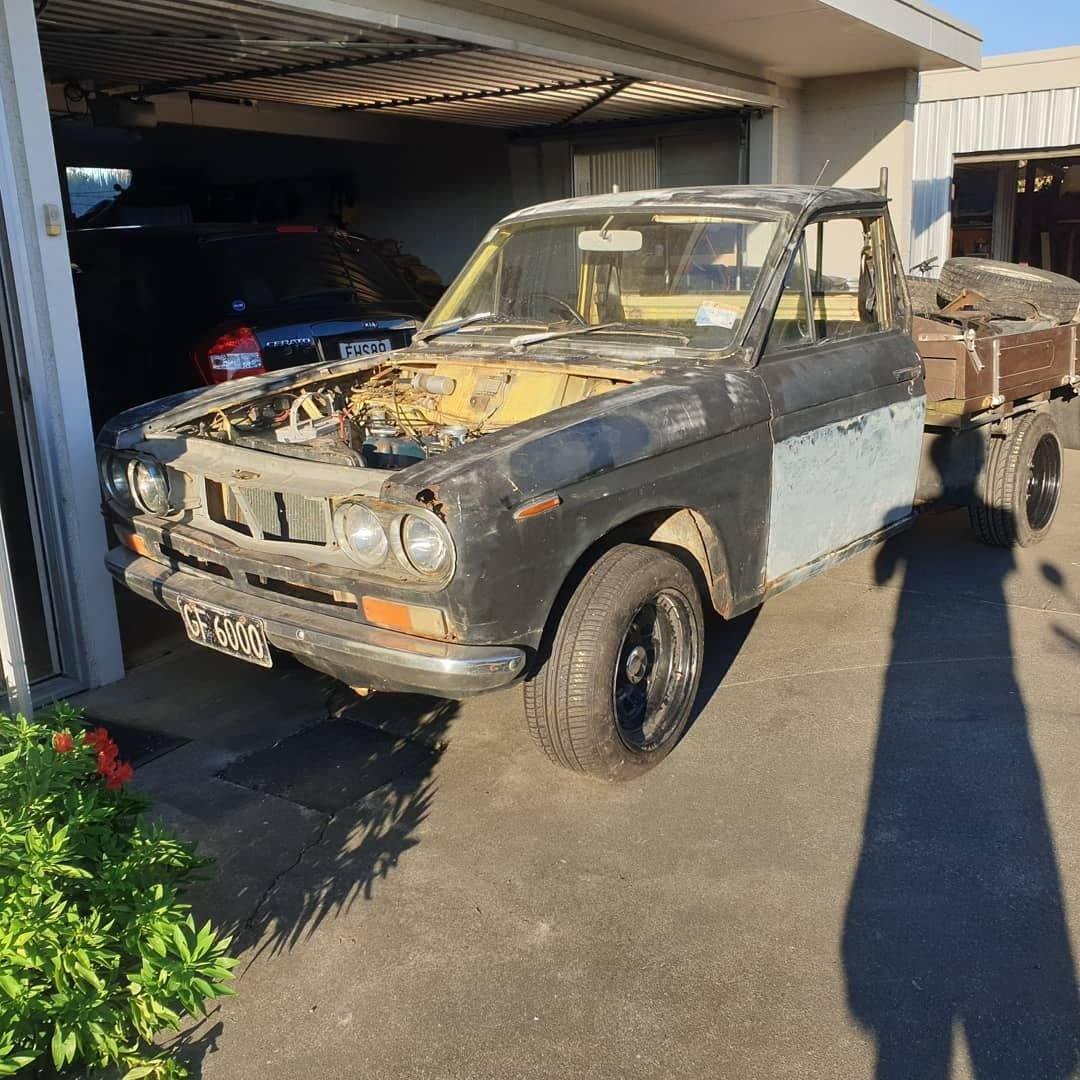
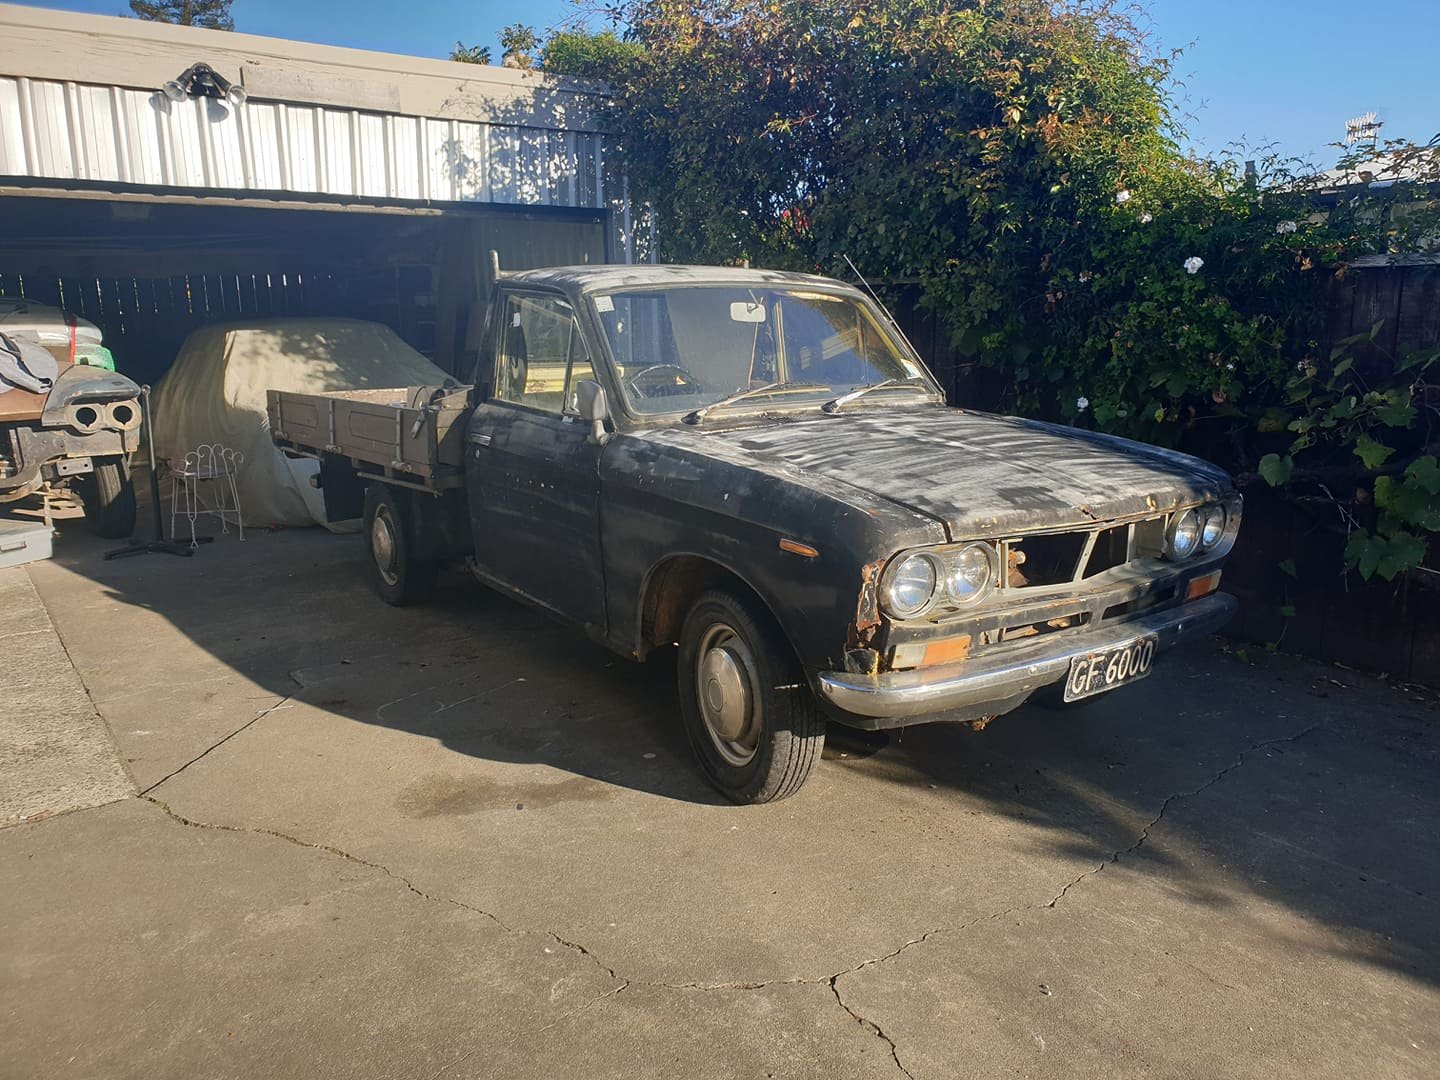
Hi folks, just realised I hadn’t posted this up yet. I think this car made a brief appearance on the British cars thread. It’s now mine and currently in my driveway awaiting fixing. Main work is going to be engine as it needs a rebuild or an alternative sourced, very Smokey!
 9 points
 -
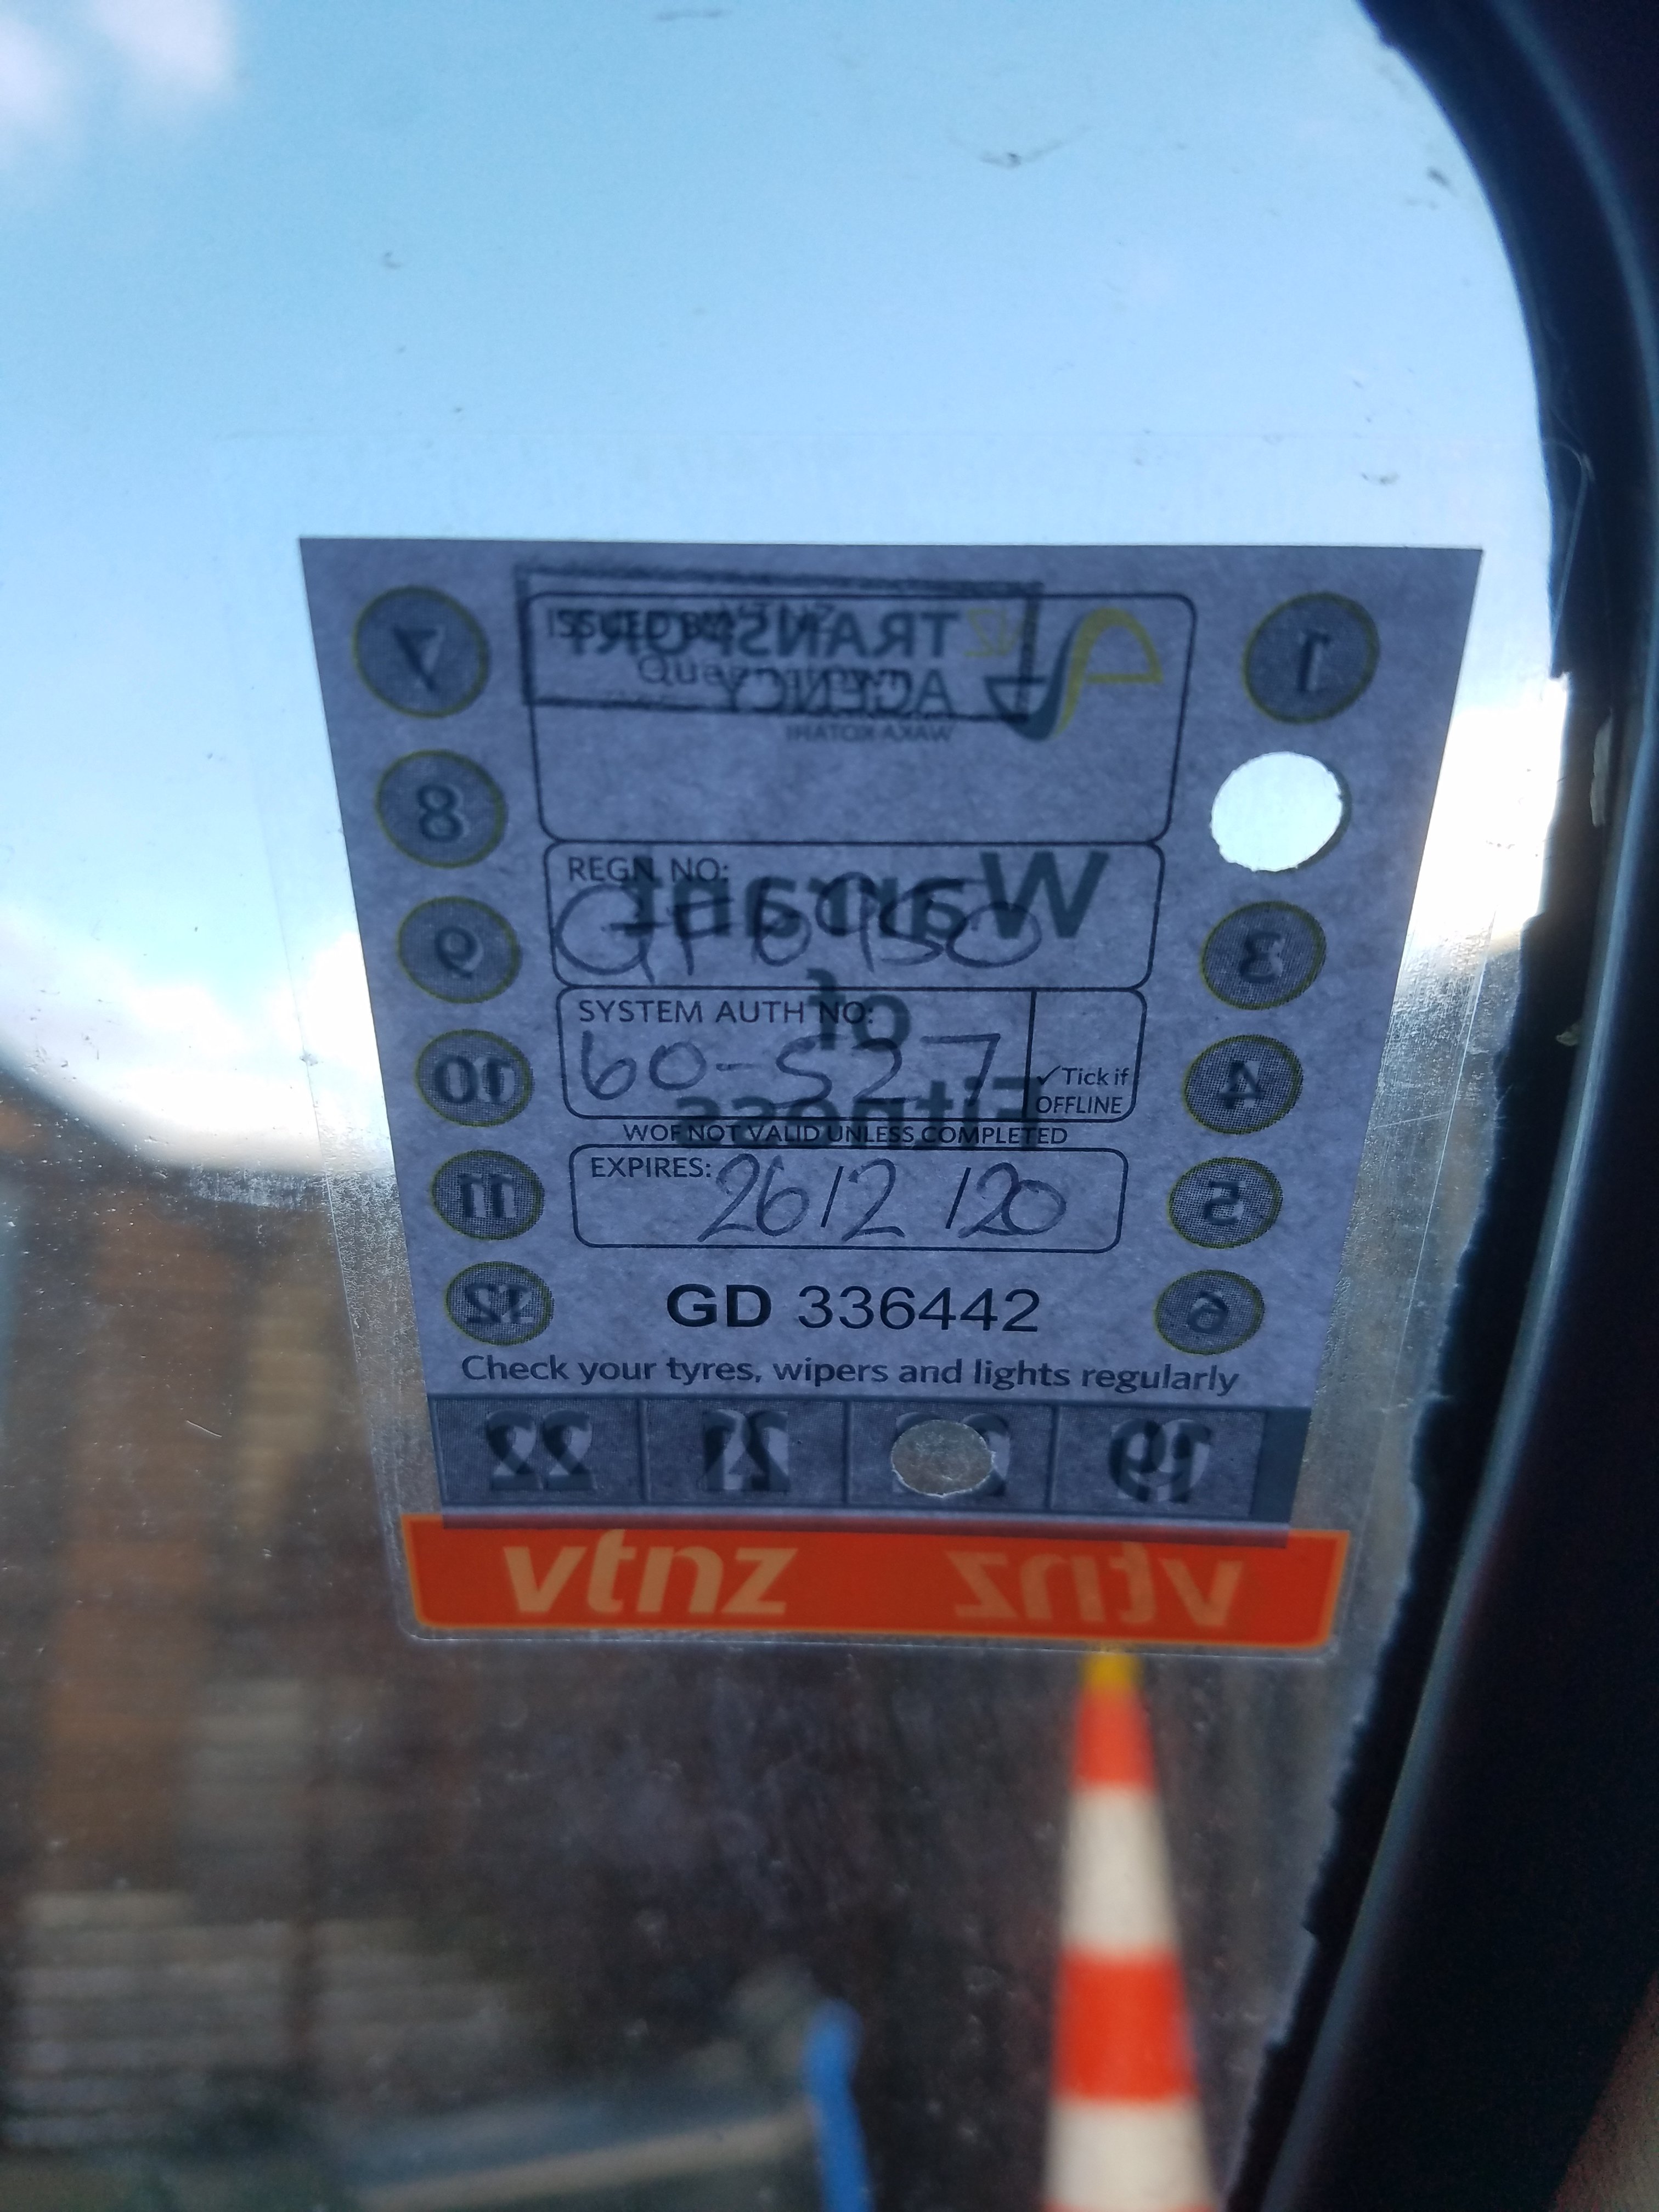
So this just happened. How does an old British car clean sheet a wof? Hanmer is on!!
7 points
-
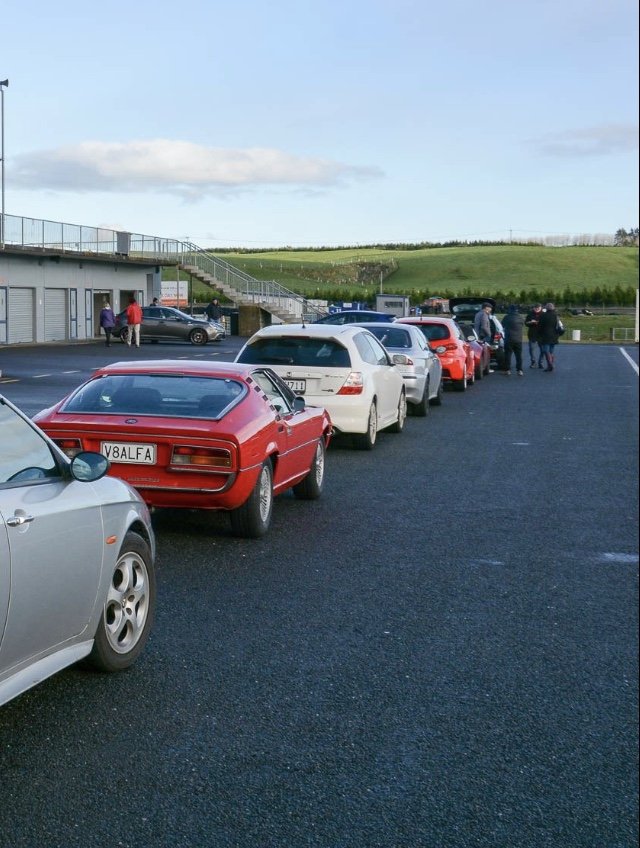
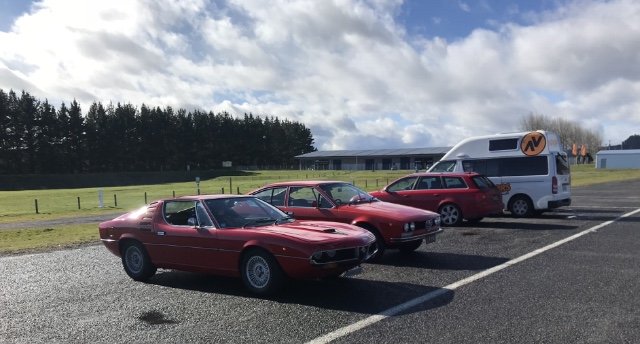
Update installed full “road/race” suspension package from classicalfa.com, incl bushes, shocks and springs. along with braided front brake lines, 4pot fronts and new rears. that sorted we hit a practice day at Taupo over the weekend run by the AROCNZ on Saturday. The result, far better handling and braking! The top trailing arm bushes were toast and now has no side to side knock and body roll is far less. Still has a bit of roll but it’s a classic car and it isn’t intended as a race car so we think it’s pretty well balanced now. new ride height has eliminated the rear tire gap and it looks far better. i drove it down from Auckland, on the track, and back again with very little issues. Now being slight exhaust knock due to ride height, a clutch that is on its way out (all though we knew this prior), and a small knock at take off and low speed. granted it’s had all new bushes, we’ll check the U joints and diff play. that, aside from much needed head room with a helmet on it ran really well! the LSD really hooks up, and even with the softish suspension you can throttle and stear it out to the outer boundary quite predictably, and ride 2nd gear out just passed 7k past the flag box. great day all round, and some small things to add to the white board ill add some track photos when the event photographers put them up
7 points
-
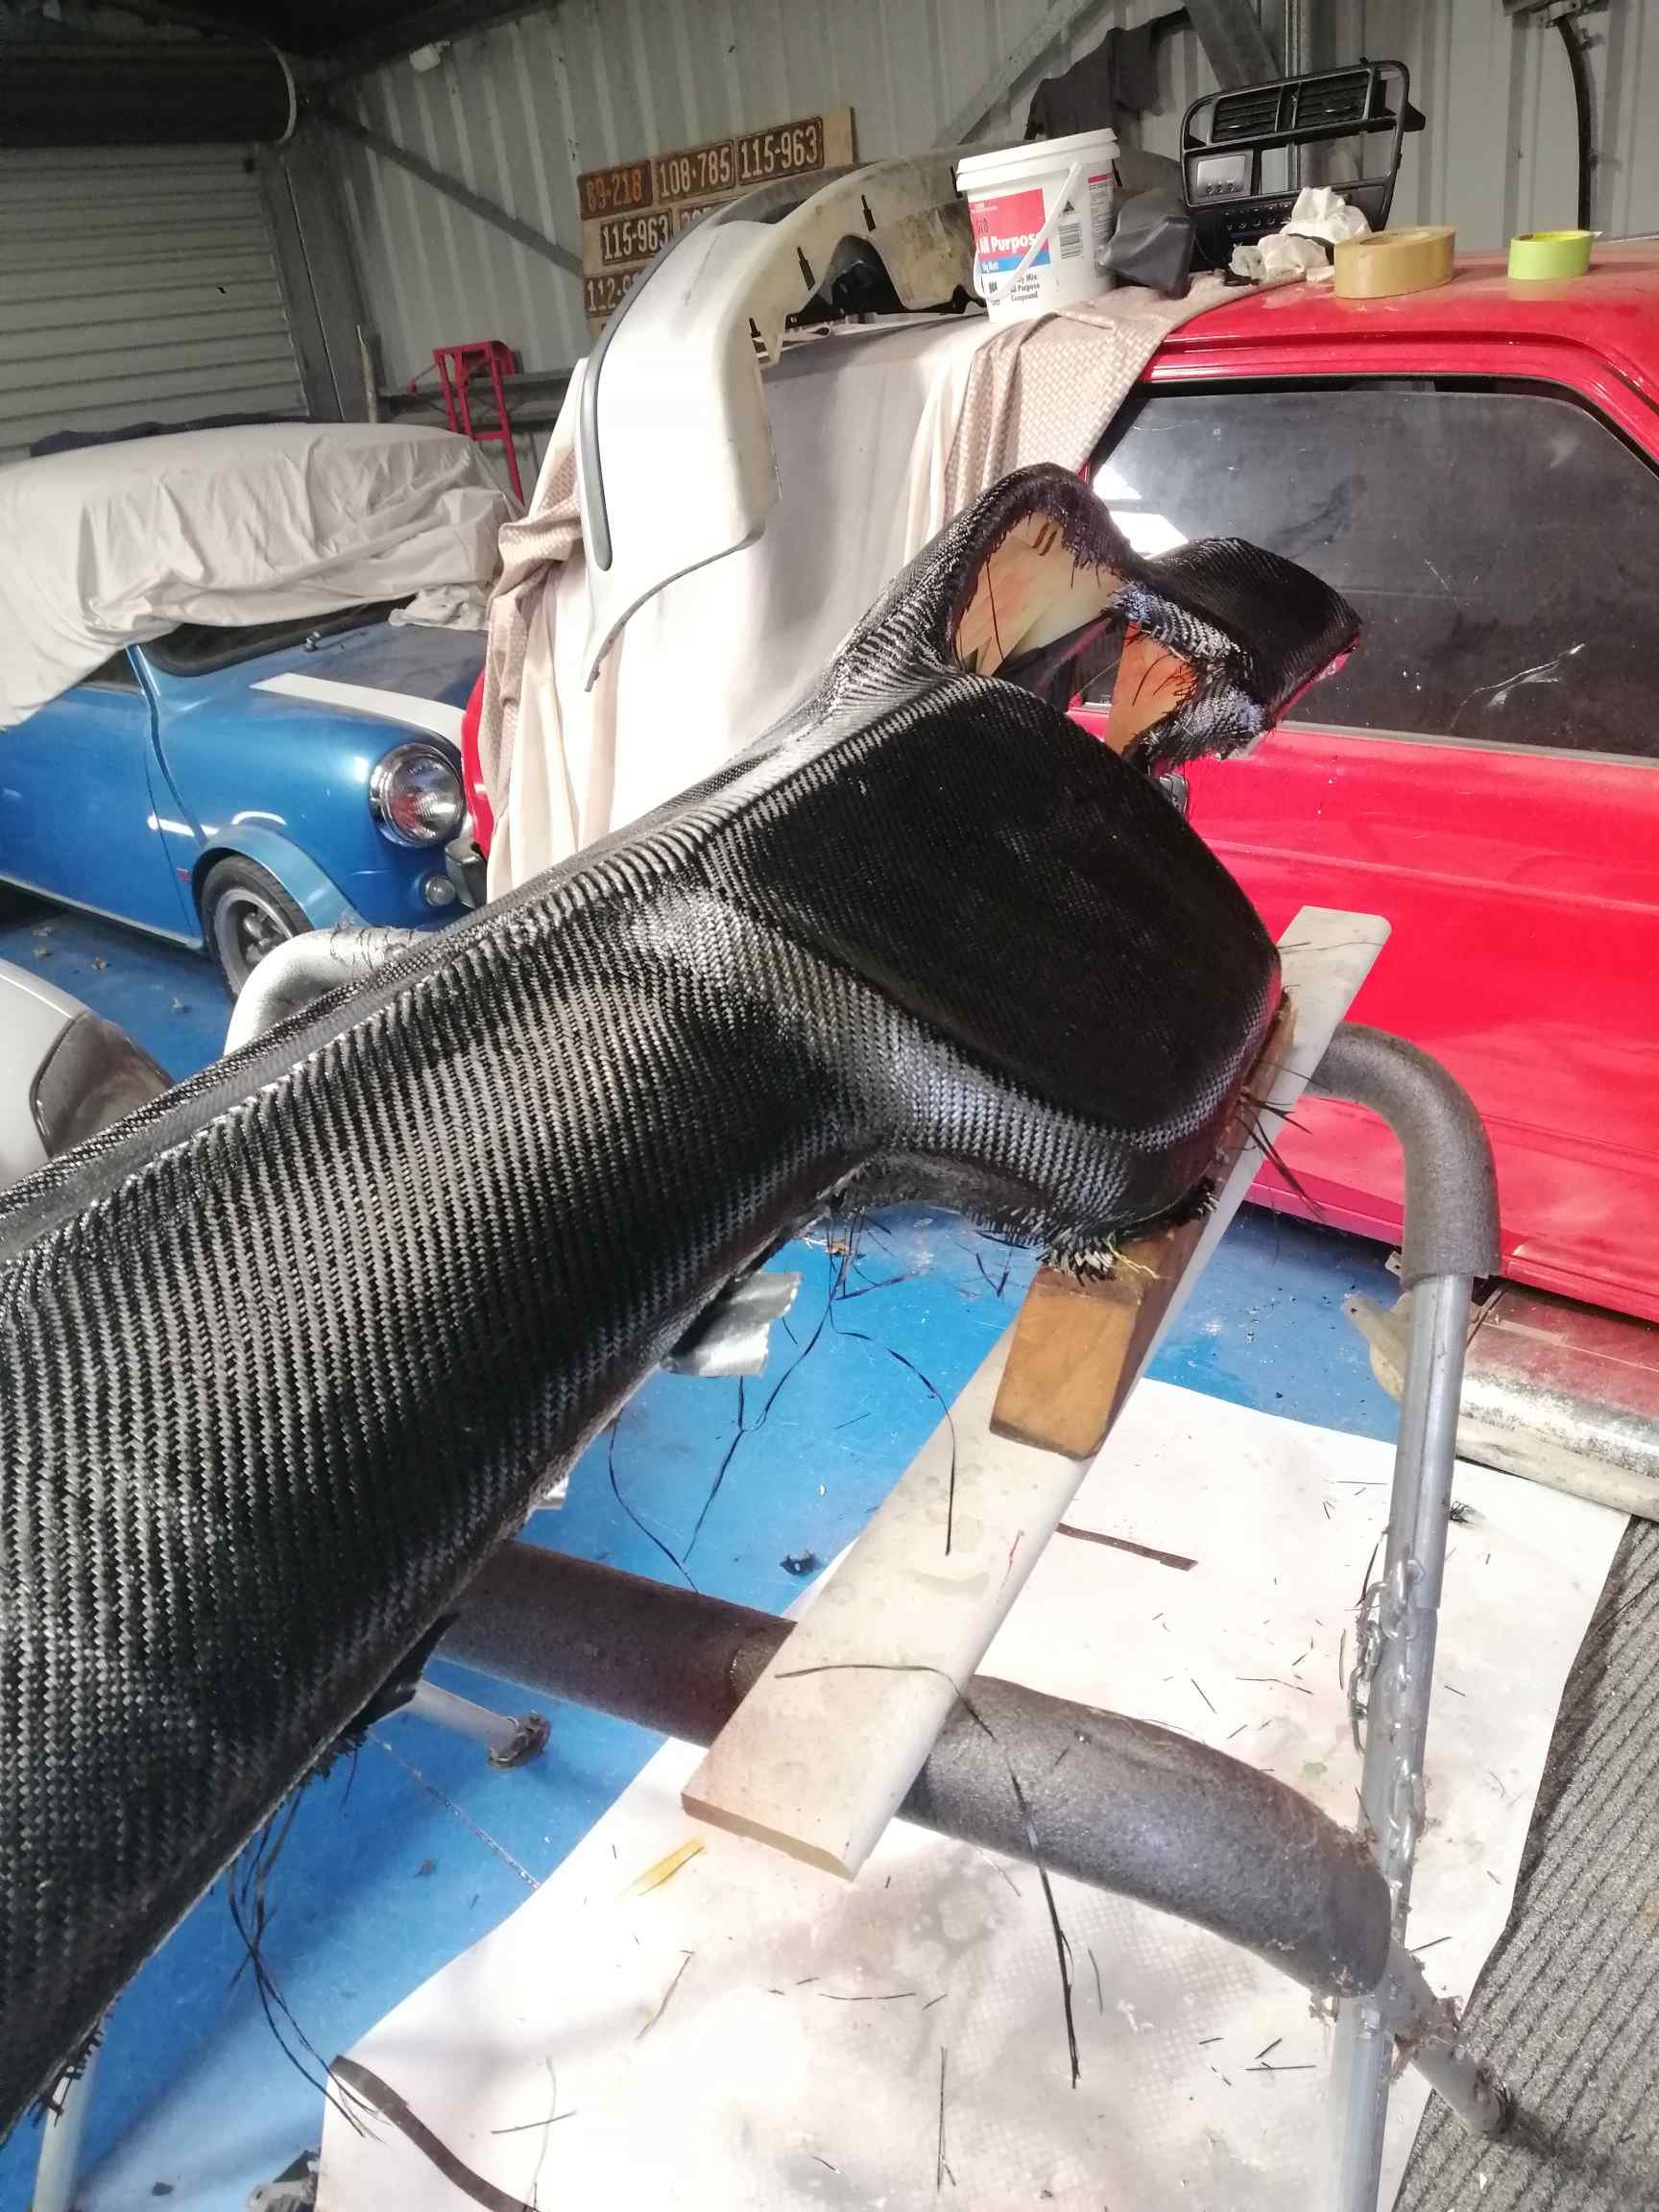
Some progress on the dash, it's not going to be an amazing show finish but damn it's light. I have stiffened up the under side with some bits of chopped strand. Once that's cured I'll continue on with mounting points (hopefully). At this stage I'll probably cover some of the top with black microsuede or something and satin clear the exposed carbon in an attempt to reduce glare. Open to suggestions for cutout for the demister. Plan is a 12v hairdryer plumbed to some sort of DIY ducting.
7 points
-
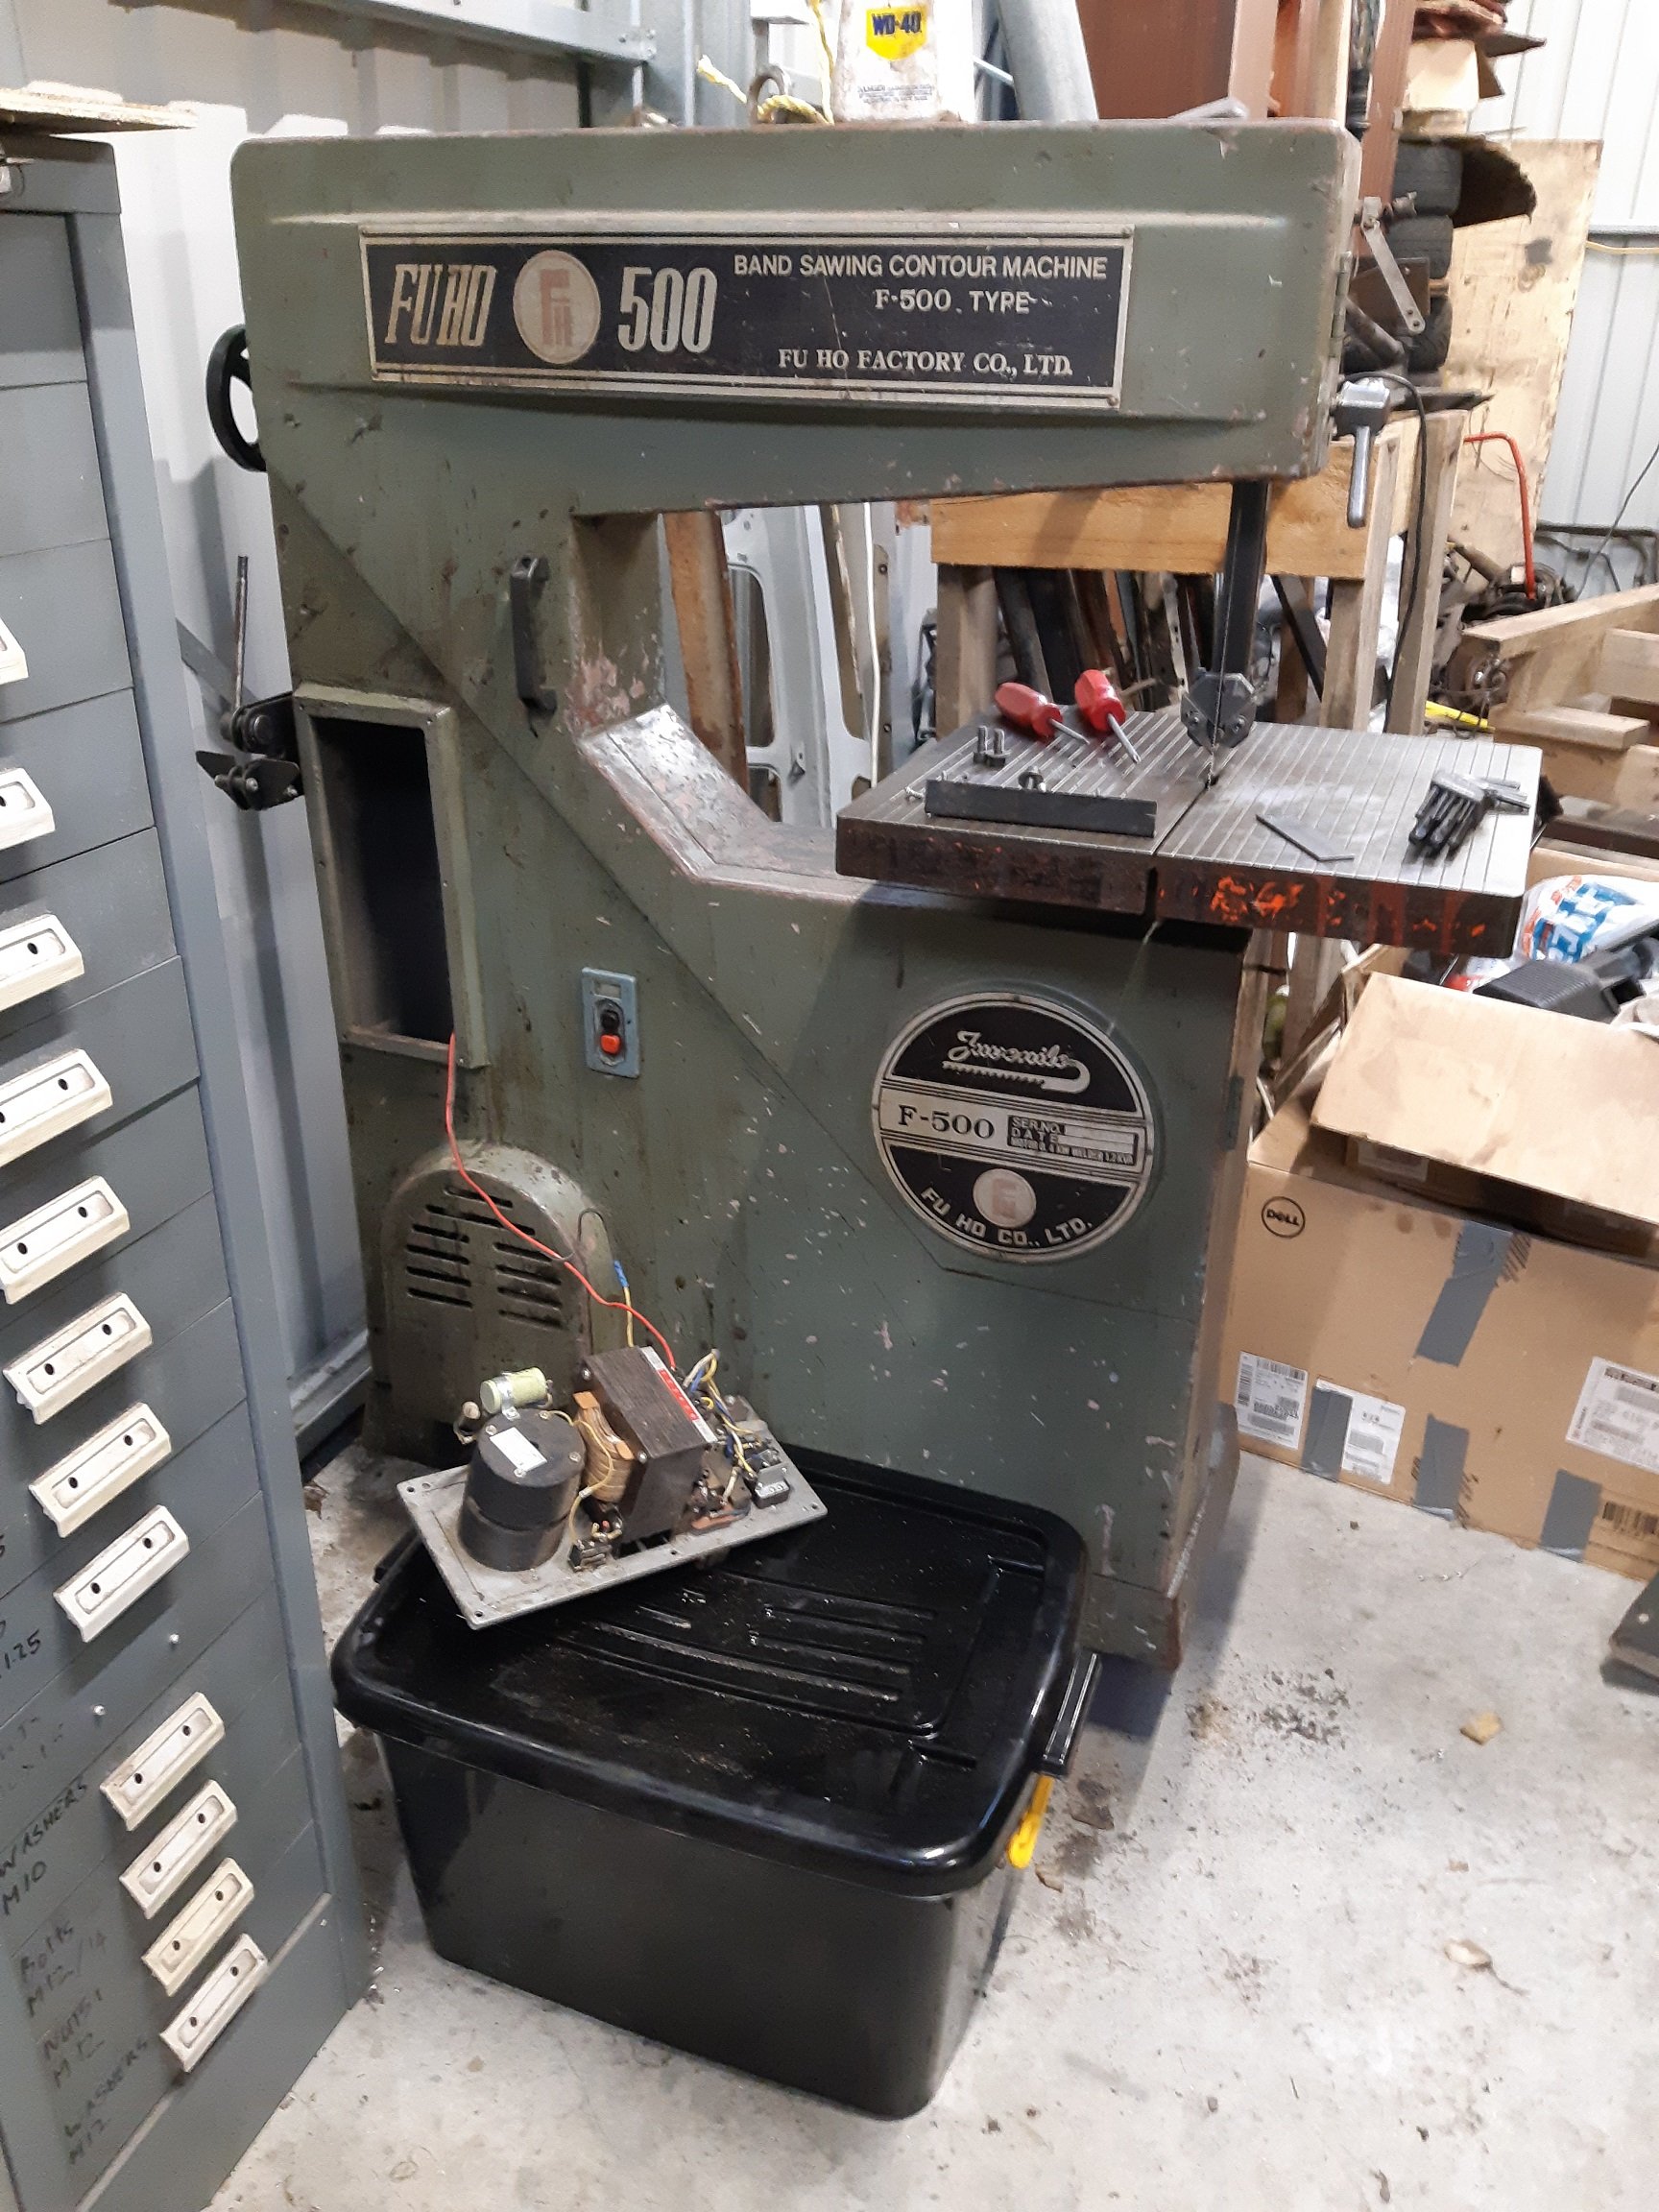
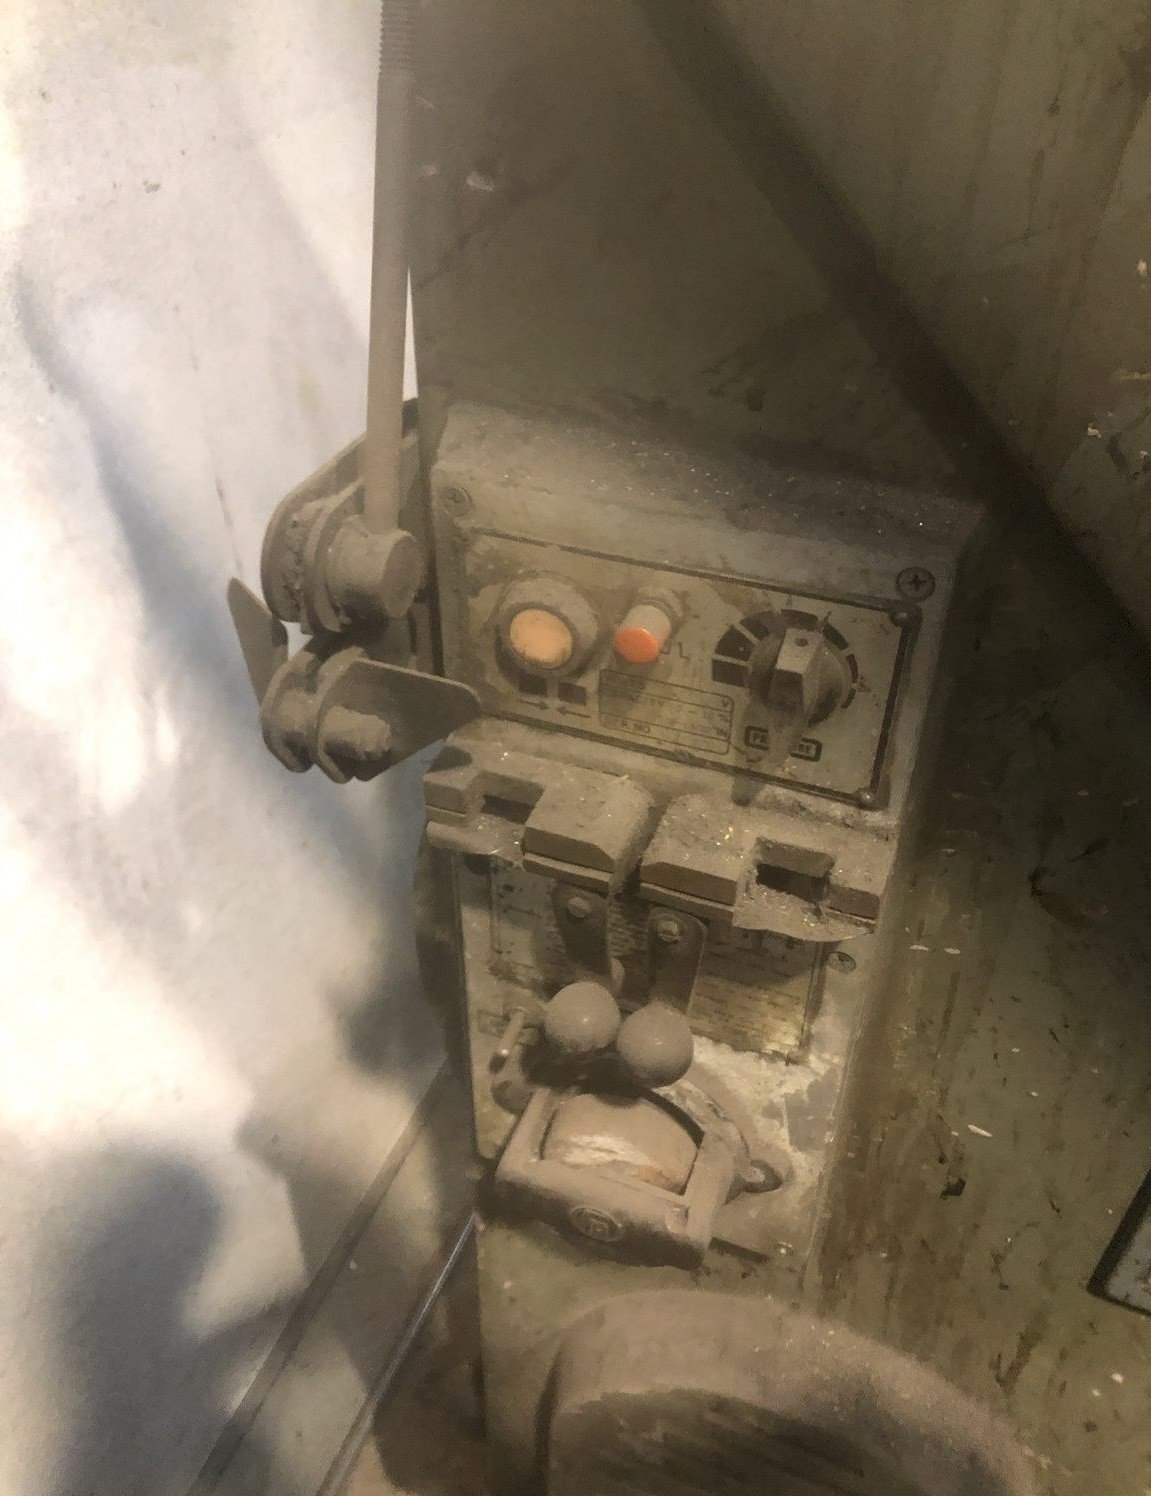
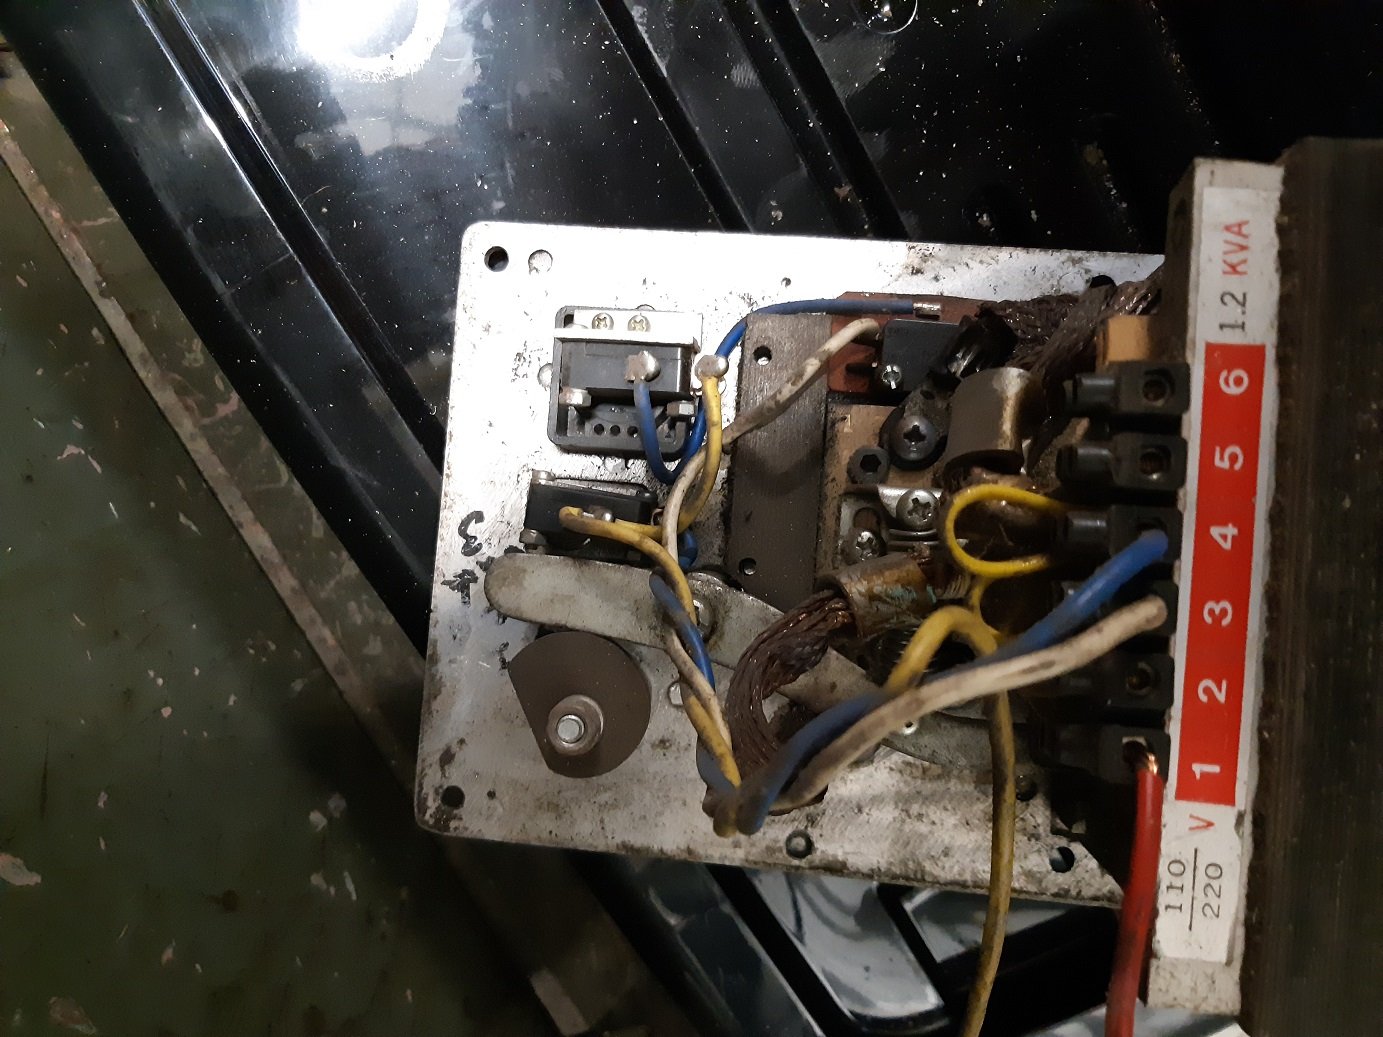
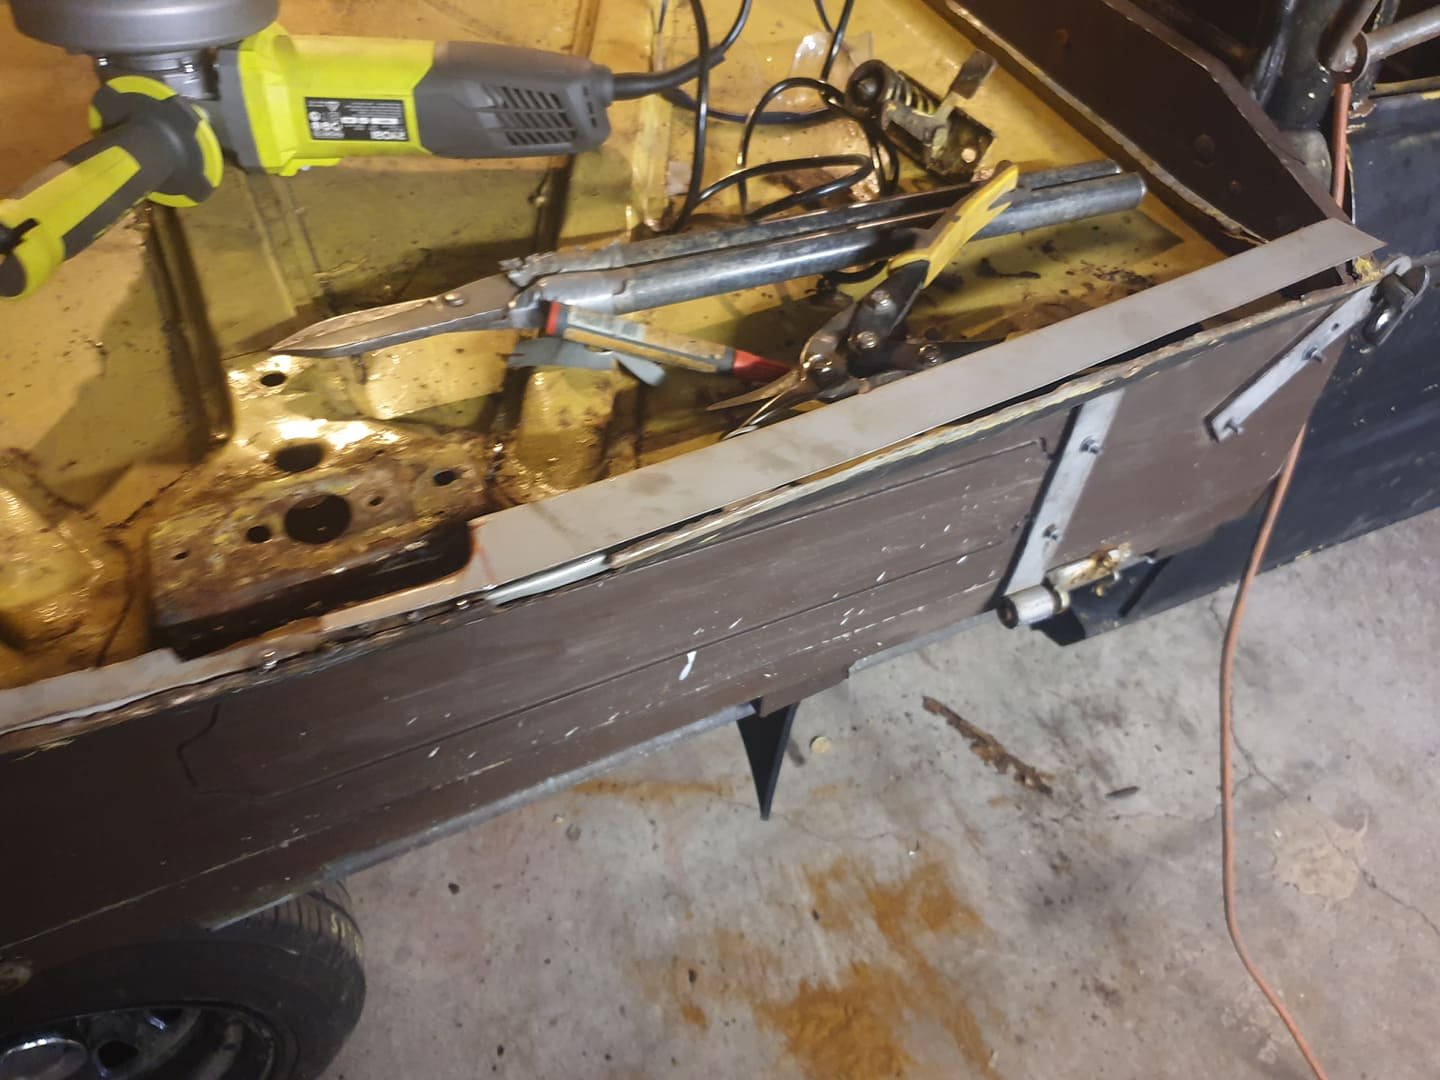
So I bought a metal cutting vertical bandsaw. It's single phase. I picked it up on the weekend. It belonged to a fabrication shop called Metalmorphic. They bought it new ~35 years ago(the plate on the motor says 1982) and stopped using it about 5 years ago because laser cutting exists. All I've had time to do is take the blade guides to bits and clean them. Looking at the photos I realised I put part of the top support in backwards, so the locking screws face the wrong way. I knew the blade welder wasn't working when I bought it, he said it had been "fixed" some years ago, but it's not working. Here is the photo from trademe, it's much cleaner now. Looking on google, it seems like many saw brands use "identical' blade welders. I'll probably never use the blade welder and just buy ready made blades. But I thought I'd take it apart and see if I could find what was wrong with it. "How complicated could it possibly be?". Someone has been in here before me... That switch with all the cut wires is to turn on the little grinder. I assume the red cable originally came here rather than the terminal block? And then yellow wires from here to the terminal block? The grinder motor also has a loose red wire with a spade connector on it that has nowhere to connect to. I assume the two wires coming from the saw are phase and neutral, and it earths through the casing? Does anyone else have a blade welder like this and can take some photos for me?
4 points
-
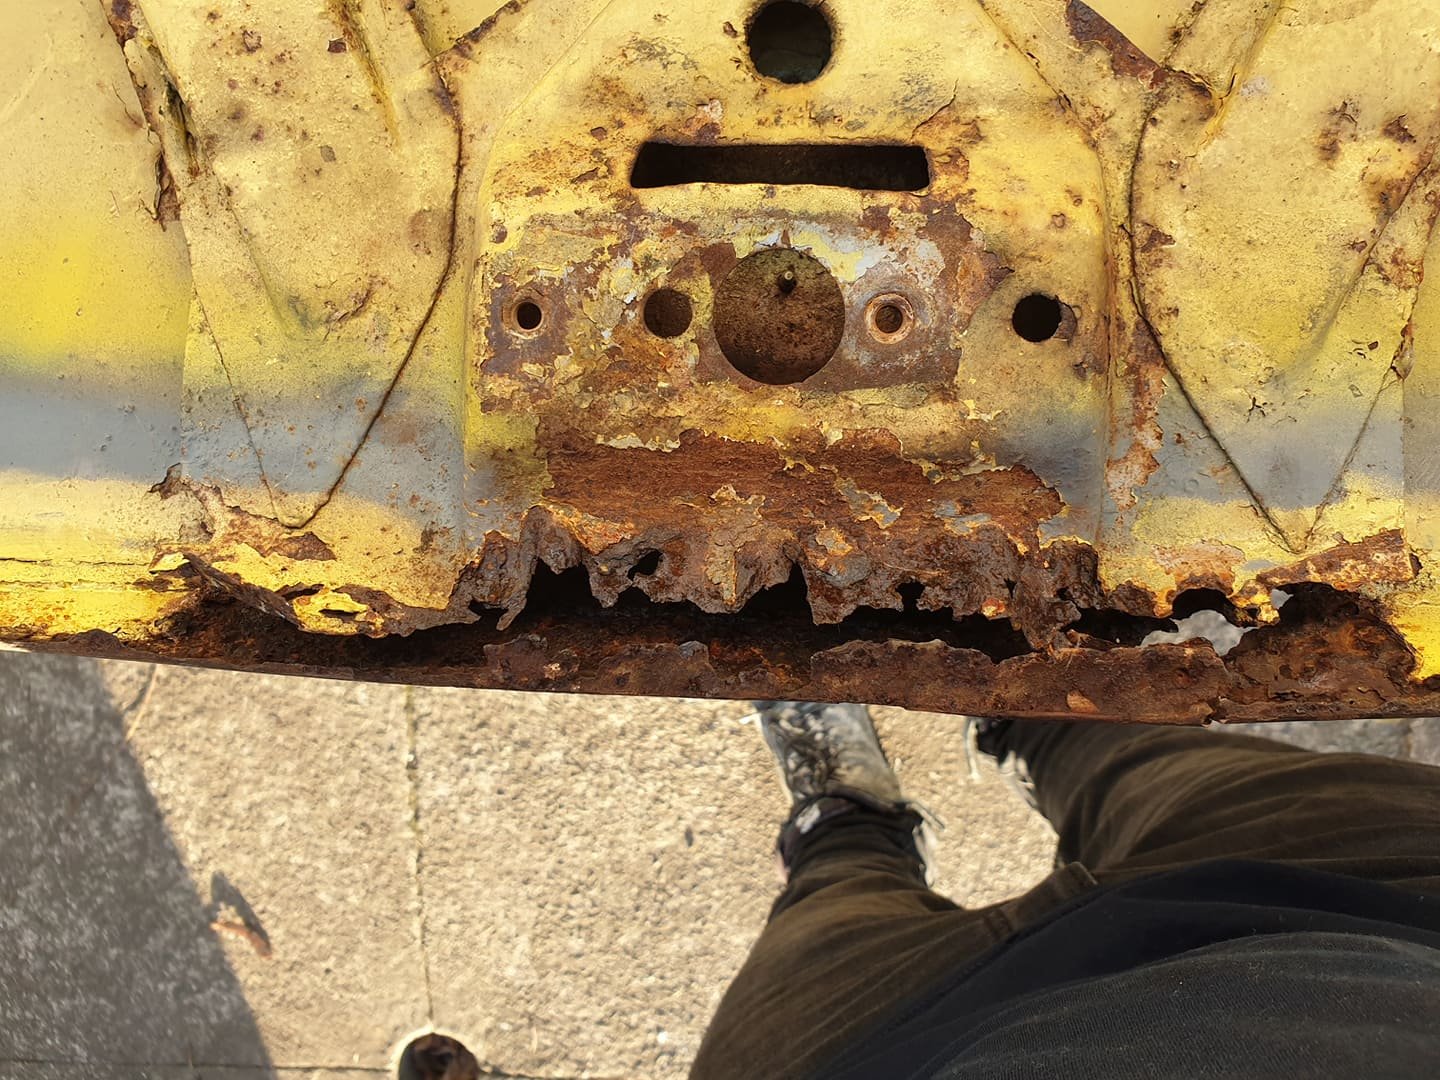
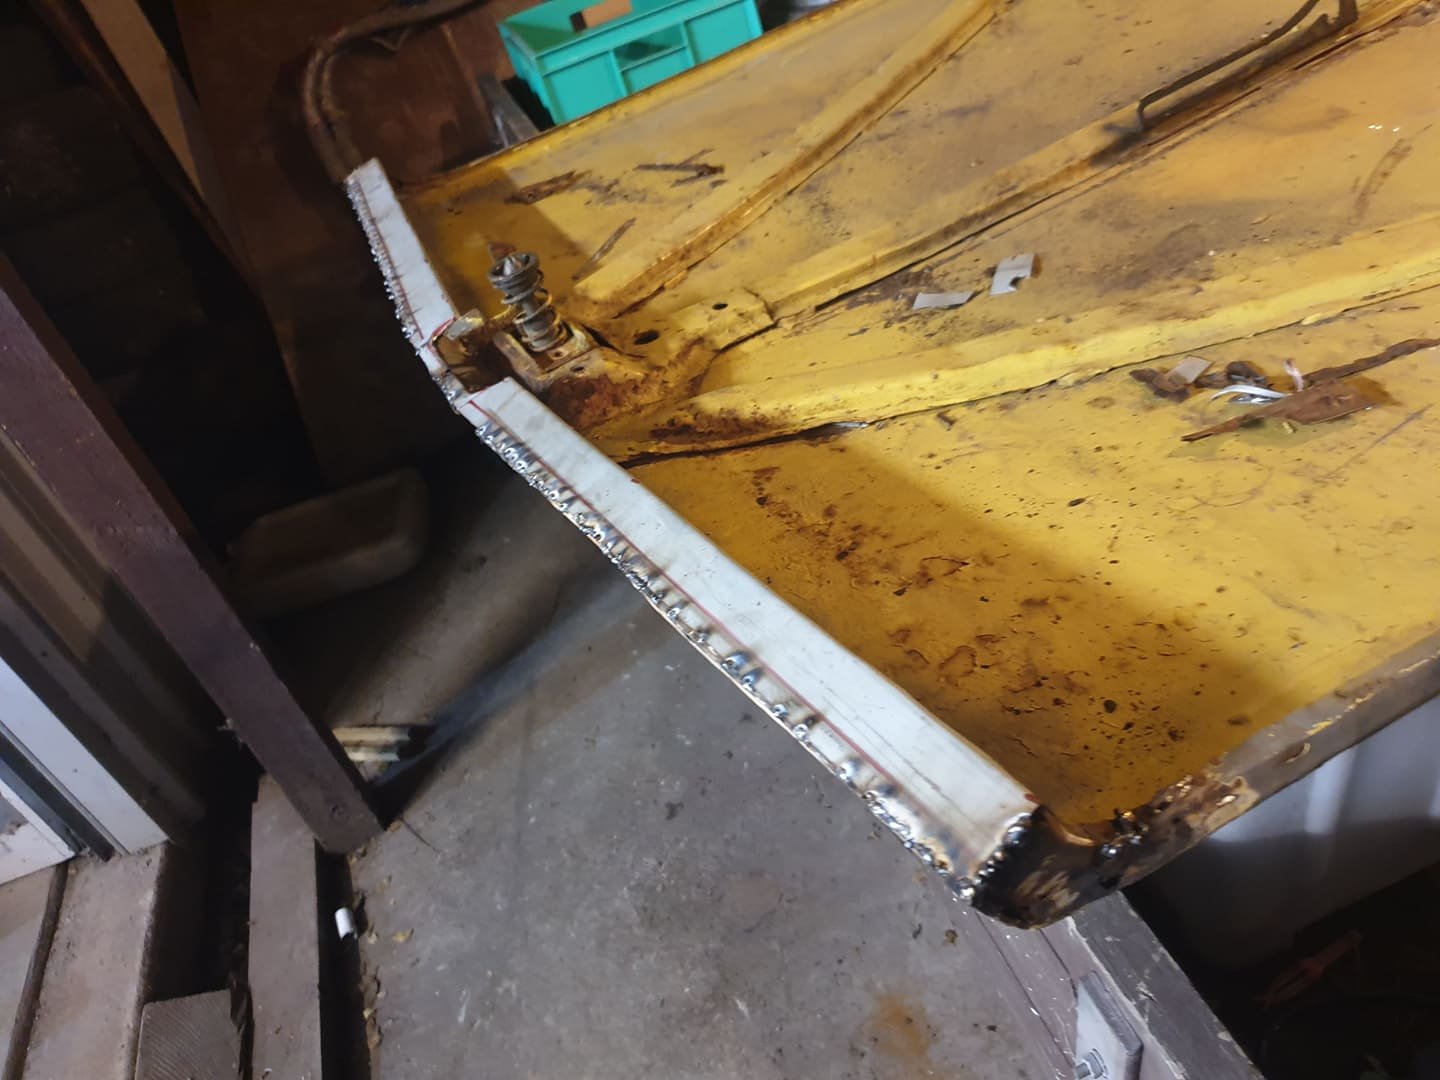
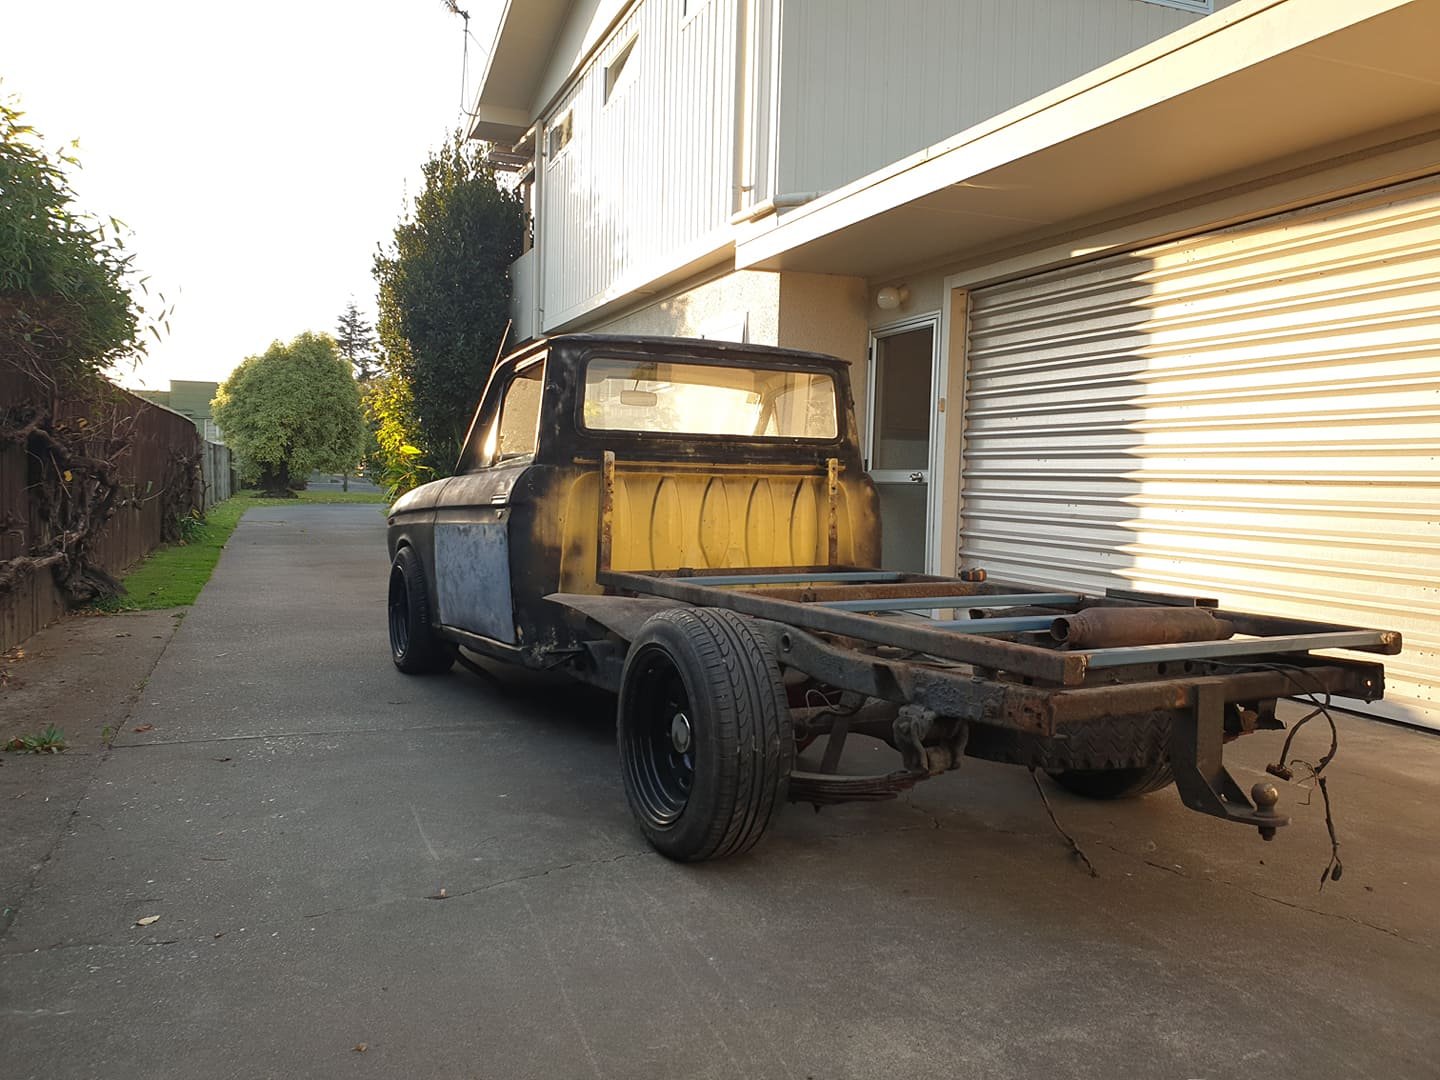
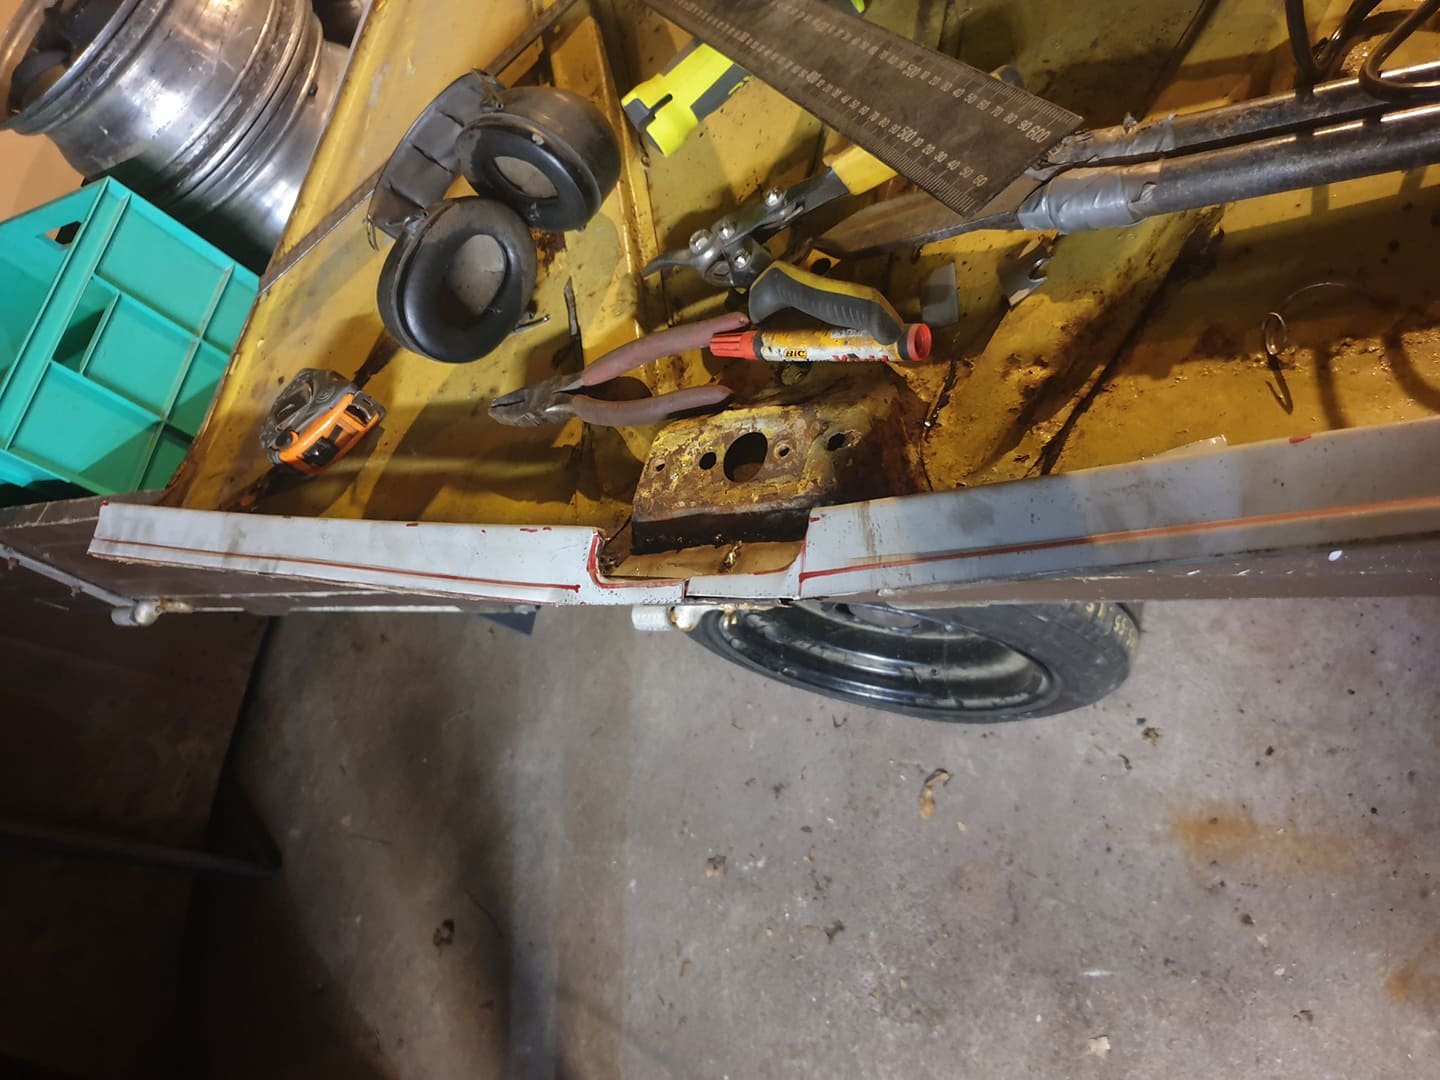
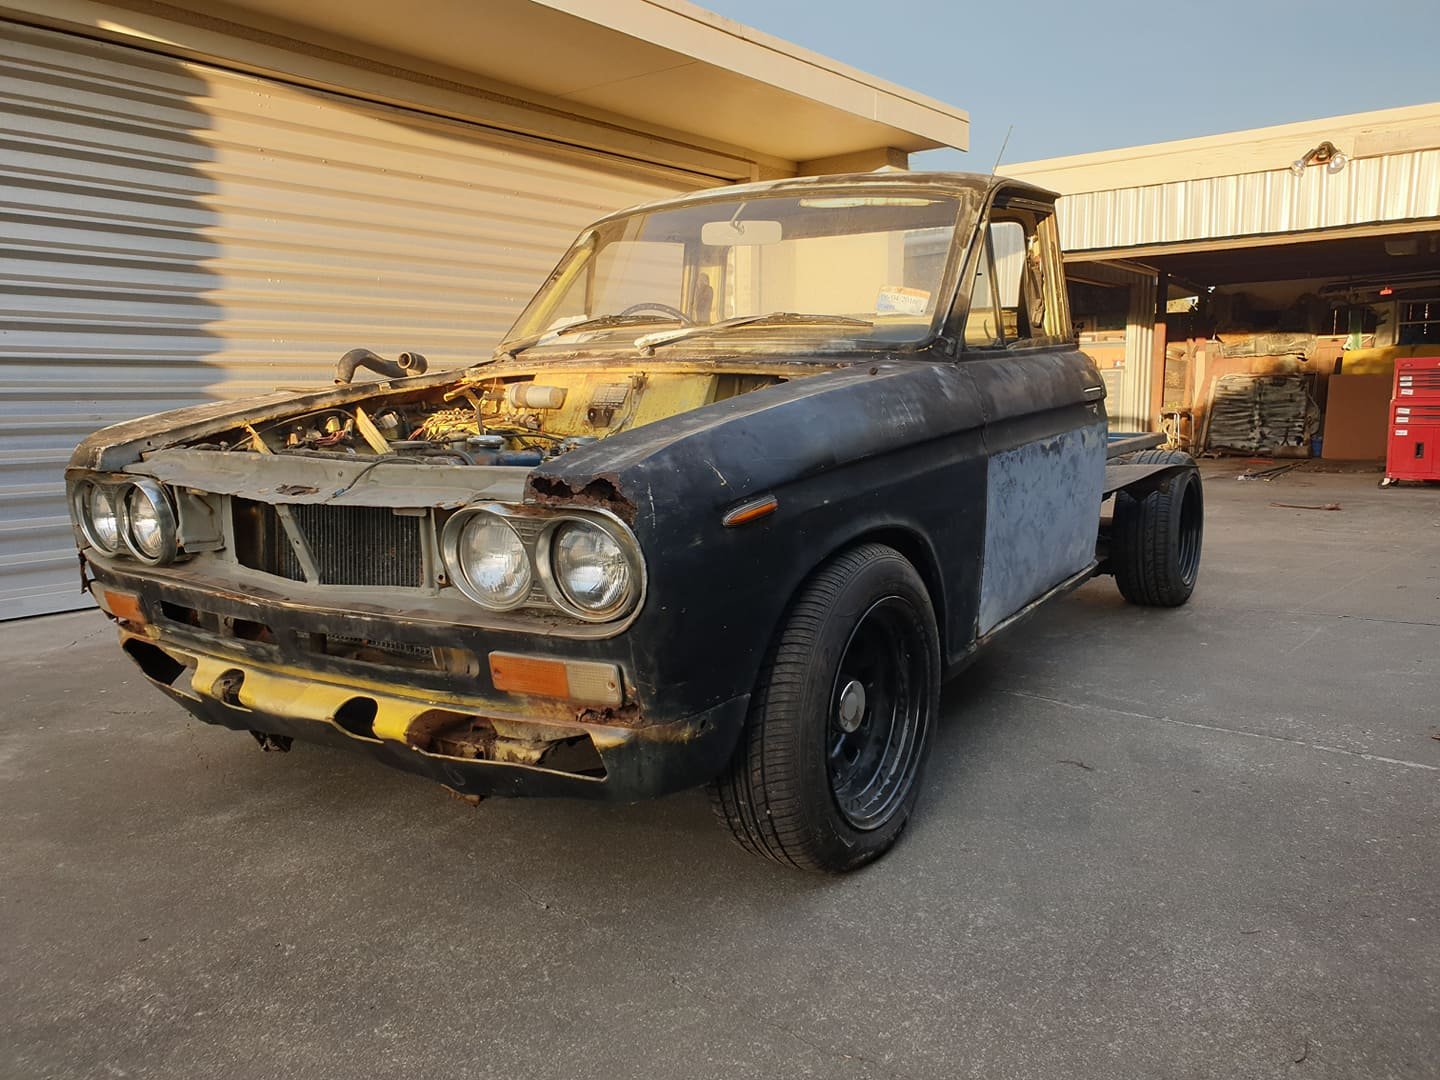
Yea so that engine... It actually only needs a crank and a conrod, plus bearings, seals and gaskets. Trundles have cranks for $250, con rods for 80. So I reckon for $500 - $600 I can sort it out. Everything else actually looked pretty good. The head had new frost plugs in it and it and the engine had obviously been apart previously. There was only about a liter of oil in it, and it had clearly been run with a spun bearing until it siezed. I will check everything else before ordering anything but that looks like a plan. I reluctantly put it to one side to strip the chassis, then spent today finishing off all the welding; All sorted, although to get through it all i had to tell my wife after tea that I had to 'tidy up' in the shed. This have me a sneaky extra half hour. I am getting this, the cab subframe and the deck zinc arc sprayed. This will be good cos then I can store that shit outside and free up valuable shed space. I have a few big jobs coming up, so I will need it.4 points
-
Chucked in the fresh triple electrode plugs and new leads.. hooked a few gears for a Sunday drive. Waiting for 1 last part to arrive. Will attempt a wof check this week. If it passes I'll attempt the hanmeet drive
4 points
-
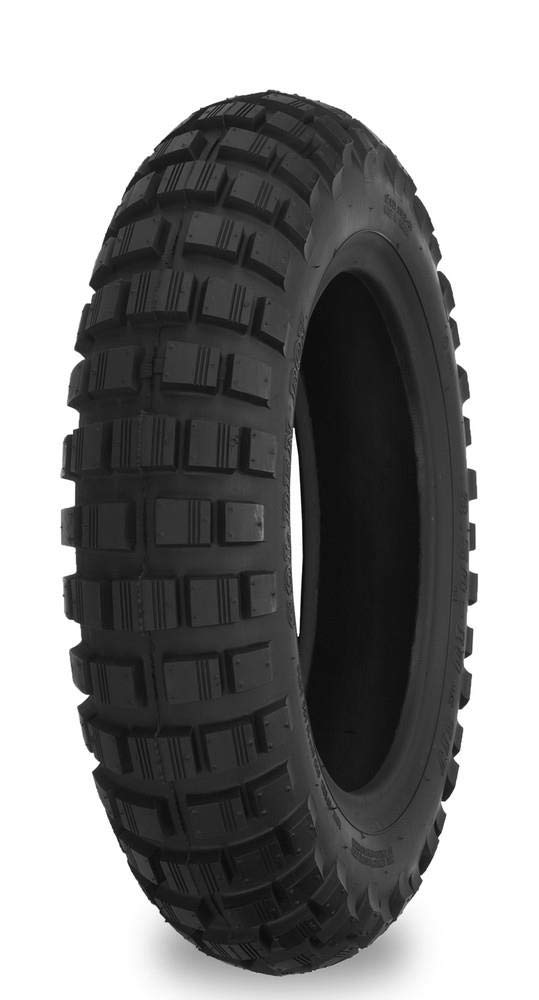
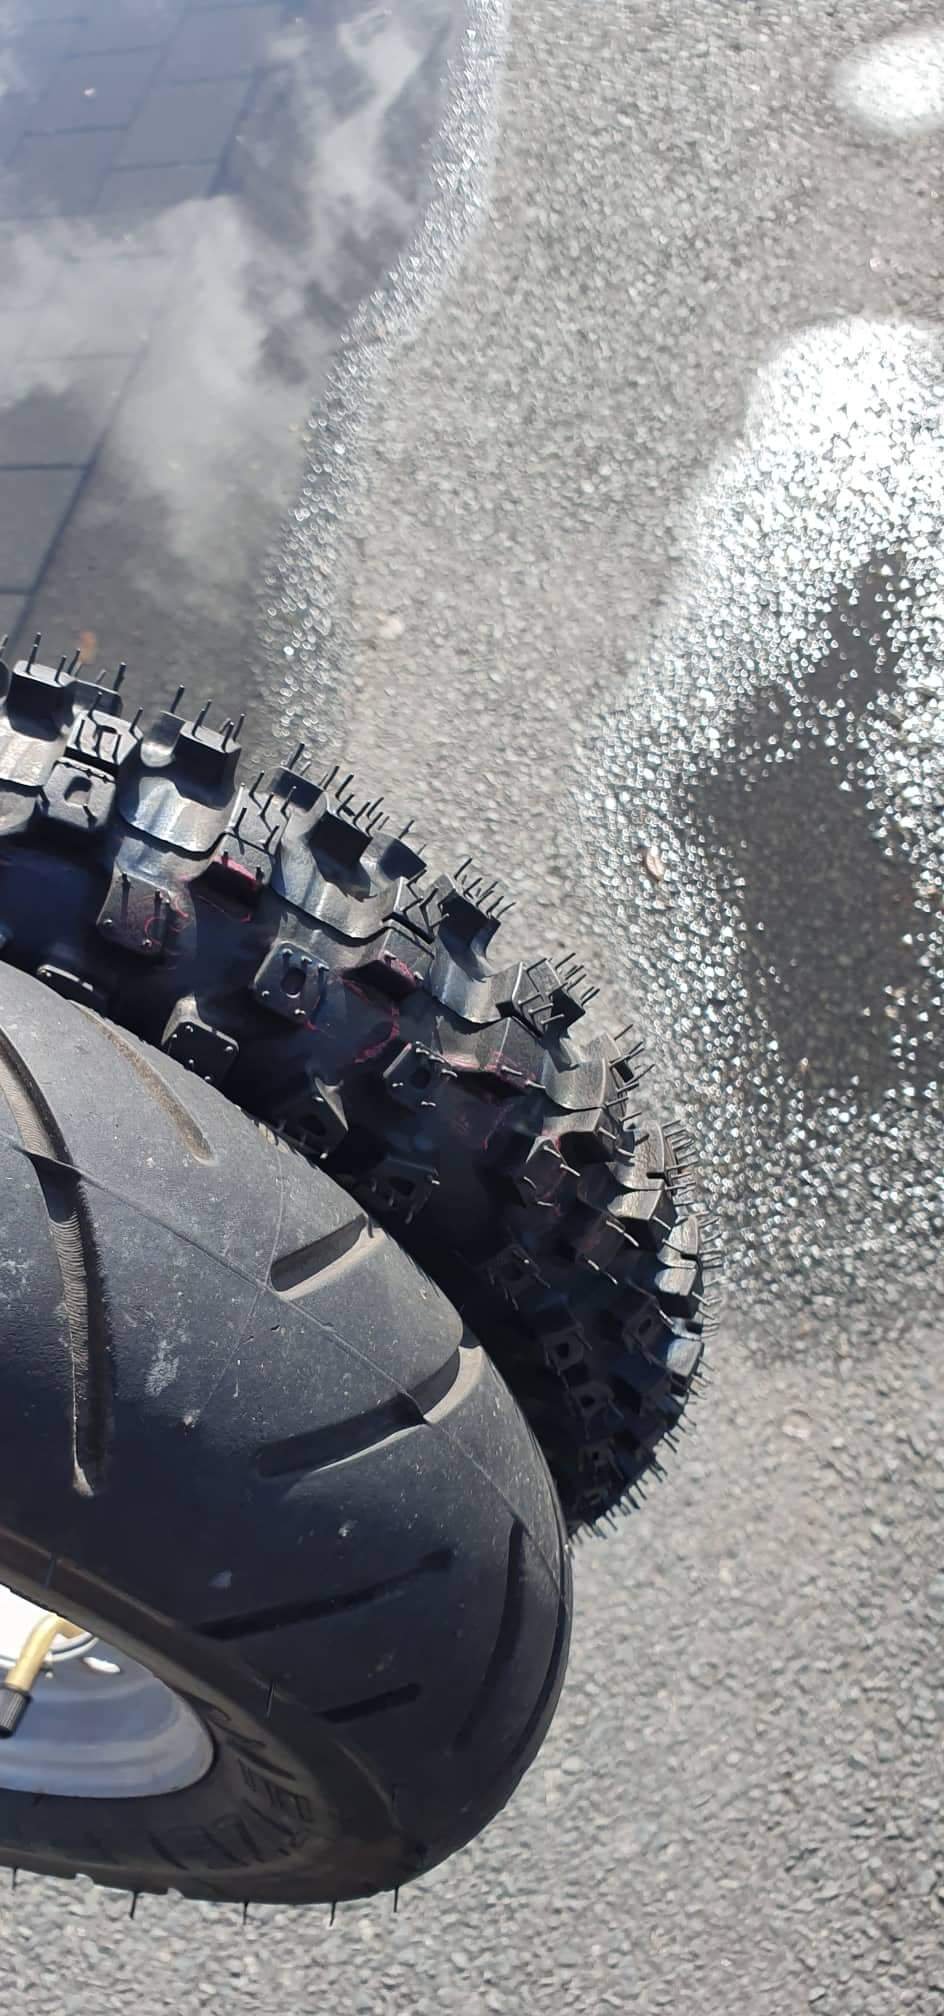
So I don't really do much with that bad boy other than ride it. Do some wheel stands here and there. But @mark105 has acquired a big bike and wants to do some trail rides and I've always wanted to do some trail rides again but I just don't have enough cash to have a dirt bike and a vespa. So I got dirt tires for my vespa..... These tires are a bit smaller than my road tires so hes a bit slower but also a bit more peppy. After doing some intense googling I found some bigger sized tirs online. Good old shinko to the rescue. If i enjoy doing trail rides on the vespa I will try get a set of these. Bit taller gearing so I can still so 100kms on the dirt/grass but not quite aggressive as the smaller tire I'm currently running. These bad boys full on motorcross tyre. I'll report back on sunday night when I'm feeling sorry for myself.
3 points
-
Because racecar is a get out of jail free card for dick punches3 points
-
If you don't mind the look of pins, go nuts. Personally i'd do everything I could to recondition what I had to avoid having them. Especially on a car like yours, original = winning. But different strokes etc. Perhaps you could have the mechanism blasted / dipped and anodized? Would link Snoozin's KP as I think he got similar things done, but pics are goneburger.3 points
-
Not really any photos of the step by step, I took all the stuff out I didn't want, then filled the holes with cardboard and tape, then a bit of jib stopping compound (because easy to apply and sand) then some old spray paint because cardboard and jib stopping compound is pretty porous. Then usual wax pva etc before banging down a couple of layers of carbon, all I had was 300mm wide cloth so joins /overlaps are a bit shit. The underside is reinforced with some ~50mm wide strips of heavy weight chopped strand glass to stiffen it up. Then cut the edges to size. Basically because I cbf doing it properly with a mould first the finish is nowhere as good as it could have been but I was concerned with lift away at the edges with no vacuum equipment. Hey whatever it should do the trick. Photos of the prepped dash with some paint, wax and pva to assist with release.
3 points
-
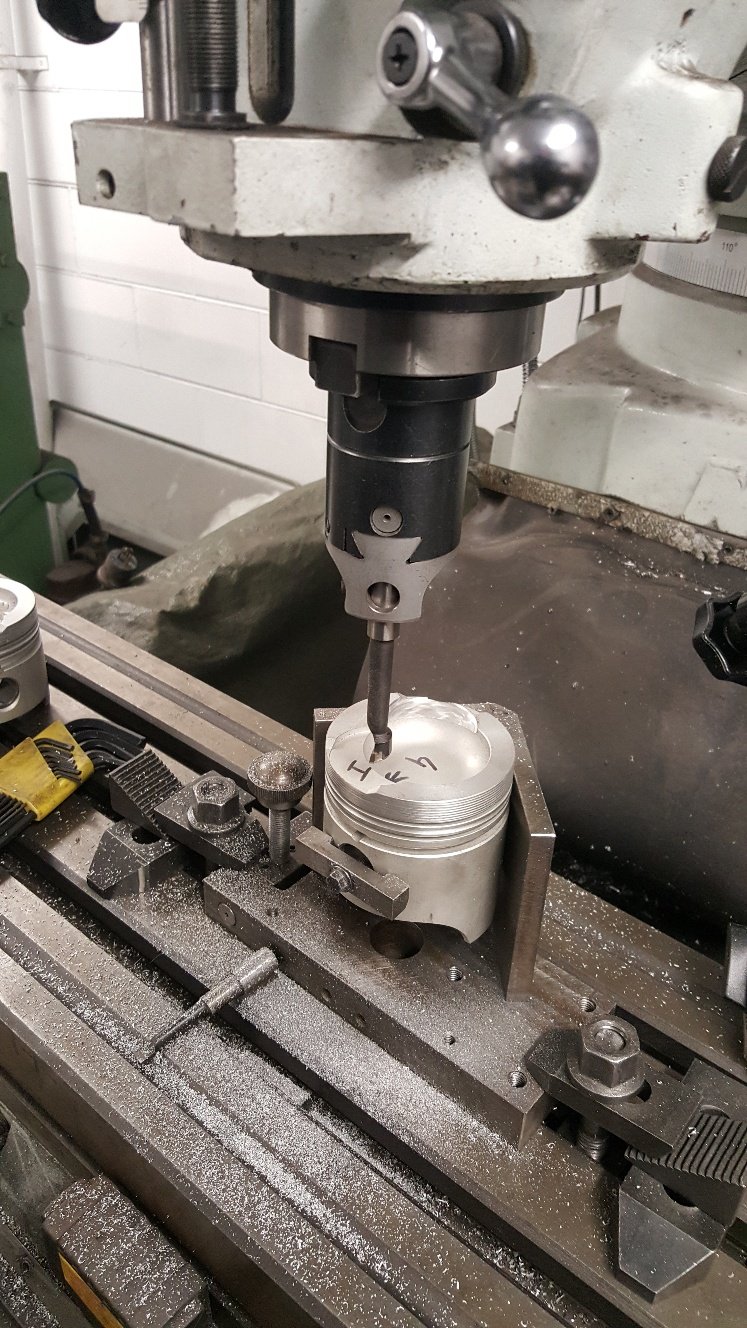
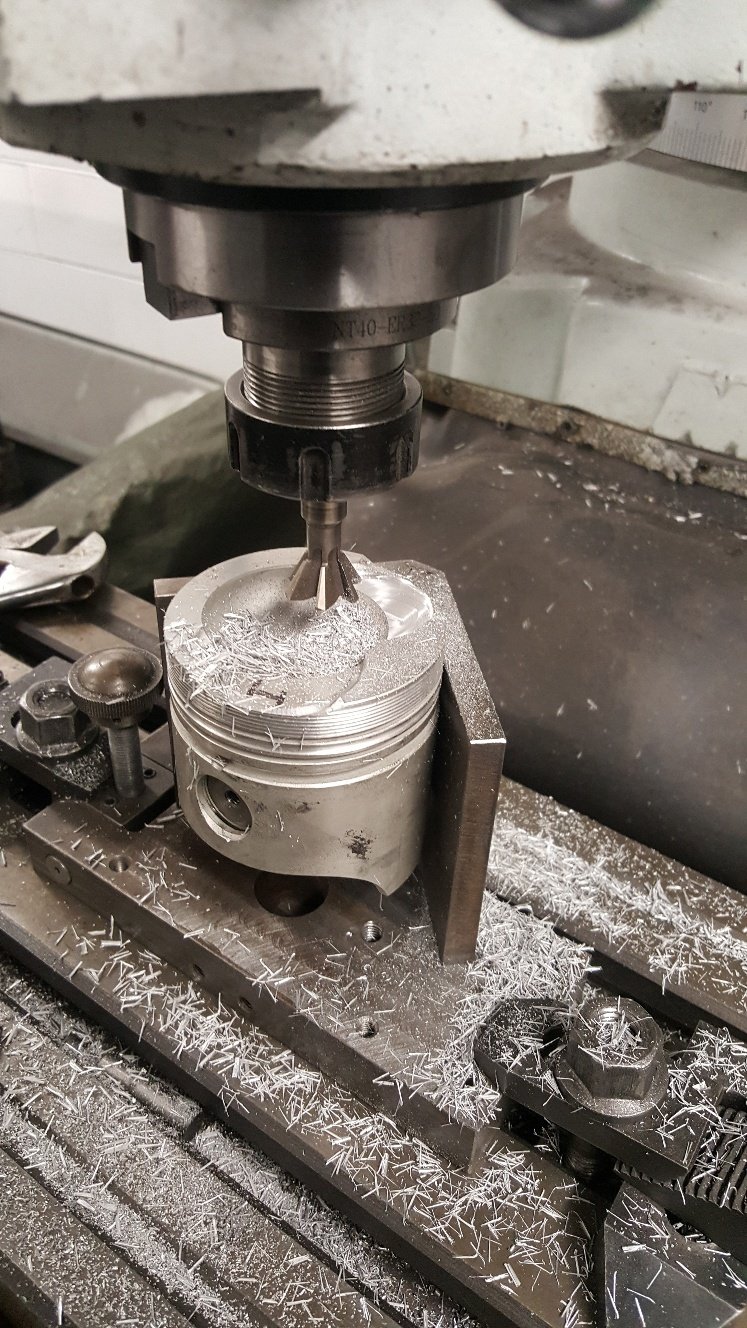
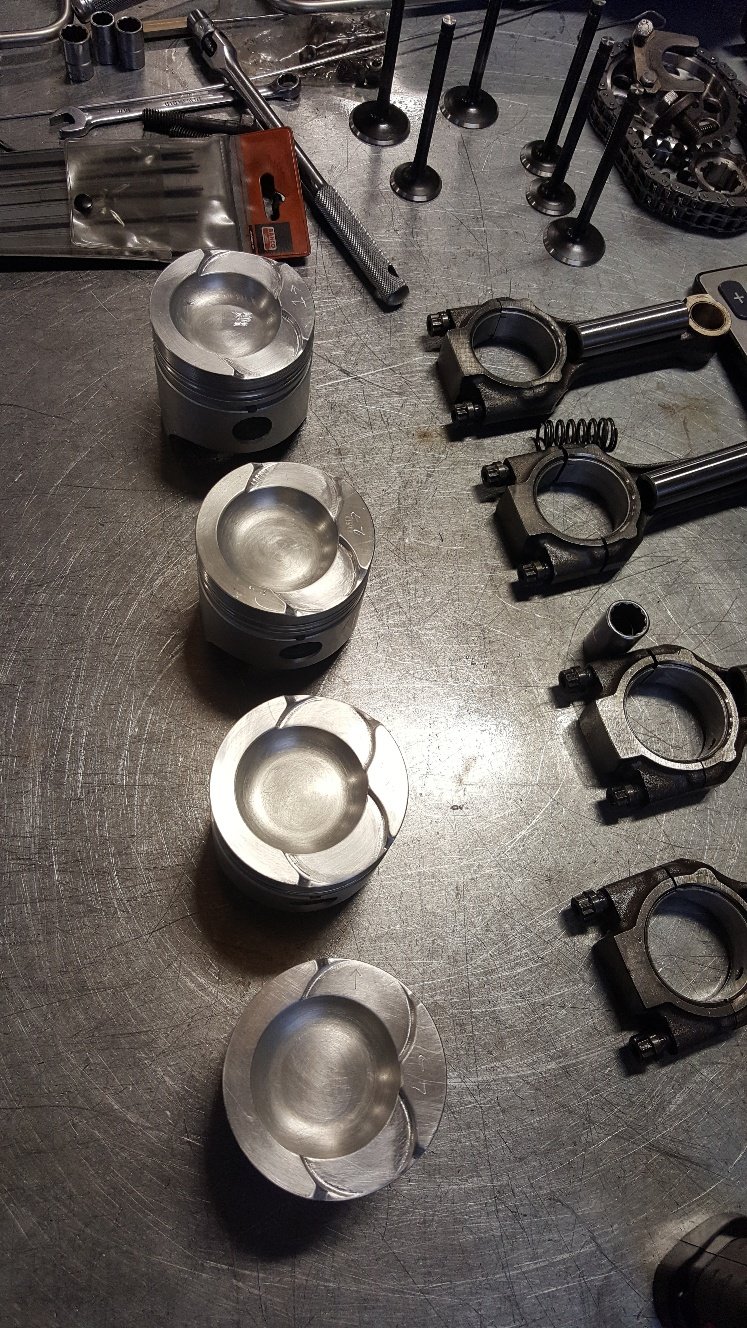
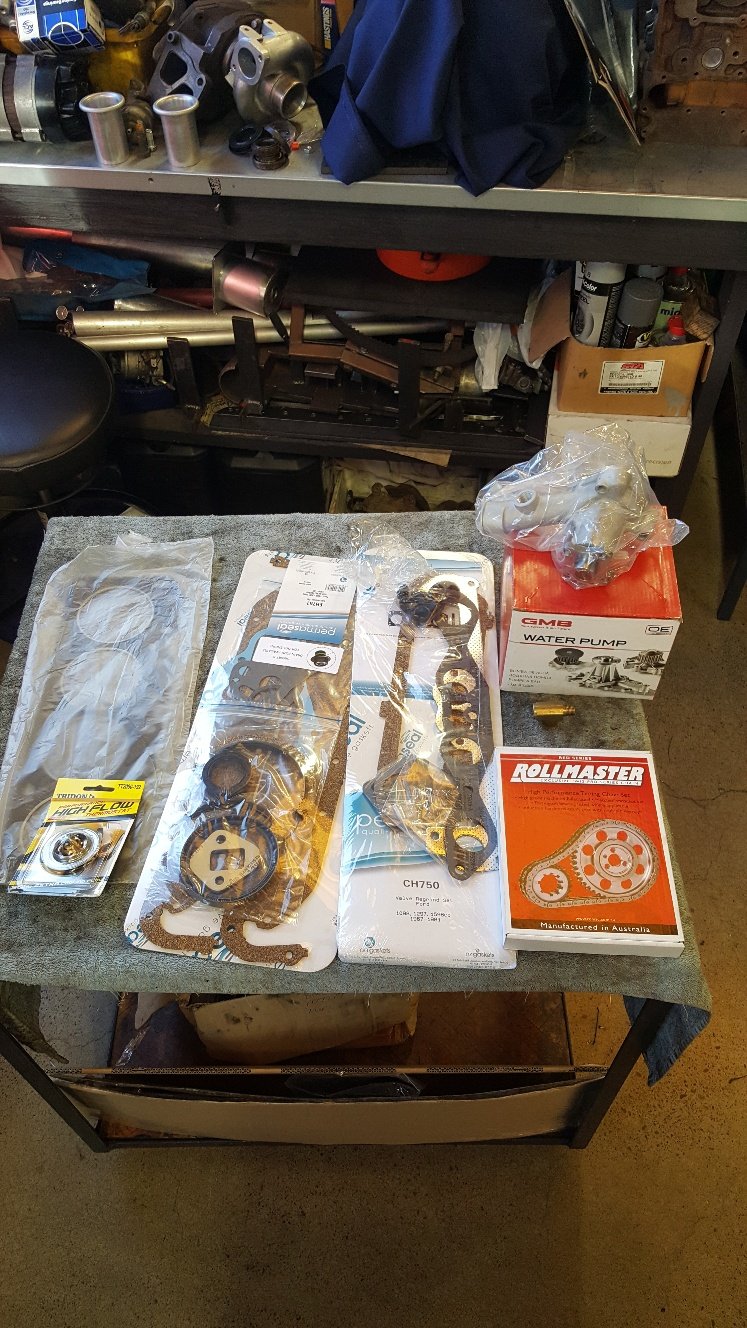
So now I know I definitely need to make the intake valve pockets bigger OD wise by 2mm. Which was no surprise as I've increased the valve size a good amount. I also found I need to deepen the exhaust pocket by 1mm. So I used a the mill to machine the pistons. We normally use a guy to do our valve pockets as we don't really have the gear to do a really nice job of it. But I'm doing this on a budget so I had a crack. This the tooling I used to take the OD out. Above And this for deepening. They came out ok. But we would normally out work this job. I gave them a tidy up with wet and dry and a small file. Tried to take the sharp edges off the top of the piston. Here's a pic of a few parts. I wasn't going spend $250 on the double row cam chain gear kit. But it had to happen.
3 points
-
Been distracting myself with some work on this. My Subaru was stolen on Monday sadly, and it has been a very eye opening experience in terms of the police, insurance companies and the shitty side of the world in general. While not an OS car, as some have mentioned- a classic regardless. Mine was a really tidy and original example, and I had some great restoration plans ahead. I am still hopeful I will get it back. Anyway, I decided to paint a few bits this week including the front bumper and the door tops- which are mostly made of rust now it seems. Surprisingly, Supercheap could mix me two cans of Spanish Olive without evening knowing the paint code. The lady commented on what an, "Interesting colour," it is. As you can see, my abilities to paint and retain a natural patina are astounding, and nothing to do with the fact that I am actually shit at painting... Finished bumper Sanded, then primed, then new colour Colour match is good, rest of the car is quite faded despite a polish earlier in the year. I think it will benefit from the wheels being powder coated black. Imagine it will be getting more attention now, and the Lotus isn't holding my attention much. Maybe things will change. I am going to daily this for awhile and see what happens.
3 points
-
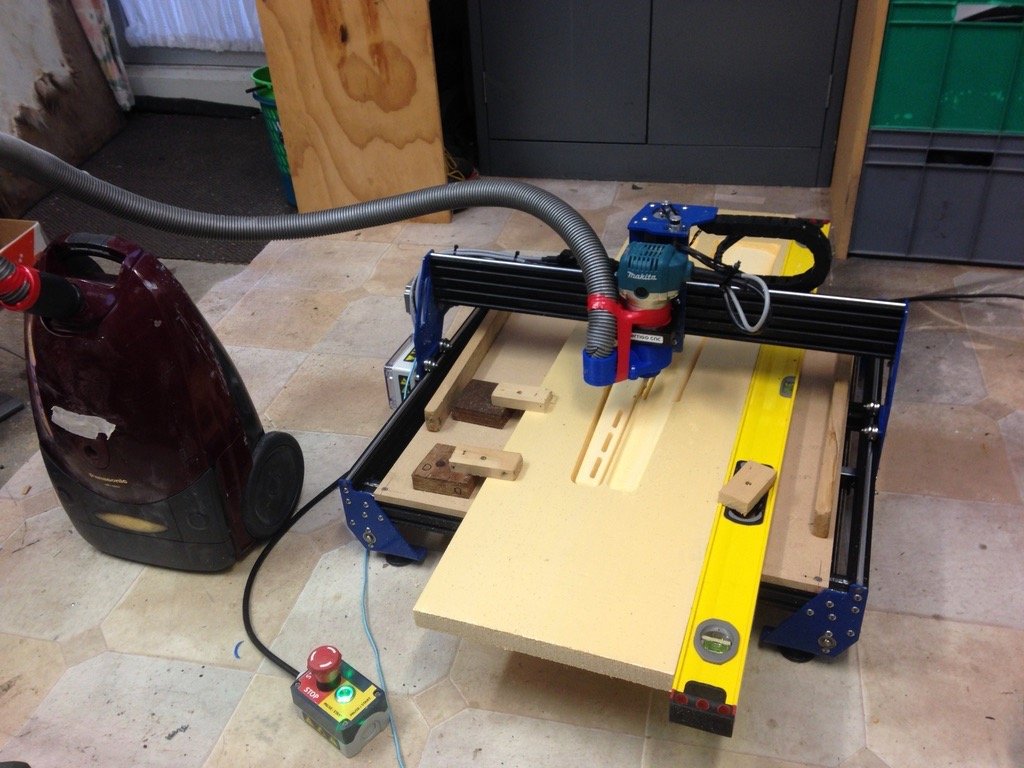
Asked a mate to carve out some foam core for a project, he declined as he didn't want the dust through his shed. He did however have a spare machine knocking about that I was welcome to make a mess in my own shed with! Gotta get me one of these toys, so simple and easy! Cores will be used for a carbon fibre rifle stock, hopefully pics to come.....
3 points
-
Ask your mum, she takes a few.3 points
-
I think bonnet pins are fine. Some look better than others but if it fixes an issue then I saw go nuts. You could also visit a local sports store and purchase an item of cricketing attire that could be useful against dick punches.2 points
-
Yeah that's just the spare dash blanked off ready for overlaying the carbon. Red paint was what I had lying to cover the jib stopping compound.2 points
-
Do I have to book a time, or will you just turn up unannounced?2 points
-
Free dick punch to anyone who puts bonnet pins on their car.2 points
-
Now painted blue
2 points
-
Some goodies arrived during the week, so it was time to get under the Tasmin and rip out some hose. Since working under cars on stands sucks, I had another go at getting the car up on the Quickjacks. This time I was much more successful. I had to use the jacks sideways (an approved method, and the same as I used on Snicket) The reason I wasn't so keen on this initially was that the exhaust hangs so low I wasn't sure it would clear the frames. It did. Just. With the Tasmin in the air, it was much easier to roll around under it on my creeper. I started to rip the old fuel hose from the tanks out. No photos of this process because it was messy.... First I disconnected the feed to the pump. This is from both of the tanks, so I had a 10L fuel can ready. I managed to spill a fair bit, but got it into the can in the end. I filled up with 10L the other day, and about 9L or so came out. Some of that difference would be on the ground (and my arms), but it confirms that the tanks were bone dry when I got the car. The hose came out easy enough. It was worse than I thought though, every section of hose was seriously perished, with cracking all over it. The hose also smelt like fuel on the outside. There were some nasty splits in the ends of the hoses from each tank too Bend the hose, and it isn't pretty The new hose is Continental J30R7 5/8" fuel hose. This is a low-pressure suction feed, so didn't need to be a high-pressure hose, it just needed to be high quality. The hose walls are thicker than the old Aeroflow 400 series hose. The old Tee piece is made from a bunch of Aeroflow bits. In the interests of simplicity, I replaced it with a 5/8" solid brass Tee Old mate wasn't too hot on cutting ends straight, so a couple of clamps were hanging over the edge. Not best practice. The new Tee section And installed into the car. The two tank outlets are very easy to access And the Tee hangs above the drive shaft (and there is evidence that the old setup had been in contact with the driveshaft at some point!). The zip tie is there to hold it up and clear of the shaft. The hose was routed slightly differently to simplify the route, and then cut to length and connected to the pump. The hose was zip-tied to the chassis in a couple of places to secure it, making sure not to pinch the hose as it had been With the tanks connected I want to replace the fuel filter and inspect the accumulator. The whole lot (pump, filter and accumulator) are mounted on a plate above the chassis, in front of the LH side rear wheel. On the later 280i the filter is mounted in the engine bay. The black one is the accumulator, and the silver one is the filter. The pump is out of shot to the left (with hose removed). This is the other side. Let me illustrate the fuel setup with some coloured arrows. Fuel comes into the pump from the tanks (orange), out of the pump and into the accumulator (blue), out of the accumulator and into the filter (yellow) and finally, once filtered, out of the filter and along hard lines to the fuel distributor in the engine bay (green). These hoses weren't too bad visually, but no point in leaving them there. One quick check for seeing if your accumulator is stuffed or not is to disconnect the vent hose from the back of it, and see if fuel comes out. Mine was full of fuel. This vent hose should be dry, because it's only to help equalise the air inside the accumulator, and shouldn't have any fuel contact. The fuel is (usually) separated from that side of the accumulator by a diaphragm. If the diaphragm splits, it lets fuel through and back into the tank instead of holding pressure. My accumulator is stuffed. Thankfully I had planned to remove it completely and will be using new fuel hose to bypass it and route the pump straight into the filter. The fuel filter has banjo fittings on it. The inlet converts to rubber hose, whilst the outlet is to a hard line. Some of the hose clamps on the fuel hoses had been installed by a scumbag and weren't accessible from the underside. I'm not too sure how they were even done up, unless it was off as a complete assembly and clamped whilst on the bench before fitting. Since I wasn't using the hose again I chopped it off, unbolted the accumulator and pump and removed the lot. The accumulator looks very old and probably original to the car. The filter had been replaced, but it had a date of 2005 on it. The receipts say that the "recently replaced" filter was leaking back in 2011, so either it wasn't that recent, or it was old stock when fitted. I ordered a filter online based on the original filter numbers I had, and even with triple checking, it's wrong. Yeah, that's not gonna fit. It's possibly the correct filter for a later car with the filter in the engine bay. Working off the number on the filter, I need a Ryco Z399 instead. One has been ordered, along with a Z71 oil filter. Unfortunately that leaves me at a standstill now. Hopefully the new filter will be here this week and I can fit it after work one day. In the meantime I had ordered a new air filter, so went about fitting that. I had previously checked the filter and noted it was dirty, and the wrong filter. The old filter had rounded corners, so left an unfiltered gap at each corner. The correct one for the early airbox is a Ryco A1345. No gaps Parts bin special I'll probably lose some +6hp gains from closing up those gaps, but at least I know its right, and won't be sucking in unfiltered air anymore. Sigh. Sometimes I just wish some people wouldn't touch cars. A little knowledge is dangerous.2 points
-
Went for a blat today. looks really slow in the video haha and it’s probably only just as fast as a late model Camry, but it would have been pretty tops in the early 70’s its pretty boaty around corners. Hopefully the sport suspension and bushes turn up from alfaholics soon. couple other things too, like a high idle. And the clutch is all the way at the top so needs a bit of adjustment. not so sure about how to sort the idle as I’ve not had mech injection before so if anyone’s got and knowledge on it feel free to flick me a line2 points
-
New fasteners on the original shit too, jeez it grinds me when I find a totally rooted screw that has been re-installed
1 point
-
clearance from them tangs should be business card too, def not touching. Dizzy looks just like the Bosch one on my ute, so definitely check the wires and the terminal connections on the wee prongs from the dizzy side sensor, they get loose BTW. maybe a GM HEI module could be adapted to work?1 point
-
Agree with cletus, seem like an electrical fault to me. Are those ignition modules expensive or hard to find? That sort of thing tends to either work fine or not work at all IME. The signal from the dizzy to the module is pretty low level just the electromagnetic twitching from the forks passing though or between the sensor depending on hall or inductive type (pretty much like a record player - the module is pretty much an amplifier/switch that handles triggering the coil) so wiring issues on that side can have a big impact. Maybe at idle the lower system voltage is low enough to drop out the signal? id check all the both wiring to out of that thing and if that all checks out, maybe swap it out? if it makes no difference no matter, as its always worth having a spare module because then the original one definitely wont ever fail!1 point
-
Saab Racecar??
1 point
-
My datsun has pins from its past life as racecar, never been a wof issue Never been dick punched for them either1 point
-
Is that an older variable vane turbo from a diesel vehicle? I’m pretty sure they don’t use VV turbos on petrol vehicles normally because the combustion temps are too high and kill the vanes really quickly. It would suck to go through the hassle of adding an electronic boost controller and then have the turbo die quickly after...1 point
-
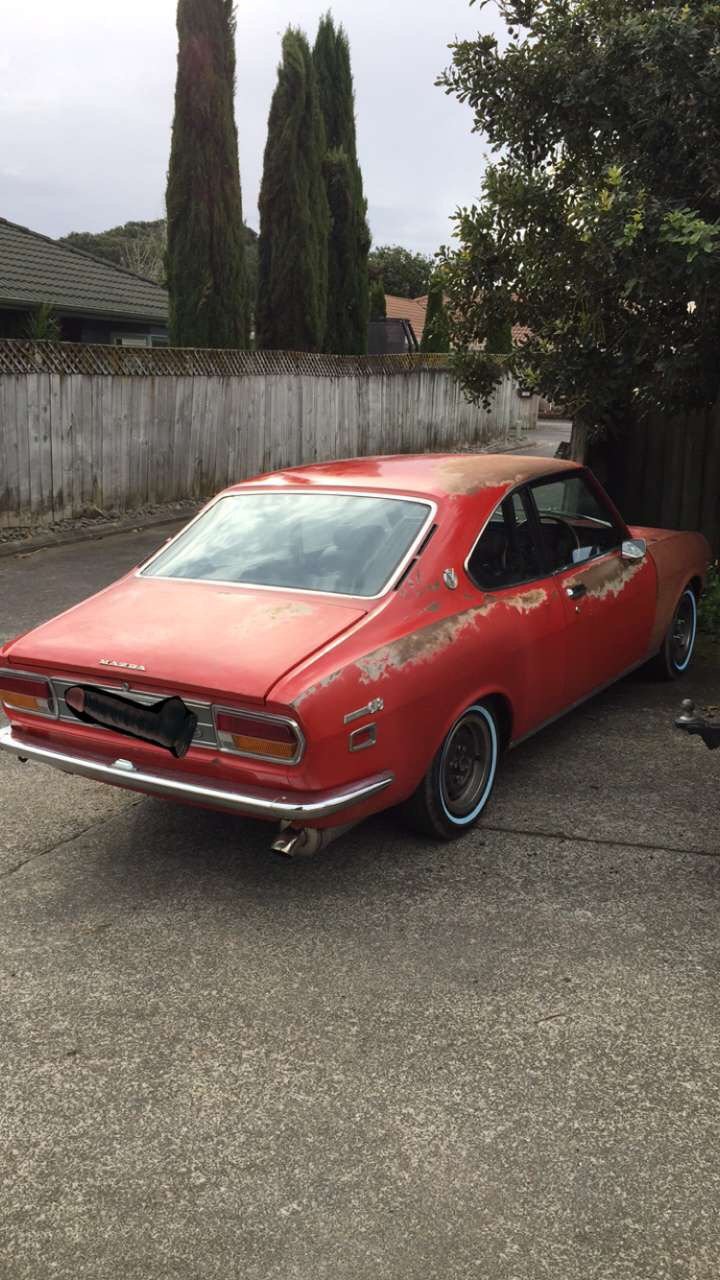
Hello friend, Im sorry but i dont know. The car was originally dark red with a brown interior (you can see this colour on the doors where the blue paint is flaking off), but was resprayed light blue with white roof and sign written in the 70's, and i put the red interior in myself after finishing rust work and (re)repainting it to match the old respray (i love the writing on the doors). You can see the red where the door spear was in this photo of when i found it in a damp shed I think it was inspired by a factory colour scheme as i have a 1:43 scale model that matches (this model also has a red interior ) , but the paint colours on my 2300 are just paint shop specials - the blue was matched from the petrol flap, the roof and engine bay were chosen from their (PPG brand) 'standard' colour book.1 point
-
I have one of these which I'm pretty happy with. 8m lead plus amperage adjustment on the torch. https://weldwell.co.nz/equipment/view/wia-weldarc-200i-ac-dc I think I paid ~$1600 on a bit of a hook-up through saeco.1 point
-
And conveniently located for pickup en route to/from Hanmeet.1 point
-
Wtf , how was this for luck.. Trolling trademe and this listing showed face.. immediate buy now damage was done Ported and polished head with new valves (to be assembled) and alloy rocker cover.. Guessing it's close to a holbay spec.. Funny this is I offered to buy this from this guy months ago when he was selling the racecar, but never gave a price...
1 point
-
Internet says its good for E85, or even methanol. I can't imagine the previous owner running anything with an ethanol content though.1 point
-
Hi thanks for the kind word. Yes its not cheap to recondition a engine, so just trying to give some context into the time that goes into machining and building a engine. I wasn't sure how much info to add as I didn't want it to drag on. I have fitted valve seat inserts for unleaded fuel. P.S I really enjoyed your housetruck build and all your other builds1 point
-
Watch for seats where the seatbelt anchorage is on the seat rails rather than directly seatbelt base to floor ... change to seatbelt anchorage = cert, and there's some severely dodgy aftermarket seat rails with seatbelt anchorage points vaguely welded onto the runners, mostly holding together with hopes and prayers.1 point
-
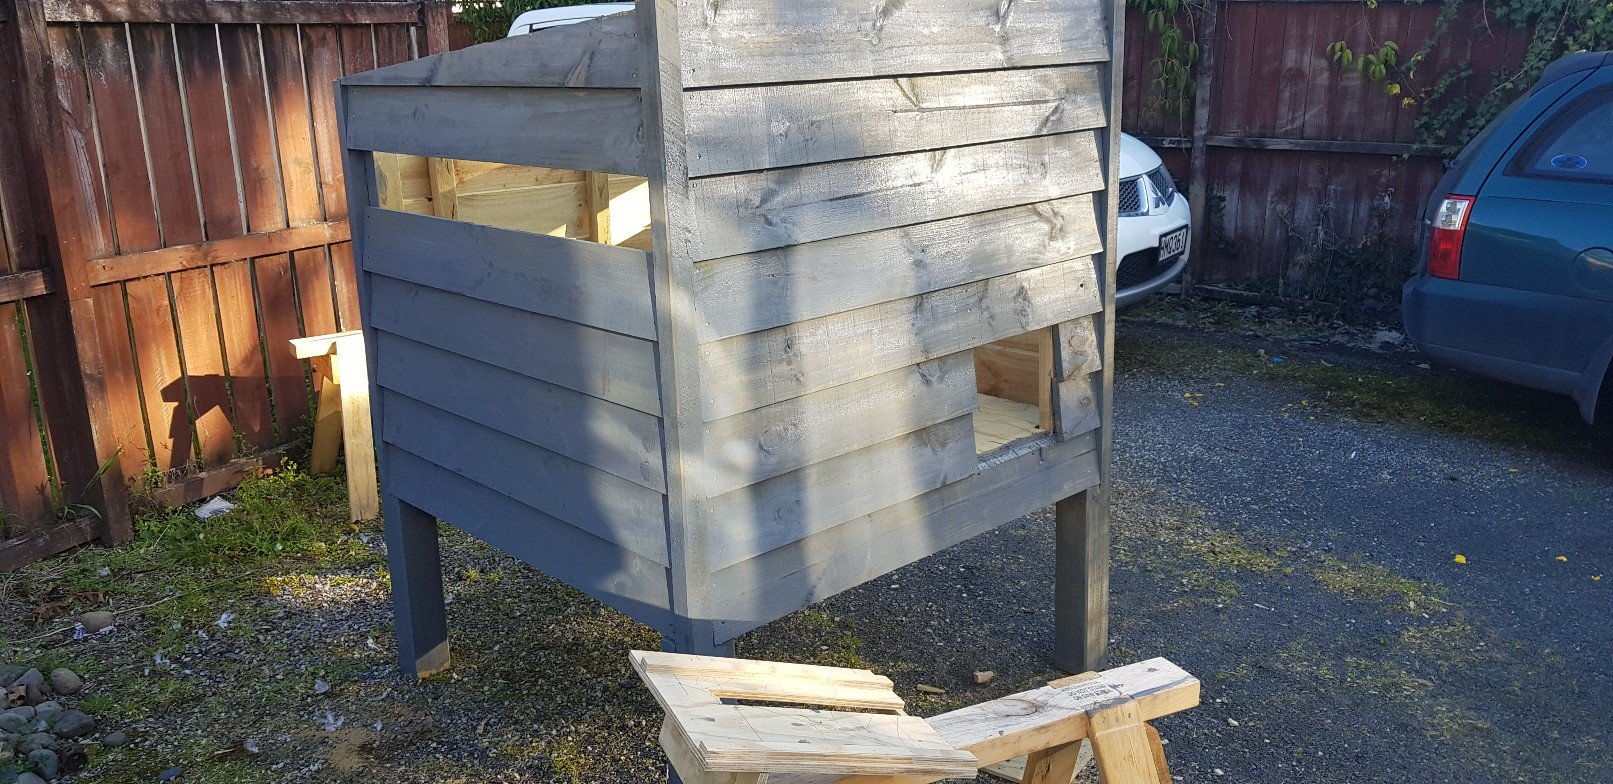
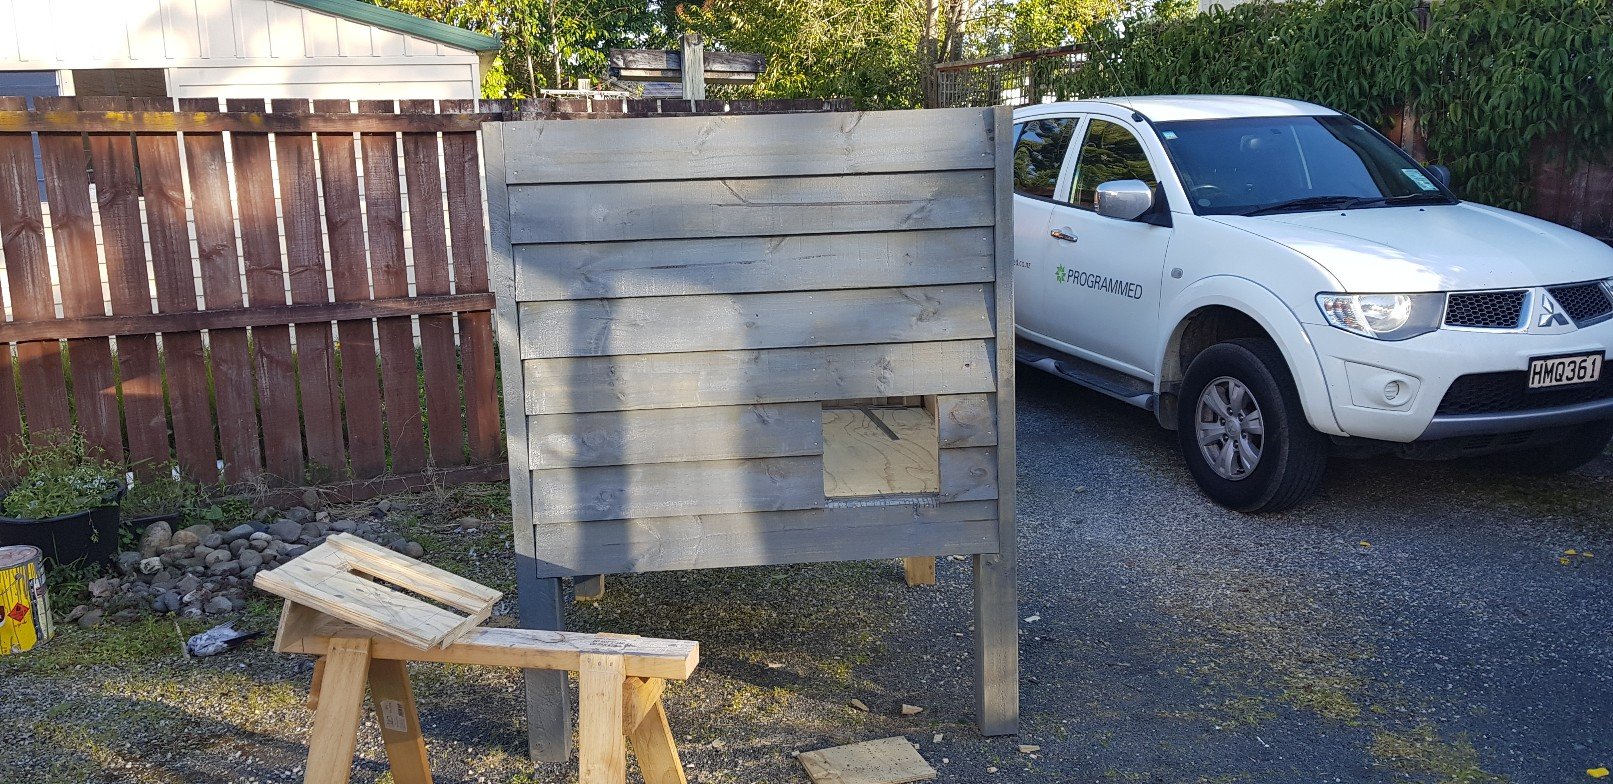
Ran out of time but got some stain on this. Im really enjoying this wood stuff!!
1 point
-
Nicely done man, only thing I would suggest is ditching the poo Ram-flo air filter.1 point
-
Brought this old girl earlier this year, done small things to it but she runs and has rego on hold. have lowered it and put new wheels on and currently making a new flat deck for her While waiting for my rear guards to be rolled been doing some rust on the bonnet with help from my old man
1 point
-
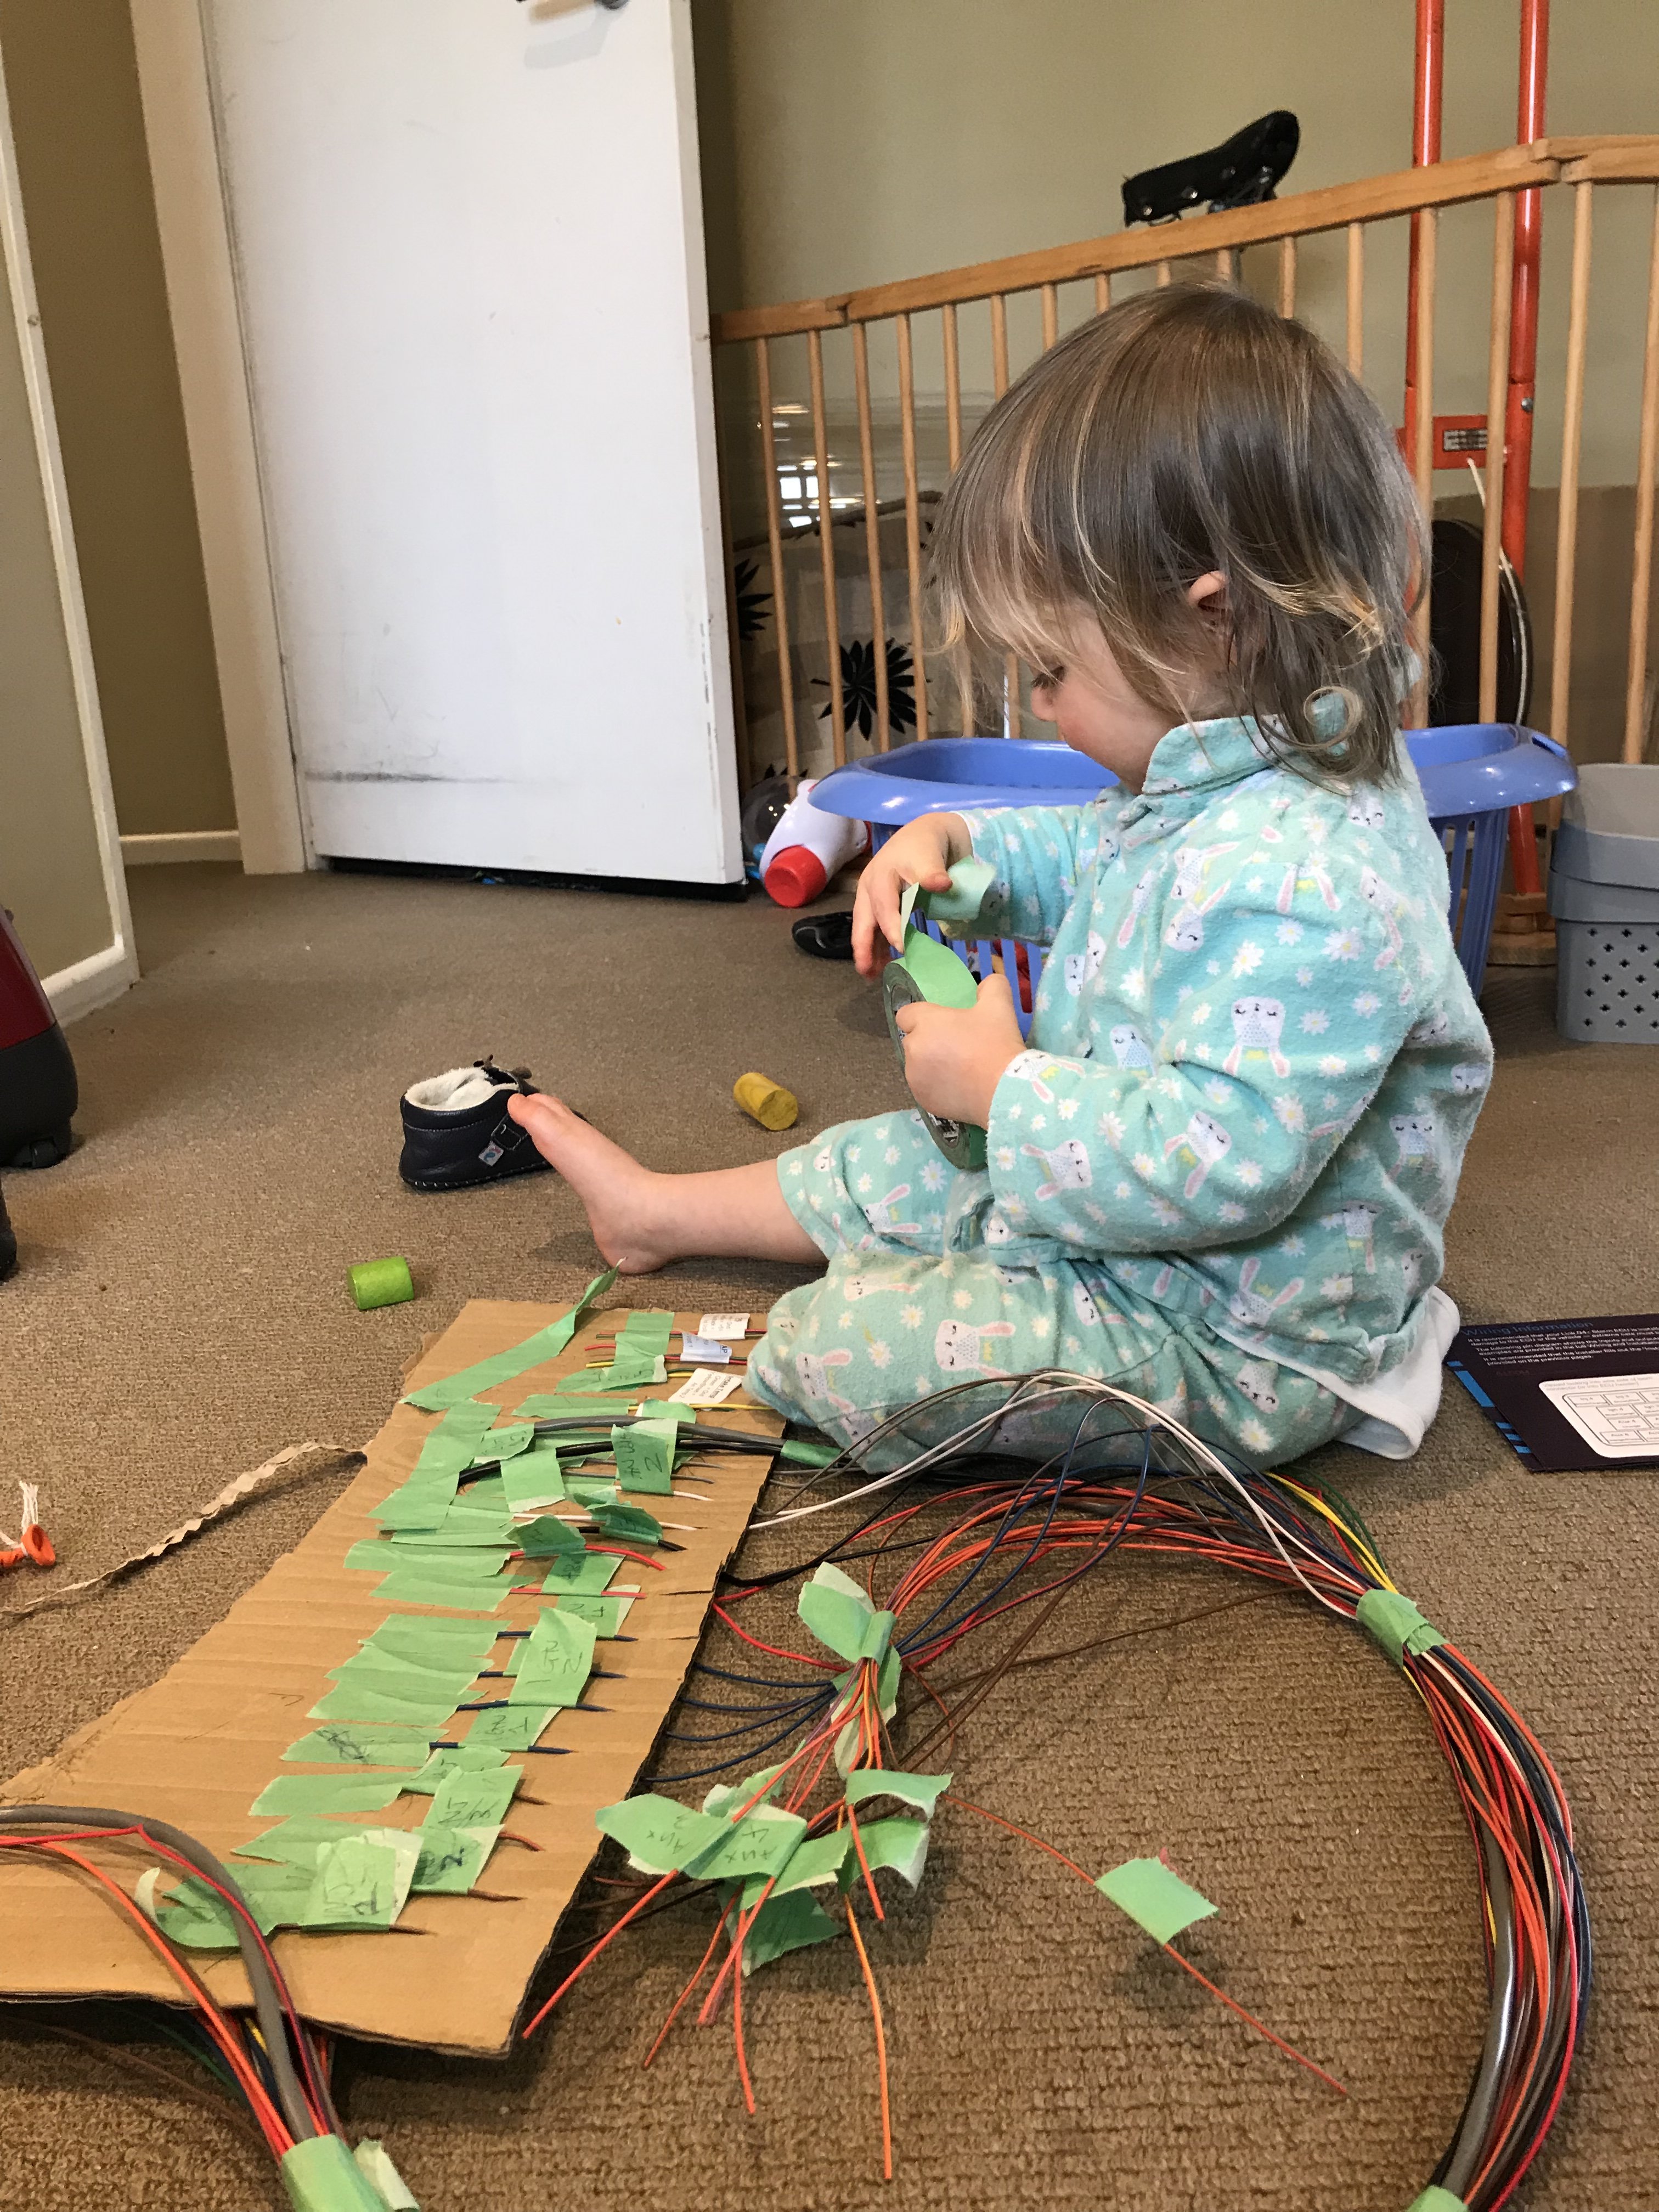
Alrighty ended up buying a Link G4+ storm and I am going to replace the engine loom. I’ve outsourced that job to my little girl so that’s under control:
1 point
-
more progress during smoko and lunch today. building a race car at work rules. cut 100mm out of the top of the firewall and made two cuts down each side of the tunnel roof, pushing the tunnel up. once i know the engine fits the holes will be patched up. should make installs a breeze. came across the first real issue too. the exhaust manifold foul on the frame rails. i can notch these out enough to clear i think. however the drivers side manifold dumps right onto the steering shaft. flipping the manifold looks to be an option, and im contemplating the option of bringing the drives side exhaust around or under the engine and merging with the passengers exhaust, or crossing back under the trans. ill clearance the frame rails and see where that leaves me i think. not quite in, but its getting lower in the engine bay! should go down and back about 3" both ways any ideas, shoot them my way! gotta say, i thought id be swinging a sledge hammer pretty early on to make this fit, so im pretty stoked on how its fitting, and can see why LS swaps are so popular in the states.1 point
-
Update on the open chequebook: It has been up North getting work done for compliance, and so far has 15mm to go until the chassis is completely straight, and the front inner guard has been cut off to straighten out any creases caused by the impact. The creases were a fair bit more than thought, up under the strut tower and the engine bay was pretty bent, but it's had a massive weight attached to it and pulled the creases out where possible, and then will be softly hammered with Billy Mavs back into place. But the headlight surround area is too smashed, so a new piece will be made and welded in. Coming along nicely, it's just a shame to not have any control of it as a project at the moment. Most of pics go to Instagram as I forget to update here so much. Feel free to follow along @theamyable.1 point
-
An exciting day today! first test fit of the huge engine and trans into a mostly stock body mx5. first i started by cutting the 'ears' off the frame and firewall. forgot to grab a pic but its these parts. theyll need plates welded in to re-add the strength lost. this squares up the bay and allows the engine to sit close to the firewall then in goes the engine! its SO close to fitting in unmodified. infact if i was to unbolt the subframe, id be able to fit the sump bowl past the subframe and the engine could sit down properly. however, i dont really want to have to unbolt the subframe everytime i need to pull the engine. which hopefully wont be often, except for during the build, but even thats enough for me. if i want to slide the whole lot in, ill need to cut maybe 60-100mm out of the top of the tunnel. a pretty easy job for the massive benefit of easy install! trans hits here sump just doesnt quite get over the subframe its possible the unmodified hood may even close over it all! most of the bulk ontop is the wiring loom ect what a monster1 point
-
Taken it out twice - both times weather looked good and both times it totally shat itself raining. Bring on summer
1 point
-
got my driveshaft back and put it in. filled it up with trans fluid and took it for a test drive. everything seems to be working fine and the trans shifts perfectly. kickdown is working shifter selects all the gears correctly i hooked power up to the overdrive solenoid and that's all working mint its like a different car. motorway crusing is lush now. no more 10billion revs at 95KPH. here's an art picture because i didn't take any of a gearbox. 2019-08-13_07-49-37 by sheepers, on Flickr1 point
-
Just make a manifold with 6 branches to siamese at the port?1 point
-
You guys are polluting this threads atmosphere with emissions chat1 point
-
You are a man of class and exclusive taste sir.1 point
-
It's not as bad as cfc's, one gram of r134 is equivalent to 1410 grams of CO2 as far as warming is concerned, cfc's were equal to 8500 grams of CO2!1 point
-
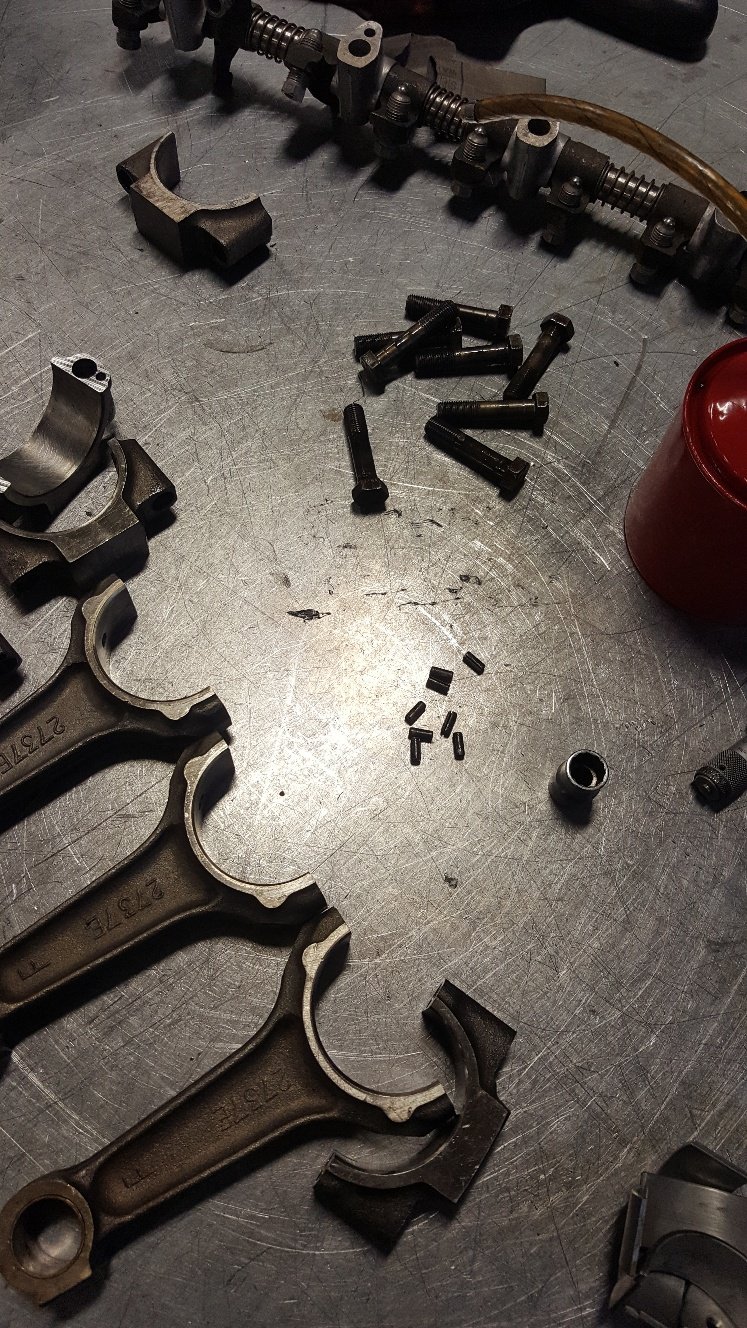
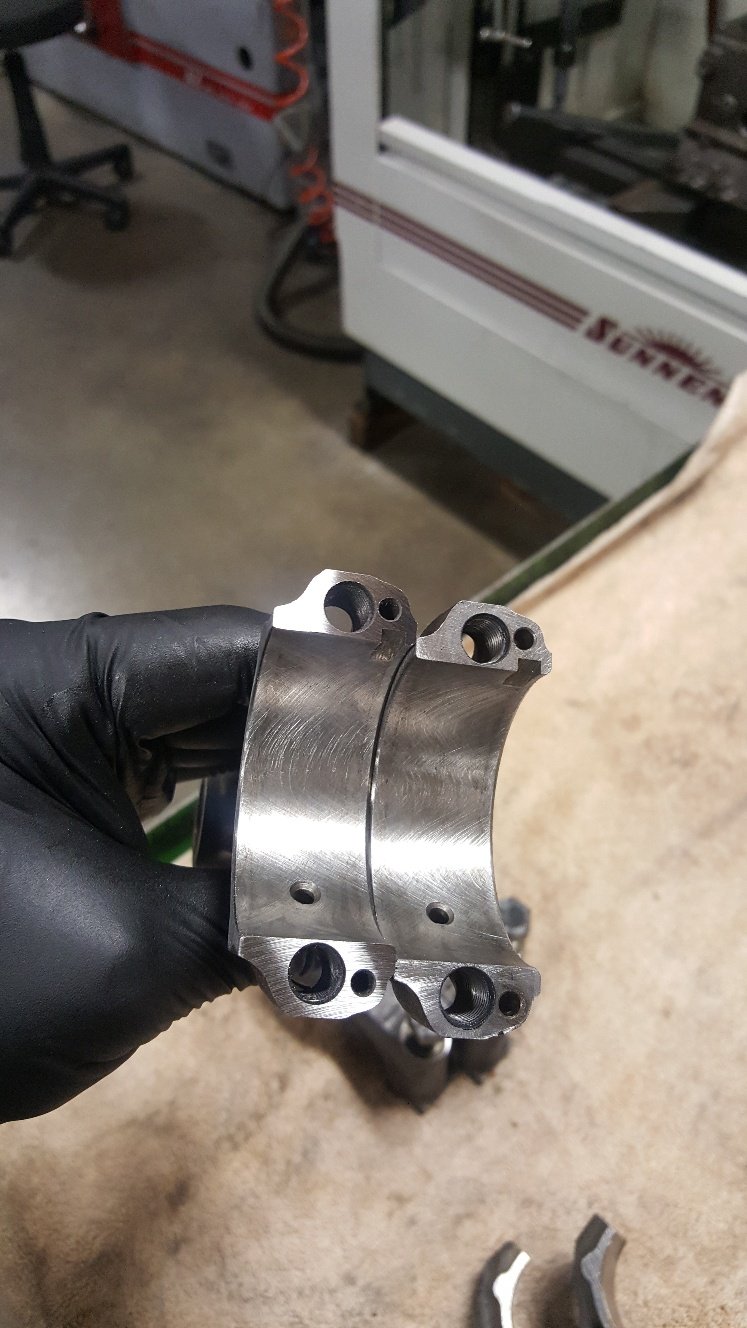
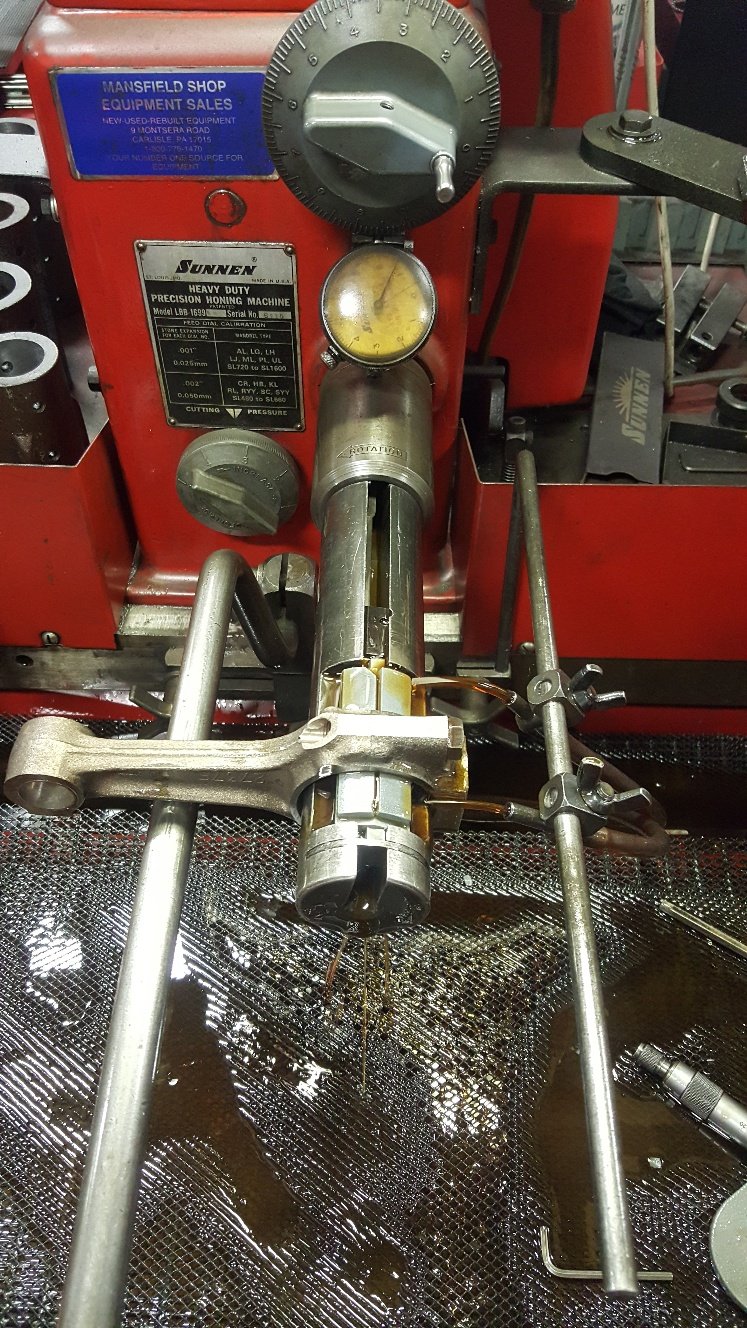
So I'm just trying to get the short block completed at this point. There's a fair bit of maching in the cylinder head, fitting valve inserts so I'm just concentrating on the bottom end. So I measured up my crank and found that the mains are worn about 1.5 thou. But the big ends are within book size. So I mount and measured the rods. I found that I had 2.5 thou vertical oil clearance. Which isn't a major issue but I'm building it for myself so I'll resize them to tighten them up. We would offer this to any customer but more often that not the budget comes into play. And budgets generally compromise most engine builds. My budget is definitely compromising this build mainly in the parts department. So I removed the dowels and grind the rod and cap parting faces. Unfortunately I didn't get a picture of the cap dresser. Note the rod thats been ground on the left. Now I reassemble the rods and hone them back to a tighter size than they were. I want them three quarters of a thou tighter. Now that they are all honed to the same size I will mount and measure with the bearings fitted to double check my clearance. This is just a picture of them apart showing them honed and ready for bearings.
1 point
-
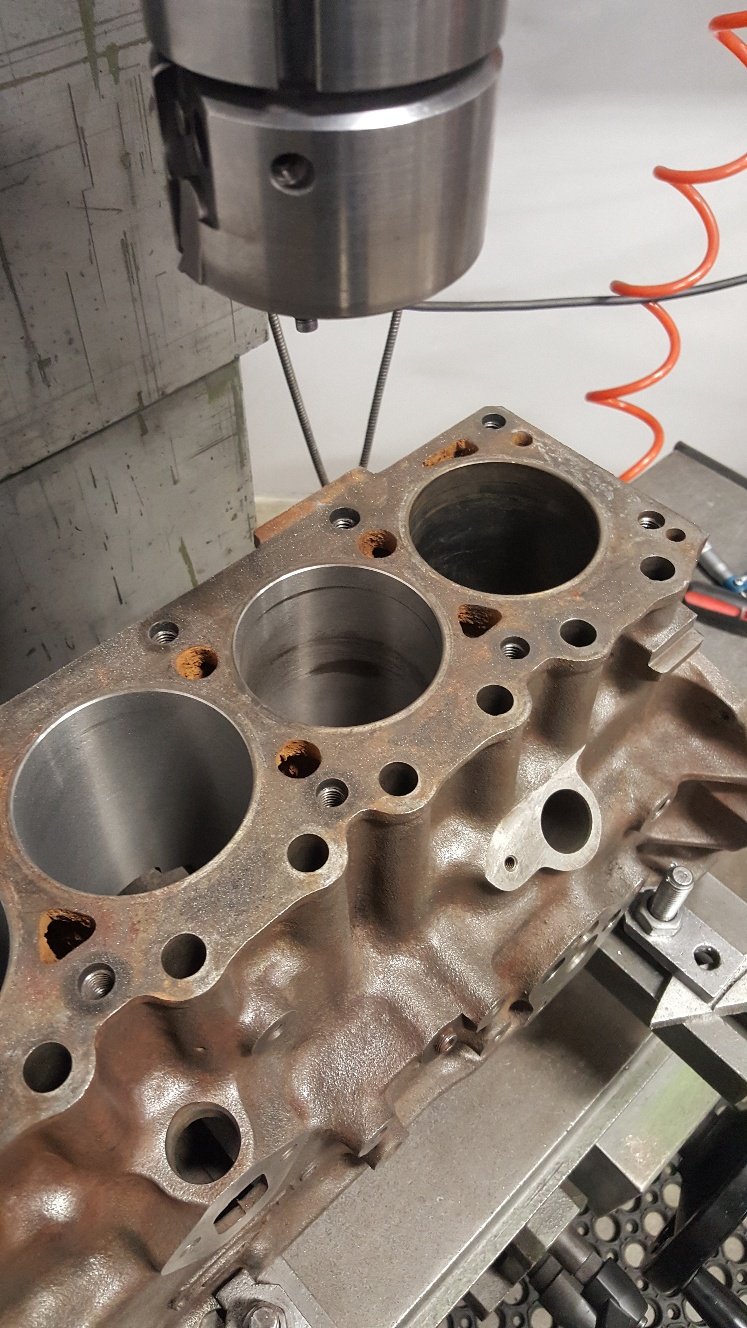
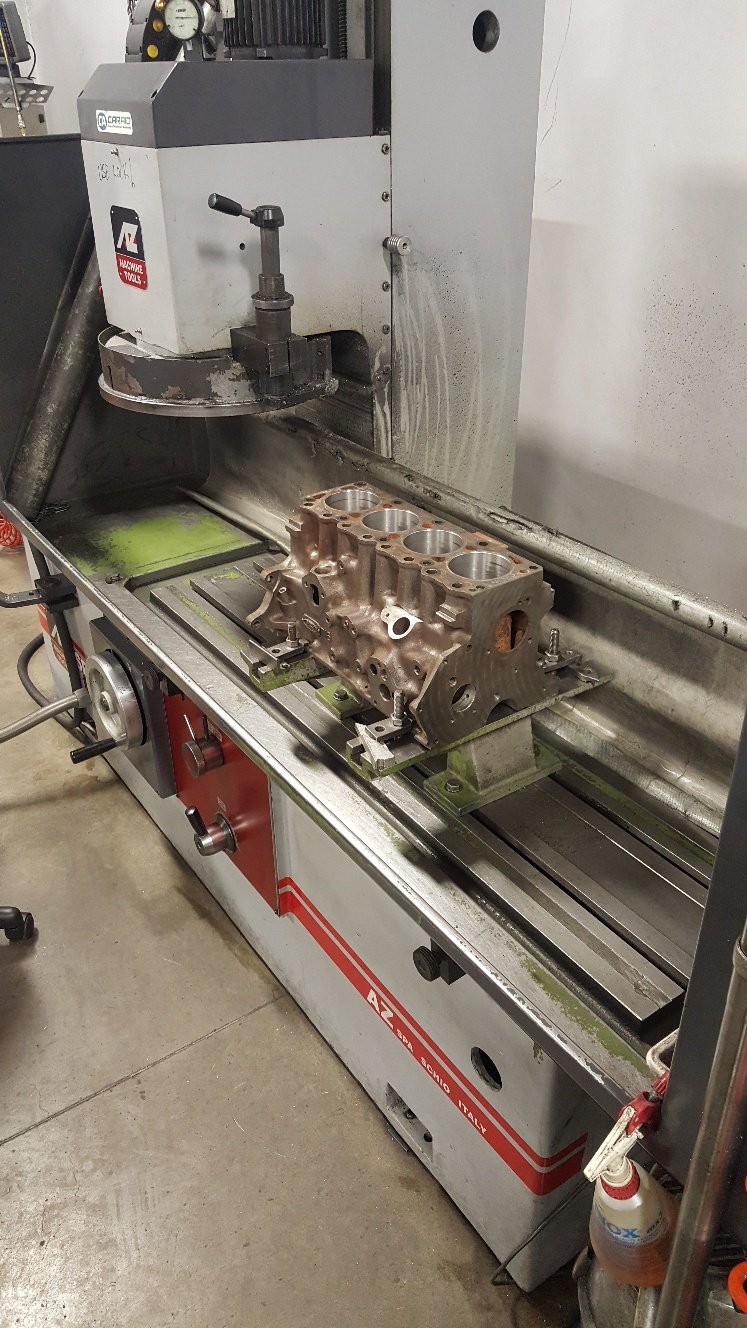
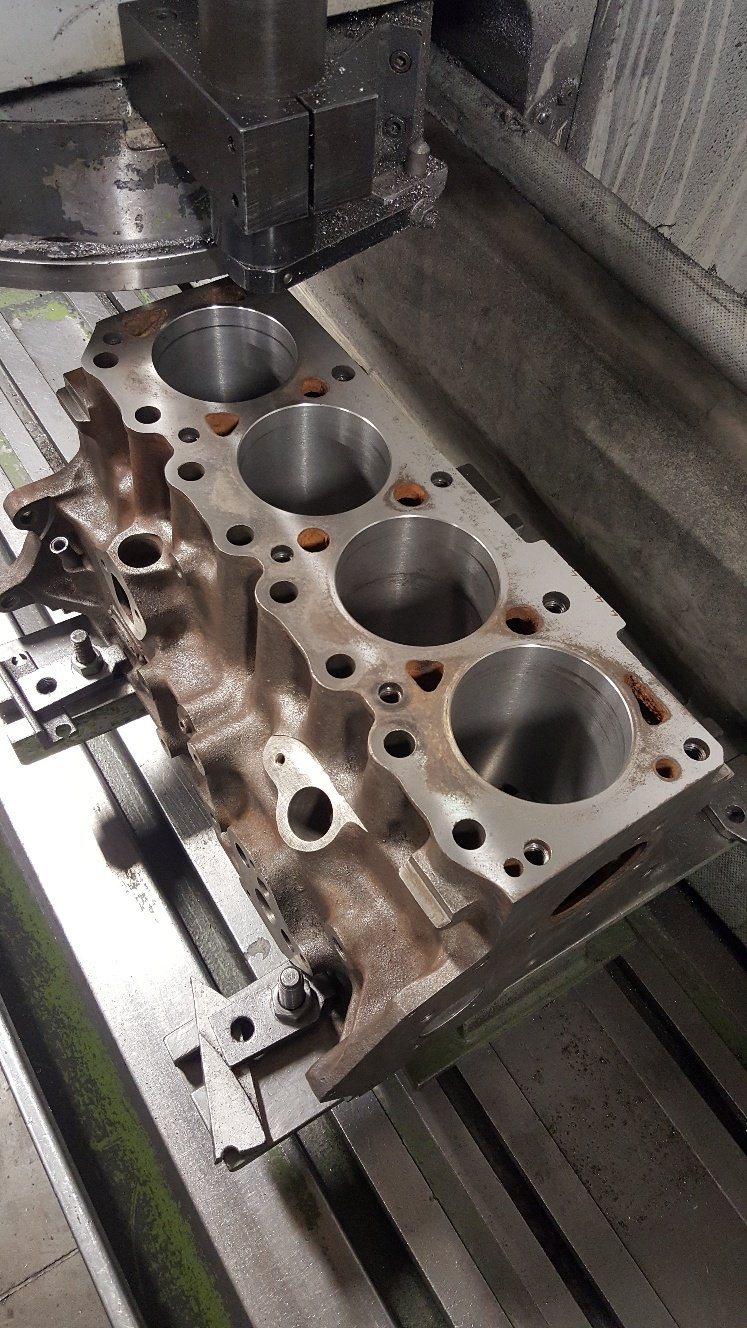
So I got the block into the boring bar. It's pretty straight forward boring a block. Doing a cylinder liner is a bit more involved as far as the boring bar is concerned. This block is at 30thou over or .75mm in metric. I have bought 40thou over or 1.mm pistons. It has a bit of wear. But hopefully it's should clean up once it's honed. This picture is of a test cut. So you dial the boring bar head into the bore. If you have a decent amount of wear it pays to slightly offset the bar towards the wear so you clean all going well at the next oversize. So in this picture you can see the boring bar hasn't totally cleaned with this size cut. I have only set the bar at 81.90mm. So I have .1mm or 4thou to hone out to get to our finished size of 82mm. We generally like to leave this amount to hone to achieve good rk rvk this is the depth of hone pattern. I'll go into that a bit more once we get to honing it. Once we've finished honing we normally go to the surface grinder. The top of the block is a little corroded so I'll probably take a few cuts to clean it up. So I've done a light cut to see how it looks You can see it still needs more off it. In this case it's not a issue to take more off the deck. When you are dealing with a late model diesel or performance engines that have been set up with good tight clearances it pays to watch how much your removing as you may have to detop your pistons as they may start getting to close to the head once assembled. Also valve reliefs can also need deepening. But this is more so a issue in extreme cases. This good old xflow should be fine. But i will be checking all this later once i can dumby the engine up
1 point


.jpg.6d24e7395eb5c4984910ccb2609b8c87.jpg)
.jpg.2d7c9b6be762da76ed612a5b26de80ba.jpg)
.jpg.8a16b41ae776d9da49059bf2fe653055.jpg)
.jpg.38942535ce397155764cd5b08d8241eb.jpg)


This leaderboard is set to Auckland/GMT+12:00