
Leaderboard


Popular Content
Showing content with the highest reputation on 07/02/19 in all areas
-
Outer mould patterns finished and ready for printing. 3D printing is good but it also means to have to design the under side! Twice as much work!19 points
-
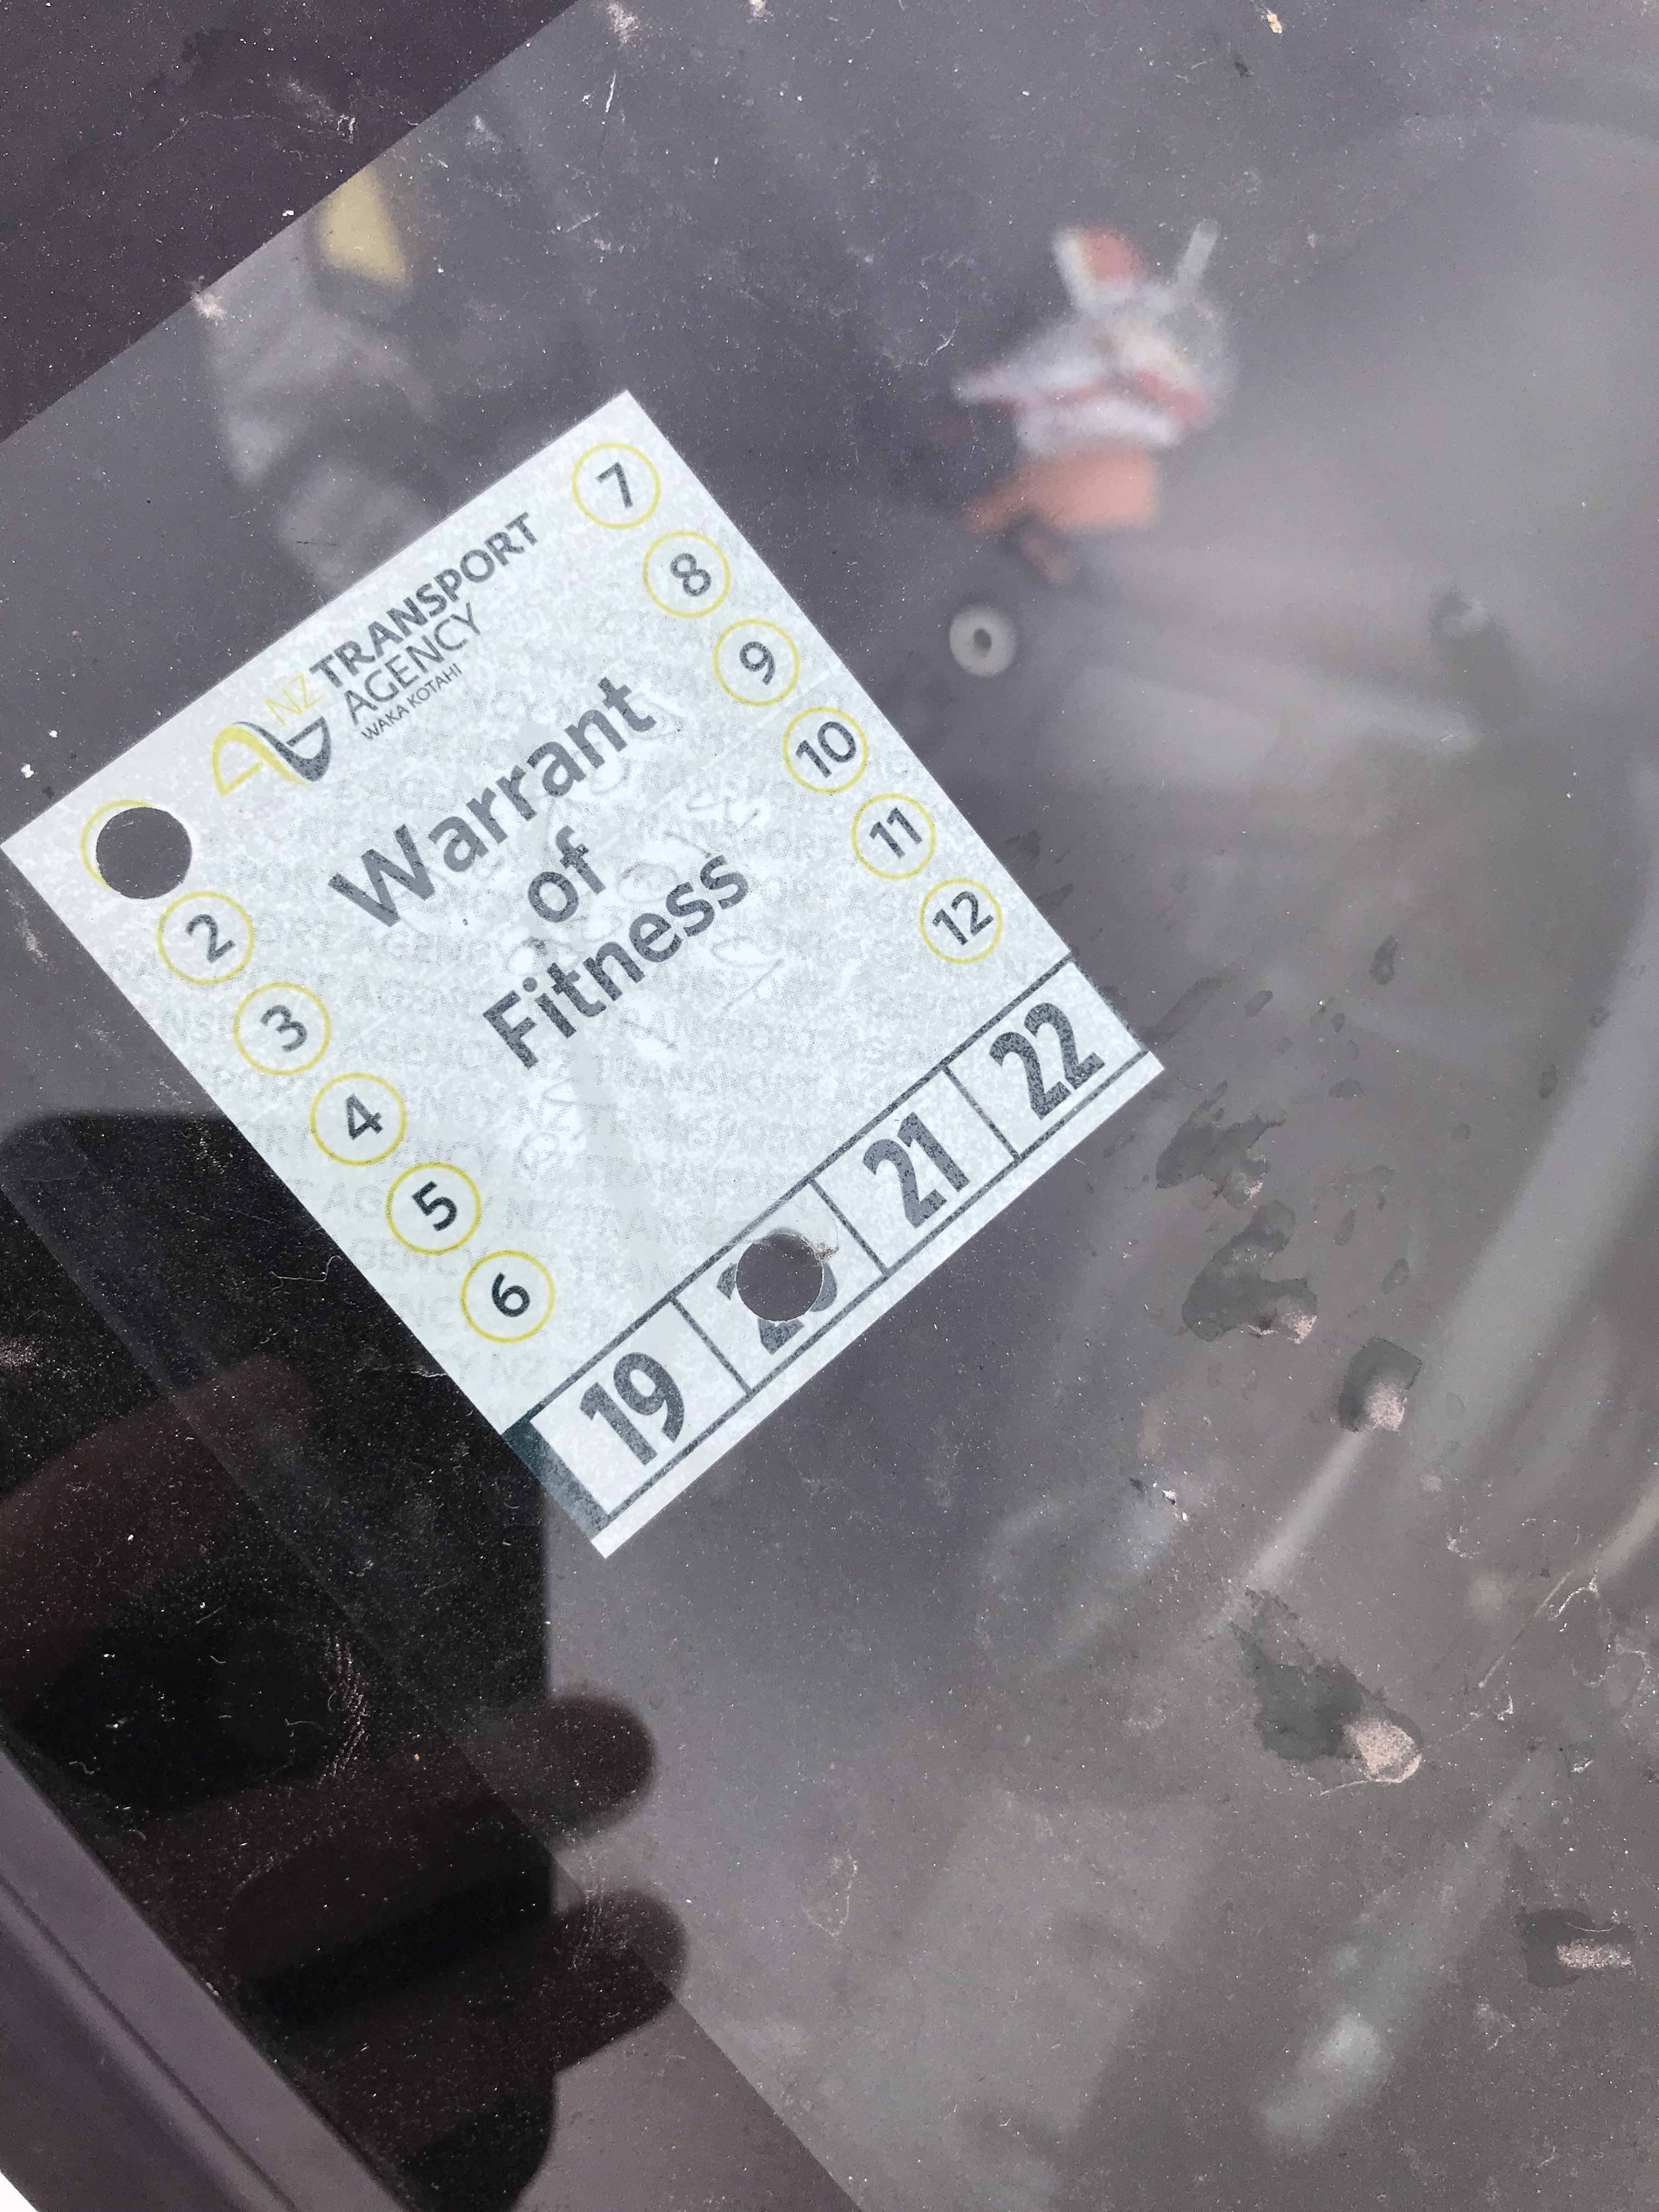
Car passed cert today - awaiting Cert plate. You beauty18 points
-
awwww yeaaahhh: Wof man even asked me if I wanted to put the sticker on lol. first wof and reg in 12 years! first proper drive and god dam it feels good! Need to do some AFR testing now that I can drive it properly but it seems pretty good already. pushing it a bit in 3rd under boost and it was around 11.5:1 Also have now realised I really need to do some heat management for the exhaust, the floor/tunnel is pretty hot... tldr fuck yeah
 11 points
 -
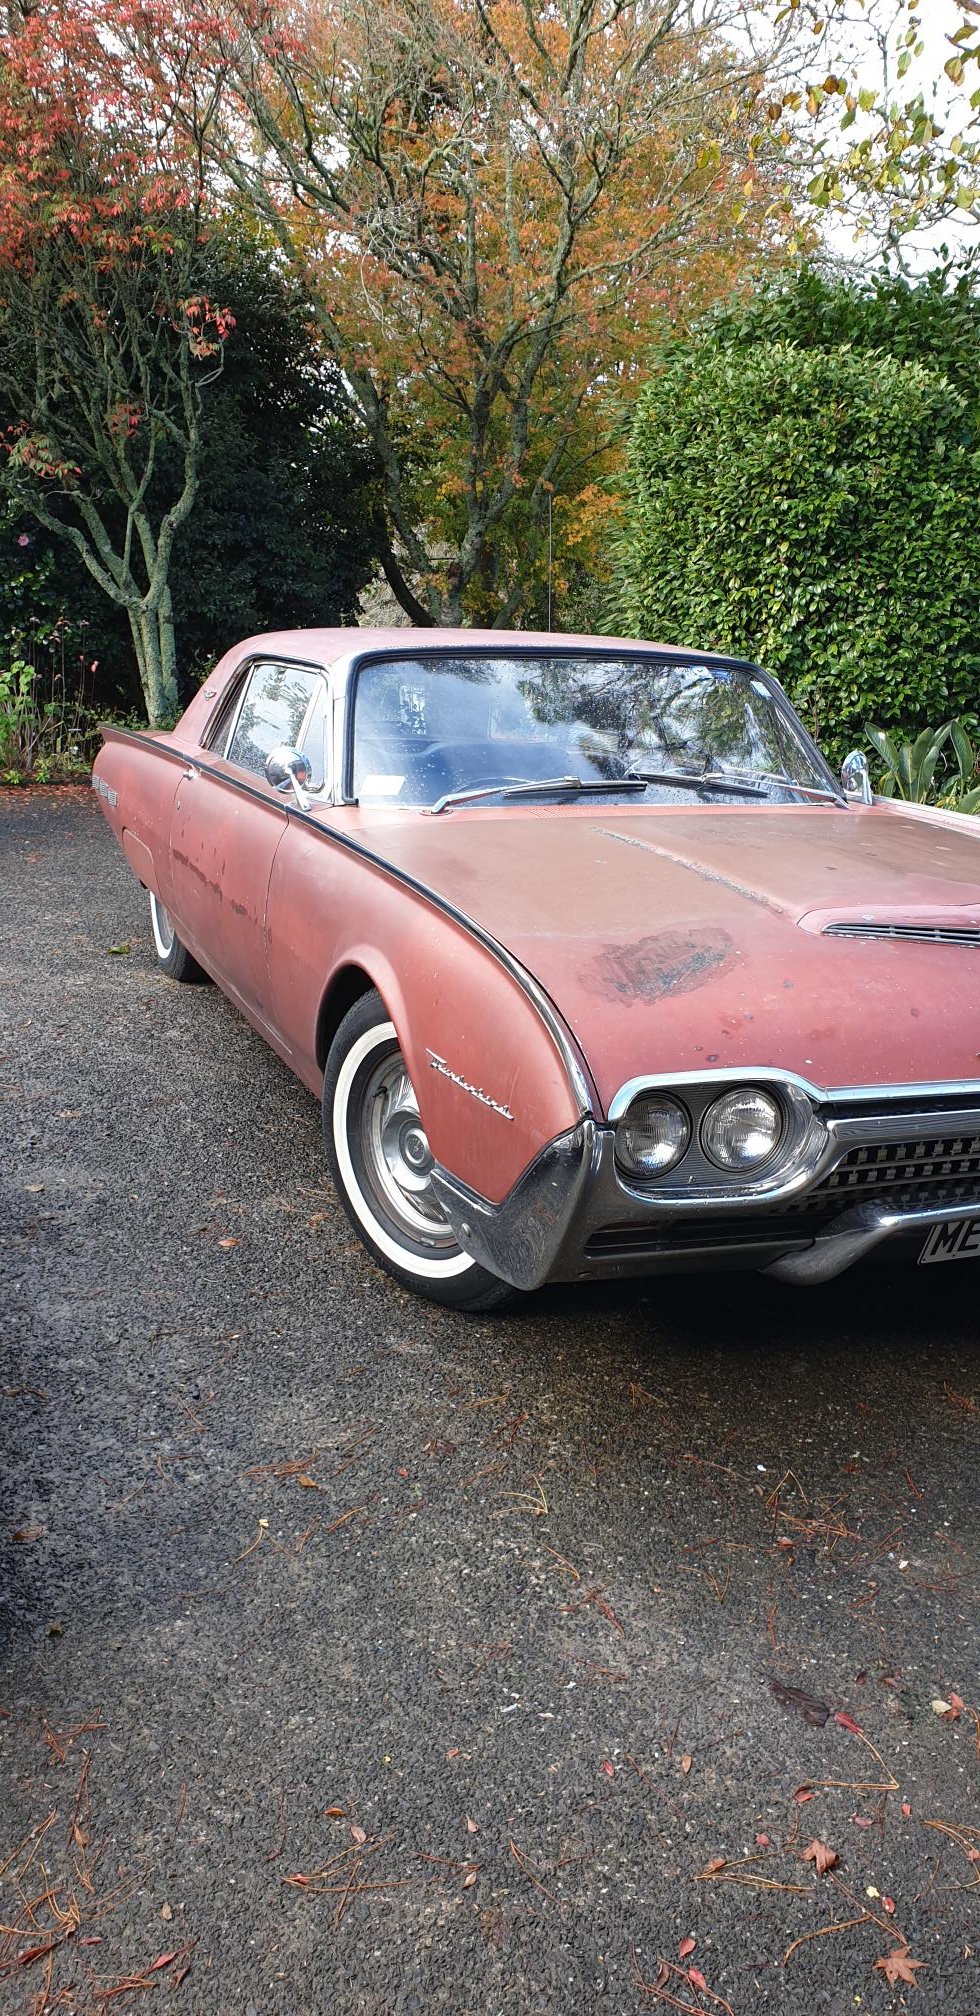
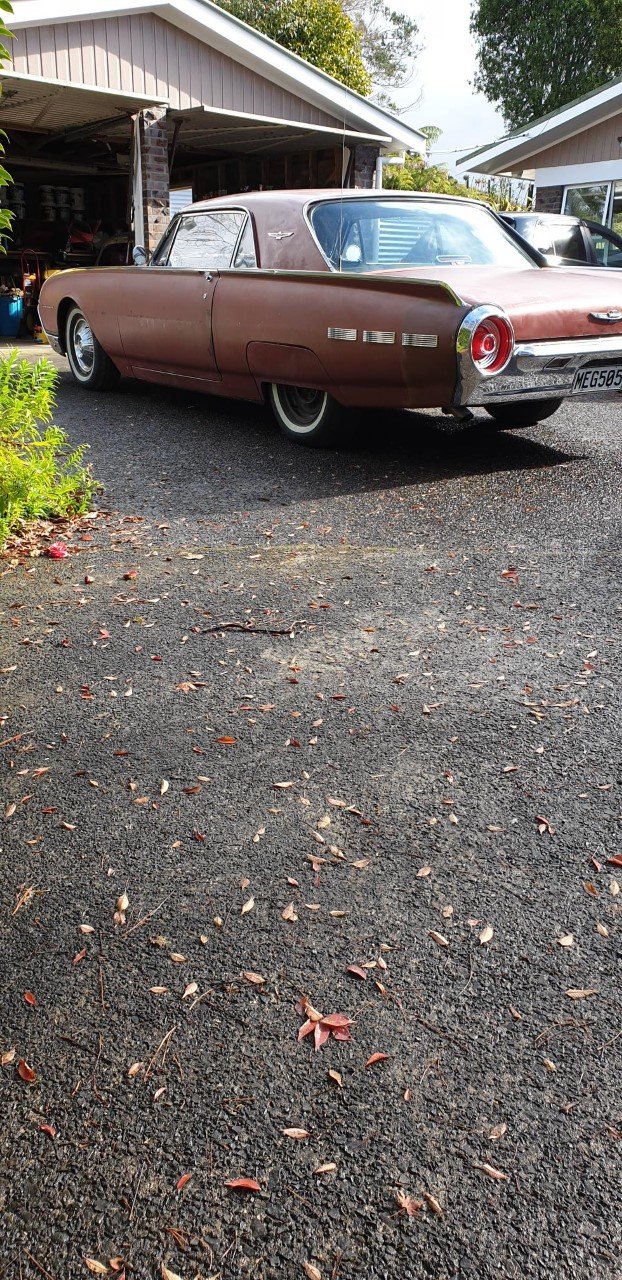
Used to have a 64, sold it to buy a house. Sold the house bought another house bought another Thunderbird because had more space. Has been chopped about 3 inches which makes some annoying but also some cool. Needs quite a bit of a tidy up but its had a disc brake conversion and a bunch of other coin spent by someone else which is cool. for yarns
6 points
-
5 points
-
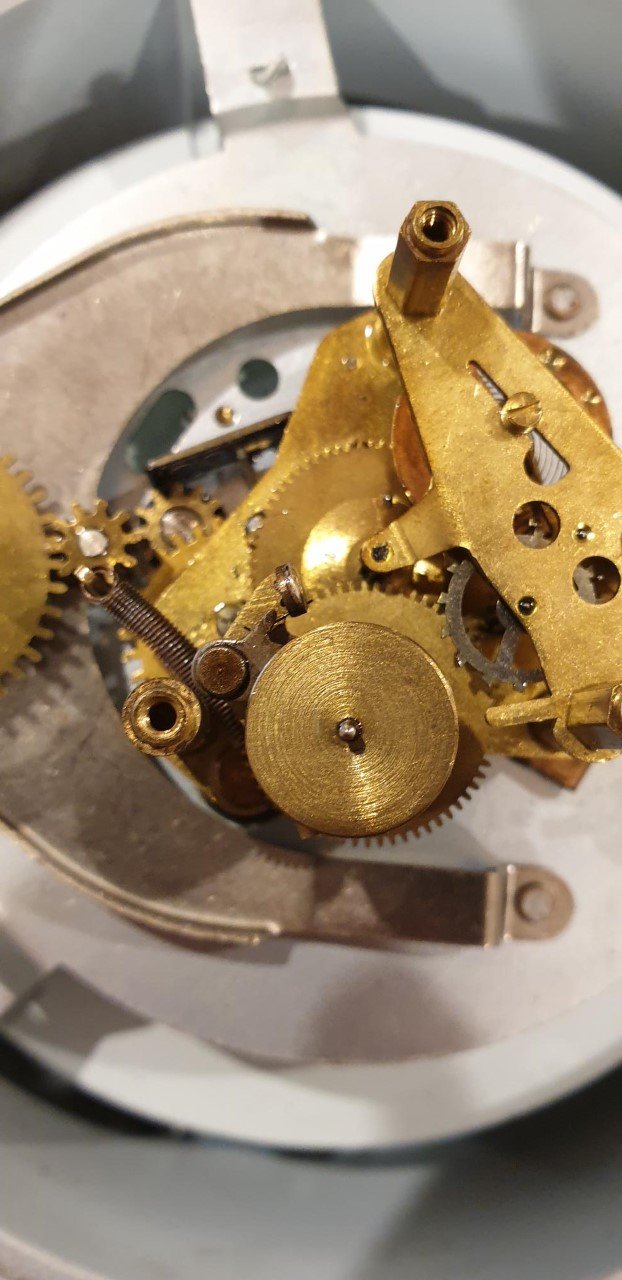
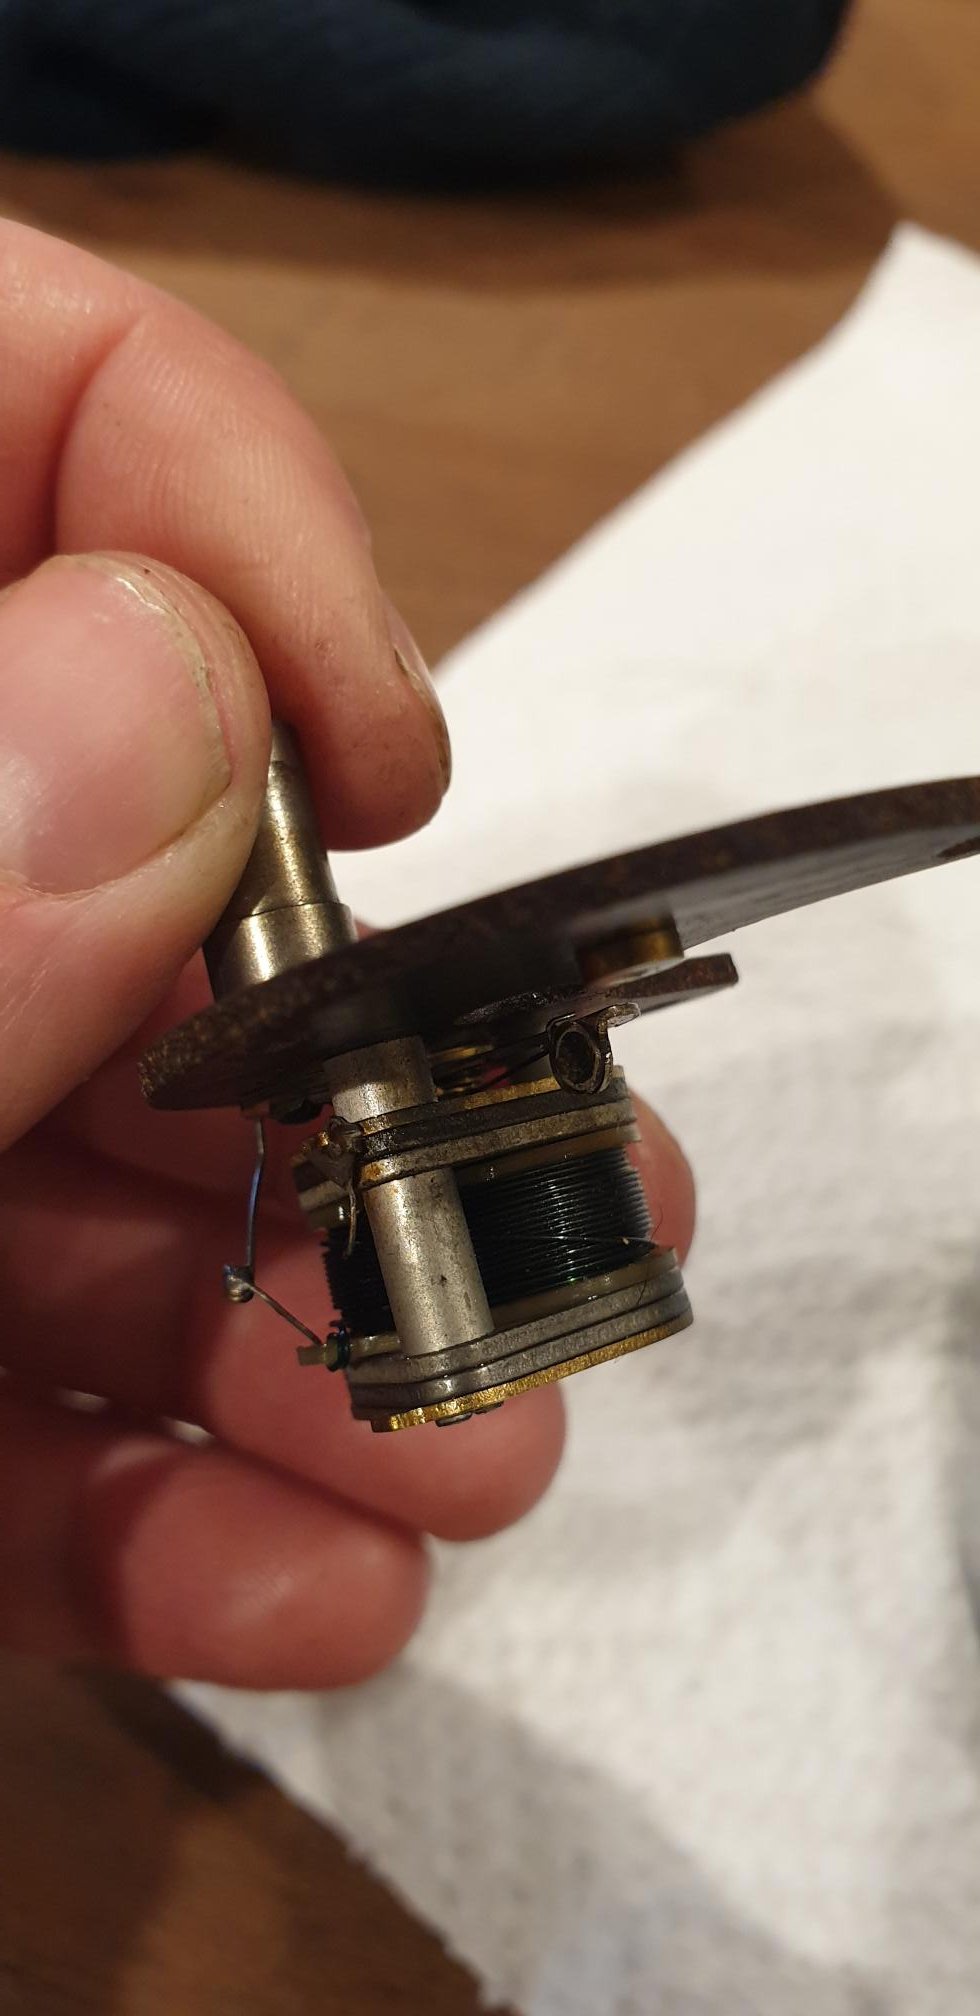
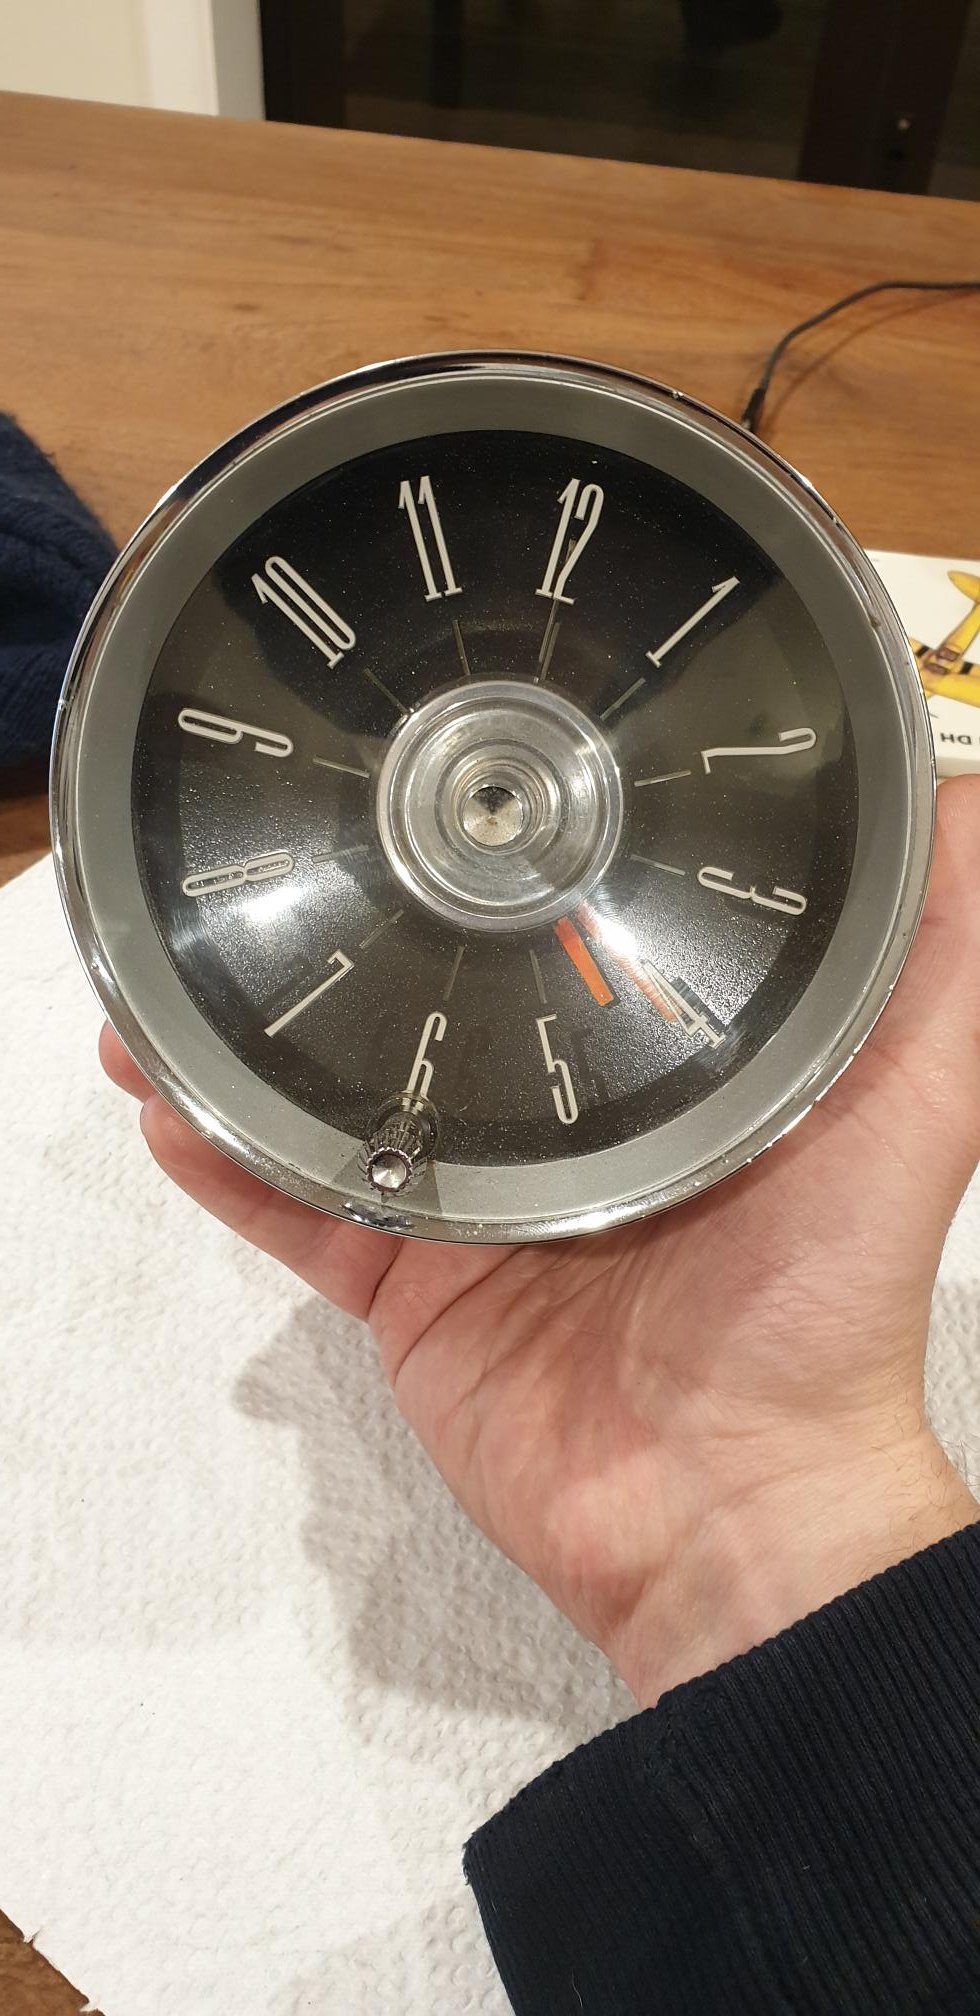
Got the clock going tonight, strange place to start but the clock comes out and the shed is cold... Some pics of inner workings,the solenoid winder and the front of the clock which still needs a polish up.
4 points
-
So here is one hell of an update for y’all.... Clint came over for the final cert check this morning and it passed! I’m now awaiting the cert plate (up to 10 working days) then it’s back to compliance for the plates. Hope to be legal for the Burger King meet on the 13th. beer o’clock oh - small update...cut up the original gear stick and welded it to the rude short shift stick. It now shifts a lot smoother. I will cut and rethread it by like 5cm to be at the perfect length.
4 points
-
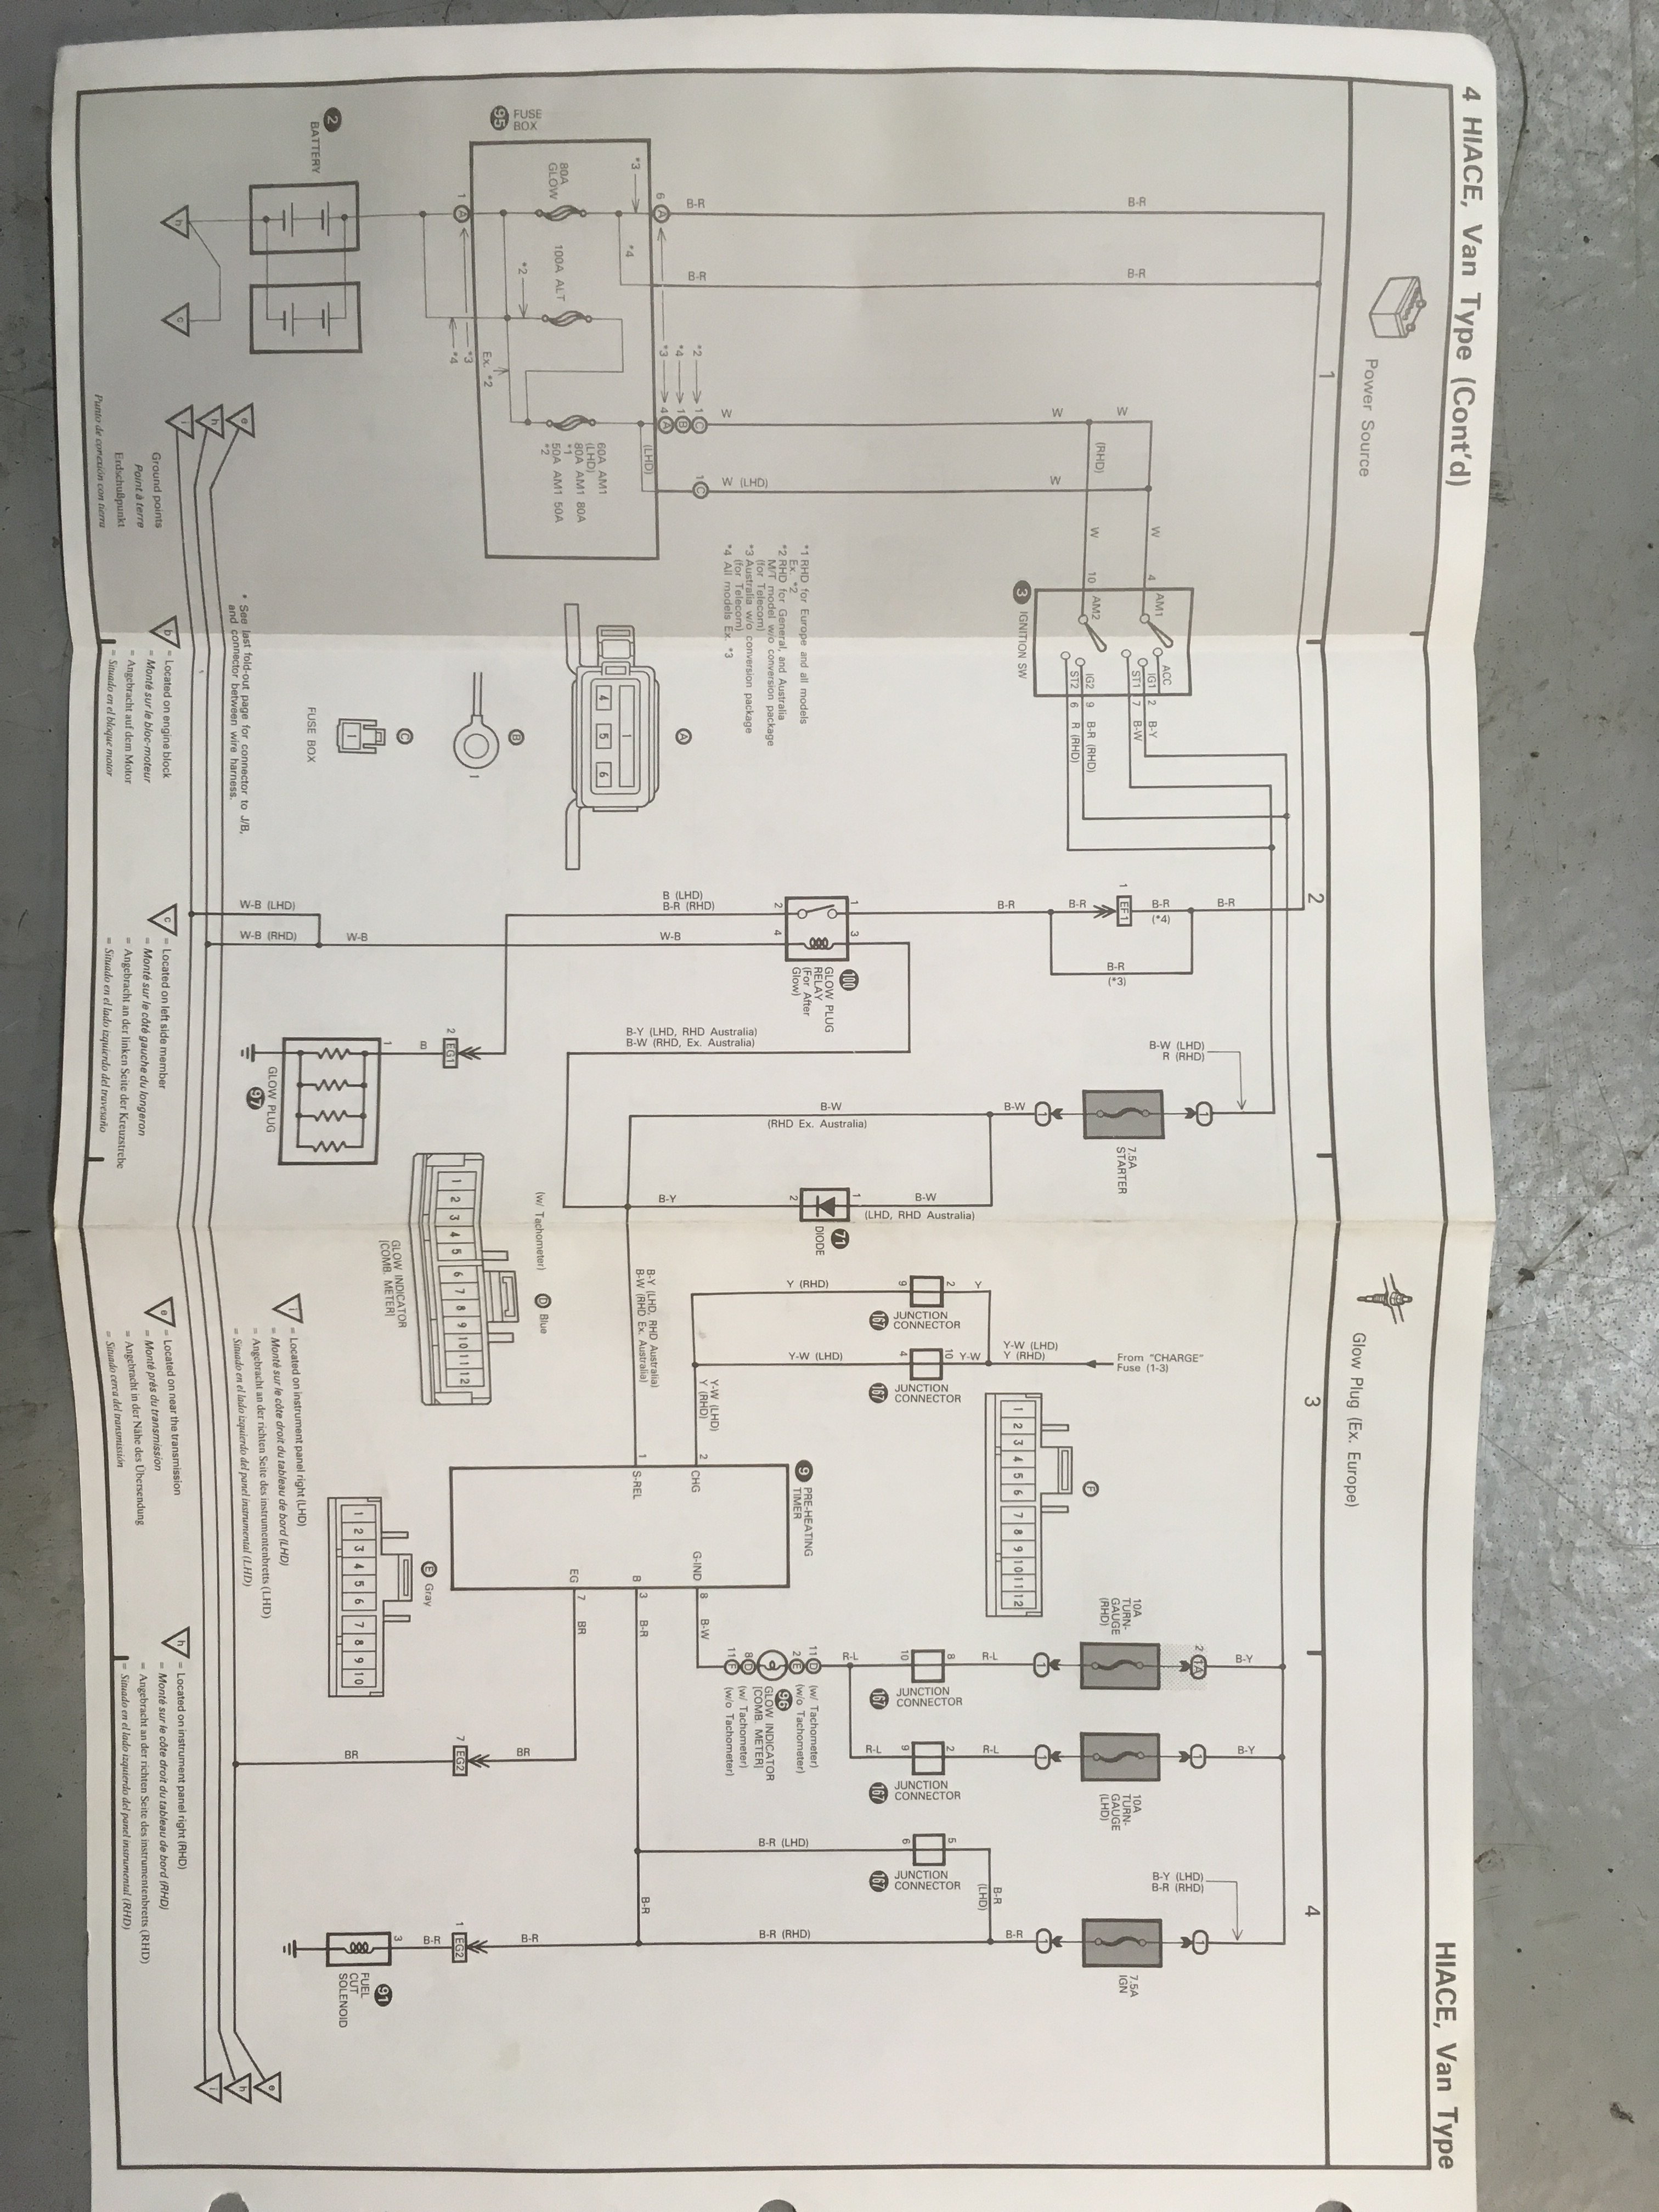
1990 Hiace Glow Circuit.
3 points
-
Is that a Morrie Resin body? I have a box of kitsets I've hoarded over the years for when I get old. Prized possessions are 2 aoshima Mad Max Falcons. Also, I like that this thread stands apart from Diecasts. Diecasts are gay. Kitsets involve real building and modding.2 points
-
Acf-50 http://aero-marine.co.nz/service/service-a/2 points
-
HI Alex, All I did was locate the existing glow-plug relay (follow the glow-plug wiring back) and just added a trigger wire to the a-fore mentioned push button. In this case that already existed - I suspect someone had the idea before! You can also get aftermarket glow timers that have such fancy features as after start glow as well, but a simple push button will do the job most times.2 points
-
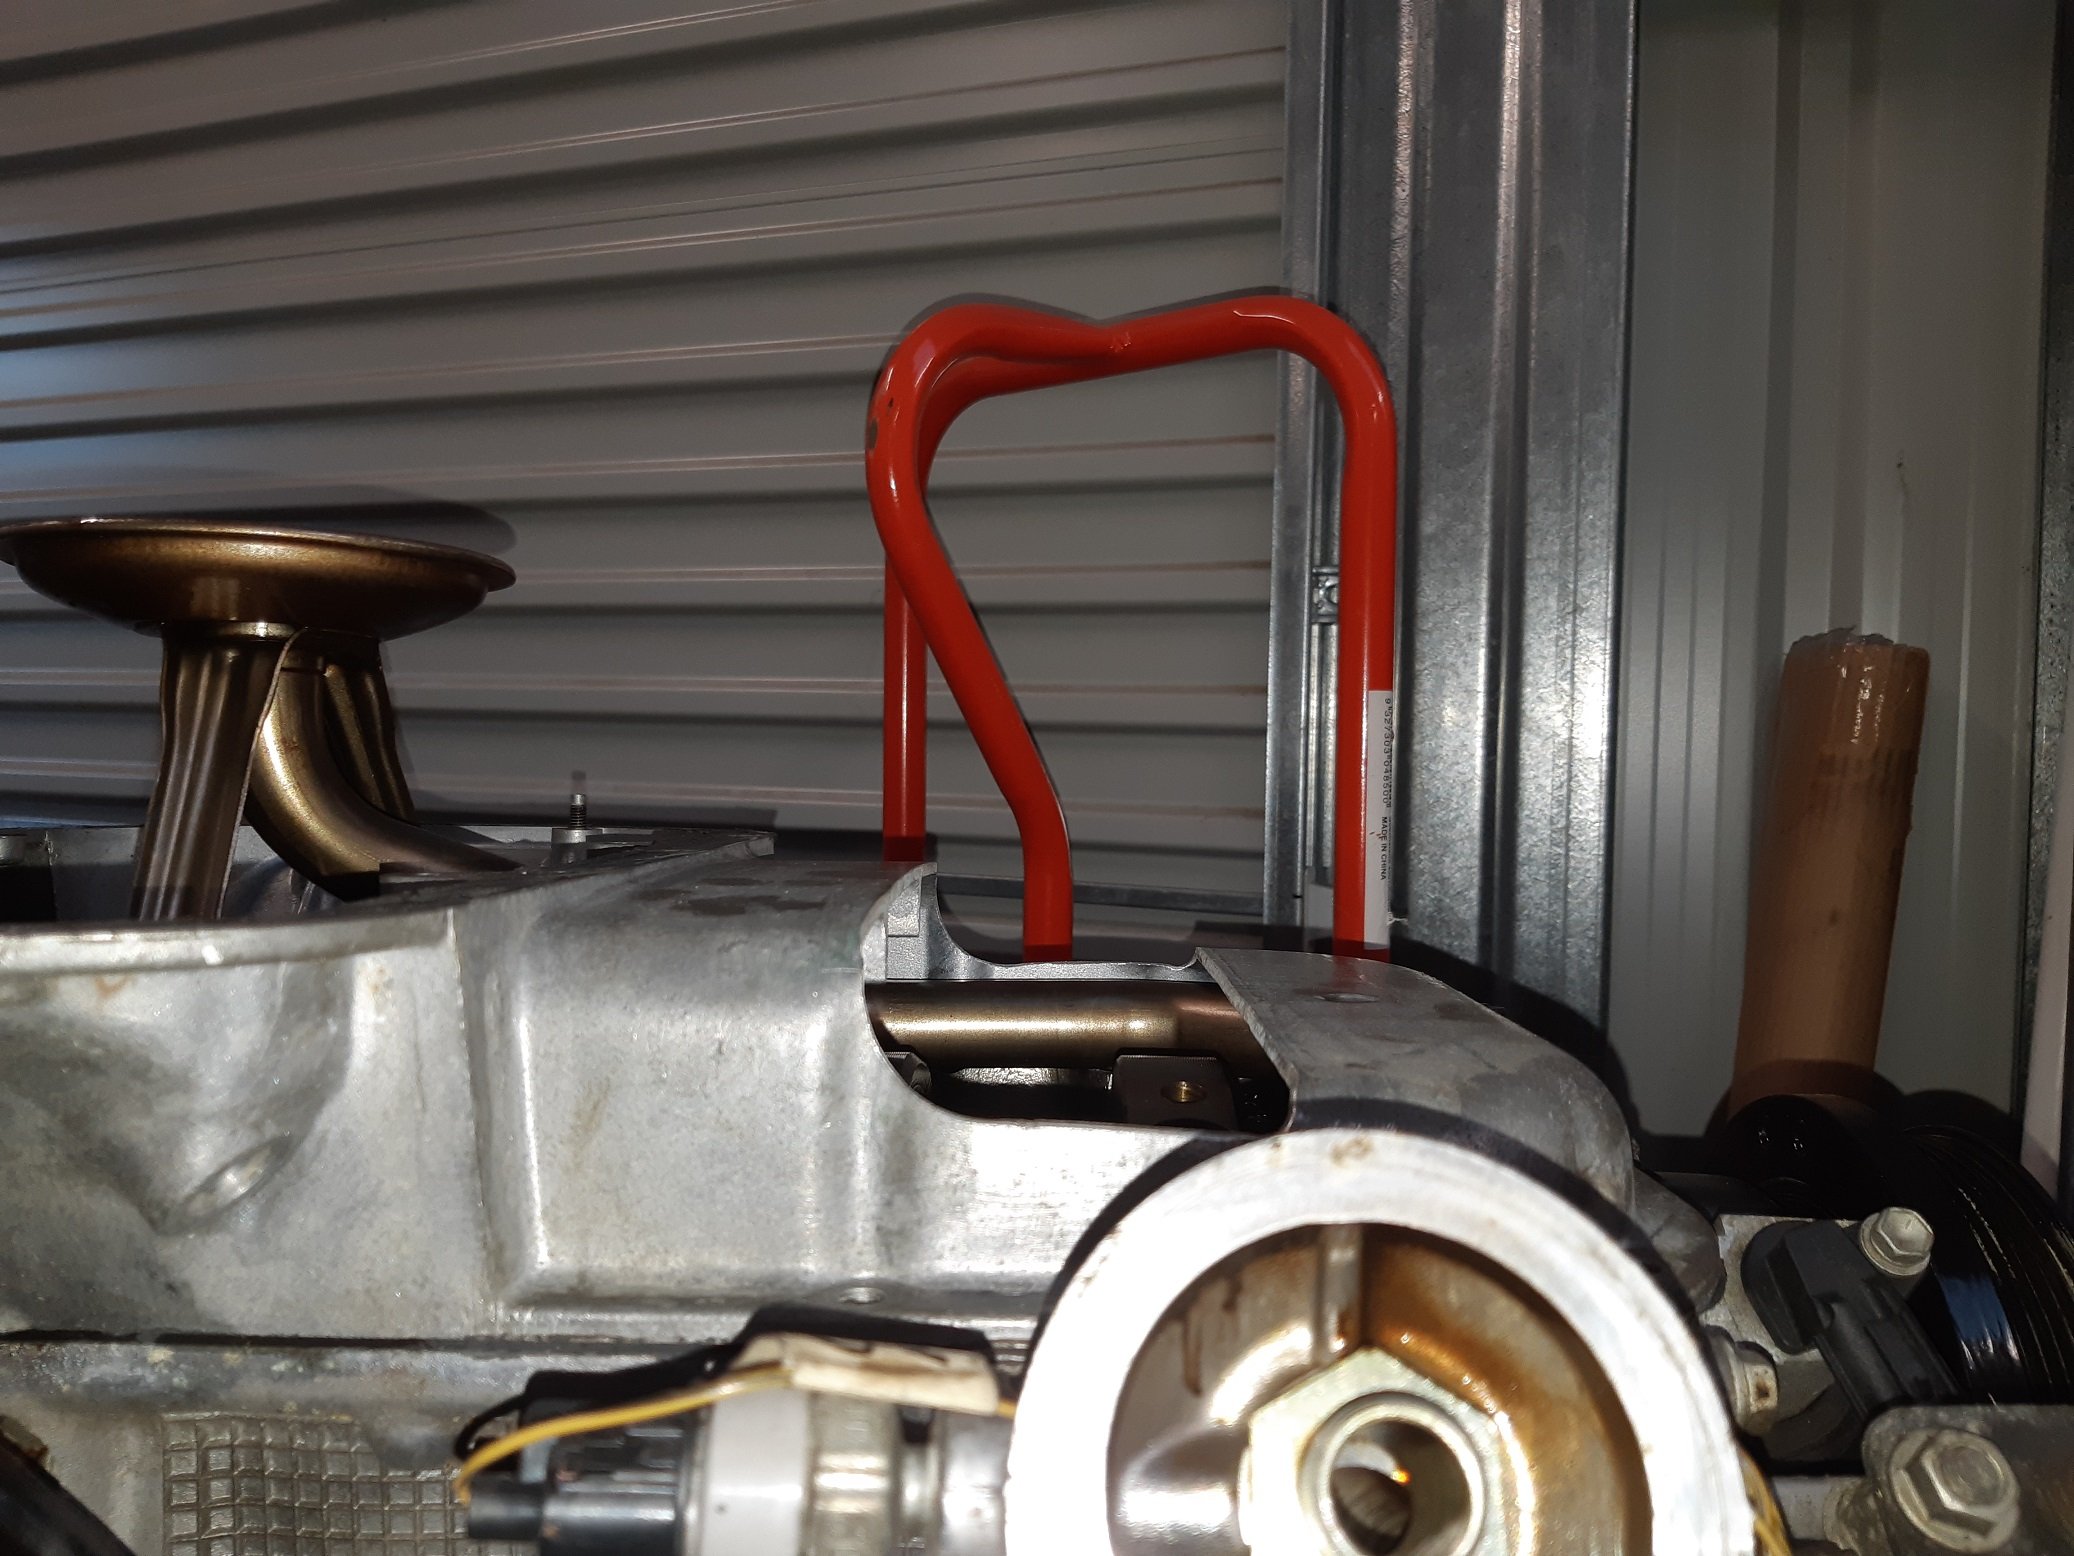
I cut a hole in this sump I paid lots of money for. I need to get some 4-5mm sheet to fill the hole. I want to make up a jig/brace/plate I can bolt it to so there is no warping when it gets welded.
2 points
-
Had issue after issue with getting this in the water. Life got in the way Had an afternoon free yesterday so decided to roll this out of the shed and give it a go Took a while to start but finally fired up with a smooth steady idle. Bundled up wife and three kids, launched the boat, found the first major issue - the gear selection was reversed. Put it in reverse to got forward spec. Motored out of napier harbour, put it in forward and disconnected the shift cable (throttle is limited in reverse), gave it some beans and found the second major issue It wont rev over 3000 rpm, not quite enough to get the boat on the plane. My gut feeling is that its way overpropped. I need to check that the throttles are opening fully, but i might just go and get another prop before i look into it much more. The prop on it looks very grabby, but has no pitch numbers to compare. The gear reversal can be easily fixed i think, instead of putting the cable onto the push lug i need to put it on the pull lug inside the control box. I was looking for an excuse to open up the control box anyway and attach a temp guage and warning LED's to the various sensor output wires in there. The good news is that the outboard is charging, starts and stops first pop, and is smooth and quiet We still motored out to spot x, and had a hour of good fishing, came home with 10 gurnard and some kahawai for smoking. The cats will be happy!
2 points
-
Sunday of productivity. Water pump back on, filled & warmed up. No leaky, no squeaky. Messed about with the front brakes but couldn't work out a way of fitting the new calipers without it turning into a fearsome bodge. I'll take the calipers & current flexies into the workshop tomorrow & make up some hard lines and brackets. Rear brakes went well though. Offered the shoes up and they looked good enough for a country job Everything fitted perfectly so I can confirm that 1971 Datsun 510 rear brakes are the the same as Hakos. Do with that information what you will.... Also done a vid. Really to demostrate the tappet rattle for comparison after I've adjusted them but it sounds like the cam's not bolted in. It's really not that bad. So that's about it, hopefully full braking will be restored by the end of tomorrow and then I might even give it a clean. Once I've adjusted the valves I'll give it the beans, I've been staying below 4 grand (mostly) because of the water pump but it really feels like it wants to pick up between 4 and 4,500. Thank you for your continuing interest.2 points
-
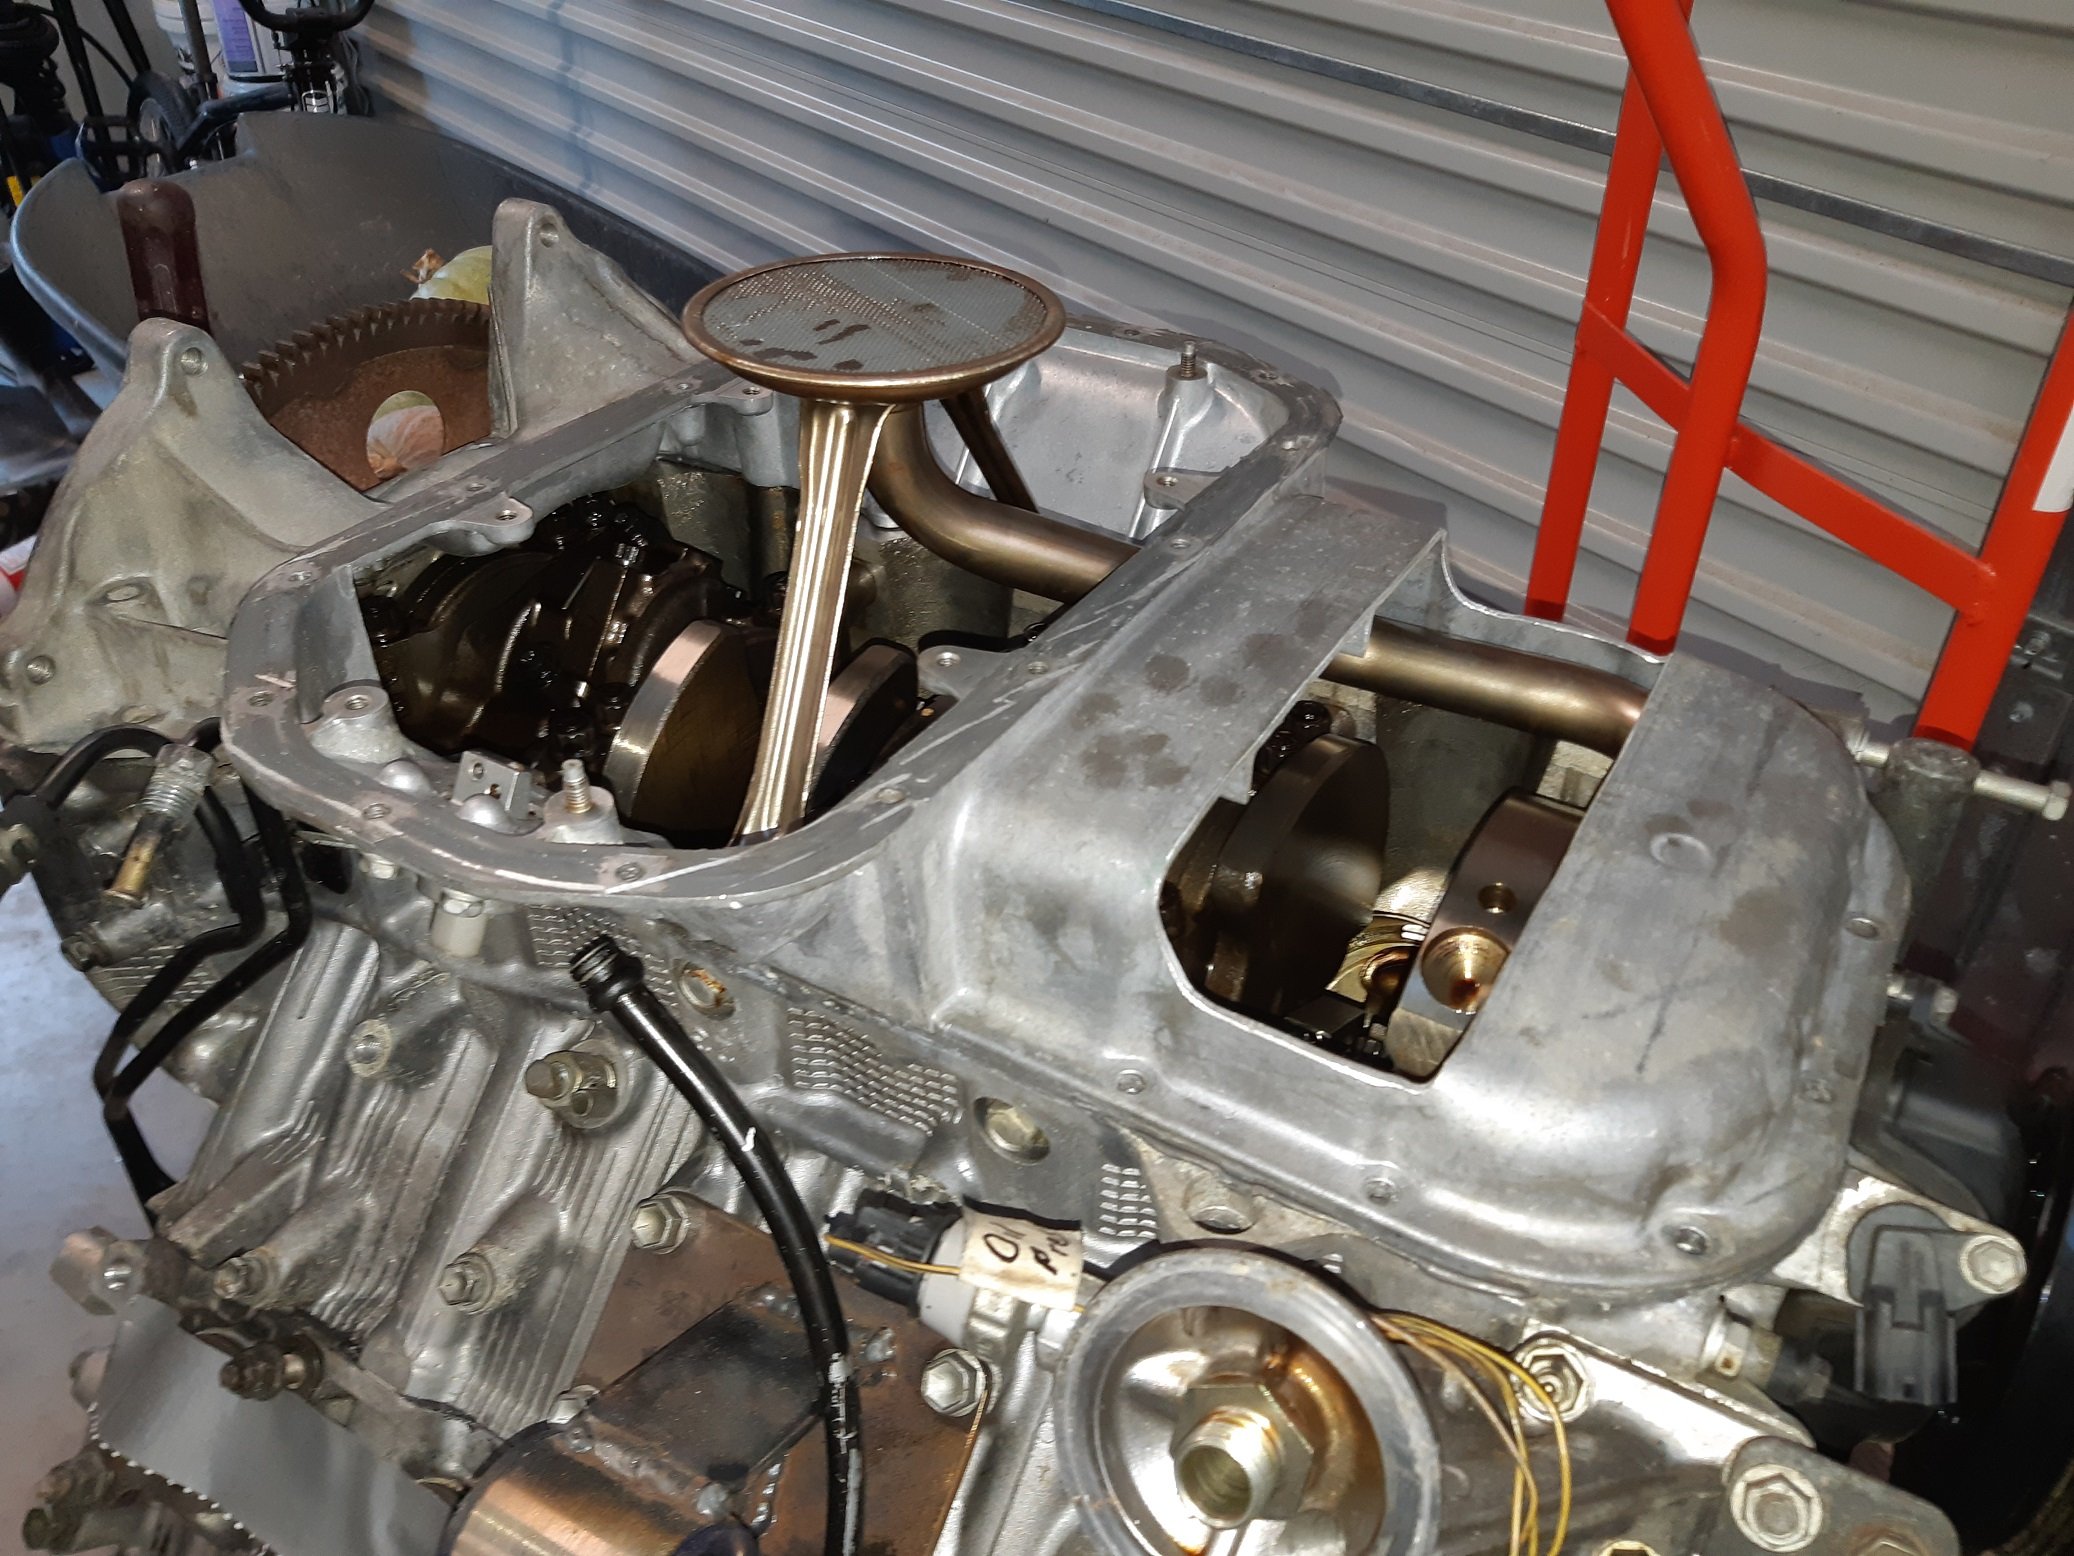
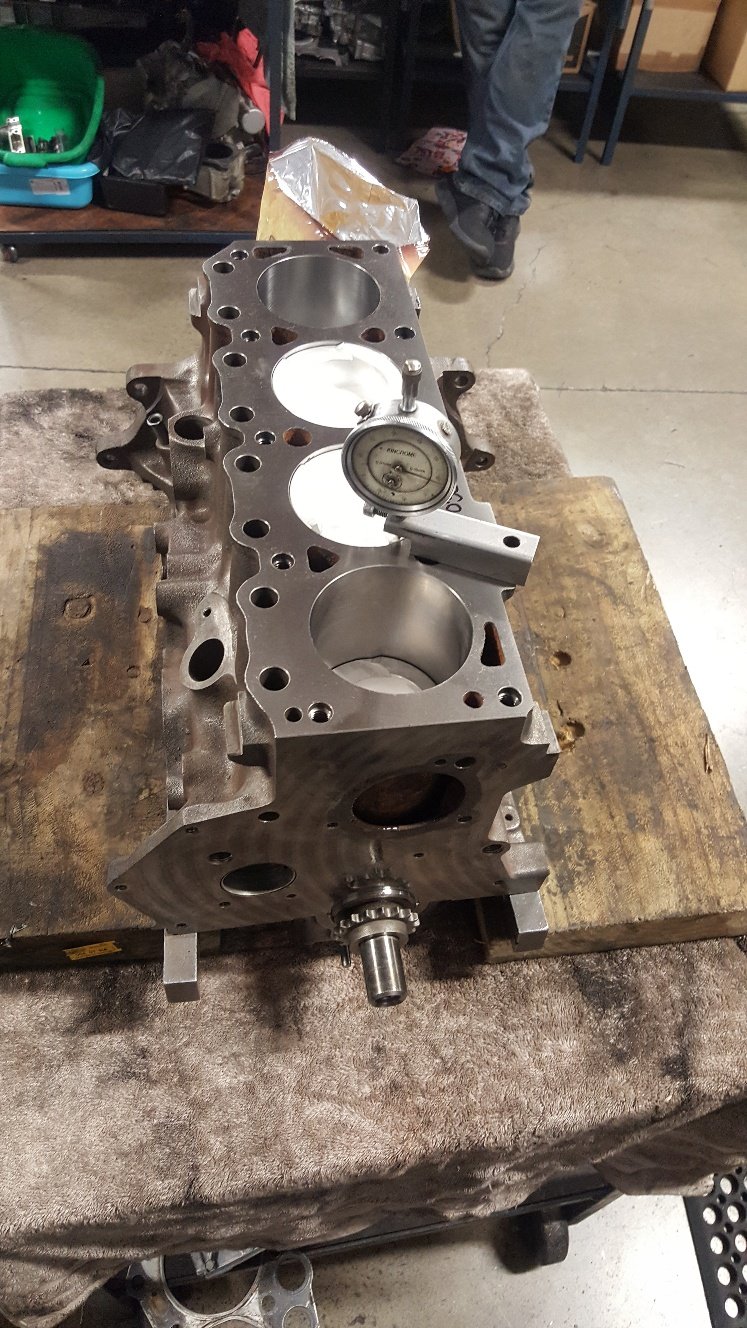
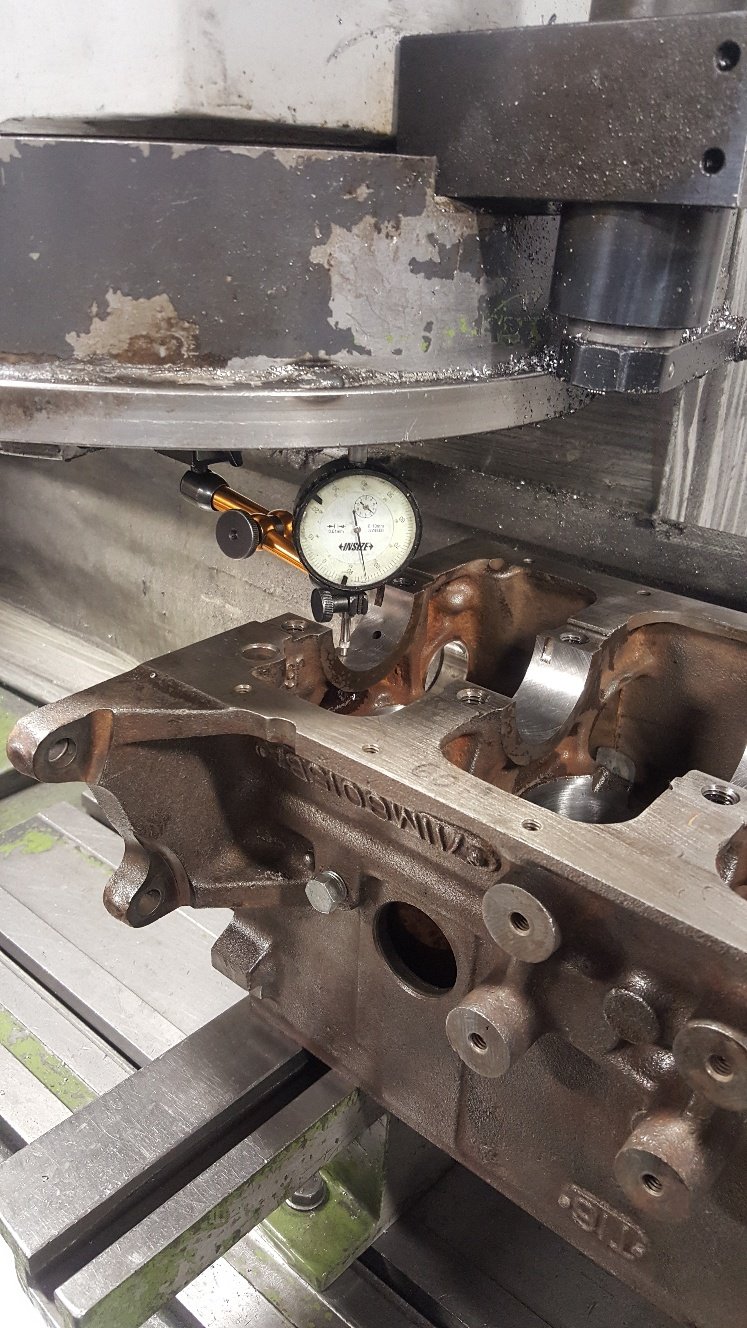
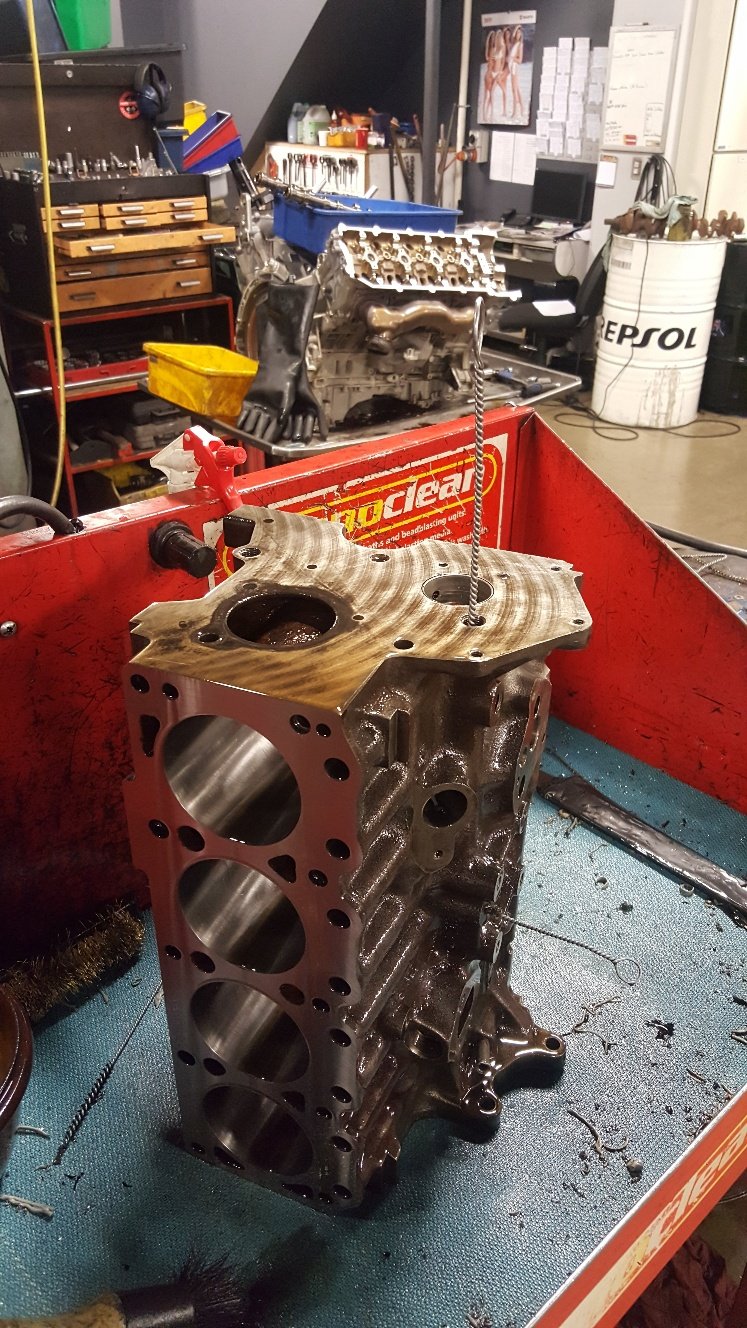
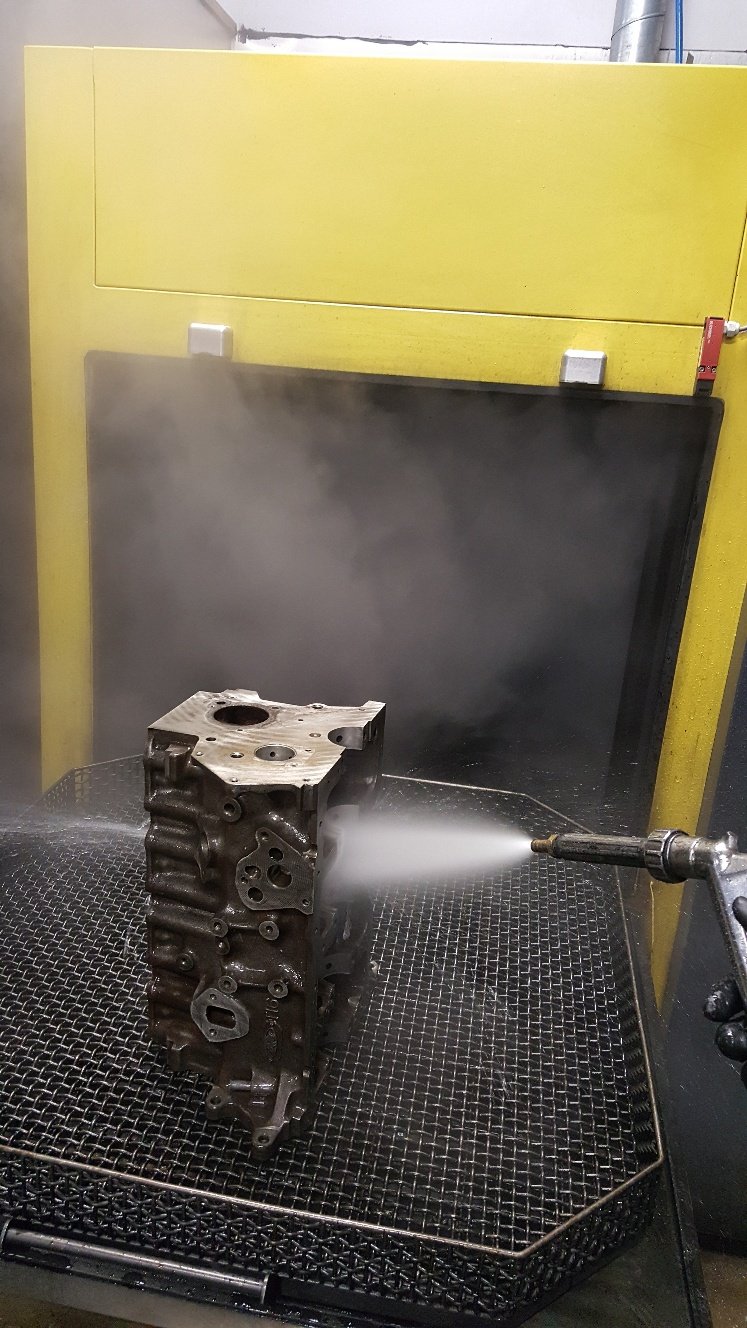
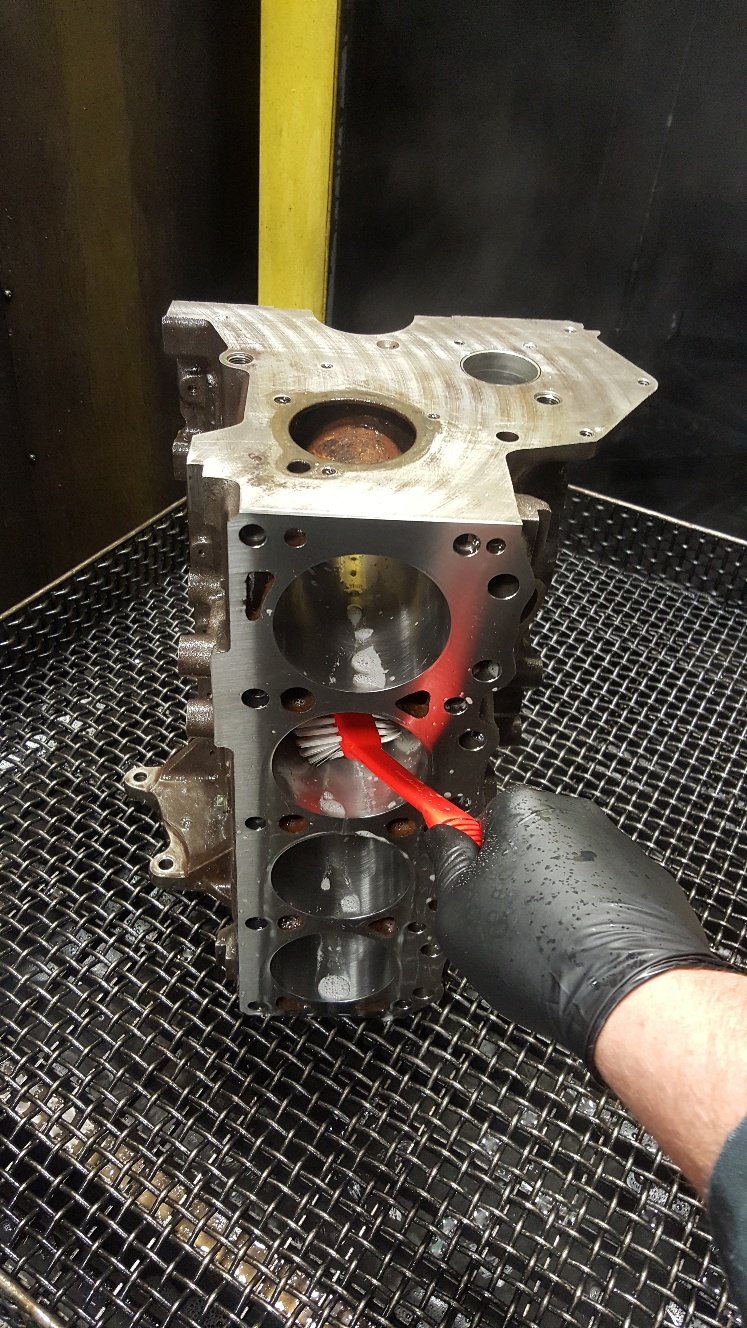
So assembled the short block to check piston heights. Normally old engines have heaps of piston to head clearance. I found the pistons are below the deck surface 20 thou or half a mm. My head gasket 52 thou thick. So ideally i won't the piston above the deck 10 thou to get my 40 thou piston to head clearance for good squish. So it was back to the surface grinder to remove 30 thou. While i was there i sat the block in the surface grinder on it's deck surface and run a dti through the main tunnel to check how true the tunnel is to the deck and i was surprised to find it was within 1.5 thou. I haven't put a pic of it being surfaced as there's already one earlier on. So I gave it a wash. I went through all the galleries with gallery brushes. Then put it in our Bupi wash. This is pretty much just a big dish washer. Made in Germany and it's one of the more handy things in the workshop. Then we just give them a good going over with soapy water. Normally just dish washing liquid and hot water to brake down any left over honing oil. And really get all the machining swarf out of the oil galleries and other spots in the block.
2 points
-
And the Ute and trailer are both legal Tegal! No issues, no dramas at all. I did put new tyres on the rear and raised the height of the Ute so that it would pass.2 points
-
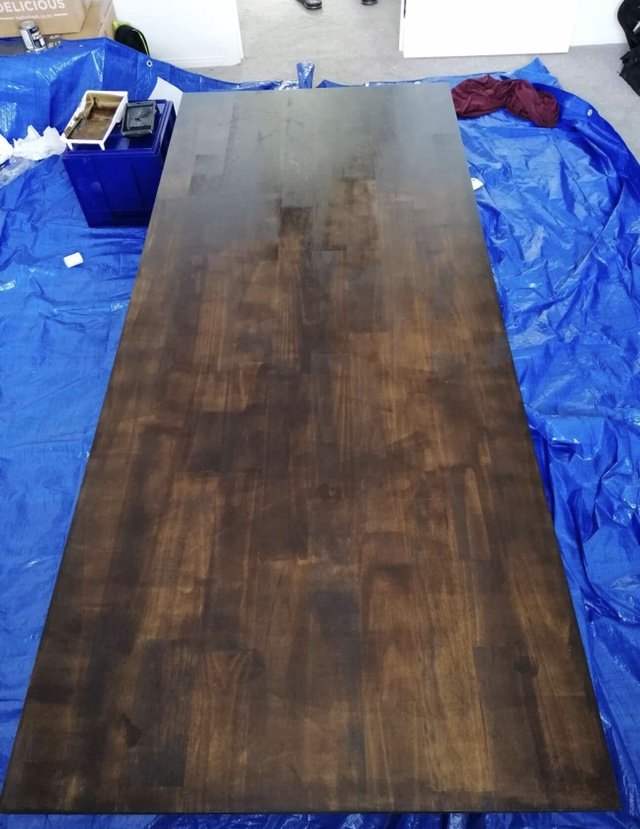
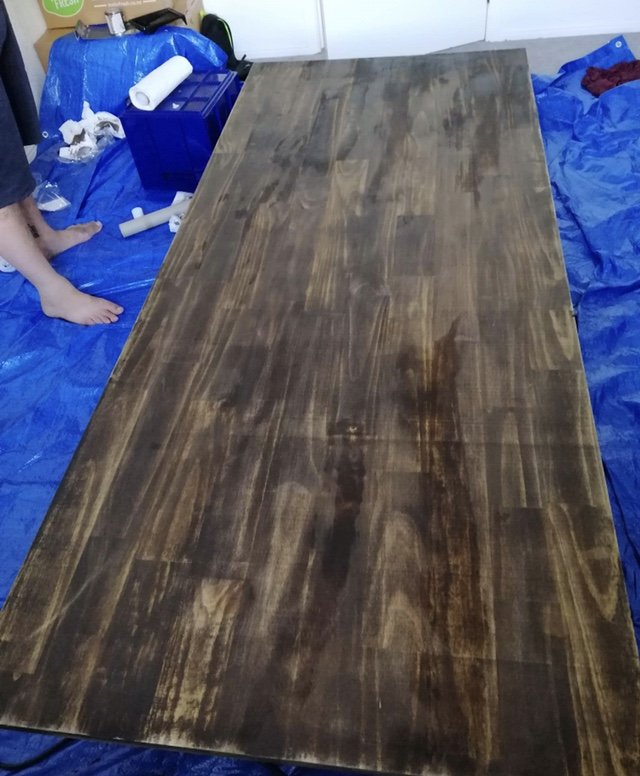
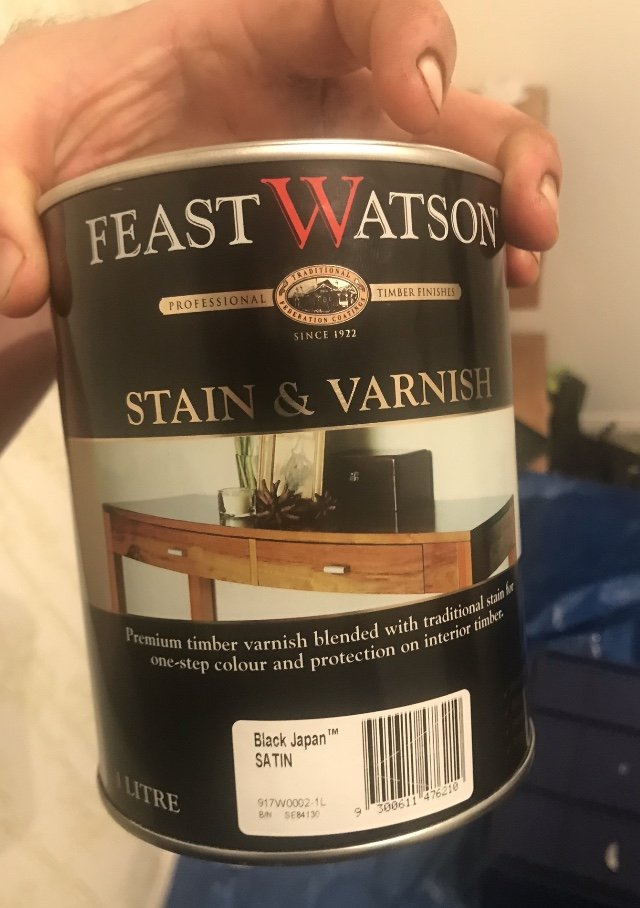
Bought a house last year so I’m a lot more budget minded now, that and what I don’t spend on the house gets spent on cars so every cent counts being a Jew on everything but cars I’ve decided to try my hand at some super tidy furniture for the house on a budget. started with a dining table. luckily I did some elect work for one of our fabricators at work so I’m getting all the legs steel, fabbed and painted for free picked up a pine laminate slab from Bunnings. $115 for 2100x900 and about 30mm thick using the stain in the picture plus a clear with Saturn finish. They were around $70 a tub. Probably only use about 1/3 of them for this so about $45 worth of stain for this. so about $160 so far for the table didnt sand the slab at all, wanted to leave the high spots and rough bits. did the first coat super thick with just the jap black, and actually looked a lot darker in person then the photo, darker then the last photo sanded it all back with worn out 120 grit, this took all the high spots back and brought through the grain and edges. next mixed the clear and jap black 1-5 in favour of the clear and that’s how it sits now. ill probably give it another coat with 1-4 and see how it looks. plan is to get another two slabs. Cut one into two 450x450 side tables and 1650x900 cut to width for coffee table. the last into 2100x450 for two tier TV table. legs will all be retangular box tube, painted in Saturn black and the timber to all be the same stain and thickness
1 point
-
It's the Old School stamp of approval. Now, what were you talking about before someone said "LD28"?1 point
-
P76 4.4 V8 and Borg-Warner 3-speed manual (or P76 2.6 SOHC inline-6 and same gearbag but column change).1 point
-
Cheers JP - it’s been a long ass road. I just want to drive it now and generally fang the b’jesus out of it1 point
-
Congrats mate. Can’t wait to see this in person some day soon.1 point
-
That’s the closest I can find. Hope it helps.1 point
-
Have used ACF-50 on some freshly polished rims to protect them, tis good stuff1 point
-
Do you also fit mixture adjust knobs to your carburetor cars so you can adjust the mixture while driving?1 point
-
Built a 1/24th messerschmitt when I was at school. Would look good next to a kubelwagen...1 point
-
Oh you guys....1 point
-
He's gone on holiday. But when he gets back we all need to give him a mild bitch slap and tell him to get his arse into gear and continue with this conversion!1 point
-
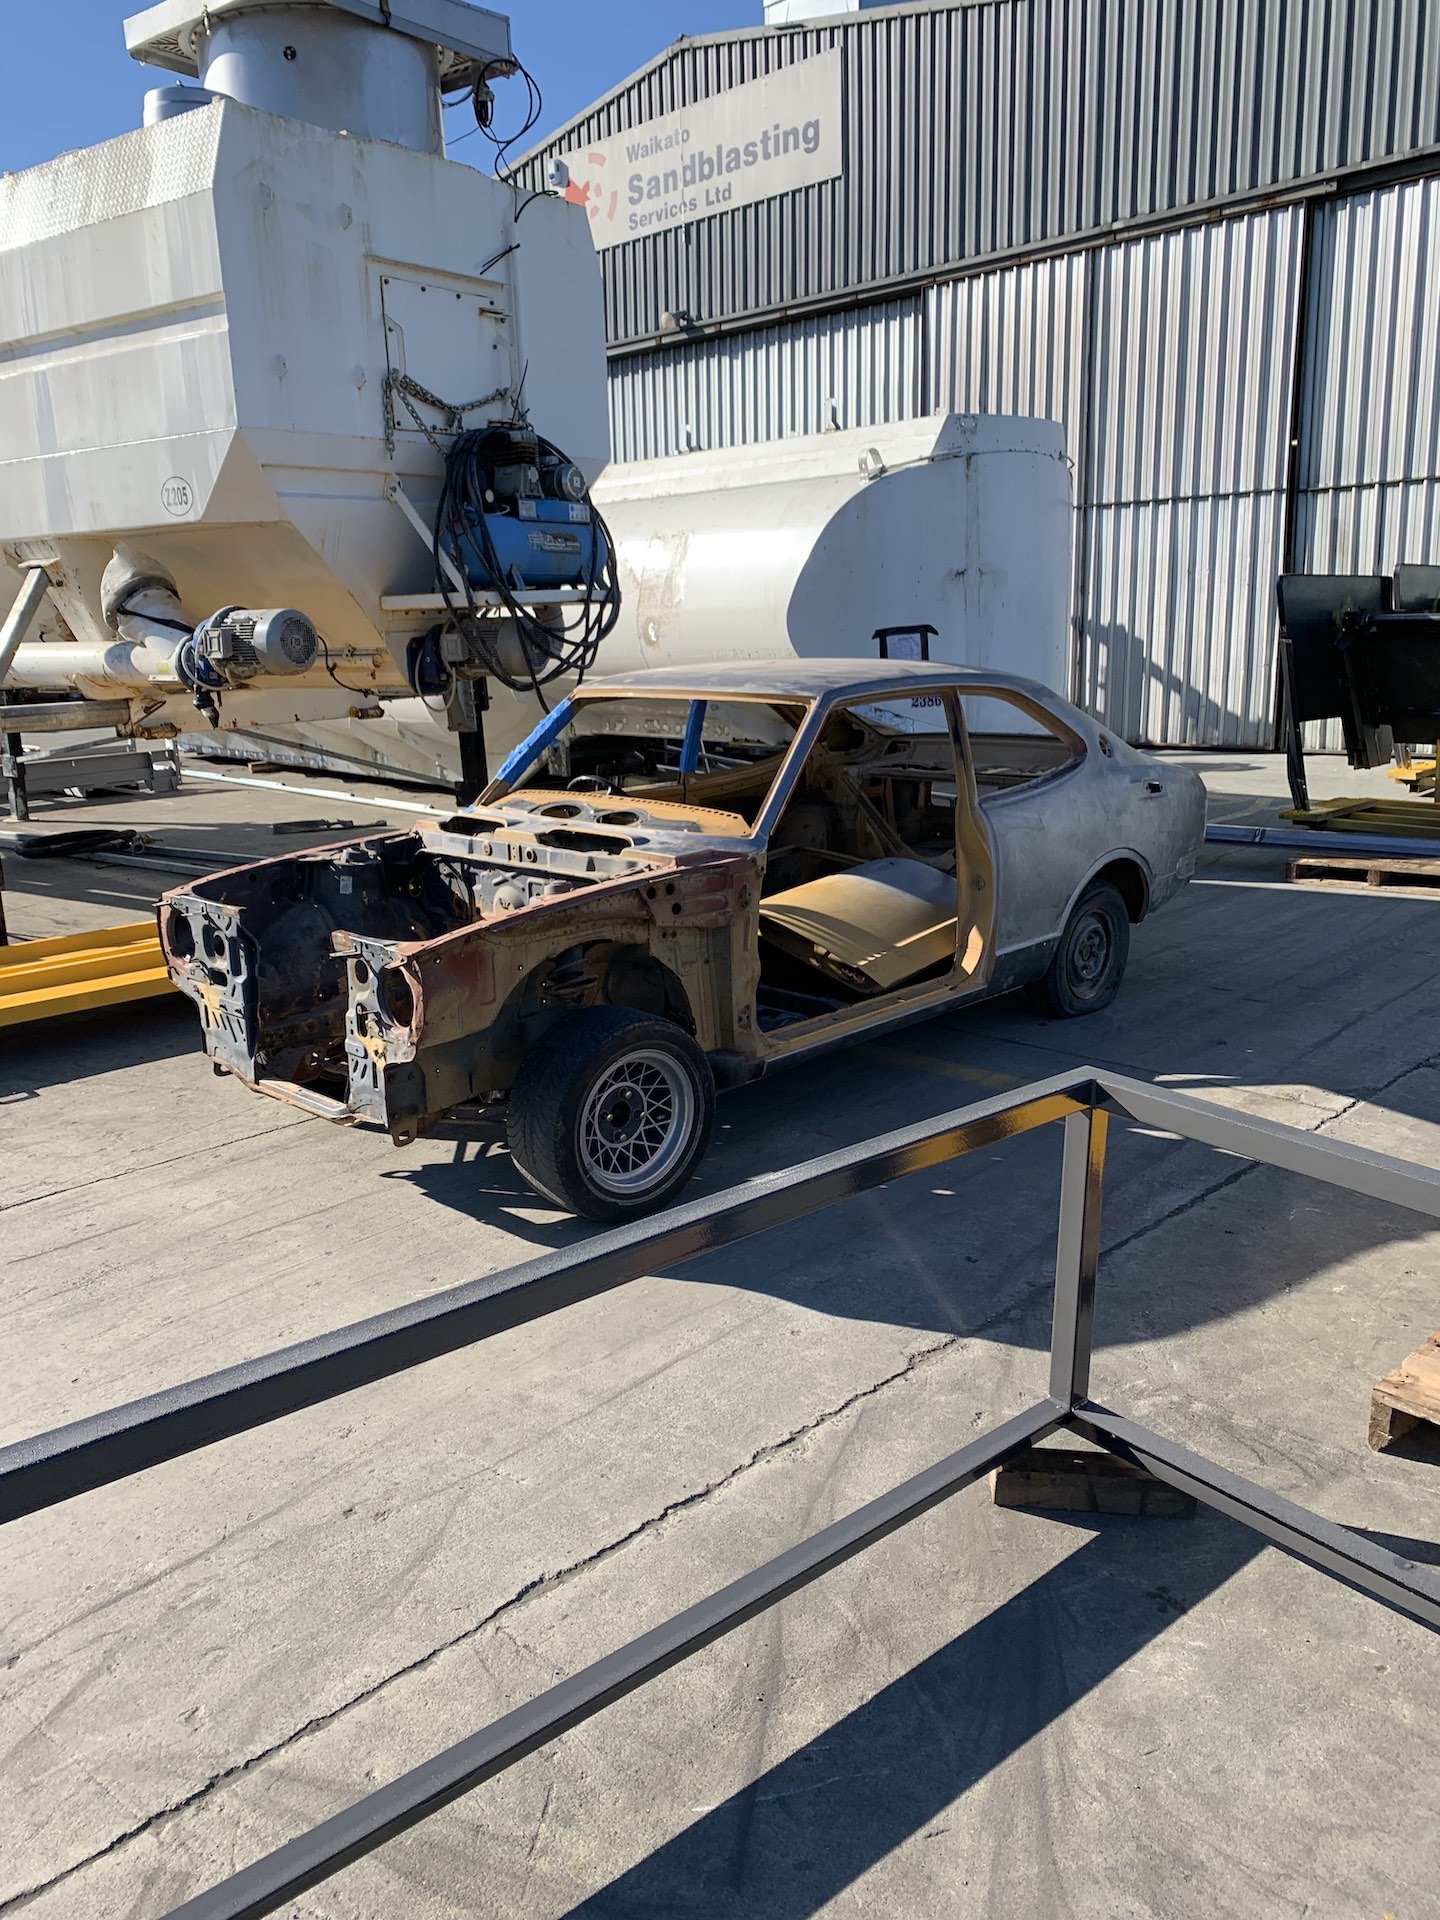
Oh man, outrageous how full circle that's gone! Cool to see you've got it back though. Last thing I saw of it was a pic of it on Facebook with a 2ZZ in it, any idea how it got into this state?1 point
-
I buy them directly from Japan in bulk mate, heaps cheaper than local and huge variety of those JDM kits.. Look up https://www.1999.co.jp/eng/m/ they have a huge range and deliver to your door1 point
-
I have a heap I made as a kid in a box and a heap I hope to make one day.1 point
-
The wiring is pretty much there now bar the speedo cluster, a bit more tidying in the cab and adding some Deutsch connectors in the rear. And a licence plate light. Now I am a difficult bastard at the best of times, and part of this is that I hate car stereos with all their bullshit inputs, eq settings and animated screens, another part is that I have not willingly listened to the radio or watched television for more than two decades, a small and ineffectual rebellion against capitalism. I only listen to talking books over Bluetooth when driving and fucking hate it when I get into a car after someone has been used it (Shane you dick) and has fucked about with the stereo and turned on the radio. So to prevent this occurrence I have bought a top quality Bluetooth mini amp off Ali express for $54, this has two tone knobs and a volume knob, and no display. Perfect. It is a nobsound brand lol, right up my street https://s.click.aliexpress.com/e/u5tcaeM In other news I have had some front driveshaft adaptors made so I will be sorting that out shortly. I will hopefully have enough cash for a radiator in the next few days as well. In the realm of actual work I have mounted the rear seats. Not masses of legroom but they work well and pack away nice and tidy; It will be tight for the engine cover but do able.1 point
-
On today's adventure Greg discovered the best feature of the kombi. Chip/snack holder for the driver.
1 point
-
Fuel tank access panel. Not perfect but will do the job. Think of the grams saved!
1 point
-
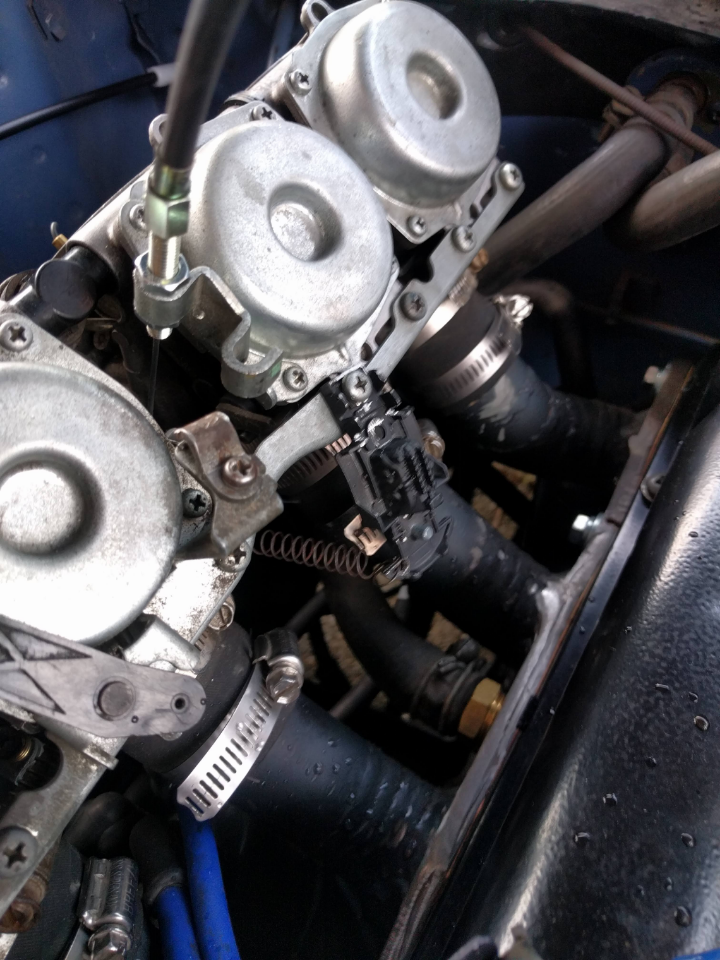
Wired in an electric bike fuel pump which fixed the over fueling issues. Tuned them with a vaccum gauge but had trouble so resorted to a hose to my ear. Threw a colortune at it and it was running rich all through the range. Wound in the pilot jet all the way and it was still rich at idle. Have ordered some jets from aliexpress and will play with them. Have driven it around the block a few times and it certainly comes on song. I had to horey up a return spring, ended up using an old matchbox chassis. Have yet to rectify this.
1 point
-
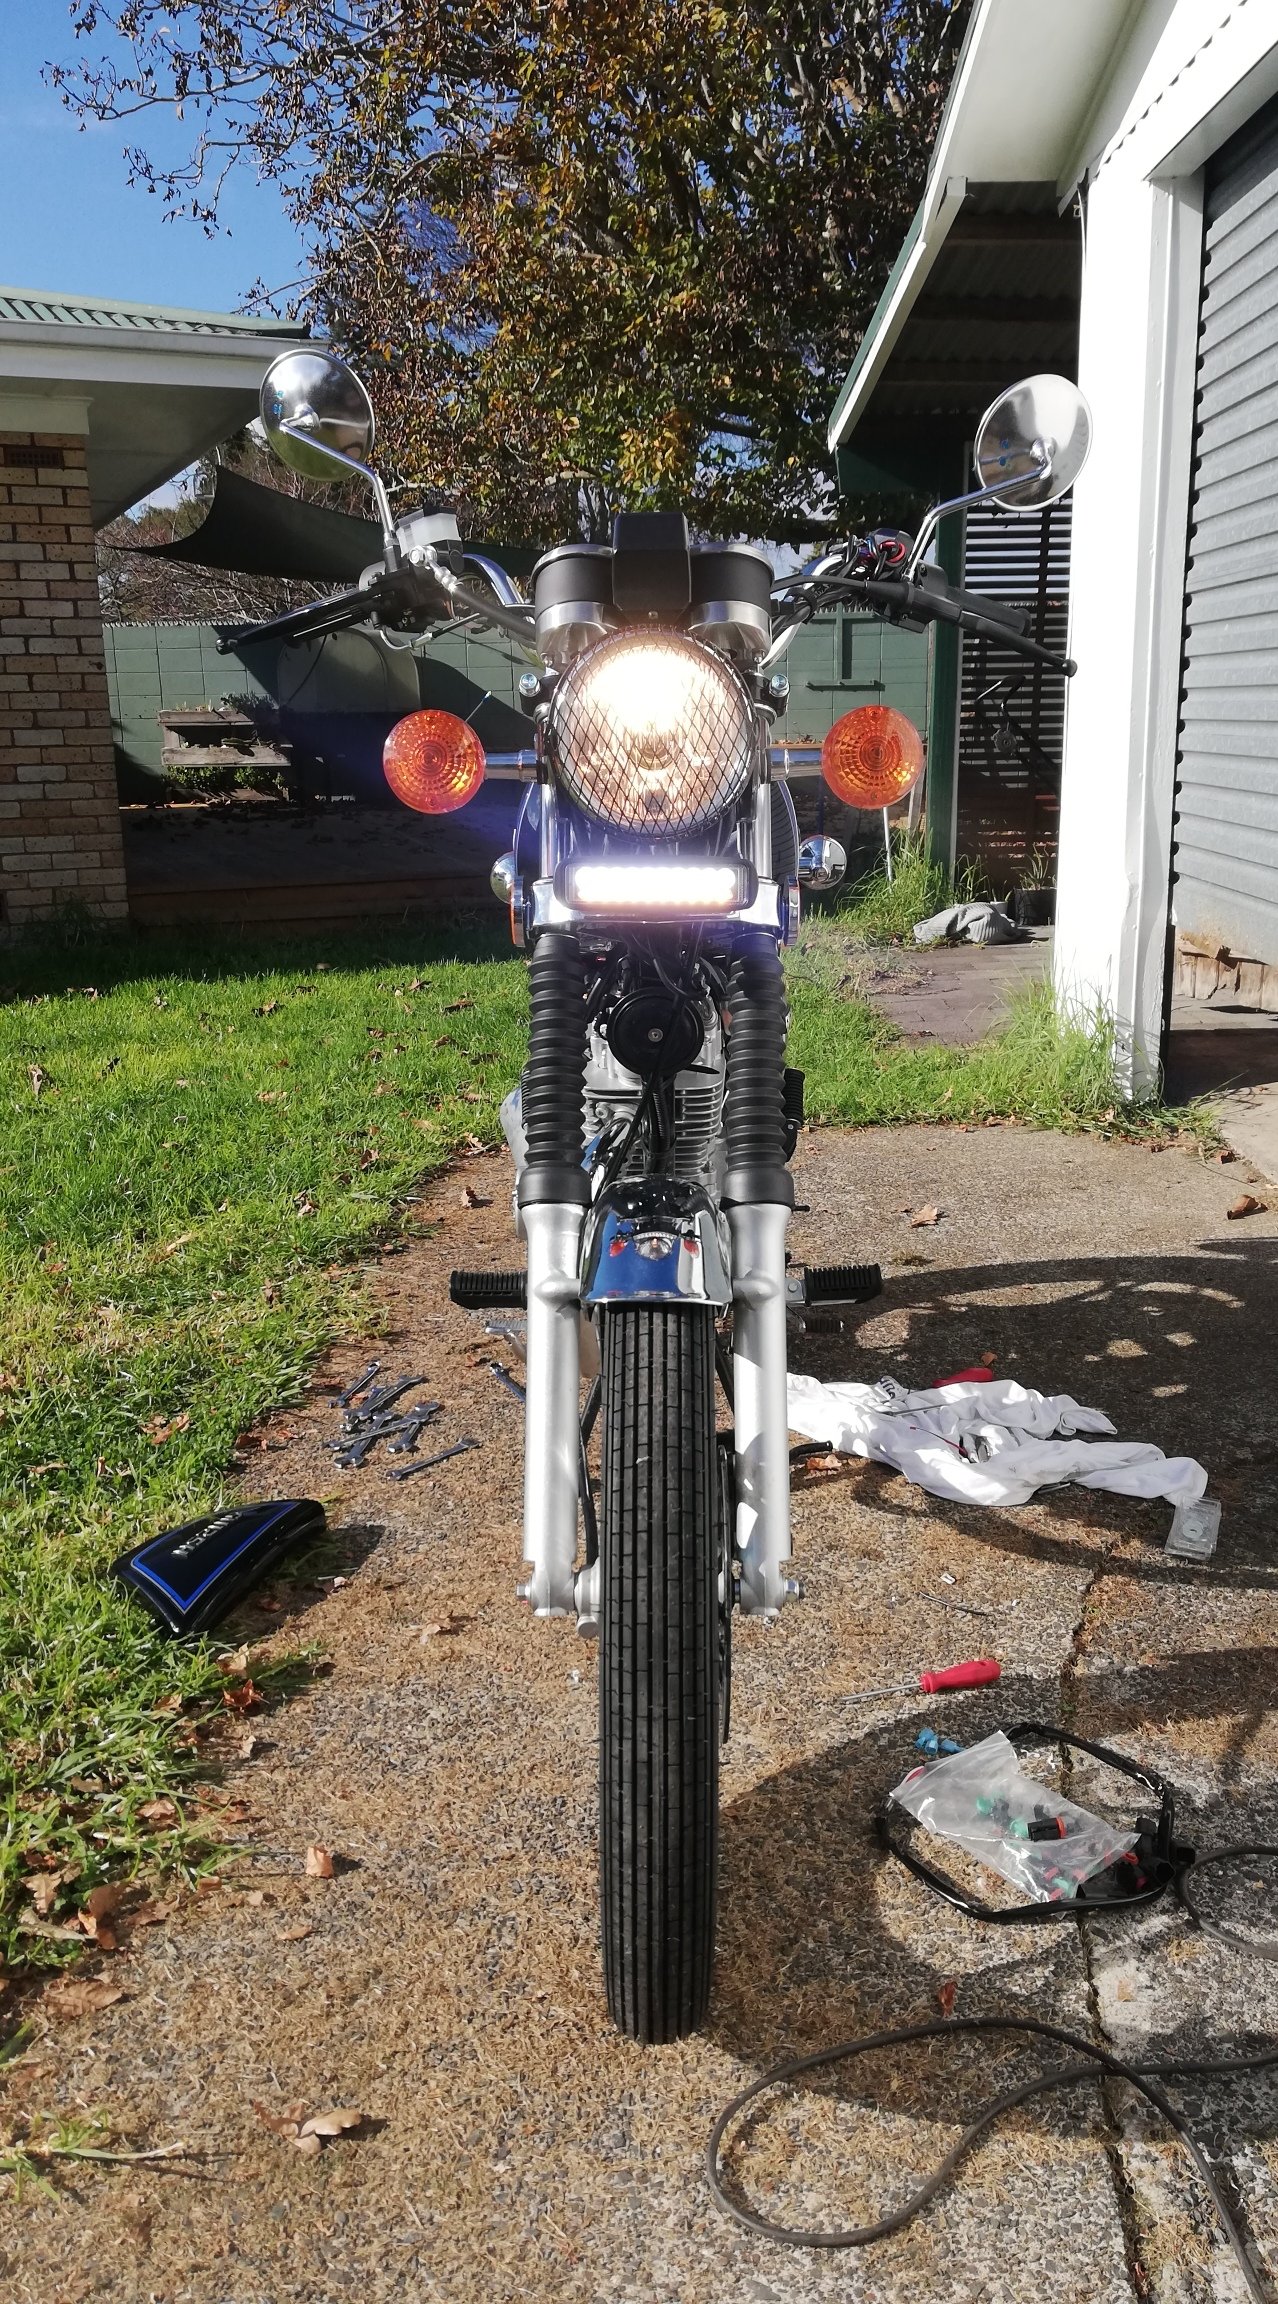
Ordered an off-on switch instead of an on-off-on. So that's on its way now. Installed the rest anyways two toggles ziptied to the handle bar should be alright for now. Run off a relay from the battery rather than the key, but I don't think il forget to turn it off. White flood and amber fog led light bar. Ready for some #adventureGN
1 point
-
That white FD on G7s looks sick.1 point
-
so we had a few problems. the engine in wasn't a straight in job. 1st we had the wrong thrust bearing, so back to the vw shop sorted out that the other one didnt go over the cone. rather annoying. now we can chuck the engine in. hold up why isnt this sliding on the last 5-10mm!!! ahh right back to the vw shop grab another clutch set up. at this point this is far more annoying than the wrong thrust bearing. so my kombi is one of those cars that is a silly year of cross over. nice ah even better this one doesnt have a clutch alignment tool, some tape on something that came off a sewing machine later and wabam tadaaaaaa on. this thing slid in with no issues at all now Now that thats in i had to make a few more little things work so we could make it run. Fuel, spark & something to make the batter keep charging while running it. had that all done and then we moved it a few times now that its running i wanted to bleed all the breaks now that we have vacuum on the booster as well. Well fuck me, tried bleeding it several time and having no luck, @flyingbrick was been a huge douche and a smart ass and trying to troll ( i ended up offering him to fuck off or ill punch him in the face ) he chose neither surprise surprise. out some the cylinder and i dropped it off for Paul to have a look at. He tried to bleed it and shit was fucked so pulled it apart put new seals in it and again, back it went and we then bleed the system up. Perfect breaks are now working!!!!!! working that good they are staying on. FUCK Right. priced up some that would suite drop spindles and fell off my chair. so apart they came. top one in this photo is cleaned new seals and pistons and in she went. and then we had breaks that were still staying on. this time due to this little spring missing and the piston not fully returning. and this one is still wrong but i modified it to work. left and drive bus problem in a right hand drive world. any who i needed to put the number plate on it so thought id drill the hole out for that. lol ill just tap that bog out shull i number plate on and i also put the headlights in as well as put the surrounds on the front. holly shit the headlights work. wonder if they tail lights work shit even the number plate light does. now lets put some upholstery back in it. door cards 1st. Underlay in before them to deaden the sound and cold factor Before after and now the door card now the wooden floor. it was resting up on a seat mount. so yeah fixed that issue rough and ready drill holes around and then jump on it. FIXED! (ps i don't care i have a kombi and i wanted it driving and carpet in it fast. i didn't want to try fuck a spider) also this ply was already cut and came with the kombi from purchase. at this point i wonder what i have under the bench for carpet turns out i have some black carpet at this point @Mrs 64valiant turned up and we put the rest of the upholstery in the back she had buggered off by this time of me sitting here having a drink to myself just been so chuffed that i was finally sitting in the back of our own kombi, Life clocked the next day i was going to @mark105 place to have a few drinks and probably not be able to drive home..... Beth was also not going to be in town, so guess what. well i had this small cut out where the spare wheel goes for my bed and well that was going to be uncomfy so lucky i know a guy who does upholstery right? found a peace of foam i had laying around and cut it to shape hey presto proceeded to a party were i slept well even more happy. so at this stage i had been driving around and this was my key haha not dodgy at all. even had a guy at the bakery see me use and said "you fully stole that didn't you" my exhaust also was pumping straight into my back bumper and was getting a bit black, so i needed to make a tip for it, i was hoping super cheap had them but yeah i dont think the love heart one was going to work. so i had this pipe i got from @Fuckedifiknow cut it a bit more and welded it and then put a nice taper on it. cleaned it up welded it on same day i done my roof racks in the 2nd half of the pop top. started with a walk over to bunnings to grab some timber slats walked back with a pool fence and some door stops? the door stops are to hold it off the roof and act as spacers. the pool fence? squash the ends this is going to work so well man this is brilliant while that was off i also changed the shitty screw holes to riv nuts lets see what else have i done lights work really well i got hub caps I had to steel this ignition out of this kombi and then u put the key part mechanism in mine as i broke mine to 100 peace's and then put a key in mine i actually needed the key part to see what barrel i needed for the wiring, one it plastic and one is steel. the one i needed was plastic. replaced the lock and handle in the sliding door as i didn't have a key and it was a prick to lock from the inside have been driving it and testing it which has been really good, beth is actually sitting in the bus in this photo also dropped off the old bus yeah. I went to drive it to work been a Friday and the battery is dead flat?! so it has something draining the battery which is great. and that is my story for now. Peace dudes & dudettes1 point
-
Ramble #3: Since forever, I've always had this exhaust manifold on which is a copy of the HKS 4-2-1. Altezza manifolds sit super bloody low when swapped into different cars, so fitting the likes of the beautiful TRD pipes is problematic. With the HKS pipes, the 4-2 section finishes right down by the firewall, which meant I (by which I mean someone competent, Denham) could cut the 2-1 pipes and reangle them to suit. I've always wanted to see how a 4-1 manifold would respond in comparison but I've always thought there's no chance of making them fit, and it would be difficult to modify. But since I'm currently redoing the engine mounts, I could tip the engine over to suit fitting factory Altezza options, and then I'd have more things to play with. So had a look around and I found a shitty looking second hand FGK 4-1 manifold. The FGK site says that over the factory manifold, dyno back to back swap to standard. It gains 7hp and more torque at a lower rpm. When I went and picked it up, I chortled at how bloody tiny it is! It's only 7kg and has really neat cast flanges which dont have any material where it doenst need to be. Ideal. The HKS 4-2-1 vs the FGK 4-1: The 4-1 isnt even as long as the 4-2 section on the HKS one haha. So I can have a nice transitioning bend to the under the car part, rather than my 2-1 section which has been chopped and angled about 10 degrees maybe, right by the flange. probably not ideal. The weight difference is massive though! I'm going to design my mounts etc so that I can fit both. So I can do some comparative nerding and see whats best. I'm thinking that perhaps with exhaust side VVTI now, some of the downsides of a 4-1 design (narrow high powerband) can be mitigated a little by moving the cam around. It will be interesting to see if any improvements to the powerband from the exhaust, happens because of better cylinder clearing of exhaust gas, or other mechanisms... If it's better clearing residual gas, and allowing more fresh air in, then I'll be able to quantify the differences in powerband from each simply by looking at which gives higher airflow numbers at full throttle, via the MAF sensor. I've never had any changes to the exhaust side while I've had this ECU so it'll be interesting to look at what changes. (or not)
1 point
-
Met a GC who works there and says he has a few spares lying around I could look at from his KE20 sedan.....score Then I got a phone call from another GC who found my wallet after it fell out of my pocket outside the bakery......right when I was looking for it in a panic......PHEW!
1 point
-
Yeah, tidy to the ability to revin then modify afterwards including the exact same plans as at the start of the thread + Y40 V8. I basically want it to be a nice 60s cruiser similar in awesome to the Mooneyes Crown.1 point
-
Had a company track day today, took the crown for a couple of laps, 100% just for a Photo Op. holy shit its terrible on track! cant corner at speed to save itself, might need a wheel alignment, but im pretty sure its just the chinese tires and nearly 2 ton weight! it did pull a (GPS indicated) touch under 170 km/h down the main straight which i thought was pretty epic for a 2ton brick with a soggy automatic. that little supercharged 1g can really pull! if it didnt over heat the brakes after two laps and wore a better set of tires, there would be more in it, but its unlikely to ever see track work again. especially once the mopar miata is running.1 point
-
Little bits and pieces starting to come together now on the 86 - painfully slow but any progress is good progress right? I've fitted the new water pump, cleaned up and painted the coolant bypass hard lines, picked up new radiator hoses and have the heater hoses ordered and on way. Front of the engine is coming along with the hall effect sensor on the crank mounted, still have the sensor for the intake cam pulley to do but hoping to knock that off next week. I've found and mounted up an ae85 radiator overflow/washer bottle in the front drivers corner of the engine bay as the ae86 one will melt over by the headers I think. Found a brake reservoir sock thing to cover tidy up the faded gayness. Am in the process of cleaning up and painting the brake lines so I can refit those, have some braided lines to go on. The drive shaft is now in with new bolts and a new gearbox rear seal. Tidied up and painted the strut brace mounting plates. Exhaust is almost done, just have about 200mm of pipe to do from the merge collector to the rest of the system to build. How its looking currently Also picked up this which is now fitted: And this which isn't fitted Pulleys are sitting on the cnc machine so will have them done next week all going well.1 point
-
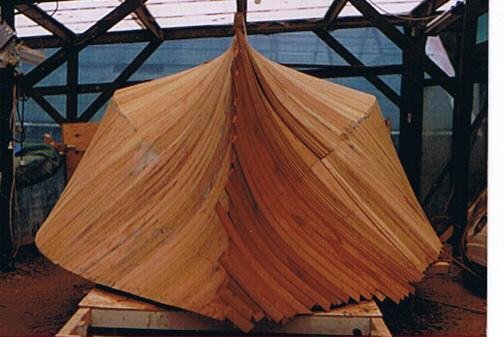
Completed the 57sc Sump Model. Moving onto the pattern making designs now. These should be a lot easier than the crankcase! Casting version with machine allowance and shrinkage compensation First cut of roughly what the sand cores would look like.1 point
-
Google translate says "Good Traffic". I concur and I thank you. /although I don't know why.... //blardy poms.1 point
-
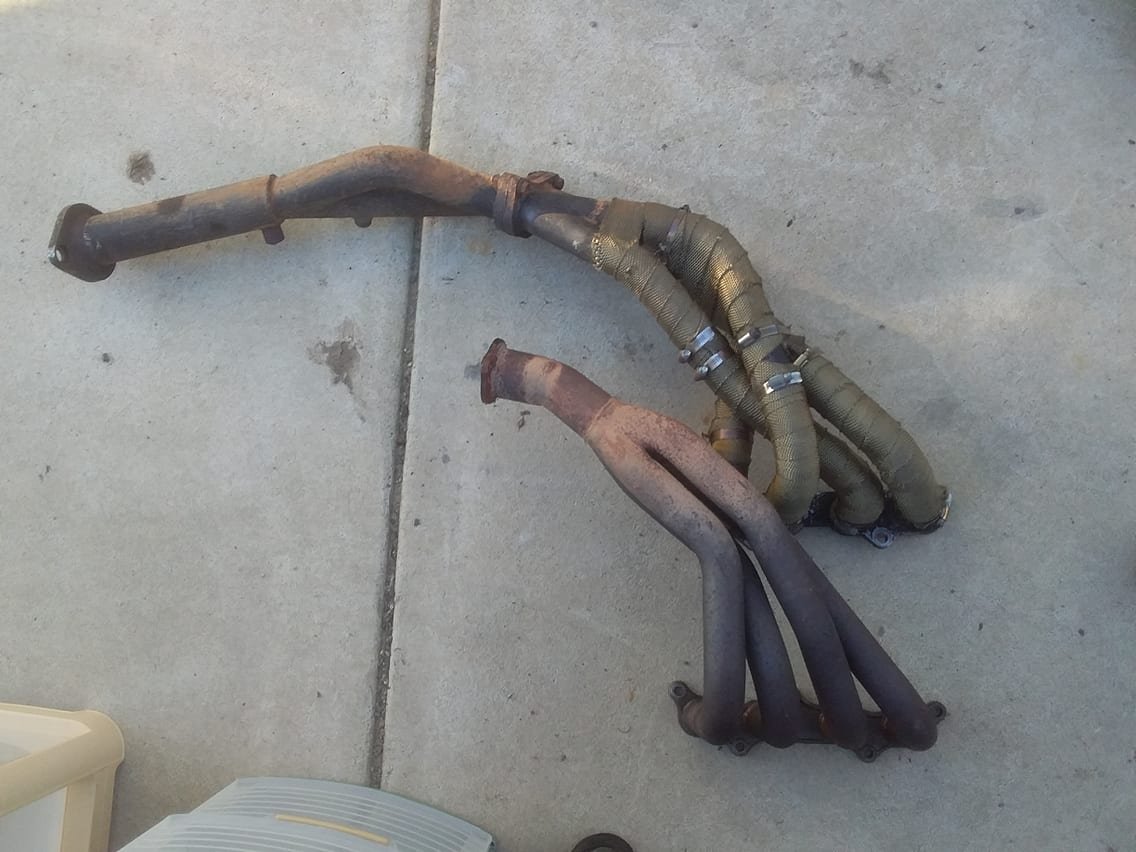
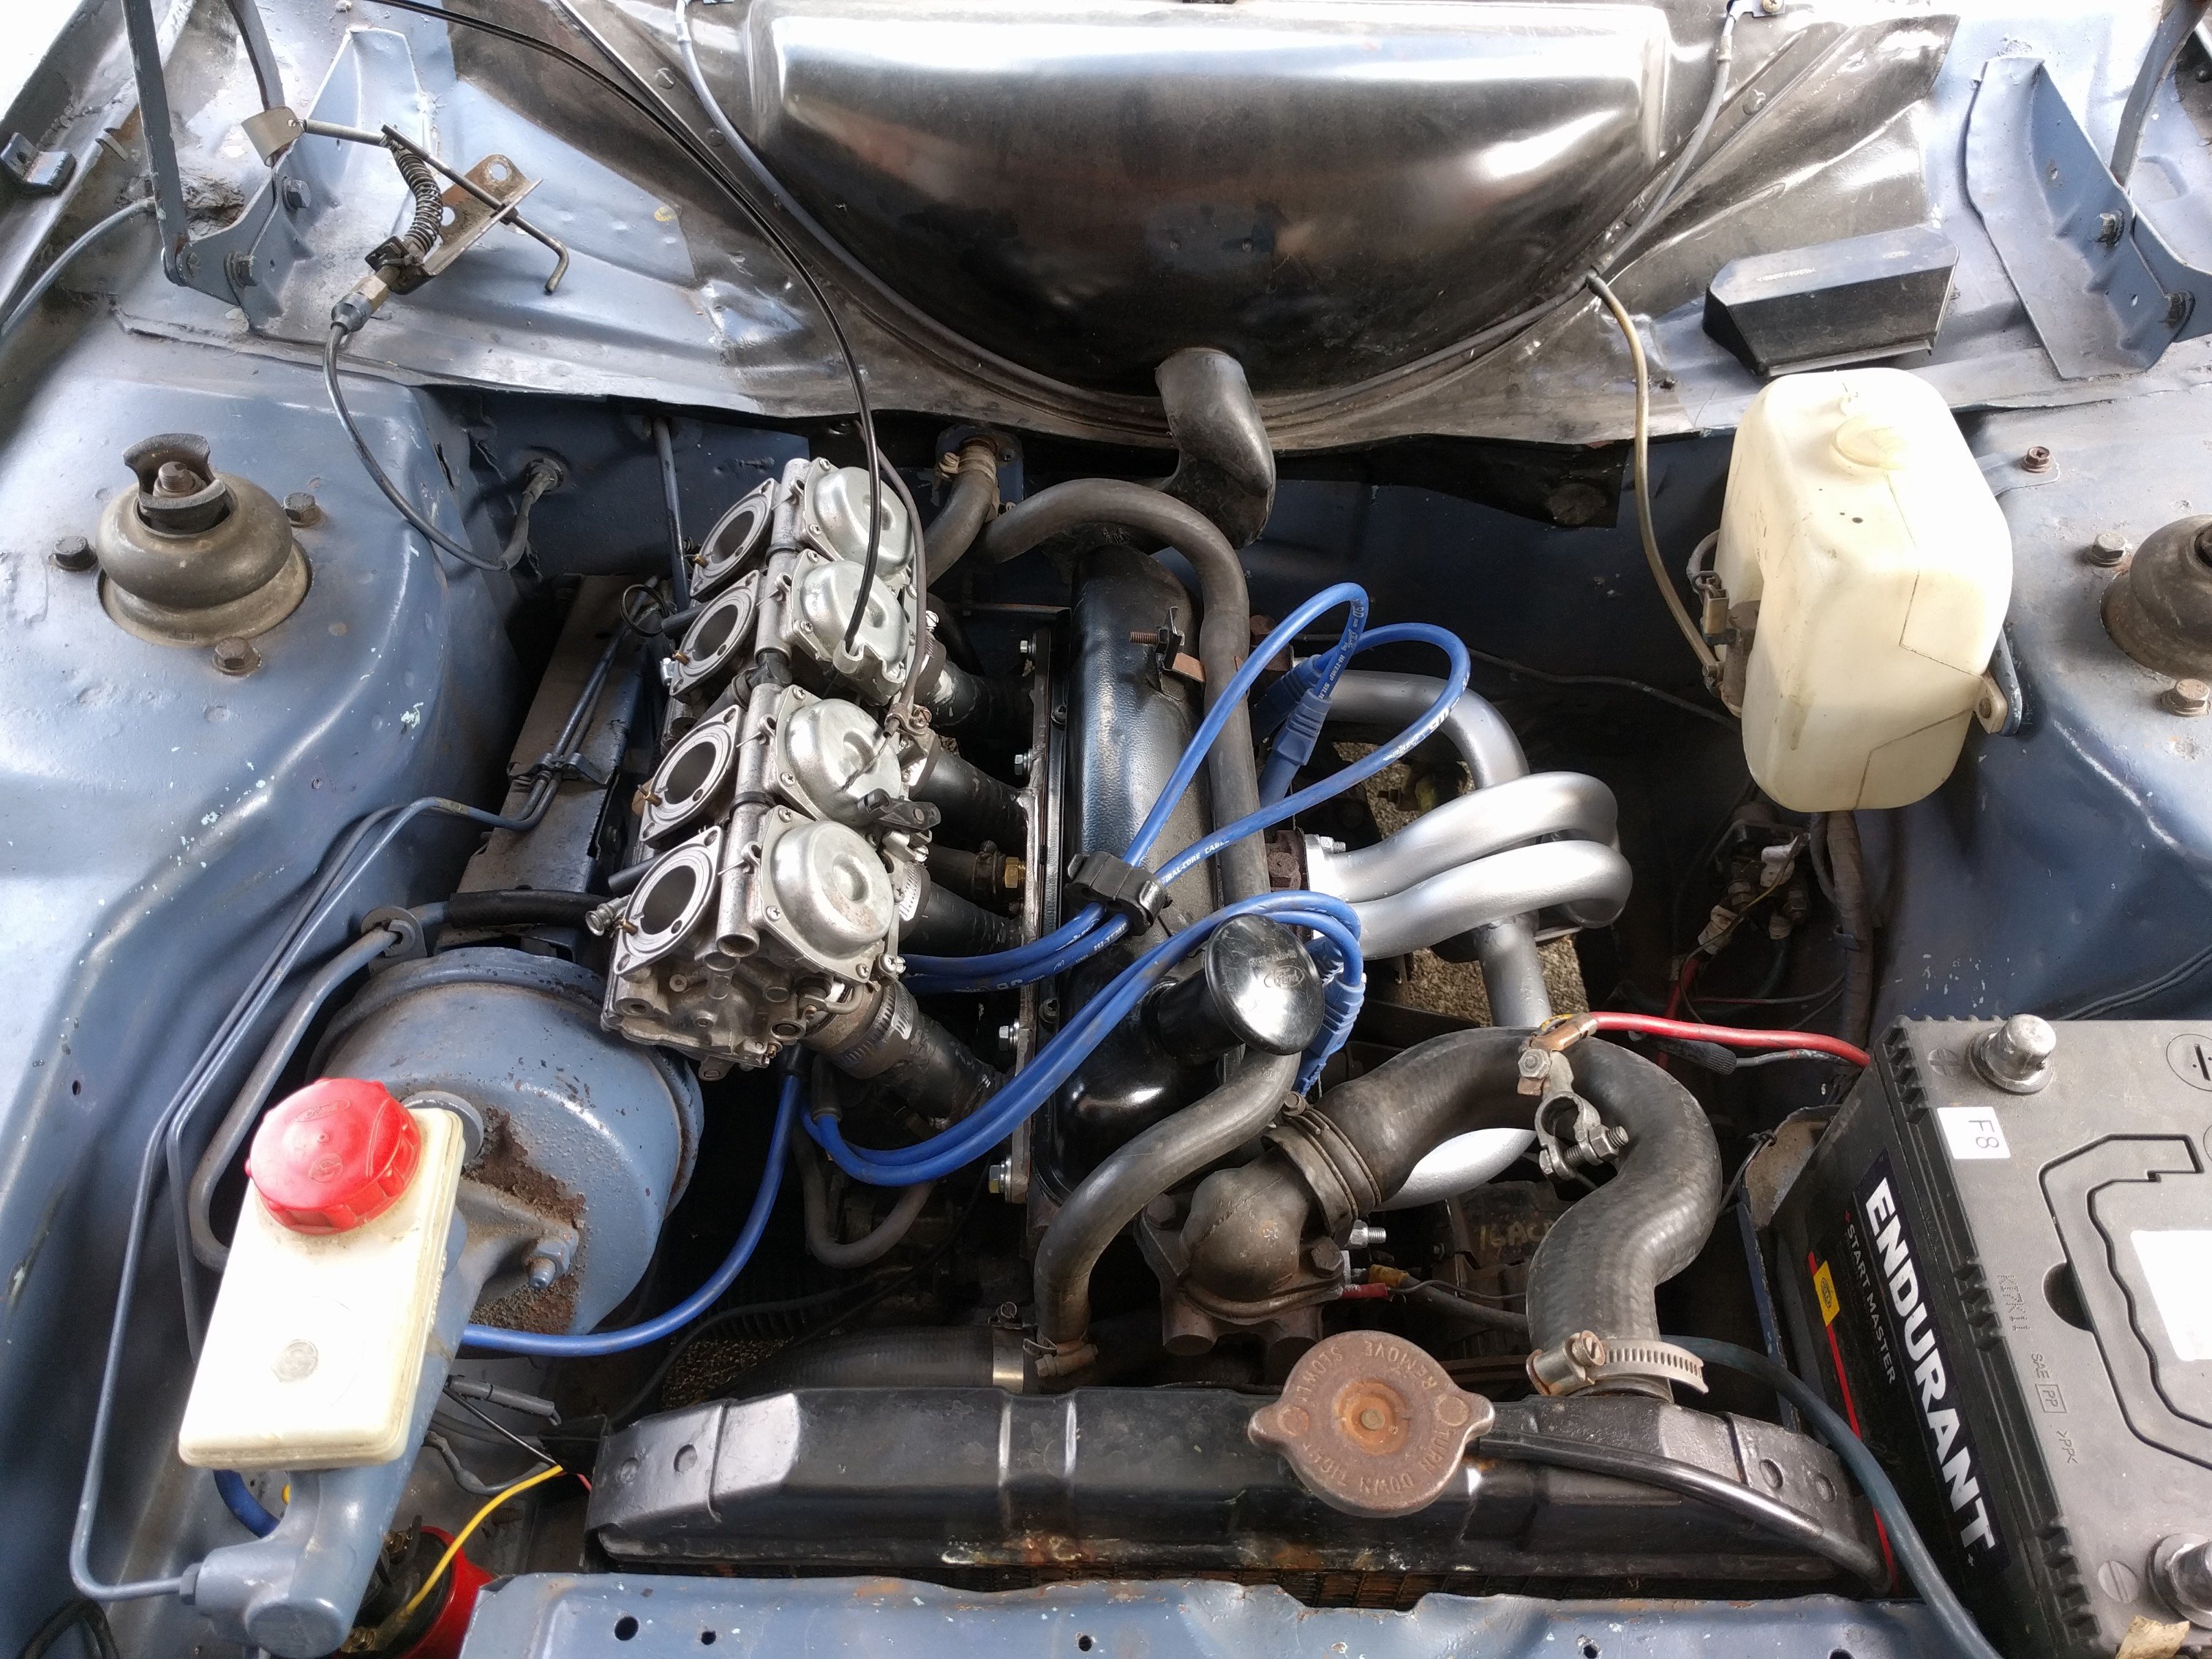
So I've been driving this around as normal. Failed the latest wof on an exhaust leak and a driveshaft uj. I ended up replacing most of the exhaust with extractors and a copy resonator. Pulled the gearbox, replaced the rear seal, changed the clutch plate and release bearing. Replaced the driveshaft with a spare . With that done I took it up to Napier over New year's. Got a bit warm on the way up,l. On the way home it developed a vacuum leak which I couldn't find. Wouldn't idle and would only run at high revs. Made for some frustrating driving. After a few hours of this it miraculously fixed itself. Still not sure what that was about. With it running so well I decided to do this.. ... Cbr600 carbs. I made up a manifold last year and this weekend thought I'd man up and actually have a go at installing it. Got all my vacuum, water and fuel lines sorted. Drilled mains to 1.3mm and blocked off the air correctors. Took vaccum lines off all four runners that run to a common line and go to the dizzy and brake booster. Running a mechanical fuel pump and currently have the pcv valve venting to the atmosphere, will fix this later. Got it installed this evening, crossed my fingers and turned the key. Once the fuel came through, it started and idled. Immediately fuel starting pissing out of a few places of the carbs, so I turned it off before I could give it some revs. I'm thinking a seal kit through the carbs. My other thought are the float bowls aren't sitting quite horizontal so I'll need to look at adjusting the float, or the other obvious fault could be non regulated fuel pressure. Will take the carbs of this week and see what's what before trying again.
1 point
-
Shit im slack Heres more build photos
1 point
-
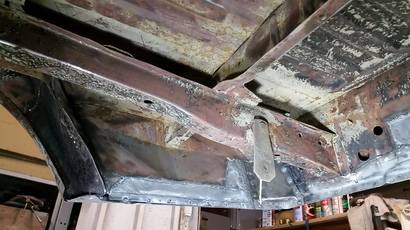
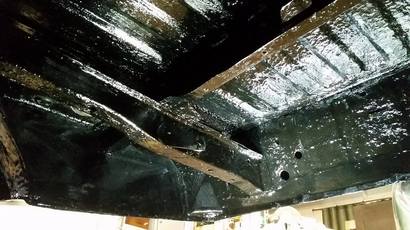
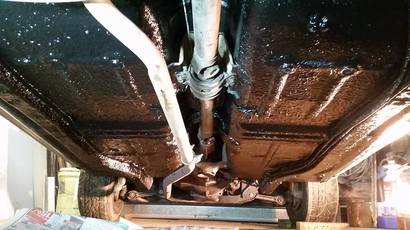
Once the necessary welds were cleaned, everything underneath from the firewall back was blown out, scrubbed, etched, tarred and painted. As always, all hollows were sprayed with 2pot epoxy stuff and then cavity wax. Have since put it back together and used it again. Come at me wof man. //oldschool.co.nz/index.php?/topic/52065-bmxnz11s-81-escort-van/
1 point
-
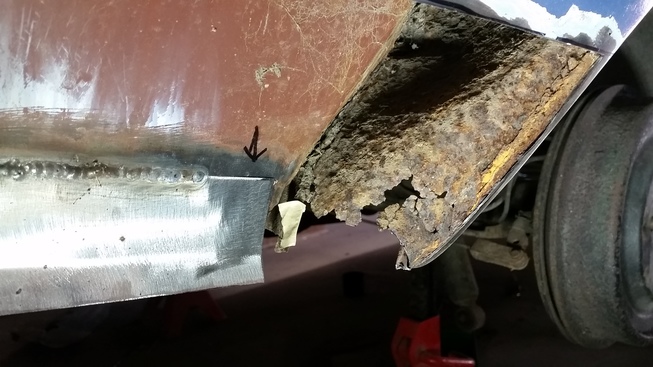
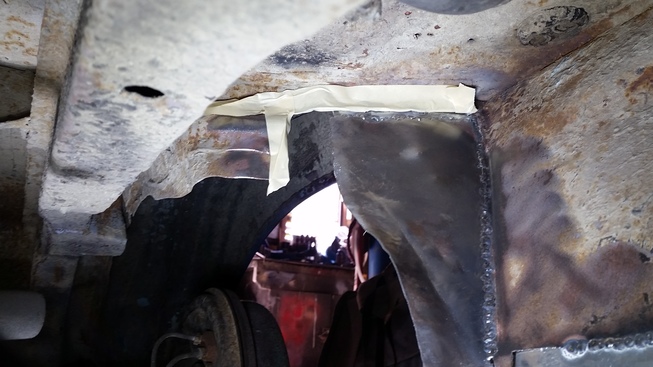
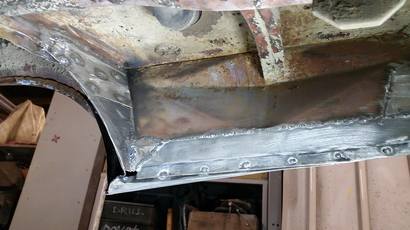
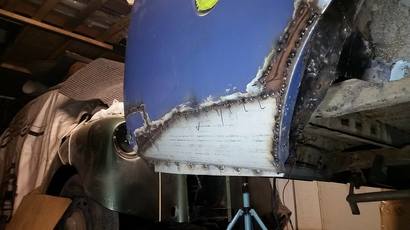
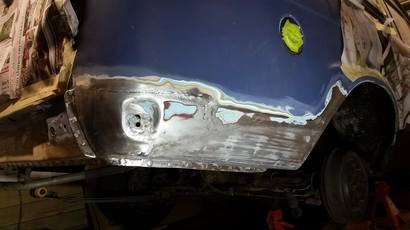
The wheel arch and surrounding area was pretty rotten where dirt and moisture had gotten between the layers. All 3 layers were cut out and replaced. I started with the middle section, the strengthening inner piece and then the outer wheel arch. Was a bit tricky to make as the original pieces were no good as templates. Once the structure had been put back into the van I did the outer quarter. I reused the bumper bracket area as this was fine, but remade the rest of the quarter with 4000 small folds in the folder.
1 point
-
This will probably be my last interesting post for a while. Will be moving to California in a month to build space stuff. Visa came through today after months of paperwork!So good! So making parts will slow down, but hopefully CAD work will speed up! Anyway, these are spring hangers and a trunion hanger CNCd from 4140. Having a mill in your shed is key to building shiny stuff!1 point


_sedan_(23230030334)(1).thumb.jpg.34d765361d66c78db614bae6ea2c156a.jpg)


.JPG.7088ba6fa7cfaef5bb1de64fe36dc3a7.JPG)
.JPG.25c6894ce27999d6c3d77eee3f811bc2.JPG)
.JPG.665778e5bebbfee26ffa5985082cba2b.JPG)
.JPG.a861dc58ccceaf8ce4540642dddfebe9.JPG)

This leaderboard is set to Auckland/GMT+12:00