
Leaderboard


Popular Content
Showing content with the highest reputation on 06/12/19 in all areas
-
It will sort of have the same style tray, but not the roll bars as this will make it way harder to get stuff actually on to the deck. Mostly cos I have a fucking great crane now;10 points
-
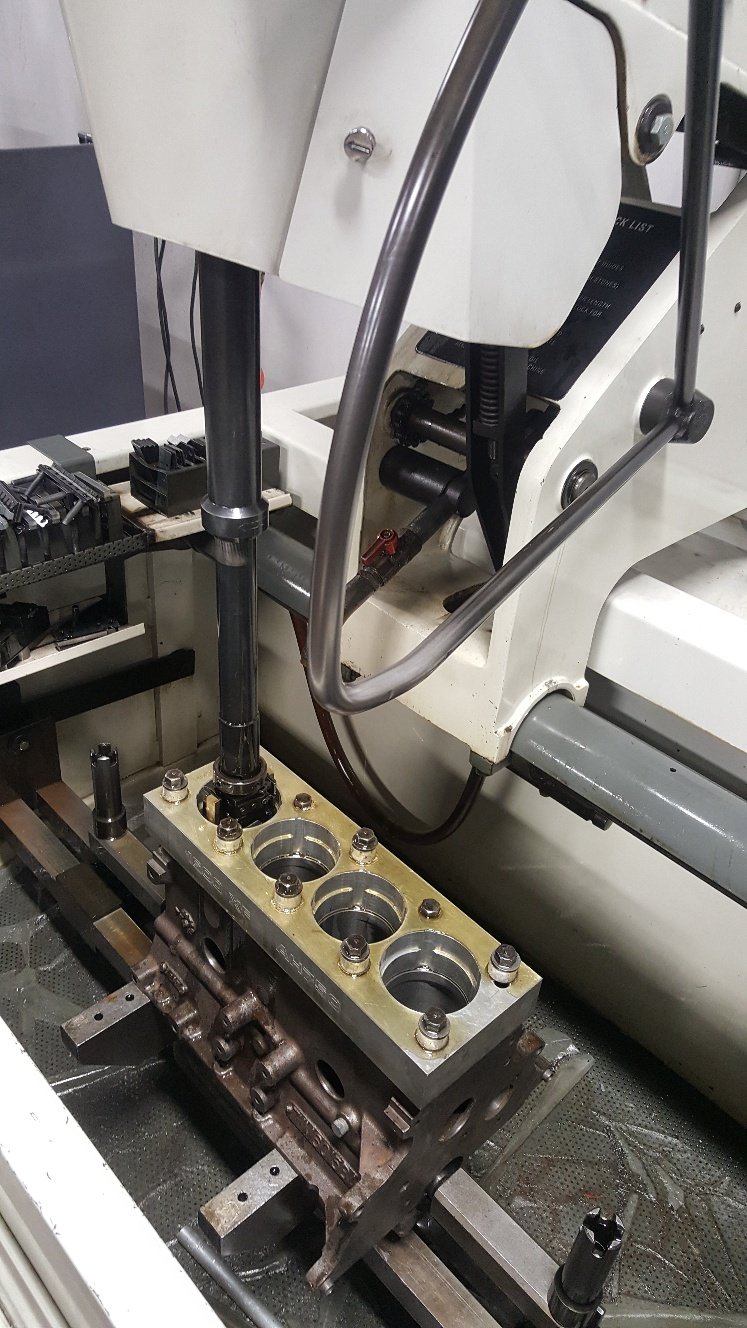
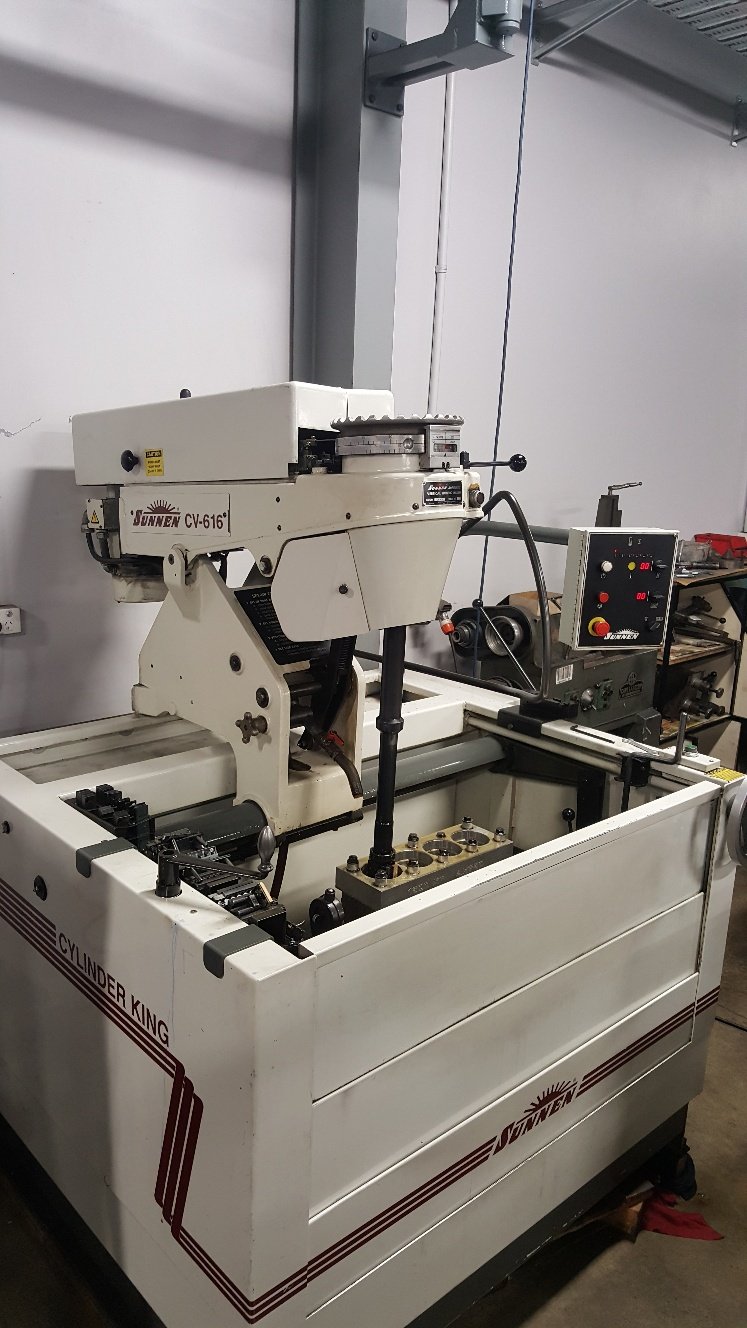
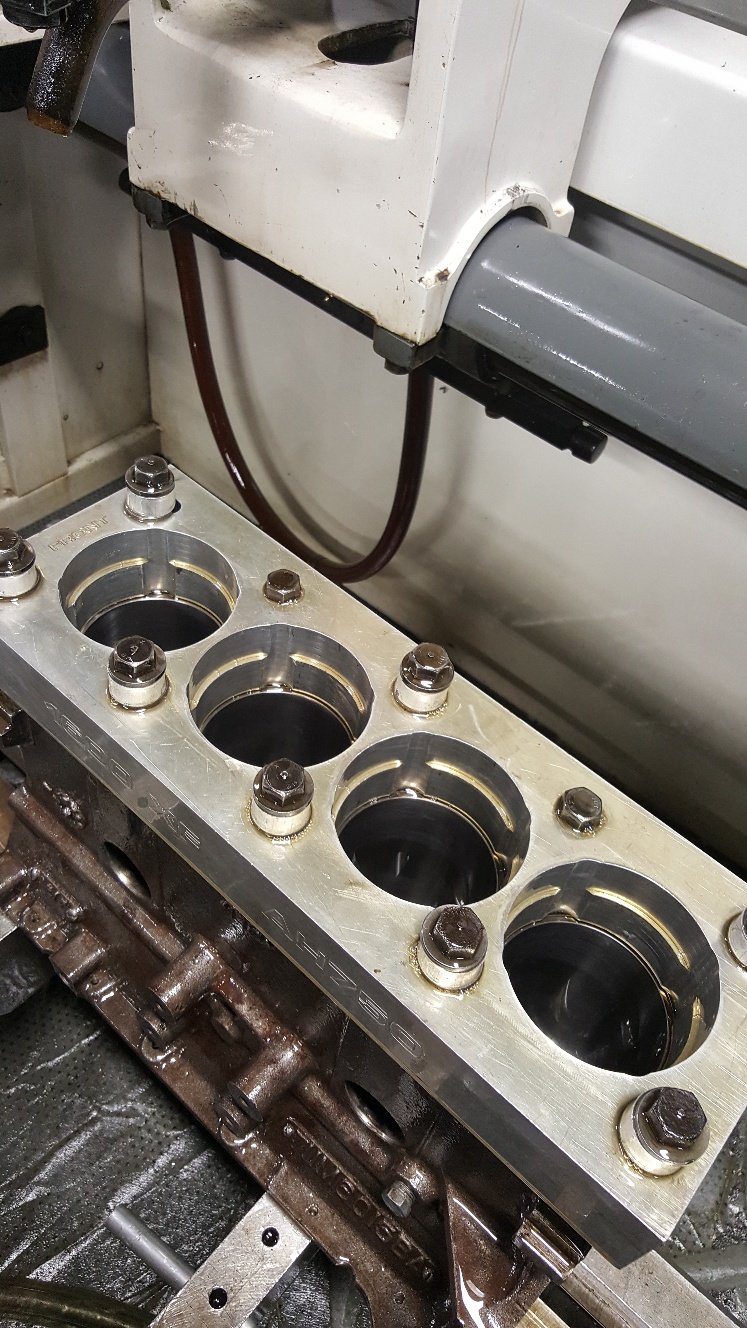
So i fitted the torque plate for the honing process. We only have torque plates for certain engine's. But lucky Ford xflow's are in formula Ford's so the boss saw the need to get one made. The torque plate allows you to simulate the tension of the cylinder being fitted to the block while honing. Some blocks move considerably from the head bolts being torqued up. This can distort the bore, sometimes up to 2 thou on various blocks. So it's like honing them in there assembled running state. I have heard stories of shops honing with hot coolant running through the water jackets to simulate total running conditions. All in the name of perfect ring seal you need a perfectly round and straight cylinder. We leave 4 thou of material to hone out as this gives us a good base to start achieving good rk rvk and there's another value aswell but I can't think of it right now. But we start off honing with a course stone which gives us a deep groves and removes material quickly. Once we've removed 3 thou we change stones to a smoother grit this removes the tops from the course stones while taking more material out. I'm also happy say I have removed all the bore wear marks after removing 2 thou of material. Now we move to a finer stone again same thing applies. Each different grade of stone removes material in different ways. Some stones will take more out of the bottom middle or top of the bore, so you have to measure the bore to make sure you're keeping it straight. The stones also react to load. Theres a round handle onto of the machine that applies load to the stones in the bore. If you wind to much load up it normally takes more material from the middle of the bore as there's no real strength there. Extra load can also create heat which will give you a false reading of size from the material expanding. Once we are at finish size we have what we call plateau stones. These are 800grit they don't really take much material out but smooth the tops off from the previous set of stones. Then we move to our cork stones. Which look nothing like cork. These are really good a removing left over honing material out of the cross hatch. We only give the bore a couple of strokes with these. Once a year we clean the machine out. It normally has about two 20 liter buckets fill of cast iron sludge sitting in the bottom of it. This machine runs 200 liters of honing fluid. Which is great as one of the jobs of the fluid is to keep the block cool as well as wash the honed material away from the honing head while honing. A drum of honing fluid isn't cheap at $2500 Then there's all the stones we burn through. So the honing process has one the highest consumables cost in the workshop per year. From start to finish it can take a hour to two hours to hone a block after a rebore. A deglaze or what we call a rering hone is normally about three quaters to a hour.
 6 points
 -
I put a piece of black tape down the middle of mine at wof time, old mate didn't see the joke5 points
-
So my engine turned up from Japan last week, assembled it all on Sunday and last night acheived its first start5 points
-
BORT REPELLENT??5 points
-
id be more concerned with purchasing body armour tbh5 points
-
Really fun weekend at the Kaspa Transmissions CAR-nival. It's a 3 day track meet with cruising, drags, drift, burnouts and racing. The drag racing was super fun. The car was hooking up perfectly and I managed to win the drag racing tournament in the Naturally Aspirated class!! I was up against some tough competition in the form of a 300KW Holden Commodore, and 396ci big block Holden Premier and another big block HQ Holden. I also went up against a 323, Intgra Type R and an RX7 but that wasn't really a fair fight. I was quite surprised that I managed to beat the big block chevs, I guess it was just down to how light my wagon is and how well it hooks up. Here is a video of all of my runs, I went undefeated 7-0 nd they had a sweet as trophy, I also won best engine bay but they didn't have the trophy there so they will send it out to me. Had a real blast hooning around the track. Went a bit too hard on the first day and wore out my brake pads. It was a total nightmare trying to find some Wilwood race pads at 4:30pm on a Friday in Taupo. None of the brake shops down there had any so I had to call around my friends and found one of them who had a close enough match, so I had to drive out to his place with pretty much no brakes and swap some pads over. In the morning I had to go get the rotors skimmed. The petrol stations loved me down there. The Avenger is pretty good on gas when you are on the road, but it chews through the gas on the track. Discuss4 points
-
Look at it the other way around, 170 for a bumper and valance, and only 14 quid delivery, bargain!4 points
-
Also I don't want to4 points
-
fuck me, so they've done the compliance check all ready. failed on park brake warning light not working ( i stupidly forgot to plug it in) and rear brake imbalance. all the rear brakes are new so i should be able to fuck around with adjusters and sort it out. that's it. i am fucking stoked. i really needed some good news and this will do nicely. the other thing that happened is that Alex who runs Western compliance tried to buy the car off me, which is a complement i suppose. so ill go pick it up Wednesday night and take it from there.4 points
-
Completed the 57sc Sump Model. Moving onto the pattern making designs now. These should be a lot easier than the crankcase! Casting version with machine allowance and shrinkage compensation First cut of roughly what the sand cores would look like.4 points
-
https://www.nzta.govt.nz/assets/resources/factsheets/27/docs/27-exempt.pdf Using an unregistered vehicle on any other road Using an unregistered vehicle on any road other than a private road is illegal. However, if you’re fined, you may have a defence. It’s your responsibility to prove that you’re entitled to use an unregistered vehicle in that situation. You’ll have a defence if the vehicle is: edit snip • a motor vehicle normally propelled by mechanical power that is being temporarily towed (one time, not regularly) without the use of its own power3 points
-
couple of jobs going at rocketlabs for composites techs etc based in auckland https://www.rocketlabusa.com/careers/positions/3 points
-
Technically would have to be trailered.3 points
-
I'll just leave everything to the last minute and figure it out the week before. Got three bikes to build so one should be ready ish. All will be a bit shit3 points
-
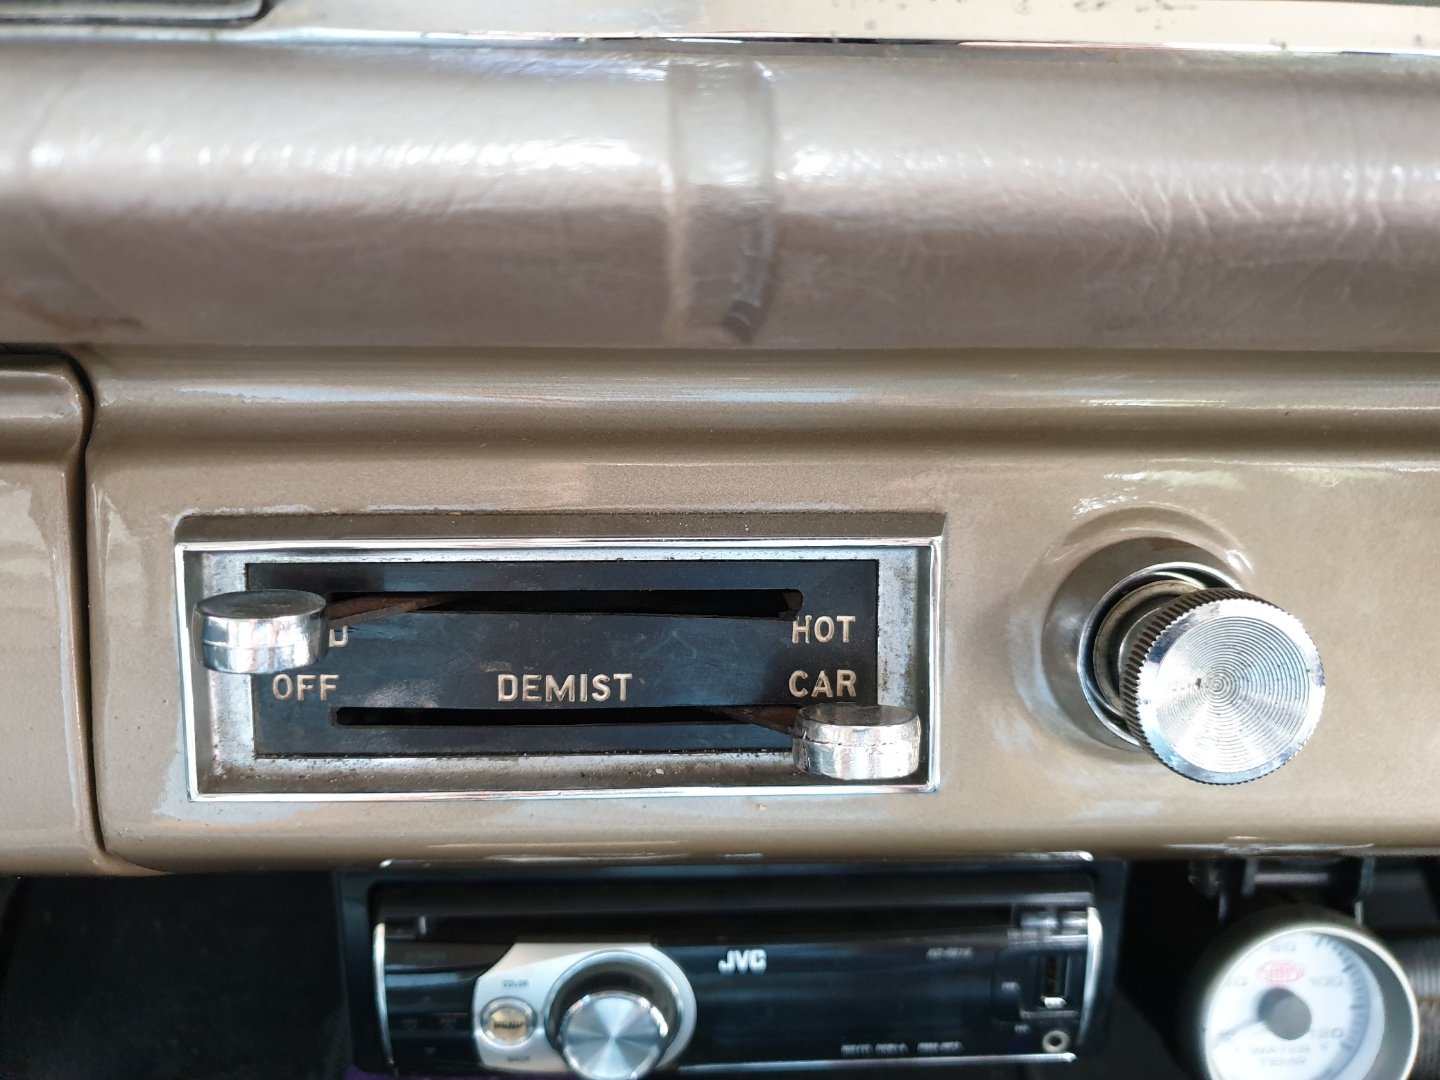
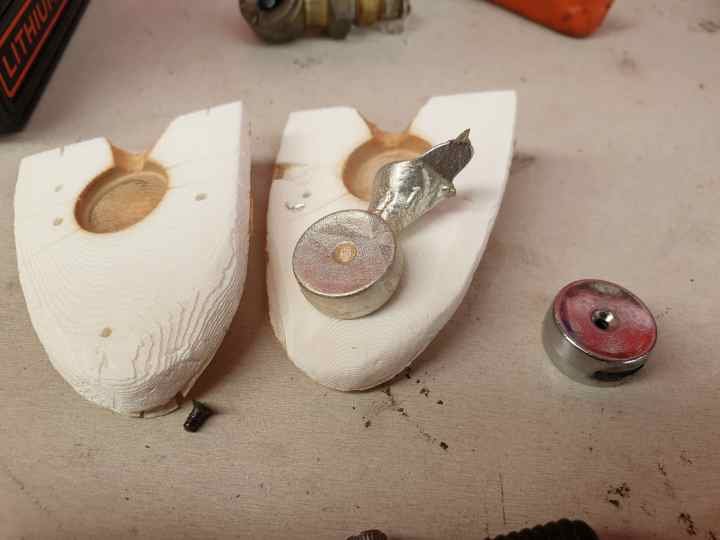
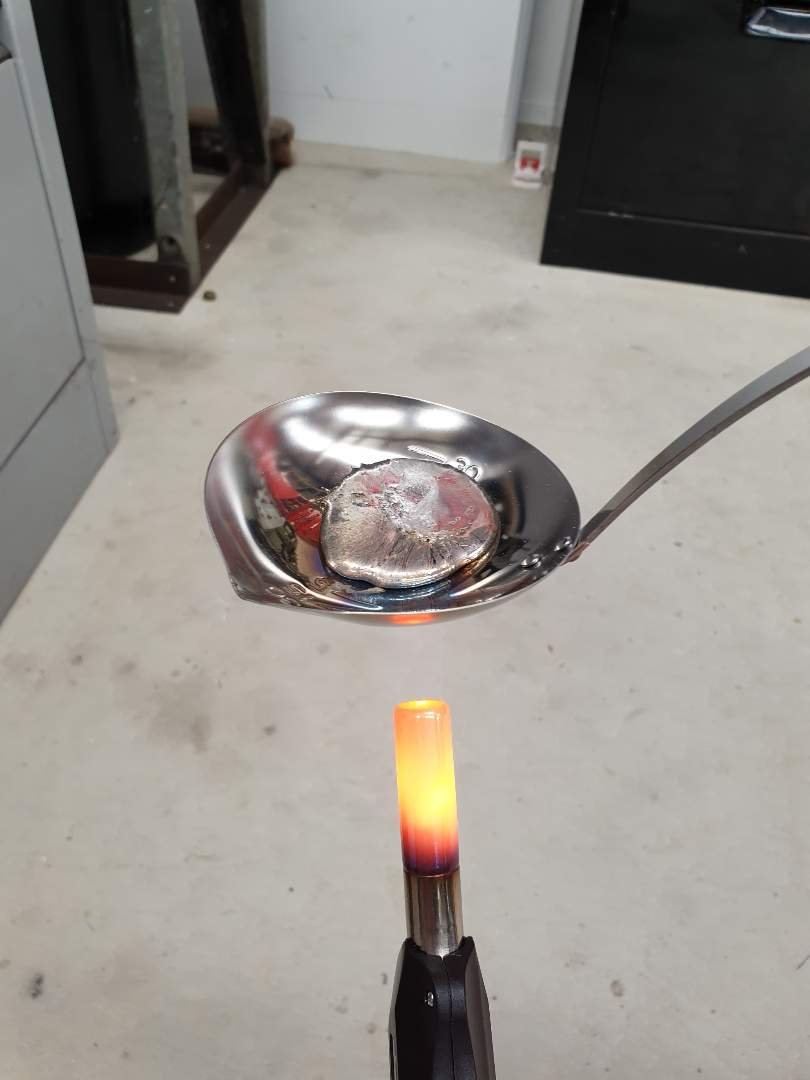
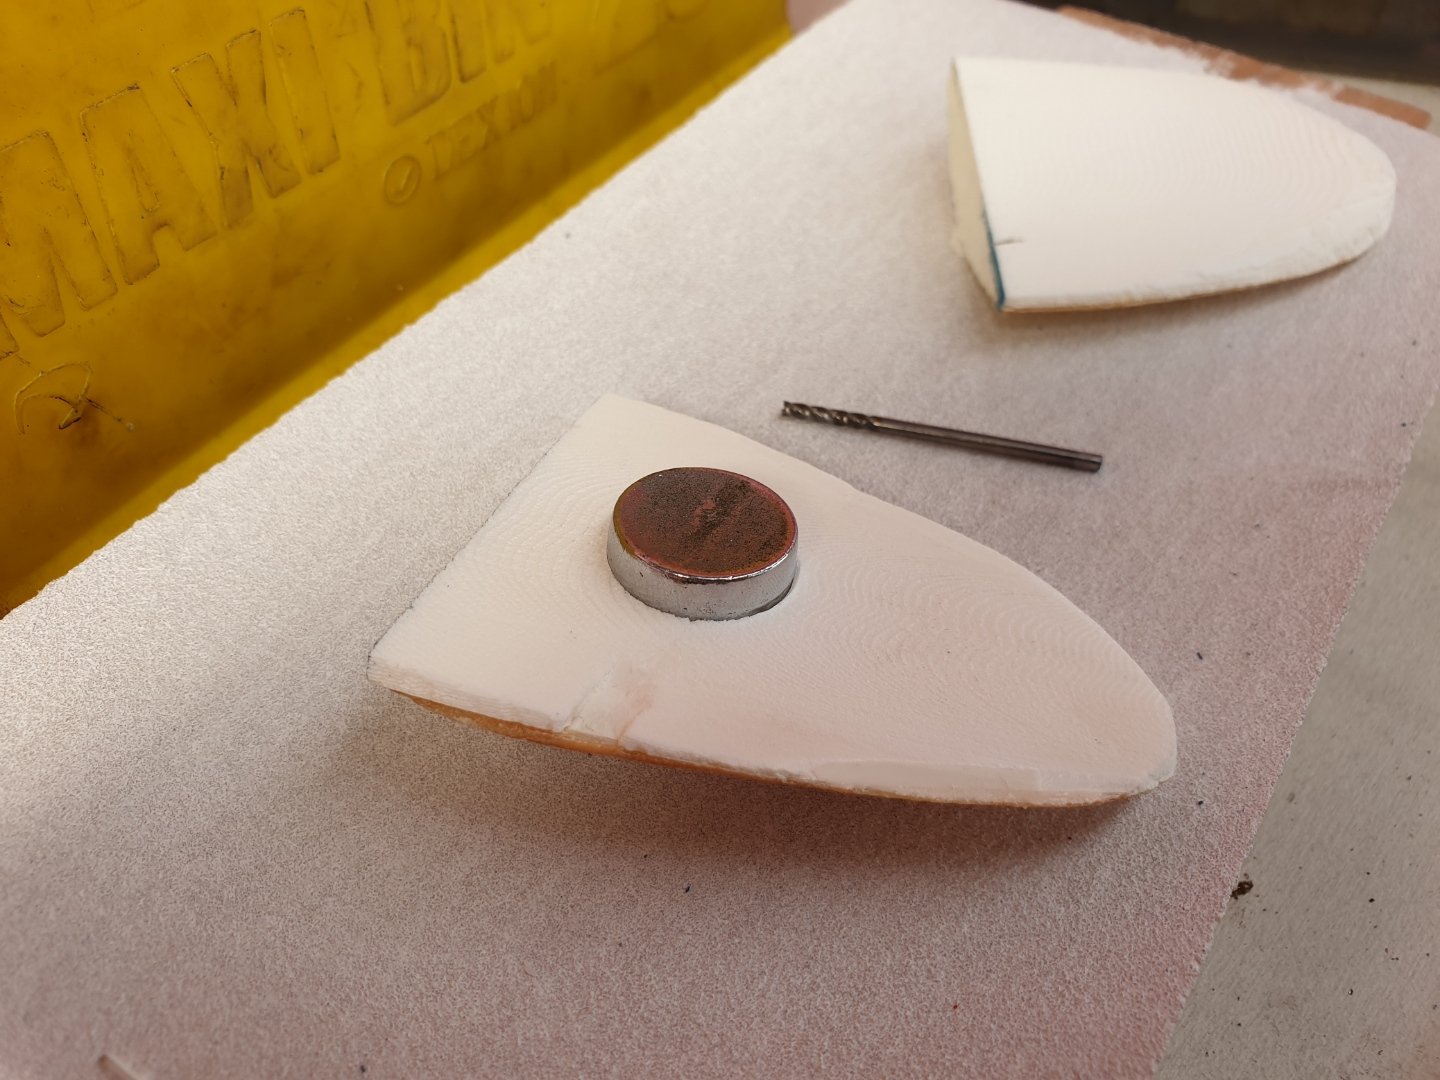
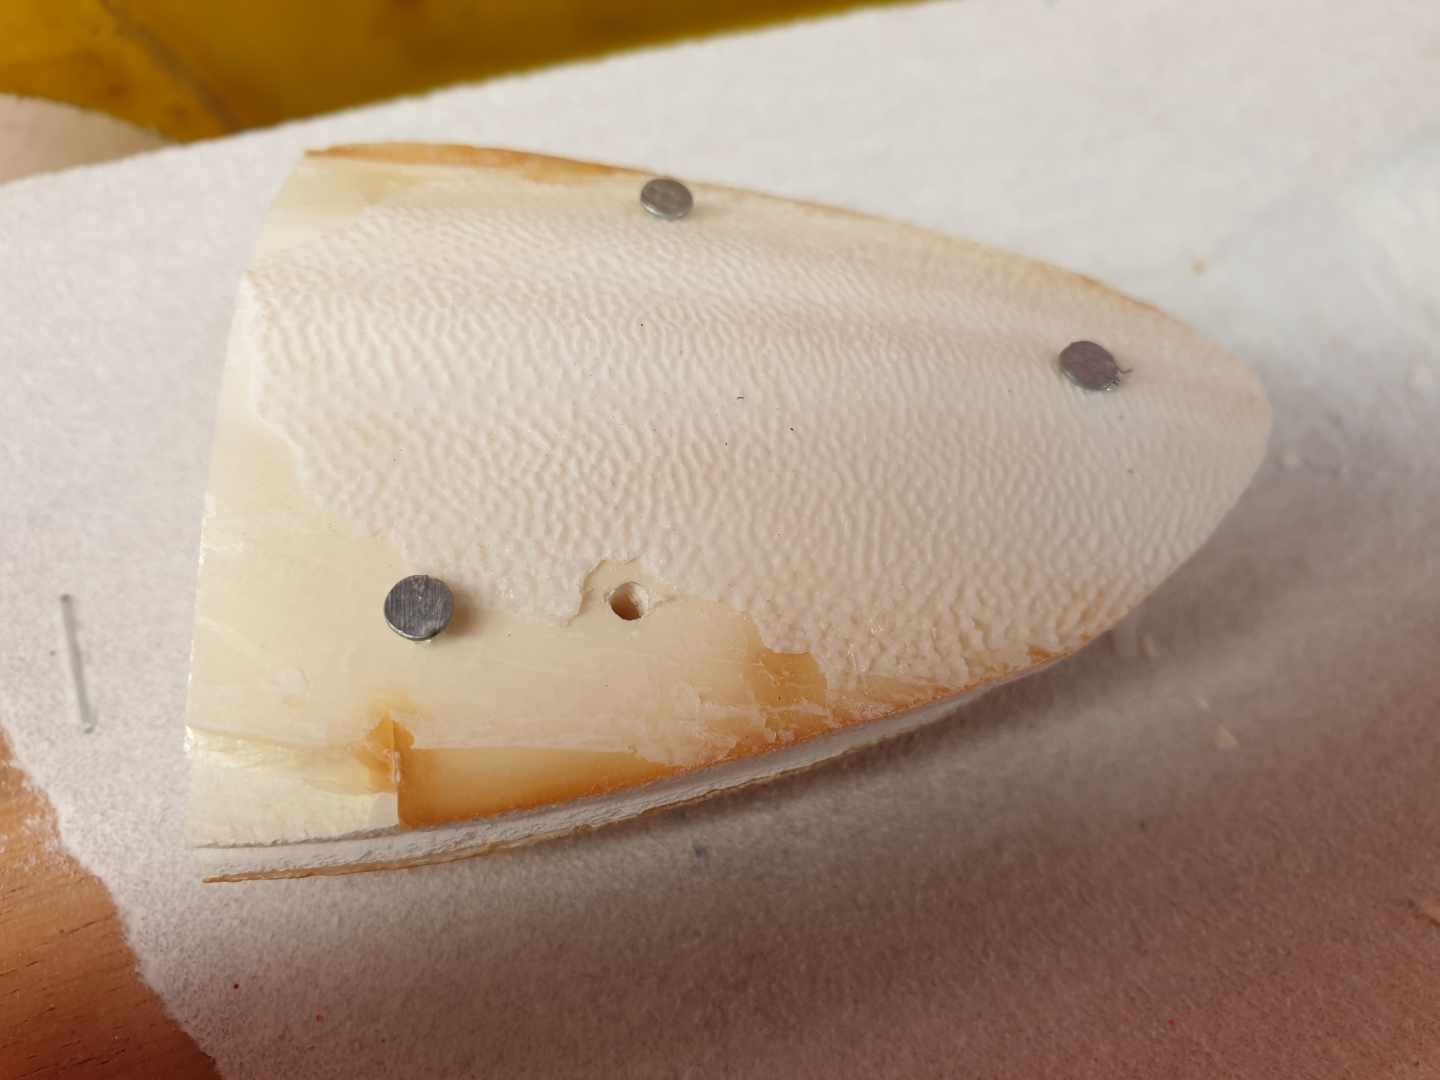
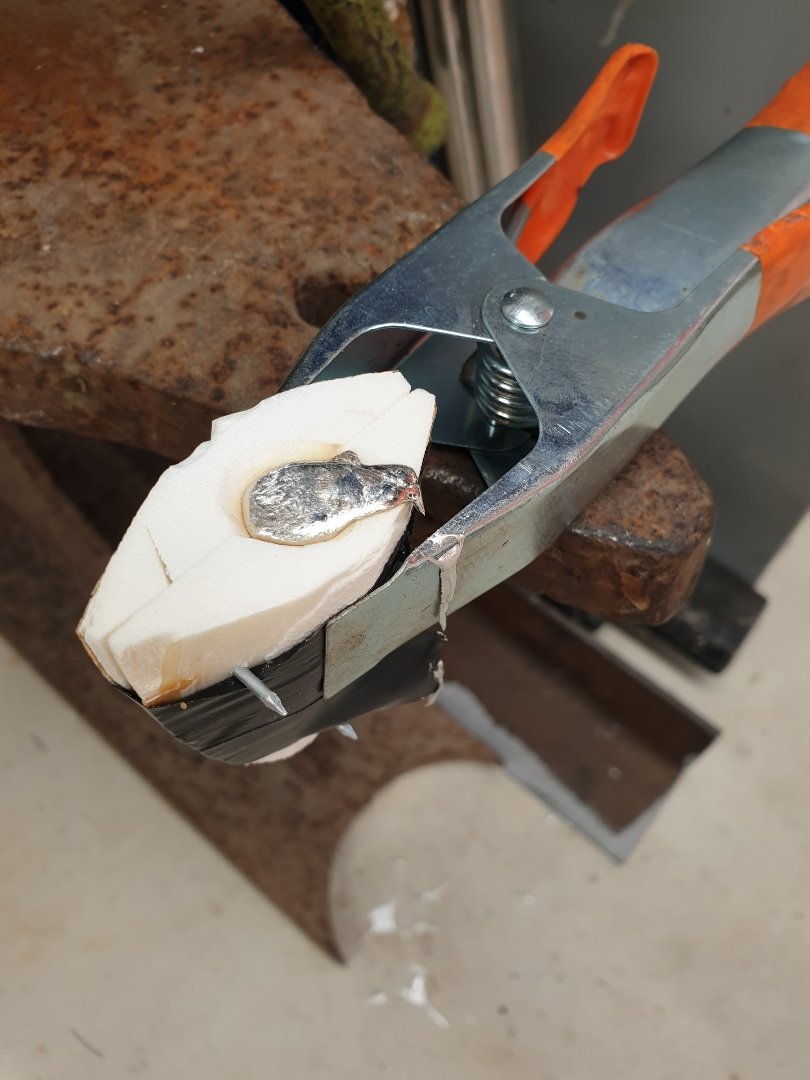
My impala was missing a knob. No one likes being knobless, so I thought I'd treat it to a brandnew knob! A Google search or two later and I was shocked at how expensive it was going to be, $30USD + $25USD postage!!! WTF!!! That's like $100DNZ. So I thought about turning one up one the lathe, but it would've looked too perfect. Then I remembered casting metal for small projects about 20 years ago when I was a student. So I thought I'd give it a go. I really wanted to capture the imperfections of the original. Original old parts have a certain amount of soul to them...new parts often don't. So here's how it went down: DIY sanding board. $2 cuttlefish from a pet store. It's that white shit you'll see budgies pecking at inside their prison cage of broken dreams and mental hell. I cut it into two halves, and then sanded each half flat. Next push in your original work piece as much as possible. Take it out, scrape away some of the indentation...repeat...repeat...repeat, until it's nicely sitting halfway in. Now match the otherside the same way. You'll need to cut a pouring funnel into the top, to get the metal in. And hard to see, but I cut 4 very small air vents on each half, to let the air out. Then I pinned the mould together to keep the alignment of the two halves squared away. Time to heat up metal. I'm using lead free pewter, same as jewelers use to make rings and necklaces etc. $14/100g online from a craft shop in Auckland. I only needed about 20g...but at that price, I thought I may make something else later? Melting it is as easy as it looks. A $2 shop ladle that I tweaked with a panel hammer to put a pouring spout into. And a blow tourch. Pouring the mould. Opening for the moment of truth...fuck yeah, nailed it first pop!!! Yeeee-fucking-ha!!! A quick tidy up, dremel a slot, buff up on the polishing wheel, scotchbright to dull it down a little to match the original patina...booyah! And what it's all about. Installed in the car. It competes me! I'm so happy with how its turned out.
2 points
-
How about a genuine JDM tsurikawa ring? You could start up a welsh branch of the yakuza.2 points
-
I swore off them! Do they still make them? Idk? I got this because it was dirt cheap and brand new. 3 year wof and flick2 points
-
You're describing a work lamp. It can be mounted in any way you want, as long as it isn't switched by the same switch as any compulsory lamp. I'm also pretty sure you aren't supposed to use work lamps on the road2 points
-
Ha! I bought a jacket with inbuilt armour a few weeks ago.2 points
-
Mate bought a TT225 the other day so thought I'd do a bit more on this, finished trueing up the front wheel, then tidied bench... Engine was a greasy mess so I dragged it out in the sun and spray degreased/water blasted the crud off... Need to re-wrap the wires and will clean up cases and throw some paint on when it's warm enough...2 points
-
Pretty sure iv been told this by woman.2 points
-
I was just checking the pics on rockauto and US spec Hilux images and had decided to look at it exactly like you said So I'm ordering them right now, delivery June 19th. £14 to ship from the states. Bargain. /I'll be round to yours if they don't fit.2 points
-
I know, it's fucking mint.2 points
-
Cheers guys! Will get my A into G and find some accom eh. Have purchased myself Shakotoms F50 to build something a little more gravel appropriate too - best be pulling my finger out!!2 points
-
Konnichiwa. It's been a while. I've been using it quite a bit when the sun shines, but was aware that the worn water pump & tired brakes weren't going to mend themselves anytime soon. Thanks to wise words from @kyteler @sheepers @Spencer I've bought a pile of stuff off that internet... Calipers look close enough though I'll probably need too make up some pipes. I saw on 'Rubbersoul dot pricey' that they were offering Datto 510 wheel cylinders as an option for the hako so I got a pair off rockauto and they seem the same. I got the 510 shoes as well, they look to be the same from what I could gather but we'll see. Bit of a gamble but I can always sell them on. So once the weather chirps up a bit I'll get it on stands and crack on. Need to adjust the valves, it's a little rattly but nothing serious. Gonna do something with the cam cover while I'm in there, either polish it up or black crackle finish. Any thoughts gladly received, except a Japanese rising sun Kyokujitsu-ki thingy, thanks. Other little worry is the diff. Bit loose and clonky. Gonna have a good look at it see what's what. May well investigate the Subaru R180 modification, or see if I can get an LSD for mine. That's it for now, hopefully some progress soon.
2 points
-
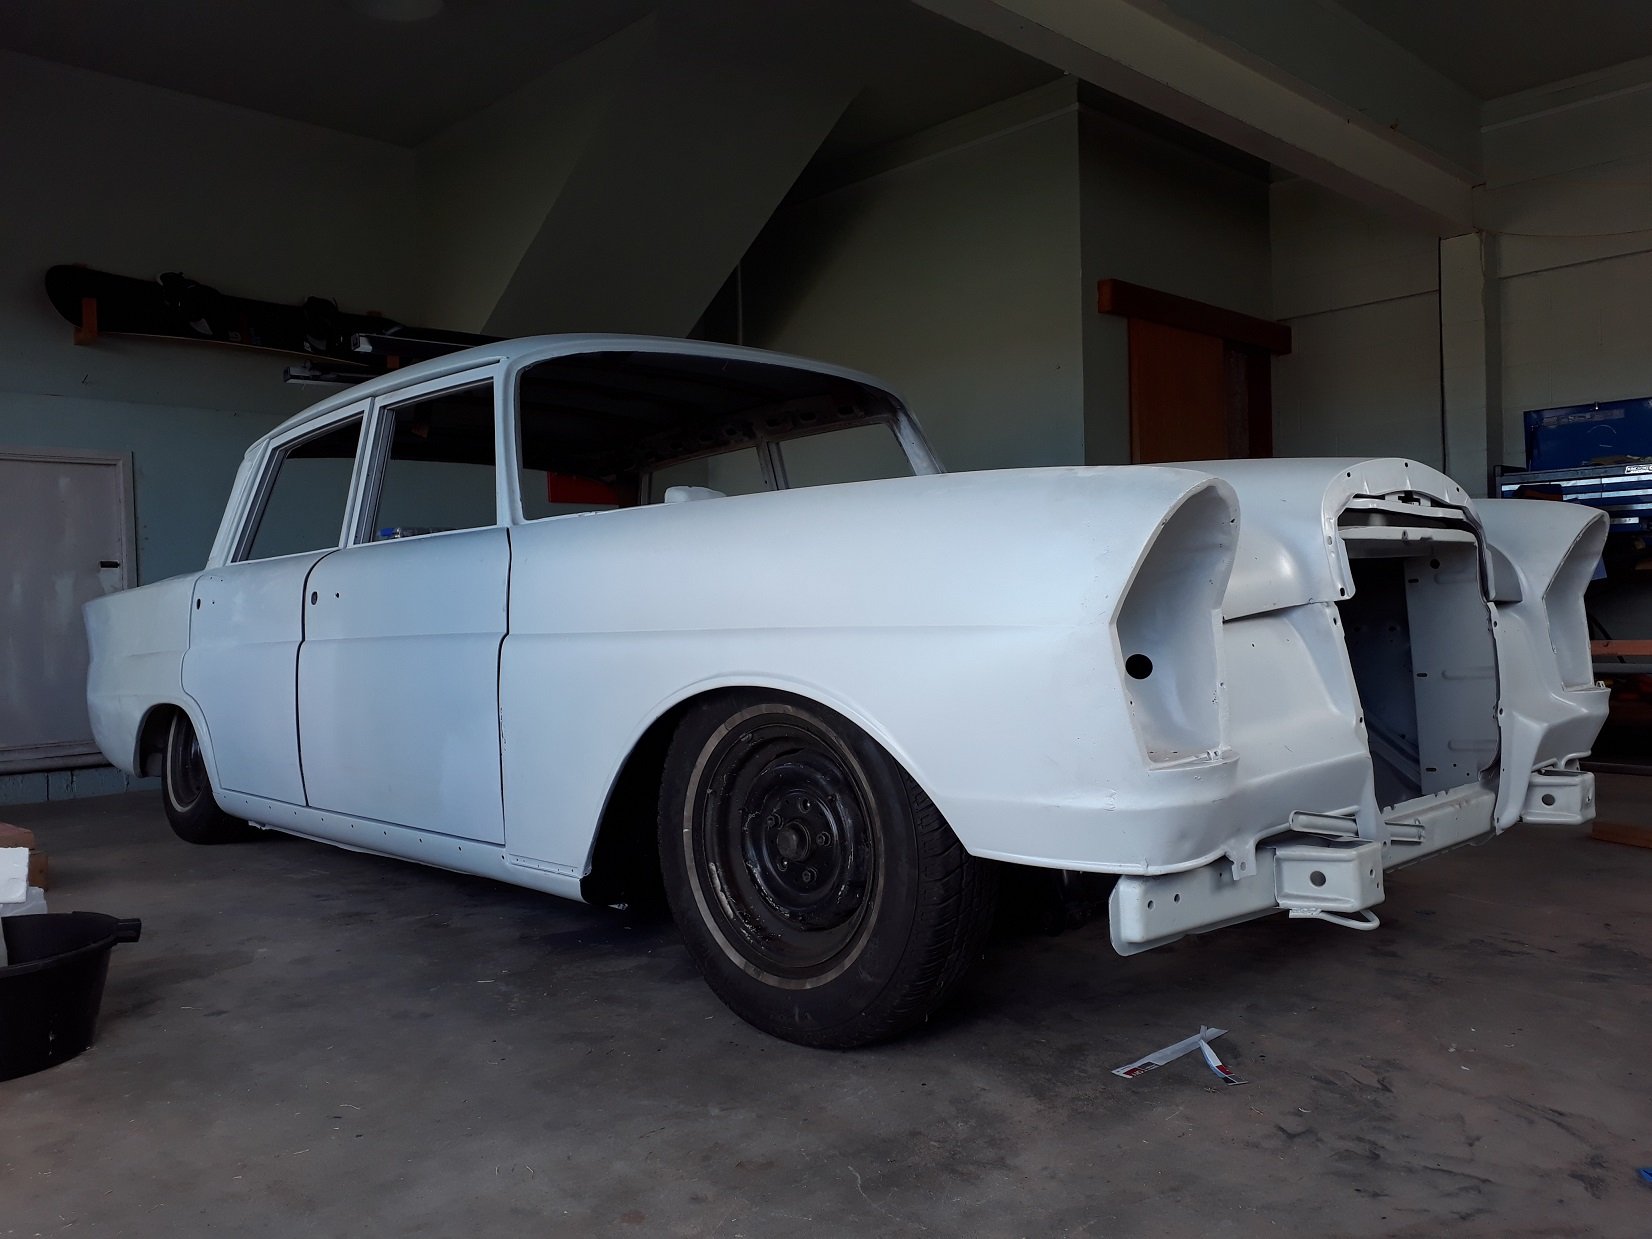
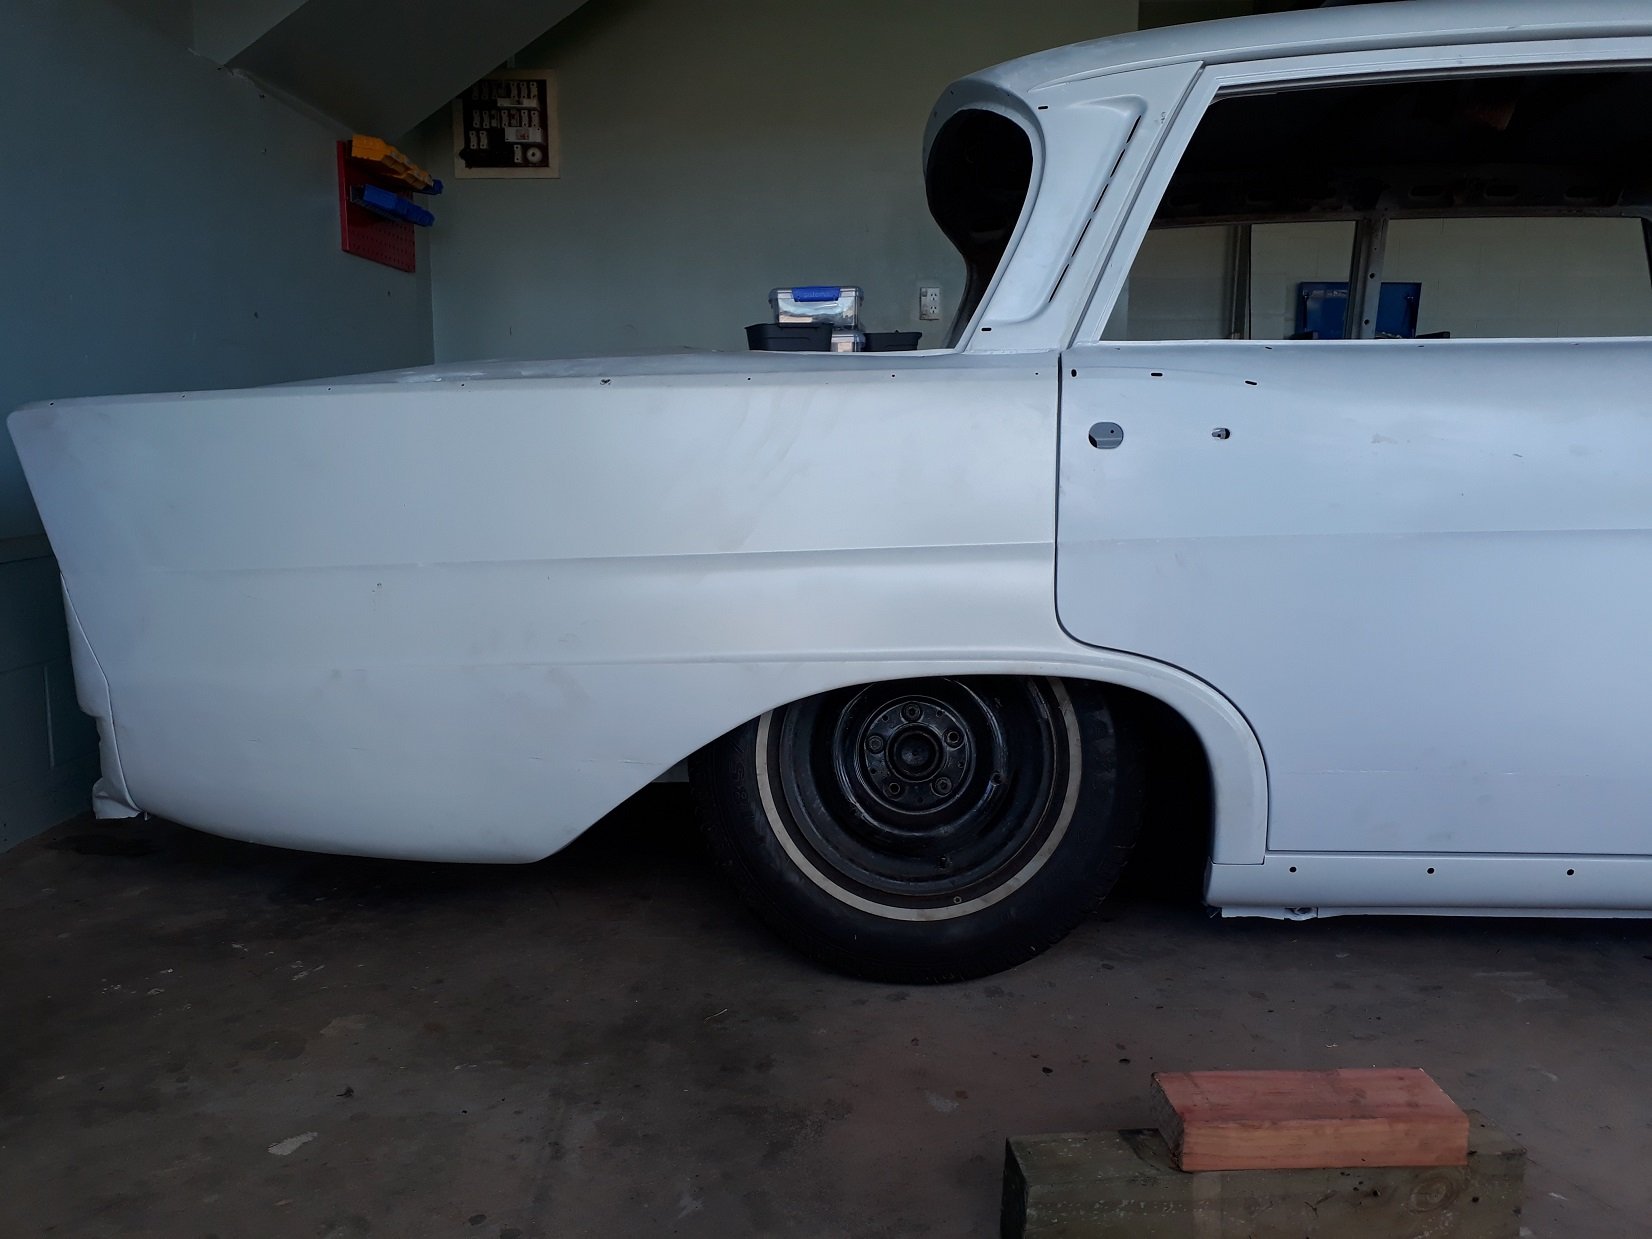
Small update. Have rebuilt the front Callipers, new pistons and seals. And all painted up! Also pulled the PS pump apart ready to take to work to clean up then I’ll re-assemble and modify the pump to reduce the amount of assistance (common modification over in the states as it’s way too light at higher speeds) Again it feels good to be putting parts back together also spoke to a local sand blaster and they reckon a couple of hours should get the underbody all finished up so I’m going to make a couple of frames so I can lower the car onto a trailer and take it to be blasted soon.2 points
-
This kid is a legend2 points
-
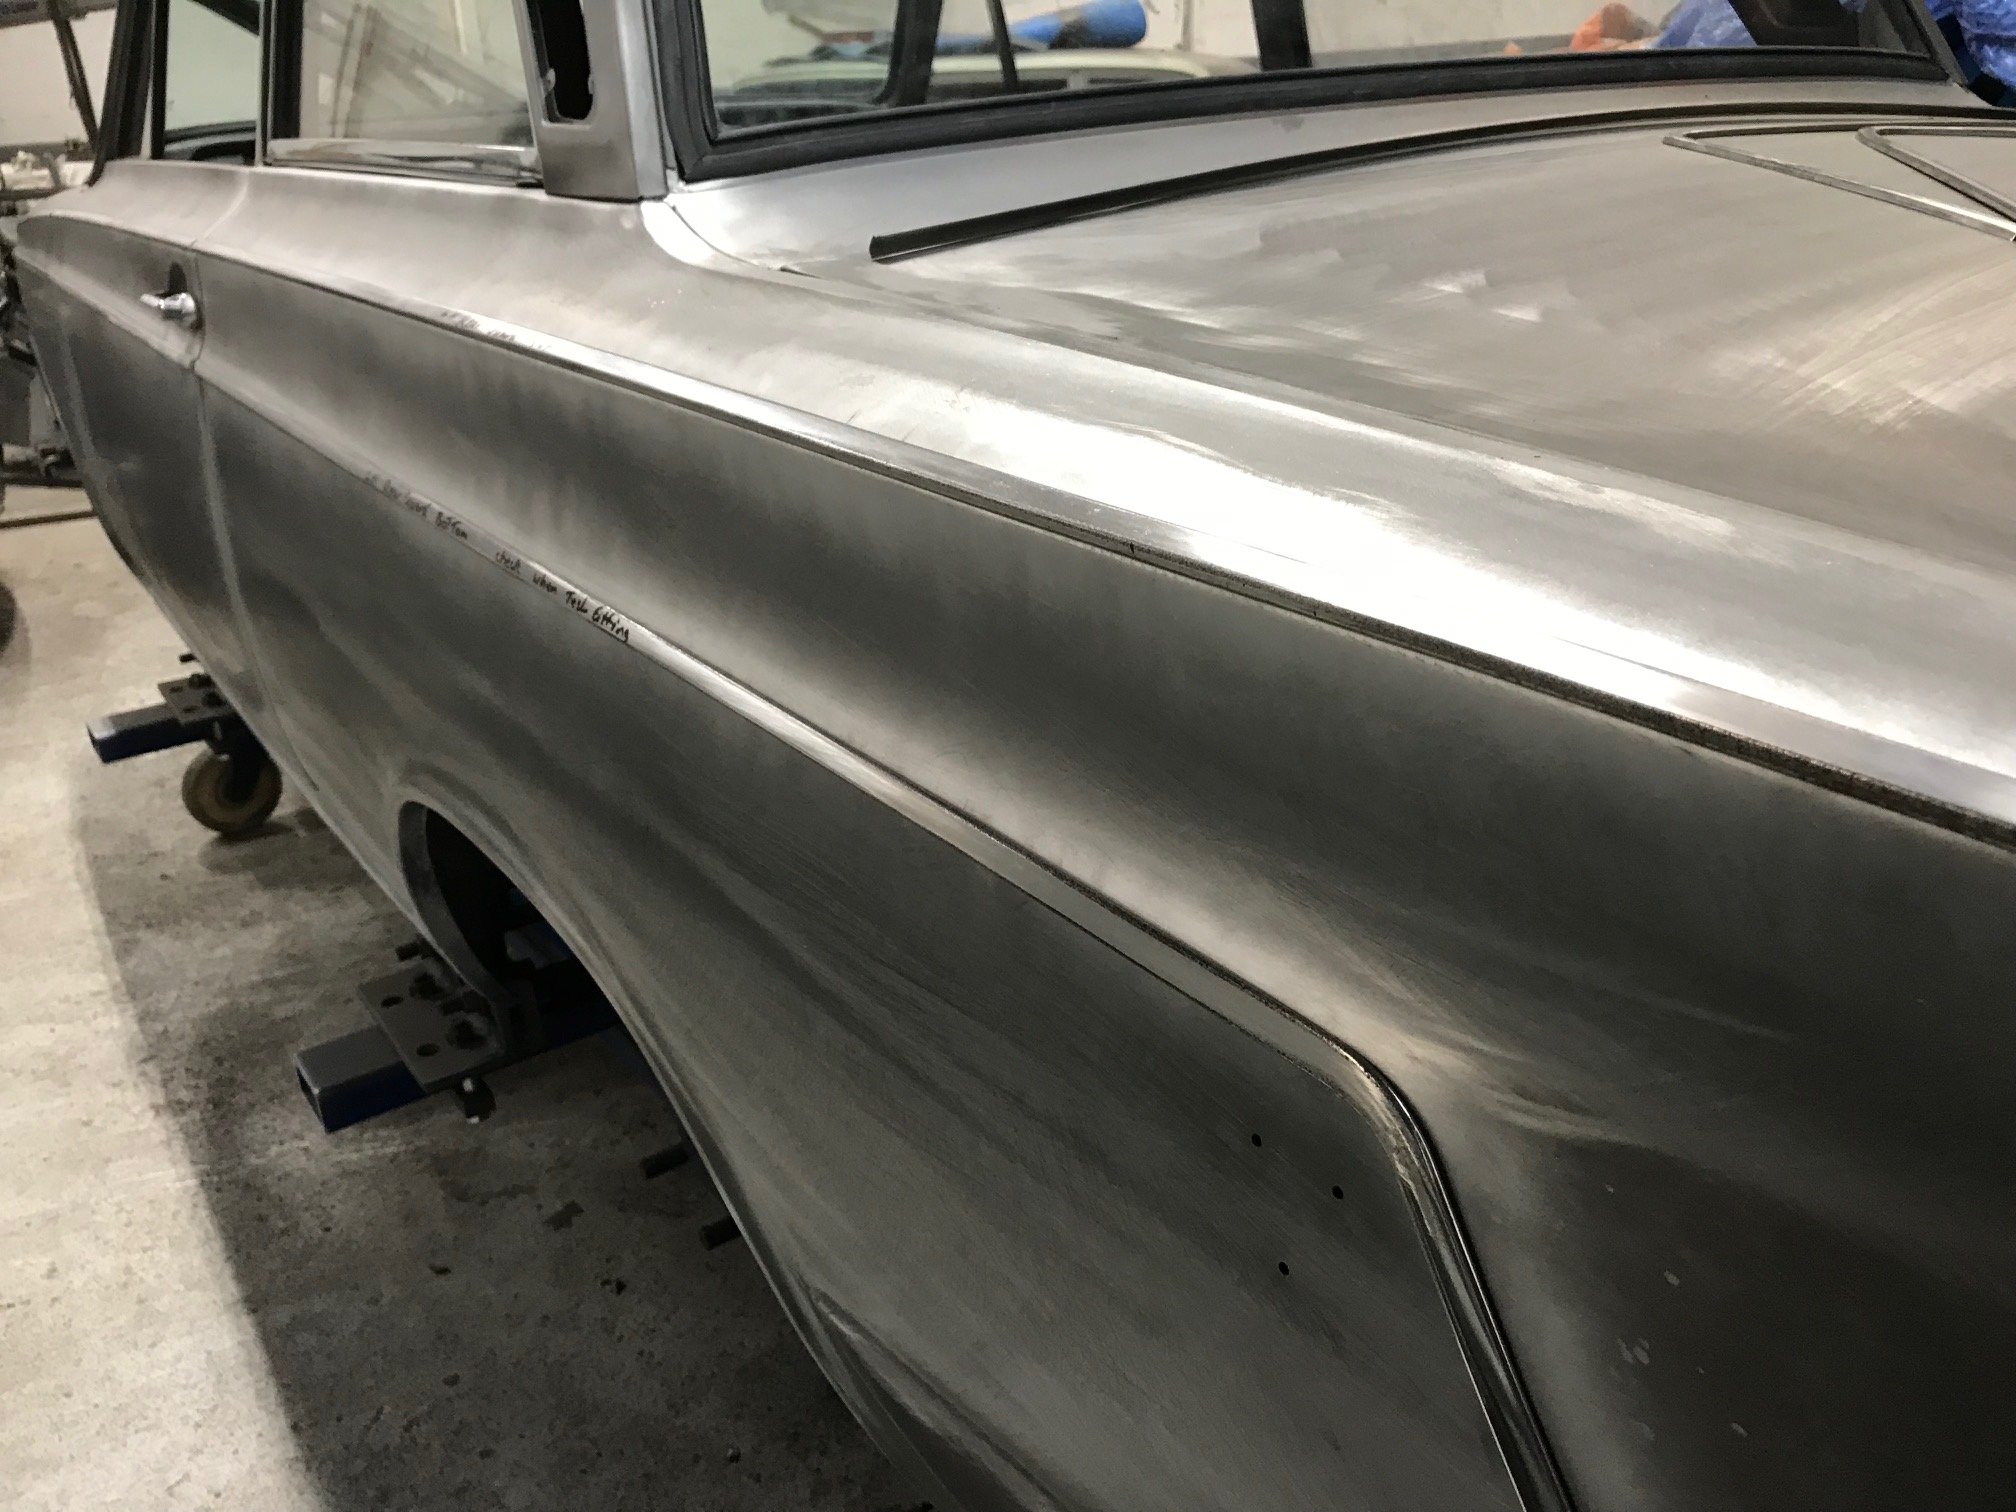
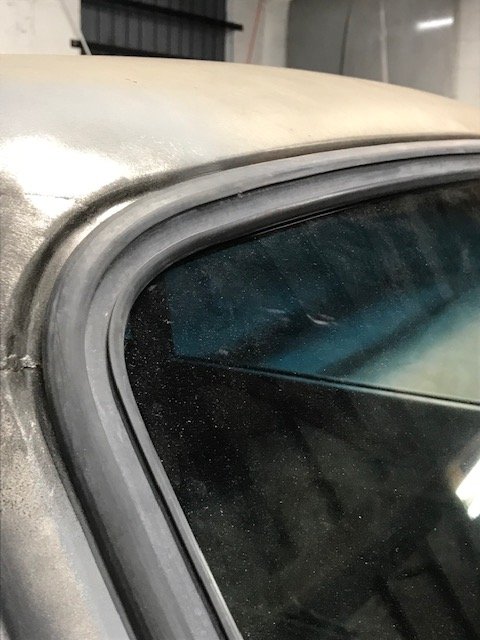
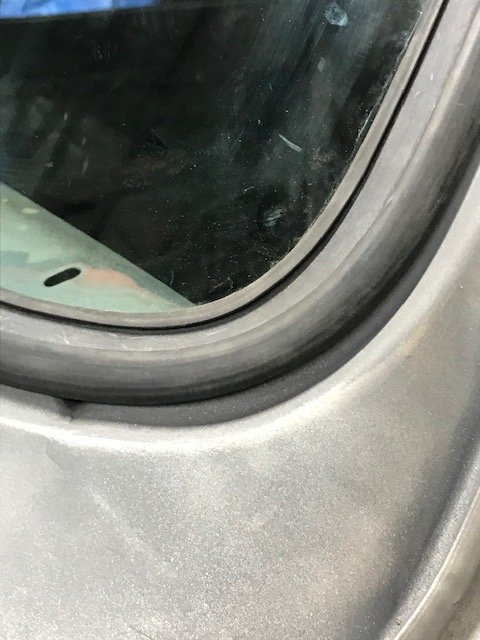
Went and check out the rubber issue today and both front and rear screen rubbers don’t fit good and the rear quarter glass rubbers are average as well compared to the originals. Need to do some research to sort the best rubbers. Rear bumper I had rechromed has a couple of ripples in at as well so it’s off to get stripped and sort the ripples and chrome again argghh. It looked very straight when I dropped it off but the new chrome highlights any defects. The moulding fit off has paid off big time as quite a few of the mounting holes have had to be welded up and redrilled to get it bang on.
2 points
-
Discussion Thread - //oldschool.co.nz/index.php?/topic/53921-bugatti-t5759-engine/ Embarking on an ambitious project to build a Bugatti T59 Replica. Using modern manufacturing techniques, 3D scanning, 3D printing, CNC machining but keeping all visual details authentic to the original.1 point
-
I literally walked into Suzuki 10 mins before closing, walked to the bike and said sell me this. Edit And then I had McDonald's sitting in the doorway of the lambo dealership1 point
-
I will persevere with a manual pump for now, just for simplicity. Probably just cut off the pump bit and attach it to a bigger tank.1 point
-
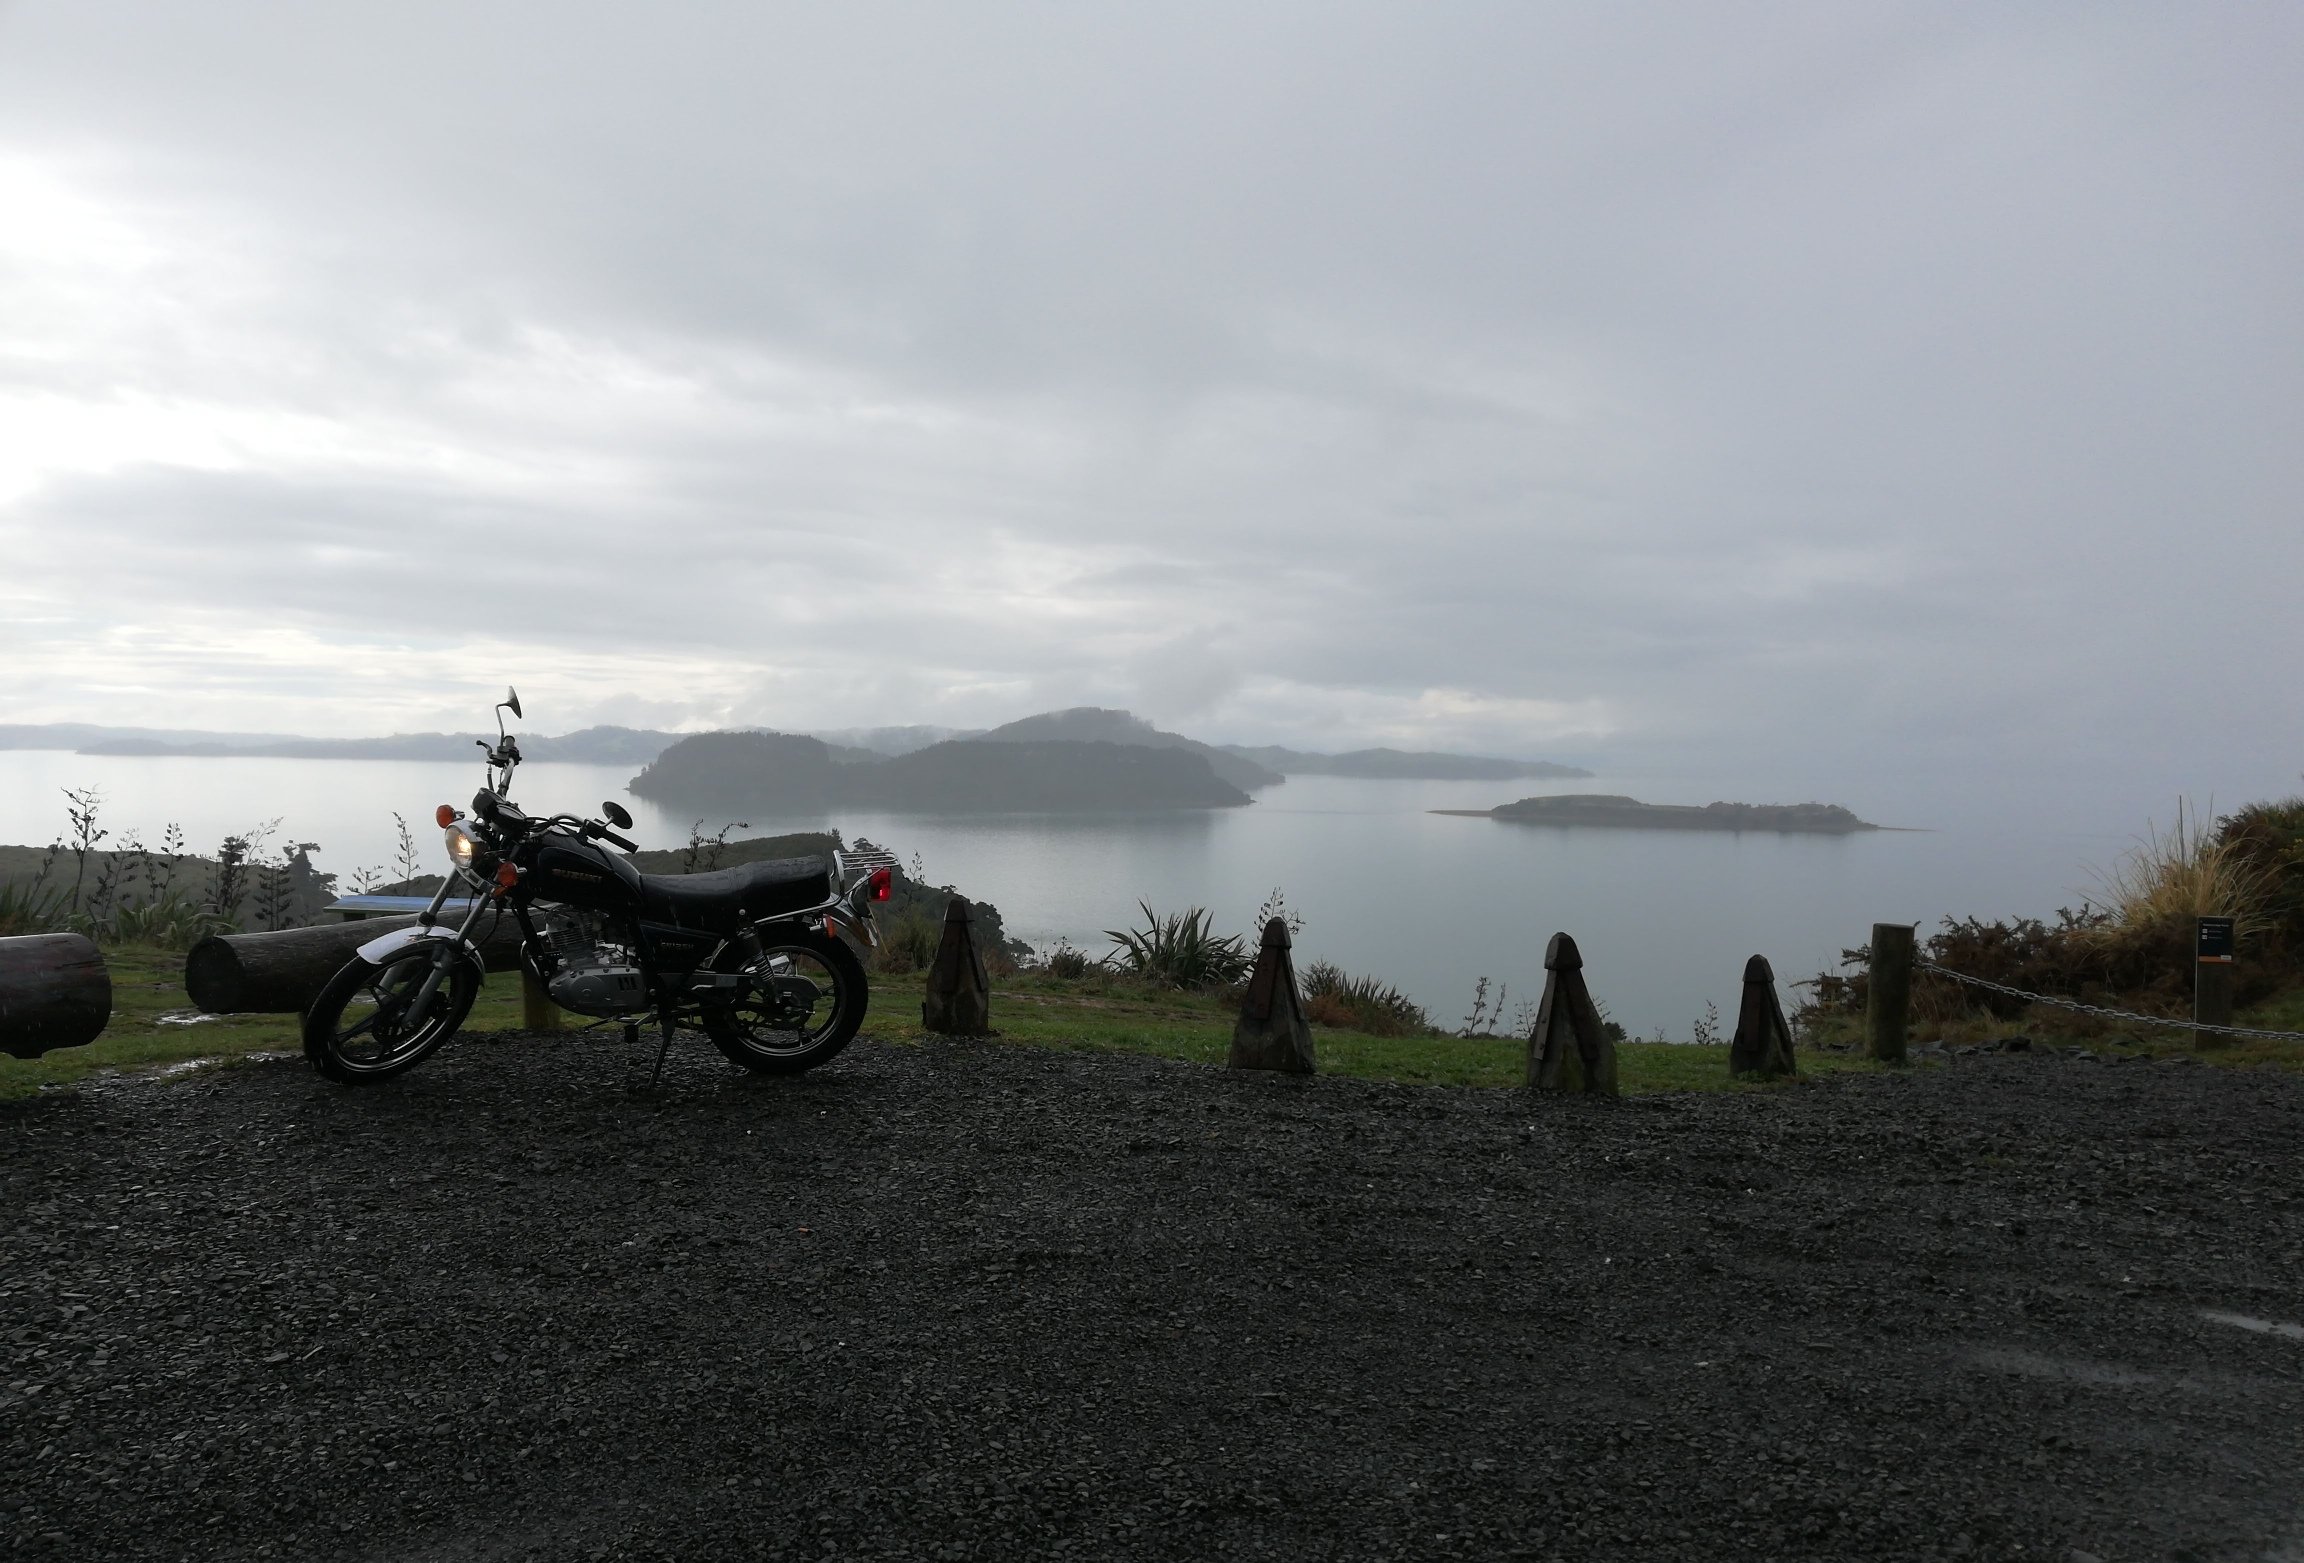
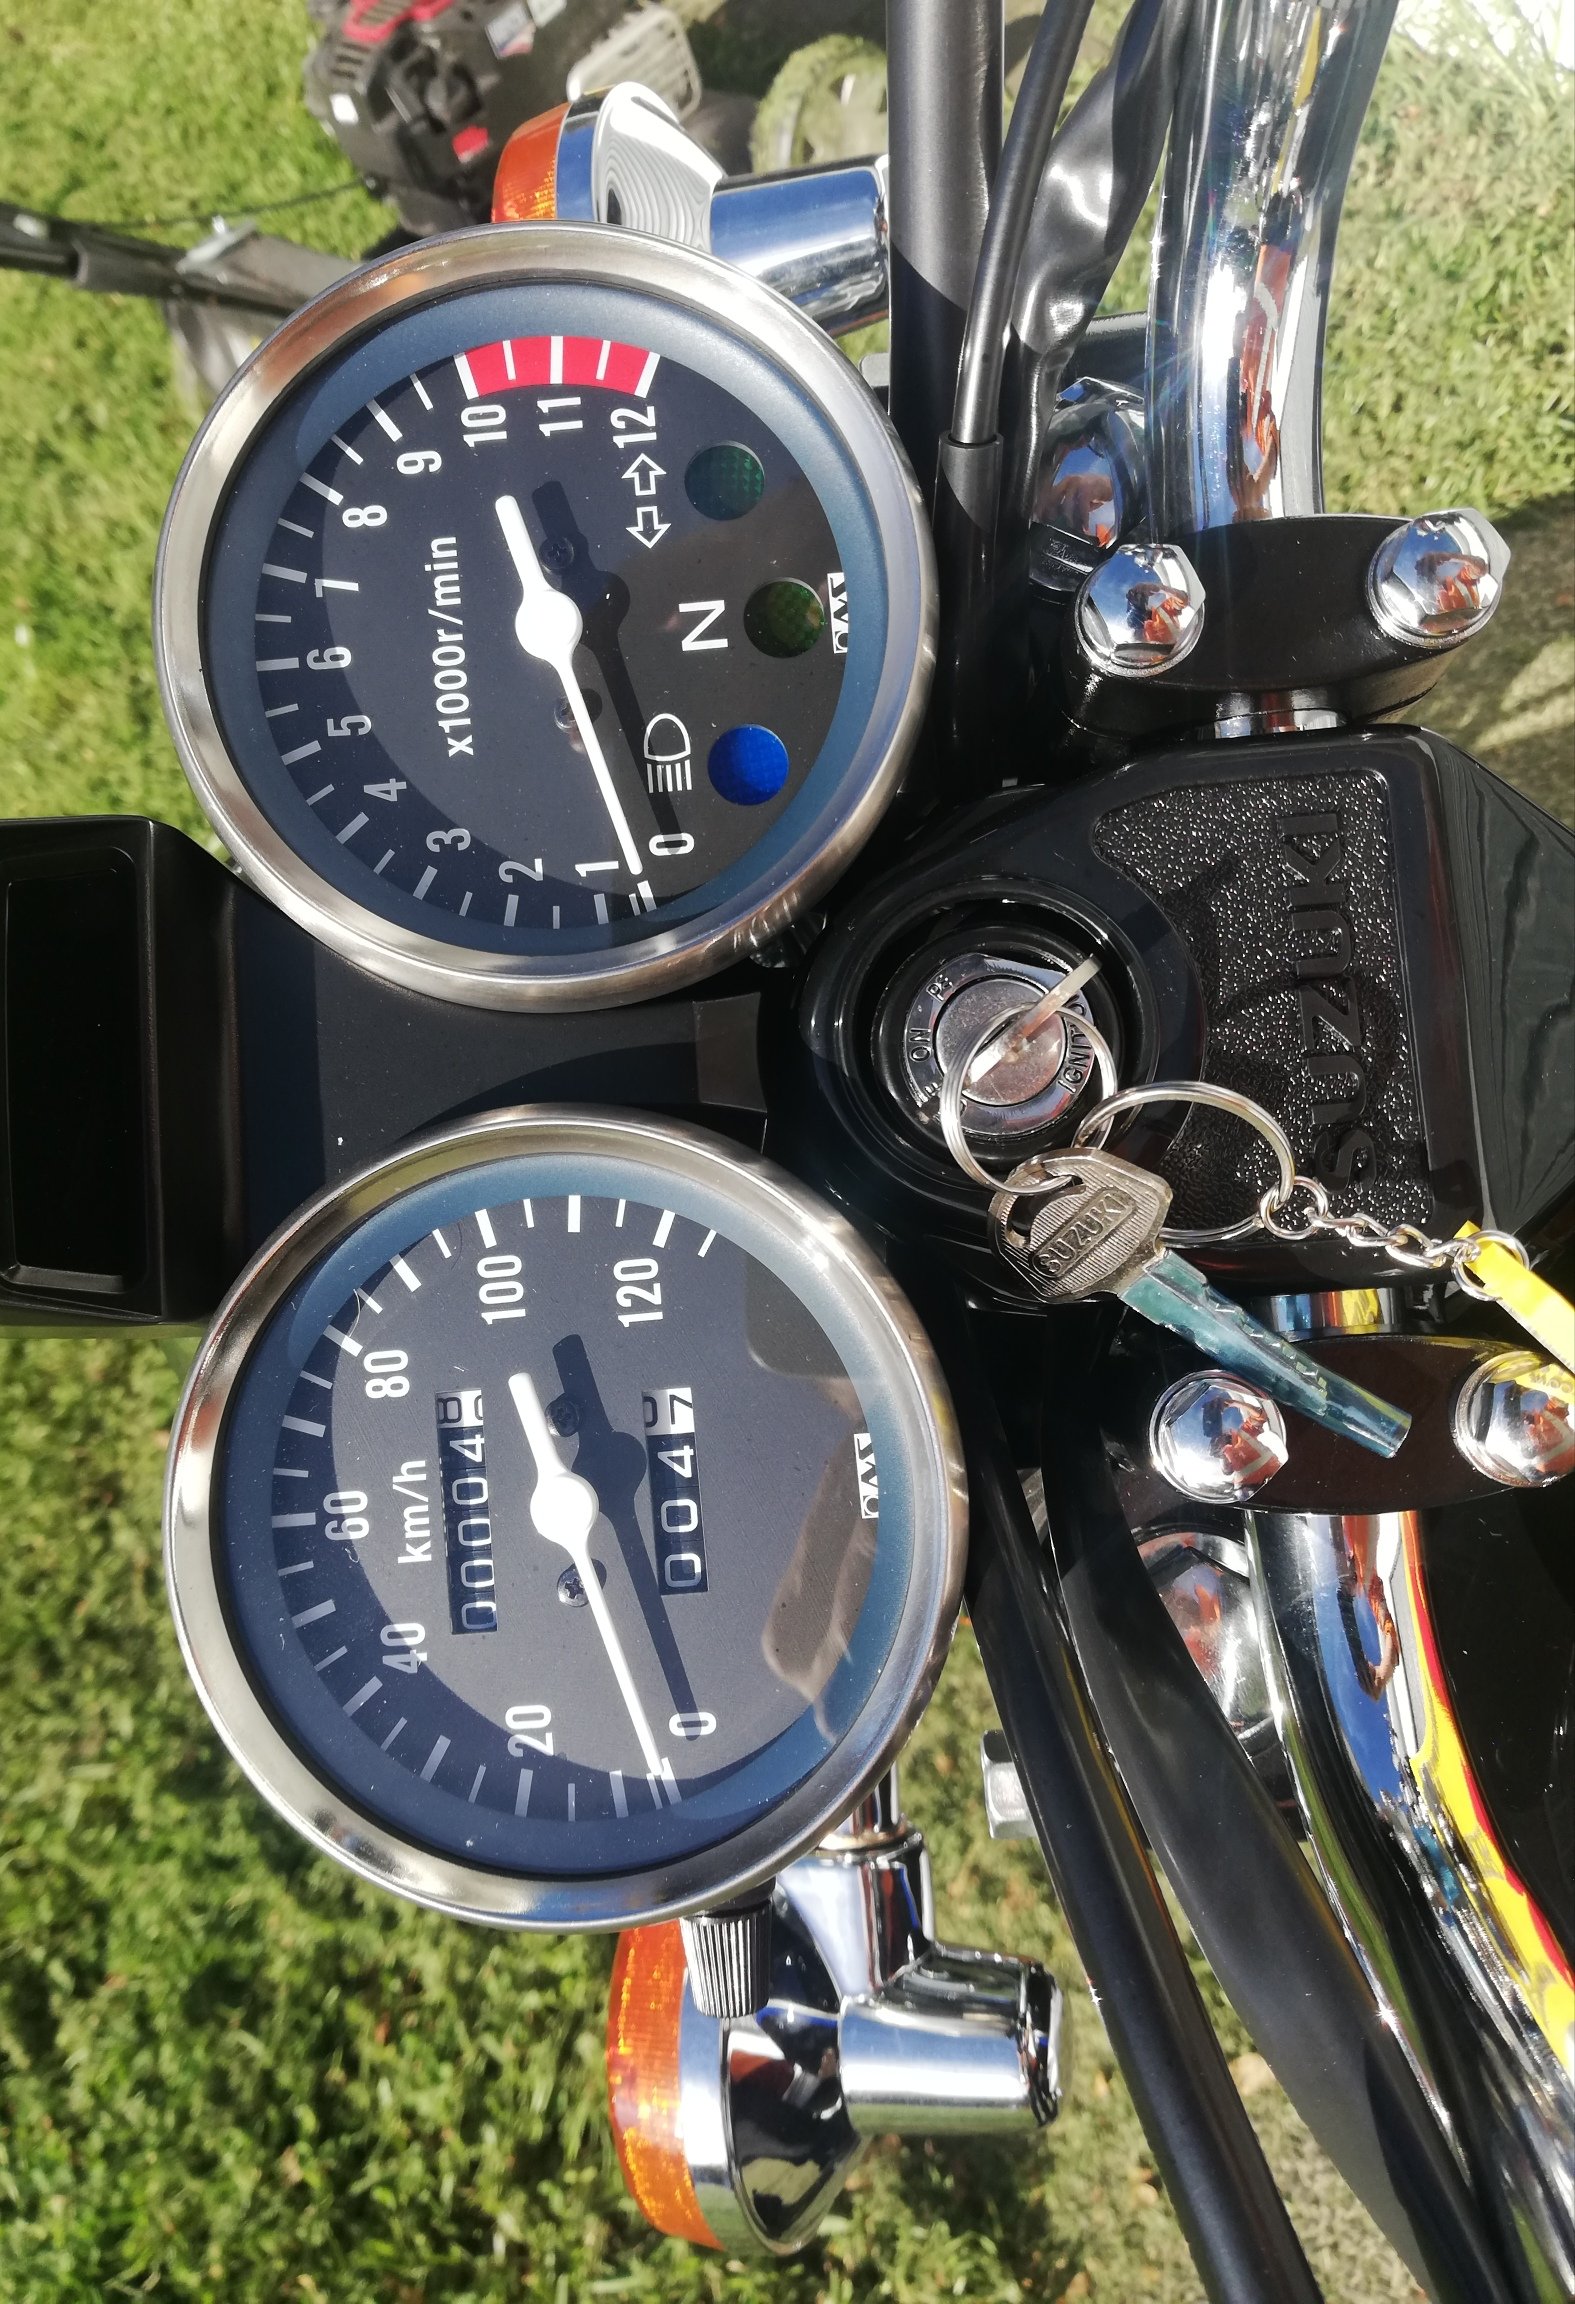
#adventureGN Nowhere near as slow as I was expecting, but It's Gona be a long first 1000km breaking in the engine I'll tell ya
1 point
-
and a remote valve for the tipper1 point
-
its loud and quite low (adjustable suspension) - sticks out as well. Also hasn't had a wof in over 10 years. So im not keen to talk to Mr officer about why i am driving it.1 point
-
been there done that1 point
-
that crane fits the width perfectly. A+1 point
-
Dude!!! Next time we do a waikato ride im gonna hound you to come down1 point
-
If not; then book a cabin or room and note it up here you have spare beds etc. People will snap them up. Have a read over the last few pages for accommodation updates. Usually a bit closer to the time an entry form appears and we pay about $20 each for the support vehicle. Not too late at all and feel free to bring maaates.1 point
-
Up the mighty GN1 point
-
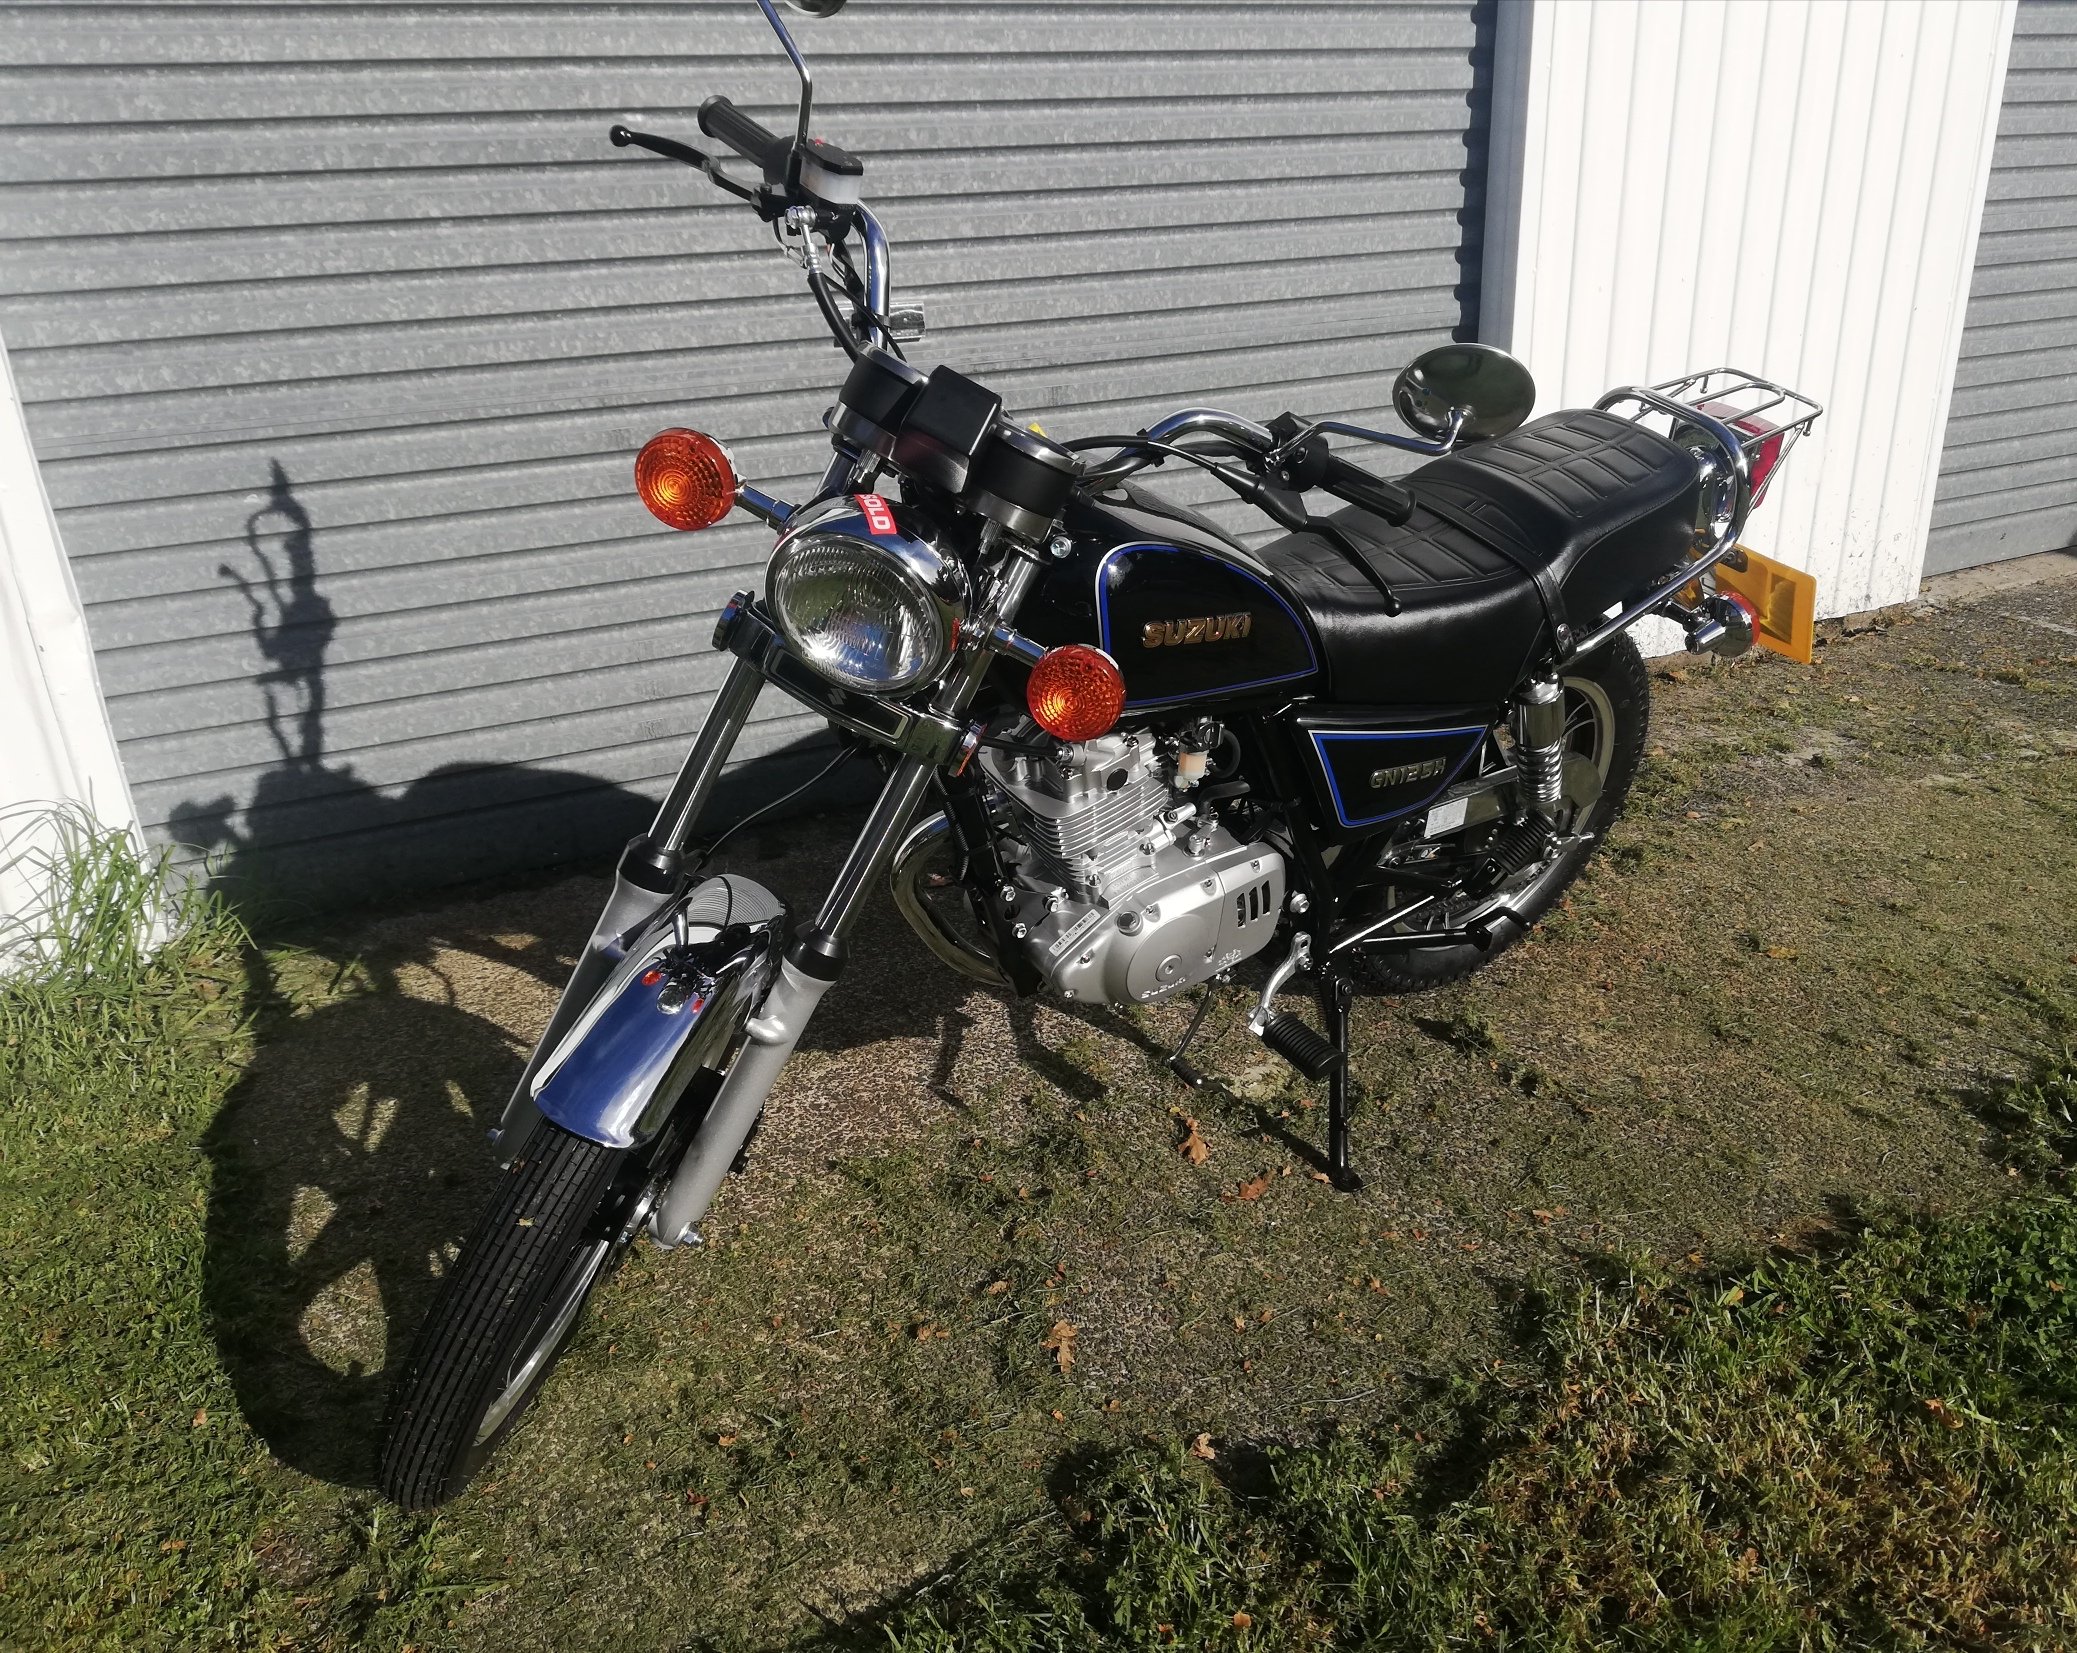
About 10 years ago I swore I would never own another GN250 So in saying that, here's my brand new GN125 Only just noticed there is blue flake through the black. Fancy. Also has a tool box, don't think my 250 had that. Frame welds could have done with some antispatter and some proper cleaning before paint.... Pretty boring Probably the only new vehicle I'll ever have though
1 point
-
Years ago when I took the MS65 through VTNZ they said the chassis numbers didn't match, so I went to Toyota and they had a look and go "meh?" And wrote me a note stating a mixup at the factory (NZ new) and VTNZ were all happy. Had a look at the numbers myself a bit later and couldn't find any discrepancy, everything matched fine. Stuffed if I know what they were on about, but now I have a handy note if I ever wanna swap chassis / tags.1 point
-
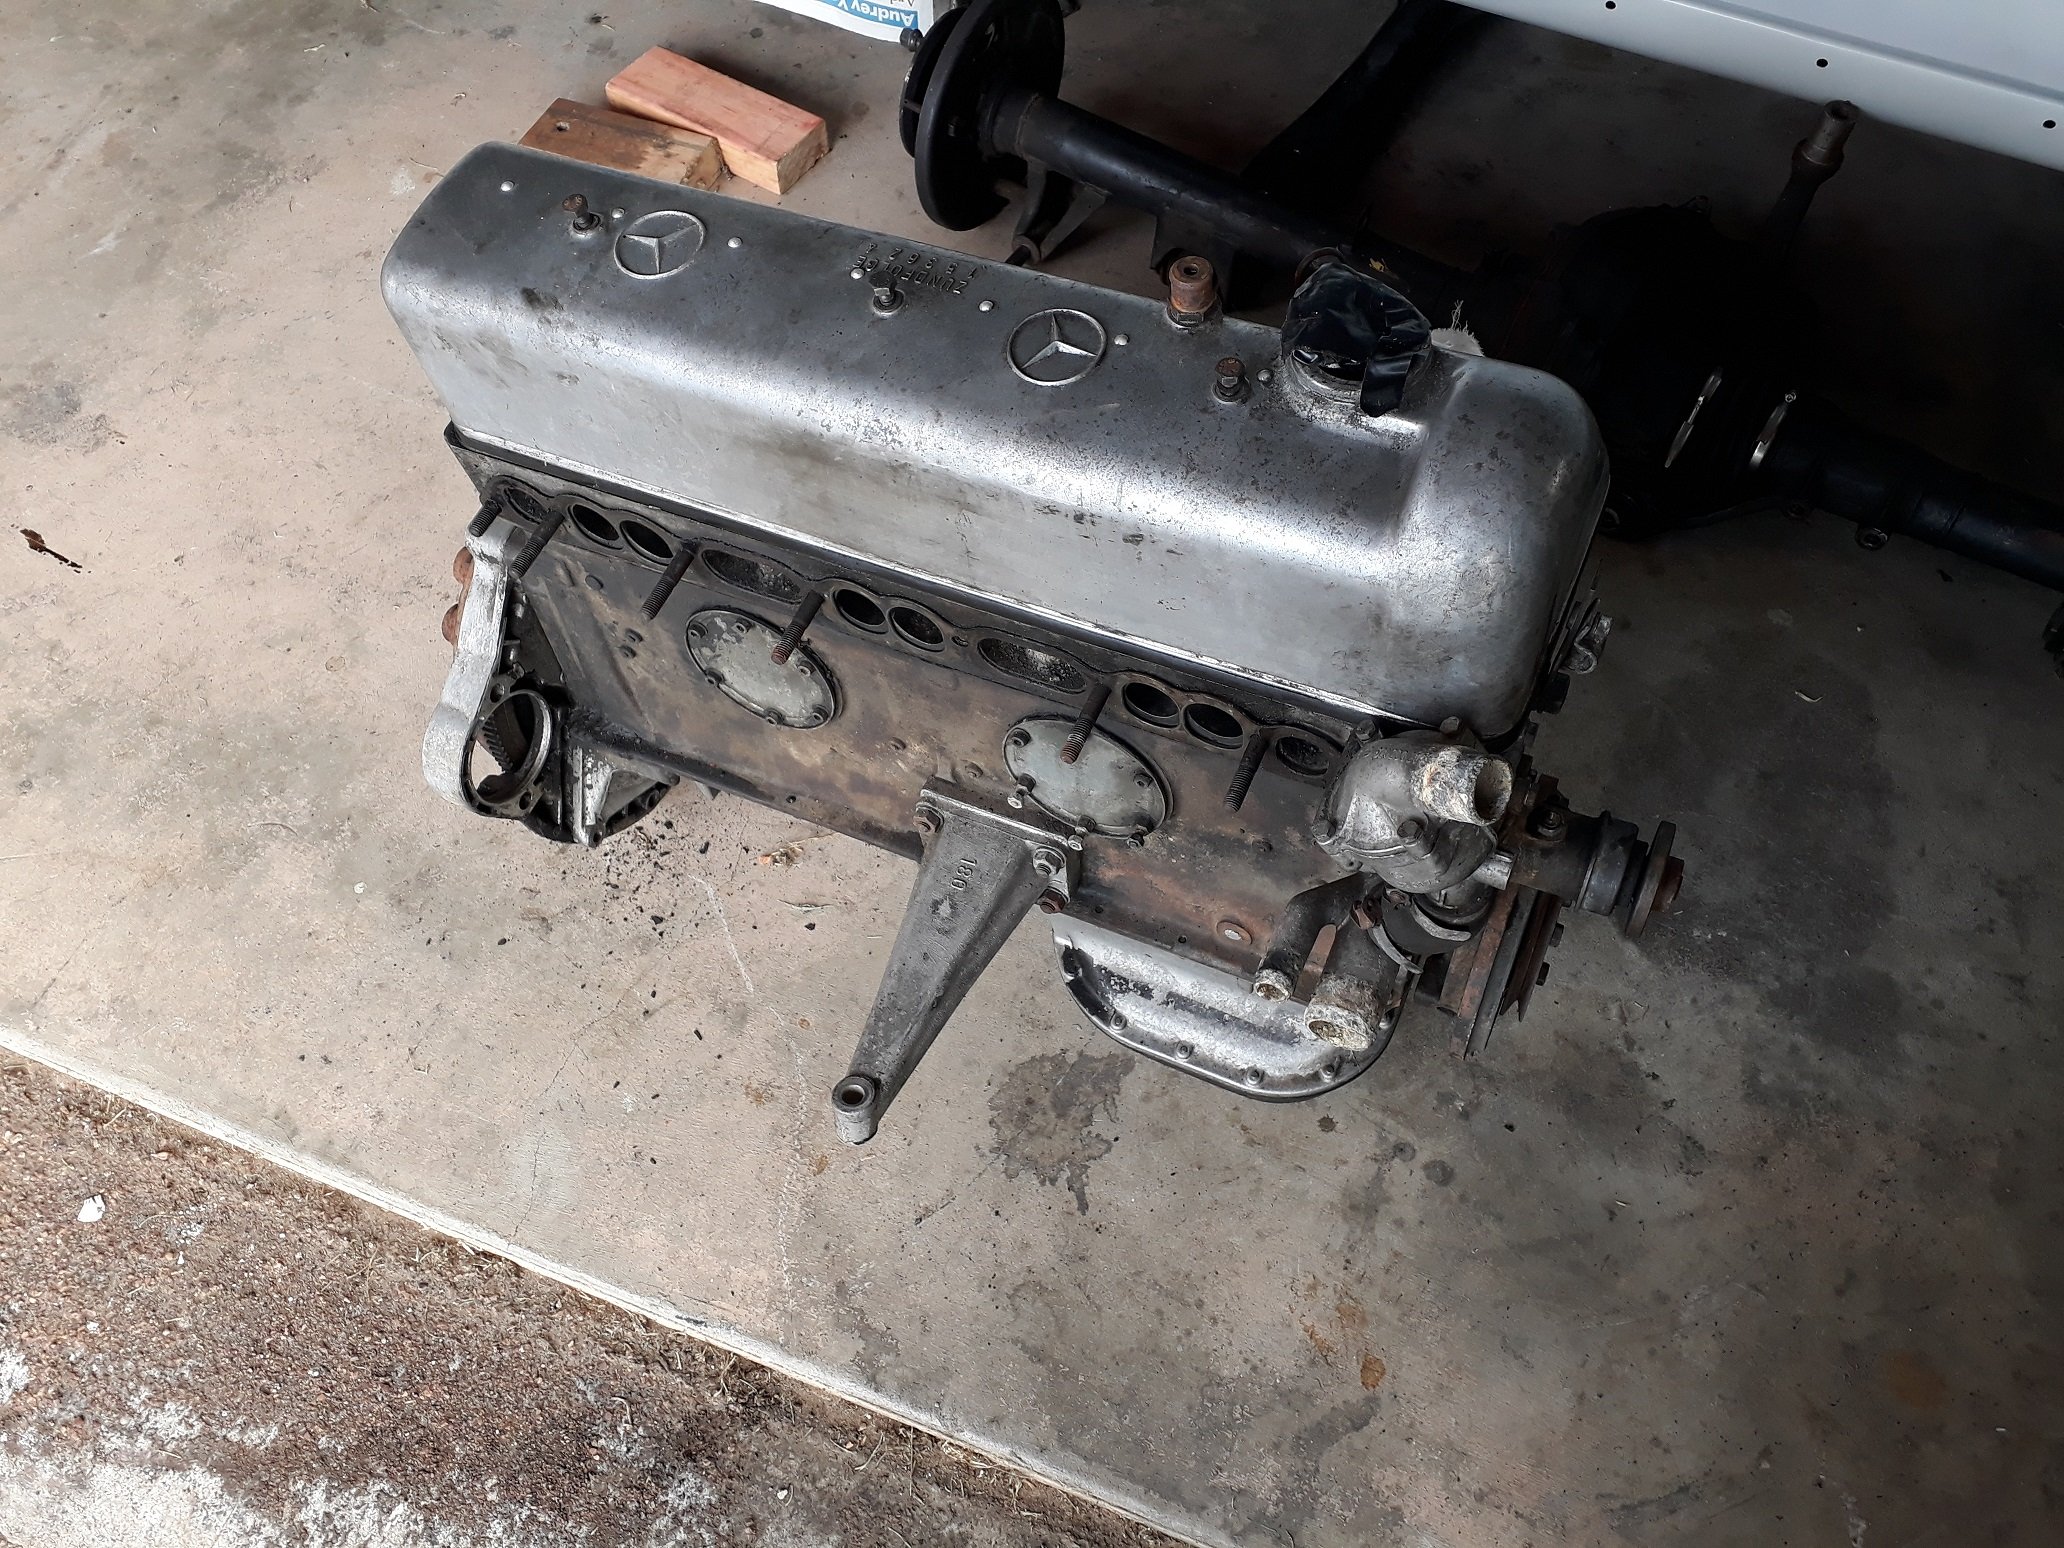
Temperature has dropped and work has slowed. Have been deliberating over engine choices for aaaaages, was pretty set on running a M104 (basically a Merc RB/JZ), other alternatives included an M271 (supercharged 4 cylinder thing) or an OG M180. I flip flopped for about 18 months until this popped up on trademe for $1 reserve, it's mine now. So I brought a 54 year old engine that 'ran when parked' 20 years ago sight unseen. It's not an L series Datsun donk but rather a Mercedes M180 which is what these cars originally came with. It doesn't look half bad under the rocker cover but even with the plugs out and a bar on the front pulley it has no enthusiasm to turn over so could be seized, more investigating required..
1 point
-
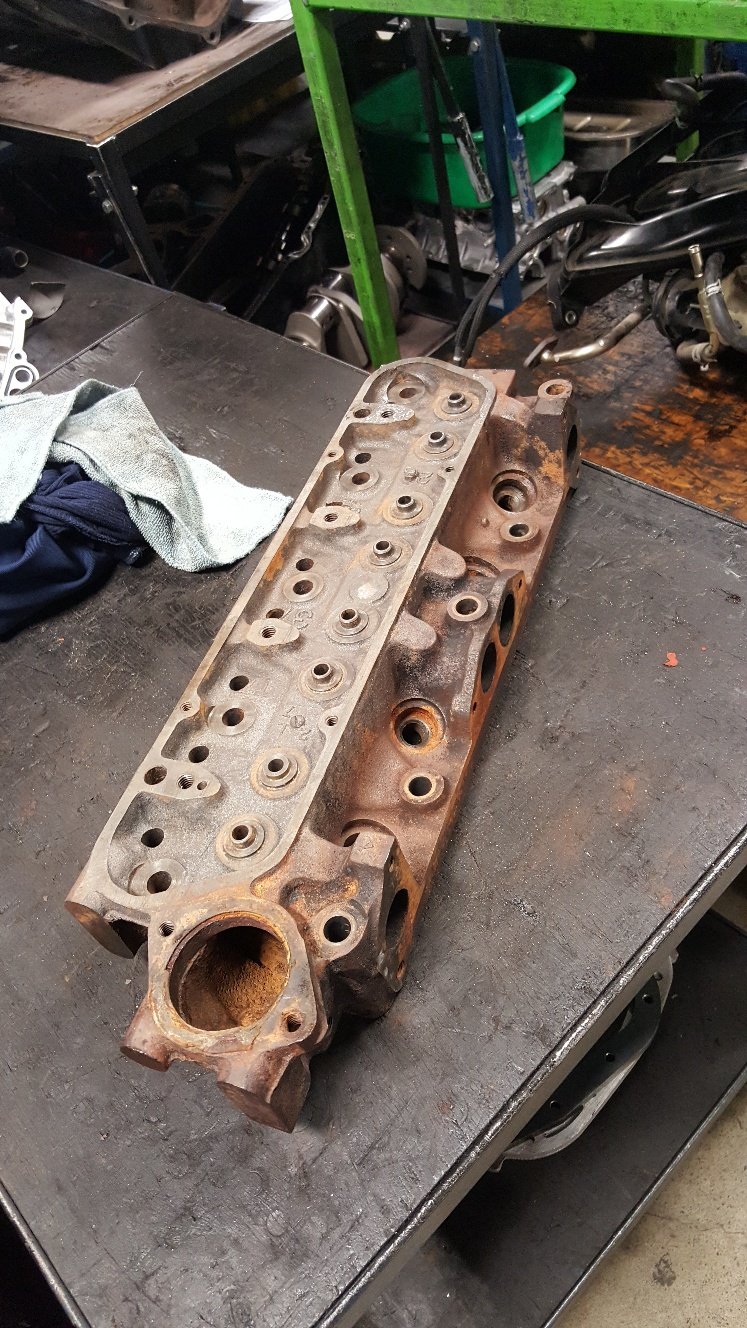
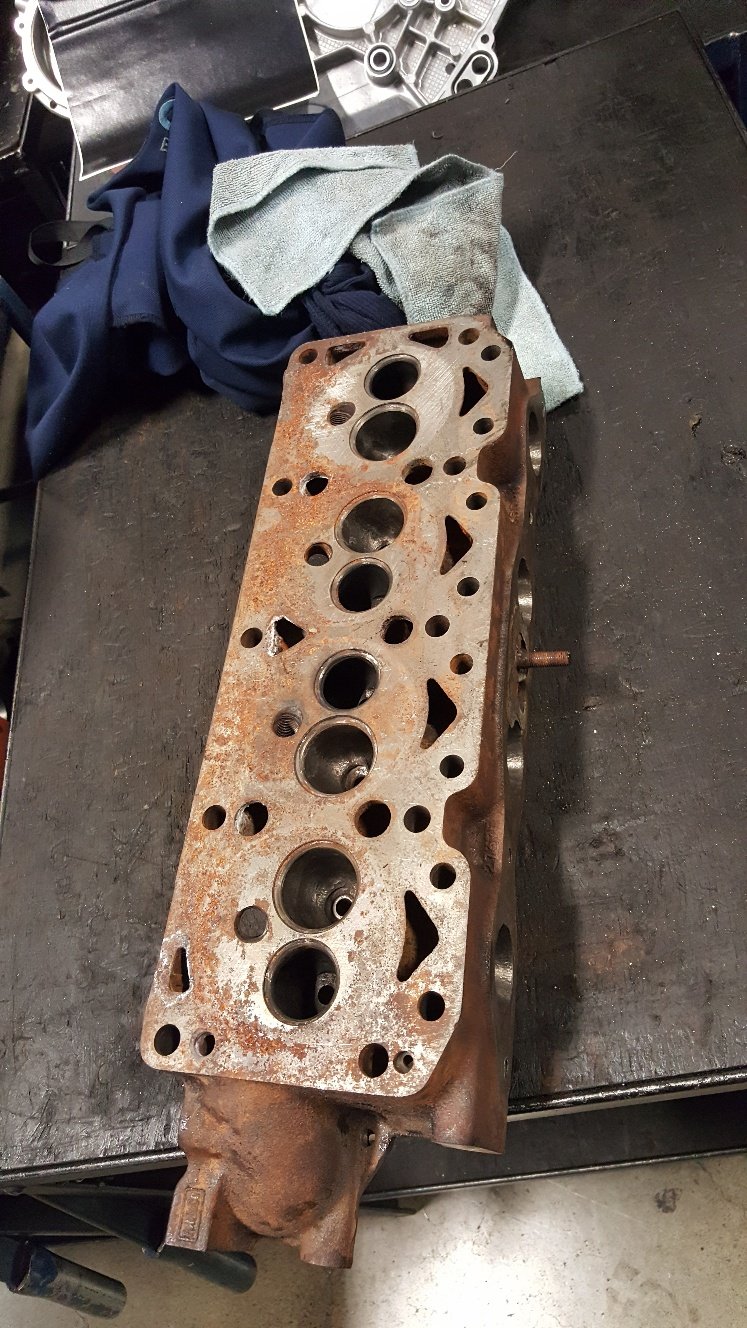
So I forgot to get a picture of the molasses. But here's a couple of pictures of the head once out. The molasses sort of just loosens the rust. Then you have to wire brush to get the rust off. I didn't put the block in what we call our hot tank as I haven't removed the cam bearing.. Our hot tank is only for ferrous metal. And the cam bearings would react with the acid. The cam bearings are in reasonable condition and this is build is on a budget. I run the tap through the head bolt threads and main threads. Removed all the gallery bungs and frost plugs. I found a decent build up of rust at the rear of the block that i chipped out with a screw driver through the rear frost plug hole. And also gave the block a good wire brushing. I gave all the machined surfaces a sand up with emery tape on a file.
1 point
-
Further than the driveway. So the time had come to buy a house. The only problem - The GX was still not on the ground. I threw it back together in November of 2018 and got it somewhat derivable. Thankfully we brought our house less than 1 kilometer away which made for an easy trip. New garage has alot more space which makes working on the cars soooooooo much easier. Also notice the 2jz-ge in the bottom left. Thats the future for the GX at this stage, once the 1g gives up. I Also have itbs to suit so thats the future plans. Anyway my current position meant that i wont get around to installing it for another year as i prep everything and grab all the parts i need. But I was starting to get angry at myself for having 2 cars in my garage doing nothing. Out comes the liquid copper head gasket additive (look away now if those words hurt you). The 1g will be coming out so why not just experiment to see if it fixes it. And what do you know it worked. So an event i wanted to attend was getting near and i persuaded myself to try make it there. Out with the BC suspension and in with the stock struts. Throw it through a wof. fails on missing bumpstops (forgot to put them back in), and an indicator bulb, and lose front brake hoses. Easy enough to do then I had myself a warrant of fitness. Cutting it fine the day before the event i re-installed all the BC suspension. And put the mk 1s on. Im abit gutted the front suspension is almost at its max low, but for now im just happy its moved further than the driveway.1 point
-
Doubt no longer Pete, it is a beautiful thing. The plan is to swap the bulbs and relays, then run it all at 24v. There is stuff like the blower motor and wipers which might go a bit too fast and let out smoke at 24v, so I will get a DC DC converter and run them at 12v off that, with the signals driven through relays if needed. That's the plan anyway.1 point
-
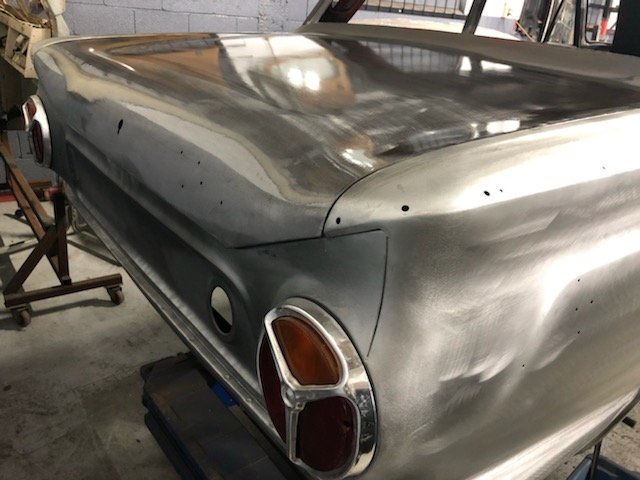
Boot lid finished which pretty well completes the panel. It’s going to be a shame to paint it! Stainless trim already to go to the polishers.
1 point
-
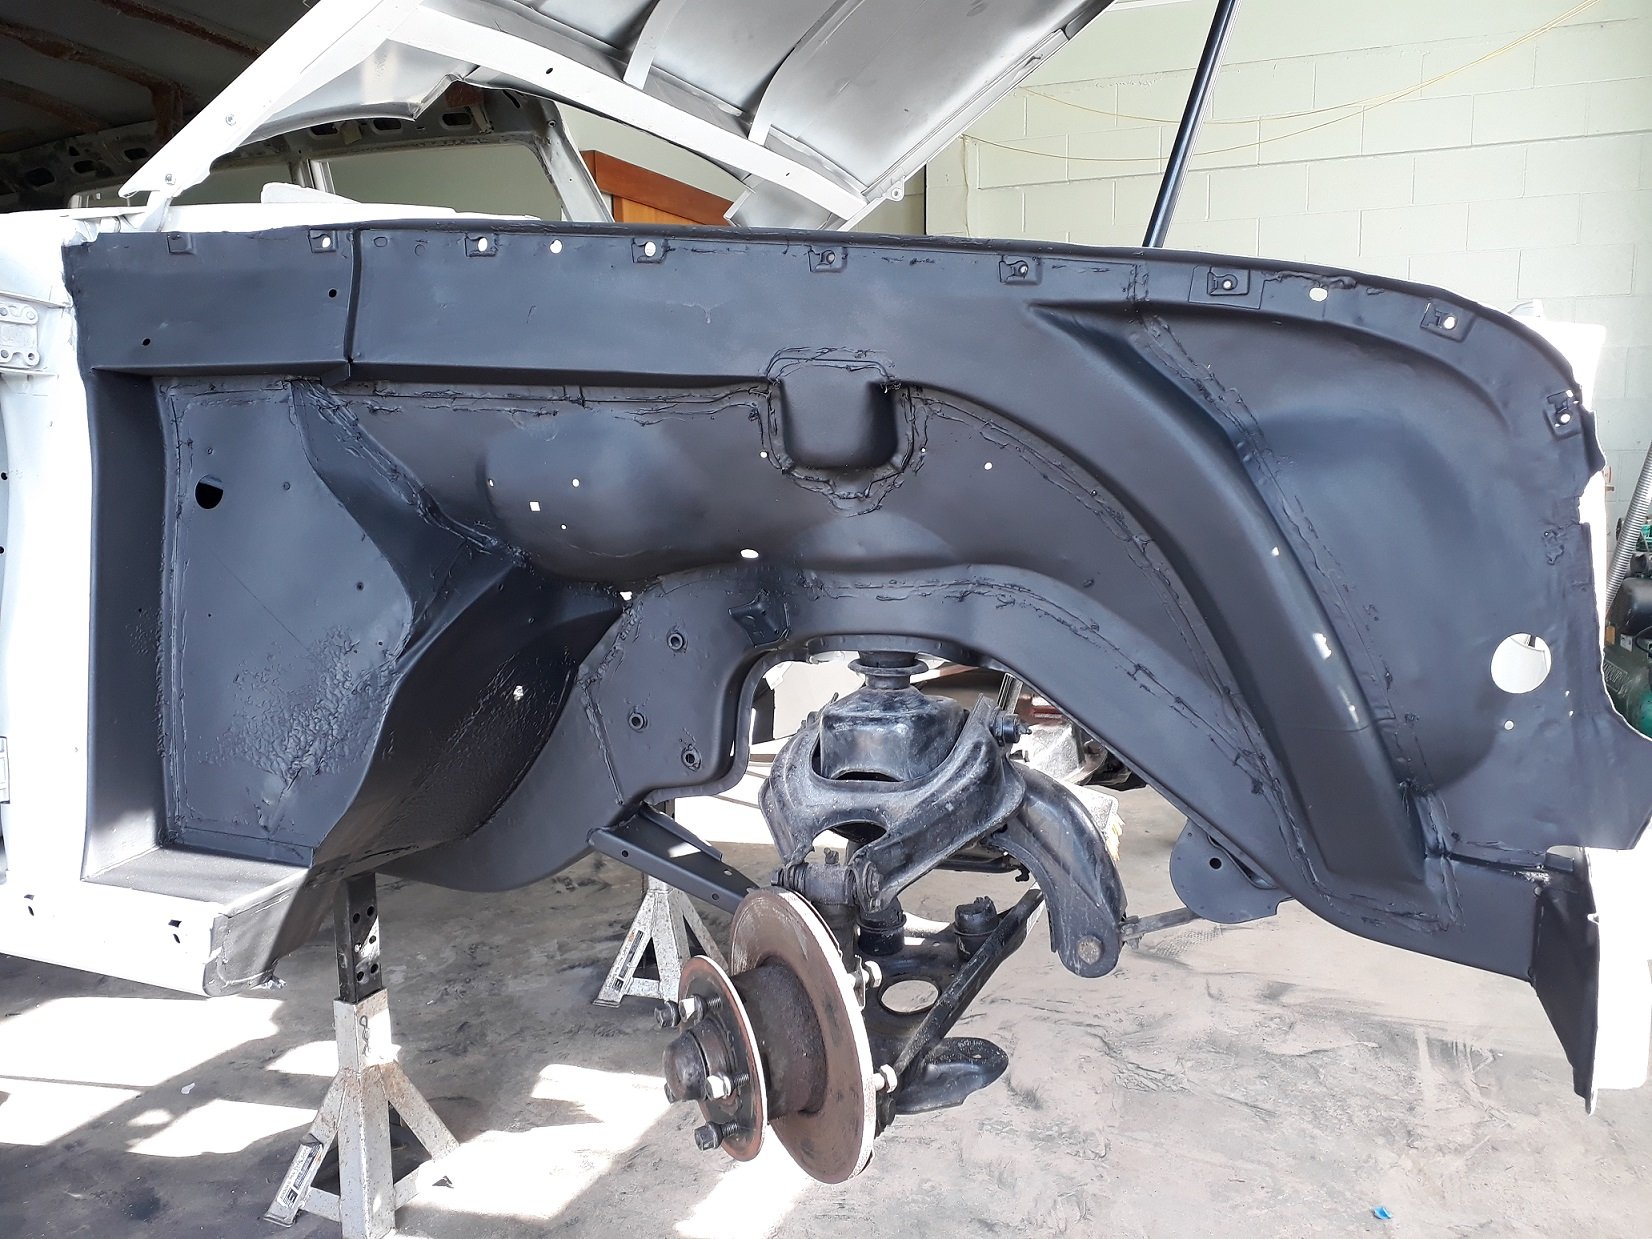
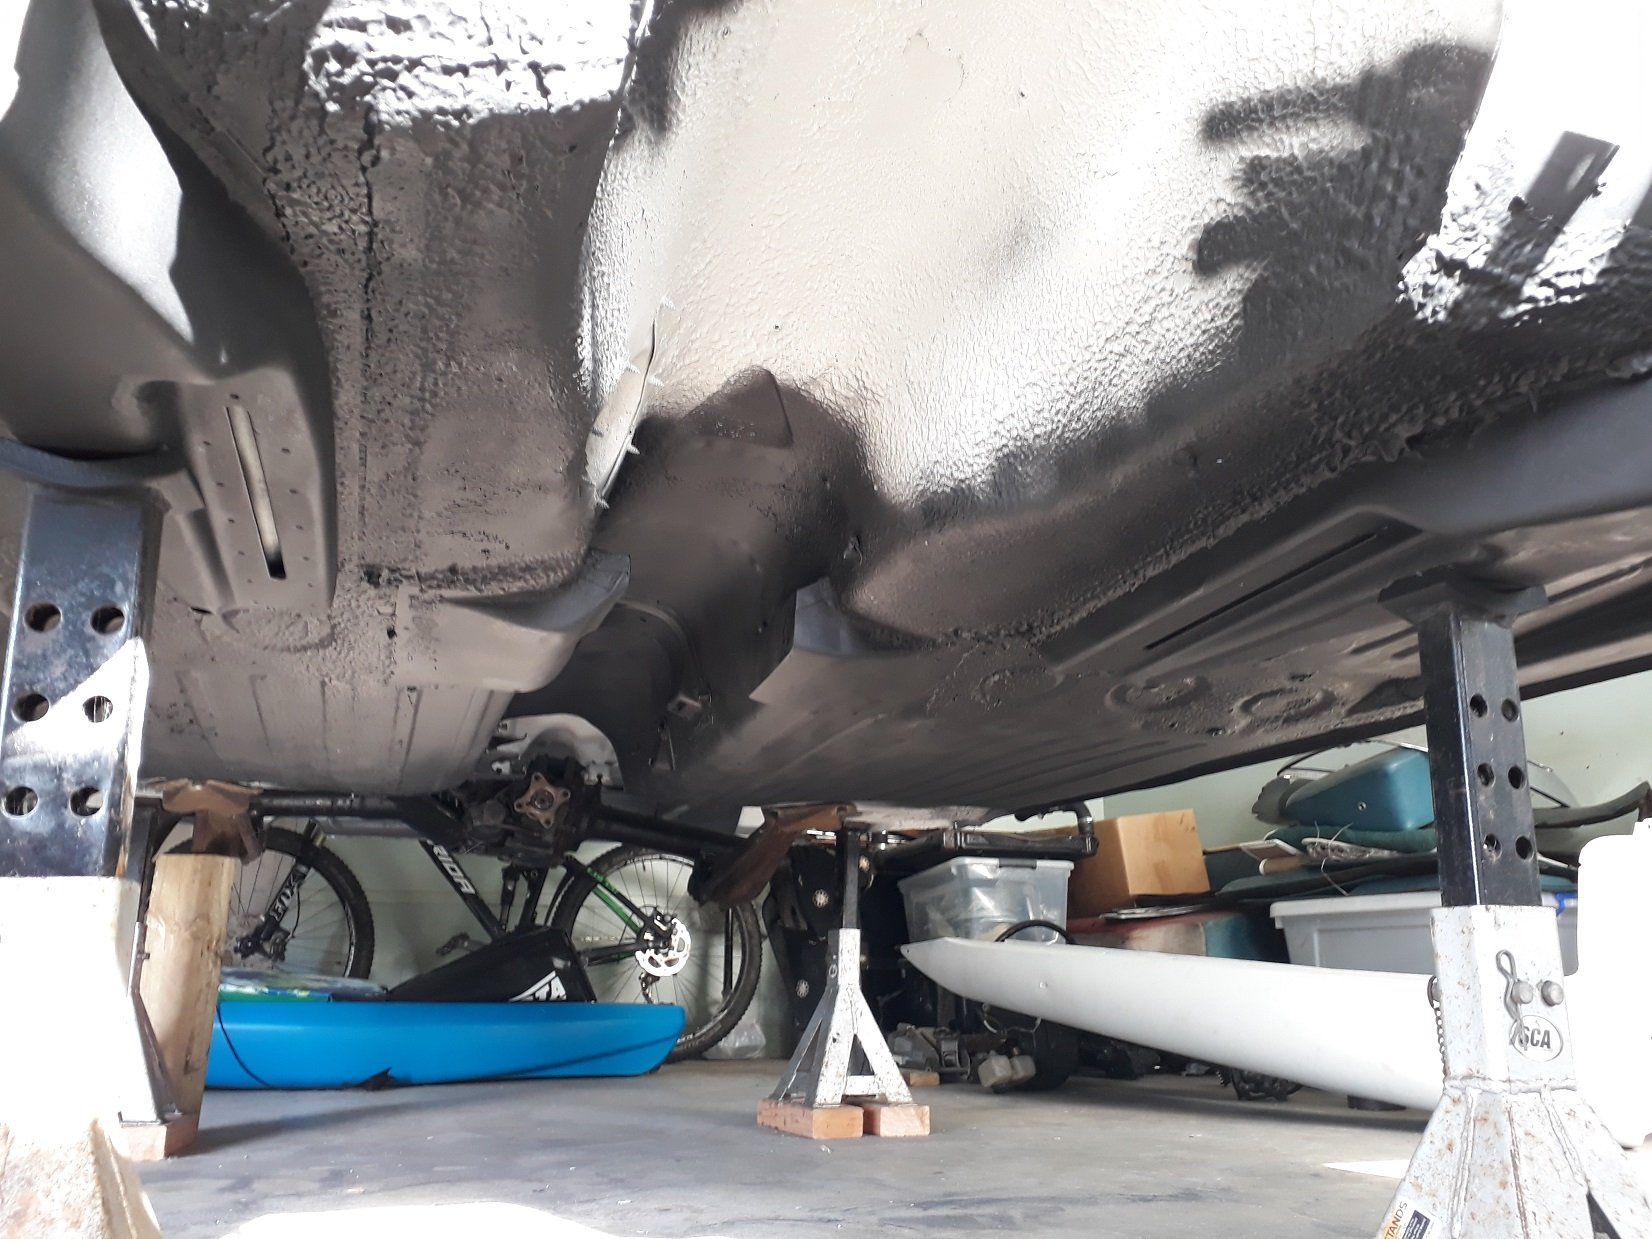
Masked up and sprayed the other side and the underside of the floors as far back as the rear seats (note all the OG underseal the blaster couldn't get off), left the trans tunnel in case it needs some clearancing for the trans I want to run (Mercedes 722.6) I need to drop the rear diff to do the underside of the boot, but before doing that I thought I should really install the bags and some wheels and put it on the ground to see how it looks, so I did. Managed to unlock the next level of sketch city in the process with mystery blocks of wood used in precarious manners to get it down off the axles stands. That's as low as you'll get one of these without taking an angle grinder to the body which I am unkeen to do, I also don't think the rear diff would enjoy any more articulation. sills are about 100mm, front cross member about 70mm and rear diff about 50mm from the ground respectfully. Now have the classic problem of the jack not fitting under it.
1 point
-
This gives you an idea of how the moulds/cores from these patterns will go together.1 point
-
Dropped the second half on with no drama. So its all bolted up now and ready to go to the foundry at the end of the week. Nailed it Thats like 1000hrs work right there!1 point


.thumb.jpeg.384ff72c8d2b0ee0d34a7bdedb55bdcf.jpeg)


This leaderboard is set to Auckland/GMT+12:00