
Leaderboard


Popular Content
Showing content with the highest reputation on 08/28/18 in all areas
-
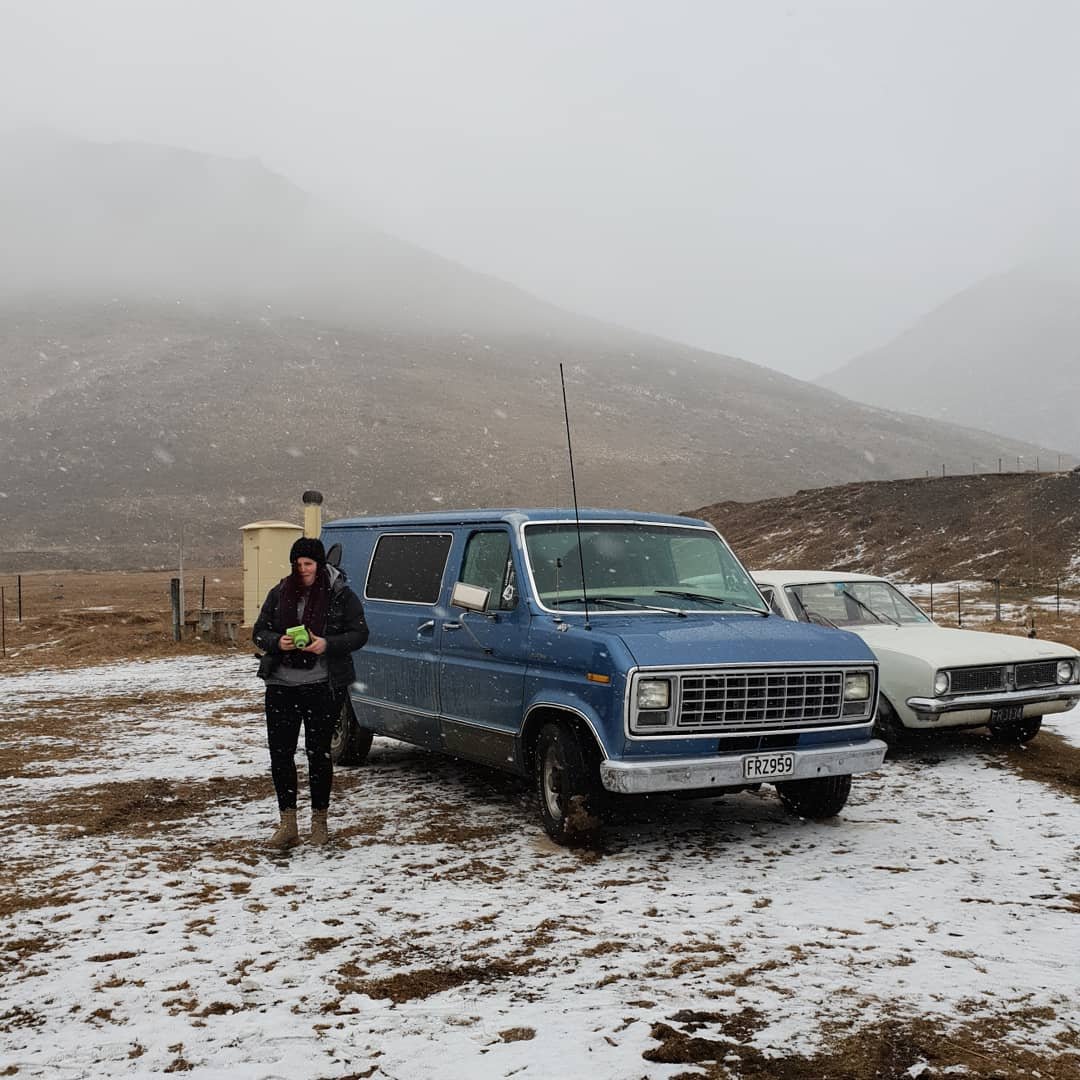
Jeez its been awhile since ive updated this thread. The big ol Van has been a bloody solid classic to get around in. Since this last post ive done the king pin bushes again. Done the front wheel bearings. Had the timing and carb tickled up at a local workshop which is probably due again. Replaced the tyres.Ive done some rust which I need to continue with. Its attacking at top of the windscreen and bottom of doors and a few roof gutter spots. Have slept in the van probably a few dozen times now. Done Wagnats once. A OS nats in national park. OS Grasskhana. A few OS hanmer meets. All the QCR Dirtmasters. A few NY camping missions and a stags do. Its a great Van and ill get onto the rust work again soon when its warms up a bit more. Need to slam some fish oil in alot of the cavitys and at some point a bolt on efi system because we use it a fair bit
 18 points
 -
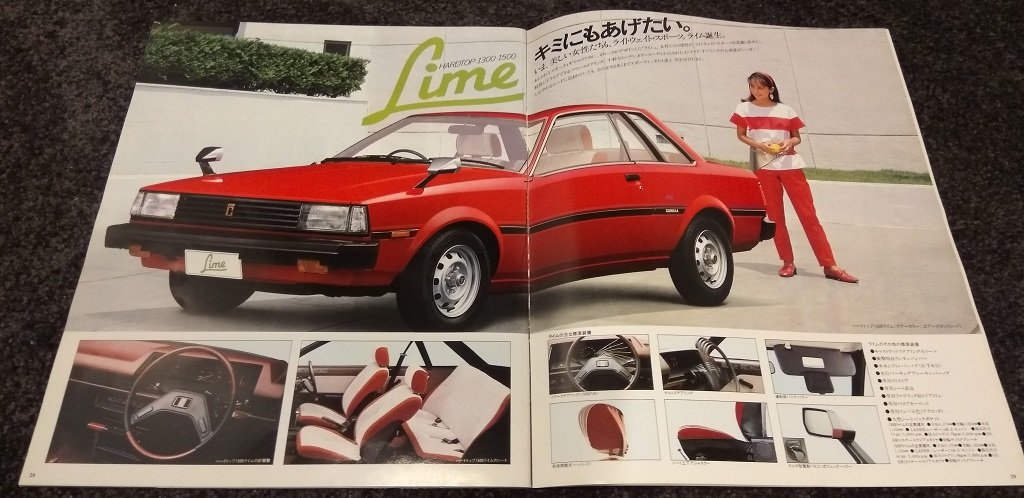
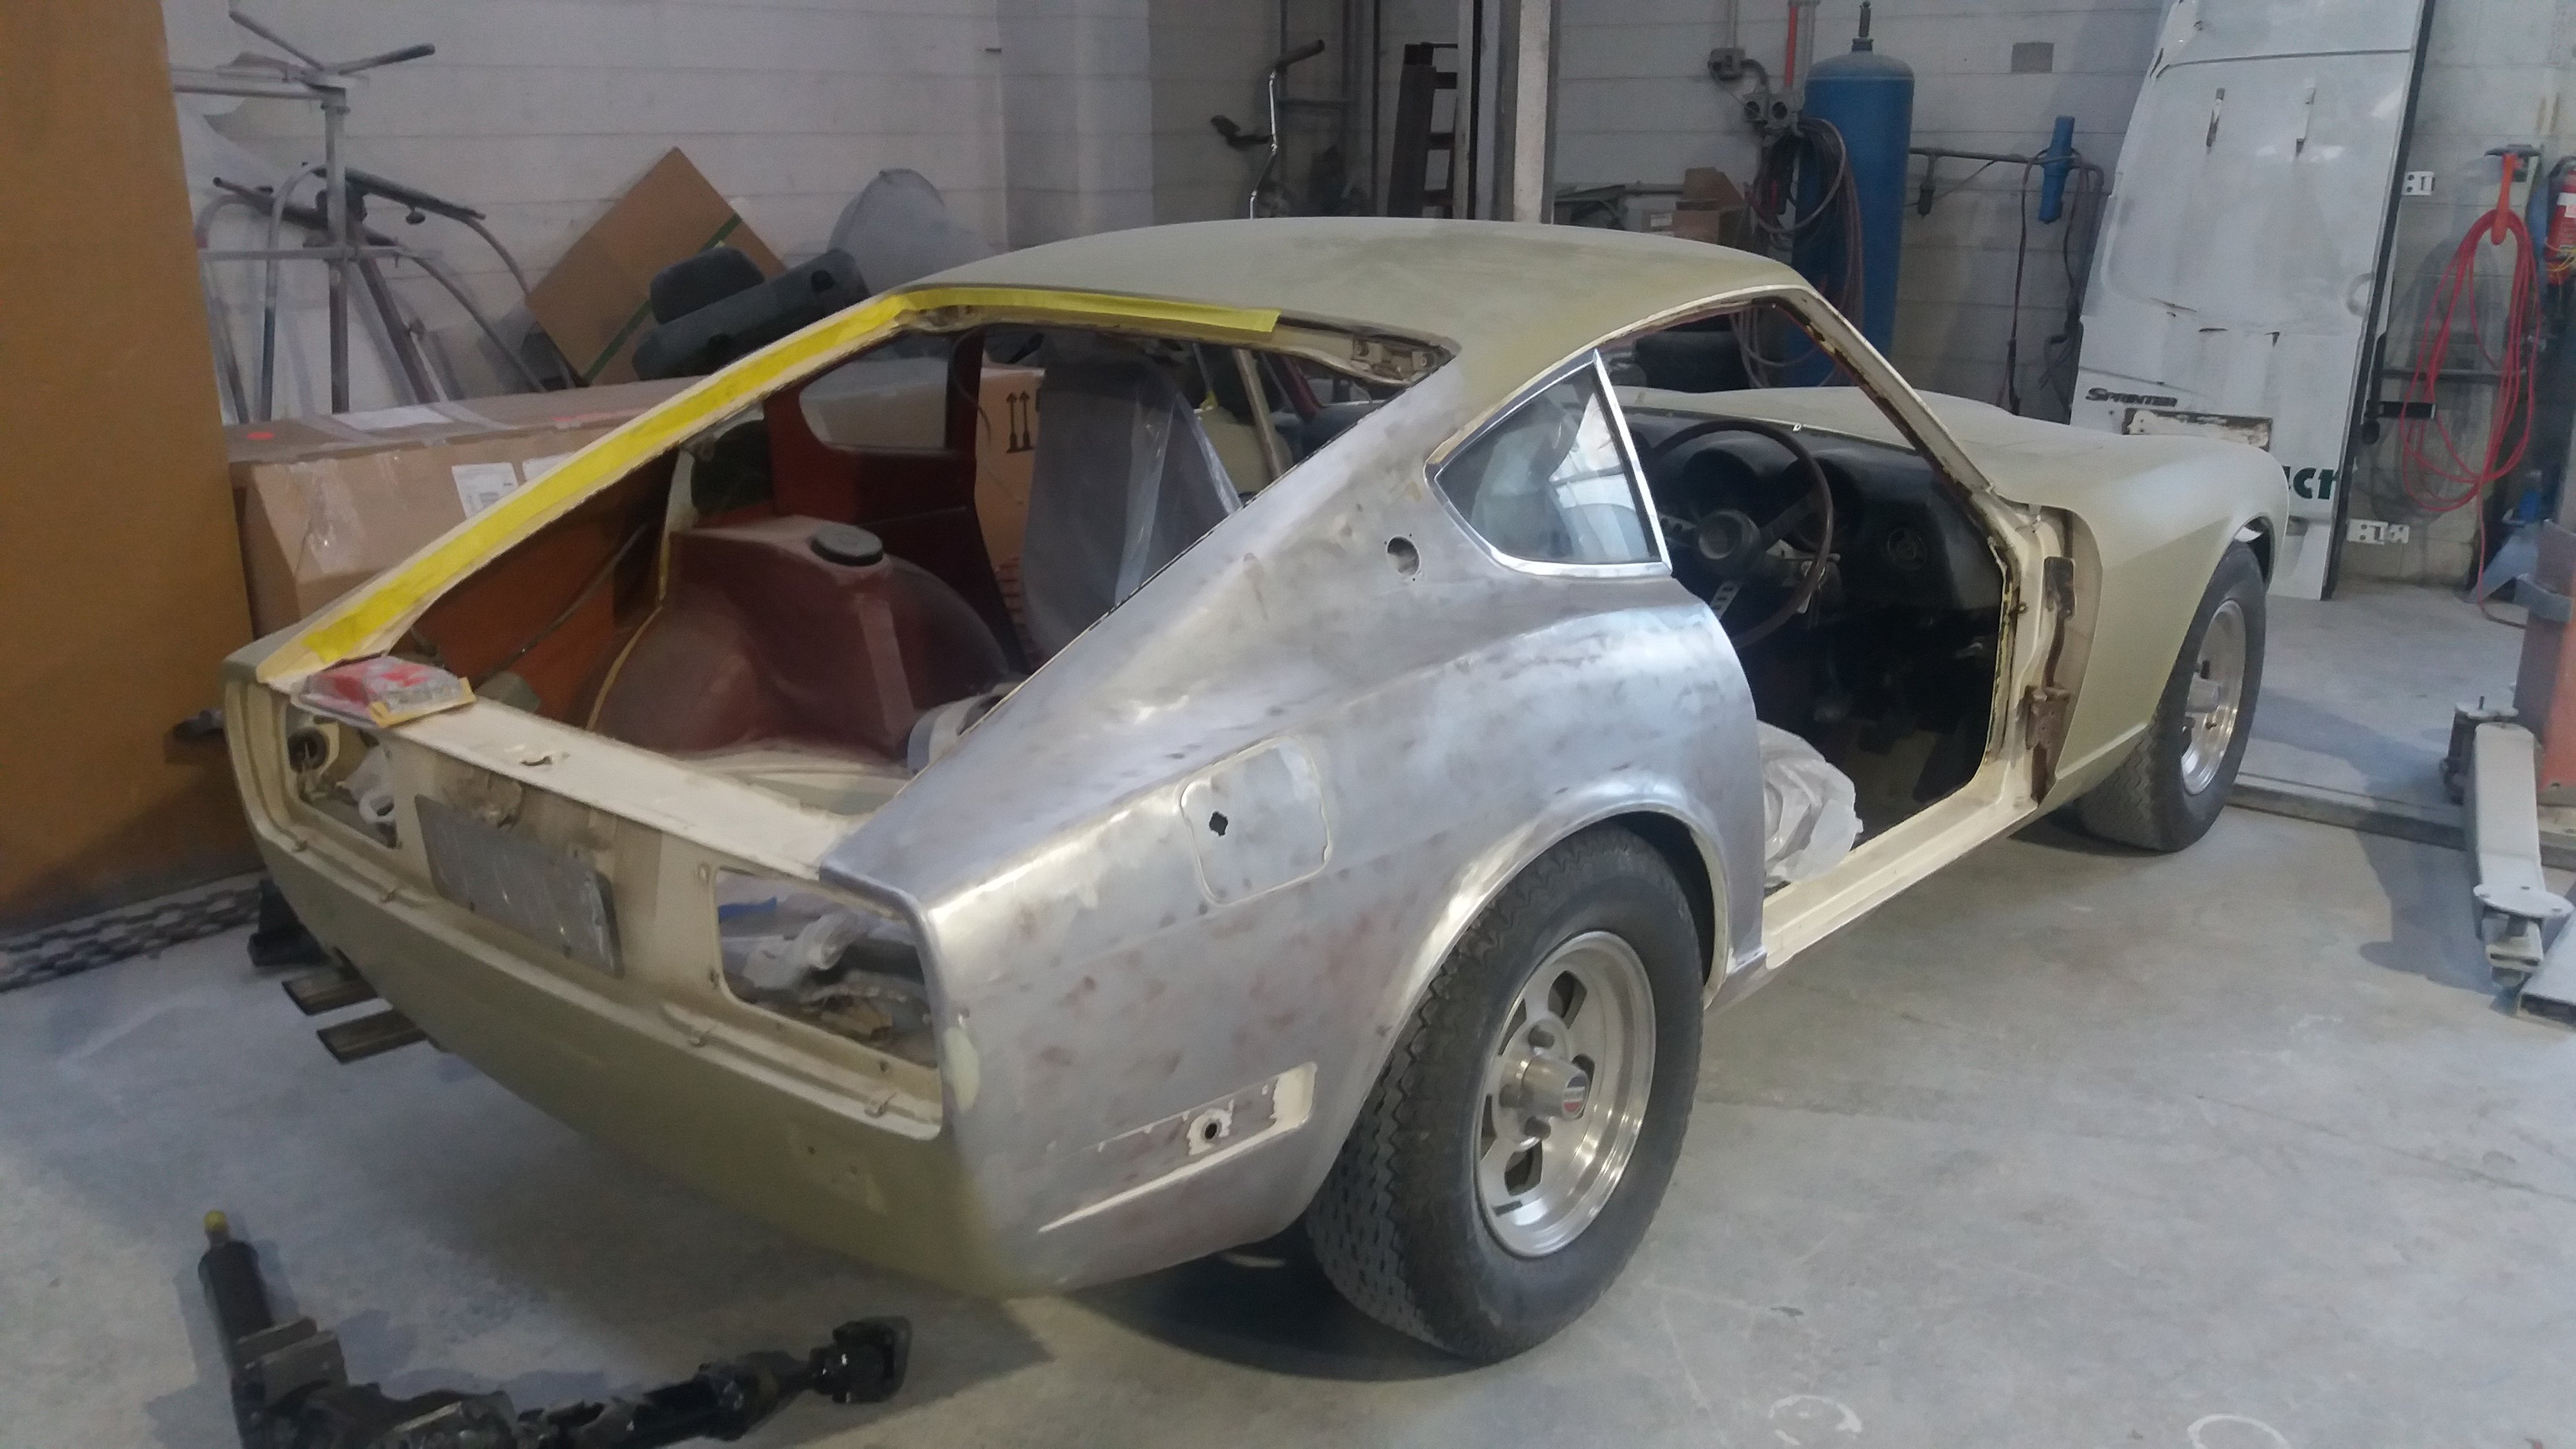
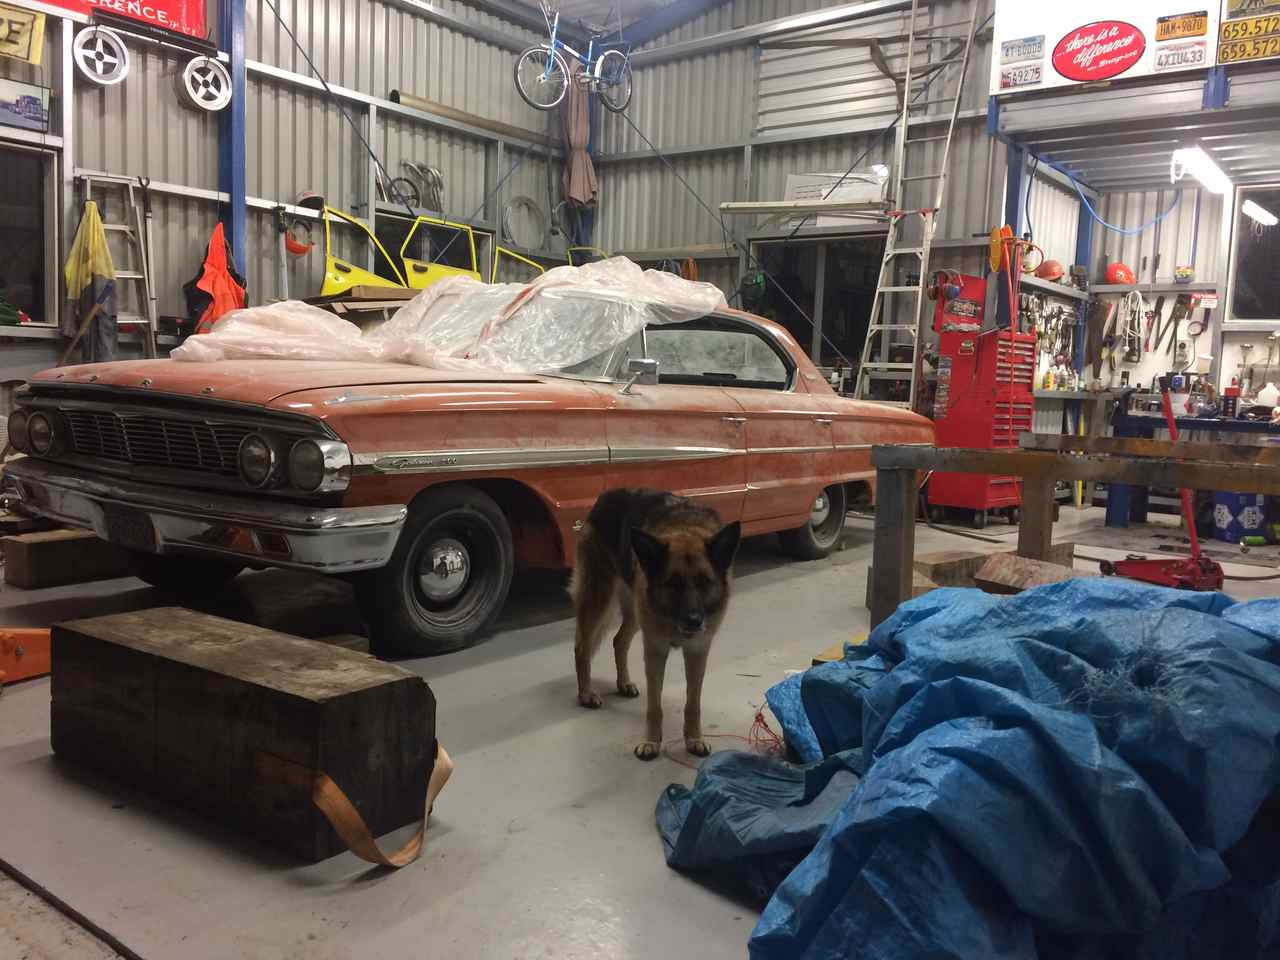
So yeah. Found out about this fine specimen right after Nats '18 after mentioning i'd like a hardtop to throw spanners at. Seedy Al mentioned I should speak to Goat, and so I did, the rest is history. It had been living in Goat / Joe's shed for a while and after some discussions I had it trucked down a couple of weeks ago. Specs: 1982 Toyota Corolla, GL “Lime” with a 3AU powerhouse and 5 speed manual trans. Lime is along the same lines as Lisse, a luxury variant of the GL model (Lisse for XL) featuring automatic transmission and power-steering. They were marketed heavily towards women in Japan. (Thanks Wikipedia). Plans including lowering it and upgrading the brakes and giving it a spruce up. Engine can come later, as it would more than double the budget given drivetrain upgrades required. There will also be all the boring bits like fixing rust, replacing half the car and all that carry on. This is actually hardtop number two, but who is counting. Teaser pics for now. Discussion Fred.
14 points
-
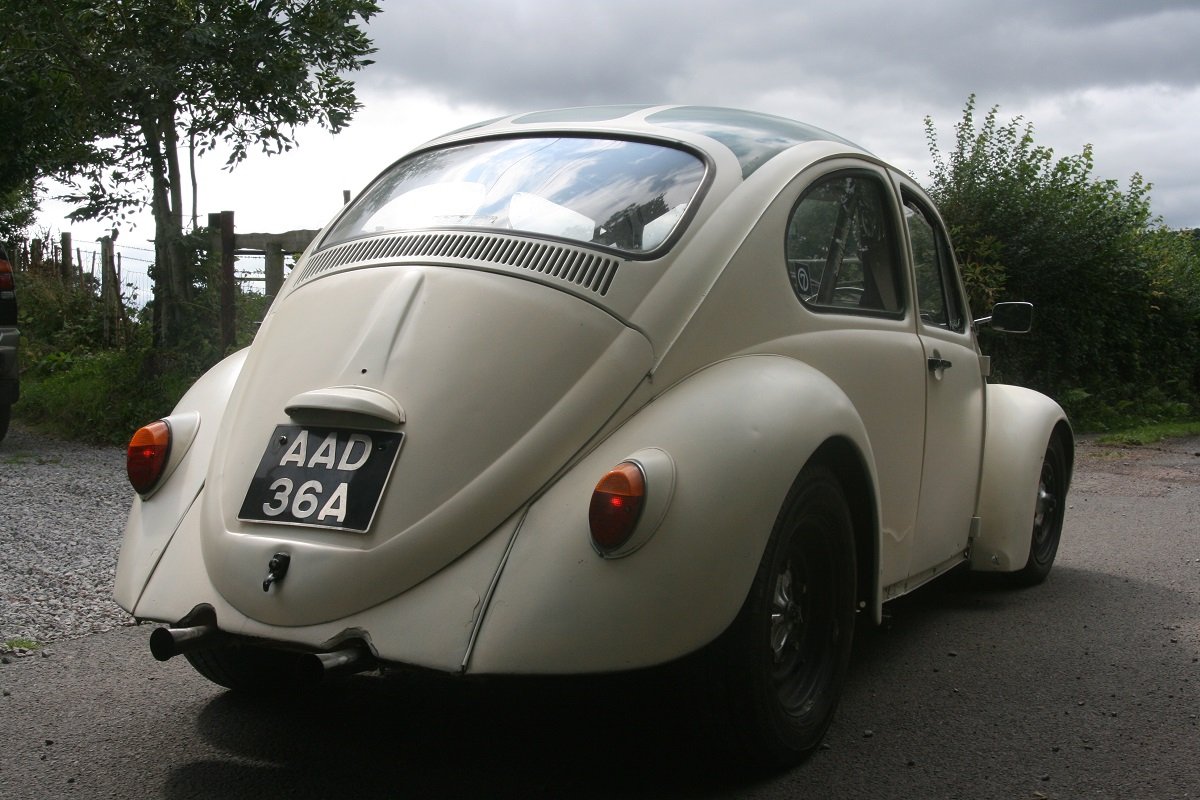
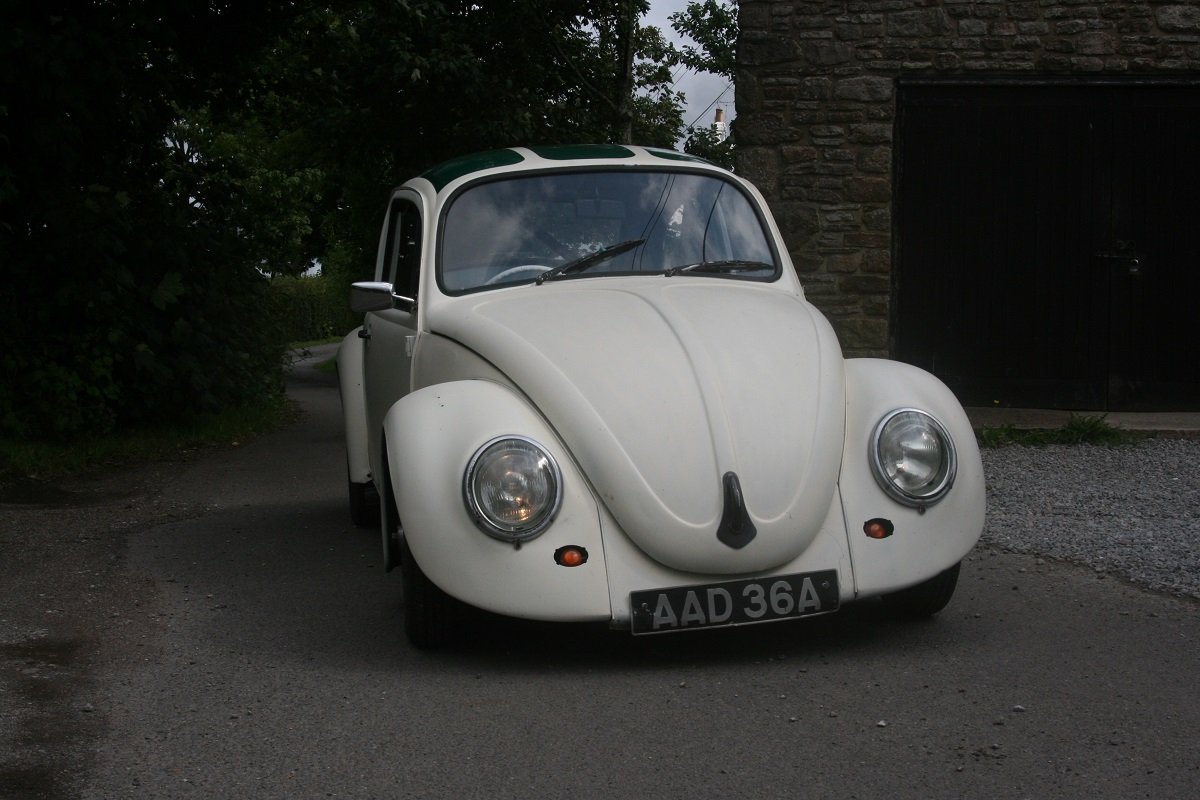
Ok, so not even slightly Baja anymore, but still a bug. 2" drop spindles fitted this morning, hopefully paint on Friday. Found all sorts of bad practice on the front suspension, all mended and safe now. pics
10 points
-
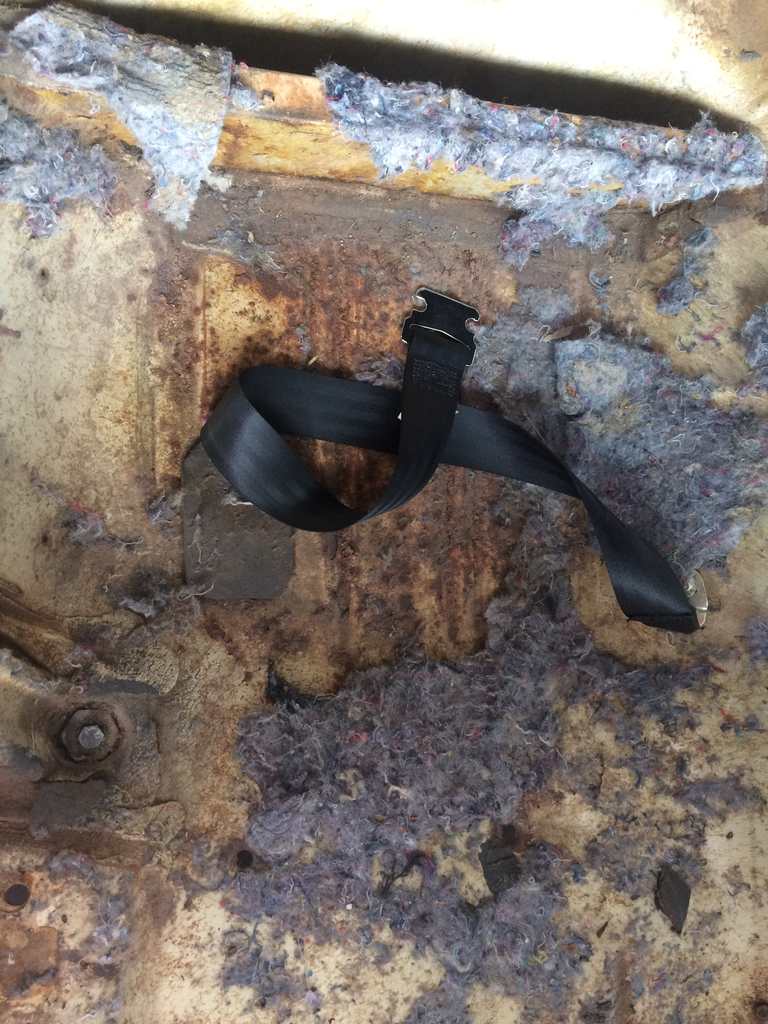
Rust found has been minimal as expected. Behind rear arches, in the rear dog-leg and the bottom of the front quarter panels. Would have spread over time so good to get it chopped out anyhow. Found out she has been in a bit of a crash probably back in the 70's since the rear left panel on it was bonded with lead joins (proper OS). Doesn't bother me since the repair has stood the test of time very well.
9 points
-
That's the plan, but I'm at work and I don't think the files on my computer are sufficiently abrasive.5 points
-
Most Original Rally Car 'winner' and my "Prizes"4 points
-
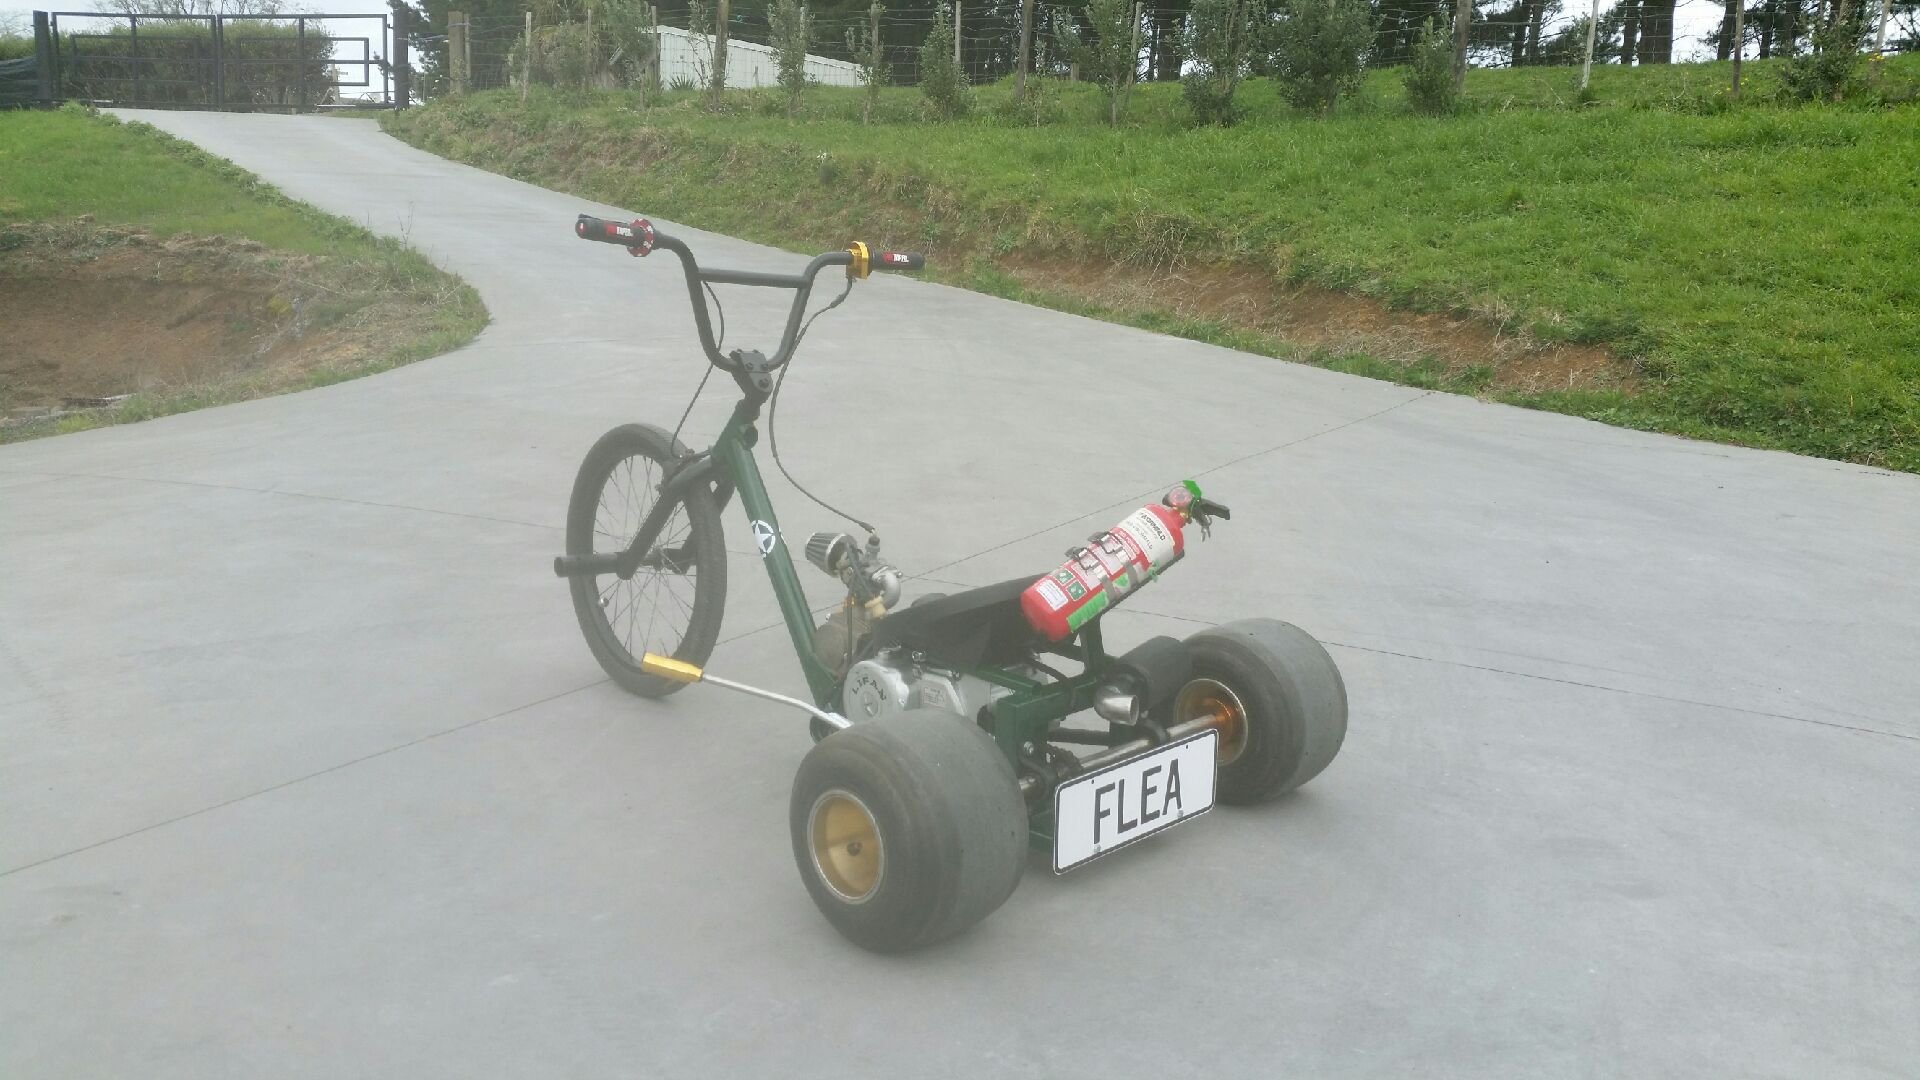
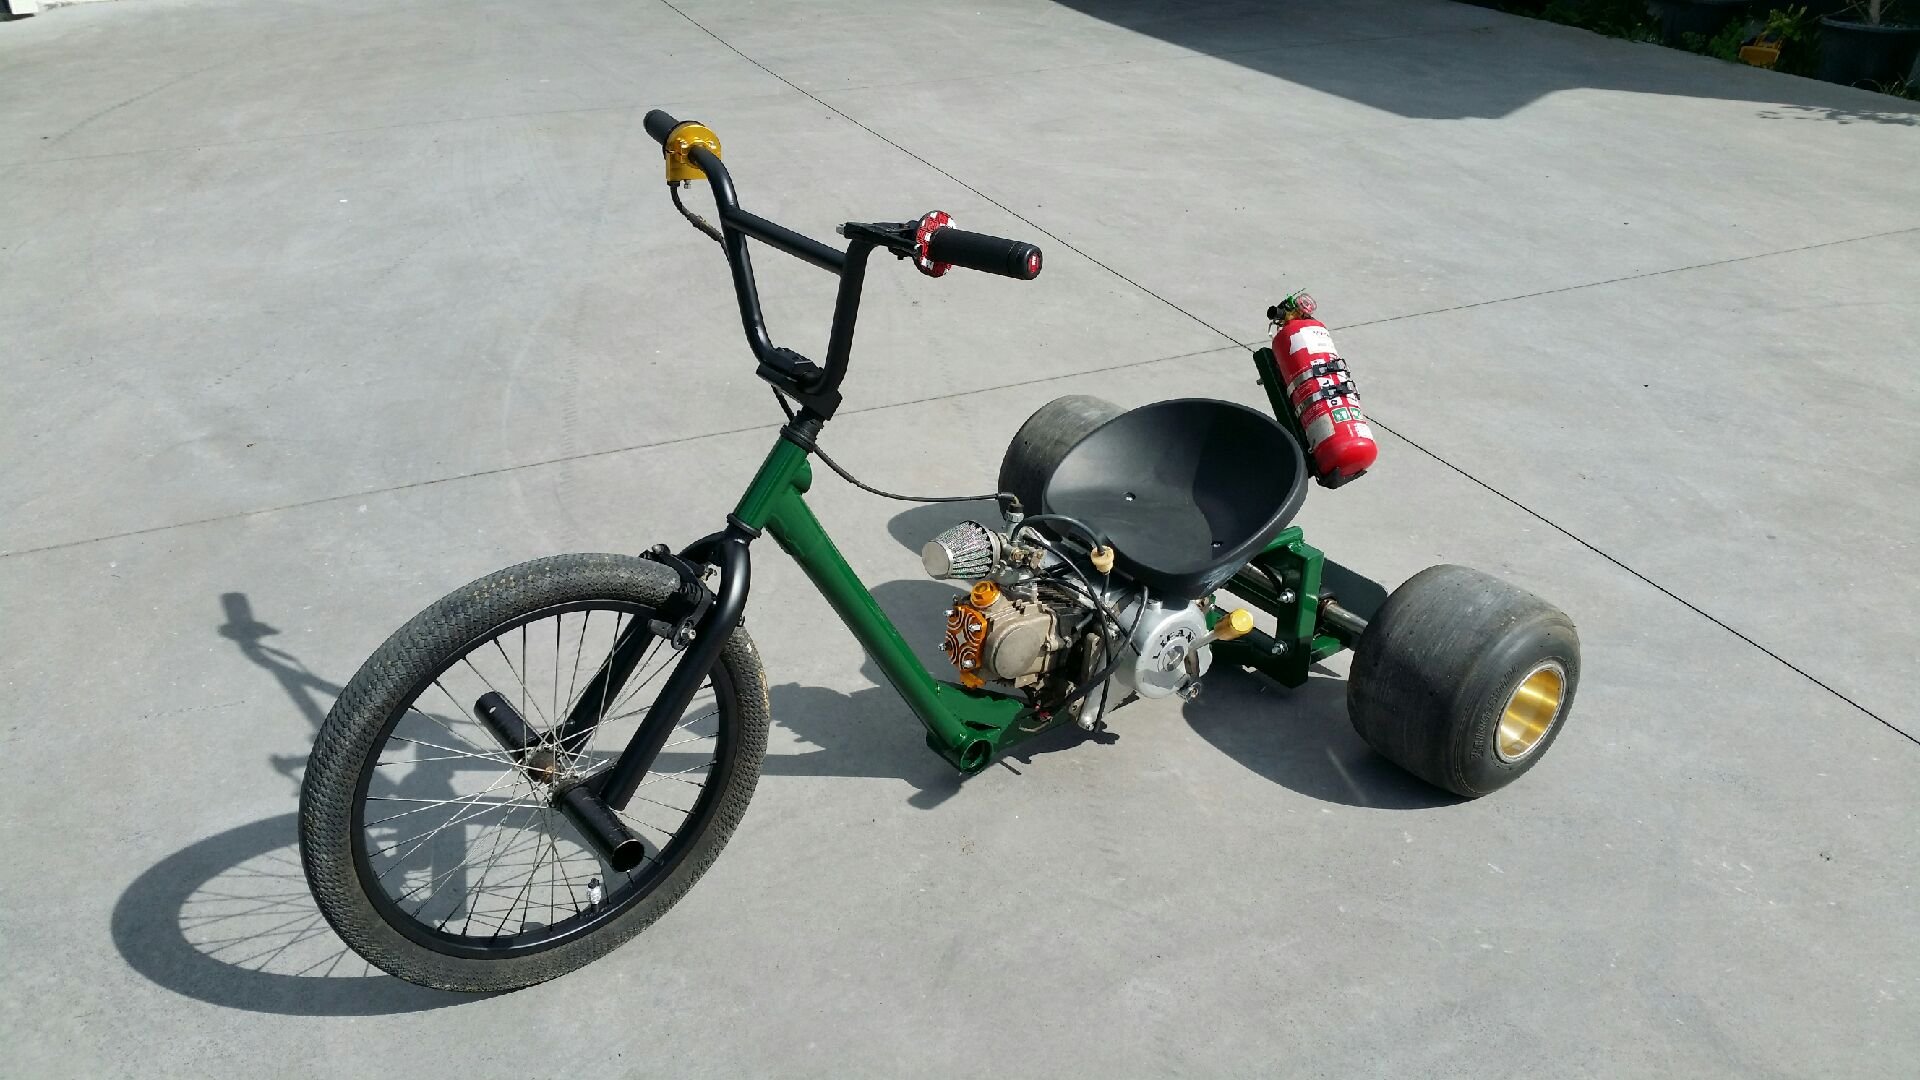
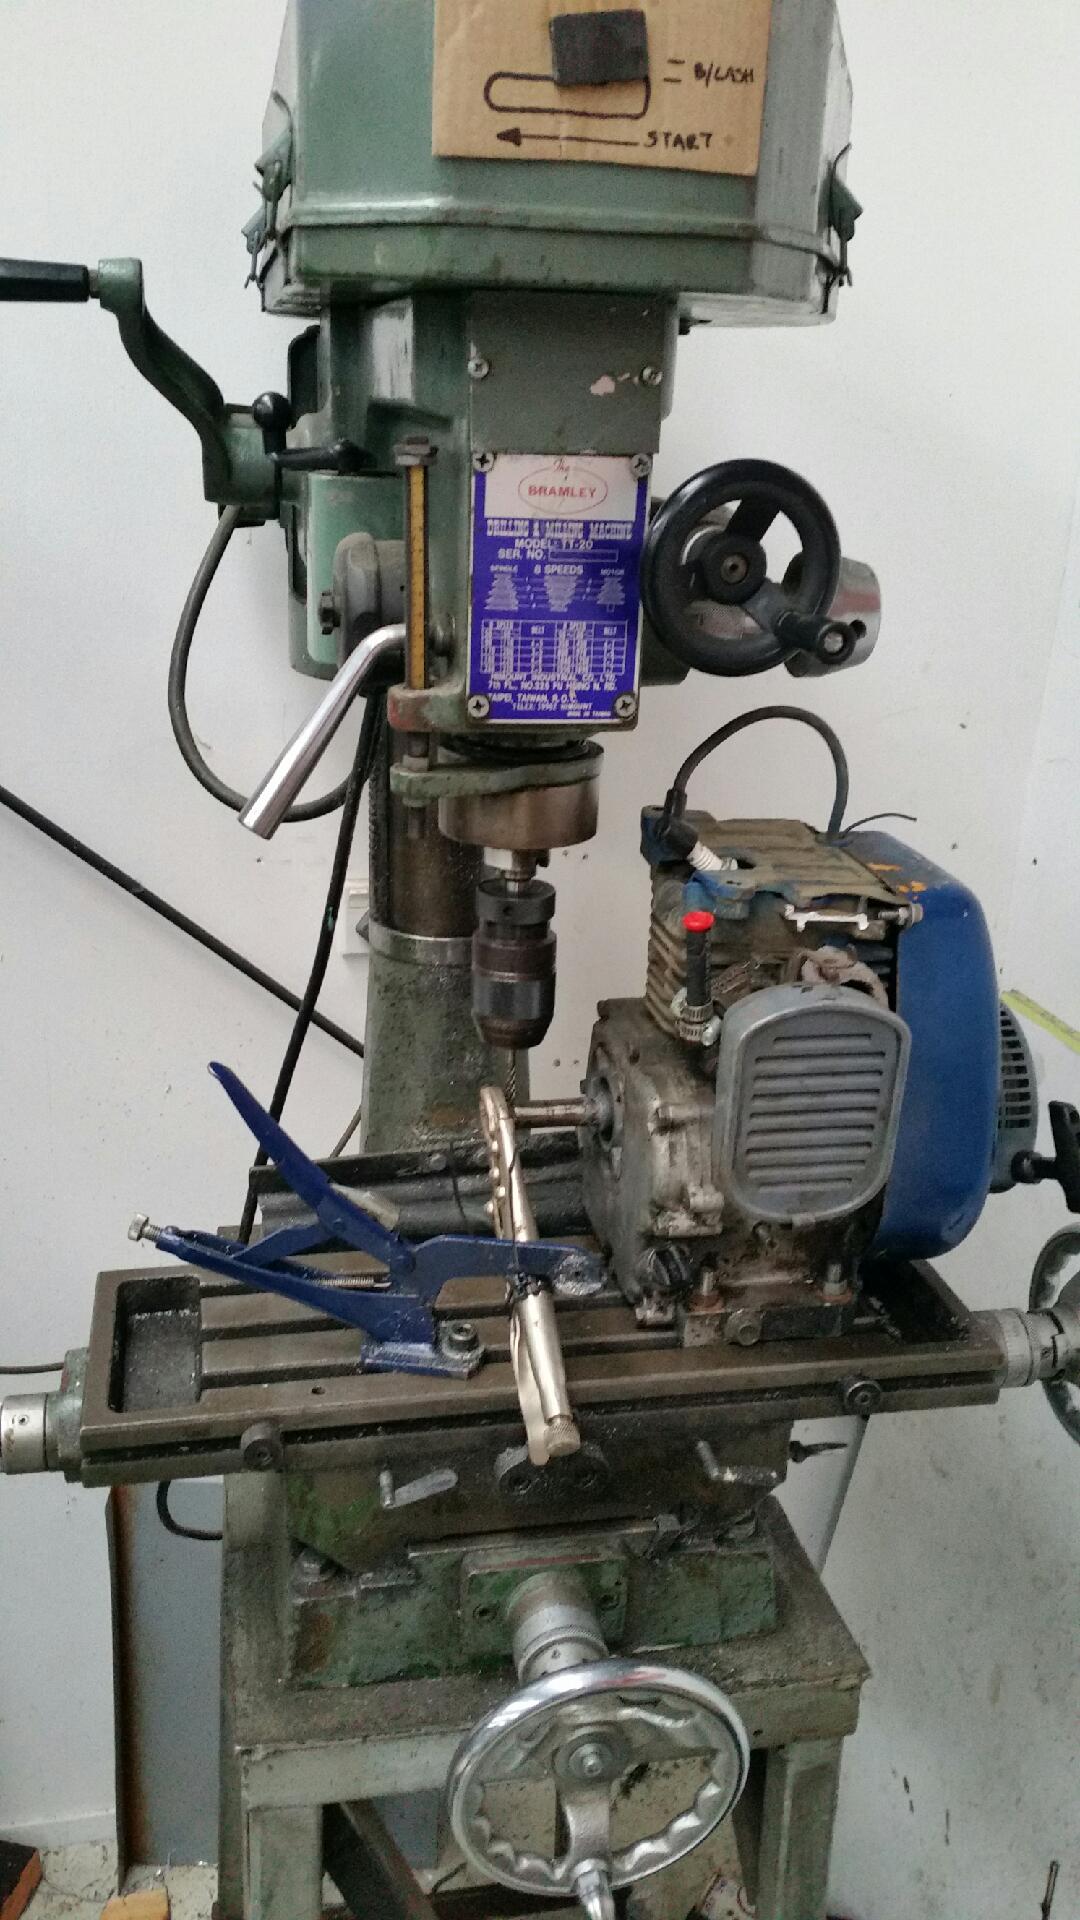
So...sick child sent home from school equals opportunity to stay home too:) So close. Needs pvc pipe on tires, fuel lines and wiring to finish.
4 points
-
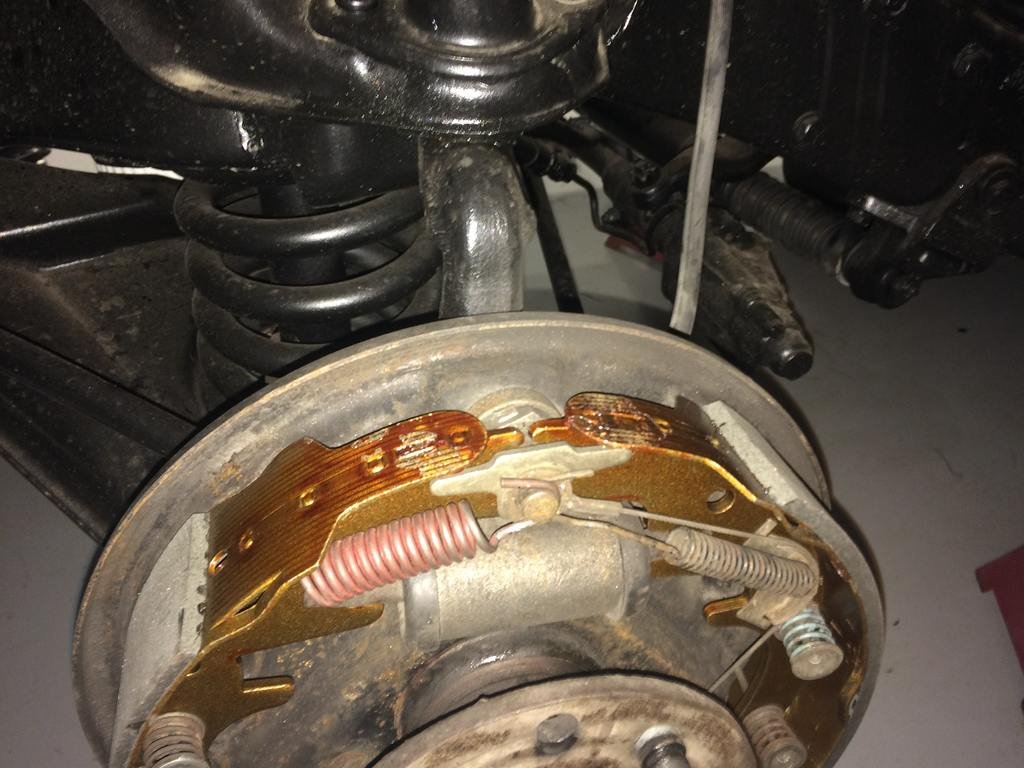
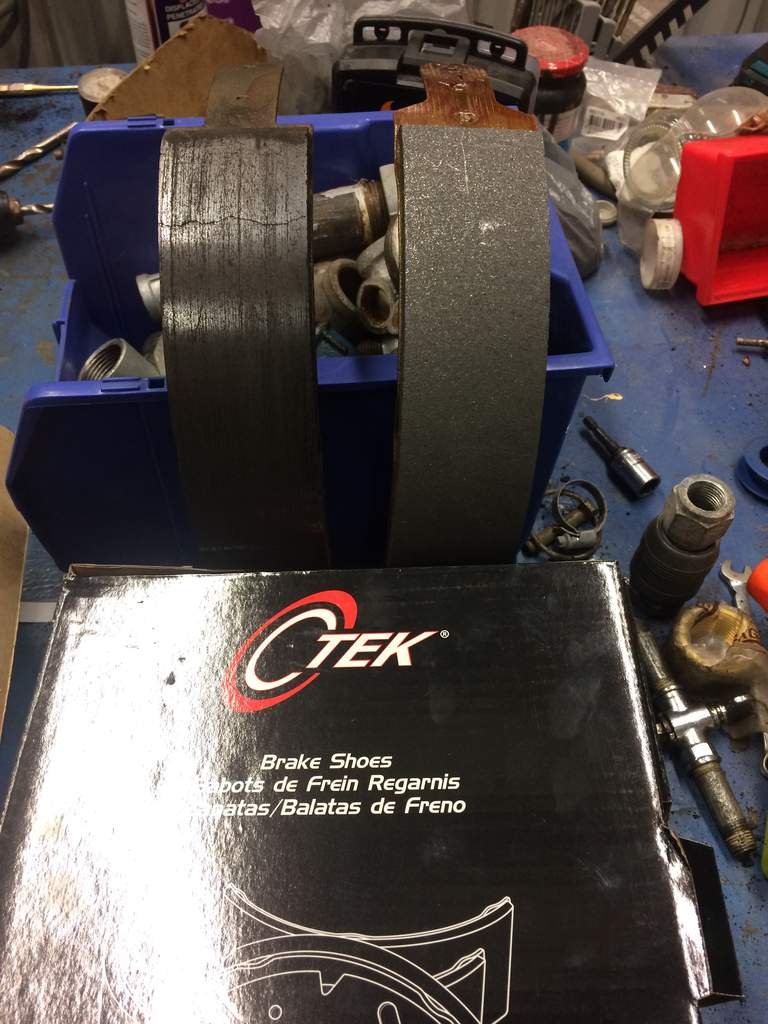
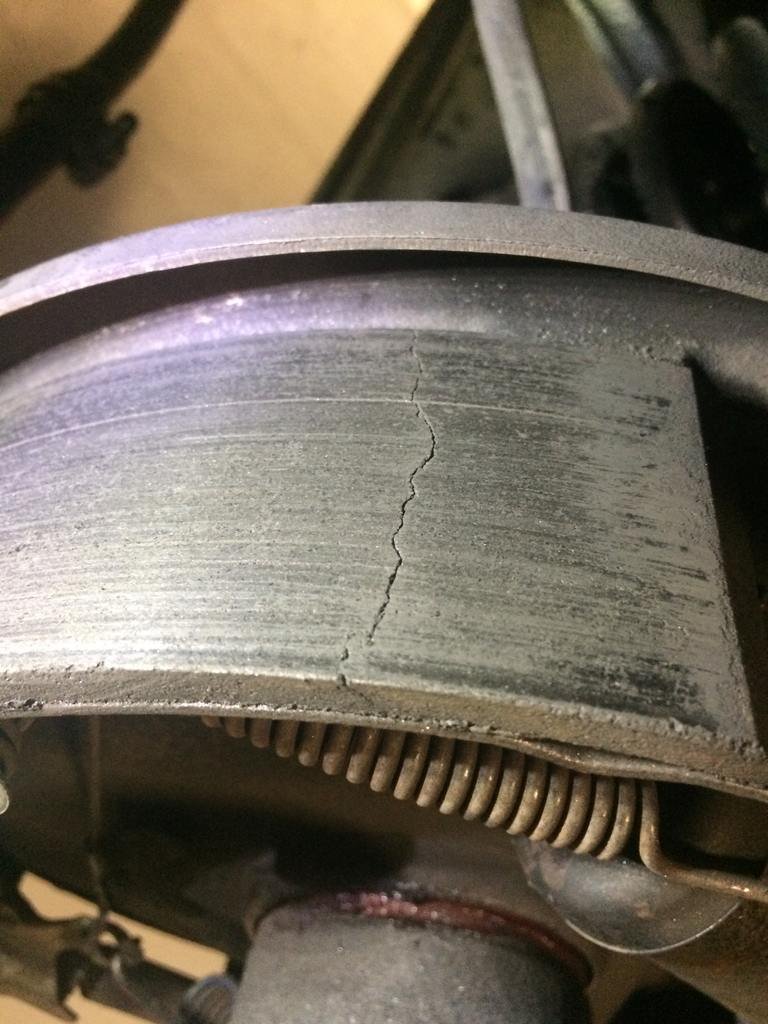
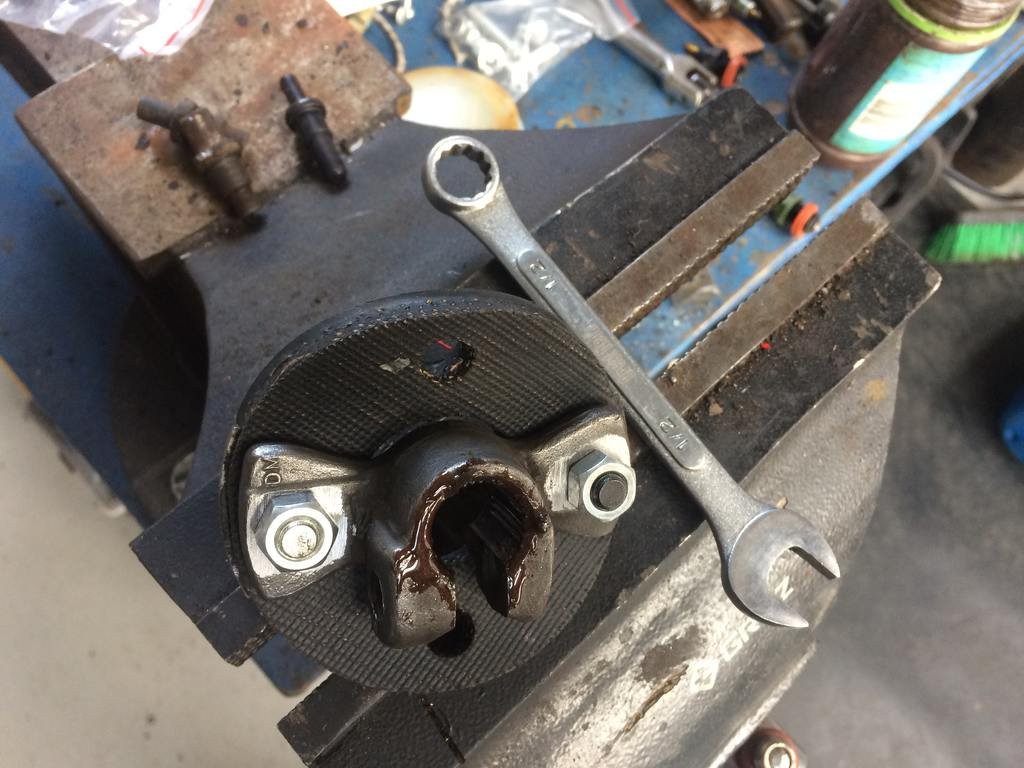
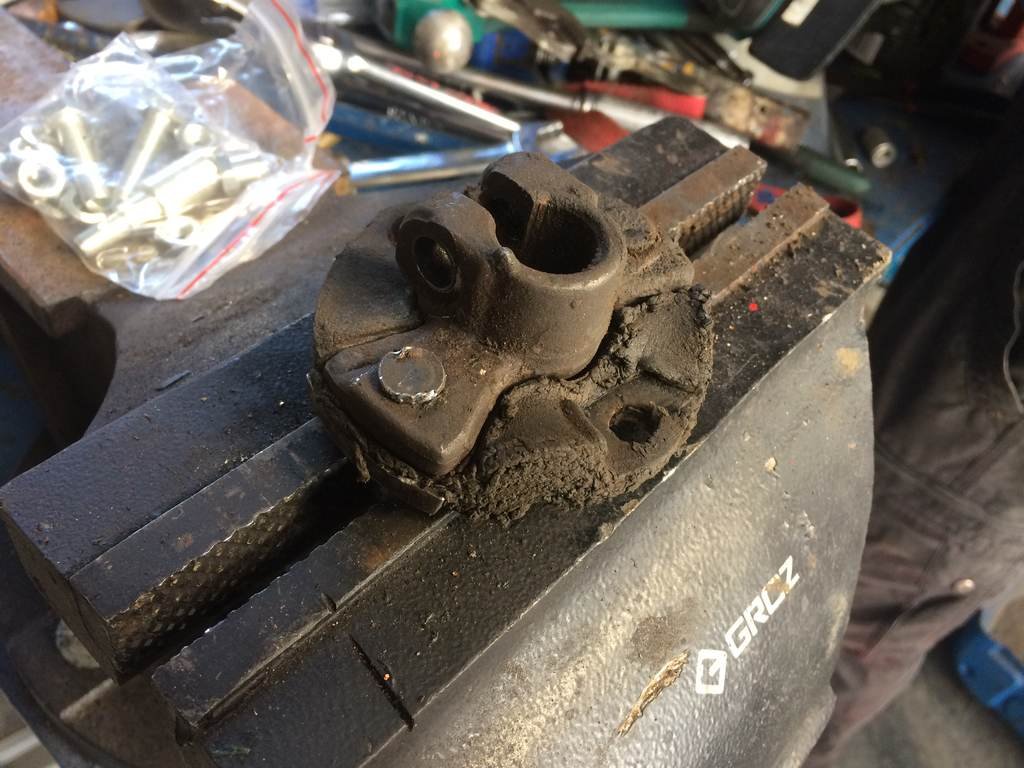
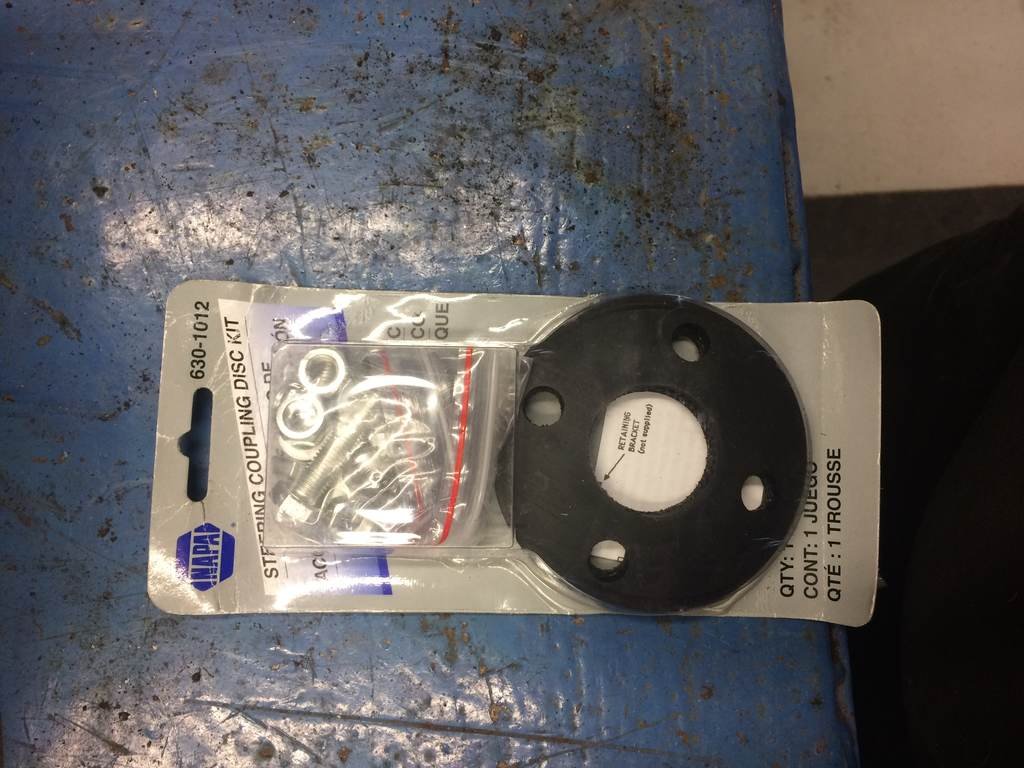
so with the car failing its compliance check i only agreed with two of the items that were failed on the list. one being that the rear shoes on the front brake shoes having a crack through them. they had done less than 800km and every brake part being new apart from the hard lines . so pulled the cracked ones off and got a replacement set under warranty due to no heat spots or any signs of user error. also those dam brake springs in these are not so fun to put in. and the other thing i agreed with them failing was the rag joint which is the joint between the steer column and steering box so ordered a new one from northwestern ford and received it the next day then pulled the joint out then disassembled the rubber joint and placed the new rubber joint onto the steel housing And now the old rubber joint as you can see is well past its use by date And now with those major bits fixed its now onto the silly bits they failed.
4 points
-
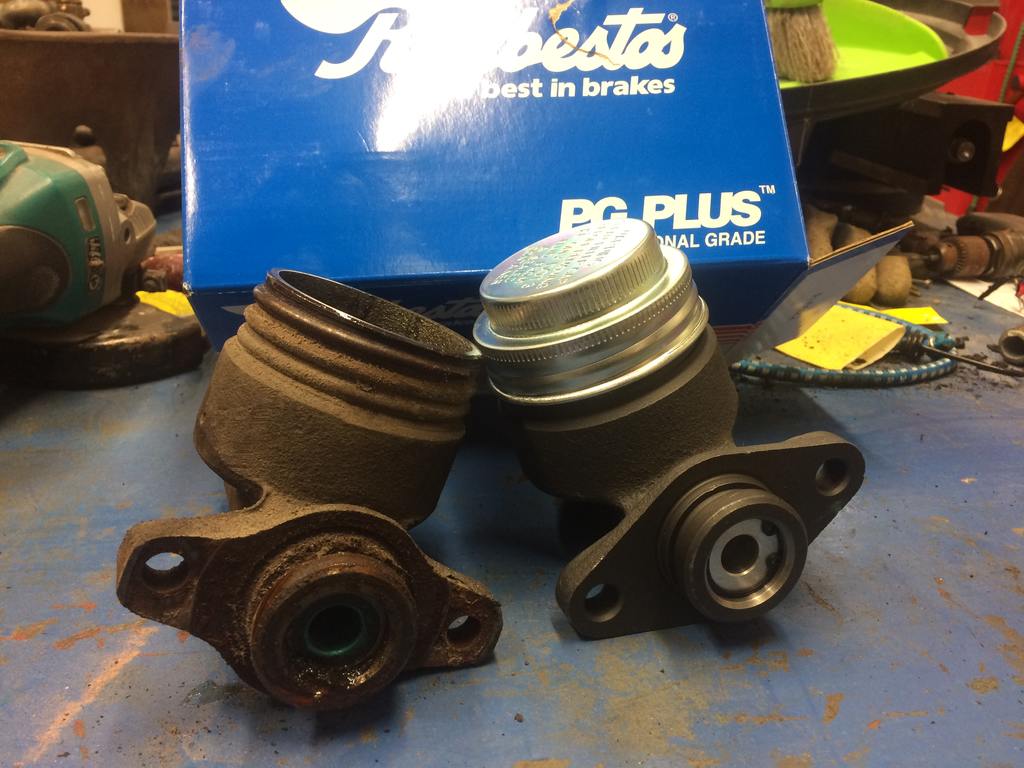
Been home sick from hanmer. Decided I should do a little on this. So this arvo pulled the booster and MC found the pin in the booster was to long for the MC by 3ish mm. Pulled pin out. Ground a bit of the end till it fitted without touching in the MC. No more dragging brakes for the win. Now just to work out why the rears grab so badly
3 points
-
I've got some spreadsheets that can grind about as much as a 9" if you need man2 points
-
yup, maybe rough out on the jack then standard burnout for finishing cut?2 points
-
Been working on the wiring. Finished the body loom. Went from this To this Started on the fuse box and relays Did new connectors for the digital dash. I used nylon braided sleeving for everything Also finished the backbone of the engine loom. The rest I will do in the car so I can work out the exact cable length I need. Link ECU all mounted Also got some new brighter bulbs now that I have some relays and better wiring. I went for 60/55W Halogen H4 with a P45T base. Should be quite a bit brighter than the old 45/40W incandescent bulbs2 points
-
So we have had this dusty old thing in the corner of dad's lock up for about 20 years. It's basically a family heirloom. incoming sharn: the story goes was that the old man was looking for a beach hack for me and my brothers to fluff about on, and potentially get it road legal. We got given it from good family friends of ours, who owned Tokoroa Yamaha at the time. all dad knew was that it had an "electrical fault". after confirming that it was not a faulty spark plug that was the issues, my father's mechanical knowledge was exhausted and off to the container it went. none of my brothers had the intention to do anything with it, so it would continue to gather dust for years until i spotted it a few years back. i went back home for a few days in july and decided to pull it out and take stock. its pretty rough, but i have been pining for another 2 stroke nangmobile since i sold my gp, and a long term restoration didnt phase me. the rego sticker on the plate would imply its been sitting since 1985. motor appeared to have ok compression. we proceeded to see if it would fire, but it wasnt playing ball. the primary coil was ok, and points were opening, but still nothing doing. after pricing up replacing the magneto and other electrical gubbins, i was losing hope. but then, last week i spotted a post on moped nz fb page from a rooster selling a complete, ran when parked motor in chch. i harassed him, tracked him down and acquired said motor for a decent price. also came with a few spares too. Much like Glenn Frey's debut single, the heat was on. im gonna get it to orig spec for a revin, then probably make some tasteful changes. probs gonna turn it into a little scramber and give it some cubits down some gravel roads. other issues to fix: - Front caliper is completely seized. pads stuck to piston, piston wont budge. was taxing moving it around before we took it off. - no key for ignition. new one ordered from ebay. - tank is cheeched. beyond repairable. going to sought for a nice replacement, now investigating options on what will fit (opinions/recommendations plz) - seat is incorrect. old boy reckons the original is somewhere in the garage... basically its gonna get a full overhaul. the chrome is actually in good condition in most places, forks might get rechromed but the rest is restorable. im looking forward to working on it. miss the simplicity of a single 2 stroke 125, those blardy 4 stroke things are over engineered. so yeah im on the hunt for any and all spares. the bike is in palmy and im in queenstown, so progress is gonna be slow. but it's OS, im sure you all wont mind. also keen for some advice on aliexpress tanks, and the likelihood of a knockoff cb125 tank fitting on this... some inspiration1 point
-
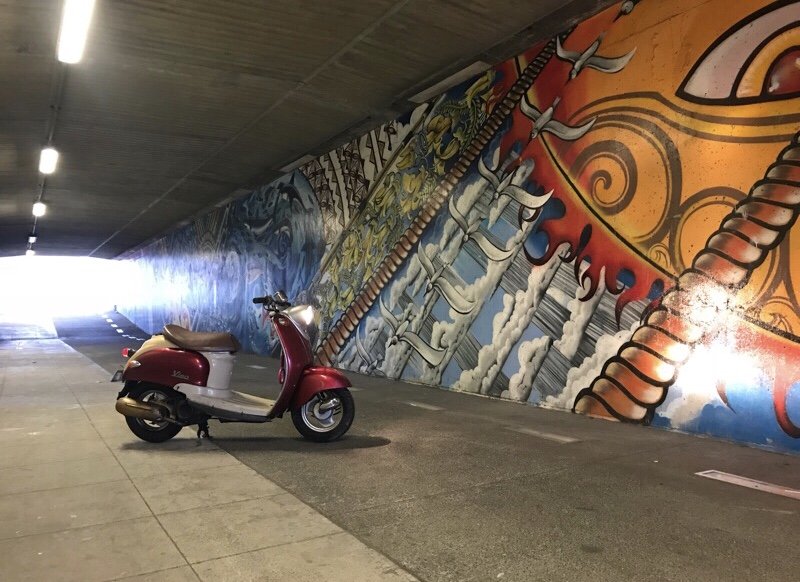
So with the SJ out of my life and a clear head, I dragged the vino out from under the tarp it had been sitting under up the back yard. story behind this Is I got a phone call from a guy I used to work with saying ‘im having a clean up and I’ve got this scooter taking up space in my shed. it’s an asian Vespa looking thing. It’s been crashed and I can’t get it to start. I was like aw yeah, could be worth a look, took my trailer just in case, had some yarns and dragged it home. Turns out it’s a Yamaha Vino. It has been crashed and has a few cosmetic scratches on the plastics and a whole a bunch of broken plastics on the LH rear but managed to source the missing/broken bits from Zebradude, albeit off a Vmoto Milan and a different colour but not bothered as at least it’s complete now, -might colourmatch it and jam some paint over it at a later date. Pulled the carb off, cleaned it, charged the battery and fresh gas and yeah sweet it runs. Cleaned out the oil system and filled with fresh Motul oil, Bought and fitted a new 3.50-10 rear tyre as it was junk. Gave it the same Slam and underglow treatment as the SJ. Any lower in the back will need fuel tank relocated/modifications and the front tyre pretty much rubbing on the cross of the forks. Took it for a ride this evening and it seems to move along well. pics from the good side at a distance on full droop on the stand. Good Smoko runner tbh
1 point
-
Do you go for sneaky walks on your lunch as a break to get away from the office and just poke your nose it to see how it's going or see if you can catch an peak from across the road.1 point
-
just get the biggest you can find/afford1 point
-
@kicker yep will do.1 point
-
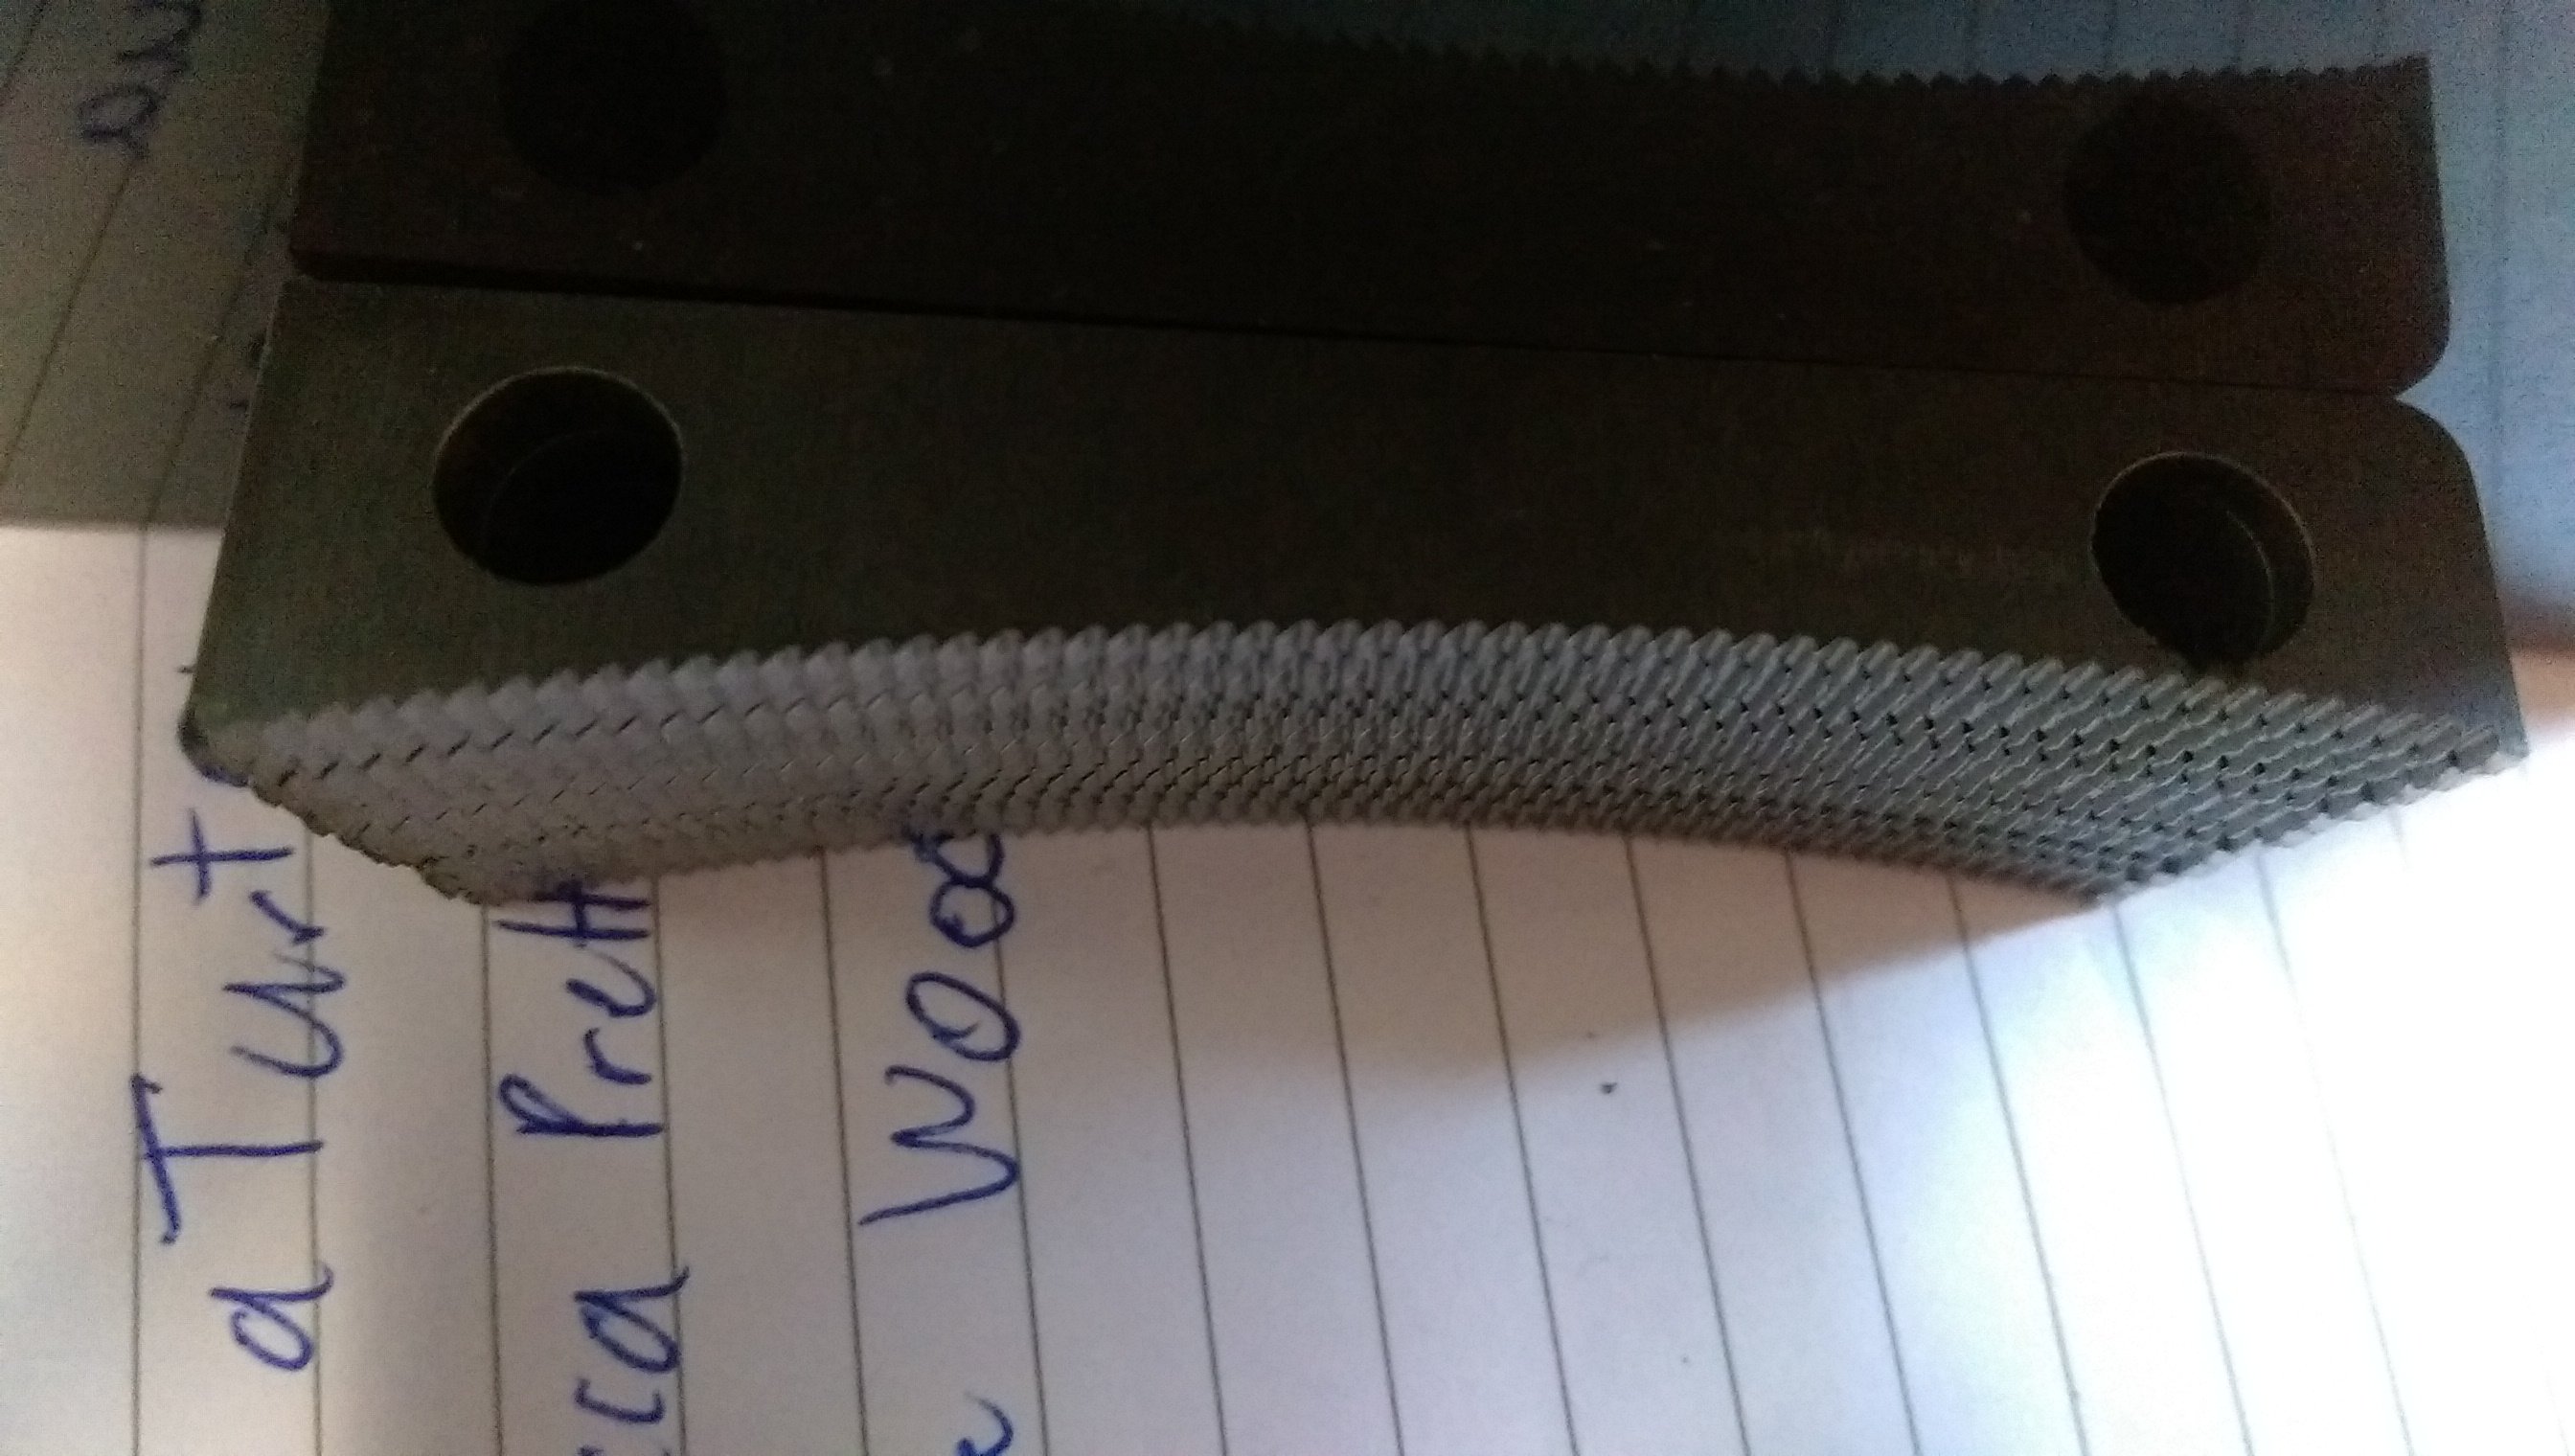
@flyingbrick I lined them up best as I could to take the photo. There is a bit of a bump on the back edge where the cut starts/stops and some slag on the back of the cut that is making it harder to line the teeth up properly.
1 point
-
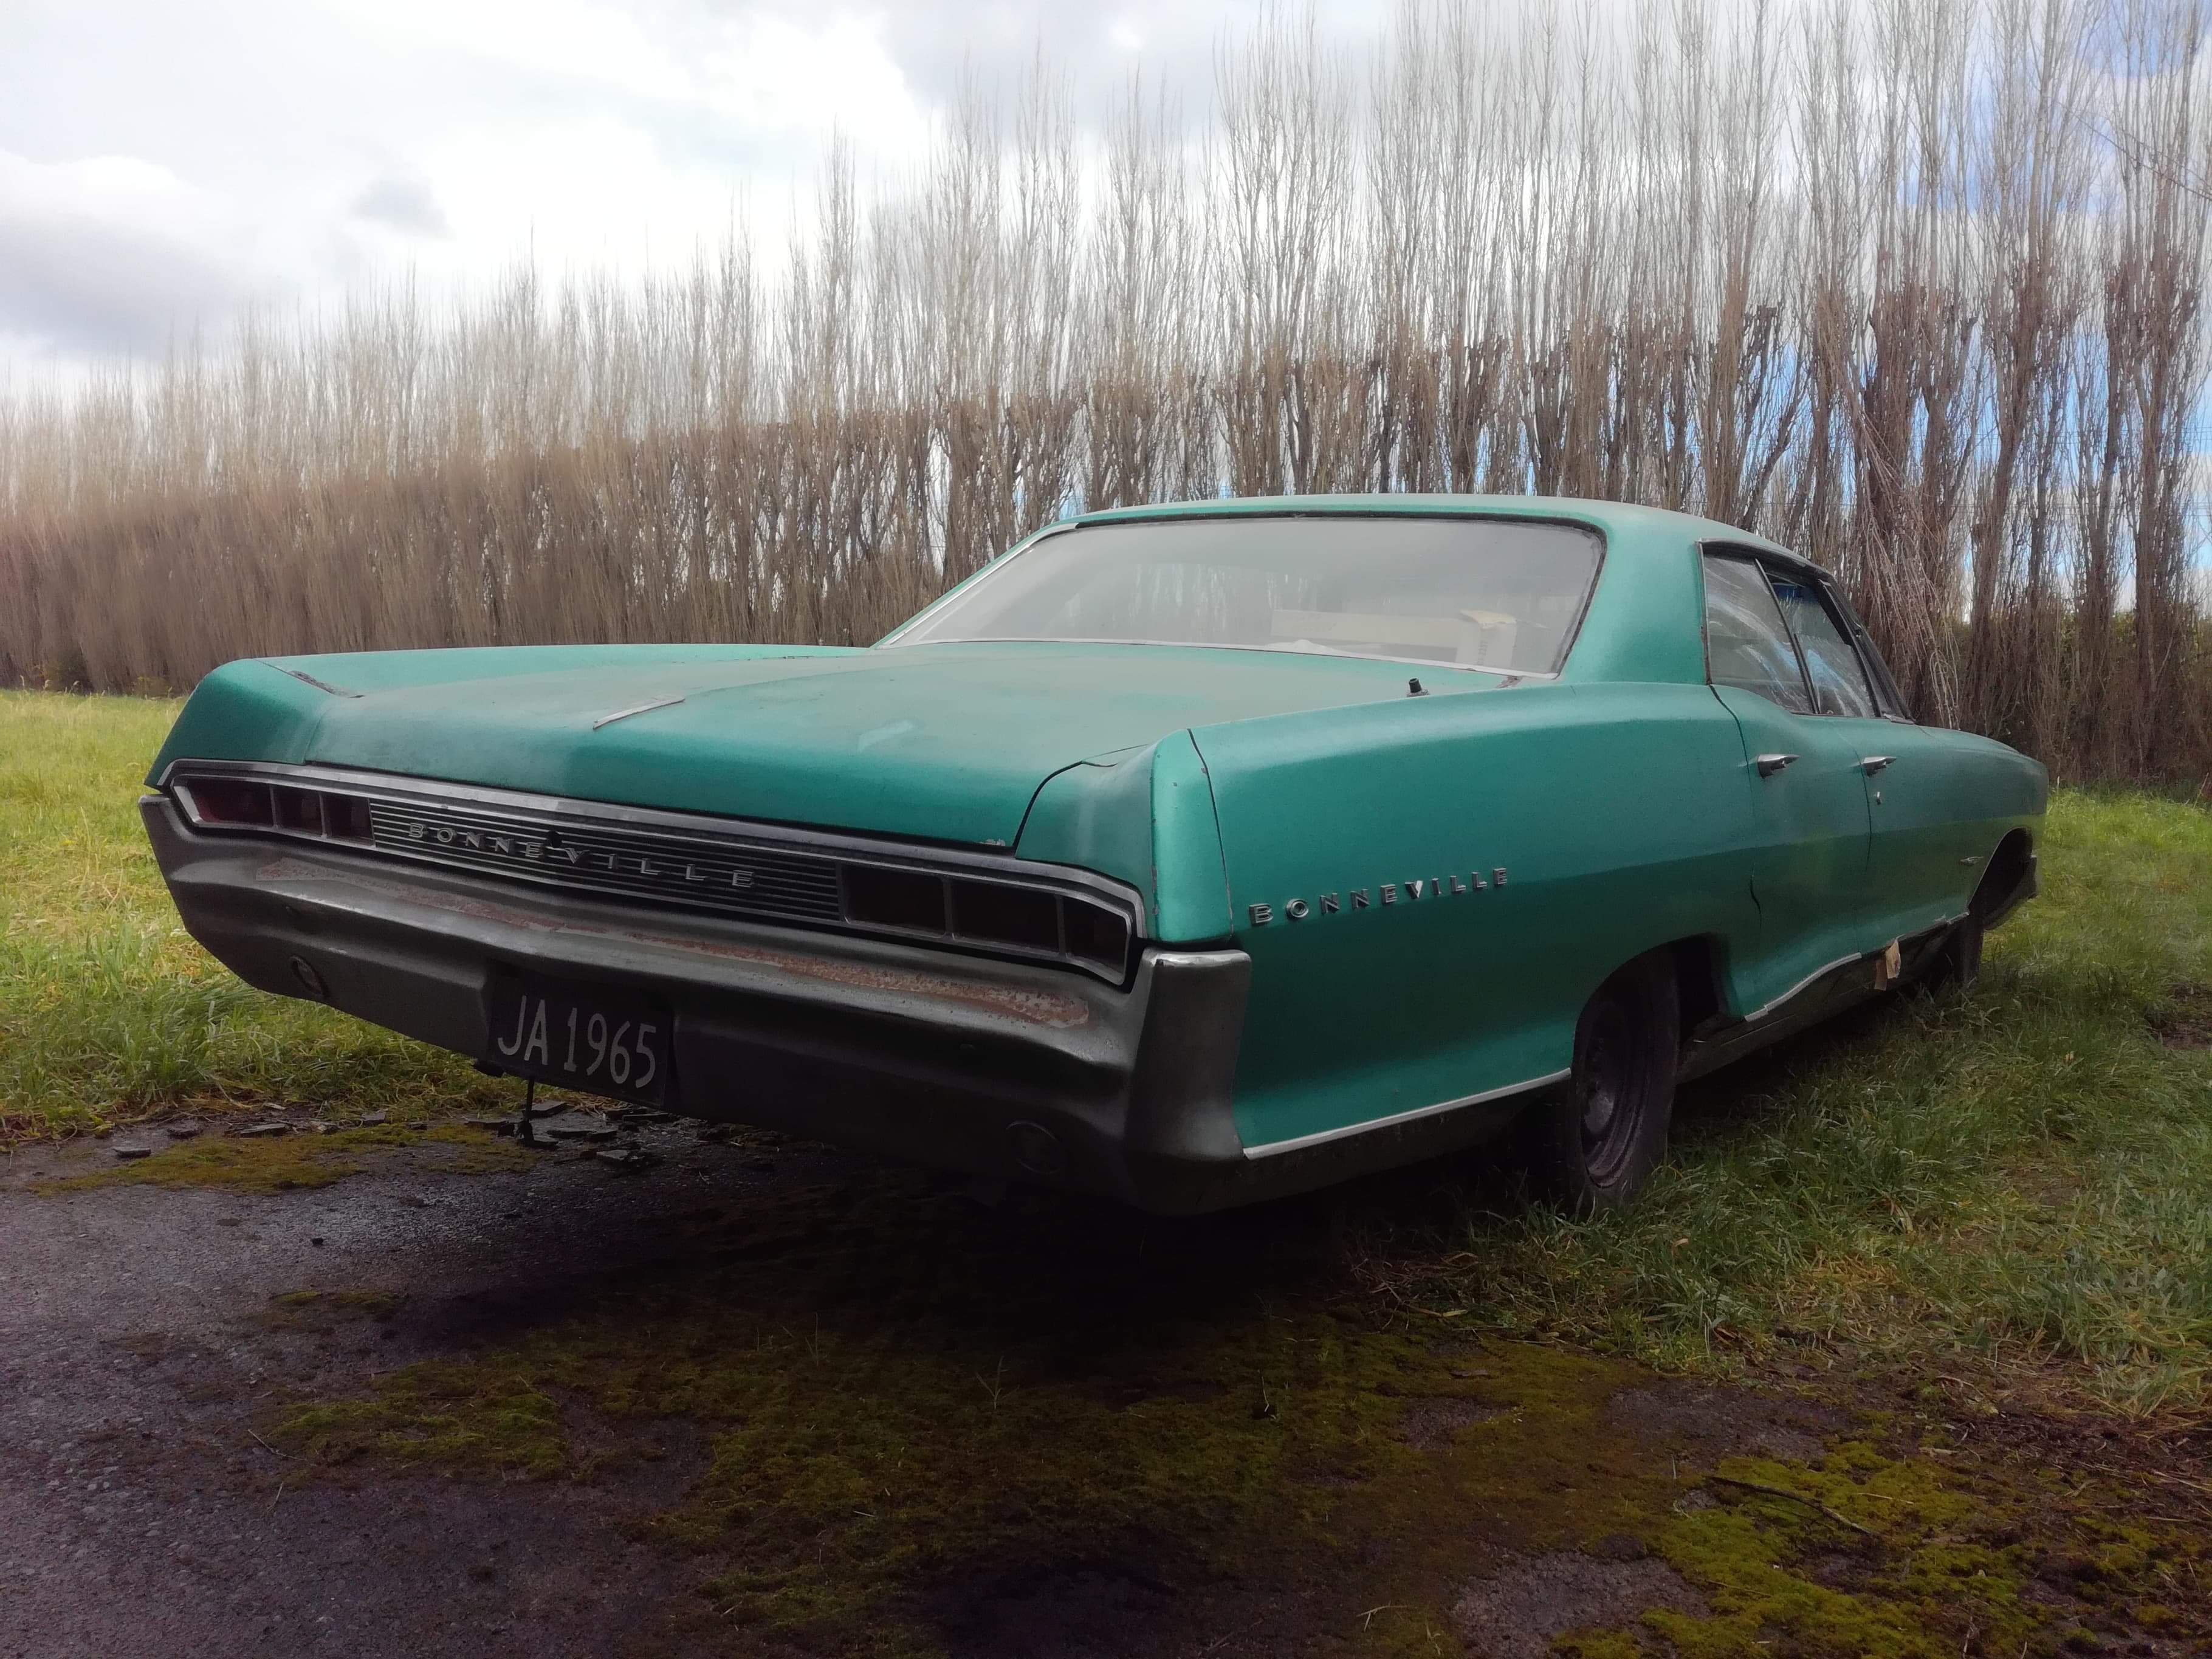
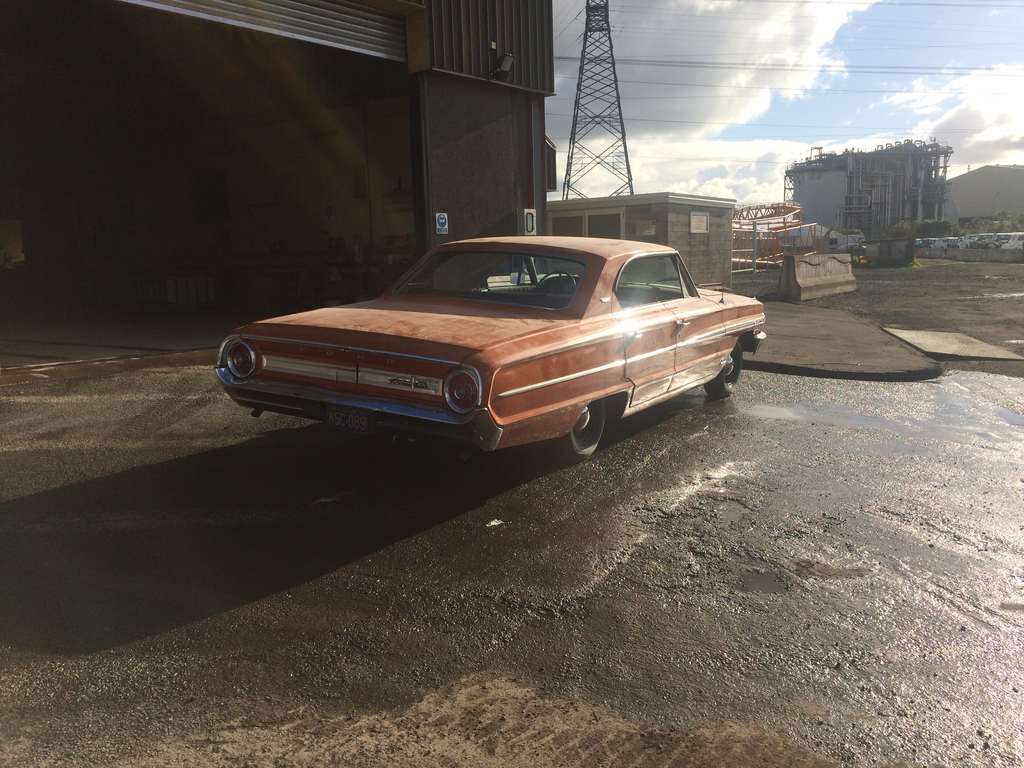
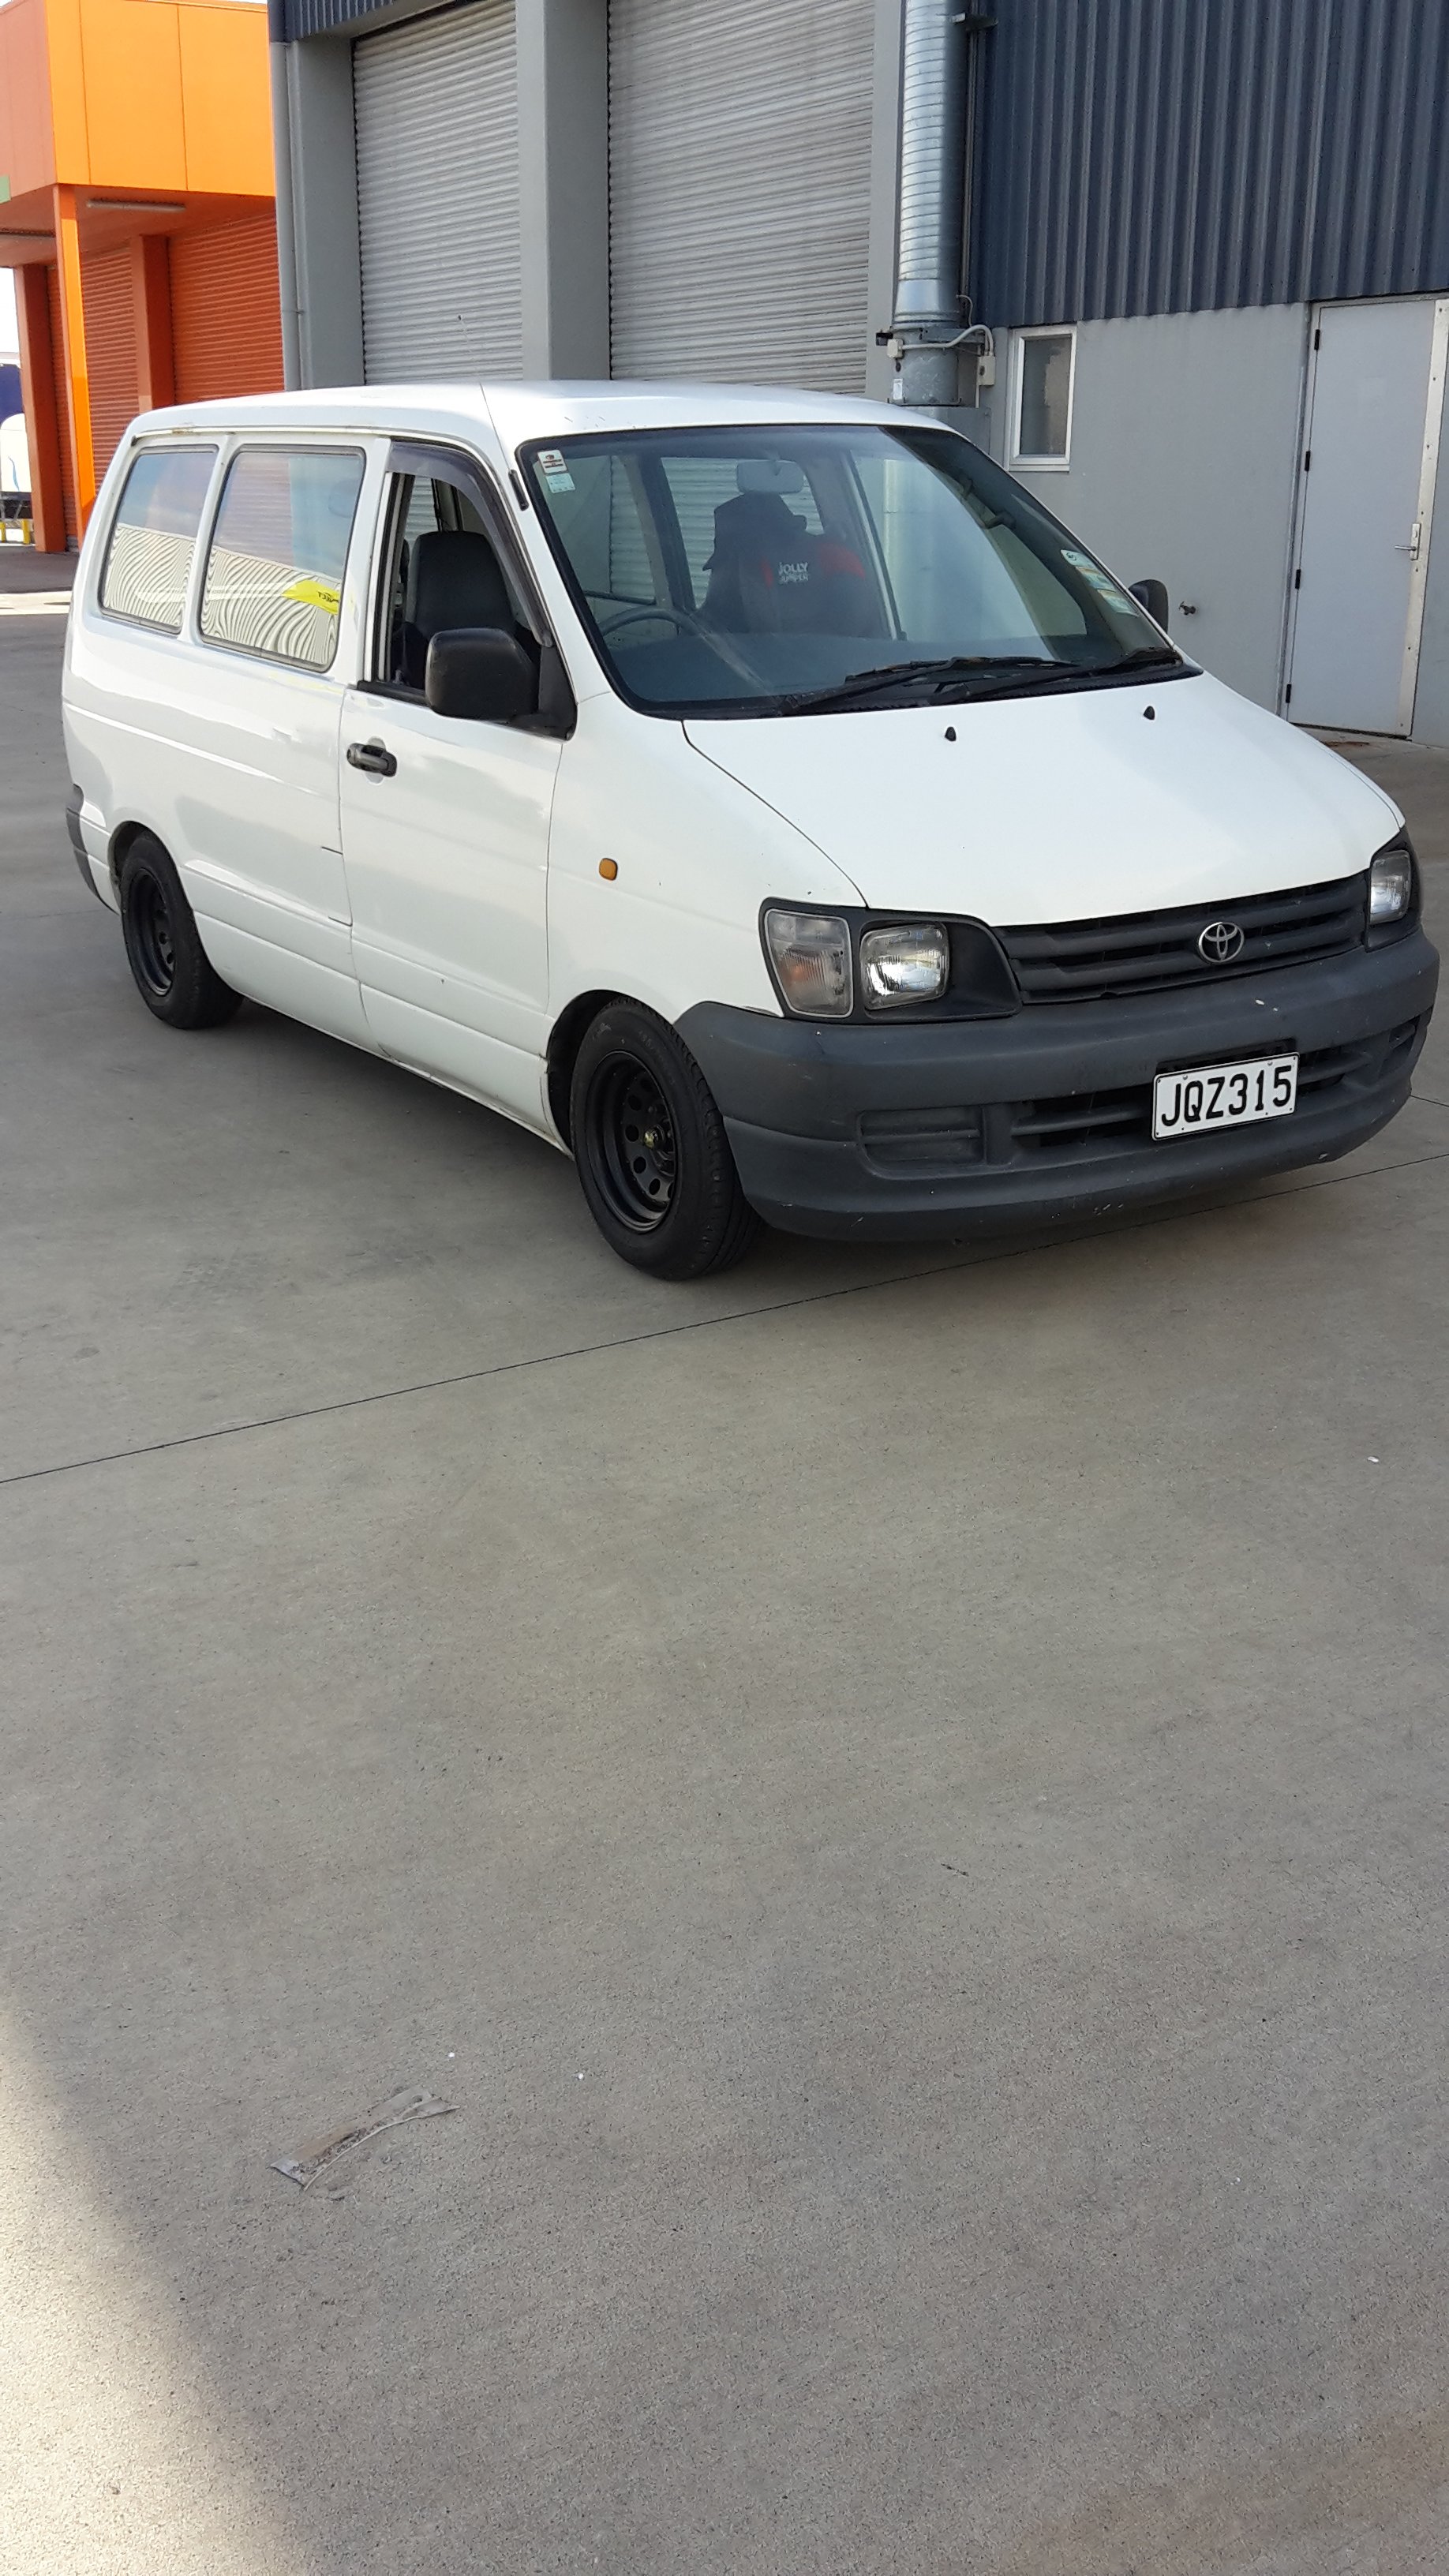
Just recently purchased this beauty off trademe from Auckland Had 73crownwagon & 64 valiant check it out for us at BeachHop and it they said it was all good so we purchased it. Then Denham & Peter picked it up for us on the following wednesday and then went over the van to make sure it was up to the big drive back to Christchurch. Cant thank Denham enough for sorting it all out including picking me up from the airport on sunday . Hit the road about 2pm with my buddy Vety who just brought a 06 Feilder wagon and we started our journey home. Took a few hundred Ks to get used to the Left hook. arrived in Welington to catch the 2.30 am ferry at midnight then boarded and crashed out in the sleeper cabins and woke up 6am when we arrived in picton. Carried on thru to Blenheim to have breakfast with my folks then back on the road for christchurch. 1080km later and $360 in gas and we are super stoked. The Van is super tidy with only a couple small rust bubbles at top of windscreen and a couple on the bottom of the doors Interior has been re trimmed when it arrived in NZ in 2010 when the late Ewan Gilmour brought it in. heaps of paperwork with it which looks like we are the 4th owners of the van ,3rd kiwi owners. The paperwork says its a 351 V8, C6 Auto but the guy i brought it off seems to think its a 302. Will look into it when i get underneath. We have 70s styling in mind for the interior and some factory spec stripes on the outside and some lake pipes.1 point
-
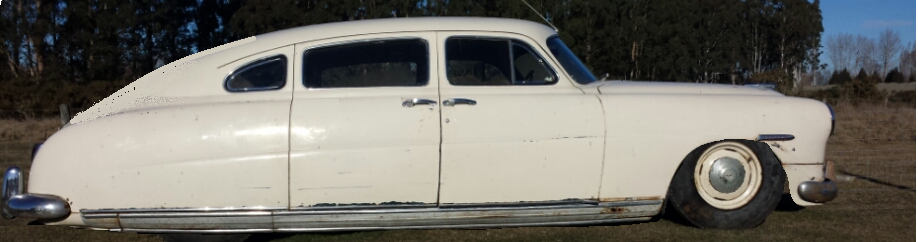
looking at putting 51 Hudson Hornet side trim on it to help break up the bath tub sides.1 point
-
Have decided I'm going to go for a full re-wire, use new connectors and make a pattern so that I can sell the looms overseas. Found, bought and fitted an oil temperature gauge. I don't know how accurate it is, but it was showing up to 110degC on the weekend with the mrs on the back and going slow1 point
-
ha so you did. true visionary! Will have no handles and I think will look even better. cheers Alex1 point
-
Speeds and feeds brother.1 point
-
I suggested suicide doors 2 years ago. Even mocked it up for you. LOL
1 point
-
Dropped off the front rims to get the backspacing adjusted so I wont need to run spacers. With luck will be ready next week. Then it can come off the rotisserie! We have been feking about with the brakes still. mounted up the park-brake etc but have decided to change it up yet again. the current setups lever is only like 2:1 may change it to 3:1. basically by drilling another hole. Top holes are for a spring I still need to get. The front after market drive shaft loop (thanks guys at Kruzin Kustoms) is just sitting there but will be bolted up next weekend. Just need to make up some plates for the inside to sandwich mount it to the floor. Should mount in the middle of the circles on the floorpan under the seat. Plumbed up the back brakes. Mounts fabed up with a recess cut out of them to allow water to flow and not pool. No doubt it will soon get a stone or something in it but mehh what can you do. Flexy lines all positioned to clear any obstacles such as frame, bags, bumpstops, tires and what ever else at all airbag heights. Have ran the RH side front hard line. Need to get a lil more hardline to do the other side. Also need to grab a couple of fittings. then brakes are done pretty much. So front DS loop and a few meters of brake line work and done. May just put the old rims on it and take it off if I dont have patience to wait further week to get my old rims back, tires on and balanced. ‘Mo on Jalopy Journals HAMB forums gave me the idea of suicide rear doors. Rather like that idea I must admit. May be something we will look into a bit further down the track.1 point
-
your trying to apply logical thinking to something british. it doesn't make and sense. or work.1 point
-
Done another little run last weekend. no drama's, just a few more dents in the door.1 point
-
Discuss here : Not much really happening here Just Daily driving 'Red' and today was Rally car Day @ Tui Brewery So got this off the Lawn : She started right up & had to hunt for a set of nuts to bolt the steelies back on, the tires took some encouragement to hold air & semi-fixed the strobe lights (one wasn't responding) 1st to register (of the 3 cars that turned up) and won "Most Original" Rally car of the day, couple of Doz of the Amber Fluid & a certificate #winning? yeah was lowering the tone a tad & here's the other beauties that turned up1 point
-
1 point
-
Yesssss boyyyyy.
1 point
-
Yeahhhh Sorry guys. Shit sorta fell apart for me for a bit, and no longer have suitable facilities/equipment to provide quality service. Perhaps an admin could close/remove this thread now to tidy things up. Sorry to those who were inconvenienced and if its any consolation I am thoroughly ashamed of not being able to help OS members out.. Thanks.1 point
-
Rad dude. Looks soo good on those rims. Always had a soft spot for Mirages.1 point
-
Yeah ok been over a year since I updated this, not a hell of a lot to add really, sailed through the last 2 wofs no sweat. I’ve been bloody slack with this actually, aside from Hanmer last year I’ve probably driven it not even 100ks in the last year haha. Have a picture1 point
-
THE BACK STORY: This story goes back a little further than most threads, but it is important to understand the significance of such a piece of history. It all starts, with the English navigator Captain James Cook sighting New Zealand on 6 October 1769, landing at Poverty Bay two days later. He drew detailed and accurate maps of the country, and wrote about the Māori people. Most of us are aware of the HMS Endeavour, that was used to circumnavigate the perimeter of Aotearoa. However Cook also did a lot of inland exploring too, and, until recently very little has been known about this. I decided to take it upon myself to do some further investigation. FACT: On his way South, Cook visited his old mate Soichiro Snr in Japan. Soichiro was a bit of a tinkerer with a soft spot for Double Brown Saki. After a few months, and quite a few Doubro's, he invented a futuristic metal horse that he insisted that his mate Cook took with him on his travels. Cook agreed on the provision that no one knew of the wizardry of the machine. Researching deeper, I found some of Sydney Parkinson's (Cook's Artist) more unknown paintings and sketches which backed up this theory. Cook arriving in the East Cape of New Zealand Although the resolution isn't high, if you look closely in the above sketch, you can make out what appears to be Soichiro's metal horse. FACT: Word quickly spread within the Maori communities of the great dorts and much skids of Cook and his men. The people affectionately named the metal horse the 'Cooks Transport 90'. The 90 was in reference to the swept volumetric area of the internal combustion area that Rangi and Whetu at Raizer Motu-mechanics calculated while replacing the rings for Cook during a visit to Whakatane. The machine was abbreviated to Pakeha iwa tekau, or, in English The CT90. Further proof, it seems, has been under our noses the whole time. The Humble Fitty cent coin. Solid evidence of Cooks Transport 90. Most of us don't pay particular notice to any currency less than Hunnitz, however after zooming in on this coin of Cook's Waka, It appears there is indeed a machine between the two masts. FACT: Cook left New Zealand a few months later, however it seems quite hastily after an altercation with a local chief called Hone Danger. In his haste, Cook peeled out of the harbour in Endevour leaving the CT90 hidden in a Mcdonald's car park in Porirua. Not much is understood about what happened to Cook's transport over the next 80 years. Further research is indeed needed, however on occasion throughout the history books it appears that the machine was noted. I hope to find more examples of this over the next little while. However, I have no doubt in my mind whatsoever in the fact that I HAVE FOUND COOK'S ORIGINAL TRANSPORT. Treaty of Waitangi Signing in 1840 CURRENT DAY The Real Deal. Cook's Original bike as found by me this year: Cook's Own Transport - The original, one and only. Please join me over the next few months, while I take time to preserve this historically significant machine. I hope to bring you a restoration sympathetic to what James Cook what have wanted before being murdered in Hawaii for giving too many prossi's syphilis. Stay tuned. Subscribe. This is a journey you won't want to miss. #cookstransport #eastcape20181 point
-
My tank was fairly rusty on the inside so thought I'd give this electro rust removal a jam. Bubbles Amps Science! Yucky I have pulled it out a couple times and given it a scrub and it's starting to look good.1 point
-
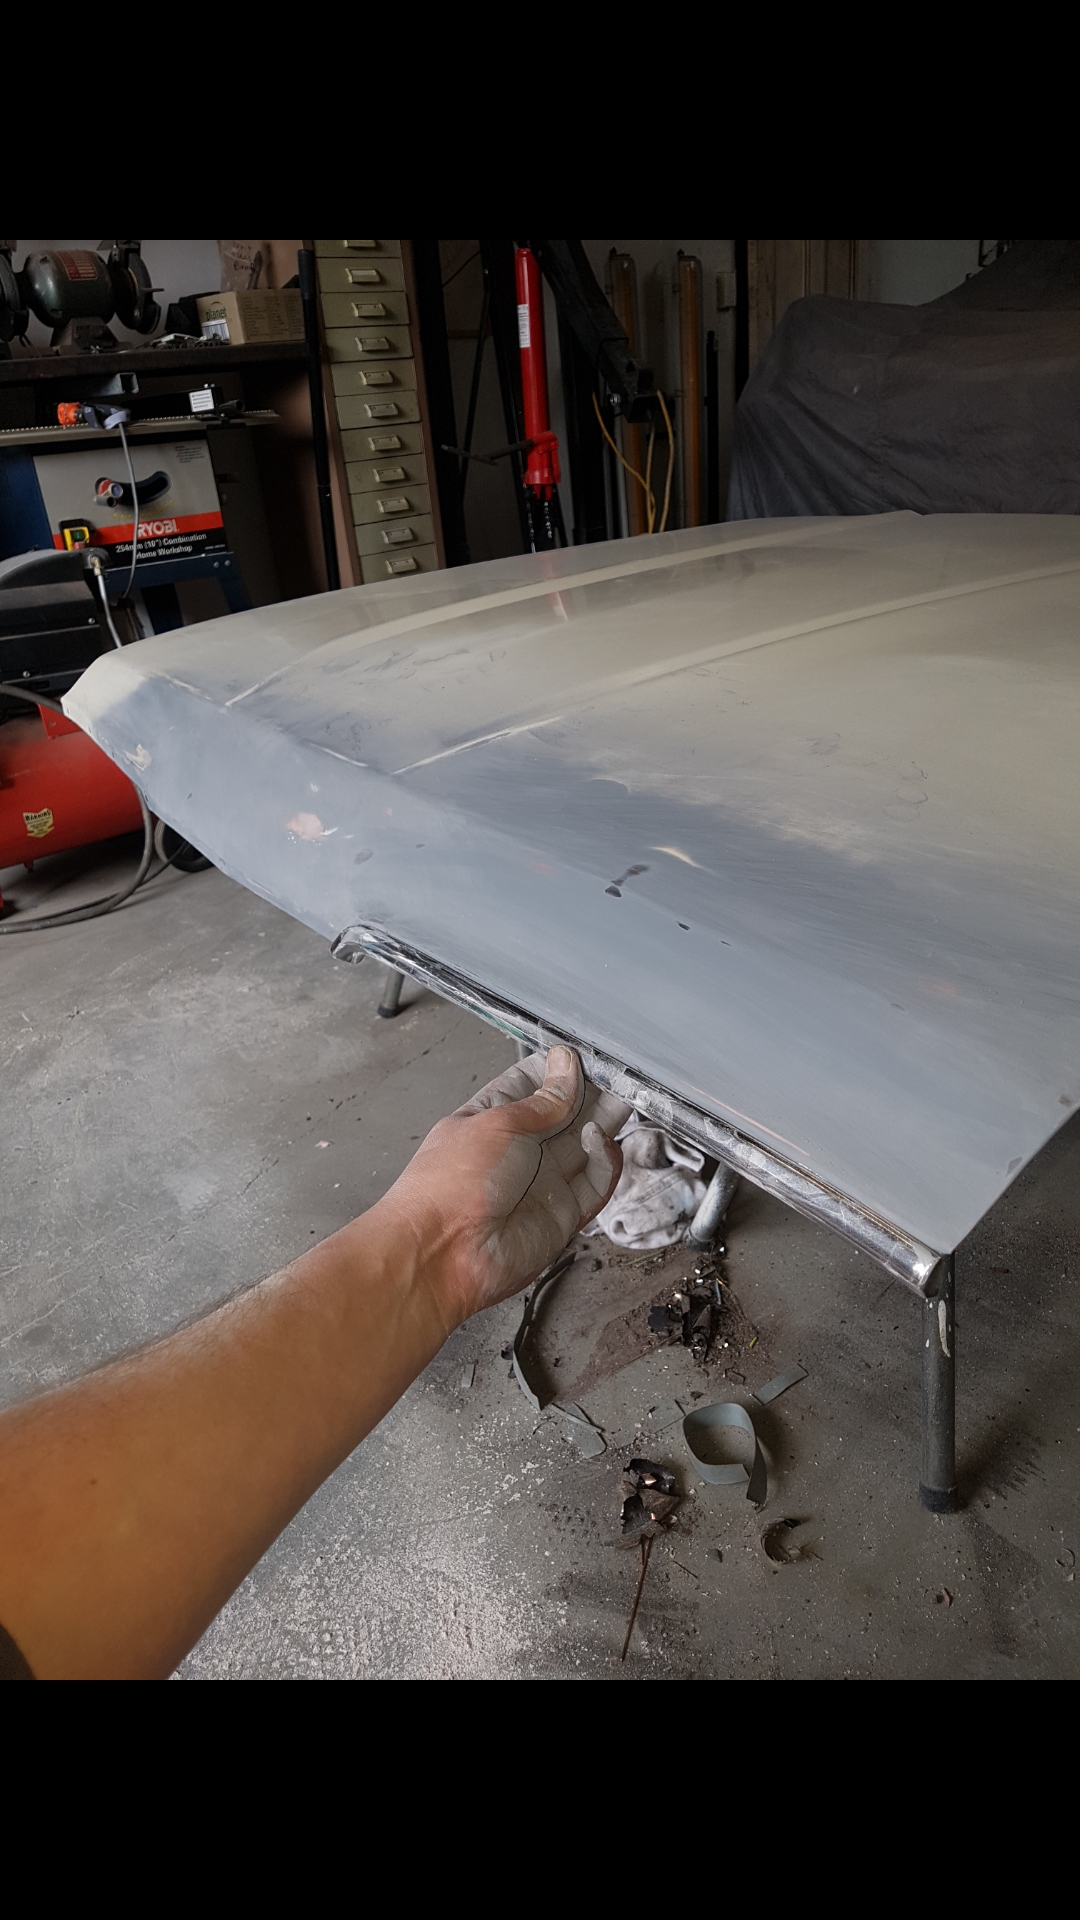
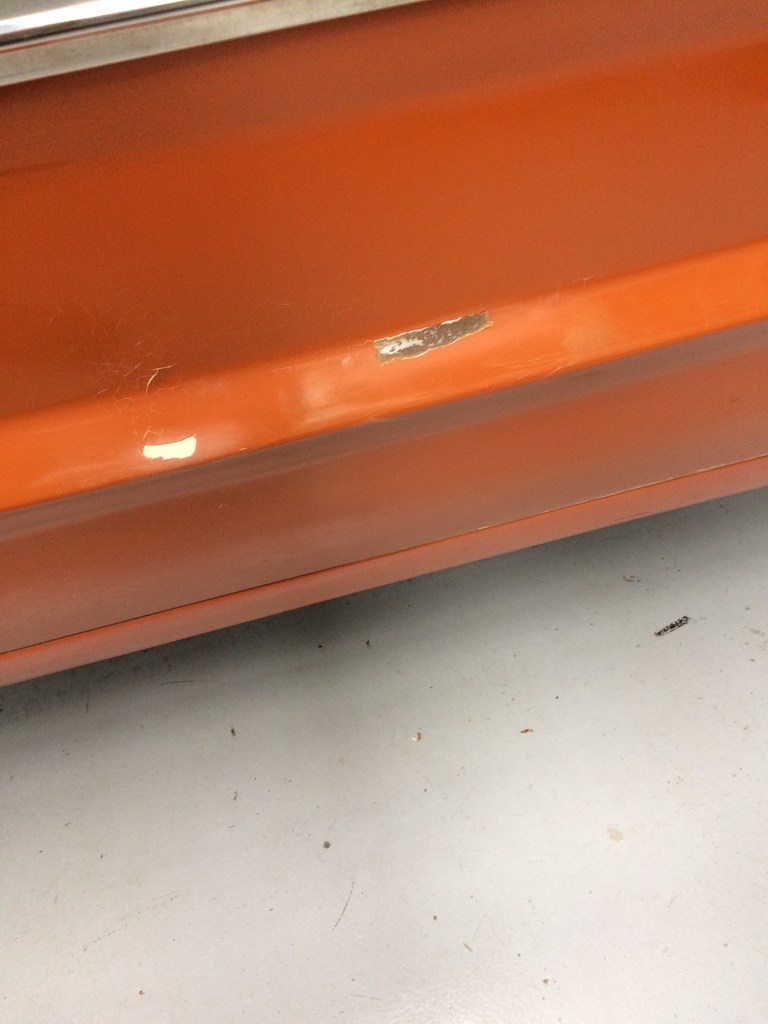
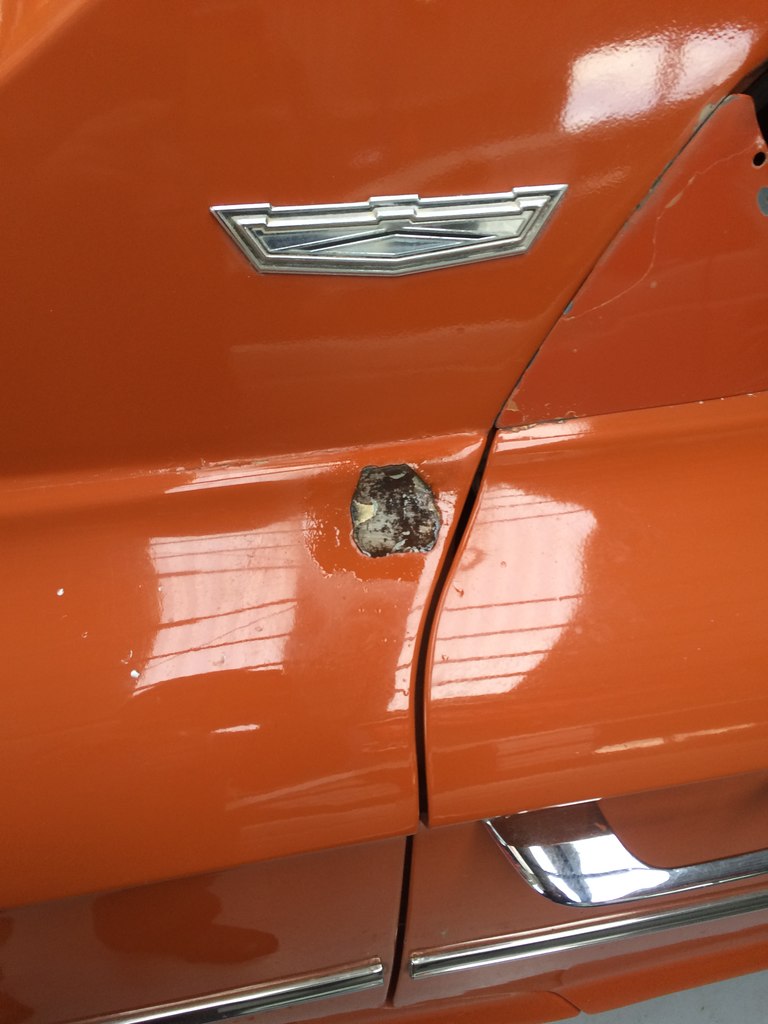
So with all of the engineer's remaining list down the next was to get him to inspect it and sign it off. but before that was done unfortunately when the car got blasted and painted a rookie error was done by me and them that the order i did the sills inside and underneath was done backwards so now i have sills that have patches in bare metal due to been hit with the blaster and the inside being covered in sand and water due to the weather on the way to the blasters. And some overspray of black in places on the car where we didn't mask between the inside of the back and front bumpers round the drivers door And the engine bay as i didn't cover any of that was in too much of a hurry of them blasting it that didn't even think about it. so gave the inside a good vacuum and blow out and wipe with a wet cloth then went over the car with thinners getting the black off then sanded some of the stone chips aswell this was a bad one by the rear passengers door front passengers door drivers side by the rear screen and these ones on the gaurd. plus the bits on the sills and a whole lot of other bits around the car. so used my fathers model spray gun from when he was a young lad to paint all these bits using the orange i had mixed up for the sills. also did all the gaurd edges to tidy them up. also didn't bother about adding any clear on it. then after that was done i gave the car a full cut and polish again. so now the paint is good from afar but far from good oh and i also installed my new master cylinder i bought a few months back
1 point
-
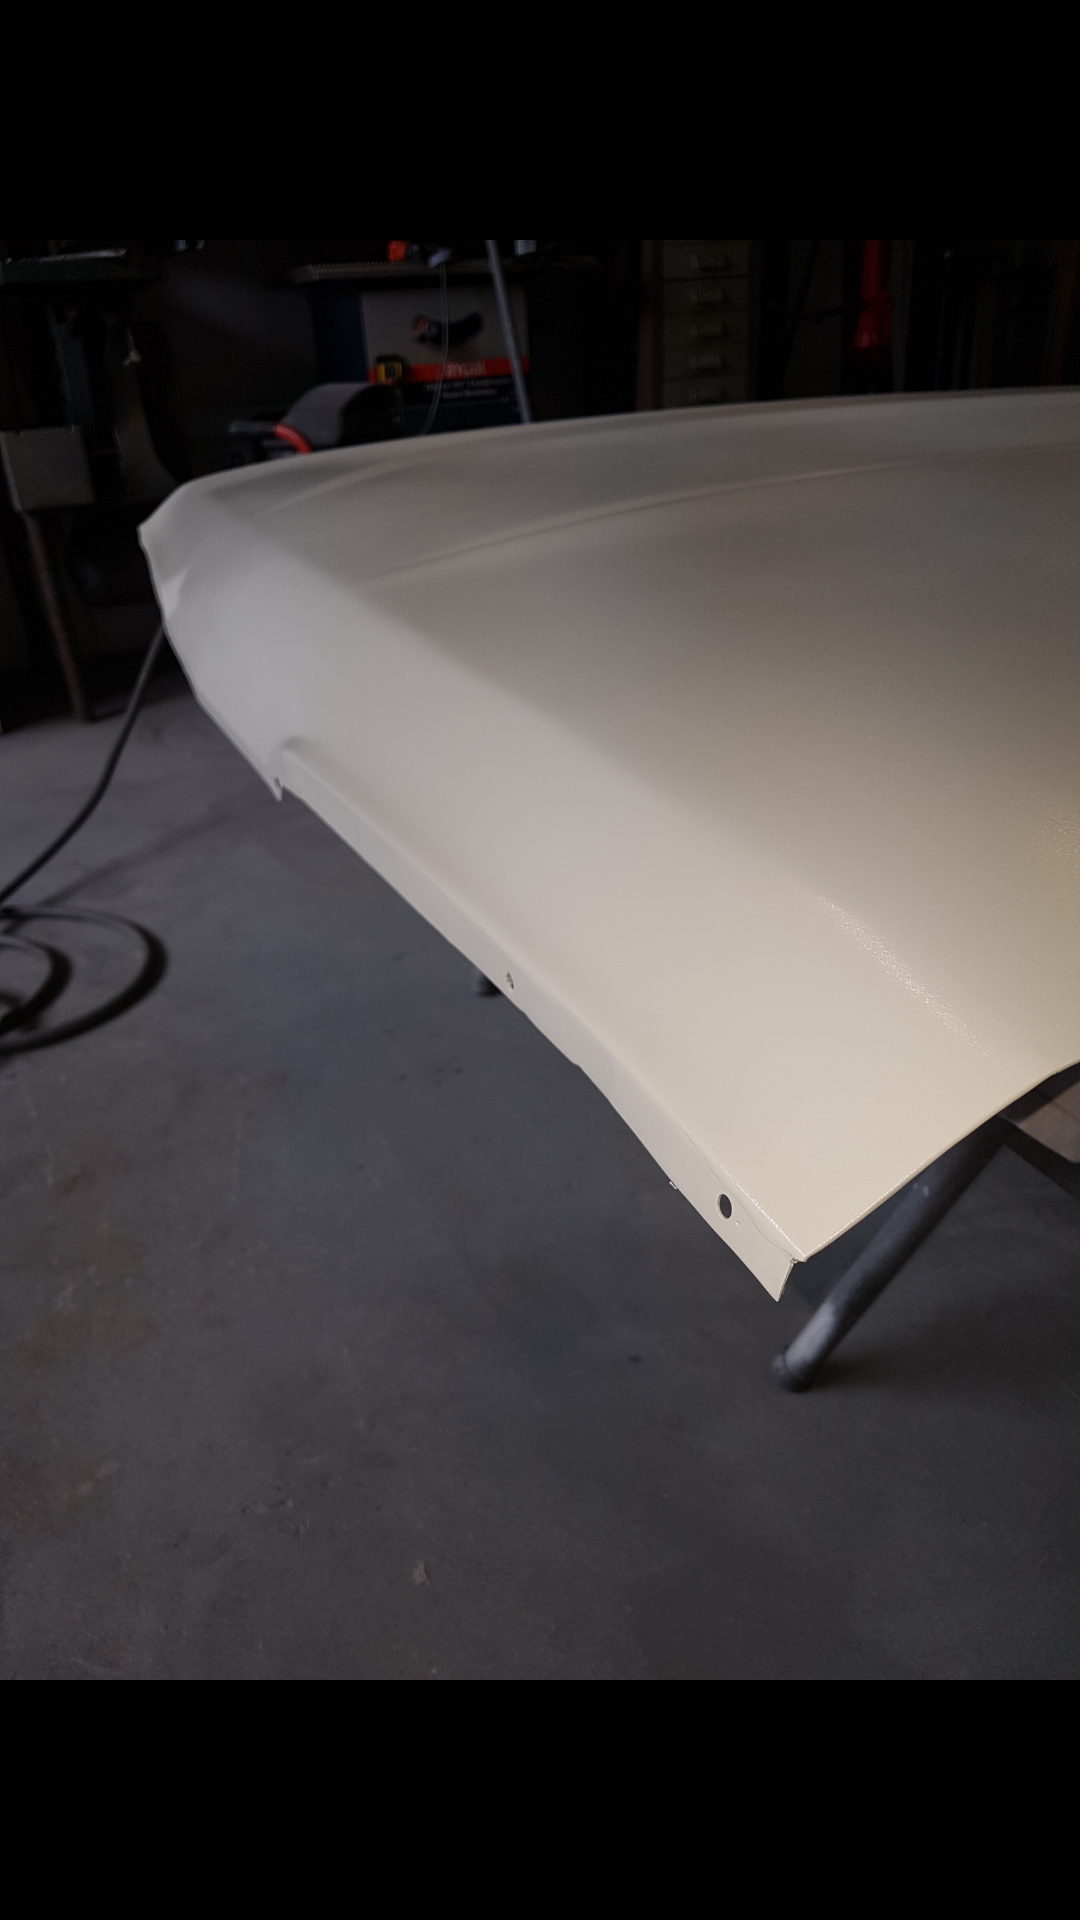
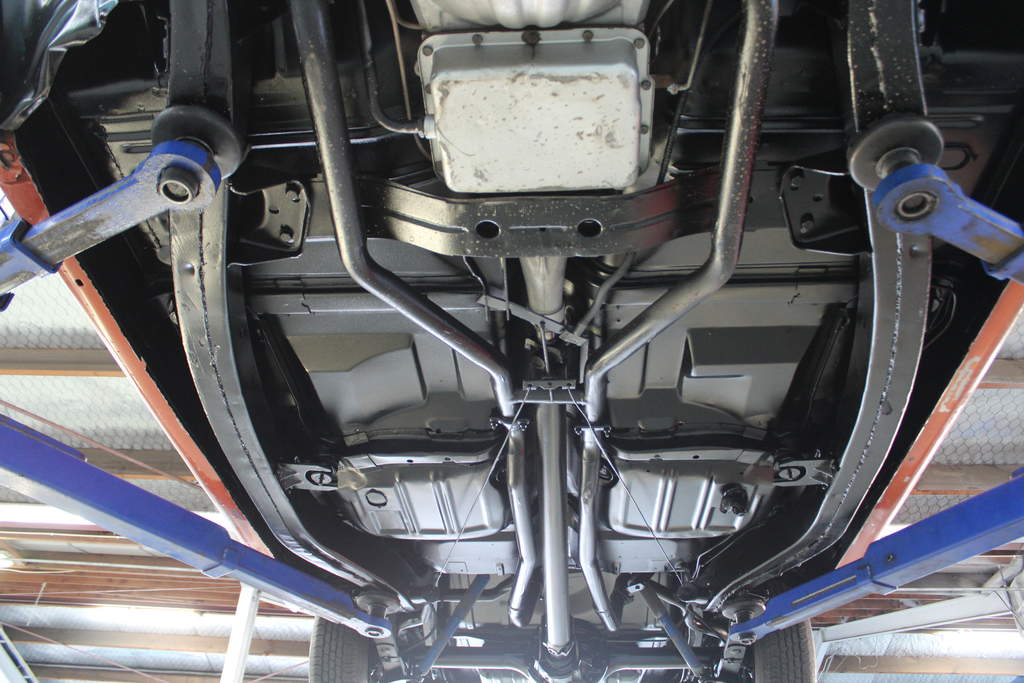
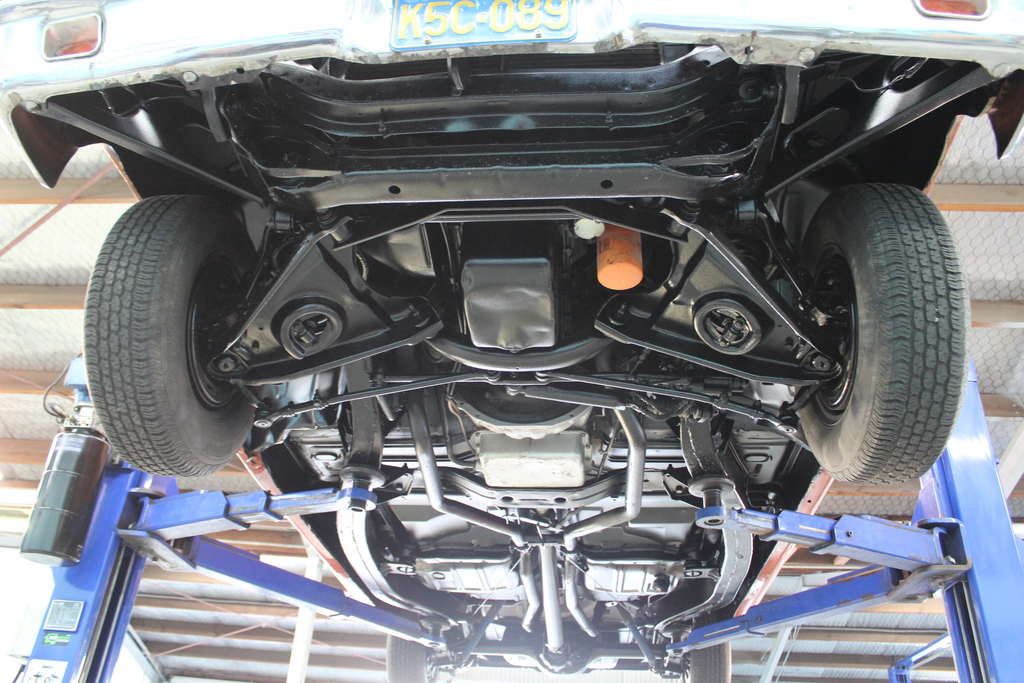
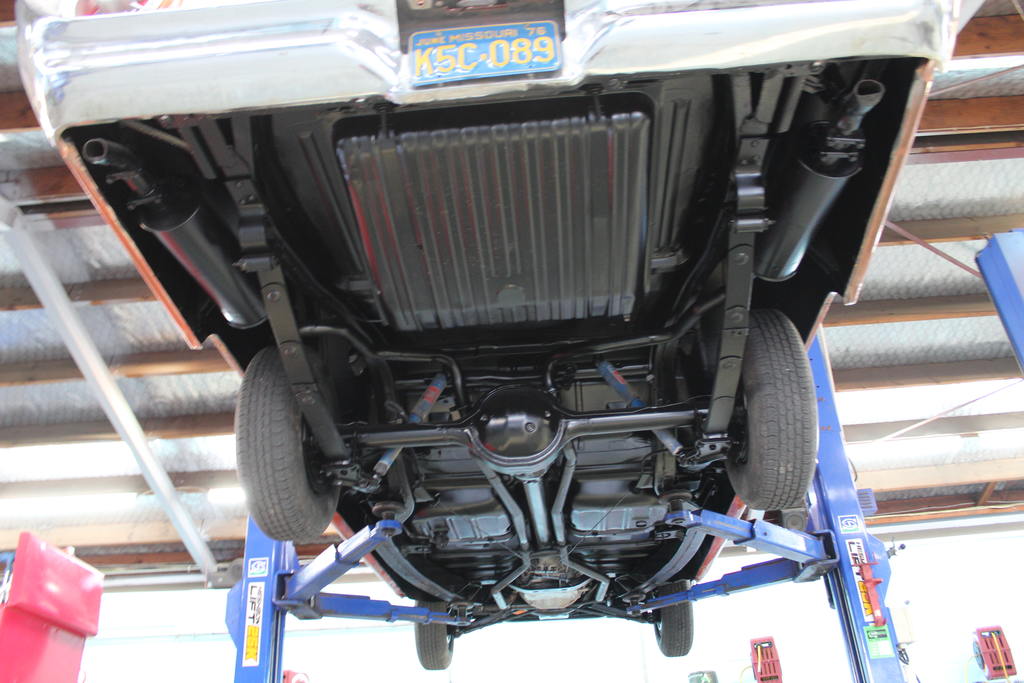
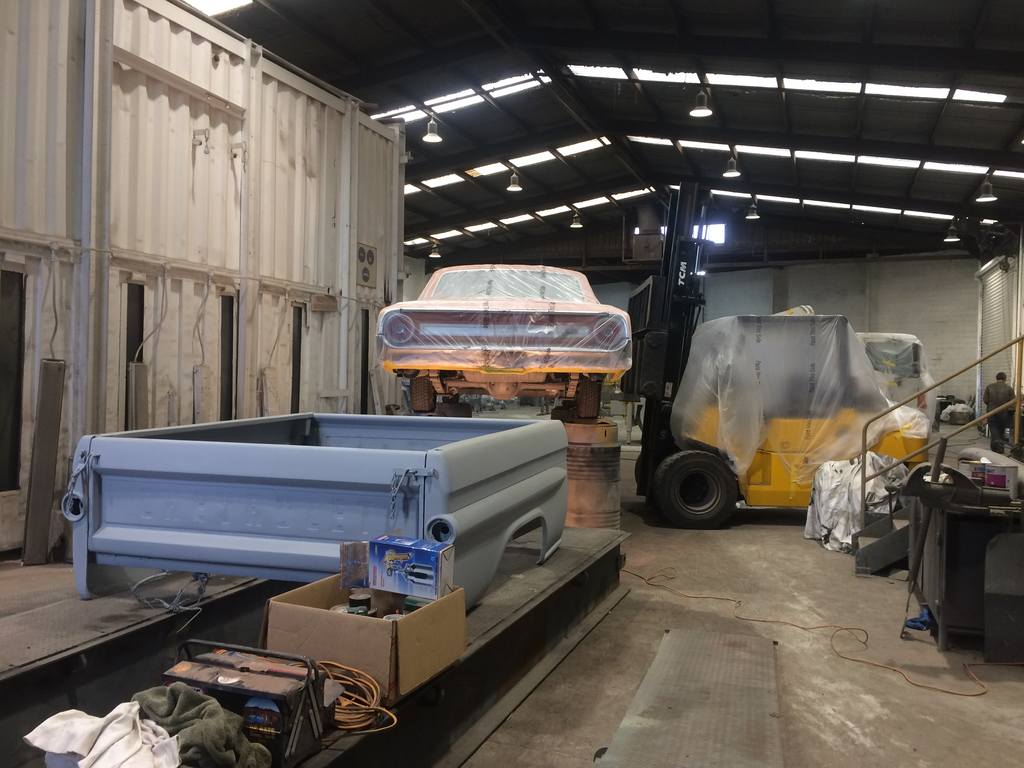
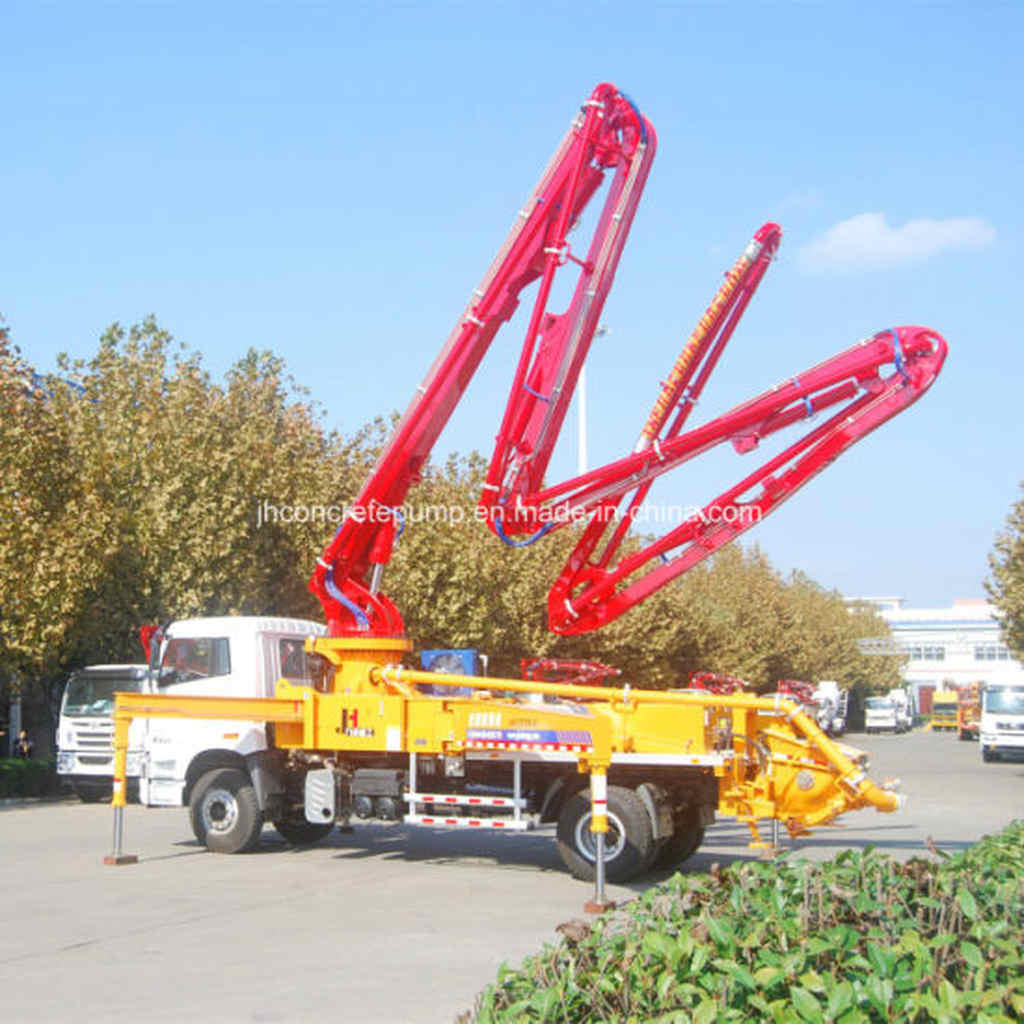
blast time! pulled the wet car cover off the car and drove it first thing in the morning to the blasters And much to the guys surprise i turned up as he figured due to the rain i was going to can it so before long i helped the boys put the car in the booth and set it on some stands so they could blast underneath and gave it a good mask up prior to it being blasted then this unfortunately this is a photo after blasting but you get the picture also masked up the trans so the nice newish paint on it wouldn't get blasted off also if i had of known that there stands were this low i would've bought down the ones i used when i painted the sills. but when i organised to bring it in he said he had some ramps that they used for vehicles but it turned out they were quite low so after about 3 hours of blasting we pulled it out of the booth. he did blast for about 2 hours then we gave it an inspection and found some areas missed. Im glad i didn't have to blast it myself with having a heavy amount of head protection and a breathing hose with a big hose with huge amount of air pressure and on your knees blasting with fuck all lighting. we then double team it to get it off the stands All of this was done with the supervision and coordination from me being that i didn't want the car damaged and knowing a thing or two about lifting and holding the car on stands. then once we got it off the stands and put the wheels back on so we could get it out of the blast booth i then set it back up on the forklift to paint underneath The plan was to have the car painted by me on his two post car hoist but due to it raining and being freshly blasted and clean we couldn't put it on it due to it being in a another workshop 50 meters away. and would get wet and dirty underneath. so forklift and 205 litre drums to make it look safe it was! I then set to work myself to save some money on the job by painting underneath myself took me about 3.5 hours to get a full cover of etch primer underneath due to using a standard bottom feed spray gun and so many areas to get into. everything pretty much underneath was blasted what a big job! oh and they painted a concrete pump truck (just not the truck cab) one of these quicker than i did the underneath haha but they had a big pressure pot sprayer. by this time it was the end of the day and he was happy enough to get his boys to put the top coat underneath which i supplied the paint for them to do tomorrow. so i left the old girl like this but on the ground overnight And those are the ramps they were going to use under the chevy truck bed so yeah there not high. I then collected the car two days later after them finishing it off one full day of painting it and half day of removing the masking. and a few hours of him running it on and off due to the paint on the exhaust smoking haha with it being coated with a total of 12 litres of paint to do the job with the finish product being this put it on the hoist and couldn't find anyway they had missed which is ace! also stinks real bad of the paint baking on the exhaust and underbody much like the inside after running it for a bit. And now i know for a next time just to get them to do the full job. such a physical and tiring and cunt of a job to do. best leave that one to the pros
1 point
-
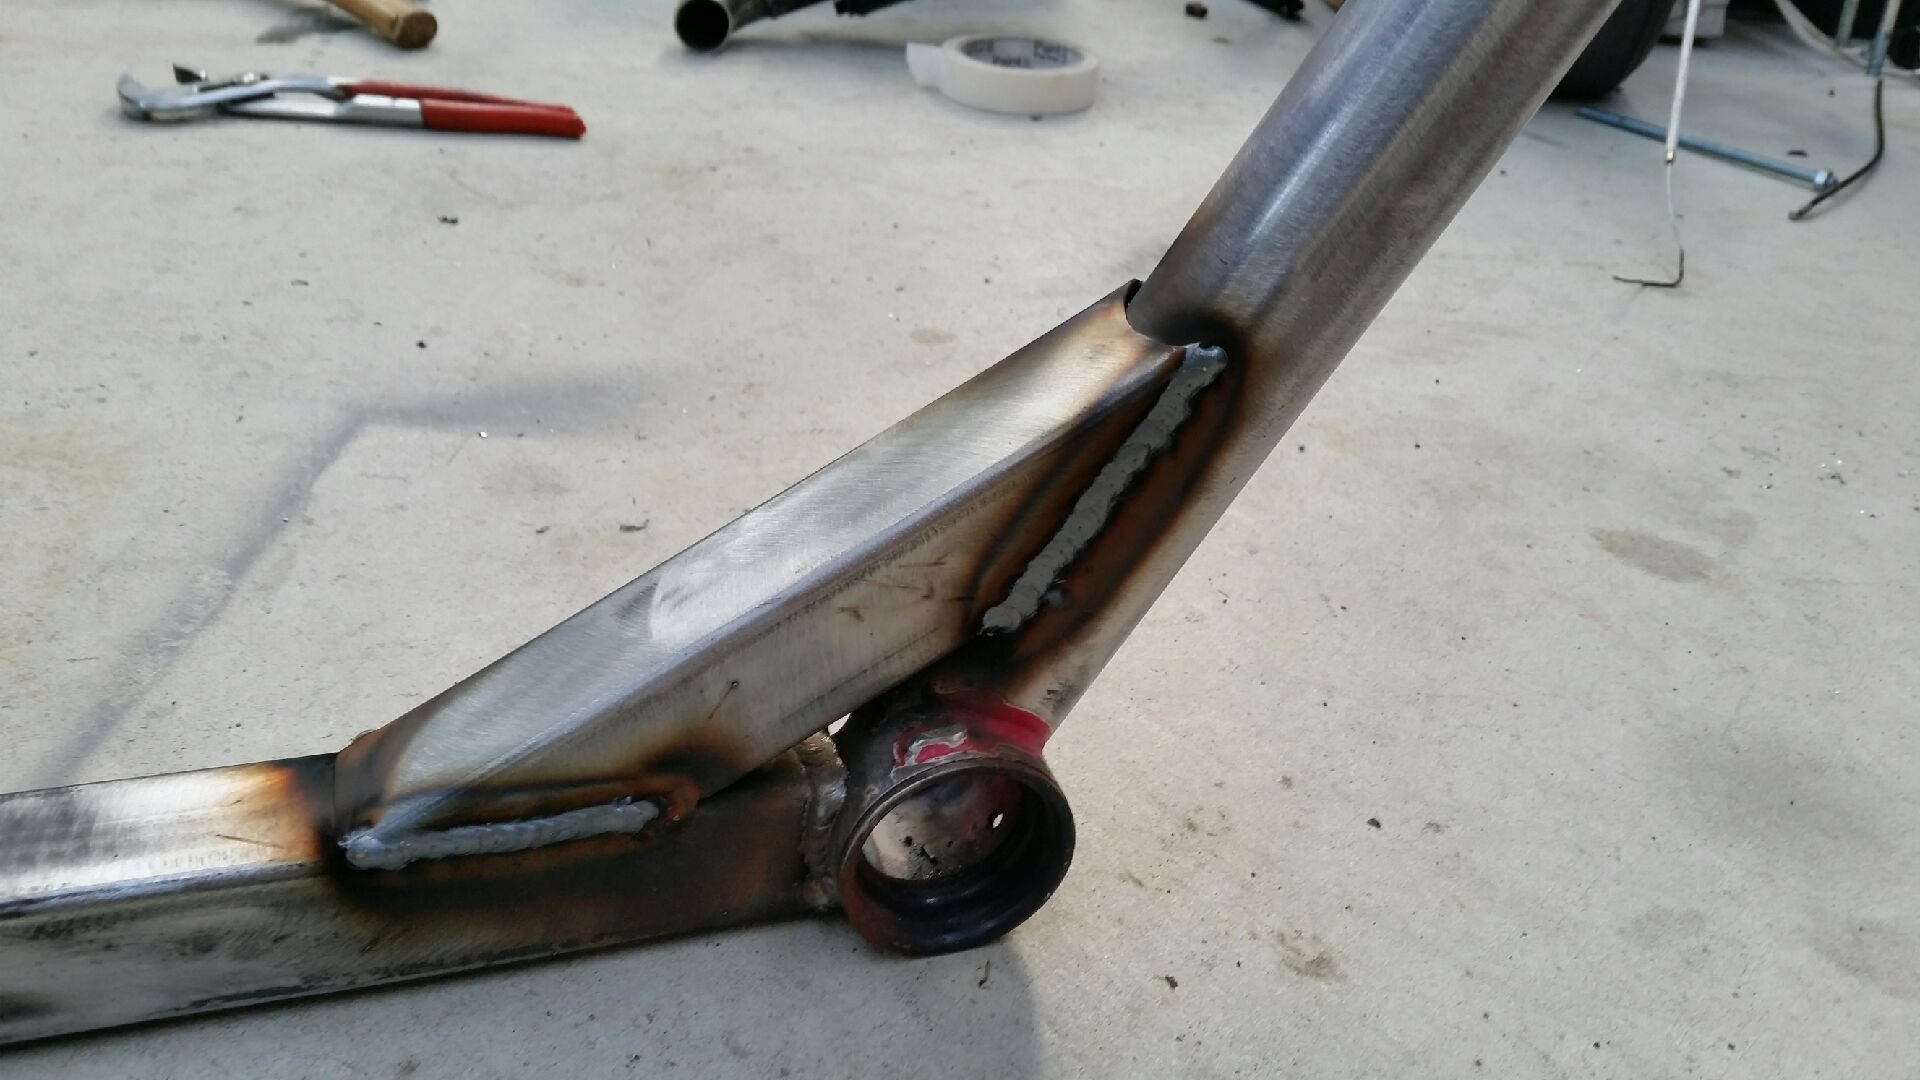
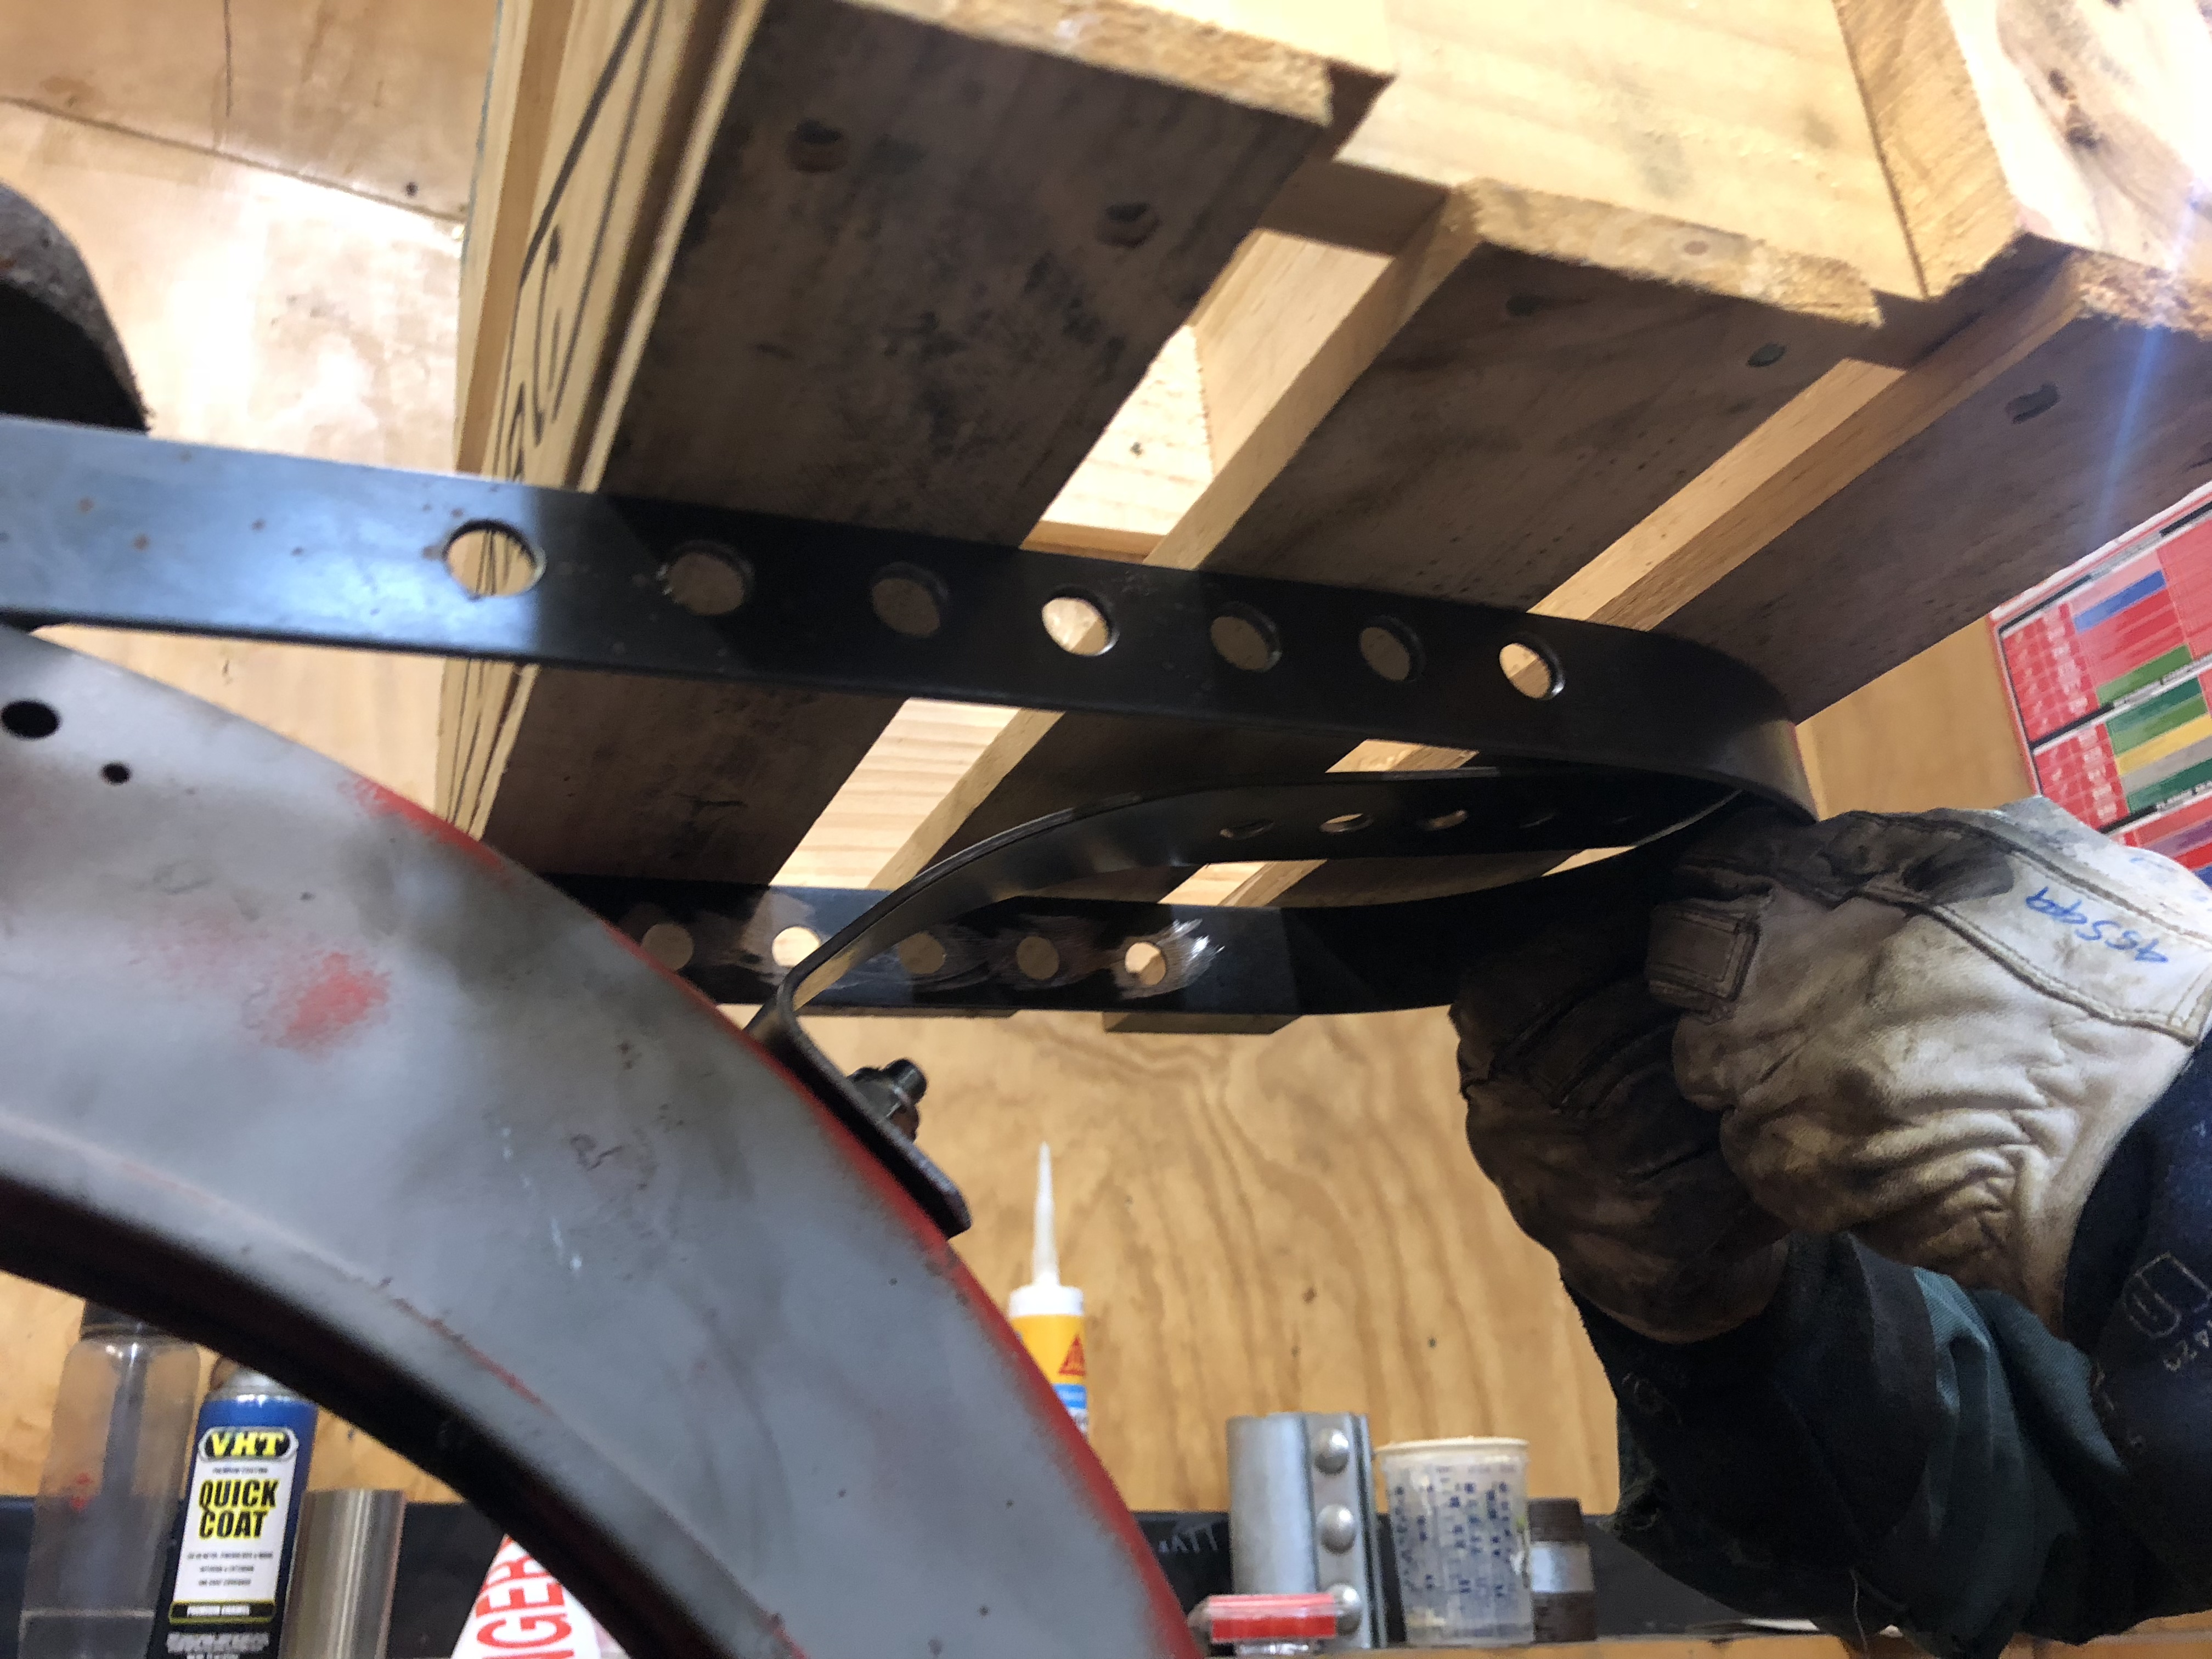
A sympathetic restoration was obviously the key to this piece of history, with advice from not only experts, but from both history books and scholars. Due to so many adventures, the machine today is in quite a state, and is unfortunately very tired on both body and motor department. The tires were both flat, and the rims very rusty. This may be attributed to the following quote from senior history researcher for Oxford University - our very own @Leyland P.I.. "Before the treaty was signed there was much conflict between the colonials and the local Maori at Waitangi. Chief Hone Heke took a personal vendetta towards the British and sabotaged the CT tyres with an axe before going bush on his mighty Mudbug Waka TF125." First thing to be done was a tear-down to see what we had to deal with. Splitting the well perished tyres from the rims provided an insight into just how far the back rim was gone. The once shiny chrome was now but blisters, and the inner wheel was rust flake and holes. The rear wheel was in need of some good cleaning, spoke replacing and a little welding. Wheels before a good wire brush. Pressing out the bearings. The bearings too, were well past their best. Square balls are a condition not liked by most. The dust/mud seals were also very perished so will need to be replaced. The motor was the original, and had done 75 million miles (mostly open road, lady owner, never thrashed) and was in need of a refresh. History suggests the last rebuild was done early June 1964 in preparation for the Beatles visiting New Zealand. Unfortunately, non genuine parts were used and the machine was late for the parade . Always late on Cook's Transport m8. Given the state of the engine, it was decided a new mode of propulsion was needed, and Darren at Shore50 came up with a suitable replacement. A Lifan 125cc with 4 speeds, 12 angry pixie-volts and a pile of stuff to make it go. A very good deal was done and it arrived on my doorstep the following day. The lifan too, is steeped in history. Again @Leyland P.I.: It is simply not true that Maori traded land for muskets and blankets. They also received Lifan 125 engines, and 1mm oversized piston and ring kits for their TF125s. However this was a clever ploy by the colonialist devils as the Maori had no way of machining their barrels to match the oversized kits. As such, this detail is glossed over by most historical accounts. They also received two stroke oil or Wai-Peru. Unfortunately they necked it like nectar, believing that the fluid would give them the speed and power of the TF125. Many died. A Maori man and a Naval Officer trading, c. 1769.Believed to be the first ever Lifan swap. The Lifan motor is a straight 'bolt in' replacement for the 90. Providing you have a welder, a metal bender, a grinder, a drill, some tube, a bit of mild steel and a few hours. 1. Remove motor. 2. Drill out the top mount of the new motor to use the original through-bolt. 3. Drilled. 4. Test Fit front mount 5. Make or acquire rear mounts. 6. Notch Frame 7. Hang, bend, fettle, re-hang, adjust mounts. 8. Take blury photo. That's all the time I have for writing right now. Join us next time to see sand-blasting, nikel plating, and more history of this amazing machine. Peace y'all.1 point
-
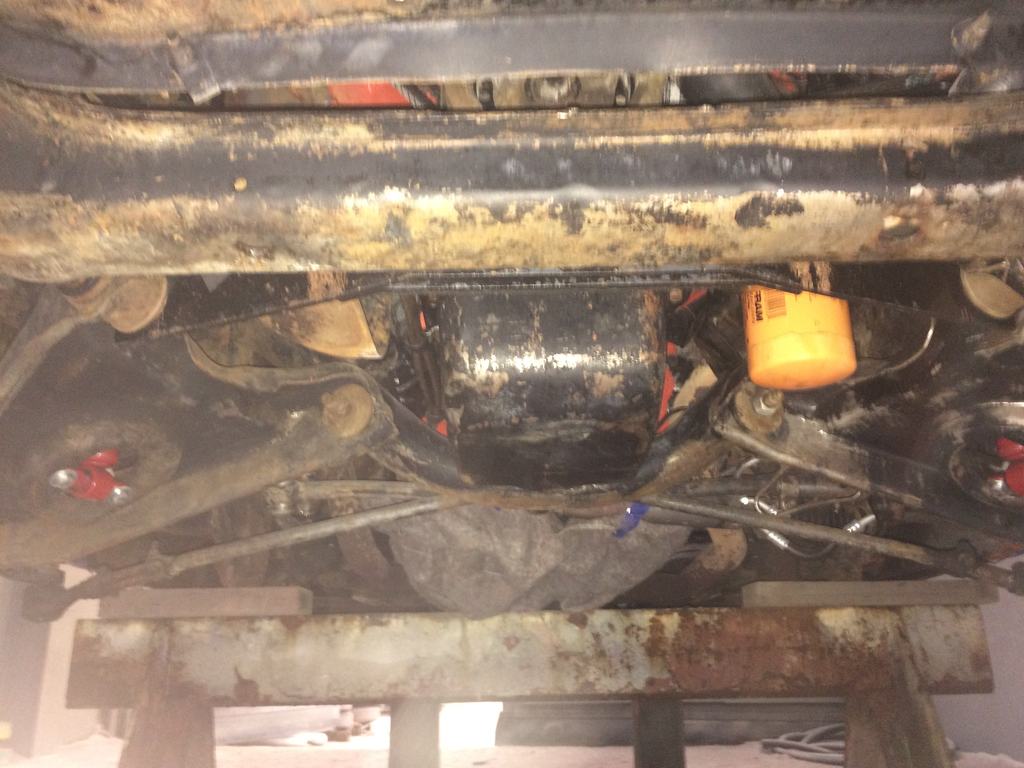
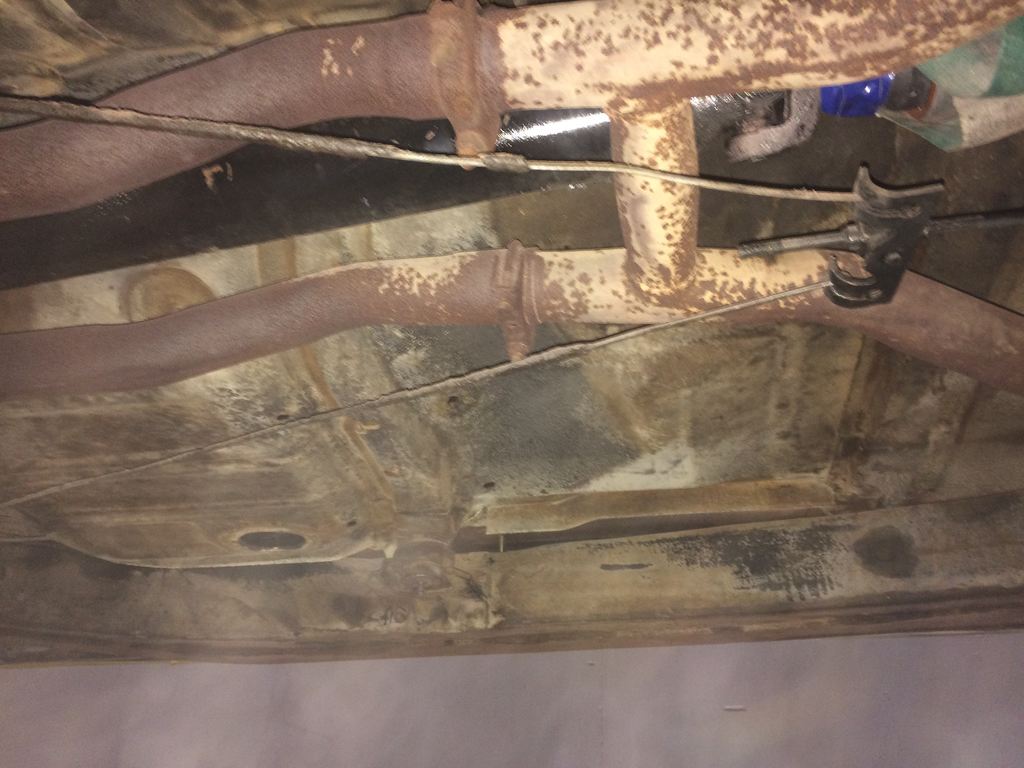
Before the car could be sent off for sand blasting and coating the underside. It needed to be clean underneath of any grease or oil due to the sandblaster spreading it around and causing the paint not to stick. so off i went for a drive to where i had access to a steam cleaner. oh wait and a forklift too so before any steam cleaning was done i put a steel i beam under the forklift mast so that if the forklift happen to lower itself it would rest on the steel beam. then sprayed some degreaser on the underside then steam cleaned it off the underside was actually still quite clean as i had already cleaned the underside last year for compliance. but still had some grease around the steering box which i removed as much as i could. now on its own wheels to be driven home. then once i got it home i put a waterproof car cover i had over it due to it staying outside for the night as it was going to the blasters first thing in the morning. And plus i knew it was going to rain that night. wasn't so keen on a swimming pool inside the car. so this cover is an extra large one. well not an american spec big one oh and yes it did rain quite heavy that night/morning.
1 point
-
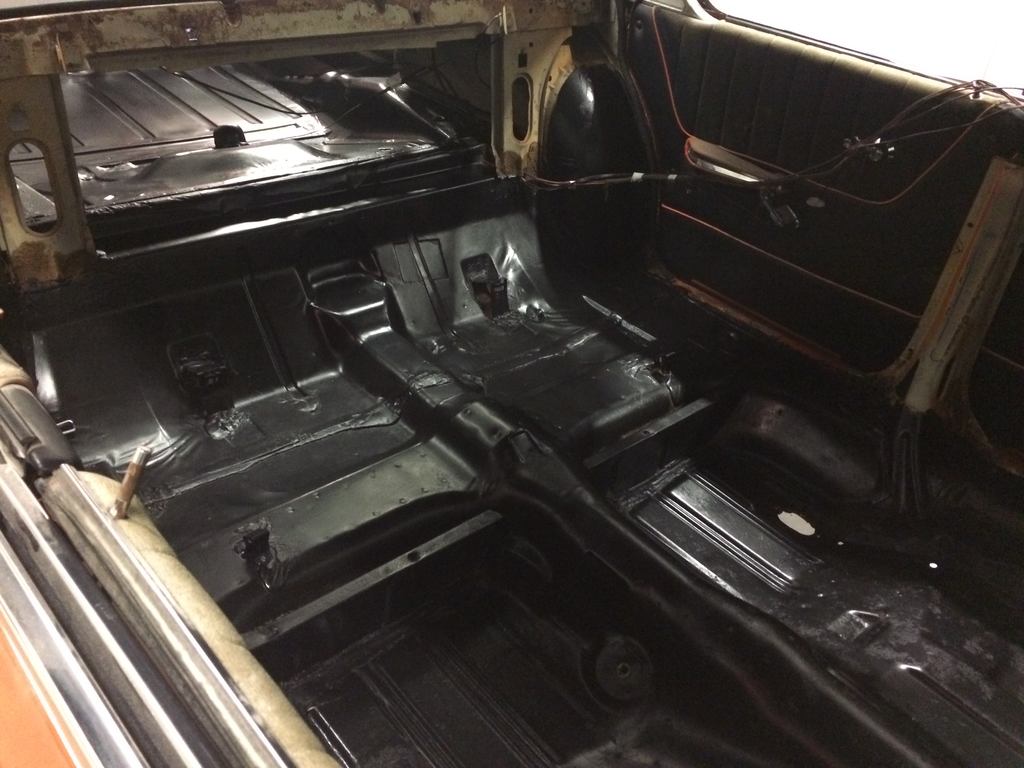
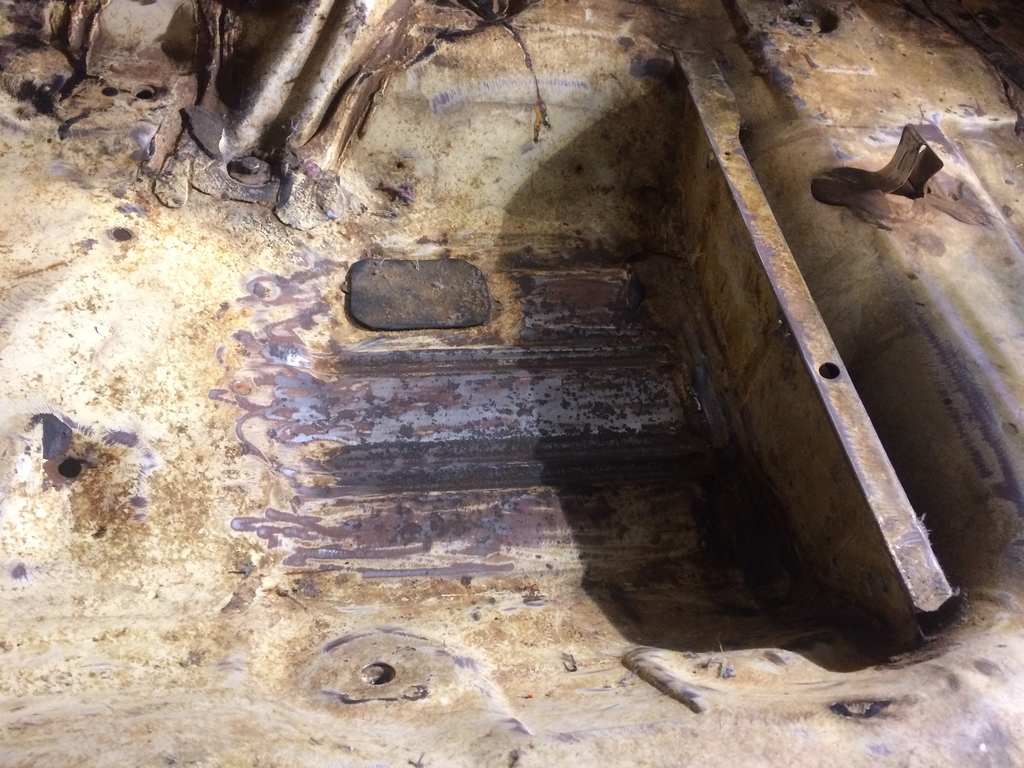
And then with that done i applied two coats of the white knight PPG rust guard paint. Came out pretty good not too fussed anyway as the carpet will cover it too. also applied with a paint brush so not exactly a quick job. and now just to get the underside blasted and painted
1 point
-
That had the rear bump stops cut down heaps, the pad on the diff that the bumpstop contacts removed, some modified 4x4 shocks, and some mystery springs. In the front I bolted the lower ball joint on top of the arm and trimmed some bump stops. The pinion angle starts to get a bit funky that low but it drove pretty good. IMO it looked best on 13s. I tried some 15x8 but they hit the suspension on the front and didn't look quite right. The 13s make it look kind of cartoonish. It got quite funny reactions. People either thought it was really awesome or really dumb, not much in the middle1 point
-
This is my old one
1 point
-
No keyway...no problem! As rough as it gets...can't be fuckers removing crankshaft...so just leave it in. Worked awesome!
1 point
-
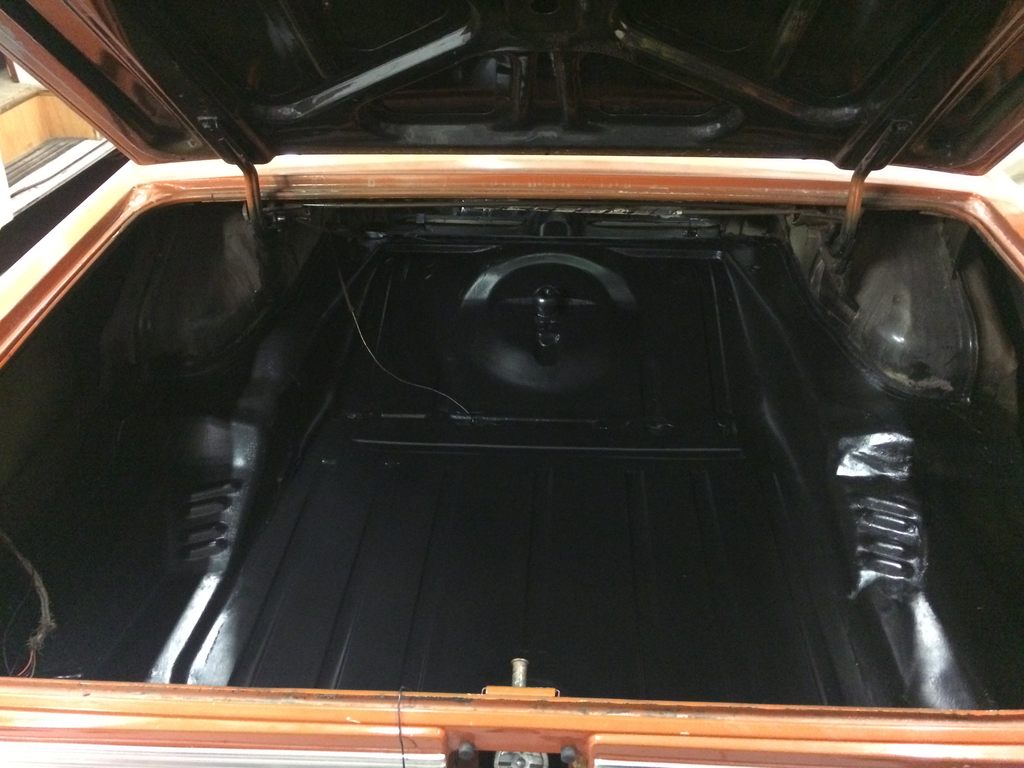
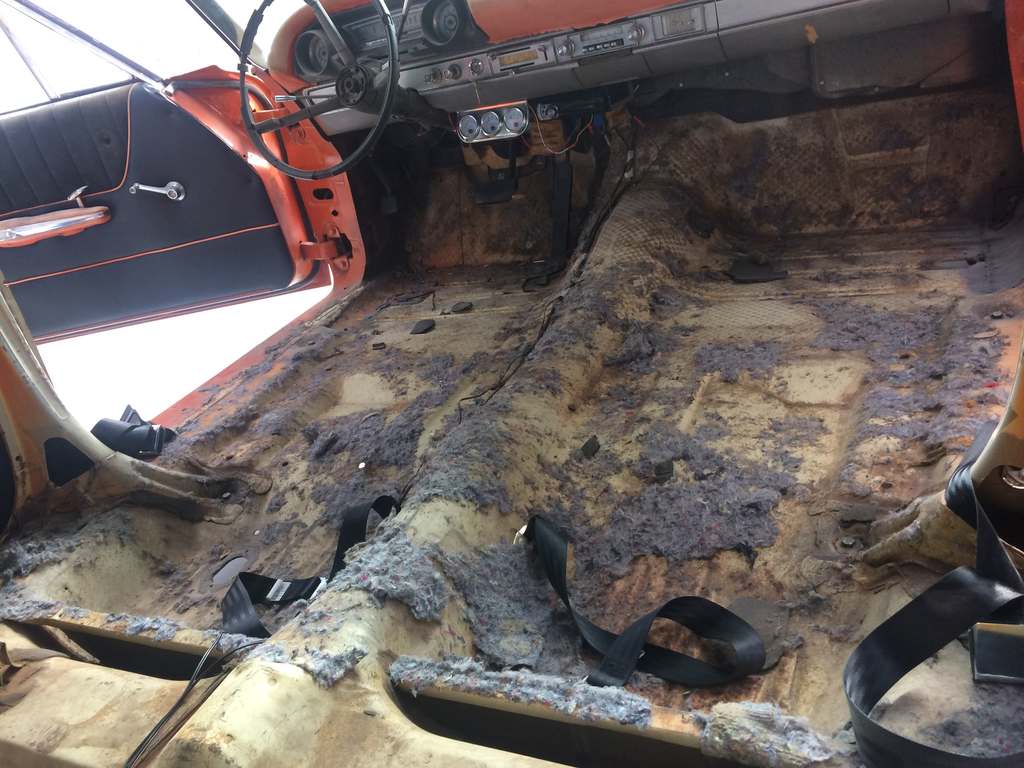
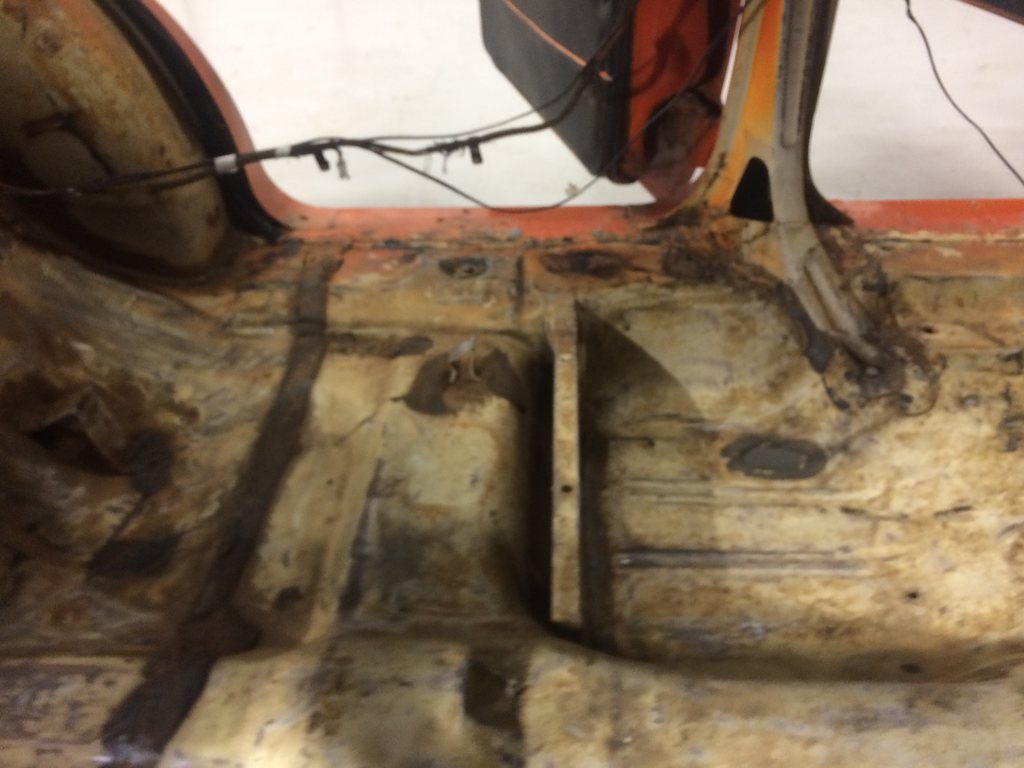
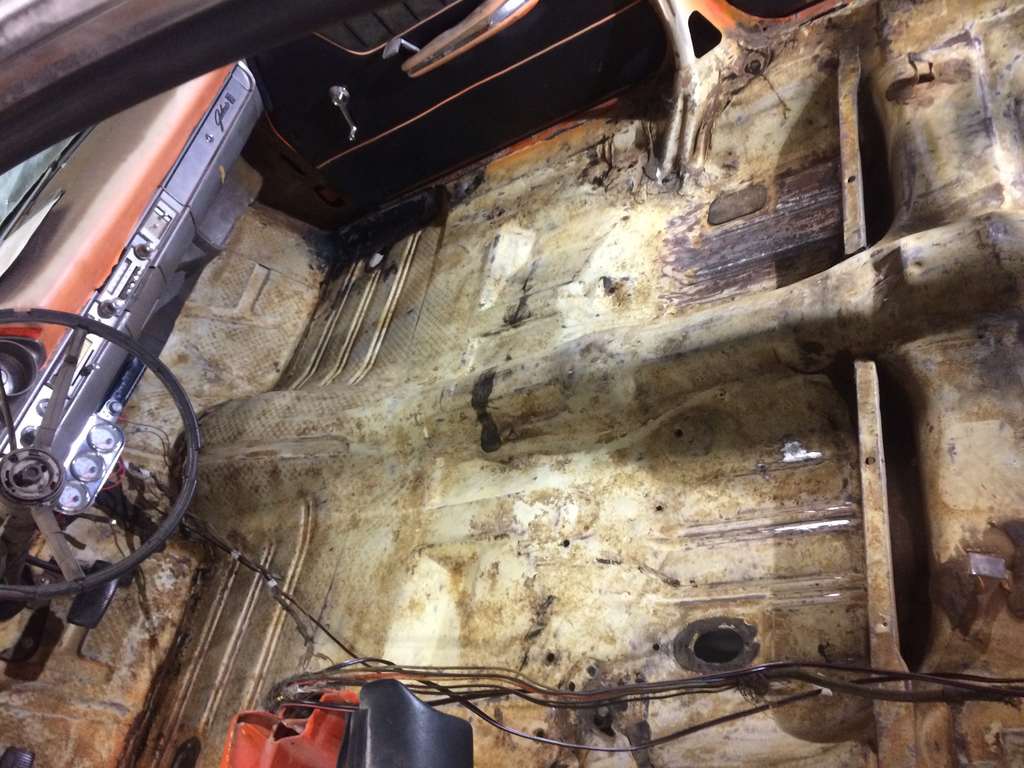
with the car being back on the ground it was time to have a tidy up and set to work on cleaning up the inside of the floors It started with cleaning up the old underlay crap off the floor Just used a scraper and got most of it off even mum came out to lend a hand and the last photo shows the only rust that was in the floor being on the rear passengers side i then got the wire brush and an abrasive disc on the grinder to get the surface ready for paint i also while i was at it cleaned up the patch on the R/F floor abit more. then after this i cleaned the whole floor with prepsol and twice in some place so it was clean and ready for paint. And covered the holes in the floor to prevent paint spilling on the floor
1 point
-
now the next job was to get it down off the stands unfortunately not many photos were taken due to being the jack operator so for this job i decided to borrow another trolley jack to help with the job this was also a slow job being that remove one block then let it back down as we were unable to do big drops on the jacks then once we were at a height where we could remove the trestle stands we placed some blocks with the axle stands at full height. then remove blocks from below or above the jack and drop the axle stand down a notch. this job took about 2 hours with 3 people and this was all done by the help of on the jack m8
1 point
-
Photo dump: Swingarm had closed up from bracing, Needed a bit of a stretch to get the chain to line up. 8am on Saturday the bikes were in the same room as each other but nowhere near ready to ride to Wellington Carbs weren't back in time to reassemble so had to make a set that were under a bench fit and work. None of the exhaust parts I had would line up other than the period Yoshimura full system I had installed on the 750, so that had to go onto the 1200 and had to mix and match to get an exhaust on the 750. Would like to make a new system of similar dimensions to the Yoshi soon.1 point
-
Swingarm braced1 point
-
Ignition and fork springs R1 shock re-sprung Thanks @Mr Vapour1 point
-
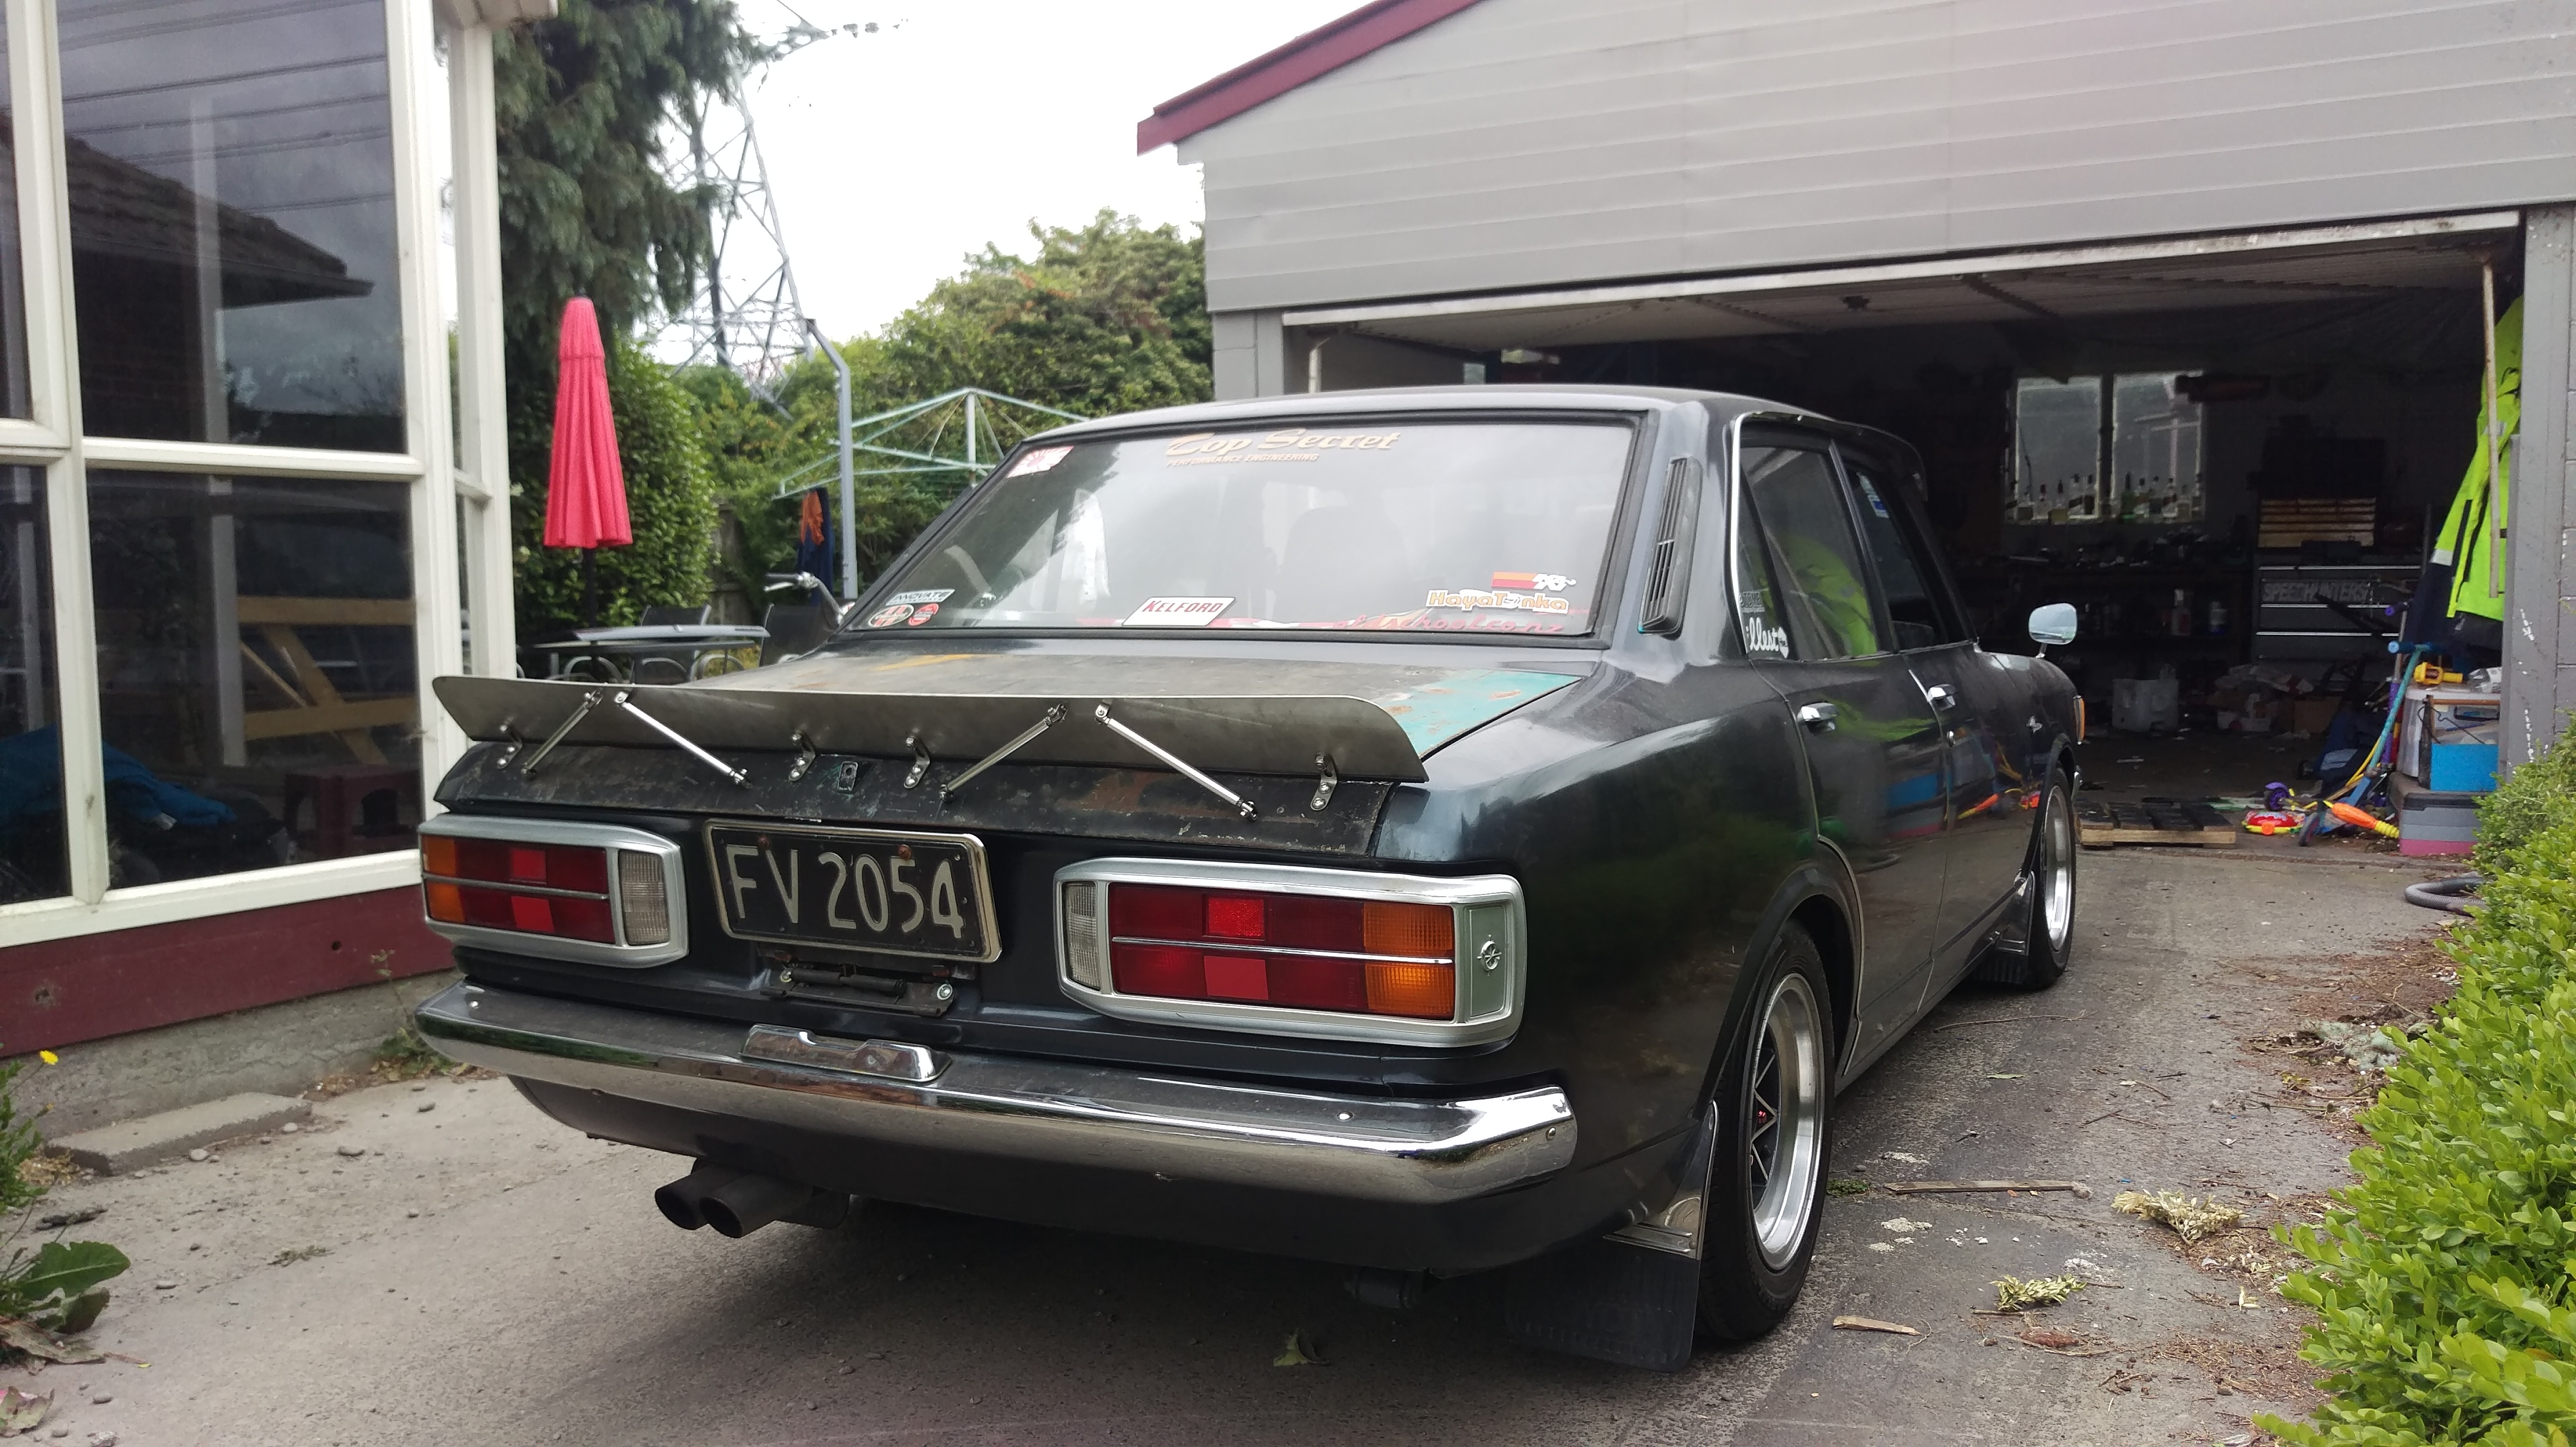
Progress on the spoiler. Very very pleased with it so far. It will be painted flat black, and I have a large old font Toyota decal/stencil in on order to so an slr5000 style graphic on the back.
1 point
-
Passed a Wof not too long ago which required new King Pins . So replaced them and also fitted new rotors and pads while i was in there. Currently changing thermostat and flushing the coolant Next up is some rear tailgate door window seals then i can start the cabinet making for the inside wrap around seating and liquor cabinet. Once winter is gone ill be attacking the small amount of rust at the top of the A pillars then get the englisman to Silver metalflake the roof and then get onto some lake pipes and this is the van loaded up with 3 of my bikes heading out to QCR Dirtmasters1 point


.thumb.jpeg.e0a4bff61111e0c8c7396950fcc94da1.jpeg)


.jpg.2a286b179d15a3d964d9c54968466ff7.jpg)
.jpg.728bb39bd7f6b4b1695857cbfc391e31.jpg)
.jpg.fd12b589c9eda16ac1435dbc239eaf62.jpg)
.jpg.1001291b37c49843dc003b271e131841.jpg)

.jpg.13917bdecf1b5994f7ad2e82a99541fa.jpg)
.jpg.6d0efcd0f9755dfe8b0ad03d32874527.jpg)
.jpg.ff0514eab506571891e6bbde2f76427b.jpg)
.jpg.3884999d1ff6f4b15171b52c3ea1a728.jpg)

.jpg.716bed421427b2d649e026013310ea1f.jpg)

.jpg.e7422178552318a7156bd1b178b8465f.jpg)
.jpg.8092a87ae2918e15bb87e0f46f718369.jpg)

This leaderboard is set to Auckland/GMT+12:00