
Leaderboard


Popular Content
Showing content with the highest reputation on 10/16/17 in all areas
-
Gave the hinges a bit of a polish and made some nylon washers, it all should work well I hope. Need to find some wood for the bed now. Decided I should go back and finish mounting the front sway bar. Started by making some new mounts since the ones that came with the rubbers weren't very nice. Bolted it all down in the right place and stole the sway bar links off the rear since they need to be changed anyway. Needed to cut out the side of that gusset sorta thing on the front end that I made ages ago since the sway bar hit it when the front raises up. Another thing that my parents picked up in America was an ashtray that goes in the middle dash panel, since neither of the RHD dashes came with one. Could of used the LHD one but wanted to keep that dash complete to hang on the wall or something haha. Had to get a second hand one since they don't sell them separate from the whole dash panel, and they were never made in stainless so it will need to be painted or chromed.10 points
-
Swapped the 175/50/13 yokohamas onto the starsharks. It's so slammed now haha. It's also nicer to drive in most ways because it sits at slightly higher revs, apart from high speed cruising which still isn't too bad. Speedo is waaaay out now though!9 points
-
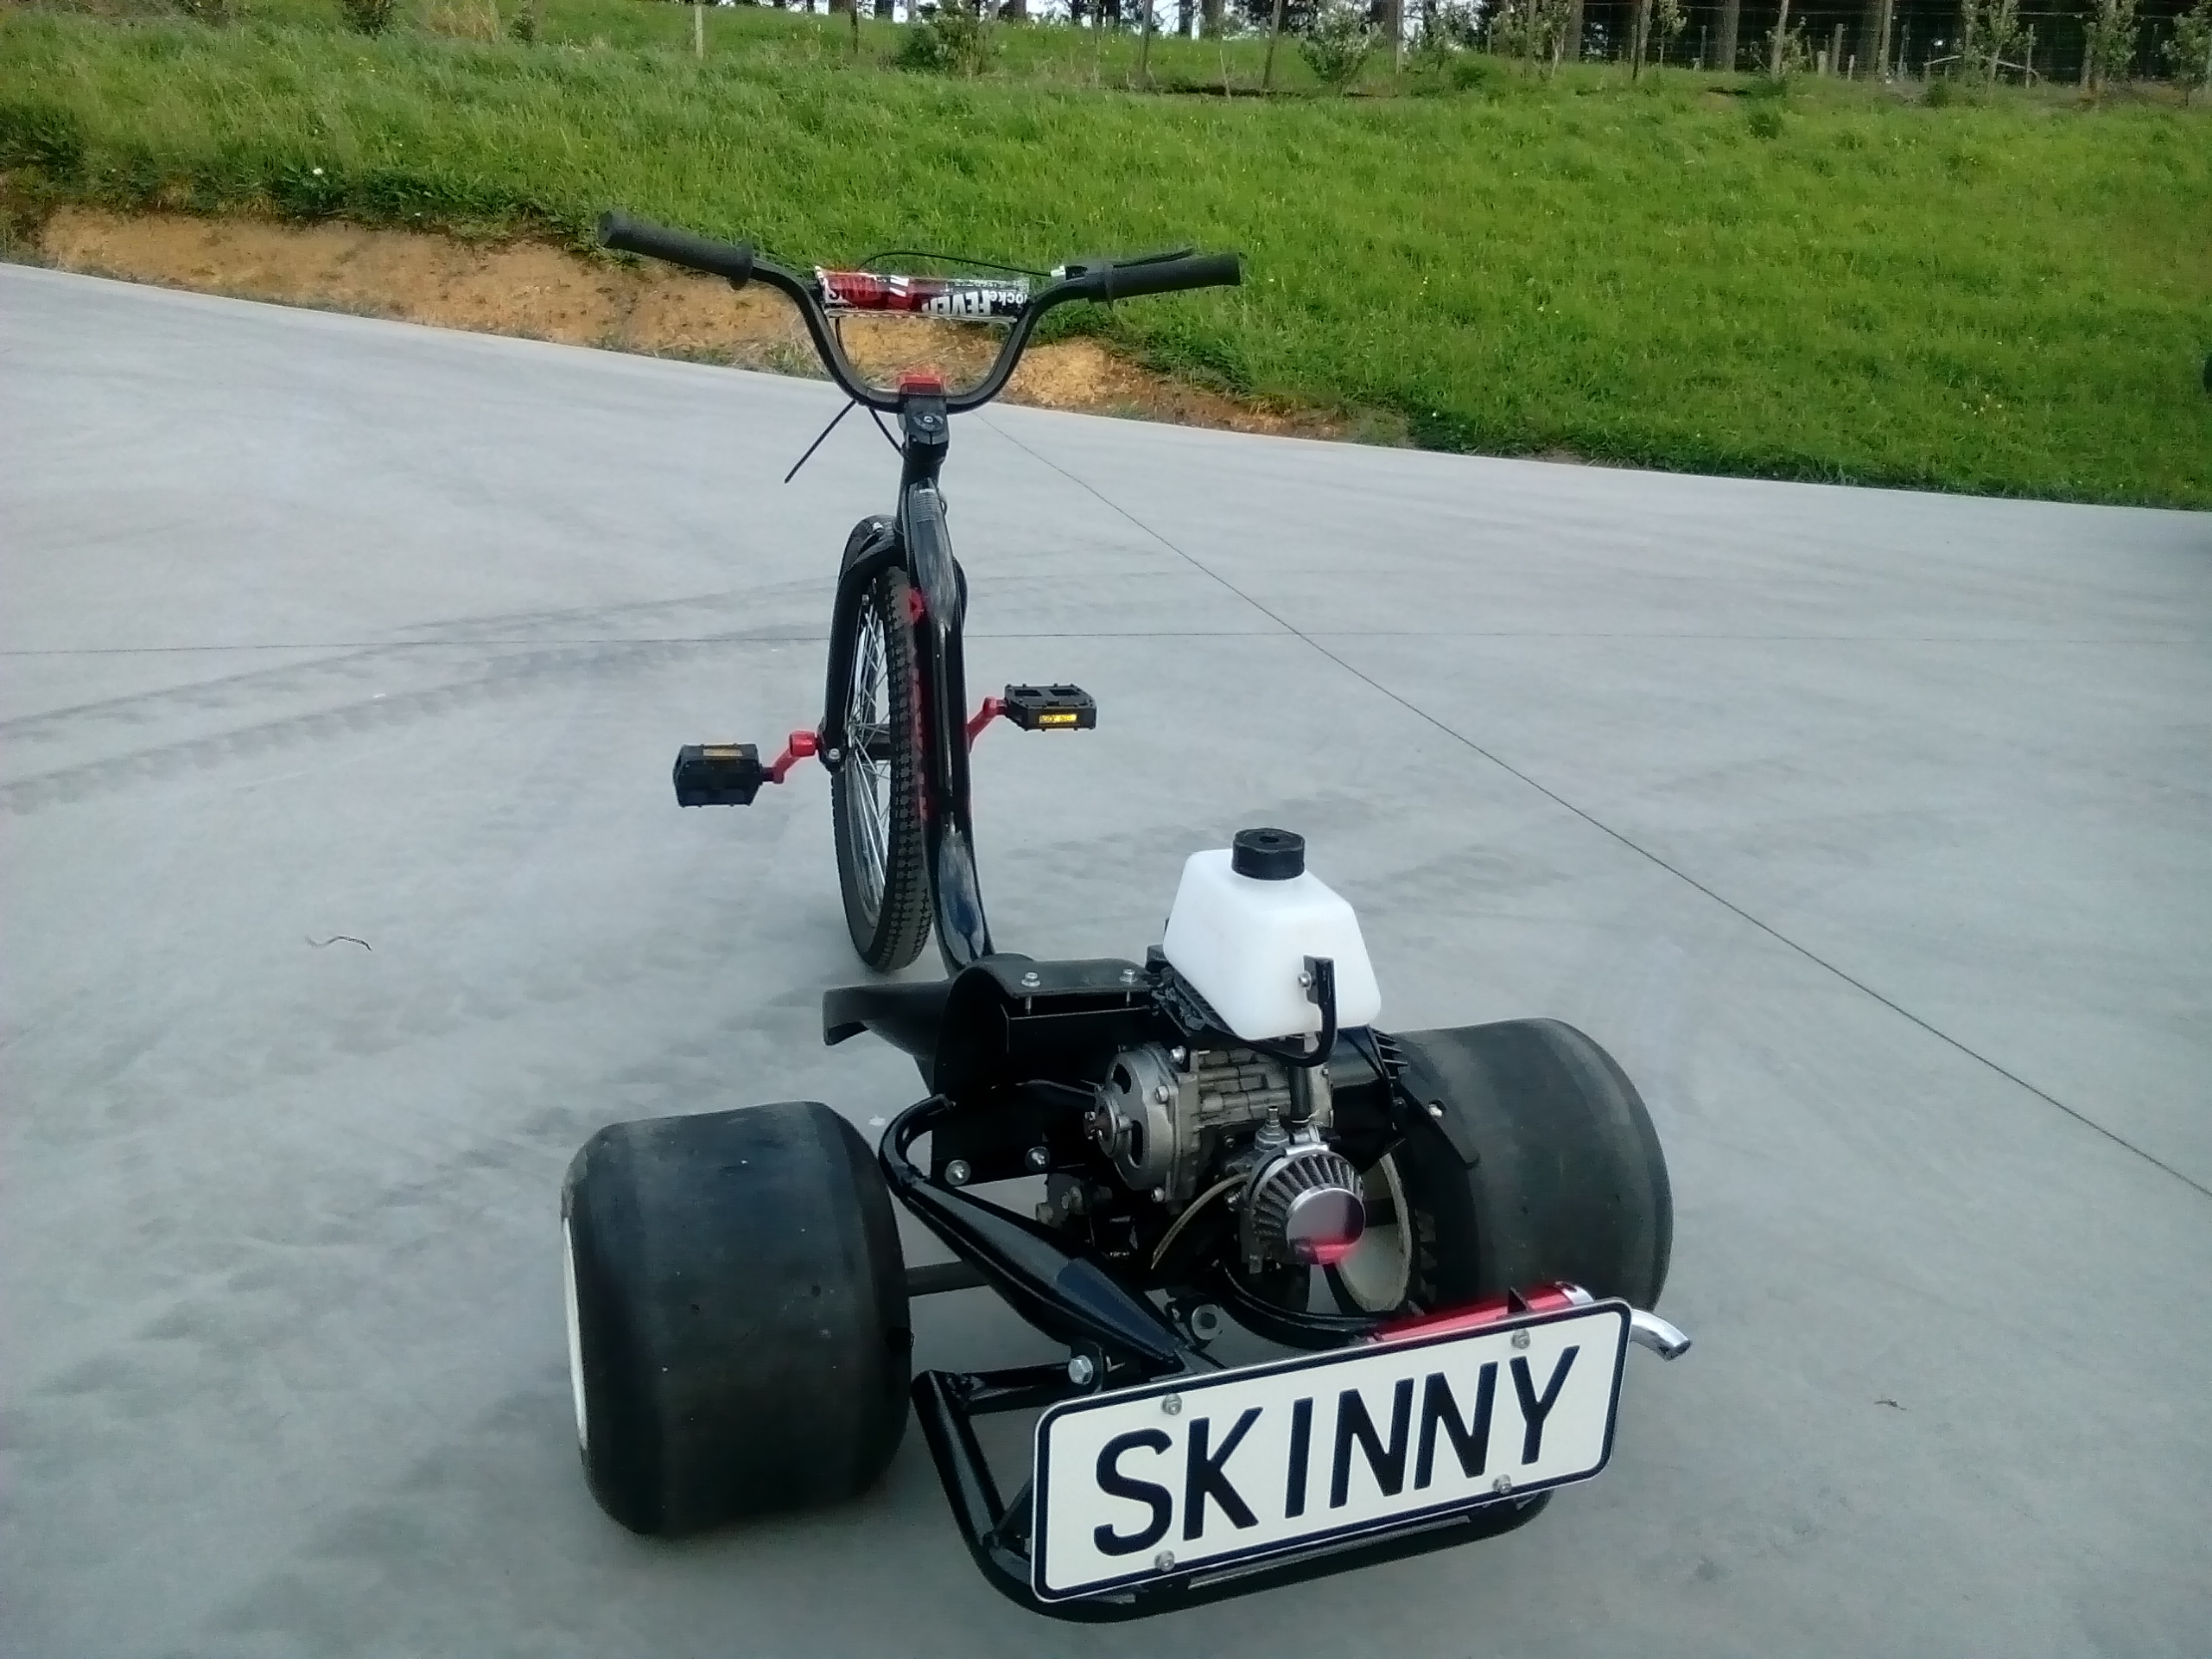
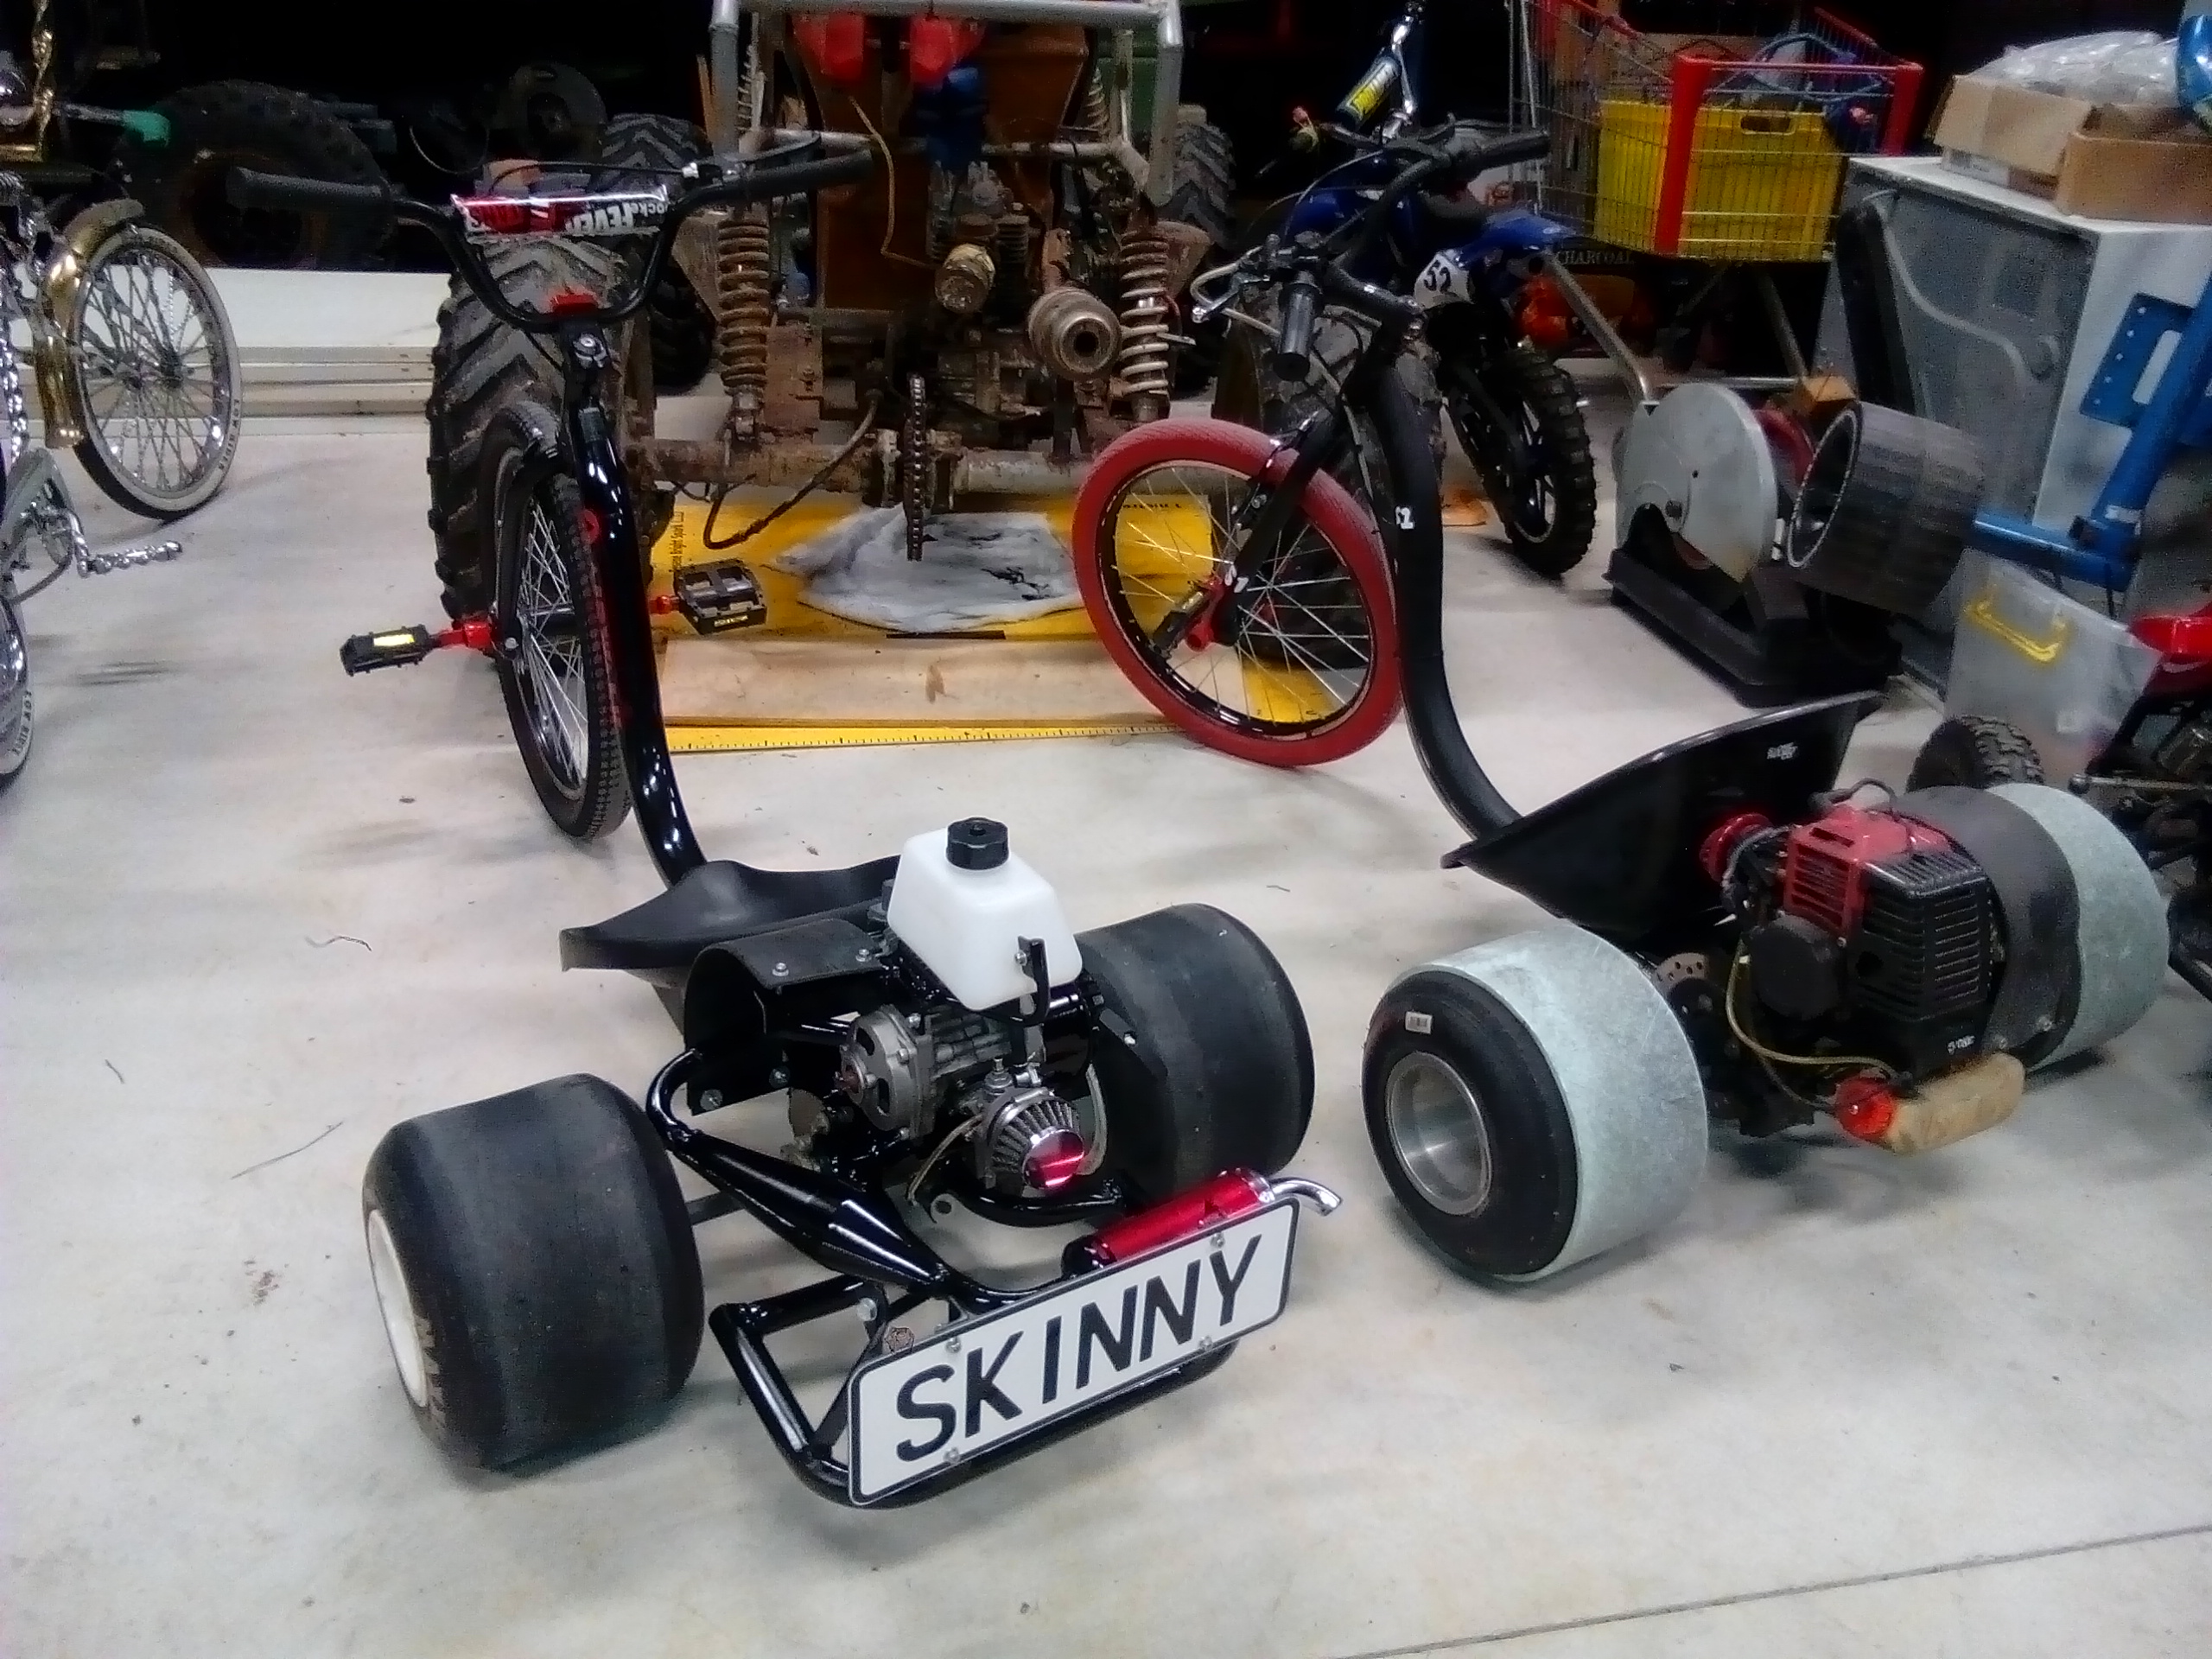
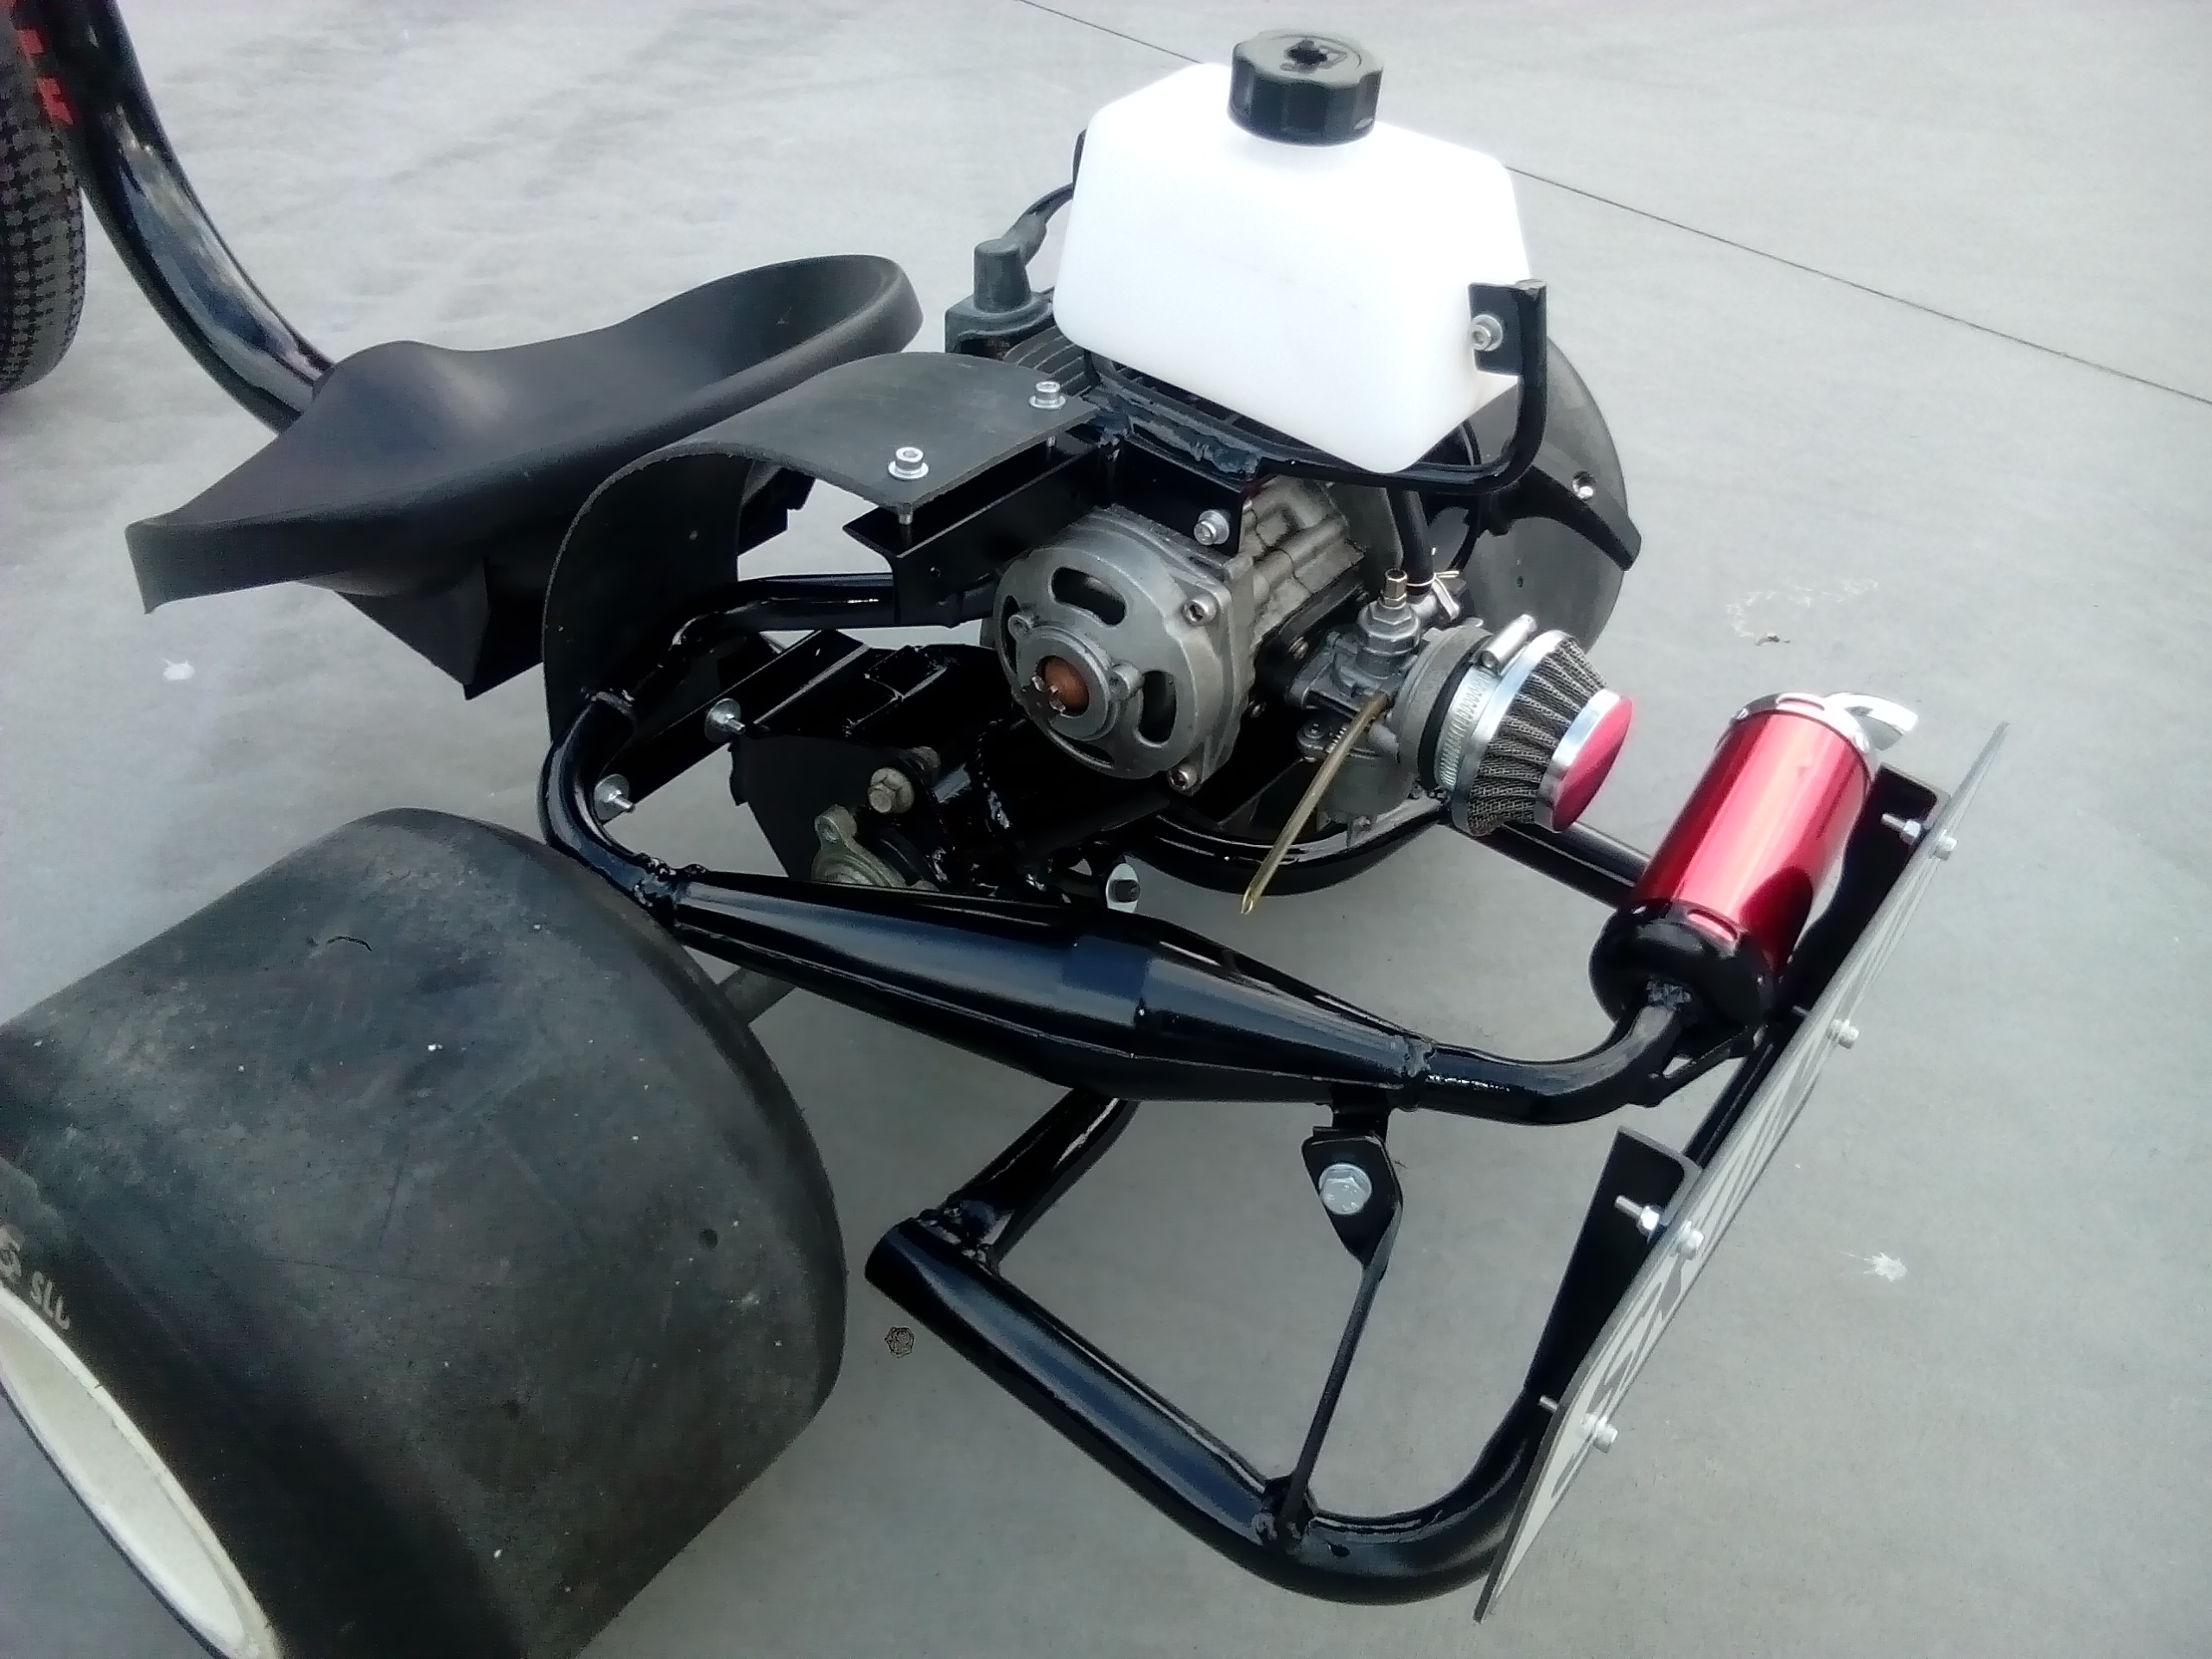
Pretty much finished, just waiting on a sprocket and throttle cable to finish it off. I've made it as a gift for a mate (nickname "skinny"). I already have one, so the only thing better than one is racing your mates on another one. photos:
 8 points
 -
.6 points
-
I actually bought this not just because its cool, but because it was a similar price to a decent trailer, but with the benefit of being self propelled! Looking forwards to smug facing at the dump as i reverse up the small gaps between all the jack-knifed trailer + modern ute combos6 points
-
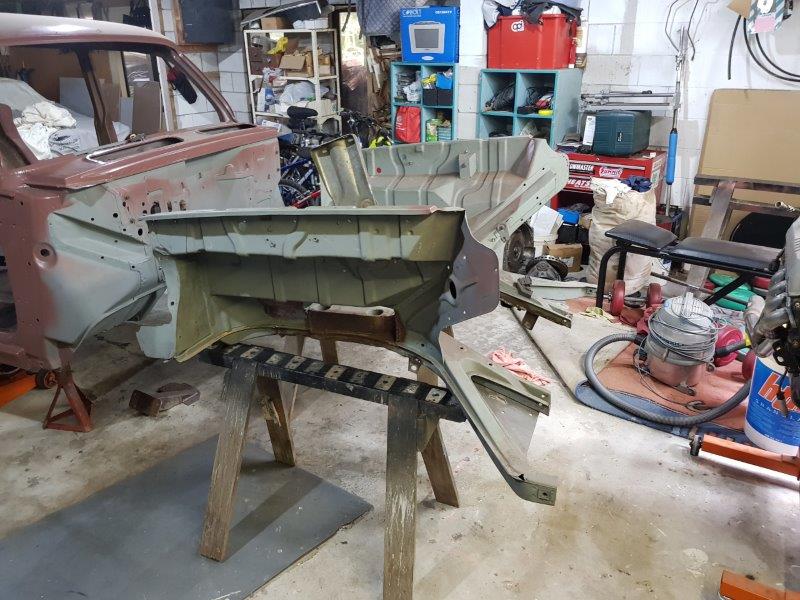
Spring is here, sun is shining and the welder is sending beautiful sparks in the air. Progress is picking up. Engine is out as is obvious from the above pic. The jig that was made up way back when the Hudson was still whole to mark out the holes to mount any panel work is in place and everything is looking good. A few tweaks will be needed but other than that pretty happy with it. A better look at the trans mount and brace that strengthens up the frame so the whole thing dosnt collapse inwards as the sides flay outwards like some molten pudding. (im on a bit of a sweet vibe at the moment- would totally demolish a pack of licorice). Any who this shows the top hat cross sections way better than the last posts pictures. They will be out soon so the frame can be strengthen up. Pic above is for Hnstray on HAMB (I post this build on multiple sites). Showing the diagonal "braces" and how they are mounted on conveyor belt rubber at the bottoms so don't really add anything in the way of bracing. From the jig you can see how they are used mainly to mount the inner guards. That bracket up top held the horns. A better look at the jig that marks the mounting holes. Once everything is marked out the front clip will be taken off. Braced up where needed at the back. Holes cut - both for mounting the panels and rad but also larger ones to help add a crumple zone. Part of the NZ cert rules say we must have a crumple zone to help absorb an impact. So those nice big ol holes we used when doing the rear end will be brought forward up front. The half pipe notching for the steering arms will also add to the whole crumple zone. Then weld it all together, add a lick of paint, put it all together along with the engine panels, rad etc to make sure it all fits.5 points
-
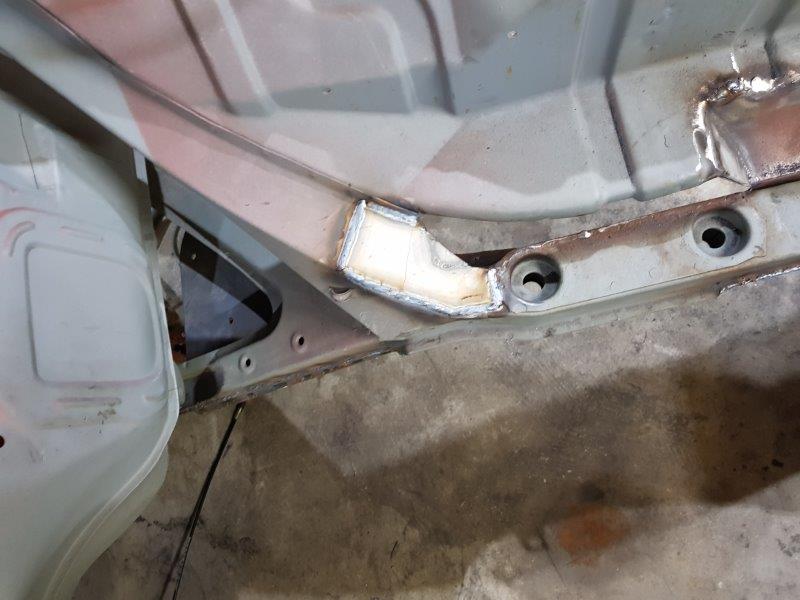
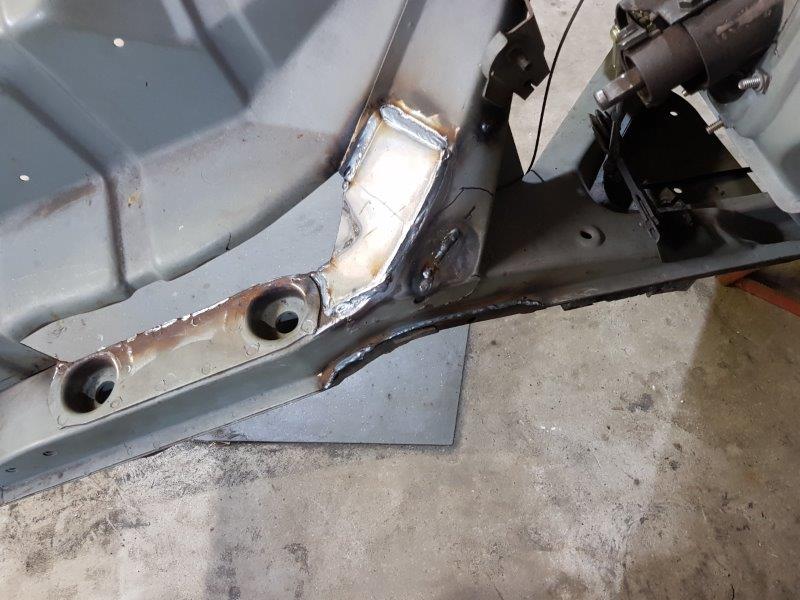
So it's been nearly a month. I suppose an update is in order. Be warned this is going to be a lot of words with not many pictures, but it's good to blow to dust off the old grey matter every now and then with a bit of reading. Firstly a quick update on the fabrication front. I've made decent progress on the passenger side chassis leg replacement. It was much easier to do the second time round once I knew what I was doing. I made quick work of the outer skin giving it all the appropriate modifications and "crumple zones," same as the other side. Same story for the inner rail with giving it the pressed in weak zone and welding in the crush tubes for the ARB mounting brackets. I didn't take many photos of these processes because it looks very much like the first time I did it and ya'll don't want to see a bunch of repeats. I got to the stage where I was ready to weld each skin together but I ran out of weld through primer so I had to nip to the shops to pick some up. They didn't have any of the previous copper based paint I had used and what's more they don't stock it anymore so I had to take what I could get. Turns out that was this: For anyone hoping to use it, don't. It's awful shit. I followed the directions on the can and sprayed everything down that I was going to weld in the correct way. Then I got everything mocked up ready for welding and started pouring in the amps with the TIG to plug weld in the reinforcement/locating plates just like the first time. It fizzed and farted when I struck the arc and generally made a mess initially. Then it was very difficult to get it to form a weld pool and once it finally did it would sit for a second before making a big pop and splashing up all over the electrode. I'd regrind it and try again but eventually it got so bad it got the gas cup red hot and broke a big chunk off of it which fucked it. Unsurprisingly, this pissed me off. So I tried using the MIG. It rendered similar results. Zero penetration and ugly ugly welds. I also ran out of time and had to ship off on holiday with the family so that is as far as the fabrication got. Meanwhile I made a bit of a start with stripping down the V6. I got rid of all the luxury equipment (power steering and AC pumps) and pulled the alternator off as well; basically getting the motor back to its bare basics. I realised that contrary to what I had been told, it is actually the lower spec 160ish hp engine with lower compression, less aggressive cams, and slightly worse flowing heads. I can't say I'm super surprised but I am still somewhat disappointed. On the upside the lower compression lends itself better to some mild boost down the road but for now I'm going to keep trying for the higher spec NA motor route. I had a look around one of the Pick a Parts in Auckland while I was down there doing other shit but didn't have a lot of time to look very hard. Although there were a few lower spec engines, I didn't find what I was looking for. Unfortunately it's a long way for me to drive to check on every new car that turns up at the wreckers so for now I'll have to soldier on with what I have. I can still use this motor for making up mounts and so forth but it means I'm still on the lookout for a KLZE engine if anyone can help me out. To keep moving forward I got the newly stripped motor hung up on the hoist and swung into position to have a closer look at how it would fit. I didn't take any photos for some reason but you'll have to take my word for it on the details. The engine fits really well with the front sump having a good amount of clearance to the cross member when the engine is placed as far rearwards as the distributor will allow. There are plenty of tapped holes on the side of the block just begging to be used for mounting brackets right near the stock engine mount posts on the factory cross member. This means I'll easily be able to make mounts that pick up the cross member, rather than doing a chassis mount. This lets me drop the whole front suspension and engine out as one unit if I ever want to. The only issue is that the engine is too far forward. I measured the gearbox from shifter to bellhousing and then measured the distance from the shifter hole in the trans tunnel to the bellhousing mounting holes on the engine block with it mocked up in the bay. The block to tunnel hole distance was abour 100mm longer than the same measurement on the transmission. Ironically this is about the distance I shifted the hole back to fit the old ford 5 speed. This means I have two options. 1: I could cut the tunnel again and move the shifter hole forward again to make everything fit with the engine where it currently sits. Or 2: I could shift the engine back the appropriate amount to put the shifter in the right position to line up with the hole in the trans tunnel. The first option requires me to undo more work I have already done which, while not too much work, I'd rather not in principle. The second means the engine gets set further back in the car. This means I have more room in the front for a radiator and fans, and, ultimately, room for an intercooler wouldn't go amiss. Also, race cars have their engines set way back too so... This means I'll probably have to modify the sump to clear the cross member but that's not too much work. I'll also have to come up with a solution to making the distributor clear the firewall. As it sits now, shifting the engine back will require either the firewall to be modified, or the distributor to be removed. In the process of stripping down the engine I found points on the harmonic balancer and a factory mounting point for a crank angle sensor on the block casting. This means I have plenty of parts to convert the engine to crank triggered ignition and either remove, or severely cut down the distributor to fit the new position. All I will really need is an aftermarket ECU. And an expert wouldn't go amiss either. Luckily I have a father in law that is a very well connected, skilled, and experienced automotive sparky and he had already given me plenty of advice on moving forward down this path. Going aftermarket ECU will give me the added bonus of learning to fiddle with tunes and so forth and really get the most out of my motor. So there you have it. To conclude, fuck 3M zinc based weld through primer, I still want to find a KLZE engine, I have a plan for mounting the engine in the car, and I have a plan for converting the engine to crank triggered ignition. If you've slogged through all of that, thank you very much for your time. More consistent updates to come. Merry October to all, and to all a good night.5 points
-
more rust. I always think it wont take very long but it does. I tend to work in sections and batch things to the tools needed - saves trying to find that tool while your lying around on the ground, as its always in your hand. . Eg mark sections, drill all the spot welds, cut all the holes with the slit disc, tidy with the other grinder ends and powerfile etc. Then make all the CAD templates, cut all the steel, then fine work to get teh patch to suit the hole, weld, grind, weld pinholes, grind, sand, primer. Also means i can do a bunch of quieter stuff after work etc and do all the welding and especially grinding in a single annoying spurt on the weekend instead of a little all the time Section A Wheel Arches. Figured id get this done so i can loosely fit the tins and start pile crap back in there. Pretty much 3 matching areas both sides, plus a couple of random blebs out of shot Section B: Rear Valance etc Took the tow bar off to get into this area, this section is 'closed' (lol) from road debris form the wheels and tray areas and does not have very big drain holes (there are some humps in the inner section that his plugs to that face forwards...) so trapped wet grime sitting on the flat sections has made its own way out. First batch of patches. I should have replaced the whole bottom section right across TBH, i added a couple drain holes in the big patch which should help let dirt and stuff out (and cavity wax in). I will also seam seal before i underspreay as there isnt much on this car, and some of the gaps are pretty bad! Moving around to the passenger side, thought id get away with filling a few pinholes, but ive since done what i should have done the first time, and cut the corner off like onm the drivers side, as well as extended the big patch in the middle both ways. You can also see the strengthener on the flank where trapped muck and holed the side, below the bumper, from the inside out, and it was just the same on the other side. Got all the remaining patches for this area ready to weld in during the week some time. Remaining rust (i know about!) to be cut out, which isnt that much if you say it fast is: - 1 tricky to fold section if the rear lower corner of rear passenger wheel arch (just in front of the mudflap) - 2 & 3 holes/bands in rust trap factory positioning things that look like jacking points but are not... of outer floor section behind front wheels, both sides - 4 rear cab/floor area (will probably use rust cuts here) pass and drivers - 5 lower rear tray to tailgate seal lip, but can leave it till after summer/WoF , and will get a section bent up so i can spot it in easy, like the 2300 section in the same place5 points
-
Painted the 9inch blue and put it in And then this weekend after the new trans and headers showed up, i decided to chuck it in and test fit everything. I went for an AOD trans so i got overdrive, and i should be able to run a higher diff ratio while keeping cruising speeds down. Its a pretty tough built one i got from a shop up north. The headers are Hurricane, and completely fowl the steering box so ill have to modify them at work. Our car hoist also serves as an engine hoist. After these photos i mounted the rad, oil cooler, oil filter and fuel pump, its gonna be a busy engine bay!5 points
-
.4 points
-
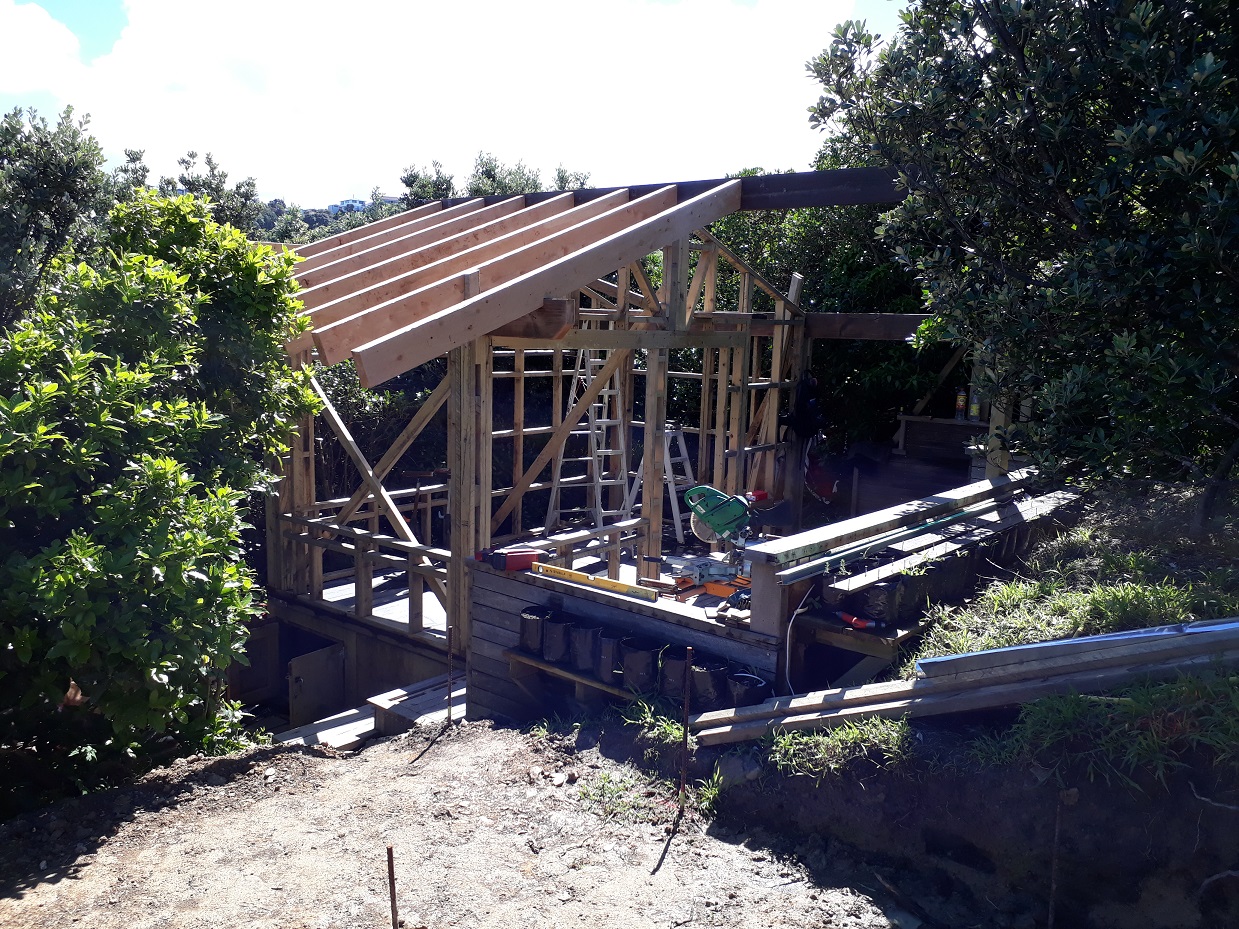
Getting the rafters up by myself has been a mission, but it's about a third done.
4 points
-
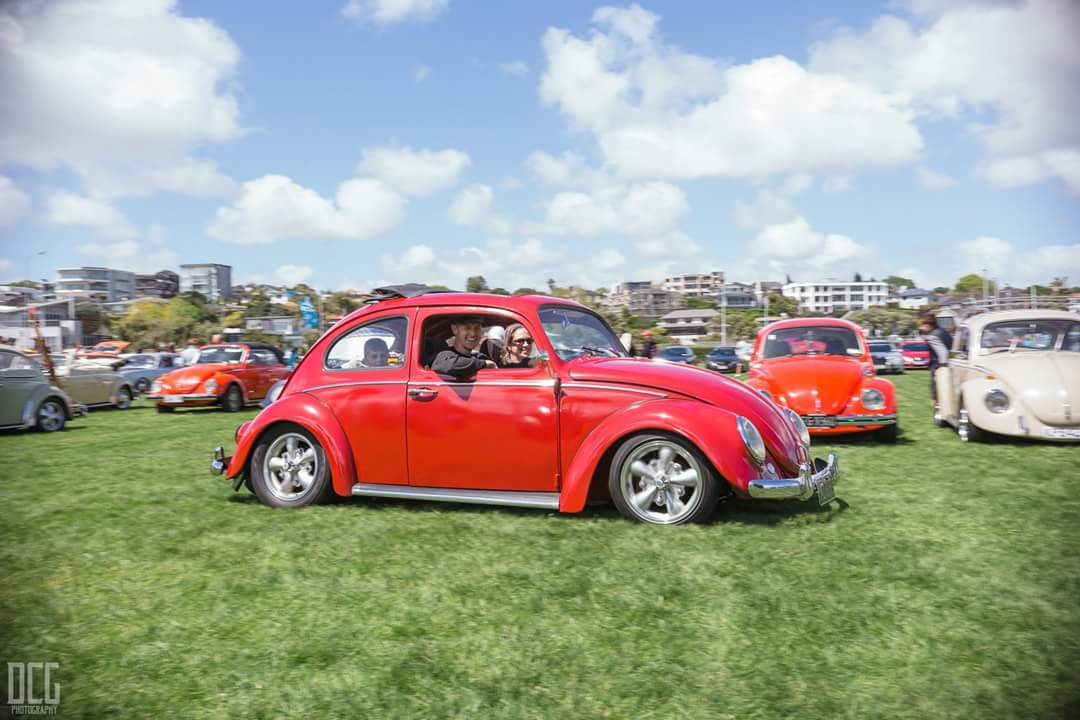
Yes Sunday was a good day, very little use of a AK.After the wof and reg last week, first job was to get the wheels all pointing in the same direction.me ol mates at lincon tyres sorted that out, easy, rear was pretty good, I'd lined the axles up with some old marks on the spring plates and it did feel good, but the fronts were 10mm out each side, no wonder it was so scary on the motorway.After a short test drive home, it felt much better, need to go over the kings and links again and should re pack the front bearings with more grease, but first.as we pull into our street something went thump thump thump!rut roewhen I put the rear drums back on the pan, many moons ago, I didn't actually have the torque wrench so I just leaned on the multiplier stuck the pin in and forgot about it.I think I may have over done it???the splitpin and the castle nut were still in place but the drum was lose and the back of the studs had been gnawing at the wheel cylinder.At this point I'm out of time and money, the Auckland VW Club Spring Jamboree is days away and if I have to go on three fucking wheels this car was going!So I pulled out the bits of seal and that mangled metal thing, backed off the wheel studs so they were flush with the drum, backed off the front brake shoe has most of that also seems to have rubbed off and redid the castle nut, without hulk smashing it, and so far so good.I am really regretting not replacing all the soft brake lines now, as I have a feeling this is why the rear shoe has rubbed so hard.So Sunday morning loaded up every tool I own and then some, after checking and checking the hubs, drove down to local gasser and met these guys and girls.and arrived at sunny St Heliers Bay for the cars first wee show.and I thought my car was low.project for Felix?were some really nice cars there.this was one of two corvair engined bugs there.some crazy kidone of the picks of the day for me.really really nice, so I was pretty please to get second place in the 58-67 bug class.not bad for a homemade car!So cheers to the VW club, Matt and the guys for letting/making me lead the convoy in, MichealJFox for the choise pic of me and the family leaving, kiwikombi for the new smaller Dellorto chokes and all the other nice volks I chatted to and said nice things about the ragtop on the day.Look forward to more runs and adventures, now where is that rear wheel???3 points
-
Hi gents I'm gonna offer my services as support ute I don't have any Jerry cans but if someone else does I can carry some extra fuel. Maybe if someone has a 12v compressor that would be useful. Can bring a decent tool selection and tie downs if you break down Chilly bin too? Sound alright?3 points
-
Hey @azzurro! Look what I found in a barn this weekend......3 points
-
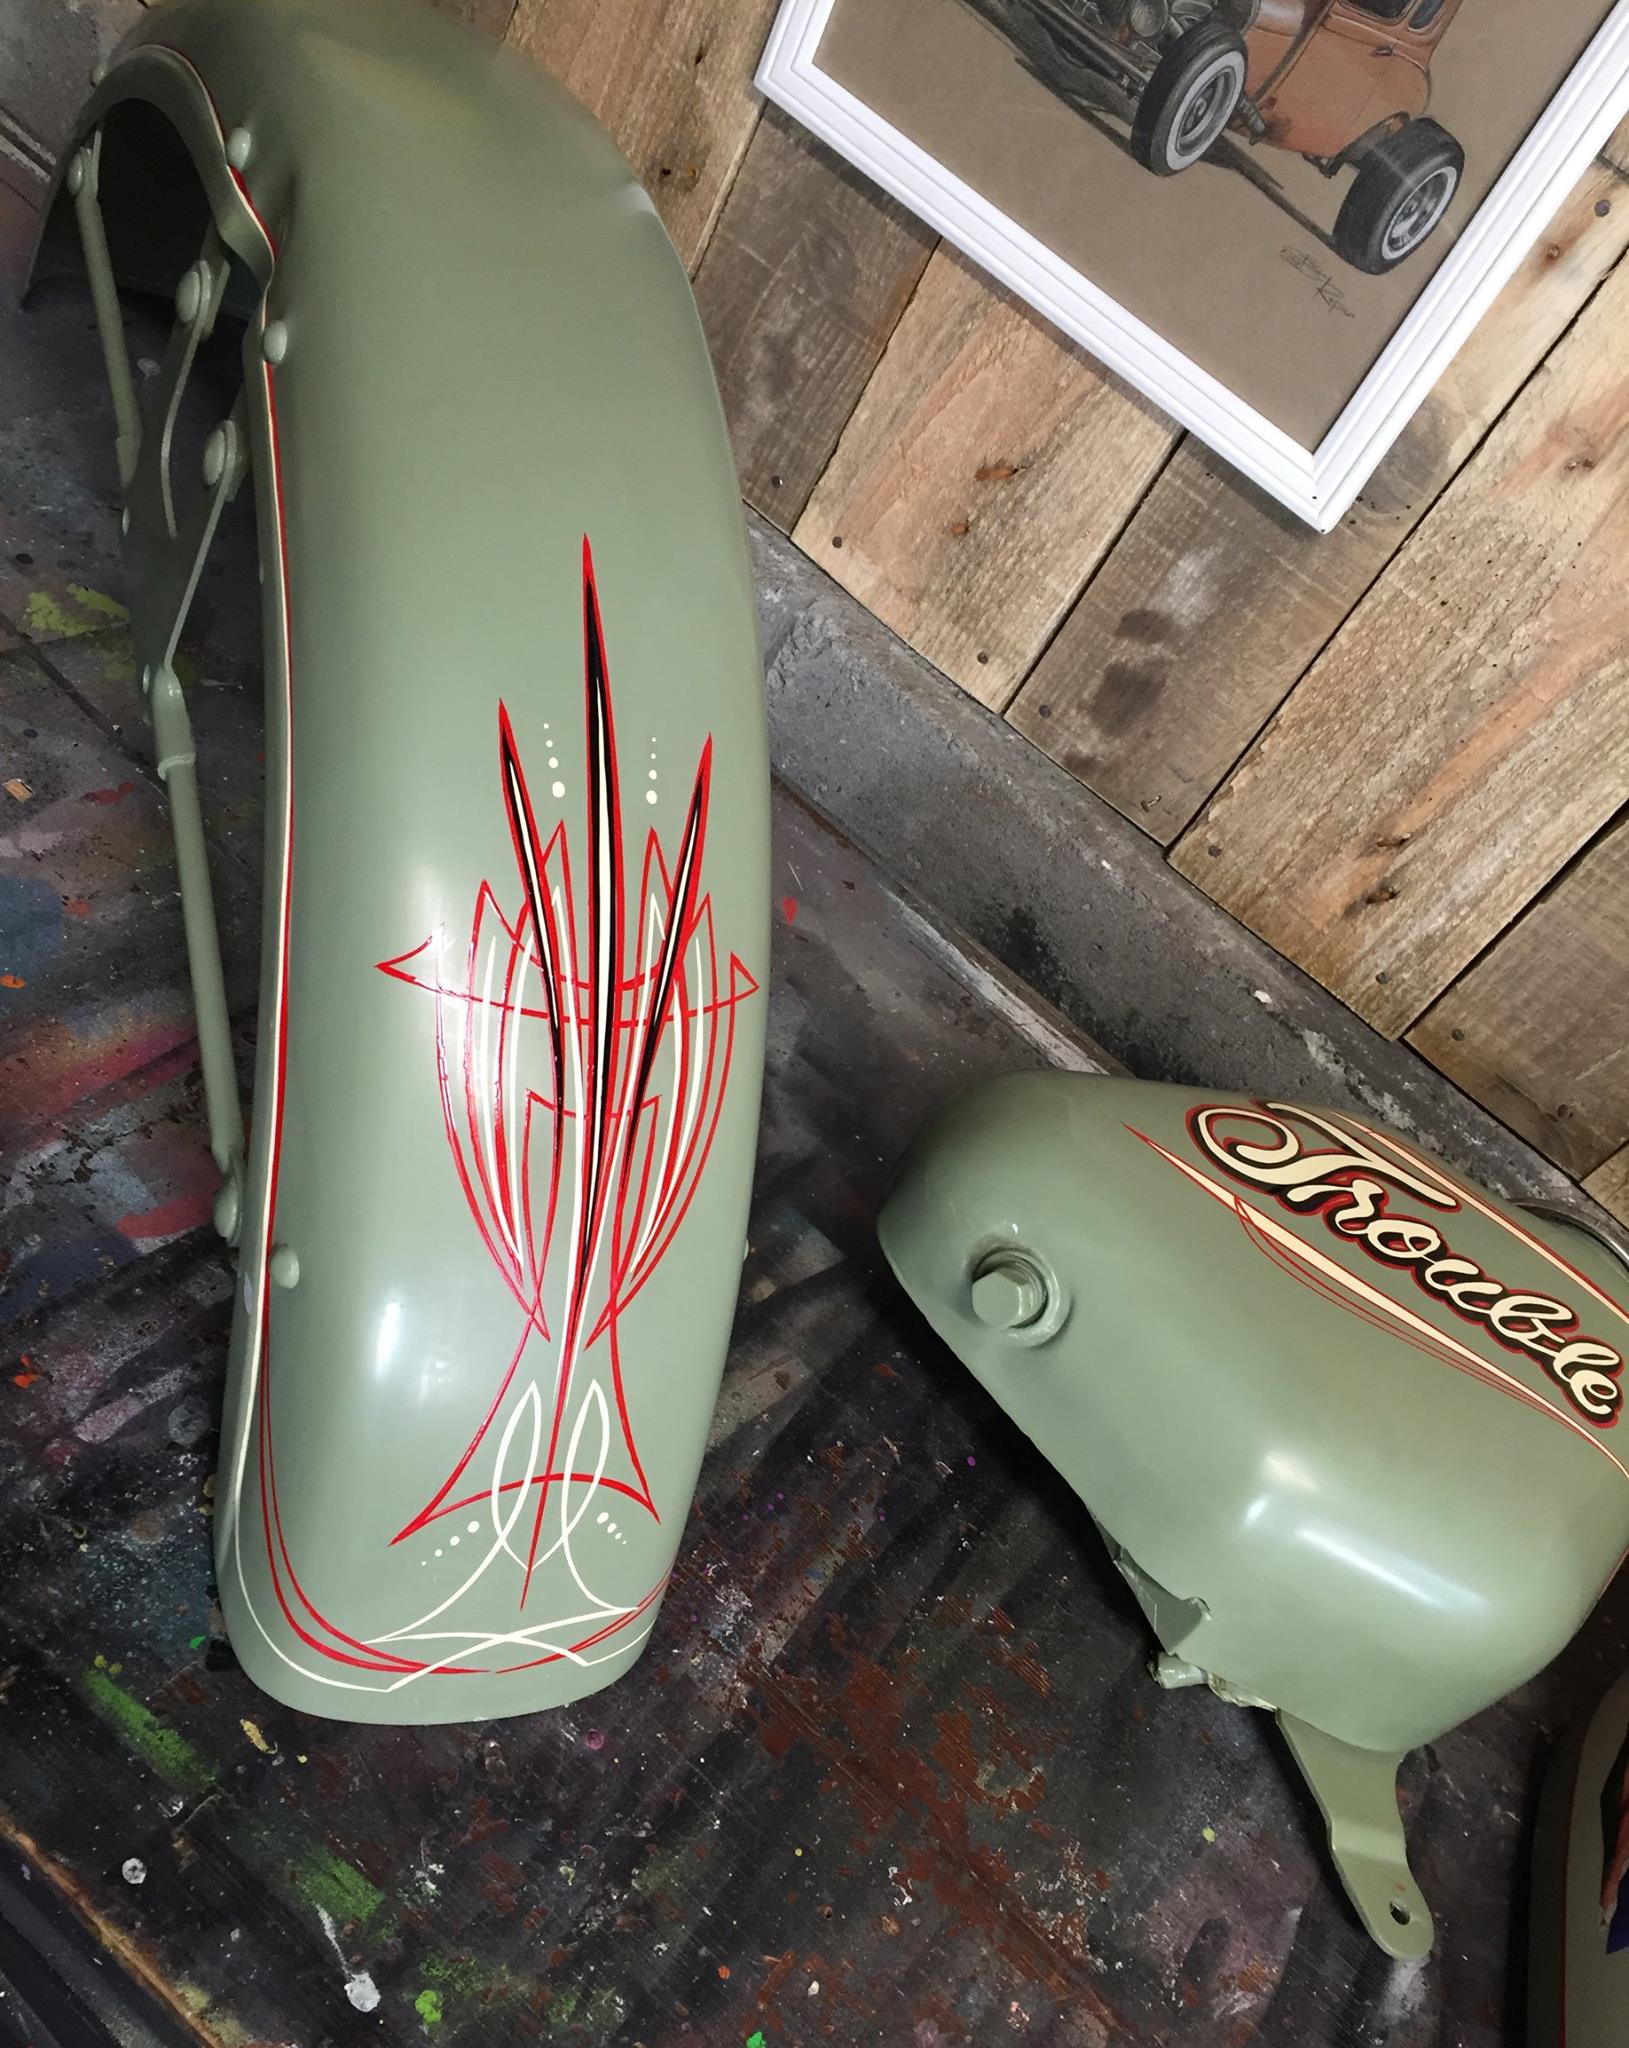
If you've ever wanted to have a decent hoon at pinstriping but wanted some pro-tips to get better results sooner, well... I'm working with a friend, Stace the Ace, to put on a bit of a Pin-striping school in my shed. There's going to be a Tuesday Night Class starting on the 7th November and running for 4 weeks, or a 2 day intensive course on the 11th and 12th of November. The basic idea is you get taught the basics of line work, how to use and hold the brushes, how different brushes create different lines, all sorts of other black-arts stuff, and at the end, apply it all on a small project of your own to take away and show your mates. It should be pretty good, she's got a clear timetable and knack for explaining stuff to make sure you get to feeling confident about what you're doing. It's $180, and you'll need some brushes and whatnot but we can help with those at a cheap rate. November 7th for 4 weeks, 6.30 - 9.30pm November 11th/12th from 9am - 4pm Website: http://www.tinker.co.nz/newclasses Facebook: http://bit.ly/2ynBDmE And please feel free to share those links... Chur.
3 points
-
Got it filled and primed 'good enough'. Painting the inside of car is even worse than the outside! I need some of the correct thinner before I can make it yellow/get runs everywhere.3 points
-
I got the old gal some new boots. Always planned on wider and 13in anyway. mate sold her van and kept the wheels so had no use for them, I’ve always liked Jilbas so once I test fit and they cleared, we struck a deal! Two were pretty grubby and brake dust starting to eat into them but they cleaned up pretty well with some truck wash, my electric toothbrush and a fine steelo pad. SSR Jilba 13x6.5 Type A. Nankang 175/50swith decent tread. Now I know how much I need to lower it, the front especially. It’s quite high at the x-member.3 points
-
My parents arrived back from America with all the bits I ordered. It was a little less exciting as I thought it would be, it's basically just a bunch of rubbers and screw/bolt sets haha. I also got them to pick up a pair of Classic Instrument gauges whilst they were over there. They were so expensive, but definitely way better looking and higher quality than most of the other types out there. Folded up a bit of sheet for the c-notch cover And also laser cut out the hinges for the back of the bed. Then decided how to make them pivot and turned up some bosses and sleeves. Need to get a better tap, a couple bolts and a some nylon washers to finish it off.3 points
-
Bit of inspo for you bro
2 points
-
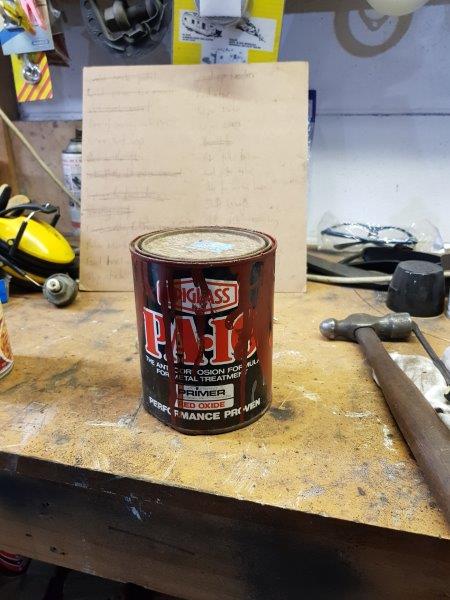
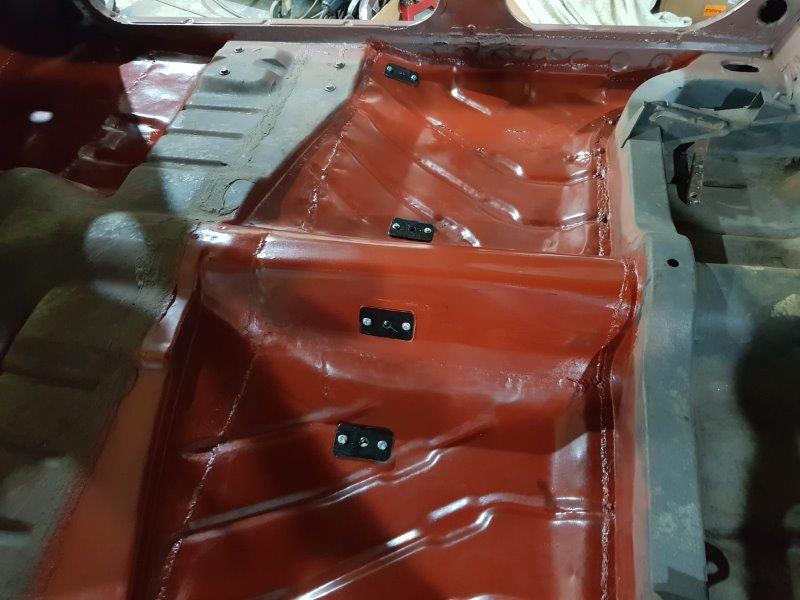
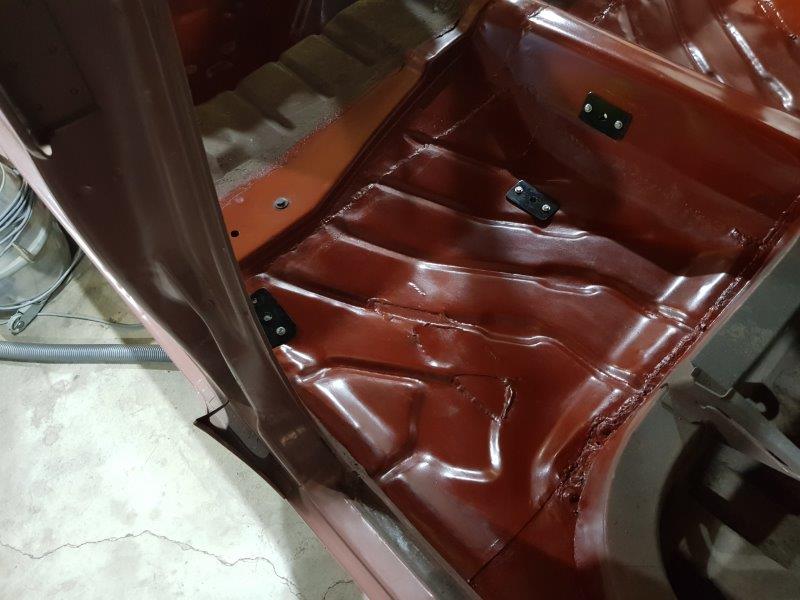
I decided to finish work a bit early today and painted the floor. The tin of PA10 I had I think I bought in 1992. It only took about half an hour to mix in all the hard stuff from the bottom of the can. It feels good to have paint on something. I will clean up the rest of the floor and make it all nice and red.
2 points
-
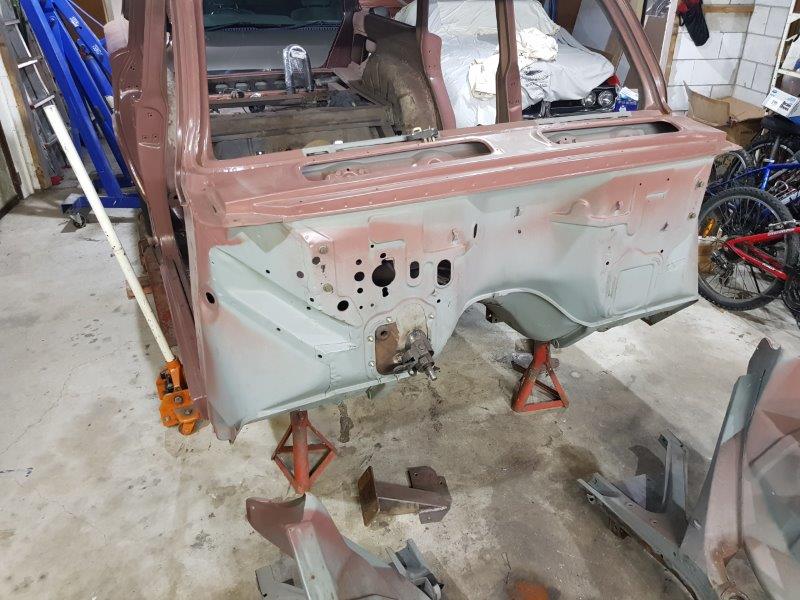
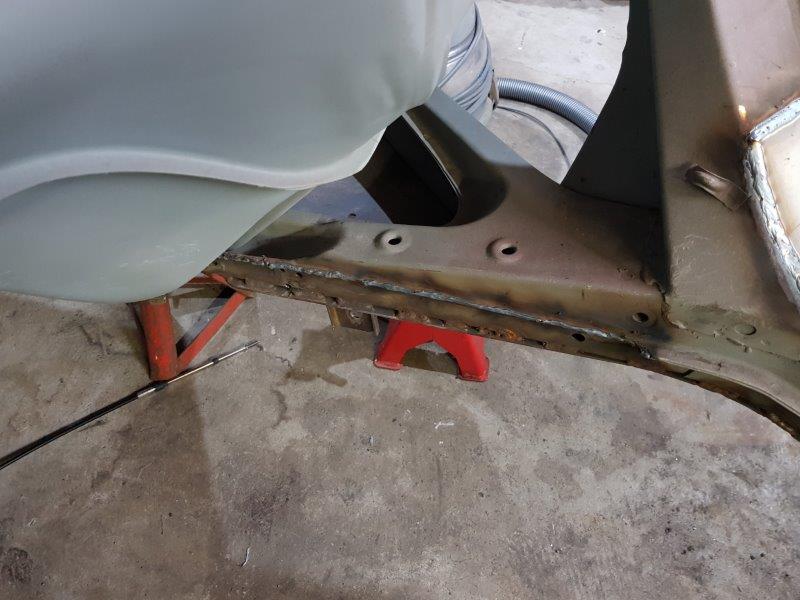
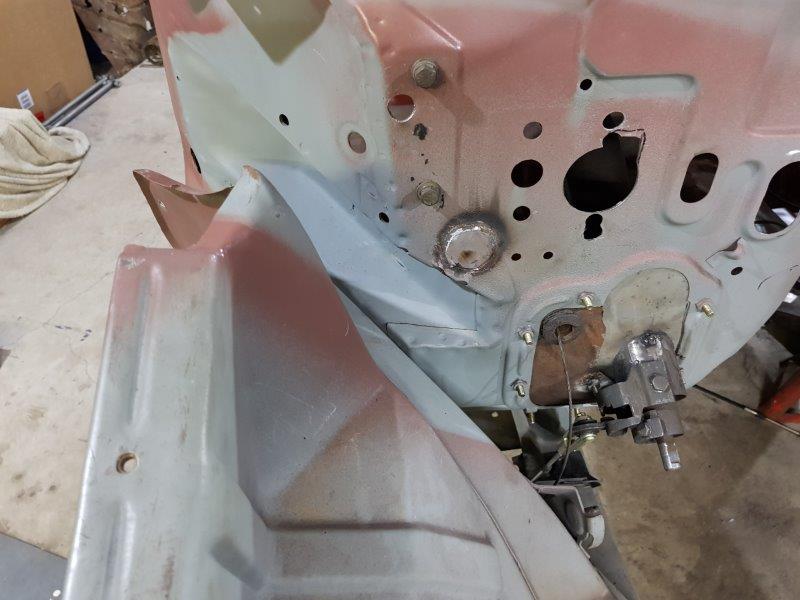
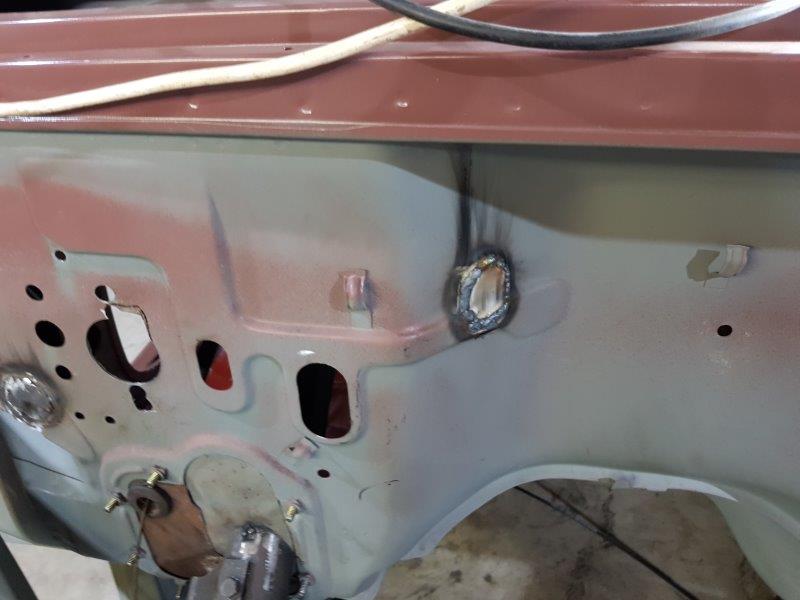
Here are the photos. RH suspension. Back to the future. This was the view for so long, nothing forward of the firewall Front on saw horse ready for welding Gussets as suggested by @cletus And the other side, also with the rebate in the joint to clear the steering. Here is where some space was made for the exhaust. Still a touch with the grinder to knock off the high spots Got rid of the hole for the throttle linkage And the one for the choke cable
2 points
-
So up to present day. The rears are AE86 disks and have a shield around them which holds the brake line and is also attached to some steel which the caliper is bolted to. Time to get rid of it so the hot air has somewhere to go. So some very careful cutting with an angle grinder we end up with this. That should help, if it's not enough then might have to look at vented disks. At some point I want to get fiberglass doors which will have windows that won't go down, so driver cooling will get worse. So time to duct some fresh air. So first need to fit some Polycarbonate rear windows. I now have a NACA duct being fitted to the passenger side which I will then duct to the dash and point at me. So for the front brakes, I've been holding off cooling them as I have a new body kit to go on (as the front splitter has brake cooling holes built in. The car came with a kit that doesn't really fit, you end up taking a section out of the middle of the splitter to reduce the width as the splitter does not fit nicely to the flares, the angles are all wrong and it's all under stress. I also want to be able to get spares so I got some new ones locally that are made for the bug eye and which I can get more of easily. As you can see, miles off from fitting. Now having never done this type of work before, cue much swearing as I try and get them to fit. So 2 weeks later (many nights of just walking away before I make this worse) this is currently where I'm at. It's close but not quite right (and of course doesn't line up with the old flares mounting holes), you can see however the fitment of splitter to flares is 100x better. I'm currently trying to work out if I can get the front higher without chopping to much of the splitter or chassis rail seams (which stick out).2 points
-
came to work this morning and drilled jets... They have "251" stamped on them , and the only thing i could find on the internet was in reference to CFM and not in any way related to holley jet numbers ... so went up in size from .053 to .056" or 4 jet sizes. if its too big i can easily make new ones but i highly dout this will richen me up enough... Watch this space...2 points
-
What I find amusing is that the old small utes from back in the day have a useful tray size not too dissimilar to all the common 'penis extension, I wanna be a yank' modern utes of today. 1/4 of the width taken up by these modern behemoths is big flares for the awesomely huge wheels. The rest is ego.2 points
-
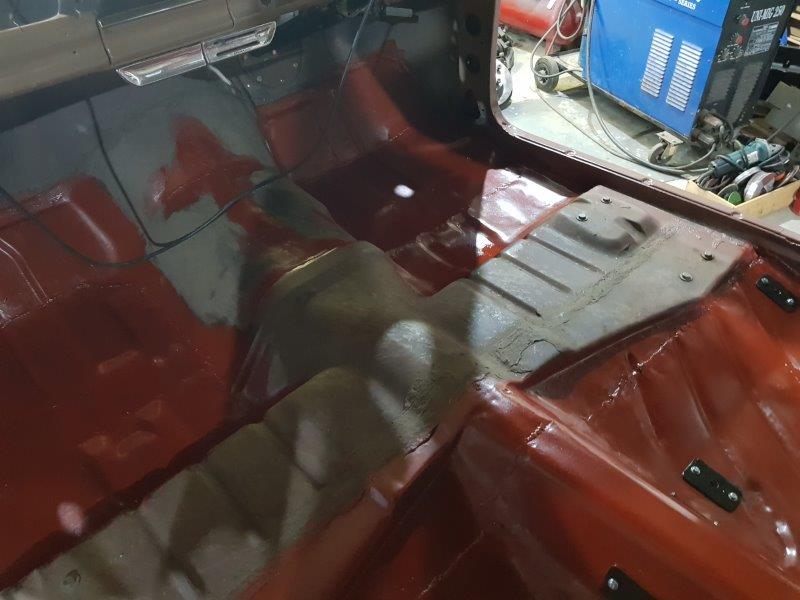
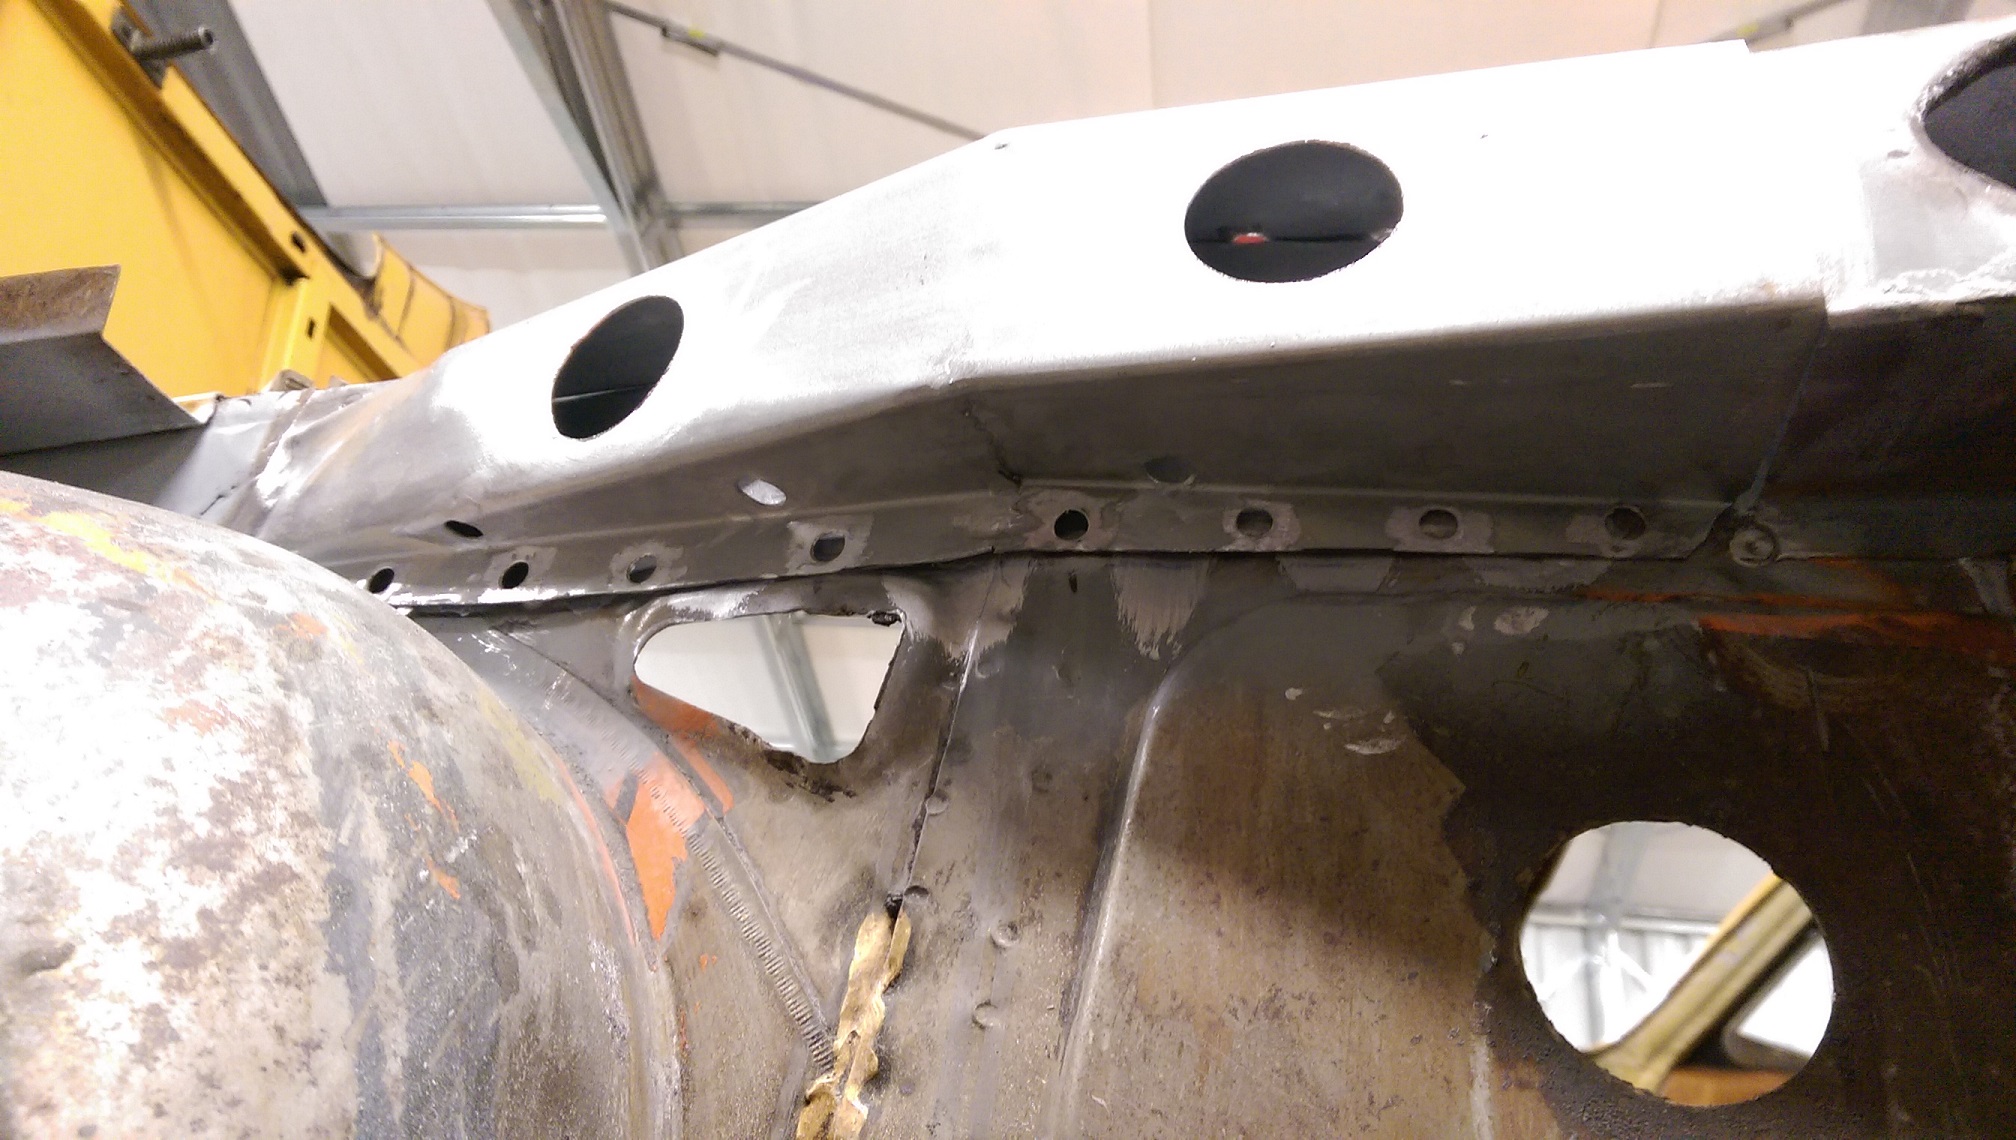
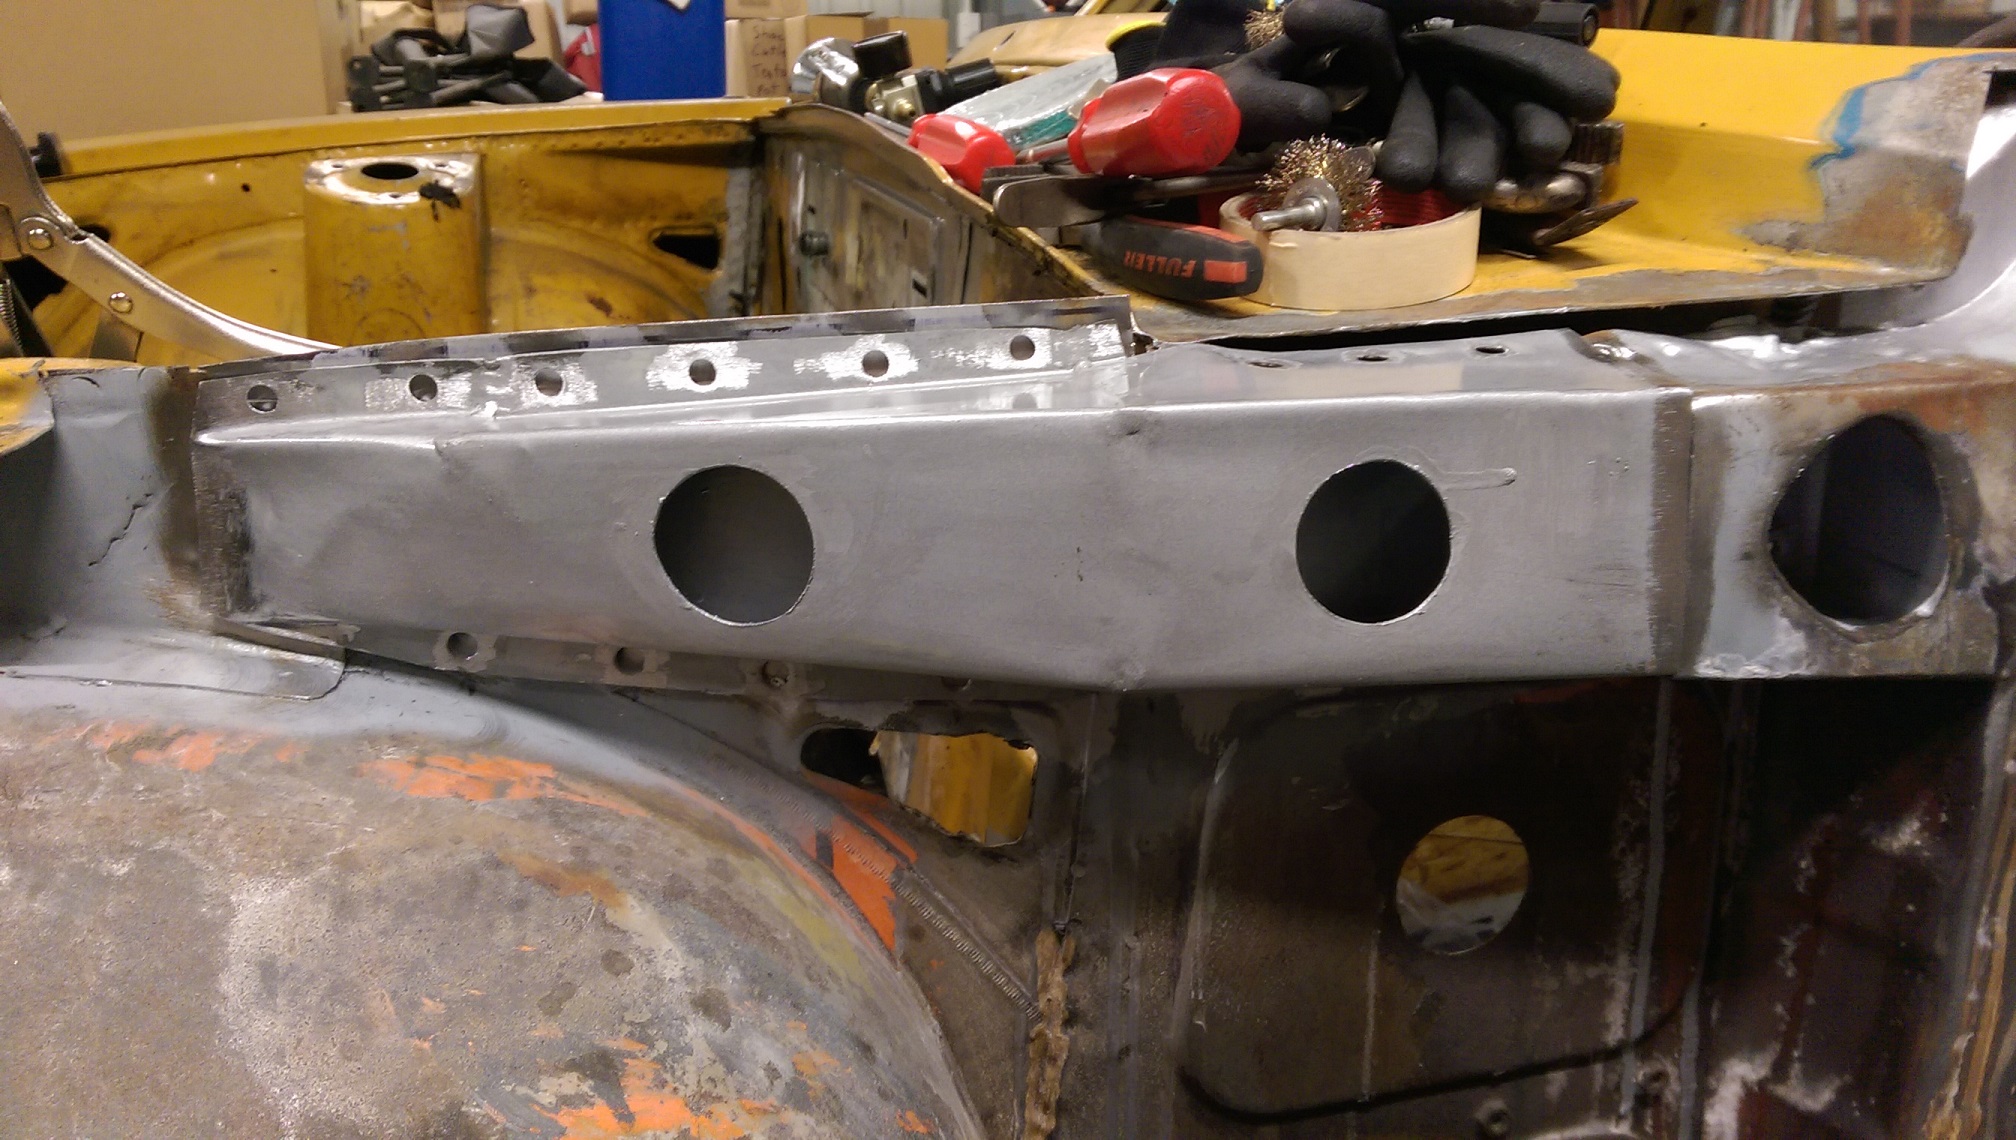
I drilled the spot weld holes and cleaned up where welding is going to happen. I also added some holes so I can stick some more paint in the back of the seams once welded. And just in case, I added some drain holes. The original had a hole in the top, that let water in but no way for the water to get back out, so the bottom rusted out.
2 points
-
Goob some anti corrosion primer on IV got some more rust down at the front of the sill, so once I've done that Il spray it full of blackguard and cavity wax Should look as good as any other part of the truck once I smooth the inner rail out with seam sealer2 points
-
I have two AW11 MR2's - one turned into a mule, and the other is my daily. This thread is about how one turned into the other. The project started seven years ago, when I bought a silver AW11. It was tidy enough, but had a bad engine that kept overheating. I attended a Toyspeed meet in '11 down in Manfield, and after the journey there, doing a few laps of the track, and the journey back again, and having to put up with blowing coolant everywhere every so often, I had had enough, and arranged to buy a 4AGZE smallport, with the intent to rebuild it over a summer and within a year of that, throw a turbo on it. It would be my first engine build to be completed, though I had practiced a few times with various 4AGE's that never made it to completion. Summer arrived and departed, and the engine was in pieces. Money and time were the issues, but I kept at it, gradually acquiring parts, planning etc. I realized this would take a lot longer than I figured, so a year later, I swapped the overheating 1st gen bigport out for a 2nd gen bigport, which was a supreme workhorse and lasted the next four years without any problems. Progress continued on the 4AGTE build as time and money allowed, but was interrupted for a few years, and stored at my brothers workshop. At this point it was an assembled short block and reconditioned head with bigport cams. Financials improved in 2015, and my brother was moving, so I arranged to pick up the engine, and immediately I got the itch again. Within a week or so, the head was torqued down on the block, timing belt set, and turbo slung on the side. It should be noted that the turbo at this point was a T3 flanged China special with a stainless steel manifold that was highly likely to bend. But its what I had. I had some oil and water lines made up, and then started planning the supporting mods. * Adjustable rising rate FPR * 440cc 7MGTE injectors * MTX-L wideband gauge * Megasquirt * Celica W2A intercooler, radiator, pumps, and hoses suitable for an MR2 * DPR blowoff valve * 2.5in twin-outlet exhaust with 20v headers At first I tried using the dual coil packs and CAS that came it, using a Mitsi dumb ignitor with the Megasquirt. The intent was to get this I didnt have much luck getting it to run, so tried a coil-on-plug setup, with the Megasquirt set up for sequential ignition. This also proved hard to perfect, so while I havent given up on it, I figured the distributor based system that was in the car was good enough for now. And it ran, and I was getting bored with ignition. The engine itself is mostly stock. It was bored over 0.5mm, acid dipped, crack tested, shot peened, fully balanced, align bored, skimmed, the works. I wanted this thing to be bulletproof. I fitted brand new factory forged pistons and ACL Race Series bearings to the block. The head was reconditioned to factory specs, but with some slightly bigger bigport cams that I had lying around. I fitted some adjustable cam gears, a Cometic MLS head gasket, and ARP head studs and flywheel bolts. Soon enough, there was nothing left to do, so it went in. And fired up. And it was glorious. The engine that I built from scratch was living and breathing. Its now done about 5000km, and hasnt missed a beat - its been a huge success. Im so happy that nothing has gone wrong with it.. because any kind of engine failure would probably kill the project, and it proves I did everything right. If Im honest, I had reservations that the engine wouldnt destroy itself as it sat there about to be fired up for the first time. But no, its proven to be a perfect runner. Around 8.5:1 compression, 160psi on all cylinders. As I was having issues getting the Megasquirt running well, due to dodgy grounds, mostly, I ran it on the stock ECU for the past couple of years. I attempted to mount the turbo (venting to atmosphere), and had a return bung welded to the sump, but it was too restrictive and resulted in smoke billowing out of the exhaust. Its possible I could have fixed things by just using a much bigger oil drain, but I decided to go down a different route. A year ago, it failed a WOF for structural rust, and when I went hunting for the worst of it, discovered most of the front firewall was being eaten away. I figured I could sink money into it in an attempt to revive the car, or find a pristine AW11 instead. Well, I found one. It has been completely de-rusted, a top quality paint job applied (dont care about color so much), 205-wide 5-spoke deep dish wheels, wheel arches, adjustable suspension, Bride bucket seats, braided brake lines, and (the finishing touch) a Silvertop 20v with open throttle bodies and a Blacktop ECU. Pretty much everything I wanted in an MR2 that I hadnt already done to the silver car. I snapped it up in a heart beat. So the project officially is now the yellow car, and the silver car is deregistered, but still in use as my test-bed. It still holds the rebuilt smallport as its heart, for now, but that will be swapped into the yellow car in the near future. Earlier last year, I found a good turbo setup, previously used on a race spec Corolla. It had a wicked low profile tubular manifold that sat the turbo, a TD05HR, quite high, which is exactly what I was after. Unfortunately, when attempting to fit the thing, I discovered that while it bolted on ok, the inlet to the turbo was blocked by all of the AW11 gearbox linkages, making any attempt to use an air filter impossible. I sold that turbo and manifold for what I bought it for, and considered going back to the original turbo, and sourcing a scavenge pump to solve the smoking, but then as luck would have it, while bitching about this situation on the MR2OC forum, one of the members had the solution - again, a TD05HR, but this time with a manifold designs specifically for AW11 MR2's. The manifold sits the turbo slightly skewed, and so clears everything it needs to, and the inlet is freely accessible. Bought it immediately. Test fit, no problems. Went ahead and started planning a foolproof oil drain for this unit. Took the sump off and drilled out a hole for a large brass fitting, sealed on both sides, and had the turbo outlet bung modified with a -12AN full flow bung, and a matching AN-to-hose barb fitting. Initially I wanted to see what the oil was doing, so am using a length of transparent hose entirely unsuitable for the application, but its serving its purpose. Itll be replaced with something more suitable for heat and oil very soon. Also had exhaust downpipe and turbo uppipe sections made, and finalized the rest of the intake charge piping, intercooler hoses, wiring, etcetc. Just recently, I managed to fix the remaining issues the Megasquirt was having, and got it running well, so there wasnt much left holding me back from going for the first run with the turbo. No smoke! Despite having a guesstimate tune (rich and retarded), and an exhaust leak at the manifold, it boosted for the first time up to 5psi. Great power delivery, though a little late in the game - guessing its due to the aforementioned exhaust leak, and possibly boost leaks. Also probably the tune. Everything can be improved upon from here. So thats where the project is at for the time being. More to come. The ultimate goal is 15psi and near-enough 200kw.1 point
-
Bellhousing off Tailhousing off and casing split - it was this join that was leaking. The surfaces look nice, no obvious nicks or cracks. Gave them a good clean up and RTV'd the shit out of everything... Sweet.1 point
-
I would say one 3" will be more than enough, I did have a 3" on my XF v8, it fitted ok, there is enough room, it was 3" from the collectors then merged into one 3" with a 50 series flowmaster in front of the diff1 point
-
@Transom the donor car was a 98 model with the GW5R chassis code that (according to the internet professors) should have come with the ZE motor. This is a photo I took of the stamping on the head which shows them to be from the DE engine. Apparently the ZE should have KL31-101 rather than the KL-101 that I have. You can also see the square intake ports that are supposed to be a feature of the ZE heads, rather than the oval ones that apparently come on the DEs. I also pulled the cam cover off to check the stamping on the cams and that was that of the lower spec model as well. What is perplexing is the fact that the intake manifold that was on the engine was the one off the higher spec motor. It looked like the one on the left in this photo, rather than the lower spec one on the right. I also found another car with the same GW5R chassis number that when I looked at it turned out to have the same stampings as this block so I don't know. Again according to the wikipedia, the KLZE was also exclusively put into the Australian model Eunos 800 with no record of the lower spec DE ever being installed. Of course now I'm back up north I've found that there is a Eunos 800 at the Mangere Pick a Part but I can't justify making a special trip all the way down to check it out. If anyone is willing to go and have a squizz for me I'd happily reimburse them for their troubles. If you could find the part number for that front pulley I'd be super grateful Transom. @yoeddynz I'm not sure what I'll do for an intake just yet. ITBs are really appealing but from what I've heard it is difficult to get them setup without paying an arm and a leg. I really like the idea of a twin plenum cross over tunnel ram style of intake, if for no other reason than it looks super bad ass. Or maybe something super sexy like this, But if I can find a set of ITBs for not too crazy money then I'll probably go with them. That said, I'm about to contradict my own cost based argument... Regarding using a Megasquirt to run the engine, I talked to my father in law and he has a particular hatred for them for some reason. He strongly recommended I go for something like a Link Atom instead. He reckons the Megasquirts are real pains in the ass to try and deal with tuning wise or something and apparently the Links really are worth the extra cost. What are your thoughts on it? I know you are a fan of the MS but what is it really like to learn to use and fiddle around with and so on?1 point
-
I had full tread on all four of my pretty new 195 Hankooks.1 point
-
Just a reminder that this Meet takes place on Wednesday this week. @cletus I have a gift or two for you.1 point
-
Been daily driving this lately. No big issues. Still waiting on some Aliexpress electrical stuff before I put the dash back together. The 24v > 12v DC converter I ordered from Banggood arrived, nice 40amp unit. Changed the engine and gearbox oils. All 15l of them. Not including the 18l of coolant. Went to an Oldschool meat. Had a ride on an AA tow truck. ... wait what? Just a fuel bleed nipple fitting that decided to go missing... The empty looking spot near the filter. Didn't notice for a little too long... Diesel everywhere. Nice and clean under the truck now though. Back window has a nice sheen to it now also. Put a new fitting and filter on and she is all good now.1 point
-
Apart from the poor palmy turnout, it was good! More same pics1 point
-
1 point
-
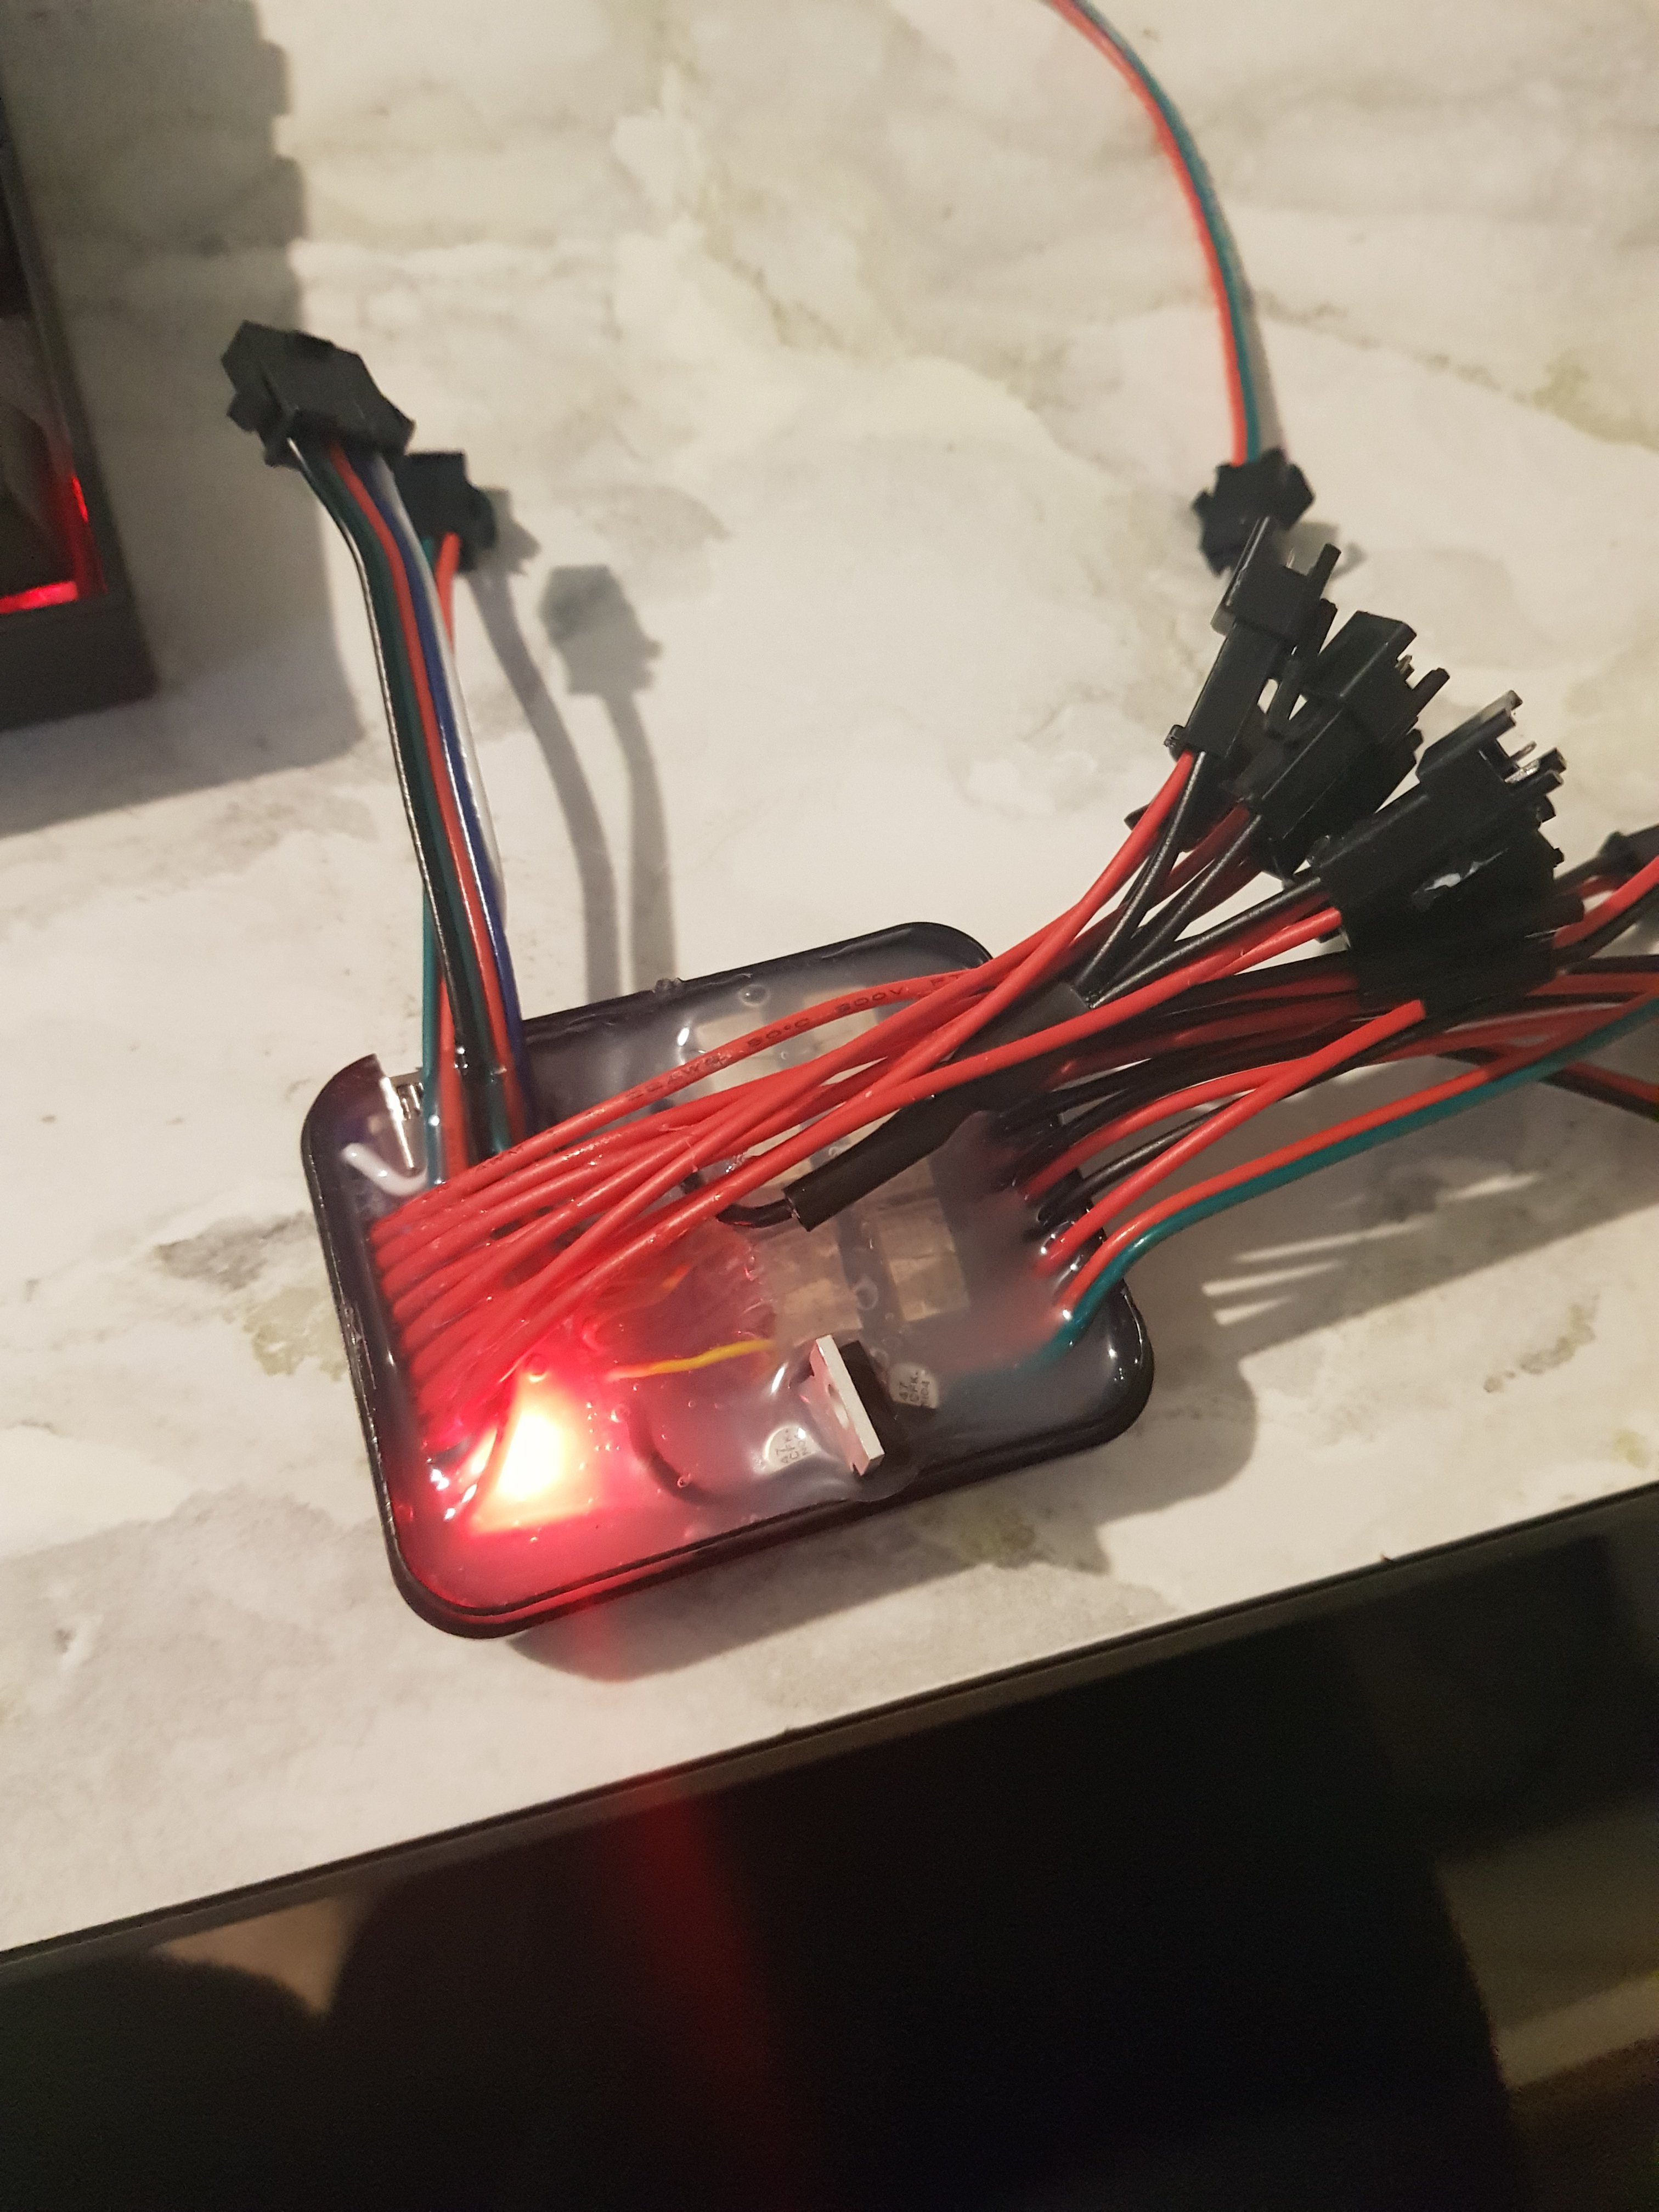
I am REALLY happy with how this has turned out. MY PCB/little relays work as they should and its all been potted in hot glue and tests A+. I ended up using a little LM1084 voltage regulator and some little capacitors and tiny prototype board to get down to 5v. The relay PCB is wired to the arduino using little wires salvaged from a broken USB cable Basically- the wires coming out of the left just get connected to switches in the vehicle (like the handbrake or gear indicator switches) and the wires on the right get fed 12v to close the relays switch (eg, 12v from the headlights ) I used hot melt glue because it was cheap, fast and easy (pretty much my life motto). It looked like shit until baked in the oven for 10 minutes at a low temp. Its an awesome thing to do on electrical shit like this and its turned from being a fragile heap of shit to a robust heap of shit.
1 point
-
Just imagine how many parts you can haul to and from Nats in this bad boy next year!1 point
-
Front end is all tacked up and sitting on its wheels!Happy times.Been some time since it has been rolling and its a good feeling seeing it all together upfront again.Air out its sitting pretty much where we wanted it. If you enlarge the above pic you will see the trans cross member is bleeping low. have a couple of inch clearance at this point air out. Ride height is about 2.5 inch higher so say 100mm or 110mm or so.Engine is offset 20mm to get clearance for the PS pump. Not really noticeable even when you are told.If you have been twisted enough to follow along with the progress of the build then you know the rear ends shockwave airbags mounts are adjustable. At the moment is in the middle setting. May bring it up to the highest setting. I do love that rake but the extra inch at the back will help level the carbs a bit along with all the other obvious benefits. Time will tell.Cross support and trans mount are all made up. Folded top hat with a flat bottom similar to the original Hudson braces. Bolt in for ease of access if in the future we ever need to do work under there. Front brace helps for body flex etc.Pic above gives a better idea of how low the braces are. Just lower than the trans pan to help protect it a bit with luck. You can also see eight (4 per side) front access holes to the bolts that let you remove the whole front clip. The whole idea with all this is ease of maintenance for future work.Next is taking out the engine. Welding up everything. Brace up some bits with some gazeting. Notching the front rails for bit more clearance on the steering arms. Drilling the panels holes and ya ... golden. Oh and trim those long ass rails and add the rads front brace. Sigh list goes on.And talking about panels... Flockie held them in place as i took a gander. Instant grin when I steeped back to have a look.We did this not only just to see how it would look but to check the tire clearance as there was a bit of concern the inner guard my hit the tire air out. Nope it was fine with heaps of room. You can see how much longer the chassis rails are as well. Easier to make em shorter than longer was the idea.And talking of Flockie who is doing the welding, math and all the hard stuff at the moment for me.... BAMLooking pretty happy with him self and rightly so. He has done some great work.Go like him on Facebook: https://www.facebook.com/flockieschassis/Oh and for a laugh check out my Buick gravel track fun vid on youtube here.1 point
-
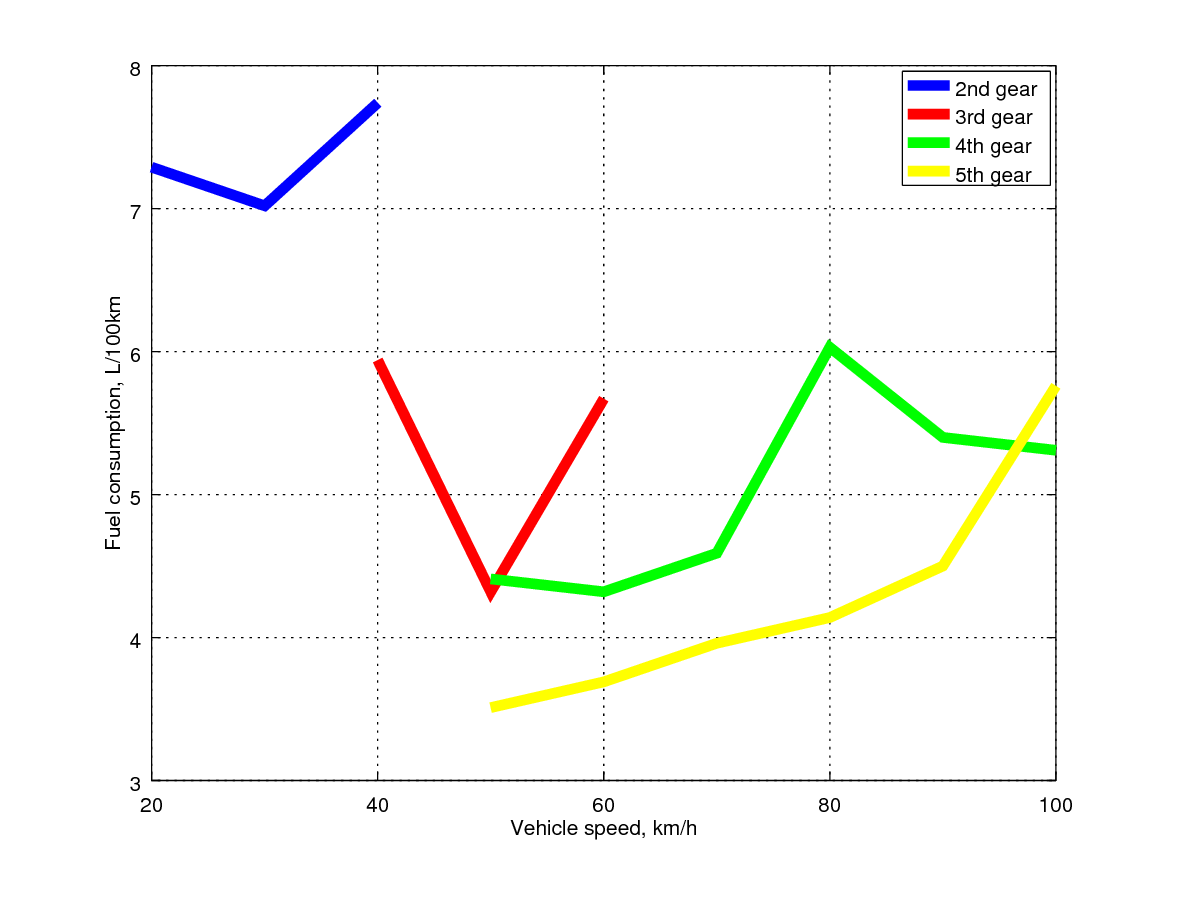
I did some fuel consumption calculations today. The MicroSquirt/TunerStudioMS seems to over estimate fuel consumption by about 10% - My belief is that this is due to my injector dead times being larger than estimated in the software. Then again, this could also be due to my data being collected from an ill-conditioned system as I only based these results off of about 35 km of driving. For the fuel consumption tests, I had the headlights on and held the car at a steady(ish) speed on a flat road to take the readings. For the fuel figures obtained for anything other than 5th gear, there was a fair bit of noise in the consumption signal as I had difficulty writing down the numbers while driving (a passenger would be useful next time). Also the samples were taken over a very short time period, with slight undulations in the road etc. For the 35 km trip, the computer estimated a fuel consumption of 2.26 L. The actual fuel consumption was 2.04 L. This gives a fuel consumption of about 5.9 L/100 km, which is very good considering I wasn't being nice to the car during this time. It's actually on par with the best result I ever had with the carburetor driving like a granny. Fuel consumption at 80 km/h in 5th gear is about 4.2 L/100 km. I think the 4th gear value is unreasonably high and I will have to take the reading again at some point. The same goes for the 100 km/h 4th gear result as earlier indications today suggested it was about 10% worse than in 5th gear. The values in the graph have been corrected by 10% to allow for computer error. Judging by these numbers, if I drive 70 km/h constantly (at sea level, without wind, in the dry) I should be able to make it to Auckland on a single tank of fuel. Conclusion: Car is great on fuel now, more testing is needed.
1 point
-
The guys at VTNZ were happy with the EFI system when I took it for a WoF this morning. The guy took a look at the engine, then the chassis tag, then the engine number and then scratched his head. He walked over to me and I was sure he was going to be grumpy but he just said "well done, it looks good. Good to see someone finally doing a tidy job of the wiring on a car." WoF obtained, now legal for another 6 months. I guess it's about time I put up a bit of a technical post with regards to the EFI conversion. The EFI system uses an original 4KE inlet manifold, injectors, regulator, runners, plenum, valve cover and throttle body. Most other bits were scrounged together from the internet: - TPS is from LS1 - IAT sensor is from LS1 - CLT sensor is from LS1 - MAP sensor is from a Mira - Fuel pump is Aeroflow "500 hp?" (smallest one I could find) - Air filter housing is from an EP9X Starlet - O2 sensor is Innovate LC-2 - Intake piping is 45 mm silicone hose, with a 63-45 reducer where it connects to the filter housing The ignition coil needed to be moved towards the brake booster in order to clear the EFI valve cover, looking at old brochures/documentation this appears to be the case with factory EFI Starlets also. In order to make the OEM injectors play happily with the MicroSquirt ECU I need to add some inline resistors as the injectors are low impedance (2.6 Ohm or there abouts). I ended up using 1x 10 Ohm 25 watt panel mount resistor per injector and these worked fine. I also have a stack of 8 Ohm and 4.7 Ohm resistors sitting around that I thought I would have to used if the 10 Ohm ones were too high resistance. The resistors are bolted to the panel that the ECU is mounted to. In order to make the ECU work reliably with a fuel only setup I need to replace the R20 resistor on the board with a higher power unit, so I used a 1000 Ohm, 0.5 watt resistor and this has been fine. A bead of silicone gasket goop was run around the inside of the ECU housing and the ECU was bolted to a plate which mounts directly to the existing bolts holding the radiator overflow bottle to the inner guard - the ECU is on the back side of the inner guard, above the plastic liner and seems to be in a fairly dry area that doesn't seem to have any moisture/dust issues so far. The loom runs through the existing hole in the inner guard that the indicator light wires went through. The loom is tied to existing mounting points along the chassis rail to keep it away from the exhaust manifold ( :/... long story there). The exhaust manifold for the carburetor setup has a huge hole in it for heating the bottom of the original intake manifold. This hole is now covered by a 6 mm thick aluminium plate which has been shaped to allow the intake manifold and runners to clear (well actually sit on). There were sections of the intake manifold which needed to be ground down in order to fit the manifold with the plate on the exhaust manifold but there is still enough thickness remaining that cracking shouldn't be an issue. The O2 sensor is placed in the exhaust system at the final collector, at an angle of about 35 degrees from the horizontal and has quick response. For the fuel line setup, I just put a brass T into the line at the tank, with one branch going to the old feed line (4.5 mm now return), one branch going to the fuel pump (8 mm) and the remaining branch going to the tank (5.5 mm hole). The high pressure fuel line from the pump is just a soft line, following the existing fuel line and using the existing brackets where possible (from OEM there is space for extra lines). I run the power feed lines to the pump alongside the fuel lines. The fuel pump is mounted to the chassis using an Integra fuel pump bracket and a piece of angle iron. The Integra bracket has a rubber isolation mount where the pump goes into it so there isn't too much vibration - the pump is still quite loud though so I might cover it with some silicone hose to try and damp the sounds. The pump bracket mounts between the tow bar and chassis using the original fuel tank strap. There is currently no baffling in the tank, I may look into it in the future - but I haven't had any issues yet in the 1,000+ km I have driven it. The fuel filter is a Ryco Z200 unit and fits perfectly into the original fuel filter mount in the engine bay and has barbed fittings on each end so it was simple to install. The fuel pump is running through a 20 Amp fuse, all of the injectors are running through a single 5 Amp fuse, the O2 sensor is running through a 5 Amp fuse, the ECU is also running through a 5 Amp fuse. The factory idle speed control valve seems to be a bit out of specification and doesn't open up far enough when cold - which required using foot throttle to keep it idling for the first 10 seconds or so. I bypassed the idle valve by using a heater control valve connected to the choke cable - giving easy manual control of the idle / cruise control. One day I will look into either modifying the factory valve to get more flow when cold or I will install an electrically controlled unit ($$). But for now I am happy using the choke cable when cold. I needed to make up some support braces for the intake plenum and air filter housing. The brace for the air filter housing connects to the alternator bracket, the exhaust manifold and two points on the filter housing. The two braces for the intake plenum are just simple flat bar which has been bent to shape and connect the plenum to the engine block at the OEM locations. At first I only had a brace on the front of the plenum to the engine block but there was a horrid vibration at around 4,000 - 4,200 rpm. Adding the second brace fixed this vibration. I was initially having issues with the IAT sensor heat soaking and leaning out the idle, causing the car to stall. This was fixed by changing the settings in the ECU so it completely ignores IAT at idle just uses the coolant temperature as estimated inlet temperature. All in all, the only hole that needed to be drilled in the car was for the O2 sensor to go into the exhaust, other than that everything was OE Toyota or fabricated to fit with the original holes and mounting locations. The engine definitely has more power now compared to with the carburetor, with a lot more torque around the 3000 rpm area. The engine also runs much smoother and is much more responsive to throttle inputs - no more slight stuttering during rapid transitions. The engine does seem to be a bit easier to stall though, but I'm sure this is just something to do with the VE map not being very well tuned in the <800 rpm region. The Auto Tune feature of TunerStudioMS is an absolute champ, all you have to do is define a target AFR table and let it do its thing (as well as setting up some sensible filters). Auto tuning makes it really easy to fiddle with settings such as IAT control or your actual physical setup. Two to three minutes of driving and it has pretty well returned the tune to near perfect, a feature definitely worth the money. I'd also recommend getting an inverter or something so that you can power your tuning laptop for more than an hour or two while driving. I'd be interested to throw it onto a dyno at some point to see exactly what it is putting to the ground. Does anyone know of someone with a cheap to use dyno around Christchurch? (Only really need to do one run). One of the next jobs on the car will be to look into getting the radiator recored as the fins on this one are starting to rot off and I don't really want to risk cooking the engine. I'll also look into getting the last of the rust dealt with at some point (little spot under the hatch window seal). I may throw some pretty graphs of the VE tables and other logs up tonight when I get home.1 point
-
hello internet (if that is your real name), three weeks after they were supposed to start the gib putter uppers finally turned up and putted upp some gib. and well fuck, they smashed it out in two days. what the fuck are you going on about sheepers, get to the fucking point! never in the history in of human house building, has so little, built by so few, transformed to lives of this two. 2017-10-07_08-25-08 by sheepers, on Fli its a house now. just like that its a house, before it was a bunch of sticks with some wires and shit but now its a house. we can see it. its real and it feels like any minute now we can live in it. this morning if you had have asked me "how long before you move in sheepers? " i would have said "umm i guess about 10 weeks?" but now, tonight, a mere 8 hours later its a 3 week journey of paint and laying carpet and were done. *actual times may vary* but its REAL now. hard to explain. but anywho, its a happening thing and its happening to us. shuddup.1 point
-
Okay soooooooo as awesome as it was living in a beautiful place and having a cool Automotive related job, life in Cromwell/Queenstown wasnt quite right for me. It was awesome fun working at HPA, made some friends and great memories which will last a long time. But, it just didnt quite feel like somewhere I wanted to settle down and in some ways it wasnt the career direction I wanted to take. So for a variety of reasons I ended up coming back up to Auckland. Being landlocked so many hours away from the ocean just didnt feel right! It was a bloody awesome experience though and it felt like it reinvigorated my life and got me back on track after some hard times lately. But anyway! It was good that I never got to the point of attempting to drive the Carina down, as the new driveshaft combination wasnt good. It took a bunch more mucking around after I got back to get this right again. But sadly it looks like the previous incident may have stuffed the bearings in the gearbox as it's pretty noisy now and leaks fluid out the rear main seal even after replacing it. Pooz. But it was great to get back home and be able to go drive it around again! The R888s are on my normal wheels so I've been driving around with a 15x6 running 205/50/15 and have noticed no negative effects to handling. Possibly because the sidewall of the AD08R is so stiff. Since I've been back, I started with a fresh sheet of paper on the tune file in the ECU. As it had some old junk in there, as well as some stuff that I setup when I ahhhh knew less than I do haha. The staged injection seemed to work well enough in terms of delivering the right amount of fuel and blah blah... But it was always a bit crappy in transient conditions. I decided I would turn on the outer injectors 100% of the time and try tune the car using just those, and get the accel enrichment and so on working as best I could. But it just felt boggy. When I reverted back to 100% inboard instead, holy moly the throttle response difference was amazing. And so the pull out of corners was much better and it felt like you could more accurately mash the gas and know what the car was going to do. So I ditched it and put a standard manifold back on. My theory is that since my intake manifold is thermally isolated from the head, it is not able to use the heat of the runner walls to evaporate the fuel so you have massive fuel pooling issues... Which means you lose control of your fuelling as some fuel you squirted in several cycles ago is only just entering the combustion chamber as it evaporates. So fuel you add at say 5800rpm only enters the cylinder by the time you get to 6000rpm and so on. And so if you tune your car with the acceleration rate of say 3rd gear fuelling isnt right for 1st gear anymore. Just lots of headaches that you cant really address well enough with the accel enrichment available on a G4+ In the documentation from Toyota on their wall wetting experiments they note that on a cold port (engine cold starts) fuel can take over 1.5 seconds to evaporate and contribute back to fuel in the engine so even if it was only half as long on the runner walls. It's a massive surface area covered in fuel which is always going to be a ball ache to compensate for. Going back to a standard manifold looks to have cured a vaccum leak or two as well, haha so the idle and so on is much better too. I've been playing around a bit with a few variables such as injection timing and VVTI advance as well. I have found that changing the injector timing so it's injecting fuel as the intake valve is open helps a lot with cold starts, and results in a lower fuel consumption when the engine is hot too. Since it's been cold I've also spent a bunch of time getting the cold idle really nice, closed loop lambda adjustment works really well if you set the adjustment rate to 1hz so its only slowly adjusting it. Otherwise it makes the idle surge if you try to run closed loop at say 20hz like you could if you were doing 4000rpm or whatever. Under cruising conditions it seems that advancing the intake cam at all just means worse economy. This may relate to the tuned length of the primaries and secondaries of the exhaust causing some undesirable something something at cruising rpm compared to a standard exhaust manifold... But for whatever reason, it isnt beneficial to advance the cam. And at high rpm low load, rather than retarding the cam I figure I may as well keep the cam advanced so when you stab your foot back on the throttle the cam is not having to "catch up". And this seems to have made the throttle response even better as well. So the engine response is better than ever! I picked up a cheap Altezza engine, planning to give it a freshen up and at some point swap it over. I'll be losing the fancy ported head of my current engine, but will be gaining: -Exhaust side VVTI -Higher compression ratio -better alternator position -Better water line setup -Better engine mount setup -Better PCV valve arrangement -And a few other minor advantages so I think it's worth the trade but will be interesting to see. The state of the oil and colour of the coolant in the altezza engine though is bloody disgusting though so it'll need a strip down and hot tanking or whatever before doing anything with it. So might be a while until it's ready to swap in. But looking forward to having a play with the exhaust side VVTI. I think I'll wire in an exhaust pressure sensor when I do an overhaul of the loom to suit some of the changes needed. Will be interesting if this will show anything relating to tuned lengths of the primary and secondary pipes. In the immediate future however I'm just really enjoying living at the start of Scenic Drive in Titirangi now and being able to go for some awesome drives on some backroads making doort noises again1 point
-
Had a bit fun playing Datsuns thisavo. Nice avo sun and a box of beer made productivity a little low. Did a little picking around bits which looked like bog on the blue diesel. probably wasn't such a good idea. Spent a bit time trying to get the brown petrol to run. Gave the points, rotor, and cap a clean which gave me spark. Checked it had oil pressure and rigged up an electric fuel pump. It didn't want to go on its own but I could keep it running with engine start so needs the carb cleaned. I also gave them all a squirt with 30 second spray and wok away to try kill the lichen. It will be interesting to see the effects. I'll give them a waterblast in a few weeks.1 point
-
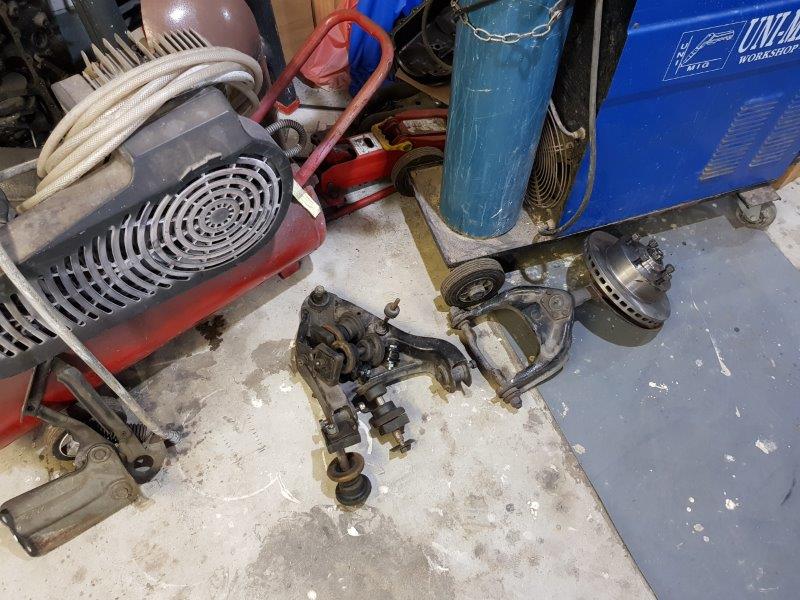
Ok so this weekend i set out to get car ready for caffeine n classics which unfortunately didnt happen. I knew i had to grease up the ball joints so i started on doing that but found that most of the steering ball joint boots were either split or missing completely. 3 were rebuilt a few years ago but had no been on road to drive up mileage. I suspect more may need doing. So i started by removing it all to replace the stuffed boots. Put it all back together and greased up every nipple. Steering felt a little stiff when going for a drive will re grease it all again and double check everything again. Otherwise felt good. Treated her to some whitewalls ! I checked out daves sweet photo album of 100s of cars he has white walled while he got stuck in! He had never done one of these nor did he see one when he went to Japan recently lol. Gave it a wash at wash world on the way home. Everything was going ok. Sunday morning got up early put car in driveway n let her heat. The brakes were feeling wierd. I popped the bonnet to check the brake master and it was completely empty! I popped my head under car and the right rear drum and tire was covered in fluid! Buggar! Trusty tools of the trade! I know the front left has been rebuilt not so long ago too so im thinking i should wip the remaining 2 out and have them done because no doubt they will be in same condition. The prince only has 1 brake line for all 4 wheels so if this was to fail while driving id loose all brakes! Sketchy! So she sits up on all 4 axle stands again haha.1 point
-
This is my home made muffler I made, it sounded like diarrhea spraying over a tin hut, I removed it after 100kms1 point
-
Engine has been running EXCELLENT post injector setup (and I fixed a vaccuum leak, well spotted (heard?) Clint cheers) Full power is back! woot! So I decided to go for a tootle up north. Coming around a corner on the Brenderwyns, truck coming the other way and then BOOM! Windscreen instantly shattered, presumably by a flicked up rock. Managed to pull over to the side of the road safely and inspect the damage... I'm so glad there was that area in the middle that I could see out of! Seeing how I was about 2 1/2 hours north of Home, I was at a bit of a loss what to do! I flicked a txt to a few people to show them for a laugh, then my old man called me back... Basically saying "Stop being a pussy, break it out and just drive back home. it will be sweet" haha. So that's what I did! Including an absolute clusterfuck when trying not to get glass in the cabin... Had a few bees and insects fly into the cabin, didnt get pulled over or anything... Made it home safe! I've got a new screen arranged already, just need to organize with a glazier or whatever to get it fitted. And then spend about a week vacuuming glass out of the car...1 point
-
First round of superlap... Done and dusted! I didnt quite get the result that I was after, but it was a very valuable learning experience this weekend. The first thing I learned about turning up to an event that spans over two days... Looking after yourself is very important! If you're getting dehydrated and sunburned you're not going to drive well on the track. If you bring a whole bunch of crap with you... Put it in boxes that are easy to take out and put back into the car! Also since am running semis where I have to swap the tyres over, including adding/removing spacers. I really need to make this process easier so buying an electric rattle gun is high on my priority list now. There was a single stupid decision I made which really defined how the rest of my weekend panned out. I decided that since I was only going out for two runs on Saturday, I wouldnt bother topping up the fuel tank because it looked to have about 1/3rd of a tank. Well, it didnt! The low fuel level + swishing around from semi slicks grip stirred up the crap in my fuel tank, which blocked the fuel filter. Which then made the car run lean, which from the heat of that blew up my wideband. (or it was otherwise coincidental...) Which then meant that I had no tool to diagnose my fuel issue with! So I had to head home after the first run on saturday. I got home and quickly changed filter, went for a test drive and seemed okay. But I couldnt confirm for sure, as wideband wasnt working. Back at the track on Sunday, the car was doing the same thing. So I'm thinking that the filter bag pre fuel pump is maybe clogged up too. So I had a dissapointing result of a 1.25.0 as my best laptime for the weekend. Looking at the datalogs shows an interesting story though, when comparing it to my previous fastest time (1.21.7) VMax (your top speed in each sector) is roughly an indication of how much power you are making. VMin (Your slowest speed in each sector) is roughly an indication of how much grip you have. If your lowest speed increases, it's because you can carry more speed through the corner. Top speed 20+ kph slower on every lap because I was losing power badly past 6000rpm. Minimum speeds were up, because the car had a lot more grip. Coming into turn 1 I was carrying 15kph higher speed through the turn, on the sweeper before the straight I was carrying 10kph more which is an amazing difference. This is a datalog from the big sweeper heading onto the straight, you can see the cornering speed is great but my power on the straight was a mess compared to previous best (Red line is previous PB) Some interesting results from the thermal camera, tyres were looking pretty even for the better part: The Front left is nice even temps, the front right looks like it could run a lttle less camber and would be happy. In the rear you can see that both of the tyres heat up on the same side, because when a live axle tips, thats just how it works! Not too much I can do about it but on the whole it looks good I think. The car felt great with the stiffer front springs, but now slightly understeery... Not in a bad way, but feels now like fitting the rear swaybar would be good. Which would help give that rear left a bit of respite I think. Interestingly enough, when I went around the pits and took some snaps of some of the really fast cars when they came back in. A lot of them are running a LOT of camber and not heating the tyres very evenly at all. So maybe there's time on the table by running a little less camber, or, maybe its still worth the trade off on the straights in order to have lots of camber on the corners. Here's an example from the rear tyre of a very fast car (Was running under 1:13 if I recall) So pretty tired and sunburned right now, looking forward to just getting some rest! But will hopefully have time to pull the gas tank out this week and hopefully isolate the issue to one thing or the other. Even though the weekend didnt go as planned it was stacks of fun! Really looking forward to the Taupo round, I'm very glad this one was close to home for starters as I made a few silly mistakes in terms of forgetting tools etc.1 point
-
Last trackday I went to I had some creeping coolant temps by the end of a run, and oil pressure dropping slightly. I think this is probably to do with the increased average rpm that I'm running now, and the car just generally being a bit more sorted so I've got more time with my foot up it. So after some consideration I have decided on some changes. The factory engine does have an oil cooler - it runs a heat exchanger on the engine block that uses coolant from the radiator to cool the oil. What's awesome about this, is that it works both ways - It actually heats the oil up too, if it's too cold. When you're racing around though, the oil cooler is obviously putting a lot of extra heat into the coolant circuit, and when your coolant system reaches saturation point and the temp creeps up, this heats up your oil too and you end up in a downwards spiral where neither the coolant nor oil are drawing heat away from the engine effectively. Now I do think the factory cooler is an elegant solution but there are also benefits to an air>oil cooler that it leaves unaddressed. Generally when people fit oil coolers to cars, an air cooled oil cooler will be plonked somewhere ahead of the radiator panel. Whether this is in the airflow or not, it presents you problems either way - Either it's in a deadzone and receives no airflow which generally means that it does fuck all. Or, it's in a good area of airflow which causes you the problem of overcooling your oil when you're not fanging at 10/10ths... And your cooling rate is at the mercy of vehicle speed. Oil coolers are a highly quantified item, they're not wizard magic... Even looking back on this report from WW2 about aircraft oil coolers it becomes apparent how critical airflow is to making a cooler work. http://www.dtic.mil/dtic/tr/fulltext/u2/a801332.pdf In the above example if you are getting 100lb per minute airflow, your oil cooler is only doing about a QUARTER of the cooling compared to 550lb/min for the same volume of oil through the cooler. Then from there trending downwards towards acheiving fuck all with no airflow. So in my mind it seems like controlling airflow seems like a better method than controlling oil flow with a thermostat and the associated plumbing complexity. So my plan is to fit the cooler somewhere in the engine bay completely out of airflow. Then I will have two temp sensors connected, one each side of the cooler so I can measure how well it's working. Then have a high CFM fan on the cooler that is triggered by the ECU. Maybe with PWM / solid state relay. Maybe. When the fan isnt blowing the cooler will have virtually no airflow over it and sitting in 30-40 deg engine bay temps so it will be doing virtually nothing. Then when the oil temp rises I can turn the fan on to push the cooler efficiency into that higher end of the map to meet demand. The engine bay temp is hotter than ambient temp, so will be working less efficiently however I will still have a temperature differential of 60-90 degrees which is larger than what the coolant radiator receives since oil runs hotter. Another benefit of this setup is that if coolant temps get high I can use the air>oil cooler to negatively charge the water to oil cooler and draw heat out of the cooling circuit. Same idea as turning on your cabin heater when radiator cant cope. Keeping the oil cooler in the engine bay also means that my plumbing becomes a lot shorter and simpler, and there's reduced chance of the cooler getting hit by rocks or whatever. Here's a diagram of existing oil circuit and proposed changes, please keep in mind that I'm at the mercy of available space and also effort/motivation/being a hopeless drunk/etc1 point
-
Had a couple of bits show up over the past week or so, new ready to run dizzy, leads, tunnel ram, twin 450 Holleys and a linkage kit Sat everything in place and cut the bonnet, only had to cut it once which was a relief. Working on installing the dizzy and cutting leads to length now. Tomorrow ill get the ram sand blasted and paint it black, the spacers are already black and i think ill paint the carbs black too. working on getting a paintjob, really want to get it straight and tidy, within the next couple of months hopefully Aiming to cruise her to kaikoura hop, 15th sept!!1 point


This leaderboard is set to Auckland/GMT+12:00