
Leaderboard


Popular Content
Showing content with the highest reputation on 09/01/17 in Posts
-
Last night I welded up the 2 little leaks I found on the exhaust, one I had just finished the weld about 1mm short leaving a pin hole, hammered the flange flat so it actually seals against the bore which got rid of a major leak and a lot of the excess noise. Then I went back through the carb to see if I could figure out why it was running so rich, turned out I'd missed that the needle had been lifted to it's max height so yeah dropped it back to the centre slot and reassembled everything. Should have got a video, but it's running so much nicer, still a bit of tuning needed I'd say but we'll see once it is ridable again. Courier came again this morning! Placed this order on the 13th of August, thanks to the big summer holiday it wasn't sent from Japan until the 22nd but it only took 4 days to get here, and that's when the fun started! Customs tried to charge me an obscene amount of $$ to apply for some special permit or license as they had decided this was a commercial order and that I must be running a business etc. Took so many phone calls and emails with everybody I talked to giving me a different story about what was going on and what I needed to do to get it cleared. Finally yesterday I managed to convince someone it was just bits for my own scooter and had it released, annoyingly between the 13th and yesterday the NZD/JPY exchange rates had changed and put the total over the threshold so I still had to fork out an extra $120. but thats much better then the $650odd I was being told earlier in the week!!! So enough words, you all just want to have a nose in my box right? A whole pile of genuine Honda goodness!! Would have really liked the rear plastic too, but not for $500 before shipping! So now it's pretty much time for paint and to tidy up all the little details, sort out bar controls and other smaller bits. If the rear plastic wasn't so far out of my reach I may have even considered sticking with the white, it's so crisp looking all fresh and new lol7 points
-
Further to last update I finished (roughly) the fuel pump setup last night: FUEL PUMP Take one piece of aluminum off the side of a broken welder, cut it into shape, cover it in kids dura-seal and drill some mounting holes. Whip out Ali Express's finest (cheapest) Riv-nut gun and slam in some captive nuts unlike everything else British. Re-purposed the old fuel pump bracket to hold the pressure relief valve. More captive nuts and a coat of whatever paint I had lying around. Complete setup installed. Factory pre-filter on the left (with new filter) - Bosch fuel pump - high pressure filter - pressure relief valve - metering unit. Not the tidiest solution but wanted to re-use a fair bit of what I already had to keep the cost down. This will be coming out again to weld up an exhaust mount underneath the floor and i'll blast some paint in there at the same time.7 points
-
So I have been scanning Oldschool for a few years but I don’t pipe up much. But since breaking my collarbone a week ago whilst skiing I have found time to finally put together a build thread to hopefully catalogue the cars journey. Model Info Japan import 1982 Toyota Corona Mark II Grande GX61 (pre-facelift sedan). 1G-EU, 2-litre, 6-cylinder, automatic with over drive. Background For the majority of its life it was owned by a Lady in her 70s-90s. She used the car as her daily as I believe and was apparently always garaged. She even wore leather driving gloves, which I still have one of, and resides in the glove box. The other was sadly lost before my ownership. She then passed the car onto her granddaughter’s boyfriend. The car then went through a couple of hands in under a year before finally reaching mine. I brought the Car in September 2015, 2 years ago Why Buy That Piece of 80s Rust? As a kid I always drew pictures of cars and the dream cars were the A80 & A70 Supras. However this then changed at the age of 16 to the Celica XX/GA61, (8 years later this is still the dream car sadly). So I move to Dunedin to study and a certain car catches my eye on my first day down there. A Cream Toyota Cressida Waggon scraping down the main street, ring a bell? I was lost for words, it was fucking amazing. But a guy just down the street didn’t think so yelling out something like “Buy a new car you .....”. After a few weeks I worked out the owner was in my course, and that’s when I meet Zeb. Zeb then opened my eyes up to all the 80s Toyota goodness and Oldschool.co.nz (however I didn’t follow oldschool till many years later). Then I got the Toyota bug. So what’s the first thing to do when you finish studying and have a job…..buy a 80s Toyota that’s what. Also the pictures of the cars potential with some low and some simple SSR mk1s that the previous owner had put up on the sale post pushed me along. Note that the following pictures are from the previous owner. I purchased the car entirely stock. I will update this thread over the next few days hopefully upto where it is now.6 points
-
My sister has a new workshop and she said you should come see it, particularly if you like Nissans & Toyotas 28 October. There will be pizza and drinks http://www.facebook.com/events/174566376421391/
 5 points
 -
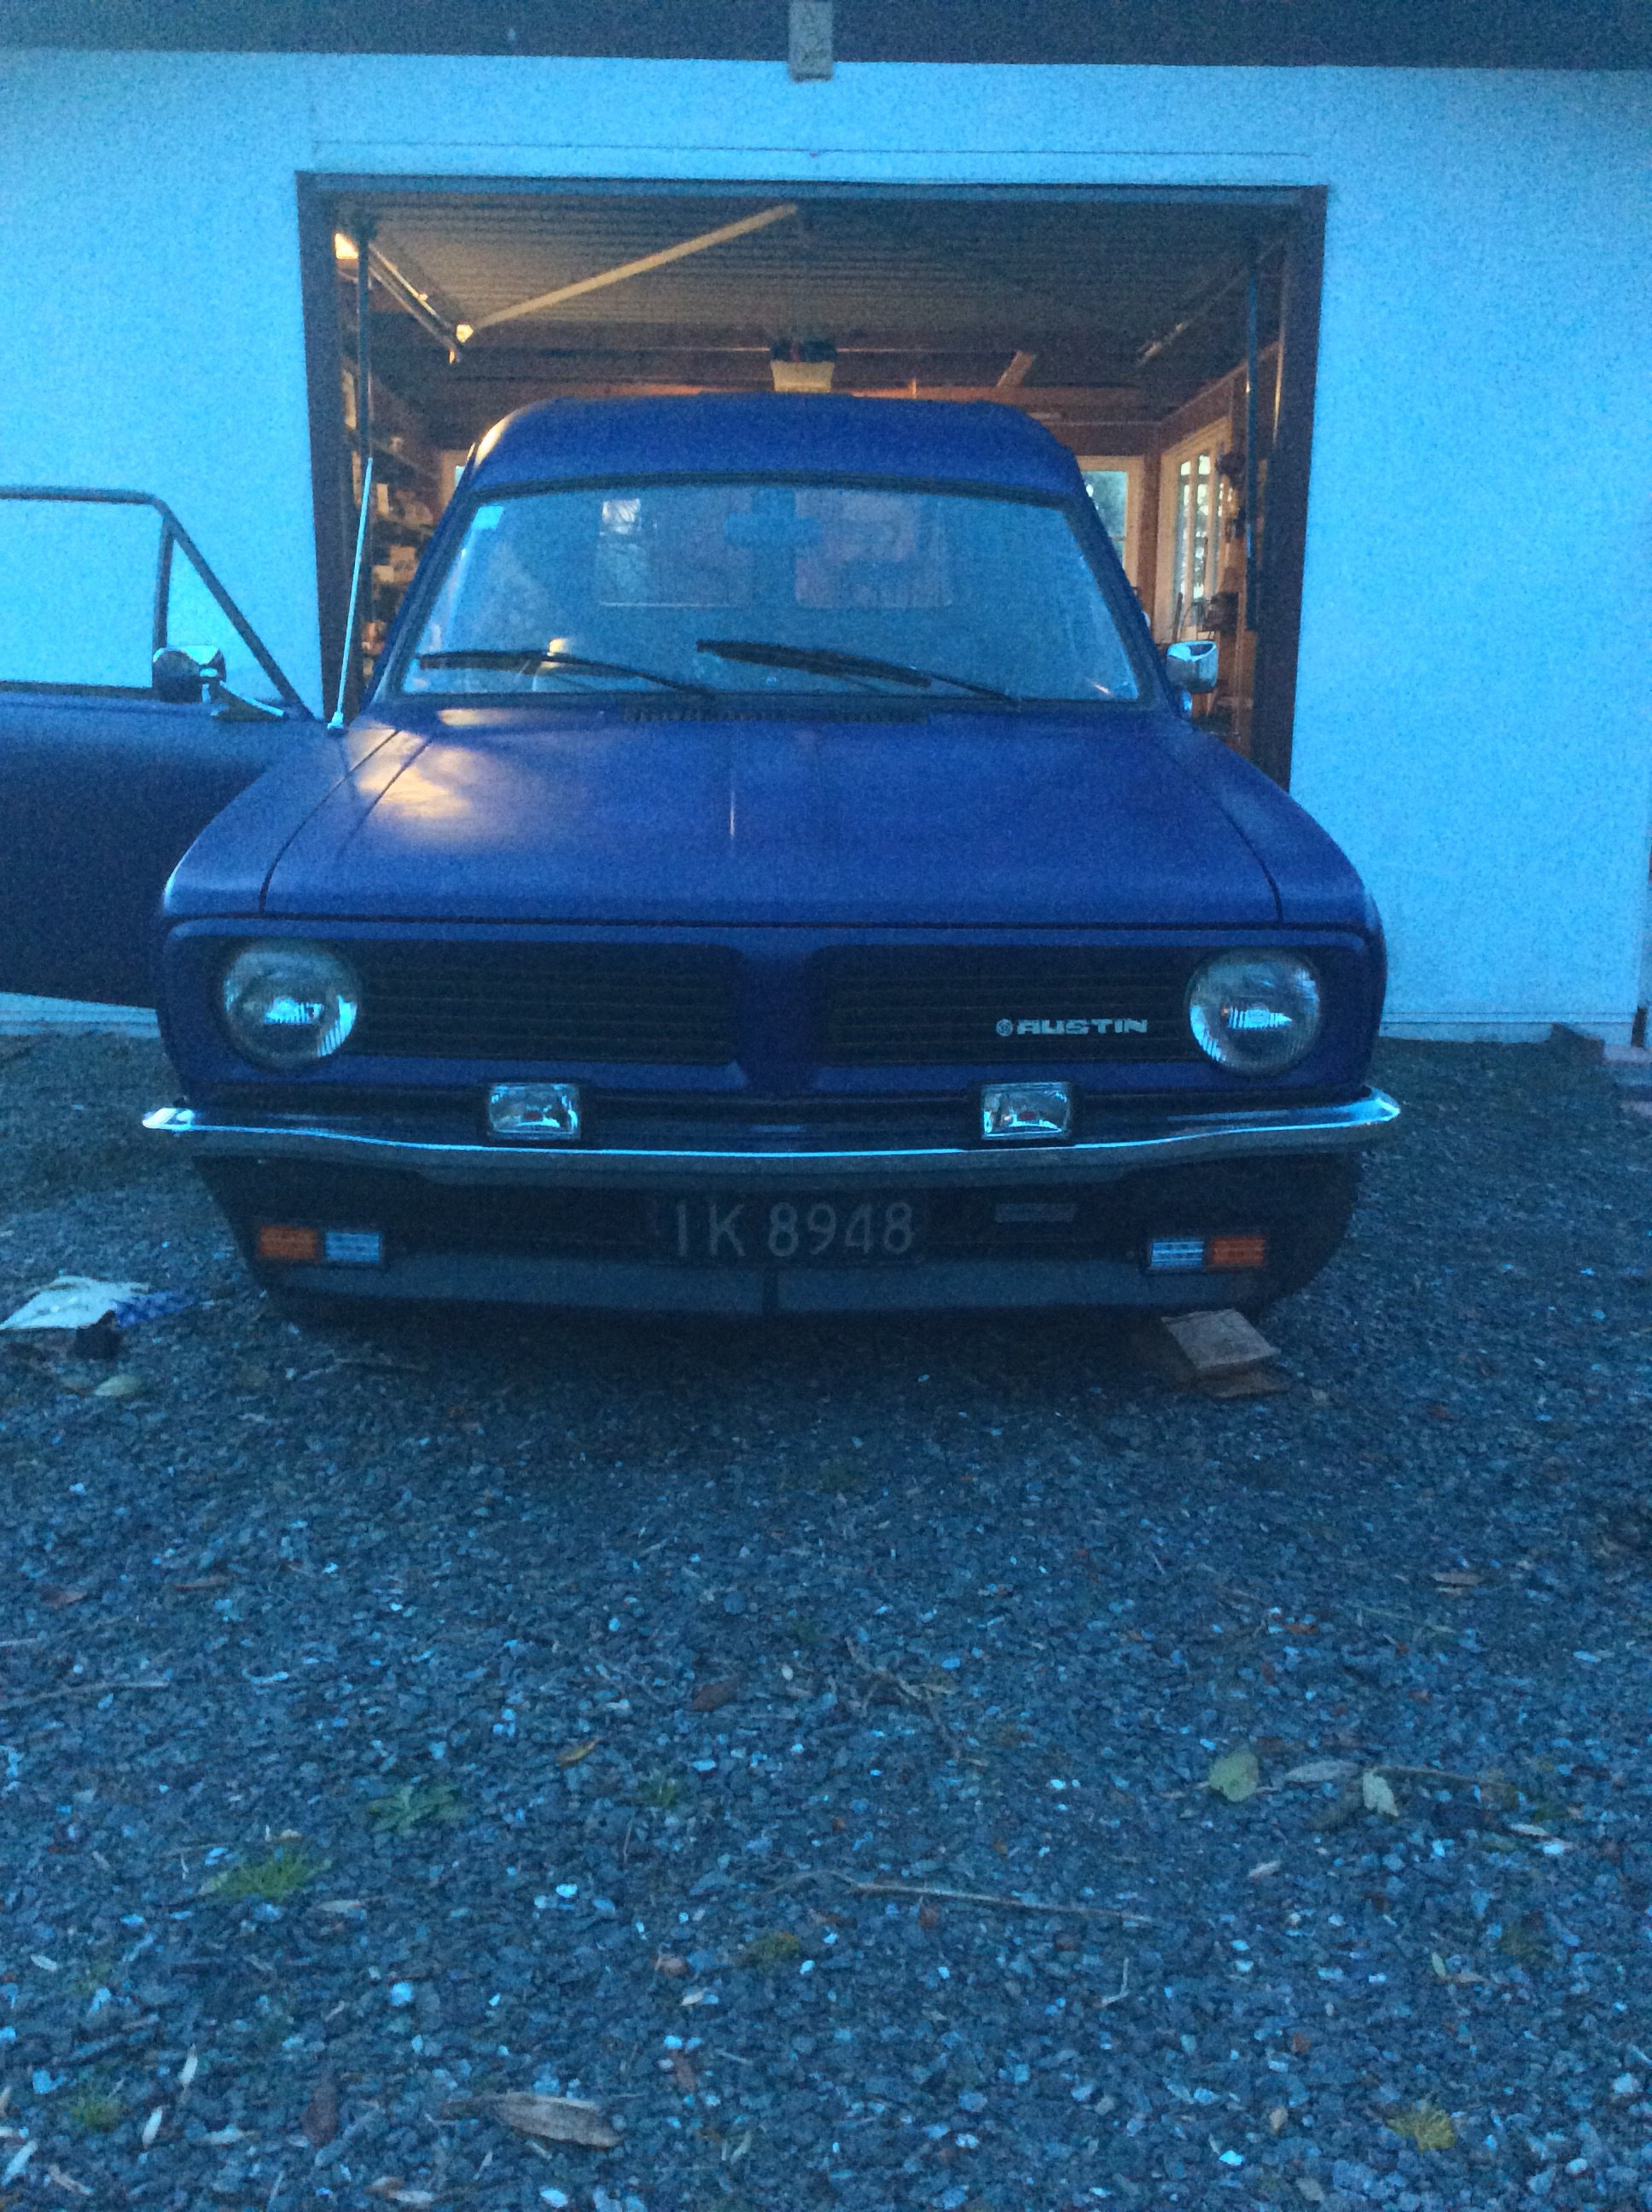
All I'm waiting on now is tie rod bushes from the UK, should have ordered them earlier damnit. Have painted a good deal of the floor pan, and ingested at least 6.2kg of ancient road debris, mostly through the eyes of course. Got a new horn, it's a Lucas high tone so a bit cheery but ah well. Jammed some cheap driving lights on, even used a relay, flash I know. They emit at least 3x as much light as the Lucas headlamps, which just get left on high beam, couldn't blind a possum. Also nos Marina front mud flaps to keep the mud out of the bottom of the guard. heater blower is no go, motor is getting current but not spinning, unsure how keen I am to get involved in 70s BL heater nightmare tbh
4 points
-
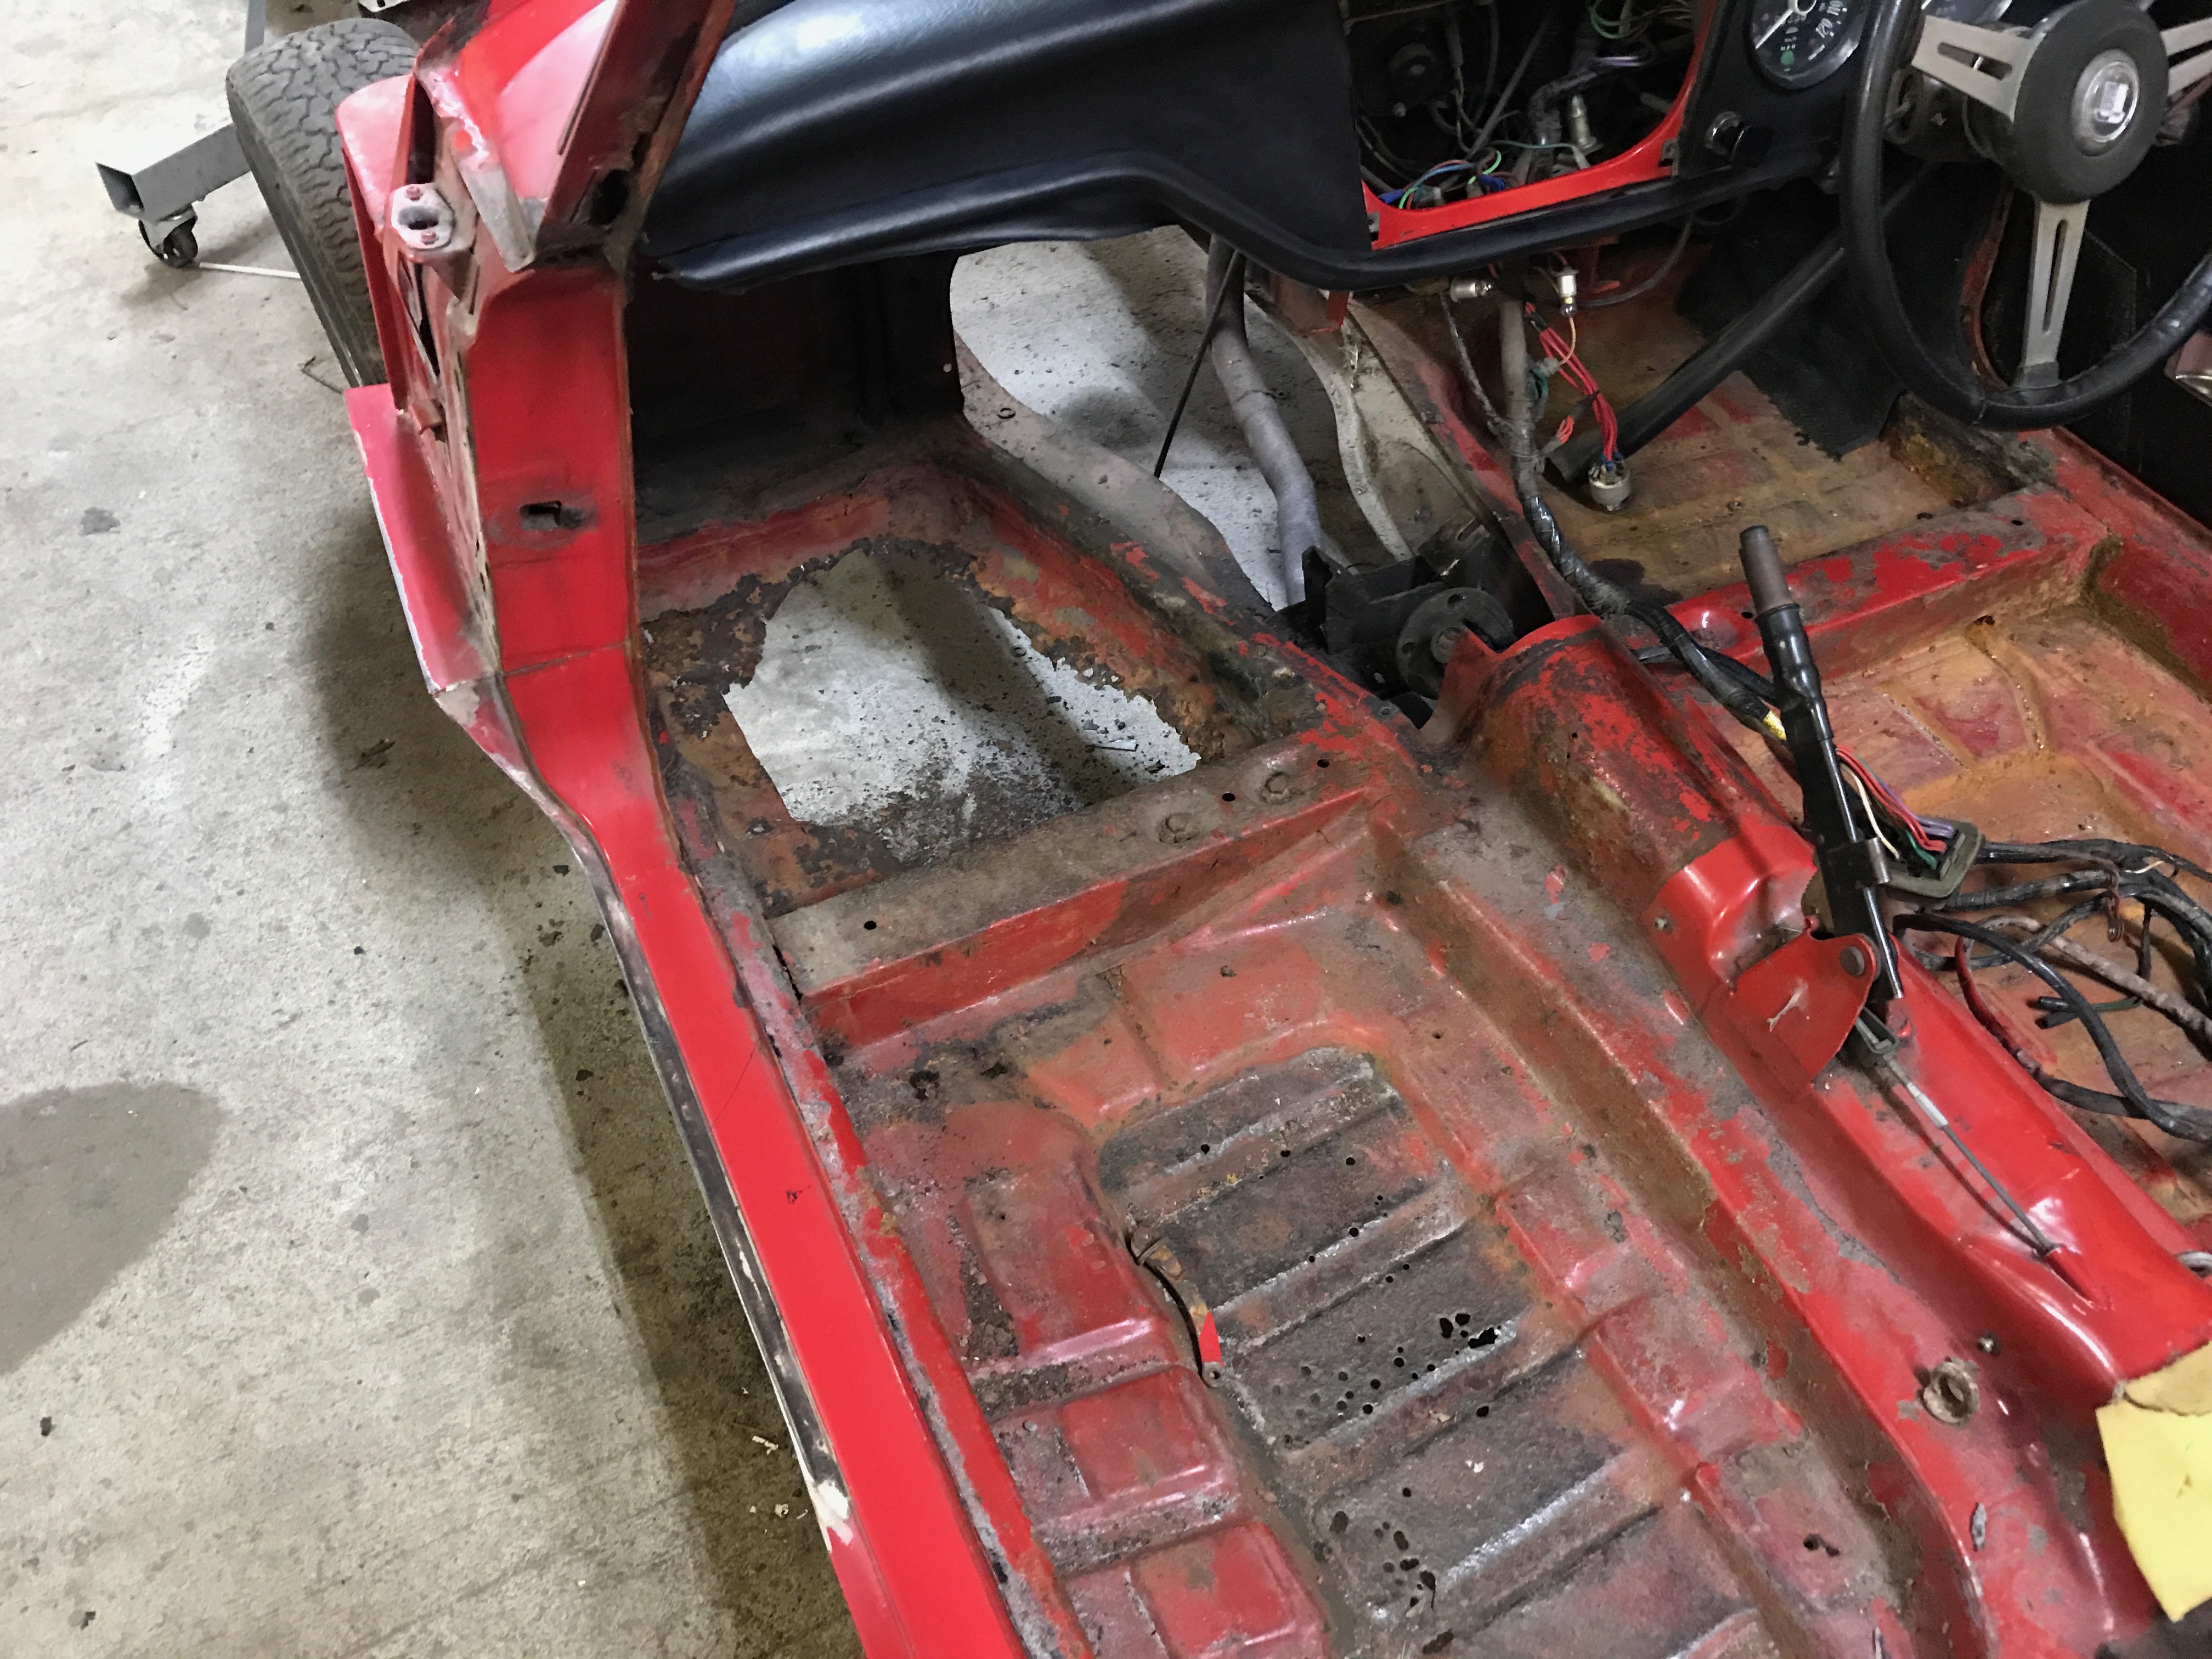
The Good The Bad & The Ugly From inspecting the car all the electrics worked, even the fender mirrors. The interior was mint minus a crack in the dash and the centre vent. Also a small hole in the drivers seat. I wasn’t a fan of the 1g-eu and it was leaking oil from every orifice, fixed to the auto box = a gradual 0-100. The exterior was fairly straight but the paint was showing its age. Stone chips and a few imperfections were apparent but none of this worried me. It was advertised as having no rust apart from some surface rust under the bonnet and 2 spots near the boot. I knew it would have more and boy I was right, yet I didn’t know how extreme till later down the track. A wheel well half filled with water was a bit of a giveaway and prodded around the boot for some clues. A few areas around the boot seal became apparent, but me being me haggled the price slightly instead of walking away. On The way home I also worked out the suspension all round was rooted as the previous owner had removed the springs for the images in the above post above. First Things First Replaced the windscreen Replaced rocker cover and manifold gaskets Add a sump bung washer to stop oil leaking And straight through WOF it flew. I was certain it would get failed on suspension, but some how it got through… so I carried on sailing the roads of Canterbury with some wicked body roll.4 points
-
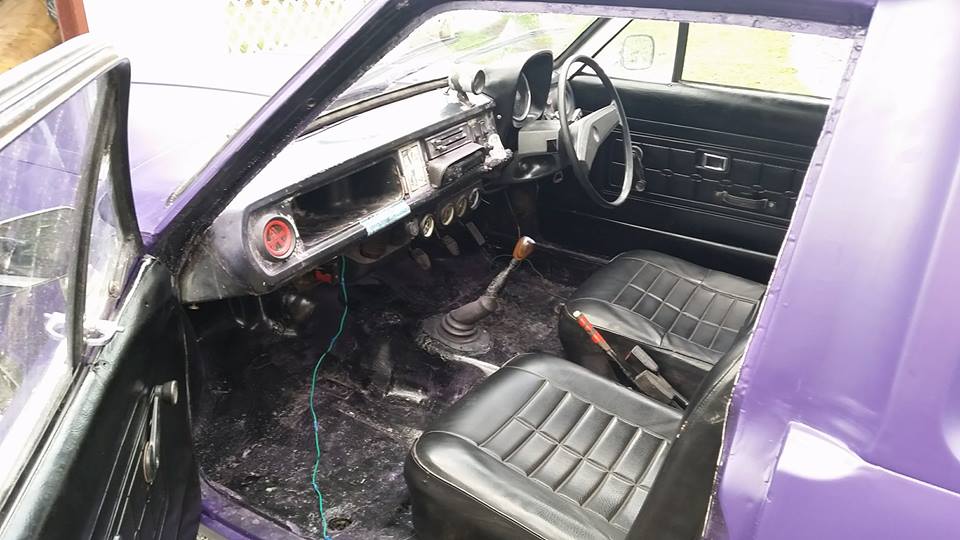
Try this again... Long story short life and dads junk got in the way lol, been mishing for the past year to get the house and garage sorted which is now done (shelving works a treat...in the storage form..) soo no excuses now!! gah.. me box is too big, had to get my trim on..whos awesome idea was it to put this lump in instead of a humble t50... Never-the-less shes in, bit of an angle or else i wont have room for the hoop but meh i just want to get it done and driving. Will weld some gussets/bracing to the box mounts and make it all flashy tomorrow!4 points
-
I was in the shed for about a minute last night before I noticed a linkage rod on front carb had over-centred, so righted that and it seems to have full travel incl secondary's . So I'll test that on the way to work tomorrow!3 points
-
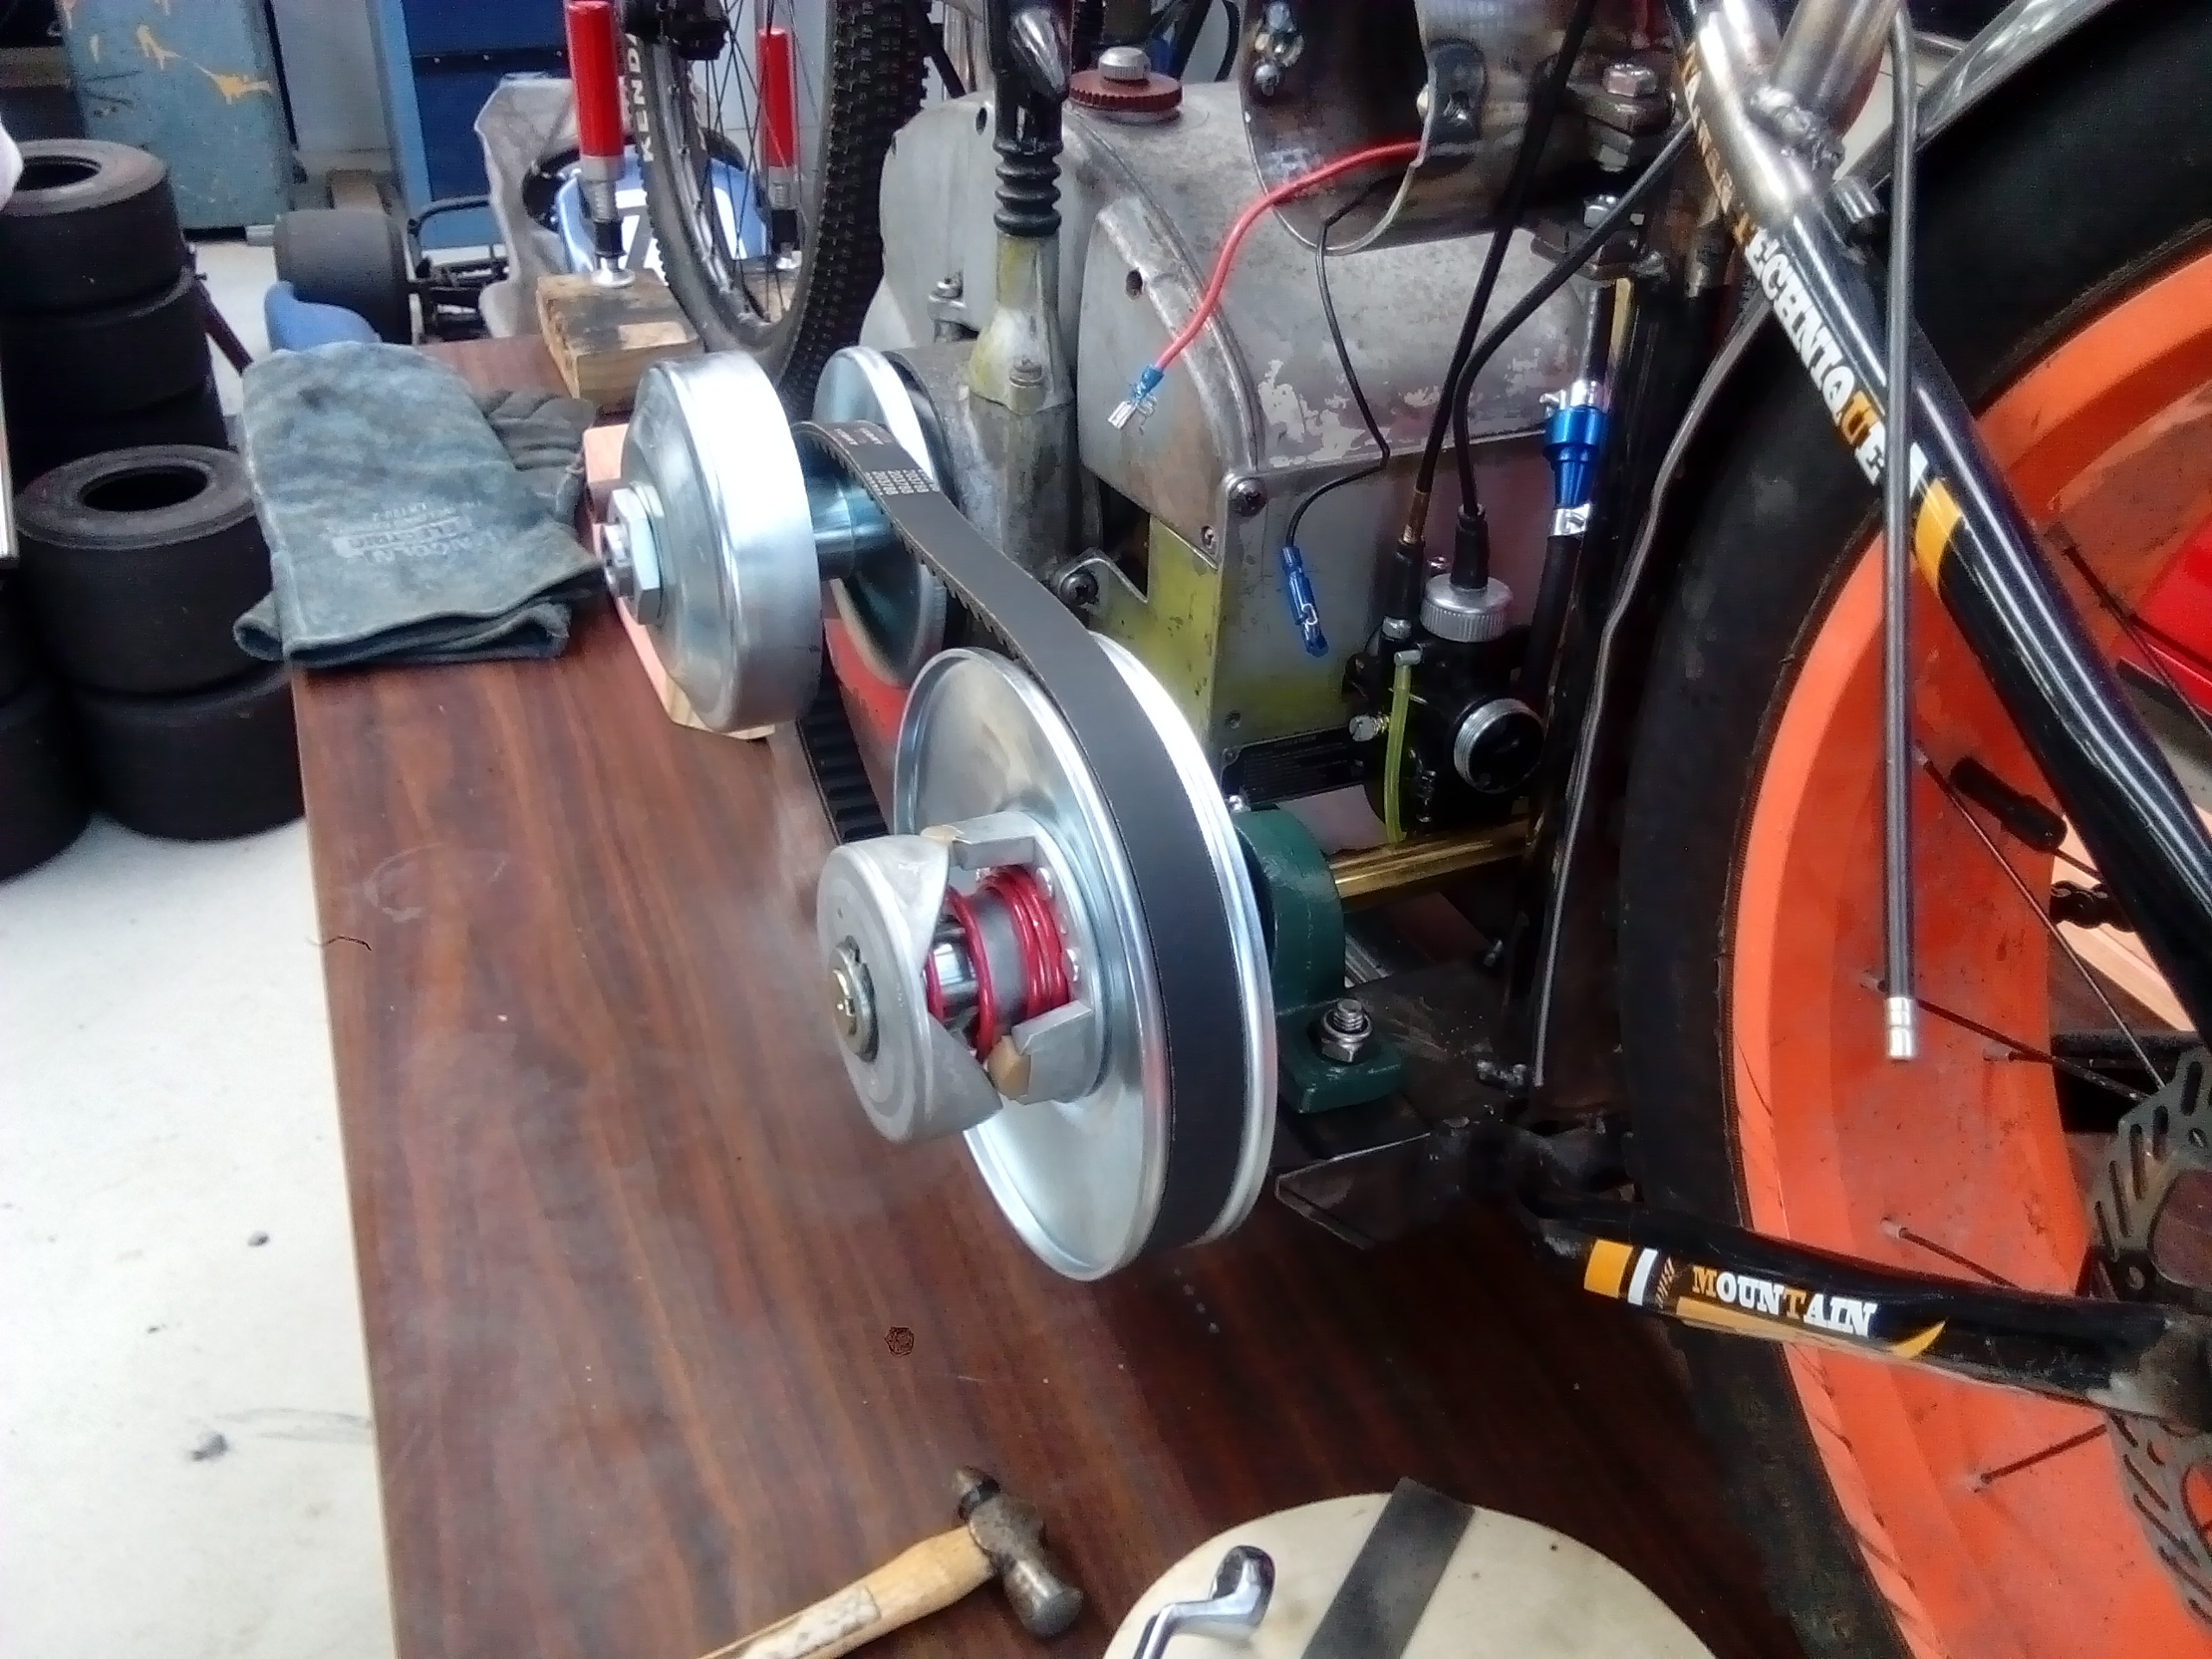
Potential replacement belt arrived today so I whipped the stock one off to compare. New belt is 666mm long by 16.8mm wide with 30 degree side angle, looks pretty close, width is spot on. Will bang it on tomorrow and see how it fits.3 points
-
not really it has to do with the linearity of the valve type and its flow coefficient. a thin bladed butterfly is really not linear at all since the thin blade doesn't really obstruct flow very much until its about 1/3 closed and at the other end you get small changes in butterfly angle making massive changes in flow area. Going to a smaller valve will mean the first third will have a more immediate impact on the flow but the profile of that effect wont actually be linear. hence why OEM 90% of throttles have bell crank throttle pulls to get a mostly linear pedal effect matched to the throttle sizing and valve coefficient #imbeingpedantichere3 points
-
Sister obviously.3 points
-
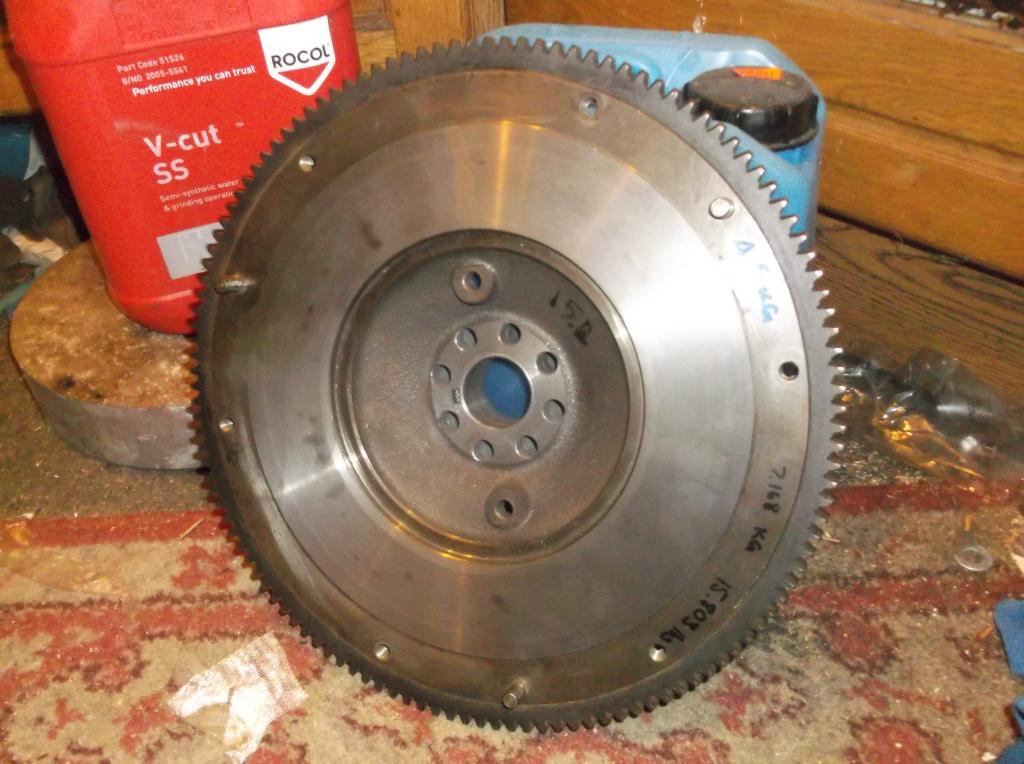
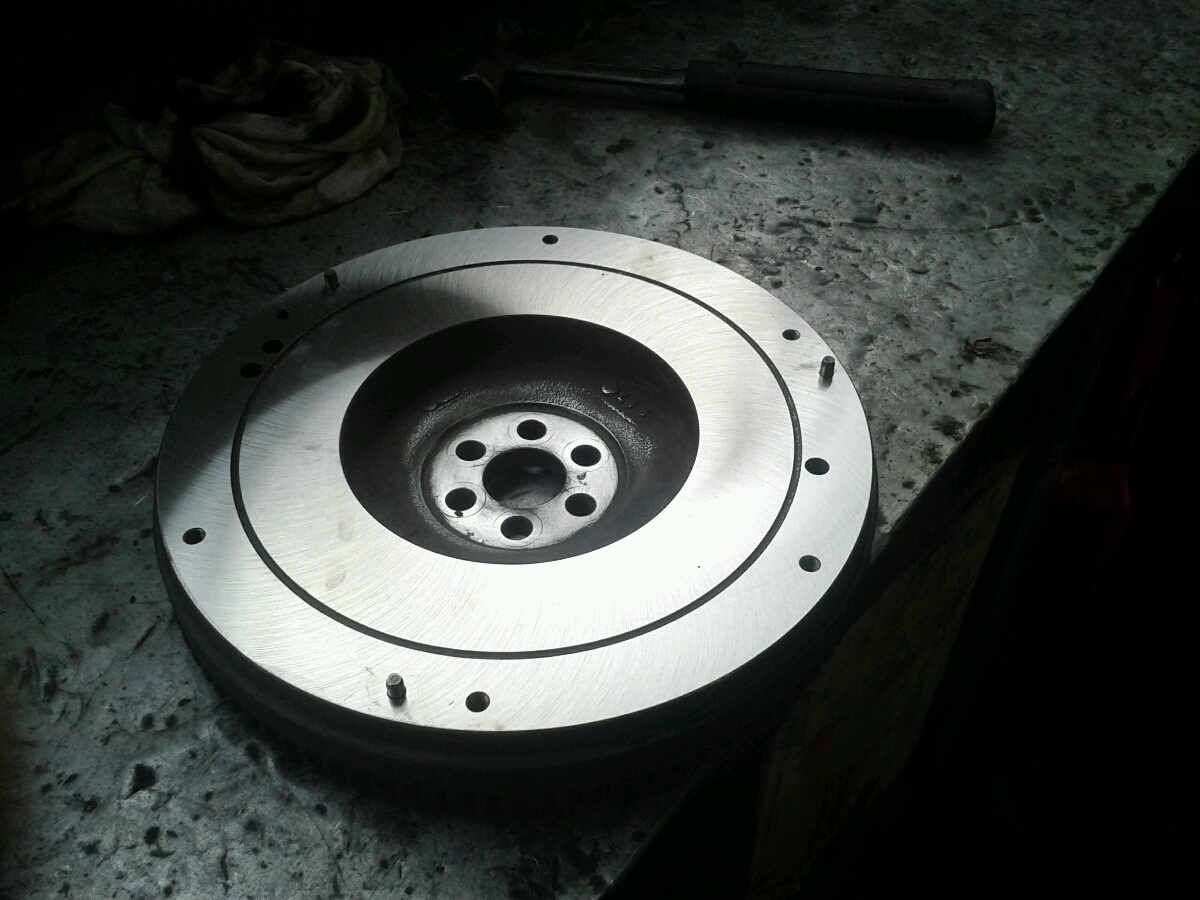
No pic update tonight. Looking for advice and opinions. I've managed to locate a gearbox in Auckland which is close enough for me to be willing to drive down and pick it up. It comes with everything from yoke to bell housing including throw out bearing and clutch lever but no clutch, pressure plate, or flywheel. So I'm at a bit of a cross roads. There seem to be two different options for how people adapt the RX-8 box to the V6. They both require the use of an adapter plate because there are no RWD boxes that bolt up the the V6 but I think I'll tackle that issue later on. For now I'm thinking about the flywheel and clutch situation. At the moment the motor I have is bolted to an auto box so I'm going to need to find a flywheel of some sort. One option is to use the rotary flywheel with a spacer adapter to take it from the single nut used on the rotary motor crank to the six bolts used on the V6. This is clairetoo's flywheel she did for this conversion. This option has the advantage of retaining the stock rotary clutch, pressure plate, and starter motor position and I already know where I can get the whole lot with minimal effort. The other option used by Alex in his Viva is to use a stock (or aftermarket) V6 flywheel with a machined spacer to bring it out to the correct position relative to the gearbox input shaft. I believe he used the V6 clutch and pressure plate which matched up the the rotary input splines. The complication of this method is that the starter needs machining to bring it in toward the flywheel center because the flywheel is 10mm smaller in diameter than the rotary one. Also I can't find a V6 flywheel anywhere but in a 626 in a pick-a-part in Auckland. Normally I'd be happy to go and pull it but I don't have an engine crane to pull the motor, and it's a long way to go. I'd be worried that I couldn't pull the motor in a day and then I'm stuck in Auckland overnight with a half pulled engine. So at the moment I'm leaning more toward the rotary flywheel because it keeps things as simple as possible and keeps the most stock parts on the car which is always a good idea if I ever needed to do maintenance. But there's one thing holding me back. I've read online that the rotary flywheels have a counterweight built in to balance the effect of the dorito wobbling around in the engine. I'm thinking though that putting that on a regular piston engine it will be totally out of balance and make a mess of everything. Does anyone know if this is the case? At the moment I'm pretty sure it shouldn't be an issue simply because Claire has already done it on her project. Finally, I'm thinking about building my own engine to gearbox adapter plate. I've looked at how much it would cost to import one from the UK and right now I'd rather have a go at making my own. I have access to a big milling machine for drilling the actual holes so I'm not too concerned with that aspect, but what I am not completely sure about is how I should go about measuring the positions of the holes as accurately as I'll need to to ensure a good mating between the two components. I have some ideas but I'd be keen to know your guys' suggestions. Phew! That's it. If you've made it this far and actually read it all then well done. I'd be only too keen to hear everyone's opinions. Chuck it all in here:
3 points
-
Plenty of time to browse tardme and pick up something cheap and sketchy @RevDWC then ride it once and decide to tinker with it with the intention of sorting some niggles then decide the rides next week and it ran fine so it should be fine mate.3 points
-
Bit more cutting, bending and attempts at welding Good grind and paint/heat wrap will solve it Only one little leak that I can find! Need to get a throttle control that will fit with a disc brake lever in place, a late model Gyro park brake lever assembly and ignition now3 points
-
Have they finished with all the building? Will the T be there?2 points
-
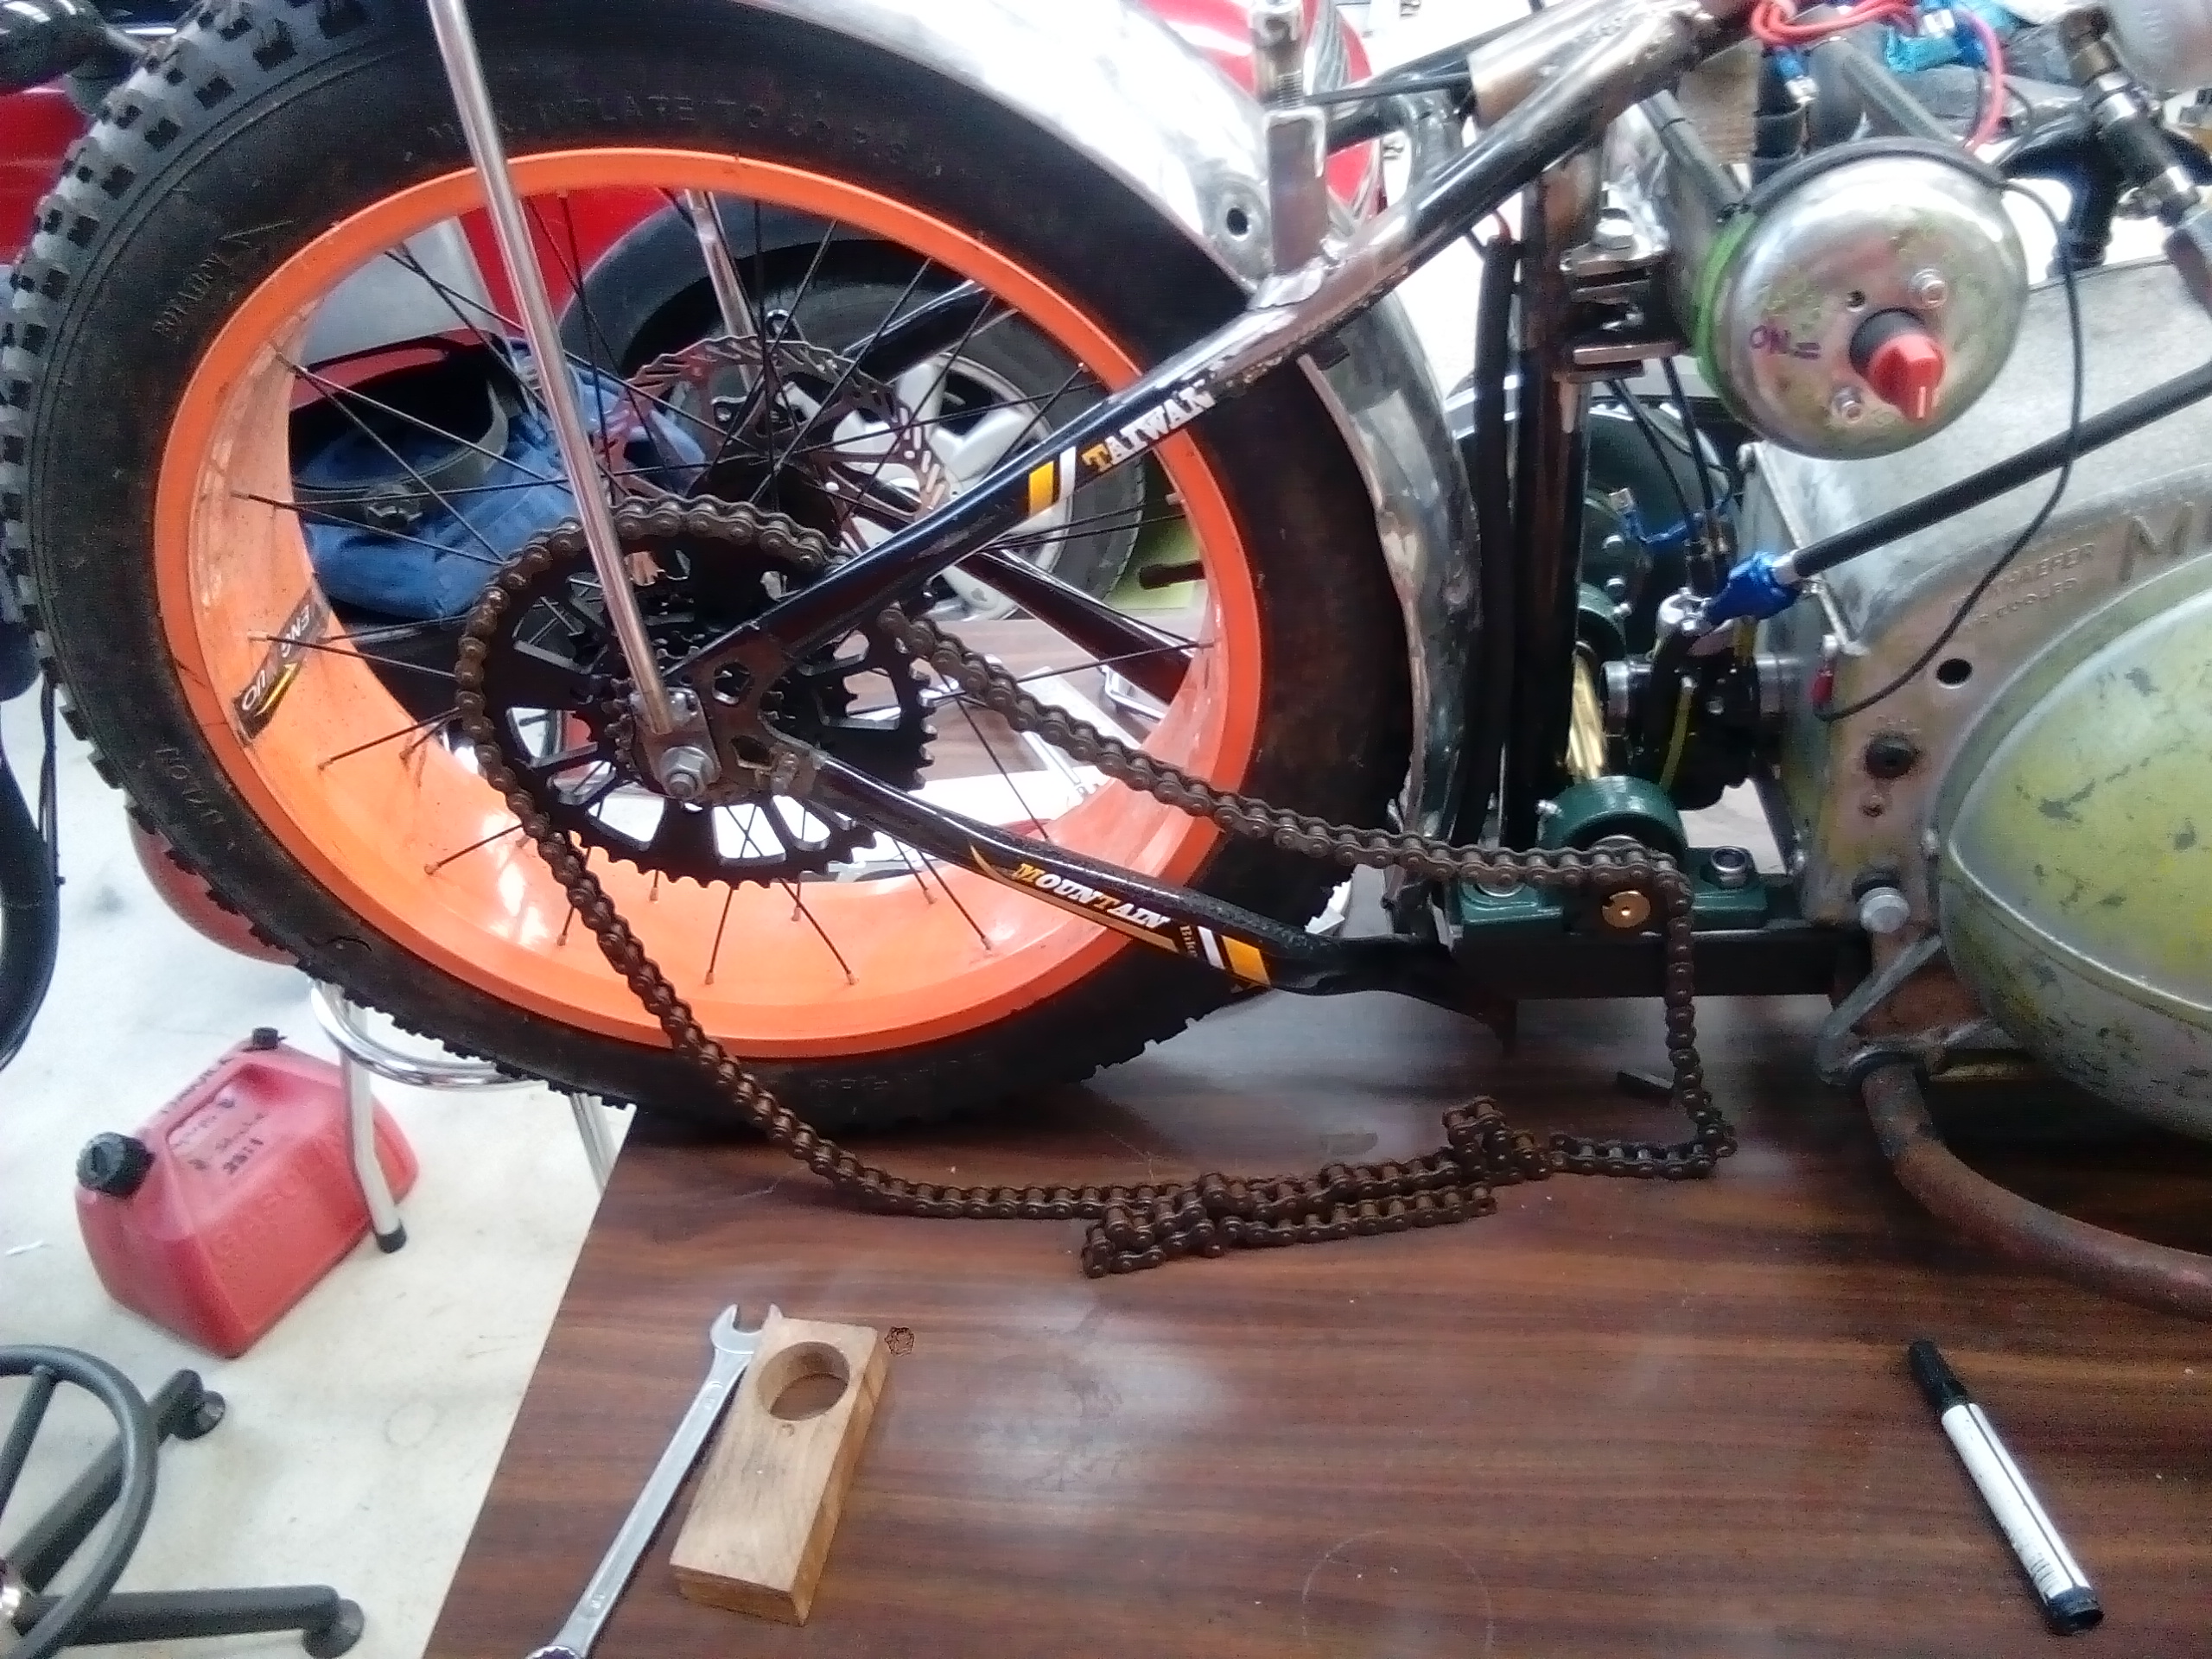
So, motor drive is on the left, bike tyre sprocket on the right...solution: use a jack shaft. it all looks about right. Will fine tune alignment and machine up some collars to limit any horizontal movement.
2 points
-
Cheers fellas! My flatmate heads down to the naki regularly but isn't going for a while so just paid the man his $87 for shipping... And then he actually said he's coming to Auckland on Monday so can drop it off and refund me $40 and keep the rest to go towards his gas, so all is sorted Thanks though!2 points
-
Wait..... wat2 points
-
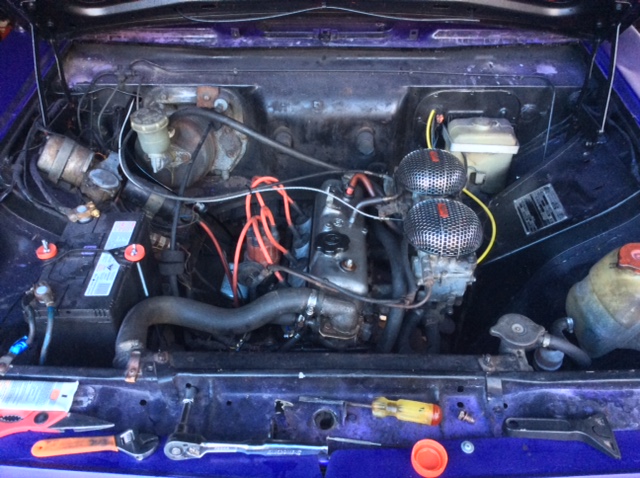
Updater. 1. Fuel pump. The one on the left is in the bin. The one on the right is in the boot. We now have reliable Bosch fuel pressure at 110psi at all throttle openings. New power supply and relay fitted also. I'm just finalising a mounting system and I'll take a pic for the next update. There are kits on the market but they are very spendy so have put something together myself. The original Lucas pump is actually a windscreen wiper motor. Needless to say it wasn't a great option from new. 2. Metering unit. After many many hours fettling, dicking about, trying things, trying other things I decided to rob a bank and buy this: Stuck it in, timed it. Available for sale for a limited time: Patented Tumeke injector bleed test bed © Also available Tumeke Remote Cranking / Gravity Weight System © Also reset and re-sprung throttle bodies, butchered a twin cable choke cable (if anyone has a spare I'd like it please), fixed the over-drive switch with some re-wiring and generally dicked about. Pretty close. Still needs a bit of timing / tuning but mobile and has been moved to home garage rather than storage garage so that I can begin cutting out rust for a WOF. The saga continues.2 points
-
I decided to start from scratch with a tune file, I've fairly well hashed out the 0-4000rpm region in all load regions of the fuel map. Because you go through all of them all of the time when driving. But I've found it difficult to reach the higher rpm mid/low load areas (partially because you're never in them) and I never felt confident in the past that I had these accurately set.So for interests sake, I thought I would software limit the e-throttle angle so 100% on the pedal is only say 80% TPS or whatever. Then go do some "full throttle" runs, where I could get consistent and repeatable results to help dial in the fuel in those part throttle areas. However, the results really surprised me! I had to pull out so much throttle angle just to lose 10kpa of manifold pressure. It was a good exercise to complete as it felt like my accel enrichment has been relying on these load cells that havent really been dialled in too well. But found it very interesting how non linear the MAP vs TPS relationship is at higher RPM. This car has a factory Toyota Altezza E-throttle unit which from memory is 78mm at the butterfly so you can tell that it obviously causes very little restriction even when partially shut. I would expect a more linear TPS vs MAP relationship when using a smaller throttle body. In other news, its hilarious doing a full throttle run at 20% throttle, it takes a long time hahaha.2 points
-
Since working down south at HPA I thought I'd start from scratch with a new tune file, my old one had lots of odds and ends in it from various experiements / adding and removing sensors etc. Looking at everything with a fresh set of eyes really showed how much a few things were garbage but I just assumed it was right when I didnt know much at the time or whatever. Like looking properly into how the cold start functions work it's now much better, starts without foot on the gas and doesnt zing the revs up when you start it. As well as that I'd never really played around with accell enrichment before, now it feels a lot nicer at high rpm when you give the throttle a stab. And I'll be ditching the staged injection as in my case it doesnt really add enough/anything to justify the added complexity to the fuel system, and the throttle response is worse when you're using it. I think to make it work as nicely as a single injector setup you really need a good wall wetting compensation model and two completely seperate tables for it for each injector. Whereas the Link only has a single table for accel enrichment settings, and an initial enrichment setting when secondary injectors come on. Which makes it impossible to account accurately for situations where you've got say 20% secondaries vs 90%. I think staged injection works well when your entire intake is hot, as it evaporates the fuel a lot quicker. But in my case when you've got a thermal isolator stopping engine heat soaking into the manifold you get a huge % of fuel ends up as wall wetting and you lose control of fueling and accel enrichment. I've now got about 3-4 sets of Altezza injectors though so I'm gonna flow bench them all and find the best matching set out of the lot. Will be interesting to see how much variation there is (or isnt) across that many of the same injector. Also just picking up this afternoon an Altezza engine in bits, so might throw it together and chuck it in the car to have a play around with exhaust side VVTI as well and see if that makes much difference compared to current setup. /Pointless Dave Rant over /It's never really over though2 points
-
I'd always though the Gyro was a uniquely Honda idea, turns out it's pivot system is a British invention, which played a part in BSA's demise Ariel 3 by BSA Then Diahatsu had a go at it with there Hallo2 points
-
Getting so close to wof-attempt time now, got windscreen squirters & fuel gauge going, chin spoiler on (+10 bhp) seats, door cards etc. Hopefully just re-attach the earth to the horn and a pair of tie-rod bushes (which I should really order) to go. Brakes work well with new fluid and various levels of abuse to free them up
2 points
-
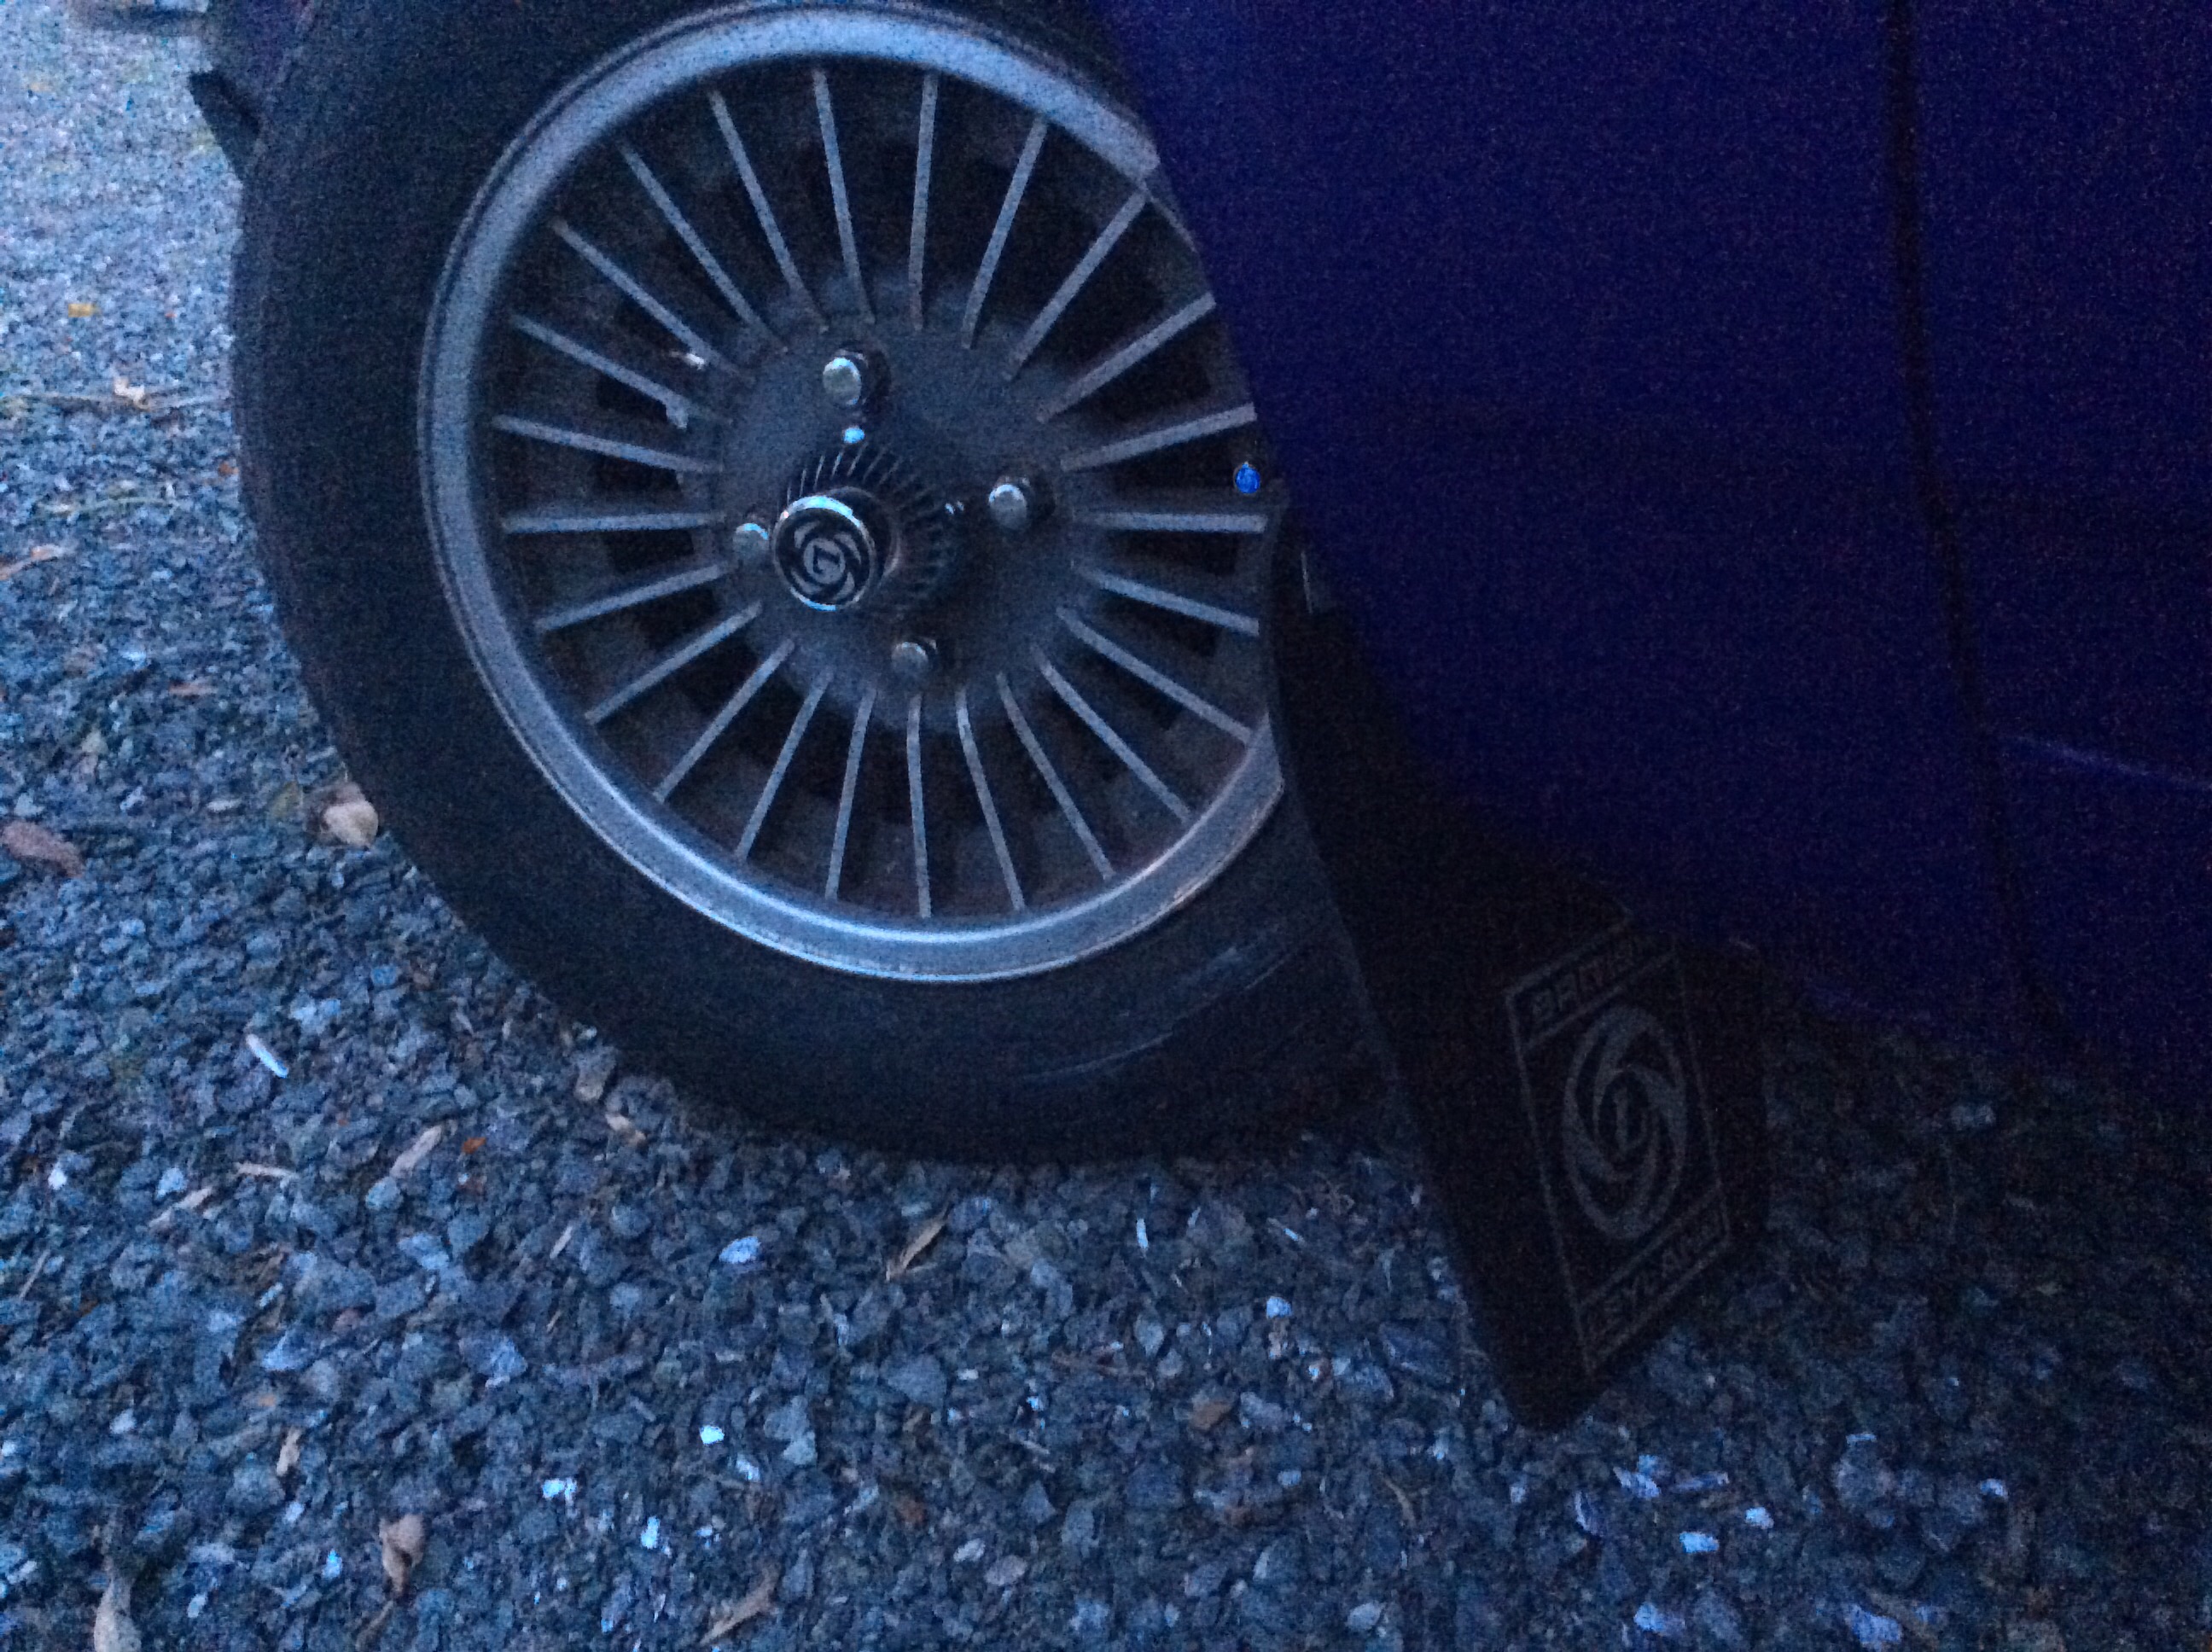
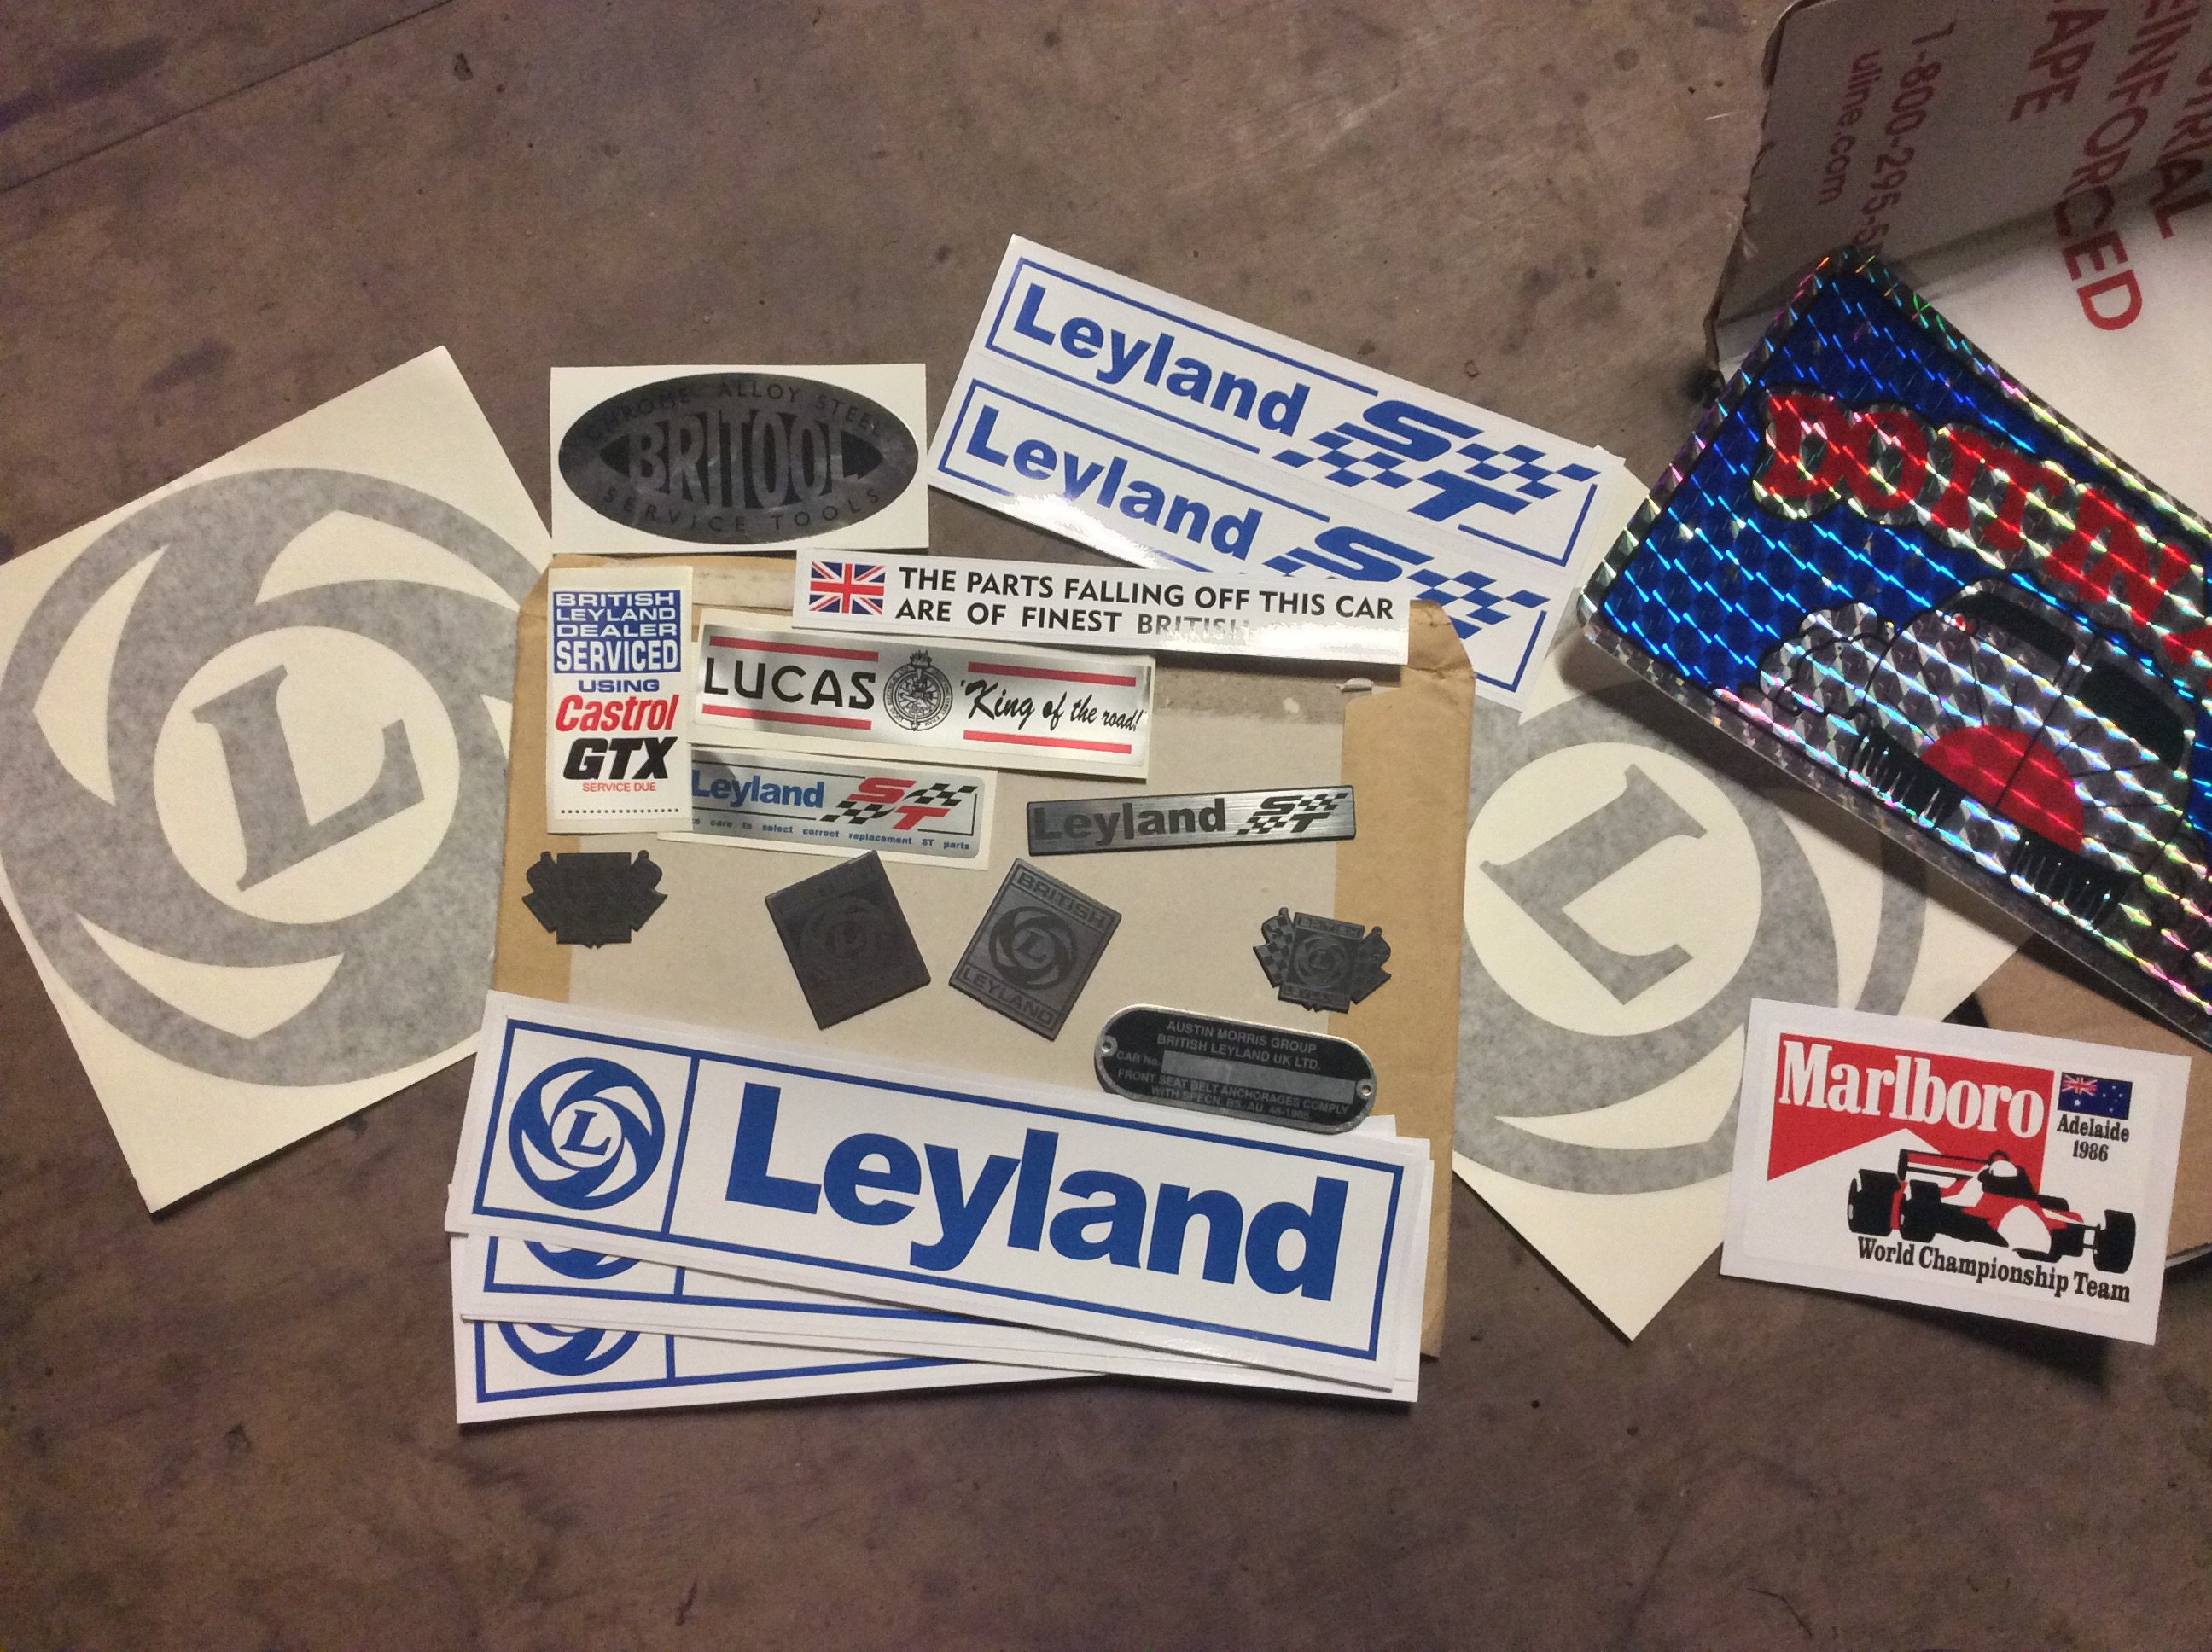
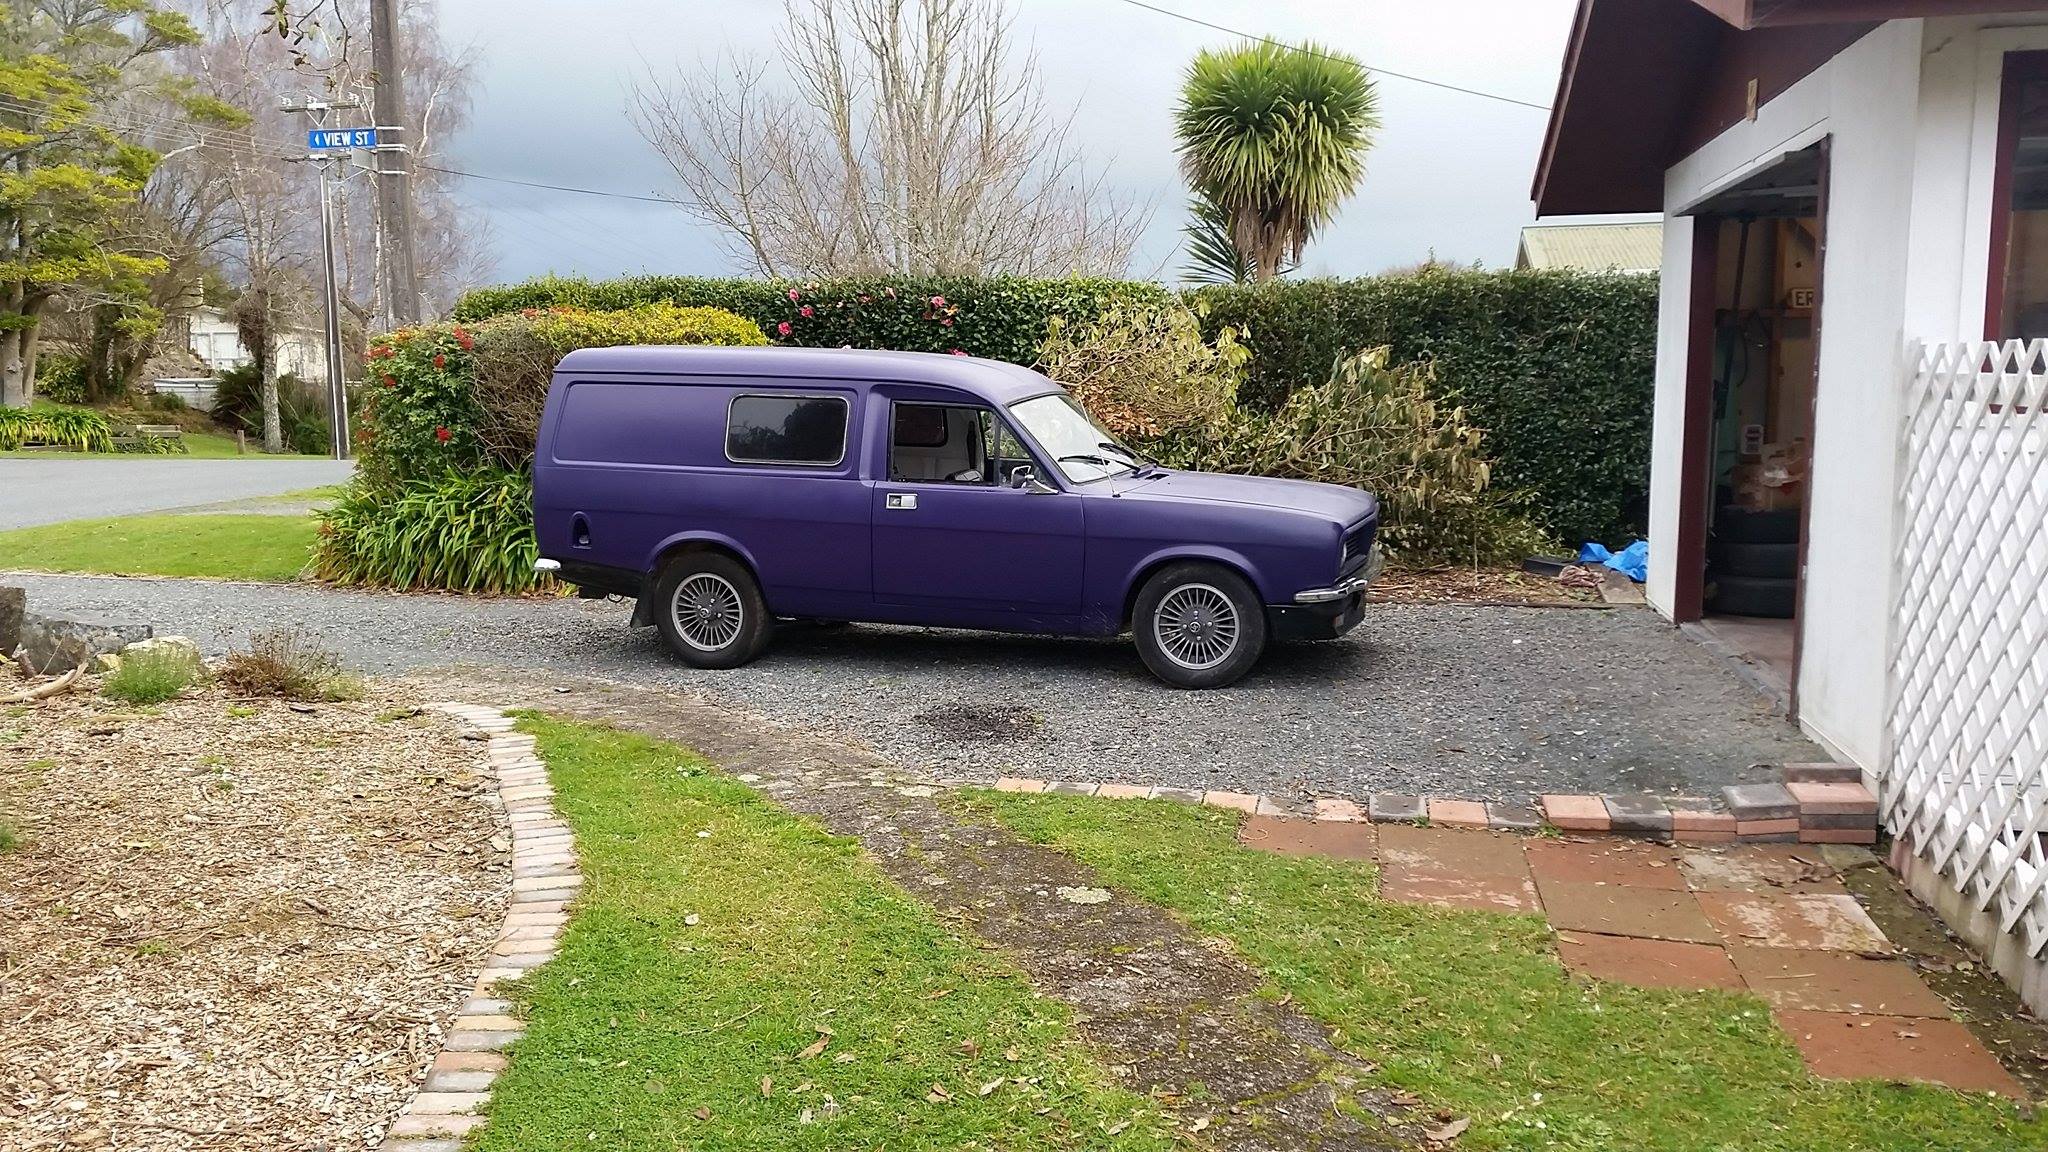
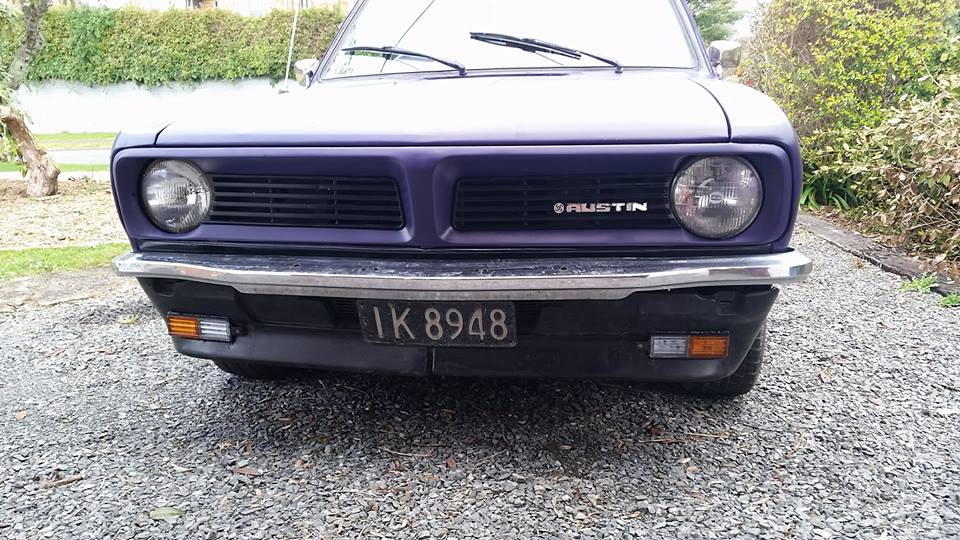
Van update time! Been reasonably busy fiddling with it (and the van), tuned it up more, turns out the missus good tweezers are a good substitute for toyotas tamperproof mixture screw adjustment tool. hooked up the largely un-necessary manual choke, found the speedo cable randomly missing (lucky is just plain ke20 spec) so ordered an $11 replacement from thailand. managed to break the ancient aftermarket temp gauge and one of the front indicators due to incredibly fragile 70s plastic and general ineptitude, luckily I wanted an AC brand gauge and needed new parklight/indicator assemblies to go on the front spoiler anyways. Have ordered generic but kinda OS looking led ones. Got the hole in the passenger floor welded up, now i'm getting fussy and am going to grind out some old bog in the front valance and passenger outer sill behind the guard and weld that too. Missus and I gave it a quick blow over with some random purple for that coveted "one colour" stz, will suffice as a working paintjob until the body is straight enough for leyland black violet, as per coupe below. Also have found a u.s outfit that does a badass frazetta "the huntress" decal, which alone makes me keen to get it paintified. Been going a bit ott with the leyland stuff, I now even have a british leyland notepad (doesn't work in the rain obviously). Yes those are leyland-logo'ed valve caps, nothing worse than when your valve caps don't match your long-socks
2 points
-
One British car is stupid. 2 is more stupidist. 1972 Triumph 2.5 PI with 4 speeds and a switch to make some more speeds. Purchased of the tardme for much less than advertised on account of it not working. Was a deceased estate so little information about the not working could be given. Did ascertain that money has been spent, and there is receipts for new metering units and the like. Has been repainted, and clear is blistering in places. There's rust in the front guard, back D pillar window frame and back valance. Spares panels are were supplied with the car but are yet to be collected. So far I've looked for some spark, found it, then lost it, then found it again. I have had it running on some cylinders but not the prescribed 6. So far suspect the coil is a bit average, and probably lots of other things. The main problem, however, is that I think it's been Barried, so nothing can be taken for granted and a full going over needs to happen once I can get the thing to run. All help will be accepted, and I'm sure someone will set up a discussion topic thing for me cause I don't know how.1 point
-
Cheers! Am looking forward to bewildering the general public and concerning parents once again with hilarious underdog jalopy1 point
-
Haha, yeah, but I have a Dad too, if I can convince him it's a good idea we'll see y'all there.1 point
-
haha shit thanks!1 point
-
Pics plz1 point
-
Huhu haaa someone know my password, and it's not me.1 point
-
The answer is more RPM. Got a link to that gear calculator? It looks good.1 point
-
Lay off the taranaki thunder bizzo.1 point
-
@Beaver
1 point
-
Can do. Can store for ages if required1 point
-
So iv had a week off, but have sat inside bored out of my mind because I did a half assed job at removing my fingers last weekend Sun came out and I can sort of use the hand as long as I don't reach for anything or lift with the thumb so this was pretty difficult removed seats not as bad as it could be Front corners and back of cab are all rough patches New floor covering I picked up. not sure who made it it was just wrapped in a plastic sack with L200 80-85 single cab written on it. No cut out for the shifter so probably aftermarket bit of sound deadening on the back Its a poor fit tbh, theres no cut out for the steering column, yet the edge is all bound and it doesn't like the corners. I stuck it roughly where I thought it should go and screwed all the edges down, cut the shifter hole, the went at it with the heat gun and blocks of wood to contour the sills. It needs a lot more of that action but it fits in now. Vacuumed off the speaker box material that was in the back and put the seats back in. The loom from the tunnel is too short to go up behind the carpet and underneath so I had to de pin a plug and run it over the top for now. so bad, also fixed the folding forward passenger seat so it locks back in place ADEQUATE1 point
-
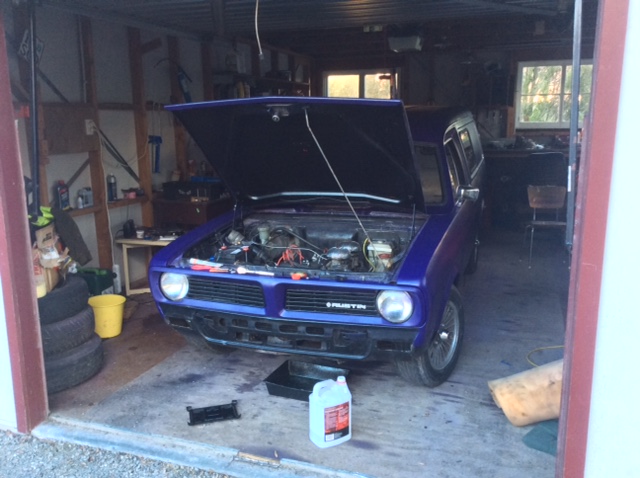
I actually tried to fire it up last Friday night, but the second hand fuel pump out of Darrell's HZ Statesman, which I've had in a box for a few years, had died from natural causes.I wasn't keen on changing all the lines and installing the factory pump, so I googled up the brand of the old pump and found they are a NZ company manufacturing these pumps in a Waihi, 95bucks delivered to my work yesterday, 5 o'clock couldn't come soon enough! I rusted home and mounted it up.This is a 2psi low pressure pump for carbs, they do a 4psi 6si a 6volt version and 24 volts version.I like it as it's small, in line, no regulator needed, and very quite.So after battling to find a good earth I ended up using the screw that holds the left service cover thing on.By now it was nearly ten at night but I've waited to long to let that stop me!I took it for it's first wee drive up and down the street last night, woke up all the neighbours and stuck it back in the shed as no lights is a bit scary!Darrel came up and we quickly realized the "to do" list is getting bloody small!-lights-seat belts-4 wheel nuts-brakes still spongy-wipersplus non wof things like air filters, sunroof etc...so while we were on a roll we connected up the lights.still no front indicators, but I'm sorting that out today.moved the power for the fuel pump over to one of the only on when car is on fuses, indicators I think?and holy shit! everything works! the wipers! both speeds! the horn, everything!can't believe it!!even though it is technically running like a bag of shit, carbs need tuning/jetting/sync, brakes where scary bad and the steering felt heavy as(might have just gottin use to power/no tiny wheel) it was awesome!I even gave it a bit of welly in second up the road and man, it wants to go!1 point
-
^^ unless you have over 350 hp.1 point
-
1 point
-
I feel like I'm saying this every update but not too much done today. Lots of balls in the air so to speak. I started with putting a bunch of holes in the outer rail skin with a step drill to plug weld it to the inner channel. Here it is all clamped in place. I gave both inner faces a couple of coats of weld through primer to help to keep the corrosion at bay. You can also see the ARB mount bolts in position to make sure they'll be able to easily slide in and out once it is all welded up. Then I welded the lot up with the MIG. It's much faster for these sort of jobs and far less involved than the TIG. While I had the MIG out I also went and spotted the butt joint together as well. I was originally planning to use the TIG for this part but I've only got the one gas regulator between the two machines and I couldn't be bothered swapping it over. No matter, the MIG will work just as gooder. It's not very in focus but such is life. You can see I've started to grind back the plug welds too. Finally I got the whole lot ground back and gave it a lick of paint. Not too bad. I reckon if you didn't know, you'd never know it'd been touched. That's all for today. I won't be working on it tomorrow because I have exams all day but I should be back into it on Friday. That is all.1 point
-
My xflow motor doesnt build pressure for ages, and it loses it easily after the engine is turned off (to the point where I can hear it dribbling back down to the sump as soon as I turn the engine off). I never figured out what it was, but I bought a mechanical pressure gauge and it did build pressure eventually, it just took longer than any other car I have ever had. I have been running the engine for 4 or 5 years at this point and it has had a rebuild in that time (not oil related) and I have never seen a problem. I have a high pressure/flow oil pump fitted too from Burton1 point
-
How did you get on Mighty Joe?1 point
-
Answer to question #1- yes, postive and negative to coil, wire were red and black, not red and blue. I forgot about the compufire points replacement I've got in the 009.Answer to Question #2 - yes I have the big red wires in the correct places, has thats the only place they could go, just had to crimp a connection on the end of the wire between the starter and the Alternator.Still no idea about the fuse box clip thing!!!meanwhile....it's off the stands, ass starting to squat down.lost that sweet rake it had, just need to drop the front another inch or two!popped the muffler and rear valance on, easy.looking good.Darrell to the rescue again with his tiny little 1/4 inch socket set.sorted those pesky manifolds out! wired up the coil, oil pressure sender, Alternator and spark plugs.Should fire up nowspend a couple nights sorting out the fuel system at the front end, looped the line around to the front, through to the old washer bottle spot, which is now the fuel filter and pump spot, and back to the hard line under the tank.I have had this set up in my head for a while now, I had even drilled the holes for the fuel lines, but no hole to mount the pump, drilling into my nice new paint fun! but at least gives a good earth, the power for the pump is for the moment hooked up to the spare radio fuse circuit, which is always live, which is not ideal.Anywho.rear bumper and mutherfucking number plate bitches! legal beagle.bumper rubbers not fitting all that great, will fit rubber first, then bumper when I next remove the muffler as the bumper mounts are a pig to get to with that big ass muffler in the way. So the correct process is Valance-Bumper-Muffler. reverse of the way I just did it.time to fire it up.1 point
-
YES!!!! I think I have been to this a couple of times and its usually pretty damn good ! Will try to make it again. We can do an oldschool line up and I'll bring the Nelson banner1 point
-
Jim's ringadinging1 point
-
time for some panelvan particularisation! put the motor back together with the supposedly recon head from aforementioned engine collection, im no expert but looks a lot nicer, can still see toyota logo stamped on valves, rockers move a bit more freely etc, used oem gasket and the arp headbolts and pushrods from head-donor, and lower thermostat-holder thingy from the old head. I laugh now but when I fired it up, immediately a loud & terminal sounding knocking resounded, after extensive jerking about turned out to be the valve cover needed to be .027mm to the left to stop a rocker tapping it! Is now running like a dodgy 70s sewing machine, i.e beautifully. Also put the windscreen in, used the ol string trick which quickly devolved into the "steal missus good crochet-hooks and use them like tyre levers" when my crappy string broke. Used swearwords as lubricant. This led to the revelation that the windscreen wipers are in fact still operational, in all of their glorious 2 speeds (one of those speeds being "off") Have some more bodging in the works so should have another update soon
1 point
-
Oil pump Perform throttle cable inspection and adjustment. Remove the R, L body cover. With the throttle grip fully open, it is fine if the alignment mark of the oil pump position and the control lever are in agreement or within the range of 1 mm on the throttle opening side. Start the engine, open the throttle grip slightly from the idling state, and confirm that the control lever operates almost at the same time as the engine speed increases. For adjustment, loosen the lock nut of the control cable, and adjust it by turning the adjustment nut. Do not adjust the alignment mark of the control lever to the closing side of the body alignment mark. The discharge amount of the oil decreases and adversely affects the engine. Even if it is adjusted to about 1 mm to the opening side, there is no hindrance to the engine. When the synchronization is bad, the following phenomenon appears. When the opening degree of the oil pump lever is too large. White smoke or start failure · When the opening degree of the oil pump lever is small, Piston stop.1 point
-
Instead of sleeping last night I spent way too long sharning with the owner of a small performance garage in Japan that specialises in crazy power Gyros and Dios along with the odd Kei car. Super helpful guy to talk to, he was amazed at someone playing with a Gyro in NZ. Thanks to some advice from him I scoured Yahoo and UpGarage Riders for some specific bits and pieces, a few messages with a friend of mine in Japan and there ordered, paid for and soon to be delivered to him to be on-sent to me... That's enough about that for now though, got to keep a few surprises for later! Pic-less updates suck, so check out these suave mofos1 point
-
Overview from behind with new coils fitted. I figure there's no bonnet on a motorcycle; so if you've got to have it, you may as well make it a feature.
1 point
-
Was tired of the torsen lsd starting to open wheel getting into works driveway so made a plan to build a bit of a Frankenstein diff. Bought a front diff out of a kia sportage to get the 7" ring and pinion out of it which is 4.778:1 ratio. Got a factory non-turbo FC clutch type lsd from USA which takes the 7" ring gear and has the same splines as the mx5 axles. All of this was bolted into a MX5 housing which allowed it to bolt straight in. Car accelerates a lot nicer now but the speedometer is 12% high even after changing to a different speedo drive. Got some Dunlop Direzza Zii's for the rear to match the fronts then went on a charity cruise up to Paihia. After the cruise we camped out at Matauri bay then I decided to take the scenic route back to Auckland starting from Cape Reinga.1 point
-
Dam, talk about a thread revival!! So Sqengineering put out with the goods, I have been waiting ever since he started talk of the j160 adaptor plate some 2 years ago. Whilst at it, I ordered the water relocation kit, 70mm stacks/trumpets, throttle linkage kit, C.O.P plate & dizzy cover for all the blaang. No excuses now, have basically everything there to mount everything etc. Sweet times ahead1 point


.png.8c880082c7828e04f162a00220cdef64.png)


This leaderboard is set to Auckland/GMT+12:00