
Leaderboard


Popular Content
Showing content with the highest reputation on 07/05/16 in all areas
-
Just a quick little update. After having completed a fair bit of rust repairs to Sams latest Datsun acquisition I moved the Viva back onto the hoist. It was nice to see an emptier workshop with plenty of room to swing a fluffy cat. Not that I would. But I could. If I had to. Spot Hannah’s triumph waiting for attention… While I had a bit of time to spare that evening and was in a cutty, weldy sort of mood I decided to sort out the new battery position. Having removed the ugly old tray from the inner wing in the engine bay. Into the boot we go just like in Viva one. But this time I want to have it mounted below the floor level to maximise the amount of luggage/bike/bails of hay space in the back of this little wagon. Luckily there is a nice area of nothing just to the left of the fuel tank. I decided to take that nothing and turn it into something. Like a battery box. This area here… ..had this box here… ..slotted through the newly cut hole in the floor like so… ..creating a tucked away place to hide the battery… With that done I filled in a couple of tiny holes and stood back happily admiring my Viva wagon that is now pretty much rot free. Yay. I celebrated by hoovering out all the grinding dust and neutralising the surface rust. The following day Hannah pushed the car out into the sun and painted it with epoxy primer. It looks much neater but I forgot to take a photo. You’ll see it soon. Back to engine bay. I finished sanding back the filler primer to a level I was happy with. Its turned out pretty good and should be a good enough base now for the top coat finish. I’ll leave the car out in the sun to warm it up before expertly applying my spray bombs for a professional orange peel finsh. Next job was to fix the tailgate (hatch..) and its turned out to be more solid than I first thought. I’m still not sure why the car came with a far rustier black one fitted. I figure it was purely because they original one might have suffered a broken window so someone just swapped in another tailgate rather than swap the window. Luckily the this original coloured one is the more solid one so I’ll just swap out the window and refit it once fixed. To start with Hannah spent some time sanding and scraping off all the flakey crusty bits so I knew what needed fixing. This was the worst bit here.. ..which I cut out and repaired the inner skin.. Then I folded up a new outer. It was cold in the shed tonight so I have been wearing my best hobo fingerless mits. I forgot the fingerless bit when I pressed against the repair panel and preceded to tack it in place along with welding my finger. I smelt the burning flesh before my cold brain registered the pain from my now not so cold finger… I finished welding it in and that was it for tonight. The warm housetruck beckoned. I few more little thing rusty bits remain on the tailgate and then I’ll fix the frilly bits on both door. I’ve also been investigating the engine and I’ve removed the inlet manifold to but and weld so I can tidy up the ugly breather hose routing etc. But for now its back to the fireplace and cup of tea.10 points
-
Throw the shortened bellhousing in the bin/Trademe. Or sell it to the Stockcar guys. Those bellhousings have their origins in stock car racing and were made to allow them to run a standard short input shaft (six cylinder) three speed gearbox behind a Holden V8. This is because the genuine V8 gearboxes were often expensive and hard to come by. If you use this bellhousing your column-change linkages will not line up so you won't be able to select gears. This is very time consuming to fix as the linkages aren't designed to extend further and still operate in a way that will allow successful gear selection. Best avoided. You are correct in saying that with the proper V8 manual bellhousing, the only other things you will need are the correct clutch and flywheel, a V8 length gearbox input shaft (and shaft cover) and a set of standard V8 HQ-WB engine mounts. With this combination, everything will bolt in, line up and your current three speed manual linkages will still work as the gearbox will not move relative to its original position. Holden 3 speed manual gearboxes were used behind both V8 (253/308) and six cylinder (161, 173, 179, 186, 202) engines. The V8 version has a longer input shaft than the six cylinder version. Apart from that there is NO real difference between the two gearboxes. They are of equal construction and strength. Many people think that the V8 gearbox is stronger but this is untrue. They are the same, only with a longer input shaft to account for the shorter overall length of the V8 engine when compared to the six cylinder engines. The three speed gearbox is called the M15, regardless of V8 or six cylinder application. An M20, M21 or M22 Four speed V8 input shaft will not fit the M15. You will have to find an input shaft specifically from a V8 M15 three speed gearbox. Or better yet, it may be easier to find a complete V8 three speed M15 gearbox. The wiring loom itself will remain unchanged. The only parts you'll touch are the positive feed to the ignition coil, oil pressure sender wire, coolant temperature sender wire, Starter motor wiring is on the same side for both V8 and six cylinder and should reach both. You'll need to earth the V8 engine from a different point though. Either way, the wiring is extremely simple. Let me know if you have any other questions. Cheers.6 points
-
Took possession of my new donk the other weekend. Acquired this as part of the deal I did on the Hemi engine. It was on TM under Listing #: 1095158136 This will work way better for me than the other motor ... simpler, cheaper and should not break my ching ching gearbox. Bring back the old days I say ... 4BBL's, 4 speeds and 4.11 geared arse ends.6 points
-
Cheers KY I just made a little video clip,4 points
-
4 points
-
3 points
-
This sentence requires some amending: Alright alright, so maybe this doesnt make much sense compared to turbo or supercharger or whatever. And maybe some pessimistic people will say "Carrying both fuel and oxidizer in an old car is an idiotic idea and you're going to blow up" Well guess what? Lots of other things have carried both fuel and oxidizer on board without major issues. The Messerschmidt 163 Komet carried Hydrogen Peroxide as an oxidizer. It featured an impressively low rate of dissolving its pilots (less than 1 in 10) which was better than any other rocket powered aircraft in service at time (none, therefore it was the best) The Challenger spacecraft flew NINE successful missions with both on board, before having a minor fuel/oxidizer interaction issue on the 10th: Also lets stop and consider that the titanic didnt carry an oxidizer on board, and yet it killed way more people than both the Komet Challenger combined... And didnt even do anything cool like shoot down bombers or fly around the planet. 0% success rate! As you can see from the above evidence, Nitrous is not only highly entertaining, but also has only a very limited probability of causing your vehicle to explode. It's far from a certainty!3 points
-
A small update this time. I am swapping my tail lights for facelift ones. One of the issues associated with this is that the boot release lock is located behind the tail lights. Due to the different design of the lights the original lock is not usable if you install the newer facelift lights. Of course you can simply put in a facelift lock but then your original key won't work obviously. I thought I would try to re-pin the facelift lock using the pins/wafers from my original lock. To do this I went to a junk yard and found a facelift boot lock. Here are two pics showing the lock with facelift and pre-facelift lights. Pre-facelift: Facelift (Note that the lock now needs to protude much further because the light is now over it): Old lock on left, facelight on right (Tail piece actuator has already been removed from old lock in this pic): In order to remove the barrel the front cover must be removed: C clip holding actuator must also be removed: Now the barrel can be removed, to do so insert the key and pull it out (doesn't have to be the exact key for the lock): Original lock has a cover which was too difficult to remove with damaging, perhaps replacement cover can be found but I wont be using this lock anymore: Original on left, facelift on right (Note: facelift lock uses 7 pins while original uses 6 but still have the slot for 7th, at least on mine): Key in original lock, notice that all the pins are pulled down into the core (flush) allowing it to spin in the barrel: Alternatively the same key placed in the facelift lock, see how one pin is not pulled down all the way. This prevents the core form rotating in the barrel: Pic showing how key is inserted in pins/wafers: Pins/wafers and springs removed from both locks, as mentioned before the original lock had 6 pins while facelift has 7: Here are the pins/wafers from my original lock fitted to the facelift lock, make sure to remove the spring from any slot that is not being used or else it could come loose and jam everything. Cleaned everything up too. It works! Oh and why all this effort? Here are the original pre-facelift tail lights (sorry for shitty pics): And now the facelift ones:2 points
-
Someone's gonna need to bring sand to soak up all the leaked oil2 points
-
i stumbled across a sweet vid of some indonesian dudes who built some sweet looking cafe racers. was wondering how they got the bars so low, as it couldnt be clip ons because these forks are so small in diameter i dont think they sell a clip on that will fit (26mm or something ridiculous). me and chunk found that we if we flip the bar mounts we can drop the bars underneath the triple clamps. bloody tight squeeze! not looking forward to taking it apart again. lost a bit of turning as well cos mounts hit the tank collar but no one turns the handlebars that much anyway. this is what it looks like with tracker bars, i think some drag bars will look super sweet now that i can mount them all low and such2 points
-
spit is assembled Dont forget to bring some firewood if you have some2 points
-
So, finally got this down on the ground again yesterday! Front springs were sitting way too high, even after driving around for a few km's so I'm taking them back to Archers to either trim properly or get another pair made up. So the cut springs are back in the front temporarily. Rear sits perfect though, and the shocks keep everything captive too. All new front steering bushes, tie rod ends have made it feel like a nicer car to drive too. May be selling this soon too, will see about garage spacing with the new (older) car. http://oldschool.co....n/#entry16031152 points
-
Sheeeeeeeeeeeeeeeet. Build thread almost off the second page. Must mean I have been super lazy........ heh Anyway, I decided the inner guards offended my eyes, so scuffed them down, and resprayed with rattle cans in satin black, in my make shift bake booth. worked a treat! would say that also came down to the previous black paint smoothing everything out. Also acquired the engine covers I were missing, Huge thanks To Toy-mota And beaver for hooking me up. makes me happy. Then came the time I thought I might try power up the ECU and see if my engine check light was working. It wasn't. fuck. traced some wires and checked powers. found when I had my relays plugged in, power to switch the ECU was dropping to 6V. hmmm....... fuck it, at this point I bit the bullet and did what I had been trying to avoid, moving the relays and extending the wires so it didn't look like a bunch of shit under the dash. Glad I did, looks so much better under there, and now my glove box fits without hitting the relays. rad. Also, connected one of the spare wires I had run over to the drivers side, to the ignition switch, instead of pulling switch power off A random circuit under the dash. Turned key, heard relays click, engine light came on. Success. So atleast I now know It should run when The intake manifold goes on. Which I painted today, and will fit tomorrow. So its getting there. Maybe not as quick as I need tho as all these changes are taking up more and more time. Plus I spent the weekend over in Masterton pulling apart a commodore with KK him self. Was fun2 points
-
Did a little photoshoot2 points
-
Maggie's been chugging along nicely, no issues really except a loud banging noise on the motorway on the way to Zebra one day. Turns out most of the wheel nuts on the back left were close to falling off the end of the thread Picked up Samdash17's twin carbs and exhaust so double doort incoming. Might get a hold of an ultrasonic cleaner to give them a clean - should be a nice addition to the bae. Let us know how much power and simplicity we are losing here.2 points
-
Just turned 32 and to give you ideas for what He likes . Choppers, Vans & Tattoo's2 points
-
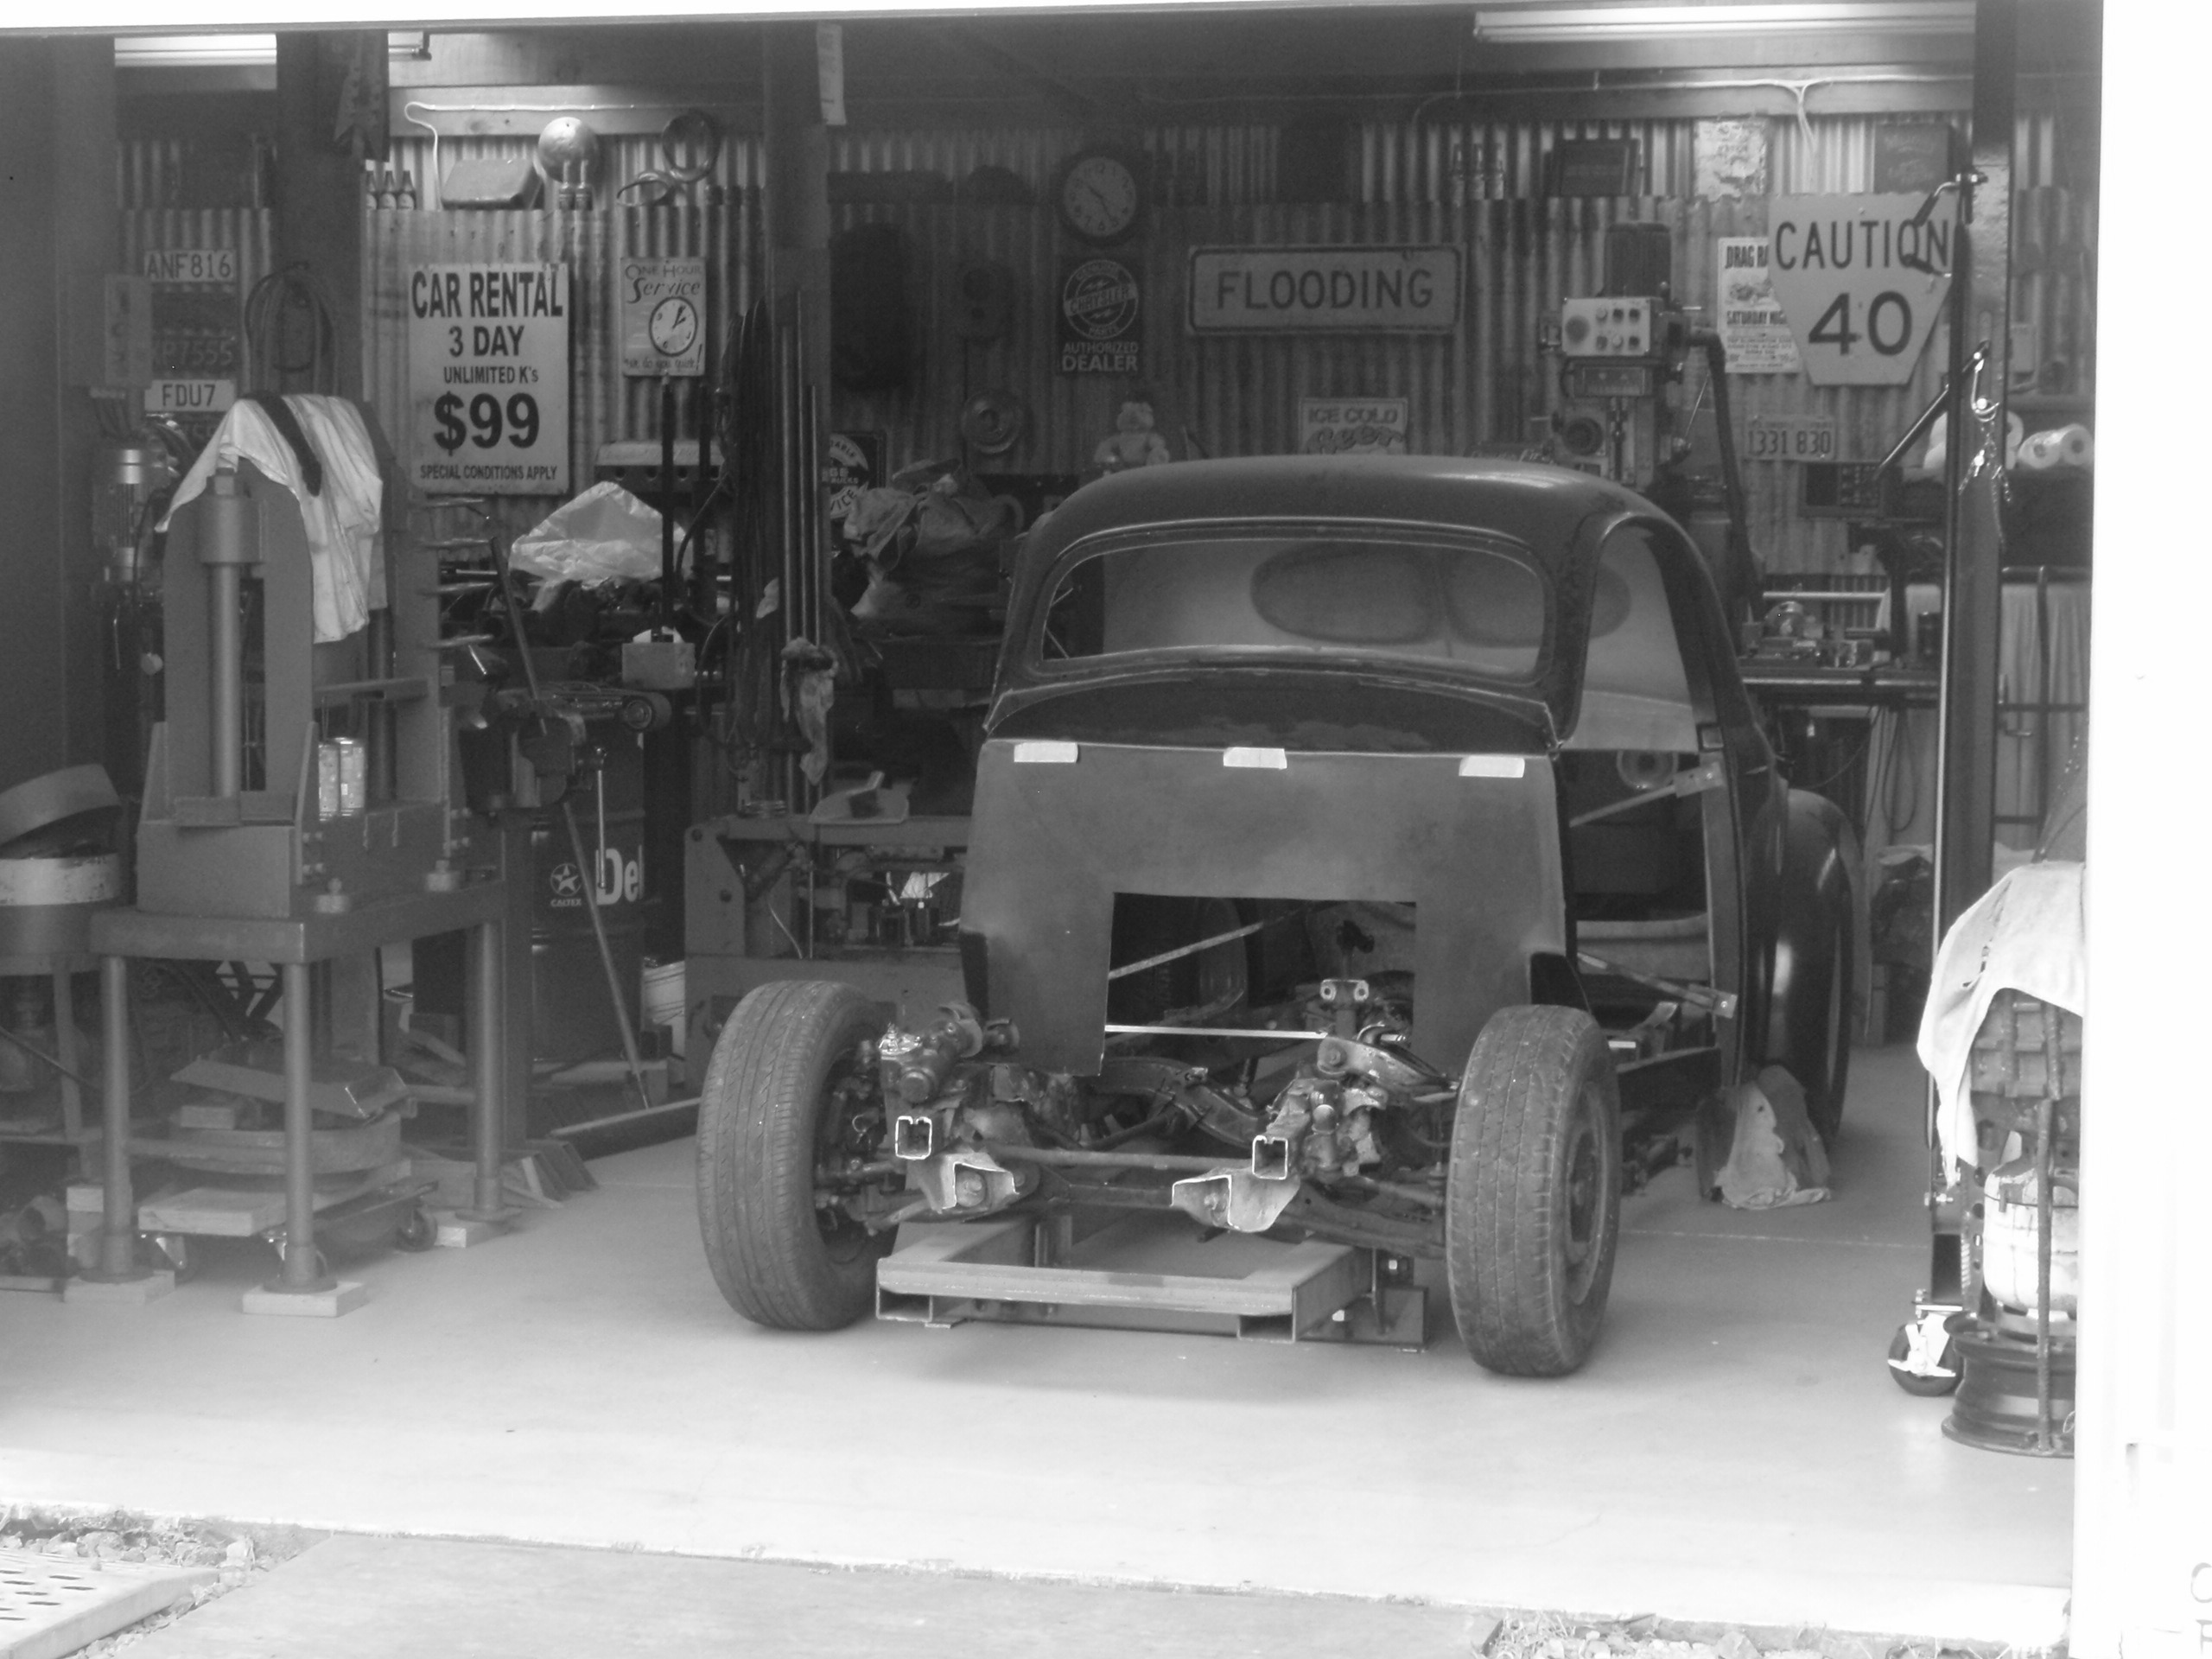
Shedrat Engine plate construction RB Chrysler/A833 in Hilux chassis Front sparkplug behind front axle CL Fabricated rear torsion mount and crossmember Diff works Co owner and assistant
 1 point
 -
Love my adubs, a true foamer will always spot a pre facelift though1 point
-
I will bring a frozen leg of wild pork for him1 point
-
I've got wood for this! and firewood1 point
-
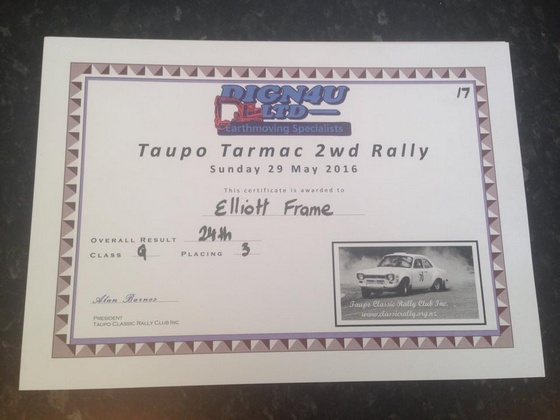
Certificates and a shout out to Uniscreen for my paid entry into the next Taupo Rally in August Thanks to Alan and the crew at The Taupo Classic Rally Club for running such a fun event and for the action shot below
1 point
-
Just use some of the leftover KFC napkins from the South Auckland gang rolling by.1 point
-
I think it is about time I drag the Falcon along and be more than just a username. Lookin' forward to meeting you all.1 point
-
I do. You can have it for $5 maaaaaate.1 point
-
Looking forward to seeing how this works out. It's like Need For Speed in real life. You have to get a colored purge going.1 point
-
Yeah should be fun. It'll be a few weeks away though as there's a few bits that I need to order. Getting stuff from the UK works out pretty decently at the moment haha.1 point
-
Measured it. The diameter from outside edge of the rim to the opposing outside edge is 400mm exactly.1 point
-
Yep so long as the engine is OBD0 everything from your existing loom will plug straight in except for the mentioned dizzy. The onky thing that may differ is the fan switch for the radiator, your old engine should have had it on the back of the block near the oil filter sort of, Im pretty sure the dohc zc had it in the same place but if not you just need to lengthen the wires to the thermostat housing. I stuffed up my original loom when I put the B18c in (obd1) and ended up using a DOHC zc loom with a few extra wires attached so can confirm that it will all plug into the chassis no worries.1 point
-
Rad! That drop looked pretty steep1 point
-
All I can add is that rather than changing linkages and driveshaft you could maybe just move the engine back 30mm. Easy.1 point
-
I will also come along! bring the anglbox out of the shed1 point
-
i have a nitrous related sharn a guy i know was tuning a wet system 'still rich, ill jet it down' 'still rich , ill jet it down' 'still rich, ill jet it down' 'oh look the bottle is off, ill turn that on' 'bang nunga nunga'1 point
-
Made an arduino based carb balancer using an aliexpress pressure differential sensor, took all of 5 minutes to balance the dells Bar graph just tracks left or right depending on the pressure differential between the two inlets which are hooked up to the carb throats.1 point
-
Bahaha! Nitrous gets a bad rap because it's sold in kits which are literally just hook it up then people "Spray and pray" when you go WOT. From a generic kit where there's zero fucks given about the particular engine etc its running on. And I believe there's a tendency for people to get greedy because its so easy to just upsize the jets and hope your motor doesnt blow up. (and then it does) In most of the above situations you've got zero consistency with activation rpm, zero compensation for bottle pressure, zero control over ignition timing/knock, zero control over a leanout, etc. With ECU wizardry, in my opinion, you can cirumvent all of these issues. (Once this is finished I will have used up nearly all of my inputs and outputs) Example: -Do not activate if bottle pressure is too low -have a fuel map based on rpm and bottle pressure -switch off if lean or knocking -leave nitrous fuel map on for "safety overrun" after nitrous has stopped spraying -have a minimum activation rpm -only use in 3rd gear onwards etc. With some understanding of its operation, and running as a dry setup (so injectors provide the fuel instead of a random spray from a nozzle) I think I will be able to get some fairly precise and repeatable results. Cant say for sure, but that's the fun part. I've got a good plan in my head already but I would say 90% of my time setting this up before first operation will be setitng up smarts in the ECU rather than the physical install.1 point
-
Have been trying a few more things with this engine. with more fairly disappointing results. / kinda boring update Firstly i brought some bigger cams, since going from the stock cams to kelford 193-b was quite a big improvement. have gone next step bigger with 193-c cams I initially installed them to the factory marks. which resulted in big loss in power everywhere. except the last 500rpm or so. ended up with the exhaust retarded 10degrees and the inlet advanced 20degrees. Which gained back most of the losses. but still slightly less power everywhere except right up top, over the smaller cams. Then I started to pull some of the car apart so could dial wheel the cams, to see if they were ground slightly off or anything. as was initially too lazy to do this. Got a bit carried away and pulled the head off and did some more port work, both on inlet and exhaust side. got my china on a copied some pictures of Hasselgren's work, who built atlantic 4age's back in the day. Back together with the cams dialed as they were, maybe some minor gains from the port work. nothing really measurable but definitely not a loss. But it turns out when i dial wheeled the cams, the inlet was way off. 20degrees retarded, which is 1 whole tooth on the cam wheel. Kelfords had managed to grind the cam 20 degrees off. So the whole time i thought it was running 20degrees advance, it was actually dialed to their recommended settings. No big drama, skipped the cambelt a tooth to regain the adjustment on the camgears. Dialed in 10degrees advance on the inlet. along with the 10retard on the exhaust cam. which just happens to be the same settings i was running the old 193-b cams at. After all that, some not bad gains through the midrange. but almost nothing up top over the smaller cams. something its restricting it making anymore peak power. ive pretty much tried everything bolt-on wise, so pointing the finger at head flow, larger valves maybe required to go any further Pink lines are old cams. Can see the rpm plot, the green (new cam) line starts to pull away slightly. plus its using more injector d/c for same fuel ratio. Indicates some gains. This is the top row of fuel map. bottom grey-ish line is old cams. top grey one is new cams. green line is different length trumpets on new cams. ignore anything below 4000rpm. Can see how gains are very minimal up top. Tbh is going the best it ever has. but not giving up just yet.. Oh and the light toda flywheel is awesome. revs so fast in lower gear now1 point
-
Heaps of progress today; Weldy weldy Some 75x6 flat bar to tie in the horizontal and provide mounts for the seat frames, this size was chosen specifically because I had some in the steel rack... The passenger seatbelt stalk needed a mount that wasn't just a hole through 1.6mm steel. This is the bolted on engine cover.. the same thing was done factory on the drivers side engine cover so should be gold. Pretty much sorted interior wise. Next on the list is the bracing underneath to mount the other side of those chair brackets. This should be a nice wee lounge, I will set up some tables to go between the front and back seats on each side;1 point
-
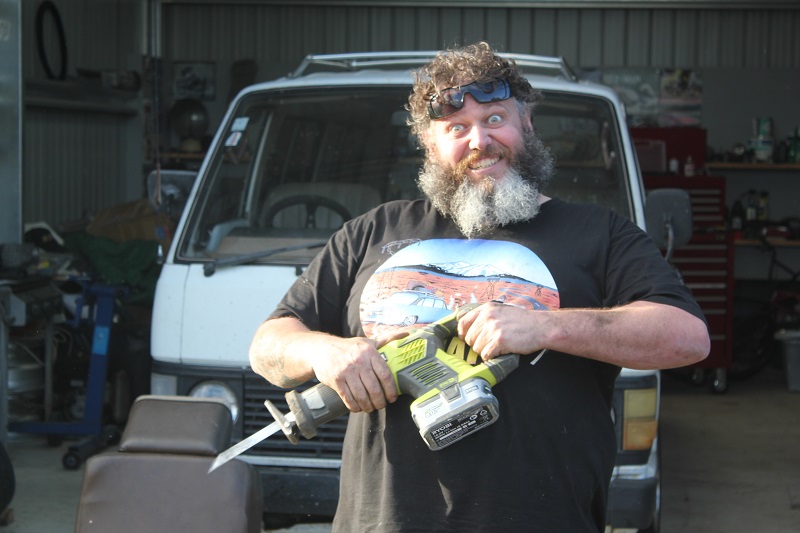
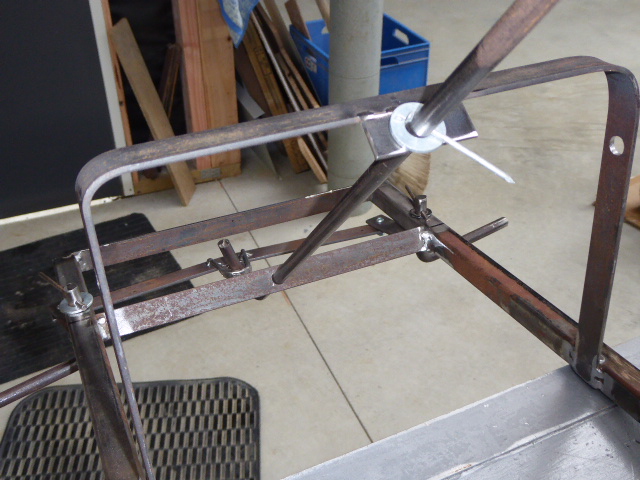
I needed some nails so I put together this nail reclaiming machine to salvage some from all the pallets lying around Porirua1 point
-
Cool, yeah I have heard that from some other people who have used him as well. Hopefully there won't be any surprises but you never know1 point
-
Im building a pedal car fron scratch this time,mainly so I can get good at fabricating and welding for big boy cars.Welding 3 mm steel is definitely much easier than 0.8 mm steel .The steering rack and column look good and work great the rear axle was difficult to heat and bend up ive only got a gutless torch at present so will need a bigger one if I keep on this track.
1 point
-
So uhhh more things have happened, though I have very few pics because my sd card has been failing for awhile and I didn't notice. Dave and I ummed and ahhhd about the shitty UJ angles, and it was clint who gave us the idea to use cv joints from a commodore driveshaft. So we crawled around under some smelly commodores and fetched the sloppiest driveshafts zebra had to offer. I don't have any pics of what they looked like factory but here's what an end looks like. The adaptor that bolts to the cv and slides into the gearbag Here's the adaptor that bolts between cv and diff. Got some aliexpress exhasut wrap and did a thing. Lots of grunting, swearing, hitting and drilling and driveshaft loop is in. I wanted to move the spring perch forward so the diff can happily sit back further, threaded rod tells me where to put the centre of the perch. So It was about now that I got real unhappy at how much toe in it had, and I was real eager to have a go at fixing it, unfortunately my phone didn't save heaps of pics. How to bend diff: 1) remove everything not a diff case and make a jig around it to stop it flying into orbit when the welds break. 2) remove centre bits from diff head and spin up some bushes from delrin to replace the carrier bearings 3) spin up an "axle" from a piece of bar 4) put the things in place and now you can measure where your "axle" is sitting in the housing and use secret dave maths to calculate camber and toe 5) use bottle jack to abuse the diff case into submission 6) measure, success, marvel at the simplicity After this, dave very kindly donated his steel barrels and tyres (bruh skids on) for me to make some wheels that fit, I don't have any pics of this either but it briefly features on snapchat (thanks pooman) So yea grind the flange from the barrel that used to be there from a previous life, cut the shit out of a townace centre and hydraulic press that bitch in. Bolt onto car, adjust offset and run out with DTI magnetted to a mazda engine block and you're good to go to glue it together. Somewhere in amongst all that, dave sneakily tightened the shit out of the gilies and I believe it's tuned to a high c? They look absolutely perfect on the car, I couldn't be happier. Huge thanks to dave the tame machinist, he didn't choose the brap life.1 point
-
i got a warrant!!!! its taken a damn while but Its been a long time between updates, reason being nothing much has happened while i've been waiting for my bonnet to be repaired. All that was needed for the wof was brake pads and bonnet rust fixed. After having this sit for so long with no bonnet (months) while it was getting fixed several average things happened to this seemingly cursed wag 1 - one day after moving around in my driveway the water pump decided its had enough of life and split its seal and subsequently drops half the water on the ground. Lame. Luckily i kept the new one that was on the other 1geu i replaced with this engine. 2 - Apparently spark plug threads aren't water tight when rain water sits on them for extended periods of time..... must have been pretty close to fucking itself because when i tried to start it one day it locked up solid! oops! with that shit all sorted it was time to put my sexy rust free bonnet on and get a warrant. Then upon returning home from said warrant the engine started loosing a substantial amount of power which was strange after it ran so well untill then. Had normal power for about 3-4 seconds after i buried the accelerator and then died down to almost nothing until i bcaked the throttle to about 1/4 . I decided this was probably another fuel blockage .... boy was i right Might be time to clean the tank out! And that's where I'm at right now. Must be time to lower it finally1 point
-
Not a lot to talk about but I have taken some pretty pictures of neatness caused by previously manky areas being covered in one uniform colour. Painting I believe. I have continued to avoid painting anything outside of the engine bay in order to keep the ‘pulled from a field’ look. However Hannah has painted the floor. This I approve of as it keeps it from getting worse plus when the time comes to tidy up and modify the wiring I have a nice tidy place to do it from. Some photos for proof… The floor surface rust was first neutralised.. The following day with the car wheeled out into the sunshine we both set to work. Hannah painted the floor with an epoxy primer while I covered the engine bay surfaces in a high build spray putty. I was expecting it to be yellow but instead it turned out to be almost exactly the same colour that I had painted my Rx3 in. Oh the memories… When the sun disappeared the car was rolled back inside and I sanded back the spray putty. Its come up pretty smooth. Way nicer than I had ever planned for this car so that will do then. Next dry sunny day it will get a topcoat. Hannah wire brushed a load of other engine bay bits and Ive now readied them for some paint. Then reassembly can start. The only rust work left to do is the hatch/tailgate and I also need to make and fit a battery box under the boot floor. We are both keen on getting this car on the road but its still only getting little bits here and there around paying jobs. Evening work has not really happened as much as planned. The shed is too cold/truck too warm to stay out late. Its just so enticing to go inside and have cups of tea with a fluffy cat in front of the fire. I shall try to improve my efforts….1 point
-
Nominal mate, thanks for the info awhile back re schedule line pipe and threaded rod. I pulled out the bits and pieces I have been collecting today and had a go running a tap up up the pipe. Did one and it turned out ok. Ya can't do it under power eh unless you are friggin coordinated, lol! This was my experience anyway. 1" UNF is big stuff eh? I have to make a jig up that will hold everything in alignment so i get consistent results with everything. There is a pic above of my pig and a motor. I sold it this week. (the motor not my pig) As part of the deal I take possession of a 500ci RB bracket engine. Will suit this car wayyy better for my intended use. Things are moving again! Churr.1 point
-
I dont have anything intelligent to add, but this would make a cool T-Shirt or something1 point
-
Ahh - finally! 8 or more weeks ago I ordered some axles. Took the long way to get them to NZ by using surface freight instead of air. Worked out cheaper this way for me. They still cost me close to $600 kiwi (each) when all was said and done. They are beauties though. Currie 1541H 35 Spline Big Bearing. I ordered special HD retainers to allow me to run a fabricated disc brake system. I have chosen to run this size of stuff due to owning a couple of Strange Nodular Iron race heads left over from previous times. I was going to sell them then thought wtf - run them. I work with Hilux axles most weeks. This is the difference between the two. I considered making my own but the challenge was finding a suitable core. Its hard trying to locate a shaft big enuff to take 35 Splines that is not attached to a big fuck off truck hub at the other end. The problem with this is that by the time you turn it down to a car size you are in the soft portion of the axle - so ya fucked. Anyway ... progress.1 point
-
Took Maggie down to the Beach Hop over the weekend. Ran like an champ the whole way - only issue was the gross old heater hose finally gave up (nothing a quick trip to ripco couldn't fix). Got plenty of love despite having half the number of cylinders. Cool to see a few familiar OS faces too. The cops decided she didn't have room for 4 people across the back...1 point
-
Got tuning done, needs to go back soon to get the top end done, since we didn't want to rev it too high too soon. Any suggestions on what oil to run? I'm guessing some mineral oil with plenty of zinc?1 point
-
Made the exhaust, was too loud as it only have one Coby resonator and just a straight pipe out the back. So decided to make a muffler for it, since I couldn't find anything the style I liked. So here's my guide to making a muffler haha Press some end caps. Drill a lot of holes in some tube and then louvre them. Weld on baffle for the expansion chamber. Wrap tube in stainless steel wool and then stuff with fibreglass. Weld on end caps Polish. Then fit. Is all welded now and have painted the tube black, just waiting for some flanges to go just in front of the diff, otherwise I'll have some difficulty trying to get it over the diff to fit.1 point
-
Cleaning the shed floor during her apprenticeship1 point
-
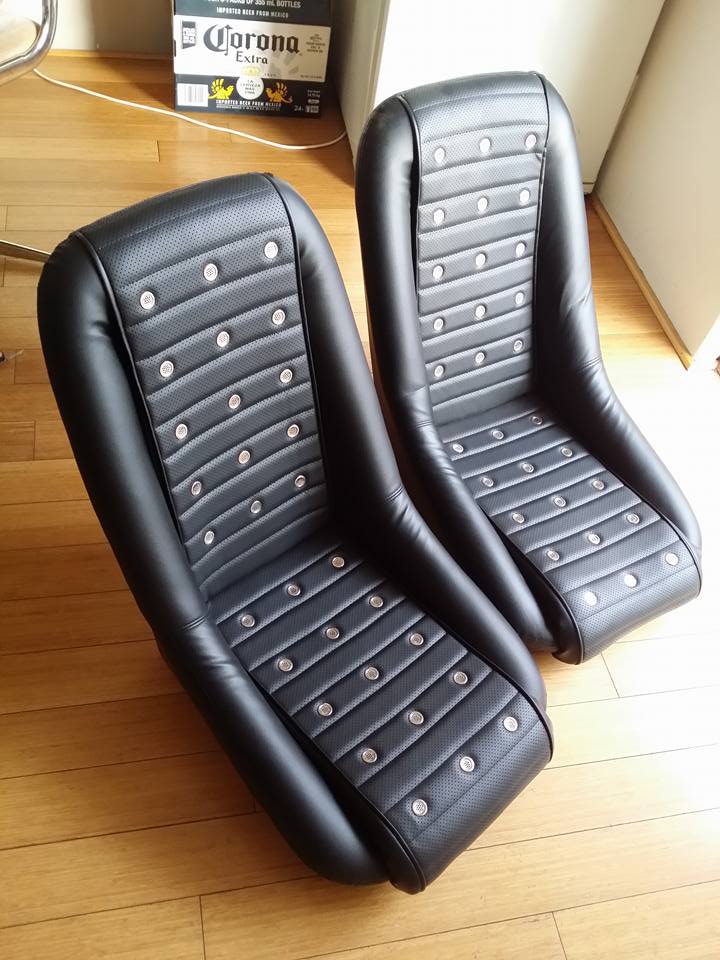
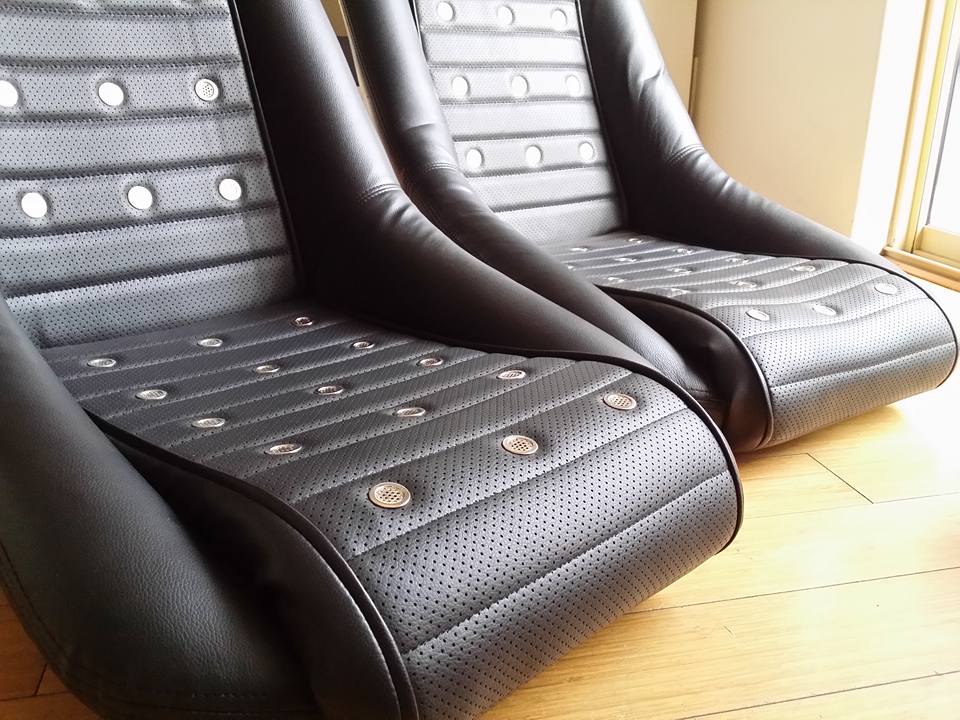
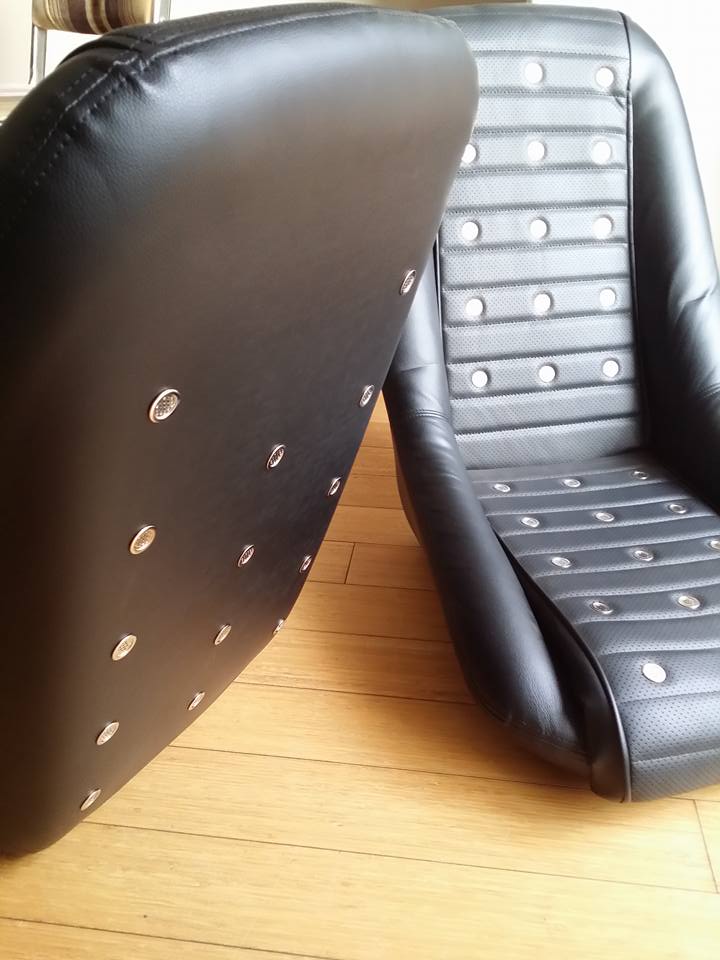
I've also picked up these sweet retro racing seats. Luckily they happened to pop up on Gumtree (Aussie Trademe) just 10mins away from where I live. Paid an arm and a leg for them but still much cheaper than getting something similar out of Japan or America. They're a similar style to the optioned Hakosuka Skyline/Datsun 240z seats. They are a very small frame so once again I only just squeeze into them - means I cant get fat and fat cunts wont be able to ride shot gun so no biggy. They also came with one headrest so will need to get another made up as I doubt i'd be able to hunt one down online. Have also hunted down a replacement rear seat as my original was stolen. They will be getting retrimmed at some stage to match the fronts .
1 point


This leaderboard is set to Auckland/GMT+12:00