
Leaderboard


Popular Content
Showing content with the highest reputation on 08/17/15 in all areas
-
So I've been looking for a hako for about 4 years now, keeping an eye on the prices and how quickly they seem to be appreciating in price as the world notices them (thanks RM Sotheby's) and with some hard saving I've been able to finally make a purchase. The car is a 1971 2000GT with L20 engine and 5 speed. Unknown ks, bit of rust around the place (wouldn't be one without it) but overall a fairly solid start. I purchased this from Restored.jp who some may be familiar with, they make aftermarket FRP and carbon parts for old cars like that Hako. This was the owners personal car.. whether that's good or not is yet to be known but it's a nice story anyway. I'd be interested to have contact with other owners of Hakos in NZ as it would be handy for parts and general networking. I'll be working on this in stages (as I'm now broke) to get this up to road legal spec.. More to come but I've already figured a couple things I need to do before it's even here ! I understand there are several in NZ already, any coupes or road legal ones? Discuss: //oldschool.co.nz/index.php?/topic/49704-mlracings-hakosuka/14 points
-
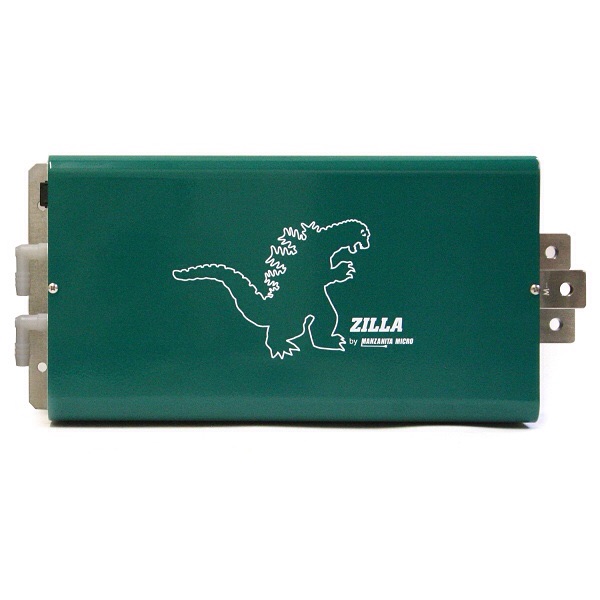
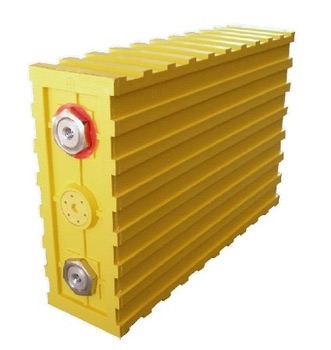
So a simple rundown We will have 2x Warp9 motors series wound DC. These are pretty much your electric forklift motors but pack more punch. They put out 150kw and 360Nm each. Any more in this chassis and it would snap in half! They'll look abit like this minus the transmission. We will also have a special motor controller the Manzanita Micro Zilla 2k-HV which is the EV equivalent of an ECU, this will allow us to shove 192v and 2000amps into the motors. We also have Li-ion batteries 192v of batteries, which is 60 batteries with 160ah of storage. The result will be an overly torque beast in a overly light but robust KE70. I call it KEV70 or just Kev. Now I haven't talked cost much at all. This KEV70 is largely funded by sponsors we have: ETCO Kumho Tyres NZ Good ride Tryes NZ Geraldine Auto Restorations Barber Well Drilling Electro flash Hammer Hardware. Along with my after school work at the local convenience store/dairy. Which has left the project 75% funded. We are looking for just the last few grand to pay for batteries and we'll be ready in November to debut this beast and its 300kw and 720Nm of torque.
 11 points
 -
Progress, I should really charge my proper camera instead of using phone photos.8 points
-
Aaron's one in chch6 points
-
have done a few things on this in the last while. killed myself replacing that donut, changing engine mounts, new brake lines, making driveshaft hoops and making welded on (instead of U bolt to diff) swaybar mounts in a overfull garage during the coldest week of the year Then about a week ago pushed it outside for more room and put it on stands to fix some issues with fitting the new tyres as i had to remove the factory wheel spacers and then some of the bolts were bottoming out so needed to figure out what was stopping what etc. then while it was up I thought I better waterblast all that mud from the dirt track at nats off finally but I found some greeblies I knew had been hiding for some time so ended up getting carried away as per usual5 points
-
I got a coupe last week. Black with a oil.cooler.on the front bumper . It's a hotwheel got it from countdown. But m looking forward to seeing your progress.4 points
-
Got the lower airbag mounts all done. Chucked the airbags in. They sit good, just a little too close to the lower rear arm so might grind a little off. Cool video:4 points
-
Well it has been 41 days since an update. In that time I have done fuck all then with a shock I realised I had 15 days until I would be sleeping in this. Anyway since then I have got a) A towbar on the anglia Wof on the anglia (Possibly not in that order) As I cannot tow this up with my 2015 outlander to an OS Meet c) I have fitted the outer skin to the rear hatch (A temporary skin until funds allow purchase of another sheet of signboard) d) Built a bike rack holder (to fit last of all) I need to do the following e) Hinge rear hatch after.. f) Cutting the sides to allow rear hatch to lift g) aquire and fit locks for rear hatch h) fit weatherproof trim g) wire up lights and anglia for trailer lights/ check her alternator h) get WOF Hope the anglia does not die en route3 points
-
So.. back on the previous page there was an issue with coolant temps, thankfully that seems to be all good after the previous drive it must have burped a bunch if air as when it cooled down it sucked about 150ml of coolant back from the header tank. Also did a couple of 4th gear runs at 16 psi and now with a few degrees of timing in the map that my mate built up during our last work session.. Virtual dyno suggests 265 wheel kw but i think that is probably on the high side for that boost level it should be more like 220 I would suspect-although that compressor wheel is a bit of an unknown. Also I think I have tracked down the high pitched squealy vacuum leak to possibly a perished injector seat seal. Err pic for thread, as you can see we are in need of some rollcage padding shortly.3 points
-
Long time no update. Been using this heaps, mainly driving to work. Managed to get it down to a skid pad day which was fun, but wasnt really a lot of seat time. Lengthened my LCAs by 30mm, just need to get some new ball joints then car chuck them in. Bought a bride seat rail, tried my ractech on it and it would of worked if i didnt have a head, because of the really low roof. Ended up buying 2 bride seats and will sort out some way to fit them. Also bought some Mx73 BC Golds, mainly so i can get it at the height i want. Got TTT Automotive to weld them up and crack test them and put them in today. Need a pretty much whole new exhaust system to get it at the height i want because it hangs quite low. Have an idea what headers i want so will talk to Streeter about bringing them in.3 points
-
Owning a gokart has been a bit of a life long dream for me, so when 10-5 bought his new house and suggested we build karts to skid around on the paddock I was excited. After a bit of mucking around thinking about building one I ended up searching trademe and found a mad little creation. I happened to be sitting next to VG's mad 750cc kart project at the time and all the boys in Whakatane were in support of me buying the one I'd found, so I negotiated a price with the advertiser and god Lee to pick it up from Havelock North for me. It's powered by a 185cc 2 stroke dirt bike engine and 5 speed box. It's a Suzuki and the pull start leads me to believe it's probably from an Ag bike - Probably a TS185. This how it looked when I picked it up: There are a few things to do on it... The engine wasn't bolted in properly, it only had one bolt at the front as the rear one didn't even have a nut. The seat needs to be mounted and the shifter was mounted on a ball joint which meant the shifter flopped around in all directions instead of just forwards and backwards. I'll be changing the direction of the shifter too since it was set up for 1 back and 4 forward - not very racecar! The clutch doesn't seem to disengage either, so I'll need to do some research on these engines and boxes to figure out how to get that going. It also needs some form of brake caliper to work with the rotor that's on there, a better steering wheel and some work on the steering setup at the front. So I need to do those things, mount the fuel tank, add an airbox and filter and we're away skidding. I had a play with it today and chopped a few things off. Here's where it's at: Need to have this finished in a month for Paddock Bash!2 points
-
Hi all, So, had a few borts and baznazas with the Grinter tonight and decided it would be a flaming shame to not hold a fathers day cruise this year! I for one being a first time daddy this year and also the fact that fathers day happens to fall on my birthday seem to think this is a fuckn fantastic idea! Wether it be to have some time out from the wife and kids, or just a good reason to take the o/s whip out for its maiden voyage of the spring season. This is not strickley a fathers only type thing, everybody is welcome, wife, kids what have you. Just think of it as the first cruise of the to be summer with some cold doobros and a snarler sizzle! Ideas on where to go and what to do are more than welcome! However in saying that, the rough idea we came up with in our 42 second conversation was maybe a early arvo meet (as dads are guna want to go to yum cha for lunch) in the northern wellington region, paramata inlet area? Anyhow, post ideas below.... Chur!2 points
-
If it comes to it, drill out the heads of the screws. The wheels hold the drums on anyway.2 points
-
The rollbar is probably a good idea. I'm not fitting a rollbar though...2 points
-
/ling out2 points
-
Screws wouldn't come out? What? I'm not Familia with the rear brake setup on these. See what I did there?2 points
-
You want to use an impact driver such as http://www.trademe.co.nz/building-renovation/tools/hand-tools/screwdrivers/auction-932372131.htm2 points
-
More progress . filling pin holes n anything missed . then re prime. Final blocking Wednesday / Thursday . PAINT FRIDAY all going well. The back needs to come down a bit I've got 2 inch blocks at home which I'll chuck in see what it looks like . Might be a silly question but I'll ask anyway . I haven't got any U bolts for my blocks can I use any 10mm threaded rod and bolt ? Or stainless steel ? Or is there proper hardened ones ? //oldschool.co.nz/index.php?/topic/42444-matteybeans-1978-rt104-corona/?fromsearch=1 Cheers2 points
-
Cool to see this on Oldschool. I remember reading in the news a while back about a twin headlight conversion being stolen from some students. Must have been you (stink about that). Keep up the good work. Looking forward to seeing this come together.2 points
-
If you are using bolt on parts the wof man won't know that it used to be auto.2 points
-
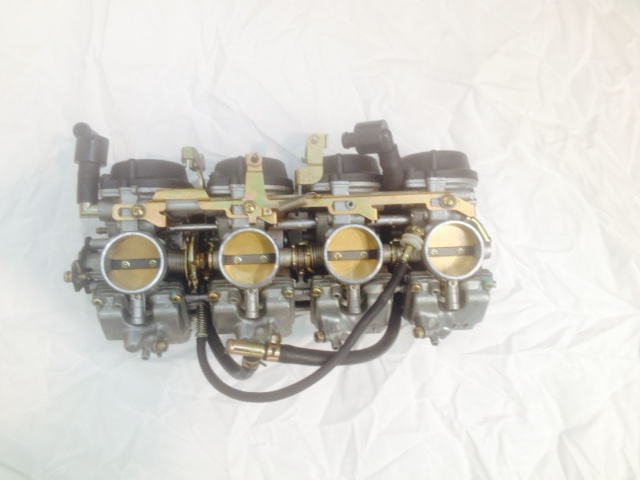
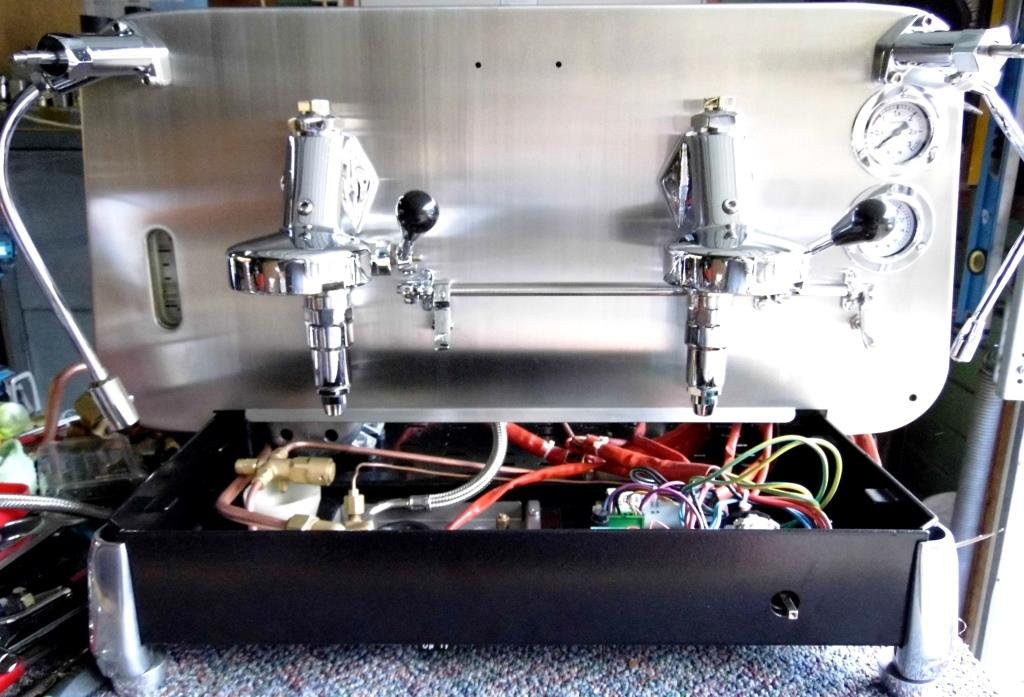
These bad boys just showed up all the way from Germany. In really good condition for the $$. So long to the terrible stock manifold.
2 points
-
Haven't seen or used one of those for years! can you explain what you are using for a signal and how its hooked up? To me, this looks like a dry joint for a starter, I think that is connecting to the wire link on the other side? try soldering that up better but be careful not to cook the diode with excess heat. If you're close to One Tree Hill you could always drop by and I can stick it on the Sig Gen and check what's happening + deal to the dry joint.2 points
-
You need to take your big boy shoes off, as they clearly don't fit you.2 points
-
2 points
-
Was this nessassary? Why modify an outdated old car?2 points
-
2 points
-
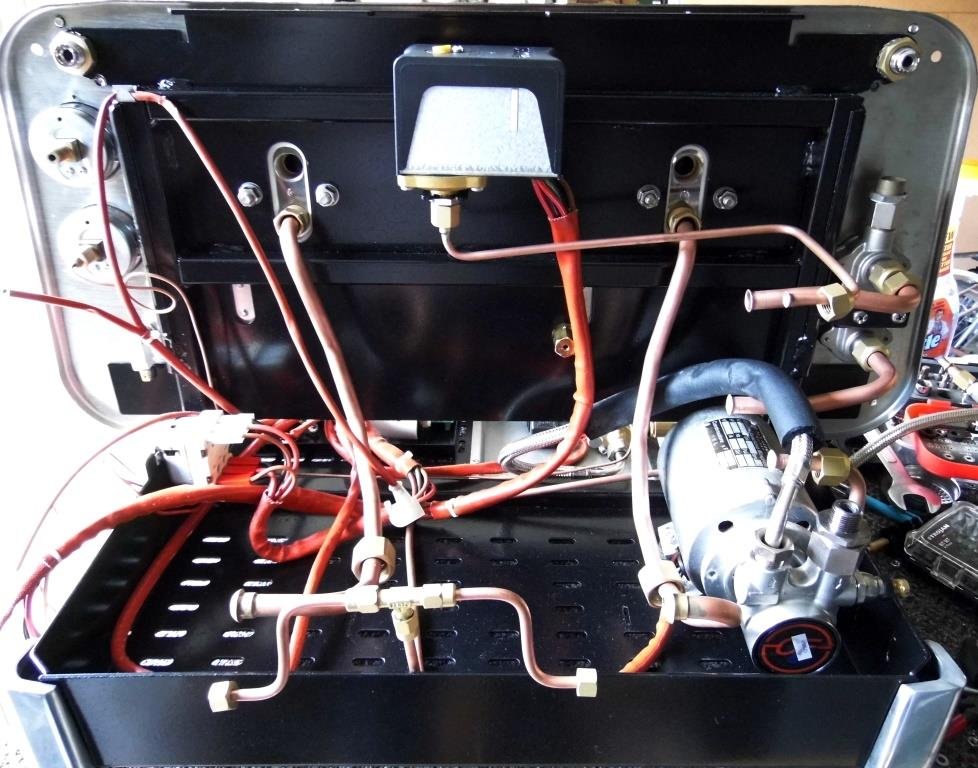
Lots going on still, getting through it slowly, All the panels are on, windscreen in. Took it off the hoist and fitted the truspokes for the first time on the paint, looks epic, stoked as with how it turned out! Had to get some 5mm spacers made up for the front of the truspokes to clear the disk brakes, and have had to get longer wheel studs as only getting 4 turns so got some of them on the way. Am pulling the front end apart to grease up and adjust and put together for the final time hopefully, Brake are nearly done just need to finish making the front lines, Steering column in just got to refill the steering box and refit then steering is done! Got a few bits on the water mostly lots of chrome but few minor things to finish jobs, Doors are going back together, had door handles rechromed so those are on, and had the catches and latches zinc plated as well as all the window winder mechanisims etc, nice and clean! Imported a full 2.5" twin stainless system with mufflers, just need to make a few brackets, was a heap cheaper than buying steel etc here and making! Already had stainless headers to go with. Should keep the underneath clean as!! Couple of pics (still no paint pics!!) Yarns over here ---------------------------> http://oldschool.co....westpala/page-52 points
-
Awesome!! I don't know if i'm just getting old but after watching that first video I thought the roll bar was a good idea?1 point
-
Any updates gents? Looking to buy one this week if no joy with the OSGC's1 point
-
30.7kwh battery by my caveman calcs, that's pretty decent! x 180 (if you can get Telsa prices from Panasonic) = $5.5k. 100- 120km of careful driving in that brick? FOLLOWED! Much excite1 point
-
Wicked shit man, cant wait to see some vids1 point
-
Tried to start the gay little thing lol. Friend Nathan came around, we started the day off with some creamy blue cheese on crackers and cup of tea, really to set the mood good. Made some pork rib dry rub in preparation for a bbq after the lundy 500 in a couple weeks then got down to business. Replaced oil, plugs, fuel (Jesus the fuel, it resembled coke when we drained the old stuff out!). Found this car has an electric petrol pump, sounds like a very small bilge pump lol. Enough about that, inspected the points, connected a battery up, tried to turn it over. *Clunk*. Unsure what I was thinking to be honest. Hmmm. Lets try 14 times more to see if it was just an off chance. *clunk*, nope. Still poked. Rocked the car back and forth, tried again, nothing. Another friend josh came over as he's an electrical genius, cleaned a few earth, ran some tests over the car for voltage etc. Tested relays, seem fine. Manually spin the motor over a few rototions with a spanner, still nothing. That sad moment you have to figure out how a Motor-Generator works. The silly thing doesn't have a starter motor, it has a motor and generator in 1. When you apply juice to the motor it spins and start the motor, but as it's spinning it generates power, so when the car continues to run, the motor's spinning and generating power. Oh Honda, you produce some innovative hunks of crap, but it's still very cool. Well next time I'll be taking electrical stuff apart and looking a bit like this while doing it as I really have no idea.1 point
-
So i took this vehicle into my work to get a Wof knowing full well it was going to fail as the exhaust was holding by a bit of wire tie that i had put on to stop the exhaust falling off And plus the old owner told me he always had got dodgy Wof's done on it. so went into work and they were to busy to do it now so went and gave it a wash inside and out but had to do outside twice as it had been sitting outside for awhile and had gathered moss etc couple hours later got a inspection and ended up with this bit of a list but i told him where the rust was and other things that weren't up to wof standard. couple pic's that i took in the workshop had done a couple of the repairs while i had it at work and also found some other bits that we had missed on the inspection but will do them anyway Anyone keen on having a yarn discuss here -//oldschool.co.nz/index.php?/topic/49713-piazzanoobs-1981-toyota-starlet-discussion/1 point
-
I pulled a few bits off the engine today for a closer look. After removing the self-mix pump cover I got a surprise - turns out it's a Yamaha, not a Suzuki as advertised. I'm pretty happy about this because Yamaha's are the shit! It also means that it might end up on the little Yamaha YB50 that I have sitting at Matangi.... After a healthy dose of grass skids of course. I'm pretty sure it's a DT175, which appears to be a bit more performance oriented than a TS185 Suzuki. An added bonus is that one of my customers is a Yamaha dealer, so I have a good parts source and knowledge base if needed. Under the clutch cover it's all nice and clean. I gave the clutch plates a wee wiggle and they don't seem to be stuck together, so I think the clutch should work OK after it's done a bit of work. I think the sticky clutch might be due to being a wet setup. I've cable tied it on which is a common trick and apparently it's also useful to run it up in 6th gear on a stand until the oil gets nice and hot, then it should free up. Looks reasonable under the pull start cover too. The CDI etc all seems to be in decent condition. Had a look through the exhaust port to get an idea of what the cylinder condition is like - there's a bit of scoring on the cylinder wall and a bit on the piston, but I've seen worse. I might pull it apart and give the cylinder and crank case a good clean out to make sure it's going to be all good. Next up is giving everything a good clean and then I can work on putting it back together and sorting out the steering geometry. Little bit of inspiration: http://youtu.be/Cv43JfE9_eg1 point
-
artyone I'm definitely interested as this rebuild is coming to an end, I've always wanted to do a one off build. Speaking to getting closer to finishing today's effort lead to a pre-fit of everything before I get the sealants out and fix stuff in place.
1 point
-
My students will be racing at the same event in November - unfortunately not in the same class! But they're only Year 11, 2 more years to get to this standard. We saw images at the most recent boot camp unless there's another KE70 being built up...1 point
-
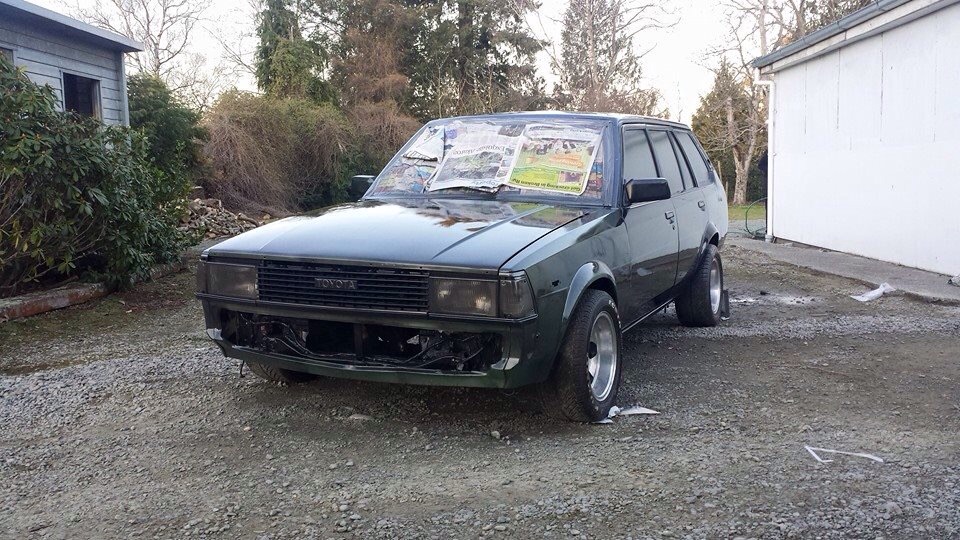
After this I set out to buy a new front end, and to my dissapointment and probably yours it won't be a twin headlight as I don't have the 1g+ to spare so I asked around and sure enough I found a straight headlight ( I believe also called the 84 front) so I got the spruced up and brought some plasti-dip to make the car look abit cleaner Then applied the matte black coat which turned our pretty beaut! Now the project is about getting the f series Hilux diff all setup with its drums and air shocks into the KE70 which is proving a challange but nothing I can't handle. Enough about the aesthetics and drive train, we need to talk about this crazy stuff we call electric powered.
1 point
-
An update from Wheel Fix It: Three of the four Buddyclub P-1s are still bent, and they've quoted a very reasonable price for repairing as well as machining the beads. Have given them the go-ahead to do the work and hopefully the wheels will be ready Monday or Tuesday. In the meantime, more elusive treasures have been obtained from Zebra: '89 spec (final facelift) LED rear spoiler. '89 spec wing mirrors, with bonus 4A-GE valley cover to replace the one that's missing from my engine (oddly enough). Anyone who followed my previous AW11 build thread will know these are merely cosmetic upgrades, but I'm quite chuffed as I wasn't expecting to find another updated spoiler and wing mirrors this early on. Now I just have to gamble on the likelihood that repainting these blue won't balloon the total cost above that of my original plan, which was to import the bits out of Japan in the correct colour. On the flip side the rear quarter is getting resprayed anyway as a result of the repair cert signoff, and if I get the LED on the new rear spoiler working before the car goes back to compliance I'll save further coin by not needing an aftermarket high stop light fitted anymore. Discuss: http://oldschool.co....1-sc-chit-chat/1 point
-
Ahh, the old brake pad falling out trick... Check your rotor thicknesses and keep an eye on your pads to make sure it doesn't happen again. I had an incident when racing Rhys's AE101 once at 160kph going into Higguns... The front of the car wasn't that happy about it.1 point
-
Next weekend the lazy Trimatic is comming out .....along with the engine and radiator. I intend on installing this stuff The five speed has had a recon with new seals, thrust bearing and the left hand thread bolt near the back. A suitable drive shaft from a VK that has been ballanced and will mate up with the five speed. VK pedalbox and clutch cable. Will also remove the clutch fan and run an eletrical one with an adjustable fan controller i picked up at the swapmeet. Skids on sunday all going well1 point
-
I read that whole thing in your voice... But yeah, that sounds rad.1 point
-
This is the first burn. You gotta turn your head sideways to look at the vid, lol! I am useless. The size, placement and amount of holes must just be about right. This ran very well 'straight out of the box' I used the same oil flow as I did for the big one. Also, this one seems to run hotter and with no tractor chuffing sounds. The paint didn't peel off the secondary pot on the big one like it has been doing on this one. I am planning on dressing this thing up with heavy iron in order to use the heat more efficiently ie a heat bank. http://vid528.photobucket.com/albums/dd329/race_hemi/P8150562.mp41 point
-
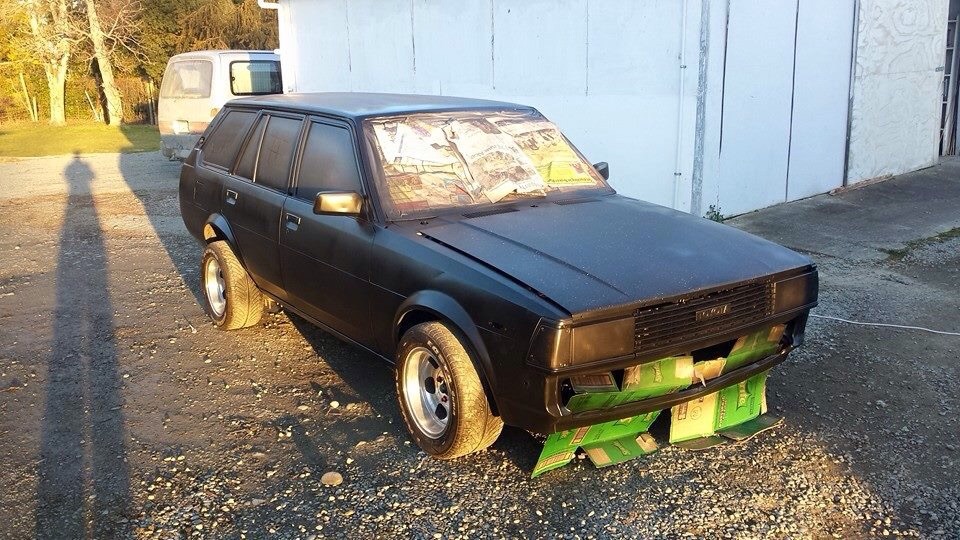
Texture black bumper stripes finally.1 point
-
Same as going down on Al's mum1 point
-
You only have two options really. 12a or 13b.1 point
-
Drawbar sure is long Will be great to tow/back1 point
-
Pic to show scale.. Kids are 5 and 21 point
-
Really? I like the lower half fully painted. Currently looks like the kit is off a different car. Looks like a fun hoon. I'd love to do similar to my ae92 wagon but alas to many cars1 point
-
1 point
-
Still gota get towbar fitted to my van before I can tow it lol. And yeah quite a bit work/bog ahead1 point


This leaderboard is set to Auckland/GMT+12:00