
Leaderboard


Popular Content
Showing content with the highest reputation on 07/29/15 in all areas
-
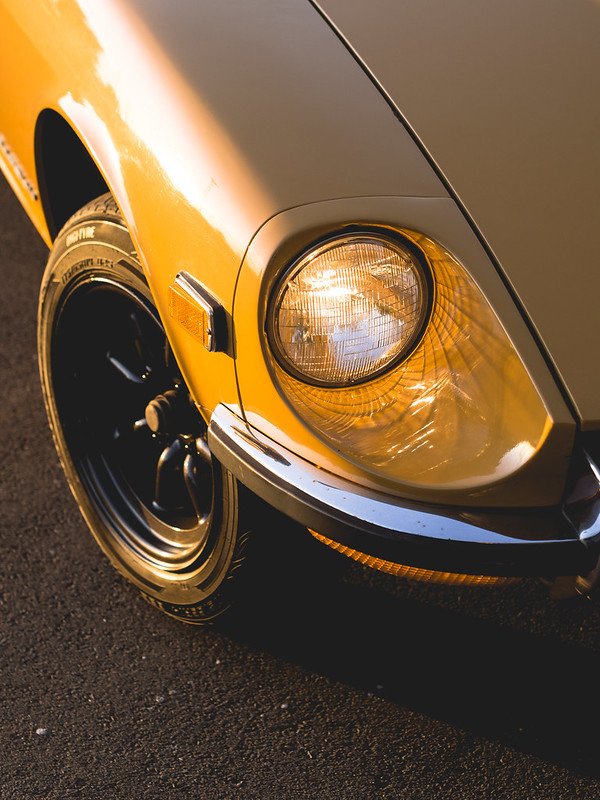
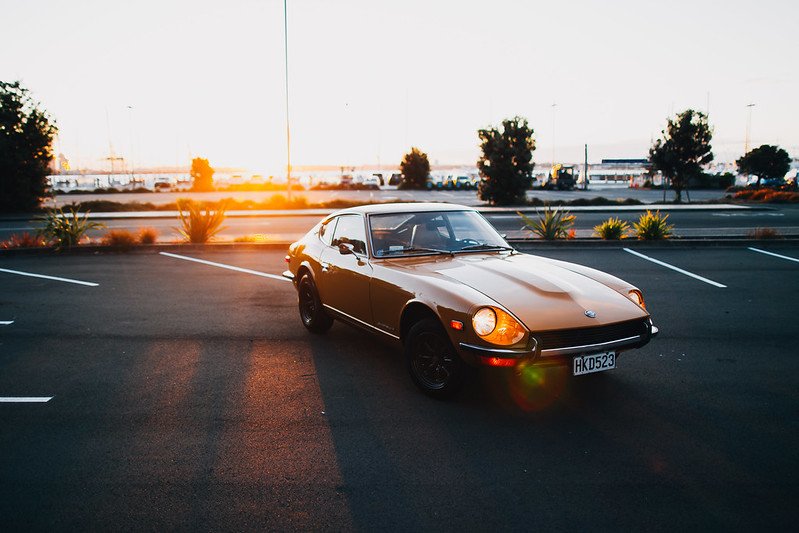
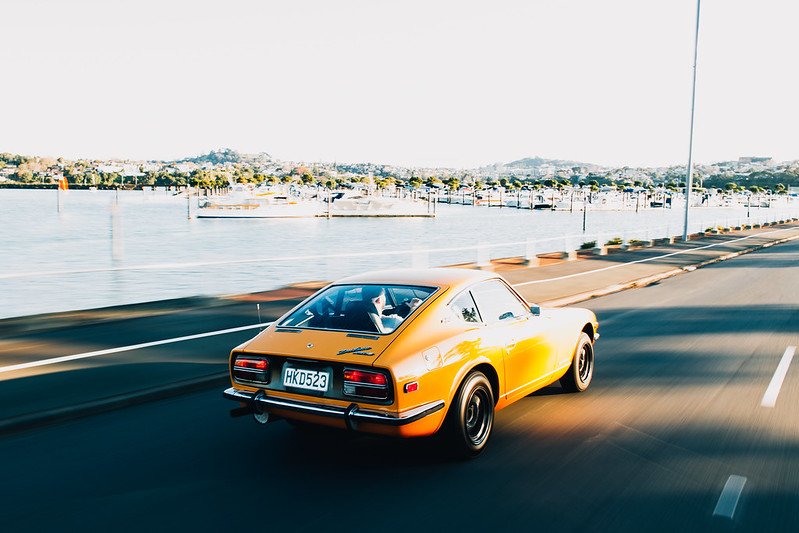
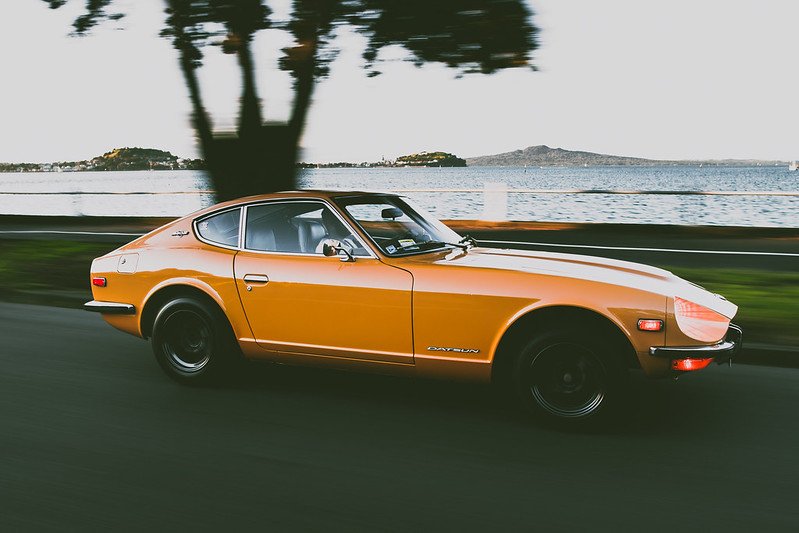
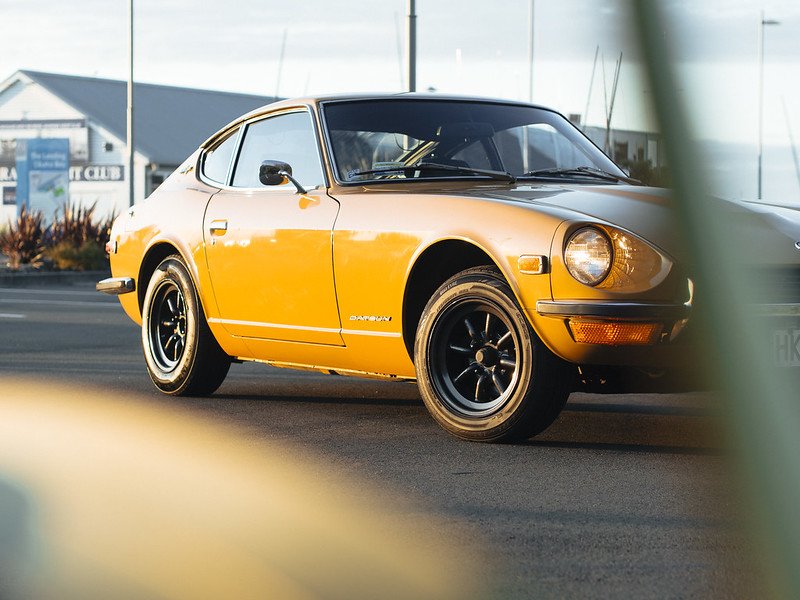
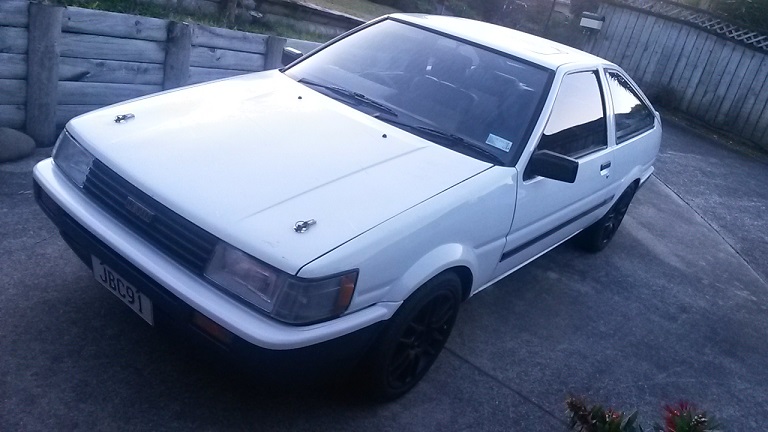
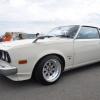
I picked up some wheels from Jessie on here, I just couldn't say no! the tyres were the complete wrong size but I rocked them anyway for a few months, 14x7et8 Watanabes. I really liked the small wheels on the Z, just needed some fat meaty tyres for the 70's racecar vibe. Went out for a photoshoot with a good friend of mine, lucky we finished shooting before the fuel pump decided to stop pumping! The sagging 50 year old rear springs are greatly exaggerated by the small stretched front tyres. The whole car sits very nose up, will need to be sorted. Its a tough balance between wanting to keep the car original, vs wanting to slightly modify and make the car 'mine'
 10 points
 -
both of the above parts have been moved to the next stage. the drivers door has now got some bog in it to make the shape right and its got another coat of primer on it. the boot lid has been long boarded with 250 and the shape is tip top so its got its final coat of primer on it. Untitled by sheepers, on Flickr Untitled by sheepers, on Flickr Untitled by sheepers, on Flickr8 points
-
Well she is still cruising around in this most weekends at netball, at heaps of car shows and the odd trip to the shops. I still havent gotten around to sorting out a nicer push pole or a gear lever and the lake pipes are still sitting in the garage somewhere too! She loves cruising around in it and her typical driving style is one foot on the wheel, kicking back and people watching. Few things to note if you are going to make one. Be prepared to be stopped constantly to be asked "where did you buy that from?" or "so cute, can I take a photo?" Because it is so low to the ground my daughter sometimes gets bored and decides she wants to pick up random crap of the ground or drag her hands through the dirt. Watch out in crowds, retards wont notice it despite being bright pink and could end up tripping over it and sitting on your child. Castor wheels are not that flash on rough ground. She rattles like a bitch sometimes. Might try to rubber mount the front castor but most places we take it are nice and smooth. Women think it is the cutest thing ever and flock to it, Dad's usually look very jealous and grandparents ask if she is wearing her seat belt or has she got a drivers licence. Few shots out and about Greeting Dodgy Uncle Hayhole and Auntie Laura on his trip to Australia Spotted at car shows:8 points
-
Suuuuurely....6 points
-
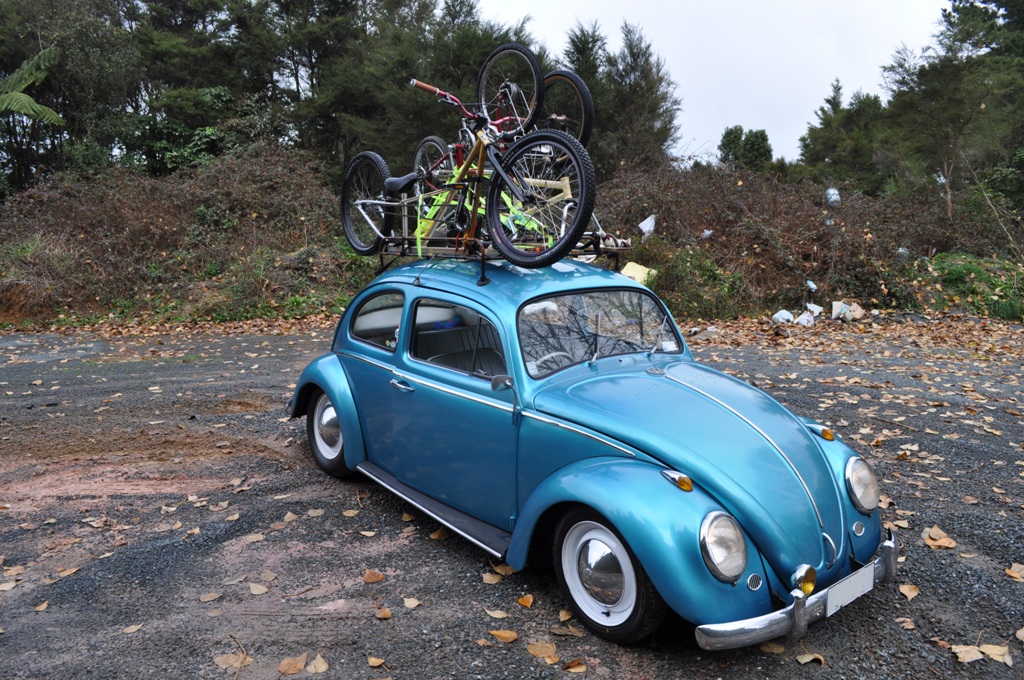
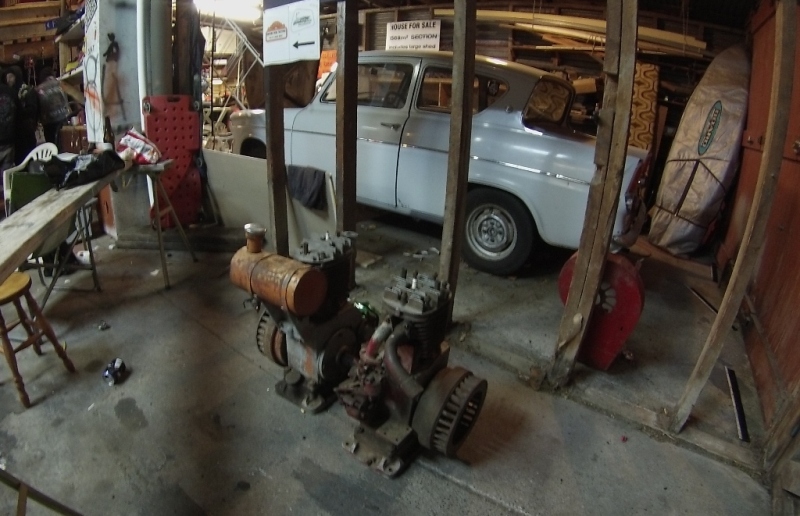
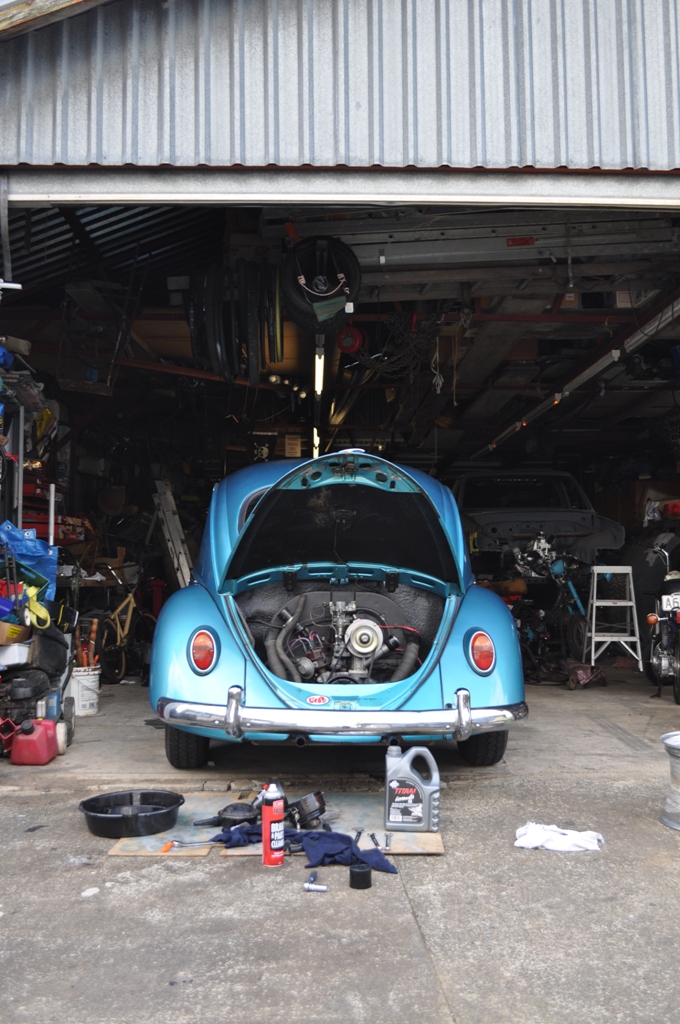
WHO SAYS BEETLES ARENT PRACTICAL Did a Semi freight run on the way down to gang summit as an excuse to cruise round and see some places/meet OS peeps. Had three bikes on the roof, A set of alloys and tyres on the backseat/trunk area for Mjrstar to drop off in hamilton aswell as stopping at gregs to foam my roofrack and tighten the bolts. THANKS GREG! Cruised on through to Taupo to pick up two stationary engines (that were alot larger that I thought) off Testament for Seedy Al. Took the passenger seat out to put them in Thats about all....
5 points
-
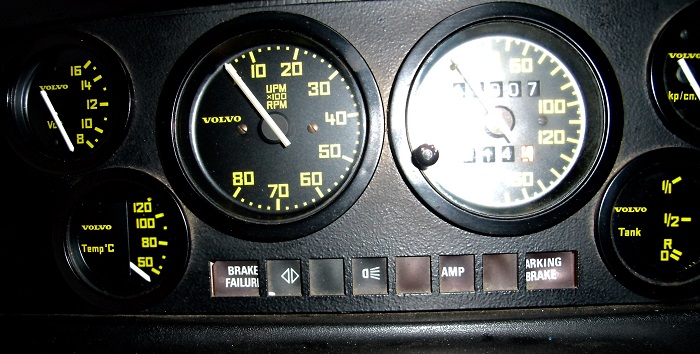
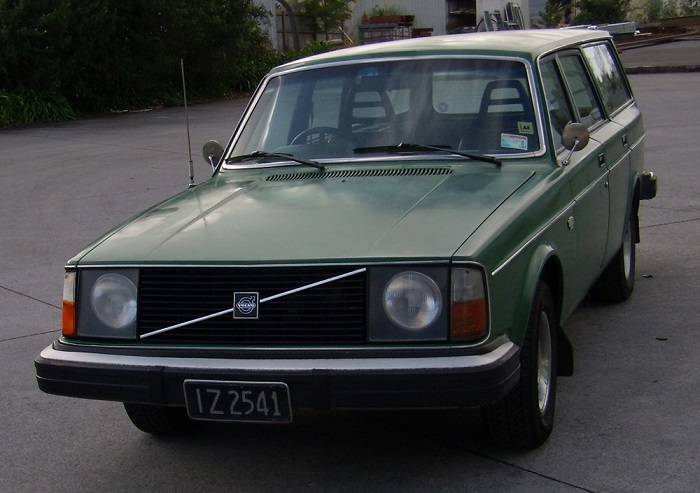
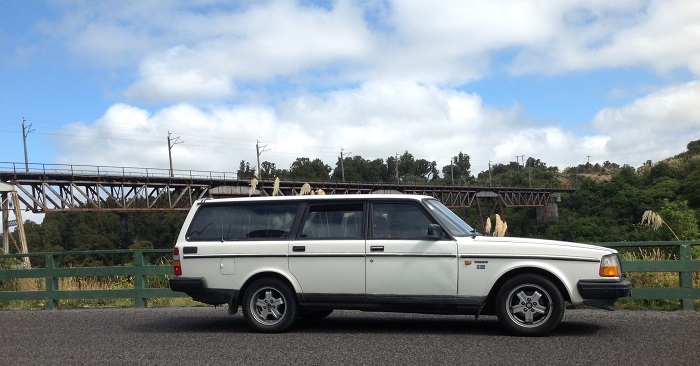
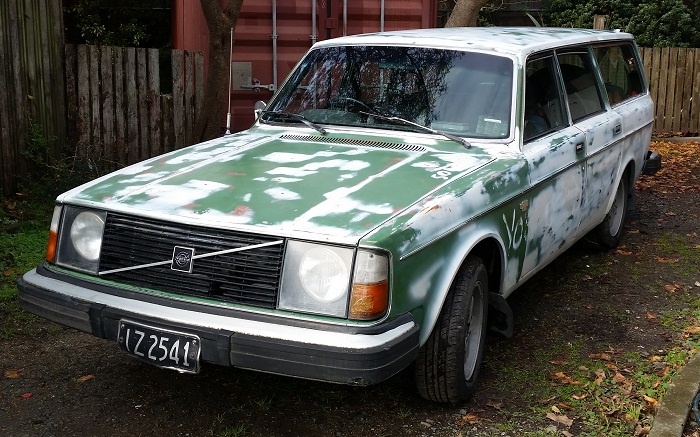
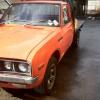
Eight years ago I purchased this car from a local Volvo enthusiast who had upgraded to a later model. Before that it was purchased new in Singapore by a NZ army officer who subsequently bought it back with him. At the time I had very little knowledge of Volvo’s (and cars in general) but needed a daily that would fit surfboards and drum kits etc. Over the next couple of years of really fell in love with it, travelled around the Coromandel, Raglan and across to Gisborne regularly when the surf was good. At this time it was in fairly good condition. For the Volbros it’s a B21(carb) with an M40 (4 speed) box. In my opinion the best looking of the 200 series. This car has a couple of unusual additions such as the plastic headlight covers, R-Sport Rally dash: and a compressor that raises the rear suspension, presumably for heavy loads. Not sure how it works or if factory installed. Investigation pending. Due to a change of circumstances I was no longer in a position to be able to keep the car. I ended up selling it to a young guy who drove it down to Otago to attend uni and regretted it ever since. Fast forward a several years and three Falcons and I was never able to shake the Volvo bug. I restored a very tired 1995 850 and then a 1988 240 (below) but I still missed my bug eyed green monster. 1988 240, B230E, M47, Black leather, Heated seats etc: In a desperate move try and find the car in 2014 I uploaded a photo to carjam with the following comment: “I would like to buy this car back, text me 022XXXXXXX” A year or so later, to my amazement someone text me. That someone turned out to be Nelson Oldschool Rep Sidewayssickness. He was kind enough to save it from a demo derby and even kinder to dismiss his sleeper build plans to sell it to me. I will be forever grateful to this fine specimen of a man. Unfortunately the last eight years have not been kind to the old girl: With the car being in Nelson in myself residing in Tauranga, Sidewayssickness had a good look over it to determine wof eligibility/roadworthiness and I decided to put it on a transporter. At this moment its still in Nelson. The plan is to get it transported to my parents house in Feilding. I have been waiting for the weather to clear and before doing so as I want to drive down to be there when it arrives to ensure its stored well. Once there a friend has offered to bring it up on a trailer in October. Known issues: Gauges don’t work Not running awesome Brakes not awesome Clutch not awesome Exhaust Leak No Drivers door glass (have replacement) Numerous electrical issues Rust to be determined I'm sure everyone reading this has regretted selling a car at some stage, but how often do you get the opportunity to get it back? Discuss://oldschool.co.nz/index.php?/topic/49418-jeezys-1976-volvo-245/
4 points
-
Slam and keep the chrome I reckon3 points
-
Slam.3 points
-
Are you suggesting because Dave has a vw he should dress like a hipster?3 points
-
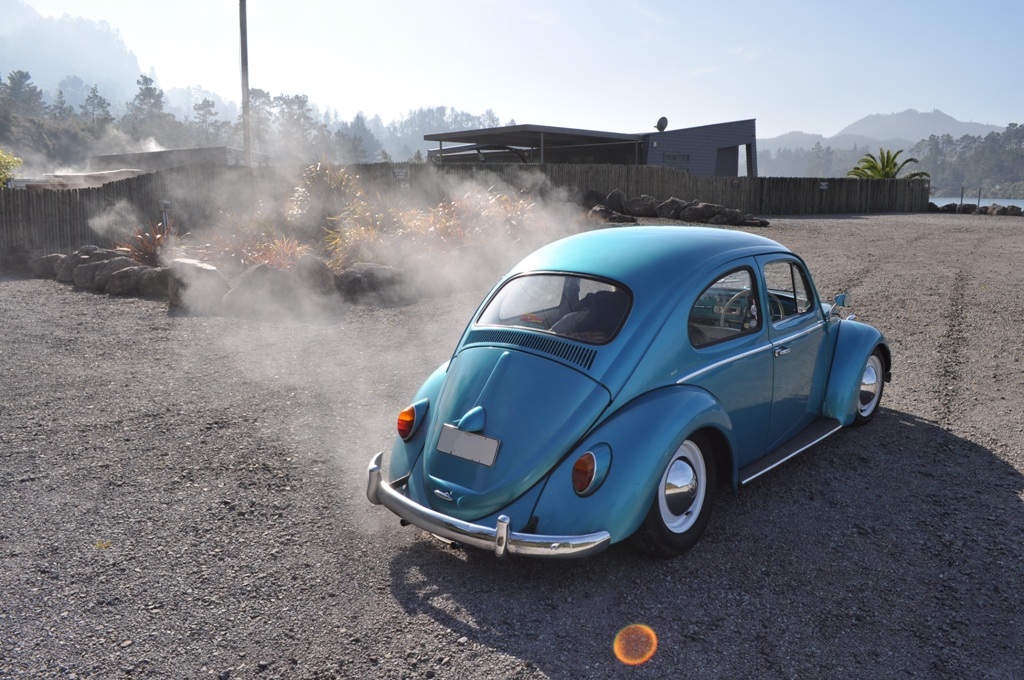
SO HOT ITS STEAMING? not really, I parked over a geothermal vent Been on a couple of club night town cruises with DMFV
3 points
-
3 points
-
Ok i have made a fair bit of progress since the last update. First of all i have drilled the holes in the rims for the spokes, all 400 of them! I painted the rims gloss black with base and clear. Then it was the job of cutting and threading the spokes and lacing all the bits up. All 4 wheels are done now which i am very pleased with because they are definitely the trickiest bit of the build. This was the tool my mate lent me for rolling the threads on the spokes. Its pretty old and i imagine it has done a few thousand spokes in its life. Rolling the thread takes less than 10 seconds. Here are some pics of lacing up one of the big wheels, i didn't take any of the small wheels as they are pretty standard. Put all the spokes in the hub The first side in with the nipples loosely on The other side going in I found the perfect jig to true them up in the scrap at work so i just tacked the bearing carriers on top of it. Truing up the wheels was a long job and the big ones took around 4 hours each to do with the 72 spokes to tighten up. And all done with the tyres on Mock up..... Next job is making up the front forks3 points
-
Knitted clowns, giant plastic baby with eyes that blink separately, just the regular stuff nightmares are made of3 points
-
with widened steels.2 points
-
12A, 18A, 13B, 20B, 26B2 points
-
LOOK WHATS BACK TO RESEMBLING A UTE. Next step is motor and box back in the hole/find rest of things
2 points
-
Last weekend, I needed to move the HZ ute, and decided to make an effort at starting to put it back together to try get a WOF on it. Chassis was yuck after being out in the weather (was like that when I got it) So I put some work in and made it look pretty...
2 points
-
Thanks BVB, I need to get them finished for the ride I'm doing in October. It's quite good knowing you need to get something done by a certain date or else you won't be able to do the event that you have already paid for haha.2 points
-
As previously mentioned, Id been having issues with the carb, It was at the point where It would drip more gas out the overflow than the thing would use when being ridden! A while ago whilst browsing Aliexpress, I had come across a listing for a FA-50 carb and though that was going to be the endall of my problems. but alas, The image on the internet looked slightly different to the carb fitted to the FA50 and with an expected eta of 20-30 days for shipping (because im cheap and didnt want to pay more for shipping than the carb) I wasn't entirely convinced. Then I remembered that on one of my rides back when this was running mint, I had scootered past a bunch of old bikes outside a dimly lit workshop. I jumped in the bug, and cruised on out the that area and came across the shop. Wandered in and had a chat to the old long haired guy that works in the shop with a majestic beard to see if he knew where I could get a rebuild kit for the carb. After a long conversation about the awsomeness of FA-50s, He said he wasnt sure where to get a rebuild kit, but if I dropped him the carb, he could probably sort the issues with it out. I asked what that would cost me... He told me an approximate price, My jaw dropped.... I raced home, removed the carb and dropped it back to him. Later on that week I received a phone call from him apologizing that it took so long to remedy, But hed got side tracked and forgot about my carb. (still talking about 3 days after I dropped him the carb so I wasnt bothered) He told me what I owed him and "Bring cash, I dont have that new fandangled EFTPOS" More FA-50 yarns and an exchange of less cash than quoted, I had one freshly rebuilt FA-50 carb with new a needle valve and seat. pressure tested and all set up ready to fit back to the bike! Got home, fitted carb, Kick started and started first kick! jumped on and went for a hoon round the 'hood. PERFECT. DSC_0349 by OR4NGE, on Flickr JUST PERFECT.2 points
-
Tried a new track over the weekend and my new rear swaybar. Even made some smoke And a vid https://youtu.be/g-6SIrj--fQ2 points
-
Few more pics with bumpers back on
2 points
-
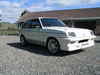
So been pining for a top Jap spec x7 series for some time, and finally found another goodie, with some subtle damage haha, but was cheap and ticked all boxes being factory twin cam factory manual and a wagon!! Also with the Cresta style front and all the other added top spec goodies. Brought it of the for sale section here on OS, was bit worried about damage but anything is fixable hahaha, so here it is Also brought three different sets of wheels haha, two sets locally and waiting on set from Japan to land at my door 14x6.5 SSR Casablanca 8 got three of them haha Pair of Impul mesh 14x7.5 -9 were 14x7.5 +11 buti did half hour worth of machining after work and some new stainless bolts so mounted centres from behind instead of infront which changed offset 20mm And waiting on this pair from Jappaland 14x7 -2 SSR F2s never seen any before these ones So missioned up to Chch and drove the wagon home last Fri went amazing drives so good, nice being coil spring all round Also picked up some parts for it while in Chch new rear door and rear guard cut So got it home nice and safe and then on the Sunday me and mate that runs a panel shop here in Timaru attacked it Then did big night on it down at panel shop this Fri night just been and got it all done, just need to put trim and bumper and tow bar back on, and booked it in for WOF this coming Thursday, then low and wheels!!! Pine time now Enjoy!! Next post be better one!! Thanks for looking2 points
-
Well, the bug bit again. I guess you could also call this thread "I lost my marbles and imported another shitty old car from Japan! Ask me (almost) anything!" Originally I wasn't planning on buying another AW11 for a couple of years... if at all. After owning five of them over the course of the last ten years and getting sick of repairing botch jobs on hacked-up local examples I firmly told myself not to bother anymore unless it was a truly tidy one, which meant most likely having to import one from Japan. Then a series of fortunate events including a career change, the sale of my Mazdaspeed Axela to a family member earlier this year (which freed up garage space and capital), and a strong dollar to yen ratio at the time all led me to engage Ewan from Stacked to check out a few nice looking AW11s on my behalf. Yeah, I'll admit that six months after selling my last AW11 the itch inevitably came back, so I'd been keeping a surreptitious eye on the car sites over in Japan for the last year to see what the market was like! After a few hits and misses I settled on a midnight blue hardtop from a yard near Tokyo called Marumi Auto which had low kms, very little rust, one careful owner, and had been quite well looked after. It wasn't cheap, and blue was never my first choice of colour (I was angling for either a Sherwood tone, white/grey, or white/gold example this time), but for the price nothing in NZ came close in terms of quality and condition, and after owning my last one the colour eventually grew on me. By some stroke of luck, this particular one had been specced with the much more aesthetically pleasing black interior instead of the default eye-watering blue that 99% of the midnight blue cars had! It arrived at Stacked's yard in Osaka around mid-May, having made its way across the country from Tokyo on a transporter, and Ewan made arrangements to load it on a RORO carrier departing in late May. Around the end of June the export certificate and some other documentation arrived, followed by a notification from Stacked's NZ based customs brokers in Tauranga that the car would be arriving on 11th July. The AW11 then spent the next week and a half on the wharf while Customs, MPI, MAF, and Land Transport NZ all poked around and carried out their various inspections in the name of bureaucracy. I was heartened by the fact that during the border check the car wasn't flagged for rust issues nor underbody damage! Then, finally, once all the Is were dotted, Ts crossed, and palms greased in the form of invoices paid, the car left the wharf on a transporter headed to North Shore Compliance and spent a few days there before I drove it a short distance up the road to the panelbeater where it now currently sits, and will undergo further inspection to pass a Repair Cert. Compliance revealed that the left rear quarter had been subject to a minor impact in the past (20 years ago or thereabouts), and because you could still buy replacement TGP panels at the time the entire section had simply been replaced. There are no marks to indicate the chassis had to undergo straightening, there isn't any cancer creeping in around the seams, and all the spot welds look good - but there are a couple of areas where surface rust has started bubbling (the join around the left hand tail light, for example) that will need to be cleaned up once the repair certifier completes his check. I've had very limited time to spend foaming over the car because of other commitments, so it was a nice surprise today to discover that it already sports a set of incredibly rare TRD lowering springs. I'd bid on some in Japan as the car was making its way over here and just barely lost the auction, so had been feeling a bit despondent about ever finding another set. So where to from here? I'm not all that interested in making the AW11 stupidly fast, but will eventually perform a few judicious tasks such as sprucing up the suspension further, now that I know it has TRD springs (some good Bilstein struts and a rear swaybar would be nice), adding a LSD, fitting a set of extractors I did manage to win ex-Japan, transplanting a few bolt-on bits I'd hung onto after selling the first '80S KID, and tidying up all of the little interior and exterior blemishes I come across. May even pull my Buddyclub P-1s out of storage, paint them a nice shade of bronze, and fit them to the car, and also hit up Yahoo Japan for any oddball accessories such as driving lights and roofracks that might pop up. Still undecided whether I want to go for a full period-1980s look similar to what I'm planning to do with squid (my Skyline sedan) but overall I'm hoping for a nice "clean-slate" build - not concourse spec but tastefully tidy and done up without a hundred things wrong or fucked with! Stay tuned for more. Discuss: //oldschool.co.nz/index.php?/topic/49412-80s-kid-part-ii-eds-aw11-sc-chit-chat/1 point
-
Placeholder/EOI thread for this year's Highlands 101 in the Cromwell/Queenstown area. I regretfully missed the 2014 event, but thoroughly enjoyed the inaugural 2013 one and have been looking forward to doing it again. Dates are Fri 13th through Sun 15th November 2015 which is the weekend after the 4&R South Island Champs so no potential clash there. Would be great to get the original group back together again, plus anyone else interested of course. It's been suggested that it would be cool to do some exploring/sightseeing as well, instead of spending the entire time at the track. Post general event discussion, accommodation and itinerary ideas here! Payment details: (use your username and "MEOW" as code/reference etc) $160.00 E. W. WONG ASB, Sylvia Park branch 12-3287-0025427-50 RWB- Paid Danger- Paid Orion Fels- Paid Birdflu- Paid i500gt-? 427carguy-? Nosco-? ? ? ?1 point
-
Cheeky scooter for getting around the city... Needed more noise... (Aprilla racing 50cc pipe)1 point
-
So i ended up buying another Chevette at the start of this year. You can check out my other Chevette here //oldschool.co.nz/index.php?/topic/25371-friendlyfires-chevette-hs-c20xe/#entry643012 which is still sitting in a shed in Nelson as i have now moved to Blenheim. Once i have settled down in Blenheim and have a decent garage, progress will then continue on that one. So my recent purchase was this lime green chevette (Registered as a Chevanne because it never had rear seats as was used by the post for deliveries) key features of the car is Sr20 engine, gear box, Isuzu Piazza Diff, Steering rack, front brakes. The car was very rough when i first got it, lots of broken and missing items (indicator stalk, window winders, center console, mirrors, bumpers, rev guage, gearbox leak, front brakes) but all those are easy fixes which have now been repaired. apart from one thing which i am having a very hard time finding which is the big rubber donut torque tube diff mount everyone that i have tried knows nothing about it and cant get them, the torque tube is isuzu piazza but im sure holden gemini would be the same? so any help with that would be much appreciated. The reason behind the purchase is that i finished uni last year and scored myself a sweet job in Blenheim but i didnt have a car on the road at that stage so instead of buying a cheap 90's jap car i decided to go old school as my daily and i love chevettes so it was a no brainer. The futures plans for this car is nothing crazy at the moment, will continue to tidy it up and add features to improve quality of life as im driving it each day This is the car as i got it Stole the springs and wheels off my other chevette as i am not a fan of driving the chevette on 17" wheels which scrape all the time and on springs pretty much touch the bump stops and get crazy bump steer. Heres the car after putting on wing mirrors, springs the raise it up, wheels, front and rear bumpers Father and sons car cruze, went out to marahau to catch up with Alex (yoeedynz)1 point
-
Buy my fe 2.2, do the bearings and stick that in1 point
-
Come on Alex, you know that if our motorhome racing team is going to race fairly, they MUST be Hino EH700 powered. Otherwise we would get our ass's handed to us by a Volvo v10 turbo, stockcar carrying 11 meter monster1 point
-
Wish my old cars were this rusty.1 point
-
yes correct. My white one does too, bit of a recurring theme? problem is they don't fit in either of my garages, too tall! Luckily I have free storage in a nice warehouse unit And it's 3x Transit vans, one ex Police LDV van, and 1x Econoline campervan. Oh, and an Escort van! I got given a brochure at the last Caffeine and Classics by an old guy asking if I wanted to join a vannners club! Couldn't think of anything that would excite me less......... But speaking of rape vans, check out this bad boy that a friend of mine just bought, makes the Transit look quite innocent and friendly! :1 point
-
Tried getting some more done on this last night. Got some rust cut out but discover more which i guess isn't a bad thing. Got one of the guys at work to make a patch while a couple of us bled the brakes and tried to balance them. It still pulls to the right so will adjust once more then investigate a bit more if that doesn't fix the problem. replaced castle nuts and split pins on the steering linkages. Cut and replaced tail pipe as it was next to non-existent. yet to chop it to length1 point
-
You must have an excessively large basement if you need two rape vans. Link for your balaclava collection? Great find, look forward to the build!1 point
-
You can never have too many... Fitted with aftermarket extractors?1 point
-
kinda keen on a knitted clown, if it looks like somethings wrong with it1 point
-
You are a very sick man......but I like it! Congrats on your latest acquisition1 point
-
Couple photos of the car launching at the drags last week. makes it look pretty fast even though it wasn't as you can see i also bought some new tires finally. ditching the fucked and stupid sizes i had. now has Nankang Prestiges 205/50/13, which i was worried would be pushing it for being too wide for the guards, but ended up being so perfect i couldn't have planned it any better. looks great with the white writing too.1 point
-
Apologies in advance for the potato-quality photos. Moto Gs aren't renowned for their cameras (but are good enough for quickly documenting stuff)! As mentioned, the main point of concern for the inspectors was the join around the left hand tail light where the replacement quarter panel met the rest of the car. Due to the exposure of this section to the elements (and the fact this is a 1980s Toyota) it wasn't all that surprising to see this when the tail light was removed and boot lip seal peeled back: You can see some of the spot welds in the first photo of the series above which need to be signed off by the repair certifier once they've made sure they are as good as factory. Back in Japan some attempt was made to mitigate or at least slow down the spread of rust on the inside of the boot. Appears to be some kind of putty/sealant. Anyone who's owned an AW11 before will be aware of the dreaded water trap behind the C-pillar vents. My previous AW11 was one of the lucky escapees and remained absolutely pristine in those areas, but the New Kid (on the block) ain't so lucky: Bwaa bwaaaaarp! At least there's no discernible cancer around the bottom of the C-pillars themselves. Finally, the boot cavity rearwards of the wheel arch will also need to be cleaned out and checked to the repair certifier's satisfaction along with the welds in this area. So far in terms of rust the New Kid surpasses all initial expectations, considering it's had a less pampered life subject to the busy, smoggy streets of Tokyo from day one when it rolled off the production line in 1986, compared to my previous AW that managed to escape Japan for the crystal clear highland climate of inland Otago in the mid '90s (and as a result had minimal rust). Discuss: //oldschool.co.nz/index.php?/topic/49412-80s-kid-part-ii-eds-aw11-sc-chit-chat/1 point
-
do Swanni's come in vest form?1 point
-
Hi Ed. Yes it looks to be in great condition. Nice find! I'll be tuned in to follow your progress. How many kms on it? Here's an updated pic of your last one by the way .... it's coming along ok. Sorry I don't mean to hijack your thread!1 point
-
And this about sums up all that Ive really had to do to the bug. Regular oil changes! Now were coming into winter, Im starting to try and scrape some cash together to do plugs ect and a couple of other maintainace bits
1 point
-
Thanks born loser, the bits for my bike have cost about $700. The long spokes are $4 each and the tyre rubber is $40 a meter so these were the main costs. I wont need to buy anything else apart for some paint to do the forks and frame from this point though1 point
-
/water jacketed exhaust.1 point
-
Got a little bit more done on this now, started off by making a frame for the ground glass. I carved a portion of the inside of the frame so that the ground glass sits on a step on the inside at 5mm from the face of the camera back. this is important as that is where you focus to and it has to be the same point as where the film sits in the film cassette. Next I ground the glass with a combination of fine valve grinding paste and cerium oxide mixed with water. Last time I did this I used medium valve grinding paste and the grind was too coarse. On cutting out the piece of glass it chipped out on one edge, so it was back to the grind stone (or chunk of stainless steel in this case) for round 2. Grinding glass: Chipped piece: 2nd time ok! Glass in frame: This frame will be spring loaded against the back of the camera and you will lift and slide the film cassette underneath once you have composed/focused your image like so:1 point
-
Right, so the first step in testing the Wankel engine was to design and build a run in/test table. These are very common for R/C plane guys and there are plywood kits available but I wanted to make a table just for the Wankel project. The brief was for the table to be easy to transport, a decent working height, adaptable for multi rotor engines, able to carry all the equipment required for the engines and be adaptable for any alterations down the line (Tachometer, EGT sensors etc.). I then decided to CAD the table and because the old boy put the thought in my mind of using aluminium I built it around readily available extrusions. To aid transport the top is held into the main tube by pip pin allowing for it to be quickly disassembled (assuming I get a noise complaint and need to leave quick fast). The heavy items (battery, nitro meth bottle, starter) are placed near the base as to lower the COG hahaha, while the table top holds the fuel tank, engine and throttle lever (not in image). All the required items will be held in by O-rings held by small stubs similar to those “JDM” bumper mounts. Thankfully my good friend Tim welded the aluminium and did a mighty fine job at it considering the extrusions were only 1.6mm thick. I turned and threaded some aluminium bar to make the feet caps which are threaded into the swivel foot and will be pressed into the feet tubes. The table top was cut from 18mm MDF and will be varnished after the fuel tank and throttle lever is completed. I was also lucky to have Ross from the Uni’s work shop CNC machine an engine bracket from aluminium which will be held by some stainless fasteners. The image above shows the extent of what has been done so far. Only the throttle lever, fuel tank bracket, battery bracket, nitro bottle bracket and accompanying O-ring stubs are yet to be fabricated and welded… alas, I have taken my pretty time getting this far hahaha.1 point
-
Hi Clint Im thinking of building an exact replica of the flintstones car. My understanding i can do this using the factory wooden chassis if built as a replica scratch built. My question is can i get solid concrete wheels certified ? If so who do you suggest i can see to get them made. Also if i import a Chev truck with no paper work to comply it. Can i change 60% of the chassis to register it as a scratch built ?1 point
-
yup getting a standard bonnet on it is on my list of jobs, only thing i have to do is modify the sump to a rear bowl to get the engine sitting lower then it should clear. The Sr20 goes pretty good in it but im not 100% happy with it, idles quite high and lots of hory stuff in the engine bay which needs tidying up. The main part i love about the car is the piazza steering rack, 2.5 turns lock to lock is awesome. Ill do some measuring when im in nelson next as my white chevette has a gemini diff, then i can compare any differences any chance anyone has any old pictures of my car saved from the times its been on trademe? id be interested to see whats been done to it previously1 point
-
Good to see someone on here is doing this right! Seen it on Trademe various times over the years and it looked atrocious with all the trim greened out and odd primed patches and horrible roof and bonnet scoops. Must be mental with the sr20! Looking forward to see what you do with it next.1 point
-
Subscribing to this thread. Would love to build something like this for a 1/8 787B replica1 point
-
the last peice of the megasquirt puzzle was fitting a throttle position sensor. so i went to pick a part and had a nosy under nearly every hood and settled on the TPS from an e36. nice and small and readily available. then came the question of where to put it. which ive detailed below. pretty happy with results. now i just have to wire in the megasquirt and lock + rephase my dizzy! so close to digital ignition! first i decided on a location. this meant this bracket would need to be redesigned to take the sensor. and i also filed the end of the shaft into a D shape to drive the sensor. i then flattend the original bracket to use as a stencil for the holes cut new bracket out, and drill holes Fold and dress edges test fit done! ooooh alloy flash discussion - //oldschool.co.nz/index.php?/topic/30375-flibois-1971-toyota-corona/page-5?hl=%20fliboi1 point


This leaderboard is set to Auckland/GMT+12:00