
Leaderboard


Popular Content
Showing content with the highest reputation on 07/20/15 in all areas
-
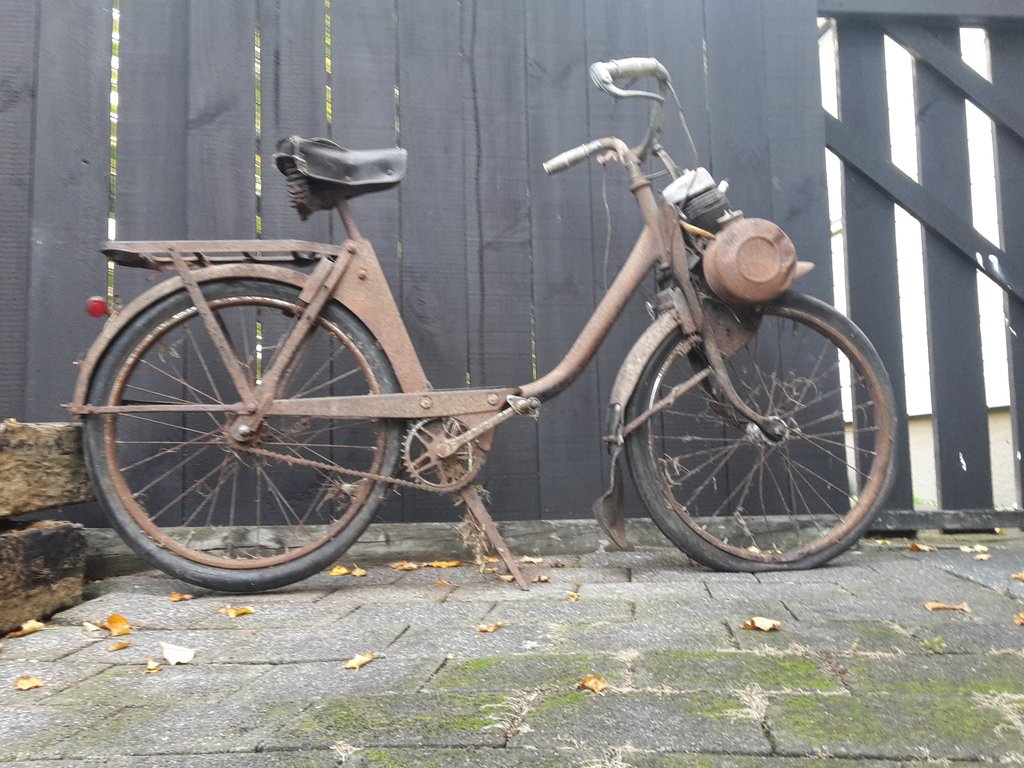
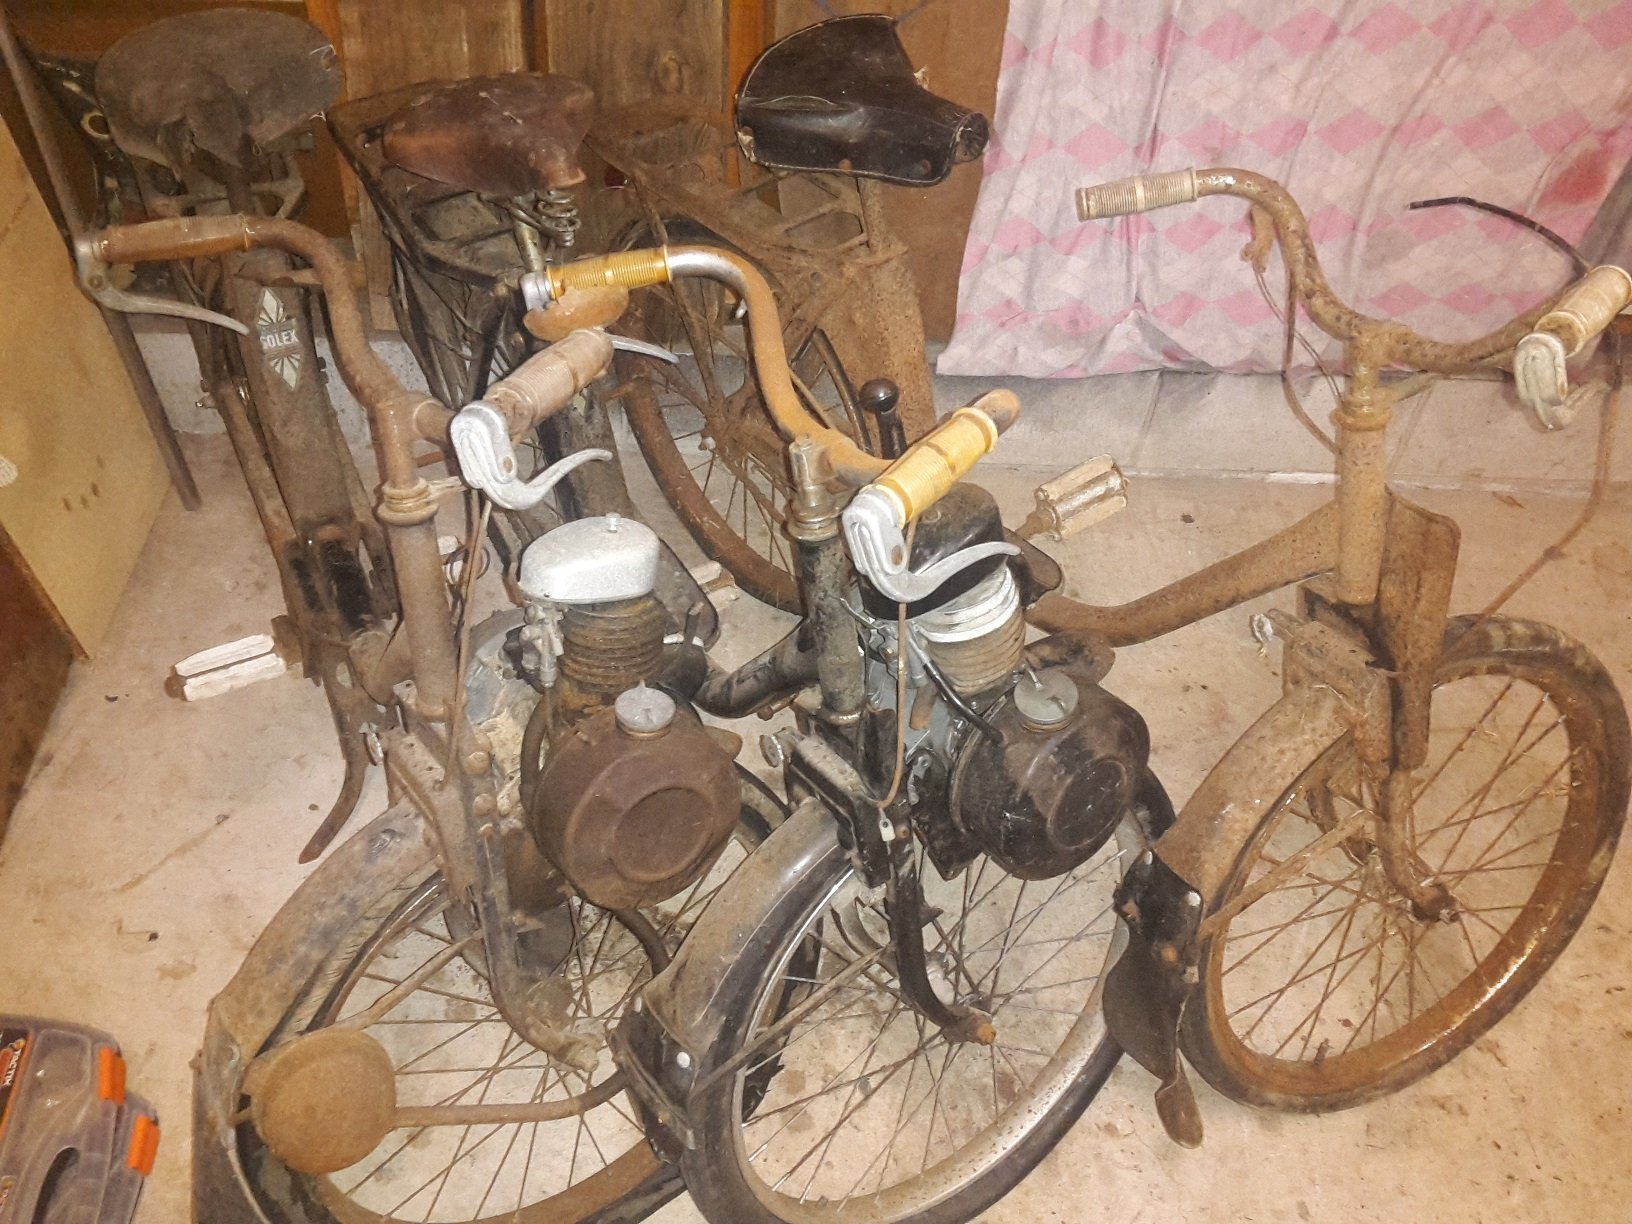
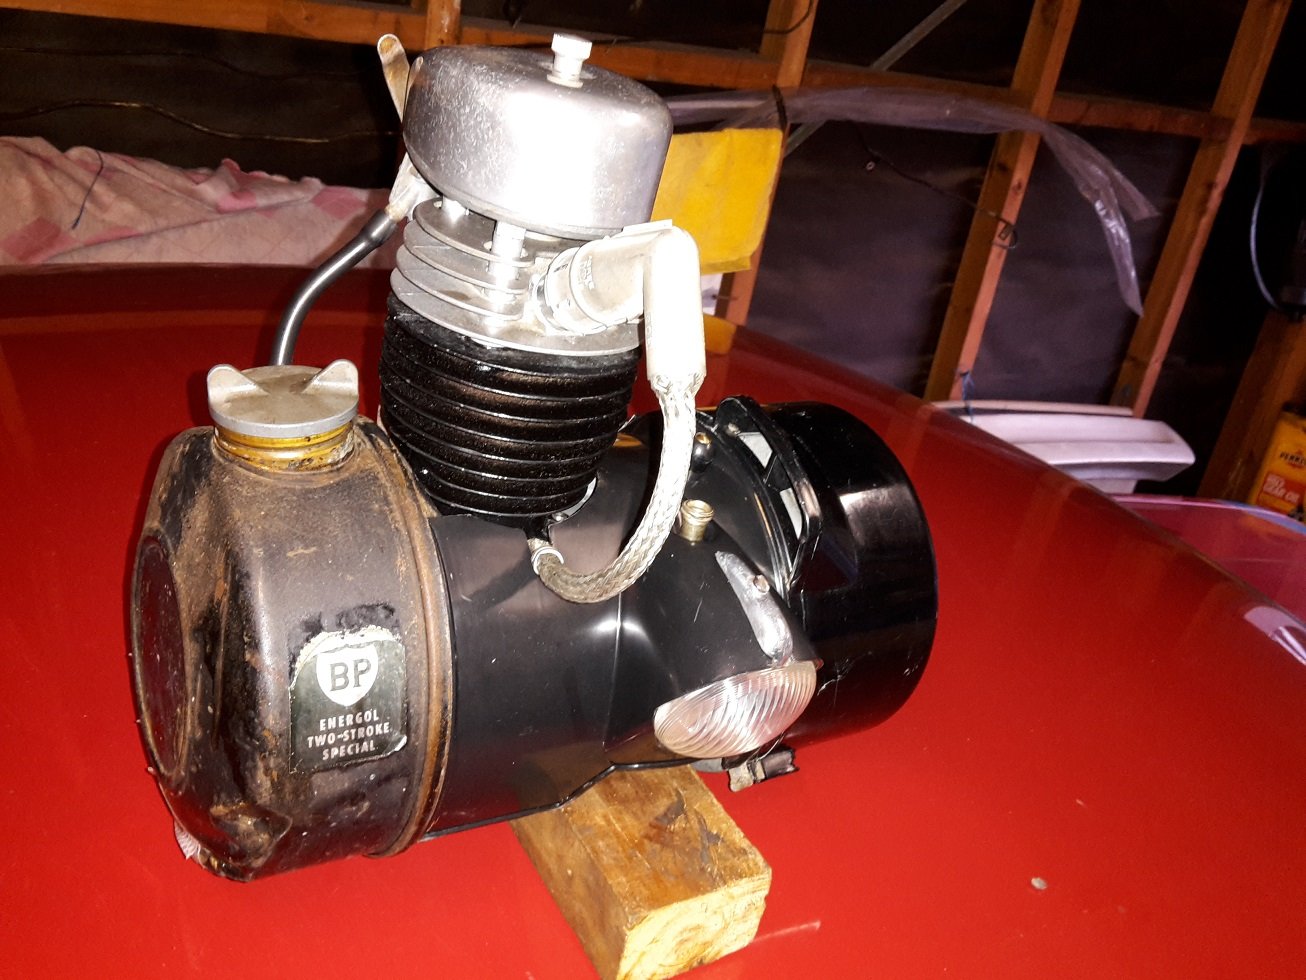
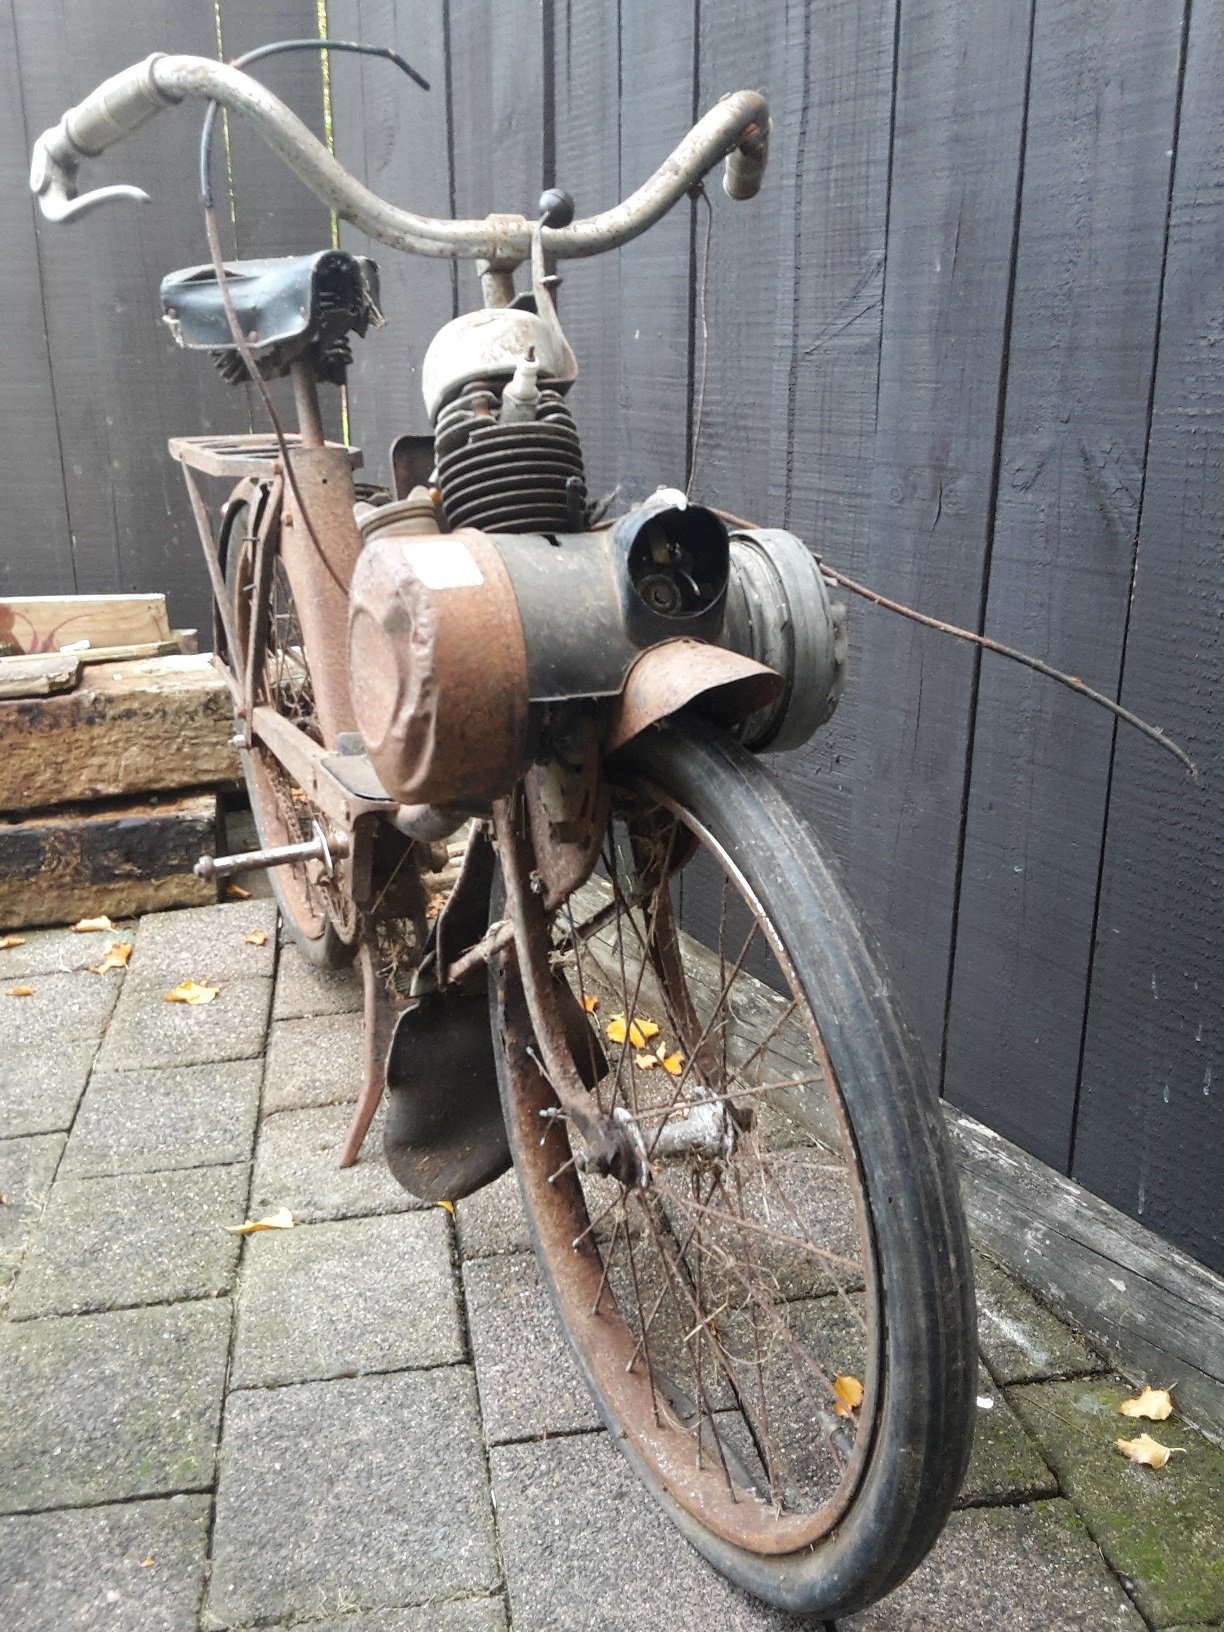
So... a day off sick(sick in the head maybe). I was bored, and looking at trademe and I stumbled upon a moped that took my fancy. So i brought it It turned out to be a 1959 VéloSoleX 1700 49cc - in completely rust-spec mint condition(rooted) ...christened P.A.M (pedal assisted motorbike) by my wife . . . If that wasnt bad enough, i found two more locally so naturally hit buy now on those too (now im really fu#$ked in the head) original purchase on the right - another 1959 1700 on the left and a very original 1961 2200 model in the middle I set about quickly dismantling a motor and learning the intricacies(breaking) of small 2-stroker motors. After a week of cleaning, honing, part hunting and reassembly - IT WAS ALIVE!! One day i shall have at least one looking awesome and be hooning down to the local patisserie - ordering le baguette and crumbing it all the way home.
 7 points
 -
fuel rails arrived. need to mod the manifold a tiny bit and they should fit. Untitled by sheepers, on Flickr7 points
-
MOAR off topic nonsense with no work done on car haha. I thought I'd draw up the throttle body as well, and a proper bell mouth. So including the throttle plate, throttle shaft, bolts, etc. Previously I'd been specifying a mass of air being sucked through and looking at the pressure drop. But if you want to figure out if changing something acheives an increase in mass flow you do the opposite. So I created a pressure drop at the rear of the TB, and adjusted it until the mass flow rate roughly matched what my engine consumes (~150 grams per second is ~6000rpm at WOT) So with a bare throttle body, 1kpa pressure drop = 150 grams per second flowing through it. Notice where the red arrows are, because the air needs to turn the corner its reducing the effective diameter of the pipe. Then with a bellmouth added, drawn to the ideal proportions and same pressure drop. mass flow rate bumps up to ~190 grams per second, easy to see why. Then if I "Half shaft" the throttle body shaft. Bumps up to 203 grams per second. If I rounded the leading edge of the throttle plate (instead of square) and tapered the rear half of the throttle plate to a knife edge, increases to 211 grams per second. None of this potentially means anything because it's just DaveScience but its fun to muck around with and learn about things. Now of course fitting a bell mouth and those other things wont mean my engine sucks in 211 grams/second of air. It just means that it will suck 150 grams of air with a reduced pressure drop. So a higher air pressure around the runners. However it is seeming increasingly feasible to reduce the existing ~3kpa pressure drop by a fair bit. I'm on a maintenance plan of using solidworks only often enough to stay consistently awful. But my understanding of the flow modelling program is improving slightly heh.6 points
-
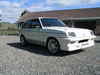
So been pining for a top Jap spec x7 series for some time, and finally found another goodie, with some subtle damage haha, but was cheap and ticked all boxes being factory twin cam factory manual and a wagon!! Also with the Cresta style front and all the other added top spec goodies. Brought it of the for sale section here on OS, was bit worried about damage but anything is fixable hahaha, so here it is Also brought three different sets of wheels haha, two sets locally and waiting on set from Japan to land at my door 14x6.5 SSR Casablanca 8 got three of them haha Pair of Impul mesh 14x7.5 -9 were 14x7.5 +11 buti did half hour worth of machining after work and some new stainless bolts so mounted centres from behind instead of infront which changed offset 20mm And waiting on this pair from Jappaland 14x7 -2 SSR F2s never seen any before these ones So missioned up to Chch and drove the wagon home last Fri went amazing drives so good, nice being coil spring all round Also picked up some parts for it while in Chch new rear door and rear guard cut So got it home nice and safe and then on the Sunday me and mate that runs a panel shop here in Timaru attacked it Then did big night on it down at panel shop this Fri night just been and got it all done, just need to put trim and bumper and tow bar back on, and booked it in for WOF this coming Thursday, then low and wheels!!! Pine time now Enjoy!! Next post be better one!! Thanks for looking5 points
-
datalogs, ear, seat of pants and pieces of engine on ground.5 points
-
Another reasonably uneventful update, but with a lolable picture. Nathan and I took out all the rest of the salvageable gear in the wreck (We litterally picked it up and tipped it on it's side...) Sprayed all of the things with ROST OFF, had a can of coke and banter then removed all of the bolt with no snappage. Then we flipped it back on the ground and proceeded to put a flipped space saver in the wheel arch to show of how amazing it could look on 15s. Sadly at this height the body is on the wheel so this height is unobtainable without some major surgery but would look pretty dman cool! Oh and before I forget, moved the n360 over to in front of the mini (Not seen in this photo) so I can get my other car back in the garage. Fitting 3 cars in a double garage like a boss.4 points
-
so the general consensus is both? I'm thinking we ditch the expensive steaks and chops in favour of having 2 spits going...4 points
-
Peter finish the passengers door for me. he made a whole new top for it, a new inner bottom and a new bottom outer skin. looks mint. Untitled by sheepers, on Flickr Untitled by sheepers, on Flickr Untitled by sheepers, on Flickr Untitled by sheepers, on Flickr so i gave it a scuff up and primed it. i also finished the boot lid and gave that a second coat of primer too. Untitled by sheepers, on Flickr Untitled by sheepers, on Flickr4 points
-
This thing popped up on Trade Me on Friday afternoon, and by Saturday morning id had a good look and pressed buy now (including delivery). I havnt got it quite yet so fingers crossed i dont get bumped by a silly offer as there were 5 questions already and 3 other people coming that day. Dude is a bit of a character and has plenty of very cool cars but hes moving so (some of) it gots to go. Its mostly complete, just missing one of two chrome strips on one door, and the tail lift glass is perspex. It also has a broken tail light but i think the more common sedan ones will fit . It has rust of course, but nowhere near as much as i would have thought, but where it was stored was pretty damp and the worst is around the roof edge, and one hole in the drivers floor/sill from a bump from underneath i think. All the doors, panels and tail gate etc is really good and the rego is on hold. Engine hasnt run for years, and is a 2300cc inline six with a single dual throat weber that produced a claimed 80kW @ 5300 rpm and 184Nm @ 3000 rpm when new. Some youtubing of 2300S Coupes show that the engine definitely has some potential! Also has bench seats, 4 speed column change and patina. Plan is to fix the rust, repaint the roof, clear coat the rest, lower and roll. If plan A of recommissioning the existing driveline doesn't work out, i'm open to something silly just so as long as its I6. Cars history (as i understand it) is that its a low milage car, and one of only a few (2-5) RHD models in NZ. Sign writing (and blue repaint over burgundy) was for Nautilus Marine of Napier, after which it was in a big private collection there, then bought buy the current owner to do up and turn into a caravan towing cruiser, but over taken by too many other projects. Pics below are from trade me: Discuss: //oldschool.co.nz/index.php?/topic/49262-azzurros-1966-fiat-duemilatrecento-familiare-discussione/3 points
-
So, I bought a New rig (truck pun intended) Its a 1987 Suzuki ST90v Truck Been pining one for many a year, and they have always been a bit spendy and a bit to far away for my liking This one however was local (2min from work) and cheap enough to justify buying. Was cheap due to not running, as the guy had had a few issues and not much luck fixing them. Already been fitted with the 1000cc 4 cylinder and 5 speed, so might actually drive good also So I towed it back to work, and then after a few days managed to get some time to have a look at. had been told it was driving, but would stutter up hills, old owner had taken to a mechanic and fit a bunch of electronic parts but still did it. So they tried to rebuild the carb with a new kit from America, and since then it hadn't run, expecpt once when it ran very briefly. Oh and a new fuel pump. So pulled the spark plugs, figured that would would be the first stop just in case they are fowld. Nup, they looked fine. So put some fuel in it. Fist check, oh yip, it leaks fuel out the drain bung, which was a bolt with a spring washer on it. Hmmm, no surprise there I guess. Checked the fuel filter and drained it, oh yip, bit of shit in there, might need a new filter. So turned the key, fuel primed up, checked carb, oooooooh yes, there is fuel dripping out of carb. Time to pull carb off and check this rebuild. Long story short found a unwound jet and a fucked rubber gasket, After a few phone calls and trade me questions I found I couldn't find a second hand one, and a rebuild kit would be $120 After a look on Aliepxress, boom, brand new china direct replacement carb on its way. for $120 This took a few weeks to turn up, so towed to my garage where it sat for a while. Until Today! Checked carb when it turned up, looked good, but was filled with machine oil, so blew it out, and replaced the ill fitting choke plate. So with the assist of Goat and Beaver who casually swung by the lock up, we fitted carb, put some gas in it, and found that the bolt I had fit in the fuel tank bung was also not going to work. But besides that, Primed up fuel system, no leaks, good shit. Turned key. It Runs!, For like half a second..... Hmmm....... goat picked it up straight away, Seems the coils not staying powered once the key is taken off crank. Beaver eyed the coil and found the pesky wire that had come off, and with some creative wiring got it back on. Turn key again, purrrsssss like a pussy. So fucken happy. Then we wnet out, got a proper fuel bung, and went for a drive round the compound, Shit it runs good, and is super peppy. Even peppy enough to do a sneaky skid. Then beaver took it for a drive and found that gumboots is a shit choice for trying to get in and out of the cab. So mission accomplished it runs. Next was the brakes, it had been hard to push since I bought it, and suspected the brakes were fucked from sitting around. So parked it back up, jacked it and spun the wheels. Both left sides bindy. So Pulled all the drums off. To my very pleasant surprise, new brake shoes front and rear, some new cylinders in the front along with some rebuilt ones. However the rear ones were shot. One seized, and one just starting to leak. Quick drive down to the local repco, and to my luck, of all the places that had any brake cylinders to suit nation wide, was 20min away. Boom drove up and collected, made sure they are correct, and payed a woping $25 for the pair. And that's about as far as the day got, But everything is coming up Milhouse so far, well, almost anyway. So now I just need to fit the cylinders, refit drums and redjust the brakes all round, and should be ready for a wof, hopefully for Tuesday, or atleast at the earliest. Rad, thanks for reading about my turd. Its so tiny!3 points
-
So I bought myself an old Kitchenaid stand food mixer from Trademe, and thought I may as well share on here. Winning bid was $84.50, which is pretty good value considering you can buy them new in Harvey Norman for $1000-$1100ish. It's an older model (a bit of researching says this model was made between 1944 & 1962) but fortunately many of the parts are interchangeable with the new ones, and they are pretty good quality and last well. It's covered in the residue of many a past cake, and the paint has worn thin in a few spots, there is a ding on the rear cover etc, but nothing that a basic refurbishment can't handle. The plan is to pull it apart, clean and repaint the outside, restore/replace some parts, repack with grease, then realise I forgot how to put it back together. Here's some photos of it so far: ^As it was when I bought it ^ The underside - the feet have squashed right down over time, as it's quite heavy ^ It's a bit gross and could do with a decent clean. Also the grease has separated/oozed out (which can be caused by sitting still too long). ^Planetary gear inside the mixer head. The grease is a bit old and hard. ^Grease inside the gearbox ^And after a clean up ^Case full of old grease before ^and after emptying out. More photos to come once I've done some more on it.3 points
-
Dude. Just get some wheels in 5x114.3, it is the easiest PCD to get wheels for. Someone will do a wheel close enough to those that it doesn't matter.3 points
-
G'day, nice buy. Is it still sequential? ive wired up a few of these and own one running the stock ecu. You should first decide if you want to keep it sequential twin turbo. Not sure if you've seen the rats nest yet but you are in for a challenge if you want to keep it dead stock. The stock ecu is quite forgiving and will run in limp mode with many sensors unplugged. it will idle in limp mode without the map, IAC, o2 sensor and a variety of other thing sensors missing. You can tell its in limp mode by the inability to rev it above 3 or 4k rpm and backfiring if you try to. My JDM import does not have a check engine light. You can quickly check its compression by listening to the chuffs with the plugs out. I have de-sequential'd a couple of fds and prefer it for simplicity and easy troubleshooting of issues. Check out the service highlights on foxed.ca, that explains the sensor relationships and what you need to run. I'm happy to help if i can with any questions etc3 points
-
Bit more necessary but dumb shit today. Mounting the Electronic throttle to the Pedal box. The E-gas pedal and bracket to be. Where the pedal needs to end up. Bracket Mostly made and welded to the Pedal box. Calipers are all done in Retina burning red! Also started on making the Gearbox mount, when i say making I mean measured and cut the steel ready to draw and cut the template on to them.3 points
-
Engine bay picture One feature im working on at the moment is lowering the rear deck and installing hinged compartments so i can store tools, ect.3 points
-
engine and gearbox out genuine waterpump and cambelt installed and new oil and filter and few oil leaks tidied up pulled up top and bonnet off engine and gearbox mounted, getting good at this didnt even need to remove driveshaft put the boot badges back on already started the wiring and have hooked up powersteering,vacuum hoses and throttle cable, hoping to have it running this time next week!3 points
-
Bit of Cleaning, and stripping down today. - Soaked the Engine bay with De-greaser and then pressure blasted to clean off 20+ Years of Grime and other shit. Before After - Dash board out and factory looms stripped out, for re-routing and Splicing with the new looms - Installed the new pedal box for the Hydraulic clutch setup - Finished stripping off all the factory tape and hard plastic tubing.. heres the two looms to merge.3 points
-
I post this from the 2:30am ferry sailing, on the way home to ChCh from Wellington, because to be honest, I've had worse results from a night away from home:
2 points
-
Chassis back from the powder coater, they did an OK job, nothing like the quality of my Quad Bike bars though. Electrics cleaned up and going in It's worth mentioning that a fairly regular item to get missed out on cheaper rebuilds is the pressure-stat (the grey black device in the middle) which is responsible for turning the water heater element on/off 100's of times a day, often for years on end, The only thing separating the steam pressure from the electrics is a thin rubber diaphragm which needs replacing every 12-24 months ideally, on tops of that the contacts wear out and can stick closed if not serviced. This one is well worn2 points
-
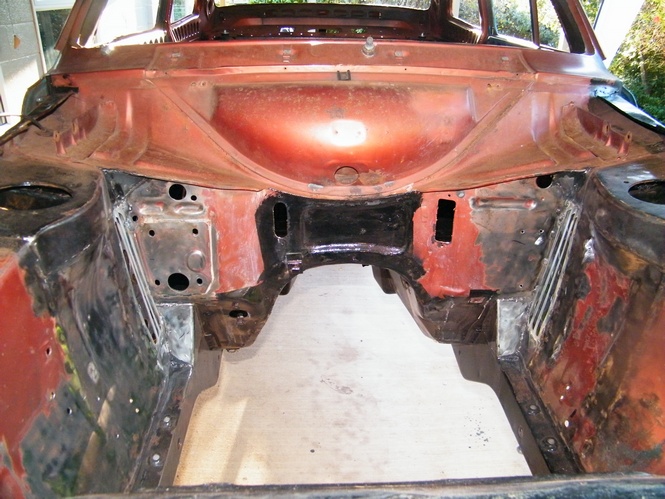
A little bit of progress yesterday: The grill, bumper and headlights off. The Guards off: A couple of pictures of the front end rust: Dads starting to cut out the rust and the motor will be comming out soon.2 points
-
Why can't you be in Wellington :'( I need some nice upholstery work like you've done. I cry errytime.2 points
-
Man that grease held up pretty well if its original eh pinstripe it2 points
-
Megasquirt lyfe2 points
-
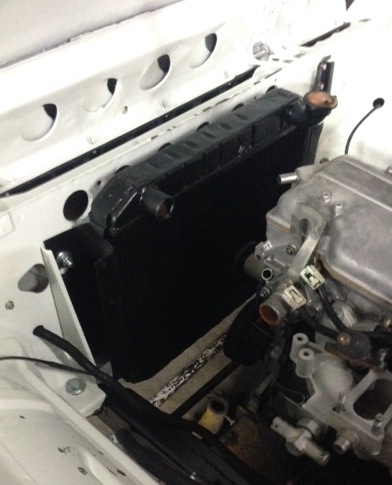
Spent weekend again working on this lemon. Installed new alloy radiator which doesn't quite fit so will tig weld a few brackets on tomorrow at work. Had a bit of a fck around with the new flex plate now that everything's bolted in. Testament tom and I have found that the flex plate has a 4mm wobble from one side to the other.... Unsure if I've damaged it putting motor in or if Ching wing shitty flex plate! I've had to shim starter motor over more so it misses the ring gear but I'm thinking I might have to drop the trans and replace te flexolate again!!!!!!!!!2 points
-
Busy day today, had a mate make up the beginnings of a rotissere for me, i had to make the chassis mounts to the bumper supports, then decided to add threaded rod to move the sliders up and down, then has a pin to lock it height wise. The car rotates easy, but it tends to roll back to pretty much flat again, so i need to work out a way to control the rotation, maybe a series of sprockets and chain to gear it down, then some sort of pin to lock it. Still rolls quite well, and is very stable.2 points
-
No anton that would mean you had passed out before both meals2 points
-
I'll be there in Japanese too2 points
-
Well i havent updated this build thread in over a year and not much has changed really. Well i sold my wheels,sold the 2jz, sold my coilovers and sold the corona rear end too. The rear end now sits on a s13 subframe (not mounted yet) with plans to run s13 hubs, knuckles and adjustables up front. I have wanted to get another 2jz for a while now so i can start playing around with mounting things and then this turned up on trademe for $700!!! Deregisterd but all i wanted was the engine. Managed to pull the engine out last Saturday and on Sunday a guy from palmy turned up and took the rolling body away for $550 so i was really happy. Playing around trying to put the 2jz into the corona So i picked up a 1ggte radiator for $200 recently and have that a go. As you can see there is NO room to run fans here and on closer inspection i may end up recessing the firewall to get some better clearance up front. The other thing is that the sump sits on the sway bay so i will re think things and may run a custom swaybar setup Thats all for now. Matt2 points
-
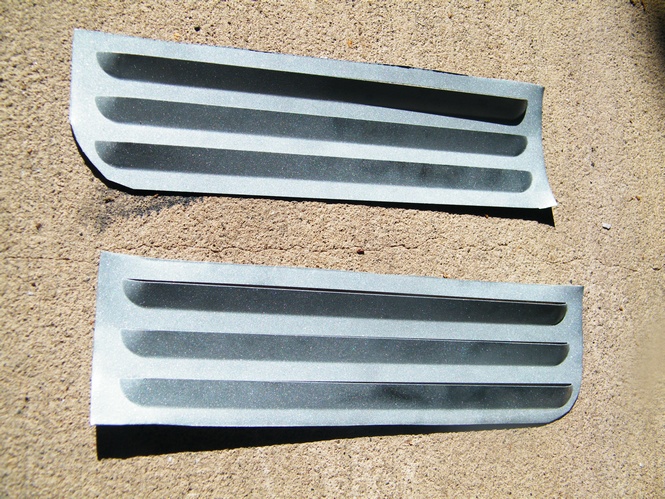
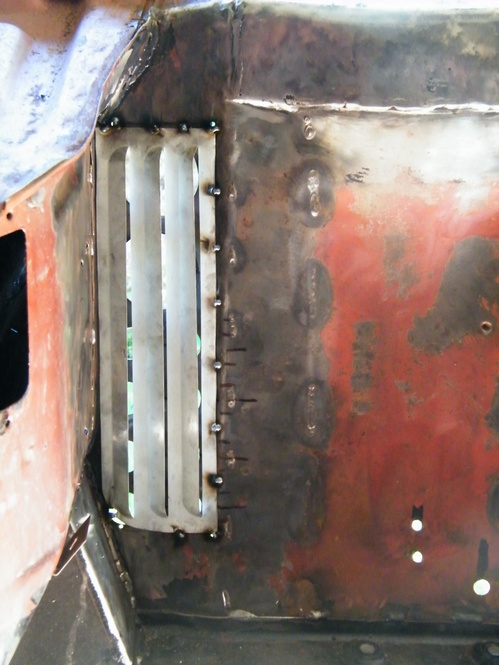
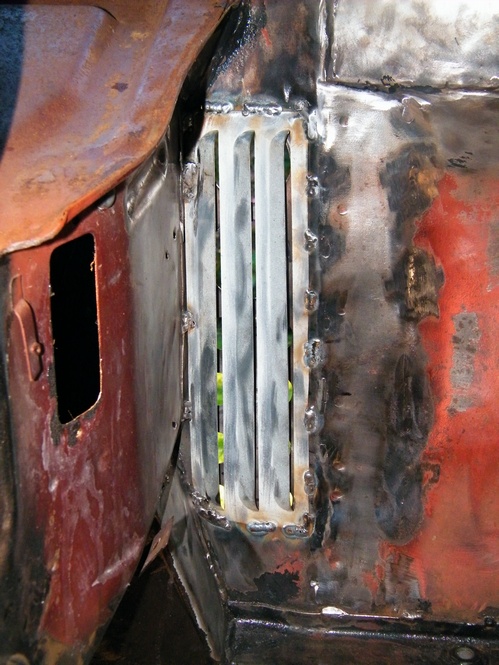
Vents to remove hot air from the engine bay
2 points
-
2 points
-
heres some more of it bolted to the superdupercharger. Untitled by sheepers, on Flickr Untitled by sheepers, on Flickr Untitled by sheepers, on Flickr2 points
-
Small post. Painted few things at work Also I think tom likes my car2 points
-
Pining? Or. Blue Gum?2 points
-
This is finished! I took it to the firewood pile this afternoon and gave it a good work out. It works great! Fast and powerful, it chomps through the knotted pieces of wood with ease. The tables are a good size and height Dave and I had no problems stacking blocks on it we split probably fiveish? cubic meters of old pine and gum, on about two thirds of a tank of petrol, in about two hours. The engine doesn't even need to be on full RPM. It doesn't have WOF and Reg yet but that's not a problem we'll sort that out next season. Project finished. WIN!2 points
-
More progress! Got the top fully welded on now, chassis cut out and the bottom partially tacked. We are thinking of putting the airbags on the outside of the chassis, since they would be pretty close together if they're on the inside. Like the pic below, except the top bag mount will be about an inch or so lower.2 points
-
Hi Guys, Thought I should make you aware of this car event which is held in Newstead VIC (about 1.5 hours from Melbourne) at the start of October If you ever went to Kumeu before it became too big it reminds me of that. Not a lot of rules apart from what vehicles can enter (pre 65, no billet/trailer queens) Can take booze in, start fires, do burnouts, they have a dirt drag strip etc etc. More details are in the below link, get amongst. http://www.chopped.com.au/ Pic from last years setup, cant wait!!!1 point
-
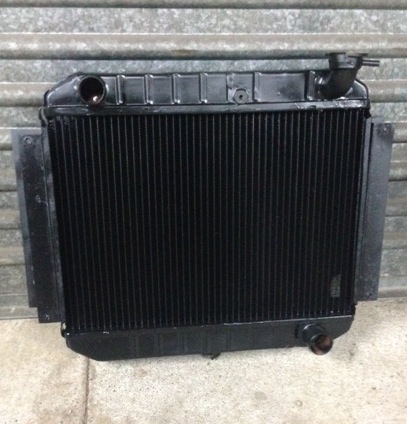
picked up the radiator from being recored today, looks good. not cheap but wanted to keep original copper jobby. sat it in, need to source some new hoses, and hook up the heater hoses also next job is to get the exhaust done
1 point
-
Oh definitely you can crank heaps more in some of the rbs ive done are at 20deg on 14psi. Also make sure you set your hardware latency properly if you haven't already done so. export your table and save it. Then set the entire table to 10 deg. Set your timing light up and rev motor to say 3k you'll notice the timing wandering either direction. Adjust the hardware latency untill its rock solid at ten degrees. Really important with megasquirt as they do wander around a lot if not set properly. You may end up with 30deg when your map says 20deg etc1 point
-
Its just a matter of flashing on the retuned file onto the ECU. This can be done over the diagnostic port. I haven't run mine on the dyno yet but it will leave a vr6 behind. I just have a retuned ECU and 2.5" straight pipe exhaust. The only reliability issue is the clutch and front tyres1 point
-
yup an adapter between the oil pressure sender and case, the return is plumbed in to the top of the extra capacity sump.... Your user name indicates you have your own turbo beetle? you should start a build thread1 point
-
Engine is back in the hole... But a man smarter than me has pointed out I have the wrong type of pressure regulator, which will explain the over fueling I have after a period on boost... By happy co-incidence I found Weber Specialties stand and the speed show and had a chat to Murray who tells me they have a regulator designed specifically for blow through twin carb1 point
-
1 point
-
Title was extremely misleading.1 point
-
Untitled by sheepers, on Flickr1 point
-
This thing better have a side pipe.1 point
-
Boiler done, starting the rebuild process now. before and after.1 point
-
You needa put this thing into production, you'll fill up your pockets with $$$$$$$$$$$$$$$$$$$1 point
-
now you need a bulldozer to shift big piles of firewood with!1 point


.thumb.png.b2aee08688778d18bdc7b3e3c1852d9c.png)


_sedan_(23230030334)(1).thumb.jpg.34d765361d66c78db614bae6ea2c156a.jpg)


This leaderboard is set to Auckland/GMT+12:00