
Leaderboard


Popular Content
Showing content with the highest reputation on 04/08/24 in Posts
-
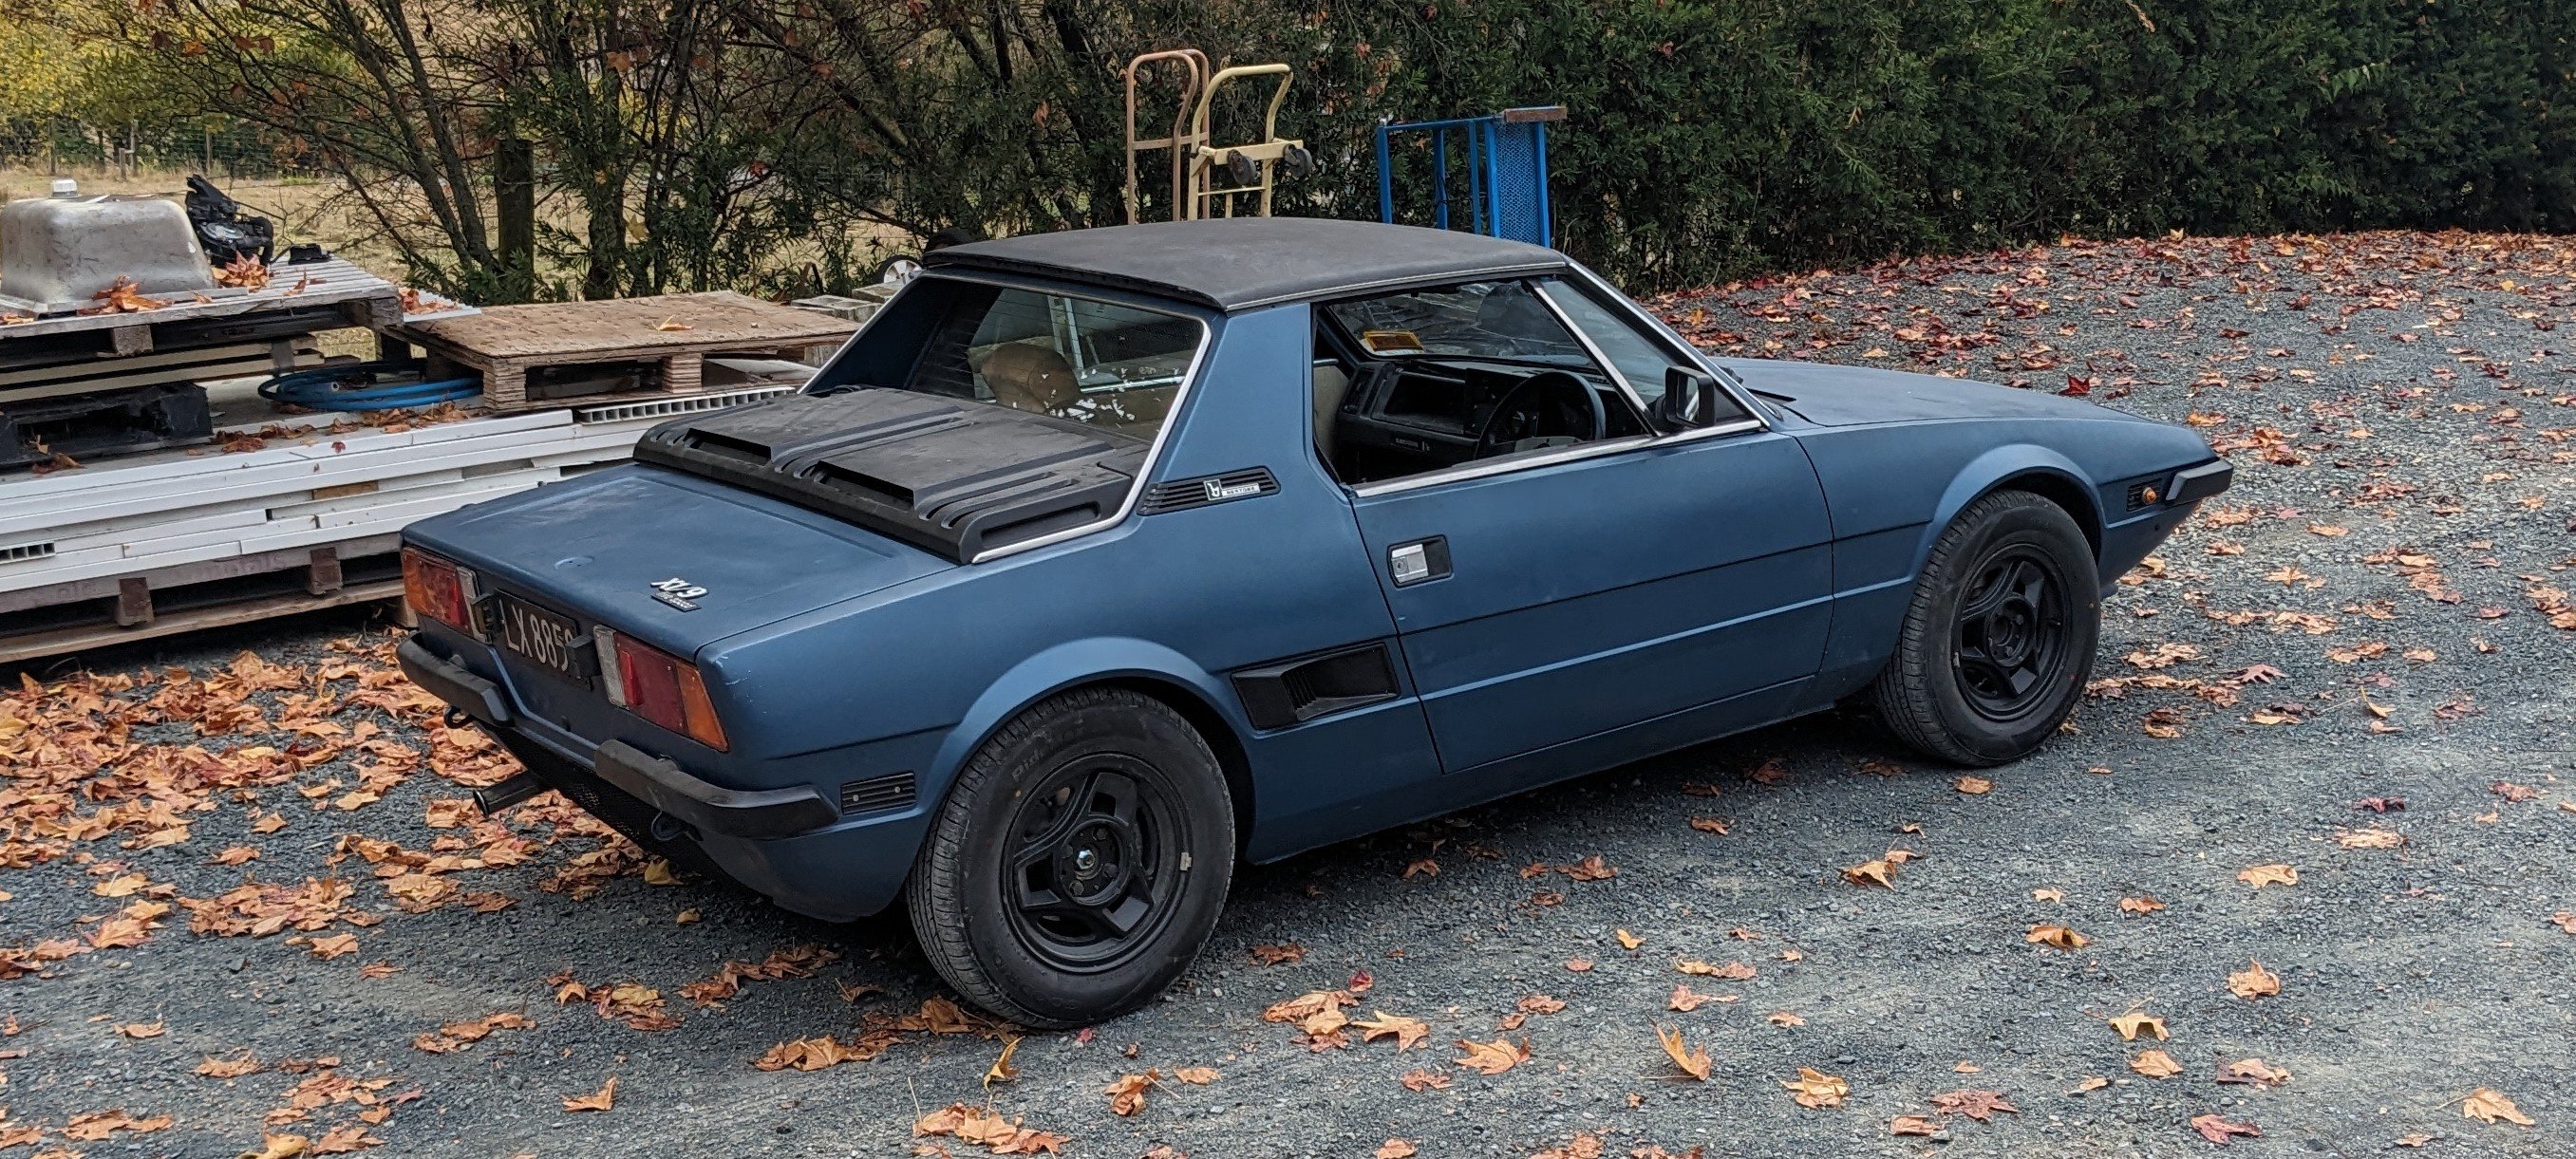
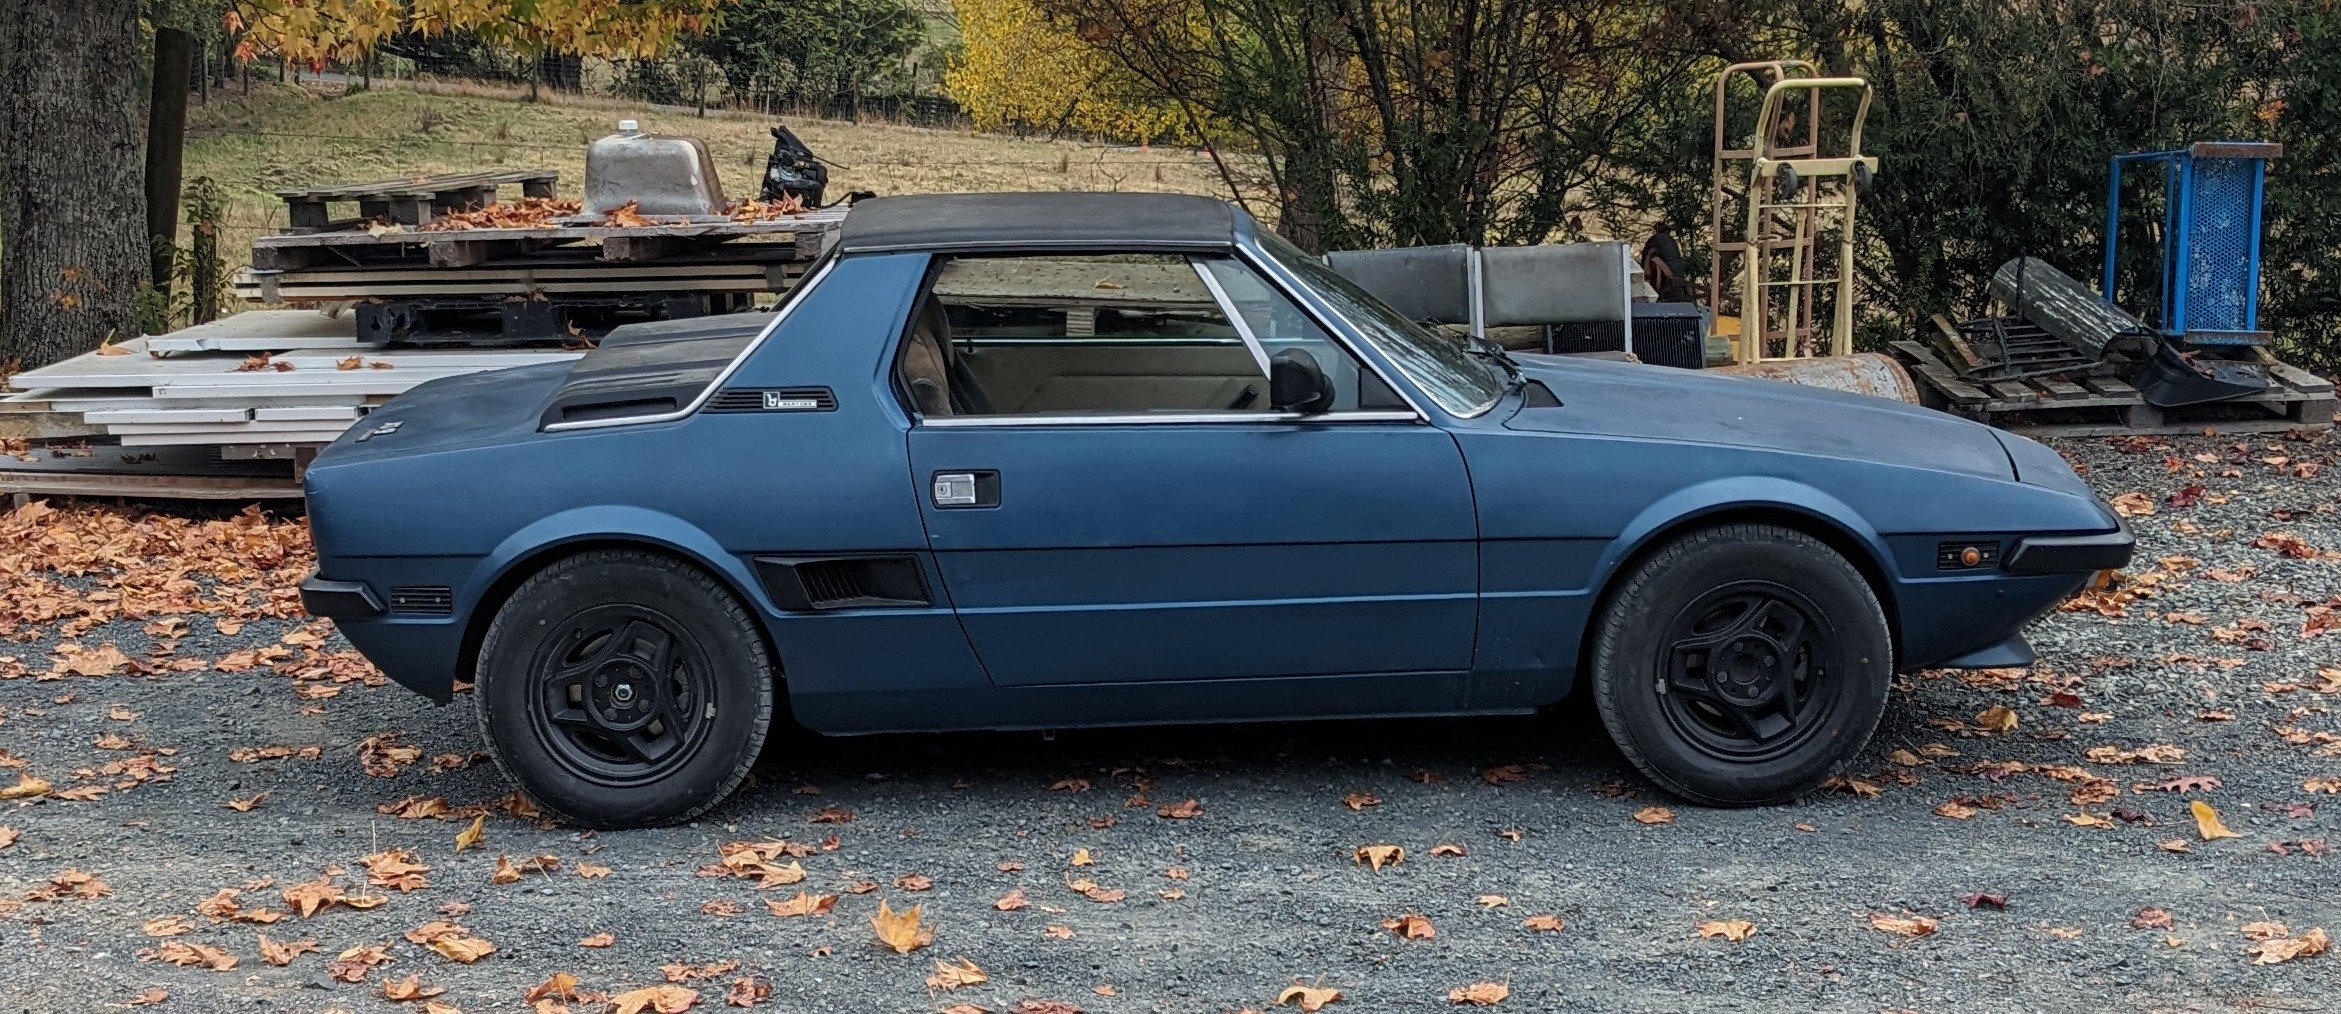
Took it for a WOF, WOF not achieved. However there was nothing show stoppy in there. A wheel bearing with too much play, a steering tie rod end, and the right rear brake had a lot of fluid around. This one was a little weird when we first bled it, it wasnt passing fluid initially but then it came free. It might be the handbrake adjustment playing up. It might just be all the fluid used during bleeding, anyway I'll have a looksee. And the low beams were not working, but I am pretty sure its the switch playing up. So overall nothing bad or even unexpected. And just look at that awesome wedgyness;
 21 points
 -
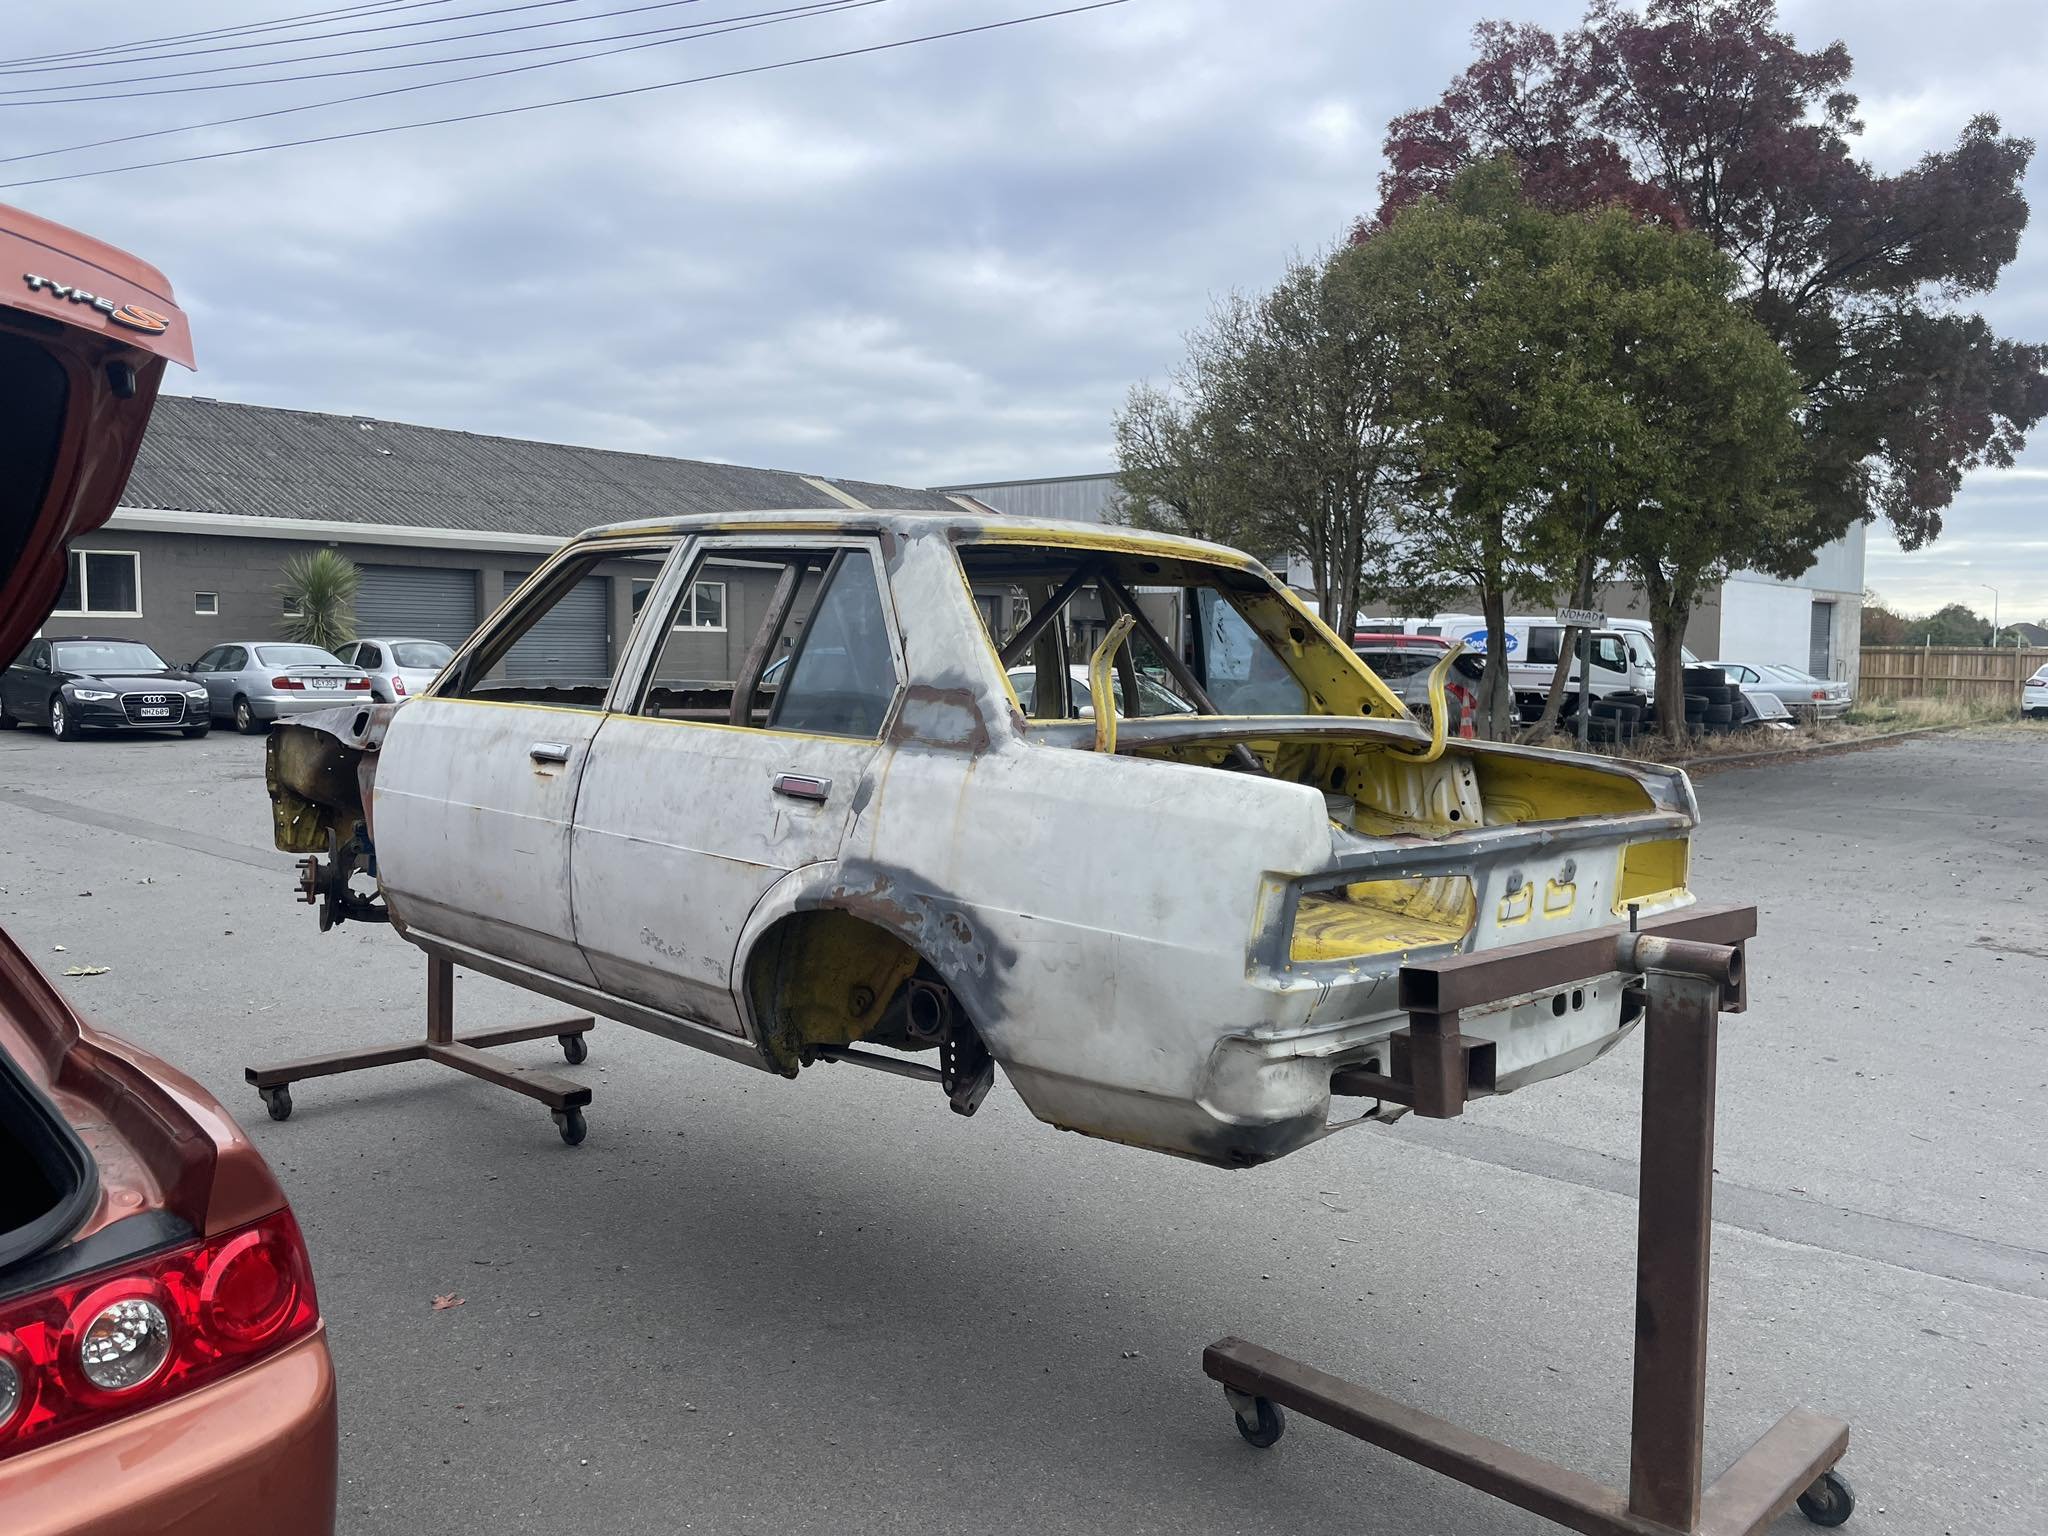
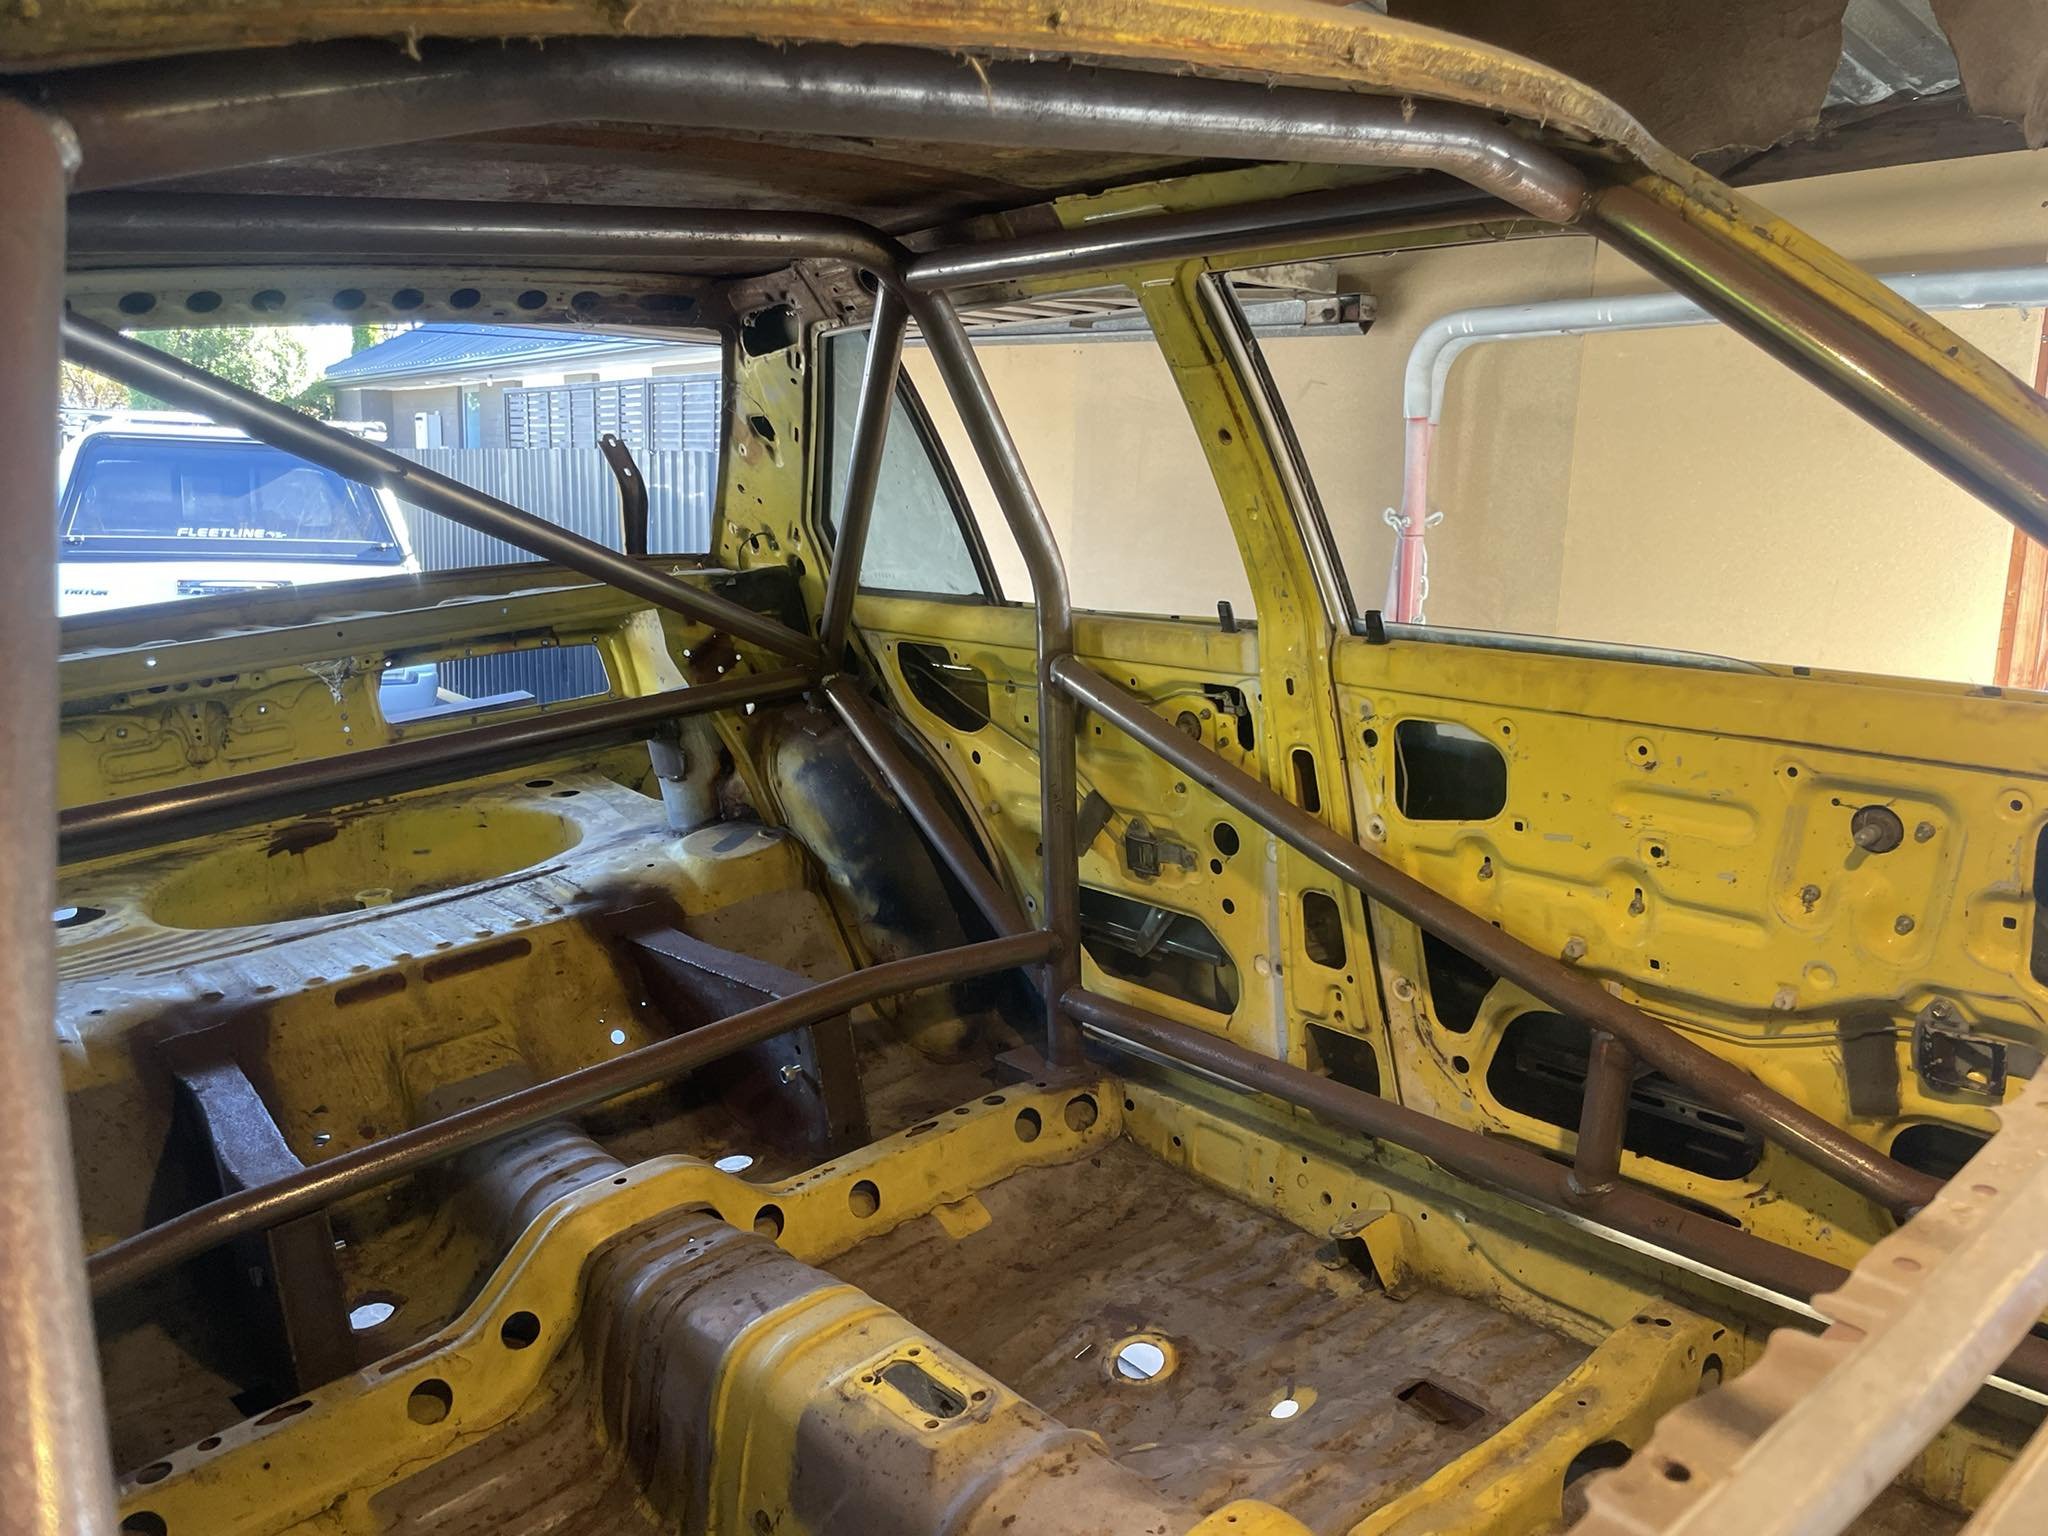
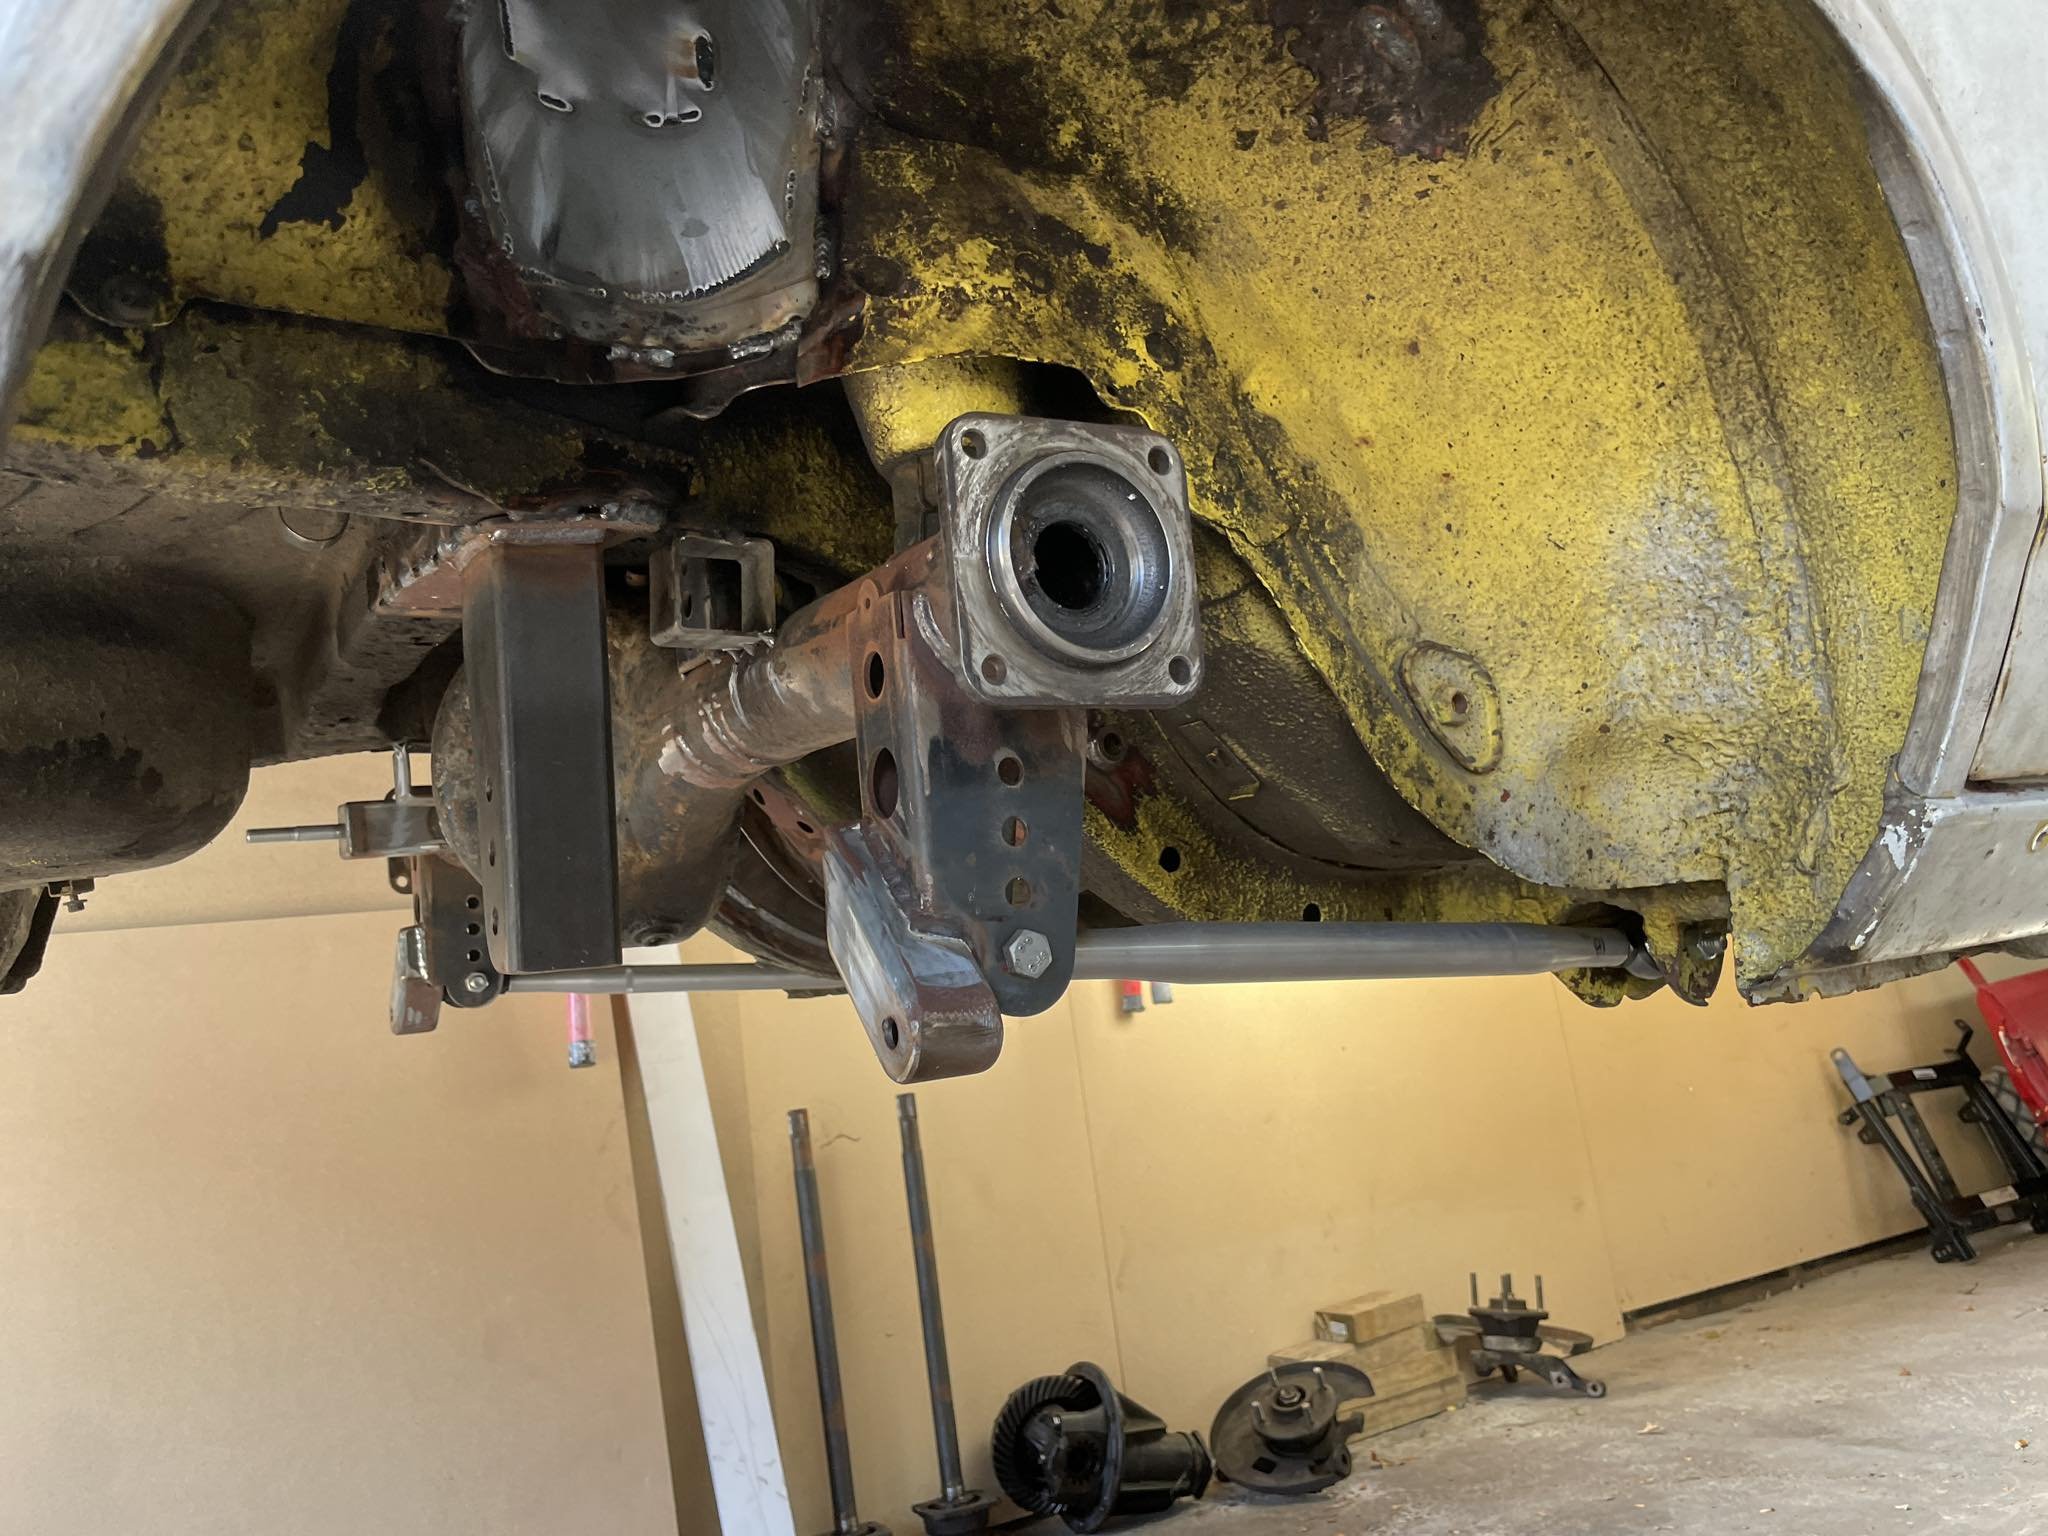
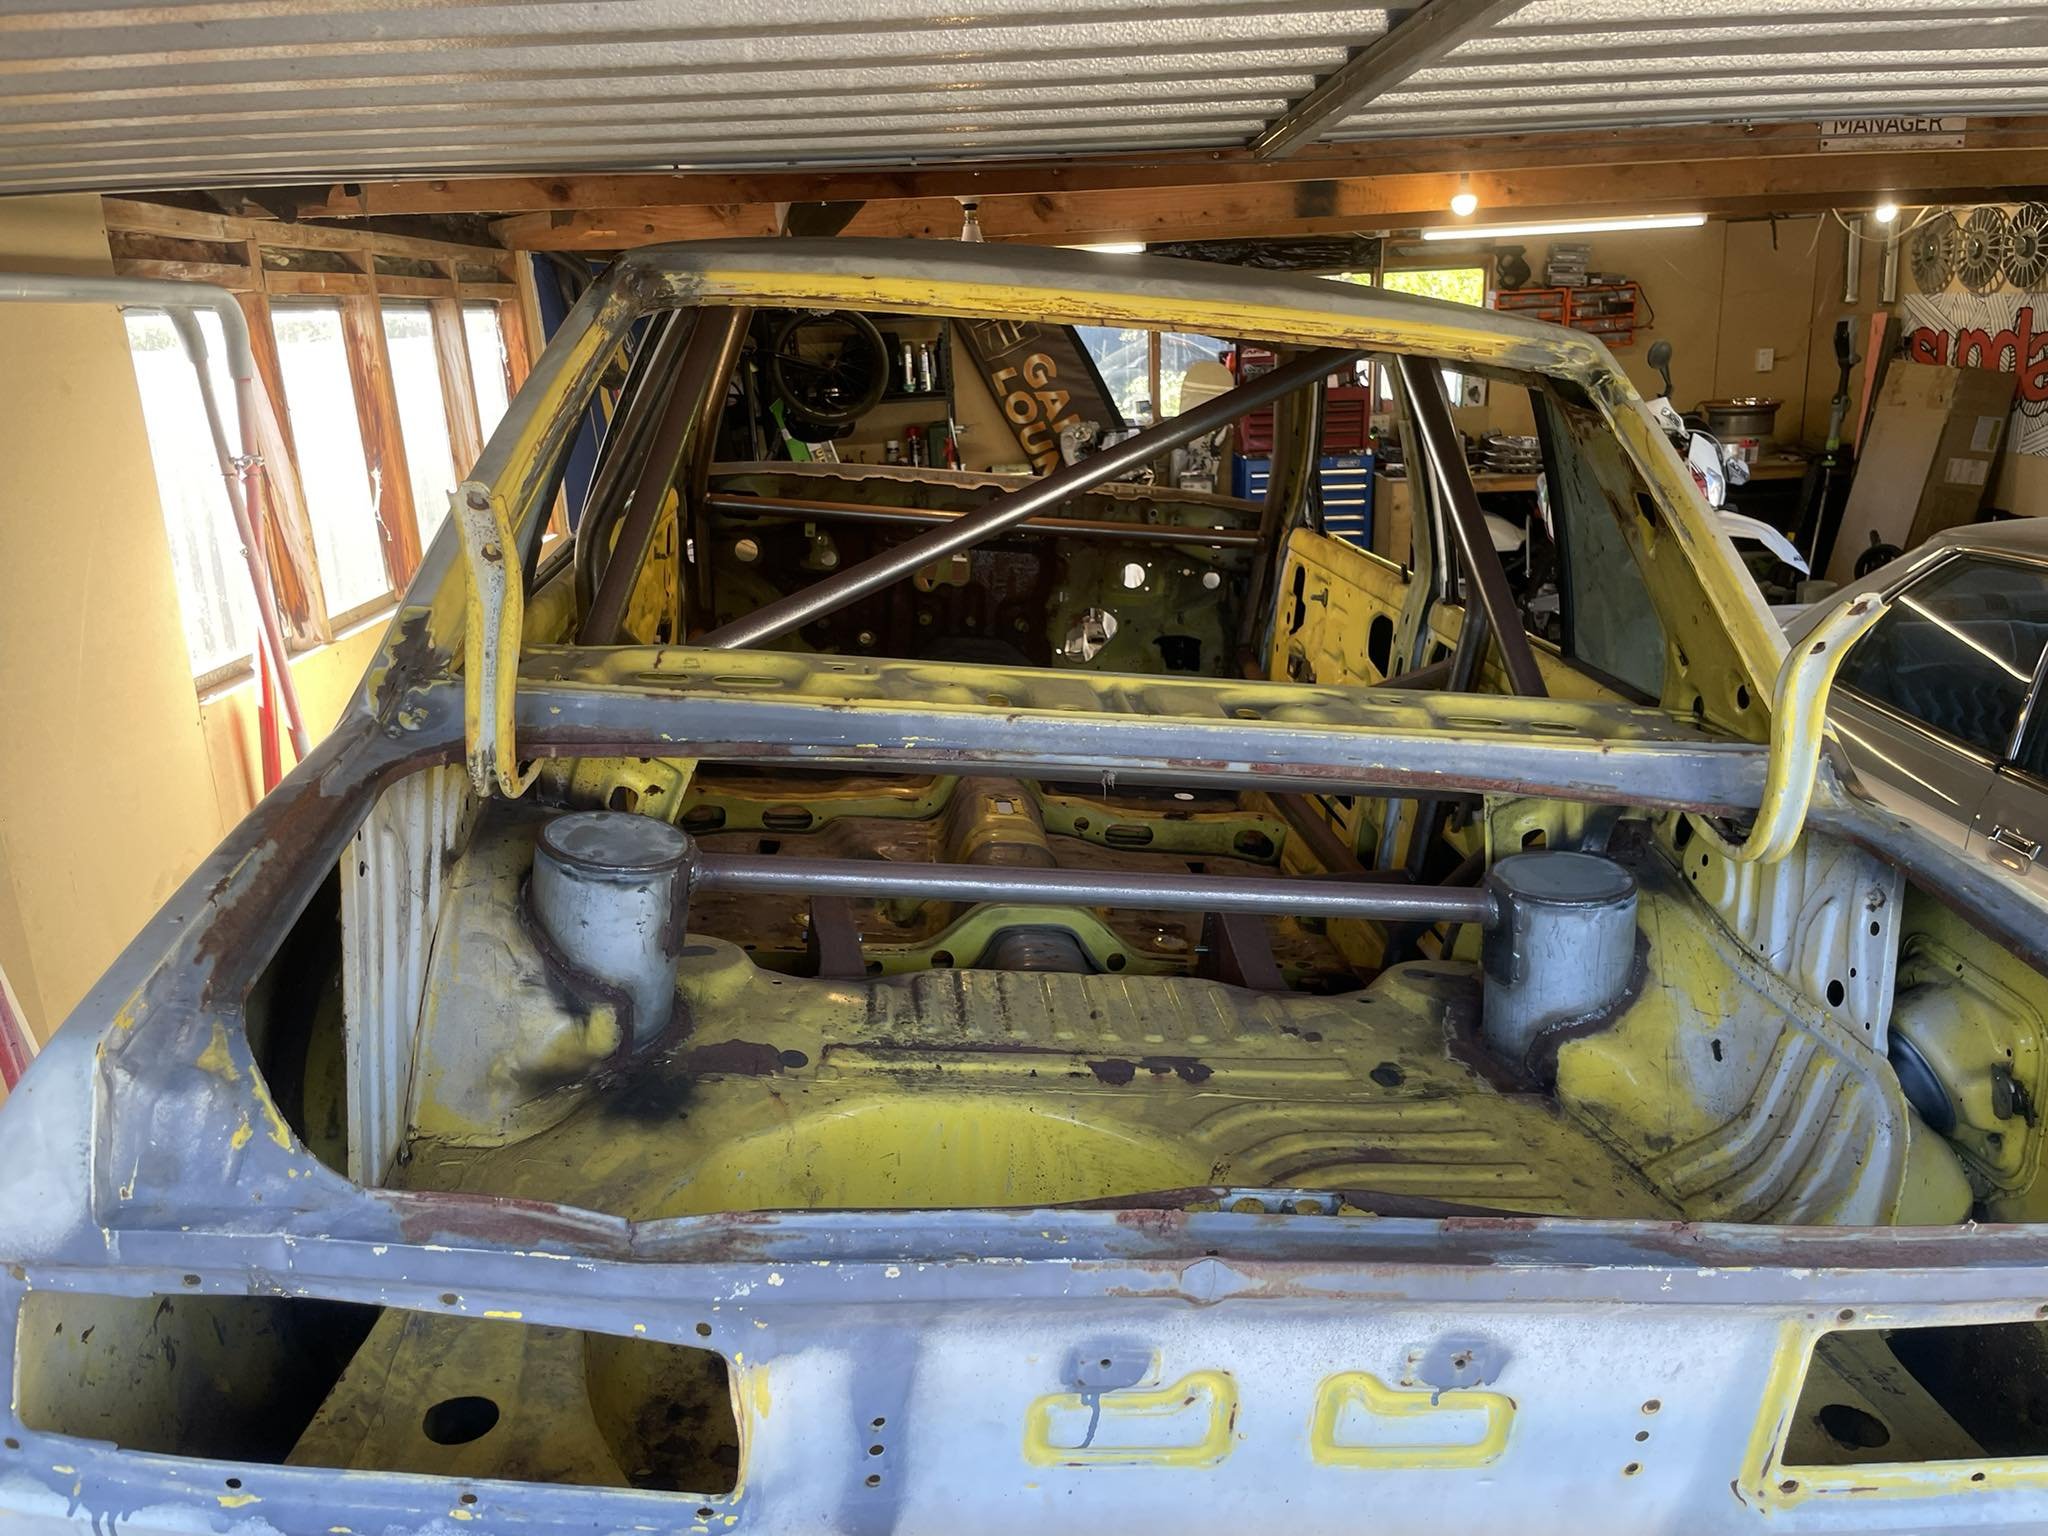
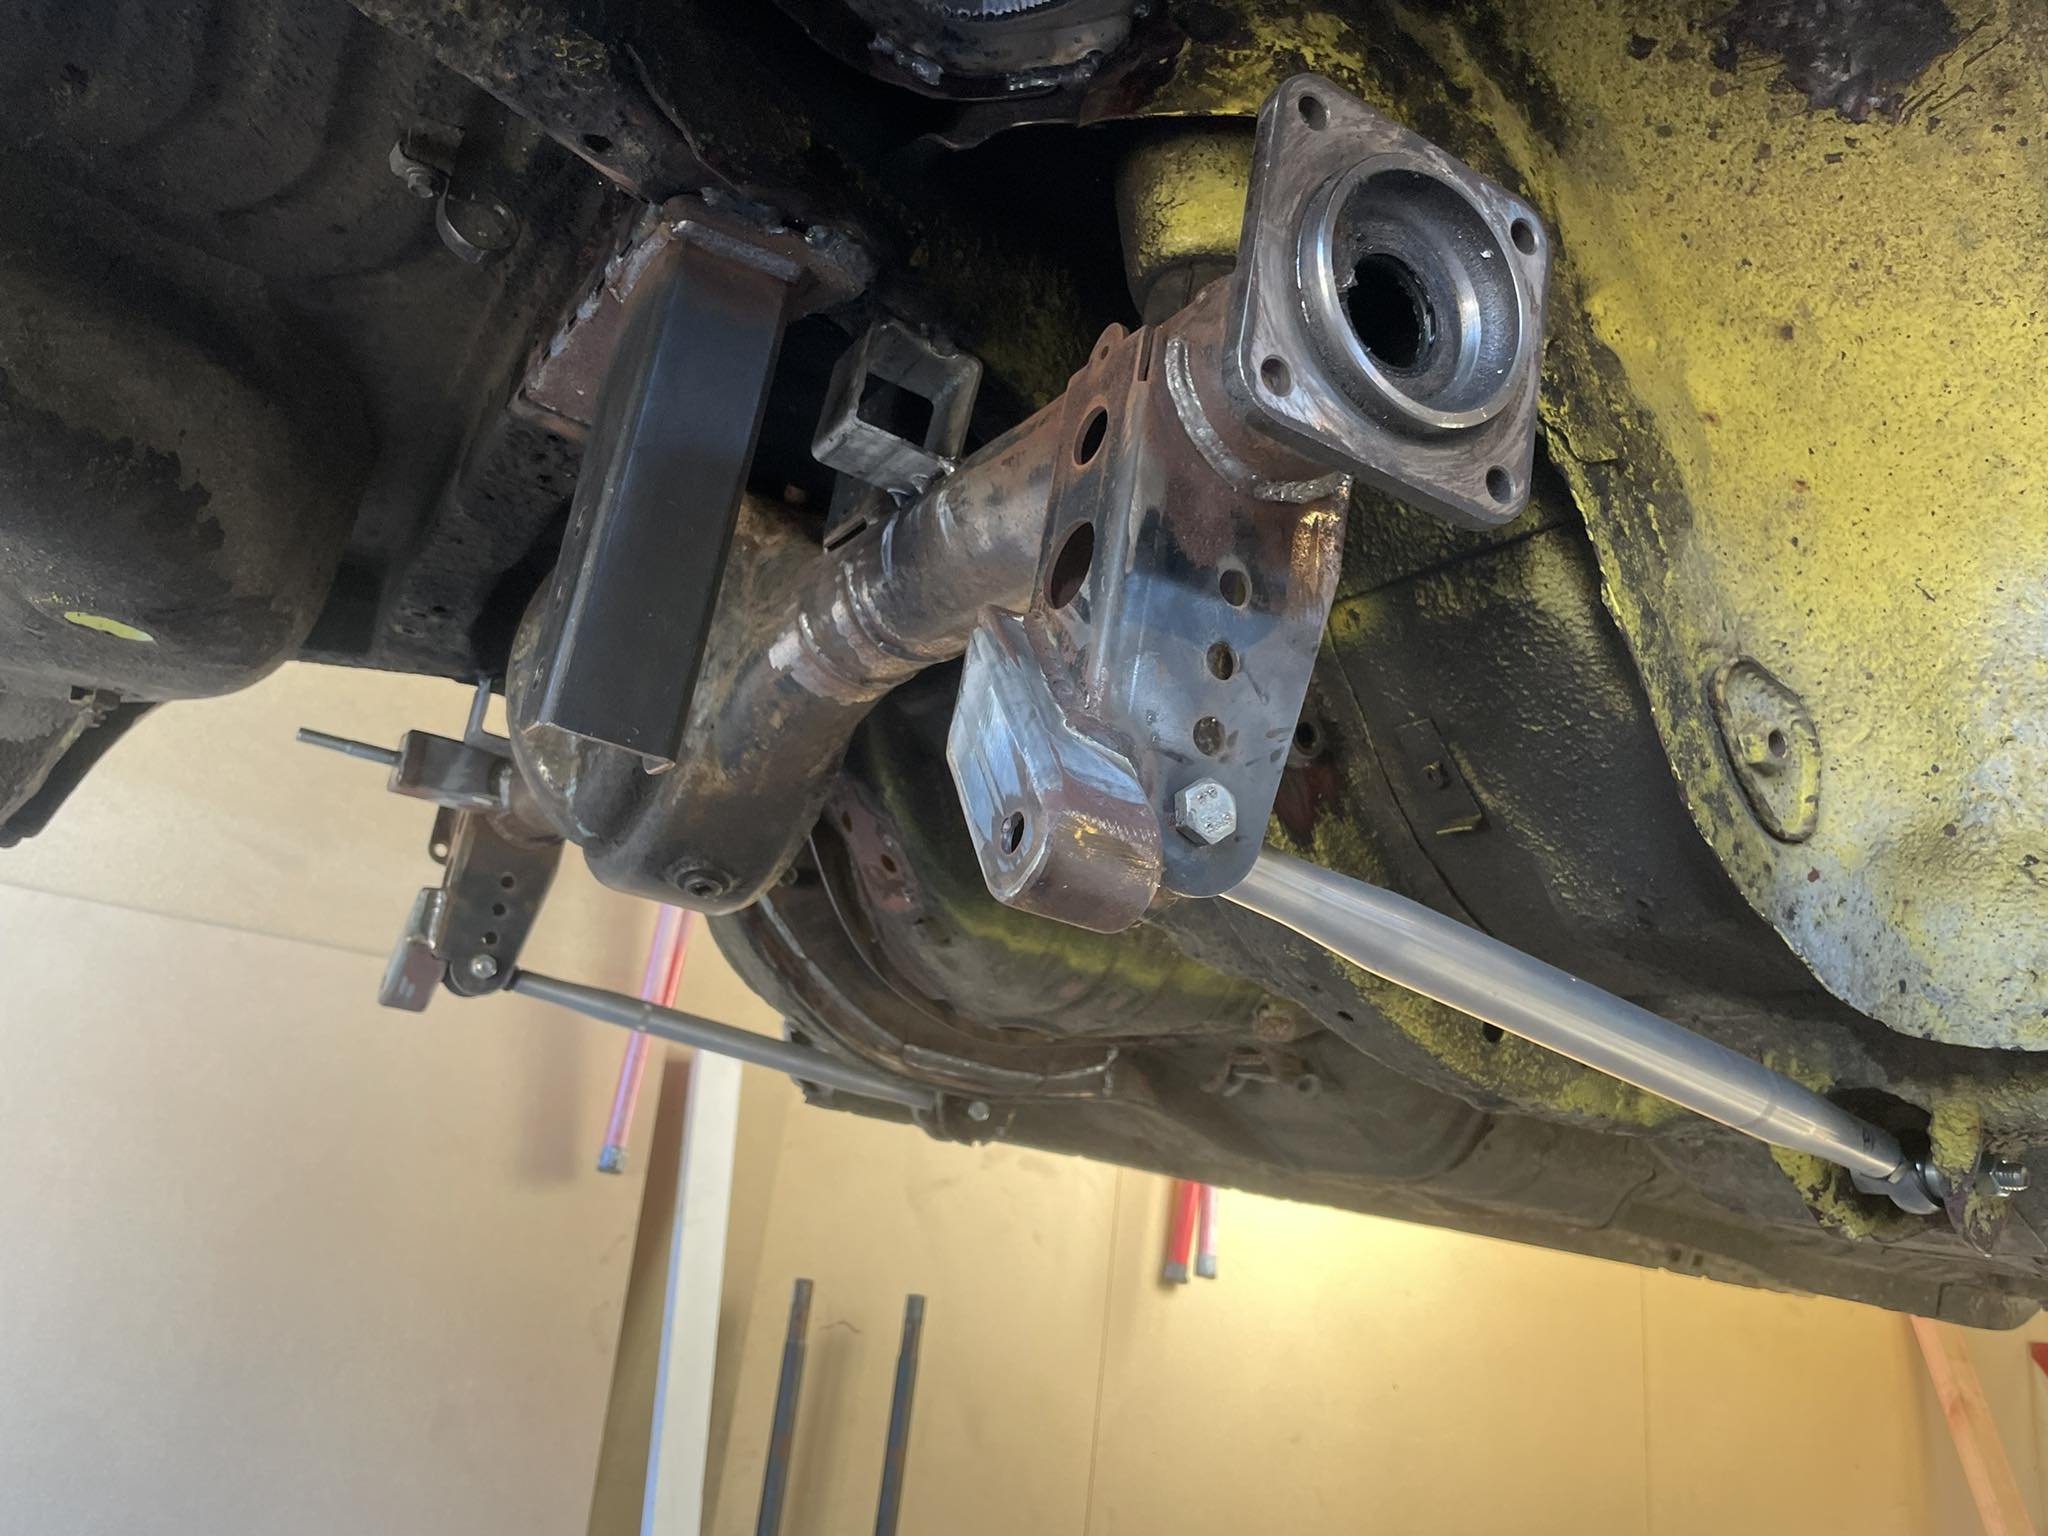
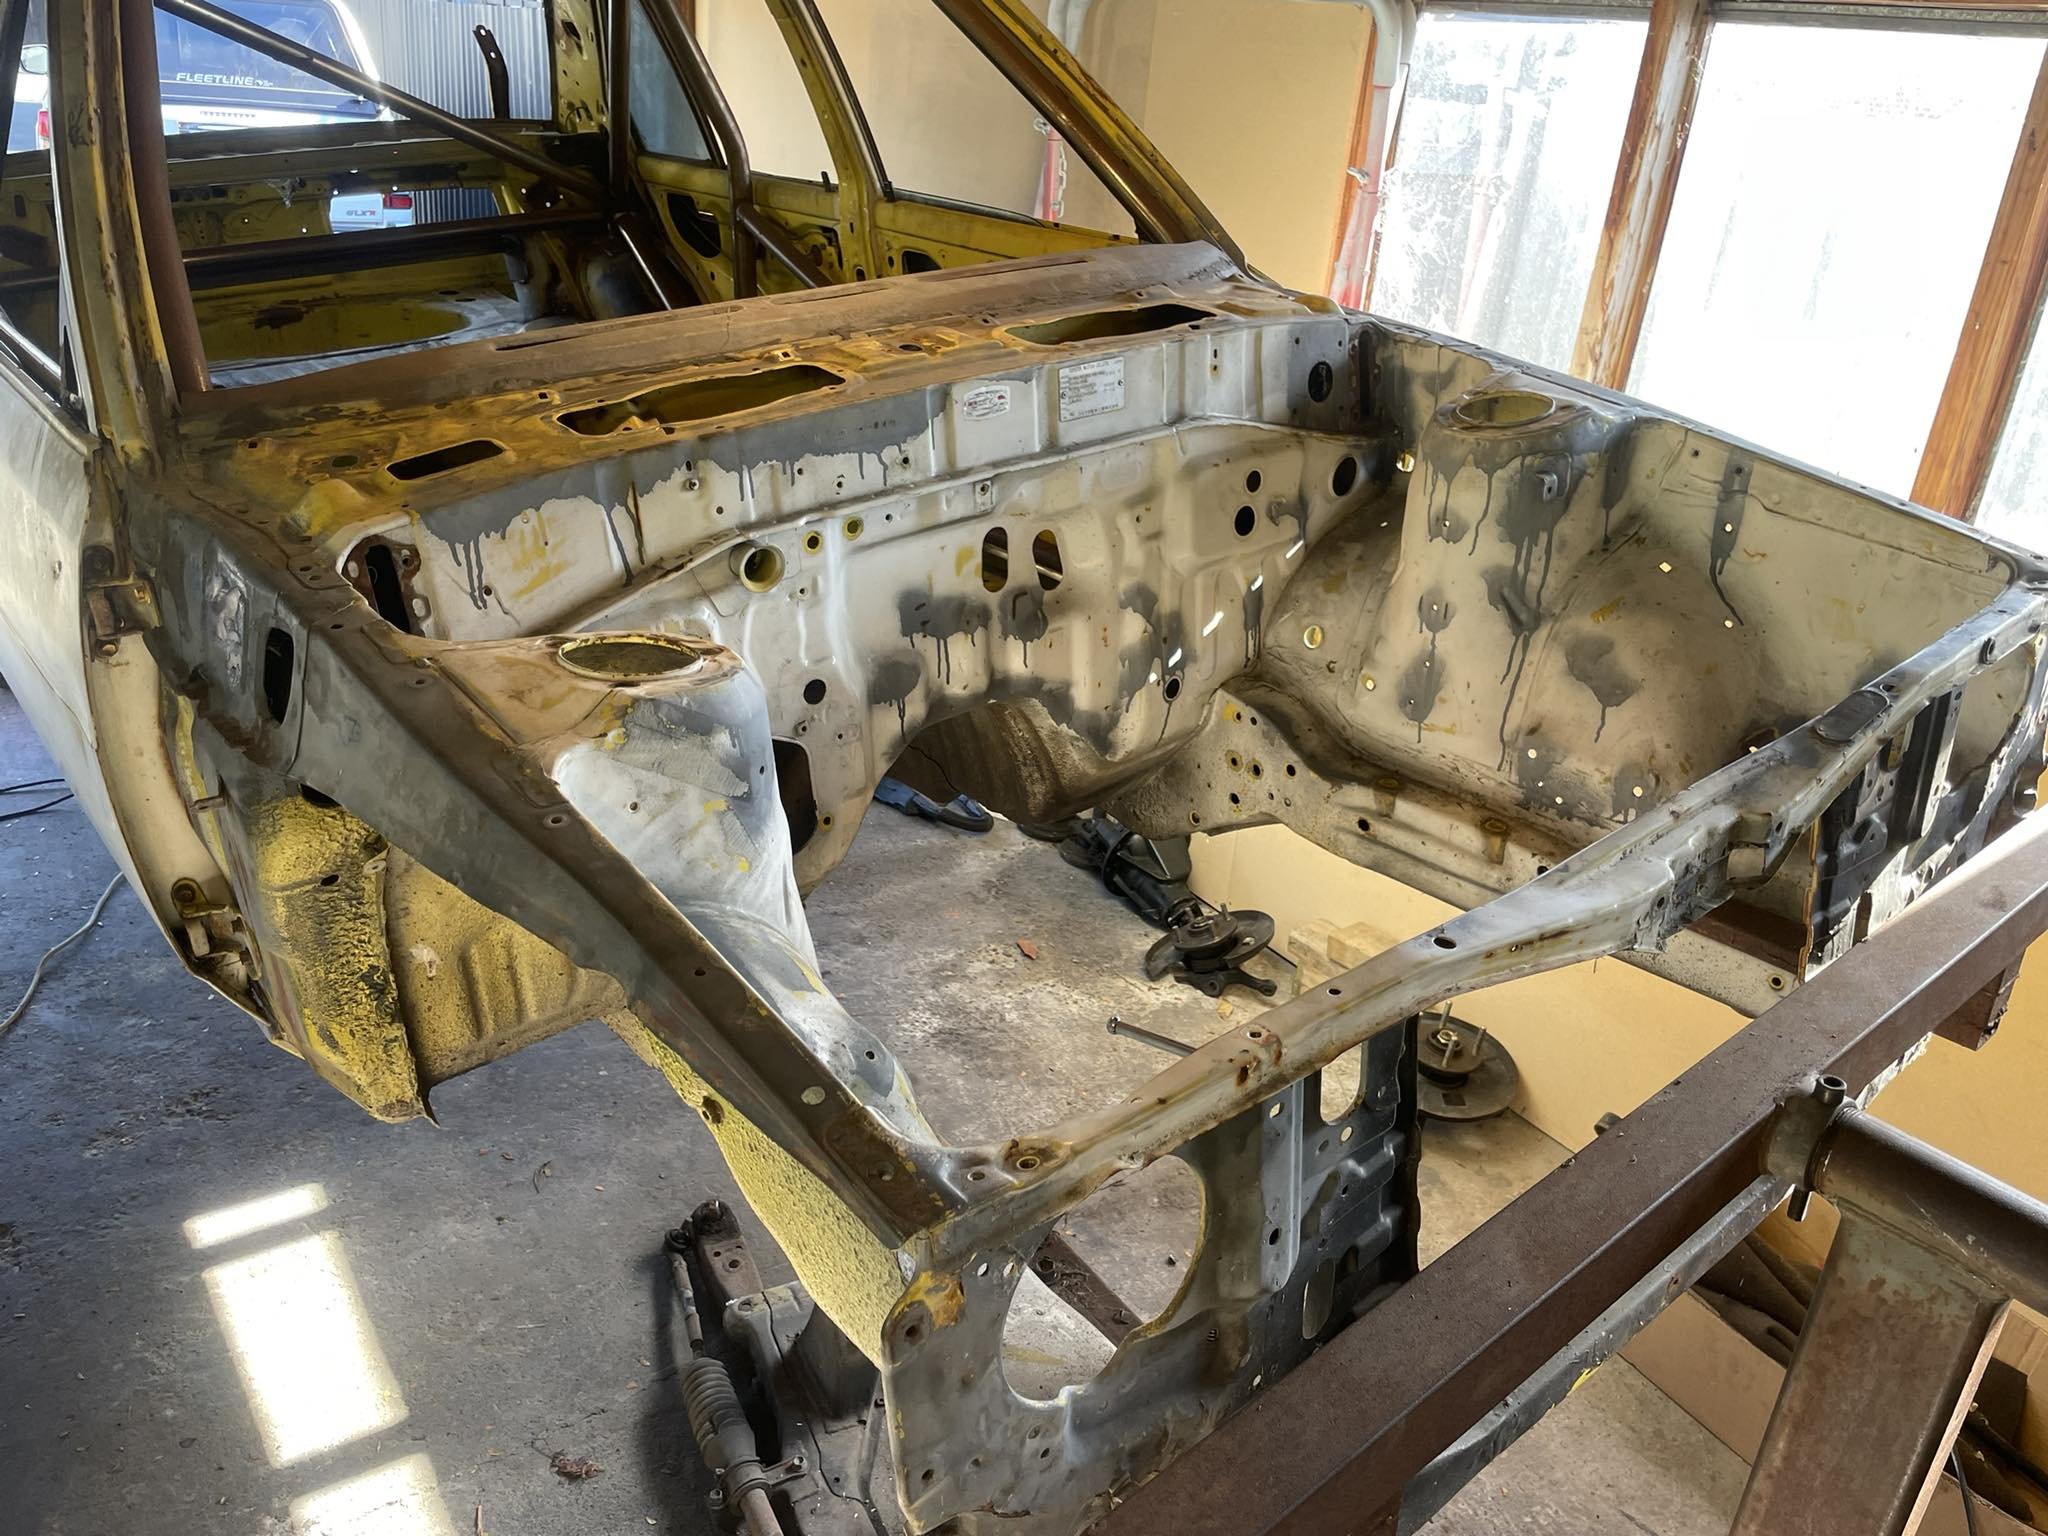
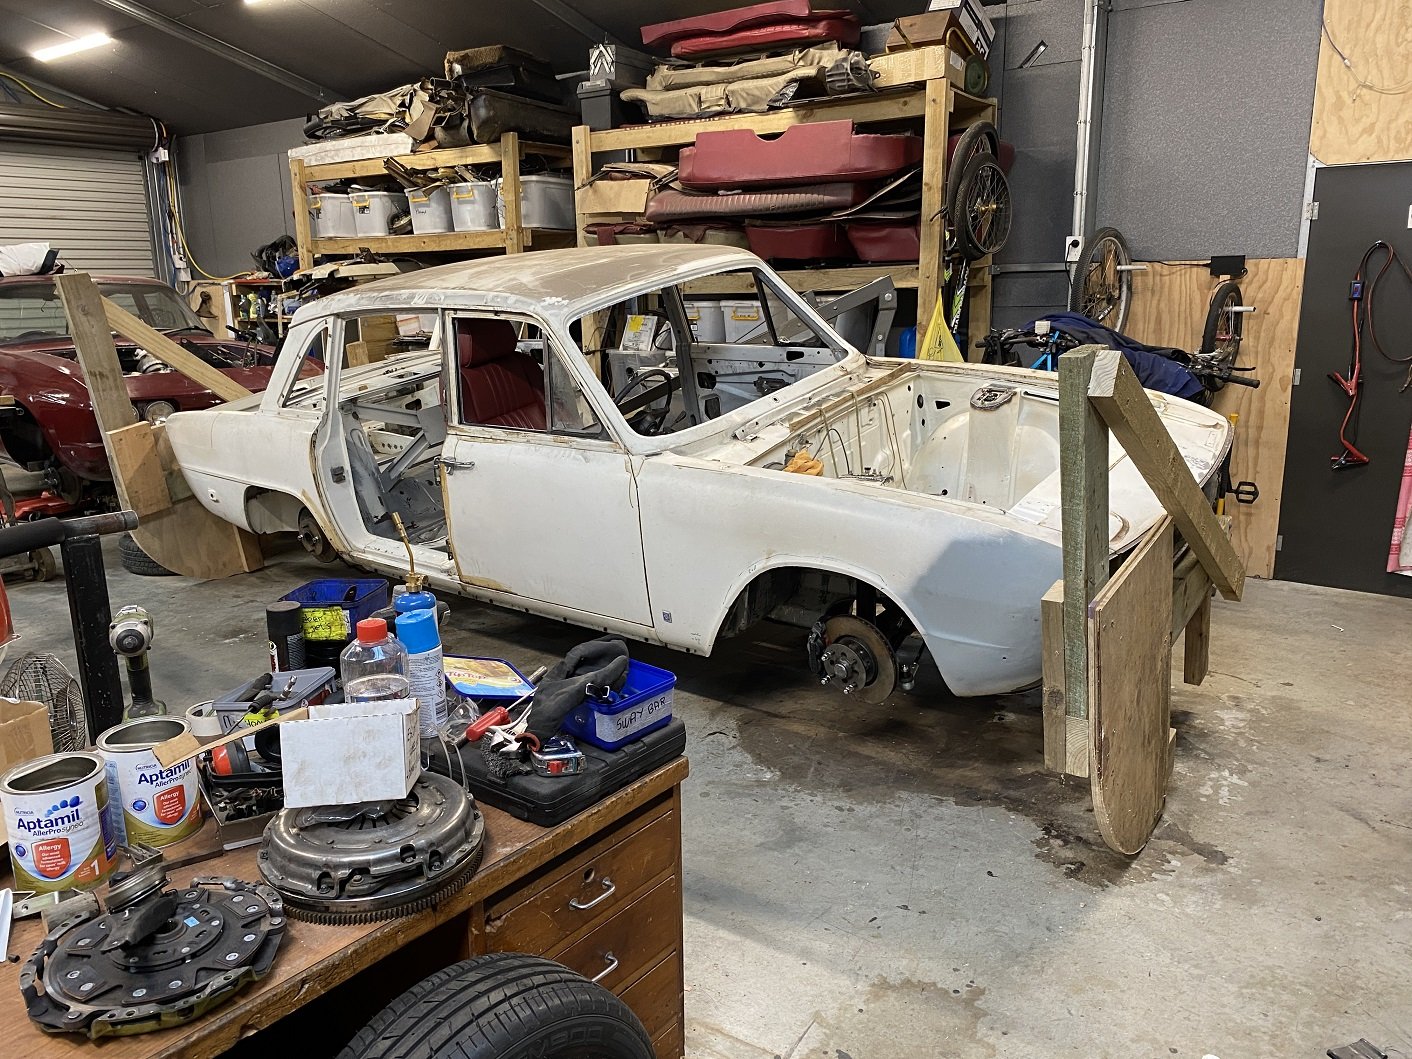
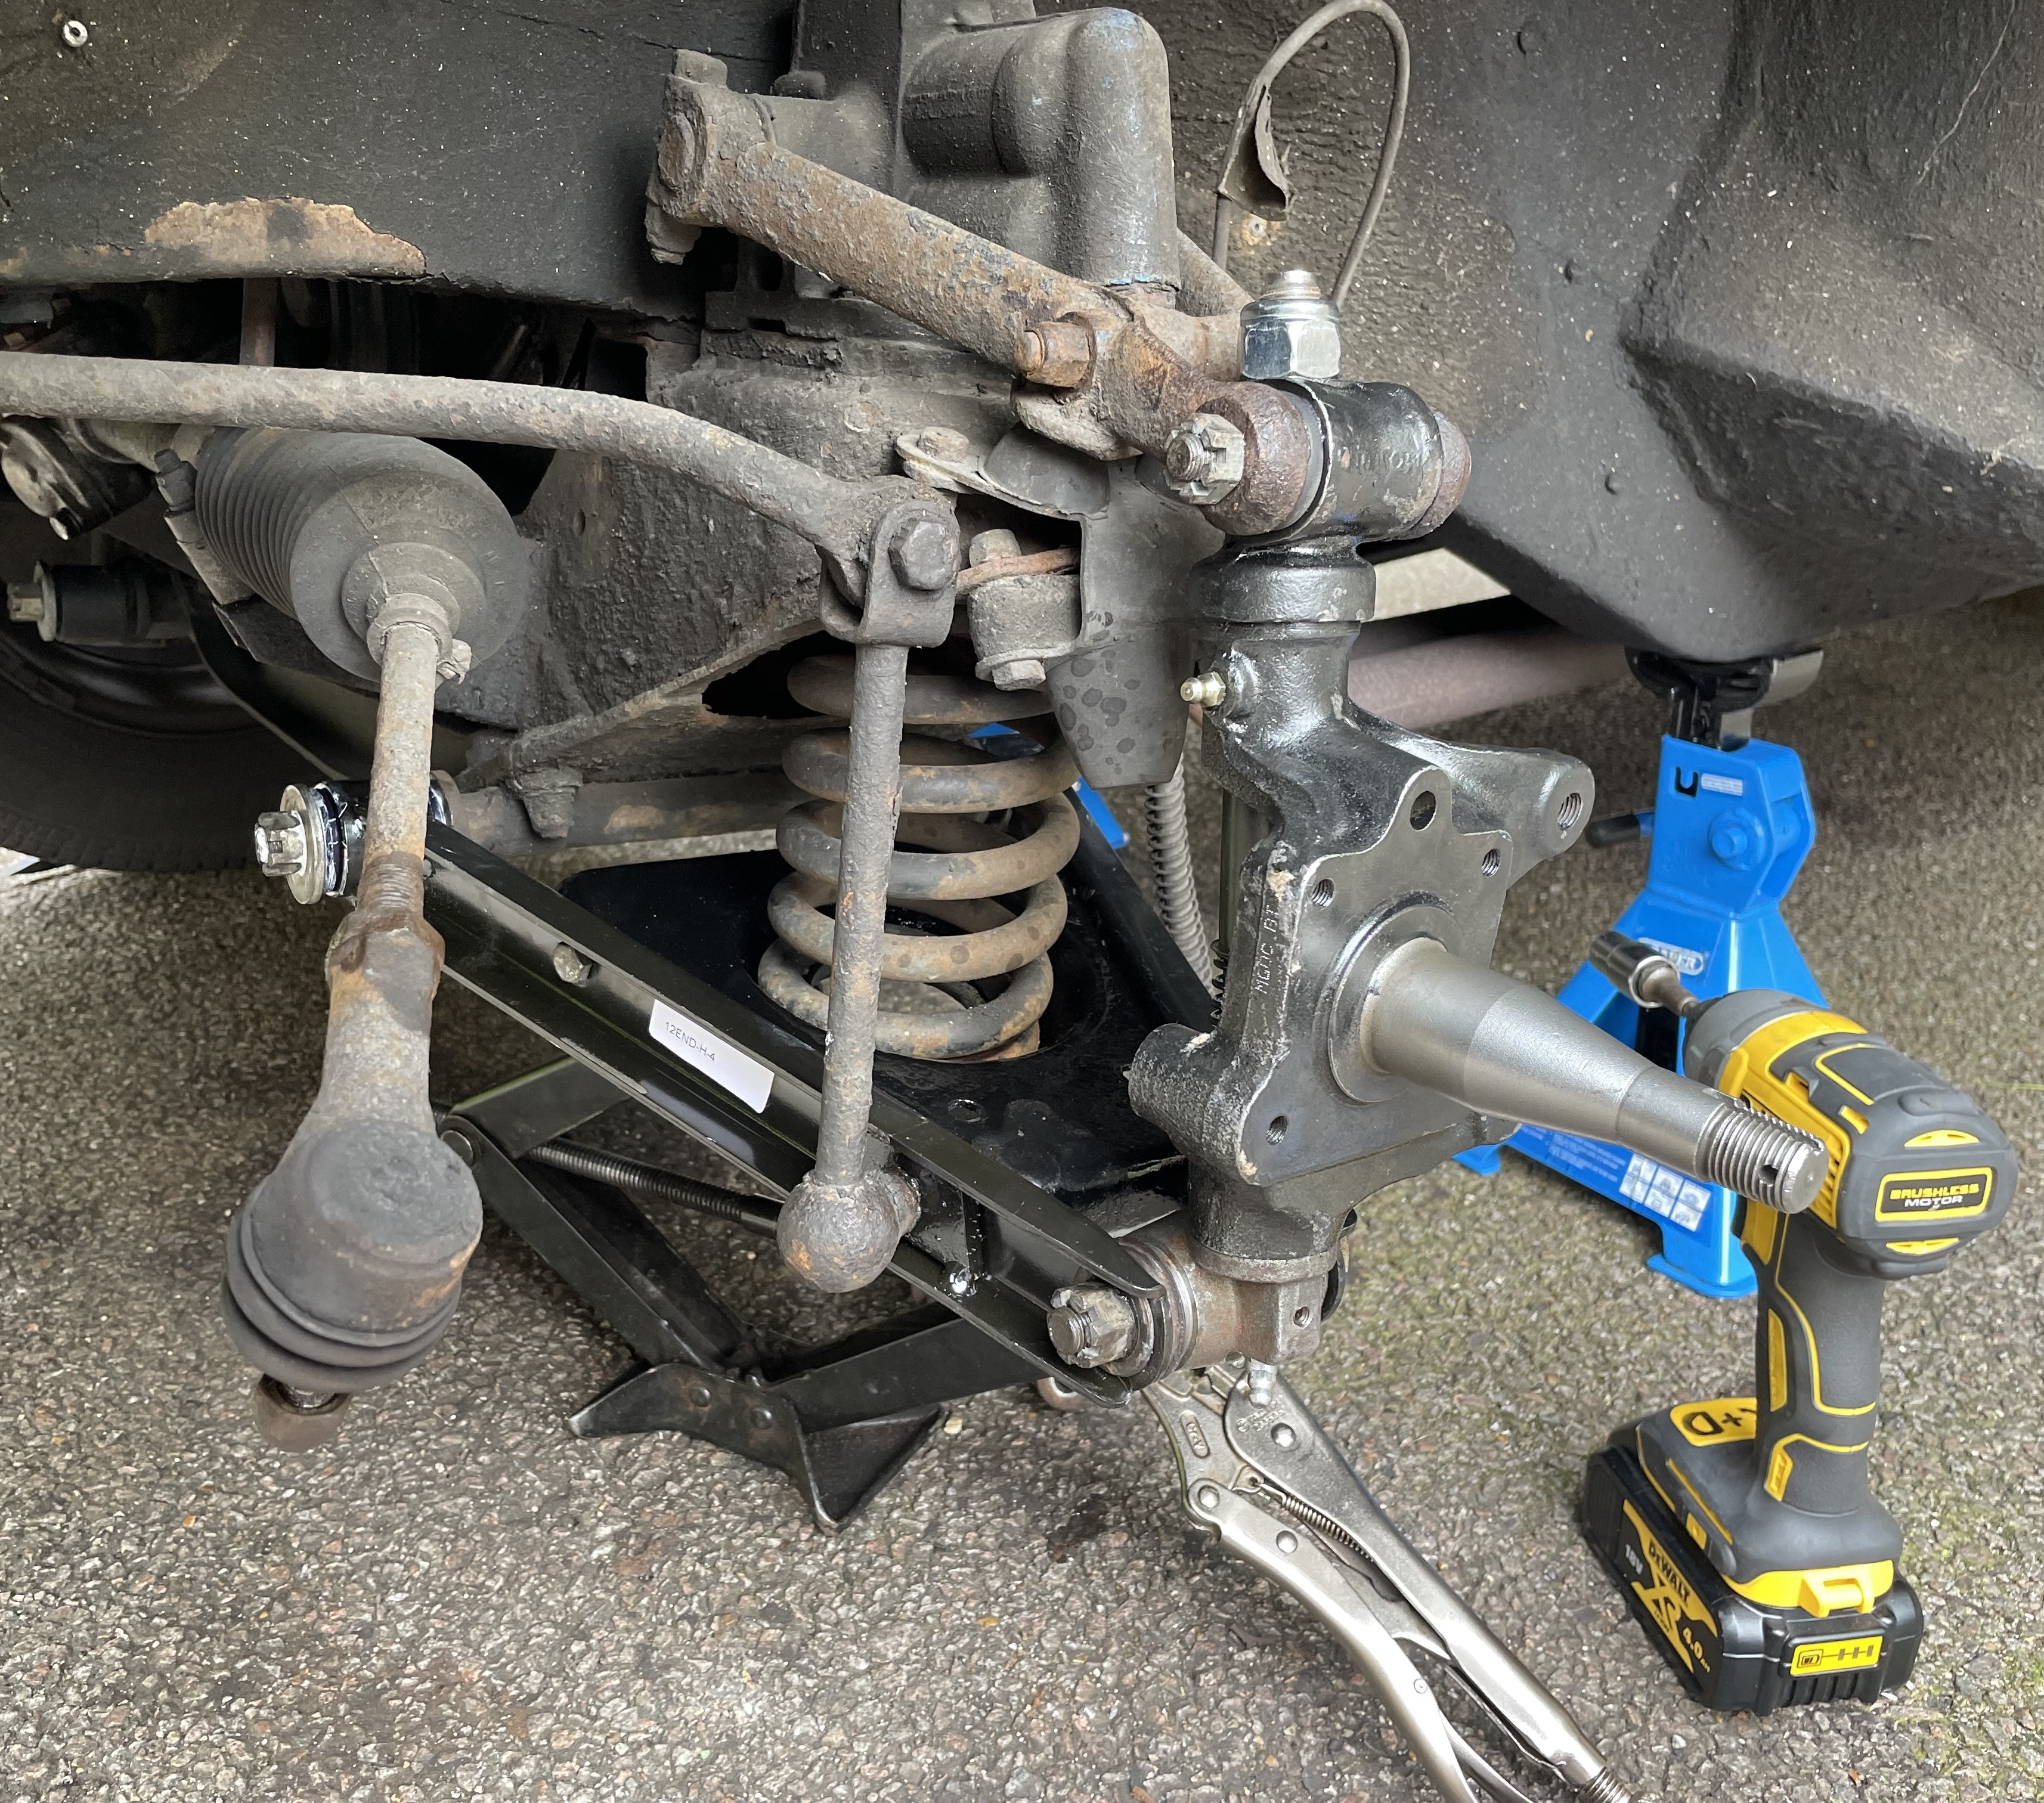
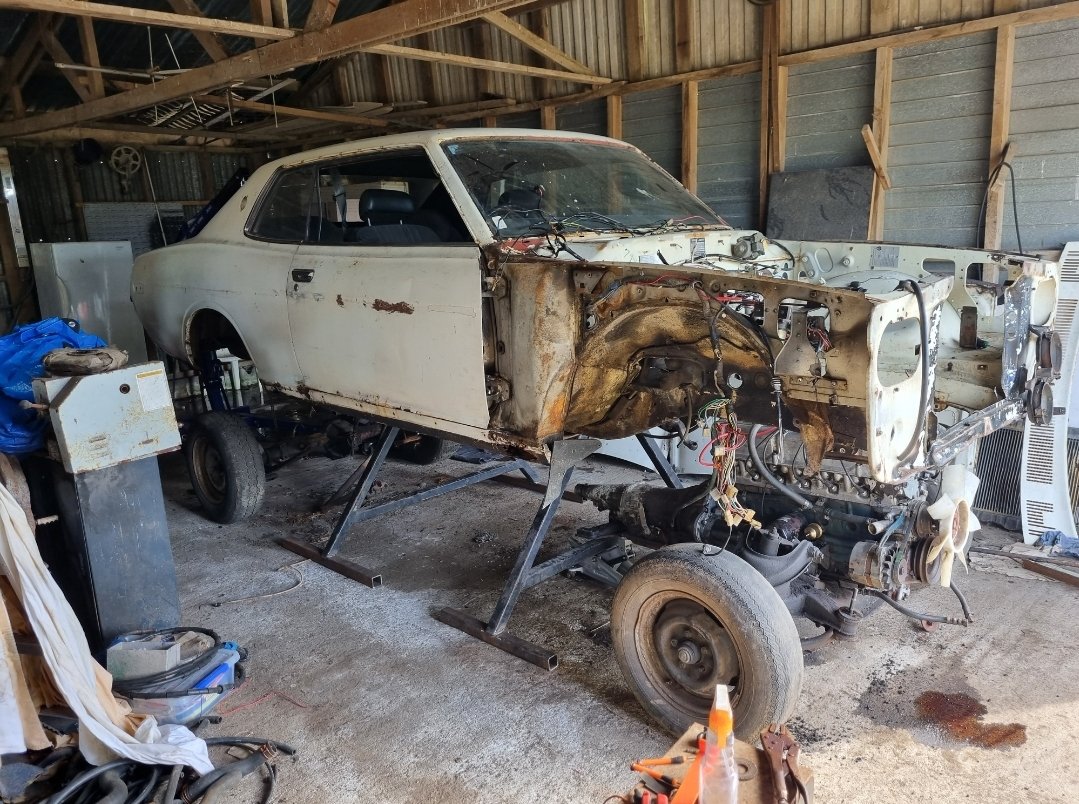
so after getting rid of my ae85 levin because i made it too nice to bash about at the track i was on the lookout for a suitable car to buy/build to have some fun in, bonus of this car is its also rego on hold if i get that way inclined. This popped on on market place for sale, the previous owner had JB Fab here build a 6 point cage and equal length 4 link setup with a b1600 diff, photos below how i got the car. It came with a lot of spares and all the parts needed to put a rolling body together really. i got it home yesterday and started attacking some dodgy spots with a wire wheel to see what i'm dealing with rust wise, didn't find too many surprises only a couple of bad spots that need patches. Removed everything that was bolted on, it had Silvia front suspension which i will be getting rid of and i have ae86 coilovers and knuckles to replace this. before i got this car i had already purchased an engine mount and j160 adaptor kit from Niteparts for 2zz. looking into diff options for the b1600 diff, i've seen a bit online about what heads fit into the b1600 setup. Ideally i would like a nice 2 way diff for this, I saw that potentially fc3s nuggets bolt in? i have a 4.9 Ratio at the moment which is perfect. current plan of attack is: - Rust patches. - wirewheel and re undercoat the underside. - Doors and front end to panel beater for a quick panel and paint. - Weld up all the unnecessary holes in the engine bay. - Mockup j160/2zz combo and start headers and itb setup. - Sort rear brake setup on the diff. - Powedercoat/Zinc everything to make it nice Discussion - Discussion
10 points
-
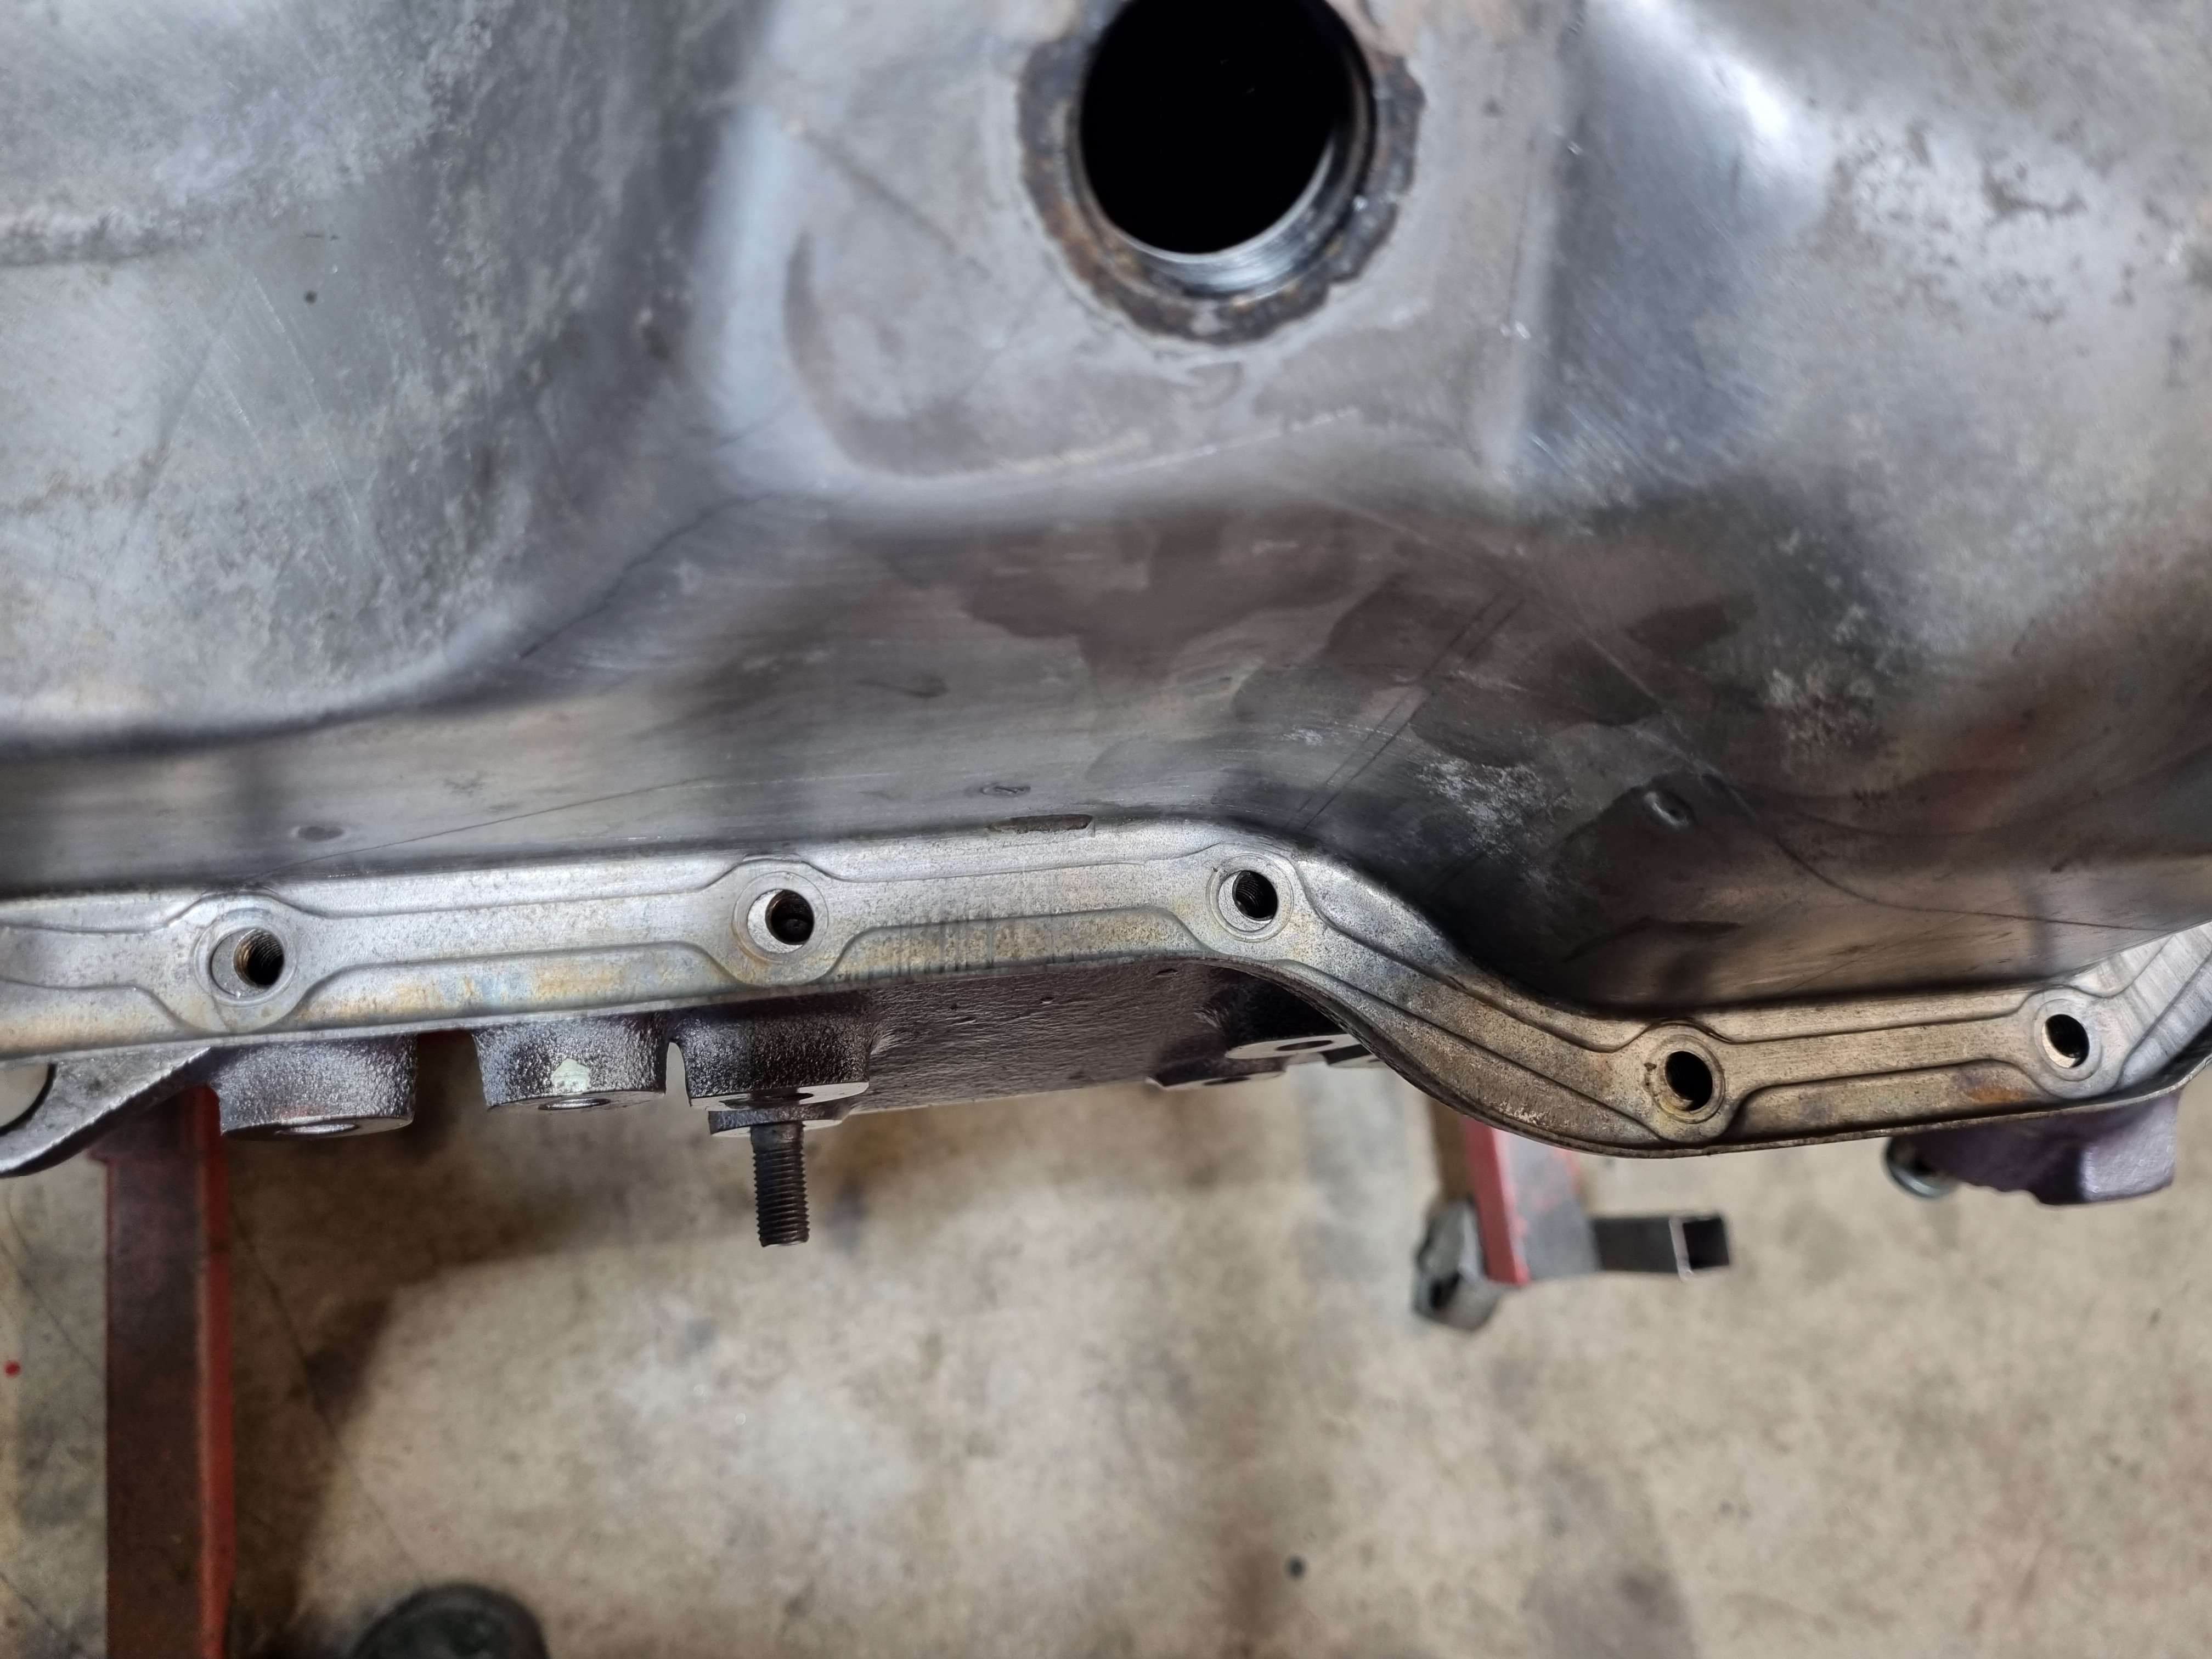
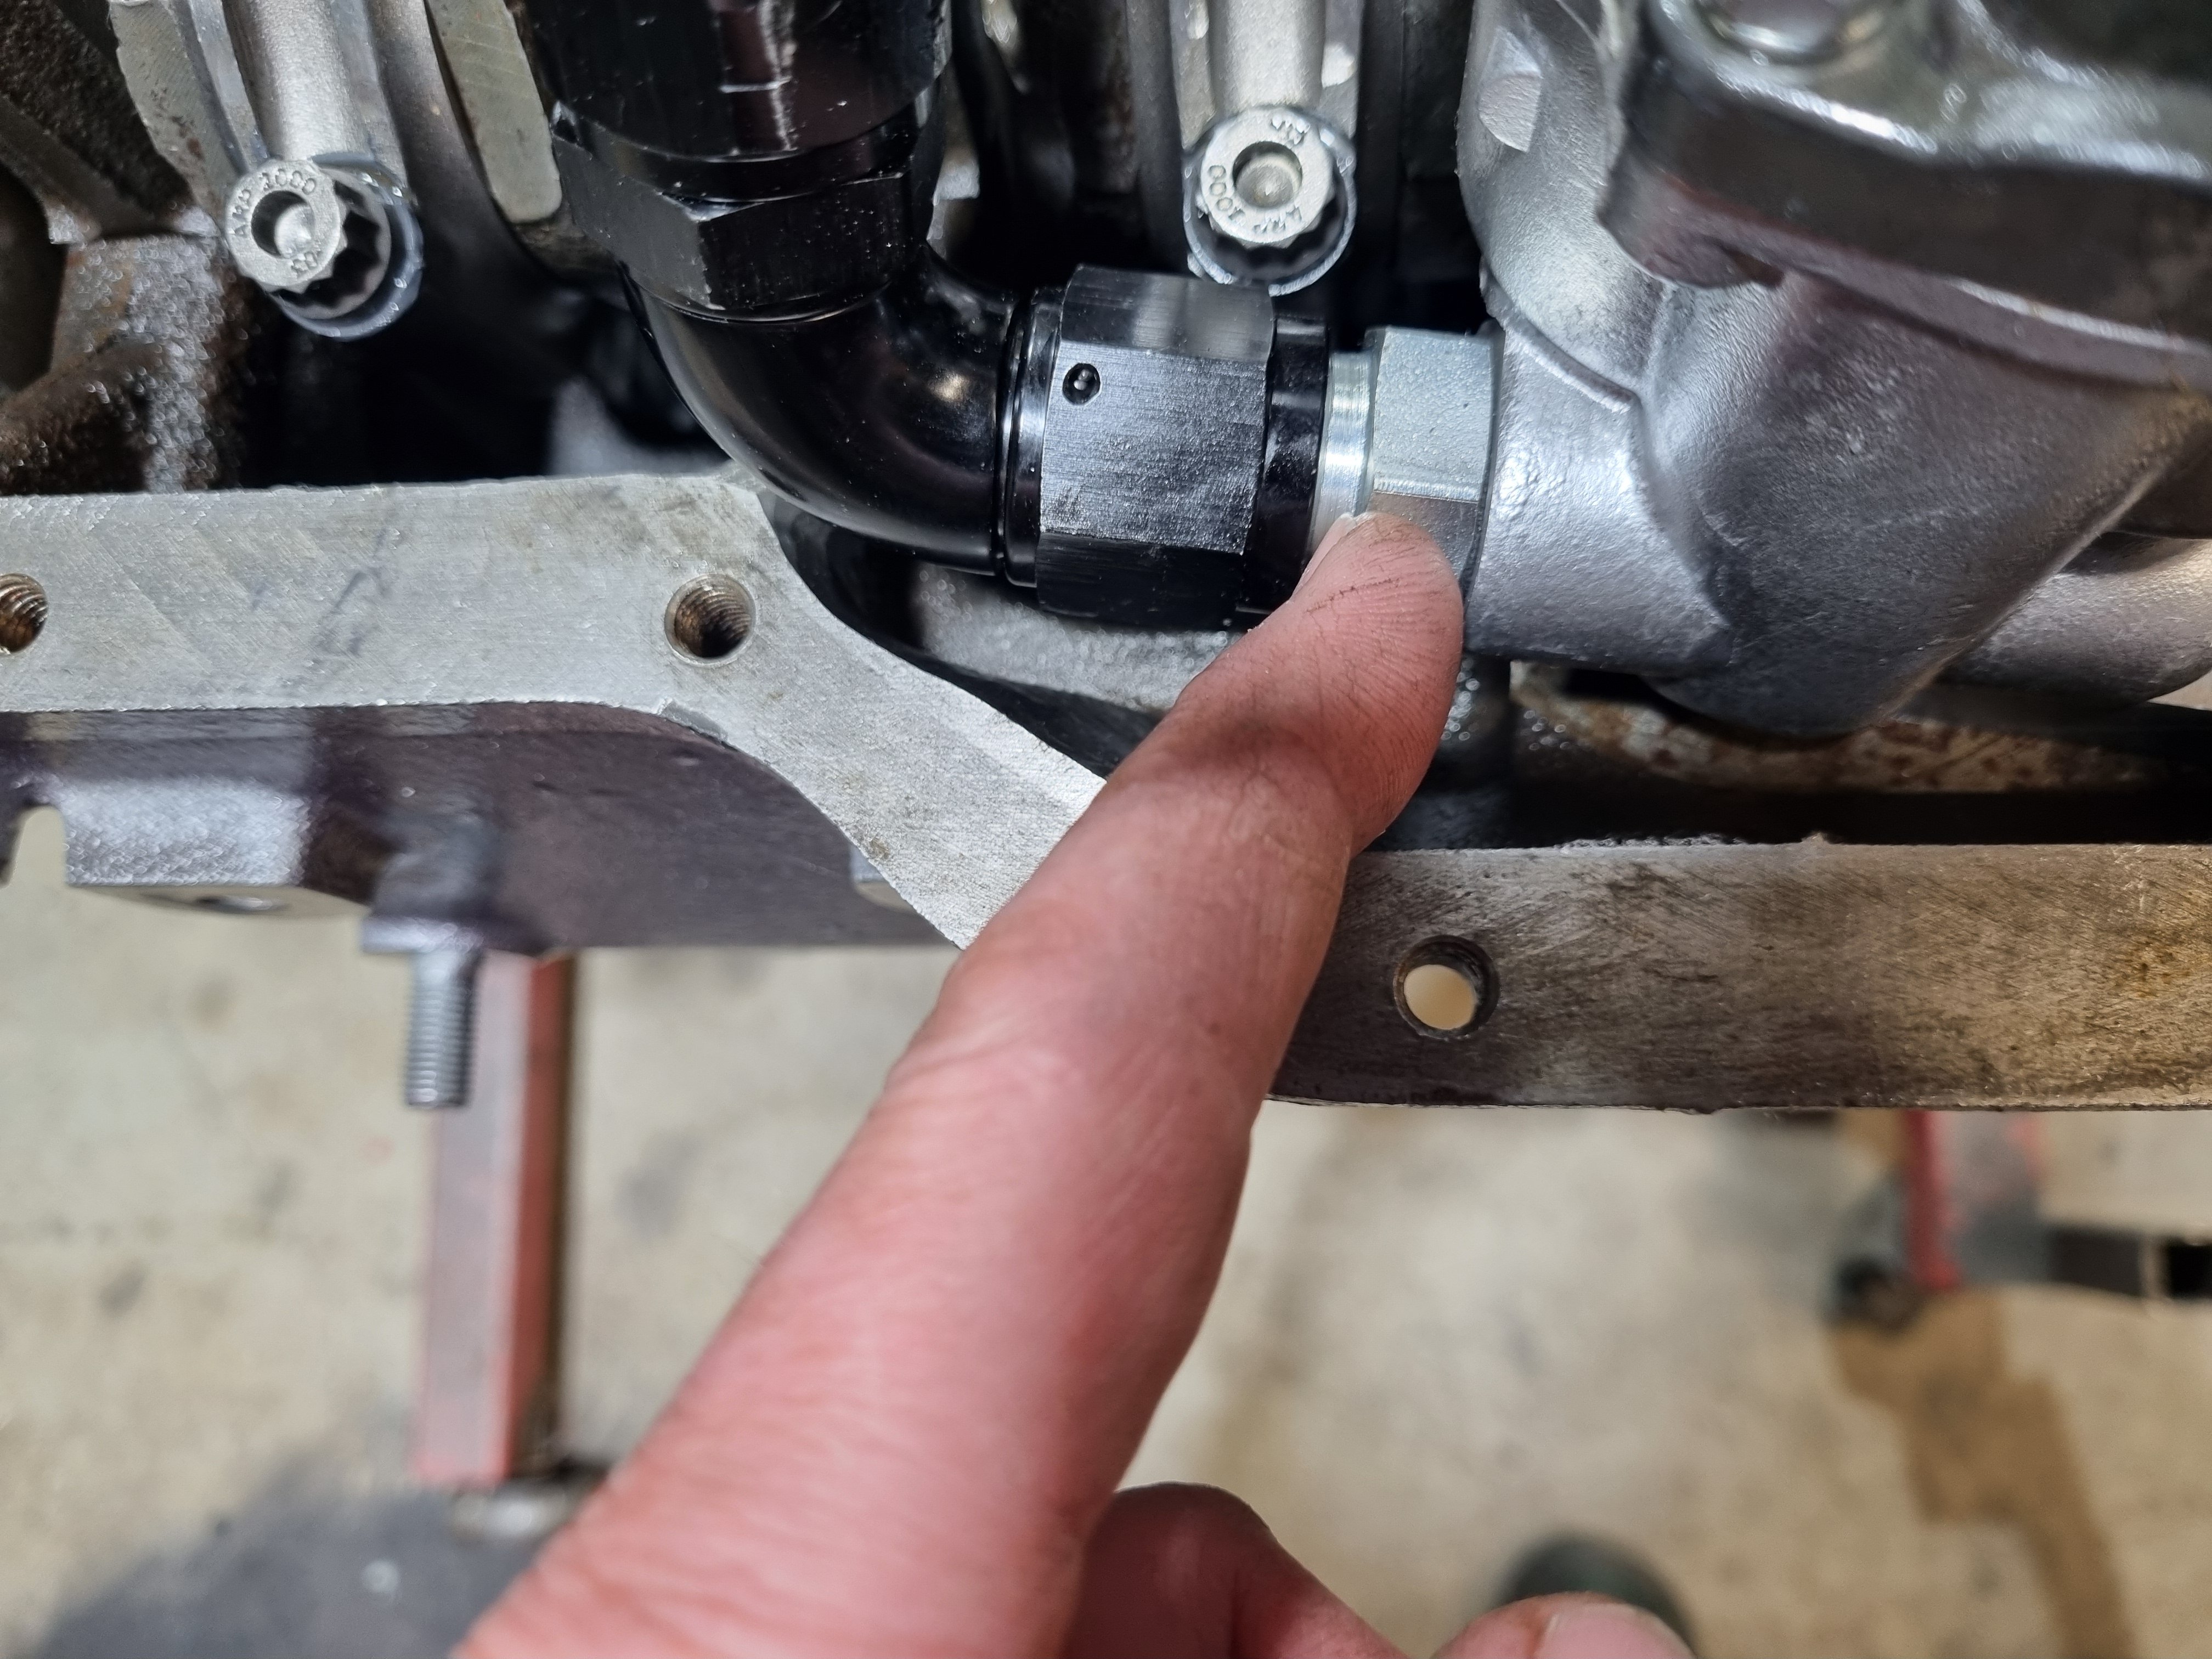
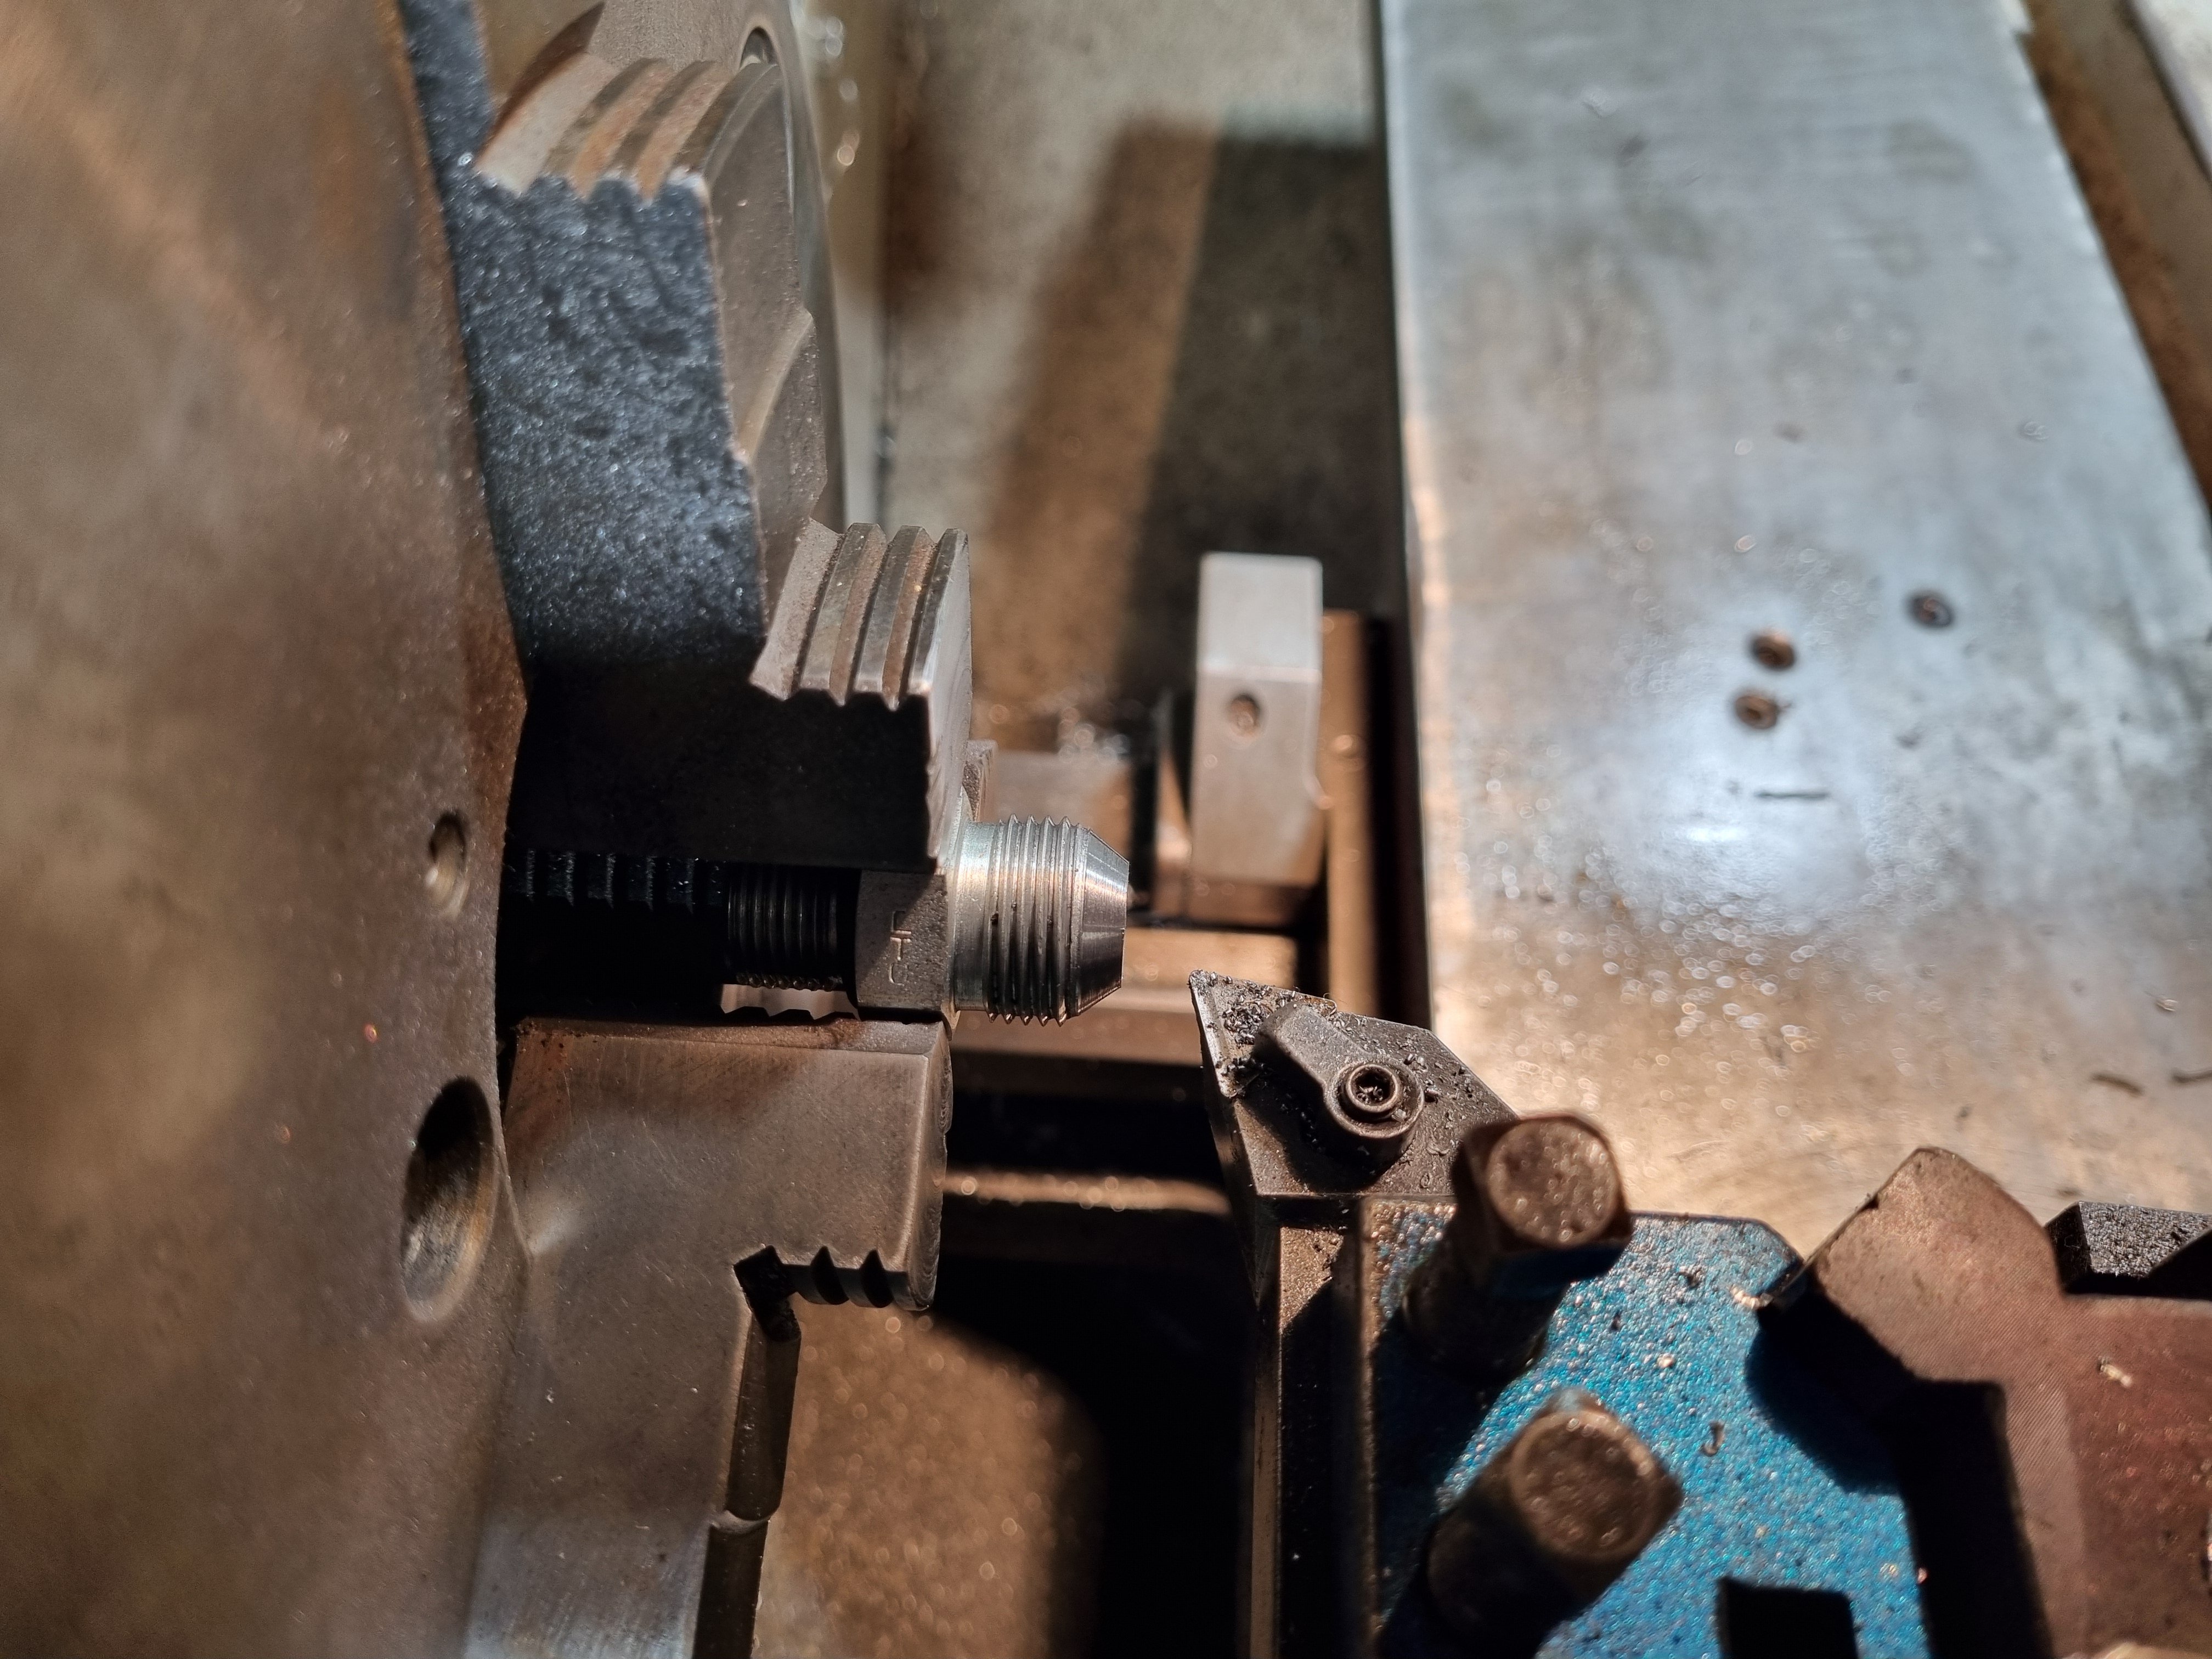
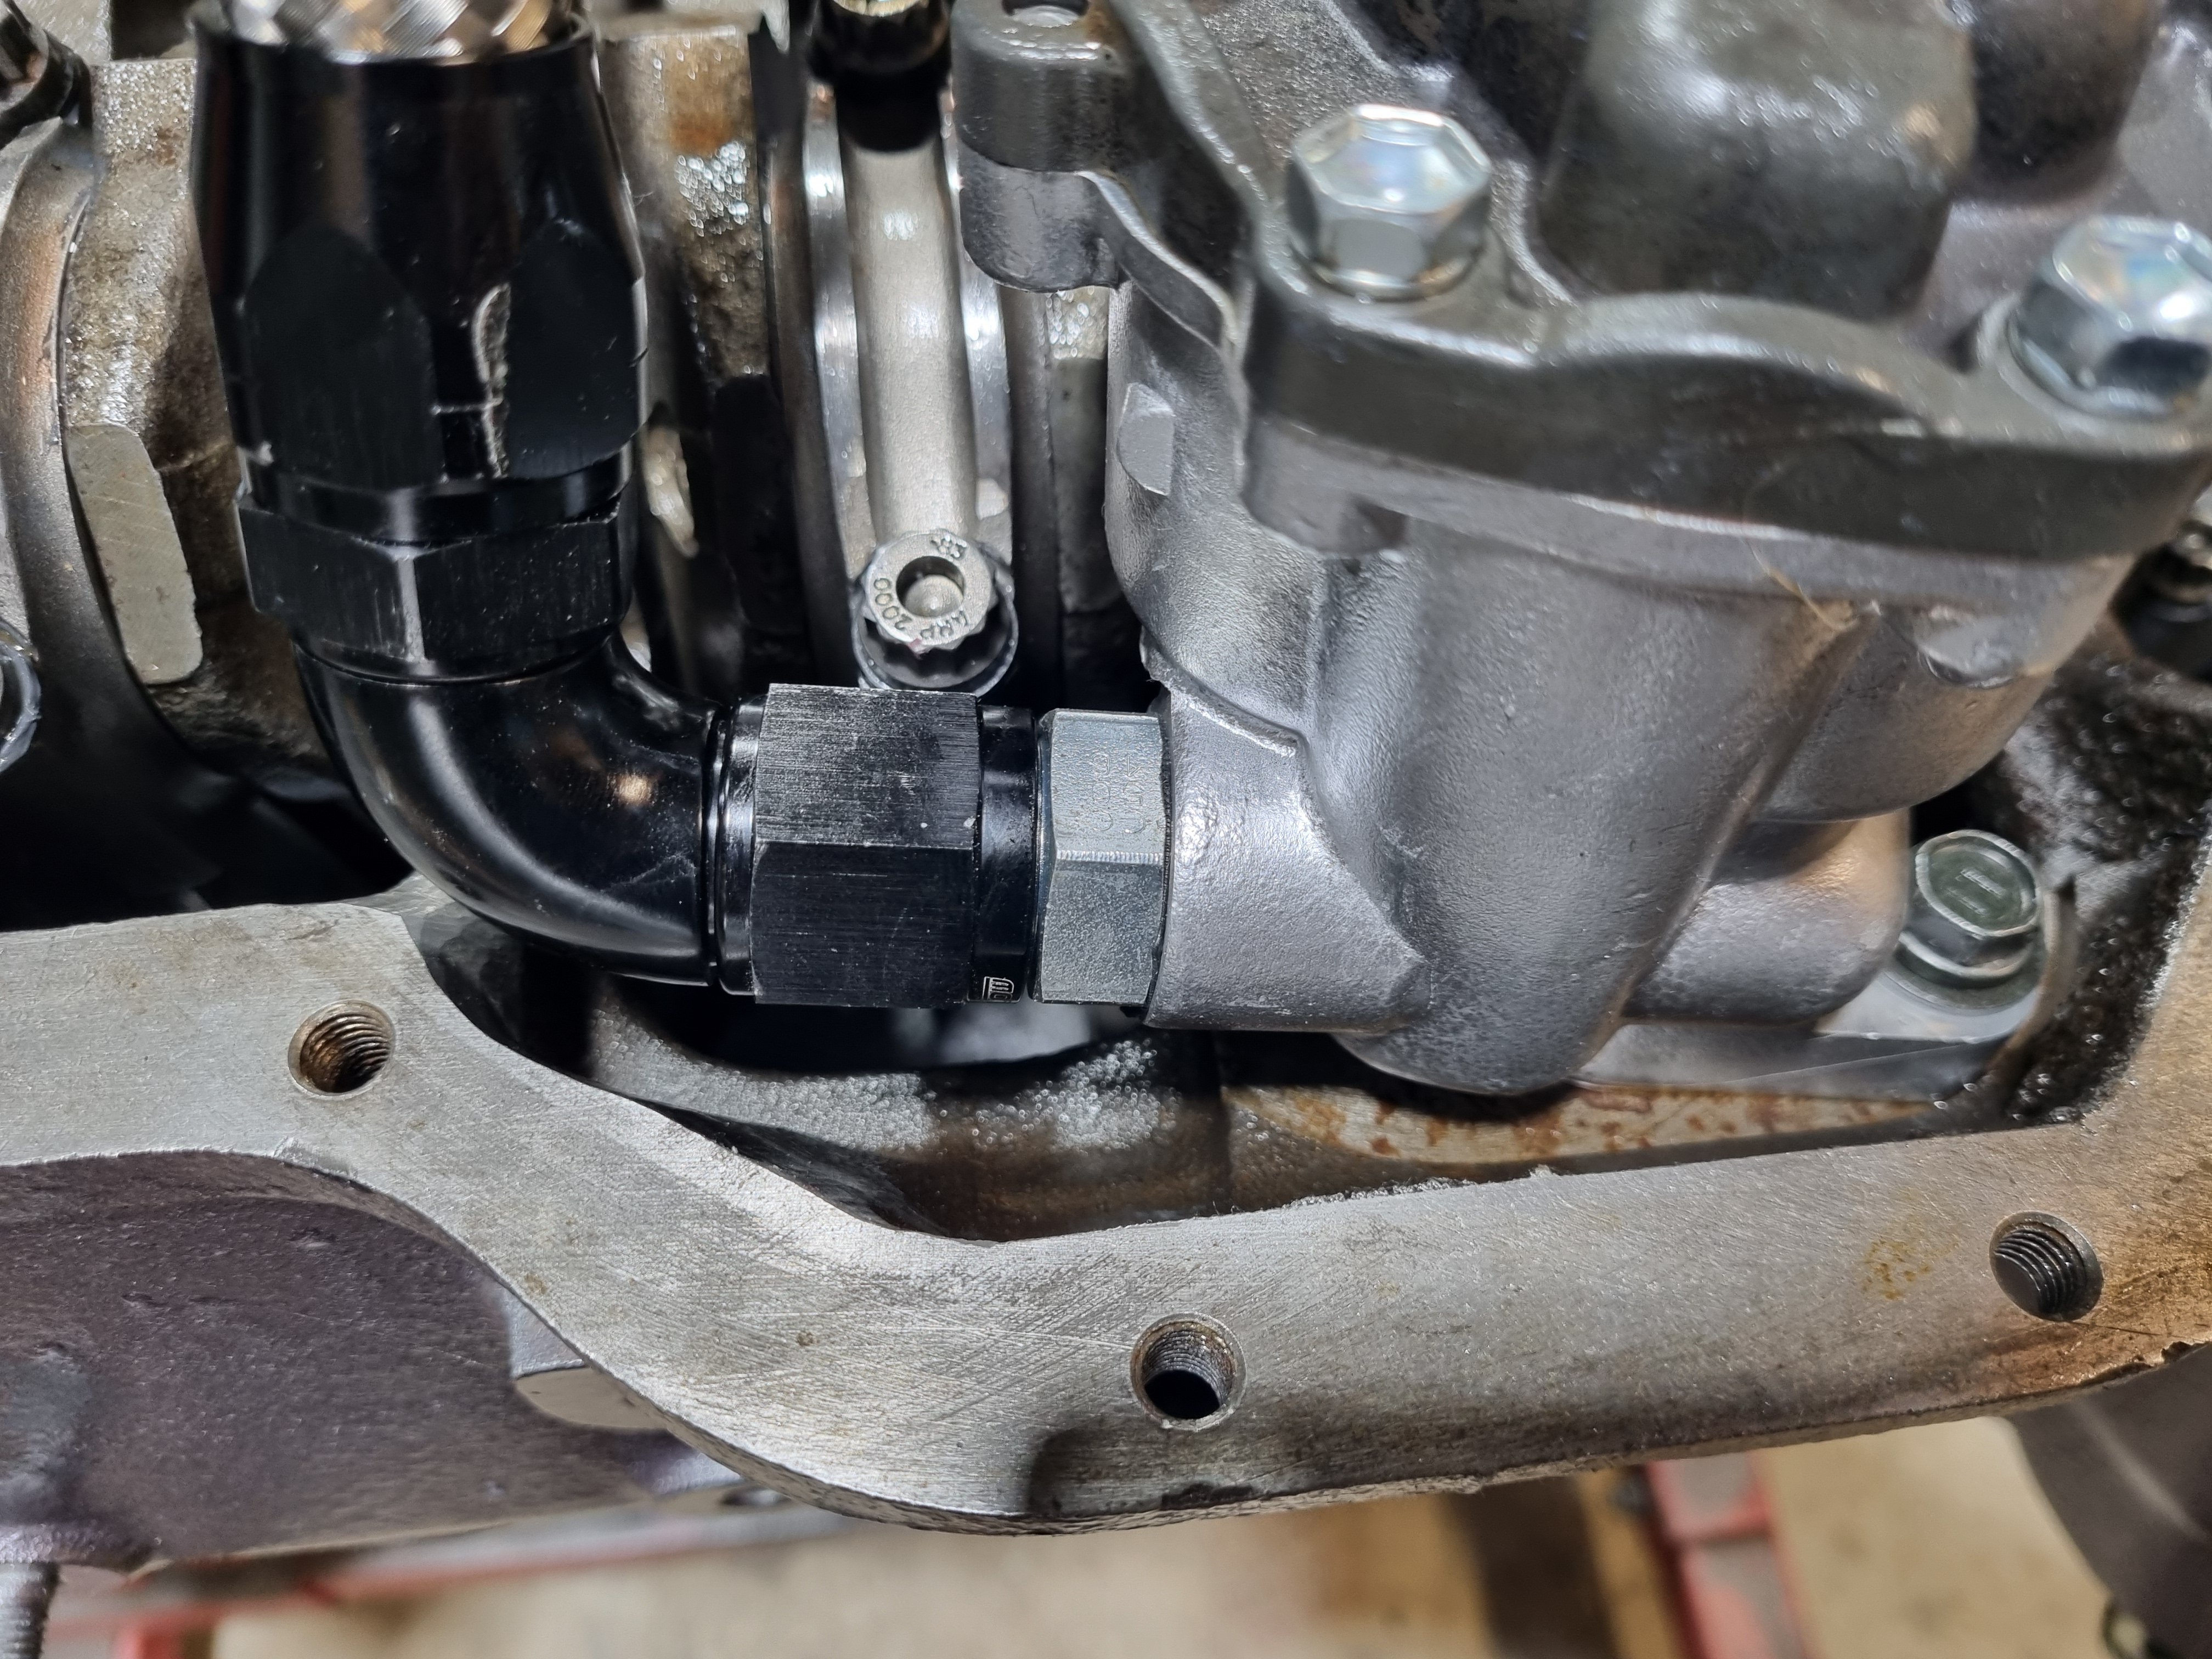
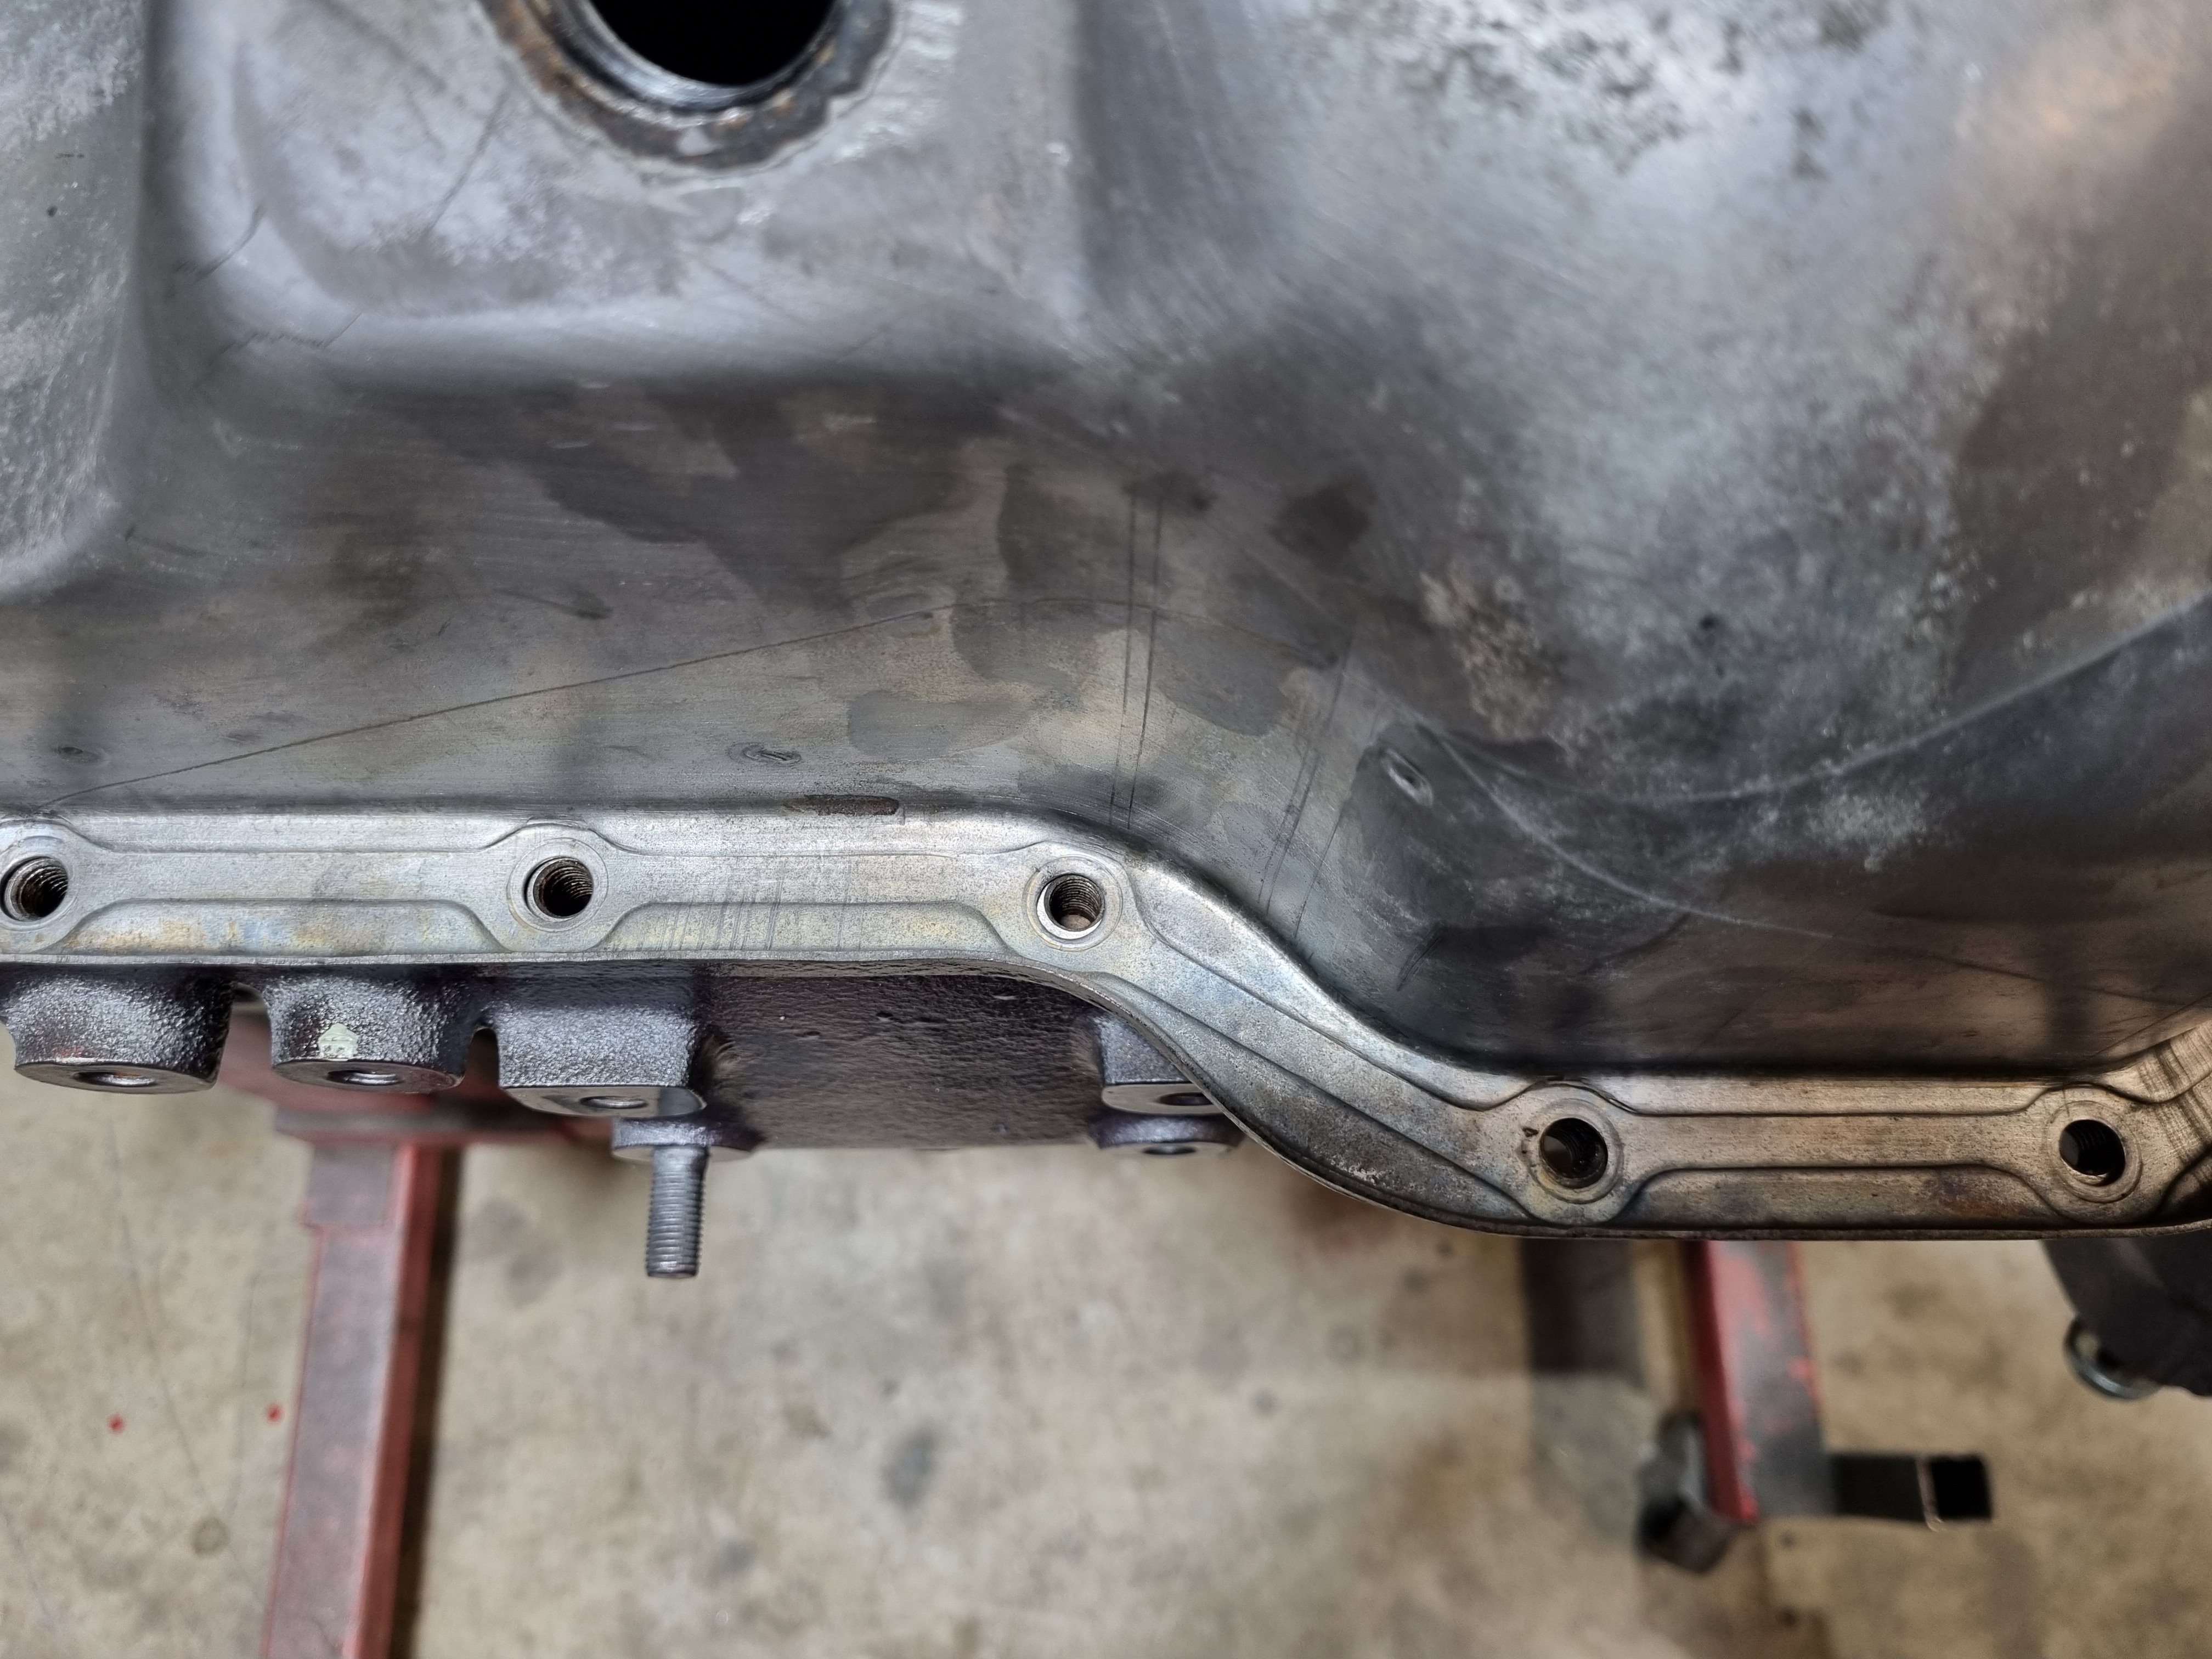
Sump. After a bit of soaking in evapo-rust it is now the cleanest 4M sump pan on the planet. It doesn't fit thanks to the dash 10 oil feed pipe. Is was fucking close though so I thought if I machined the fitting down as tight as I could get it so there was only a tiny gap between the boss and the nut the sump might clear. It didn't. Like you could do up the sump bolts and it would work but it's still touching the pipe so I'll have to do something else
8 points
-
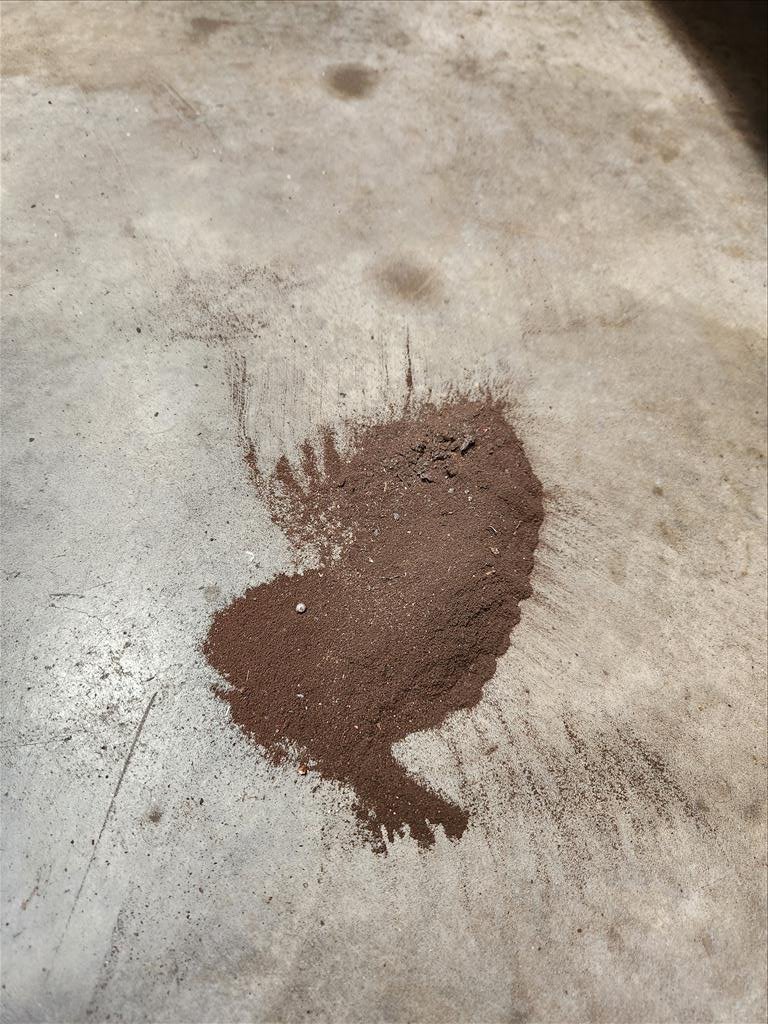
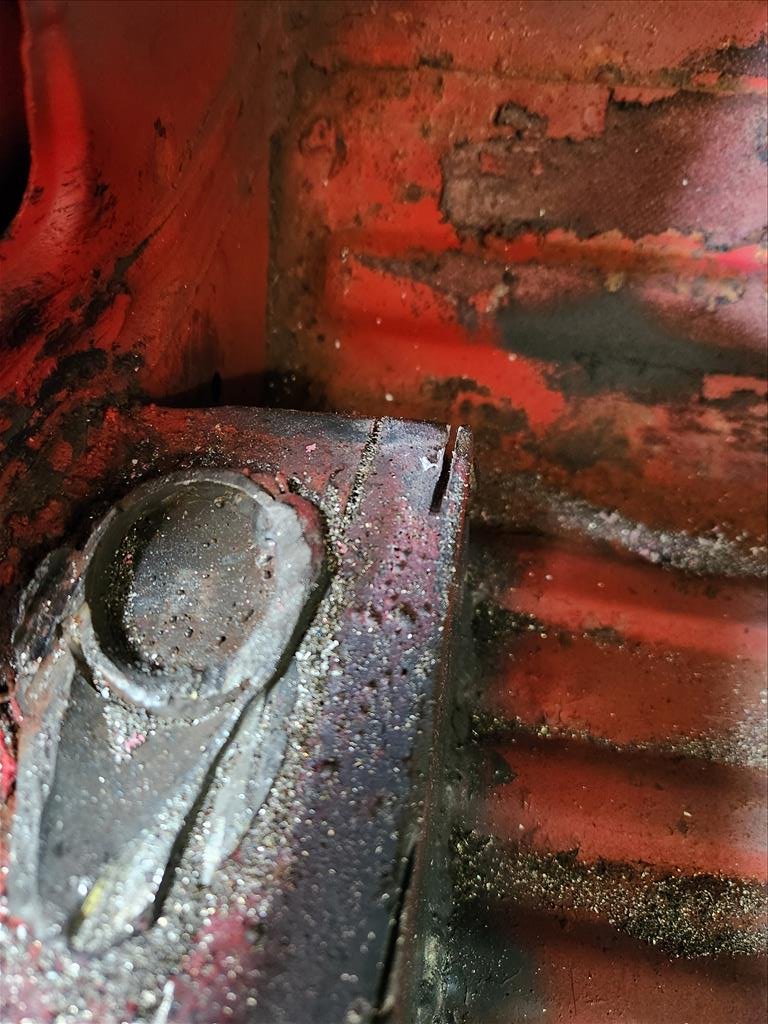
Yea the brakes. I ordered the whole shebang, good old Brian at The Italian Job hasnt invoiced me yet so no idea what the damage is, but fuck it it needed to happen really. I pulled all the calipers and gave them a cursory clean up; The rears had a bit of pitting but not so much that I thought it worth replacing, I may order some pistons anyway for just in case. This is the worst of it; Then the bits didnt arrive til Saturday morning, but it was exciting when they did; I had already decided to spend some time giving the truck some new oil and filters, so I cracked on with that. After I drained the oil I did get distracted by that Honda S800, which ended up being a bad plan as when I got back I missed the quite important service stage where you put the sump plug back in before washing out the engine with 10 liters of pristine Delo 400MGX and dumping it onto the garage floor Fuckety fuck fuck. And fuck. Anyway after I had flagellated myself for a while I cleaned things up then went back to the X, at each corner replacing the seals and discs etc and bolting it all back together; Then today I enlisted the wife to help bleed the brakes, which I had to do many times as a lot of quite ugly fluid kept coming out. After that I took it for a gentle test drive which was pretty meh, then I bled them again and they came up mint. So hopefully a wof this week maybe....7 points
-
Another thing I had been wanting for a while but was hesitant to buy due to cost finally came on sale, so I snapped it up. Since my car was a track toy in Japan it came with some goodies still attached, one of which was the Cusco front swaybar. This apparently takes the swaybar from the standard 18mm up to 20mm, which Cusco claims is "ratio with standard 138%", whatever that means. Either way, it's stiffer. The bar is so dirty it's hard to see, but it's definitely thicc and blue. I suspect this, along with my blown rear shocks and wrong rear springs, worked together to cause the handling at the last track to day just be straight up hostile. The car would not rotate, it was all over the place, and really wanted to push on in corners. Since I've fixed the shocks and springs now, the one thing left to do to balance the handling was to fit a rear swaybar. The car originally had one when it was in Japan, but it went missing at some point before I got it (likely before it left Japan). The Alto Works apparently has a standard rear swaybar integrated into the rear beam, but I haven't seen how big this is, I suspect tiny. I've been watching the auctions for ages now trying to catch a bargain on a used bar, since they weren't cheap new. I had no luck, but by chance I was having a nosy over on RHDJapan and noticed the exact bar I was looking for was on sale, so jumped at the chance. So, here is my new Cusco 16mm rear swaybar. It's both easy to fit and a real pain. The bolts that hold the end plates to the rear beam have to go under the lower spring pads. Trying to lever the pad up with a trim tool with one hand, whilst using the other hand to push the bolt through, is not my idea of fun It also makes it hard to get the hex key into the bolt to stop it from turning as you tighten the nut. In hindsight, I would probably drop the rear shocks off and lower the rear beam until there is no pressure on the spring and just lift the pads up. I got there in the end though, and the bar fits nicely. As soon as I started the car I noticed a rather large issue; the pipe before the rear muffler was knocking on the swaybar end plate, badly. Doing some research, it seems this is a common thing and the first thing to try is flipping the exhaust hanger. I pushed the car up a ramp on one side to give me some extra clearance Mine started on the stock side, albeit it had been raised up above the normal height (possibly for clearance when the car was lowered) Zero clearance I undid the bolt holding the hanger in place and moved the hanger to the other side of the bracket. I then reinstalled the bolt down into the stock hole, which has the captive nut (the visible nut is just a locking nut the previous owner used to secure it to the upper hole, which doesn't have a captive nut) This gave me ample clearance As a bonus, the exhaust is no longer obscured behind the rear bumper As opposed to A quick drive shows that the exhaust is no longer rattling its little head off, so that's a success. I haven't had a decent chance on the twisty roads to test the new swaybar, but already the car seems to corner flatter and feels more confident in corners. I'll take it to work later in the week and hit some twisties and see how it feels. Since the car was already in the garage I took the chance to do a couple of other changes. One was to replace the rear engine mount with a newer genuine part, and a Silkroad insert. The standard Type 1 mounts are known to be softer than the later mounts, so the new part alone should help tighten it up and fitting the inserts should improve it further, without the harshness of solid mounts. New genuine mount, and inserts The inserts fill these gaps Like so. I slathered them in rubber grease and used a mallet to hammer them into the mount. The inserts are a flexible polyurethane. Interestingly the inserts stick out on both sides of the mount Here's the old mount in place. I first tried to remove the bolt that goes through the small end of the mount and soon realised that no, it doesn't fit The solution was to take the bracket off the gearbox There's a little plastic cover over the hole in the subframe the big end of the mount lives in. This is held in place with a clip on each end, obscured by the swaybar I don't know if it's because of the bigger swaybar, or if it's an issue with the stock one too, but there was no way the mount would slip out passed the bar. I ended up having to undo both swaybar links, and unbolt one end of the D bushes that mount the bar to the subframe, so I could lift the bar up high enough to slip the mount out It turns out the previous owner had given stiffening the stock mount a go at some point. He had slipped some rubber sheets into the gaps and then slathered the whole thing in.. something. Glue maybe? It didn't really help, there was heaps of movement in the mount I slipped the new improved mount in, bolted it all back into place and reinstalled the swaybar. Since the links were off, and I had new ones (because I had previously noticed that the old ones were stuffed), I replaced those too. Unfortunately the nut on one of them was stuck and someone had stripped out the hex in the balljoint (not me) So out came the spinny death wheel, which made quick work of it. And the new links went in with no issue. I did have to source a new nut from my stash though, as genuine links don't come with new nuts (!). With everything tightened up, and the wheels back on, it was test drive time. Immediately you could notice the mount was stiffer. At startup and idle there is a noticeable vibration in the cabin. Not horrible (like my Integra with solid mounts), but it's there and causes a couple of small rattles. Once the revs are above idle though, the vibration is gone, and boy does the mount make a difference. There is no backlash in the engine coming off throttle, and gear changes are even more direct (they were already bliss). Everything just feels more solid. I'll live with the vibration, it's just part of having a road going little track toy, but A+ definitely worth doing so far. Finally, one last small change. I finally got the courage to add a third stage to the boost controller. I know from information about what the previous owner did, that the car used to have three settings programmed by CADCARS on the boost controller before it was exported, "comfort mode" - 14.5psi, "circuit mode" - 18psi and "mountain pass mode" - 21psi. Stock boost is 8psi, and that could be achieved by turning the boost controller "off". I've had it set so A is stock 8psi, B is 14.5psi and C wasn't set. Since I was confident the car was happy on 14.5psi, and knowing it previously ran up to 21psi without issue (I'm not going to push it that far), I finally set C to 18psi and holy moly, I thought 14psi was fun! Accelerating through the gears to 100kph is pretty rapid, but the real fun is around town, where you can just rip around like a madman, whilst still under the speed limit. Coming out of corners, second gear, 18psi, with the LSD gripping like crazy, whilst doing 45kph, leaves you with a massive grin. AFRs seem happy, although intake temp does climb pretty quickly, indicating the little spooly boi is getting pretty close to its limits for not just making heat. Thankfully the massive Greddy intercooler recovers quickly and the temps drop back as soon as you're off boost. Right, I think that's about it for now... *opens Yahoo Auctions Japan*6 points
-
Hello, Maybe it's just my age, and to do with the cars that I learned about when I grew up. However I seem to be stuck in thinking of all of the motors from the 90s or early 200s as the "golden era"? Where anything before that was a bit primitive, and anything much after that is too modernized and hard to do anything with. So only things from around this time are good. Legendary little rippers such as the 4AGE, 4G63, 2JZ, 1UZ, 13B, LS1... Gotta love em! Cheap, plentiful, great potential, great aftermarket support, and so on. However a lot of these older motors are getting hard to source, expensive, and a bit less fun when it costs 10x what it used to. However I feel like there are some good modern options which are slept on. So, what are some cool modern engines that should have some potential for swapping into shitty old cars? @shrike noted a few cool options in a recent project thread. I figure it's a worthy topic of it's own, going into some more detail on each type of motor. I will write a few posts below that I've seen some success with, with some different engines and pros/cons. In my mind what made those older engines great, was a combination of few factors -Easy to make power in factory form. -Good modding capability. -Good aftermarket support. -Plentiful engines / not too expensive. Now to be fair I am Toyota biased, not because I think these motors are best, it's just what I know about from top of my head. Feel free to spam other alternatives if you know of something cool! First up Toyota 2ARFXE engine This is a 2.5 litre 4 cylinder engine with a 90mm bore and 99mm stroke. This is normally found in a hybrid car like a Camry. There is a non hybrid version too (2ARFE) Think of it as a slightly less good Toyota version of a K24 I guess. Why consider it? It uses all of the Toyota hybrid engine tricks, for good economy - that are good for power too when modified. High compression ratio, huge ports, big standard cams, somewhat bolts to a 3SGE gearbox (Easier for FWD than RWD though) There's currently one on Trademe for under $900. How does it go? These motors have a really big factory intake cam, and this can fit on the exhaust side too. So you buy a 2nd one and fit it on the exhaust side for a cheap and easy upgrade. Then retime the cams away from atkinson cycle, and you make big stacks of power with some basic bolt on mods. This guy was making 270whp with an NA motor with 2x factory intake cams fitted. Pretty awesome! It somewhat bolts up to a 3SGE bellhousing pattern, which works well for transverse engine swaps. Downsides are that it's a fairly tall engine, some people have had to cut their bonnet to fit in smaller RWD cars. Okay so that's cool for a low budget throw together, but does the aftermarket support scale up? How about a full $$$ turbo build? As this motor was common in america, there's heaps of stuff available. Papadakis racing made a 1000hp variant.5 points
-
Thought I'd better do a post before the thread falls off the page. Slogging along. Paint tomorrow, then camo, decals & my usual laying on of filth & cargo.5 points
-
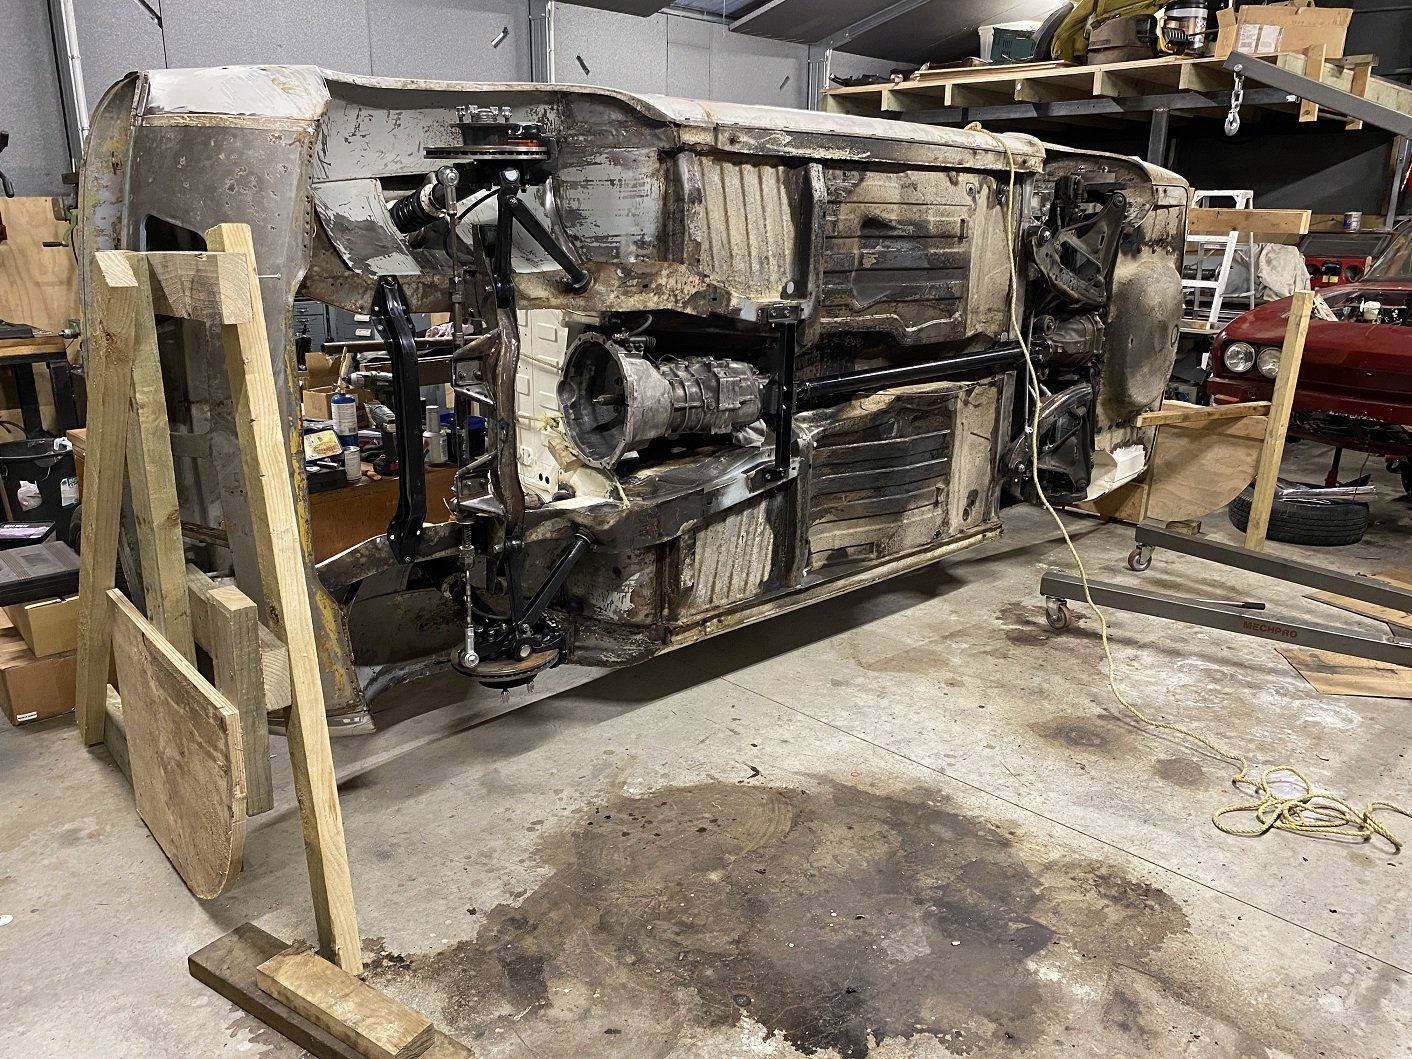
This make some things easier.... I bolted the don't-fall-on-me props on so they can't accidentally be knocked out. It's a bit bottom heavy with all the suspension still attached so it does want to come back down.
5 points
-
Damn, that's me out4 points
-
This is 1 million percent about cool people getting together. Old cars are just a bonus.4 points
-
The golf R32 engine has intrigued me, I haven't done any real research, so it's probably a garbage idea for some reason, and is probably not ideal for high rpm, but from a capacity vs physical size, it could be alright... it seems like a likely candidate for a +t conversion, just check out the head gasket surface area between the bores, and the number of head studs.. (2 things not easily changed on an engine)
4 points
-
Old compressor vs New compressor
4 points
-
voted yes... might be in a new car tho, few months to ID the issue and get it back on the road. Also could i surgest getting people to pay the cost way ahead of the time, then if people pull out last minute it doesnt affect everyone else.. (sorry for my last minute pull out on the NI trip just been)3 points
-
What's a good running K24 worth? I had a look on trademe but there's none on there at the moment I'll likely have access to one soon, and it's in a handy take home package3 points
-
We had a mk2 3.2 TT with a little exhaust and I always thought it sounded like a masturbating Wookie. Really lovely motor otherwise3 points
-
When I took my 1NZ with cams etc for a WOF with the standard intake manifold on. You could not have believed it was the same engine. Holy crap, it turned into a slug haha. Totally choked out by ~5000ish rpm. If the 2ZR was similarly designed, it would be a night and day difference with some bolt on mods. However yes - I must concede that some motors like 1NZ and 2ZR do in fact totally suck in factory form.3 points
-
2GRFE / 2GRFXE This is a 3.5 litre V6 that I guess replaces the 2JZGE engine. Has good aftermarket support, aftermarket cams etc but the engines cost a lot. Popular for engine swaps into MR2s and similar, because the east-west variants have a bellhousing pattern very close to a 3SGE. So they bolt up to a factory gearbox. Unfortunately ends up being pretty expensive all up, though. This guy made 405whp with an NA setup, using high comp factory pistons, aftermarket cams and valvesprings. and some bolt on mods. Pretty sweet to be banging past 100hp/litre at the wheels with a fairly big engine.3 points
-
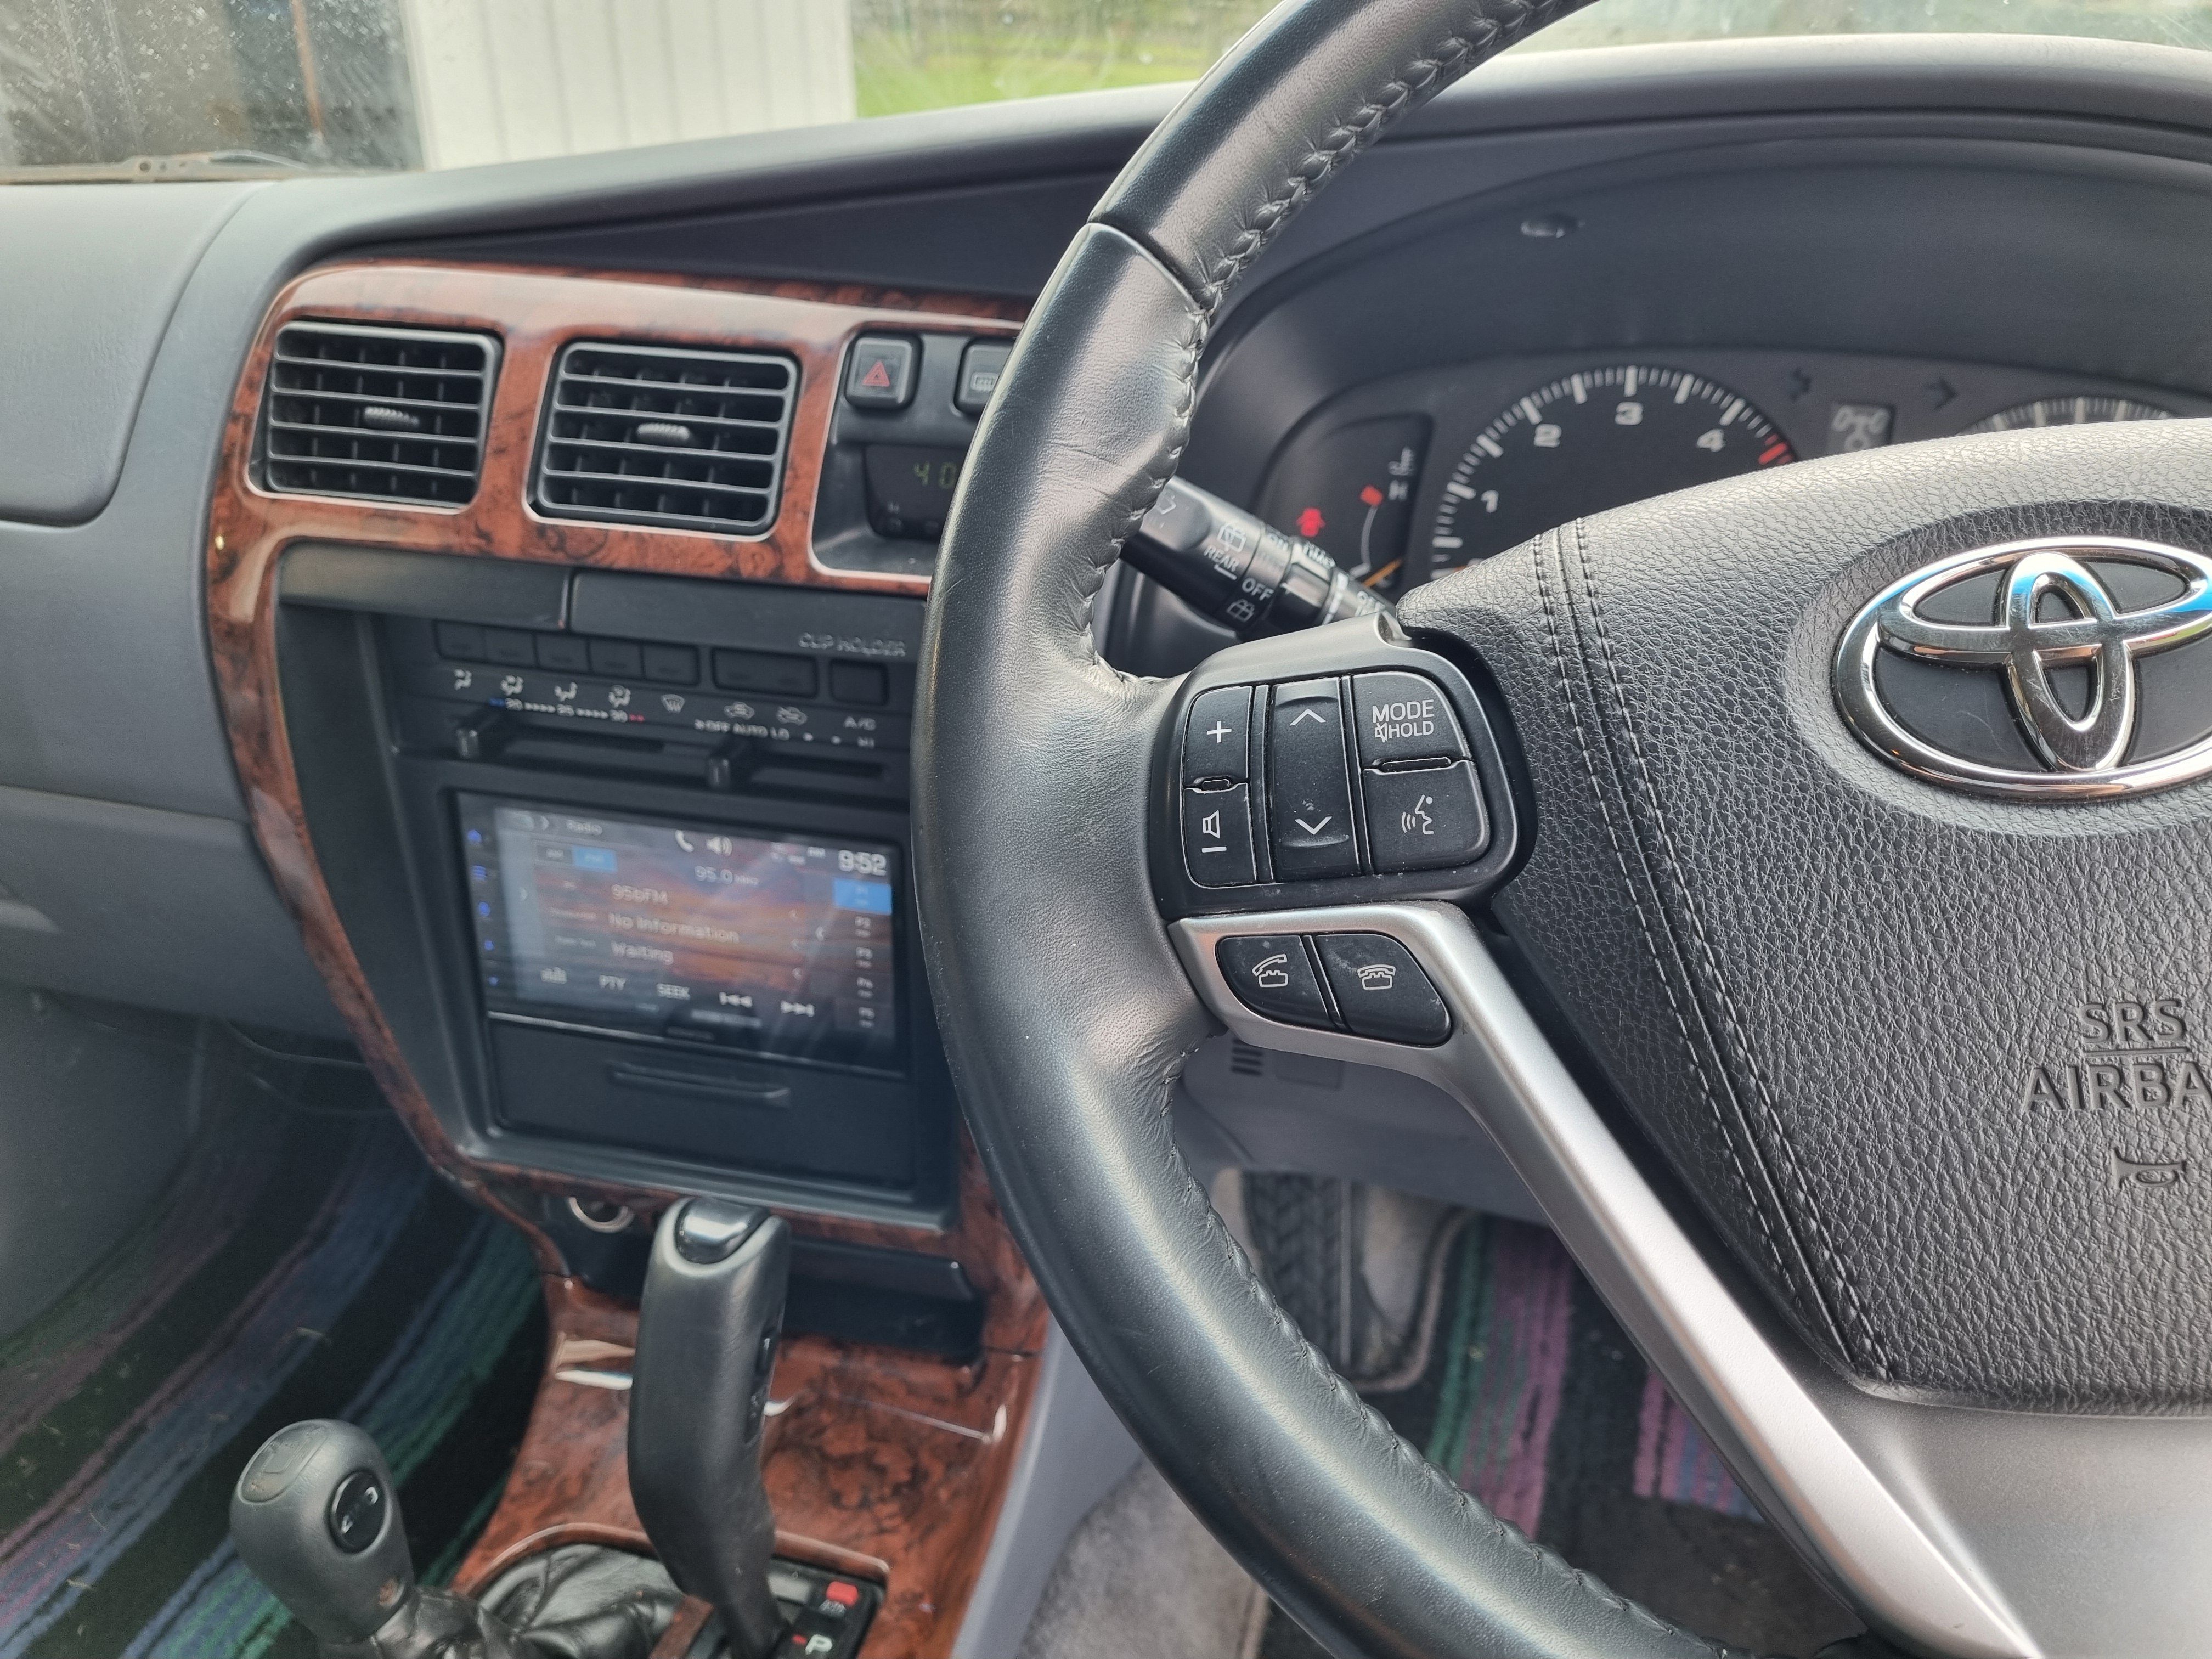
Steering wheel controls all wired and working. Everything on the left of the wheel works as it should. Right side is for dash and whatnot so there is nothing to connect they to. Fucking stoked.
3 points
-
I remember reading about them as a kid and being "whoa" at 2l turbo 4wd in a hatch Never had much to do with them apart from fixing one for a tight arse car dealer customer we had, it was a fill in job for when work was slow so it ended up taking 4 or 5 months , it broke a ring land so the car dealer supplied 1x second hand piston. Did it with the engine in place, getting the head/intake manifold off counts as one of the worst jobs I ever did Also due to the fact it took so long just doing bits here and there, when I started it I'd forgotten I'd removed the oil filter. It was on the hoist, fired up, pissed oil everywhere, I reached in the window to turn the key off but it had a turbo timer down by the console so I had to do a panic dive in the window to turn it off, the boss thought that was quite funny seeing me with my legs sticking out the window3 points
-
Shrike thats all great and everything, but... Have you considered a 2ZZ?3 points
-
But....... cos I'd hate myself & & I'm a pedantic fucking perfectionist I'm chopping the arse off it. Rust in the seams has to be dealt to, then I guess sand/beadblast the damage
3 points
-
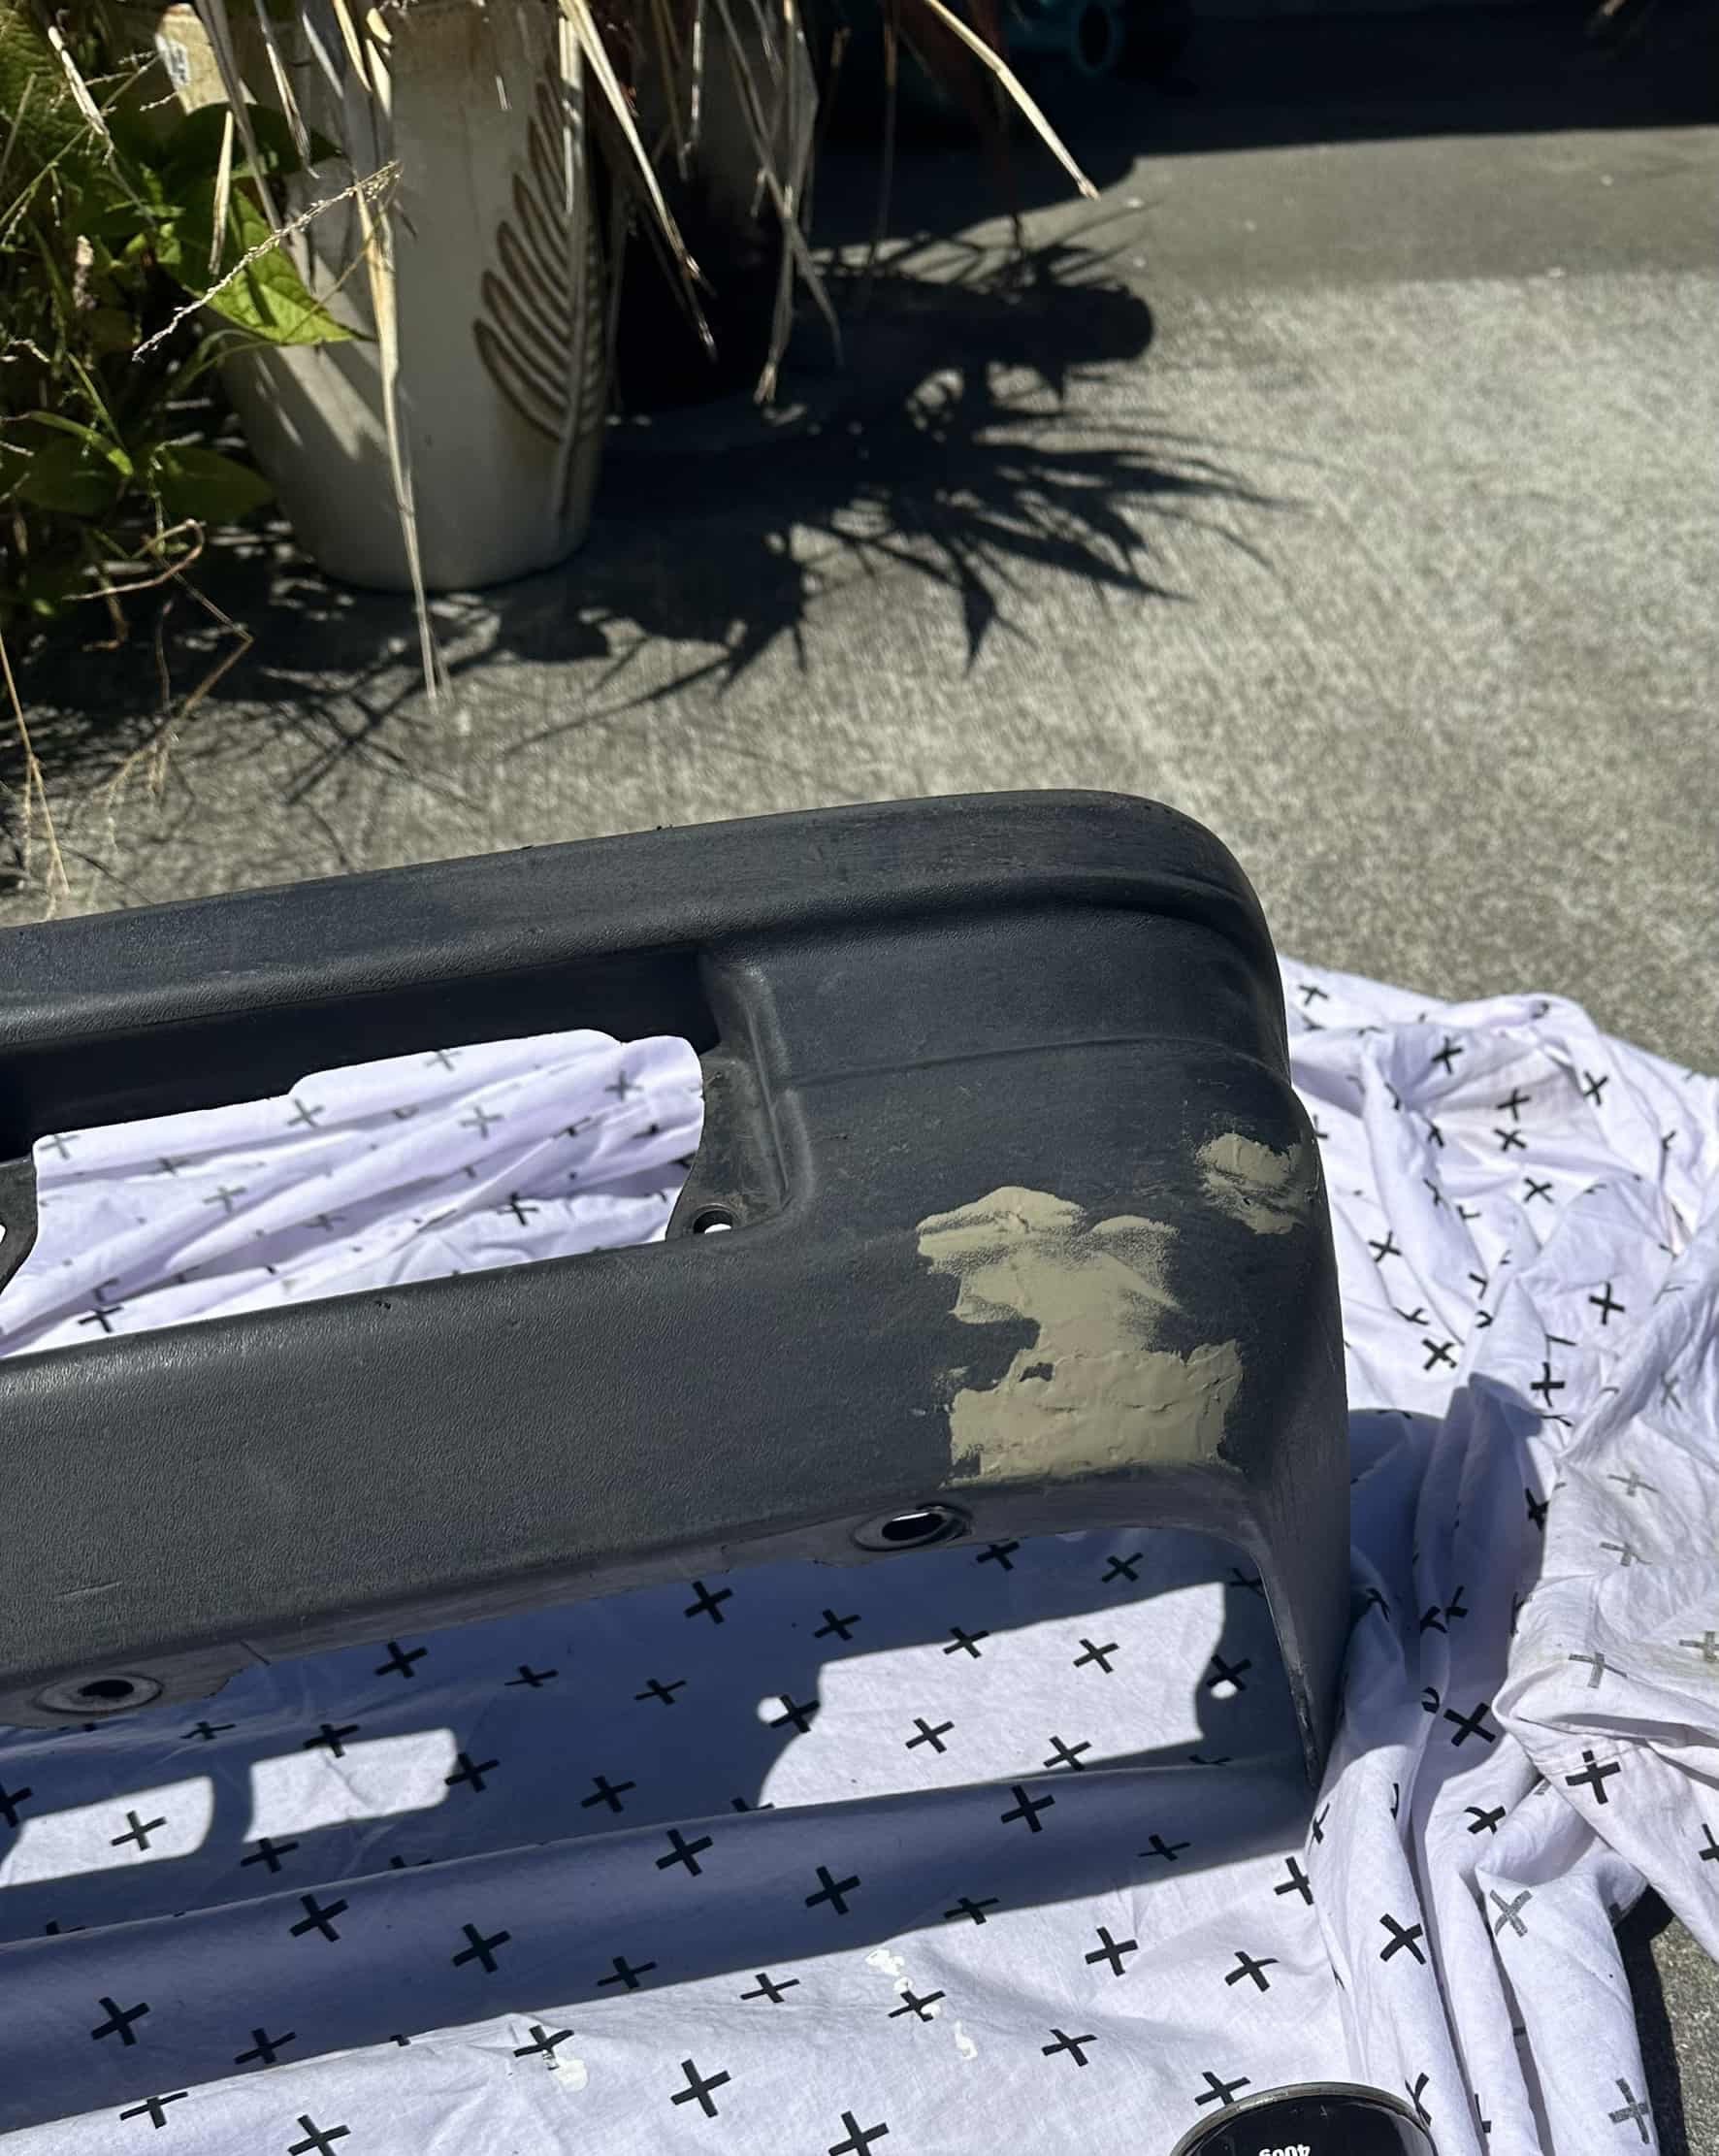
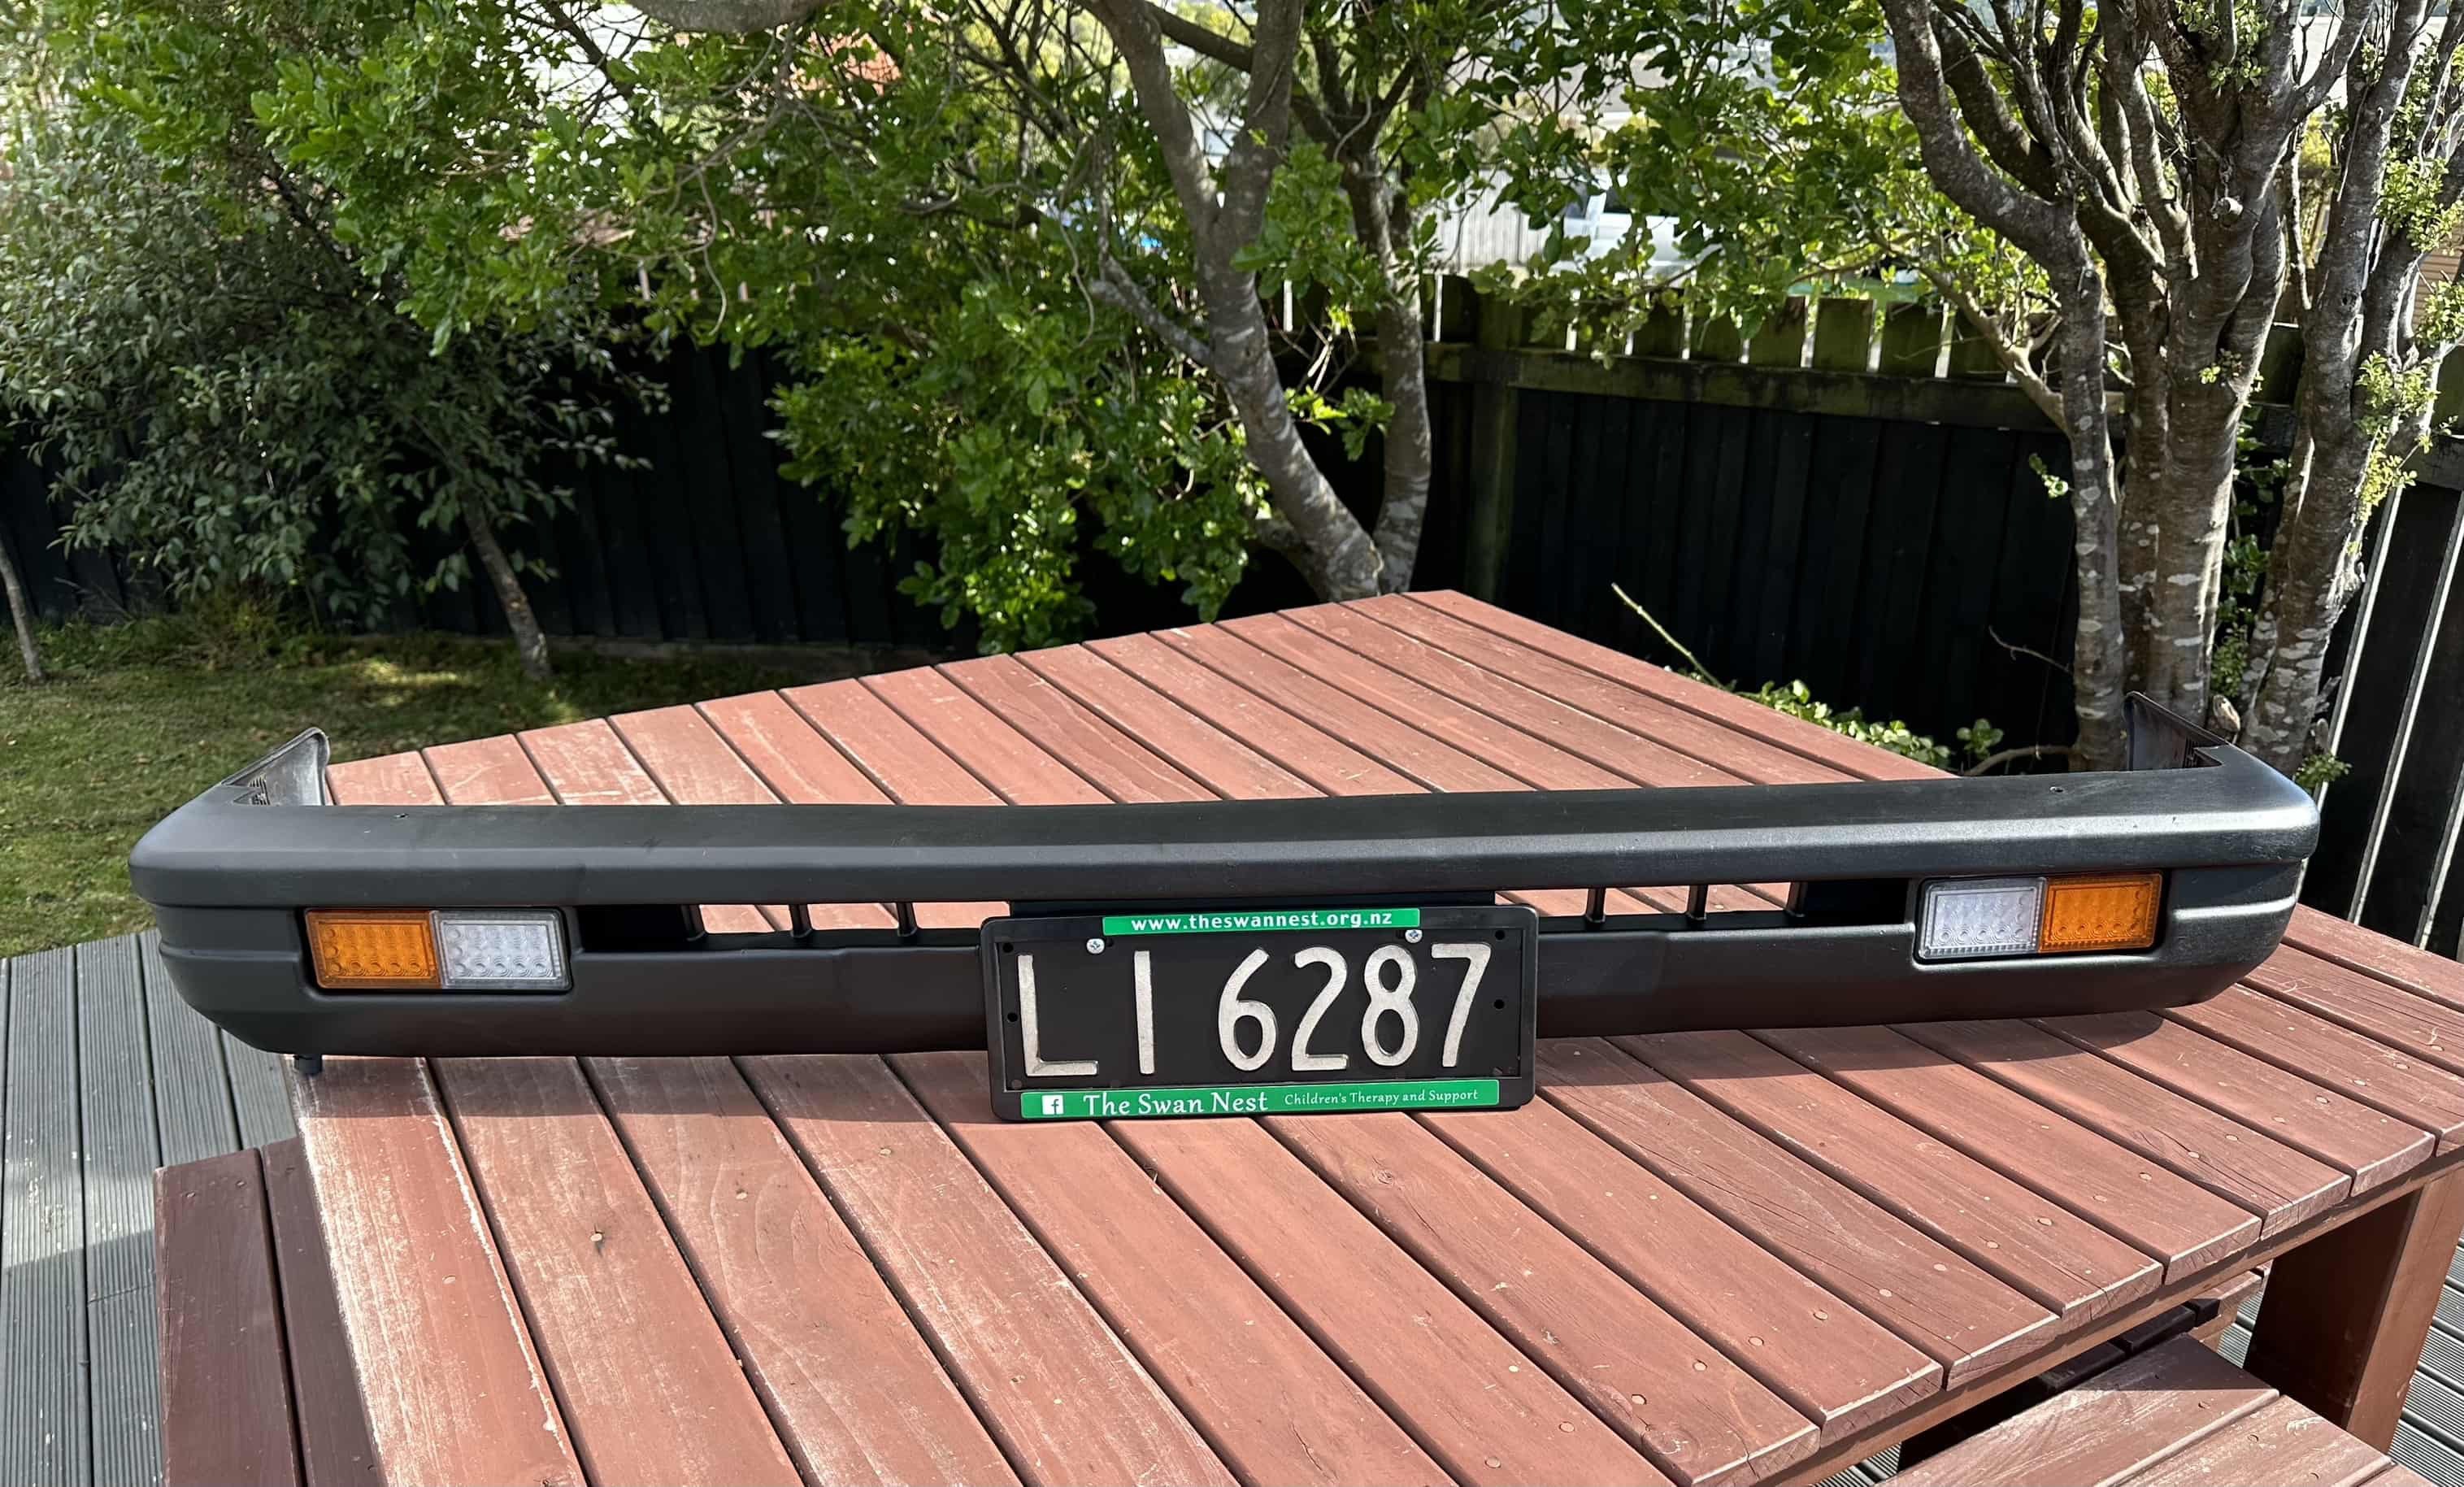
Front bumper restoration complete. After giving the bumper a good clean, firstly with a water blaster then scrubbing with a brush and some warm soapy water, I needed to fill in some of the larger scraps and scratches left by the previous owners touch parking attempts. After some sanding and a quick clean with grease and wax remover it was time for a spray with bumper paint, 4 coats later and it was looking pretty good. I also took the time to paint the headlight surrounds, grill, number plate lights and grill. Now all reassembled with freshly painted number plates and LED indicators and DRLs The finished product
3 points
-
2 points
-
Bmw B58 will be a goodie, it’s in pretty much every platform they make. Just wait for the rest of the car to depreciate around it. 10 years old in 2025. What’s peak depreciation? 15 years? Edit wow pretty light too - 139kg. The 8hp trans they are attached to looks like a really well supported thing too. https://youtu.be/n5hSrXZ18cA?si=sE7ImVMGbkfQbYox2 points
-
Sorry haven't tinkered with them beyond normal servicing really. One day I might think about building a racing mower.... Won't be using Briggs though haha2 points
-
Sidetrack to your build and sorry/not sorry. But the biggest tragedy with the 2ZZ was that they made the 1ZZ and 2ZZ completely different engines. They were trying to make a competitor to the B18C but totally missed the point in that regard. Like how good is the B18C, on account of that even the peasant versions can be awesome, with just different cams and so on. Can you imagine if every single turd car out there with a 1ZZ, had 2ZZ potential? Would be incredible! But instead we have zillions of 1ZZ turds and very few of the cool motors around.2 points
-
Haha! There's an offshoot of the DUBNZVW/VASK group exclusively for VR6 models, known as Wookies in the wild...2 points
-
I finally sucked my stomach in and pulled the dashcam sd card. As remembered, there's nothing spicy. Just a car that was already eating bearing material encountering its limit while being pushed hard. Unhappy noises start around 0:21~. I'm really happy I was right before the exit to the pits. The cut at 1:00 is from the car stalling. I didn't have the presence of mind to think to push it the rest of the way, but the track guy thought I'd stopped it intentionally and told me to keep it moving, so he probably wouldn't have let me anyway. Definitely should have pushed it back into the bay once I got there but I was a shaky mess and didn't know what was up so giving myself a pass there. It's funny how dashcams make everything look slow and the cars in front super far away. I mean it is slow but still.2 points
-
2.4m stud height, definitely not tall enough to be useful for a hoist. But not worried about that. One thing I've learned is that no matter how fancy and comfortable your garage is. Whenever you go to an event you still end up lying down on the ground trying to look for your 10mm spanner or something. Haha.2 points
-
2ZRFE / 2ZRFXE This is a similar era engine to the above, but a smaller 1.8 litre 4 cyl motor. When the 2ZZGE stopped production, Lotus used a supercharged 2ZR engine instead in the Lotus Elise. So there's some alright aftermarket goodies. This was also the 1.8 litre engine used in the 1.8 litre prius, hybrid and non hybrid versions in corollas. So they're fairly common. There's a prius version on trademe for $700. Perhaps most notably though, this engine was used in "Yaris Hilton" by Mighty Car mods as their cheap and cheerful turbo car. They eventually blew the motor up, it was shitloads of fun and zero fucks were given. It's pretty awesome that this engine spans all the way from being in a $$$ Lotus, to the basis for an absolute shitbox car minimum spend build for max lolz.2 points
-
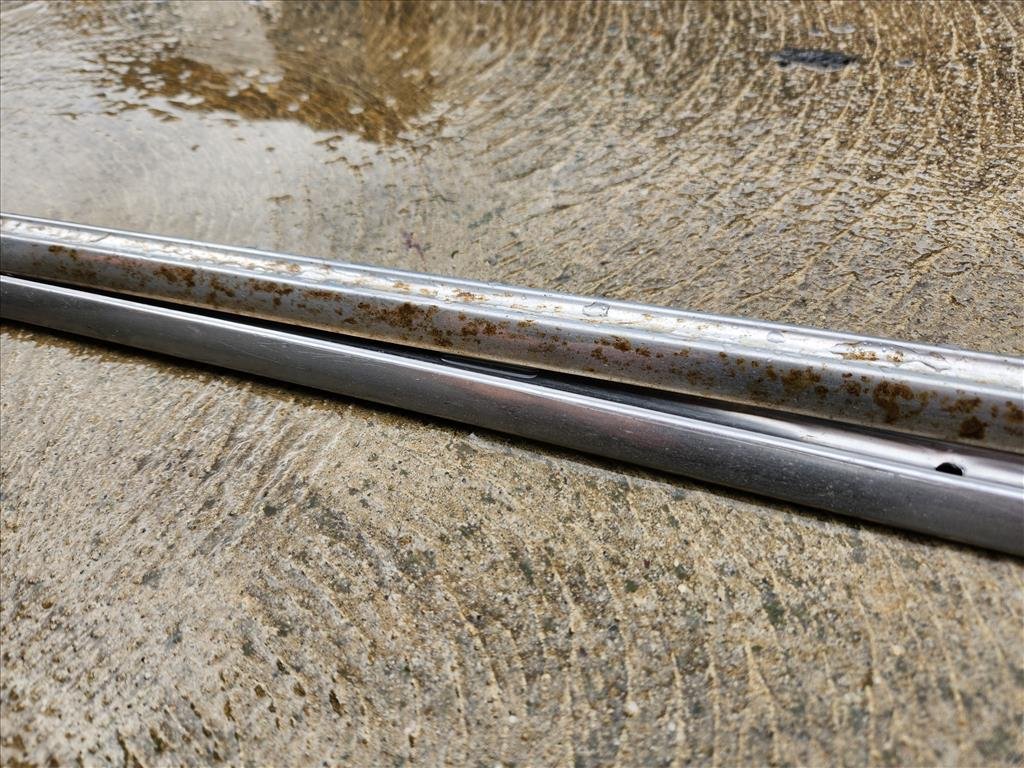
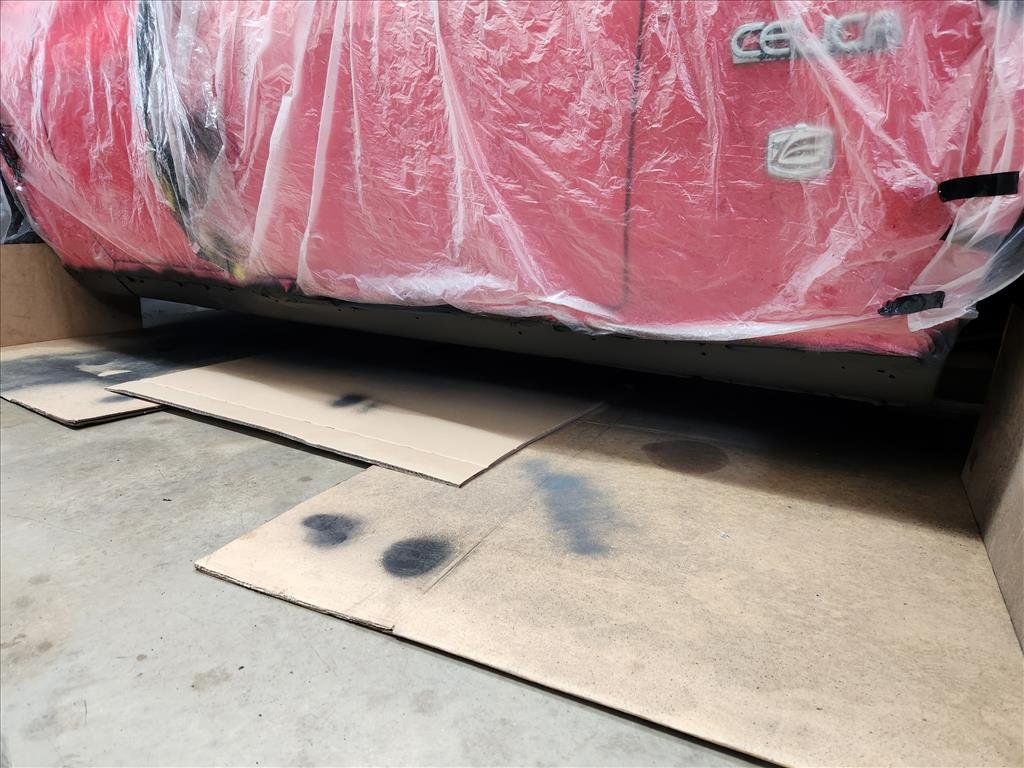
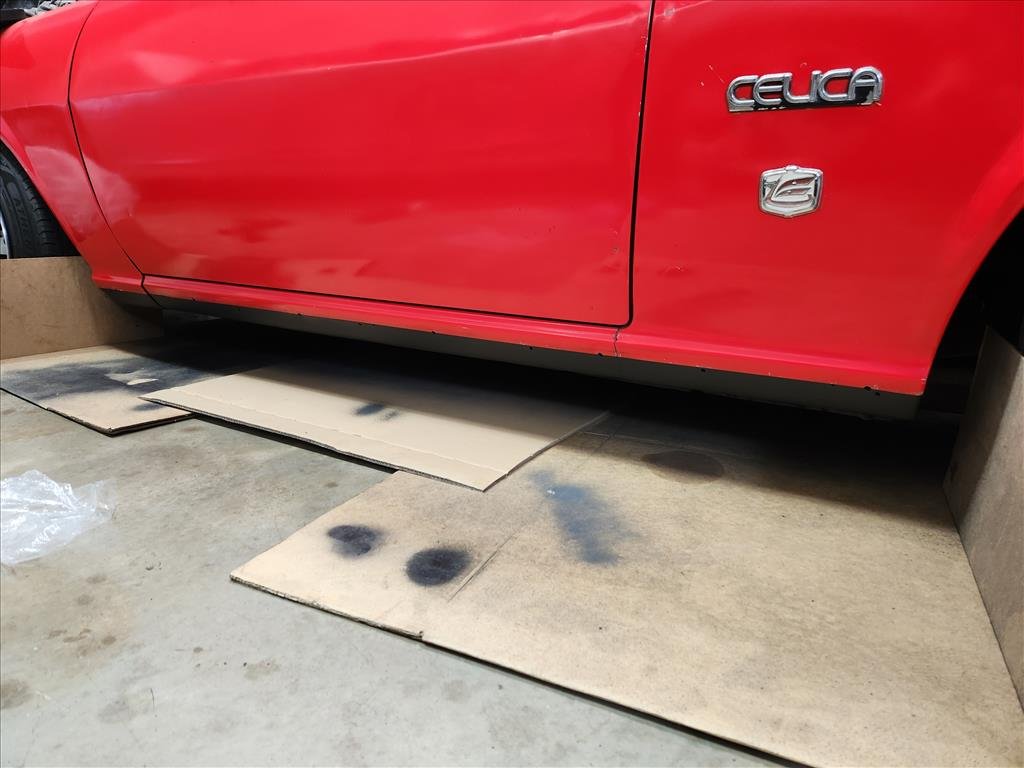
In typical Alex fashion I started a job without having all the bits to complete it. That mess I posted yesterday got covered up today with new underseal but I ran out so only have the one side done so far. I've just sat the trim on there loosely with some incorrectly sized screws but you can get the idea. I think it turned out pretty good. The trims looked pretty nasty after years of sitting around so I hit them with a bit of scotch pad to get rid of the muck and surface rust. That'll do.
2 points
-
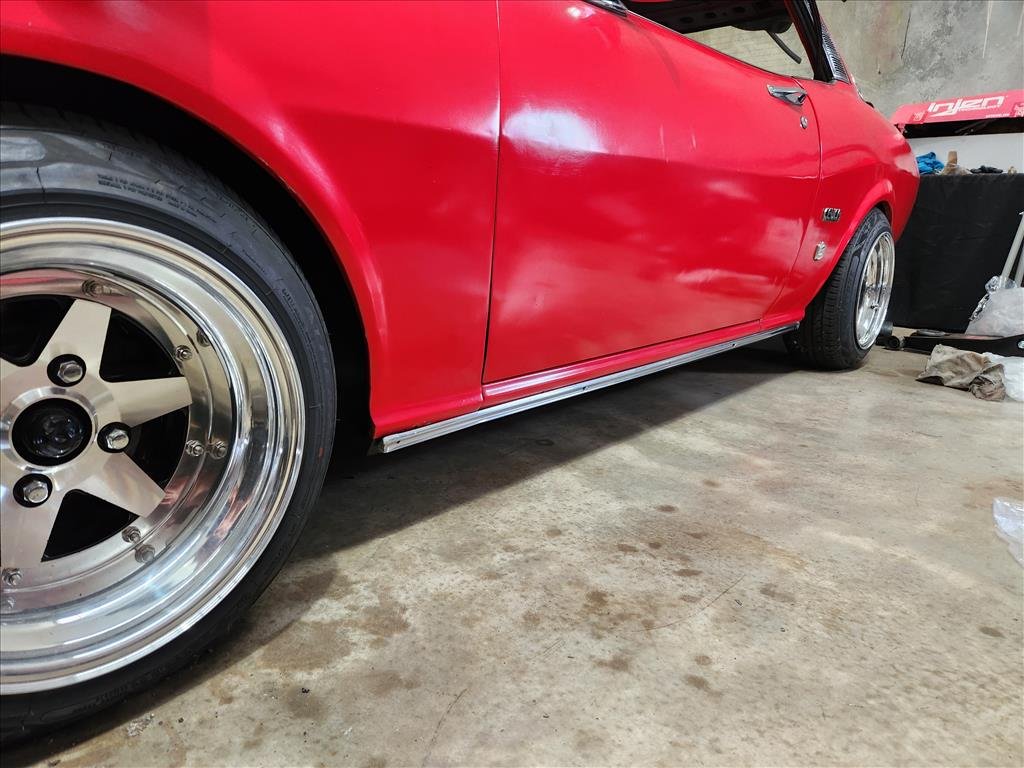
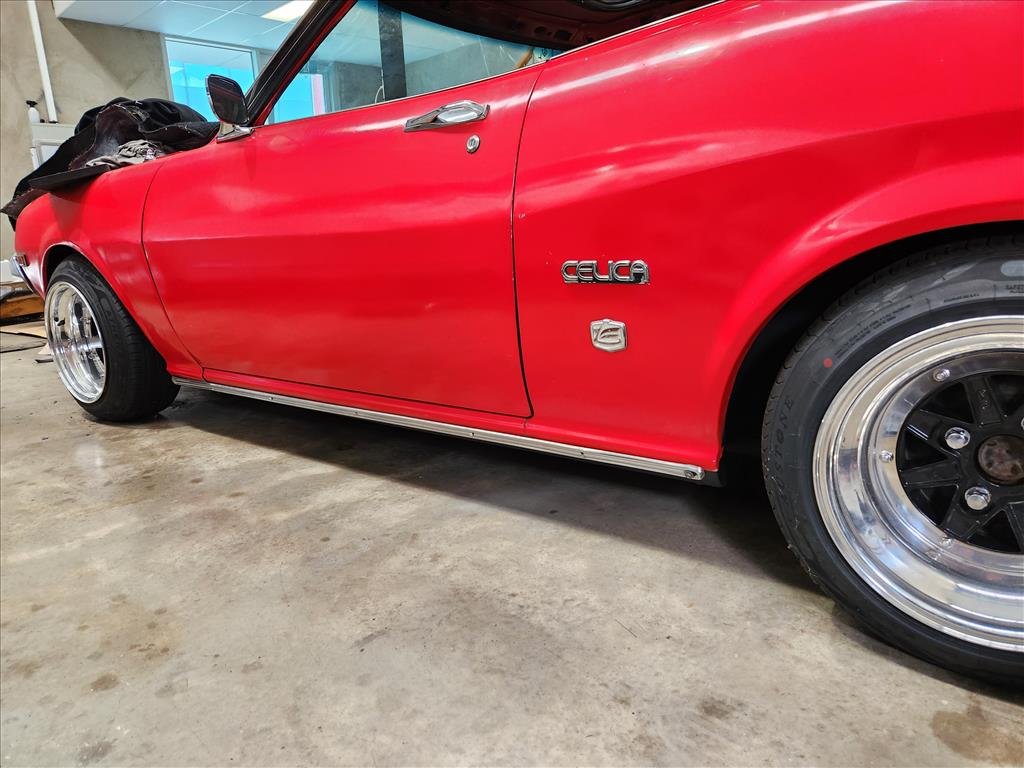
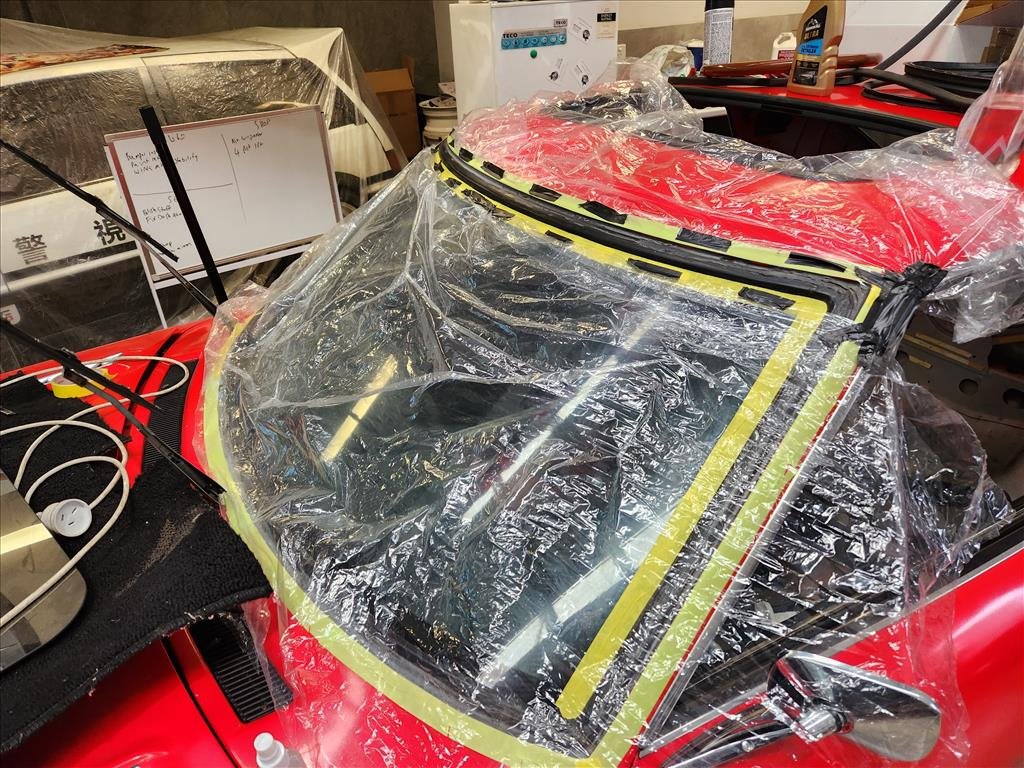
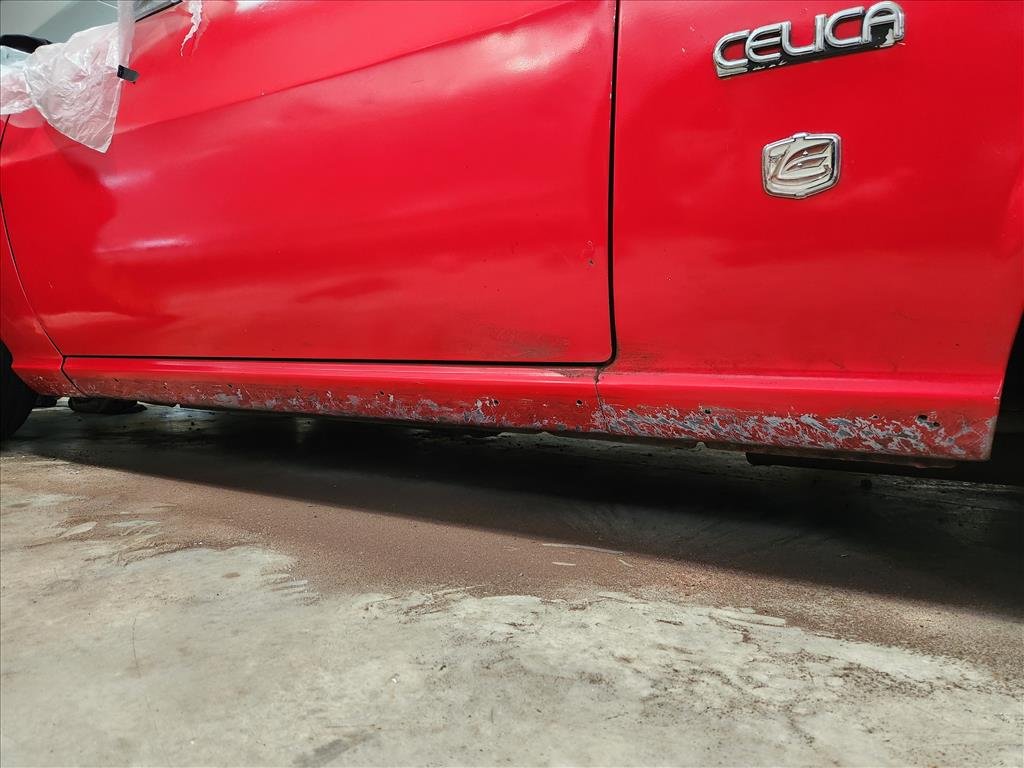
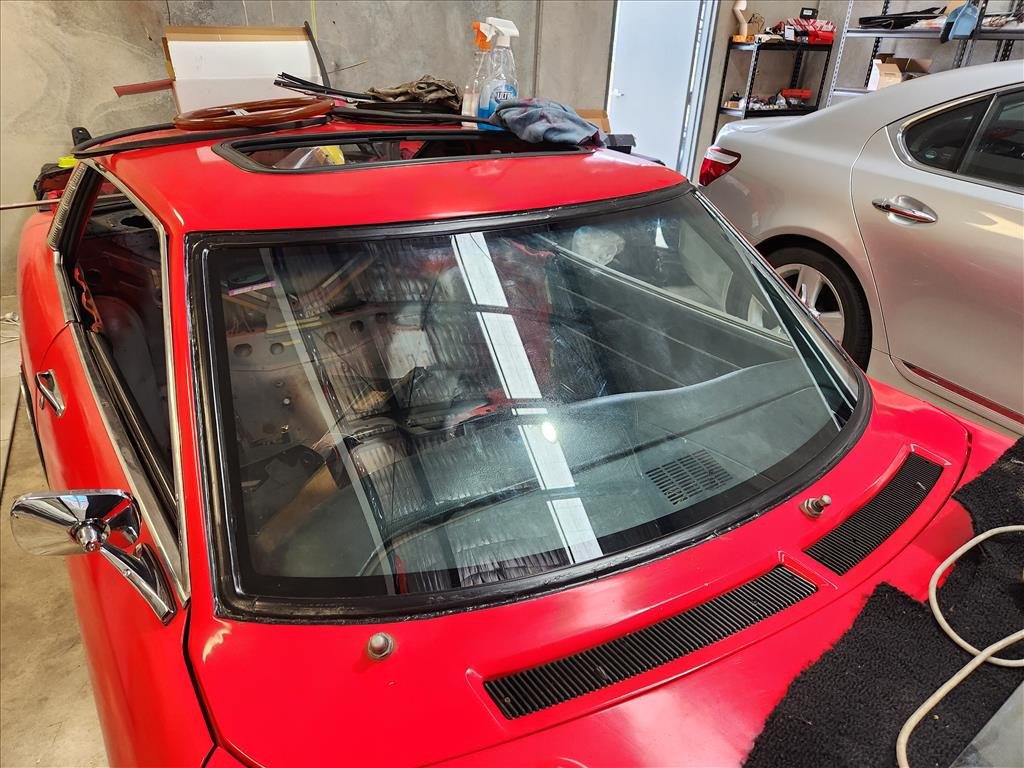
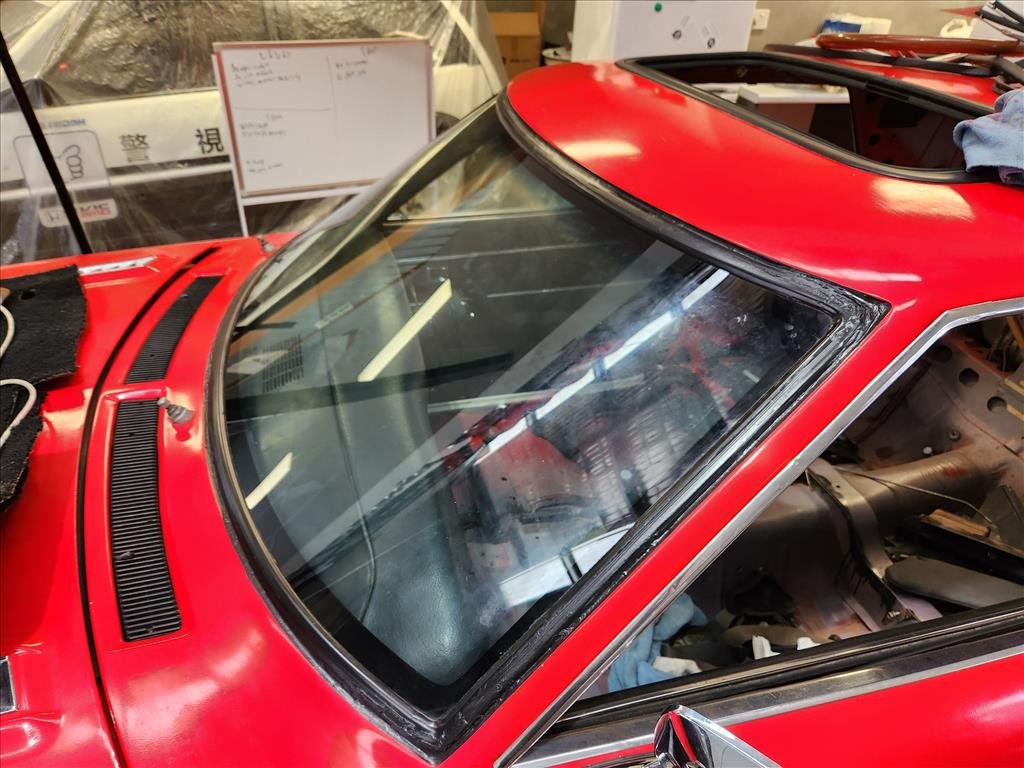
Even after spending like $150 on some beefy blades I still can't cut these damn rollcage boxes out. They must be made of uncutanium or something. Congratulations rollcage boxes, you live forever. I even tried to grind down the top so it was flat but that would have taken 20 years, ain't nobody got time. I'll just get the new carpet and then try to cover them somehow, maybe use the old carpet to make up something; not sure yet. So after that disappointment I found a distraction. I mentioned some time ago about the trims around the windscreens being terrible to look at and it just so happened I had some trim paint laying around. I think they came out great, but now they're a little too shiny compared to the rest of the car.. hopefully over time they'll fade a bit. I'll get some more paint and tape and do the rear to match. I do have the trims to go around the front and rear windscreens however that's a windows out job and I don't really want to find out what's underneath. This is what 20 year old underseal looks like when it's wire wheeled off. While I was in between coats of the windscreen seals I removed the side trim and wired off the remaining crusty old underseal coating that was put on. Unfortunately as you can see lots of the paint also came off so I will spray new undercoating there and re-install the trim after giving it a polish. Originally those trims use plastic clips to hold them on but mine was riveted so not sure if I will rivet again or maybe use screws instead.
2 points
-
Fingers crossed it doesn't end up sounding like every Altezza in Palmy.....2 points
-
Nearly have all the loom sorted/removed in engine bay..not yet found the wire for the factory dash boost gauge..grrr. Anyways pic of latest parts precurement. Trick NZEFI coil set, spendy injectors which don't match my colour scheme in any way, fuel line AN fittings & braided hose set, Spal puller fan, lightened flywheel, Cusco numberplate relocate just cos was getting their brake booster shocktower mount (YT vids says it makes a better pedal feel) , OEM heater line cis less hassle clean my one with corroded outlets and this match colour scheme, turbo oil feed line and Works Bell short boss kit...need a second kmart bin..
2 points
-
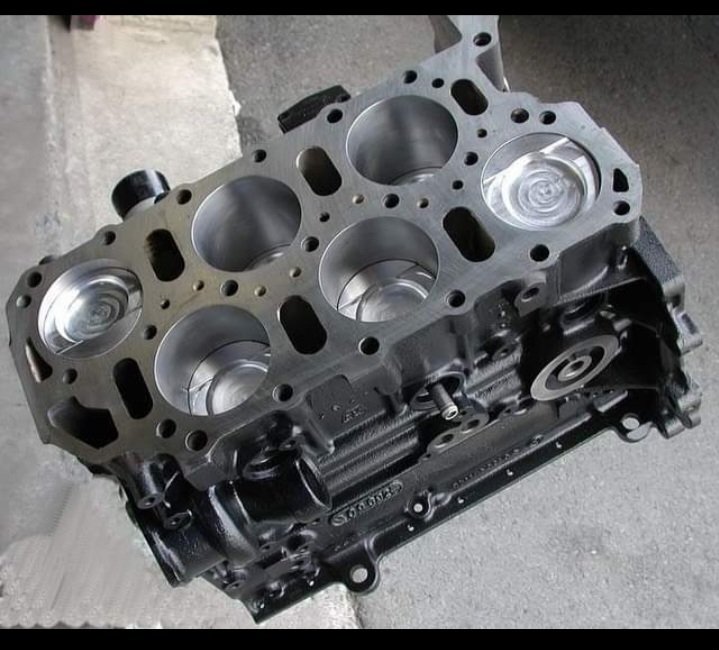
Lots of spreadsheets and mulling led to the decision to rebuild it ourselves. The engine the mechanics sourced had no information other than "64kkm"; engines before 2019 models have thrust bearing issues I'd like to avoid. They'd charge a lot of money for something that I'm meant to be learning how to do. The cost of getting an appropriate year replacement engine from Japan is approx $5000 delivered with gst, depending on who I go with. Engine reconditioney man said if it was his block, he'd re-use it. Obviously he's not going to put "it's fine" on paper but it's better than him saying a perfectly reusable block should be tossed to avoid liability. Anyway, The good news The crank and conrod could be saved! The block should be fine! The bad news For the life of us, we couldn't find any undersized bearings for the crank in the "standard 0.25mm" increments. The engine is used in so many cars, I find it hard to believe there's nothing out there, but we just couldn't find the right people. Apparently part numbers are king in Japan and they are super cagey about anything else for liability reasons. After a while of inquiries and searches, I gave up and bought a new crank and conrod. The good news 2: electric boogaloo I'd been plugging part numbers into Amayama and bugging them to update their database because no altos past 2015 are in there. But while inquiring with Jesse Streeter, he mentioned off hand that he could get them for cheaper. I gave it a shot and.... yeah he's right! Amayama: $1.9k Streeter corp: $1.45k Delivered faster, too... That said, I'd already bought a batch from Amayama; still, the bulk of the parts went through streeter so I'm very happy with that turn of events. When Jesse's first batch arrived at his office, I asked him to send a pic of the crank stamps. This let me use the block and conrod stamps to figure out the most likely bearings to use and order them in advance. I forgot to get him to check the new conrod but fortunately it worked out While girlface cleaned the schmoo and old (possibly metallic) oil from the block, I cleaned up the old crowns. I struggled a lot with some old kitchen scourers and toothbrush with acetone before I spot-tested a brass brush and absolutely blasted through the rest of it. I also replaced the new flywheel bearing (don't worry it's clean now), 10mm for scale Cleaned and schmoo'd the transmission clutch housing, ... and the floor, went slightly overkill getting rid of those fuel fumes that we really should have dealt to weeks ago, And sorted out those drive shafts. When we removed the engine, we cut the boots open. I was super dubious about this move, having (somewhat) recently dealt with the Starion's shafts and watched people on youtube reinstall their modern FWD shafts, but since when is DIY engine overhauling smooth? I popped the shaft ends out of the transmission easily with gentle pressure from a crow bar and some light rubber malleting. Then dealt with the other ends which were still in the car. Fortunately I didn't have to remove any suspension bits because there was no engine blocking them, I just had to remove the wheels and hub nut. That's a rusty rotor. It's okay bb soon hush Then I recruited girlface to slam them out in an afternoon. Ew Ugh gross This is the closest I'll ever get to baby poop We struggled for like an hour to get the big end "properly" seated. It just looked like there was a notch waiting for it. We used shims, screwdrivers, pliers, the vice, brute force... I finally had the idea to go confer with Kelvin on how they look assembled on his car, and also hunt for high-res second hand drive shaft shots on the internet, and discovered that nope we'd been all the way on the whole time .... :') So fine, moving on to clips. The suzuki boot clips we got were this design I'd never seen; you bend a piece of metal over and it has the precise correct clamping force for the boot. Cool. Well it was cool until we had to do the two large clips. You see with the small ones, we could just use adjustable pliers to perform a reach around and grip both sides of the shaft. This let us press down easily and evenly. There's a lot of force required to get the metal to bend over, and it needs to be consistent along its length because it'll happily deform. We tried a few things, and just when we thought we had a good thing going with a hammer, we broke it :\ We didn't think the other one would go any better - or inspire confidence if we did get it on - so we decided fuck it, we'll go generic. One clamp installer and generic set later... ... the drive shafts are back at square one. I sure hope the outer boots don't die any time soon because you have to take the inner ones off to service them ... ... We need a final shipment (bearings) to arrive which will take up to a couple weeks probably, but we've got all of the other parts and there's plenty of work to do in the mean time. I've been assembling a (work-in-progress) dependency/workflow diagram to try rein my brain in and have been printing out sections of the manual for stuff that's trickier to do in front of a laptop with greasy hands. And we're caught up. Oh I bought a head stand and it's probably overkill... So um, here some more pics for scale.2 points
-
1 point
-
Snap! Have been dreaming of jamming one in the Fiat 1500..1 point
-
Try NZ Impers, on Facebook.1 point
-
Wreckers quoted me 1500, there is heaps on FB marketplace for 1k That's for the K24A3, obviously if I go to pickapart and roll the dice it's cheaper (but I'd need to be in NZ for that) Happy to have a chat if you have one come up im also open to a whole car depending on pricing1 point
-
I recently brought a ER16 collet chuck for the router so it can fit 1/8" shank microdrills Buy a second to hold the jet and you'd be able to overkill the job without risk of breaking drills or needing good eyesight.1 point
-
VR6+T is a very common mod, and there's shitloads of material online about it, plus a wad of aftermarket bits. The engine itself has been around forever in various configurations - 2.8 12V, 2.8/3.2/3.6 24V. Yes, they're heavy but as mentioned, they've got a lot of meat in the block. 15° angle between bore center-lines, so they run a conventional inline-6 crank and firing order... Add to that the asymmetric port length between cylinders (inlets are on one side of the head, exhausts on the other) and they sound absolutely awesome. 1000hp+ is achievable - Just spend 30 seconds on YouTube looking for VR6 Turbo Mk1 and Mk2 Golf conversions...1 point
-
Just worth mentioning that there is also a slightly older version of the same thing, called 2AZFE / 2AZFXE. Not quite as good but possibly cheaper and more available perhaps. This one is cool.1 point
-
Going with a stock 2zz? Or doing some tweaks? Curious to see how the 2zz goes in rwd few newer options around now, esp after seeing @Romanresults with his 1nz 2AR have been popular in MR2 etc I'd love to see the newer corolla M20A-FKB engines in one of these but the 14:1 M20A-FXS would be interesting (might be a bottom end swap sort of thing) direct injection, my partners corolla gets like 4L per 100km B1600 diff is an interesting option drum brake or is there a disc brake option. How heavy are they compared to the factory diff?1 point
-
Voted. I'm comin. @SunnyCoupe you keen??1 point
-
Now the exciting part bolting on shiny cool new stuff!
1 point
-
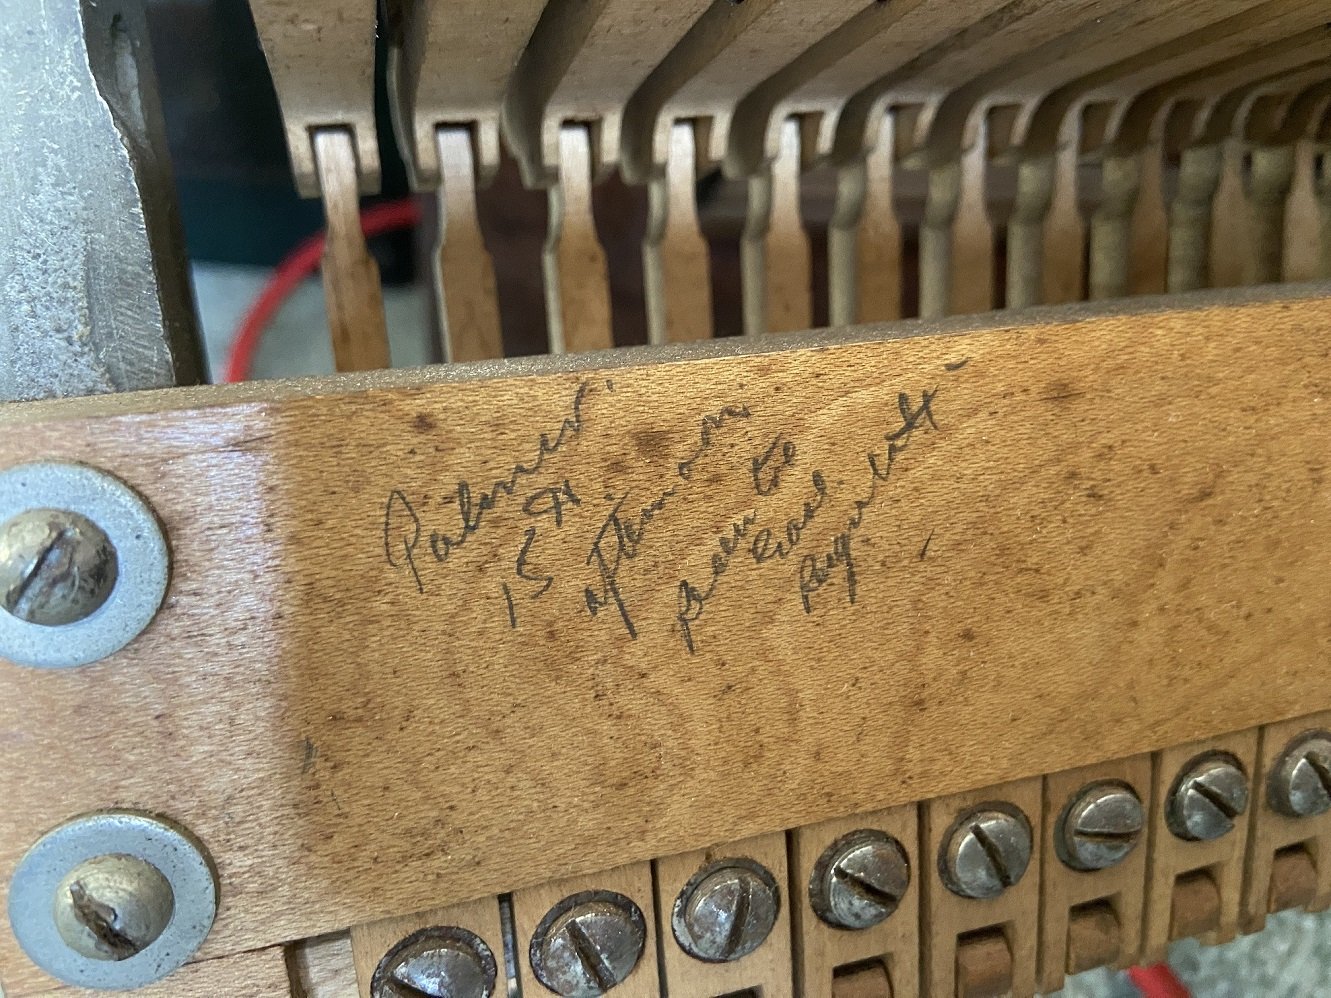
Interesting. A guy from my industry randomly decided to retrain as a primary school teacher, but he didn't last long in the field. I used to flat with a primary teacher years ago, and I remember her making strong vodka jellies to take to school and share around the staffroom at lunchtime - presumably those helped the teachers get through the day. I had David Jenkin assess my piano years ago. I found it interesting and I was sorely tempted to throw money away on a rebuild, but instead I bought a new piano for some reason. Now I have two pianos, because of course I can't get rid of the old one. More than a decade ago I was already finding it difficult to book piano tuners - they were busy, which meant they would tell me their one and only available time slot a month or two in the future, and I'd have to make that work. Then they'd decide to specialise in tuning expensive Steinway grands and stop accepting jobs for old British uprights. The piano tuner I use now is someone I was forcibly transferred to when my previous tuner basically said he was too busy. She's not the norm for the industry as she's about a decade younger than me. She was able to bring forward her return visit to finish the hammer bushing replacement to earlier this week. So that work is mostly done now, but it has an annoying short-term downside - as Tim Finn would say, what I need is a positive action, but there's a fraction too much friction. Ooo, and I noticed this written on the back of the action: I think it says "Palmer. 15th afternoon Recentre Ease Regulate". Palmer was my great grandfather's last name, and ironically he must have been getting the same work done to the action as I've just had done.
1 point
-
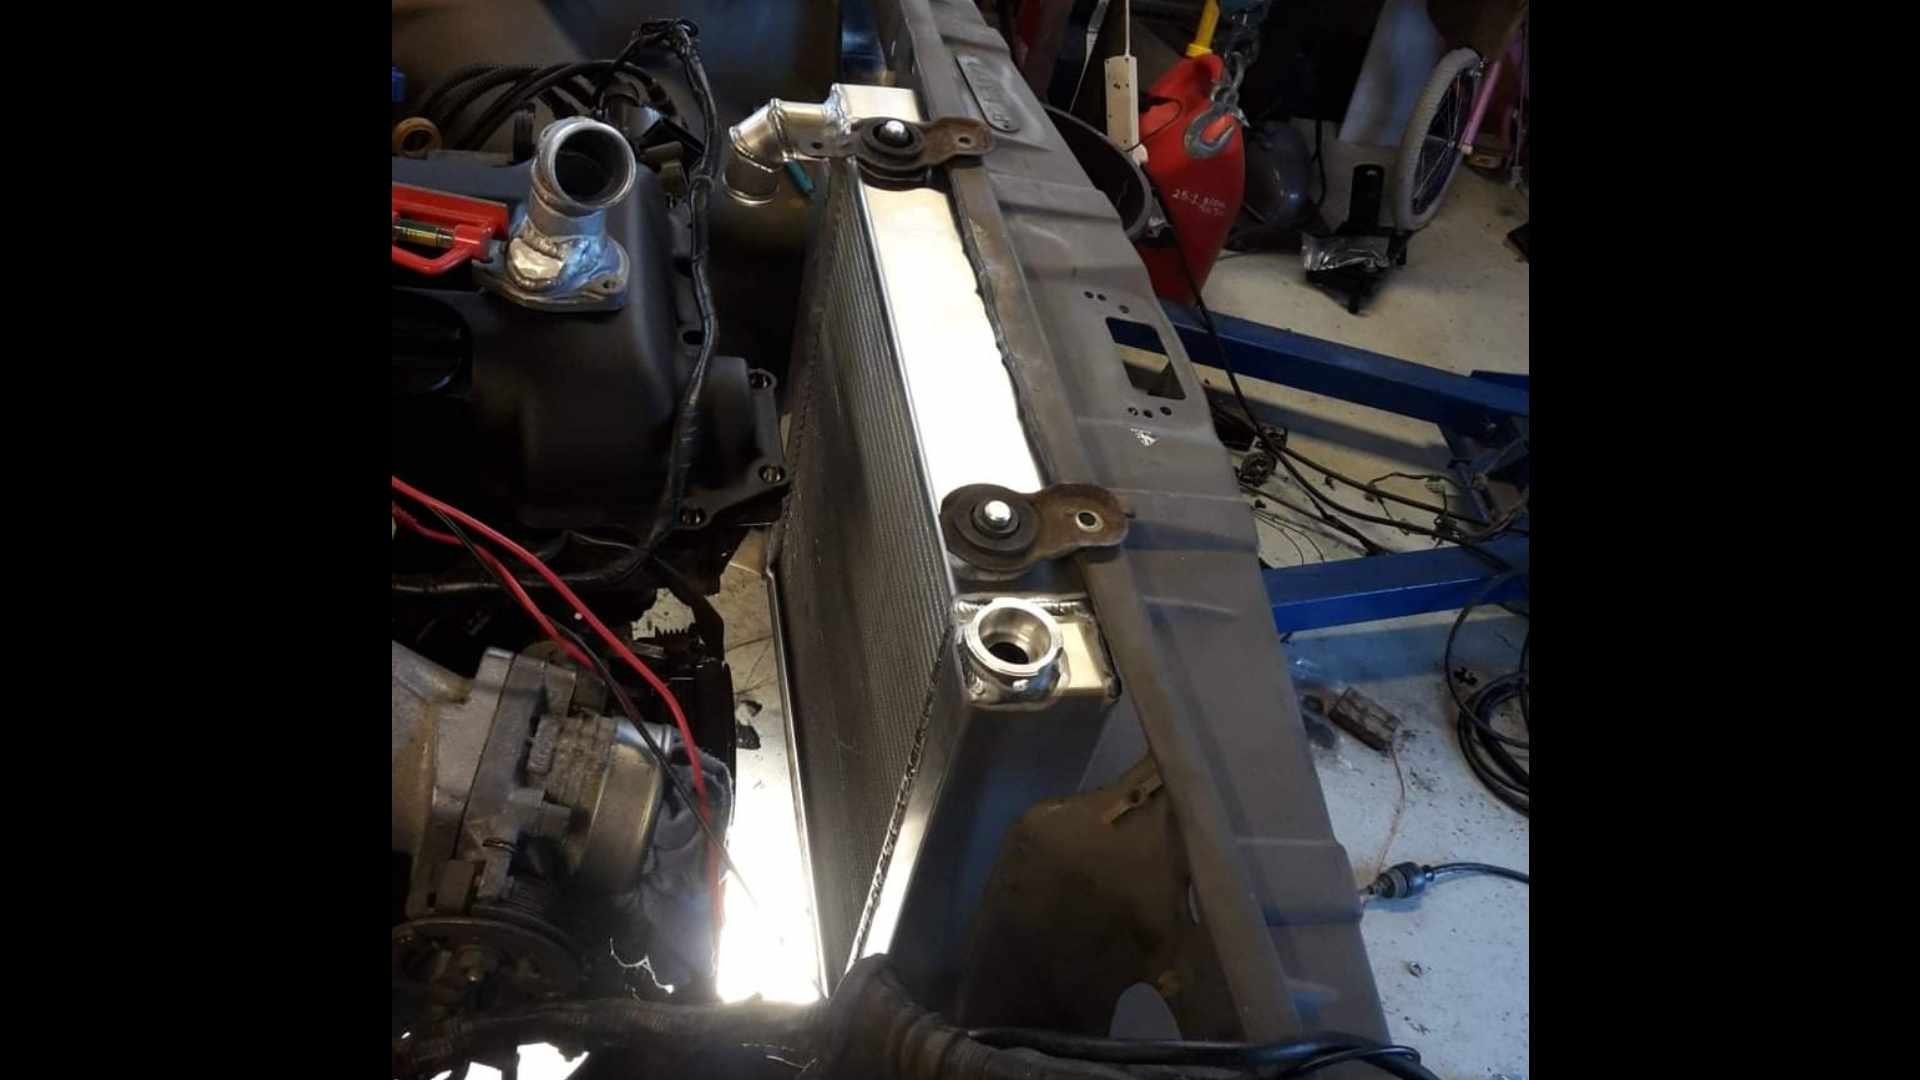
The donor front/radiator support panel came from a farm ute, which had had an L16 repower. Some butcher had gas cut the radiator supporr panel out so they could fit the larger L16 radiator. I tidied this up as best i could (not very well) and got a mate to make me a custom Aluminum radiator to fit in the space i had.
1 point
-
If you're looking for something with a long pintle and a short time to spray, I might be able to help. Would need a nap between each injection event tho.1 point
-
Also, goals1 point
-
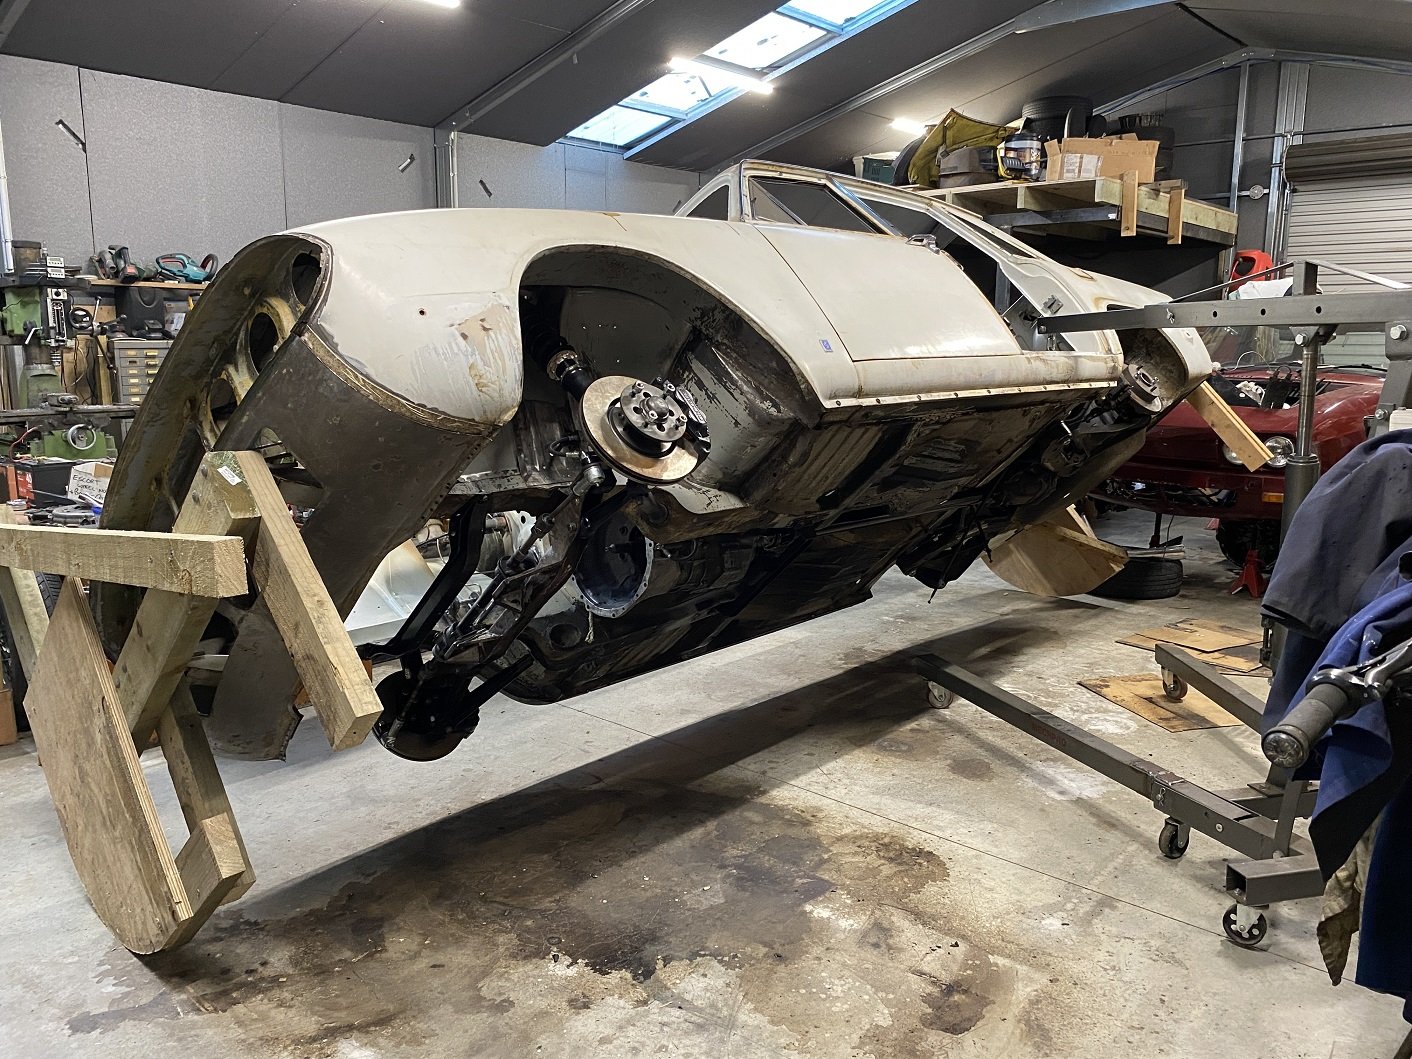
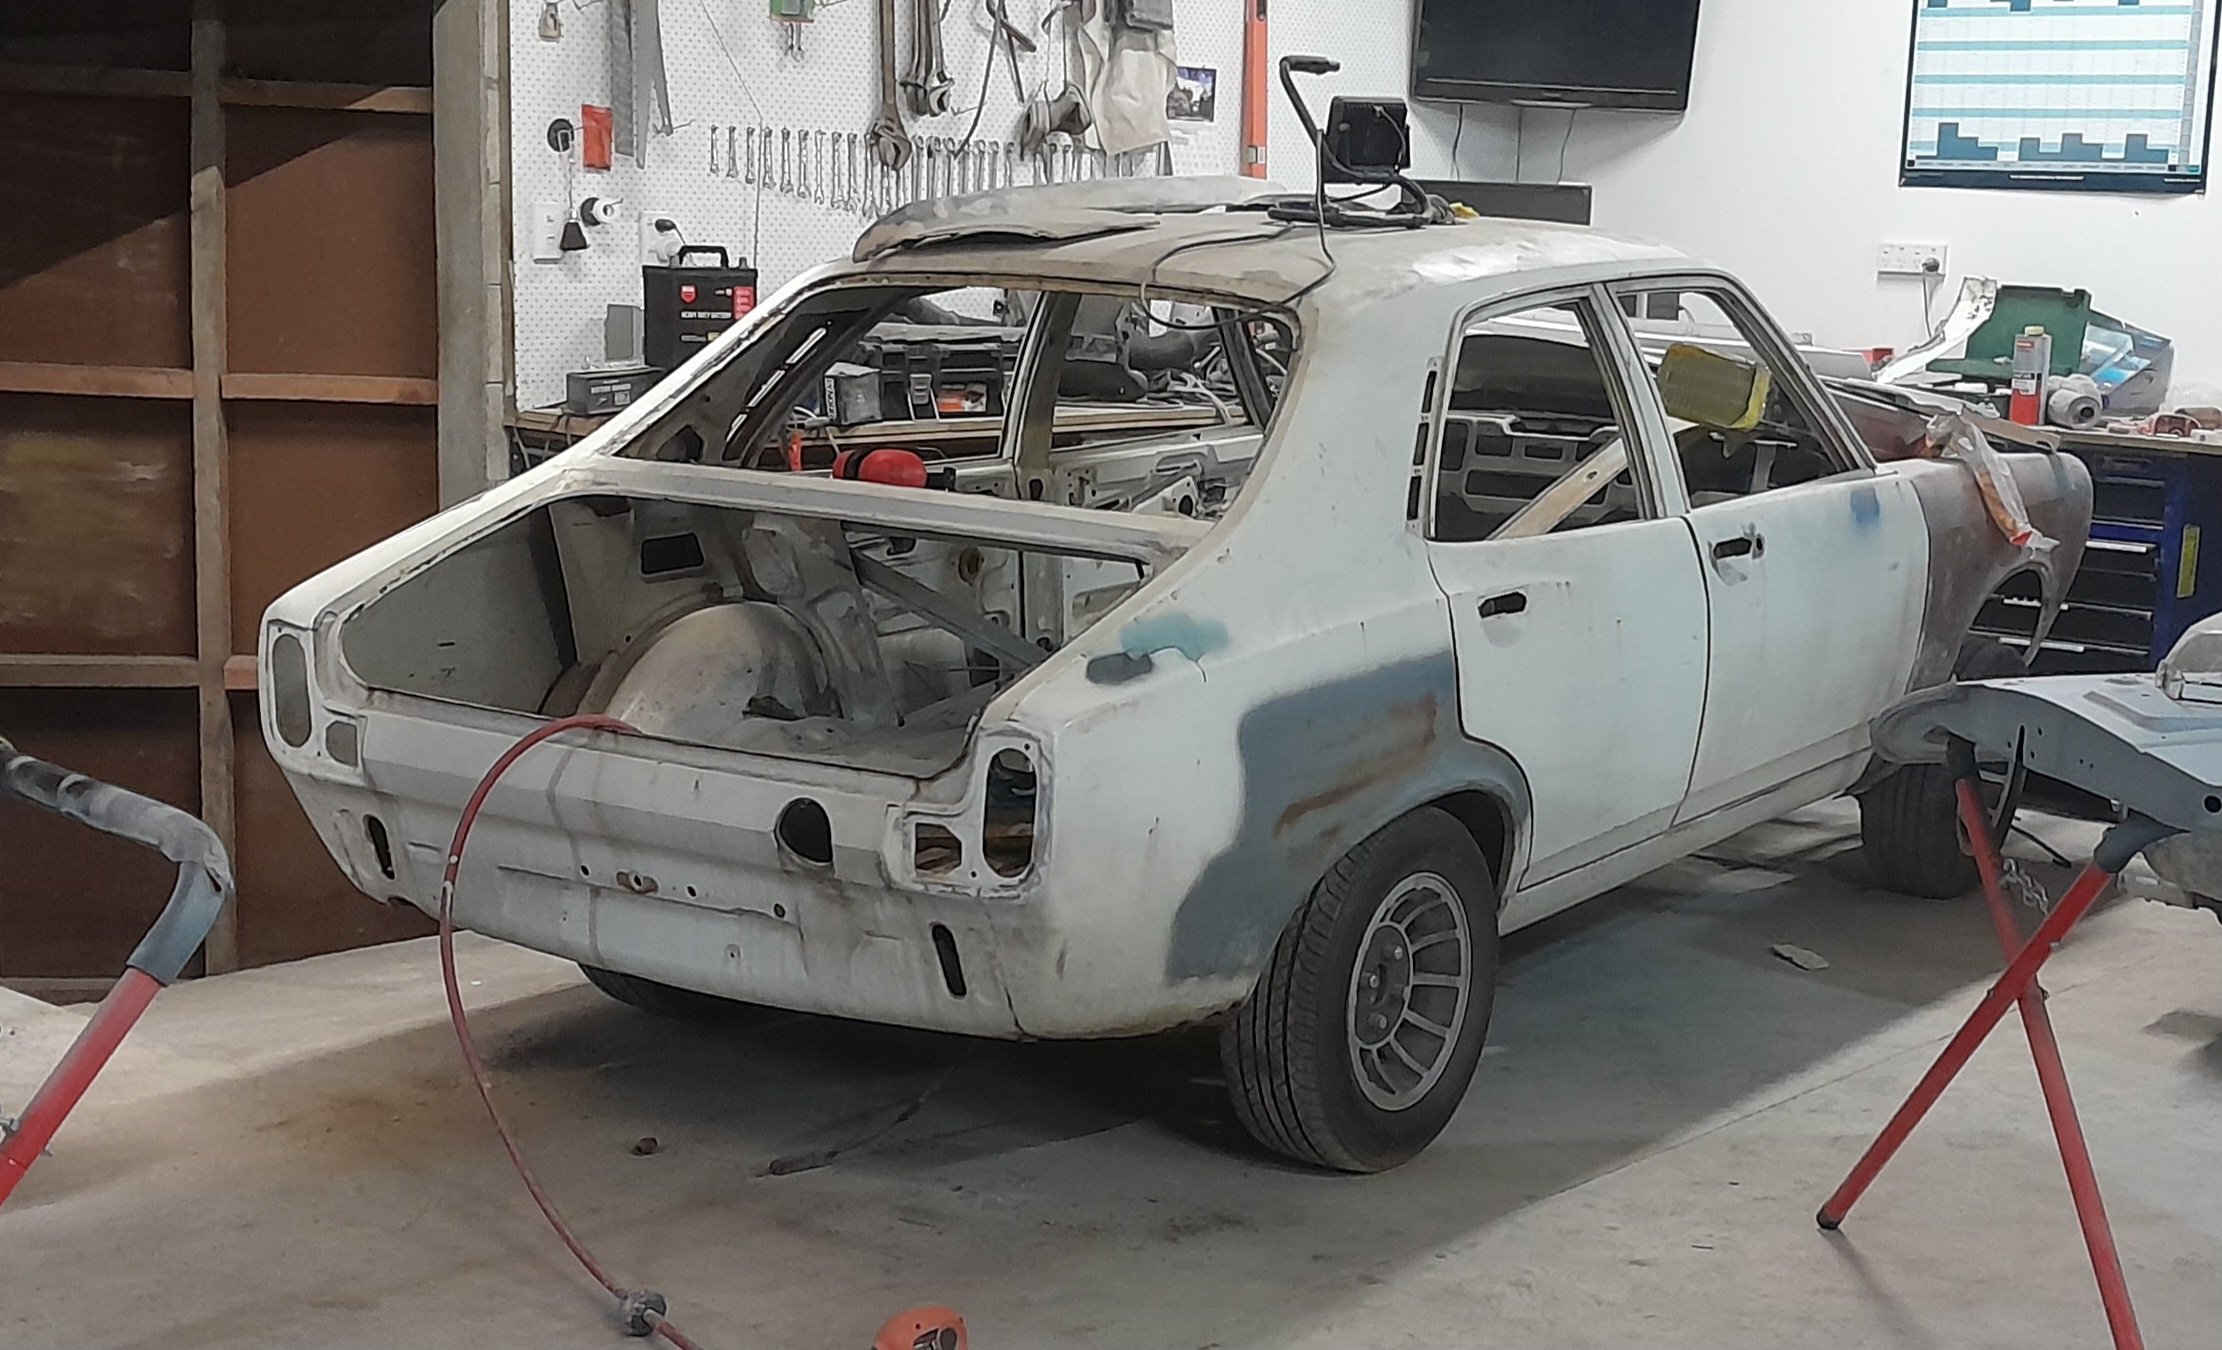
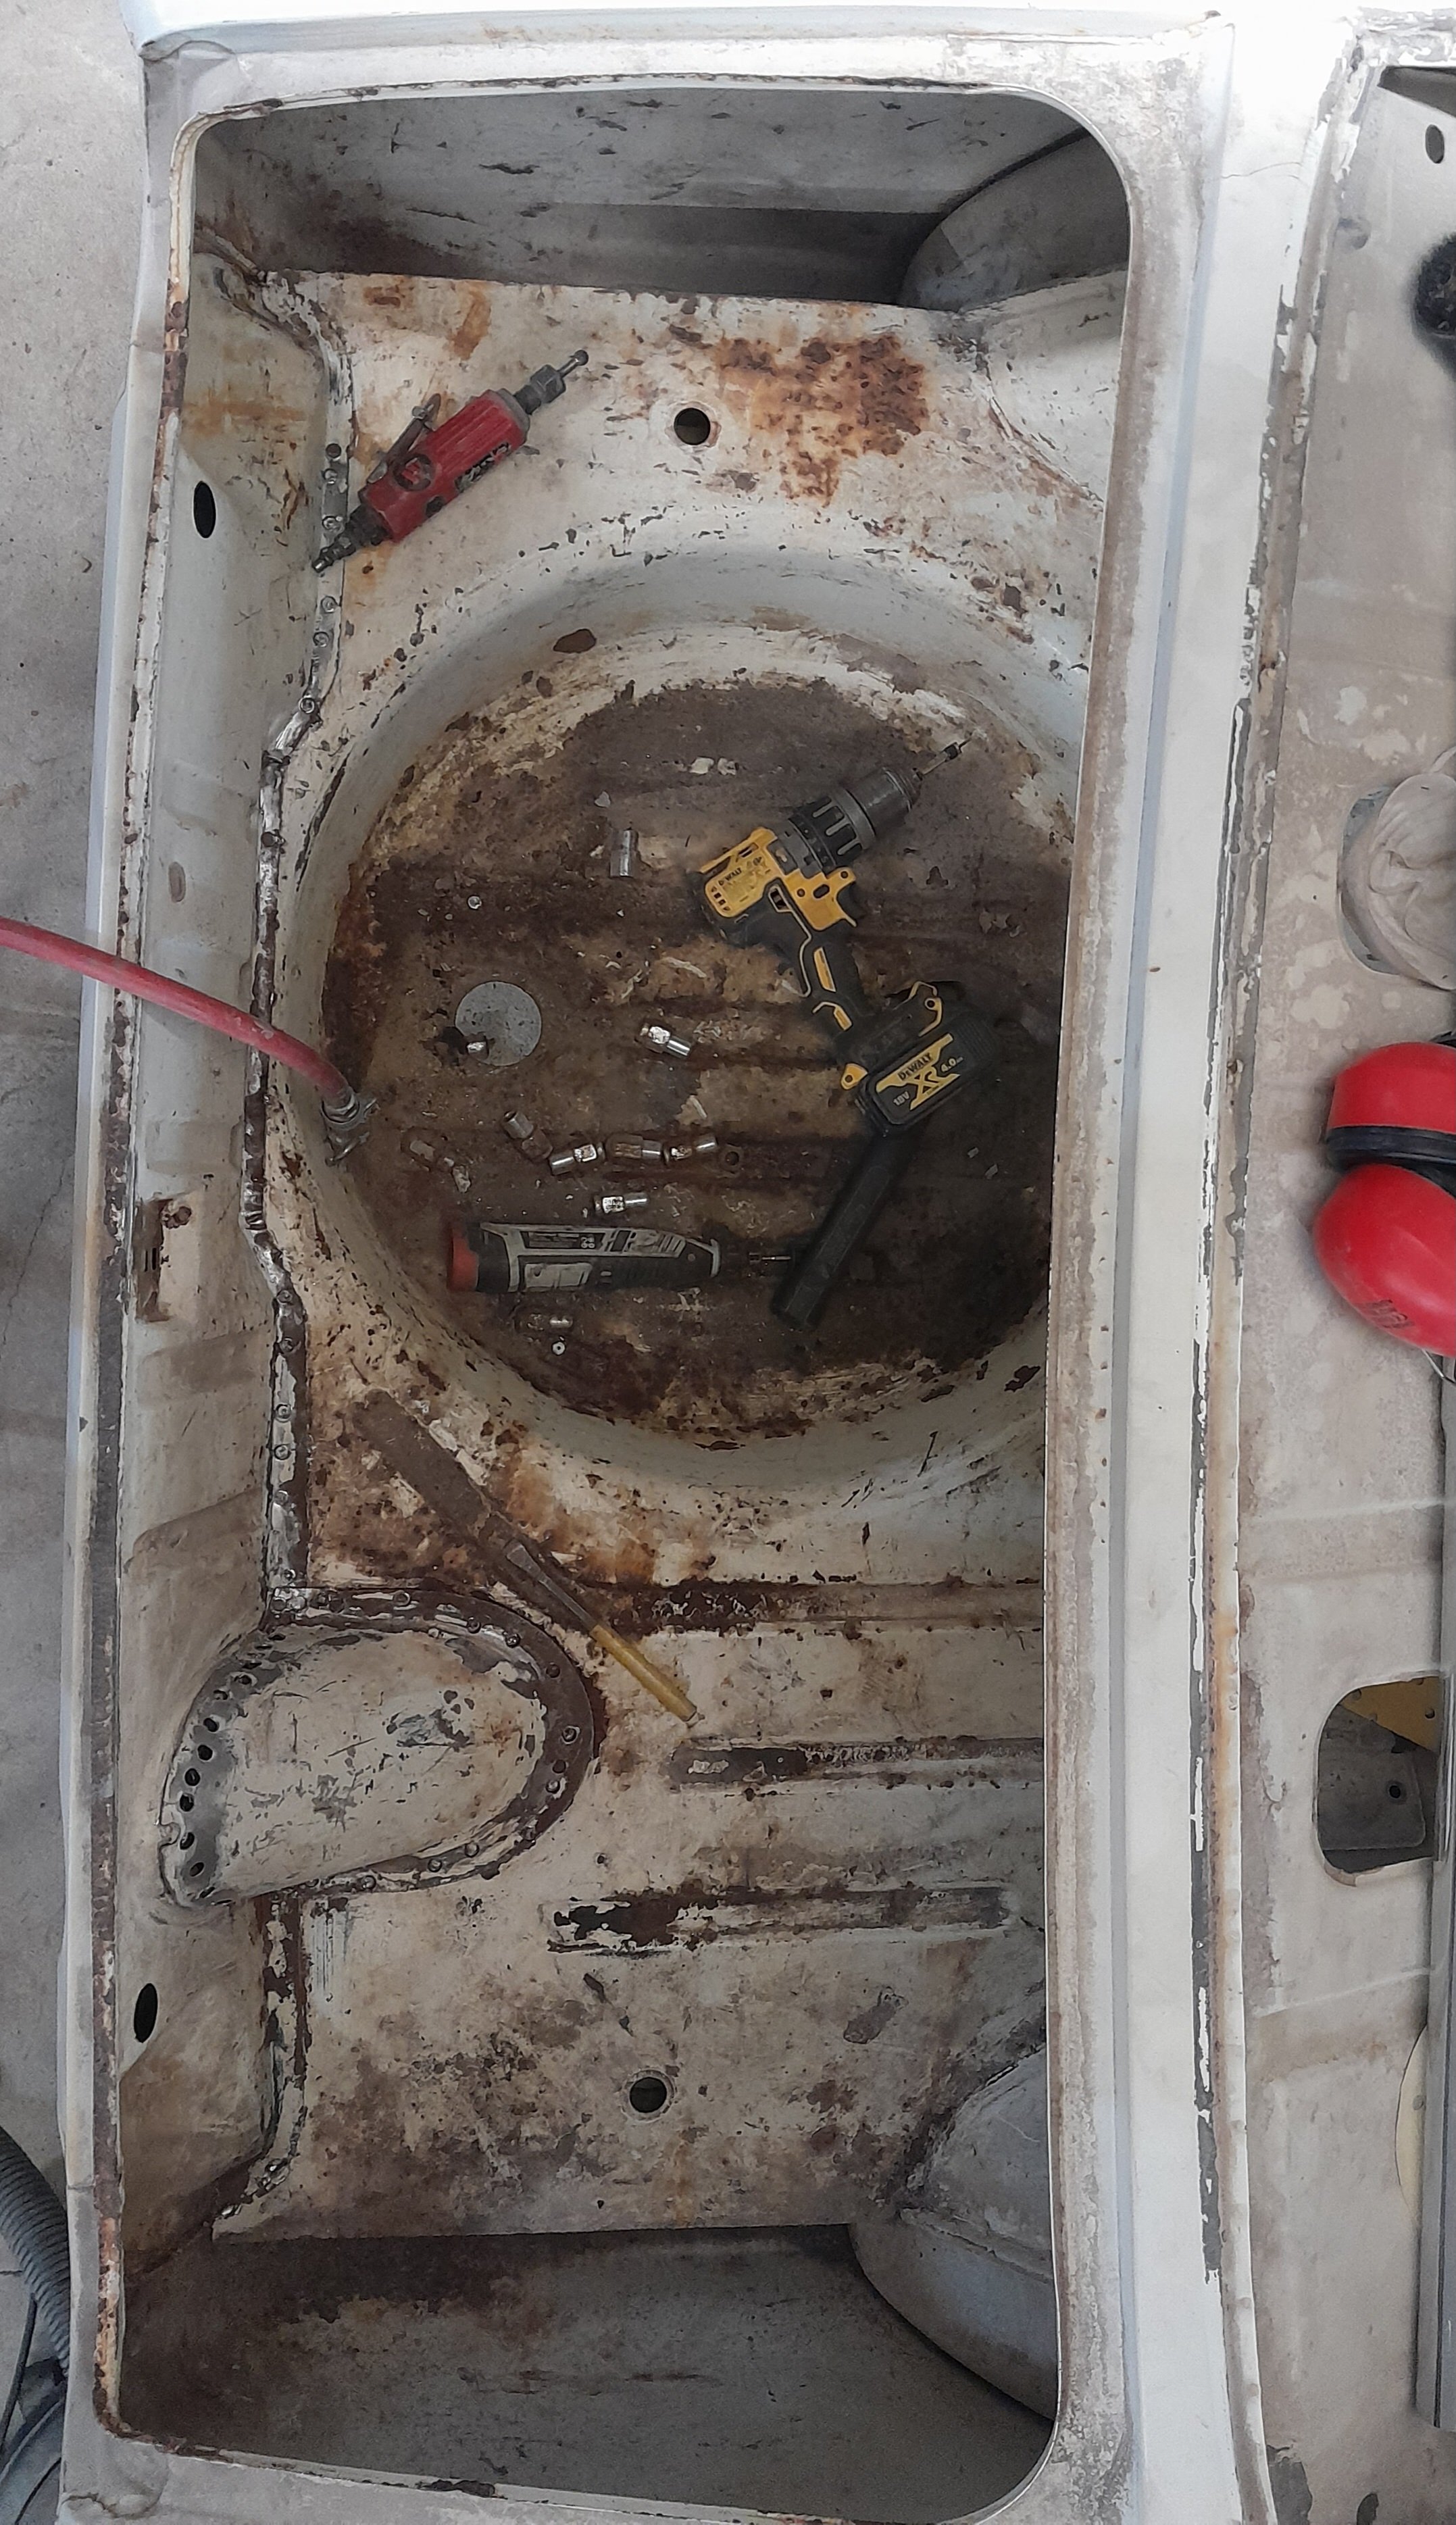
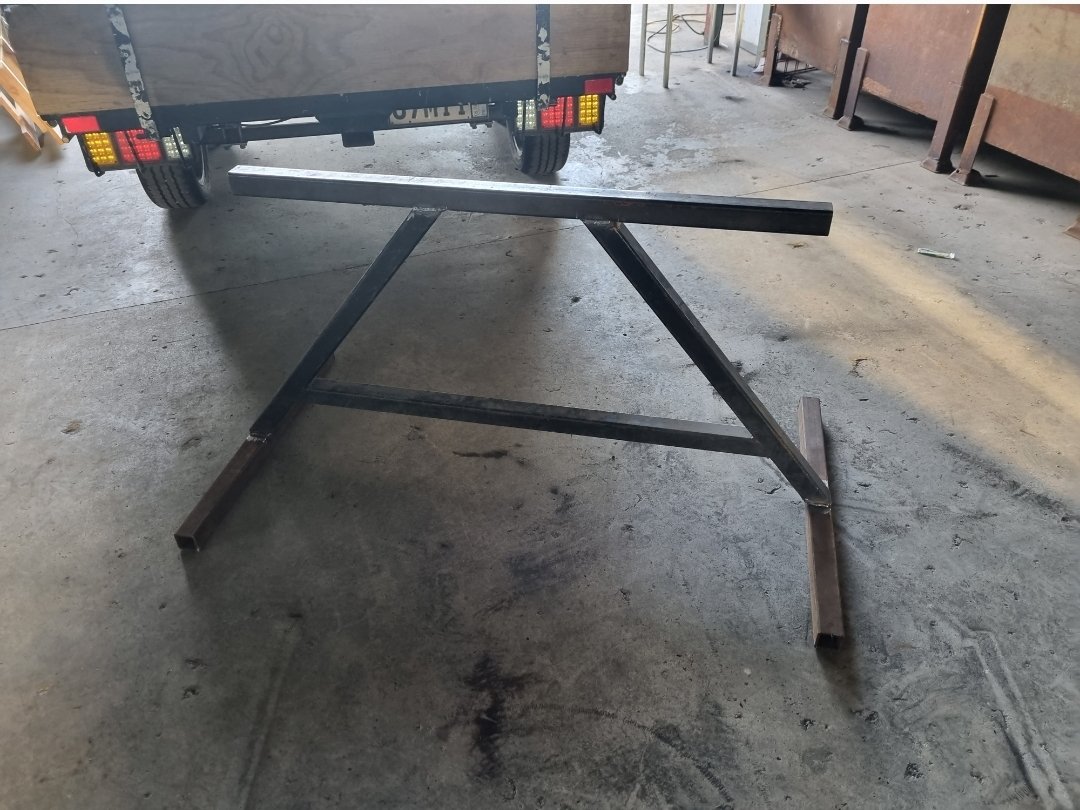
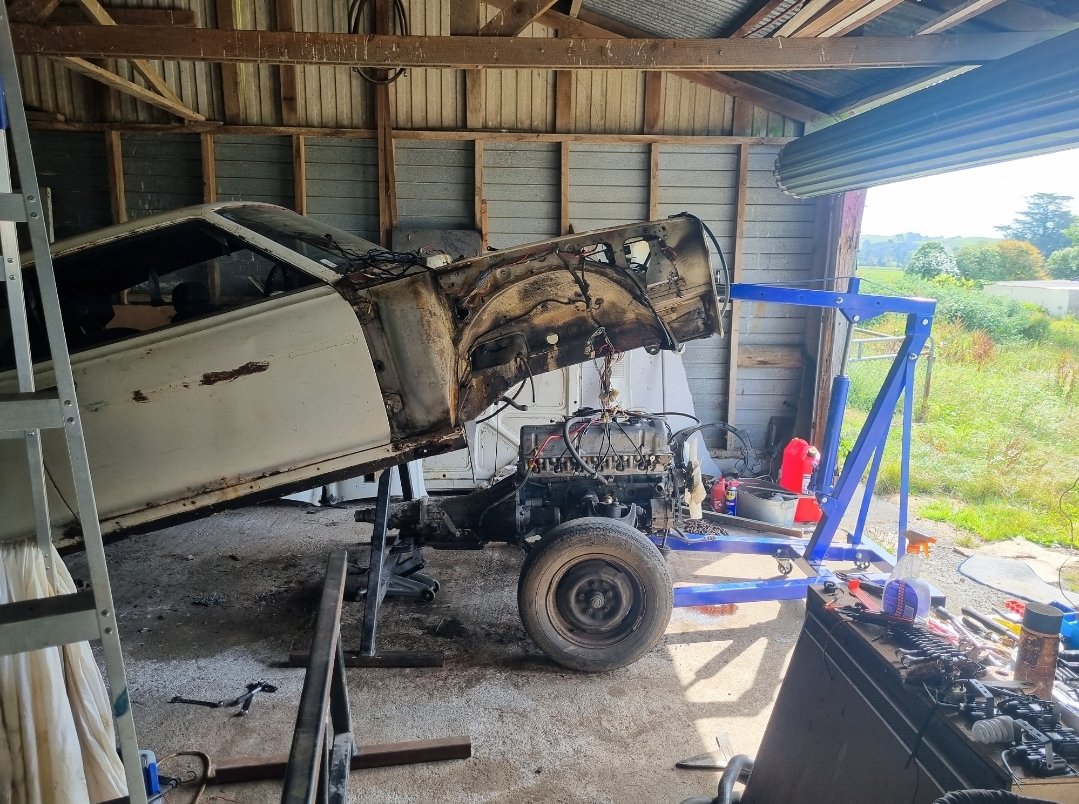
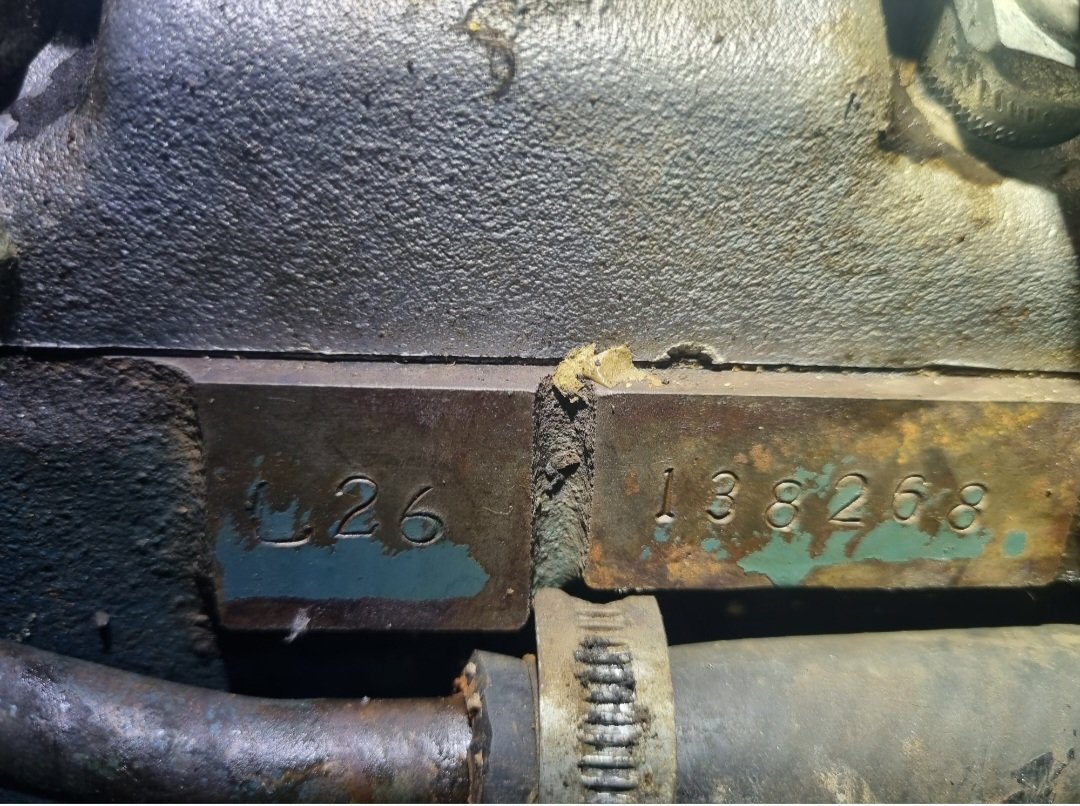
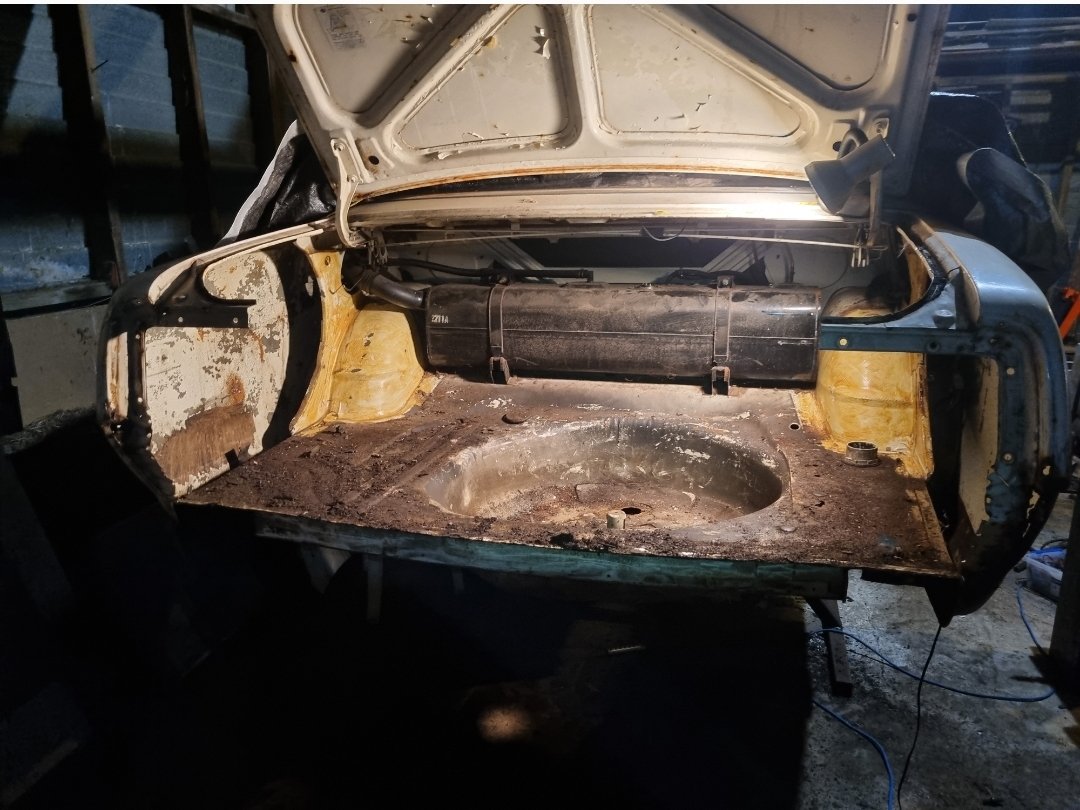
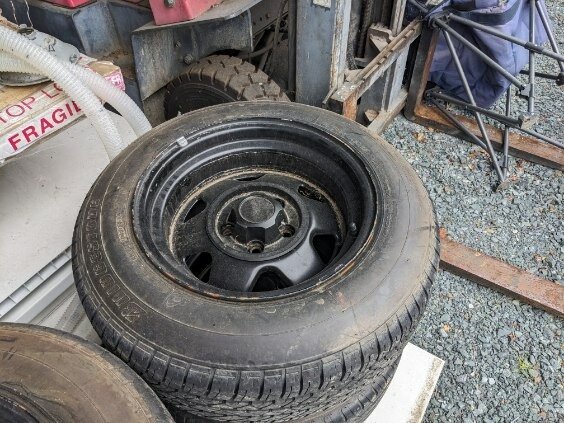
Sporadic sunday morning update. Intention with this project was to do the bare minimum and get it to functional. So that doesn't appear to be happening, shock horror. If it's worth doing, I guess it's worth doing right. Or burying myself deeply it in and selling on OS in boxes for $500... Finished tidying up and rewrapping all the loom in the front. No pics. Decided to get it up off the ground so I can make the floor all pretty, I figure with revinning I'm not going to fuck around and have them pick holes it it, the jobs just have to be done. Easiest way to do that was drop the running gear out and lift the body off on to some stands I hacked up. It was a surprisingly simple task. Might turn it into a brodozer on 37s... I haven't taken many pics, but I've scraped all the under seal off the underneath from the doors back, it's really sound and haven't revealed too many other gremlins. I've dropped the brake and fuel hoses out as these are toast. Thinking I'm gonna get a little pot sandblaster to deal to all the surface rust, then brunox/paint/under seal. Also discovered another 20hp under the bonnet. Not sure if they get picky on this shit for revin?? Meant to be L24.. I wanted to start at front and work my way back, but I need to bits to ensure I can align everything, so until such time I decided instead to attack the rear. Drilled and cut rear panel off, have started cleaning shit up and deciding how I'm going to attack the patch work. It needs new floors either side of spare wheel well, but weirdly the well itself is fine. Needs ne bottom quarters and a little bit of inner quarter and inner wheel tub work,so I'm just gonna start picking away at all that. I'm enjoying the process. Also, @ajg193 found my missing plate under one of his presses. And @ThePog found me some sweet widened Jeep rims which I'm gagging to get my mitts on
1 point


This leaderboard is set to Auckland/GMT+12:00