
Leaderboard


Popular Content
Showing content with the highest reputation on 01/08/24 in all areas
-
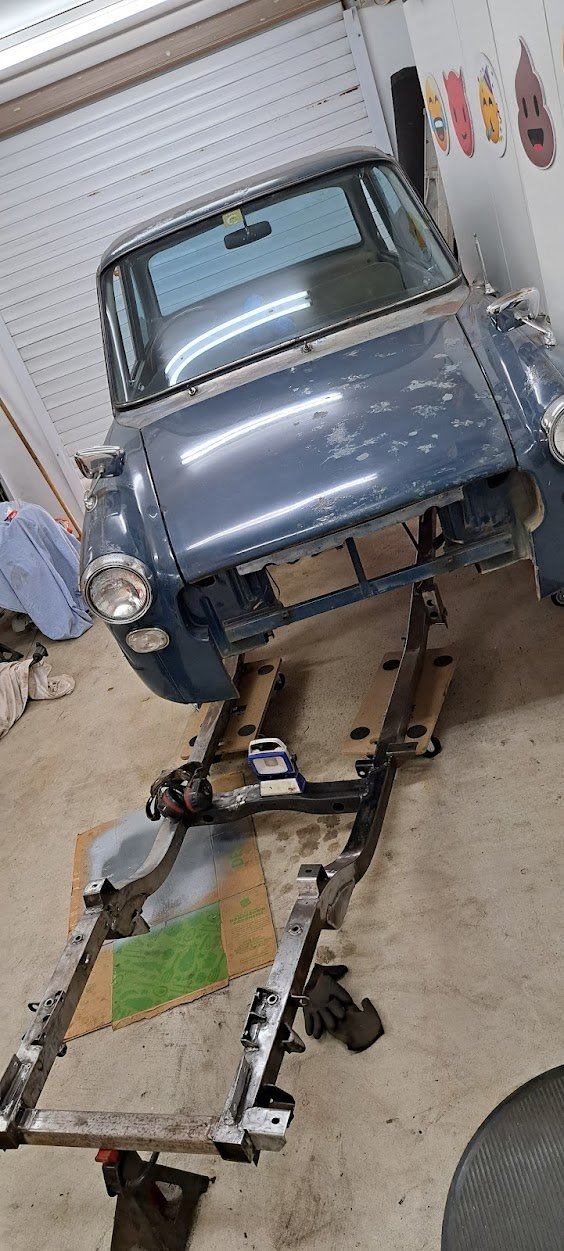
I have been talking with @daveyc123 about getting his viva finished and Wof'd after seeing his posts in the help/depression thread. I'm heading over on sun 4th of Feb with another member (i dont want to tag him incase his commitments change and he feels obligated) but thought I'd put it out there incase anyone fancies a bbq/working bee afternoon. I'm very happy to supply some saussys and warm beers for the cause and load my ute up with as many tools/jacks/sharns as I can gather. I've been and seen the car and it needs a few things like window seals, weatherstripping, electronic ignition fitting, electric fans, a carb tune up etc and probably the brakes and wheel bearings given a check up as the car hasn't seen the rd in a few years. I'm very happy to do this on my own as i said I'd help out but thought I'd put it out there incase anyone feels the same. He lives burwood/Shirley. (I have already cleared this with him)15 points
-
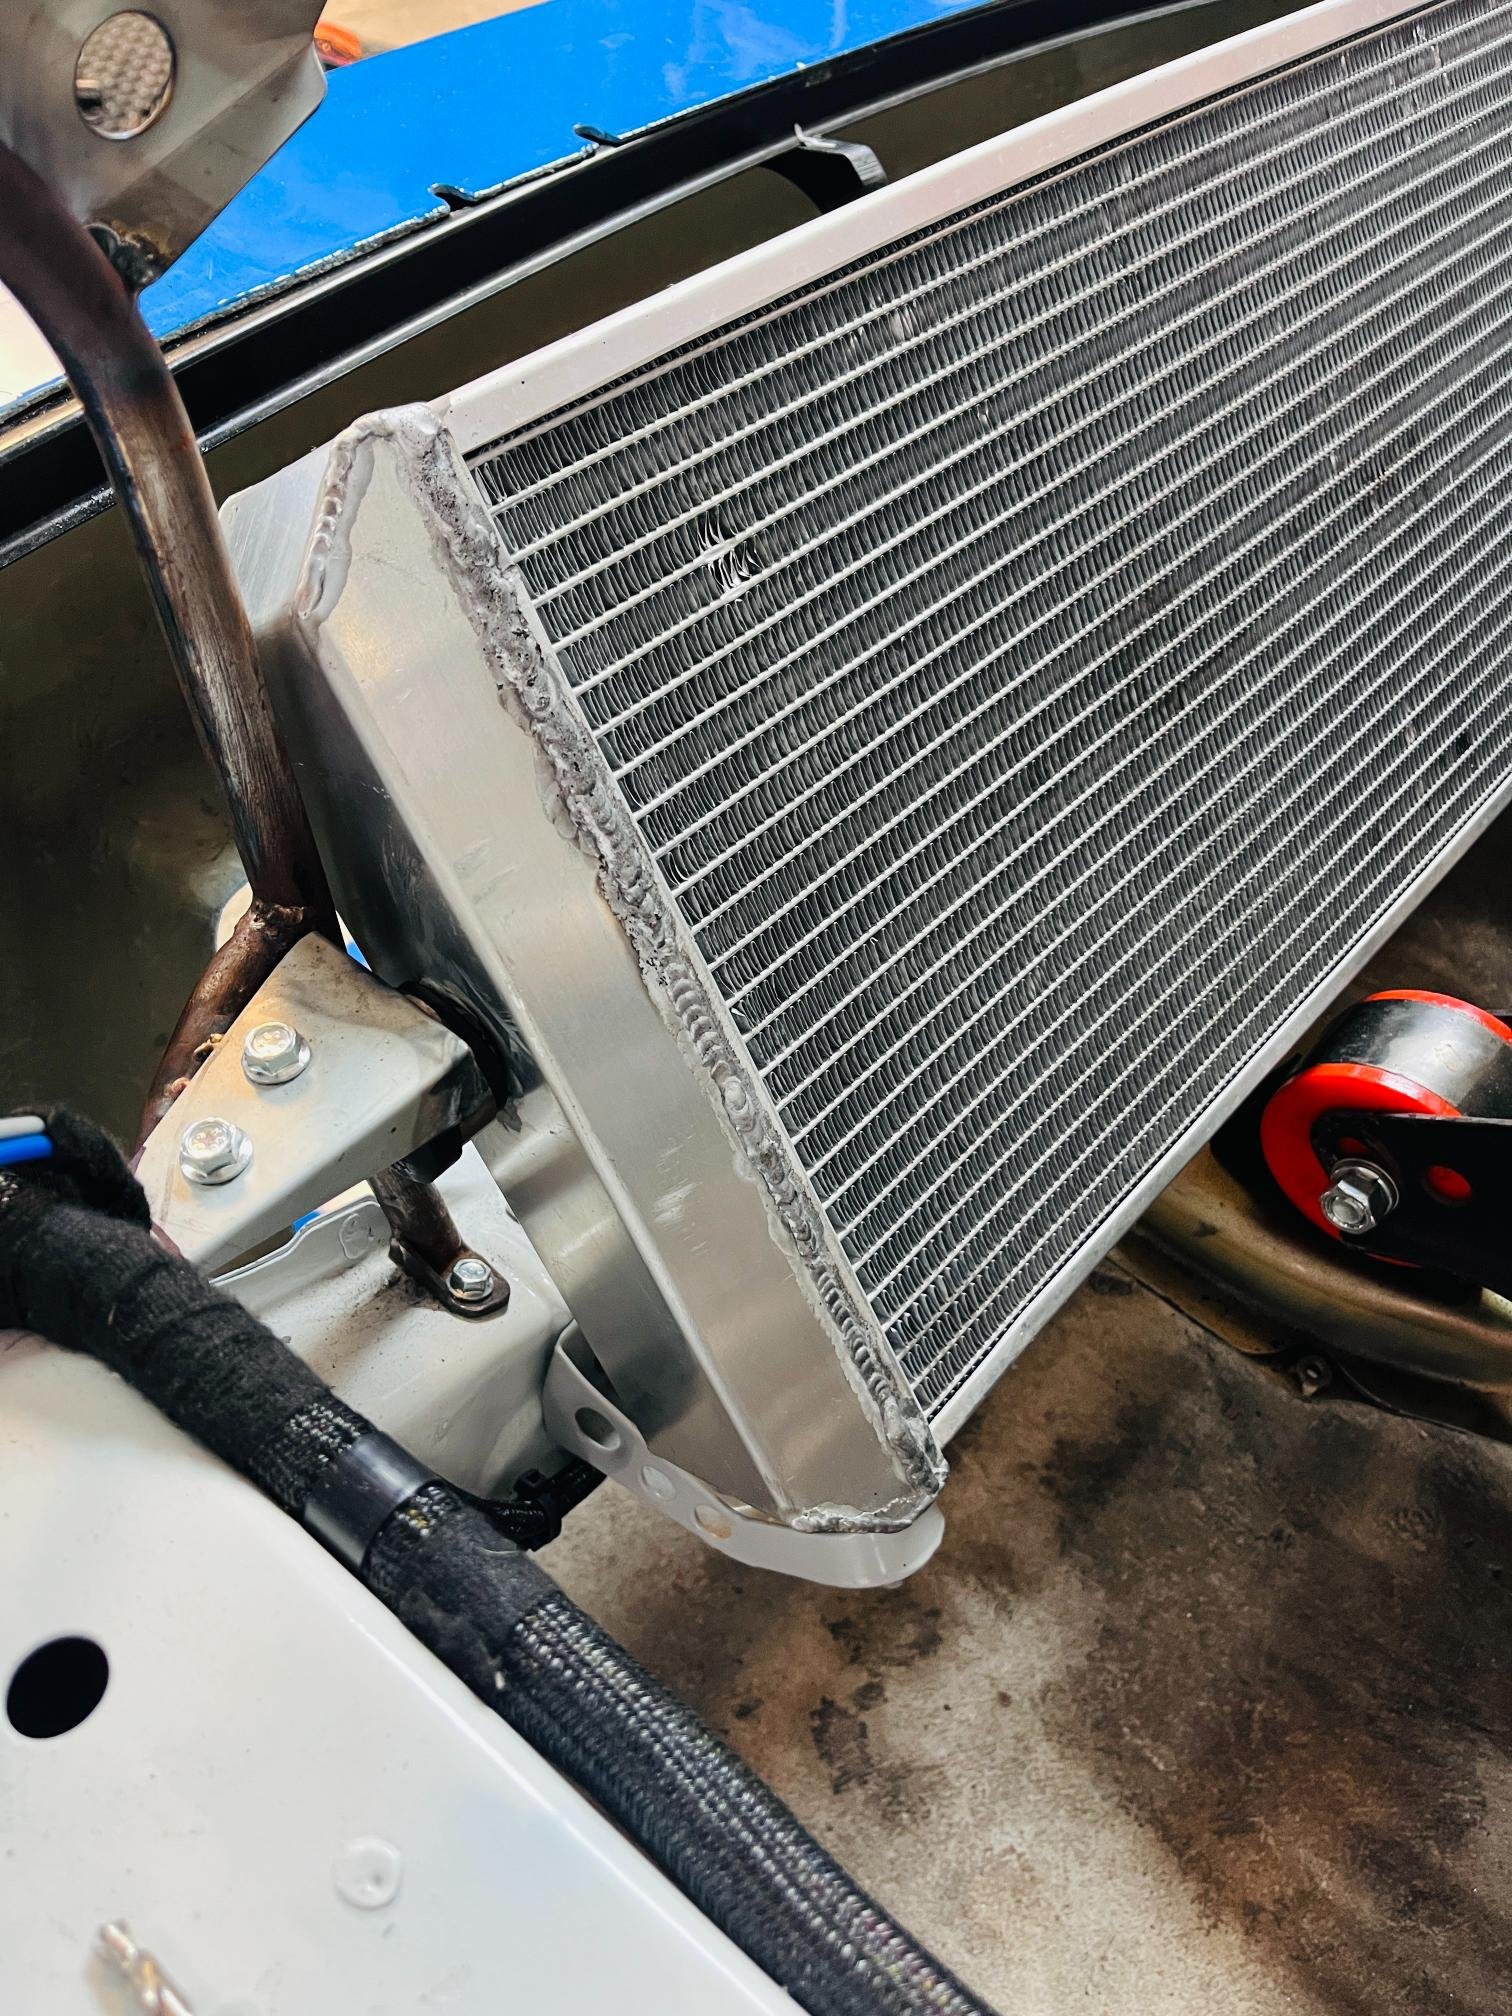
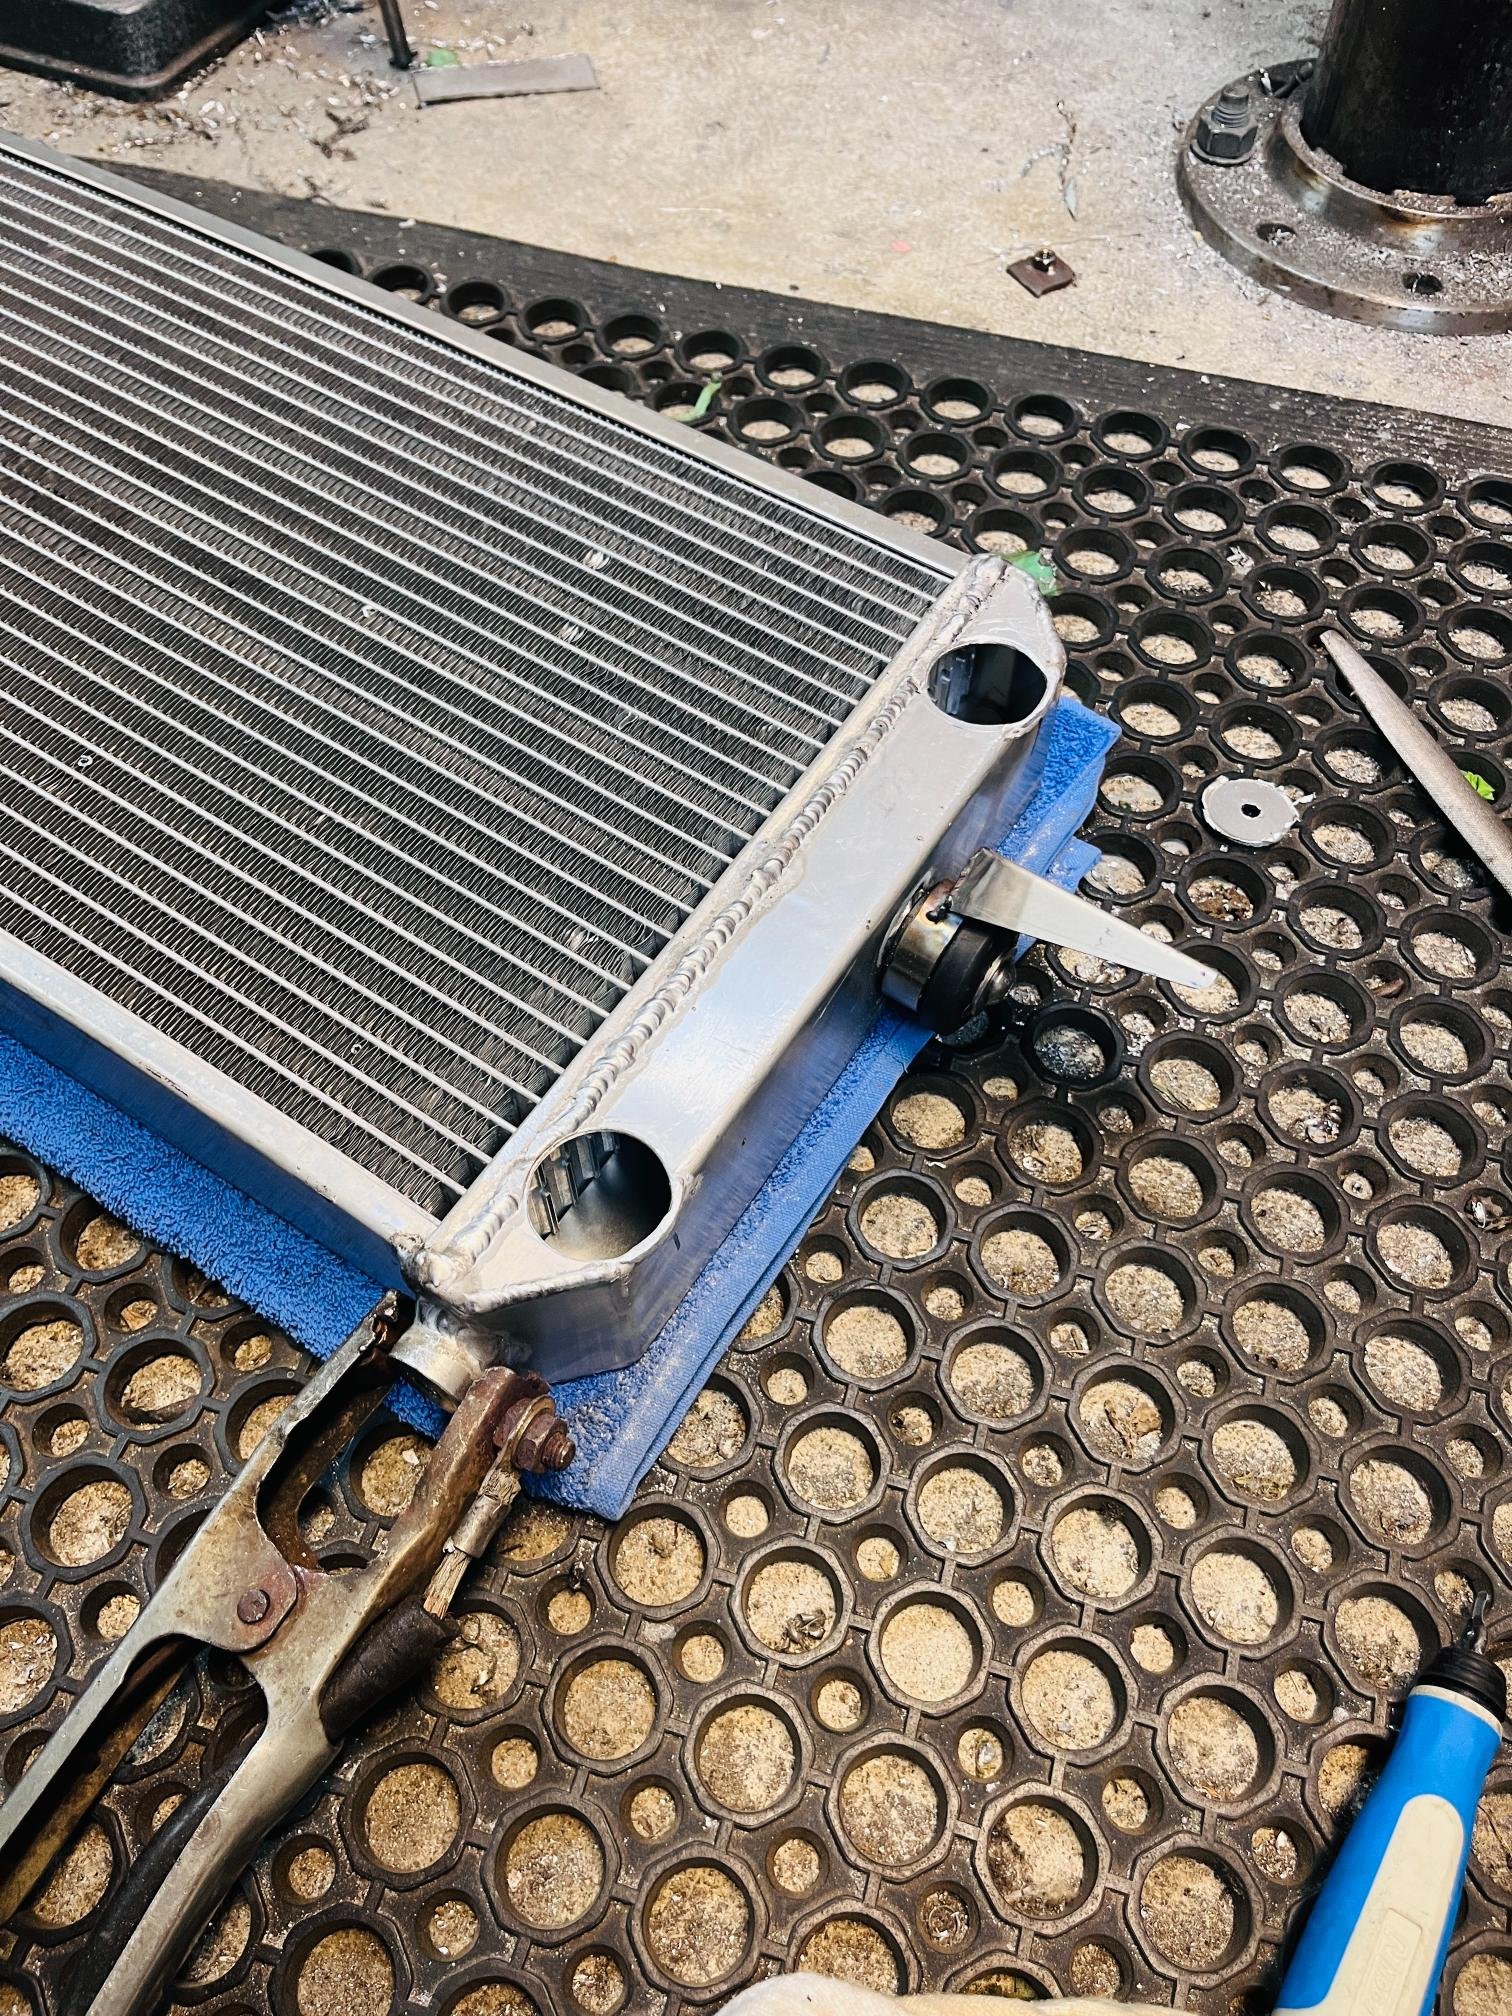
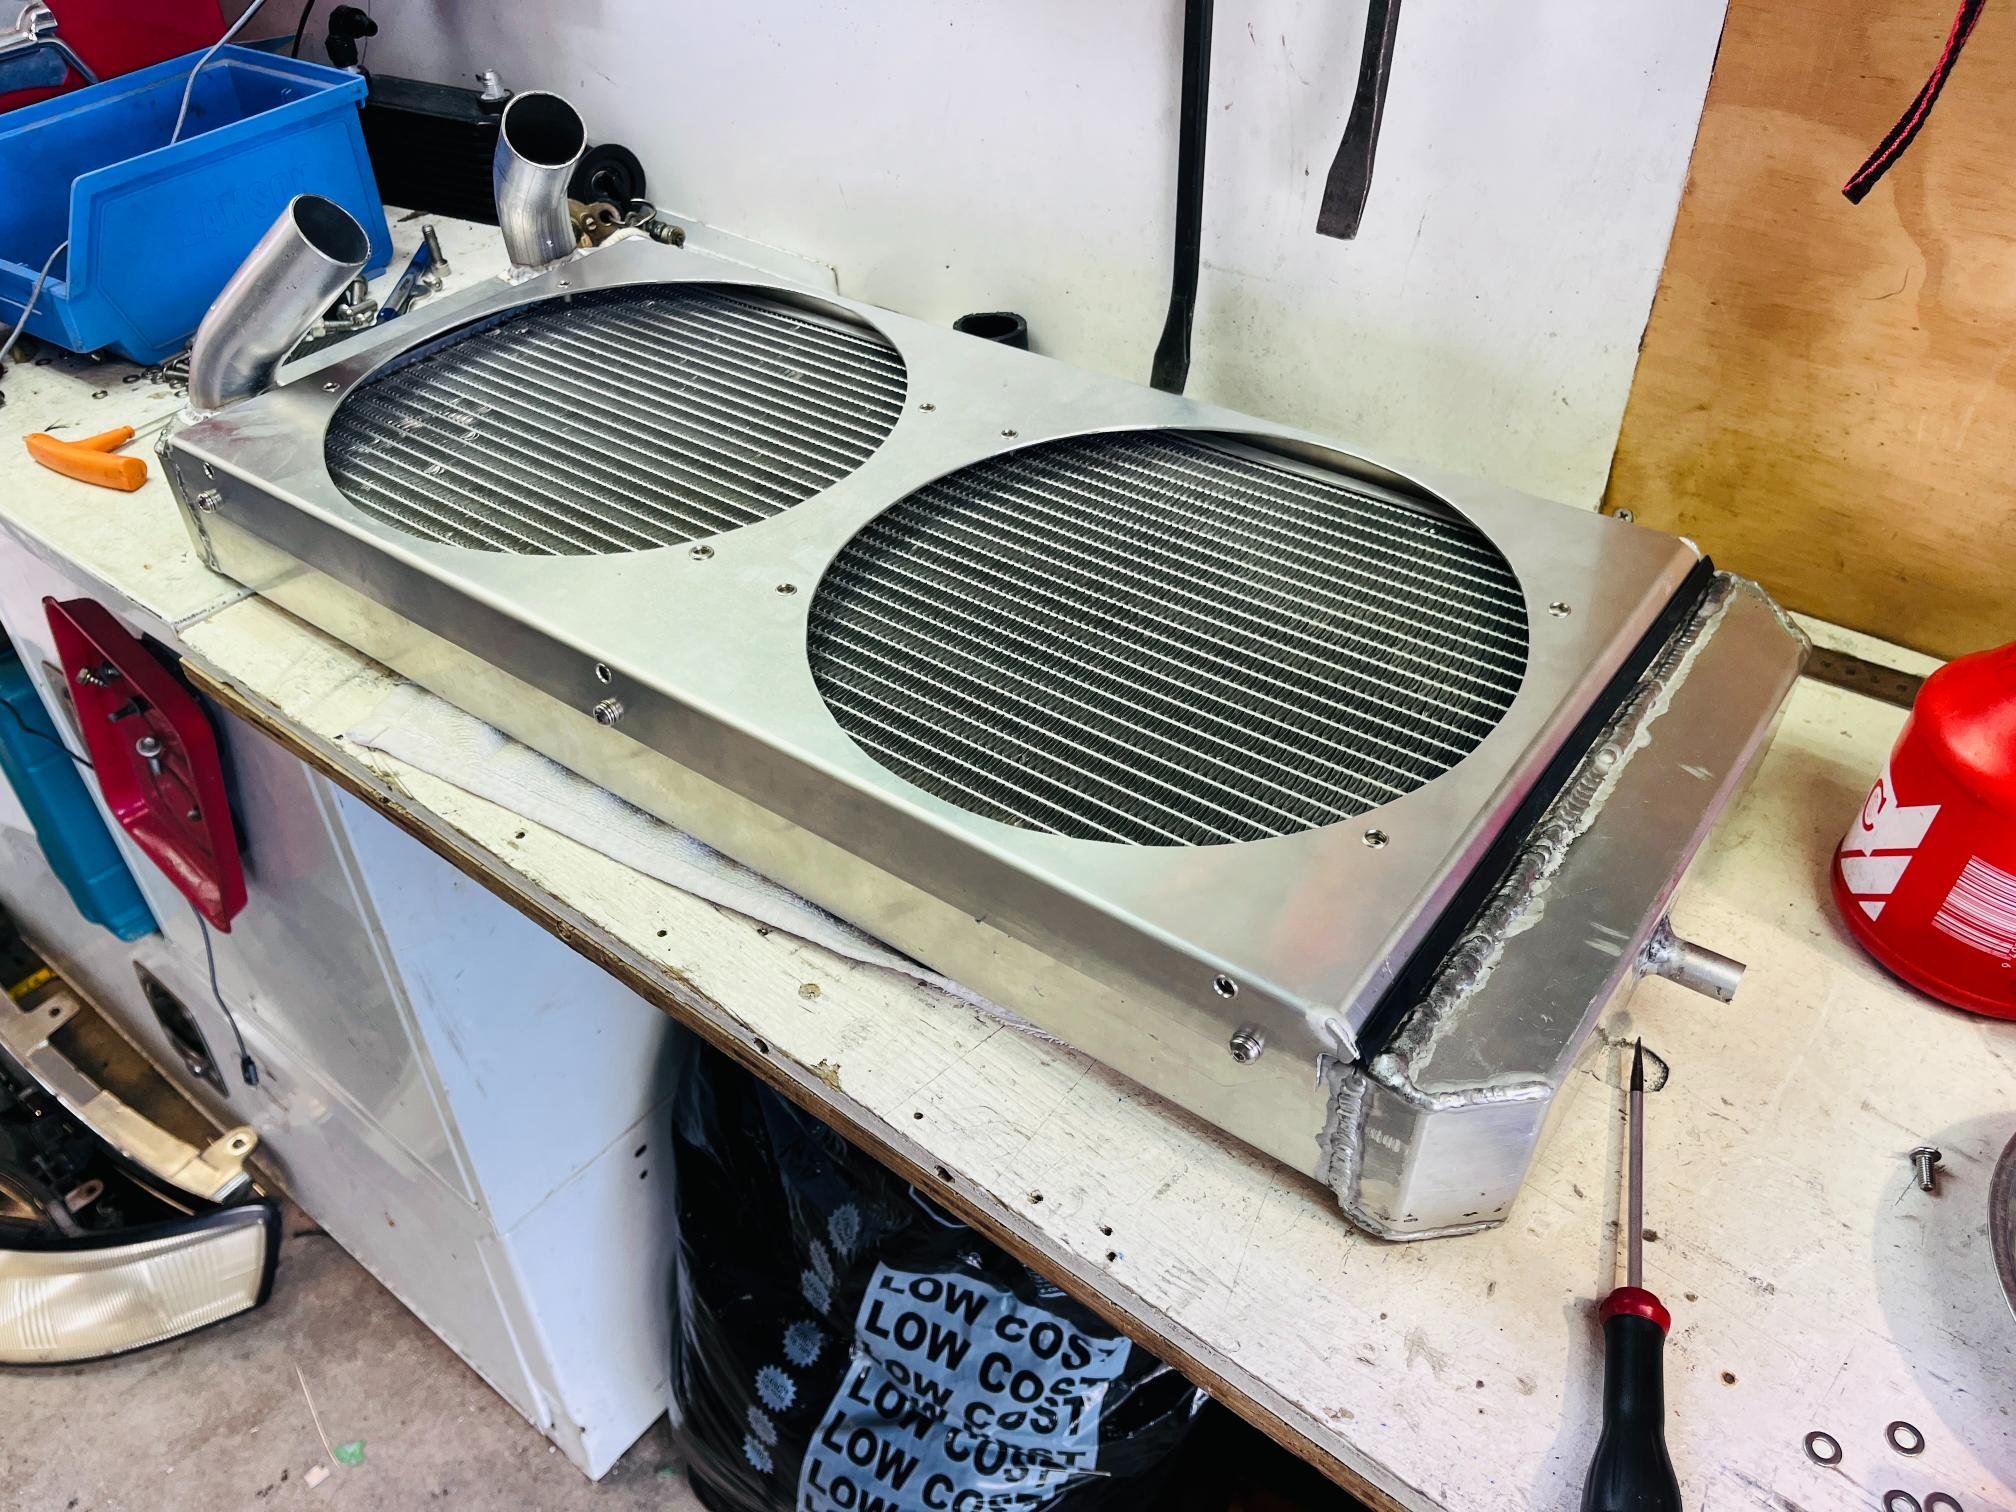
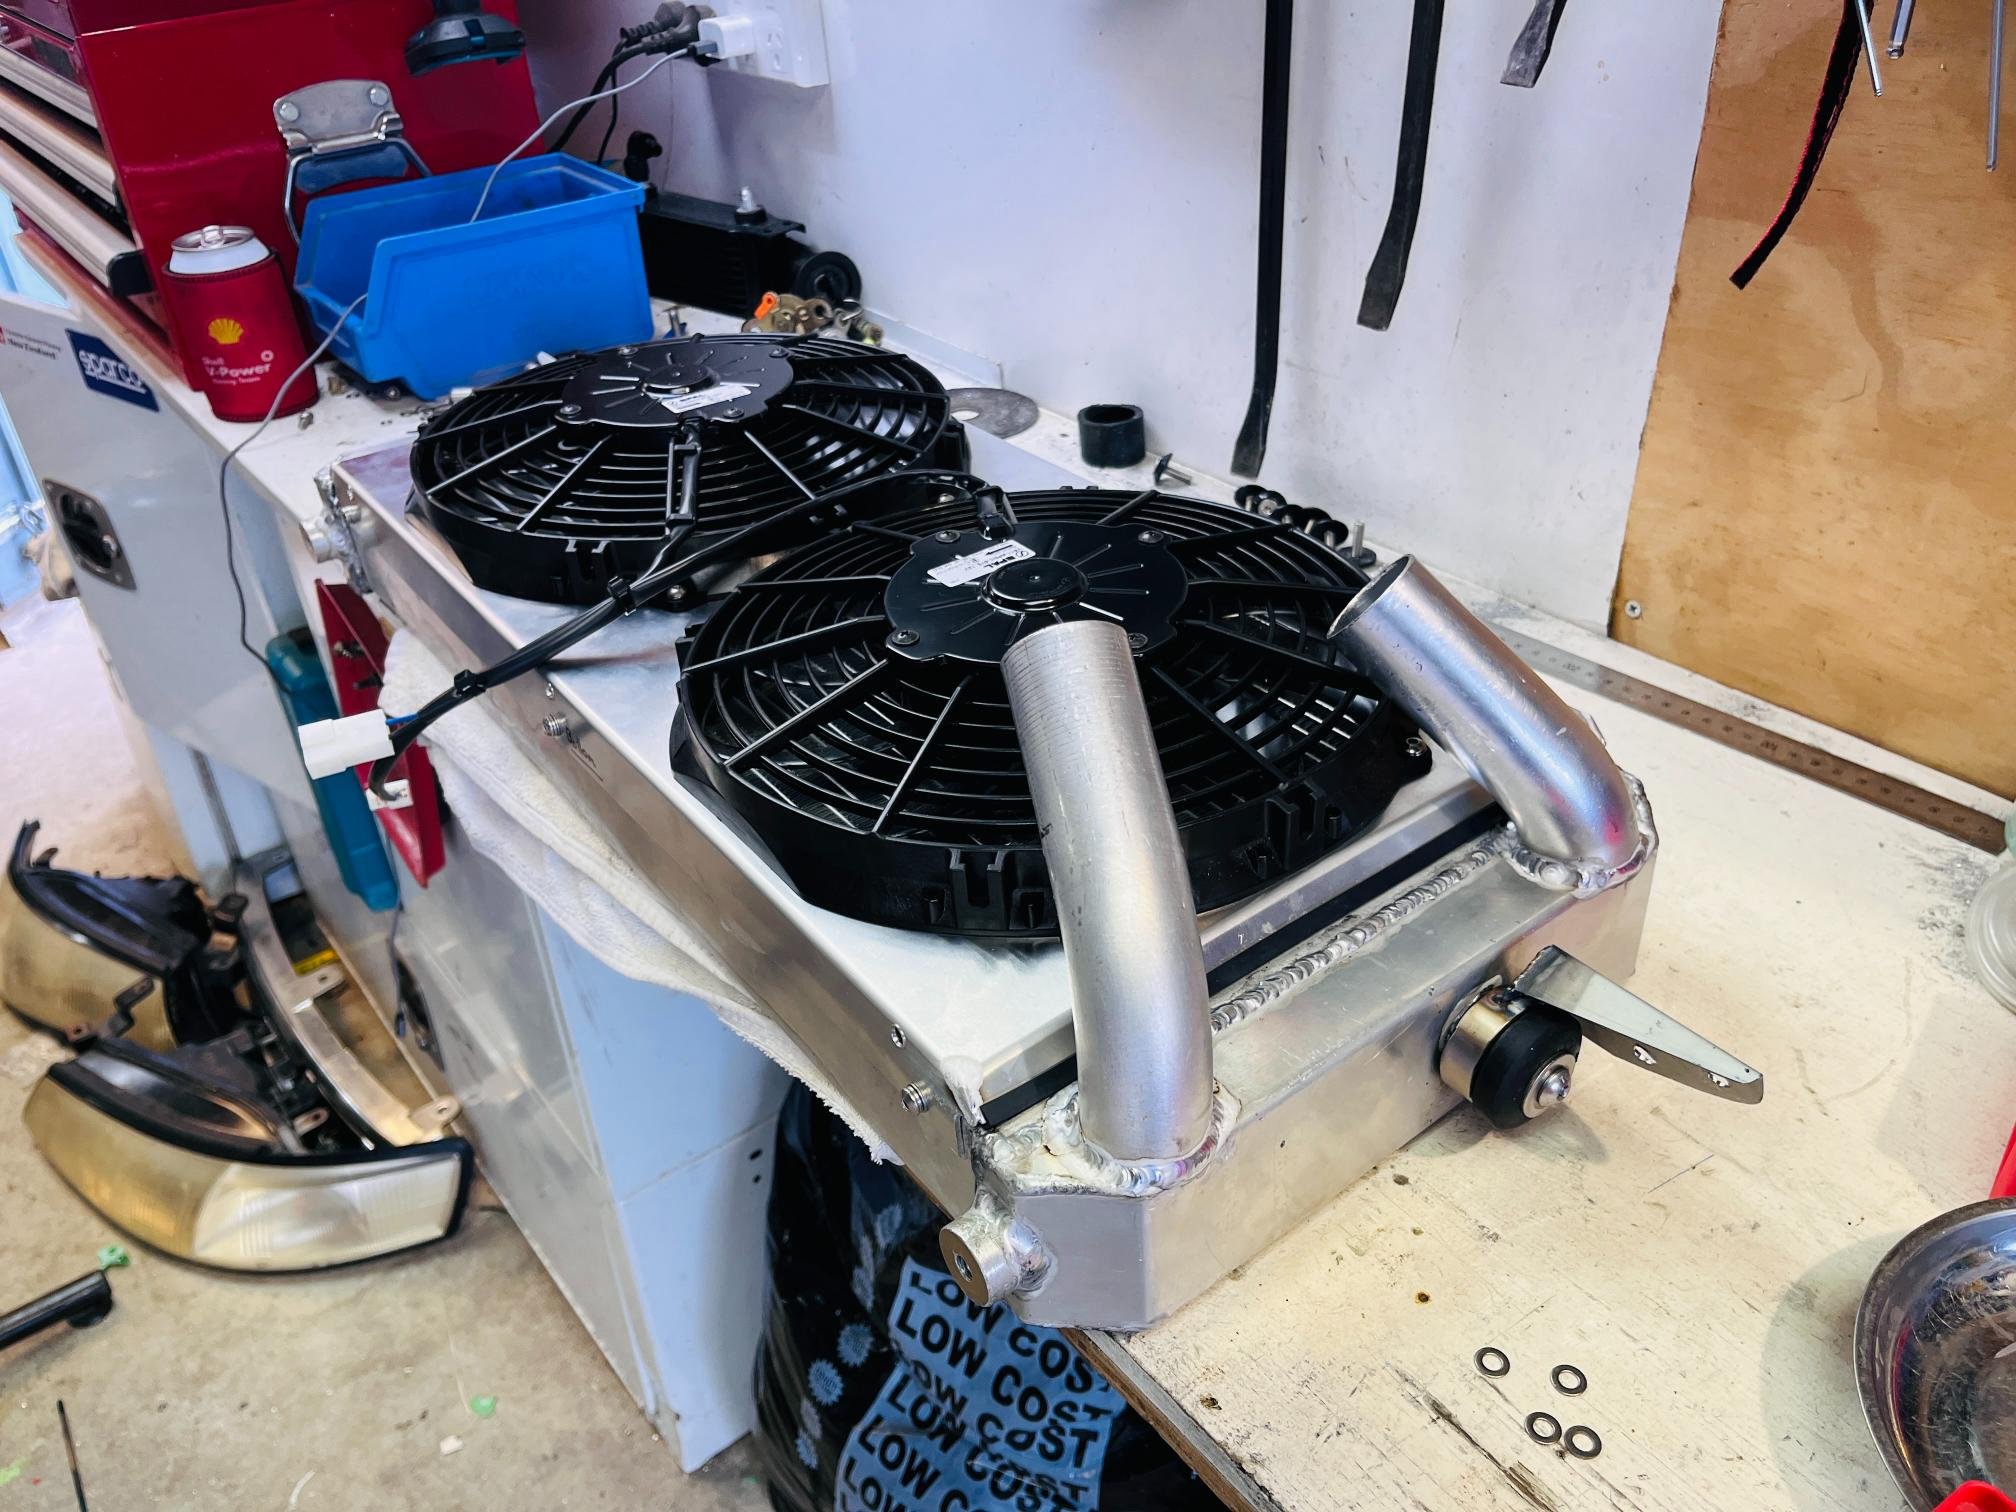
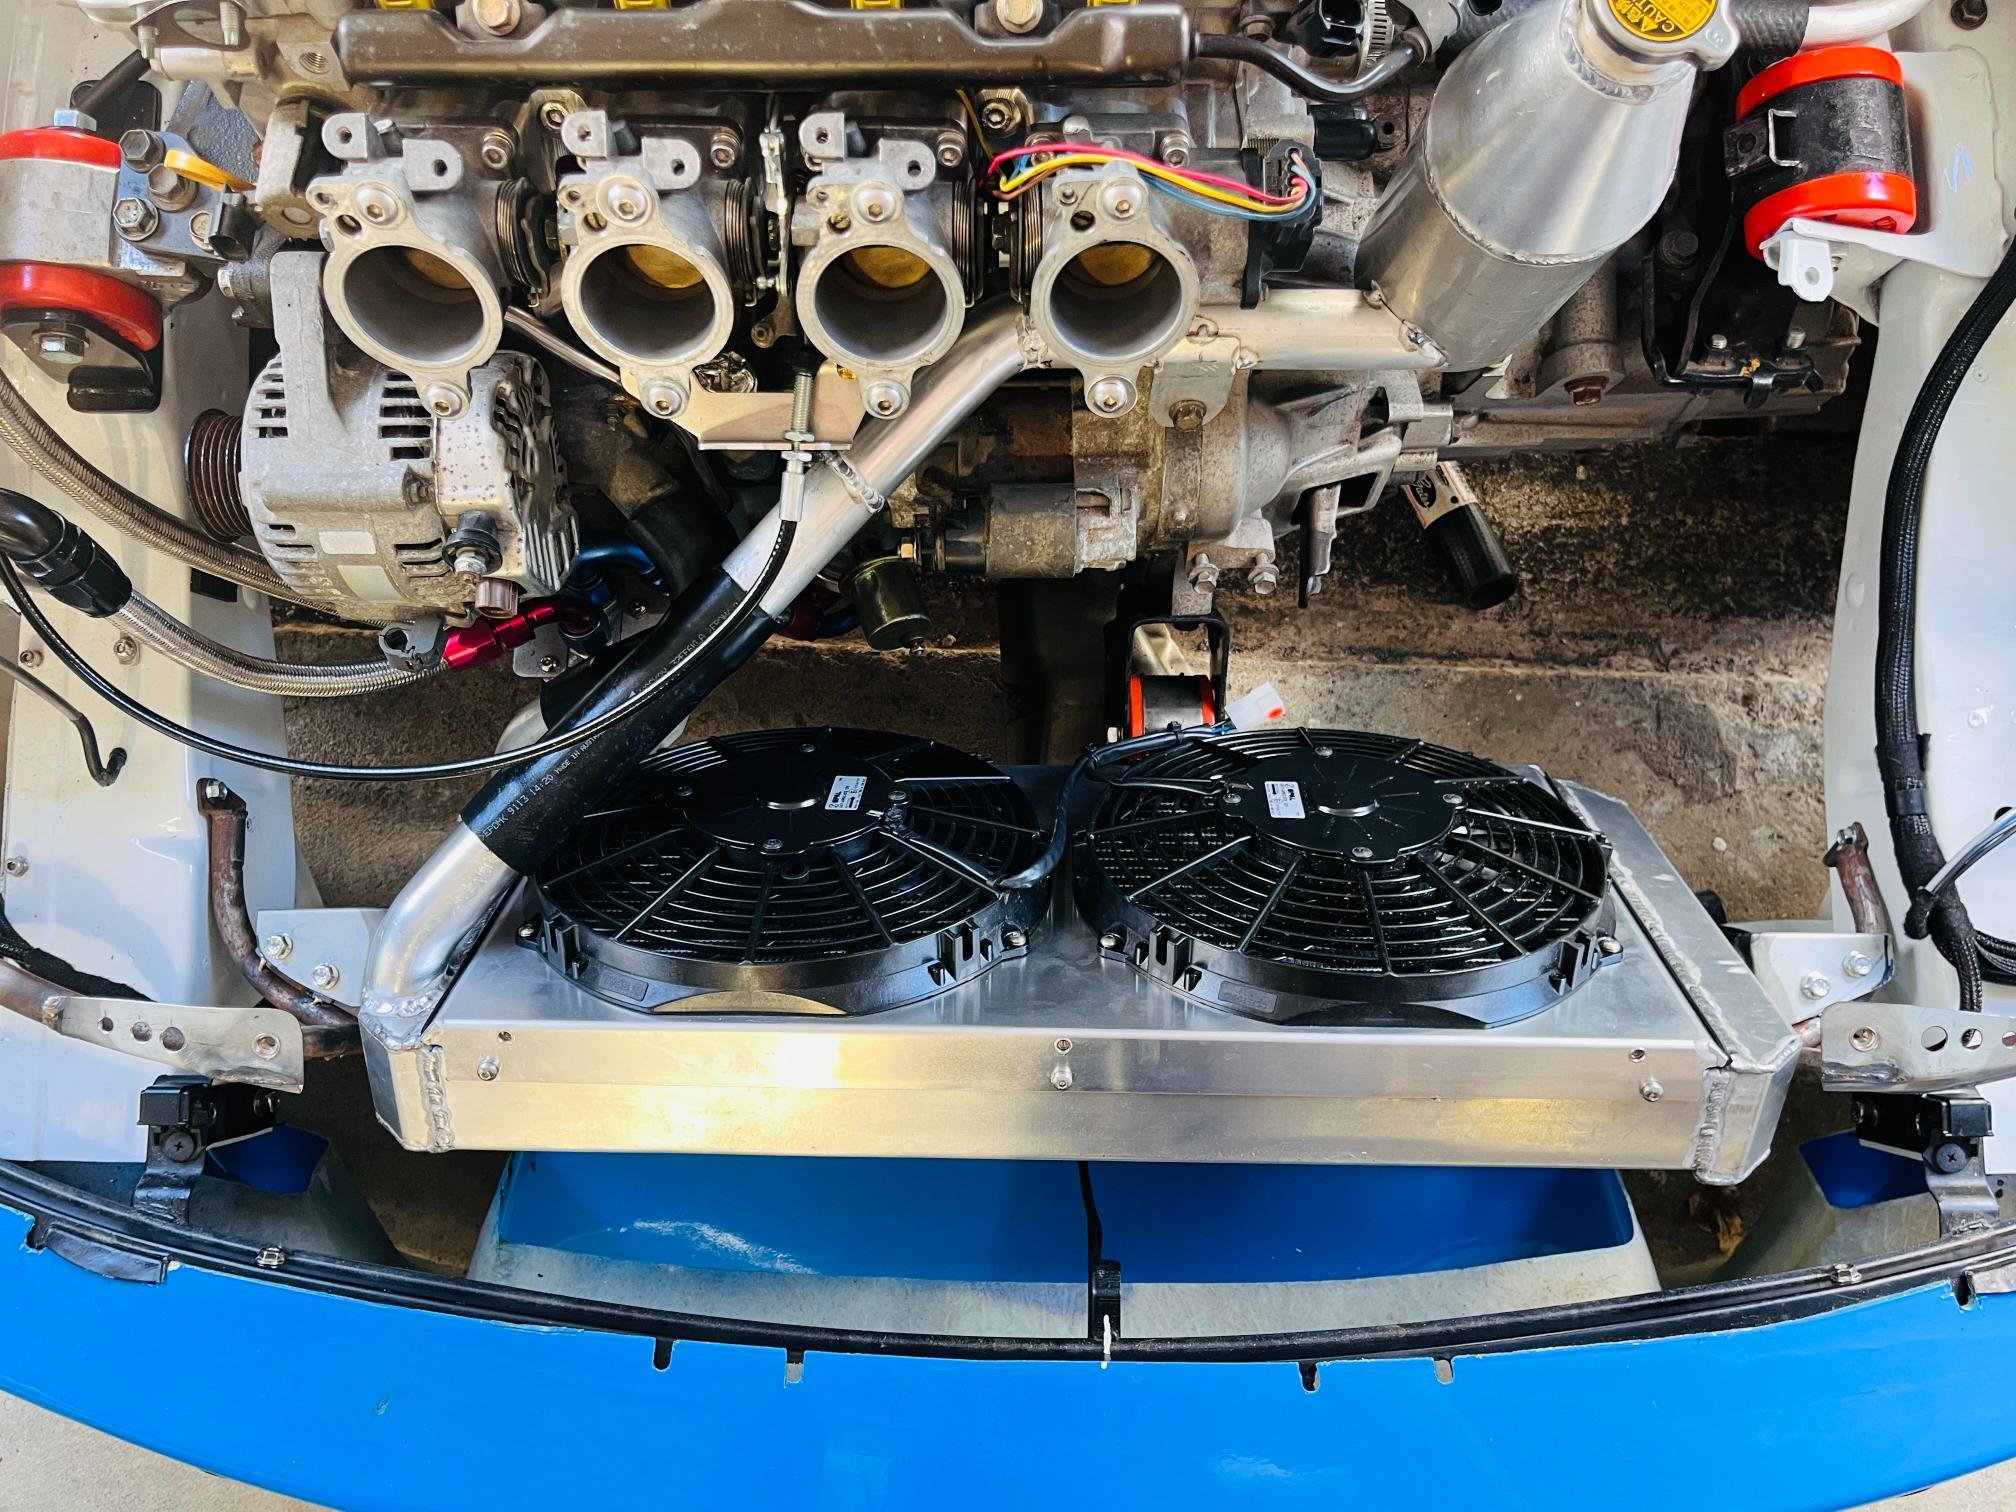
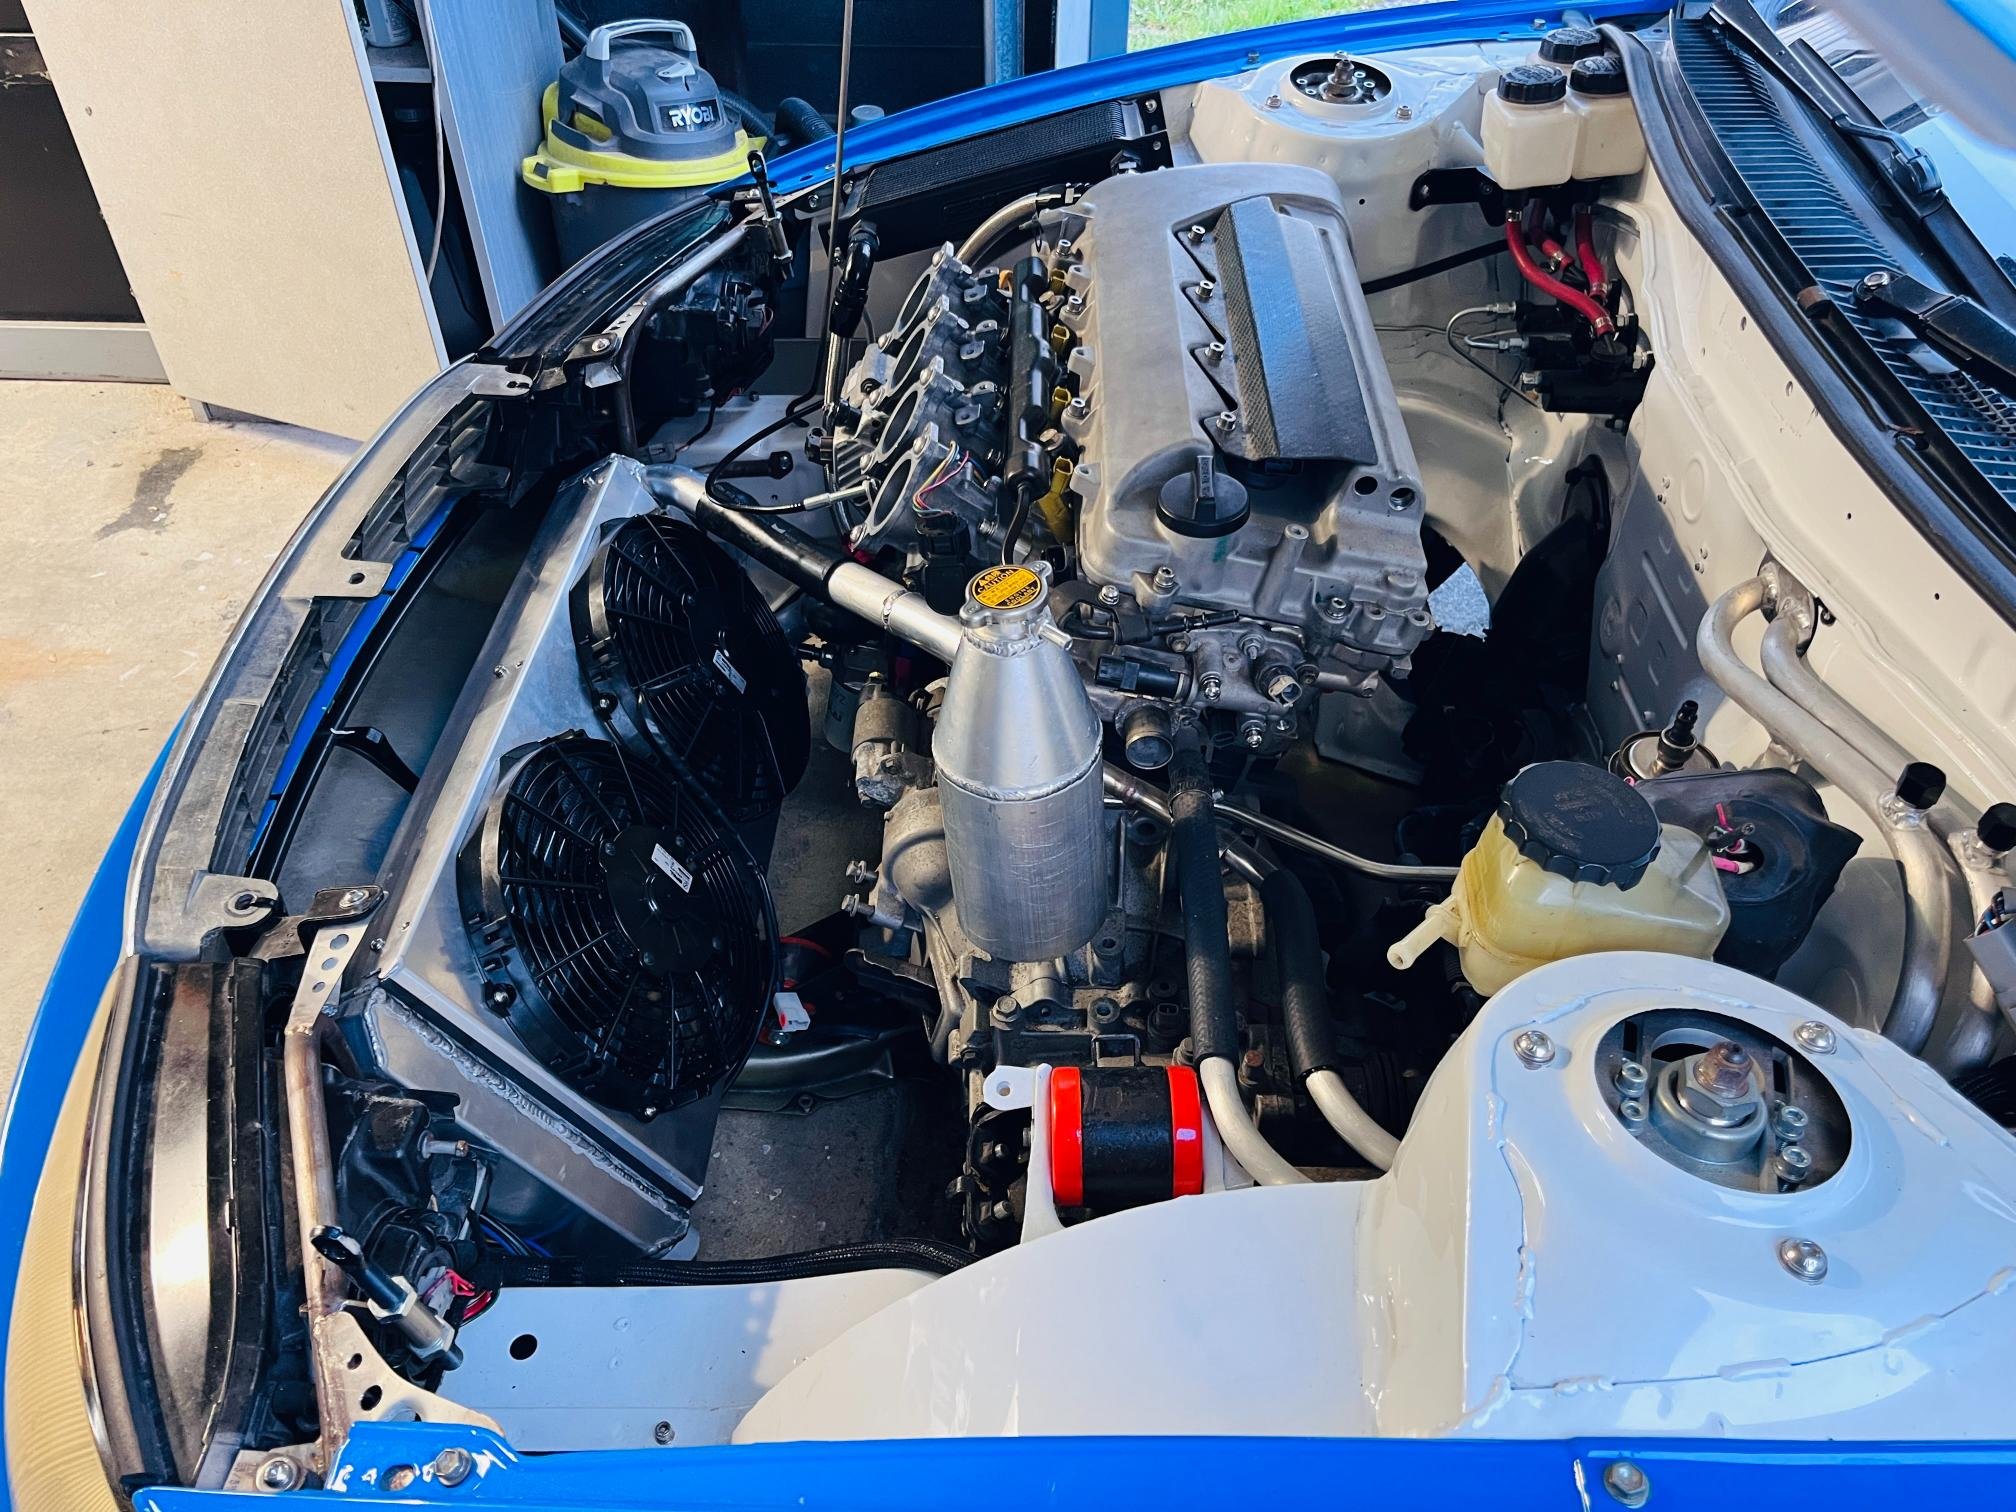
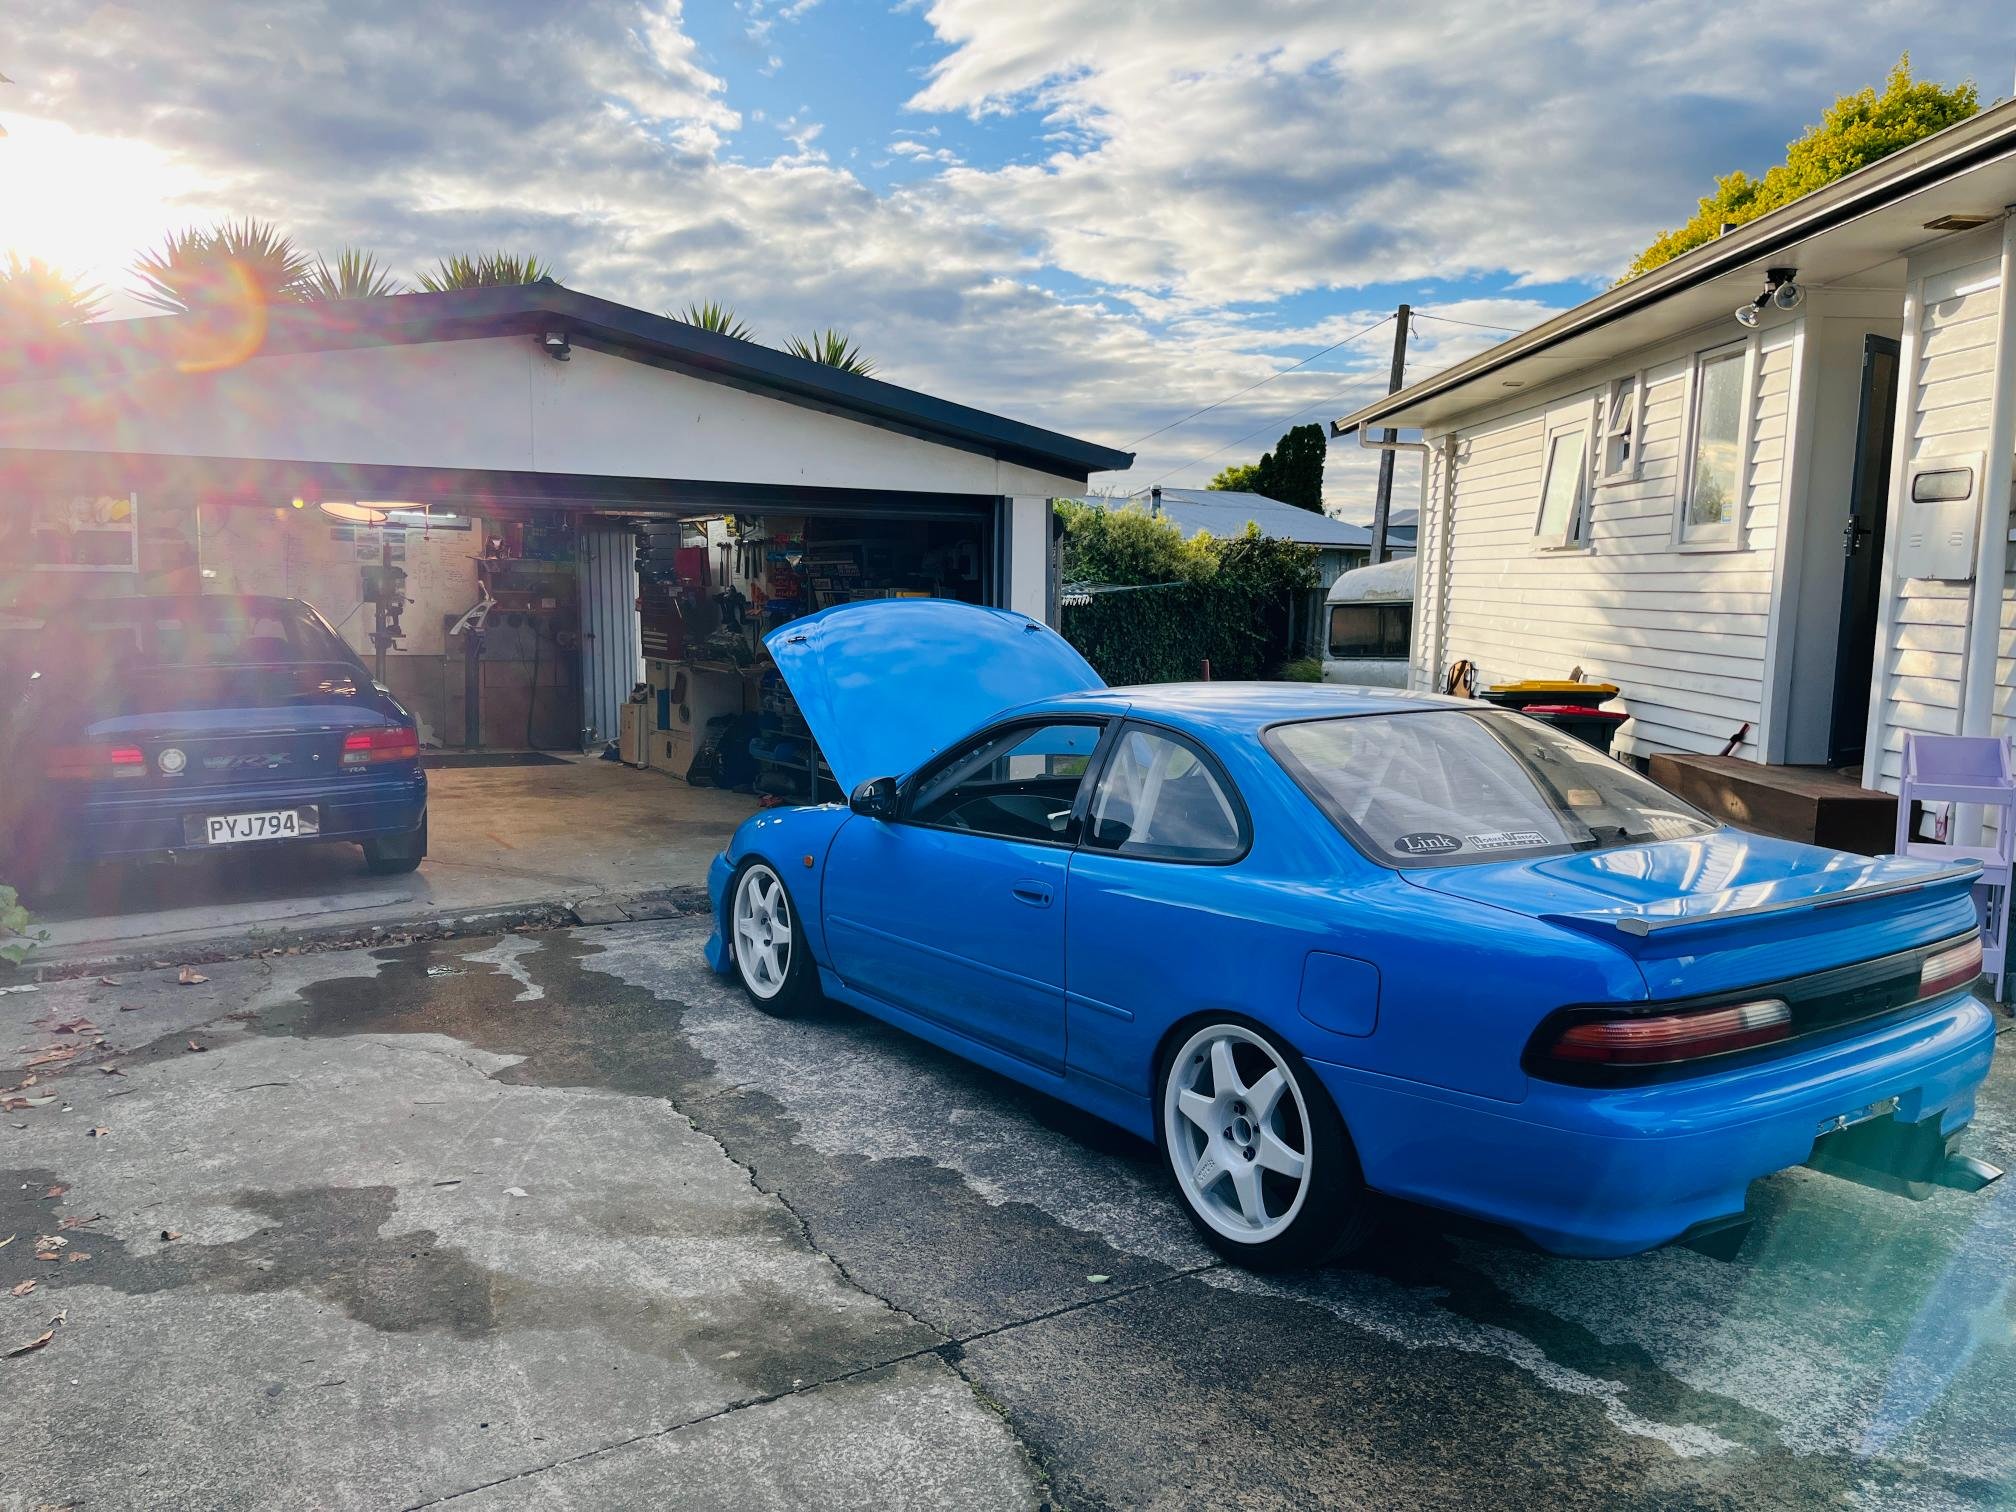
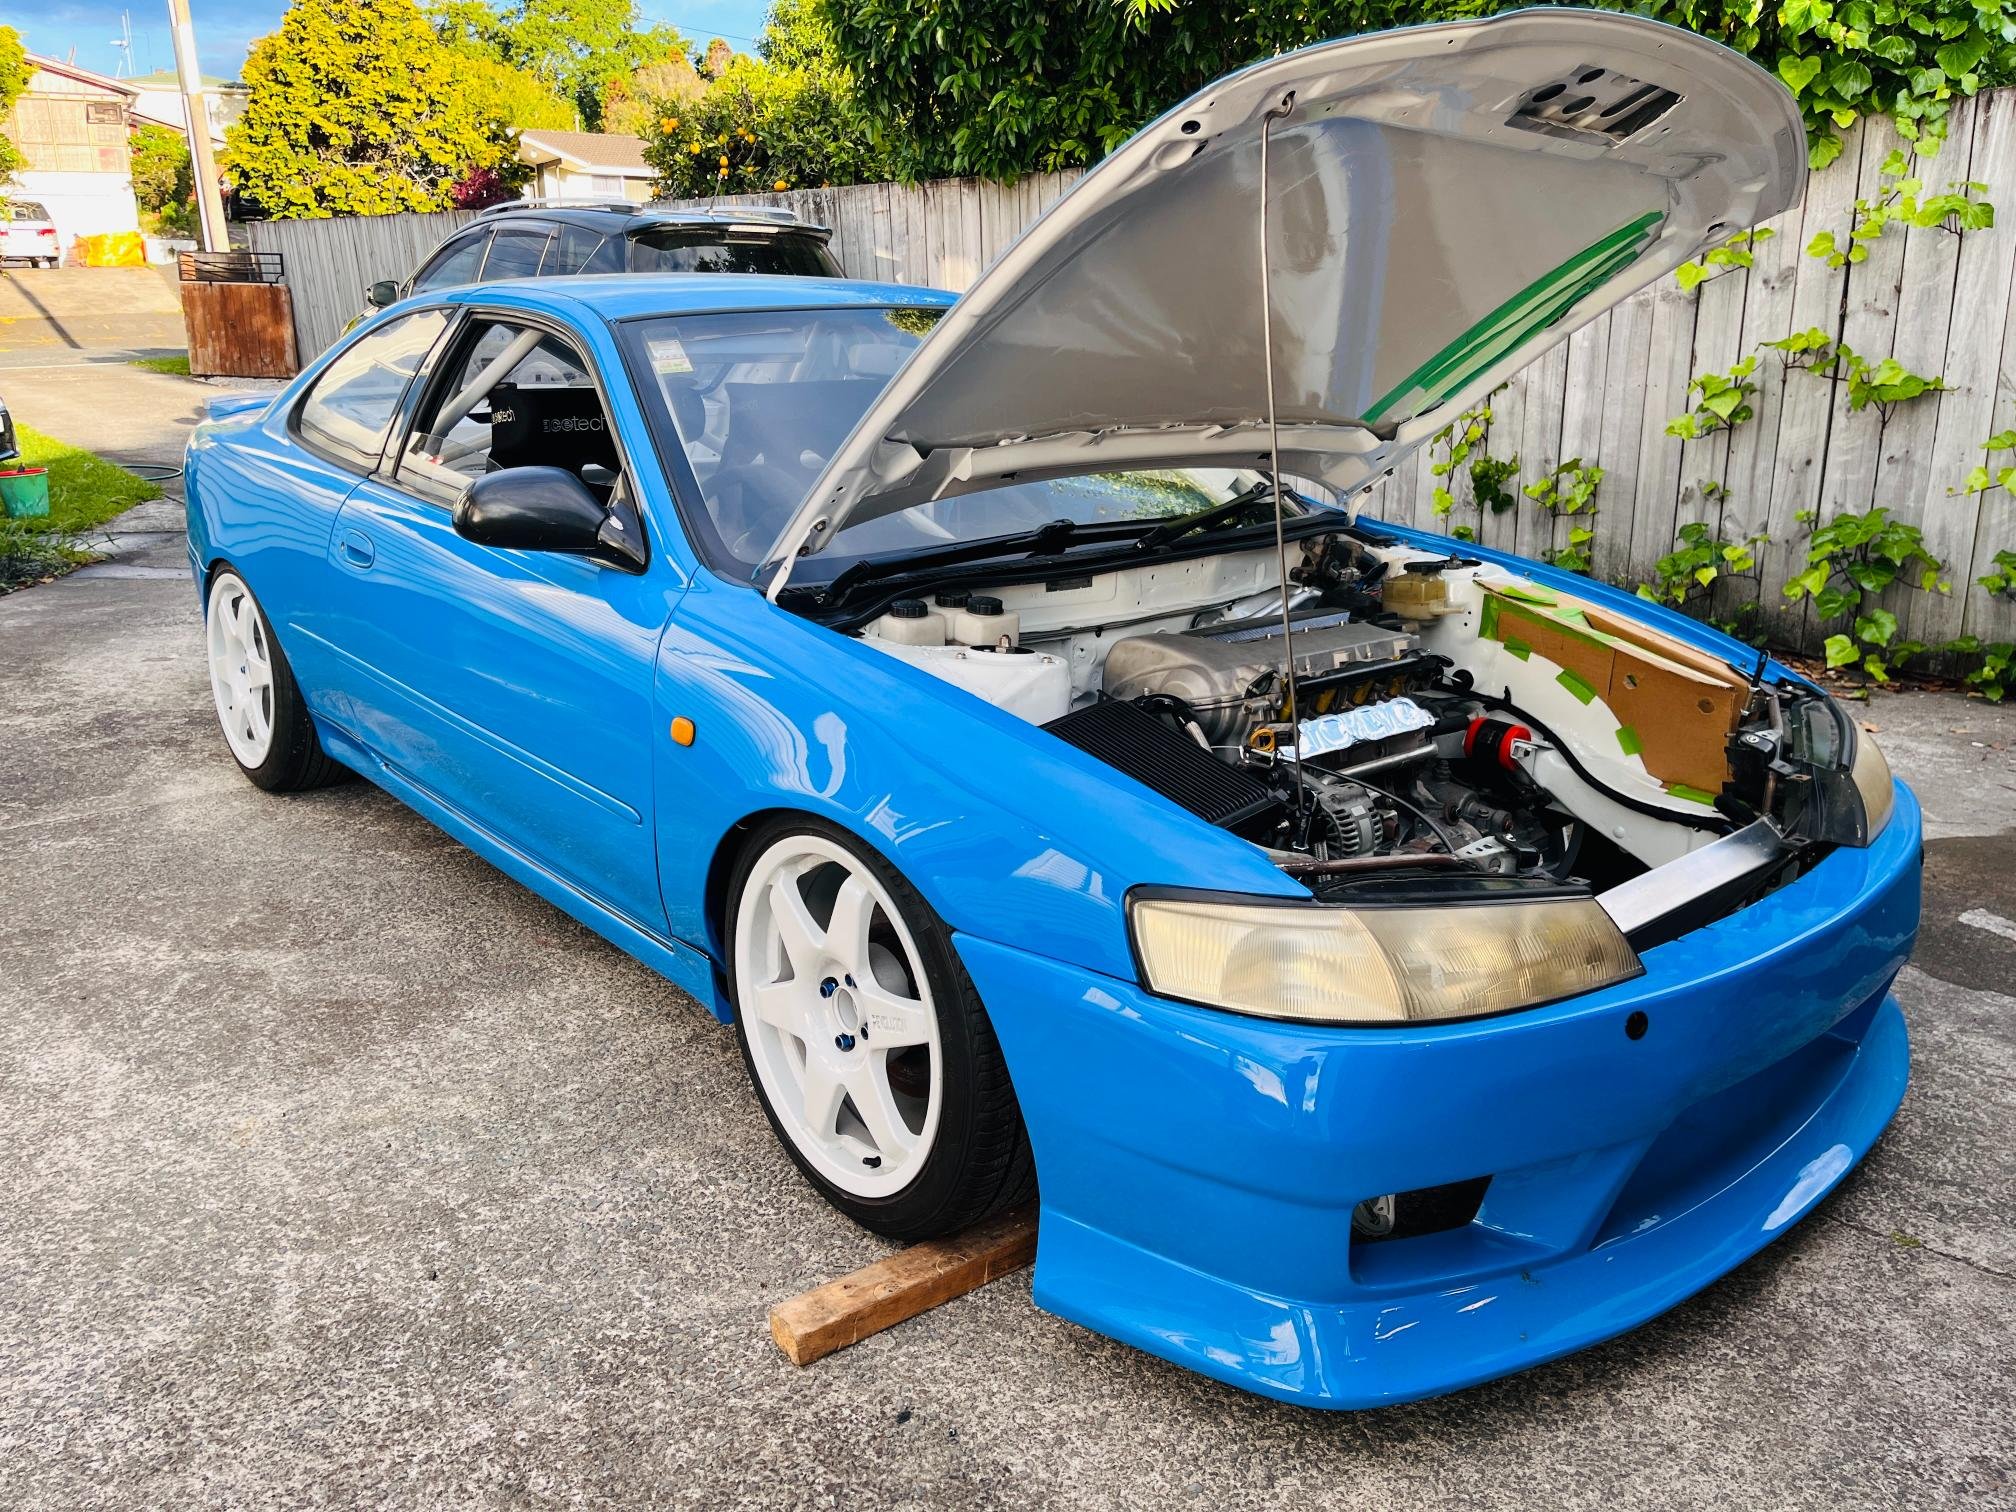
Got radiator side mounts, fans and pipework all sorted over the holidays. These had been holding me up until as their location determines a lot of other engine bay related constraints so was great to get it ticked off. Without a radiator cross-member mounting the top of the radiator was tricky. I ended up welding a boss on each end and finding a shackle bush to mount to the headlight frames. I bloody hope I never bend the front end cause everything will get damaged..... Might need a good crash bar post-cert for bumper-to-bumper racing! Made a shroud for the fans (which are the wrong direction currently due to a brain-fart on my part), mounted 15mm from core so hopefully enough to draw air from whole radiator surface. Have included rivnuts for future addition of bonnet ducting. Now I'm in the process of moving the header tank over to the guard to make the bonnet duct simpler. Should be a great layout when header tank, catch can, rad overflow, bonnet duct and airbox are all finished up. These may take a while to finalise as I'm focusing on jobs that get the car started.. ] This is a HUGE step for me. And super happy with how it worked out. The end is feeling a lot closer and achievable now! Just got to keep moving forward.
 10 points
 -
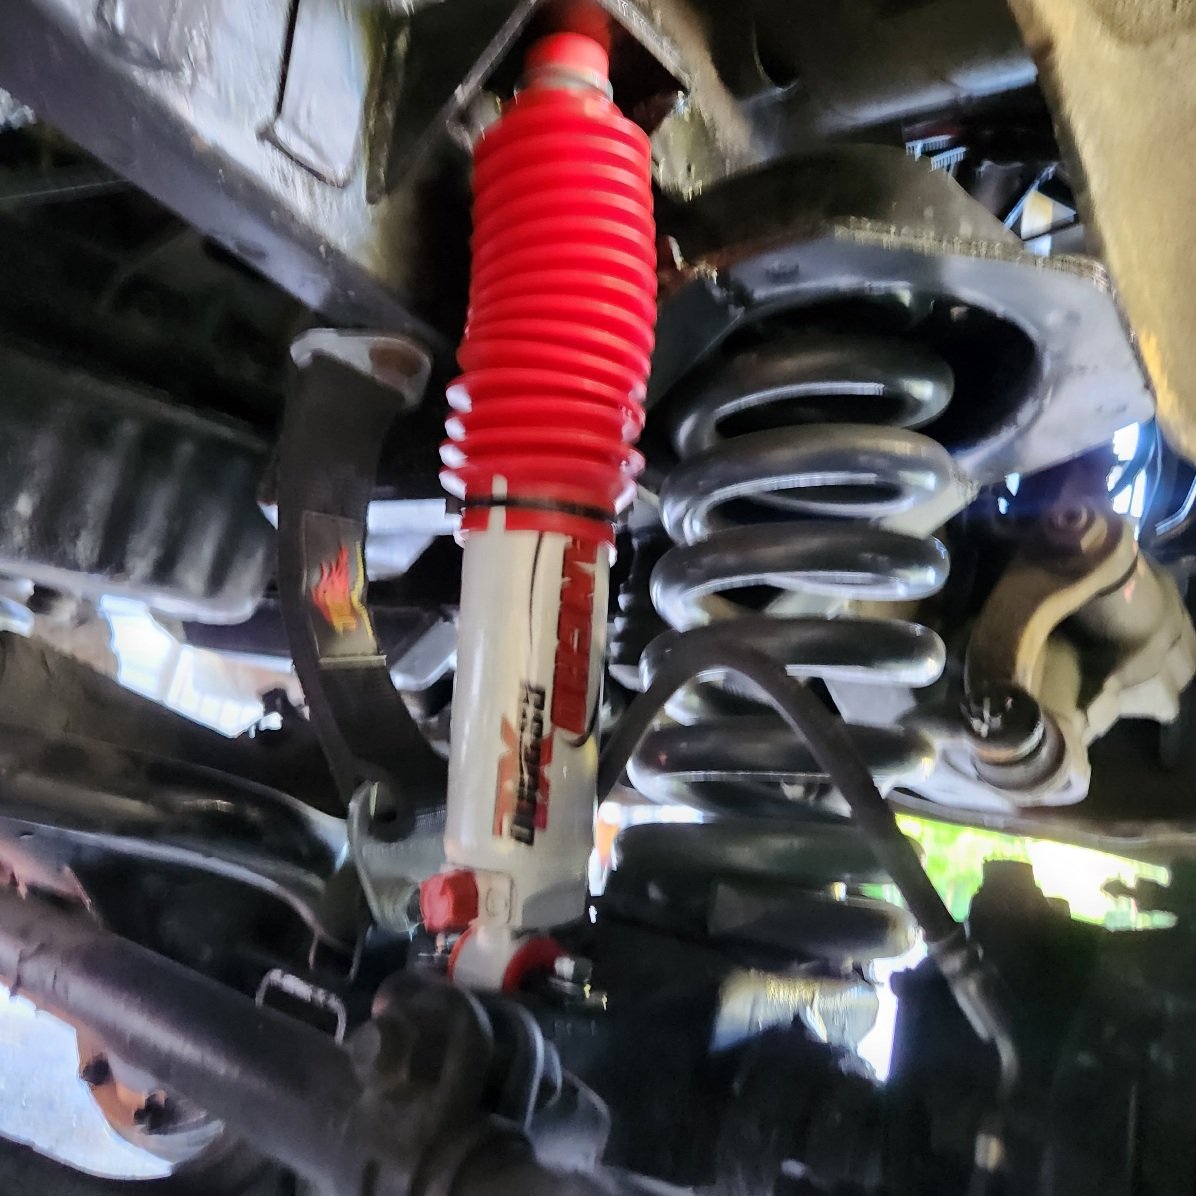
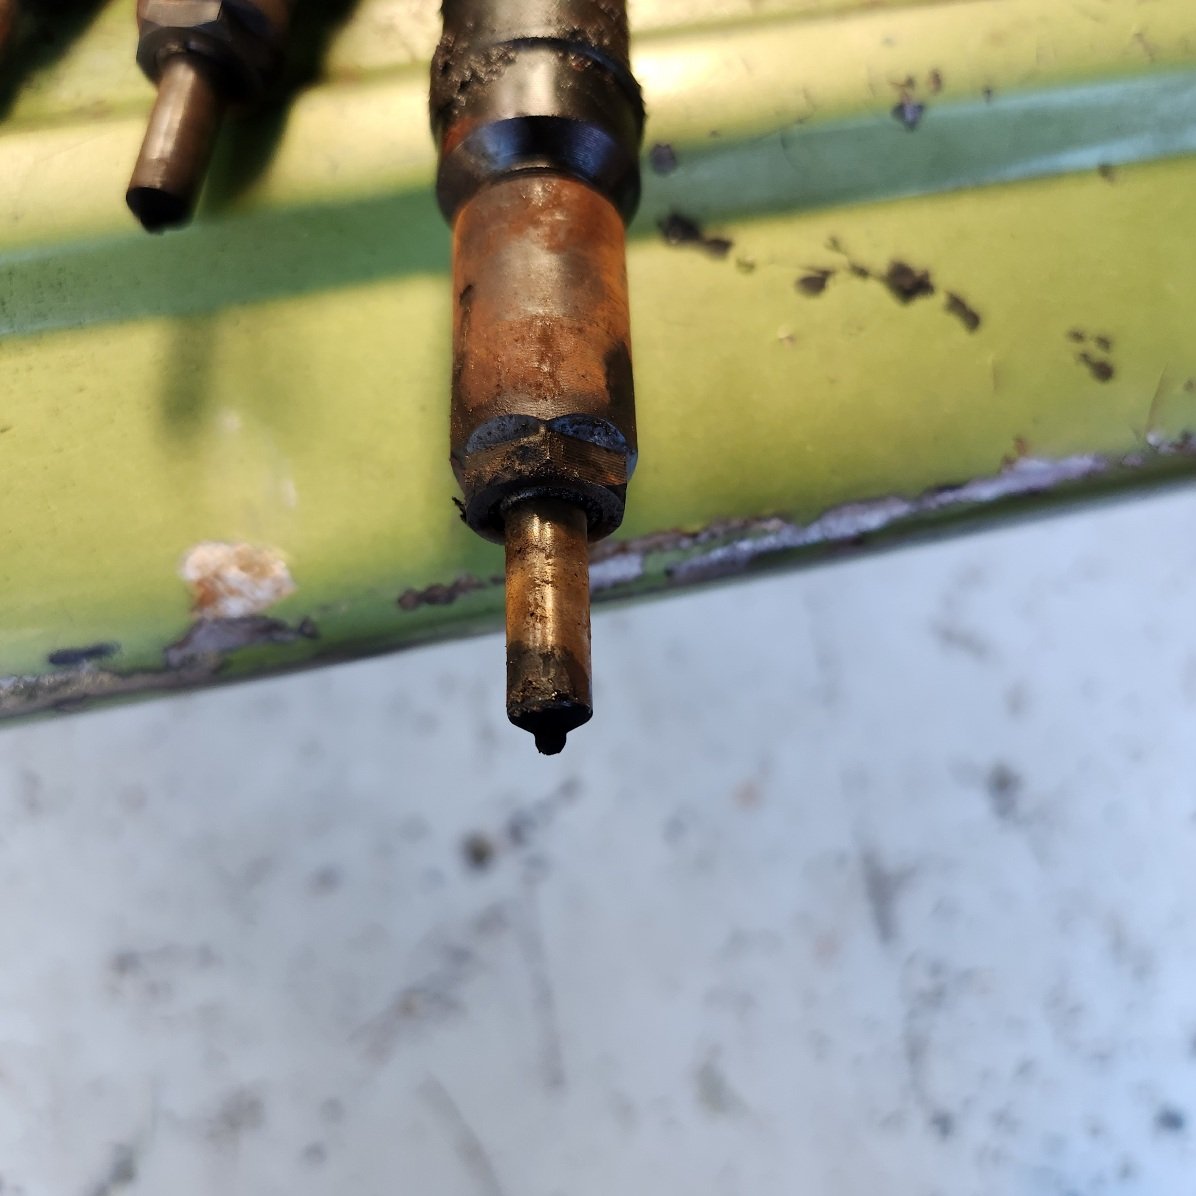
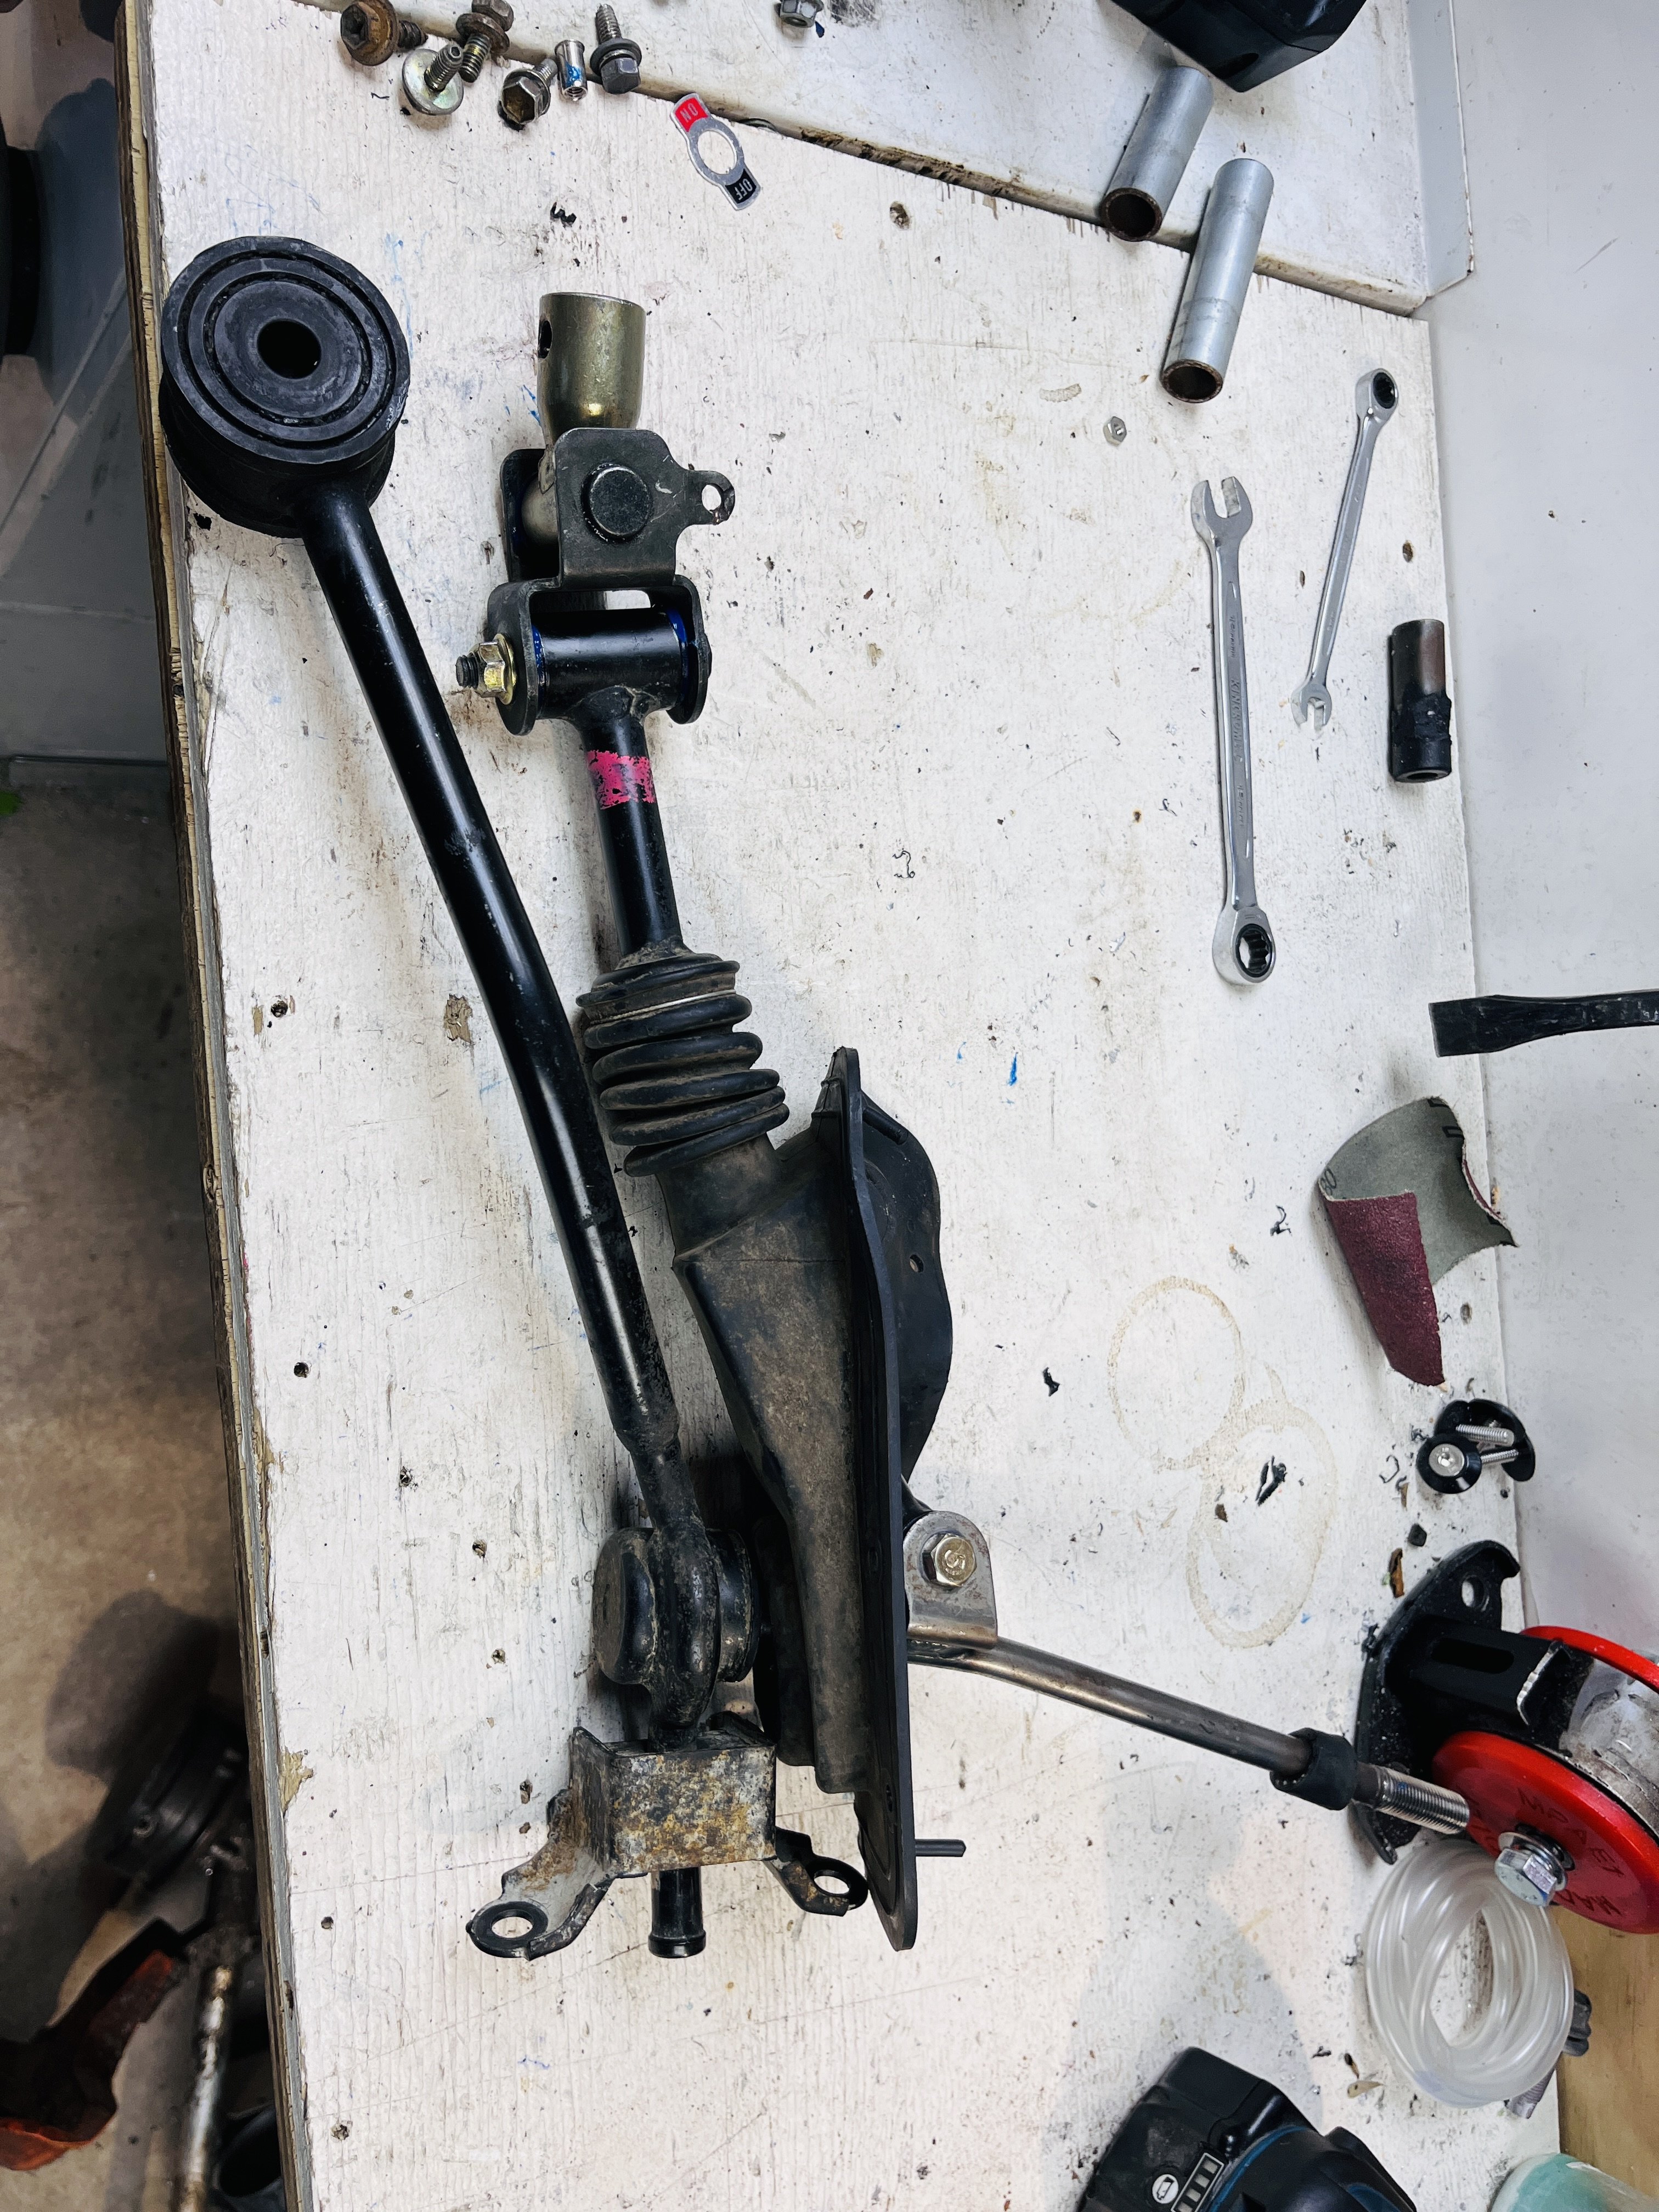
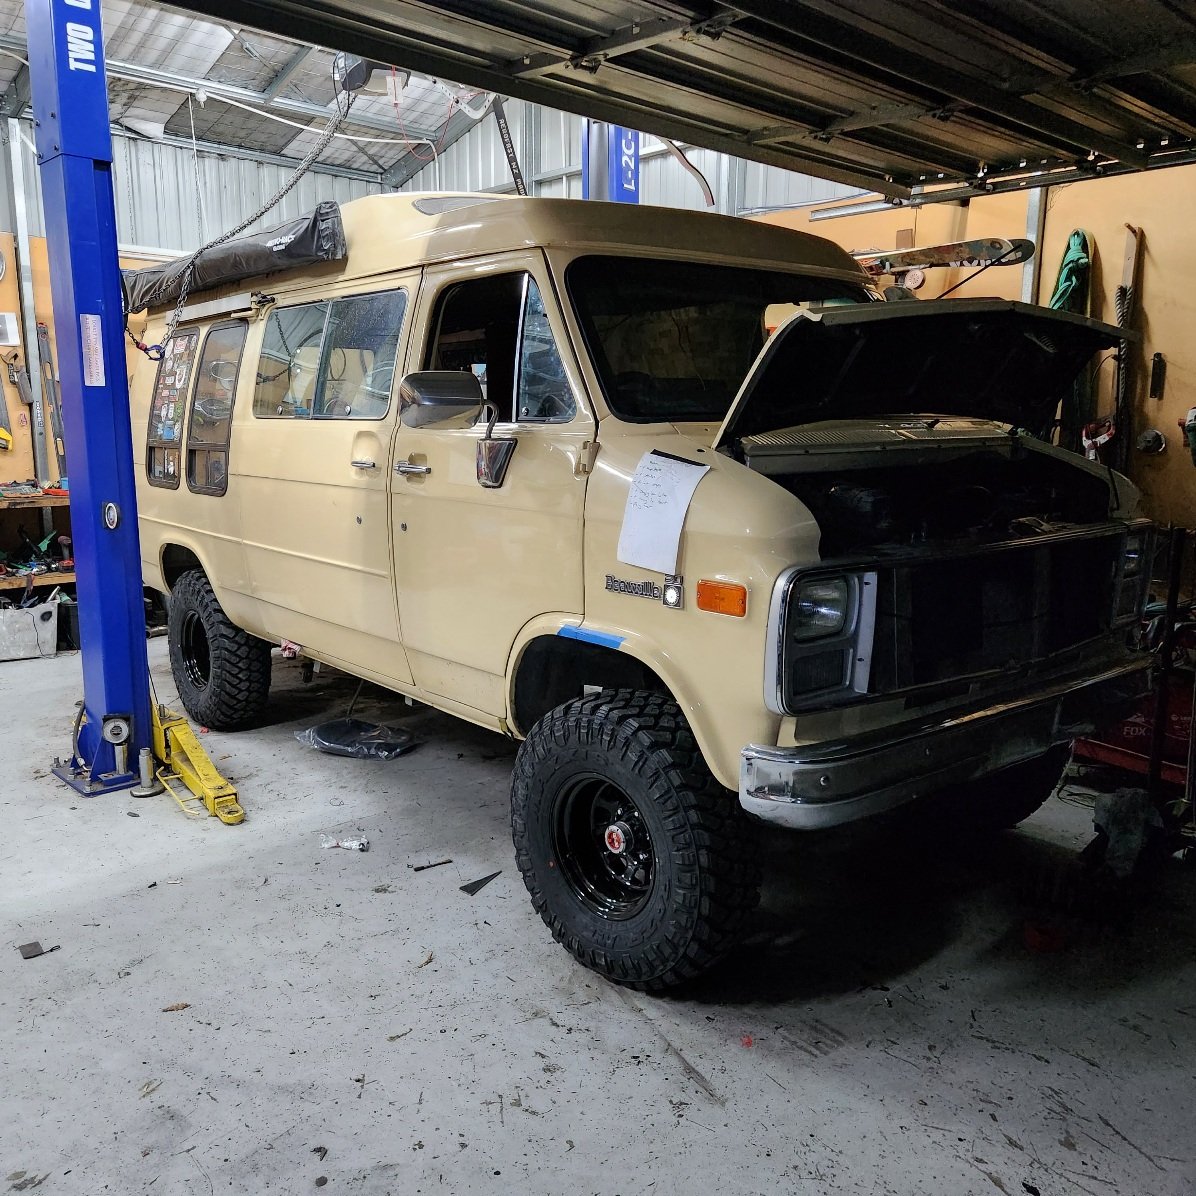
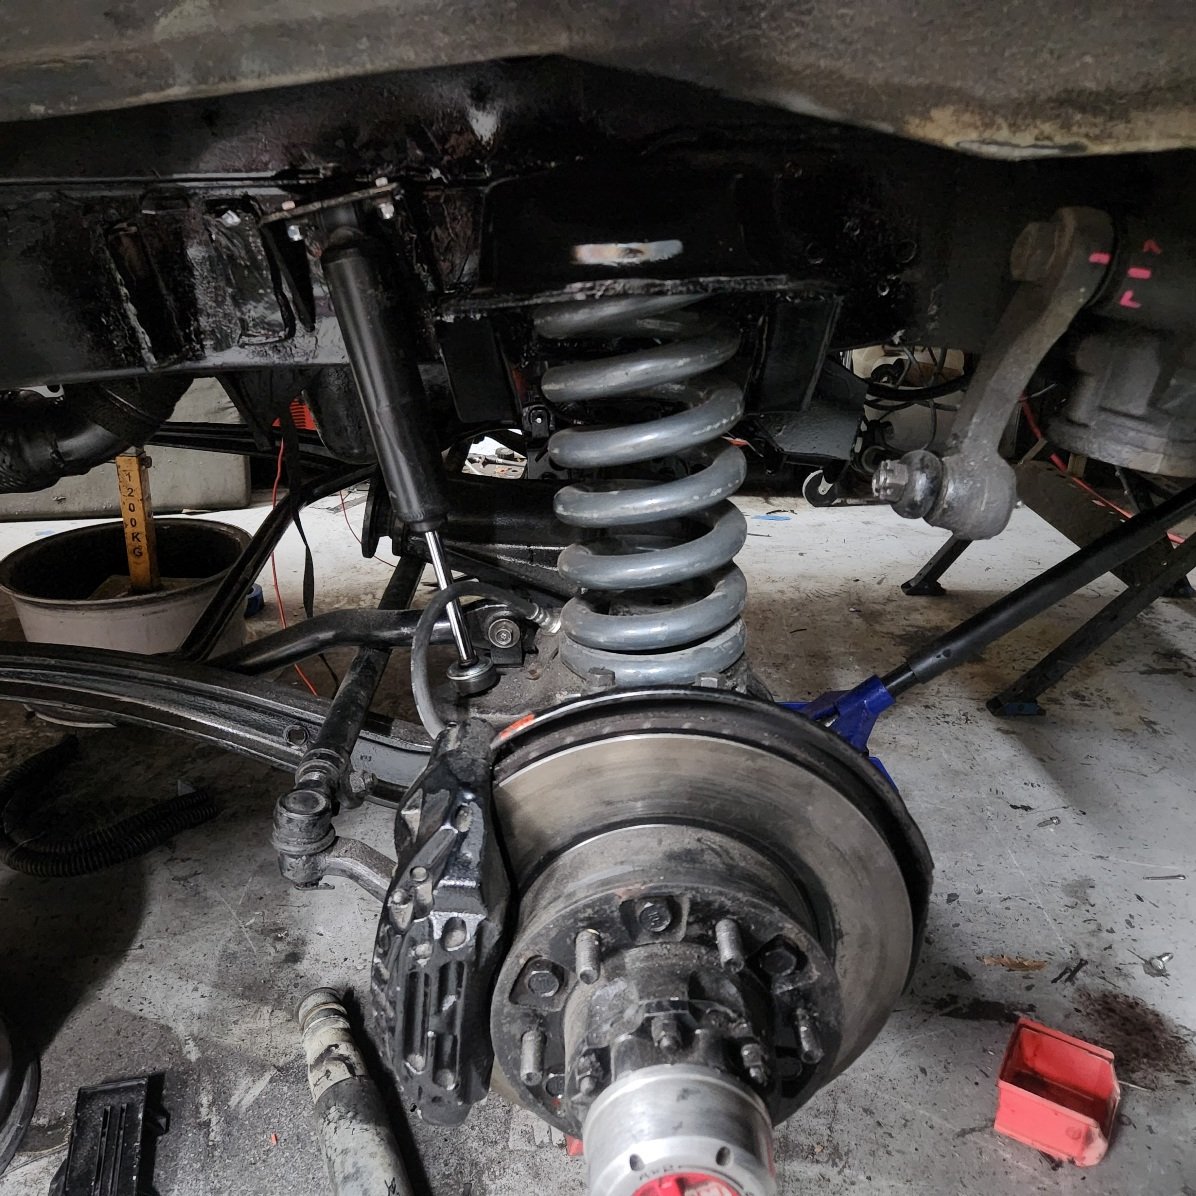
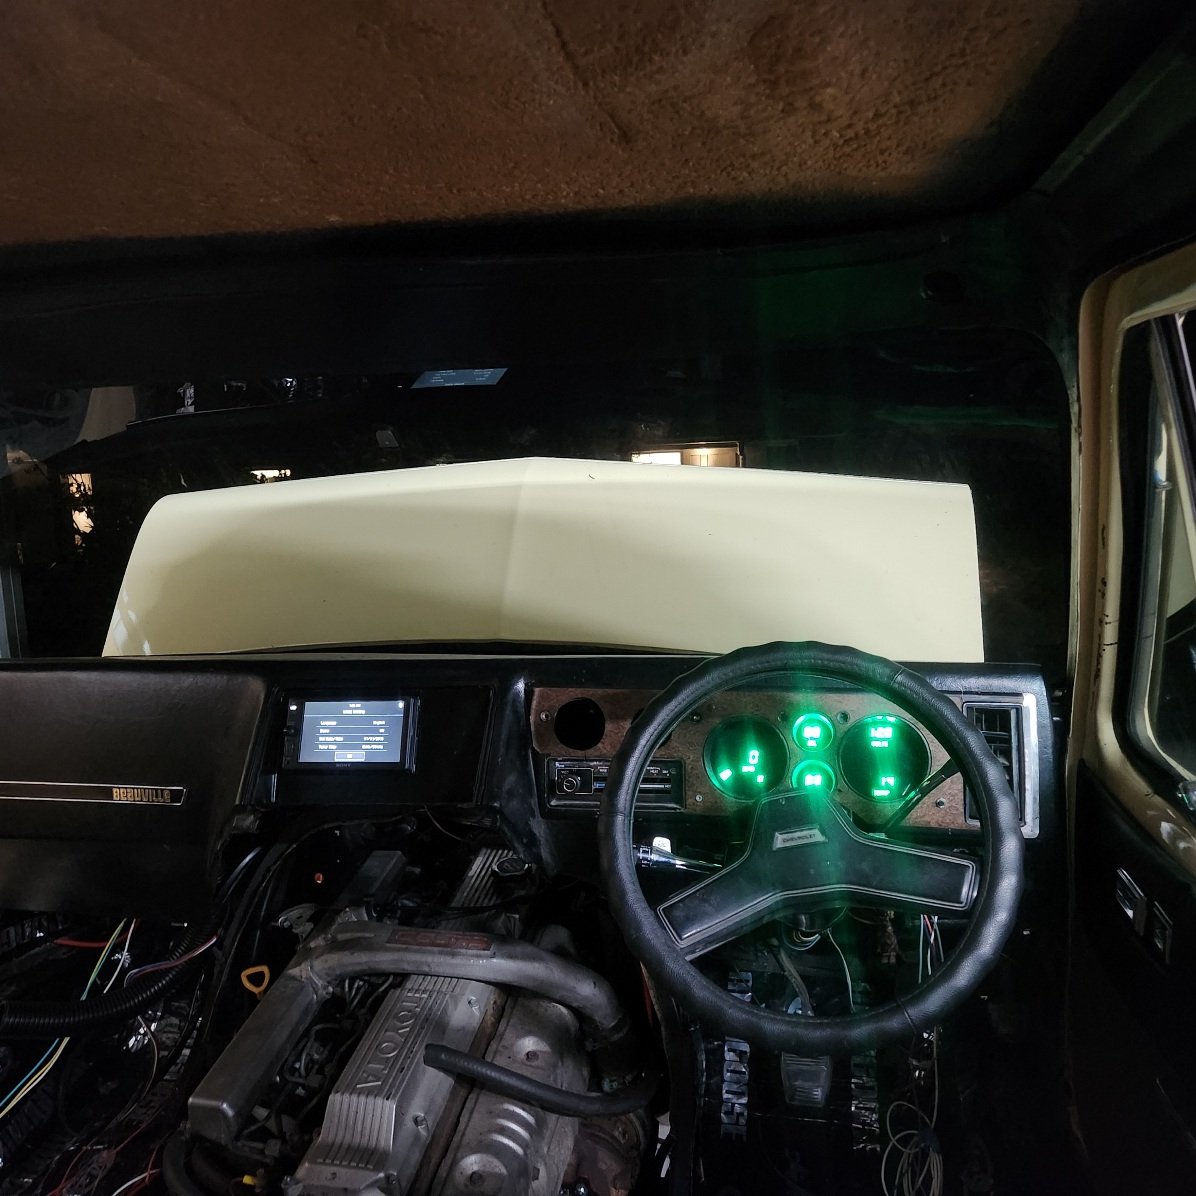
I've been getting some miles on this pig, it needs more power, it hates wind when towing and it was undershocked something wicked. Anyway did some camps over new years Twas good, wanged some adjustable ranchos in up front which dampen bumps out great, it still dives a bit but I'm guessing that's just lifted van life with a bit of travel and me sitting over the axle. But towing boat home today the power was really pissing me off so I whipped out injectors and injector pump. Pump will get overhauled and output pumped up via a reshaped metering pin, and injectors looked spectacularly nasty so I'll get them up to trundles this week for some lovin too, hopefully this makes a big difference. Also steering lock is shit, I hadn't checked the stops properly and it's not hitting the hub ones, just the box limits. So I've got a longer Pitman arm blank coming and will get it machined for a ball joint, itll be 15mm longer which should cure my problem Still no word from the certifiers, I'll start hassling them again next week to try and get it looked at.
7 points
-
More parts arrived, so with some time up my sleeve this weekend I got cracking on fitting them. There were some checks to do before getting into the "fun" stuff. I had noticed while driving the car to work last week that there was a knock from the front suspension, particularly when turning or going over a bump, so I wanted to spanner check the suspension and make sure everything was tight. I found out last time I needed to jack the car up that my jack didn't fit as the front lip was too low, so I ended up having to drive the car up on a pair of old brake rotors to get some extra clearance. I decided this time it's about time I finally forked out and bought some low-rise ramps to help jack my cars up. A quick trip to Repco got me these They only lift the car 65mm, but it's more than enough to be able to get my jack under and lift the car up onto stands. Way easier than using random bits of wood/junk from the garage. The only thing was that I had to hold a mirror out the window to spot myself, and make sure I didn't drive off the end (not that it would matter, unlike big service ramps, these wouldn't hit anything if you drove off them). Rolling around under the car, everything appeared tight, until I went to check the lower balljoint on the RH swaybar link and noticed it clicked. Looking further into it I could see the top balljoint moving in the shock, causing the clicking noise. It turns out the nut was finger tight, and this was because someone had rounded out the hex in the end used to stop it from turning, so it couldn't be done up tight with a spanner. I whipped the wheel off for more space, and hit it with the rattle gun to great success. Nice and tight, and no more clicking. It pays not to ignore noises. One mod I had been waiting to install was my new-to-me Trust Greddy intercooler. The standard intercooler is tiny But before I installed the new intercooler I wanted to check the intake temps and see how both intercoolers react. With my headunit running native Android I can run TorquePro on it. This allows me to read a bunch of different sensors from the engine, including coolant temp, intake temp and even the factory wideband O2 sensor. Ignore my reflection and ugly layout; the layout is just thrown together quickly to display the most important stuff I will need on the track at a glance. With the standard intercooler, running 14.7psi, and an ambient temp of about 18c, under sustained load, the intake temp would rise quickly and hit about 50c. This would slowly drop back once off boost again. Not great results. The Greddy intercooler is a beast. It includes a new, much bigger shroud on the top, which fits the standard intake hose. Removal of the old intercooler is quite simple. Four (unless you're missing one) clips secure the shroud, two on each side. The intake hose just pulls off the shroud. Remove two hose clamps, one at the front of the intercooler and one under the rear, and then two bolts on the front of the intercooler hold it to a bracket. With those removed, the intercooler pulls free. Side by side with the new intercooler, and it's a slight size difference And in thickness too The previous owner had modified the stock intercooler, with something that Google translates as "processing", which means removing the end tank and insert crushed bits of alloy tube between the core tubes to try and smooth air flow on the hot side of the intercooler It turns out some of these had come free in my intercooler and were sitting in the end tank Thankfully they appear to be accounted for and are on the inlet side of the intercooler, so couldn't really go anywhere The new intercooler just bolts straight into place I noticed when test-fitting the shroud that there was a large gap along the rear edge, where air could just freely escape instead of being forced through the intercooler. I decided to run a bead of non-setting butyl tape along the gap to seal it against the shroud The standard intake and carbon duct work nicely with the new shroud While in the area I also replaced the hose blank where the BOV used to go on the intake pipe, as this was showing signs of cracking and had been weeping breather fumes Now done in the engine bay I moved on to the interior. I had ordered brand new carpet from Japan which arrived the other day, so no time like the present to get it fitted. It arrived in a massive box, which barely fit in the back of the Alto. Thankfully, it weighed nothing. Barely a kilo. The first job was to clear the interior out. Remove the seats, the center console and the scuff plates. The seats come out easily enough. Four torx bolts on each. Slide them to the mid position on the rails, and (un?)recline them forward about 45 degrees. They will then easily fit out the front door openings. Remember to disconnect the connector under them first. I didn't need to remove the back of the rear seat, just the base squab. A sharp tug on each front edge will disengage the front tabs, and then there is a tab on the rear that goes over a hook on the back of the seat belt buckle bracket, you need to push the squab towards the rear of the car to disengage this (or as I did, fold the seat back down, reach under it and lift the tab off the hook by hand). The center console is a pain. The rear half is held in with two bolts into the floor, one under a cover at the rear, and one that is uncovered once the front half of the console is lifted up. The front half is held in place with a screw on each side and is clipped to the rear half. The catch here was that it would be easier to remove the front half completely. To do so you would need to remove the gear knob. Suzuki used a press-fit knob on these, which I couldn't get off. Instead, I undid the four screws that secure the gear boot to the center console, which let me remove the console without the knob or boot attached. There is also a section in front of the gear shifter that needs to be removed. This has one clip on the RH side, and then a quick sharp tug should disengage the clips holding it to the center stack on the dash. With those removed, I set about giving everything a real good clean. I vacuumed up all the excess dust and dirt from the panelbeaters, and then gave everything a quick wipe down with APC and a cloth. From factory, the Alto Works had an underlay under the carpet. I wanted to replicate this without having to buy the pieces from Japan. Thankfully I still had a large part of the roll of underlay from when I did the carpet on my TVR After some quick measuring and some cutting, I had four pieces to fit Some trimming is needed to get them around the seat mounts, but otherwise they just sit in the footwell. Just like factory. Both sides had the same treatment Next, I unboxed the carpet and carefully dumped it in a heap in the back of the car After MUCH faffing about fitting the Monstersport foot rest, and poking holes in my new and expensive carpet, I refit the console and suddenly it looked a bit more like a car again. Don't forget to pass the seat plugs through the carpet! It tucks nicely under all the side trims There were two clips under the drivers seat, one clip under the rear seat, and one screw on clips on the front corners of the carpet. When refitting the front scuff trims I decided to remove all the faux carbon wrap they had on them It may have looked nice when new but was looking a bit tatty and dated now Thankfully once removed it uncovered nice near perfect condition trims. Much nicer (look for it in the below photos). I gave all the seats a quick vacuum as they were all also quite dusty, and then refit them So how does that flash new carpet look? Much better. It's practically a luxury car now. I have a set of carpet mats on their way from Japan, but until they arrive, it is brown paper time. Don't want to get that new carpet dirty now! Driving the car to work today had a few results; Firstly, the suspension knock. Gone. It is one of those things that must have been worse than I noticed because the noise is very conspicuous in its absence now. Secondly, the intercooler. The bigger volume hasn't affected response, if anything, it feels like it spools a bit quicker, maybe less restriction? Temps have dropped. Doing the same sustained high boost pull with similar ambient temps results in a 5-10c decrease in max temp, but the drop when coming off boost was much quicker, it was dropping degrees a second, so it not only cooled the intake charge better but shed the excess heat much quicker. Hopefully that keeps the intake temps in check on the track. Lastly, the carpet. Road noise is significantly decreased, as is exhaust drone on the open road. The exhaust might be more bearable at 100kph now since the car isn't acting as a big echo chamber. The car feels more civilised in general. It's funny how just refitting carpet can make such a big difference in how much of a "car" it feels. A+ changes. Very happy with how the Alto is coming along. It's less a track monster, and more a weekend warrior now, but much nicer to live with.6 points
-
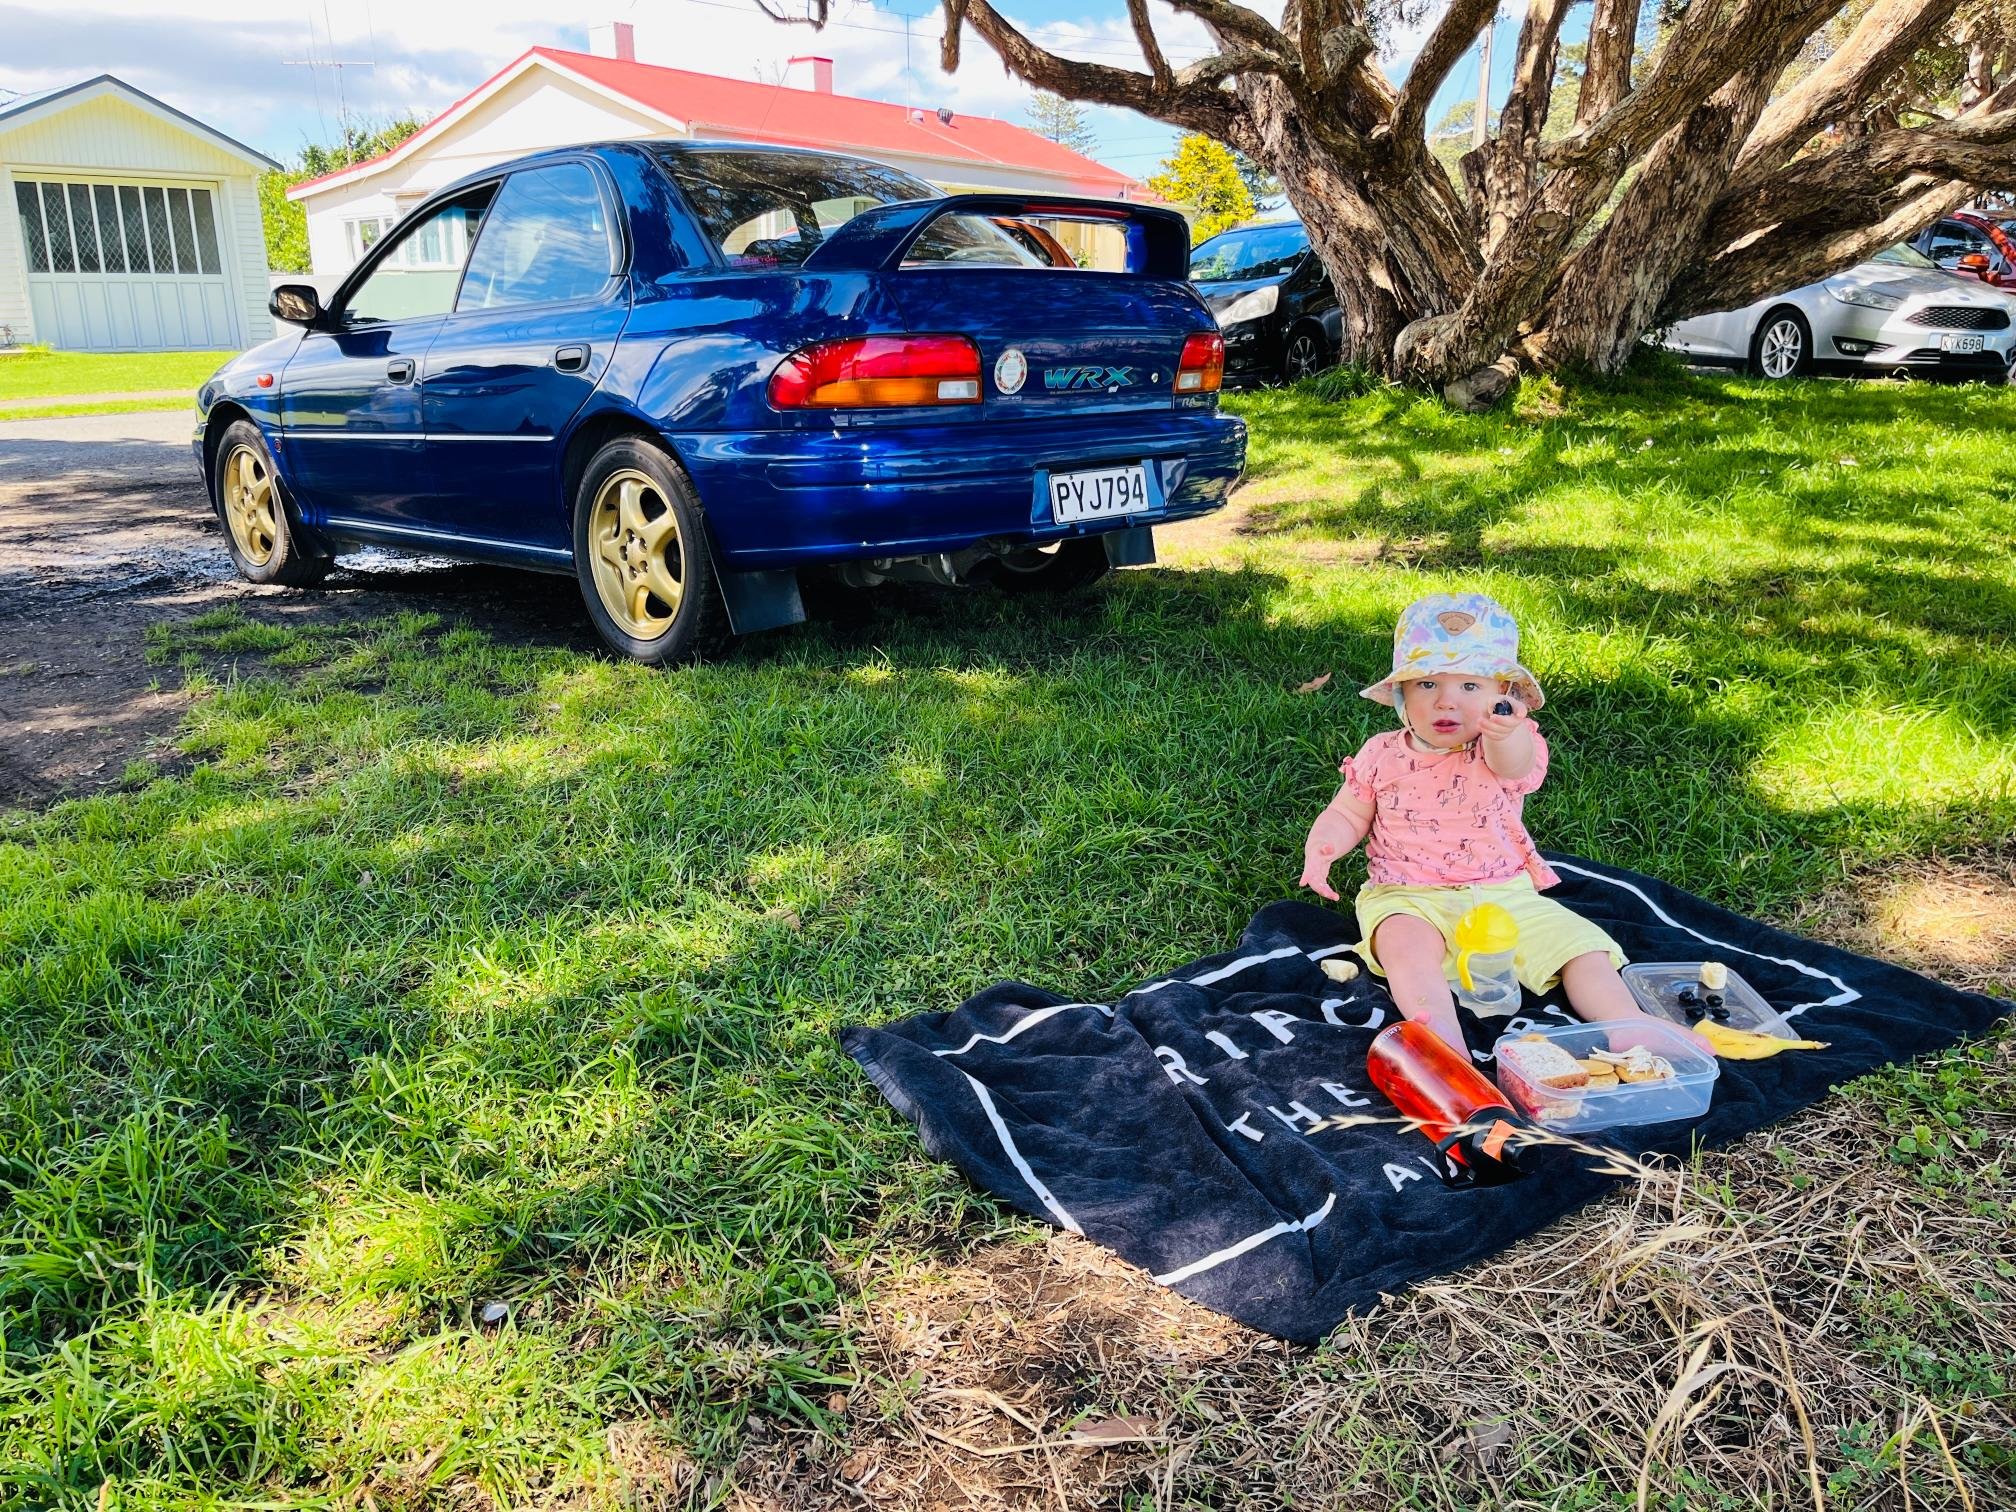
Done a few summer drives. Speedo cable broke again, replaced the whole thing this time. Clutch is starting to slip a little more, need to give it a bleed (starts slipping after a period of driving so thinking old fluid/leaky cylinders losing their ability to hydraulic things). Clutch is probably near end of life too, but a good condition hydraulic system is the first step... Had a mare with trying some new wheel cleaner. It stripped all the clear off the Speedlines and ruined a centre cap. Supplier was good about it and we'll look to get these repainted soon (they weren't in great condition anyway). So now we're back to factory wheels. Finley loves this car. Every time it gets kicked out on the driveway she has to go and sit in at and tell me all about it. We had a dad-daughter date out to raglan which was an awesome memory to create with the car. Also it's fucking fast on the divvy... Getting sick of dumpy big bore life. Any suggestions on where to purchase a good value 3" chambered muffler? Mild steel will be fine, I'll hide it away and put a 2.5" stainless tip on it to replicate the group A look. Doesn't need to be anything flash, but would like quieter and more refined boxer rumble.
6 points
-
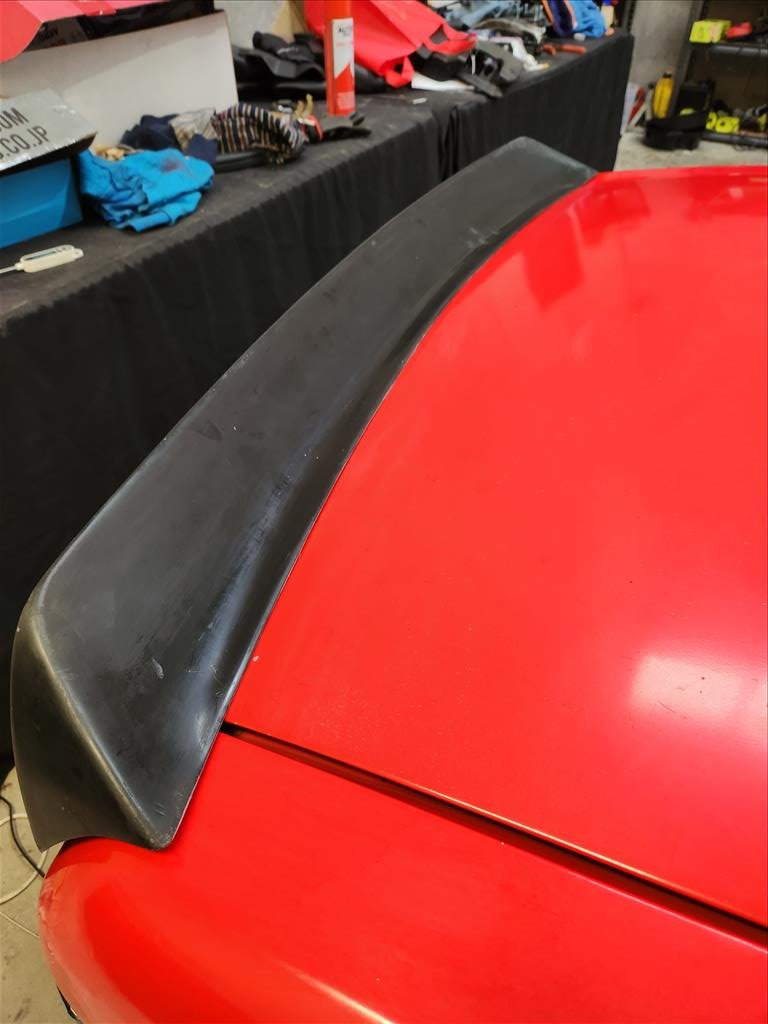
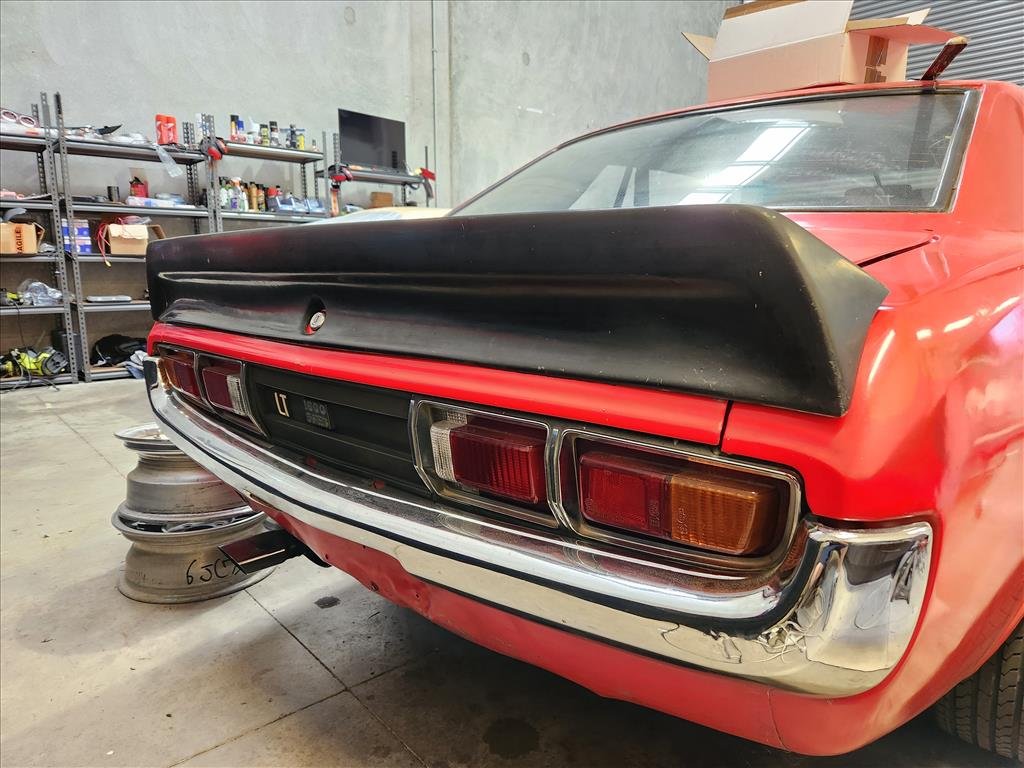
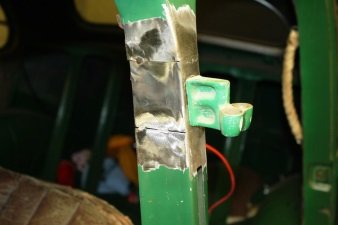
Cleaned it up as best I could around the edges, still a bit poo but oh well, good enough. Looks like it'll stay on there so that's the main thing. I slapped it and said "that's not going anywhere" so I can't see it falling off. One day I might paint the car so it's the same colour.
6 points
-
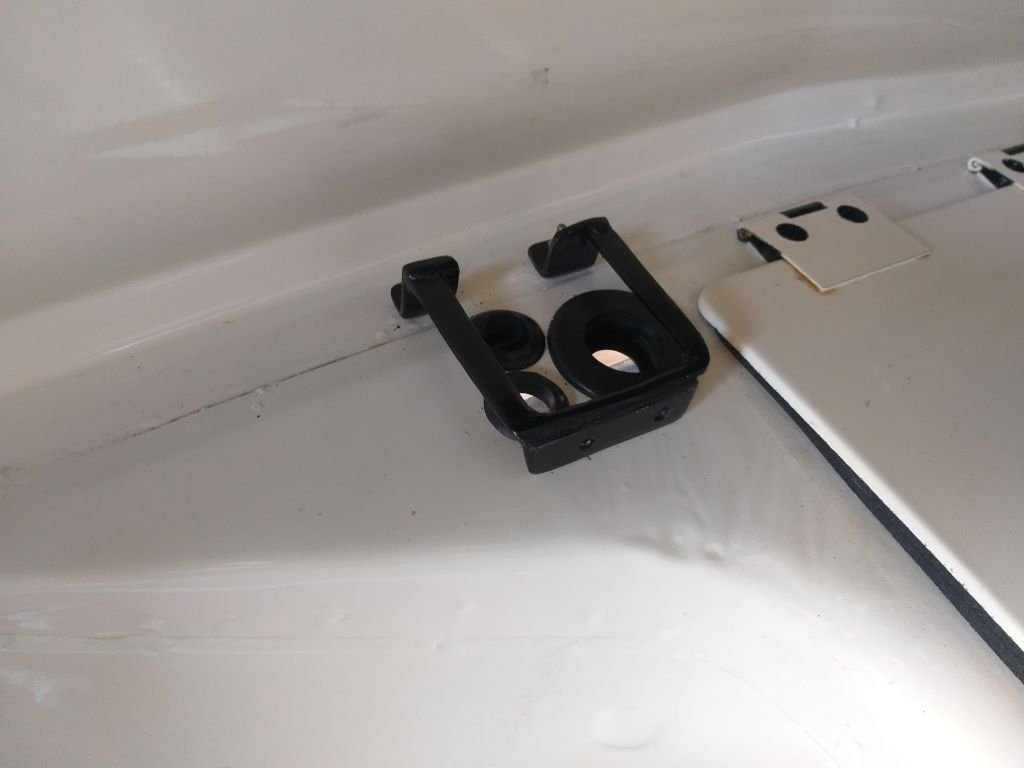
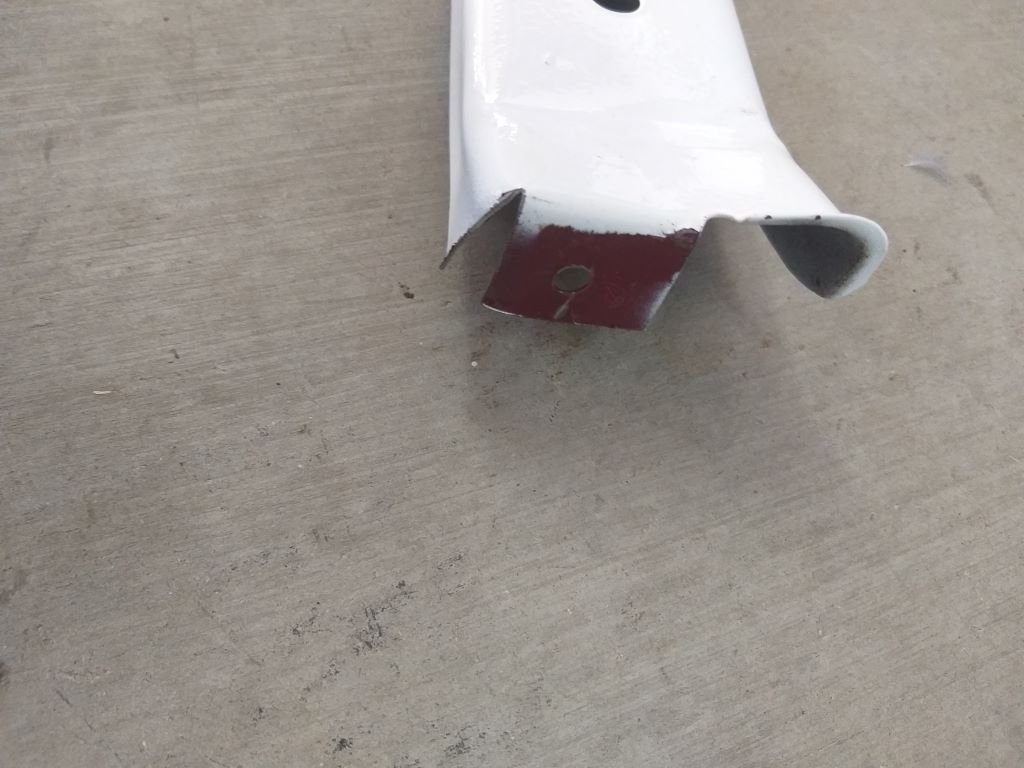
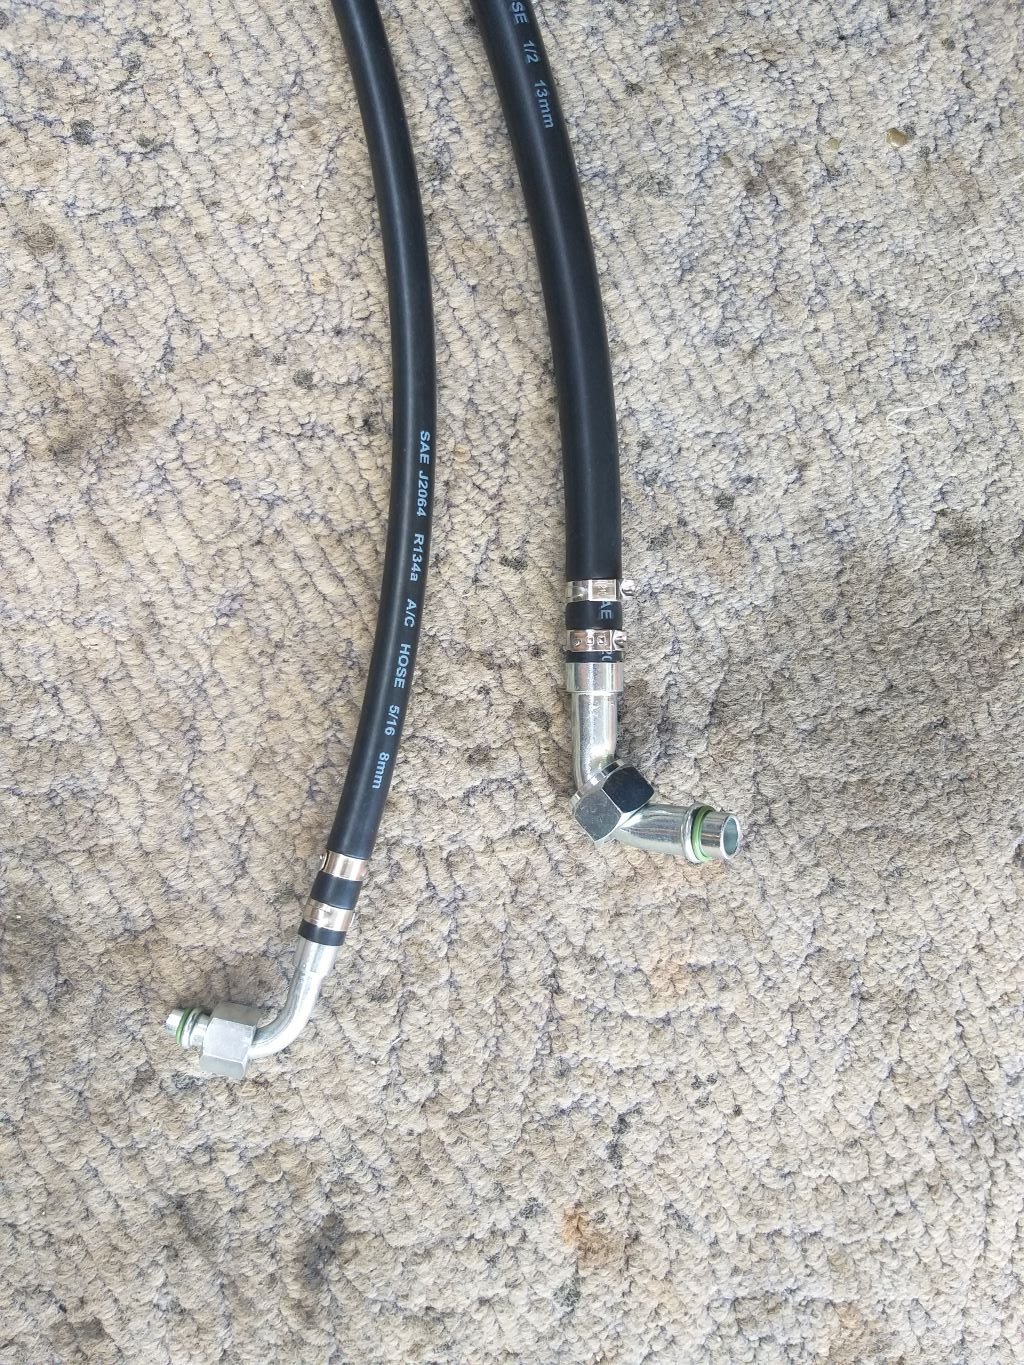
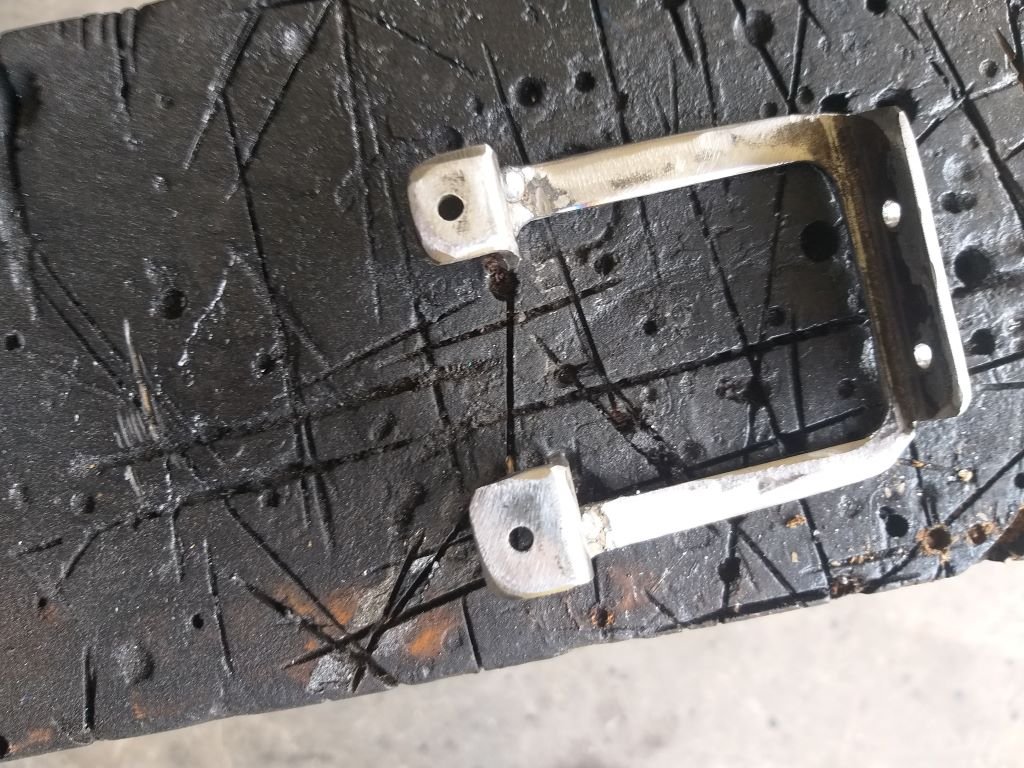
First thing this morning I fitted the freshly painted mounting bracket for the panel that will hide the a/c hoses inside the cab. I then scratched around under the dash trying to figure out how I was going to fix the cover panel at the top. Luckily one of the bolts that holds the Ford badge on the front panel is perfectly positioned for the task. I found one of those multi holed mounting strips in amongst my stash. Looked a bit manky but nothing that a little loving wont fix. Gave it a trim and a quick bend followed by a test fit. Works like a charm. Gave it a tickle with my flapper disc then a few coats of the usual satin black. I needed to bend the upper mounting tab on the cover panel itself which was easy enough: Can't mount it till the paint dries on the new bracket, so I carried on making up a/c hoses. These are the two hose ends that run from the under-dash unit to the compressor and drier bottle respectively: Spent the rest of the morning routing these hoses under the dash, through the floor and then under the front of the van. I'll post some photos of the pipes in position tomorrow.
4 points
-
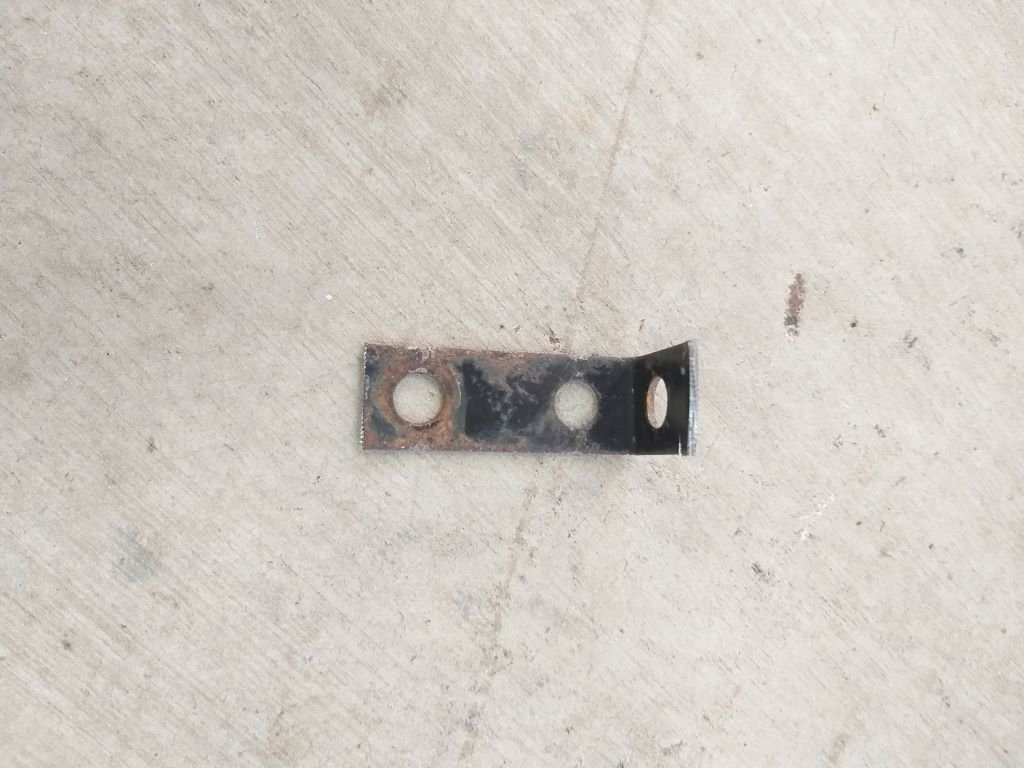
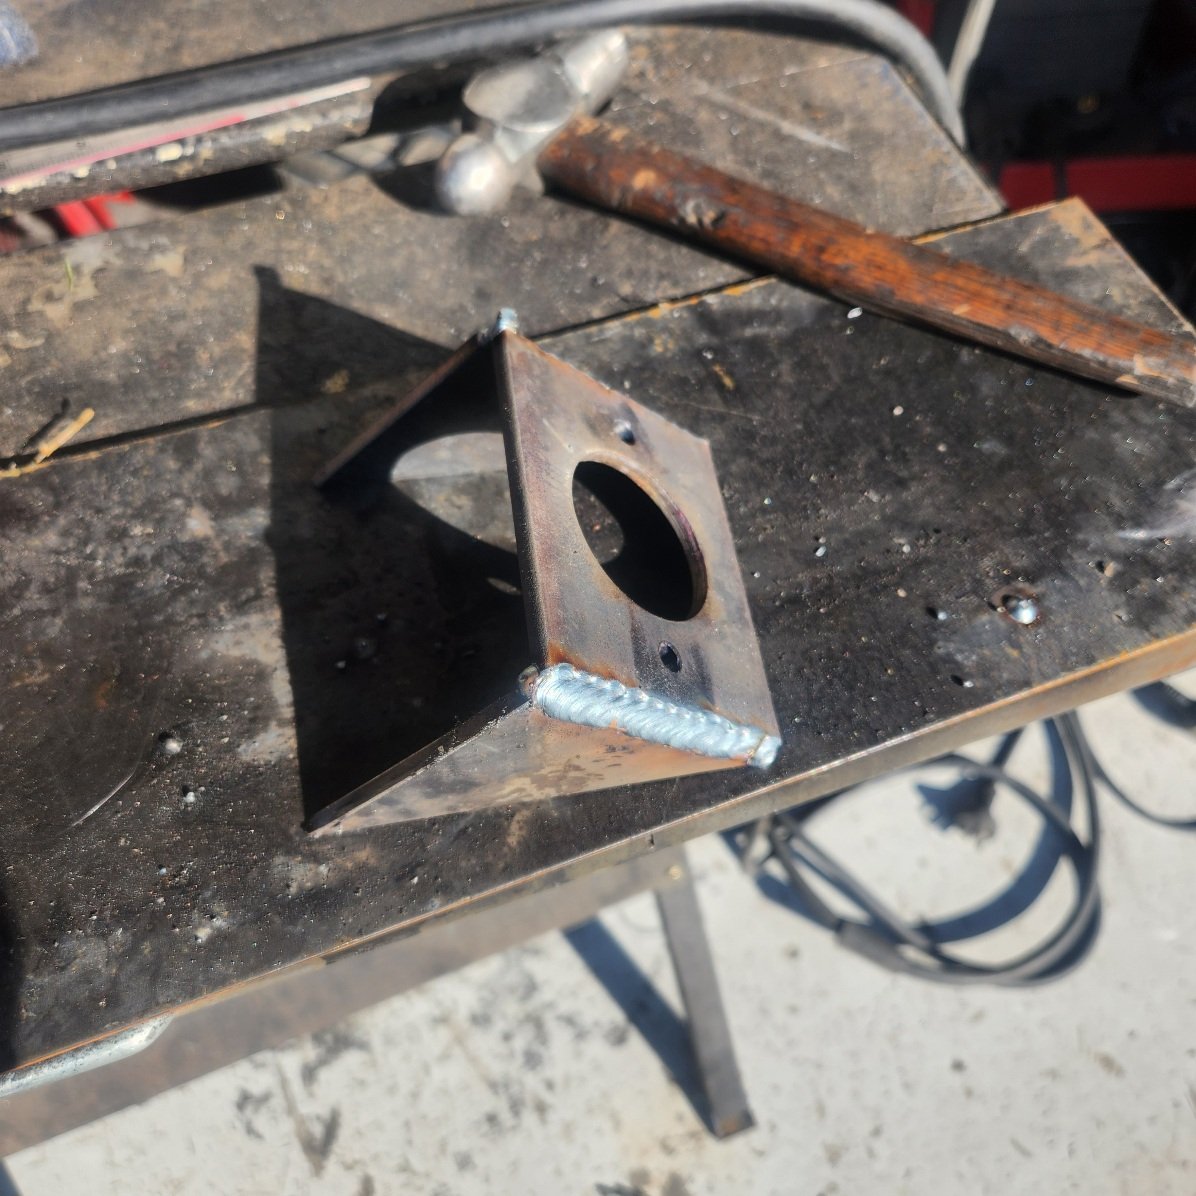
Spent the morning entertaining my neighbours with the sweet tune of my angle grinder and ended up with this: Gave it a quick test fit followed by a spot of satin black: Looked around for another noisy Sunday job, but eventually had to settle for something a bit quieter. Decided it was time to make up the first a/c hose. Picked the compressor discharge hose as my first victim. The process is pretty straight forward and goes like so: 1. Test fit and trim hose to final length. 2. Slip the clips over the hose. 3. Slide the hose coupling into the hose. 4. Line up the clips with the green o rings using a spare coupling as a guide. 5. Crimp the hell out of the clips using these state-of-the-art crimping pliers: And, that's the first hose ready to rock 'n roll.
4 points
-
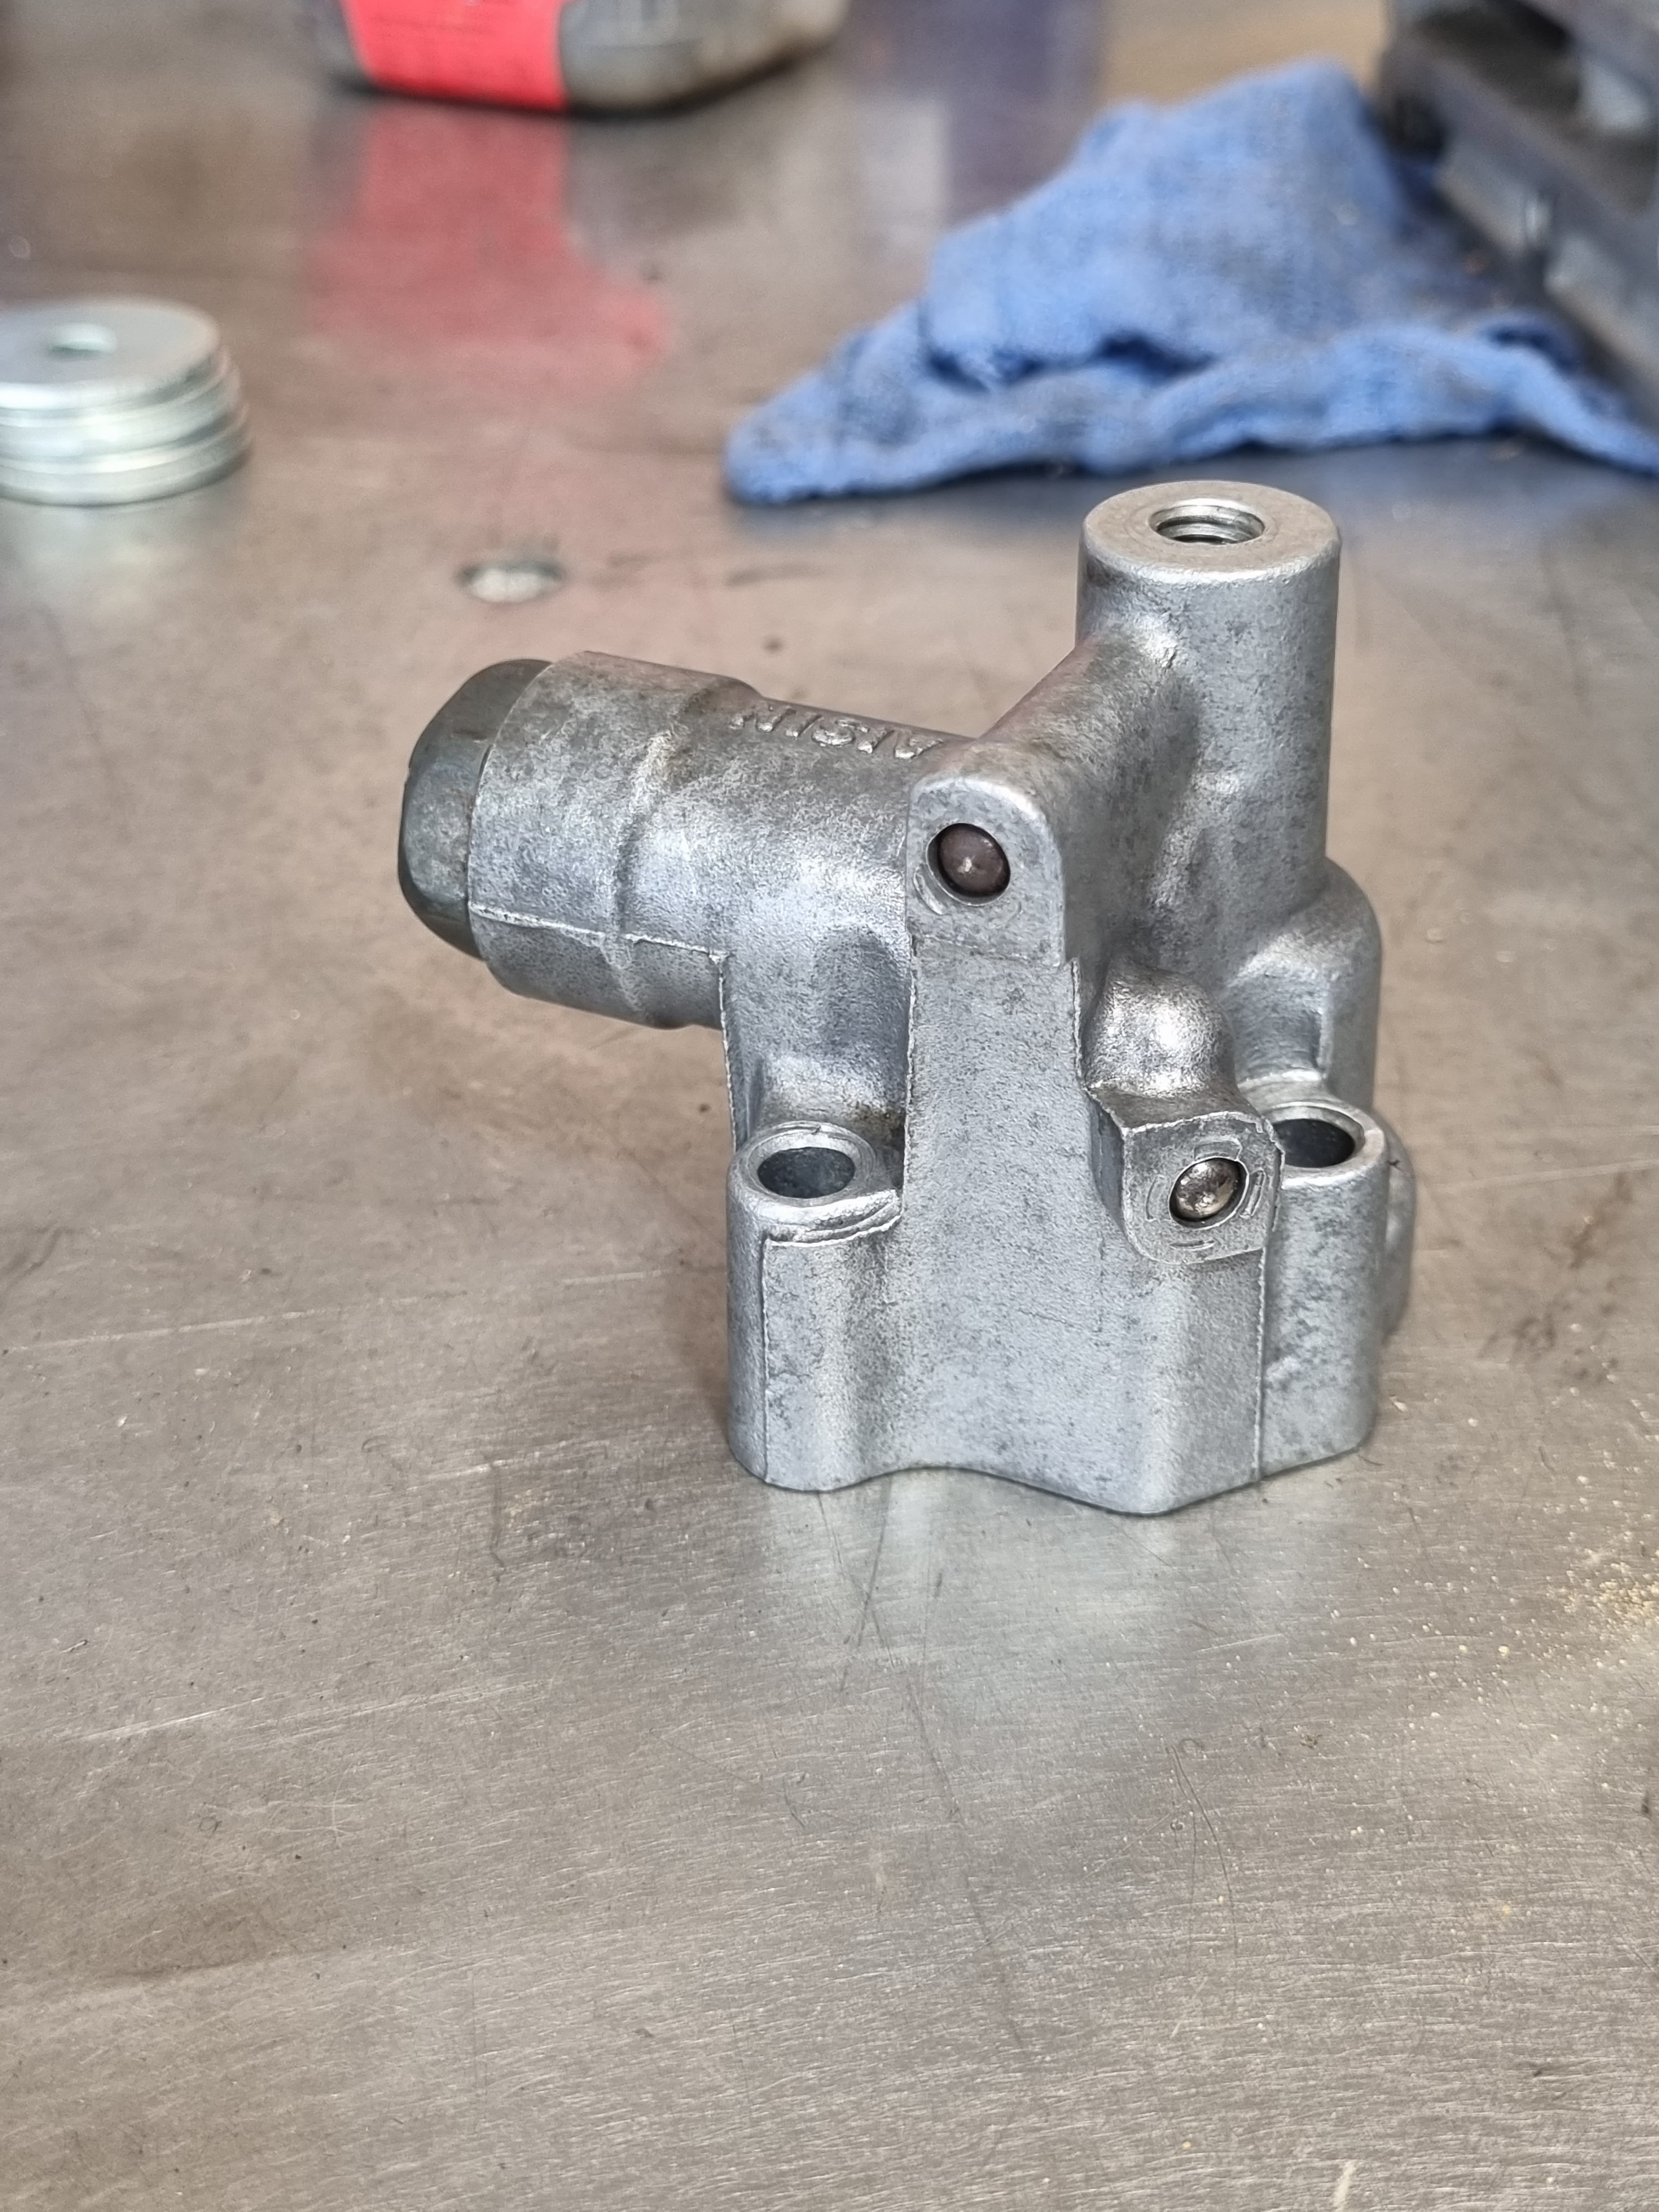
i was wondering if i could raise the oil pressure in the lifters just a bit to compensate for the heavier springs and increased ramp angle of the new cam. the 5M head has a pressure relief valve which feeds the lifter bores. ive never really looked at it in any detail but its got a spring and a big nut to holding the spring in place, how hard can it be? so i pulled it to bits and had a decent look at it. what i saw was worrying and left me with a feeling of no confidence with this doohickey at all. but i had to remind myself that it does work and they have worked for many years and they're not raised as an issue that ive ever heard. the problem is that the oil feed for the entire lifter circuit has to pass through a tiny hole, i couldn't measure it but it would be less than 1mm. so that's not very much oil flow. i couldnt open up the hole even if i wanted to so i just decided to settle for upping the pressure a bit. i did some science and figured out roughly what pressure the relief valve opens and its approx 7.6 psi. i was thinking of raising the pressure by about 10 percent but that calculated out at a shim about 0.4mm thick. but more importantly the errors in my measuring methods were more than 0.4mm. its pretty hard to accurately measure how much weight compresses a spring by exactly how much when you don't have anything but a vice and some weights. so after some thinking about it and calculating what different shim sizes would do i decided to add a 1mm shim which should see the relief valve open about 10 psi. fuck it, ill try it and see what happens.
3 points
-
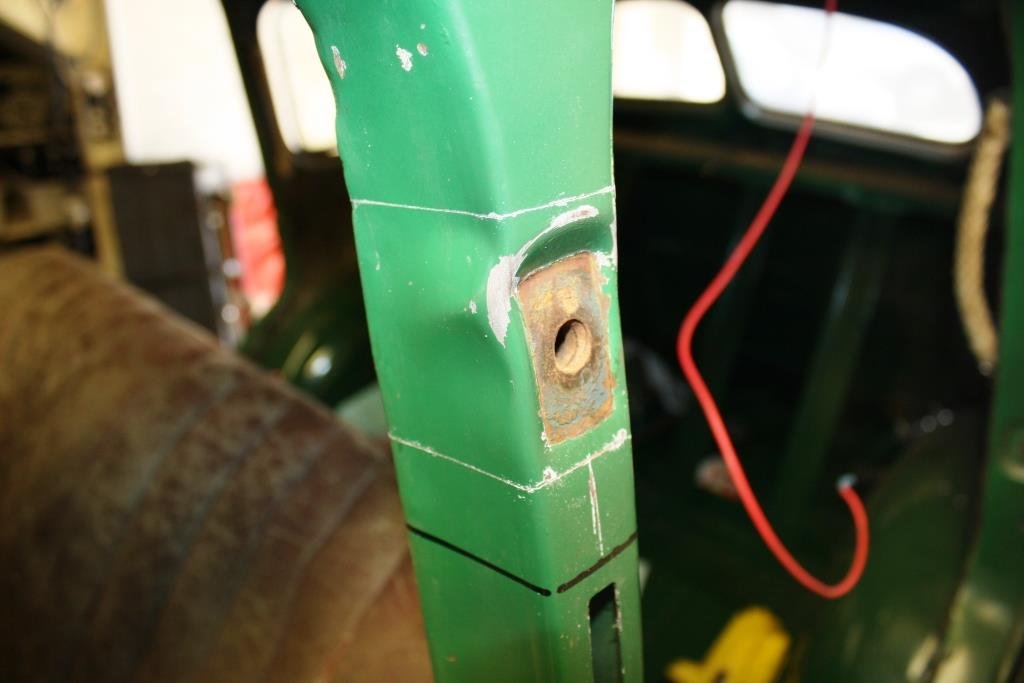
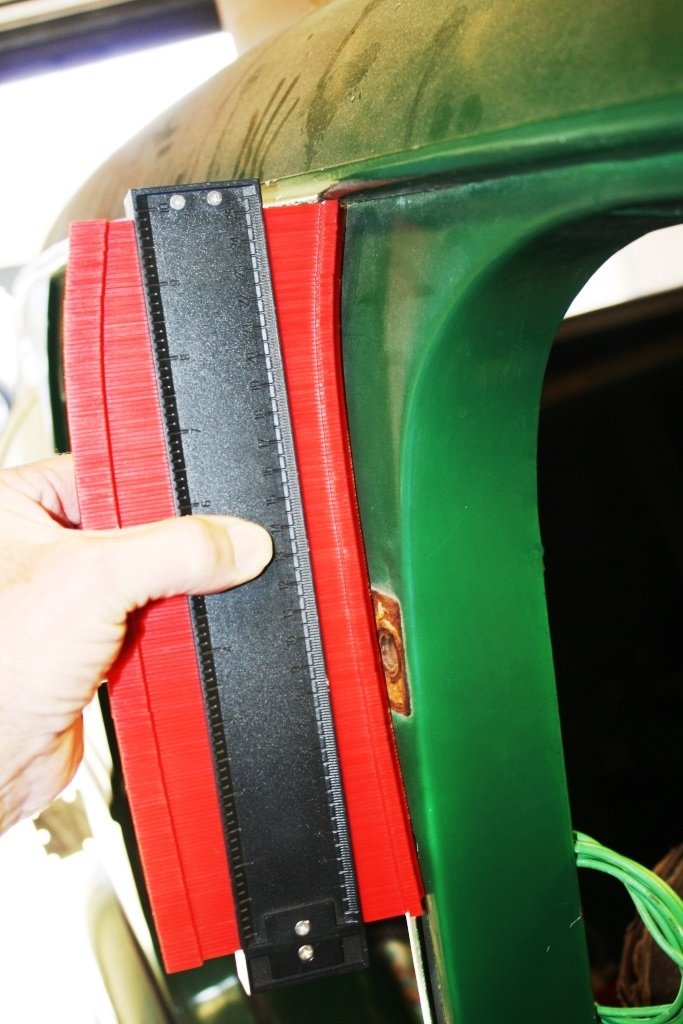
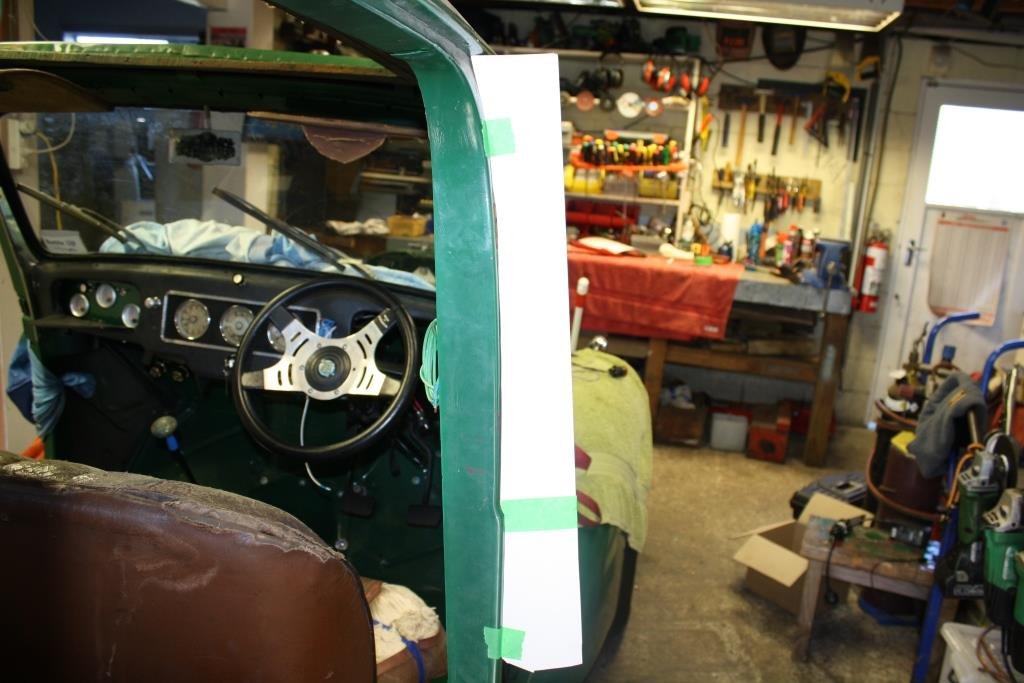
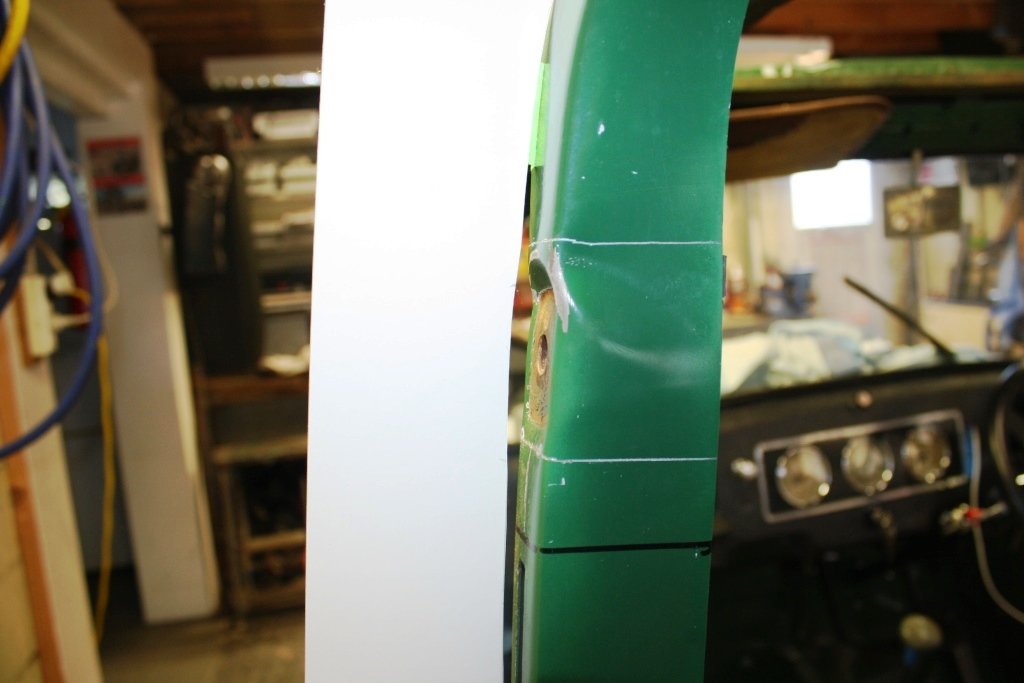
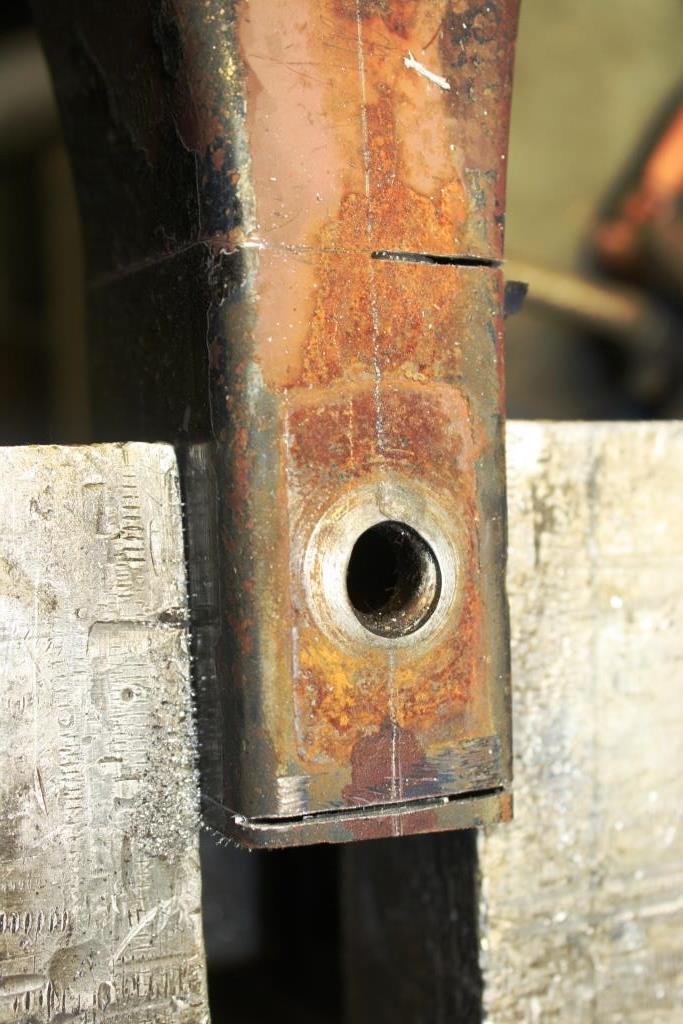
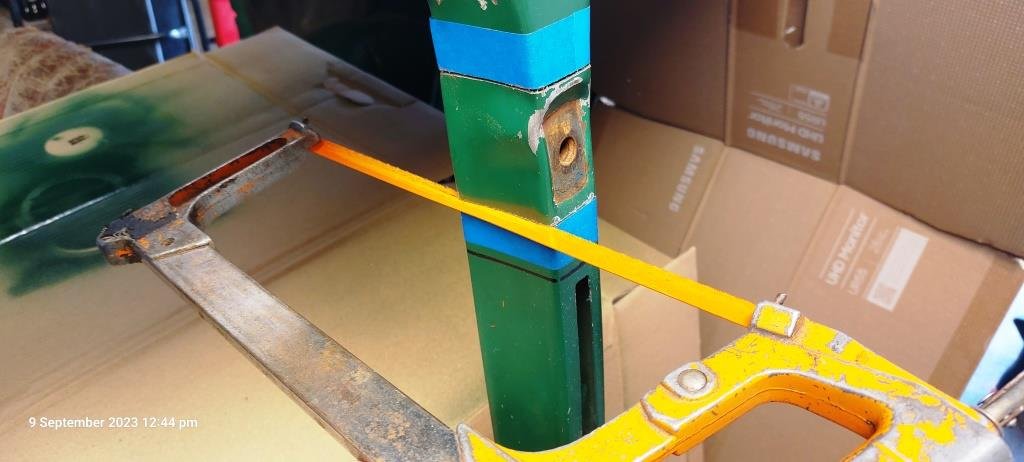
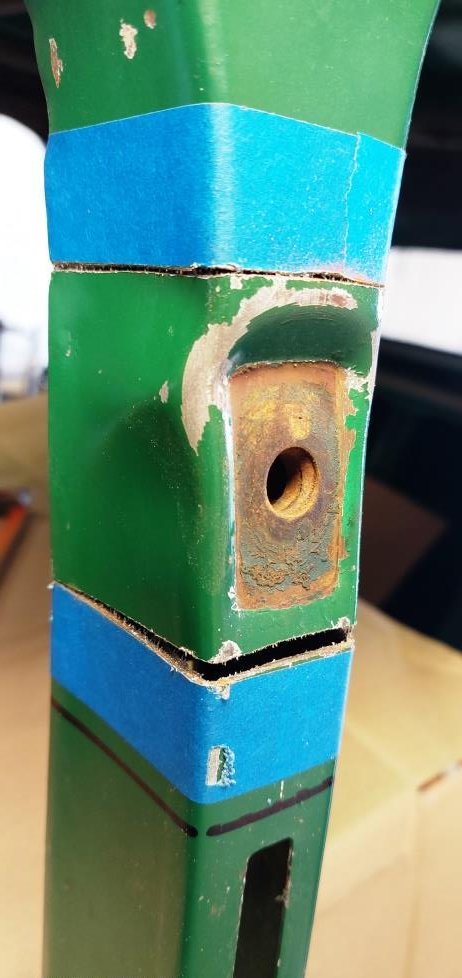
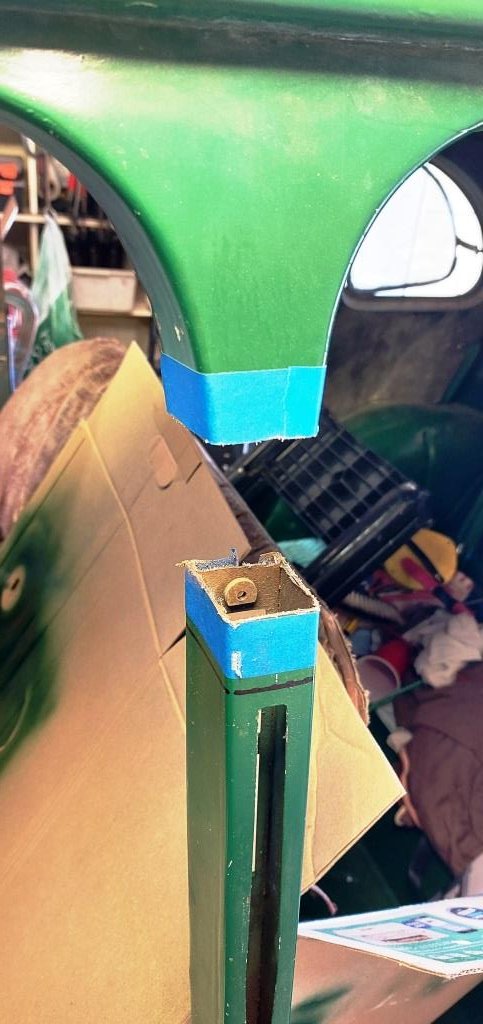
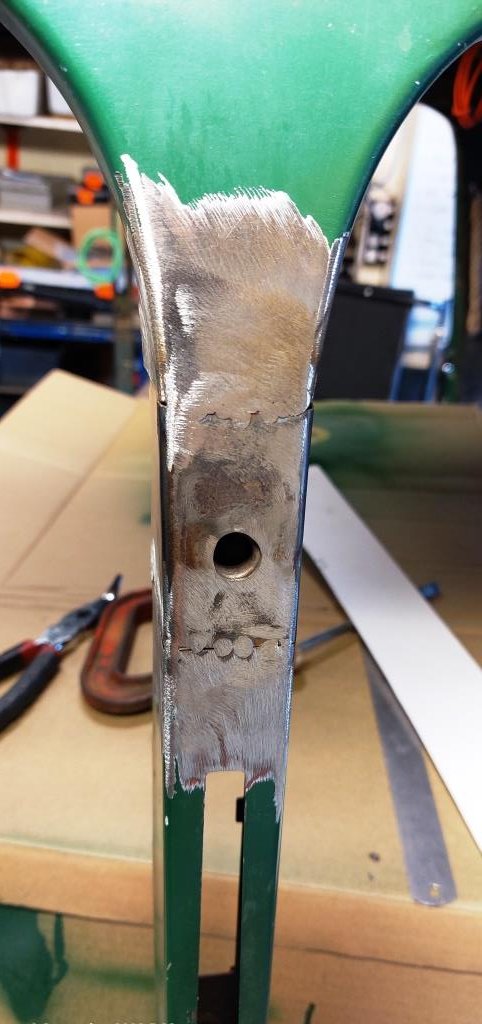
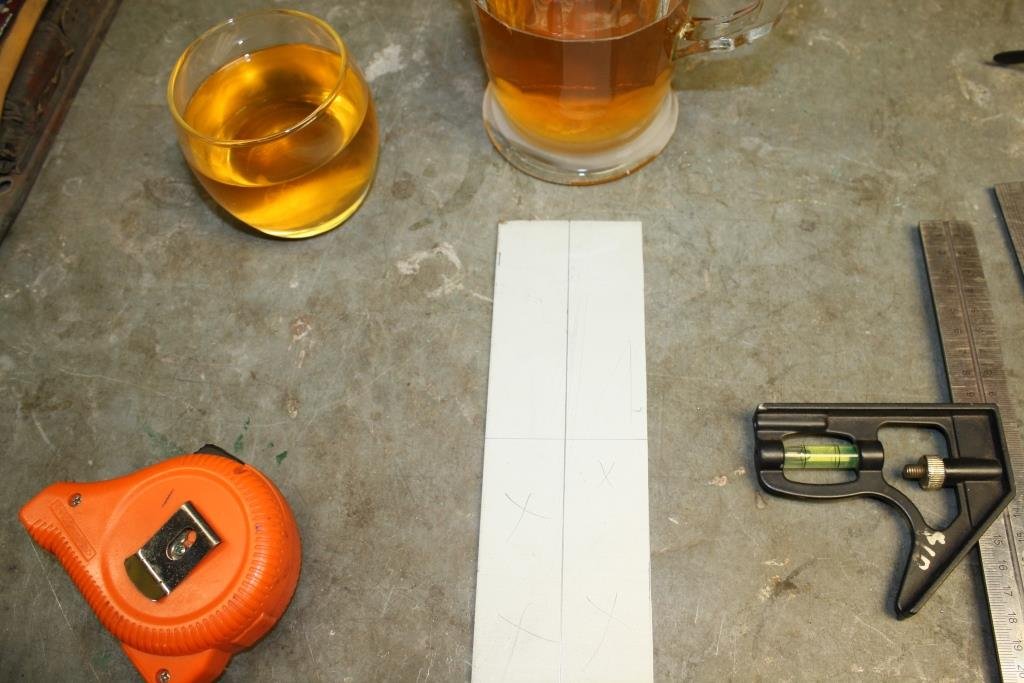
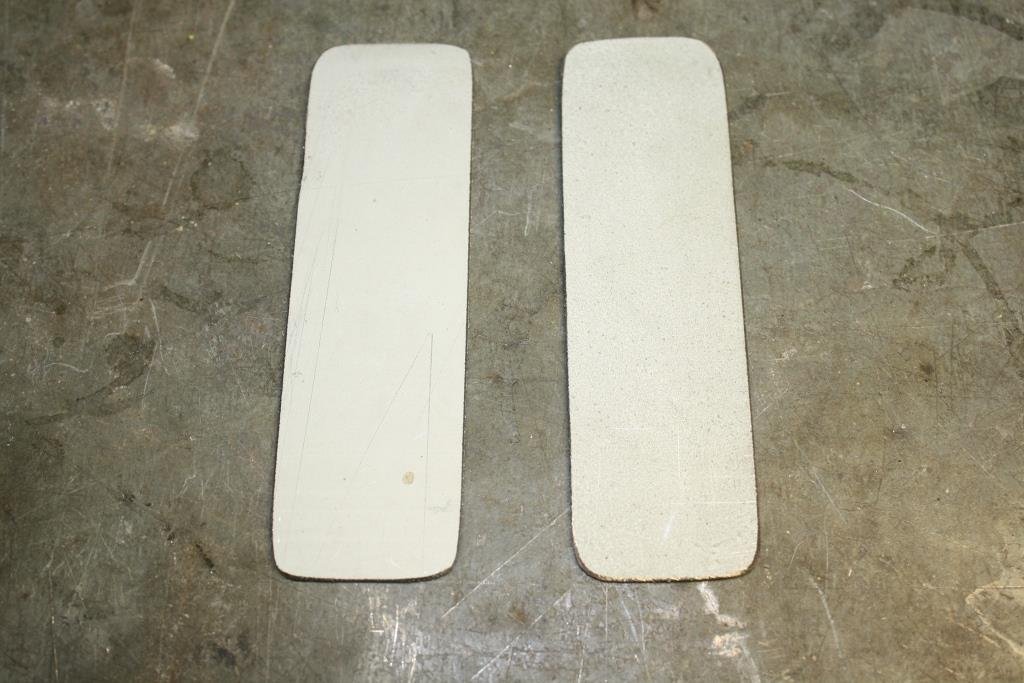
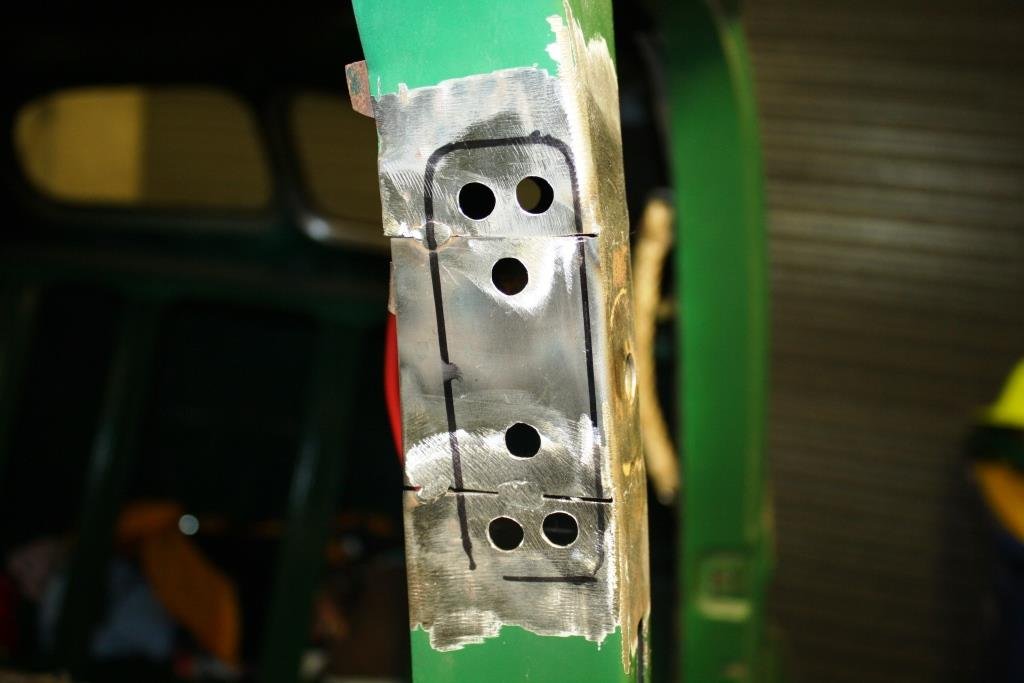
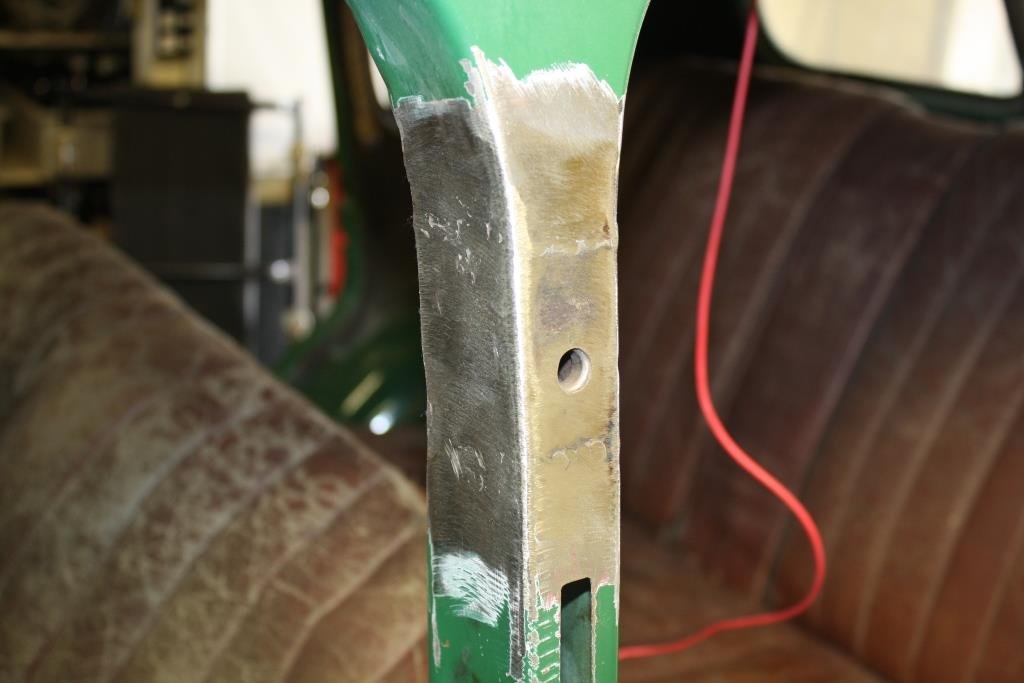
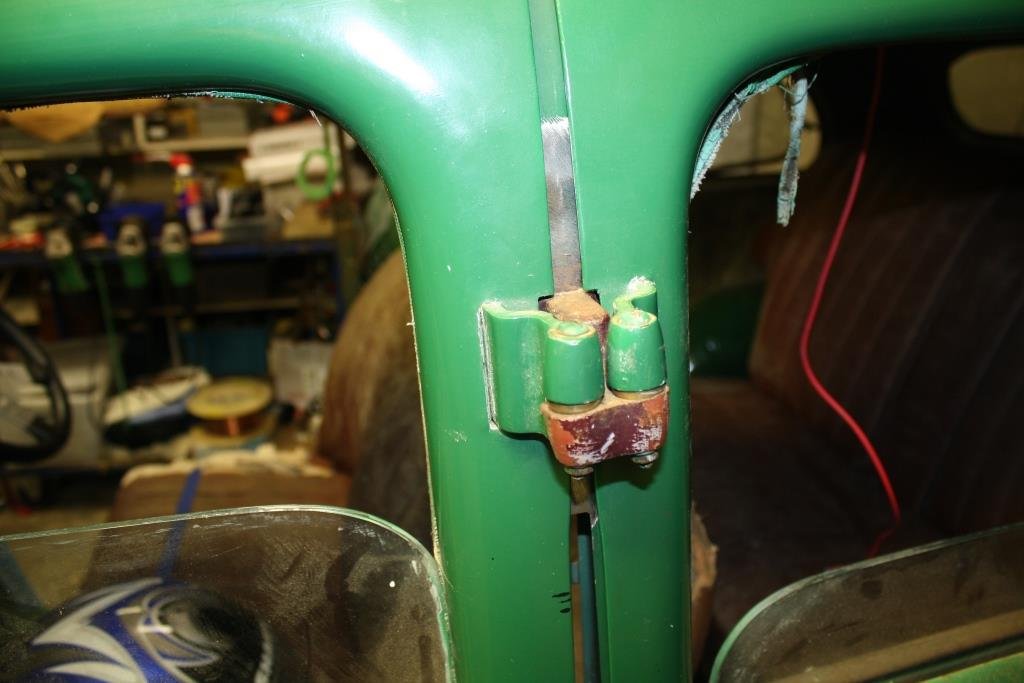
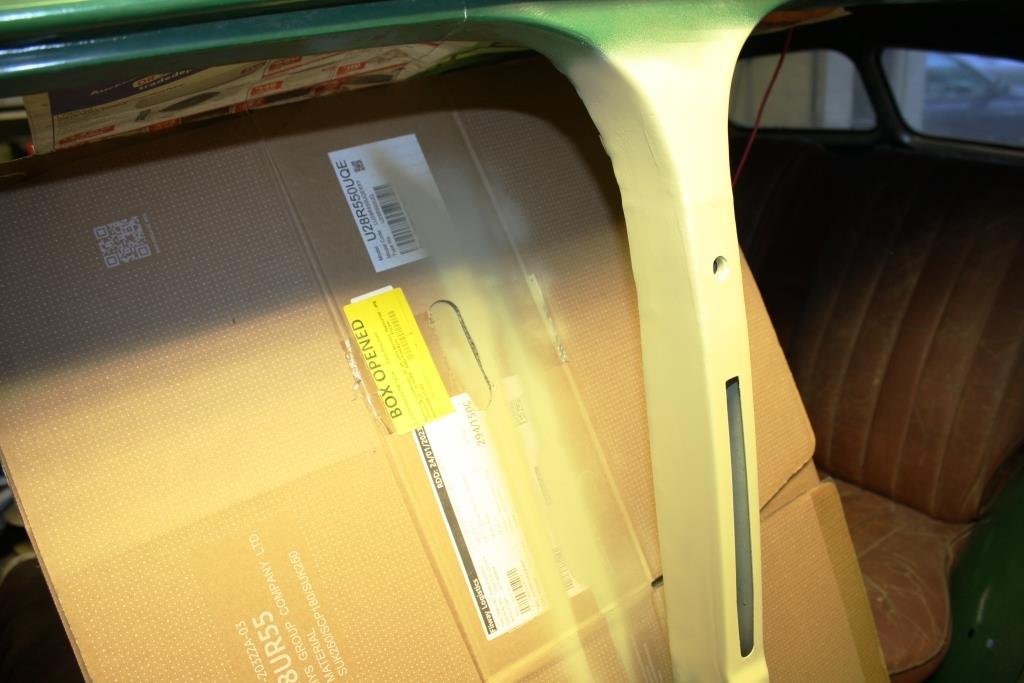
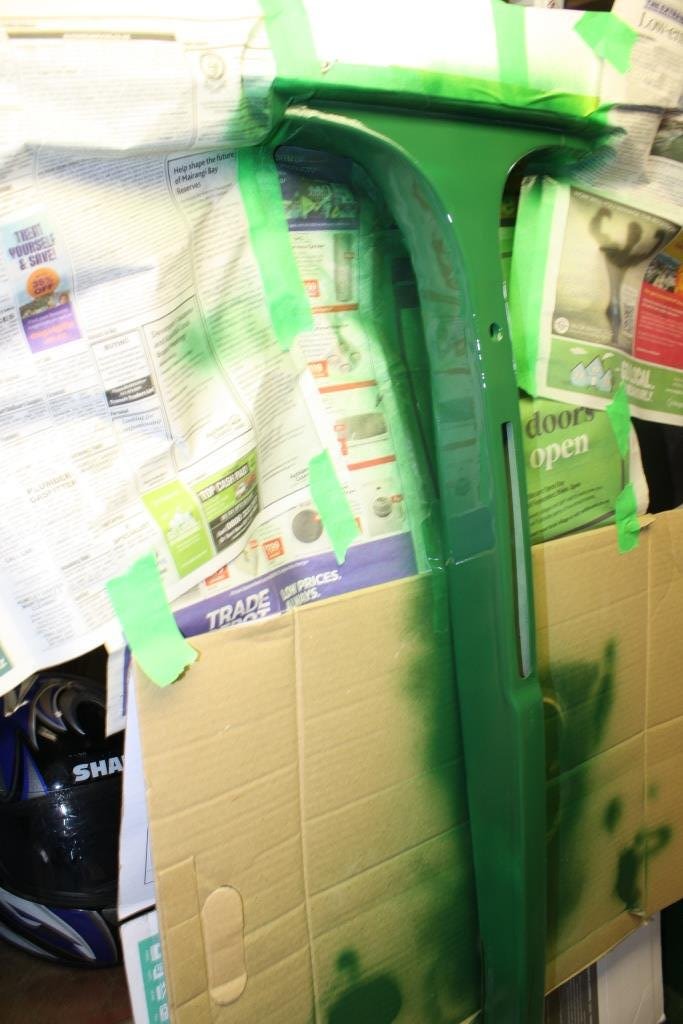
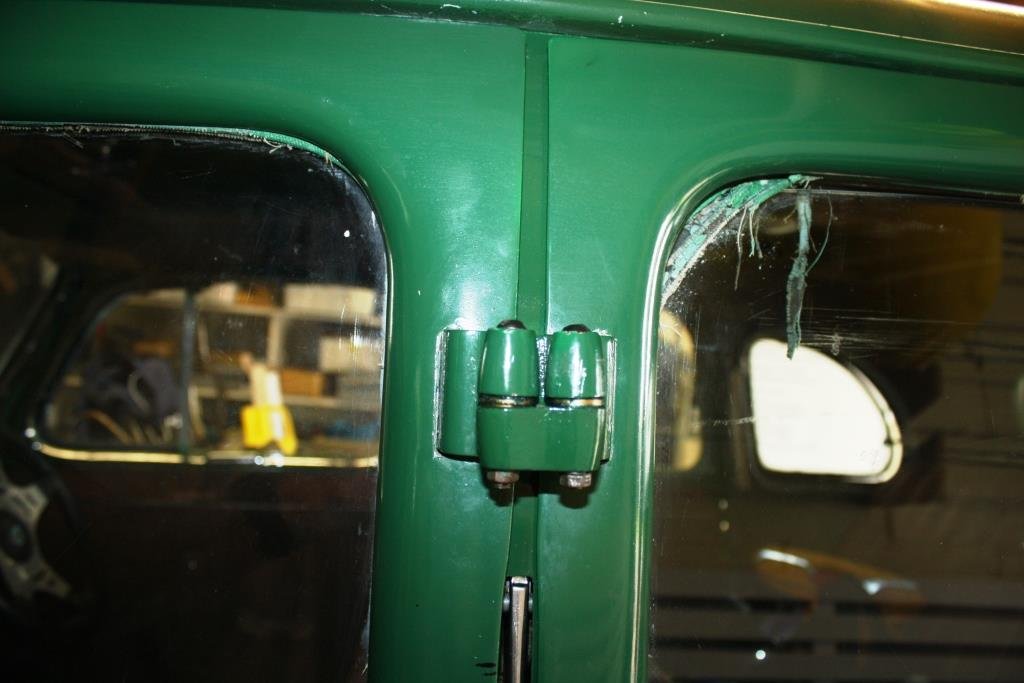
Time to take on a job I’ve been dreading somewhat; repairing the damage to Rigamortice’s port side B pillar that was the result of the body falling off my homemade body rotisserie. I used a profile gauge on the good side…….. Converted it to CAD……. Swapped sides…….. …. And it was easy to see how out of shape things were…. After a lot of measuring I cut a section out of the replacement B pillar…. And did the same on the car. I went back to using an old school hacksaw - far more accurate than an angle grinder for me. It popped out with a bit of a bang, obviously under some tension. Started tacking the repair piece in… Checking it with the CAD template…. Still just little tacks, a bit messy but I’m cognisant of avoiding putting too much heat in and distorting things. A quick test fit of the doors and it looks OK. Cut out some 16 gauge zintex strips… Marked out and drilled for plug welds.. Put the reinforcing strips inside the pillar and started welding……. A quick test fit of the doors and nothing has moved….(phew!). A few coats of sandable primer… The obligatory insipid green… Doors finally back on and everything fits.
3 points
-
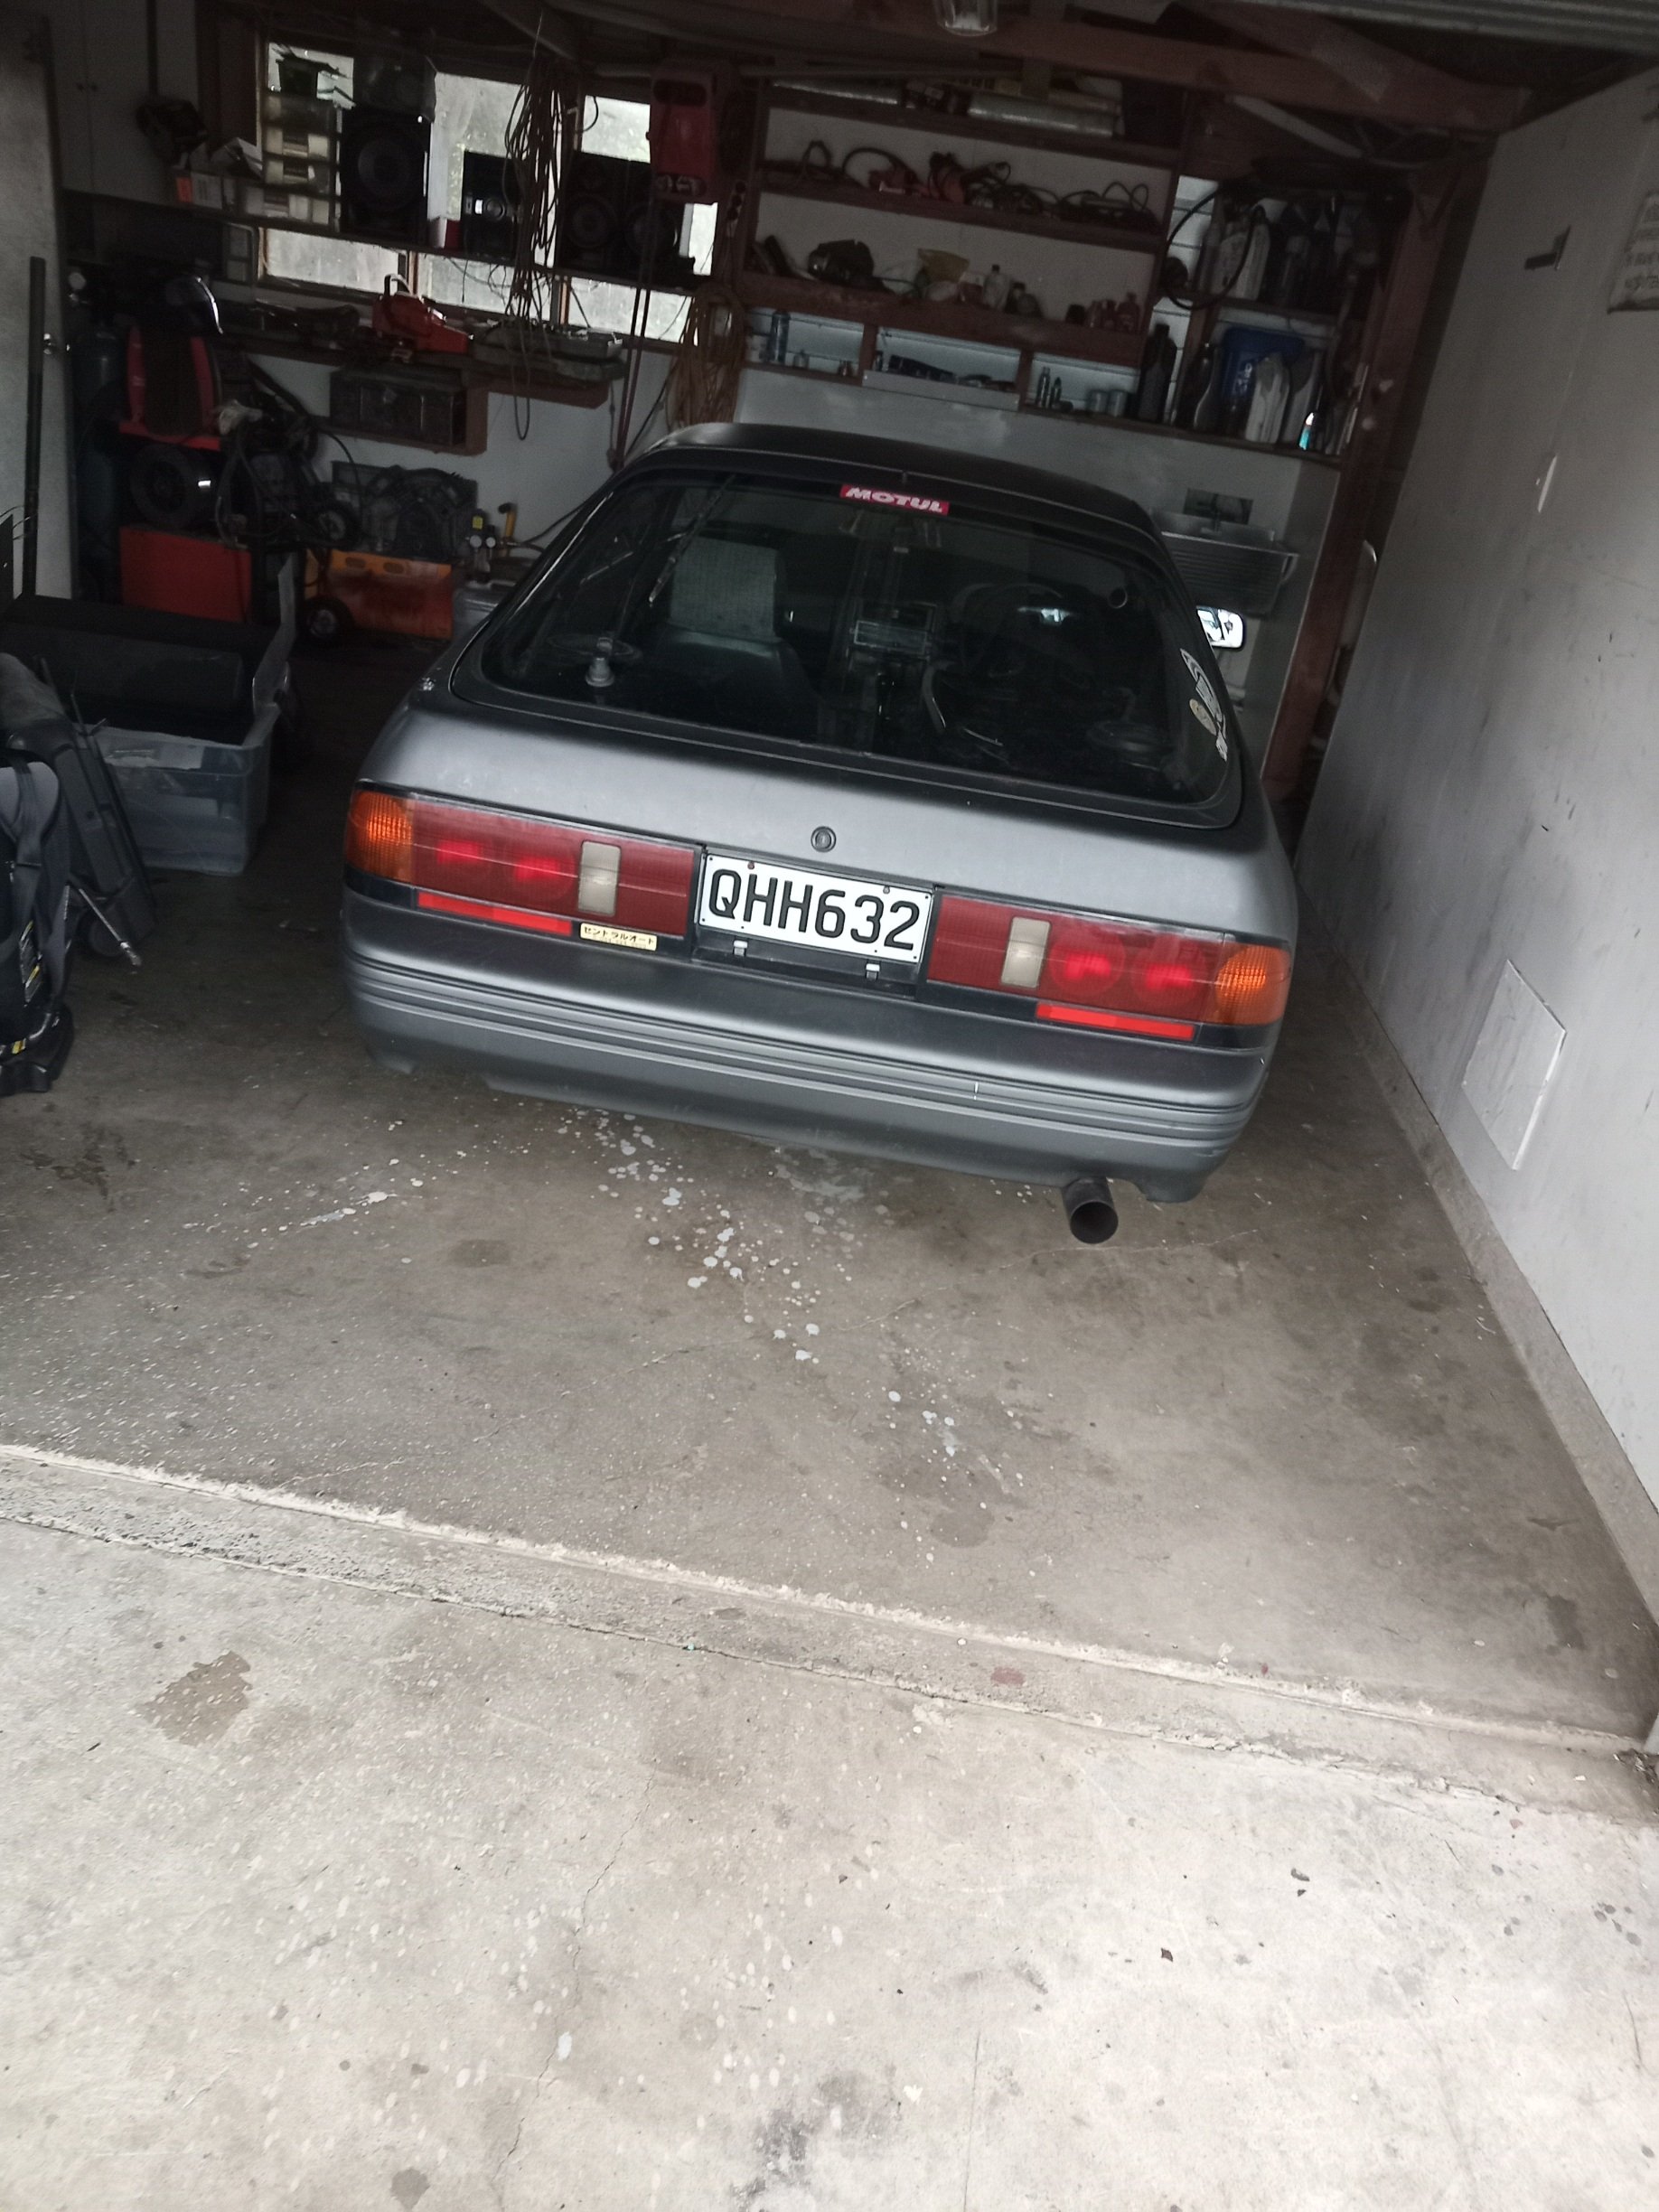
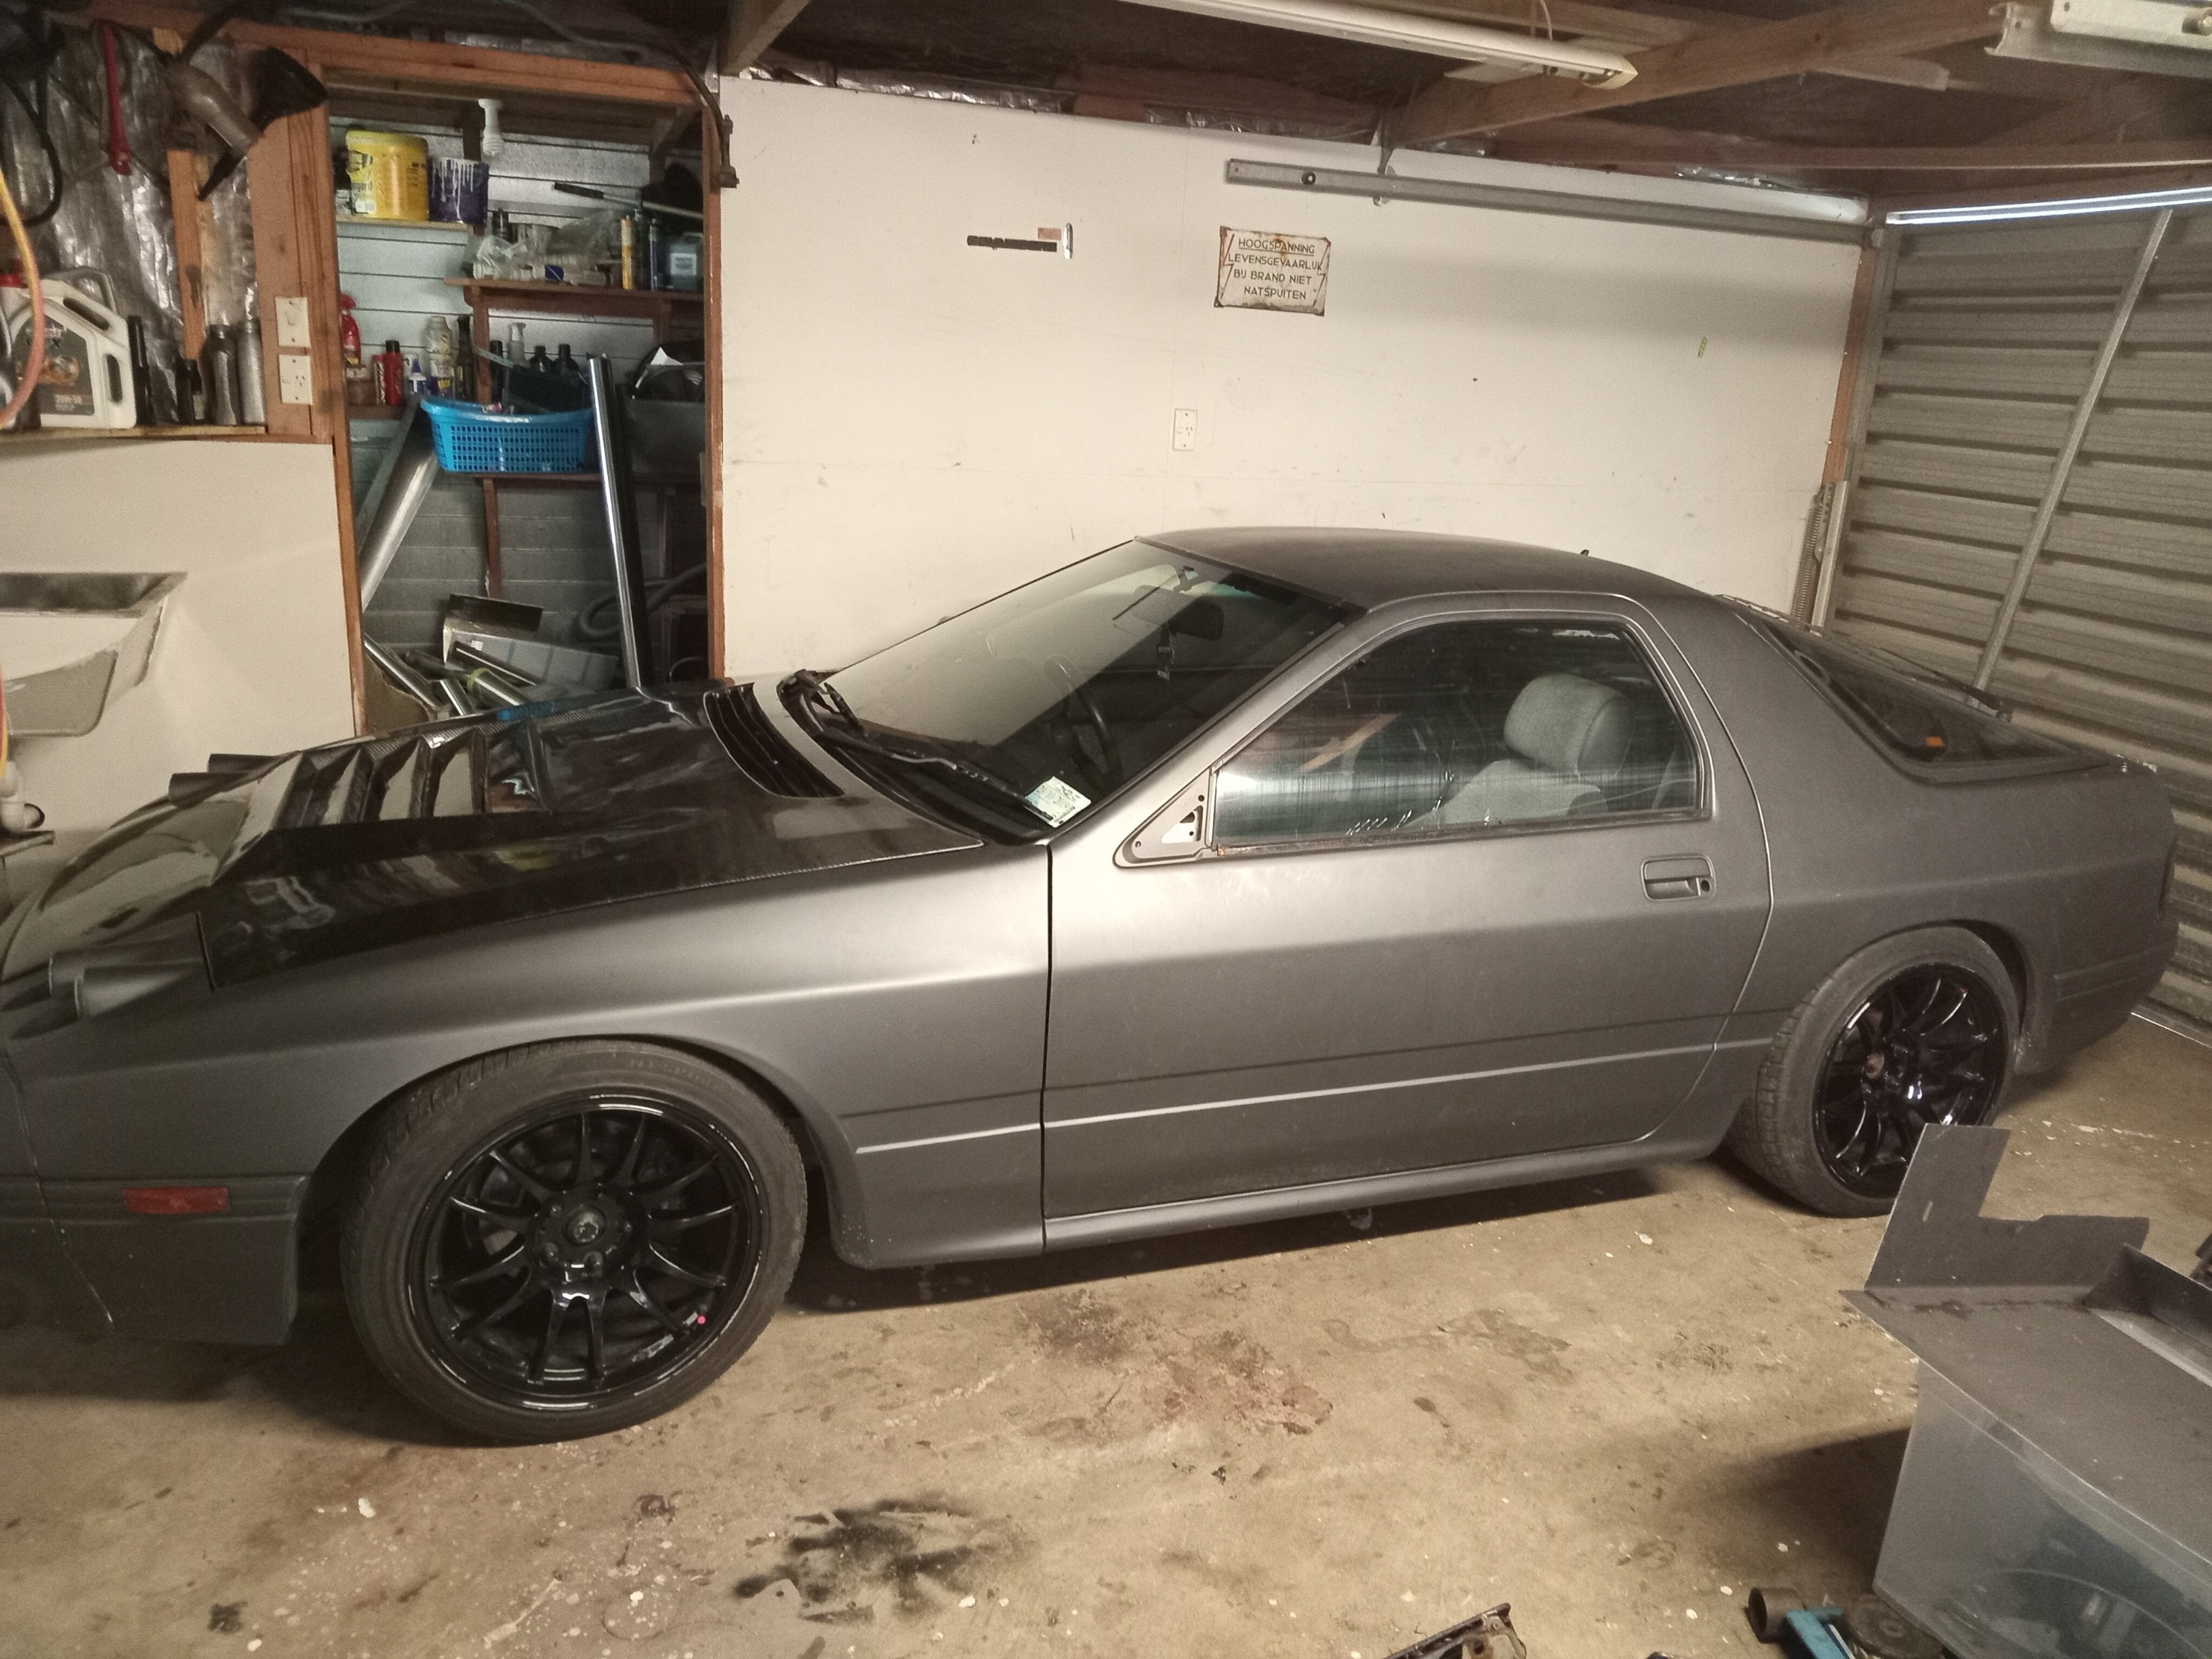
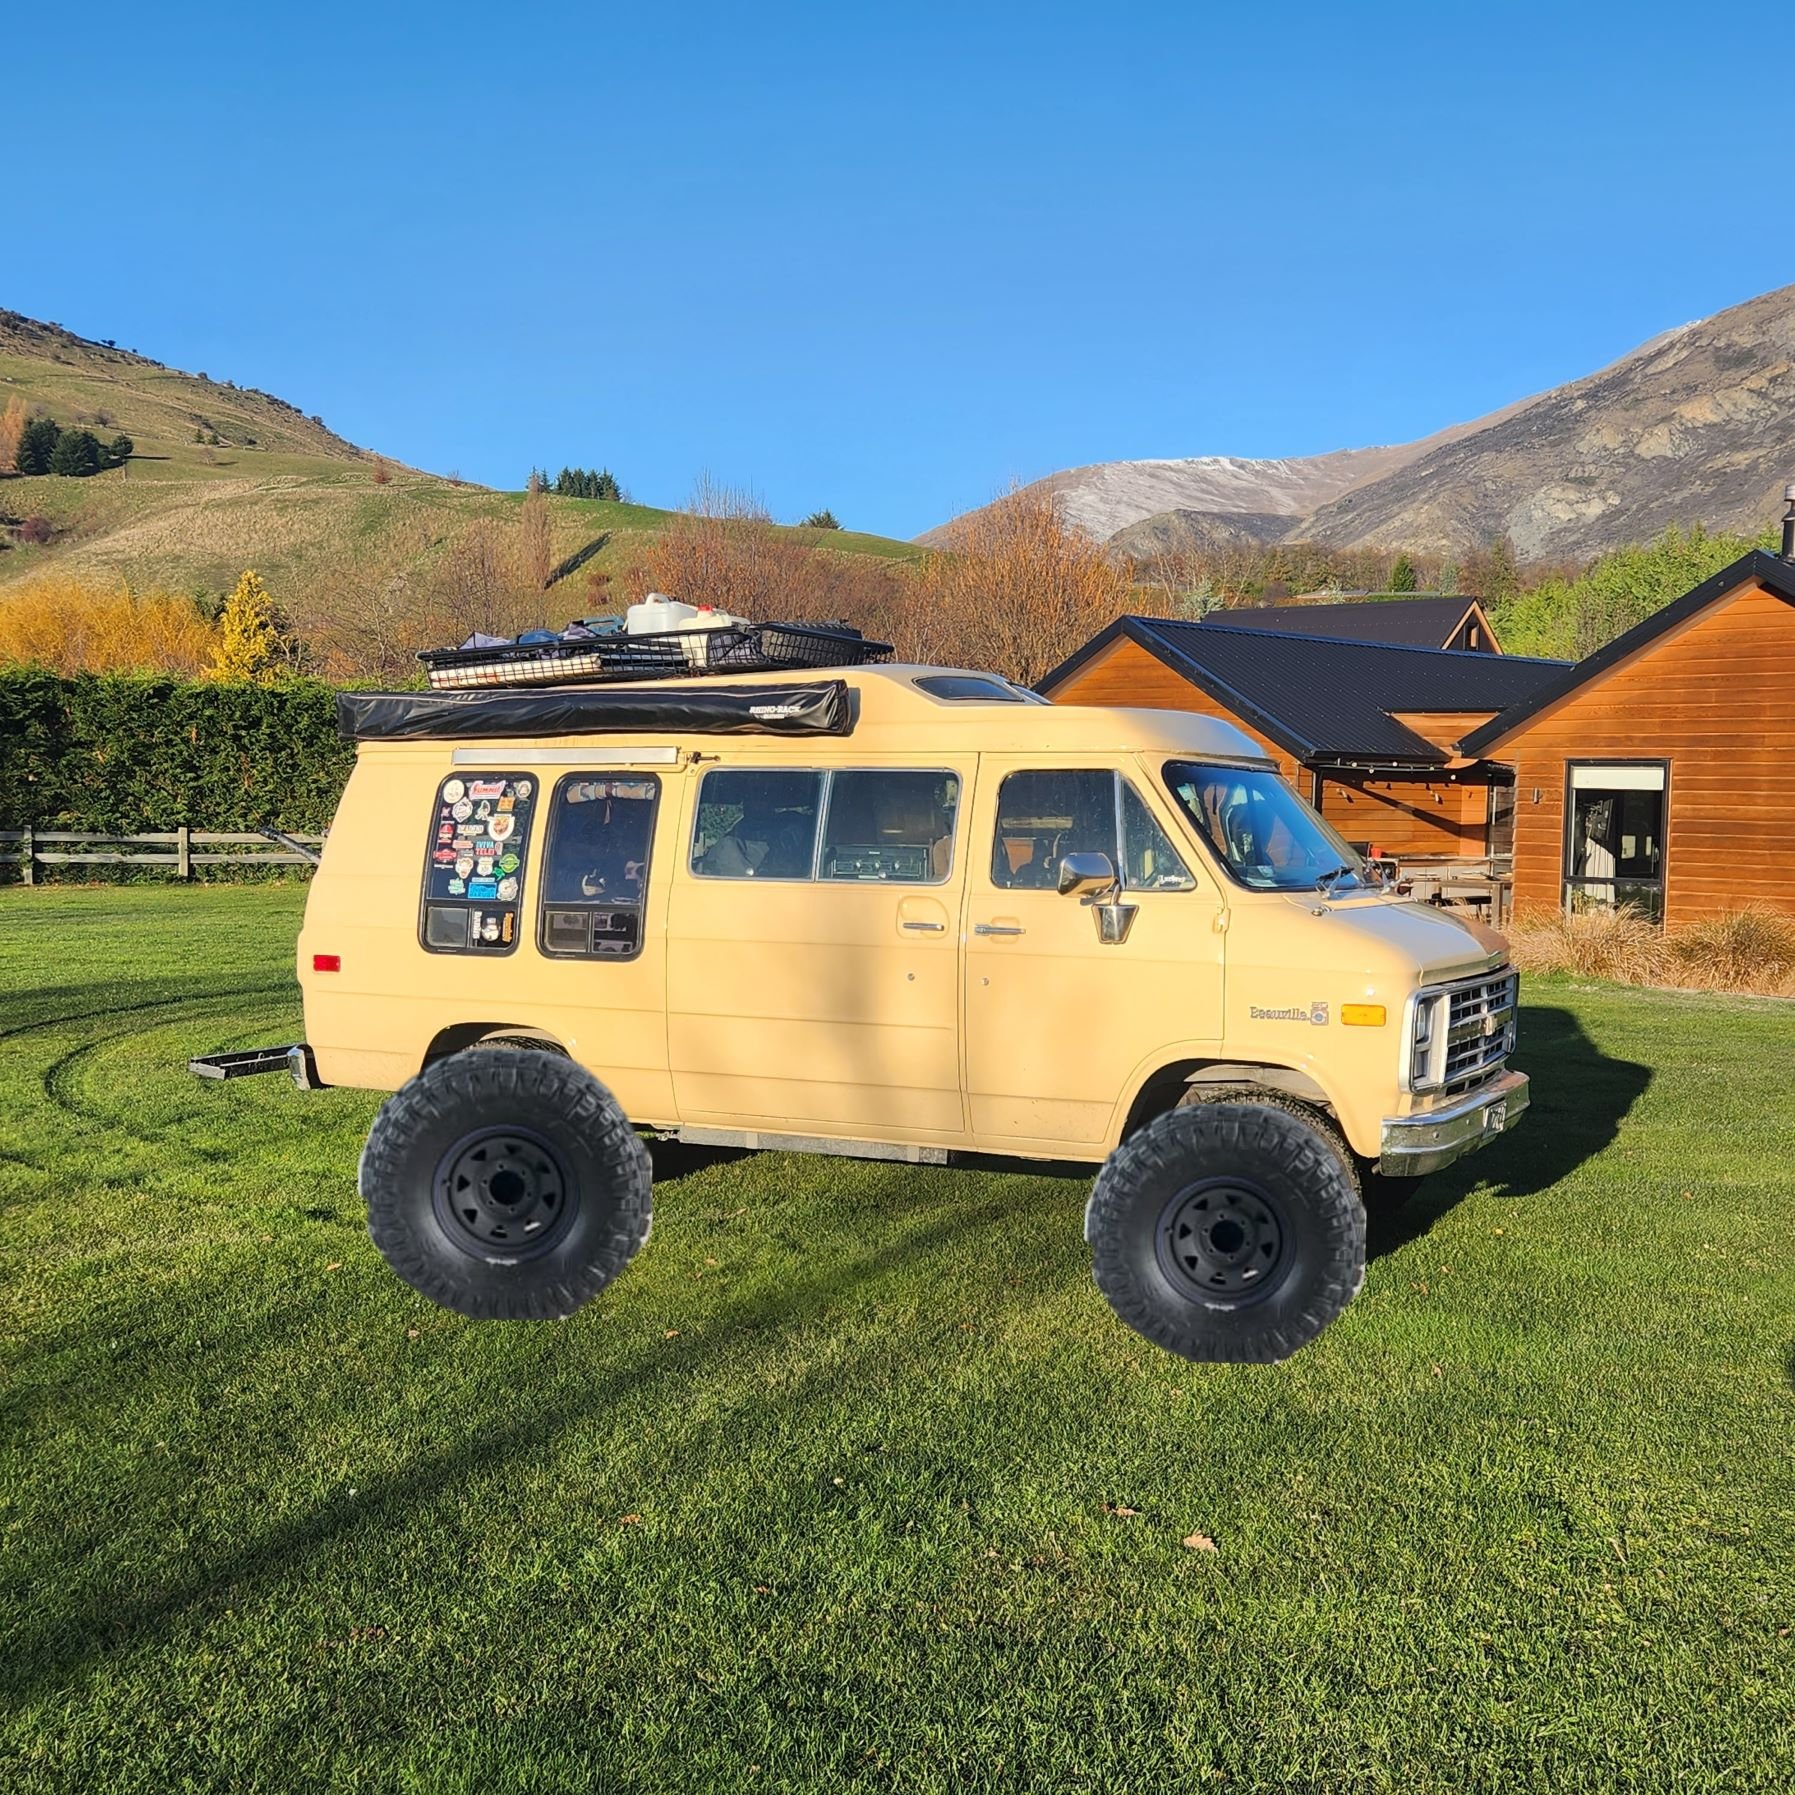
So i got this now, it needs some love, but it is basically a streetable track car, dyno sheets for 300kw, straight pipe and super loud, hasnt had a wof for 5 years but regos on hold, my plan is to get it back on the road and have some fun in it ...
2 points
-
Keen, will confirm. I may even have a socket set with BritUNCworth something or others. Will cheerfully rewire to -ve earth for proper Brit electron handling.2 points
-
Copy paste from a tech article on V8 lifters, I assume a OHC engine would work on similar principles Hydraulic lifters eliminate the clatter and the need for periodic adjustments by maintaining zero clearance when the engine is running. They do this by using oil pressure against a spring-loaded plunger inside the lifter body. Oil fills the cavity under the plunger when the valve is closed. This pushes the plunger up to take the slack out of the valvetrain and hold it tight. A one-way check valve inside the lifter holds the pressure inside the lifter as the valve opens. Since oil is incompressible, the oil trapped under the plunger prevents the plunger from compressing and the lifter act like a solid lifter to push the valve open. Hydraulic lifters are also kinder on valvetrain components than solid lifters because zero valve lash reduces the hammering effect that occurs when the valves slam shut at higher engine speeds. There’s no air gap to fill so the valve simply follows the cam lobe as it closes for a more gentle landing. This also reduces noise and helps extend the life of the valvetrain components. Under normal driving conditions, there’s no danger of the valves being pushed off their seats or not fully closing when they seat because the valve springs exert more pressure on the valvetrain than oil pressure inside the lifters. But at high engine speeds (say over 6,000 to 6,500 RPM), hydraulic lifters experience some limitations. At high speed, hydraulic lifters may “pump up” and hold the valves open causing the valves to float. This can happen if the valve springs are not strong enough to maintain normal valve control, and the lifters try to take up the slack that really isn’t there. This overextends the plunger and prevents the valve from closing all the way. The same thing can happen if the oil inside the lifter does not bleed down quickly enough between cycles to maintain normal valve lash. Hydraulic lifters can also “pump down” or collapse” at high RPM if they are leaking too much oil pressure internally due to sloppy assembly tolerances. This creates too much lash in the valvetrain, which results in noise and loss of power. Hydraulic lifters are precision fit assemblies. The plunger is closely matched to the housing to provide minimal clearance so the leakdown rate is not too great or too small. That’s why you should never intermix the internal parts when you are cleaning and rebuilding a set of hydraulic lifters. Do each lifter individually so the original assembly tolerances are maintained. One of the key differences between stock production hydraulic lifters and aftermarket performance lifters is that the latter usually have tighter internal tolerances for better oil control. Many performance hydraulic lifters also have better valving that allows them to handle more RPMs than their stock counterparts. A good set of aftermarket performance hydraulic lifters will typically allow an engine to rev 1,000 RPM higher than with stock hydraulic lifters. Some can handle even more RPMs. Even so, most hydraulic lifters can’t match the performance and reliability of solid lifters over 8,000 RPM. That’s why high revving engines in NASCAR, drag cars and circle track cars still use solid lifters. Hydraulic Adjustments Hydraulic lifters still need to be adjusted when they are initially installed so the plunger will operate in its mid-range of travel. If the plunger bottoms out, it may prevent the valve from closing causing a rough running engine and possible valve-to-piston contact. A plunger that is over extended and near its upper range of travel may not be able to maintain zero lash as engine temperature changes. This can increase engine noise, and it may even cause the plunger to hammer against the snap ring causing it to fail. A hydraulic lifter plunger may also become over extended if an engine has sticking valves or excessive wear in the valvetrain. It can only take up so much slack before it runs out of adjustment.2 points
-
Yep, got to be honest when I say that I had my doubts about the hose joints being up to the task, but in talking to a mate of mine who used the same system on his Mk2 Capri a few years back, he reassured me that they actually work and haven't let him down so far. I guess the final proof will be when I get it gassed up.2 points
-
You can get all those trafficators going again. It's usually the shellac on the windings is failed and shorting. Fairly straightforward to rewind by hand, not too many wild turkeys cos there's 700 odd coils2 points
-
hydraulic lifters- i would think that opening up the feed holes could possibly be a negative thing anyway as they use oil to take up the "slack", if you increase flow, the oil could potentially leak back out of the lifters easier? on old turd pushrod things, at high rpm the lifters can pump up, and hold the valves open. my white car has this problem sometimes. this info may or may not be relevant, but might explain why theres not much oil flow, and not a whole lot of pressure in the oem setup2 points
-
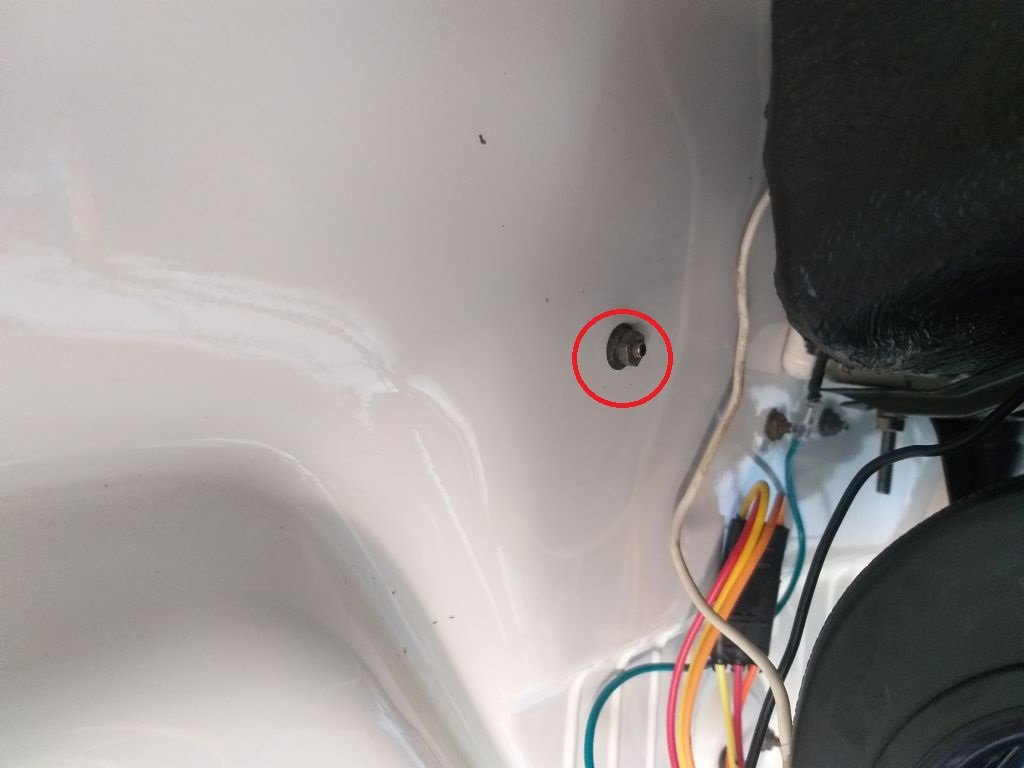
Yea so I did a bit of head scratching and asked the internet, this rather unusually resulted in an actually useful answer from a proper barry. It turns out that what I took to be an earth wire on the motor that didnt appear to be connected to anything was a signal return from the switching/diode setup on the back of the pod motor. With some extra direction from Barry and setting up a test rig on the bench I soon got the result I was after. I then had to ransack the old loom for some relay plugs to make up a little sub loom that sits in the headlight pocket, there is heaps of room so should be fine. And with some hours tidying and wrapping the front loom we have this sequence of exciting light based goodness; Next is looking at why the washer isnt pumping. Then maybe tomorrow I'll drop the engine....2 points
-
I should give you shit for not accounting for those phone/network outlets on your wall2 points
-
I think you need to fit a hazard light function so the trafficators flap like wings.2 points
-
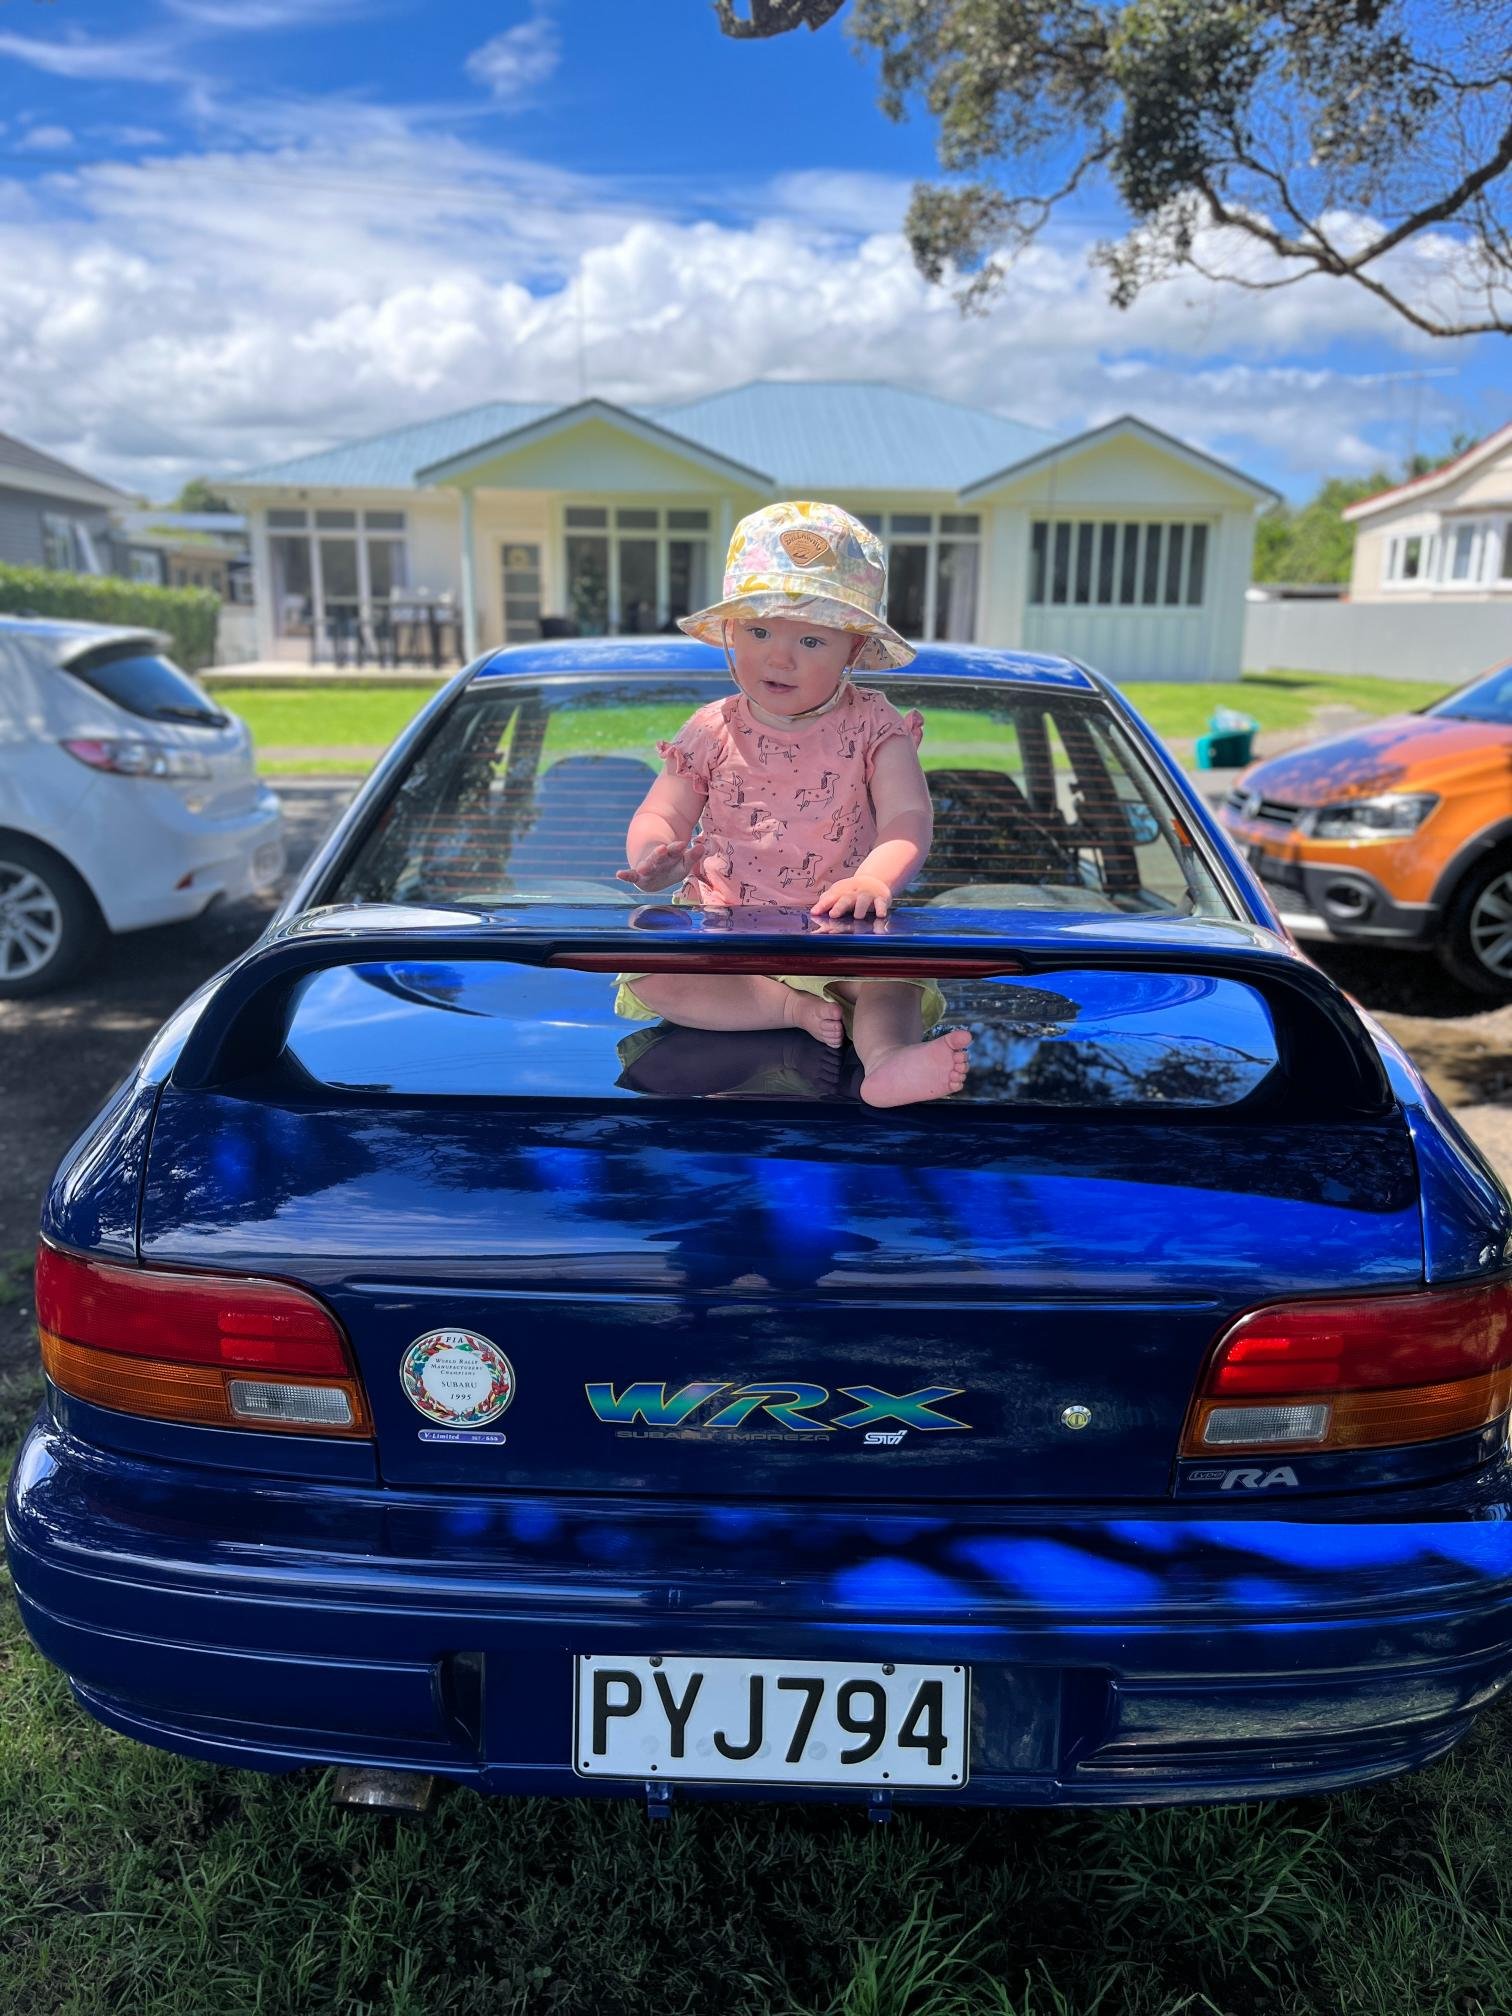
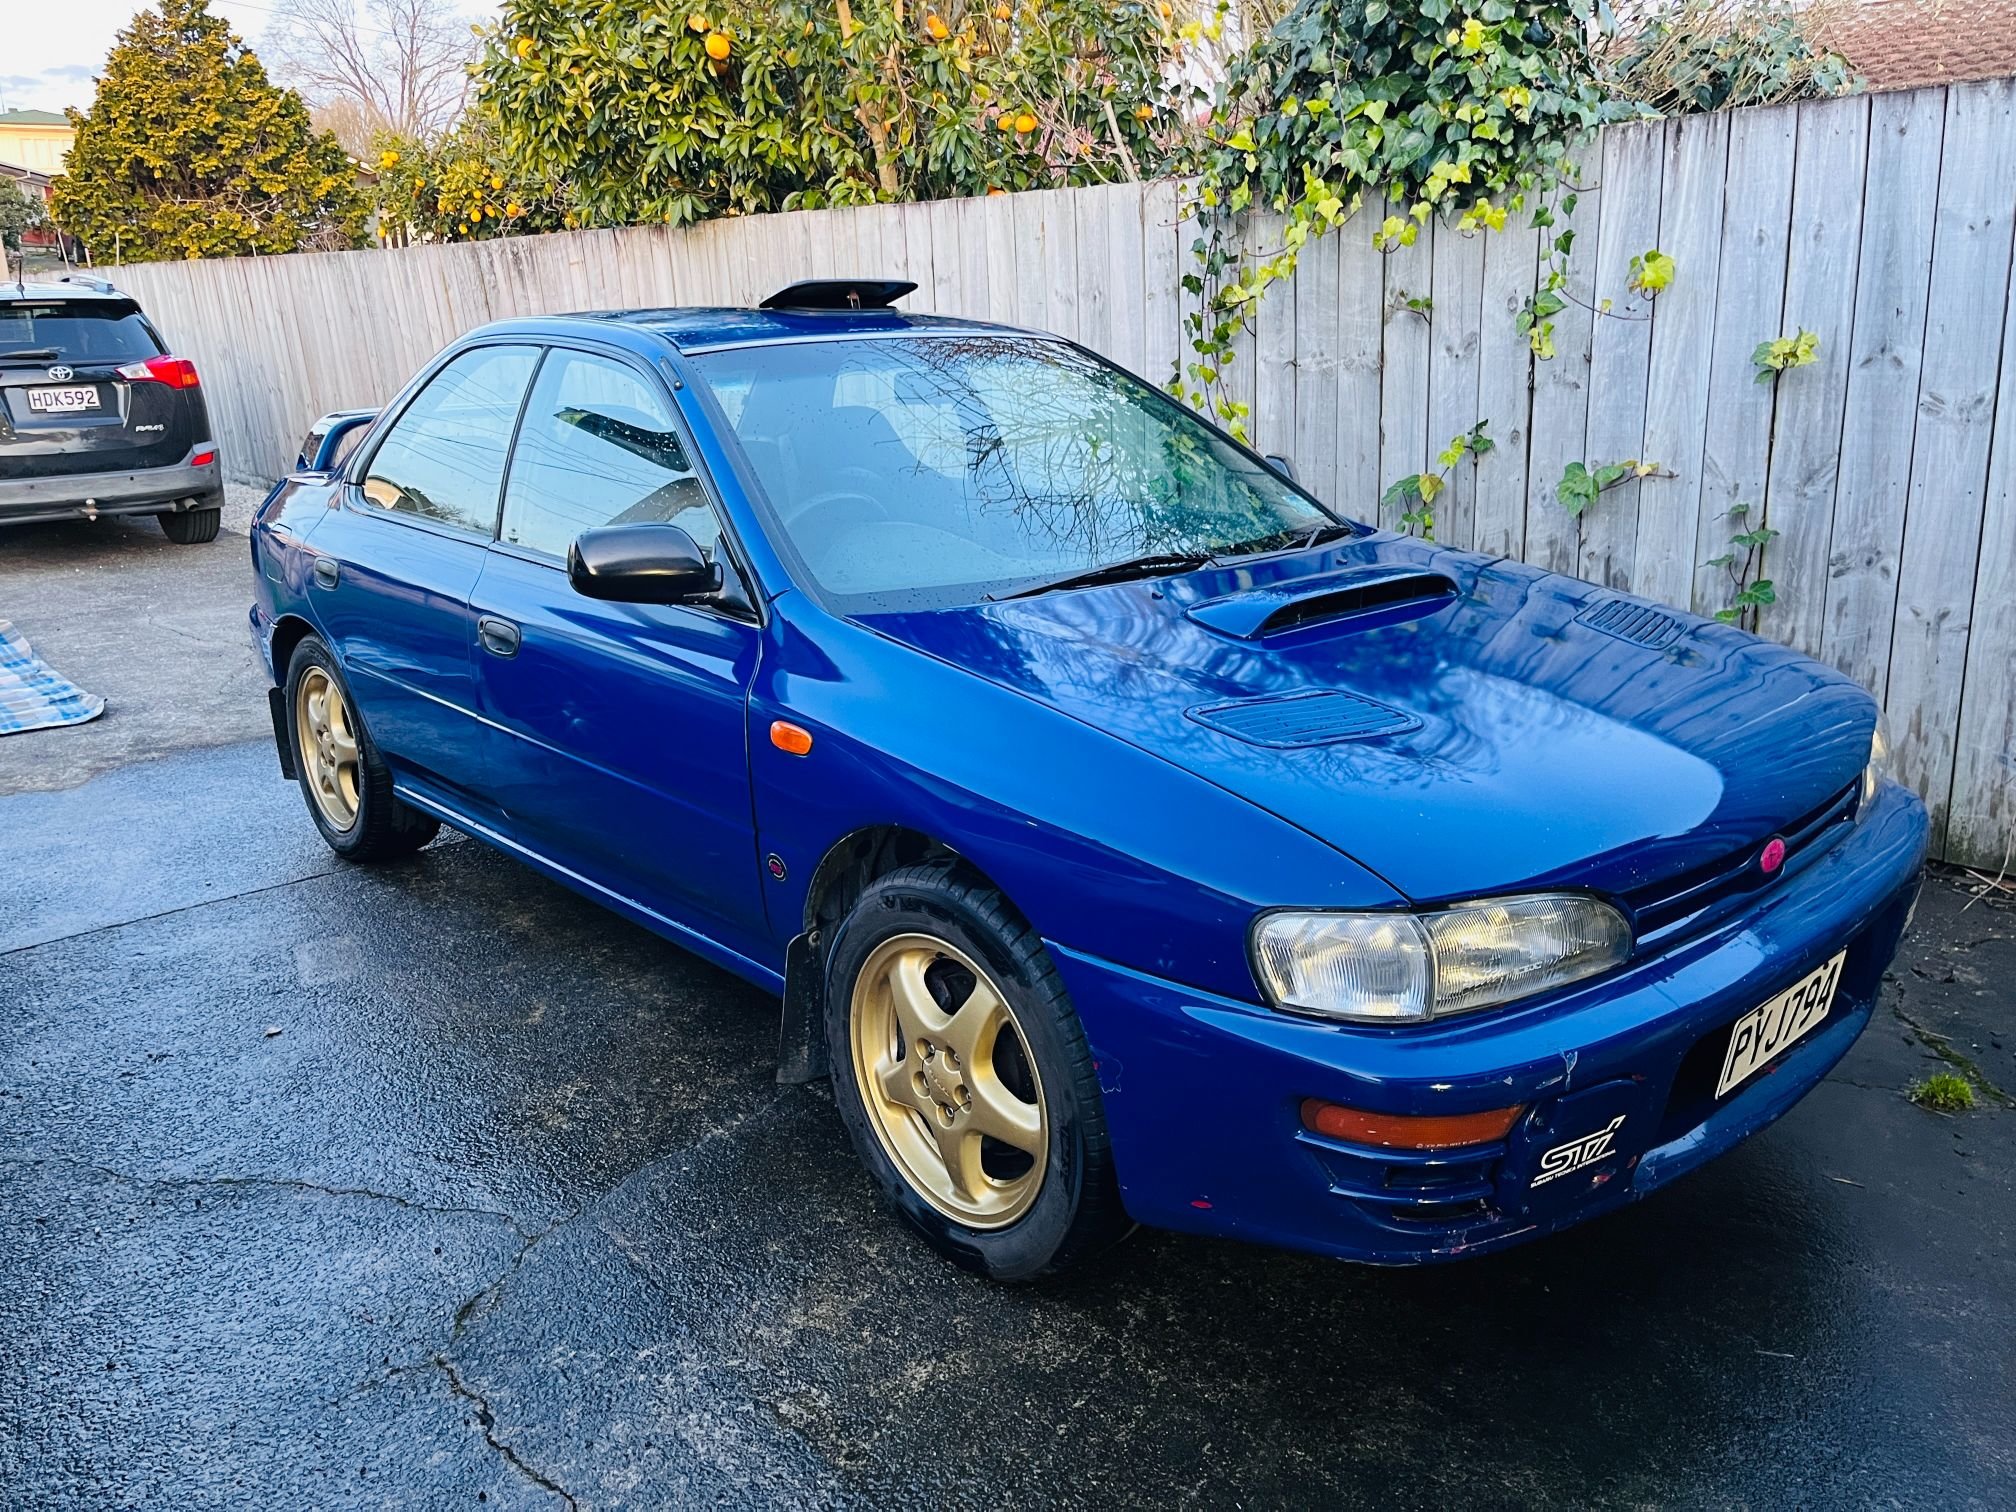
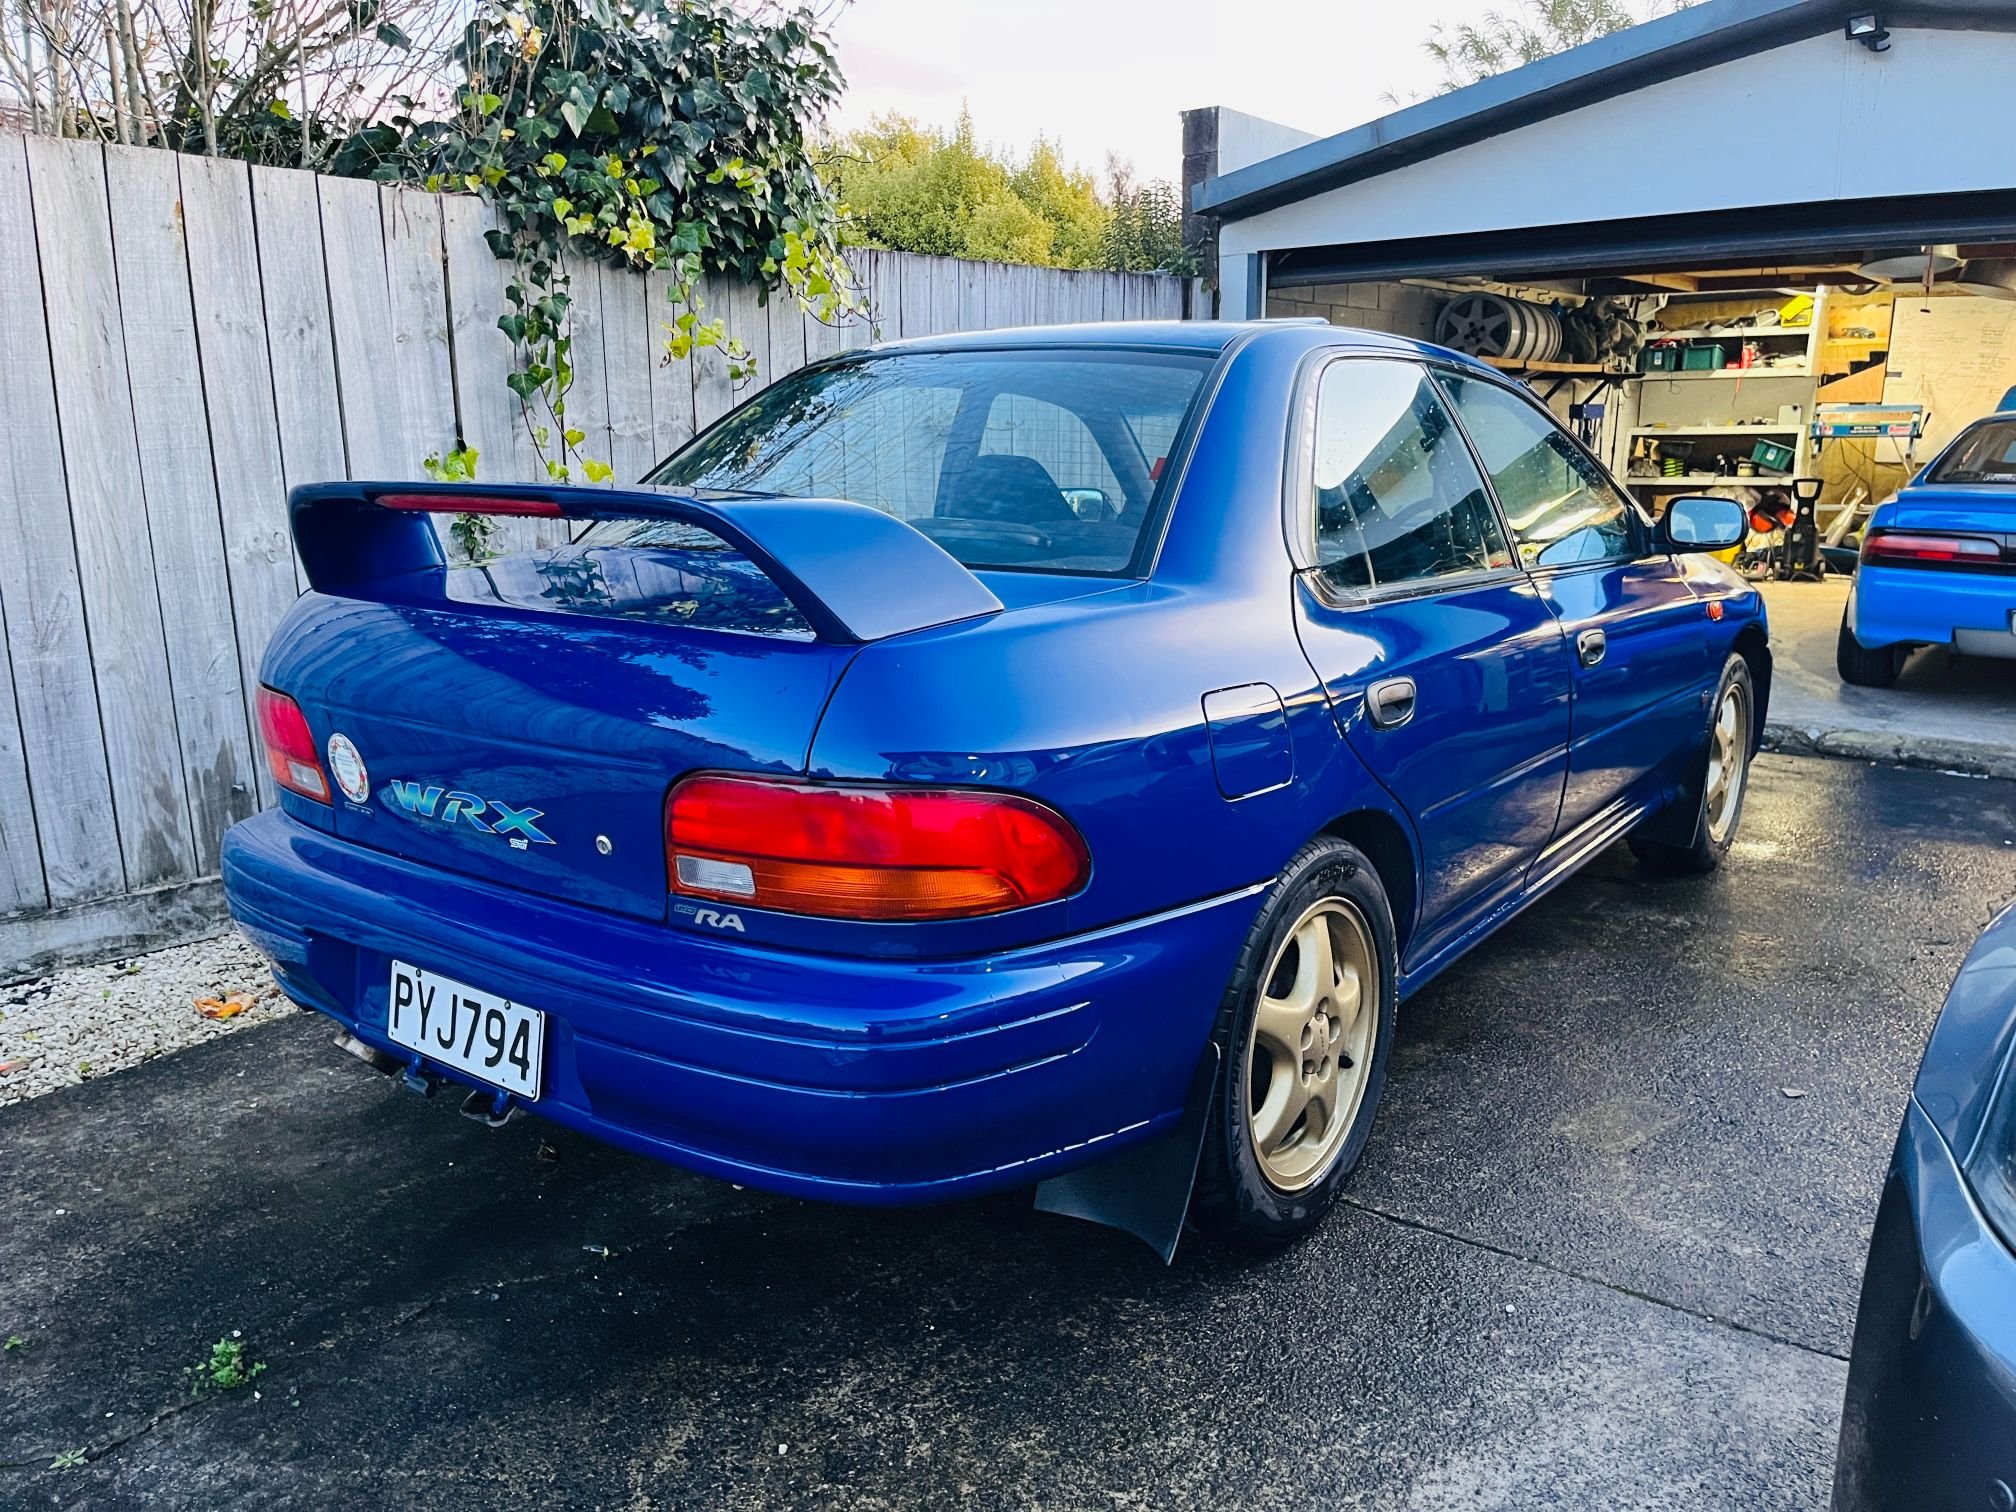
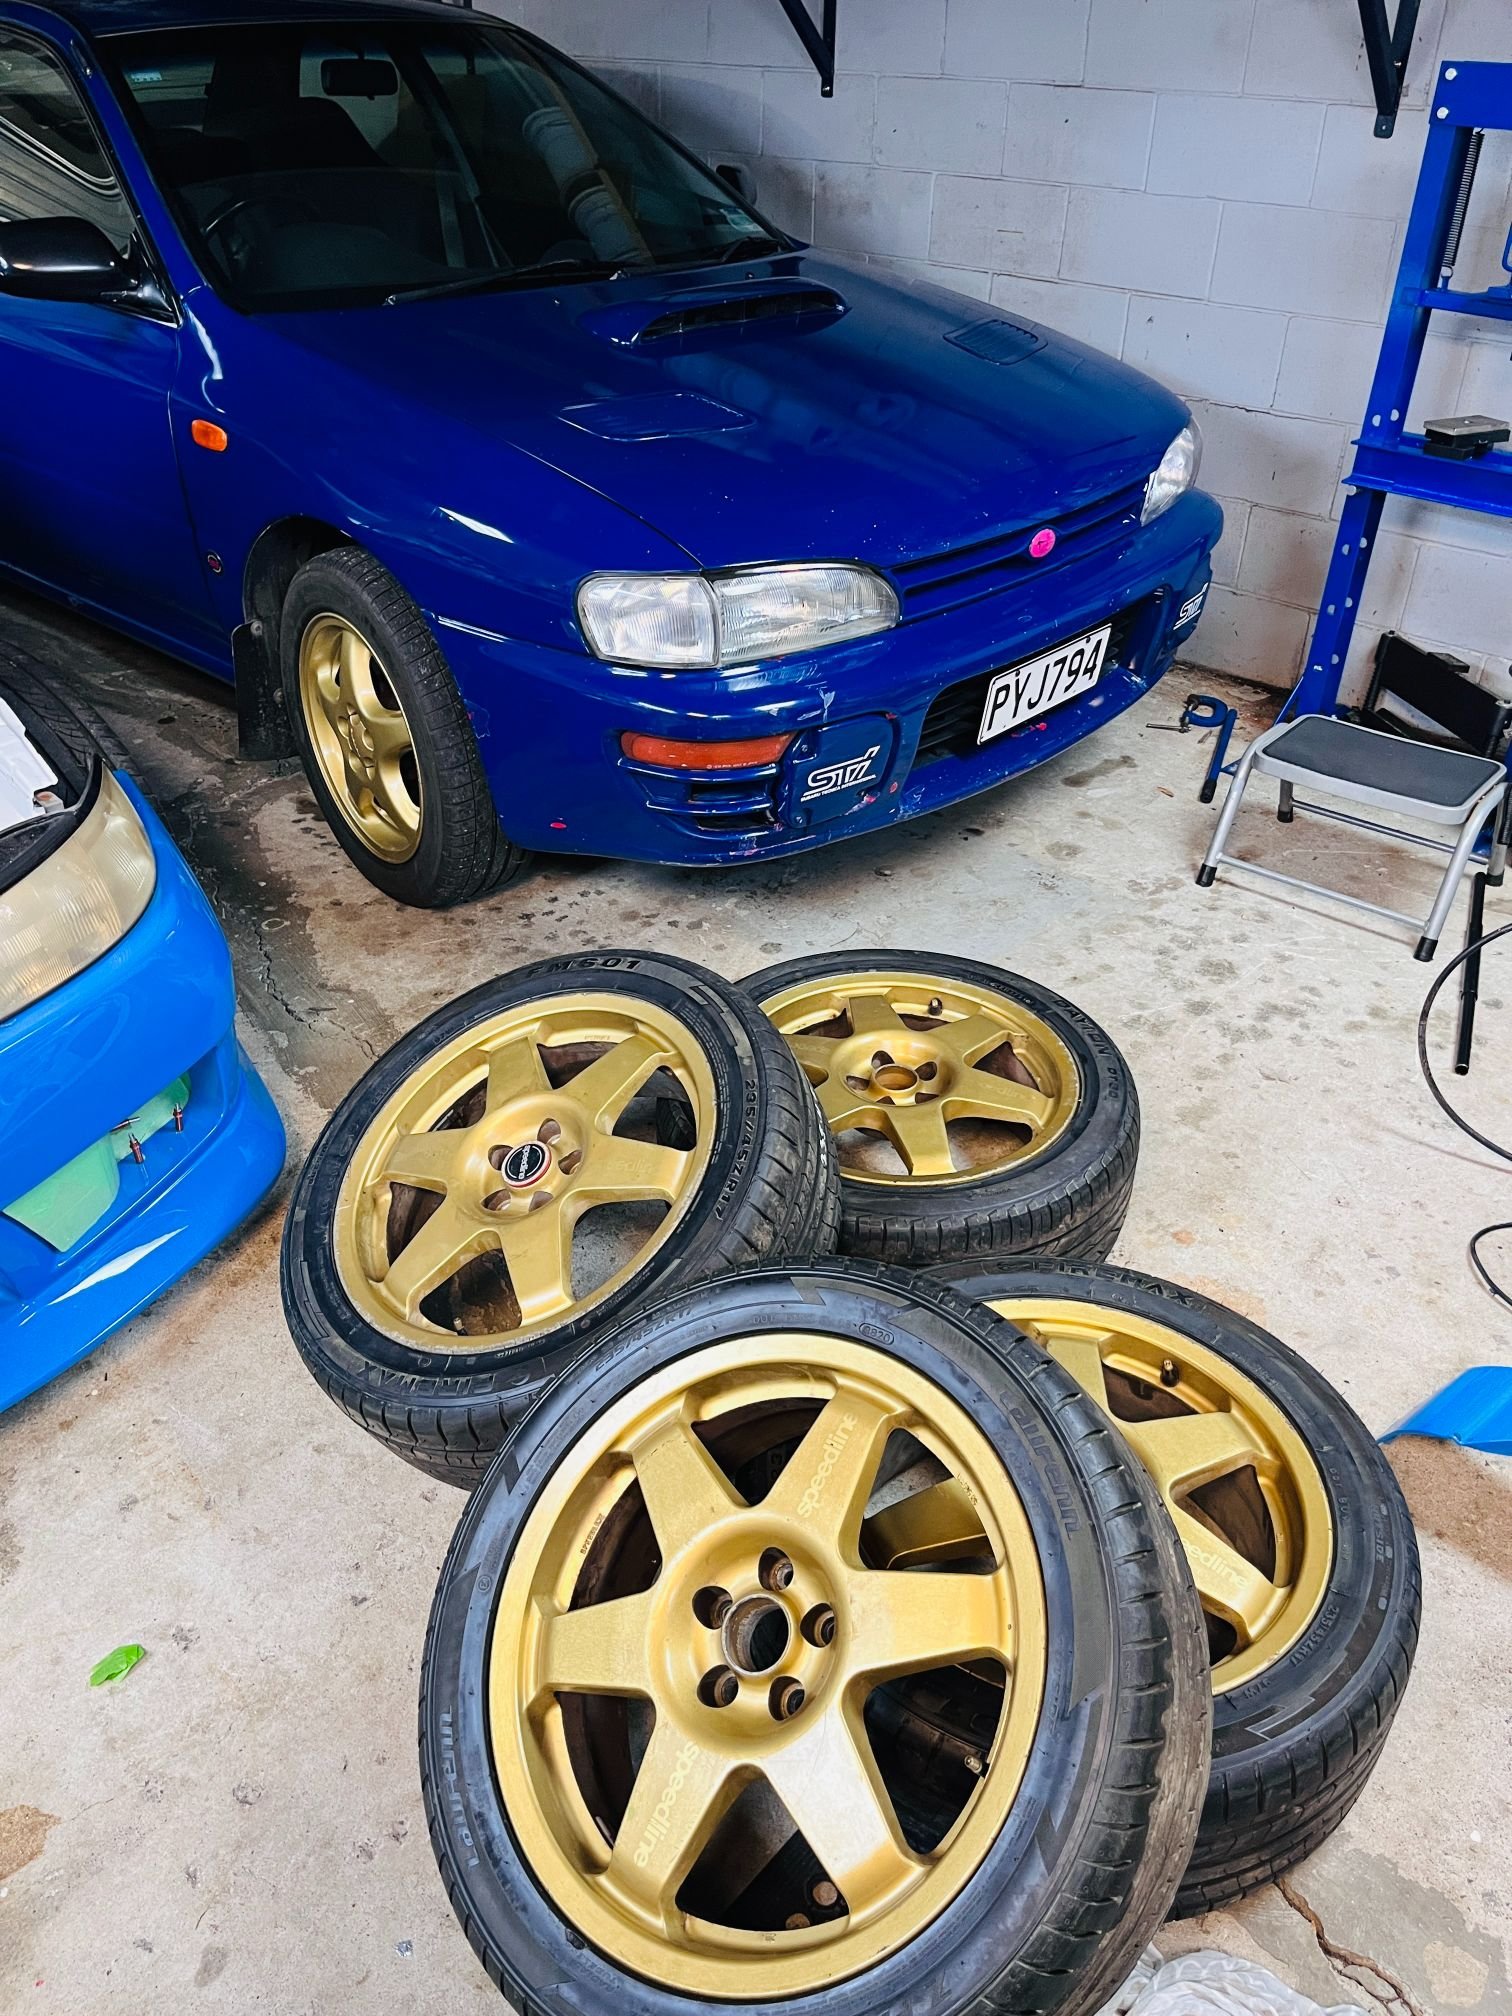
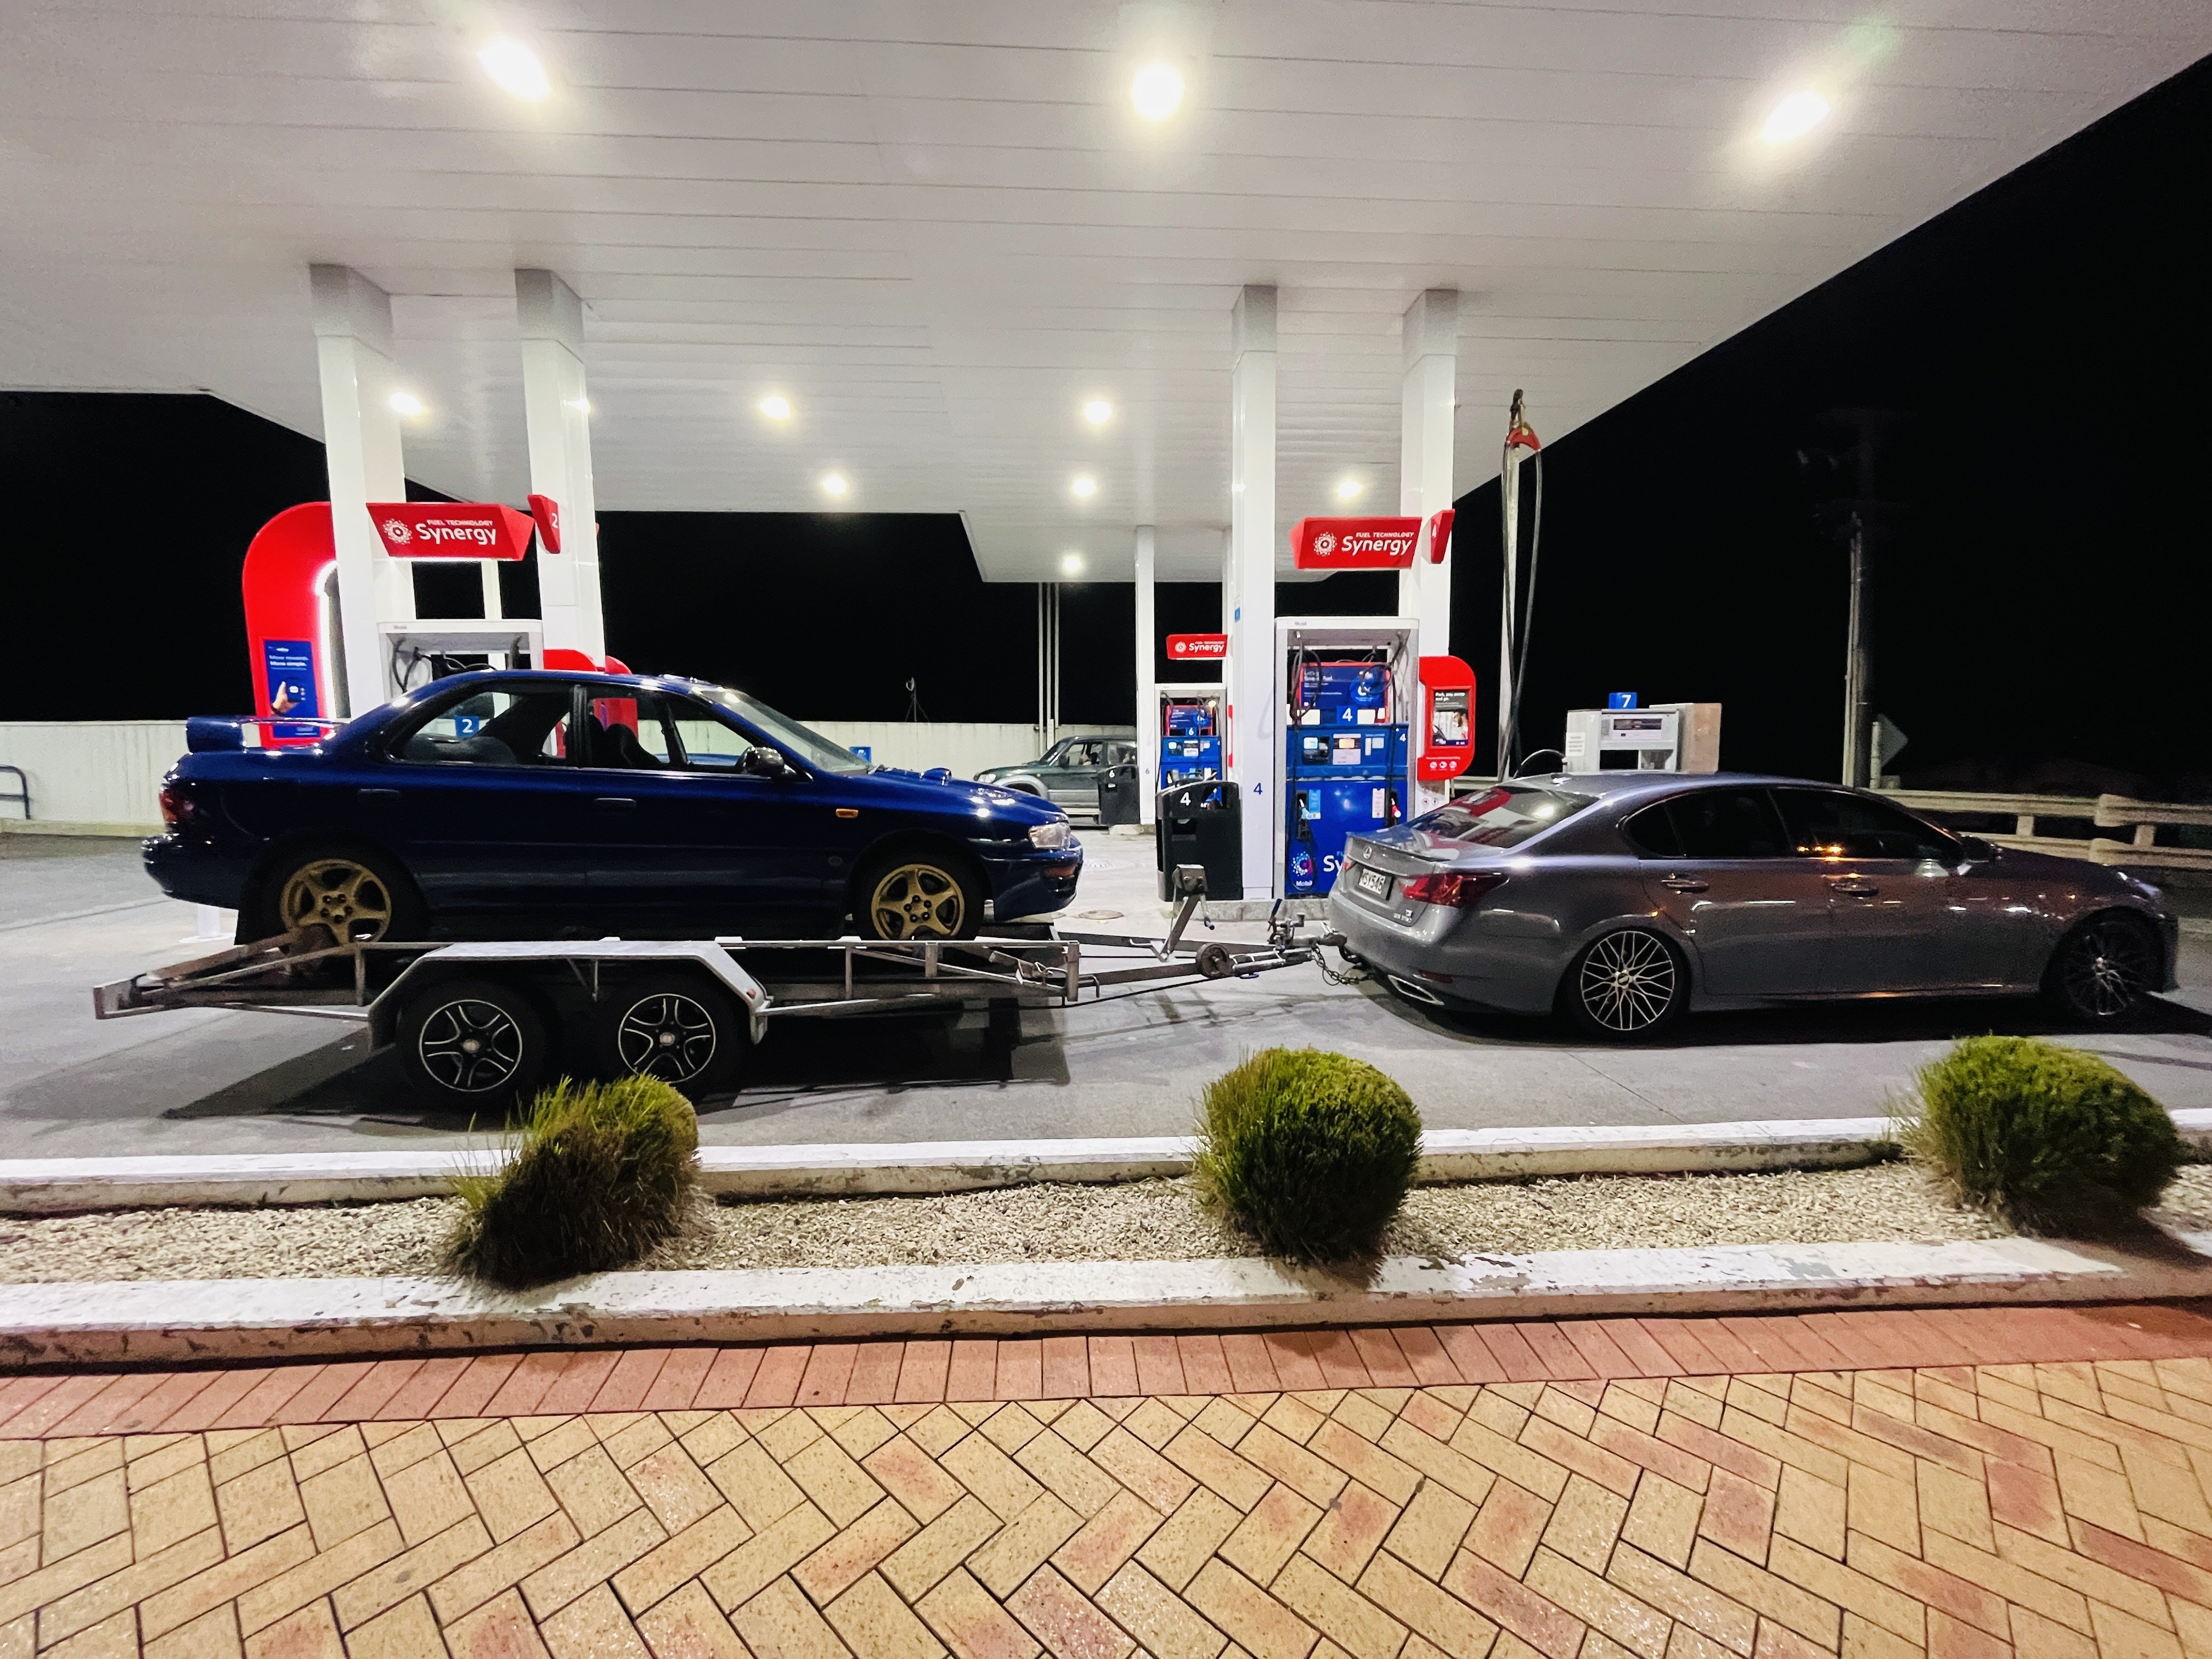
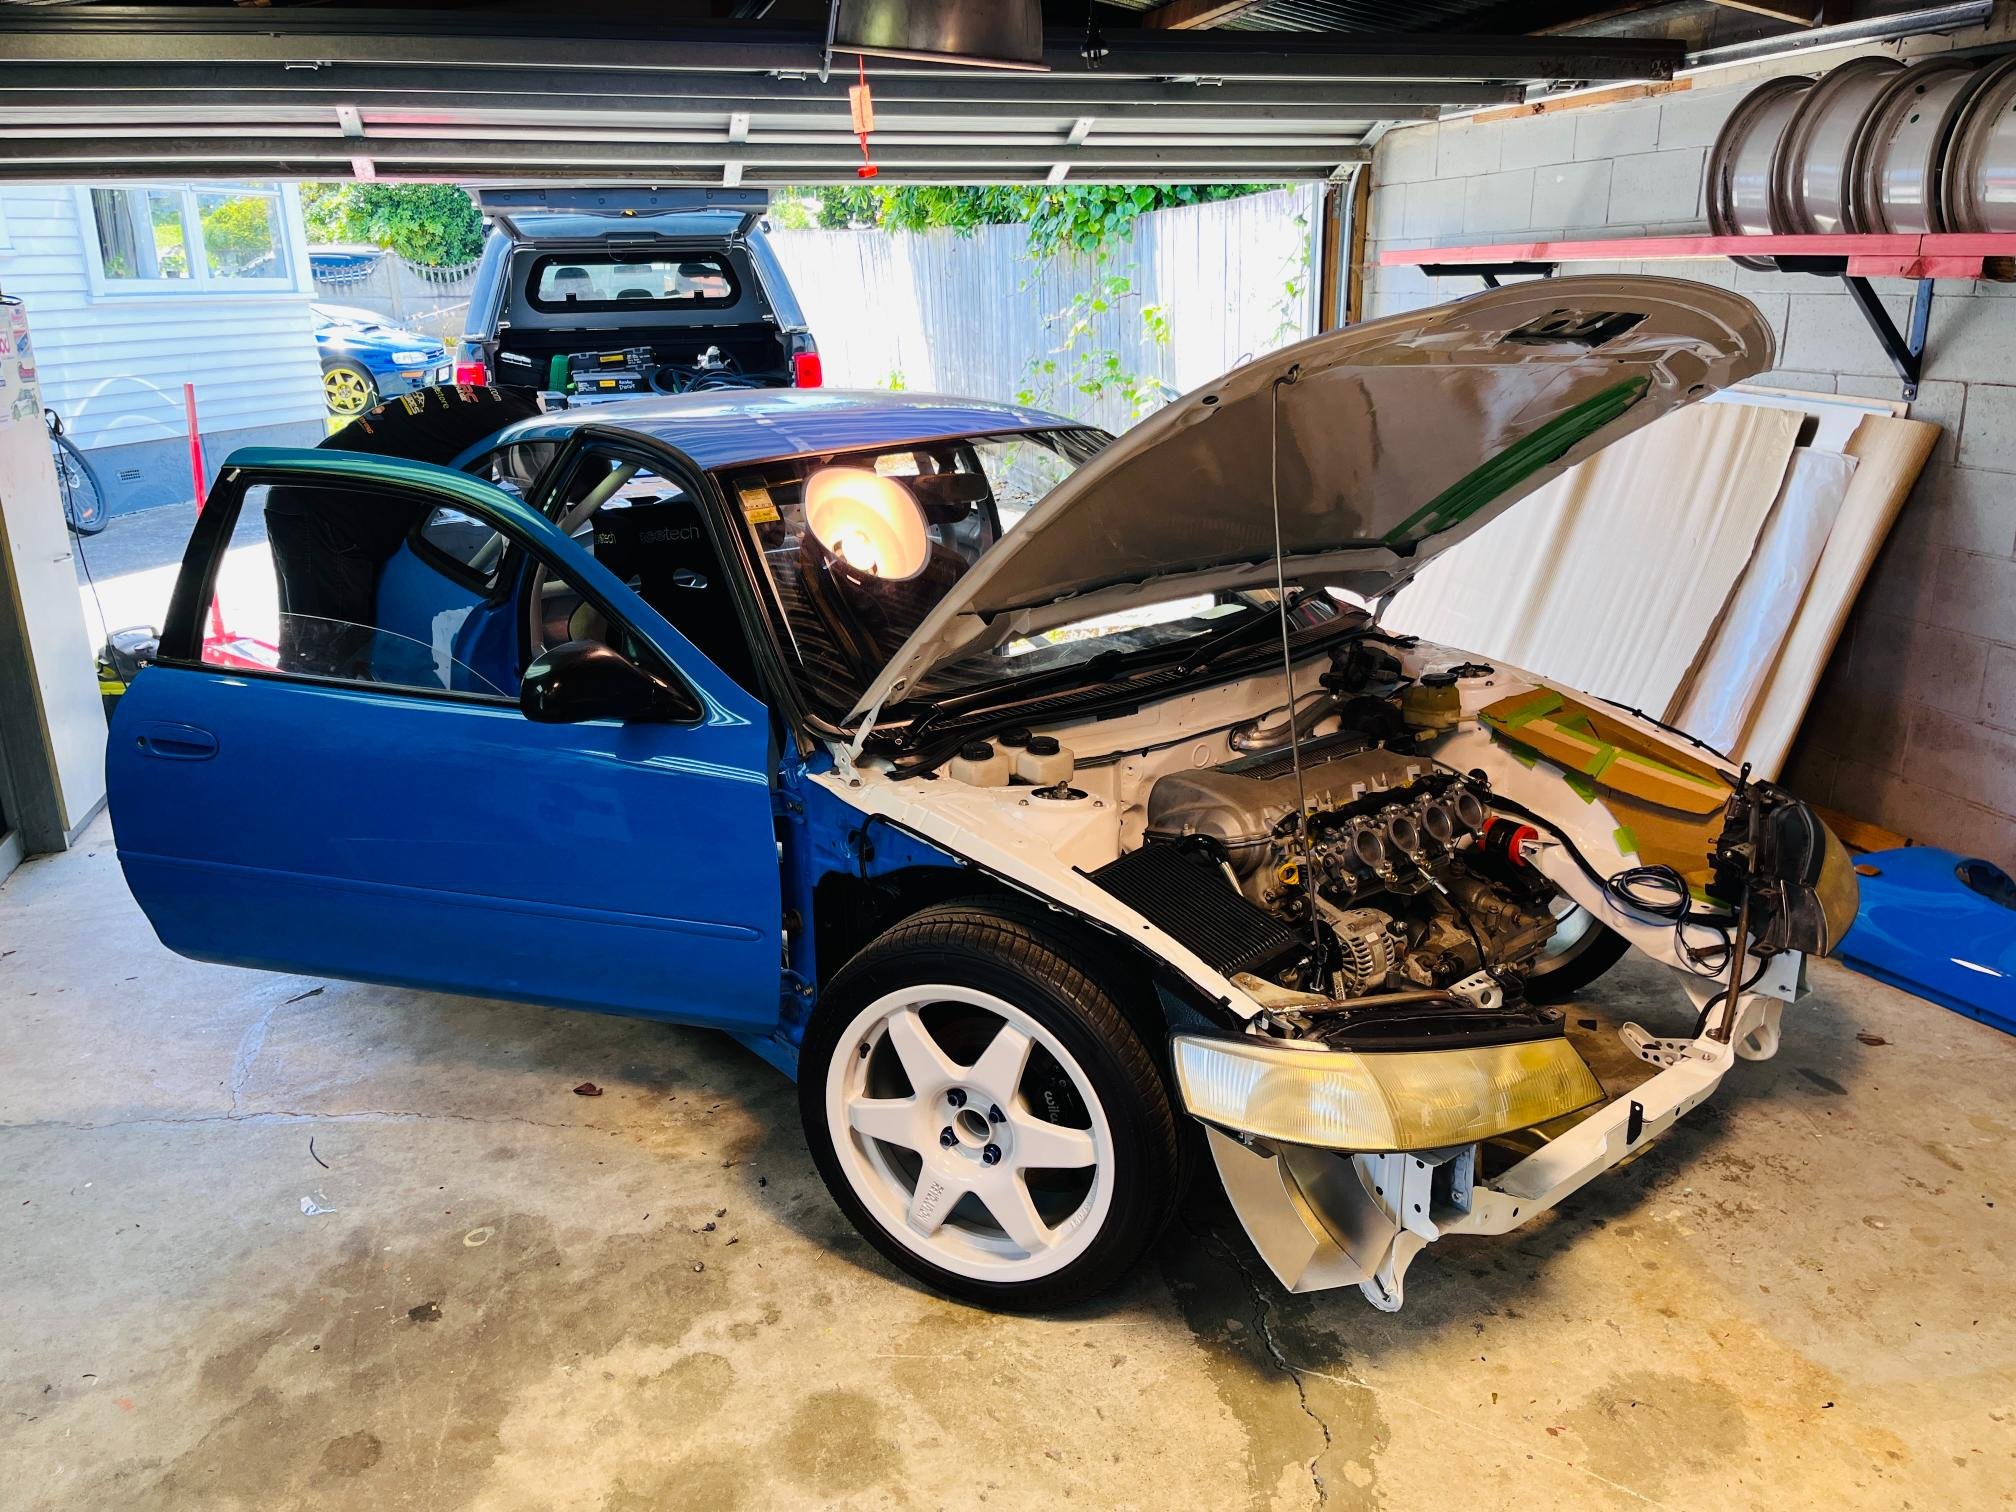
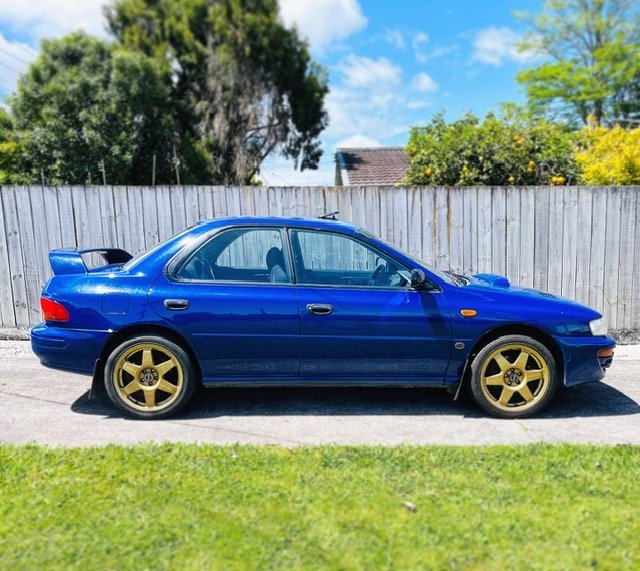
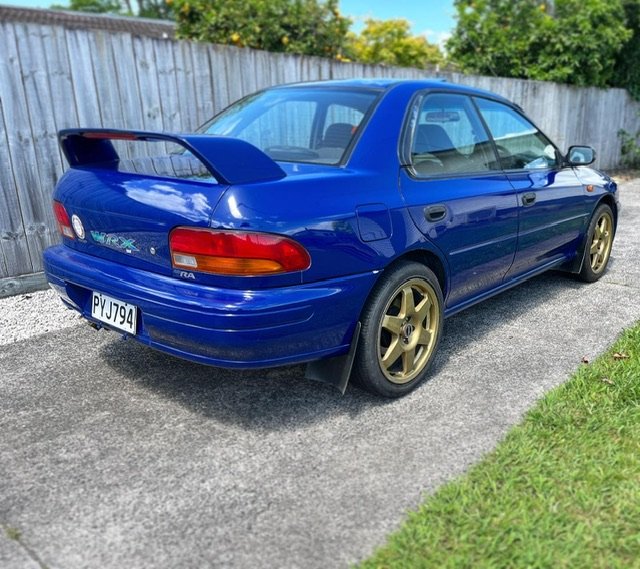
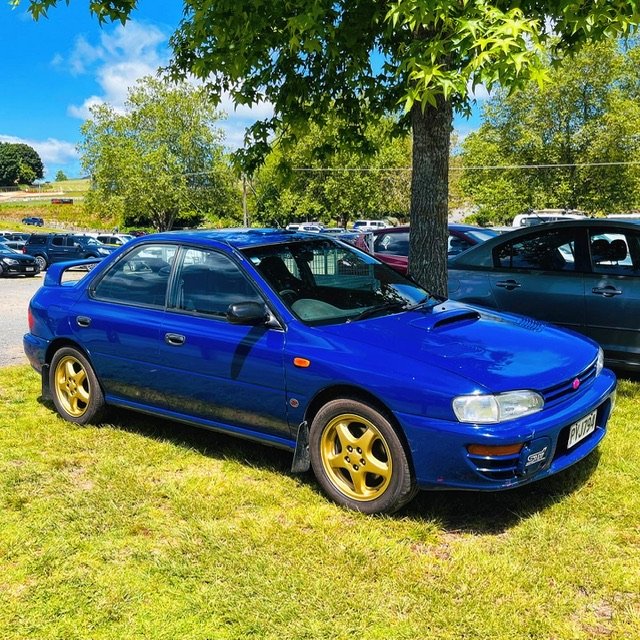
So wife and I have been looking for a sunday cruiser for the family for a while now. Won't be a forever car like the Lexus & Levin, but should be enjoyable to own & do some basic Resto stuff for a few years. I've always loved Subaru's based on their rallying pedigree, having spent my teenage years drawing Subaru rally cars and building Subaru models. My family wasn't into motorsport/cars back then so I didn't ever get much exposure to them. Found this 1996 WRX STI Version II Type RA V-Limited for a reasonable price. This is the first of the V-limited models which was released only in JDM market celebrate Subaru winning WRC manufacturers championship & Colin McRae winning driver title in 1995. It was also the last year Group A regulations were in place - meaning the road car was much closer to the WRC car. From 97 onwards the 2-doors Subaru's were based on World-rally-car regulations and didn't have to adhere to production vehicle specs as closely. This was the top-dog model with a bunch of special homologation features/quirks; Closed deck block, forged pistons, rods, mechanical lifters, fancy valves & TD05 turbo. Reportedly made around 300hp from factory (a shade more than the 206kw JDM gentlemans agreement) 5th injector in intake plenum (unused in road form, this was a homologation-special) Intercooler water sprayer Short ratio gearbox with Centre control diff (DCCD), rear plate type LSD Lightweight glass (green tint), lightweight panels/bonnet Seats with Colin McRae/Derek Ringer signatures Roof hatch, Wind-up windows, no rear wiper, aerial on A-pillar, black door handles, no sideskirts/basic bodykit etc. Weighed in at 1150kg or so. This one may be a little more as it was optioned with AC and a radio. no. 367 of 555 built (Based on Type-RA registry, I estimate theres maybe 100 left in the world?) These were pretty much group N rally cars from the showroom floor. It's 98% original which is super important. Has done high KM's (238,000) but last owner had for 13yrs so hasn't been thrashed too much. Generally rust-free but needs a good mechanical strip-back and freshen up and underbody tidy-up. To do list (in no particular order): Paint tidy up (bumper, bonnet, roof) Replace Shifter linkage Clutch Plugs/filter & general servicing stuff Swap out dumpy exhaust to something group A inspired Not planning to do much to this car just drive it every so often and do some basic restoration work. Focus is still on getting the Levin racecar finished by the end of the year. It was also my first experience towing with the Lexus and god-damn its a great tow car. Good noises, super lush, towed like a dream (even with very poorly loaded car). Used all the fossil fuel. First order of business was to acquire a set of gold Speedline wheels for the full Colin McRae look. These are the 17" version of the wheels used for Tarmac rallies in 1996. Will report back in a few weeks when I get a chance to get these on the car.
1 point
-
I'm out of town that weekend but want to express admiration for this initiative, big thumbs up1 point
-
I have BC Golds in mine. A+ would trade again etc.1 point
-
I like it !1 point
-
The perfect bike for a 700km bush bash drop the muffler off and you wont hear the whine1 point
-
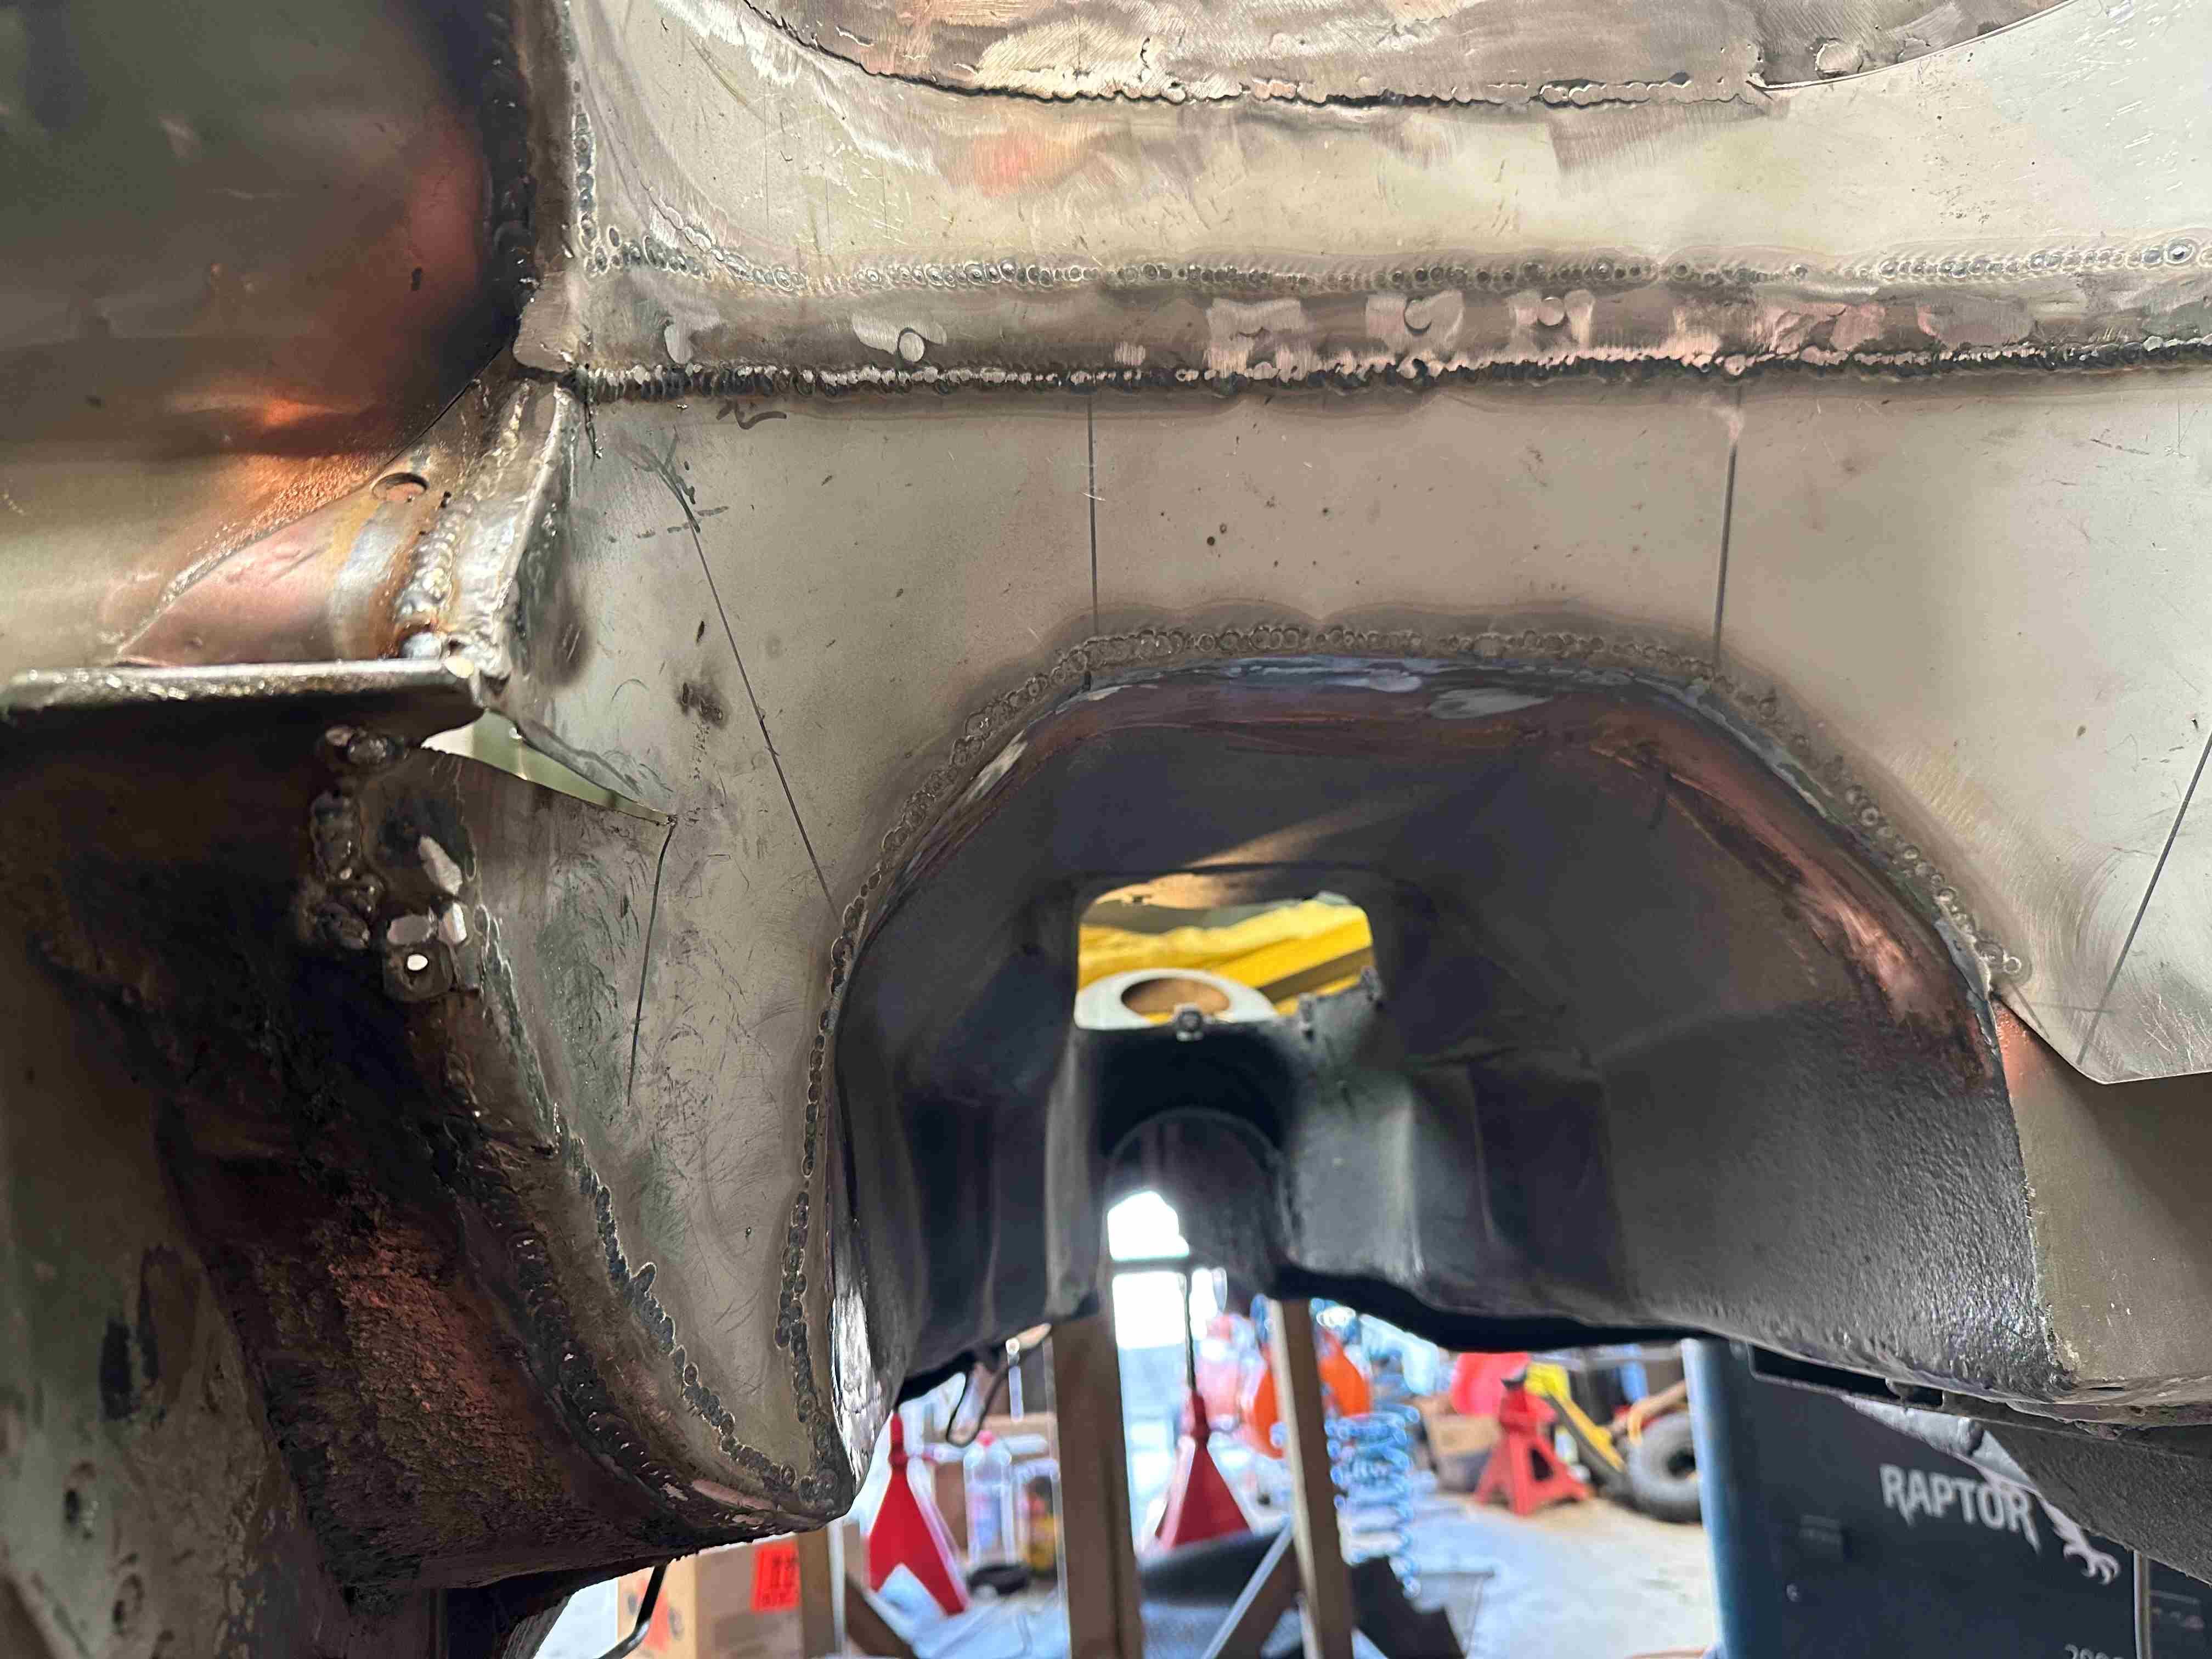
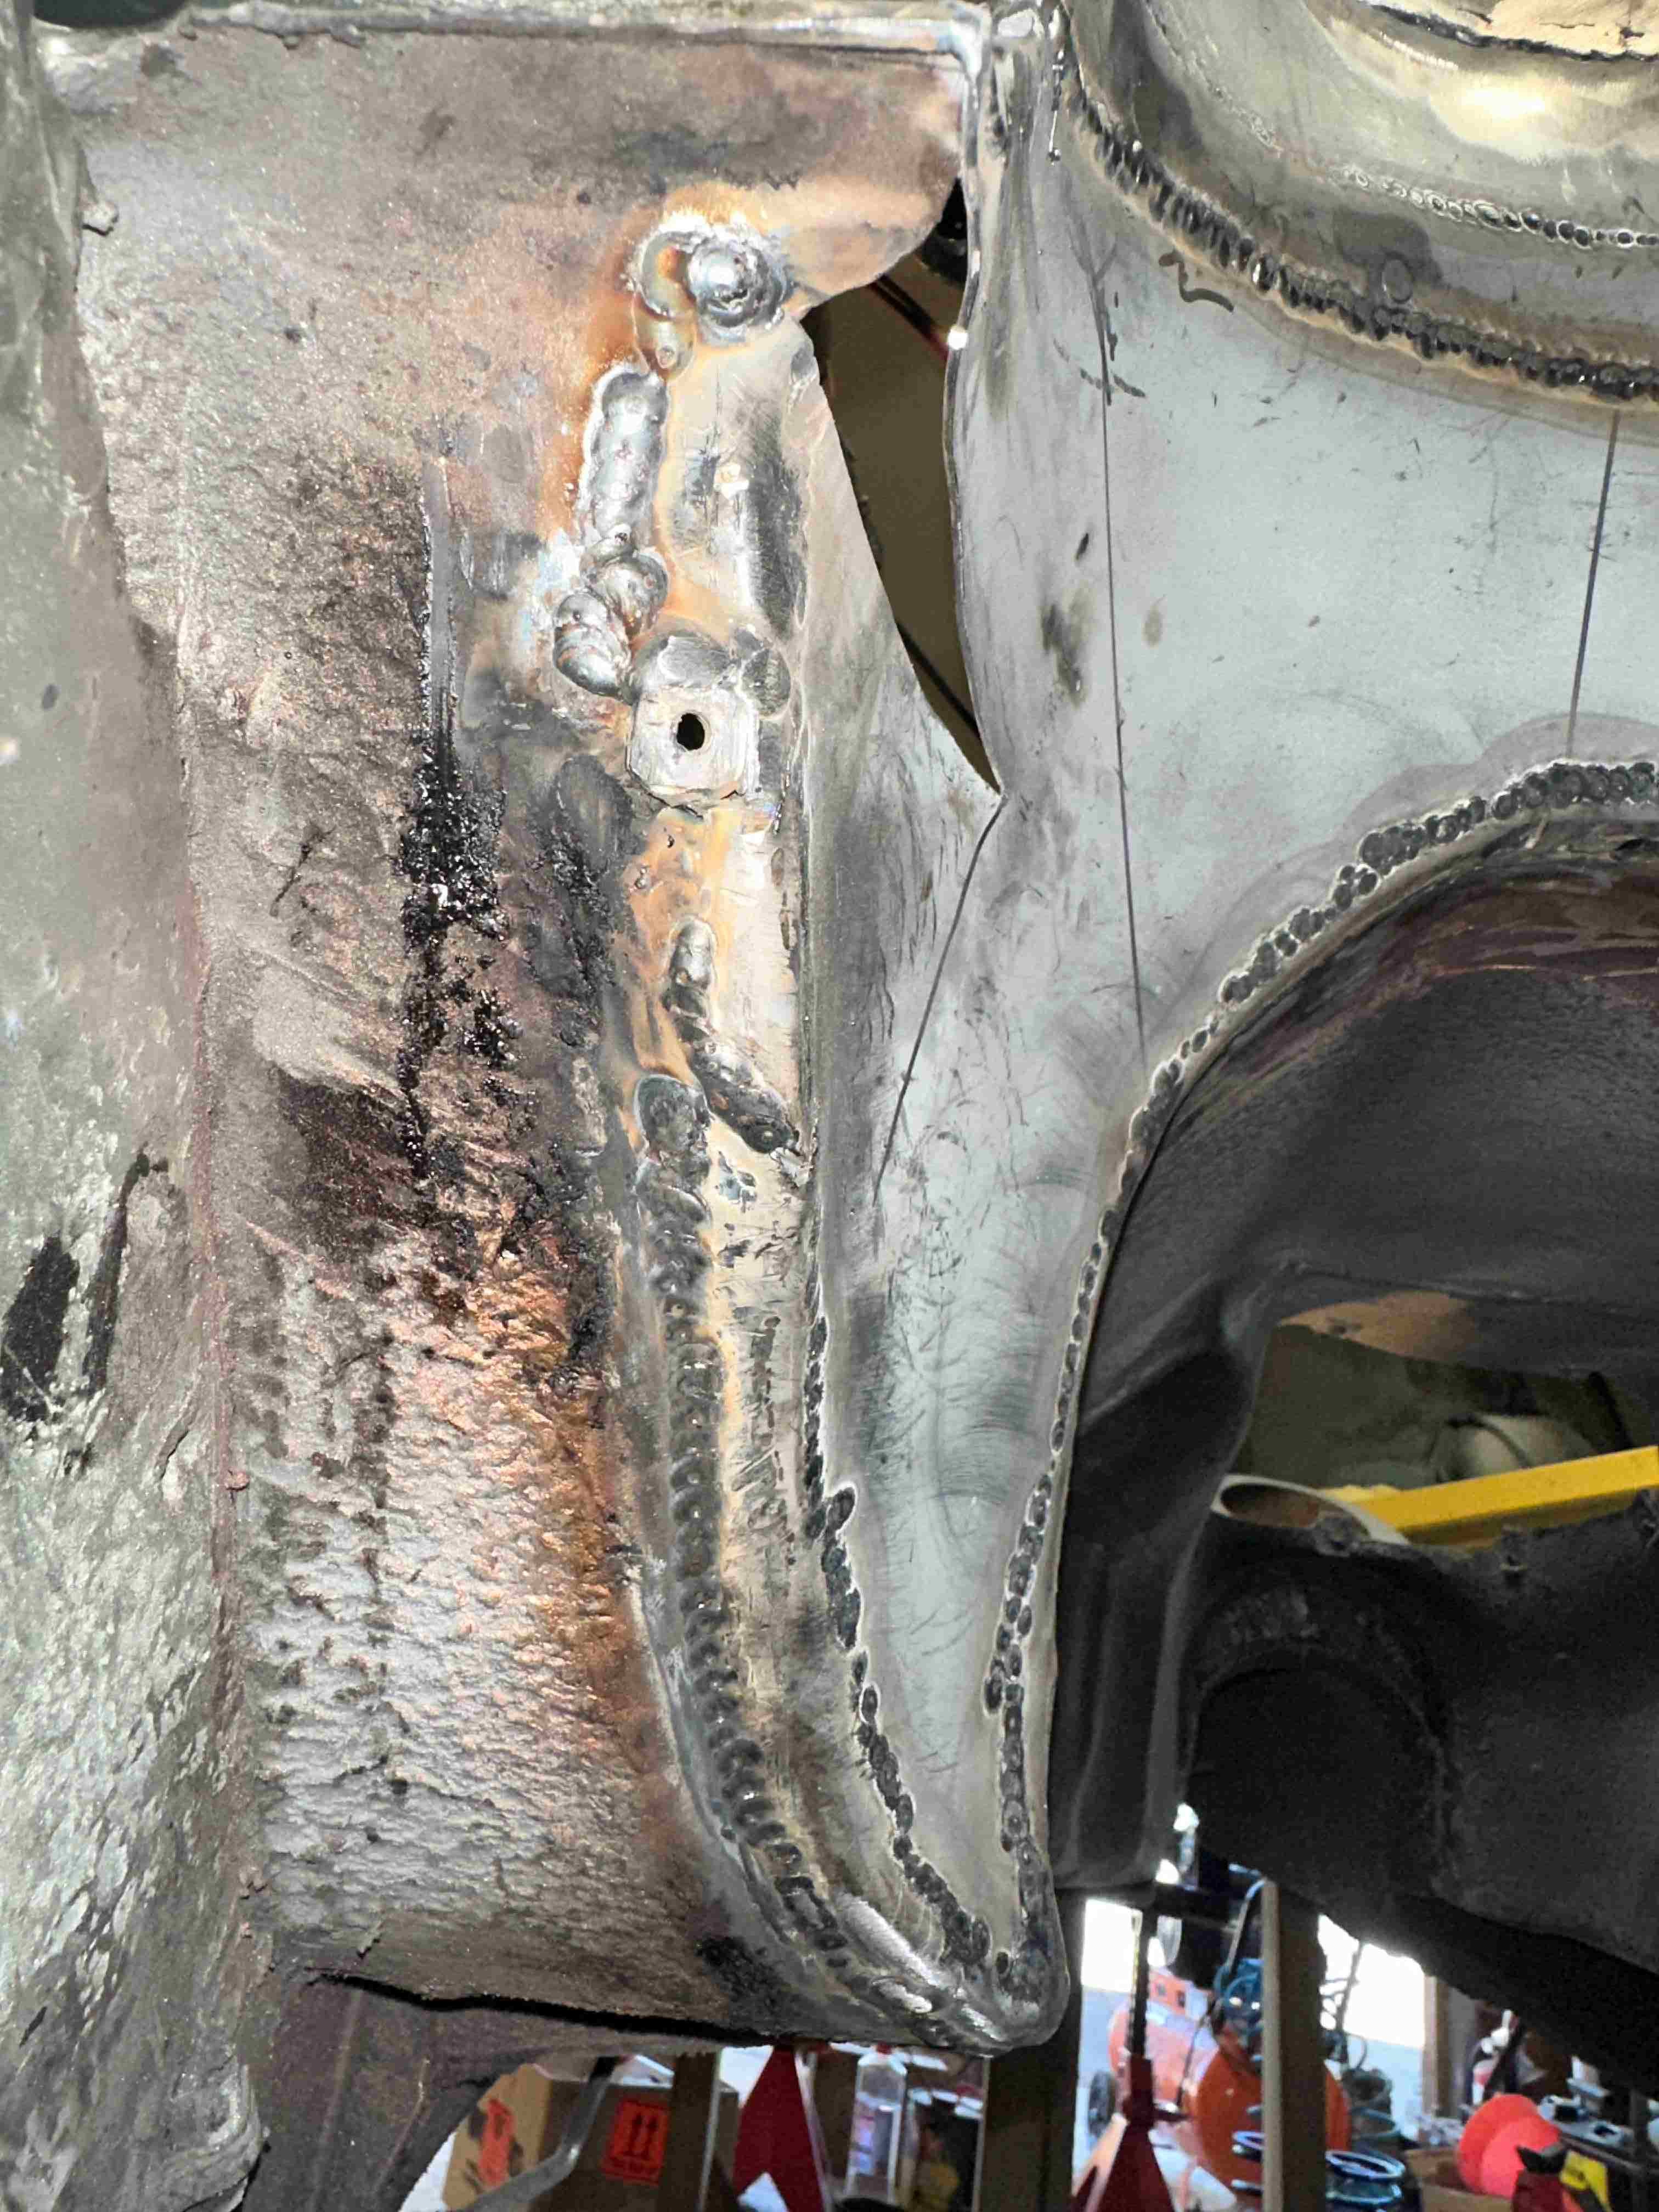
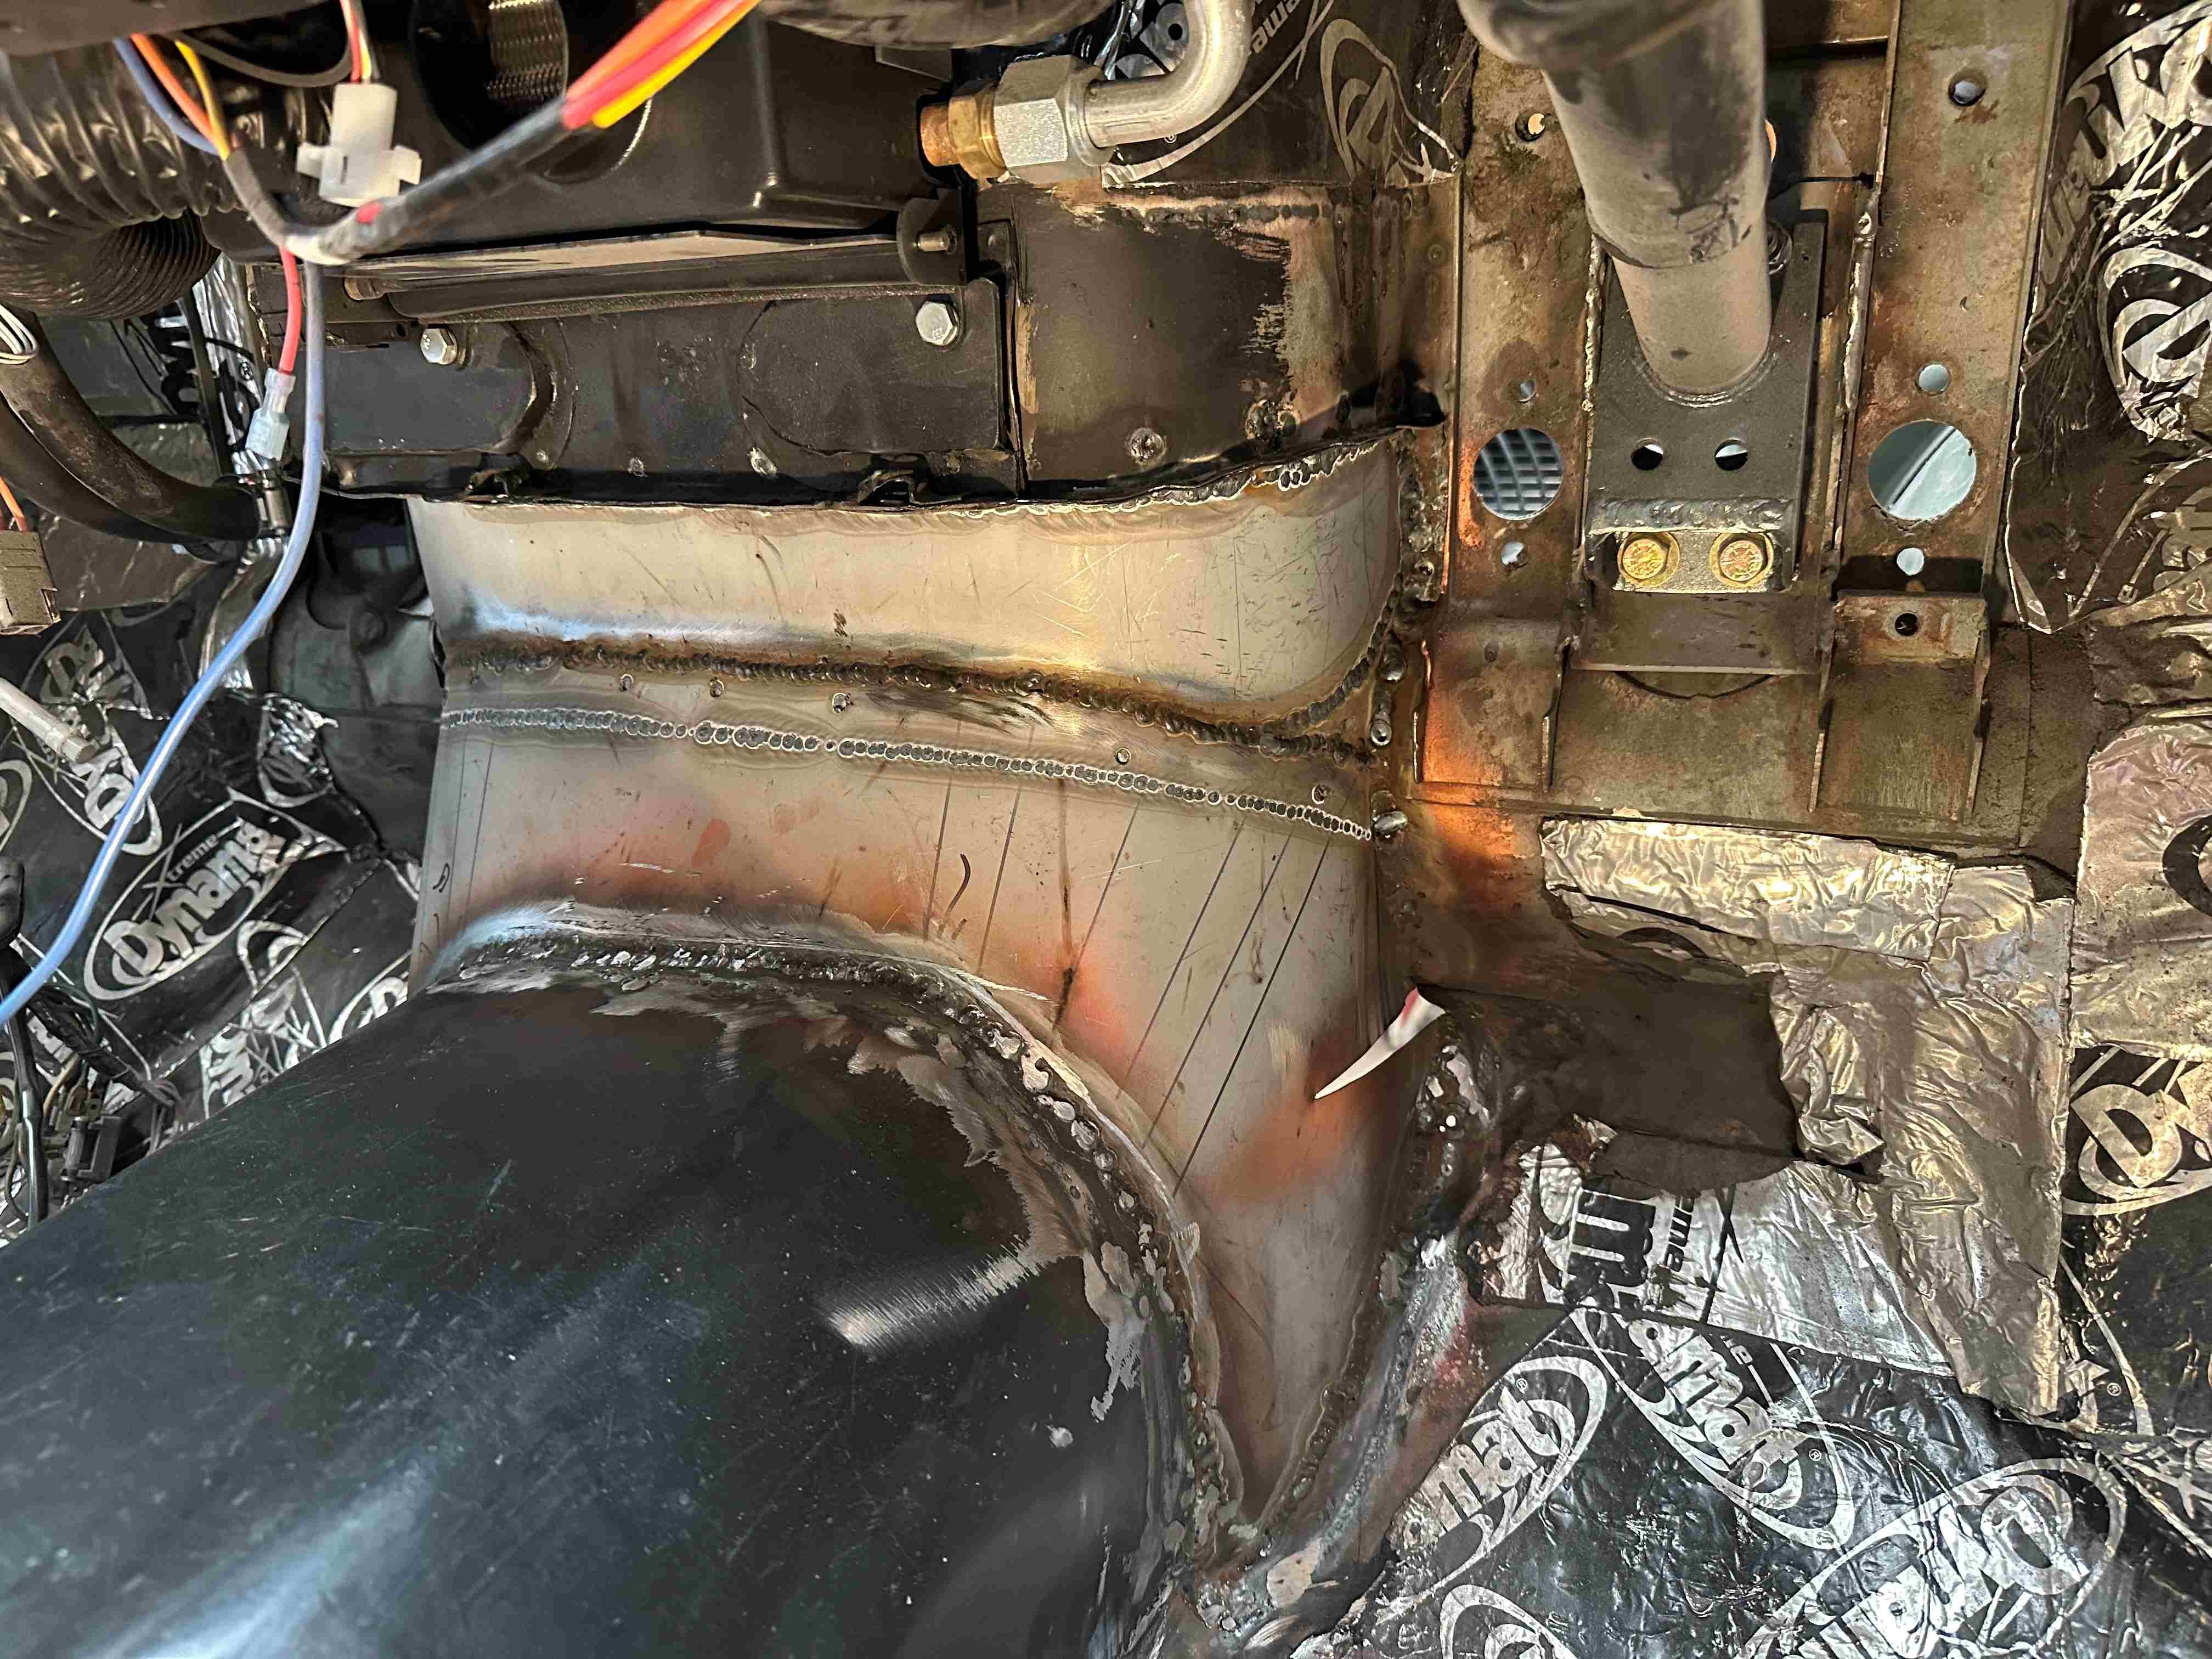
Mainly done. I need to weld in a small piece to fill the hole you can see in the pic's. It's that shape to give a bit more clearance for the odd square corner of the Honda engine. Also, another piece to fill the tight corner up on the right. It will make a little shelf but will be ok. I am pretty happy with the welding. I seem to have good penetration and not too much build in the main. I have taken a few high starting lumps off but it won't need much more. Some filler will be needed to smooth of top join (I suppose I am allowed to being sheet metal), but I still need to weld that from the inside as well. I think it is coming along well. Far better than my first attempt which was not so good but still gave me a stepping stone to doing a much better job the second time.
1 point
-
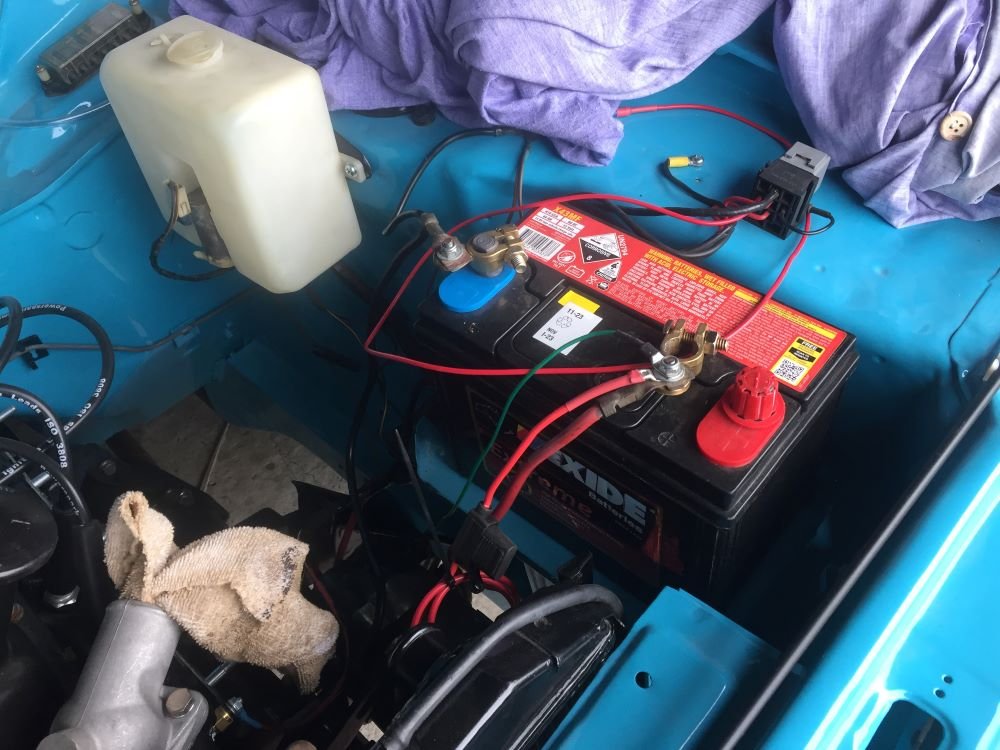
Next to be put in is the starter motor and alternator which is pretty easy. Most of the loom is in place so hook up everything I can. Next build a loom for spotlights out of parts I have. Run a fused power feed from battery and earth to chasis. Pretty sure I can activate spotlights to only come on when high beam is on by taking a wire off high beam fuse in engine bay which only has power on high beam. All set to see what has power at this stage. After dinner and grandchildren are in bed we go out and hook up battery. Turn key and nothing, no lights at all. After a night thinking about it and looking at all the picture I had taken, realise I have one wire on wrong terminal. Hey presto we have lights working, fan blowing, indicators flashing. Just hope the next click of the key bring similar results Project Discussion https://oldschool.co.nz/index.php?/topic/84912-petes-mk2-escort-1600-sports/page/2/#comment-2595759
1 point
-
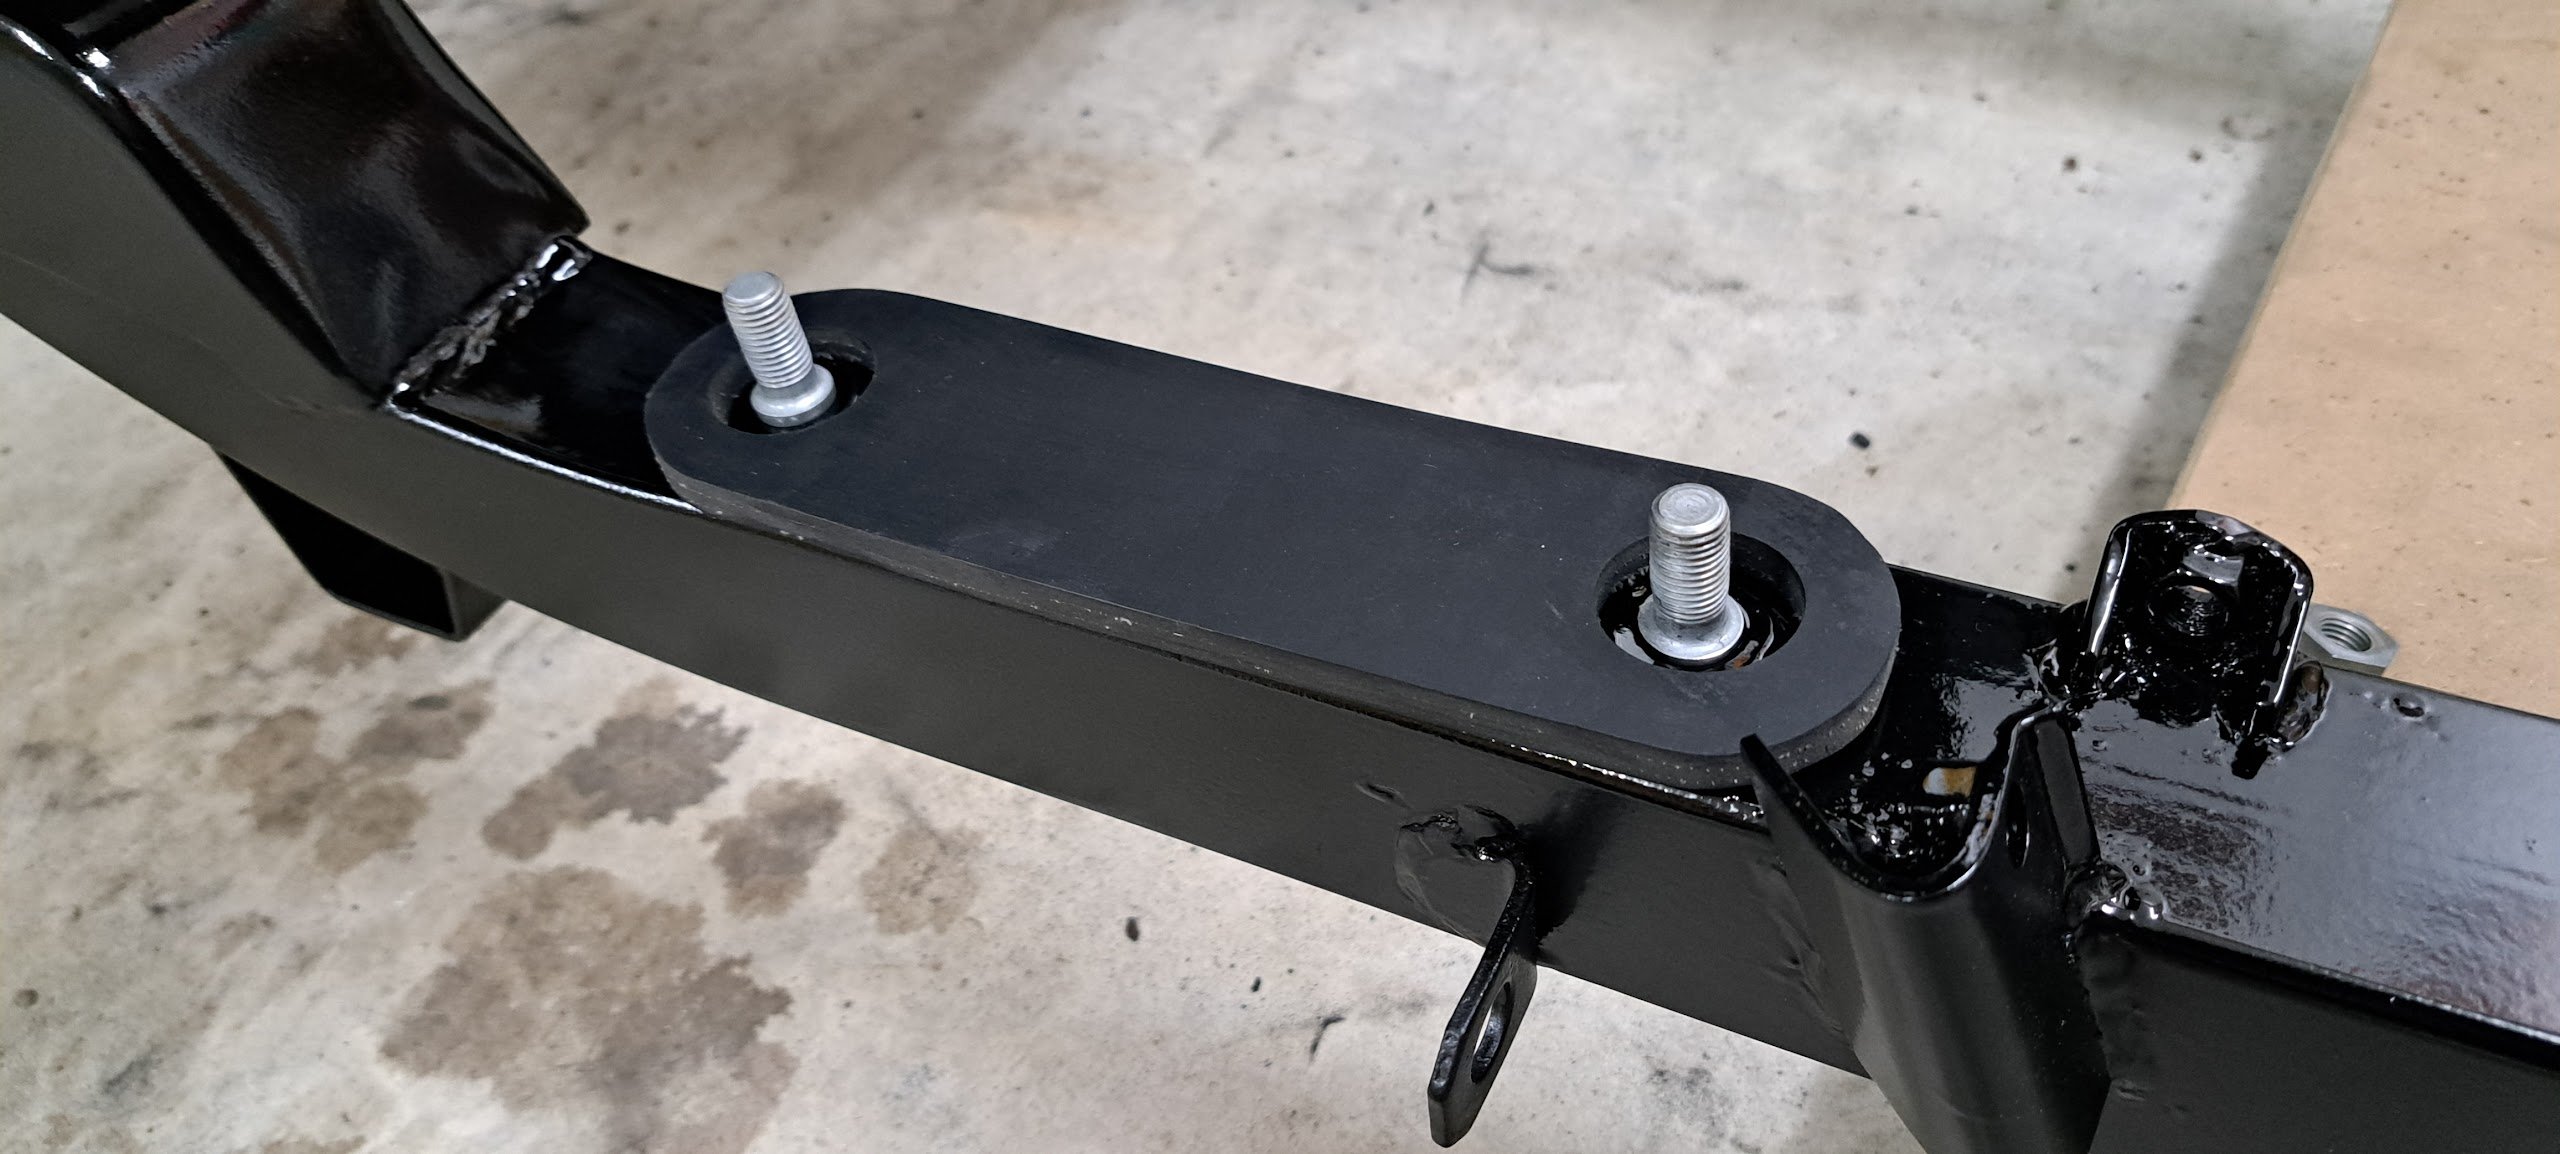
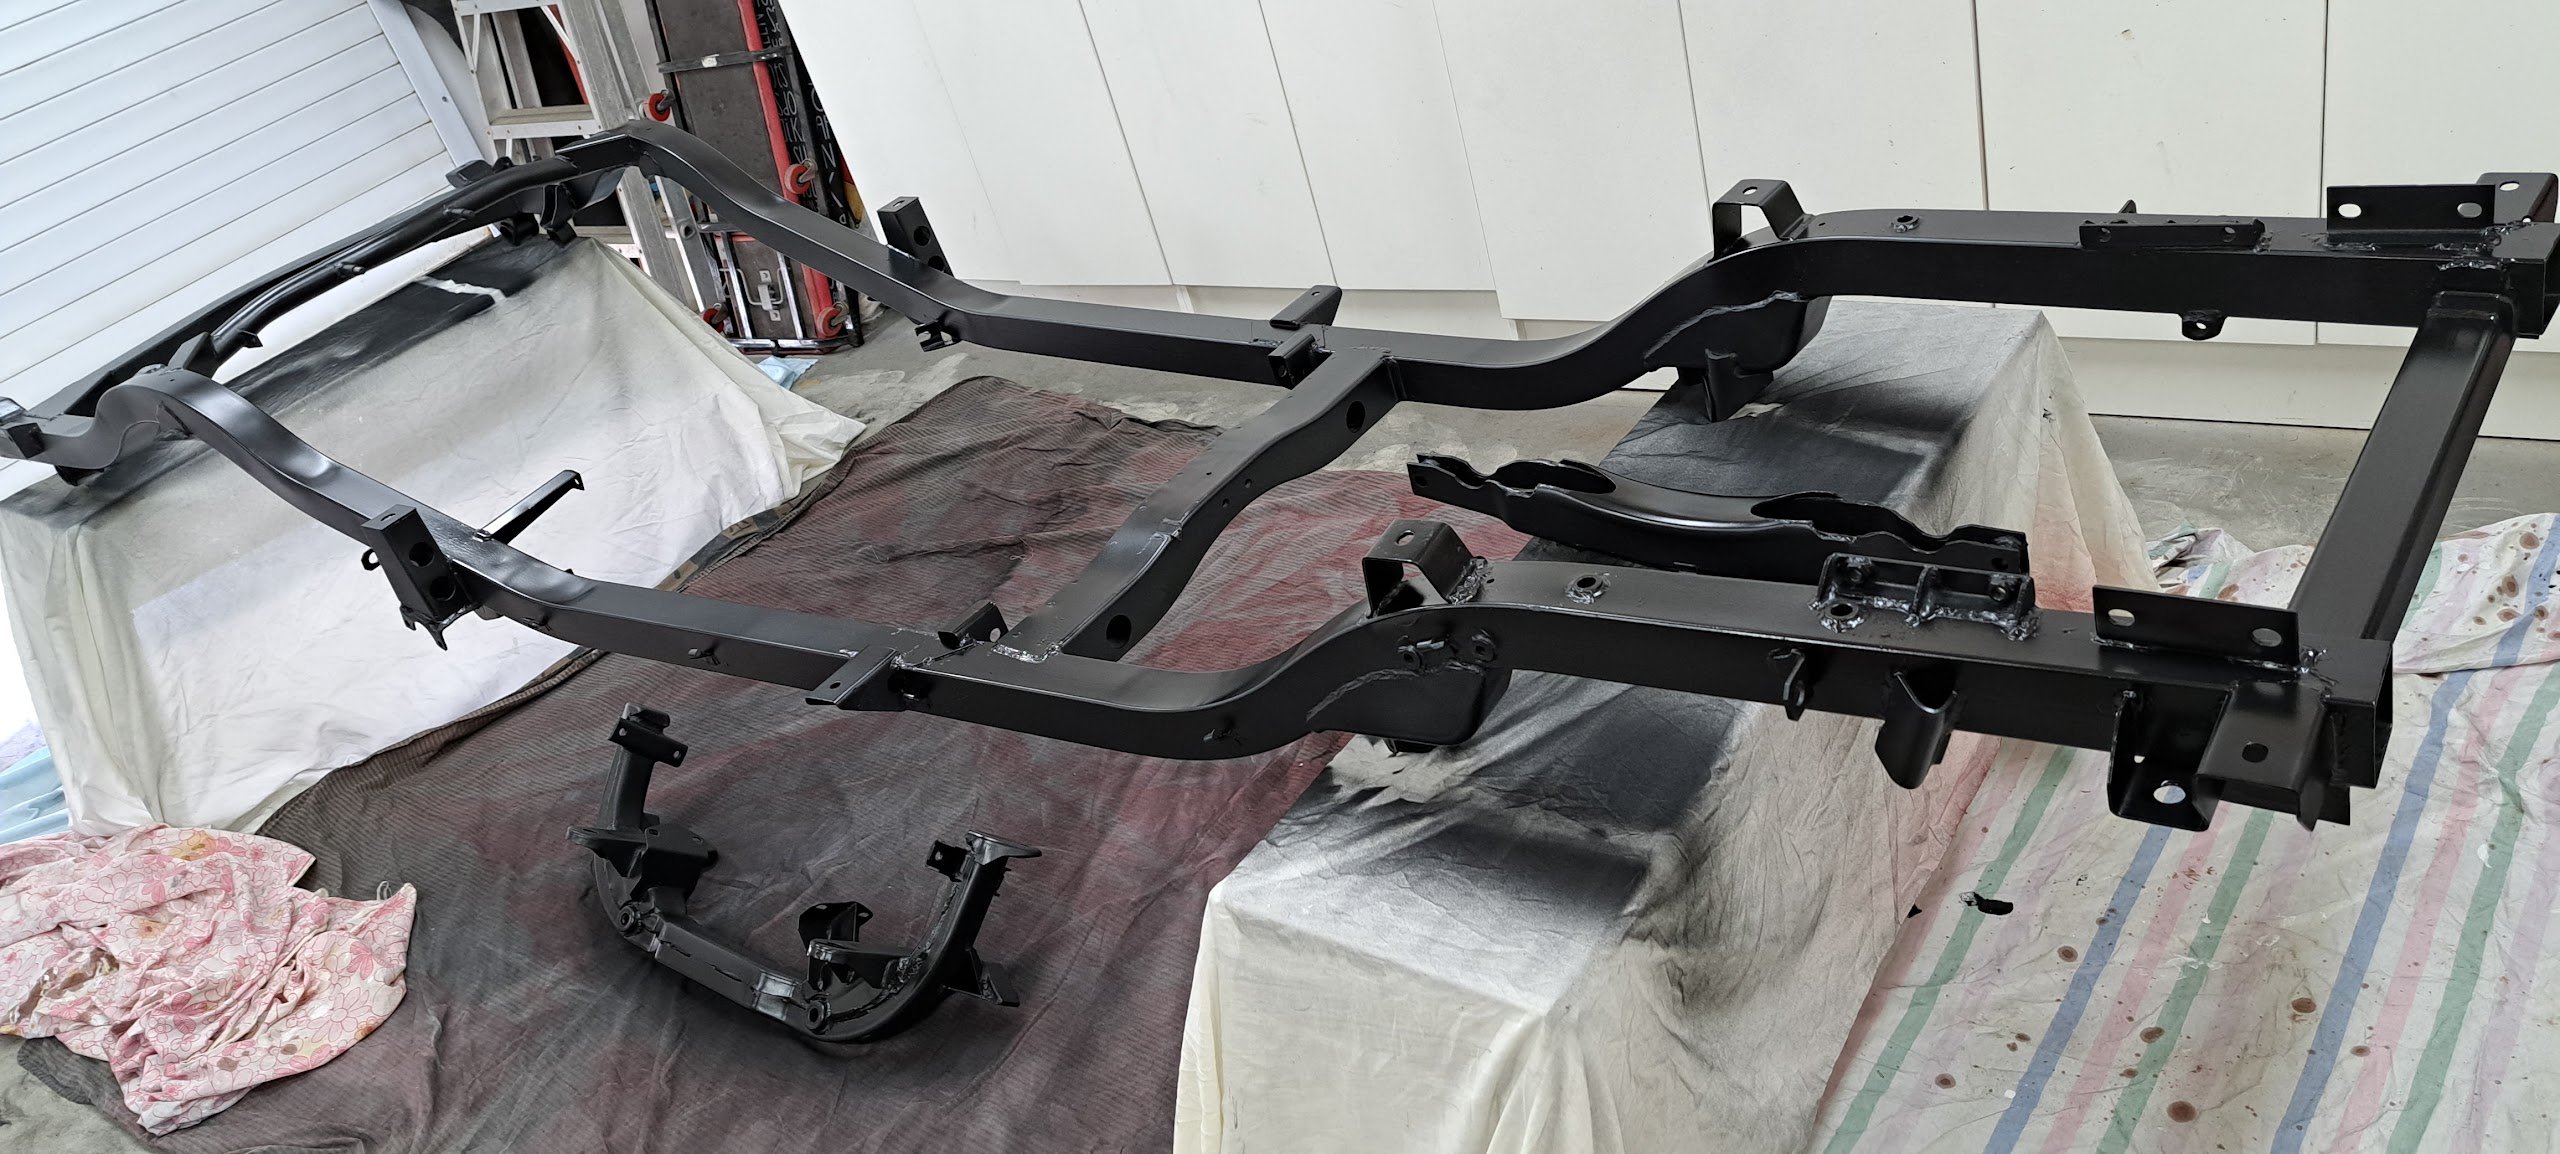
Chassis all painted in 2K black And reassembly started with the front engine cross member with new hand-cut rubber insert and plated bolts.
1 point
-
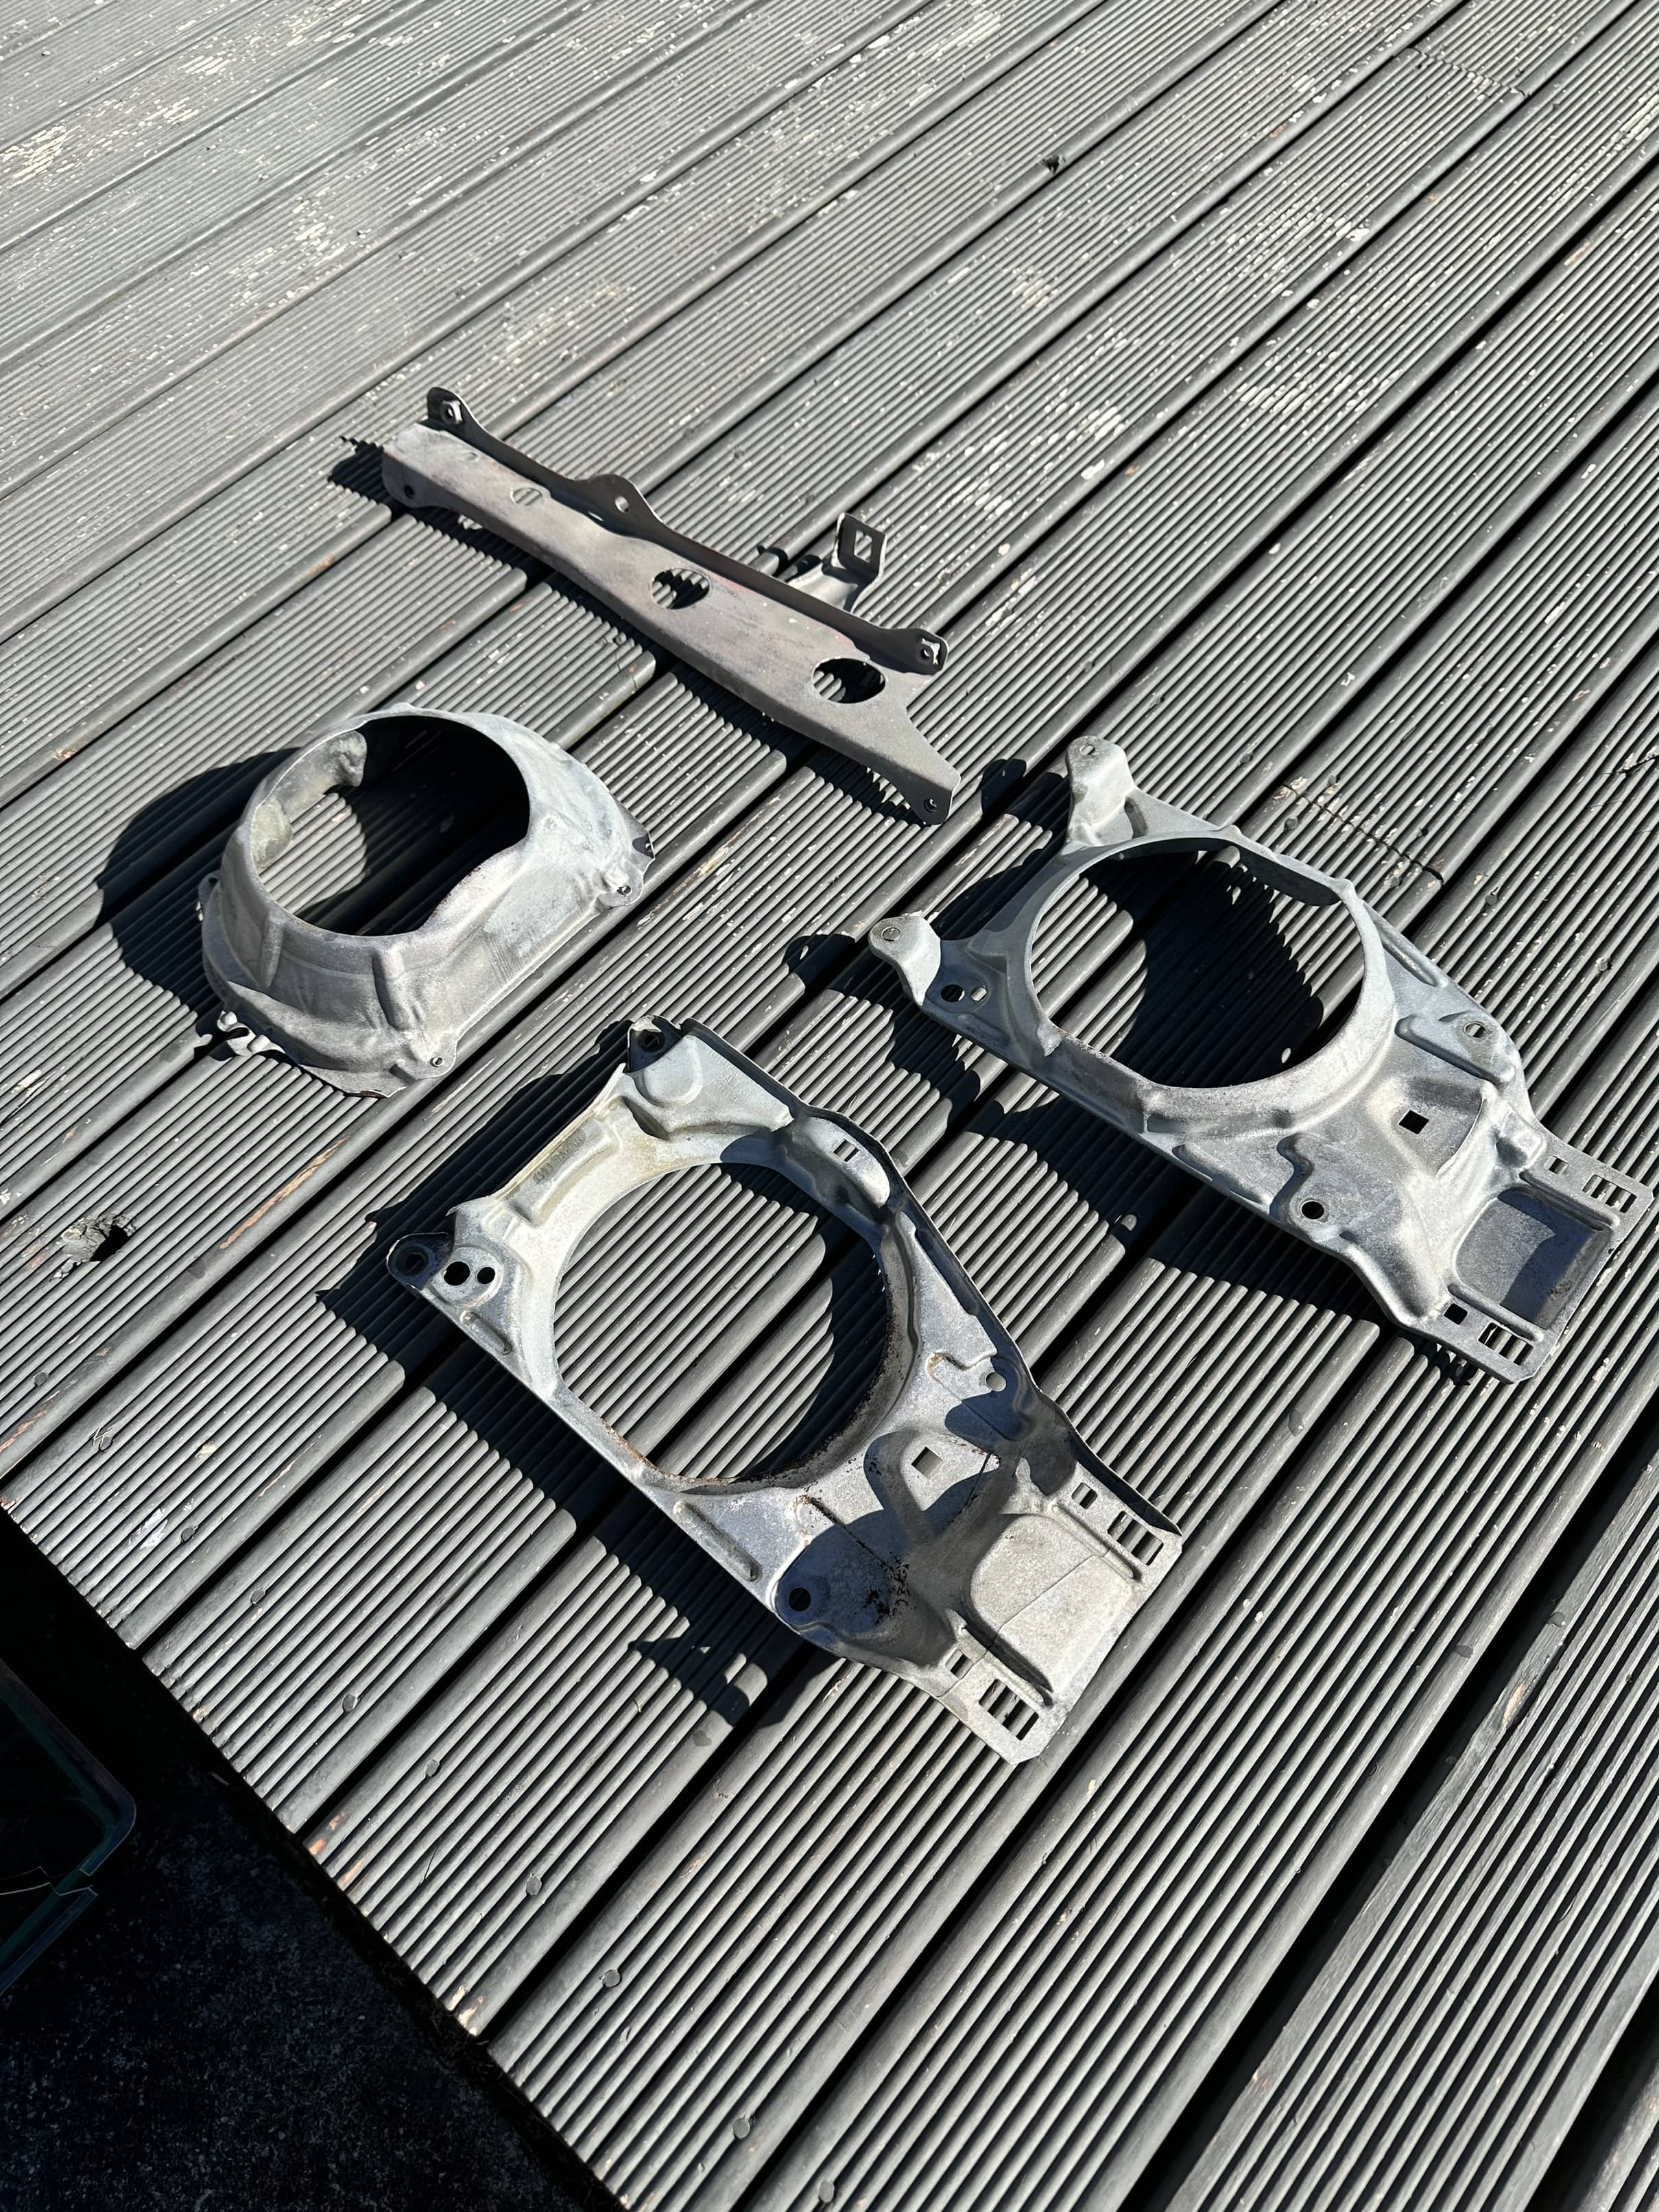
A couple of hours of sand blasting and then a soak in CRC Evapo-Rust and the first parts are almost ready for their first coat of primer.
1 point
-
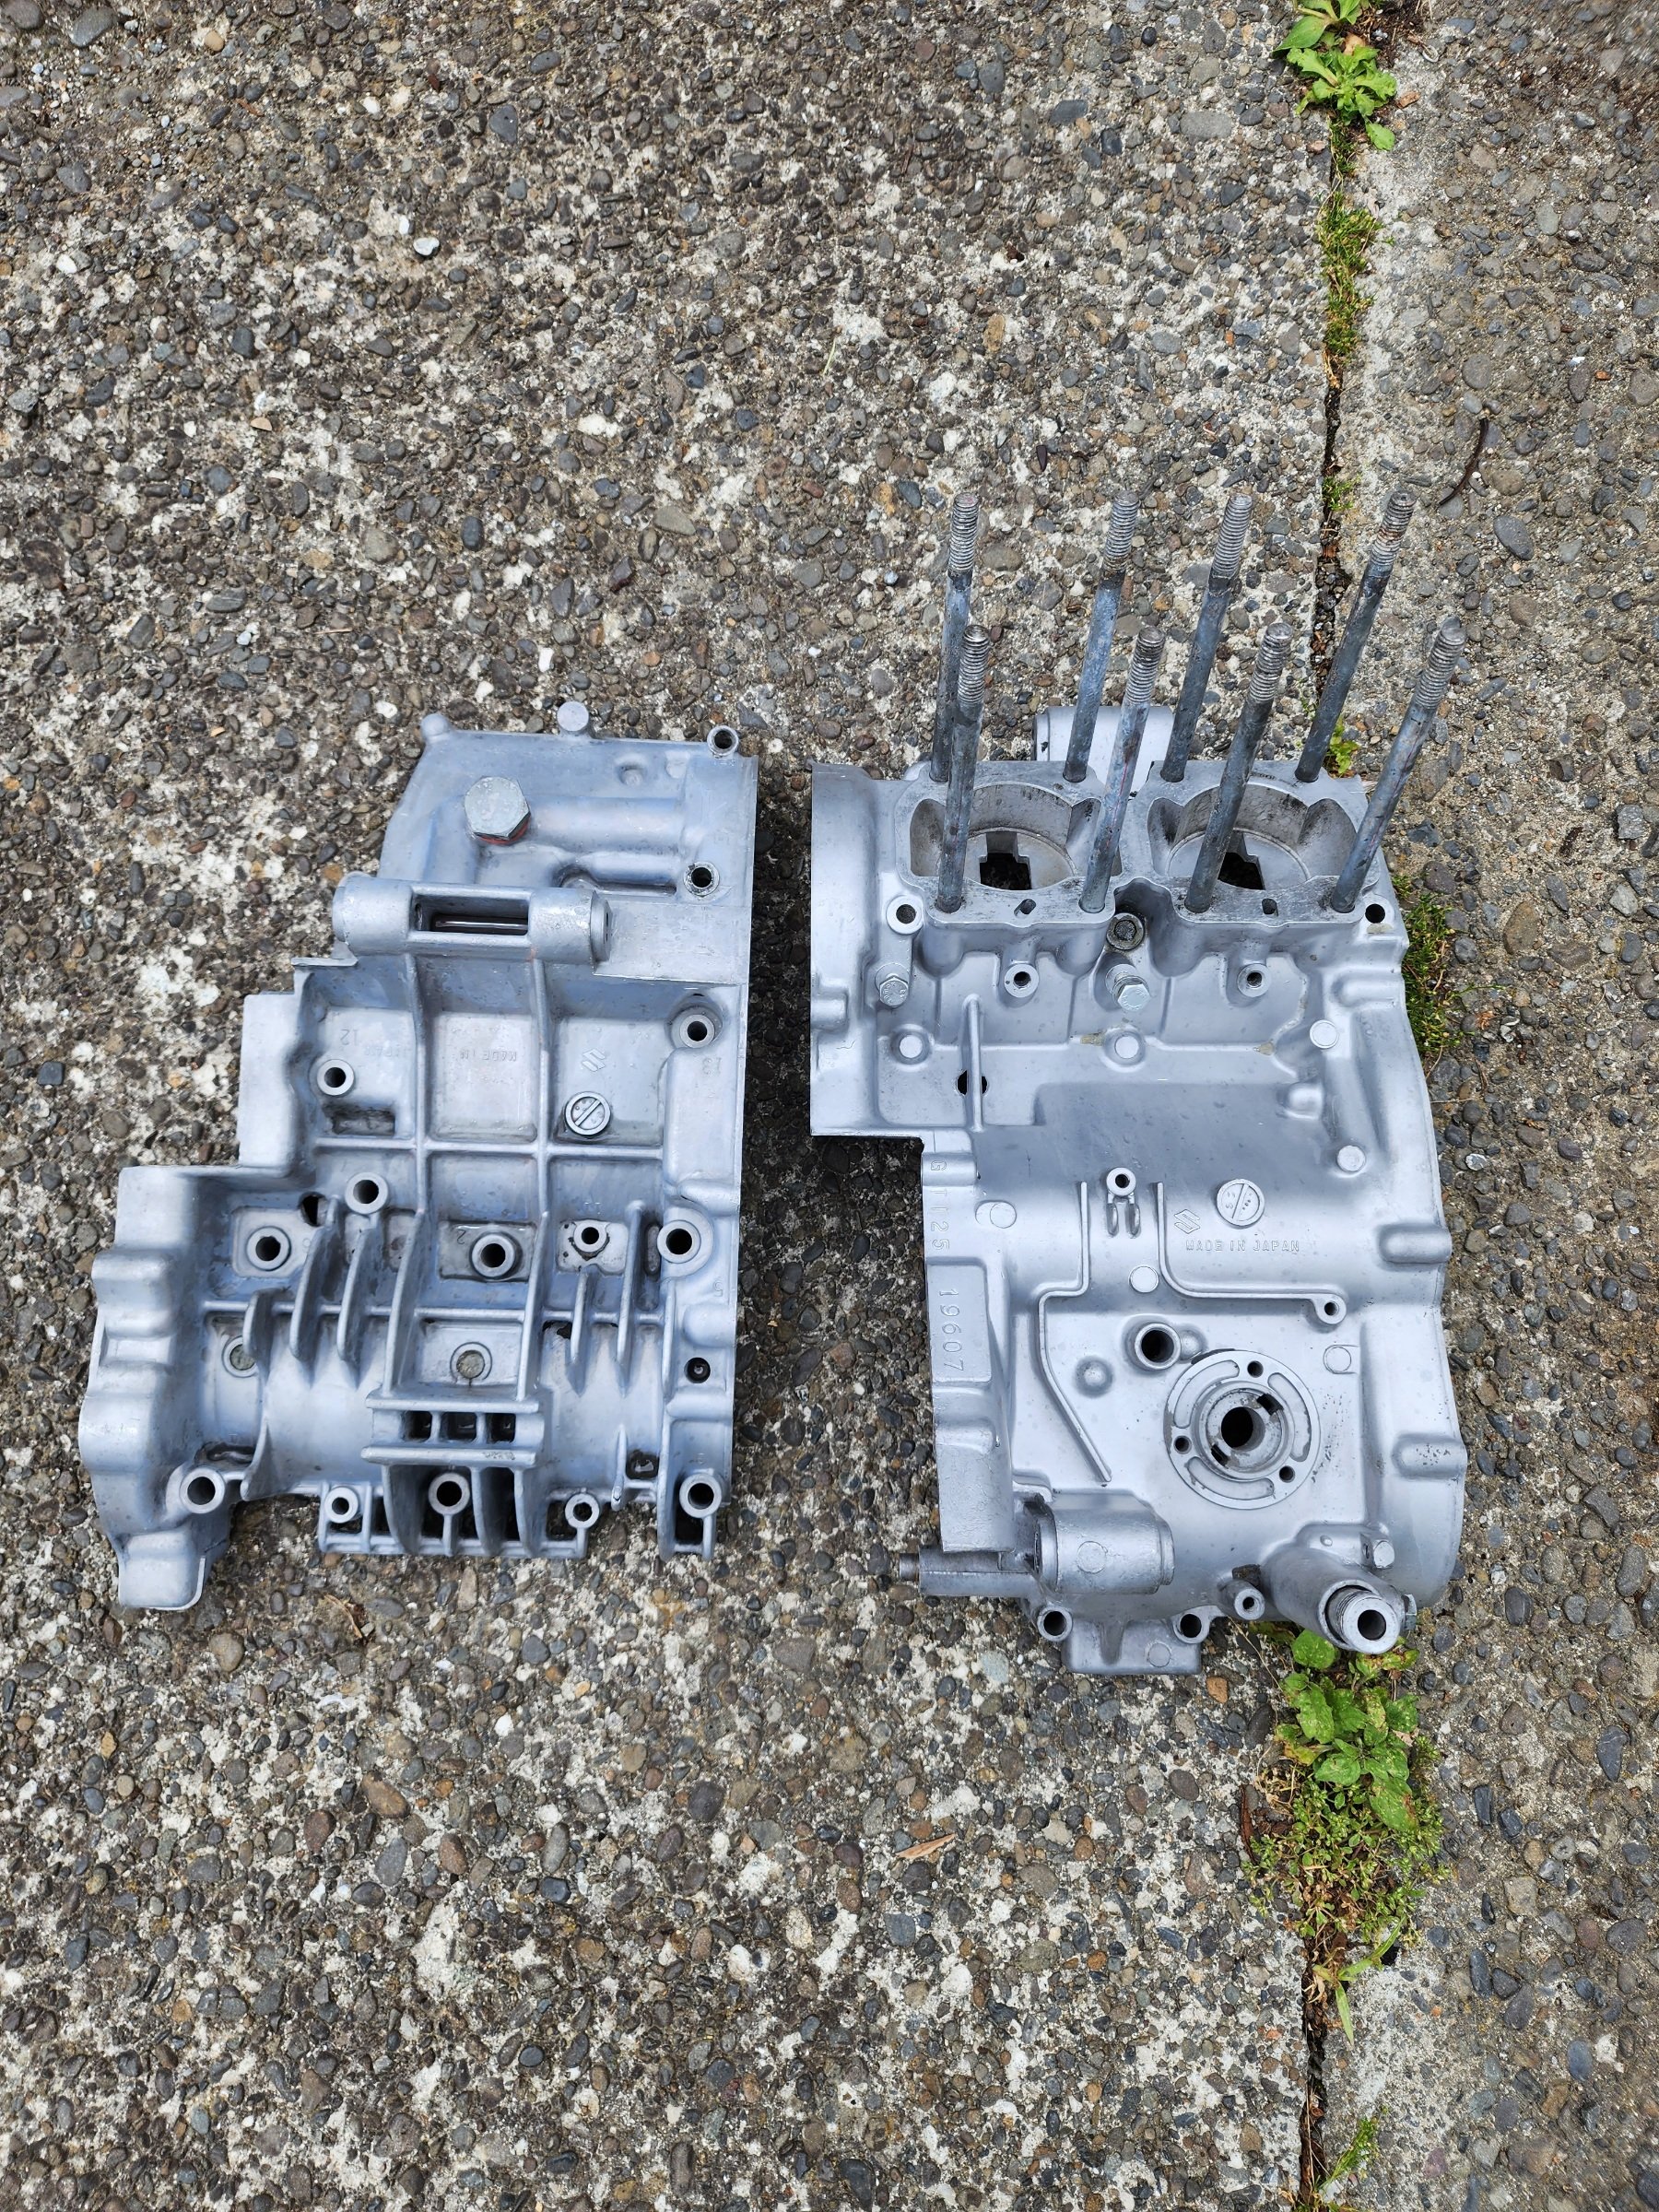
And there we go, I figured it out. Left casing was washed and sprayed with MetalPrep (Phosphoric acid + Zinc Phosphate), poor man's alodine or zincate Right casing is glass bead blasted
1 point
-
Everything there is aluminium. Colour differences are pressure die casting alloy mix vs gravity die casting. Nothing they left as cast would have been clear coated originally - normal Suzuki finish of the era was silver paint. Two pot epoxy silver is the common replacement now. Some pieces like the side covers would have been polished then clear coated. A look at brochures or road test pics on line will tell you what to polish. Edit - the best paint to use I'm told is Durapox. I've seen several sets of cases done in it and it's a good finish. Zinc based I've only ever found used on components in contact with fuel. Some carb bodies and float chambers and the occasional tap.1 point
-
a couple years ago dad was working for a place that did building maintenance and water blasting washdowns for all kinds of usually government or council property. he often went way out to the middle of nowhere with a waterblaster to wash a building and do any any repairs. most of the company had stupid modern pickups, but there was also a hiace supercustom 1kz 4wd (he personally owns a 1kz hiace 2wd and adores it) he wanted that, he then convinced them to install the heavy duty rear springs that he has fitted to his own van and then proceeded to have the most user friendly rig of the fleet. while others were carrying step ladders and rummaging around their dumb high side trays dad had all the space in the world. i kicked him a spare modern stereo head unit that i told the company they can keep if they let him fit it and he had music and comfort while he toured the back country towing probably 1500L of water and all his tools in the back with a clear 2nd row of seating for luggage storage/smoko room. Then people who had been with the company much longer tried to steal it from him but the owners were cool people and told them to jog since he had set it up himself and those people had turned their nose up at the old van in the corner.1 point
-
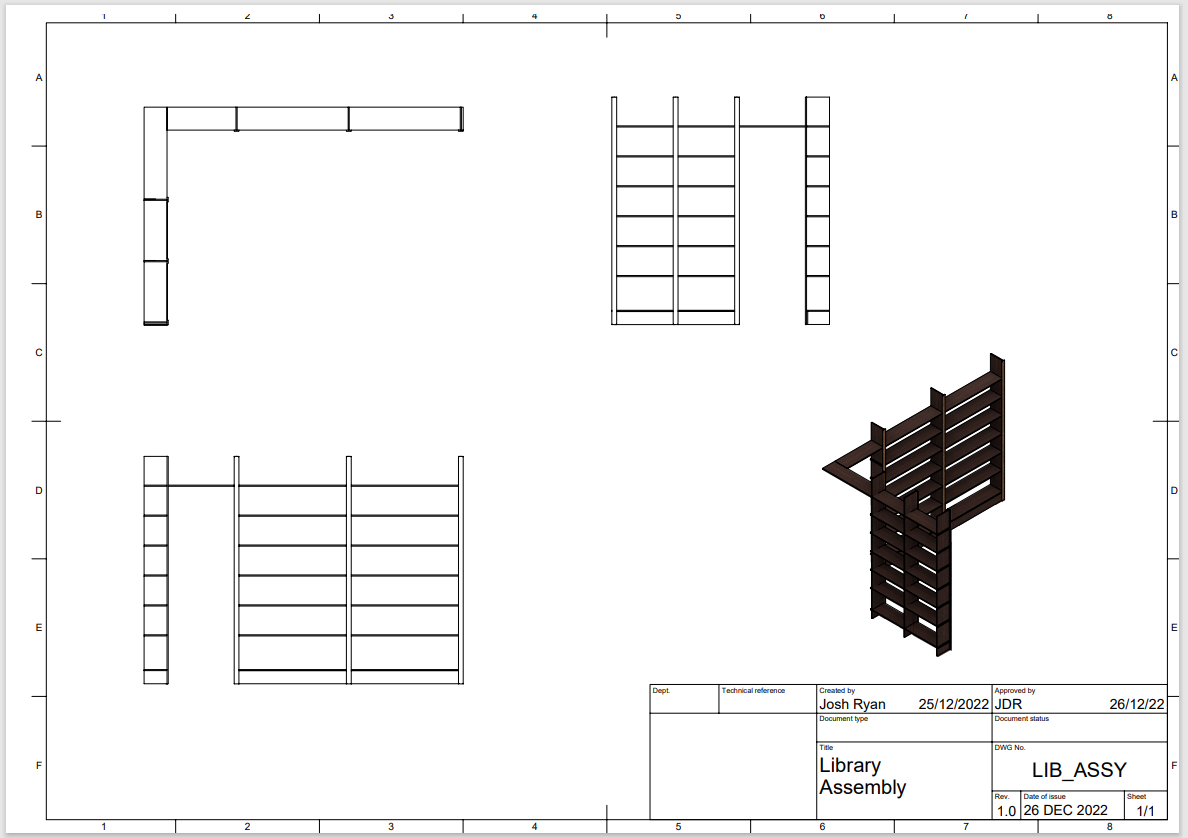
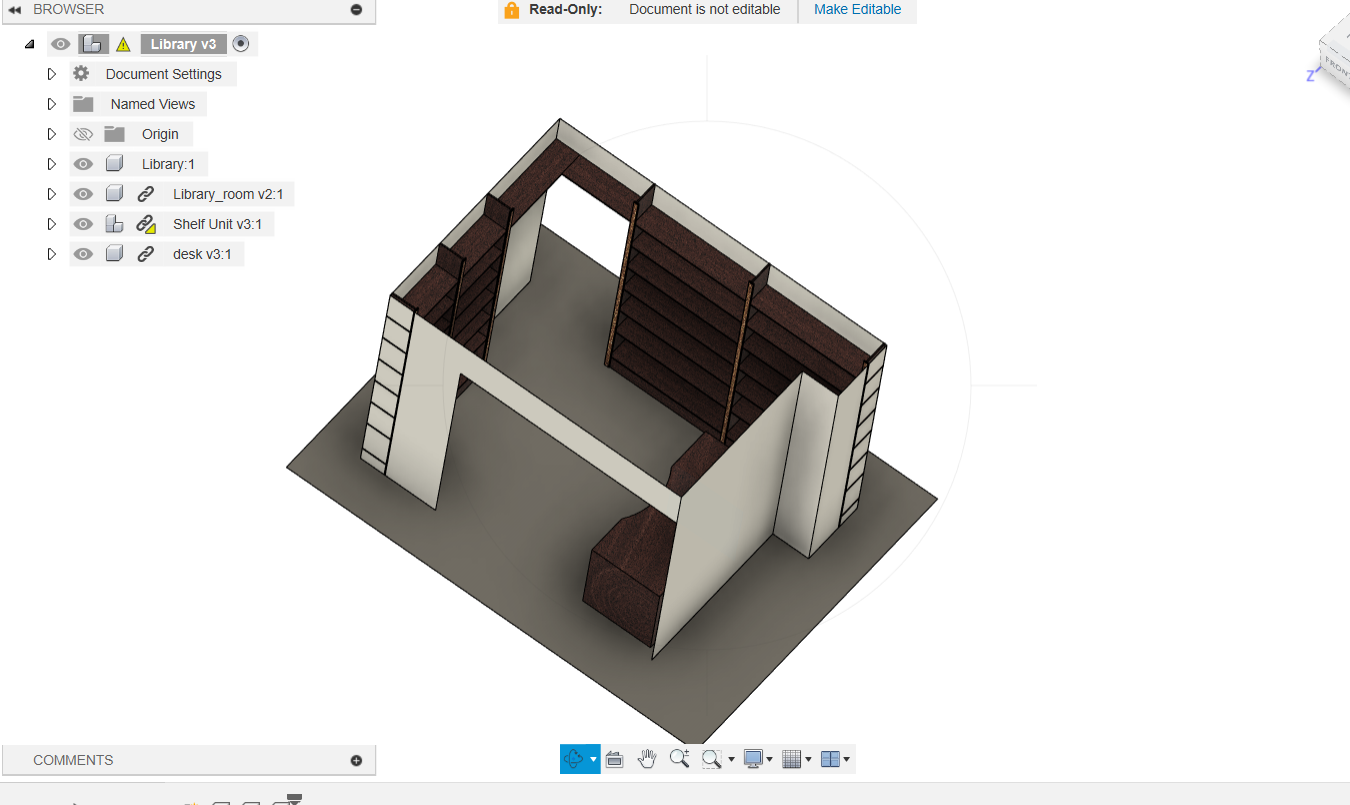
vista print do them for office purposes. from memory their website even has the tool to convert an image into the line with various sliders to to get it right. https://www.vistaprint.co.nz/stationery/stamps/self-inking-stamps nearly made her cry for $15 i also played pretend engineer and designed the whole lot on fusion 360. i modeled the room dimensions and did it this way for two reasons. firstly to get a feel for spacings and to play with colours and secondly so that i could tweak dimensions to maximize the sheet usage. i ended up with a tiny amount of wastage which i turned into a pretty decent shoe rack.
1 point
-
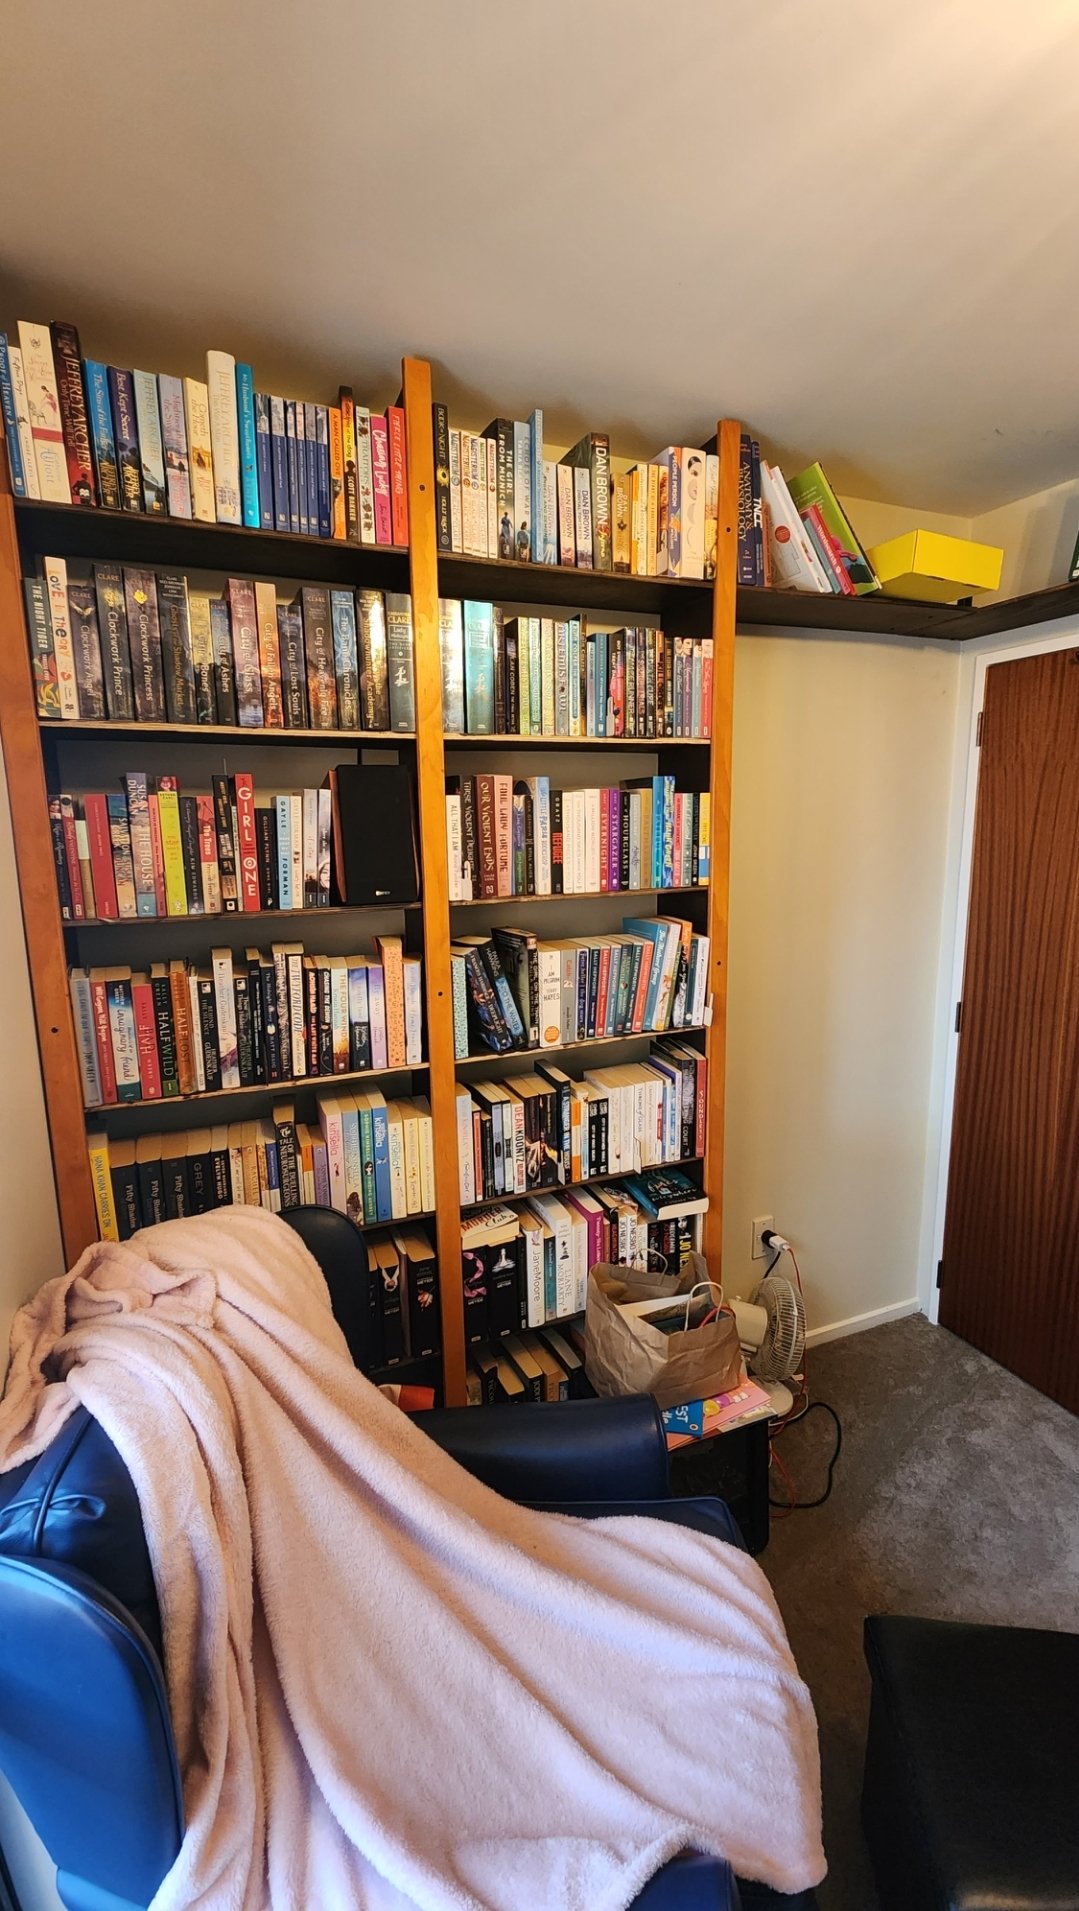
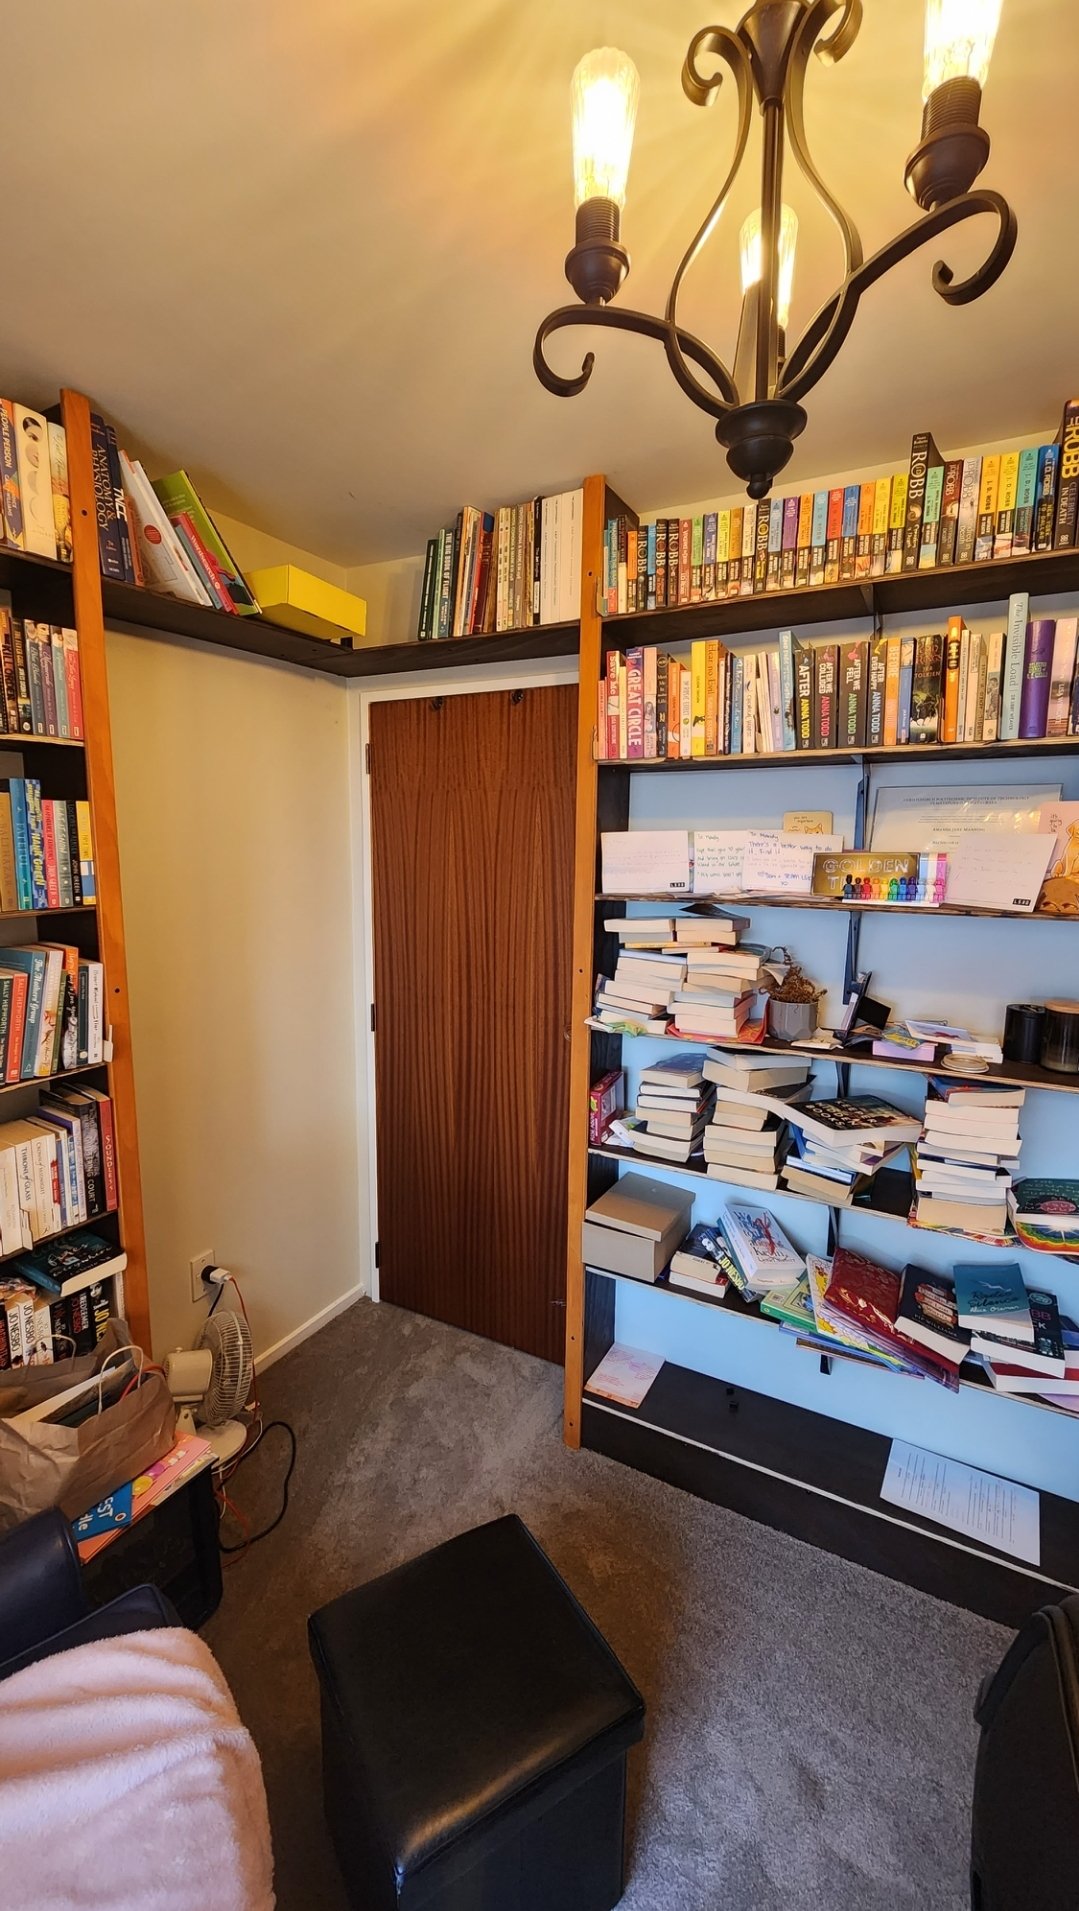
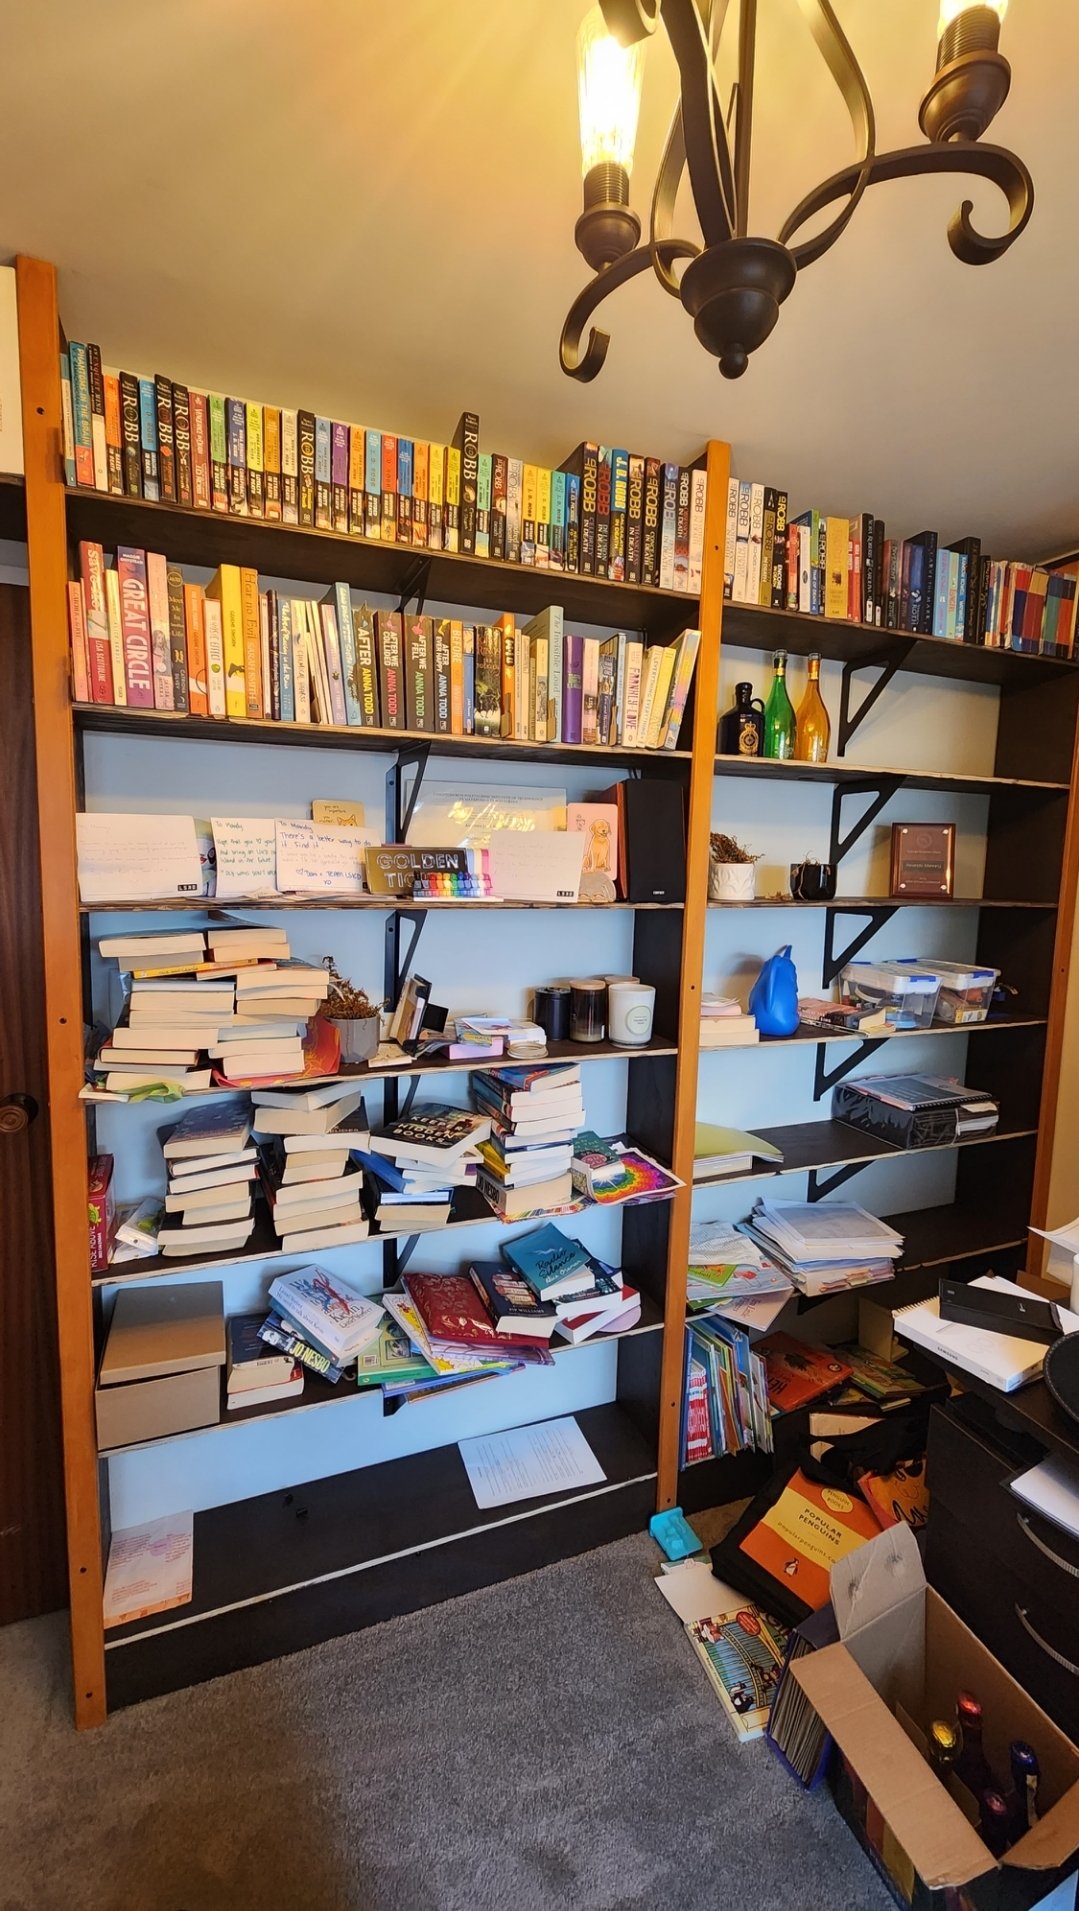
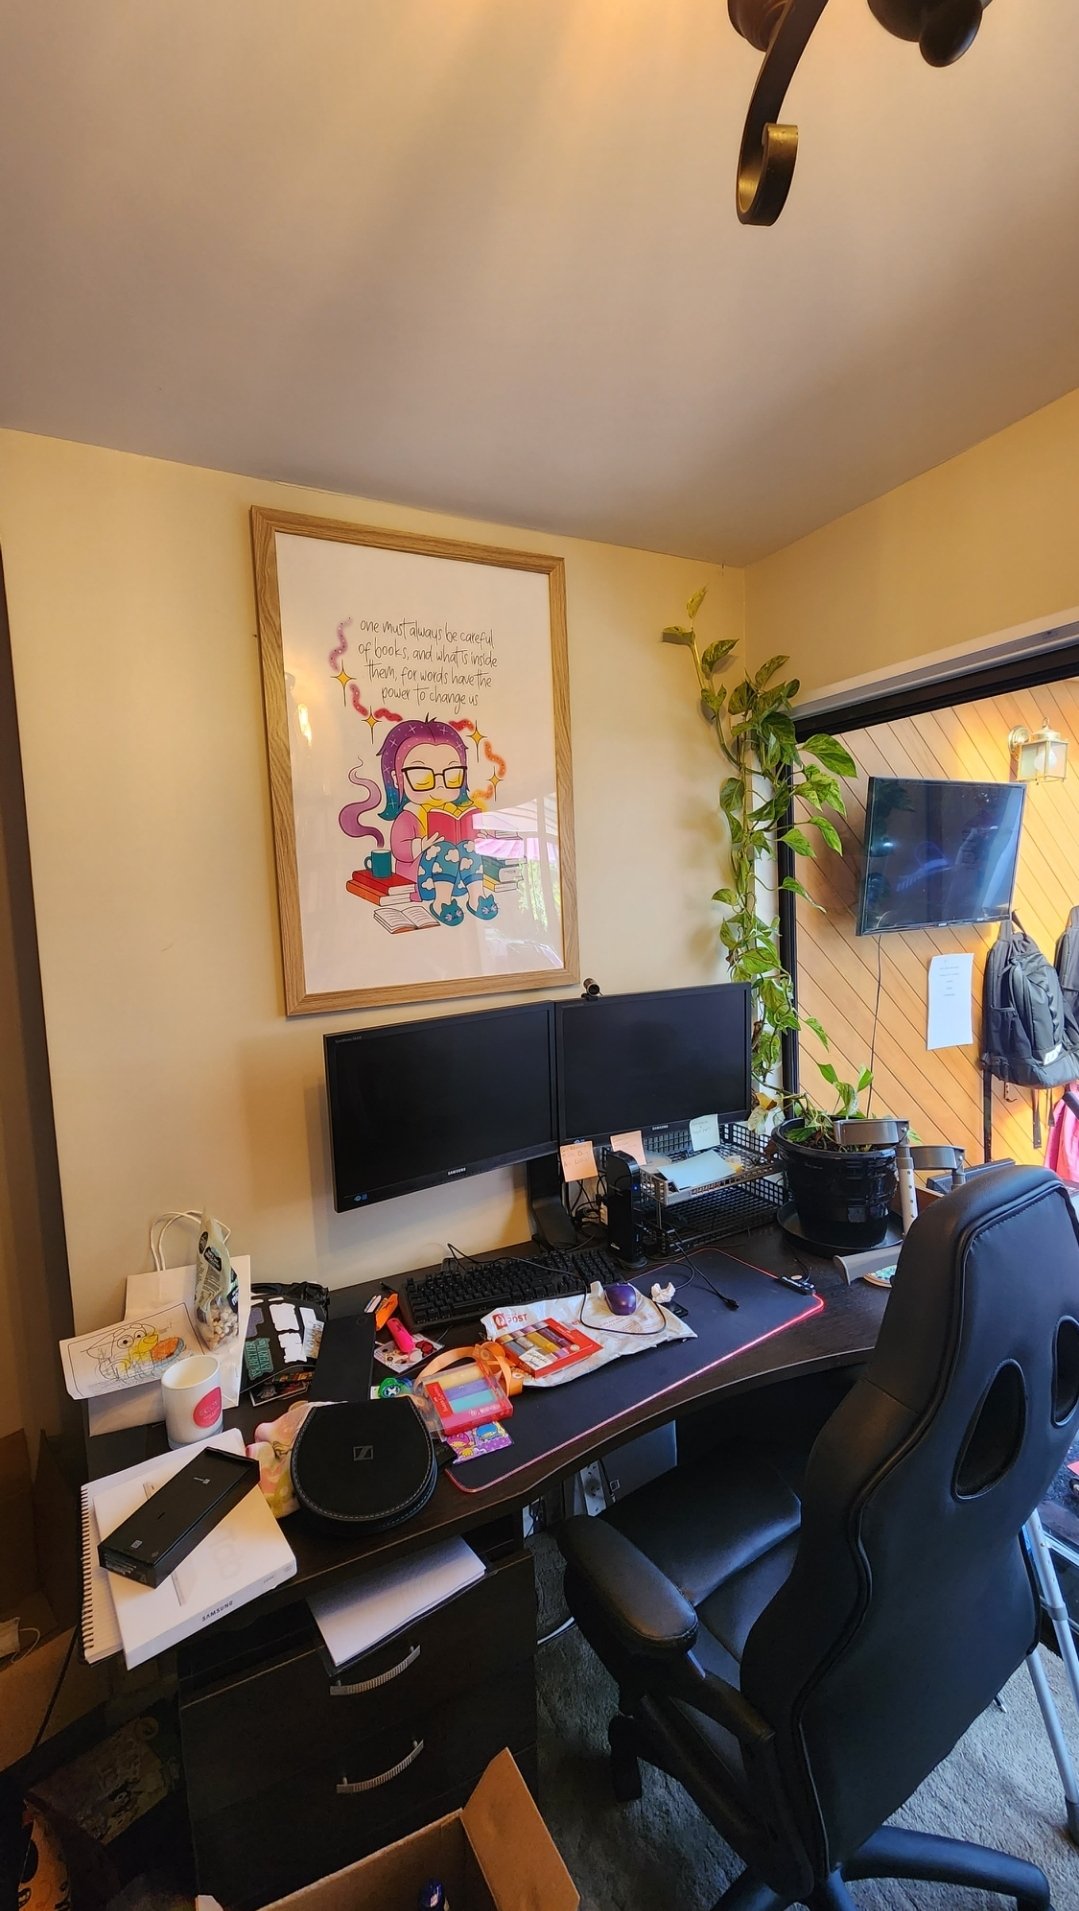
Reminds me that a while ago I asked about having library shelves machined. Well I decided that I wanted to do it all by hand since I'd always told my wife I would build her a library (not assemble her one) It's kinda messy at the moment because she's part way through post grad studies and there are a bunch of new books that need filing which means moving every book lol The large framed cartoon was designed (and tattooed) by her tattoo artist to resemble her, I also turned it into a stamp. It's not quite finished, I need to decide on what I'm going to do with the shelf edges, and I'm on the hunt for a structurally sound but old wooden ladder to fit with a rail. I'm quite happy with how many husbands get in trouble when their wives see it. Makes for an excellent space whenever I get to work from home. The work office sucks, our library is quite possibly one of the nicest environments I've ever been in (when not in messy Xmas holidays mode)
1 point
-
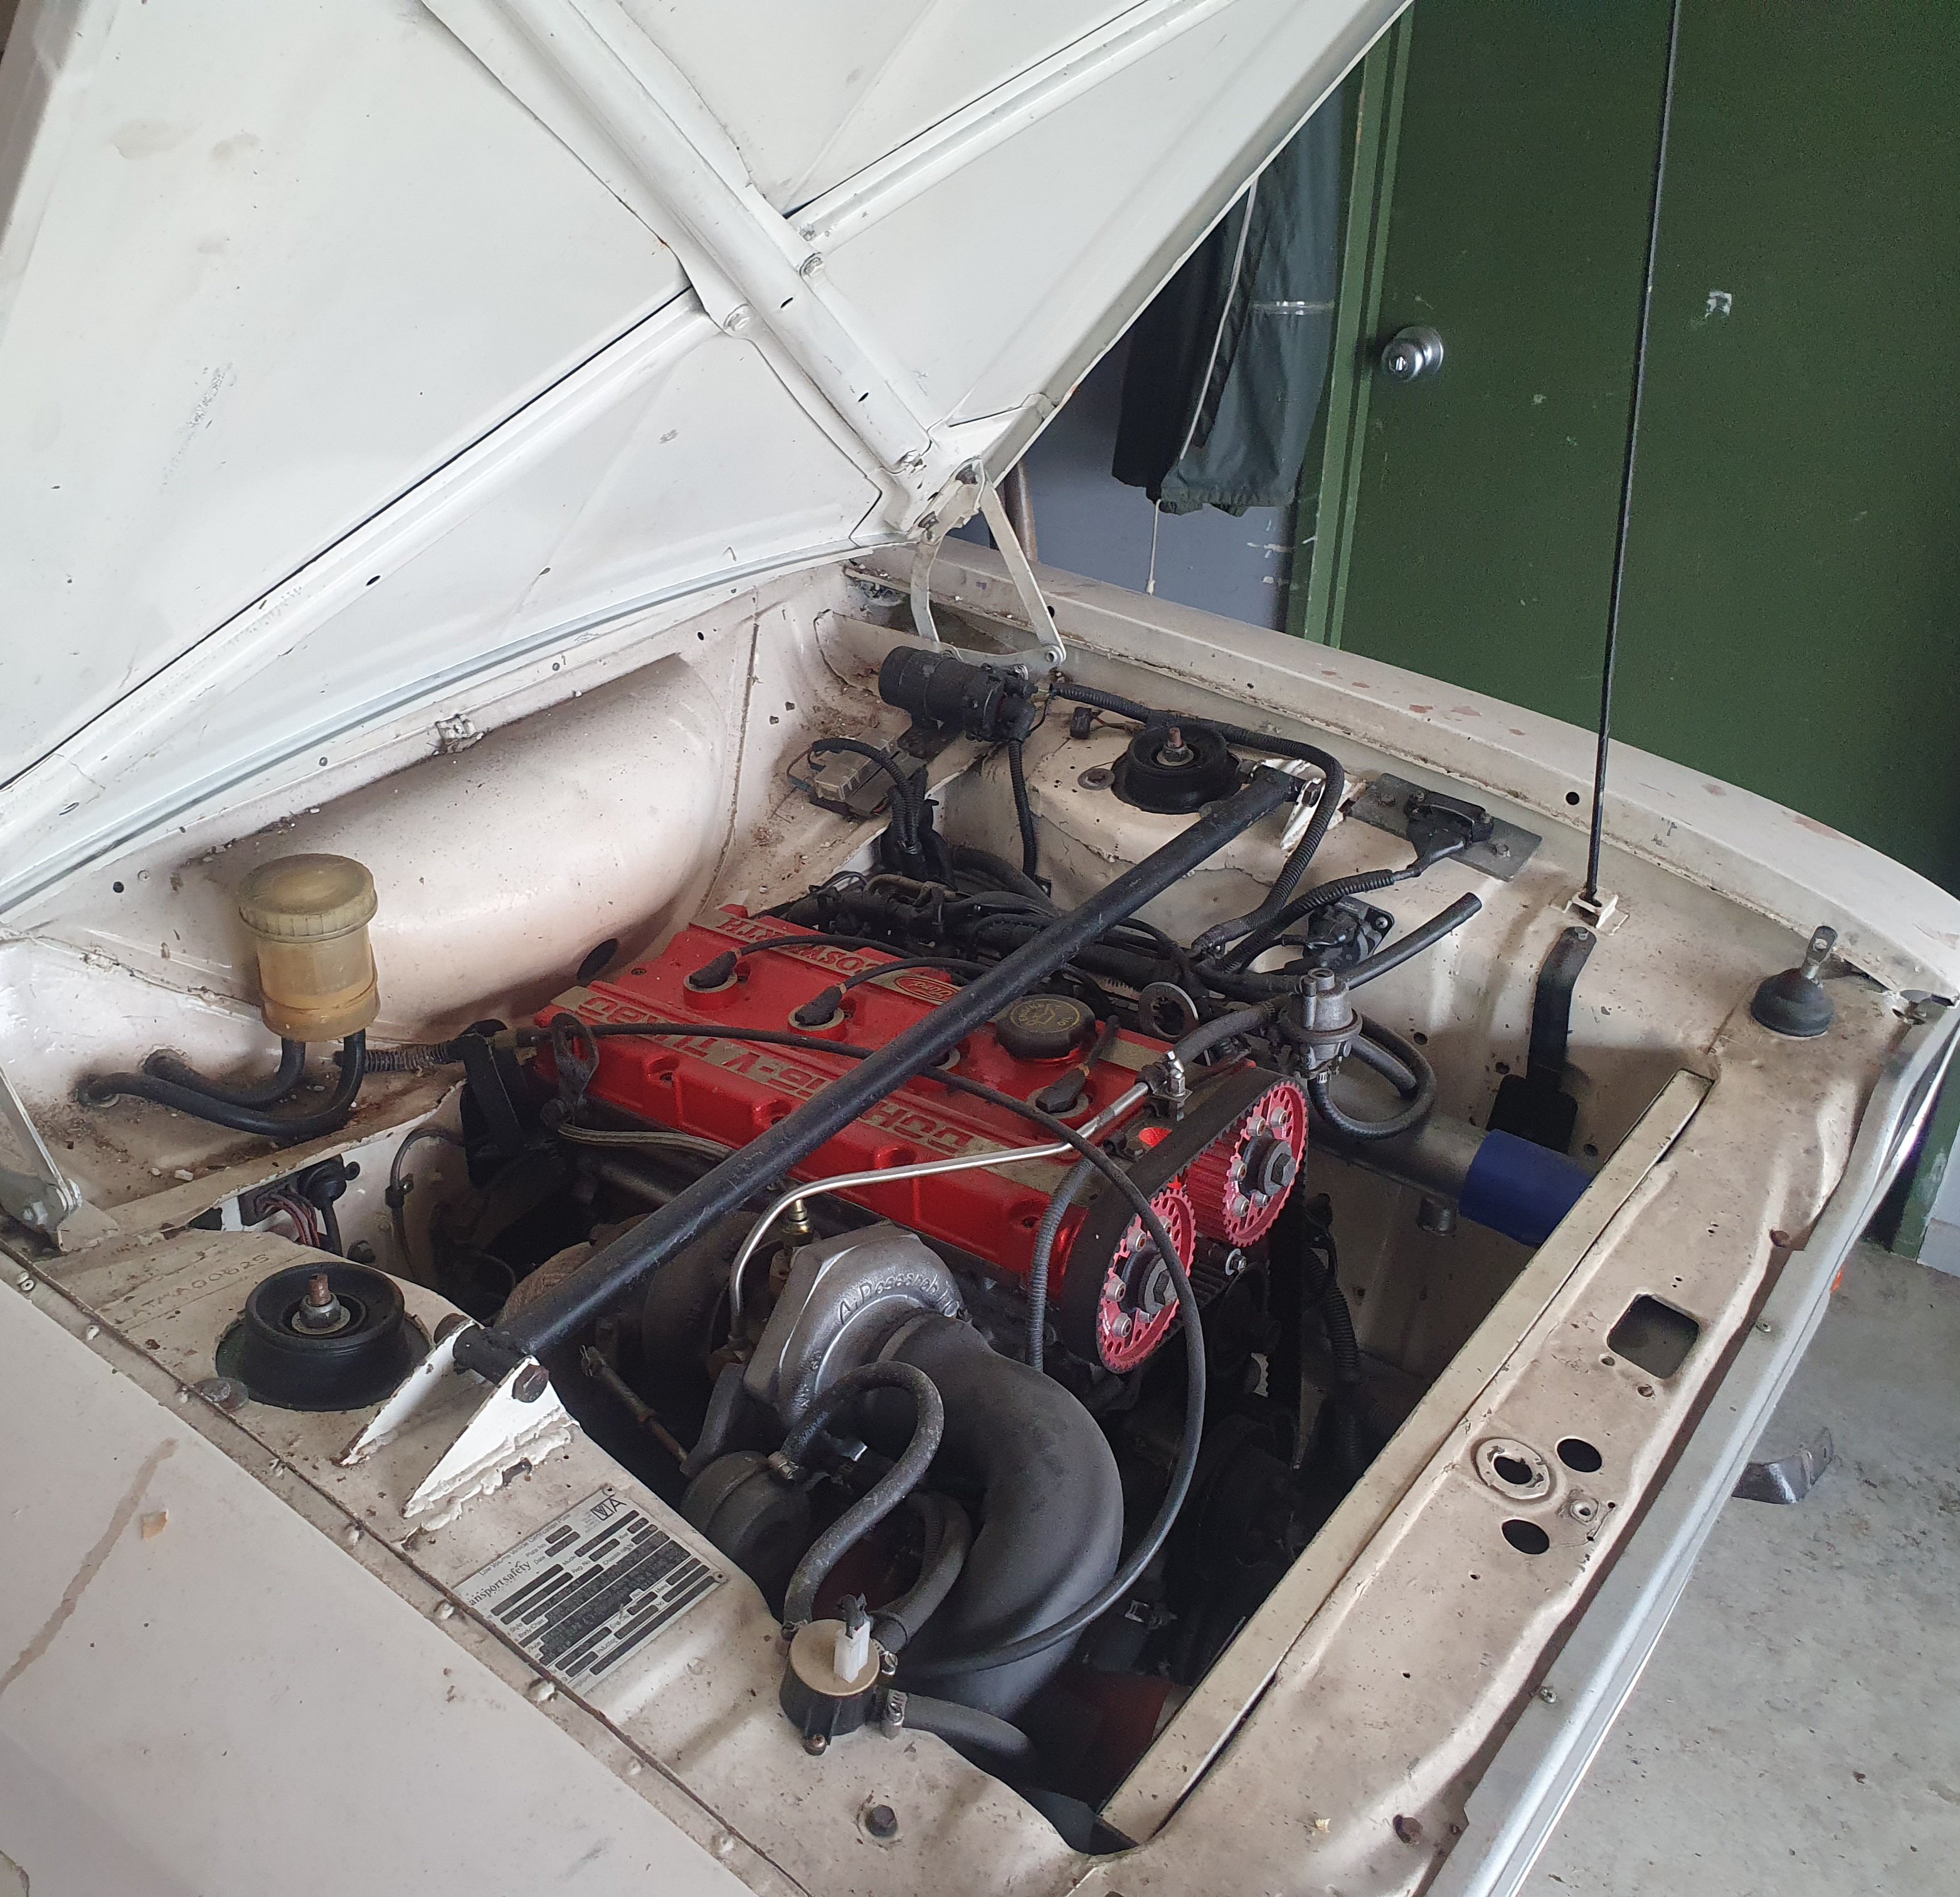
The mighty Cosworth
1 point
-
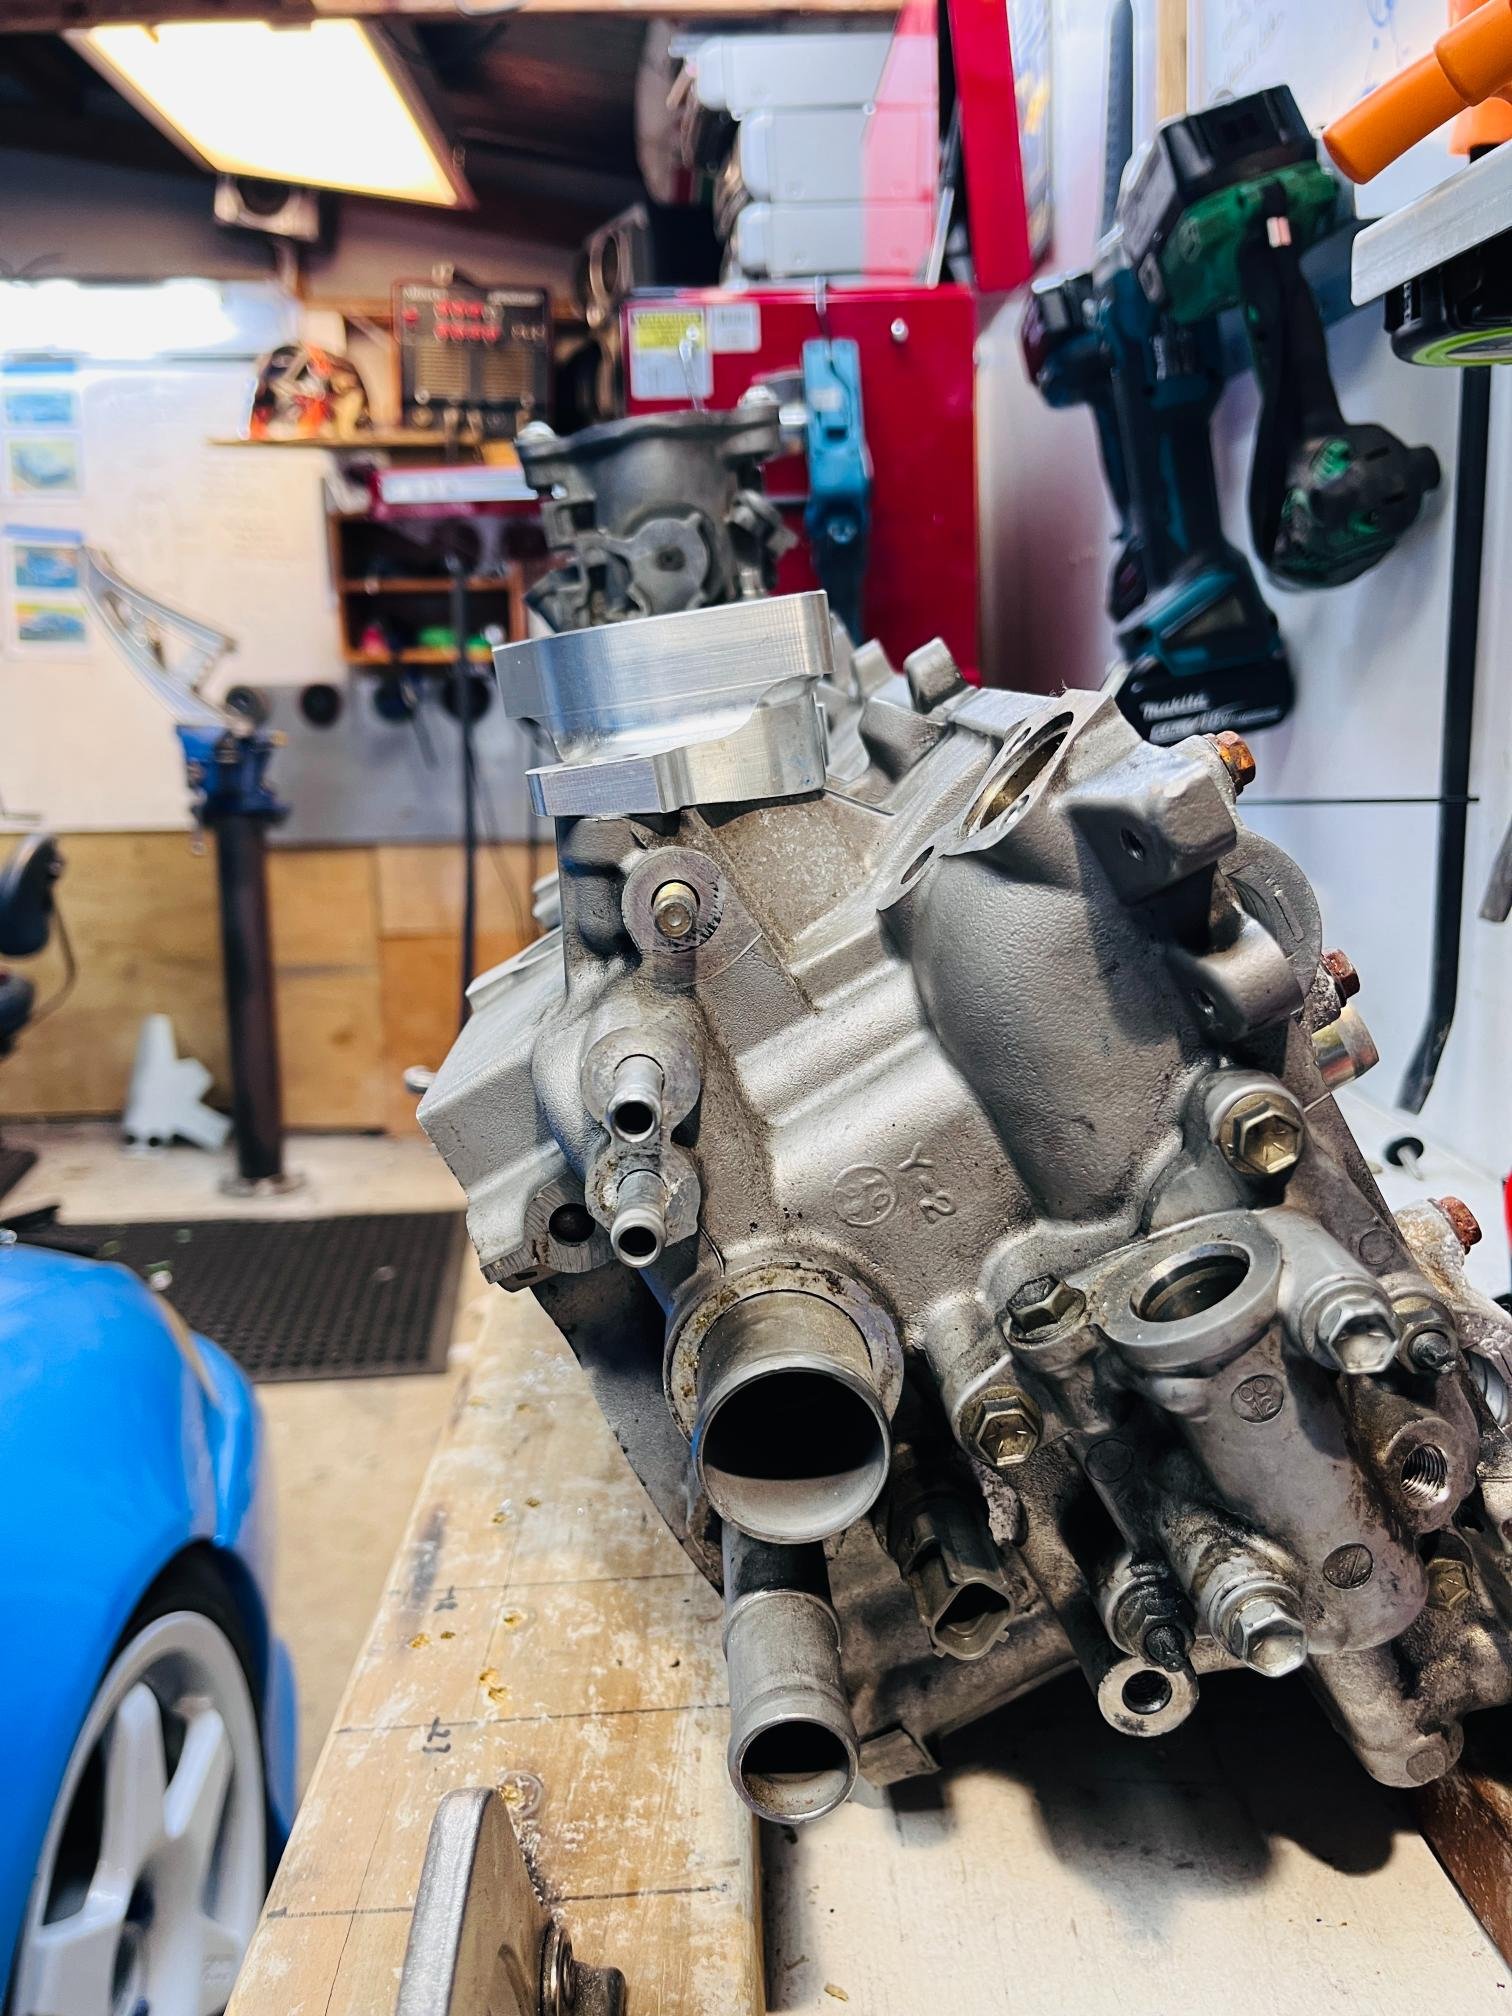
Did the other side, pretty much the same deal so imagine those pics mirrored. For a break I decided to start in with the wiring install. If you remember this is pretty much where I got to; Then it immediately turned to madness Then after a couple of days effort rerouting and reterminating it got much tidier Working on the front of the car wiring now, and I'm probably going to have to drop the engine to do it justice in the engine bay and back of the car. Thats fine cos I want to sort a couple of things on the engine/clutch/gearbox.1 point
-
First tank of fuel since getting the car done. Averaged 5.98L/100KM. Its currently my most efficient car, and I wouldn't be surprised if its the most efficient car I have owned. It doesn't get an easy time either, with it coming on boost almost instantly, it lives either on boost or high in the rev range most of the time.1 point
-
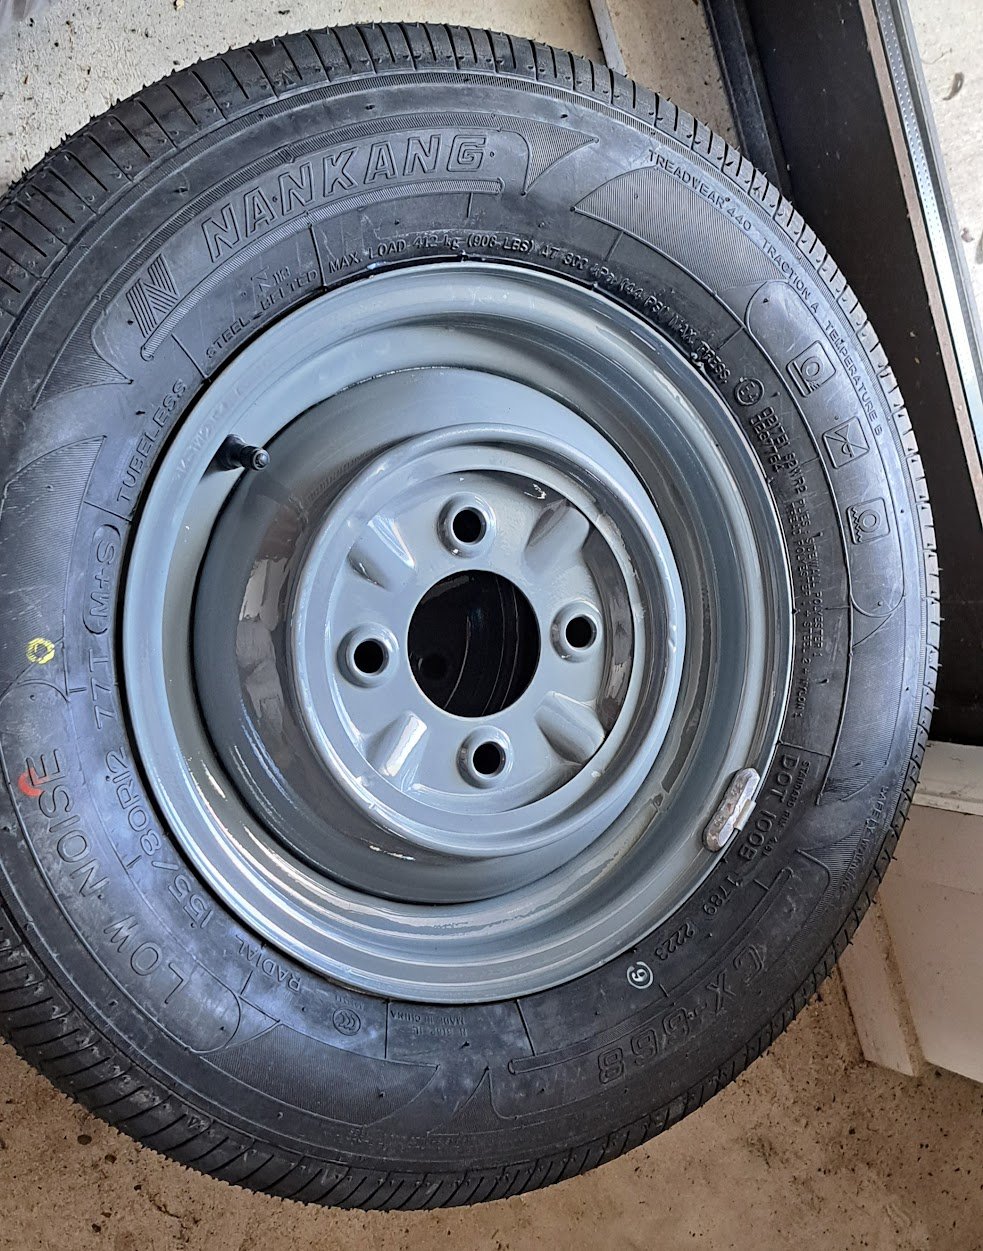
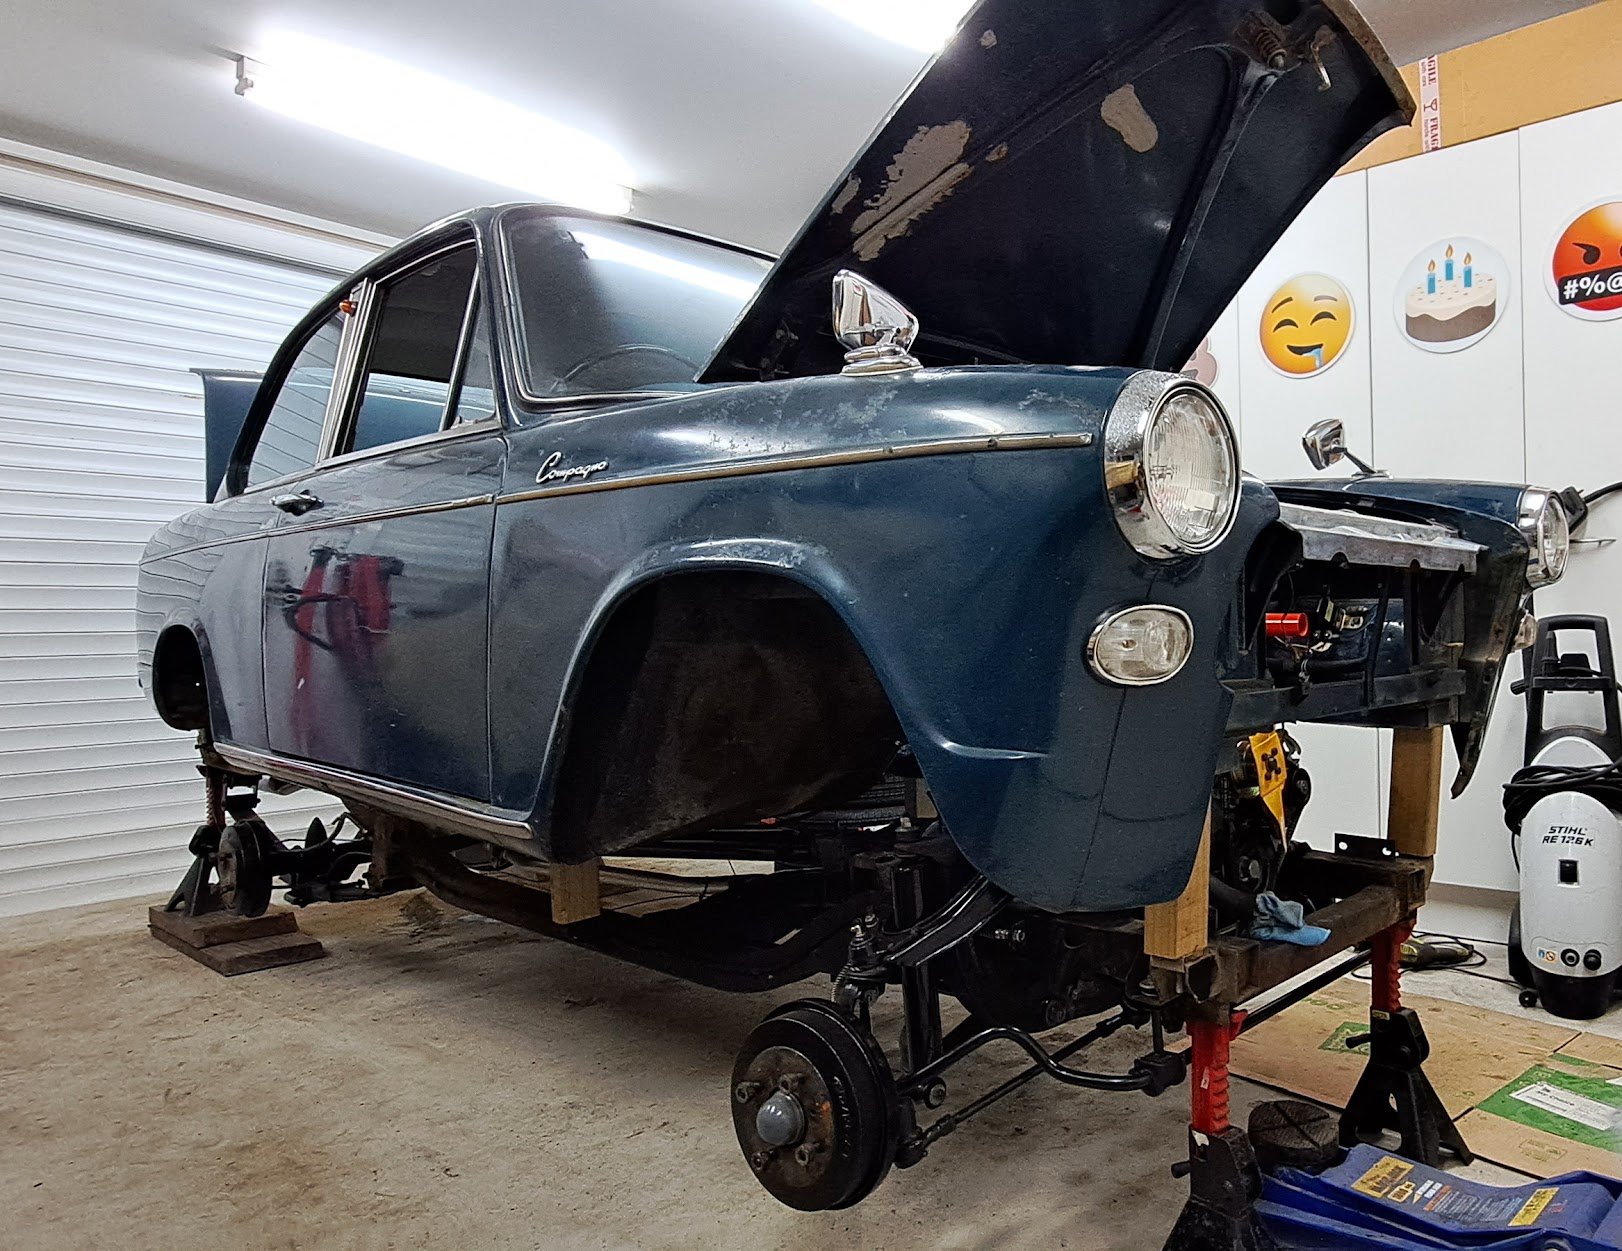
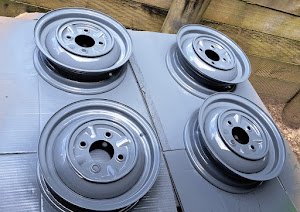
Overdue update - Body spaced off the chassis then the chassis removed completely then stripped everything off the chassis and epotec primed it Also acid dipped the wheels and straightened them up + painted them and some 155/80 R12 tyres fitted
1 point
-
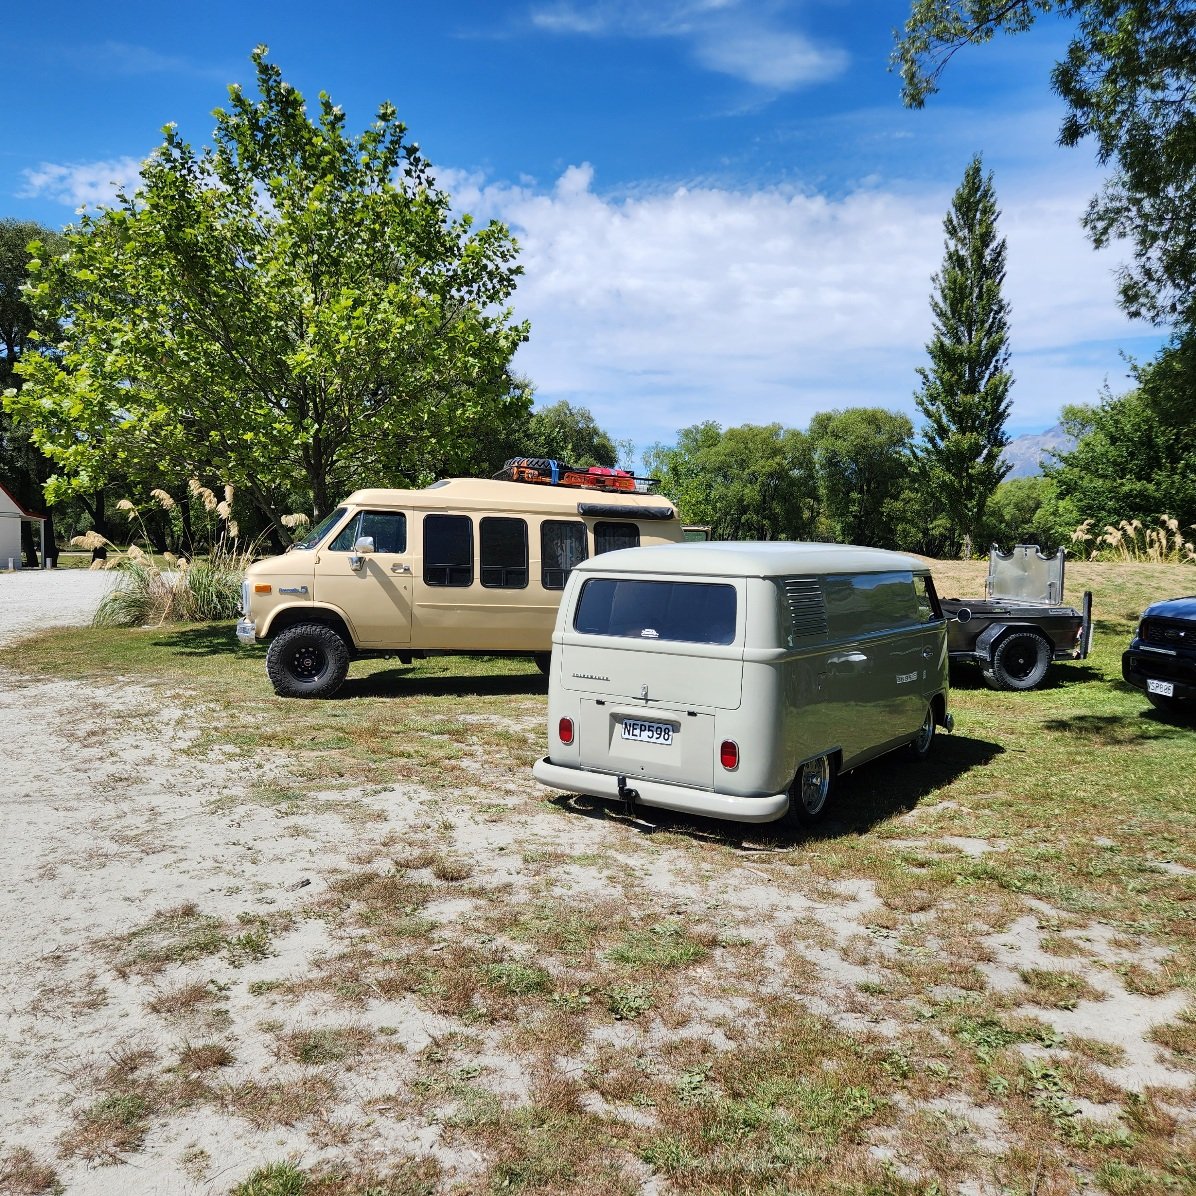
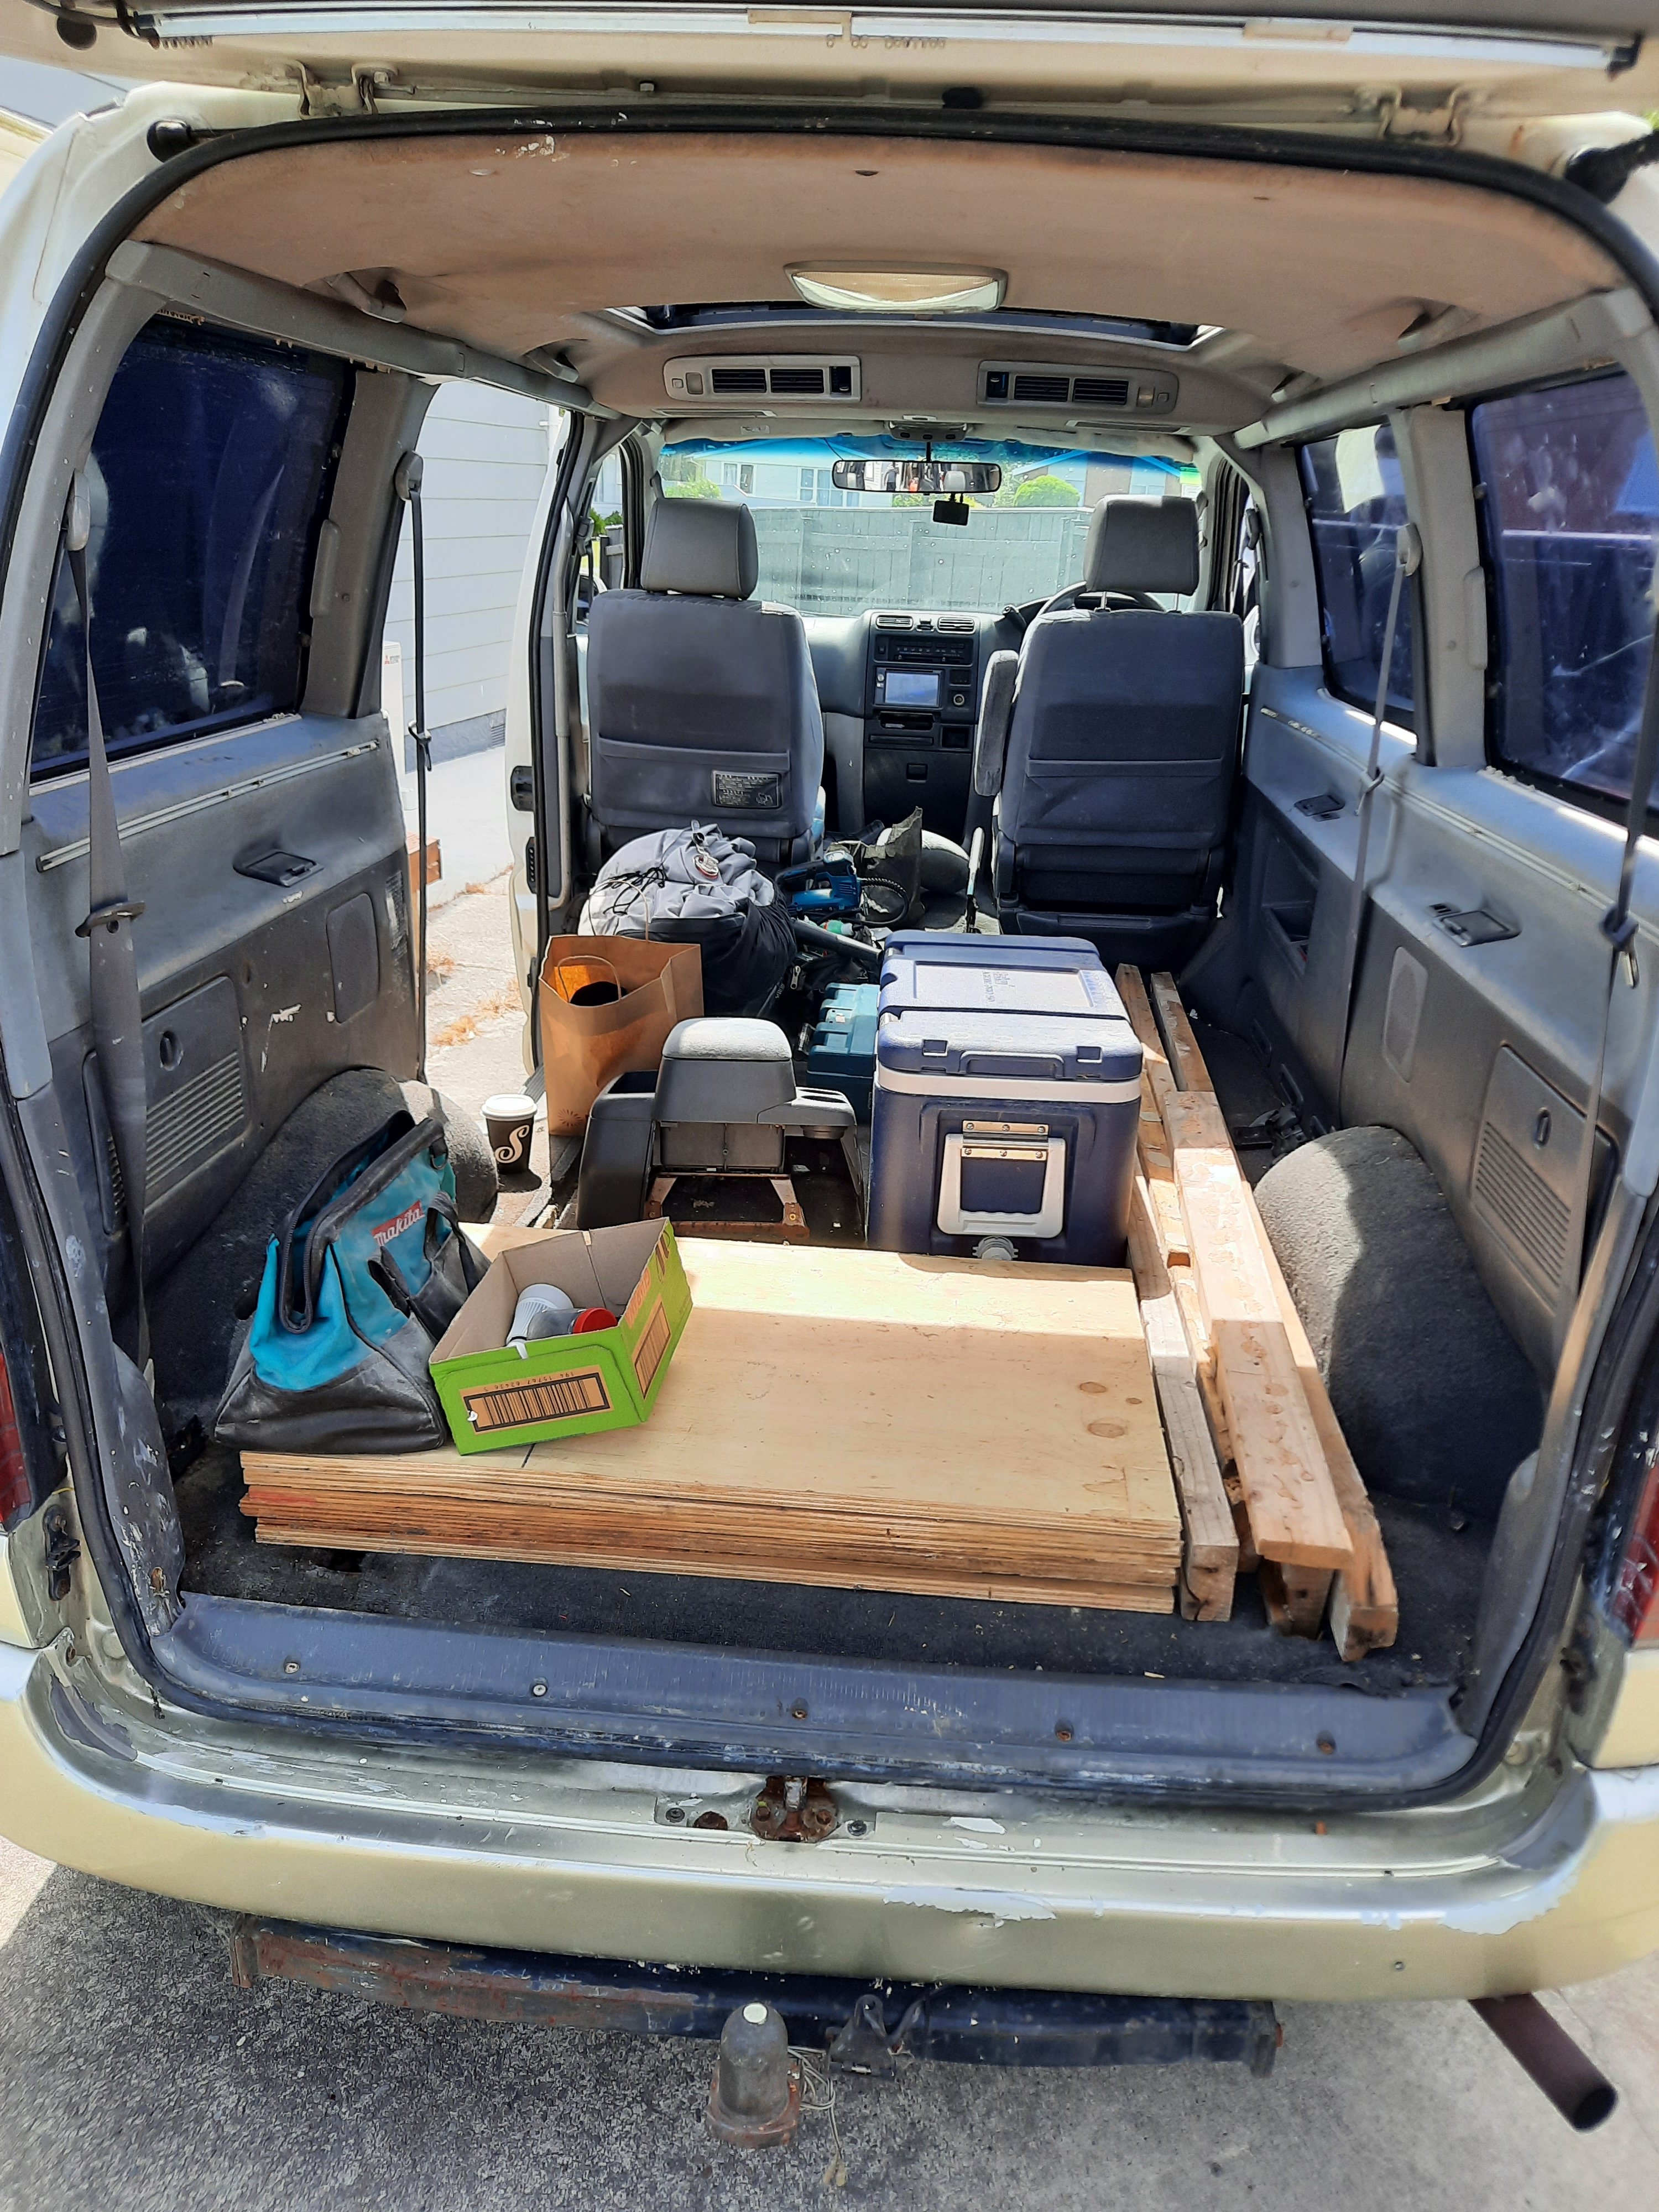
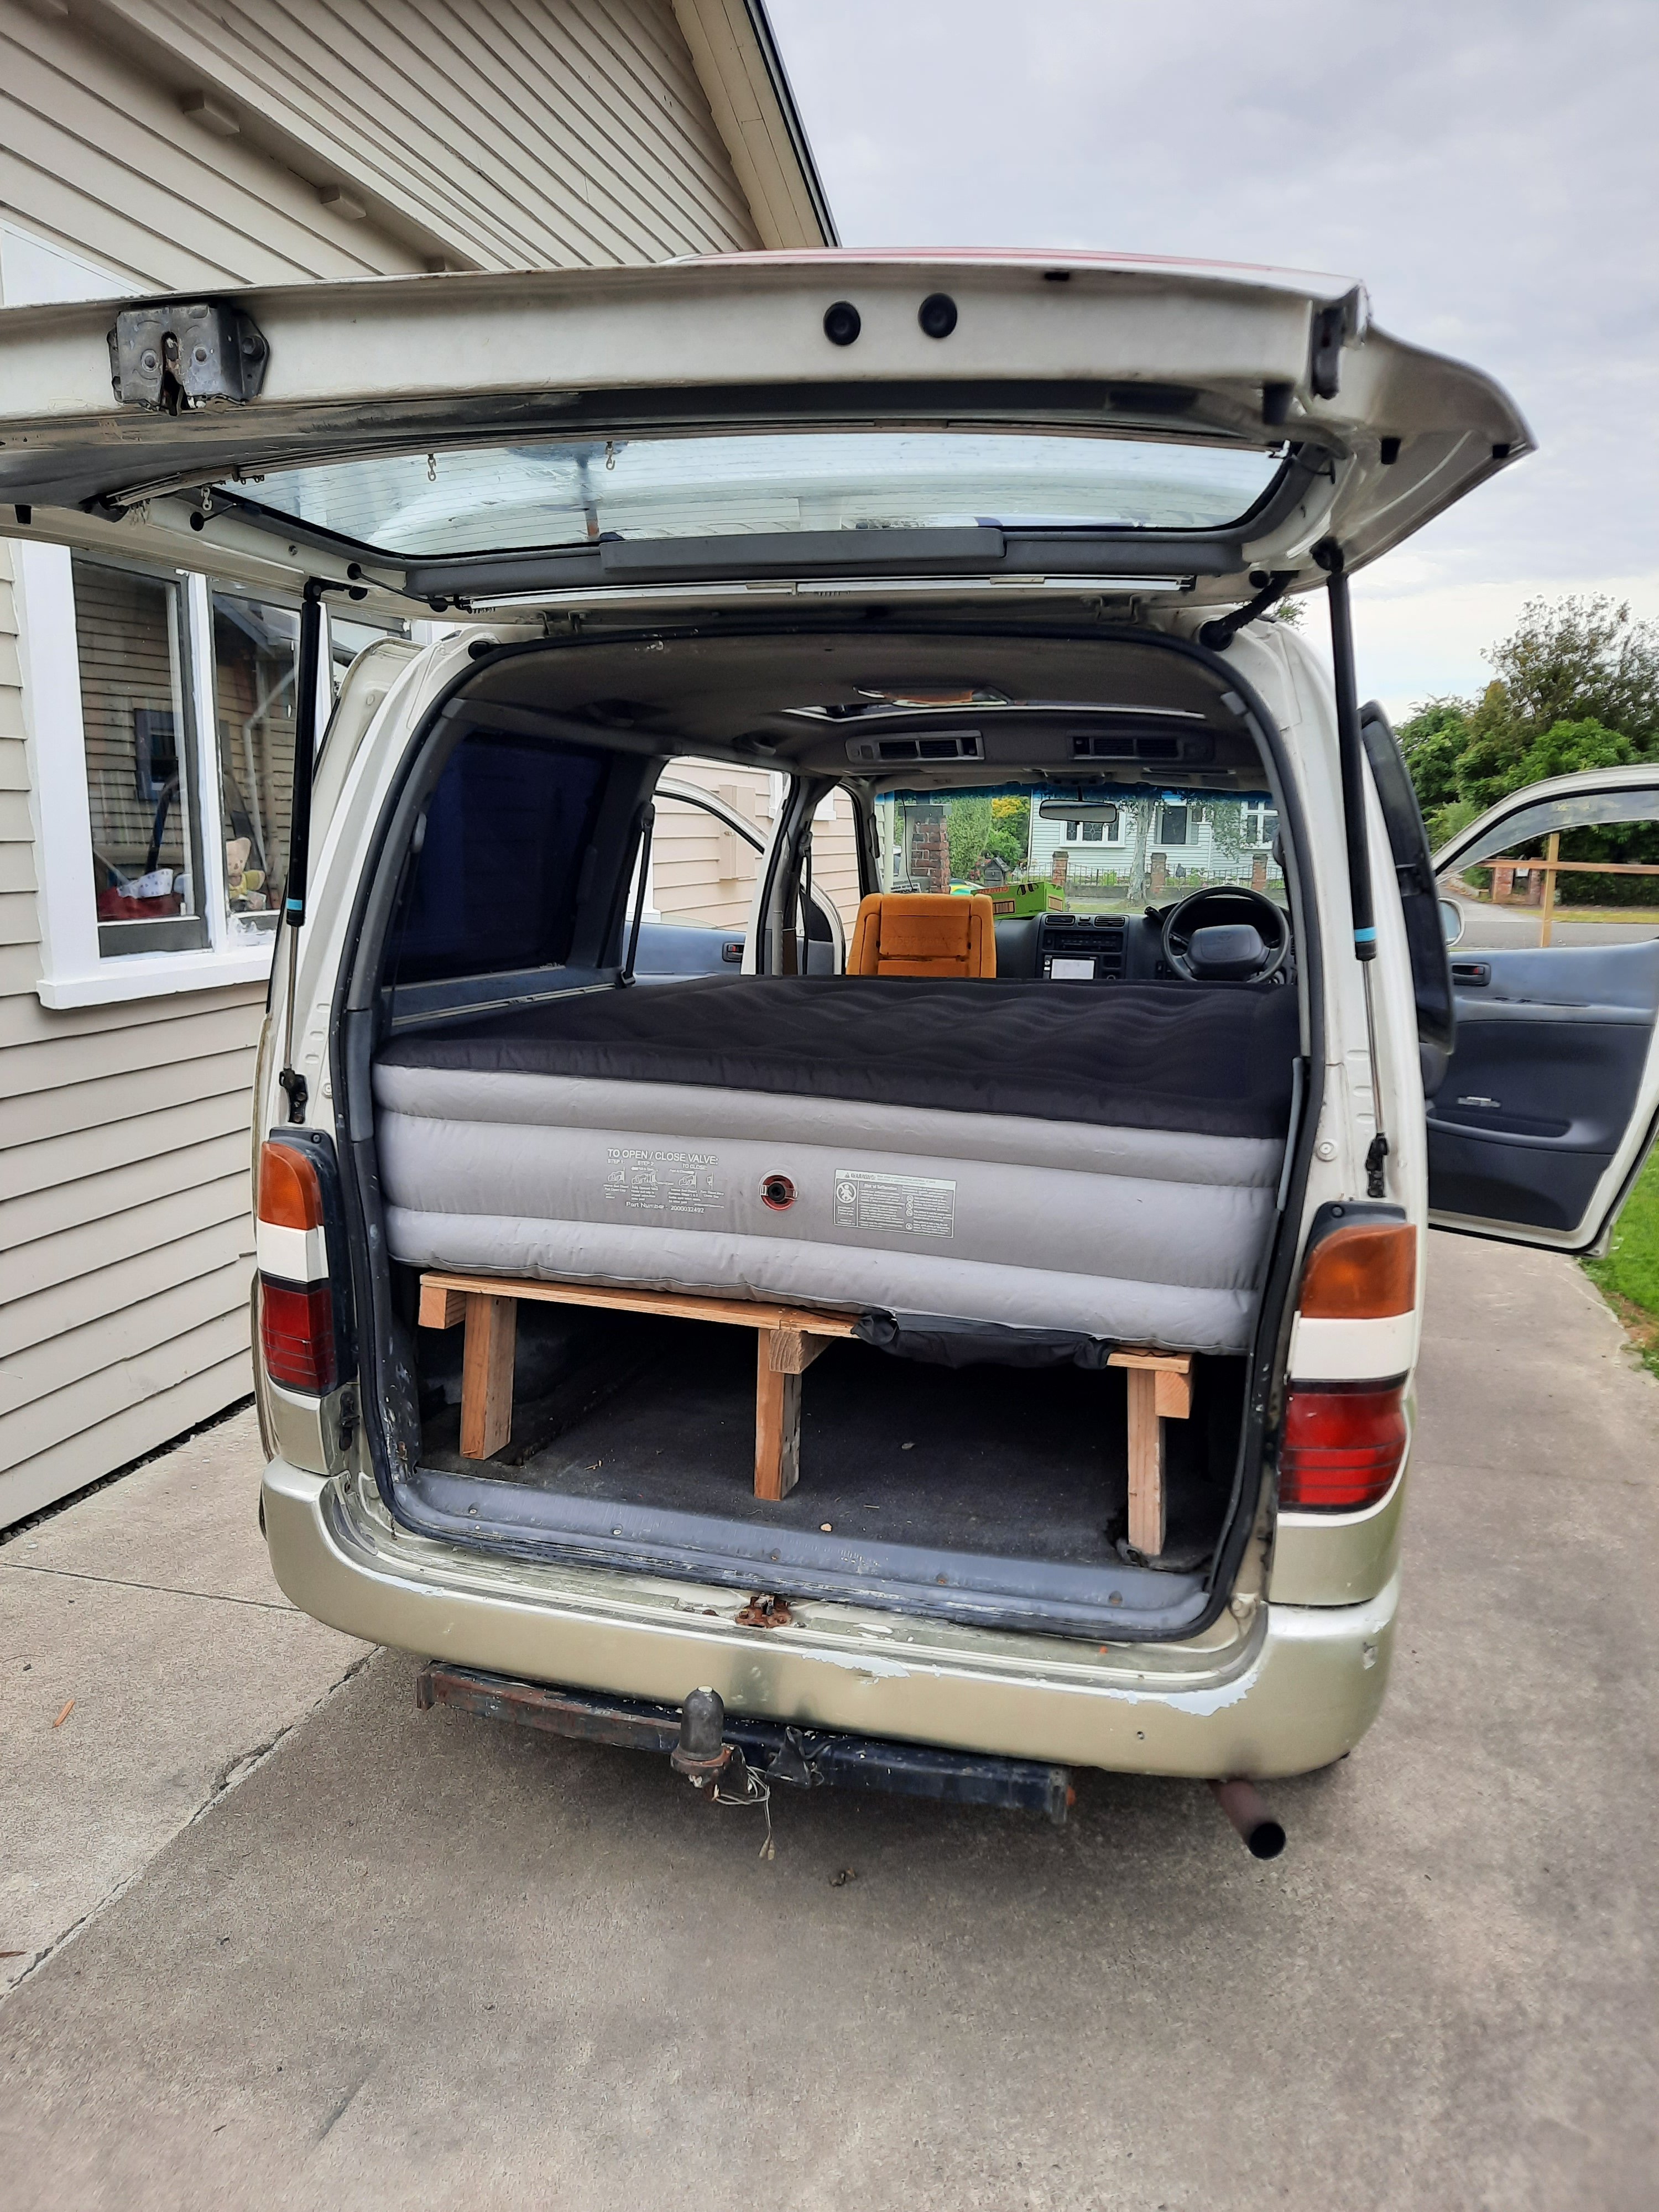
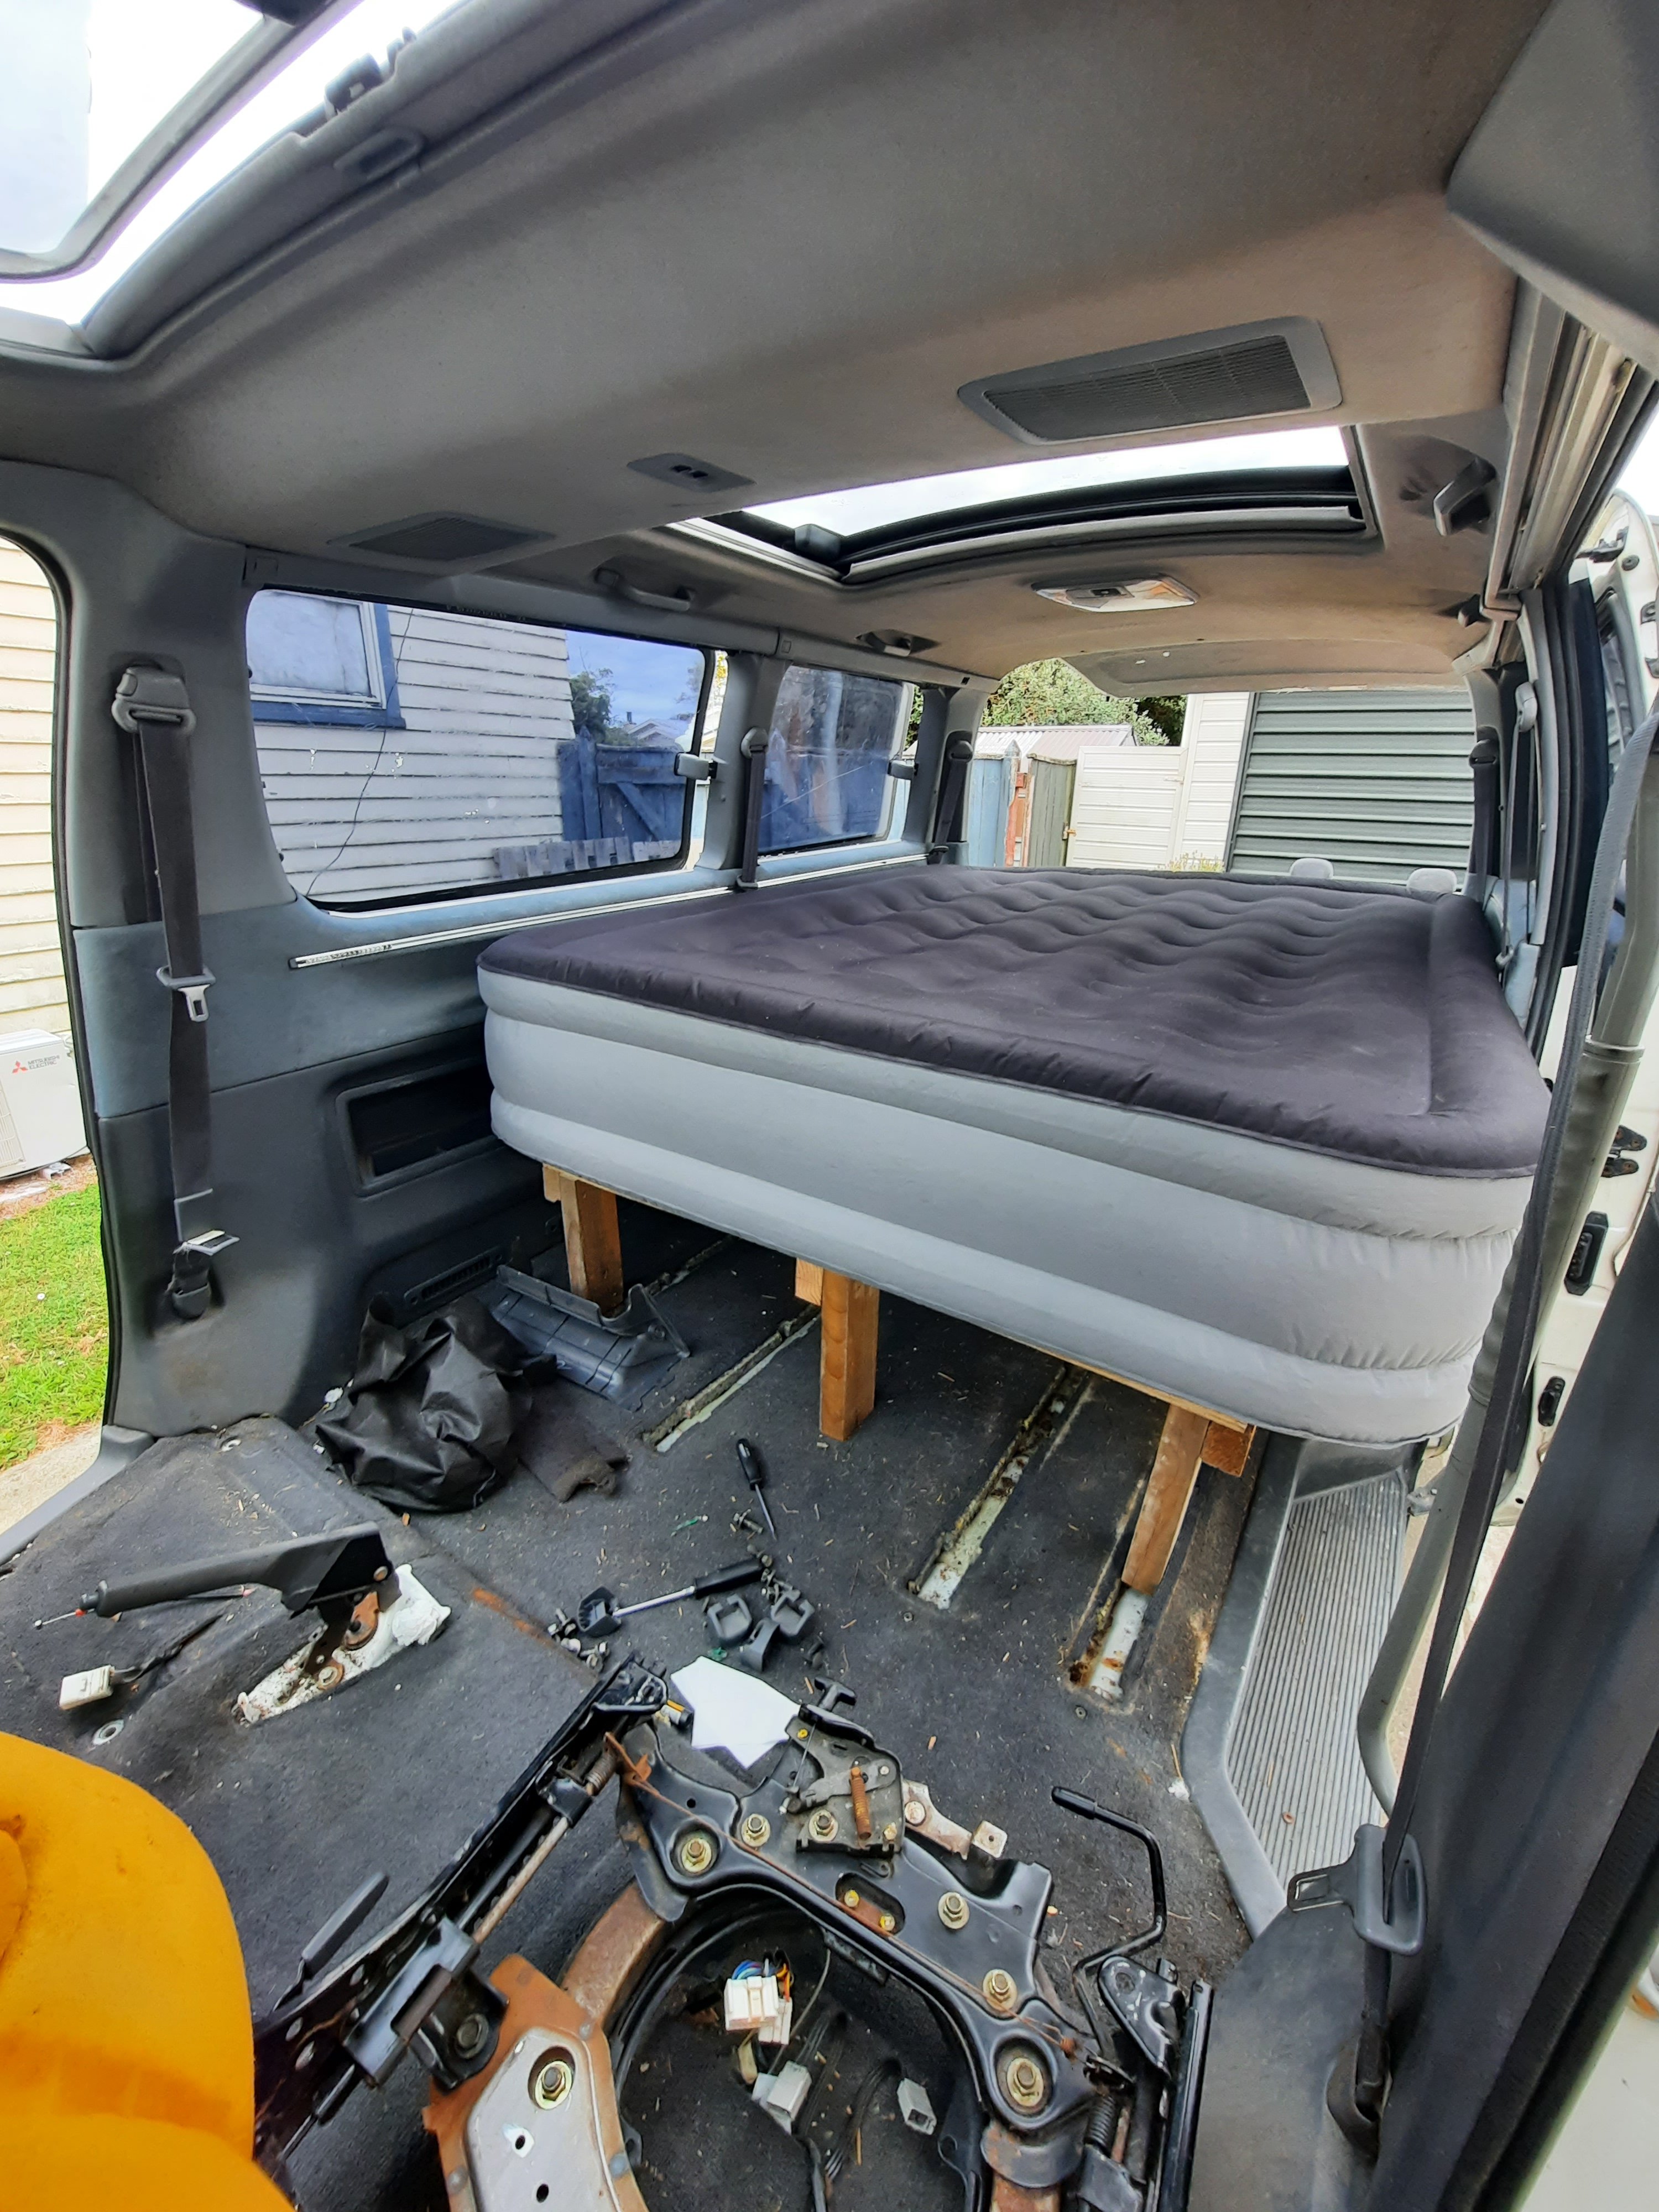
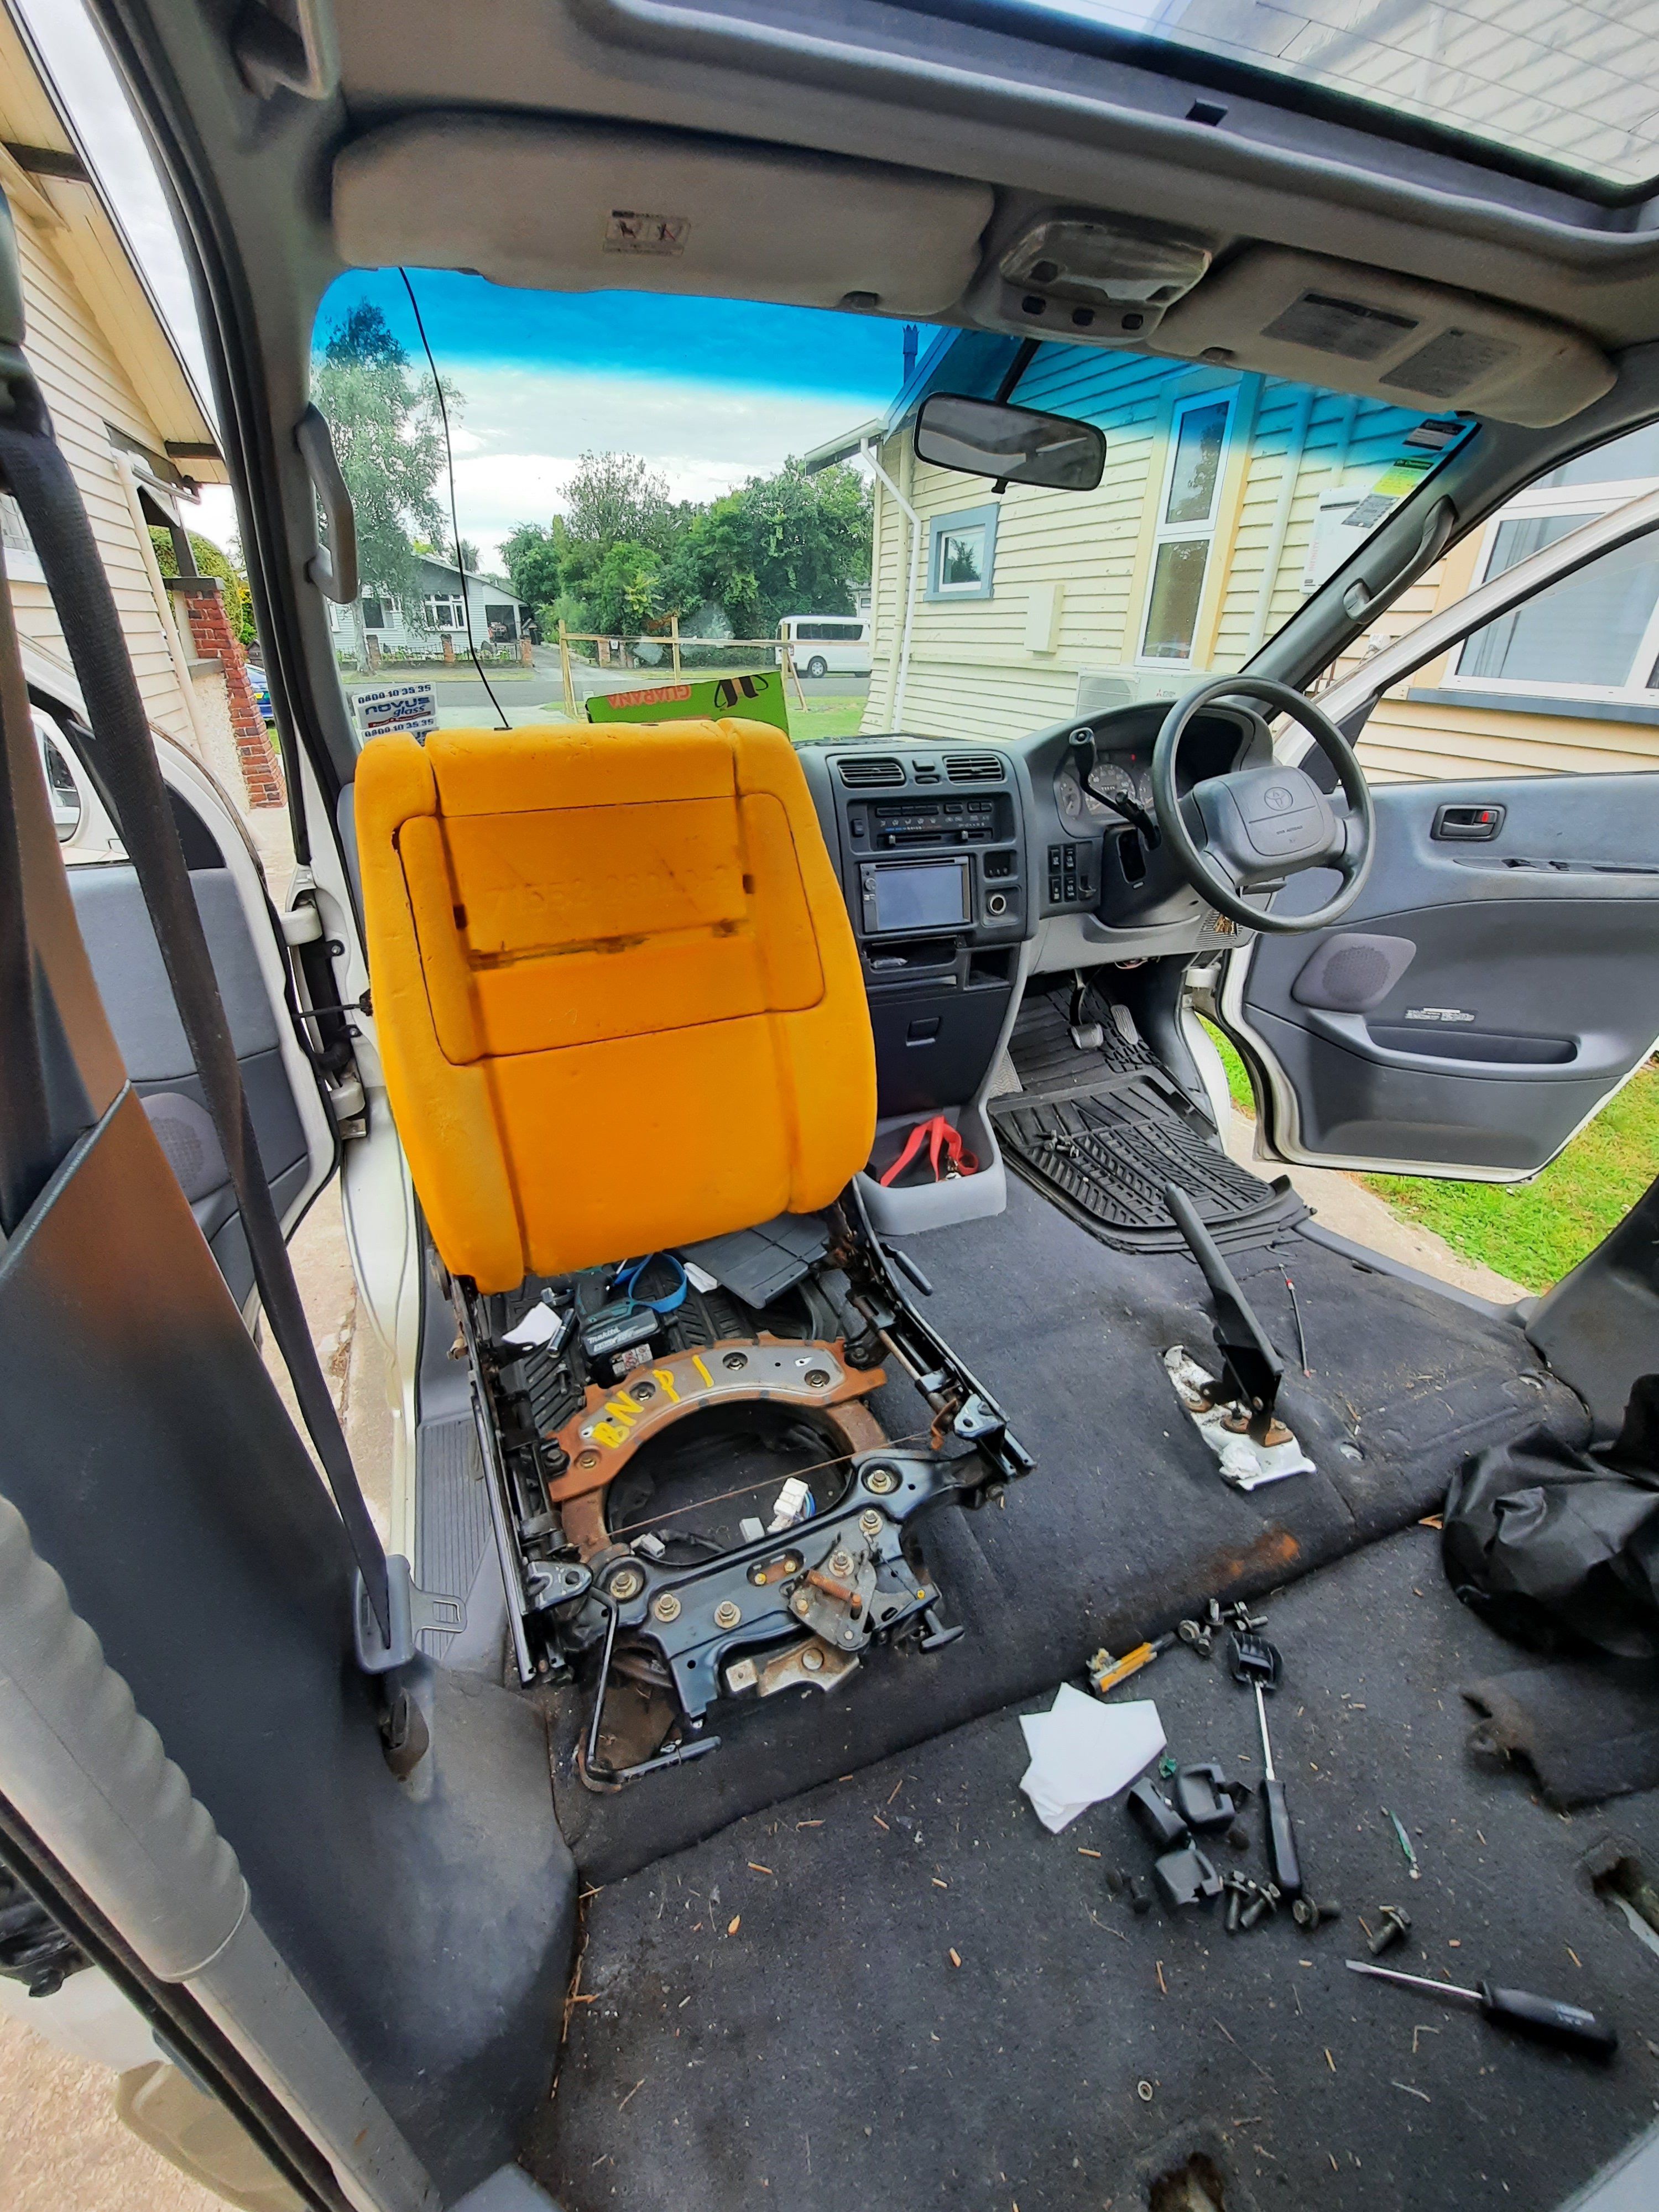
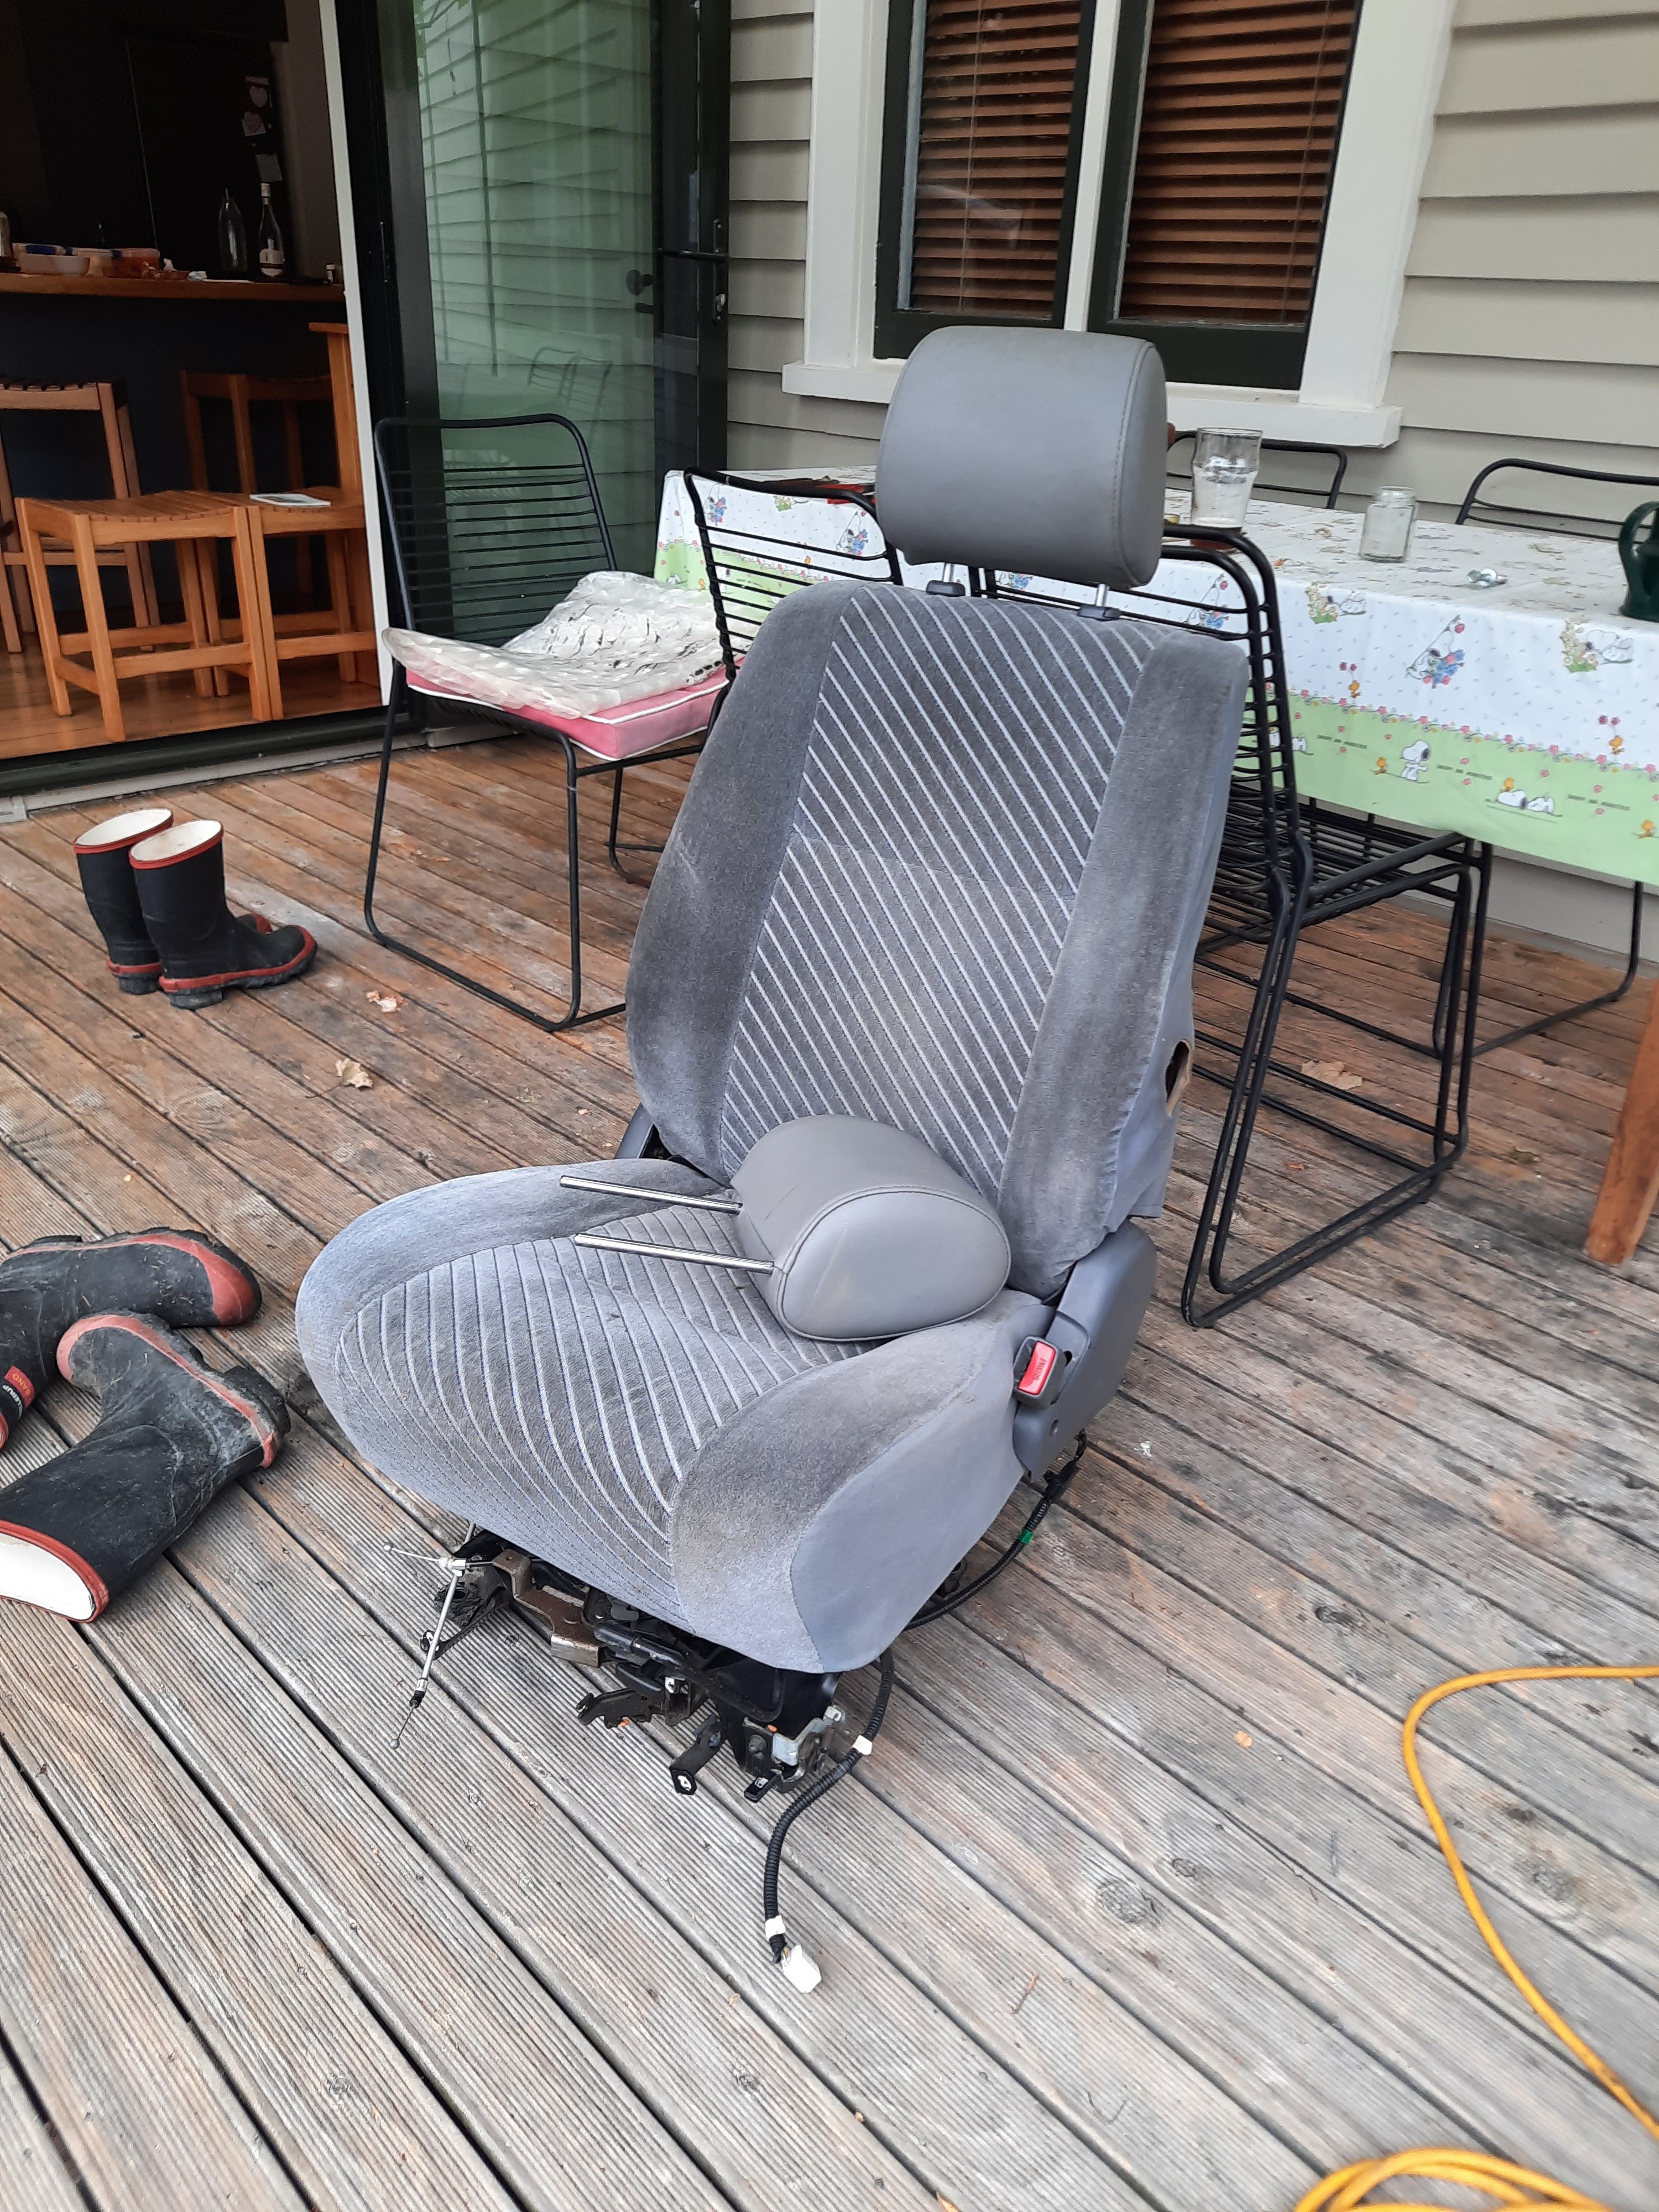
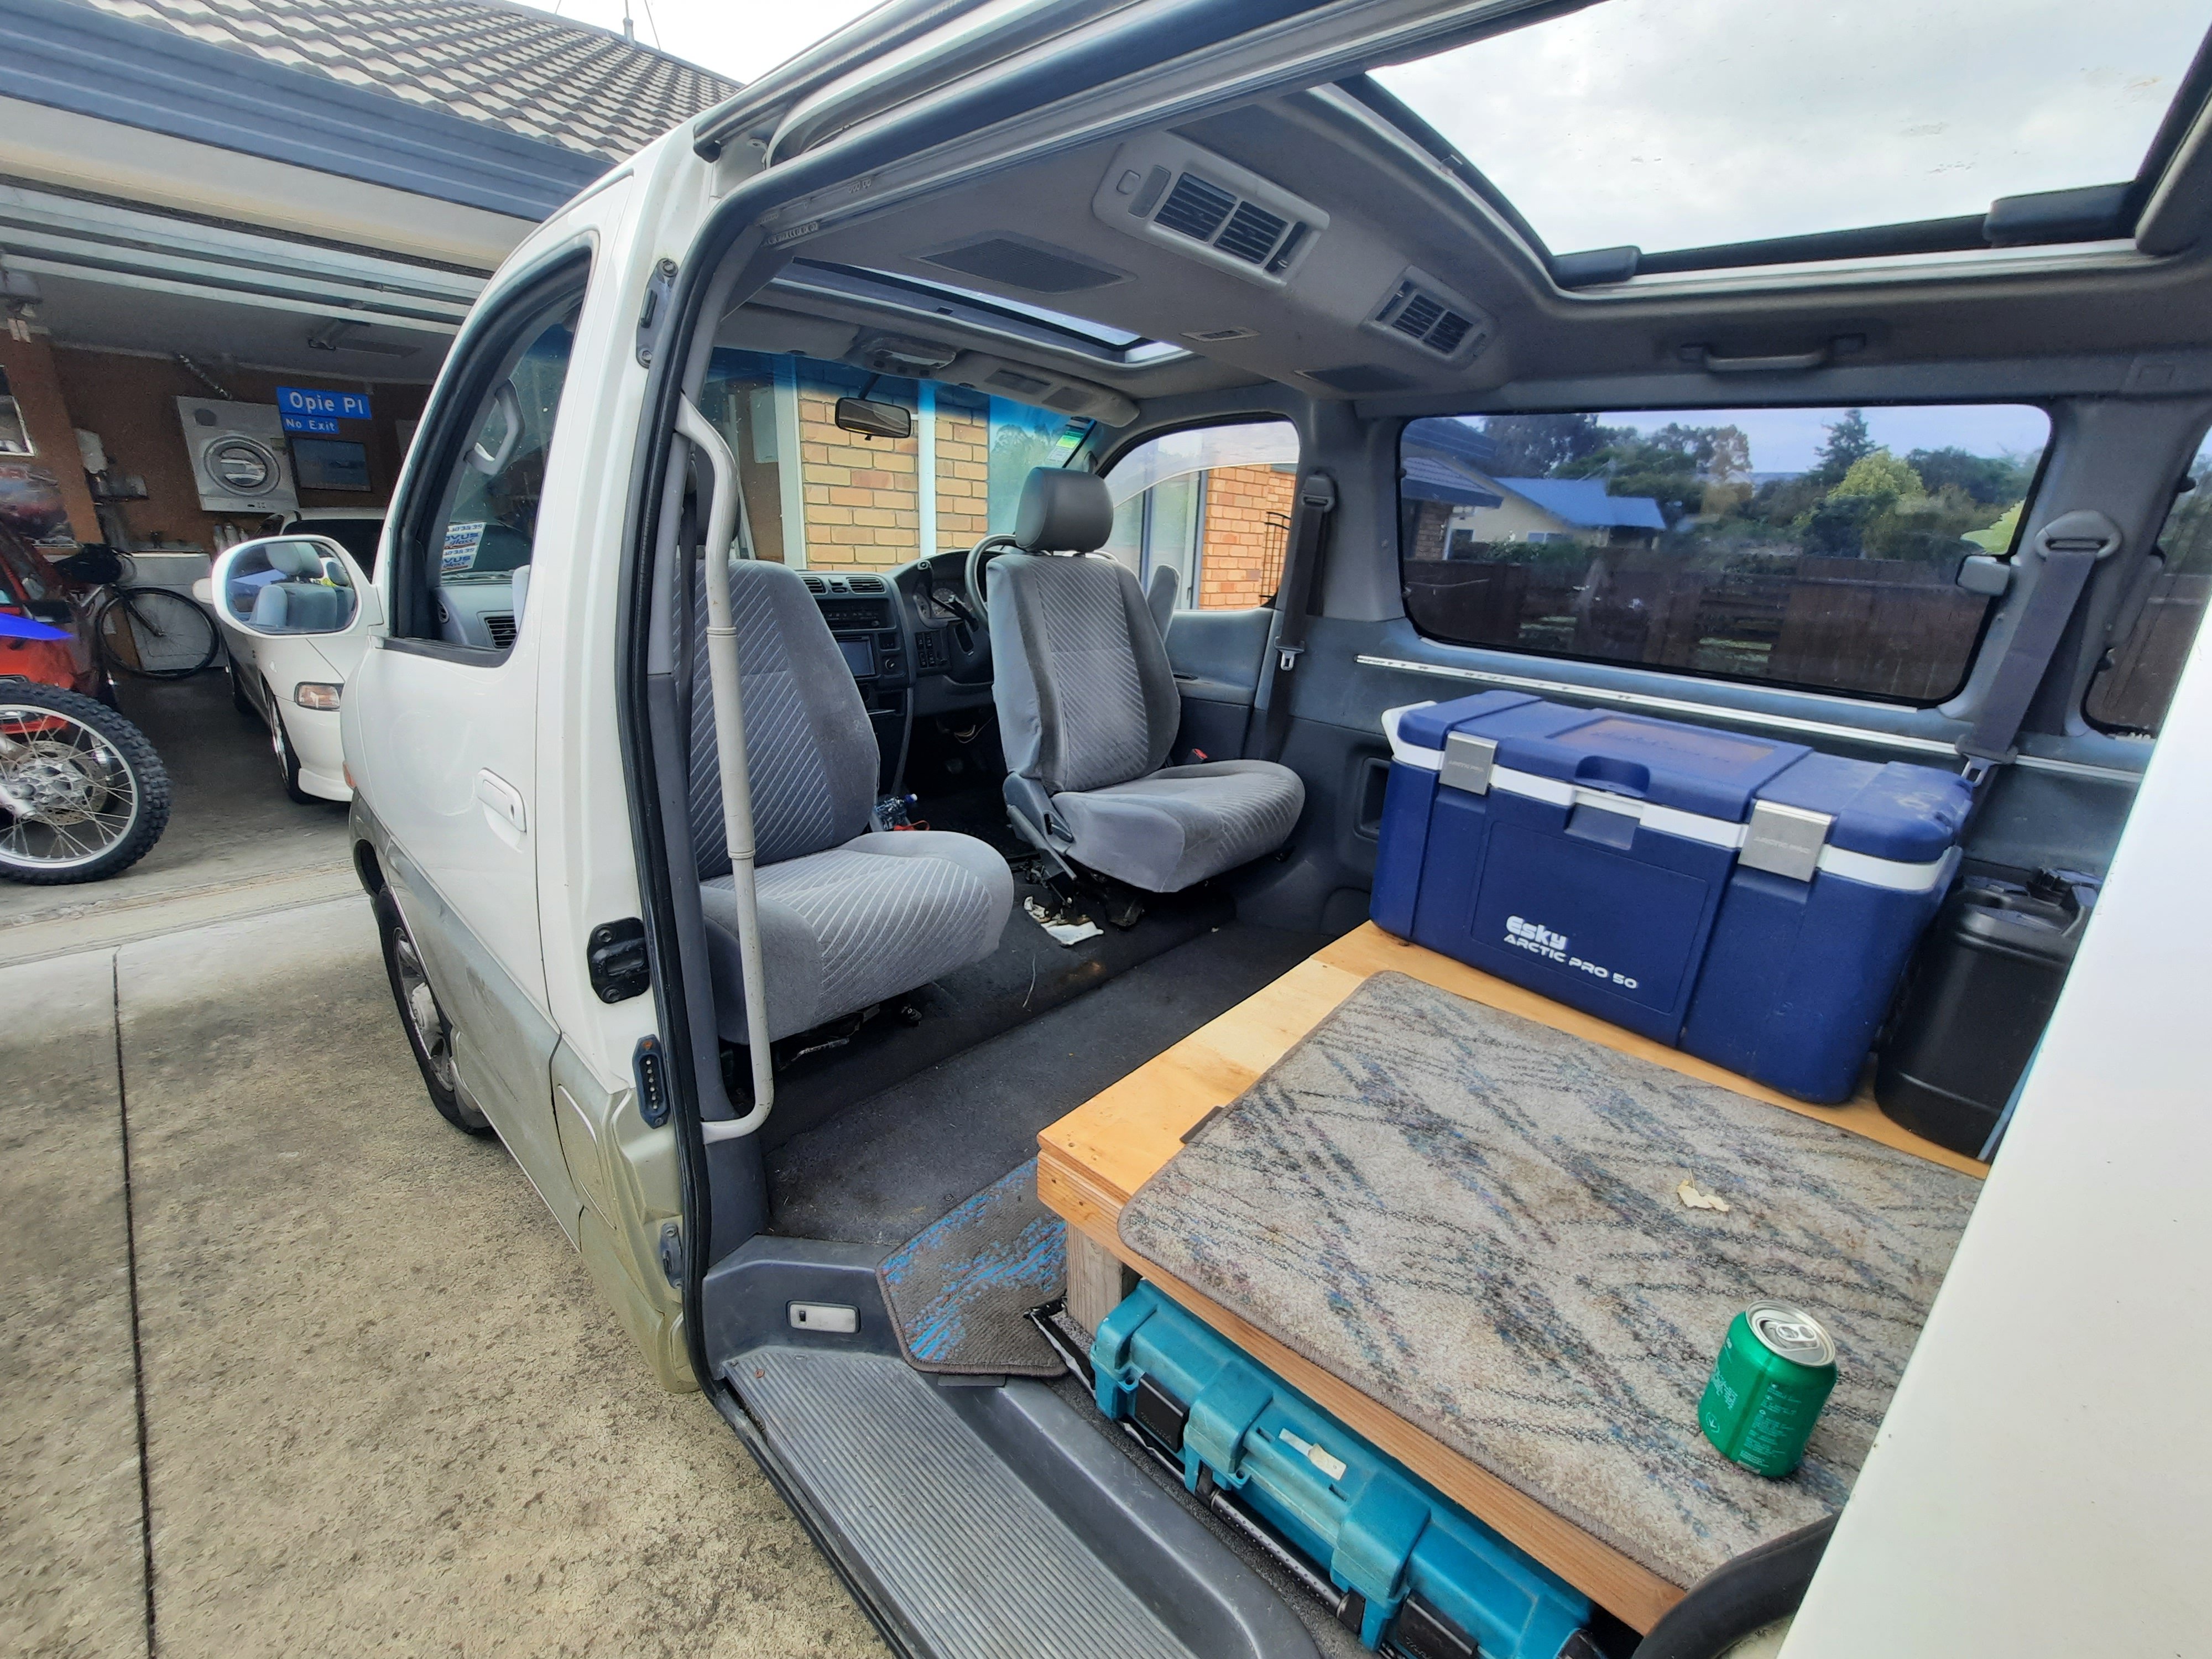
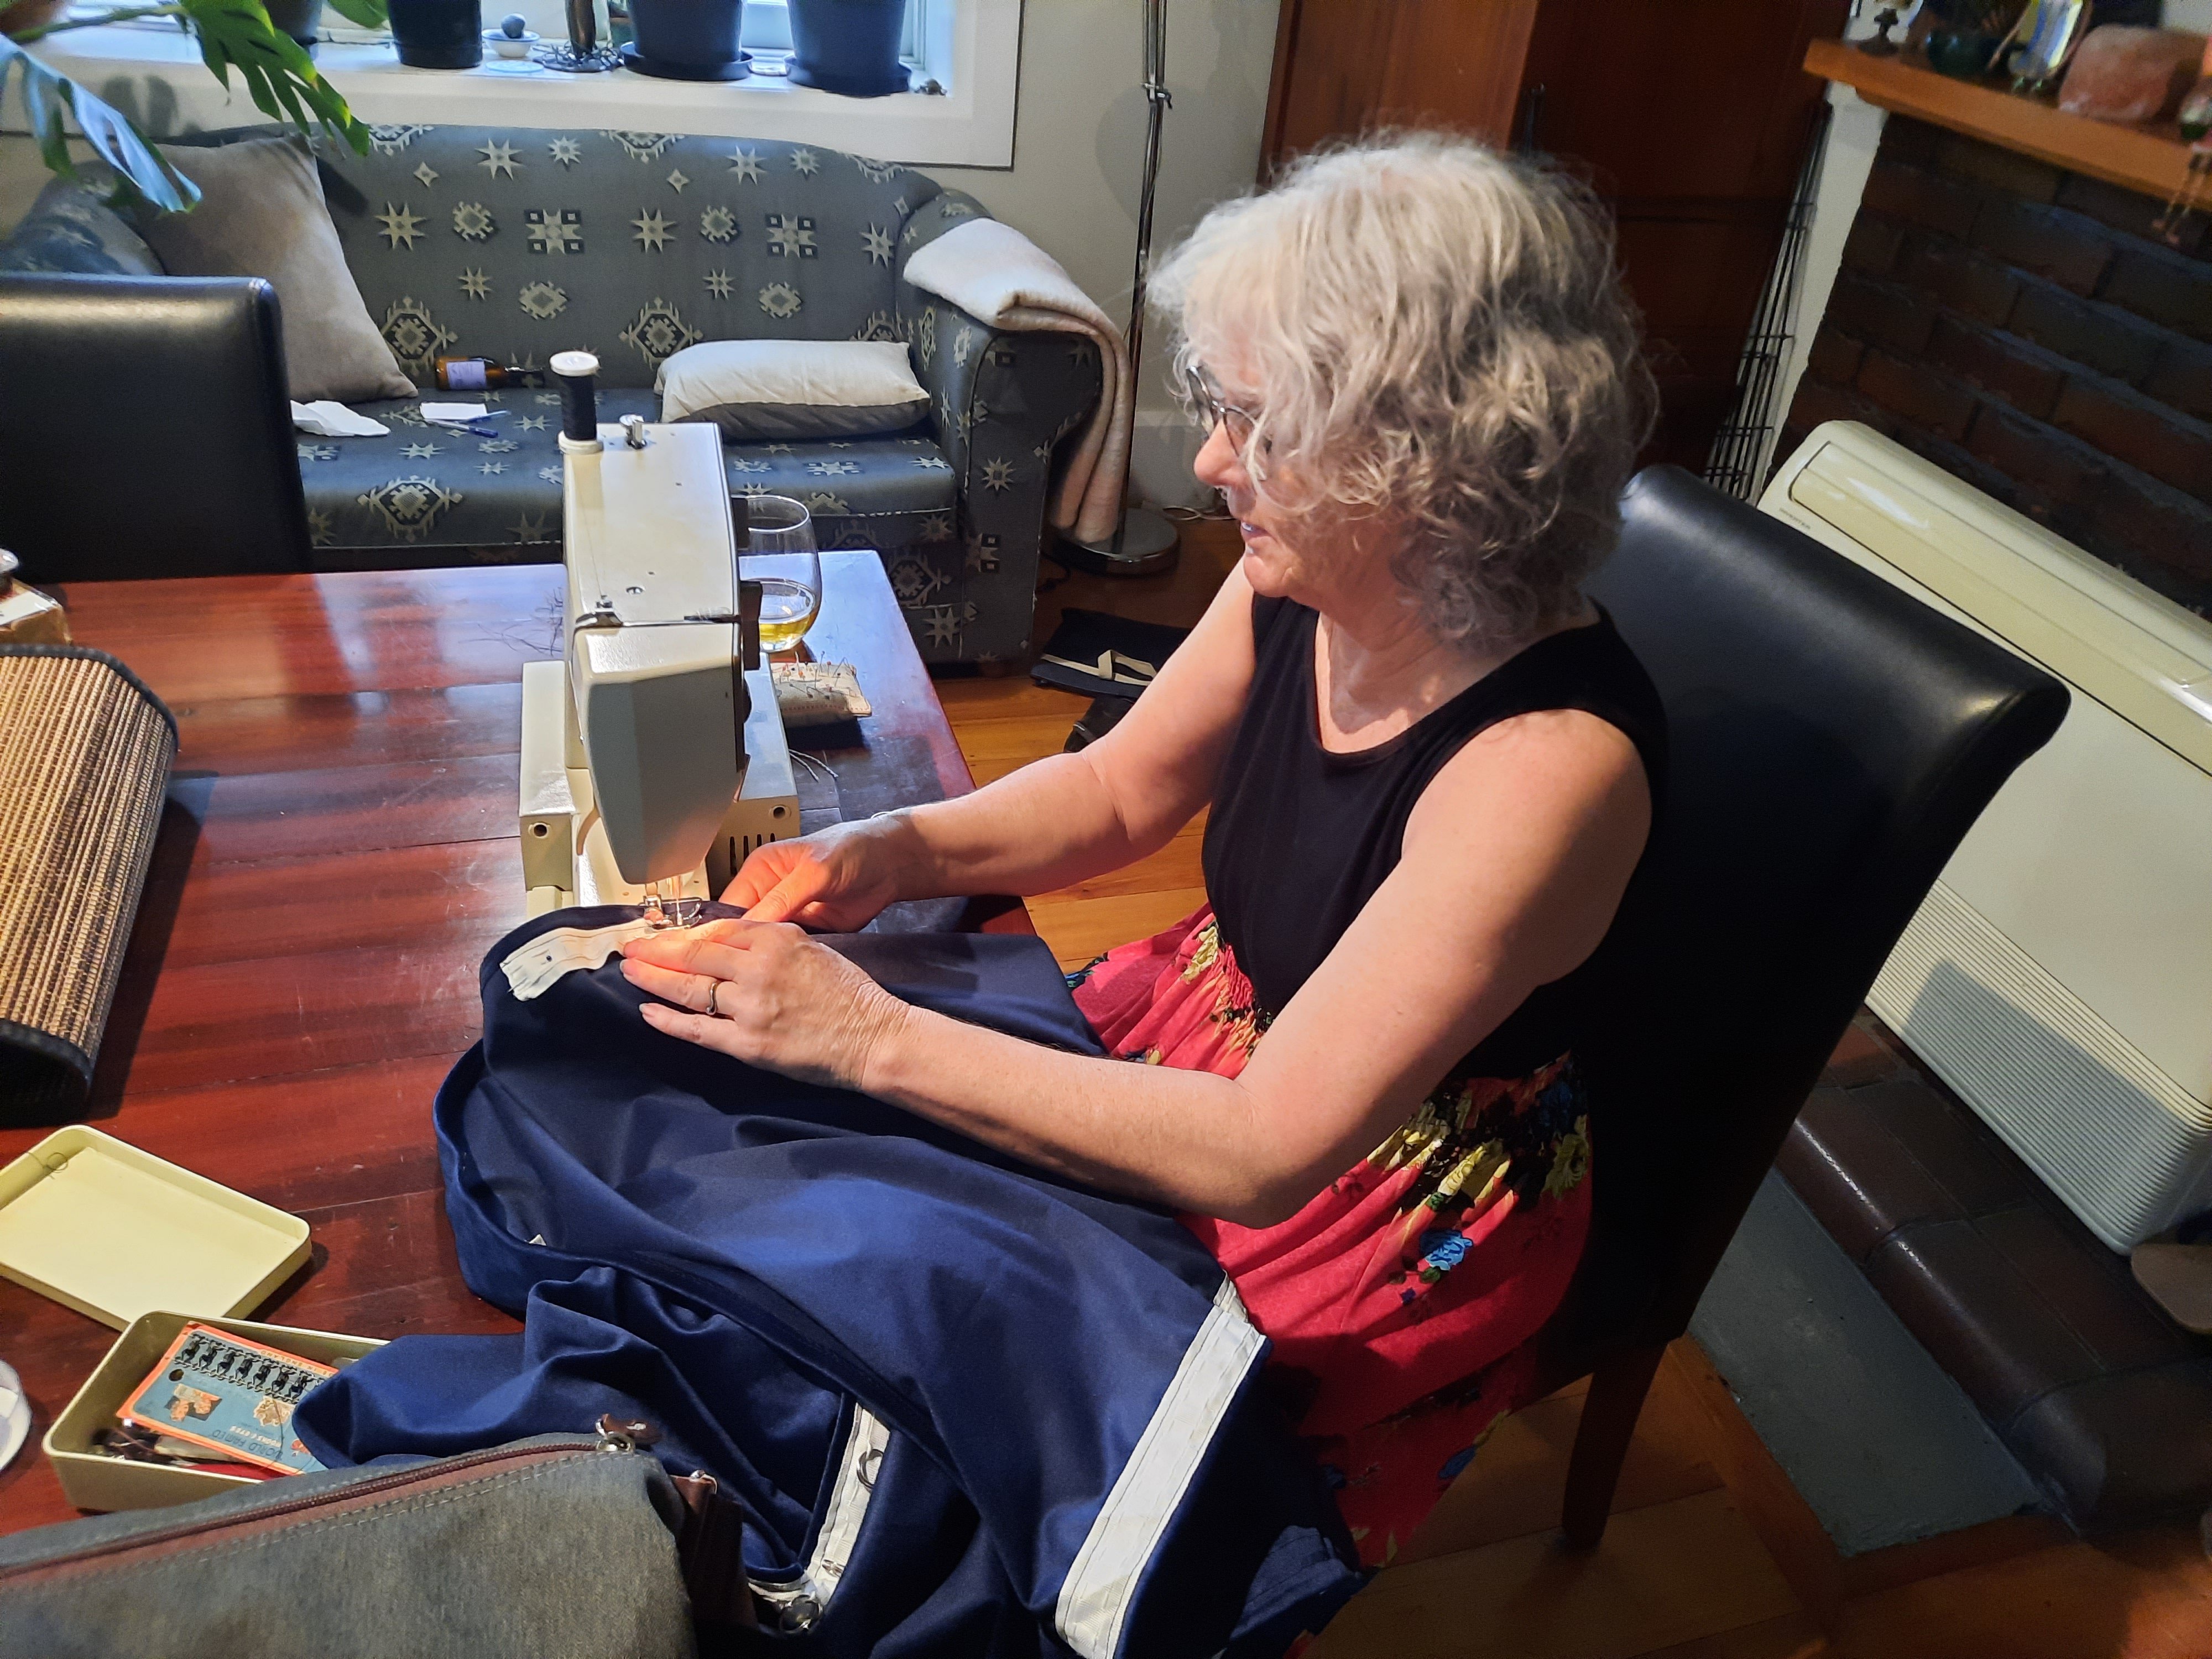
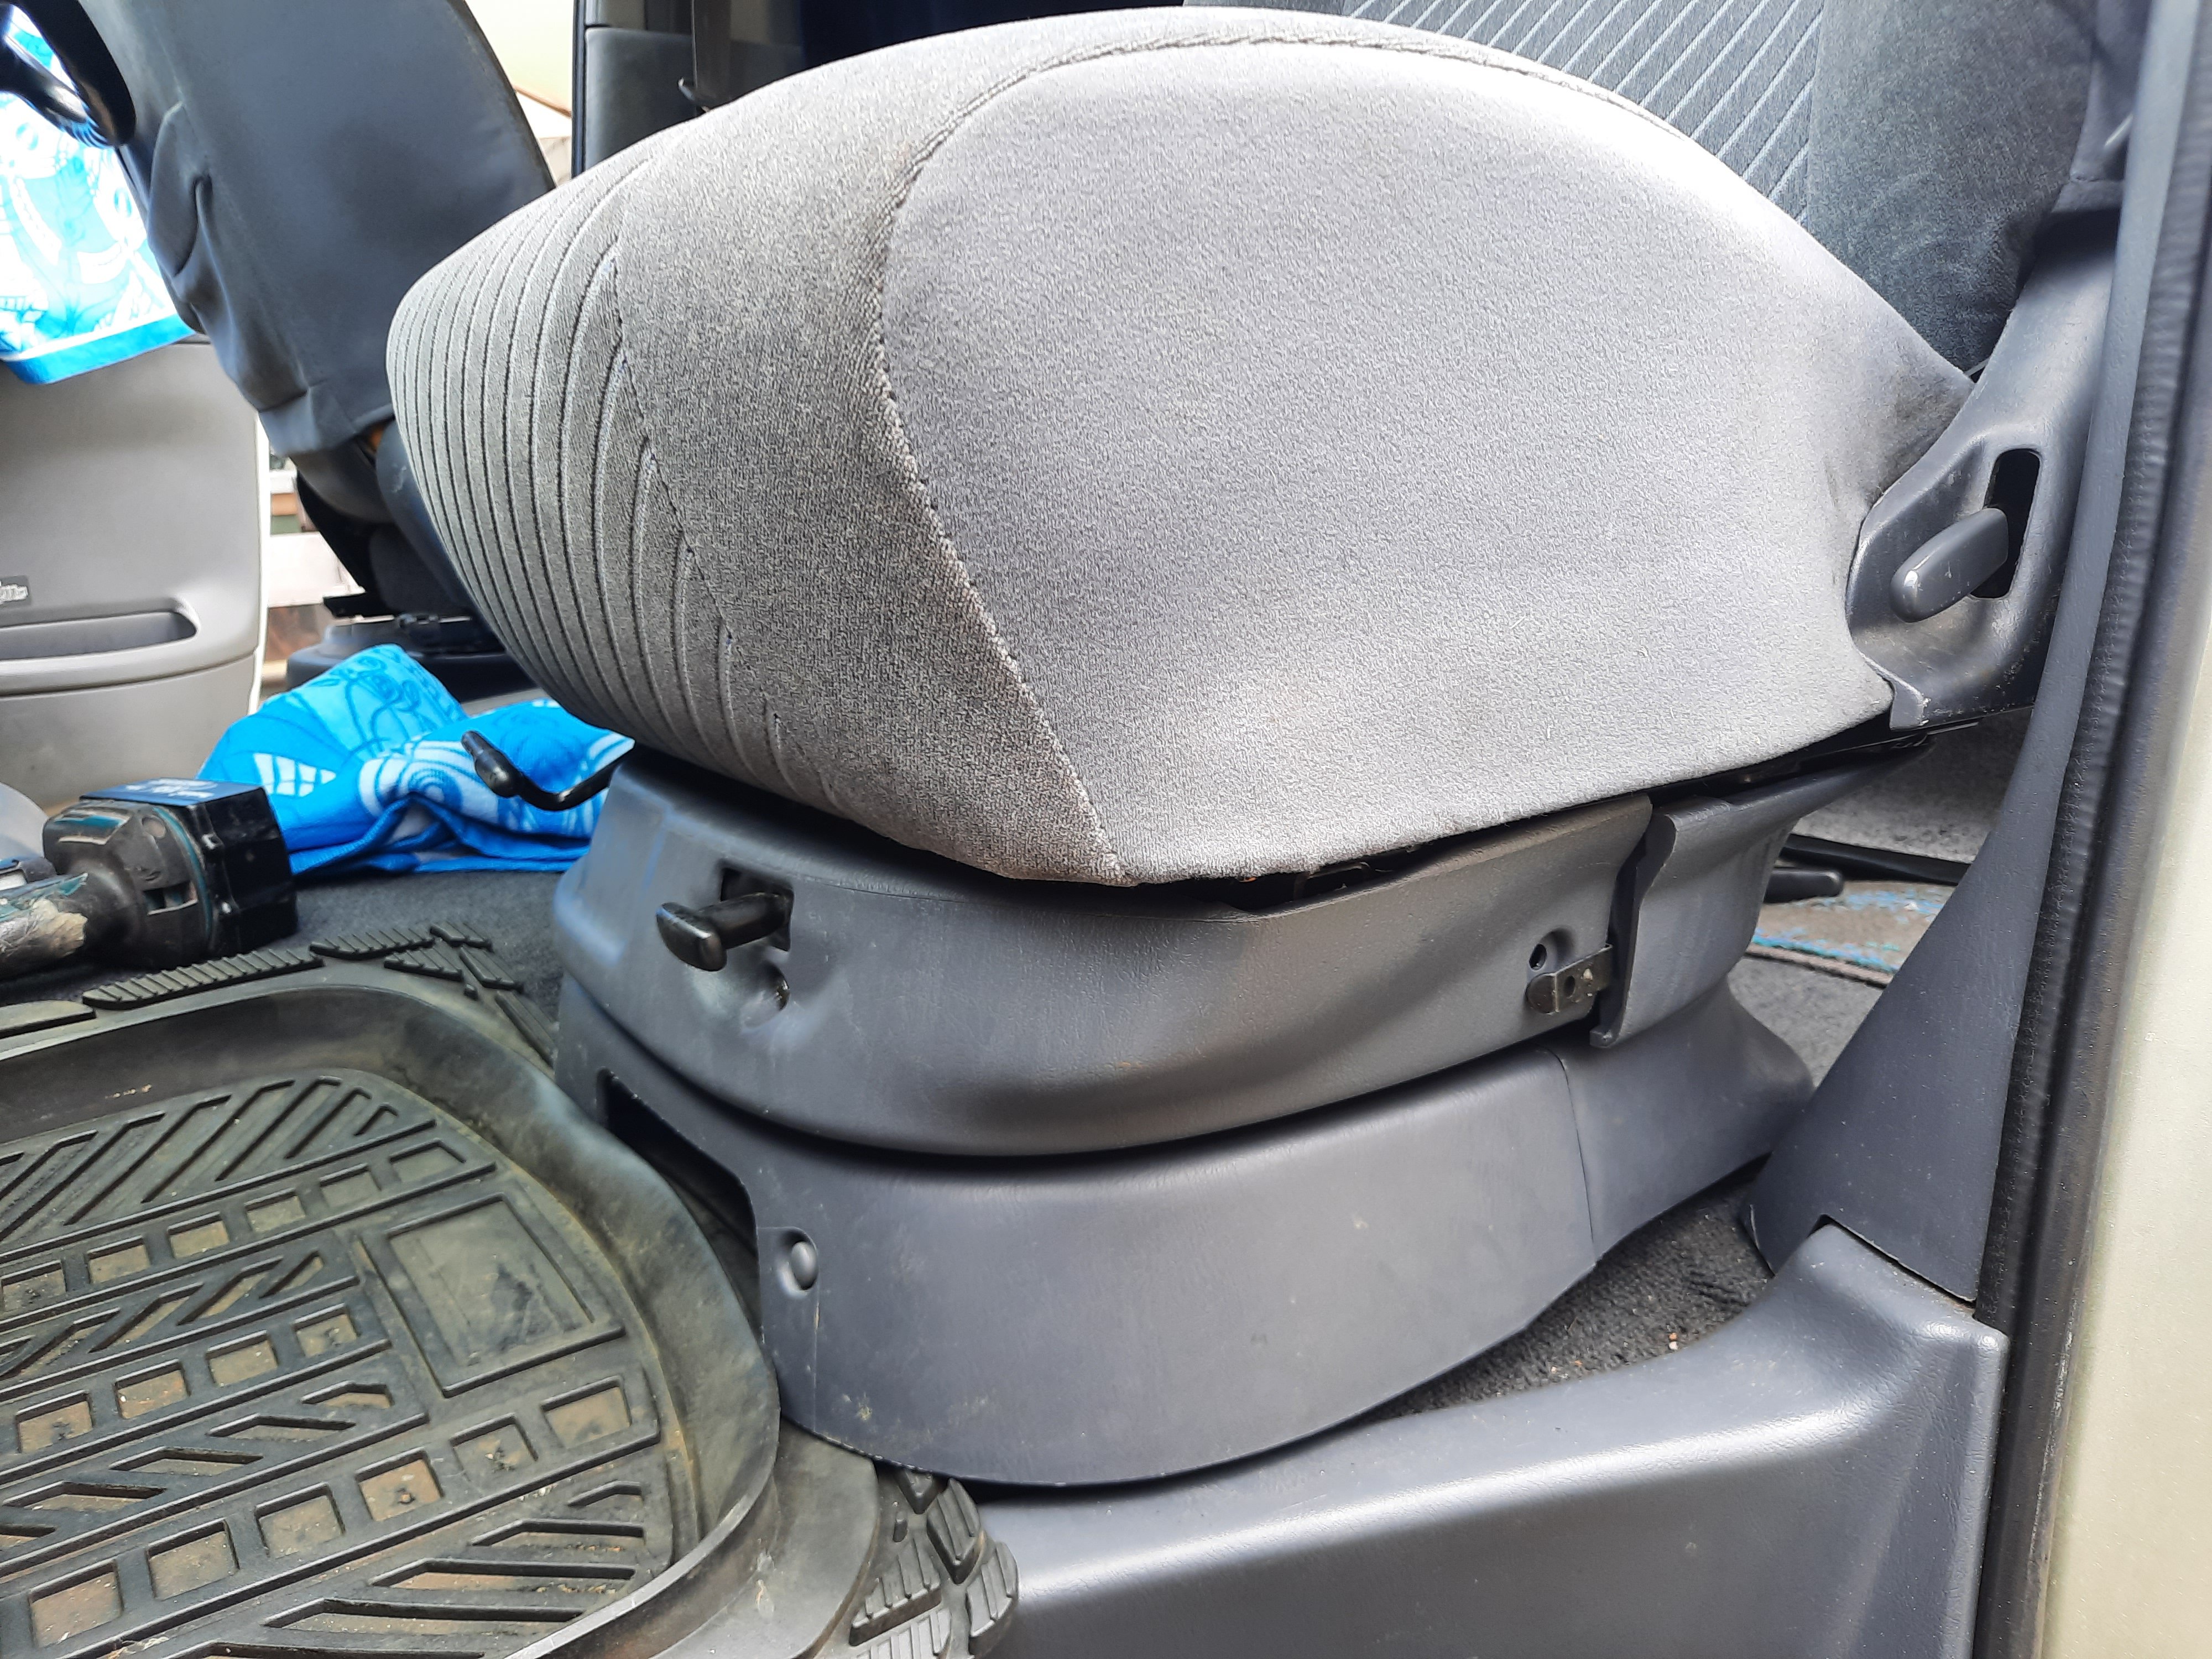
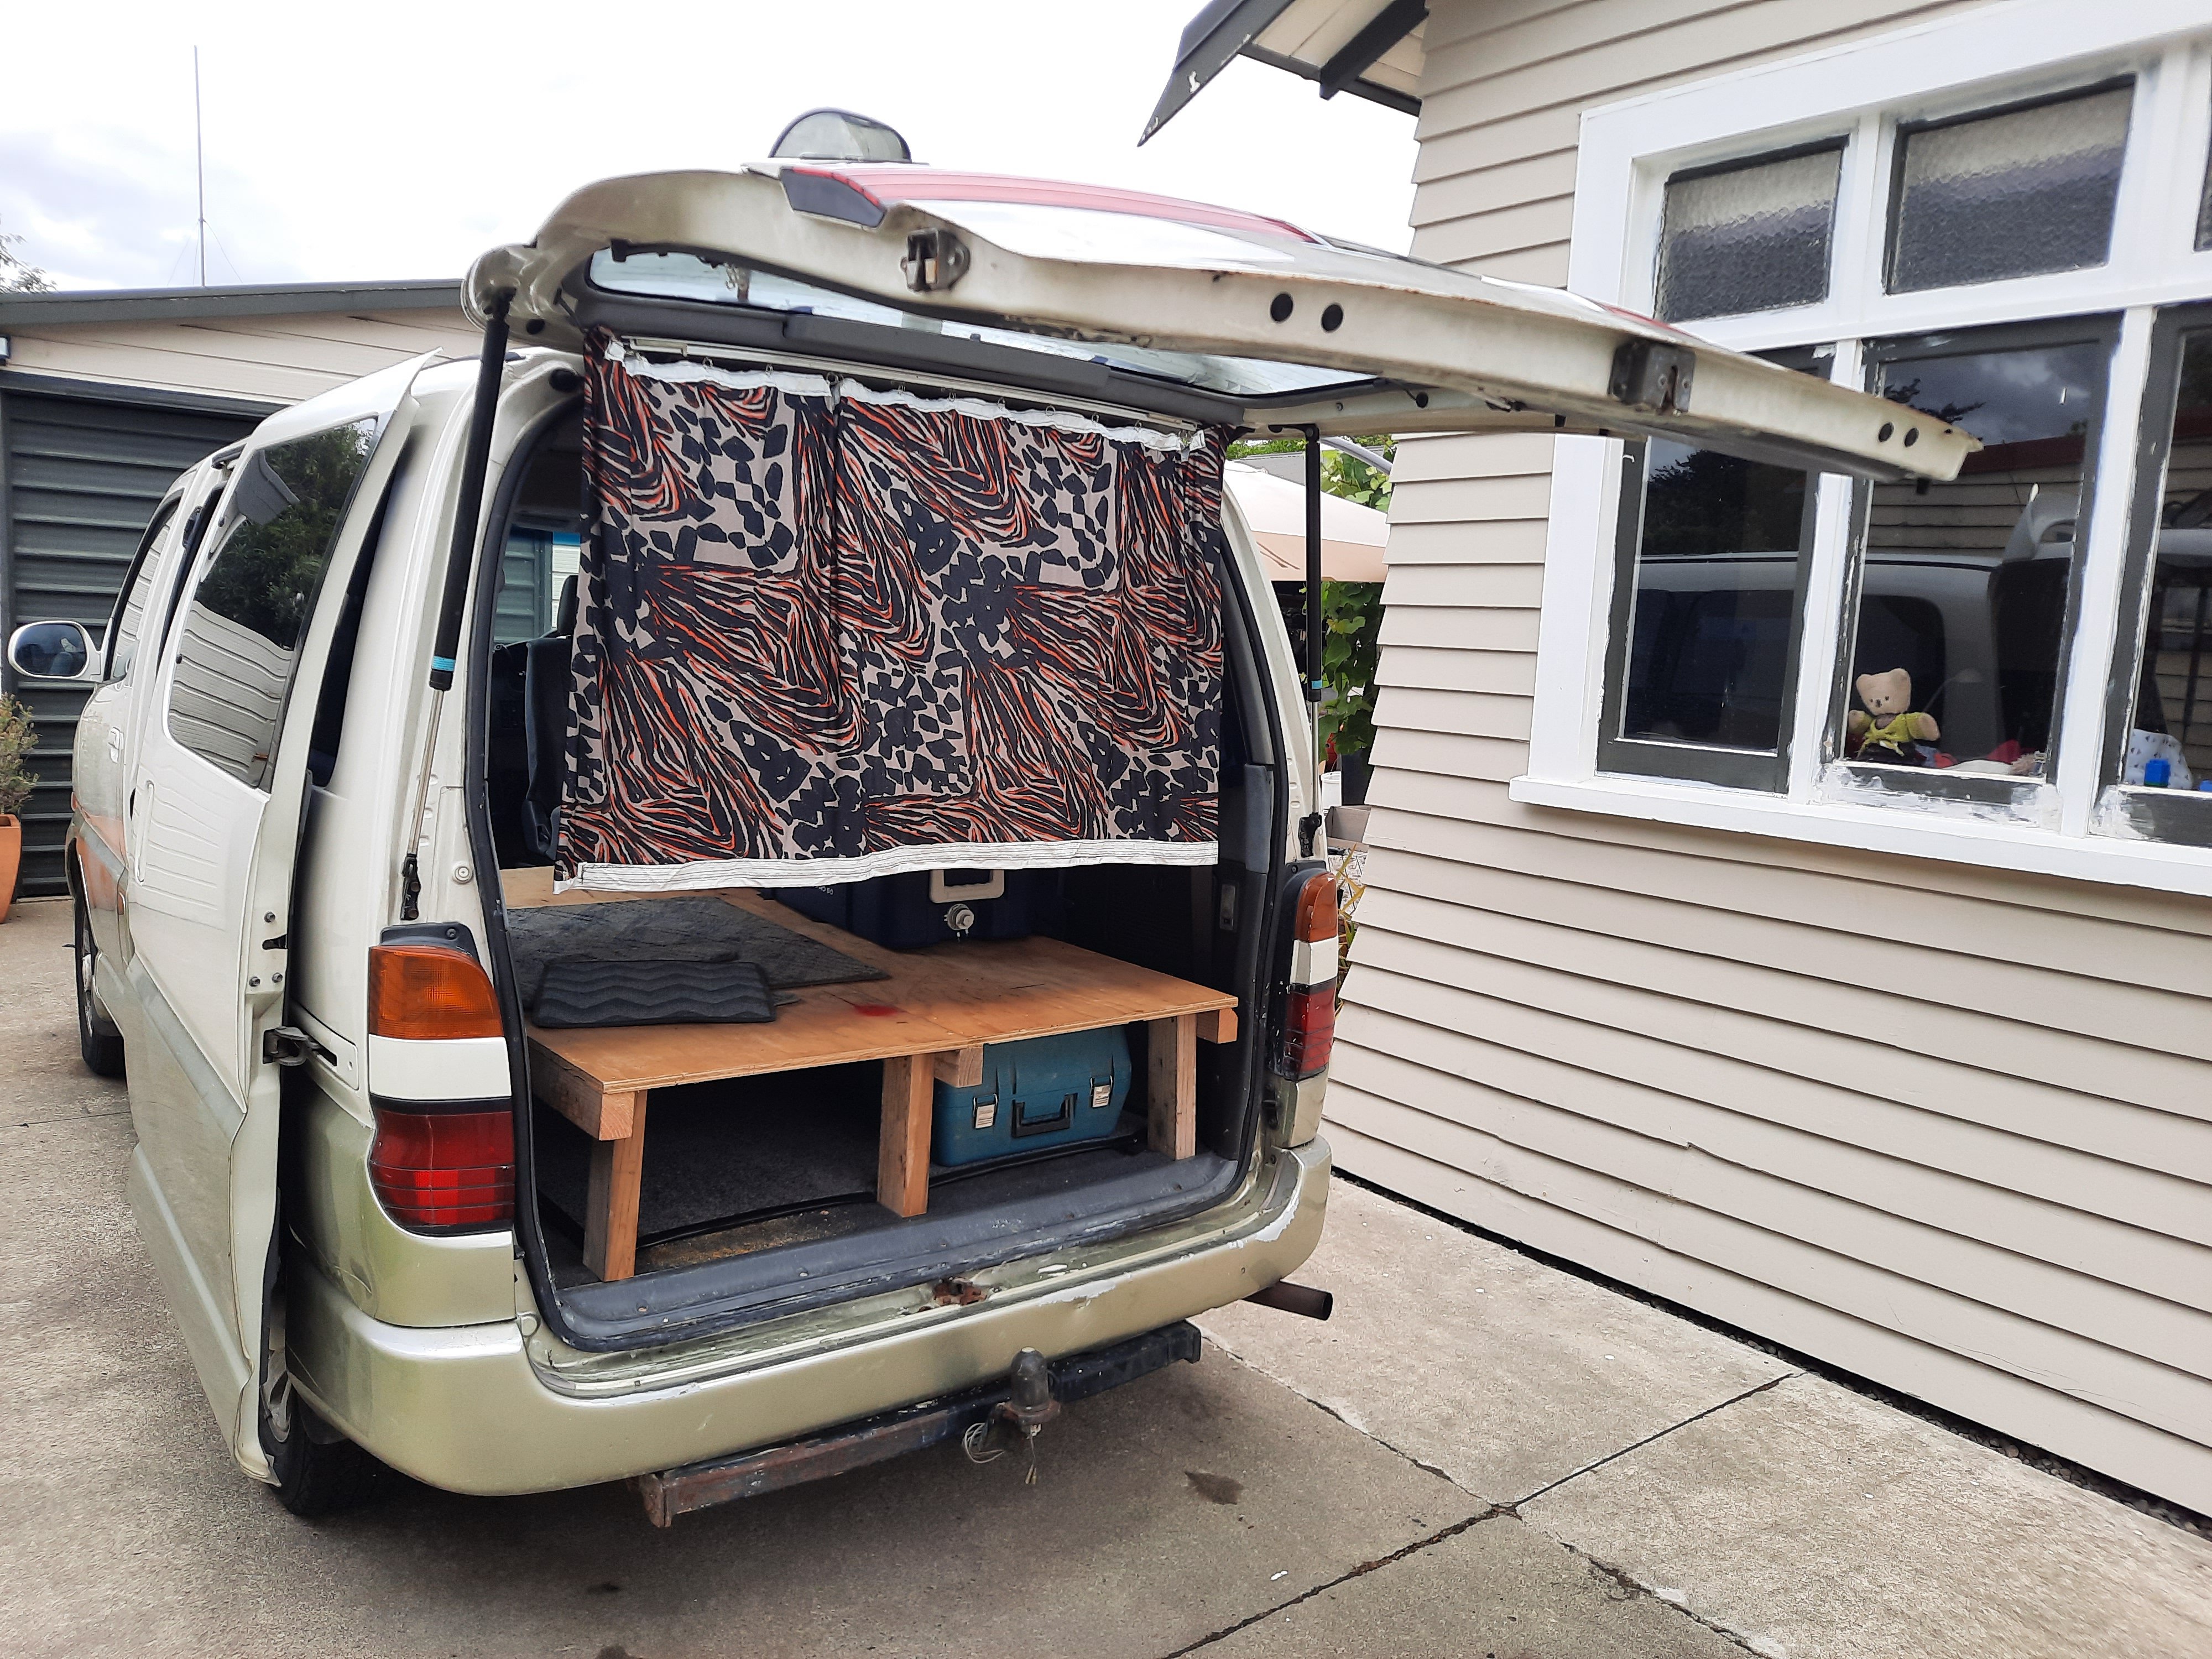
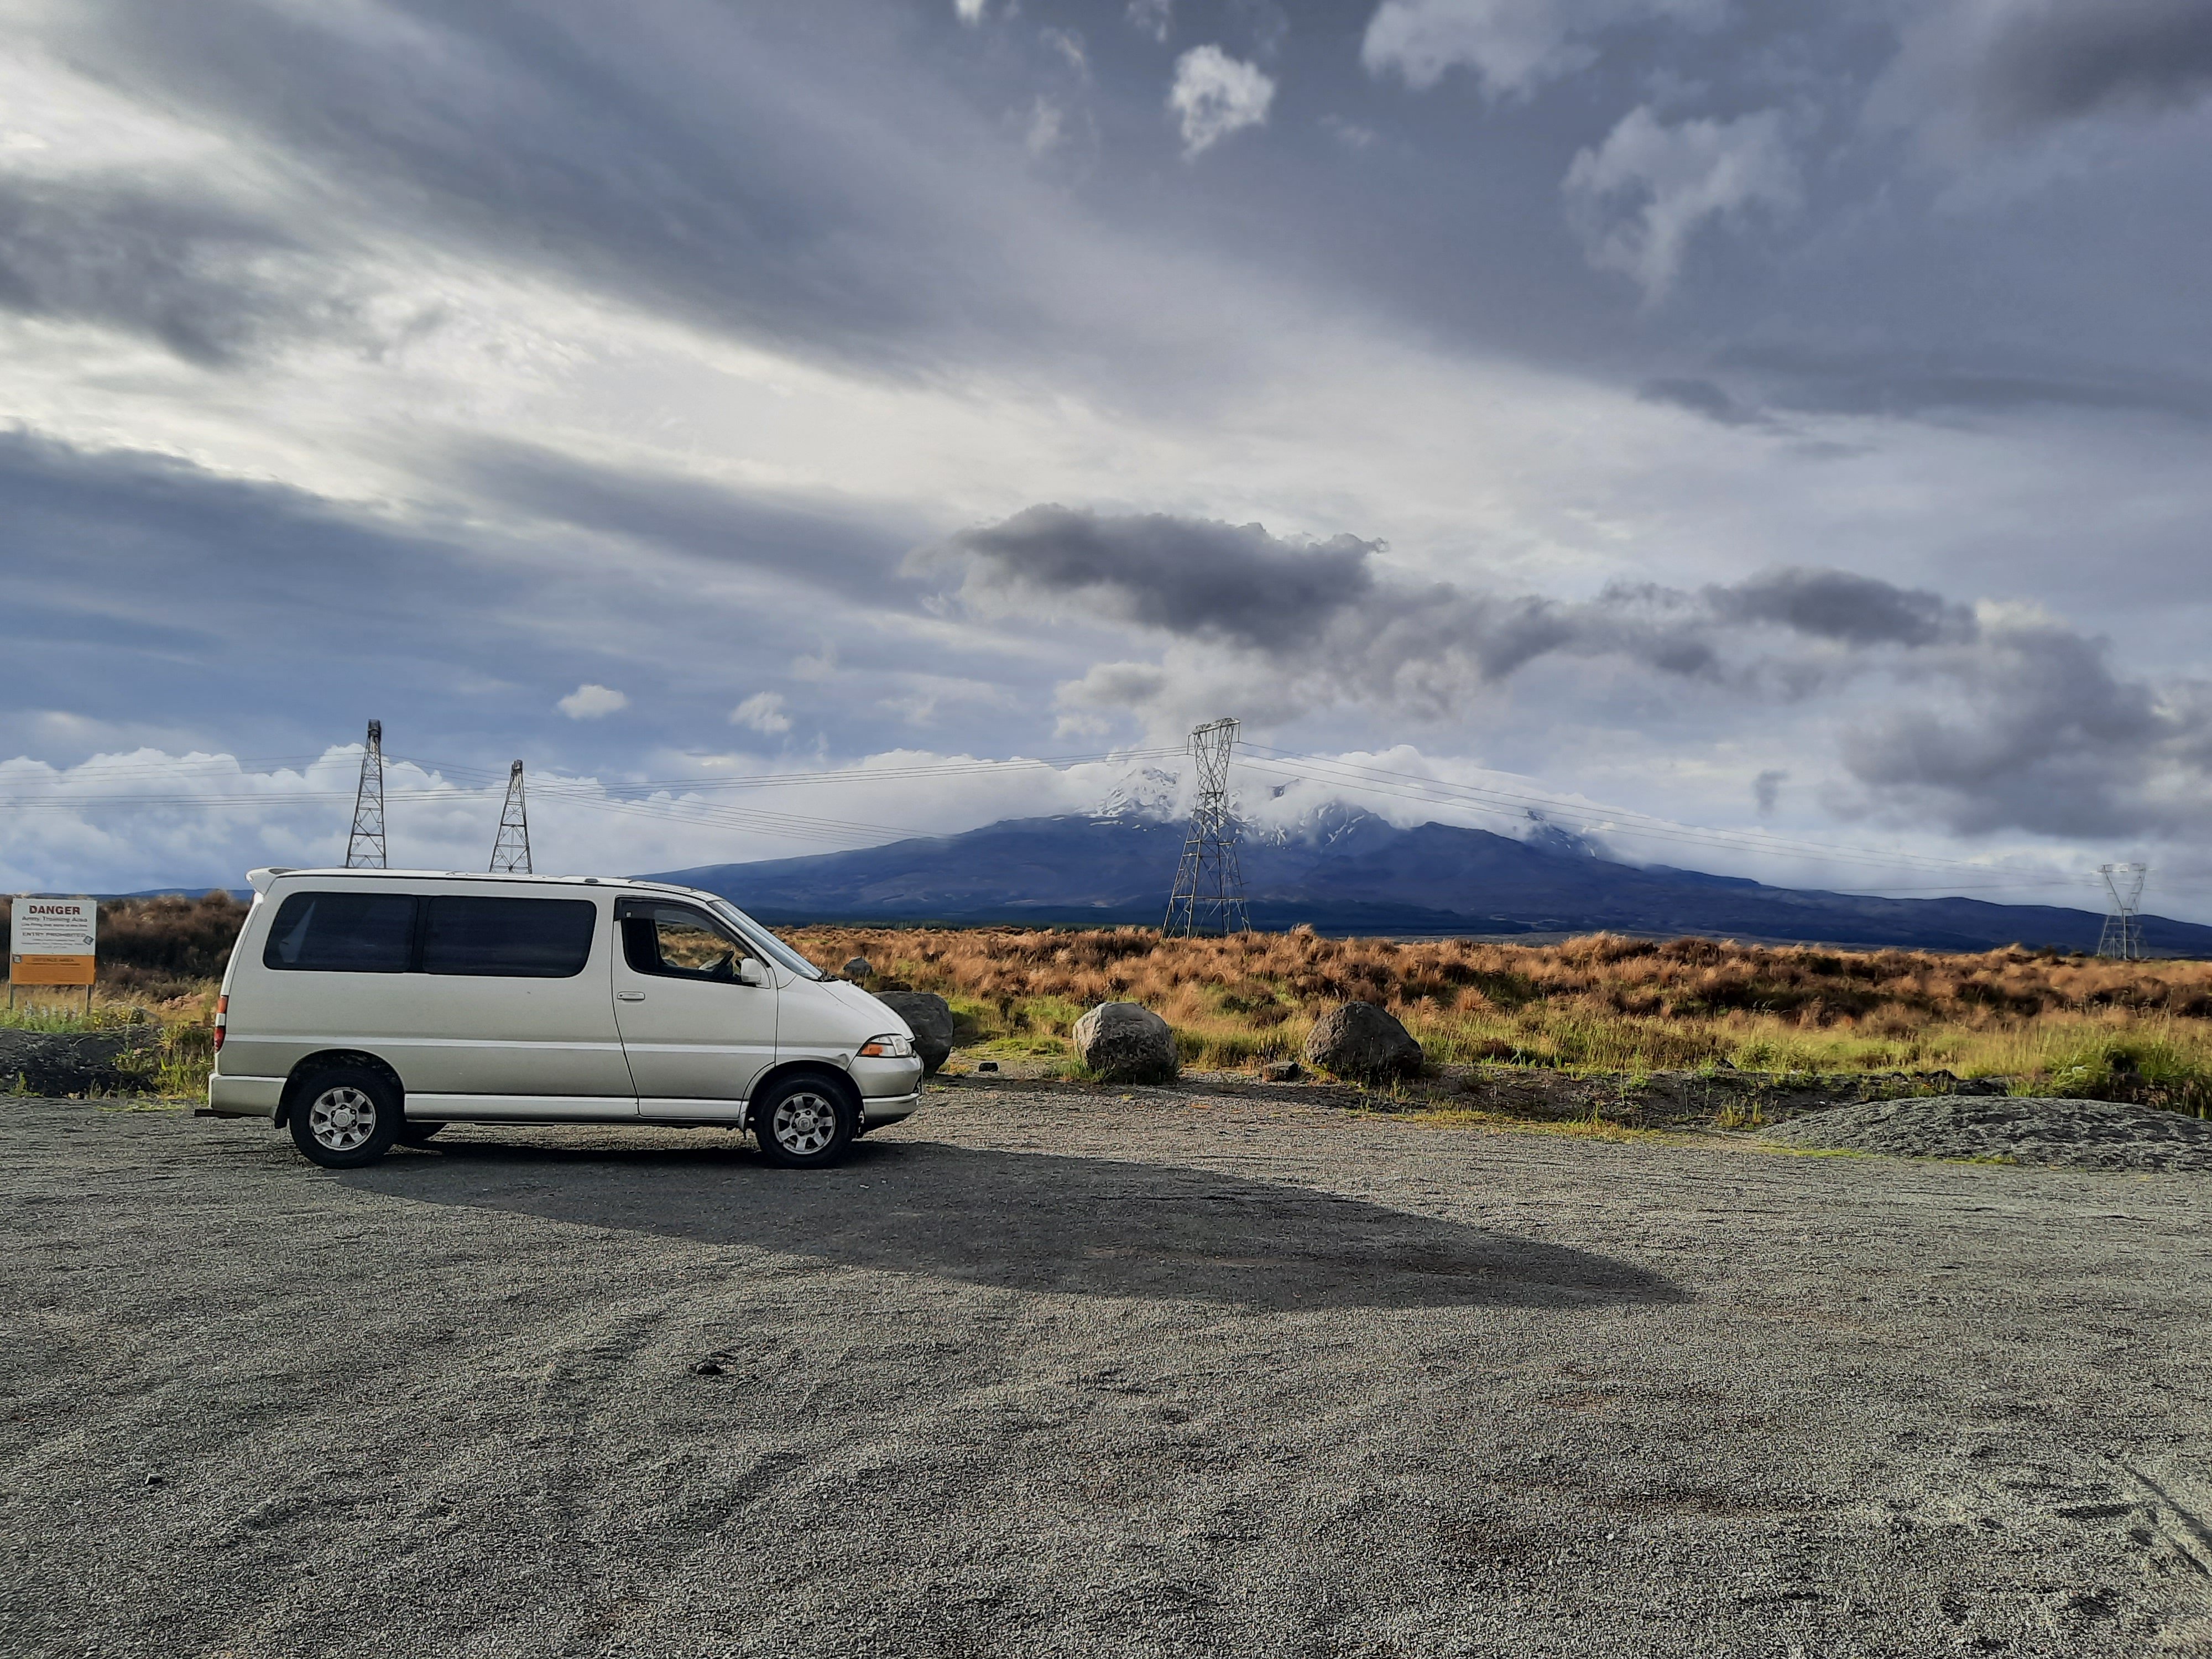
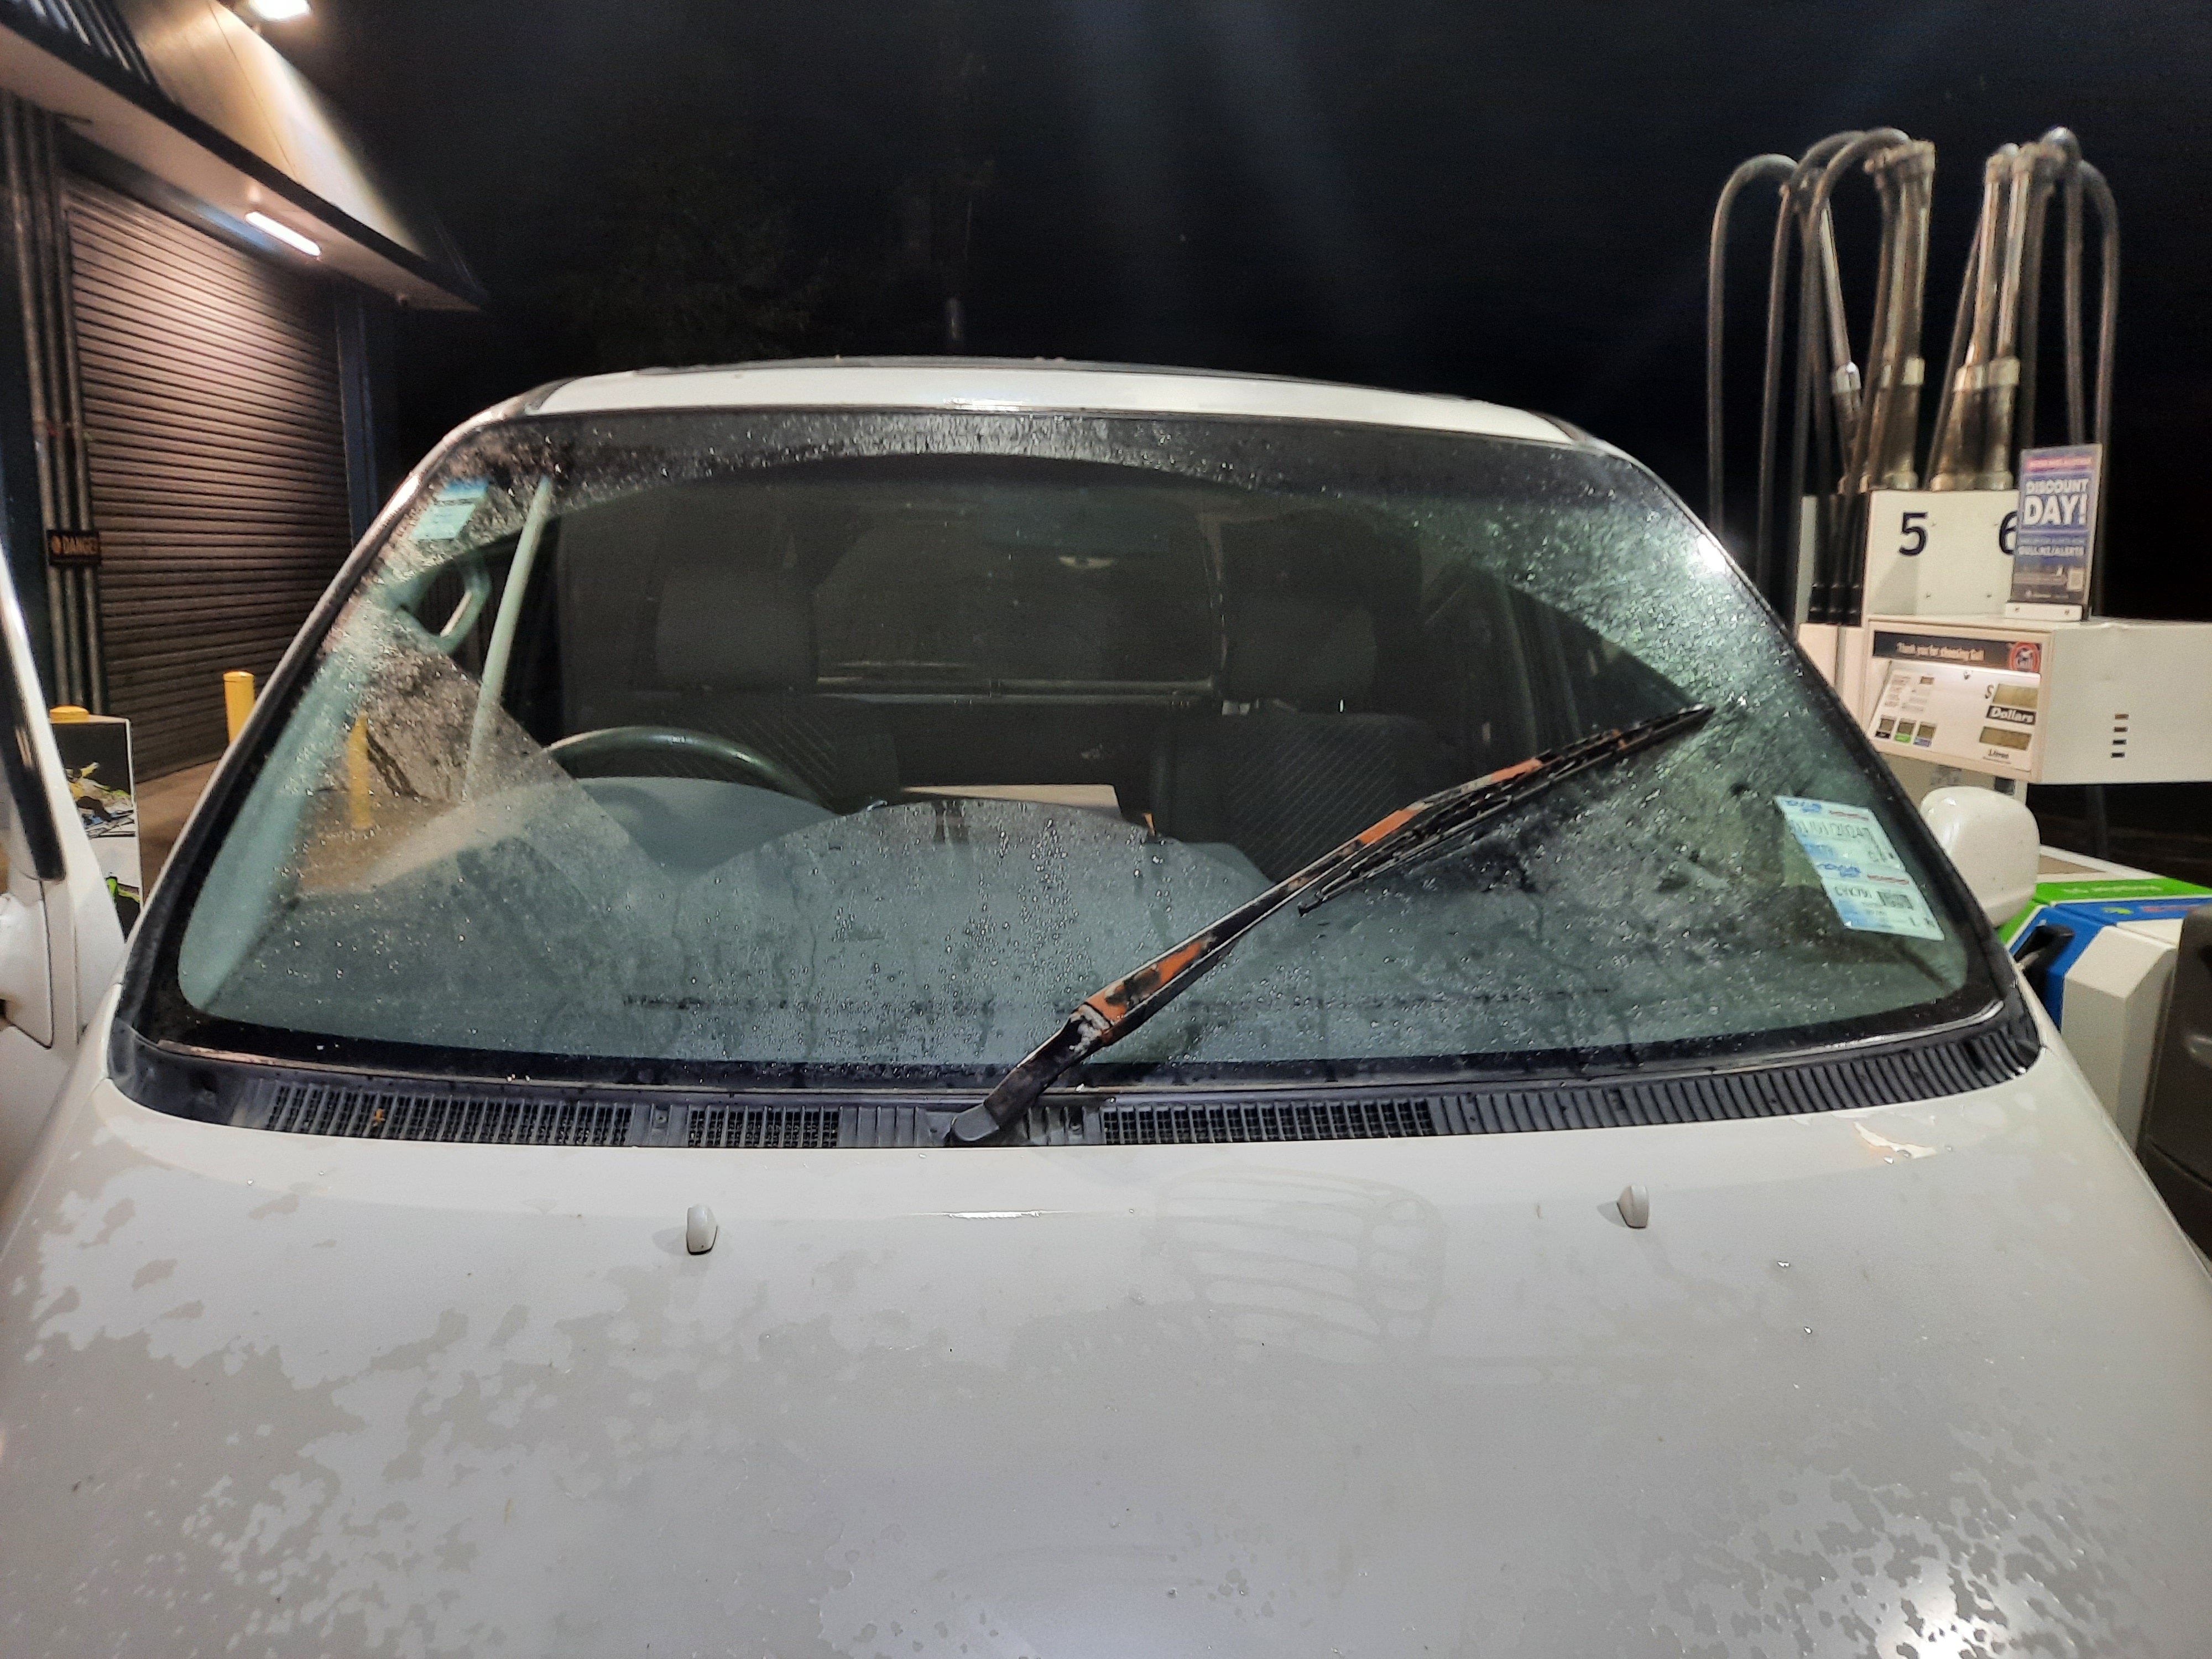
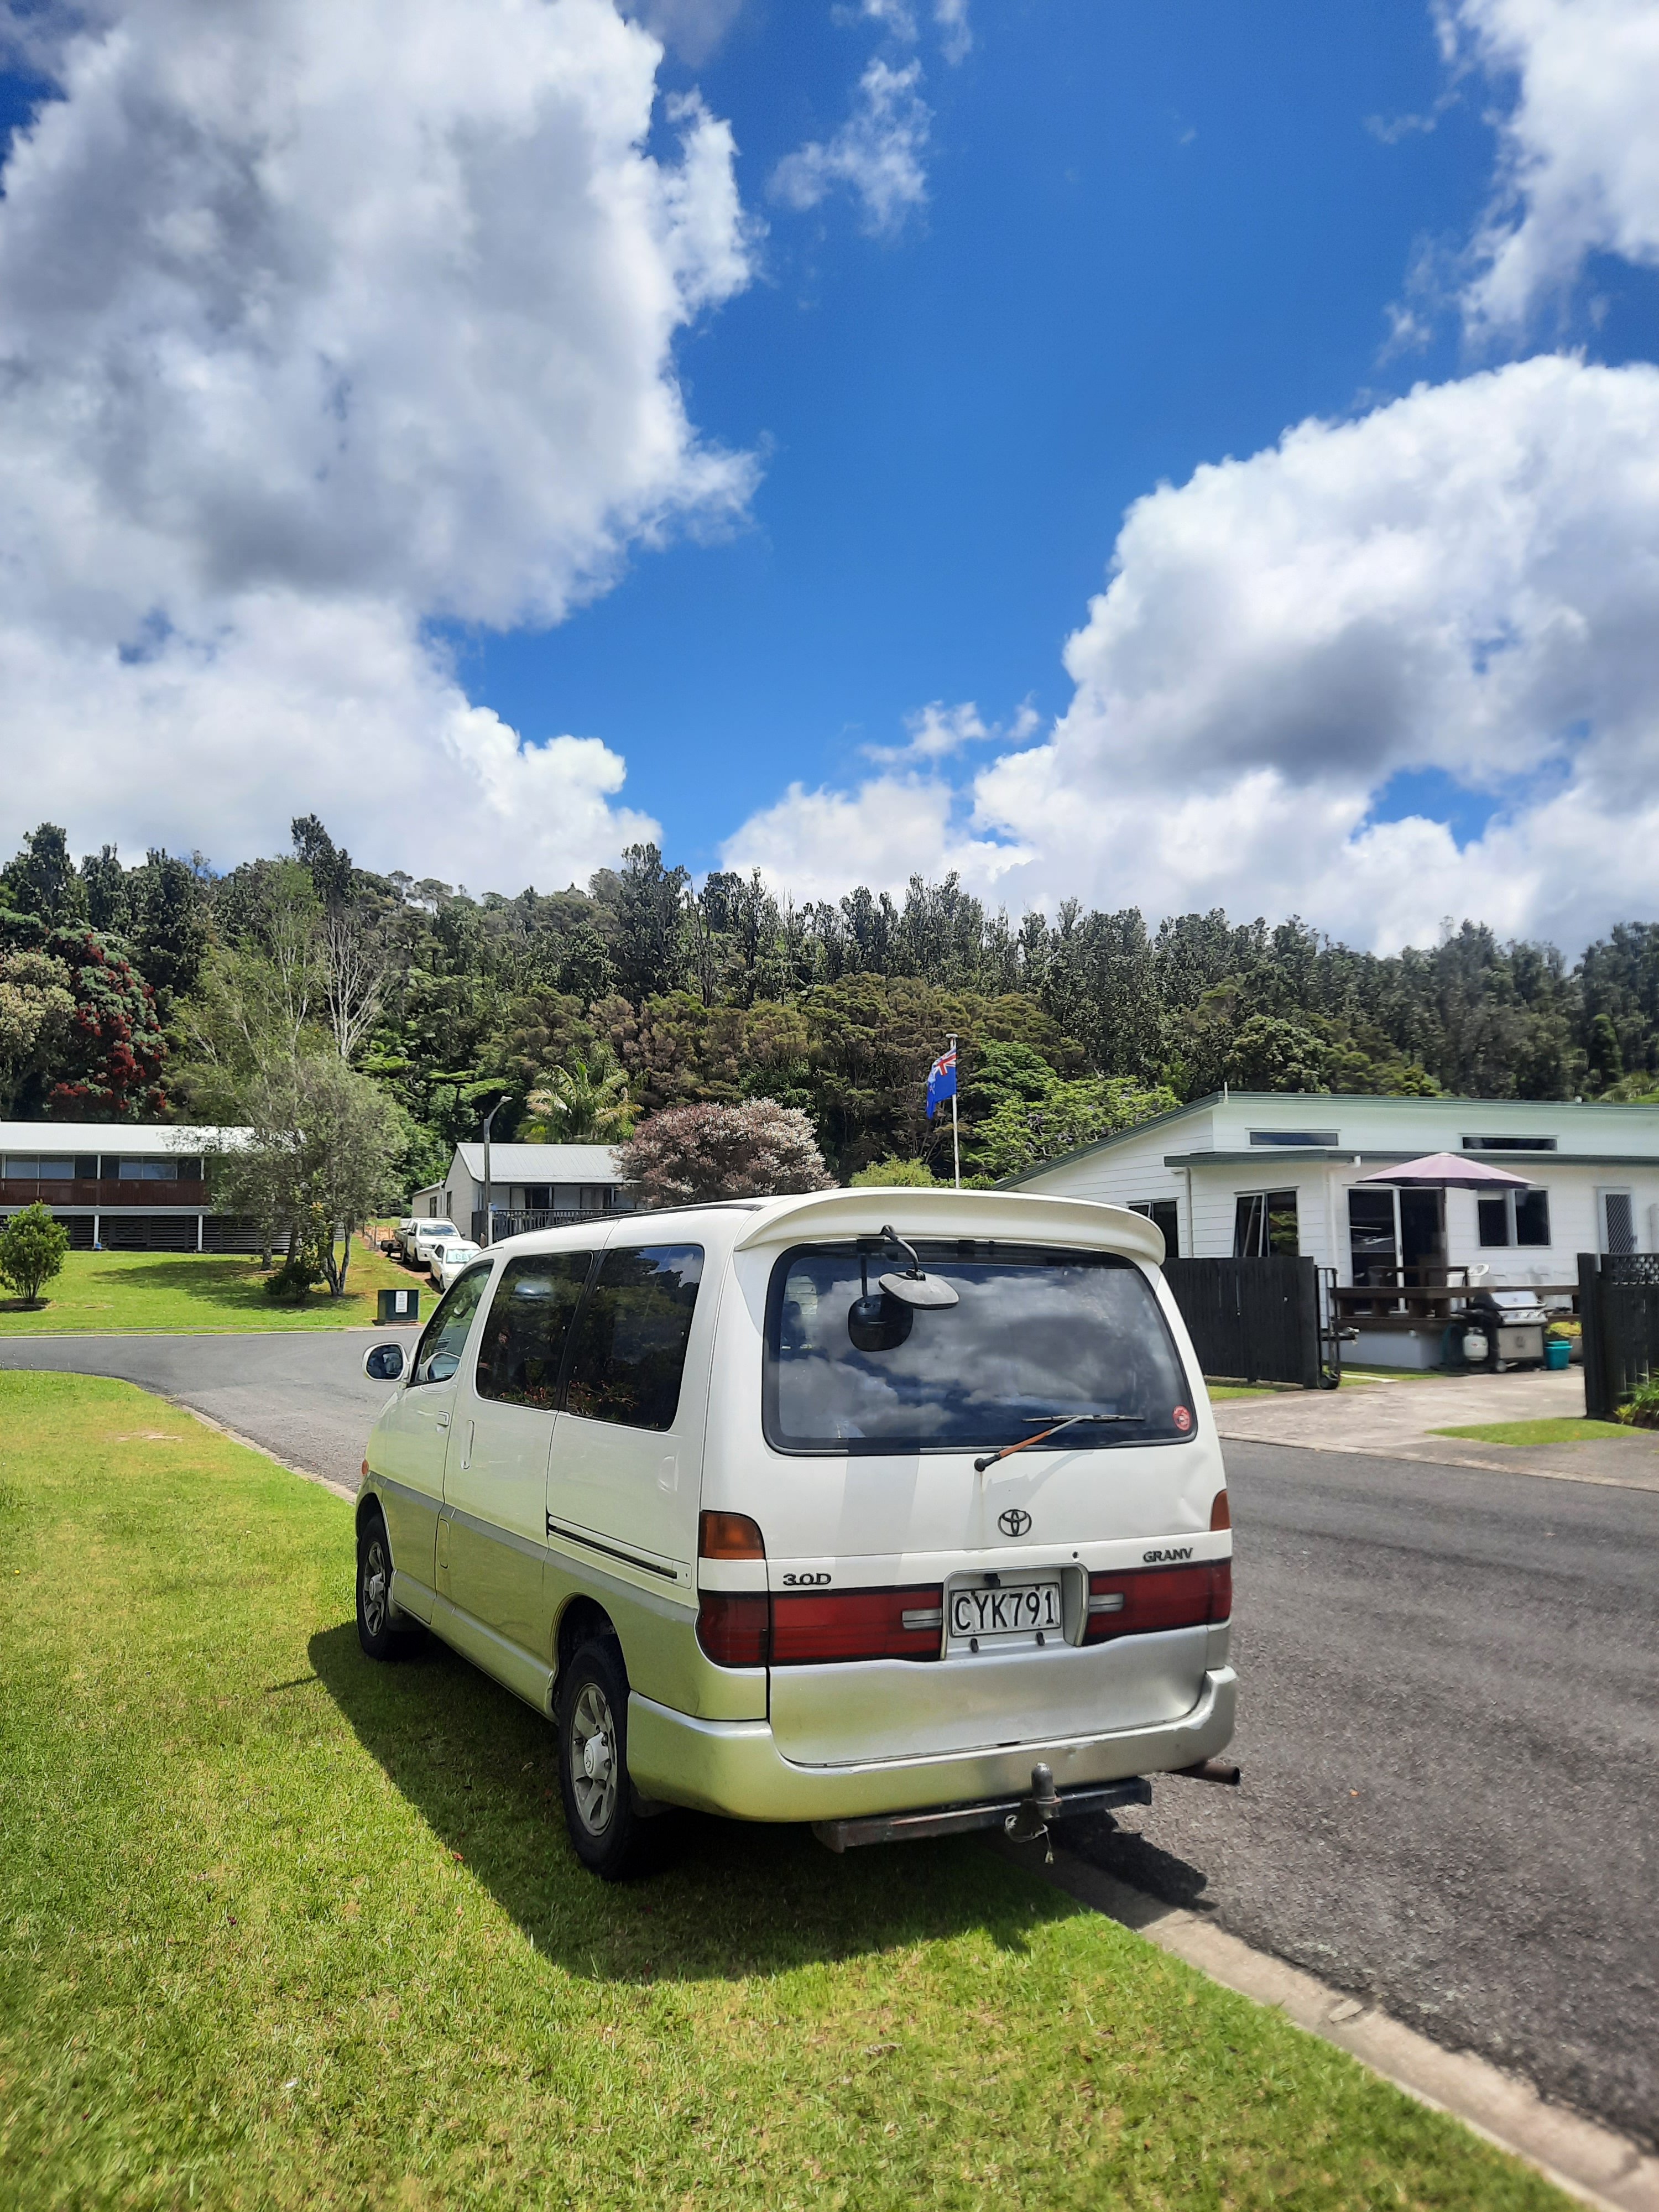
Once I got home from my pickapart mission it was game on to start getting the van ready for a few weeks of adventure around the North Island. First job was seats. The Regius seats mount to the floor exactly the same as a Granvia, so doing a straight swap would be a piece of cake. Unfortunately the seats I bought had ripped upholstery, and the seat rails mount to the bases slightly differently on these two models, so some mucking around was needed to make them fit. Dad figured out that the seat backs are almost exactly the.same shape, so he set to work swapping the covers over. The bases unbolt and mount the same between the two models. So after a bit of mucking around, we were left with rotating seats in Granvia trim colour: While Dad was doing that, I removed the fear seats and knocked up a quick bed base. It should be strong enough for a few acrobatic activities... The captains seats are so lush. Refitted the factory trims to make it look normal: Next up was to get curtains into the thing. I'd been looking for a set of genuine ones, but they seem to be the first thing to sell from any wreck... Mum came to the rescue and sewed up these lush velvet curtains using material she scored for $10 from a thrift shop. Hey baby, want to stroke my velvet curtains? We ran out of material, so the rear curtain is a vibe of it's own. Aaaaand with that, it was time for the maiden voyage - a night mission from Palmy to Whangamata. It felt slow and was struggling to kick down... it felt like the throttle pedal wasn't going all the way to the floor. It has thick universal floor mats, so I removed that at 100kph and boom, full power!!! It goes great now. Heading through the Waikato my windscreen was fogging up. I eventually realised it was the OUTSIDE of the windows that were getting foggy. Wtf Waikato, why so moist?!?!?!?! Also note: the racecar spec single wiper conversion. The drivers side spindle is so floppy that it wouldn't touch the windscreen over 80kph. The single works well enough for now. Safely arrived in. Whangamata: Pretty happy with it so far. The engine and transmission seem solid for a 300k+ van. I'm looking forward to adding some more goodness to it soon!
1 point
-
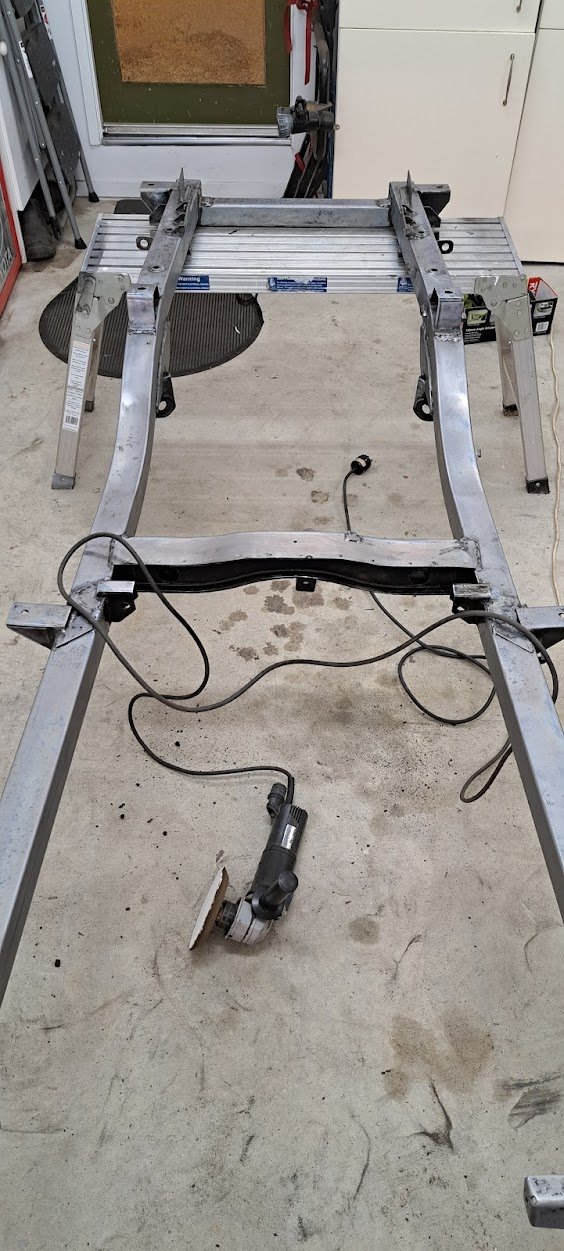
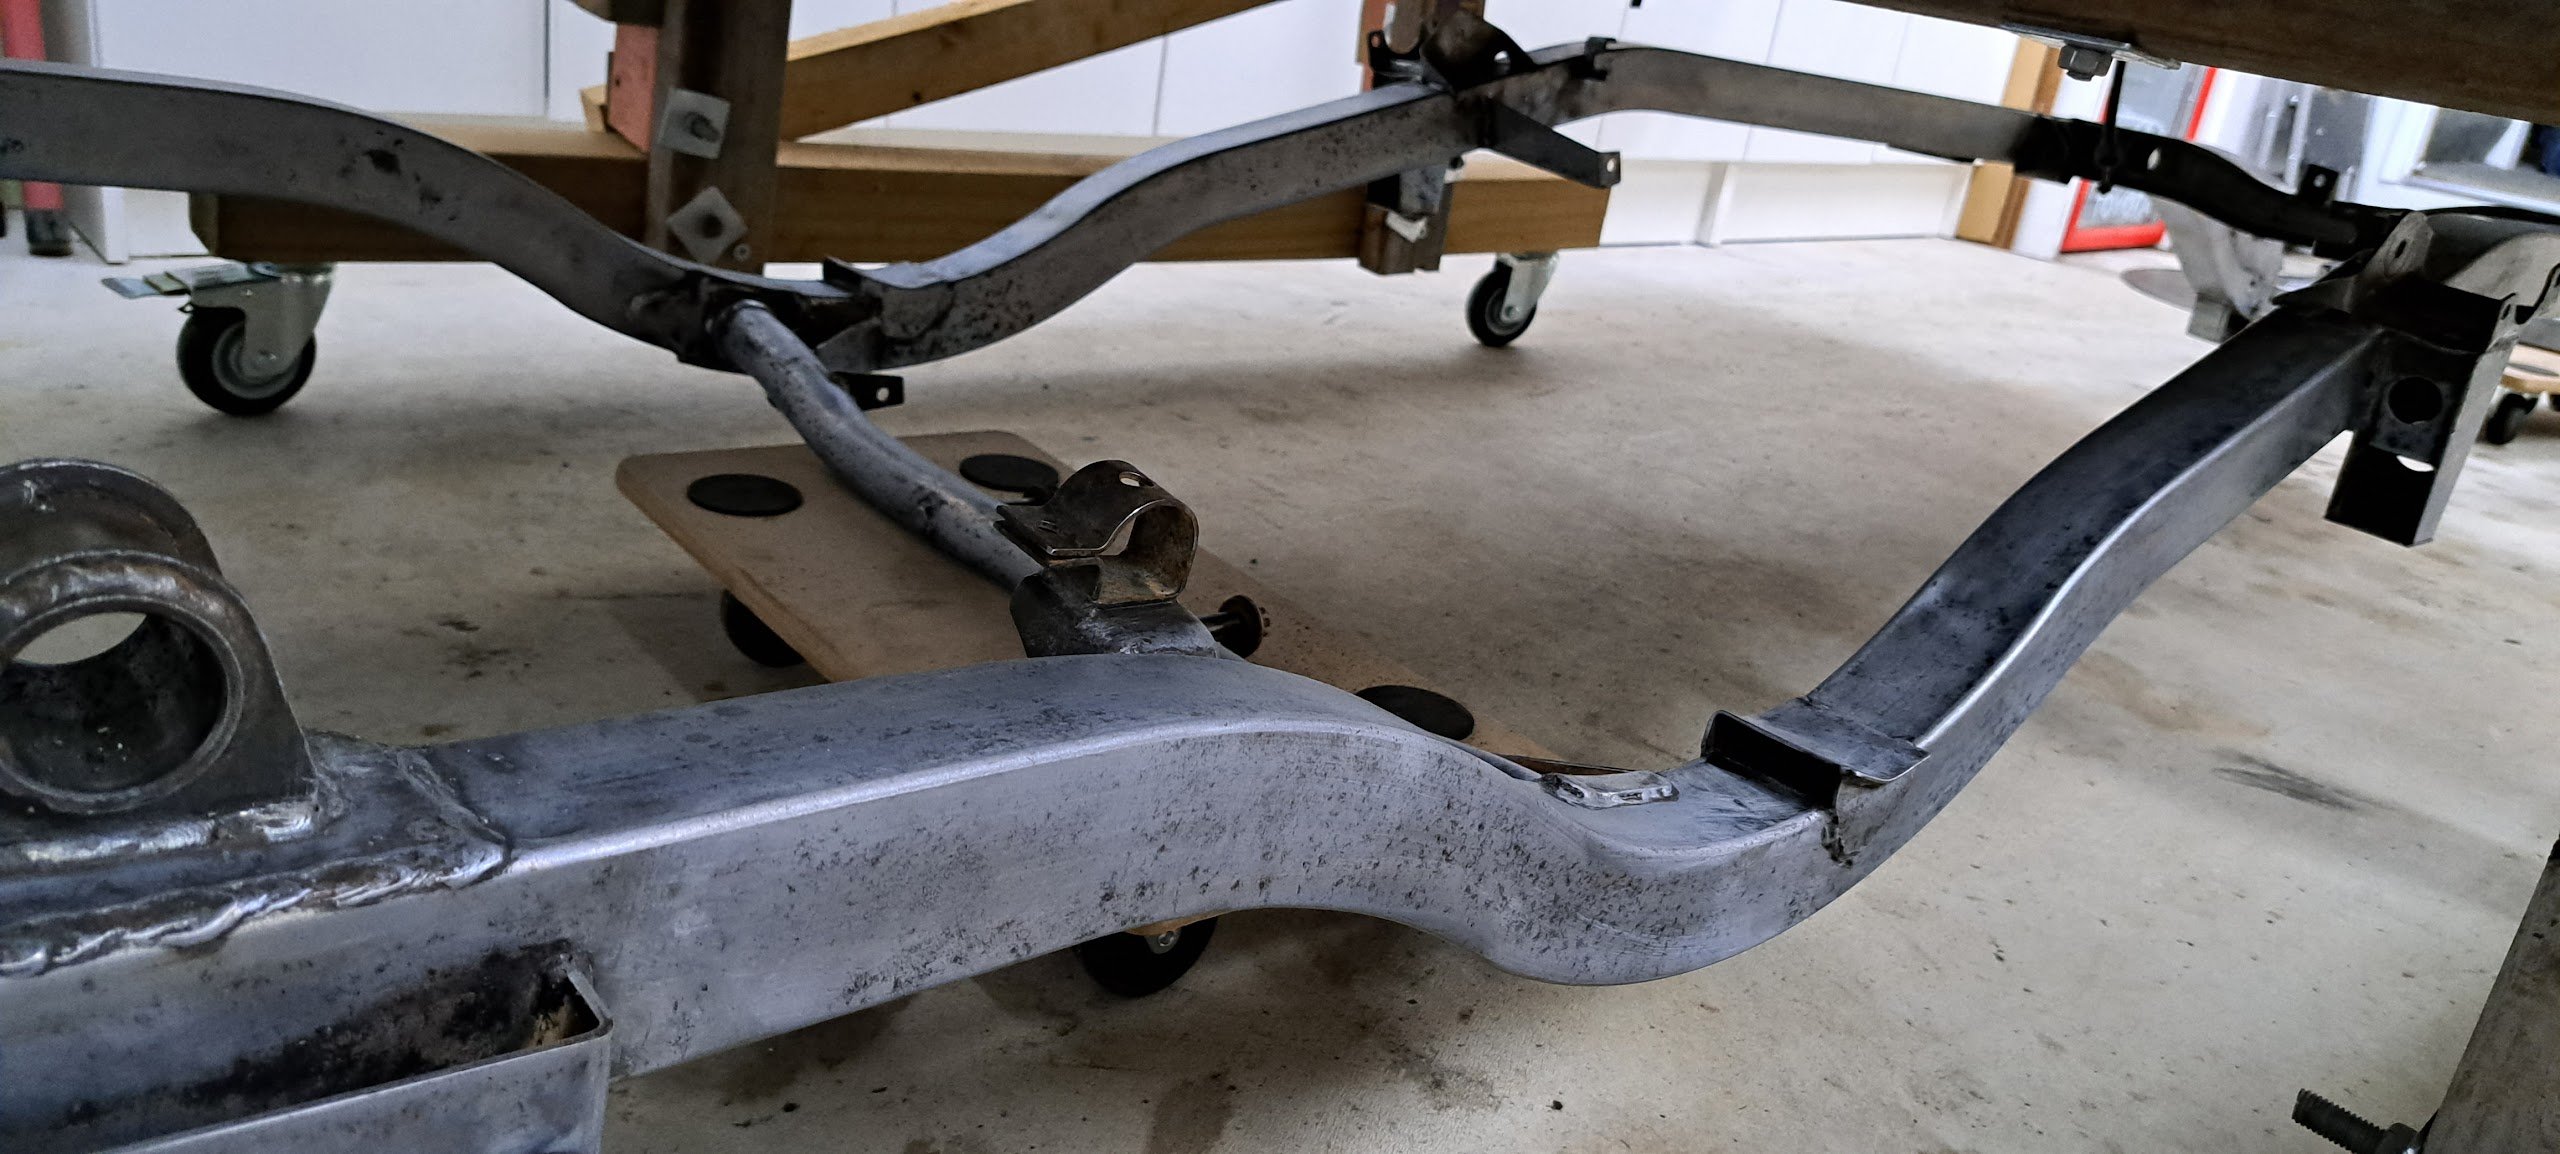
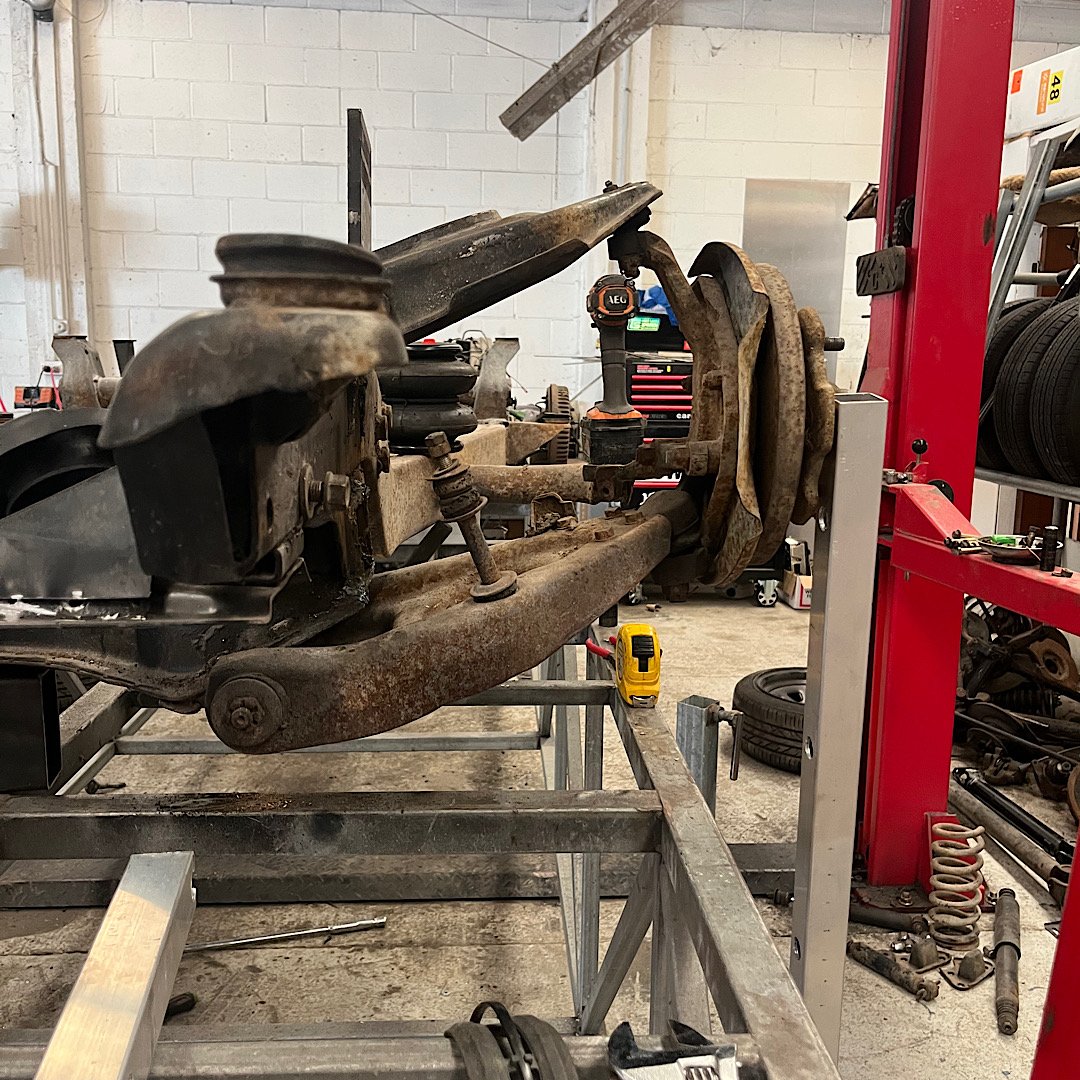
Put the chassis up on the table today. then fired up the lightning scissors and whipped off the spring/shock pockets. them found that the ball joint angle maxes out pretty quickly. any ideas on legal ways to ease up on the ball joint? by my calculations this limit only gets the frame 80mm off the ground. Weak as pic is at the ball joints limit. flipping and swapping upper arms doesn’t solve anything, thought about it, tried it, it failed.
1 point
-
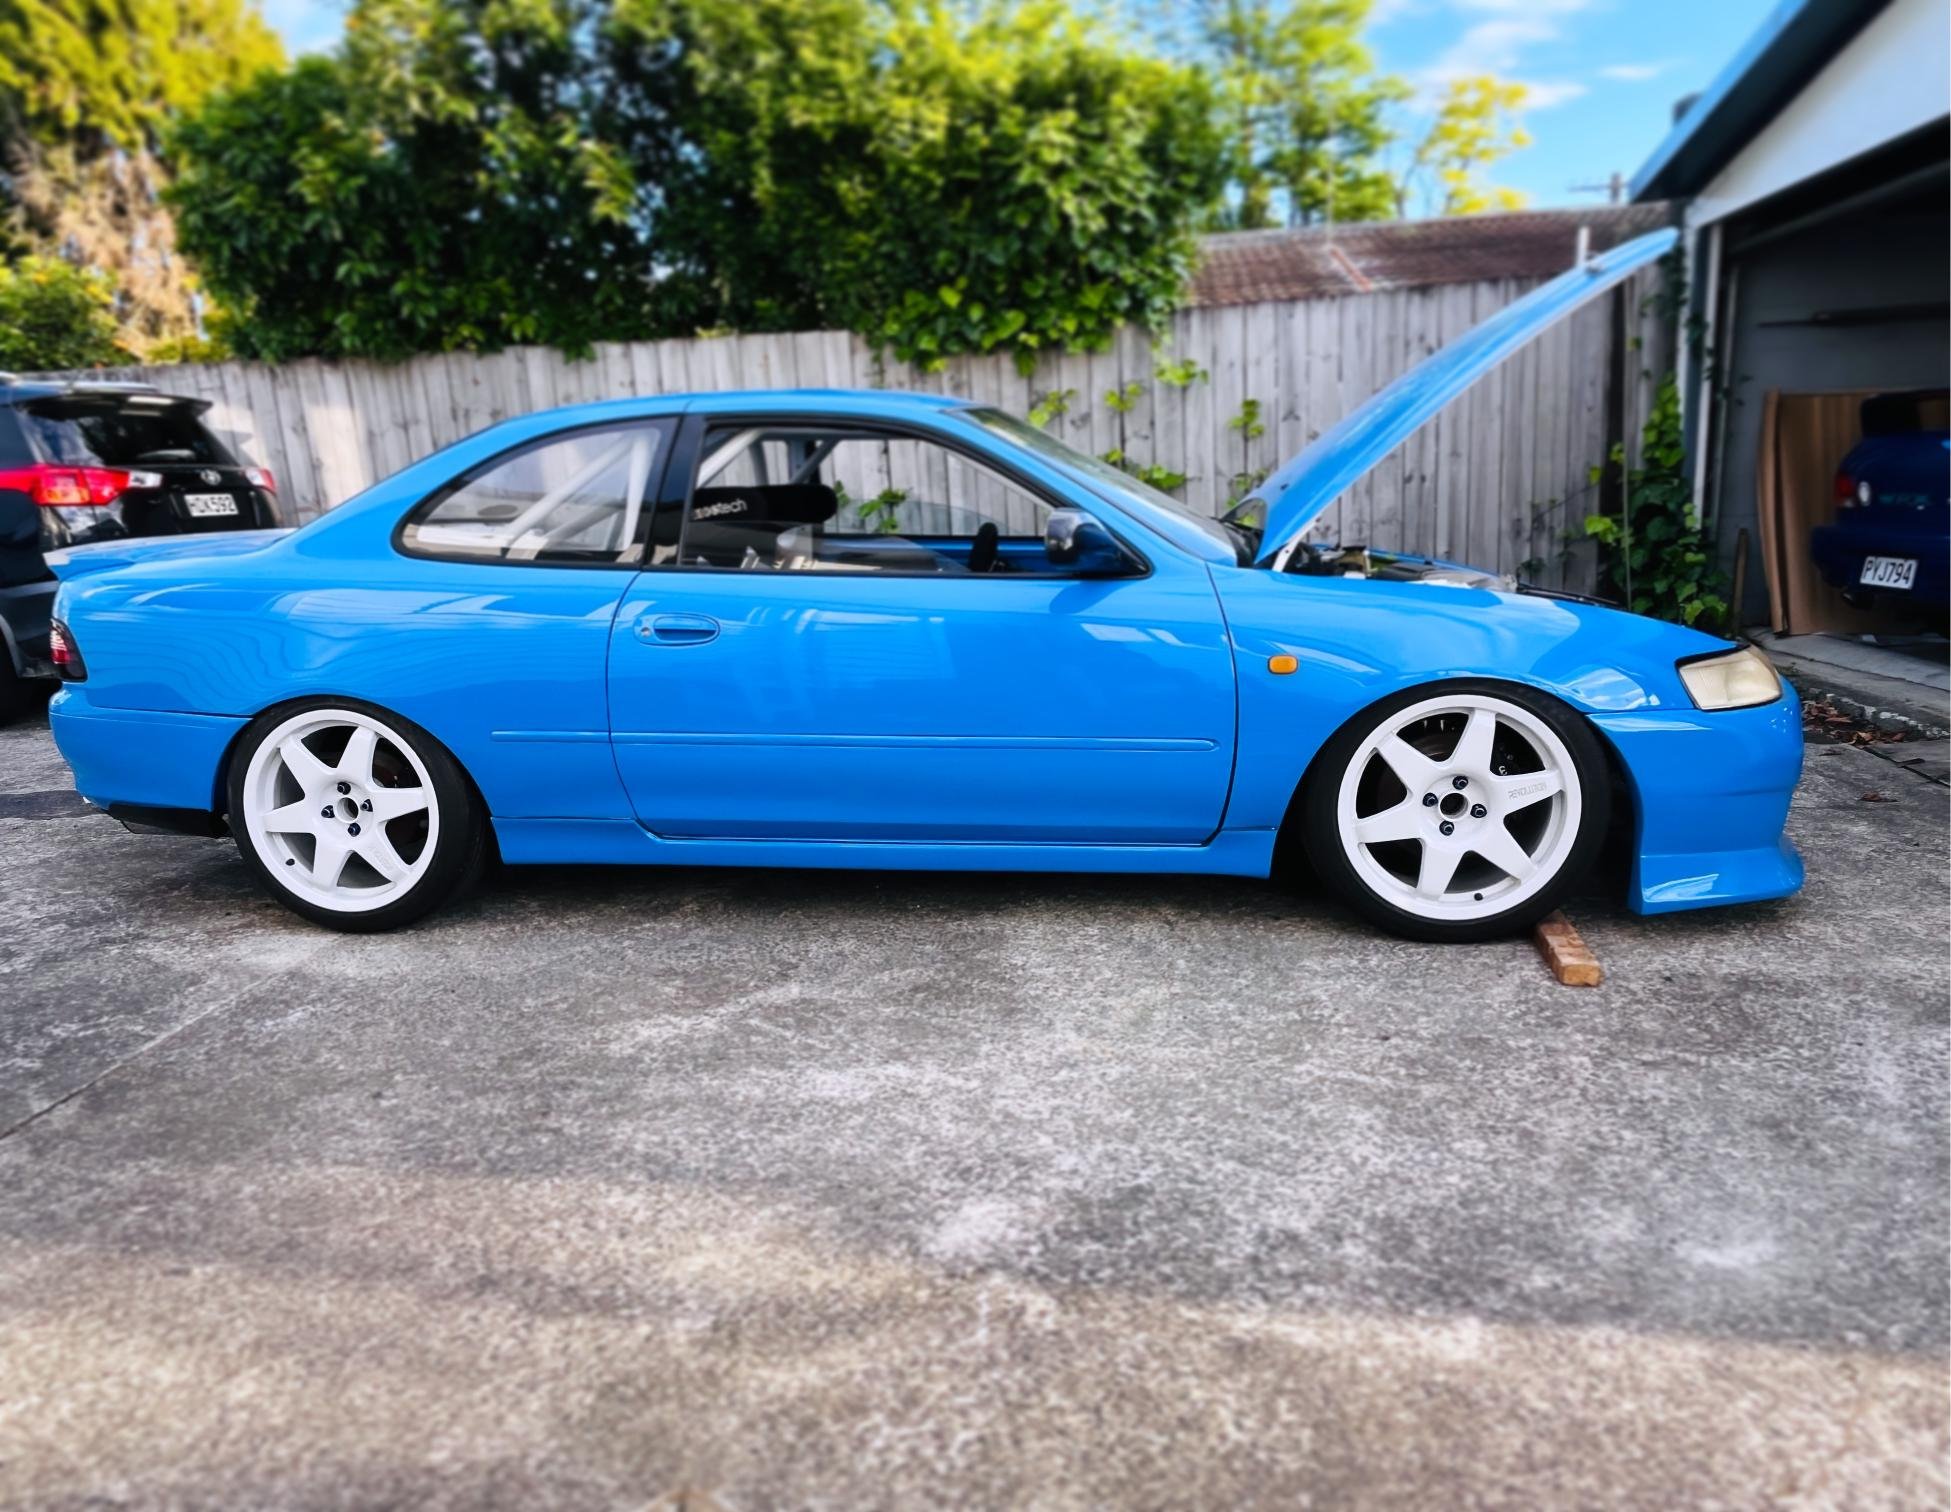
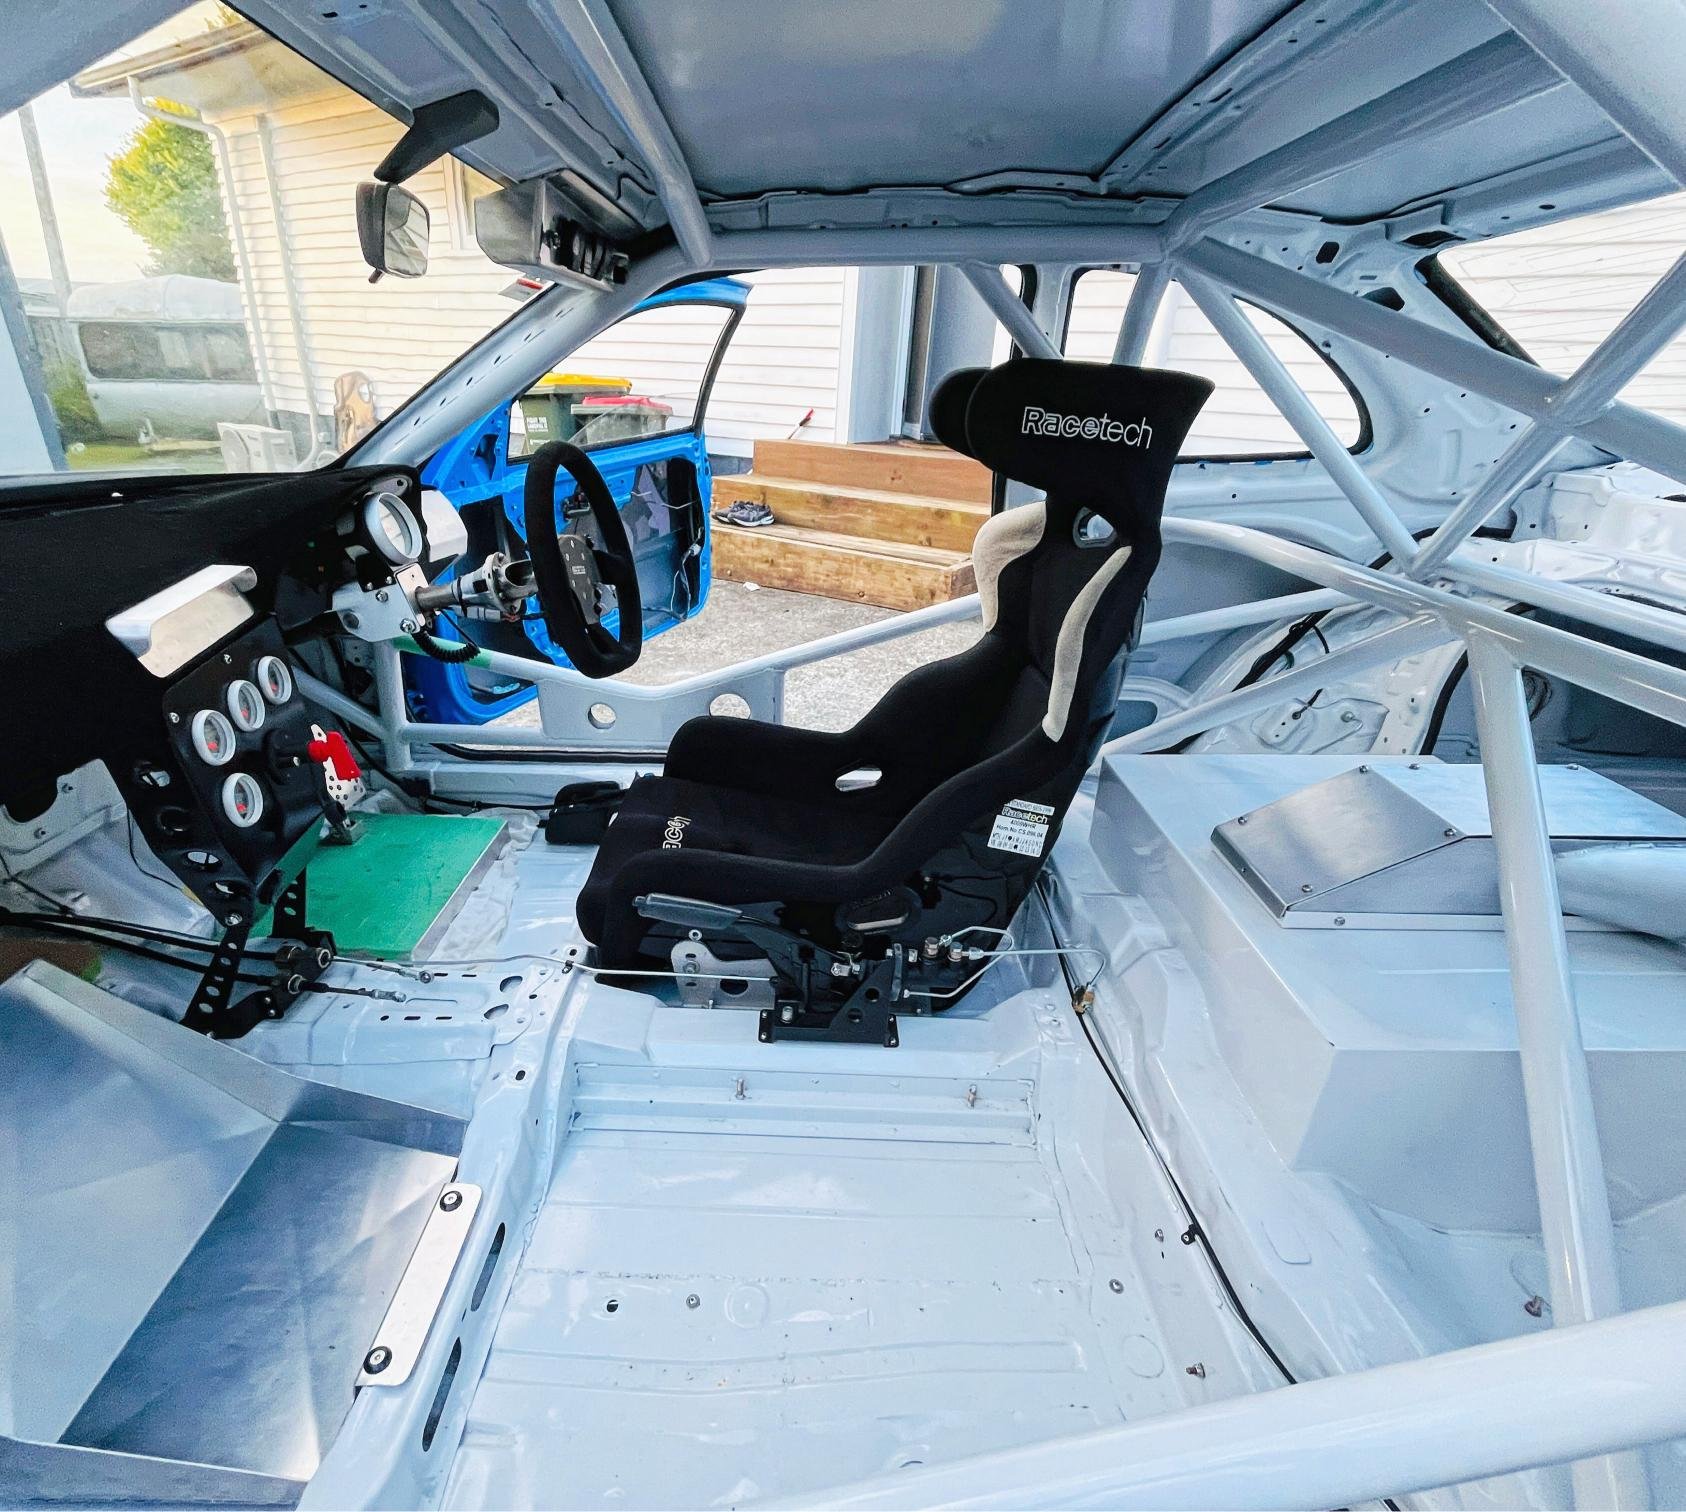
Loving the slam on this car. Can't wait to slay some backroads in this (at a bit higher height) @vk327 cranking into the wiring. Body loom is 98% complete and working. Very exciting to see lights flashing and wiper going. Starting to feel like a real car, not just a collection of parts thats been sitting in my shed for too long...
1 point
-
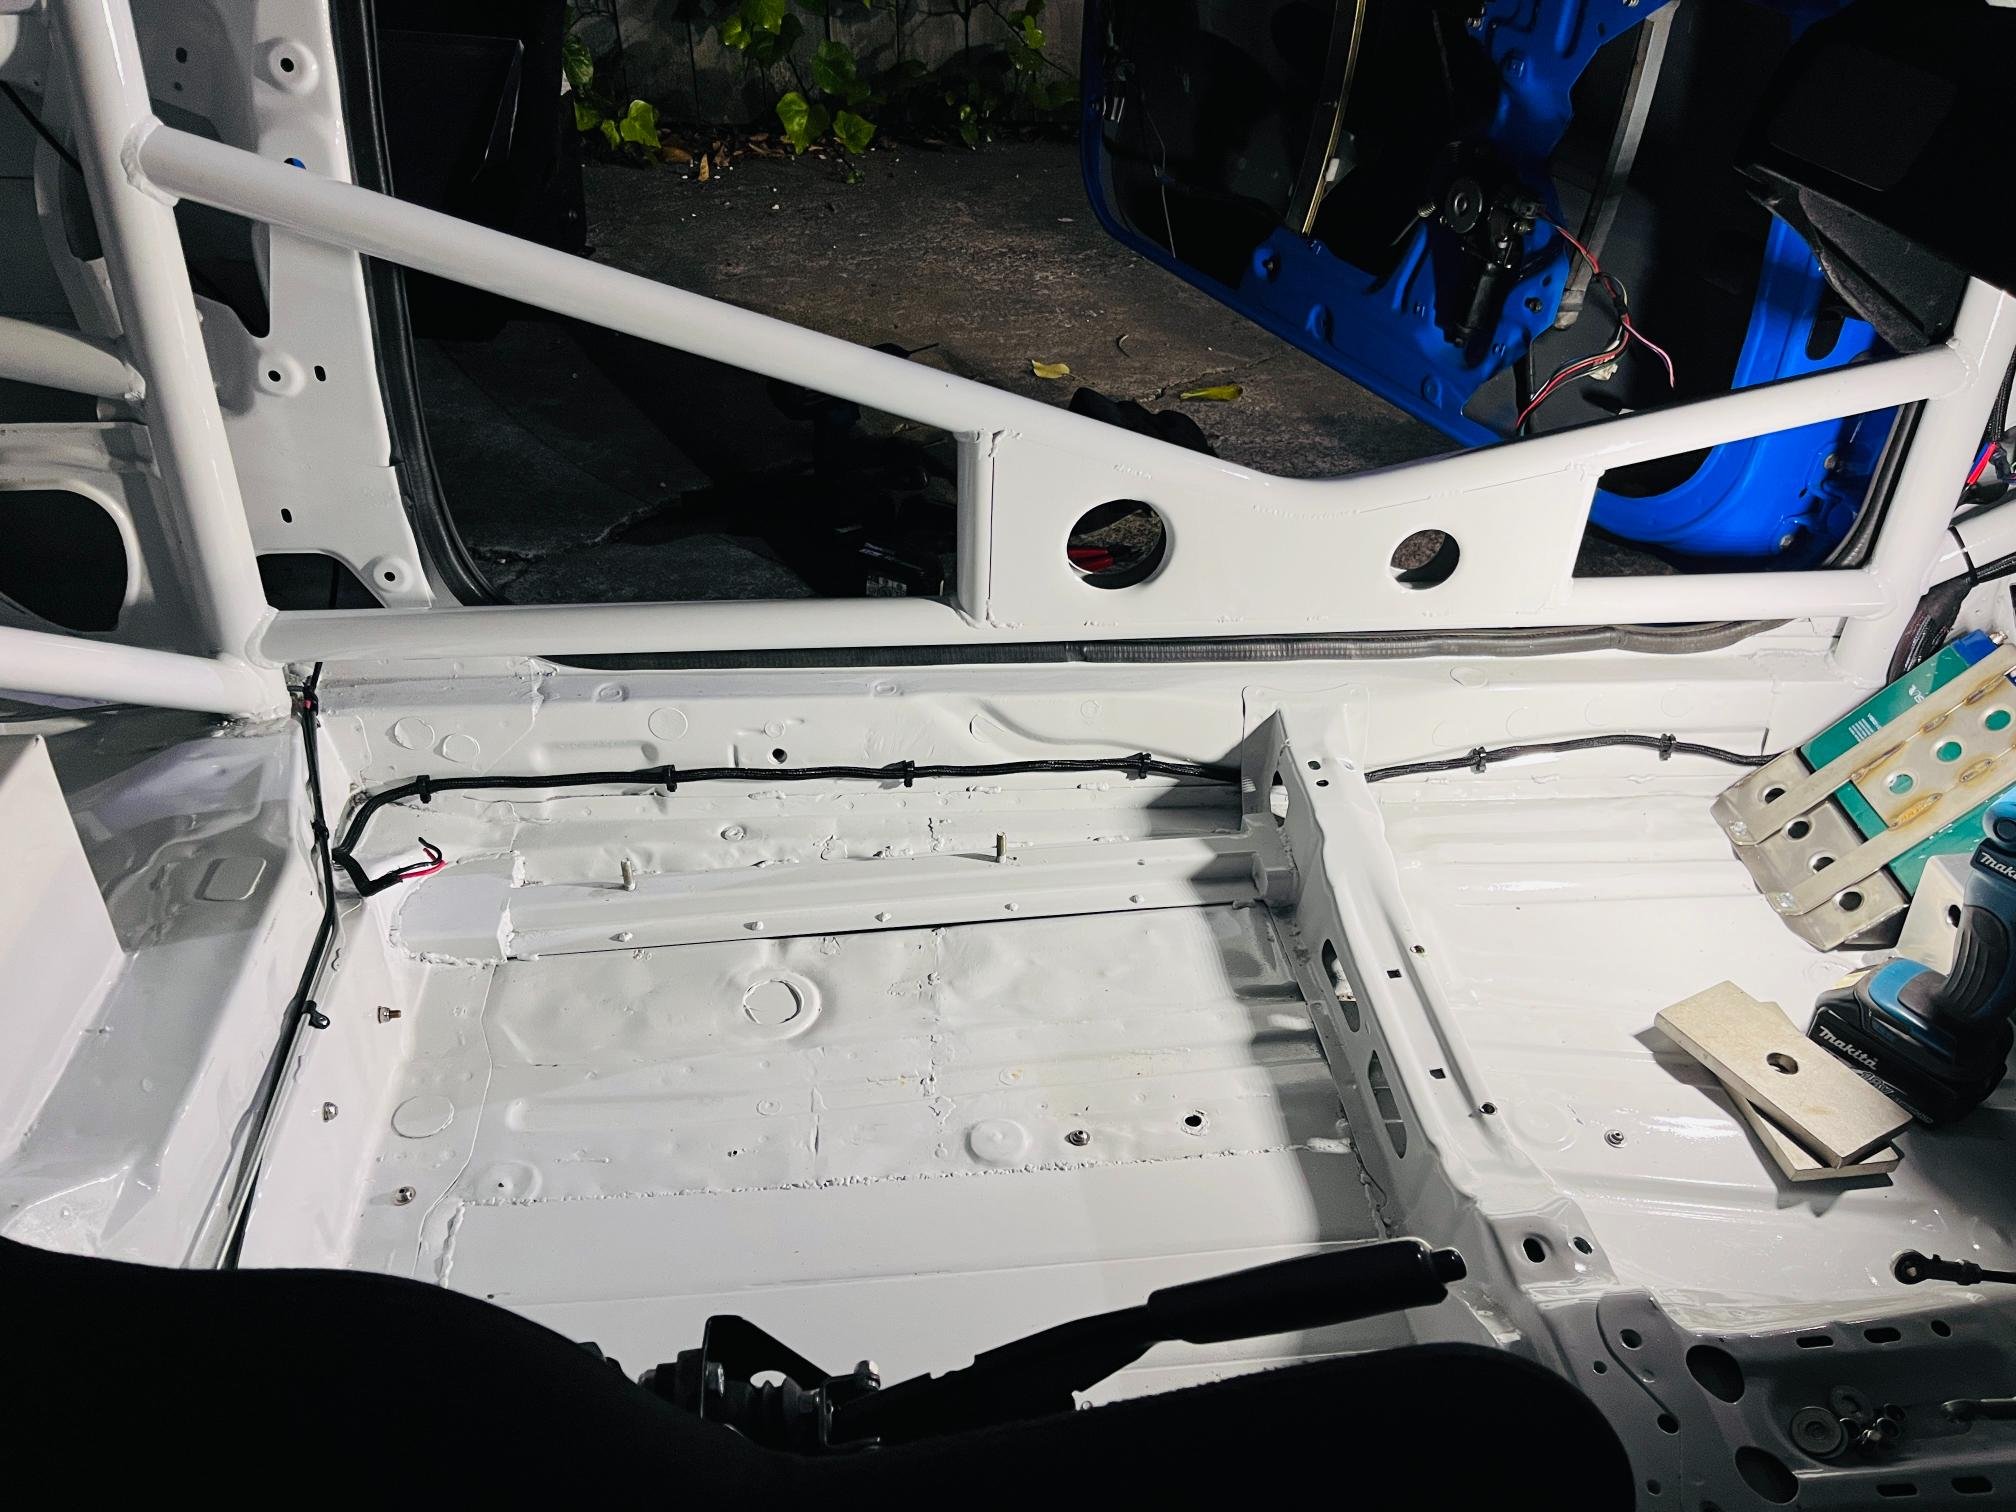
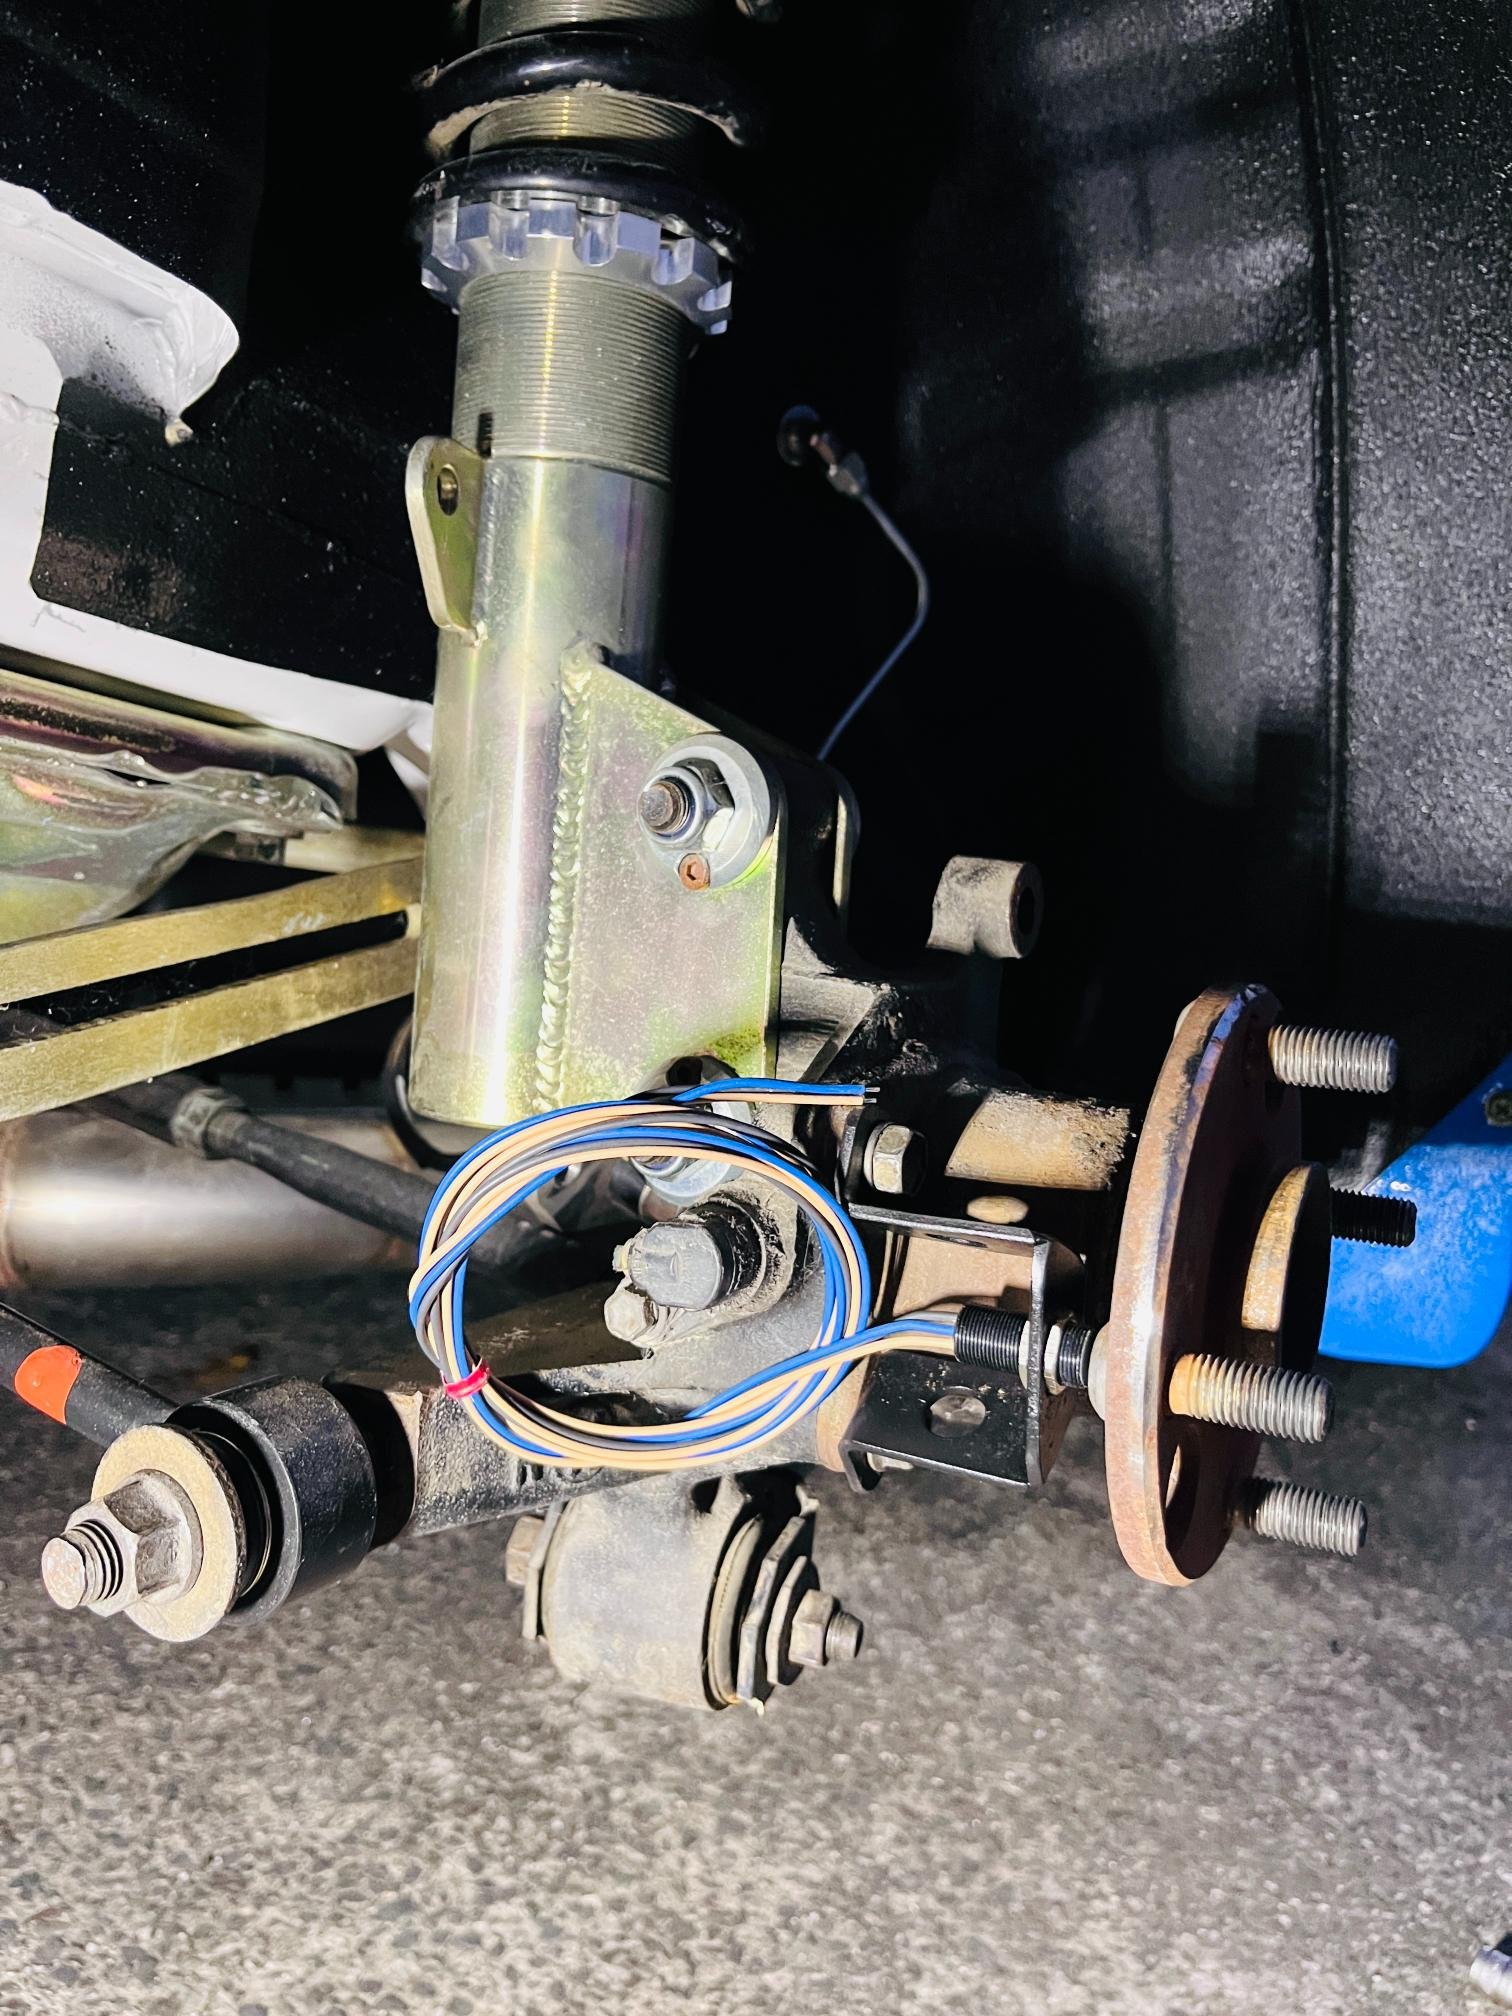
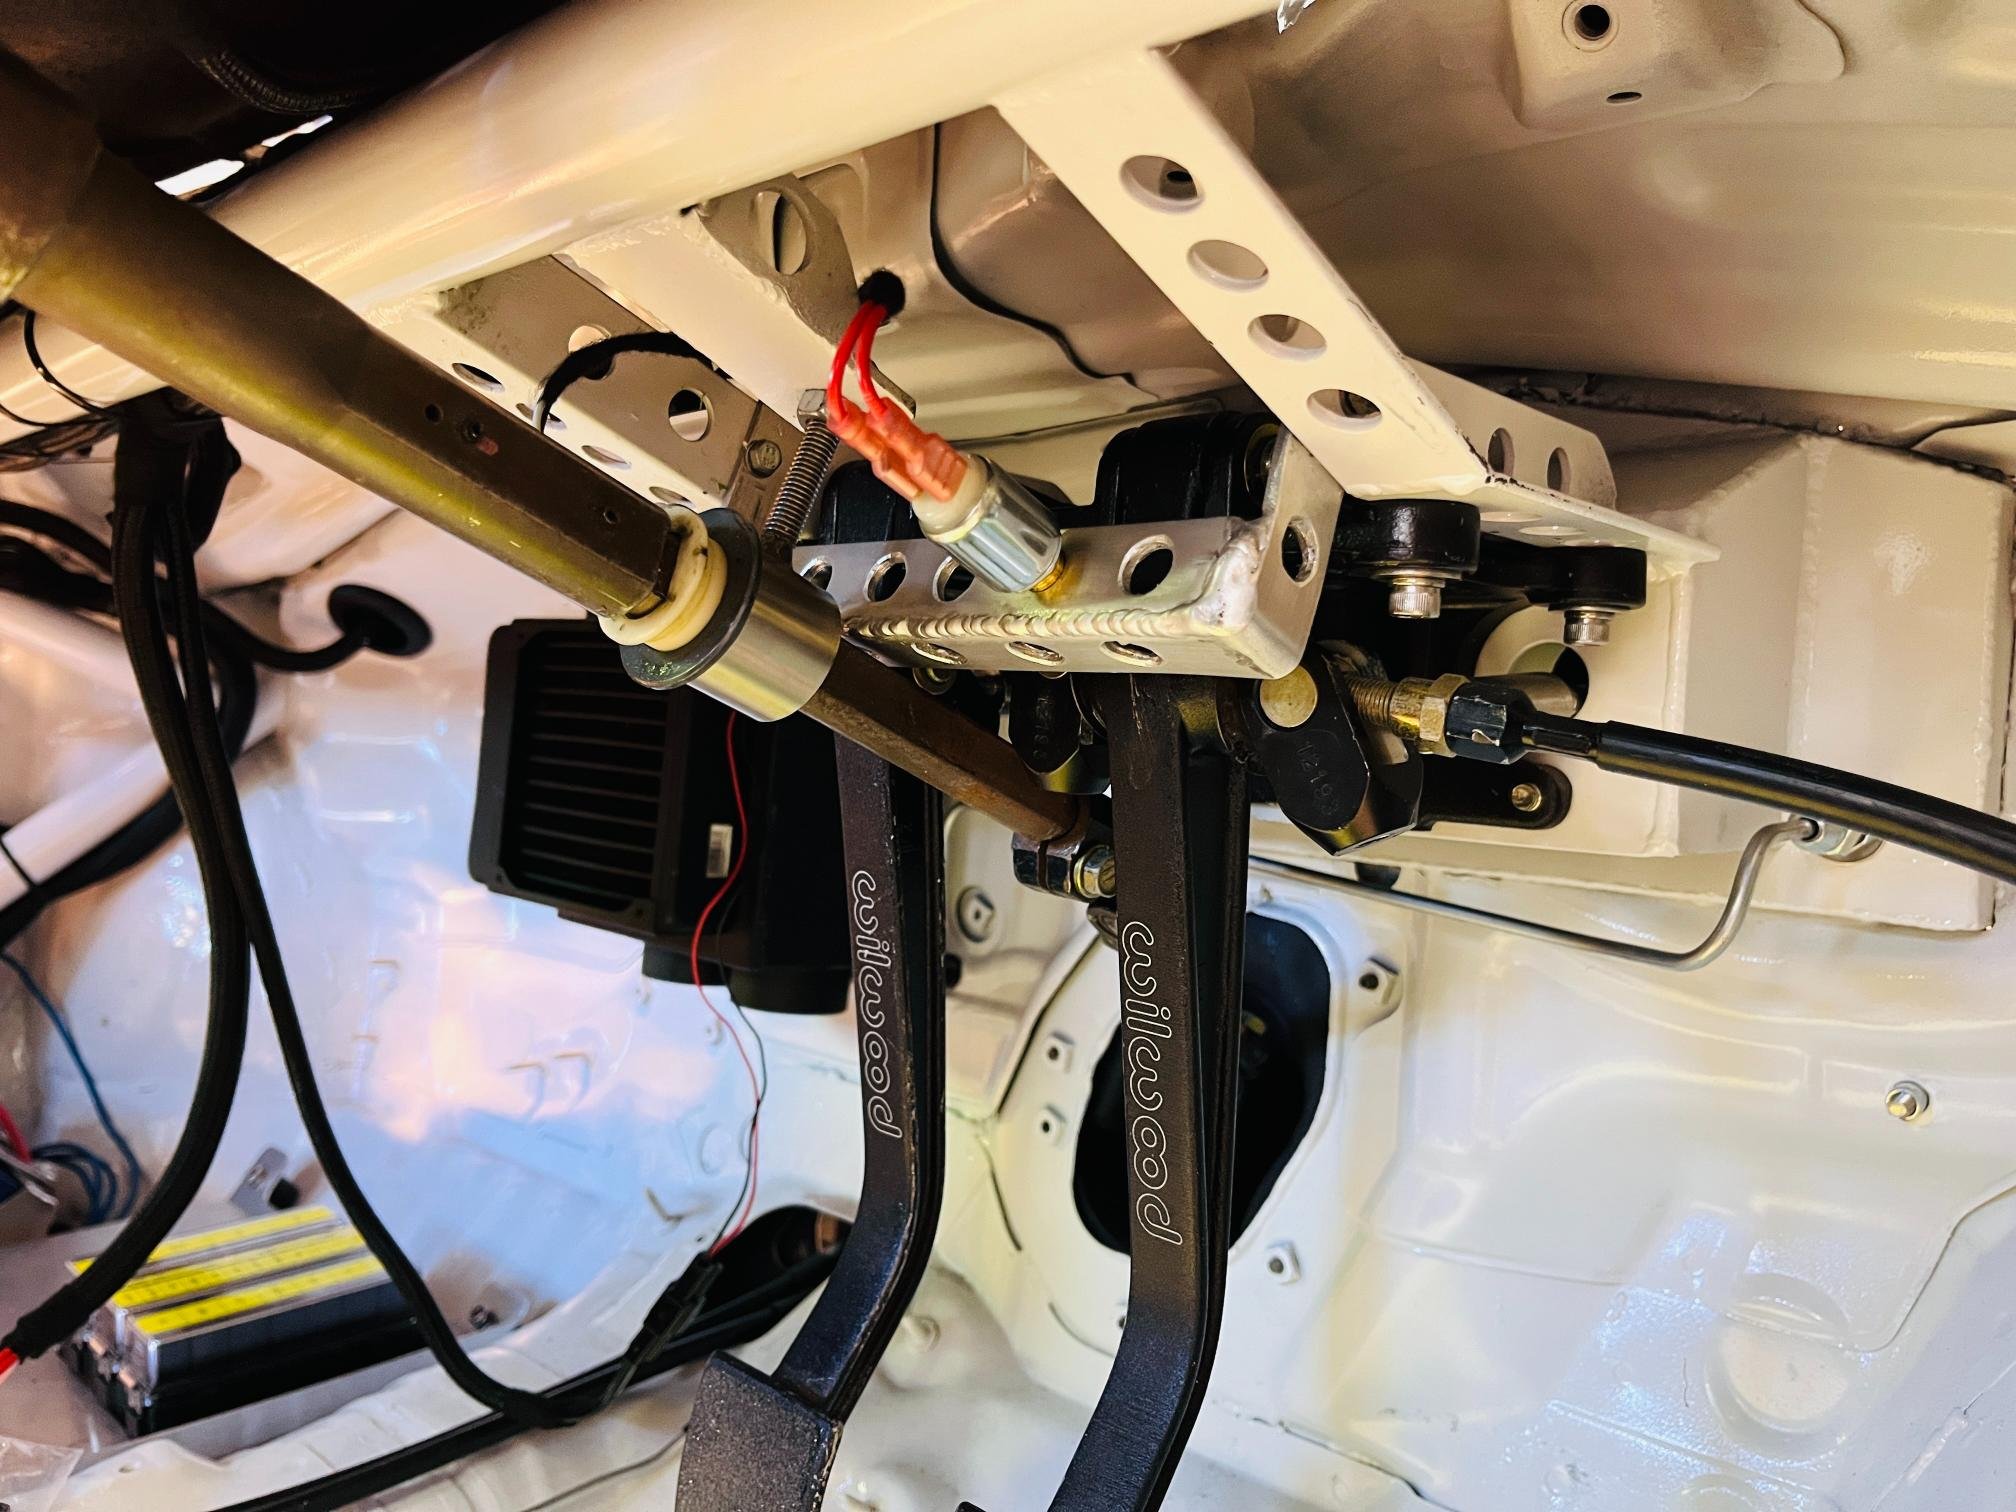
Thanks to @Guypie for machining my intake manifold on a 7deg angle. This netted me 16mm of additional bonnet clearance so I'm happy. This should be enough to design some funky-shaped trumpets to fit under the bonnet. Very interesting seeing @kpr testing results, it seems shape doesn't matter too much, as long as length is correct. IIRC 130-160mm trumpet (330-360mm total) is what I was aiming for. Lots of wiring progress lately. A bit more on that soon, but for now here's some satisfying pictures of general tidyness/not being hory. Made a sweet bracket for the speedo sensor pickup off rear hub. This will drive the Monit (for wof purposes), but also allows ECU to do some launch/traction control things (compare front vs rear wheel speed etc) Sweet bracket for clutch and brake pedal switches. Included clutch to do launch control/flat shift at some stage. Lots of holes because aluminum isn't lightweight enough I guess?
1 point
-
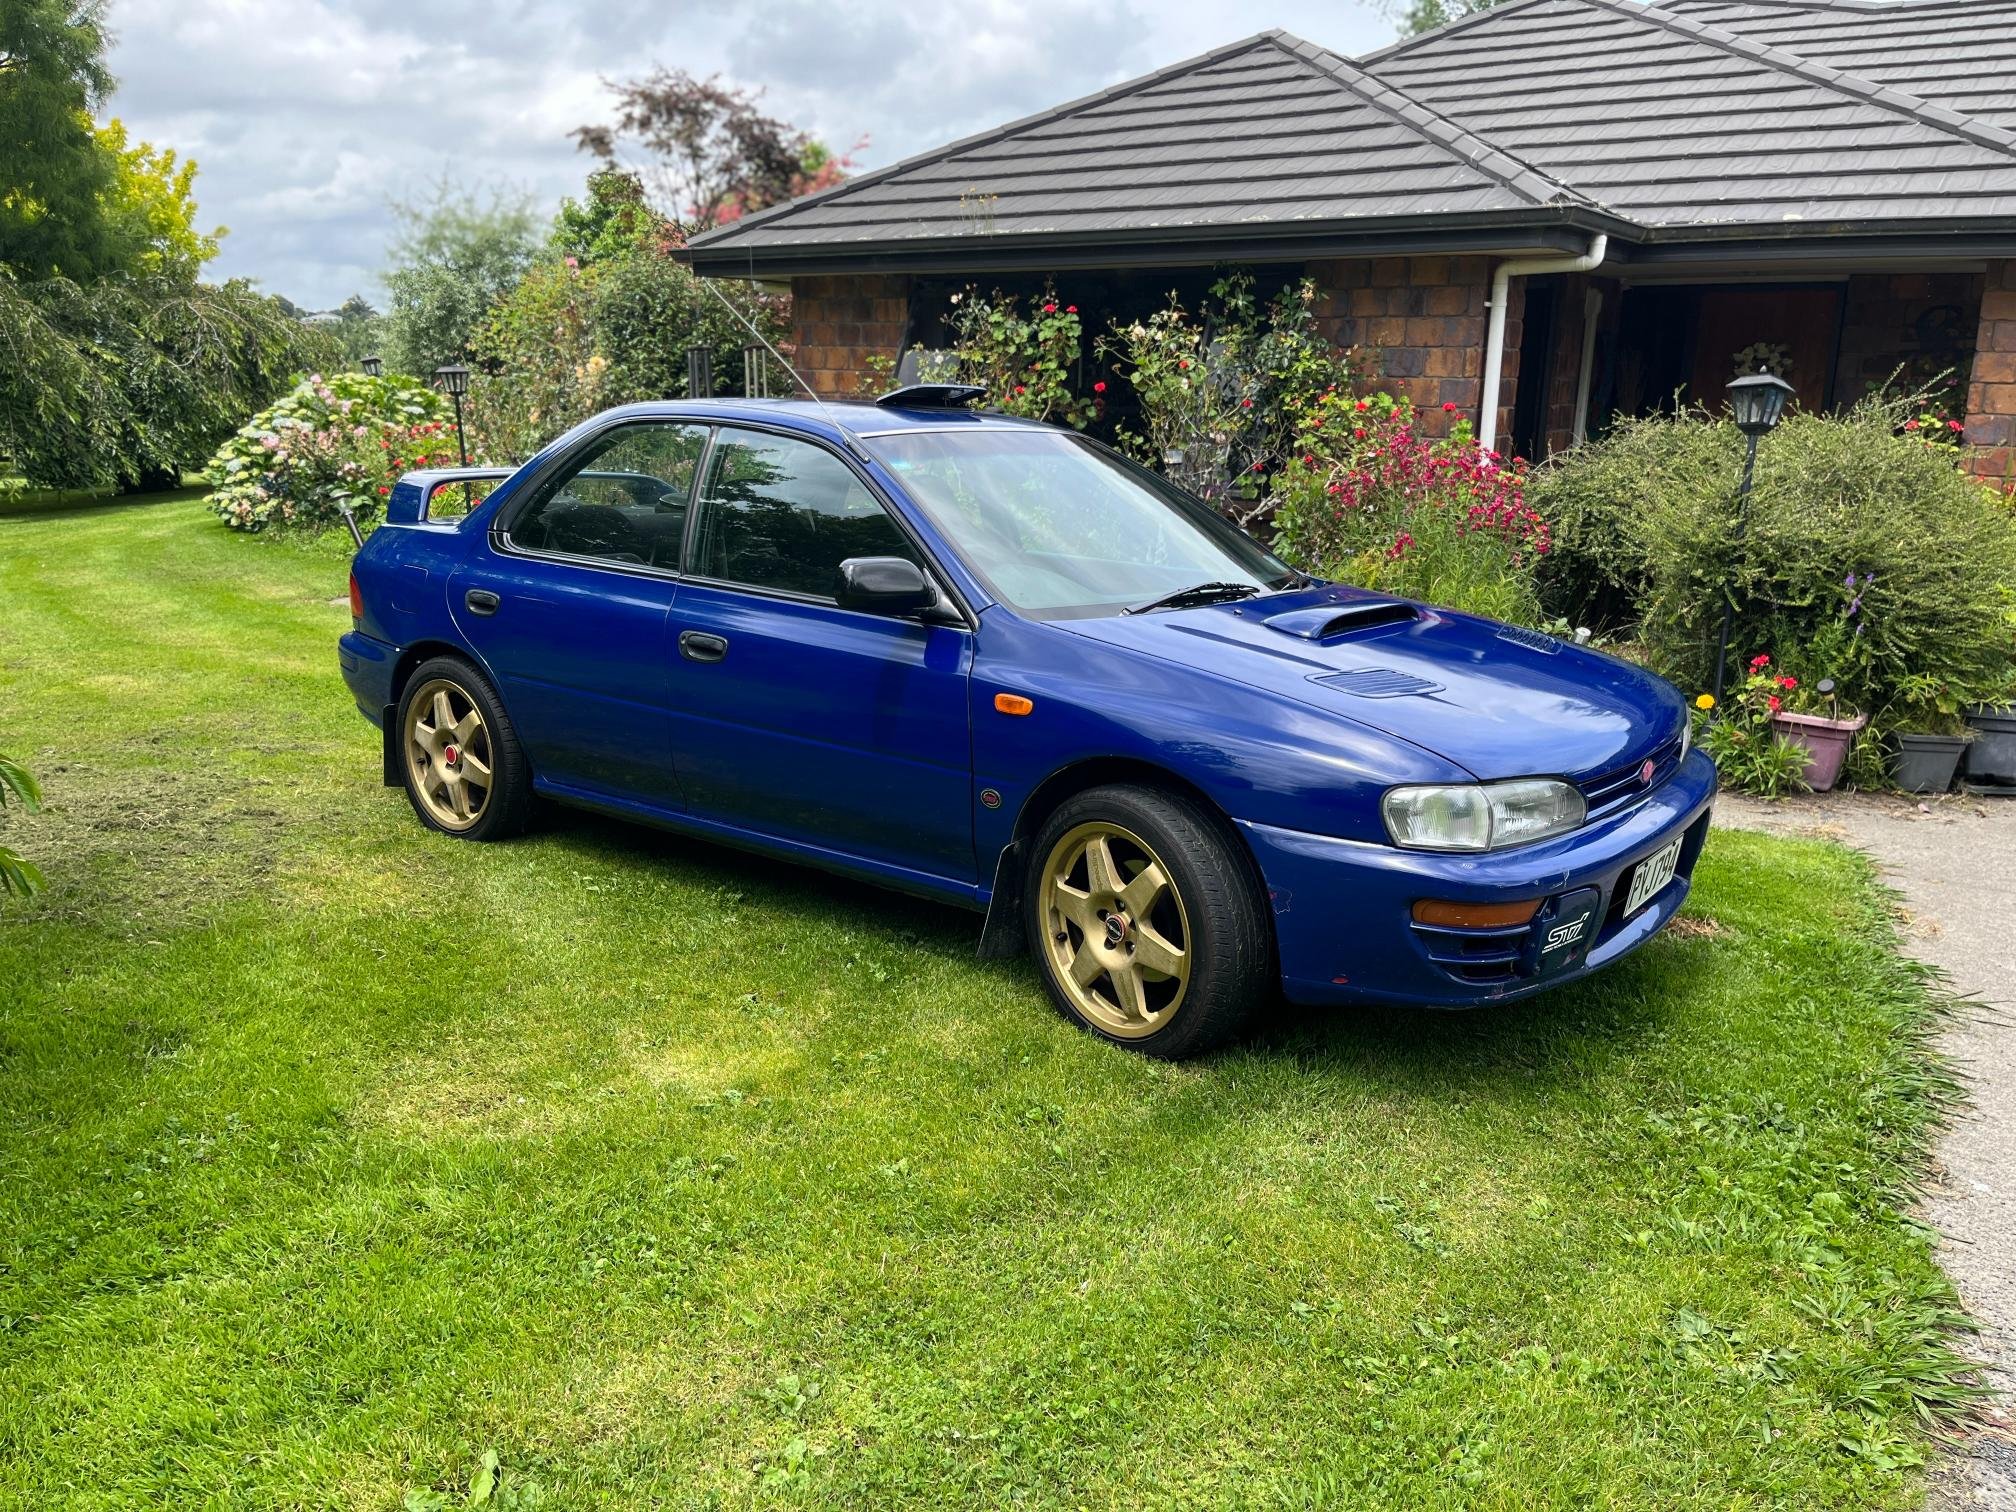
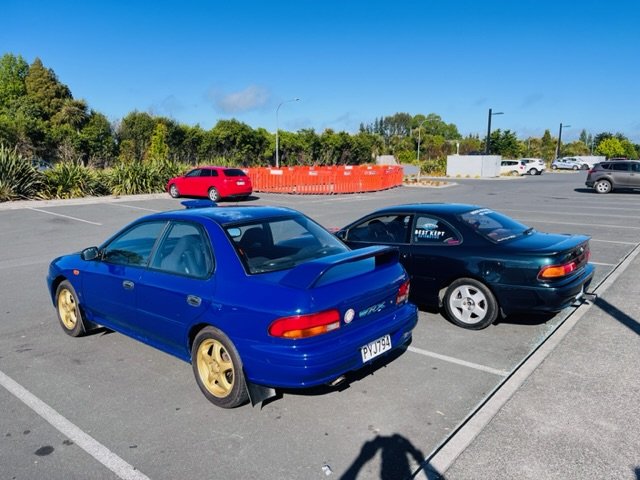
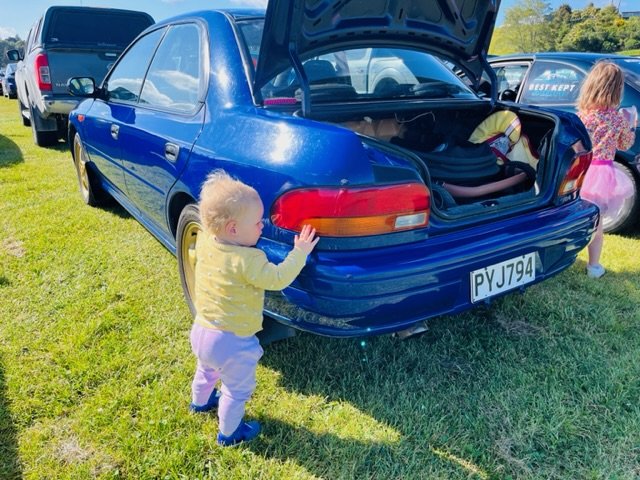
As summer arrives, have been using this for the odd Sunday drive. Passed a warrant with no issues which was slightly surprising. The more I drive this, the more impressed I am with the performance. It hauls ass for a factory car and has super short gearing. My daughter Finley loves it so that’s the main thing Just a couple of 90s jdm classics out for a cruise gave the engine bay a good clean/detail. Came up pretty good. thanks to @Guypie for machining the centre bores for the speedlines out to Subaru size (the reason they were cheap). Also fitted a set of very used 215s as the 235s they came with were a bit balloney. End result is it looks great on the speedlines. Classic Colin McRae/95 WRC car look Next on the list is replicating the Group A back muffler and looking for some wind up windows and door cards?
1 point
-
Oil sqirters on an M series, as I understand it they are specifically installed to wash the coolant off the bores when you get a BHG.1 point
-
Yeah, a couple of my favourite things were Kevlar-lined rear quarters for snow rallies so they could smash through snow drifts without damage, 10:1 compression HKS built 4G63s, and all the parts of the body acid dipped to within an inch of their lives to reduce weight. There was also a good yarn about them leaving an evo three in Kenya (they must have sold it) and everything that went into the country had to come out (legally, including used tyres etc.) so they took a local fwd lancer the same shape back with them which was eventually built into a 4wd turbo reccy car using spares from around the workshop. Also, tales of being caught by the cops at Rally of NZ in a speeding convoy of Canters loaded up and heading to the next service stage. He had a Kiwi, Aussie and UK driver's license and the cop told him he was taking his license off him. Cop didn't know how many he had, so he handed over the Australian one, they swapped drivers and continued on their way.1 point
-
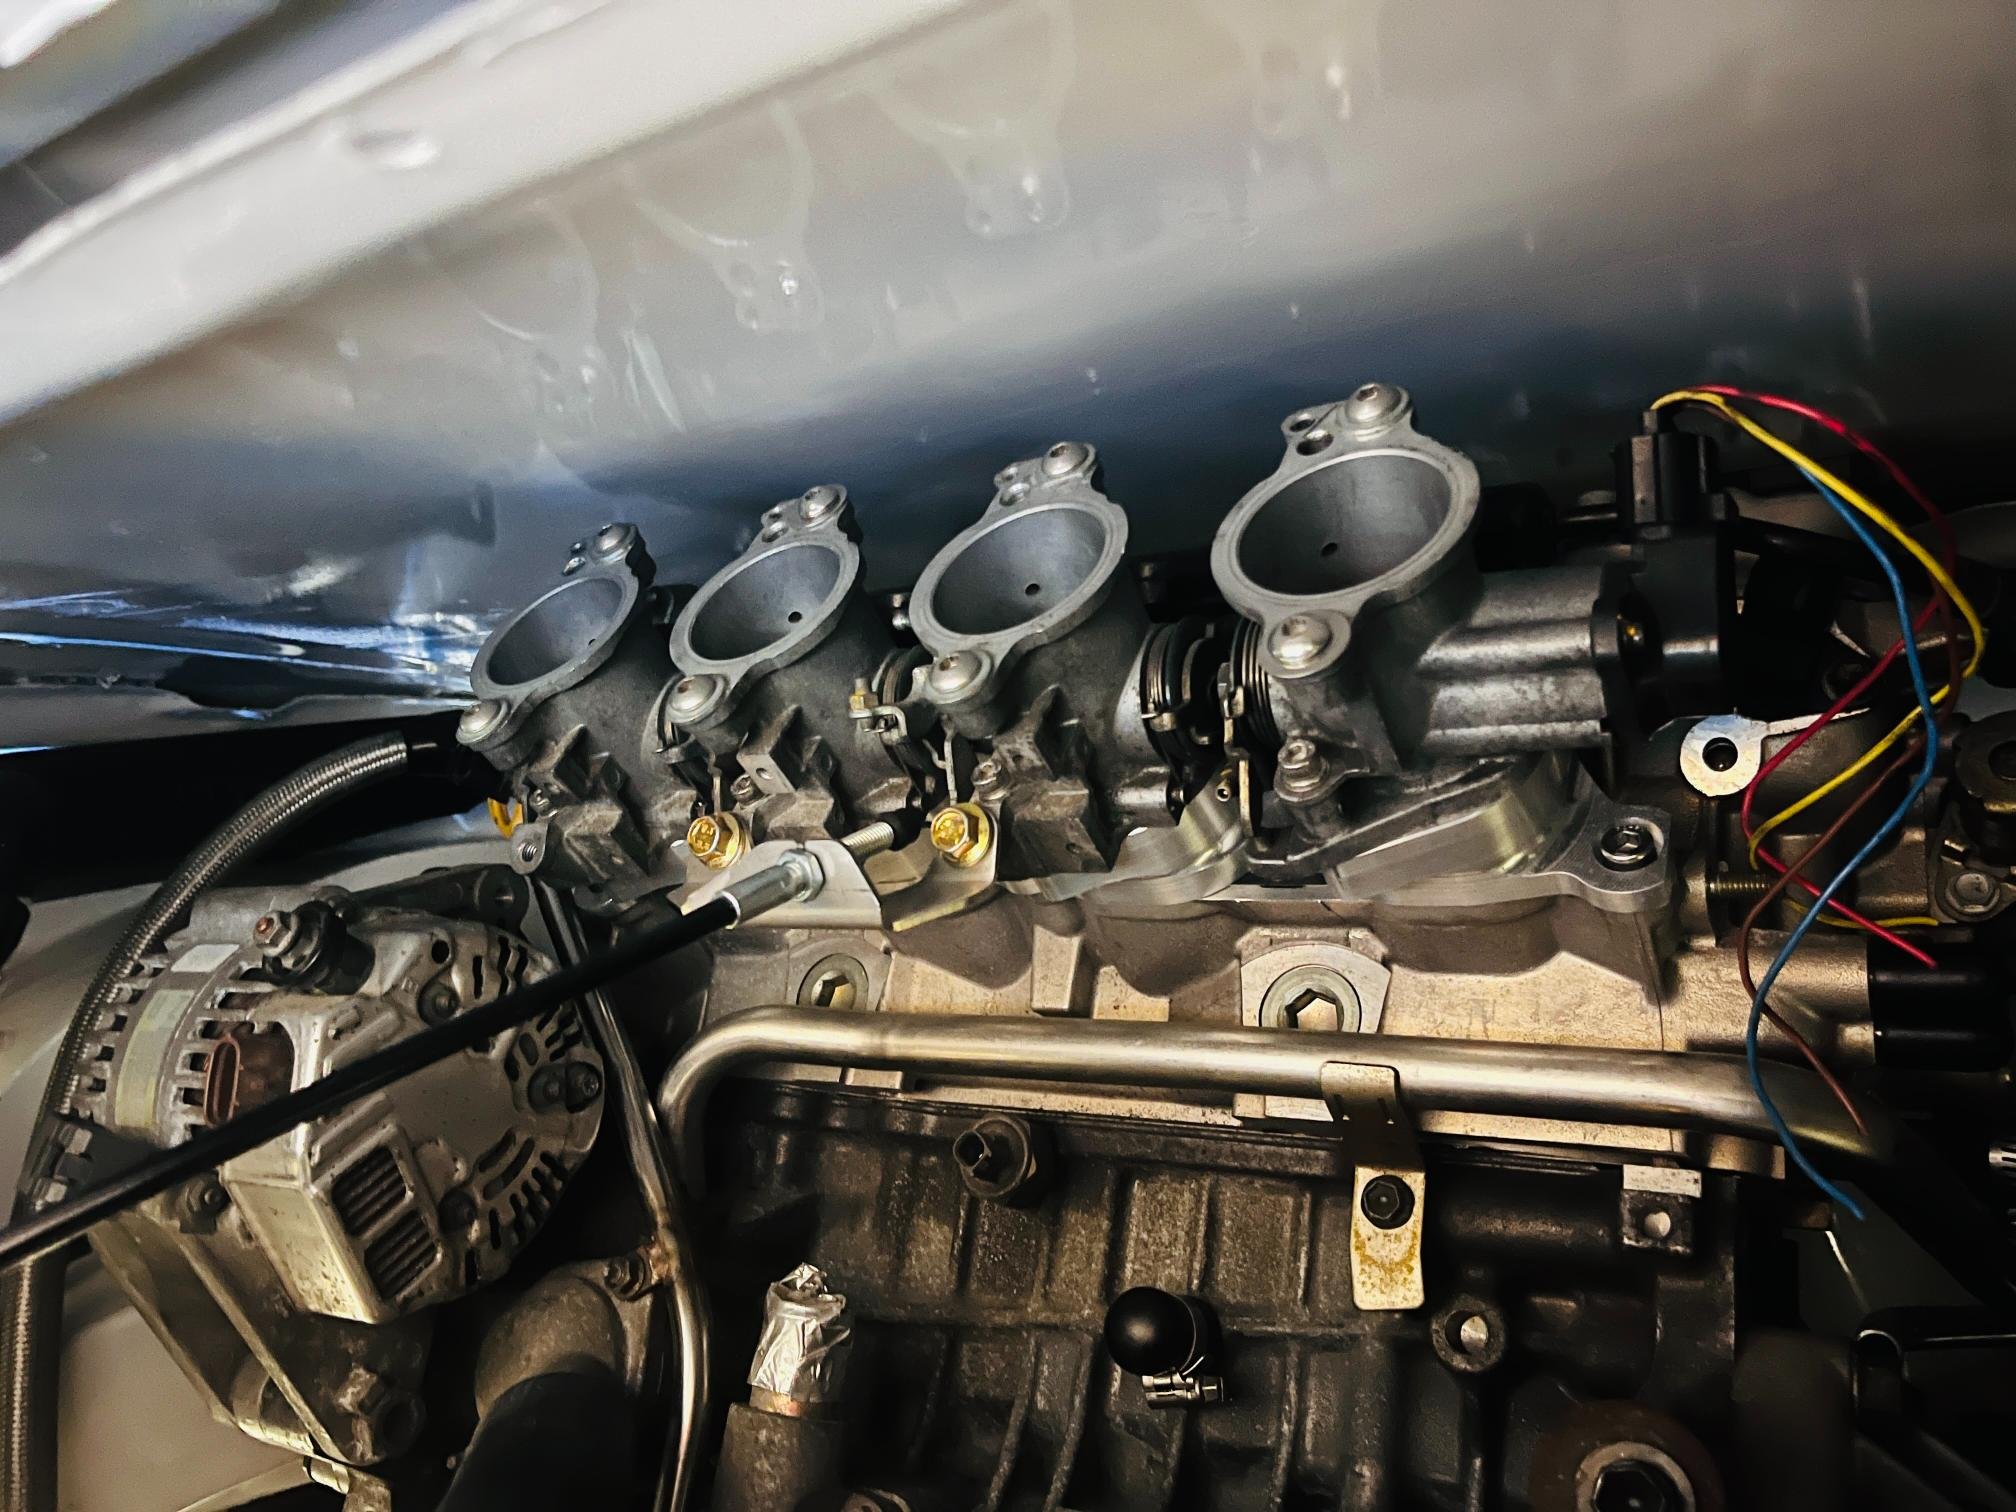
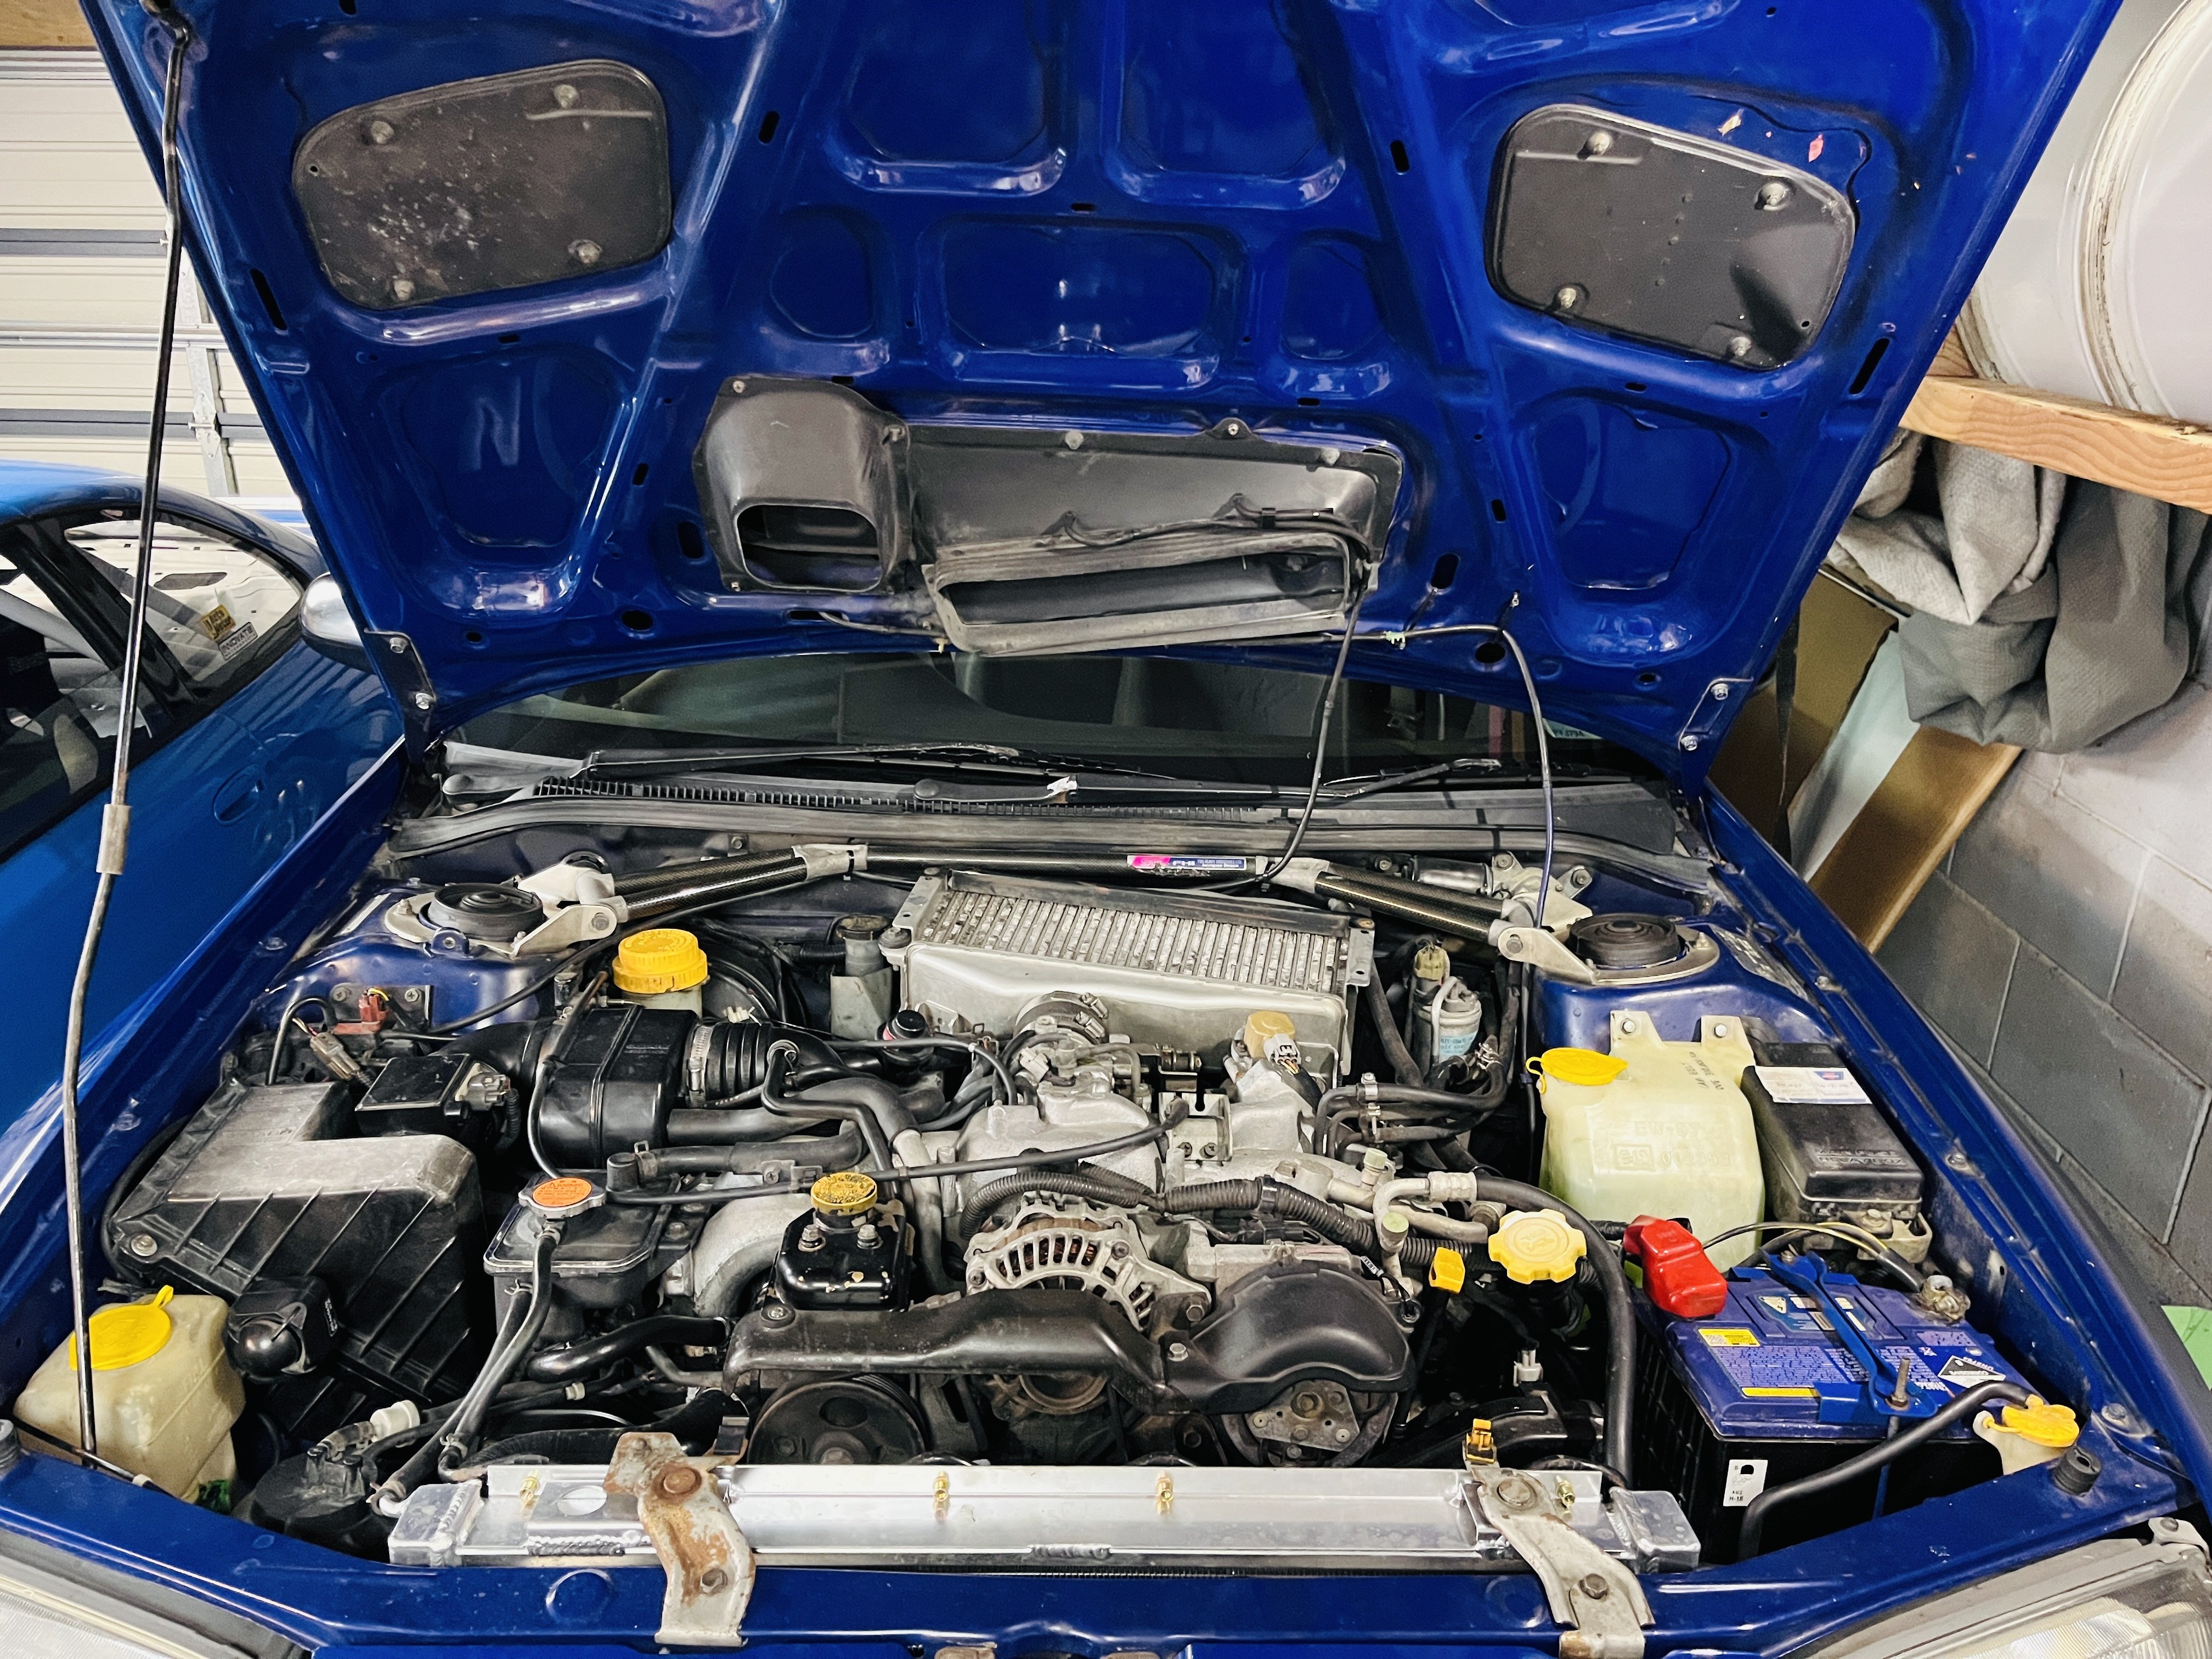
Speedo cable fixed by local company apex auto centre for a fraction of what a new cable would have cost. Massive win. drove it to brunch with family this morning and god damn it goes like a cut cat! And then the clutch decided to start slipping…. So will put that on the next-year list to sort… Here’s an engine bay shot because speedo cables aren’t very interesting. Everything is mostly there, bar a few bits of trim on intercooler and turbo shroud. These are common to all v1-2s so shouldn’t be too hard to find. interestingly, the RA’s never got the red sti manifold cause this one has an extra unused injector in it. It has an aftermarket radiator which I’ll paint the top of black (not available through Subaru anymore) and generally give everything a once over with black rattle can.
1 point
-
After a couple of goes I managed to track down the right bushes to rebuild the shifter. Feels so much nicer now. But man what a prick of a thing to work on! Haven’t sworn at a car so much for years… Also took on first 15km drive to get fuel from Te rapa and half way the Speedo stopped working and then got a check engine light. After some research found that without speedo reading and after 15mins of driving it throws a check engine light and limits to 4000rpm. They use a mechanical drive to back of dash with some whacky clips so will see if I can get cable remade. New ones are available but very pricey so will try a local shop first. Hoping to take for a Sunday drive this weekend. Fingers crossed it all goes smoothly!
1 point
-
Bit more progress last few days, I got the dash back together, the instrument panel cover bit is pretty fucked, I might try and make a new one or try find one on eBay. But the new cluster work good and mounted ok I made up the front shock mounts, shocks are some ones I had, Google says Hilux, Torana and a few others so will see how they go for dampening. I think I'll use limiting straps aswell for top out, it'll be a heap of weight on the shock shaft otherwise I also farted around with springs. I got a set of cruiser ones but they are way too big so I chucked in some g30 ones I had, I know they ride good and have lifted it another couple of inches which it needed. Im stoked as fuck on how it looks, big feet and stock body. I live in a town infested with late model Japanese 4wd utes covered in every accessory know to man, this brick will stand out.
1 point
-
Putting this brochure here for reference later on:
1 point
-
so it should fit 15x10s at -44p, 33x12.5 MTs and poke out 15mm so ill run plastic fenders , omg Im good at photoshop
1 point
-
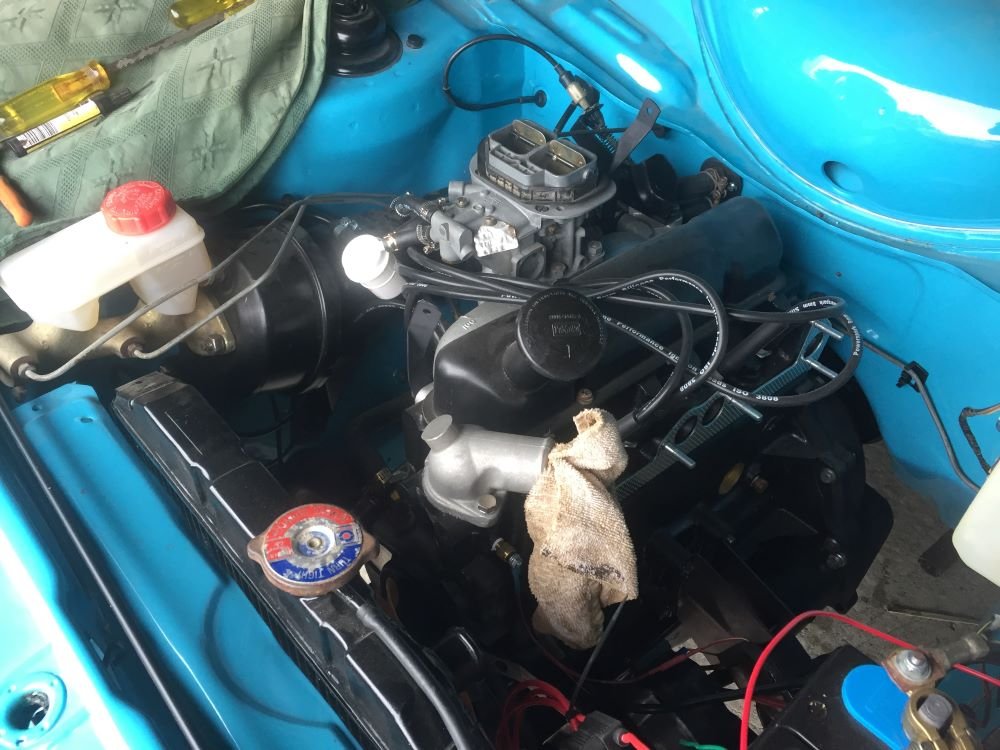
Yeah, I've got an update for this old crate too. Got some overnight parts from Japan. All new water hoses ( except the rad hoses coz I'm a dork) & new strut top mounts. I made up the rad hoses out of bends & also had the rad re-cored because leaky. And, it turned out, blocked solid. So all fitted & it now stays cool, doesn't leak & doesn't crash around at the front. I have plans for it though & I intend to implement them before a couple of local car shows in the spring. I've told Mrs Shuzz she's driving it coz I'm driving the Chevy. She looked worried. / pics of rad & Hako for Fred.1 point


.jpeg.aa059a0362a26e6af1f287df460bd1ee.jpeg)


.thumb.jpg.570970b401ac8d26ce9af7c1bf2bd8cd.jpg)


This leaderboard is set to Auckland/GMT+12:00