
Leaderboard


Popular Content
Showing content with the highest reputation on 17/06/21 in all areas
-
13 points
-
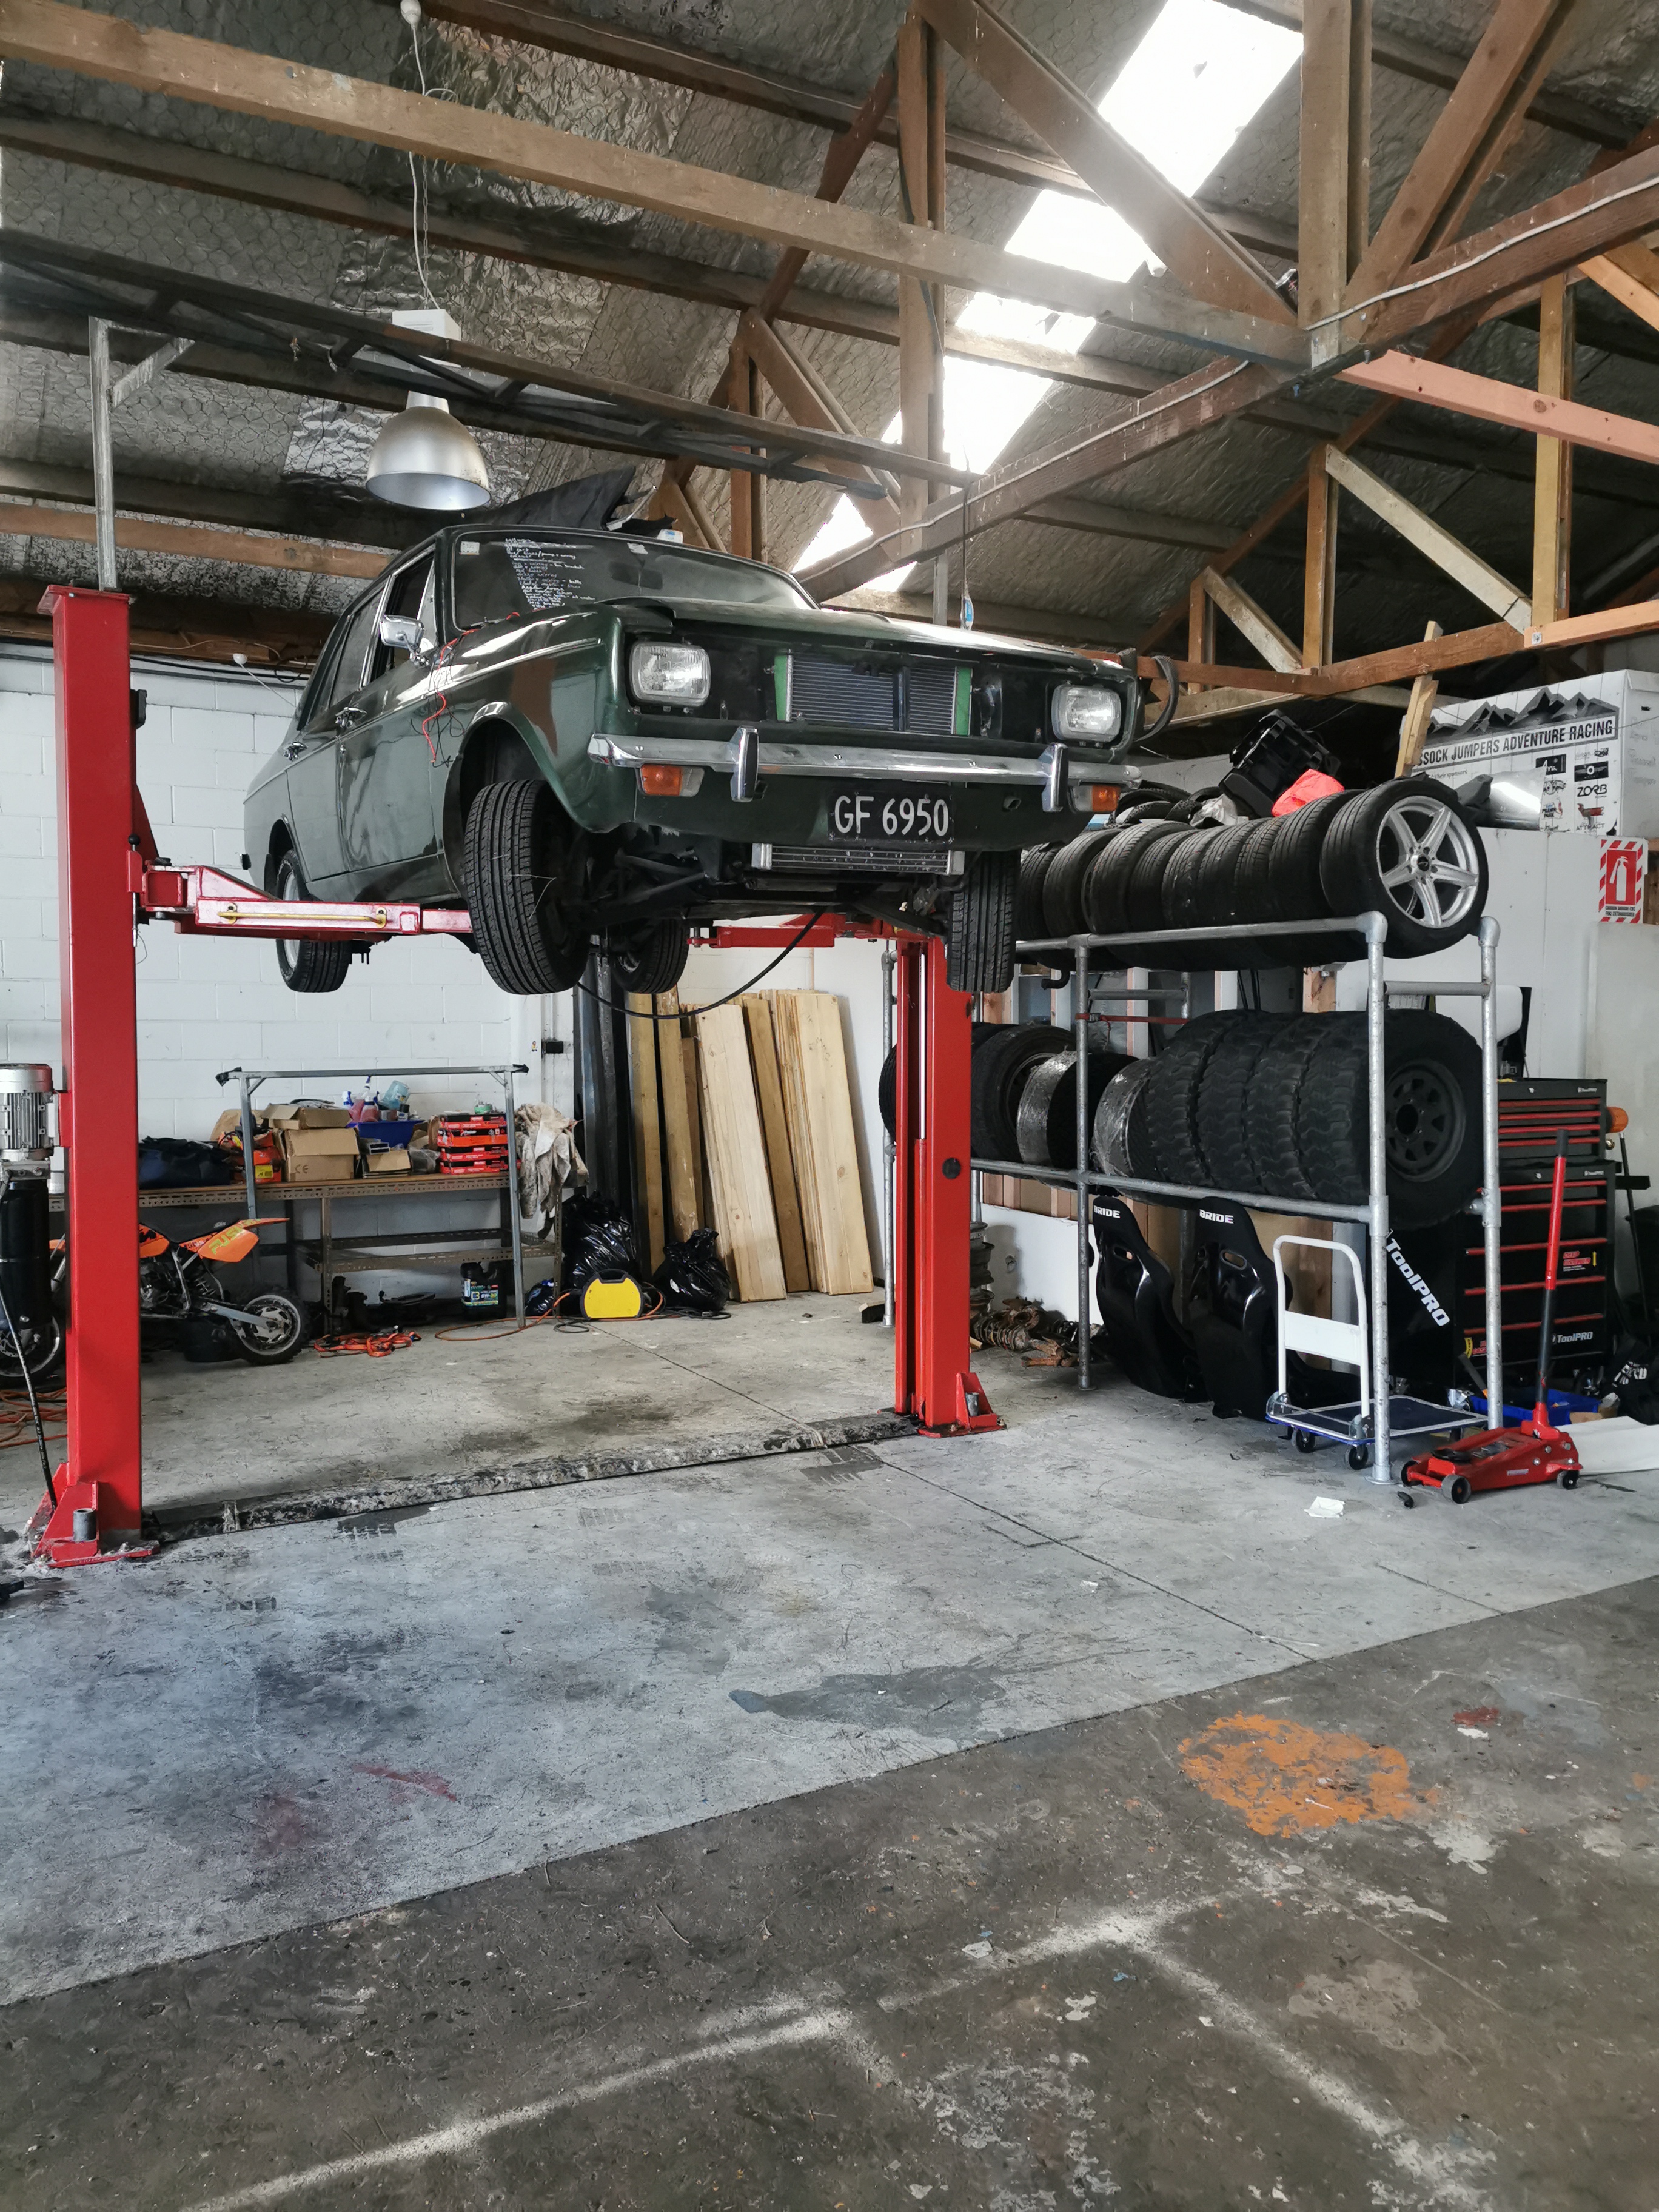
Hoist.... Engage Finally got the hoist up and running, built a tyre rack. Looked under the car, she is mint as under there, not a hint of rust.. 50 years of British oil leaks did its trick
 12 points
 -
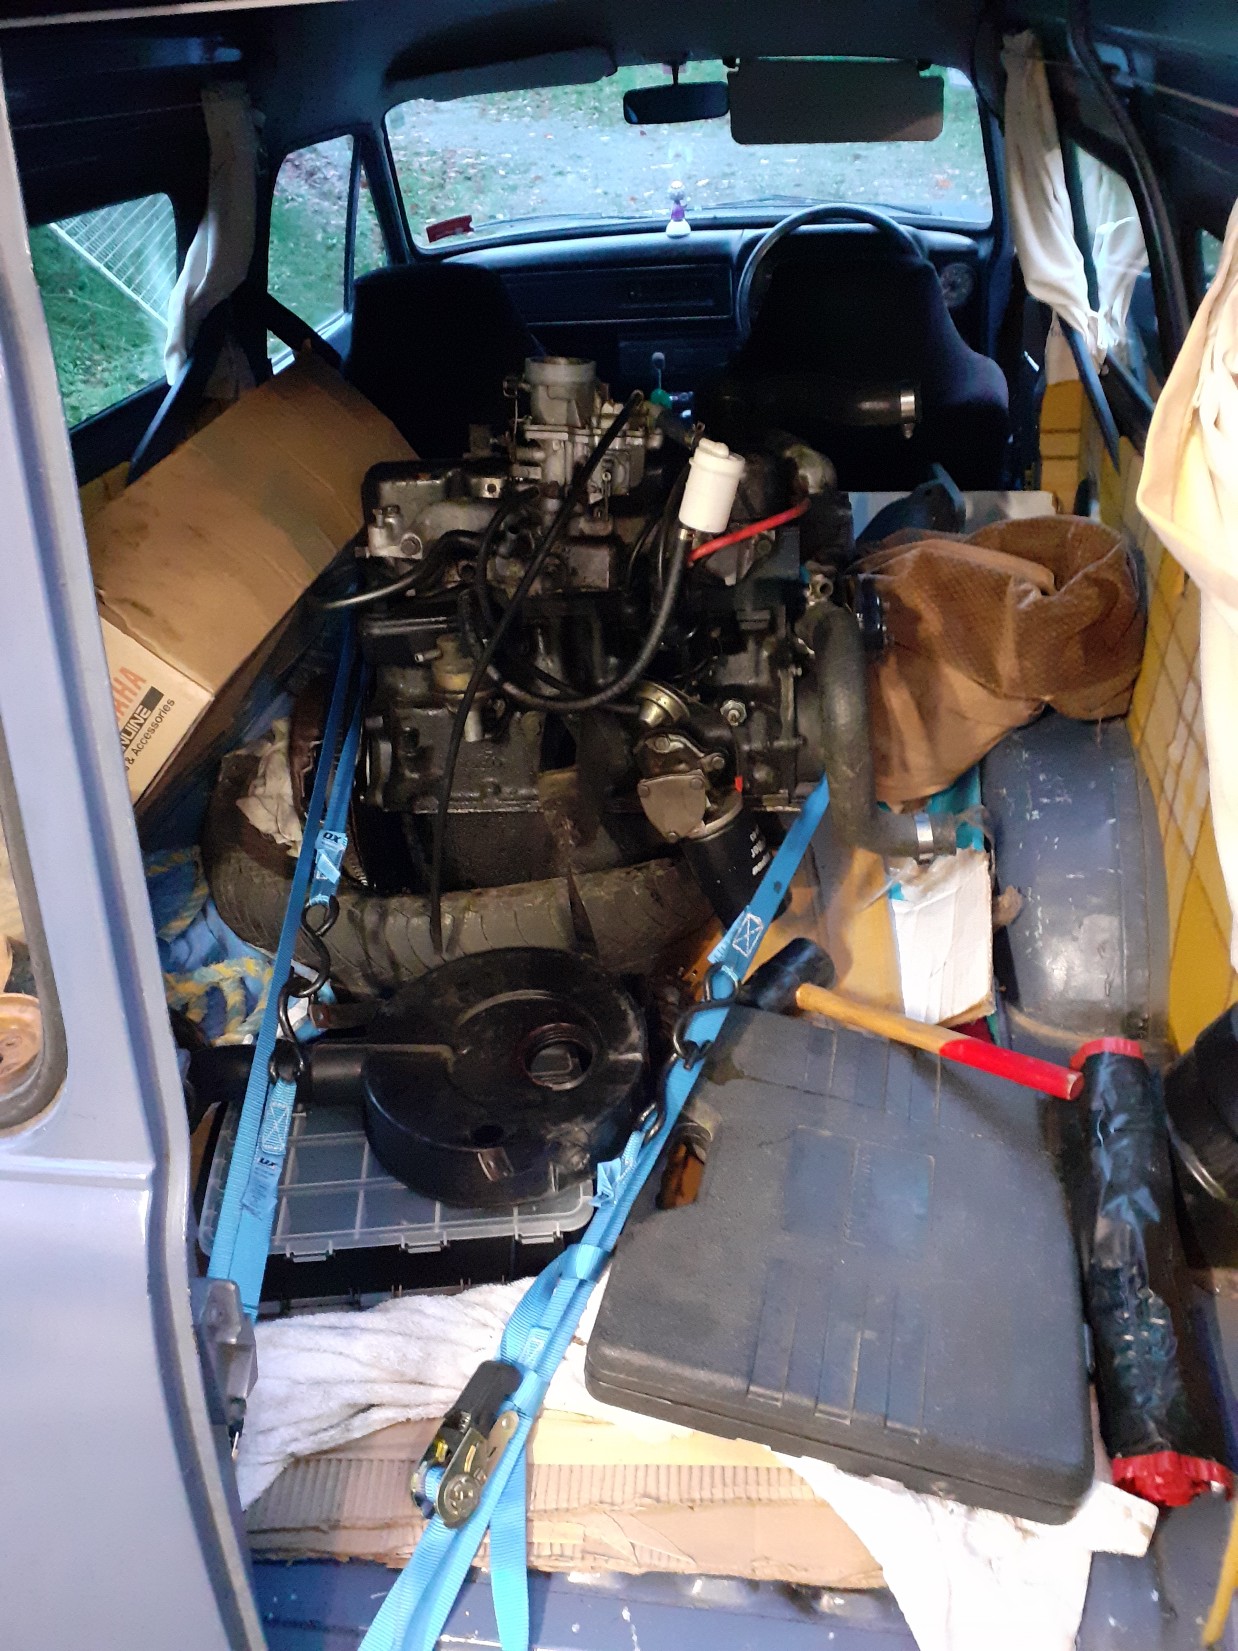
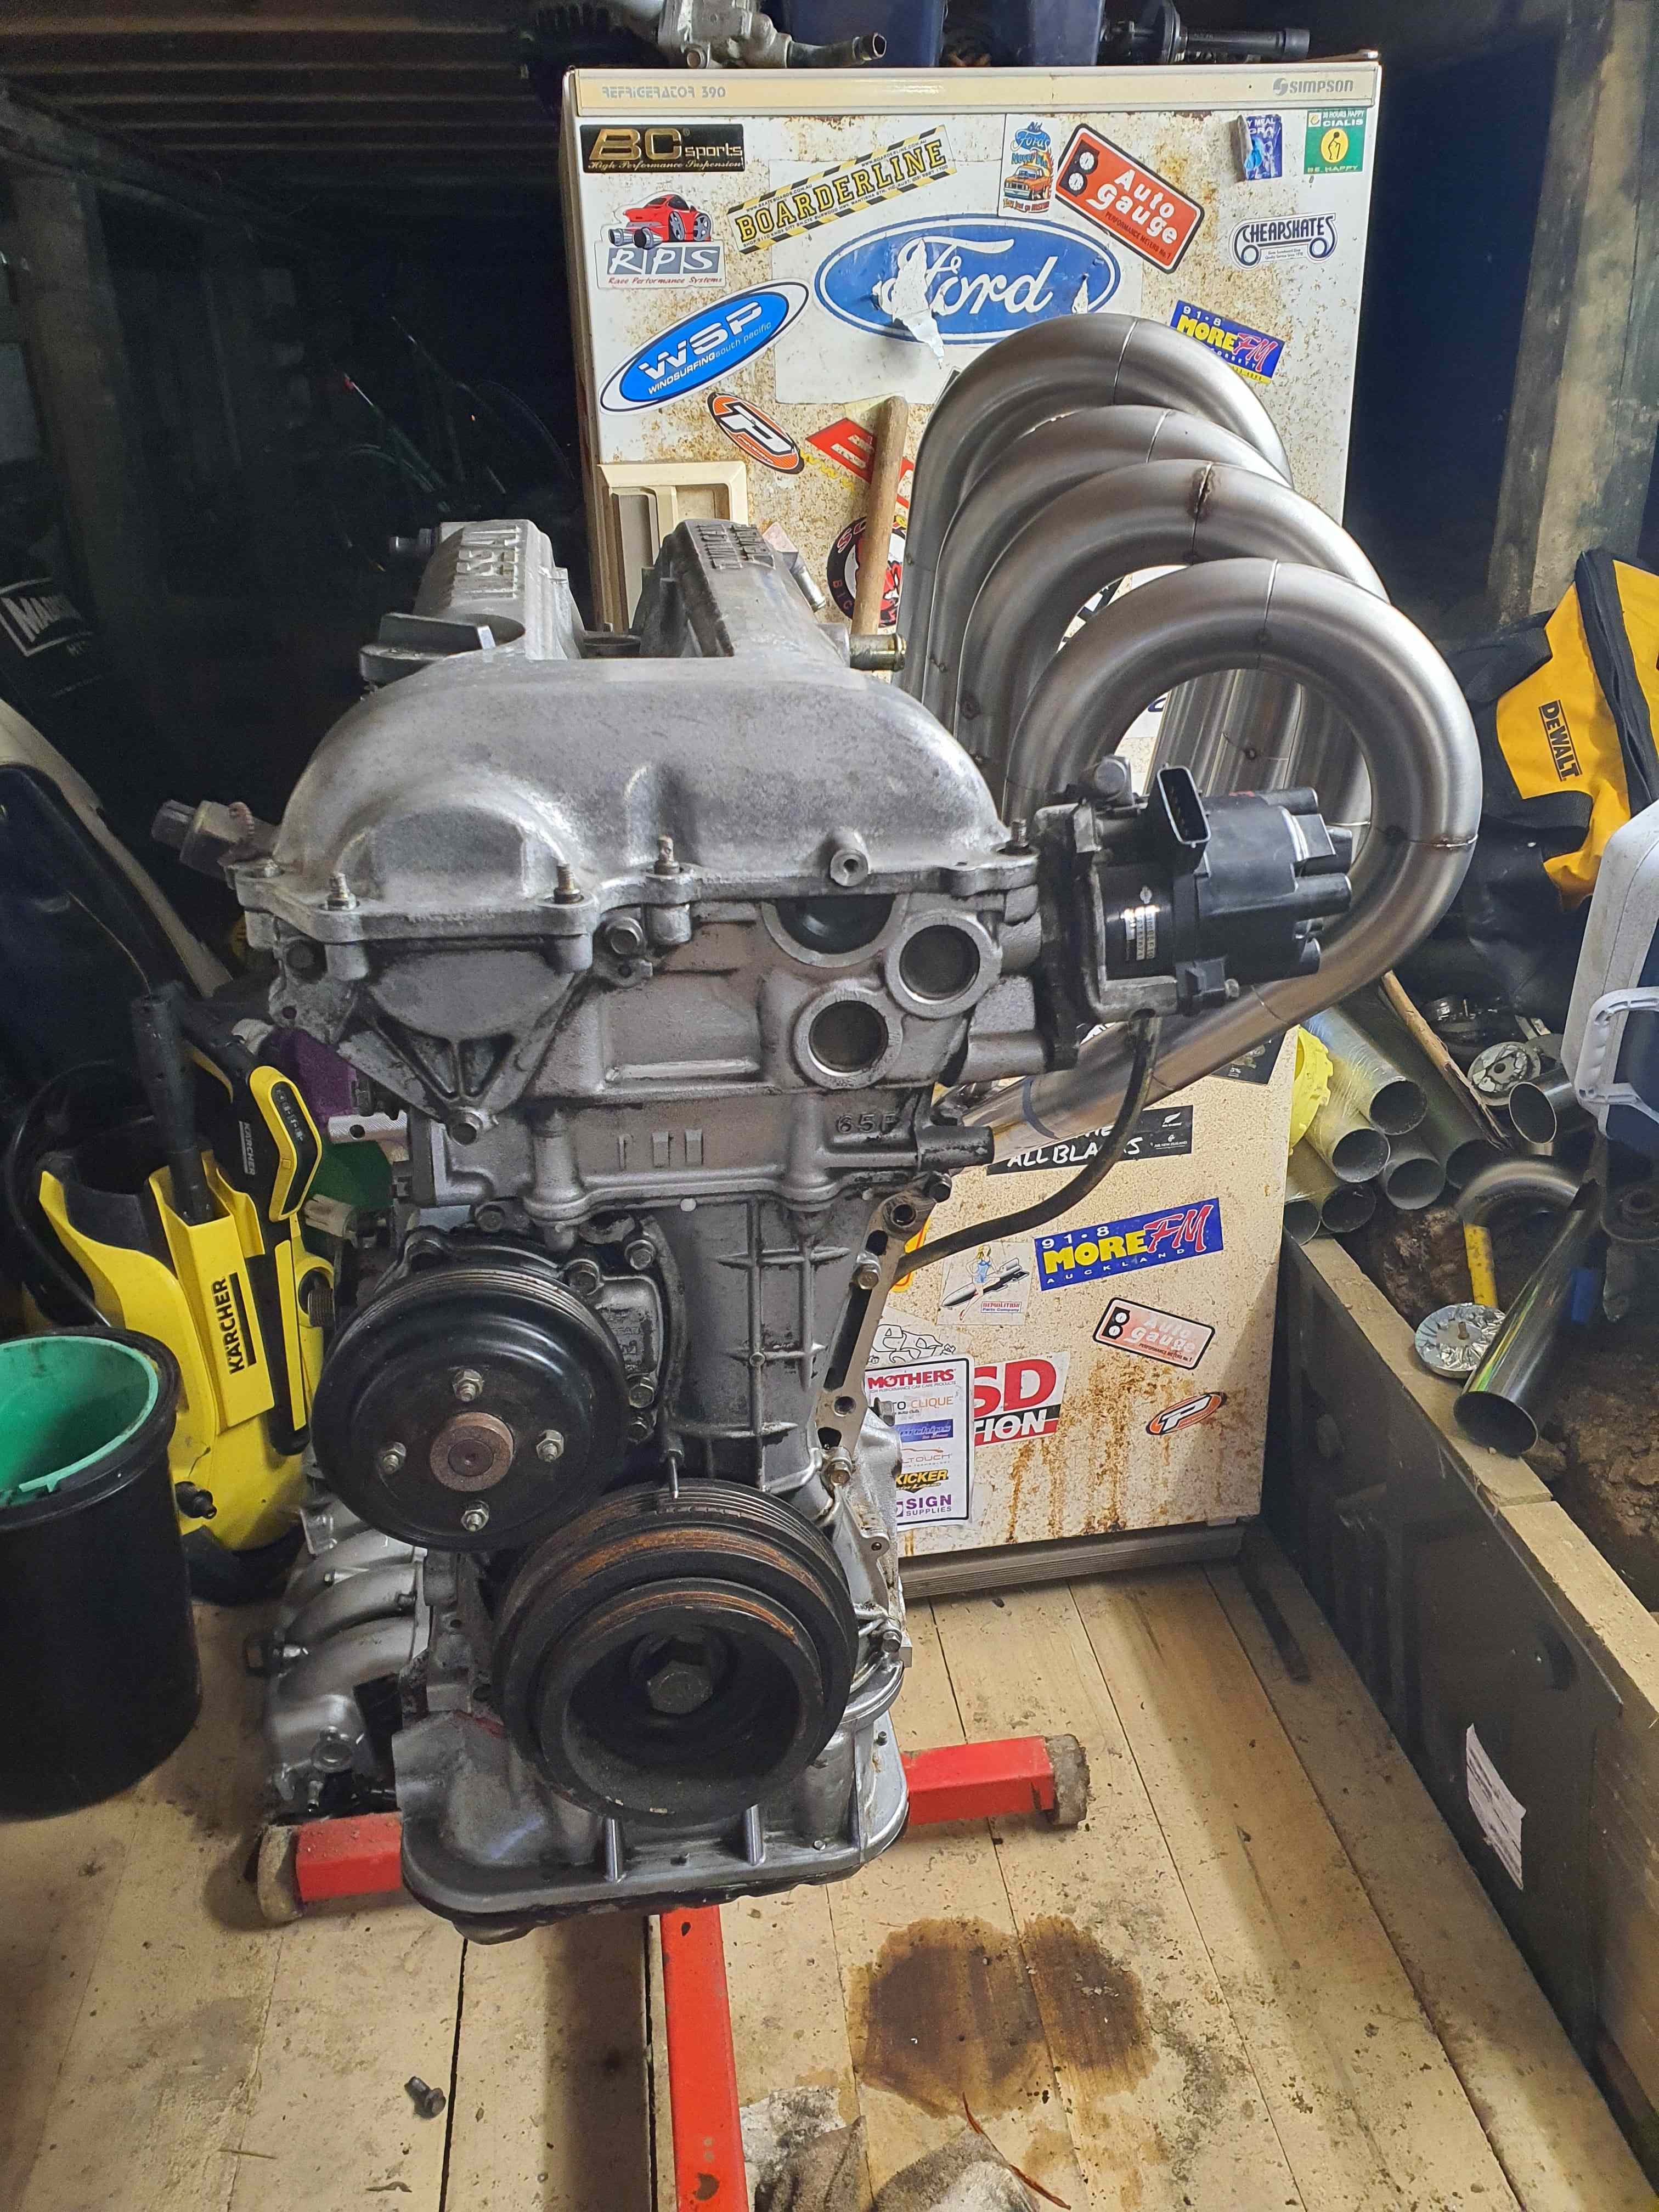
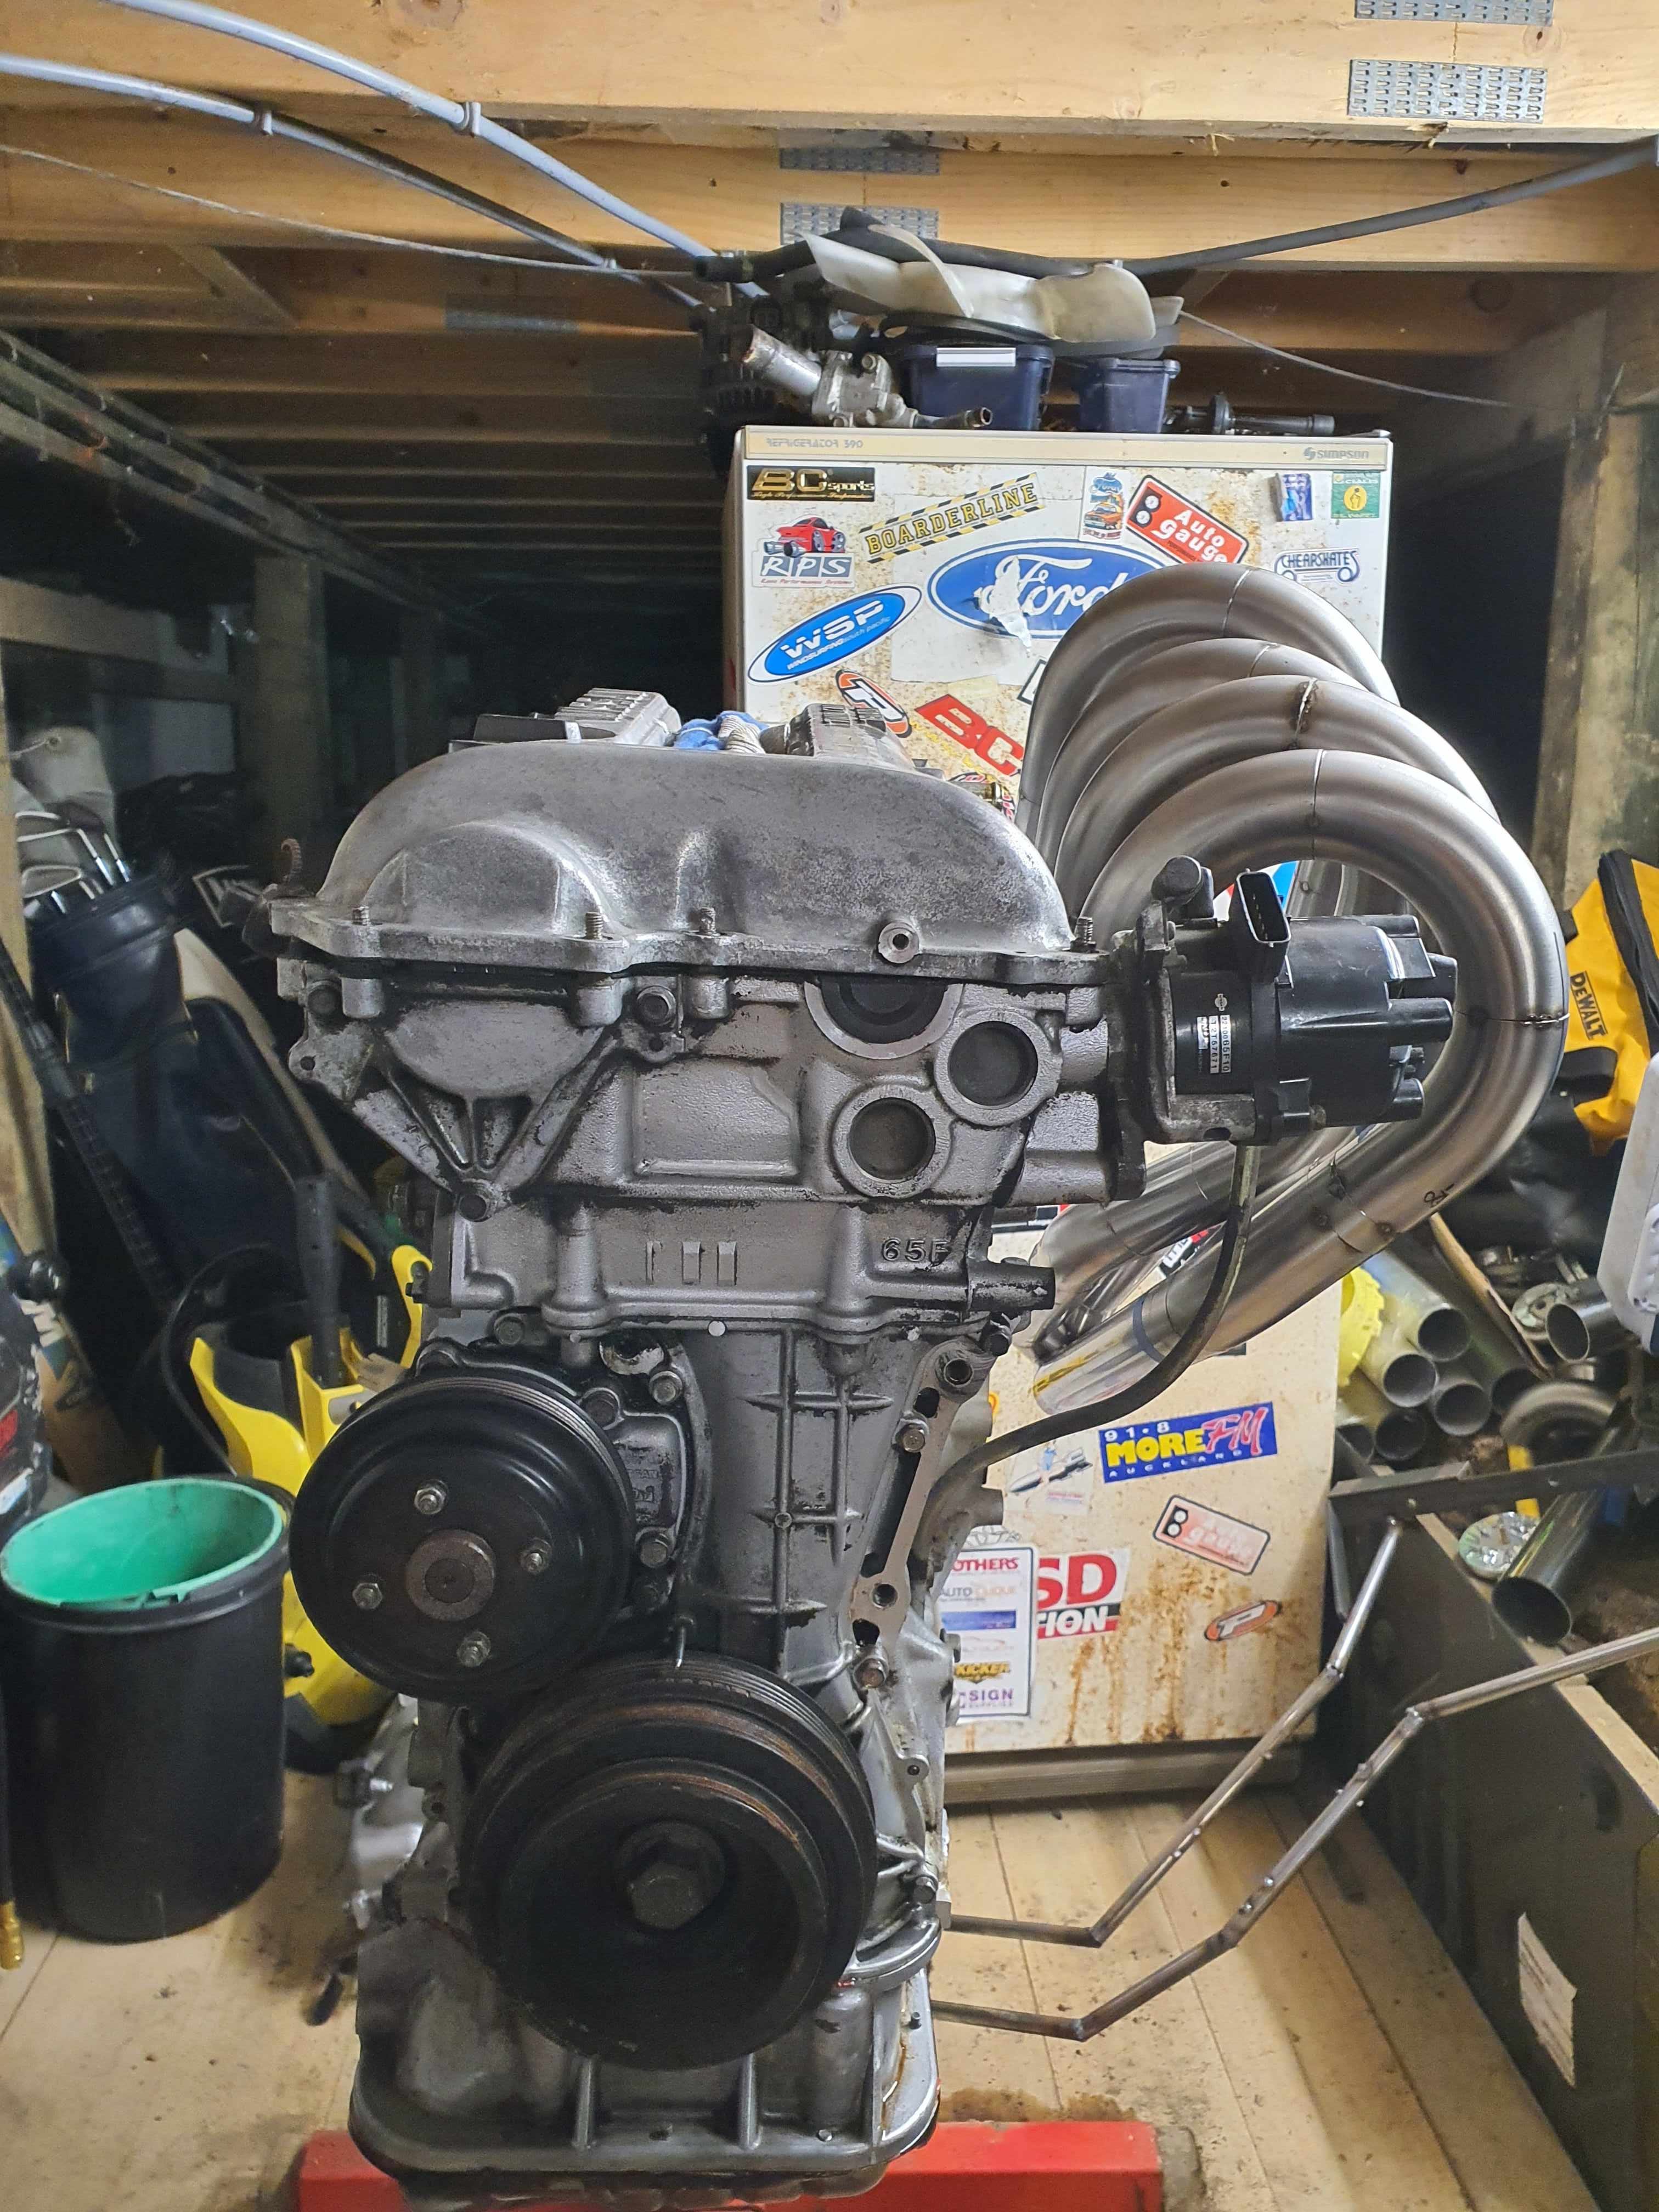
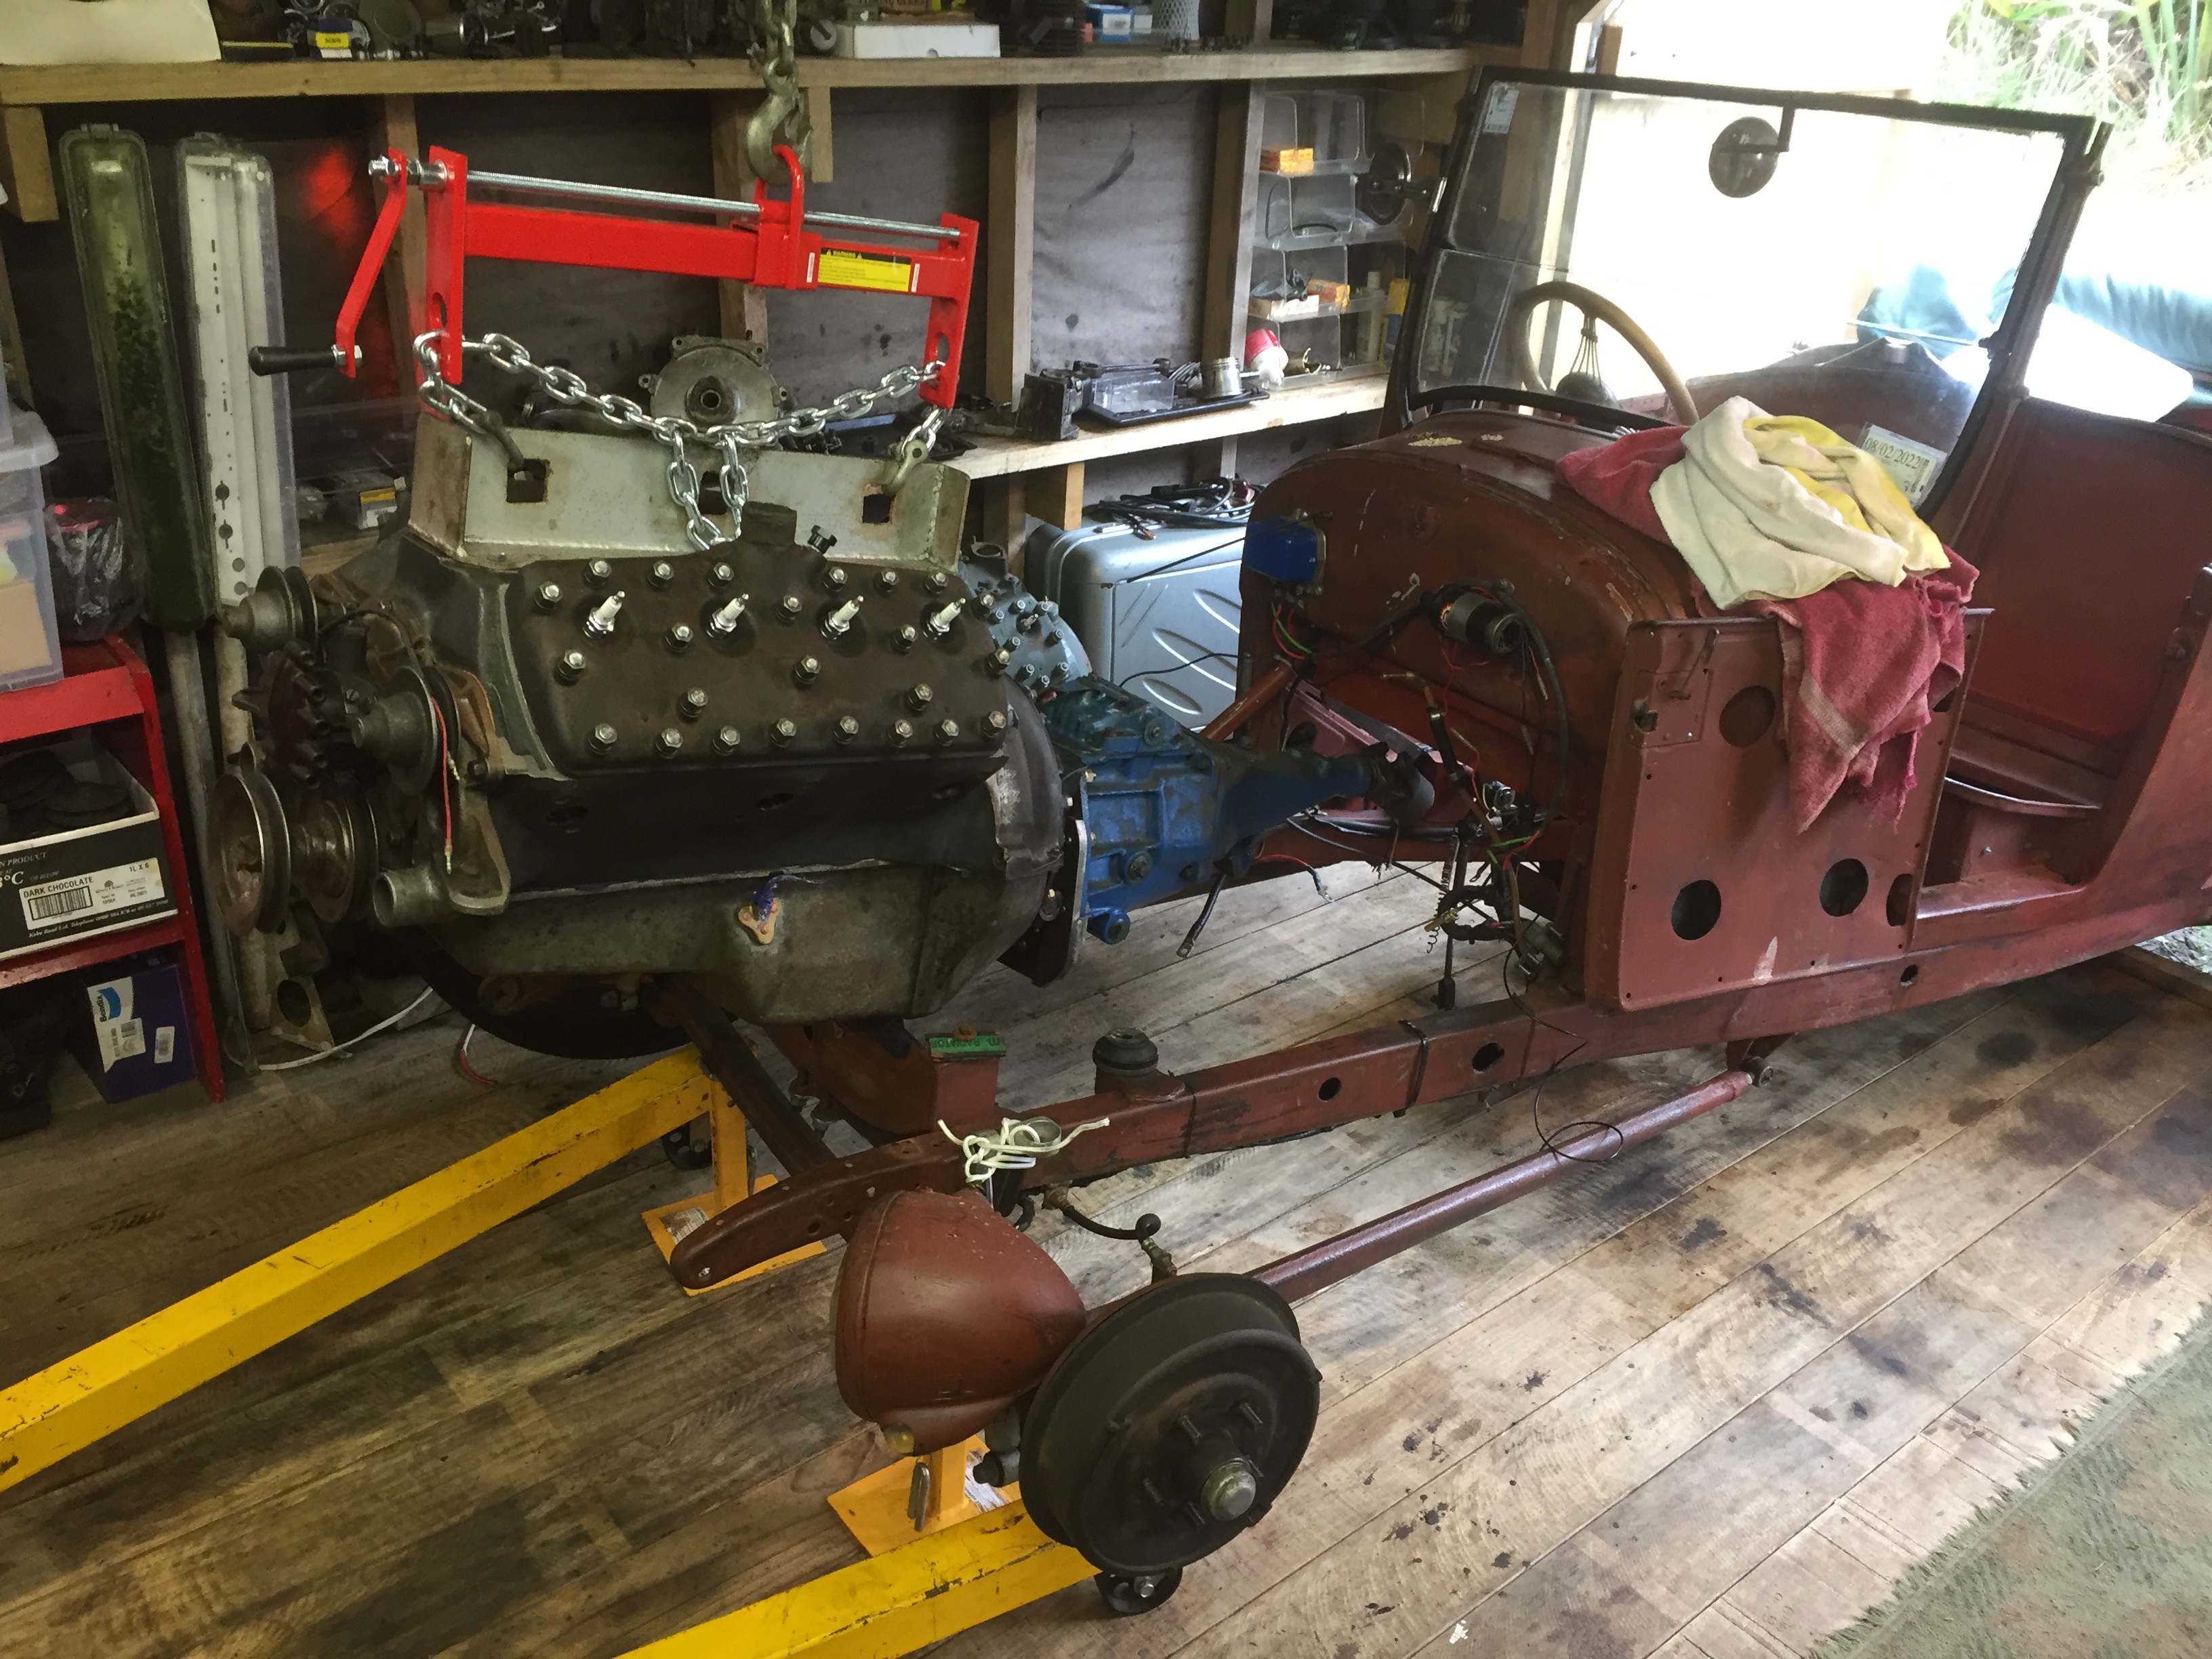
The last few trips over the remutakas was really really bad. So before the Motueka trip I gave it a compression check which pretty much confirmed it. I ended up picking up a complete motor, gearbox and radiator from a runner up the road. It all looks pretty promising with a new waterpump, hoses and other a few other parts. Queens birthday weekend I pulled the old one out and put the new one in. I cleaned up the new one, gave it some paint and put in a new clutch, pressure plate, waterpump barb, radiator, and changed over my electronic dizzy, carbs, fuel pump and extractors. I ended up cutting the exhaust off just after the extractors so I need to weld on some flanges, sort the timing and fill it with fluids then it's good to go. Fingers crossed it actually makes an improvement.
12 points
-
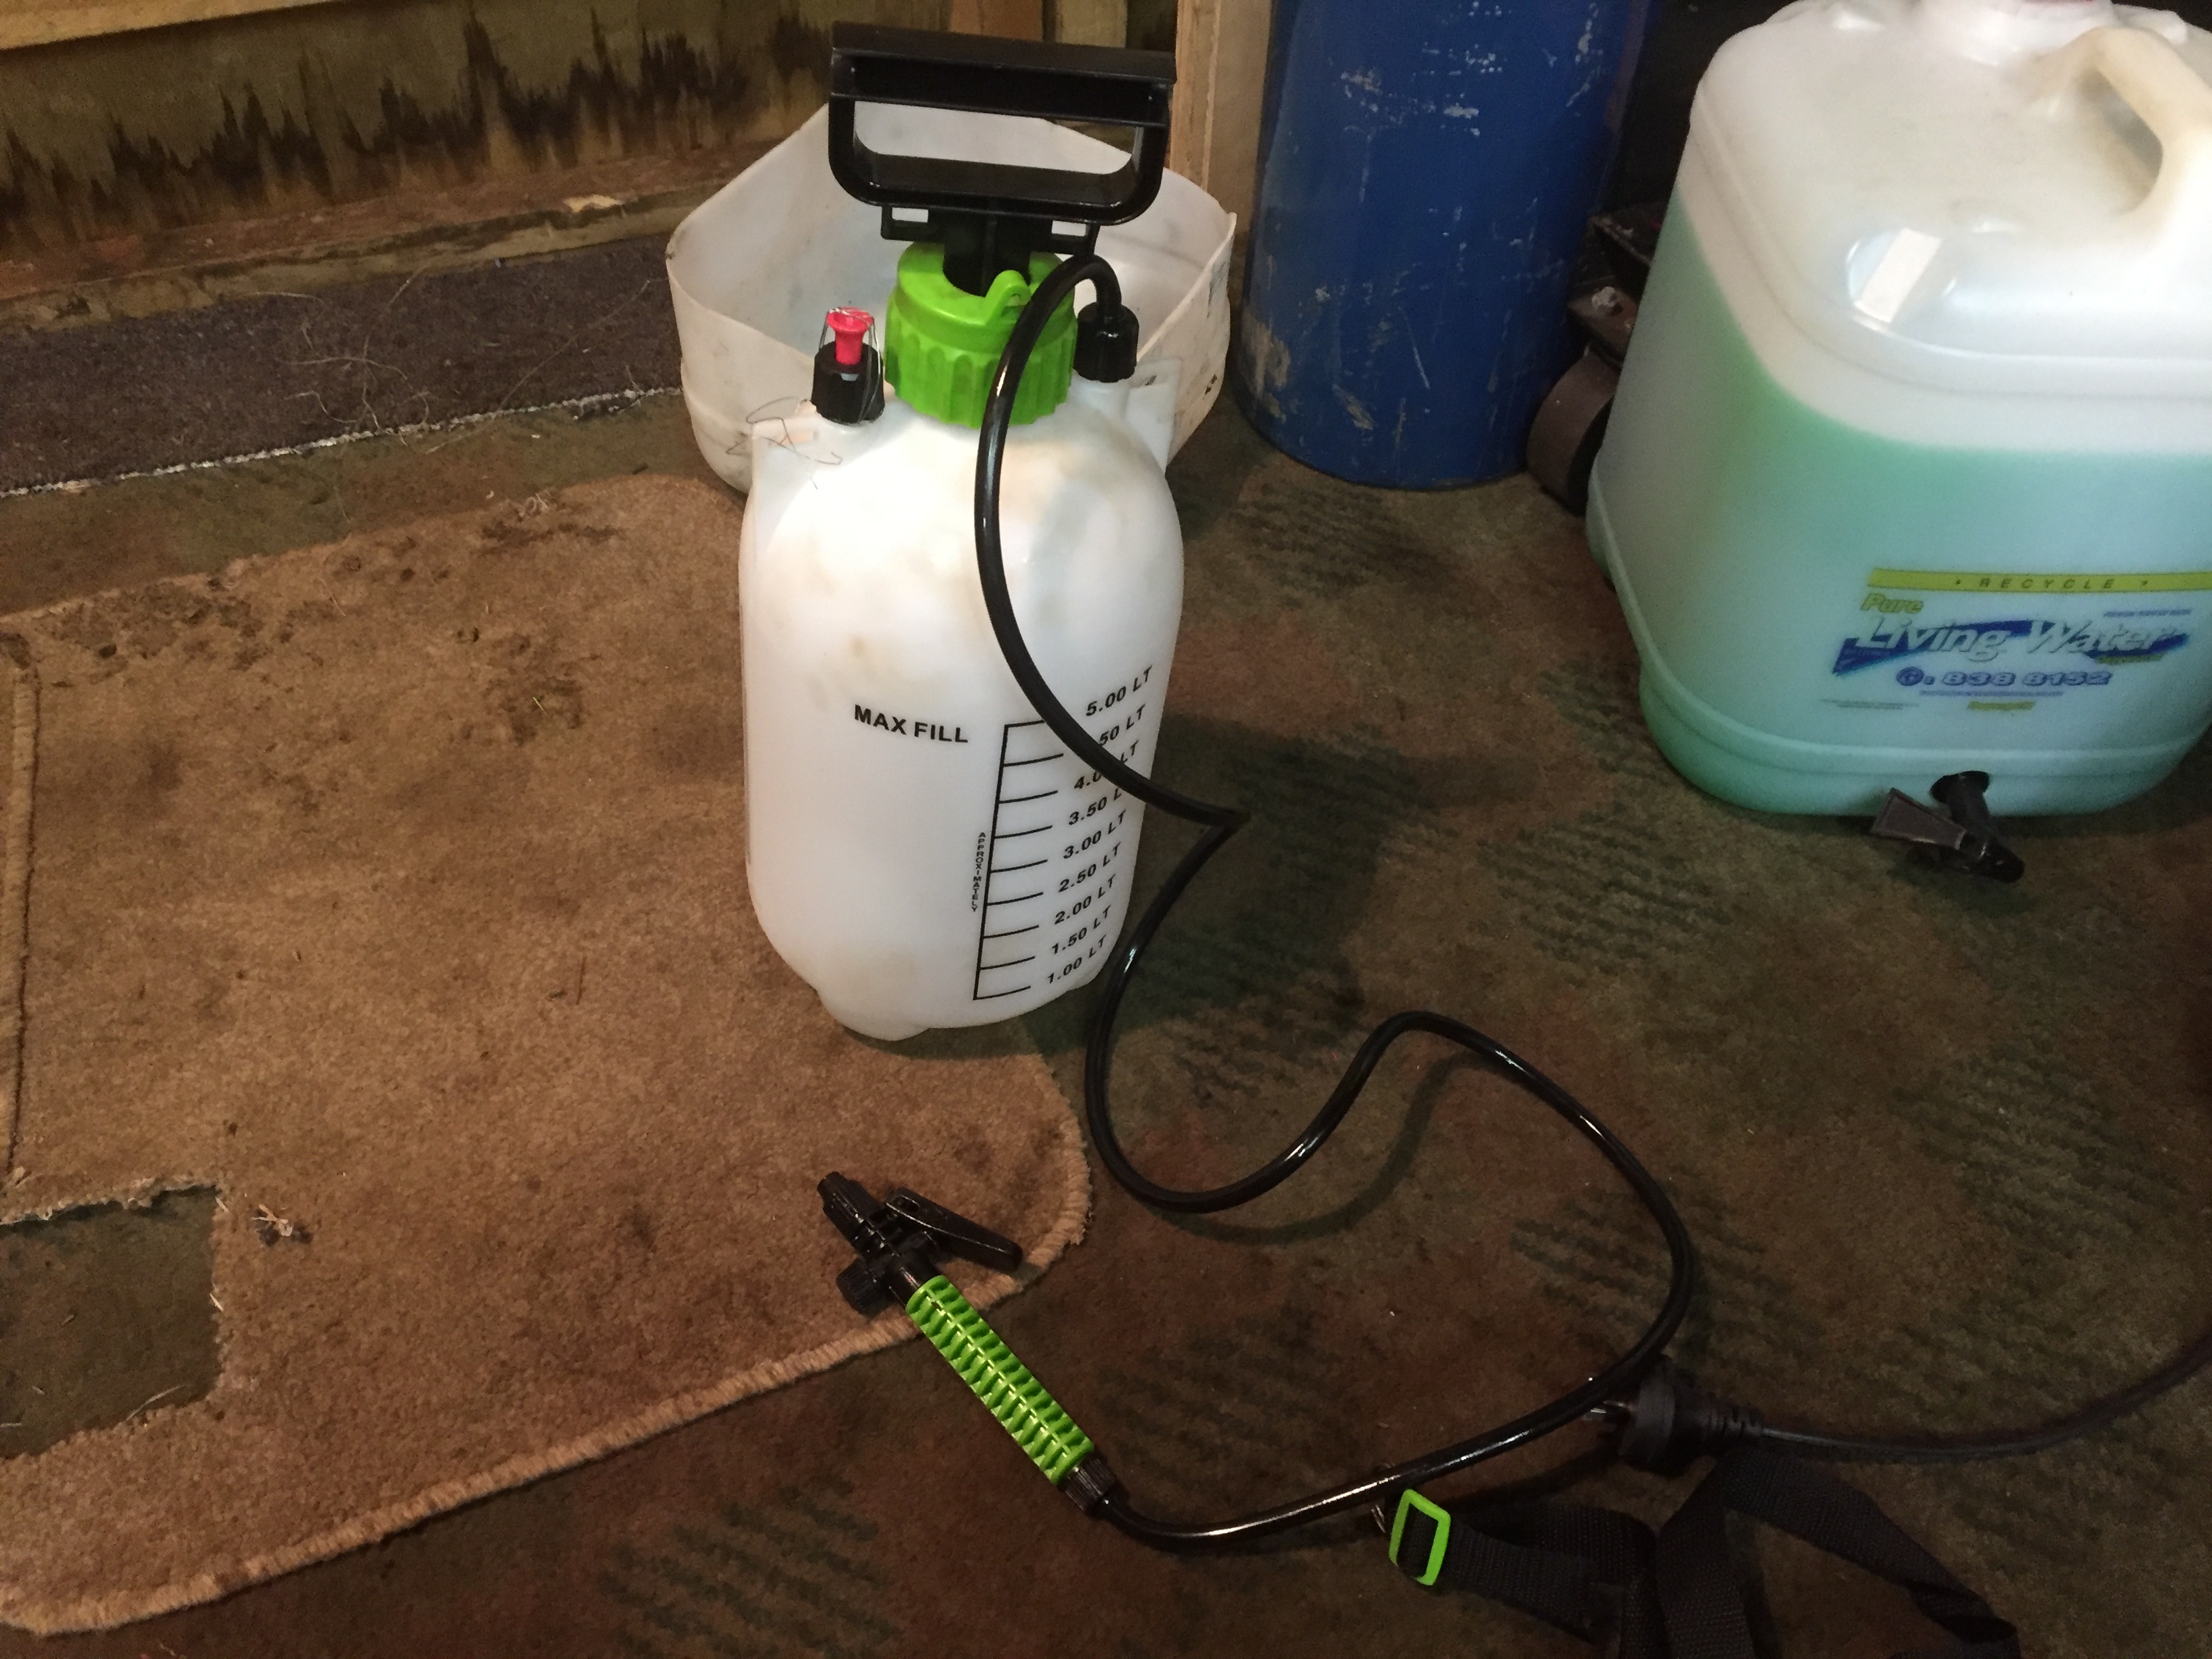
I got this $10 garden sprayer and tied the safety valve shut with wire and filled it with engine oil, had it putting out almost 60 PSI, forced about 1L of oil into the oil system wire turning the engine with a ratchet, and I could hear it bubbling inside
10 points
-
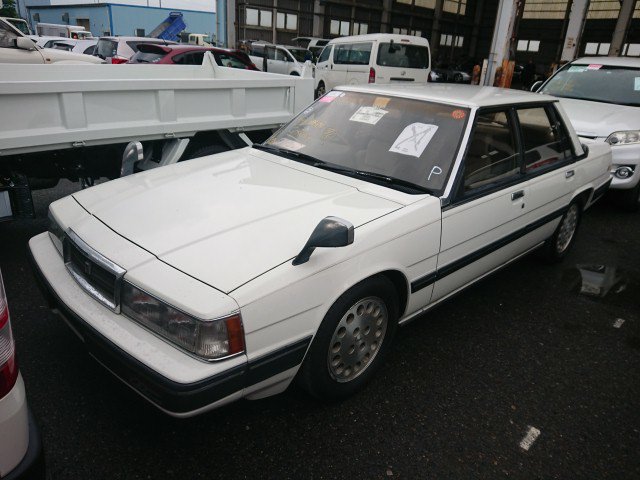
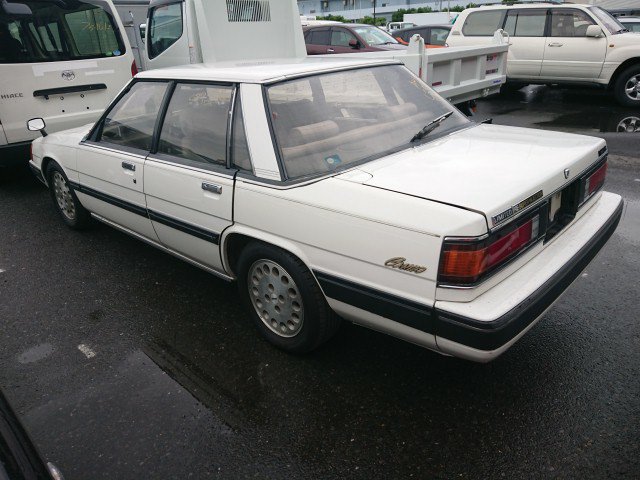
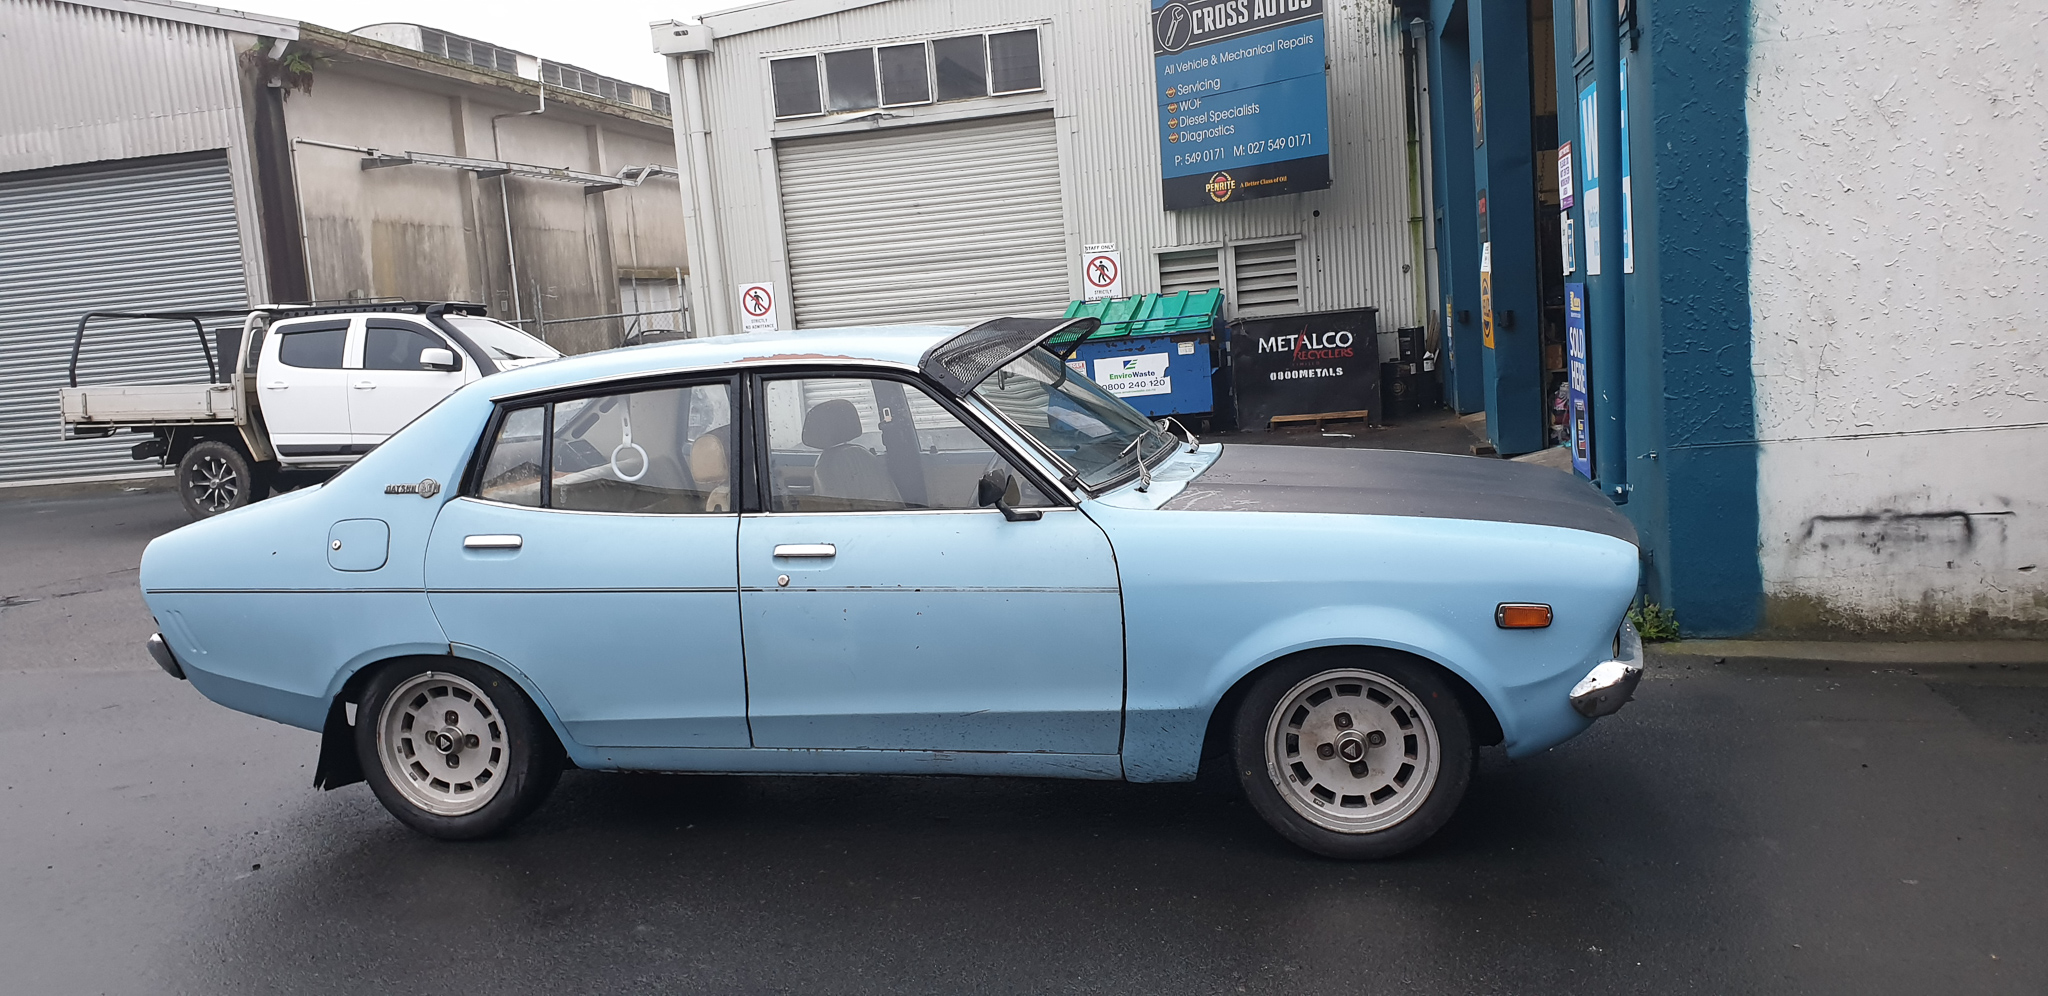
Rightyo, I'm pretty damn excited about my recent purchase so thought I'd share it now, although the car isn't in my possession yet ... Longish sharn below; After selling my 323 wagon in January for (IMO) silly money, I was immediately on the look out for another car, this time, preferably back into a rotary. An option of taking out a 5-10k loan was on the cards, giving me a max budget of around 20-25k. I'd looked at a few cars locally, rx7, rx323, rx626 etc. Either they weren't ticking the right boxes, or would have required more money to get them legal than my budget could stretch to. And from previous experiences around paying off a loan whilst owning an old car, it does get hard trying to either keep the car running whilst paying off the loan, let alone saving money for modifications etc. So I made the decision to not get a loan and keep within my actual budget. Nothing rotary in NZ was going to happen with sub 15k, well nothing that appealed to me anyways. So after reading through the importing from Japan thread and picking a few people's brains that have 'been there, done that'. I began searching Japanese sites for a car that I'd be happy with and contacted Stacked to act on my behalf, and to help with questions I had on particular cars and more information that I wanted from the sellers. https://oldschool.co.nz/index.php?/topic/55223-importing-from-japan/ I eventually narrowed the search down to 3 cars that were within my budget: 1. 1979 mazda familia (323) wagon - still piston - still for sale actually if anyone was wanting to buy it, considering I sold my yellow rough one for almost 12k, this does seem like it could be worth while buying https://www.carsensor.net/usedcar/detail/CU5545473225/index.html?TRCD=200002&RESTID=CS210610 2. 1981 Mazda Luce - not for sale anymore, but was 13B, automatic - luxury barge spec mazda (similar to below). 3rd option is the one I've pulled the trigger on and purchased - and just received confirmation today from Autohub that it's ready and waiting for shipping to NZ! 3. 1985 Mazda Cosmo, 13B model, with, unfortunately an automatic gearbag. I only have the crap quality images below, but the car appears tidy, a little bit of rust in the doors, and thanks to one of @S124AB's contact in Japan, I was able to obtain some better quality pics which showed the underside of the car looking relatively clean and tidy. I priced up shipping, GST and a conservative compliance budget and this was affordable with no loan required. Anything rotary and manual seems to equal more dollars in Japan, so I'll live with the automatic for now. Plans will be; Get legal Lower Wheels Cruise and enjoy Save up for a manual swap, coilovers, cert, maybe engine porting of some sorts. Will update once the car arrives at my place. I'll either be really happy with the condition, or I'll be selling as parts lol
9 points
-
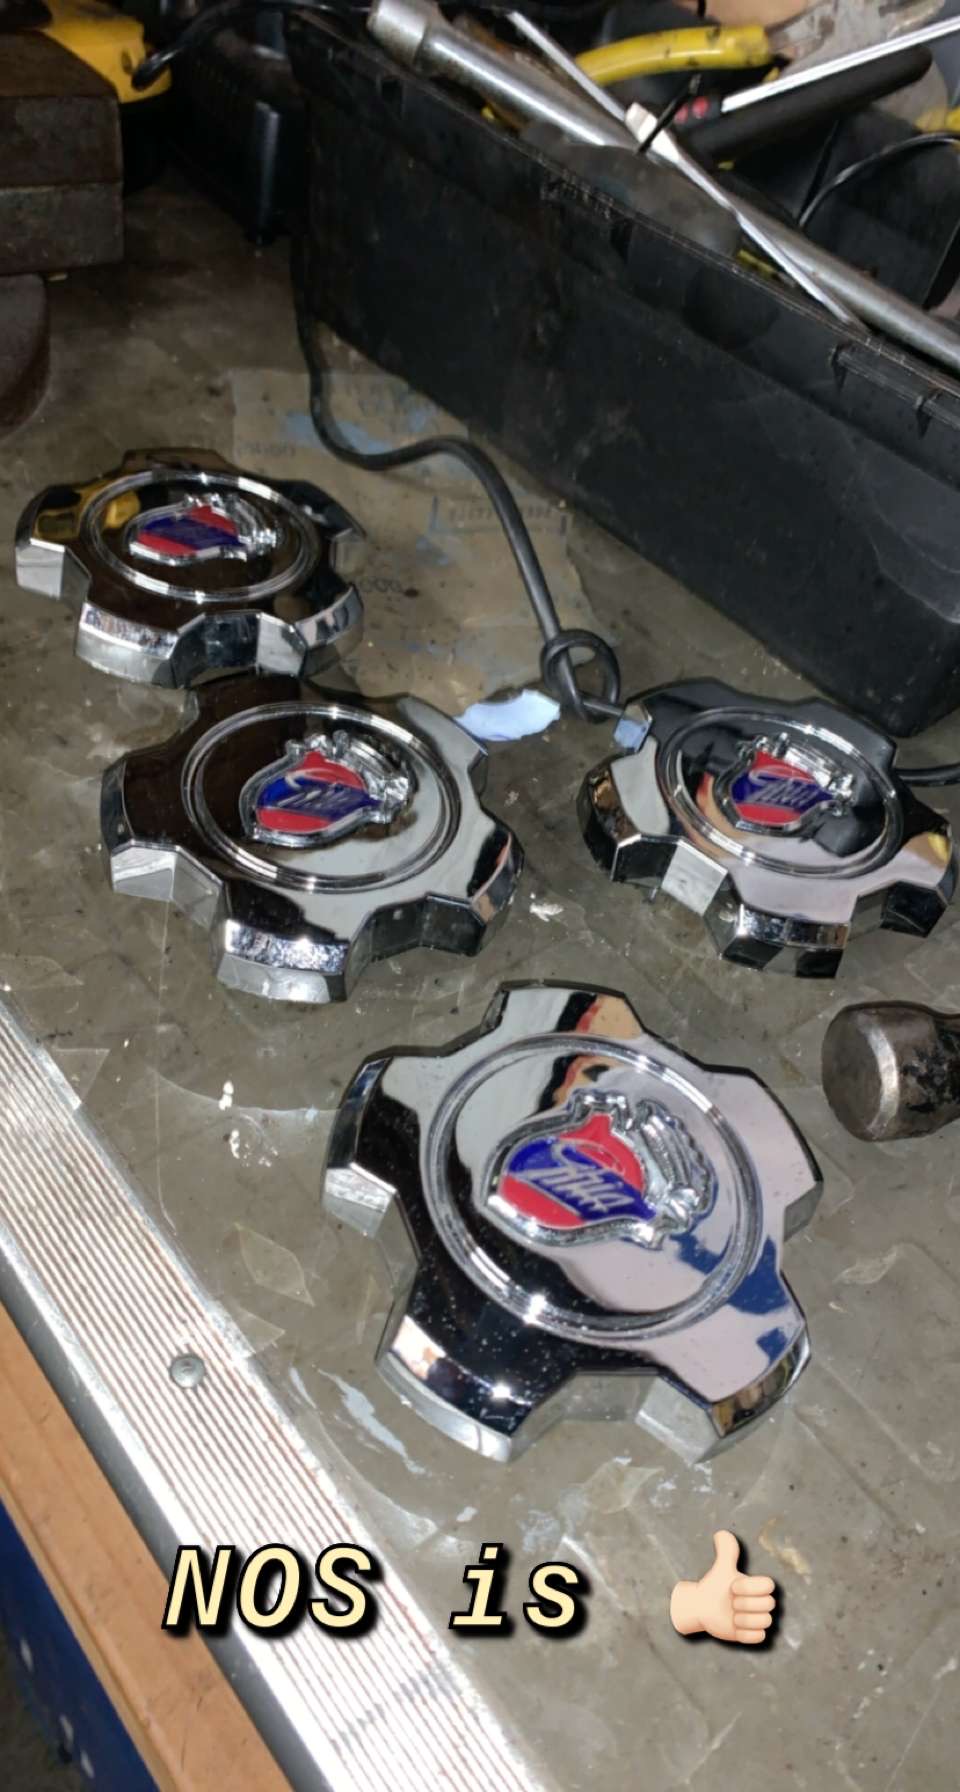
I saw these NOS or new old stock XE Fairmont Ghia centre caps on FB Marketplce for $60 and couldn’t believe my eyes. I checked and they are NOS therefore I snapped them up, as repro are like $72aud each! one day I will reco the snowflake 15” rims and these can take pride of place. I do love NOS goodies
9 points
-
Still using this when I can and taking it on regular trips. Most notably I took this down to Nelson and Motueka last September for a bike trip. Had no issues other then a weird oil vapour smell. I put it down to over filling the oil, I couldnt get a clear reading on the stick, and it clogging up the pvc valve. I was lucky enough to spot another escort parked up along one the bays and the retired guy was happy enough to lend me a few tools to remove some of the excess oil. Have just done general maintenance to it like replacing the rack bushes which were non existant and made for an exciting drive home.
8 points
-
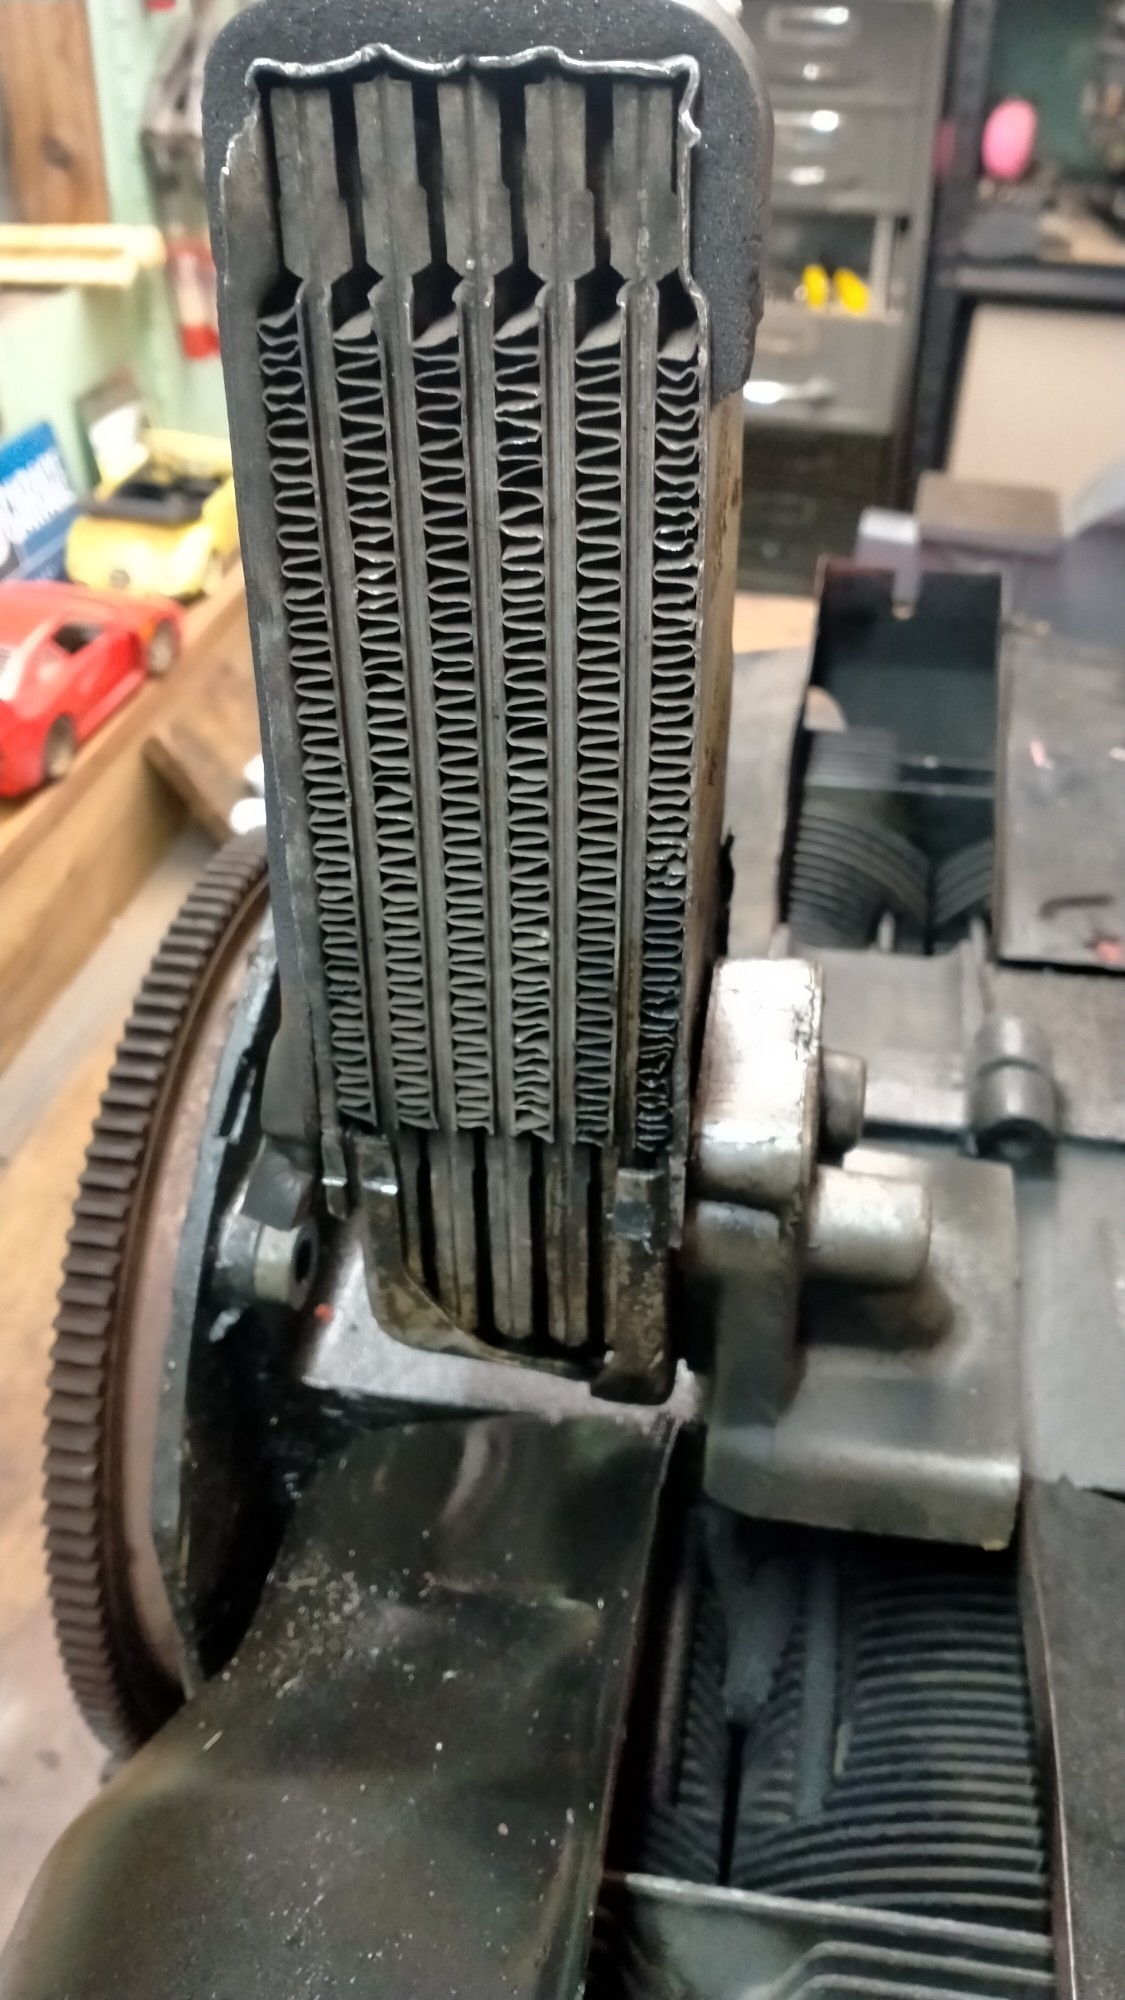
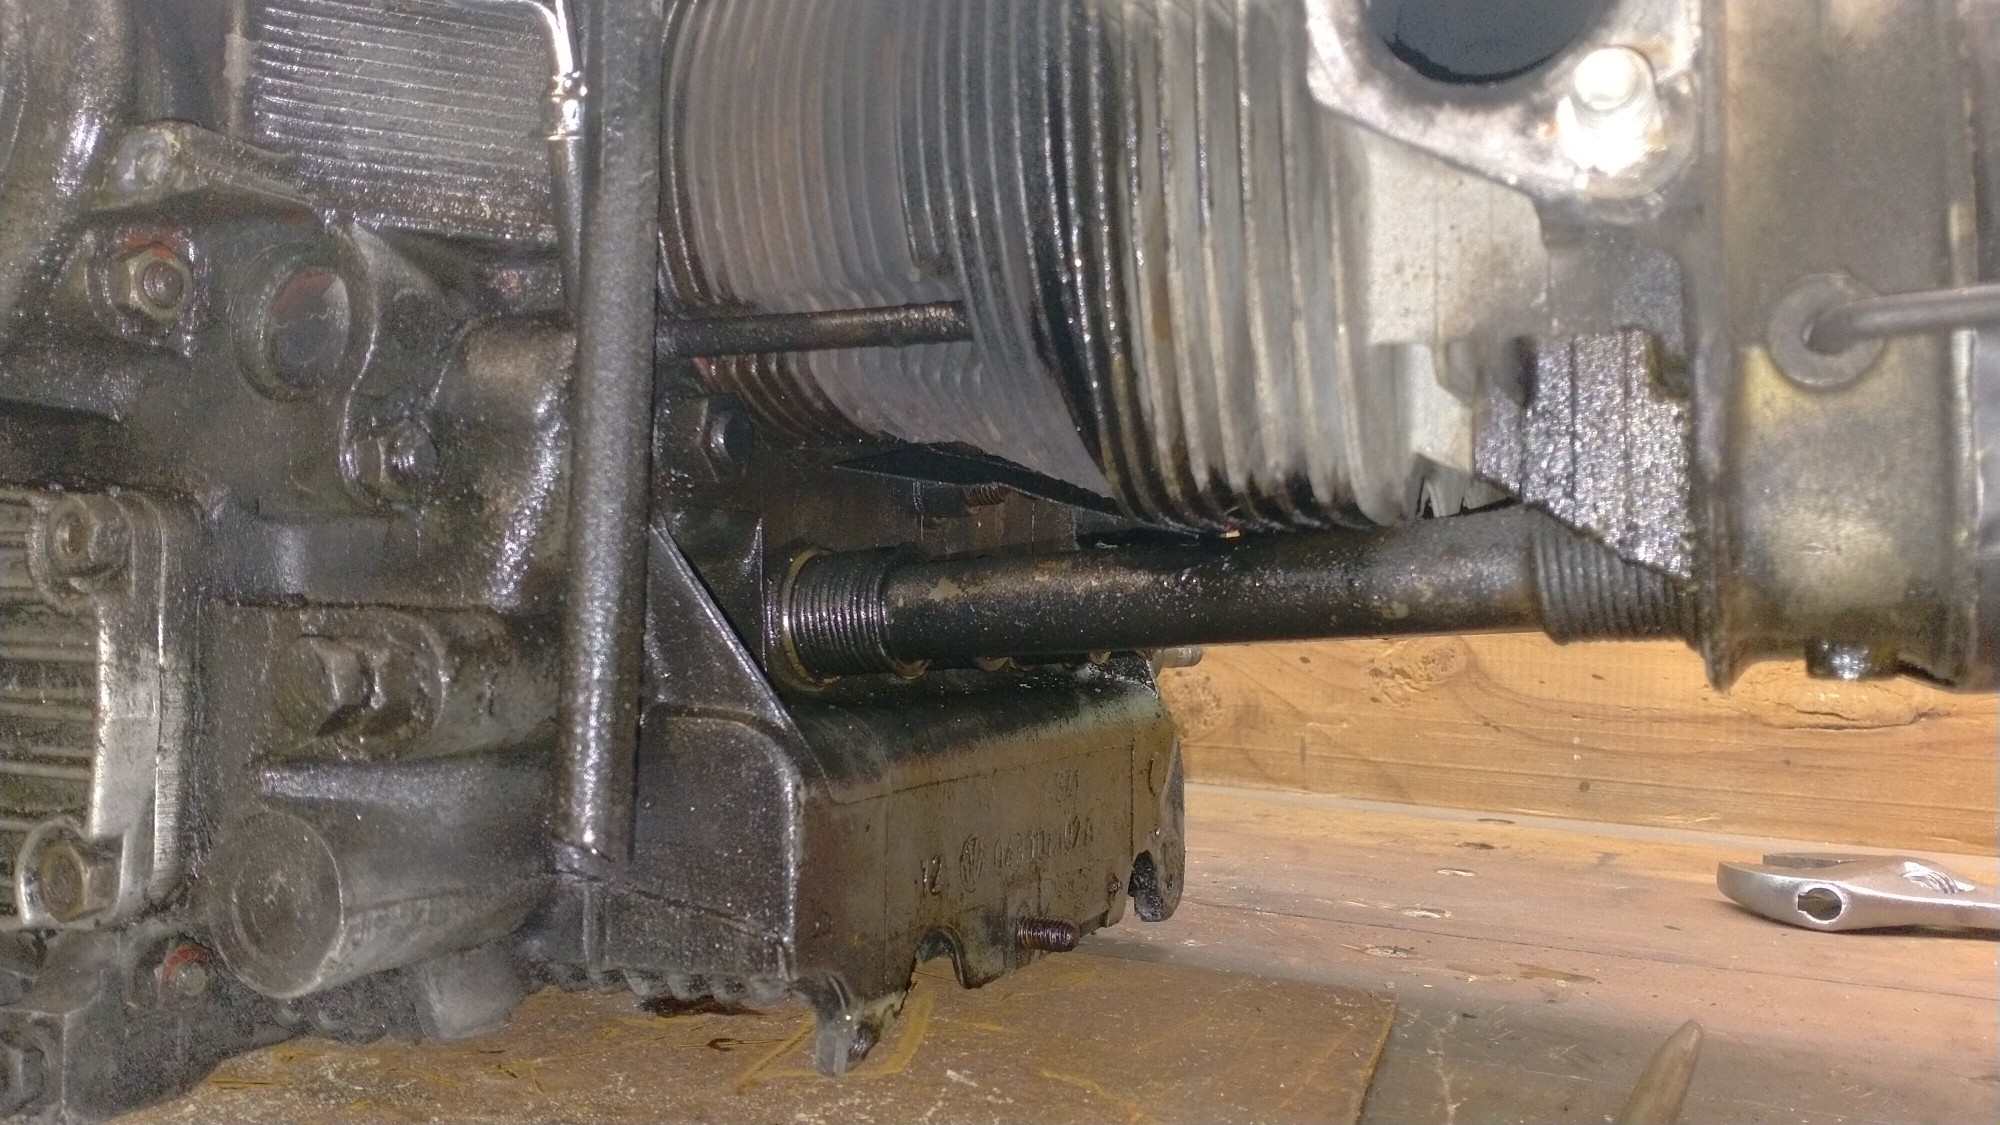
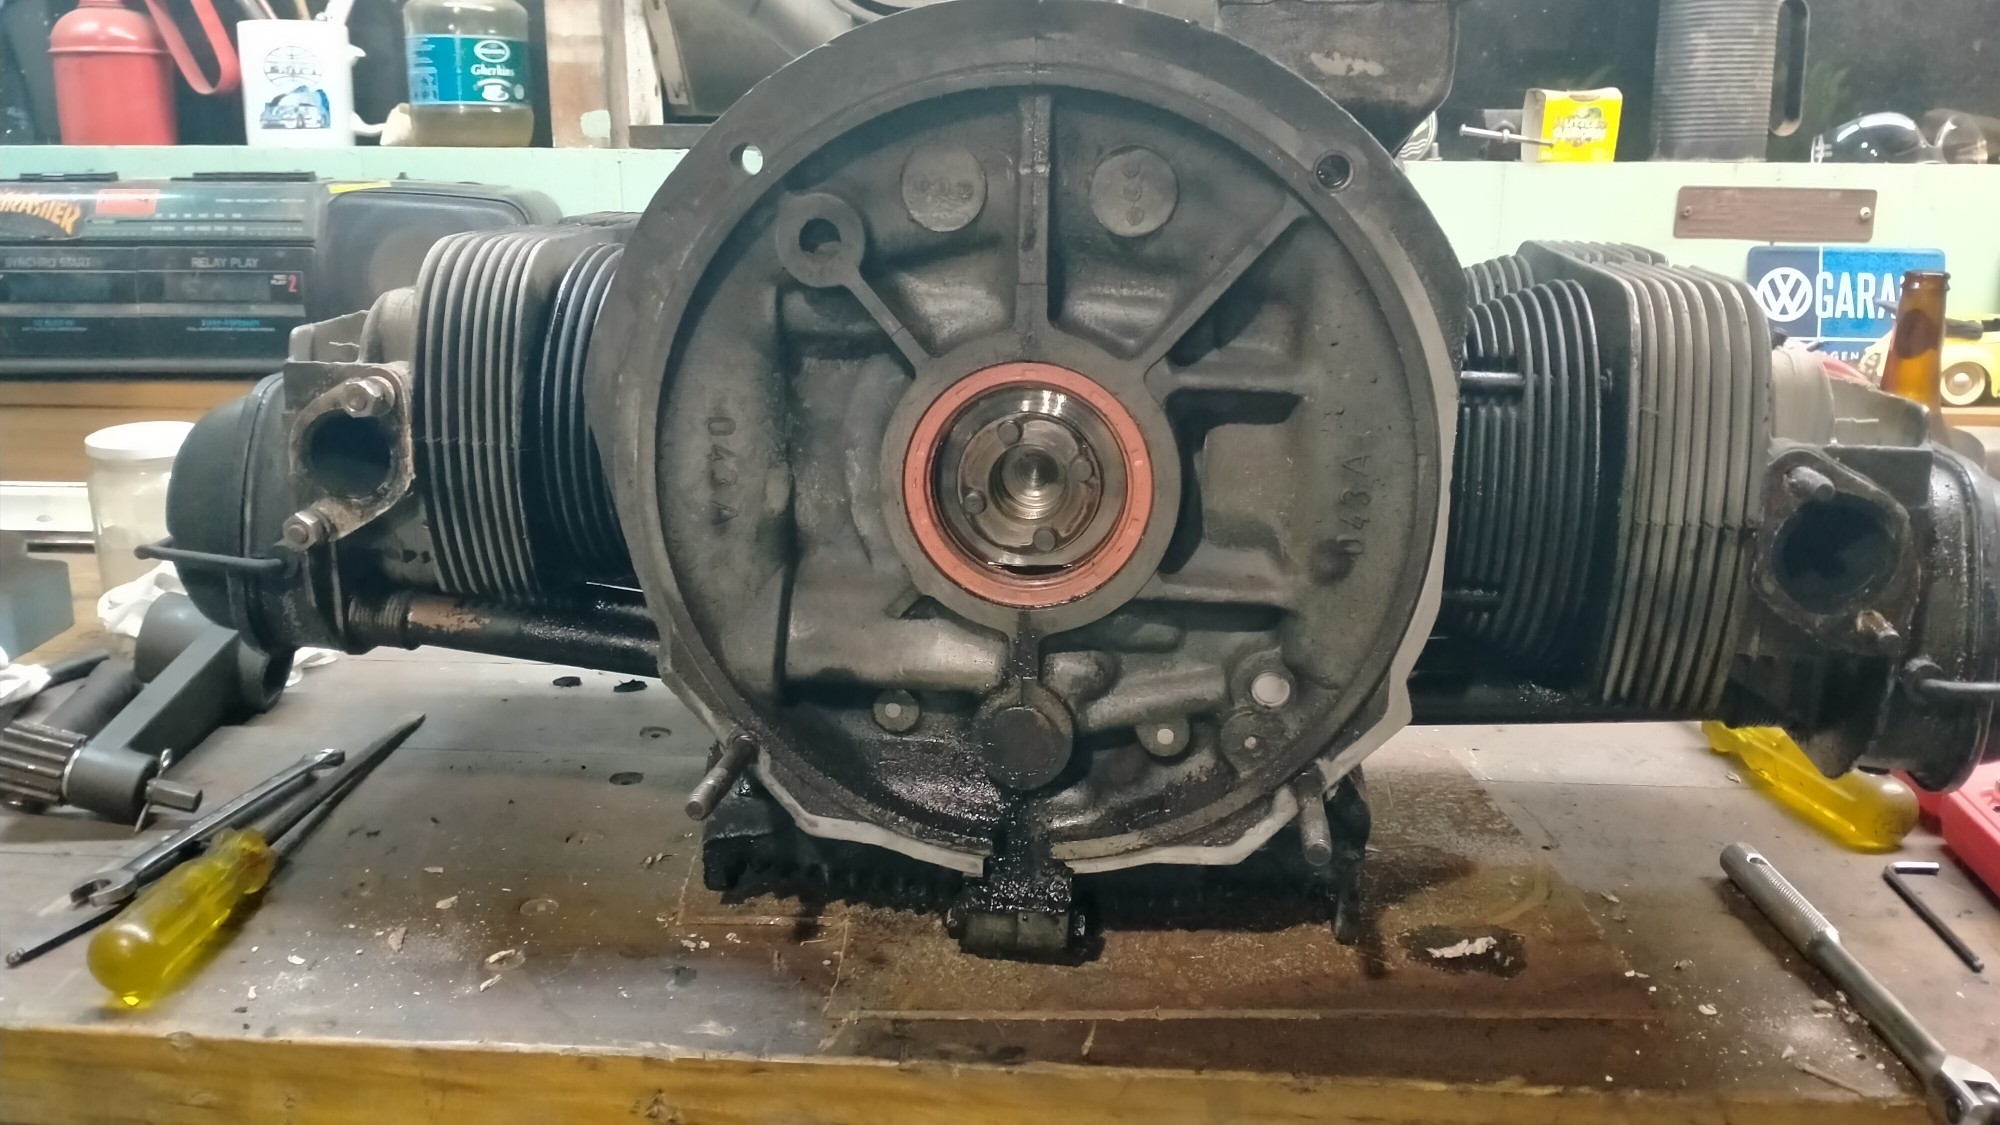
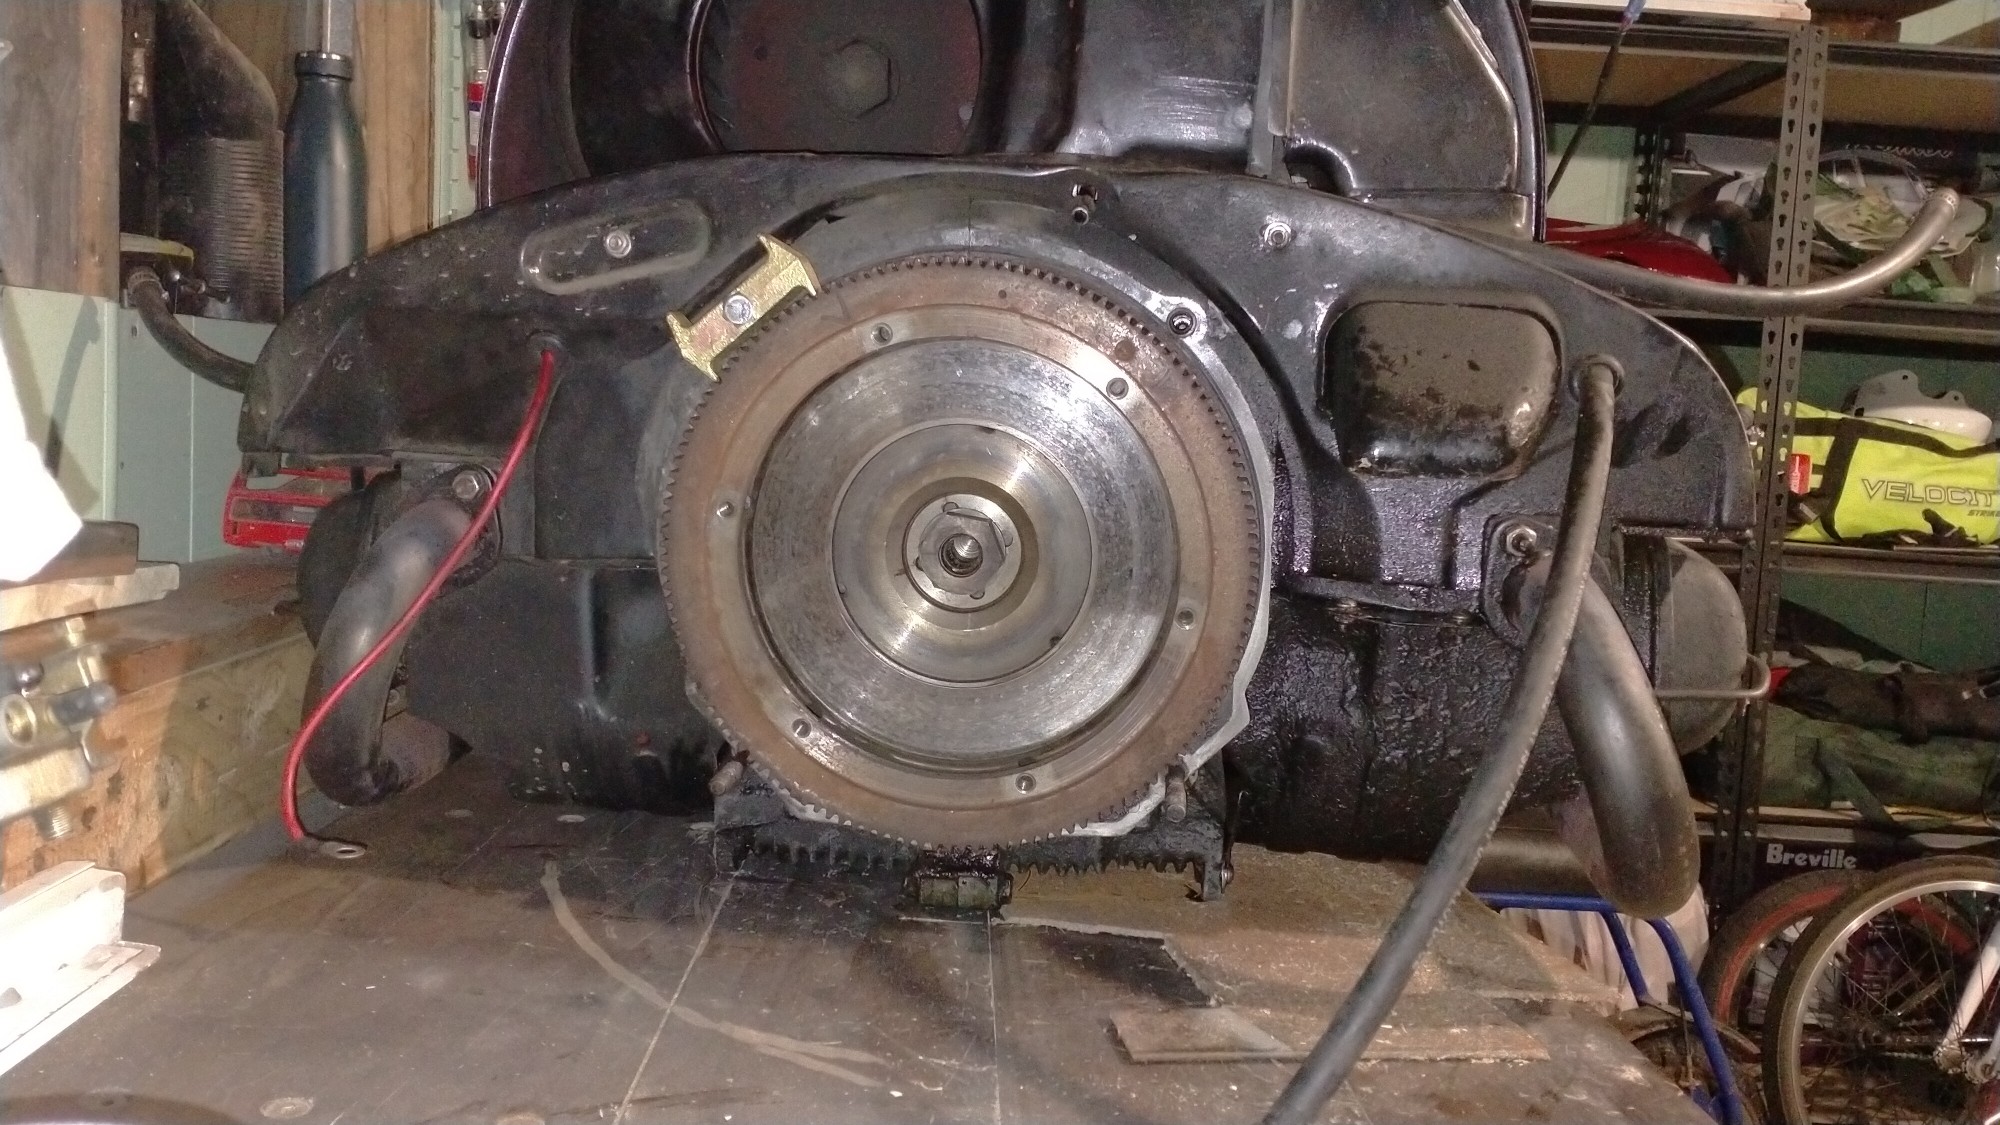
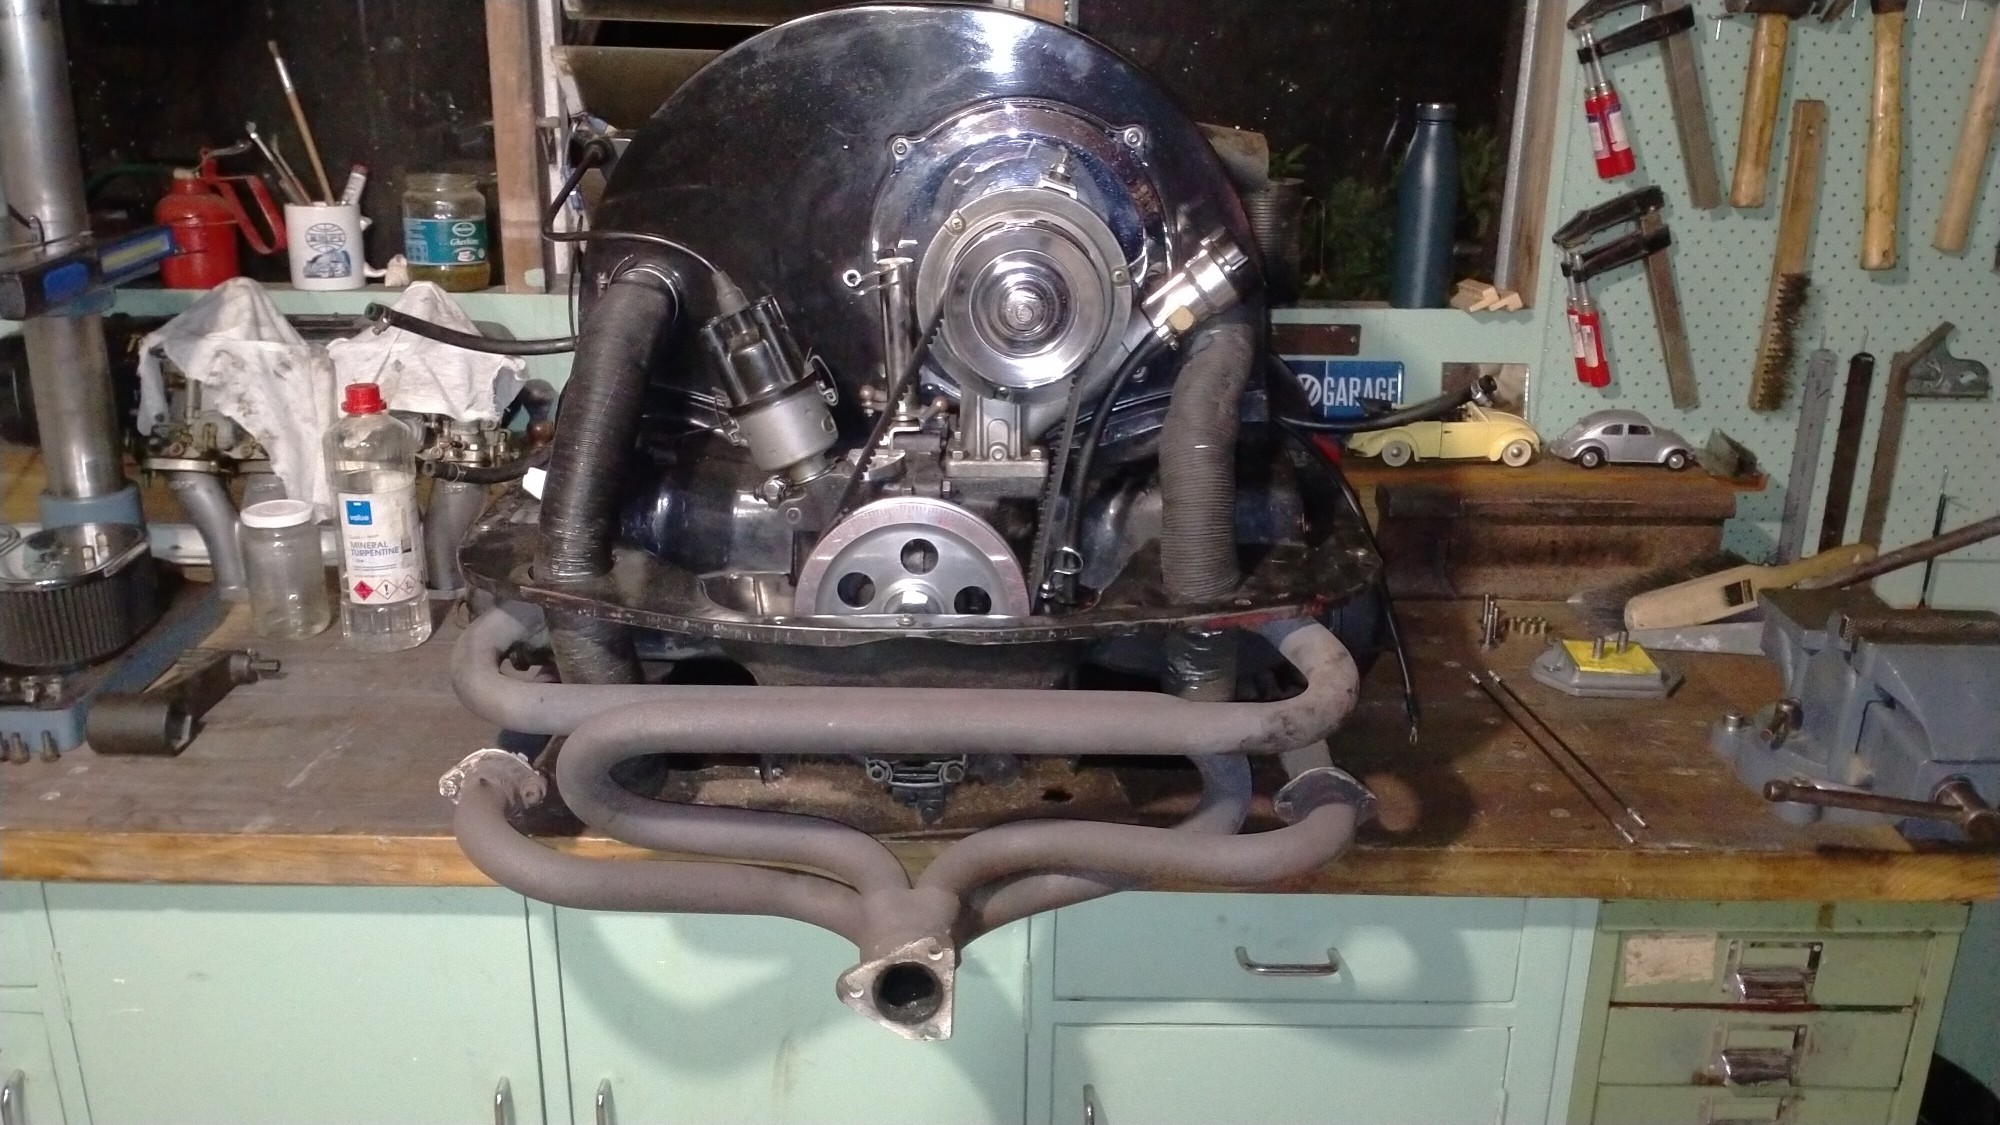
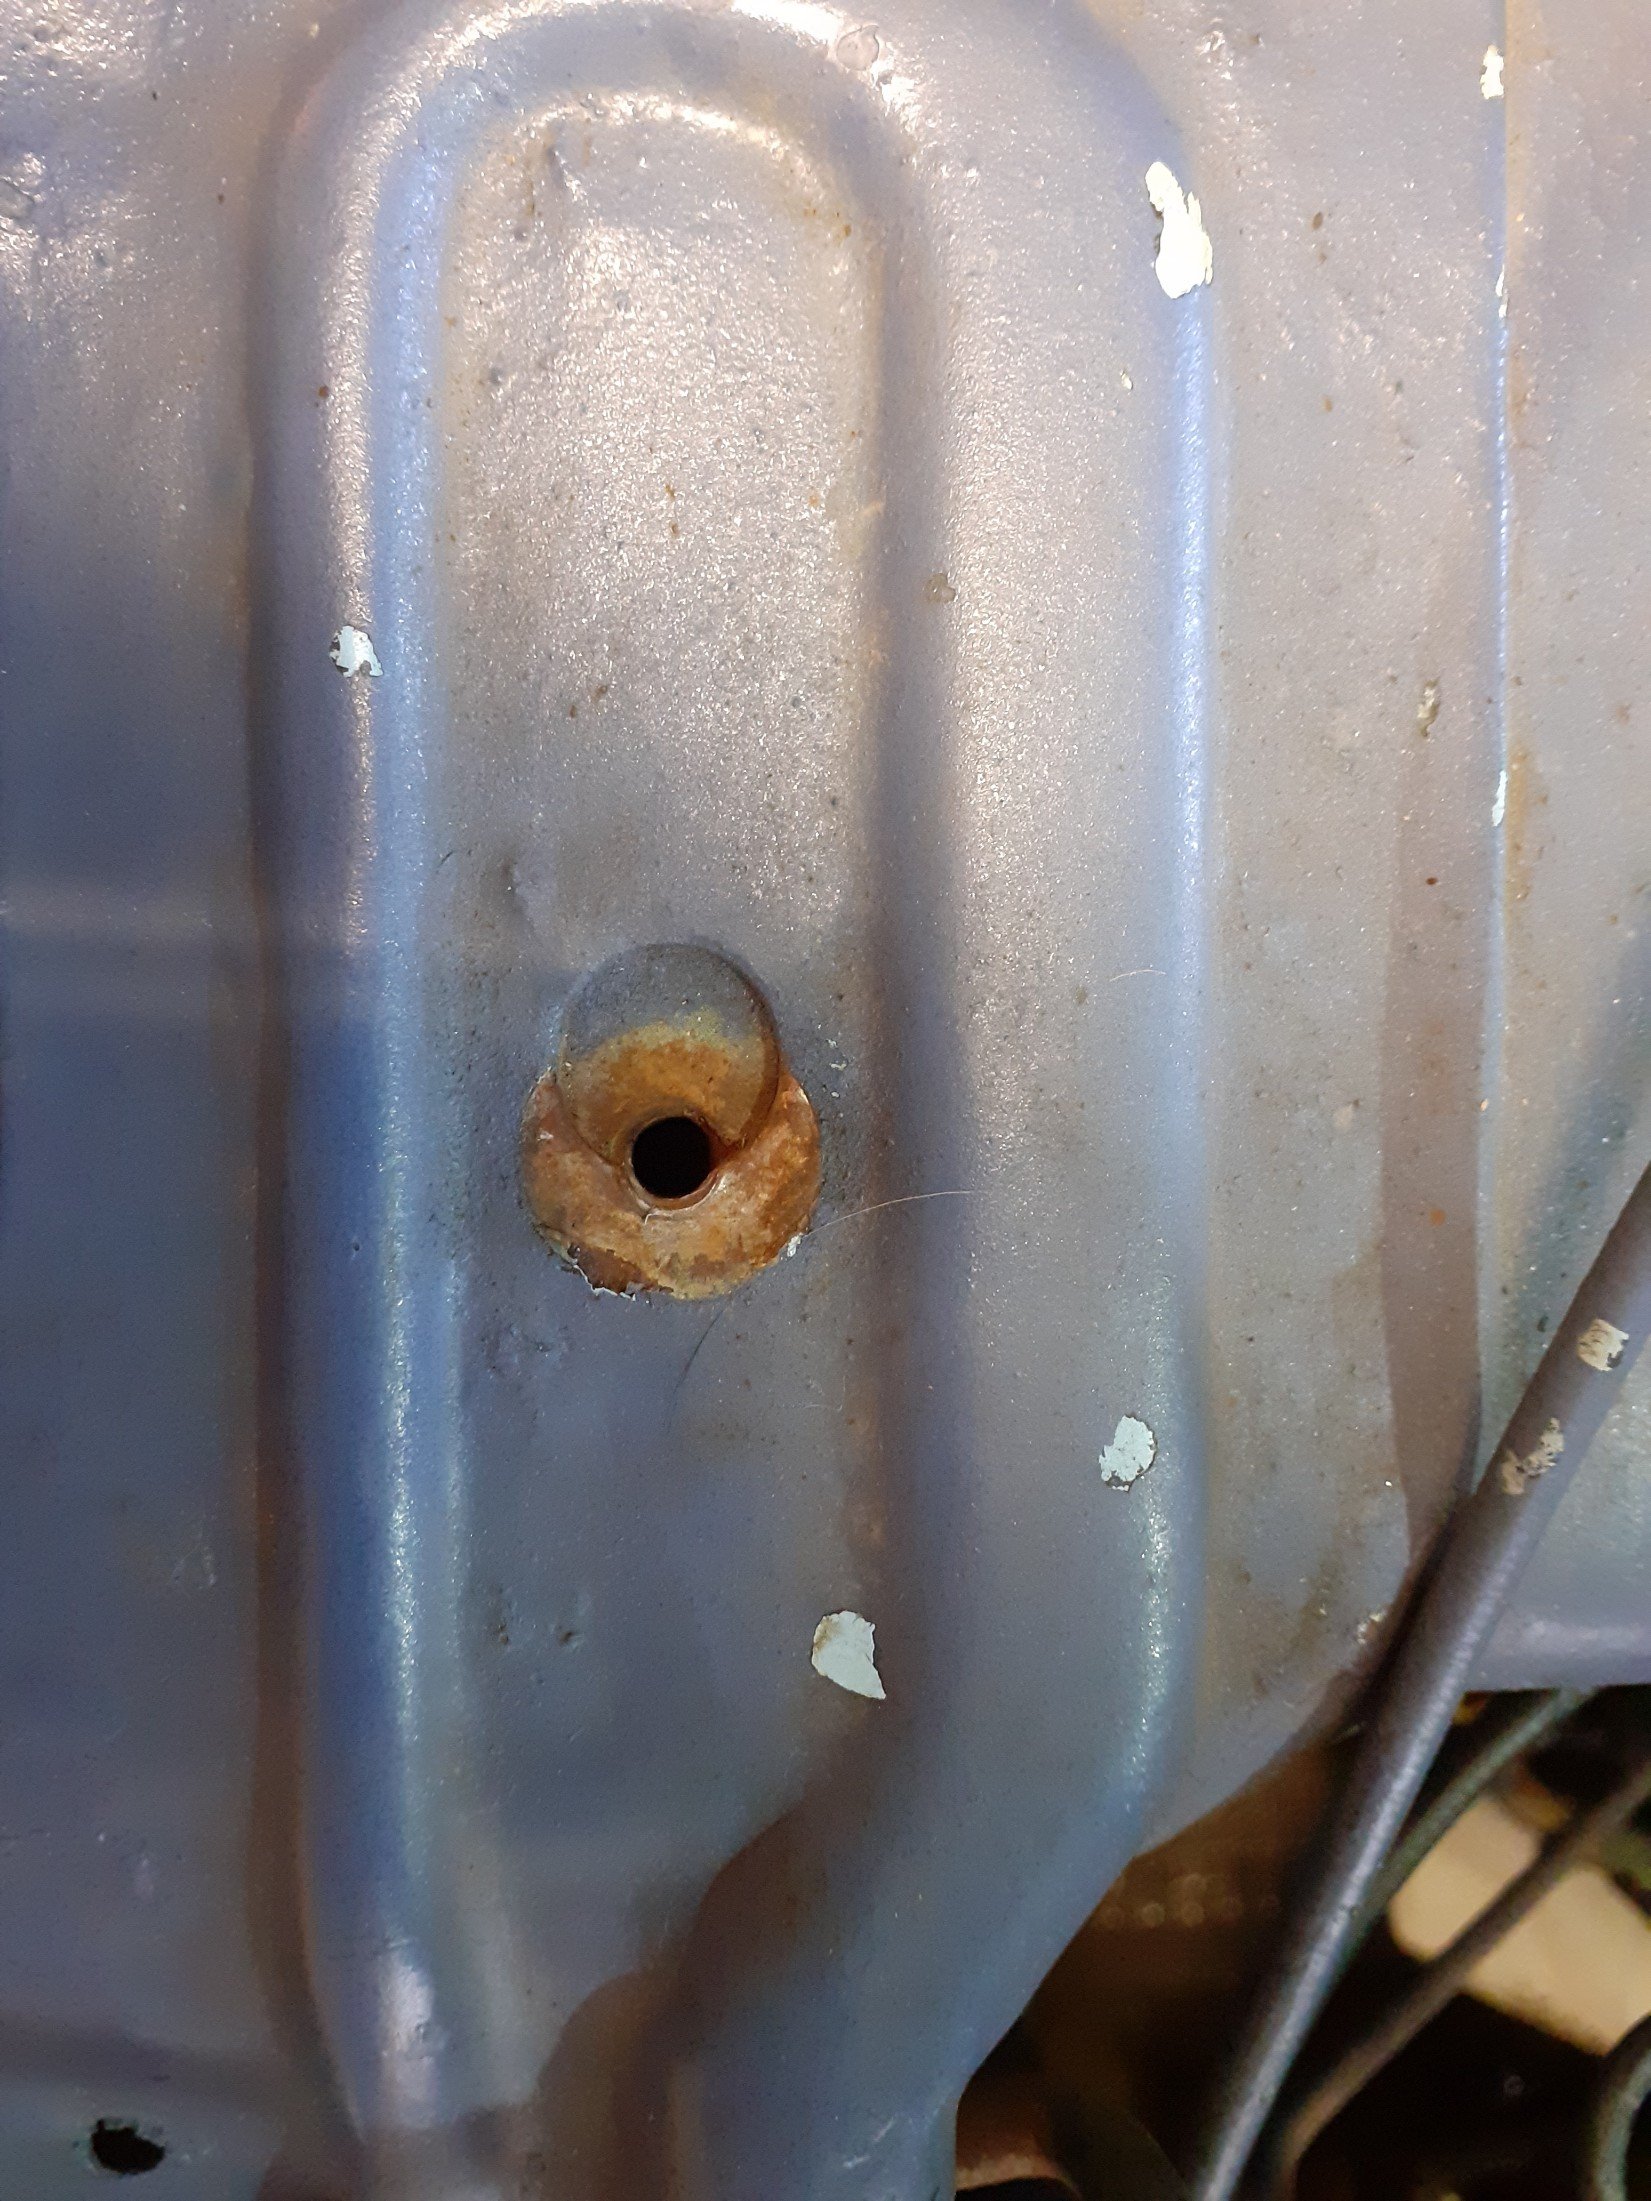
Stripped all the tinwear off. Some of the problem is poor crankcase ventilation. As well as the standard cam, lightened flywheel, carbs and exhaust. This engine is actually blueprinted and dynamically balanced, which means it revs faster and higher than stock. Which means more pressure or splashy oil stuff inside or something. Add to that my stupid worst than stock breather, and shit comes out everywhere and anywhere.the front pulley doesn't have any seal, it has a thread that chucks it back inside, looks like some oil has made it out, possibly the oil pump cover below also? The rear crank seal has definitely been leaking, nice wee river running down the middle. Comparing the 1-2 side to the 3-4 cylinder side they look fairly similar. I'm thinking I didn't do fuckall to seal the alt stand when I put it on, was rushing to get it back on the road. The case is wet with oil around it. One thing I did do was replace the seals on the oil cooler, so imagine how pissed off I am with the fecking oil under it. But looking closer, some of the fins on the front of the cooler are pretty hammered and oil stained. guess the fan has been shooting things at it for 30odd years. So add that to the shopping list. With all the leaks up top, it's difficult to tell if the cylinders or pushrod tubes are actually leaking or just covered in shit? After the last rebuild, I wasn't able to re-torque the head studs once the engine was run in, question is, how far do I go with this? It runs pretty good and now I'm not driving it daily I've go a bit of time to seal it up properly. Look at this puddle inside the bottom slead! Yeezus.
8 points
-
Slow progress recently, but I have made a start on the sills. Now the outer is in place, i can make an inner & then button the outer up to the A pillar/rear arch
7 points
-
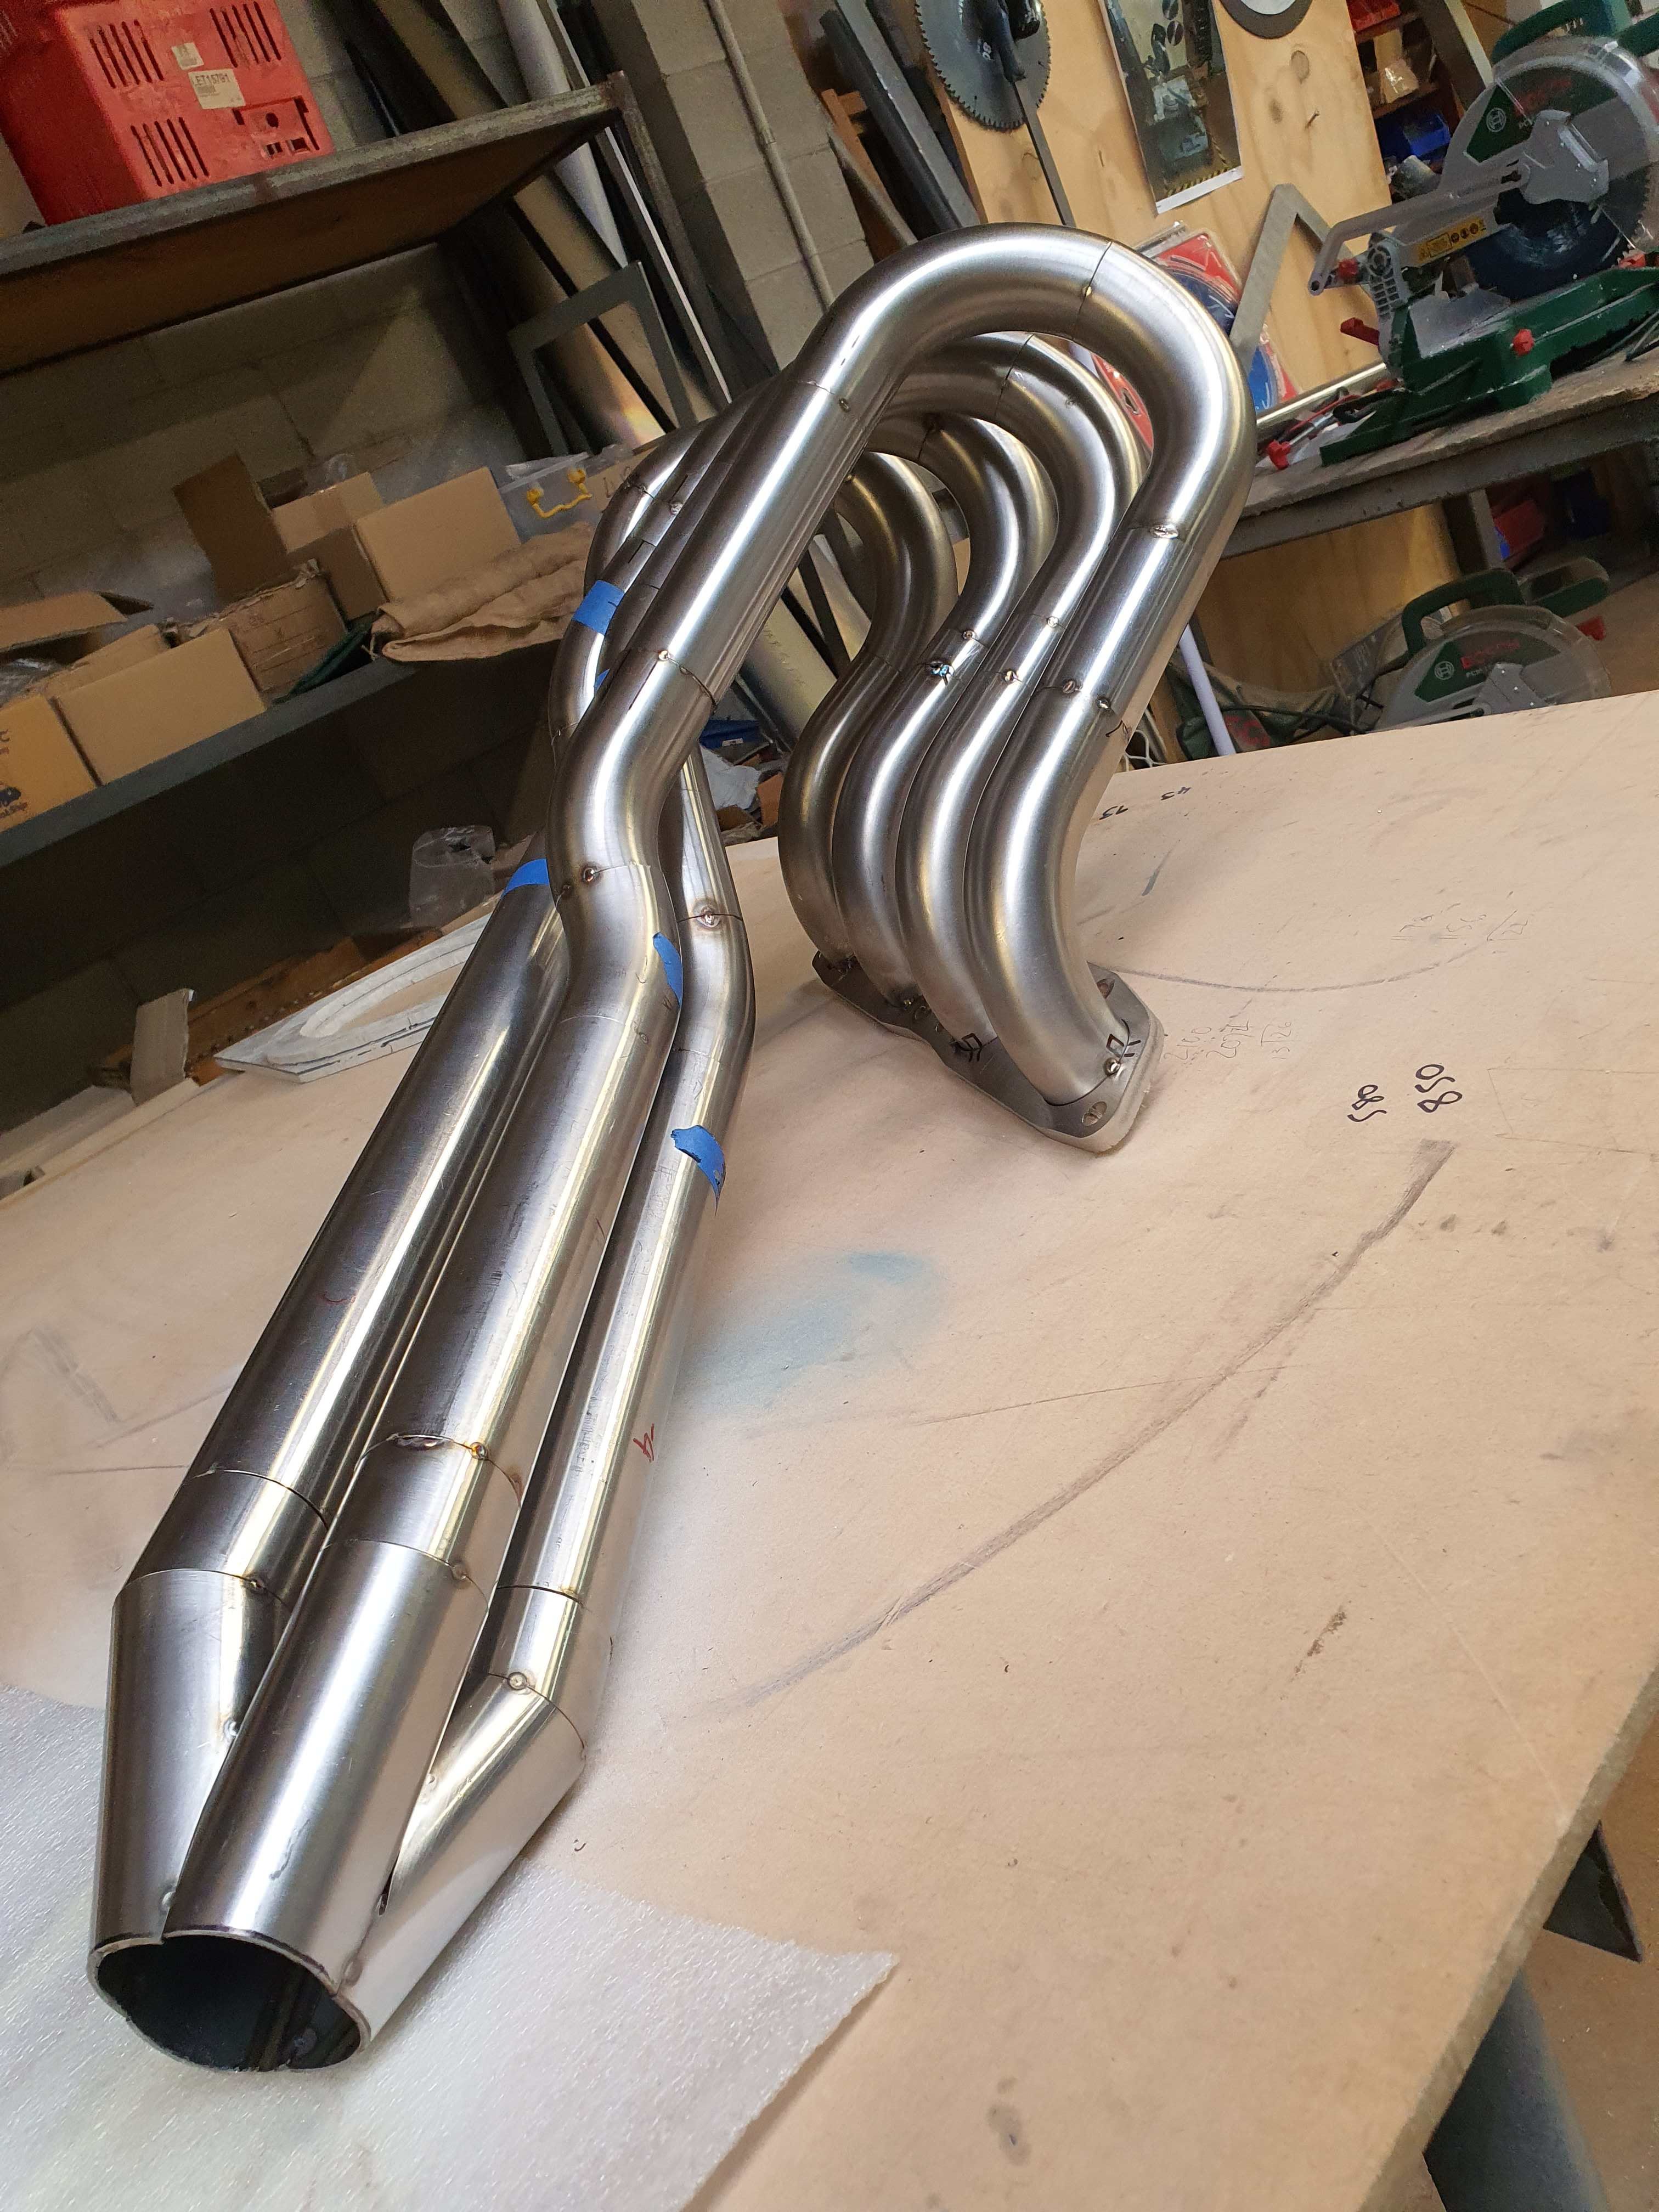
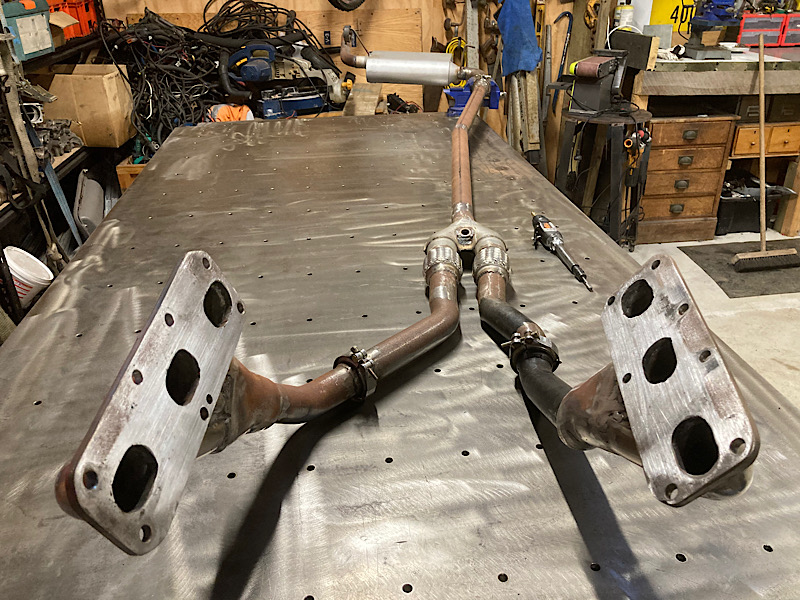
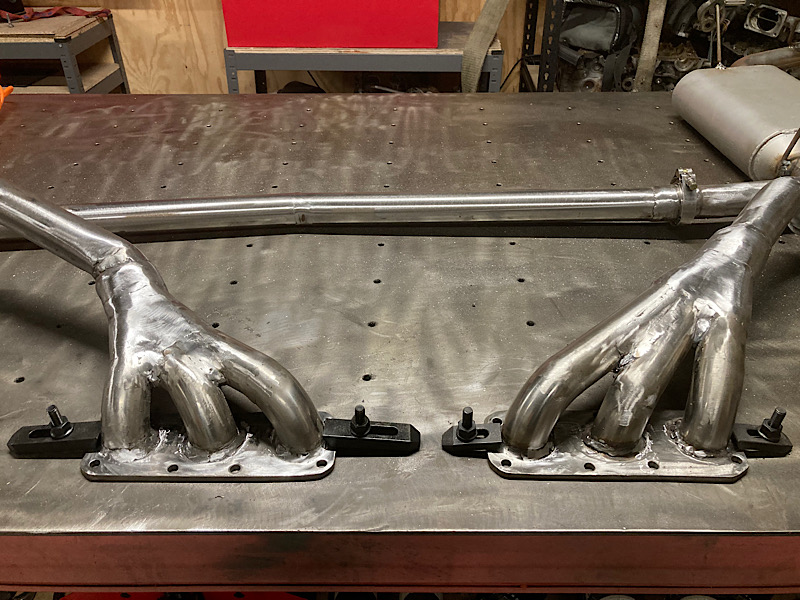
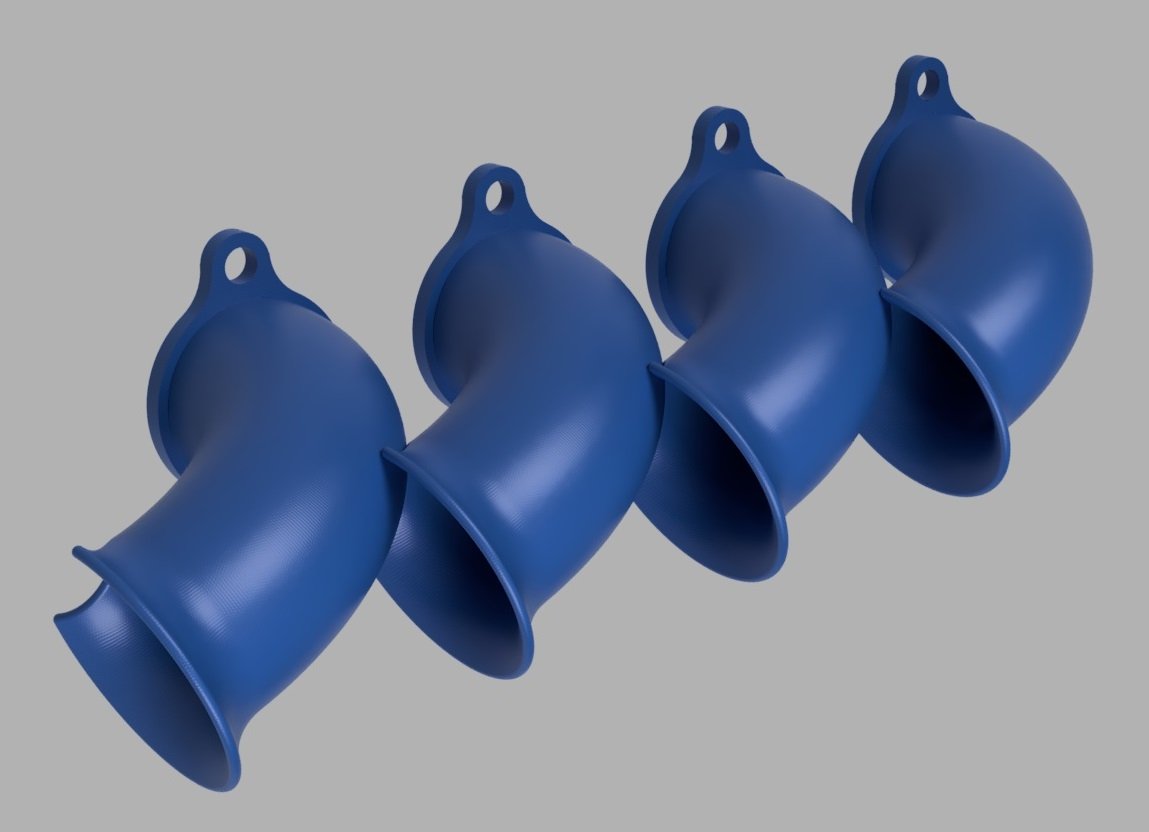
Have gone down the keep it equal route. Managed to get everything tacked and the collector on. Fitted it to the motor I have and thought they sat way to high. After this I decided to take as much as I could out of the tops. Since Runner 1 is the shortest when it comes to height it determines how low I could go. Managed to get 26mm lower out of all of the runners and visually it looks like it will be sweet Will be test fitting to an S15 in the next few weeks just for safety sake, then I can finally get stuck into fully welding.
5 points
-
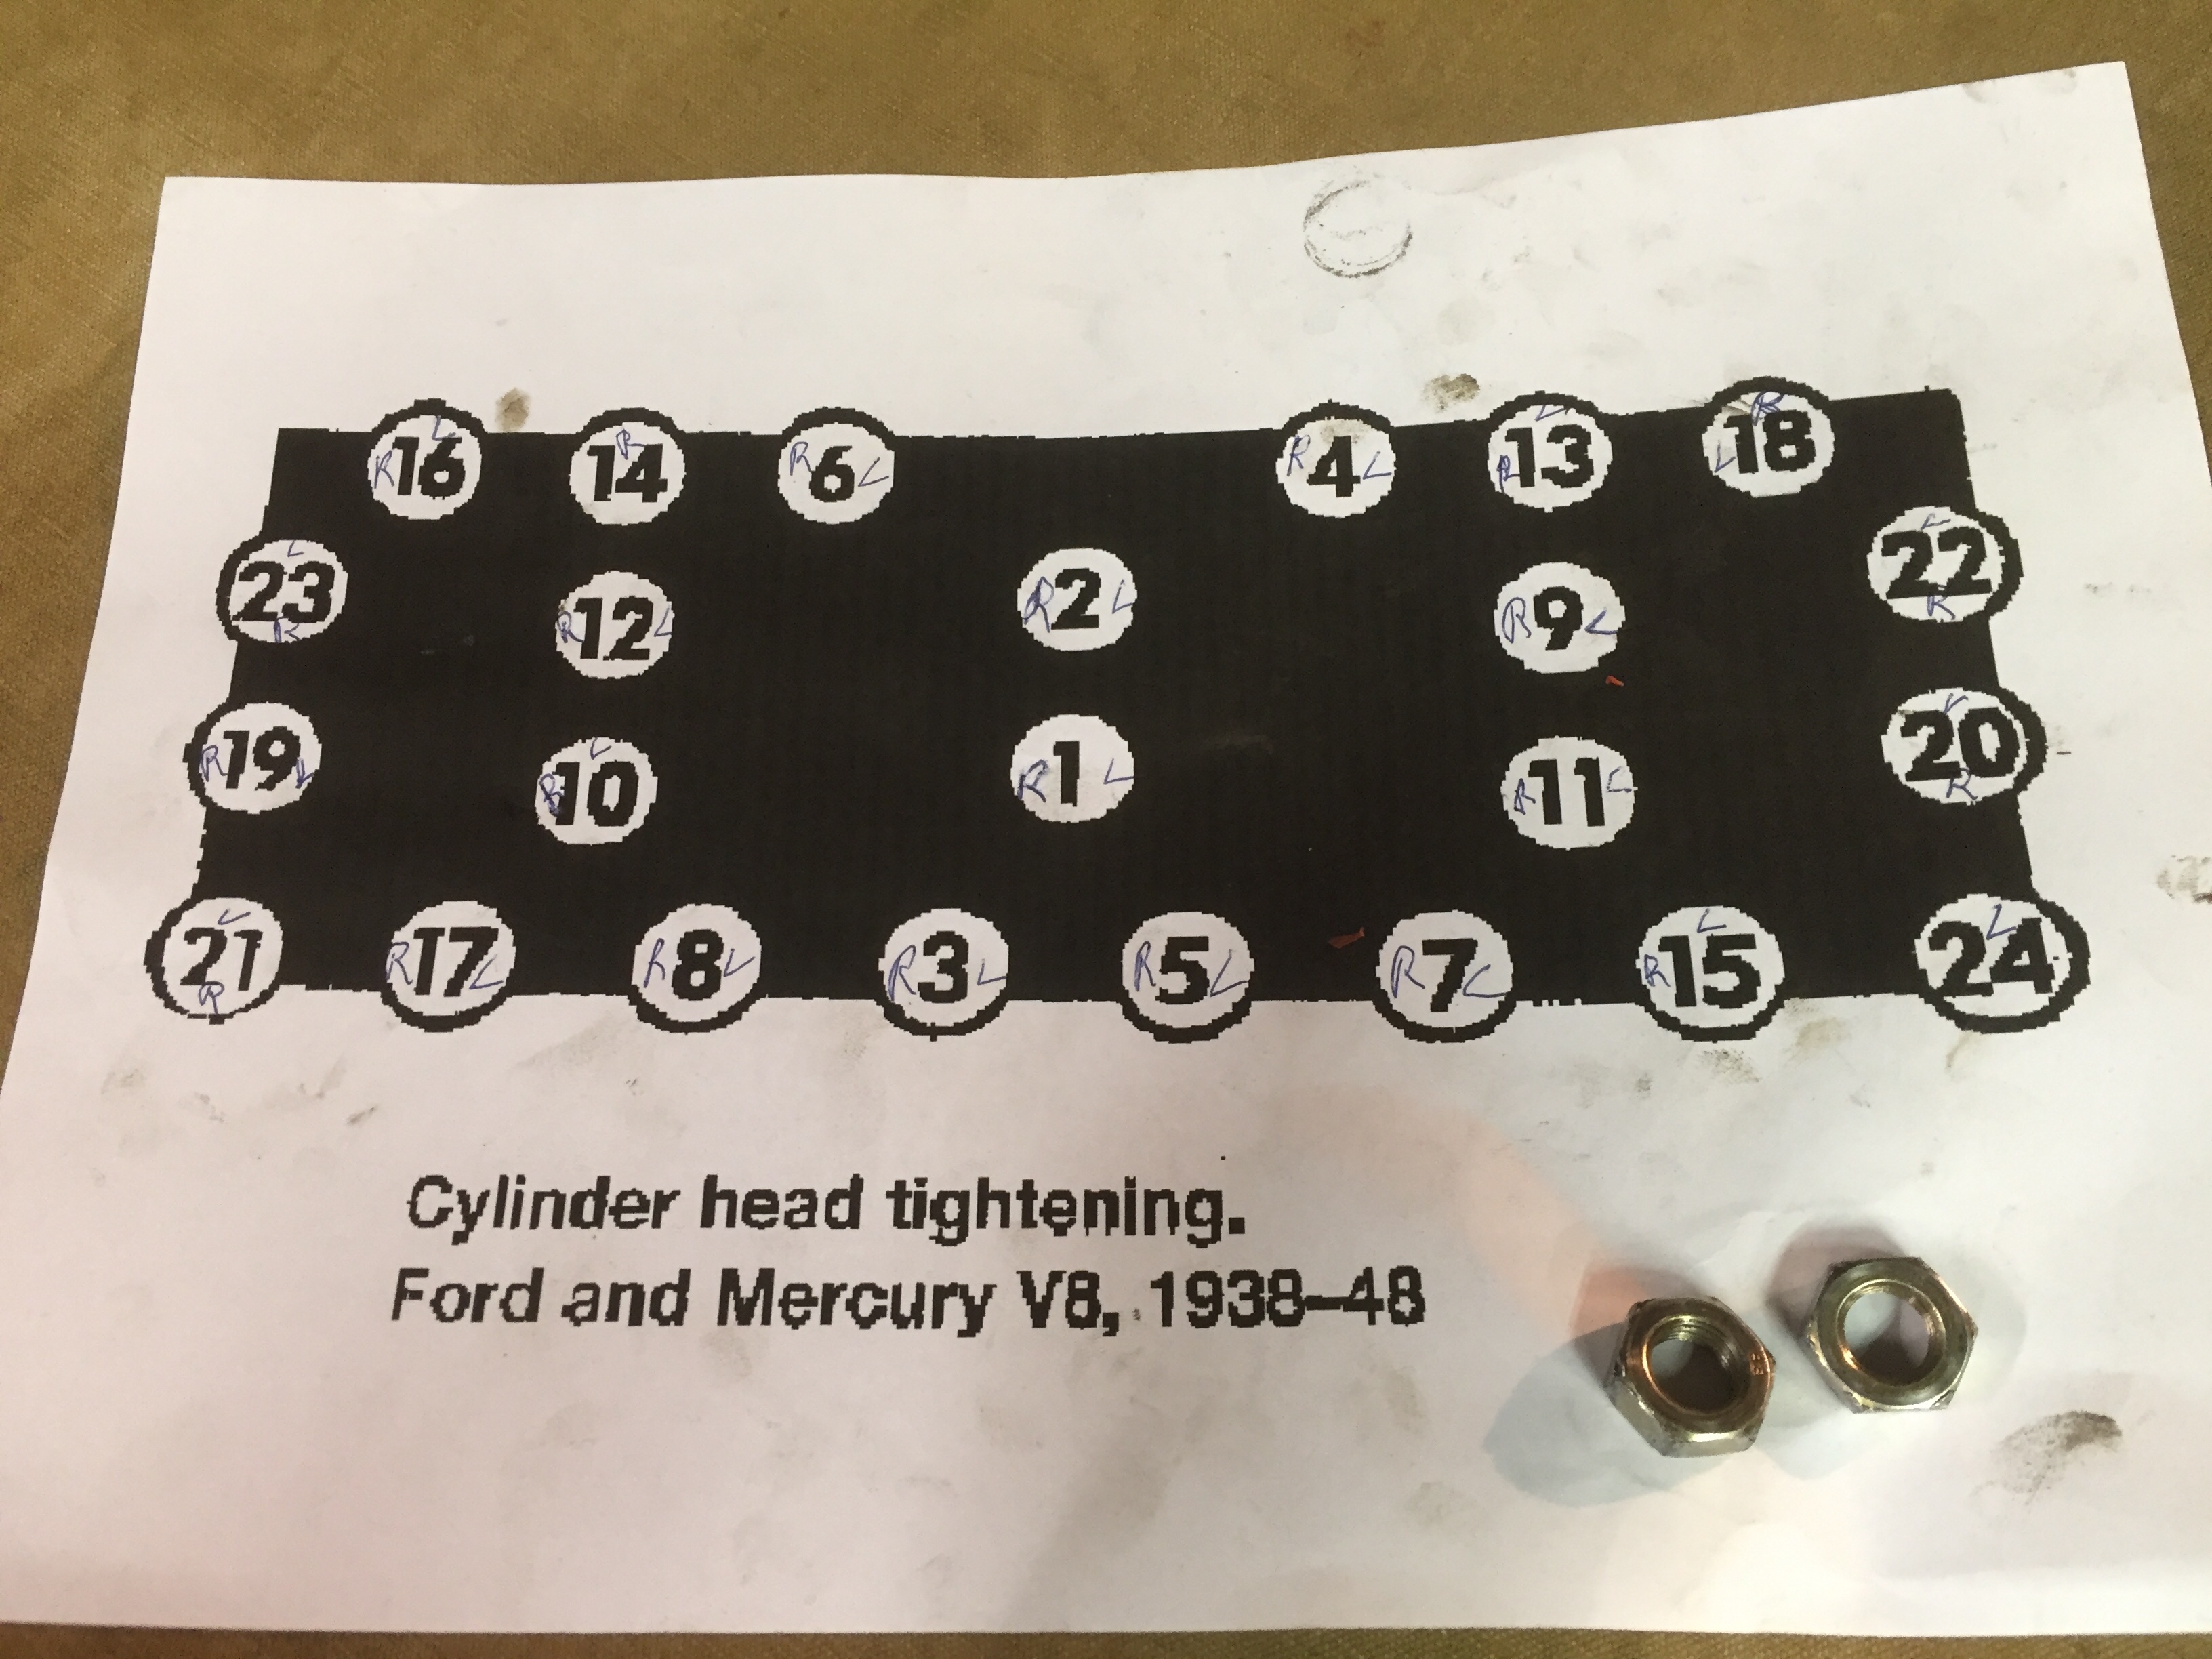
I sealed each head stud, back it off with the power bar, put lock 2 nuts on the stud, extract stud, clean, apply sealer, install stud, remove lock nuts, fit washer and nut and re torque X 48 times.
5 points
-
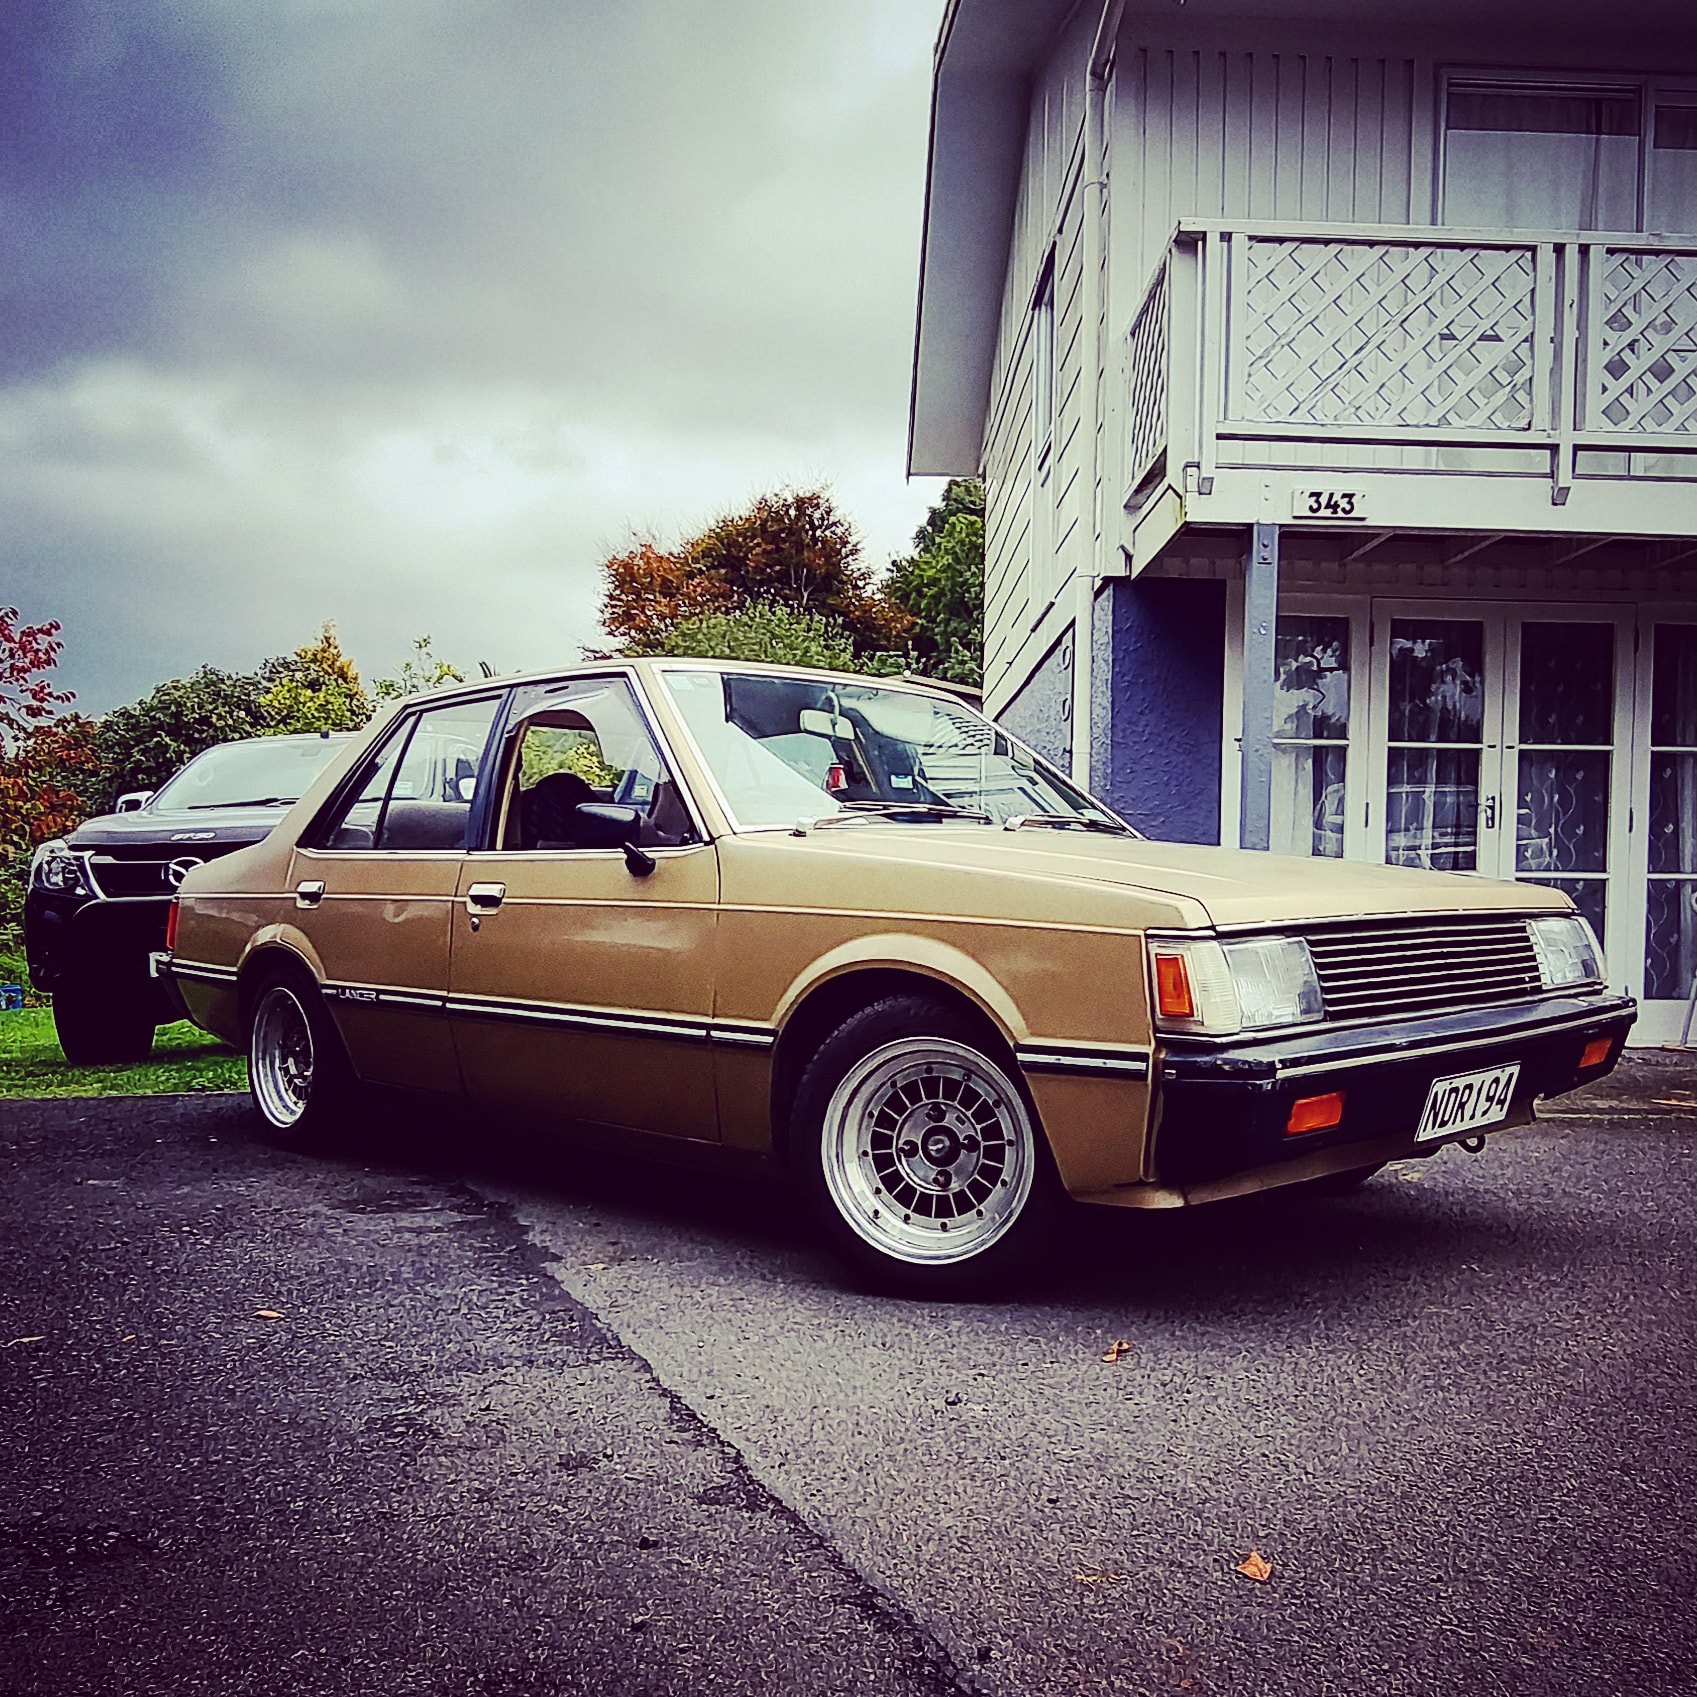
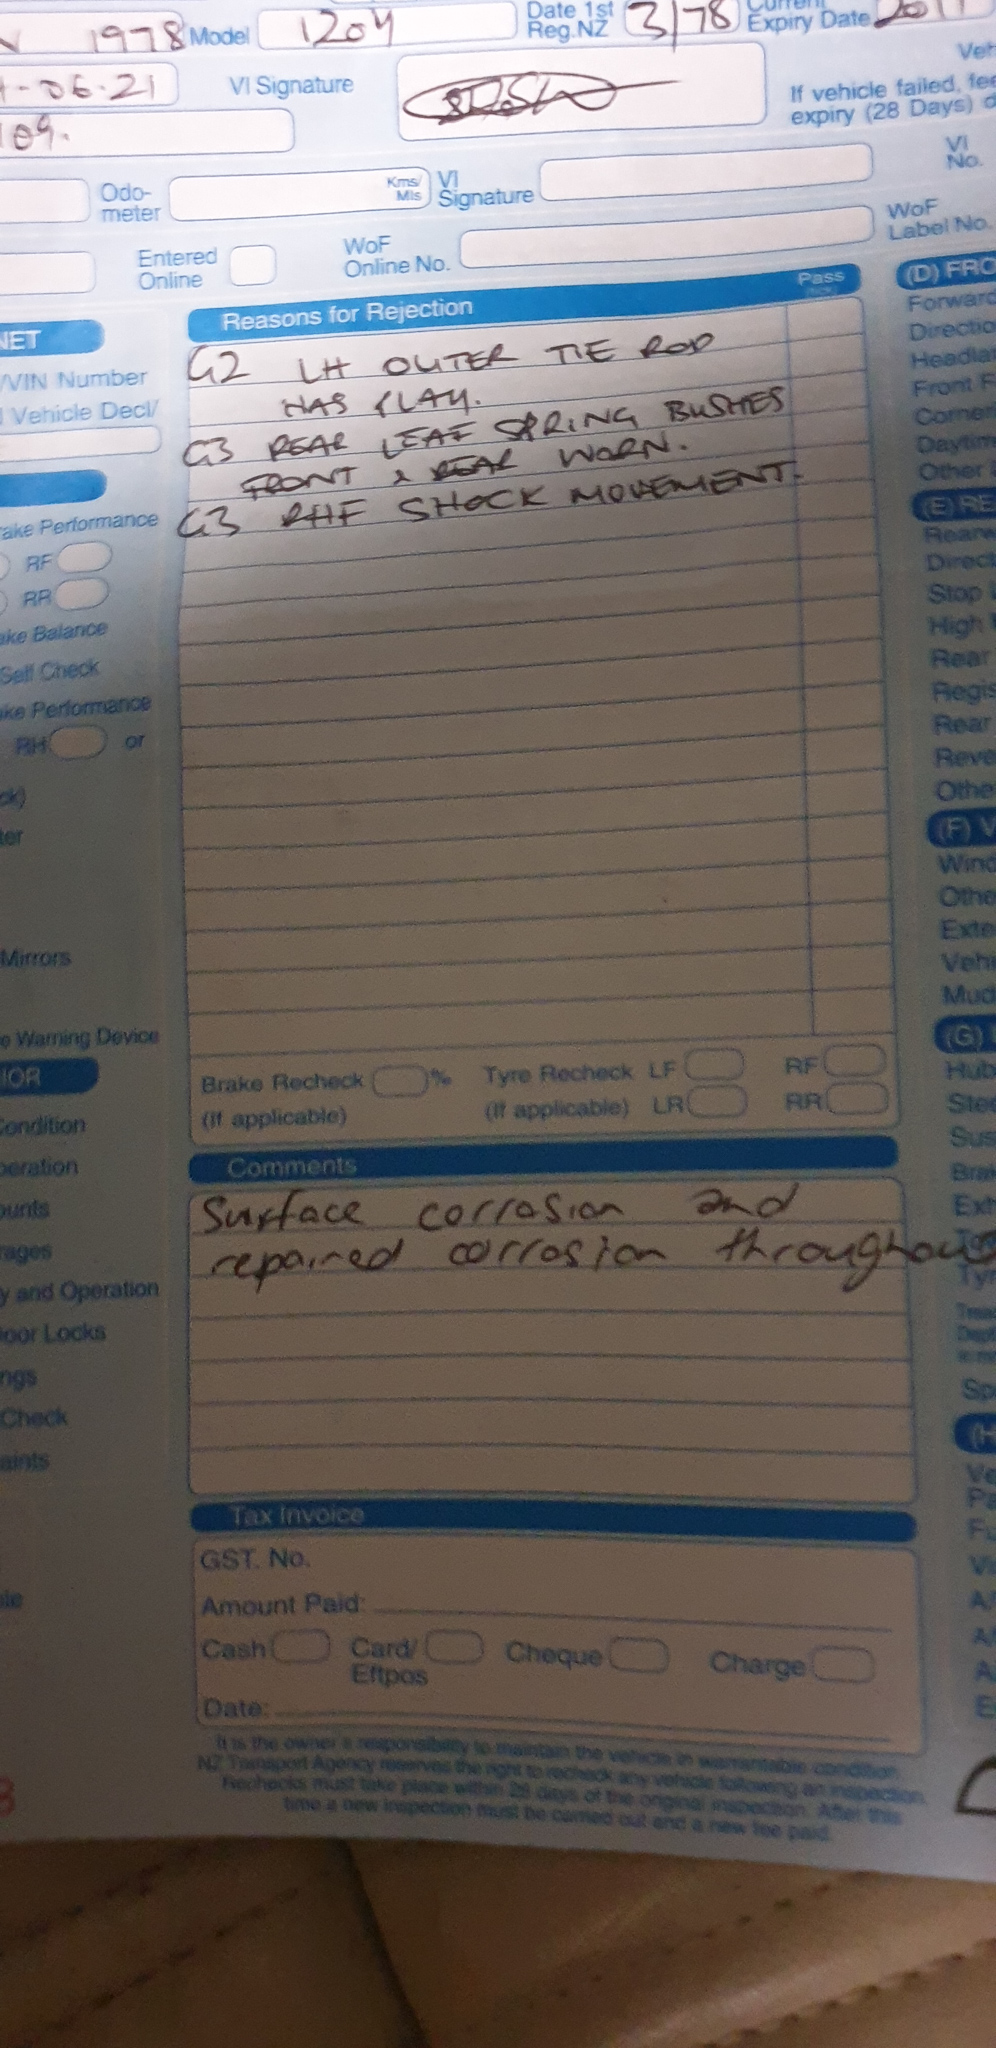
WOF passed, just a mention of a chip in the windscreen out of the drivers vision area, and the cracked fog light lens (which still passes because its not letting moisture in). Great success. Also got sick of the guard rub from the RH Rear, so jacked the rear of the car up and had a look. Found a clean spot on the inner lip where it had been rubbing, so took a small sledgehammer to the lip and hammered it in a bit. No more rubbing, so now I can drive the car harder, like it was built for. Next on the list is to replace the clock spring so I can fit my 3 spoke steering wheel, and replace and rekey the ignition barrel since the previous owner made a mess of it somehow.5 points
-
"question is, how far do I go with this?" Dunno how far to go, but something like this would be a good start at least https://www.trademe.co.nz/a/motors/car-parts-accessories/volkswagen/new-listing/31339061034 points
-
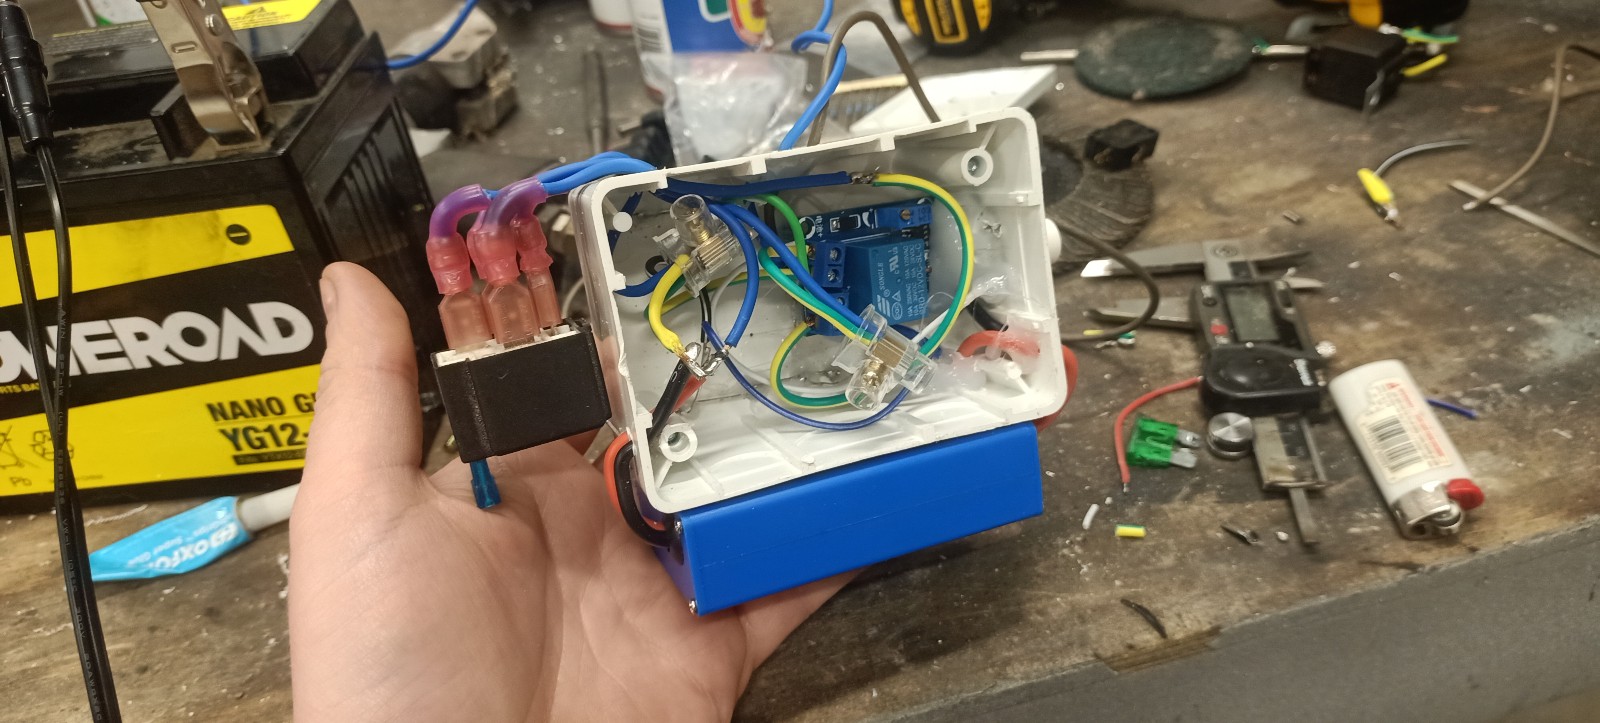
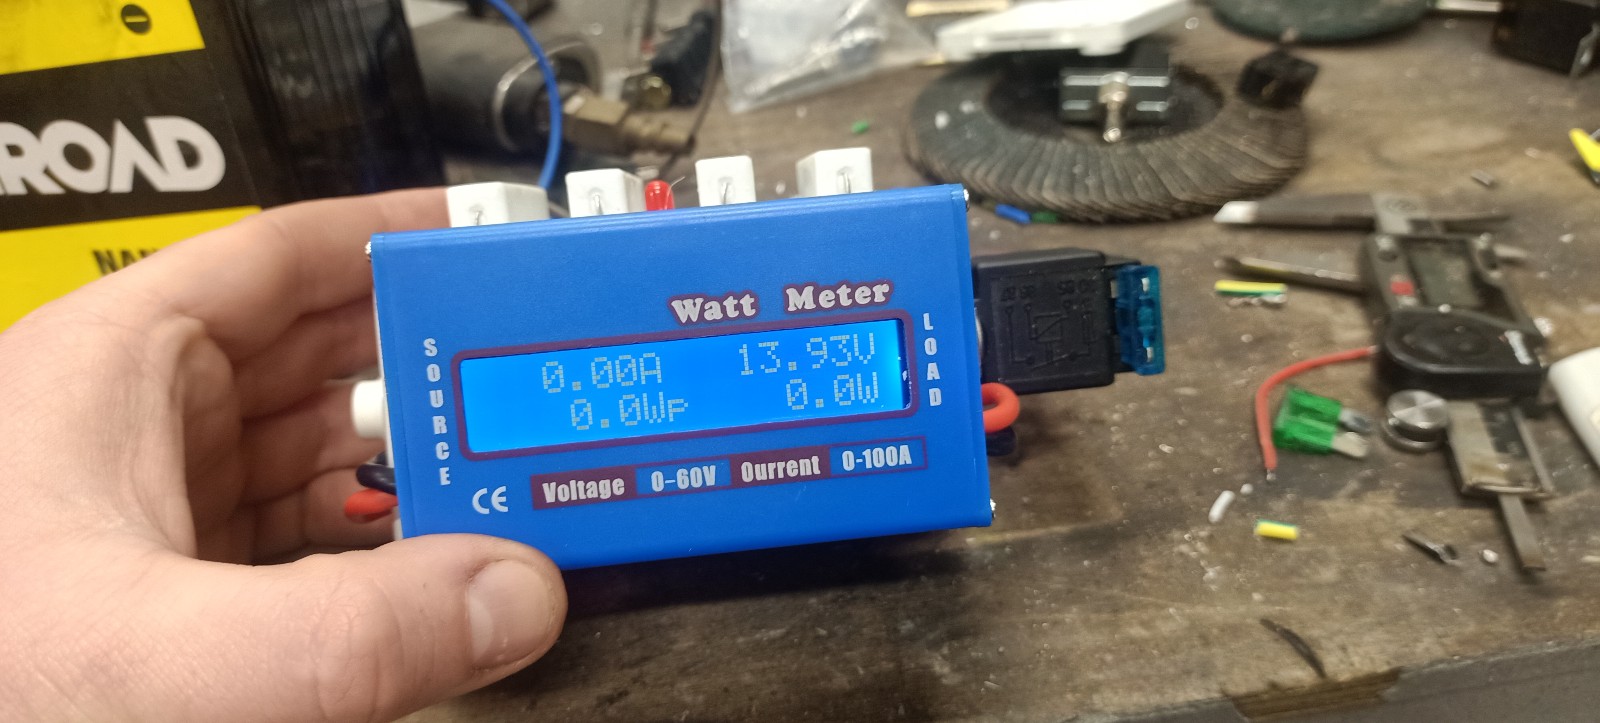
Yup technology is amazing. Tonight I assembled a basic watt meter/load with voltage switch thing so that I can test battery capacities accurately. Its all just cheap shit from ali express but seems to work OK. You connect a fully charged battery and press the button on the side, this engages the resistors to give a 30 watt load, and then when voltage gets down to 12.1 it disconnects the load and holds capacity information on the screen. During discharge it also displays load in Watts and battery voltage. Quite neat. The old busa battery drops from 13v to 12.3 very quickly,and in total outputs just 0.4Ah before it disengages the load at 12.1v I know that I'd get more out of the battery if there was a smaller load (manufacturers test Ah over a ten hour draw down or something) but it should still be a lot better than what I got. Not quite brave enough to connect and test the new battery though, LOL.
3 points
-
I put this all back together now, I just fired it up and ran it at a 1500 rpm for 20 mins, a few head studs are leaking, when I re torque them I will pull each one out and put some sealer on it, it has around 40 PSI oil pressure witch is good for 30w oil and the kind of pump I am using, after I seal the head studs I will run it again and then change the oil to something elce.
3 points
-
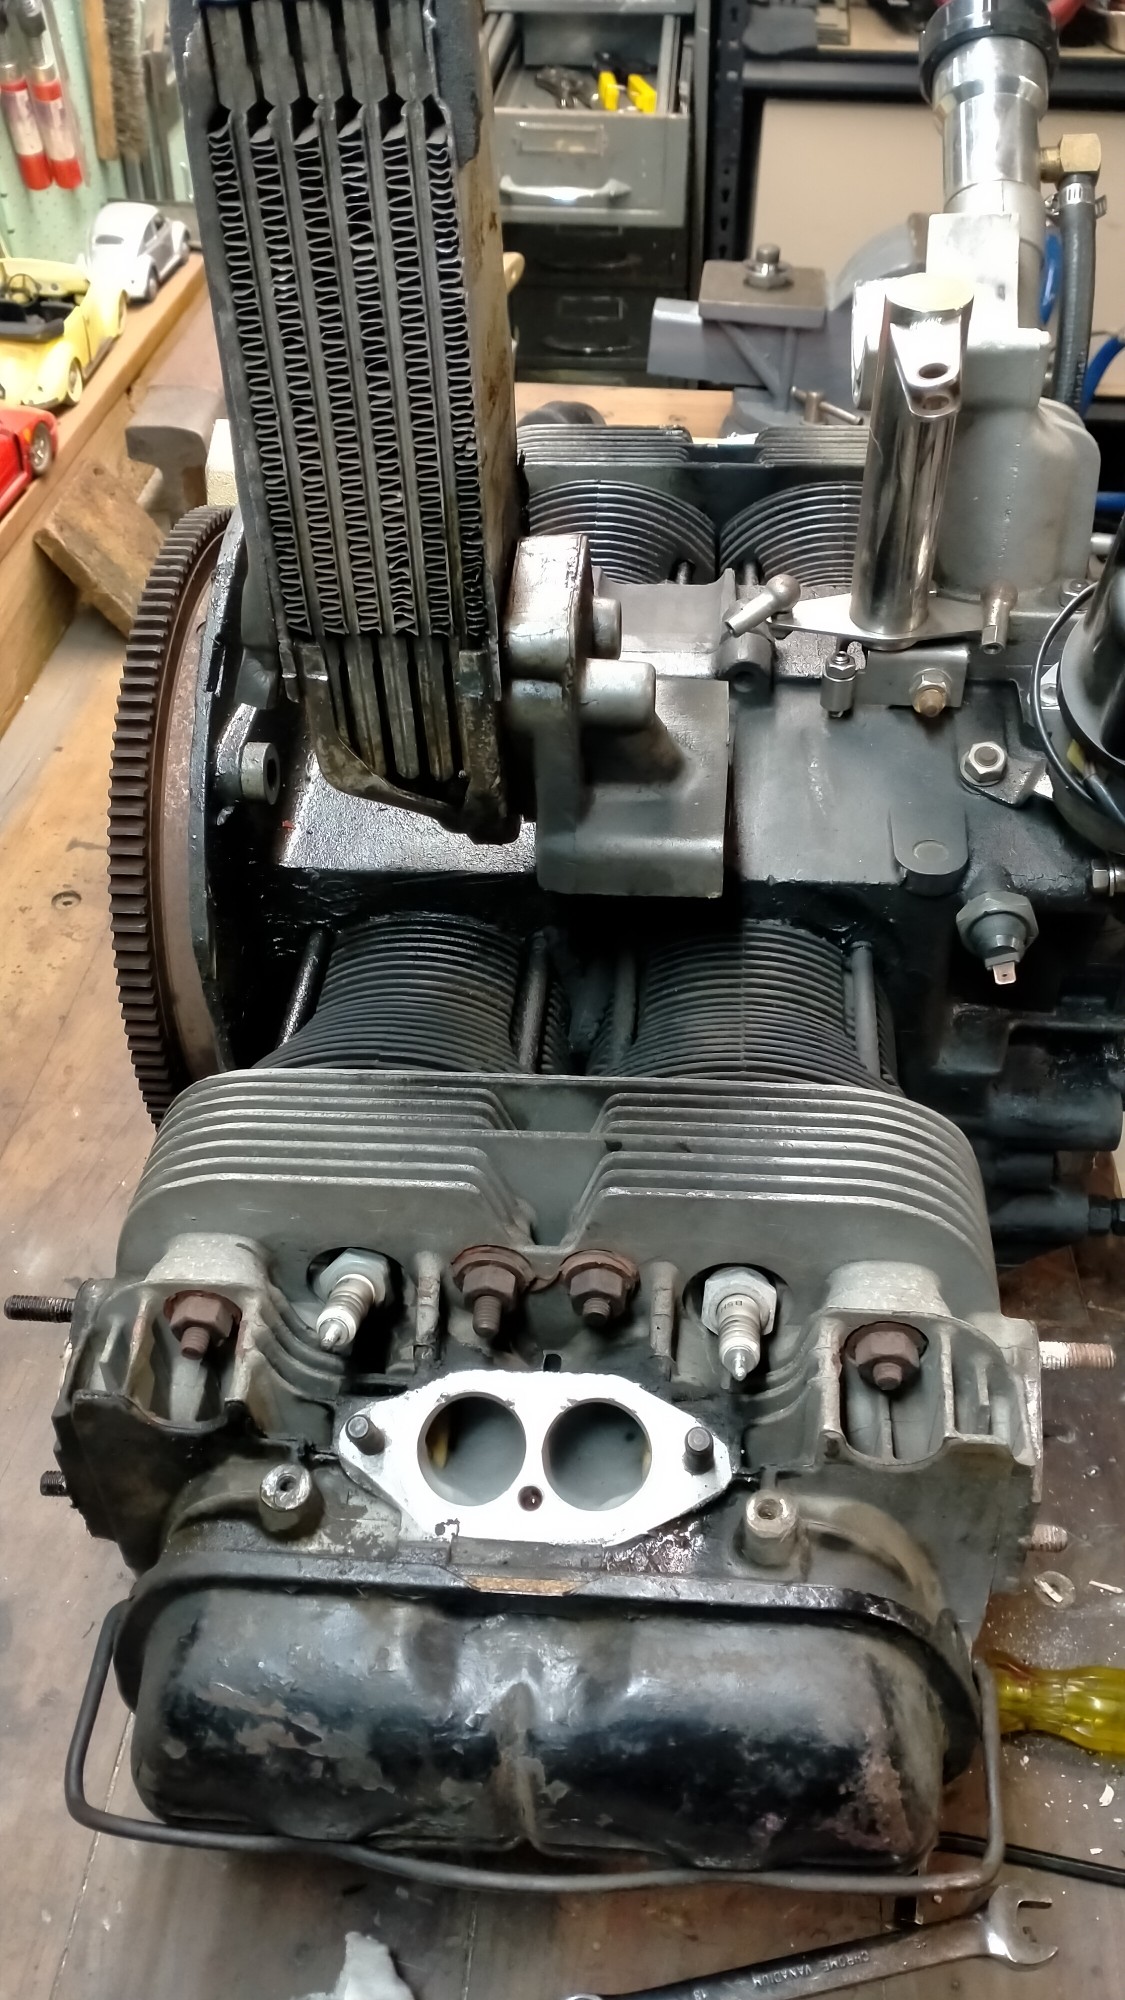
Old solid front mount. Nice new heavy-duty kombi mounts in place. So fresh and so clean! Just need to remember to top up the gearbox oil, something else I've never done, not the easiest process I'm guessing. Which just leaves this thing to sort out. Which although looks cool from this side. Is caked in oil from this side. Any tips on stopping a vw engine leaking oil from ever possible place would be greatly appreciated. Fin.
3 points
-
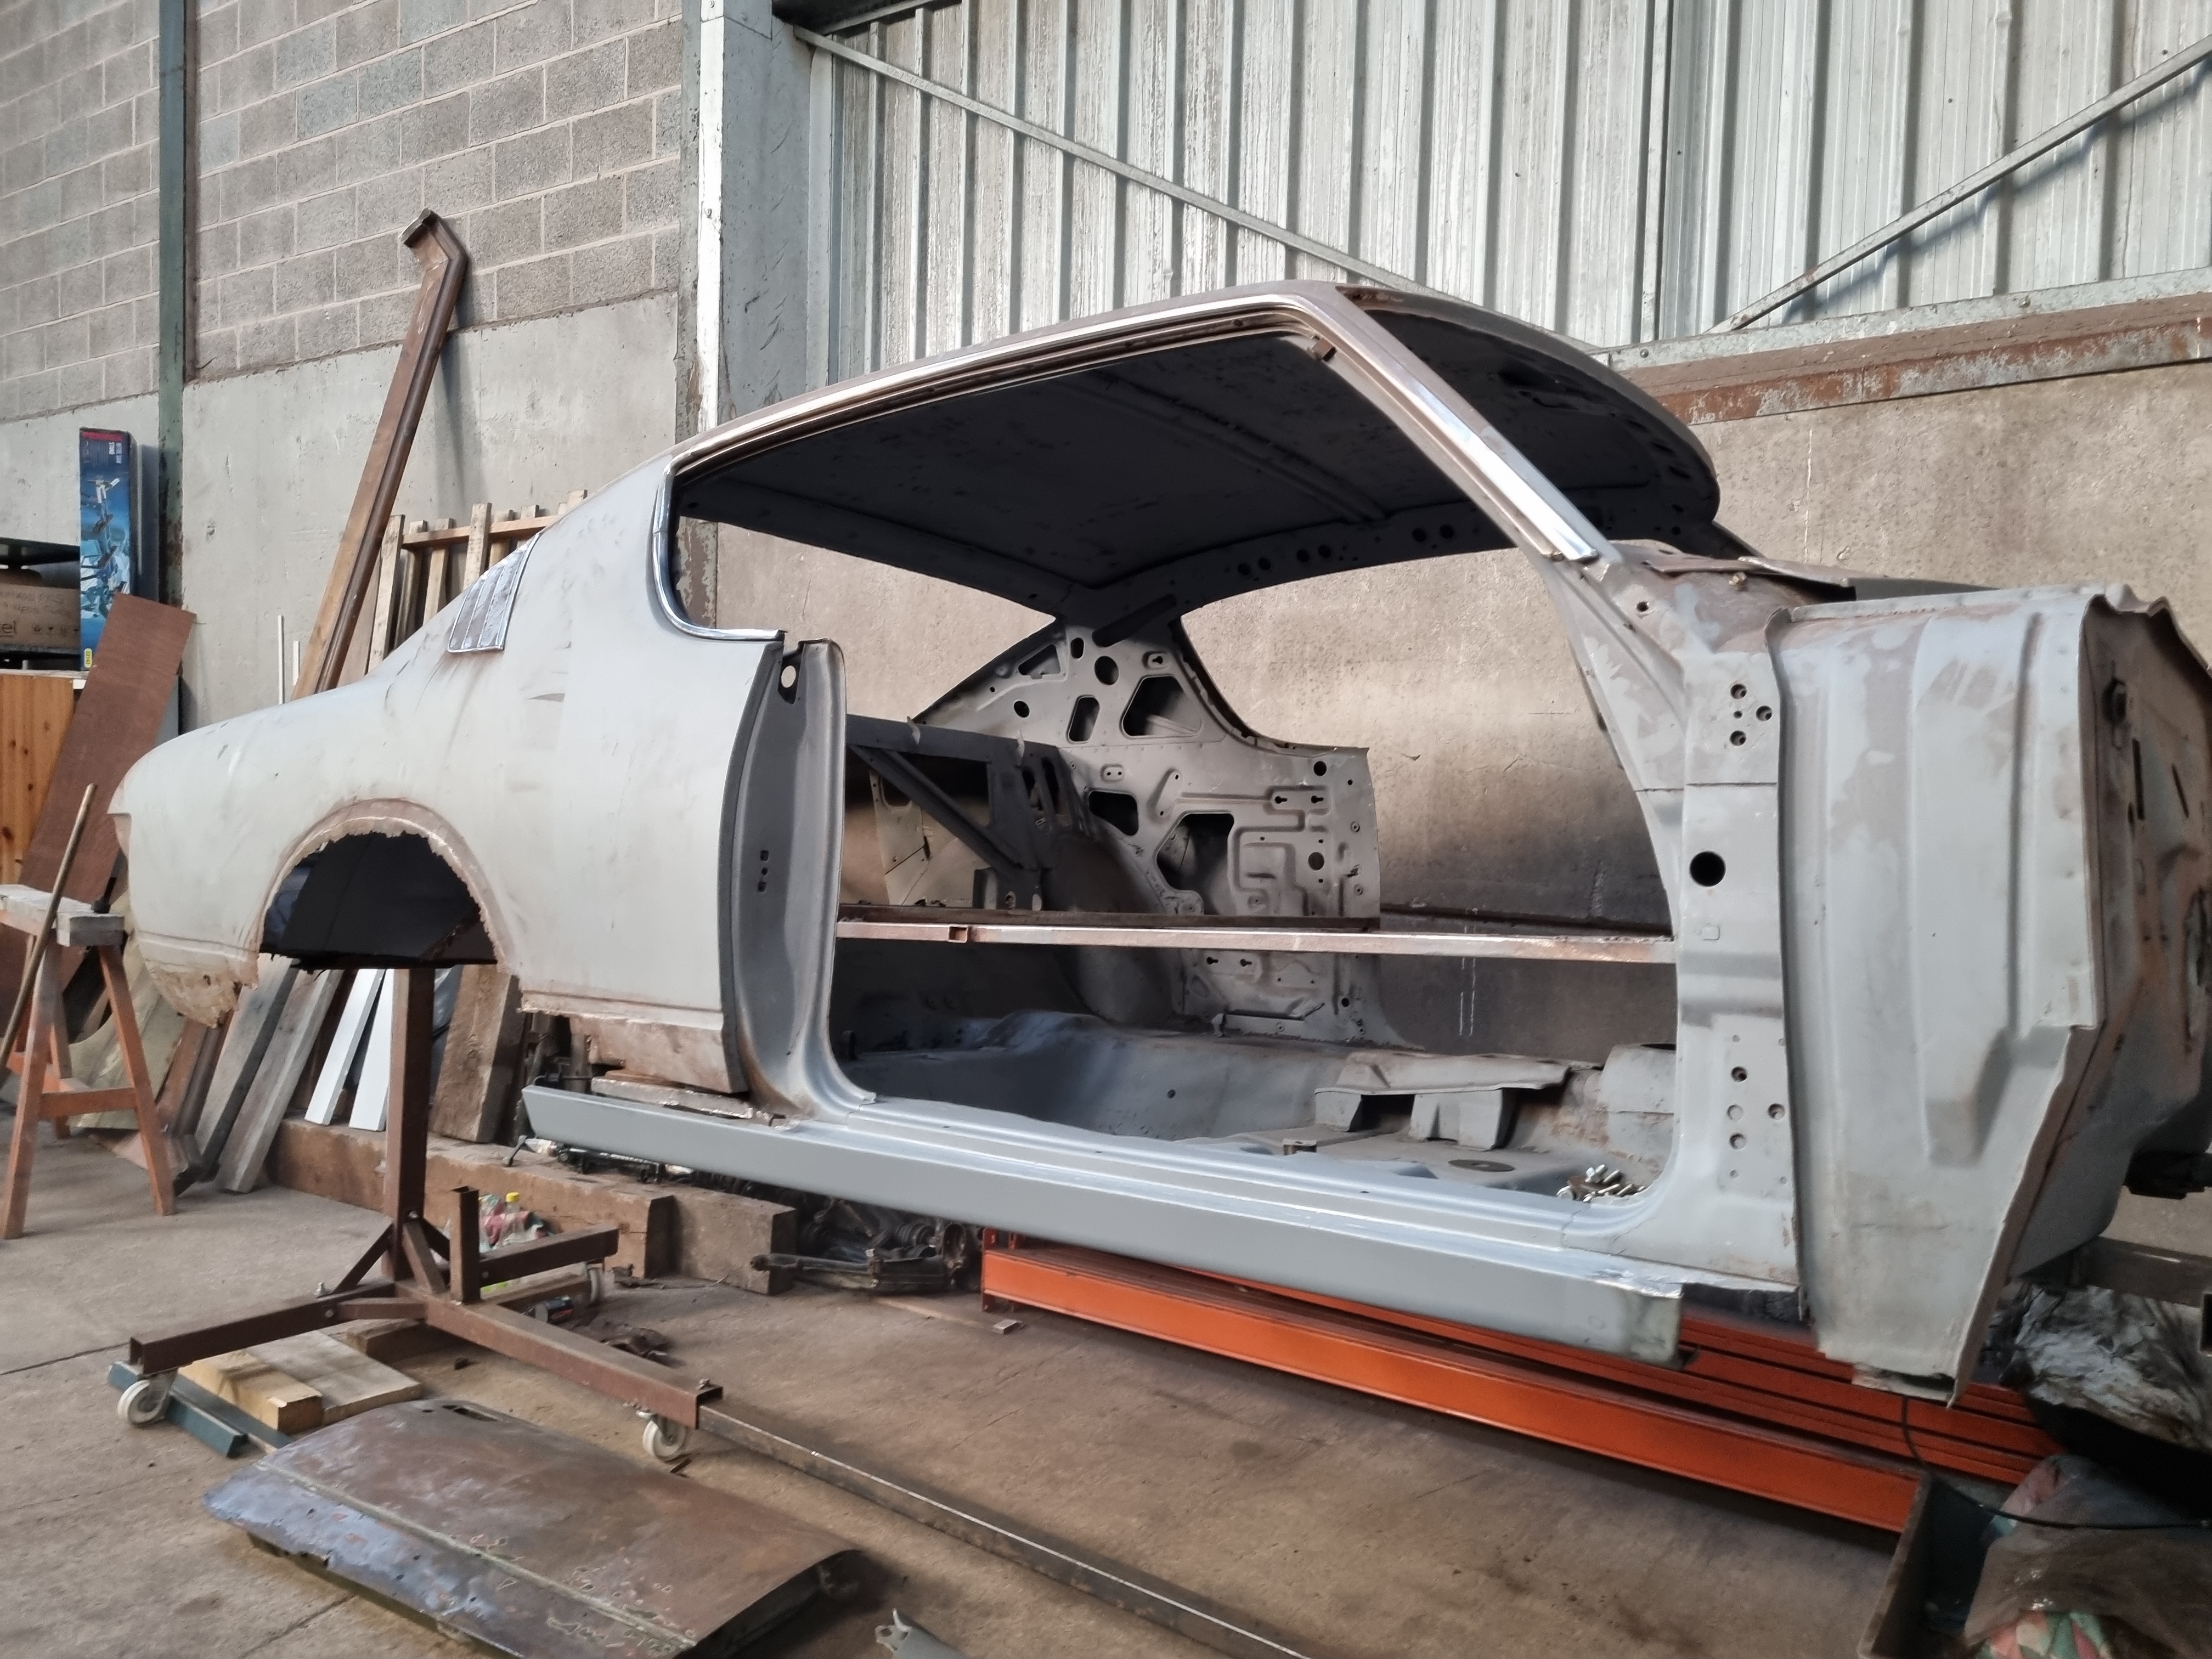
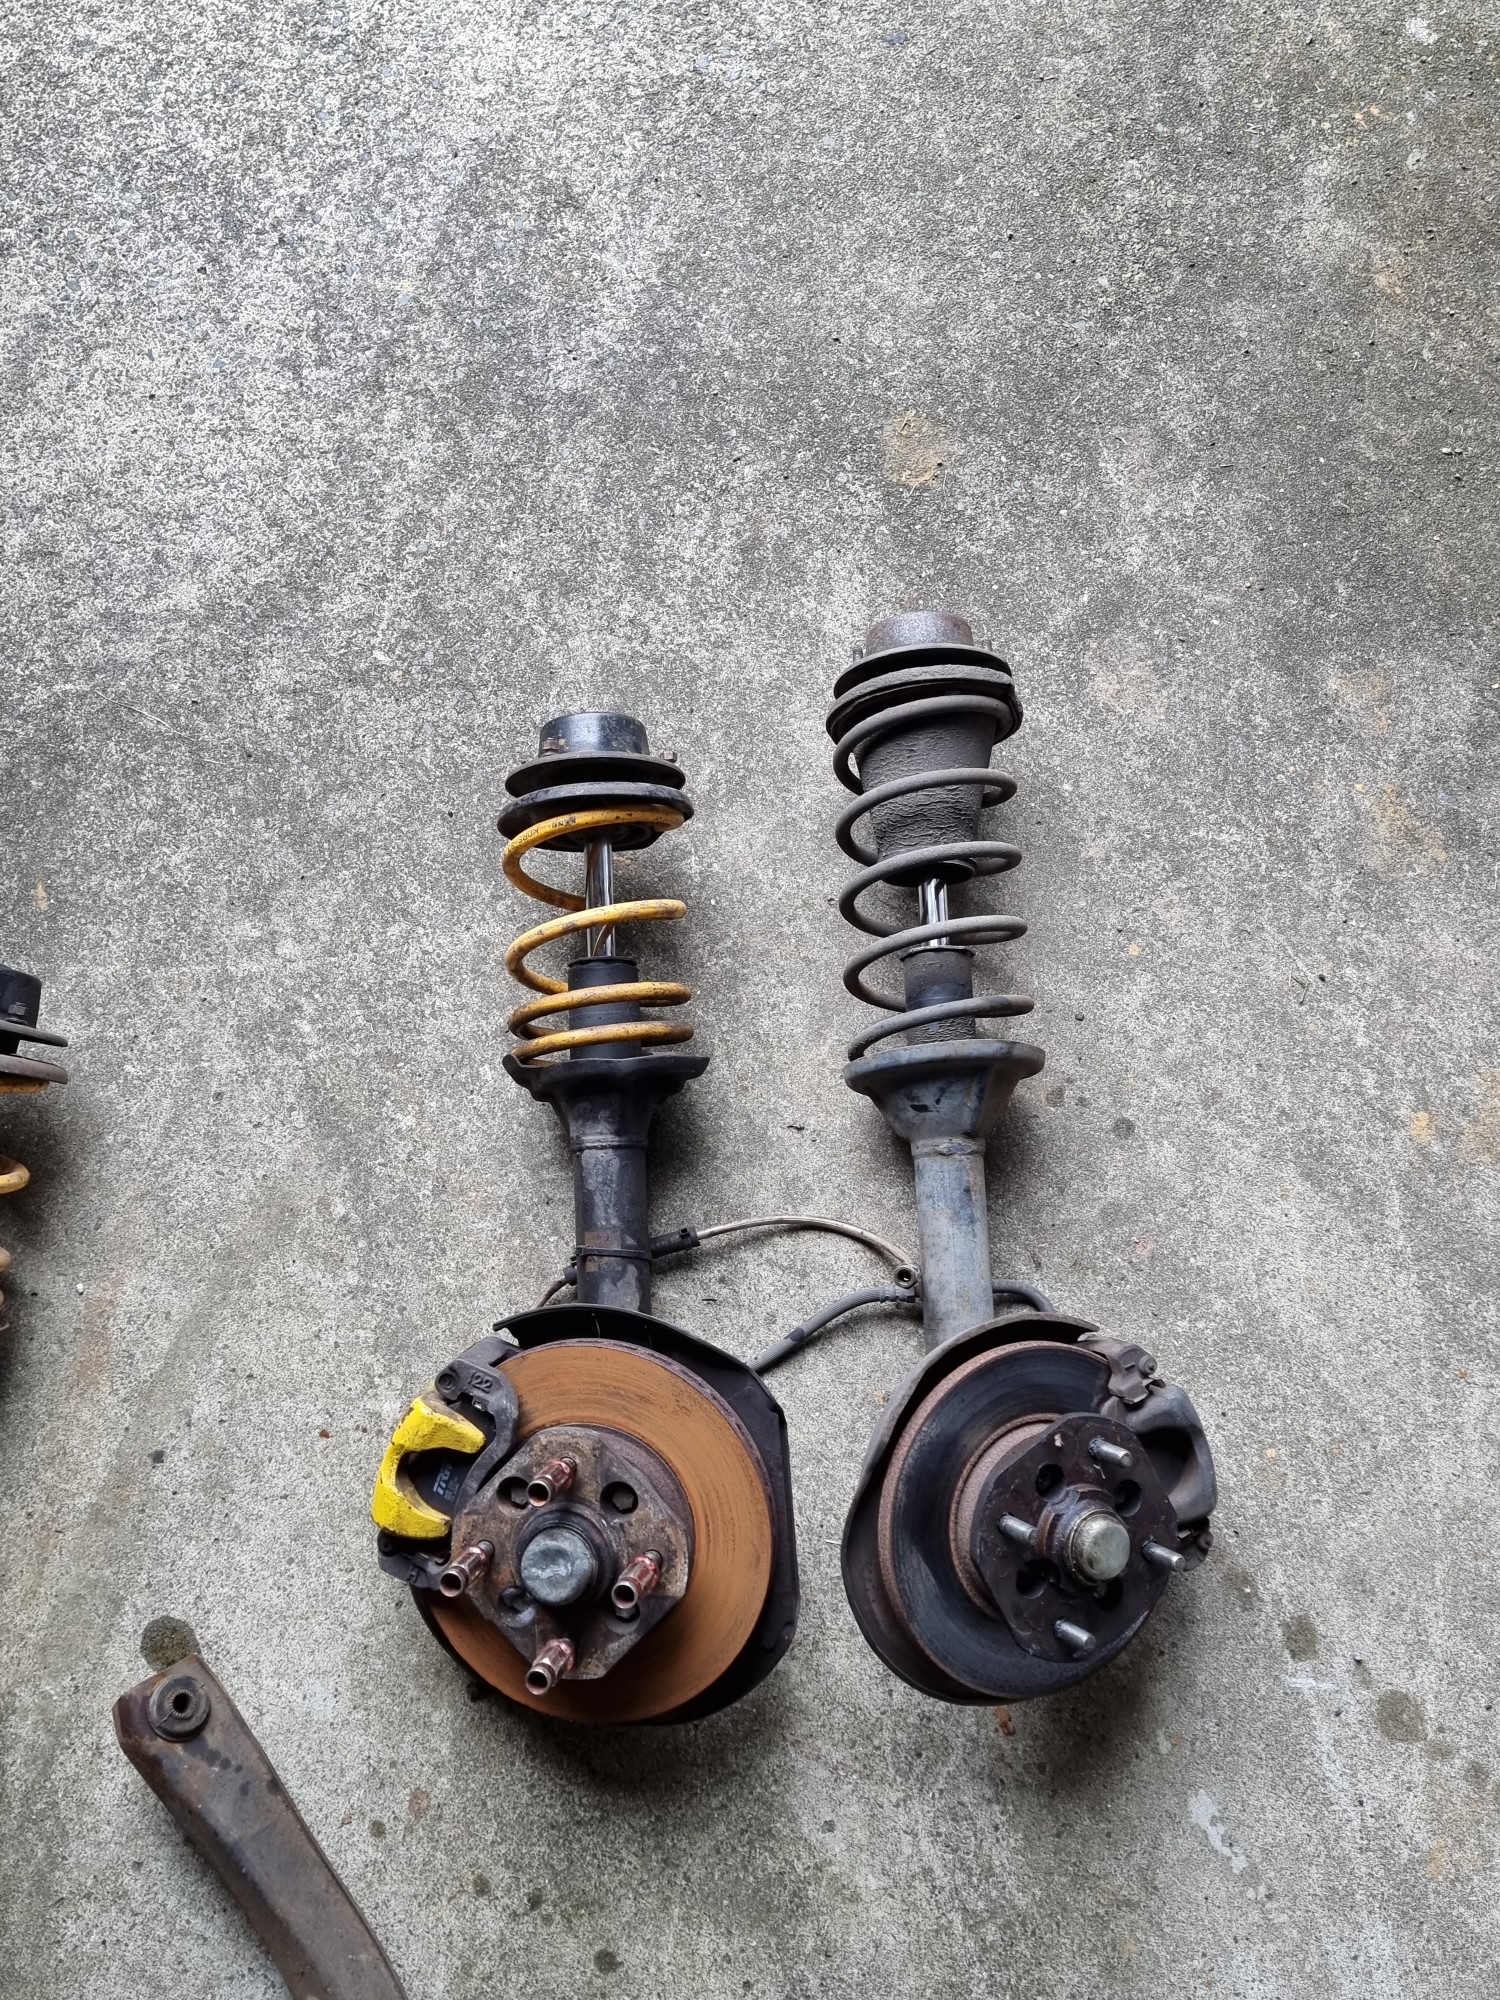
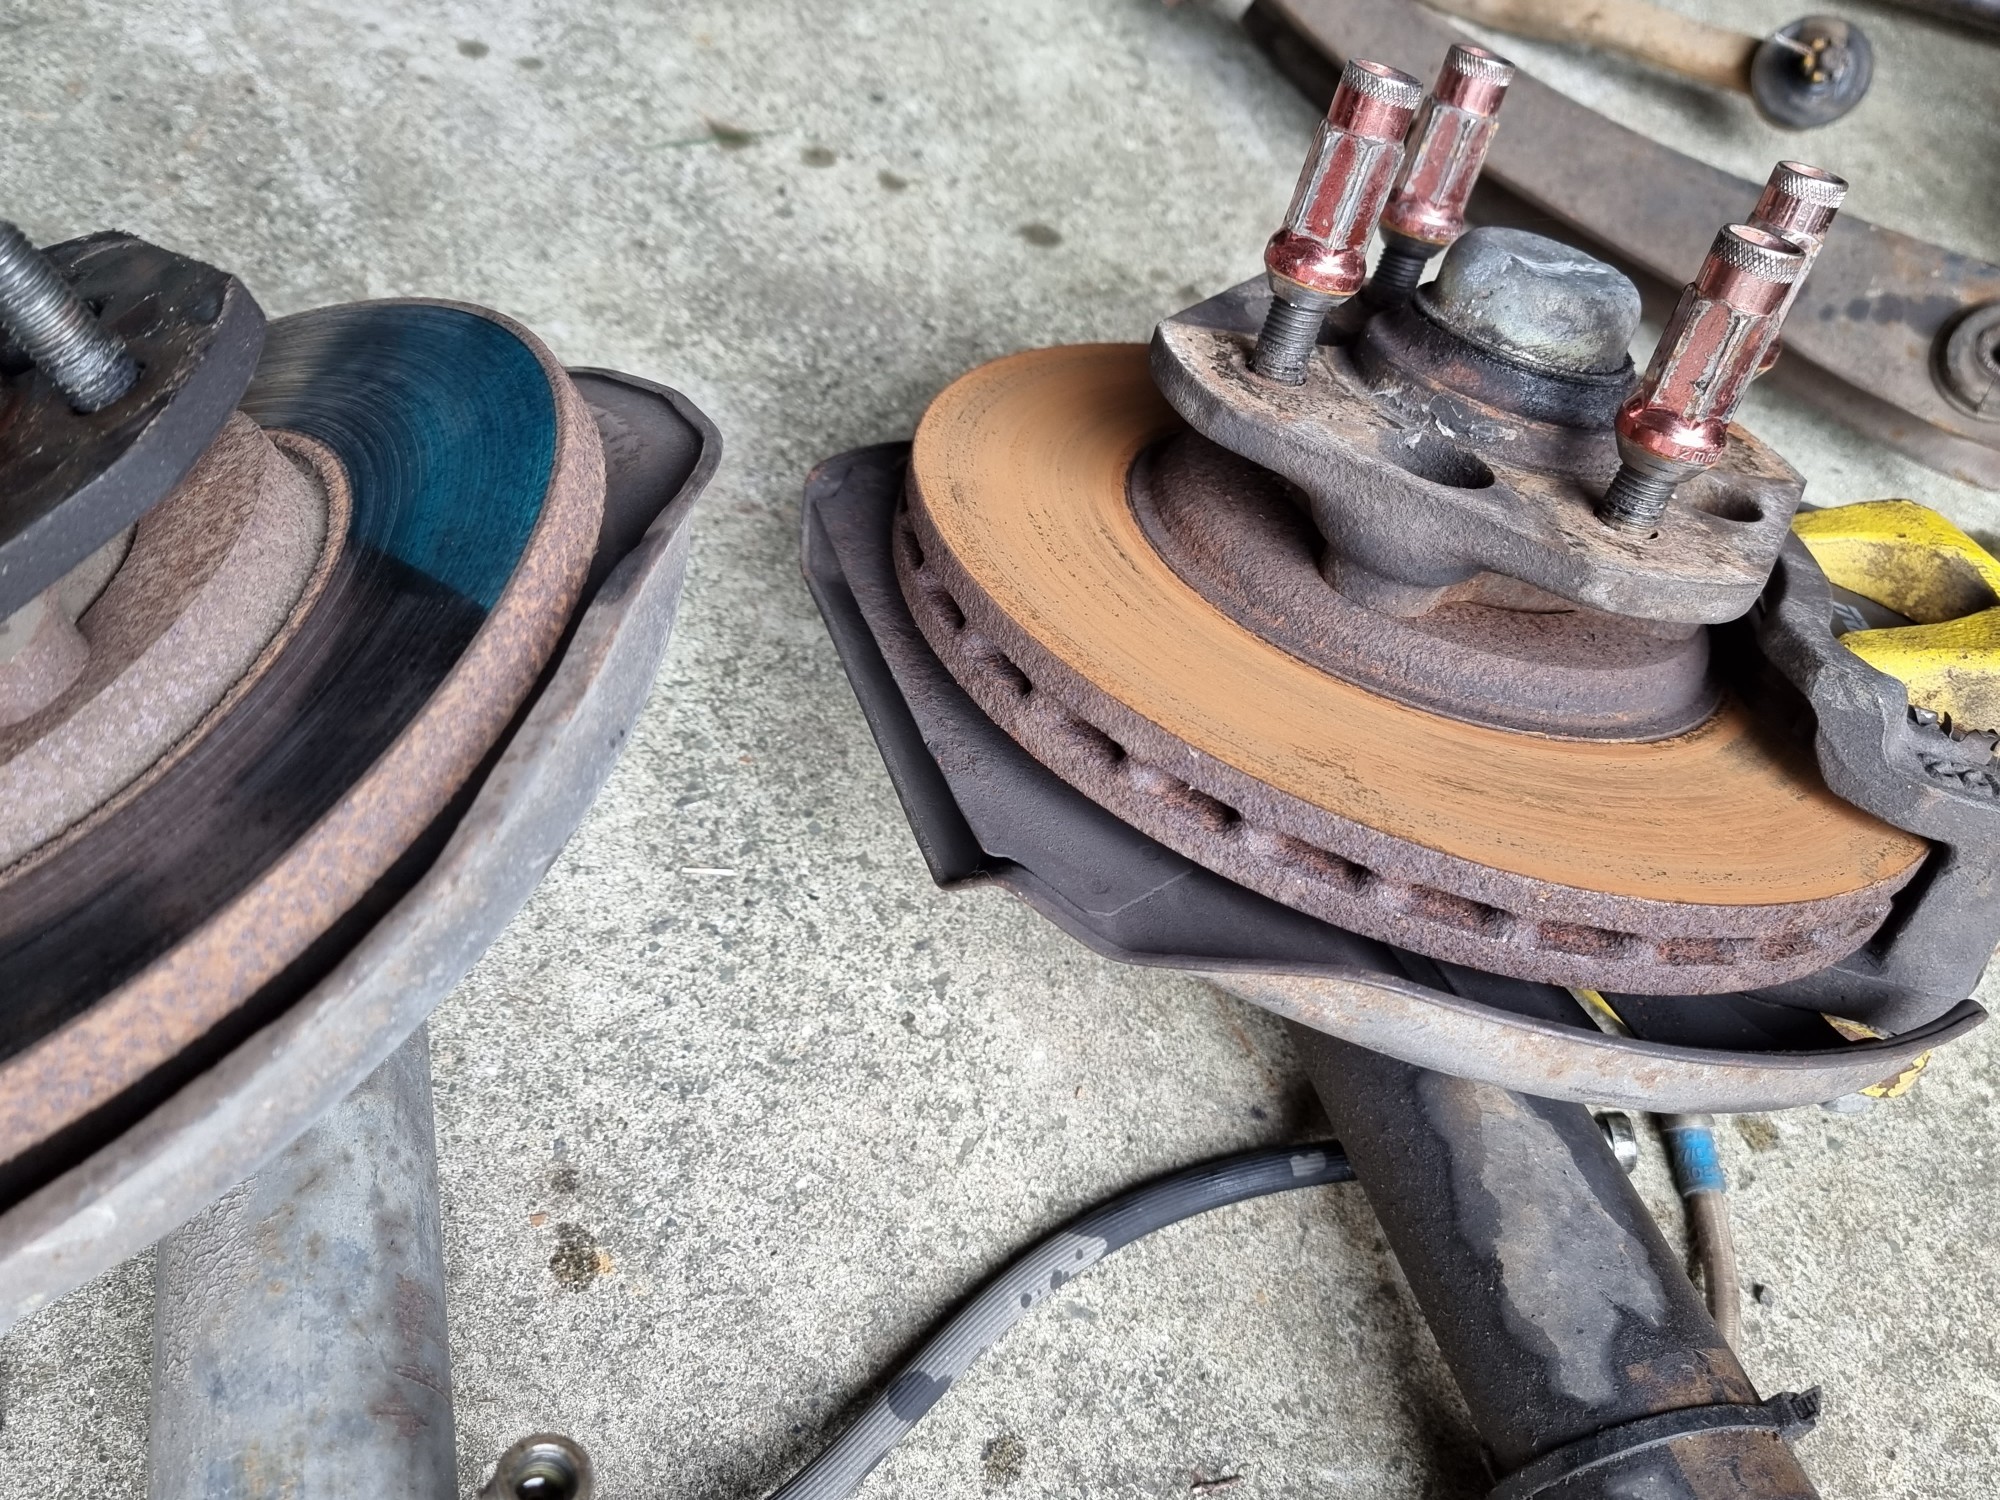
So ran into issues trying to source factory rear shocks and after much frustration this happed... I pinched the suspension and wheels from my green car as that's parked up with compression issues.... Starion struts, starion Lower arms, lowering springs and mirage rear shocks Sad to see this car like this again but it's also given me motivation to start fixing the rust and bodywork properly
3 points
-
https://www.bunnings.co.nz/move-it-125mm-100kg-black-rubber-swivel-plate-castor-with-brake_p3940326 I got mine for an engine stand, they didn't have these ones when I got mine. 3 on each end should be heaps2 points
-
AL2# tercel I had a 2a with 16v head on it that i bought for the head once upon a time, had been built for 1300cc rally class, although that 2a was from an AE802 points
-
In my experience, any extra pressure in the crankcase causes a myriad of oil leaks. As for the rear main, if its a fairly high kilometre engine then the bearings, especially at the back, will be slogged and letting oil out the seal.2 points
-
Sooo much awesomes. Also, auto will be sweet for daily driving! Can't wait to see this on a sweet sweet set of Titans.2 points
-
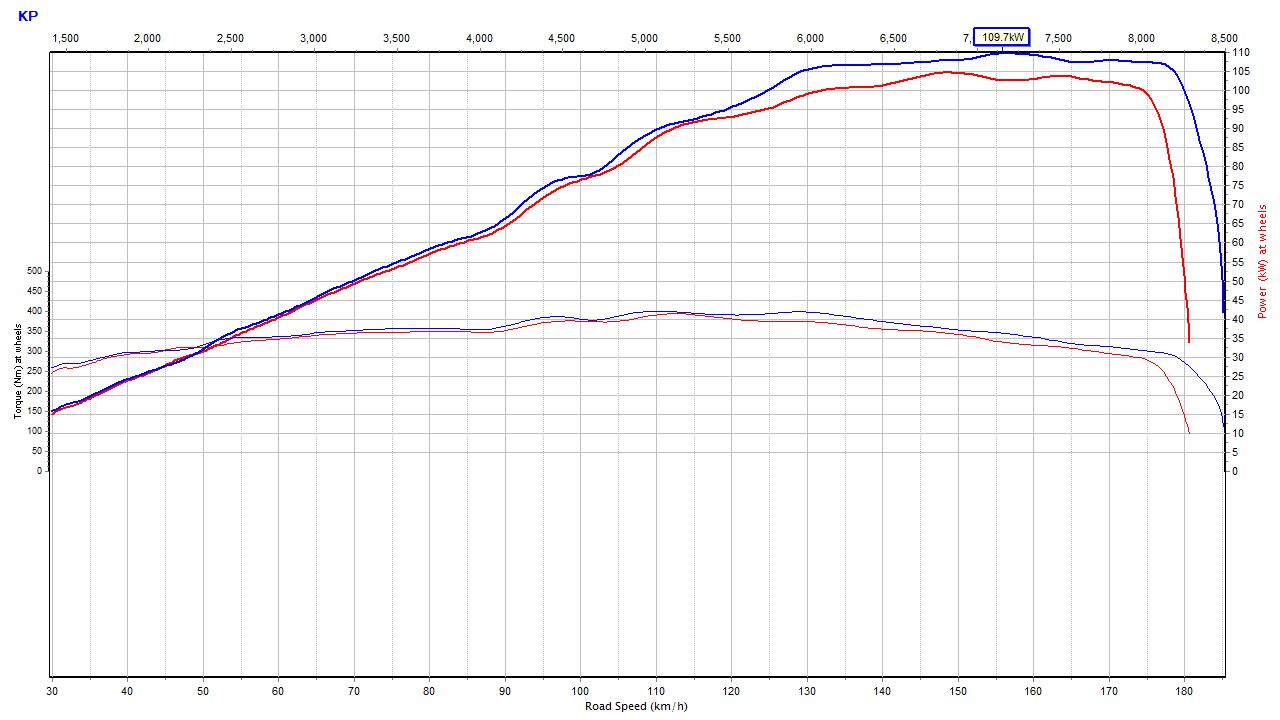
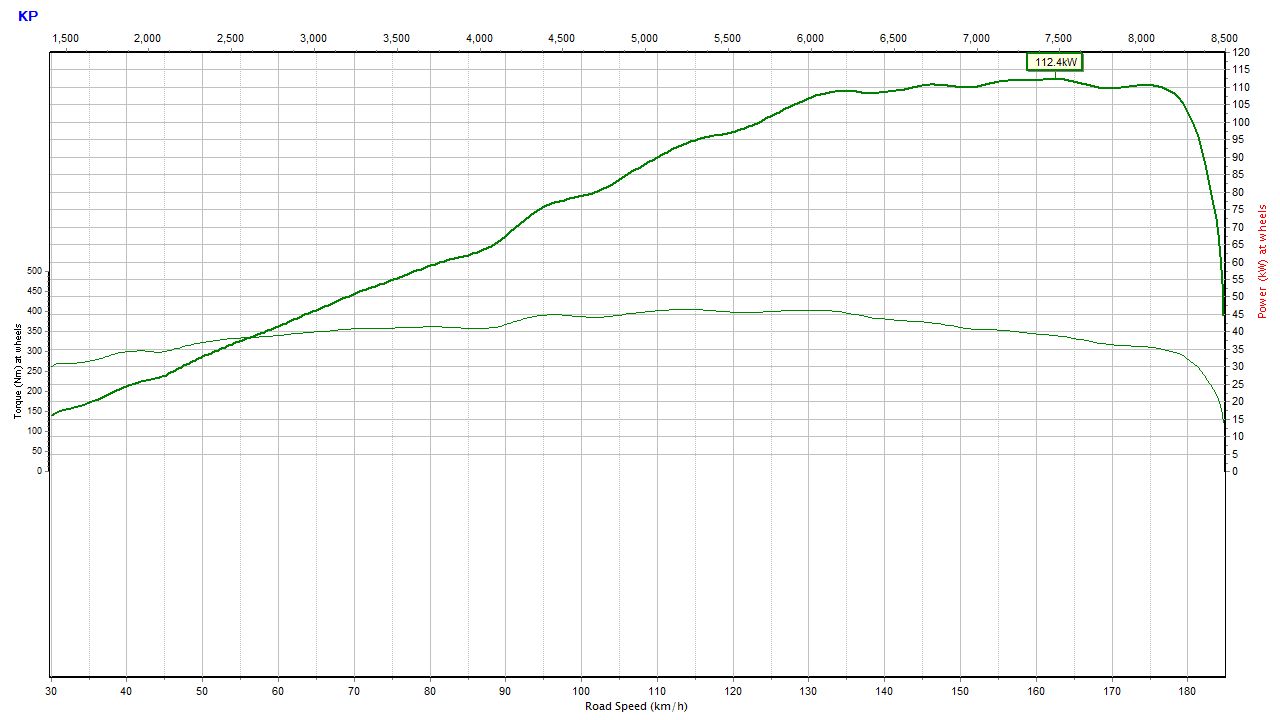
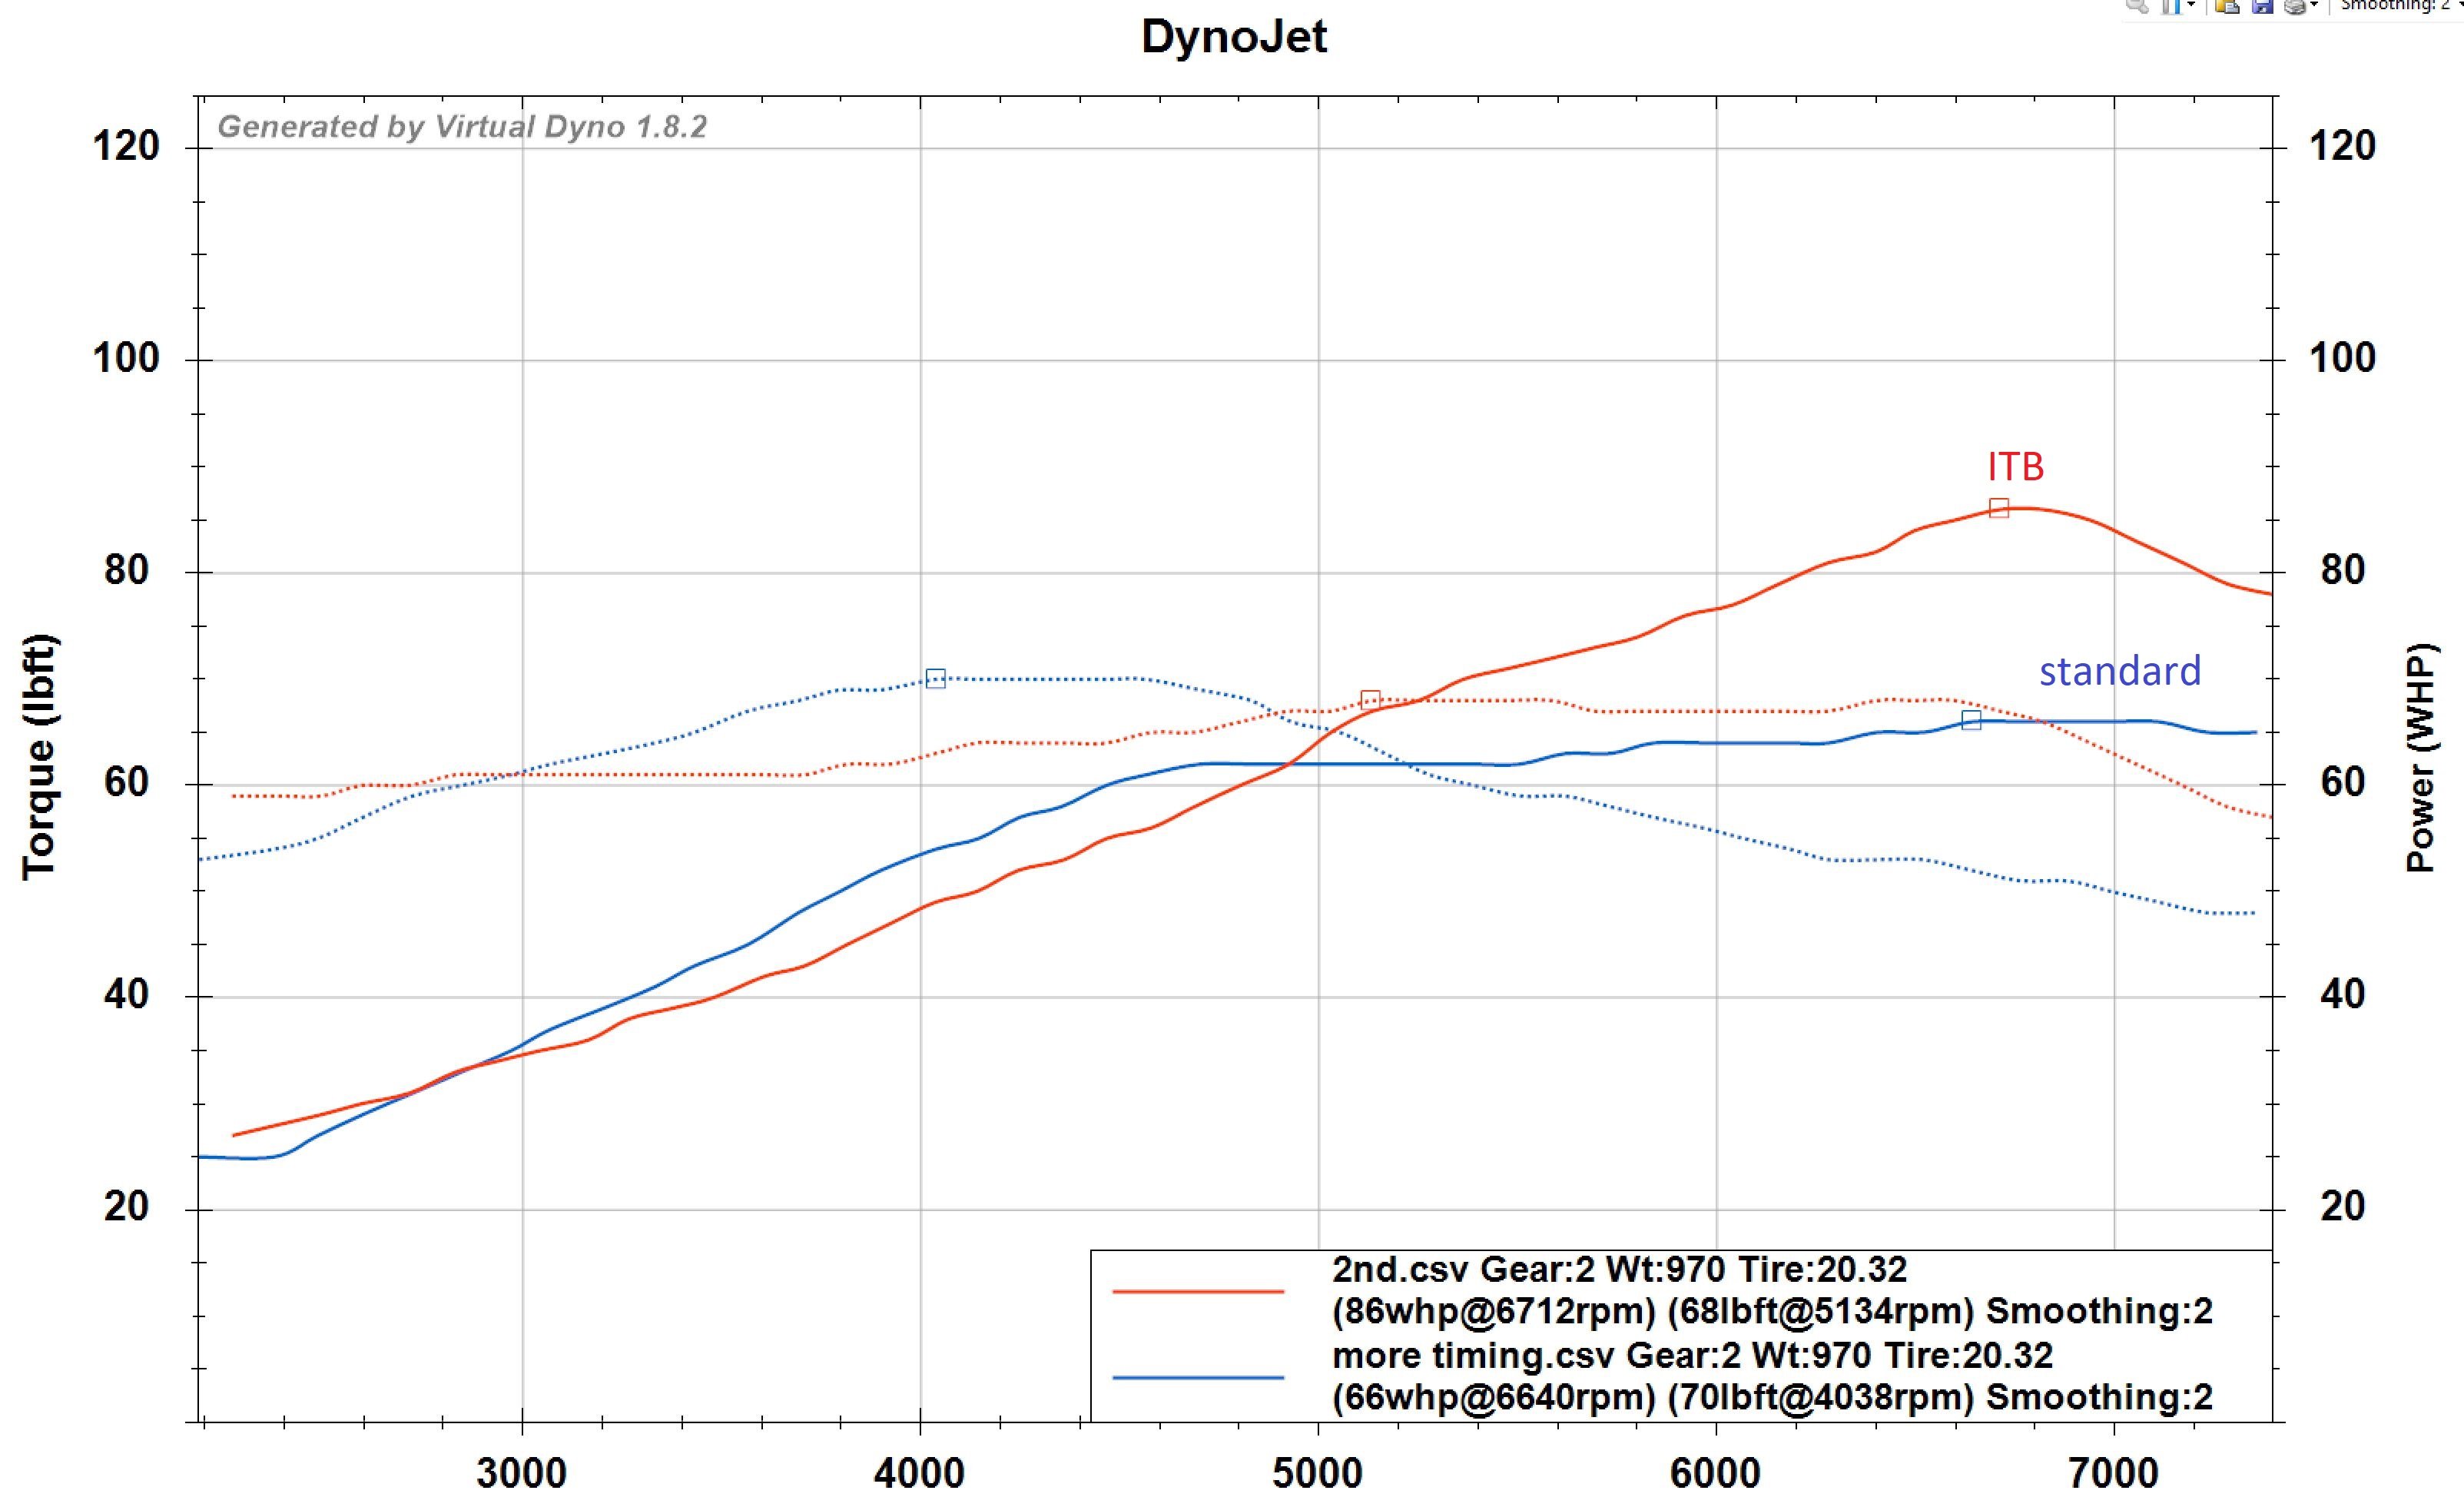
stock vs "ported", not bad gains with the little factory cams. not cracking 110kw was annoying me. so ran it up at 100deg oil temps. what a weapon.
2 points
-
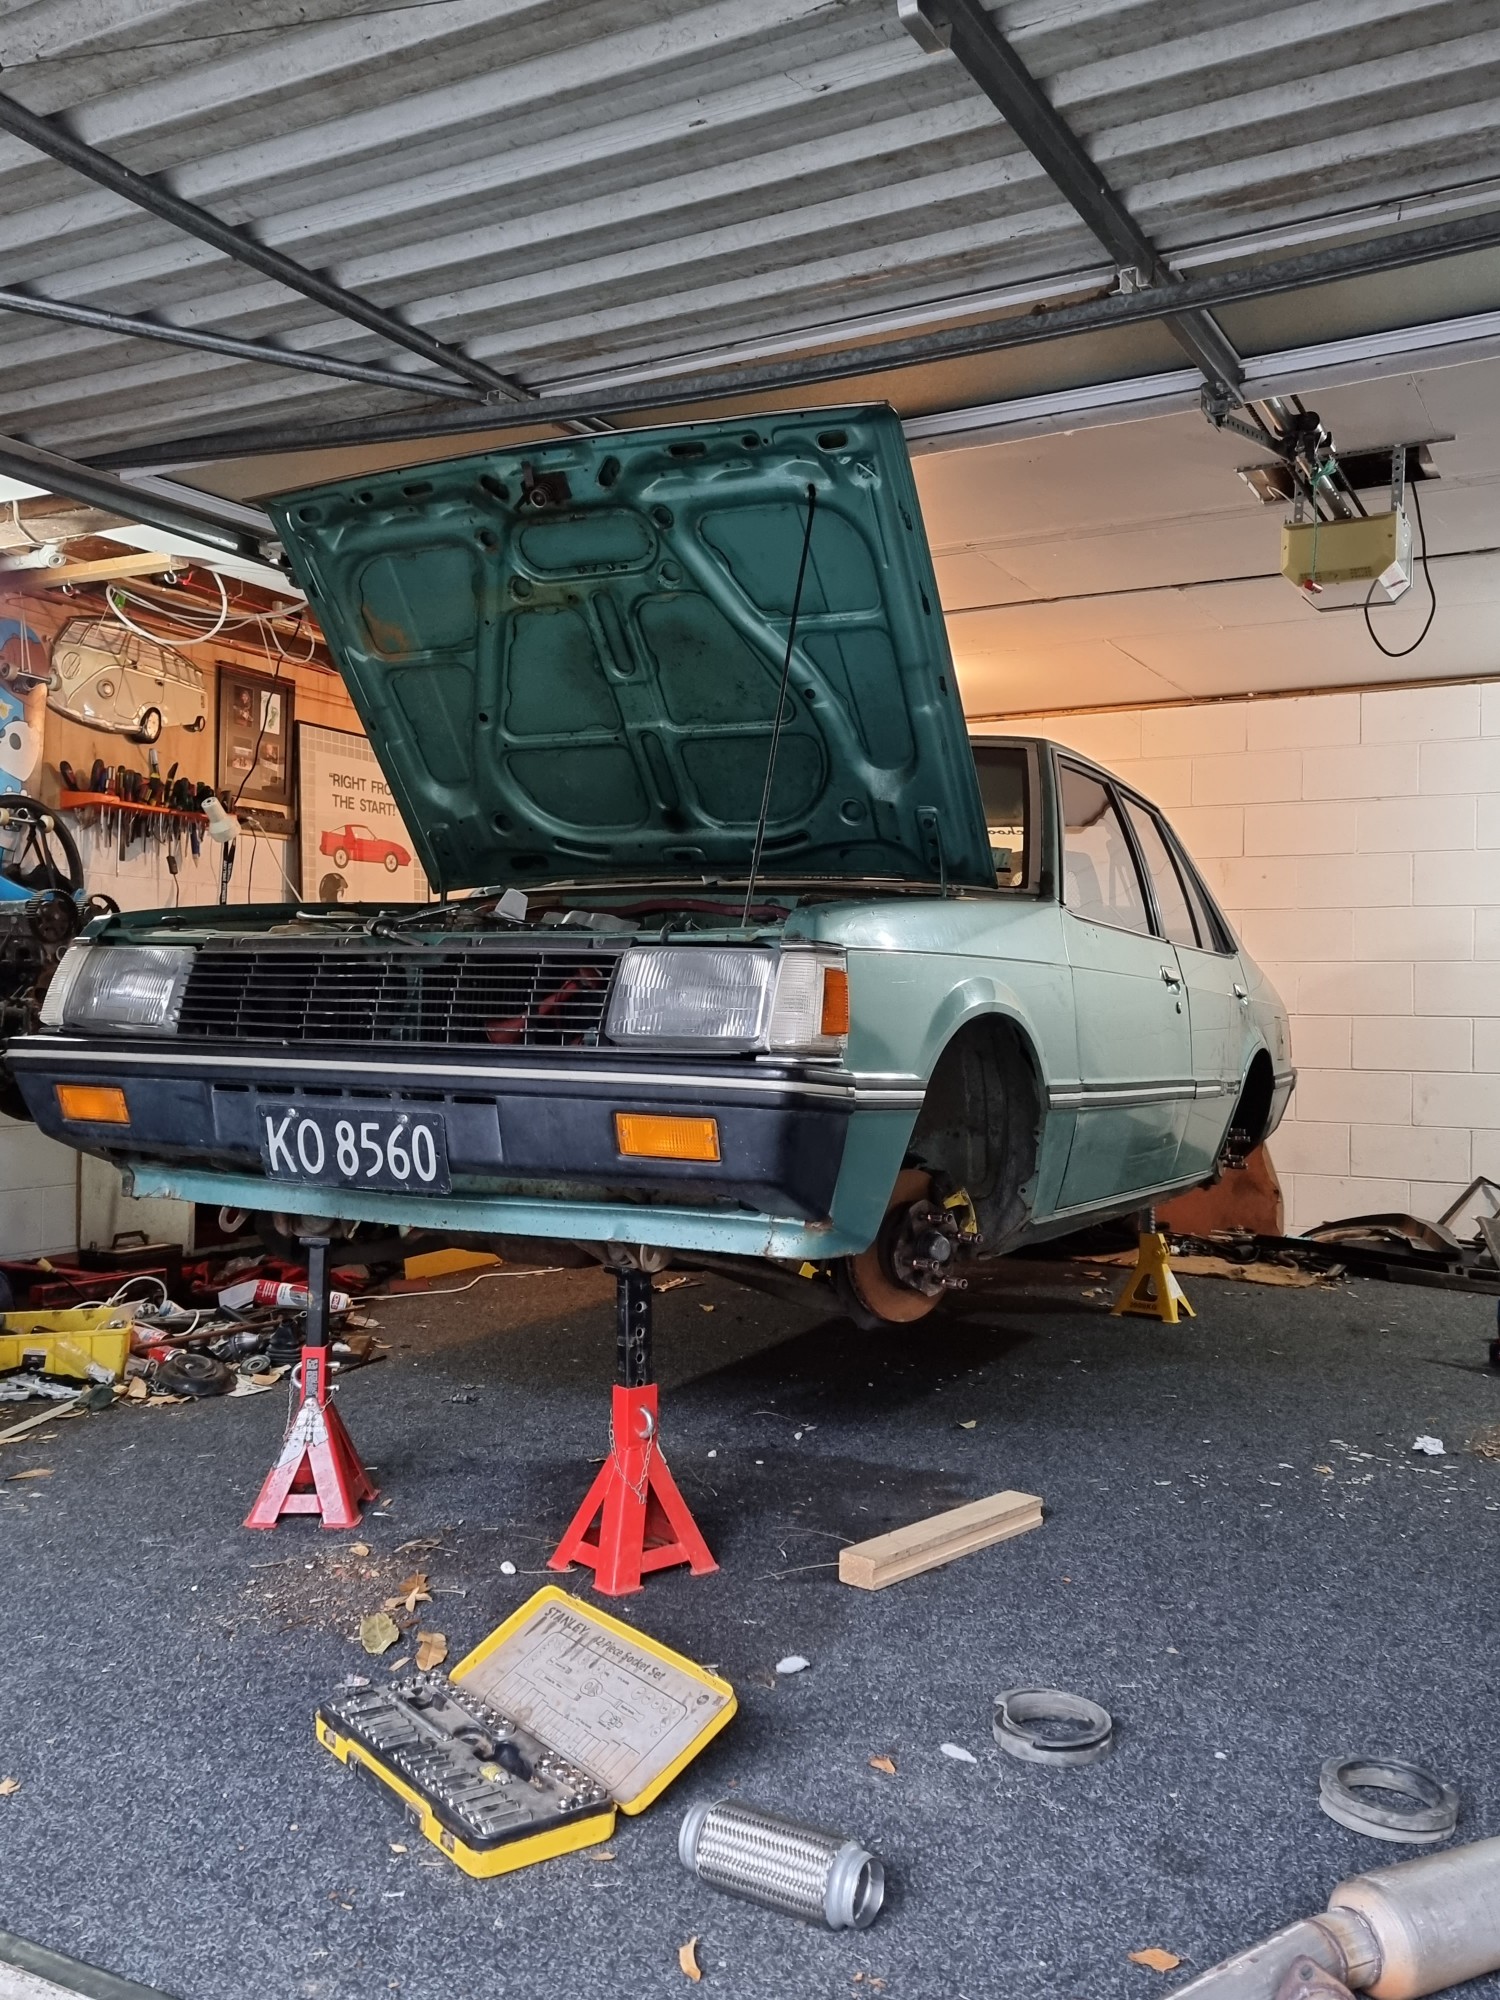
Big day today for the old girl. WoF time, first time in 10 years! List of work completed to her in the last two weeks while I've had time off in between changing jobs: New battery New water pump New valve stem seals, head gasket, tappet cover gasket, carburetor gaskets New ball joints New shocks Indicator wiring gremlin fixed Battery discharging issue fixed (washer motor short) Alternator replaced for one that actually charges and doesn't whine! Full oil service New rear slave cylinders Front struts swapped for B310 big struts with bigger brakes (bolt in), lowering springs installed. Front brakes rebuilt (seals and pistons). New master cylinder New tyres (Nangkang 175/60/14) Spare bonnet for my Green 120y put on (already paneled and primed black) Spare arched guards sprayed with a rough blue match and put on. Tune up 2" Lowering blocks installed Rust cut out and repaired: Engine bay - left and right strut tower Under left and right front guards - support rails Radiator support Front valance Rear right door shut to roof seam So all in all, pretty happy with the WoF items! Spring eye bushes and tie rod on order, will hopefully see them next week. Could have picked these would be pulled up, should have done them in hindsight but have run out of energy! I will get some more photos up of the work completed. She drives really nice and smoothly, no more smoke thanks to the valve stem seals! A full buff and replacement of the pinstripe is certainty required!
2 points
-
2 points
-
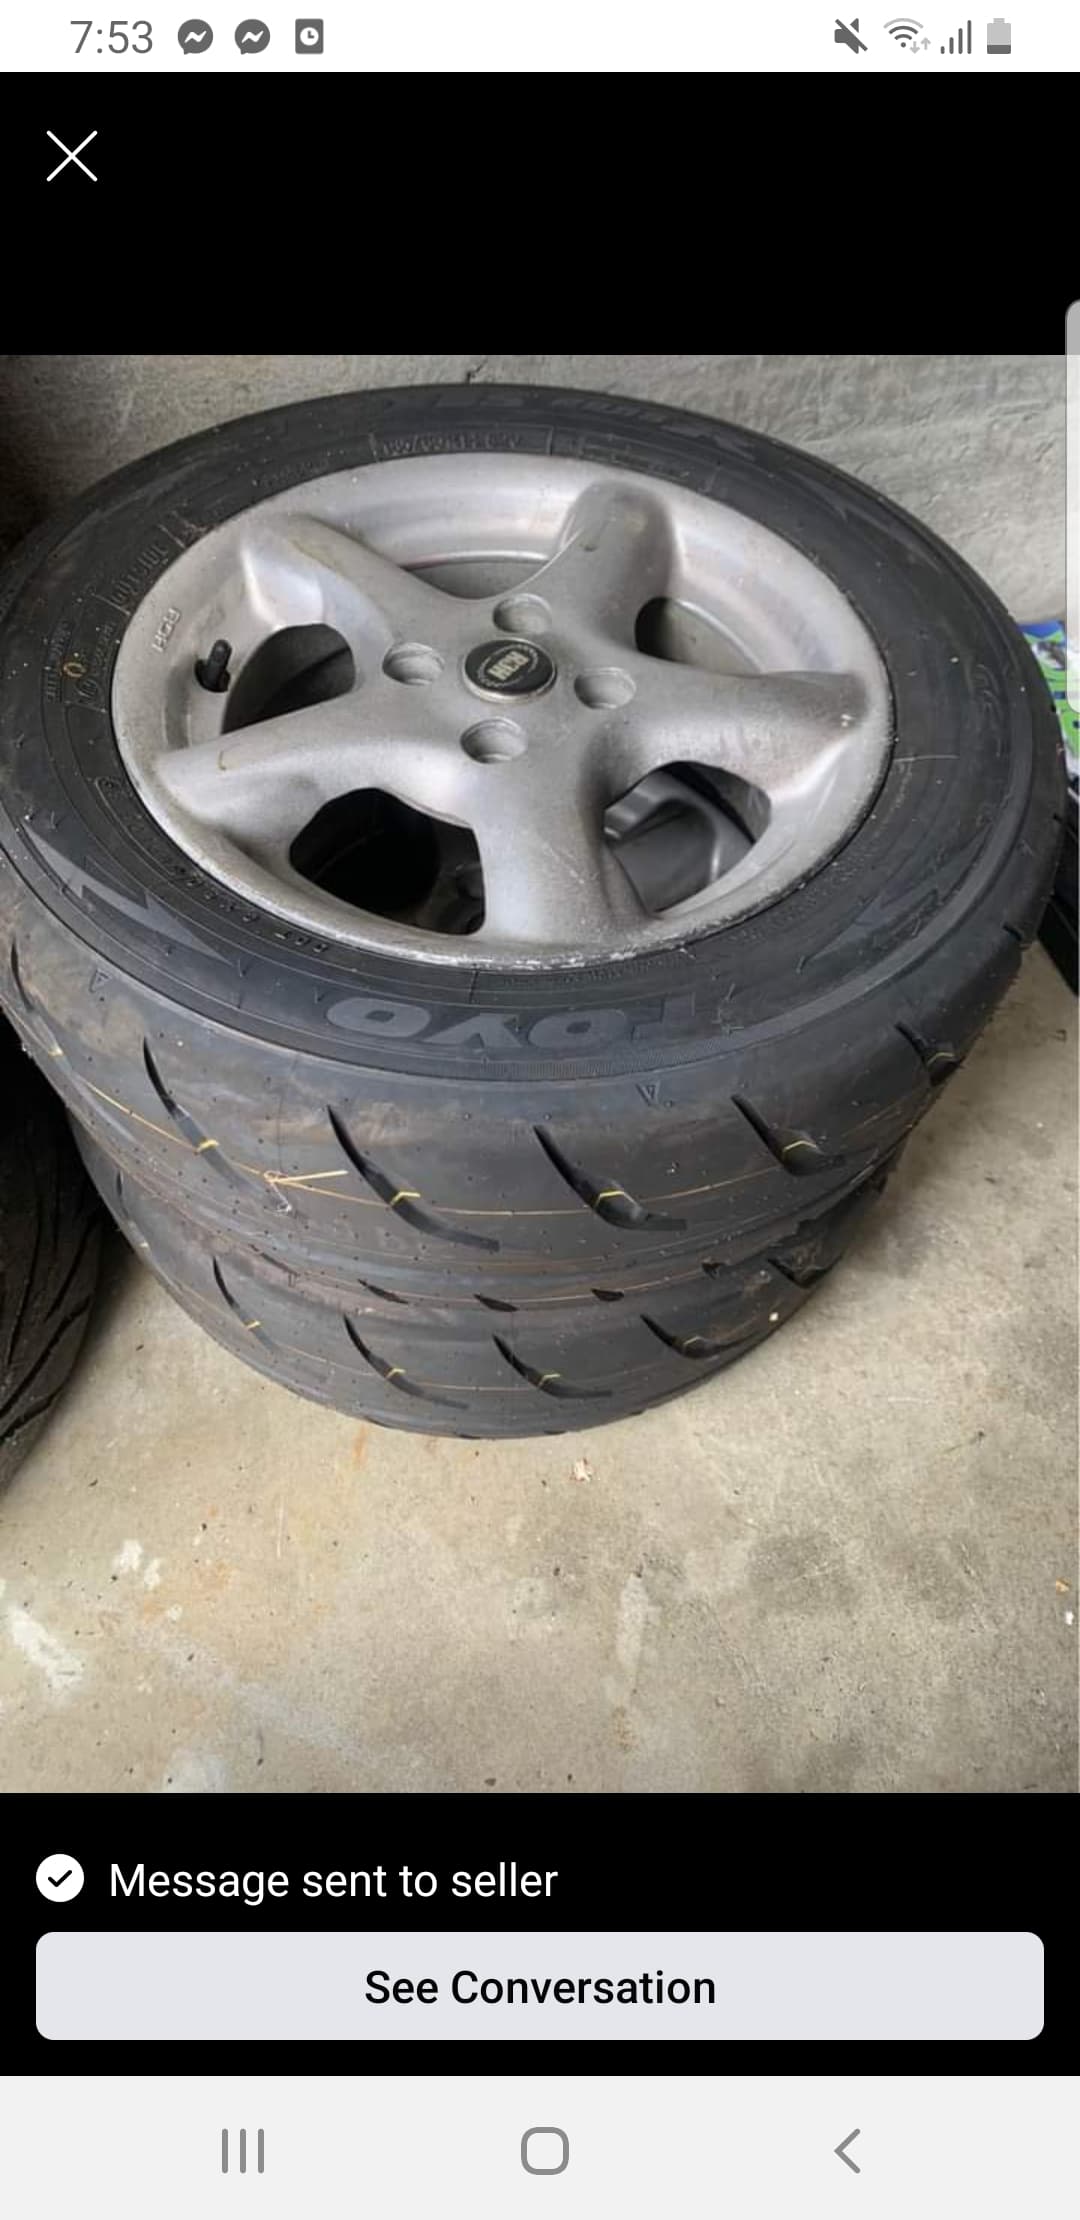
Time to work on car stuff has been stretched a little thin, but have made some slow progress. Took the head off, and found yep, valves bent. But no other damage. Valve seats looked fine and so did pistons. Cool! So for now I'll just fix it up and drive without VVTI. I pulled the valves out of my 2NZ motor (same part number) and sent the head off down the road to the engine place to lap the valves in and refit the valve springs. Hopefully get it back by the weekend maybe. There was another Vitz RS at Zebra so I went and pinched another C56, hopefully this one is a little more enthusiastic about going into gear. I'm getting pretty good at pulling motor/box out of these things. It's much easier once you know the order of things. I will keep current box in for now, and fit LSD into this spare one and check all of the synchros in it while it's apart. If they're bad, I will pinch the ones from my standard Echo gearbox as that thing shifts gear wonderfully. Assuming they're the same. Also just before my valves went asplode, I bought these for some lols / traction. Two of the tyres are a bit chooched but will hopefully do a trackday or three with them on the rear. (that does hardly any work anyway) Havent tried them yet but should be a laugh.
2 points
-
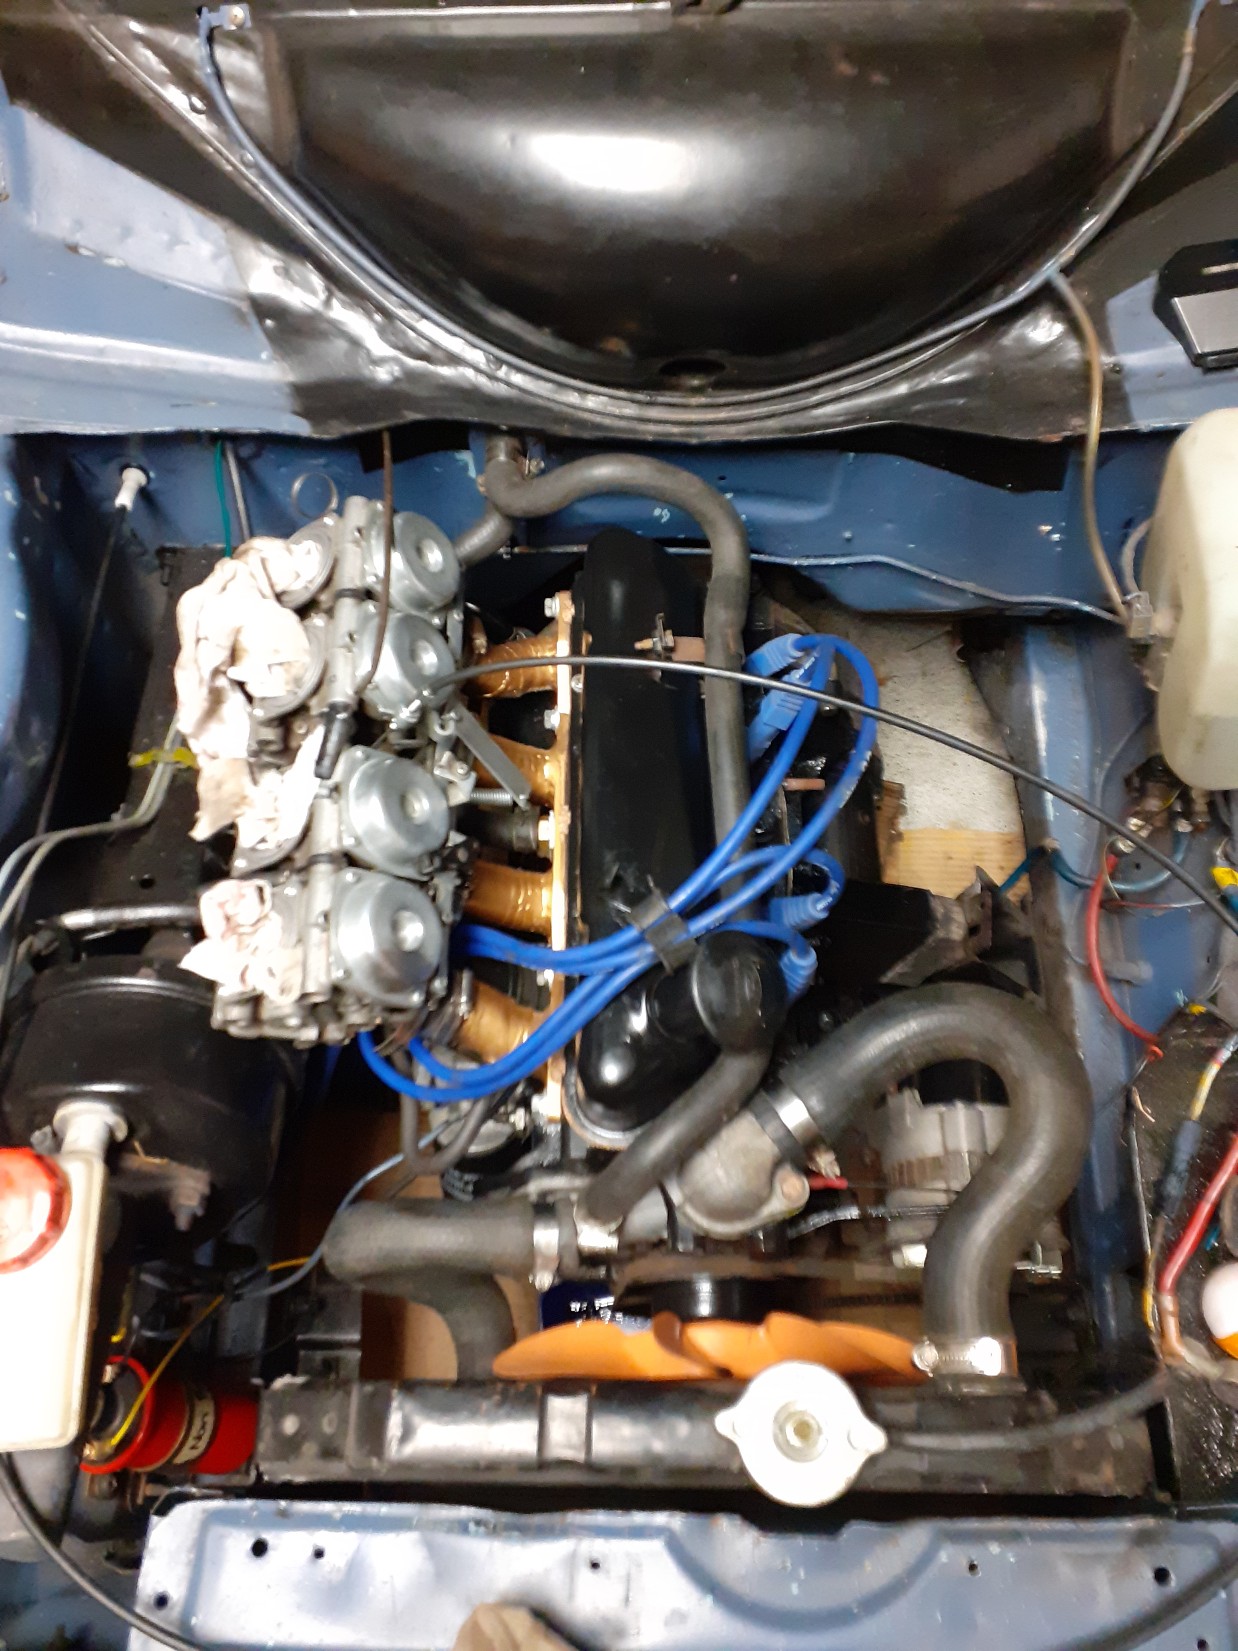
Cleaned up some engine parts, brake booster, battery tray, rejetted the idle jets, new gasket for the oil pump, removed and cleaned up the swaybar mounts. I assembled and put the new waterpump on the engine but forgot to put the alternator tensioner on! Removed the assembly and in doing so I had to destroy the new gasket. Happy to know the vnt copper gasket spray works very well. All put back together and assembled the rest of the motor for a start up. Unfortunately it wouldn't catch on any cylinders and a couple of back fires through the carbs. The only thing that has changed is I've leaned out the pilot jets from a 35 to a 32 and adjusted the fuel screws. Will check these and any potential vaccum leaks tomorrow. Have since cleaned up a few more cables. Good old British workmanship. Bonnet stay/post should have been centered.
2 points
-
+1 for decent welding supplier and they will be able to crimp the lugs for you. They have the hard wearing double insulation cable, most electrical places don't.1 point
-
Sweet! The best thing about an import is it is far less likely to have had any dickfingers touching it1 point
-
Happy for you man, fingers crossed for straight forward compliance1 point
-
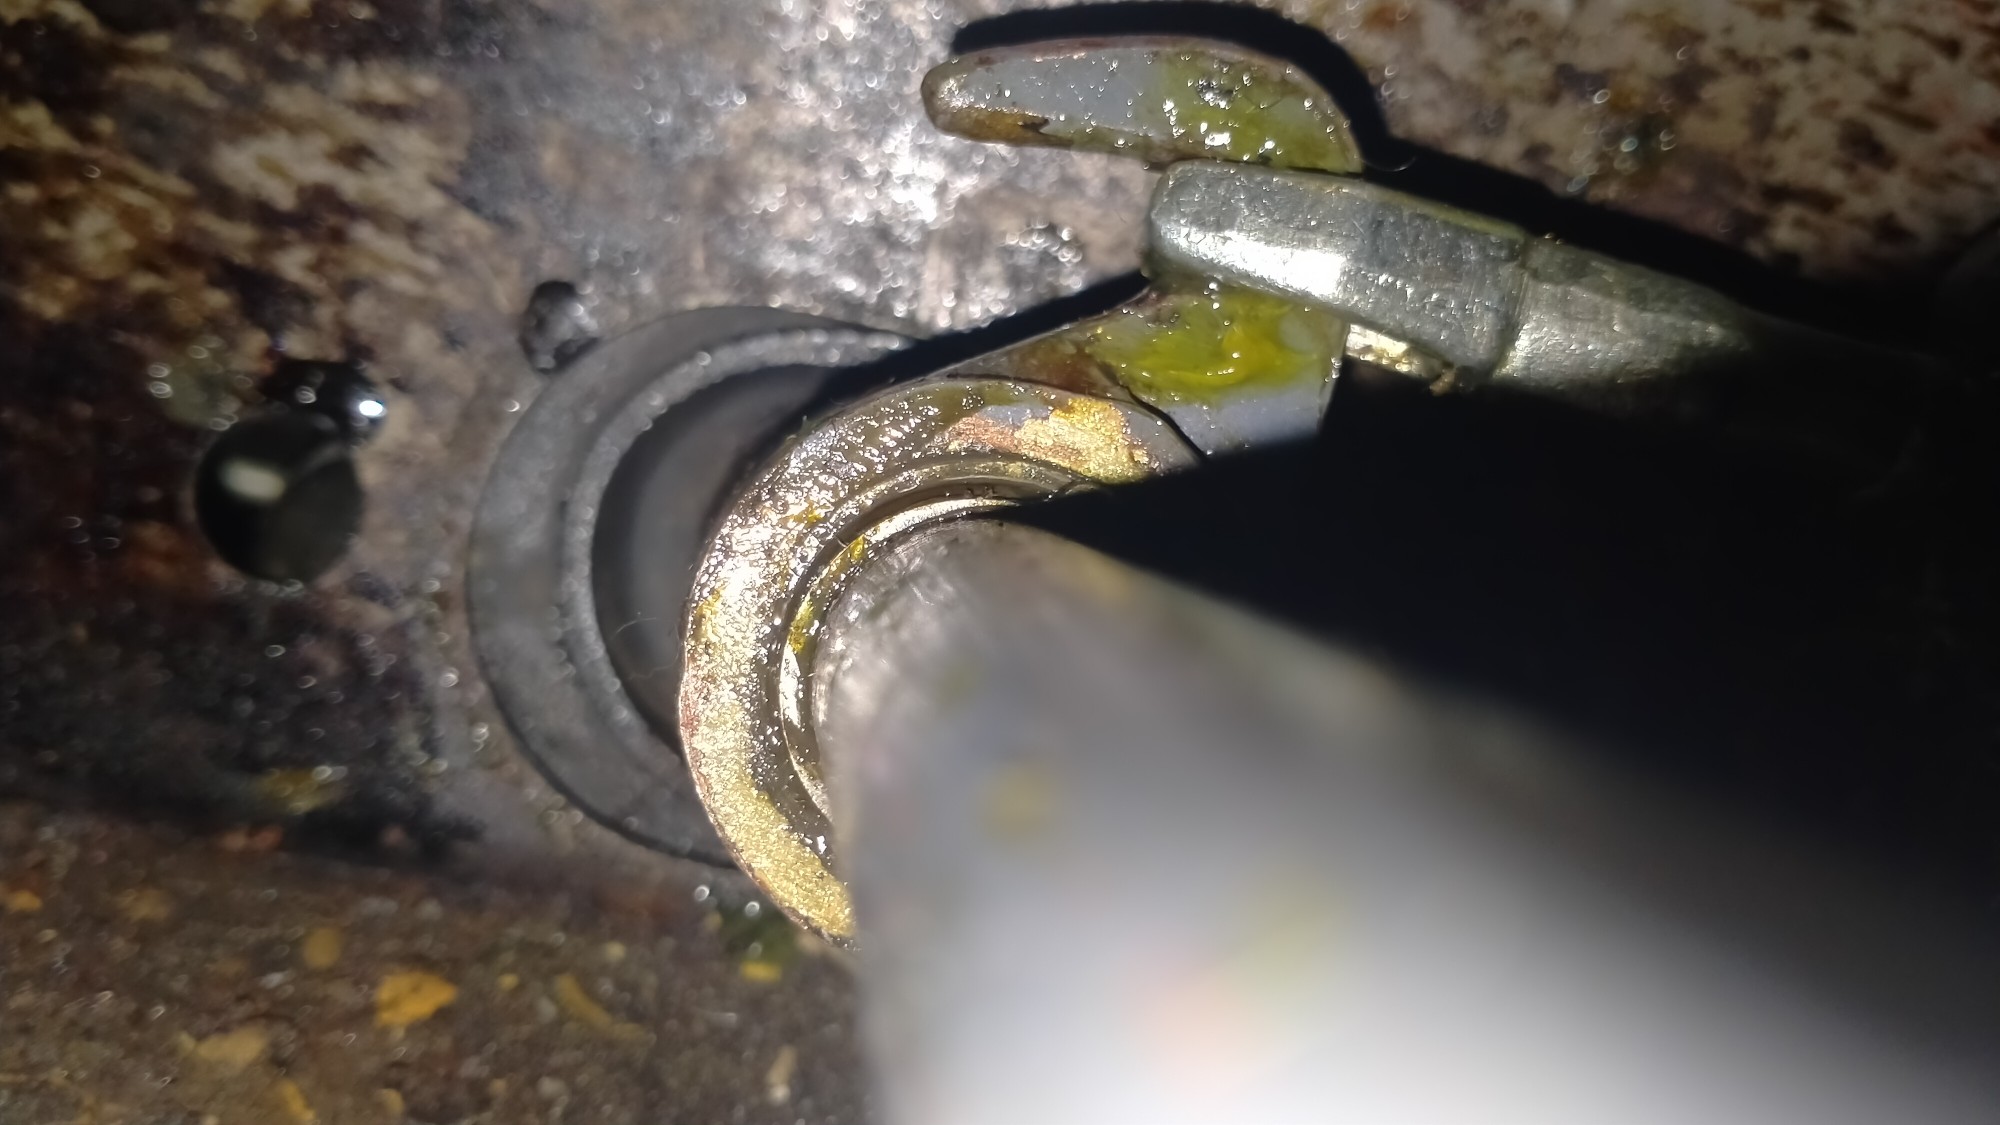
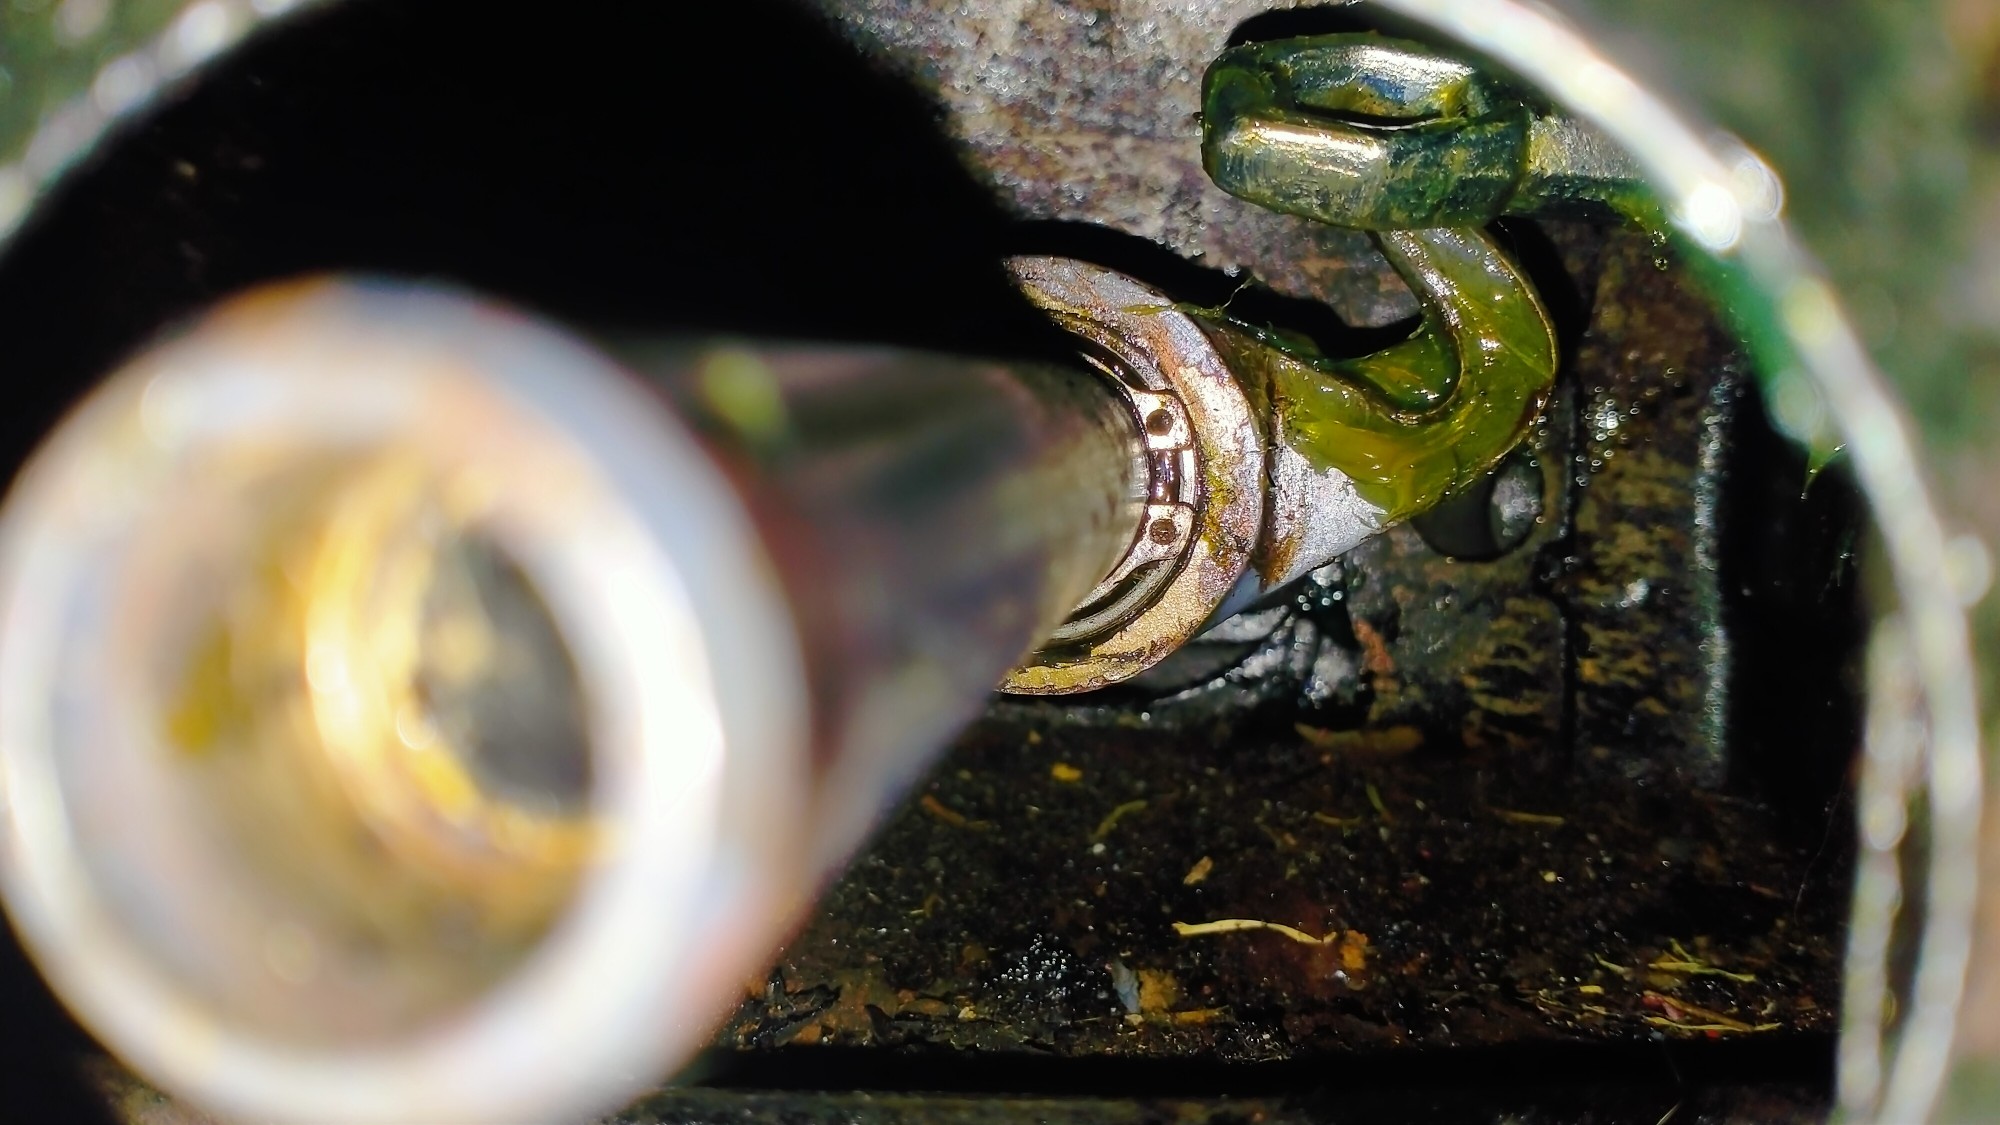
Still going. After being a daily driver for the last three years, the clutch had reaaalllly had enough, I adjusted it one more time, and it was working sweet. I drove over to qualitat to grab a couple last parts, thought I'd pop in and see a mate at his work down the road, pulled up a couple blocks away and bang. No more clutch cable. Old mate helped me push it inside, dropped me off home, picked me up in the morning, took me back over to qualitat, and helped me sort the cable. Good cunt. Guess I had it cranked the cable a bit much and stressed it out. Anyway four hours later, I got the little loop on the little hook. Fuck.
1 point
-
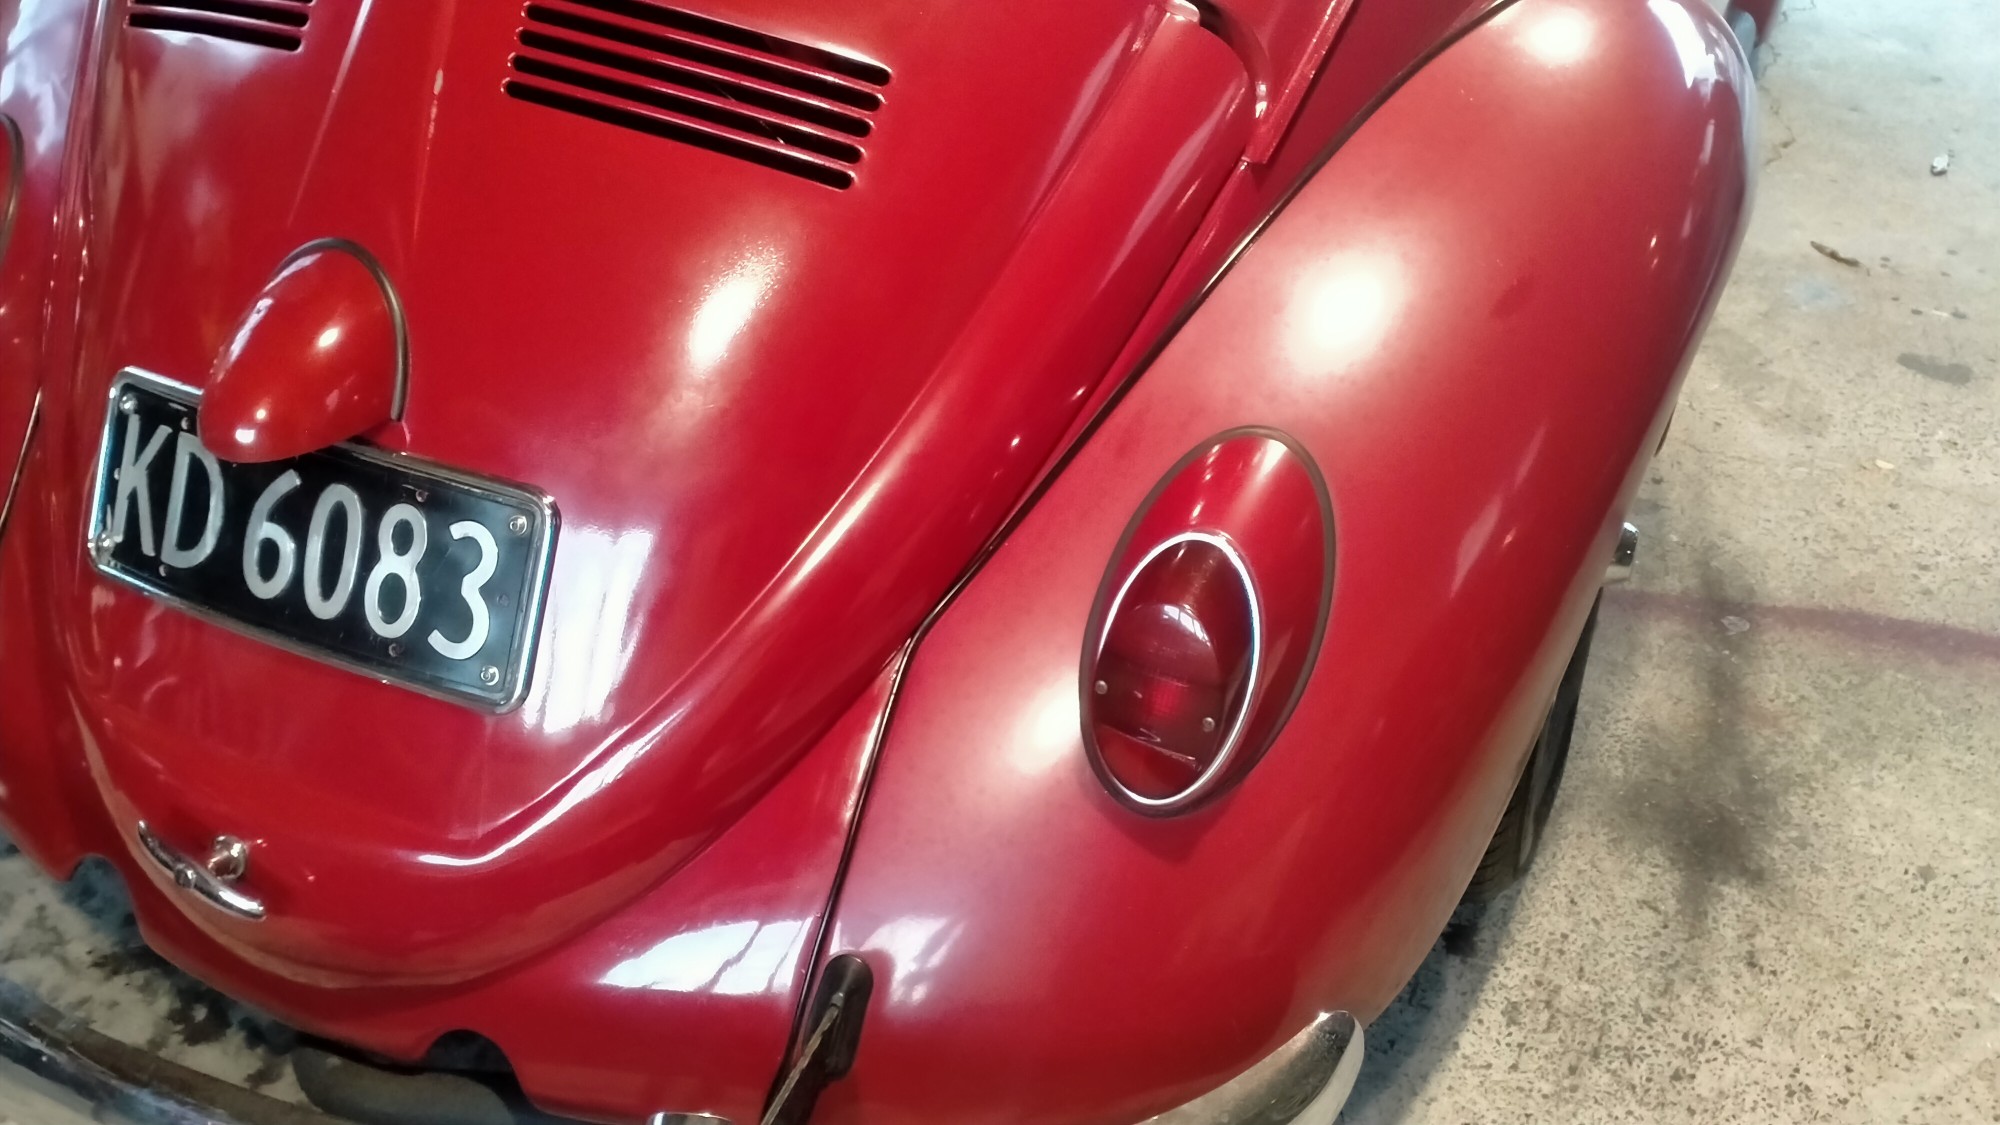
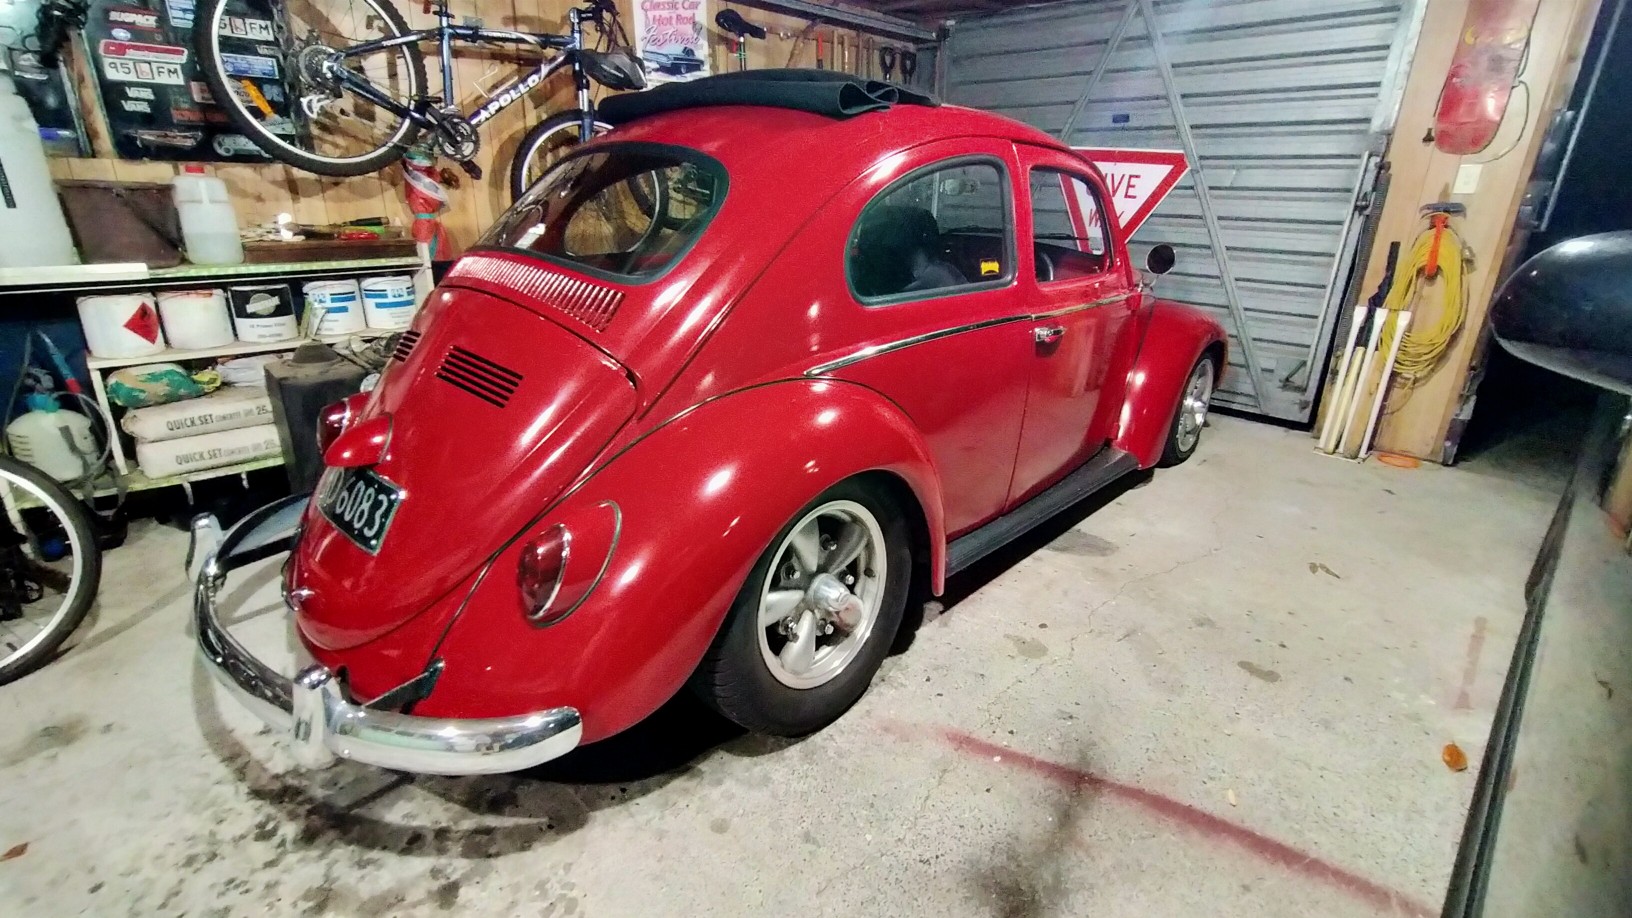
Another thing I've never gotten around to is polishing the paint. After I smashed the front fender I had intended on doing it after painting. After sitting out in the sun all day at work for the last couple years the paint was pretty rinsed. Spent a couple evenings worth of elbow grease, paint is actually cracking in places. Wish I'd done it years ago, but whatever, looked so nice after a shower of rain, water all beading off.
1 point
-
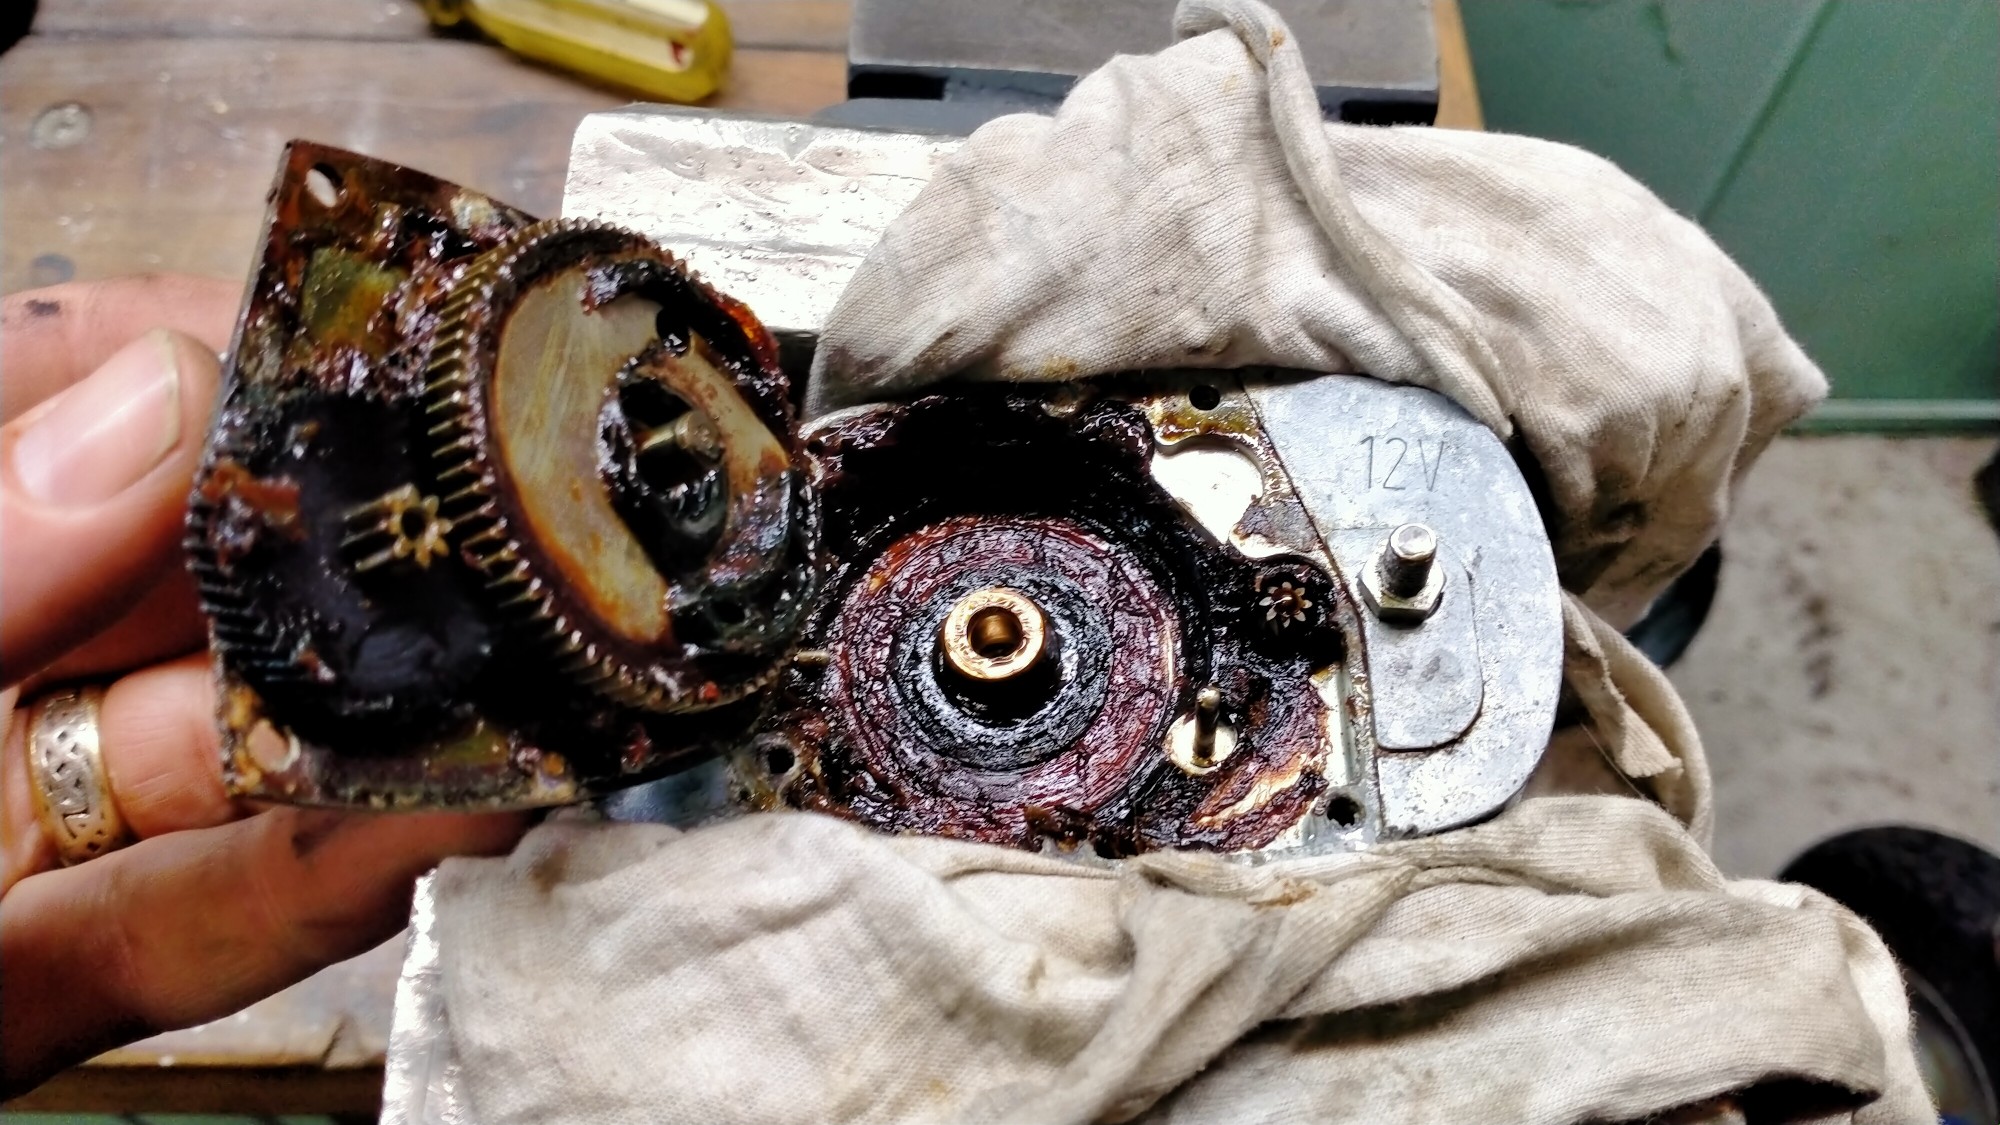
The other thing that likes to die is the wiper motor. It works fine until you really need them, like a thunderstorm in heavy Auckland traffic. Then they cook themselves and fuck out. Opening the motor for possible the first time in sixty years reveled grease with the texture of smashed prunes.
1 point
-
Die grinder and paint won’t make me the welder I ain’t ...
1 point
-
A 13b Hunter?1 point
-
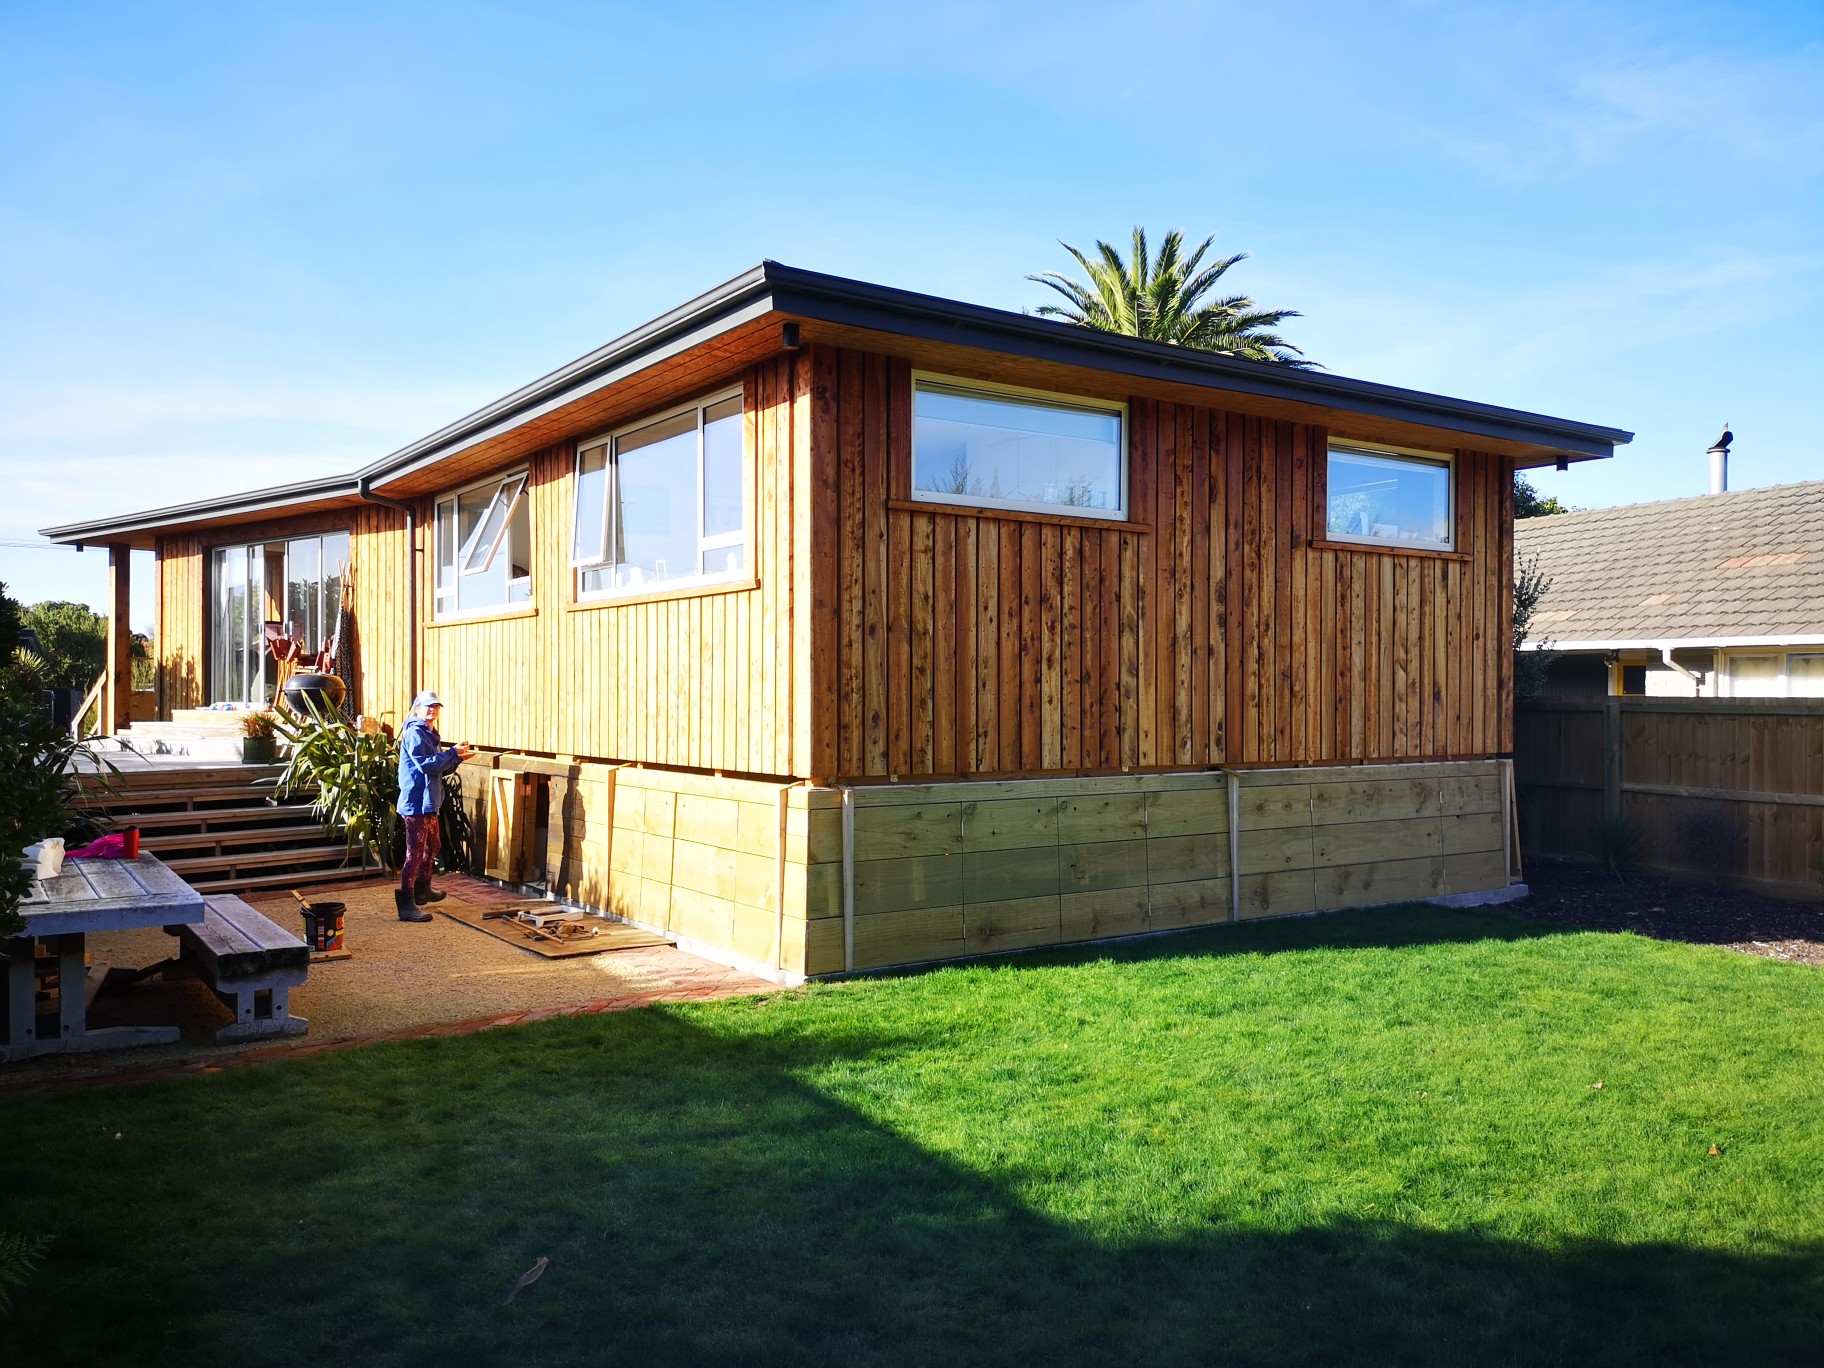
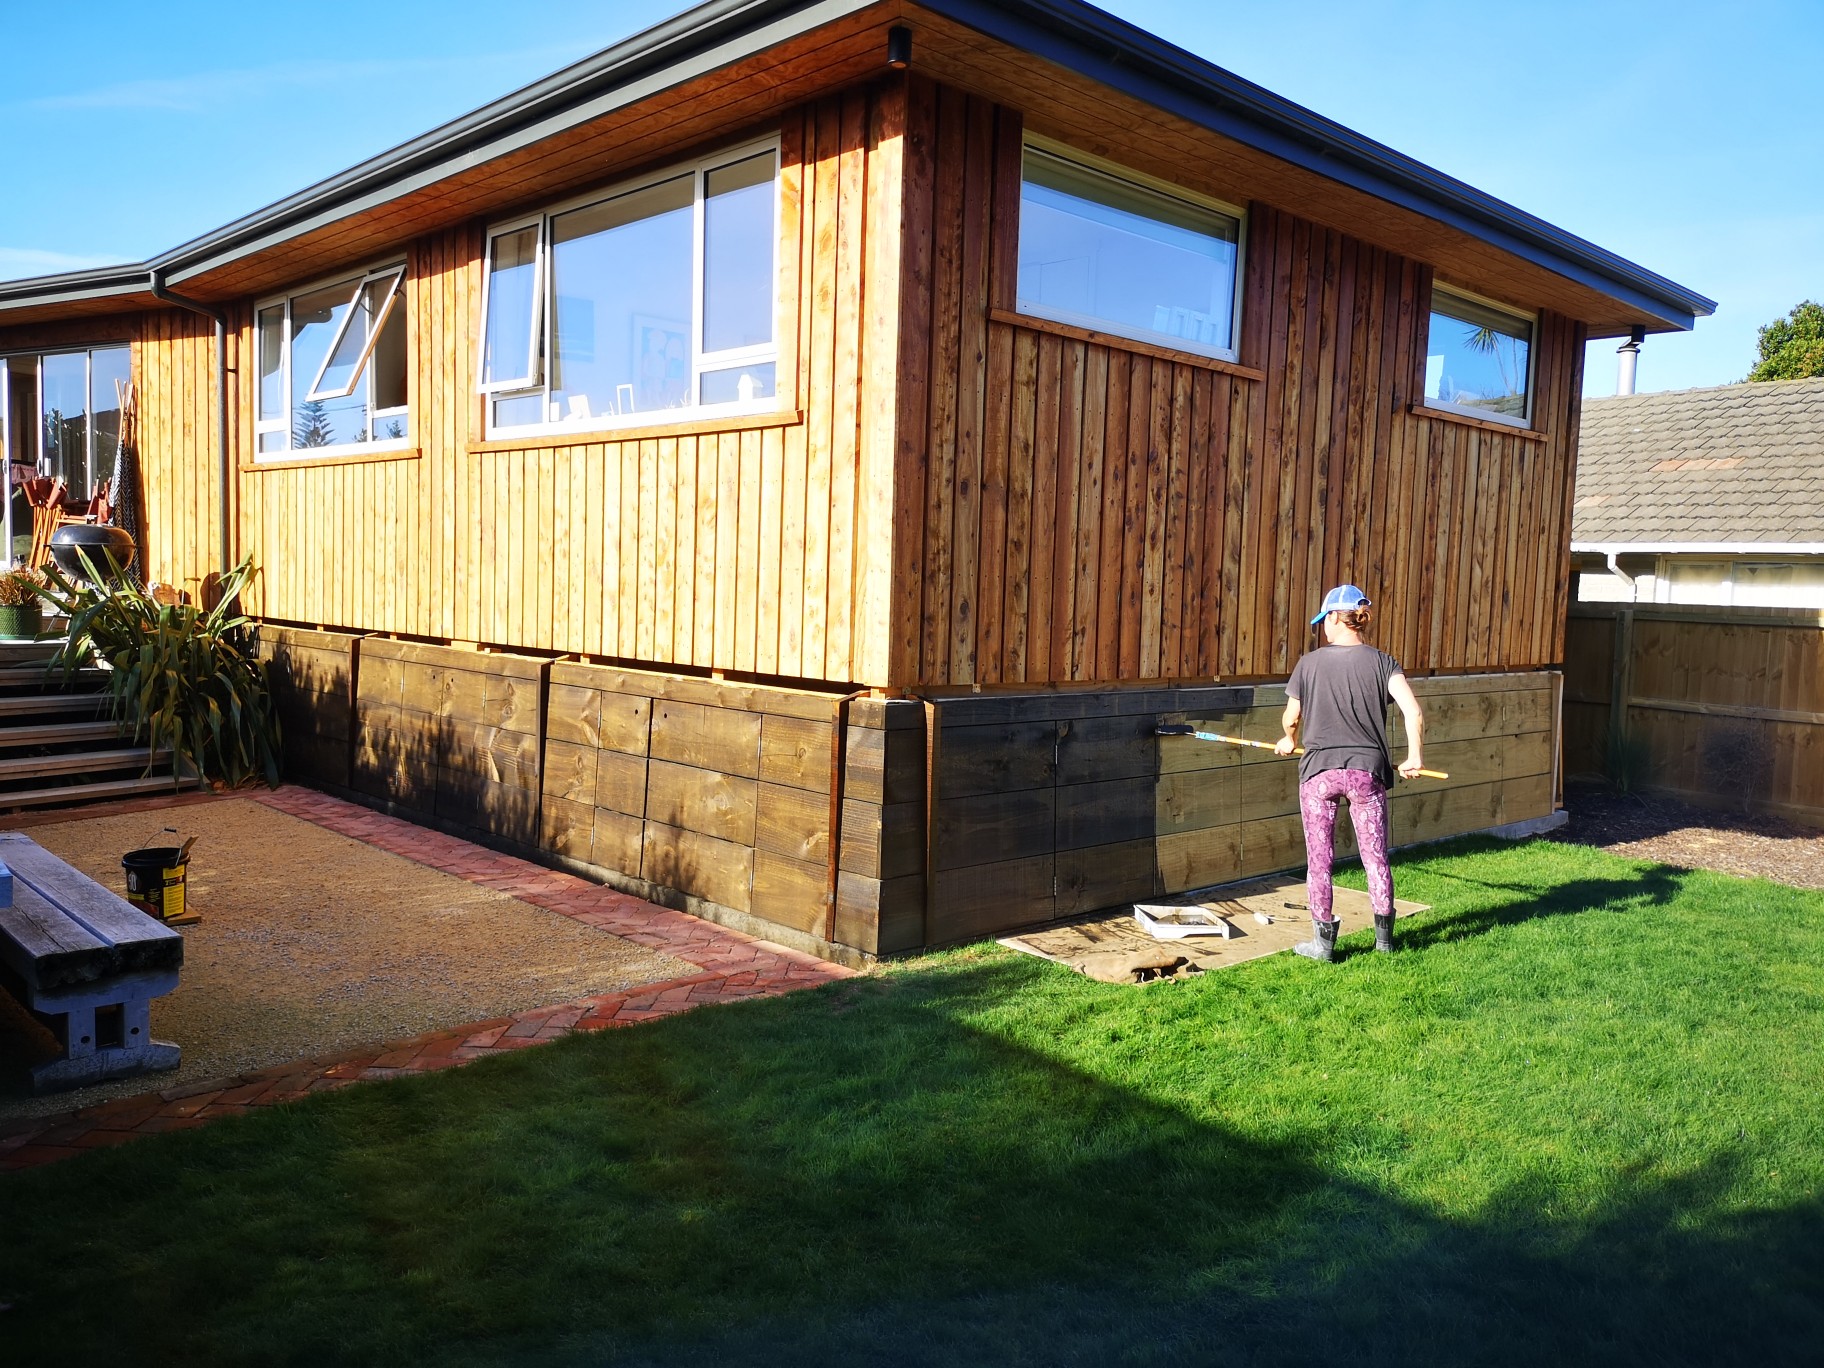
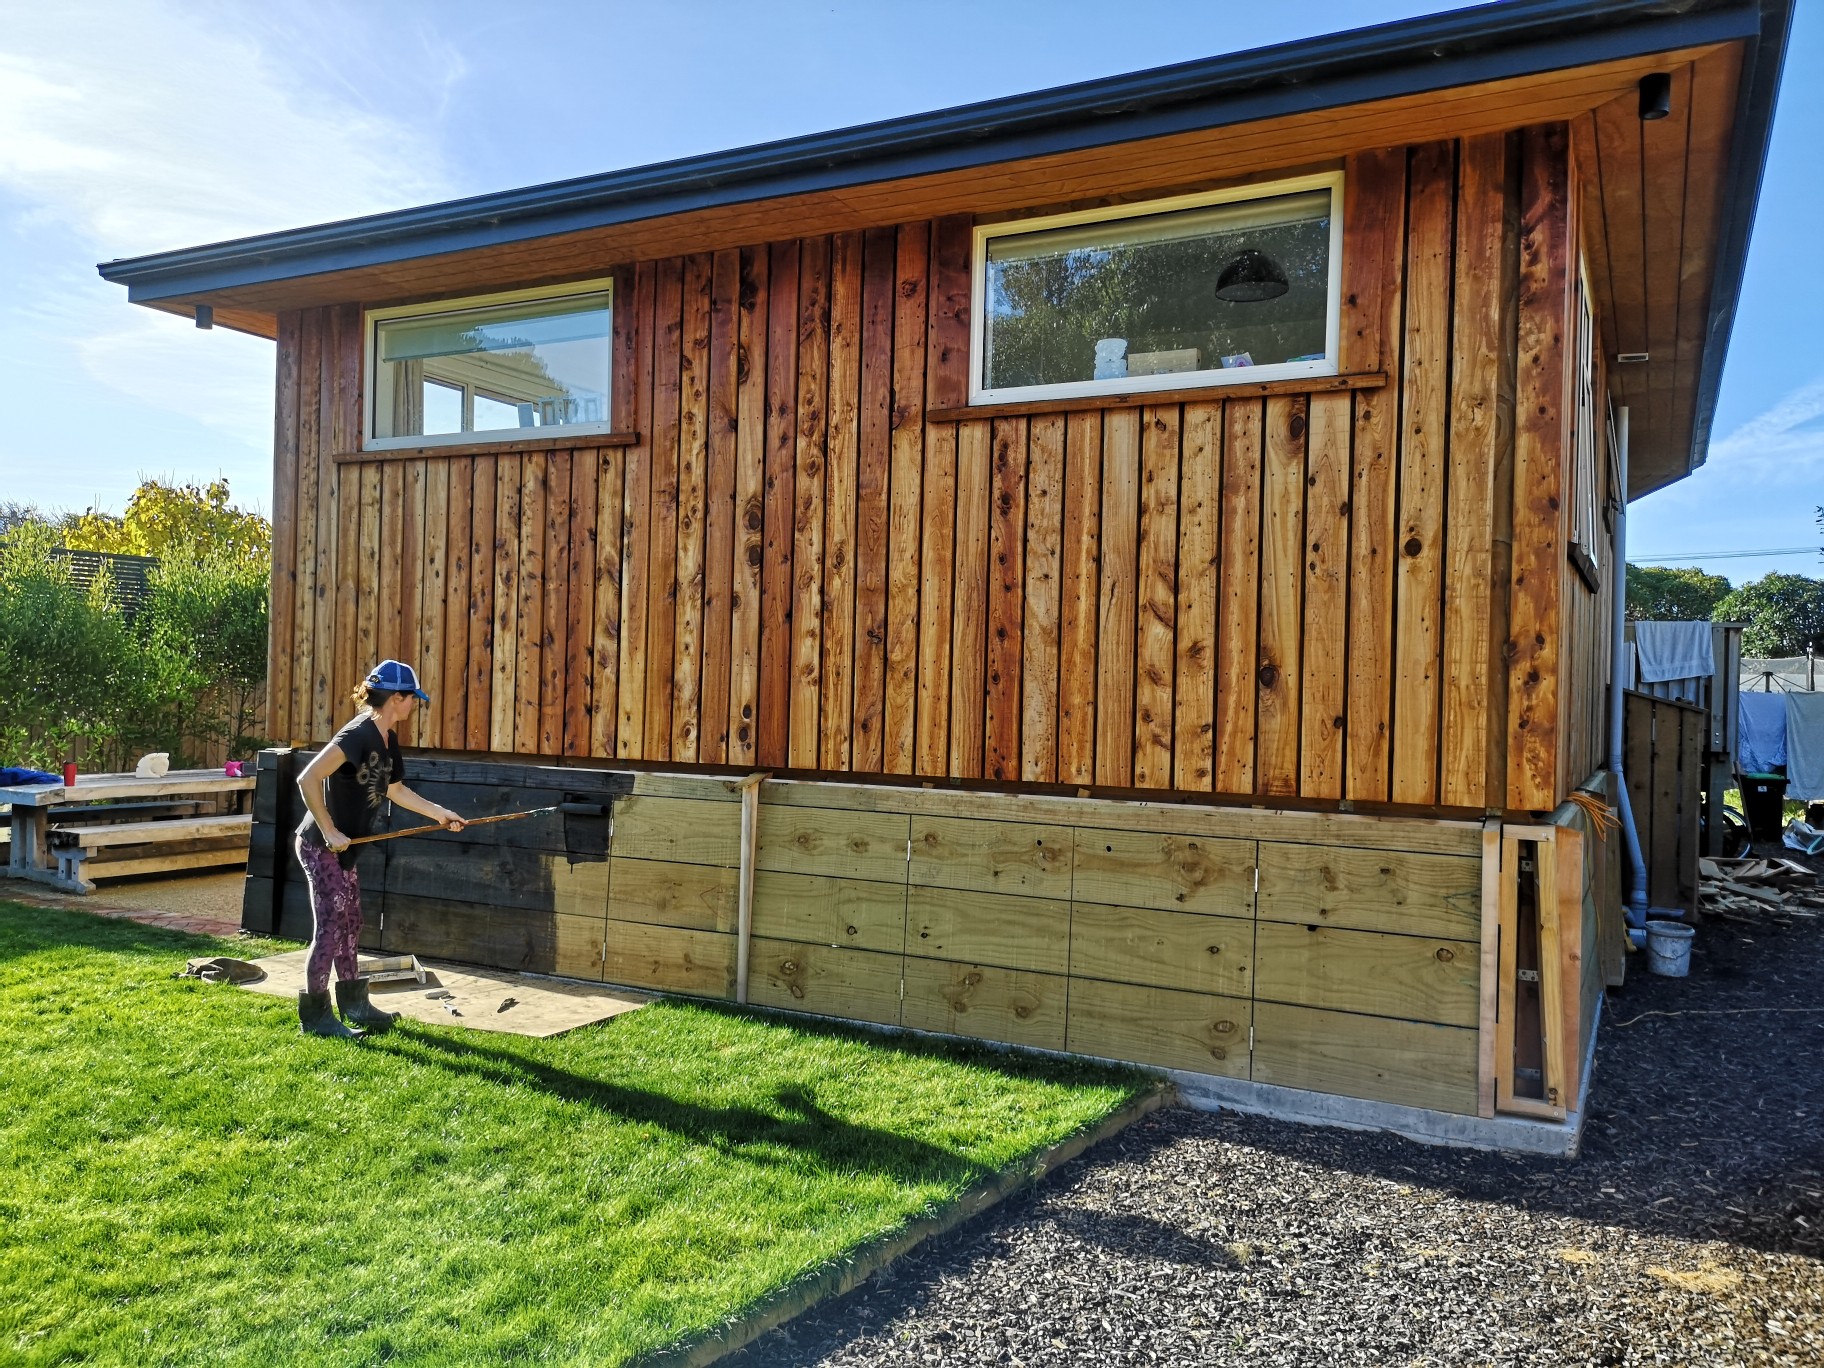
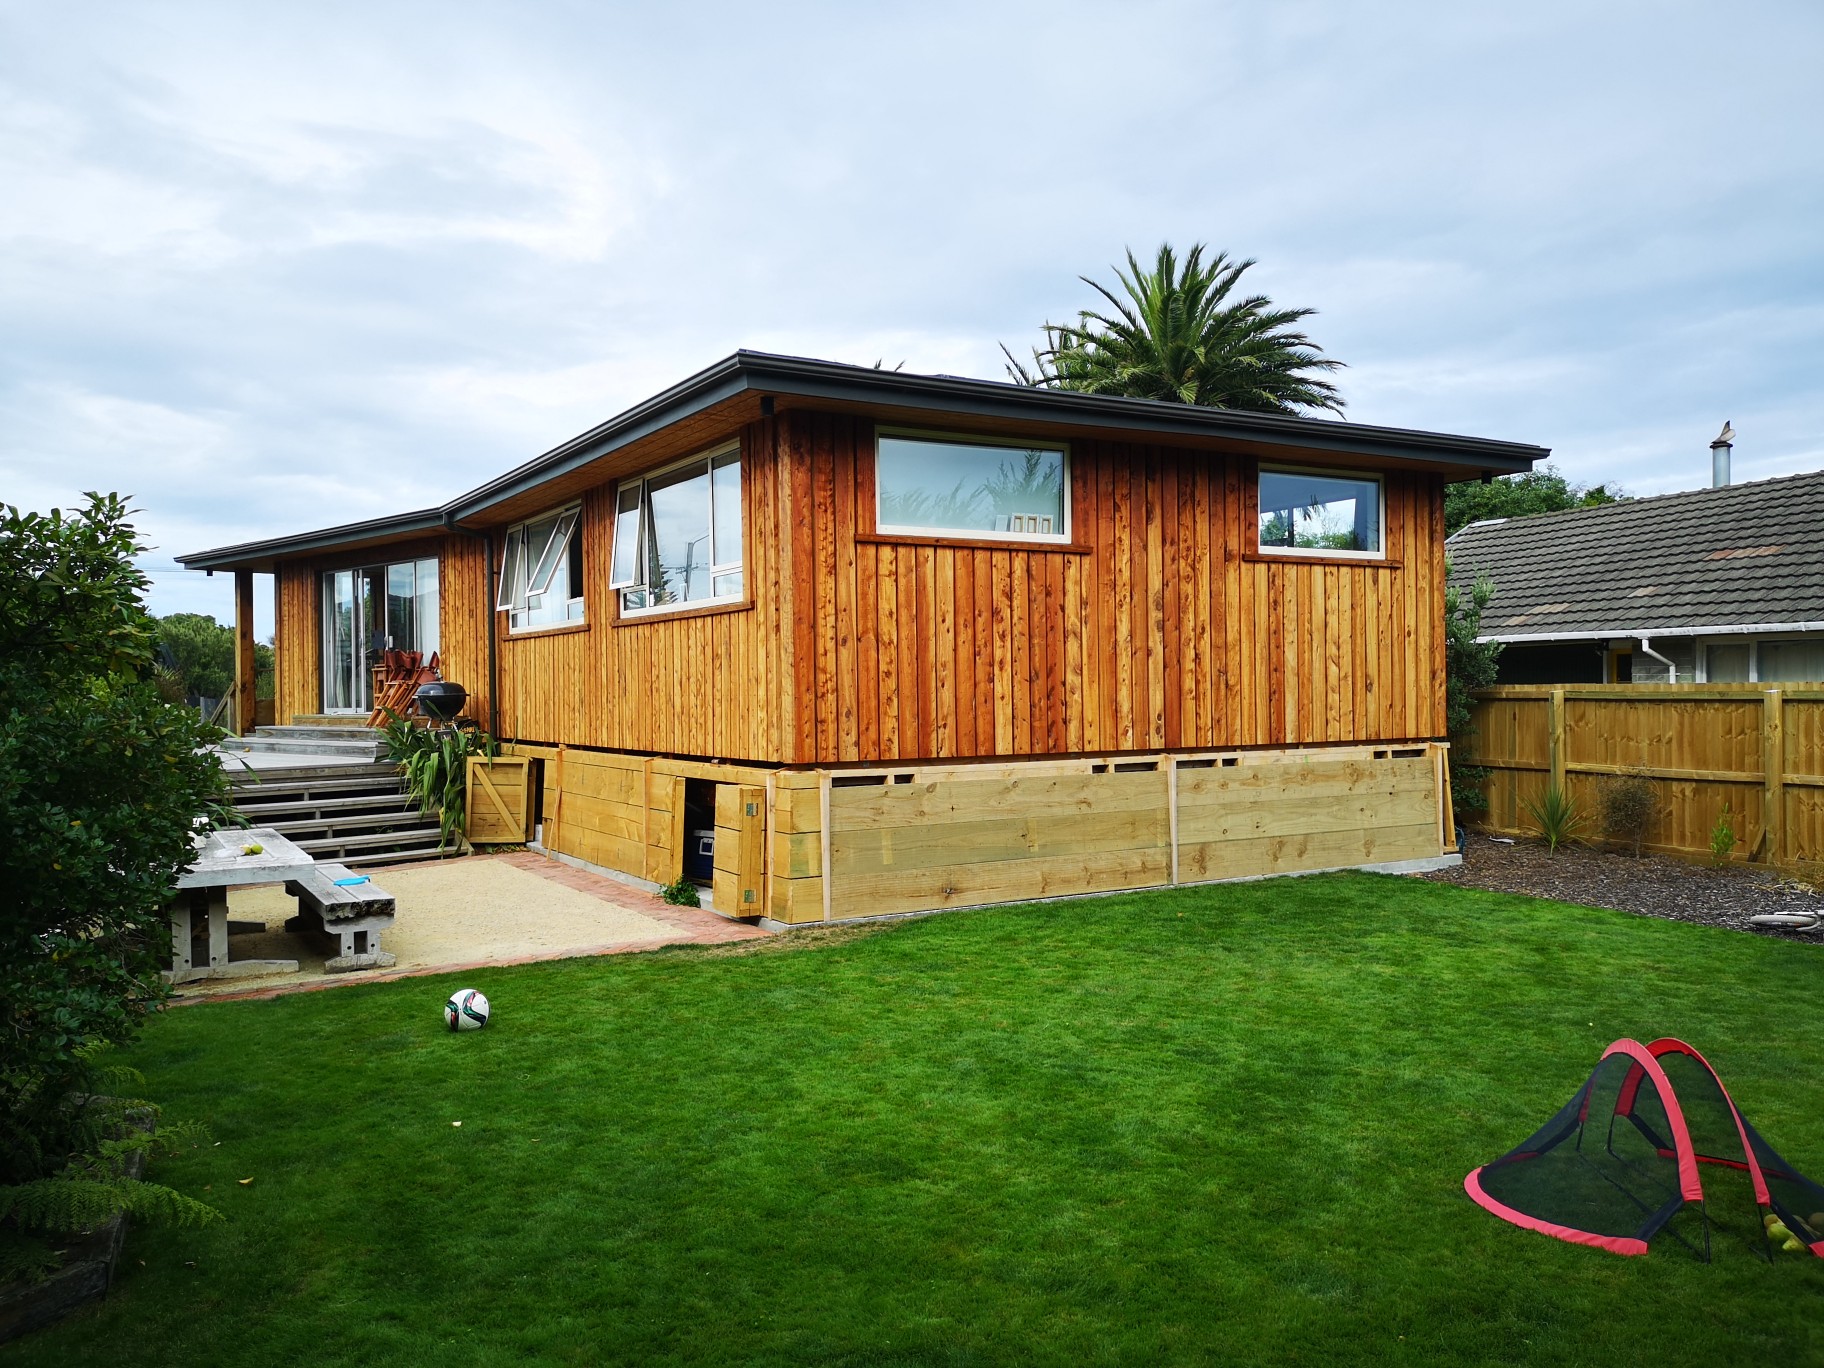
Whilst this was going on, missus and I finally decided on a colour to add to the oil (blackball), so she started the back of the house.. Had a bit of a second thought when she stained the uprights that are mac thinking we should have left them natural for a bit of contrast.. To late now tho, in saying that, they go darker than the pine boxing so maybe it won't be so bad..
1 point
-
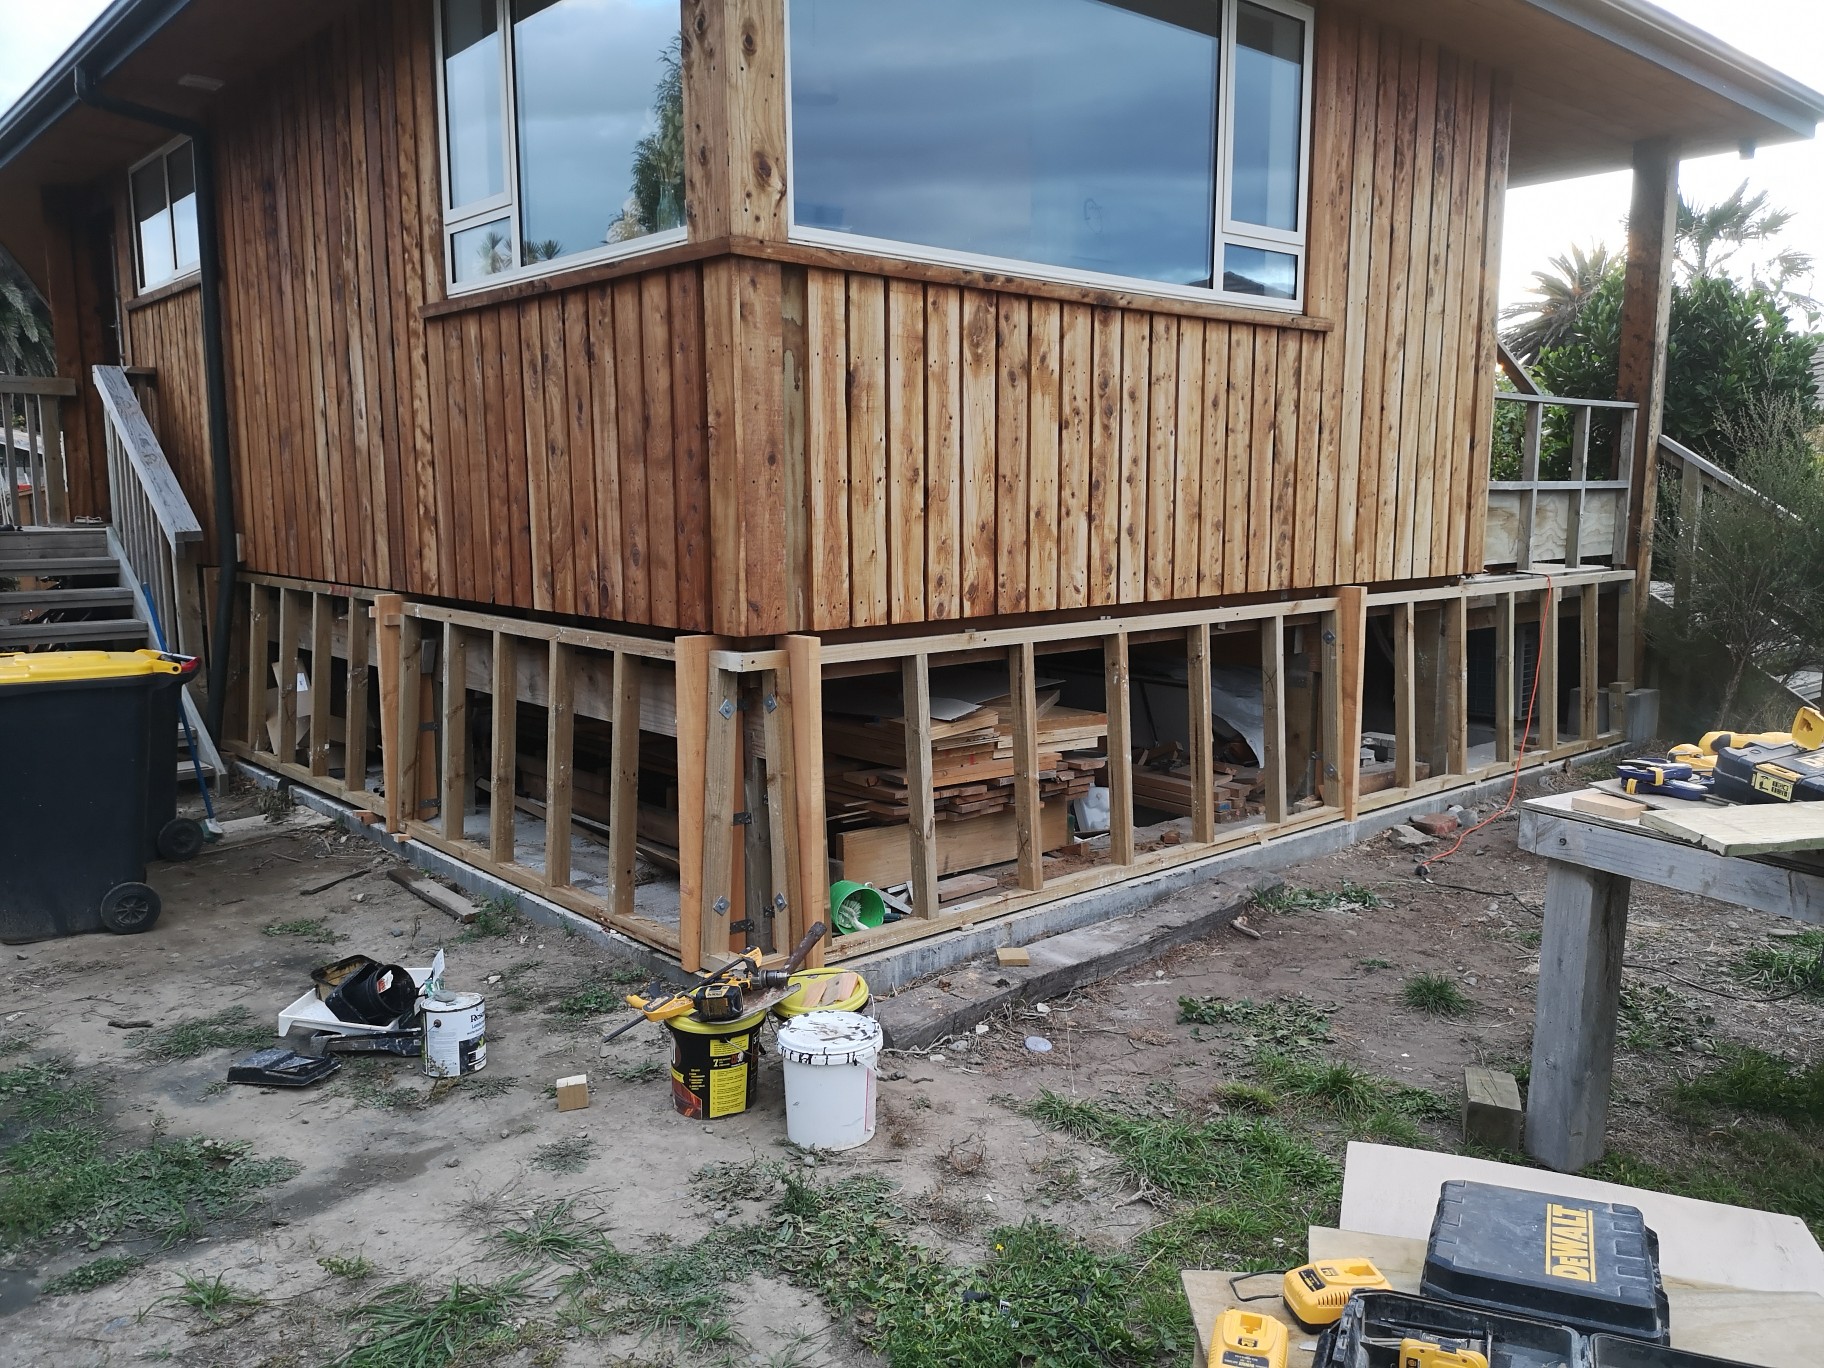
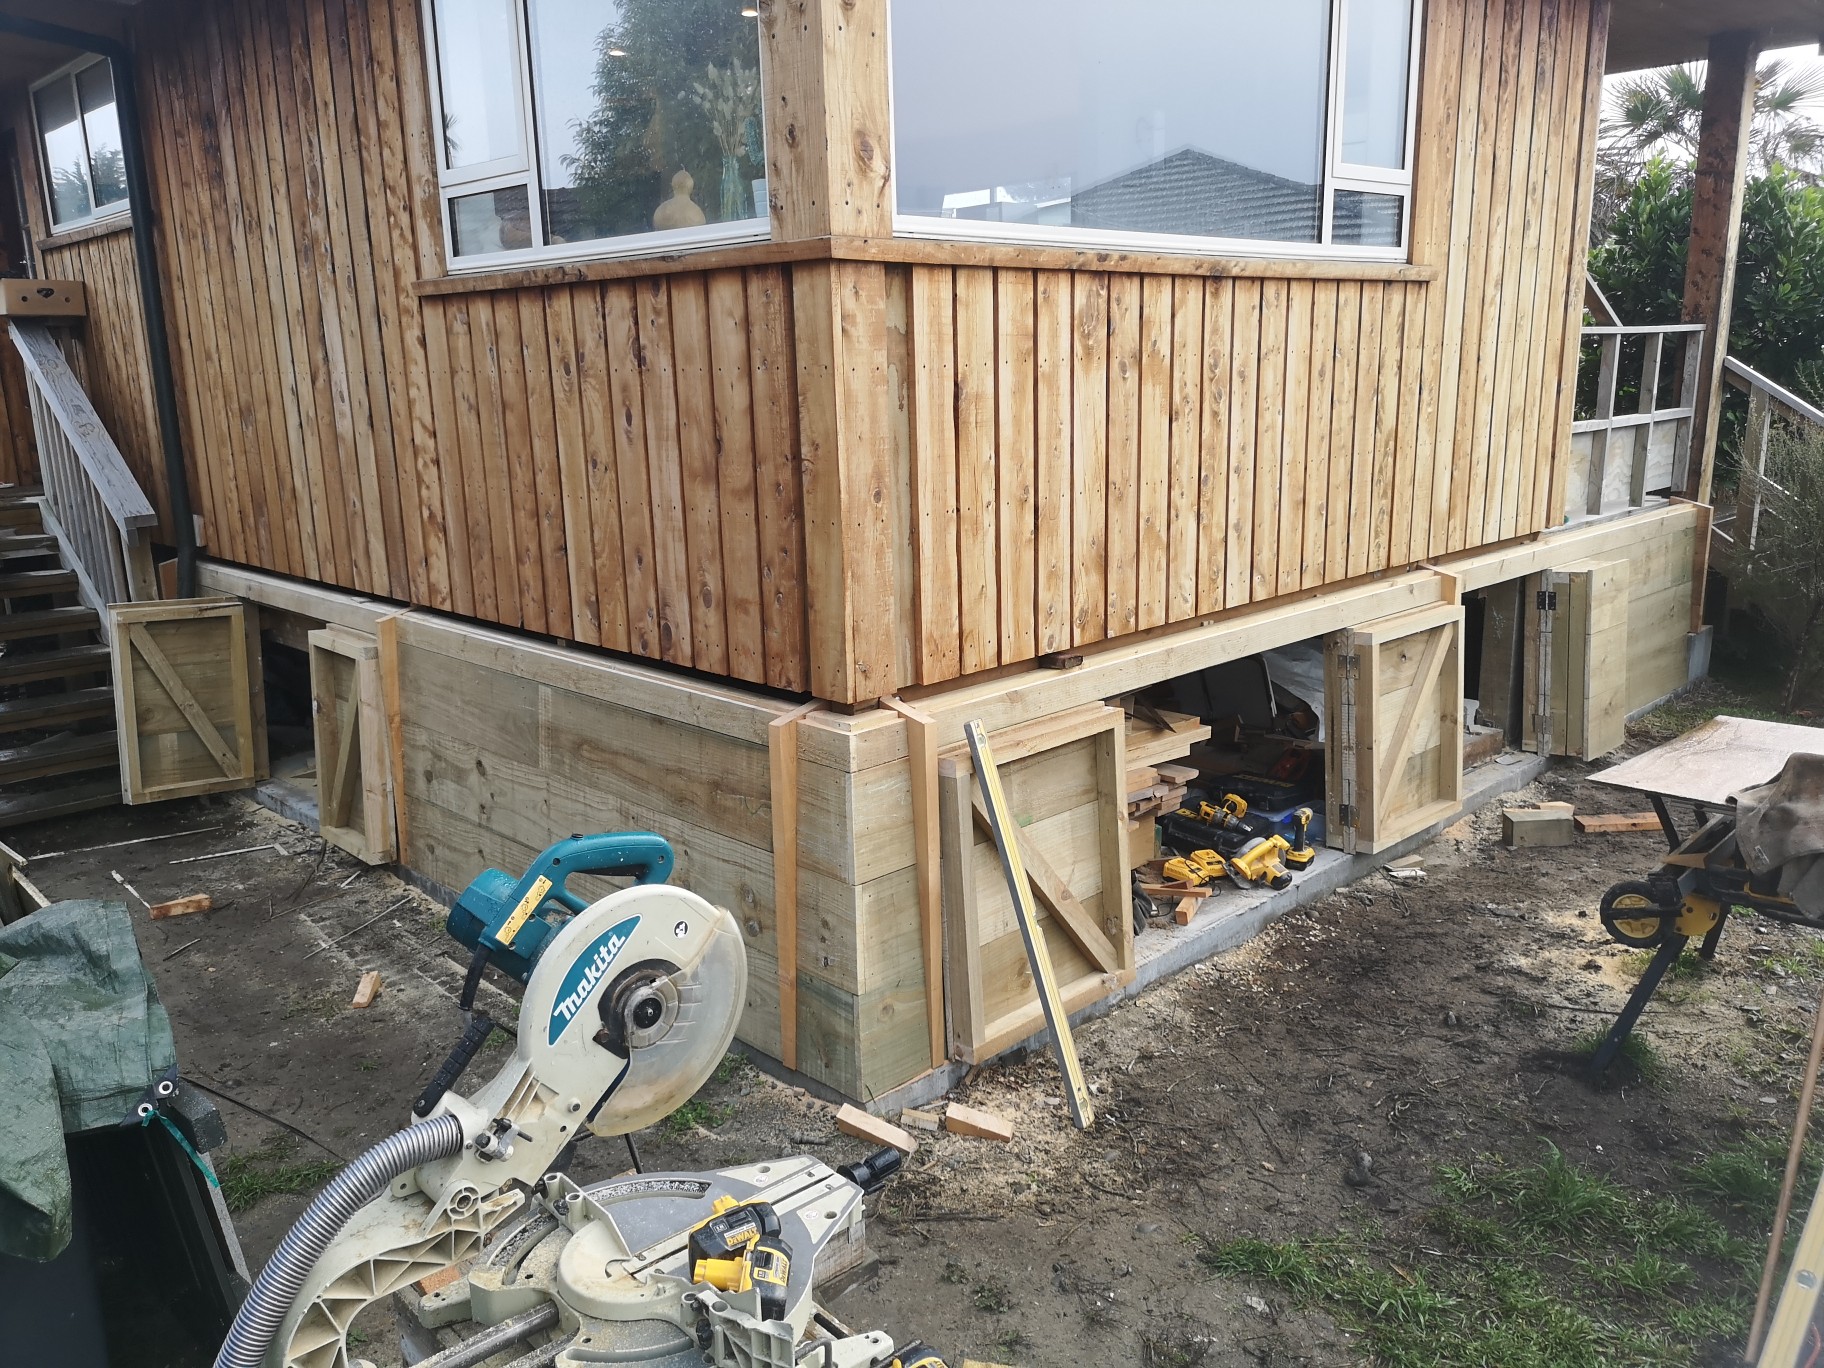
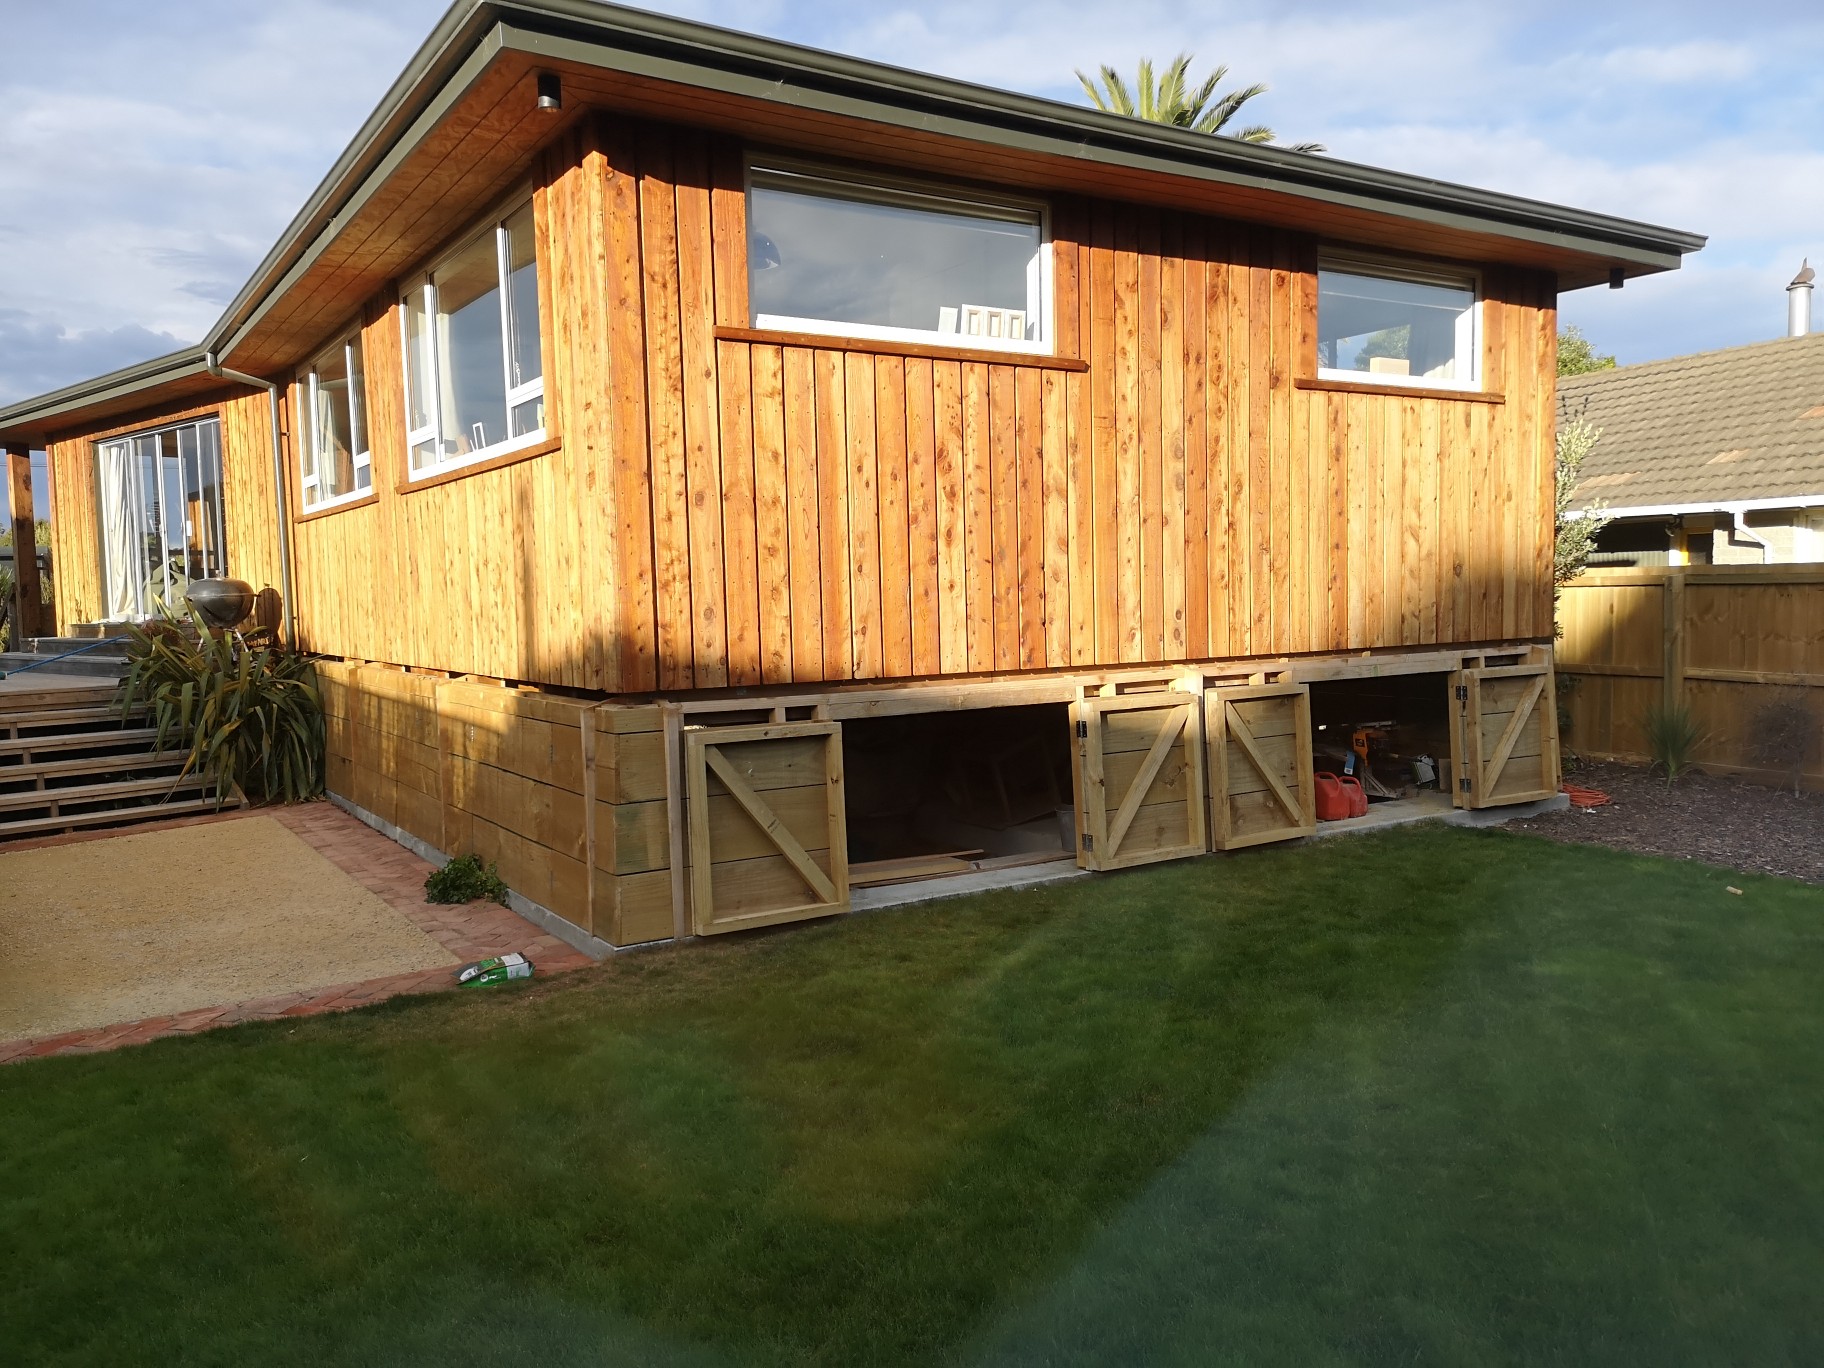
Then came around the front of the house to close that in.. Had to put in a few gates to access all that space. If you look close just to the right of the yellow bin you can see a black spot on the foundation, the water line I also had to move, paid for that one tho. Framed Gated, Clad, Gated...? Because this boxing warps so badly I have to install the gates without hinges then clad over the lot, let the timber shrink then cut the gates out and hang them = fucking around..
1 point
-
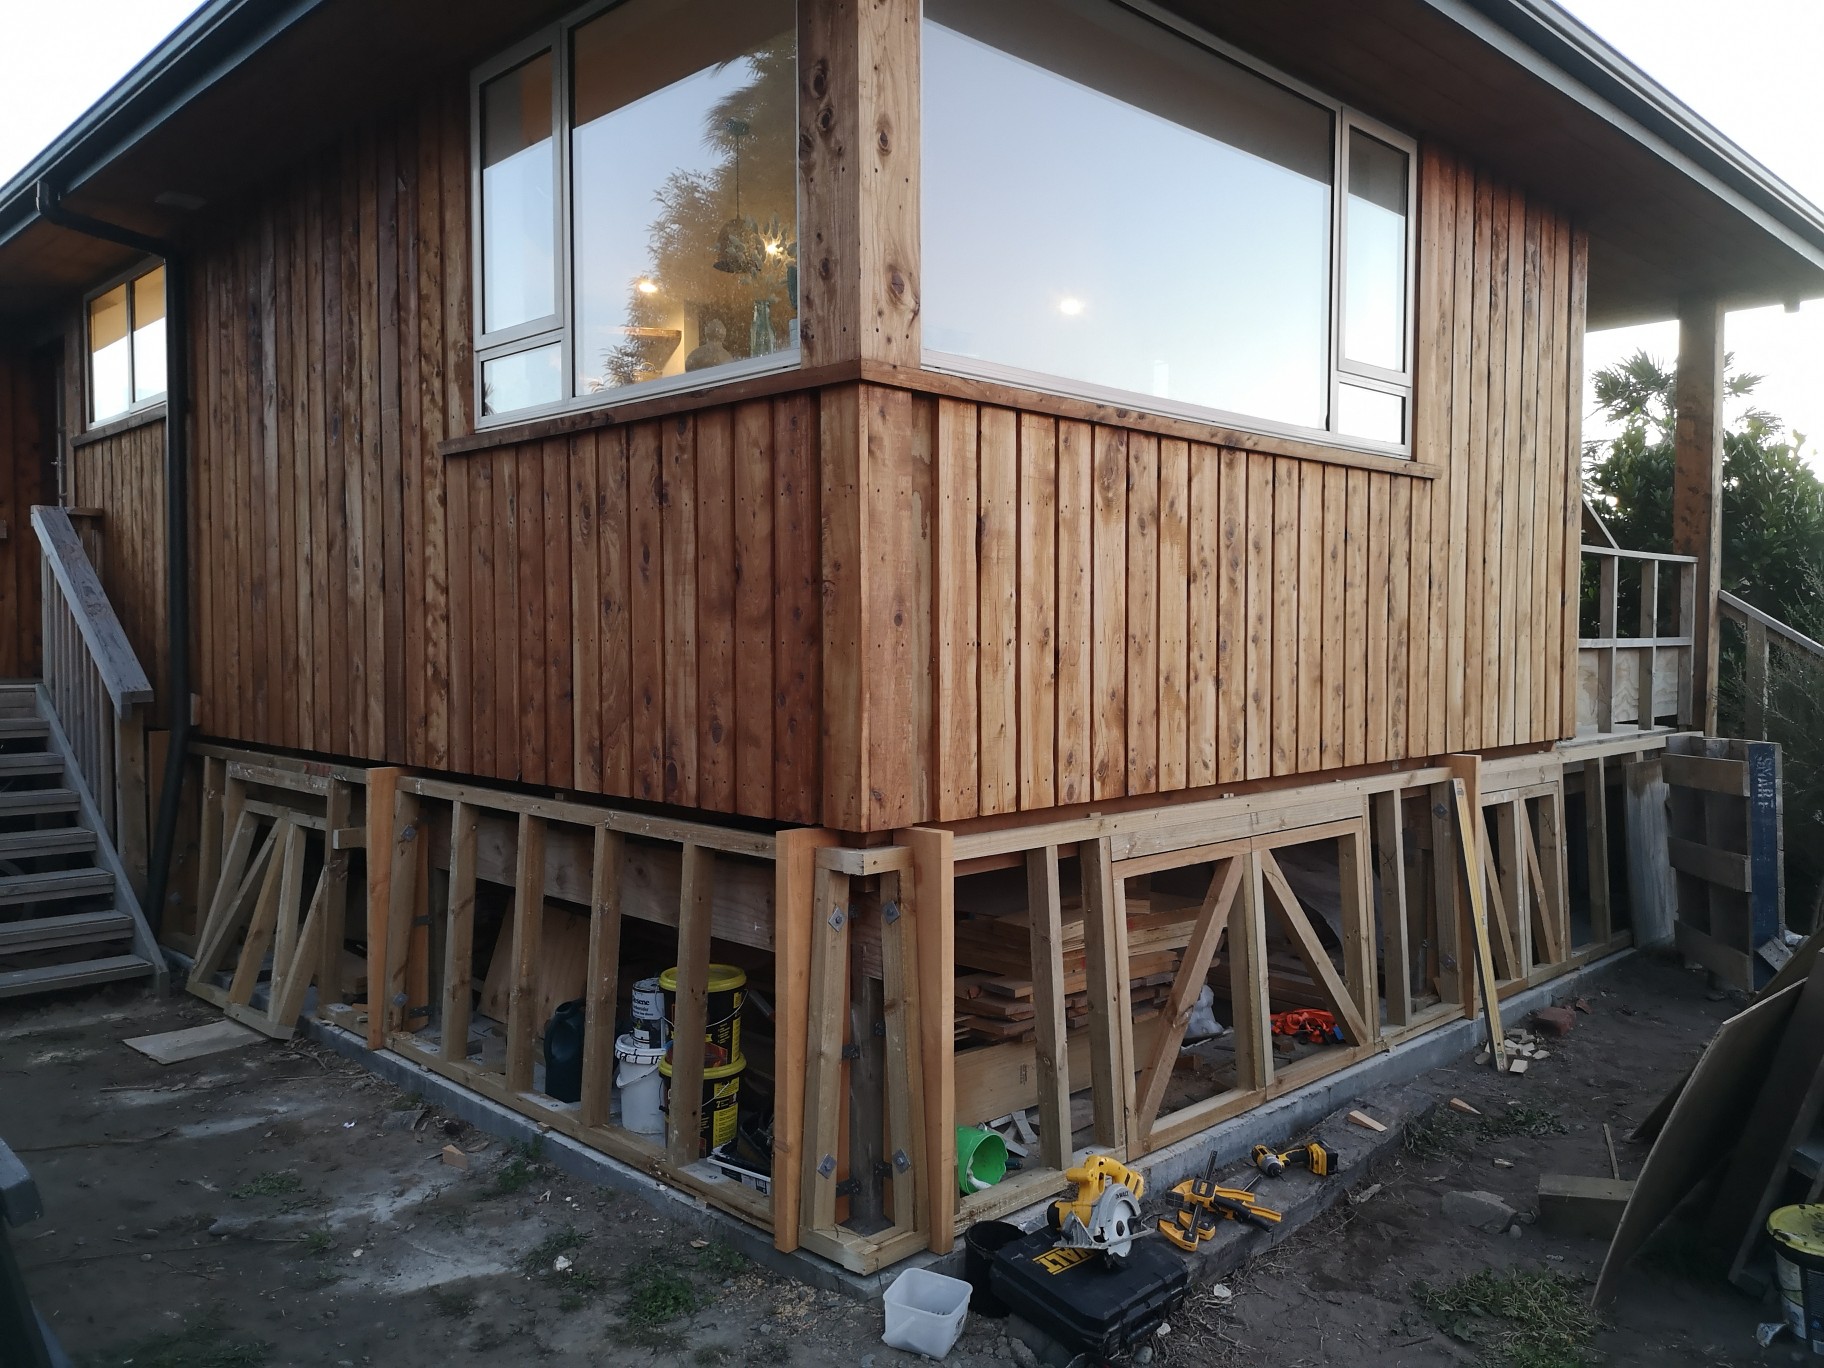
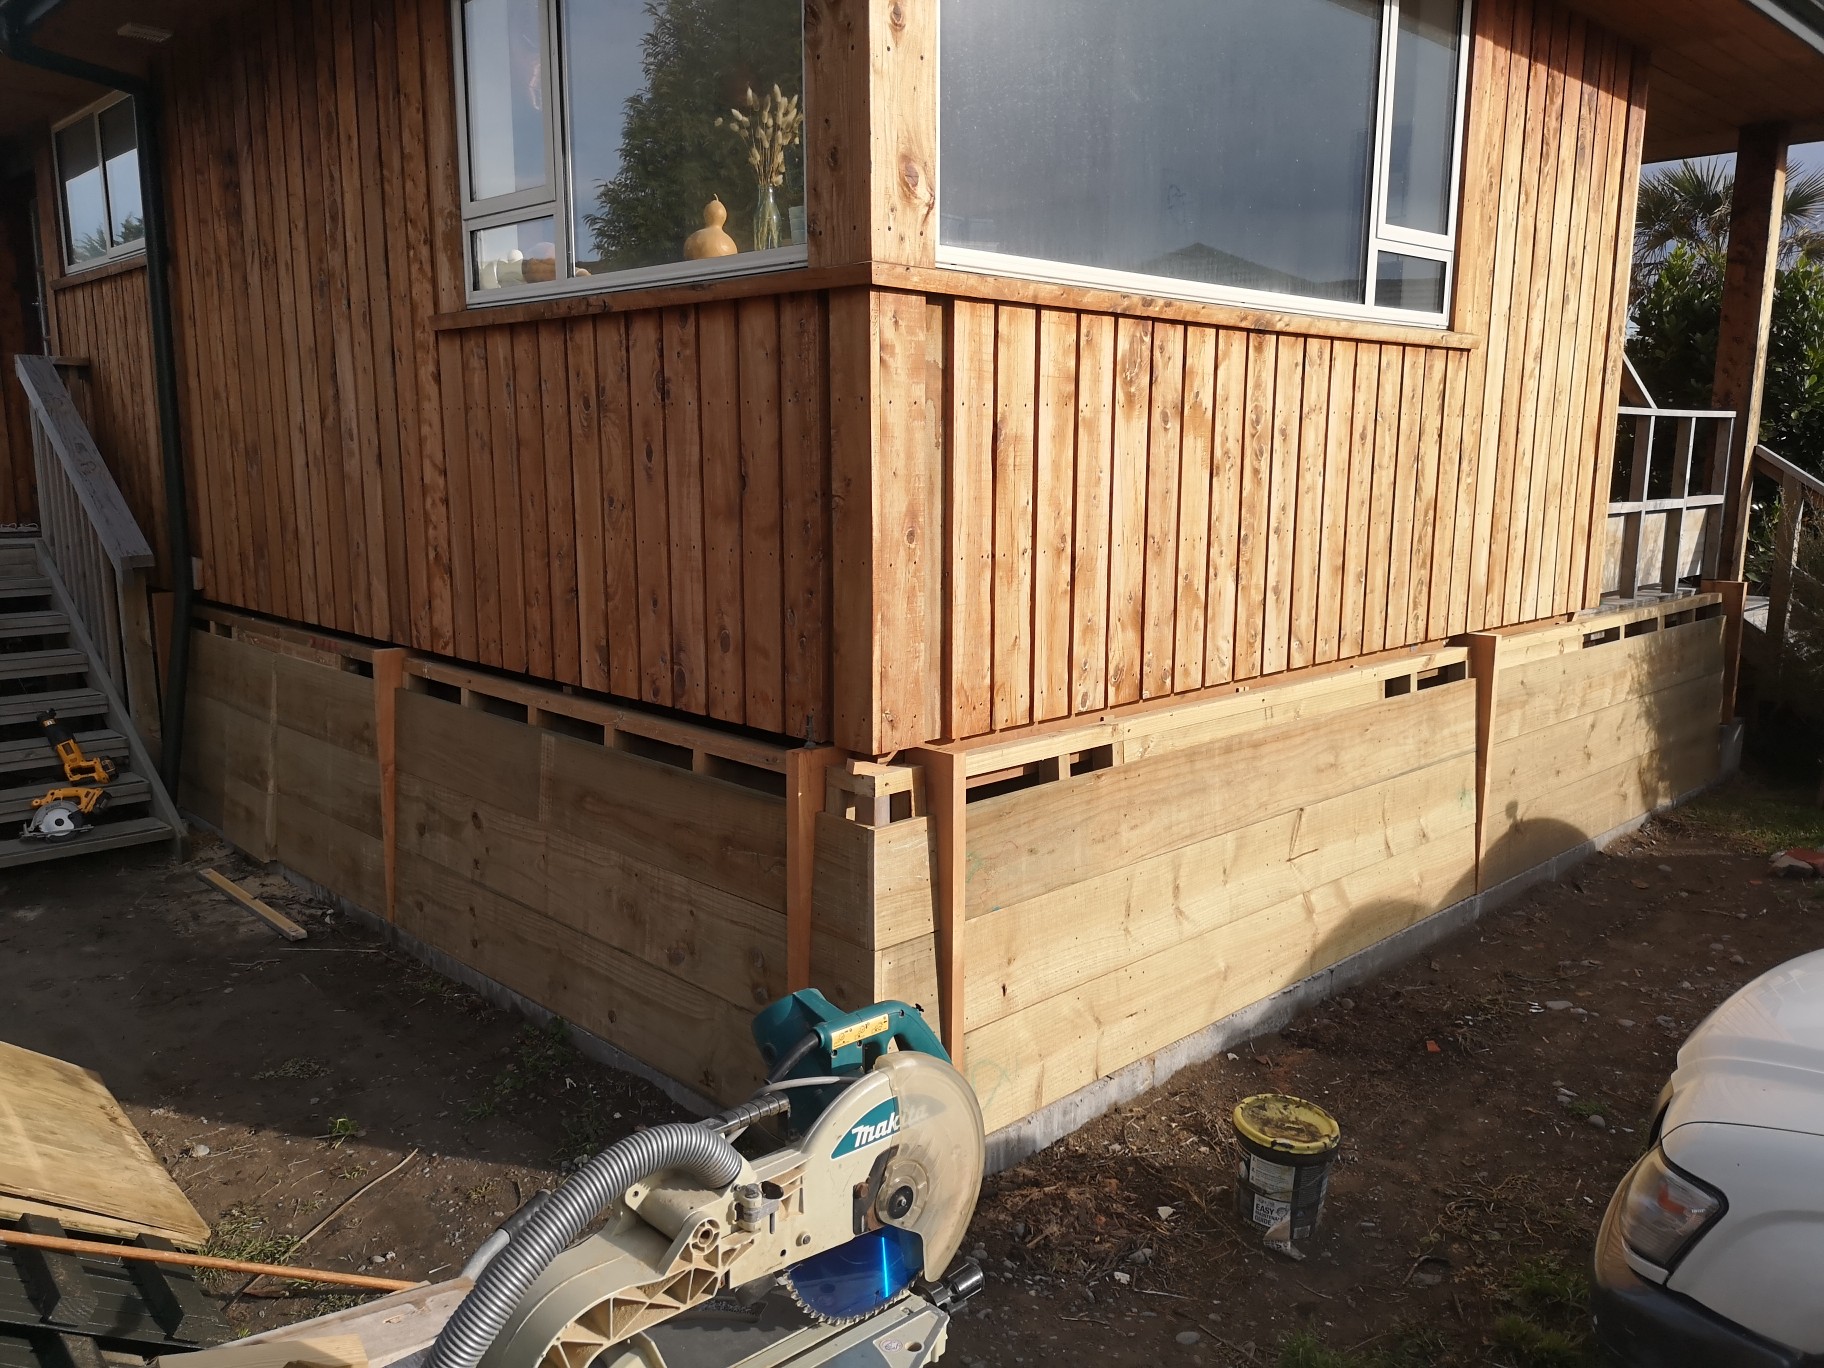
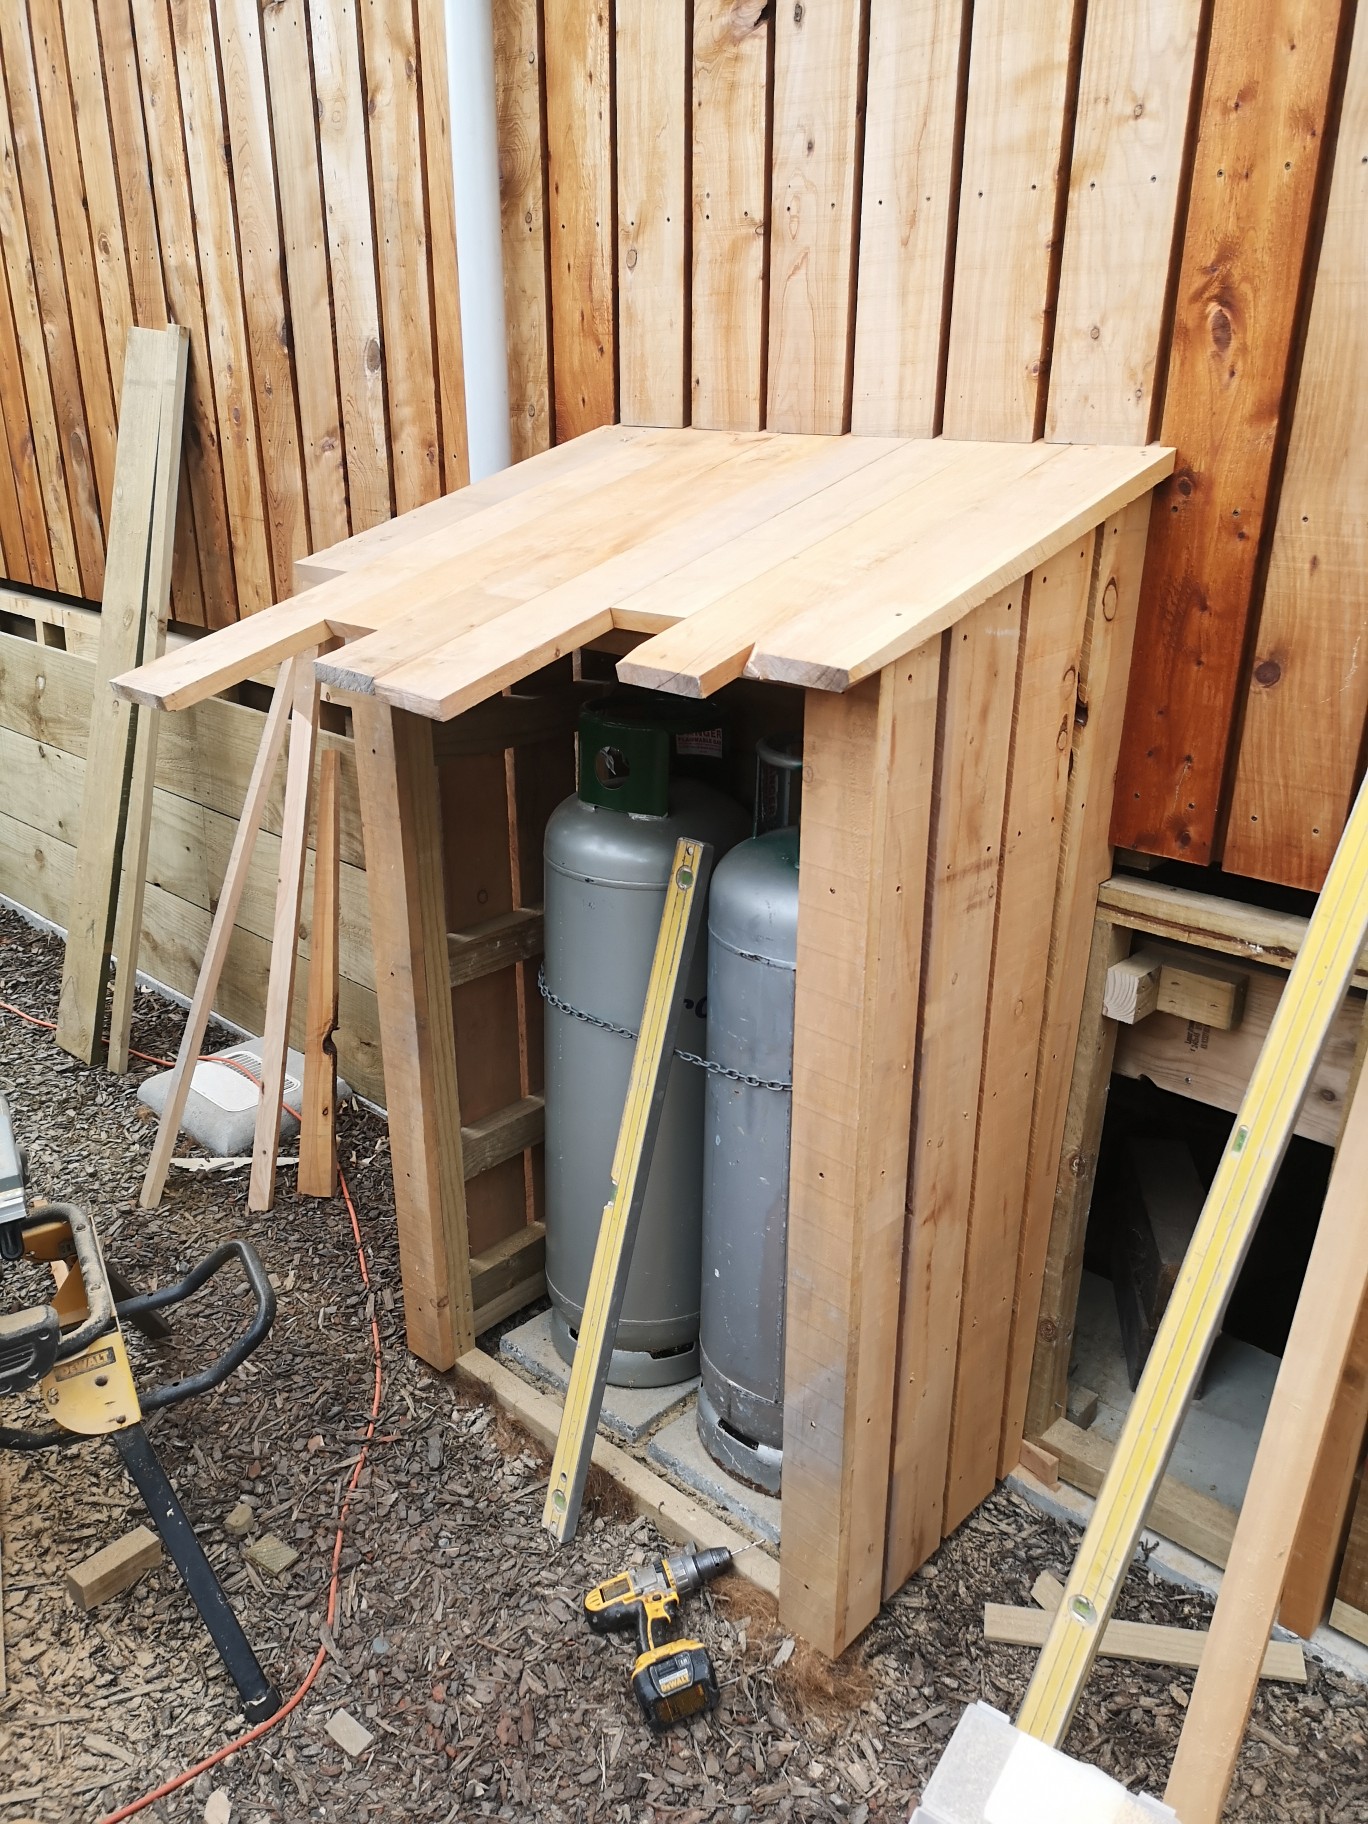
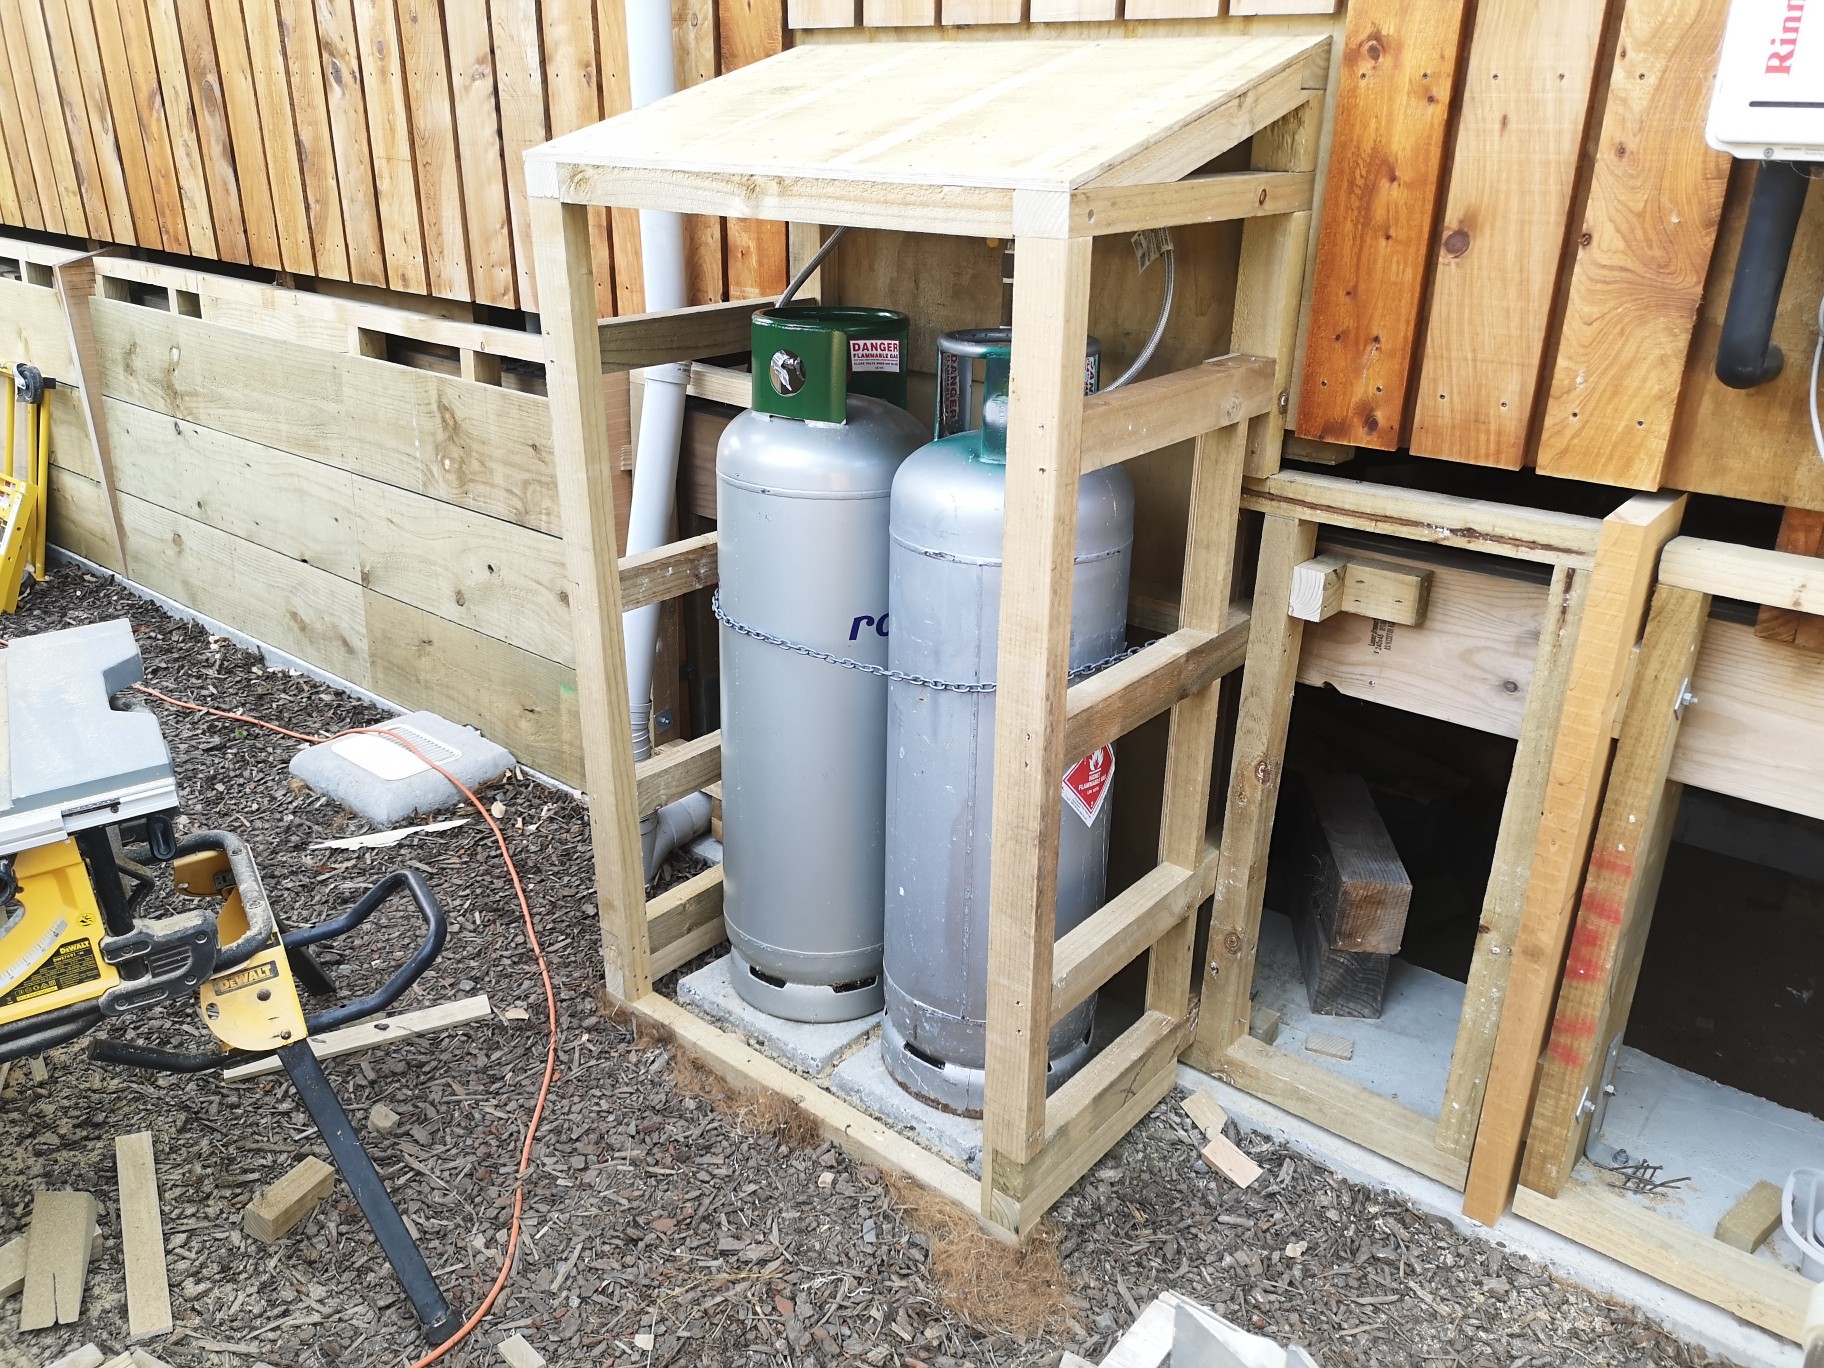
So with the inside 99% finished in the second week of April it was time to carry on with the outside. Progress was a lot slower than I initially imagined (typically) put down to the fact that I had to complicate things with the installation of access gates.. Anyway, got some more boxing on.. And gates installed Then came around the back of the house, my intention was to allways have a shed for the gas bottles and something around the califont to make it look less shit (whilst complying with the regs of course). In my haste to get compliance I made some stupid decisions with regards to placement of certain services i.e. Power, water and fiber. Couldn't move power but spent more time than was worth moving the fiber along.. Framed up the rest of the subfloor and built the bottle "shed" There is also another single gate to the left of the gully trap below. Clad it..
1 point
-
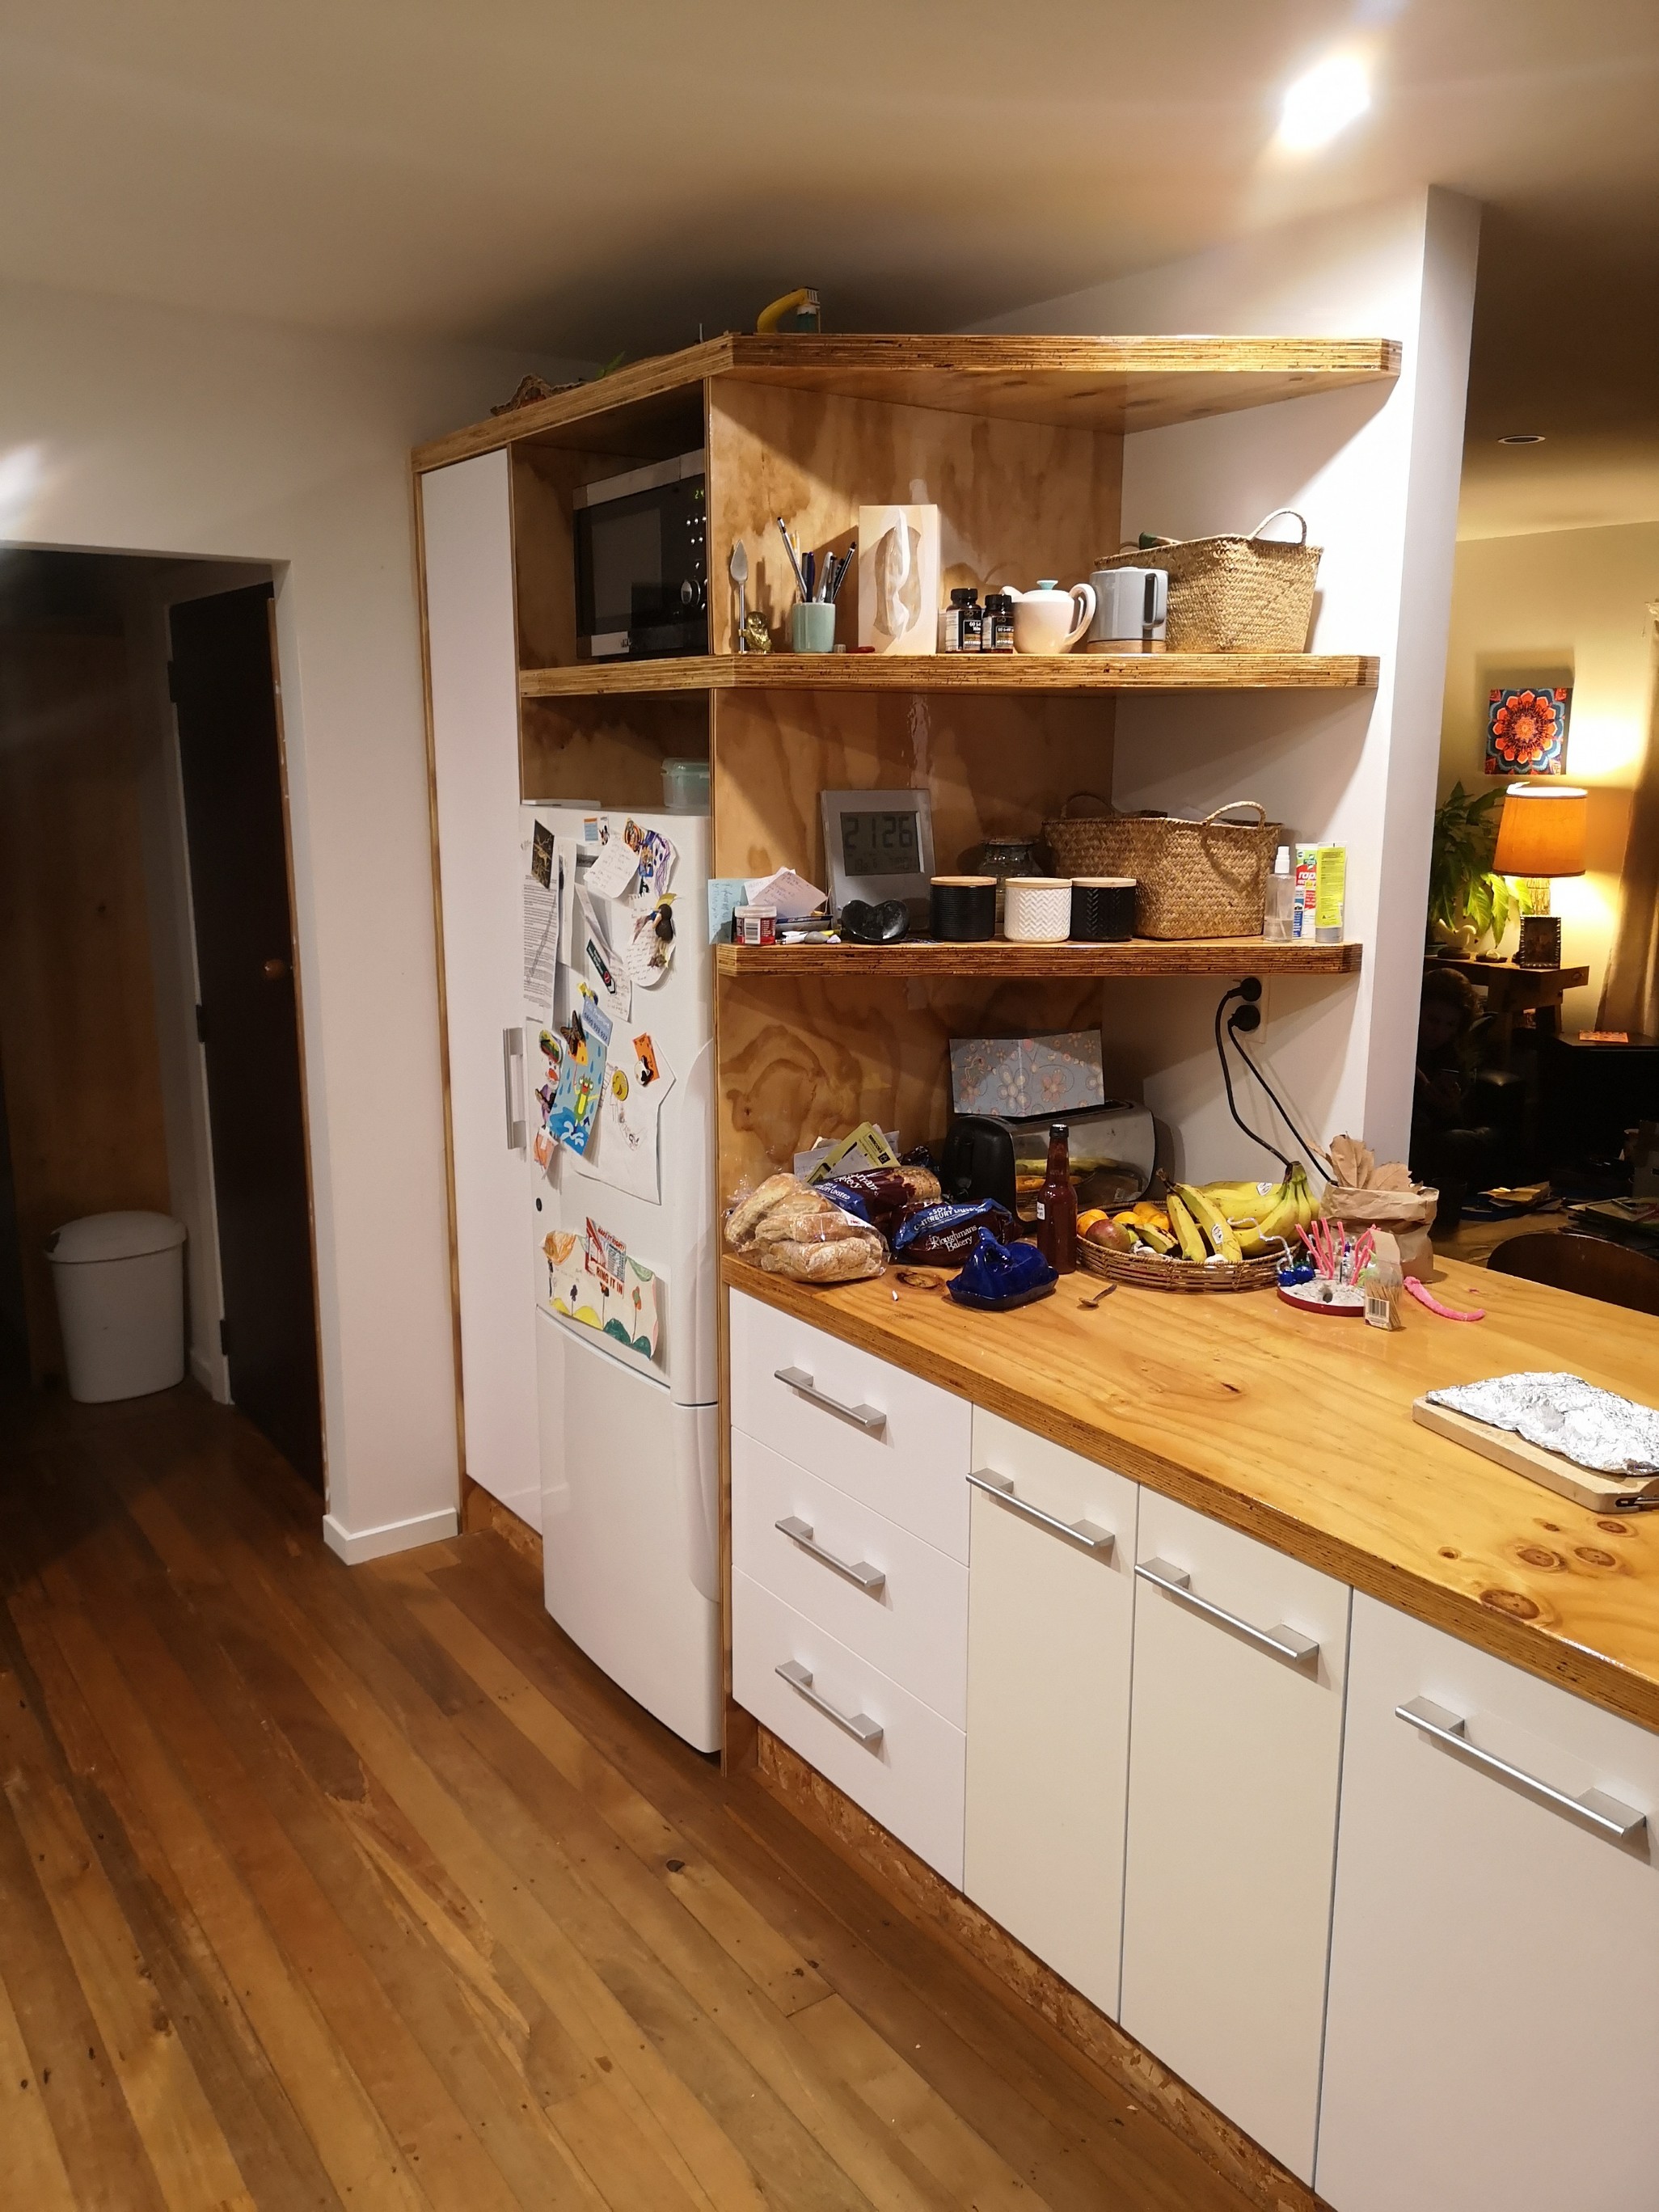
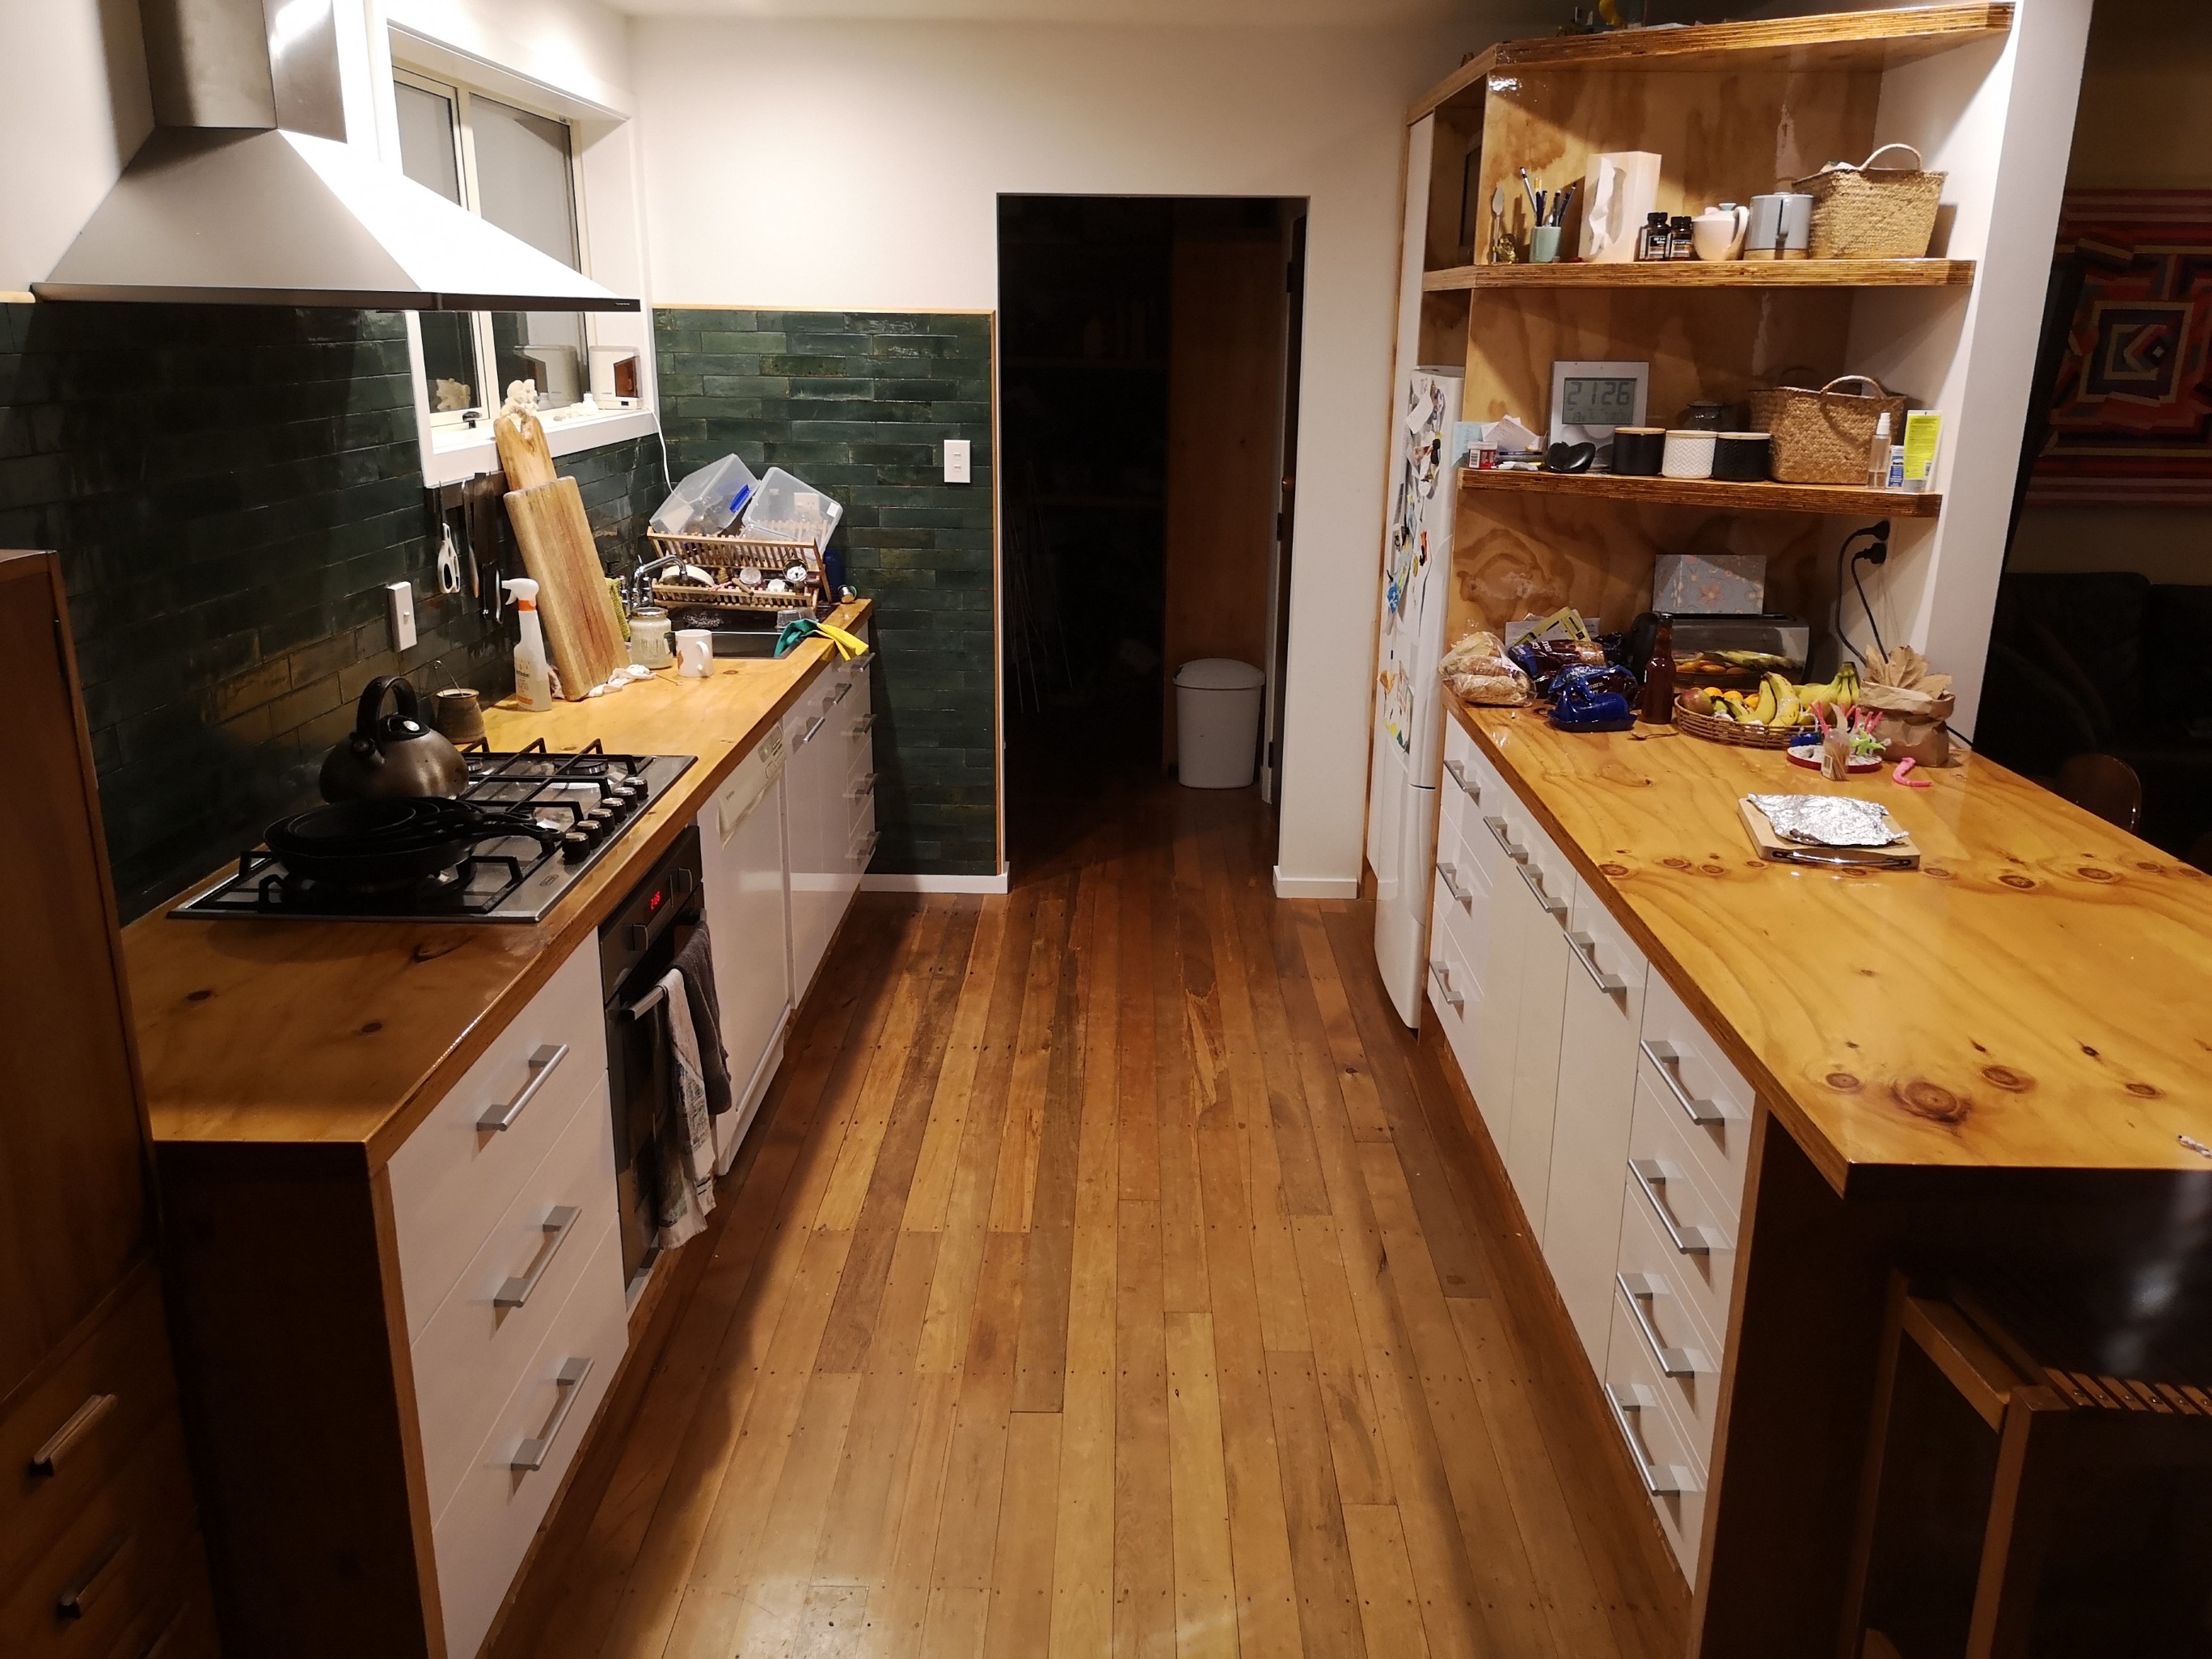
Kitchen finished (besides the extra little bit of plaster and skirting from the aforementioned fuckup) Another place to store crap.. (note the off colour cupboard doors)
1 point
-
This thread sucks, do you ever finish anything?1 point
-
Surely....
1 point
-
I dunno?1 point
-
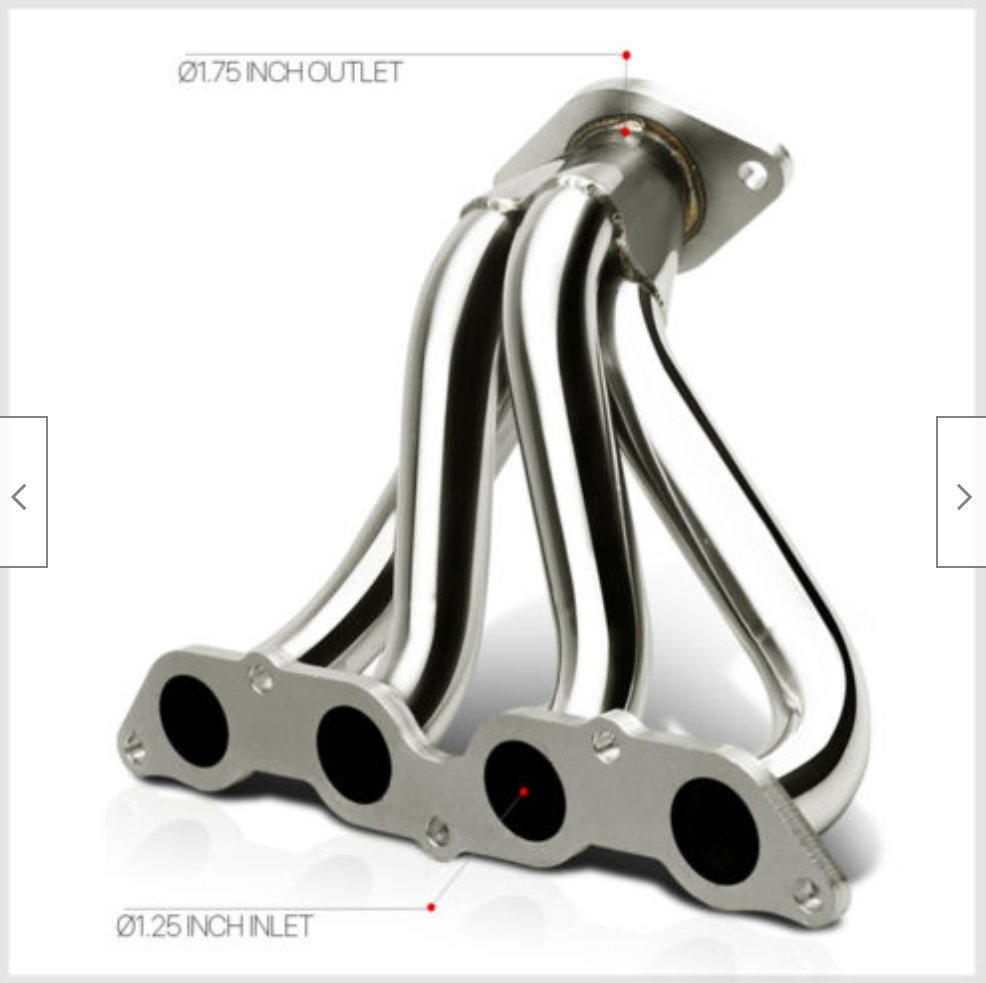
Its pretty wild when a motor was released in the US and has a big market haha. This below is somehow $60 USD and probably no meaningful difference from TRD one: It's got the full sized pipes not the strangled down ones. It's hard to know how well it might go, because the only dyno stuff I can ever find for these cars is where people are using the garbage inlet manifold which kills it. https://www.ebay.com/itm/Stainless-Steel-4-1-Exhaust-Header-Manifold-for-04-06-Scion-xA-xB-BB-1-5-1NZ-FE/333425100376?hash=item4da1af4658:g:-Q4AAOSwwgRfWYP1 Ordered one, should be here before drags. If so I might make an attempt to sort rest of exhaust too. Can also get aliexpress conrods and stuff like that. Living the dream Also I've found out the Vitz RS model has better ratios and a 4.3 final drive. So I'll have to nab one of those at some point. But probably a while off yet and will get it ready with a prius motor. EDIT: Also printing some longer trumpets but I'm out of space, so try some tipped ones.
1 point
-
Outduction?1 point
-
Hopefully you can read this.
1 point
-
holy crap that sounds amazing! you can dort right passed the po-po and they are going to have no fkn idea where that Honda is.1 point
-
1 point
-
When you've got Bingo at 3, but Trackday at 5: The difference from this has been amazing! Max torque has moved up another 1000rpm, and then it has 20hp ATW more at peak(66hp to 86hp) It starts valve bouncing pretty bad, this might be what the sudden torque drop is at higher rpm. I thought I might have made a mistake with logging it in virtual dyno so I went back and a did a few more runs and they all looked the same. This has felt worth the effort. Also interestingly the VVTI cam range that it likes now is a bit more typical to what I'd expect. So moving the cam around (about 20deg on midrange then tapers off to 5 up top) and it was even better again. I bet there's some good improvements too from de-choking the exhaust side too, because its absolutely tiny on that side just like the intake was. I'm not that keen on spending $$$$ on getting an exhaust made up though so I'll have a think about this one. Also, yes it makes a big bloody racket at full throttle now haha.
1 point
-
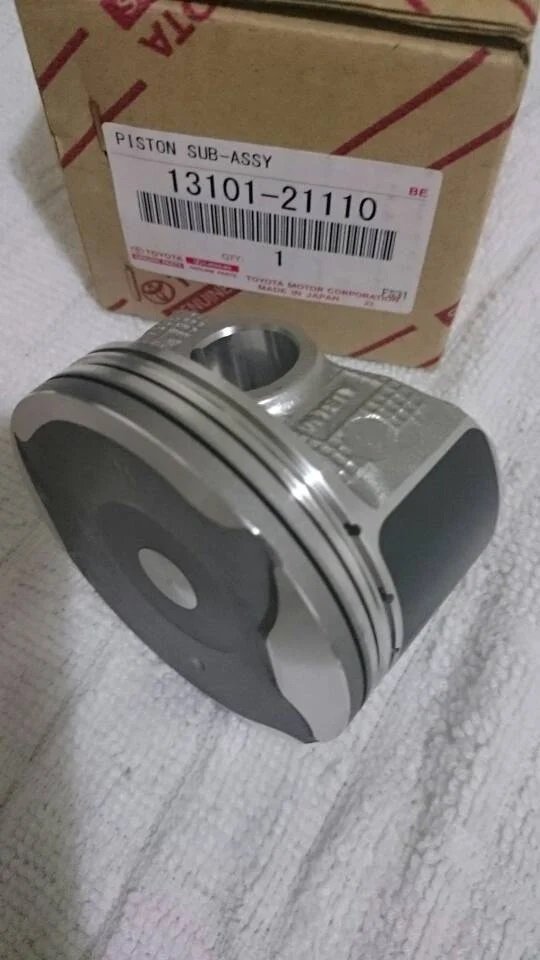
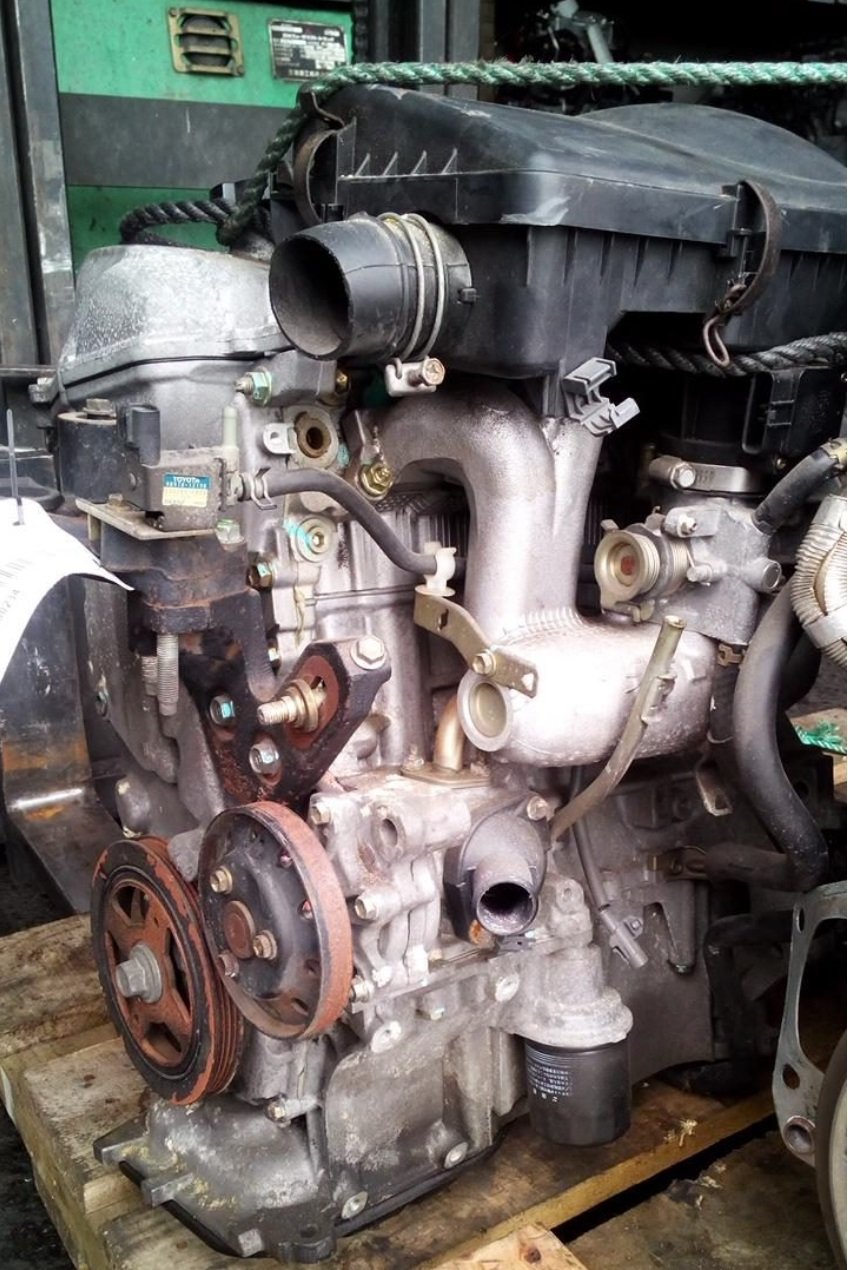
Okay so some 1NZ / 2NZ engine sharns. The 2NZ engine is the 1300cc variant. (as fitted) 10.5:1 compression, max torque @ 4000 max hp @ 6000. The 1NZ is a long stroke version of this which bumps it to 1500cc. Still 10.5:1 compression, max torque @ 4000 max hp @ 6000. So it gains power and torque but looks like the manifolds etc are the same which explains same rpms for max power and torque. So it doesnt look like there would be any worthwhile easy bolt on bits from the bigger motor. Howeverrrrrr The early Prius engine is a modified 1NZ engine that uses atkinson cycle and makes the worst power out of everything by far. But what's interesting and maybe relevant is how it does it. Atkinson cycle means it leaves the intake cams open for a lot of the way while the piston is still coming up so it pushes the air back into the intake manifold. So it reduces pumping losses but then has high static compression which is win win for efficiency. In order for this to work it needs a comparatively long duration intake cam (270 deg) It also means it has 13:1 pistons and an alloy intake manifold with what looks like shorter runners. Fancy coated pistons from factory: Alloy intake manifold to deal with air/fuel pumping back in and out of it: So the intake manifold might be a decent swap for a normal 1NZ And some prius weirdos have put the normal 1NZ intake cam in, to make it 13:1 comp in a more normal sort of way which is pretty lush. It would probably go decently by retarding the intake cam a whole bunch so its normal cycle then advancing inlet at high rpm when overlap is useful for power. It has forged steel rods but checking part numbers its the same as normal 1NZ. You can buy a whole prius engine for about 500 bucks. Definitely not going to do that any time soon but once my new shed is sorted I might buy one and tuck it away for a rainy day.
1 point
-
Along those lines, this is one of the internet greats https://nerocam.com/SCC_TAP.asp1 point
-
On the weight loss theme. A mate and I had a 4wd Subaru Leone wagon we thought we'd make into an off road buggy. We removed all panels and doors, chopped off the roof at the bottom of the windscreen height, chopped the back off at the rear most suspension mounting point and put the fuel tank where the back seat was. Added a single roll over bar and a bar across the tops of the chopped pillars. Now this isn't recommended for a tidy road going car but the performance increase was staggering. In the length of an industrial Dunedin block (maybe 100-150m max) we were cracking 130kph, it kicked the ass off my Mazda gtx at the time too. Never did take it off roading though, someone drove past and offered good coin for it. And that's my story.1 point


.jpg.bbb4bd5fe7a2a28422a0b82a2cc85c31.jpg)


This leaderboard is set to Auckland/GMT+12:00