
Leaderboard


Popular Content
Showing content with the highest reputation on 20/06/20 in all areas
-
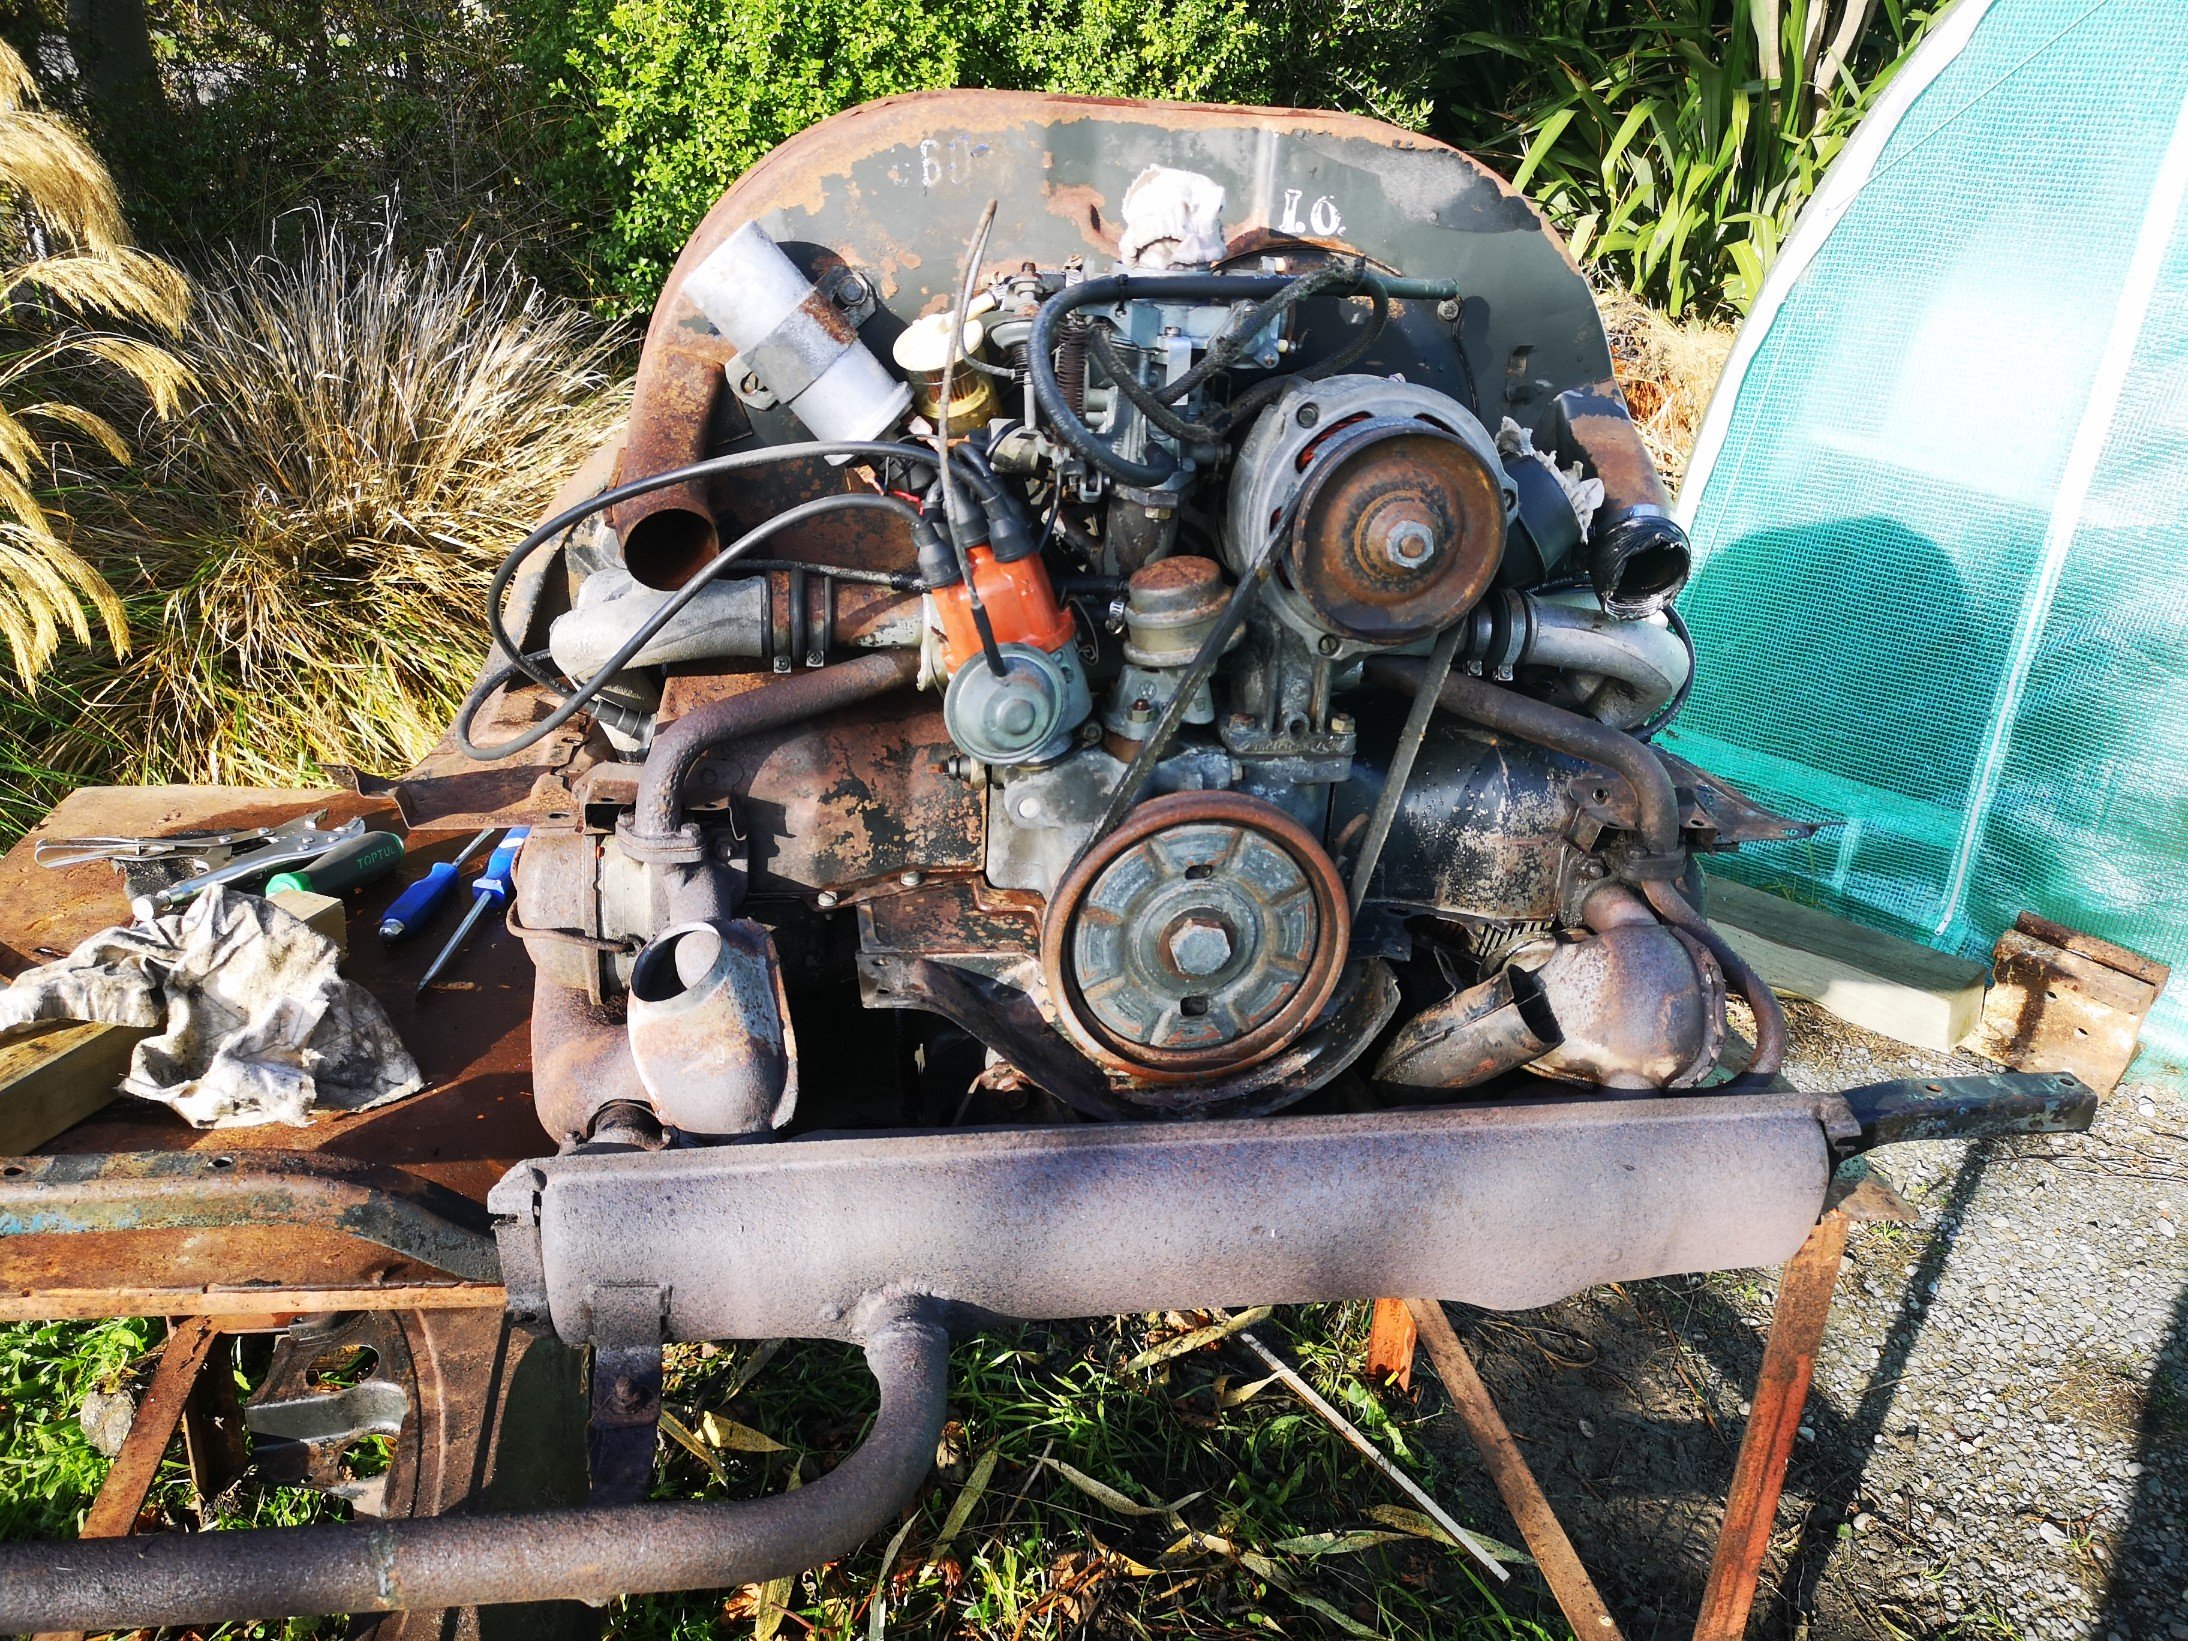
The EJ Holden moves under its own power, probably for the first time since 1994 and possibly 1990. Managed to get round to my mates place about half a k away and back. Found a water leak from it looks like the lower radiator hose. The brakes have a reasonable amount of travel and need a good shove but work OK. I'm going to have another go at adjusting up the rear brakes tomorrow. The steering isn't too heavy, not power steering but not bad. Lots of little but time consuming things to do. The electric fan is on all the time, I suspect the temperature sender has died, it's buried under the throttle body so that has to come out to check the sender. I installed my new H4 semi sealed beam headlights. They are flatter than the old fully sealed beams but worth it for the brightness. Lots still to do but massive step forward. I think this car is going to be lots of fun.11 points
-
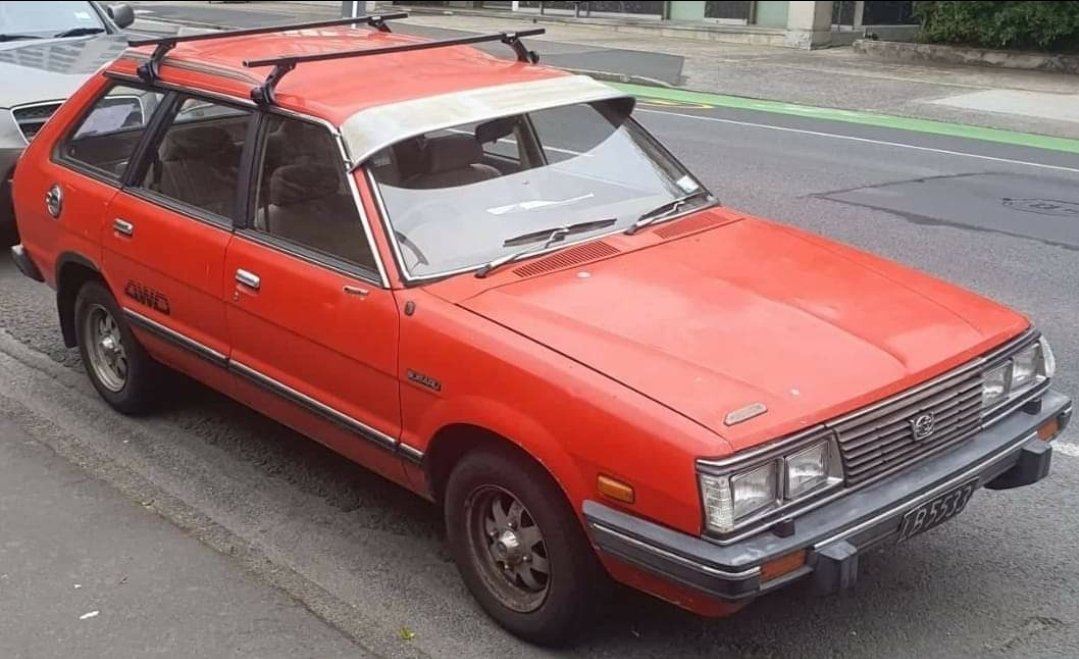
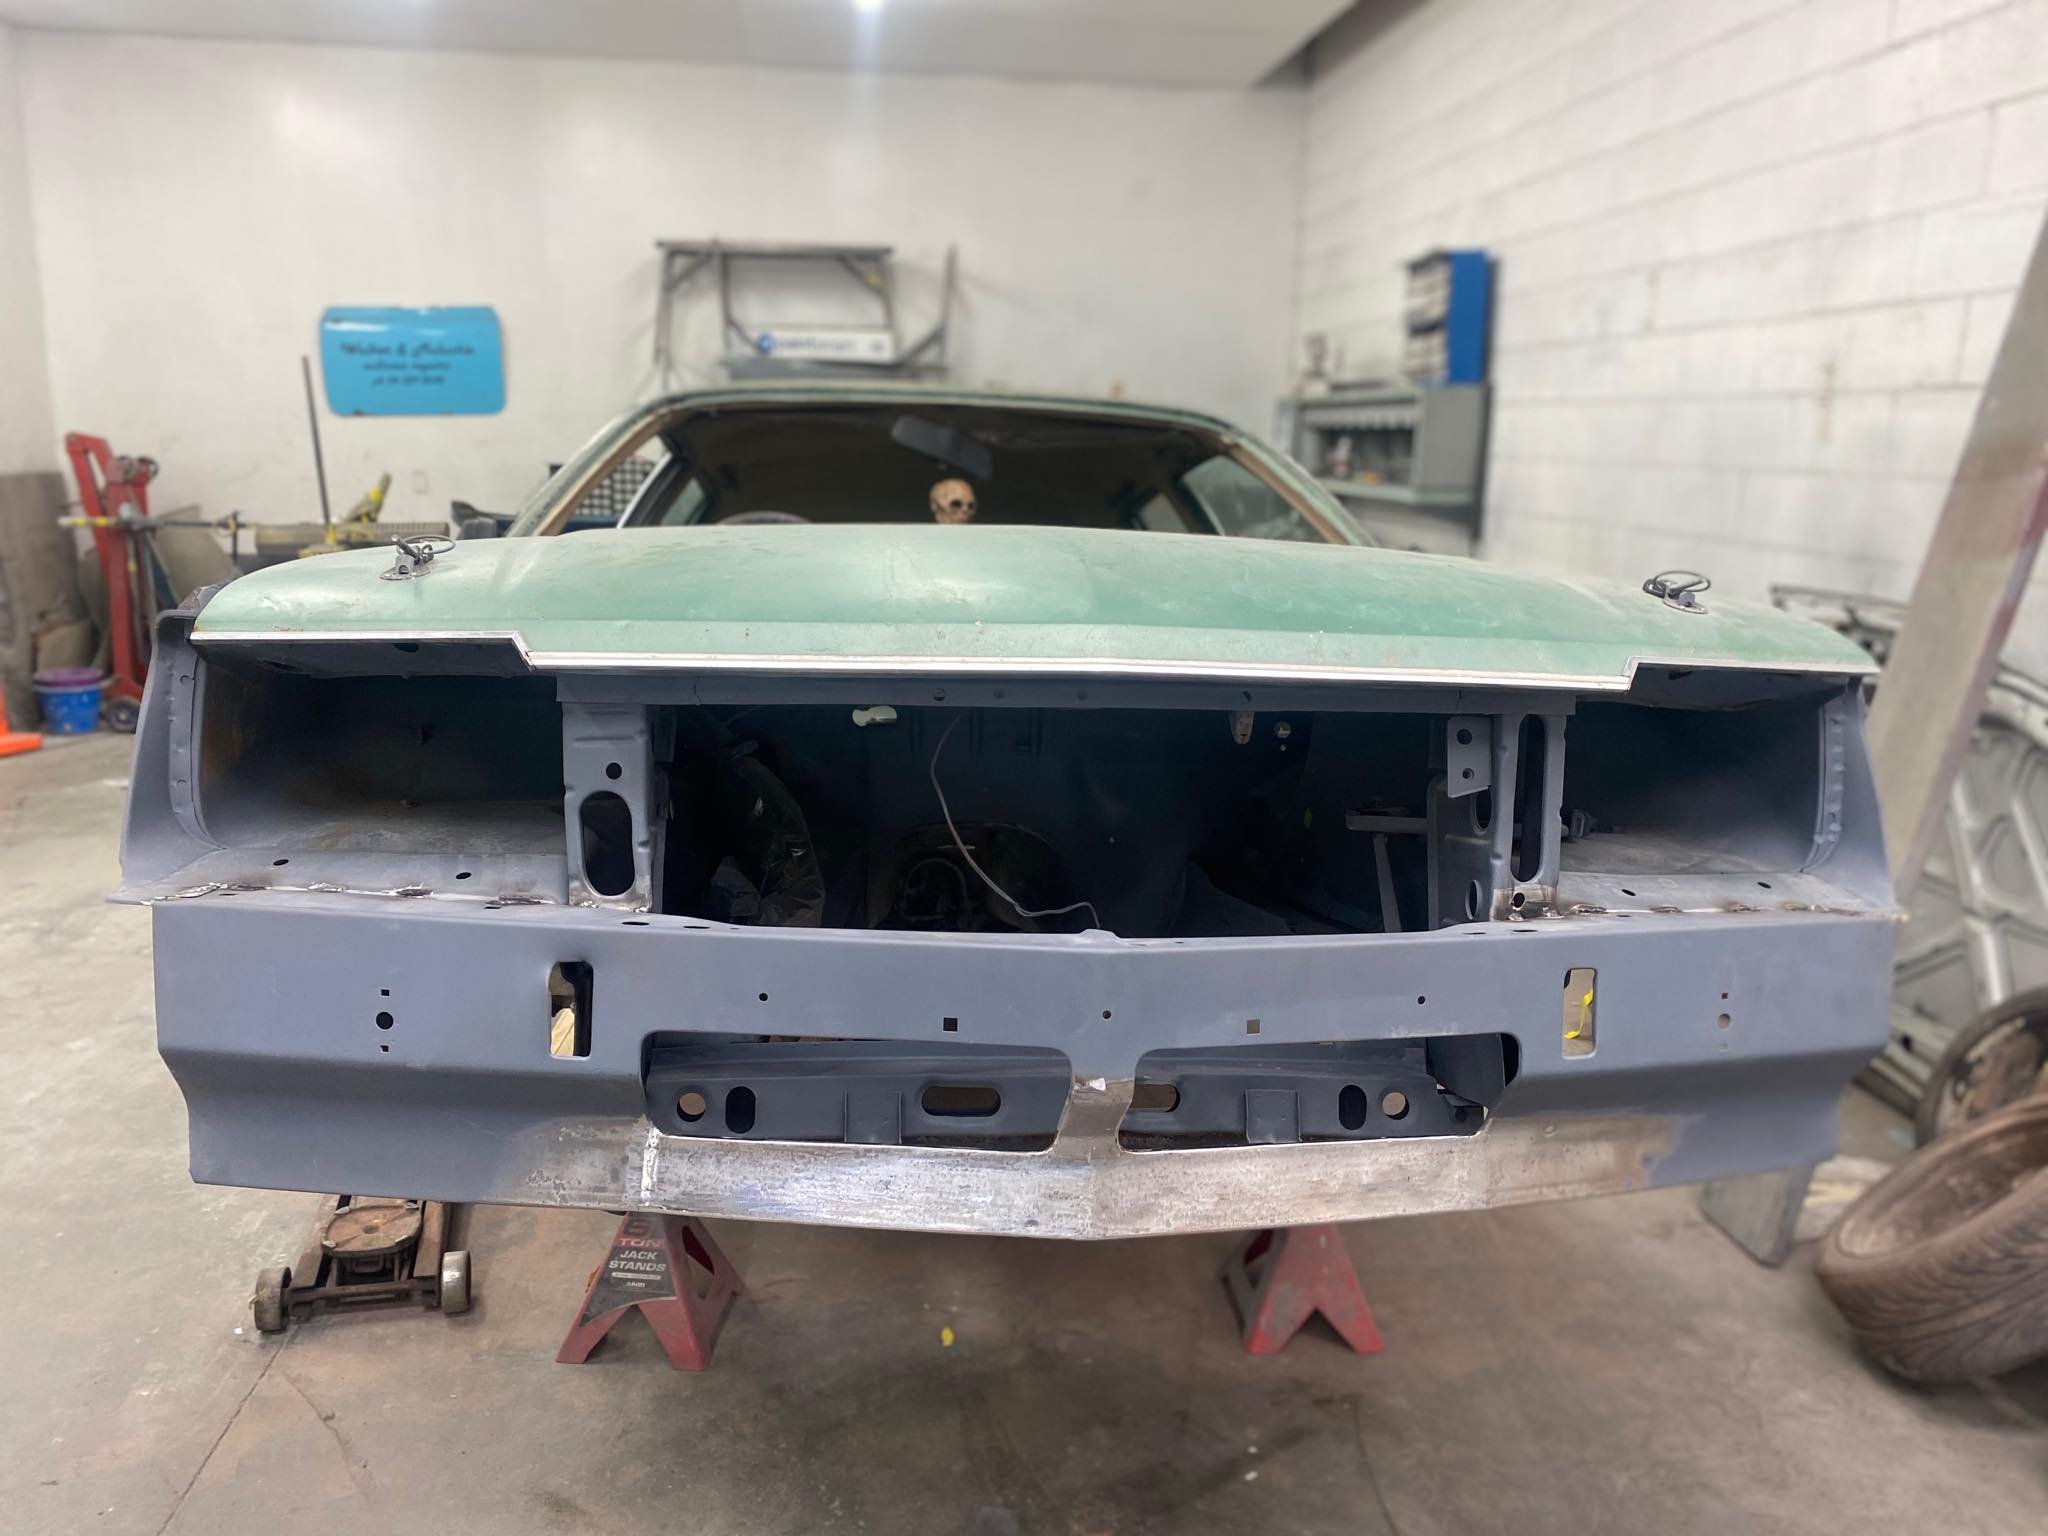
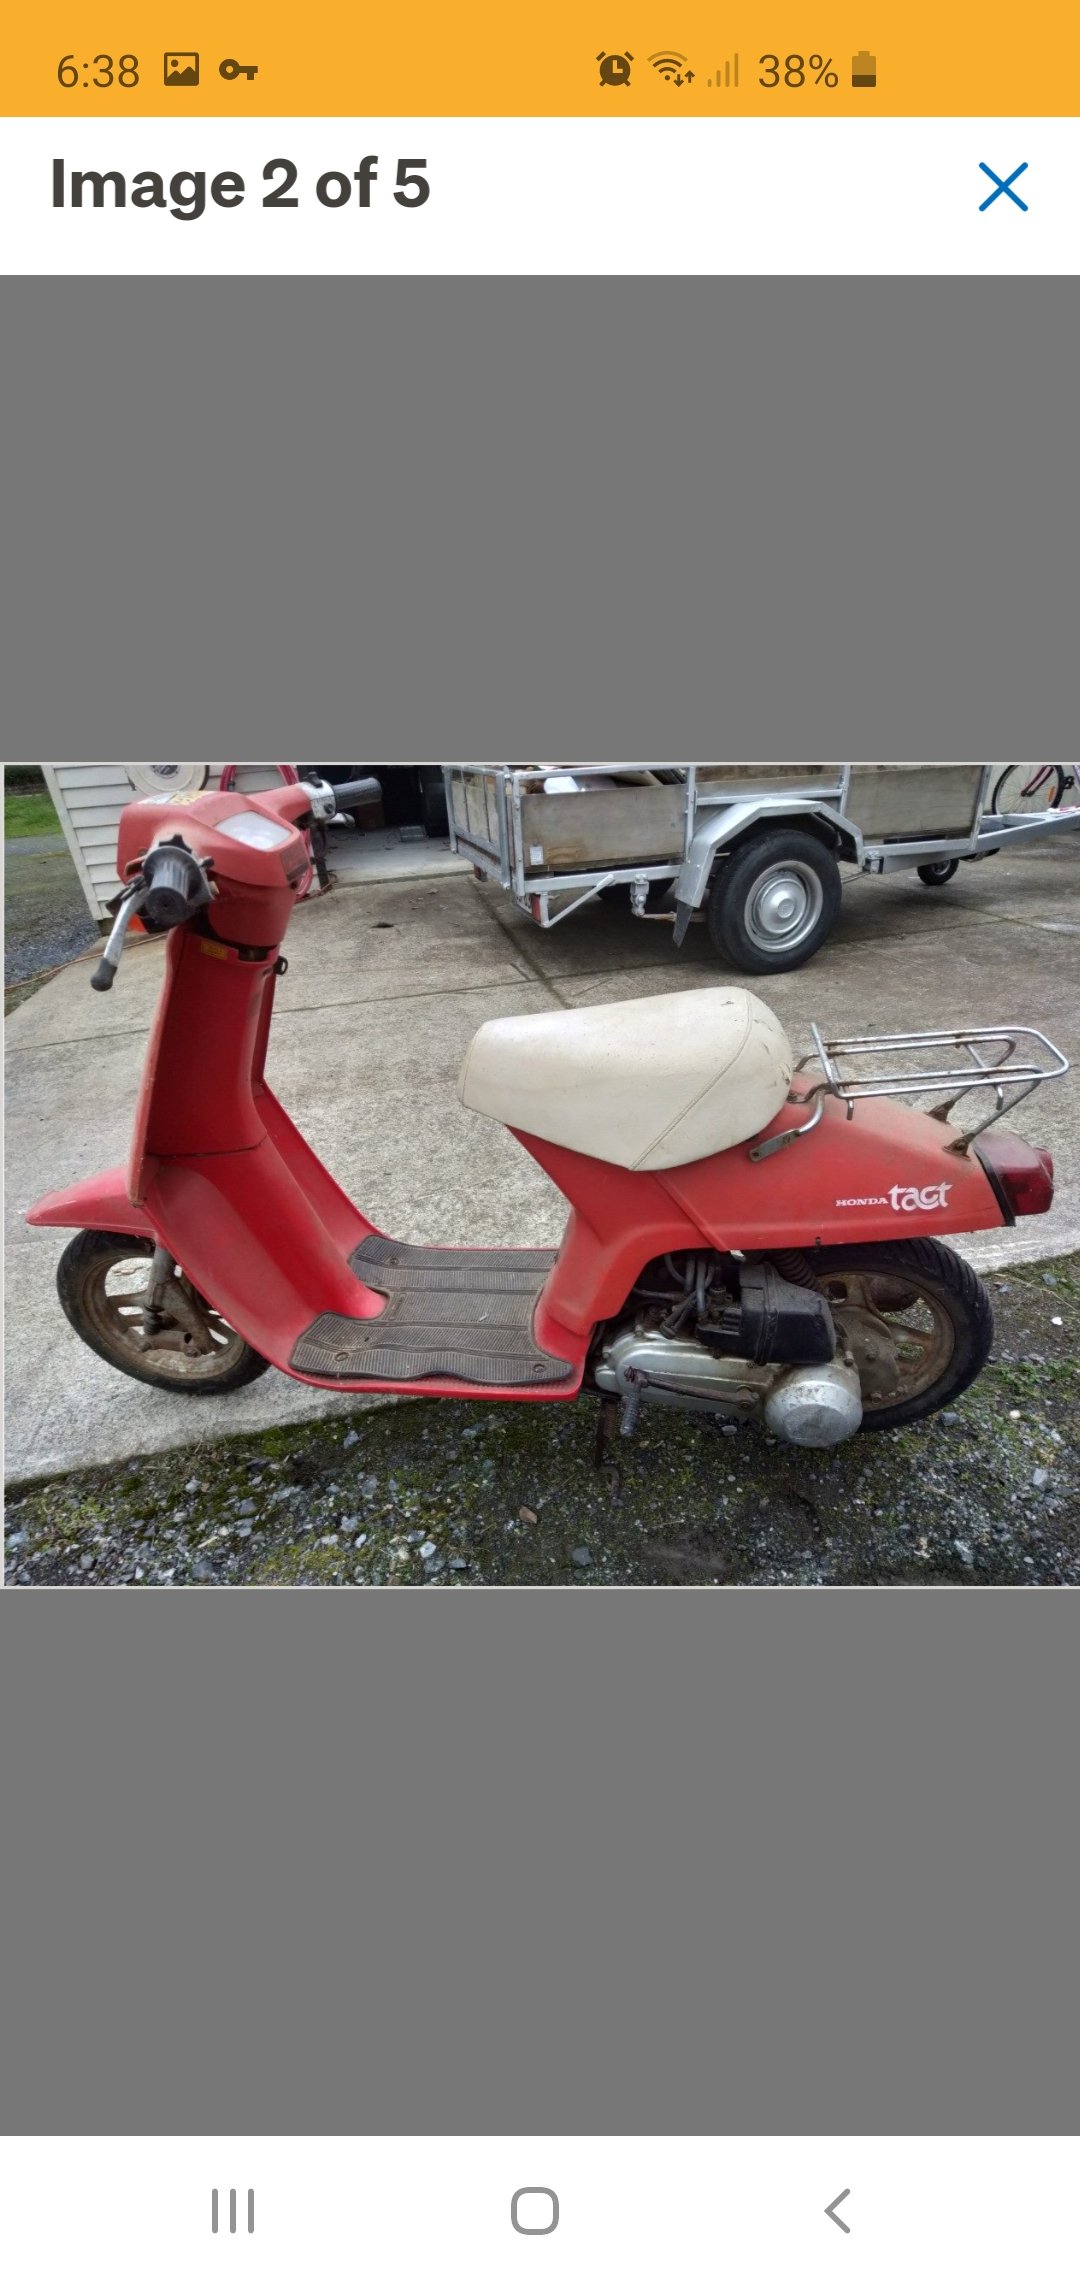
Got this as daily hack. have fixed a fair bit of cancer. Ideal plan is to tidy up as much as possible without a full ground up build....maybe a set of custom rims.. dont have a lot of photos as such but here is one I took before I bought it. The previous owner lived it so I'm continuing the legacy Discussion thread
 7 points
 -
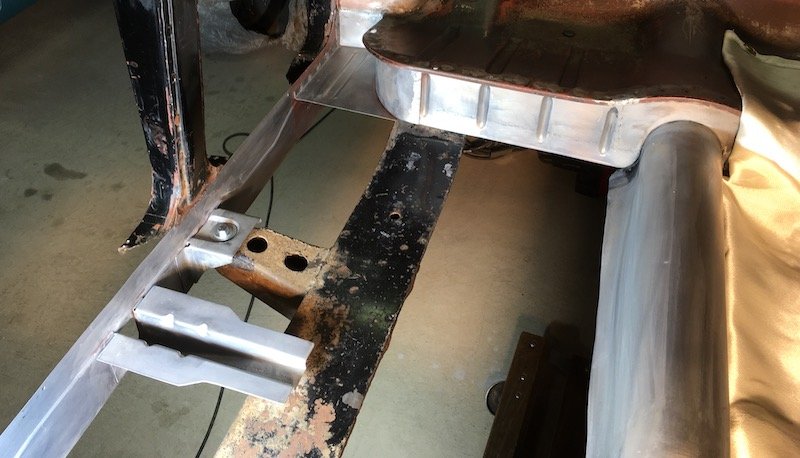
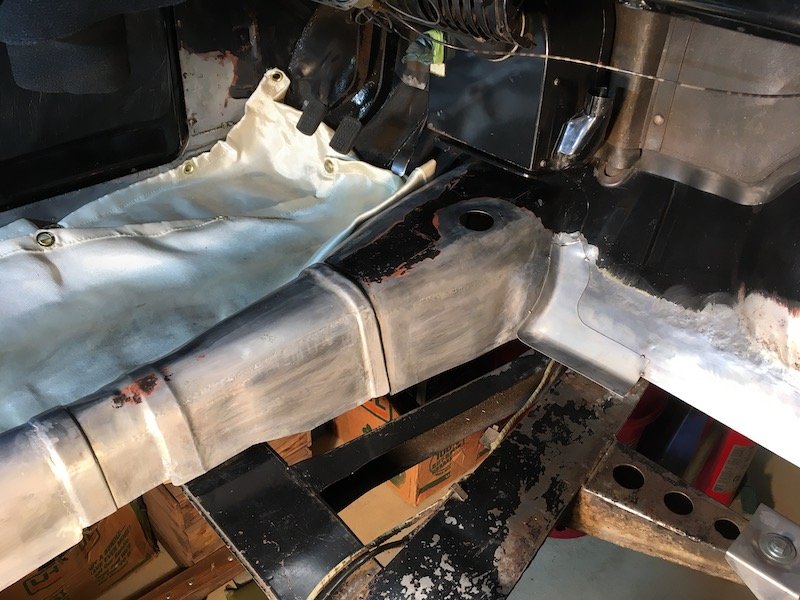
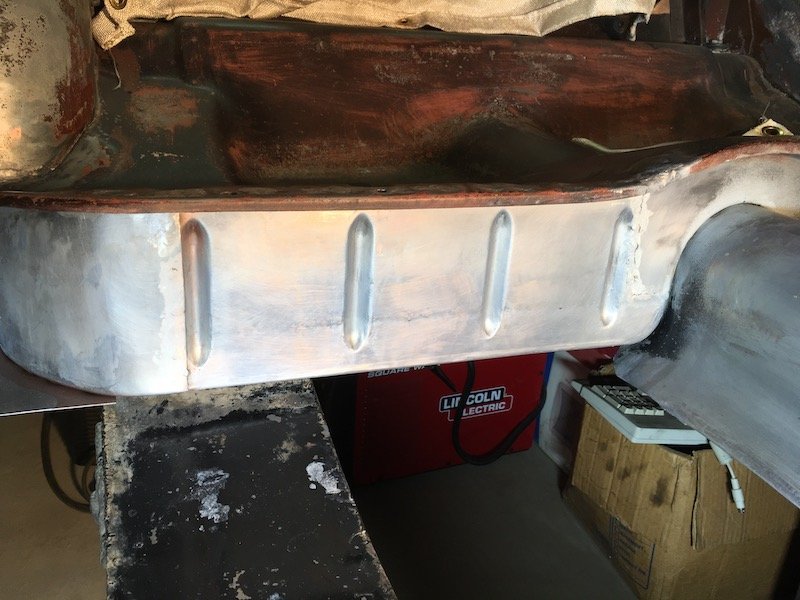
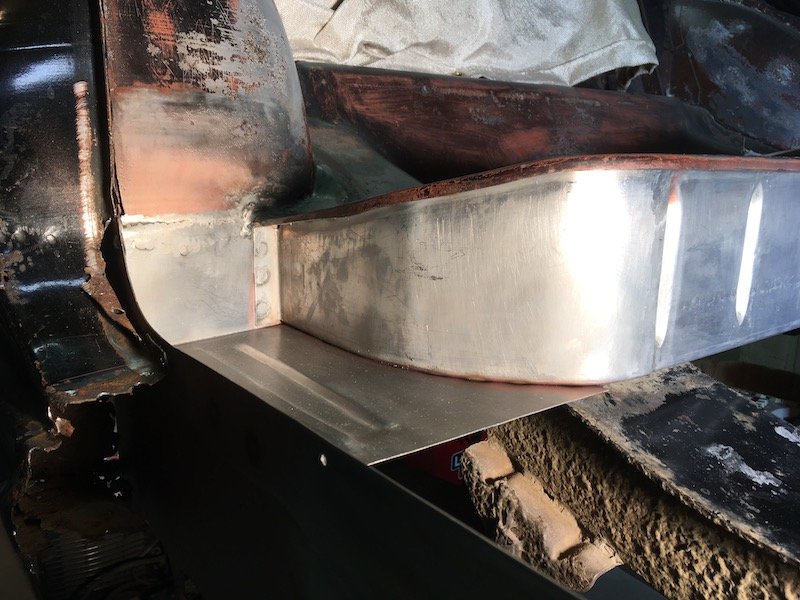
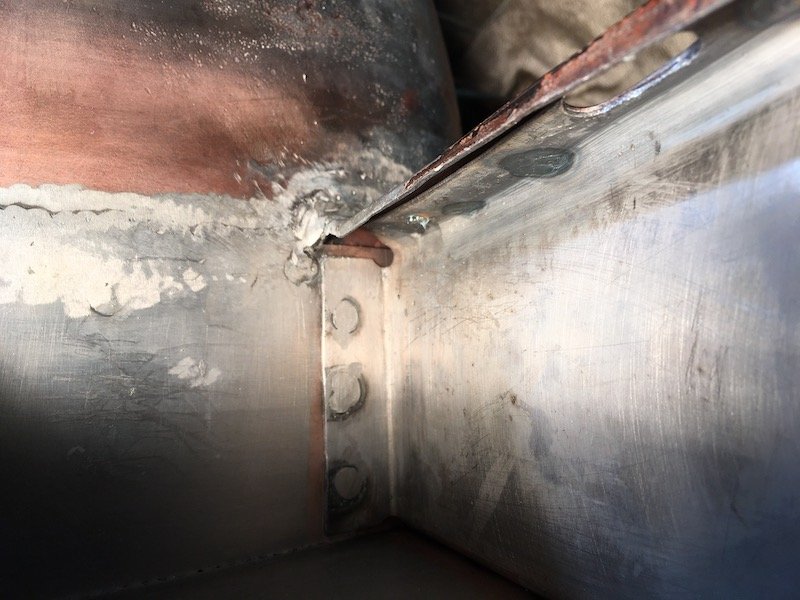
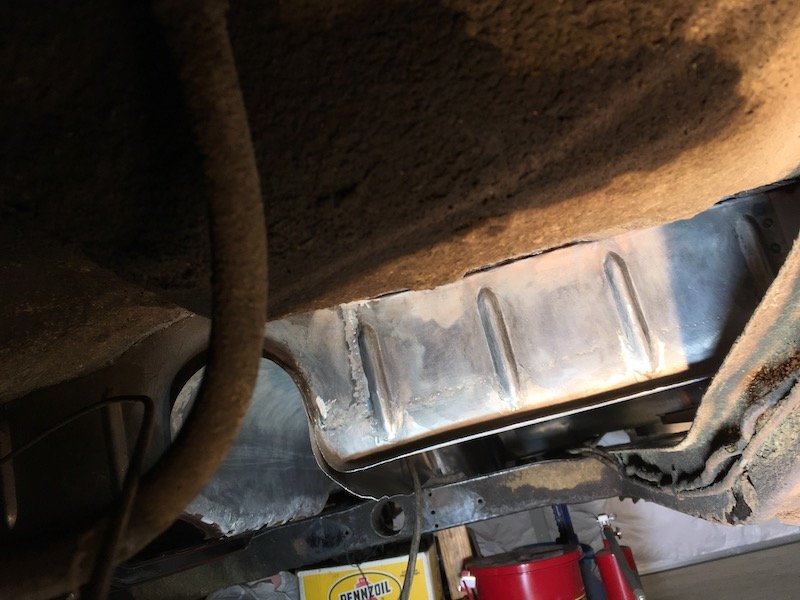
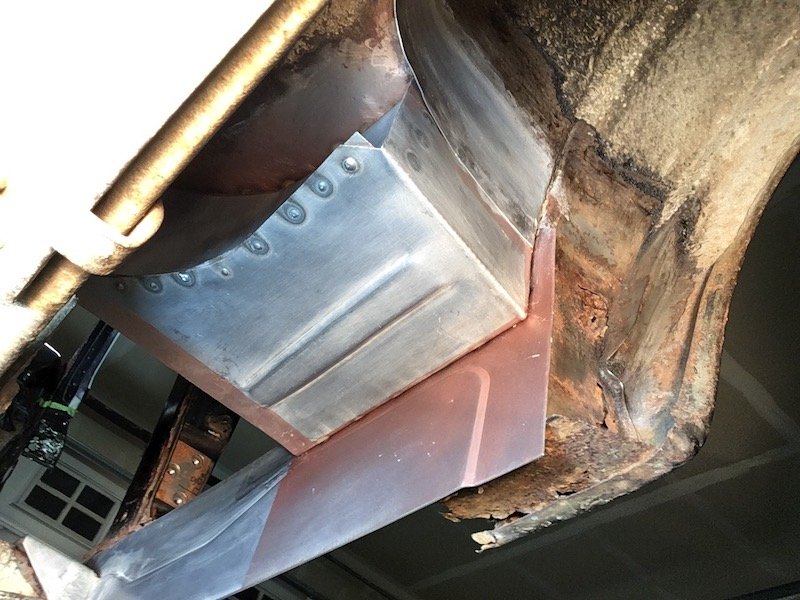
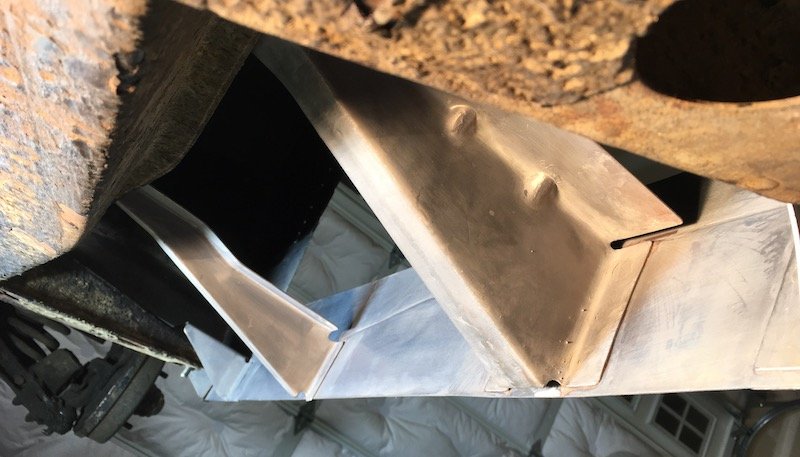
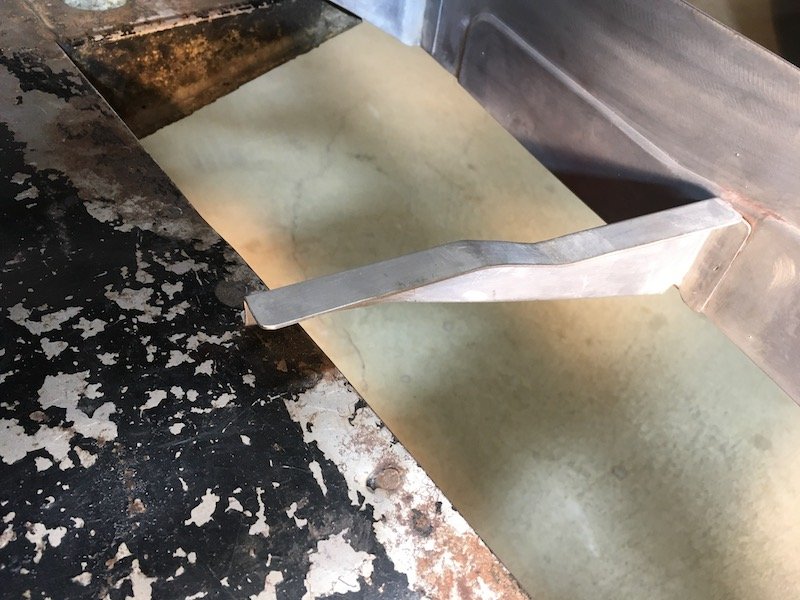
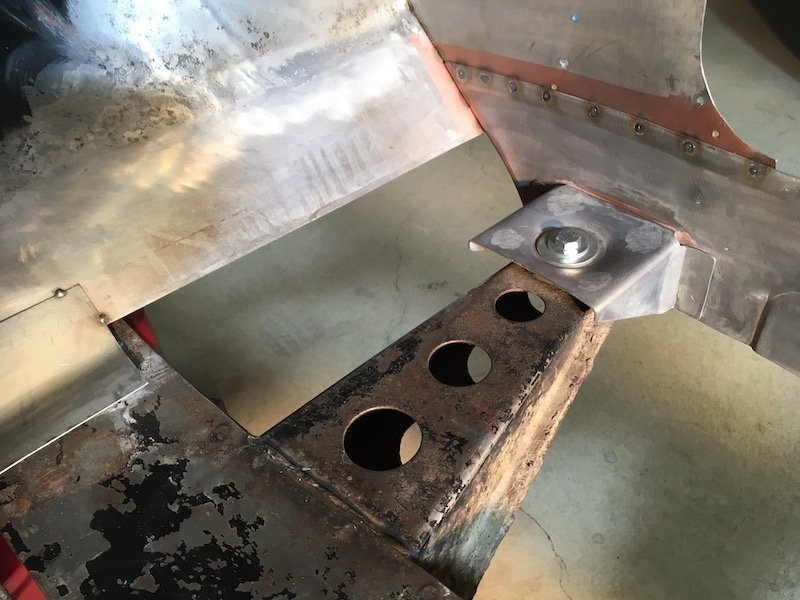
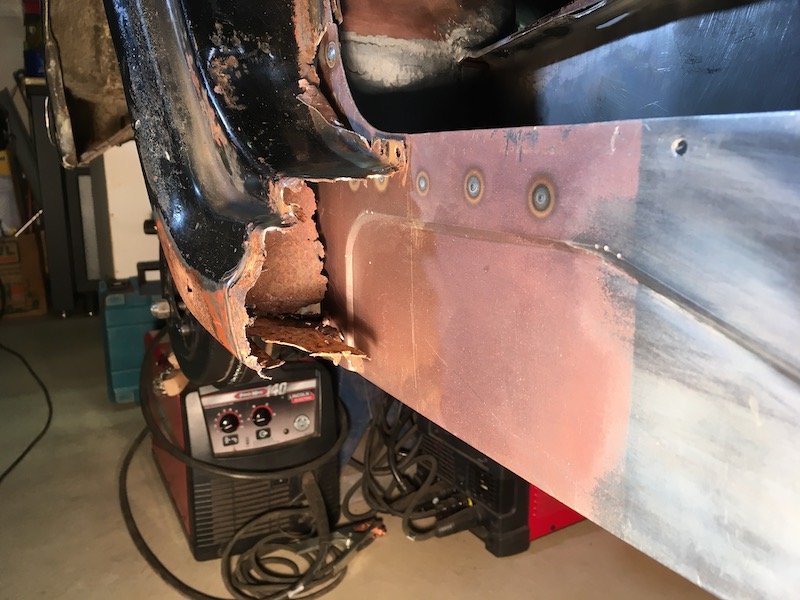
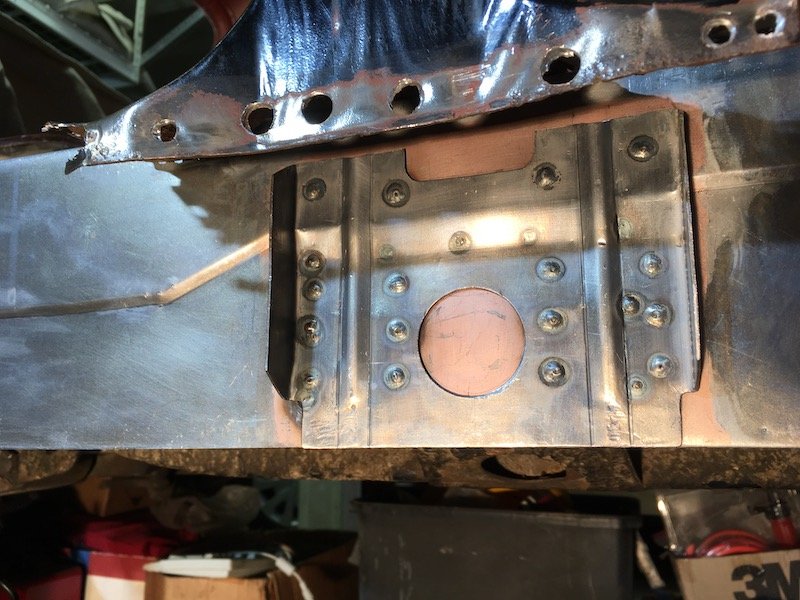
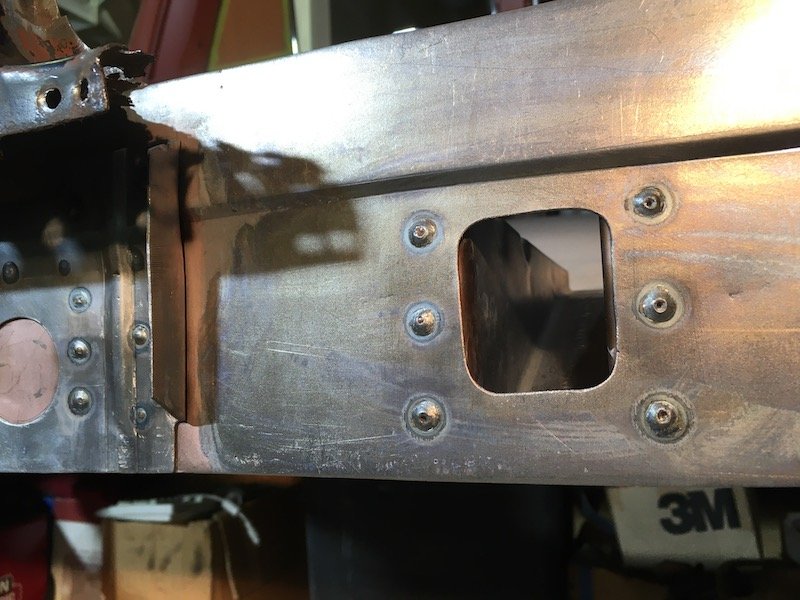
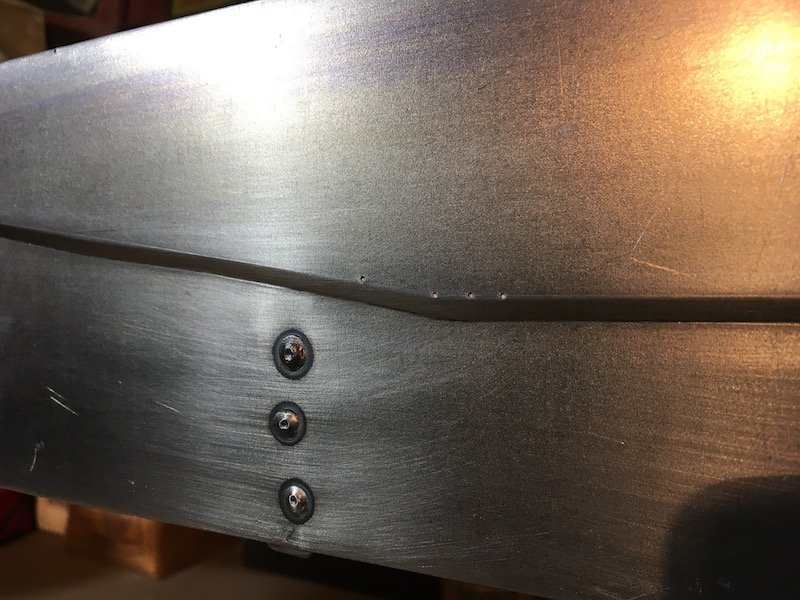
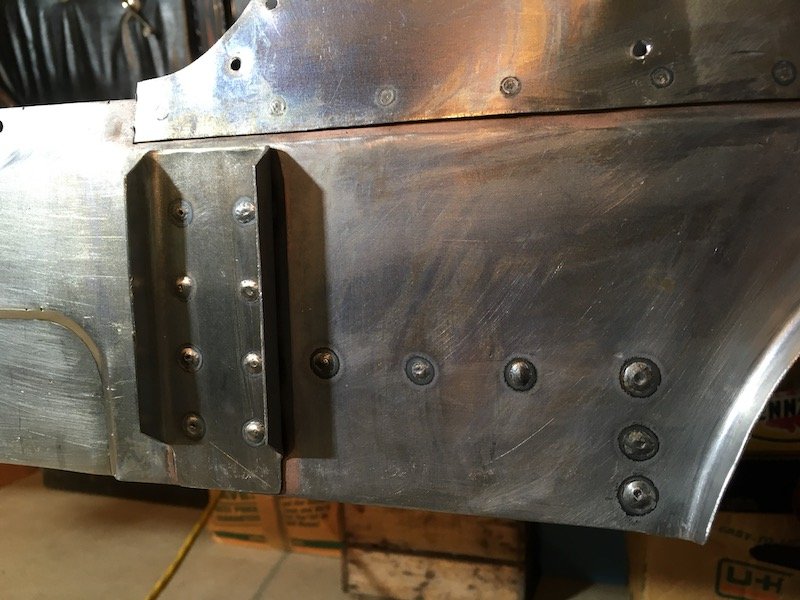
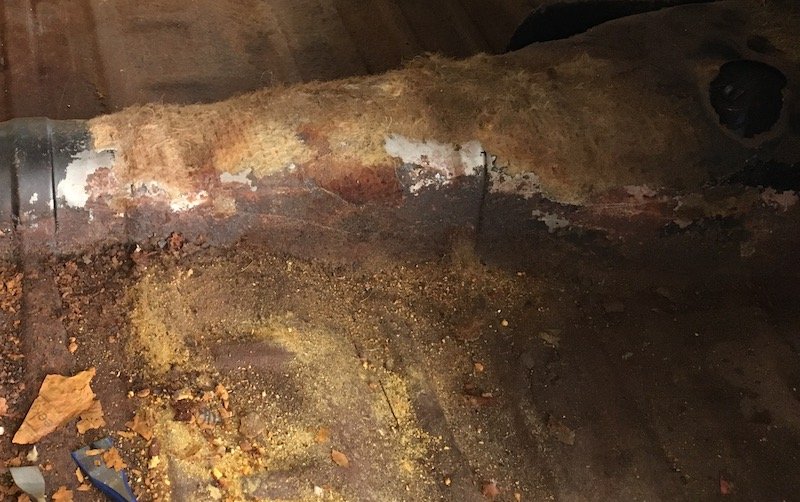
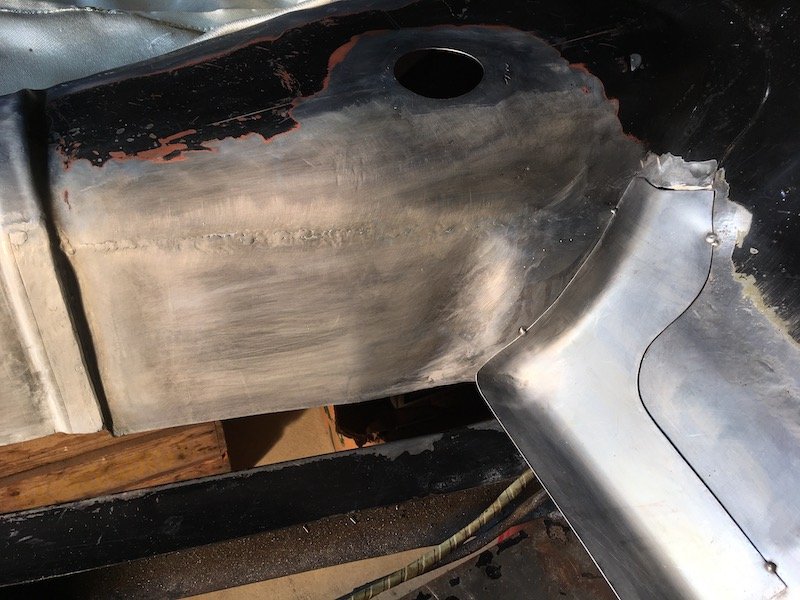
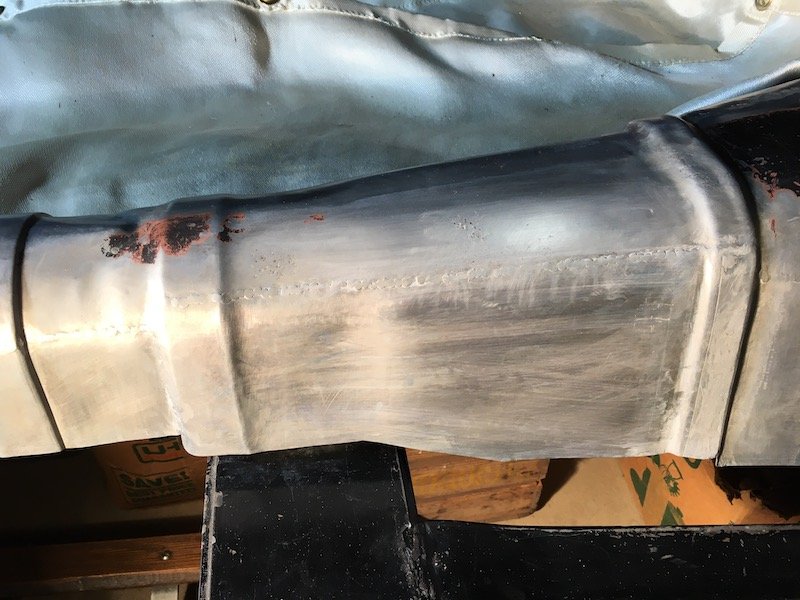
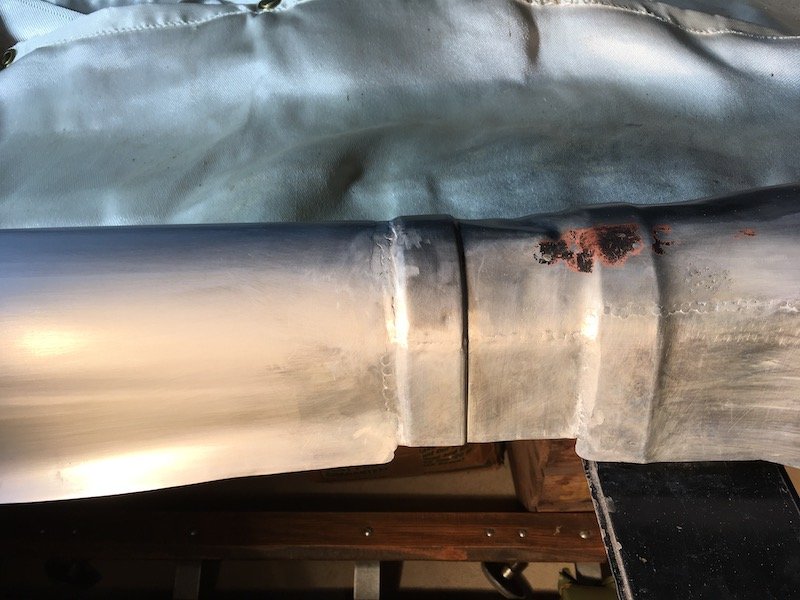
I have been picking away at this radiator piping all week, my back heartily disapproves of grovelling on the concrete, I may have to find a crawler.. First thing I did was create something to make beads on that pipe, this seemed like a good idea but the pipe is 1.6mm wall thickness and quite resistant to change. Fortunately I have a large press, so this seemed a good way to do it; Works fucking sweet, just press and spin, press and spin etc. It is scary when you over do it and the two 8mm weld beads go pop, but otherwise uneventful. Then I just cracked on, some of these boys go complicated; Then I chucked them into place today; They have come up good, hopefully there are no leaks, I was in the zone when doing it but there is always room for a fuckup. A couple of pics up you can see the drain plug I put in a relatively protected spot, but I reckon a skid guard is on the cards regardless. You can also see the vent on the top of the rad which should help get the air out... I just have to get what was the side drawer face mounted on hinges, find a feed for the fan relay then bolt everything back together. Getting to the clutch slave will now be way more fun than it was. In other news I believe I have well and truly sorted the brake situation, things are in transit right now and I will post a pic when that package arrives.....6 points
-
I guess I ought to, even if it is only to harvest the phone numbers of your respective wives and mothers.4 points
-
Building the 1961 Datsun 310 Bluebird - Right side completed periphery structures. A flood of pics to display the completed right hand side periphery structures. This will provide solid support for the future floor build. And on the work goes until the Bluebird rust be banished. Discussion: https://oldschool.co.nz/index.php?/topic/60267-marts-pl310-61-datsun-bluebird-sedan/ Build: https://oldschool.co.nz/index.php?/topic/60264-marts-pl310-61-datsun-bluebird-sedan/
4 points
-
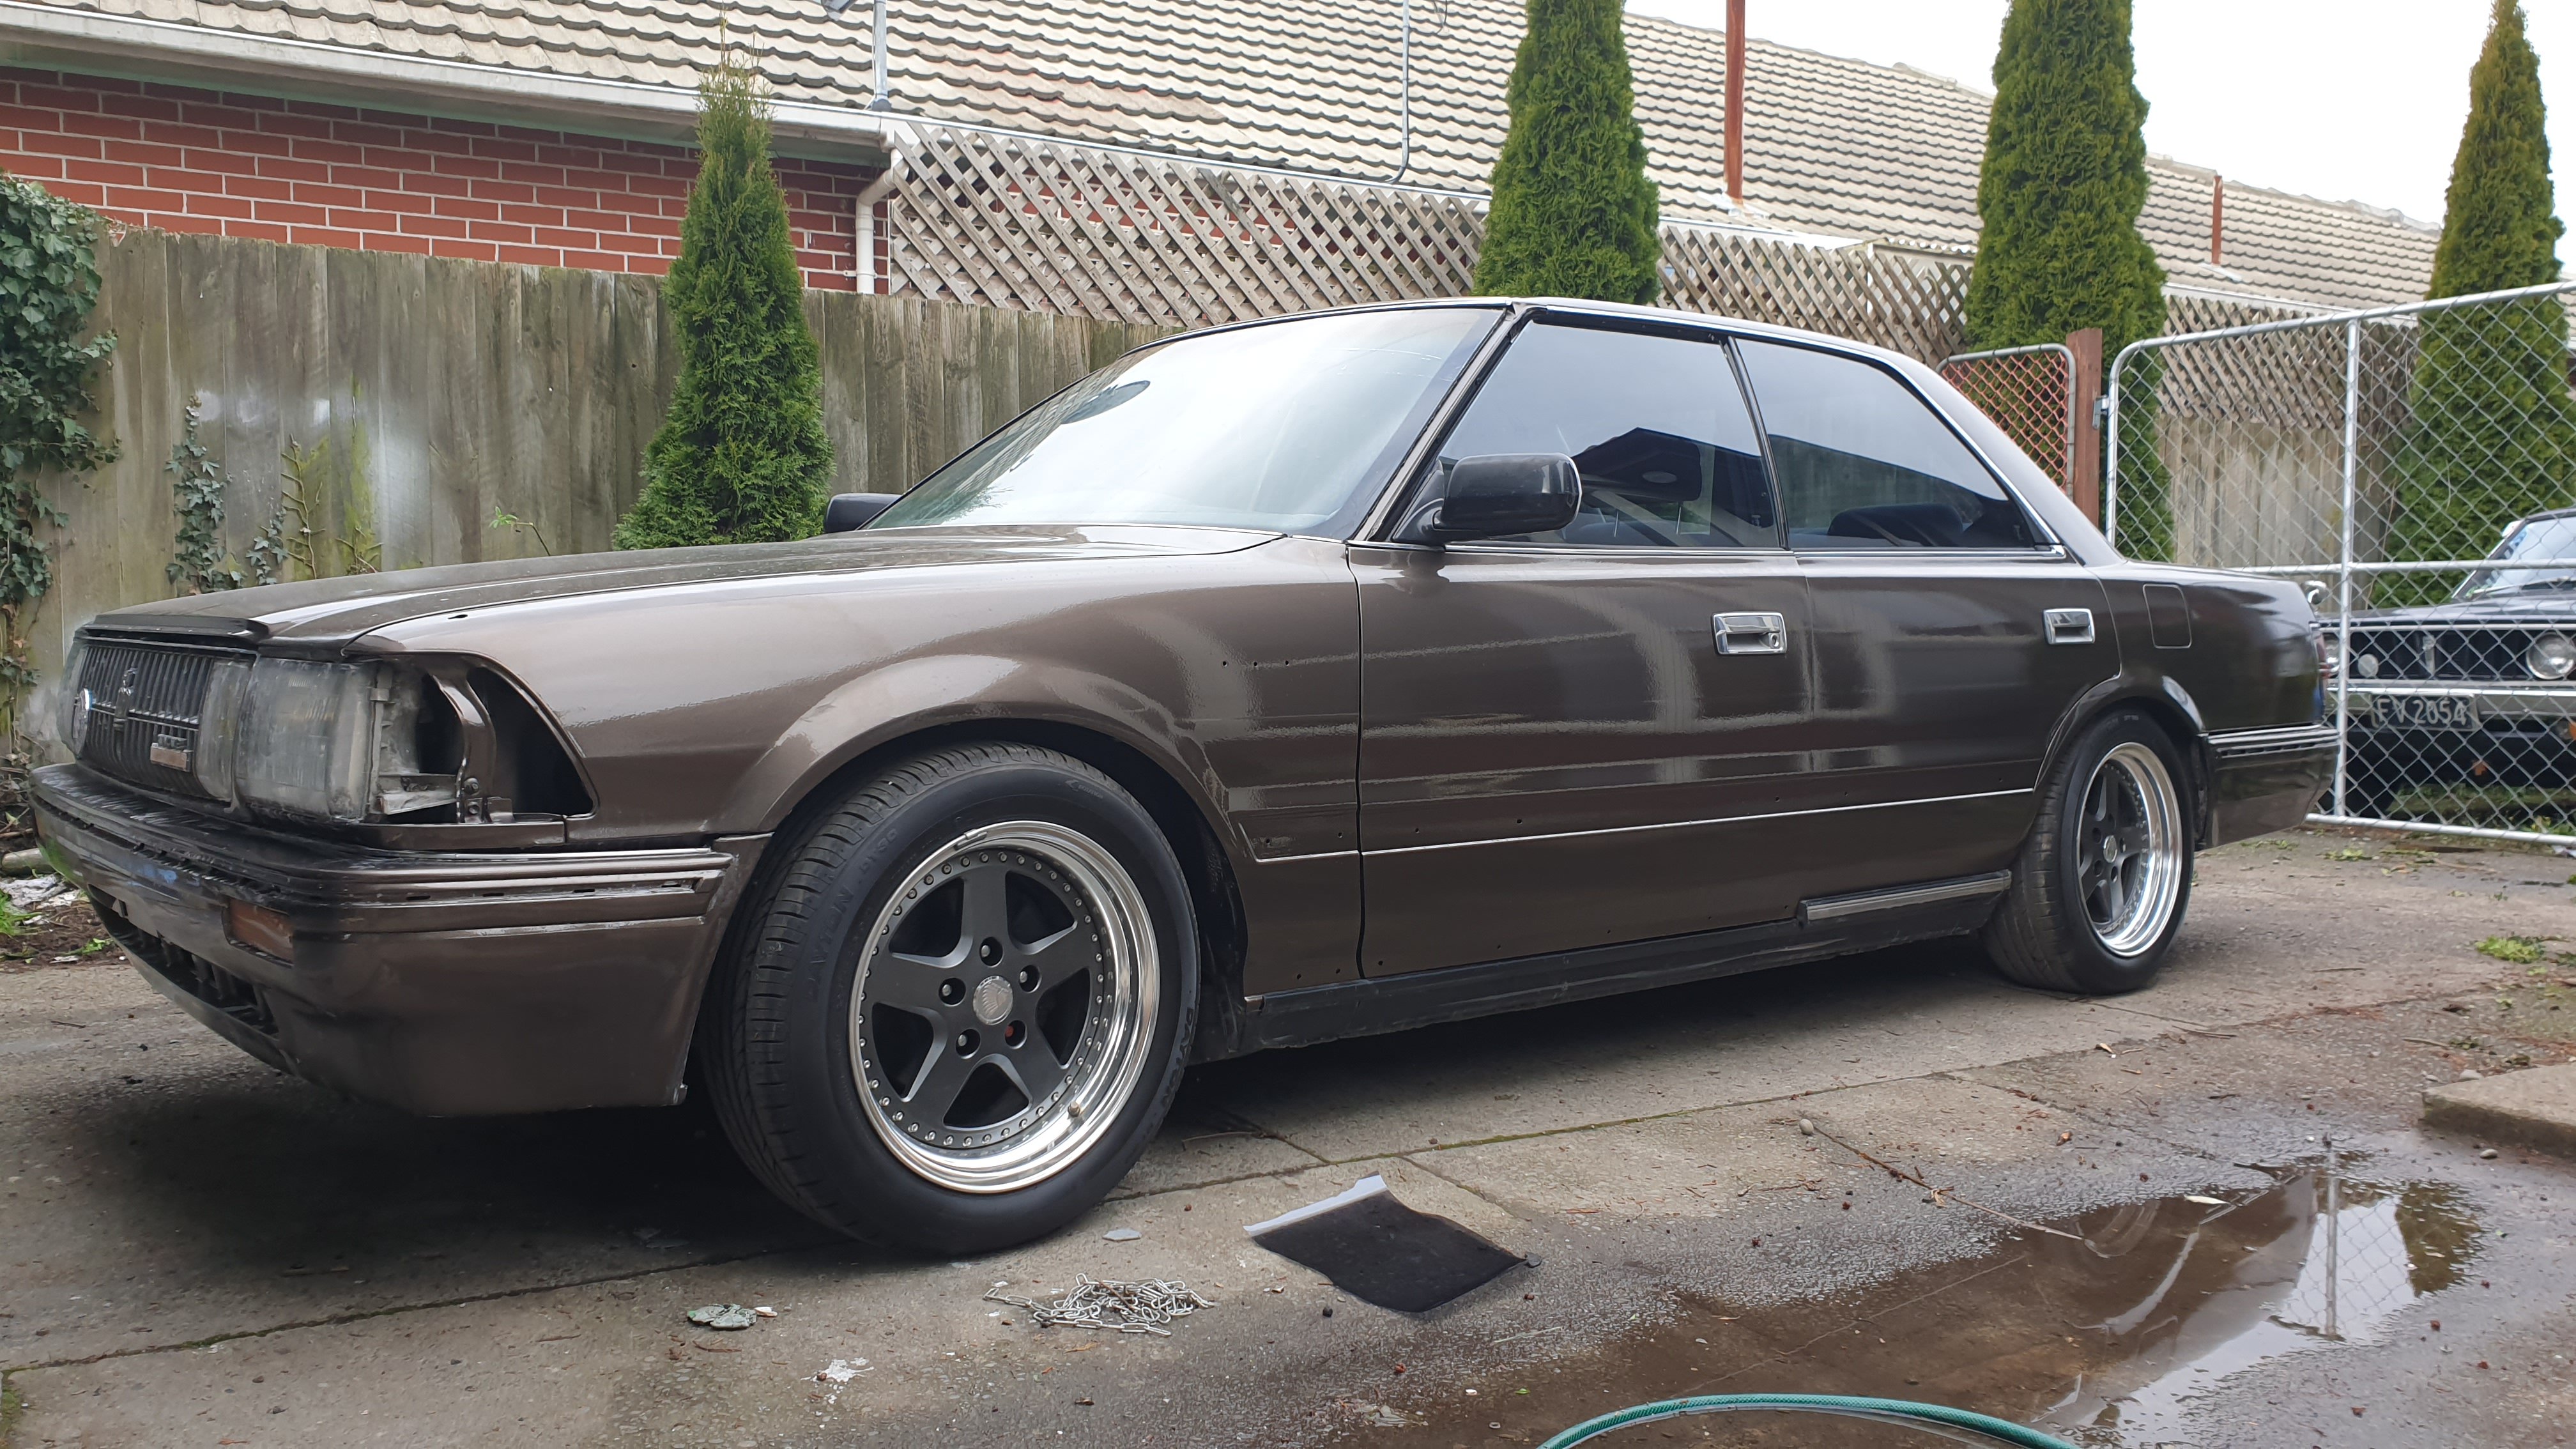
Picked up some good quality window tint from @Archetype. As expected I wasn't able to do a good job of the rear screen and I'm happy to pay someone to do that later on, but the sides went flawlessly and I'm so pleased I opted to tint the car. Should help heaps with it being an oven in summer. The car is all but complete and back together, things lefts are to cut back the orange peel and buff it aswell as fit the manual trans. l
4 points
-
Building the 1961 Datsun 310 Bluebird - Right side inner sill and brackets. Rusty front section of inner sill before pic. Not worthy of a simple small patch. Inner body skin above it is also rusted out. A-post body mount bracket not looking too good either.All get replaced. Drilled out all the spot welds to the outer sill flanges and cut the gas welds at the posts. Hacked out the connections to the body jack pipe.The rusty inner sill is now ready to be pulled out. And it's out! A couple of pics to size it up against the new sill plate I built a couple of years ago. . And the brackets. four on the inside and two outside. I flattened the old forward end flange and use it as a template to trim the excess off my new inner sill. Bent the end to match the old and started welding the two new outer brackets on. Forming a recess in the A-post body mount bracket. 16g sheet proved quite resistant to 12 ton press. Eventually the press worked but did not produce a really clean edge, plus I have to fill in the clamping holes. I decided the B-post bracket will be made in two pieces. Making the B-post bracket. Sprayed some machinist blue die over my flat pattern copy and cut it out of 16g. Resulting flat pattern. Later on I bent up the flanges 90 degrees and then made the inside piece after making a little forming tool. Cut and welded it in. Made some indents to match the original with this setup. Angle iron brace and 3/8 inch rod that was pounded on to form the metal made soft with a gas torch. My four new brackets for the inboard side of sill. Position check for welding. Drilled and coated with some weld thru. Set up for plug welding. All goes smoothly. First and last fit check of the inner sill assembly. Exceeded my pic upload limit at this point. I pulled the sill out just to flange the upper edge for a lap fit same as original at and forward of the A-post. Welded the inner sill in at the front and back ends and then proceeded to cut most of the A-post off for future reproduction/reconstruction. Removed the outer sill as well. I'll post a set of summary photos of the periphery. Maybe tomorrow. So now the project is up to date with these last three posts and same number of months. The periphery is all welded in, ground, metal cleaned and etched. Working on the right side floor next. Not physically started on that floor as yet. I'm wanting to figure out ways to improve upon the left side floor just a bit. Discussion: https://oldschool.co.nz/index.php?/topic/60267-marts-pl310-61-datsun-bluebird-sedan/ Build: https://oldschool.co.nz/index.php?/topic/60264-marts-pl310-61-datsun-bluebird-sedan/
4 points
-
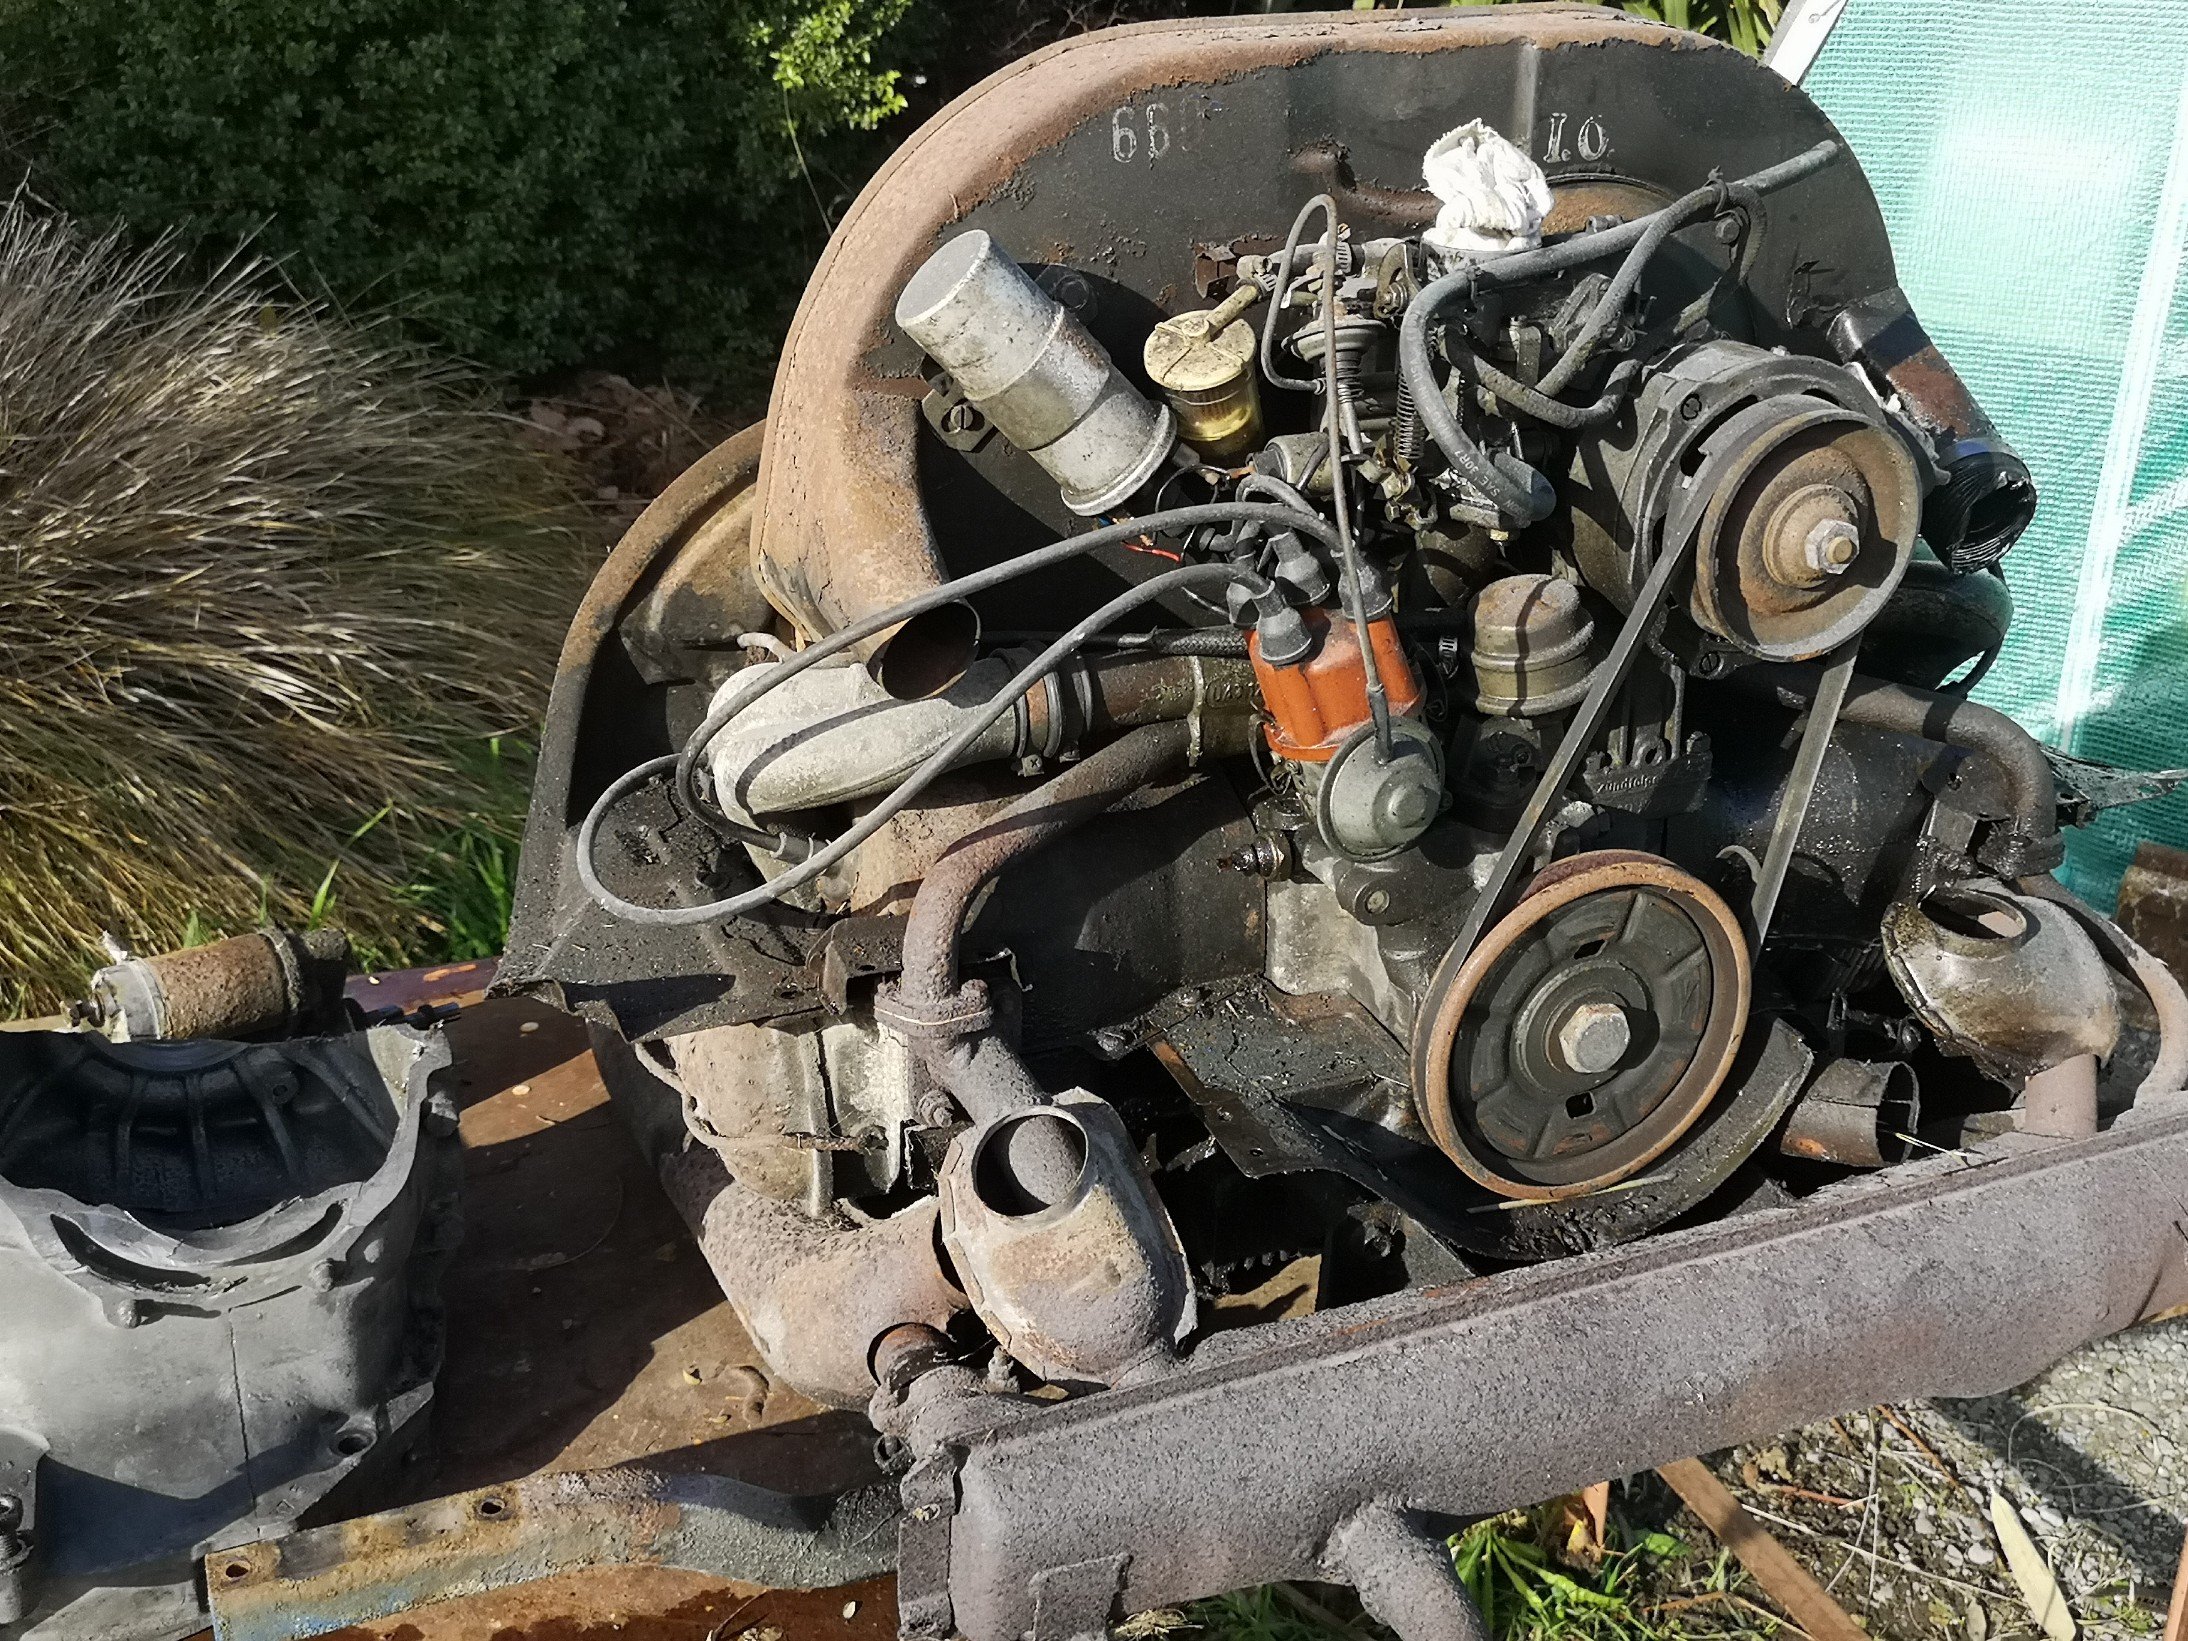
Pulled the engine this morning.. Took all of about 30 minutes. Took it home and gave it a clean Before, After, doesn't look it but I can assure you it has a lot less oil on it.. After doing some reading I've come to the realisation that my sister probably cooked the engine, there should be an engine seal around the tinware and also the heater pipes weren't on either, according to the gurus that be on the webs the engine bay should be totally sealed otherwise the engine will overheat.. Went out to buzz bug this morning and he confirmed what I thought, was good to chat to someone that knows they're shit. Gonna send him a list through of stuff for the engine, he's also getting in a bunch of rust repair panels which will suit our kombi..
3 points
-
As mentioned in spam I'm tired of waiting. Thanks to old mate @rb drifter we are off to collect a specimen tomorrow. Certainly not Hemi cool, but I think what I have in mind for this should get the forums approval. Pictures tomorrow......3 points
-
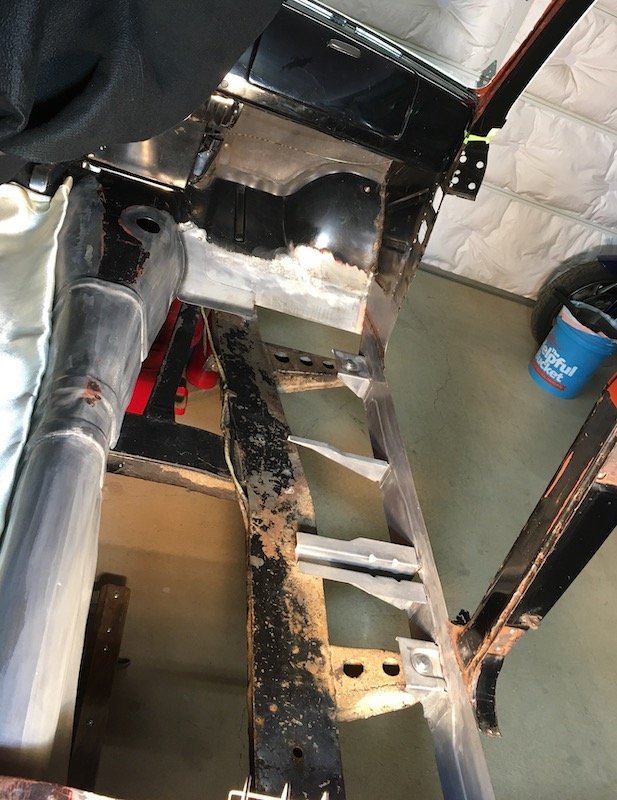
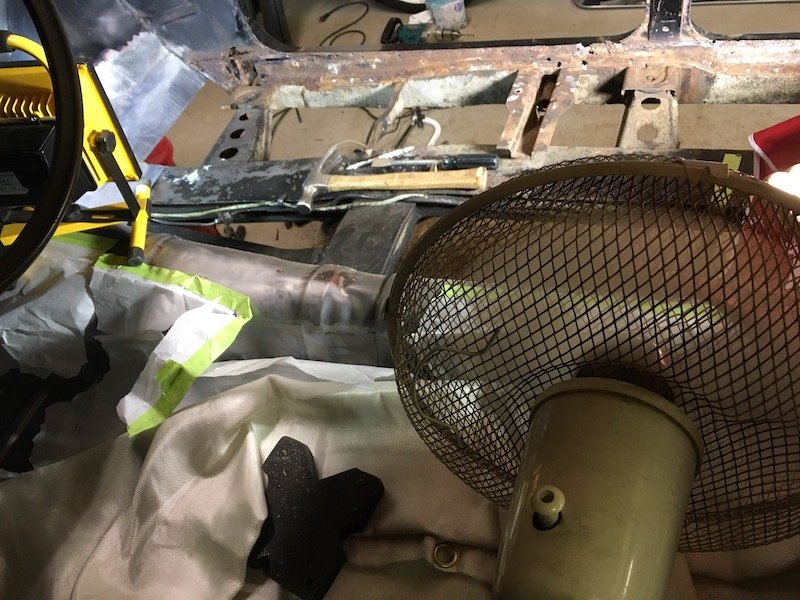
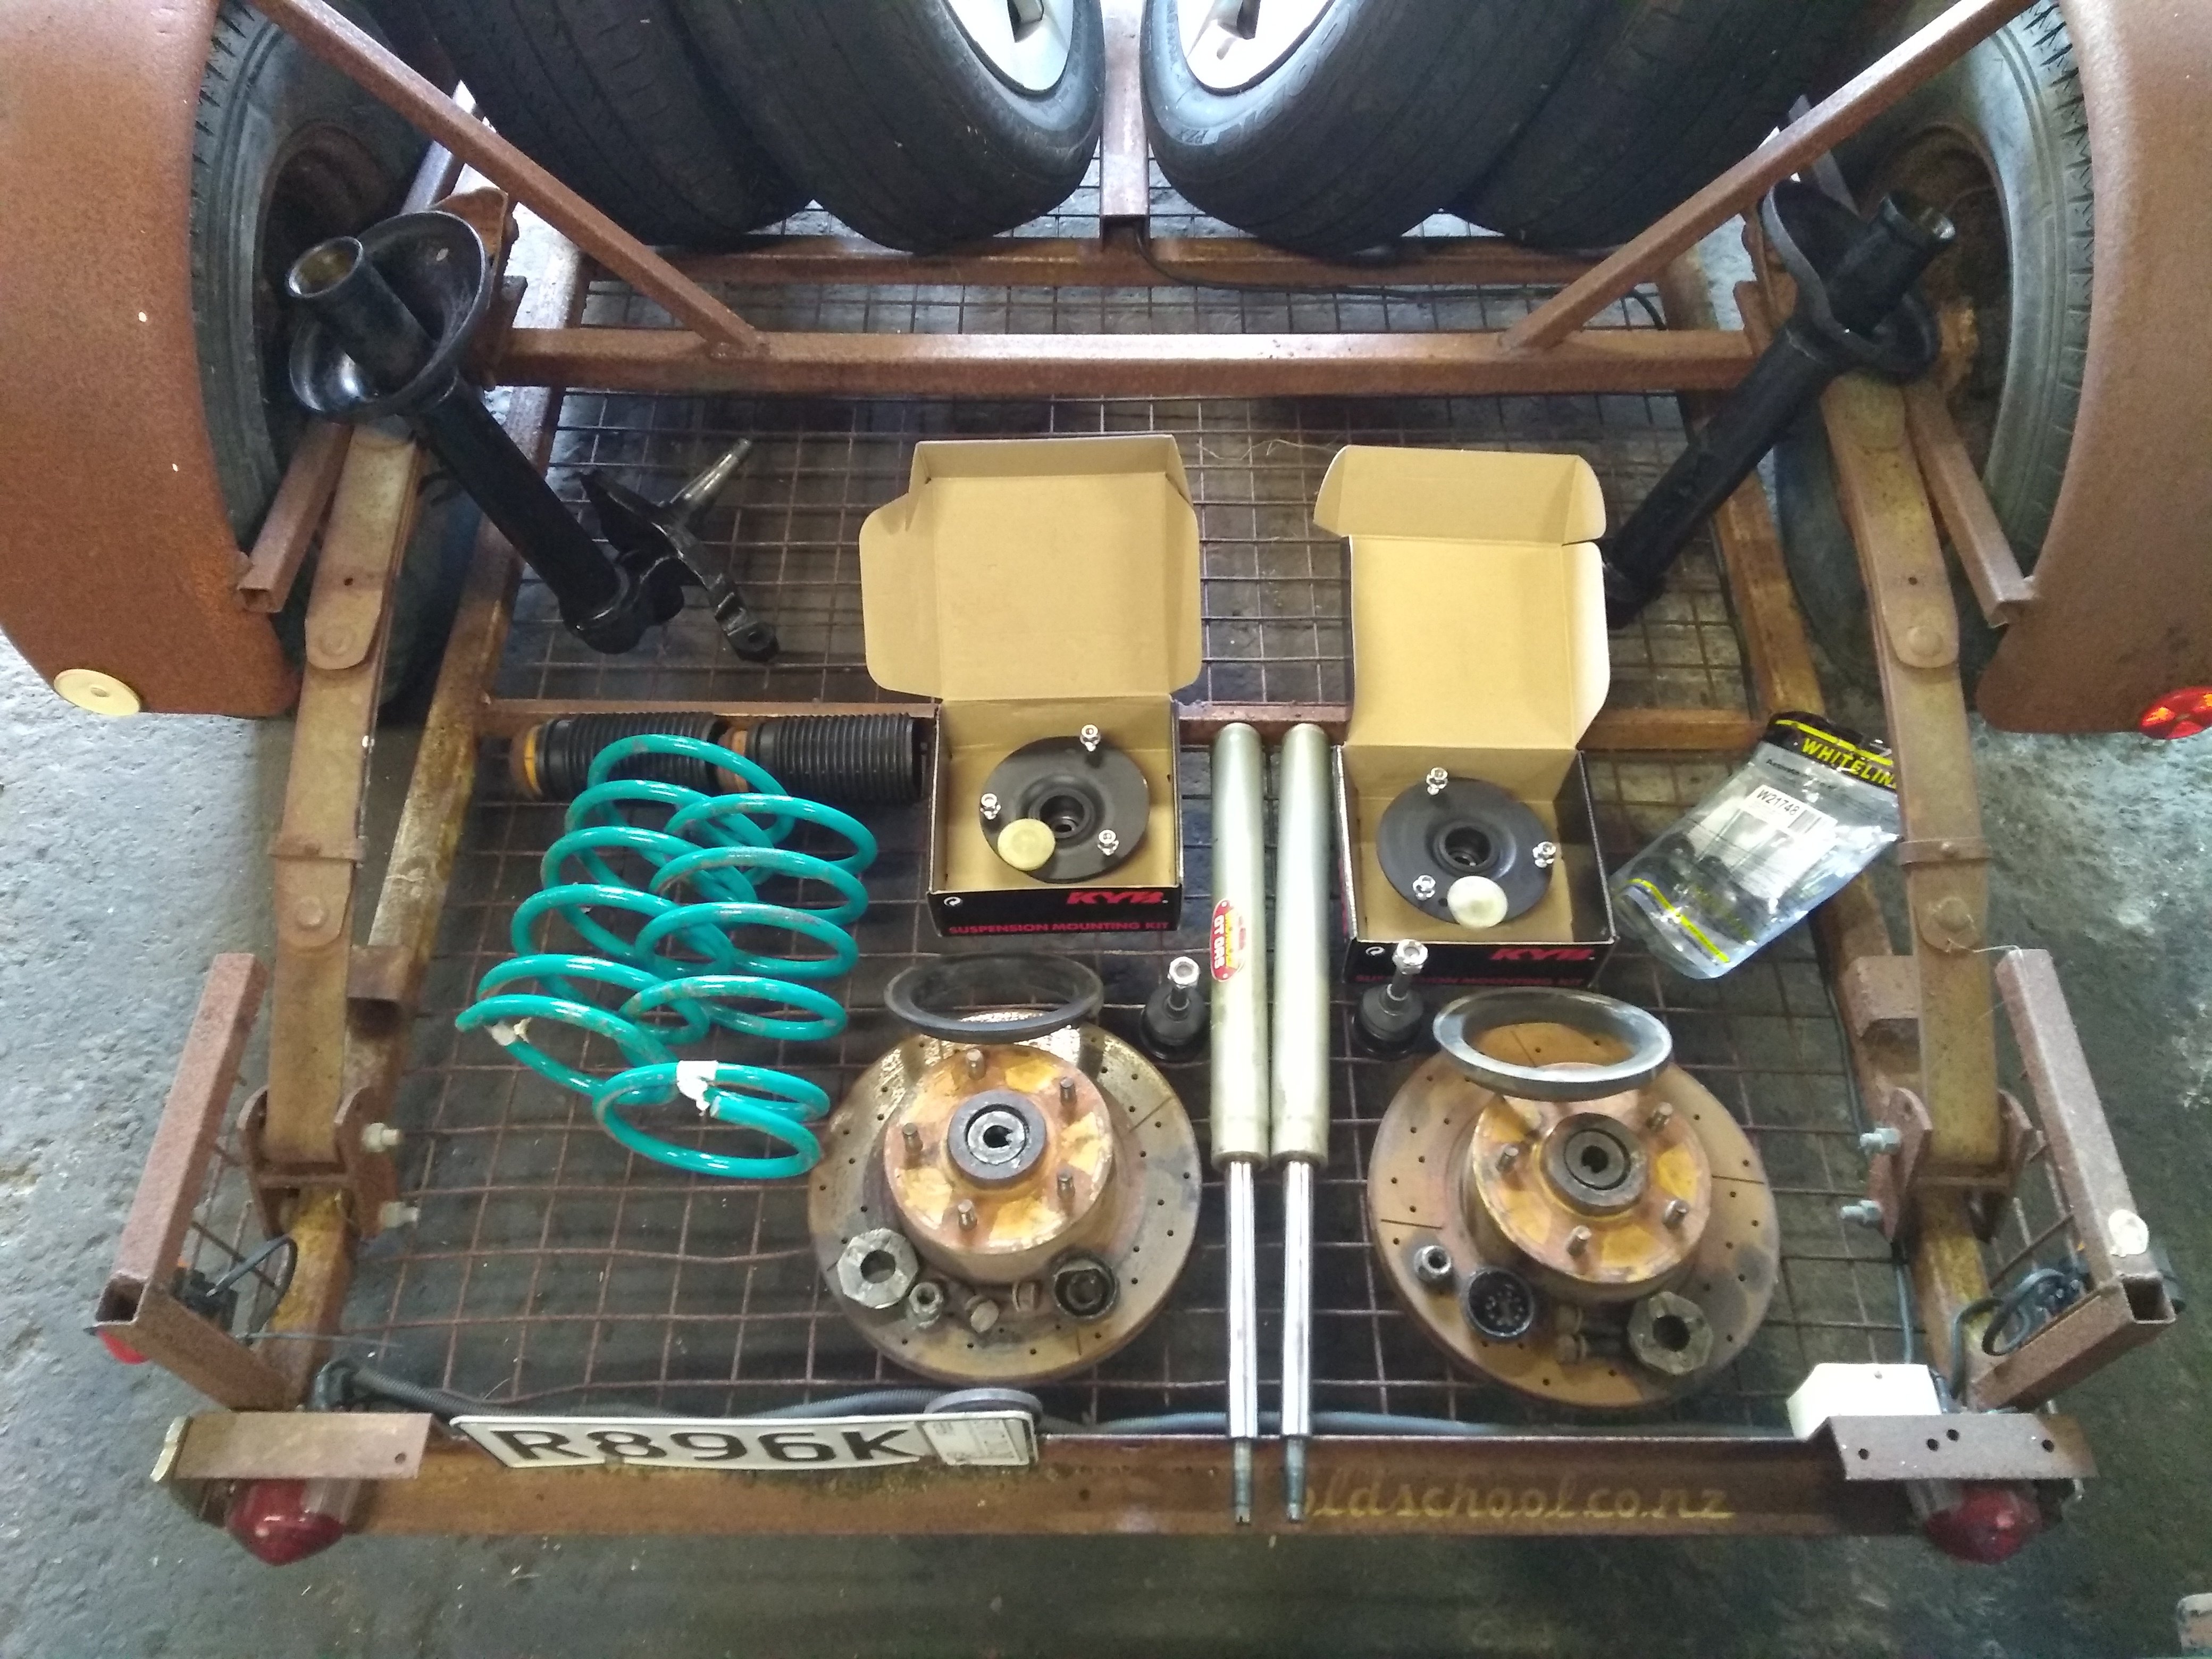
Progress is happening on the rust!! WooT!! Also went to do finally assembly on subframe today and had a bit of a hiccup with some nuts and washers, even though I gave the nut and washers to the guy to match, he still got them wrong, cue RAGE QUIT. (probably exacerbated by cunt of a job it is to get the lower suspension arms in, 4 things have to line up and they don't) But at least I got the brakes back together.
2 points
-
It had crossed my mind to cut the pins off, but don't tell Michael.... To be honest it's probably never going to see any rain. Me from 30 years ago would disapprove but it's actually worth something and as you said, they can rust given any excuse. It's done really well at not doing so over the years. There is every chance I'm going to paint it at some point, the current colour is pretty odd and it's got quite a bit of micro blistering. If I fit the badge properly it won't come off in one piece, if I butcher it & fit it with badge tape I can remove it. * First world problems....2 points
-
I enjoy hooning bikes and riding with dudes or is it hooning dudes and riding with bikes either way its better than being a foamer2 points
-
better put my bike back together so it has time to break just before this2 points
-
0 rated sleeping bag and a belly full of PGs makes for a cozy charged night2 points
-
Yeah will be rocking hammock and and bush fly. Keen to string it up out the back of one of those units at the gizzy motel too2 points
-
I think someone should have cut my hands off at birth, or at least ban me from trademe... Yip...aha...yep...yes this did just happen.
2 points
-
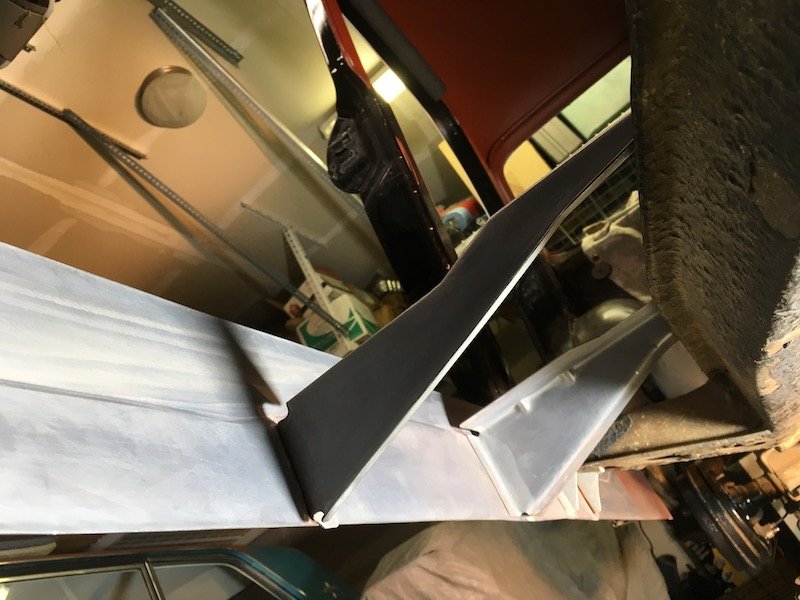
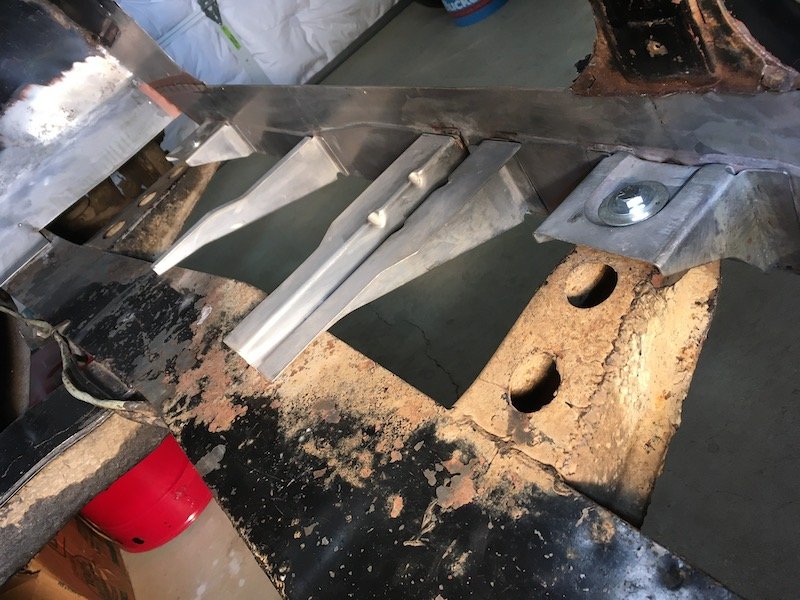
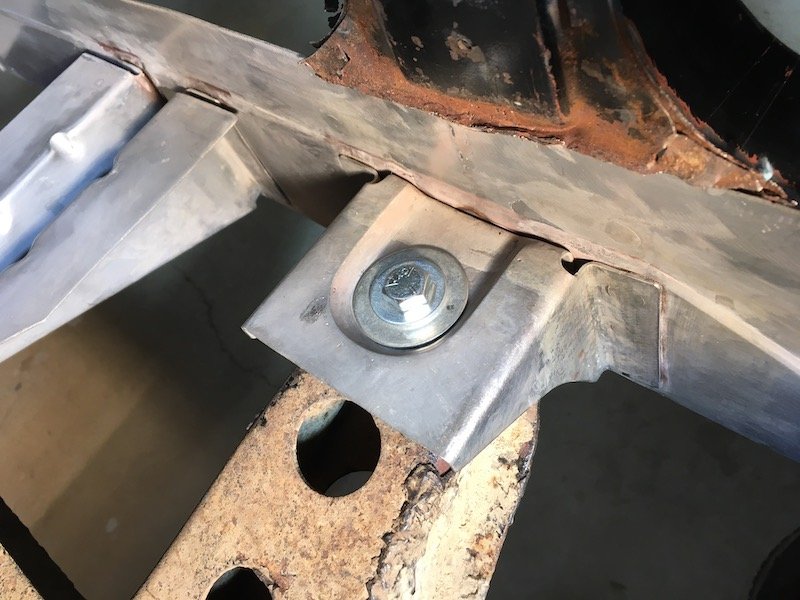
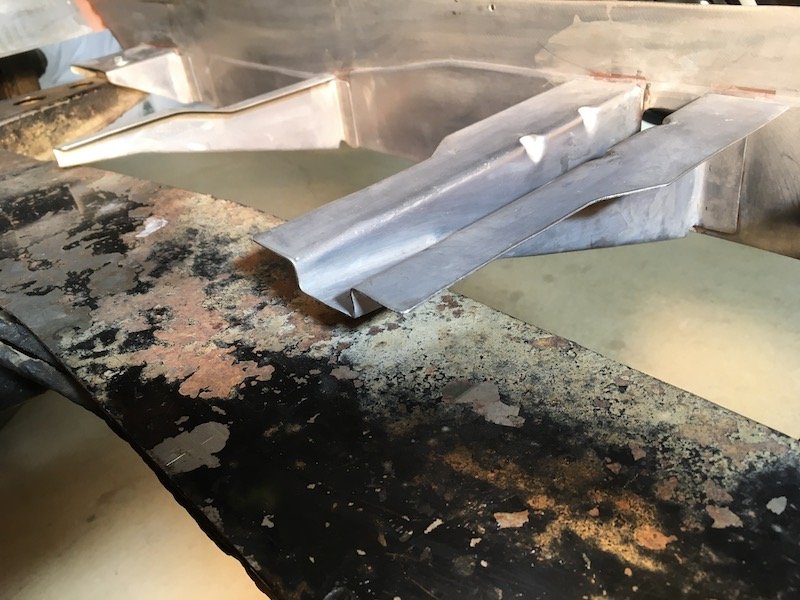
Building the 1961 Datsun 310 Bluebird - Replacing the right rear seat pan support structure, step and wheel well lip. First, the Bluebird rear seat pan structure as it was. And from the wheel well perspective. So I started by cutting some rusty metal out. Then I worked this piece to savage the good 3/4 portion with the four beads and replace the rot. Fitting the old and new together. Made some tack welds. Finished and cleaned up the welds and built the vertical side support. The little side floor was built a couple of years ago. Screwed the pieces together. Checked fit with the car. Fitted good! Welded on later. I moved on to fix the rot on the wheel well lower lip. A bunch of little rot pieces cut out and repairs can begin to the wheel well just behind the step plate vertical flange. Mostly self-explanatory. Three more or less flat pieces of rot cut out and new metal welded in. Took some time to do though. . And in the next post: The new inner sill and all six brackets that go with it. Discussion: https://oldschool.co.nz/index.php?/topic/60267-marts-pl310-61-datsun-bluebird-sedan/ Build: https://oldschool.co.nz/index.php?/topic/60264-marts-pl310-61-datsun-bluebird-sedan/
2 points
-
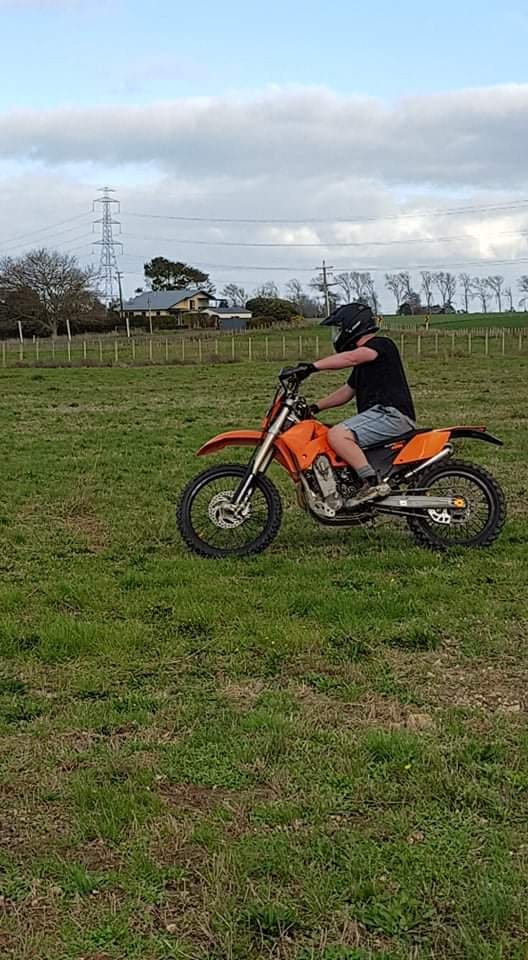
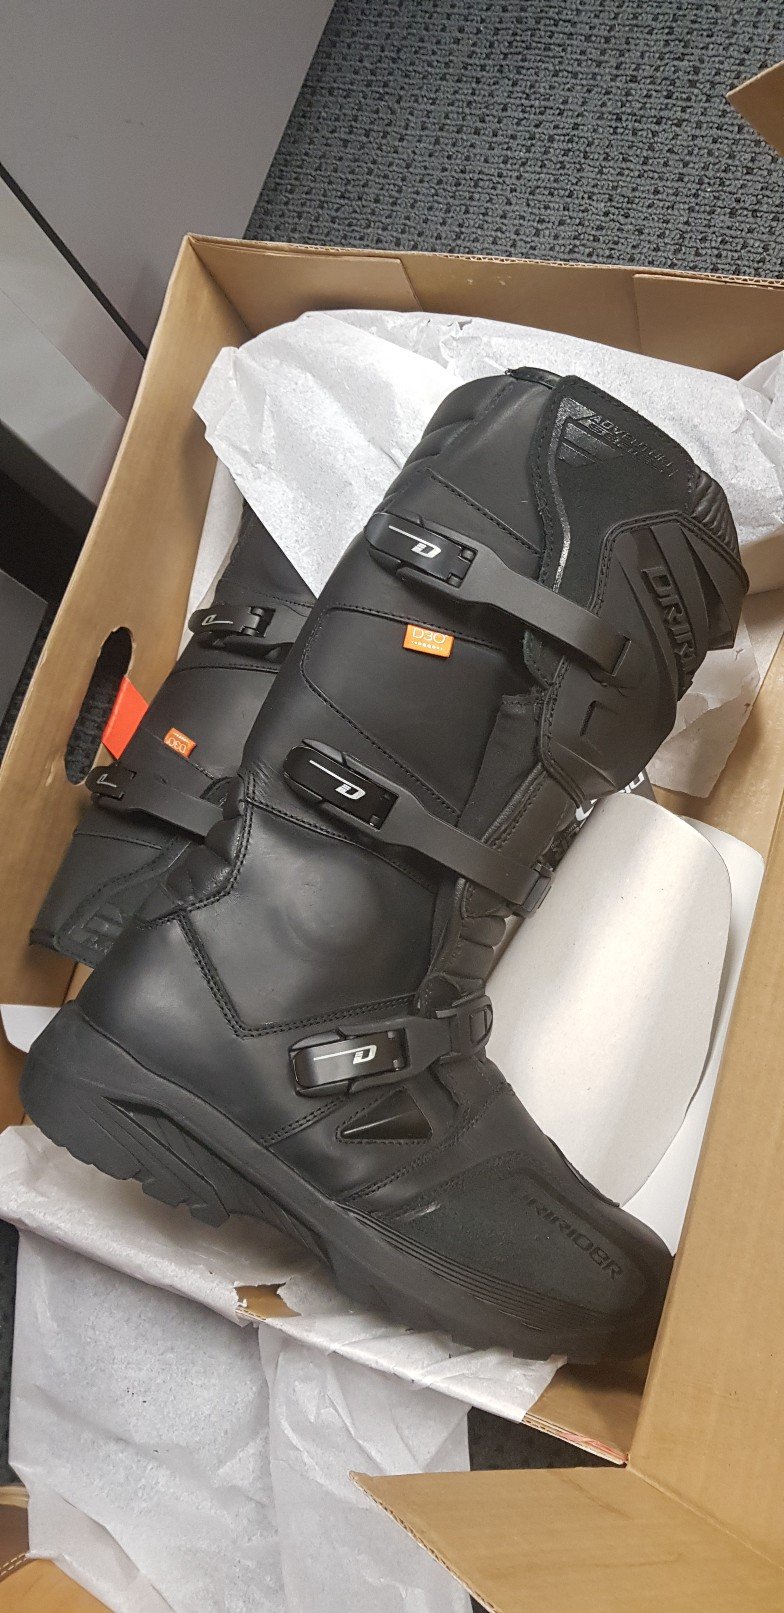
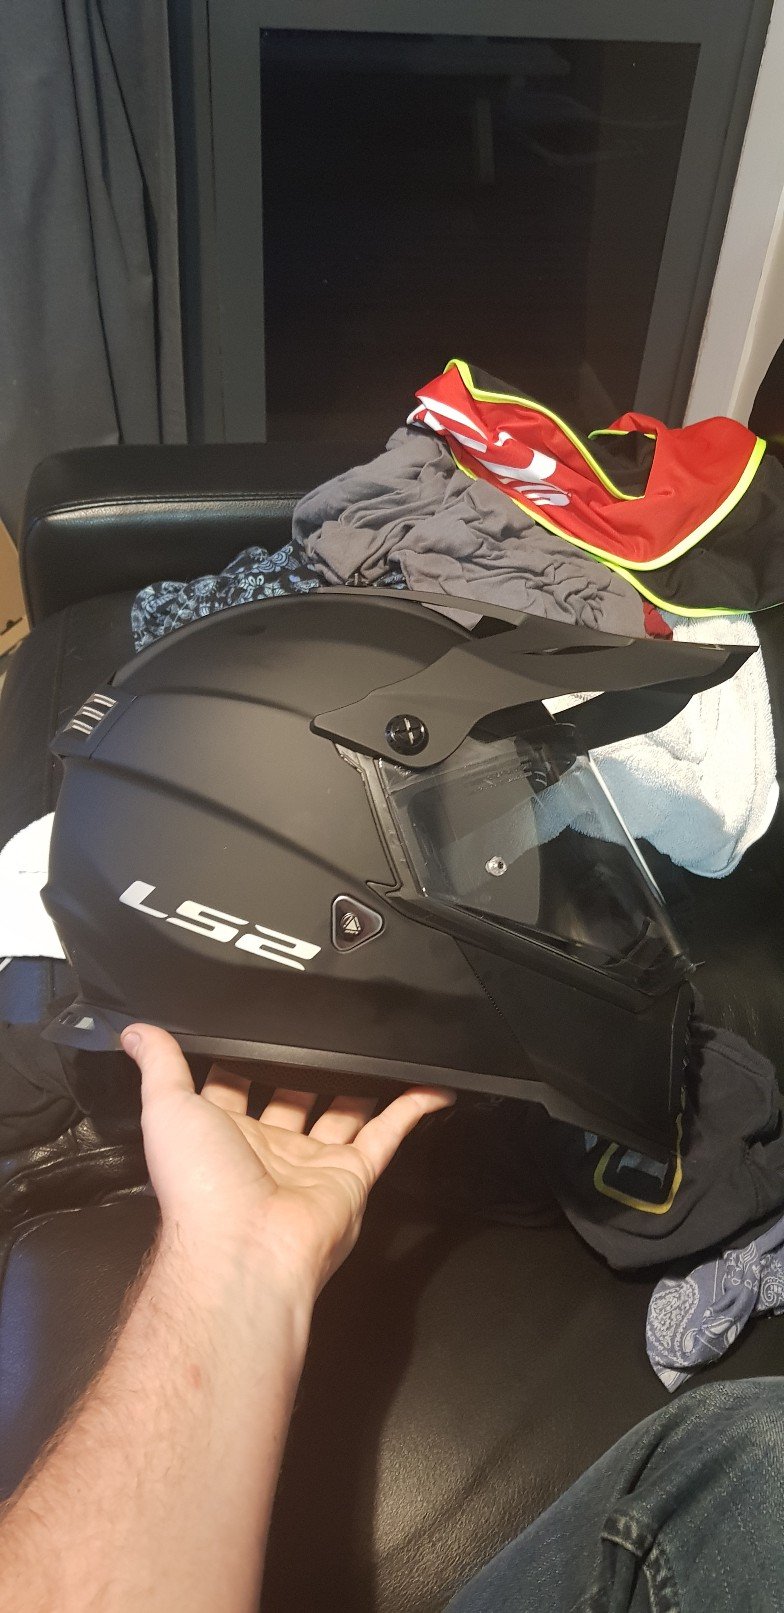
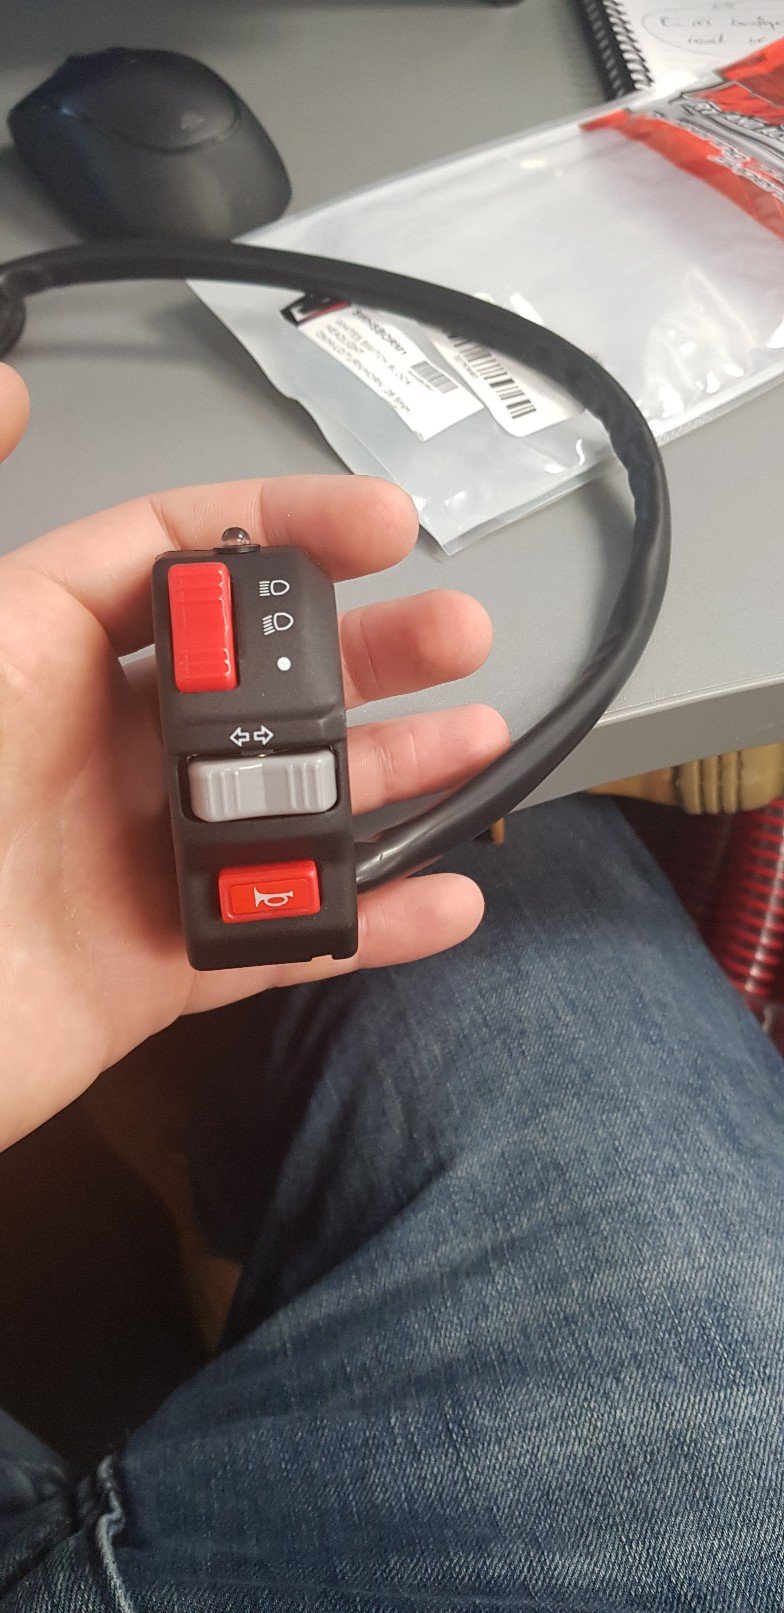
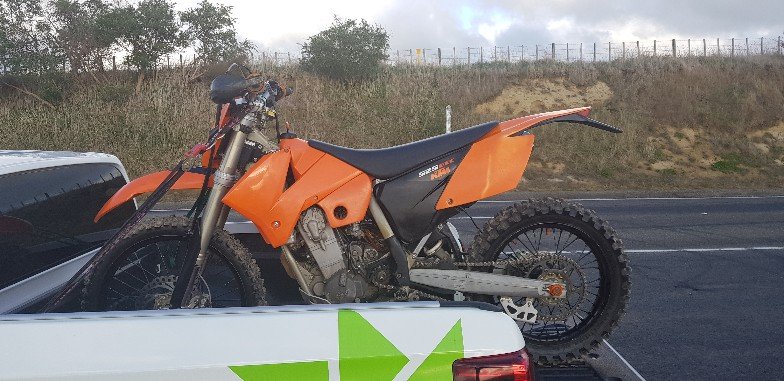
Wanted a reliable wof/reg do anything dualsport adventure bike. Kinda wanted a dr650 but totally failed and bought an 04 ktm 525exc instead. Its pretty much as per standard except for ohlins steering dampener. Hopefully can get it road legal but even If that fails I'll still be super happy. It's probably gutless to some, but for me it's just intoxicating- and now that I know how great the current knobbies are, it seems a shame to put road legal rubber on. 61hp and 112kg dry, so goes a bit better than a dr650 at 37hp and 160kg (from memory) So far I have bought a cool dual sport helmet, some decent boots, handle bar control switches, a cush rear sprocket, factory indicators from a ktm Duke, some t6 aluminium to make a new side stand, a folding aluminium ramp, a center stand lift thing and a pair of pirelli mt21 tires (road legal) Here's some pics from the past week, thanks to @64valiant for assisting with pickup, driving and providing clear and correct directional information.
1 point
-
Link to discussion thread Thought I might share this with the oldschool community. I did attempt to attend an old school track day in Taupo right back at the start when I brought this car but had a shattered wind screen in Waiouru which prevented me from attending. So quick run down. Car is a 73 Ke20 2 door sedan which was aussie built. Check out the youtube clip of the cars first build below. SR20DET, roll cage, paint was all completed in Australia. Since I brought it I have overhauled most of the car, had some fun but now it is time for my version two with reliability in mind. Will start this with progress pics to date and take it from there. Original Build video https://www.youtube.com/watch?v=h35kYINEhaw From the drive home. This is how I brought it. First show. Now the strip and rebuild Stripped every bit of wiring from the car, all panels from doors forward removed. I have taken the entire fuel system out and will focus on the wiring aspect first then for a mix of all things to finish it the way I wanted.1 point
-
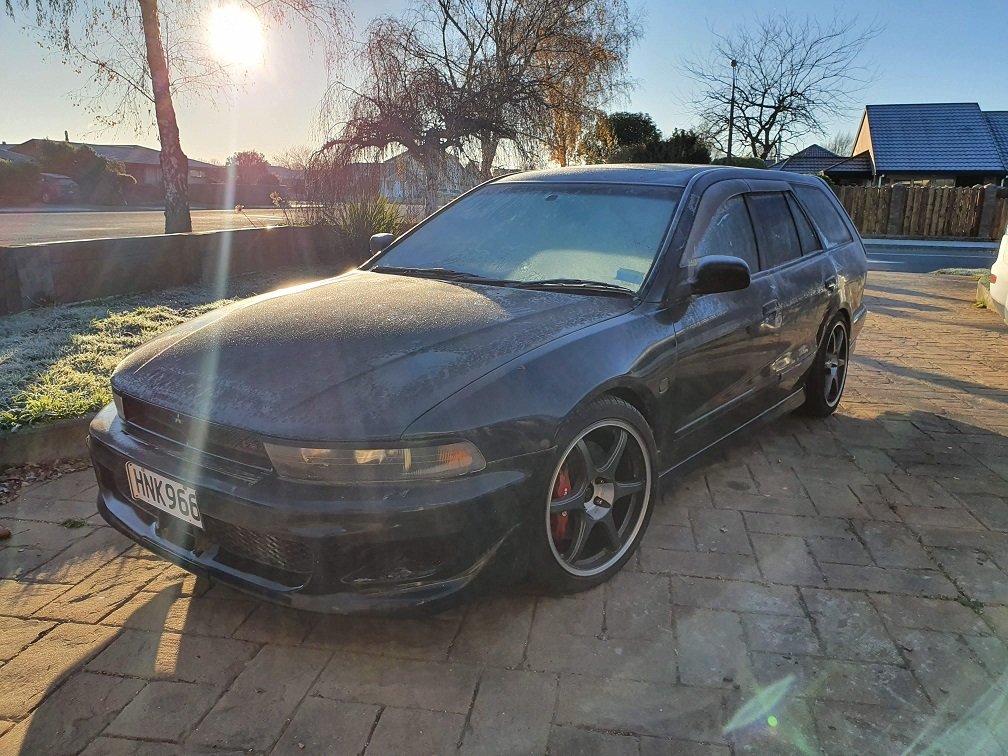
My truck will need to come off the road sometime soon for the engine swap and body tidy up, before it starts rusting into oblivion. Another daily is needed. Was on the hunt for something reliable and family orientated with good resale on the other side on the truck can resume daily duties.... Somehow I veered hard left and bought this instead. Hadn't been driven in 4 years, and only started occasionally. Bit of malarky with the battery, some fresh fuel and it started up just fine though. Idles nice and smooth with far less lifter tick than expected. I'm sure that'll change once its driven a bit more (for the worse, lol). The valve-stem seals / turbo seals are SHOT. Its a smoke generator on decel. It's got an FMIC, skank whistle, manual trans, evo bembos and is allowing me to live out my mid 2000's bogan dreams again. Are the diesels and lumbo runs still a thing? I'm going to need to buy a baseball cap. It's pretty decently optioned, has AYC and the moonroof sunroof too, so that's nice. I know nothing about the trim levels / models and such, but I'll be researching with glee infront of the fire this evening I'm sure! Ahead is a day of cleaning, detailing, and 'getting to know you' :-).
1 point
-
Perfect bag sleeping conditions. I'm all about the tenting1 point
-
Much swoon. Definitely on my list of desirable cars I'd gladly own.1 point
-
These things are amazing off road. I remember one night in a mates one, we chased a rabbit through some sand dunes. They're surprisingly capable vehicles.1 point
-
Nah that means you get described as a known gang member do not approach when you feature on police 10/71 point
-
@GuyWithAviators calls me daddy, but I take no responsibility for him.1 point
-
After having dealt with rust repairs on Toyotas that use holes to fix the badges on, and the associated water that inevitably leaks into the car and fucks up the whole boot area. My vote is for dont drill. I'd rather grind the tabs off and reglue or whatever. You probably wont need to take it back off, but you probably will have wankerish issues with water ingress.1 point
-
Oh hey wow, its June. What kinds of things ought to be sorted out and thought about?1 point
-
.1 point
-
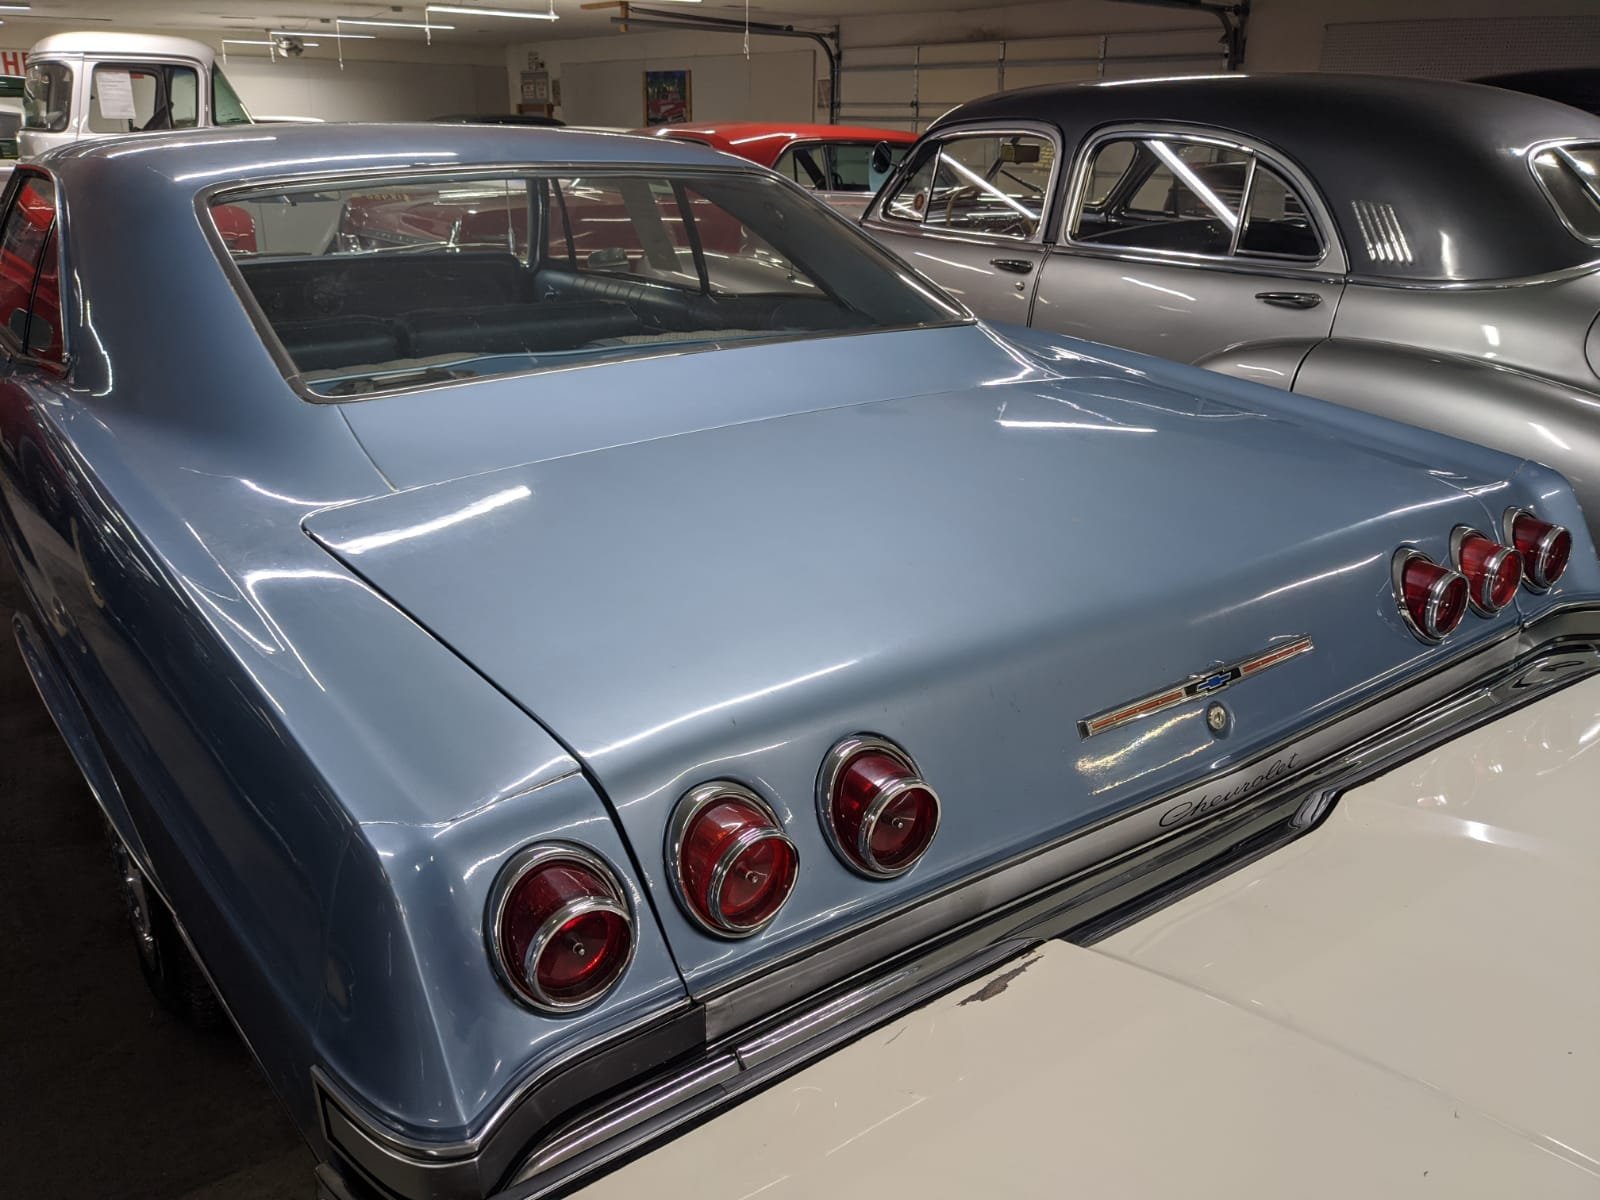
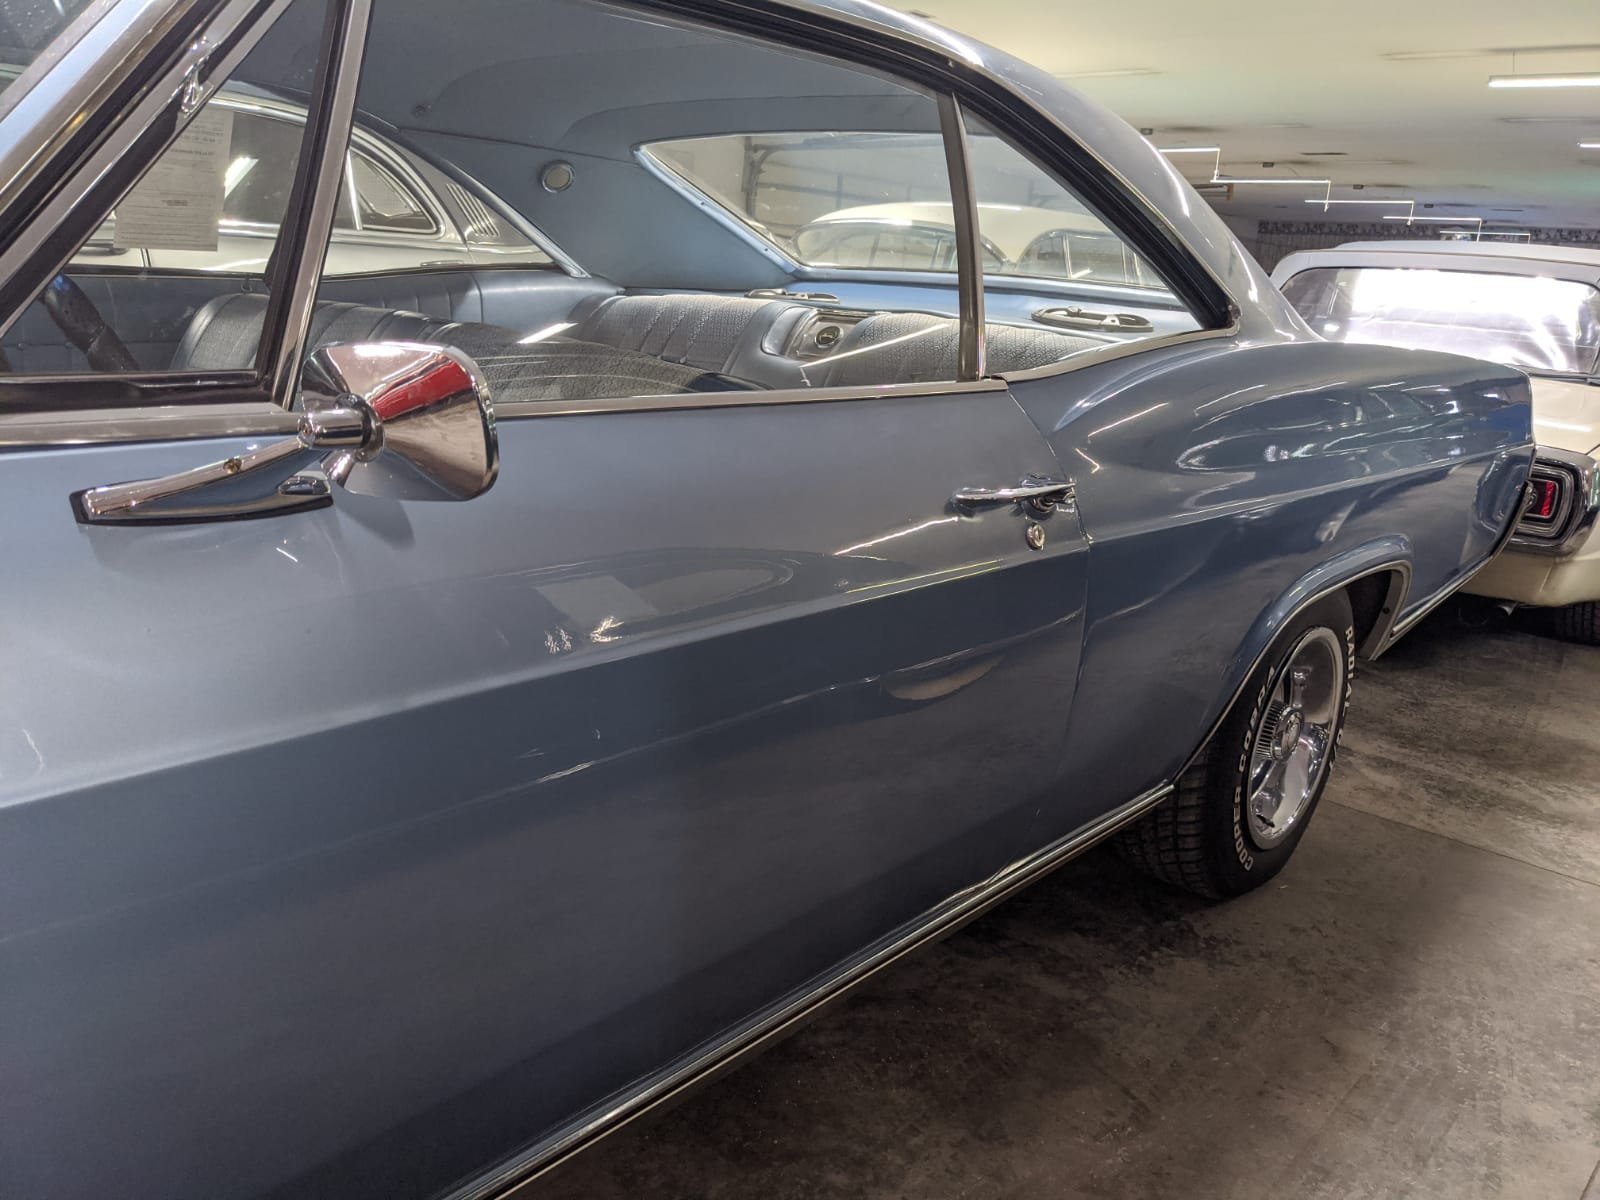
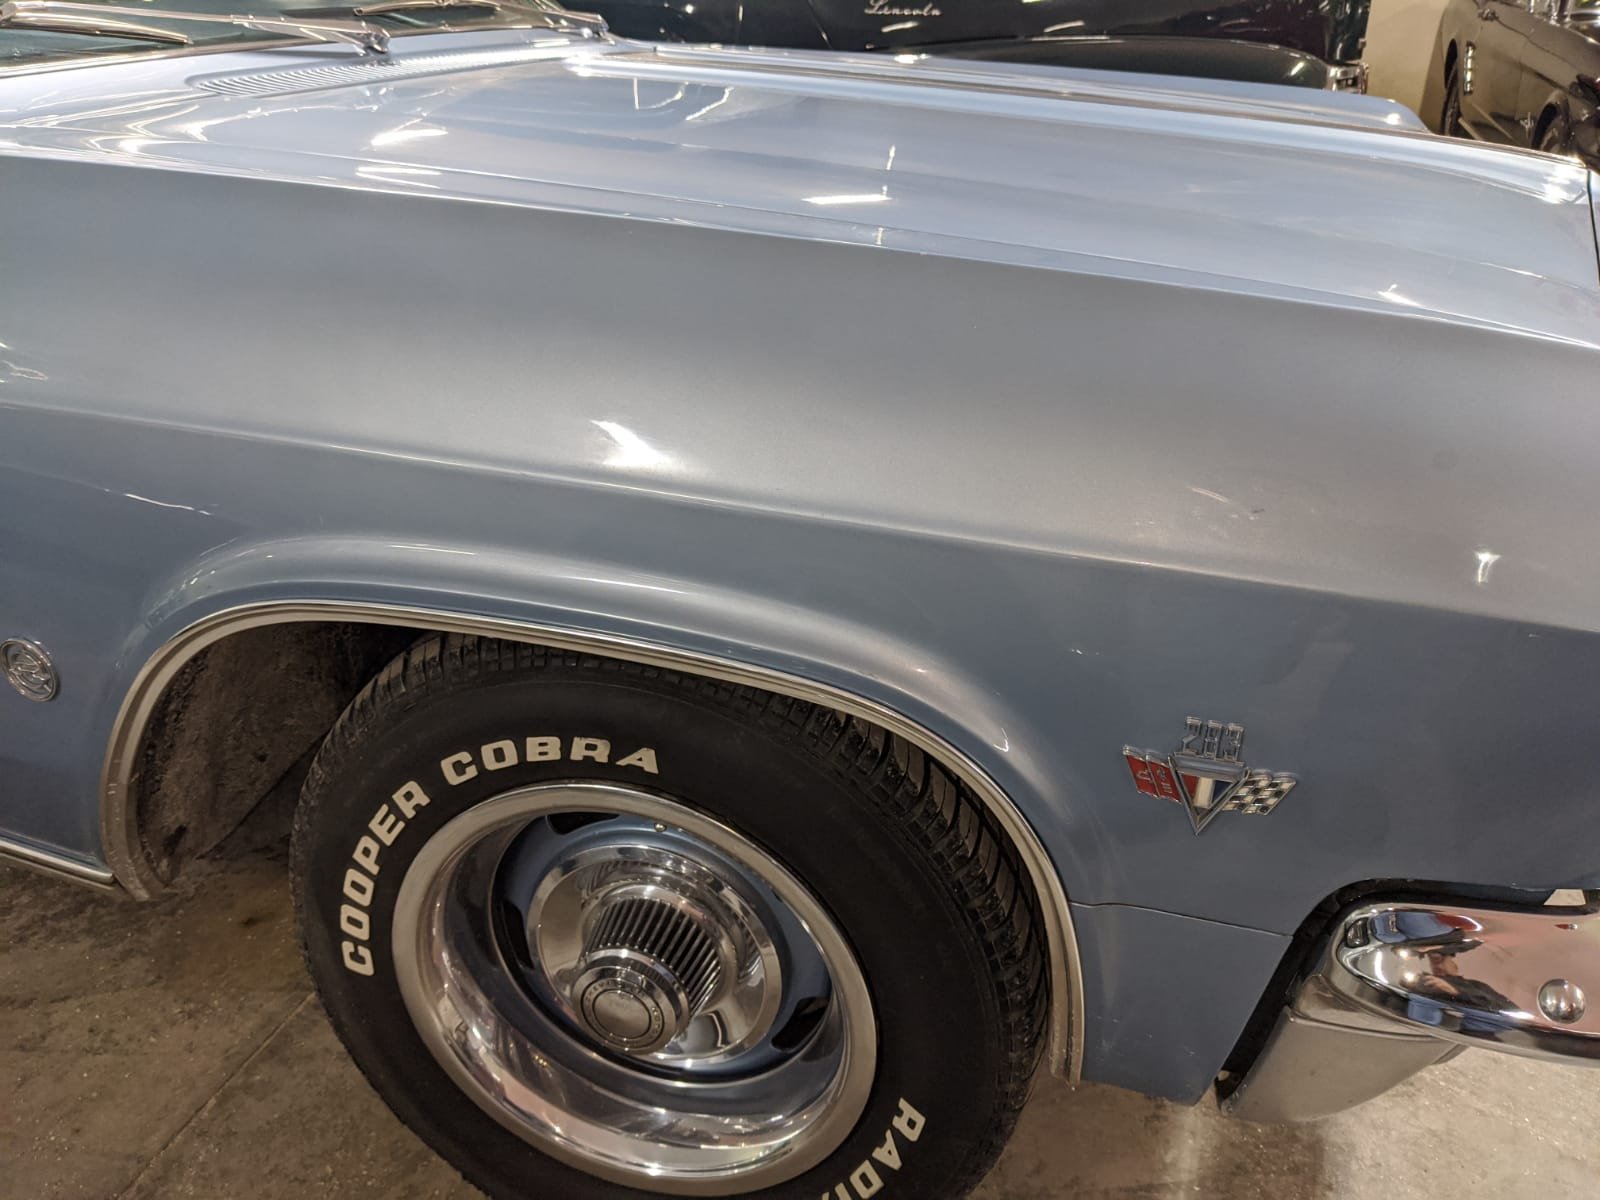
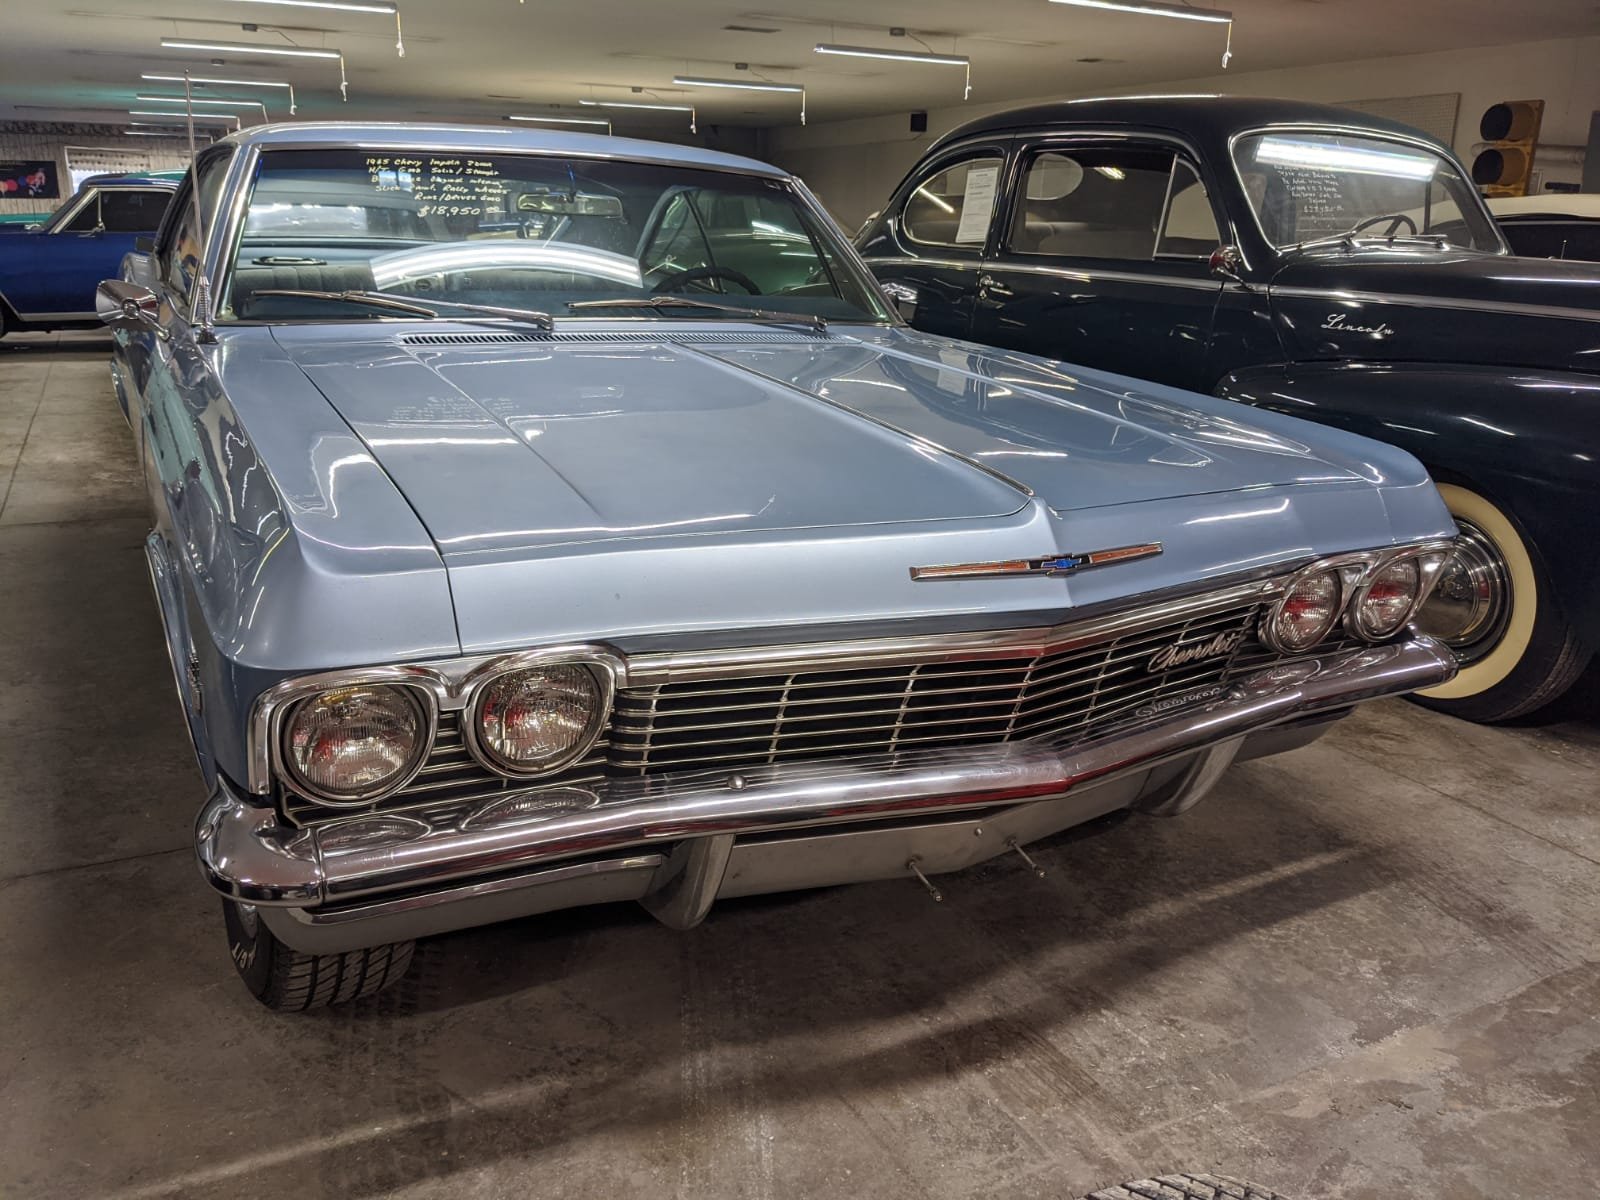
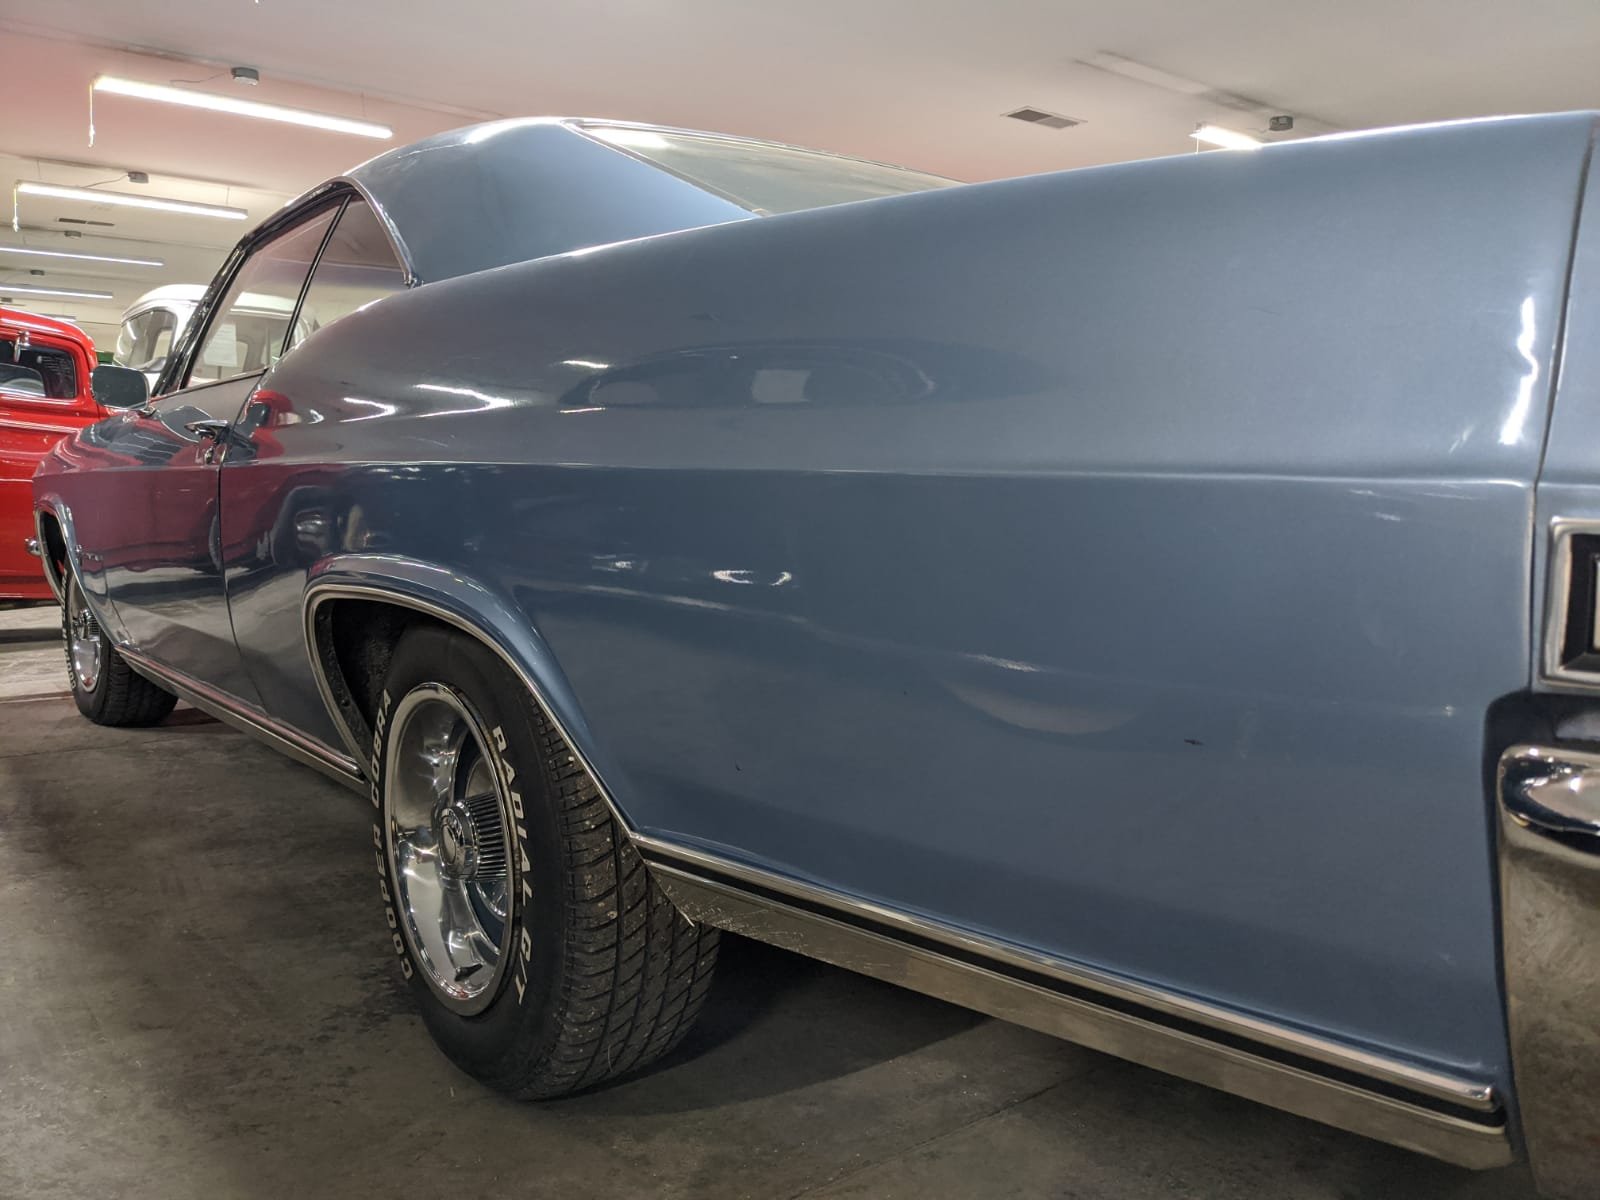
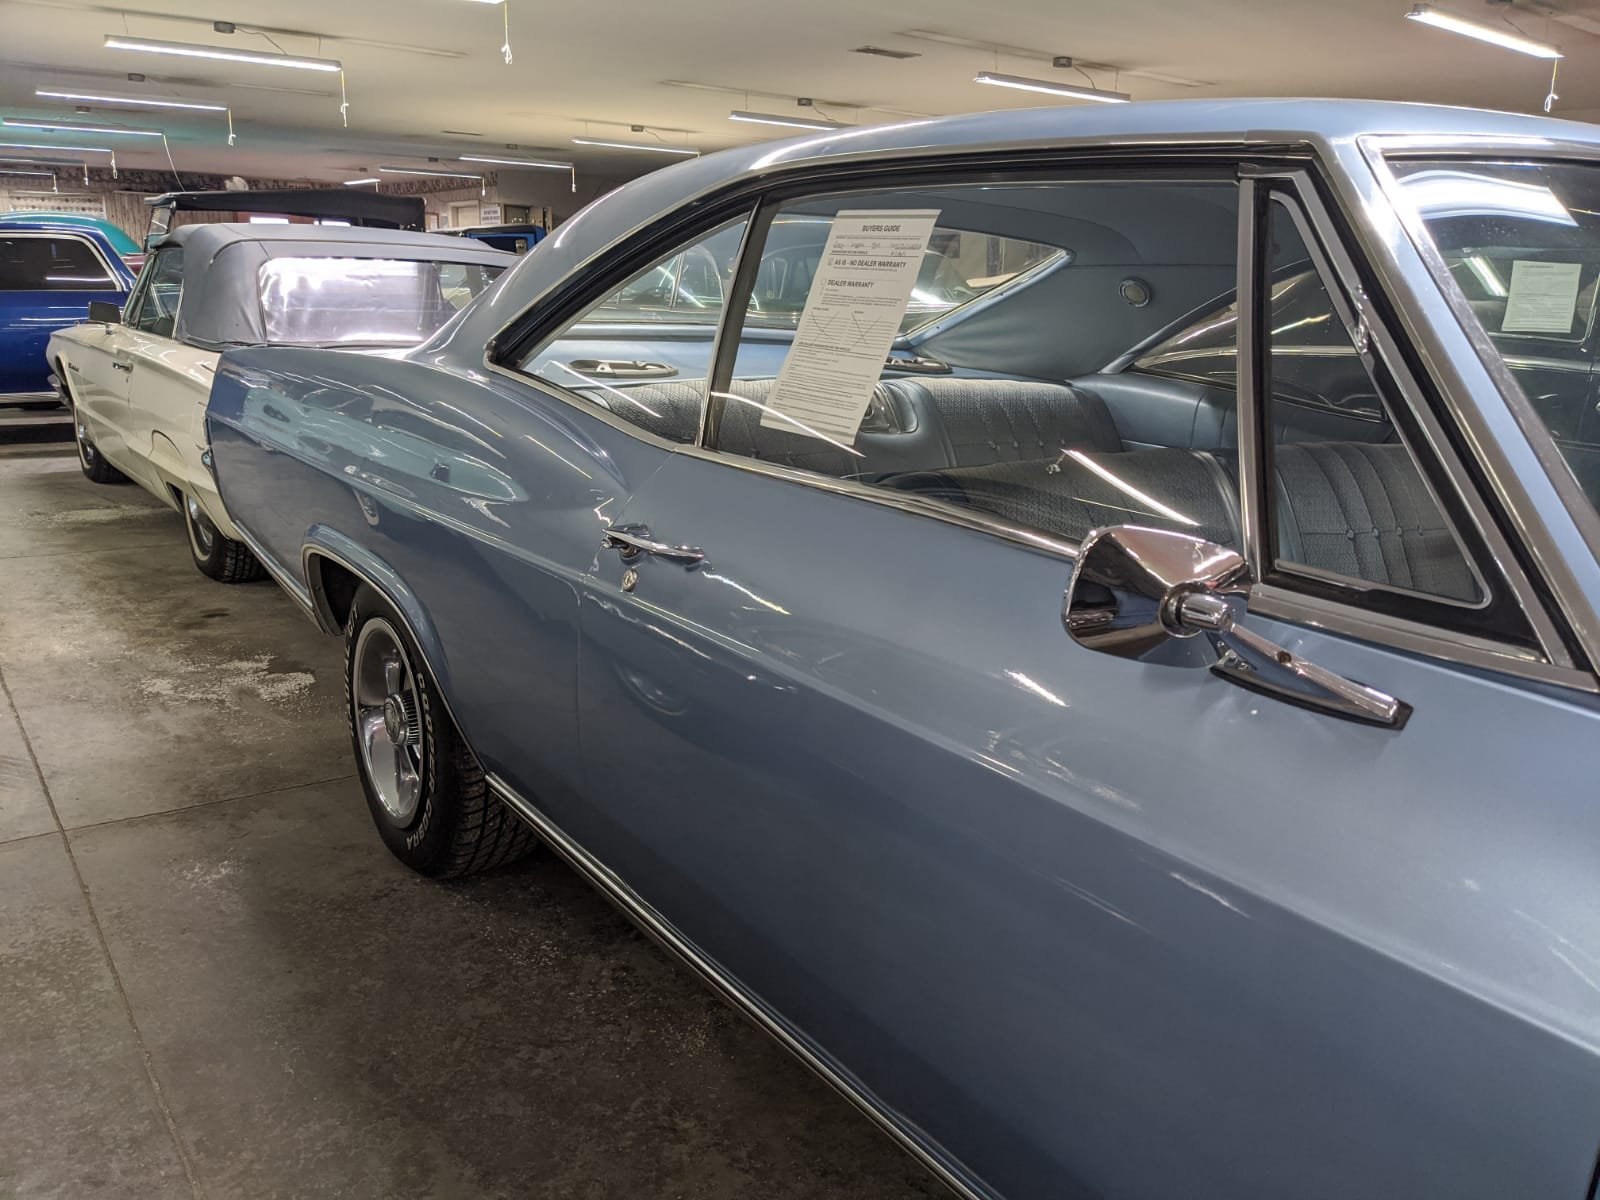
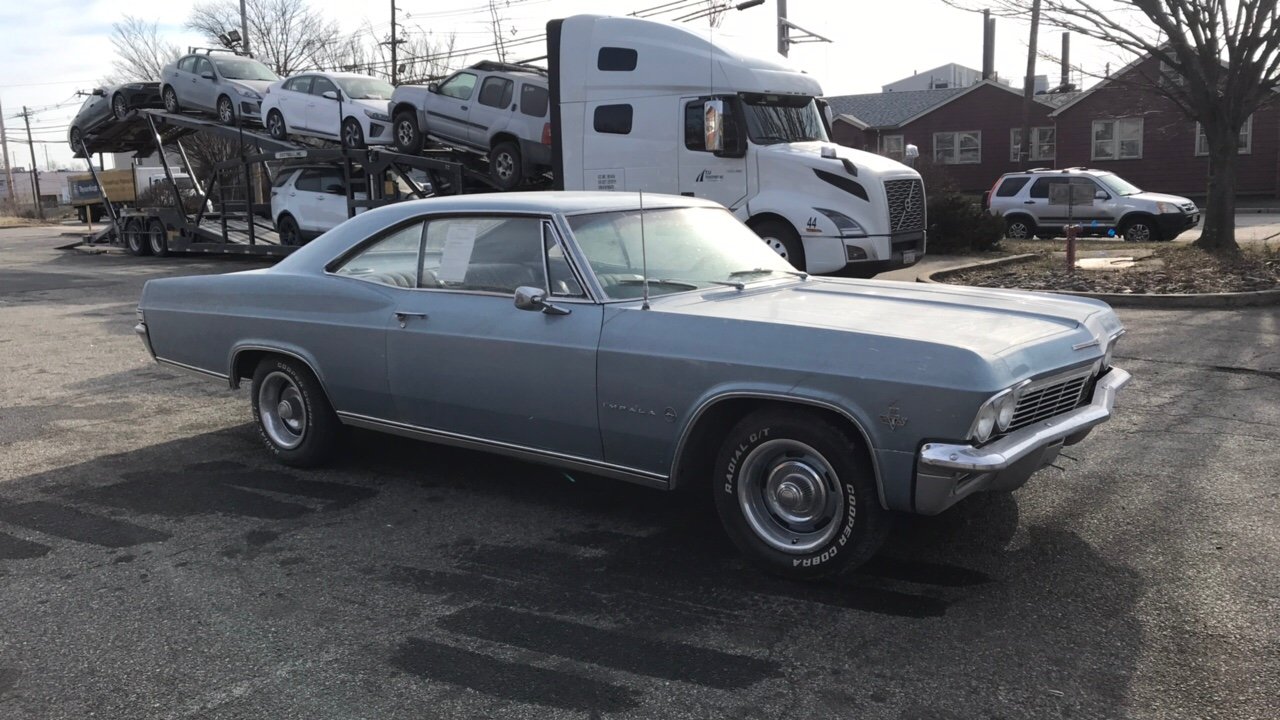
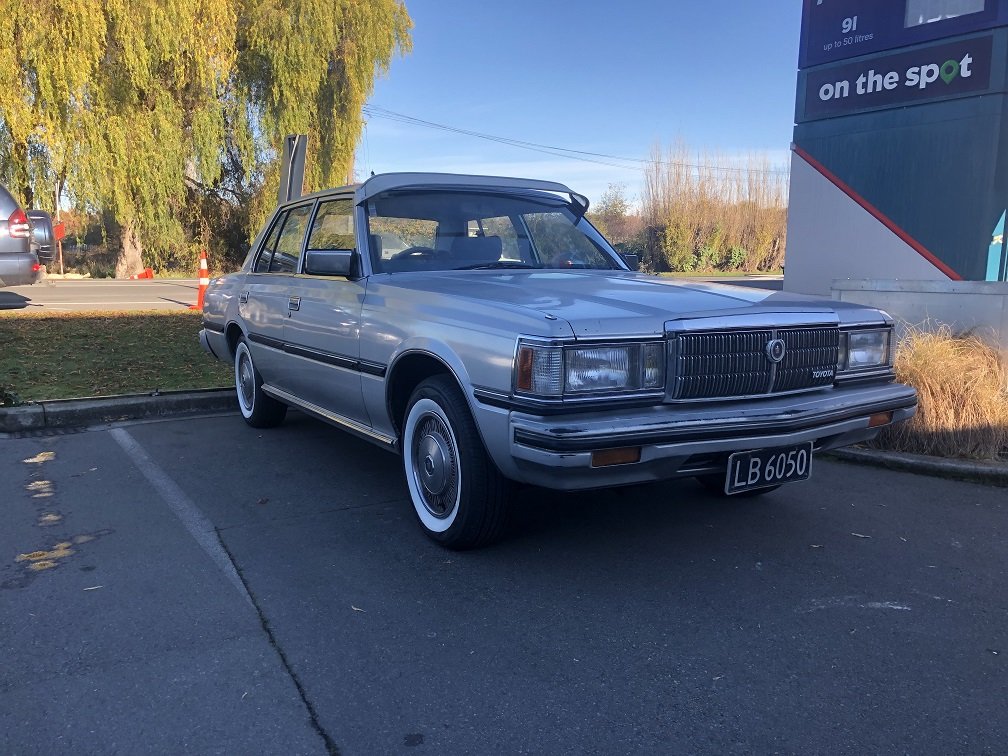
Hi, Thanks everyone for the advice. Pics of my car below. Currently sitting on the wharf in New Jersey awaiting to be shipped. So hopefully I will be able to get it here and certified to enjoy this up coming summer cruising. Cheers
1 point
-
Building the 1961 Datsun 310 Bluebird - Replacing the right side of trans tunnel. So all the Bluebird rust repairs and reconstruction of the peripheral structure surrounding the future right side floor pan are complete. All new metal where the floor will then make a solid welded connection. I'll make several posts. I'm proceeding around counterclockwise from the previous post about the right side toe board repair. Posting in sequence then, here is the right hand side of trans tunnel, repair. The Bluebird trans tunnel as it was in the beginning. Then cleaned up a bit to expose the extent of damage and perforated areas. Formed the first patch and matched the original shape. Cut out the rust. Tacked in first trans tunnel patch . Then formed the second. Cut out more rust. Tacked in the second patch. Formed and fit checked the third patch. Scribing some cut lines and making index lines. Cut out yet more rust. Tacked in the third patch. All three patches in. Lastly, I made a transition fillet piece to connect the toe board to the tunnel. As formed. More welds, rough grinding, cleaning and metal etch. The transition fillet piece gets just a few tacks to hold it temporarily until the floor build gets underway, then I'll remove it and join it to the floor as a little extension. Moving on, I will post the right hand rear seat pan structure rust removal and related bits next. Discussion: https://oldschool.co.nz/index.php?/topic/60267-marts-pl310-61-datsun-bluebird-sedan/ Build: https://oldschool.co.nz/index.php?/topic/60264-marts-pl310-61-datsun-bluebird-sedan/
1 point
-
wouldnt it be easier to just cut the pins off and stick it on?1 point
-
Hack-oss-ka-nundrum. As we know, KY had an overwhelming fit of Good Cuntary and sorted me a new boot badge from Japan after I gorilla'd mine. To be fair, it was epoxied on so I didn't really stand a chance. First thing I noticed was that the new one had four mounting pins where as the old one was held on with double sided tape & glue. I assumed it was just an old badge that had got damaged so cleaned the old glue,etc off the boot to find the holes. No holes.... I had a check from behind, as well as i could through the holes in the frame and there is sign that they've been welded up or anything. All very strange. It looks like it's an earlier boot lid, but even then most of them seem to have a badge, even the 4 cylinder cars. Never mind, guess I just bite the bullet and drill holes in it. The badge just clicks in blind ( if I get the drill size right) which maybe explains why the original one got broken in the past as I can't see how you'd not break it trying to get it off. Better get me some brave pills and a decent ruler. Gulp.1 point
-
It runs, going to Ellerslie to have a burger and celebrate with people who understand!!!!!1 point
-
Coming to Lake Waikaremoana soon.
1 point
-
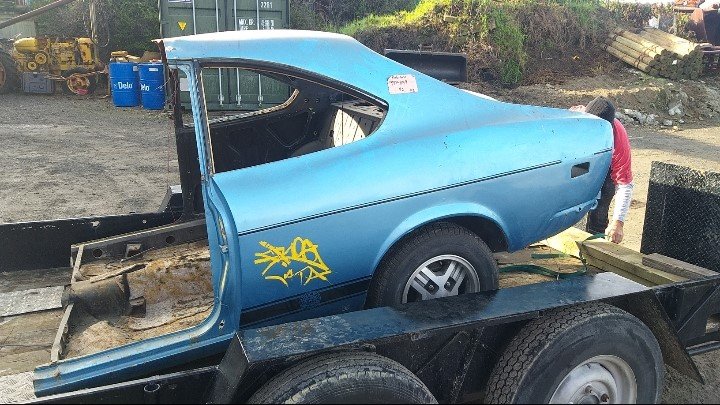
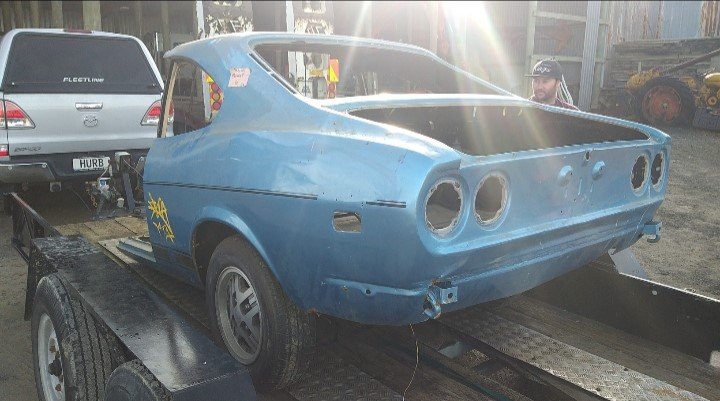
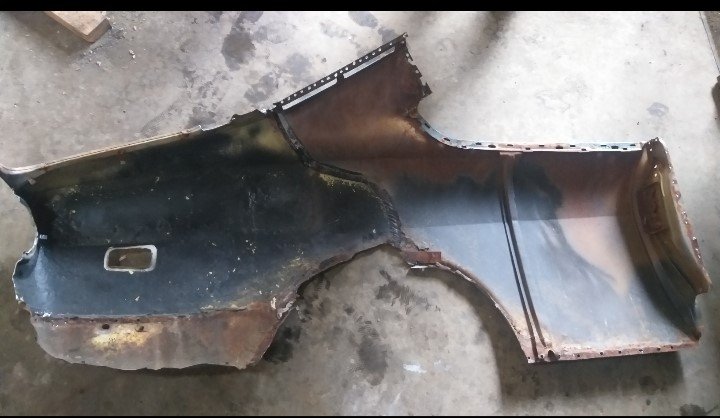
Tried to find a new 1/4, found a NOS one, but by the time it got to me it was nearly $5k! - pass. otherwise options are very limited for these coupes now Have ended up taking the 1/4 off this half cut a mate had stashed (ill weld my shitty one back on the half cut), once removed it had plenty of Mexican repairs, it wasn't great, but still better than what I had, Choppers Auto Body says hes far happier repairing this so its currently at the dippers awaiting a full strip.
1 point
-
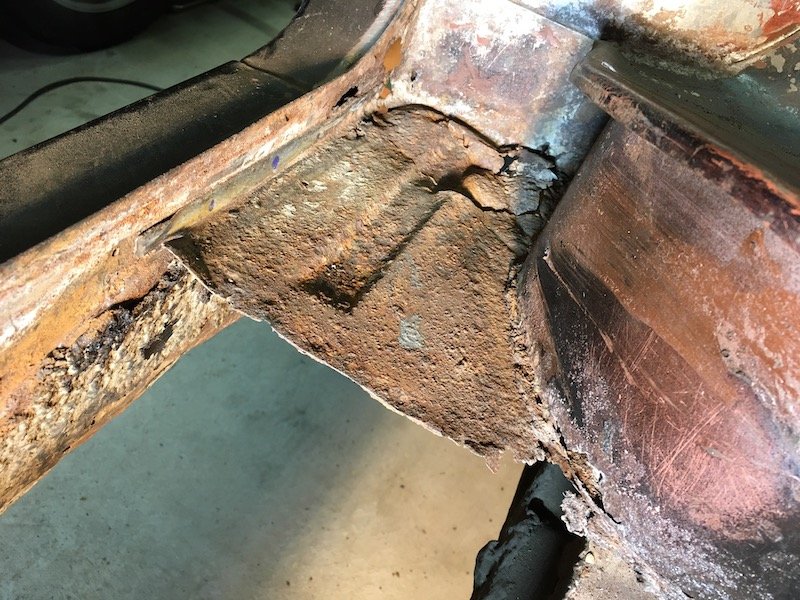
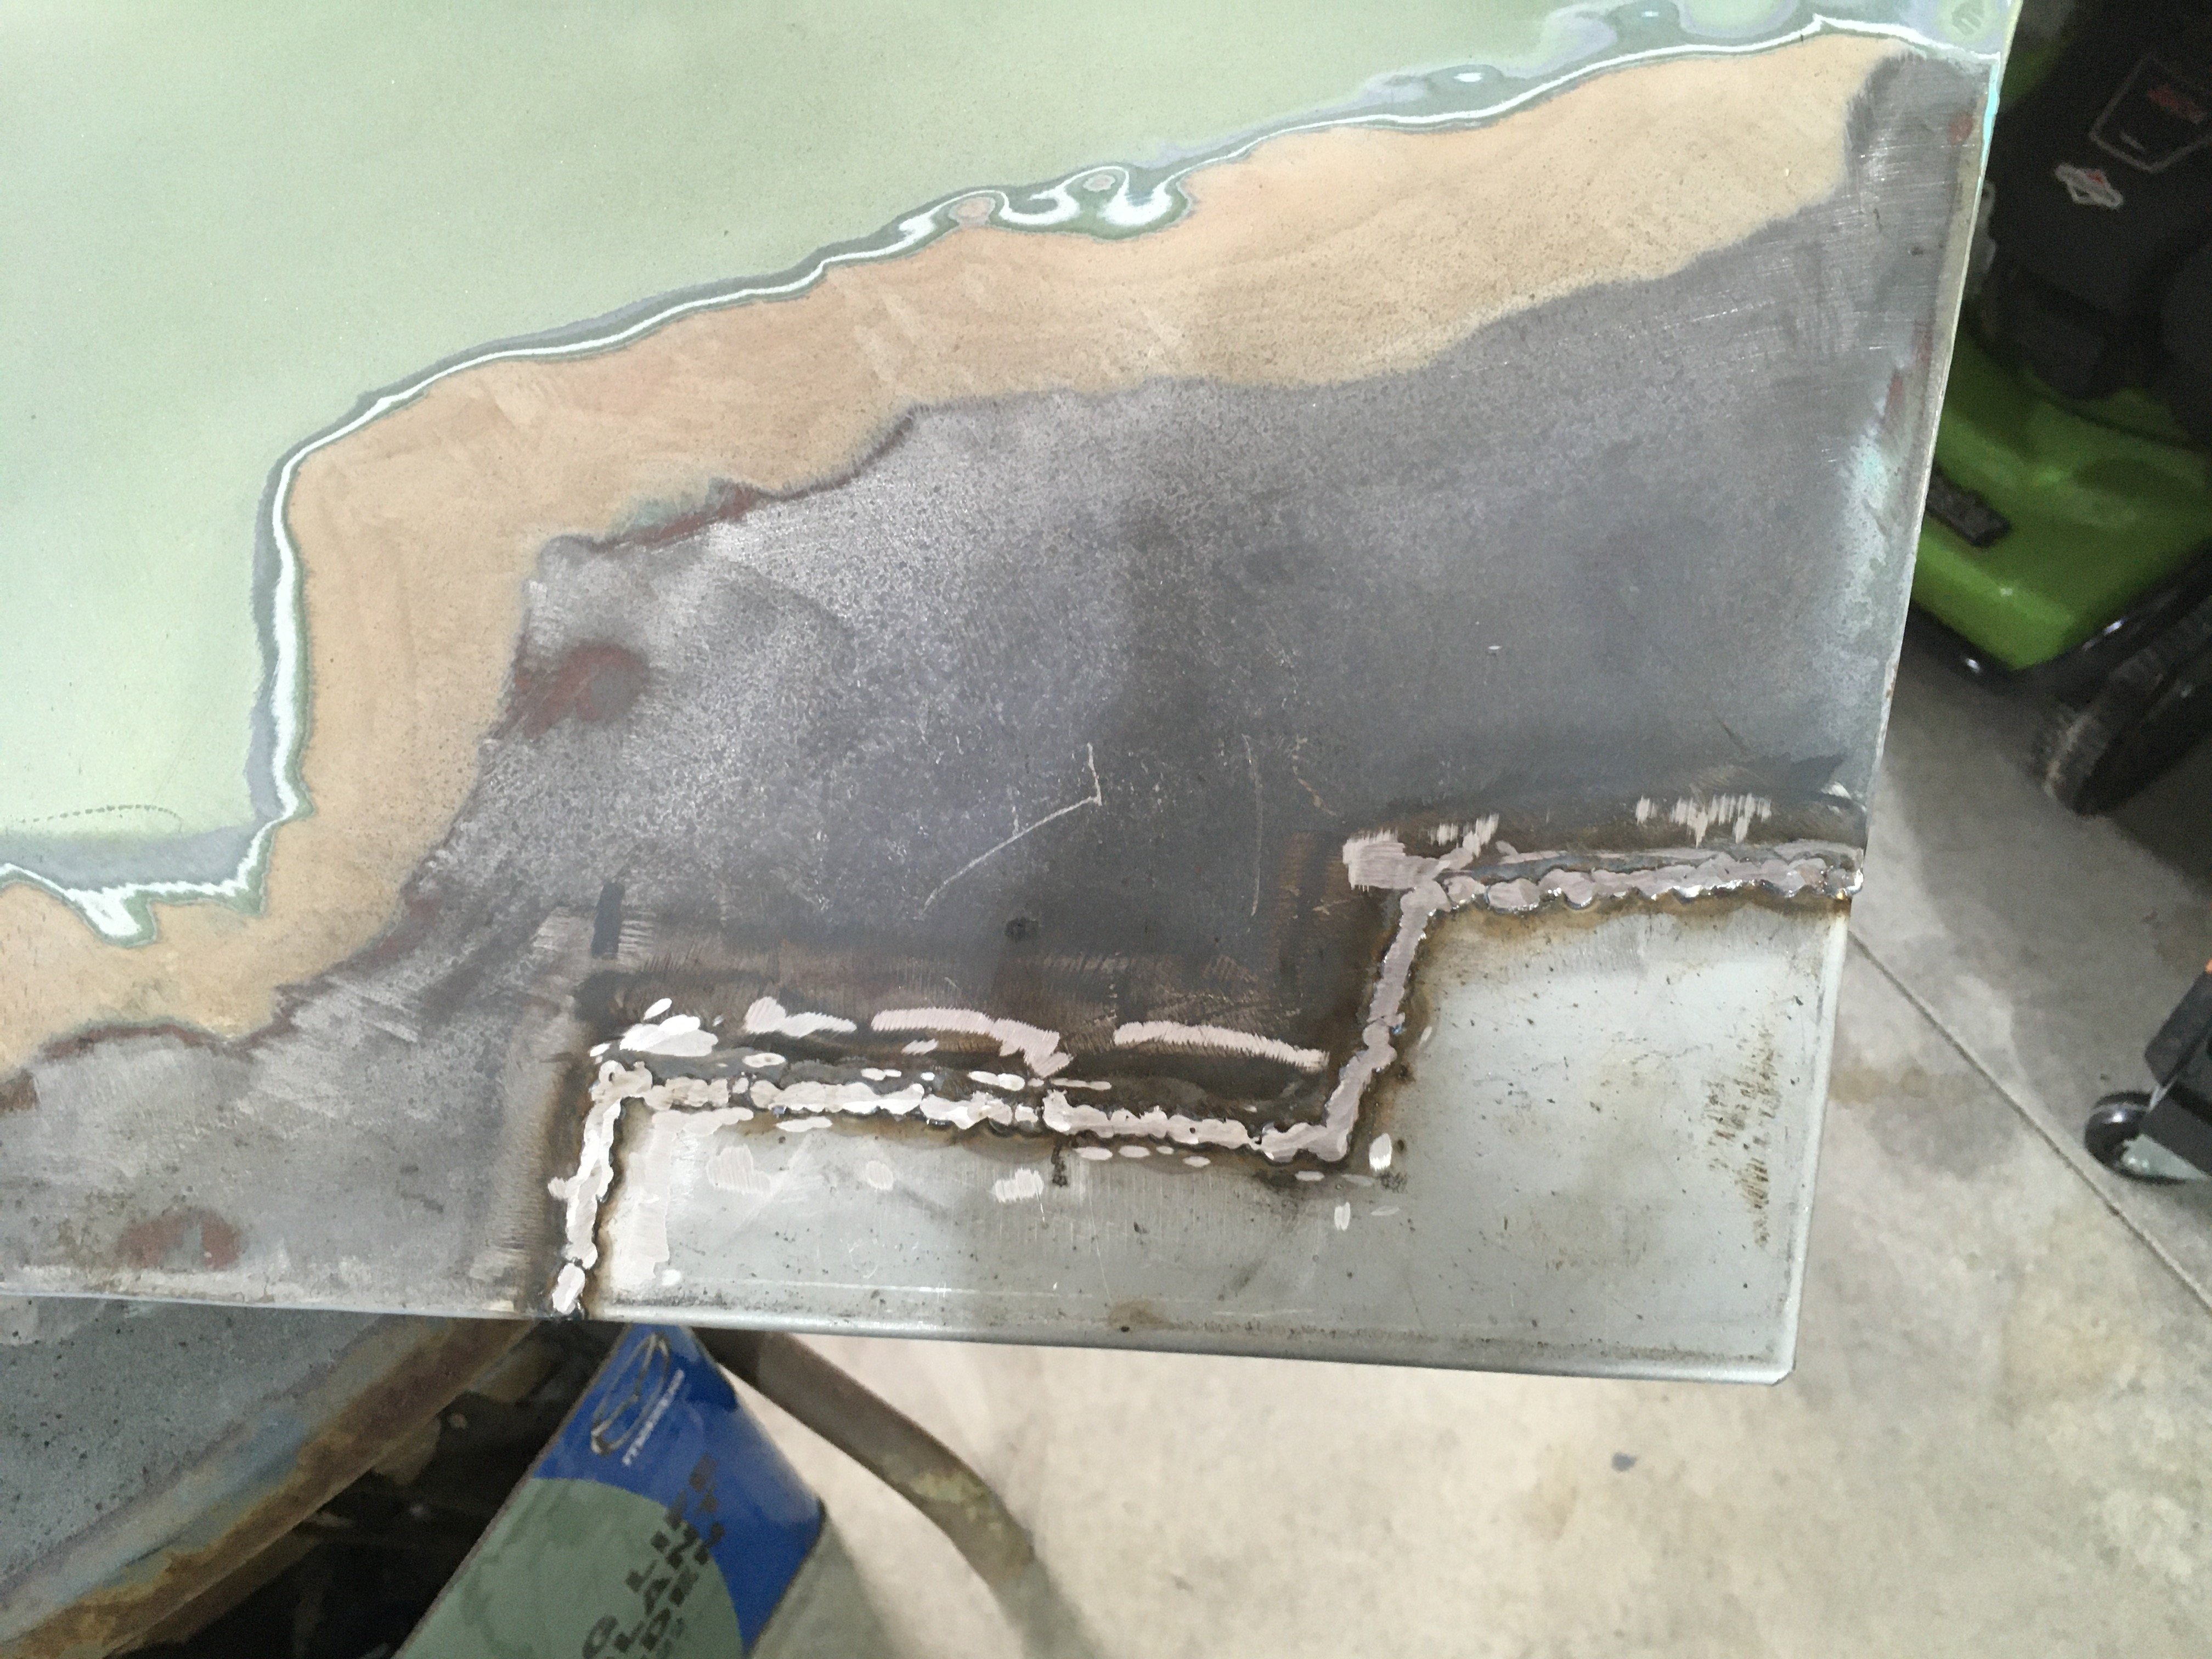
Made some progress on the outside of the big corner job above Welds got a bit hot and bowed out a bit, so I dug some more bog out. Bit of a mess under there.
1 point
-
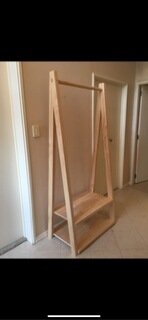
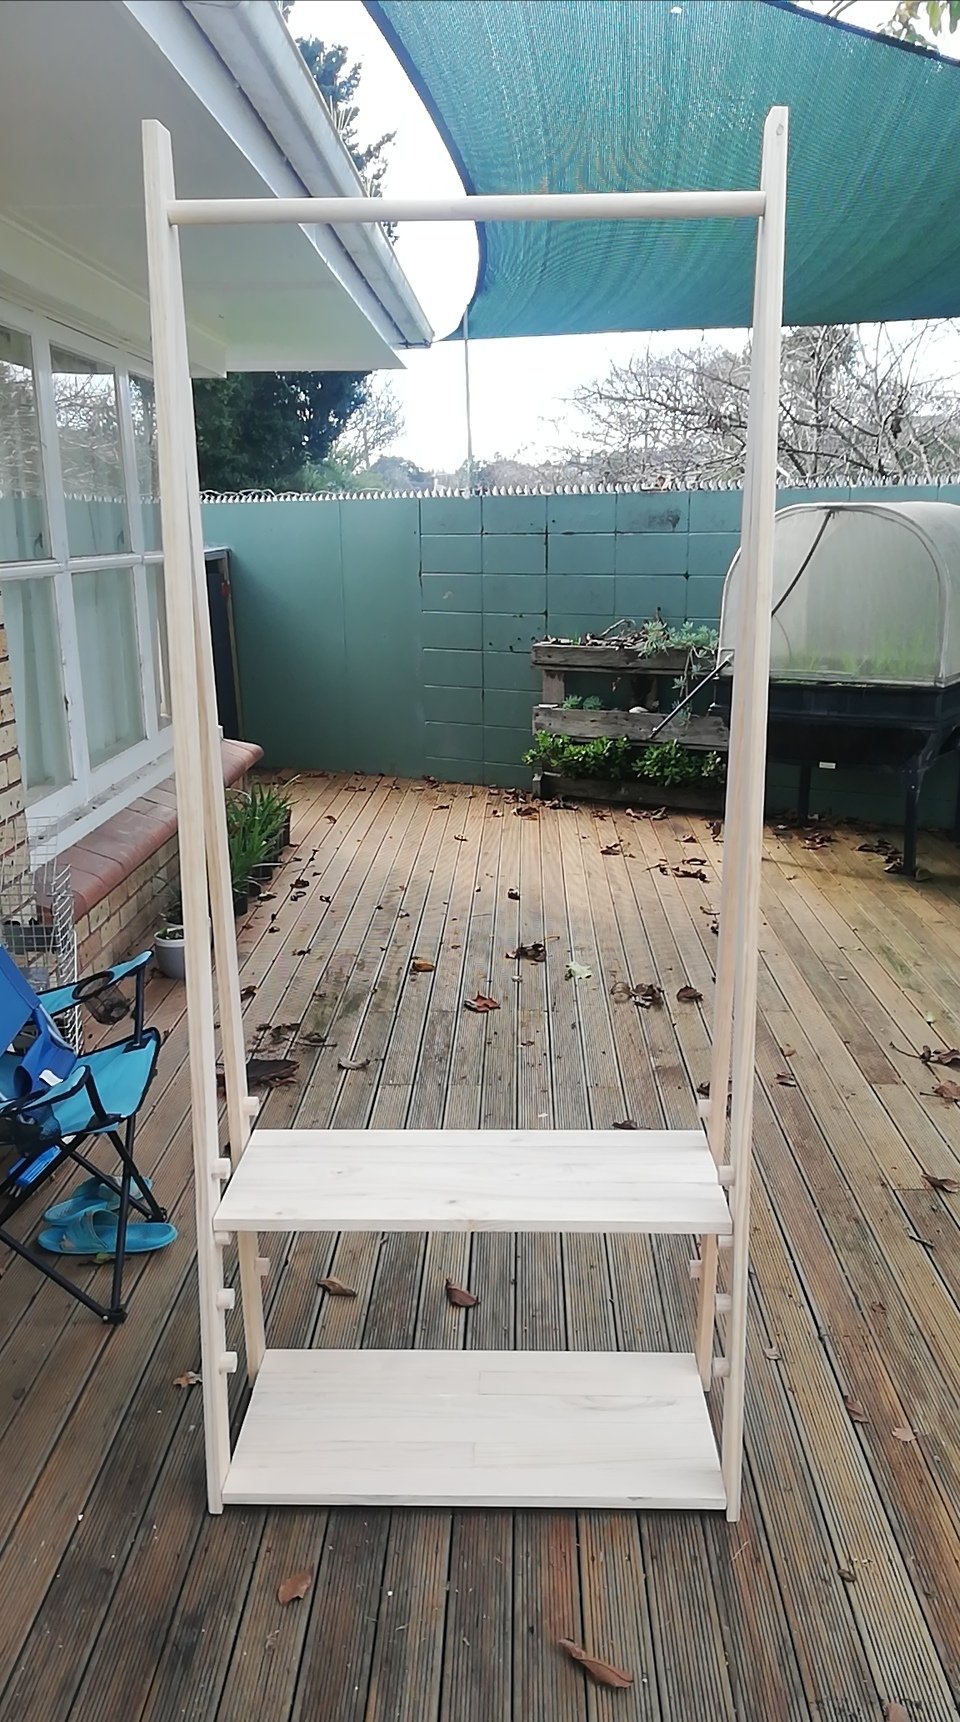
Wife sent me this picture a few days ago I told our neighbor you would make this for her. No, just buy one, it will be cheaper Apparently none available. So today they are getting this She wanted a removable shelf, so I went one better and made it adjustable
1 point
-
If you were to build a gyrocopter you could fly the engine up there1 point
-
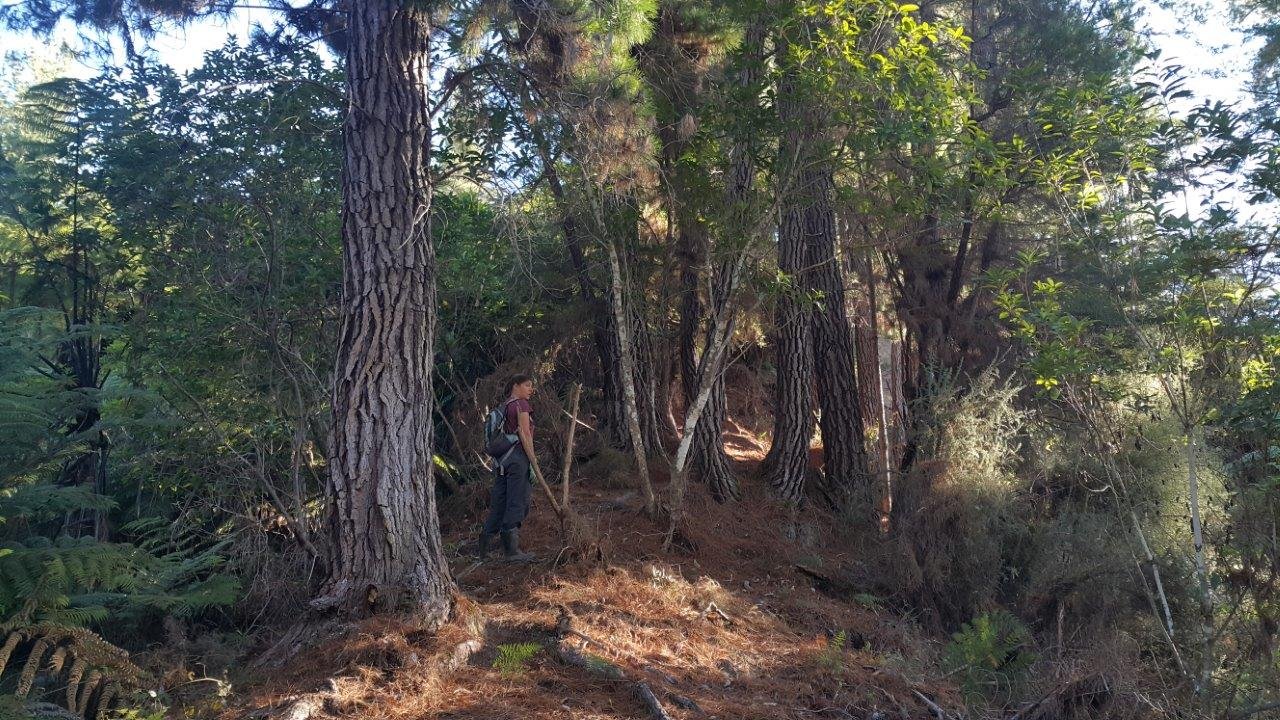
Did some more pine tree poisoning today. Now dealt with 116. Most of them big fuckers. Found the largest yet. Just wow.... Also after digging a trail tranversing across the top of one of the big slips we found a sweet way down a spur. dug a rought trail and removed a fair bit of Himalayan honey suckle and sussed out a really sweet line down through the pines then off into a big ferny bowl which could then have a track sweeping side to side, big bermed corners. I took a video but 3 mins of walking up a hill his hard to make exciting. So here's some pics sort of showing the ridge through the trees down the spur. Another 20 or so tress to go up this spur then three more ridges to do. Will probably have killed the drill by then.
1 point
-
Done! I took my kids around the hills last night and it blew their minds! They can't remember a time when it wasn't stuck in the garage so it was pretty cool. Big thanks to all you folks on here, you've been a huge help with advice/parts/motivation! Future plans are to finish tidying up the little bits of rust, throw in a 3.9 rear end that @Barnz.NZ helped me out with, maybe pop on some fender mirrors and debate if she should go low... But for now its time to eat up some miles!
1 point
-
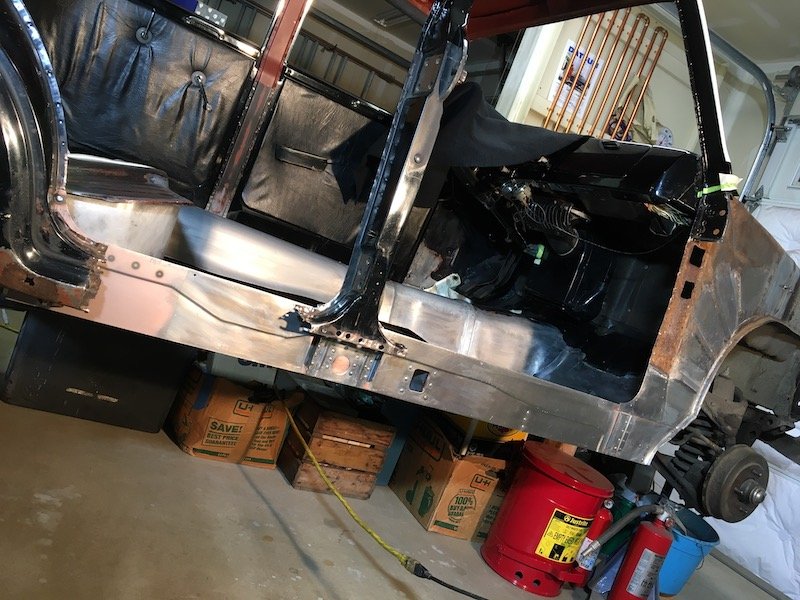
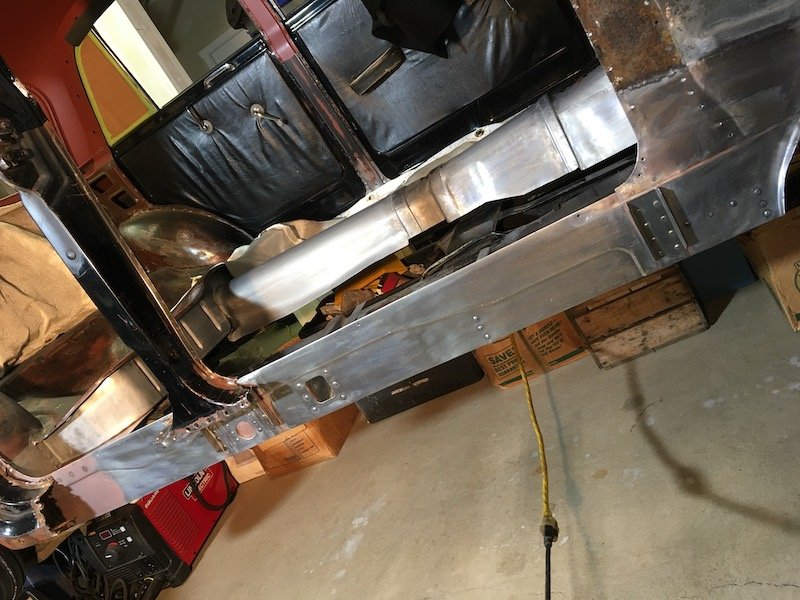
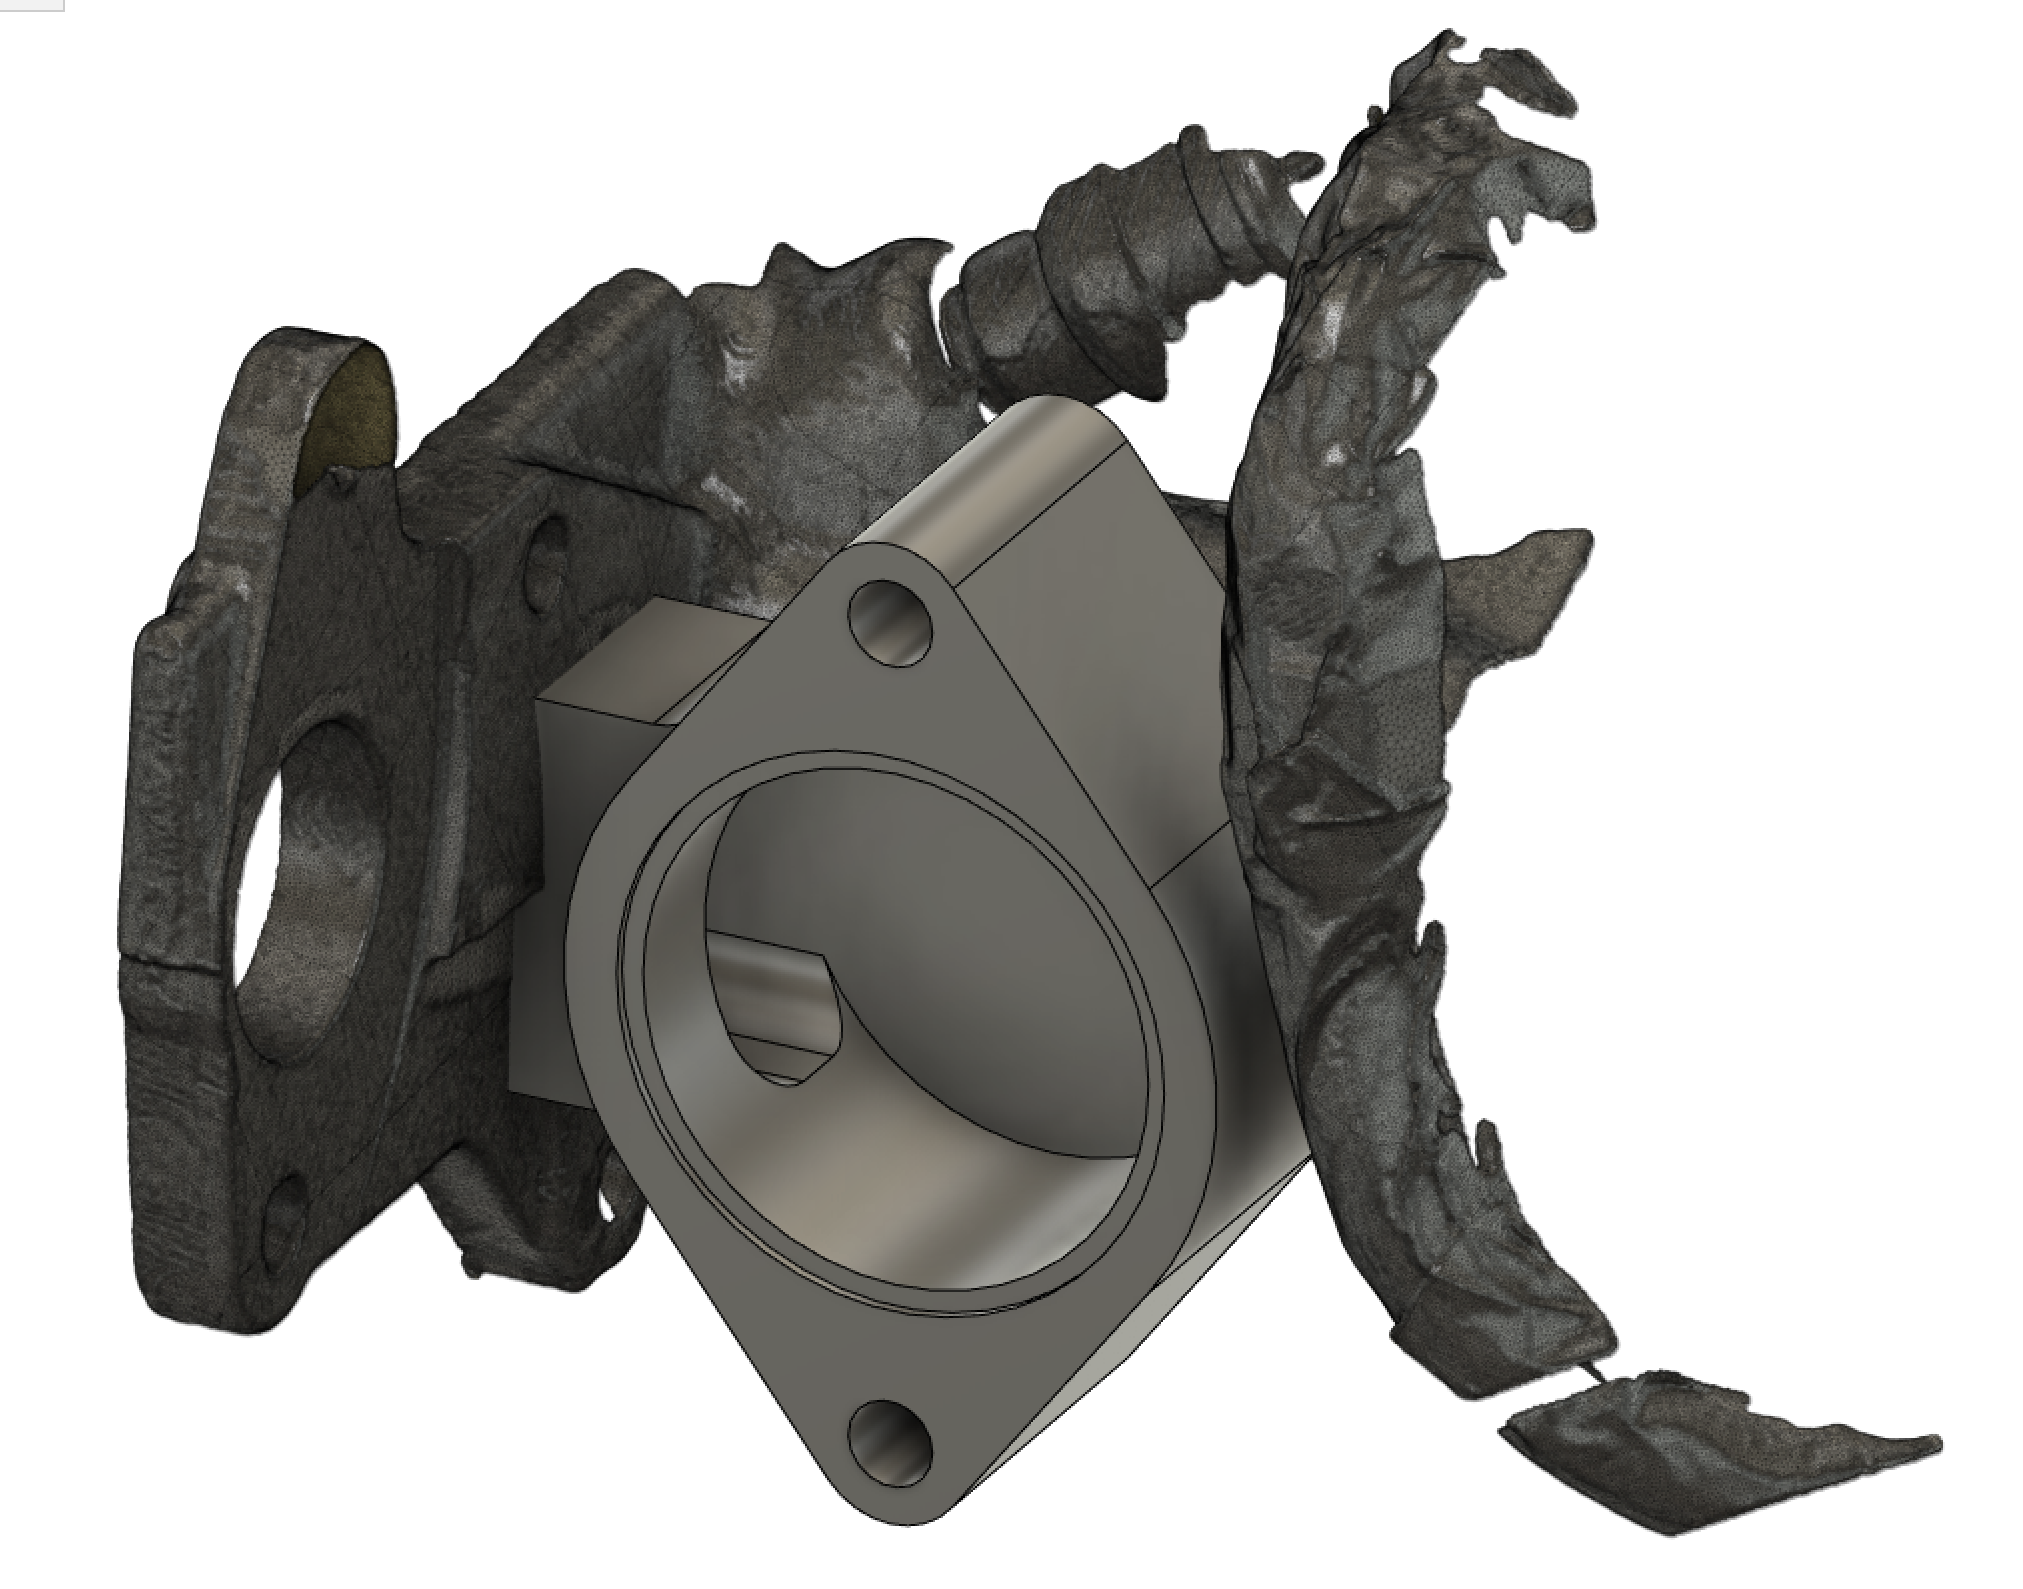
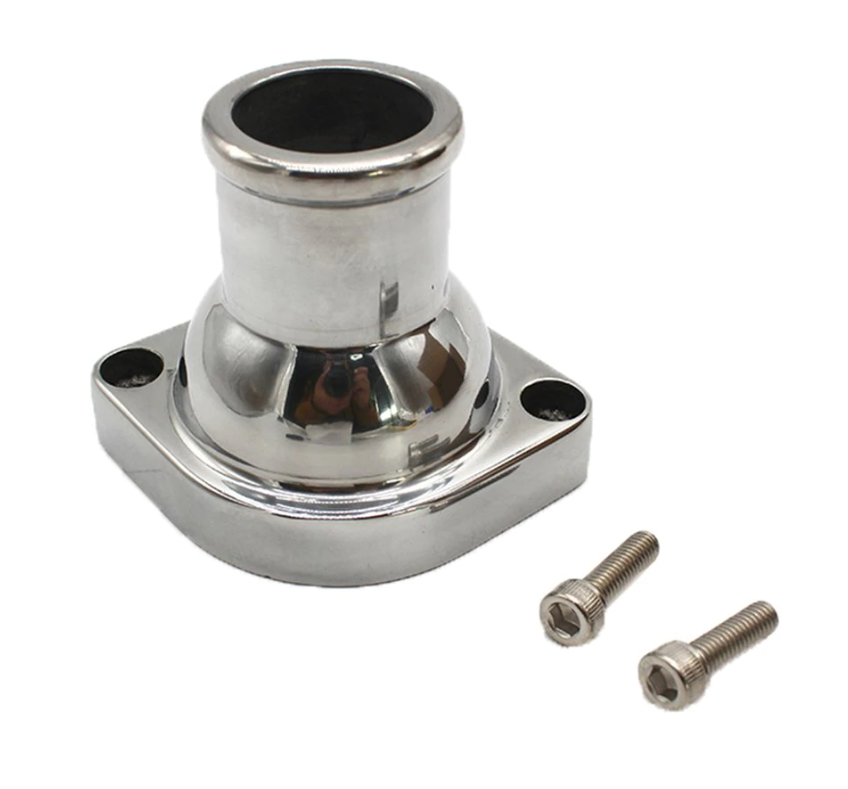
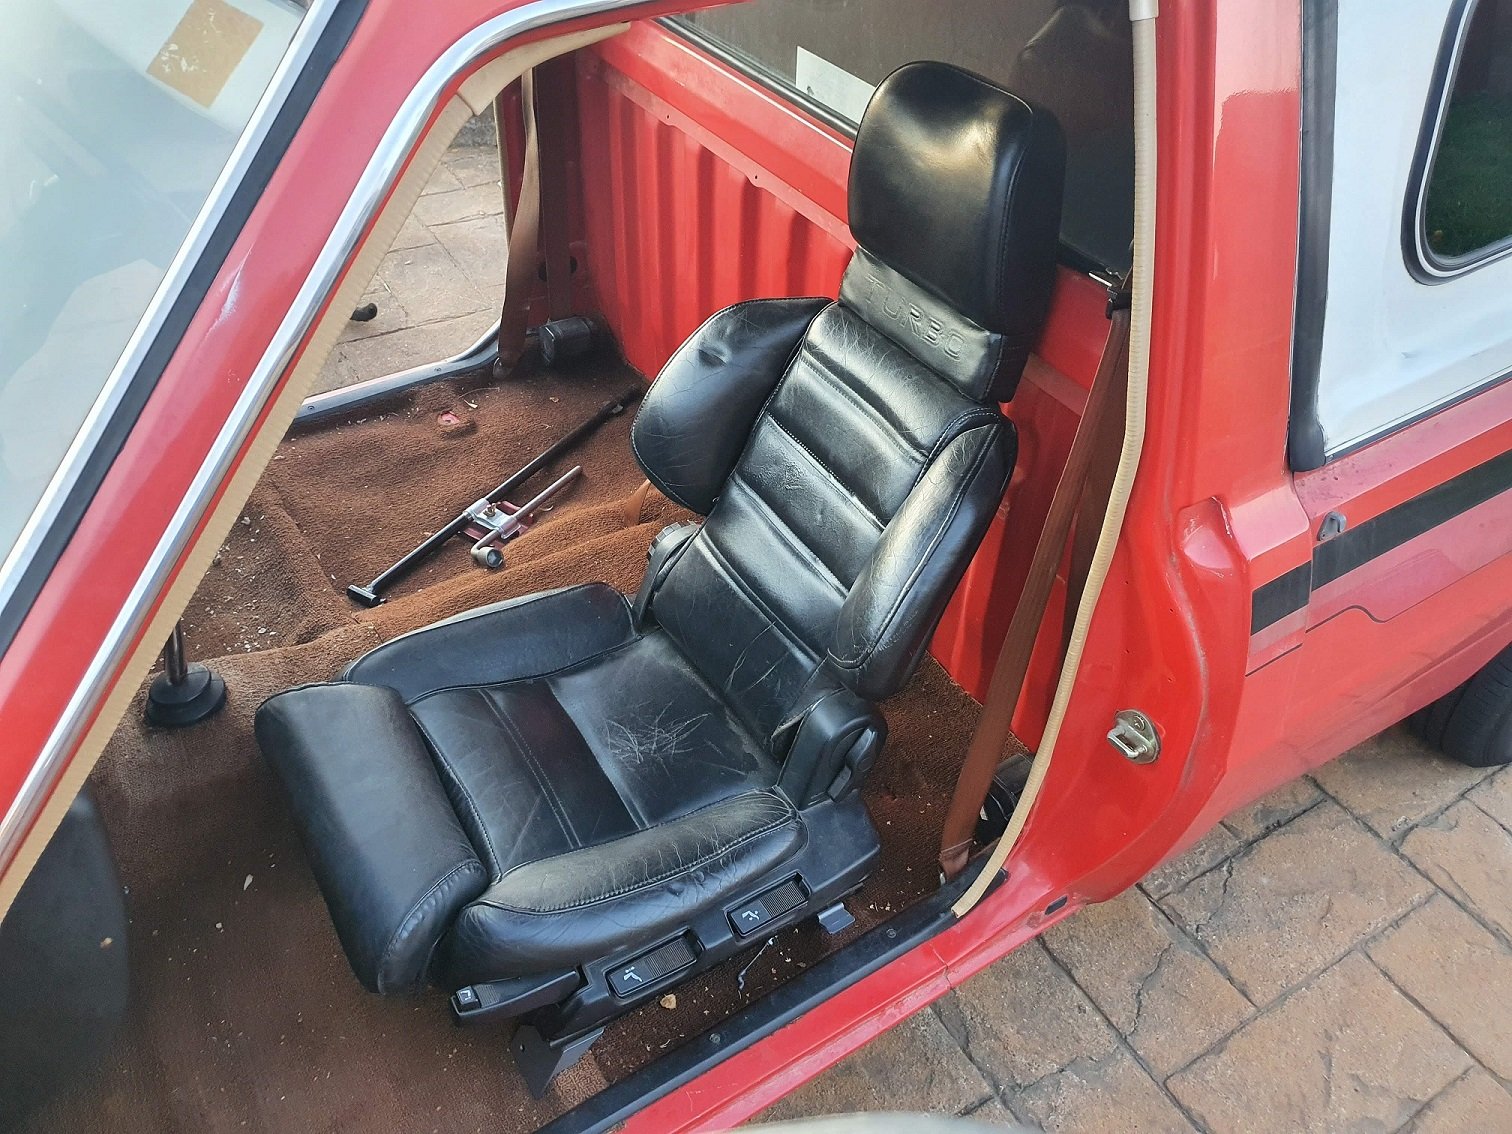
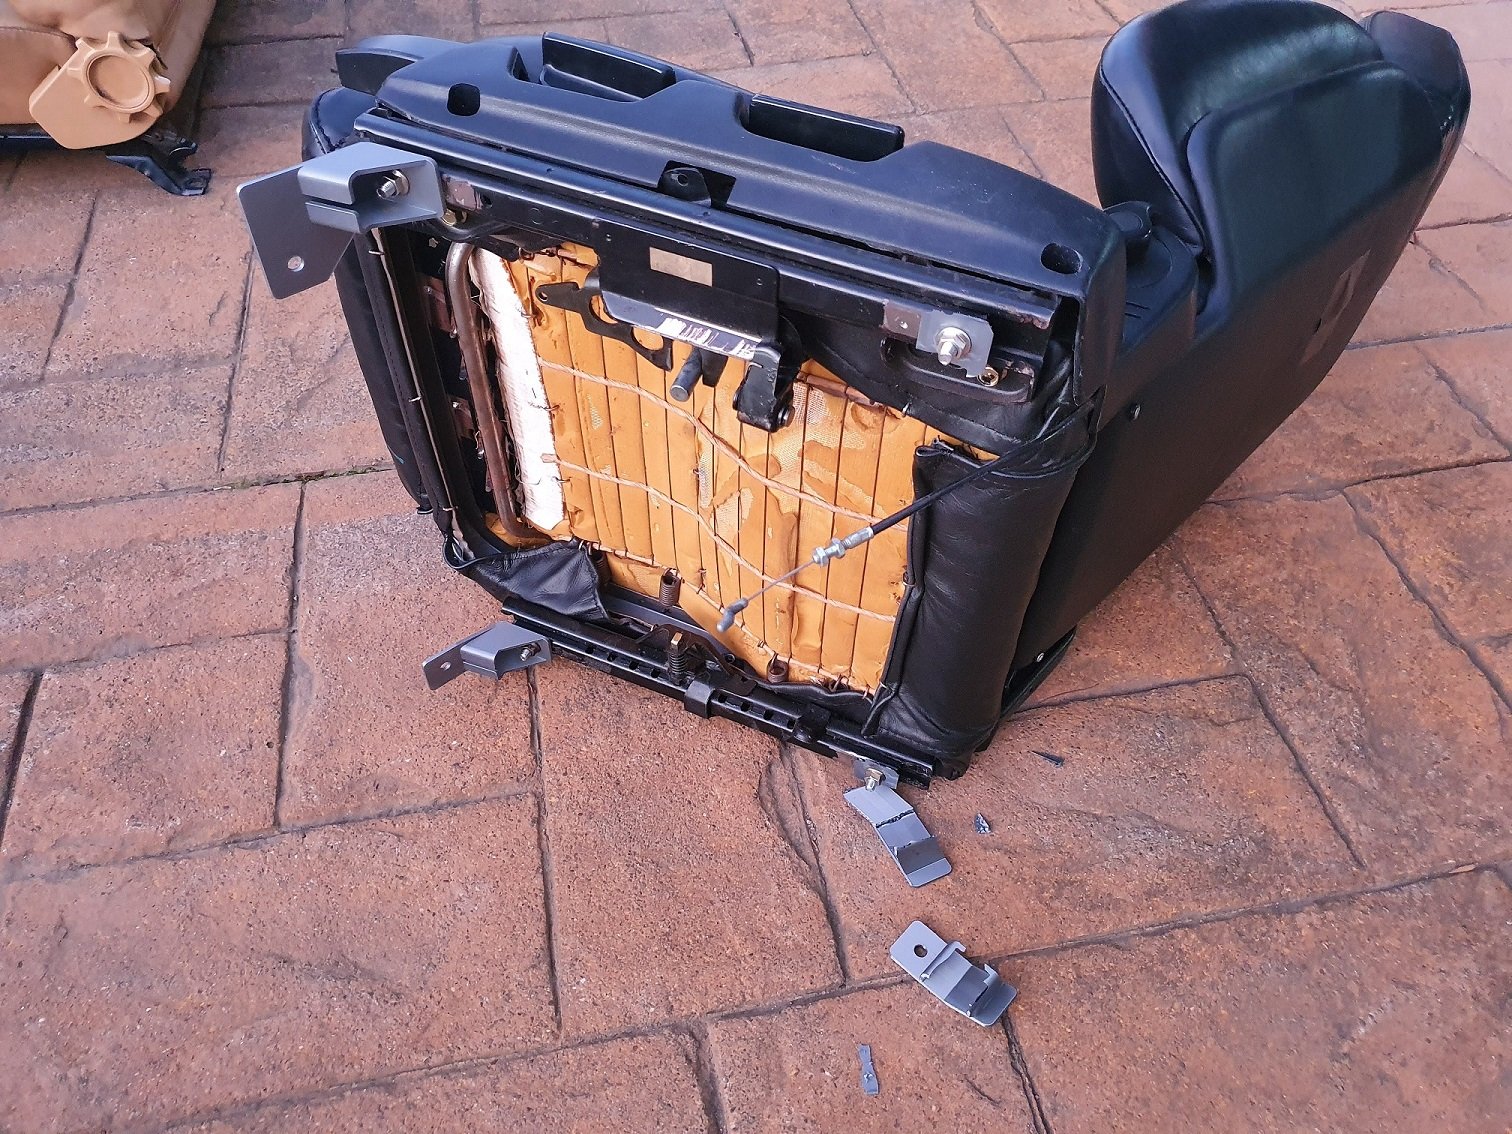
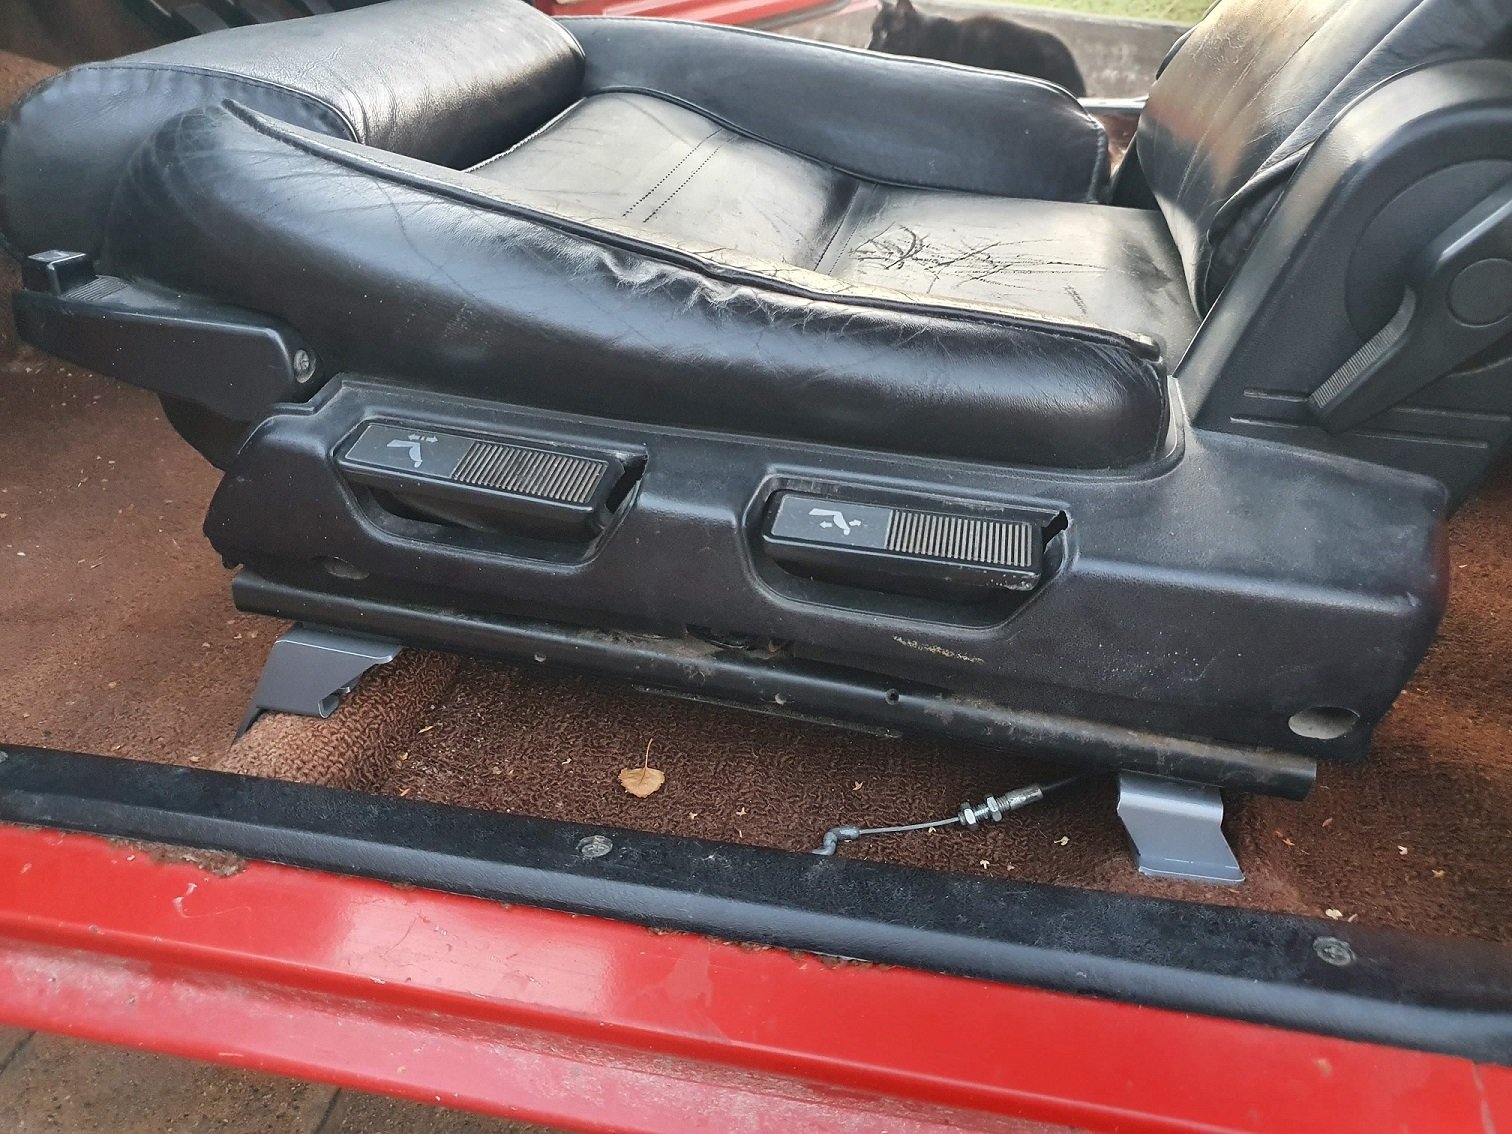
Back on the mojo-train a little with this project, it's been nice to make a little progress. First up I fixed a stuff-up with the fuel rail; I tapped the ends m18x1.5 for the AN6 threaded adaptors, and got some nitrile bonded washers to seal everything up... I was in the groove and winged the tapping, figuring that I couldn't get it too far off with a tap that big.... Mistakes were made. I tapped one end on the piss quite epically :-(. Got it in a mill at work and squared the end off perpendicular to the threaded hole, so it should seal... Luckily the rotation of the angle is such that its not noticeable when all plumbed up on the manifold. I modeled up the thermostat section I will need to weld to the intake manifold with ease of machining in mind, have ordered a straight through LS1 upper housing from China-land, hopefully it'll get here some time in the next couple of months Need to get it and measure it before I machine the lower half part and weld it (or have it welded, I'm a but rusty and I want it to look nice ) in place. That should be the end of the mods for the intake manifold. Sometimes I think I should have just built one from scratch, but I'm too deep into it to turn around now ;-). Actually I lie, I still need to mount the fuel pressure regulator, but that should just be a simple bracket. Part of the plan has always been to fit a pair of Starion bucket seats to it. I love these seats, always have, they're really comfy, lots of adjustments and look just weird enough to fit with the rest of the truck. Because my truck it a sport model, its got the threaded mounting holes in the center of the cab for bucket seats. The non-sport ute I had for parts didn't have these, which was an interesting find. This is great, as it would let me use a second set of l200 seat rails (now having a pair on each side) and adapt buckets seats to them... But because the adjustment handles on Starion seats are pretty integrated with the seats themselves, I can't go this way... As per usual I completely over complicated things because I wanted to muck around with cool gear to do the job... This let me pick up on the bolt holes and required angles of the existing mount points in the floor. I used some wood and other props to get a seat in about the right place and took some measurements to get the other half of the puzzle, the mounting points for the Starion seat sliders (with the original sheet metal bracketry to fit the Starion chassis removed). The mounts are designed to be welded together out of simple bent sections of 3mm sheet steel. Hopefully this, and the original fasteners will satisfy a cert-man as I wont be having the seatbelt stalks mounted to the seats (which they are in a Starion).... At worst I have all the measurements now, so will be able to come up with another solution if required. I printed a test set of brackets to check the fit. I always get jumpy when something fits first time... but here we are. I've mounted them quite low, as it gives a good feeling of sitting 'in' the truck, as opposed to 'on' it. I've also centered the drivers seat with the steering wheel a bit better. It's a compromise with the pedal centering, but feels good when you're in there. The actual seats I'll fit are a pair of grey fabric ones that are in excellent condition. I've got two sets of these black leather ones, neither of which are fantastic, but between the two, and some money I'm sure, I'll be able to get a really nice pair for my Starion project (which is a long term thing... far in the future ). I'll have to get some black carpet, and some new black seatbelts too. Then retrim the door cards and roof lining. Sheese. Should look pretty tidy in there then. Well, once I do something about the massive gaping crack in the dashboard as well... Future problems. I had a couple of sits and everything seemed great. They might be a touch too far outboard, but you can reach all the handles and still wind down the windows without bashing your knee. I want the space in the middle for a center console (more storage is betterer). I've gone from having about 3" of clearance to the roof (I'm 5"9') to around 6", so they're certainly a bit lower! The inevitable result of my fat ass wiggling the seat around, but the prints served their purpose. Will get the component parts profile cut, bend em and weld em up. Fun fun.
1 point
-
Right, tbh I didn't realise there were actual limits, it came with the 33/12.5 on the rims and I was just going to replace them like for like, obviously this isn't a go. I checked the offset tonight and it is +5mm as far as I can tell. All the 10" rims are -44 so that's no good. So if a 15x8 that can work then good. If I go R16 x 8 then a 305/70-16 will be it. There is a zero offset available in that size. I have been wondering about the brakes, they are pretty good now after bedding back in but not amazing. The calipers are pretty budget affairs, just a single side, single piston. I might have a trawl of the patrol sites to see what people have done to improve things. Cheers for the heads up.1 point
-
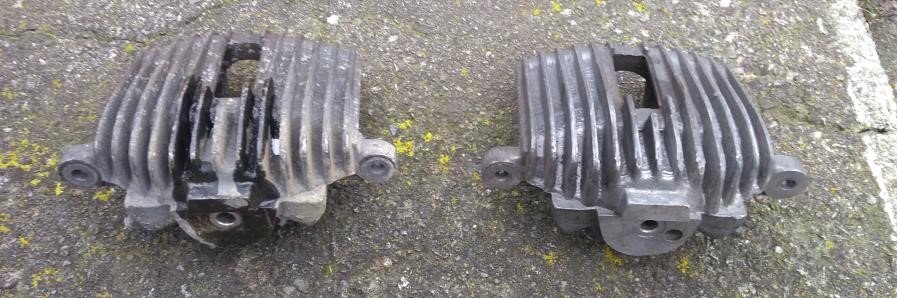
Spent the morning cleaning up the last couple bits to put the subframe together, had the sexy @Steelies and his good lady Ms Steelies call in and say hi, then @LoveChild made a surprise visit soon after. Bloody nice of y'all. Decided I need a bunch of gold passivated bolts to make it all look pretty so compiled the bolts I need to buy and hopefully I can find them all this week. Anyhow after doing all those bits and pieces I got onto the bit I was not looking forward to which was to clean up the shitty looking brake calipers and mounts. Broke them down to the individual components and proceeded to wire brush the living shit out of them. I was going to vapour blast them but I'm happy with the outcome especially at the low low cost of 90 minutes of elbow grease and this before and after doesn't really do the justice of how much nicer they look now. So anyhow after a morning of filth and grime, I went to Ms Steelies coffee shop and rewarded myself with the finest coffee in Wellington (Coolsville in Hataitai for those who care) and currently kicking back in my tracksuit pants and hoodie in front of the heat-pump pretending its an open fire. Enjoying a windless but brisk Wellington winter afternoon listening to podcasts with my pussy giving me the stink eye. Your pal, Dave
1 point
-
QuickDicks for life.1 point
-
I'm up there next week. Going to tell them how much of a sissy gang the foamers are, and that they shouldn't associate themselves with such specimens. /spam1 point
-
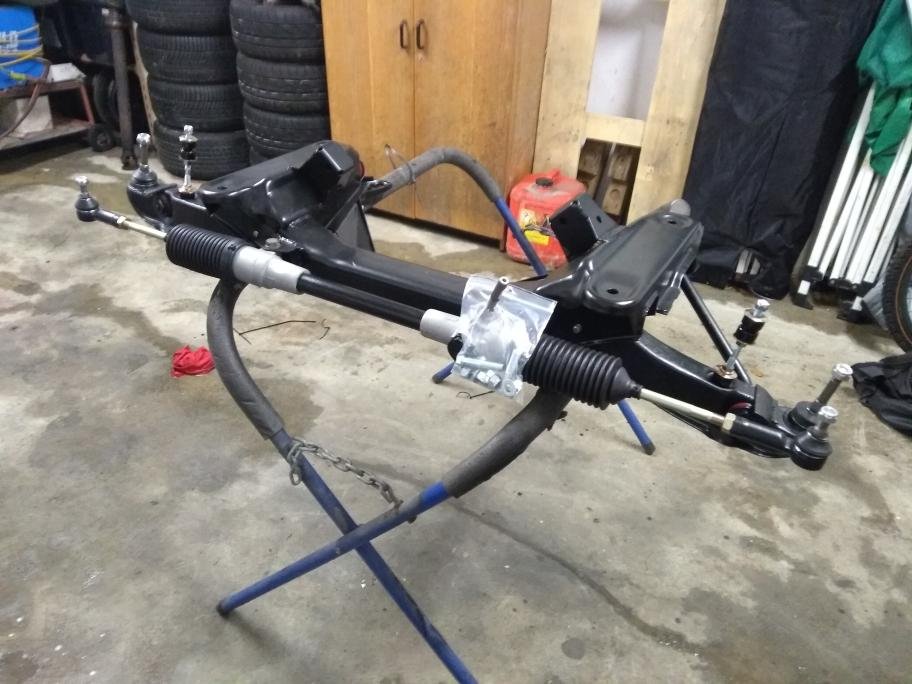
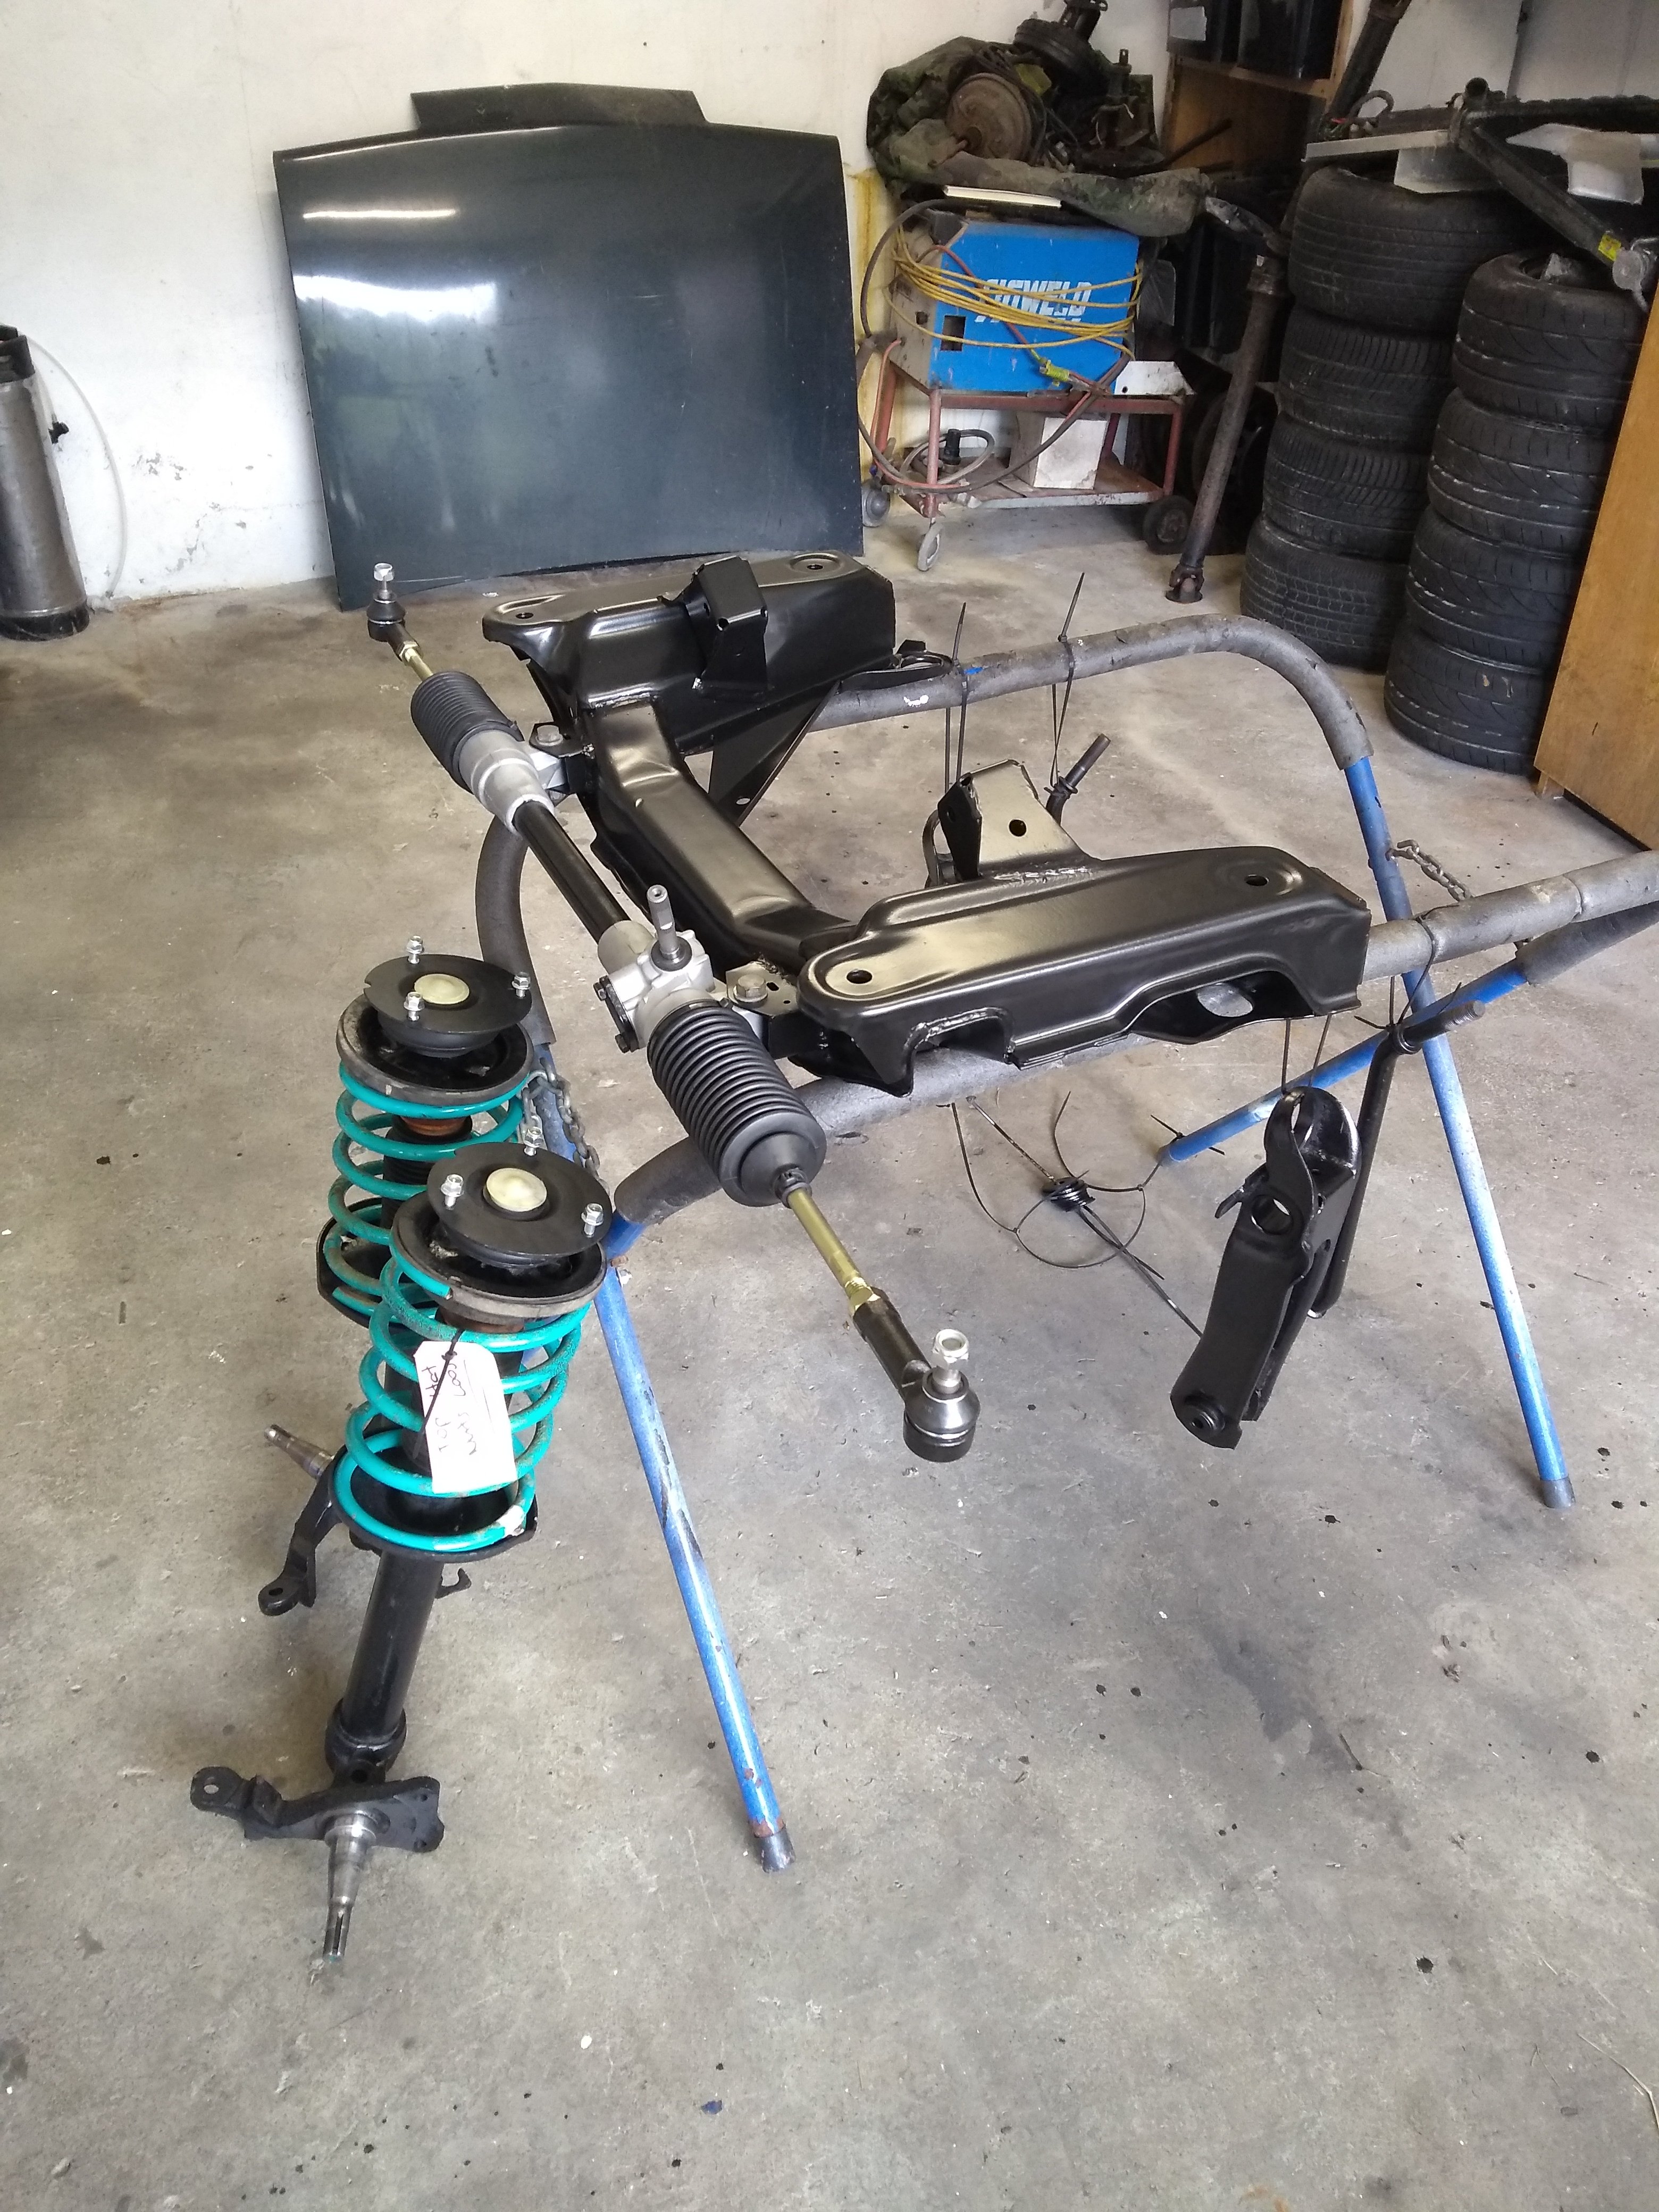
We'll talk about a spanner in the works. Some guy named Covid (sounds Dutch) threw a bit of a curve ball. Seeing as my lockup was the other side of town and further away than I was allowed to travel. This thing has been on ice for 7 weeks. Anyhow first day back on the spanners netted some progress. Super stoked with how the crossmember and rack turned out.
1 point
-
Update time. Considering we've had several weeks of enforced lockdown we've not done as much on the property as expected. I blame quiet roads and bicycles. But yesterday afternoon we actually started on one of the most important things we've wanted to do which is build a cabin up on the ridge. We had been given loads of old decking from a house not far from us. It was left for us in the yard while we were out on holiday and it got rained on. When the sun came out and it started to dry it started to bow. We promptly stacked it inside with flitches to let it dry slower. There it sat for way too bloody long!!! Its been a pain in the arse moving cars about it and having lost that space but was a daunting thought of moving it again, up to the ridge! But we've done it! Our shoulders and legs are shattered but it was such a satisfying job to get done. Now we are really enthused about building the verandah up there, and want to crack on with it. We have a huge pile of treated pine 12 x 2 and 8 x 2 that we can use for the build so will order the posts next week and get them up there (in the quad for those!) Photos ... I did took the little mower up in the quad first and gave the lawn a tickle. Its coming up really nice considering what it was like up there when we bought the land! We first looked at the ridge 6 years ago, when first viewing the property - well excluding that miserable day we had gone up there for a first look via the main gully in winter and had been totally put off the place until the summer following when this pic was taken. The gorse was already quite rife... a couple of years later we got stuck in- the gorse now even worse.. Now a completely different place that even has a nice lawn to mow... Here's the pile of wet decking complete with nails being removed... Then it was about 20 ten minute walks uphill through the bush with decking starting with the first few on Thursday night... The last drag up what we call the ridgetop runway... not an easy gradiant... each time on the way back down we would grab a log each for splitting later on... Yesterday we finished taking the rest of the long lengths up. I filled the quad for one run with all these short bits and some beers!... Pile shifted. Shoulders battered. Beers consumed in the evening sunshine... Today is a chill out day where we get to shuffle stuff about in the workshop and celebrate all the reclaimed space (until @Tumeke Triumph wagon goes back in that is..)1 point


.jpg.312f68f9ca47874c114d1ad16228b9c6.jpg)
.jpg.c3567ddc9f9f1feed21913512c4a33e9.jpg)
.jpg.cd1ce1c81bf1b4db906172e017f6e48b.jpg)
.jpg.d6f16de9dc524af1c8c32cae4a9347ac.jpg)
.jpg.677d1bca1c0073a5627c93d9abaccaf1.jpg)
.jpg.02e68628ec2f81d8e80ed27d9e05cda2.jpg)
.jpg.a69187b522750a09931794d2cc088bb6.jpg)
.jpg.95ab4d1cbbb935c6638573d635964b9f.jpg)
.jpg.8a8bf4a6e72d9b2406ba60695aa1d958.jpg)
.jpg.e3e9945788bb633fb722d4976e8fb834.jpg)
.jpg.27015deba7043cd7b77e24cdffb2fe4b.jpg)
.jpg.da9c08485edd0ae258b2951e8345b618.jpg)
.jpg.e12c2a9fc06dbd73179710daf1acd479.jpg)
.jpg.d7b7239478911a988839c5b66f7d0da7.jpg)
.jpg.6dcfcfa6ea9c0f05c235e610fb758ff4.jpg)
.jpg.11b98fe10db676e40dabaf24d38c5323.jpg)
.jpg.79617009d92e231a45128d6139ad86a6.jpg)
.jpg.75f755e78f0cb29b9b65ed18f22a839a.jpg)
.jpg.5fcd2b41e152e660655fde43c2c51dae.jpg)
.jpg.3ccbc1511fa7418660c4b04c2e1b260f.jpg)
.jpg.61746cfcdbe2b4b108963ef0ca8898d7.jpg)
.jpg.292584779d752e0dc2b57d1a32859ffa.jpg)
.jpg.99fcaf25c7d7005fc4f55816ed230a40.jpg)


.jpg.b9155f7769ad9db3e09e641fa66b61eb.jpg)
.jpg.bfd8b030f2791dff3c579f739e0bb4f9.jpg)
.jpg.7958d35ac0ebdb88fbdc11c1e9ddc037.jpg)
.jpg.da1c48b0e61854074898d369bd1851cb.jpg)
.jpg.c2cdff4035ddb45e8f2a7dd6af29522a.jpg)
.jpg.090d0c829659c97dcb6af190a40d158f.jpg)
.jpg.69e39dda205d9db5b6c23d128dca05b4.jpg)
.jpg.b5ff1456271593268fcc879bd6ec11b8.jpg)
.jpg.e5ab5393e732f71c975442dd17a8f17f.jpg)
.jpg.579e275ef72aa6f0db88d8cf9a207061.jpg)
.jpg.85c8baa01246a267c65c9e5fba459032.jpg)
.jpg.3ef915e4d81f60ff74d0e3357a9daa32.jpg)
.jpg.241f6bda199e5460908ad802c59ceebb.jpg)
.jpg.4904bb6a7e8fded6960fcbe747a33904.jpg)
.jpg.f2df22f2fde17747a46d9c4f4291640e.jpg)
.jpg.b24ba5a335a1b9ce433457f1425cbce5.jpg)
.jpg.46fa000cb98b93d78739ba3de8a0aee4.jpg)
.jpg.92d9d8a8f5639ffc9a3d26f4bacad199.jpg)


_sedan_(23230030334)(1).thumb.jpg.34d765361d66c78db614bae6ea2c156a.jpg)


This leaderboard is set to Auckland/GMT+12:00