
Leaderboard


Popular Content
Showing content with the highest reputation on 06/08/20 in Posts
-
Bit of a mockup32 points
-
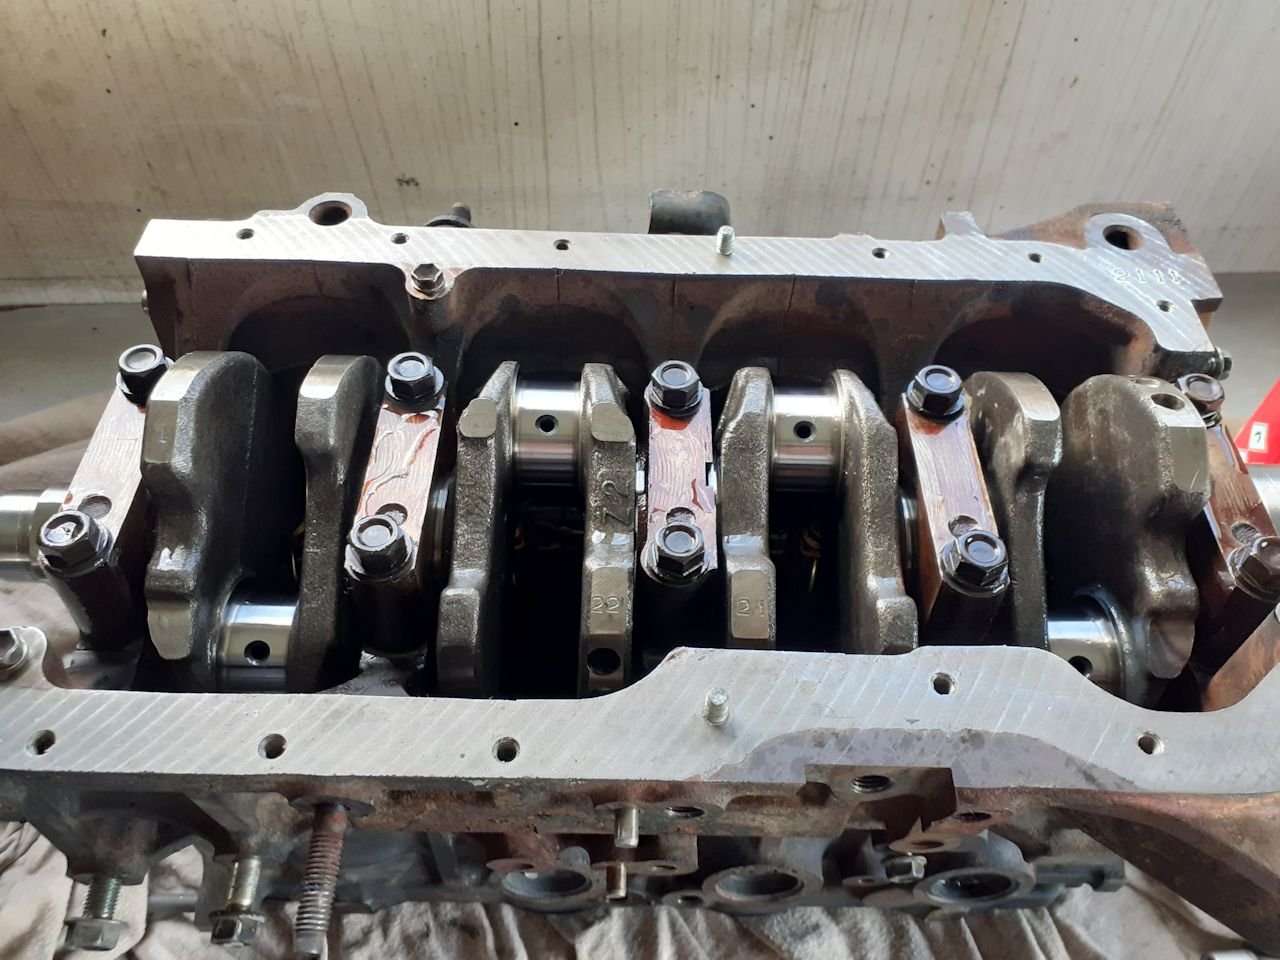
Pretty well detailed now. Bearings, seals, cam timing, compression ratio all realistic. Now need to do waterpump, oil pump and drive to supercharger. Dont have drawings for any of that though so need to wait until the Bugatti Trust is open again.24 points
-
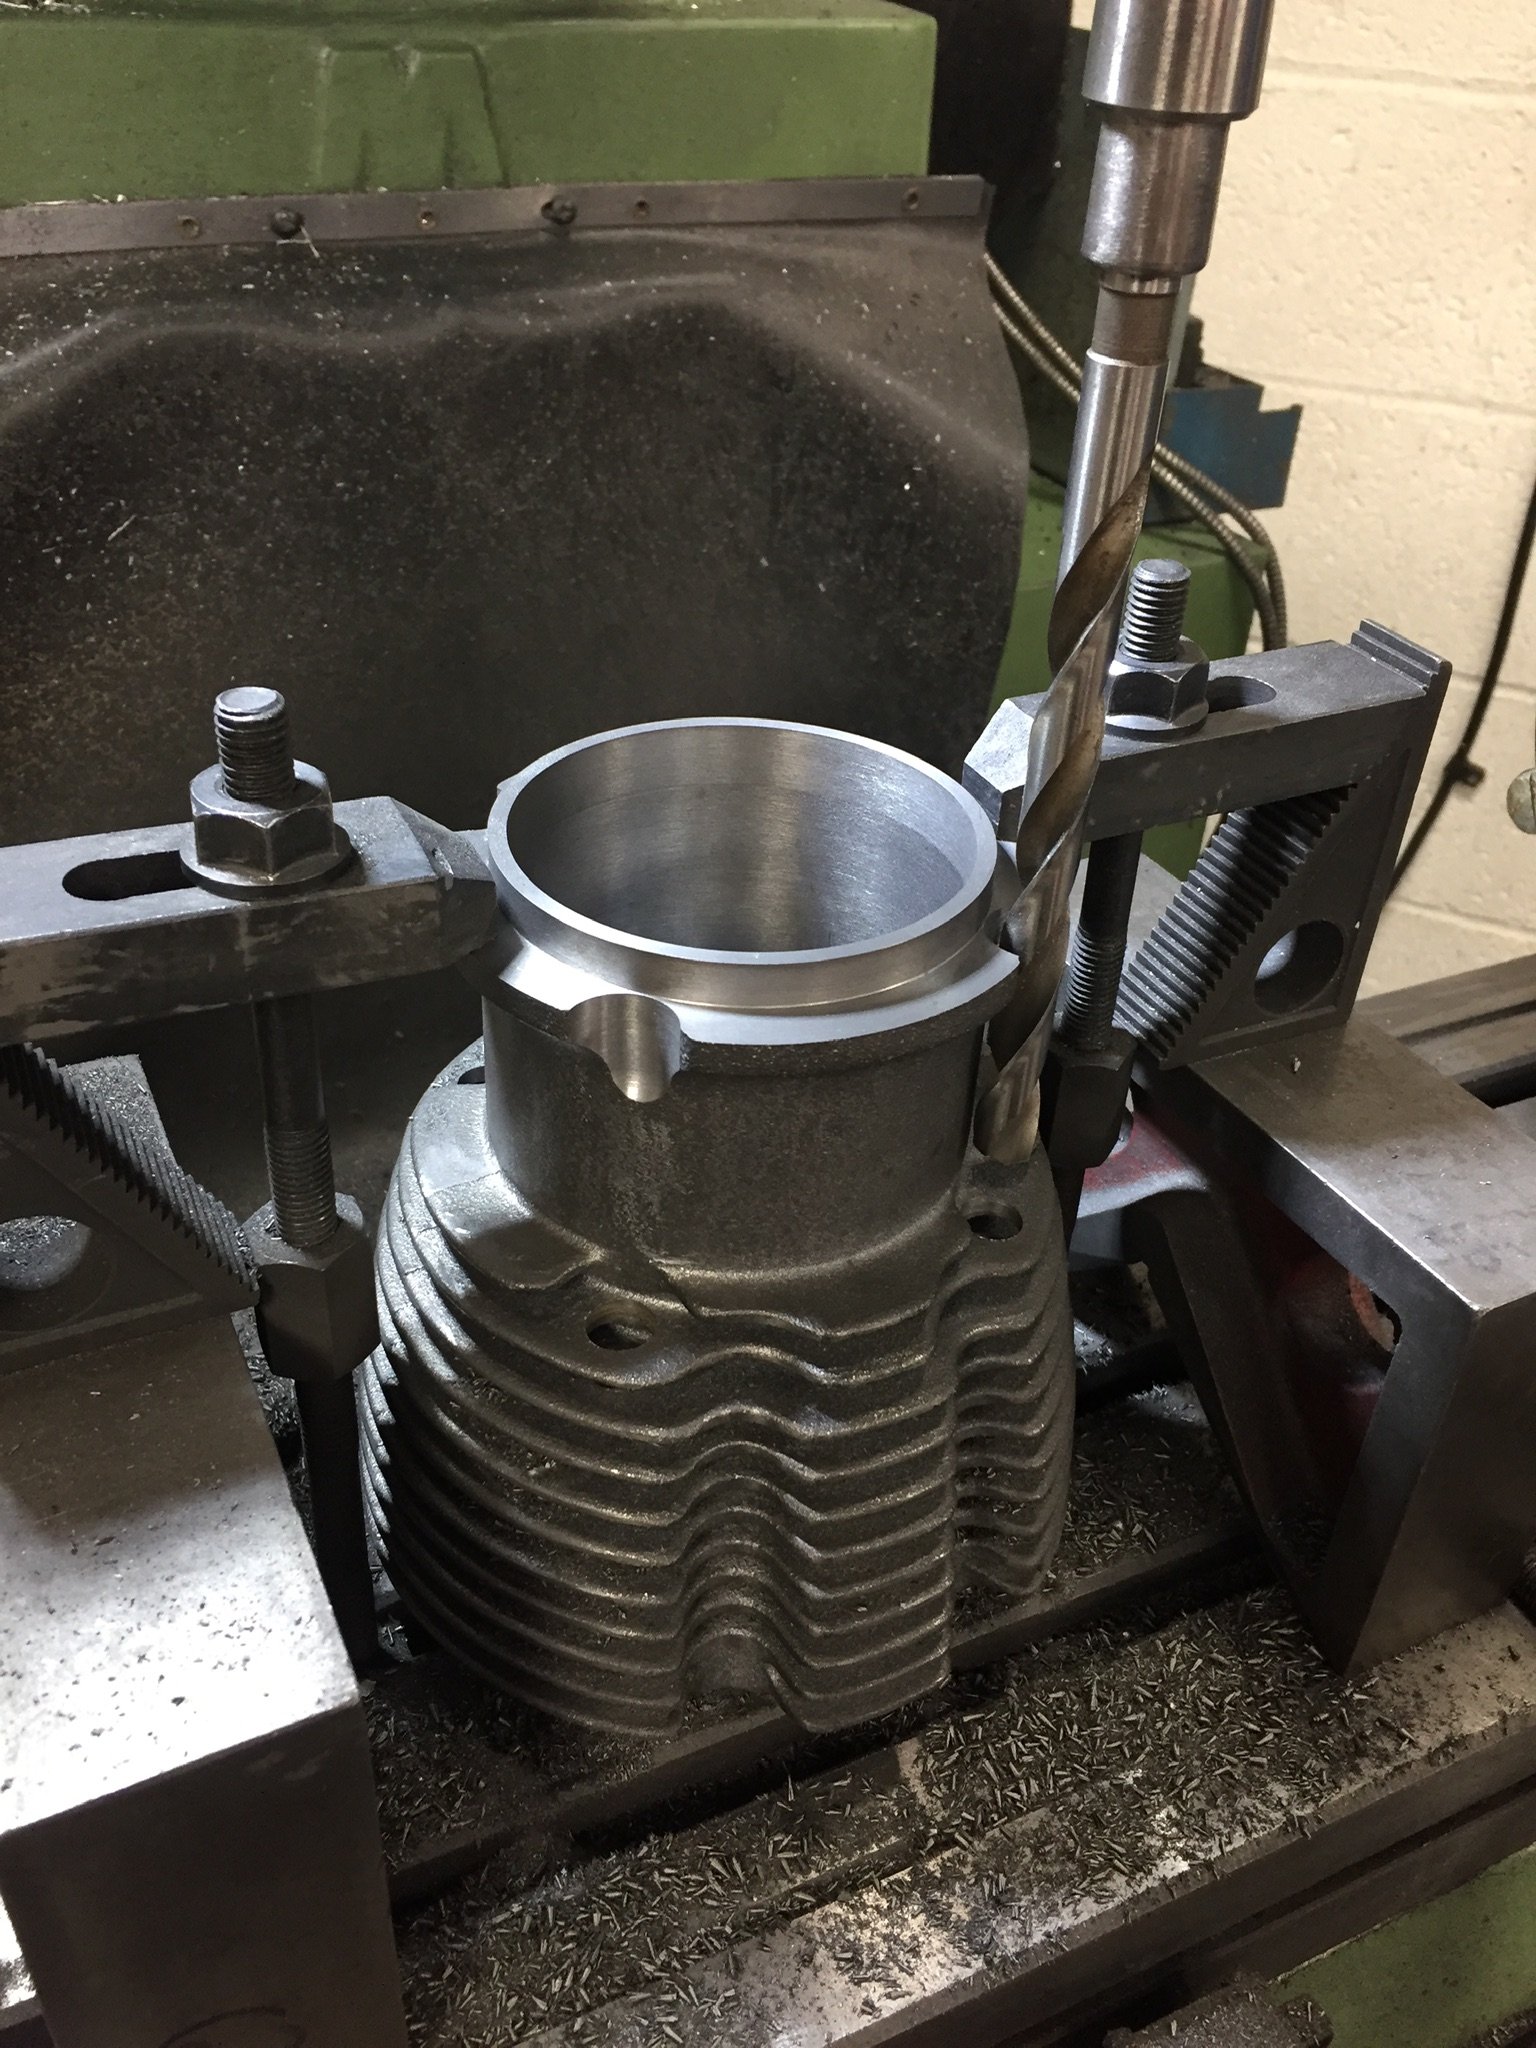
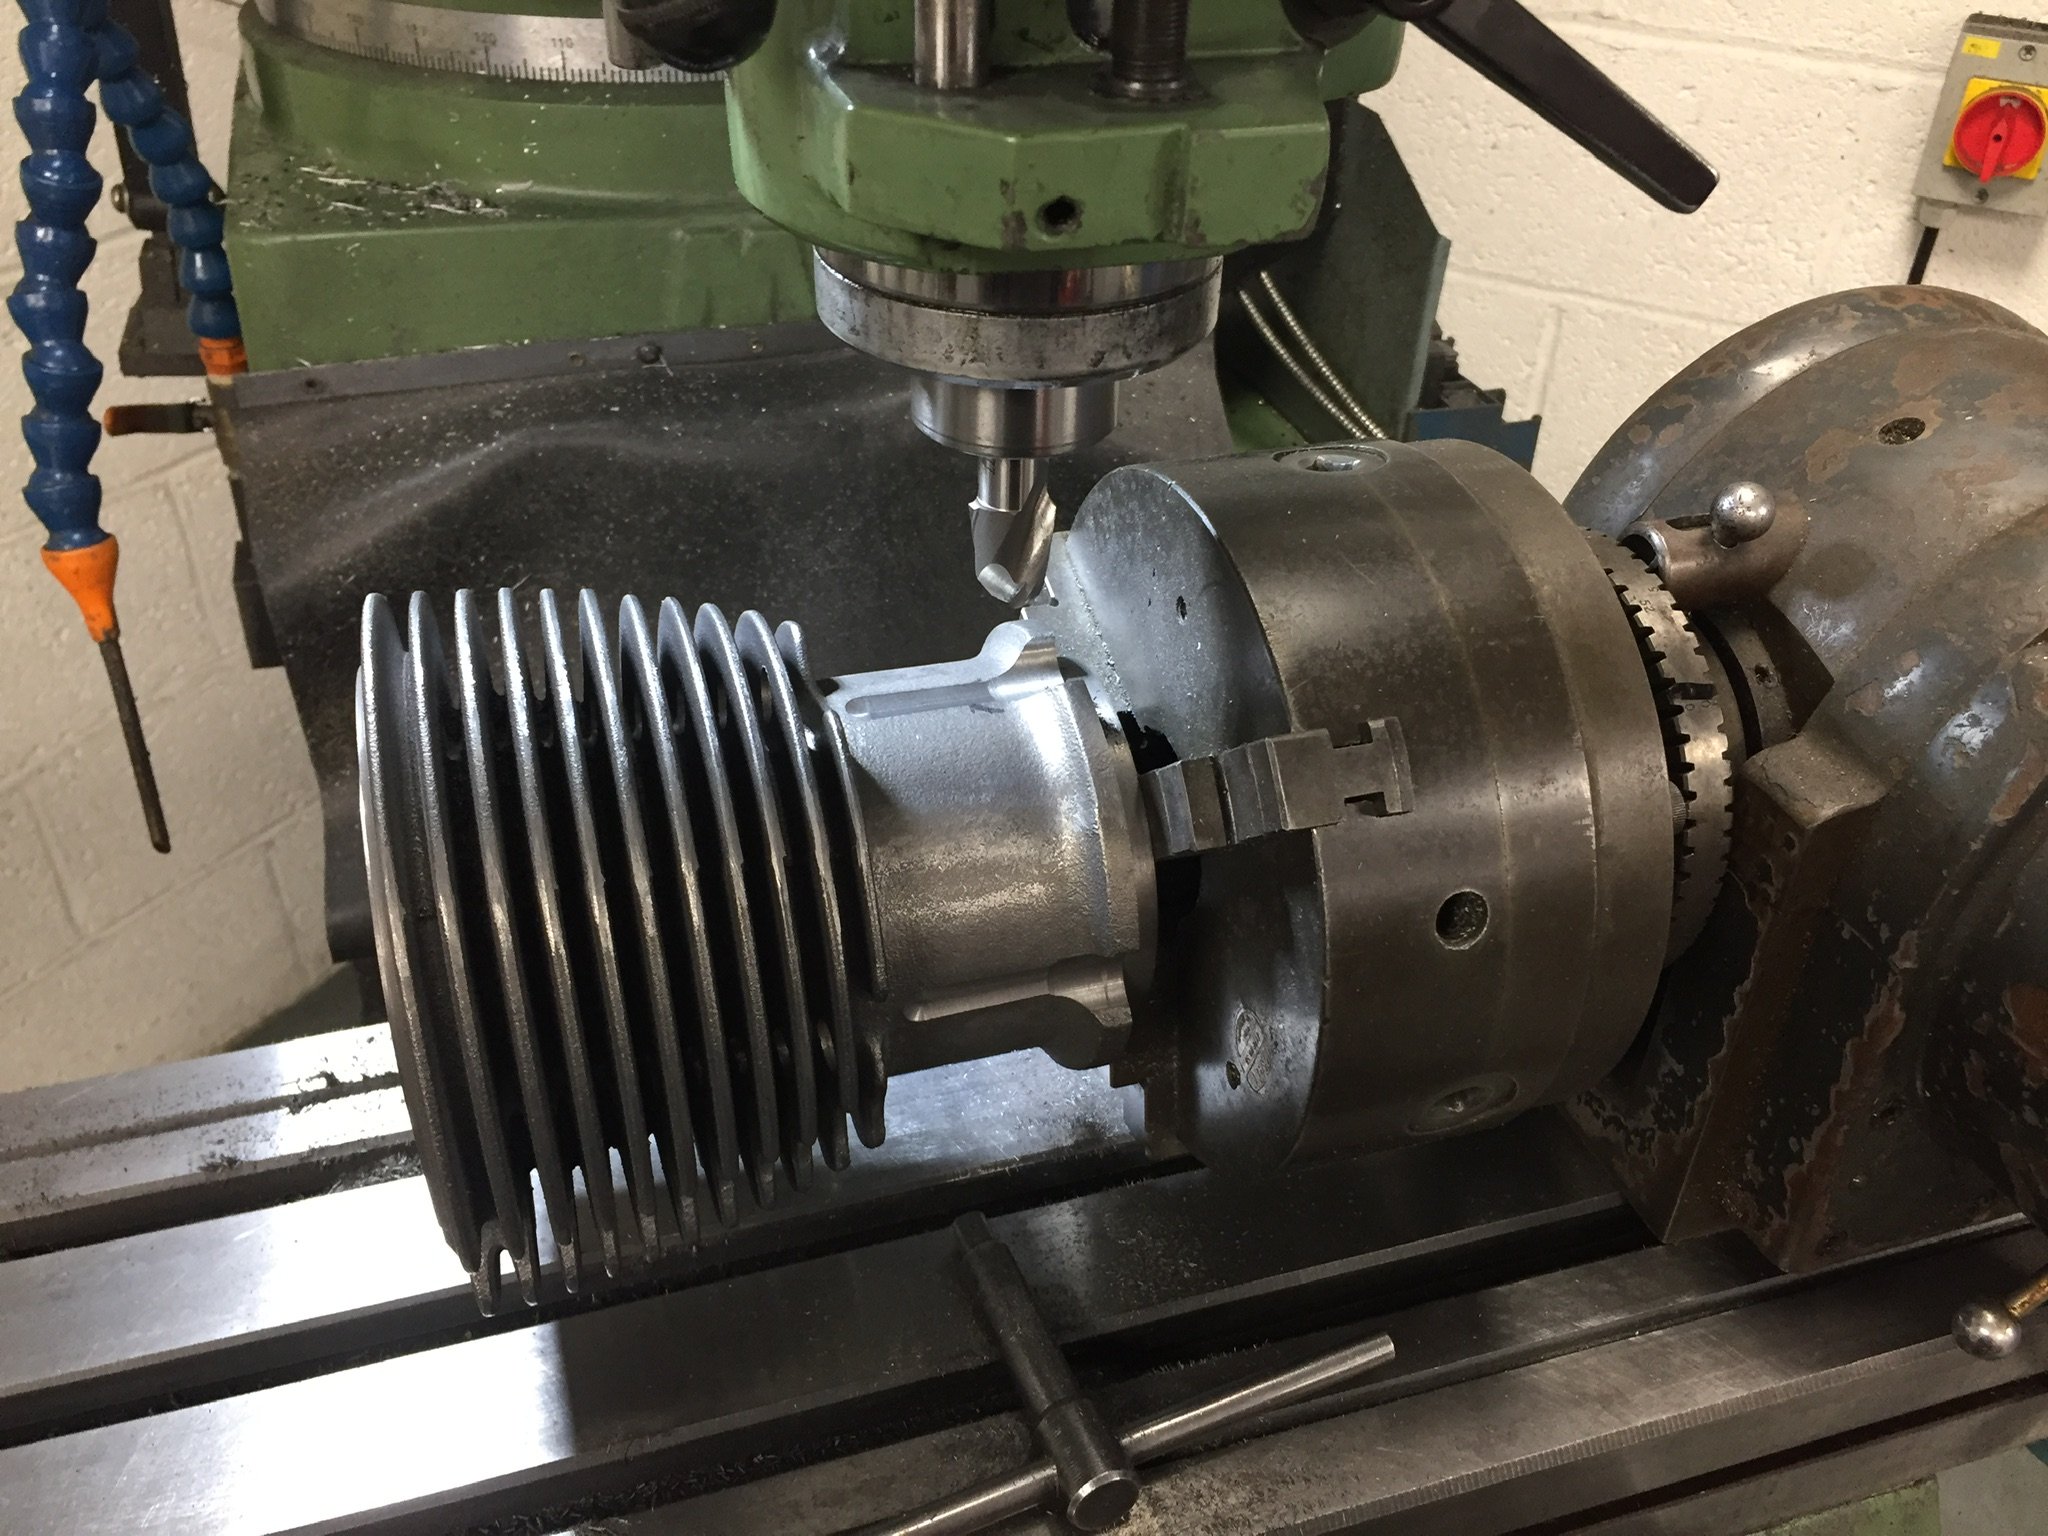
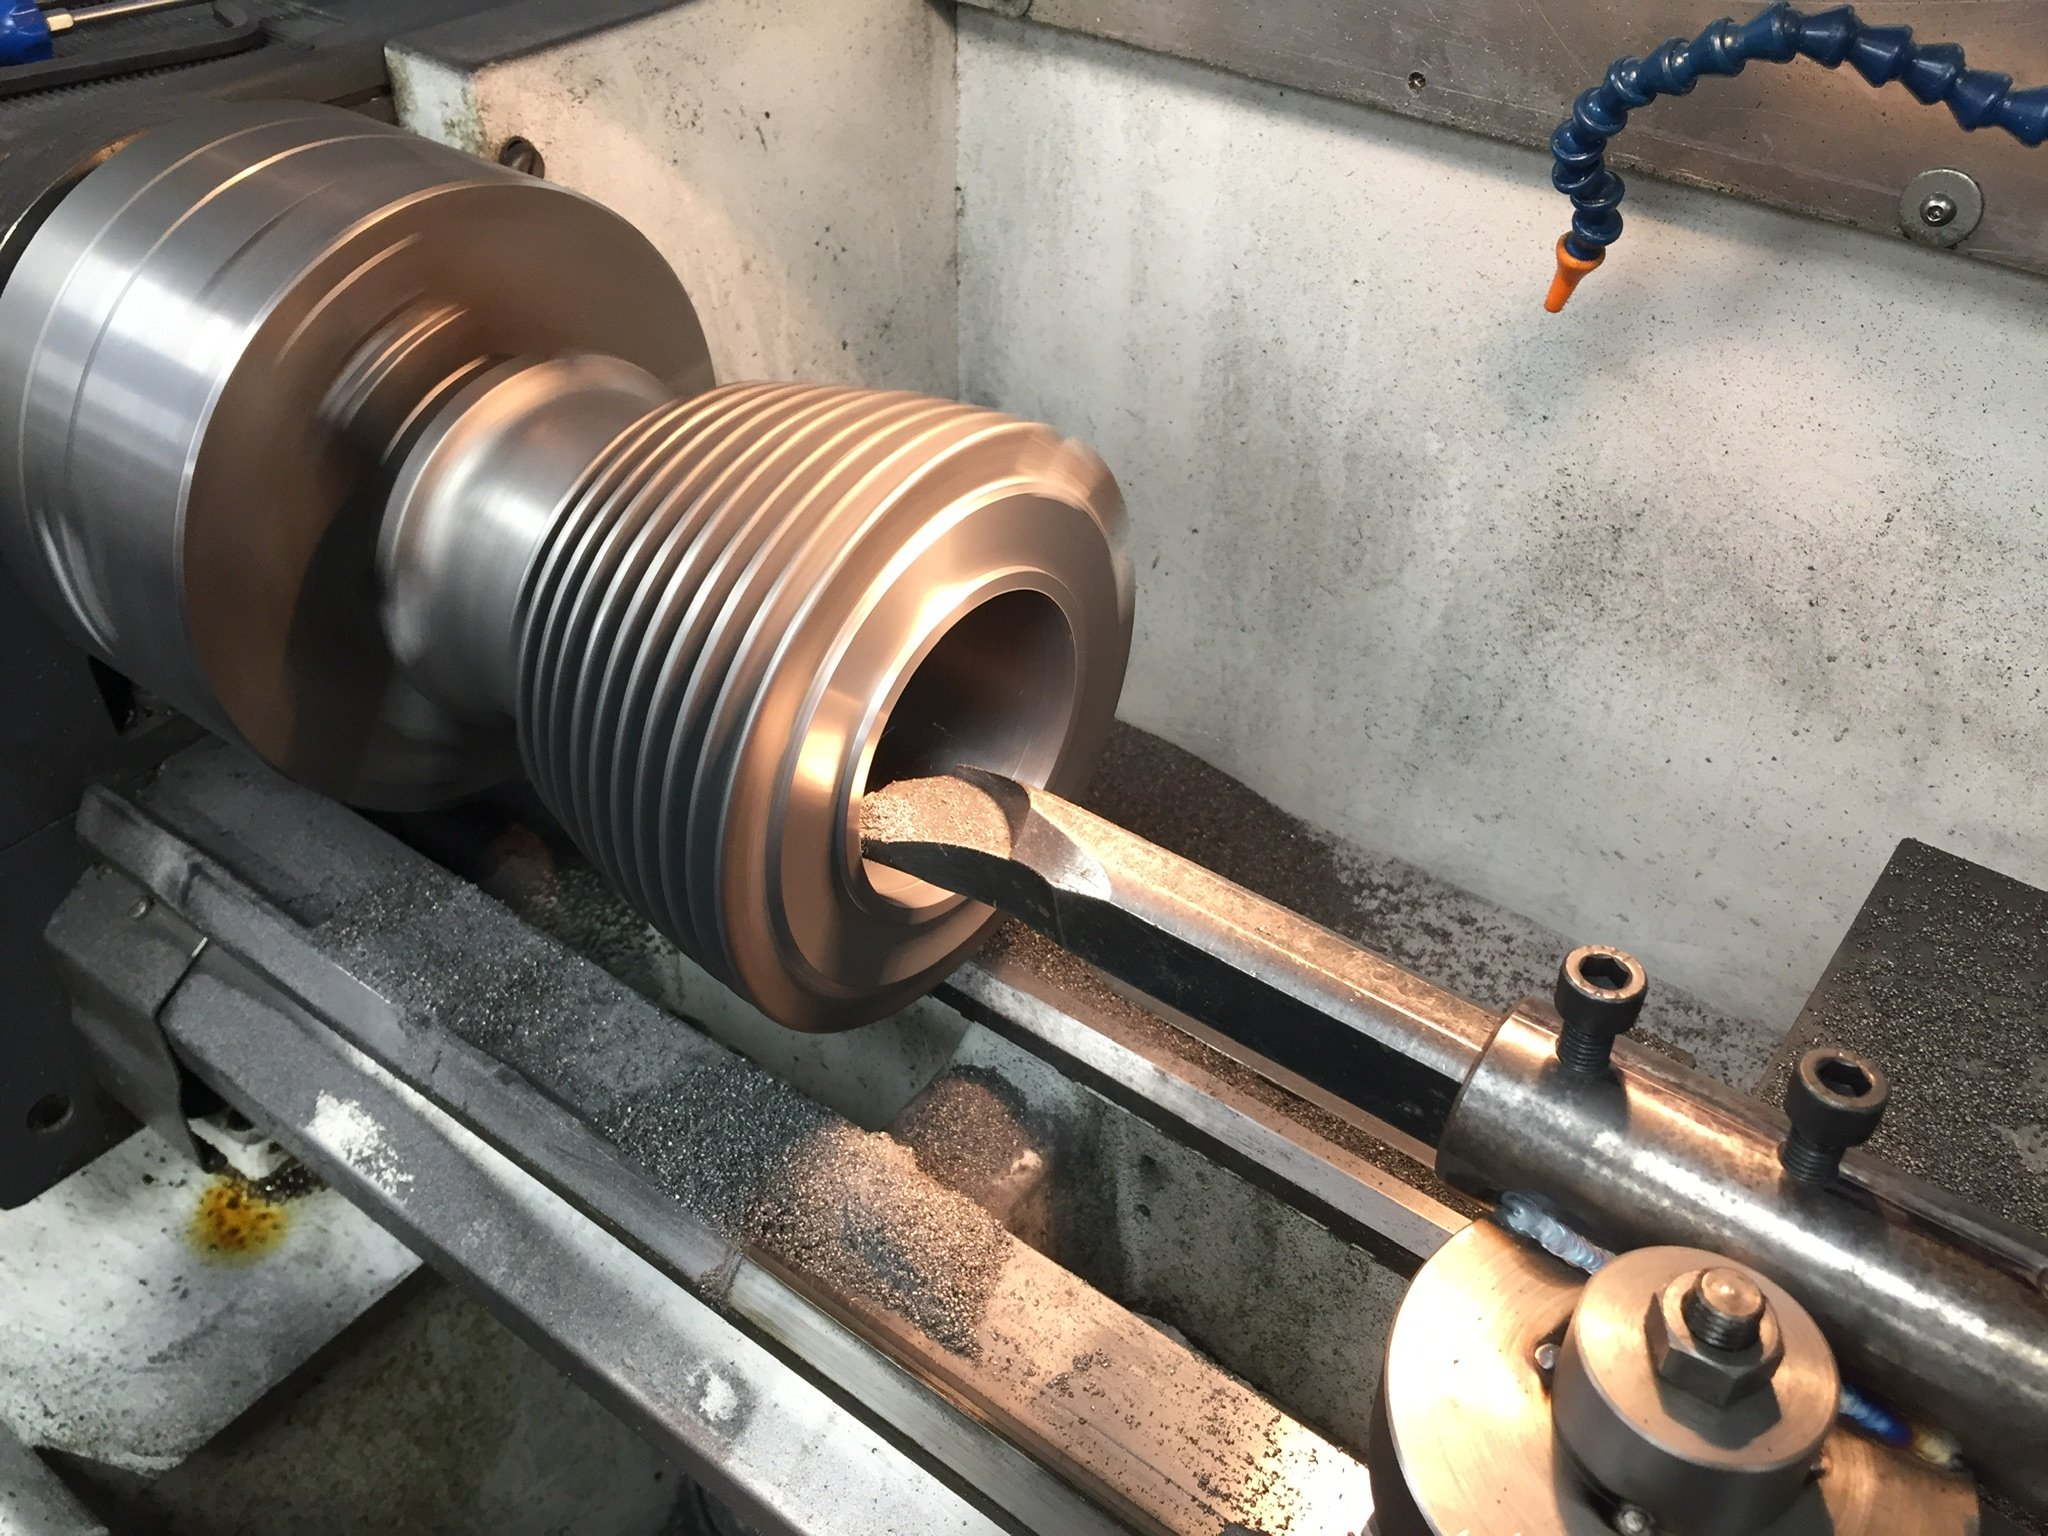
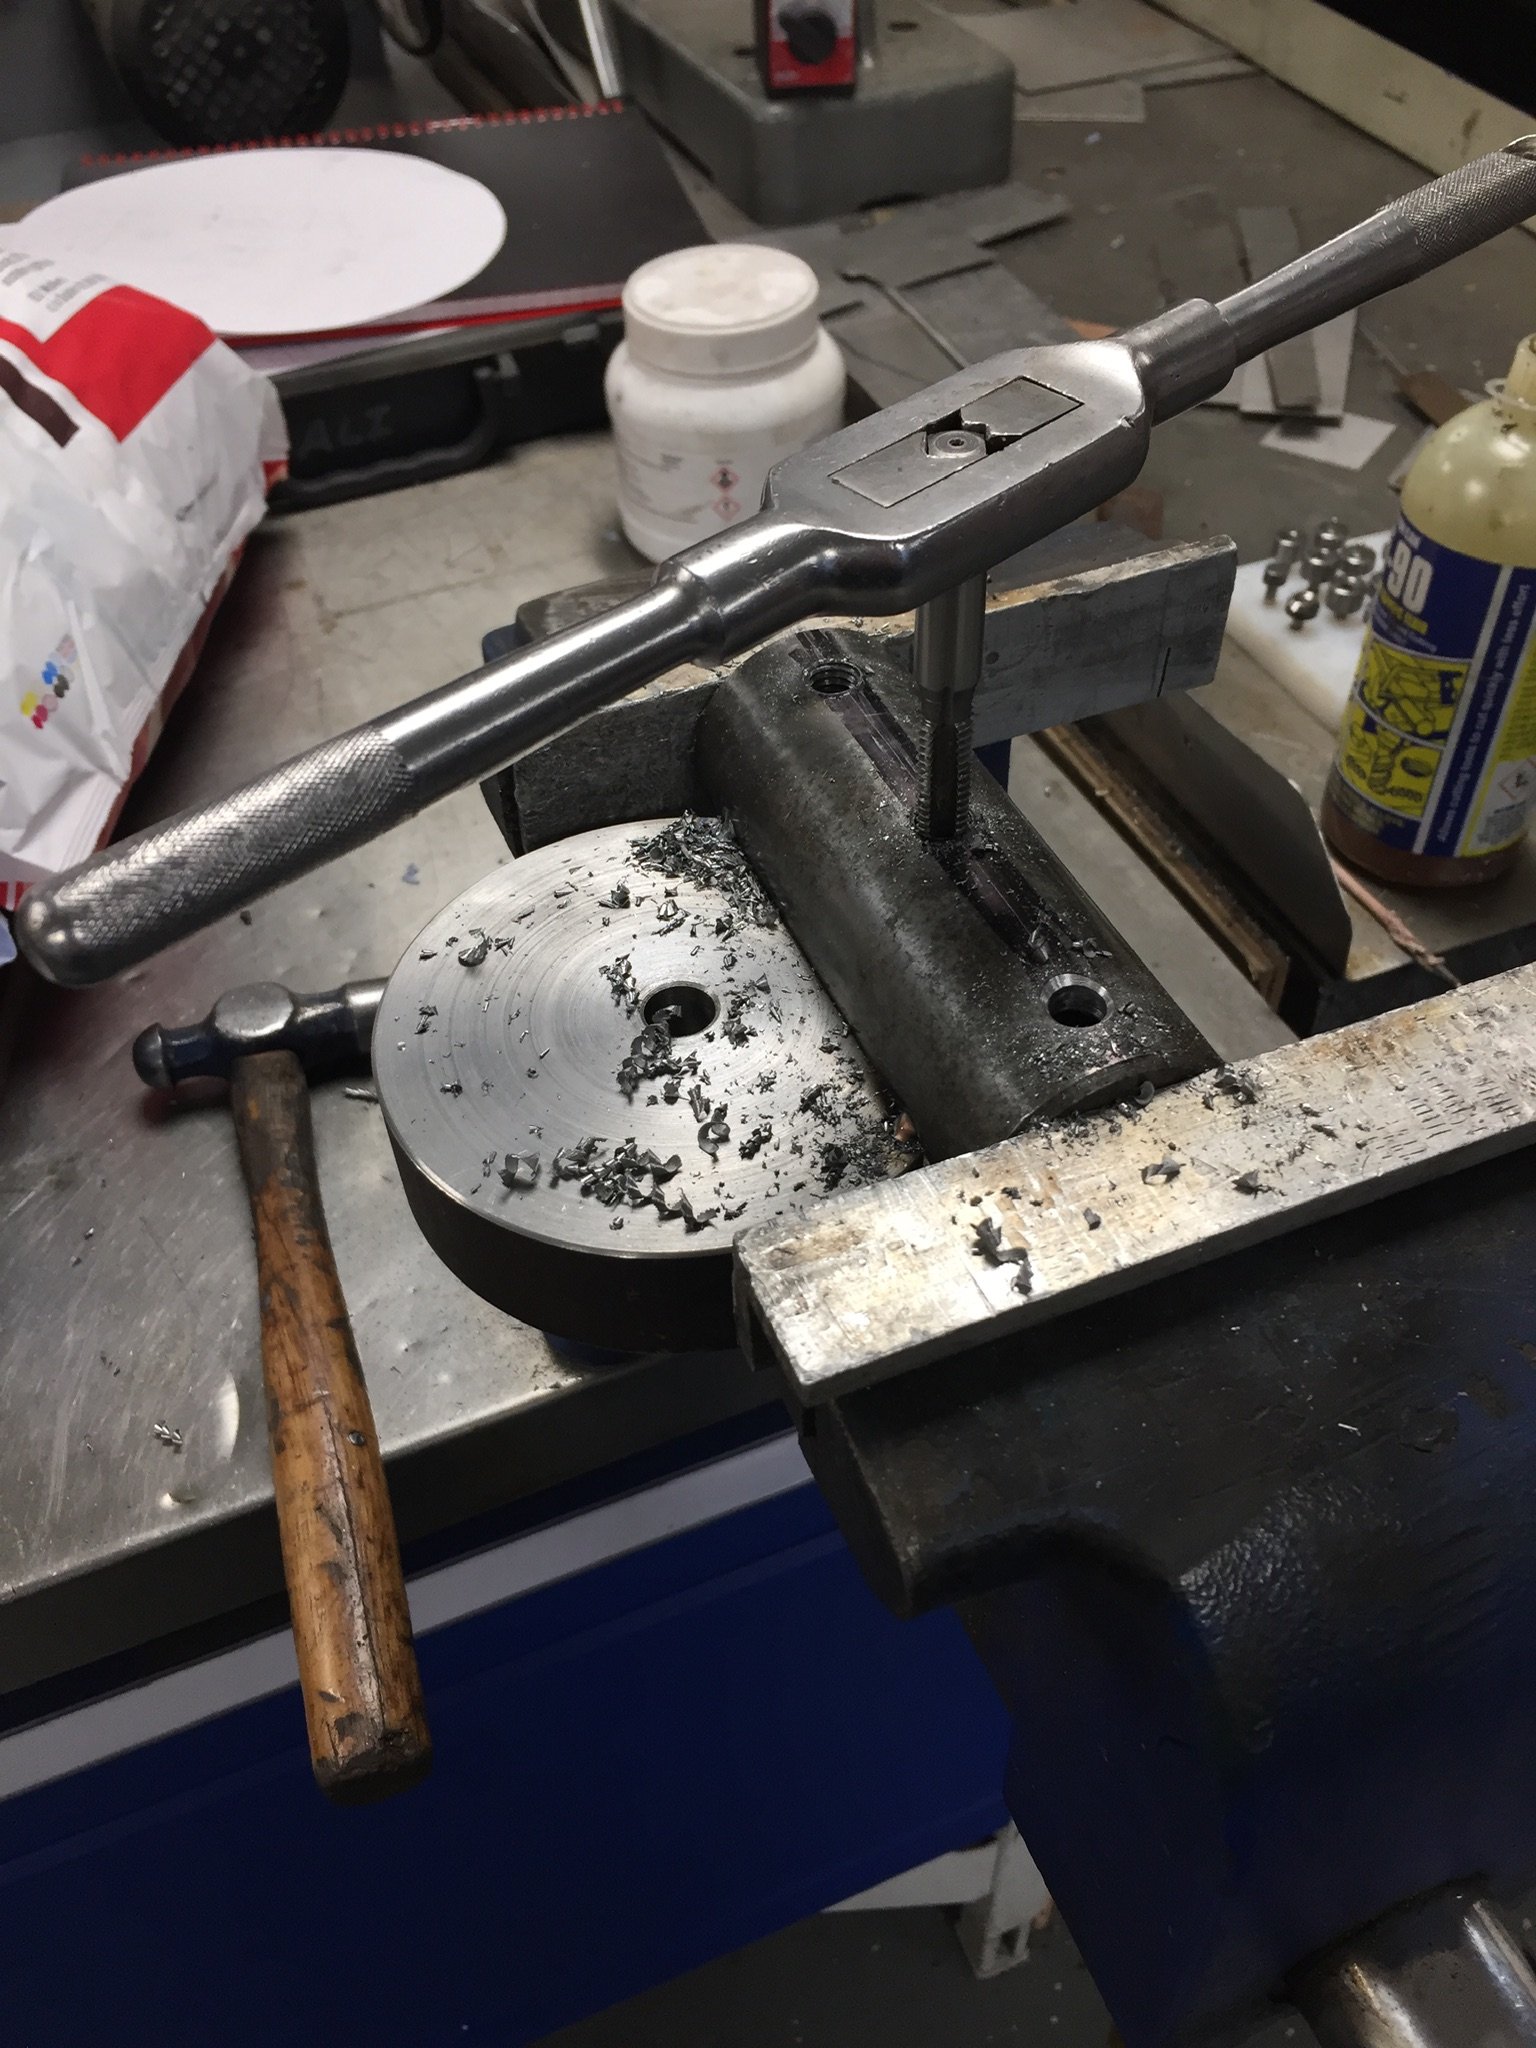
Over to the mill to drill through stud holes. Dividing head to do stud clearance cutouts Repeat x 2 Will need a final hone when the time comes otherwise finished
 21 points
 -
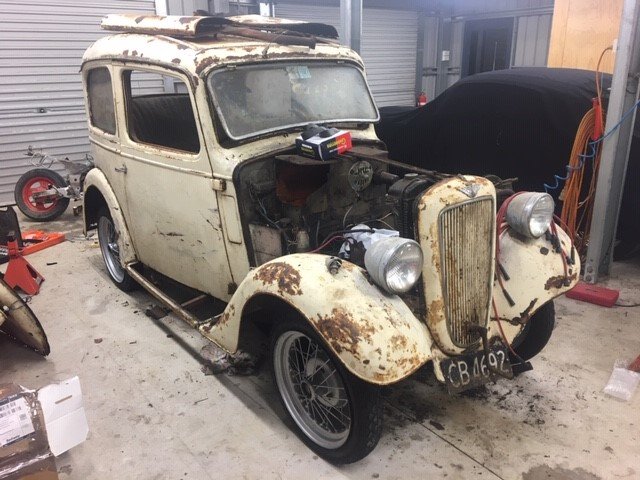
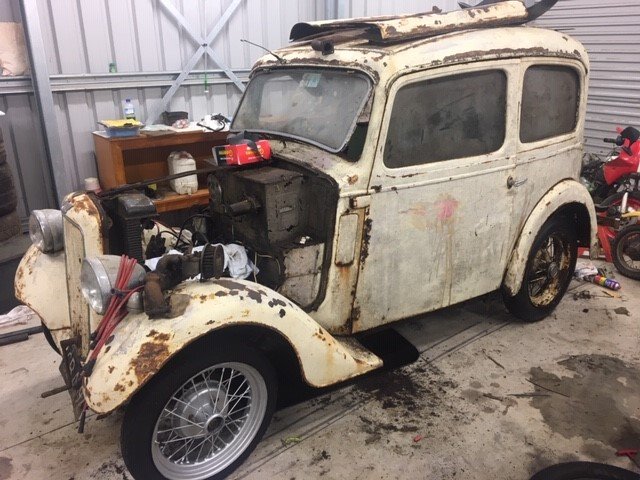
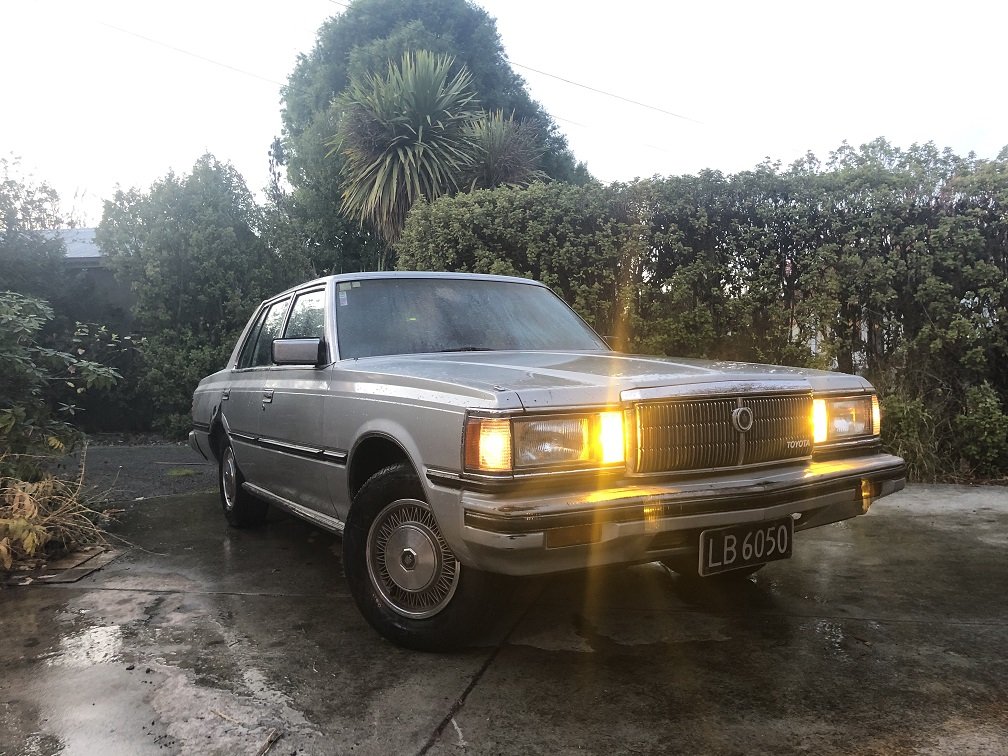
So I swapped out the ancient genuine Toyota pads that obviously weren't up to the job with some Ferodo's and also changed the brake fluid to something a bit overkill. The brakes were completely different after that, so much better. They were able to bring the old boat to a stand still from 100kph in under 4 seconds consistently, and cert man was happy. I've been filling time waiting for the plate by making up new brackets to fit my old Cressida visor and throwing on some clip on white walls for the complete sleeper look! Hopefully the cert plate will arrive any day now and then I'll be hitting the road for some quality road trips!
12 points
-
Since a majority of the engine is modeled and most patterns have been printed I am going to move on to the car (since I dont have a workshop at the moment to do casting). The Ol' man has offered to have a go at making a chassis. I just need to provide him with tooling. The first approach is to try and make it using the original method. Which was to form sheetmetal over a mandrel to produce a C channel type chassis rail. The mandrel is out being manufactured now.11 points
-
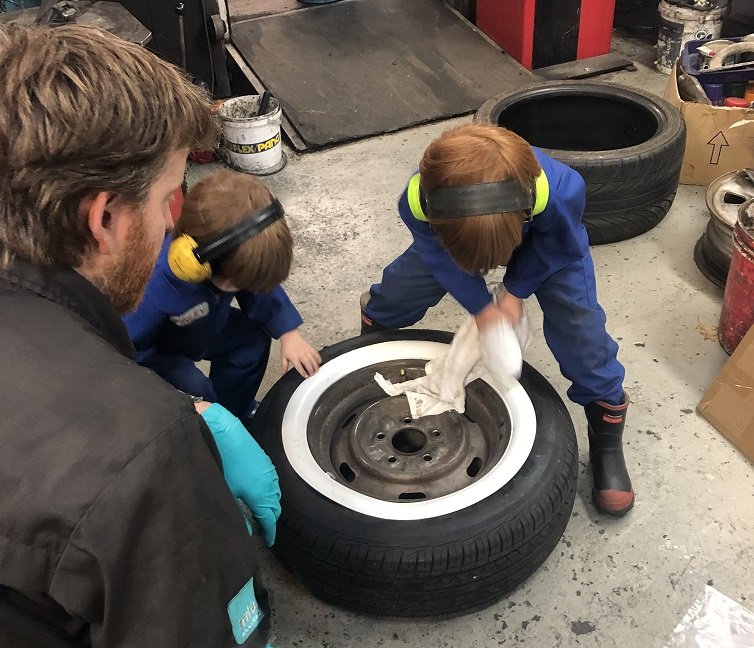
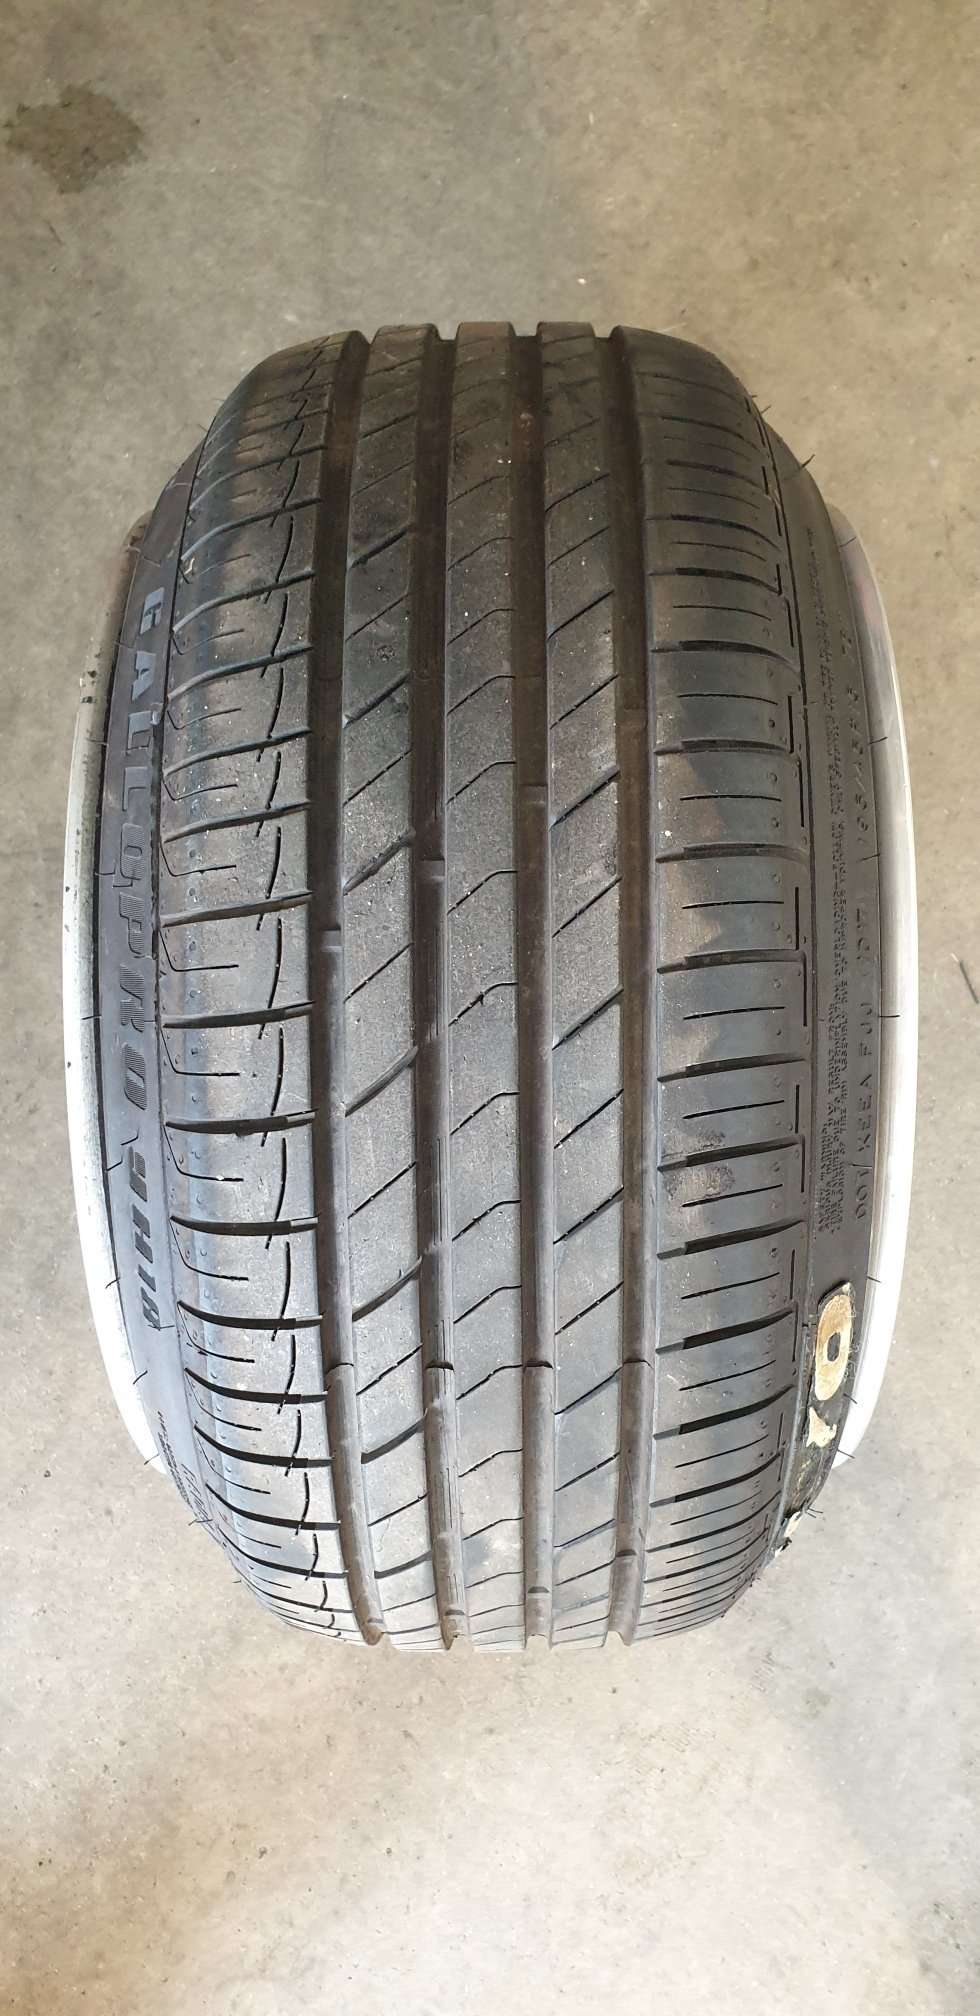
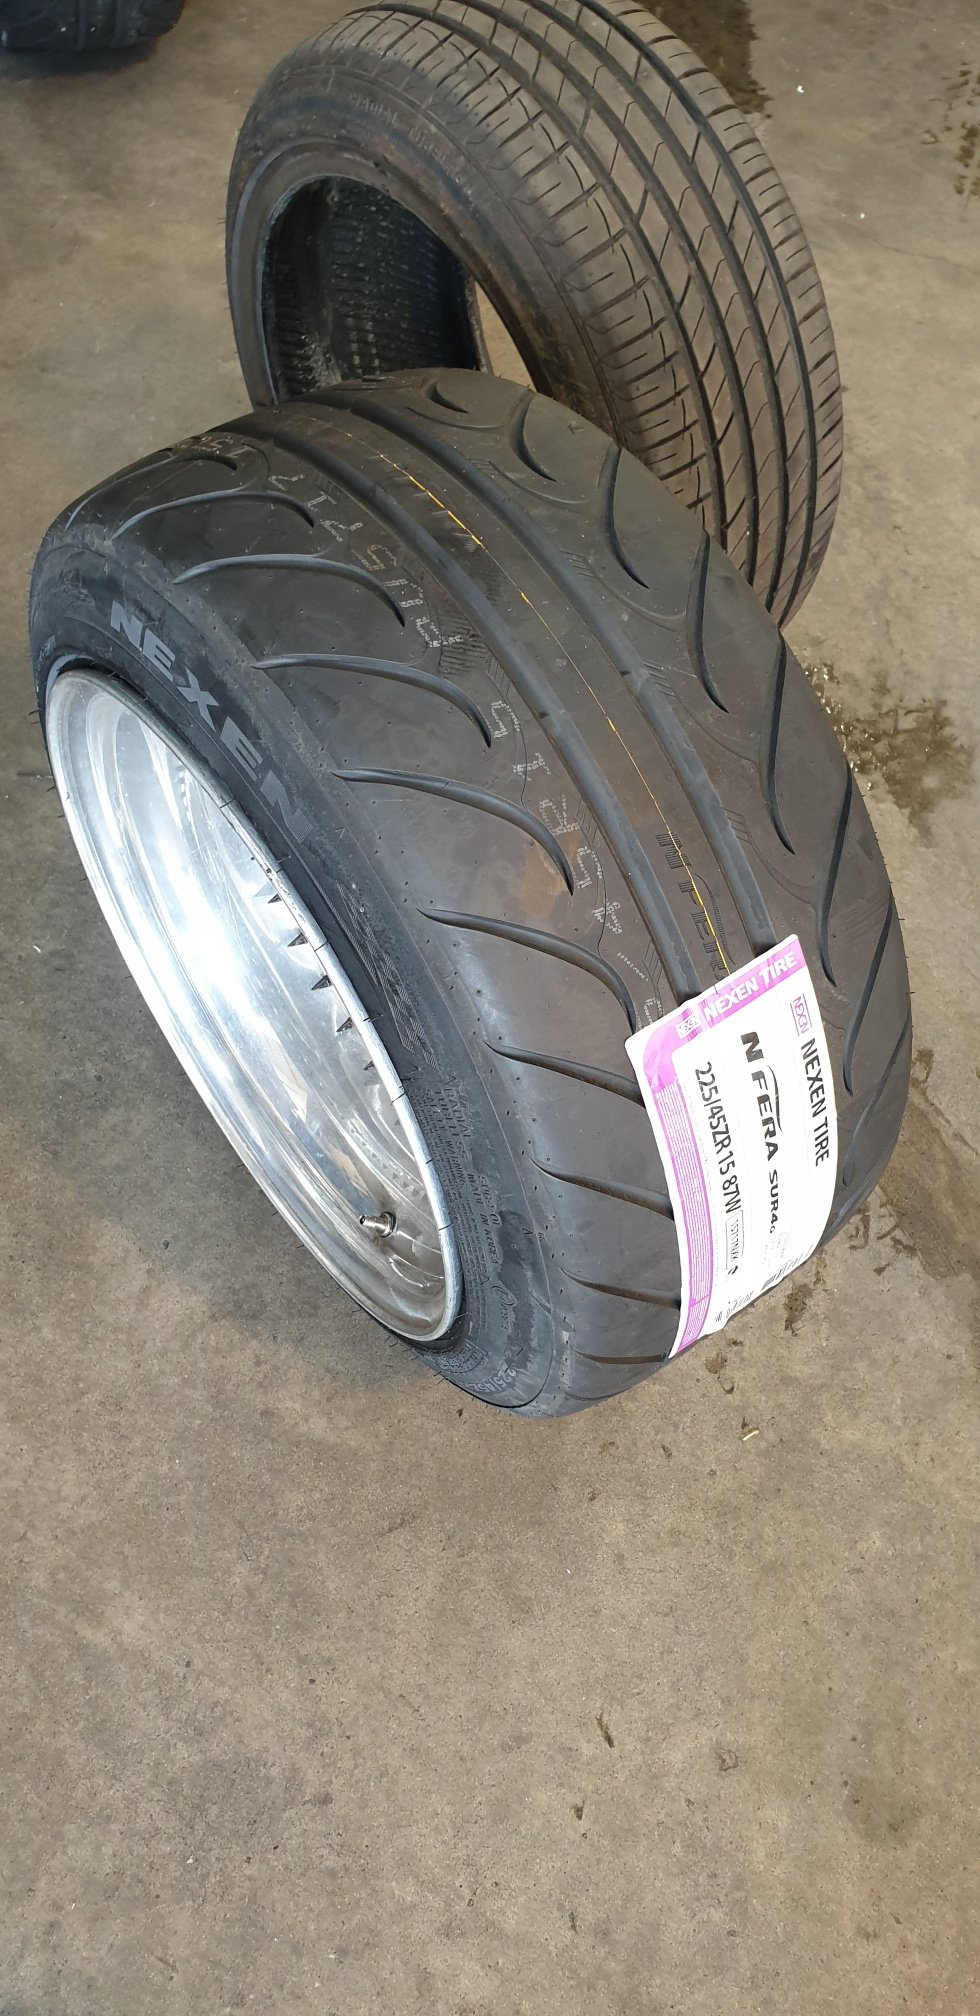
Got the new tyres put on the 10" for the rear over the weekend. Much better and less strech haha.
8 points
-
Righto, this might be the last update for the moment as it's about as finished as it's going to be for a while. Try and stifle your relief. The tub is sold. Got 400 quid for it which is better than a kick in the nuts. Better make the thing roadworthy again. Because of virus I can't get Steve to do the welding so nuts & bolts it is... Sanded the chassis & got a bit of paint on. Shiny. Chopped the ends off the box section, Painted & bolted down, mocked up the bed frame Run out of excuses to do the electrics so gave it a bash. I don't really get it but how hard can it be ? This was about the time I went in and had some food before I lost the plot & ruined it. One of Carol's pizza's & an ice cream later and I finished the job... They don't all come on at the same time normally, I'm not that useless. Liberated a pile of 1" roofing boards from my Dads barn, pretty fucked but did the first layer side to side & the top layer front to back. It's good & sturdy. Gonna add some tie down rings at some point. Good enough for the moment, would like a hoop, etc, but we're moving soon so I'm going to have to learn proper welding before that happens. Hopefully have a bit more in a few months. Chur.7 points
-
@Mr Vapour worked his magic on the intake, carb and callipers My uncle has a aliexpress CNC plasma cutter so I hand drew a picture with some measurements and he did a test run Not perfect but that's why it was done on scrap steel. Will do the final product in 6mm ali. I also got a cheap chopping board to mangle into a spacer\gasket so there will still be some barry hand-finished factor6 points
-
Disregard that grumpy old cunt, someone helpful will be along soon for ya. @fuel5 points
-
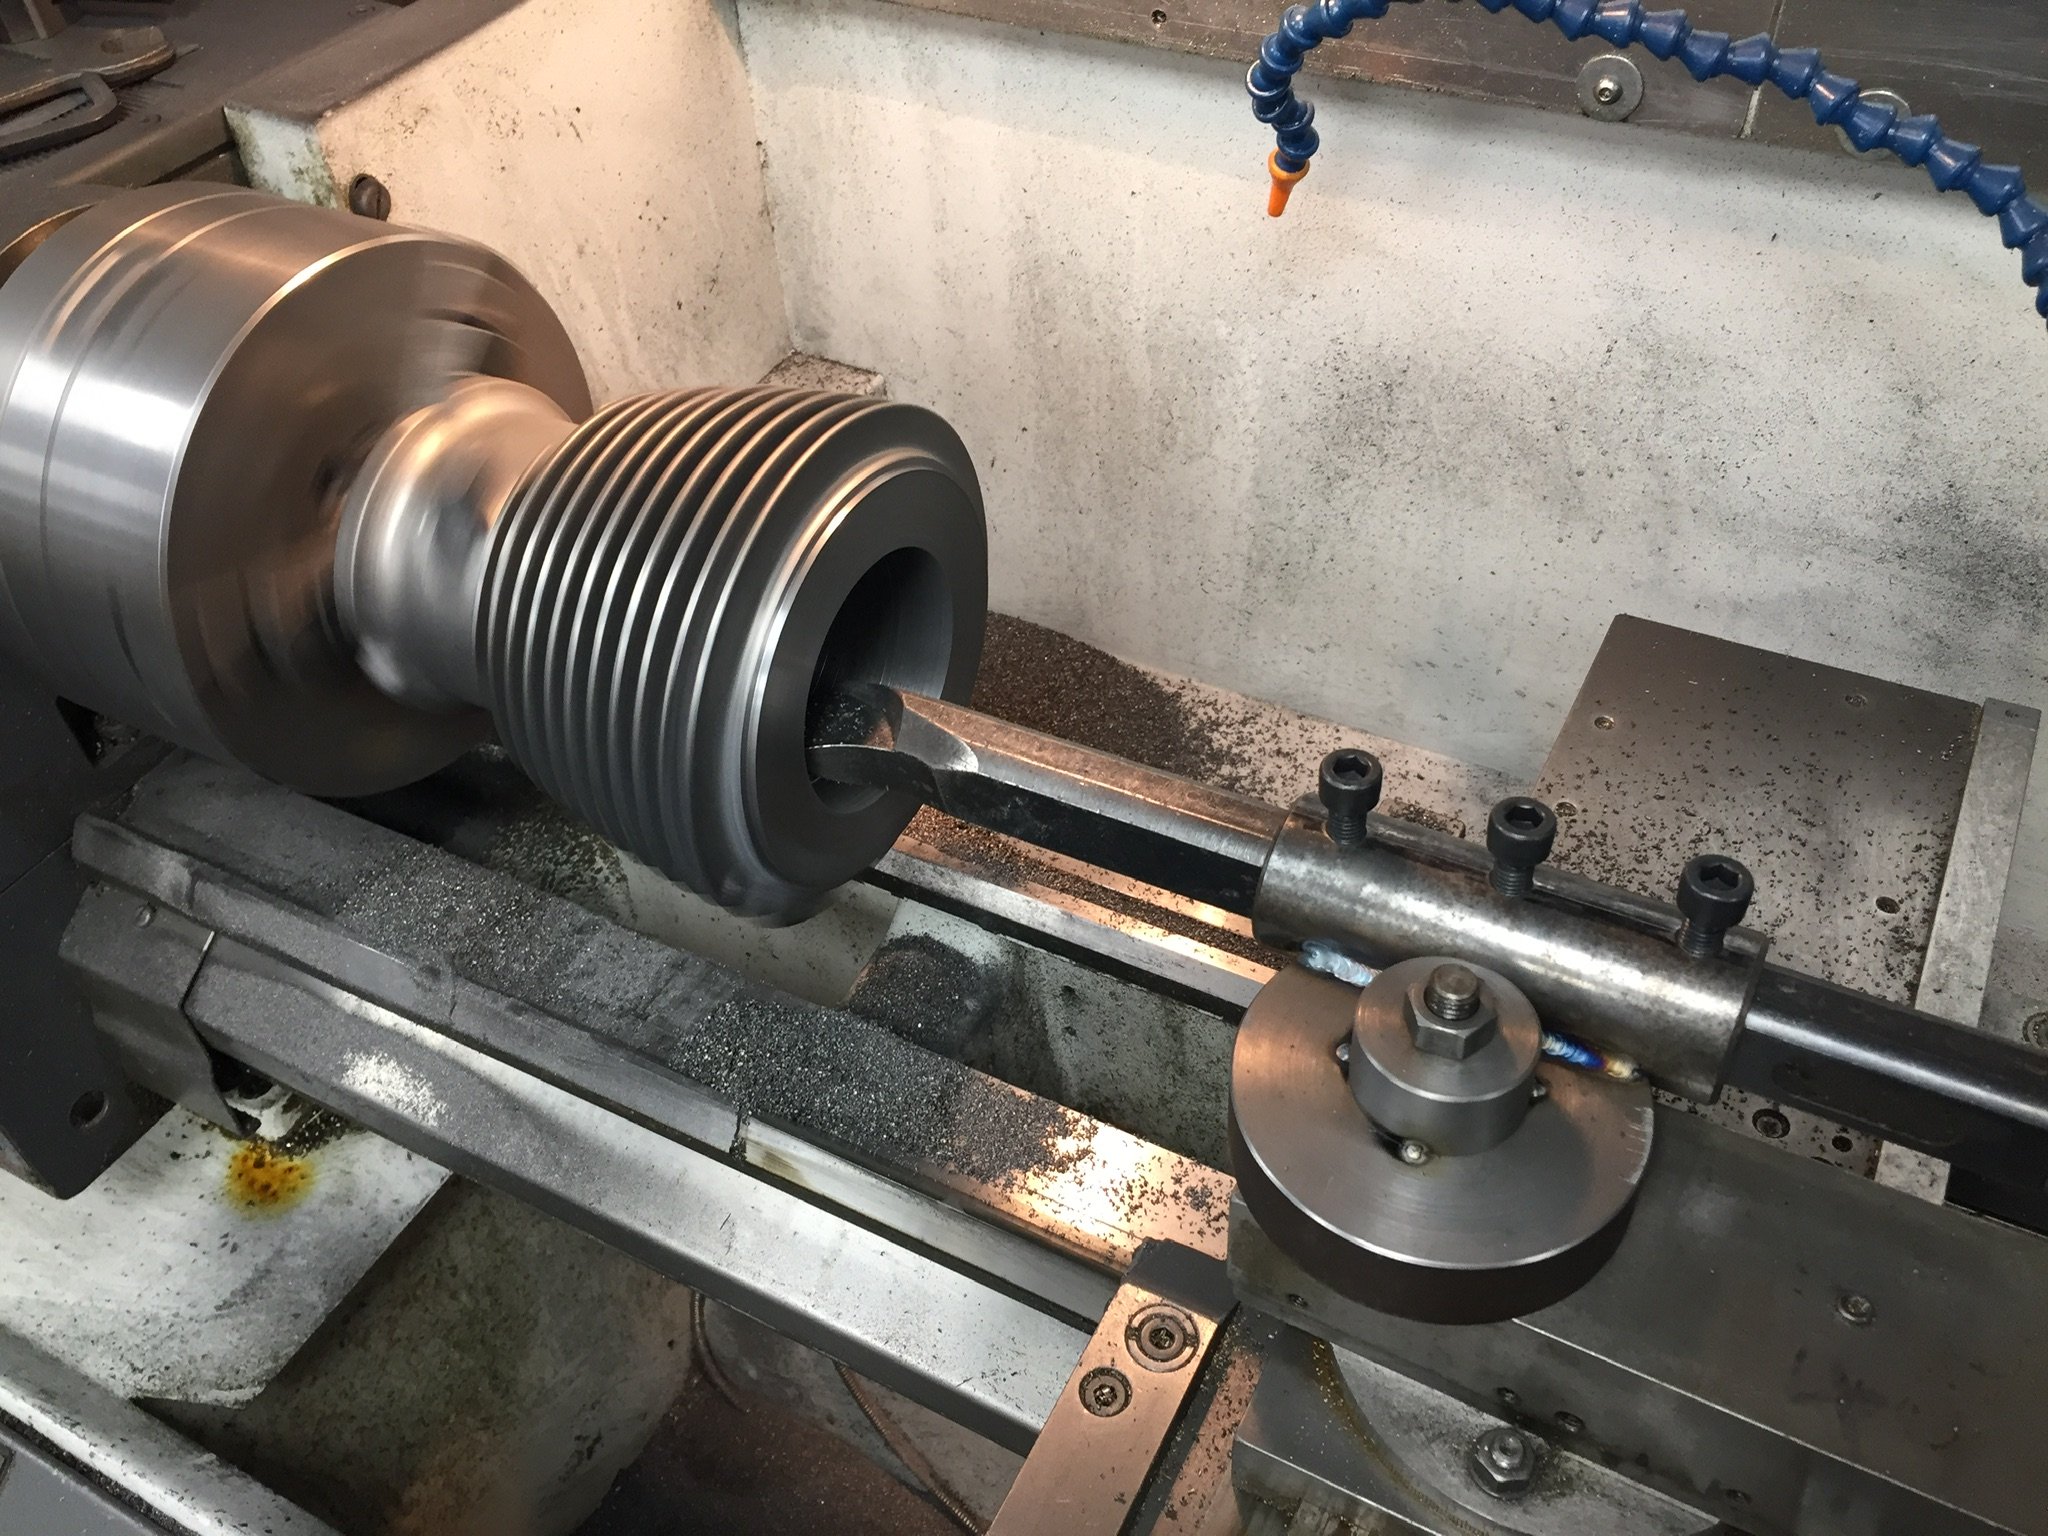
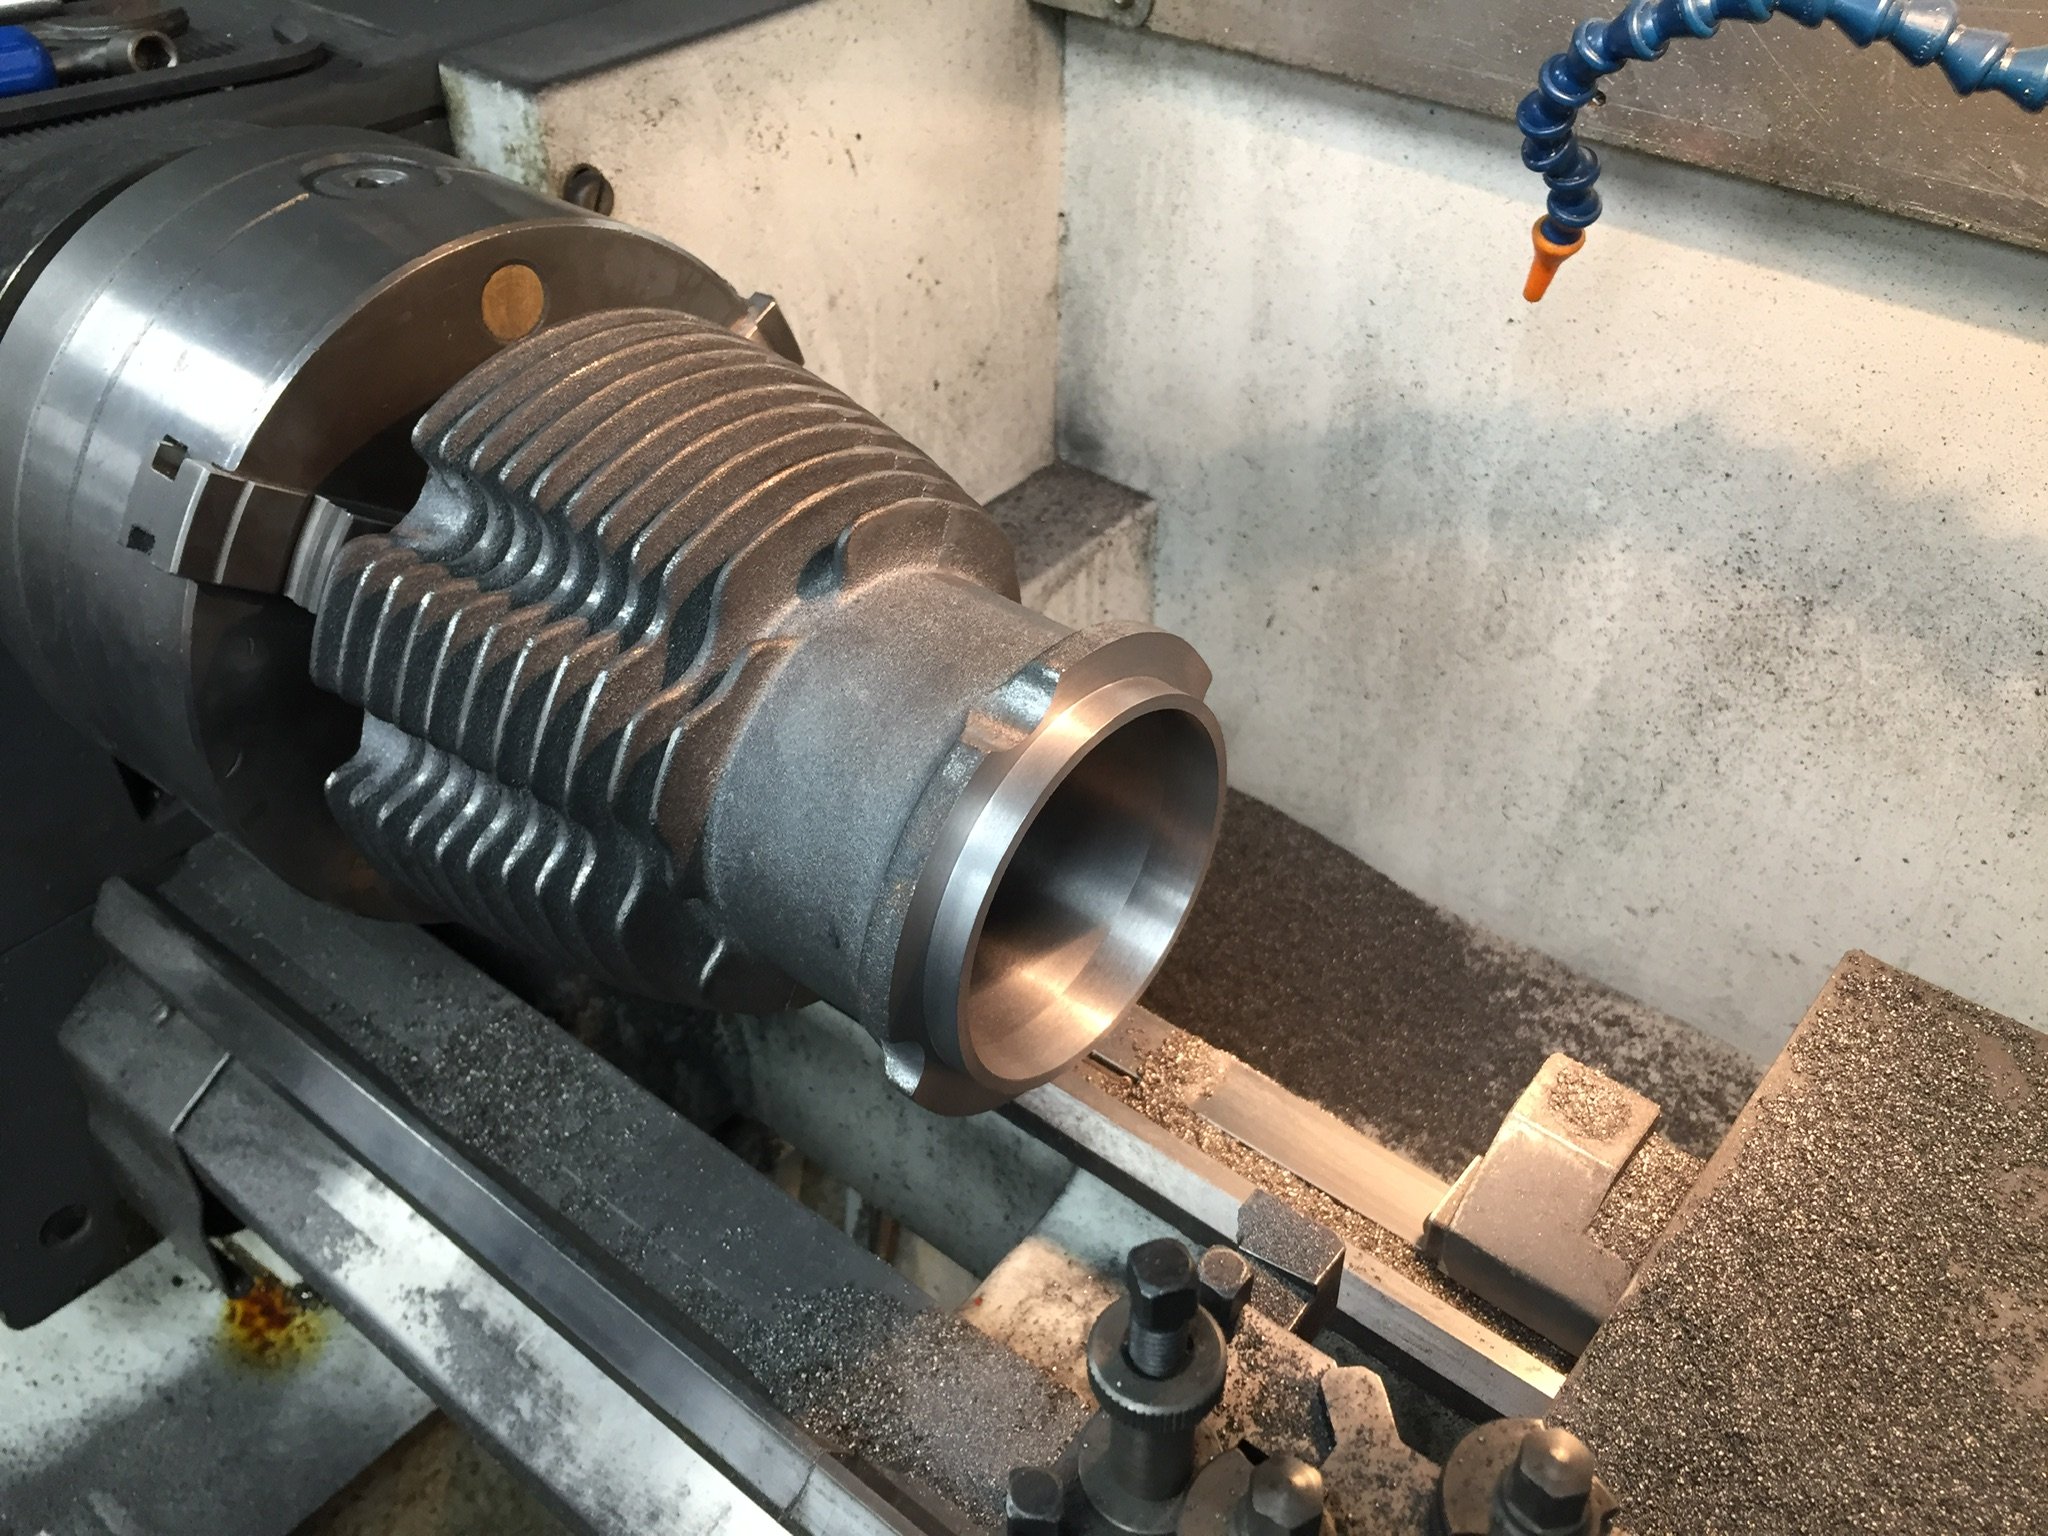
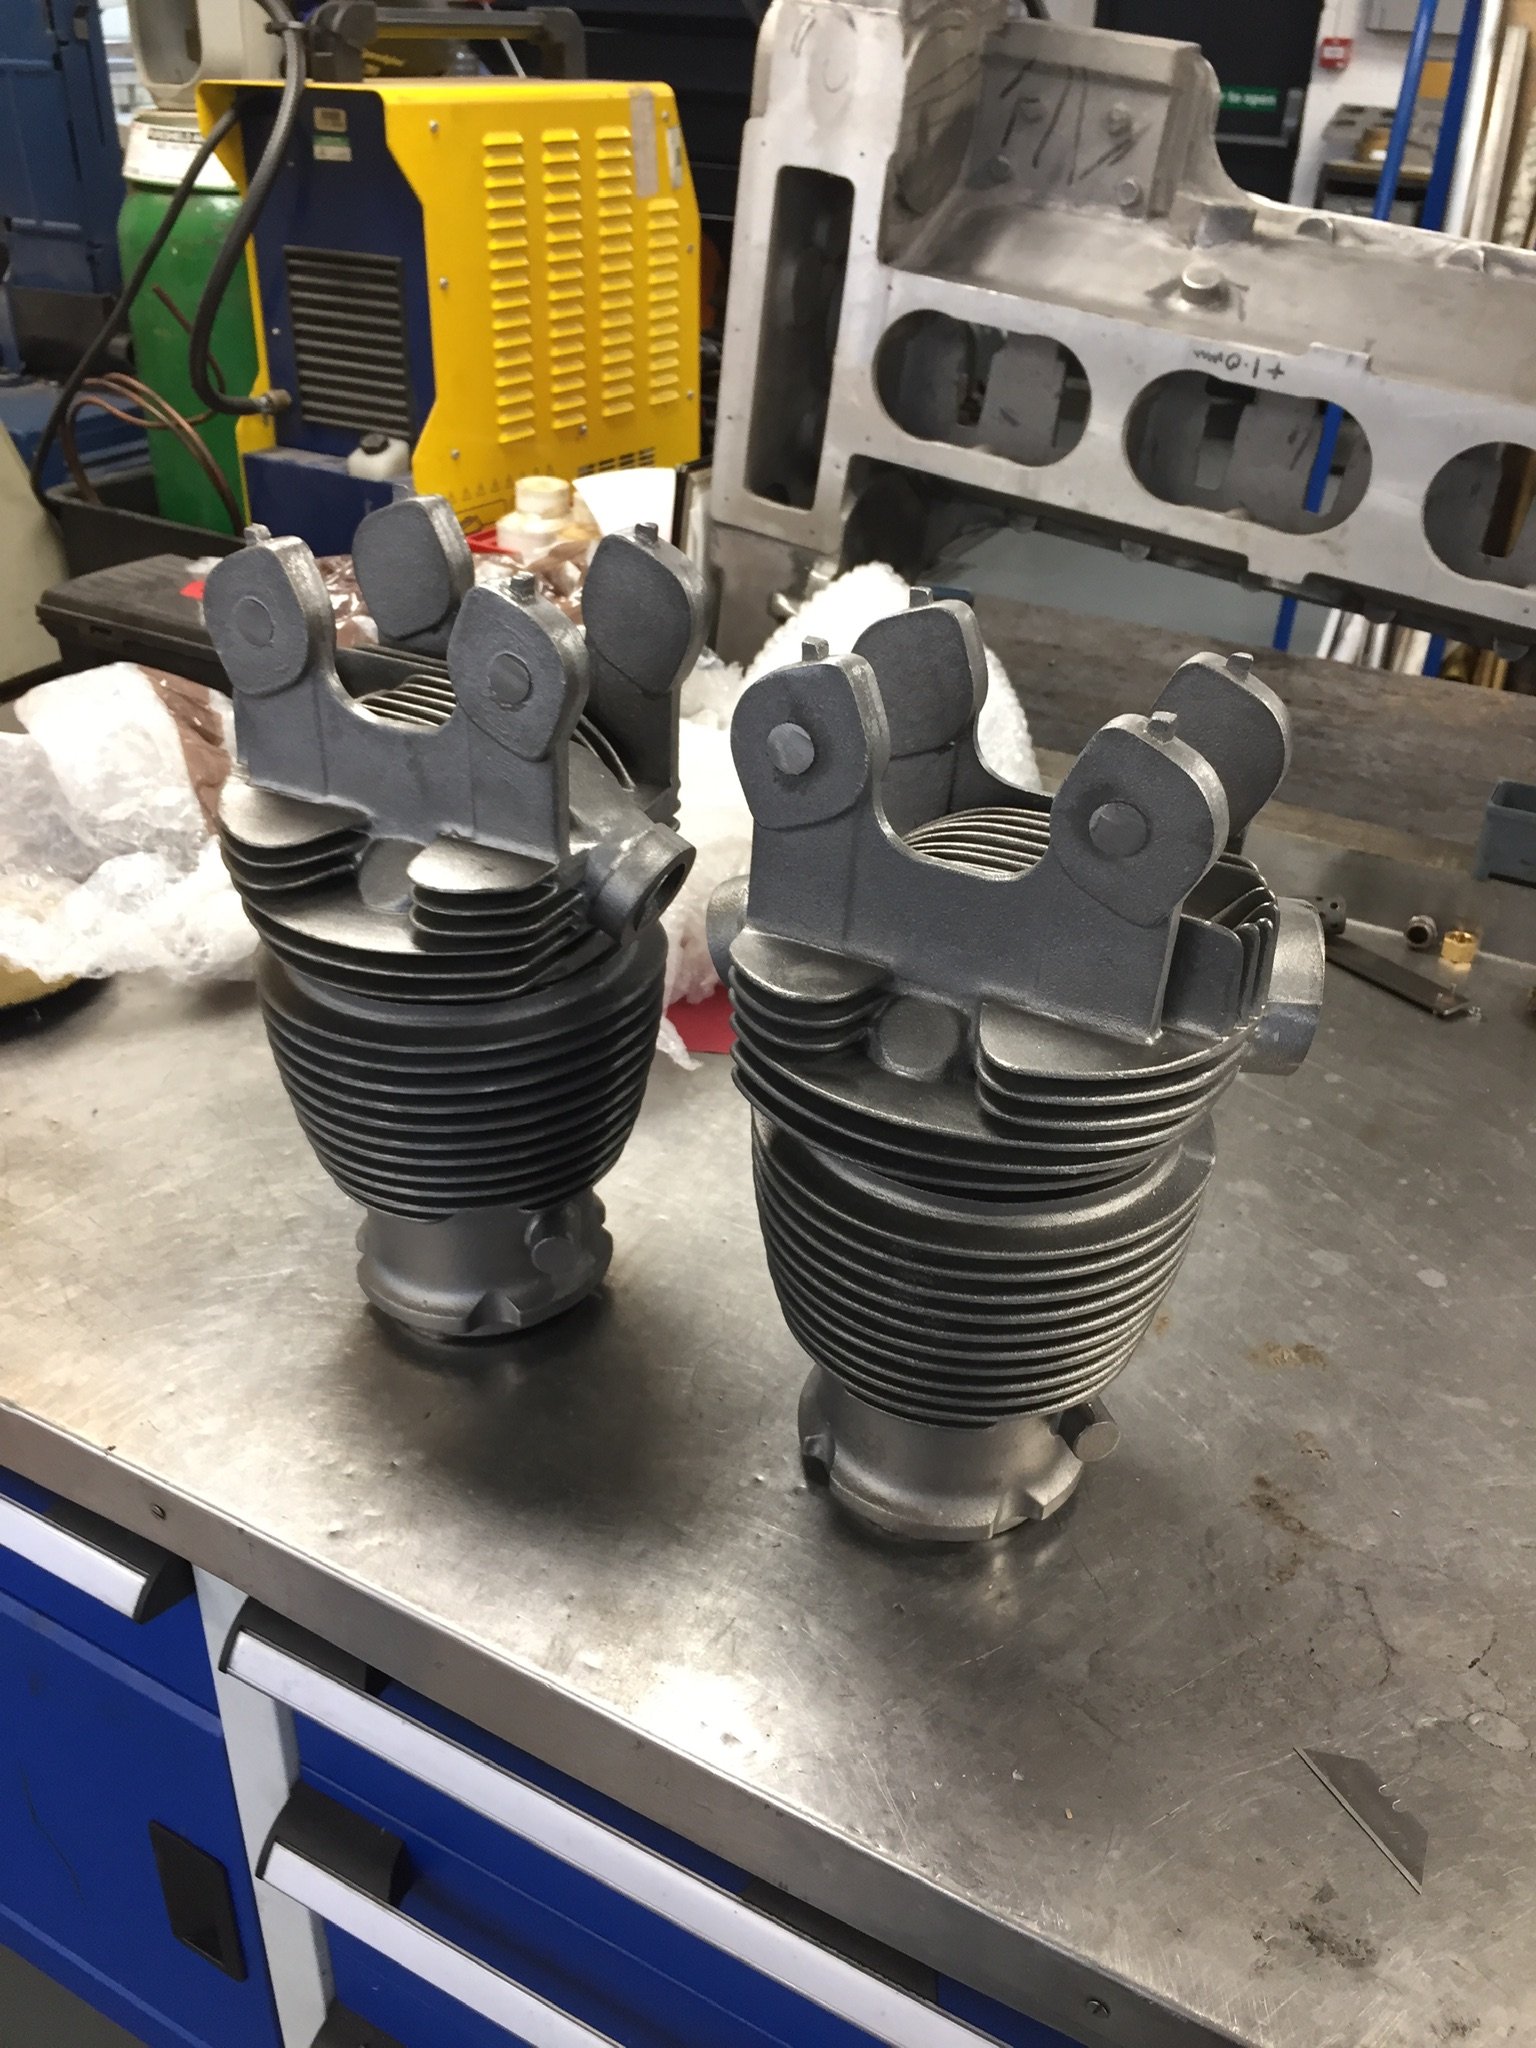
First cuts on the casting. This was a serious brown undie moment holding the rough casting on some very narrow jaws boring out a rough casting at the other end. Bored out and head spigot machined. 3.5 inch bore Flipped over and cyl base machined
5 points
-
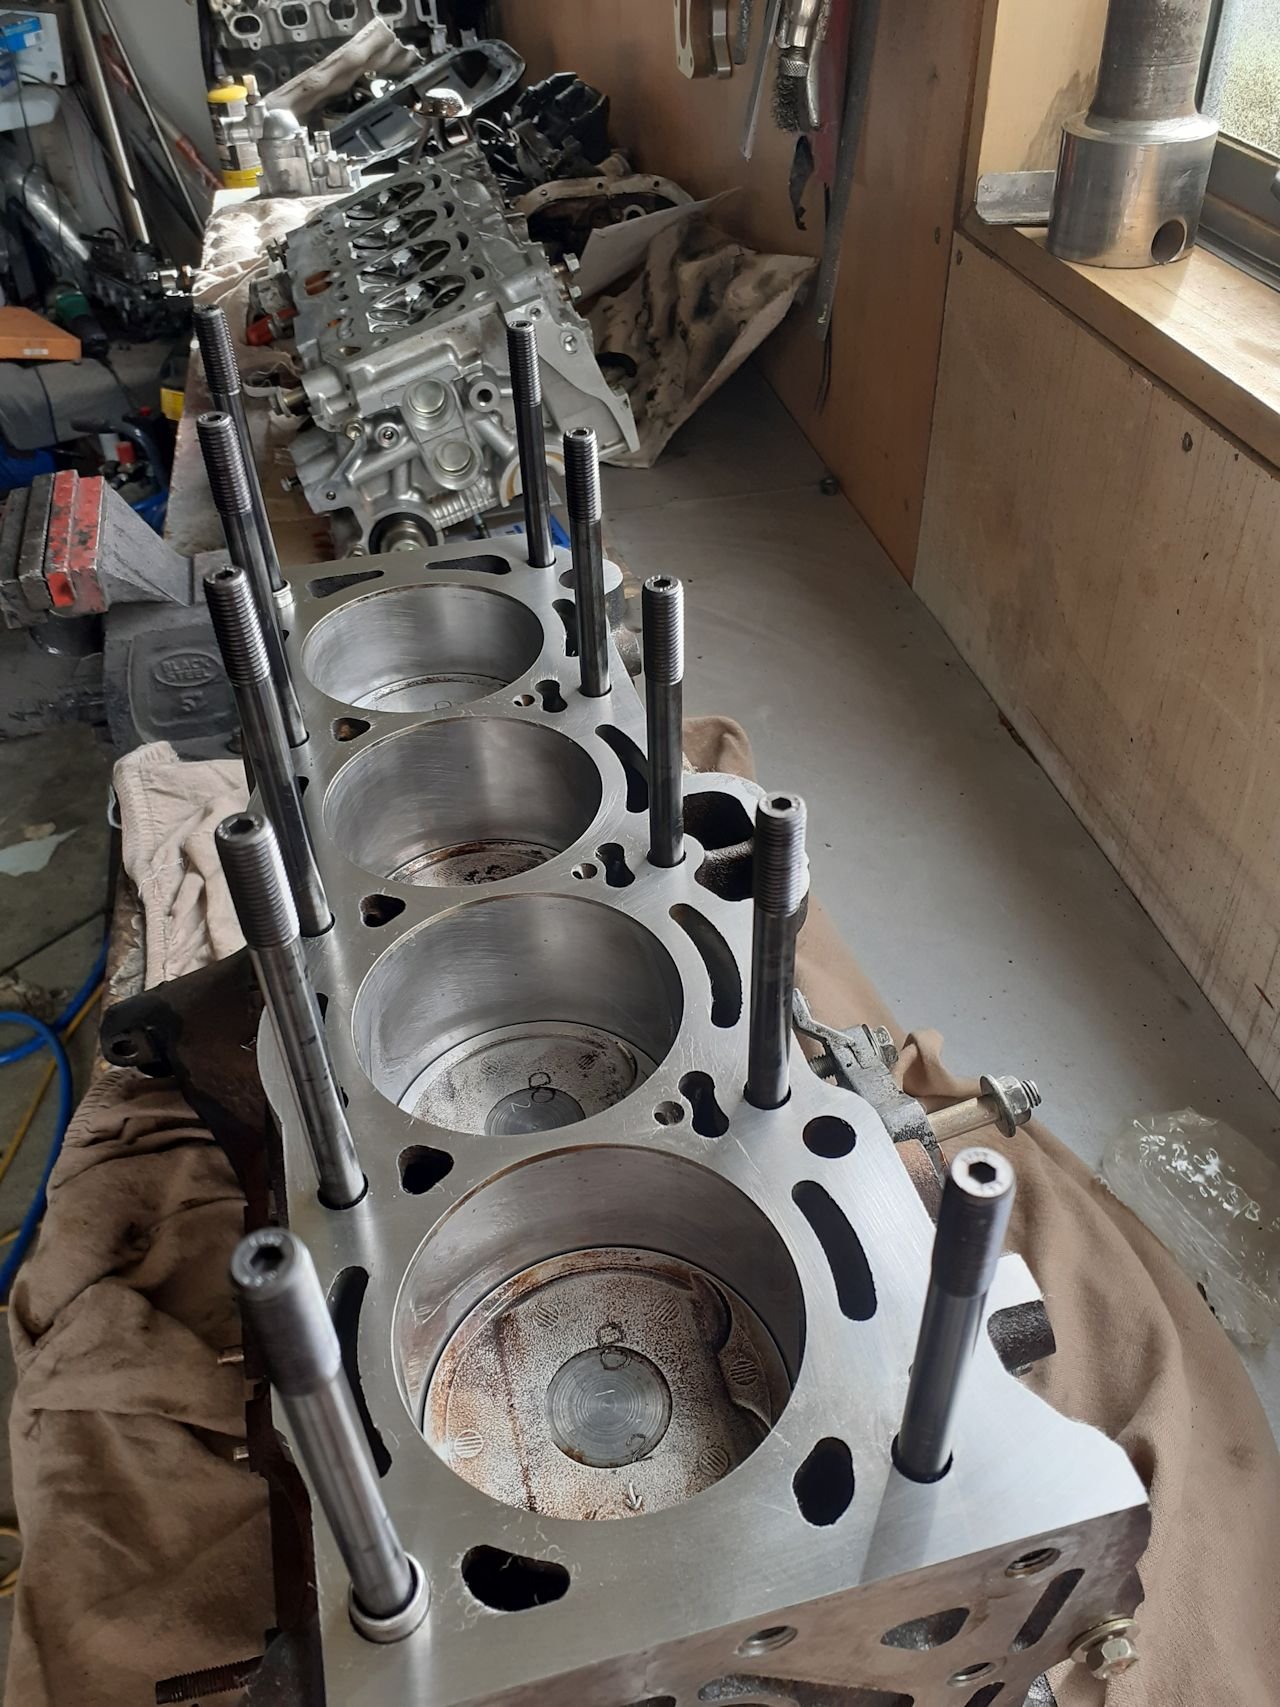
new bearings, rings, fresh hone and block decked, arp head studs. water pump, cam belt.. blah blah And done. runs shit under any load when cold, so need to look into that. but otherwise so far so good. goes harrrd
4 points
-
Got another triumph tr6 with the proceeds of the sale, that fits in the shed.
4 points
-
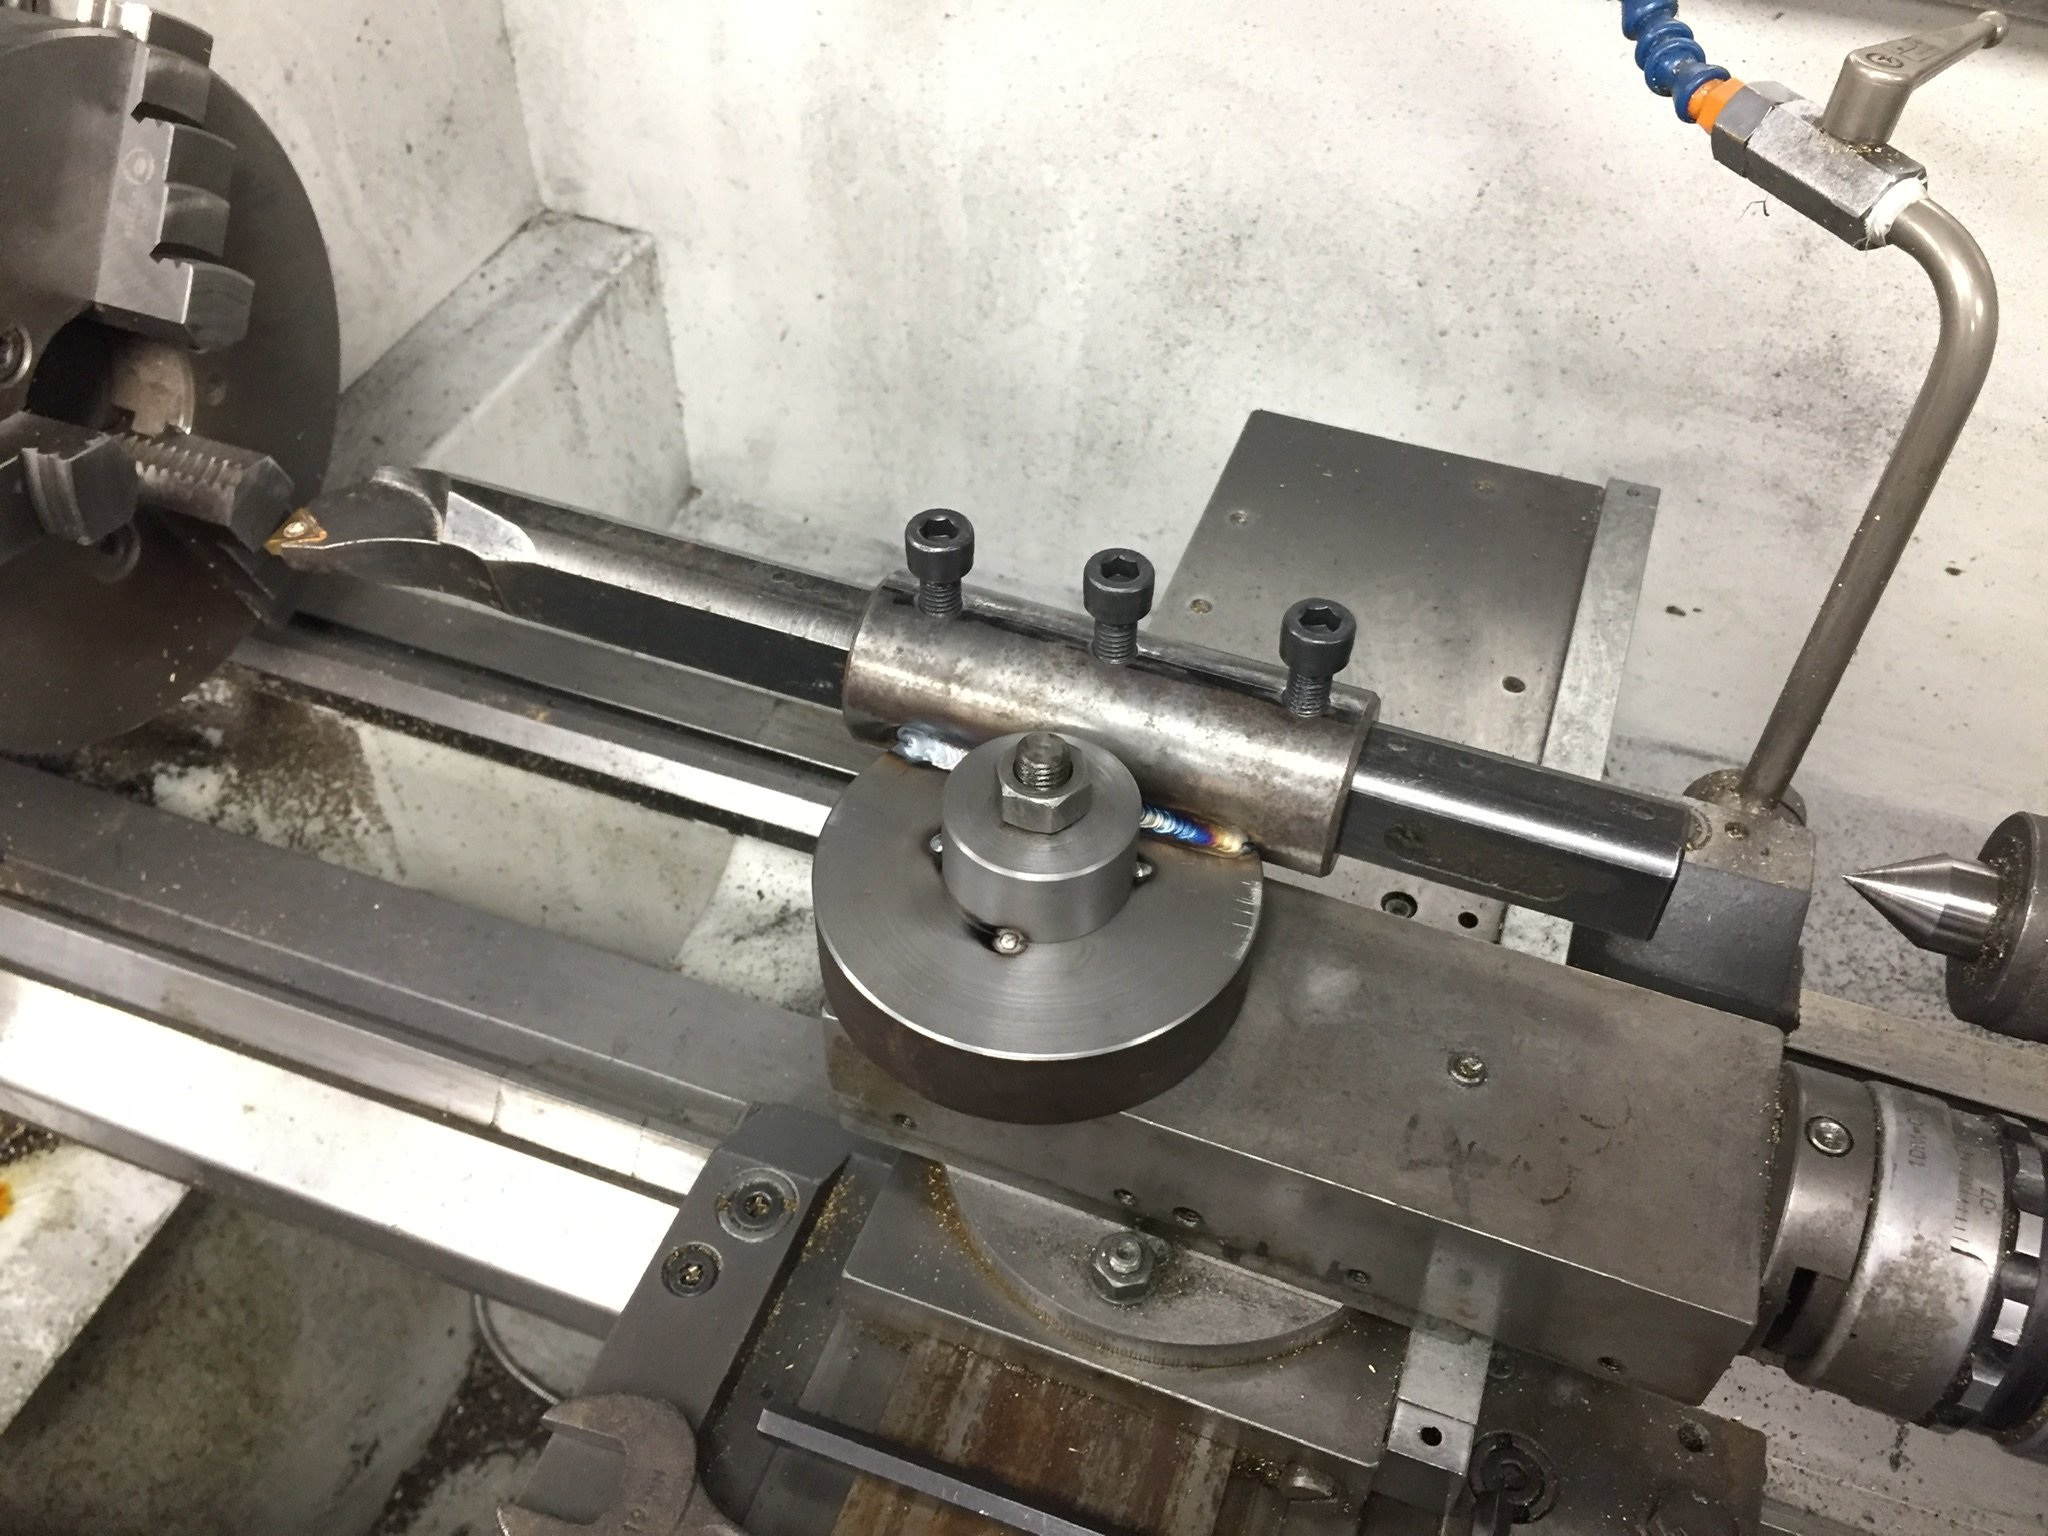
Yep I imagine this will be the case. We did, 3 GP Bugatti’s and was going to do the Mille Miglia the weekend before. Was pretty guttered when that was all cancelled. You just about could of. Chain driven blower might have to be in this cars future. Cyl time. The crowd I got the crankcases of had just done a run of cylinders and heads so I managed to get a set. It was far easier getting them sent a couple of hours down the road instead of to New Zealand that’s for sure. First issue to sort, the only boring bar big enough was a bit large for the toolpost. Couple bits machined up and welded together Should do the trick
4 points
-
Getting through the list quite nicely. - Secure LH Interior door handle (had fallen off)- Front park lights not working-LH Headlight dim- Aim RH headlight correctly- Wipers to work (Will prob do 12V Conversion- Secure RH exterior mirror (loose)-Replace broken piece in exhasut and mount muffler-Secure fuel line-Replace rear brake hose and hard line-Repair petrol leak at pump-Repair cert sign off for rust repairs-King pins-Play in drag link Half way through doing King pins, got one side done, the other side is being a right PITA. have been soaking it with CRC last few days. Need a couple of fittings to fix the brake related things which ill hopefully get today and then we will be away with that. Just trying to sort a 12V electric wiper conversion for it currently, nobody in NZ seems to have stock..4 points
-
I couldn't find my black paint so "cast iron" colour will have to do. It was cold today so I soaked the paint can in the sink for a bit and heated up the brackets with the gas torch to warm things up new pistons and seals all re done sliders lubed up and new bushes on them. The old grease was hard as fuck and the sliders took a decent amount of force to get out. everything is nice and smooth now. Should be ready for another 40 years of neglect now. Ordered new hoses on the supercheap 25% off sale and they took nearly 6 weeks to arrive Ht leads finally arrived from aus today. I had a new cap and rotor in stock that I had hoarded so thats a nearly new ignition system. I'll order a male crimp to work with my existing coil and re crimp one lead to suit. I'll use the gm hei module and wire it so its internal advance isn't used as the dizzy has vac and centrifugal advance3 points
-
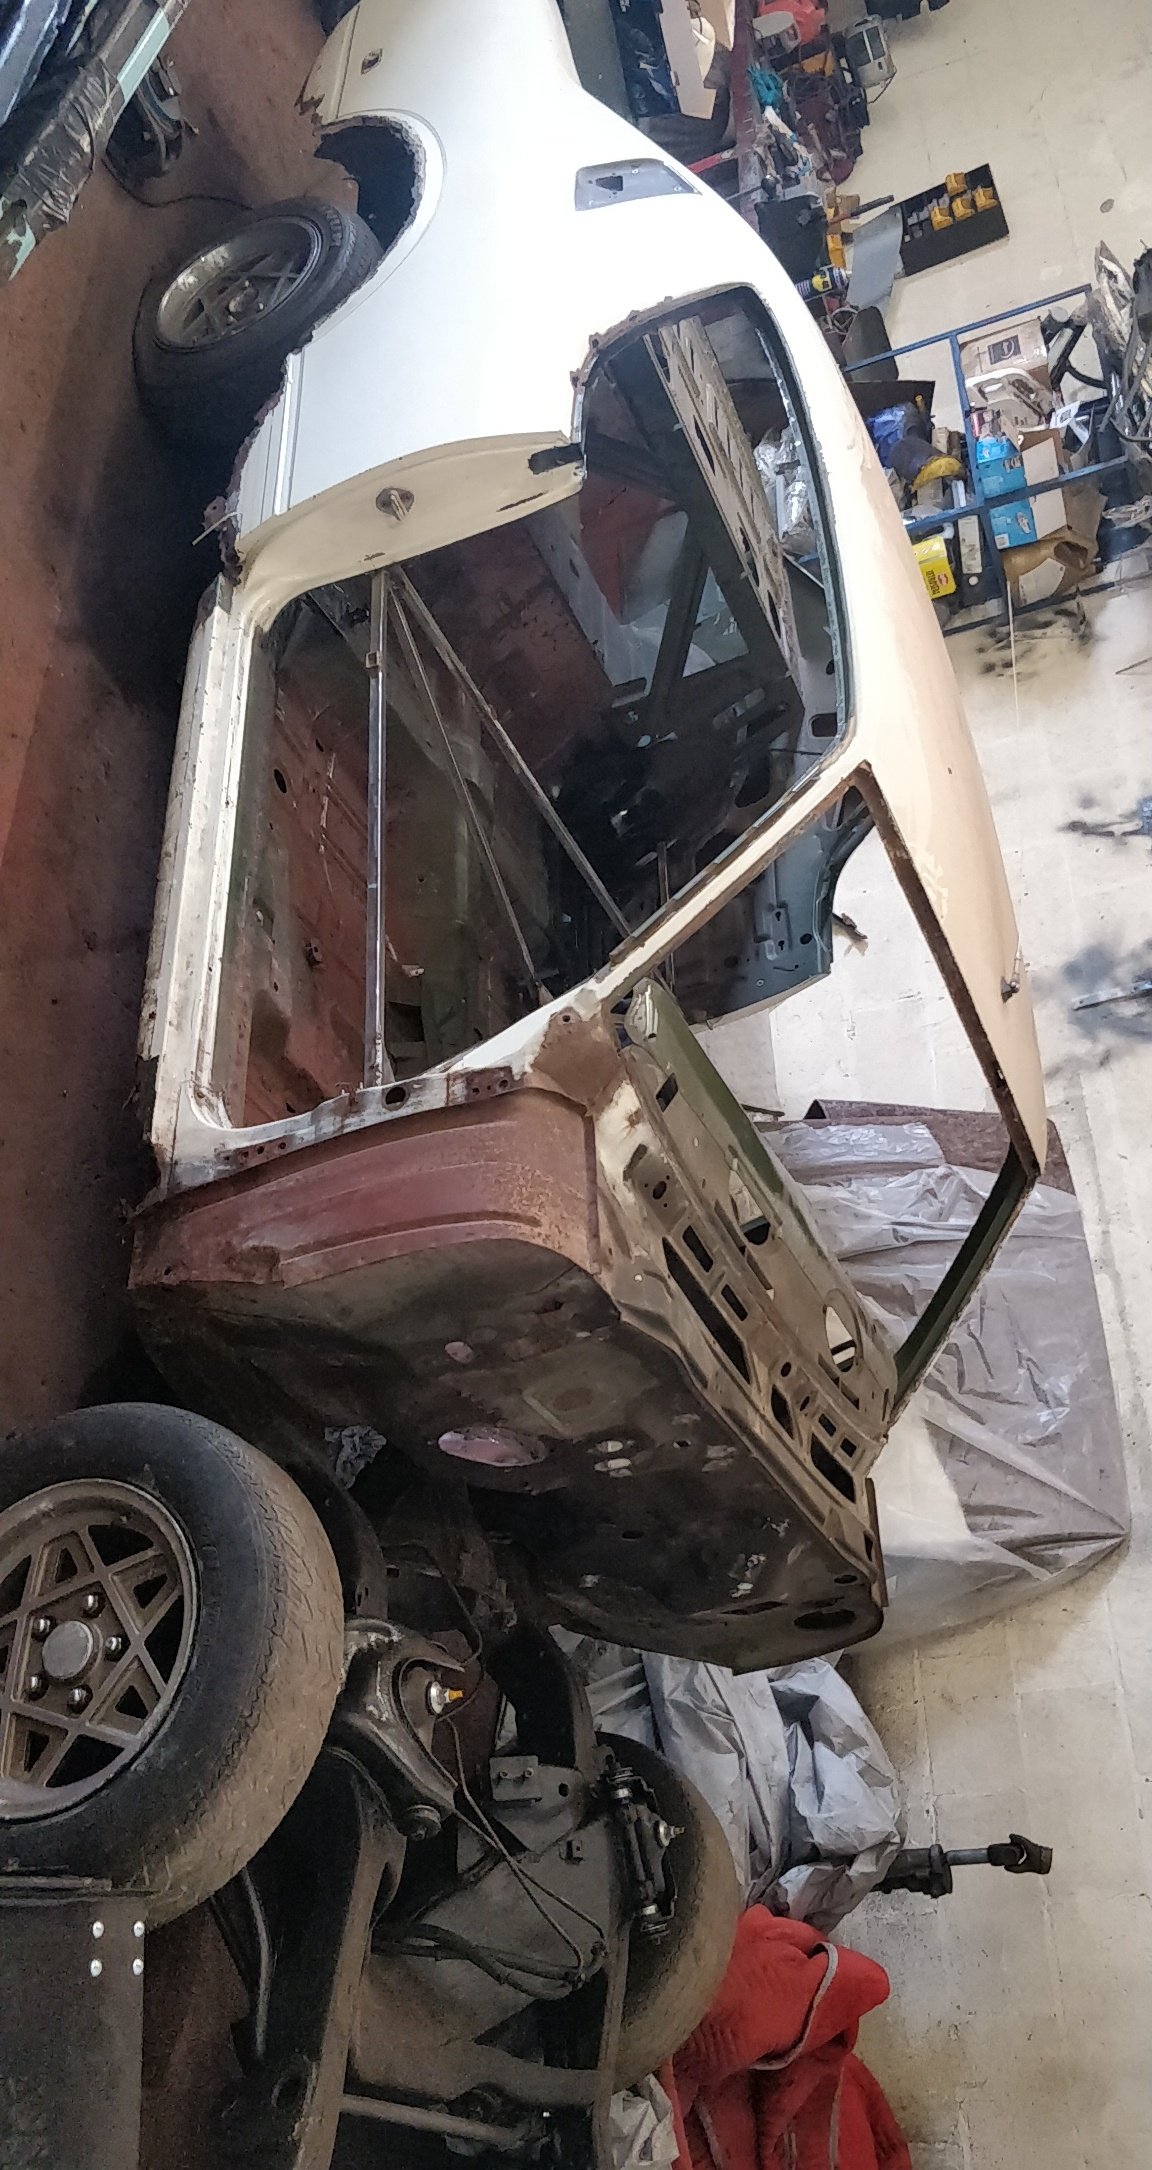
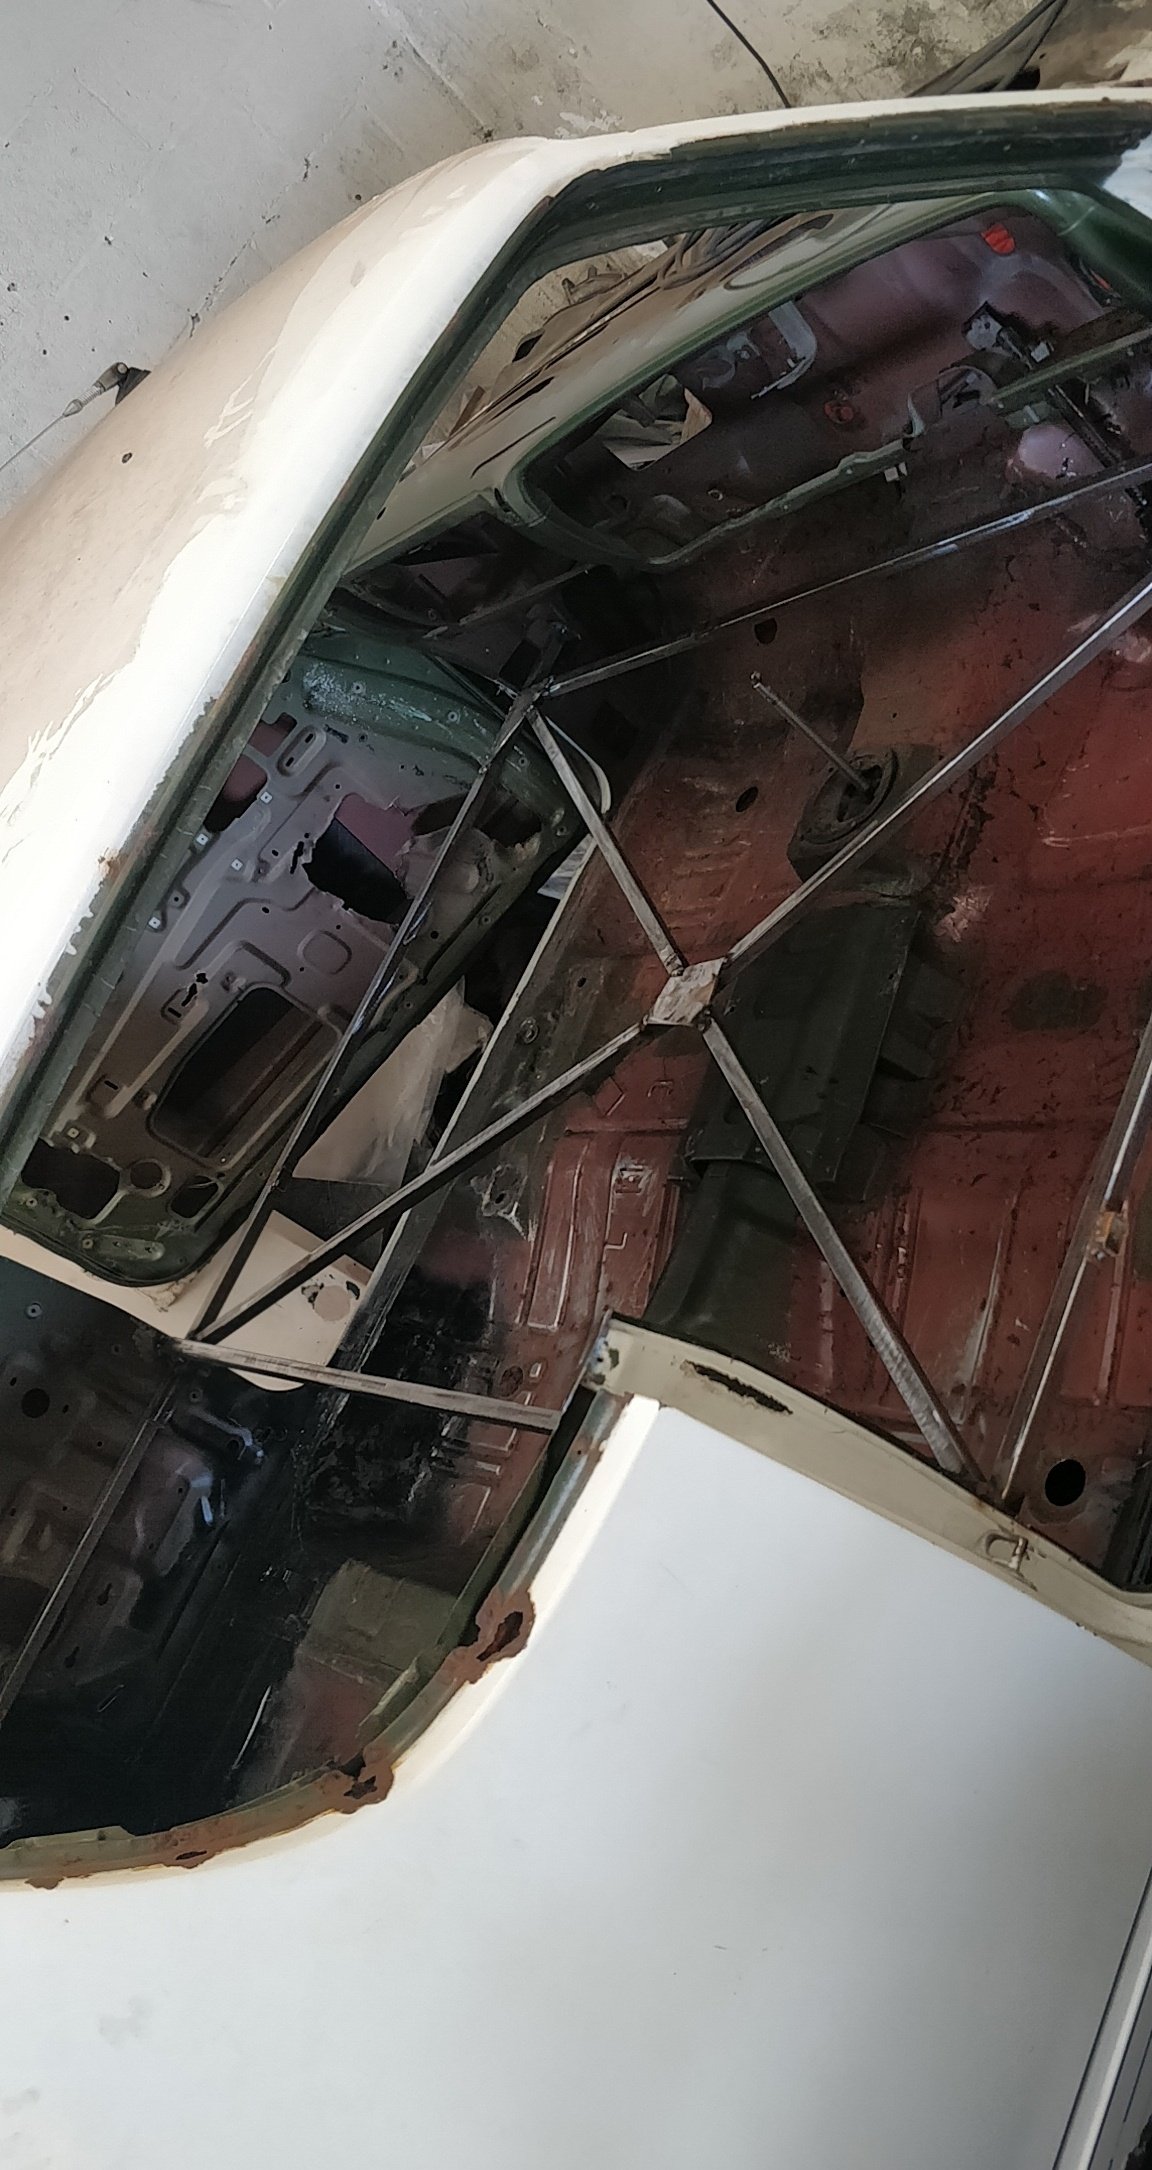
Steady weekends progress, frame built inside ready for when the body comes off, and remade the boot lip
3 points
-
couple pictures from doing more assembly. starting to look good now3 points
-
Windows pretty much fell out, (one did and it slipped through my fingers onto the concrete, somehow it didn't break) Its mostly pretty good except for the bottom corners of the front wondow, def needs new seals tho. Can also see where my sis side swiped a courier on the pass rear arch, can see above where Chris pulled it out somewhat. All fit on the back of my ute to be stashed under my house for now (along with tons of other shit) Not sure what to do about the motor, do I bother getting to see if the beetle motor runs or just rebarrel this one as it's the matching numbers engine, then rebuild the the beetle one and sell it for max profit.. Quite keen to get a twin carb kit for 3 more hp.
3 points
-
3 points
-
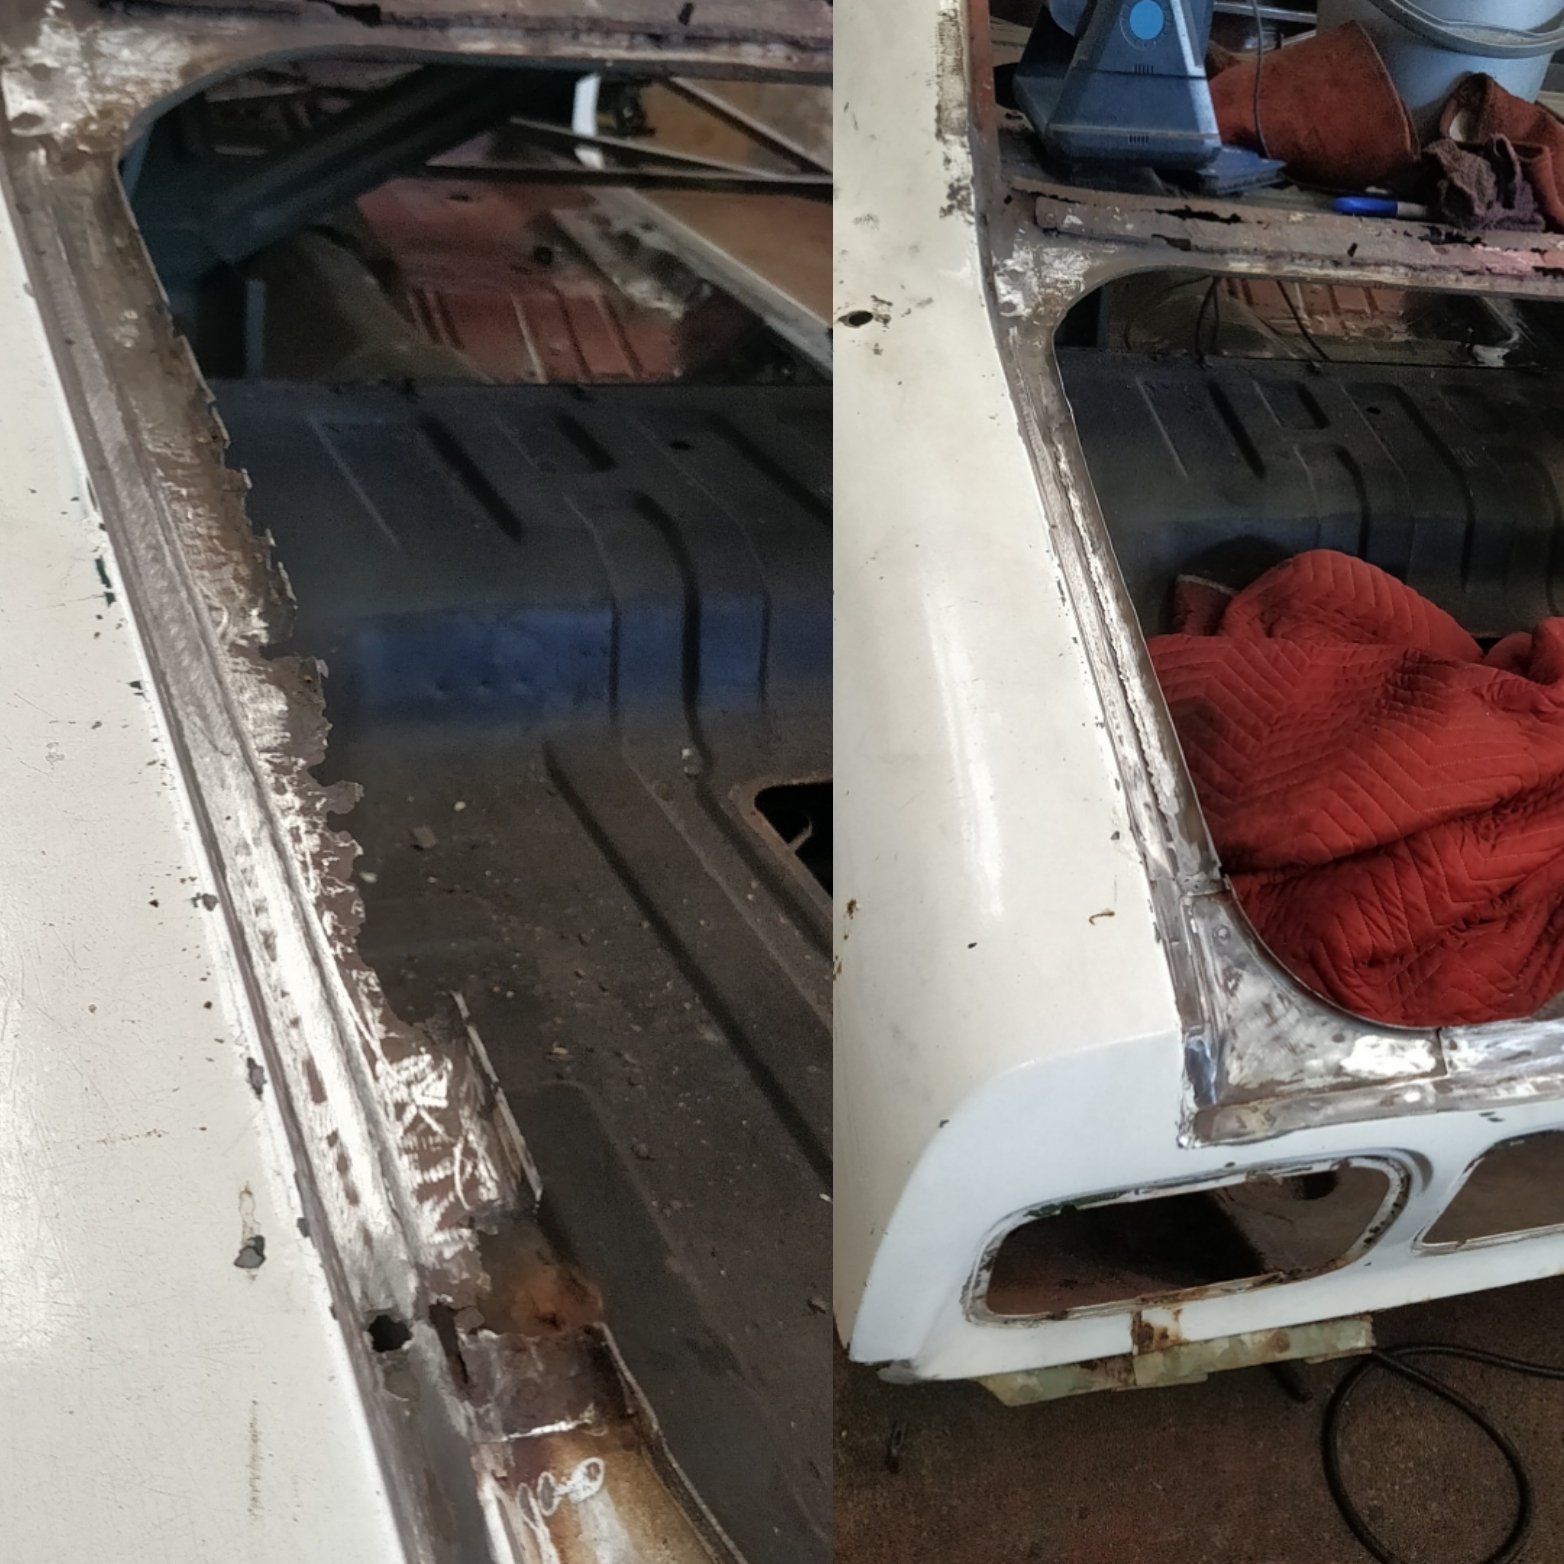
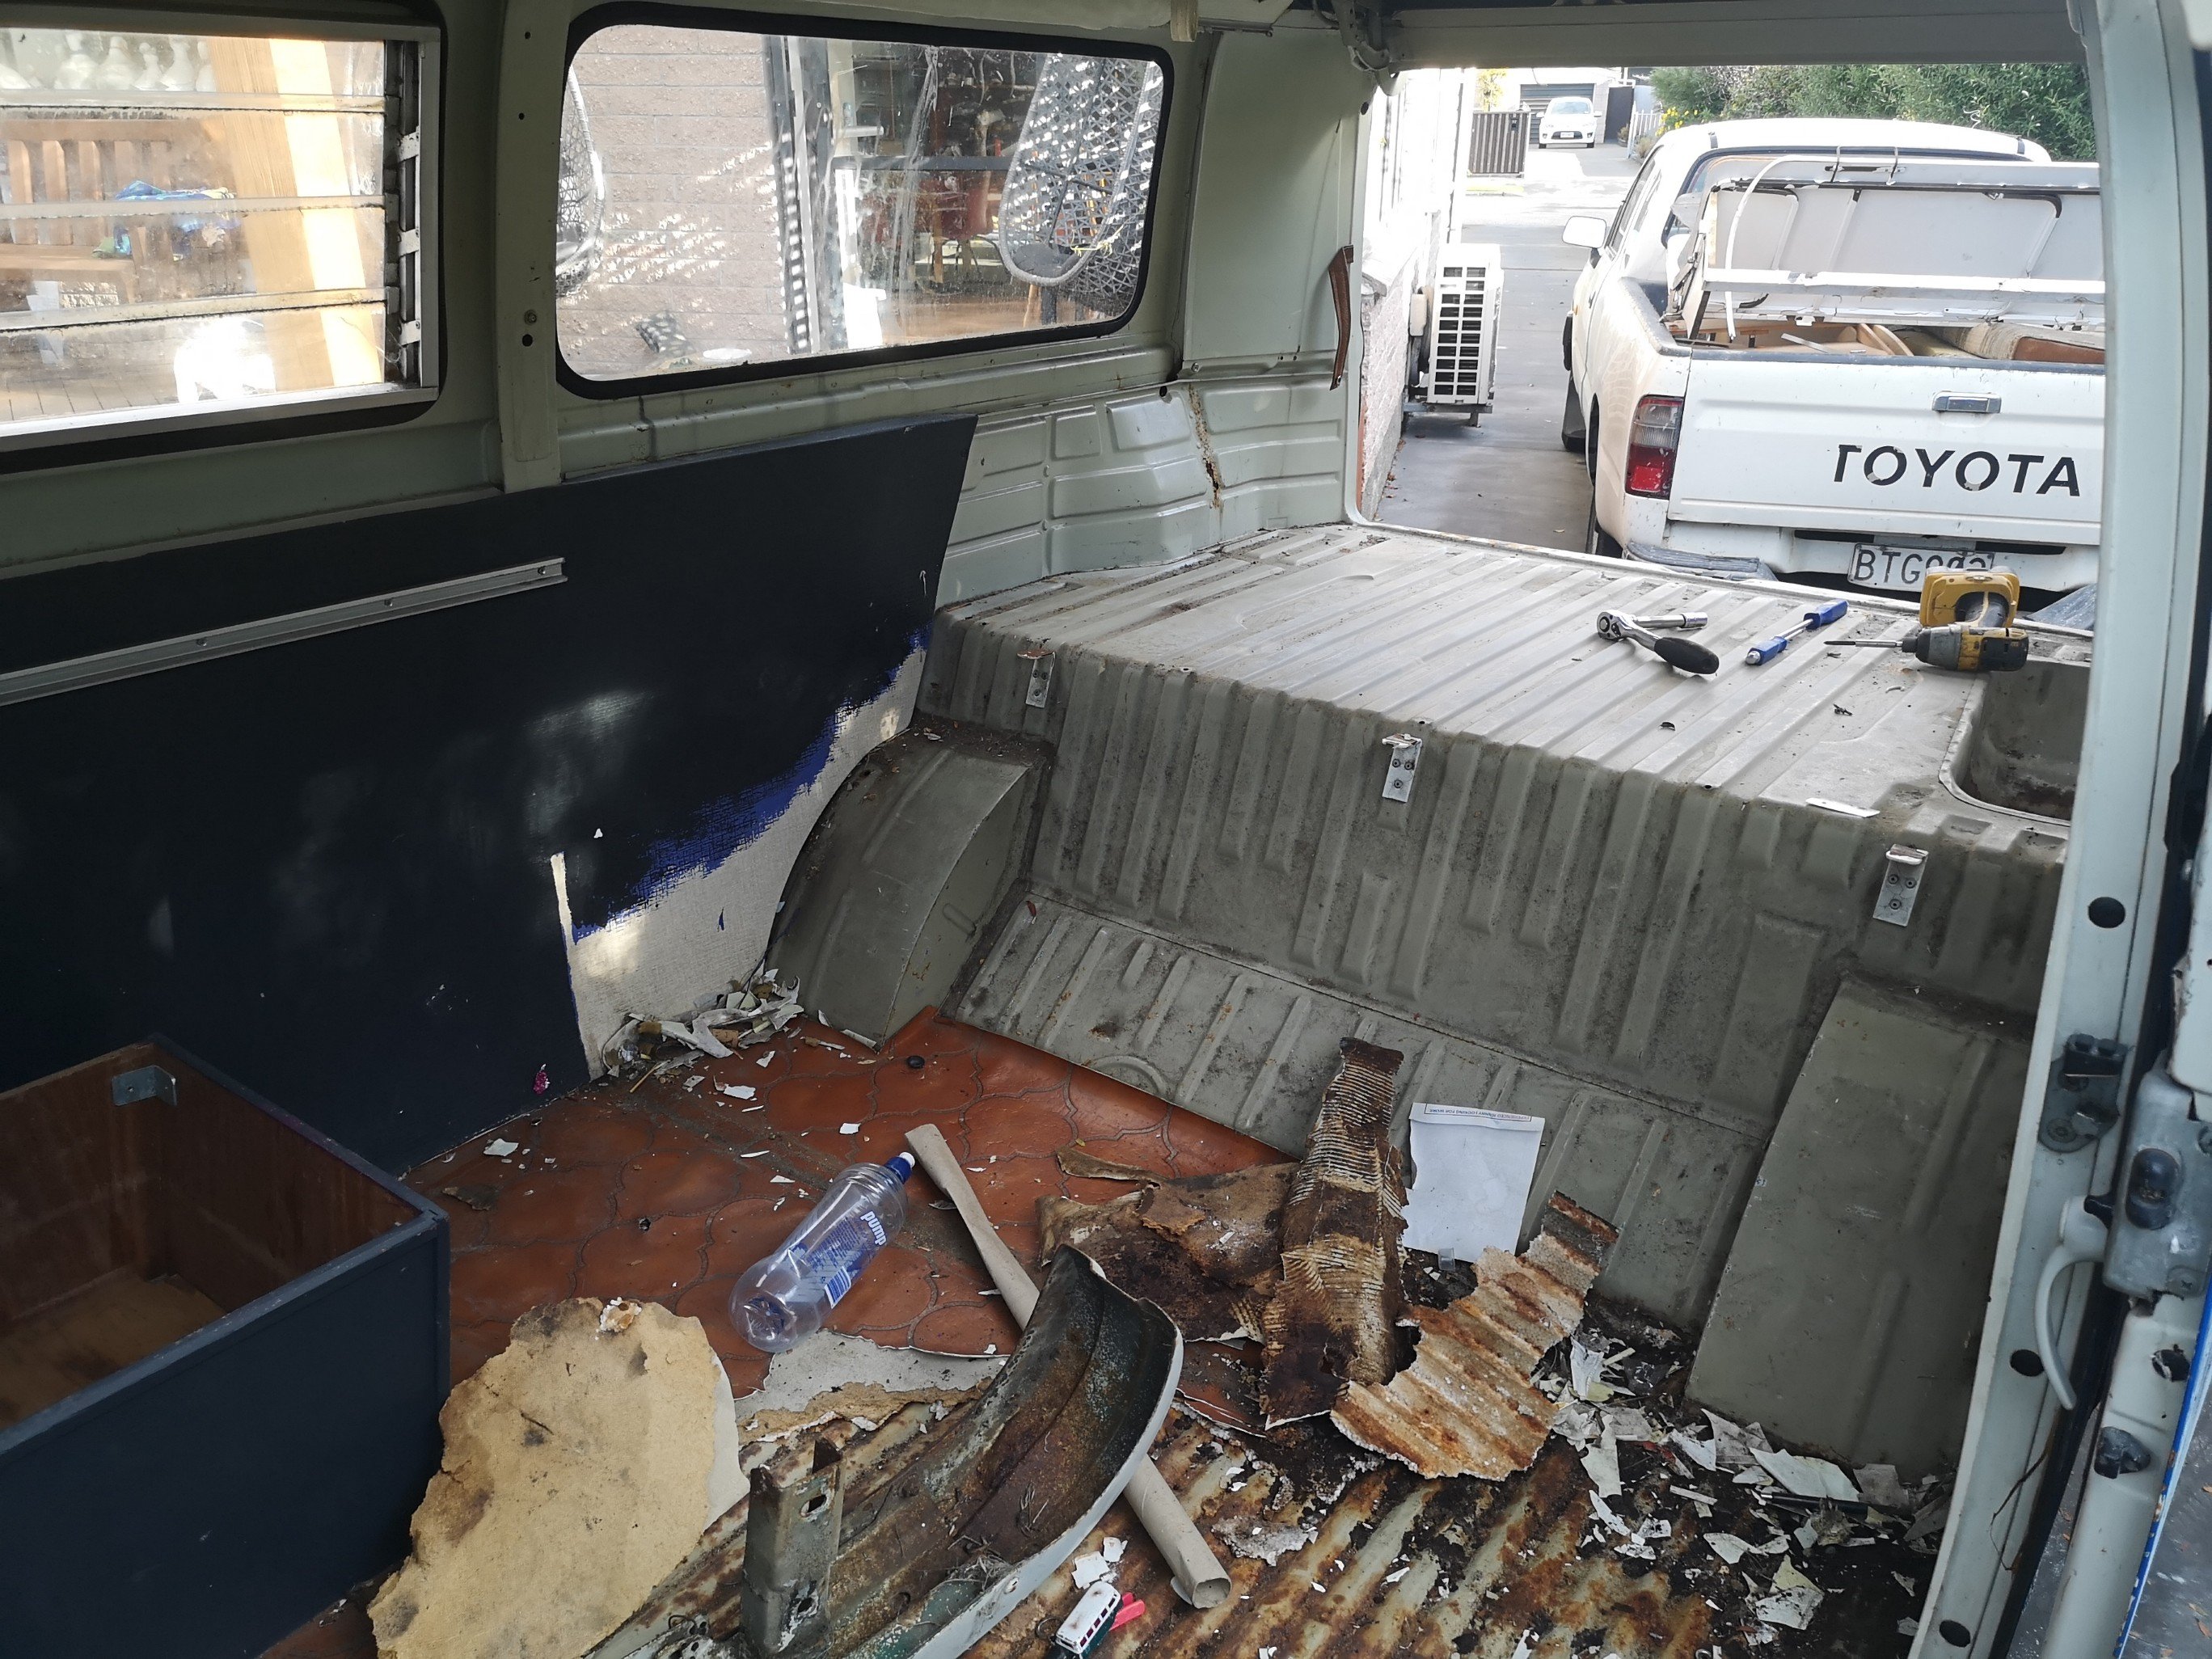
Spent a couple of hours this morning stripping the interior out so as to make it easier for Chris to do his magic..
3 points
-
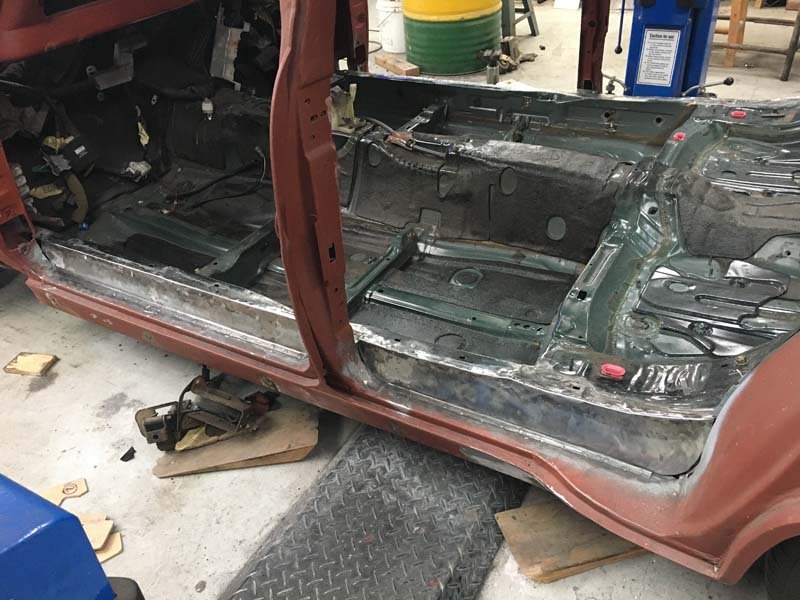
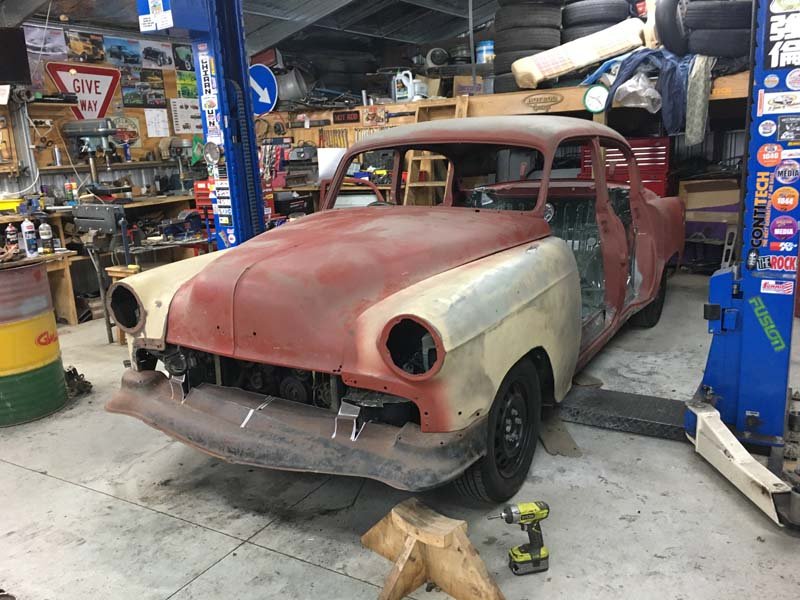
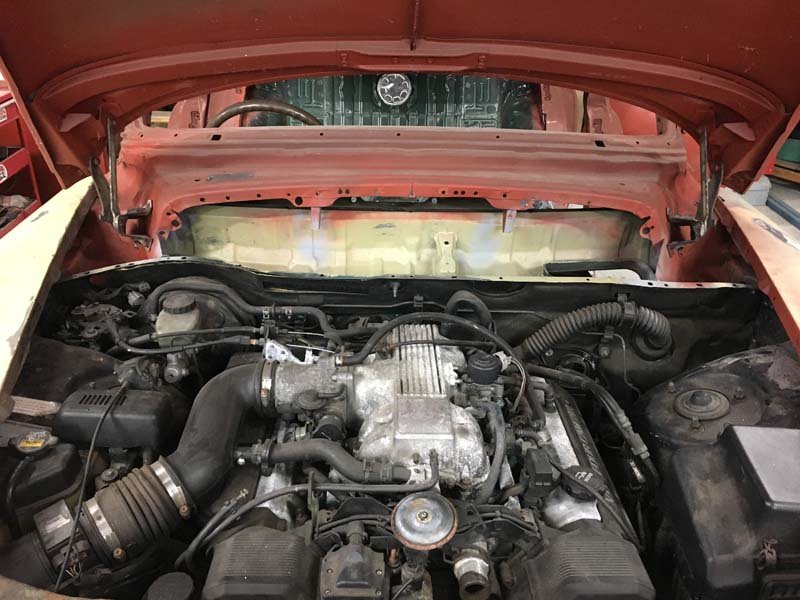
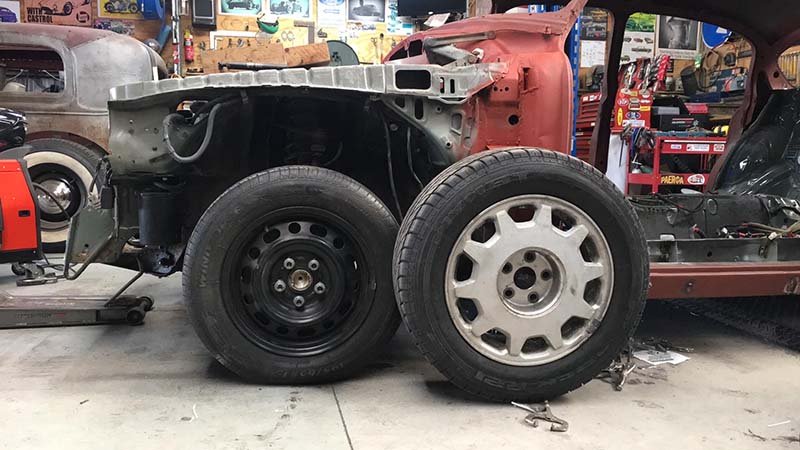
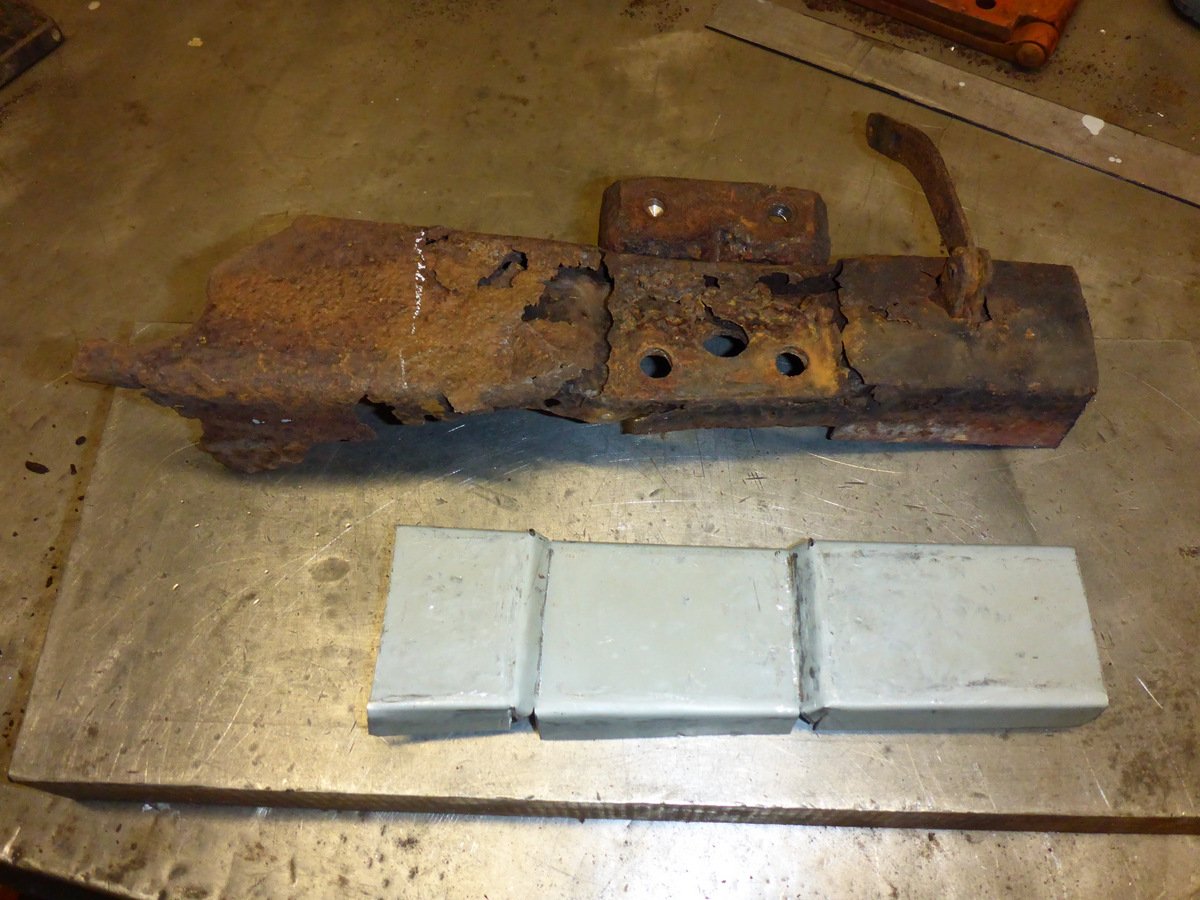
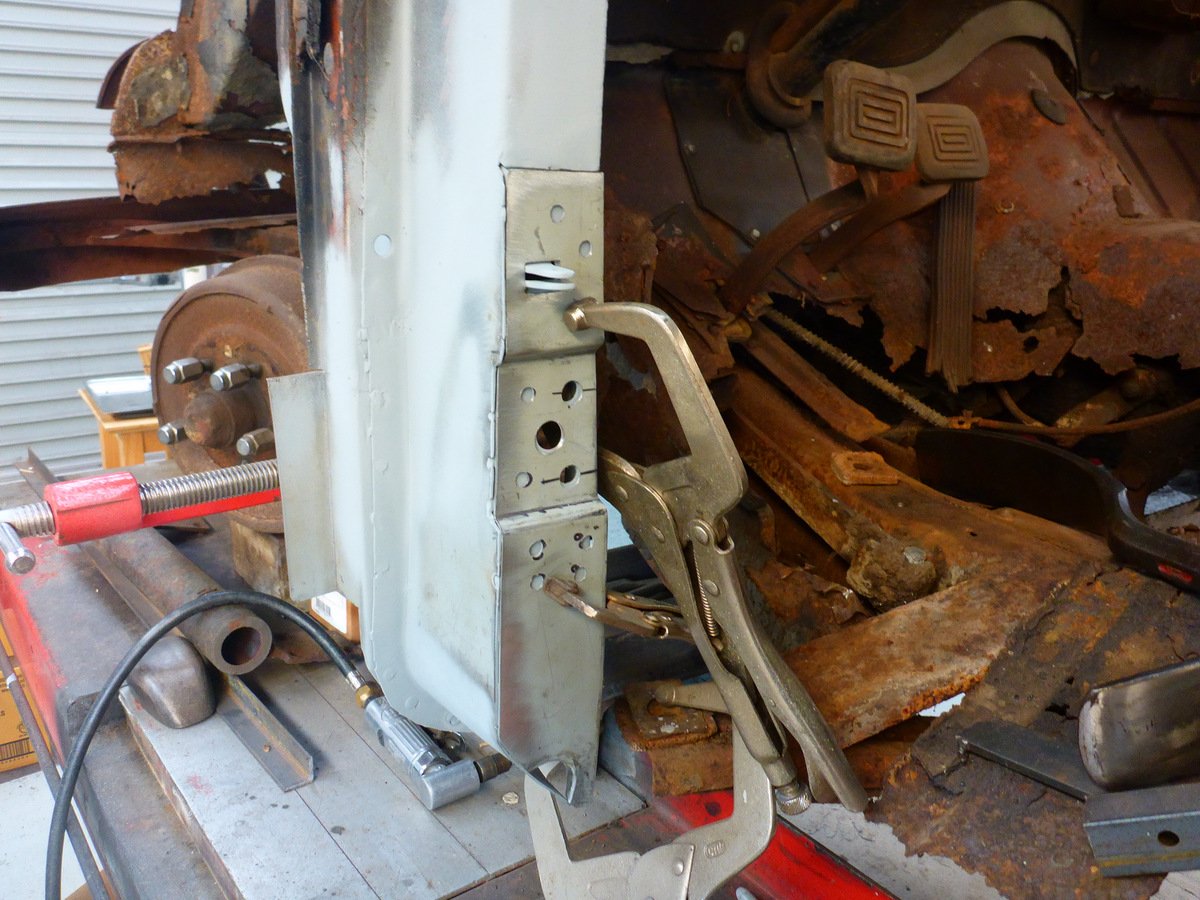
Filled in the tops of the sills, few smaller holes and a larger gap in the front footwells to fill. Cut the front cross member/radiator support off the ls400. As i have ordered a aluminium 1954 Chevrolet radiator to fit in. and took some time to start fitting the fenders and bonnet. Picked up some mazda 3 wheels. 15x6 50p with 195/65 tyres. Old man has some 54 belair caps that fit them, or i will get some moon discs. Front wheels are still not tucked under as much as i would like. But with the guards pumped out a bit, some adjustable upper and lower control arms, and potentially changing the offset of the front wheels ~10mm. It should be fine.
3 points
-
This is what it would really look like
3 points
-
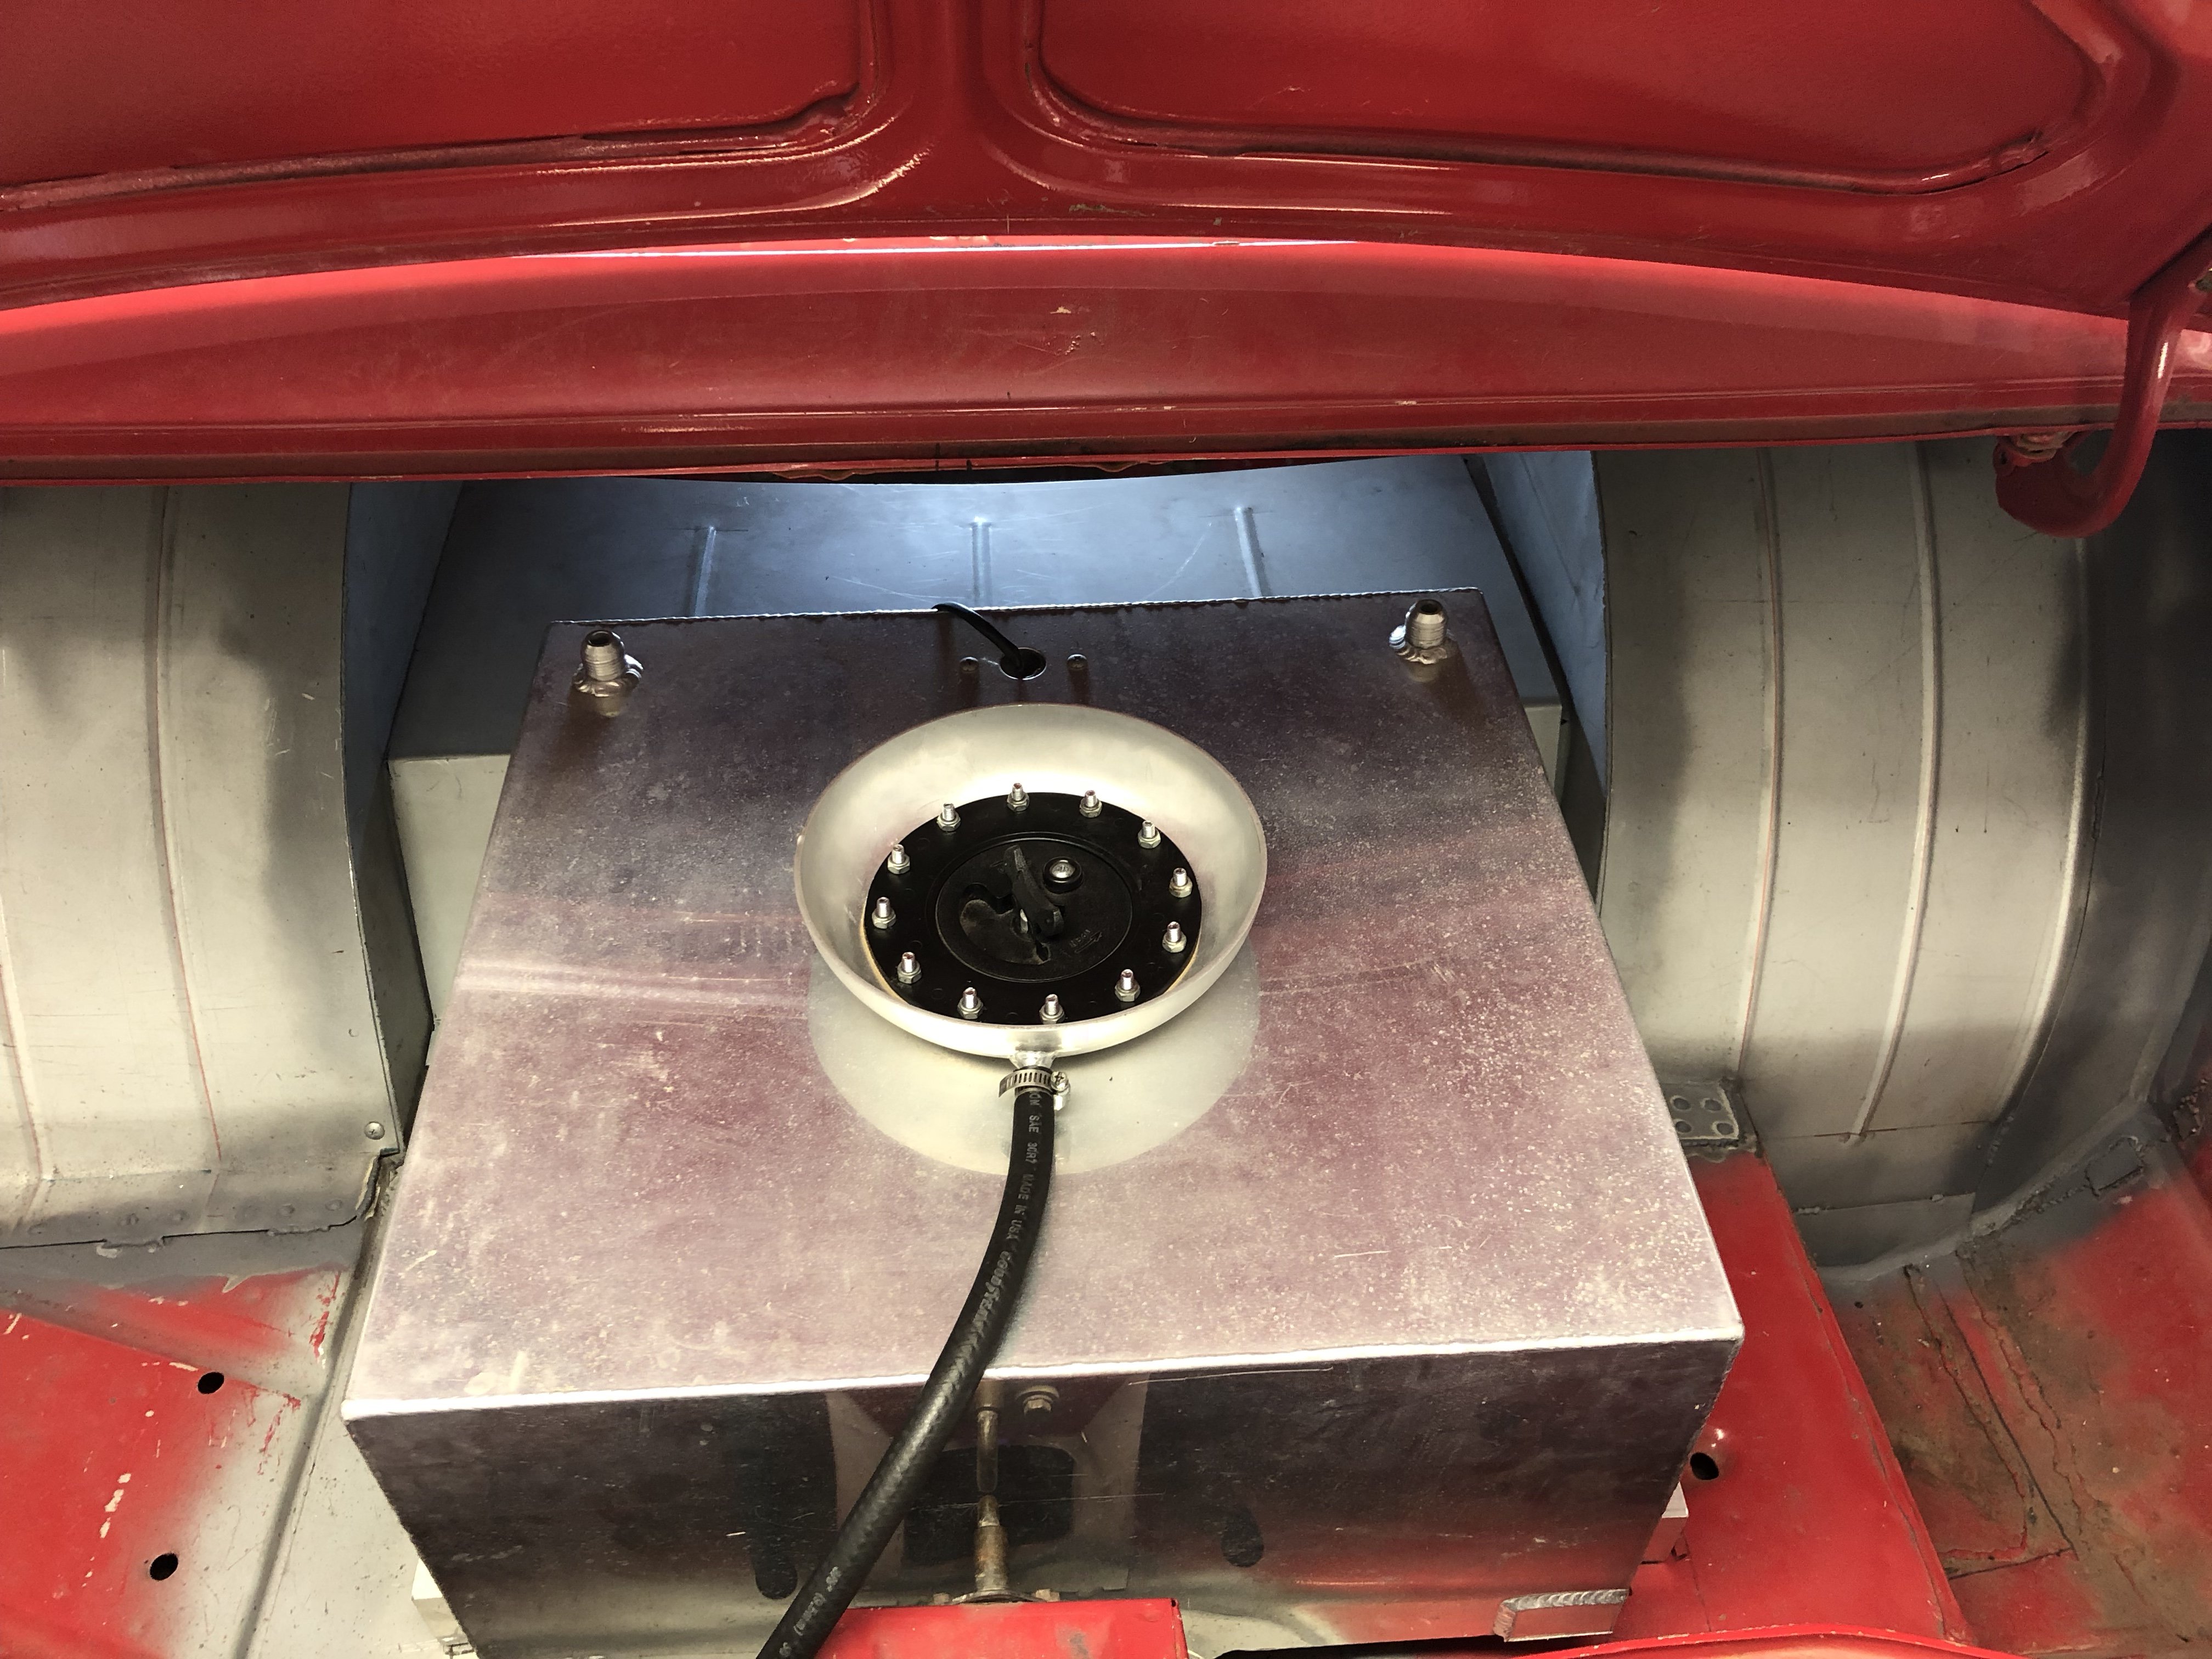
Gas tanks all done ready to hook up.
3 points
-
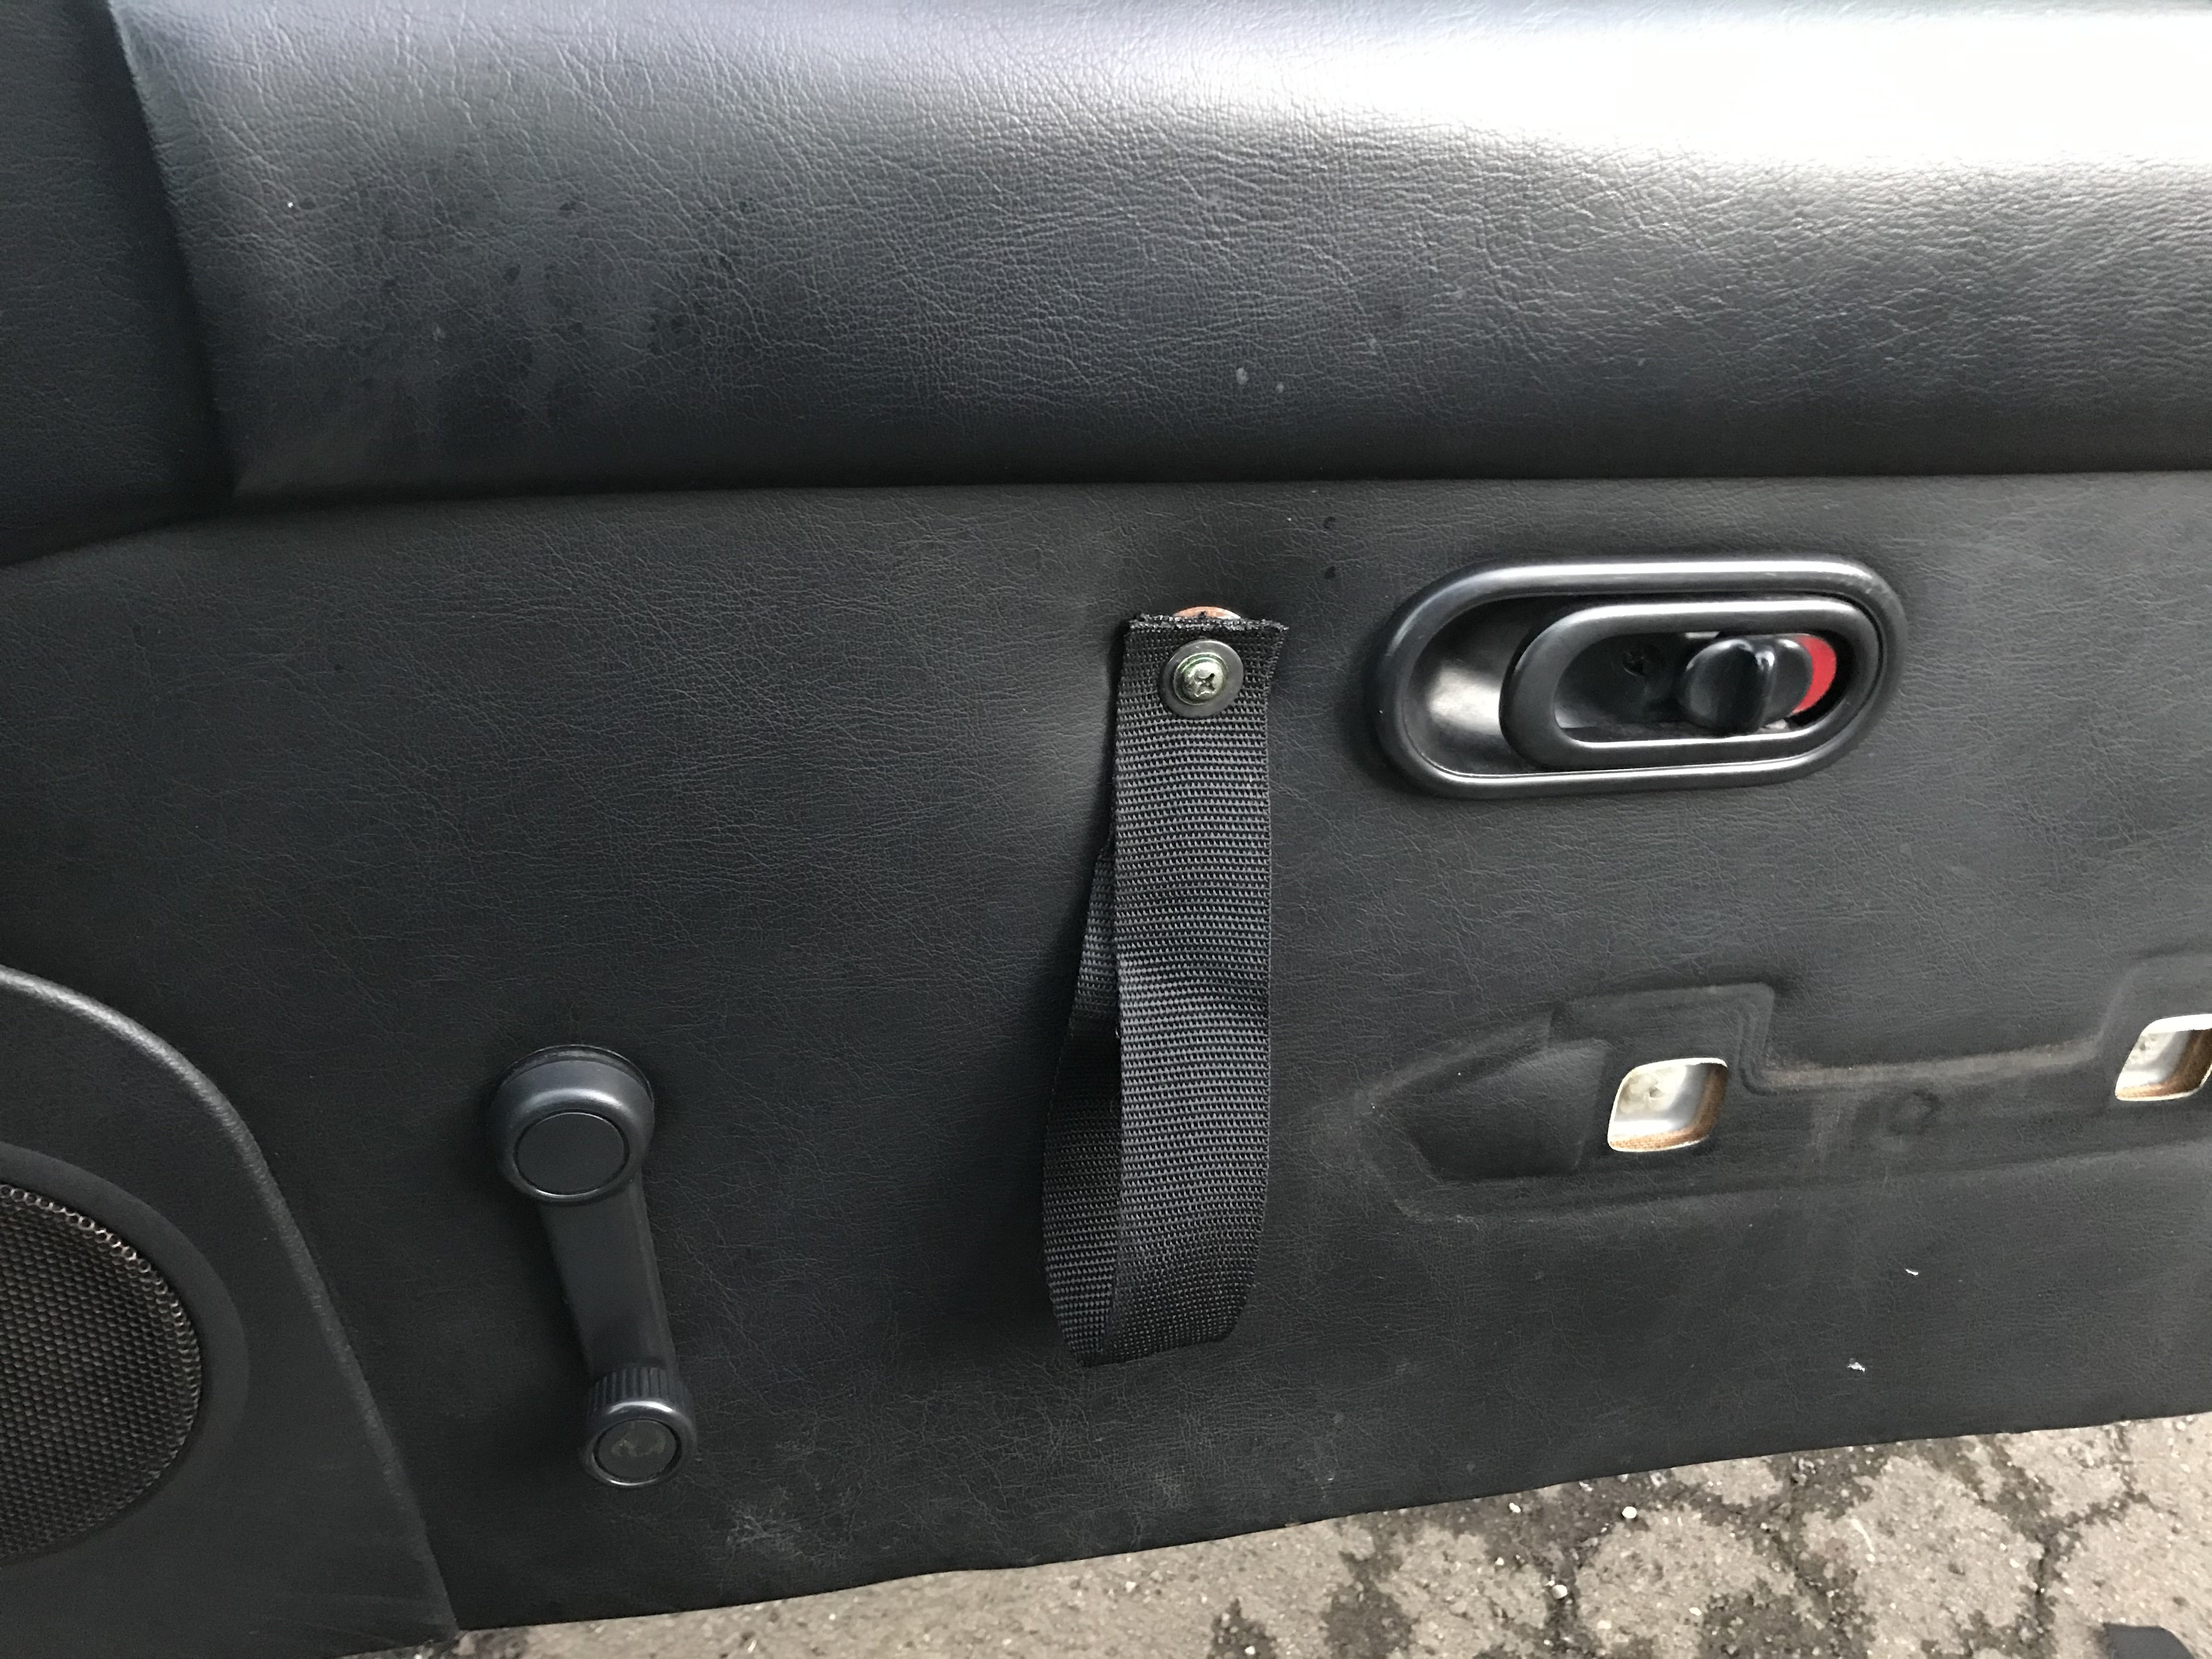
The door handle/arm rest is right up against the seat so feels a bit cramped. Removed it and made a little strap thing. Way more room now and can turn the window winder handle without awkwardly reaching around the door handle.
2 points
-
Decided to have a go at reskinning all of the doors for a few reasons.... - The rear ones are dented and too far gone to repair - I've been quoted ~$700 ea for reproduction doors ex UK - It takes AGES to strip the paint off (and I tend to use alot of stripper) without overheating the alloy - The skins themselves look easy enough to make - a roll and some folded edges, my pan brake is just big enough - There is quite a bit of alloy corrosion on the lower sections (alot of LR doors do this) - I have a super friendly alloy supply shop 5 min from my house who have 1200-H14 1.2 mm sheets in stock at (what I think) a very reasonable price. Will report back....2 points
-
2 points
-
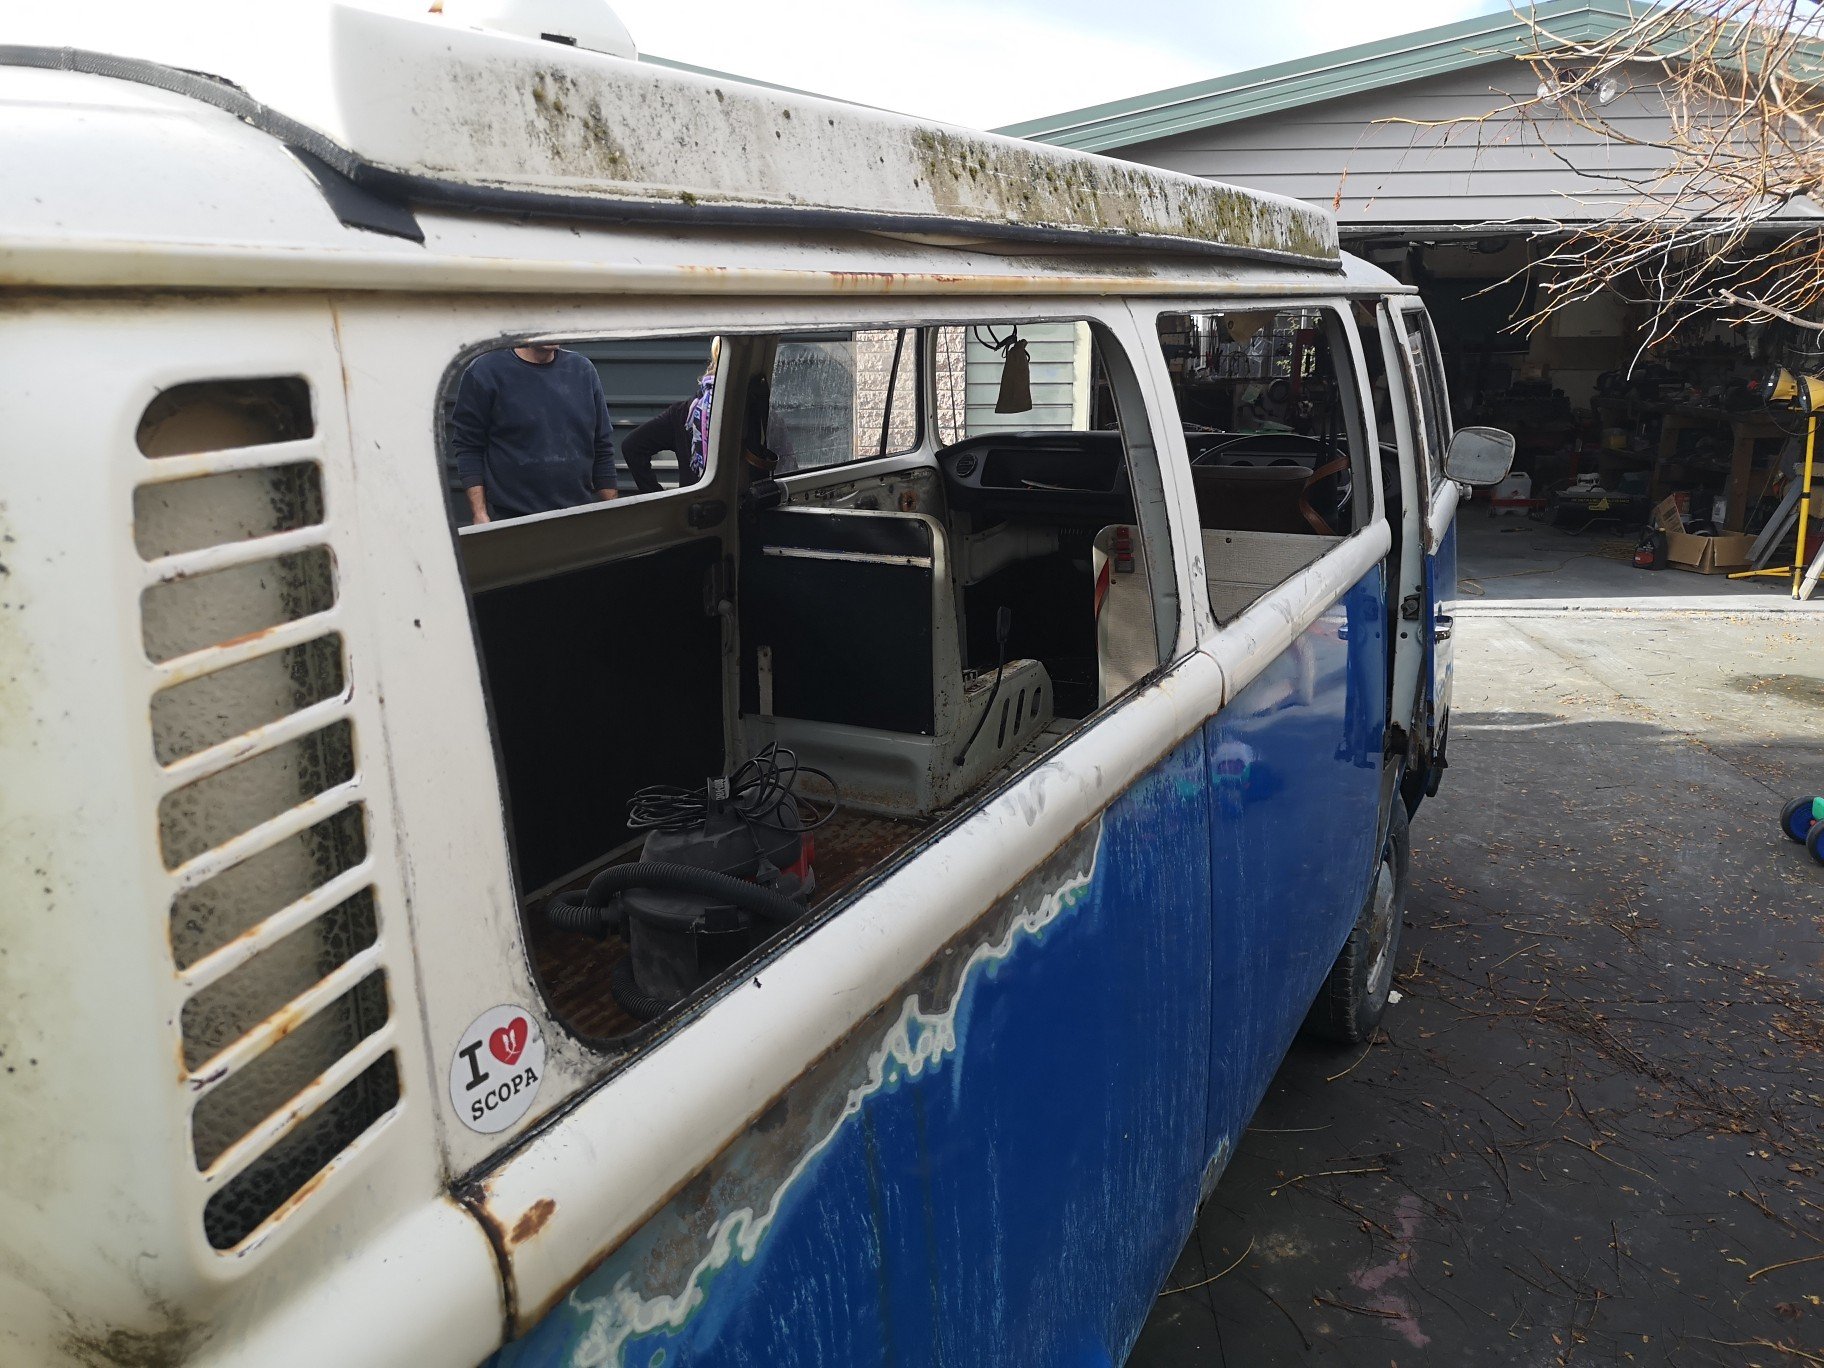
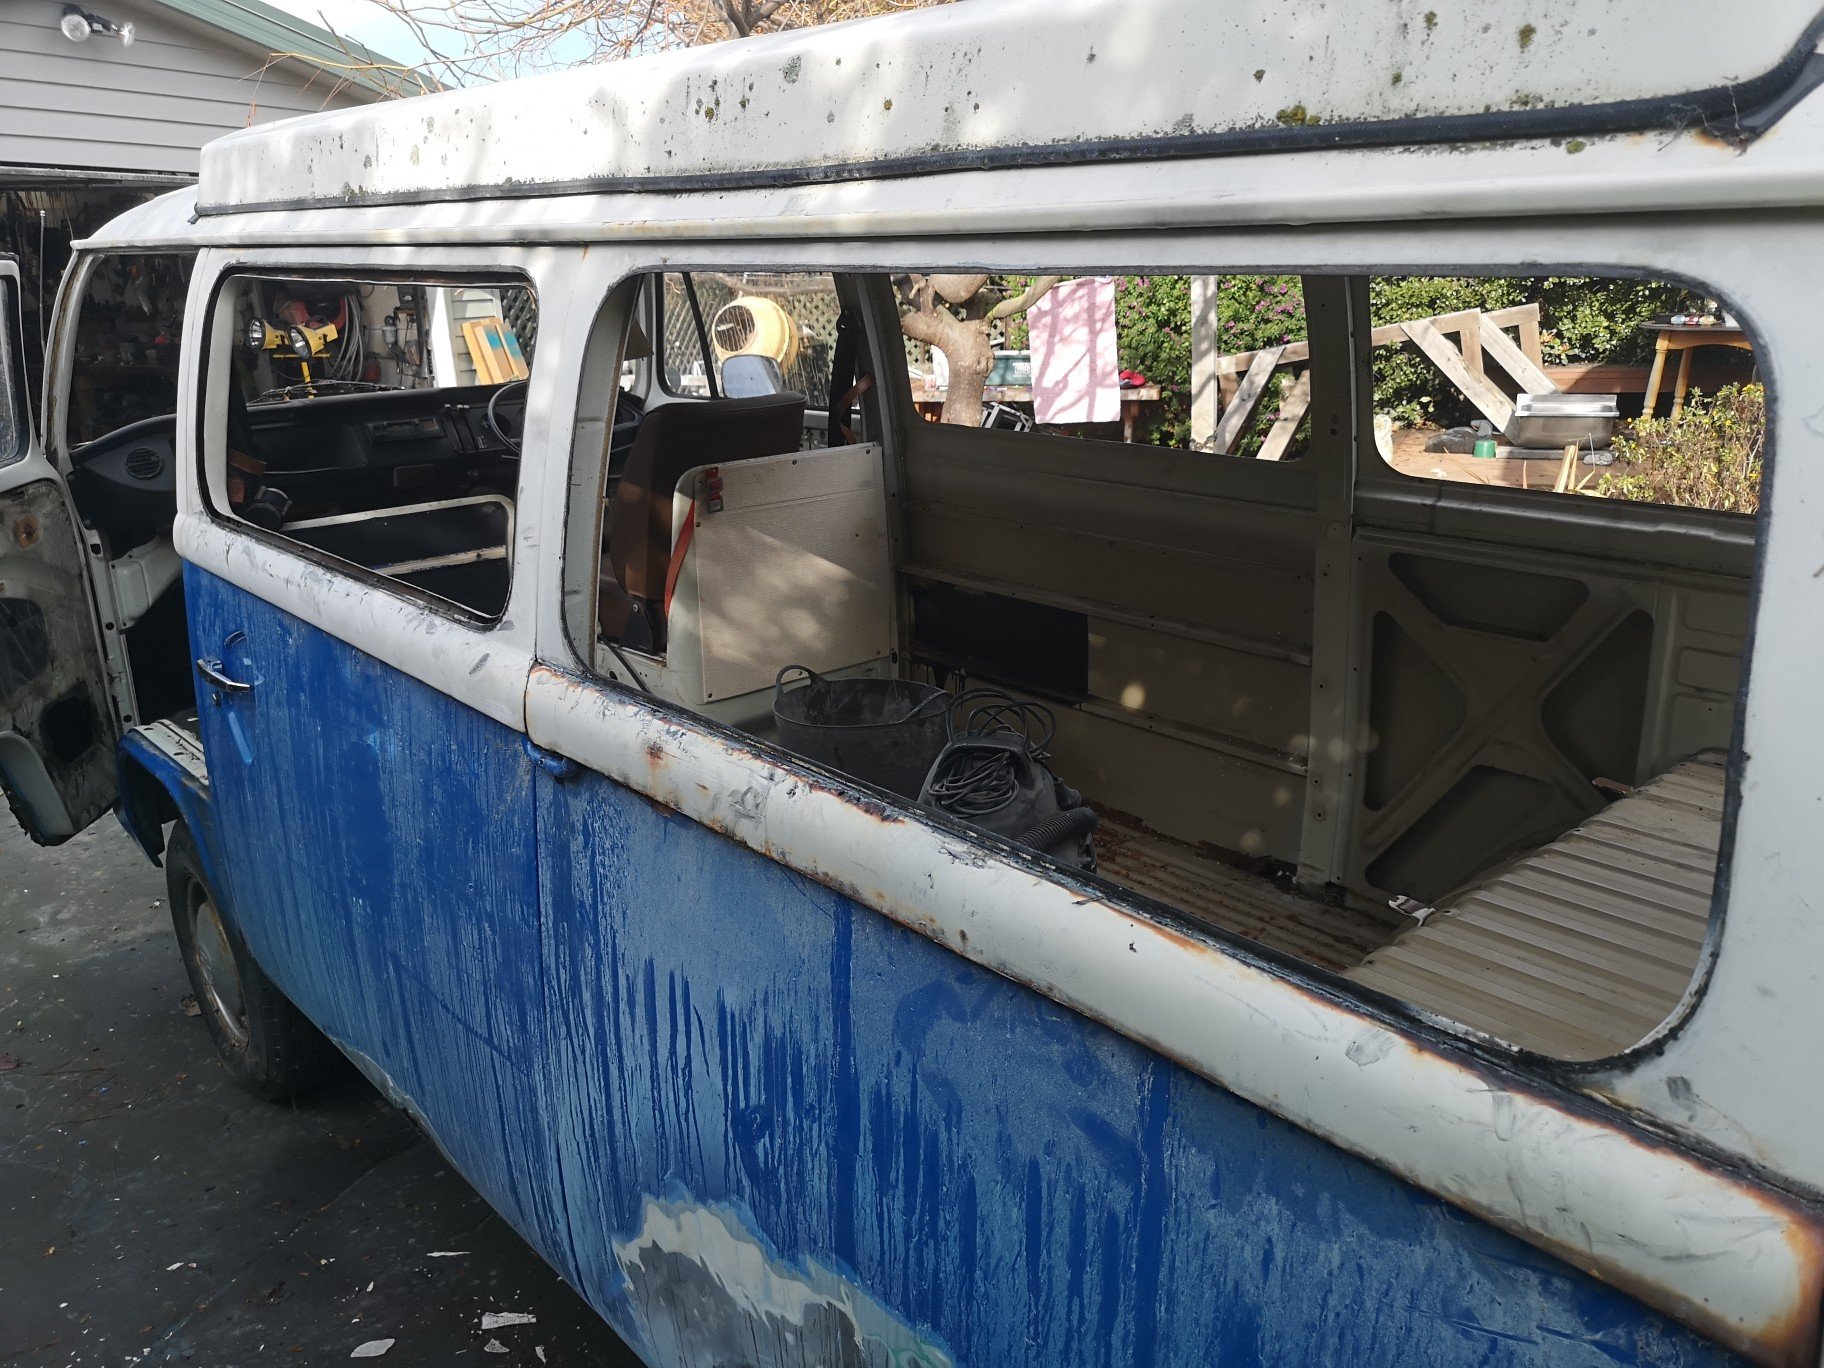
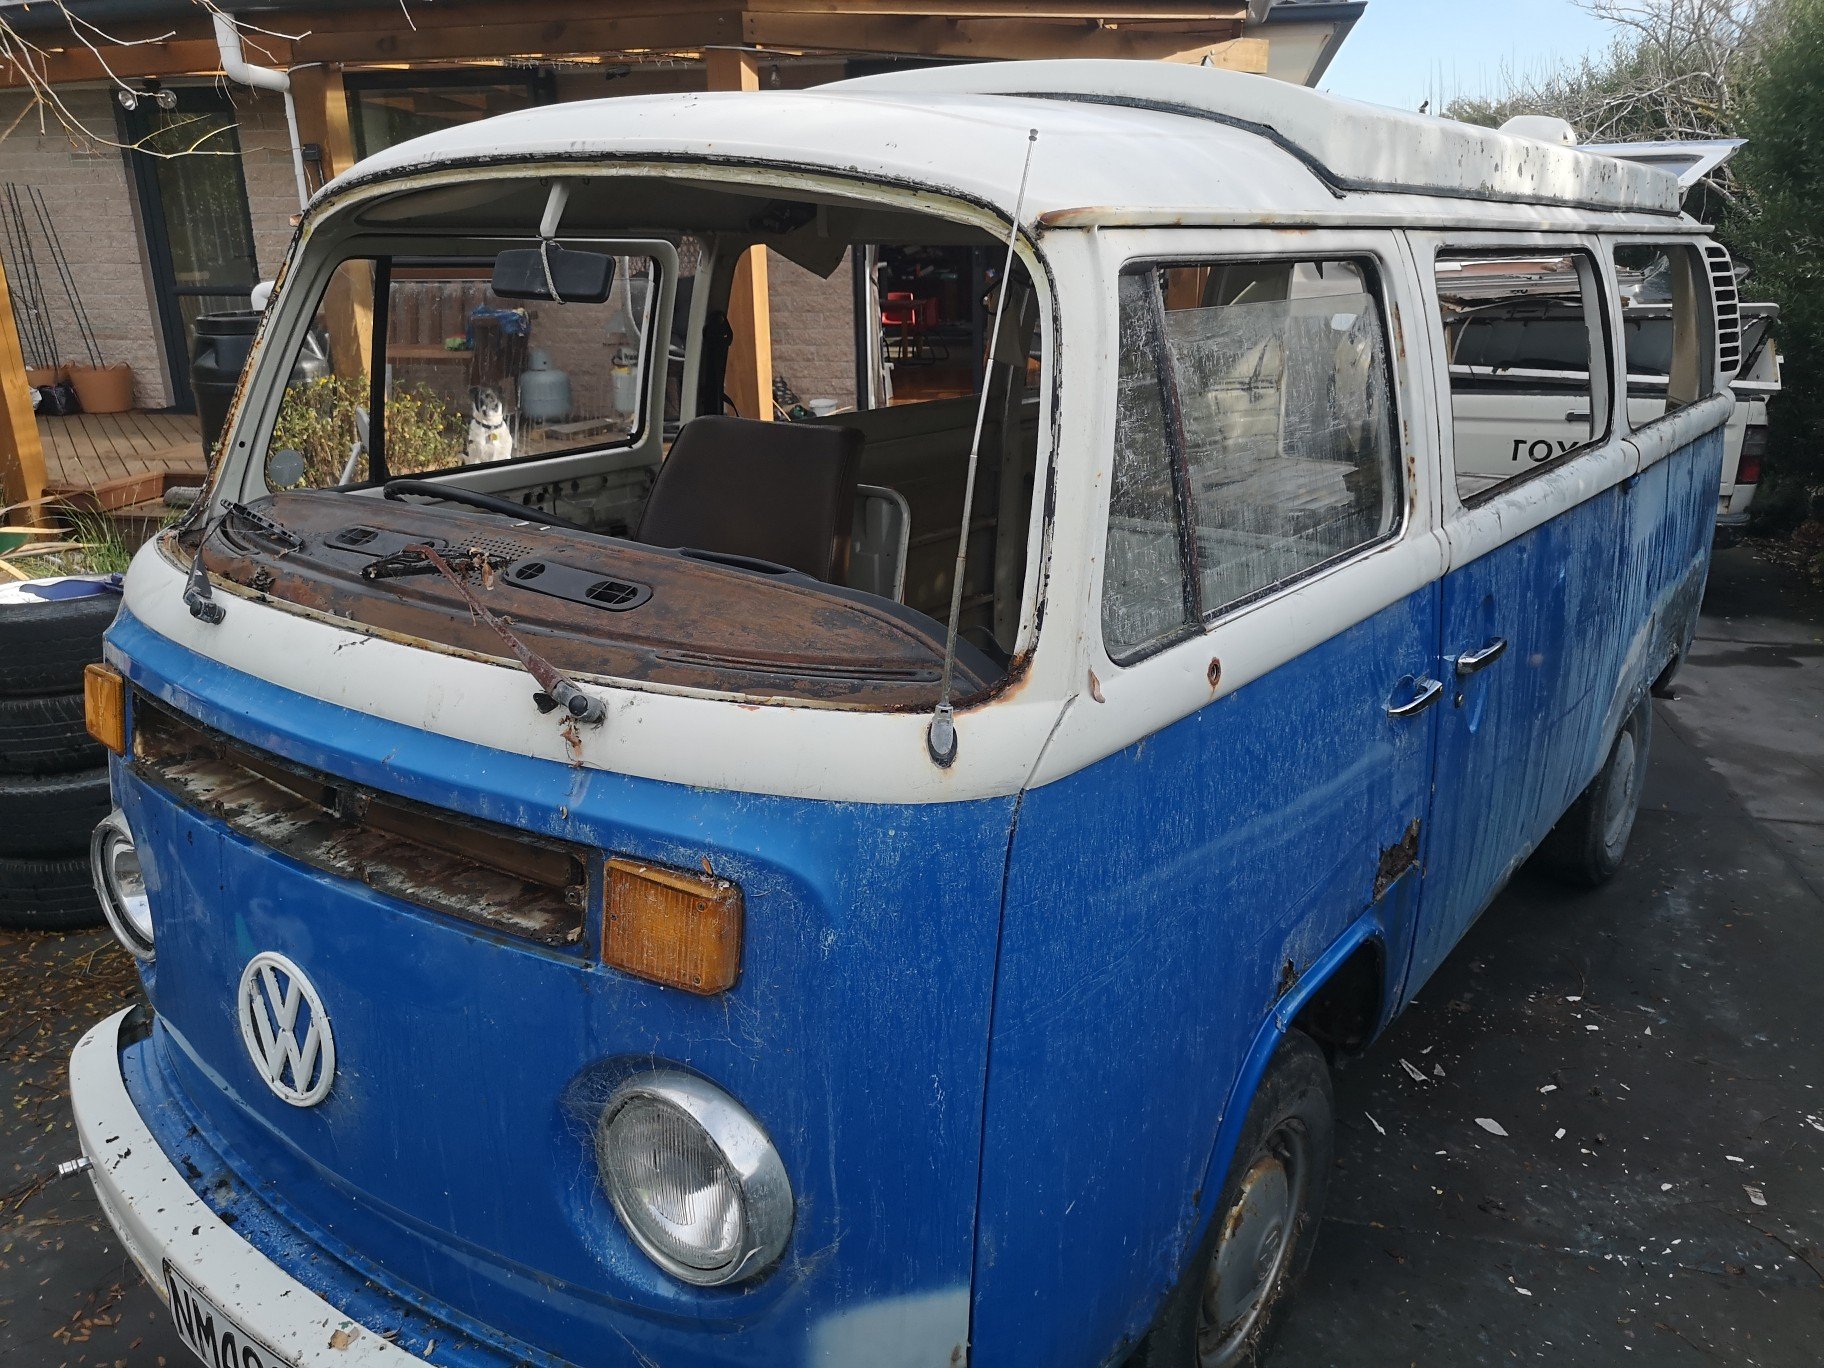
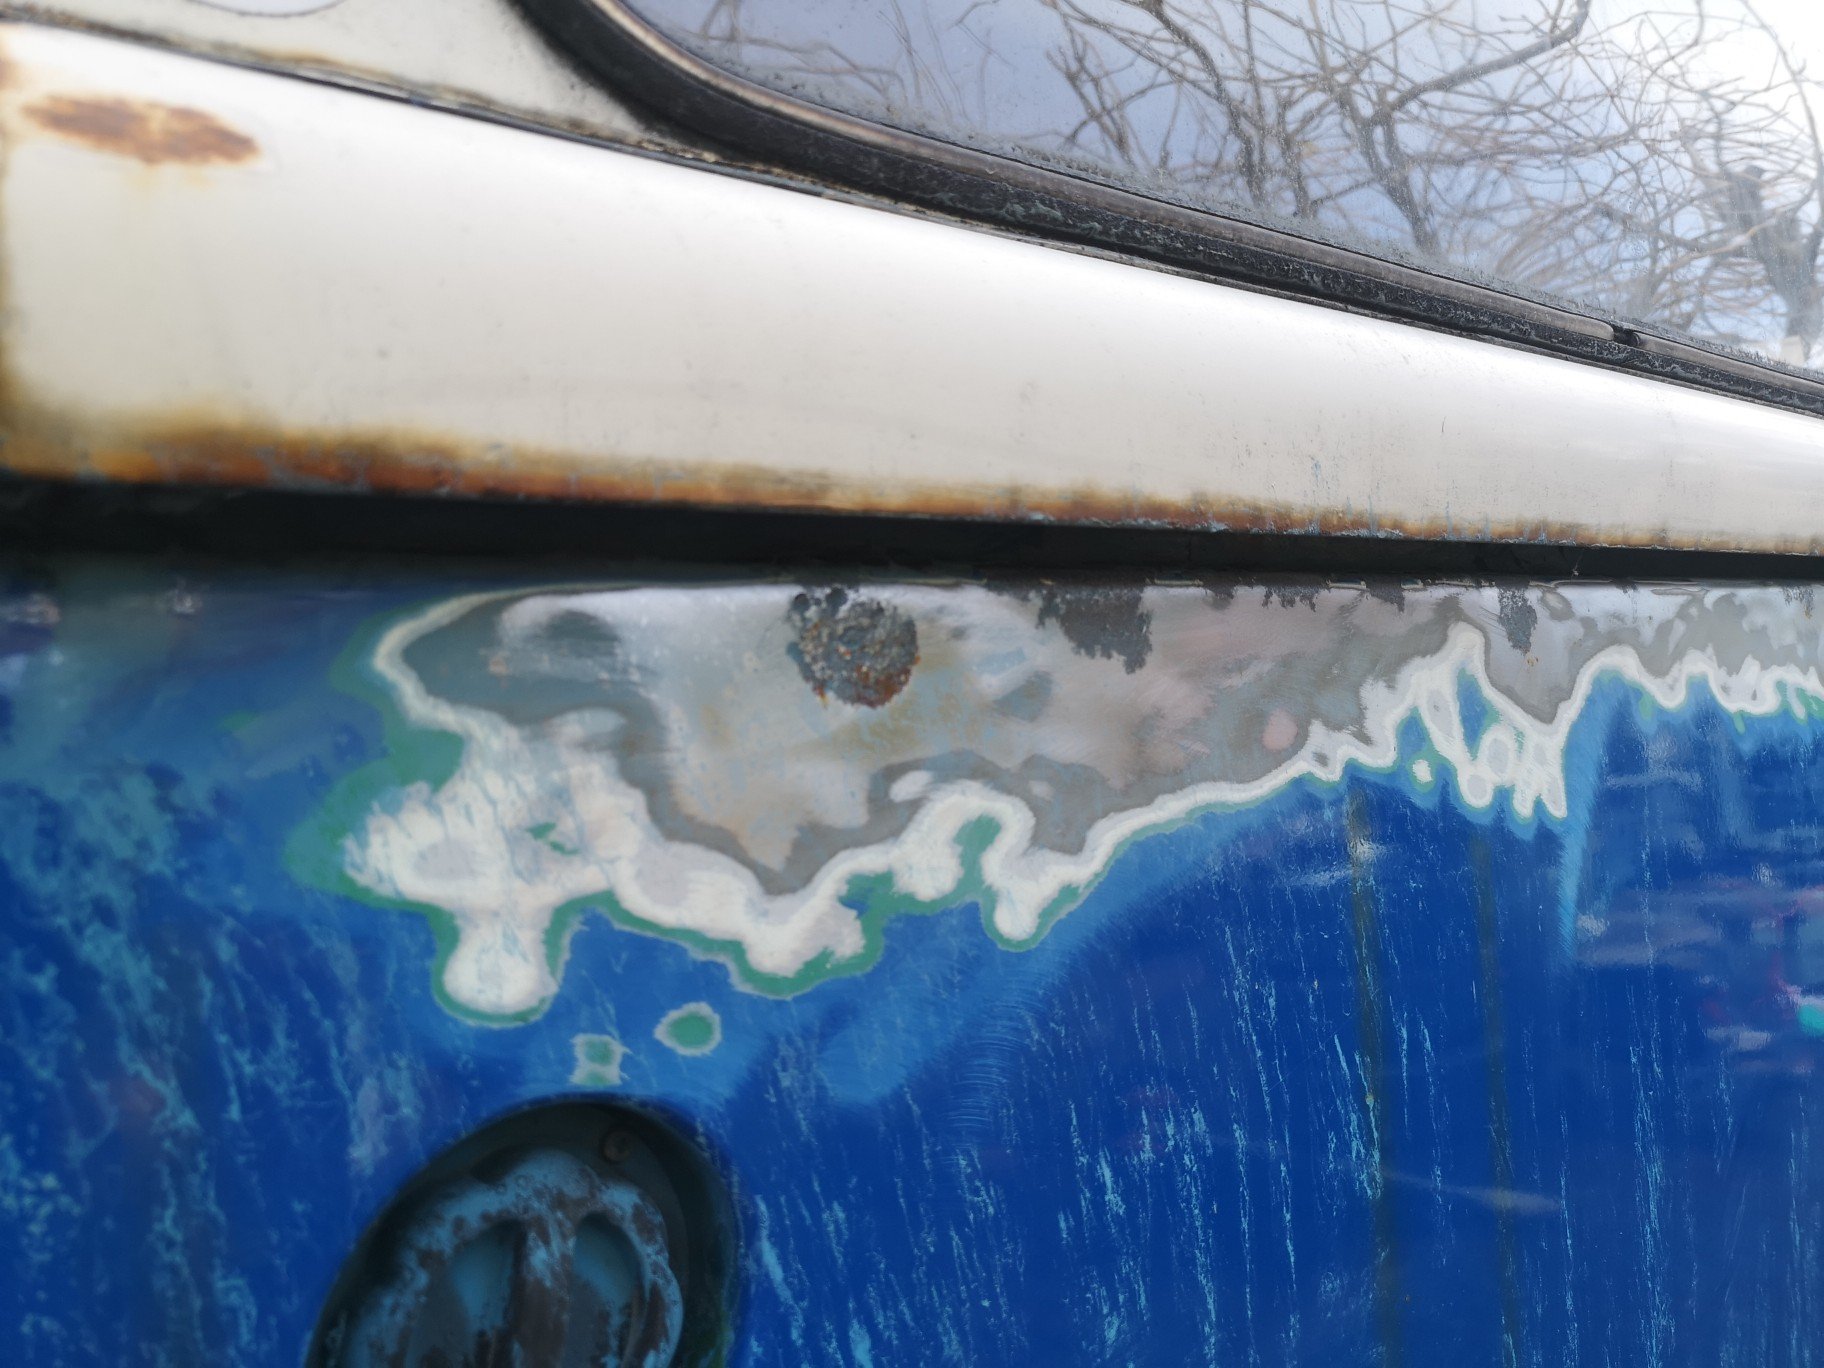
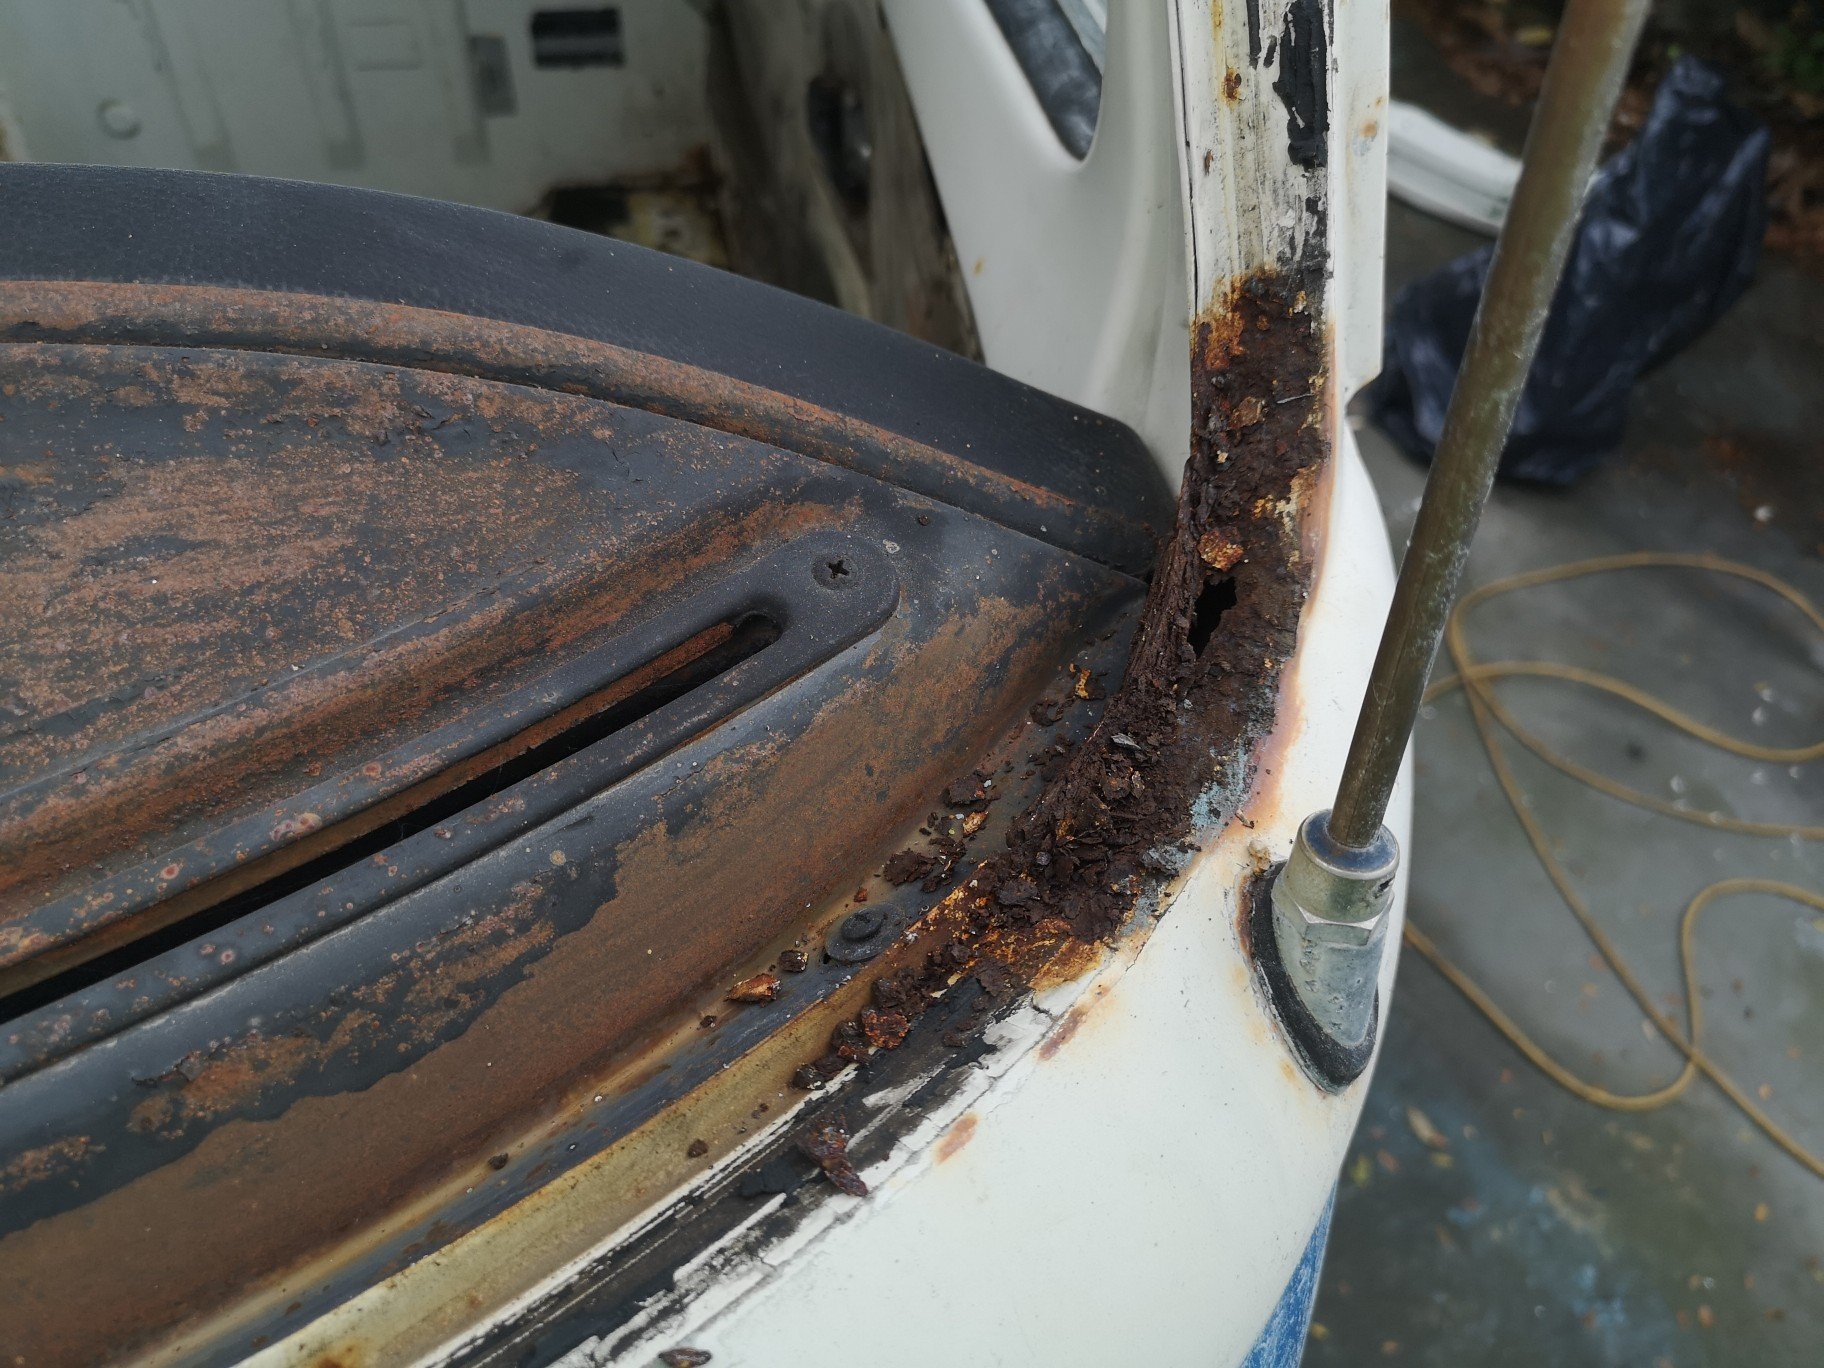
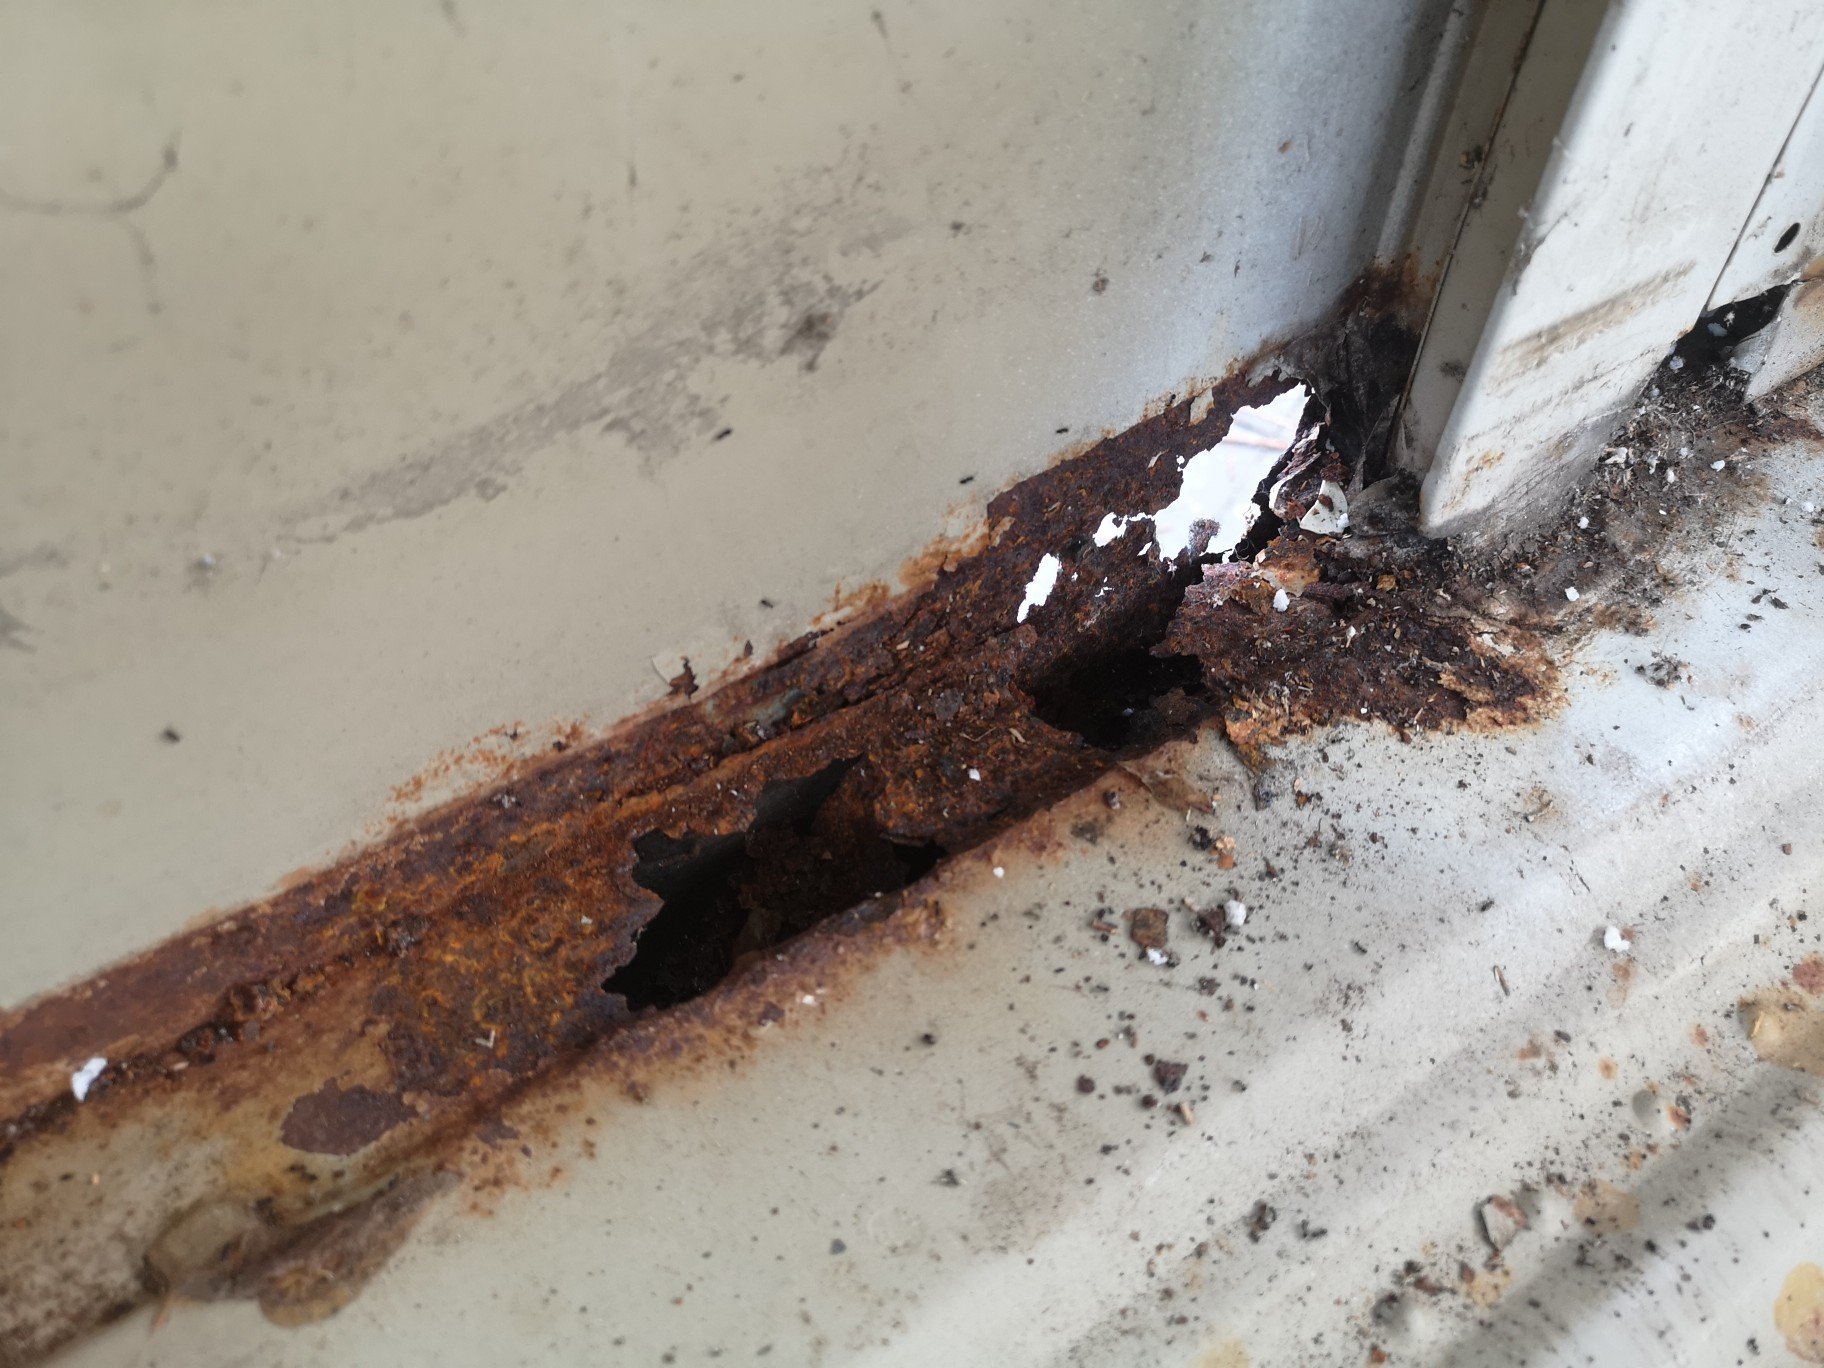
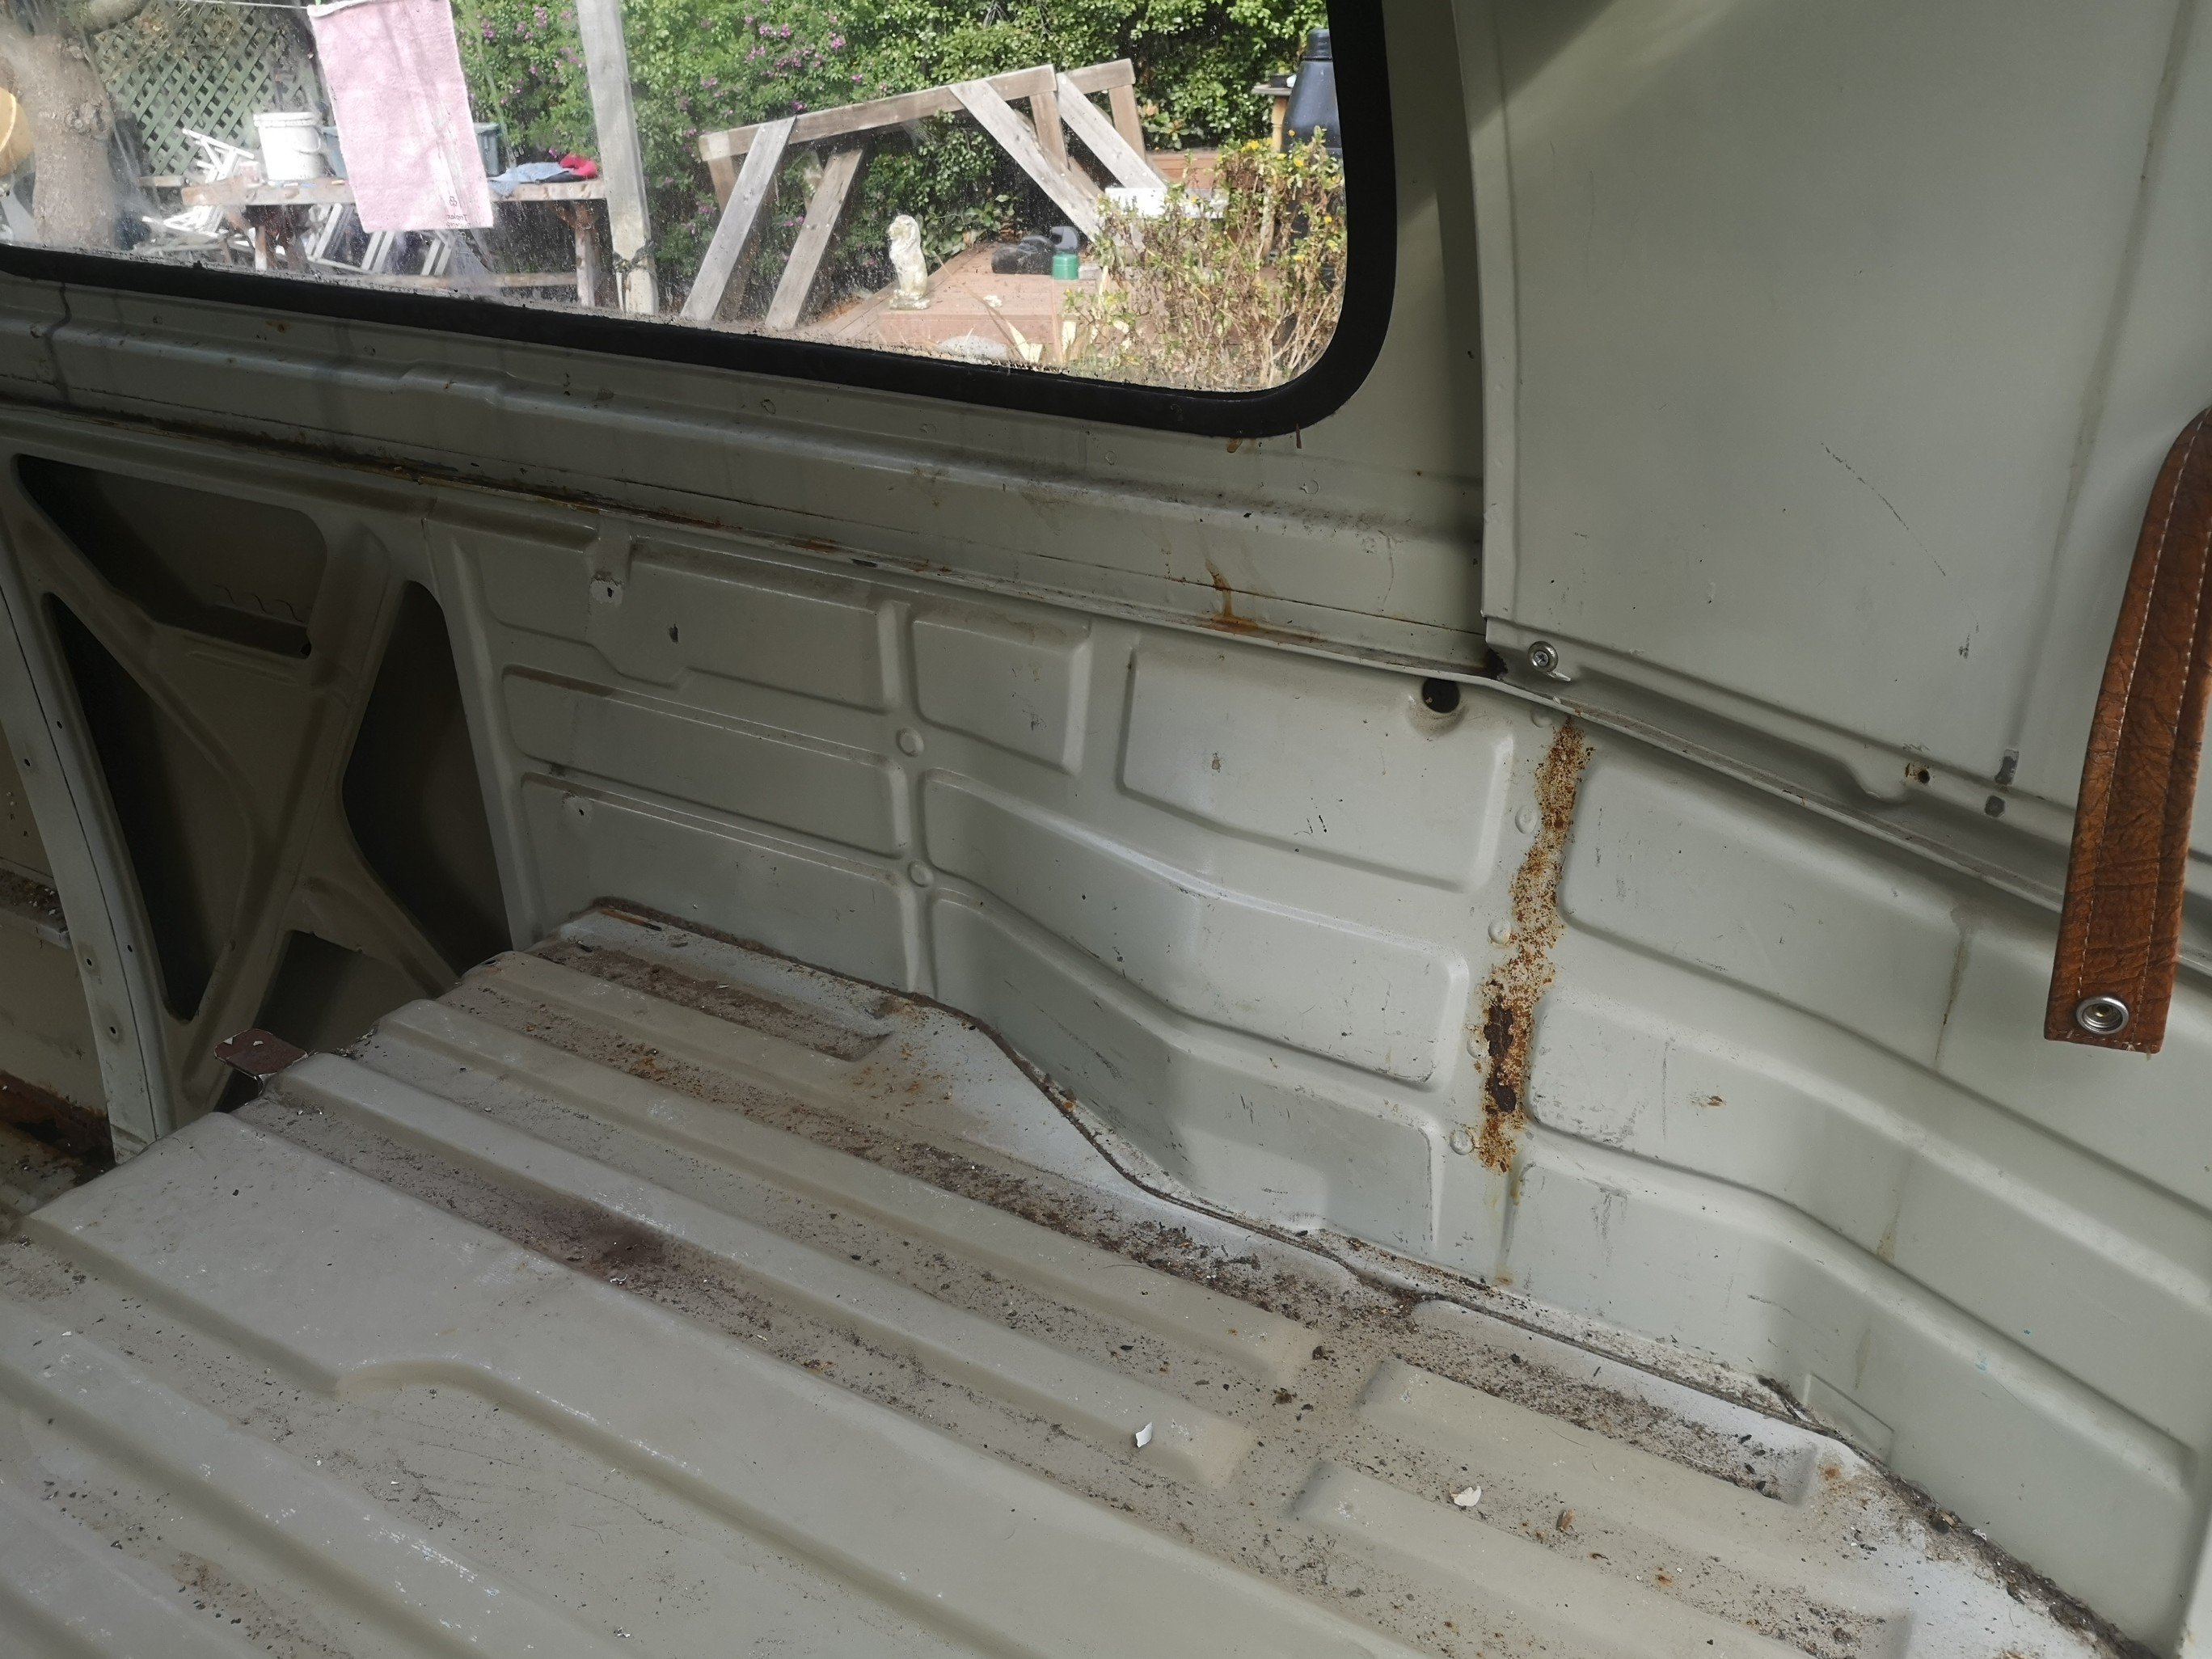
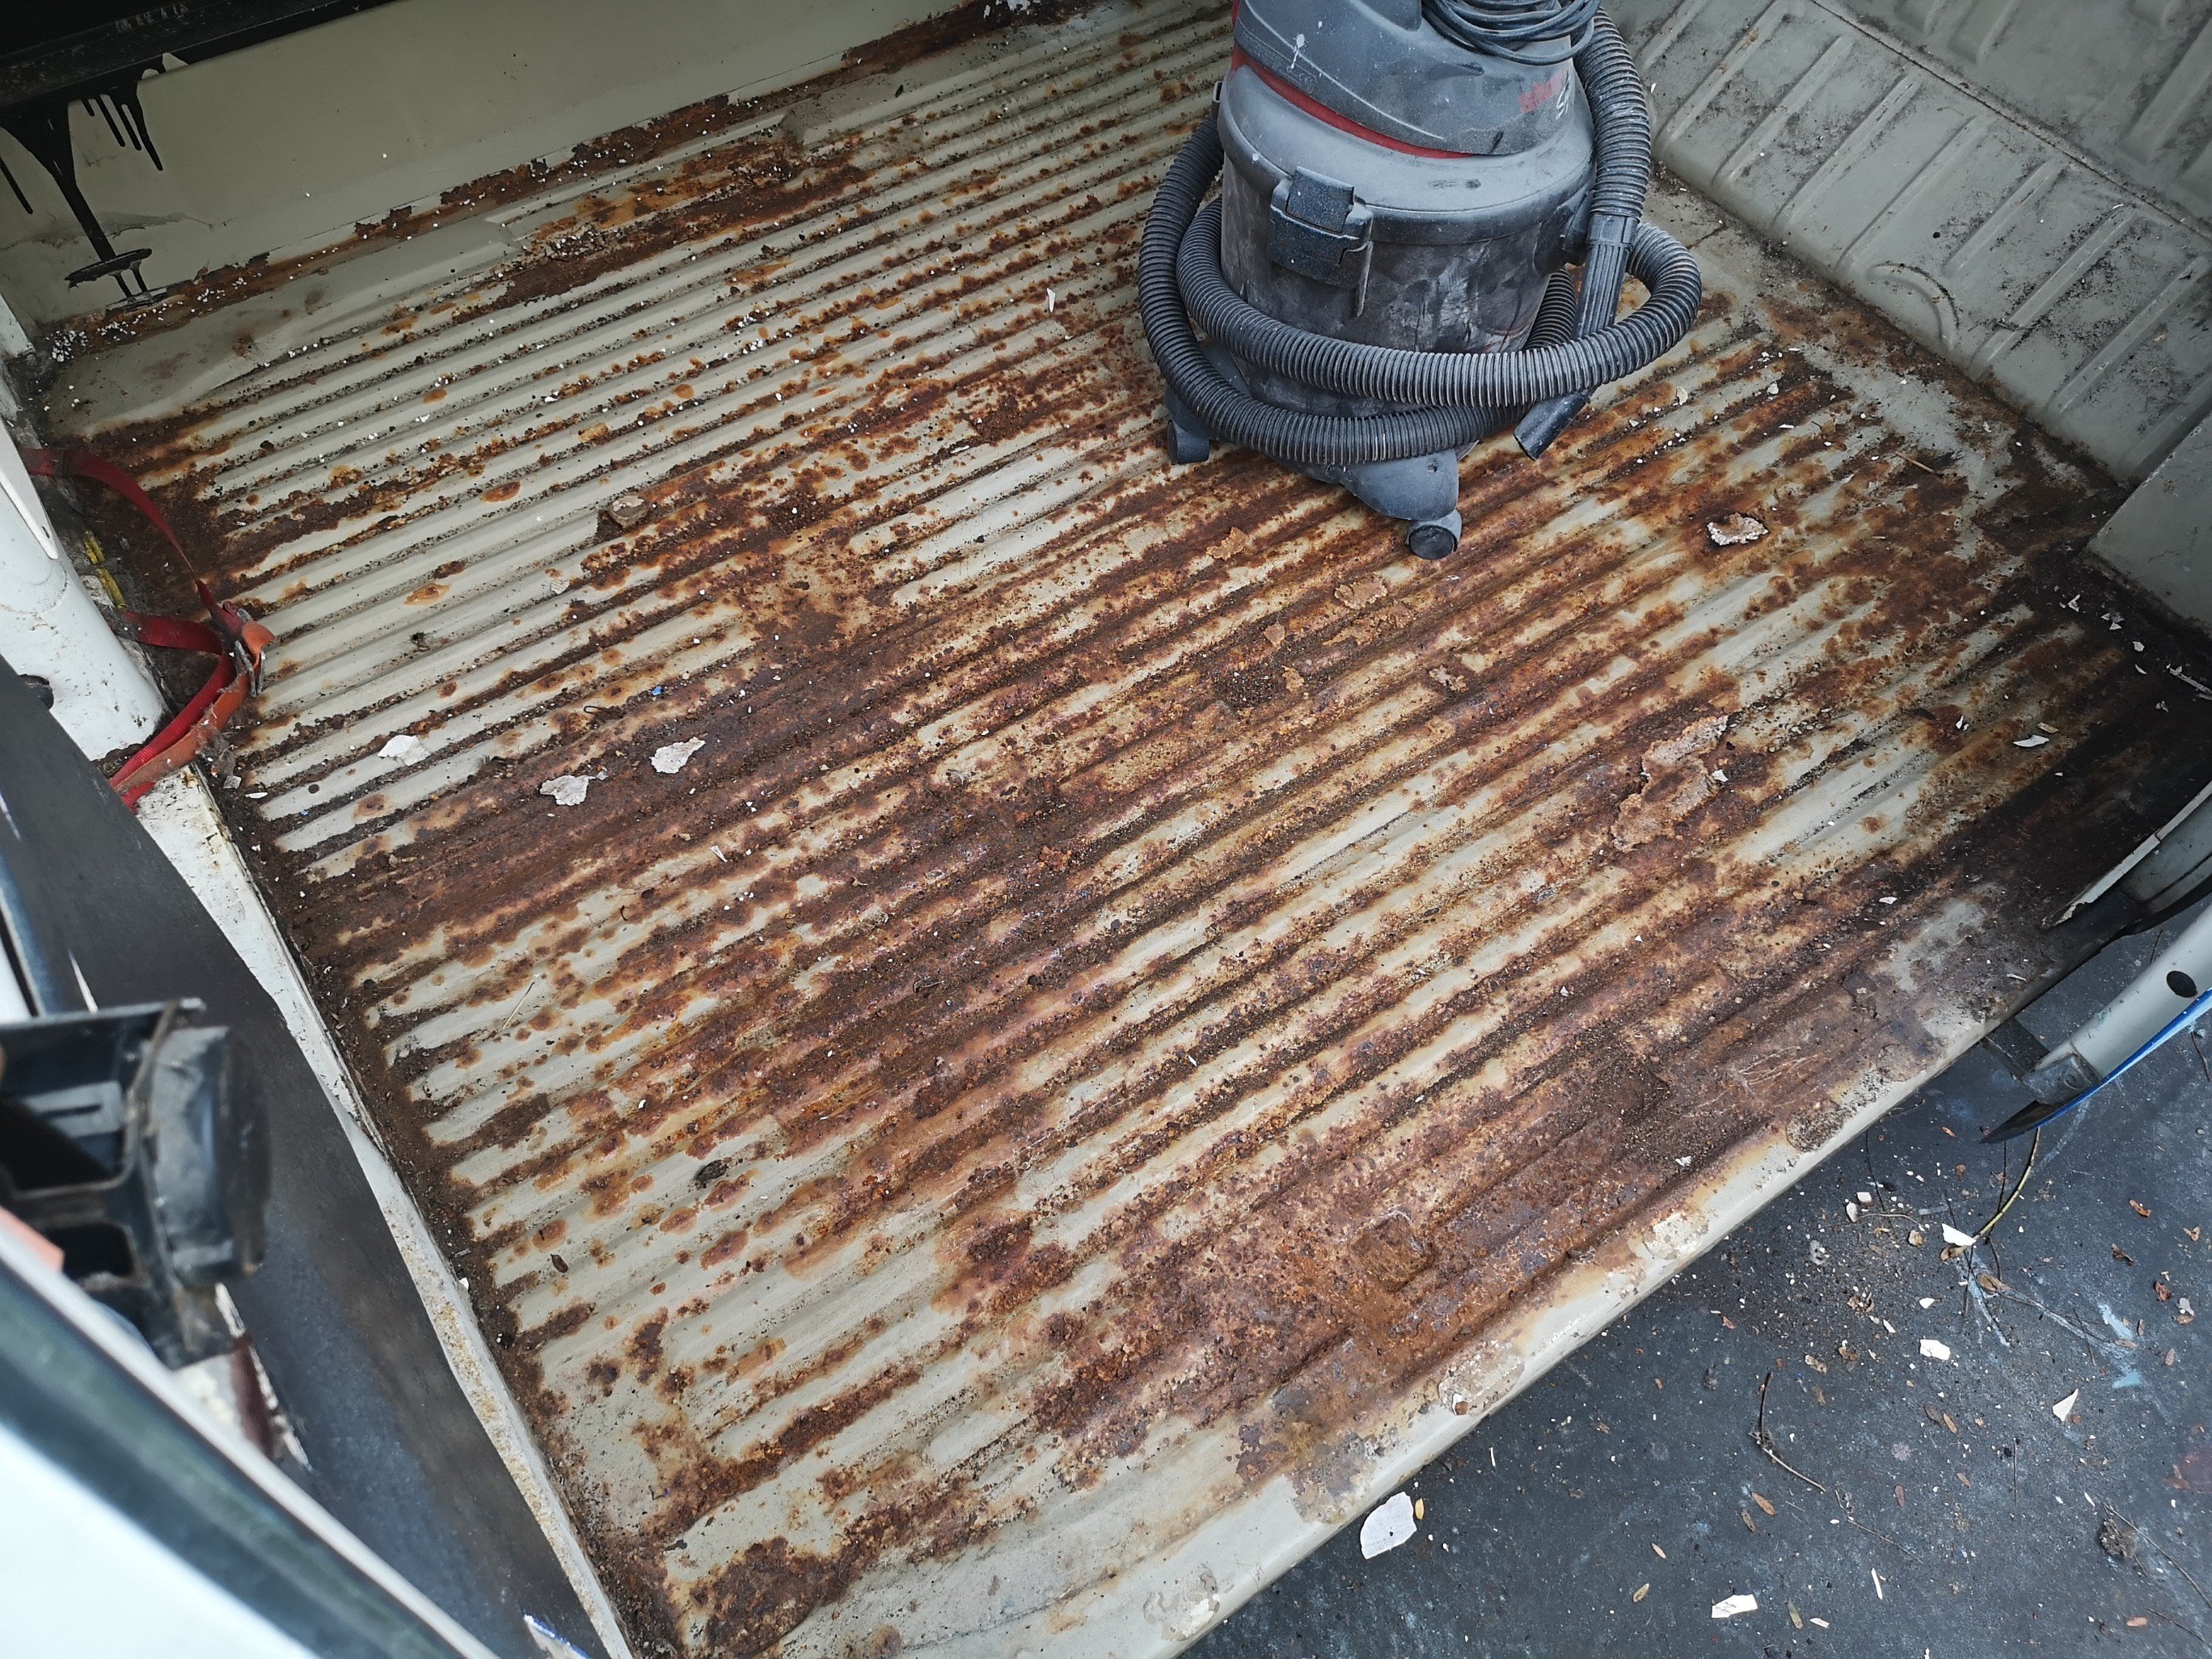
Pic dump..... Window seals have been leaking pretty much everywhere, Although I think this bit of rust is front the vent.. I think this floor has been rusting for a few years before it was parked up, its spent a long time outside in Brighton.
2 points
-
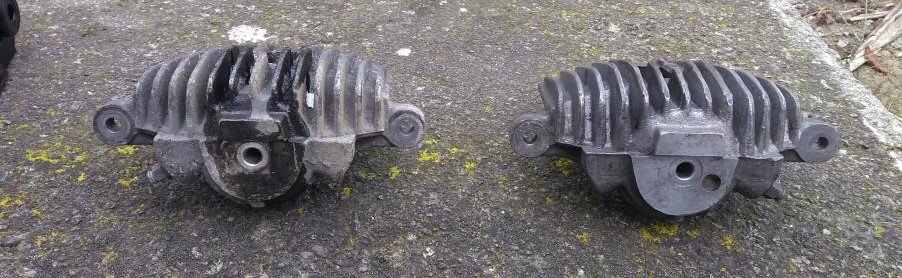
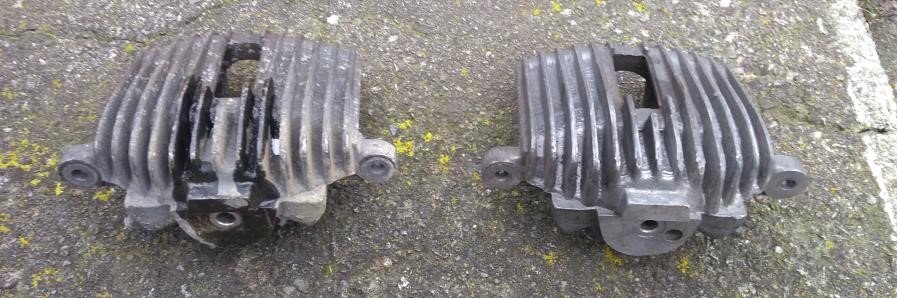
Spent the morning cleaning up the last couple bits to put the subframe together, had the sexy @Steelies and his good lady Ms Steelies call in and say hi, then @LoveChild made a surprise visit soon after. Bloody nice of y'all. Decided I need a bunch of gold passivated bolts to make it all look pretty so compiled the bolts I need to buy and hopefully I can find them all this week. Anyhow after doing all those bits and pieces I got onto the bit I was not looking forward to which was to clean up the shitty looking brake calipers and mounts. Broke them down to the individual components and proceeded to wire brush the living shit out of them. I was going to vapour blast them but I'm happy with the outcome especially at the low low cost of 90 minutes of elbow grease and this before and after doesn't really do the justice of how much nicer they look now. So anyhow after a morning of filth and grime, I went to Ms Steelies coffee shop and rewarded myself with the finest coffee in Wellington (Coolsville in Hataitai for those who care) and currently kicking back in my tracksuit pants and hoodie in front of the heat-pump pretending its an open fire. Enjoying a windless but brisk Wellington winter afternoon listening to podcasts with my pussy giving me the stink eye. Your pal, Dave
2 points
-
Took longer than i hoped, but job done both sides.
2 points
-
I managed to fit 3 of the new tyres last night. Stupidly I left the 4th wheel at home as I had separated it from the rest to sort tyre sizes a while ago. So I bolted on one of the originals just to be able to put it on the ground. The GN tyres look pretty lo-pro and sporty on it, but I don't think they look kosher enough for when it comes to on-road-inspection time.
2 points
-
Lower hinge area is a double skinned piece Inner reinforcing section first Then the outer part
2 points
-
One year later...... So shortly after my post I packed my bags (including a JAP crankcase) and hopped on a plane to the Uk on the big OE. I’m working in the vintage car world over here and have had some pretty amazing experiences. After spending so many hours looking at pics of cyclecars and the like it’s pretty neat to be at the events where they are running and get a real feel for them. One of the coolest trips I have been on was in Mark Walkers GN Thunderbug. A 4.2 litre Vtwin in a light weight chain drive chassis is definitely a good formula.... Some pics from the last year... Have many more to put up. With so many good vintage car events over here i need to get a car built so have been working flat out on the engine after hours and have made a fair bit of progress Cases bolted together and set up on the rotary table with a mandrel through the drive side bearing boss. Using the boring head to fly cut the decks Drilling and boring the cyl stud and follower holes prior to tapping 3/4“ 20 tpi cycle thread, mmmm lovely..... After all holes drilled and tapped and cyl base spigots bored Next up barrels2 points
-
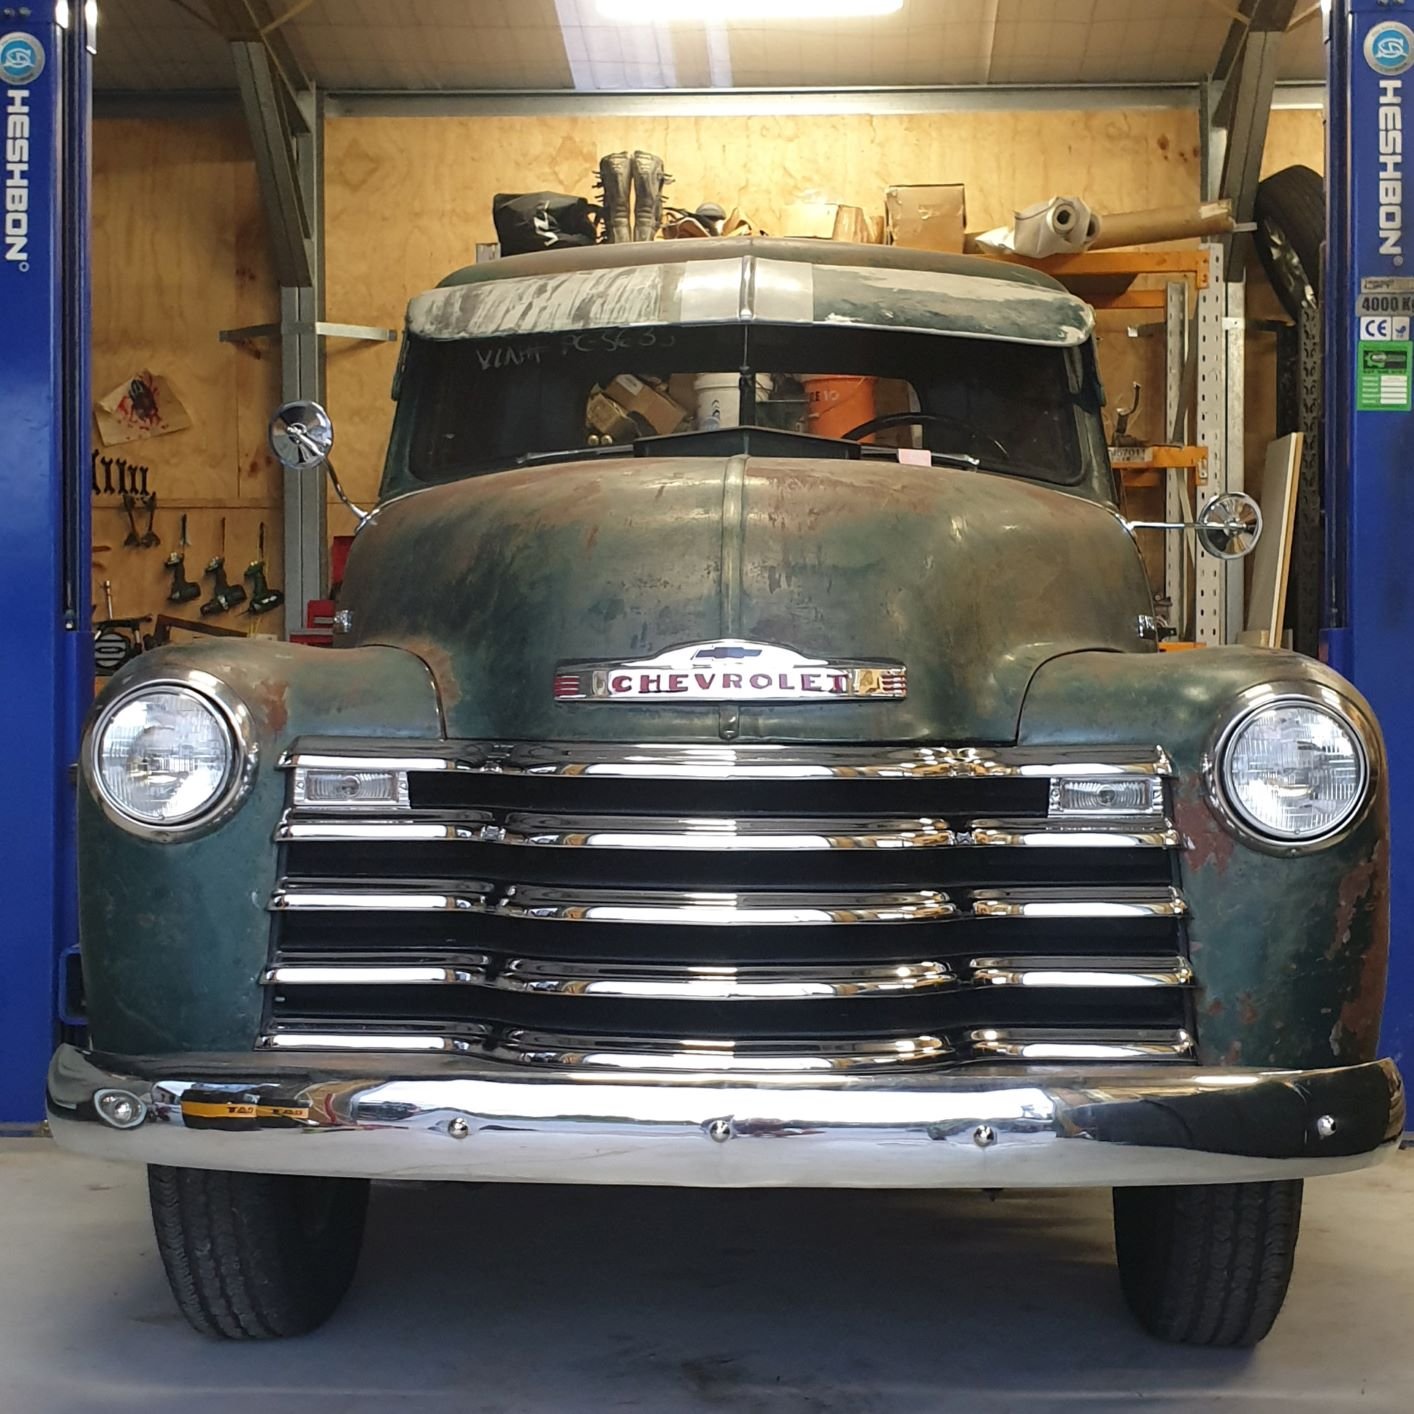
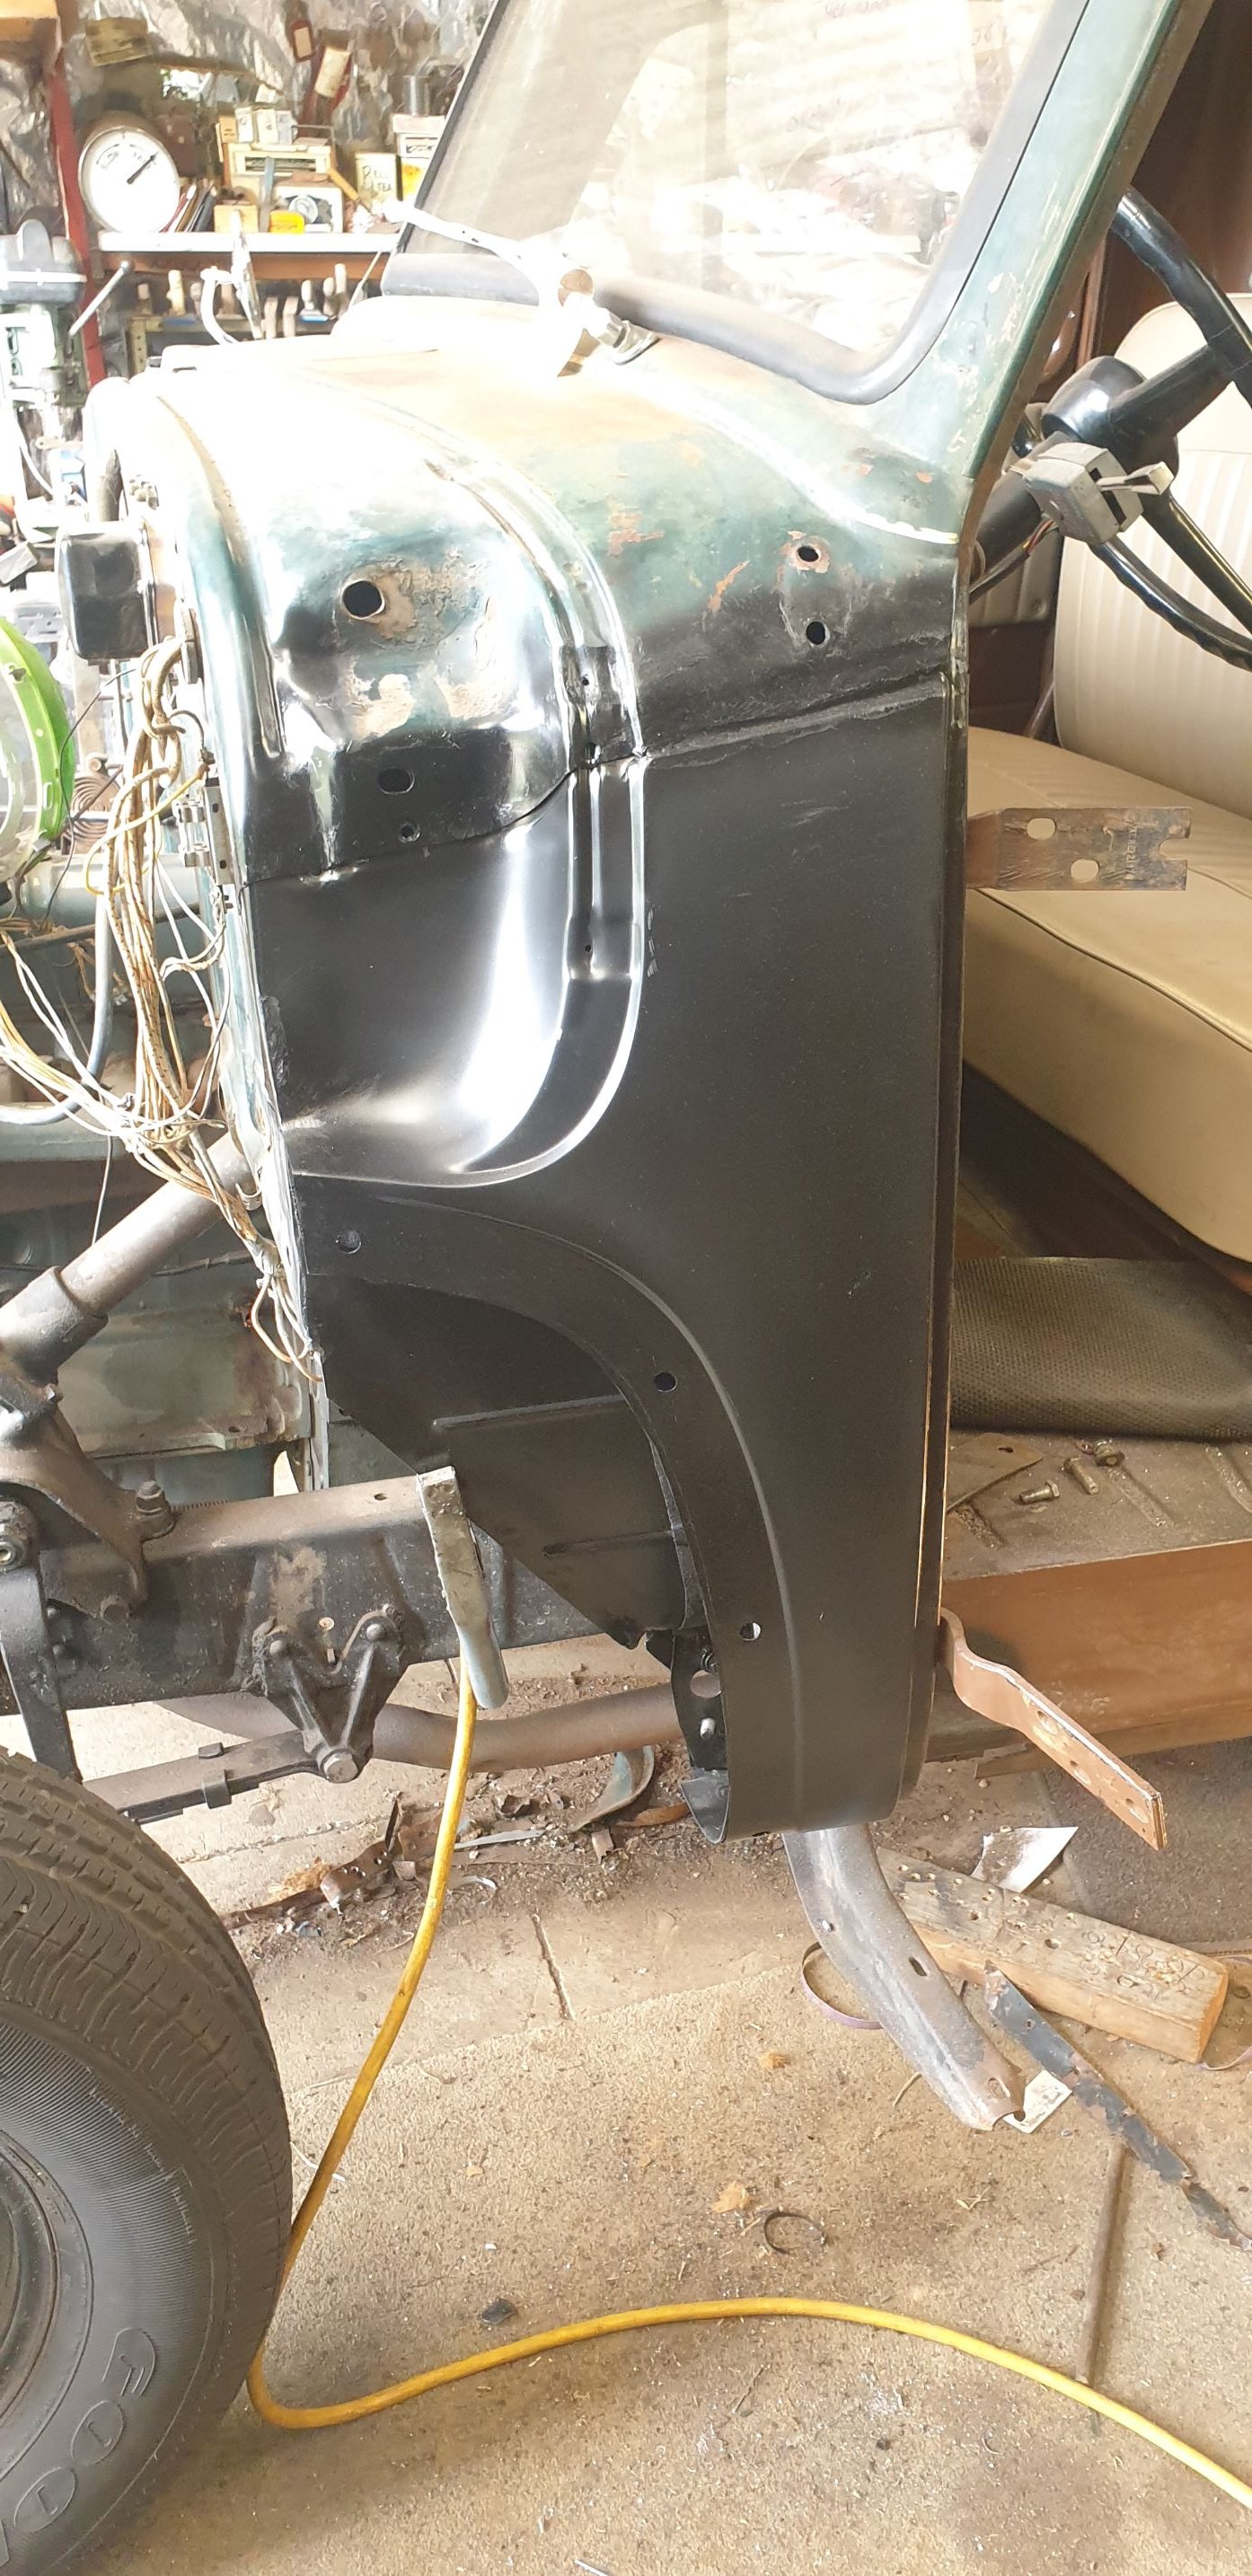
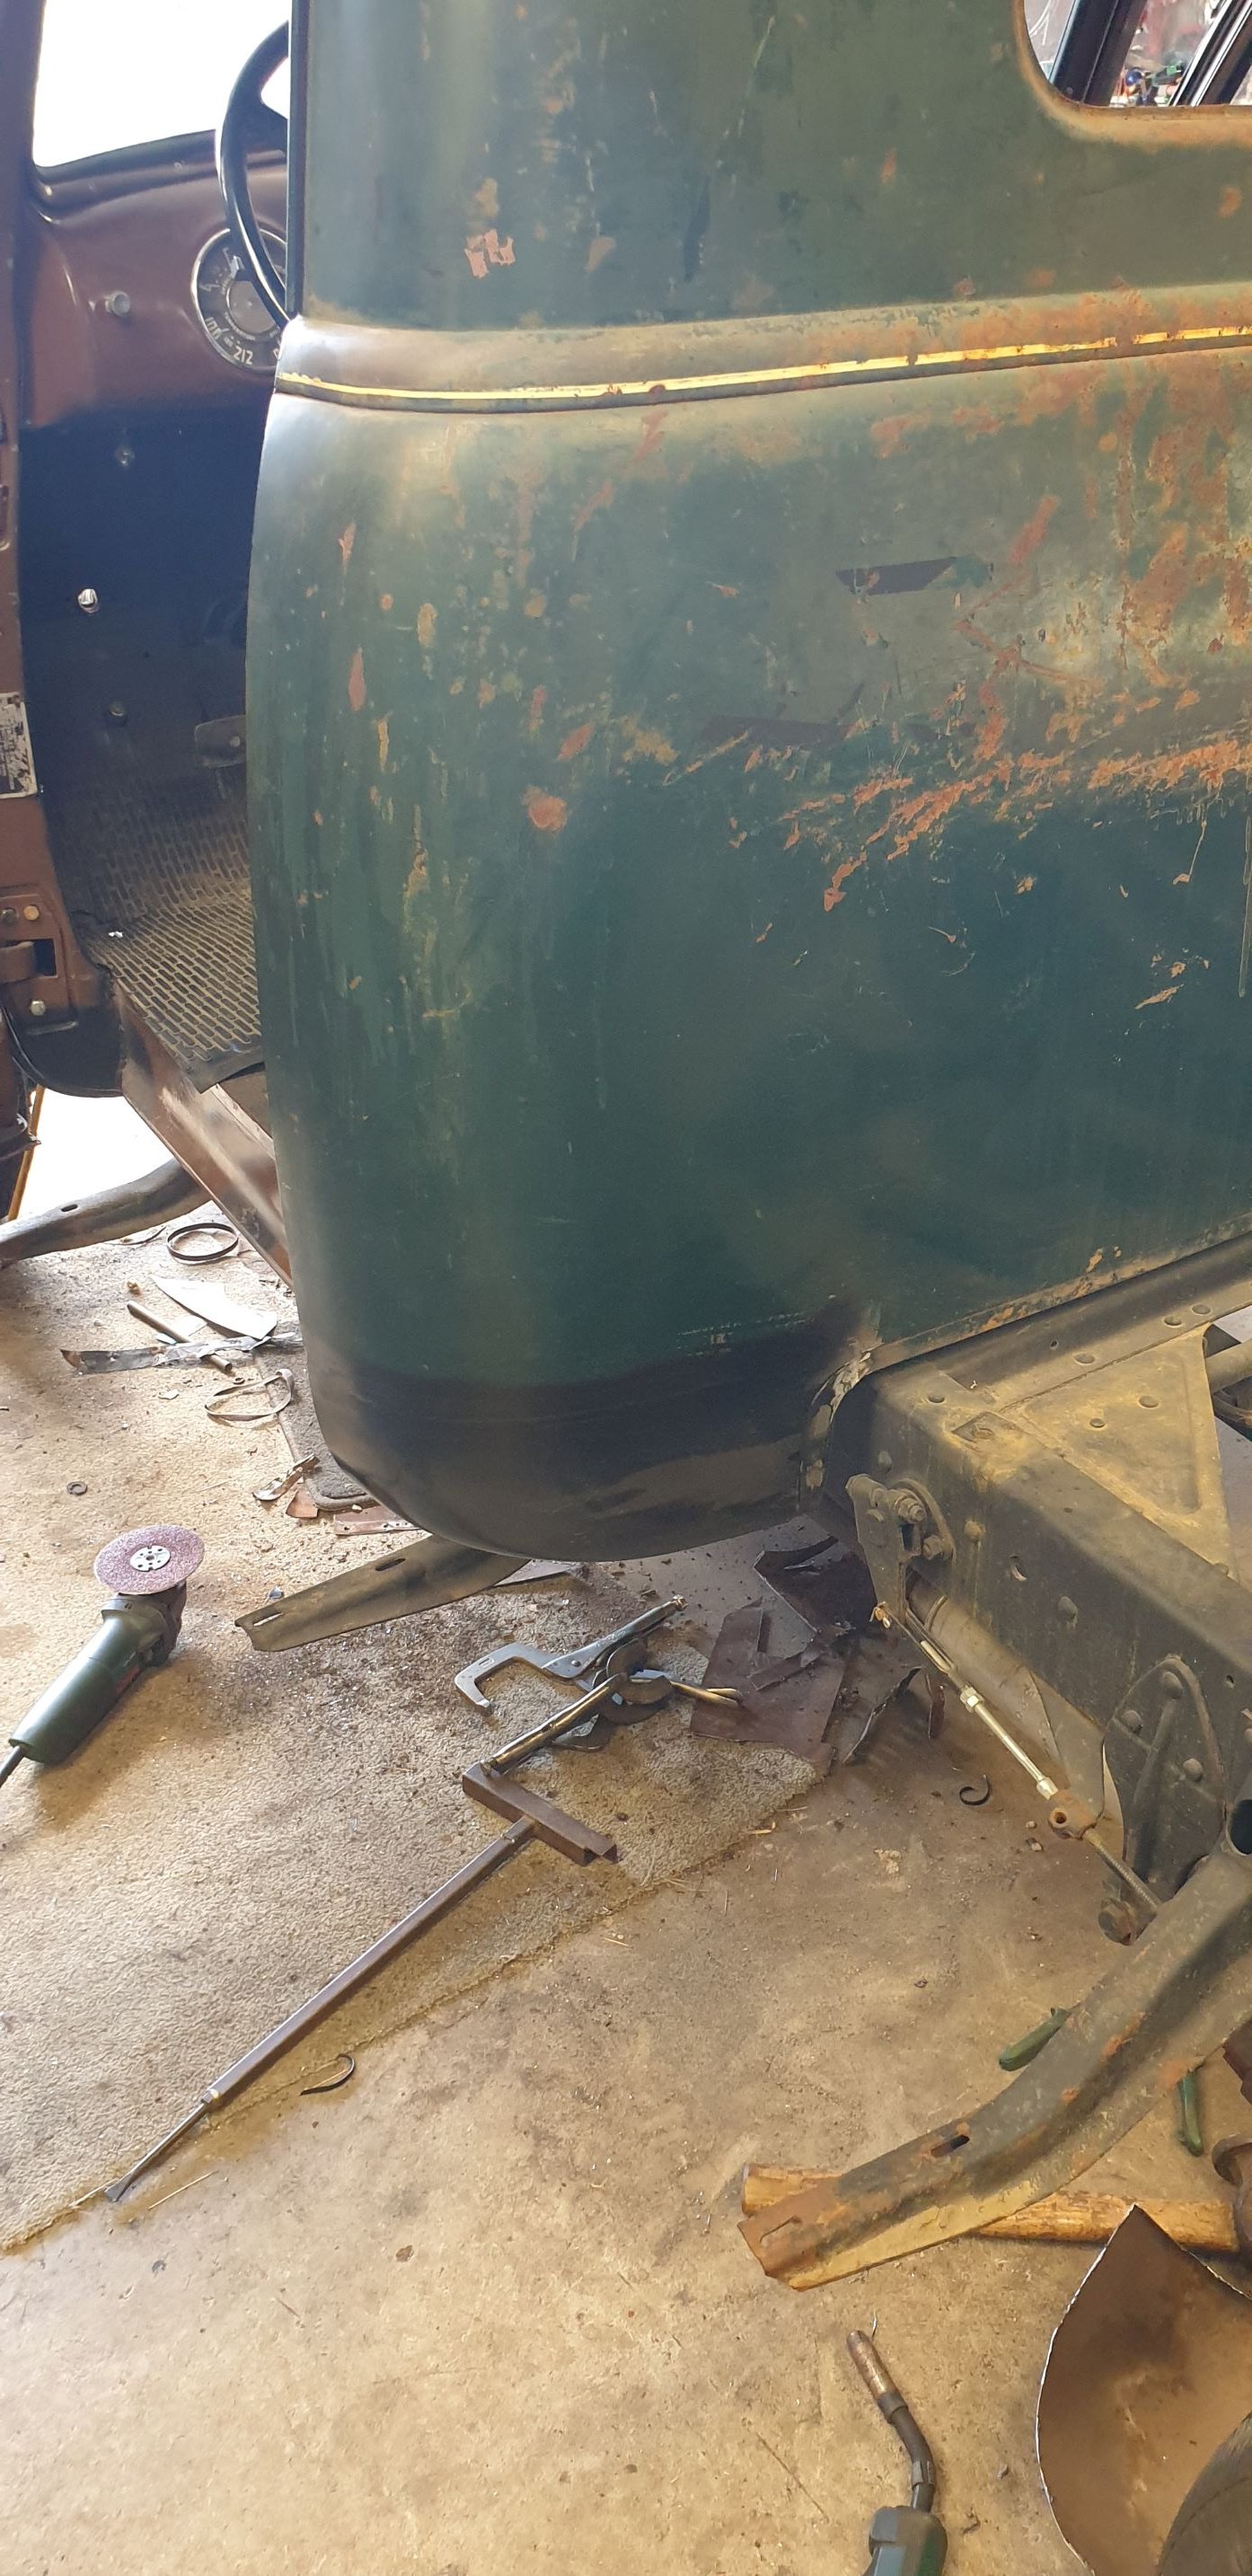
Now we upto date at last night. Got the bumper back on and the front end together with the lights on. Found a Fulton Visor from the states which was already green/patinad so matches the truck quite well i think! Got that on test fitted. Thats all the updates for now But with lockdown for the next month im planning on getting it all back together and to a stage i can take it for a VIN once we are allowed out of the house.
2 points
-
Managed to buy an original set of pistons and rods on ebay. Look in perfectly good condition to me! Good enough to use to get things going. Theyve been machined out for shell bearings already.2 points
-
Another project!! loooong whistle boys here she is the stock agent special, the Country Calendar theme humming, fonterra payout whinging, river polluting, gate closing pinnacle of agricultural motorcycling. This bike was actually my dads, he purchased it in 1976 and delivered newspapers for the wanganui chronicle, and general pesting round the Rangitikei region. He gave it to his pal to look after for a while when we moved house many moons ago, ol mate wants it gone now so i have come to snap it up. According to jim the bike ran when parked, however that was many haircuts ago. Its sat outside for a very long time, The motor is seized solid, so it will need a proper birthday once we get to that point. Today i started dismantling it and taking stock of what it needs... pretty much one of everything. Taking it apart had its moments; plenty of snapped bolts, rounded out screw heads and a lot of rust. I have a lot of challenges ahead of me; the biggest one being finding a replacement tank. Ive seen some rooted tanks in my time, but this one is really up there... Yea that chrome will come up mint maaaaaaaaayte F Dagg Automotive and Farm Machinery Limited So this is where im up to. Once i can rig up a suitable stand for it i will proceed with final strip down. The fork uppers are fucked too so im thinking of swapping a complete Mudbug front end onto it. Parts in general are proving to be a bit tricky to track down for these too, ive found that these are very simila to the TS125 of similar vintages, only slight styling differences, and the addition of the Hi-lo gear box on the TC.1 point
-
How much of a sleeper is it?1 point
-
Will do next time I visit. It's not a small affair1 point
-
sounds good, my scooter goes and im keen on a burger1 point
-
yea fuckin sorted out the intercom/magnetic lock shit so we can look at you on camera before we ignore you. 2020-06-06_03-25-29 by sheepers, on Flickr 2020-06-06_03-25-20 by sheepers, on Flickr1 point
-
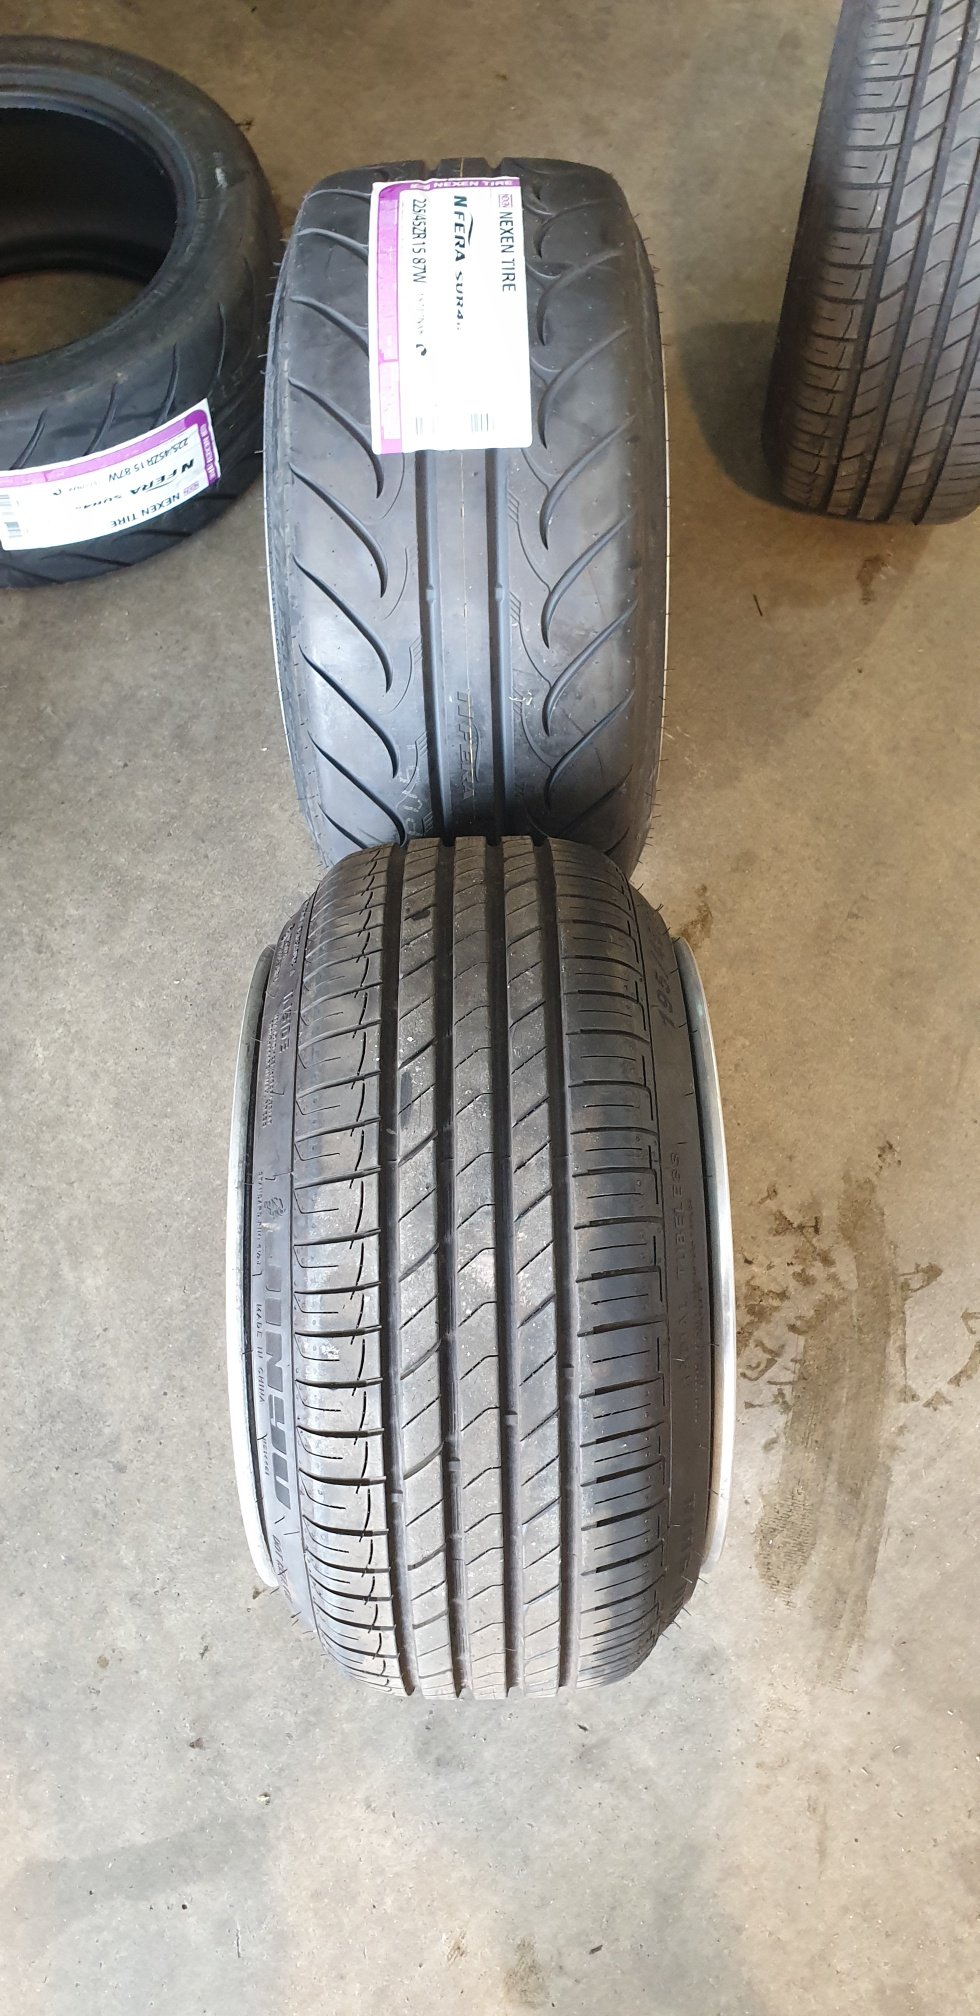
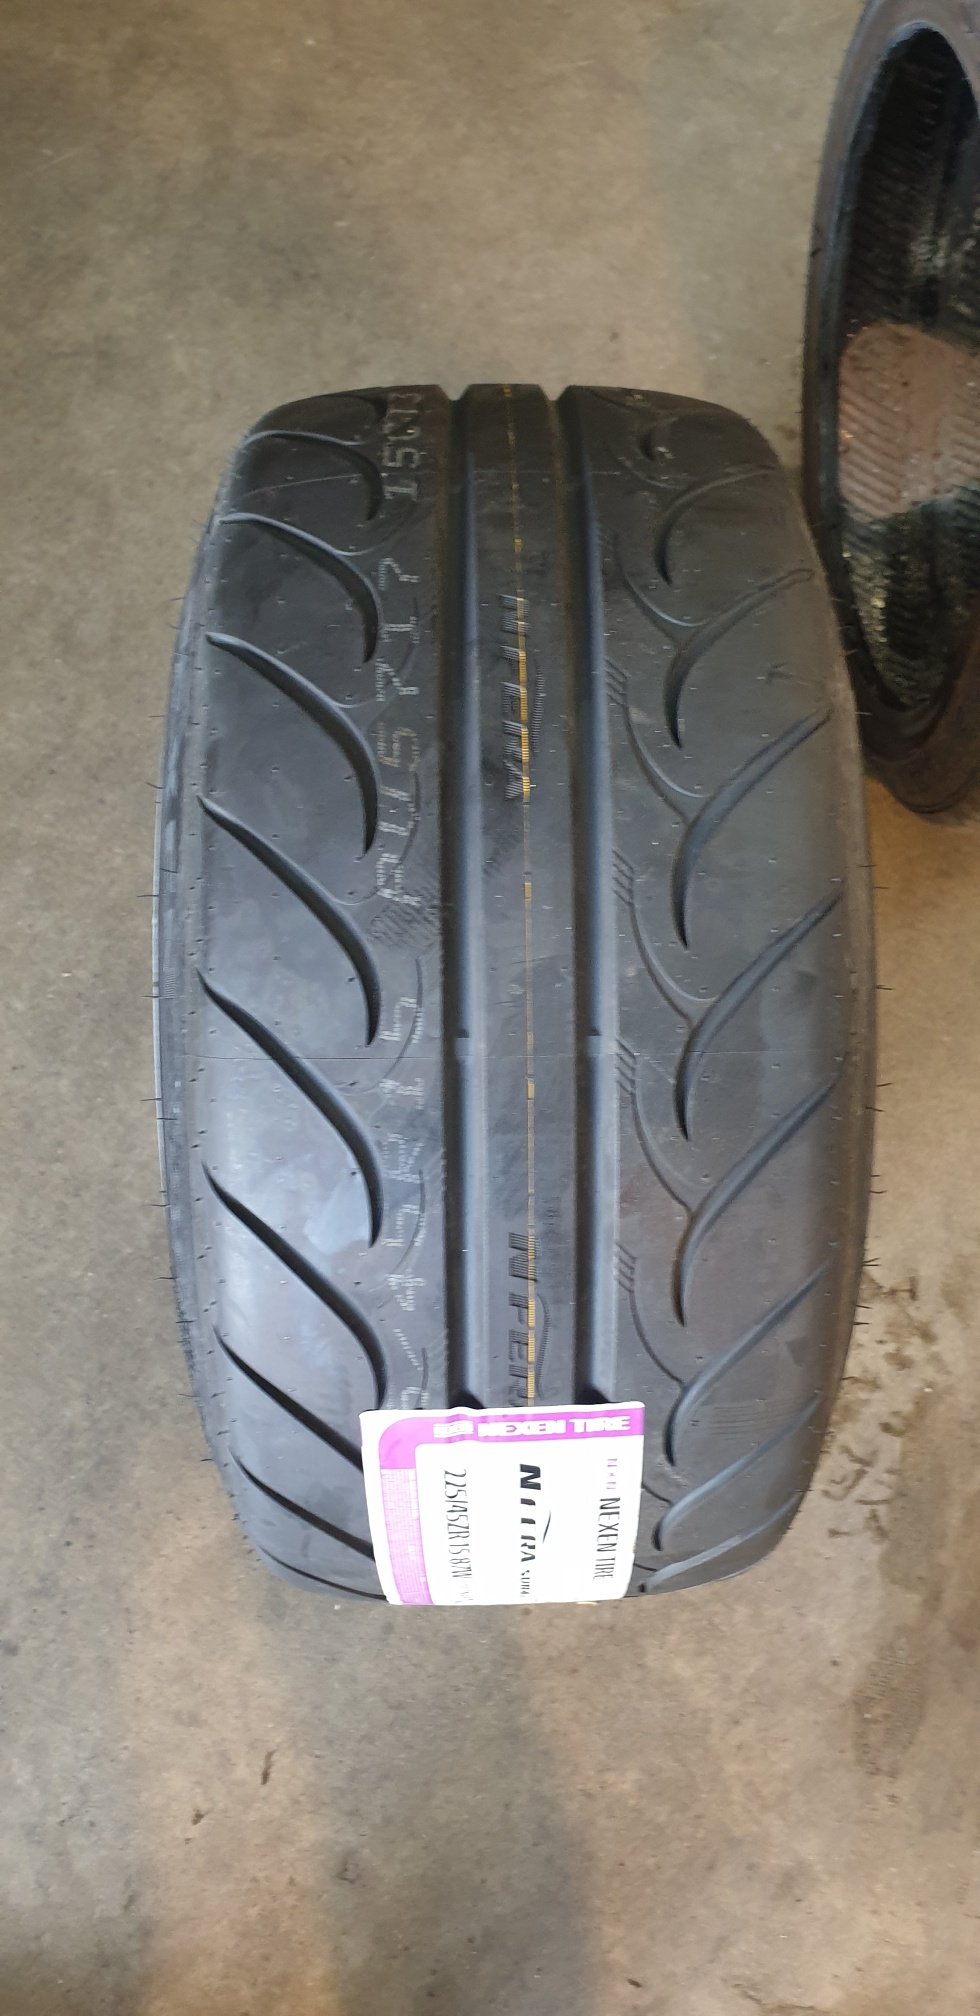
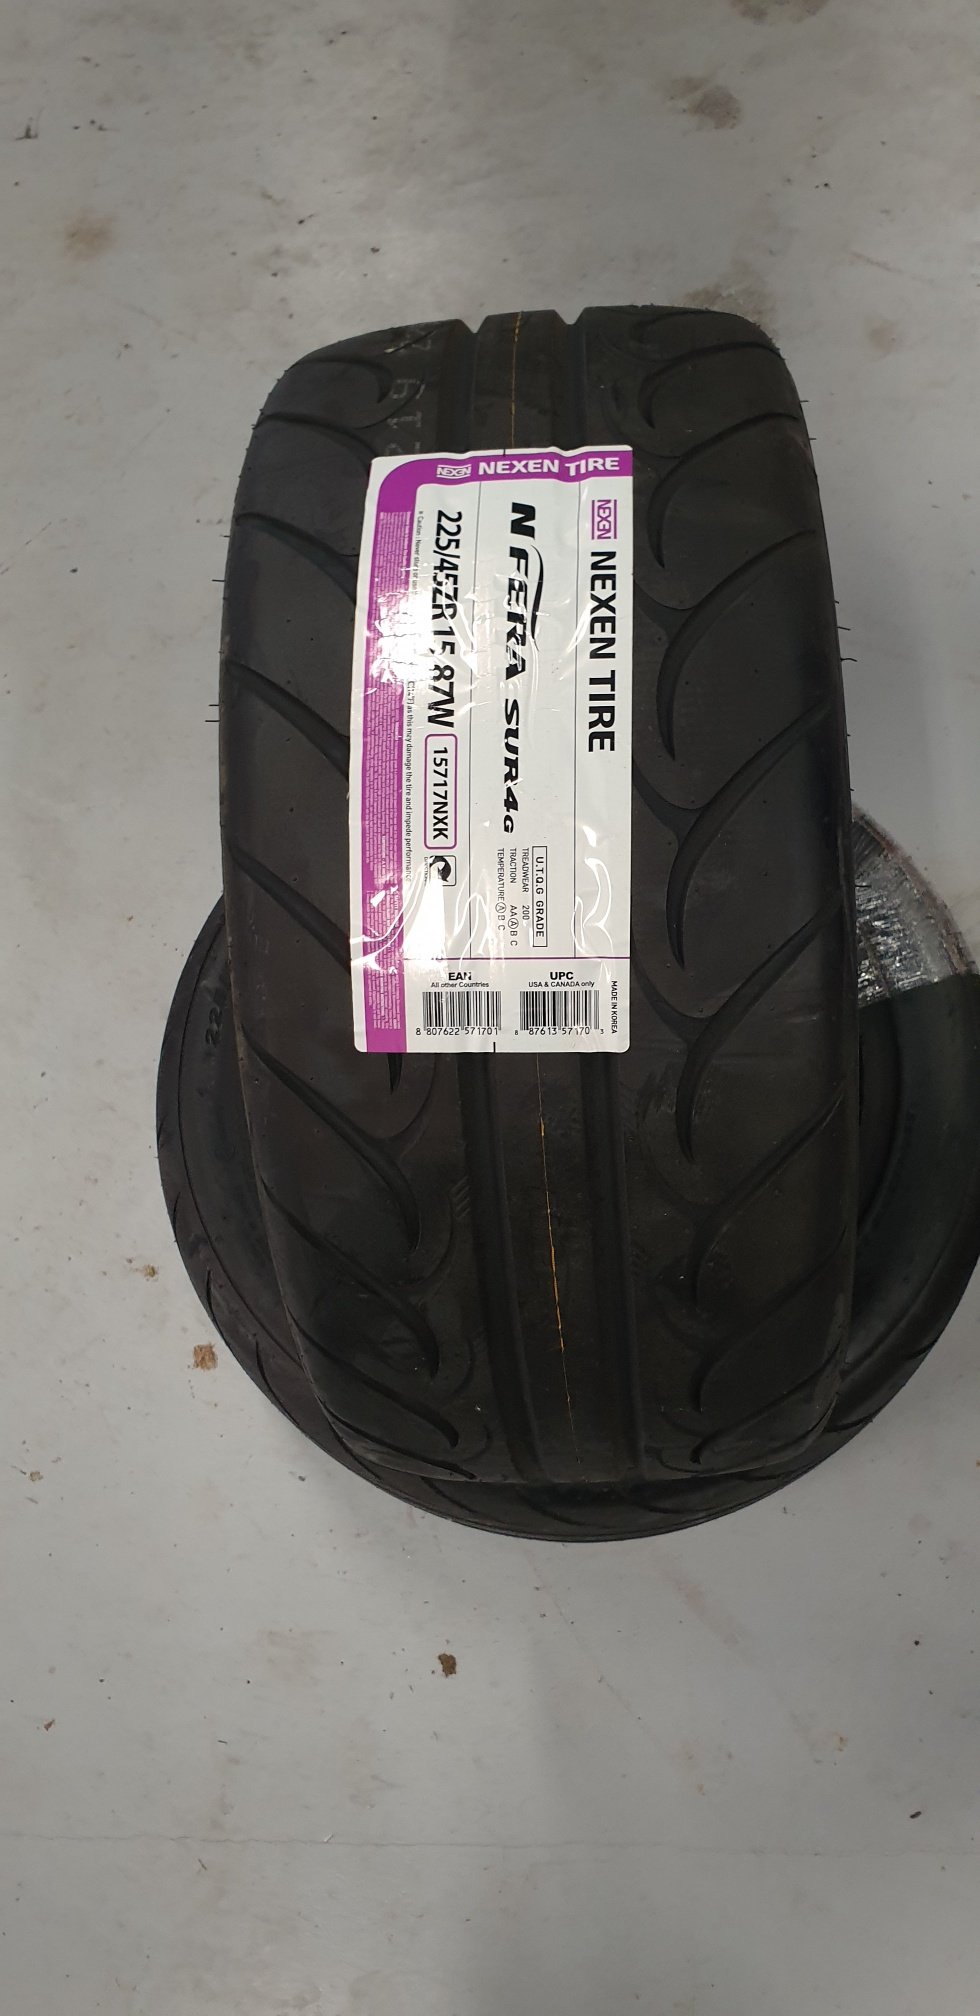
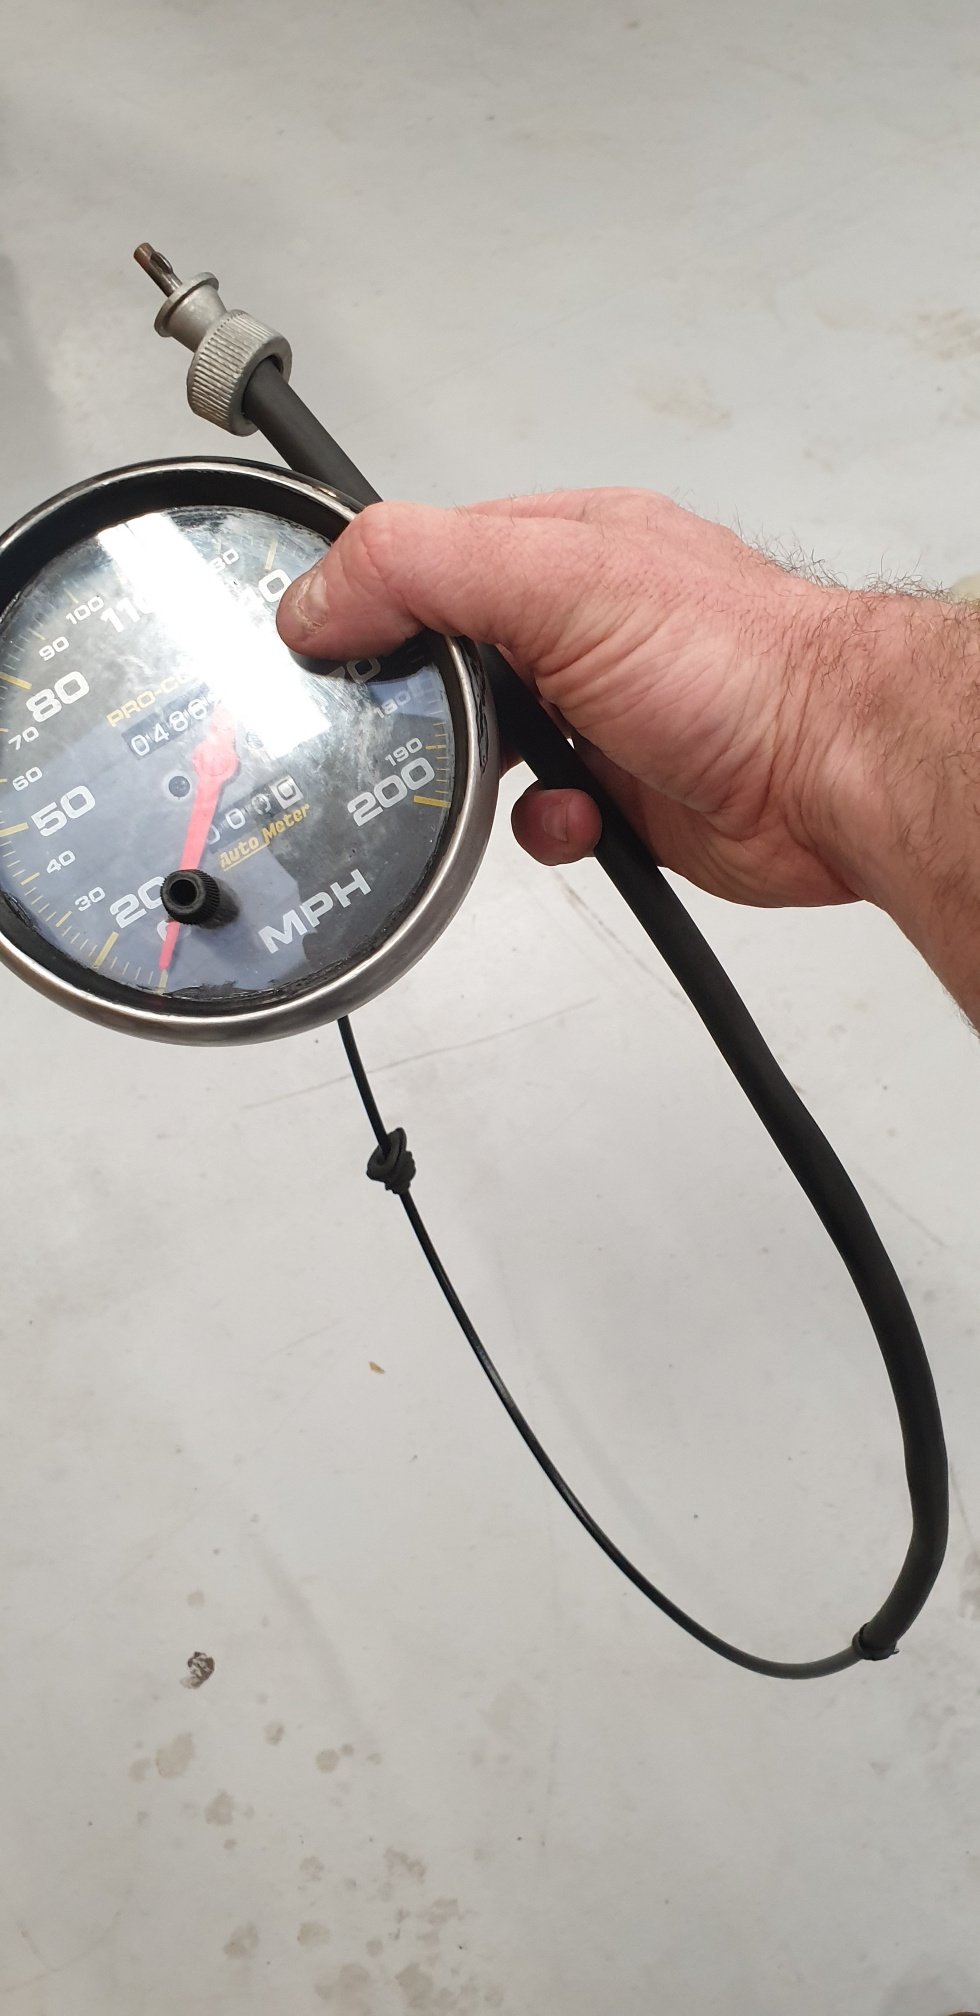
Havent done much in the last couple weeks been sorting the truck vin and other bits. Ordered some new tyres for the rear, Have gone with 225/45/R15 Nexen semis (best priced tyre in this size by a long way) to go on the 10" rim. Also was putting a new speedo cable into the truck and realised the chev factory gauge end fitting looked similar to the autometer speedo i had with no cable. Tested it and sure enough it did. Had a mazda cable to fit the s4 box so sent it all down to CBC in Christchurch who made me a new cable to suit which looks to work perfectly. Got to sort the last of the truck vin repairs this weekend then ill be back into this to get it sorted and rolling again.
1 point
-
Youngest has made a forge/furnace thing to melt beer cans. Forced draught courtesy of his mother's hairdryer. He needs a better crucible. The stainless steel jug wasn't quite up to the task. Check out jetret's experiments on youtube for more.1 point
-
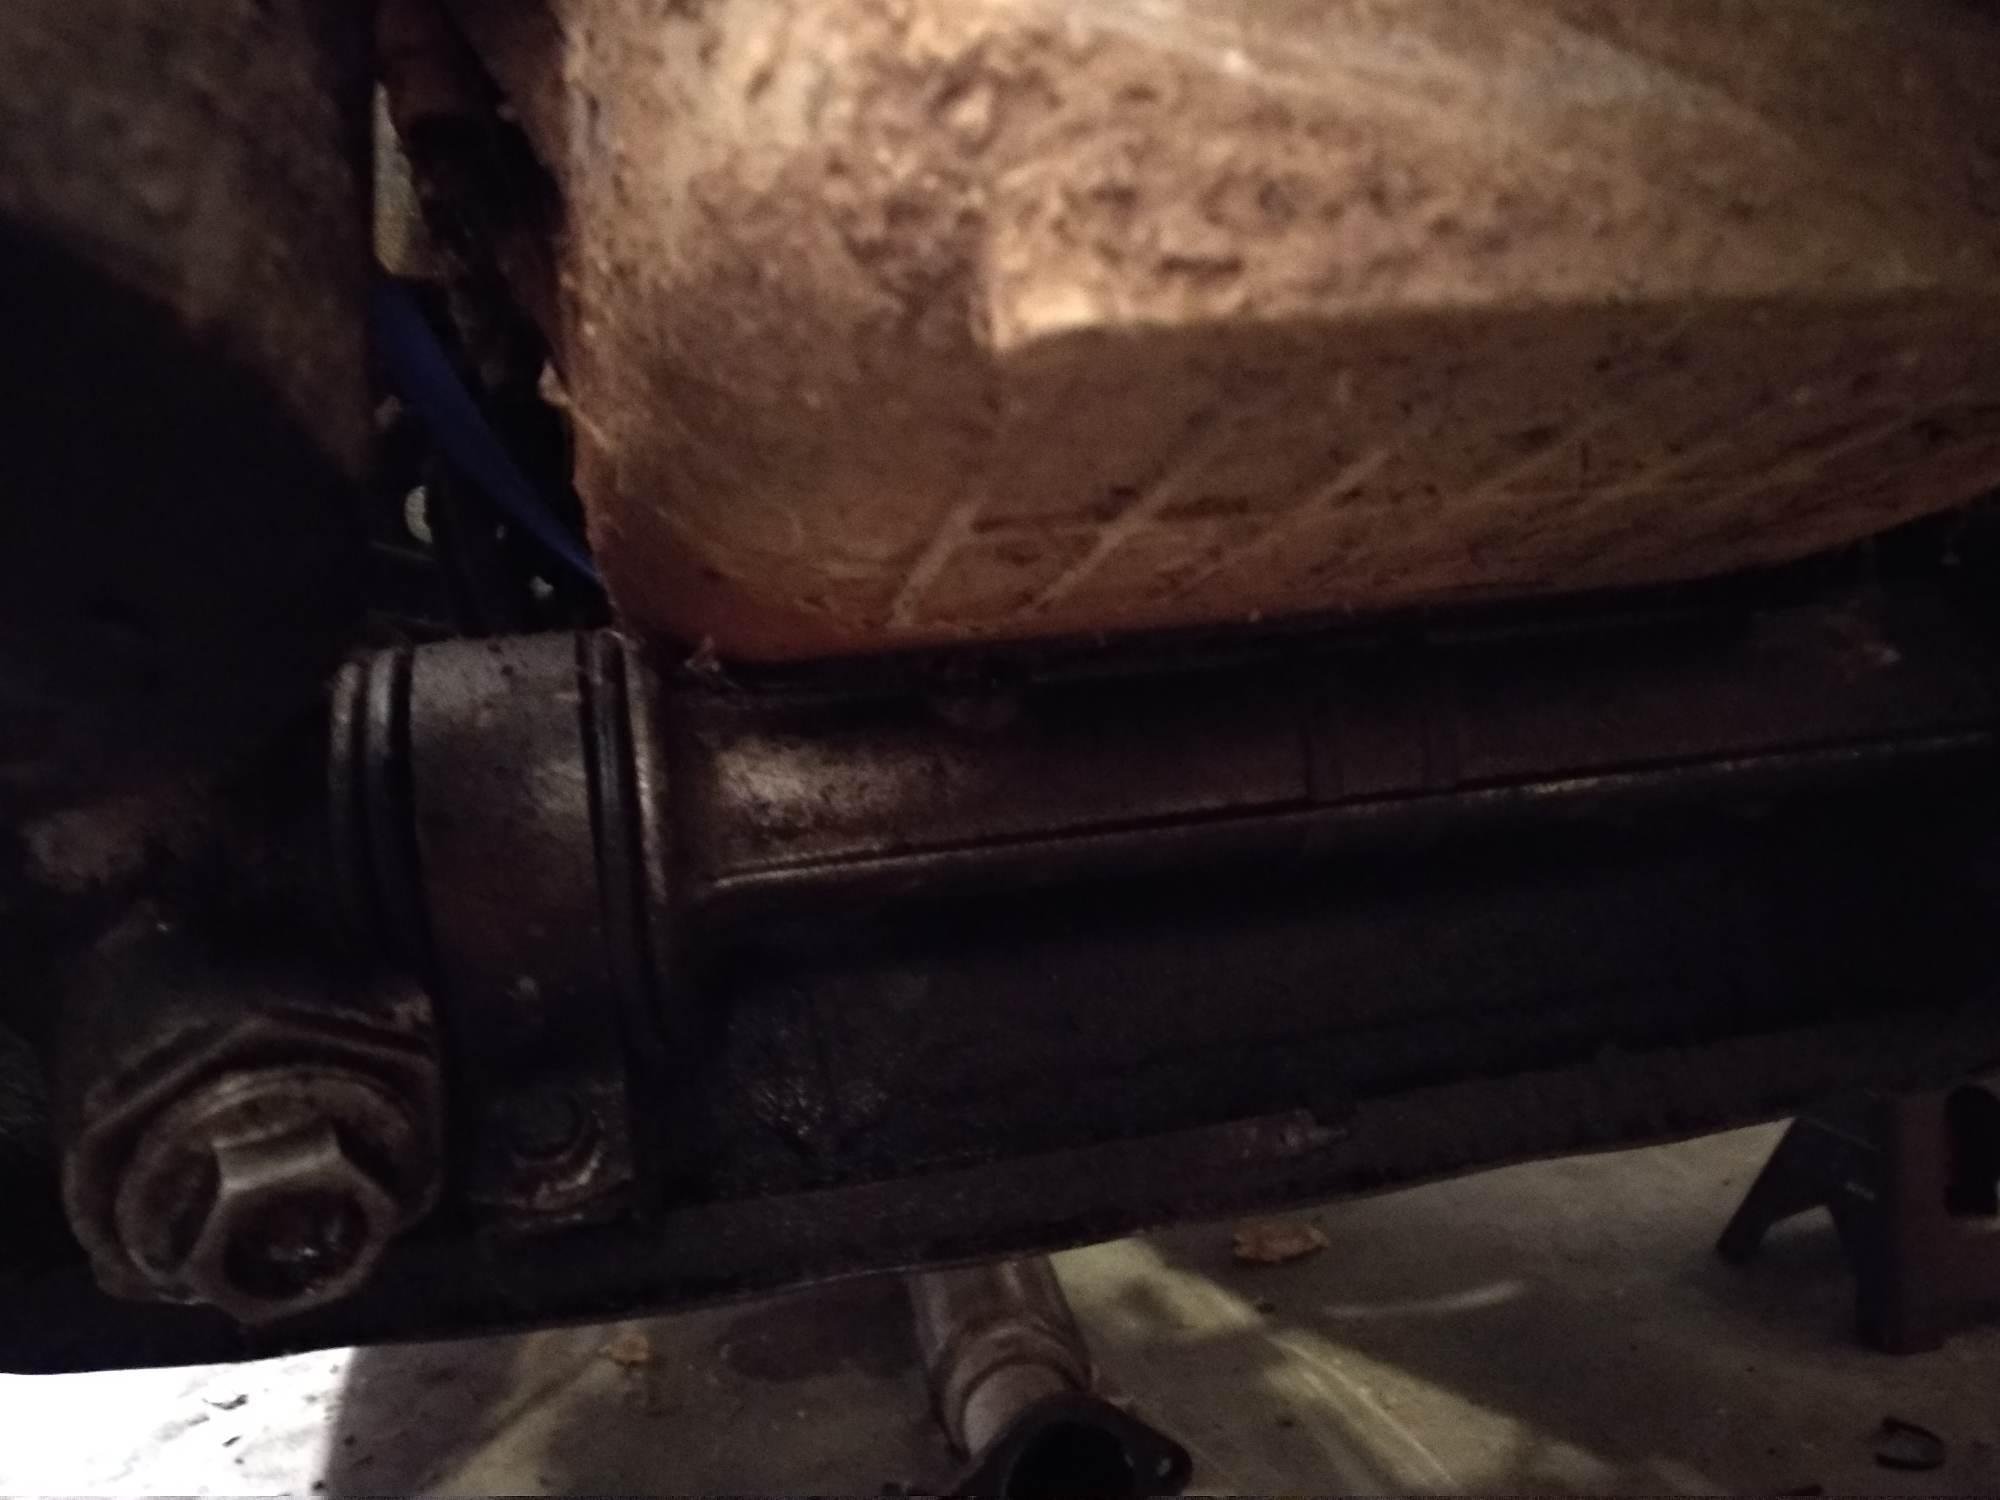
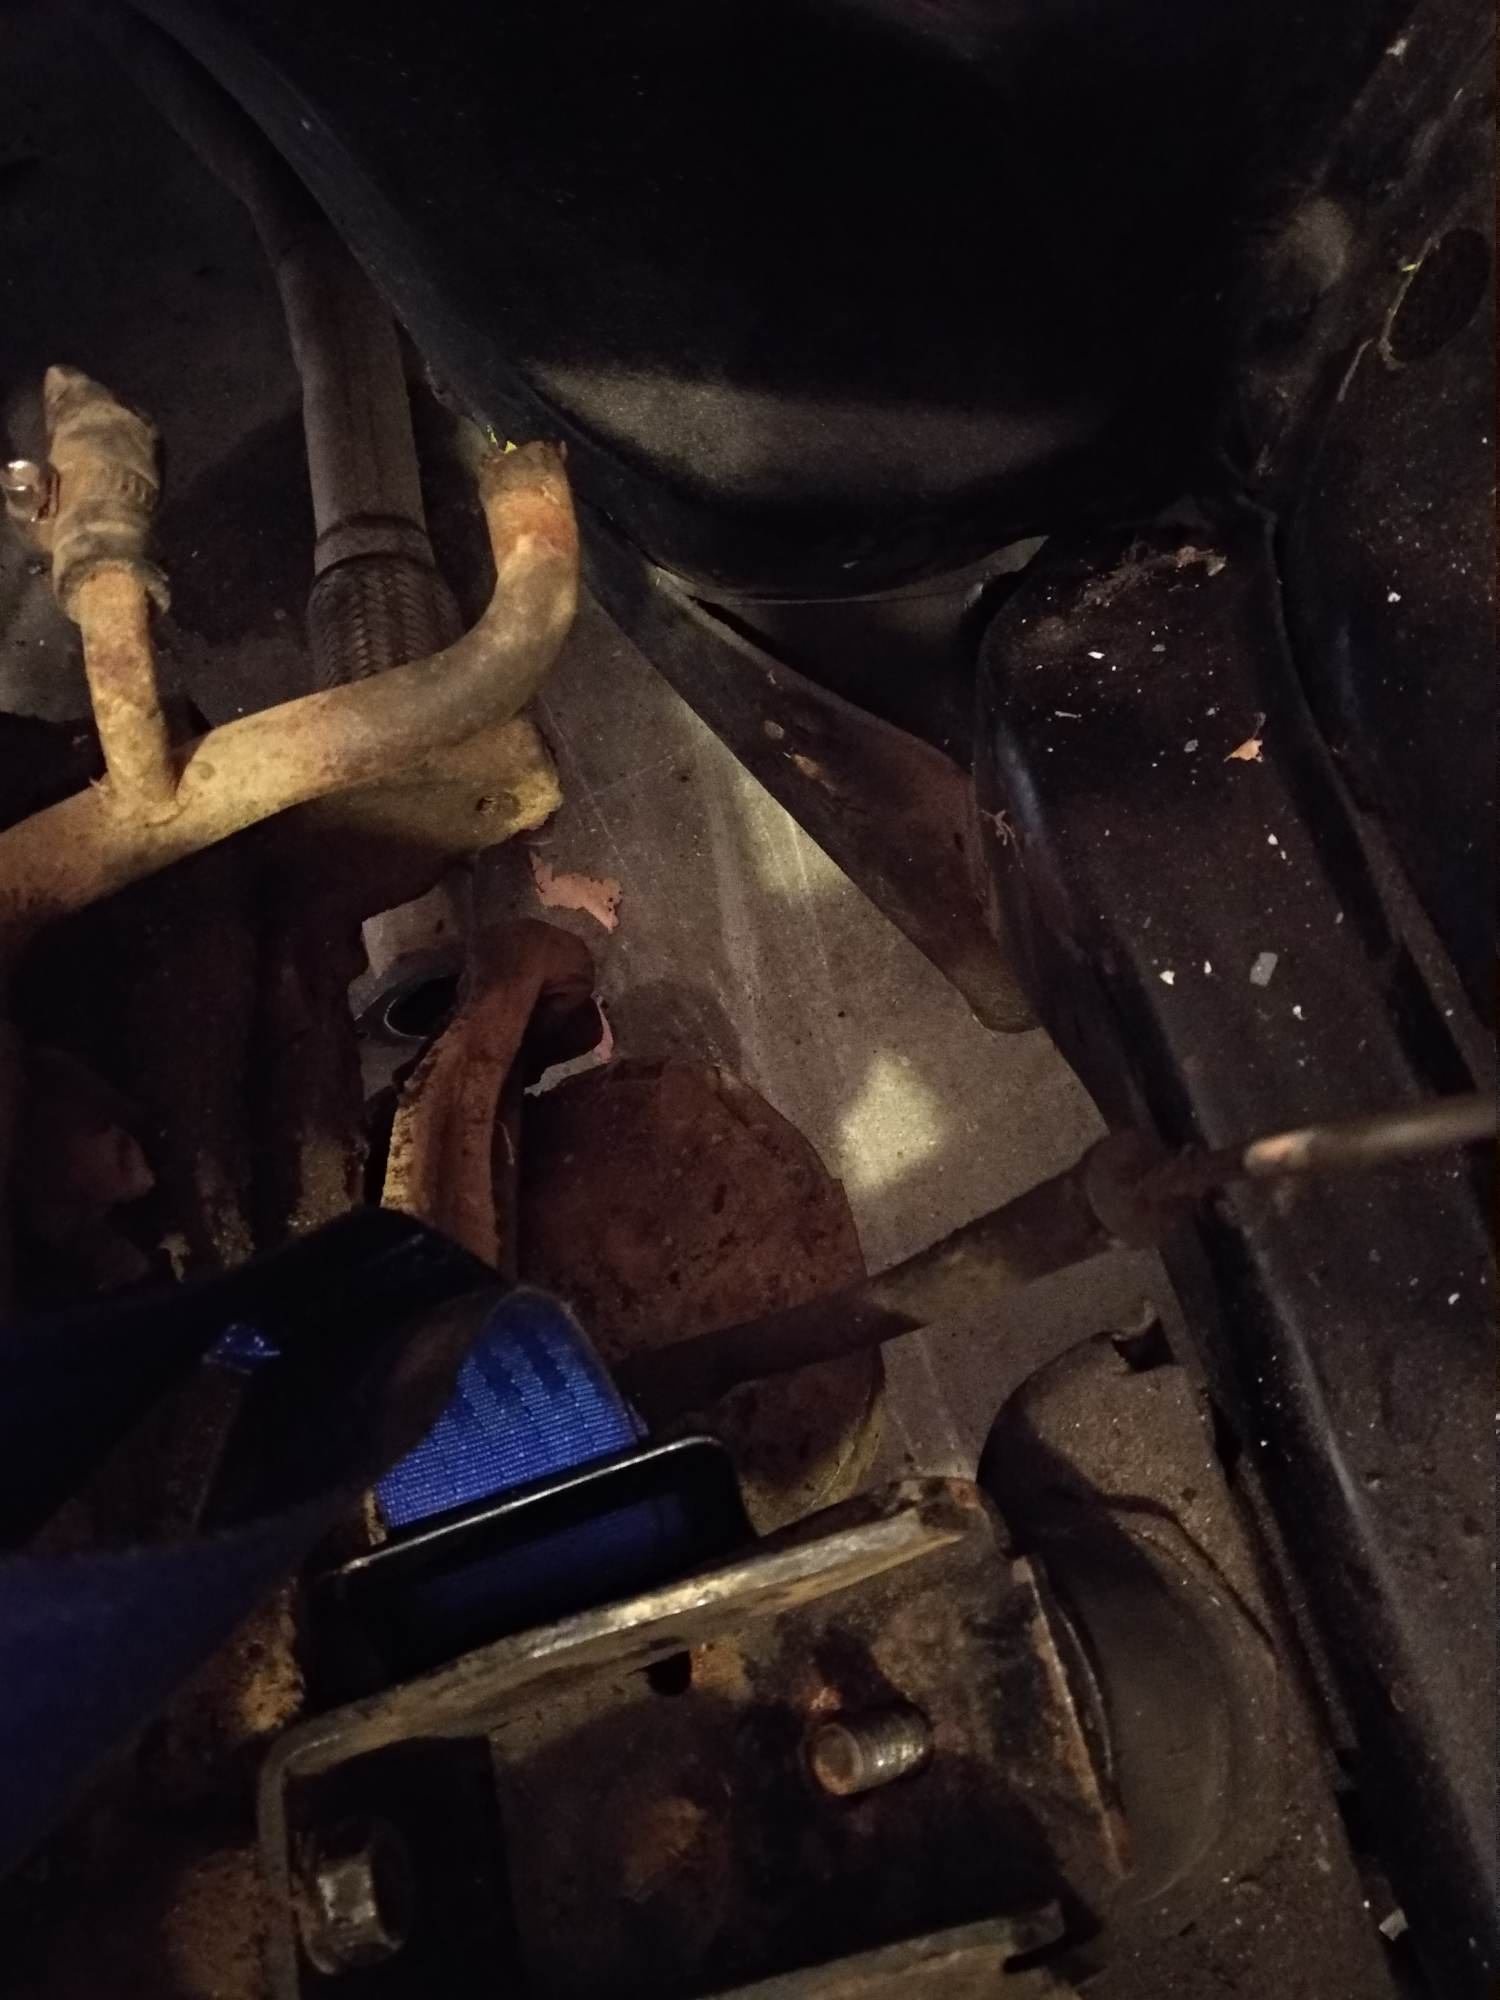
It seems that I got prematurely excited about not having to modify the sump. The engine is sitting on the mounts but the sump is just touching the steering rack. That leaves me with two options. Lower the rack by 10-15mm, or cut and shut the sump. I'm leaning towards the second option. This is mainly because the steel bowl of these sumps has a fun tendency to sit super low, around 20mm lower than the bottom of the x-member. Lot of people just deal with it, but my x-member is not much higher than 100mm off the ground, so that's too low for me. Since I'll have to modify the bowl and the pickup, may as well just sort the rest of the sump while I'm at it. The other, less terrible but still annoying issue is that the 'wing' on the bowl does not leave much room for the dump pipe: So if I'm modding all this stuff then I may as well chop the side off. I can make it up on the other side. I've got a fair idea of what I need to do; if only I had a fair idea of how to weld things
1 point
-
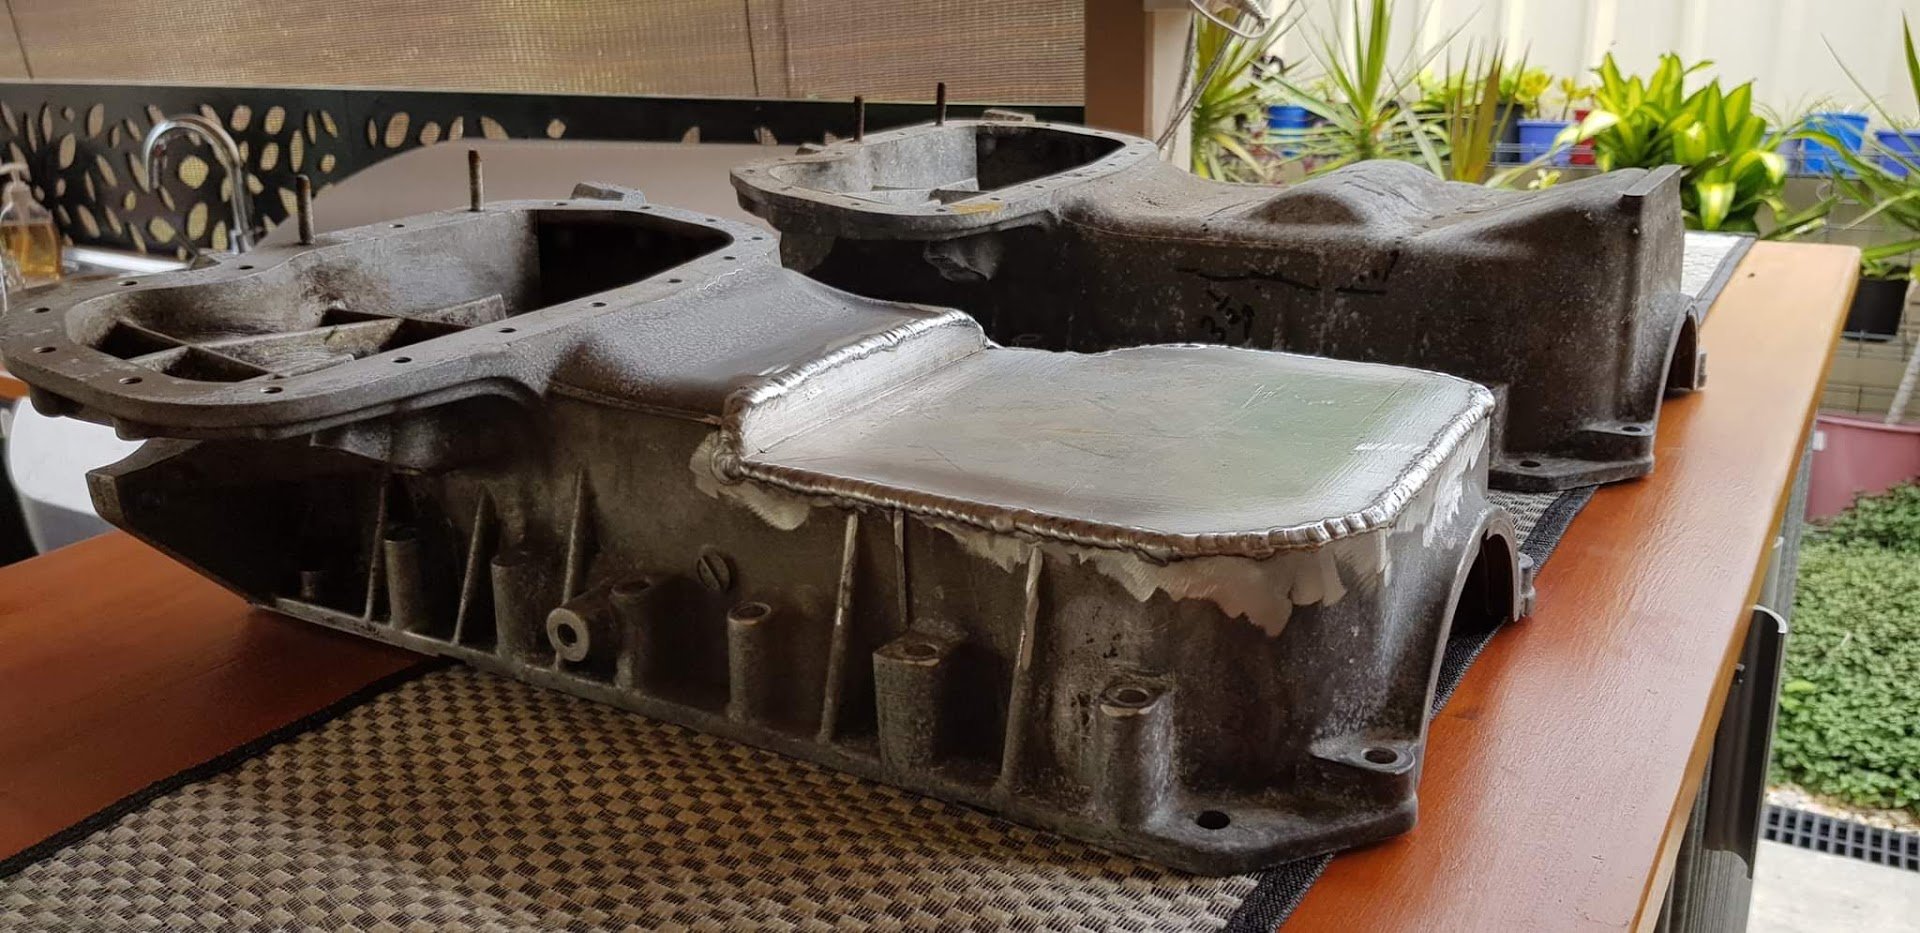
Engine is now sitting in the garage. I've spoken to a few of the Aussie 4Z engine boys about what I picked up and they are mostly confused. It seems that there is some difference between the Isuzu and Holden 4Z engines. Basically, none of then Aussies have ever seen a 4ZD1 with an alloy sump, they typically have steel sumps. The 4ZE1 (which is essentially the same block but taller and wider bores) usually has an alloy sump. My 4ZD1 has an alloy sump. A normal E1 alloy sump looks like the one in the back of this next picture, and you cut and shut it as shown. My D1 alloy sump is basically flat. Two of the Aussies had never seen a sump like that before, and one thinks it might be similar to very early E1 sumps. Here are some pics: The hopeful part about this is that I might not need to modify the sump, it should clear the steering rack. However, the third Aussie thinks that the bowl might sit too low and I might need to reduce its height and shorten the oil pickup. My thoughts are that that is more difficult that using my other E1 sump (pic 1) and doing the cut and shut. Anyway, need to drop the engine into the car to see how this mystery sump fits around everything. Pic of engine looking nice and grotty. Dude who sold it to me says it wasn't blown when he got the car, but that the fuel pump gave out or something. It turns over by hand super easy which provides some hopefulness.
1 point
-
Vin Check went well, Mostly things i knew about and hadnt sorted in timeand a few other minor things. All in all pretty happy and easy enough to sort - Secure LH Interior door handle (had fallen off) - Front park lights not working -LH Headlight dim - Aim RH headlight correctly - Wipers to work (Will prob do 12V Conversion - Secure RH exterior mirror (loose) -Replace broken piece in exhasut and mount muffler -Secure fuel line -Replace rear brake hose and hard line -Repair petrol leak at pump -Repair cert sign off for rust repairs -King pins -Play in drag link Pretty easy to sort really so allllll good.1 point
-
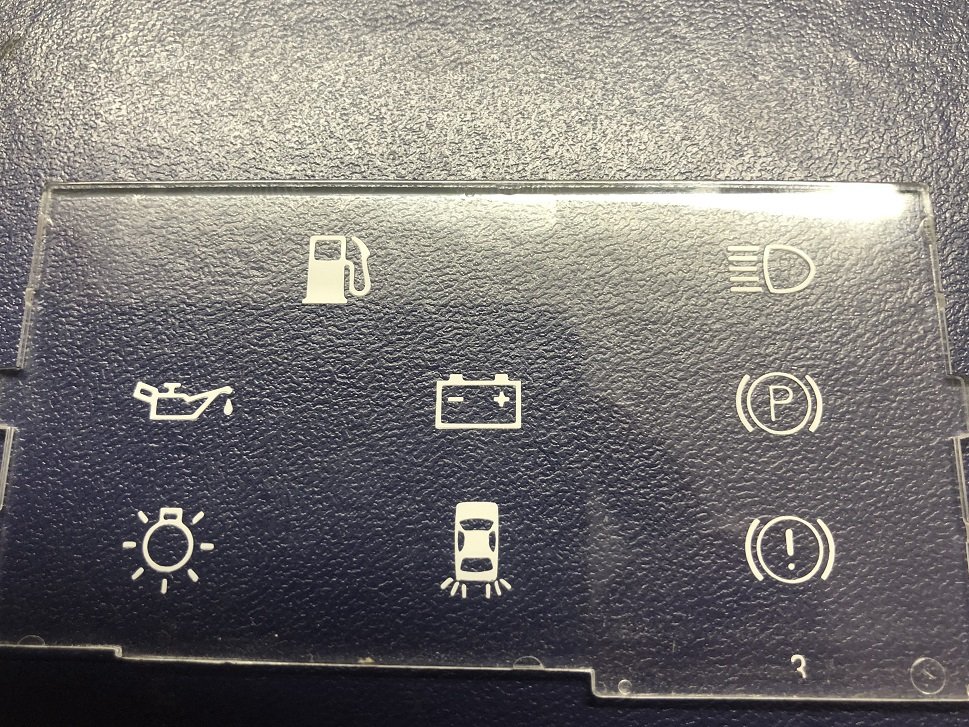
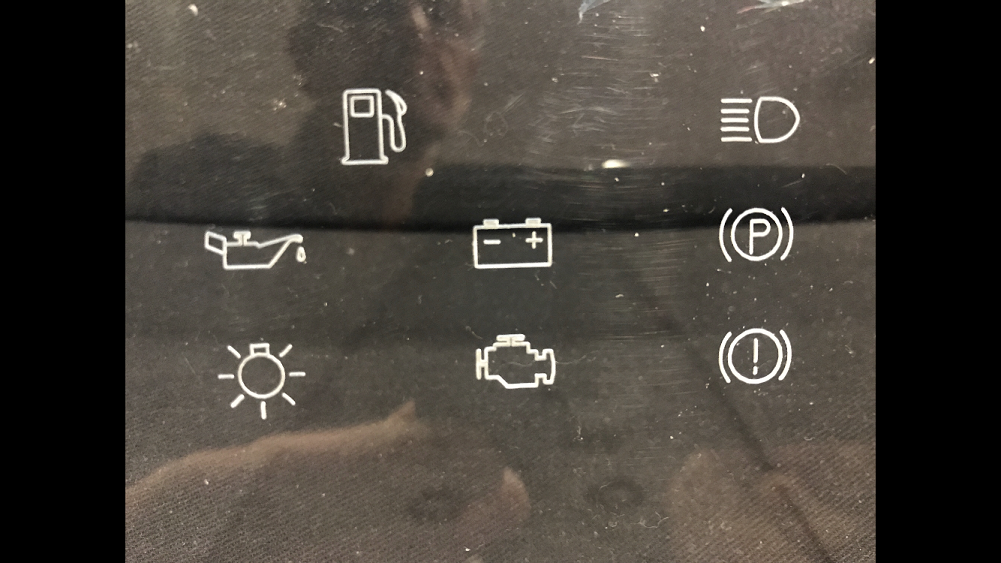
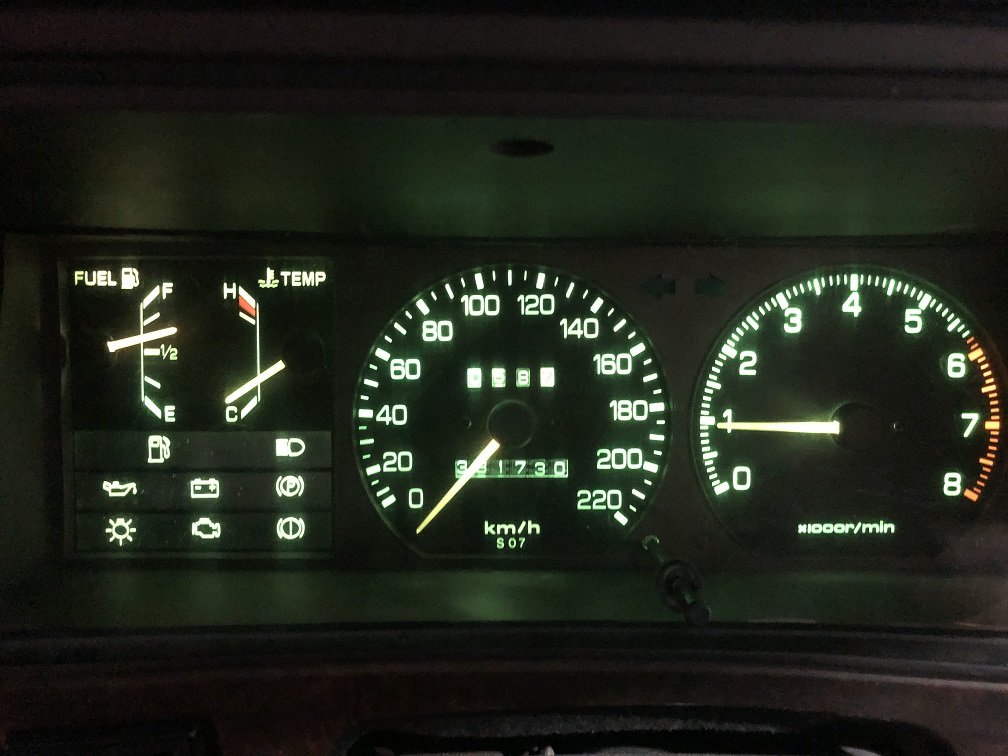
Last job before cert was the dash lights. I joined the tail warning & headlight warning lamps together to make space for an engine check light. The current symbols are etched onto clear plastic so I couldn't clean it off. My father in law came to the party with his new engraving machine that he was playing with over the lockdown. After he drew up the new design and calibrated it he got a great result! Only problem with a good job is no one will ever notice it And she's done! Off for cert to see what I've missed, hopefully it's not a large list!
1 point
-
Been a Veedub fan since my teens, collection stuff that lived in a box for ages, found a bird cage stand and re purposed it as a shrine to the VW. Couple of semi rare items, the red 50/50s one year only Australia and Italy, also some Snowflakes up the top. VW lounge light, used a big valve for the stand, actually casts a VW emblem on the roof above.1 point
-
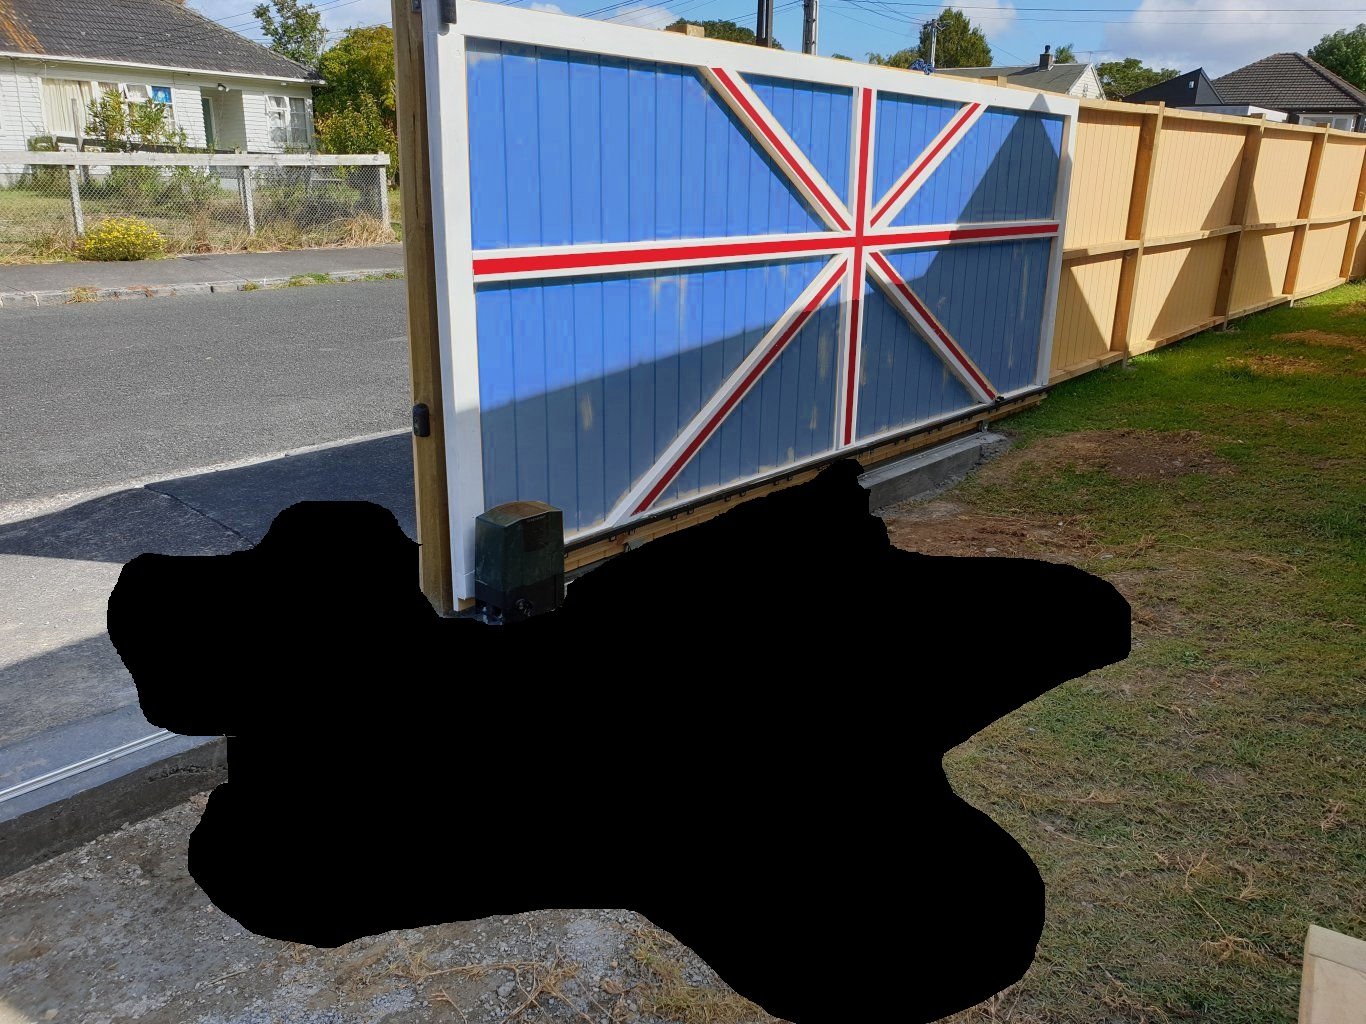
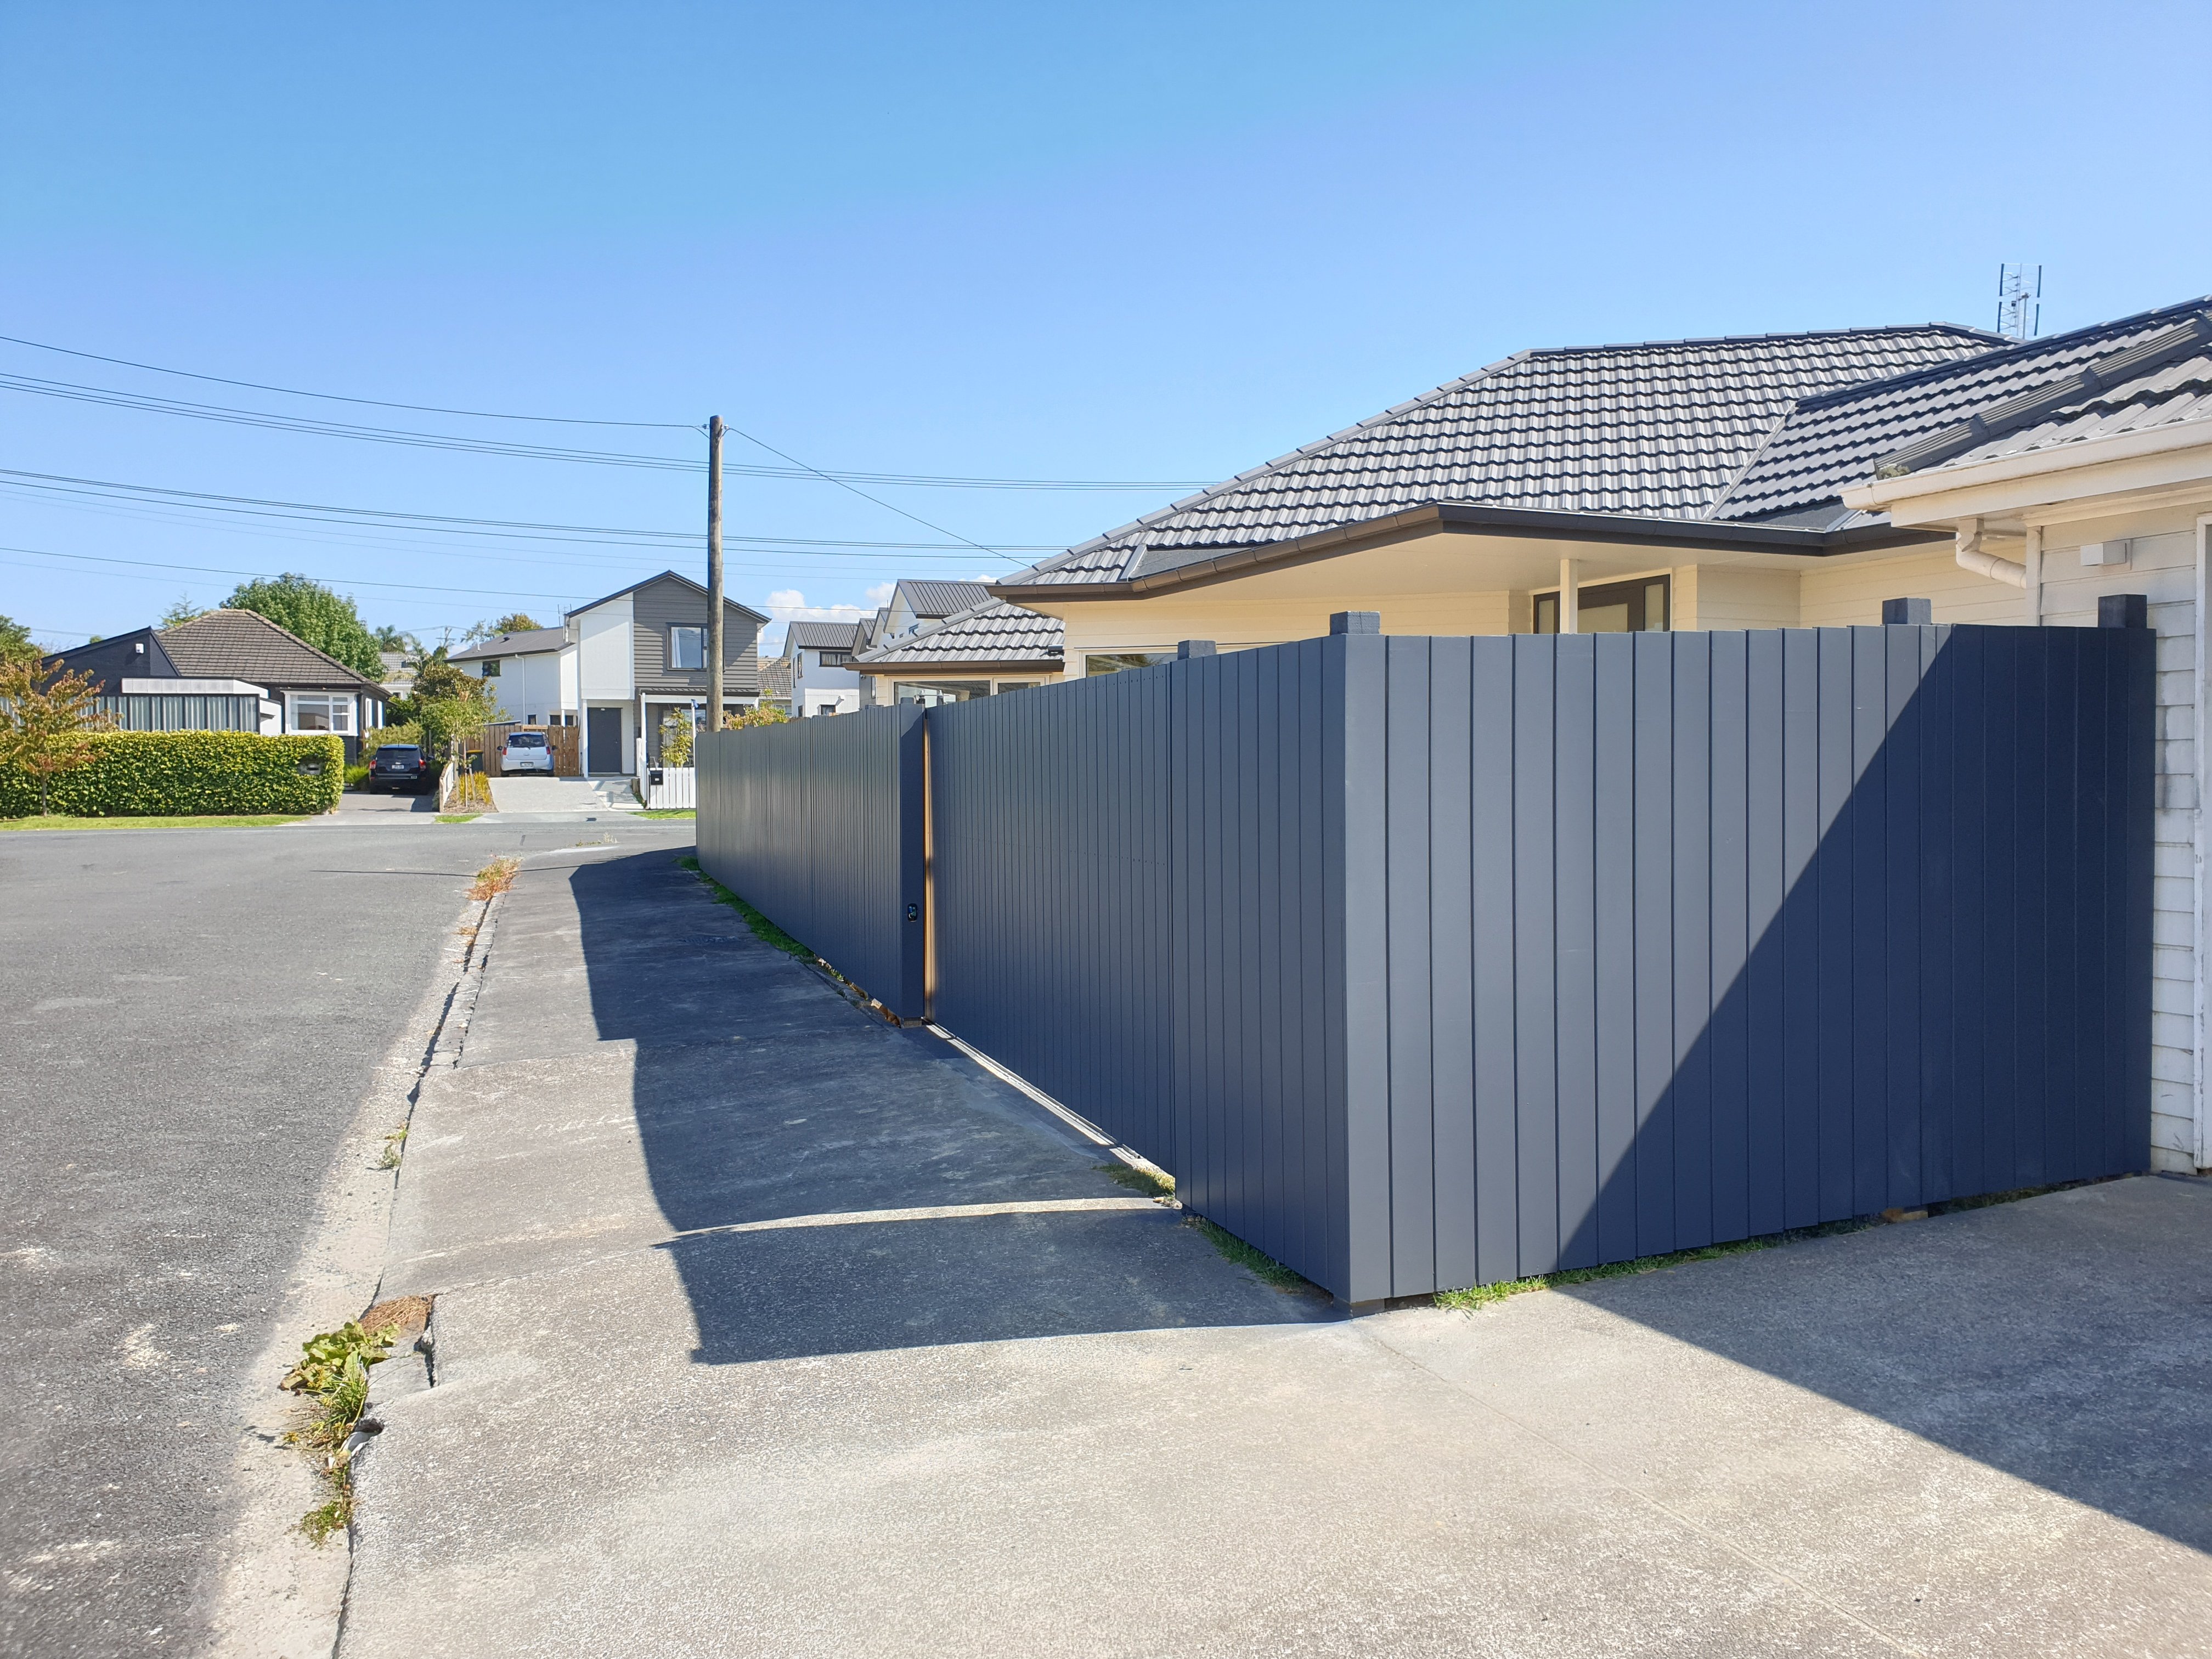
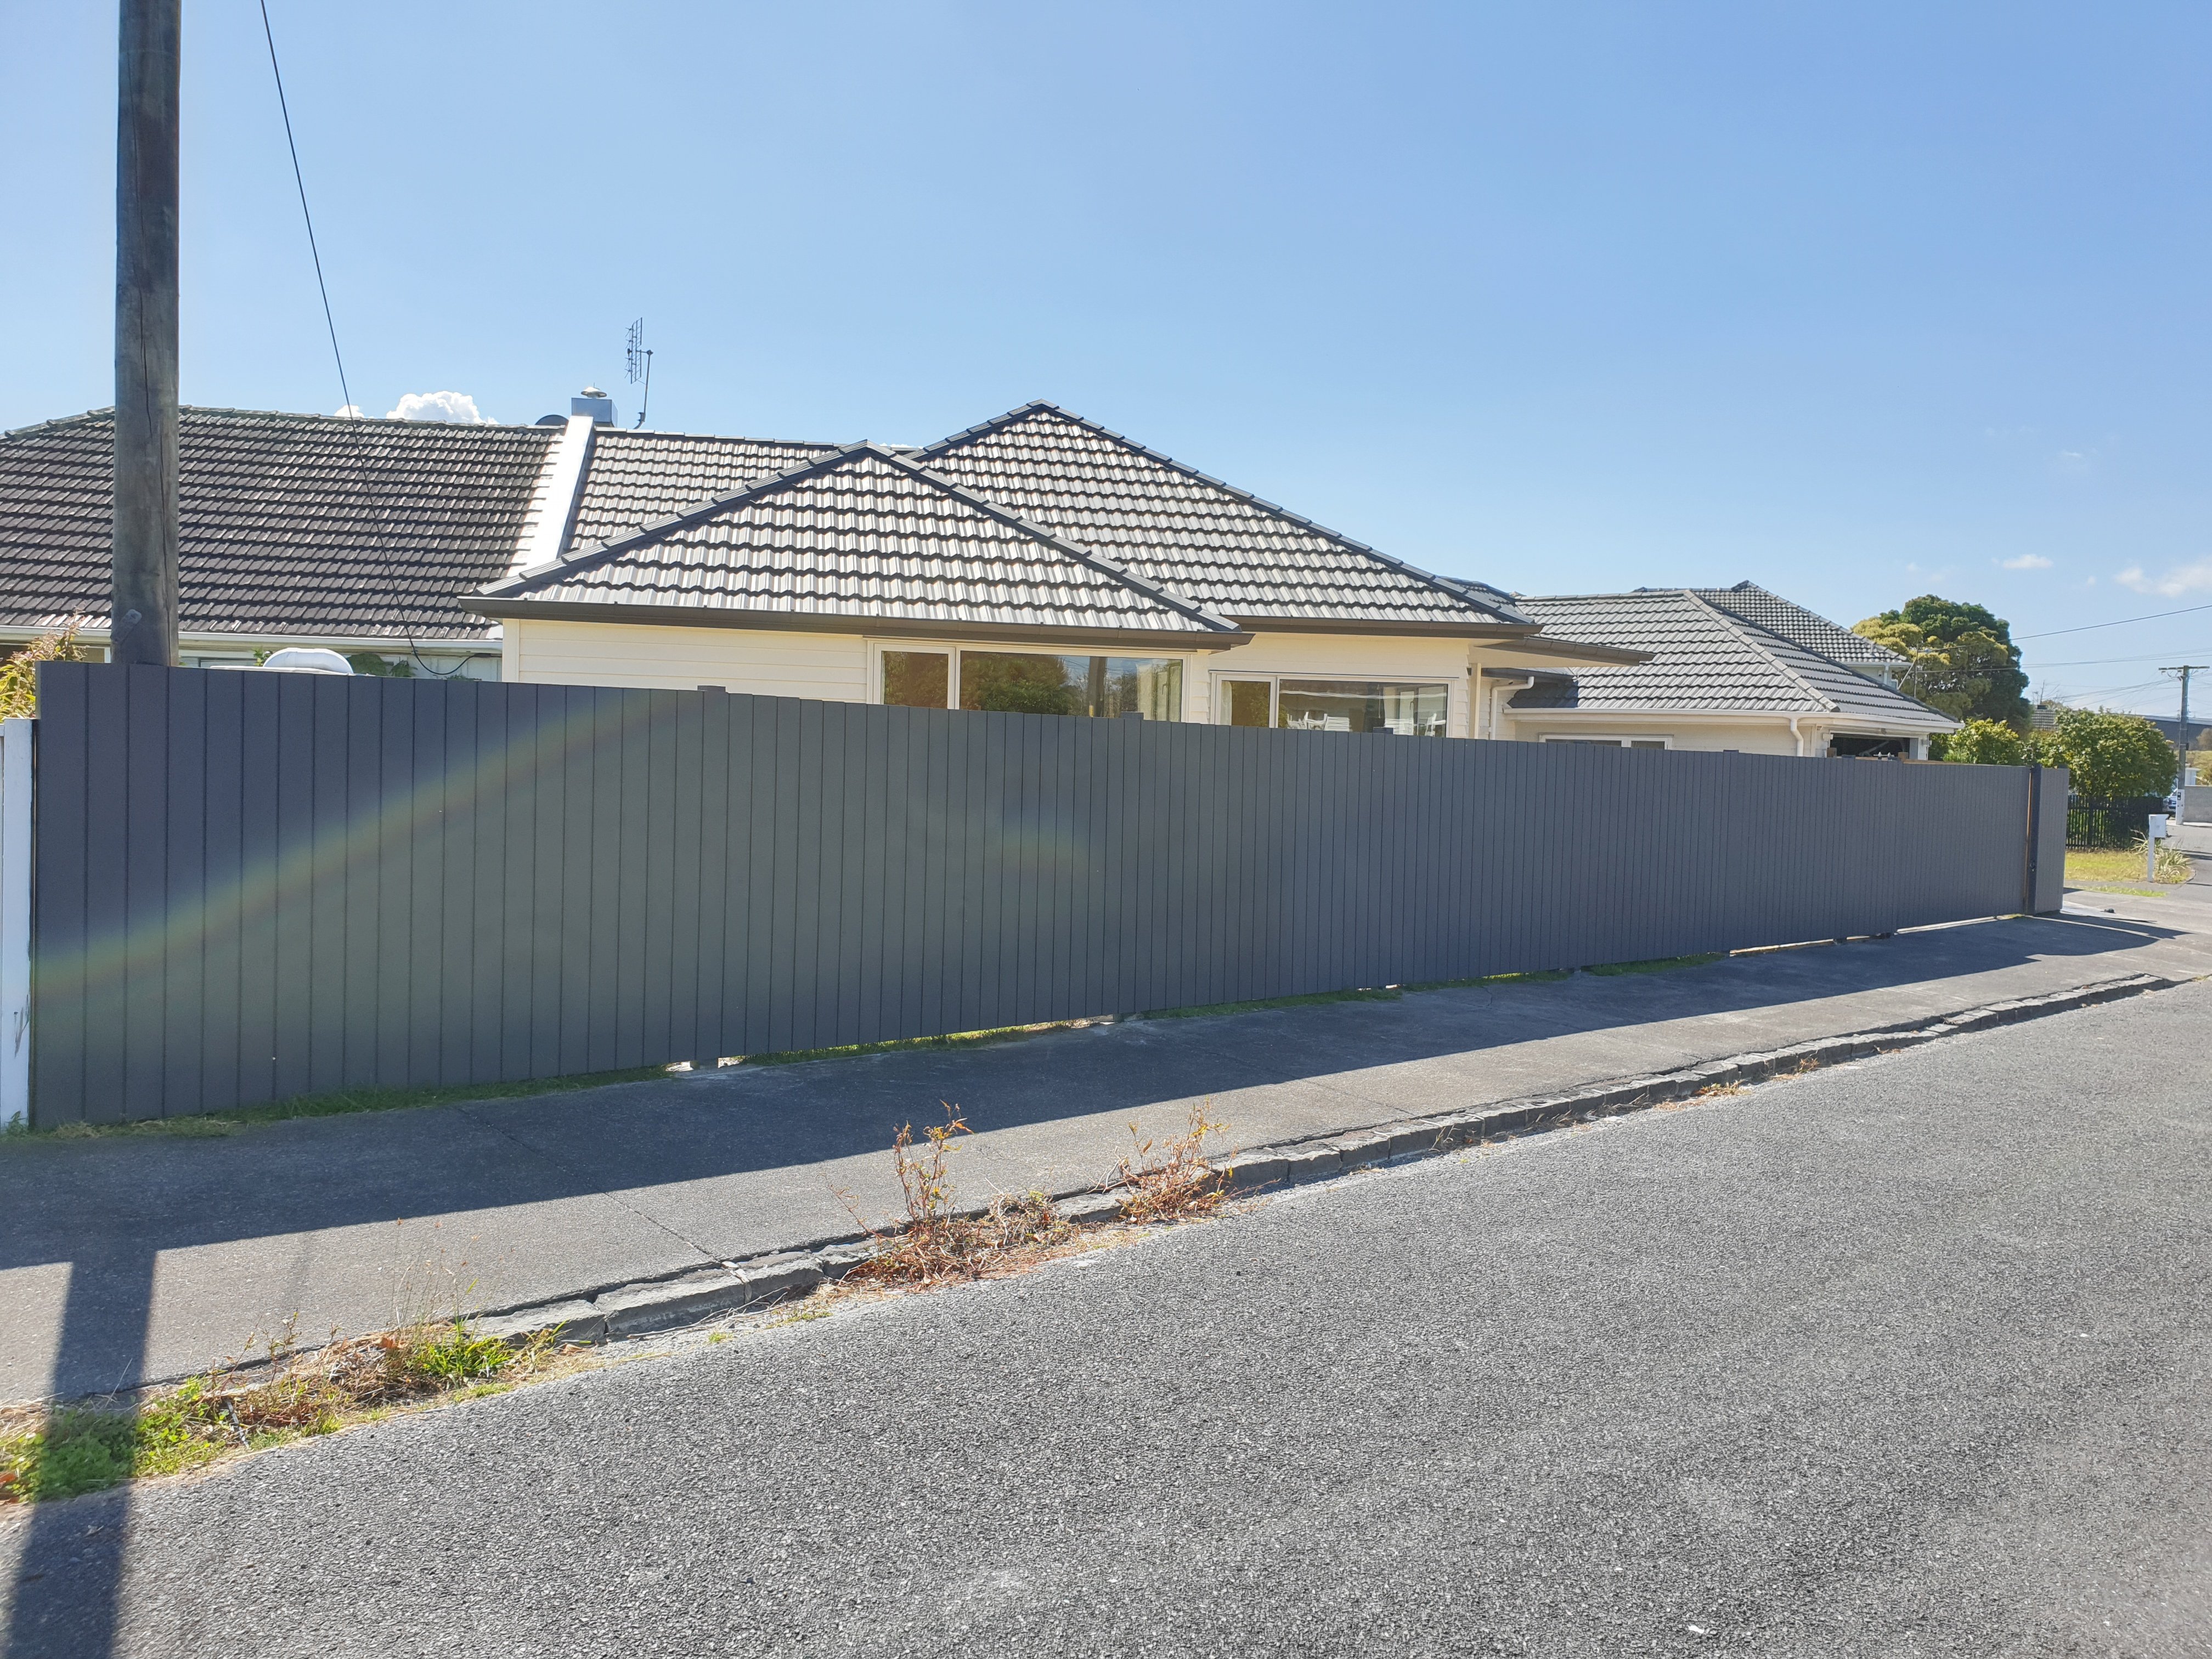
Painted a fence. Used an airless sprayer. So easy, would trade again. Haven't got enough paint to do inside so that will have to wait.
1 point
-
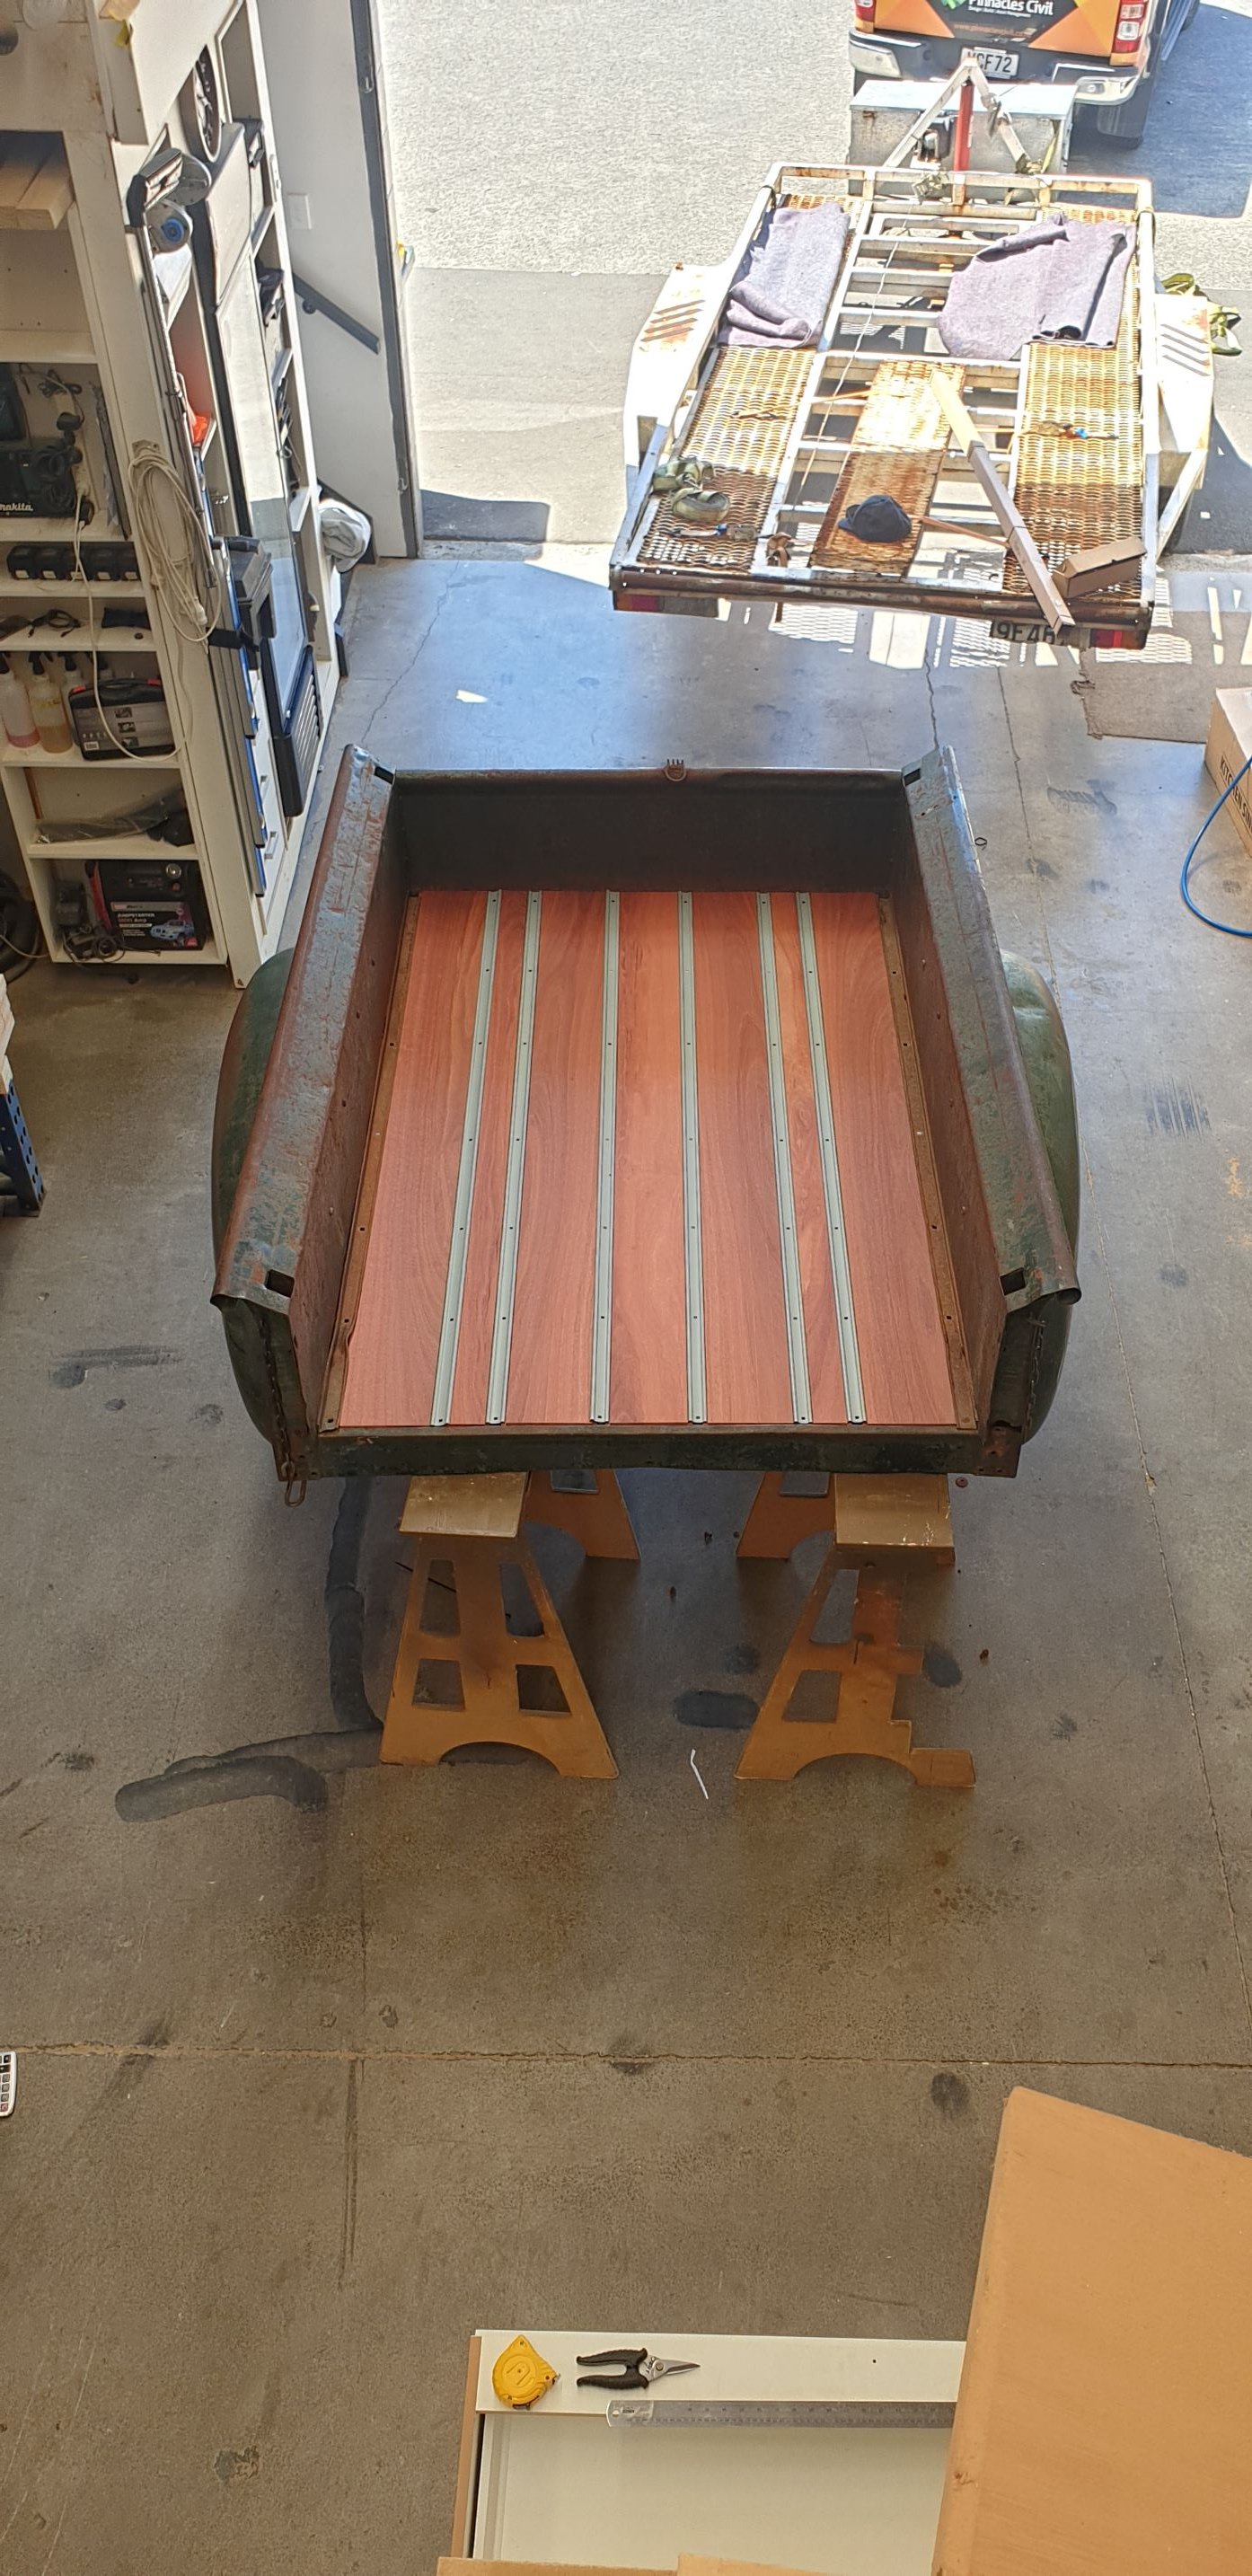
Got the tray panelbeated, the one bit of rust on it fixed and the new bed strips welded in. Then took it to a mate whos a cabinet maker and we spent the day making new timber for the deck.
1 point
-
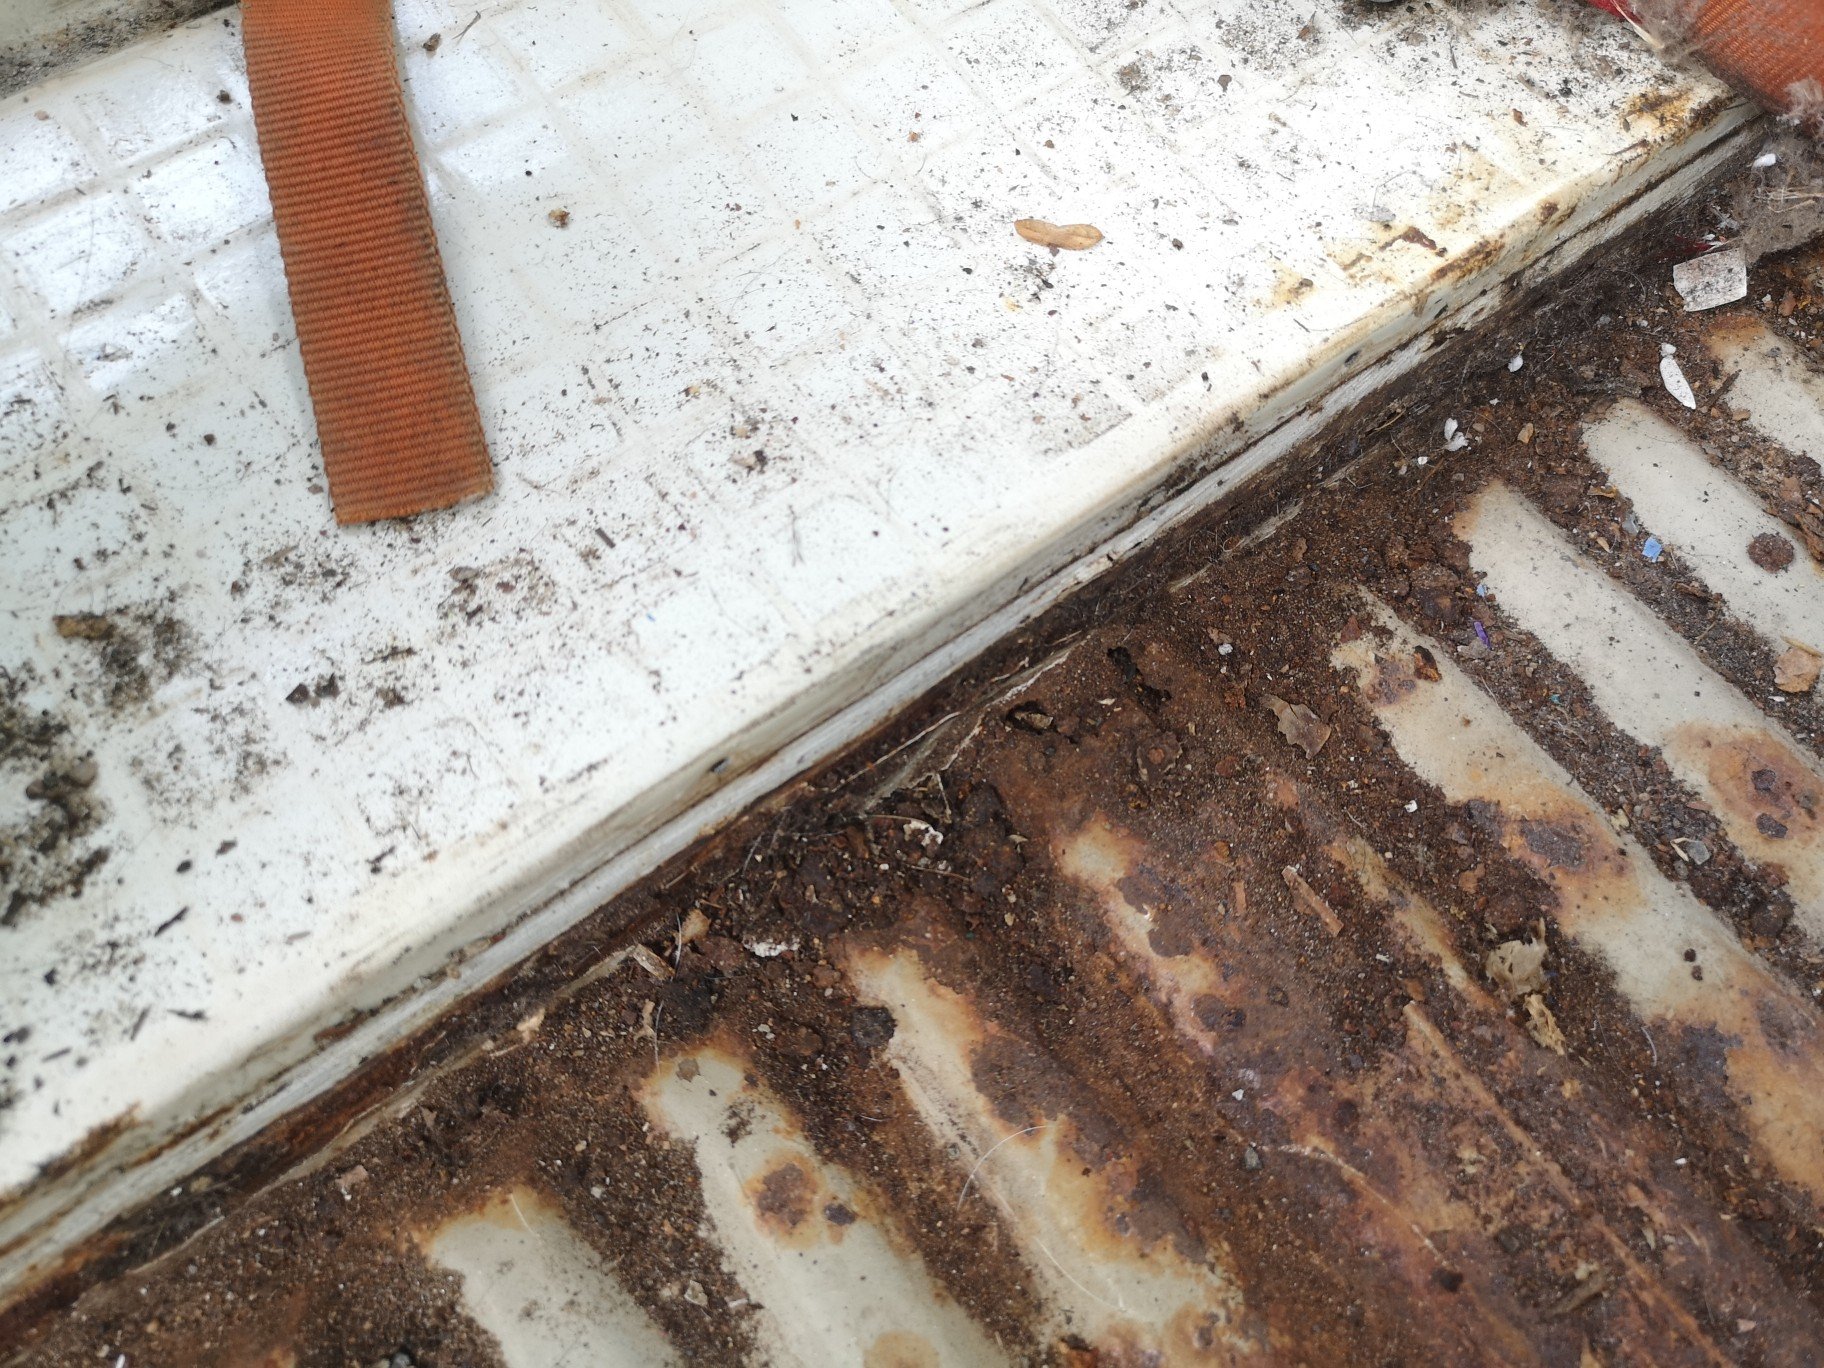
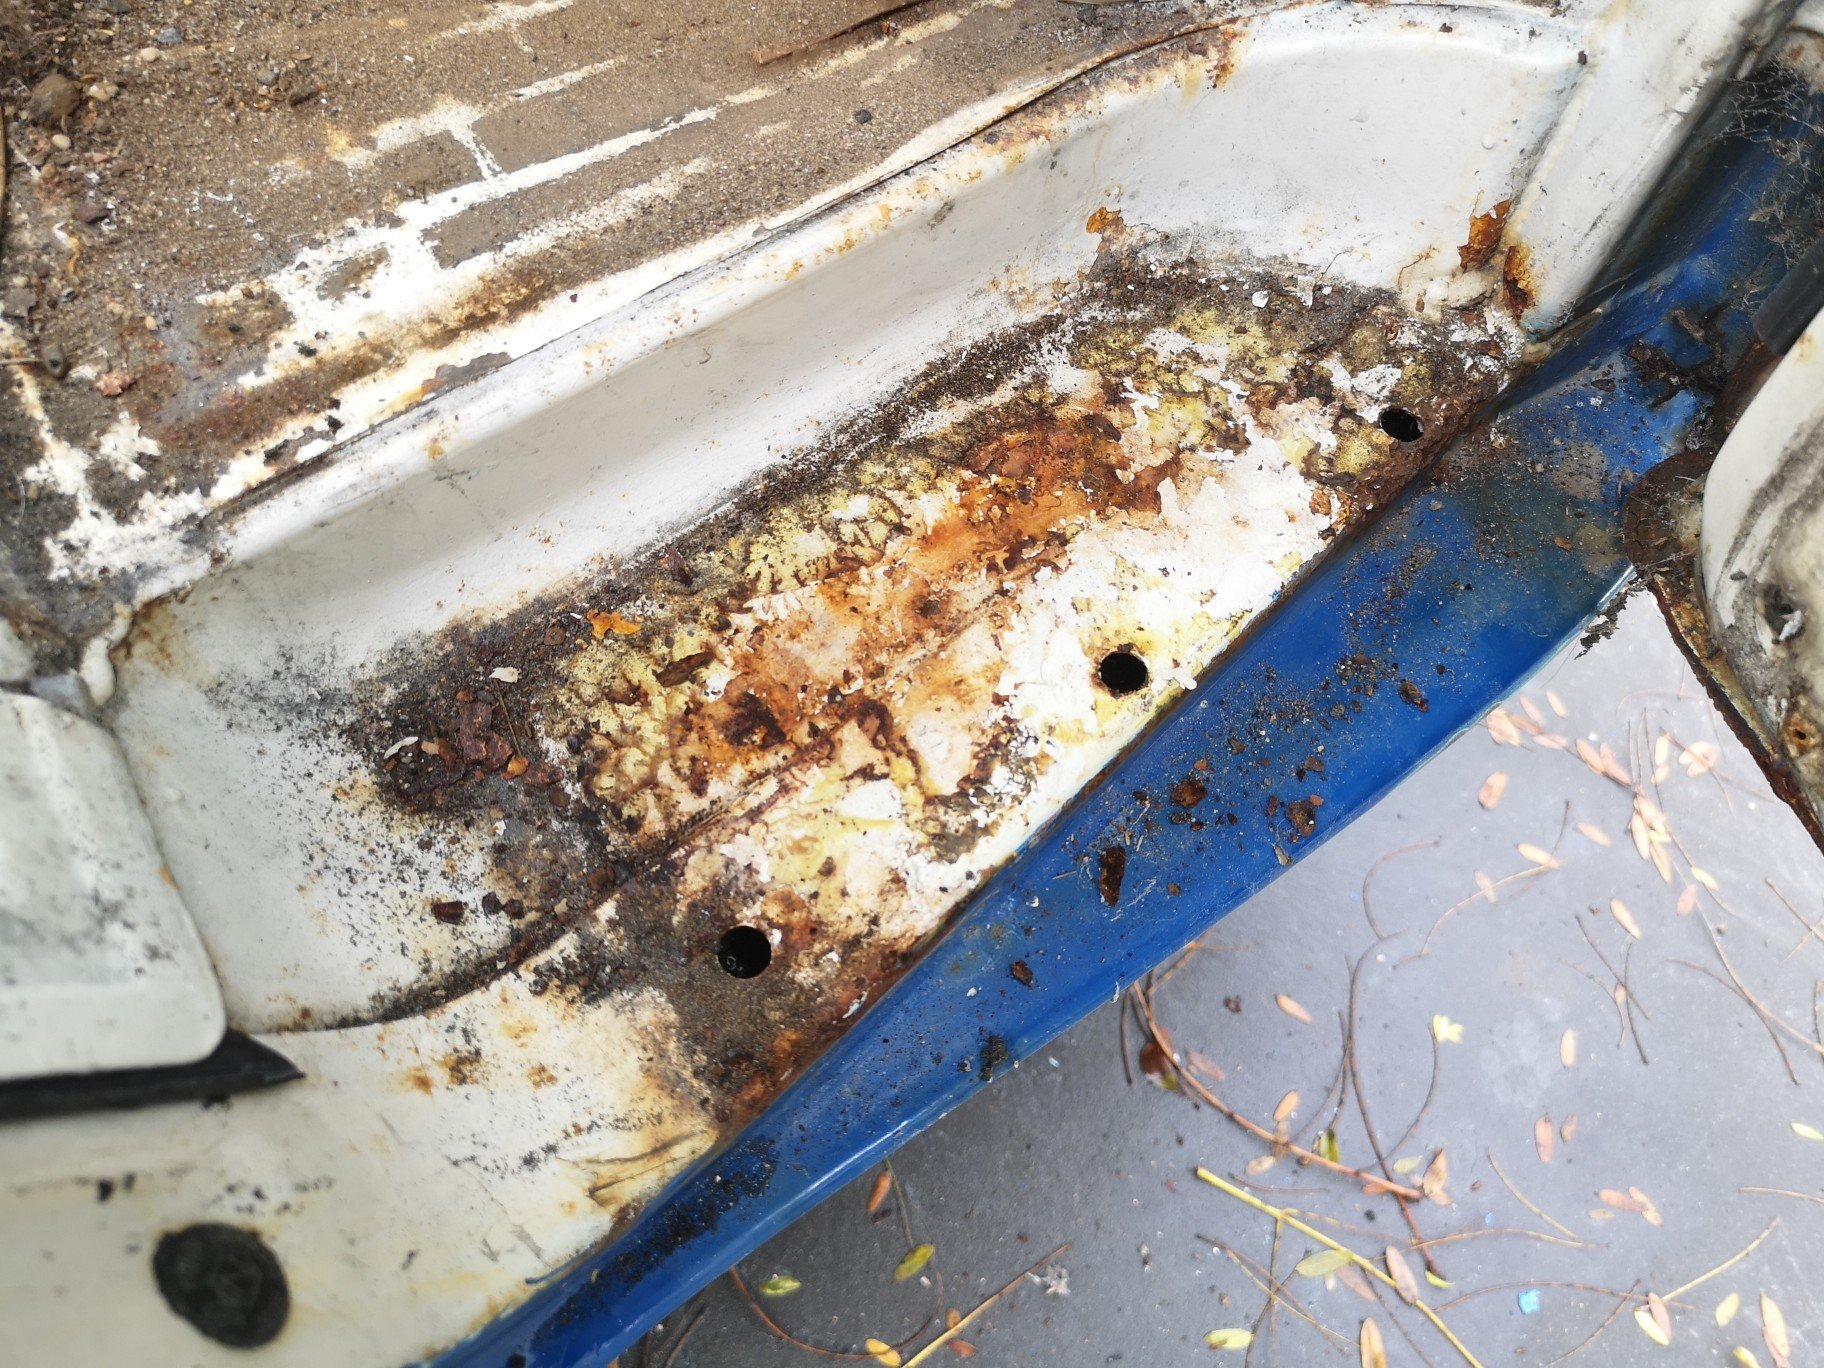
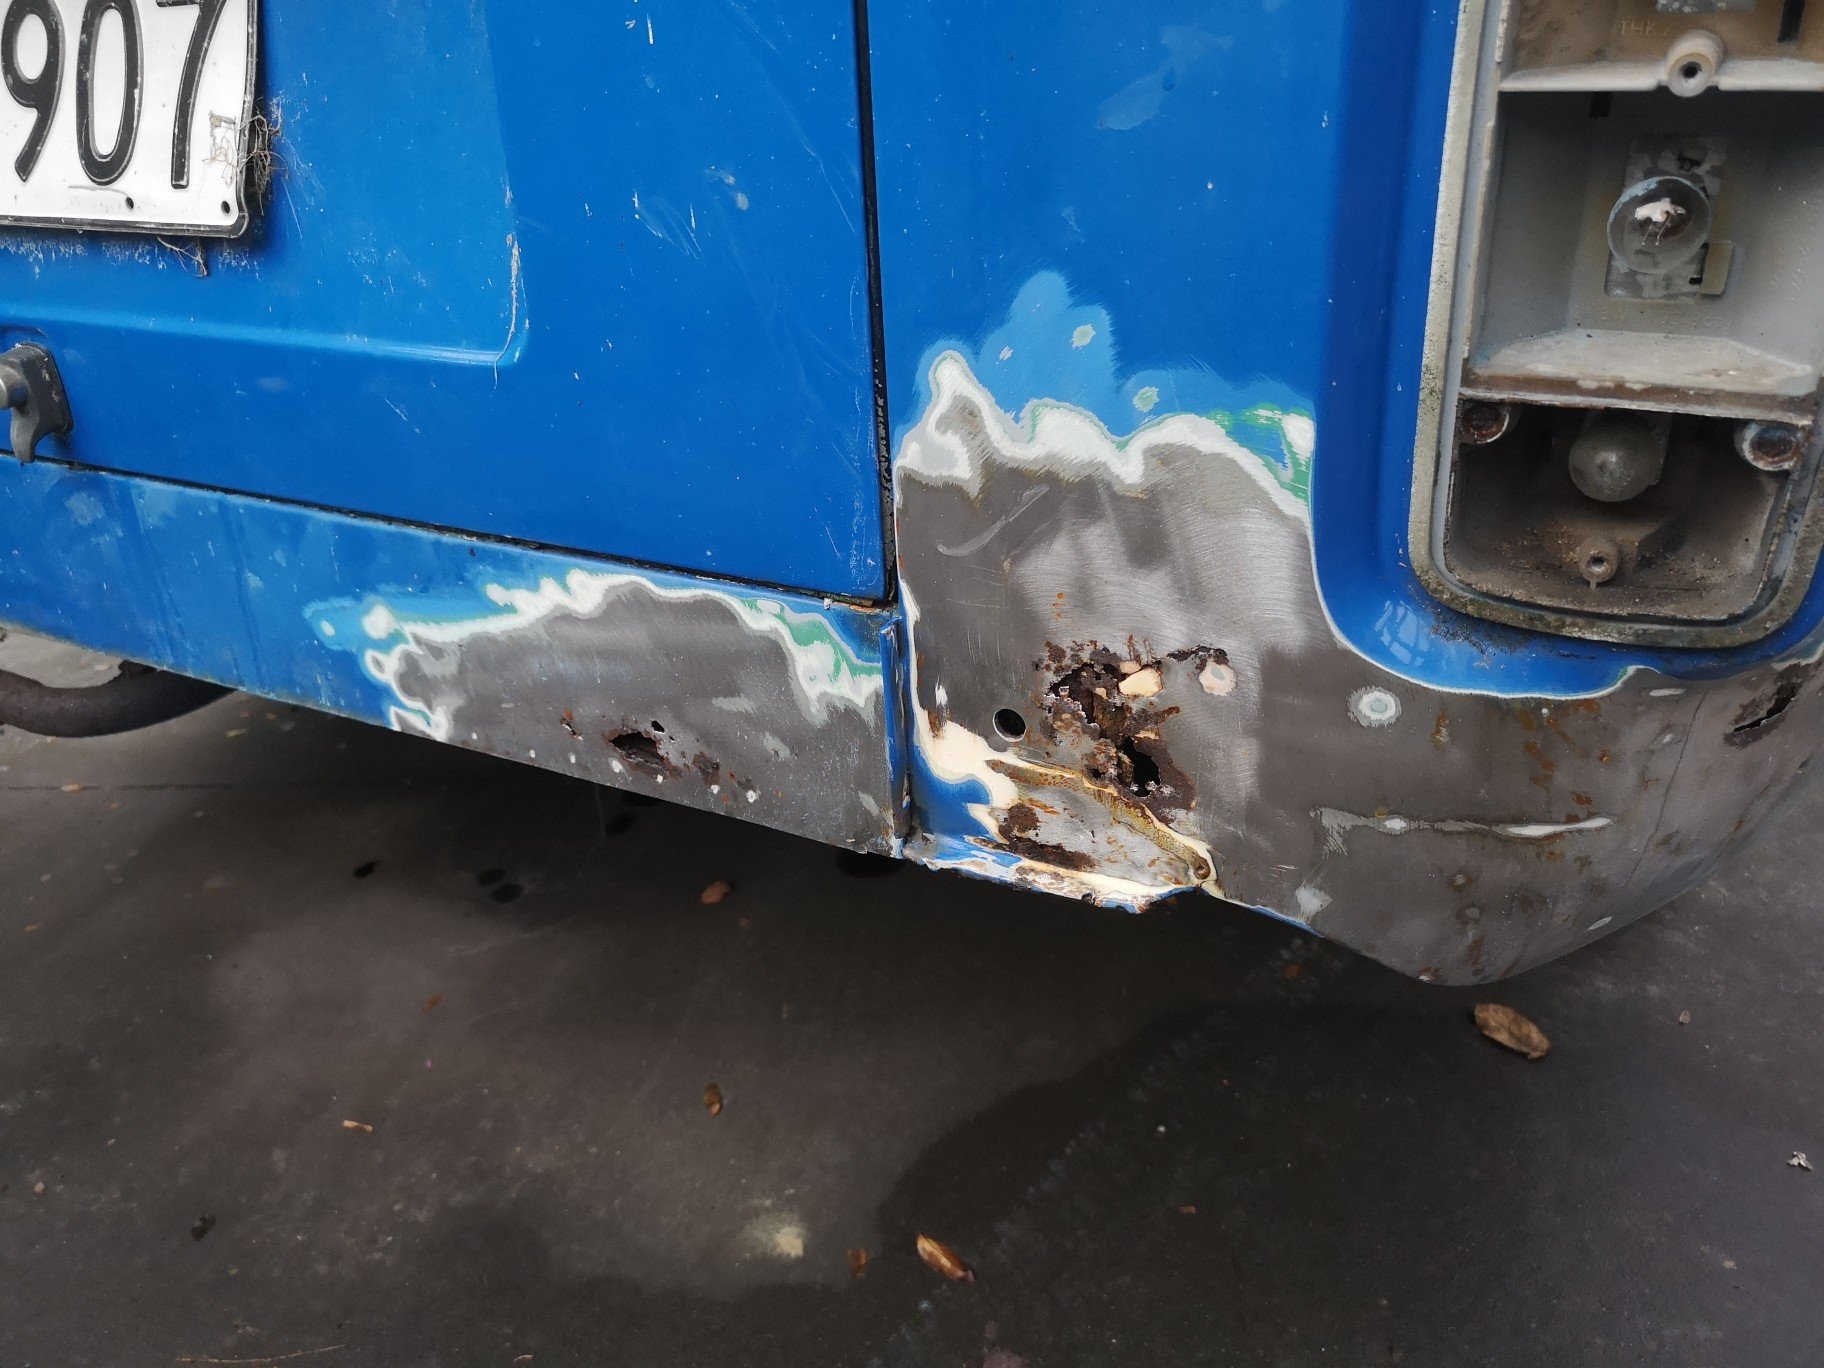
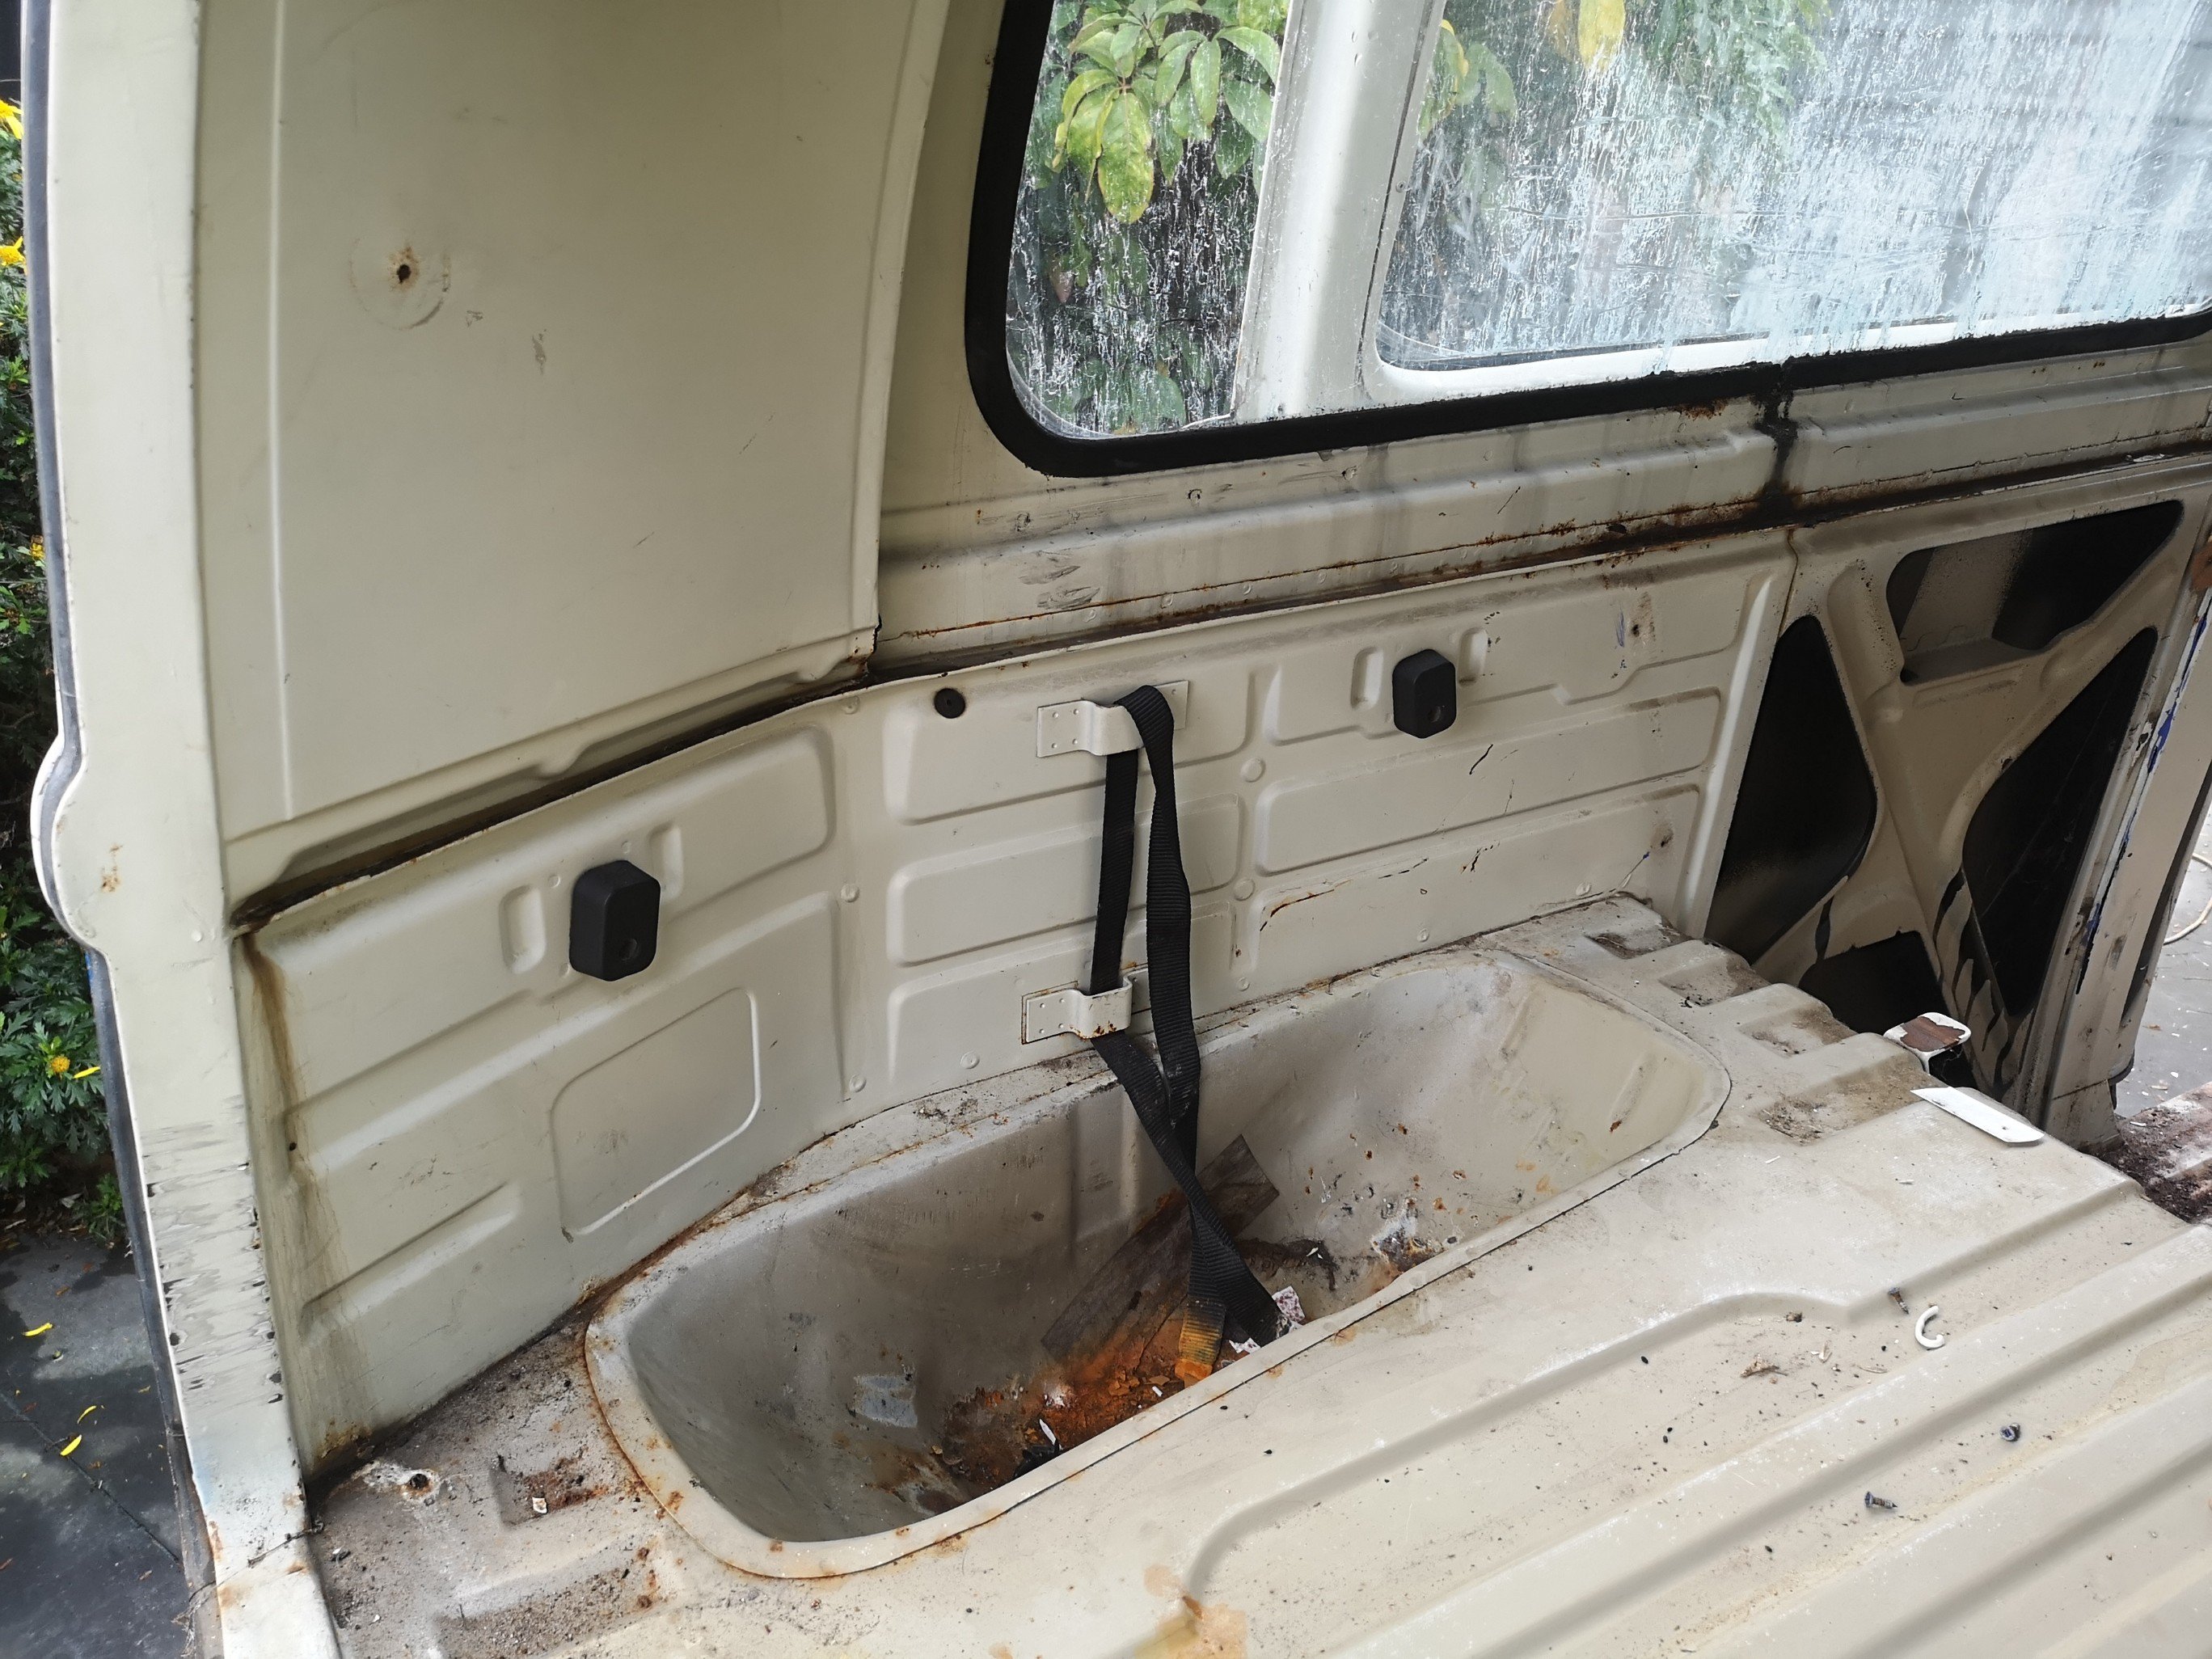
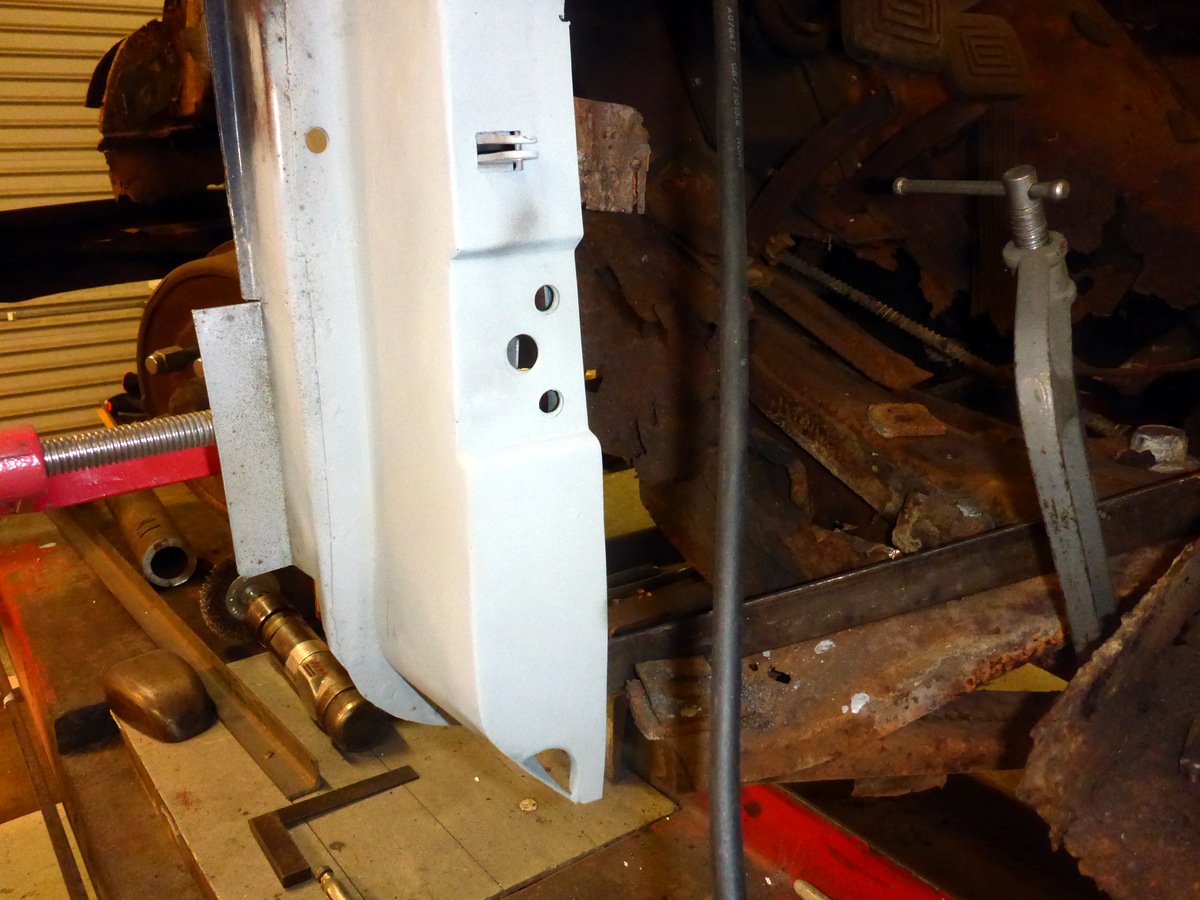
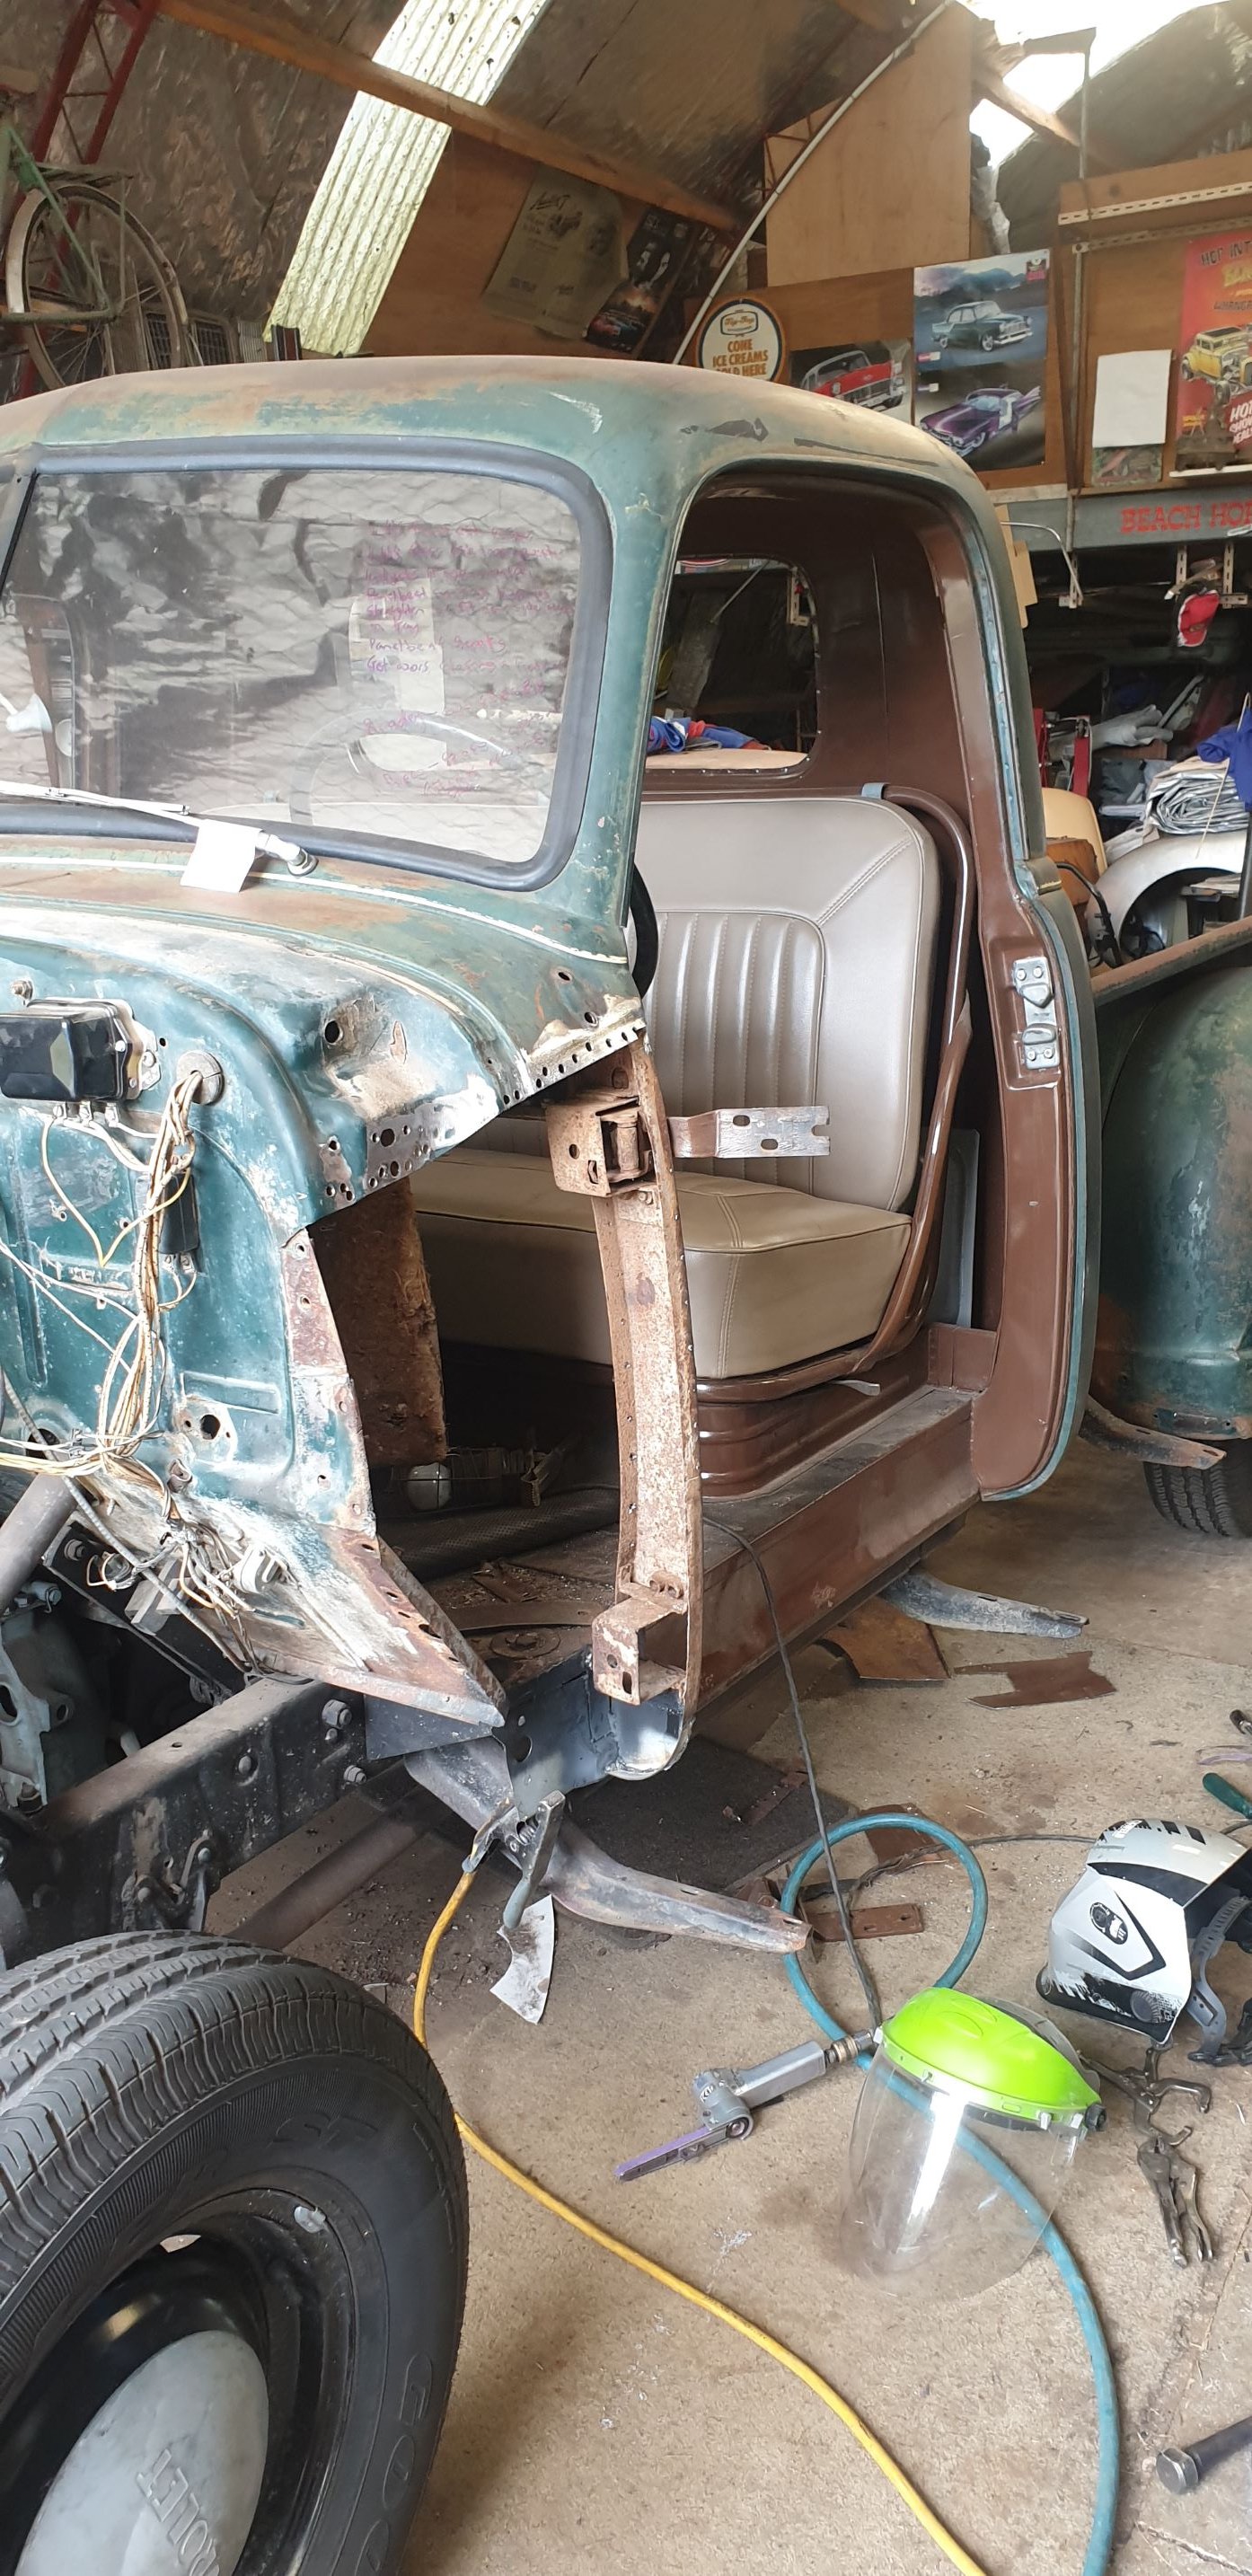
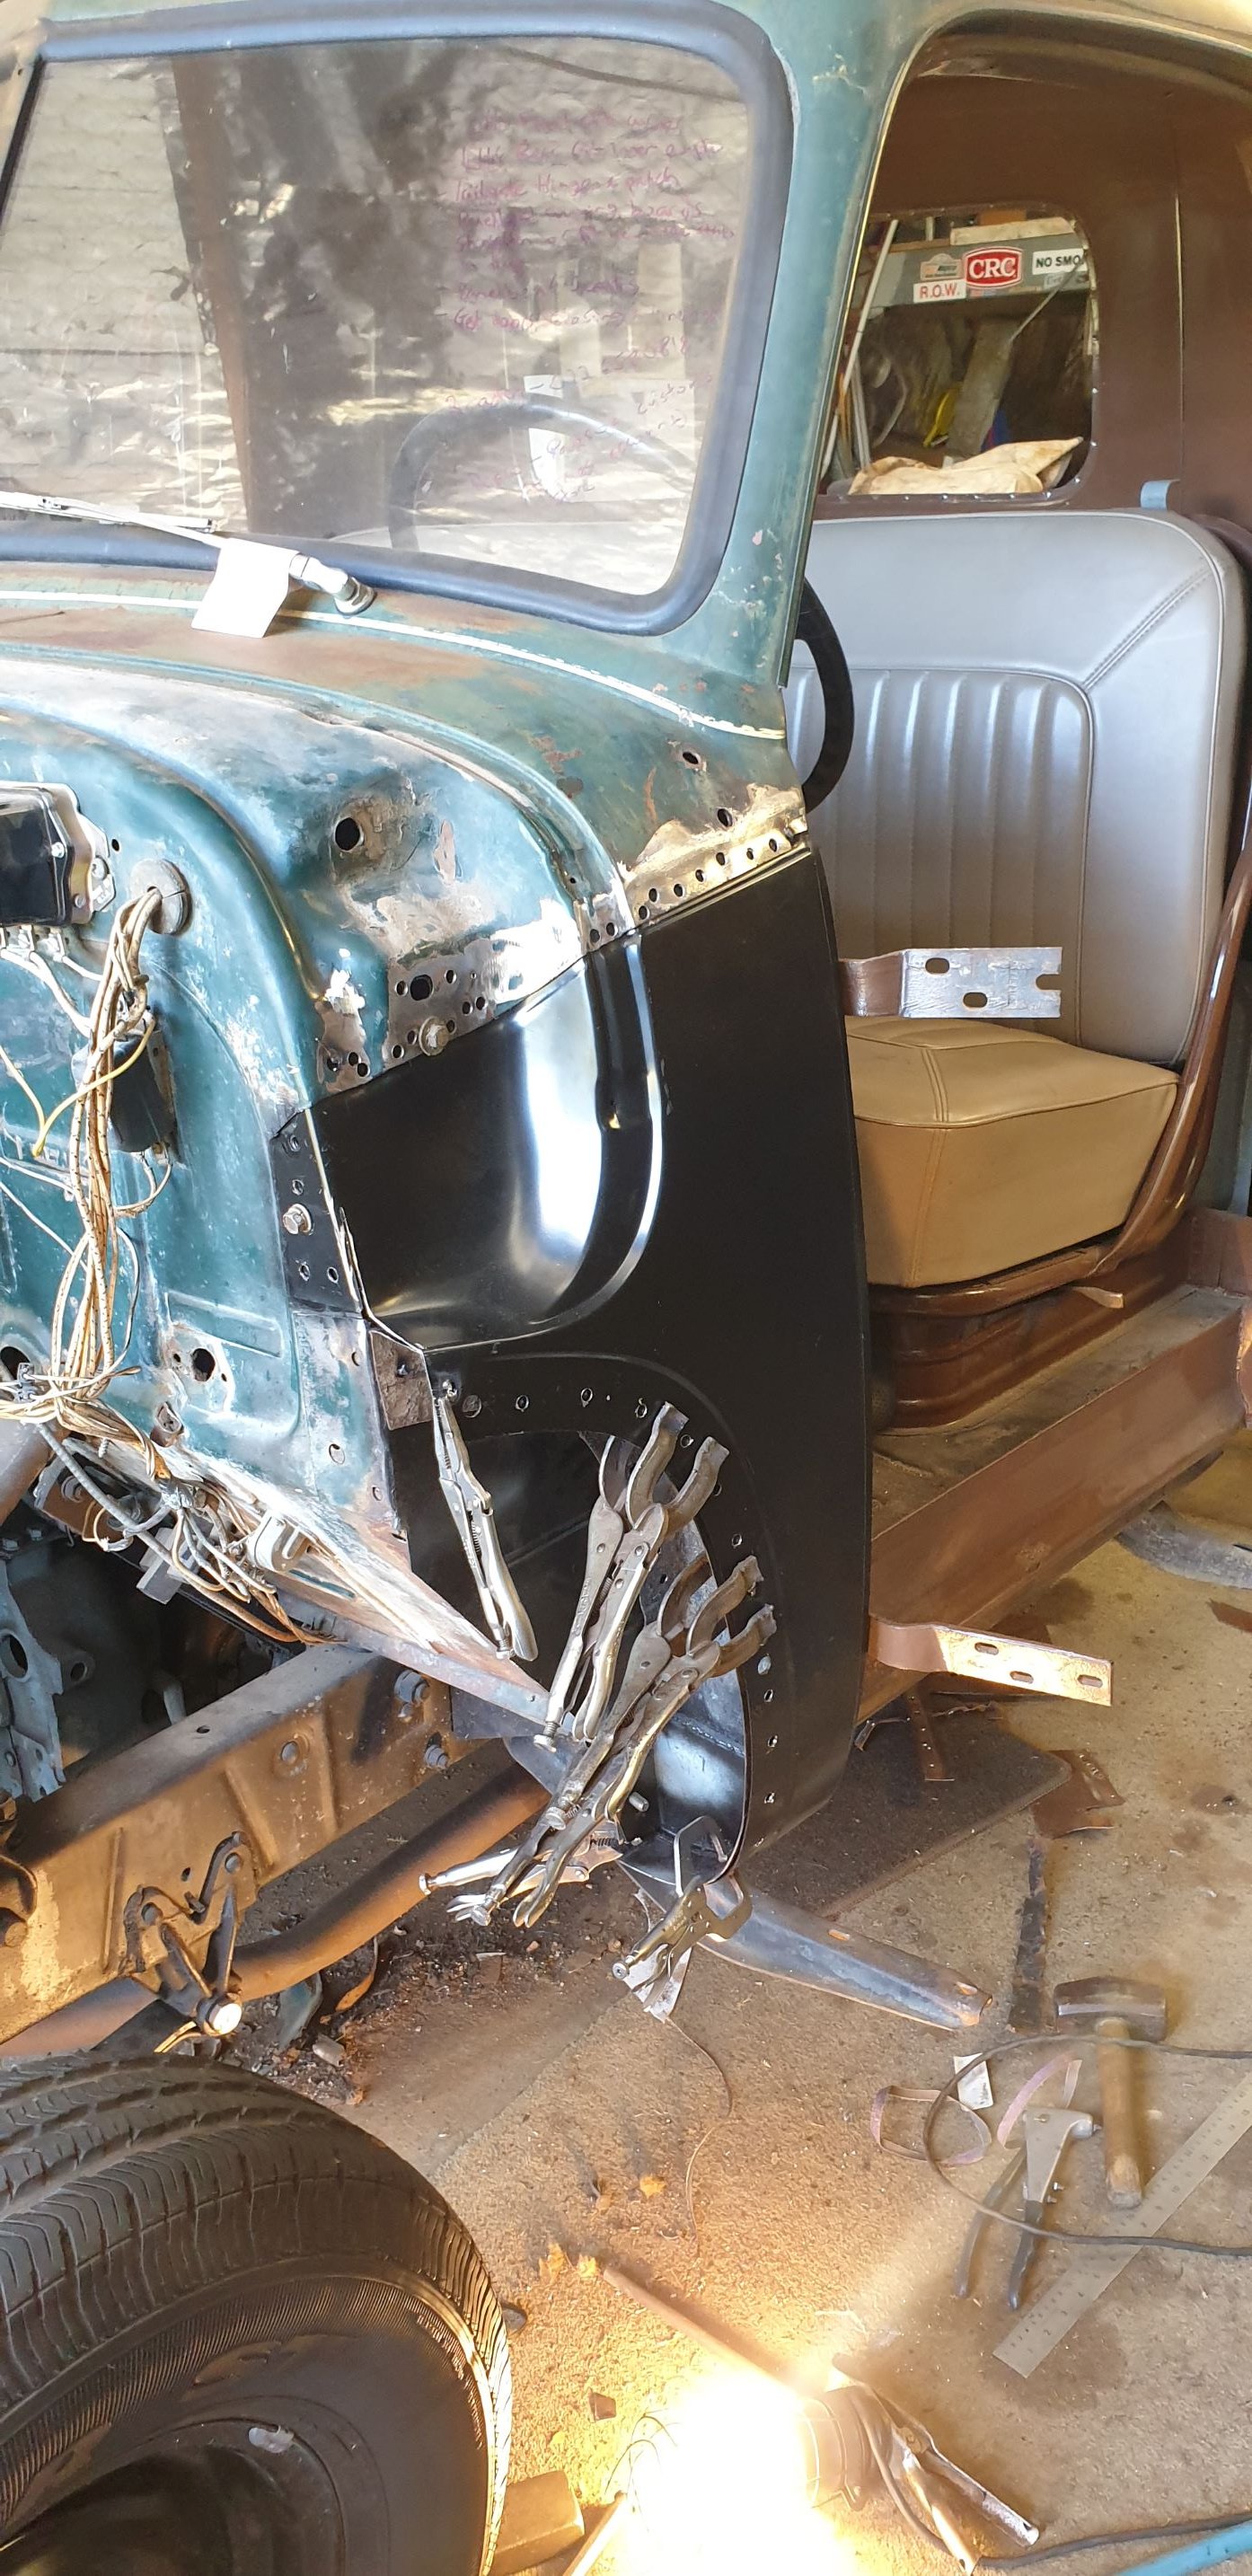
Next up was get stuck into the rust. Managed to find a skilled older tradesman who was keen to tackle it. And also keen to let me come and help him which was awesome. Learnt a heap of new skills and was epic watching him hammer and dolly out the dents. The front drivers side door had swung round and stoved in the corner of the cab as well as bent the door at some point. The yanks must of tried to bang the dent out from behind via piercing holes in the inner guard to put a bar or something through to hammer dent out from the inside (unsuccesfully) it ended up leaving a heap of holes for water to get in which in turn rusted the bottom of the inner and outer cab corner out. The rear cab corner also needed replacing on the same side, outer only. Had a bit of rust around one tail gate hinge to fix as well. Apart from that she was solid as , floors and doors and guards are good as! Next up was get stuck into the rust. Managed to find a skilled older tradesman who was keen to tackle it. And also keen to let me come and help him which was awesome. Learnt a heap of new skills and was epic watching him hammer and dolly out the dents. The front drivers side door had swung round and stoved in the corner of the cab as well as bent the door at some point. The yanks must of tried to bang the dent out from behind via piercing holes in the inner guard to put a bar or something through to hammer dent out from the inside (unsuccesfully) it ended up leaving a heap of holes for water to get in which in turn rusted the bottom of the inner and outer cab corner out. The rear cab corner also needed replacing on the same side, outer only. Had a bit of rust around one tail gate hinge to fix as well. Apart from that she was solid as , floors and doors and guards are good as!
1 point
-
ended up getting 45,000L roughly a day out of it, haven't got it tested yet but haven't got sick or the shits. the water goes through a decent filter setup down to 1 micron, put a 750w sump pump with float switch down the well to pump to a 35,000L storage tank. so happy been able to sleep better not having to worry about running out of water, kinda wished i had documented it better as more people could build these as its not difficult. if i build a pool i will probably dig it by hand too.1 point


.jpg.9ed8cc8635a79d20ad84cd3cead353e0.jpg)


This leaderboard is set to Auckland/GMT+12:00