
Leaderboard


Popular Content
Showing content with the highest reputation on 04/10/20 in all areas
-
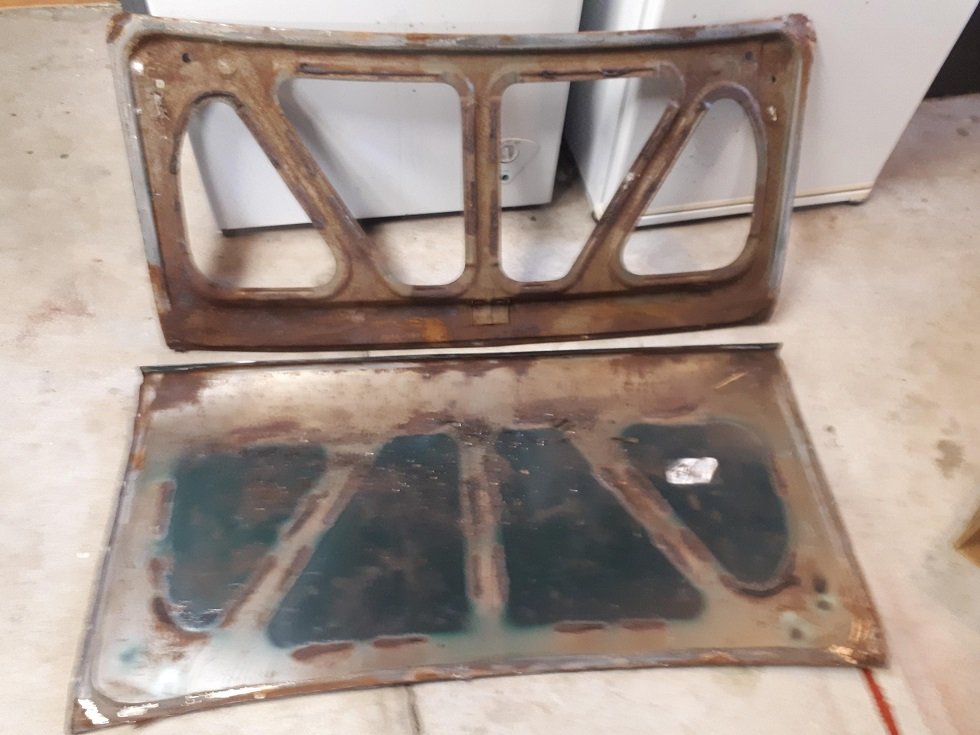
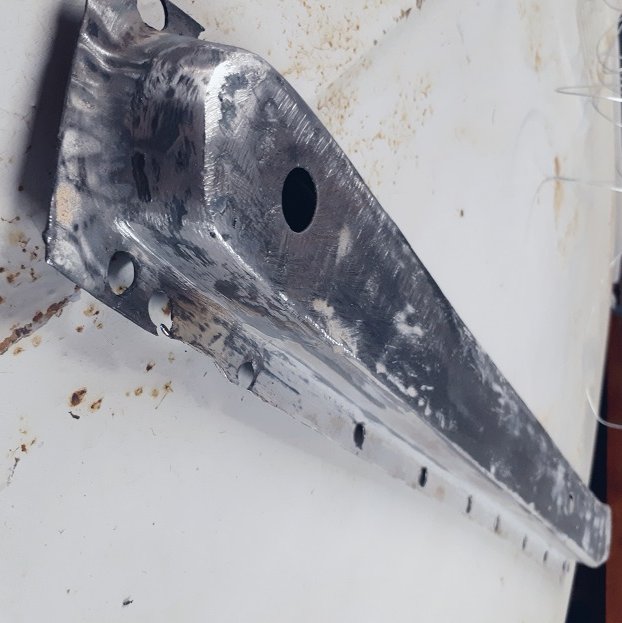
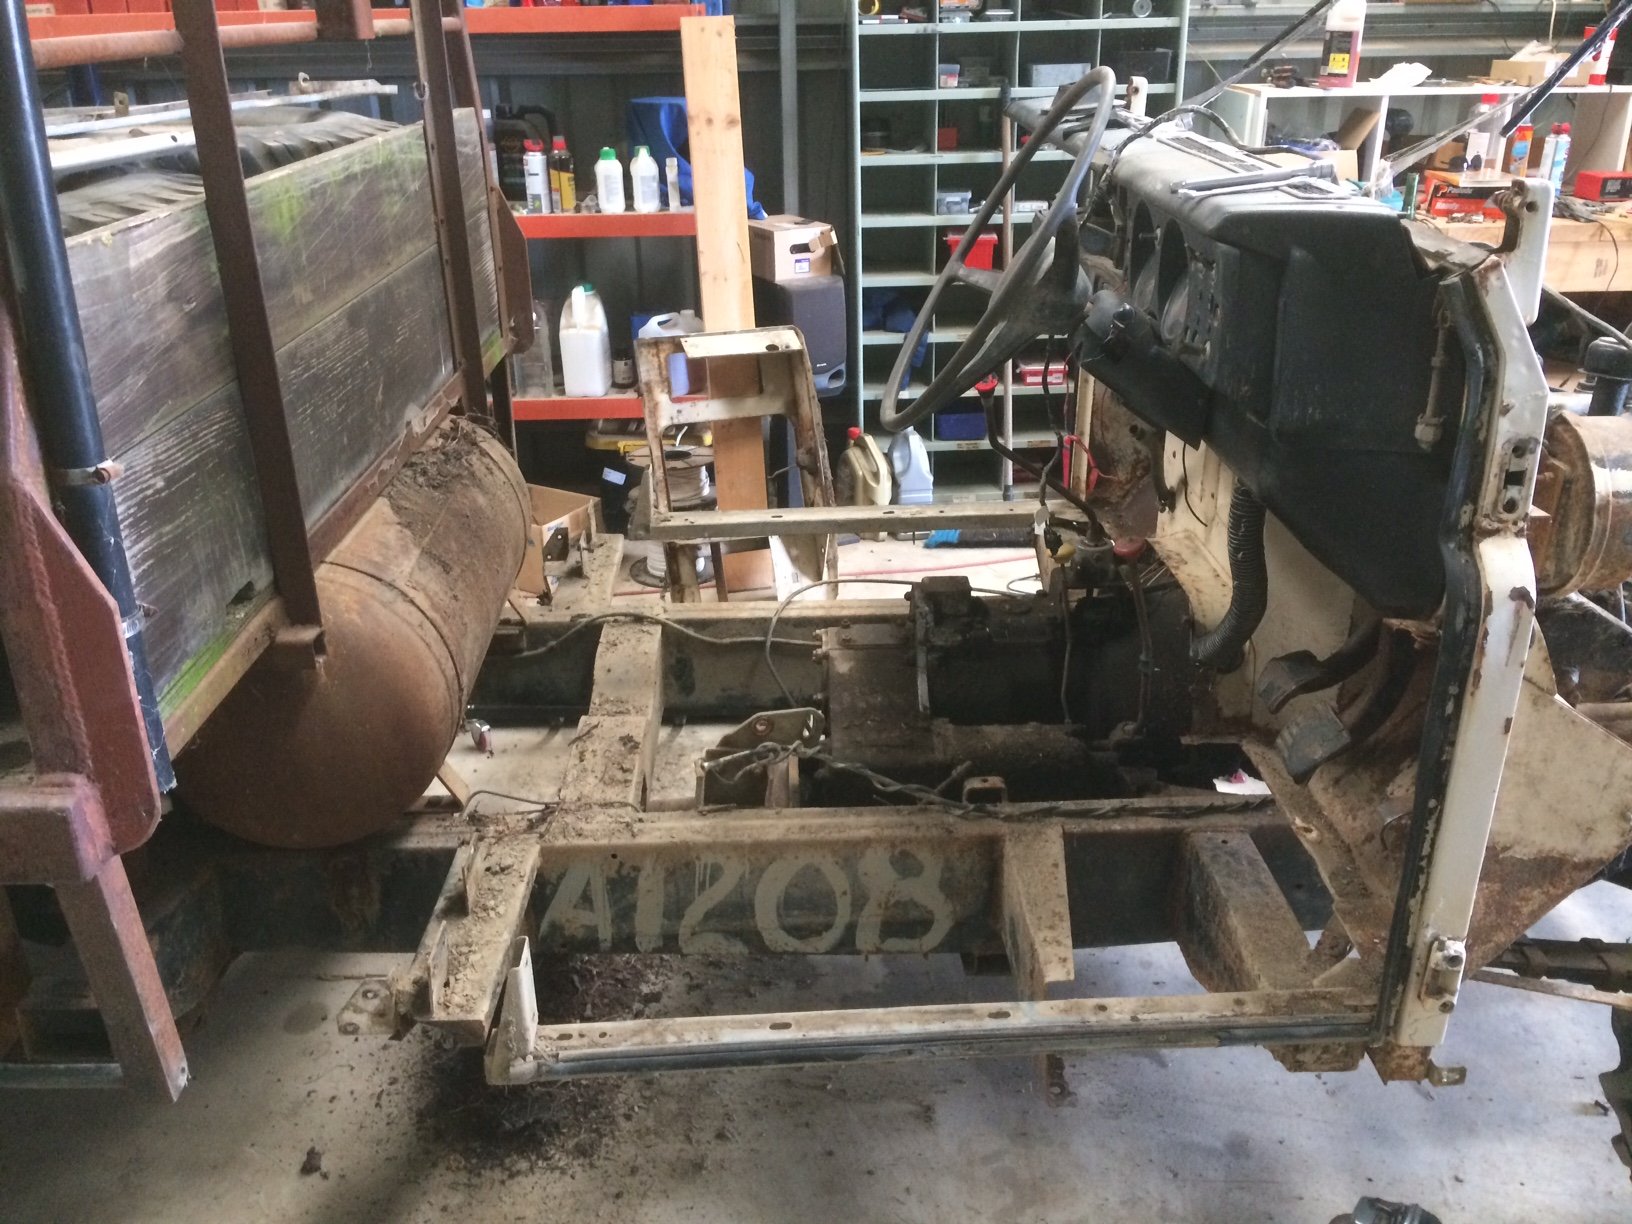
Unpicked chassis rails and straightened them up on both sides, floor hammered back up into shape too as it looked like it had been bottomed out or jacked up a few times. split both the bonnet and boot lids to repair them, both have been acid dipped since, along with the front guards. both doors have been blasted around the rear frame, and I hand stripped the outsides. - no pics basically the whole car has been bare metaled and epoxied at this point , and minor repairs have been carried out around various areas of the car The next post I make is where the fun (headache) really starts!
 19 points
 -
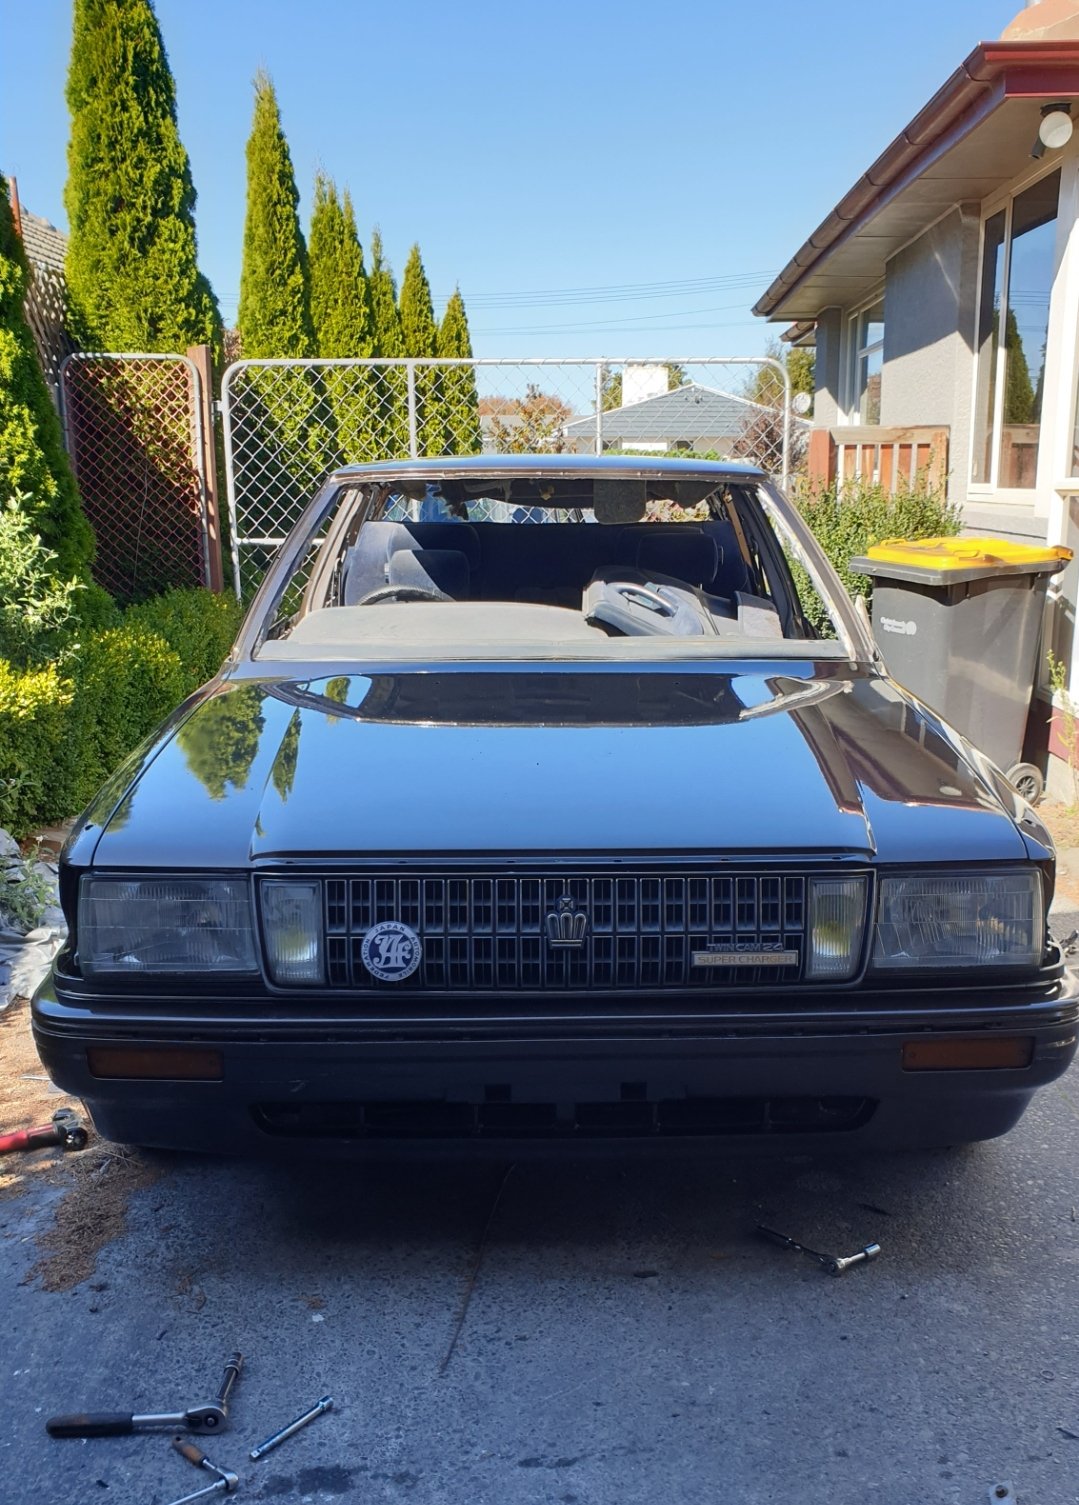
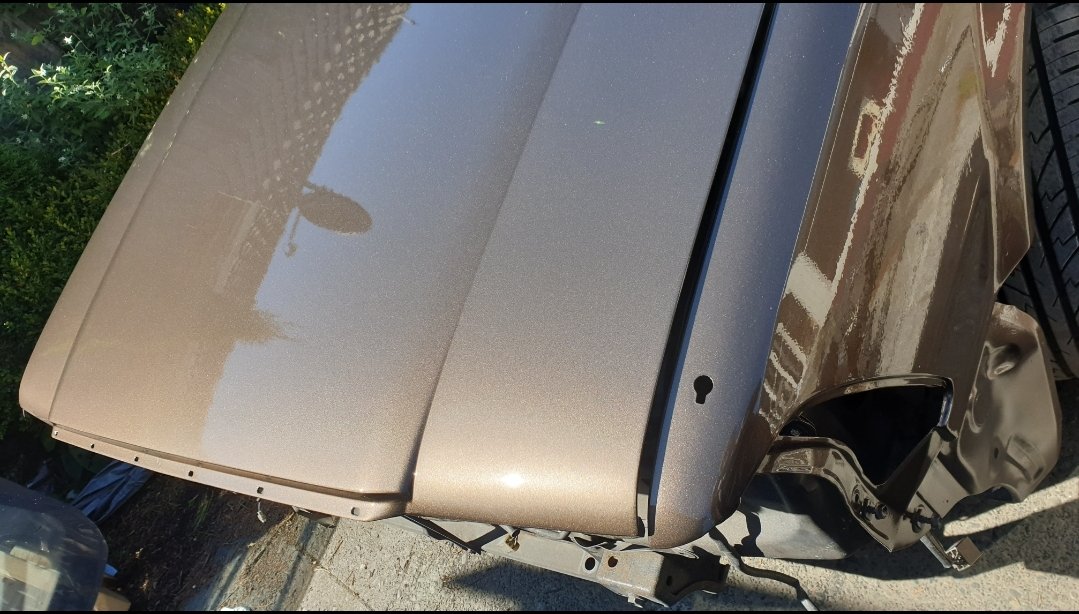
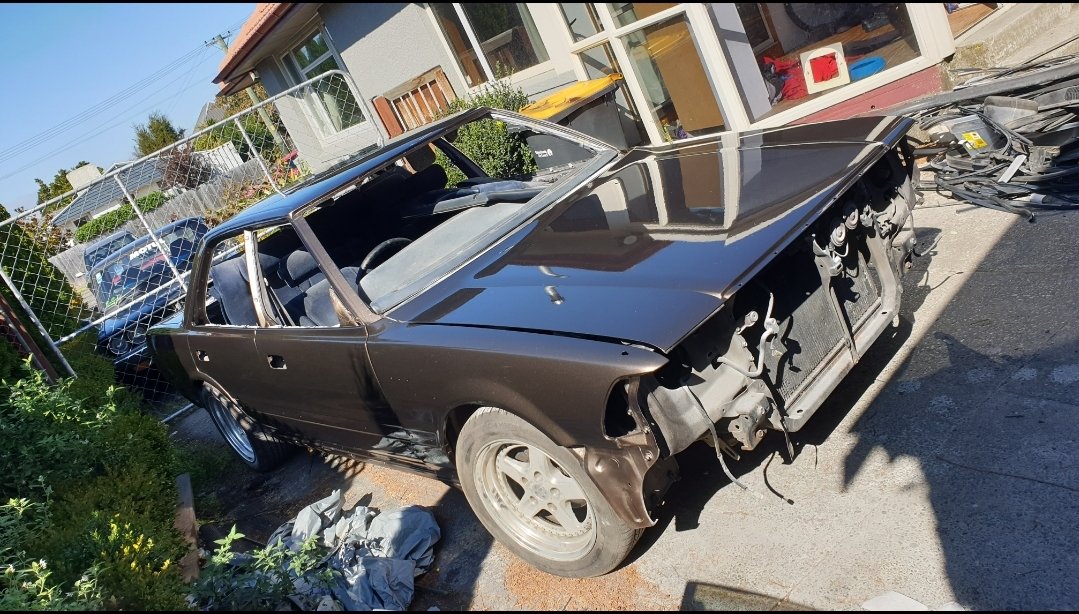
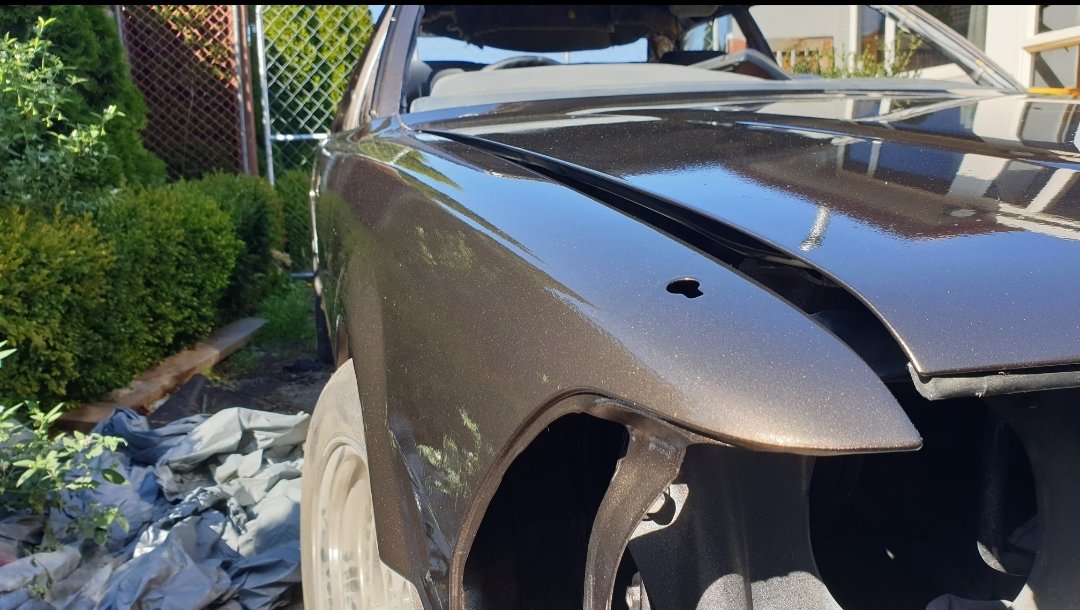
Spent the day refitting parts that I don't think will get in the way of fixing the clear coat defects. Really starting to love how this car is looking now.
16 points
-
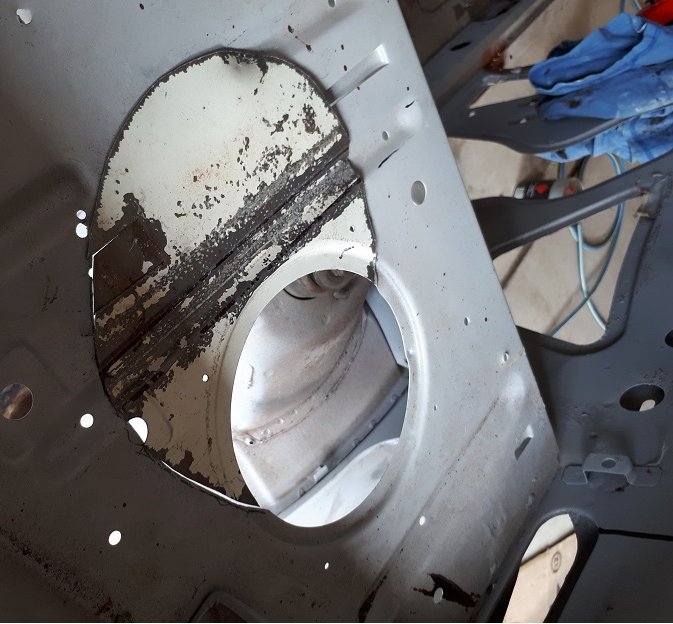
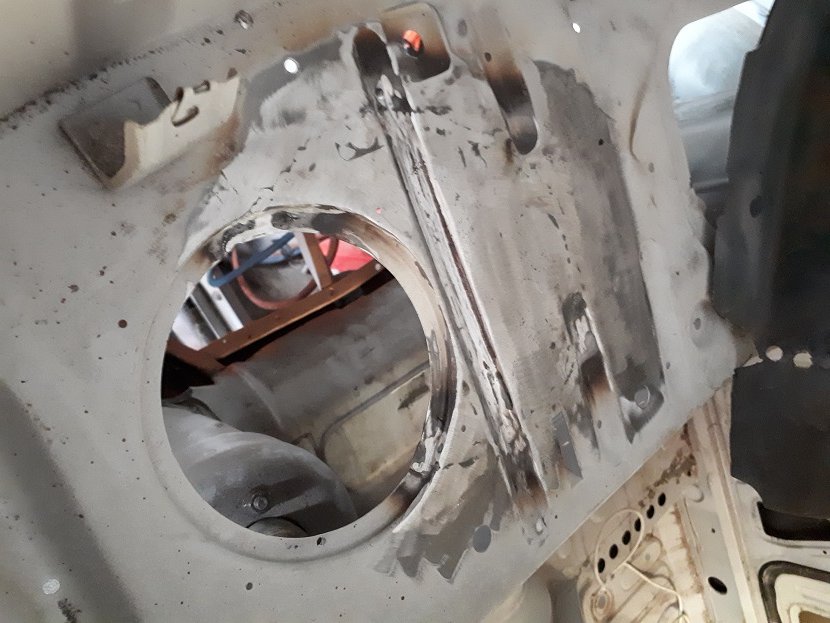
Nother day nother patch..
13 points
-
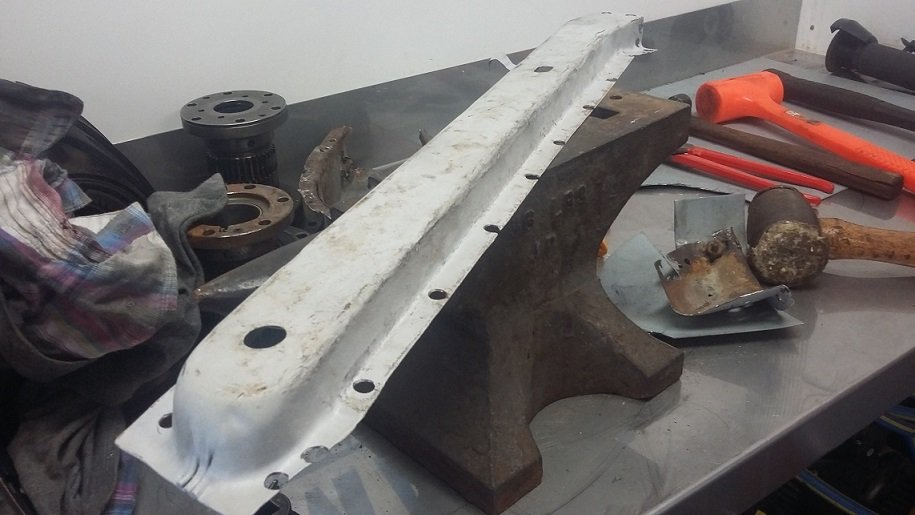
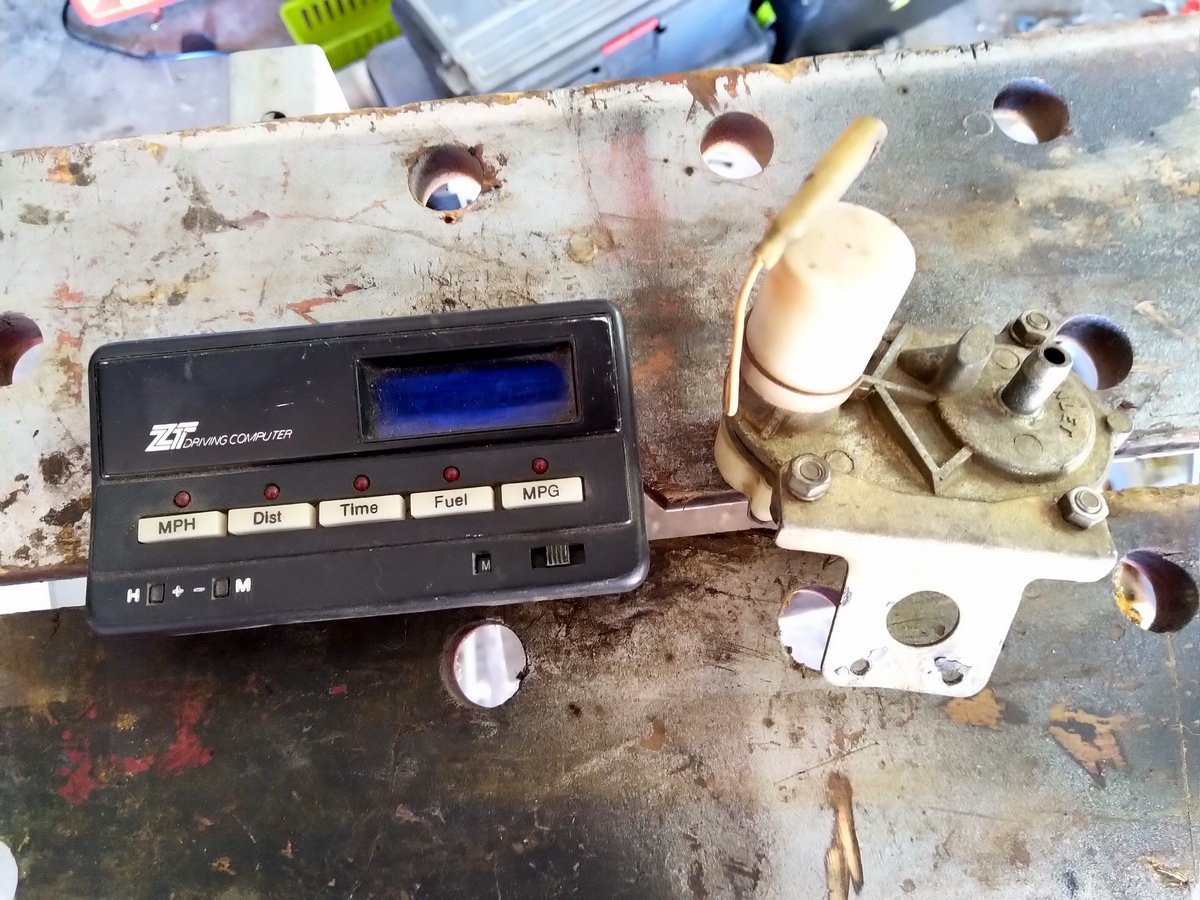
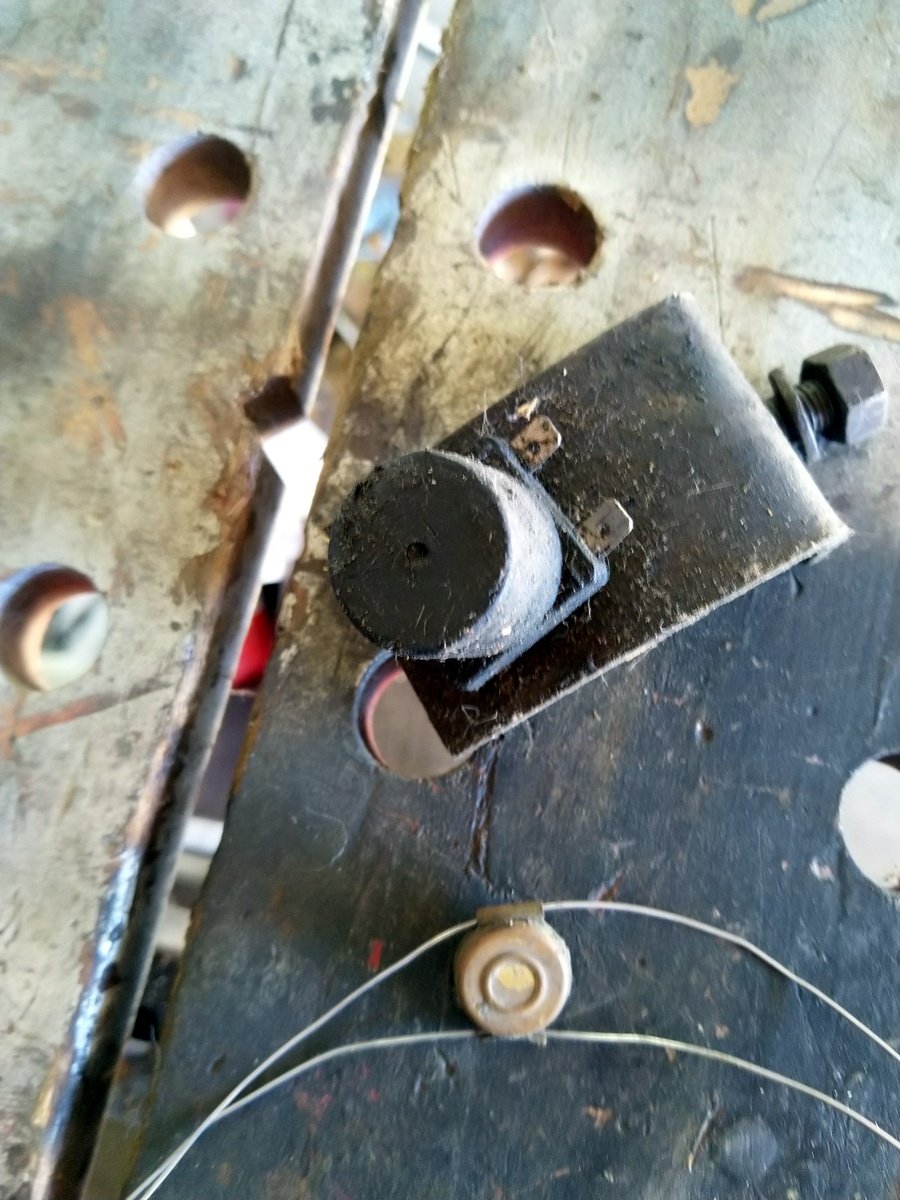
Its the fuel flow sensor from a ZT Driving computer, '80's tech at it best (they worked well) I was surprised I could find mine. You may also find these magnets and this pickup coil on the drive shaft for the speed input. The fuel flow unit had a tendency to block.
8 points
-
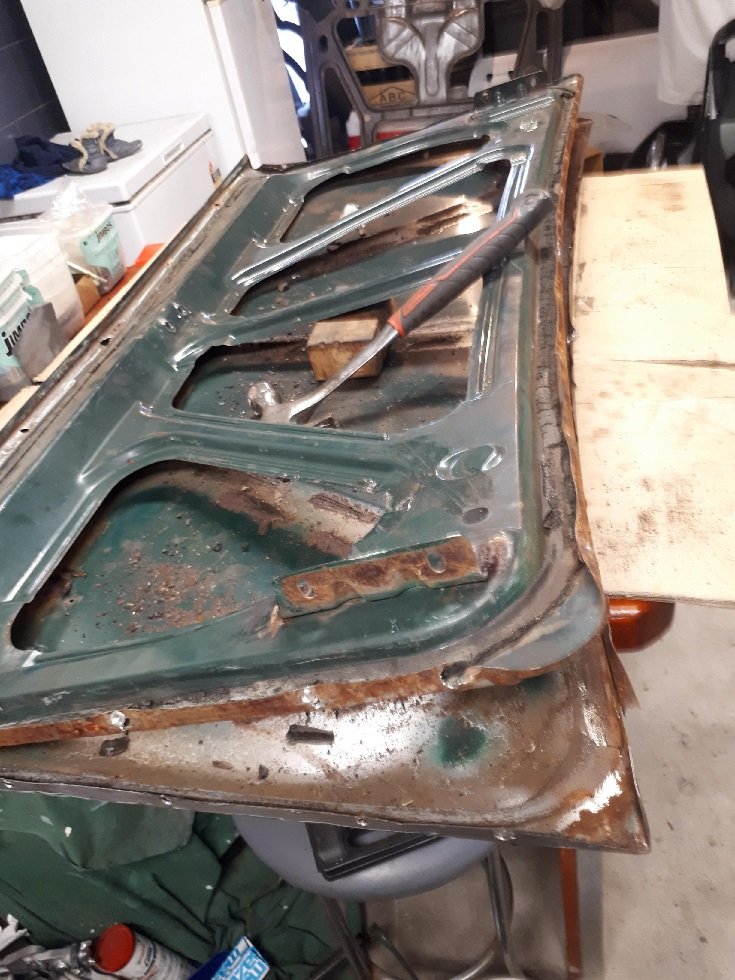
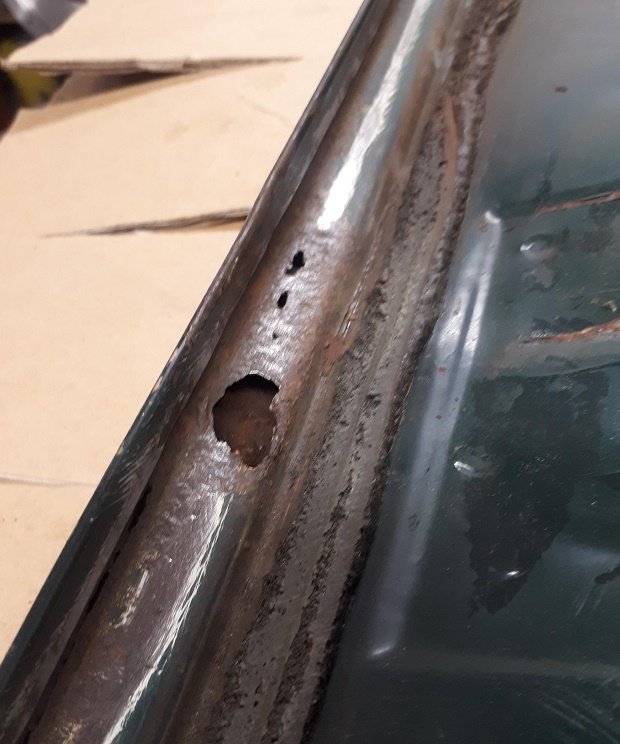
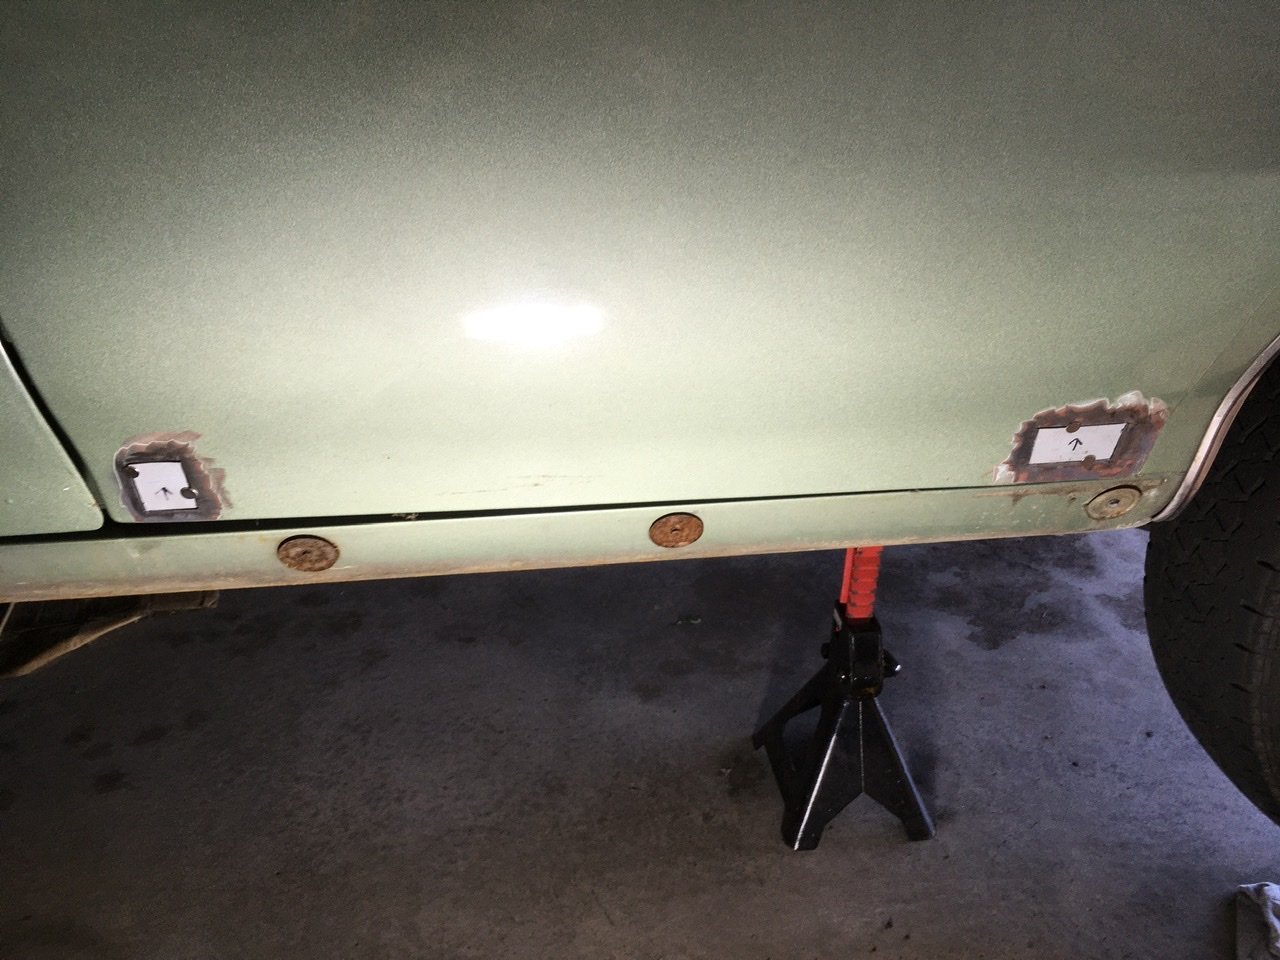
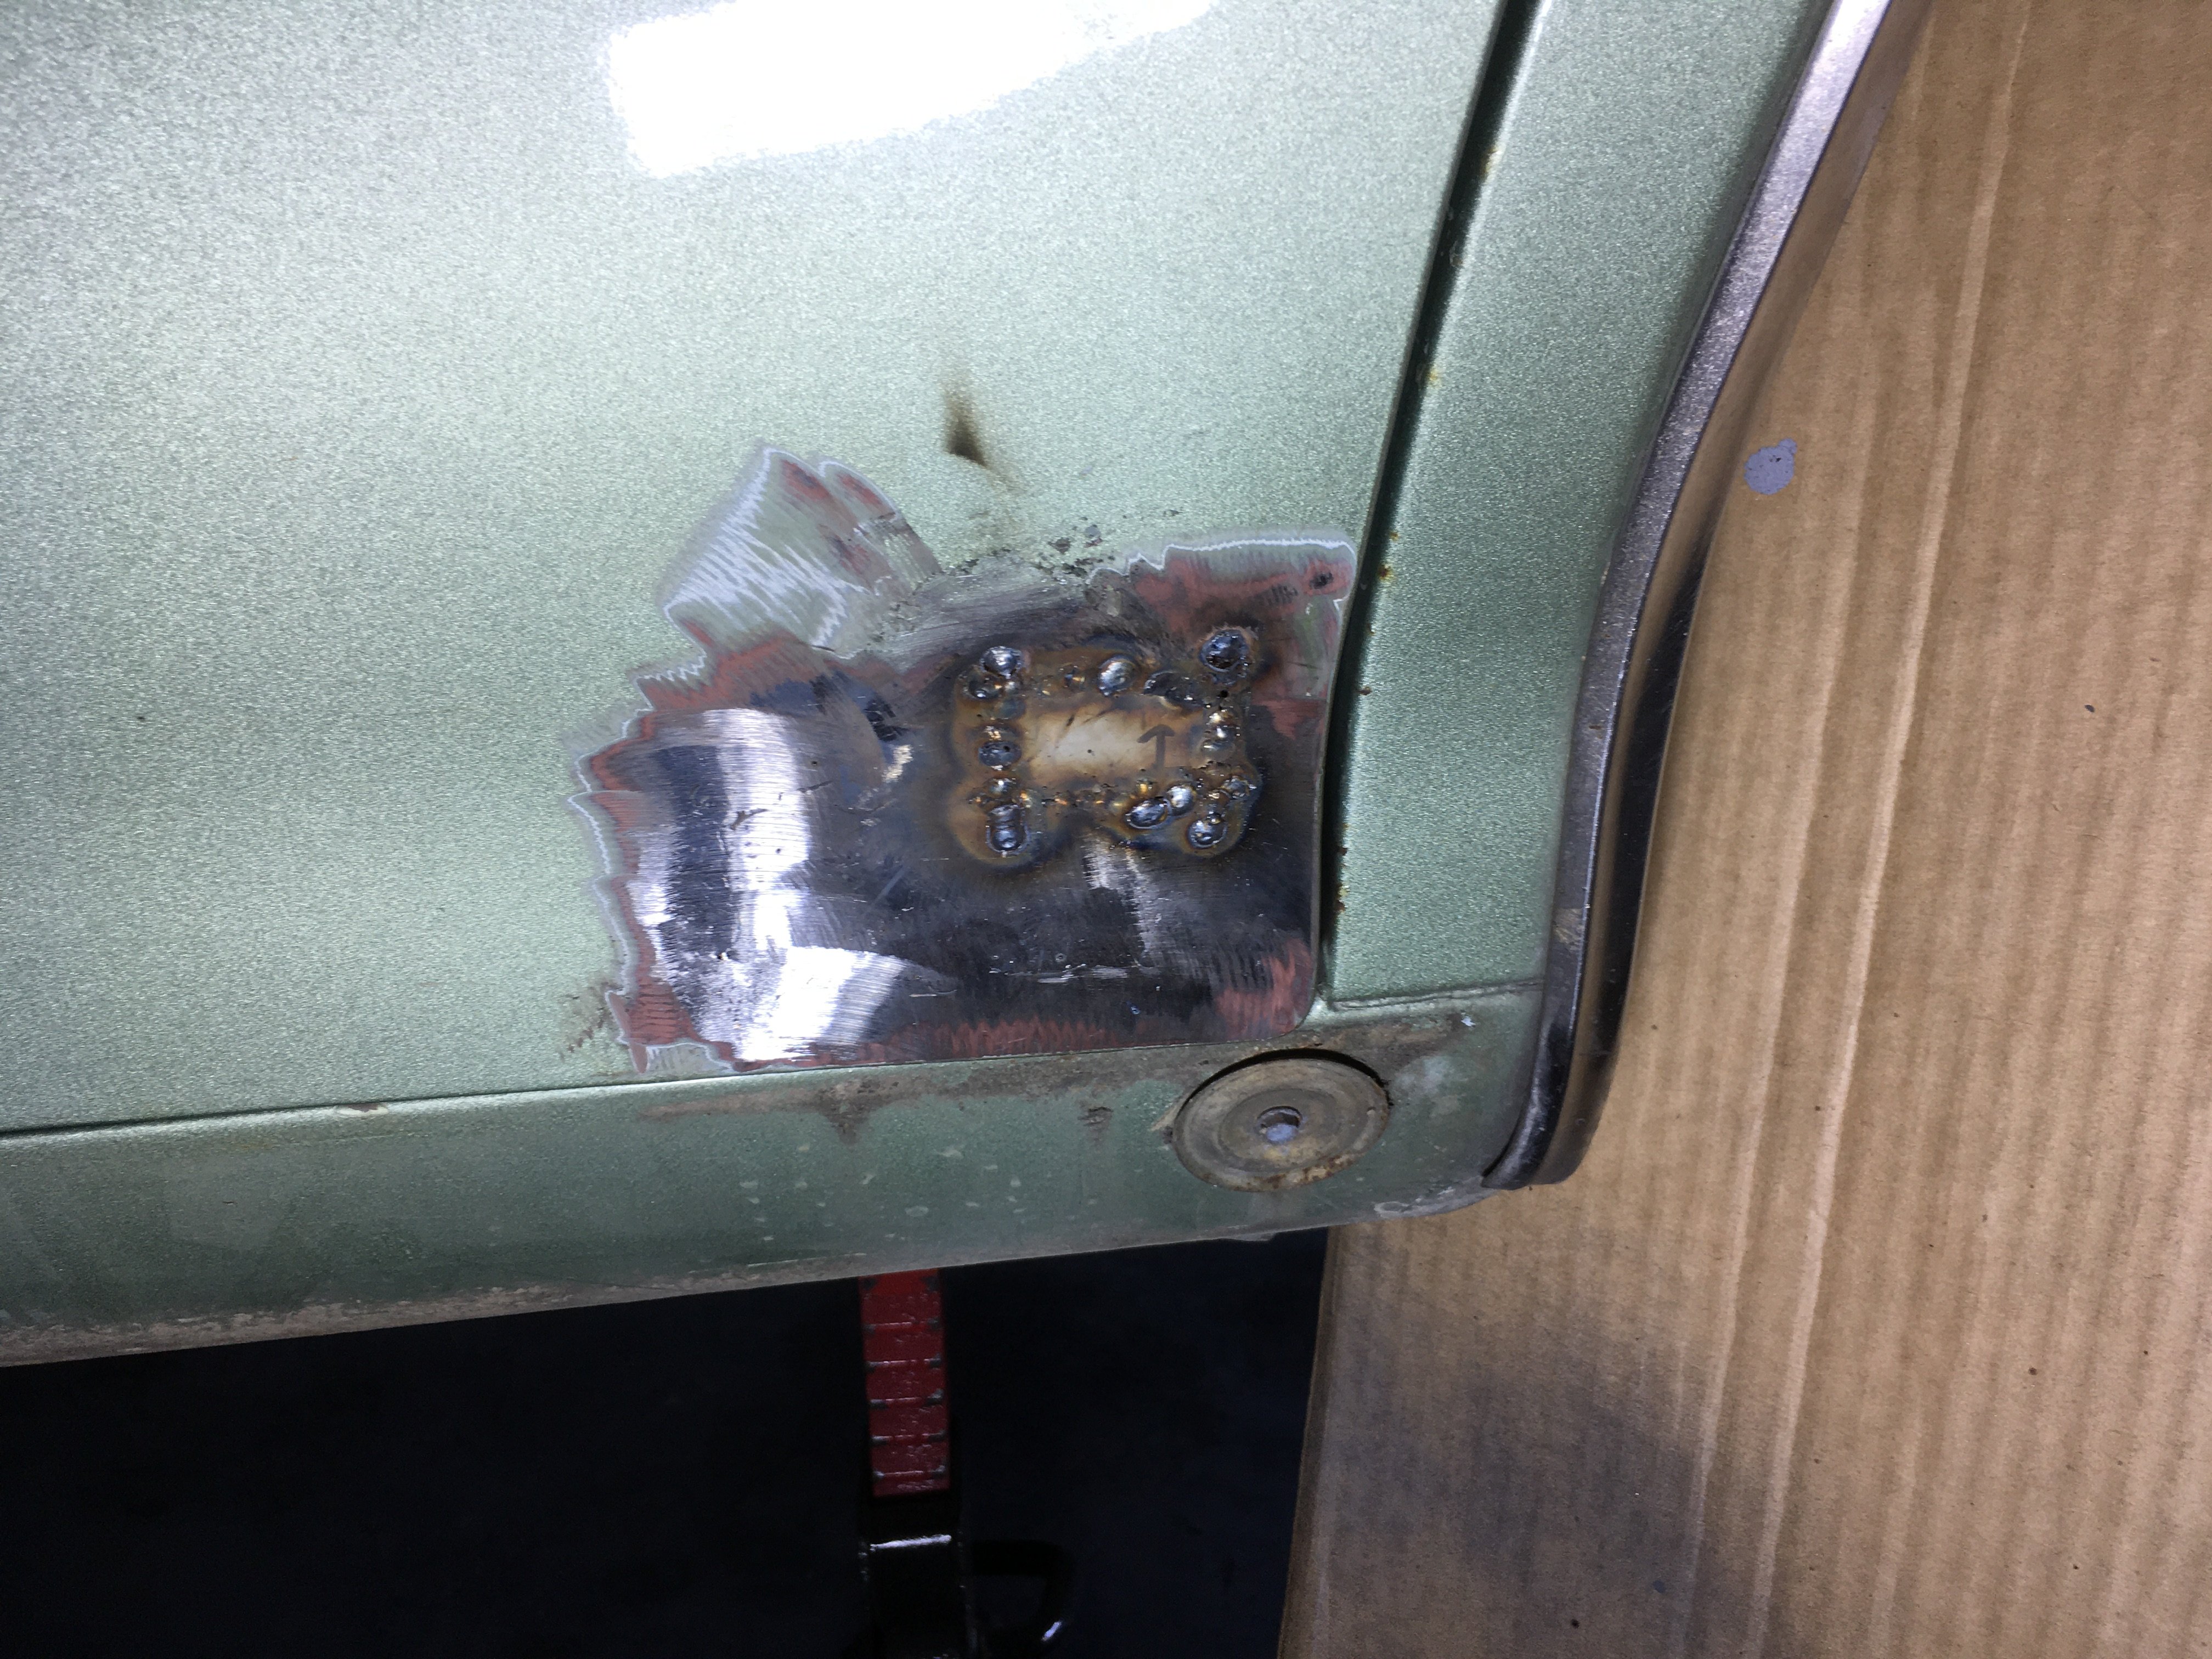
Most of you know the rear door handles are missing thanks to some yank in the early 2000s. Check out the sweet hole filling. I will leave it as is for now incase I decide to find and fit some handles. The brown is the factory sound deadening stuff. Inside the door is pretty solid except for those two spots.
7 points
-
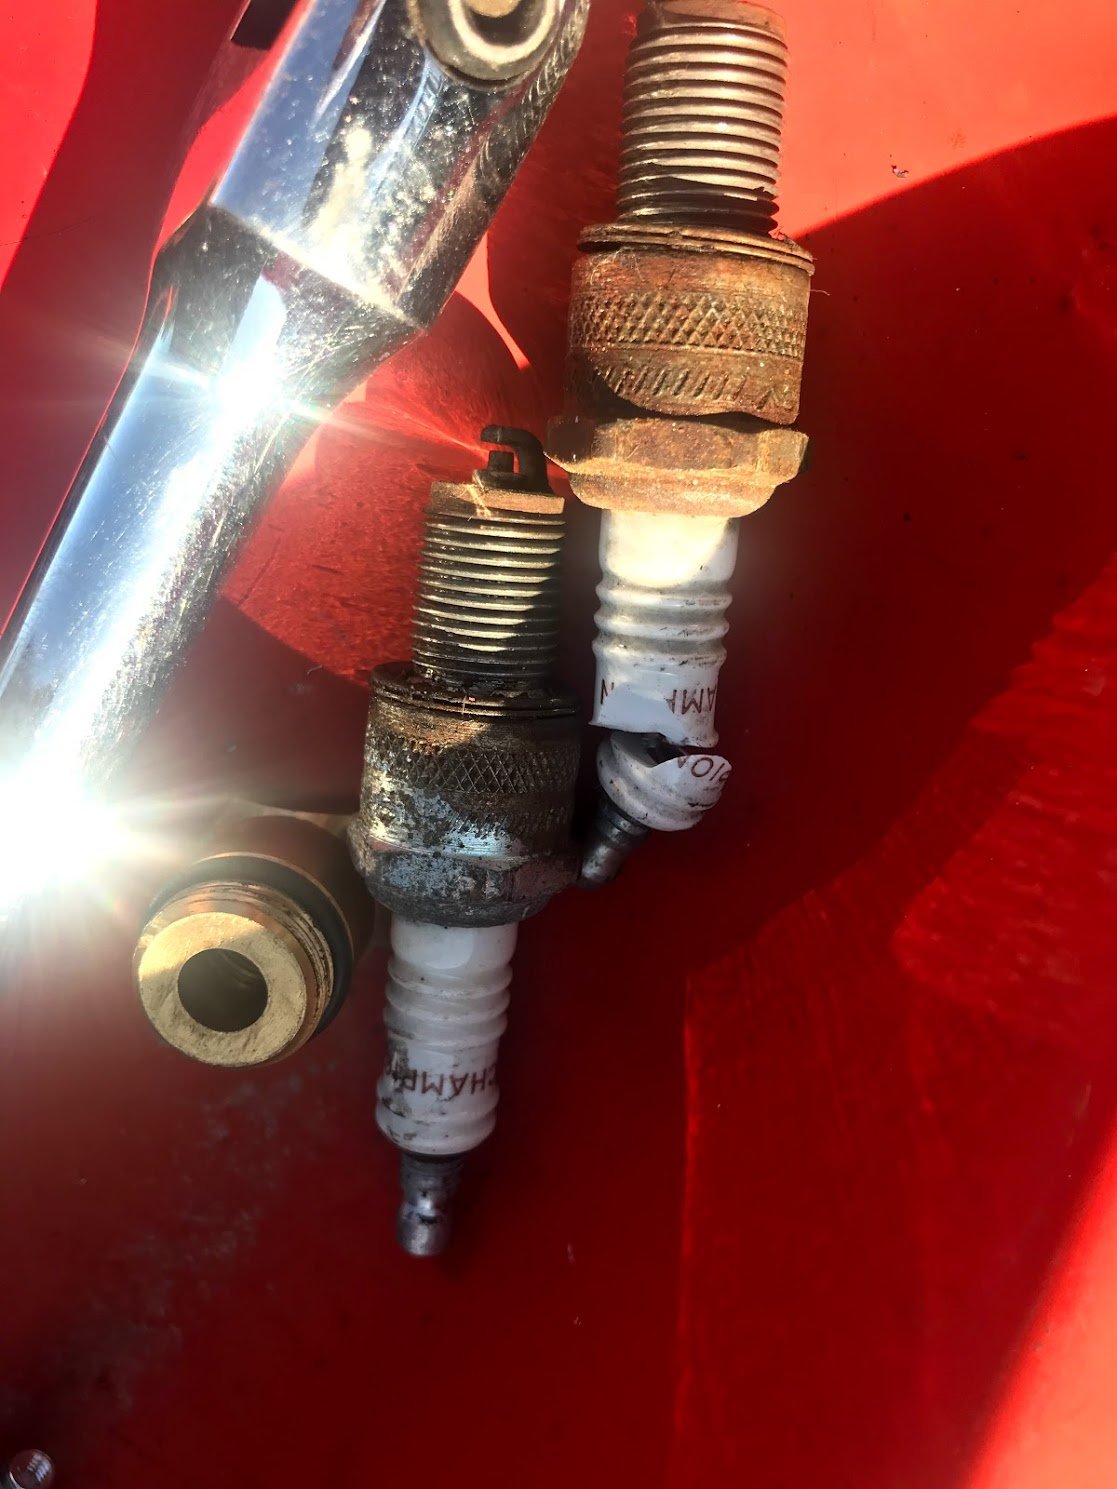
A little trick I have used on a borderline hard to start car it to use a set of toasty hot sparkplugs from another car that's just been running / the oven.7 points
-
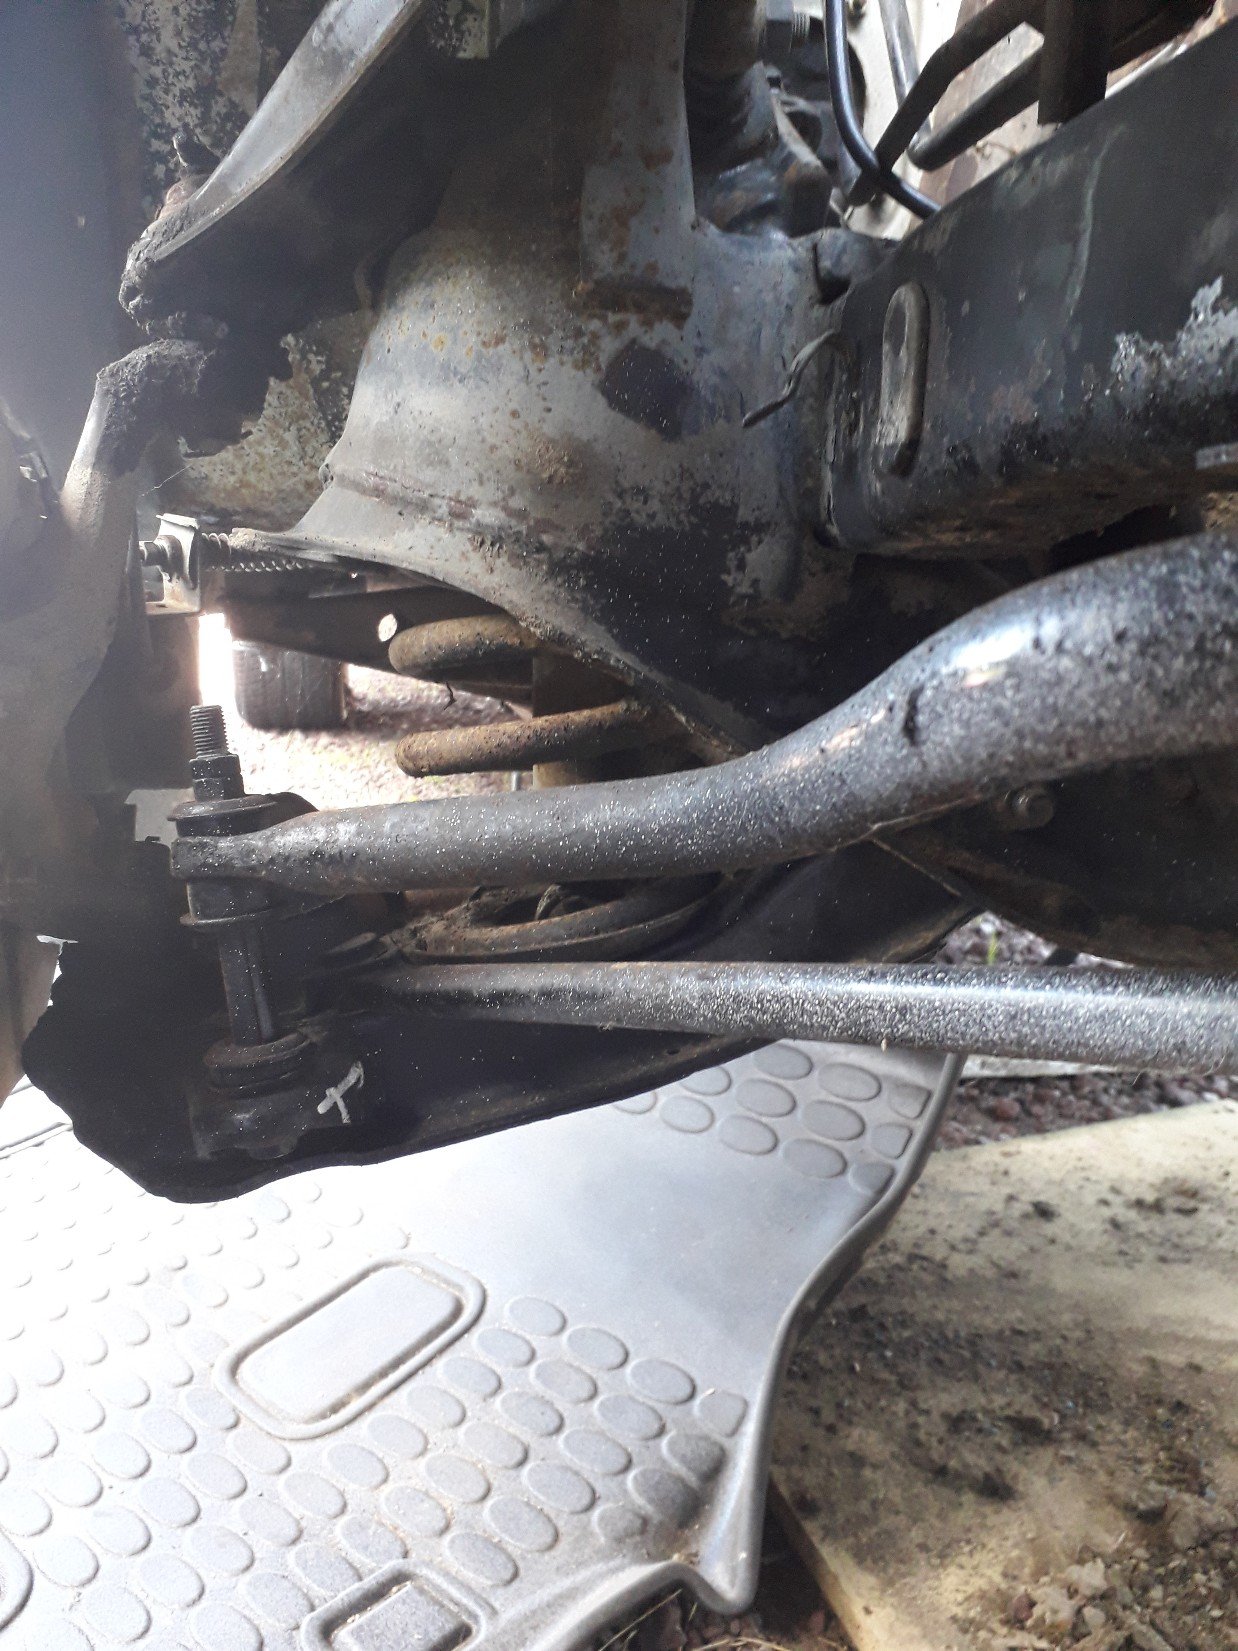
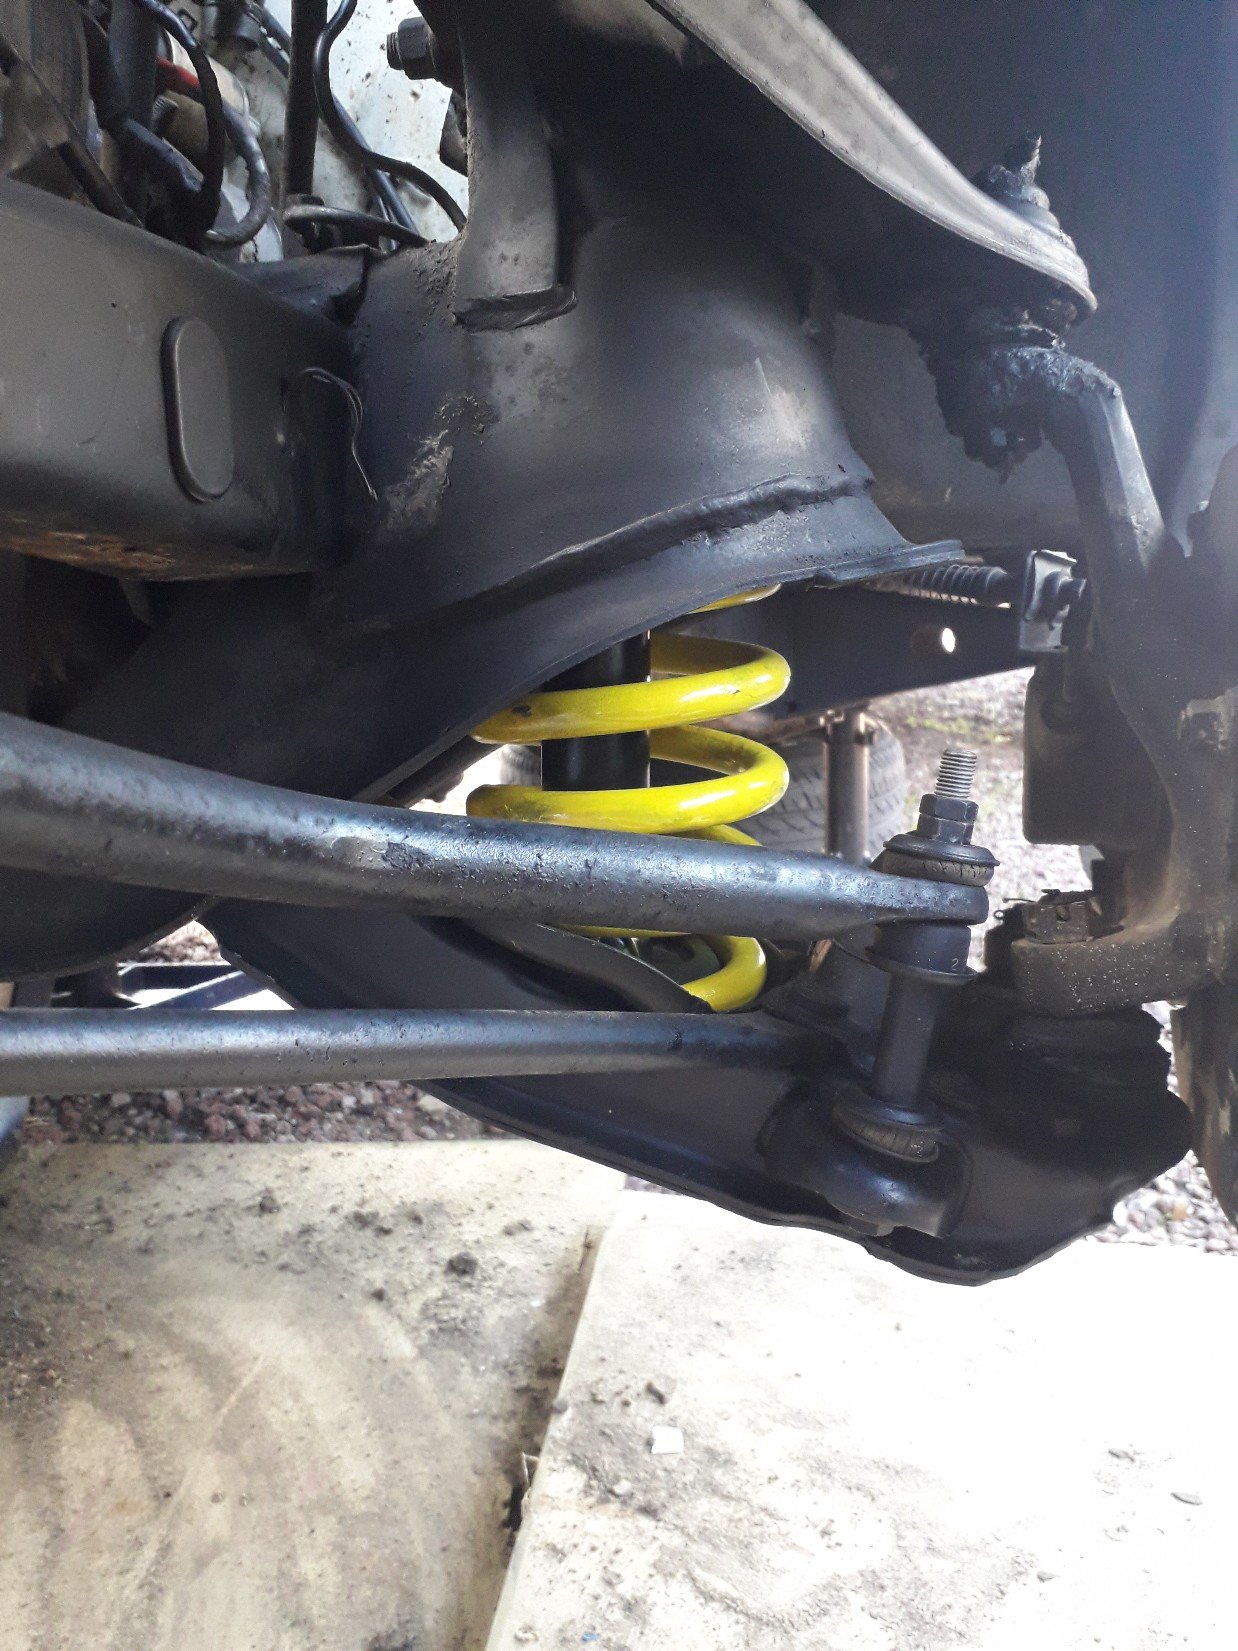
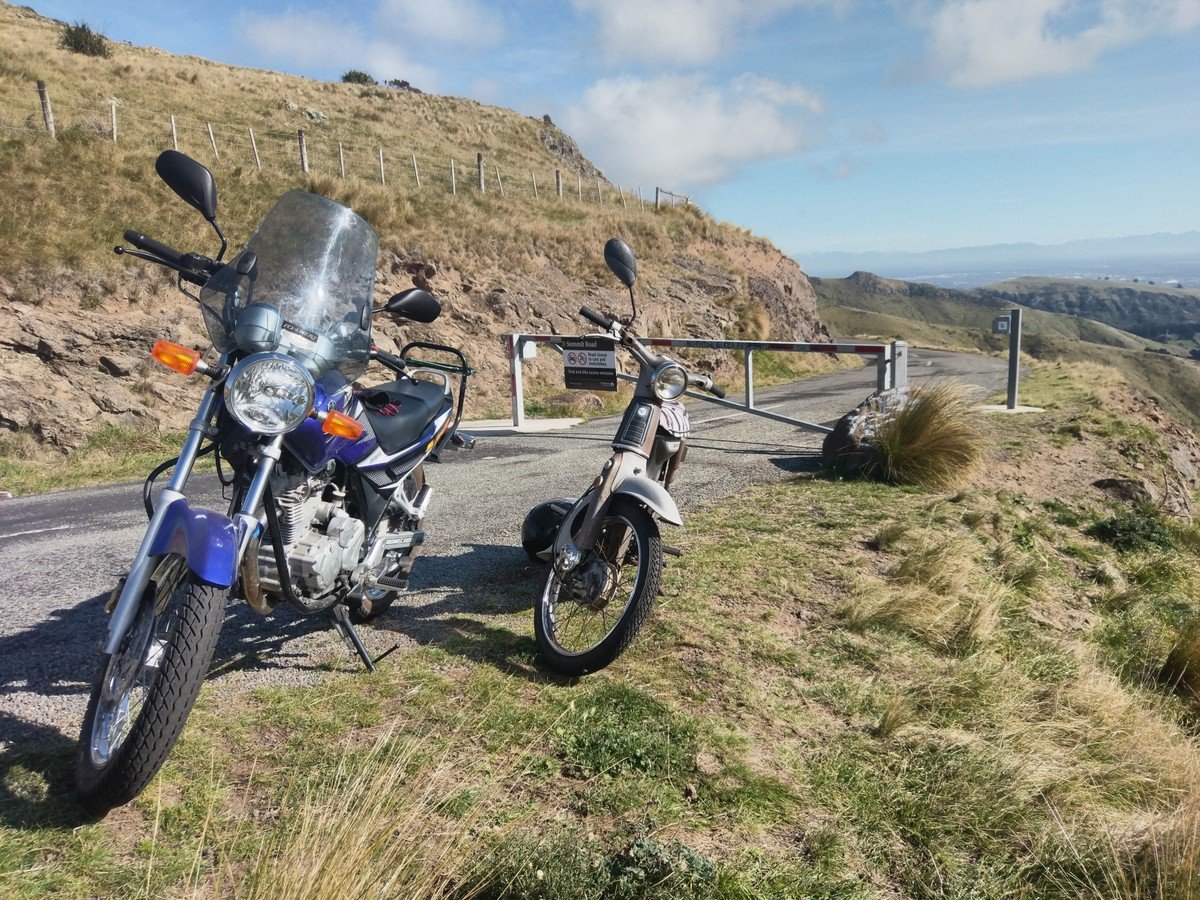
man what a bitch this has been to do over self isolation time. a second pair of hands would had been extremely helpful today cant wait to get the front all sorted and get it on the ground. just assembling it to get it to the new shop. once it is here ill make new break lines and go over everything else. make sure she is ready to go.7 points
-
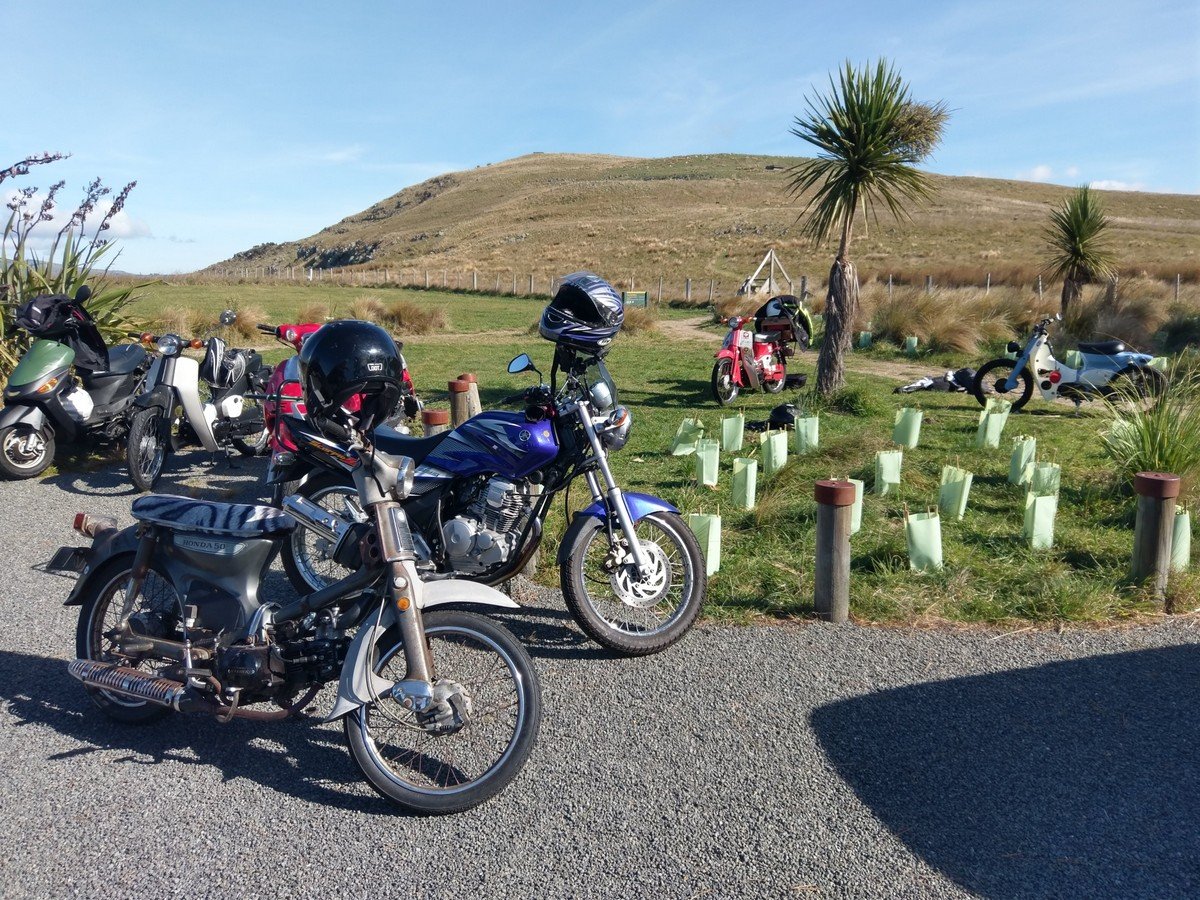
So with Eastcapescapade 2.0 looming quickly I decided I needed a reliable lump to power this. Grabbed a new 125 semi auto Lifan from Shore50. And had some DrATV lower engine mount adapters in stock leftover from the 67 Honda build. Were handy to have but needed bending to fit properly - knowing what I know now I'd make my own or redrill the frame next time. Used a Honda intake manifold to get the carb to mate up to the 90's airbox. Had to drill out the intake in the rear rack with a step drill bit to get more air into it though. Did some endurance testing and daily rode it for a bit. Lifan life was great. My exhaust I made for the ATC fit this well. I also used a Trail tech regulator for lighting this time around, getting rid of the battery. Then Eastcape ride happened. Bike went really well, kept up with the pack pretty good. Although it was using lots of oil... later realised I never took the cap off the breather on top of the motor lol. Oil was seeping past the base cylinder gasket and past the valves too, was smokey. Start of the Motu Road Rere Falls with @Shakotom FR140 and @MopedNZ's 62 Honda also 125 powered (manual) Top of a back road forestery road in Gisborne. But then at the end of the second day pulling into Hick's Bay my ehxuast broke where I'd welded the header on - made for a loud ride for the last few KM. And also the rear wheel kinda broke.. half the spokes became really loose and some broke. No way of fixing that to be safe enough for the rest of the ride. So I jumped on @chris r's GN125 he crashed that morning. Jammed the front wheel inbetween a tree to straighten the forks, bled the brakes so they kind of worked. Ripped off the remains of the tacho and speedo. Replaced some missing nuts and bolts others had taken for running repairs that day. Taped in the headlight - job done. Was actually a good bike for the last day. Kept up with the 140cc bikes really well. Was on limiter between every gear change. The engine knock went away eventually. Oh it was also dereg and I had no motorbike license. But coast life no dramas.6 points
-
Sanded and re polished the copper pipe work today. About 4 hours work there. I was lazy and only did the visible side too6 points
-
Repairs went well, two lazy days blocking and sanding with really limited supplies, I’m Stoked to report that it’s all rubbed back and paint will fly this weekend! Sorry the photos are so random6 points
-
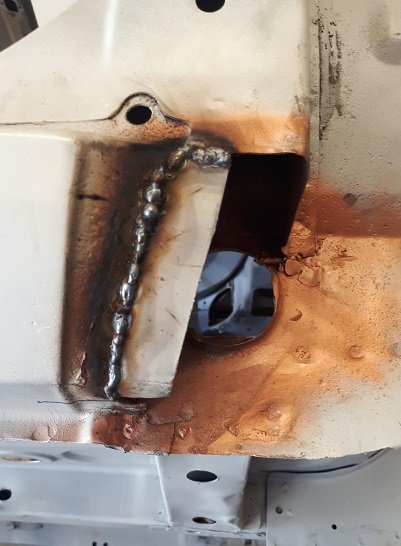
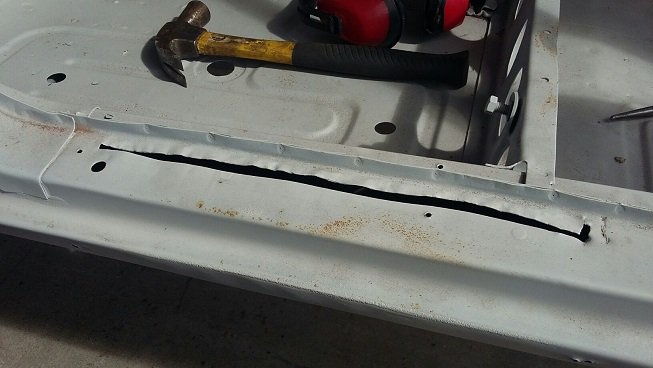
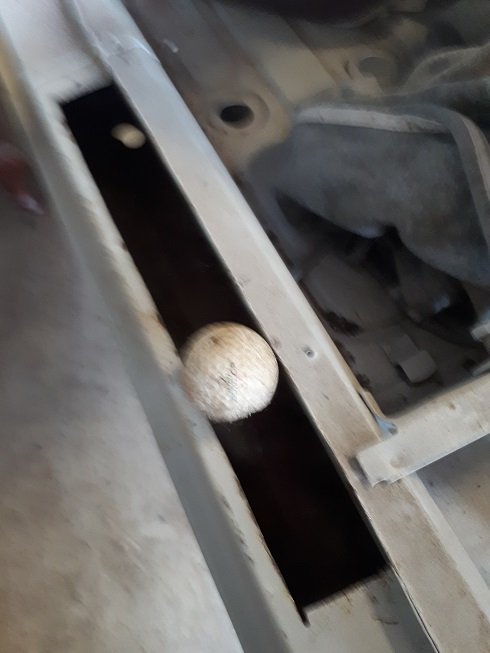
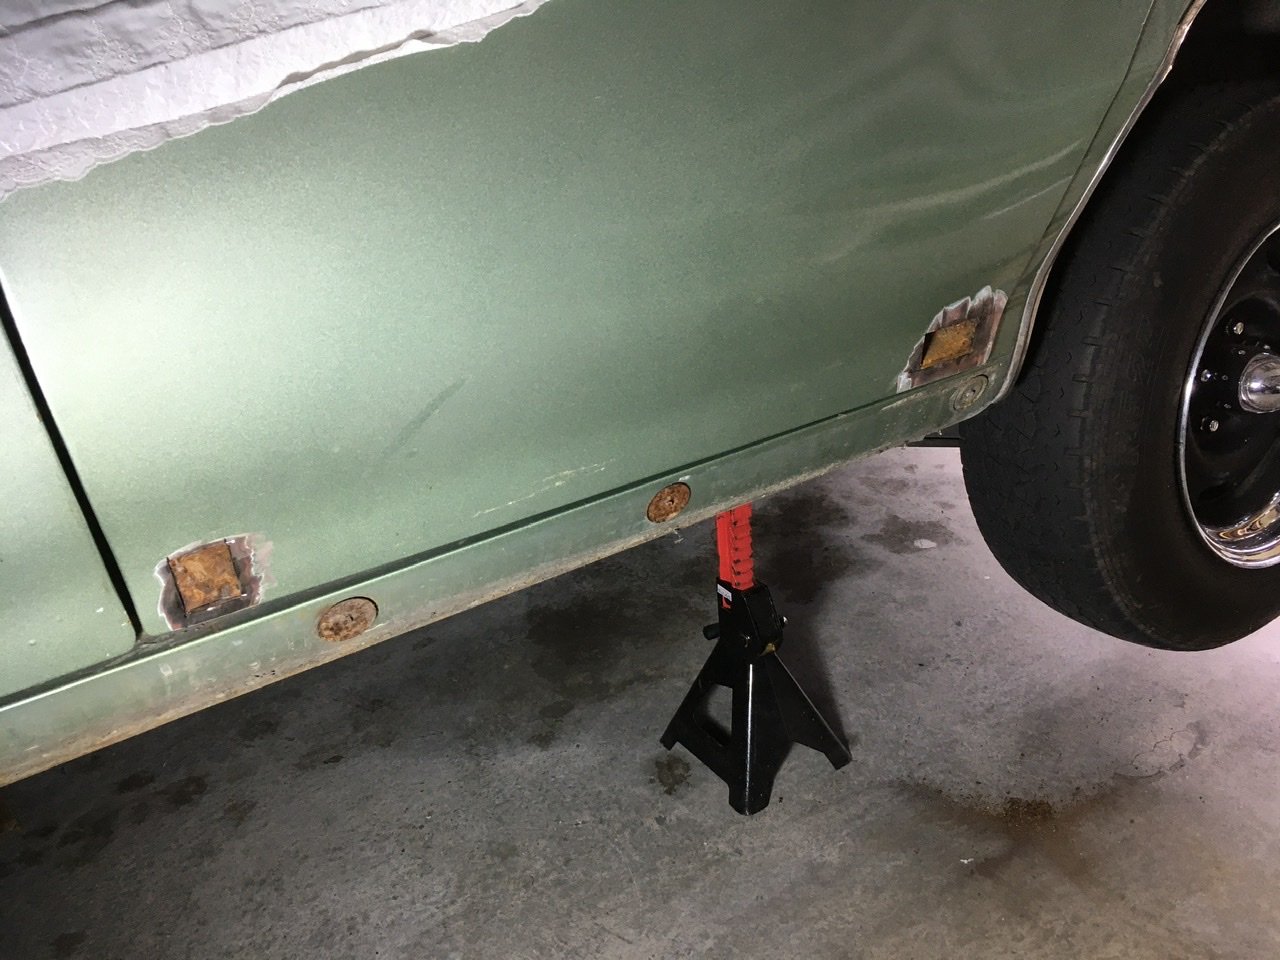
A couple of patch repairs here, speaker holes, seat mount, bottom of A-pillar, and the random cut in sill, with bonus golf ball found inside
6 points
-
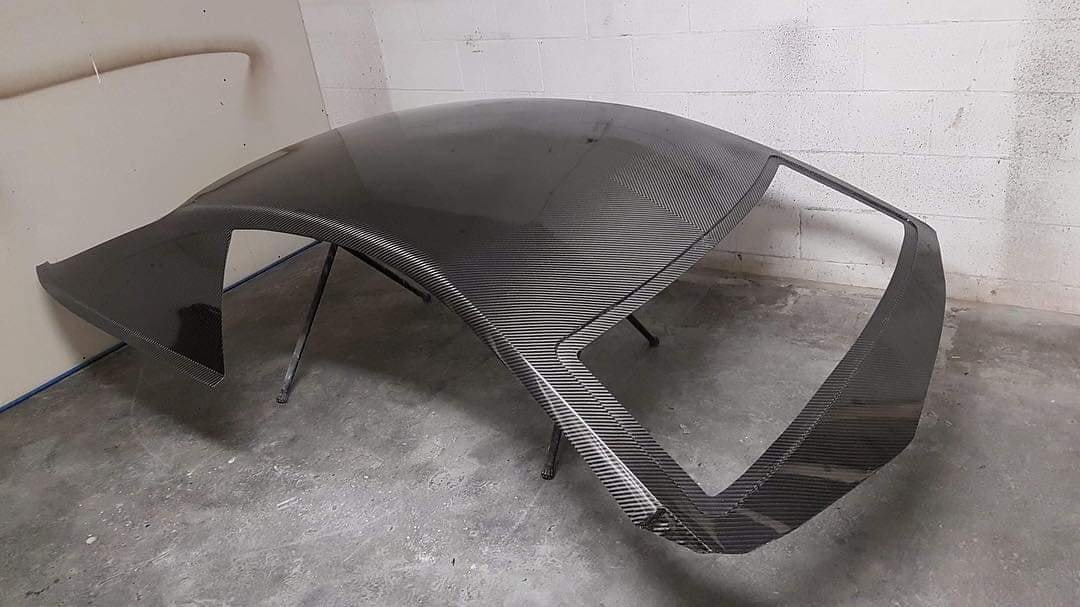
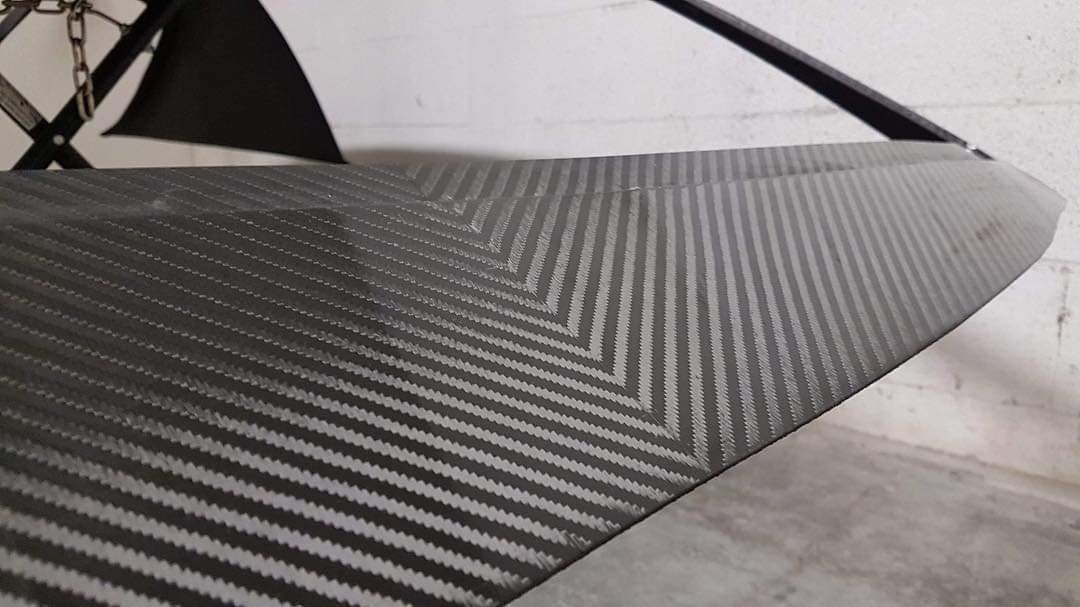
This guy! Bloody hell I cant believe someone can trim the edge of carbon that nicely. Then align it too. Amazing.
5 points
-
Also made it into the paper lols. After Eastcape I robbed the Lifan 125 for another project. Then it sat around for months and I eventually sold it. If the frame wasn't so rusty I'd have kept it but I'd also recently aquired another yellow Yamaha Adventure bike I wanted to focus on. So out the door it went. But I still have the ATC125M engine - sitting under the bench for a one day project. Needs rings though, which are NLA although TRX125 quad are apparently the same... Here's a couple of vids of rides I took this bike on. Was a great intro to 4 stroke Honda small bike life.4 points
-
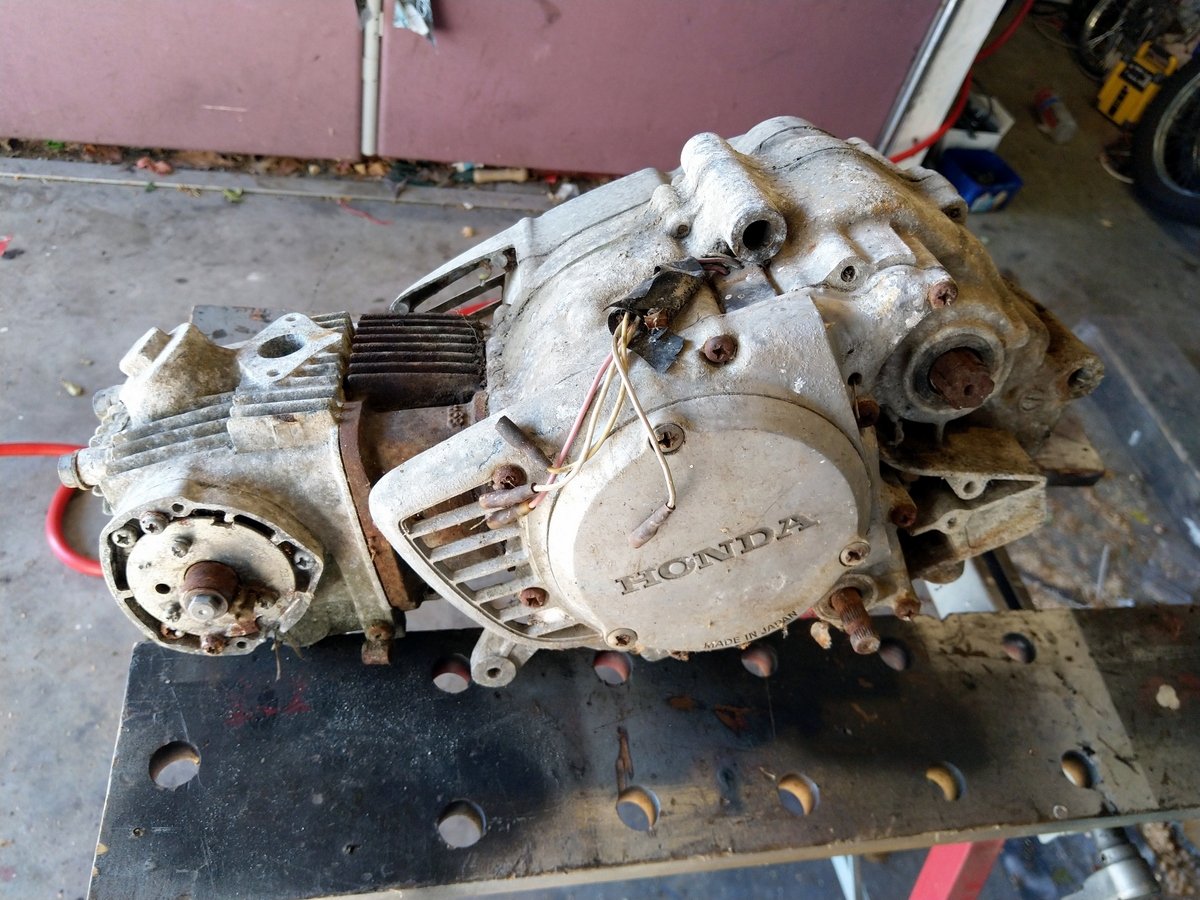
Oh yeah, should finish up the CT90 story. With the 90cc motor dying I was keen to upgrade it so tracked down an ATC125M - yeah the trike. Came up from @Raizer in Gisborne to Tauranga thanks to @Shakotom. It lived in @MopedNZ's mothers back shed for a few weeks until I had a day off to do something about it. I trucked my CT90 down and pulled all the bits off the trike I'd need, then offered the big block up to my 90 frame. Bolts in, just tight around the swingarm and sub-transmission, also the stock foot pegs don't work with pull start. Left the trike carcass in Tauranga and some piner took it away to build up with a Lifan I think. Took my CT125 back to Auckland and got a chain attacthed and had it ridable but uh oh... lots of false neutrals and such. Where have I seen this before.. Yep, the infamous shifter arm issue. But this time instead of just breaking the arm it actually broke the casting of the casing where it bolts on. So I sent the casing away to be tig welded and took the brand new shifter arm from my old 90 engine that I'd already replaced. Got a new gasket set and cleaned the whole motor up while I had the cases split. First time taking one of these Honda lumps this far apart - managed to get it back together though. Used new stainless cap screws (and copper coat on the threads) too.4 points
-
Finished off the rest of the electrics and fired it right up. Did a spanner check and tightened up all the remaining lose bolts. Finally finished!
4 points
-
Thanks for that, now i have a spare one!4 points
-
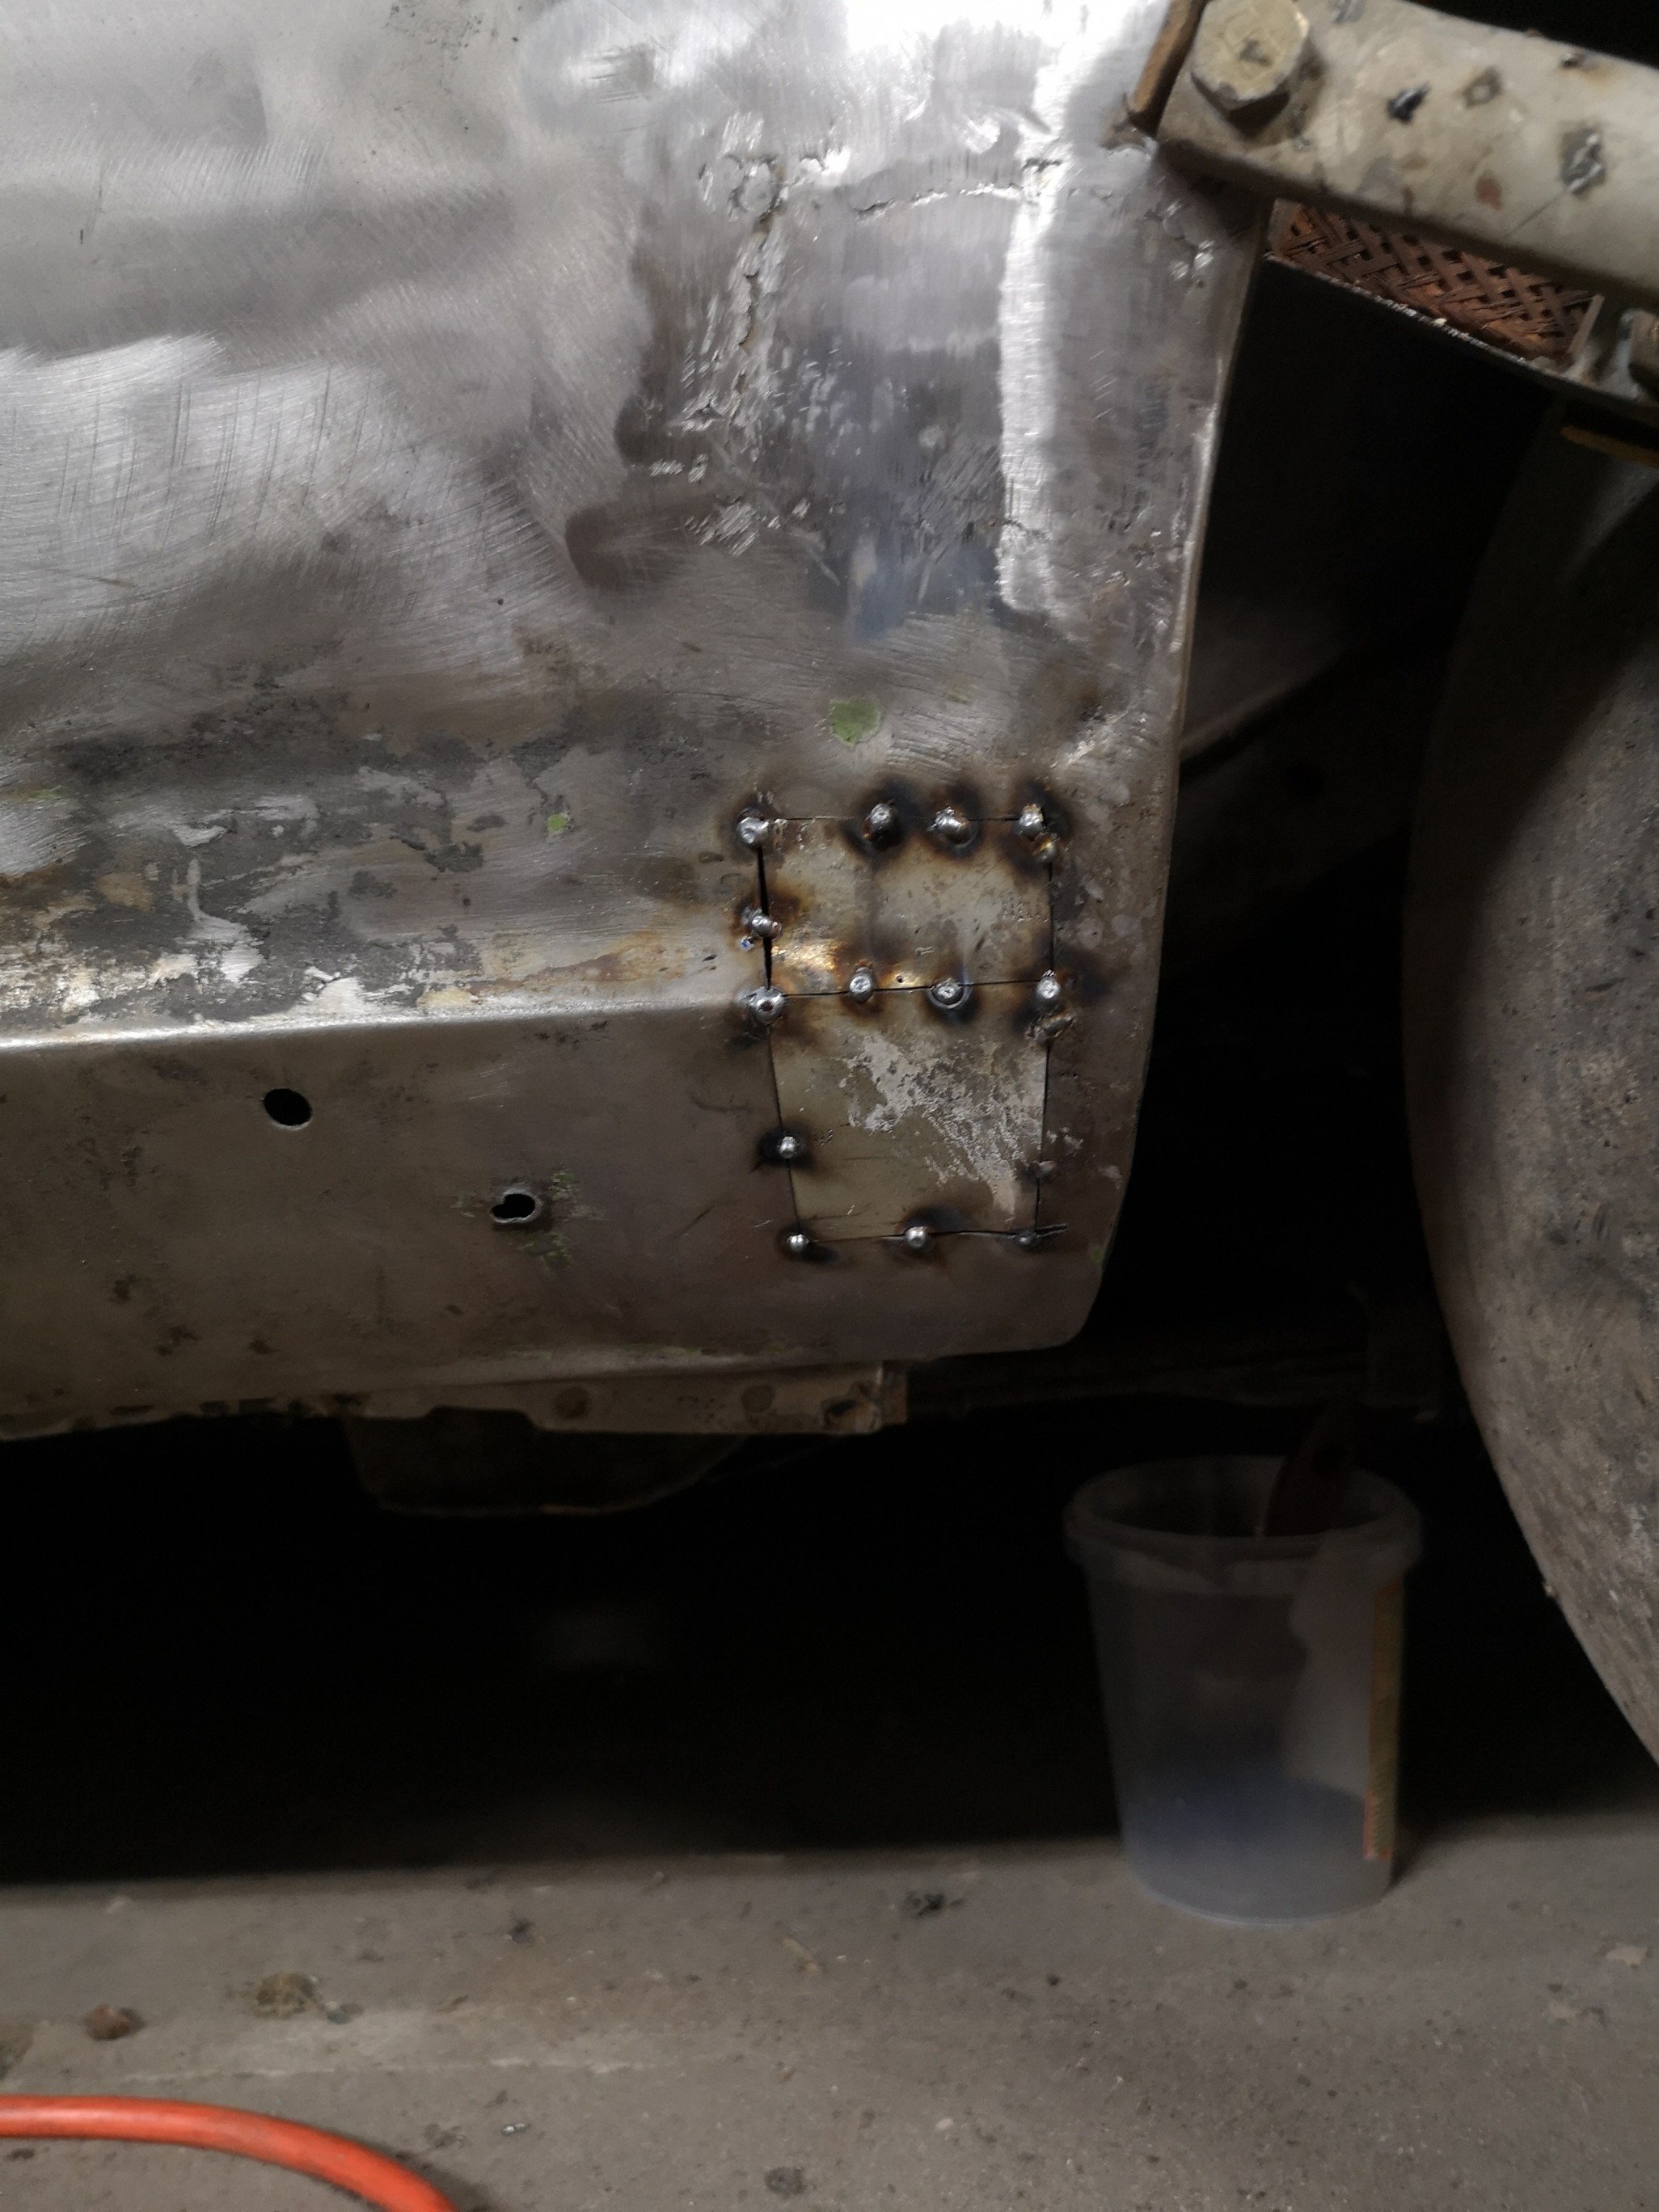
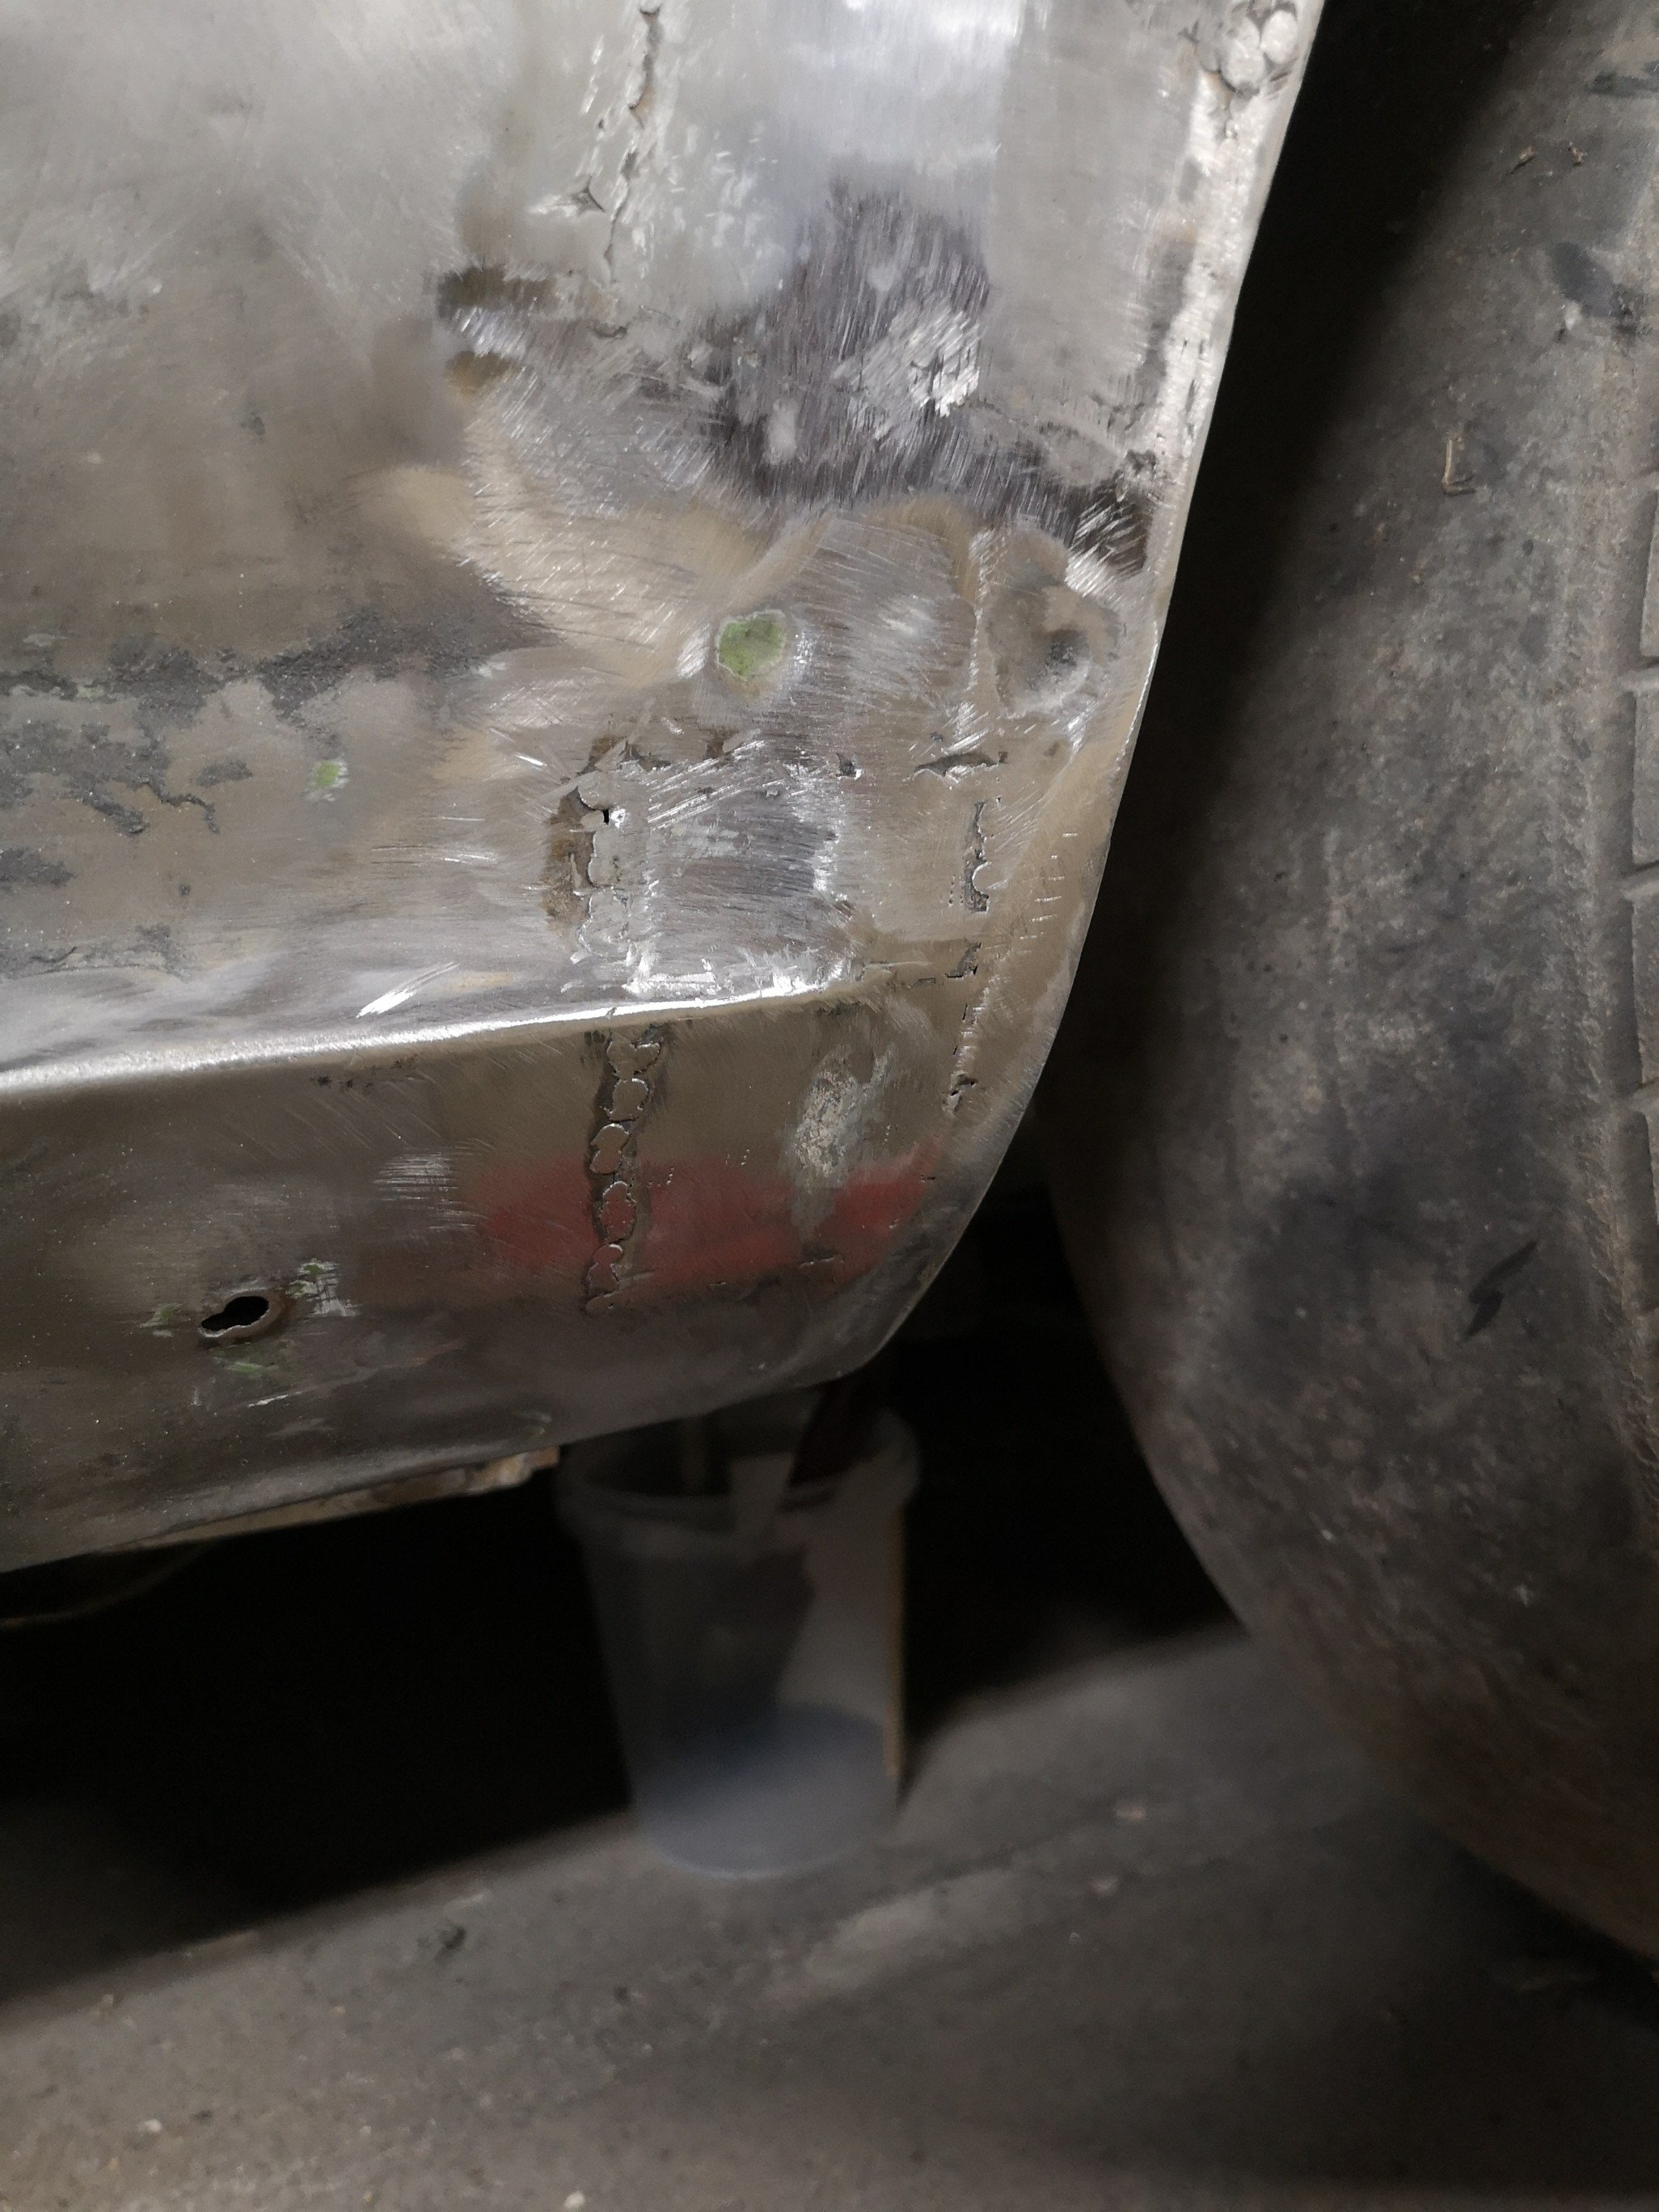
Next scabs to pick we’re on the bottom corners of left rear door. Cut some holes and made some squares. I got a bit keen and things git a bit hot and warped, but managed to tap it flat again. Remember I’m new to this. When grinding down the rear patch I found another thin spot and needed to put a bit more in.
4 points
-
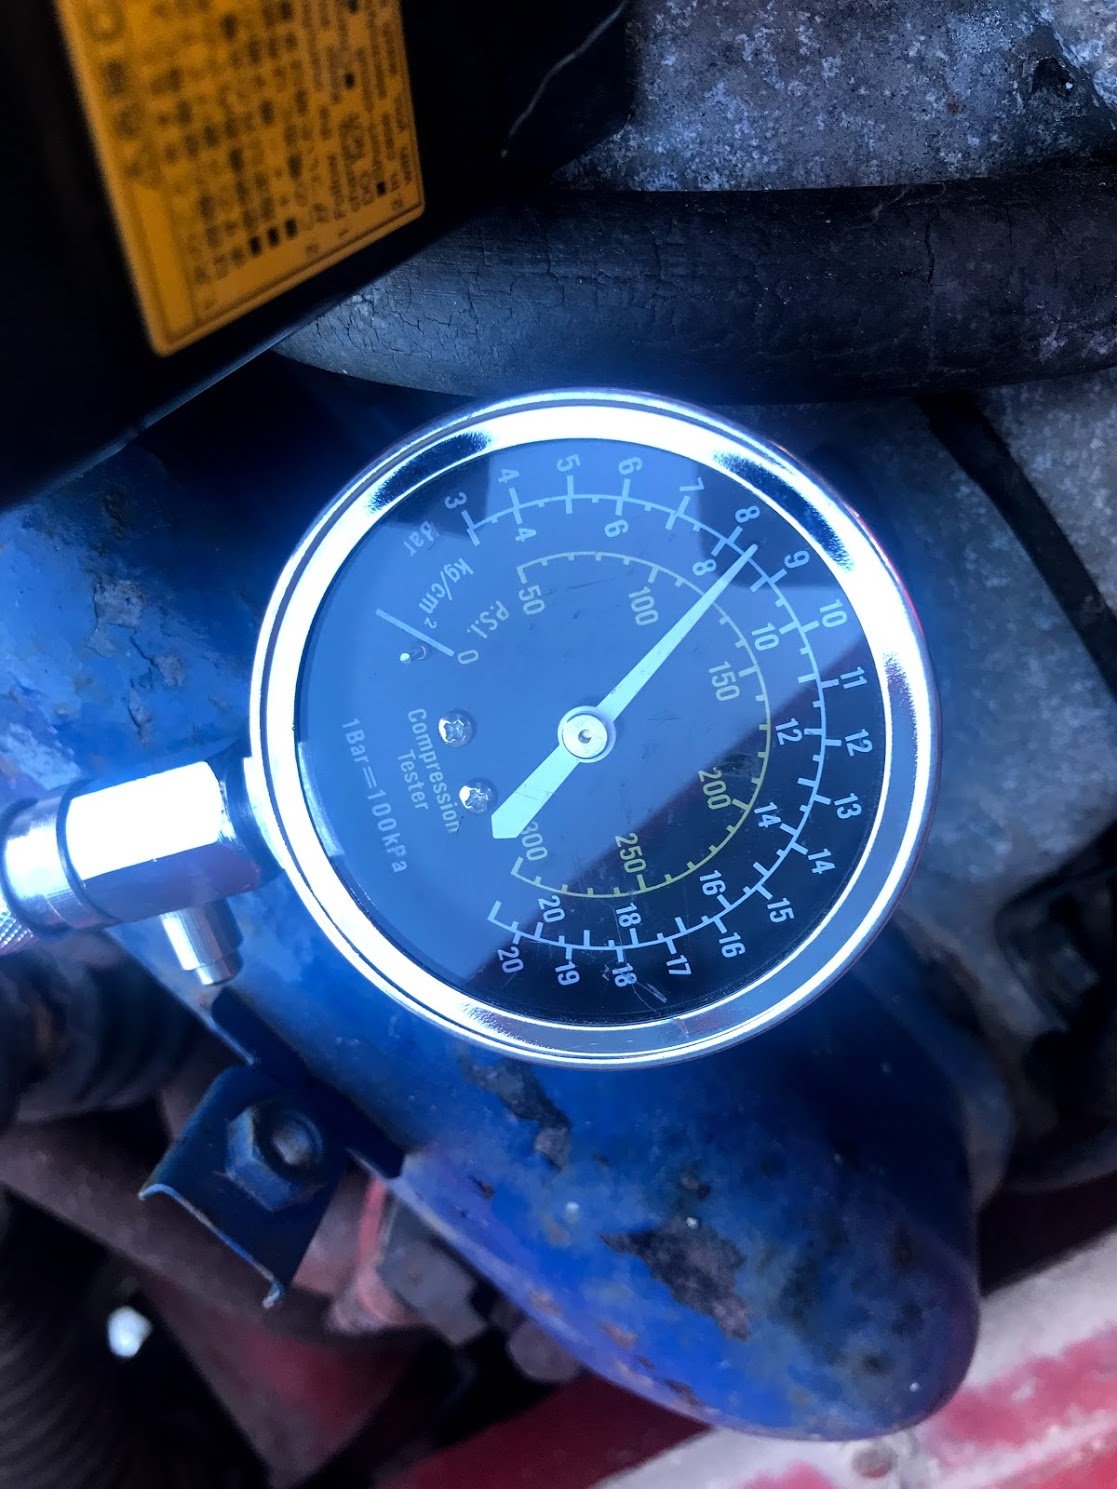
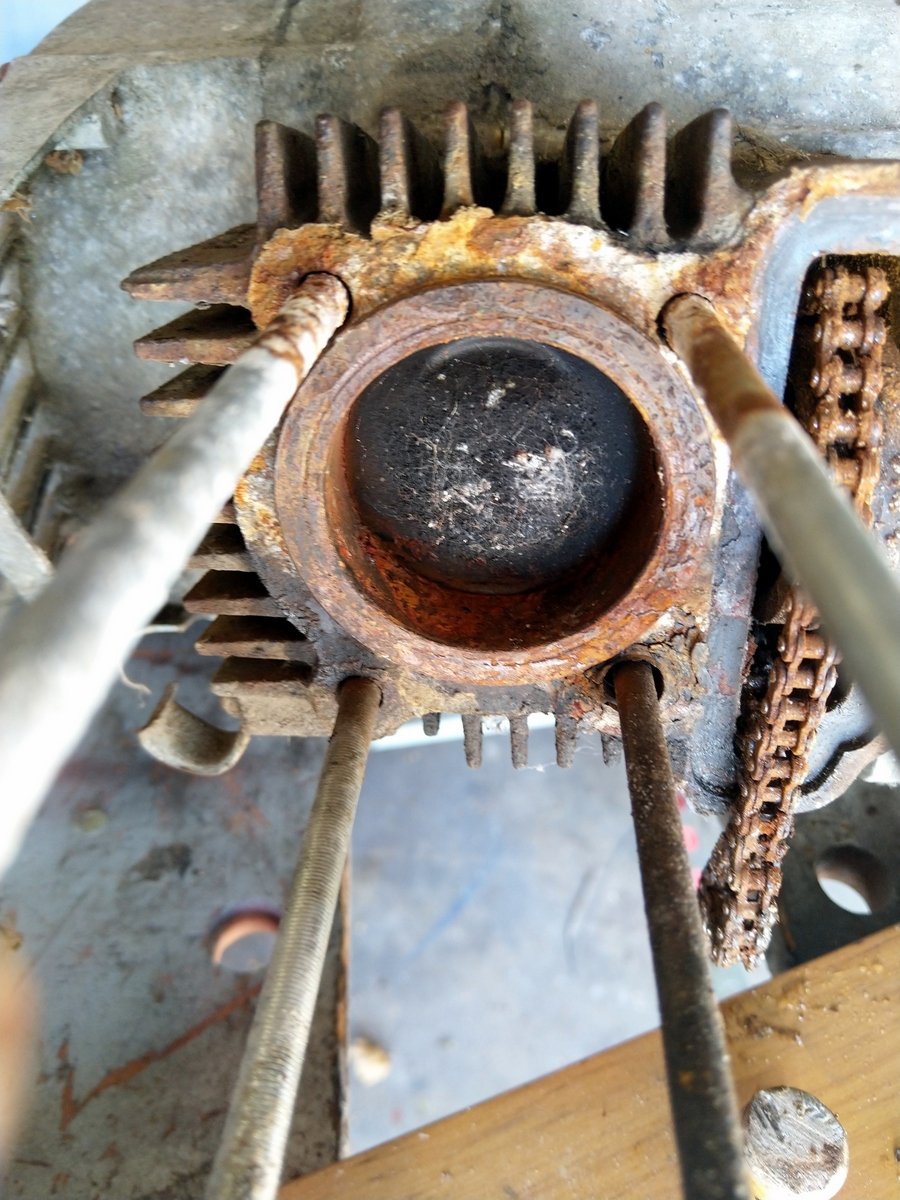
Bit more testing today, tried blasting carb cleaner through all the passages but didn't seem like any where blocked and didn't make a difference. Took out a spark plug to test for spark, nothing. Tested the lead and getting spark when held close to the engine. Tried connecting the lead without the old lead-ends jammed on (was just to hold the stripped lead core onto the spark plug) and used electrical tape to hold it onto the spark plug. Again this is just to see if there is any life in it. I'm not normally this cheap lol. Now I can see a spark on the spark plug itself. Maybe the old plug lead ends were causing resistance or something? Did this to all 4 and tried again. Still not firing. Took plugs out again, broke one spark plug....taped it back together lol... and squirted a little fuel into each cylinder. Tried again and now it almost fired again. I think that is convincing enough for me to spend a bit of money on some leads and maybe a new coil and distributor. Maybe an electronic ignition conversion? I then did a compression test since it seems to be turning over pretty well now. Remember this thing was basically seized and I had to use a power bar to get it to turn! My compression tester has always read pretty low but I was amazed to see decent compression numbers and it is obviously dead cold. Three cylinders are 120psi and one is 140psi, not ideal but bloody amazing considering its history. I reckon if I can get it started and hot it will improve, probably not a huge amount but getting some heat cycles through it wouldn't hurt.
4 points
-
Jammed the big block back into the bike. Had some issues with the electrics, couldn't get consistent spark. Turns out the kill switch was shorting out inside the handle bars. So I remade the loom and put a 12v battery and relay in for the electric start - was quite lush tbh. Although pull start was hilarious. Trimmed the swingarm to clear the dual range transmission a bit better and also added longer rear shocks from a CT125 farm bike - same as XL125 I think. I also made some foot pegs to suit the wider case. Made this video with a pitbike exhuast and muffler on it. Then I moved to Tauranga and had a better garage to work on things. So in between helping Callum with his green 62 Honda build I made an exhaust for this out of the pitbike header and og Honda muffler. Also note the new seat cover from Midnight Upholstery, won that in a Facebook competition. Comfy. Rode it around a bit, went really well. Low range was hilarious and did instant wheelies anywhere. But the motor was pumping lots of oil out of the breather on top of the motor. Like it would soak your boot in oil after a few mins.3 points
-
It's even an essential item. How bout that3 points
-
One side done for now. Pitman arm is on. Looks lots tidier now at least.
3 points
-
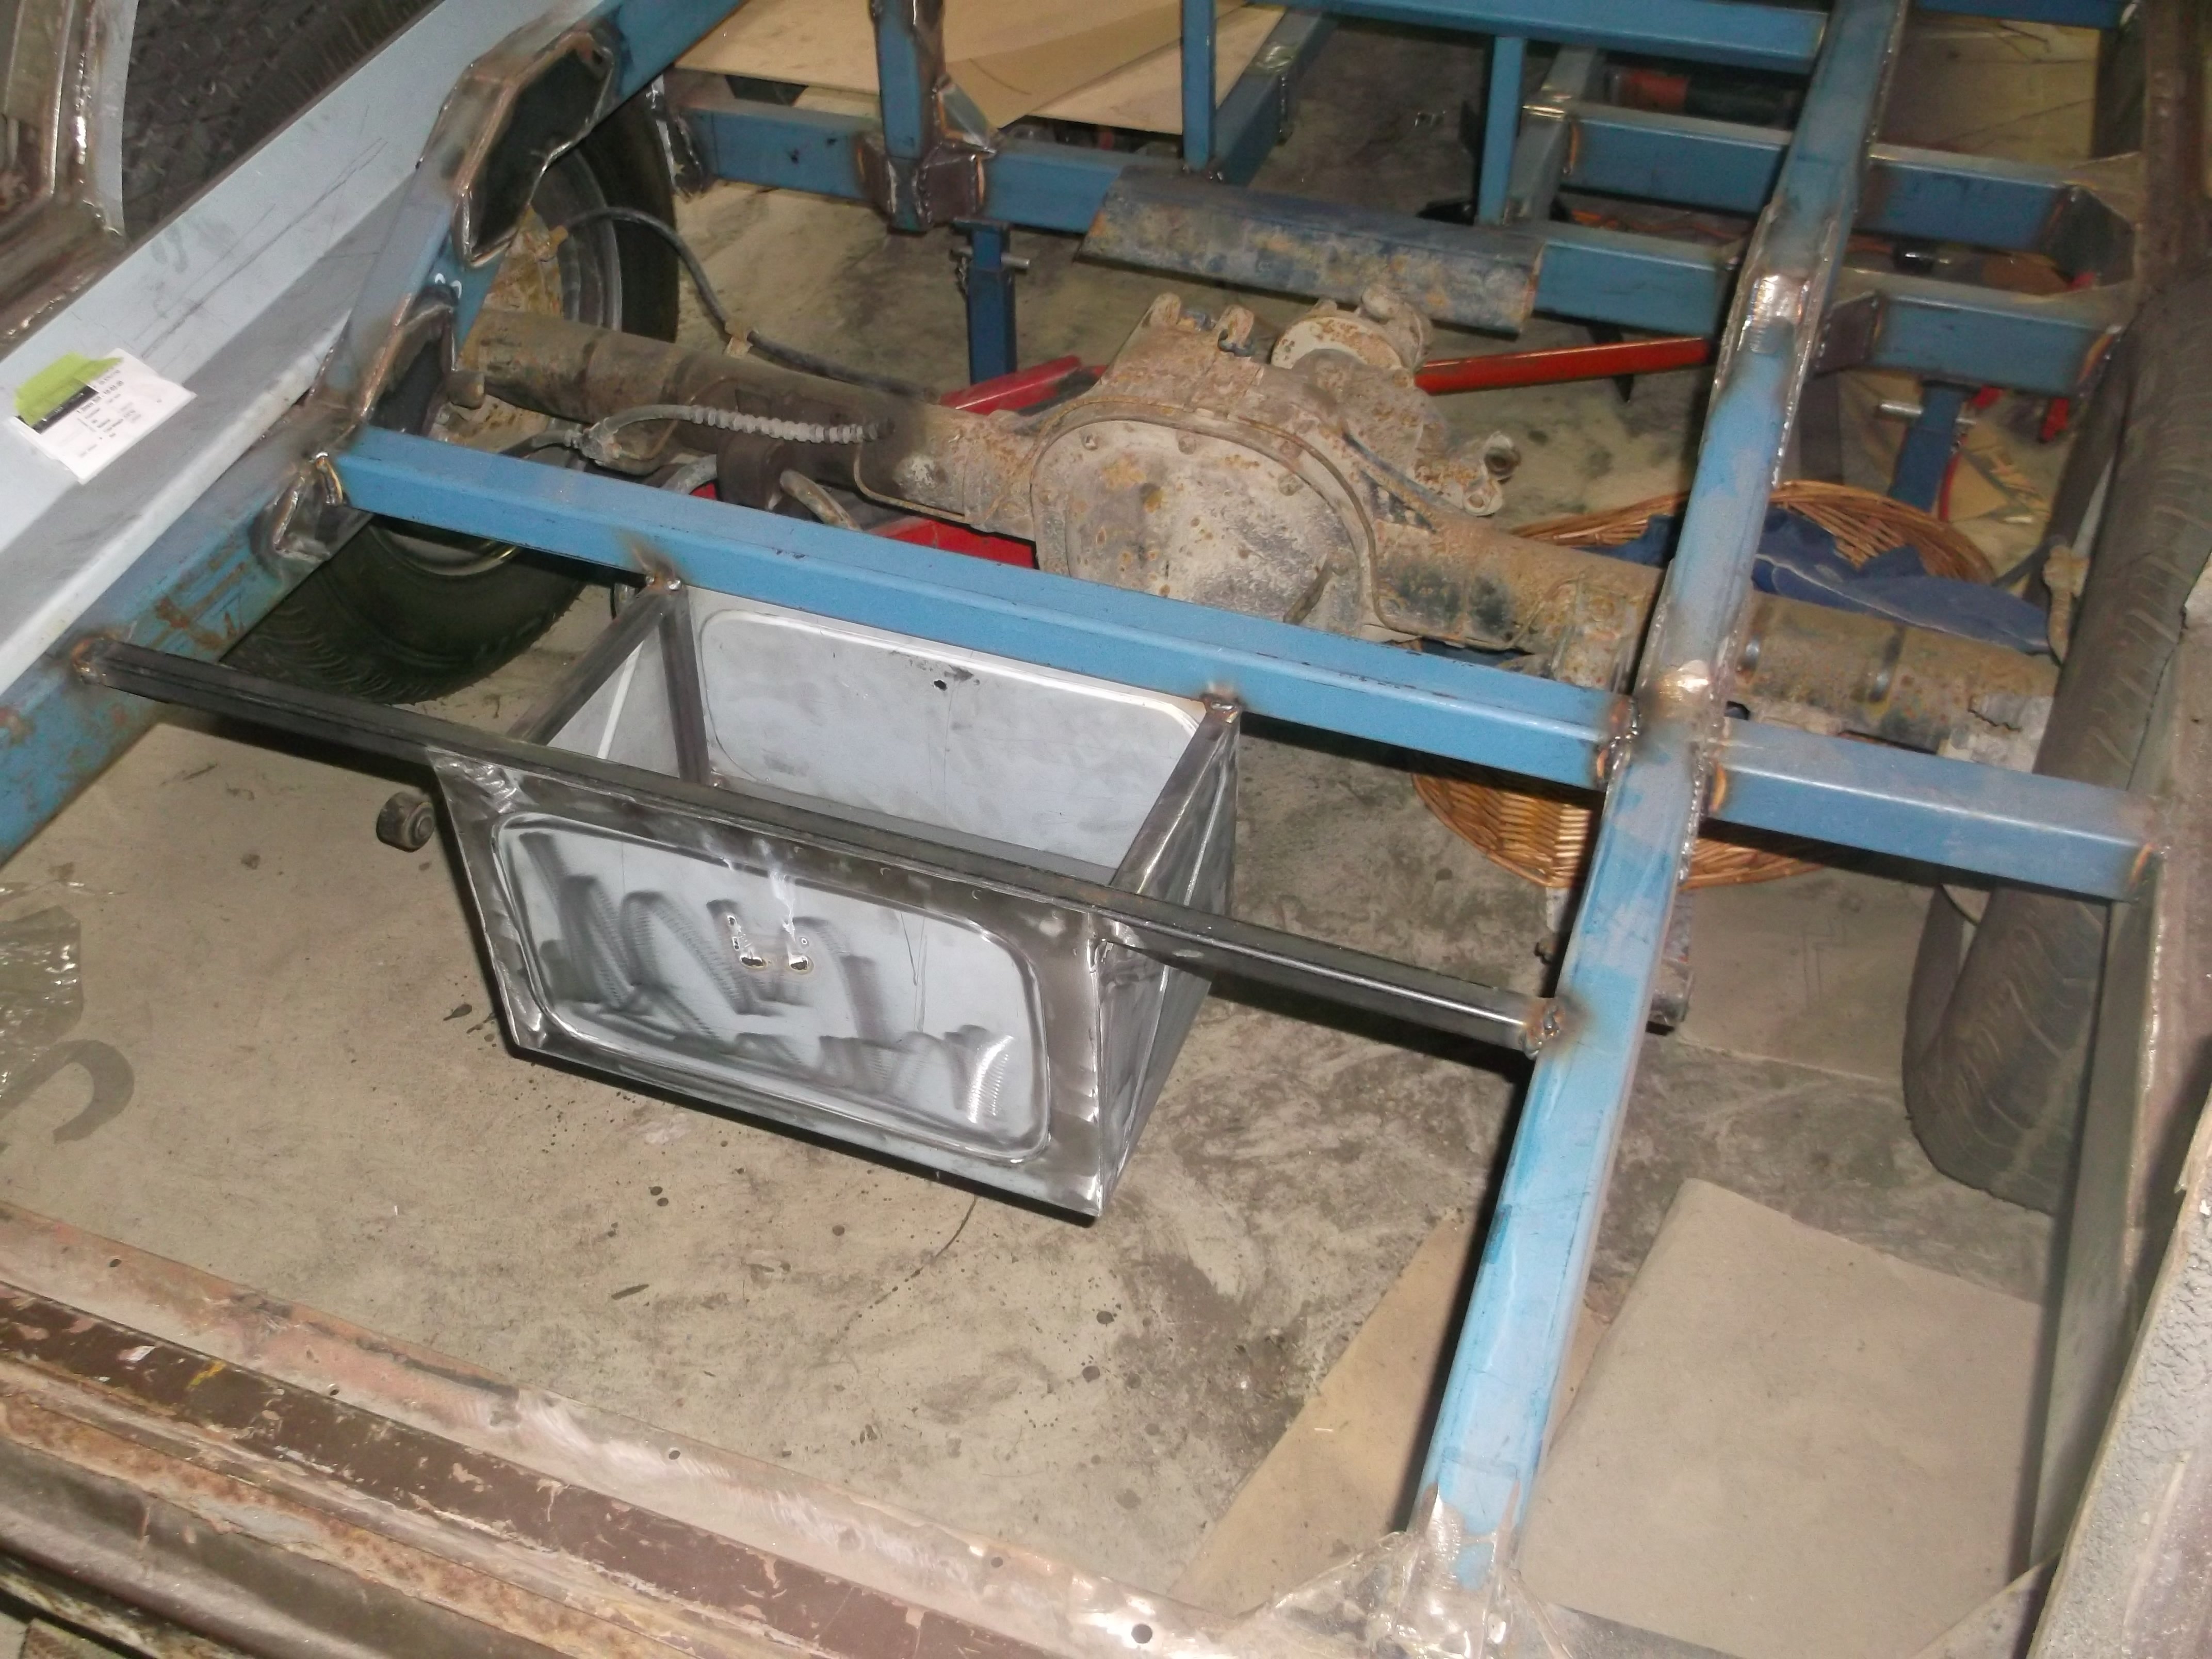
battery box made today
3 points
-
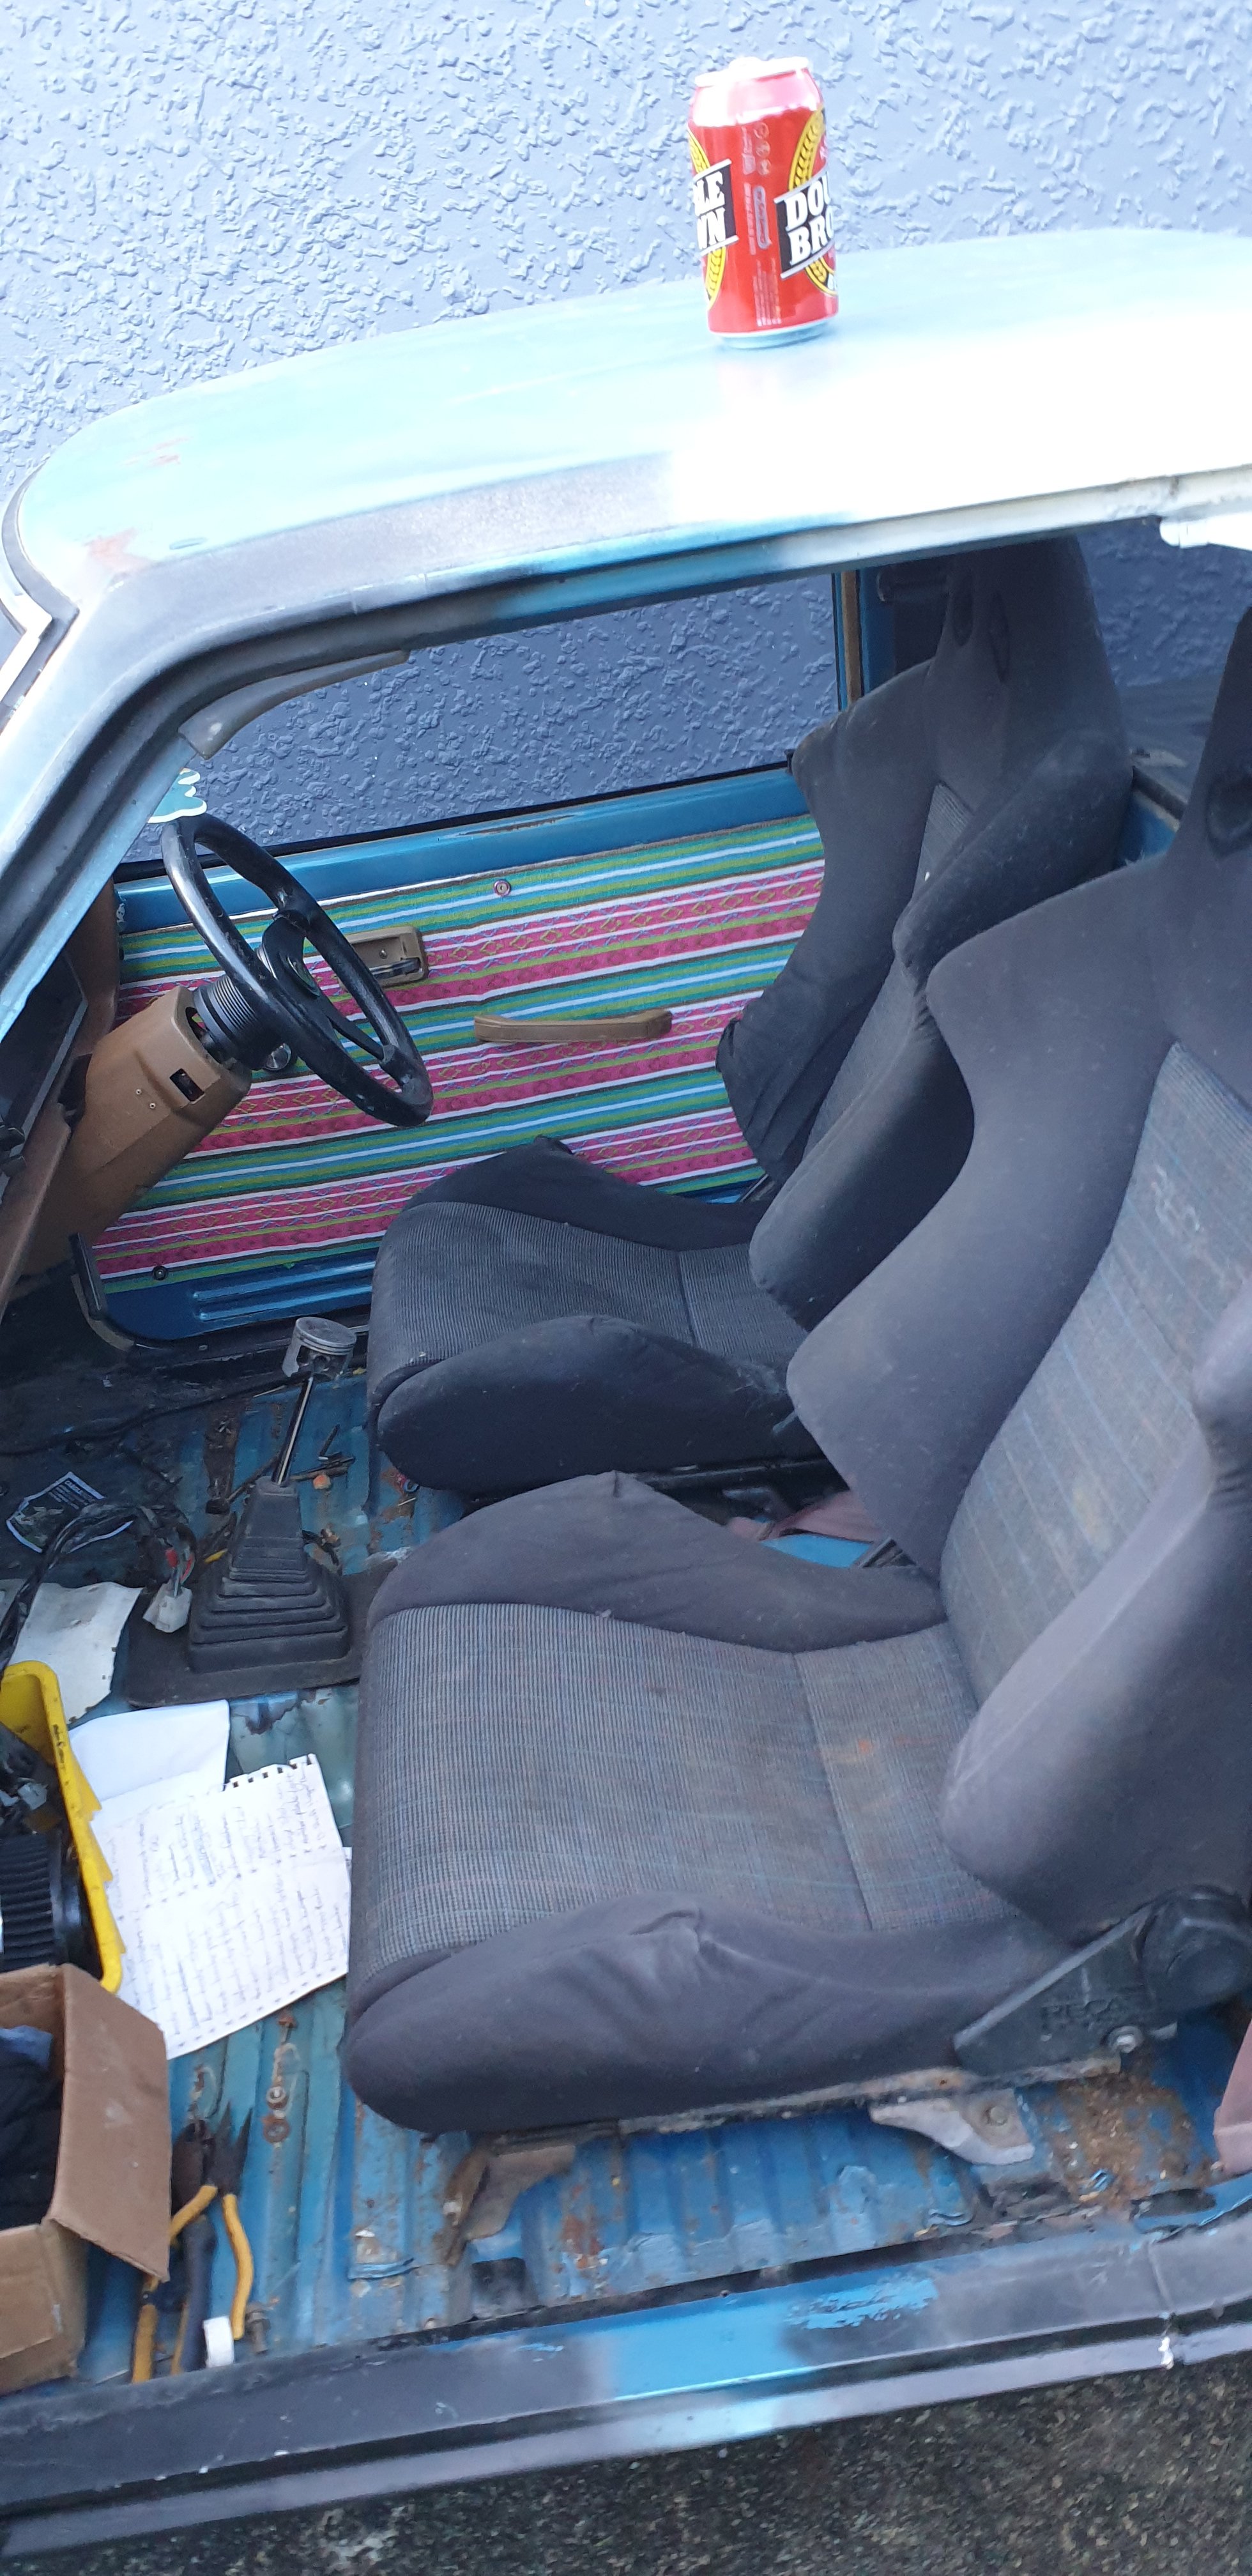
Managed to get the recaro seats mounted today, didnt take much just original L200 rails, drill one hole on each rail to mount them. Feels so much more comfortable. Still need to rivnut one hole by tunnel for each seat but cant do that until after lockdown
3 points
-
With those being ‘done’, I dug another FR50 frame out of my stash and bought it home to make a start on. I need another two stroke scooter to keep the balance in the shed right. stay tuned.3 points
-
Literally the day after selling the clone Z50, I got a message from a mate -Hey I’ve got a rough Z50J sitting here that I only bought for the motor, wanna buy the rolling frame? Slept on it for the night and thought ah, it’s an actual Honda Z50, let’s do it properly this time. Got it home, and assembled it to a rolling frame. Put it in the corner of the shed while I placed a couple of orders for various bits and pieces and waited for them to turn up. then assembled. Ended up with backdated 4L tank, 8x3.50 alloy wheels, undercowl, alloy foot peg covers, Windsheild, lowering the suspension a bunch, fork brace to lower the front guard, OEM style tail light and frame extension. Fairly happy with how this has turned out this time, and it’s at about as far as I can get it during this lockdown. - need access to a welder/vice to make rear indicator mounts. Keyring Details.3 points
-
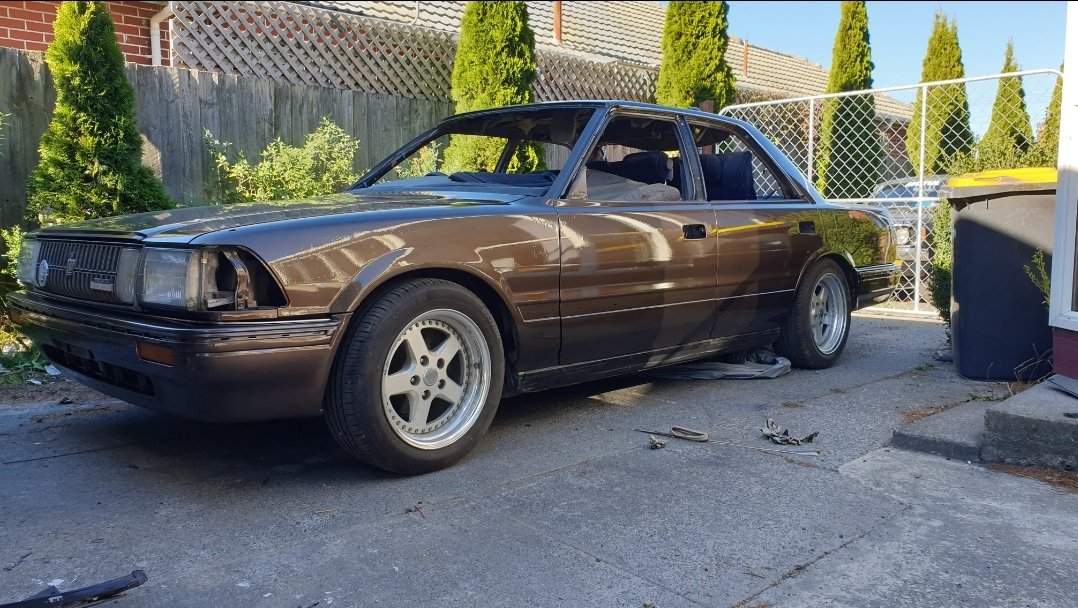
The clears a bit of a disaster really and reasonably gutted, so many things I'd have done differently in hindsight. But it's done. Drove it into the sun yesterday and it's not all bad news.
3 points
-
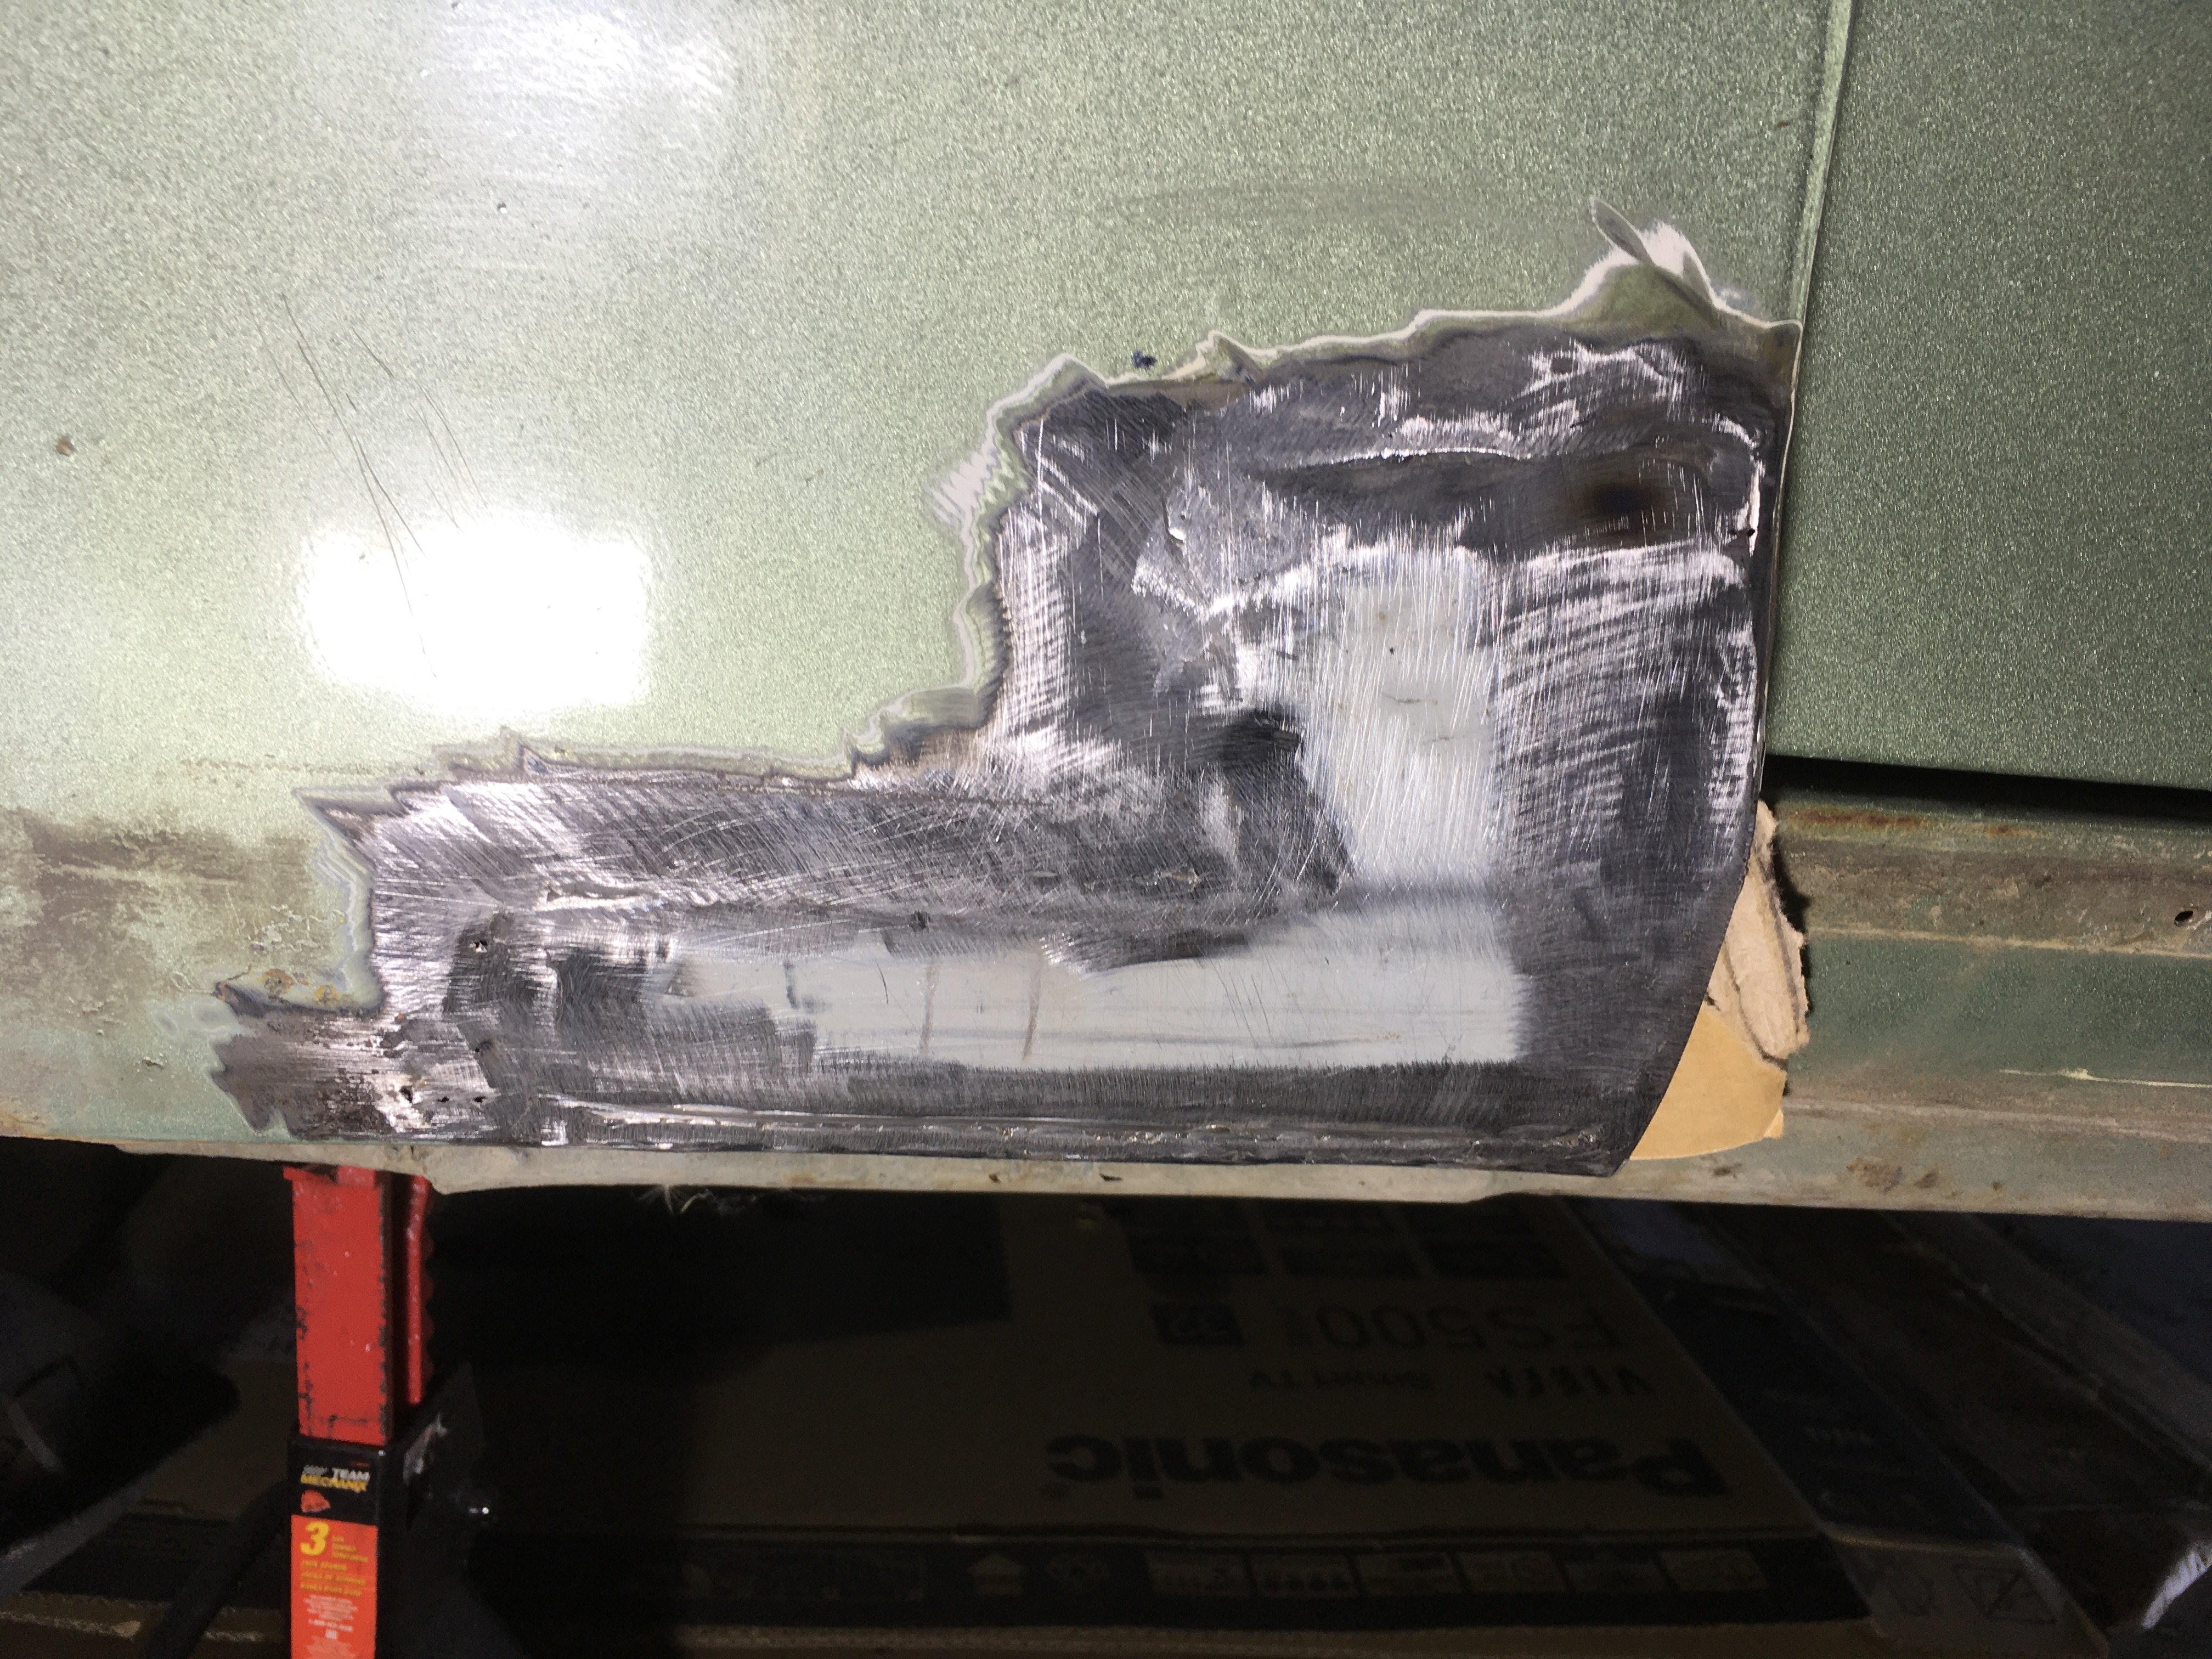
This is the first time I have done panel work. I am pretty happy with how it turned out. Tell me I’m doing it wrong here:
3 points
-
Then BOOM! I was happy with the results - not sure it would last long as its though the hardening on some of the gears and really needs new bearings (complete sets are only $35). I don't have enough bits to put it in anything right now, but maybe someday to see what happens.2 points
-
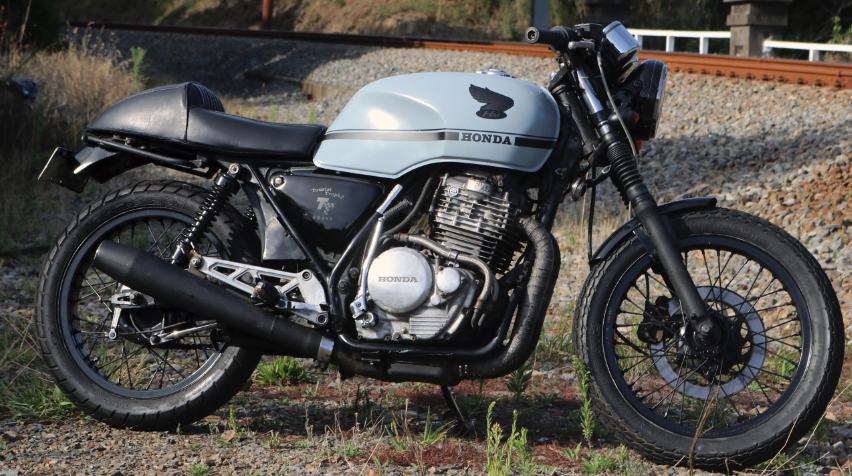
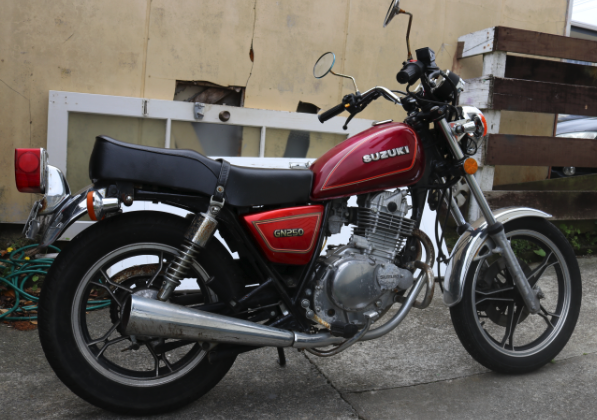
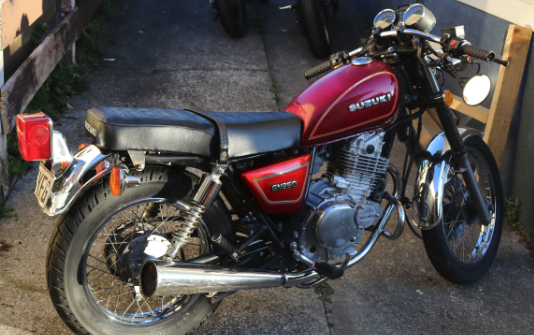
I realised I hadn't updated this in awhile.. Not much has changed really. My GB's tank was poked, the seams leaked so I picked up a new one which was internally mint but externally a bit fooked. I fixed the dents, Por15'd the crap out of the inside to avoid leaking in this one, painted it myself in a glossy winter grey and added some cool racing stripes for additional HP. Pretty happy with how the colour turned out with the stripes.. Went for that same colourway with gloss black and matt black. Just need to put the drivers side mirror on and it's ready for a warrant check after lock down.. It might be time to flick this one off.. I also picked up a GD250n that had a blown motor.. Got a new motor in it and did a tail tidy.. It had problems with the TPS which I got fixed and went for a WOF. Failed on brakes and fork seals.. Replaced those/got them fixed and rode to work a few times before the mrs decided she liked the look of it and started to ride it Shes hapu so her riding days are over for awhile so this will be going up for sale once lock down is over. A couple months before lock down I nabbed another GN250 that I couldn't pass up on. I intend to fix and flip this. Needed some love/work. The electics were on the piss, the brakes were shot, fork seals were well and truly shot and was just lacking.. well, basic maintenance. Ordered a bunch of parts and it sat in the shed until I could find time to do anything about it.. Low and behold, had some time over the last couple of weeks to tinker with it. This was the state of arrival.. After new brakes, spoke wheels, new bars, new grips, re shaped seat, wiring all sorted, and a whole lot of elbow grease and love.. this is how it looks After lock down i'll go for a warrant check, fix whats required if anything is required (seems OK to me) and flick it off.. The red Hyo is in the shop for a WOF.. It failed on tyres and exhaust had a hole in it, so that's locked up at a workshop currently not being worked on which is all good. Thats really it I guess..
2 points
-
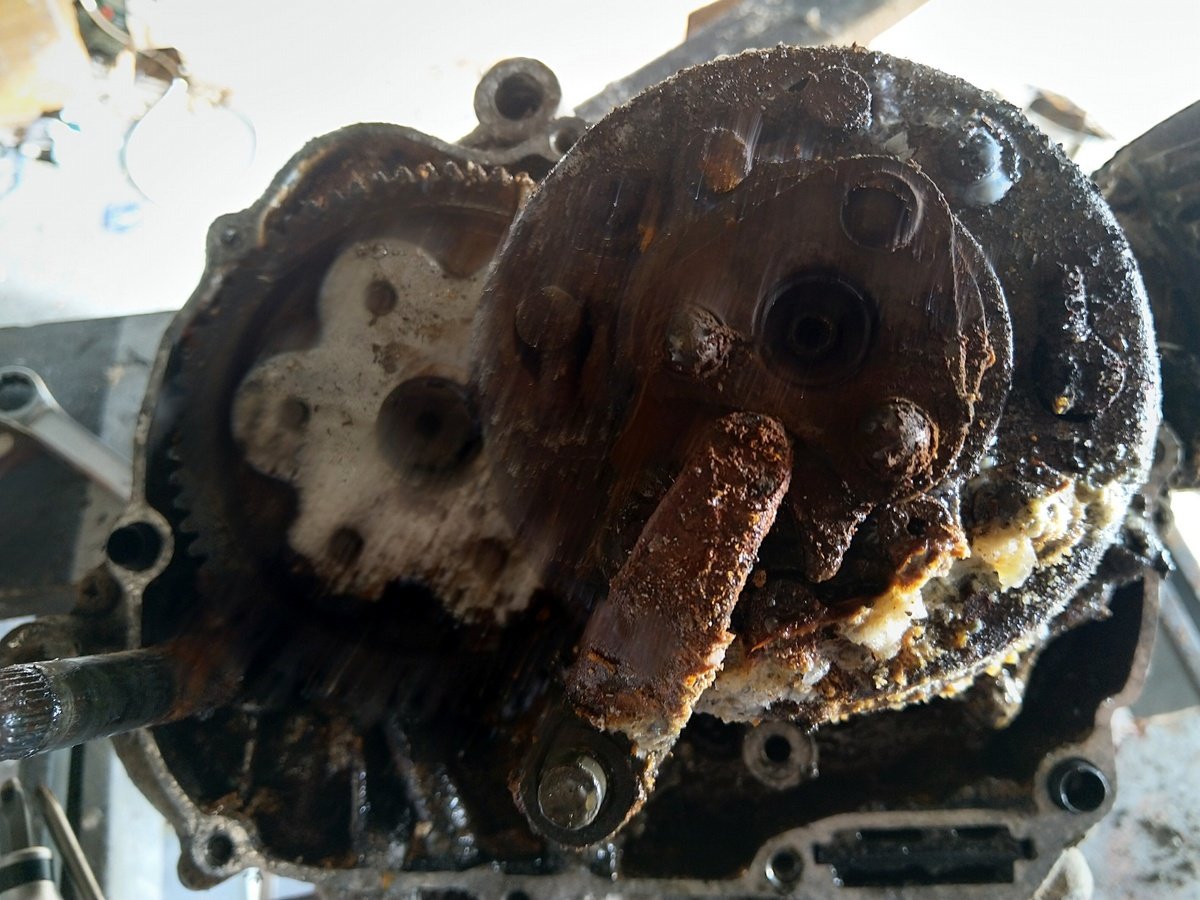
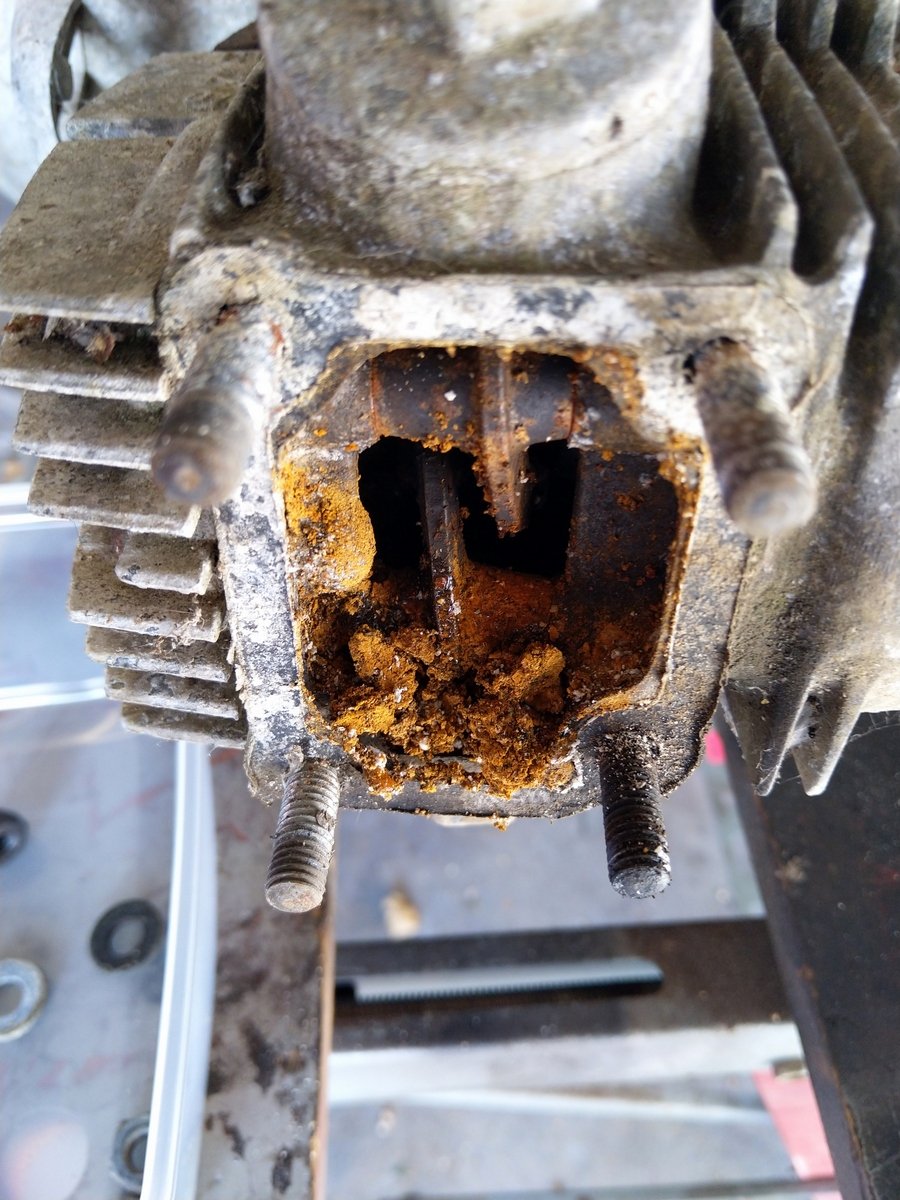
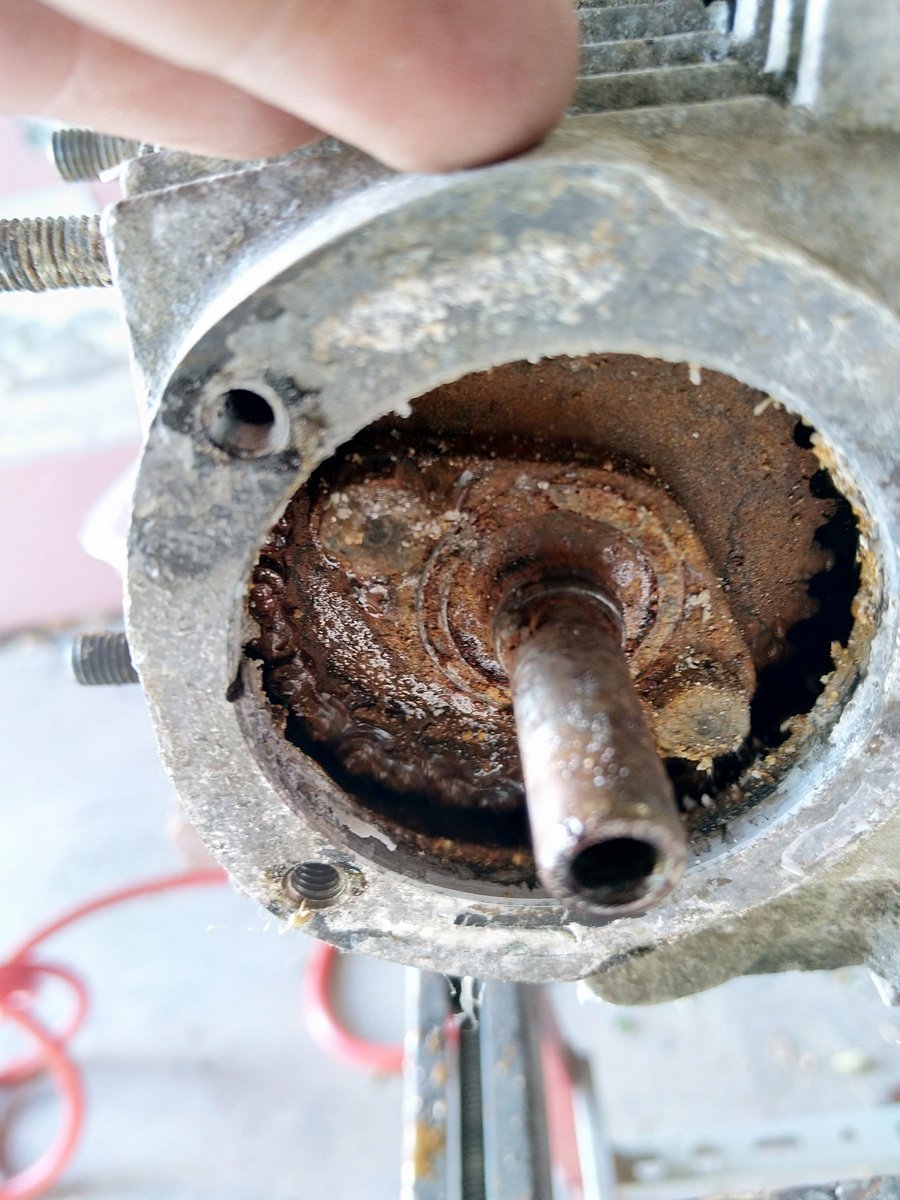
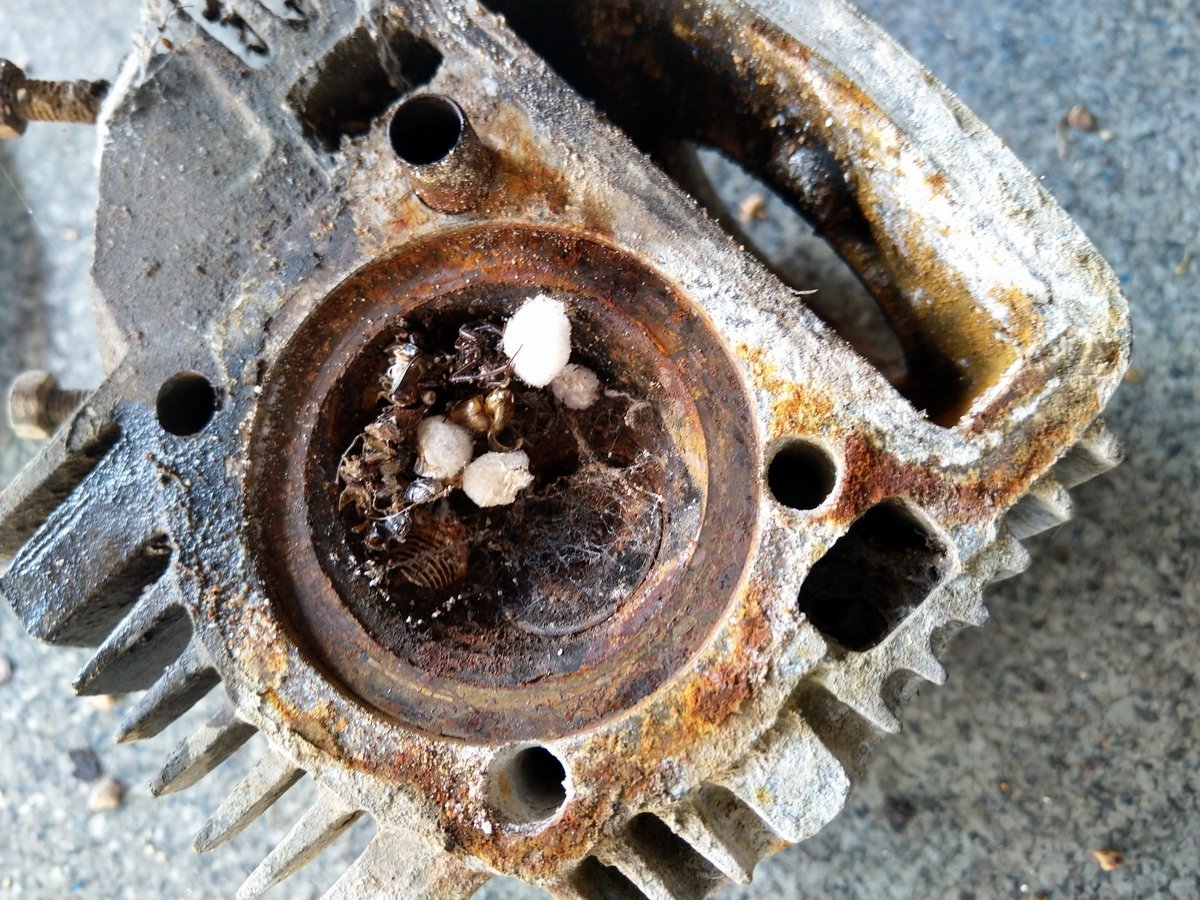
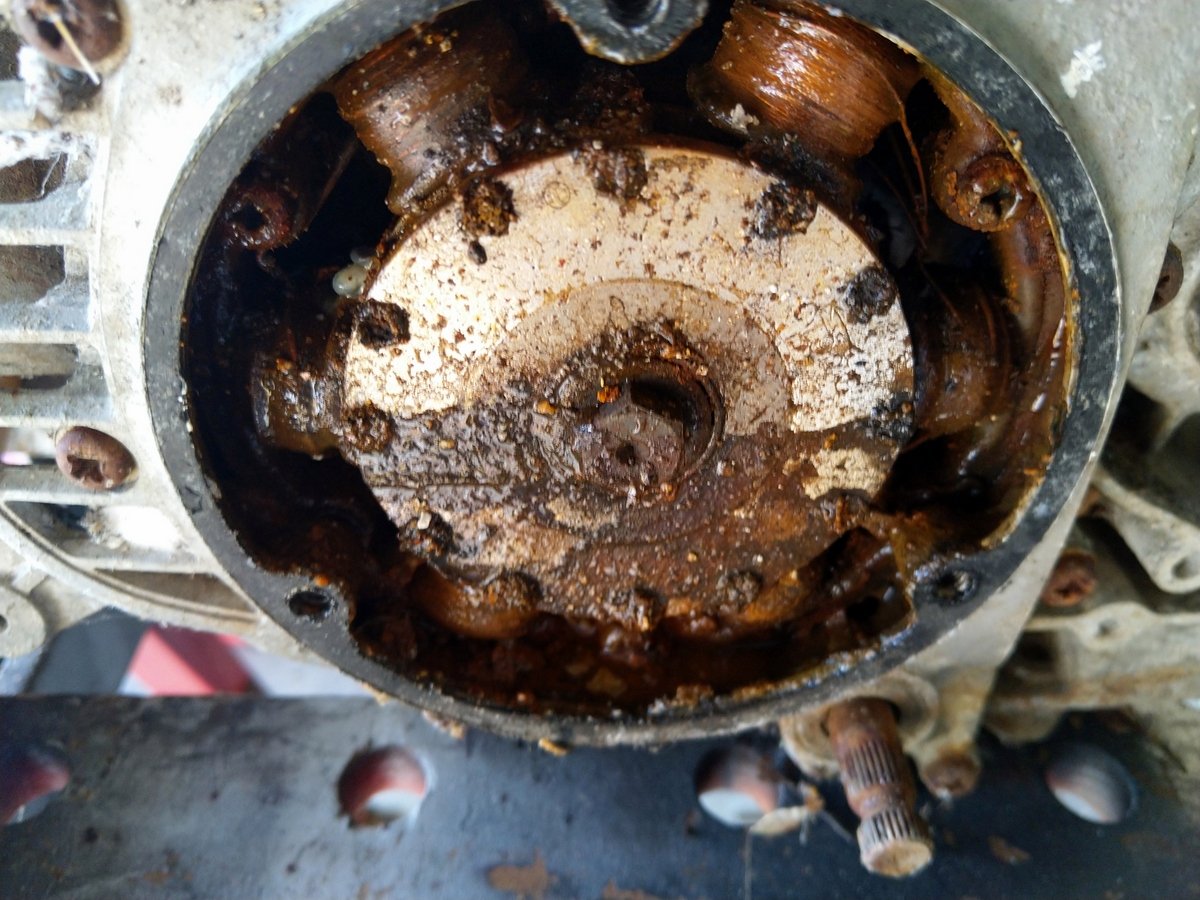
On to more recent related happenings, during this lockdown I decided I needed a bit of a challenge, so I retrieved off the scrap pile the OG motor from the deluxe. It had been carefully stored outside in the rain for the last two years - after 20 or so before that under a hedge somewhere. Needless to say it did not turn over (not even a little bit) I the challenge was to get it running without any new parts. Below is the story of that = sorry very picture heavy! There was a nice tide mark! Clutch cover off
2 points
-
https://www.trademe.co.nz/motors/car-parts-accessories/vintage-parts/accessories/listing-2595956024.htm?rsqid=e53d334fdec84c6d838f1705684580df-001 are you sure2 points
-
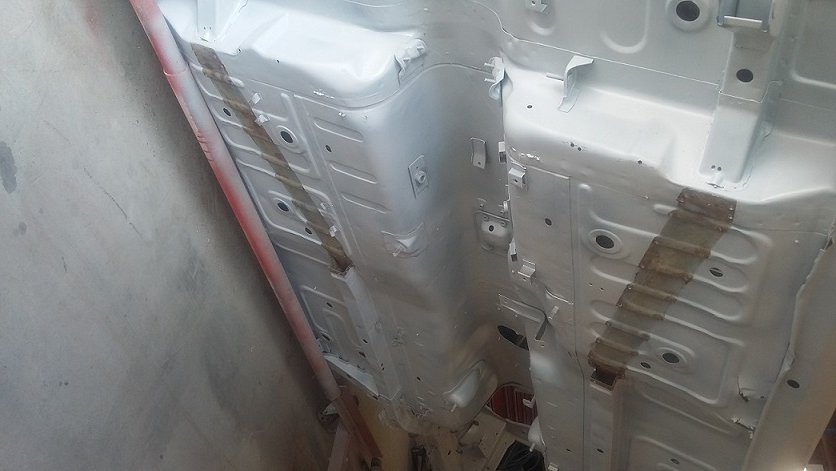
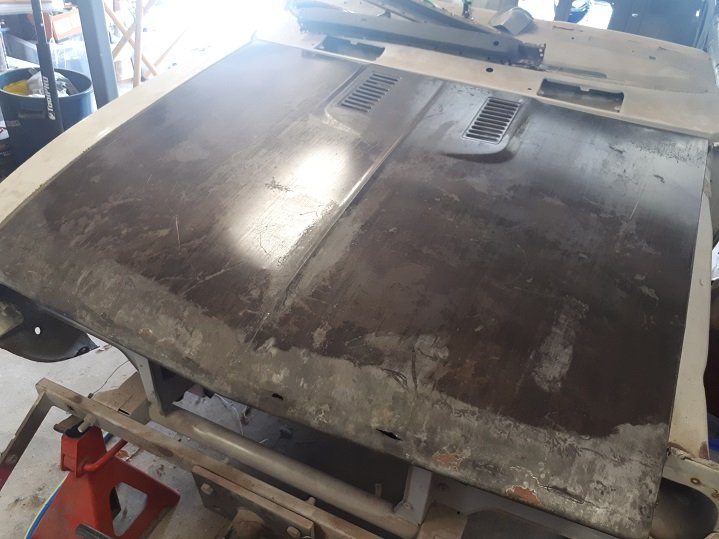
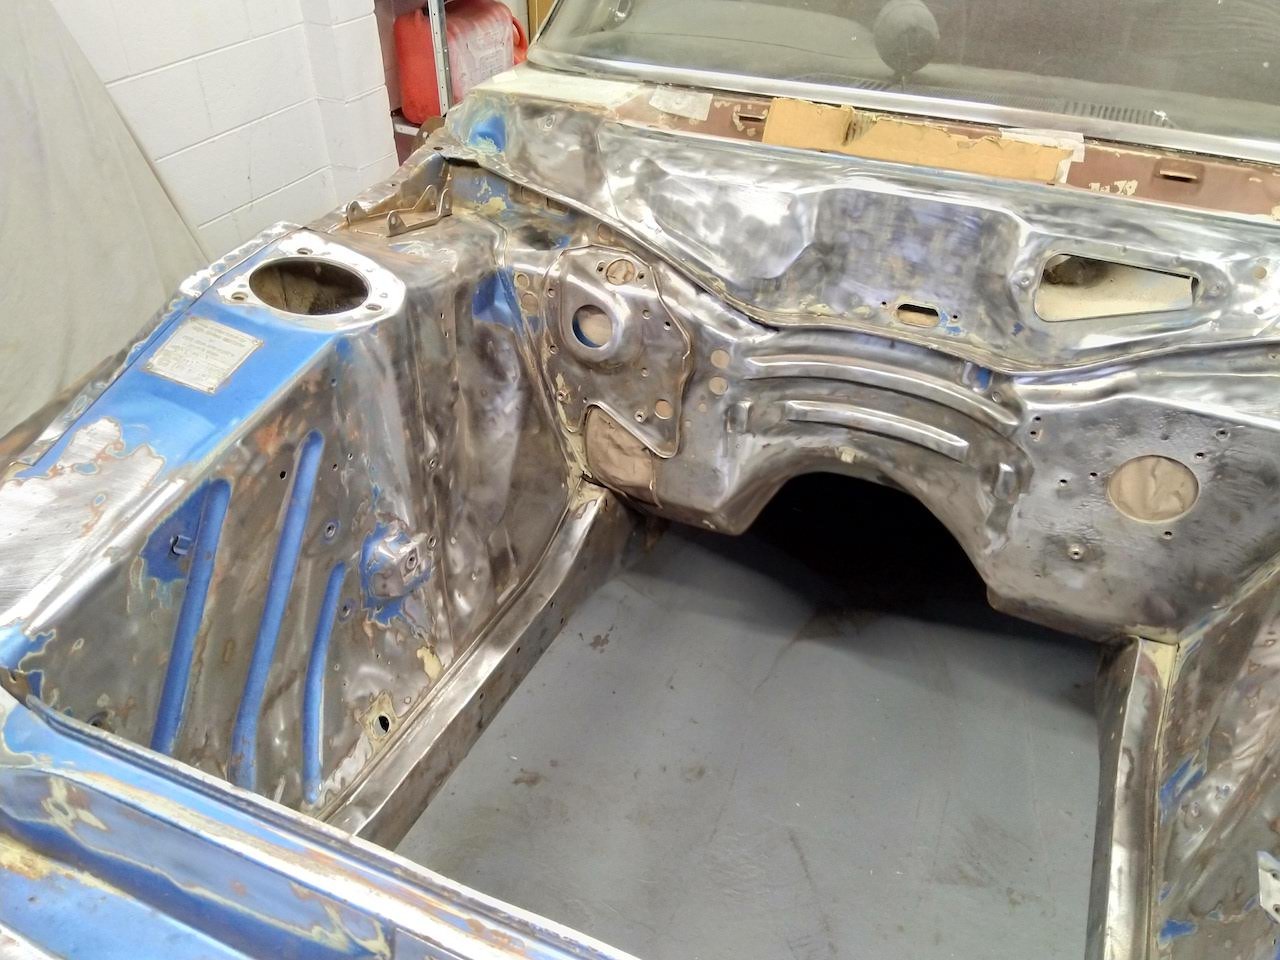
Mostly to bare metal. Didn't get any pics of it just before paint unfortunately, here is about 90% stripped.
2 points
-
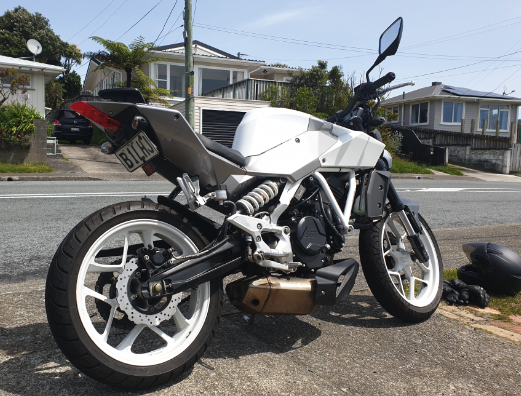
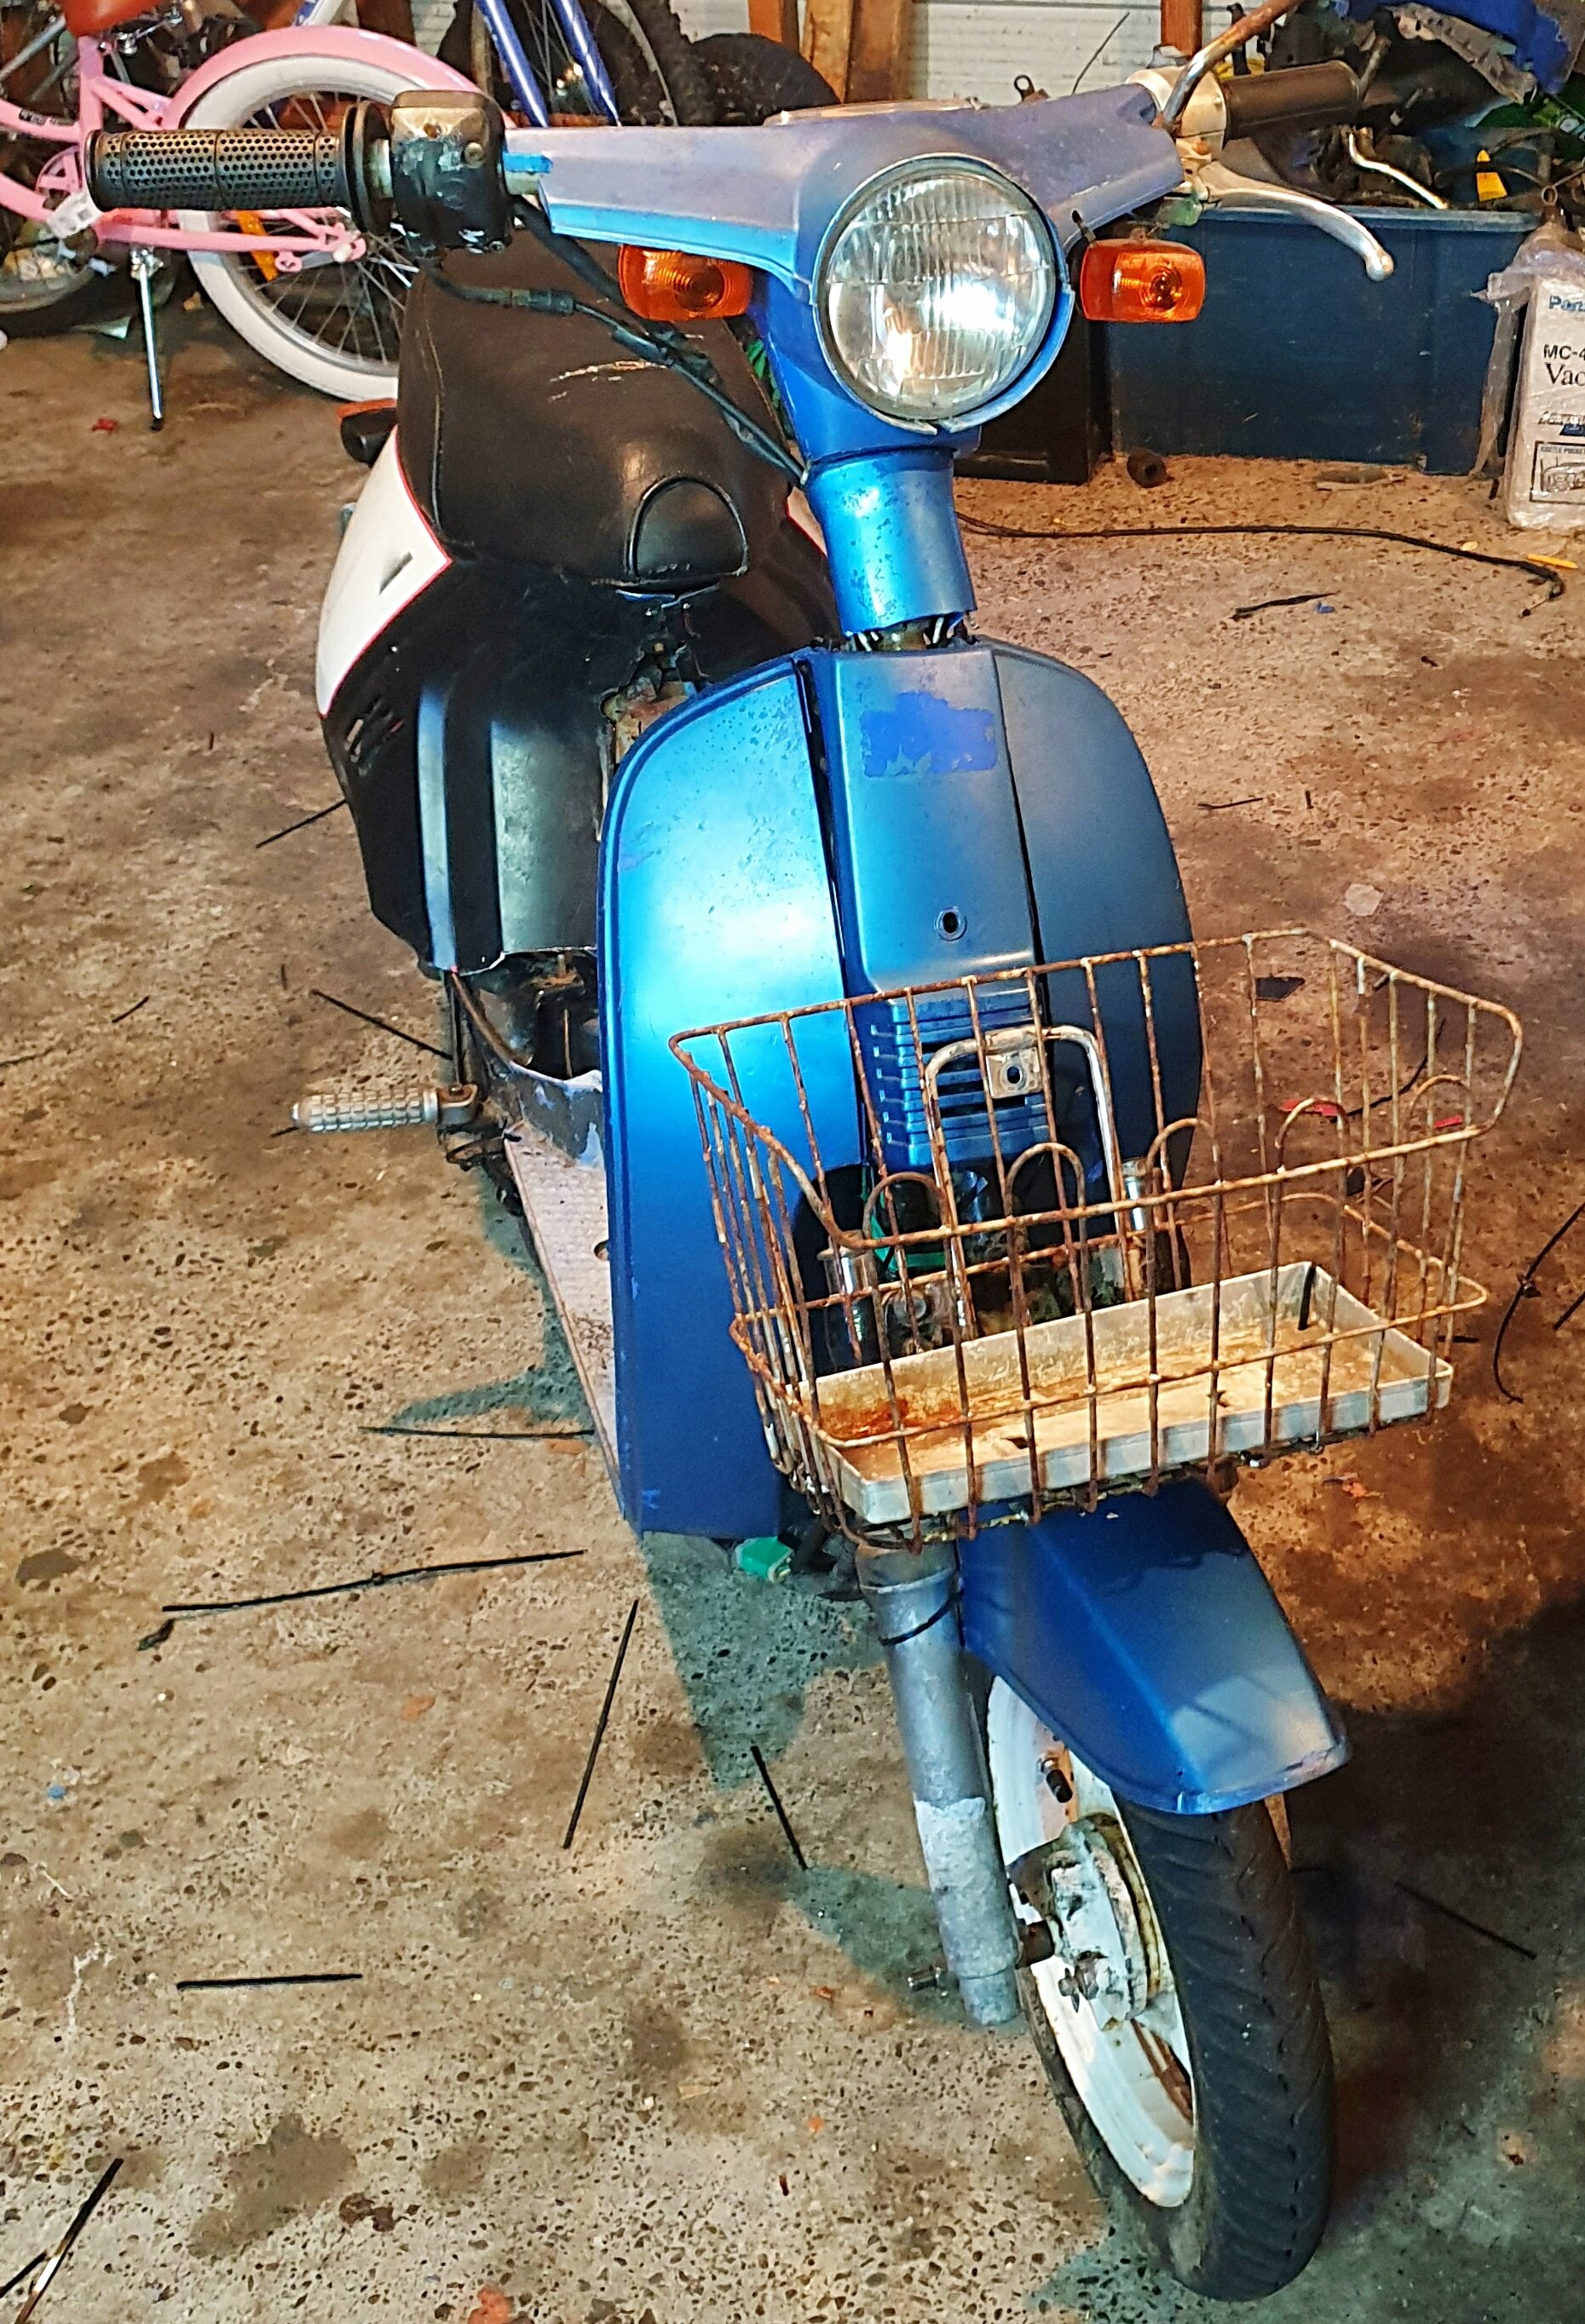
So mounted the basket wich I think super dope. And used some of the front guard that i had to cut to cover the gap under the light. Gave it some rear breaks wich work ok. And mounted some foot pegs further back. With floor bord still there. Just for a more better position. Gona make a cover for the gap under neathe the seat. And paint the rear panels blue. Or many repaint the whole bike. And wheels.
2 points
-
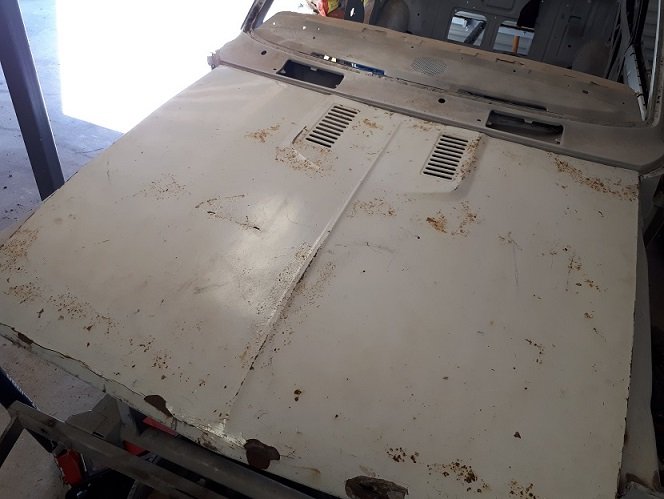
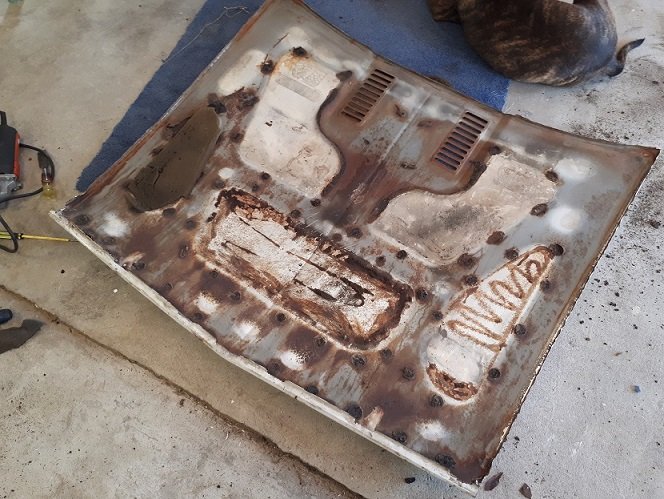
1, I had the hood laying on the lawn out of the way, he wasnt watching where he was going. 2, nope, he was nearly twice my weight LOL 3, yup, he has to bend over to get through doors. And yes, from my experience a glass part has to be considerably thicker. My suggestion is to get some glass and some cf and start playing around. You need to fool around for a bit before committing to a big part anyway. Ali express cf is great.2 points
-
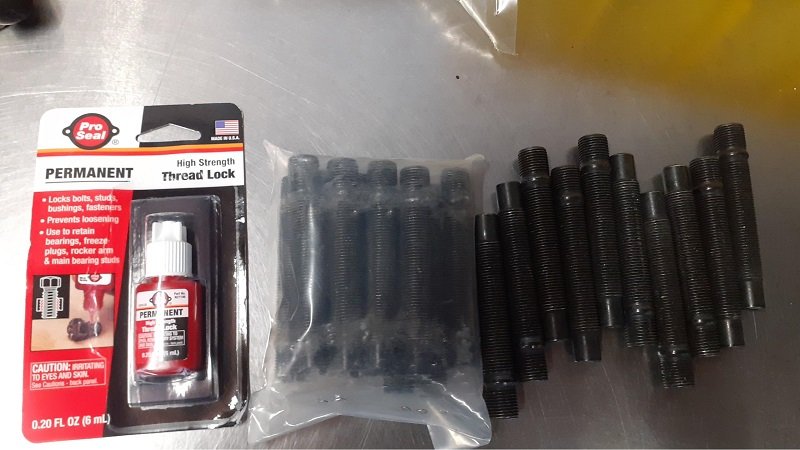
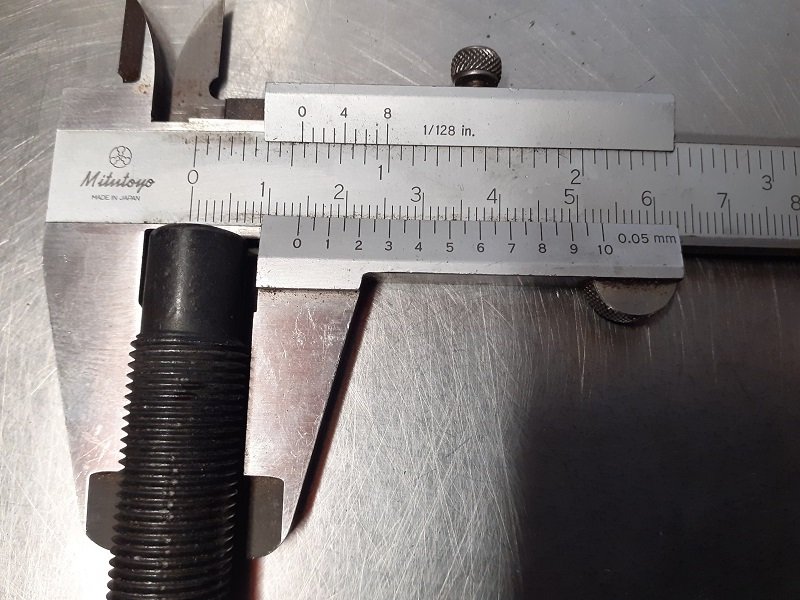
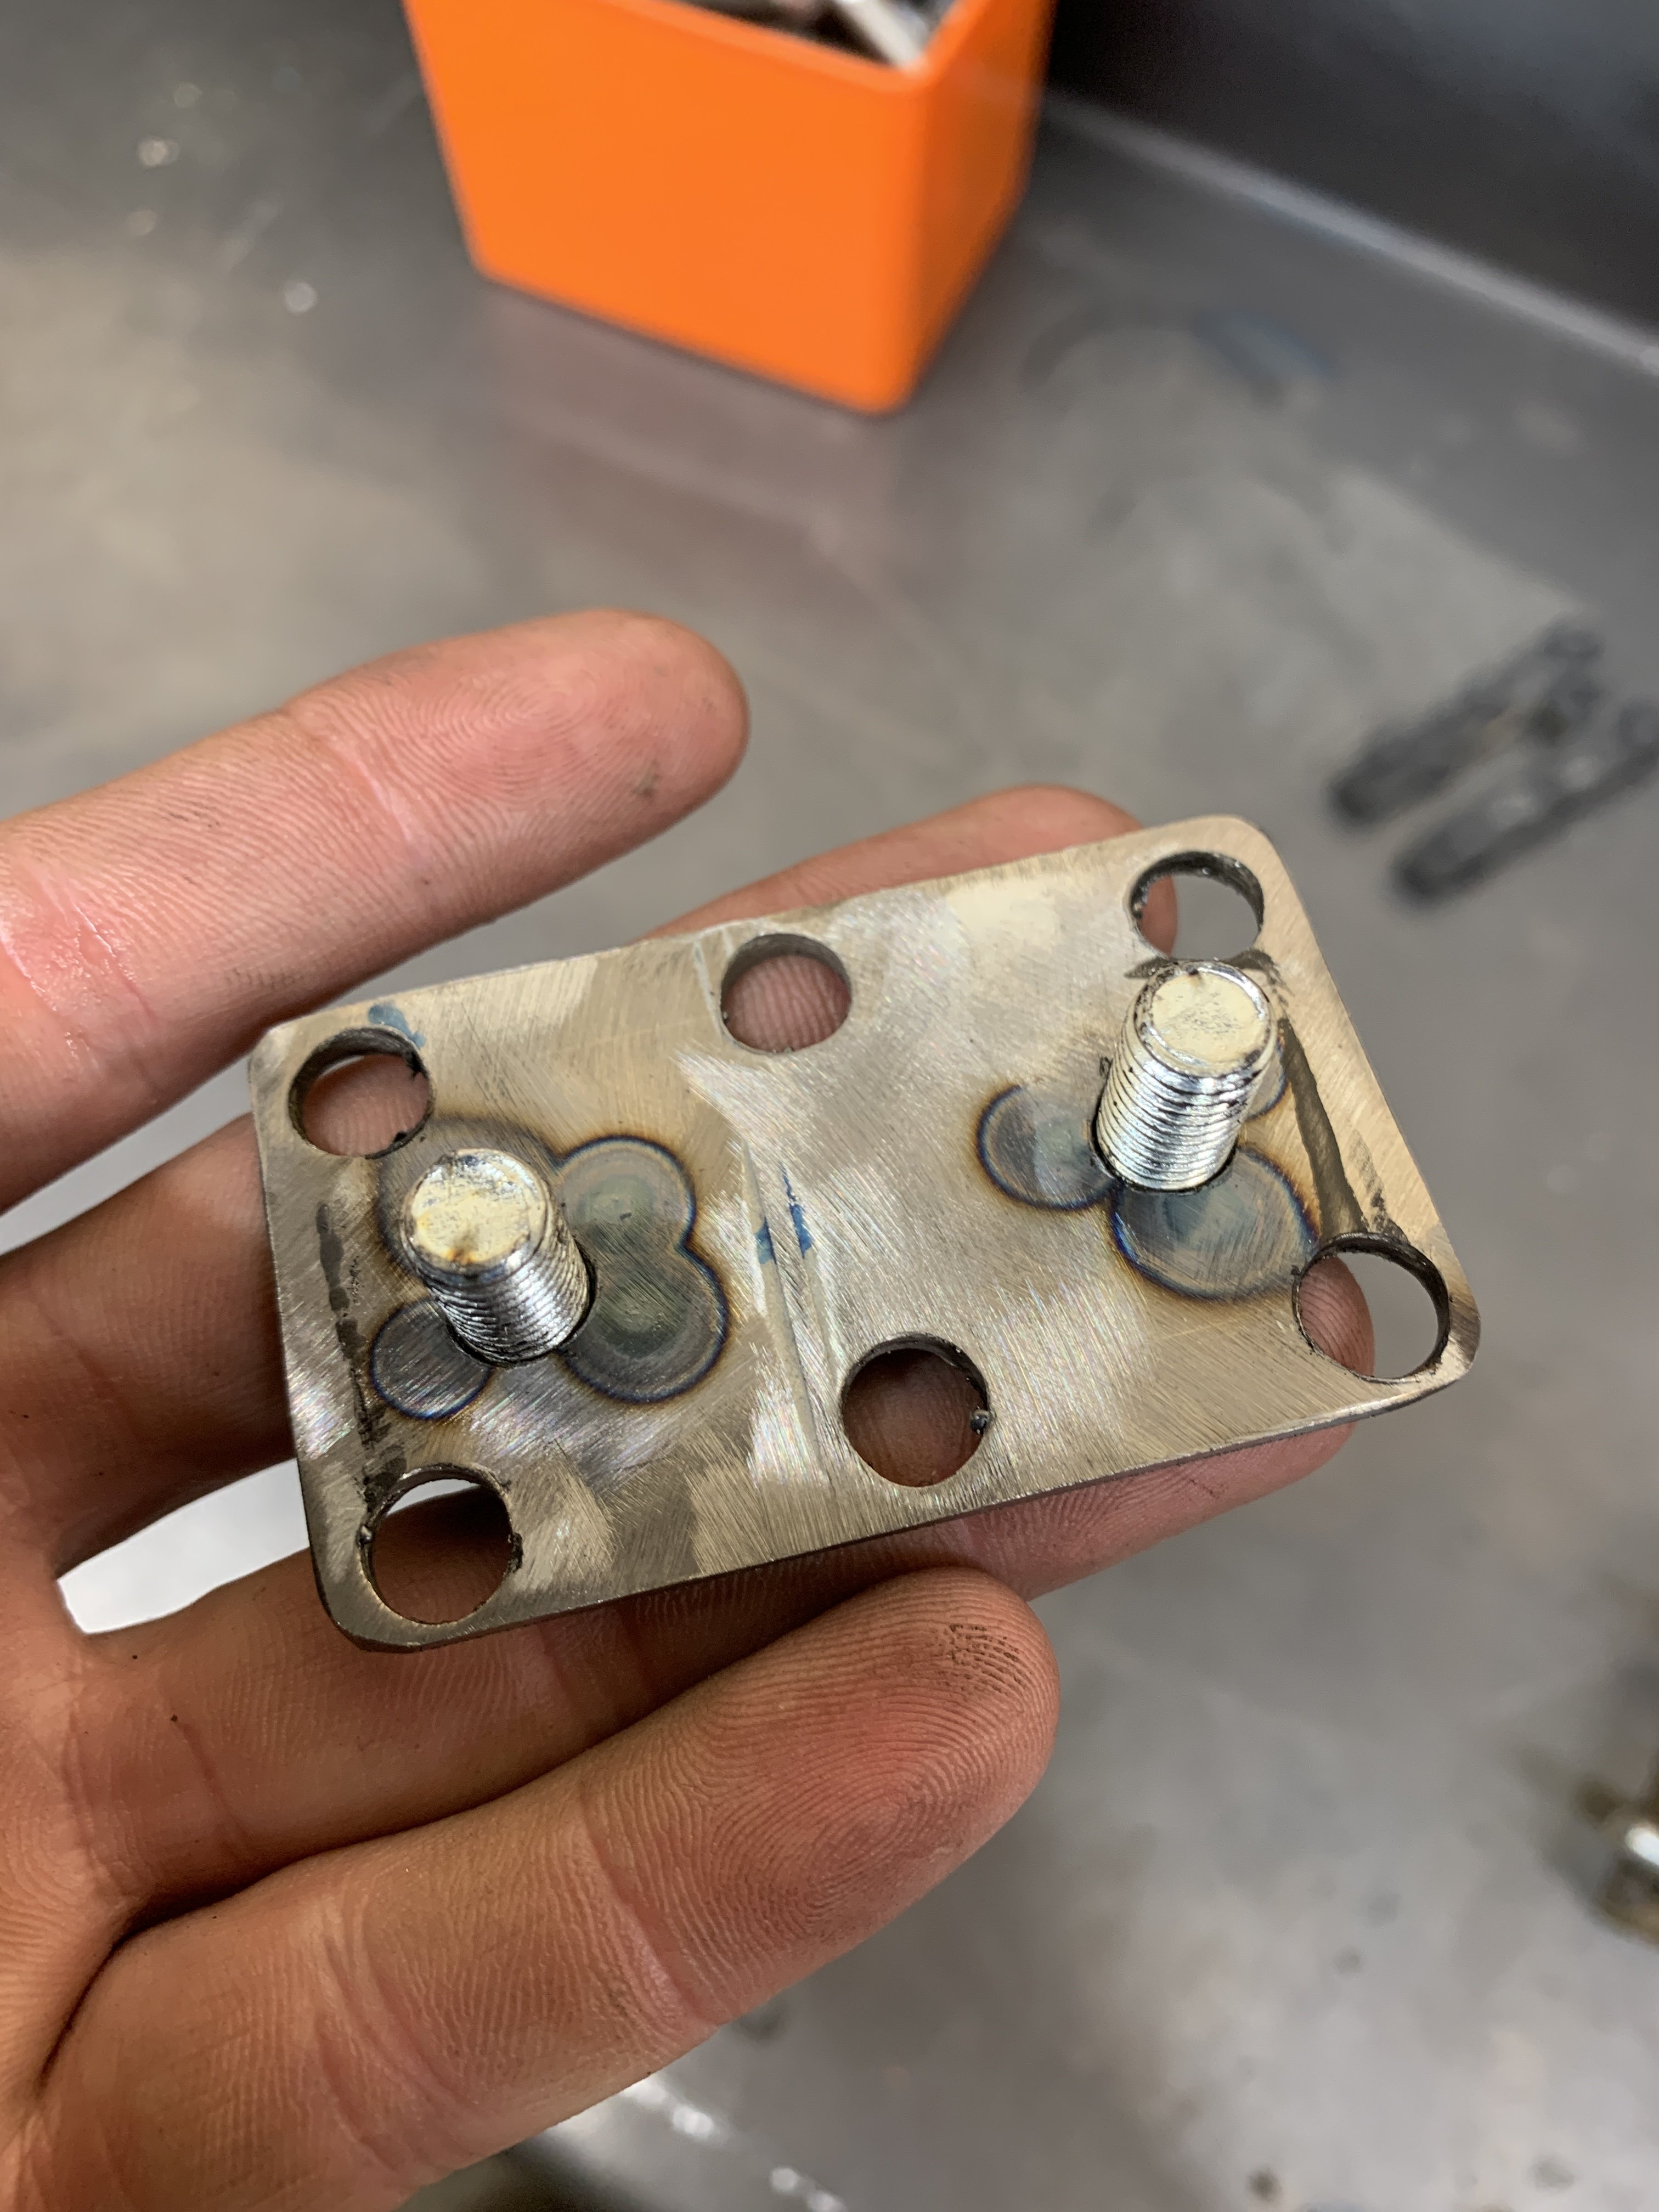
Fuck I was super stoked when my package arrived from the USA under lock down.... FUCK!!!! So I ordered 12x1.25mm Wheel Studs. They sent 14mm Wheel Studs. Fuck. Fuck Fuck. Fuck. I swear, I am cursed with incorrect parts. Life as a mechanic has been painful, daily battles with Repco and BNT and parts departments. Waiting for urgent parts that only turn out to be incorrect, not what I asked for or even put into the wrong box. Just dumb shit. Anyway it's safe to say I've developed a complex and this shit kept me from making any progress in the shed today. (Just went and sulked instead) Sent them photo's etc etc, but seeing that it's the USA, I can't see it being sorted anytime soon, let alone at all. Rant over.
2 points
-
Since then I have been riding it when I can and have done over 1500 K on it now. A couple of trips out with the wife. Also got worried about the state of the OG wheels so built my self some new ones.
2 points
-
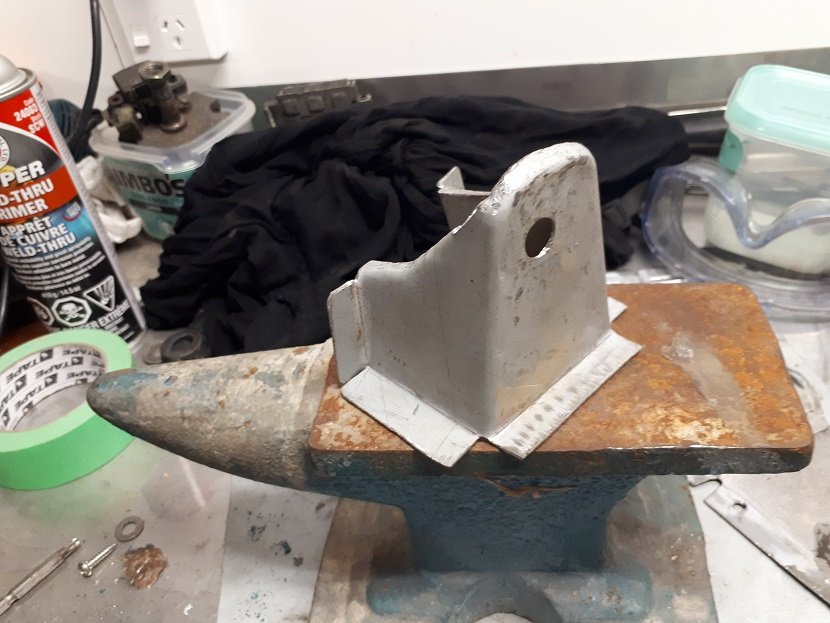
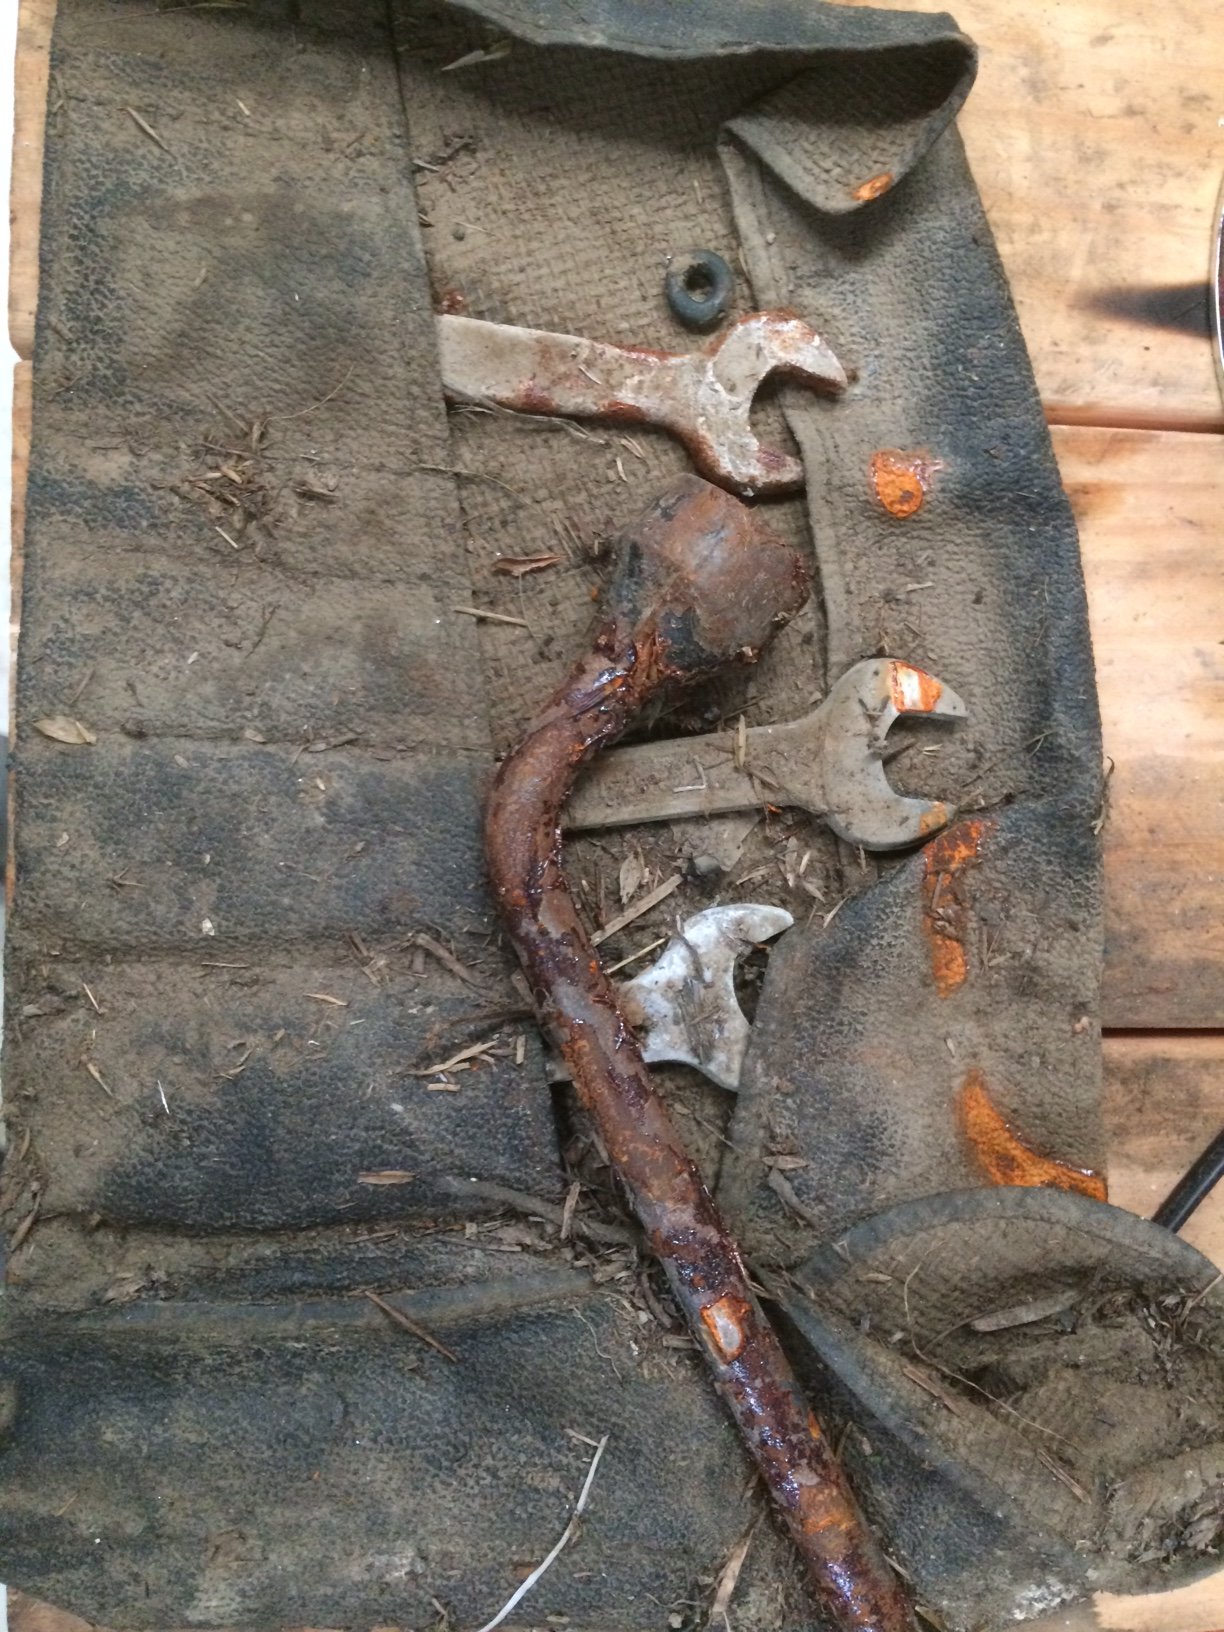
Continued from previous. Another protracted battle then followed with more nuts and bolts. There is a sill trim that runs along the bottom of the cab that is in two sections. A short section attached to the lower rear cab and a long section that runs along under the door, and ends at the rear of the front wheel arch. These trims are thin aluminium and were already quite wrinkly. Removing them has destroyed them. They would be quite easy to remove if the bolts weren’t rusty and seized, but the brackets are quite flimsy and will not stand up to high torque situations. Finally, having extracted all the bolts, the rear cab lower half lifts away, and is a bit awkward to remove without a helper, as it is a decent weight, and the galvanised sill frame now has no rear support, so you can’t put weight on them. It’s a good thing Land Rovers are not fast, the seat belt mounts don’t look like much. But hey, there’s a sticker that says they are approved by Her Majesty so they must be OK. Factory toolkit: Exploratory choppy-chop. To be fair the end caps were just about weet bix anyway Til next time
2 points
-
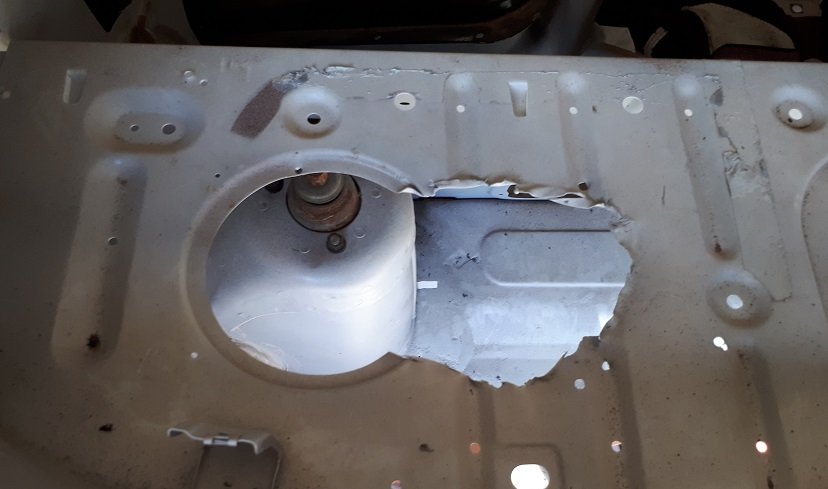
Oh my Lordy. Made some plates with the intention of plug welding them to the firewall. Got stuck in to the welding which was quite fiddly under the dash. Was smoking a bit and got to the point where the smoke was a bit worrying, so hunted round to find source and sure enough, fire! Couldn’t find it but could see orange glow. Went into full panic mode and ripped inner guard liner off to find the fire on foam attached to back of firewall. Put it out but I think it took a few years off my life. Anyway bolted pedal up and it’s not in a great position. When you hit brake pedal the side of your shoe catches the throttle. Will be great for heel/toe but maybe also bad for doing an Audi5000 and jamming on the throttle while panic braking. I think moving the go pedal back toward firewall and across to the right a little bit might fix it, but I’ll do a test drive before I make changes.
2 points
-
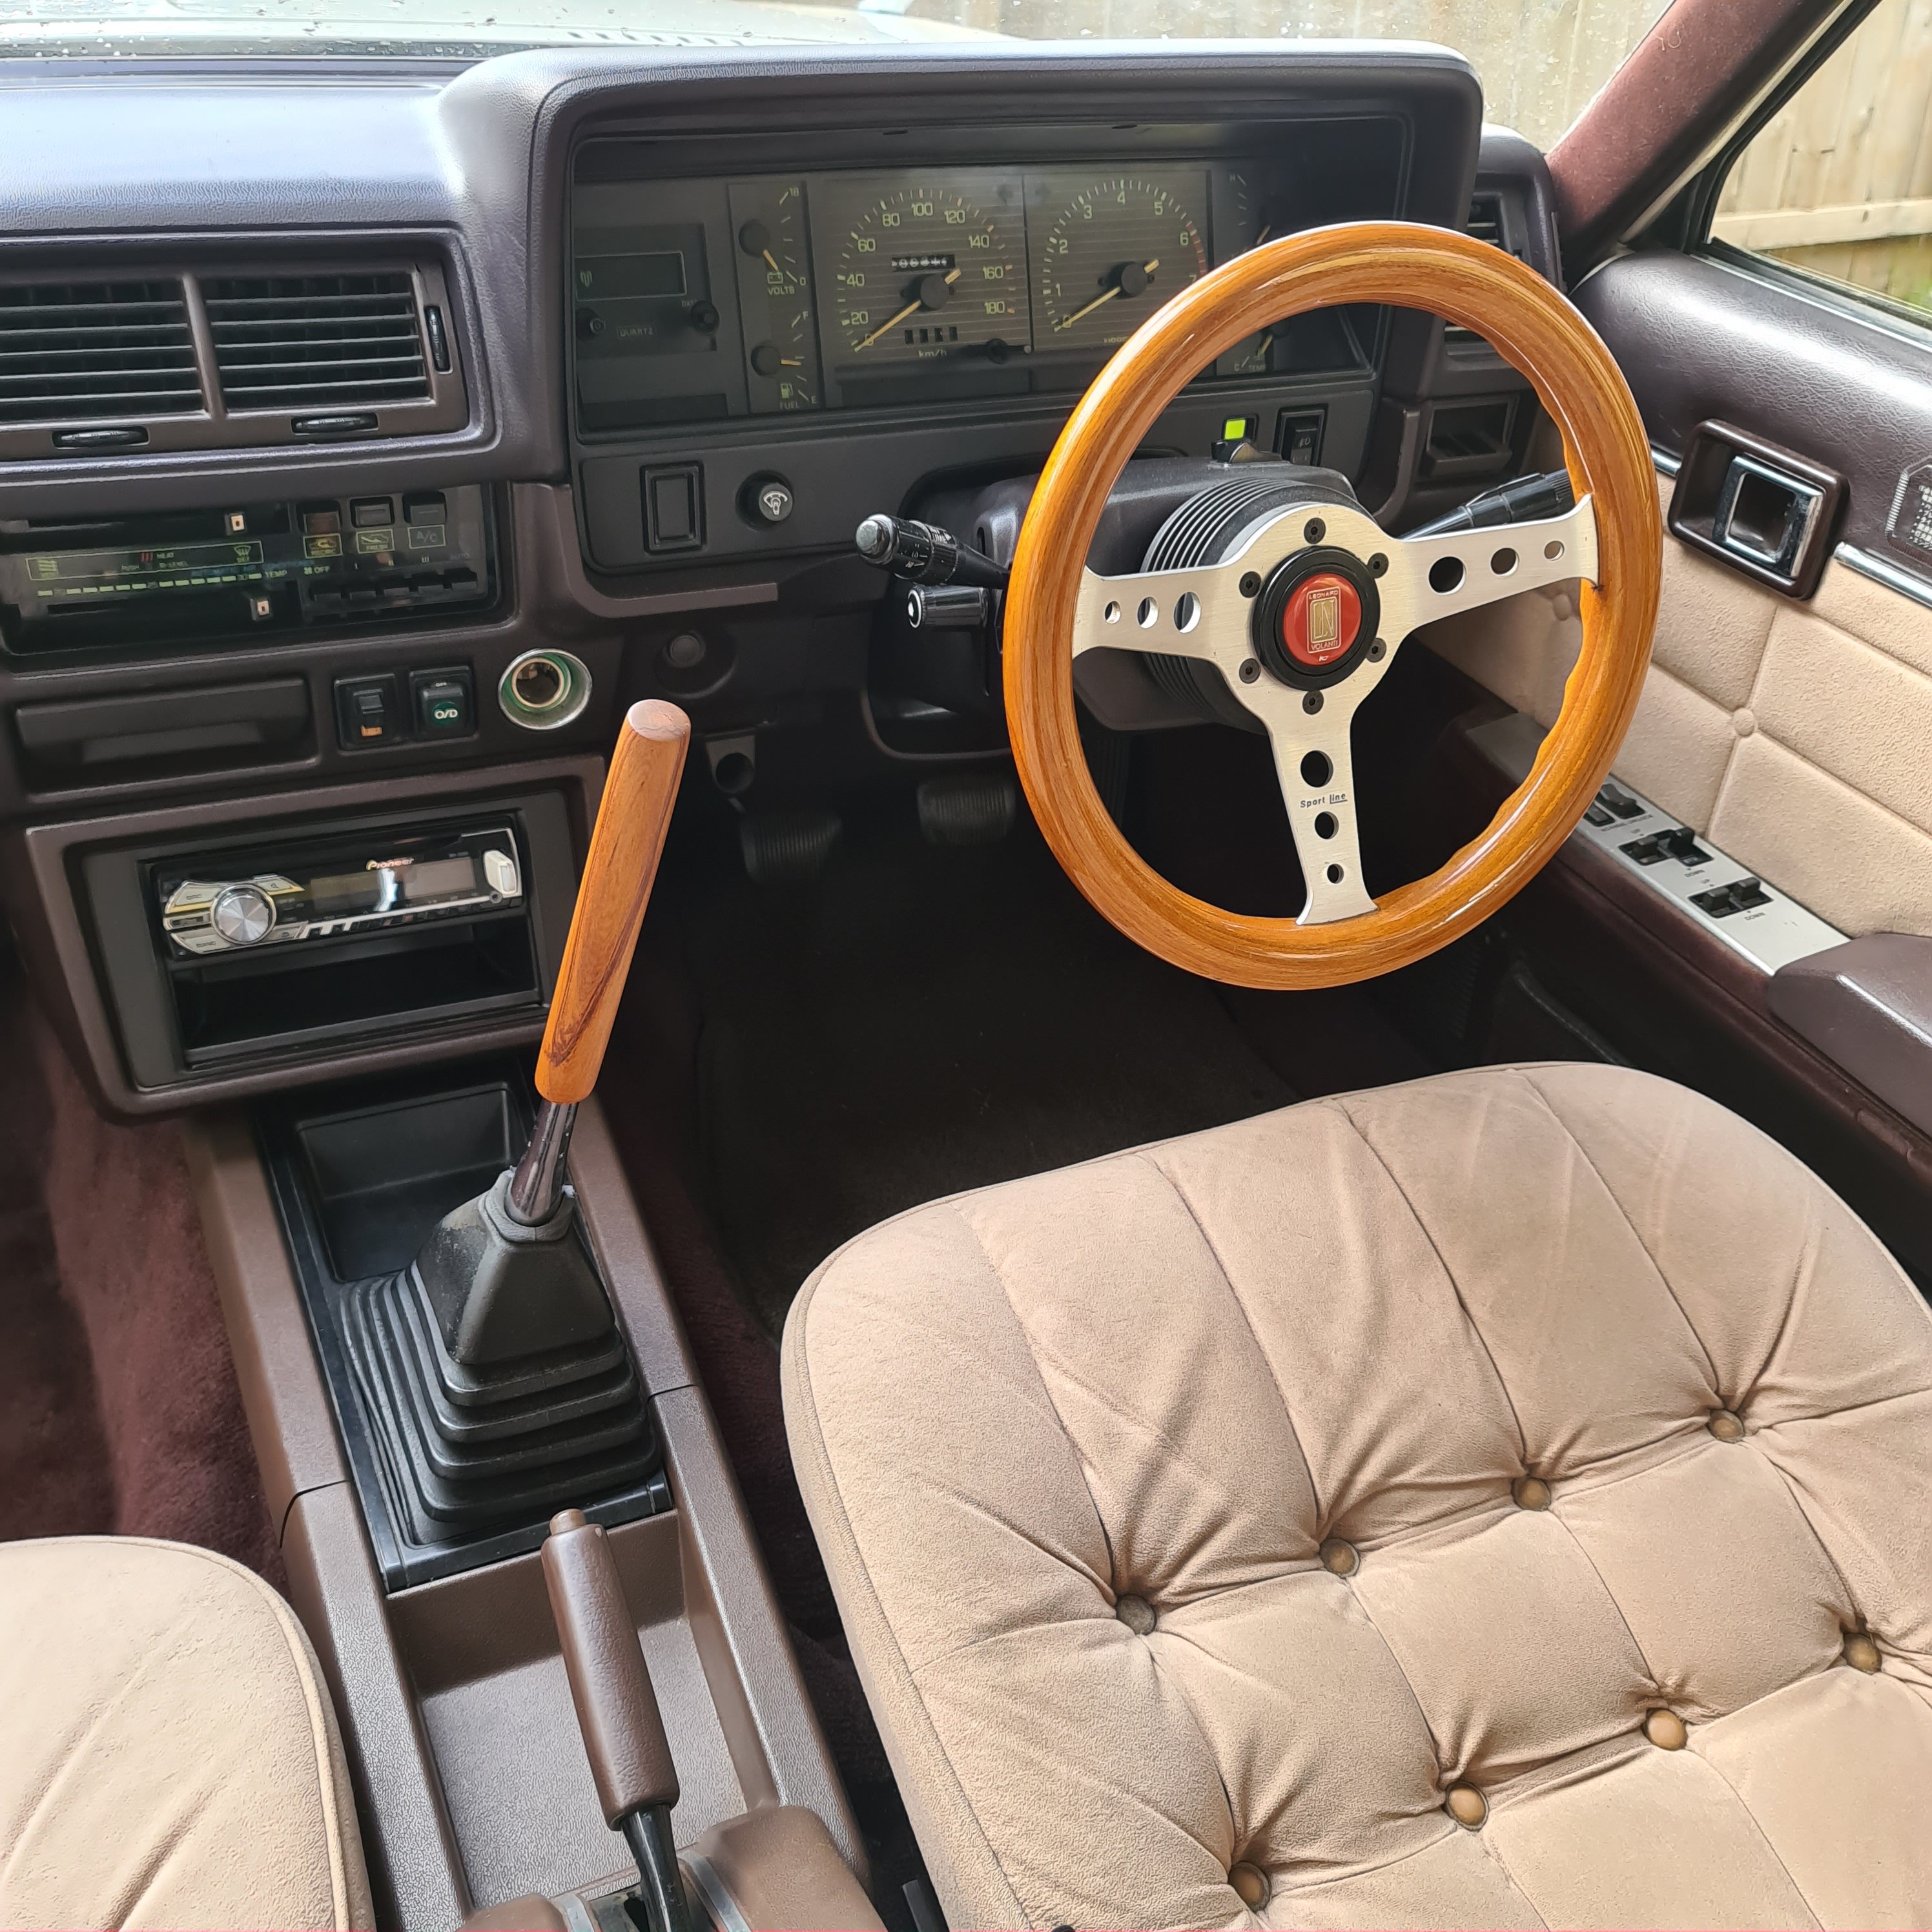
Have wanted a Mizuno Works wooden shifter for a long time but decided it was money better spent elsewhere for now and made one. I had some kauri or rimu? recently machined for a furniture project that I ripped into 30x30mm strips 250mm long. I planed the corners off to get as close to round as possible before centre drilling- apparently not- the base out to 12mm and winding in a m12x1.25 bolt with hex head cut off and put the cut off end into my cordless drill It took 3 attempts to get one usable due to drilling the first one wayyy off centre and in a straight line and splitting the second. Ended up with 185mmx22mm finished size and have just applied some linseed oil which is a fairly close match to my steering wheel. Wanted to put the other half of my factory stereo back in but seem to have misplaced it so swapped out the silver cassette bottom half for a pocket instead. The black ties in with rest of interior better than the silver anyhow. My only other plan for interior is to have a leather shifter boot manufactured. Sadly the place who did my last one has caught fire back in October and doesnt look to be reopening
2 points
-
Some of the UK readers of this forum may have already see this episode of car SOS- its a goody. The Imp they restore is like Hannah's first classic car , a 1974 Imp super painted in Prairie wind. A little car we enjoyed immensely and what made me always want another... The episode can be watched here.... https://www.dailymotion.com/video/x7t30c32 points
-
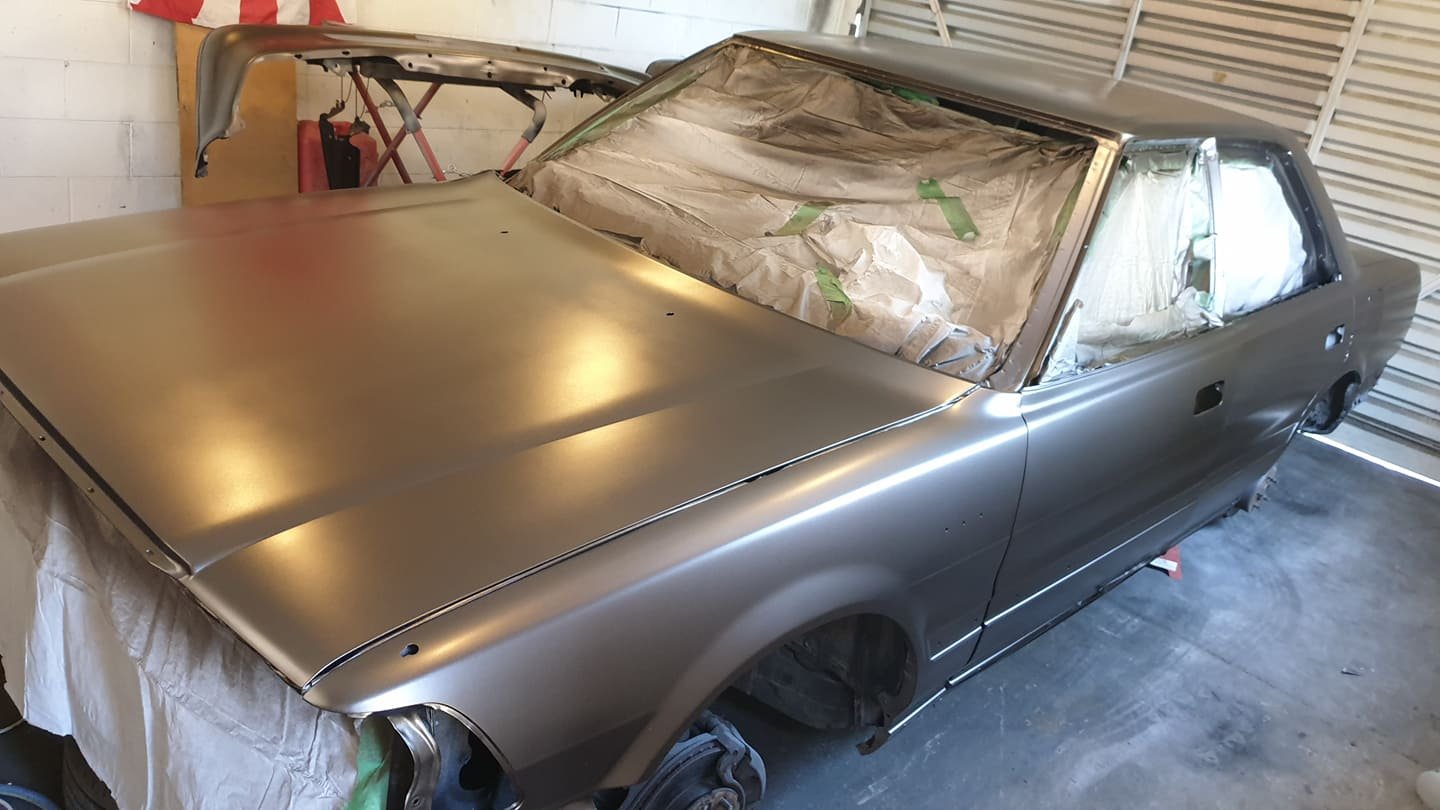
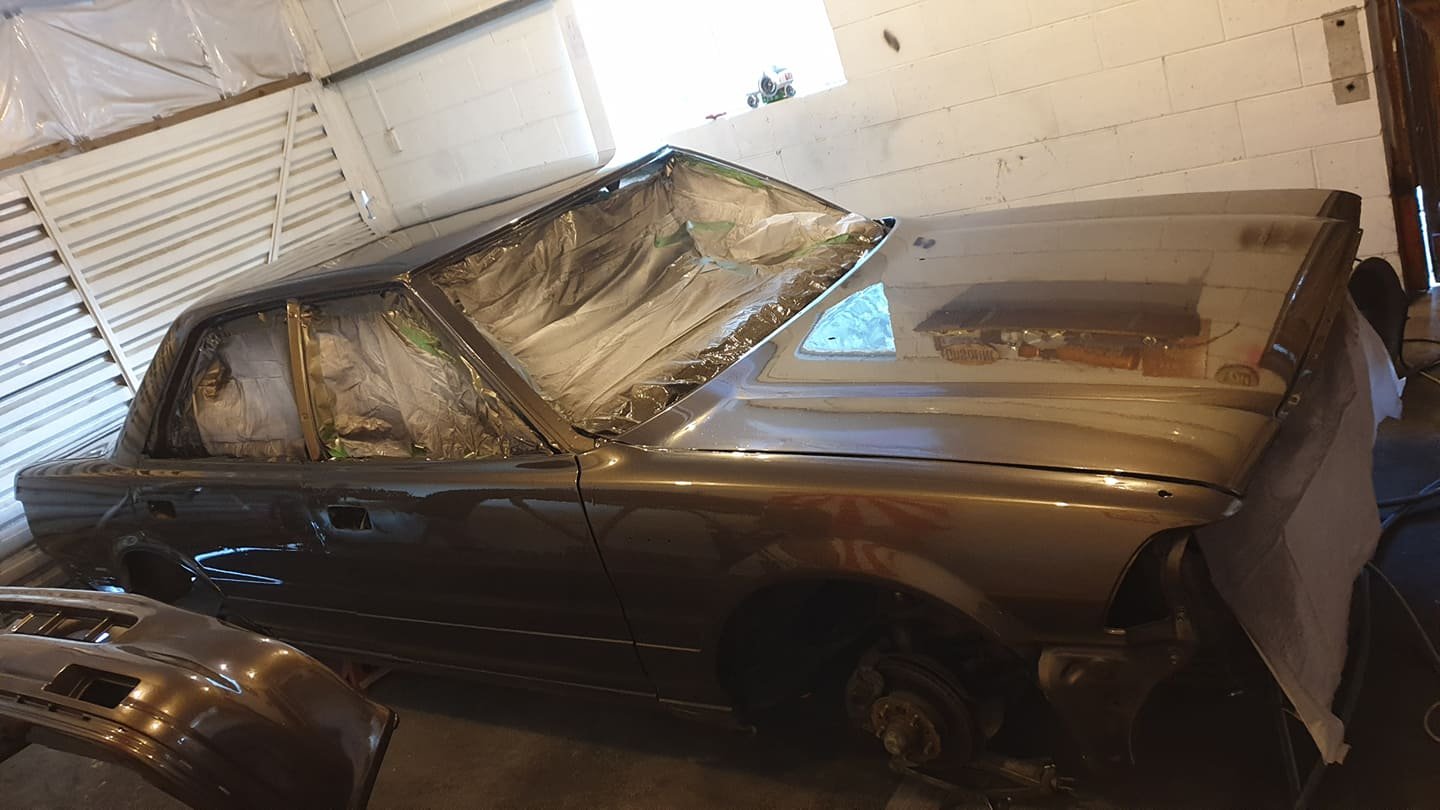
pulled the pin yesterday and painted the exterior. the basecoat went down beautifully. but i really made a hash of the clearcoat. quite alot of sags, and in hindsight, the lighting in the garage was shit so i couldnt see them forming and i think i was holding the gun too close. really took the fun out of it, however all it means is a bunch more colour sanding which ill tackle in a while once its gone nice and hard. on the plus side, the thing looks dead straight, really happy with the sanding job. have un masked it, which was a tour of all my fuckups, but ultimately itll come up awesome. the colour is amazing and i cant wait to see it in the sun.
2 points
-
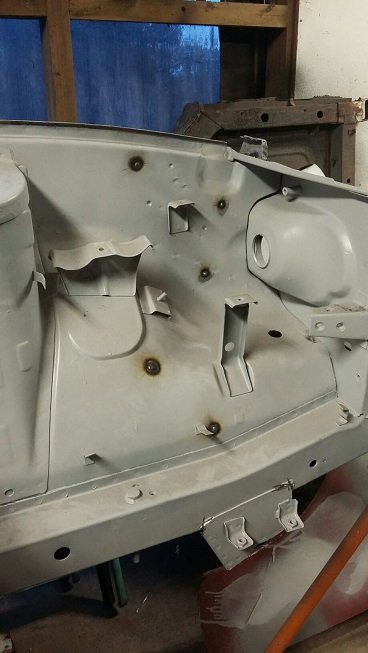
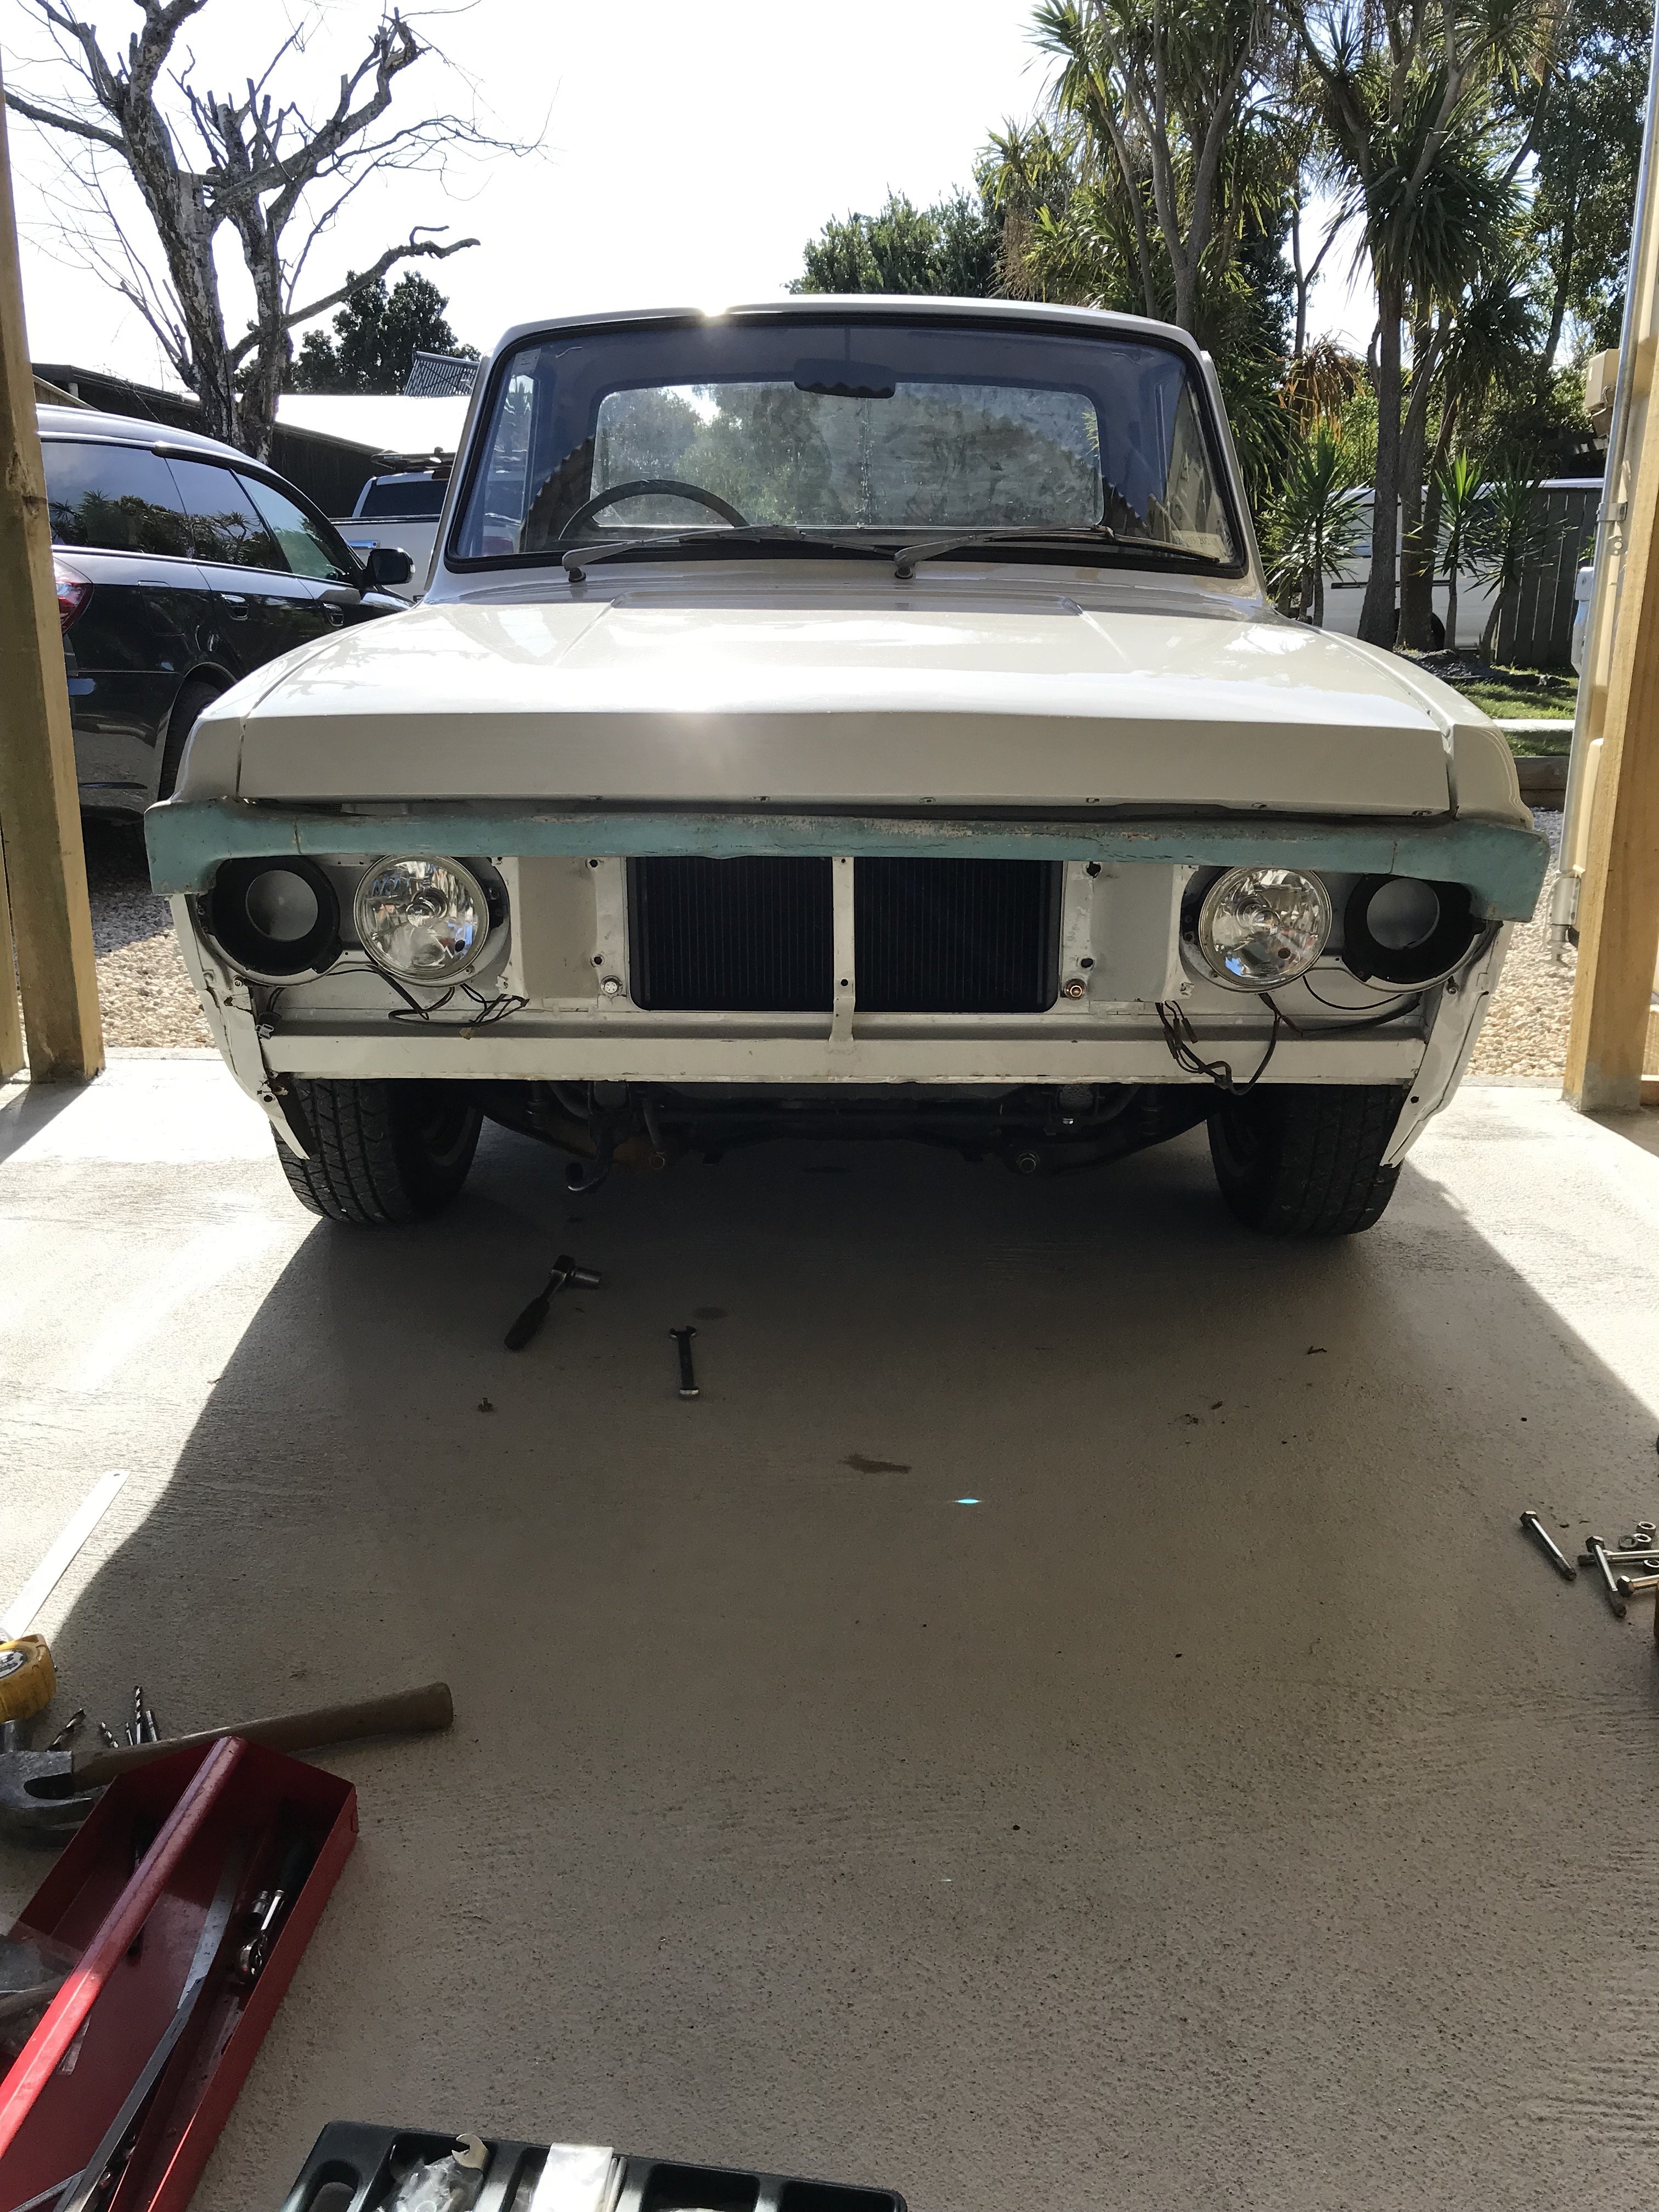
pulled the front off to see the differences between the 1600 and 1500 fronts, I transferred the mounting points for the top trim and put some rivnuts in, the 1600 headlight trim mount and outer headlight fouls the 1500 top trim from sitting into place. Then after looking at how twisted the top trim is thought I would leave it for now and carry on tiding up the other pieces and try find a better top trim or maybe look at making a mould to make a fibreglass top trim, Can buy them but quite pricey at 300 usd plus postage.
1 point
-
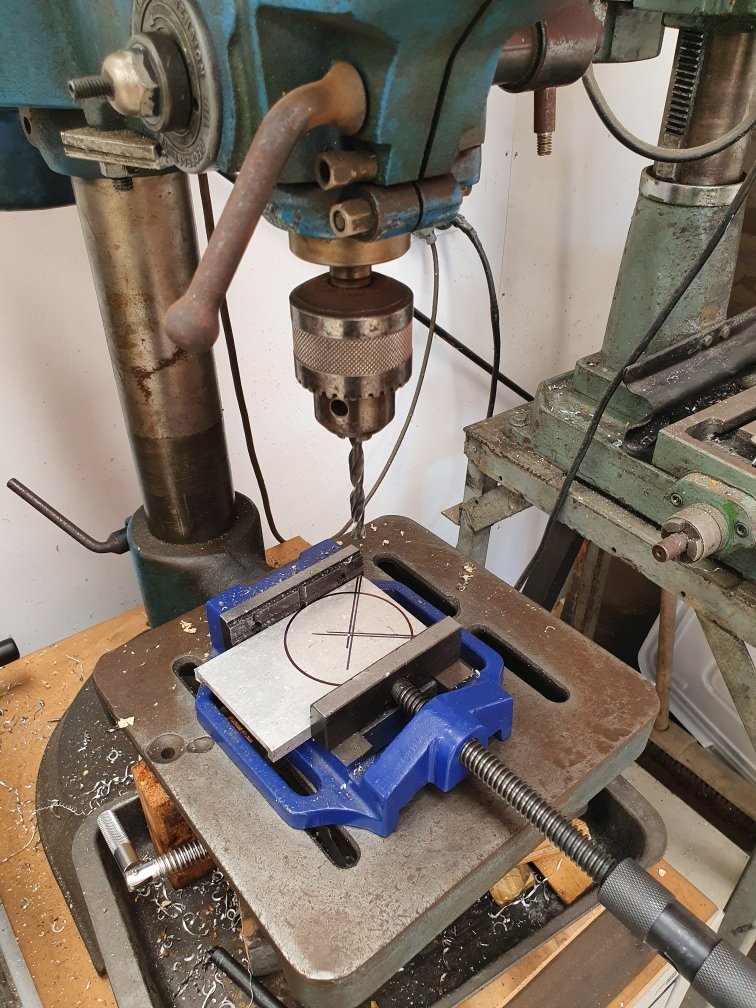
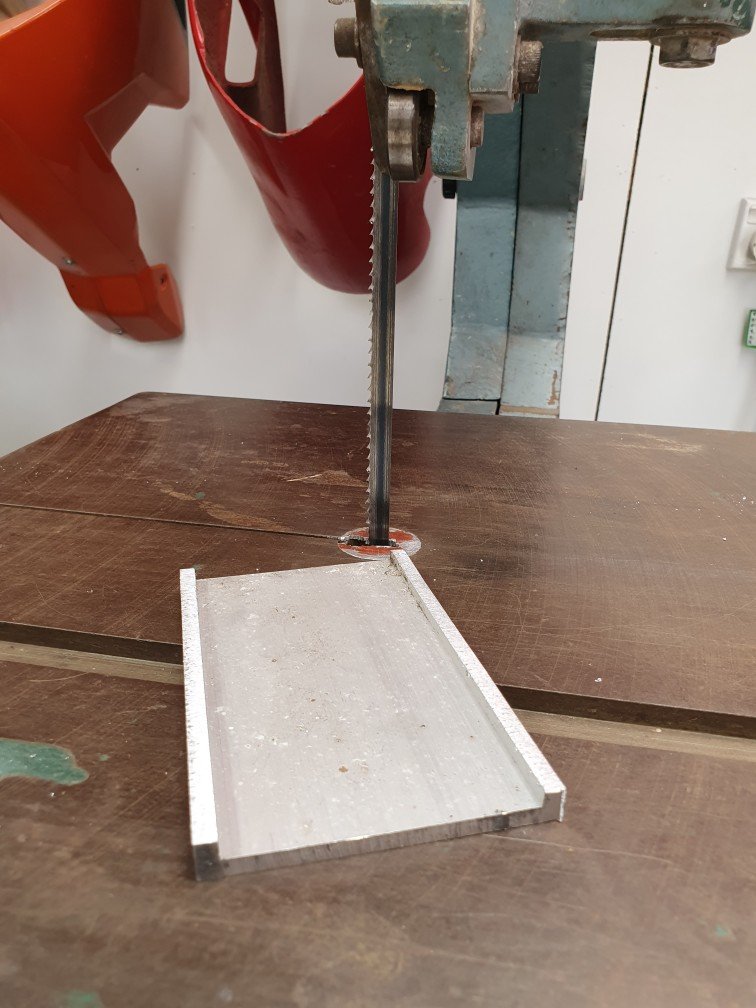
All of this, I started by making some moulds in fibreglass to figure out what works and what doesn't... Its not as daunting as you might think.1 point
-
1st off. Why the fuck was someone standing on a Carbon Fibre Bonnet? 2ndly. Did he lose any teeth or was he the owner? 3rdly - 120kg dude, that's really impressive. So in terms of Bonnets, Gaurds, any external panels on a racecar, Carbon Fibre would make sense. But what about a dashboard? Like would you require an extra layer of cloth in Fibreglass vs Carbon Fibre?1 point
-
Like many I've taken some time during lockdown to sort out some work on the old girl. Got pretty tired of looking at the old rear bumper in its sad state, with holes dents etc all through it really ruined the car. Thankfully the sedan I parted out opened up the opportunity for me to modify a straight (sedan) rear bumper to suit my wagon bumper as they are NLA. So after some mixing and matching of bumper mounts and the careful hacking apart of the sedan bumper I ended up with a fairly reasonable looking bum. Tailgate is next on my list for a re-bog, just need it to last until I can really hack it apart and re-fabricate large amounts of it (it's very bad). Took the oppurtunity to tidy up my exhaust tip, too. It's a nice quiet car with no drone etc which is cool. But I'd like it more aggressive for the new motor. Also fitted factory grande head unit. It struggles to work so I've just wired my lights to work and I'll relocate my BT headunit under the seat for max functionality.1 point
-
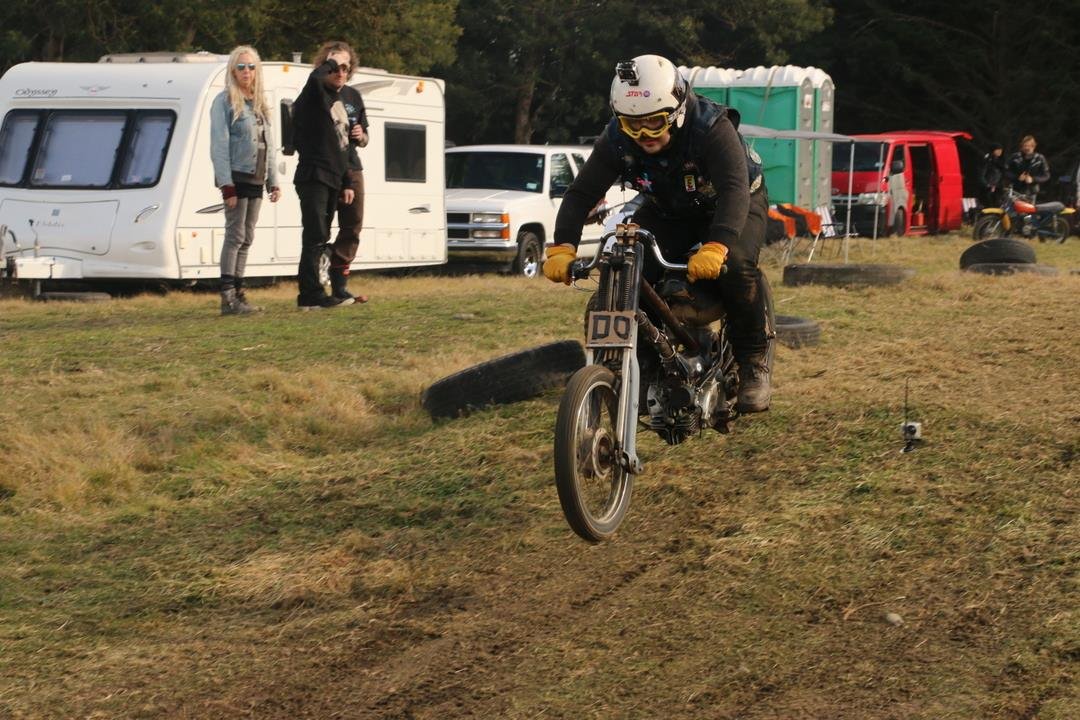
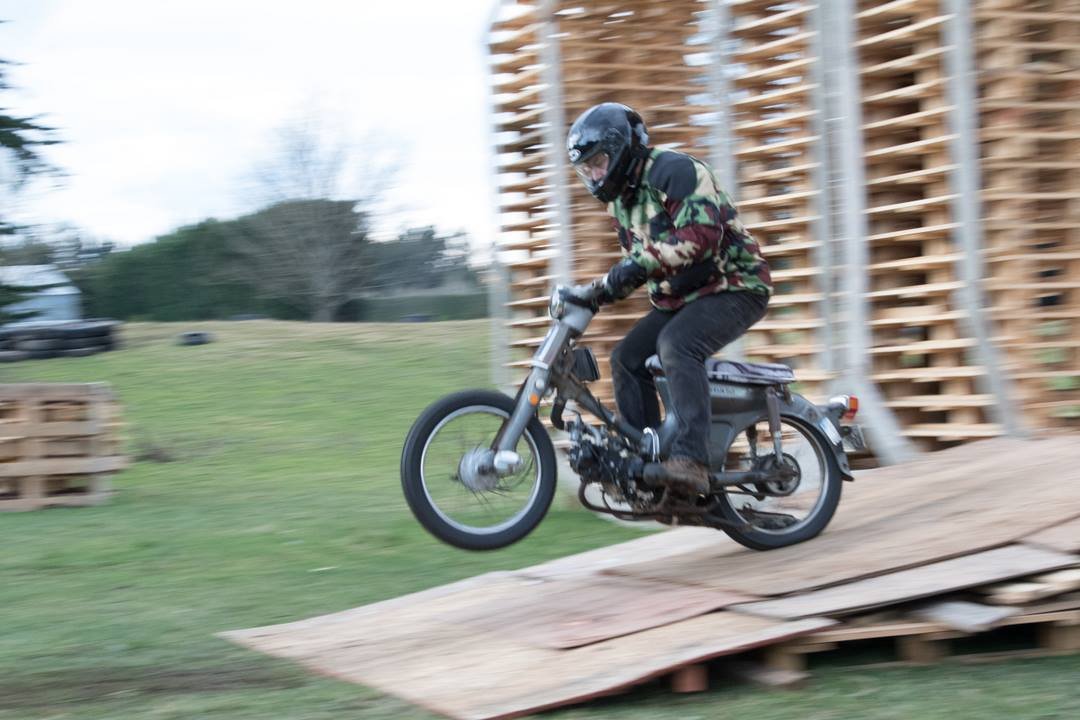
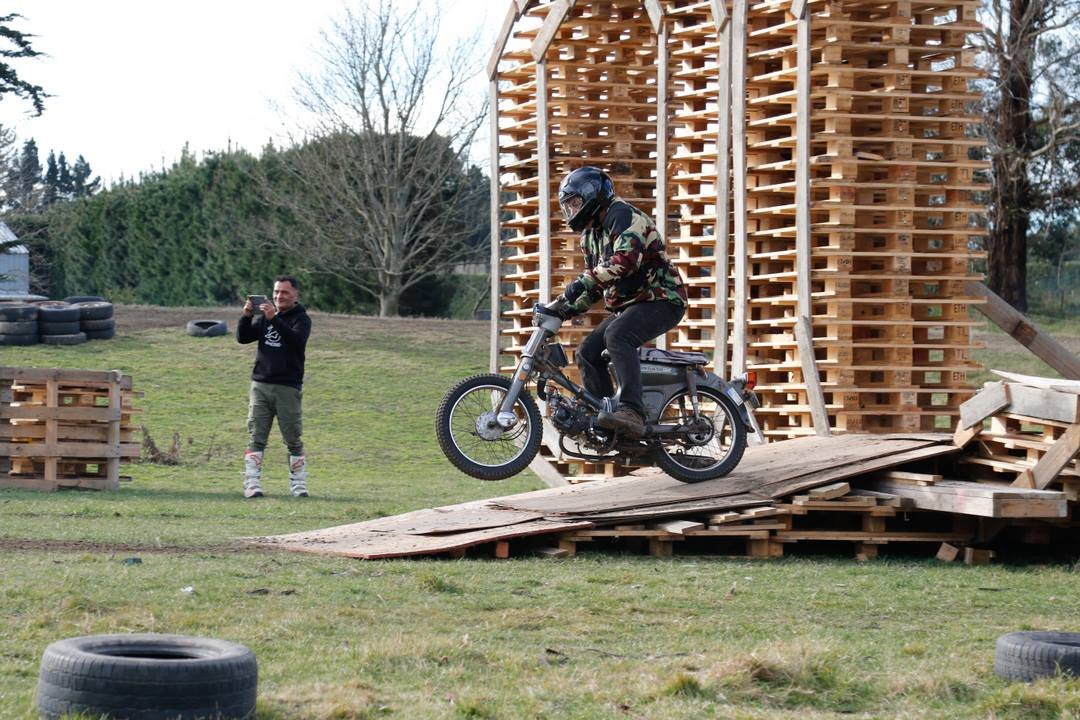
Having had this thing nearly two years time for an update. Was lucky enough to take it to QCR's "Dirt Masters" and ride it inappropriately. Just removed the front guard and fitted some Golden Boy tyres. So much fun was had, along with @GuyWithAviators on his absolutely ridiculous super stretched Yamaha V50 (Don't try this at home - not a dirt bike :))
1 point
-
yeah its quite a good watch. Entertaining enough. I met that Fuzz guy years ago at a retro-rides gathering when I had my rotary chevette. He's a sound fella- really into modifications and also a bit of a bus barry.1 point
-
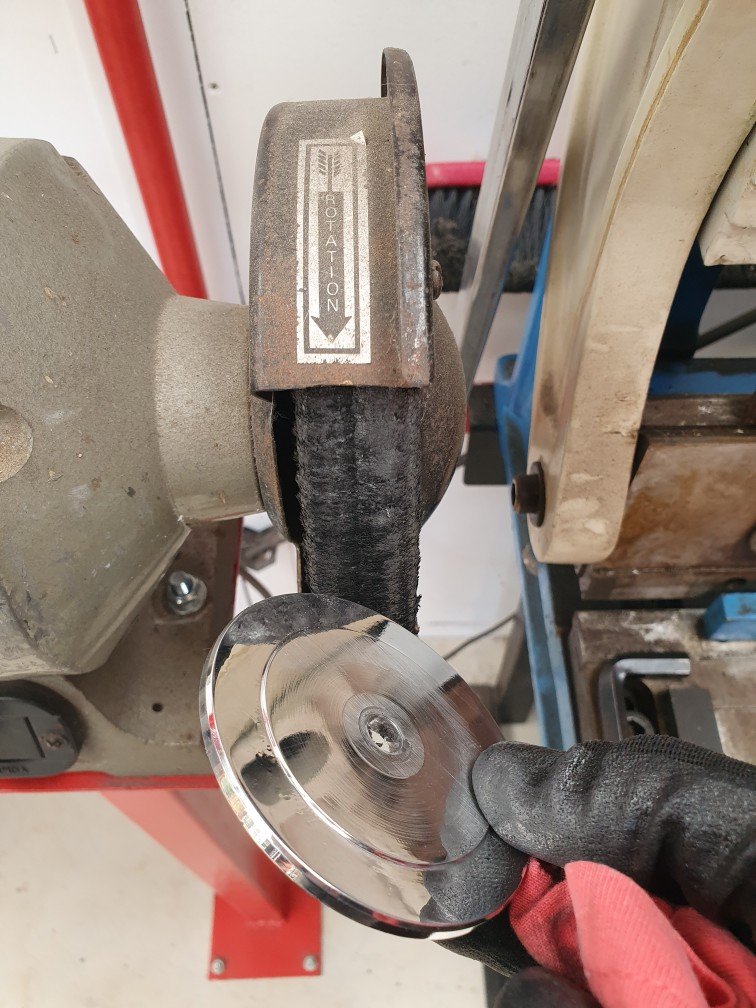
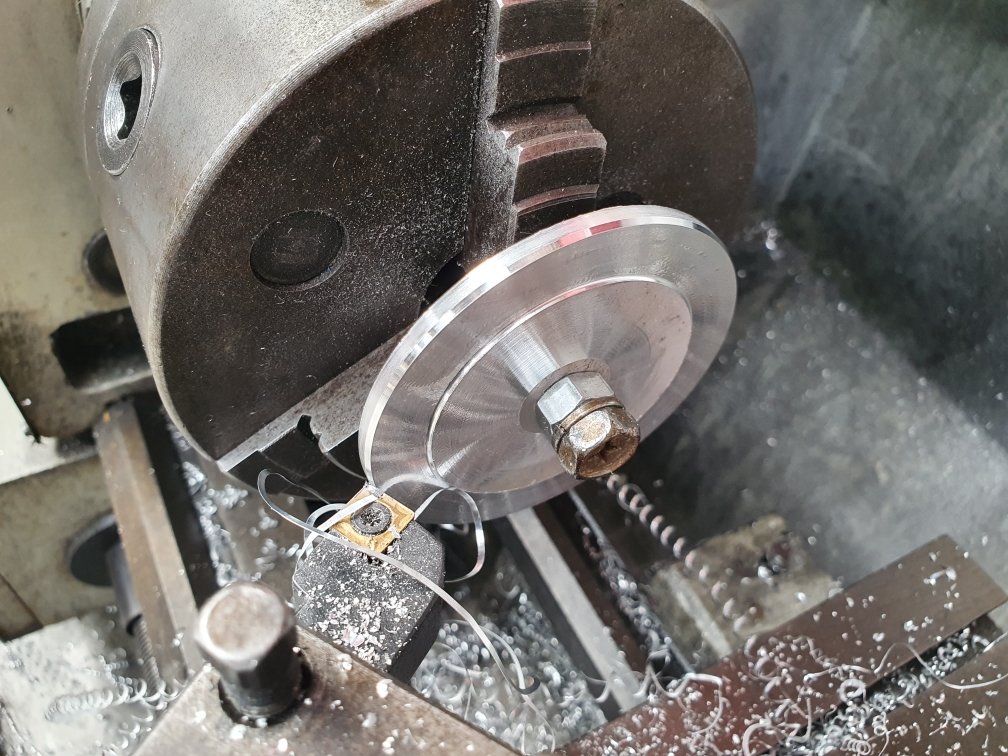
Well I must say I do love the new Recaro seats. They are so comfy and hold you in place soooo much better in the corners. I had still been using it heaps through summer. Got a shot of it next to an I8. Huge cars!!!... What else? We took the Imp over to Blenheim for the big classic car show they have there. Its getting bigger every year and I have kept missing it each time. Not this time though! The weather was a perfect Med like blue sky day and the cars that turned up for the show were a really nice mix of everything. My parents came along too. My dad is 87 and not too fast on his feet having pretty bad lungs now. I was worried he would struggle but I kid you not- he seemed to perk up more every minute and flitted about all the old cars really quite animated. It was great to see and I'm so happy he made it along. Mum loved it too and we met some great people. Pics.. The show.. Dad pondering if he could have fitted a V10 into his Moris traveller he once had, or maybe the 120y wagon they had... Hannah's favourite car of the show (and her dream car)... Some sweet old boats there... Me next to dad, holding a 8 month old Kelpie puppy(my favourite brand of dog, we used to have one).. The Imp (wtf the Toyota Pius was doing there we don't know..)... There was actually a car there that made the Imp look huge... The Imp was popular, being bright blue and the only one there. Lots of people checking it out all morning. I printed off some photos of the restoration onto a4 sheets and stuck them in a plastic binder with a quick note for each. People I spotted seemed to enjoy the read and I imagine it made for more admiration for the little car that was rescued from a field. The trip to and from Blenheim was fun and uneventful. The Datsun engine impressed again with its thriftyness by managing 44.8mpg and that was with some spirited motoring too Drove some nice roads near my old home town. Very very dry over there and sadly they still have not had much rain. But fantastic grape season if that's your thing. Once back home I decided to put the car up on the hoist and deal to a couple of jobs I have been putting off. Those of you with a good memory may well remember the state of the ring gear. It was worn badly in two locations, 180 degrees apart. This meant that it had a 2 in 4 chance of stopping roughly near one of those spots. It seems that sods law dictated a sliding scale of when it would stop and this scale was linked to how many people are around when I would go to start the engine. Worse if those people were probably of the type that think 'oh that a nice old car but they are very unreliable'. When the time was right the starter would ignore my want for turning over the engine and instead may a horrible loud racket as it wore the ring gear worse. I would have to then sit the car in 4th gear, put my foot out the door and rock the car- so moving the flywheel around just a bit. Then start the car and drive away red faced as the people now watching tut tutted... Never did it do this on our property btw... The other thing was that the rear main seal was leaking badly. Bad enough that the clutch was playing up and I'd have to think carefully about where I was to park the car when going to the country club* for fear of meeting those same people again and only going to reinforce their misguided opinions about old cars. I had the chance to replace the seal when I took the engine out way back at the beginning. But remember who I am - a tight wad who likes to save money and $25 seemed like an awful lot for a seal that 'looked ok' Silly me. So out with the engine then. Made easier by using my special custom made bespoke 'Datsun A12 engine cradle' Here's the worn ring gear. I drilled it and broke it off. Removed the old seal. It was indeed very hard and not very sealy. More like a ceramic ring then a seal.. The oil had coated the clutch disc.. Luckily that cleaned up sweet with a load of brake cleaner and was deemed good to use (please refer to note above about tight wad..) Went to my old workplace, Autofocus in Nelson and used the gas set there to remove the good ring gear from another flywheel that came on the A15 engine I had bought. I then dropped it onto the A12 flywheel... With that done the engine was given a quick clean whilst out and slung back in place. Oh but not before making using the opportunity of an empty engine bay to size up a different engine. That however is secret squirrel and will be announced later in the year The Datsun was all plumbed and wired back up. It started straight away and after bleeding the coolant system I took it for a hoon. Clutch feels great and no horrible starter noise roulette... However..... the bloody speedo gave up and decided that the needle should reside at around 90 mph. It had been getting ever so more optimistic over the last few months and I had read that the springs can weaken. It doesn't affect the odometer which is mechanically linked to the speedo cable, just the speed reading. Now though, having just fixed some other issues my 'unreliable old car' decided to throw another at me. When I returned home from said hoon the needle decided it would resolutely remain at around 60 mph even when the wee car was stationary. So this happened... I'm so glad that I had added plugs to the wiring birds nest that resides behind the instruments because it made removal much quicker and easier. I took the speedo apart and found this... It seems that the sponge sealing which fits between the telltale warning lamps and the speedo face had broken down and crumbled into the speedos magnetic disc area so creating drag. I'm not sure but it was messy in there with lots of friction. Rather then muck about trying to clean it all out I instead pulled the spare speedo head from my stash of Imp parts and fitted that instead. I removed all traces of the old foam, opened my little alladins drawer of various foas and double sided tapes and stuck on some new stuff... This lot will be binned in the future as I fully intend to replace the whole cluster with nicer modern gauges (but with a classic style to them) including moving over to an electronic speedo head. Speedo cables and all their wobbles can leave by the back door thank you please. So since the world has gone a bit weird and we all have extra time I decided that instead of refitting the dash into the car in the poor evening light I would instead do an update. I'll refit it tomorrow. One other job to look at is a rattle from the steering rack. I think I know what it is and I have already stripped and inspected a good spare that I might swap in. Other than that I'll just get back to using the Imp, obviously only for shopping purposes at this point in time. I now have plenty of other tinkering jobs to do and hopefully in the next update there will be some very exciting news * I don't actually belong to a country club. But I do like a spot of lawn bowls....1 point
-
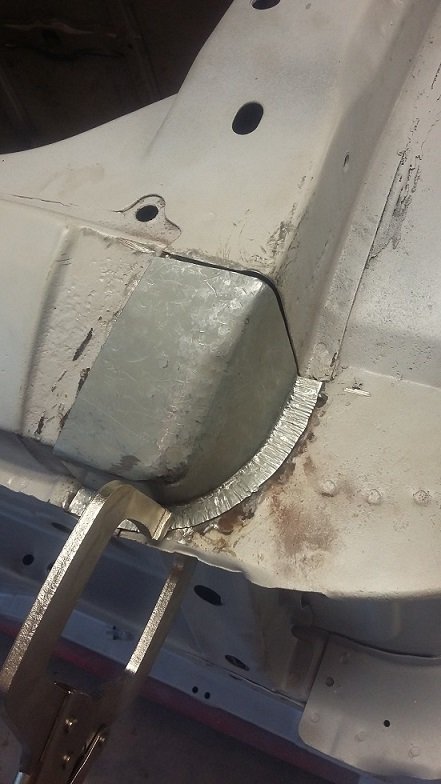
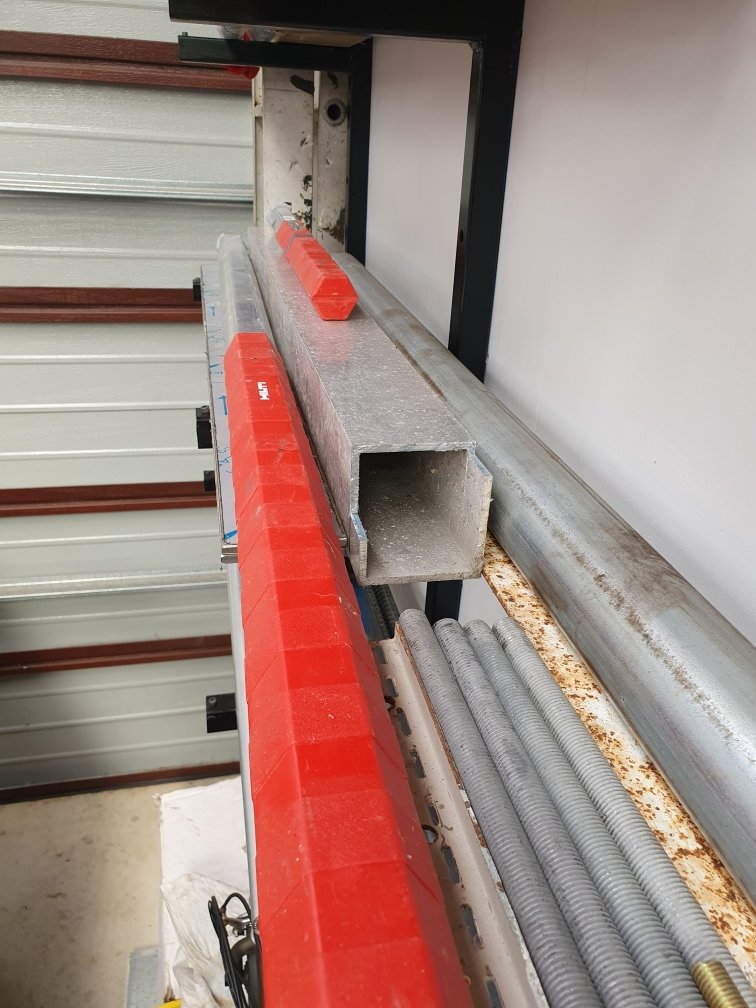
man she has been some time since the last post..... I think old mate @Geophy ended up getting some steel and i asked him to get me some right angle in the end. Welded that on and then it really started to get in the way at the shop. Invited old mate Geophy over again and got him on the grinder he went over allllllll my welds and made them flat for me. Making it easier to stick the cladding on when i am ready/have the money. the main reason was so i could get it painted and get it out of the work shop. we had been planning on moving the shop and it was not going to be able to fit in the new shop. I had re upholstered a chair for a mate and he owed me a favor so i hit him up seeing if he could paint the caravan before i had to leave it sitting out side. boom! Not the best of paint jobs but we have paint so its now sitting at my mums place out in the weather as we move places and sort our own lives out again. I would really like to get back into it and get it covered in for at lest winter. so i think thats the next goal. By cladding and material for the floor.1 point
-
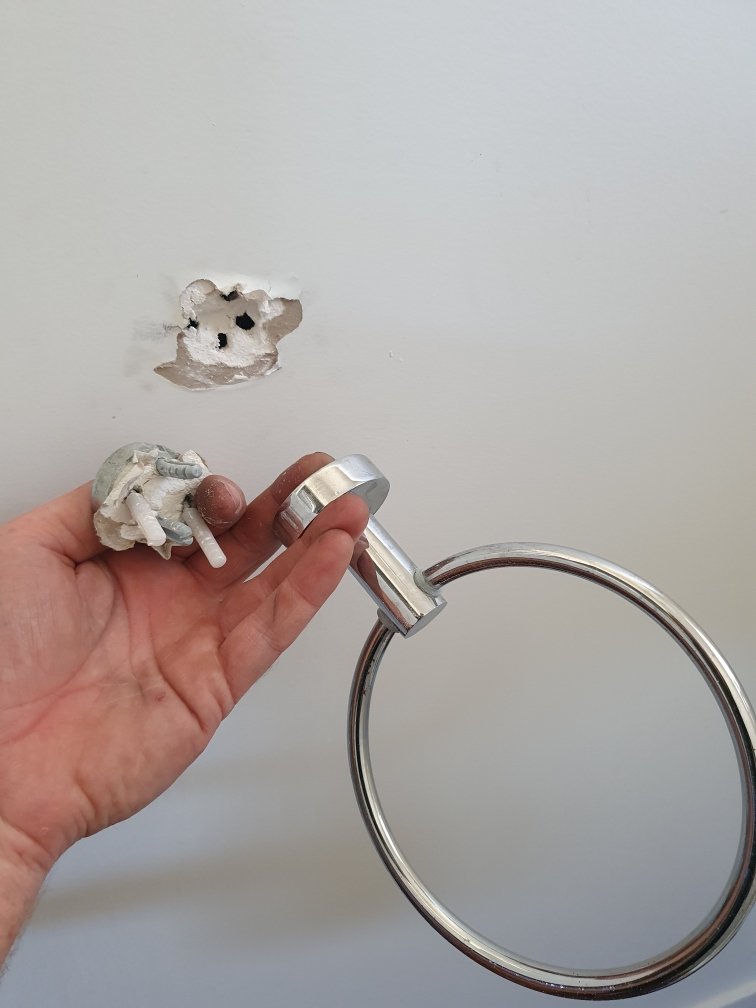
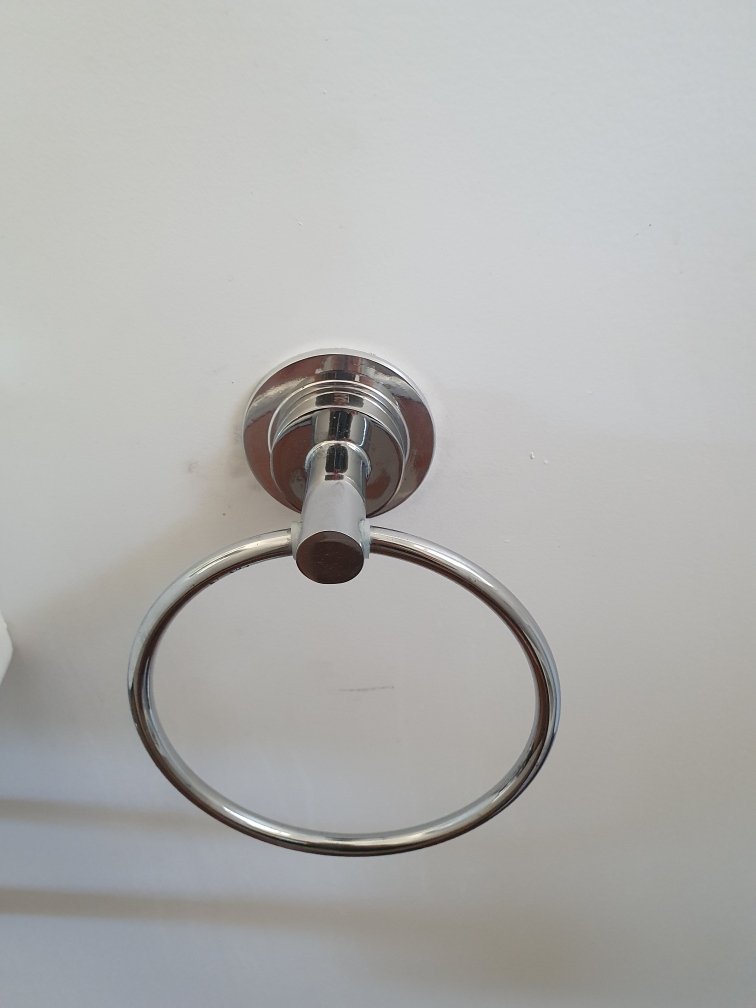
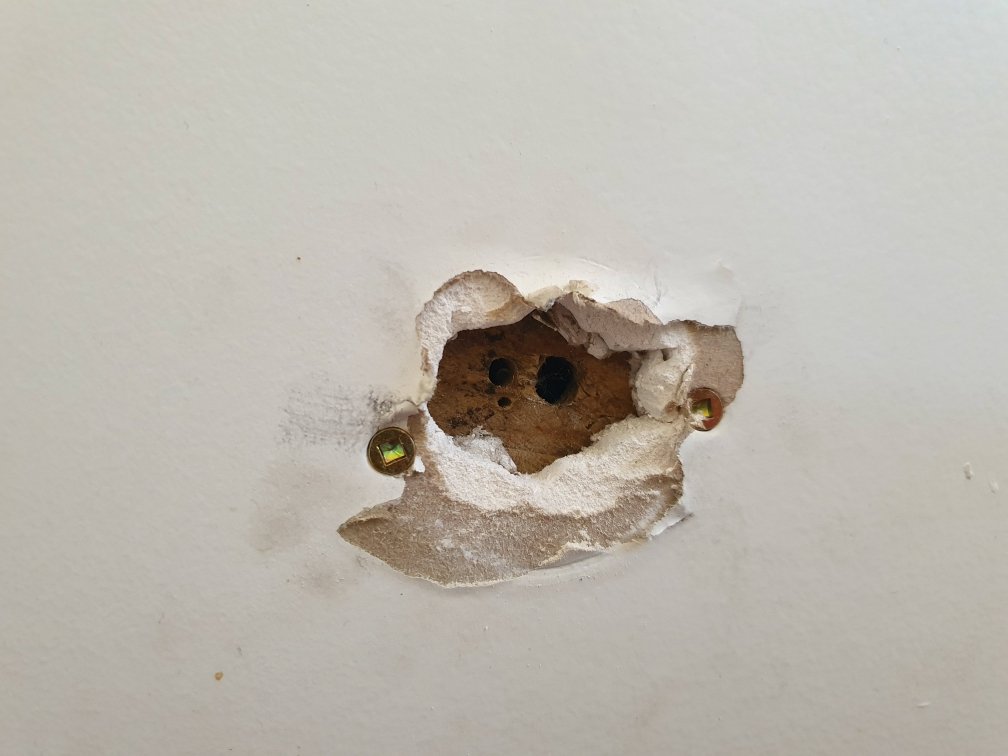
Anyone with kids will appreciate that half your life is spent cleaning or fixing the path of destruction they leave in their wake. Apparently the towel holder isn't rated for climbing on...go figure eh!!! Nothing some serious over engineering can't fix though. And finally
1 point


.jpg.6b694f9f965e9f4f6362647502f5e48b.jpg)


This leaderboard is set to Auckland/GMT+12:00