
Leaderboard


Popular Content
Showing content with the highest reputation on 04/04/20 in Posts
-
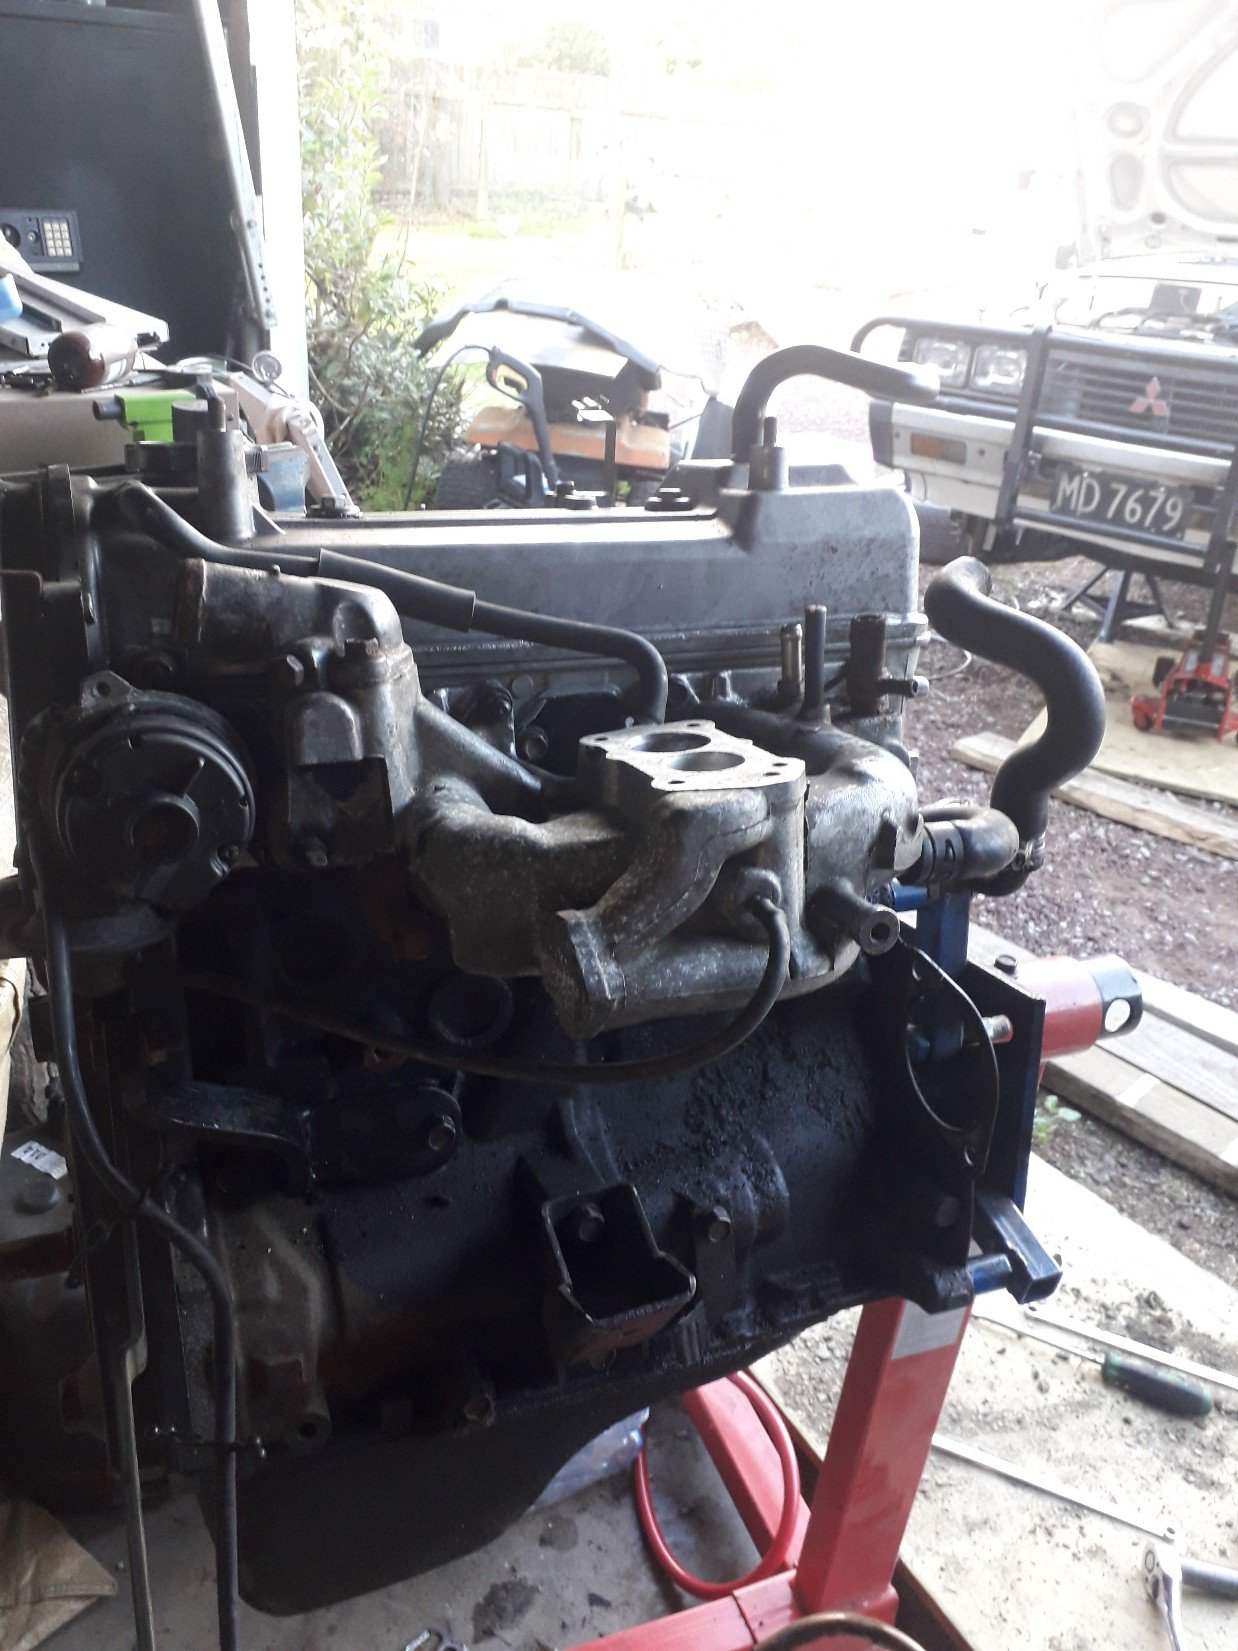
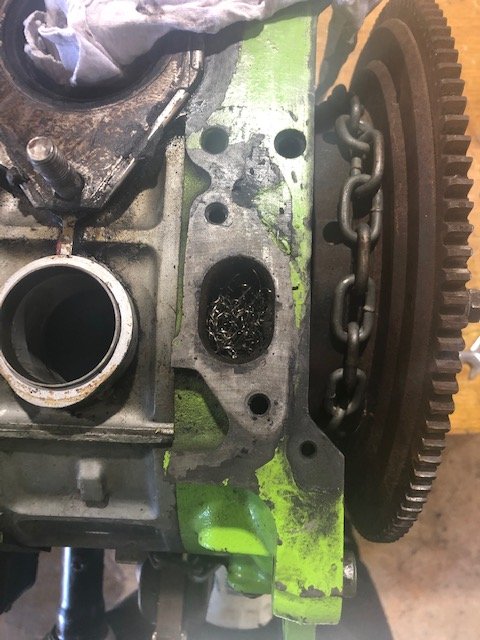
Looks like i should be able to fix engine back to pretty much 100%, lockdown spec The bad; it has spun 2 big end bearings, shells in pic below were worst. All the rest of the bearings in the engine look pretty tired as well. Crank isn't too bad, but would need a grind to be usable. plus seems it has already be ground in the past, so in the bin it goes. Oil pump hasn't let go or anything but some bearing material has gone through it, bin as well. from there onwards everything looks clean, oil filter has done its job Good news is I have a bran new crank and oil pump. Both are for another project Ive been collecting parts for. Means that goes back down the list, but rather have this thing running. Rods are all good. some very light marks on one of them, shouldn't be an issue. pistons and bores look perfect, although i haven't taken pistons out as may not be able to get hold of a ring compressor. Have managed to sort some new main and rod bearings, should be here early next week. Have also done the oil restrictor mod, to the oil gallery that feeds the head. keep more oil in the sump at high rpm Tl;dr : putting this junk back together with new crank, oil pump & bearings.19 points
-
15 points
-
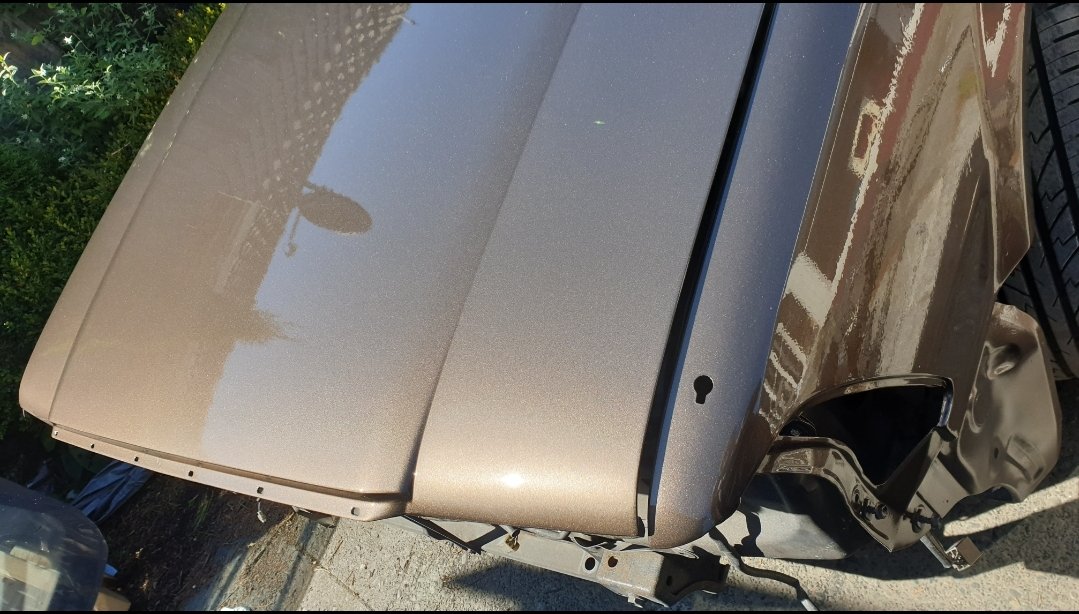
The clears a bit of a disaster really and reasonably gutted, so many things I'd have done differently in hindsight. But it's done. Drove it into the sun yesterday and it's not all bad news.
 15 points
 -
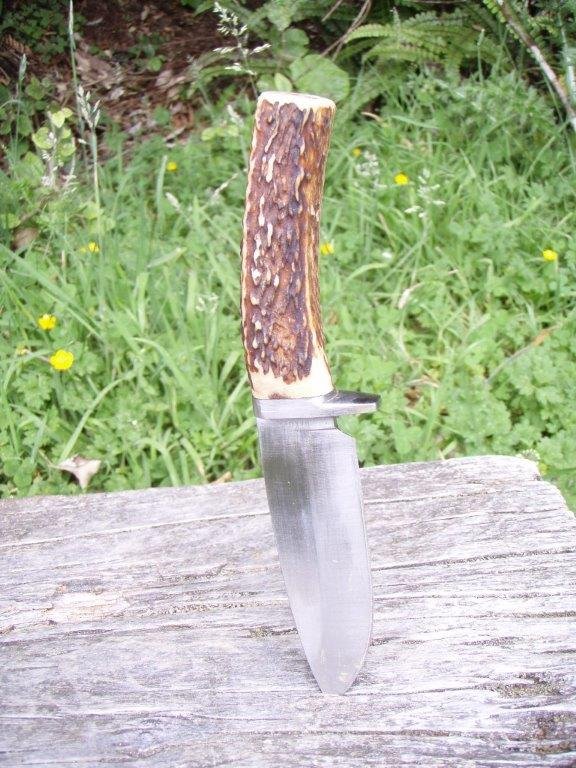
Knife made from circular saw blade. So sharp it'll "Cut ya just lookin at it"
12 points
-
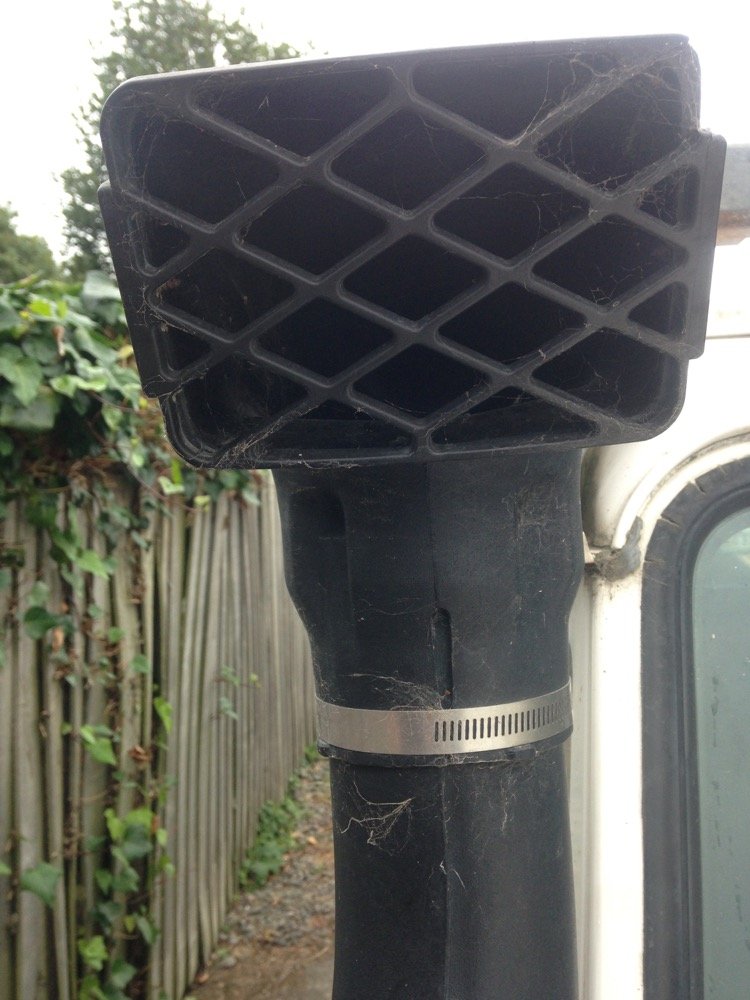
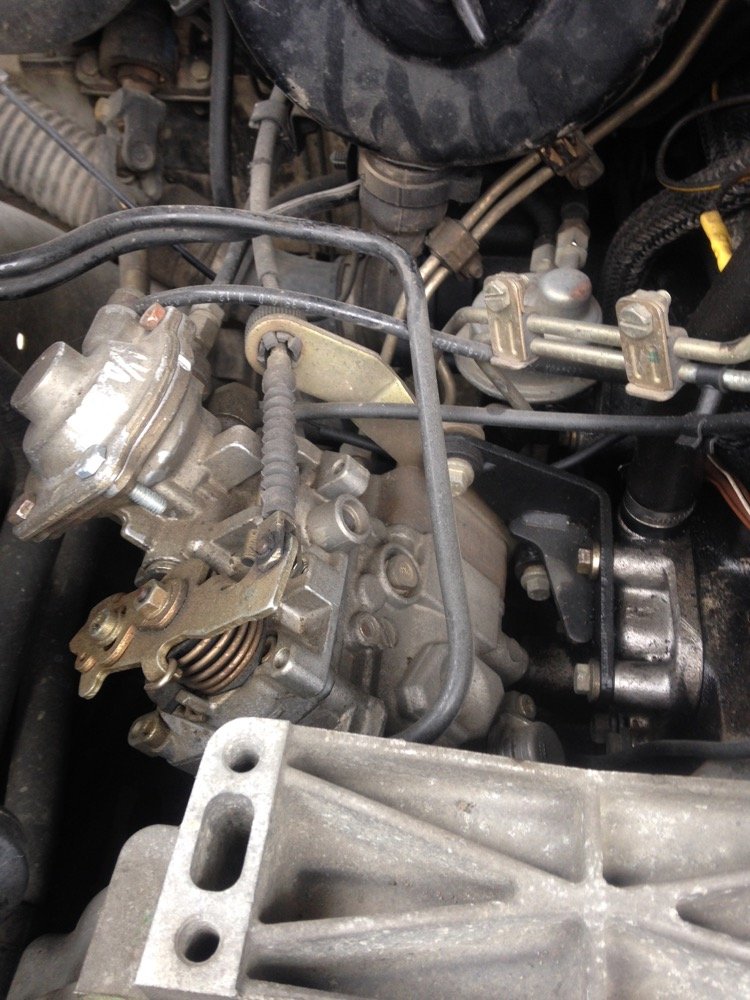
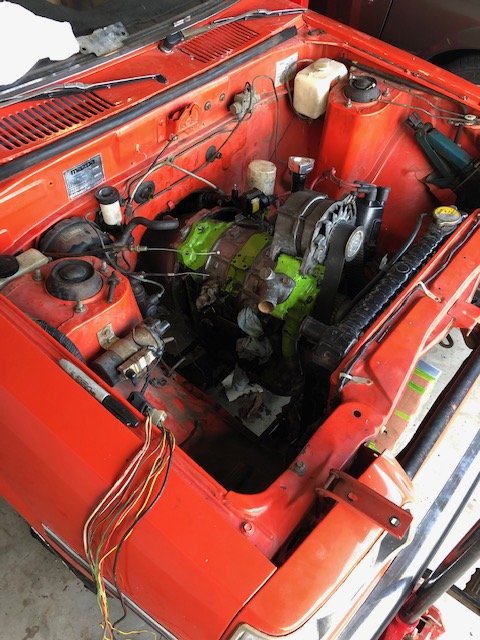
Earlier this year I went for a 4wd mission to scope new hunting areas and came to the realisation that I was choosing spots based on where the Niva could go and not where I wanted to go, the big barrier on the east coast is rivers, and the fiat motor hates water! We managed 15min up this valley before being forced to cross the river, issue with the twin cam is the spark plugs are located in the valley between the two cams, any splash of water is directed here which promptly kills the engine, normally mid-current. We turned around and headed home, on the way back I was pondering methods to prevent water but nothing was simple or failsafe. What I needed was a snorkel, diesel, raised breathers, longer wheelbase and bigger wheels........ With this in mind I set to work.... The snorkel was easy, pretty much bolt on Diesel pump to fiat twincam was tricky, but with a big enough hammer it went into place Bigger wheels needed clearance, overload springs were installed This all took quite some time, and the result somewhat best enjoyed with a cup of tea in hand Unfortunately i've replaced the Niva with a more suitable vehicle for my current needs. I have access to a garage not too far from home that once lockdown is over it will be tucked into, My mind says I should sell it and move on, but I can't bear the thought just yet of parting, its been a great toy over the years and really is a hoot to drive, sadly I just don't have the space for so many cars! Before parking up, I plan to carve out some rust to be sure there is no deterioration, parked up in WOF condition is the plan, ready to hoon should the urge arise.
11 points
-
Carol said she fancies black (like her men ?). Not smooth enough for that. The truck, not her. Or me. Or something. And a bit too BTTF n'all. Anyway... Yeah, I reckon 70's stripes. Now I've got the slot mags I'm starting to feel like a bit of brown metallic might be fun. But to refresh, something between this and this Gonna do some doodles and see where it goes9 points
-
I’m not the most knowledgeable fulla out there, just a little bit of knowledge and experience on things. I’m sorta hoping my thread will encourage others to tackle those jobs we usually think as too hard or for specialists only. Don’t hesitate to gimme a nudge and ask how I tackled things, or how/why I made the decision I did to do things. I’m all about sharing and expanding everyone’s knowledge, experience and capabilities. Nothing is off limits or a secret In my world. head over to the discussion page I started and fill your boots.8 points
-
The wife commissioned me to build a swing for the child. I started pre lock down, so had all the steel/chain/shackles/hose already. I didn't get paint, so it ended up silver, as that's all I had. Made the baby spec seat out of some rubber I had laying about, and the adult side is made out of old conveyor belt. I had to make it in three bits so I could get it out of the shed/into the back yard. I've also assembled a hut the father in law made, and reconditioned a see-saw the wife had as a kid. Next up is reconditioning/modifying the old slide (also wife's) in the background.6 points
-
All cells fairly even after a charge so wrapped battery in foam... Put some plastic card over BMS as protection, foam on all sides and some layers of heat shrink... And yes, fits in the canvas bag like a good'un... Very snug but I'll take it...5 points
-
Found the boost leak, one of the threads on the inlet manifold inlet was stripped and my rubber gasket was flapping like a my arsehole after a vindaloo. Must have done it up Archer tight - tighten it til it strips, then back it off half a turn. Managed to get an m8 recoil kit and sorted it, no more funny noises. I took it for a spin just now, it is boosting to 10psi which feels really quite lively. The EGT's are getting up to 600deg which is a bit much considering it's only acceleration load, it really needs a boost compensated fuel pump but this will be a lot later I reckon. I'll dial it back a tad and see what happens. It might need a fan on the intercooler, I have wiring for it now. The power steering is still playing the game, now I just need a functioning alternator. Good times. Pic edit for interest5 points
-
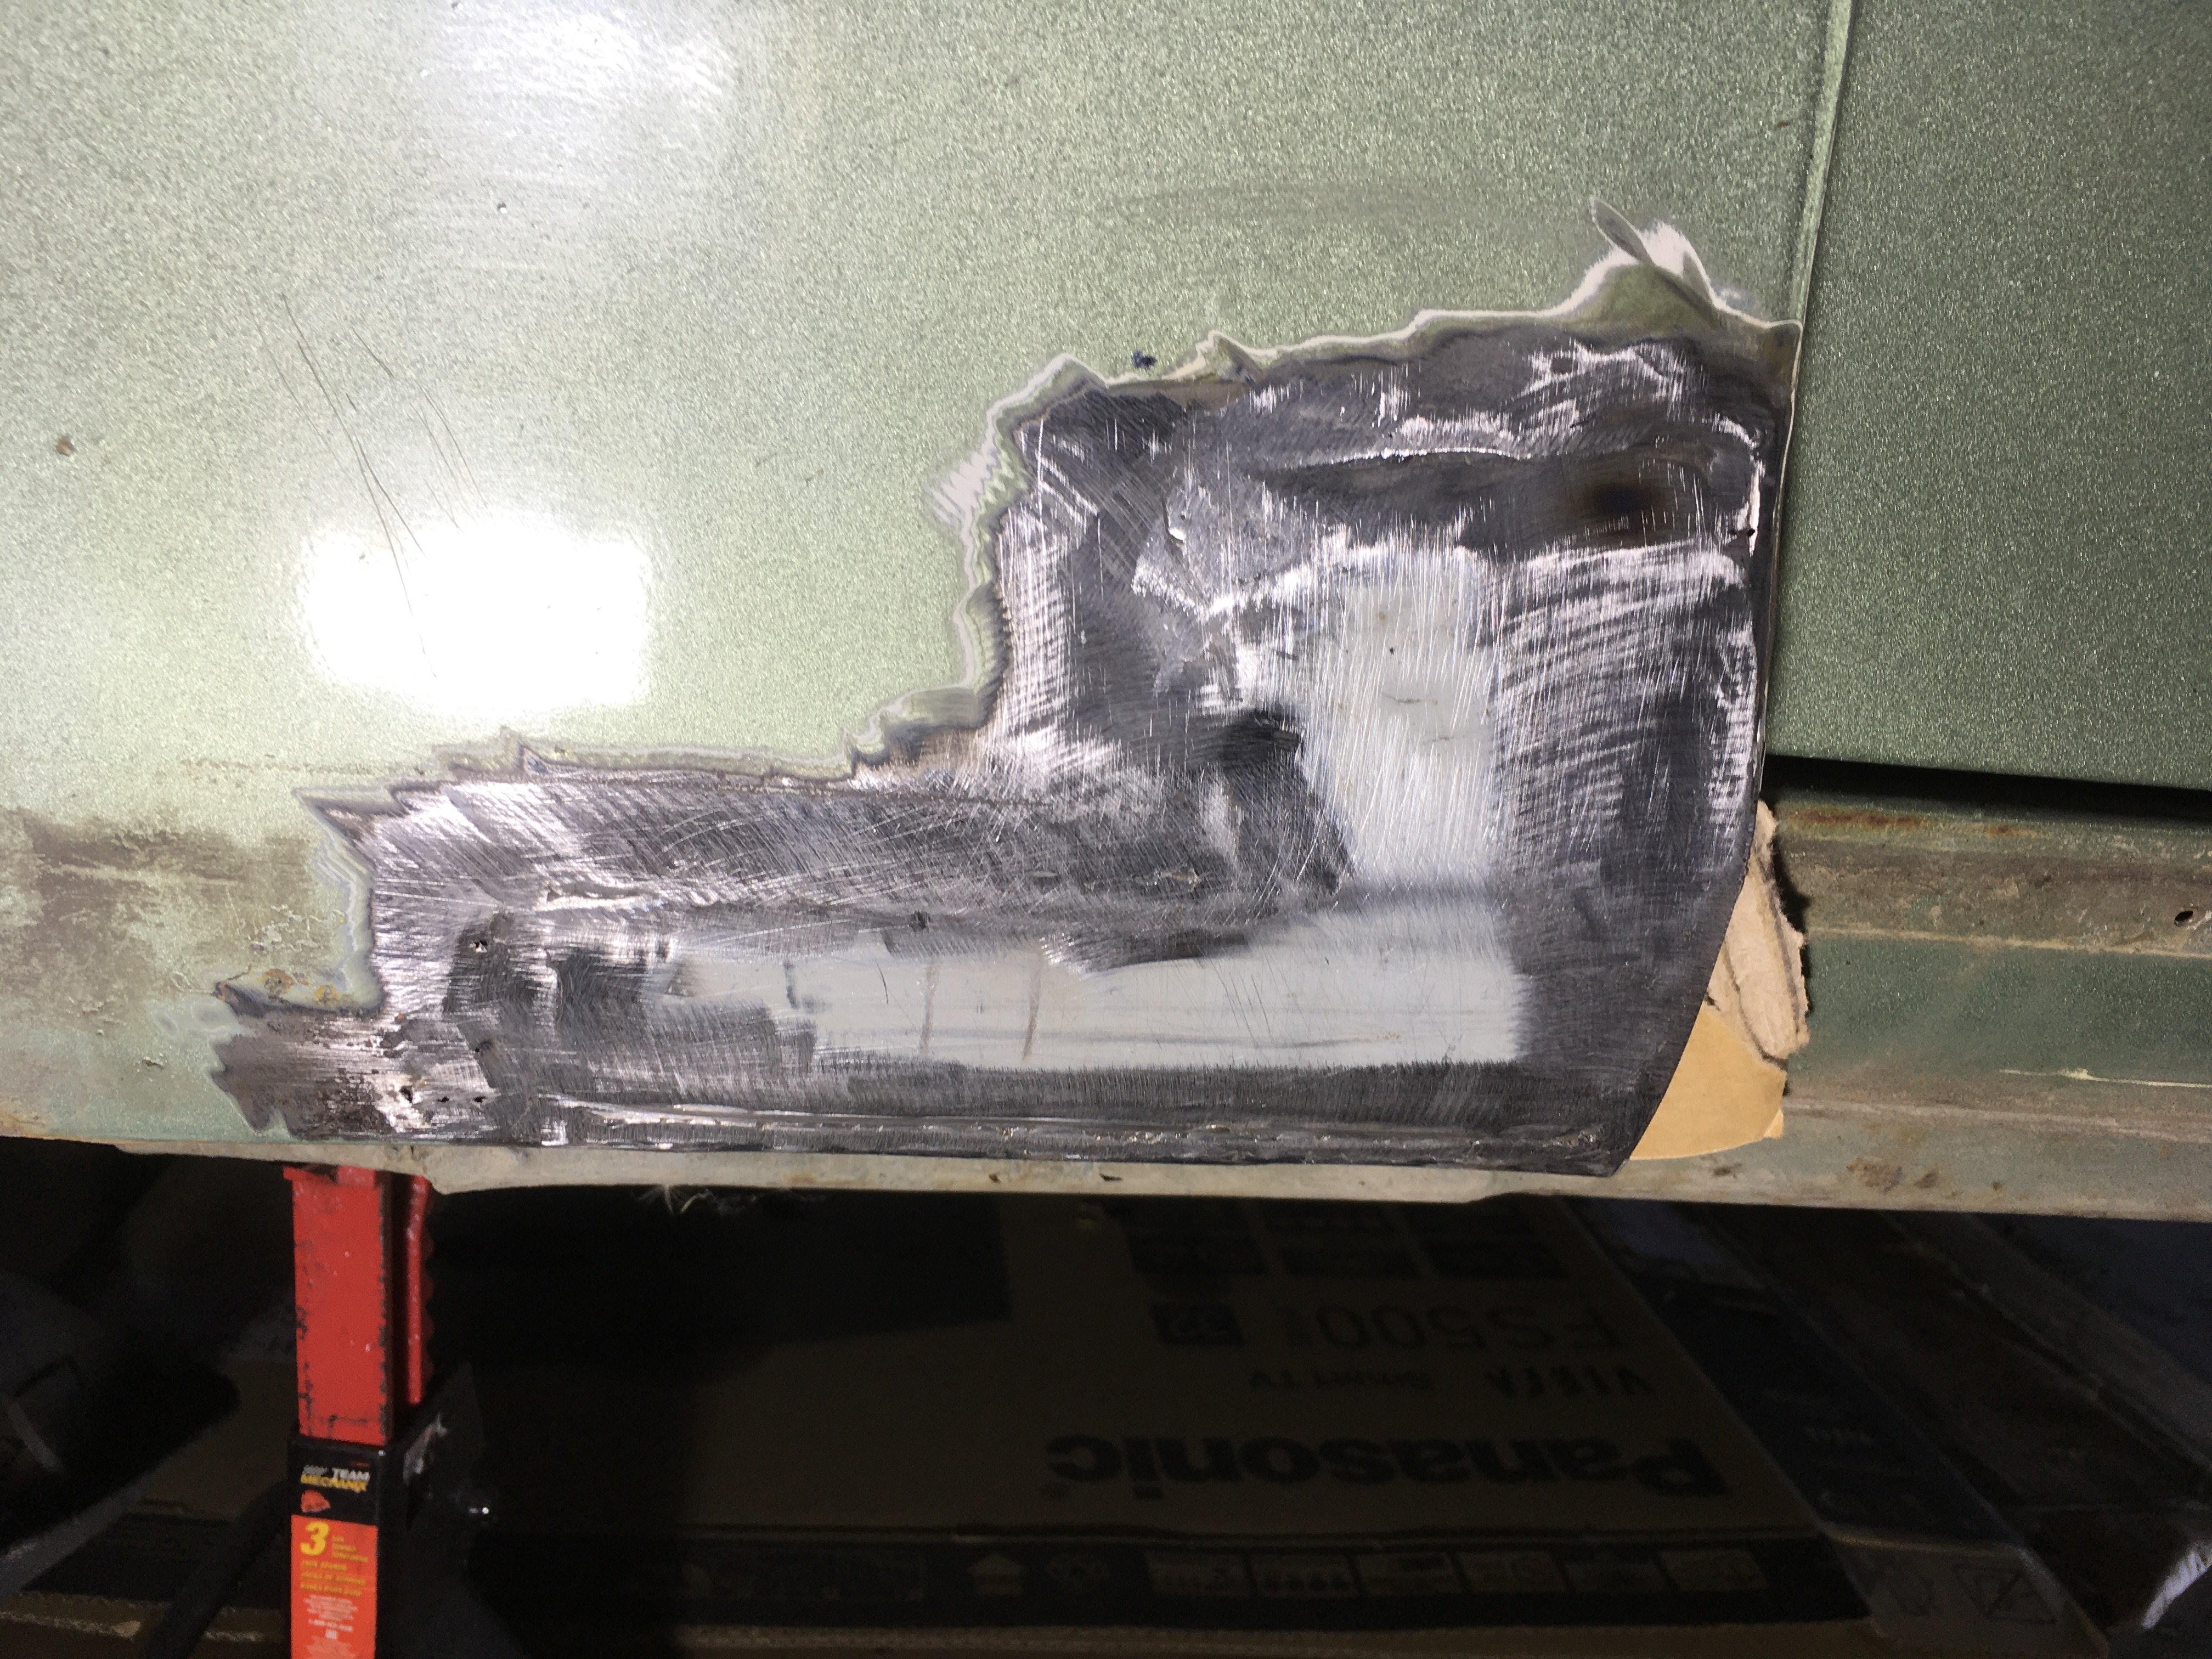
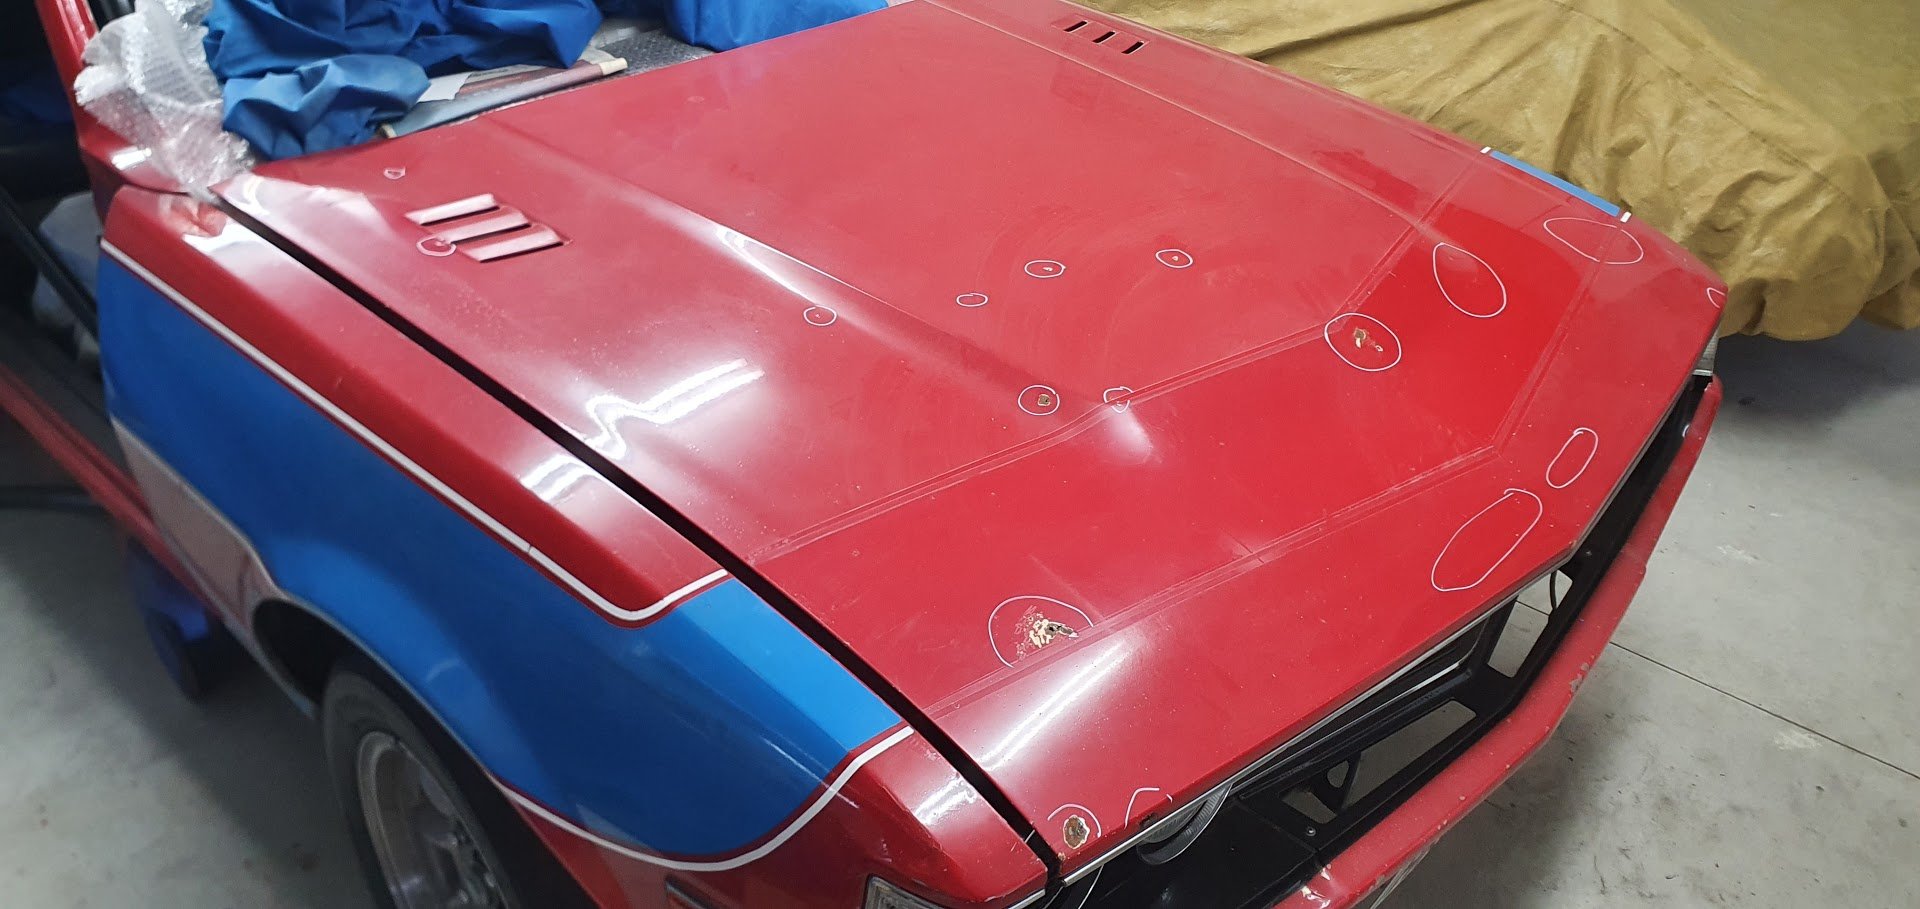
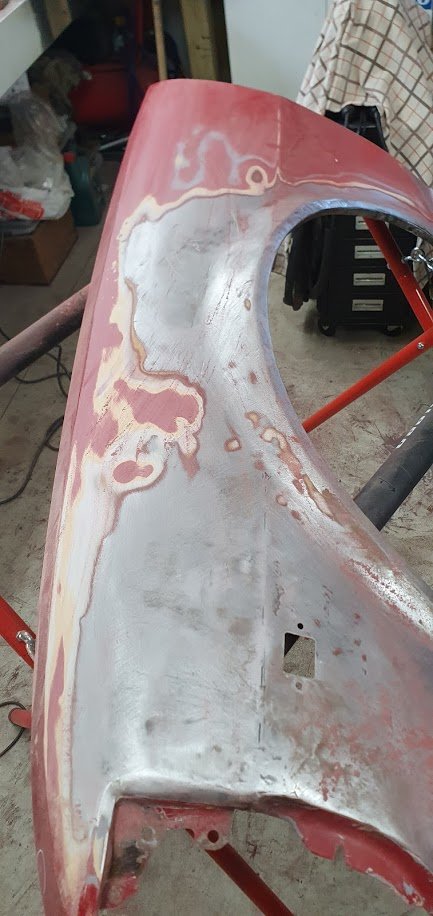
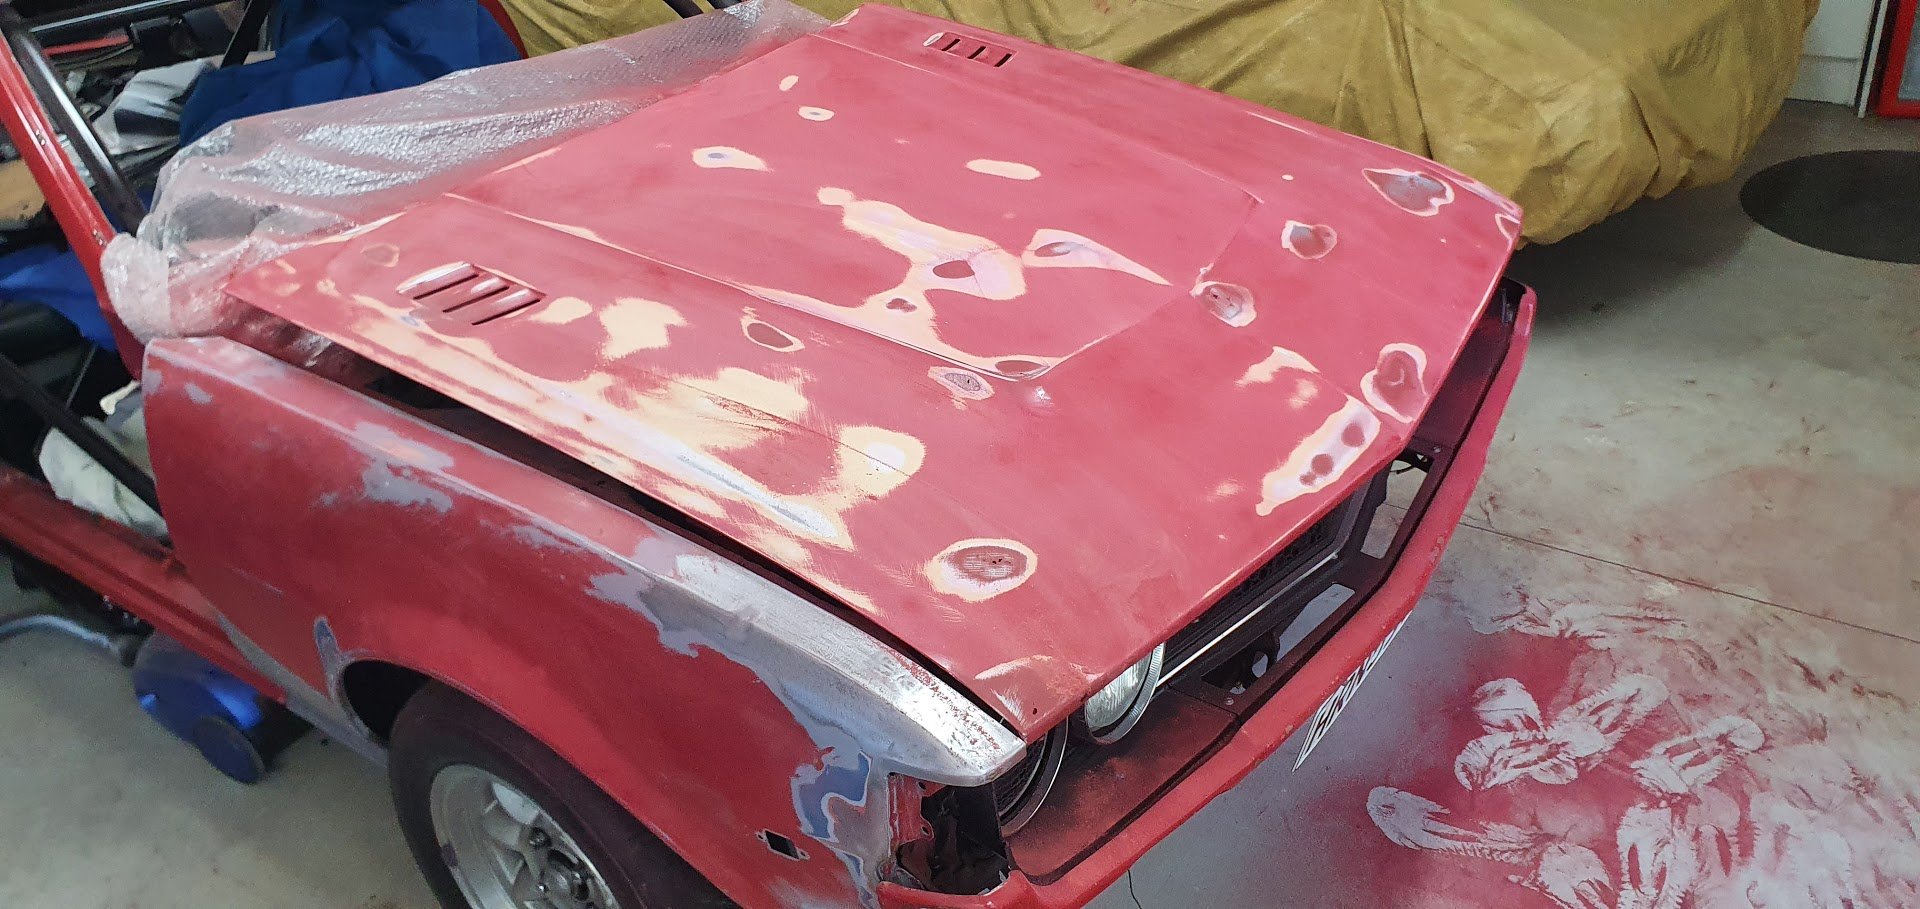
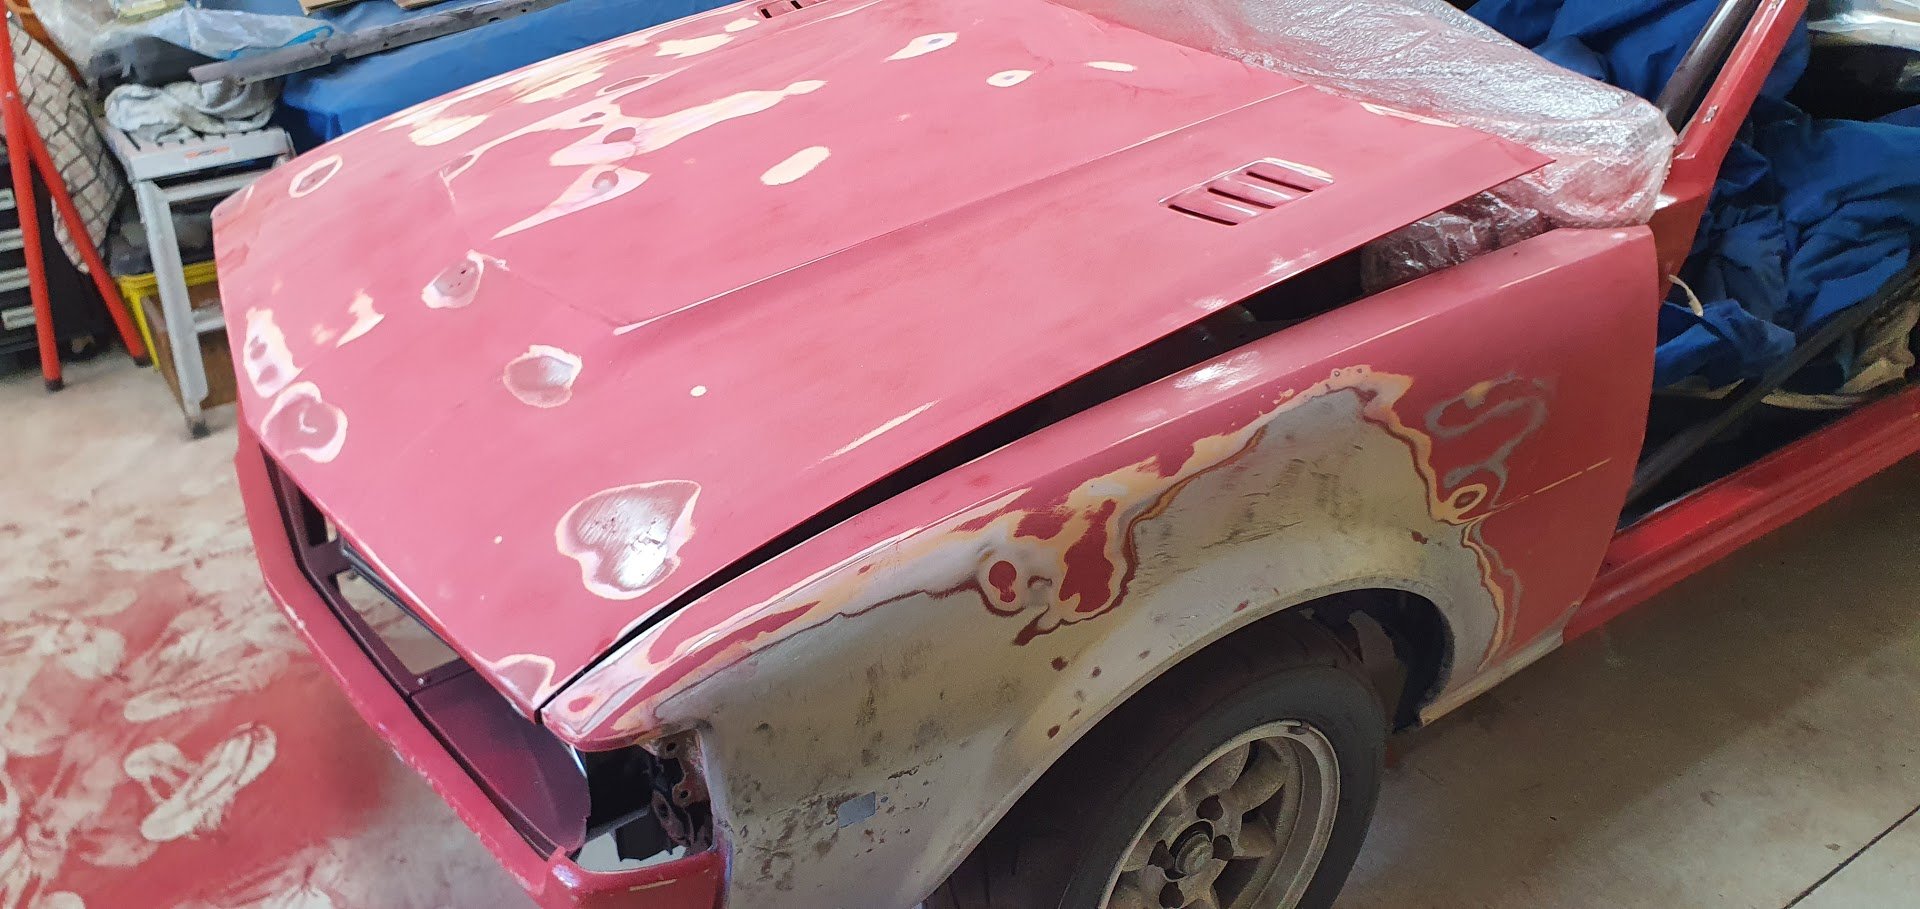
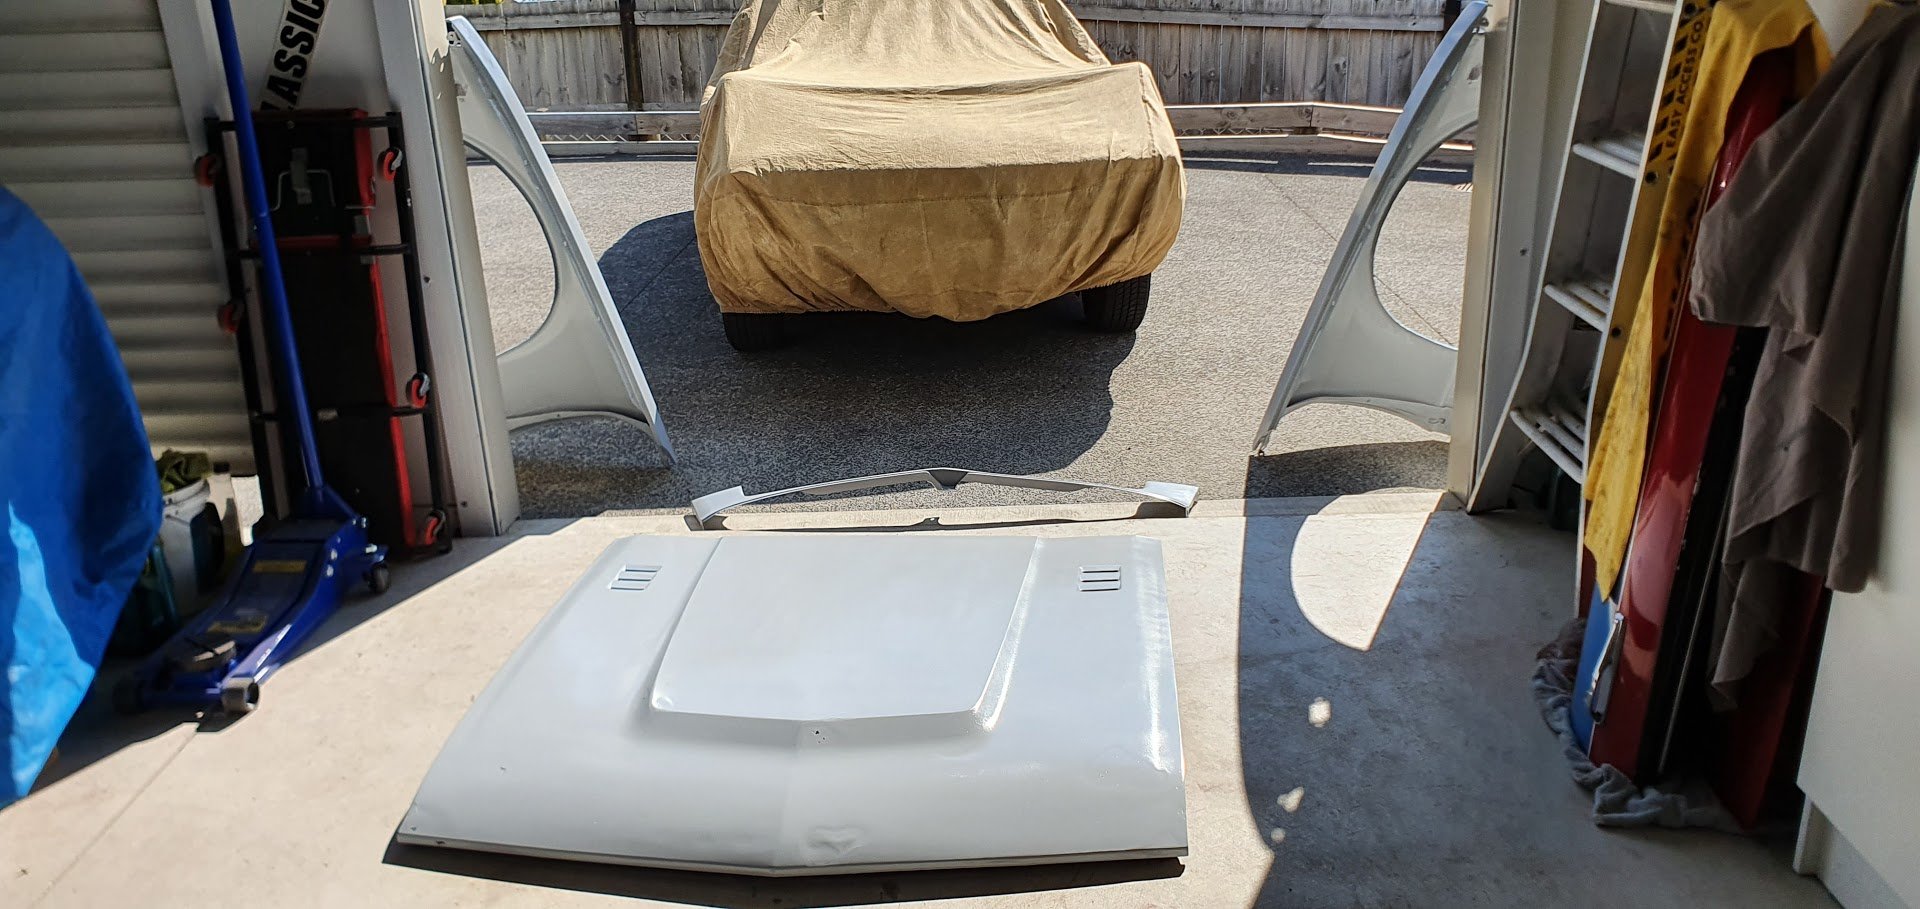
This is the first time I have done panel work. I am pretty happy with how it turned out. Tell me I’m doing it wrong here:
5 points
-
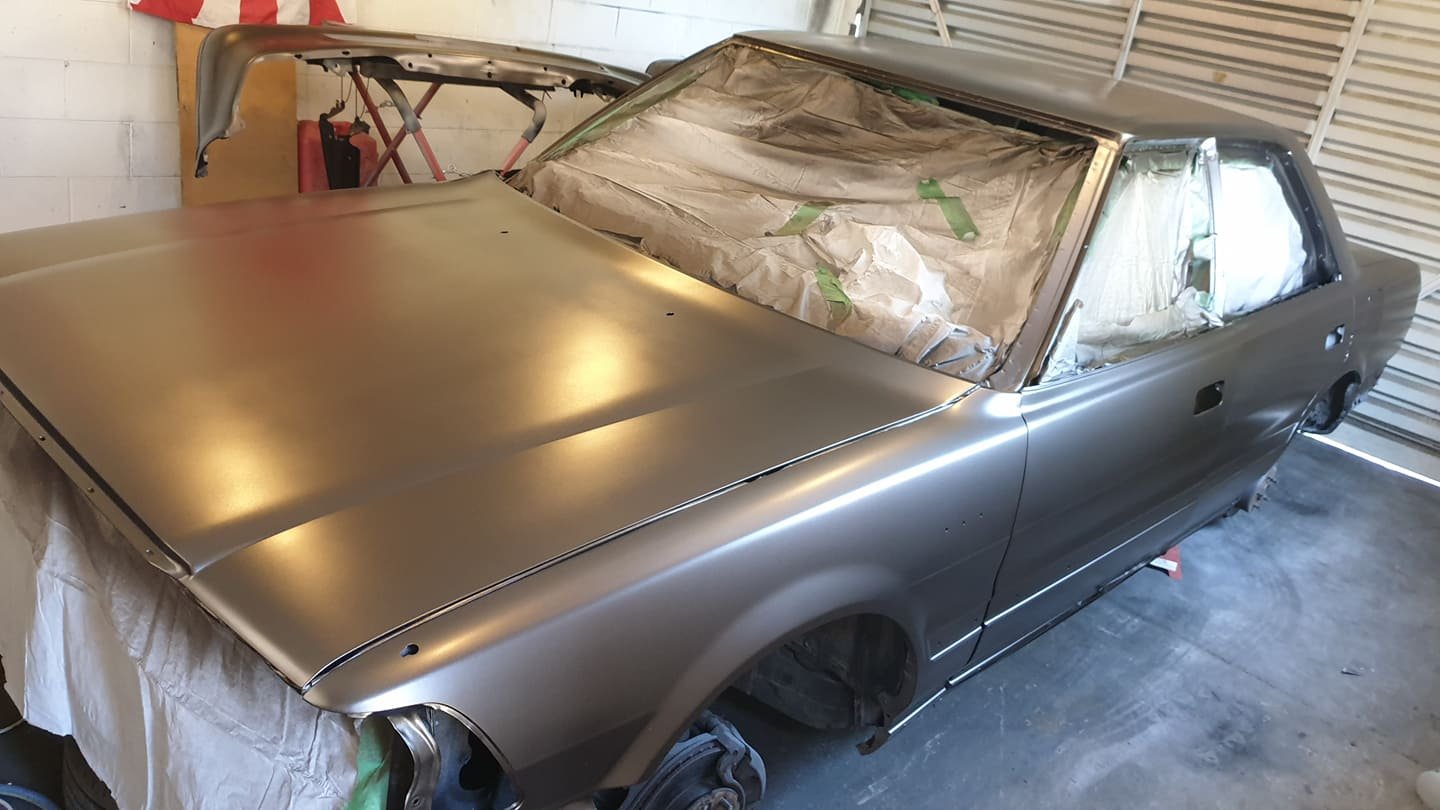
pulled the pin yesterday and painted the exterior. the basecoat went down beautifully. but i really made a hash of the clearcoat. quite alot of sags, and in hindsight, the lighting in the garage was shit so i couldnt see them forming and i think i was holding the gun too close. really took the fun out of it, however all it means is a bunch more colour sanding which ill tackle in a while once its gone nice and hard. on the plus side, the thing looks dead straight, really happy with the sanding job. have un masked it, which was a tour of all my fuckups, but ultimately itll come up awesome. the colour is amazing and i cant wait to see it in the sun.
5 points
-
So Yeh nah, the norgren air filter things didn't work. I took it for a blast on the beach, was probably like 10km away from my car, and it lost all power. The little filter things had got saturated with gas and stopped breathing. Luckily an easy fix, I just cut them off and it ran sweet again. So I thought I'd give plumbing them into the air box a try. I've welded a nipple on the very bottom of the plenum to connect too, this will also act as a drain if a float sticks and floods the plenum again. I also replaced the restricor tape with a bit of flat bar. I also did a dodgy patch on the exhaust, and put some flat bar over it to protect it a bit, as it's the lowest point. I also started building a simple trailer for transporting this thing. It's not going to have springs, and will have a hinged draw bar so it can tilt, so I don't have to have ramps. Regards, VG.4 points
-
Hey gang. Faced with being allowed to do sweet FA until at least July, looks like the Hilux is going to get a bit of lovin'..... Time to get the roller and the house paint out. Although it looks as rough as a badgers arse, it's only got a few dings on it. Both doors, a few on the bonnet and that nasty old war wound on the drivers side B pillar. Bonnet first Did the doors too, only a couple of little dents. Next job is where I got hit by a bus about 20 years ago. It's never bothered me ( I got paid out & took some mates to the pub) but if I'm going to fancy it up it needs sorting. Borrowed a decent slide hammer and had at it... Pretty pleased with that, especially considering what a lazy cunt I am. First coat of filler and a bit of a sand, I'll skim and paint it manana So that was the easy bit, next up is wet sanding the whole flipping car. Woo.....Hoo. When I borrowed the slide hammer I blagged a few cutting discs so I hope to get the push bar cut to size tomorrow n'all. Then I'll have to make an essential trip to get it welded up, while maintaining 2 metres social distancing, having a shower when I get home & burning all my clothes.4 points
-
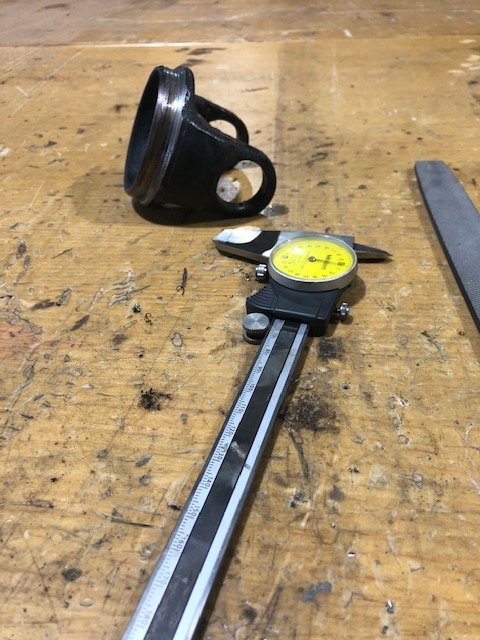
Clearly that was going to be too big for the vacuum line so on to plan b. Drill out hole to 4mm, flare a piece of 3/16 brake tubing, turn down end of tubing with mini lathe (cordless drill in reverse and a file), smear with brush on electrical tape (cannot find my shellac anywhere), and tap into hole with greatly oversized hammer. Et Viola
3 points
-
one day Ben im going to get you for all this heresy!3 points
-
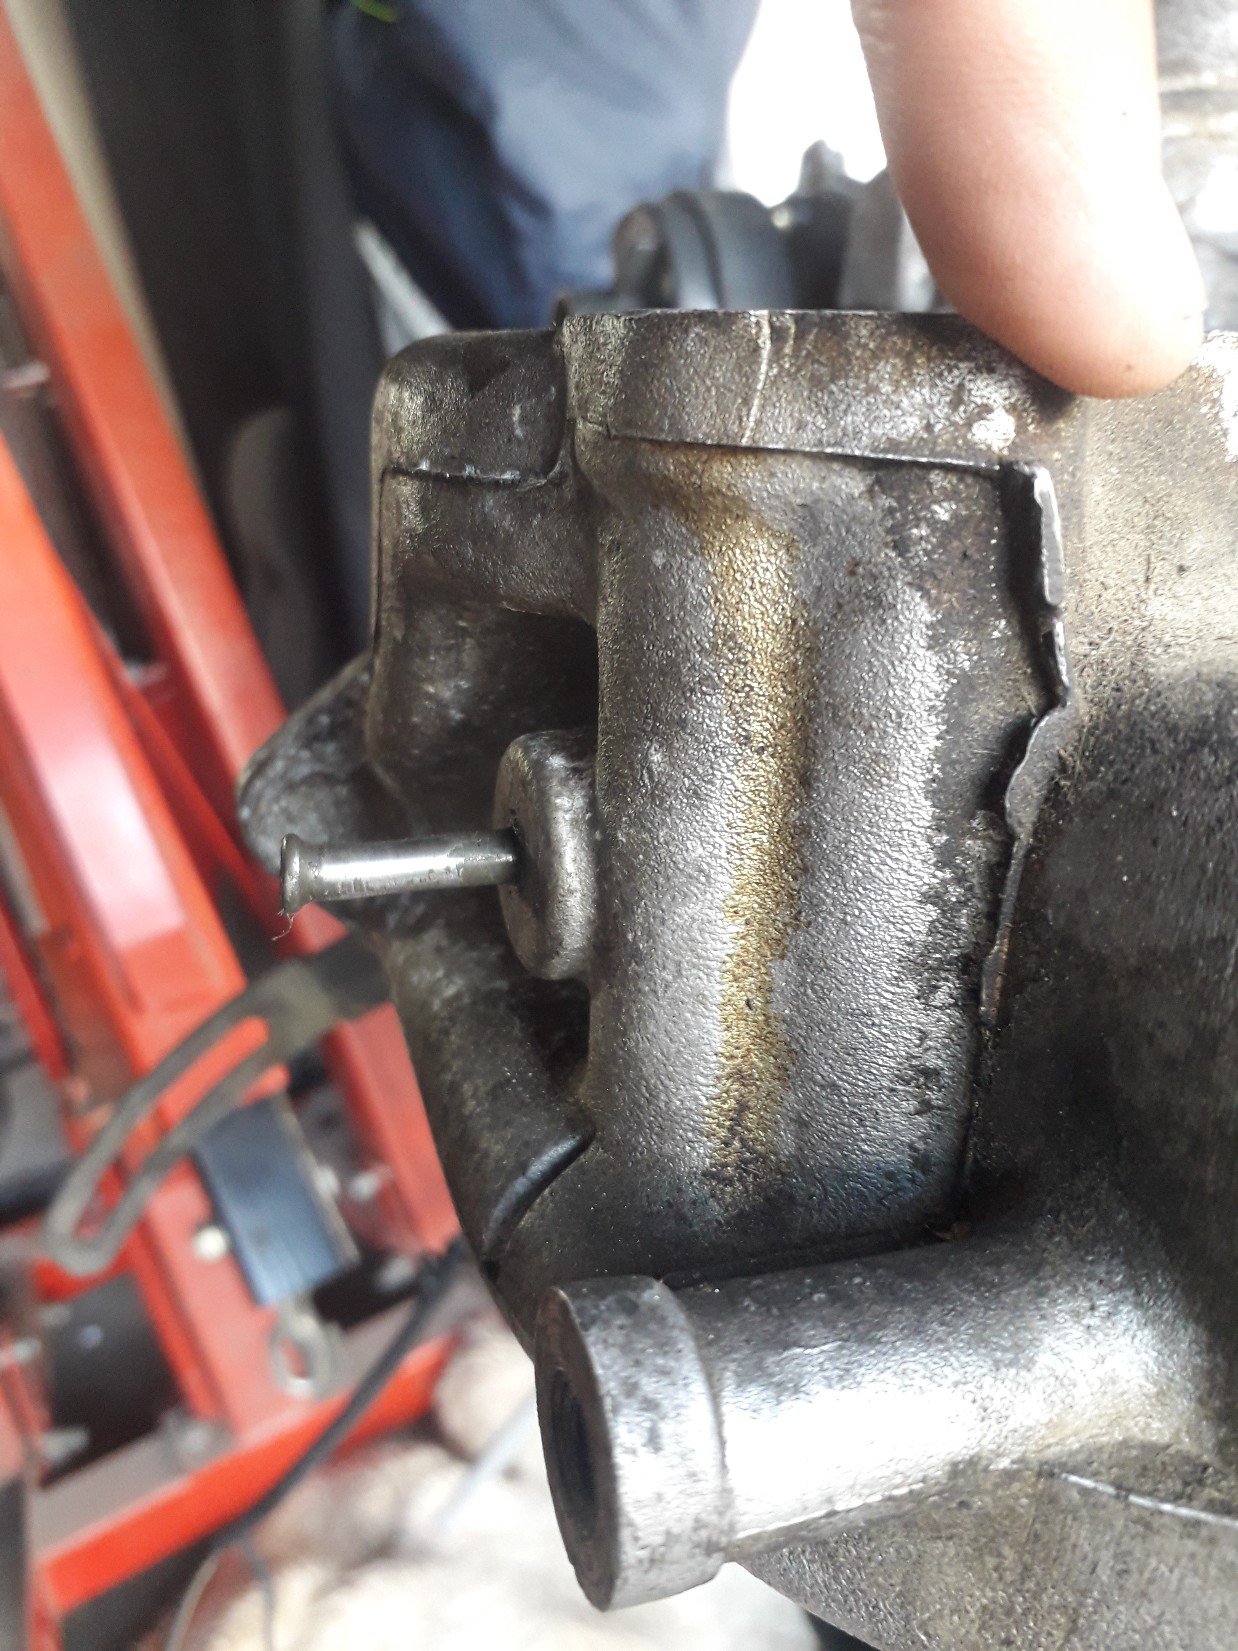
Engine mounts are one of those things that there are so many different combinations of shapes and sizes that its impossible to have a set rule on how they must be done But as a very general rule, 3mm steel with gussets. You can come up with a design yourself no problem, post up or send me a pic if you want some input on if they are ok or not One thing to remember when designing mounts, is if the rubber breaks, the engine should not be able to rock over and jam the steering. So for example if you have limited exhaust manifold to steering shaft clearance, you may be better to use a locking style rubber mount instead of a round cotton reel type one3 points
-
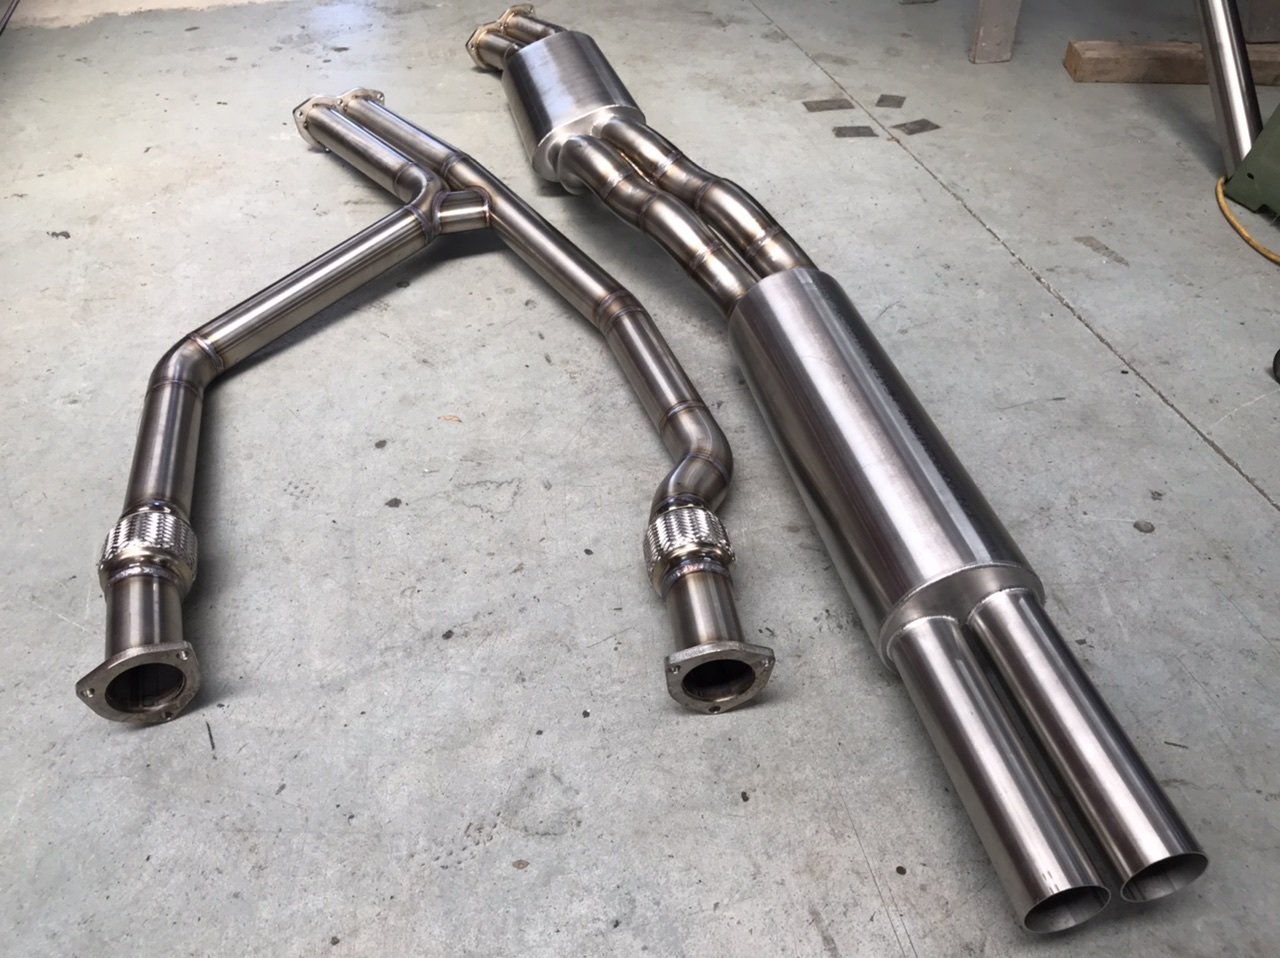
NSFW spoiler that shit man, talk about exhaust porn.3 points
-
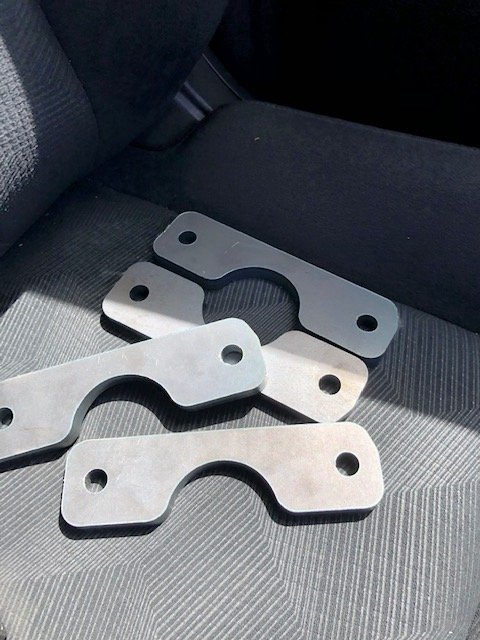
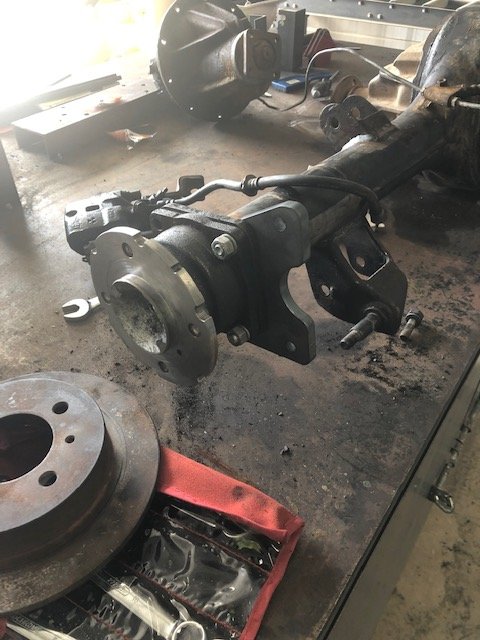
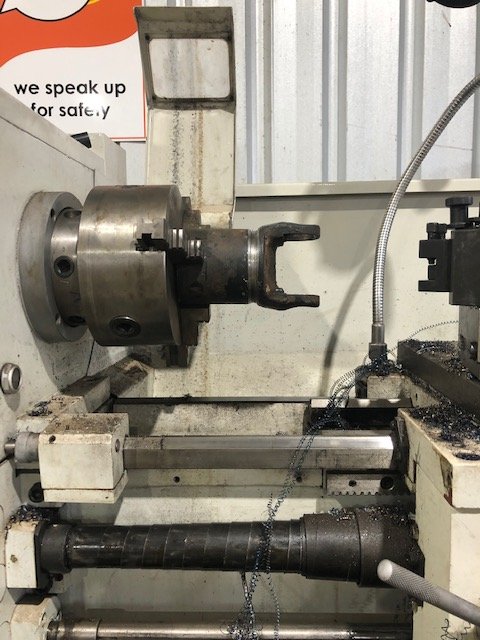
Time To drop it all back in and see if my 12 hour day was a success!!! too right it was!!! In other down times I machined the universal joint/yolk off the driveshaft that came with my LSD head, as well has have some spacers Lasered for my callipers to mount. now I can say the diff is all but done!! Just a lick of paint, seal the head to the housing and install it ready to fill with oil
3 points
-
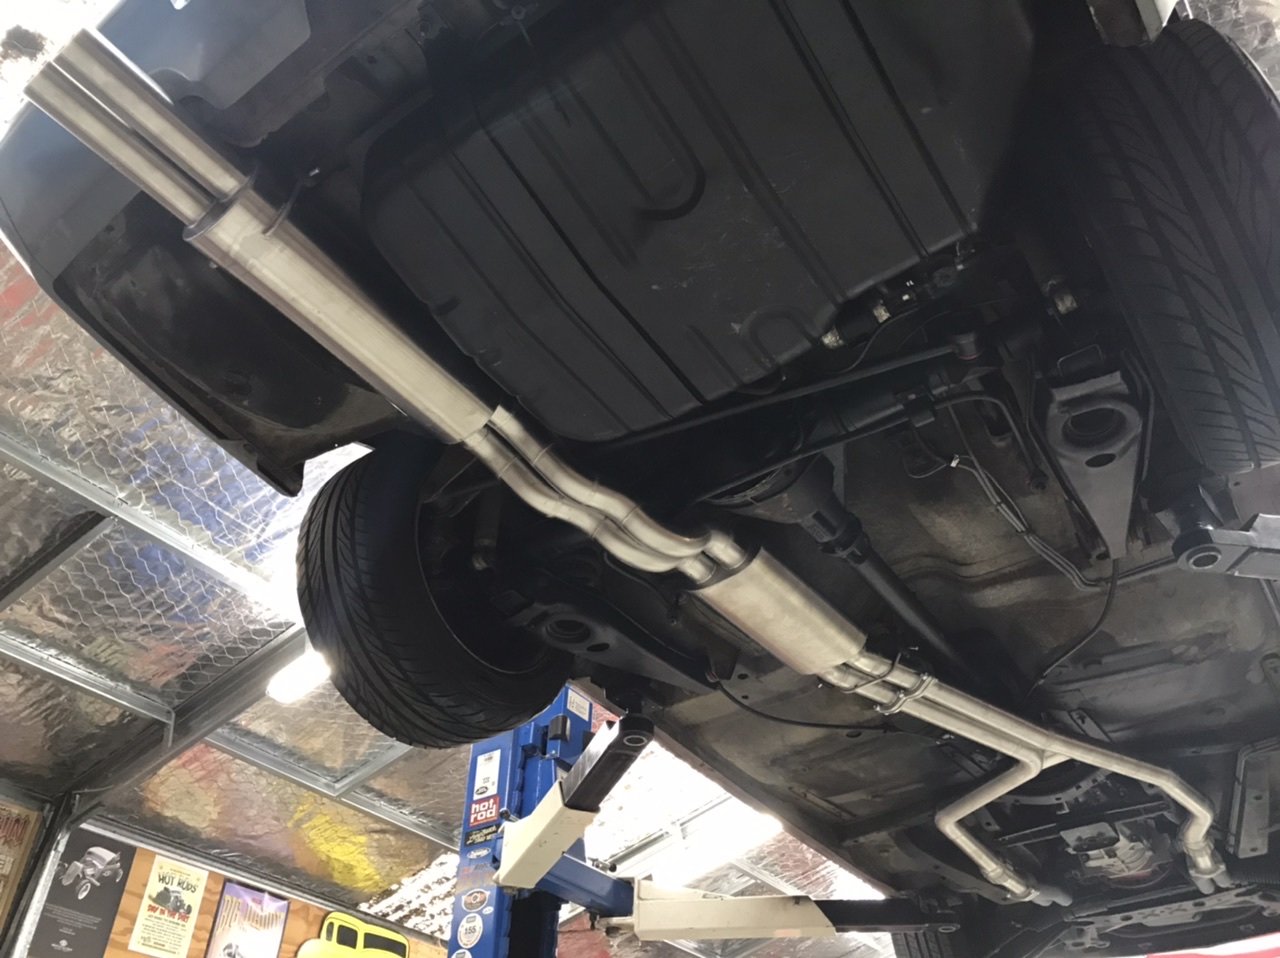
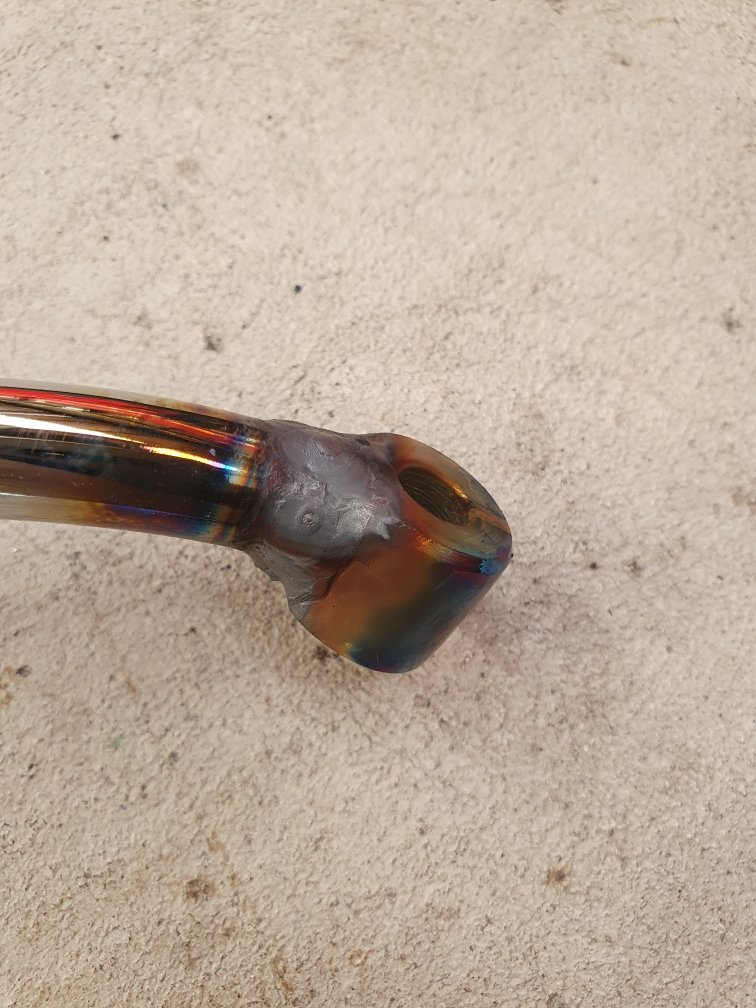
Here’s the last exhaust I made for a VK commodore. Twin 2.5”. Made the mufflers/resonators as straight through louvred type. Sounded really good and not too loud.
3 points
-
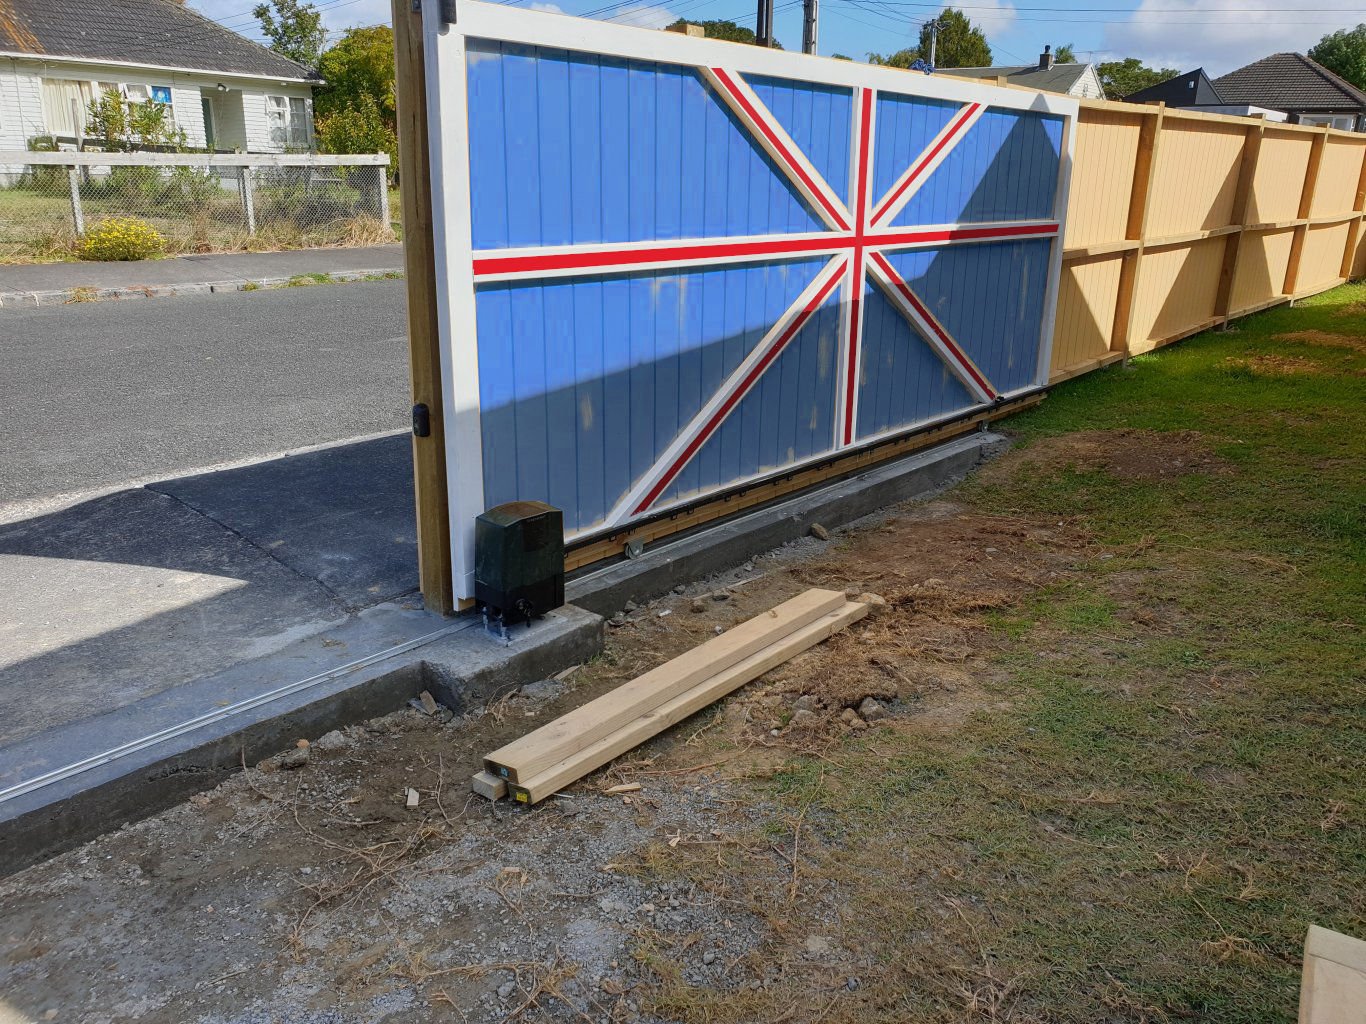
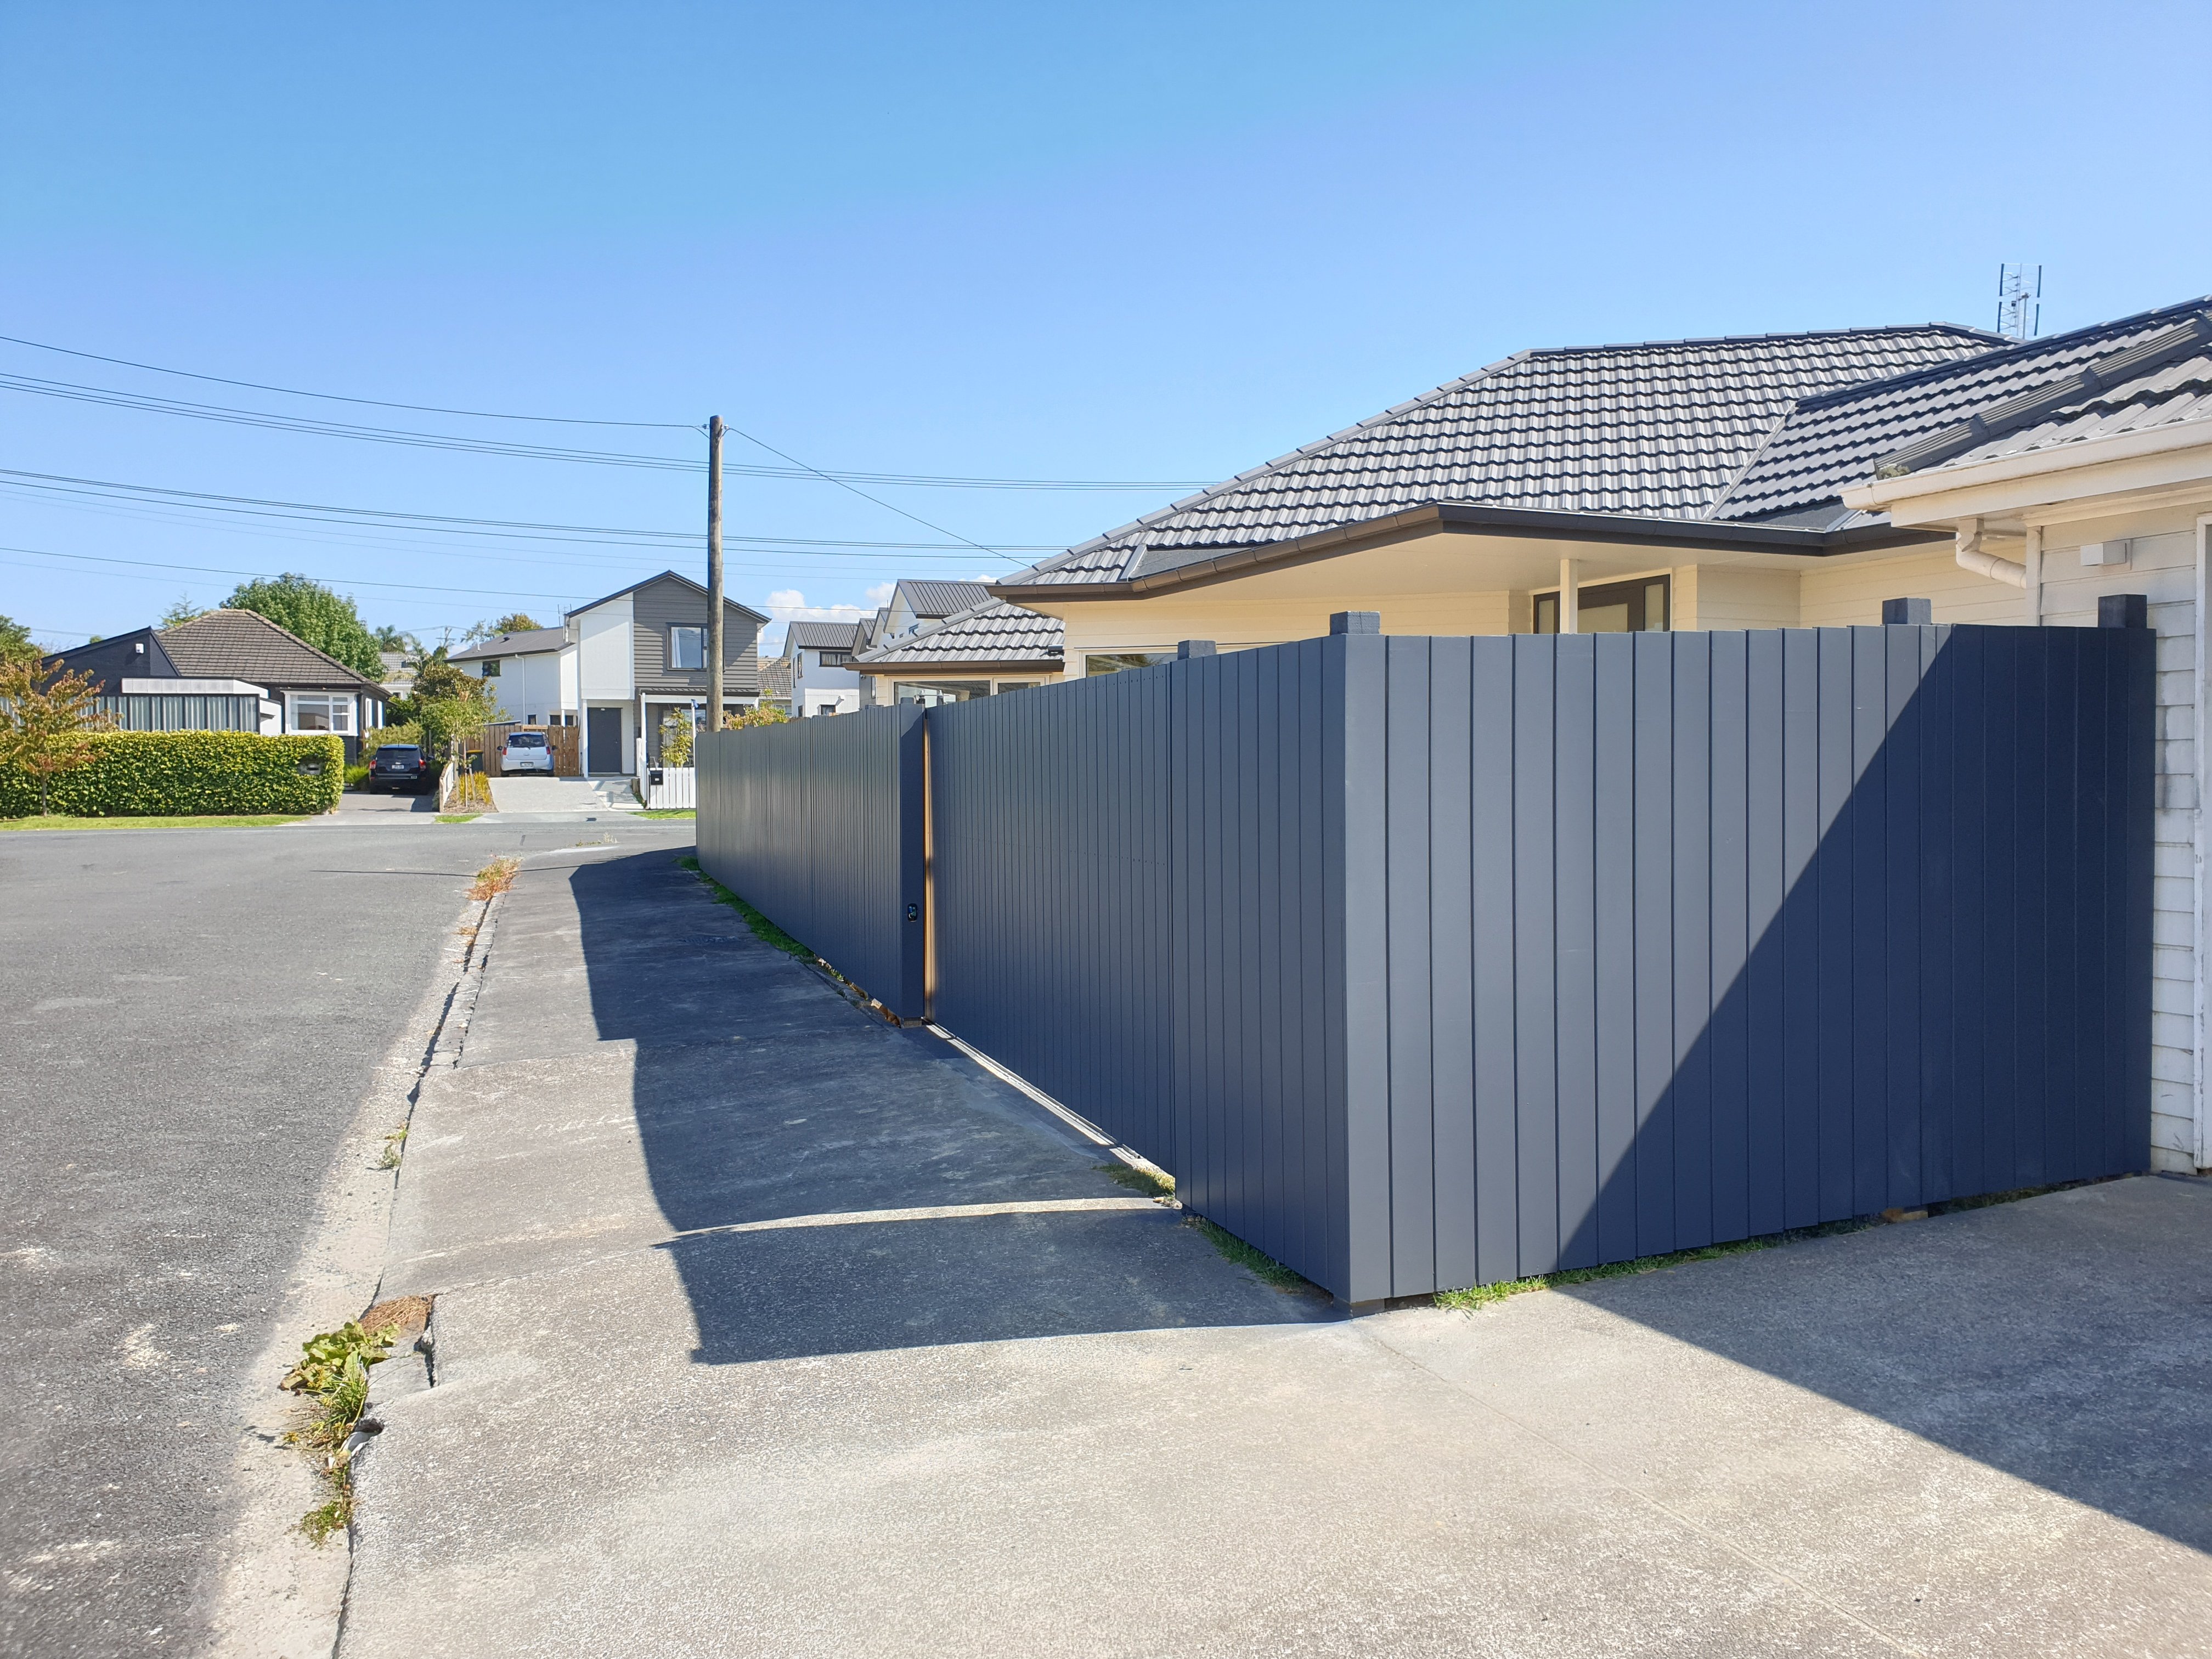
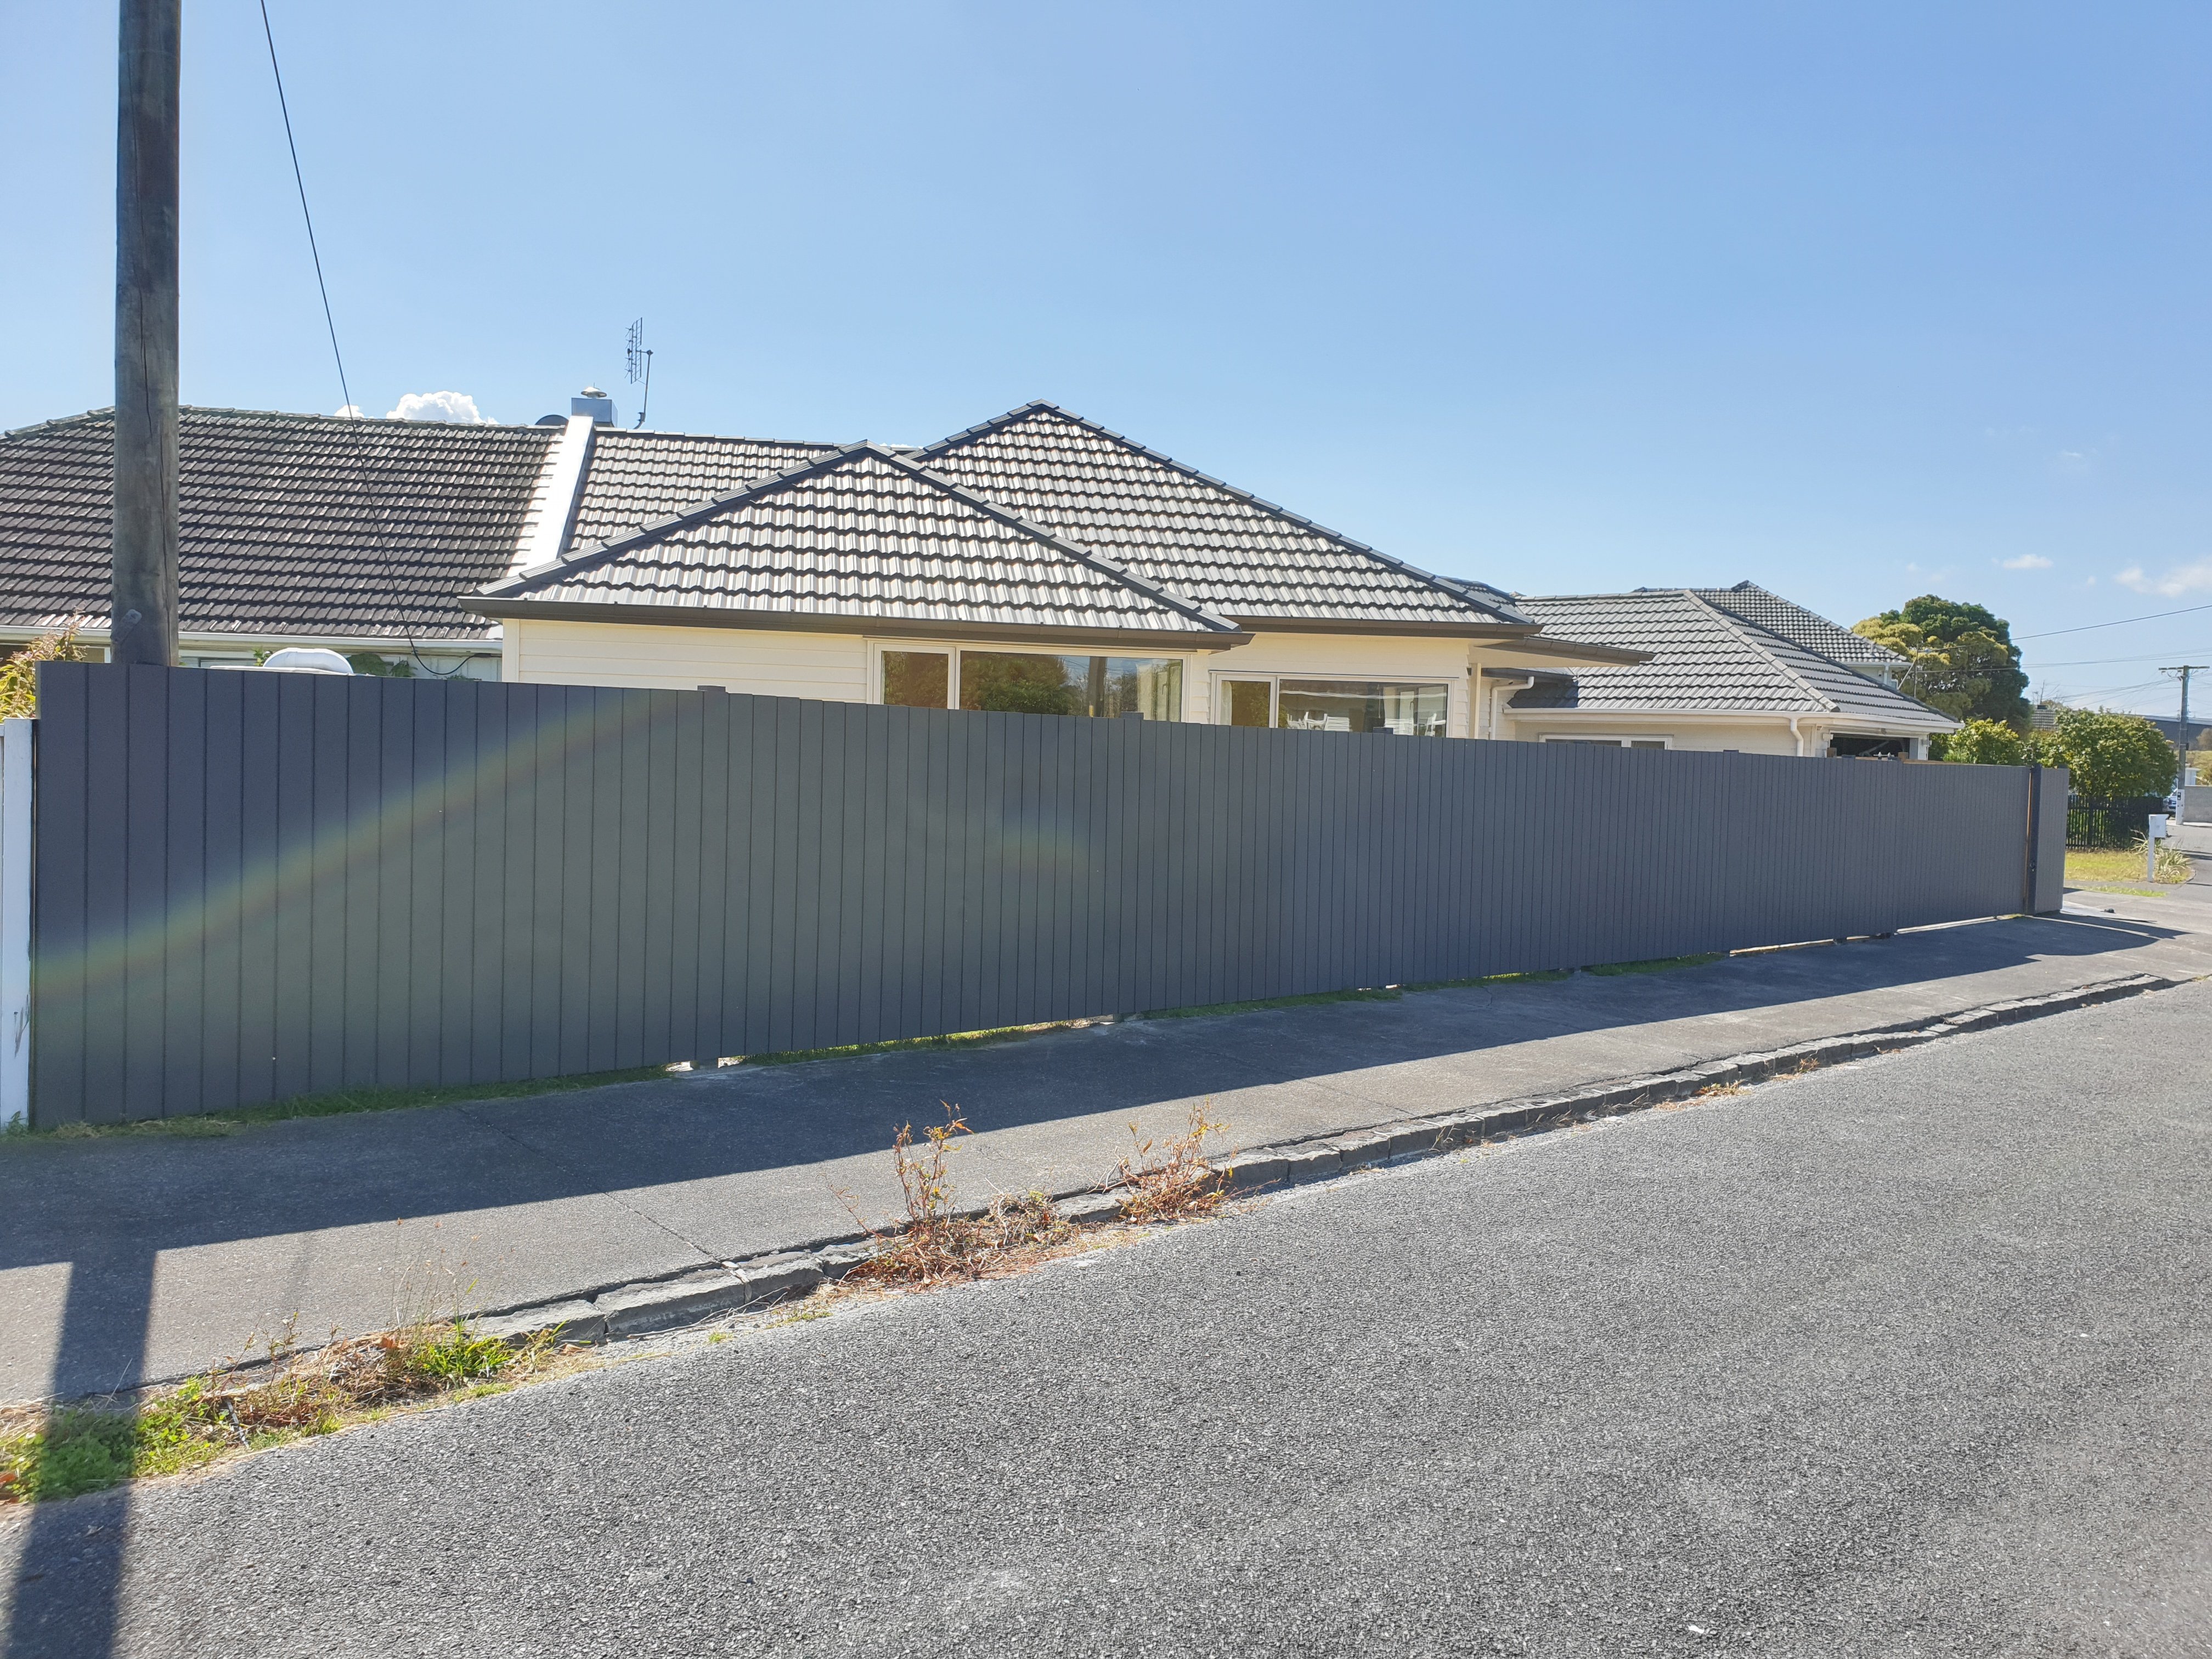
Painted a fence. Used an airless sprayer. So easy, would trade again. Haven't got enough paint to do inside so that will have to wait.
3 points
-
Top arm refitted with the polybushes and new balljoint installed. Also mockfitted the front hub/shocker/lower arm, while waiting for the lower control arm bushes to arrive. Everything seems to fit as it should which is reassuring.
2 points
-
Thanks for solving the mystery Sheepers. First time I've encountered one of these. Luckily the sump on my mock-up engine doesn't have this so I'll swap the sumps over and get rid of it. Looks like I could do with a new sump gasket anyway and would be good to give the bottom end a bit of an eye over at the same time. Bryan, the dipstick is about the only thing I can get to with the 4Y fitted in the Thames LOL.2 points
-
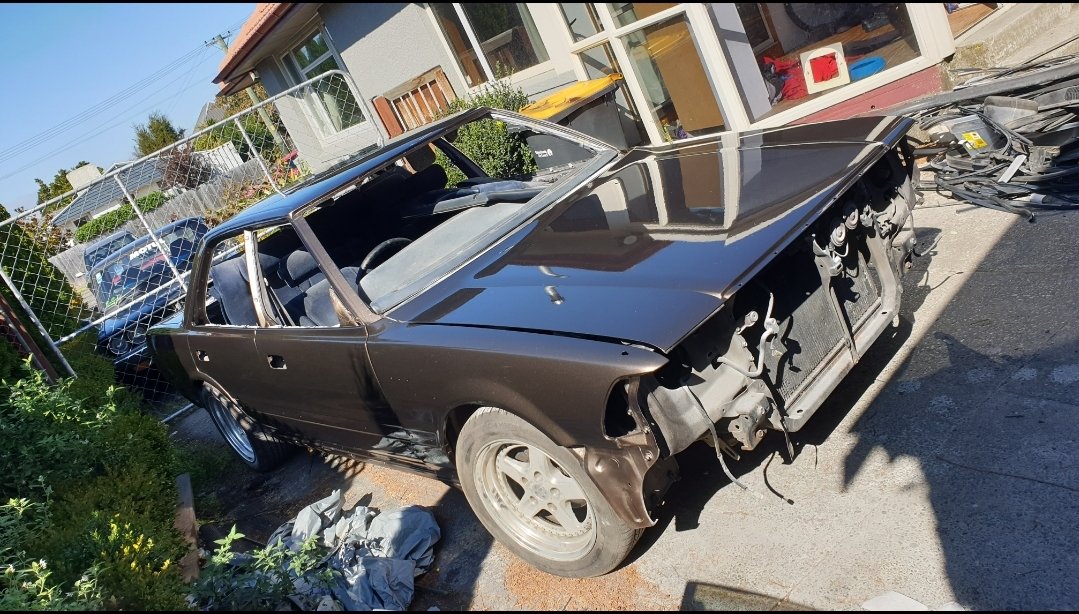
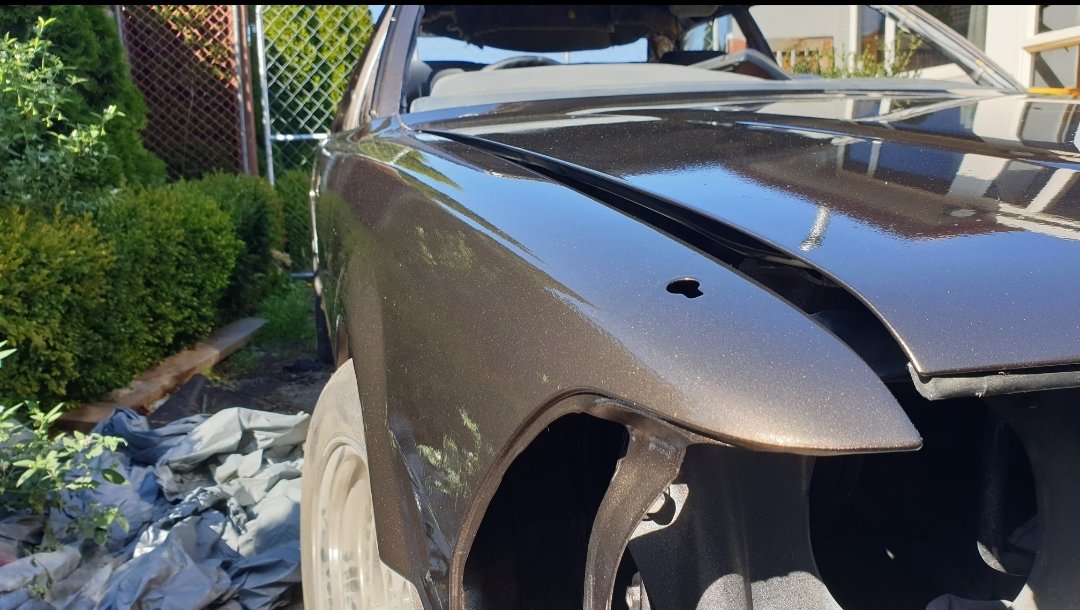
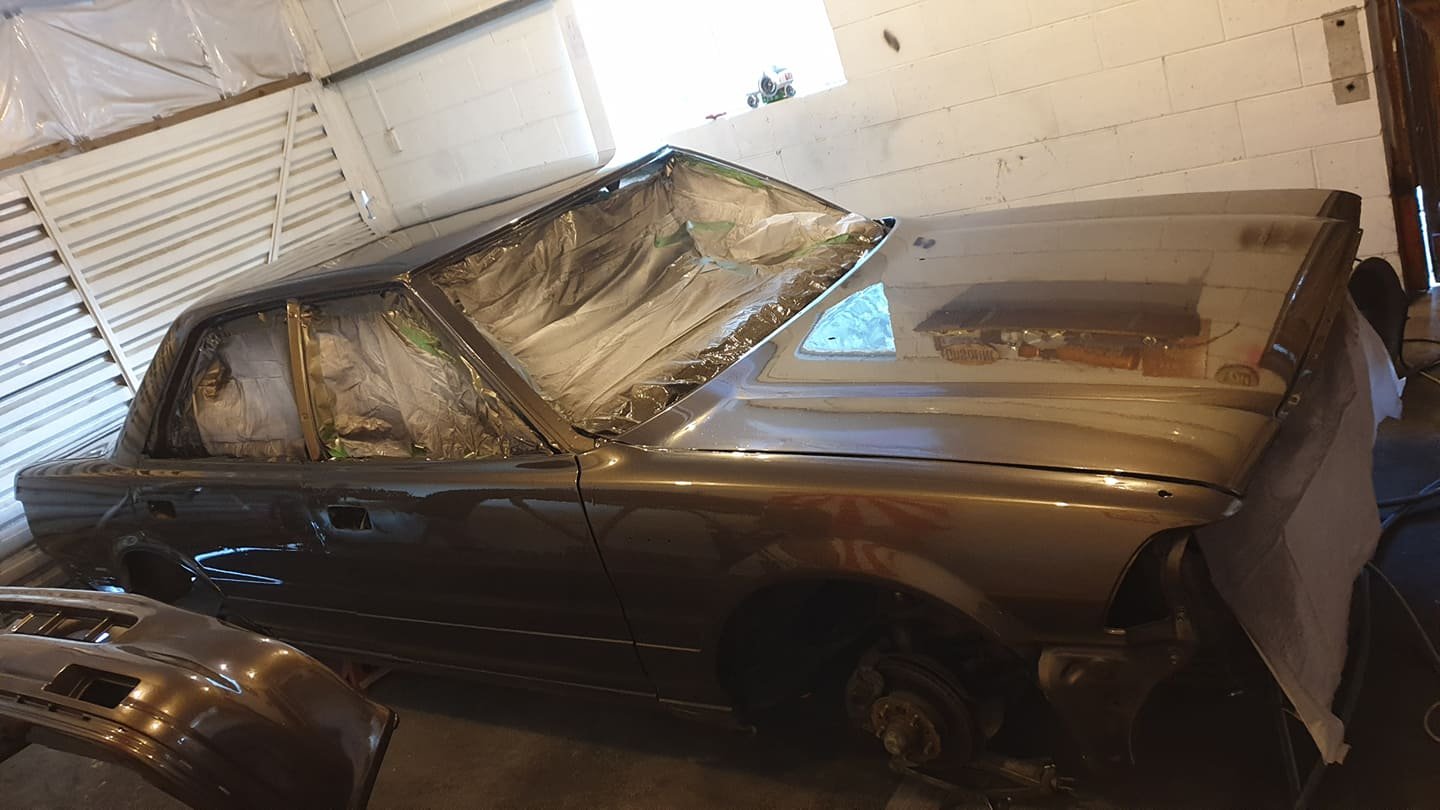
The metallic went down better than I could have imagined, just the clear went to shit. It's prety bad, the photos don't show it up that much/have only photographed good angles, but you can look through the runs and see the panels are dead straight so that's awesome. And I'm really hoping that with yet some more sanding it really will look as good as hoped it will. I think it will. I'm also pleased with how the bronze works with the blue interior. And am undecided on wheel centre colour. Initially I was going to paint them r32 gtr gun metal grey, as a mate painted his r34 rims this bronze on my recommendation and the colour combo looks great. But open to suggestions. Really need to clean all the sanding dust of them as is and see what I think.2 points
-
Could be useful if the dipstick is hard to get to when installed in the Thames?2 points
-
Got the plug out, was a bit worried as thought it was going to be a cunt. Also found some dodgy/damaged wiring for the alternator so pulled that out (need a few bits to repair it). Looks like some suspect oil lines as well (diesel life so vacuum pump on back of alternator) so think I'll replace those. Oil return on turbo is also clearly leaking and making a fucking mess so I'll pull that off as well and will be good to replace a few bits there. Hopefully this will limit the horrid oil leaks this thing has. Obviously can't do much till the world returns to normal, but no drama, will be nice to sort these little things out once and for all.2 points
-
More updates... Laid some paint this afternoon ready to go back in the car. Also, forgot I never posted the guard resurrection. In December last year I spent some time repairing rust, filling and sanding. Got some paint matched, its not perfect but pretty close considering the lime/yellow/milky colour. The paint tin is back at the shop and they are having another go at it. So back to the diff, aiming to have the exhaust sorted on Saturday and the diff in on Sunday. Might go for a hoon up the road on Sunday night2 points
-
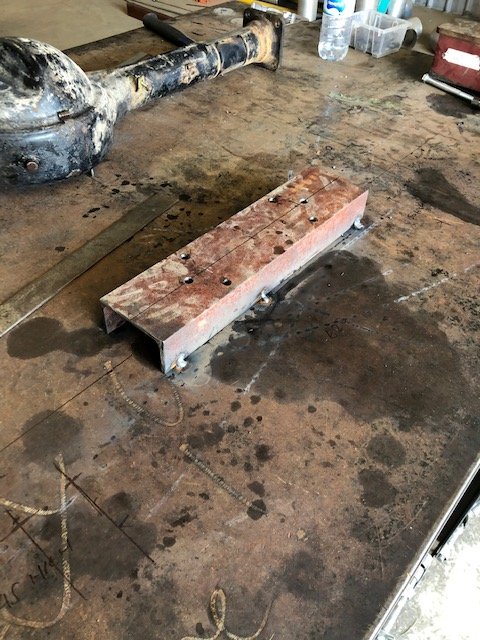
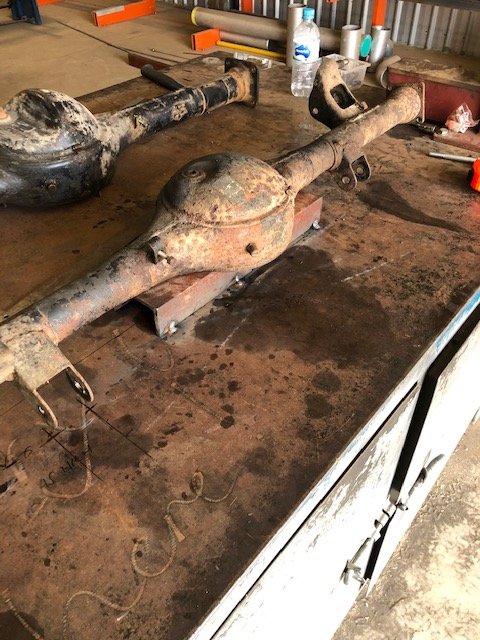
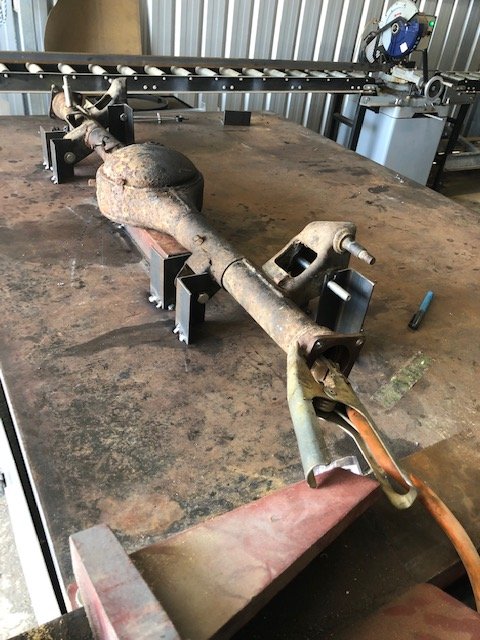
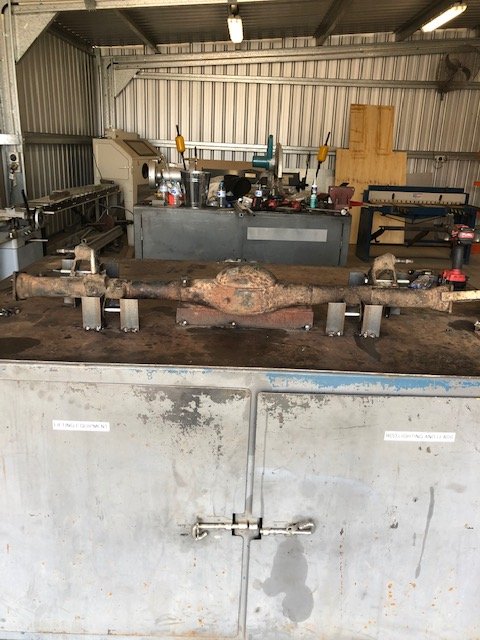
So from here I made a basic jig to mount the faces of both diffs on. And please remember, this is the first attempt I’ve had at anything like this so I wasn’t really sure how to tackle it. just used basic angle iron and welded it to the bench and bolted all the suspension components to it. Cut them off, and sat the 1600 diff on the jig and rolled the mounts o to the new housing.
2 points
-
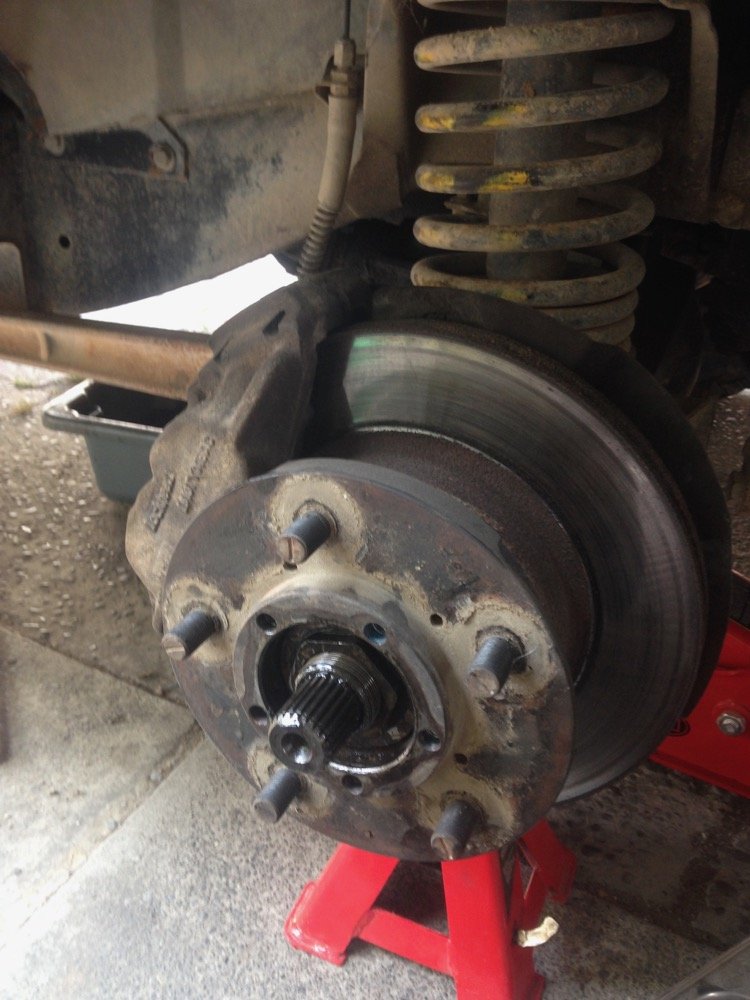
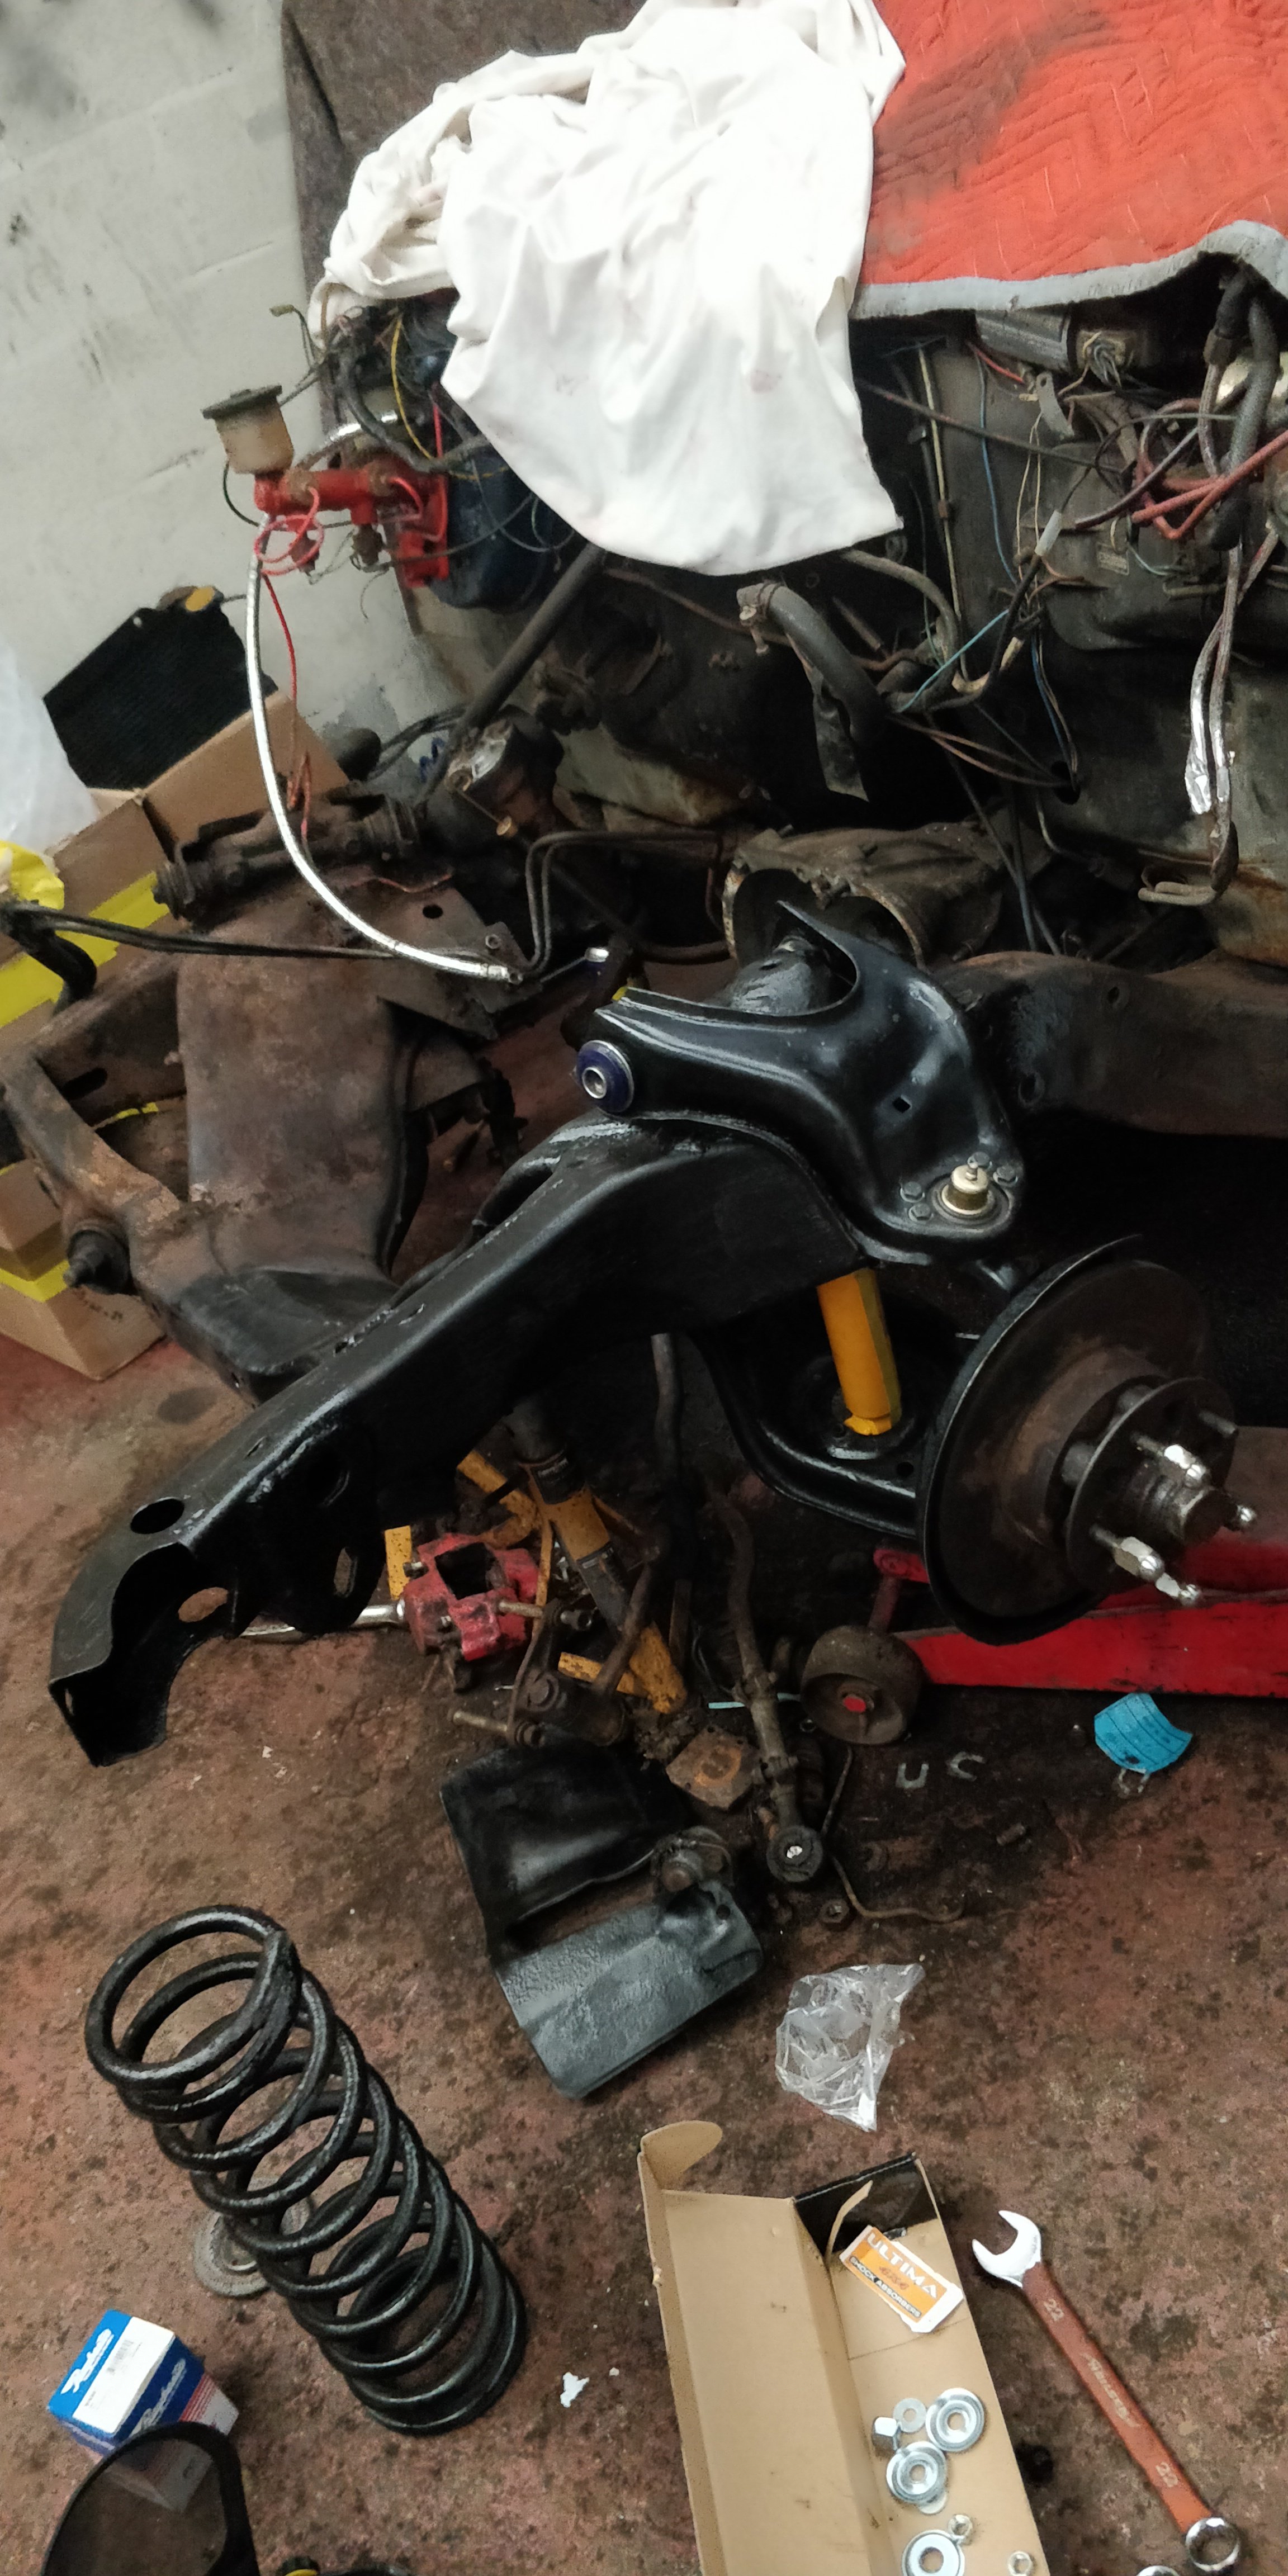
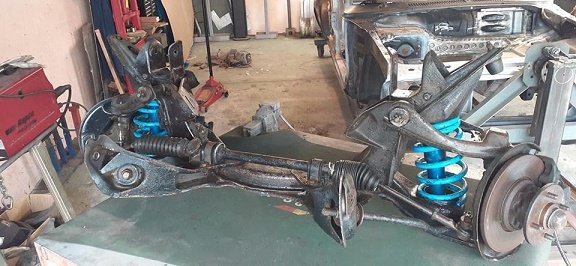
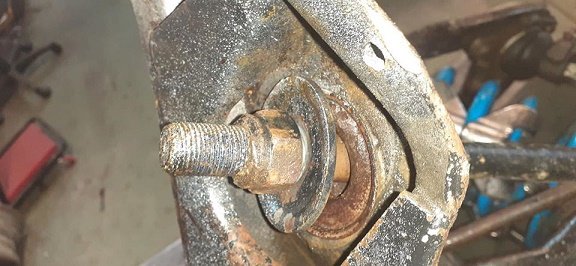
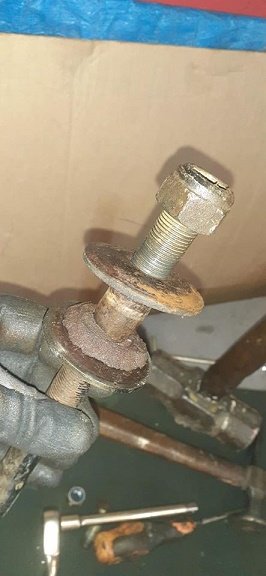
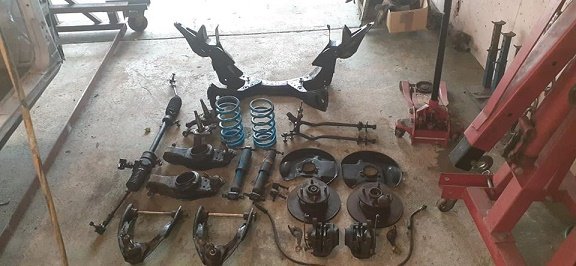
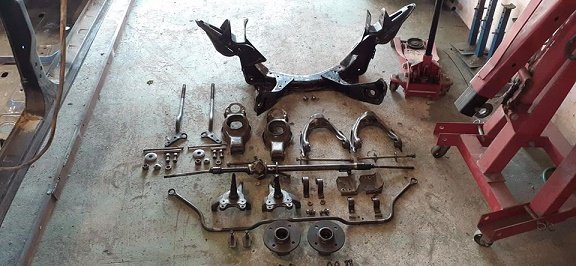
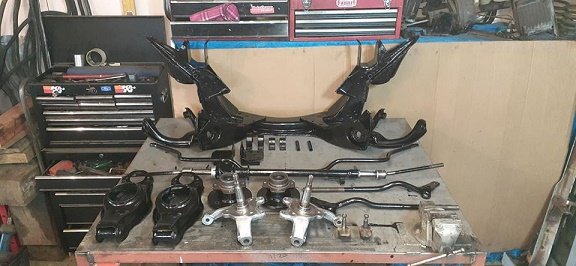
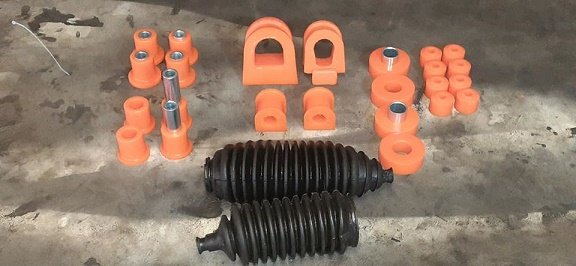
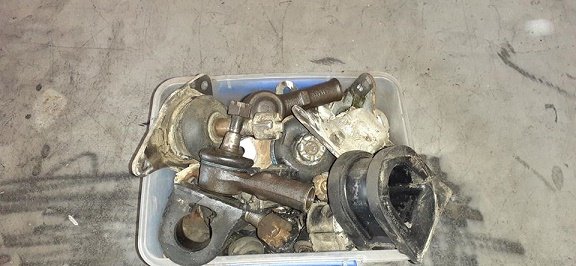
decided to have a play with something other than rust /welding/cutting/making.......turns out pulling a 44 year old front end isn't as easy as undoing some nuts. the front end most of the bolts had to be cut and studs pressed out..most of the bushes were none existent .(i have a set of bolts front another front end ) all stripped down after a couple of days with wire wheels on my drill press and some de greaser and a wipe down and coated in POR15. i bought a full bush kit last year and found 2 good condition steering boots in my parts shelfs and all rebuilt with what i have ...still need to get some new tie rod ends upper and lower ball joints and decide on discs and what calipers to use......and some split pins and thats the front end completely done.........once the world returns to normal. and the crap left over.
2 points
-
fizzed it all up today, been stripping out all wires/ all non essential wires/cables off of the bike and routing through tubes where possible to clean up the look gonna have a go at fibreglassing the seat base tomorrow which should be interesting2 points
-
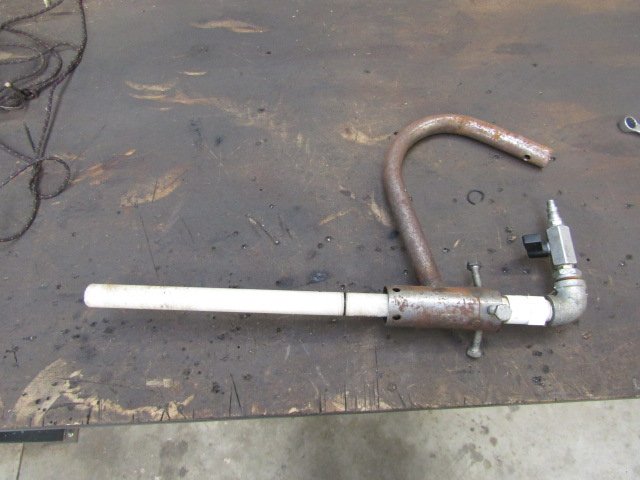
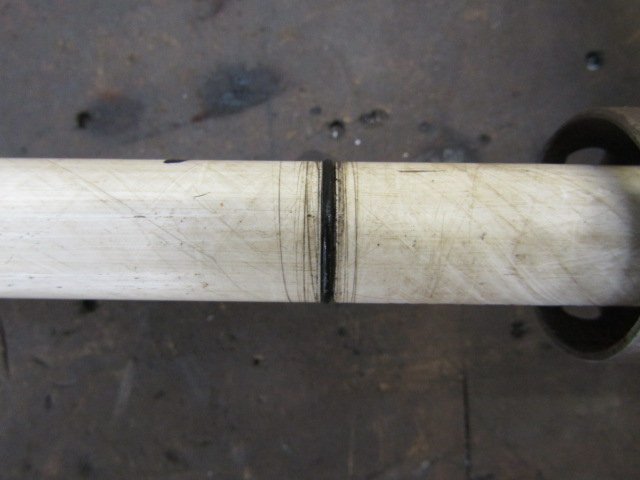
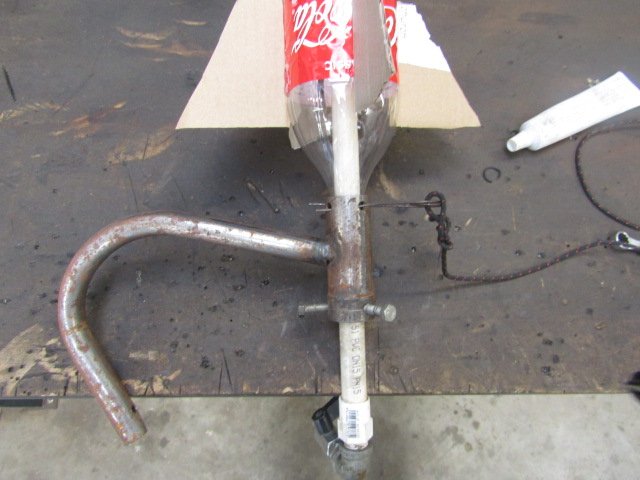
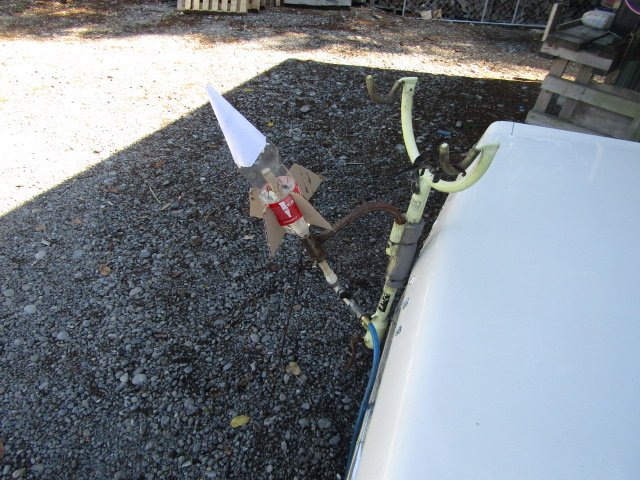
Another thing I did a while ago, someone might like to copy to amuse them selves/kids. Bottle rocket launcher, pretty simple just some PVC pipe, a ball valve and a collar to catch the bottle. Goes pretty well off the compressor. Shallow groove that holds an O ring to seal the inside of the bottle neck The O ring sits under the collar. I got a bit carried away using a lathe to make this. The pin holds the bottle on with the small ridge under the cap. We find that about 1/3 water and as much air as the compressor can supply gives best results, It mounts on a bike rack so it has a nice solid base to sit on. @scooters
2 points
-
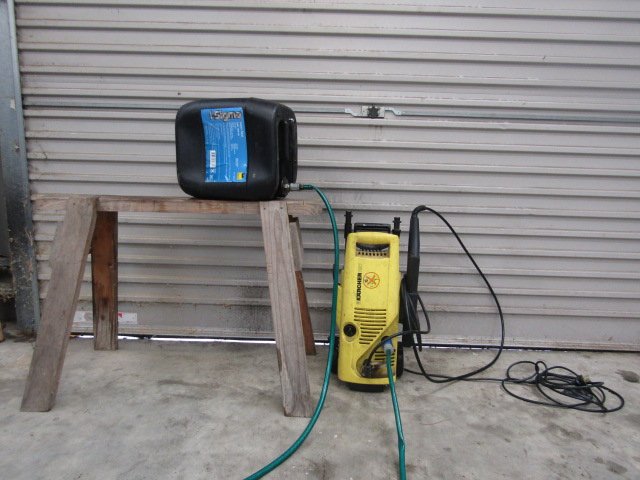
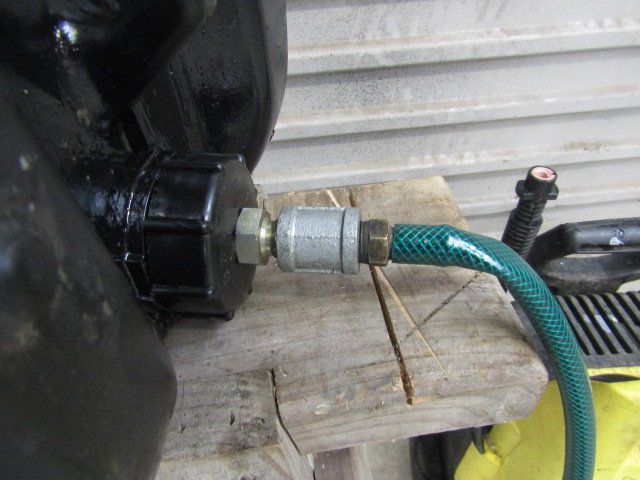
Anyone on here who's ever used a hot water blaster knows how much better they clean than than a standard cold water blaster. I have a little Karcher water blaster at home, it goes ok but with cold water but is a bit meh. I've heard of people plumbing them into the hot tap to make a DIY hot water blaster. Taking the hose into the house sounds like a recipe for disaster, makes the place look like a meth lab, and my garage is a long way from the house. Solution. Take the hot water to the garage 20l at a time. The water blaster doesn't use much water, I was surprised at how well it worked, and for how long. It took 3 fill ups to clean up the bike frame and parts I was tinkering with today. I probably wouldn't recommend it for degreasing the 440 out of your Grandads motor home, but for small jobs B+ out of 10.
2 points
-
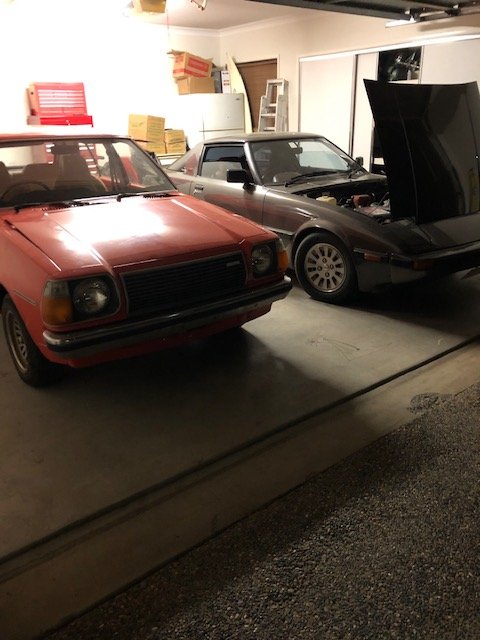
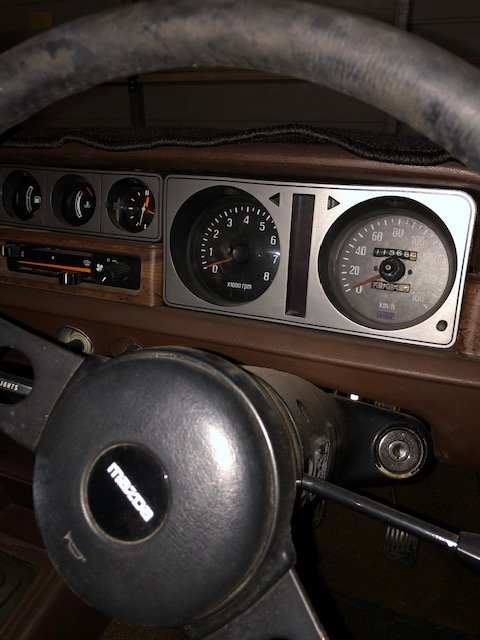
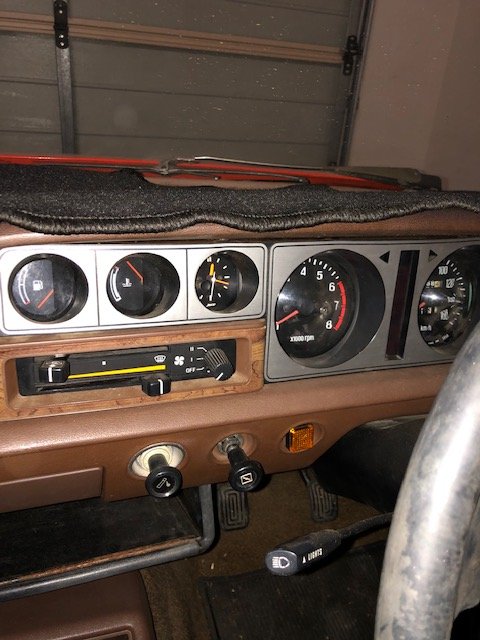
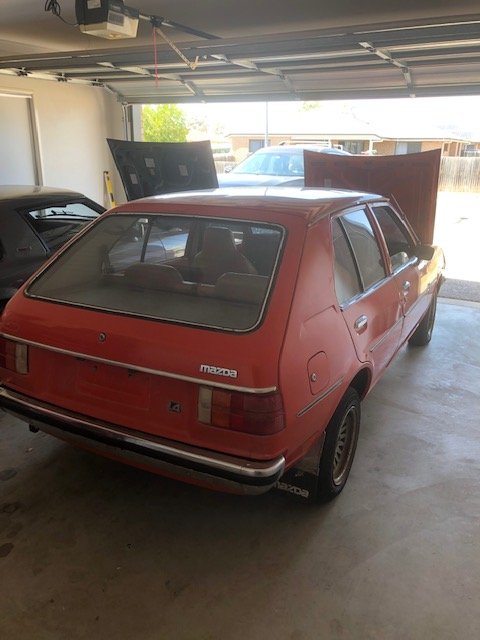
Howdy folk... a couple of months ago I pick up a 78 323 for a paltry sum of $2300. it seems in sound condition, with the only visual rust being a bubble in the bottom of the drivers door that hasn’t blistered, and some on the inside of the tail gate where the chrome/plastic trim fixes. Small shopping trolley dents on every panel... Like my rx7 post, I’m shithouse with computers so this will likely be painful but just bear with me. my objective is to do as much as I can myself, have a bit of fun with a basic low budget build. So I’ve converted a b600 diff to lsd, with disc brakes. Built a gearbox for it. Acquired a 13bpp, and 13b bp. And converted most of it. Anyways... enough of this jibber jabber. No prick likes that. I’ll throw up some pics.... here goes
1 point
-
Typically these dont run a sump gasket either... just good poos on there and away ya go. Goood tip is to panel beat the bolt holes flat before you re-seal as they tend to sit high and not allow the pan to sit flat properly agaisnt block...1 point
-
And for those that like a little dish at dinner time.
1 point
-
2k hardens by a chemical reaction It will happen faster with increased temperature. But is not required, it just speeds it up. Too cold and the solvents won't evaporate from the paint fast enough and give a poor finish Too hot and you can harden the outer layer and trap solvent inside Takes about a month for a paint job to be truly hardened1 point
-
MIx up like 4mm of paint and see how long until its hard. I have used clear in the past that you can sand super quick, it all depends.1 point
-
Shit yeah Rog, Repair looks awesome!1 point
-
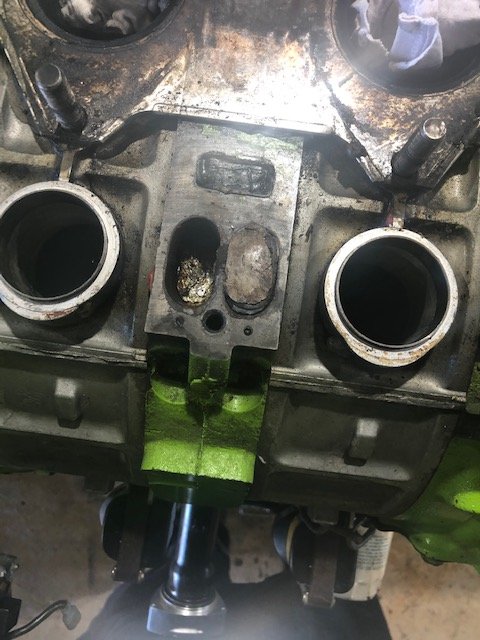
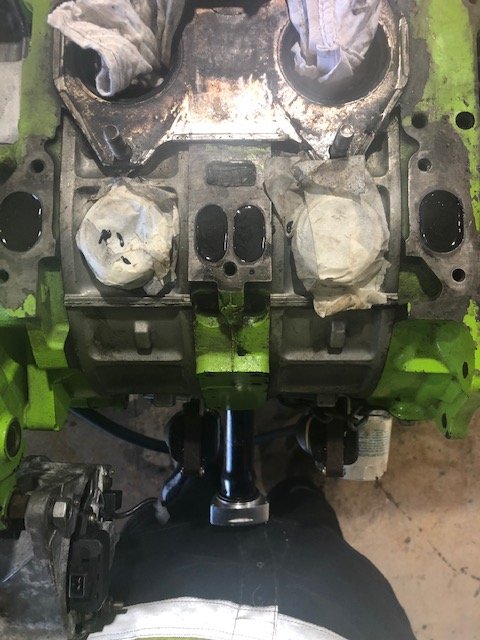
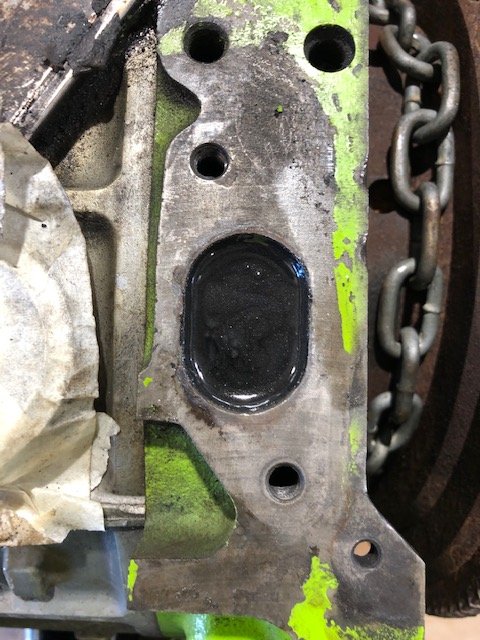
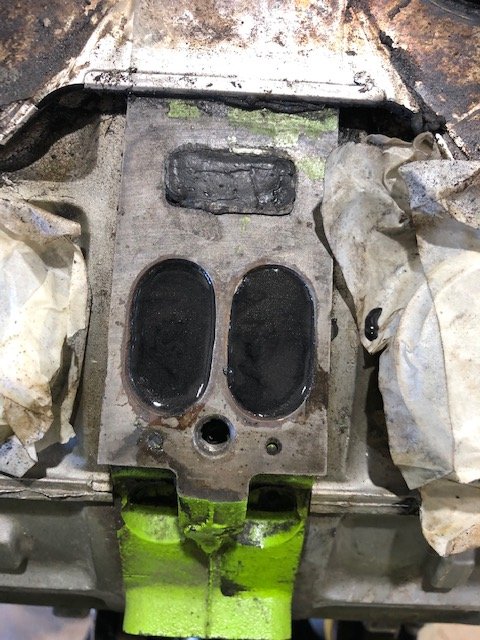
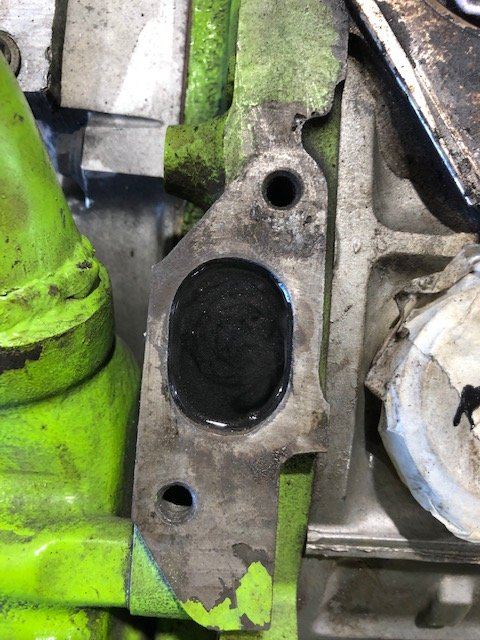
I’m not sure if it is just me, but I wasn’t too impressed with how the back half on the inlet ports were filled. I know into the block they were devconed appropriately, but it must be an Aussie thing to only fill it halfway and then put tin foil or steel wool to same a buck or two.... cheap cunts. So I then needed to pull that shit out and seal it properly...
1 point
-
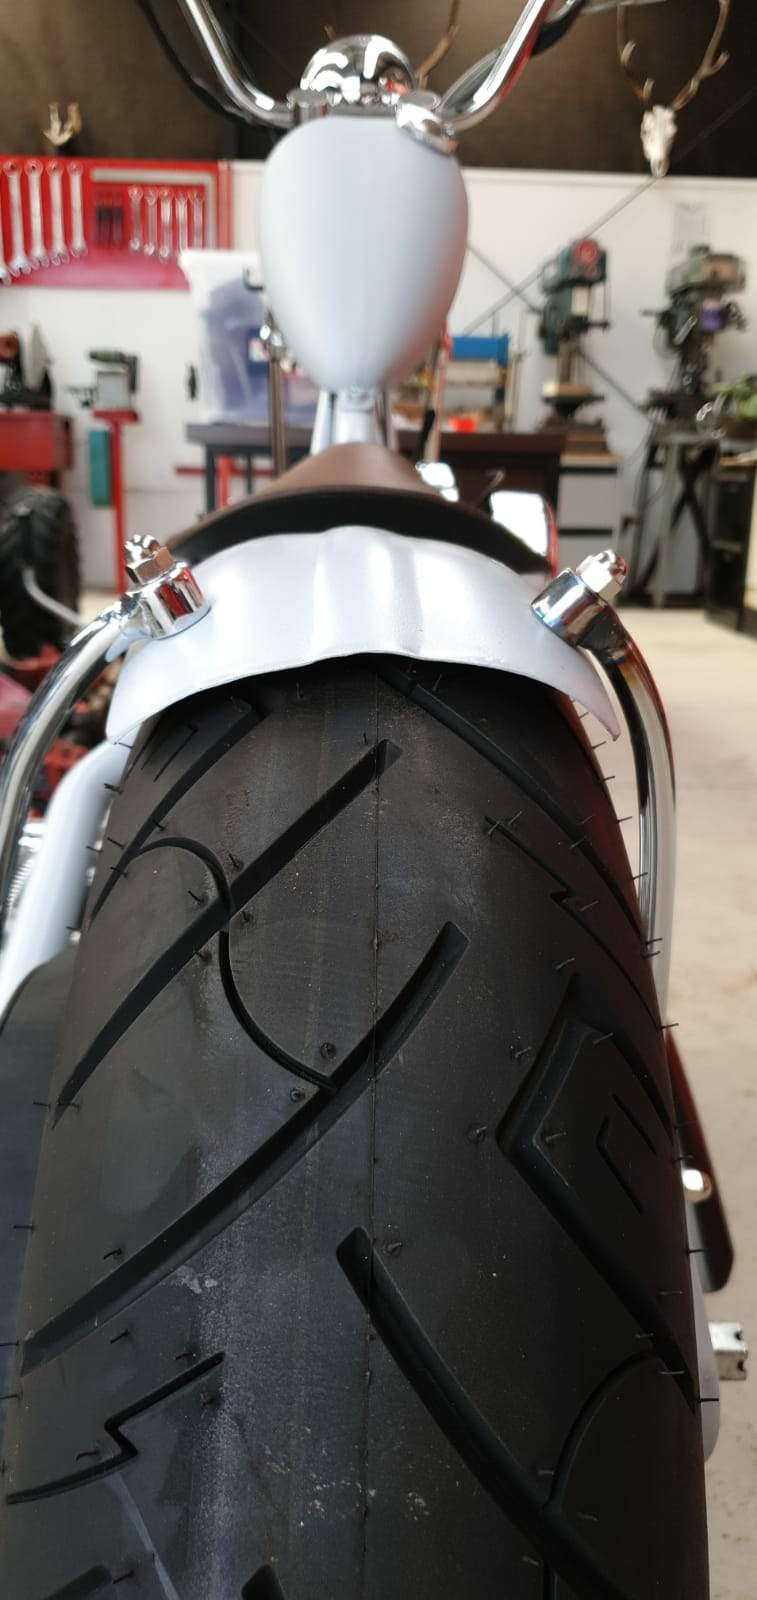
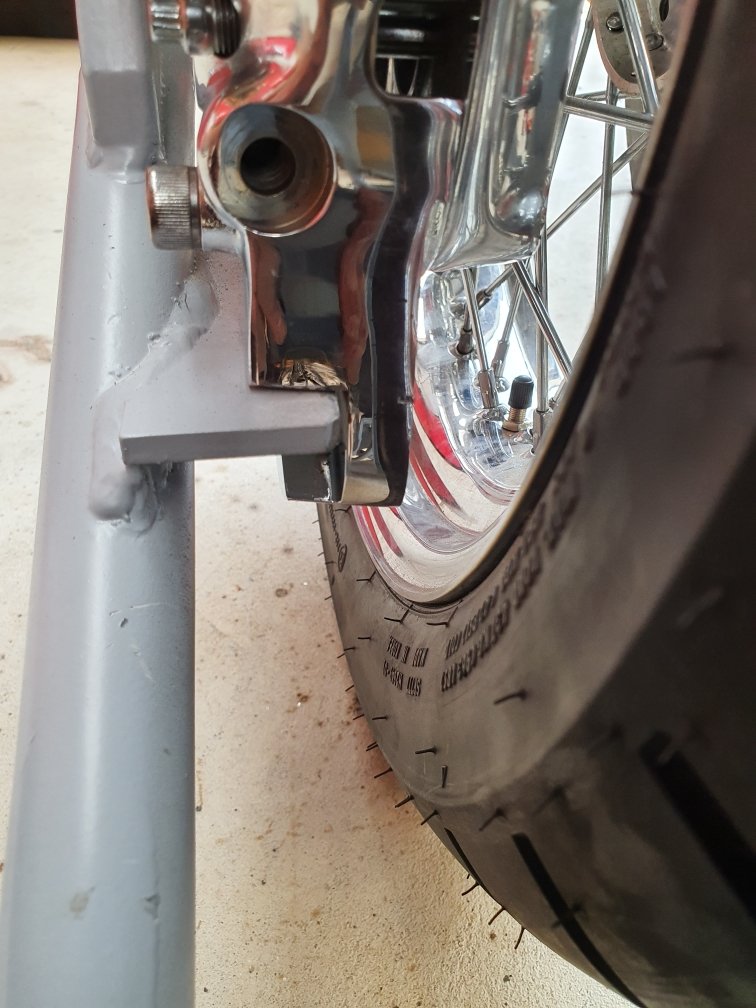
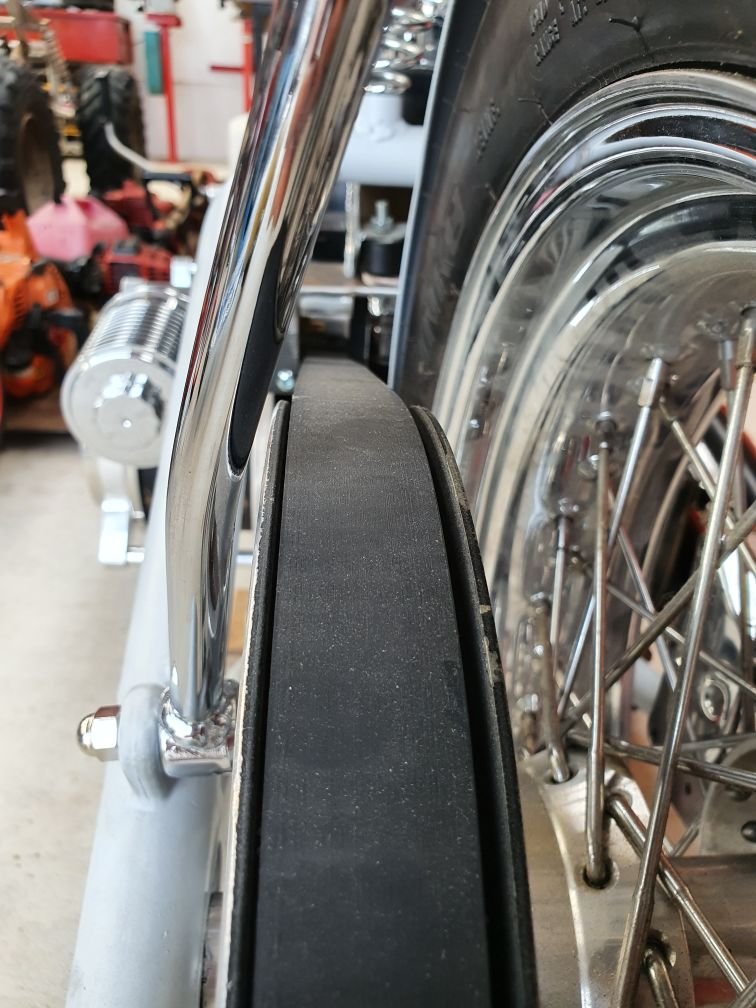
Tig welding like a boss! Doing this because everything shifted over by fucking around with the wheel spacers to centre the rear end perfectly. Unfortunately my fender strut had to shrink a bit. So I cut and welded it with the tig. I'll get it chromed again. Bit sad, as I made these 4 years ago and was quite proud of how they turned out. Back then I arc welded them. Clearance for spinning bits is now all mint! Brake tab is perfectly positioned thanks to my new hub and rotor centric spacer block I made yesterday. Fender sitting just right. Needs a little hammer and dolly love...but good enough for now. Stoked!!!
1 point
-
Measured battery voltages this morning, ranged from 4.09 to 4.16V, so a 0.07V difference. Hooked up some lamps and drained high cells individually while working this morning... Then when all even'ish drained the whole battery over a couple of hours, down to around 3.4v and chucked it on charge again, will see how even the cells are when it's charged... Looked in the garden shed of future treasures and had a couple of old carriers. Of course only the rustiest one fitted... Then lubed the brake cables and reassembled, only really have around 1/2 front brake, but it'll do for now. Also shortened chain... And went for a short ride up the road, in rugby shorts, socks and slippers. Kids didn't want to go with me... And hopefully (but seems unlikely) the battery and controller will fit in these 'vintage' bags (courtesy of Ali)... Gonna be tight up front, have to fit Sturmer Archer trigger shifter and throttle yet. Wonder if I can go LH throttle (think I bought a thumb-type lever) without it being upside down... So may be able to rig some power up over the weekend. Quite excite..1 point
-
yeah mine was out by about that for 20 years from when it was certed these were sold as dodge ram 50's / d50s in the states. so cheap parts off rock auto www.mightyram50.net if you haven't seen it yet1 point
-
I read somewhere once that it's nearly impossible to make these look cool without modifying the rear end which I agree This is gonna look like one bad ass r80. Enjoying the process so far1 point
-
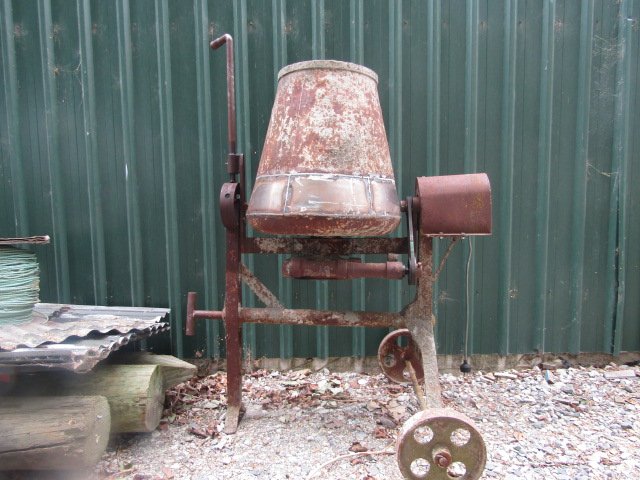
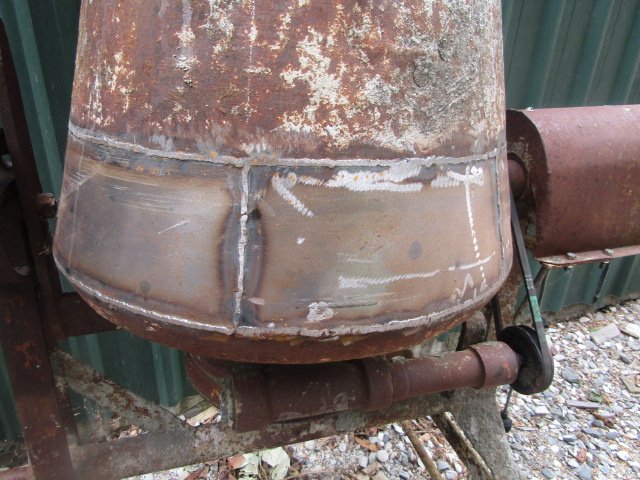
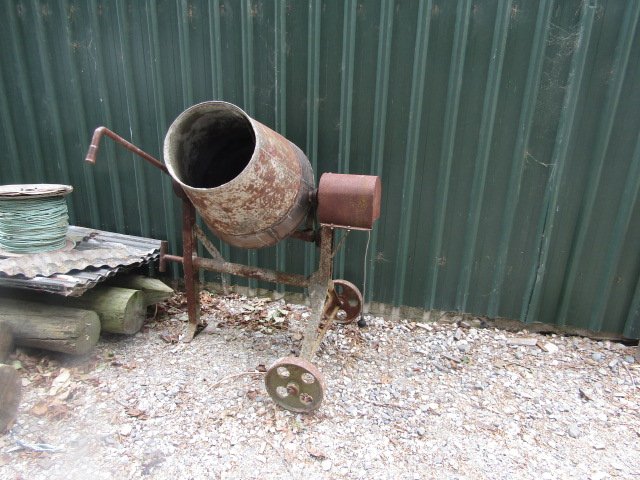
Also. As @RUNAMUCK stated previously little chinese concrete mixers are shit. Concrete mixers are a handy thing to have though so when I spotted this in the scrap pile at a friends yard I pounced on it. It has a cool worm drive gearbox, the motor looks like it's off an old fridge or washing machine. The locking handle was rusted in place and the bowl was badly rusted. I fixed both and now it goes hard for what it is, quietly and at a good height to tip into a barrow. Edit. I'd like to find a couple of pneumatic wheel barrow wheels to make it easier to move around because these steel ones suck.
1 point
-
So ... lockdown project.. sanding, sanding, sanding, sanding, sanding and Painting..
1 point
-
Lockdown progress. Been truing the wheel while waiting for documents to load remotely in my slow remote office, and put tyre on it last night. Was worried I had no rim tape to protect tube but found some in my hoard of old bits... And what I'm starting with... Widened the front fork slots to fit the motor axle... And stretched the forks out a bit, they were around 86mm and need to be 100mm... And it's not going to look too silly... Clearance on one side slim but ok... But the other was touching... And couldn't slide a washer on cos there's a plug preventing the nut coming off. So bent a spring washer open, slid on over the cable, and closed up again... Old pedal was a bugger to get off, had to get grinder out... And MKS pedals look sweet in white... Adjusted crank bearings and put new seat on too, plus slight panel beating of front guard. Starting to get close... Wasn't going to put seat and pedals on, I like putting new bits on last, but not much else to do until I get rear wheel made up. Hope to get on that this week...1 point
-
So yea, no luck sourcing brushes, just as well I have a lot of useless shit lying around; Makita 9" grinder brush Vs worn Safari After a bit of loving with the file Into the carrier I cleaned up the slip rings in the lathe, you can see why I won't bother too much with this alternator, that ugly bit of shaft is where the seal from the vac pump is supposed to do its work. The whole alternator was full of oily shite, this is the culprit I imagine. I chucked it all back together and got charging voltage no problem at all, a triumph for bodgy cunts everywhere.1 point
-
Had a customer ring me this morning, I had already told him yesterday we can do a cert on essential service vehicles but we have to be able to prove it They cant prove it is so he said 'cant you just say you checked it yesterday?' No. Boss also had some dude ring him on Wednesday assuming he could drop his car off at bosses house for a cert while the lockdown was in effect1 point
-
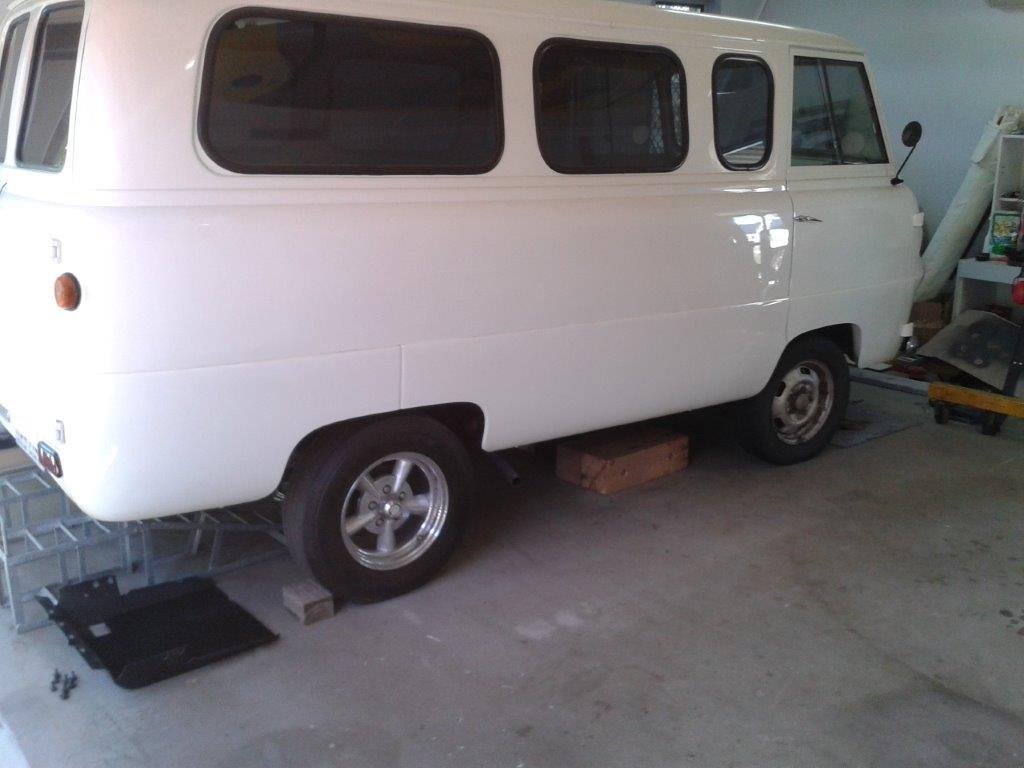
I've now pretty much wrapped up the "proof of concept" phase and took a few minutes to update my list of parts that will be used. In summary the list is as follows: Toyota 4Y engine out of a mid 80's HiAce using standard engine mounts cut off the HiAce cross member and glued on to the back of the Mitsi Starwagon suspension beam. Final fueling option still to be confirmed but is either going to be a single side draft carbie on a slightly modified inlet manifold or full LPG. Top hung side shift 5 speed gearbox also out of a mid 80's HiAce. Using a standard gearbox mount that is rotated 90 degrees and shifted slightly forward to clear the Thames chassis cross brace. Clutch actuator will remain hydraulic using the standard HiAce slave and the Thames master (I haven't tried this but if I encounter issues I'll revert to the HiAce master). Gear selection will remain a column shift using a column rod fabricated from the upper portion of the Thames rod using the Thames upper mount and the lower portion of the Starwagon rod using a fabricated lower mount. A second cable sourced from the Express will replace the Starwagon shift rod that connects to the gearbox. Complete rear axle out of a mid 80's HiAce fixed in place using a heavy duty 4 bar rear suspension kit sourced from a Hot Rod shop and fitted with coil overs. Drive shaft out of a mid 80's HiAce cut to the correct length. Mid 80's Mitsubishi L300 Starwagon complete front suspension beam, including all suspension and braking components. Mounted to the Thames chassis using fabricated l brackets that pickup the standard Thames mounting holes along the chassis rails. Mid 90's Mitsubishi L300 Express power steering rack fitted with the earlier Starwagon rack end joints and mounted using the original mounting lugs removed from the Express suspension beam and welded on to the front of the Starwagon front suspension beam. Mid 80's Mitsubishi front beam strut rods mounted rearward facing. Bolted on to the Starwagon lower suspension arms as per standard. Mid 90's Mitsubishi L300 Express stabiliser bar located in front of the suspension beam, with chassis mounting points moved 40mm inwards on each side to line up with the Thames chassis rails. On the suspension side the bar will be joined to the Starwagon lower arms using the mounting lugs cut off the Express lower arms and welded on to the Starwagon arms in the same location. Steering will use the standard Thames column, steering wheel, indicator stalk housing, indicator lever and upper mounting point. With the Thames steering box now deleted, the lower mounting point for the column outer will consist of a fabricated L bracket picking up the Thames plate at the bottom of the outer column and the standard steerign box mounting holes on the Thames chassis. The existing worm gear at the bottom of the inner column will be machined off and a spline cut into the shaft. A new universal joint will be sourced to attach the inner column to the steering angle box out of the mid 90's Mitsi Express. The shorter steering rod out of the Express that uses a rag joint to bolt up to the steering rack at one end and a factory welded universal to mount to the angle box at the other end will be shortened to the correct length for the Thames by cutting off the UJ and machining a spline into the shorter shaft what can be mated to a newly purchased UJ. An electro hydraulic power steering pump (final make to be confirmed) will be sourced from a wreckers to power the Express rack. All credit to go to Browndog for this suggestion. The Toyota HiAce brake master cylinder will be used in conjunction with an aftermarket remote booster setup. Smaller bits and pieces will be selected on an "as needed basis" when final fitting takes place. Hope I haven't overlooked anything major. Please shout if I have. With my list updated I figured it was time to drop the Thames back on to its wheels as I'll need my axle stands elsewhere for the next phase. It's not the greatest picture but this should give an idea of the final front ride height with the L300 suspension in place. The back is still standard Thames ride height as I haven't mocked up the back. The ride height difference is noticeable. Please forgive the manky front wheels. I still need to source metric lug nuts for the Dragways. Thanks for reading.
1 point
-
It's been reasonably quiet in the past year. I've done next to nothing on this car... since Toyota Fest last year: Drive shaft remade/balanced New rear hub centric rings for the rear discs. This was necessary due to the BMW rotors. I had the centres drilled out to be the same as the Longchamps on the rear. They're nice and snug. The Longchamps have a tapered centre bore so the spacers can't fall out.. Swapped in my 4A-GZE motor that's running on the stock small port ECU for now. Turbo time after Toyota Fest this year Swapped in the original Intake Manifold, runs heaaaps better on the stock ECU which makes sense. Replaced broken fuse box (exciting) ae86-1 by phillipbaines, on Flickr ae86-2 by phillipbaines, on Flickr ae86-3 by phillipbaines, on Flickr ae86-4 by phillipbaines, on Flickr ae86-5 by phillipbaines, on Flickr And FYI this is the shifter location with a Rear Shifter type W5X box using the SQEngineering sandwich plate with the T50 bell housing. Perfect ae86-6 by phillipbaines, on Flickr I'm also looking for a replacement fiberglass bumper as mine is broke...1 point


.thumb.jpeg.384ff72c8d2b0ee0d34a7bdedb55bdcf.jpeg)


This leaderboard is set to Auckland/GMT+12:00