
Leaderboard


Popular Content
Showing content with the highest reputation on 09/23/19 in all areas
-
So Al my work mate was good enough to give the intake manifold a bit of a tidy up with the die grinder while I was assembling the engine With getting the engine pretty much together I thought it was time to get onto a few of the bolt on items. I know from my mk1 cortina that I was wasting my time the orginal alternator. So I found a old Nissan alternator and fitted that. Redrilled the holes and it pretty much lined up. Changed the pulley over from the old Lucas alternator. Which just ment turning the hole out to suit the Nissan alternator. So it's pretty much together just have to sort the flywheel out next.
 8 points
 -
Done a quicky on the painting, minimising the work to get it done, and by done, i mean water proof and ready to roll quick high build prime over the sanded back repaired areas then a blow over with the blue. i mixed a bit much paint and instead of waste it, I got a few sags instead Still, unmasking is just the best Front door bits swapsies. Its surprising how much lighter a car door is without all the trimmings! took bits off all three to make one 'good' one Again, this one fit straight in the hole a treat (after a shim here and a hinge shave there) and now opens and closes the best it ever has so ive decided i quite like the look of these doors and they can stay Tidied out the inside of various mostly empty boxes and various screws, trim and clips, that are now consolidated into one bin Put the grill and headlamp assemblies, nearly all the bulbs now mostly work after a wiggle or a tap. Still a bit of a list of things to do, - Exhaust has a leak, looks easily accessed - handbrake cable buzzes on exhaust - i messed something up when i assembled the rear door, the window snags on the door lock rod when its wound down - sand the runs, flies and dust out the of the paint once it hardens a bit more - polish - clean and install chrome trims I also put the interior of the doors in and gave the dash a wipe. . Looking forward to giving this thing a good blazz again soon! Its mobile and driveable now and only the exhaust really needs sorting for a WoF, and now its together it also means i can start sort a lot of stuff out of the shed and into storage etc8 points
-
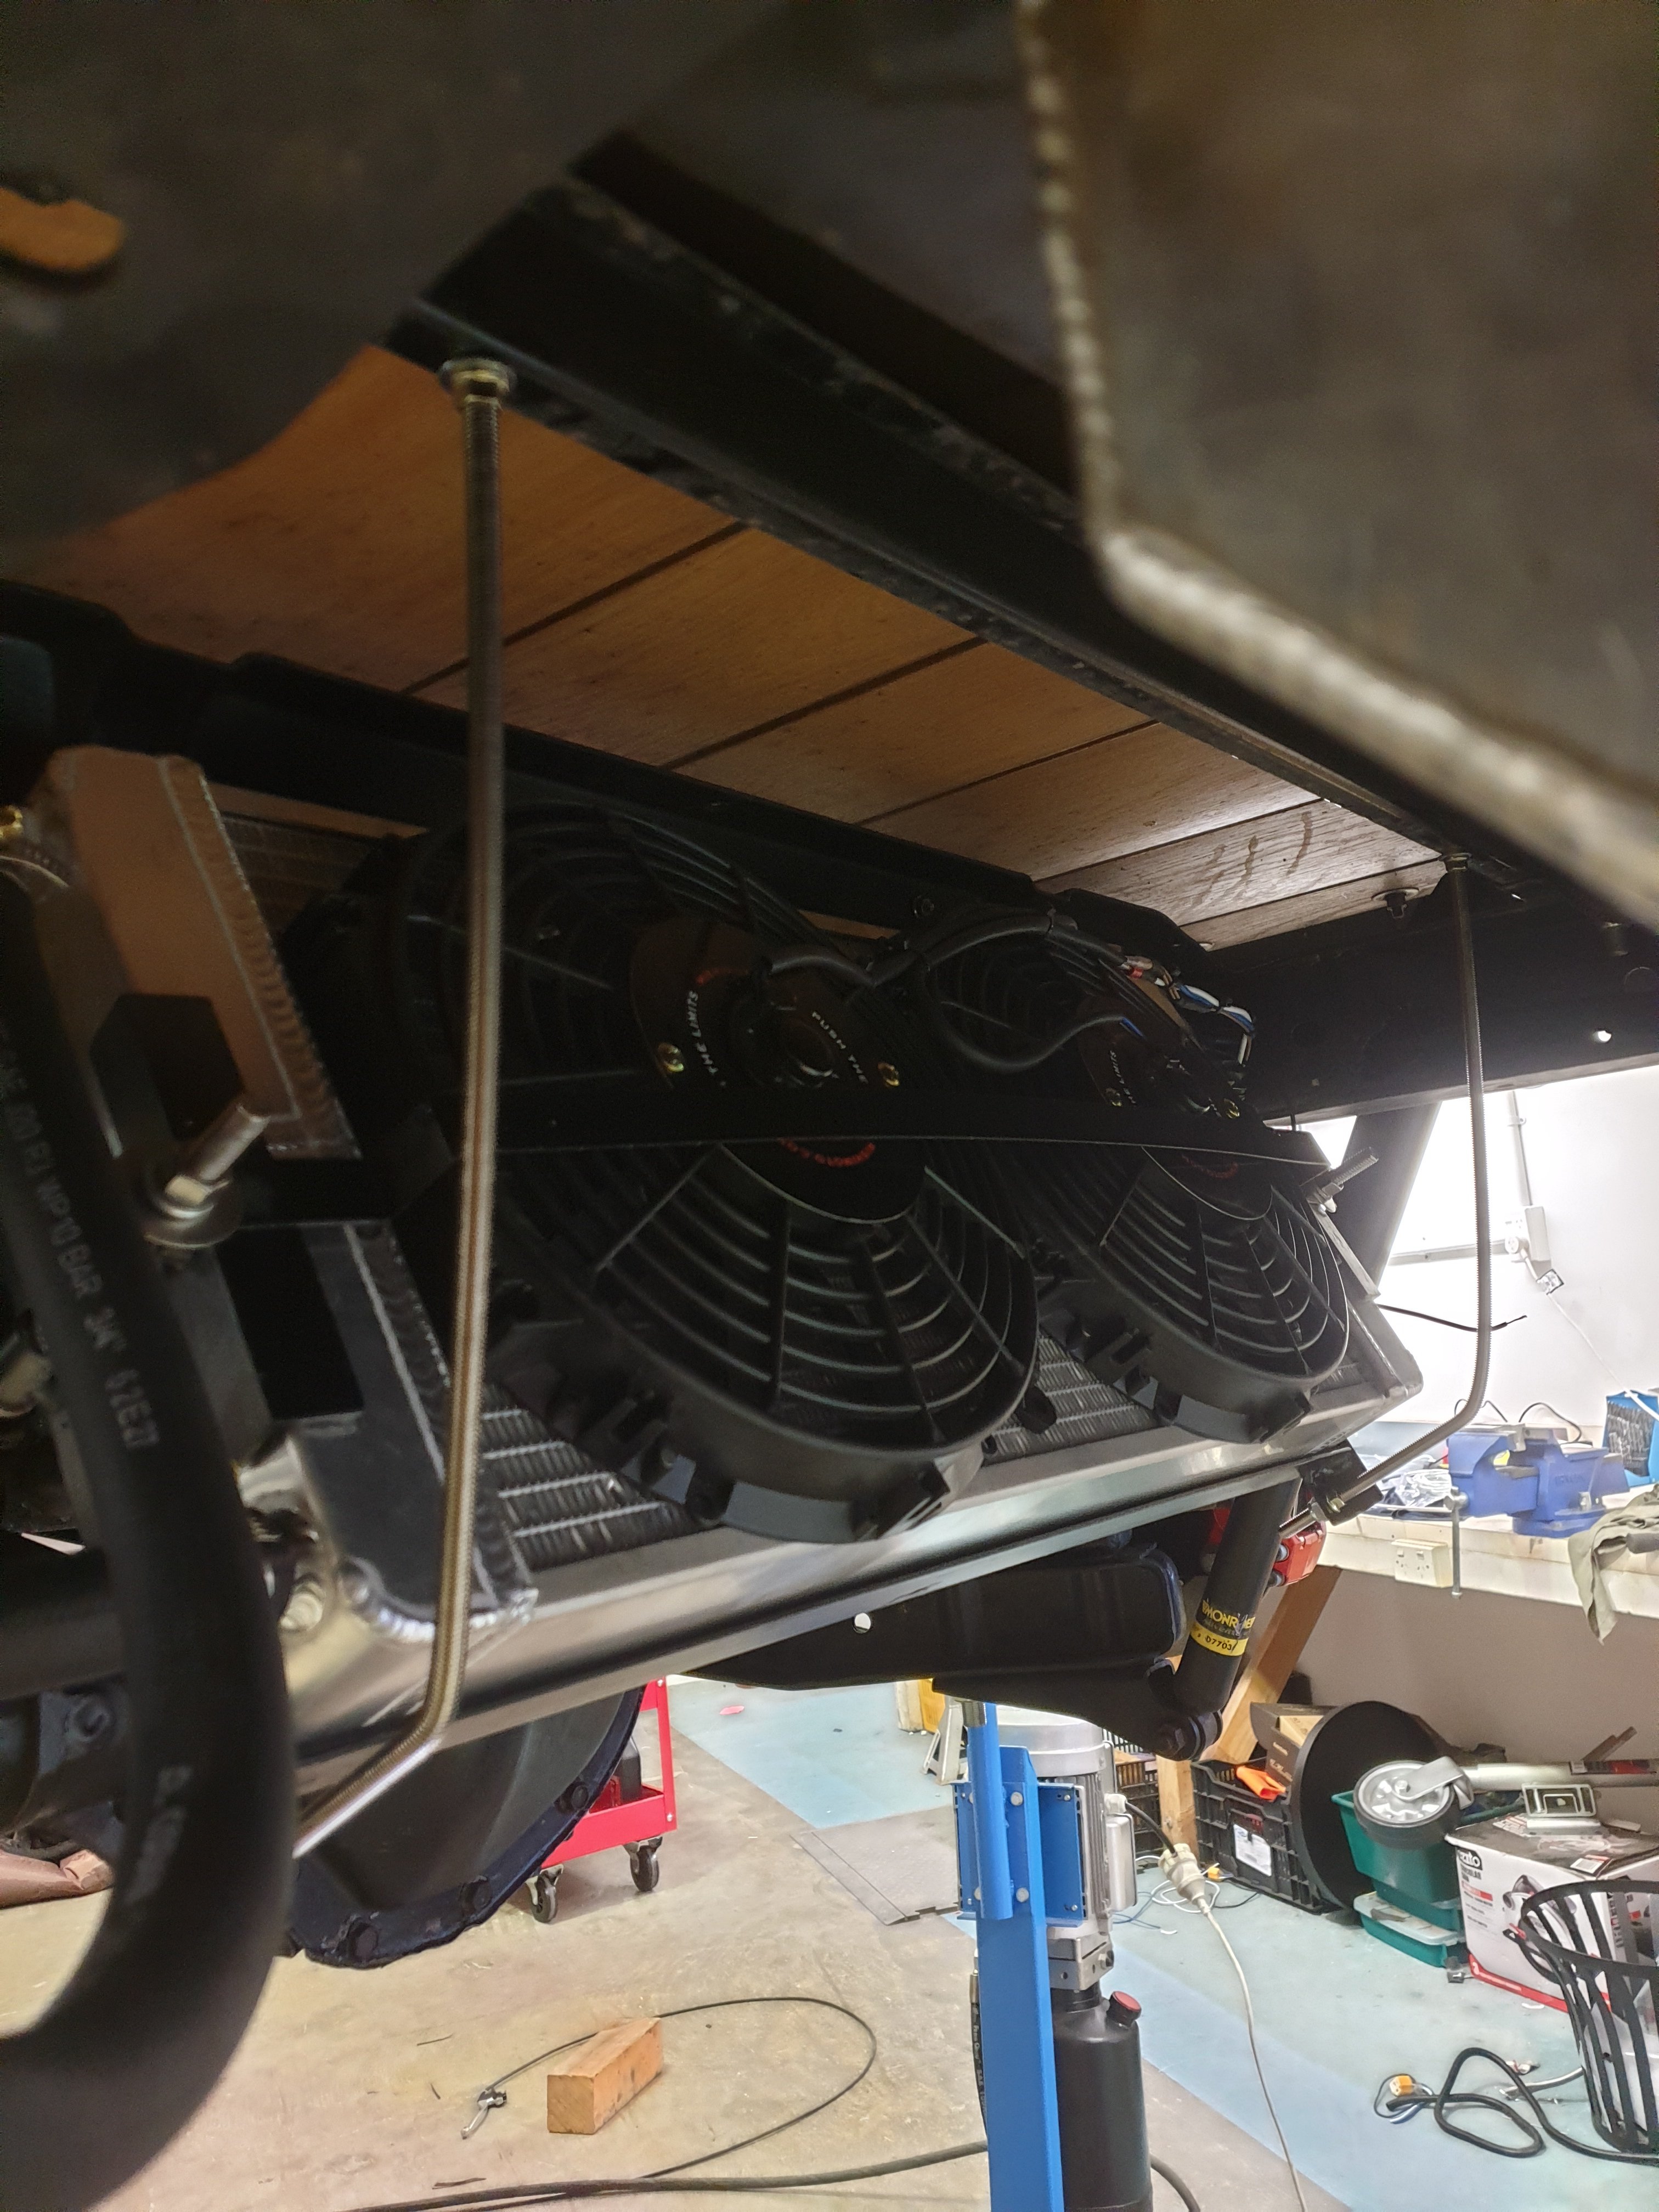
Bit done over the weekend, tidied up the last of the wiring, stripped an internal thread on brake bias adjuster (bastard) , checked electrics, powered everything up, got radiator for supercharger heat exchanger mounted behind the diff, looked at trans cooler and put it back on the bench, got power steering half plumbed . One of my lads is a plumber so going to run 3/4" copper lines from front to back for the heat exchanger plumbing. And probably need to cover the front of radiator with mesh or something.
6 points
-
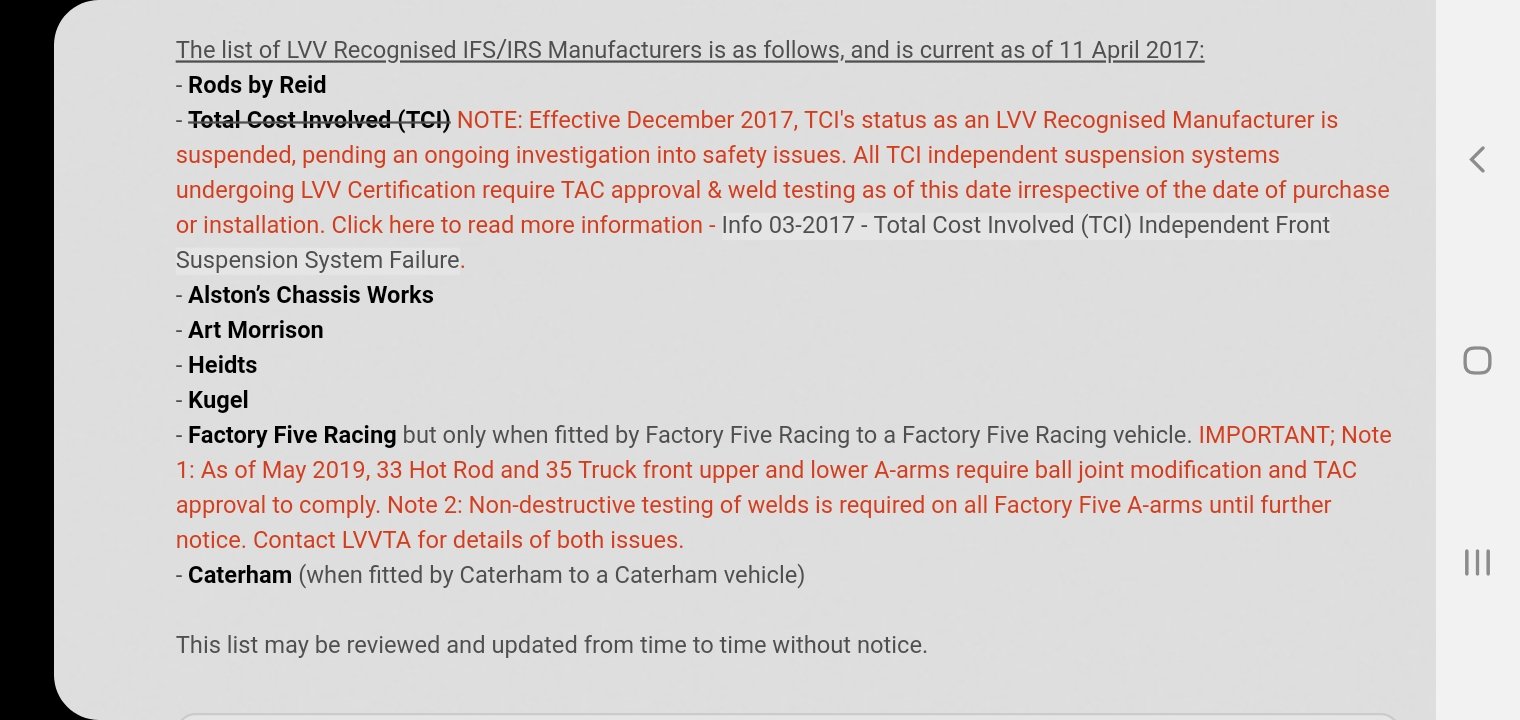
Goes off date of first registration NZ Have had revinned cars with no belts at all5 points
-
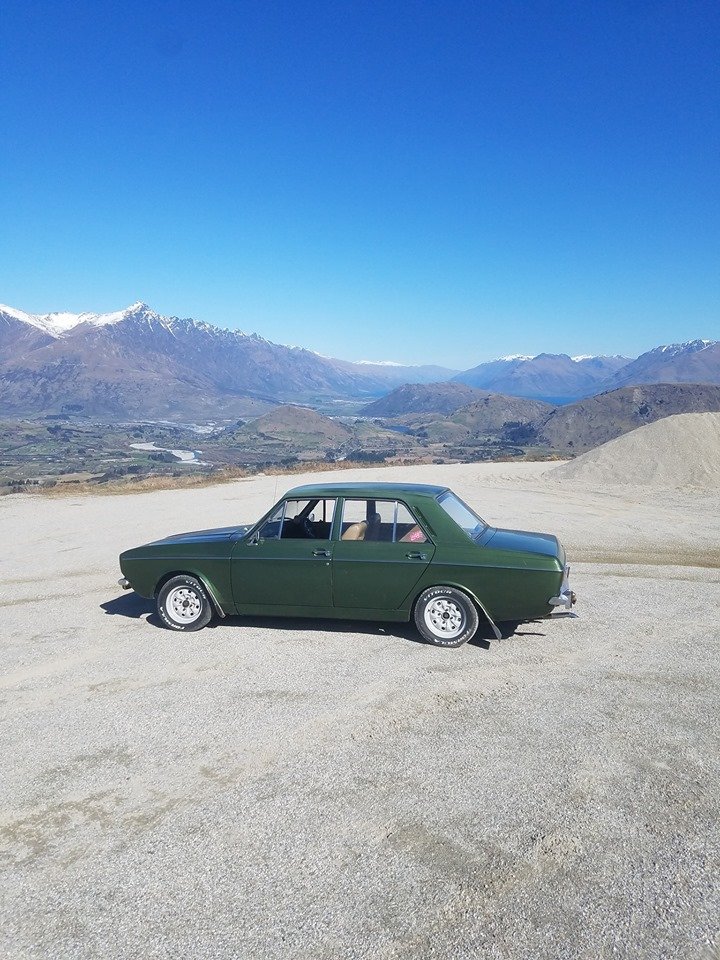
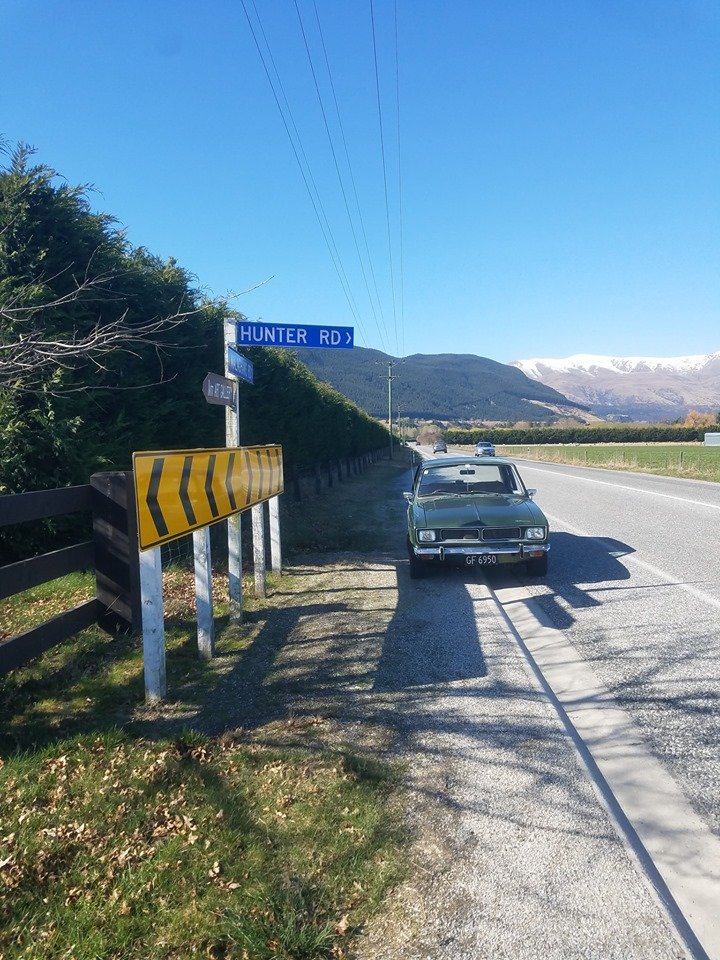
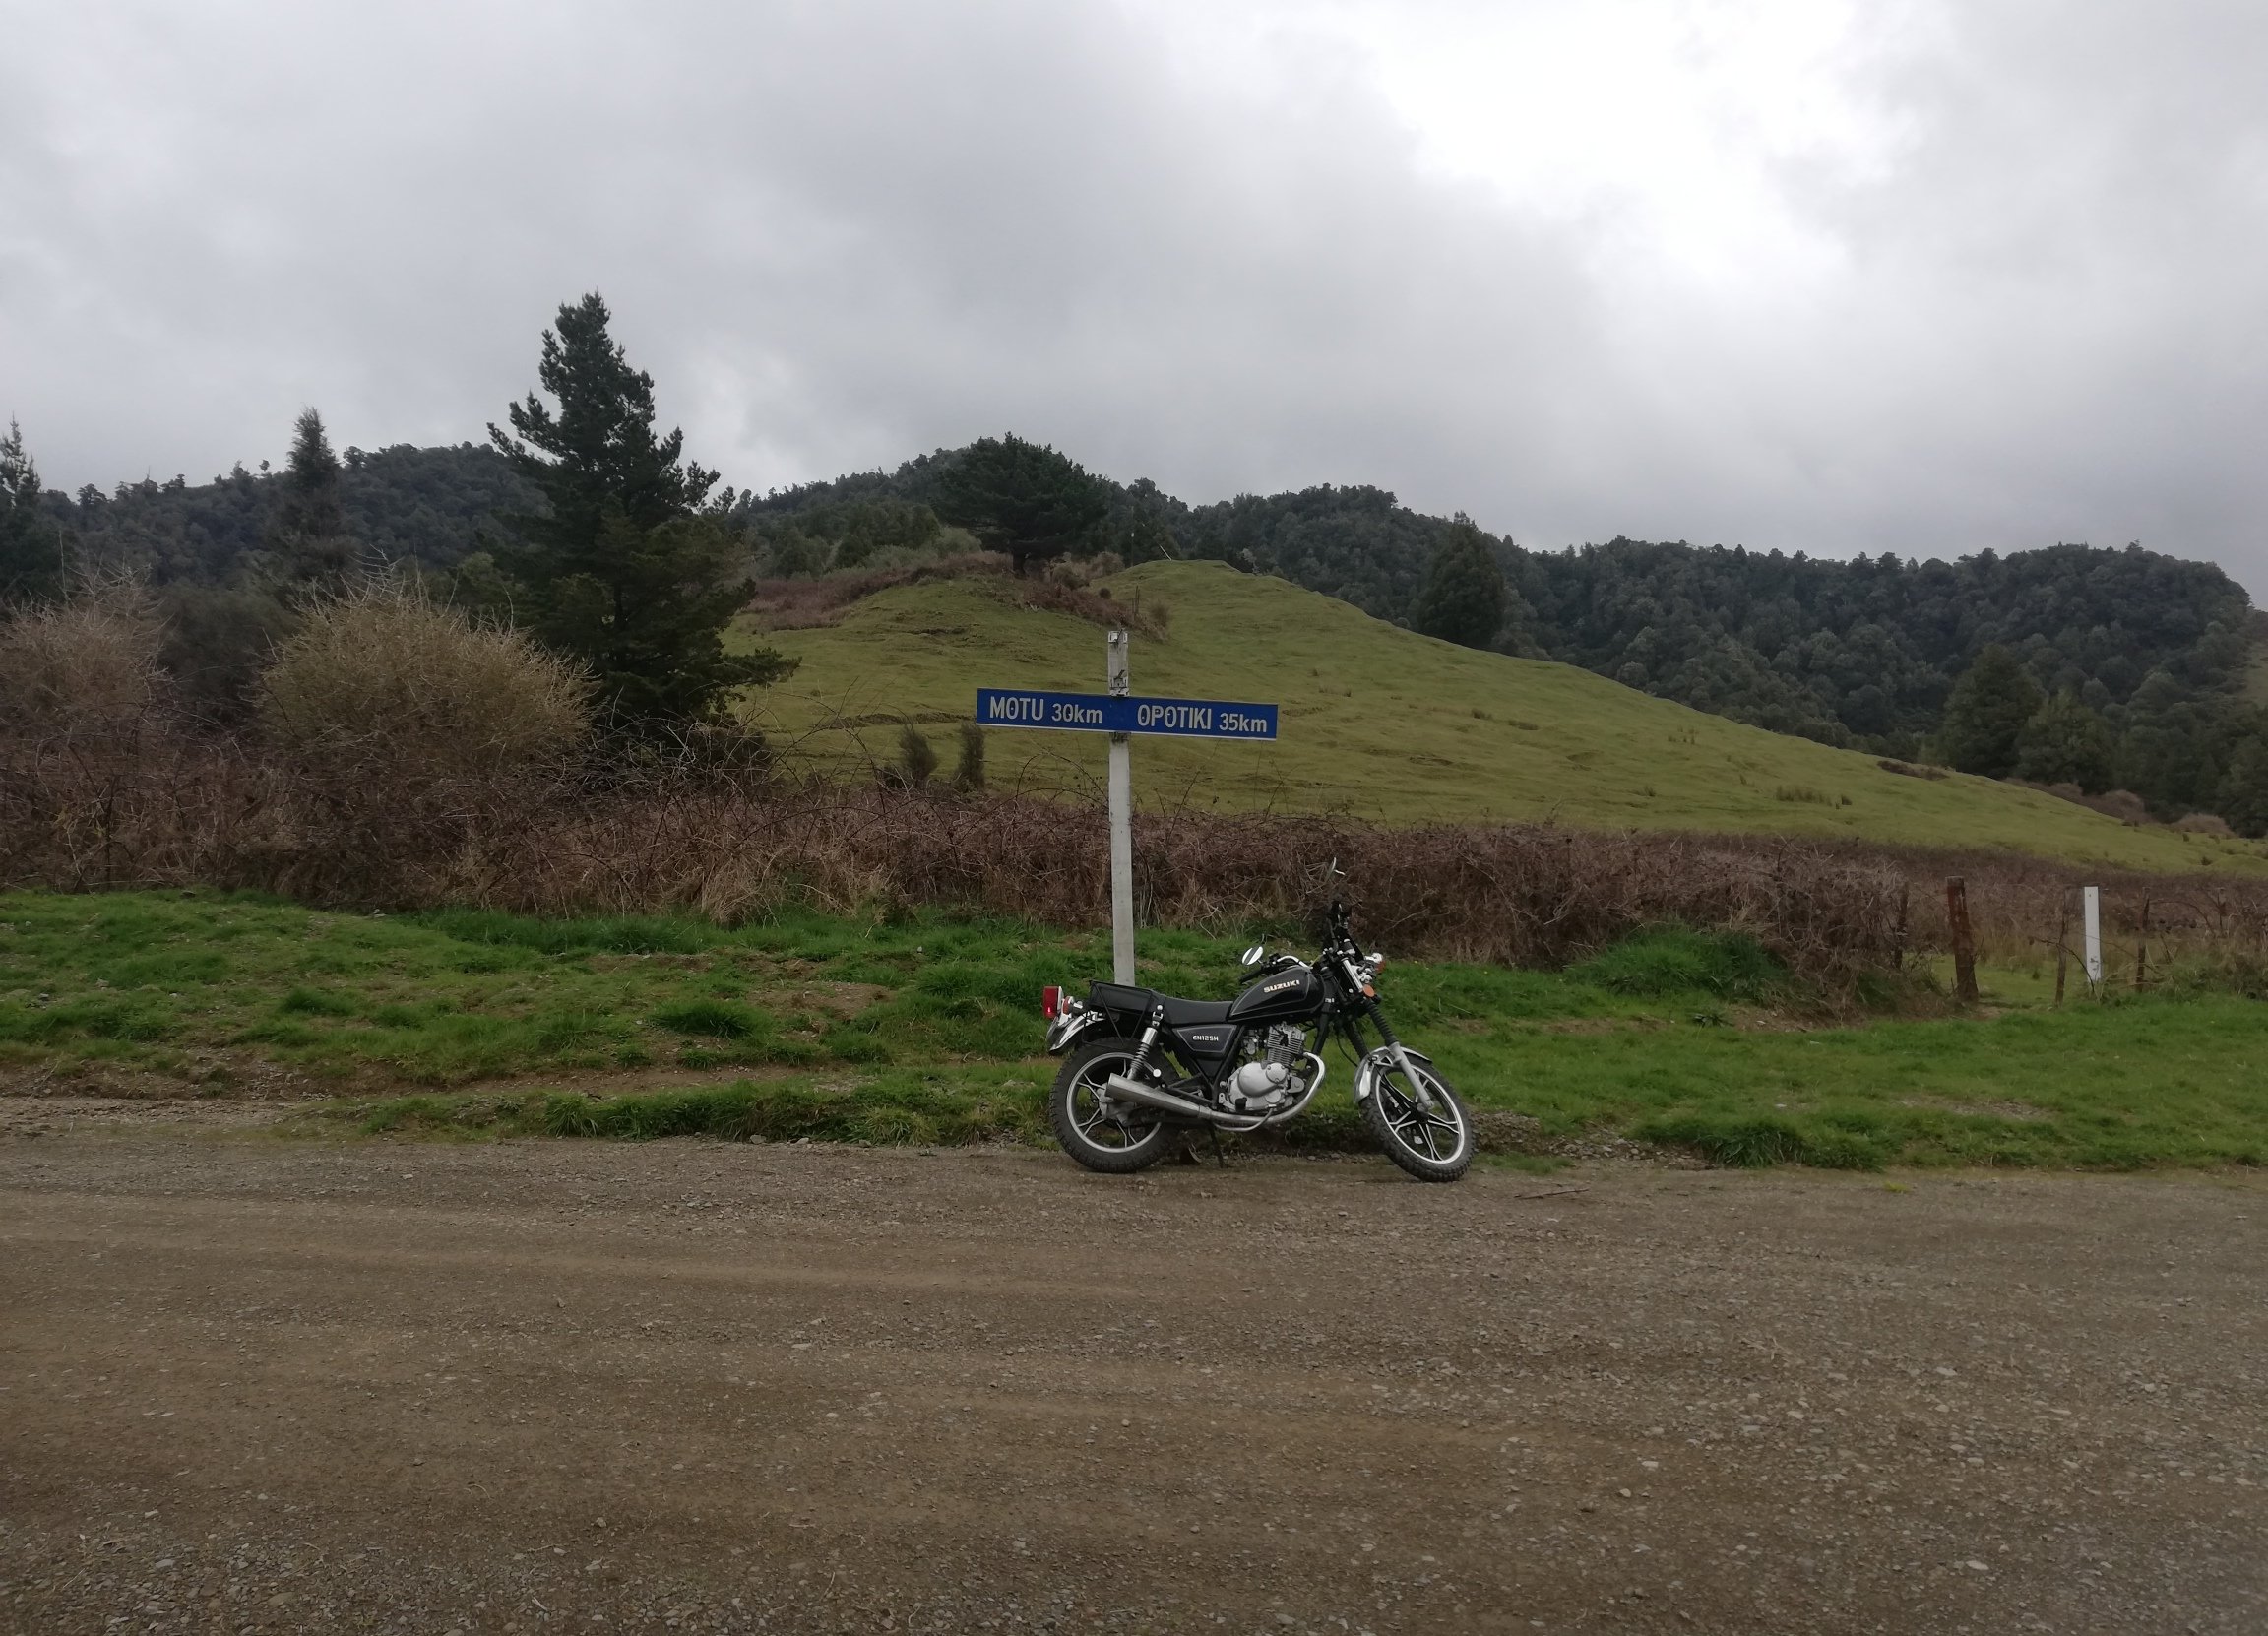
took the old girl for a spin today.. went up the coronet peak road, hooked a doughy then drove to arrowtown. shes slowly getting a bit more blow by, maybe time to slap the ported head on it haha
5 points
-
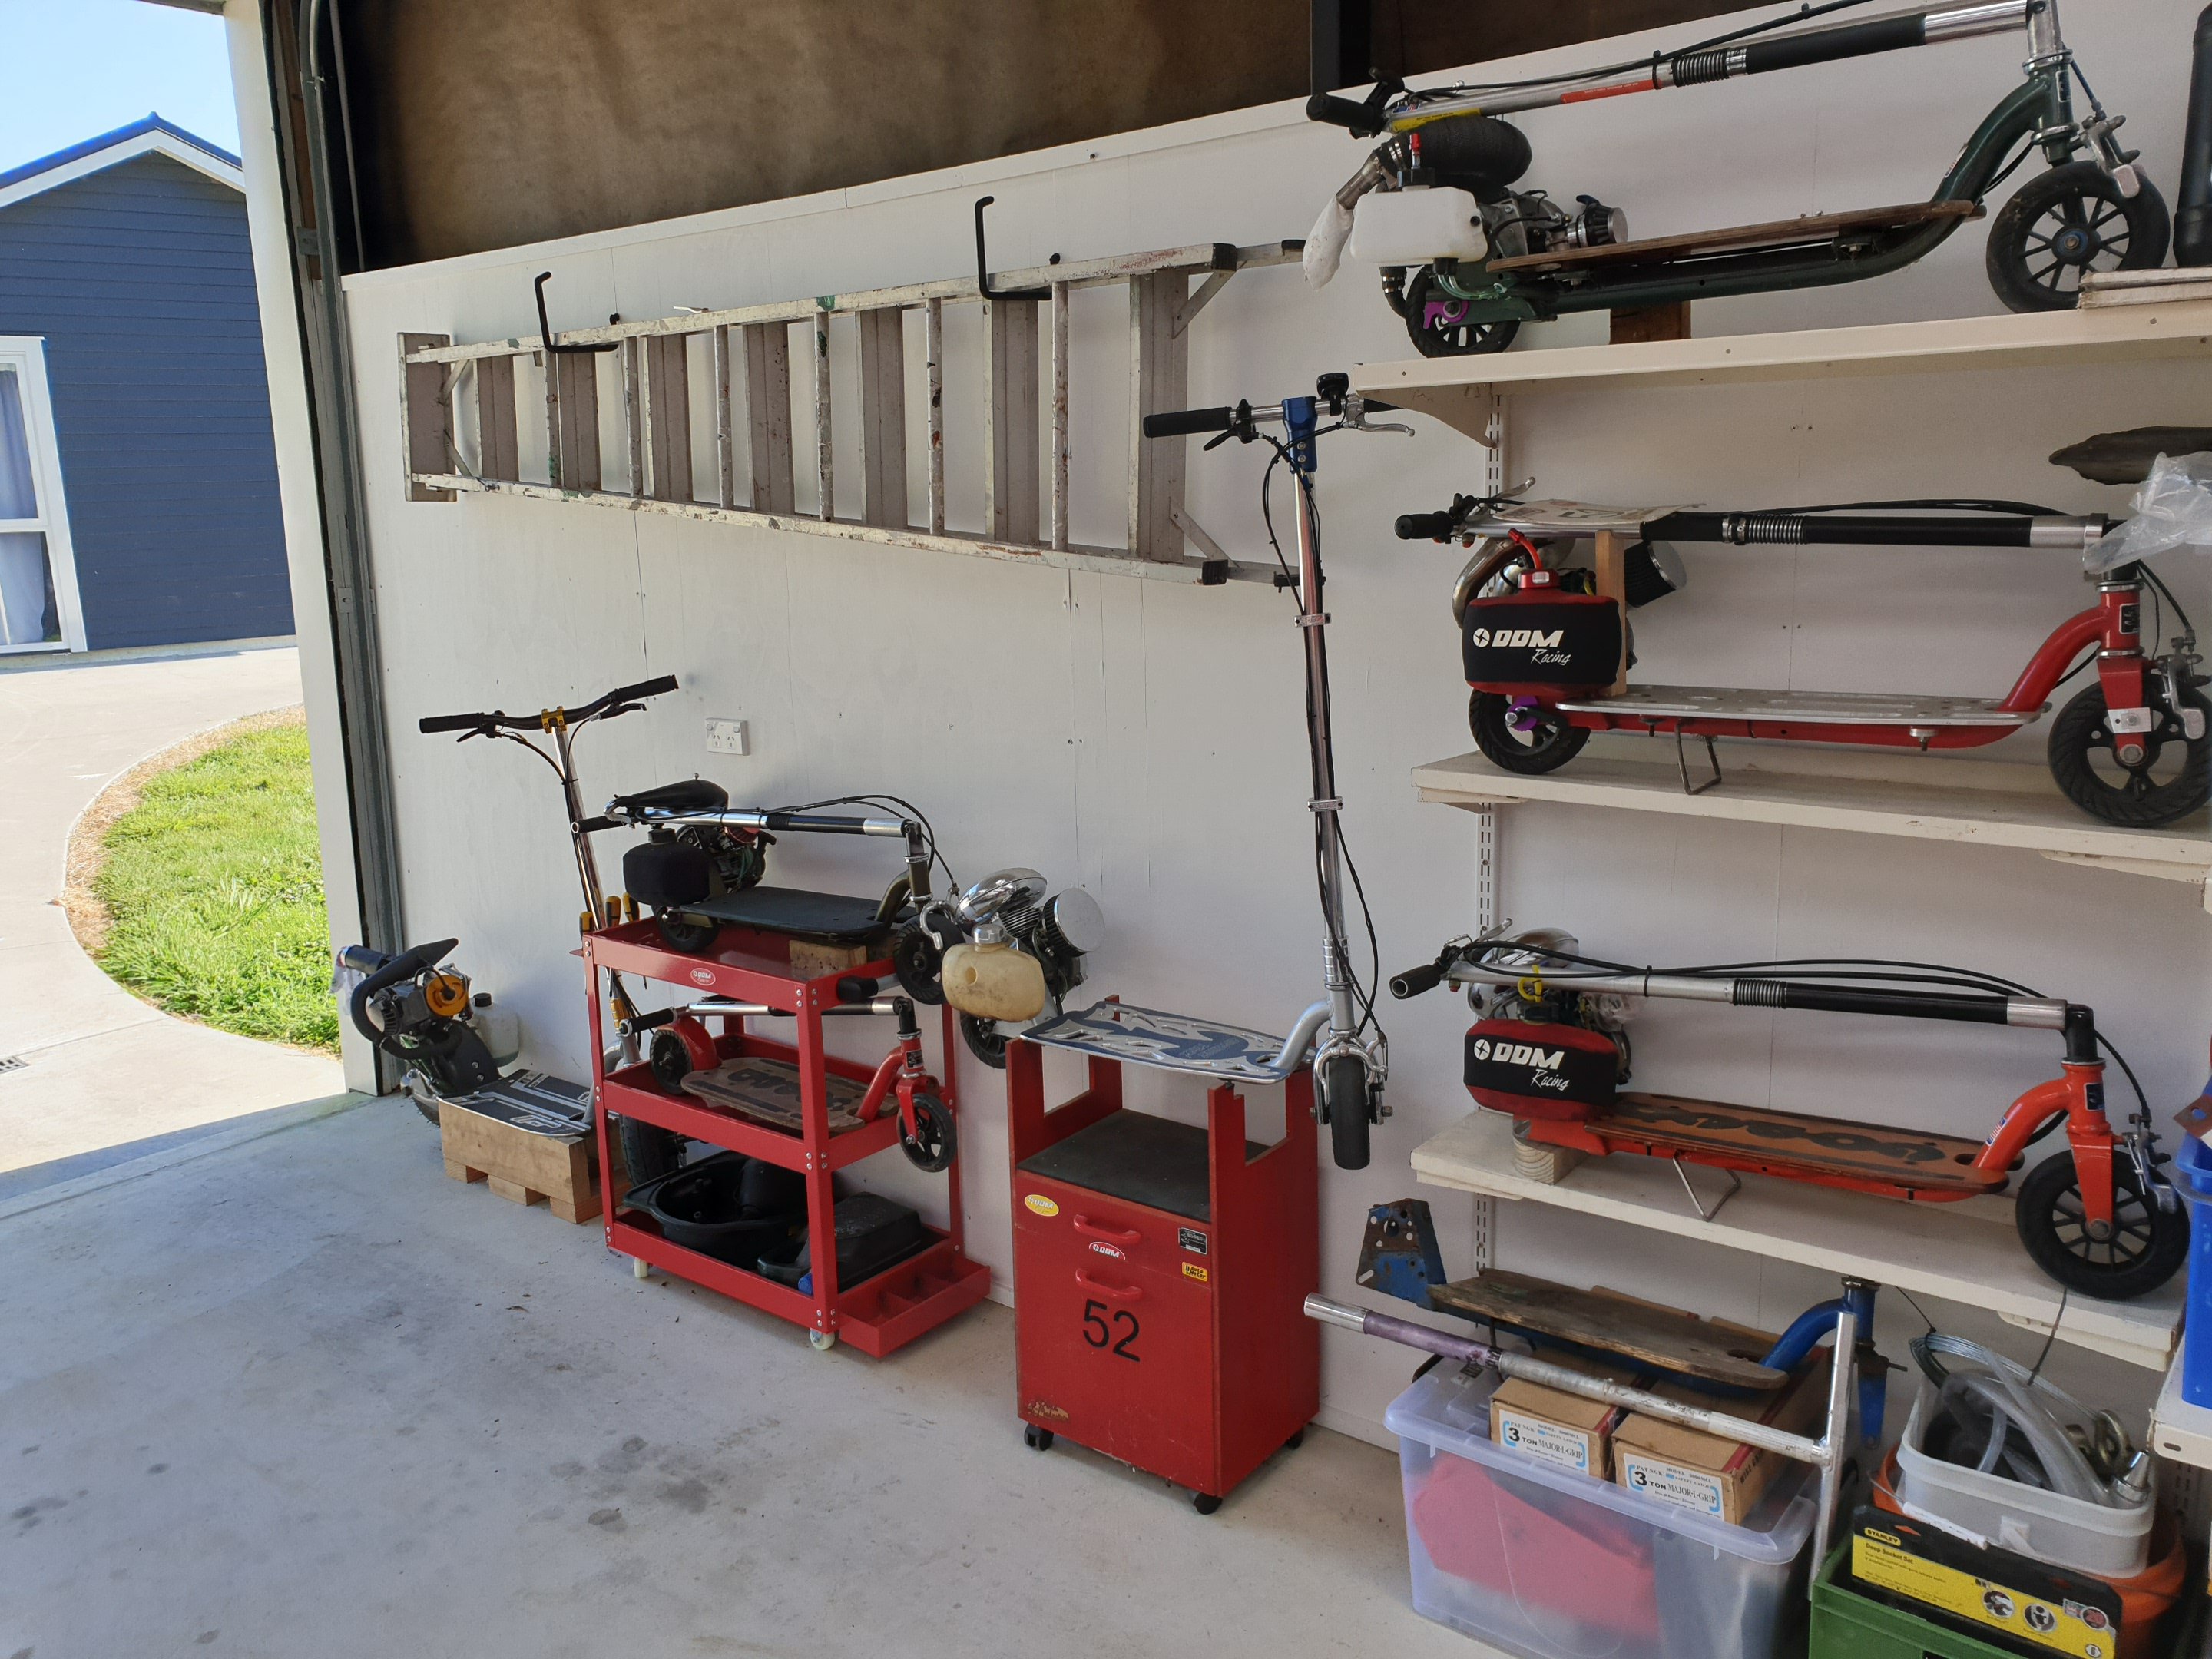
They're breeding like rabbits! Plus another one on the bench as a "work in progress". Waste of money you say - can't argue with that...but some people gamble or smoke that amount in a month, so there's worse habits out there I guess?
5 points
-
2 months later i have all the bits to rebuild the bottom end. the heads are already finished and i have them back. parts, 9 to 1 CR Ross forged pistons (the cunts will not change the value of the parts on the shipping invoice so keep that in mind when deciding to use them or not) eagle H beam rods and ARP rod bolts ARP main cap studs and bolts new genuine Toyota oil pump theres heaps of other shit too but you get the picture. block will now be bored and honed to 88mm. rotating assembly will get balanced and ill get the short block back. then its reassembly time. good days. or maybe not good days. going in to hospital to get back surgery in about a month so that will fuck all progress for a while............... 2019-09-19_07-59-37 by sheepers, on Flickr 2019-09-19_07-59-22 by sheepers, on Flickr 2019-09-19_07-58-23 by sheepers, on Flickr5 points
-
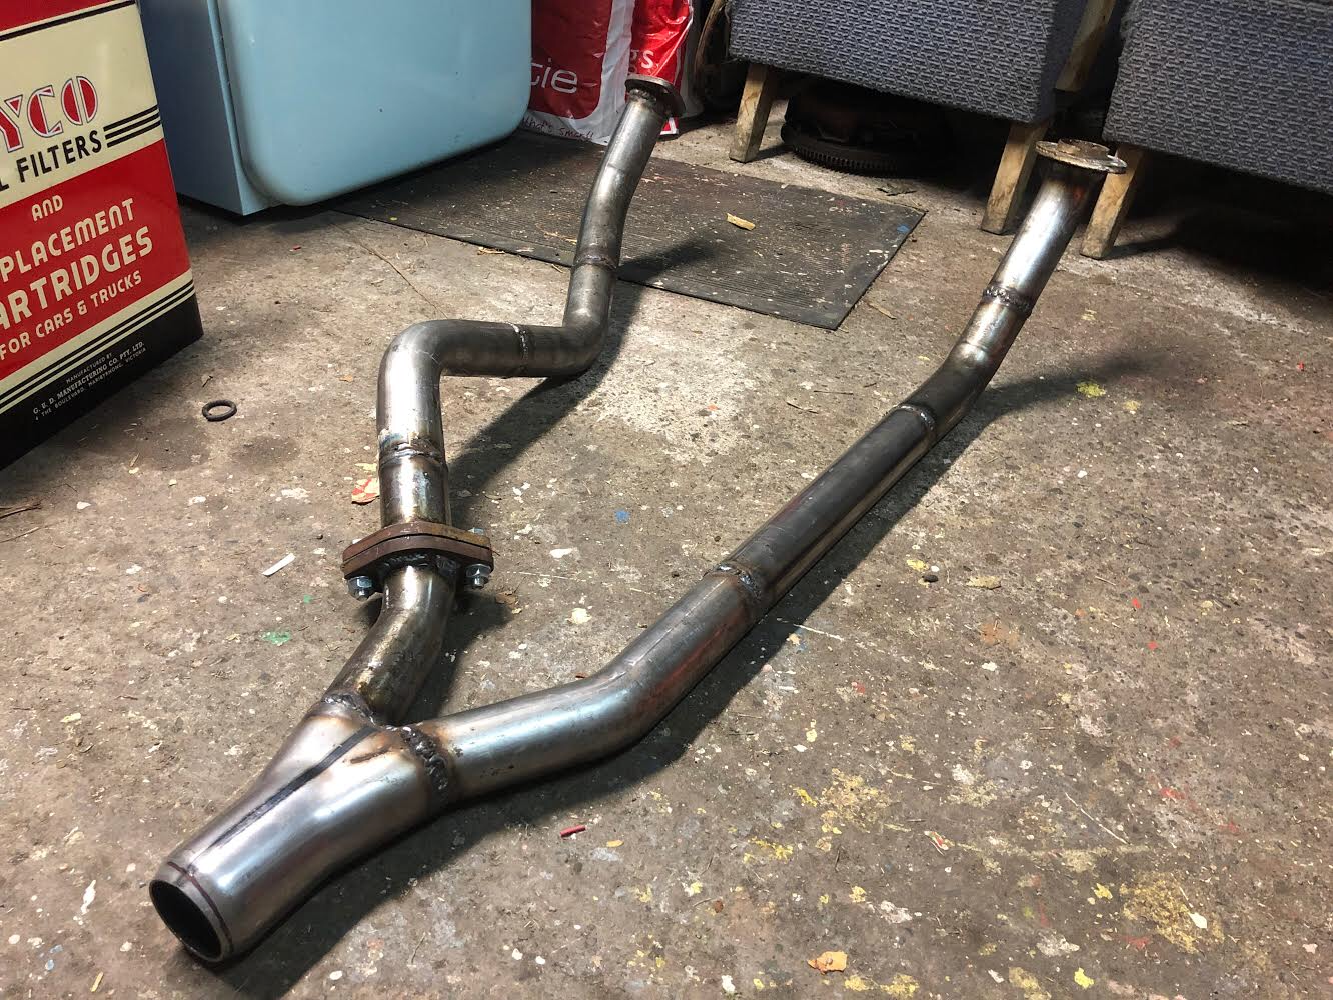
The exhaust front section is pretty much done, I’ll just hook it up to the old system for now and finish the rest on a hoist.
4 points
-
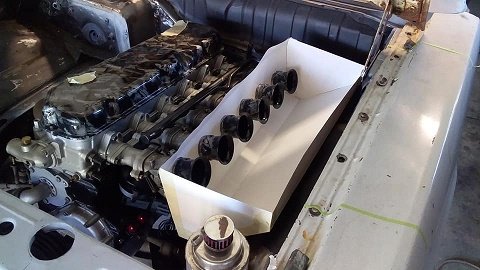
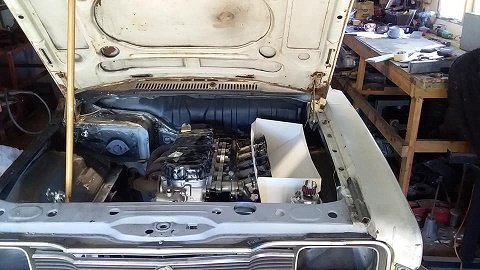
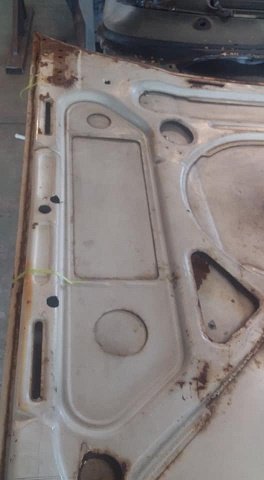
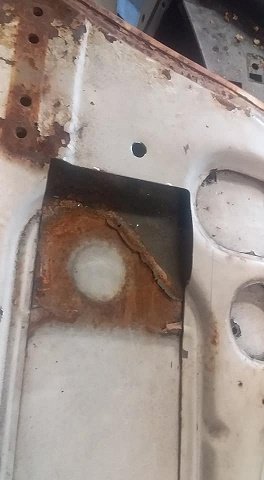
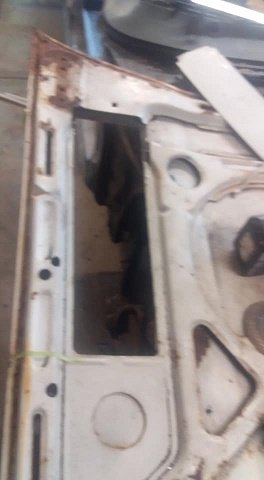
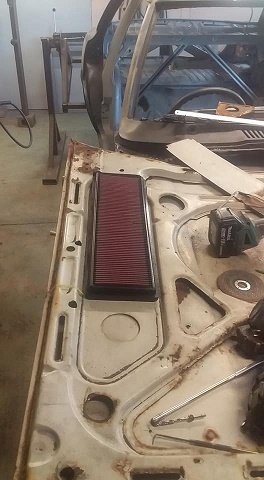
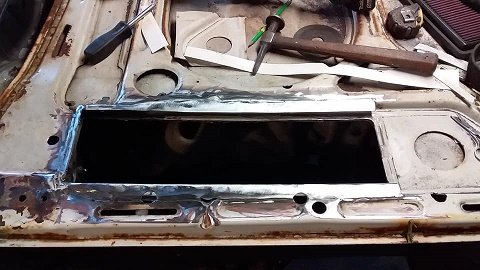
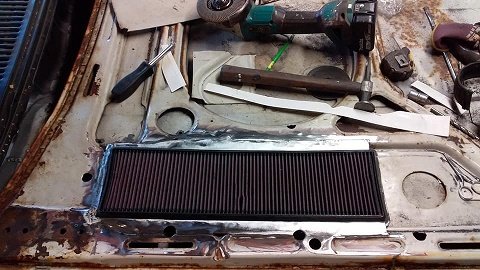
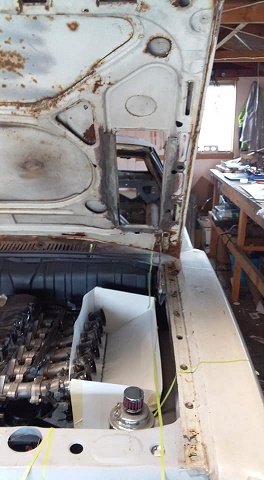
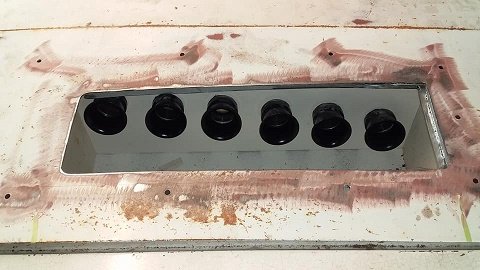
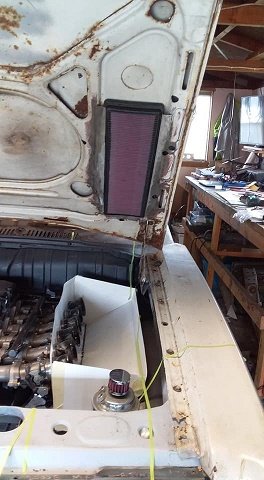
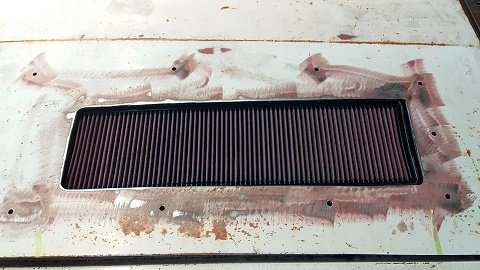
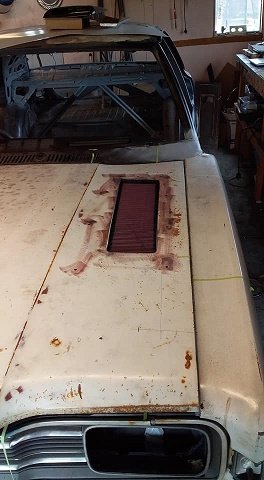
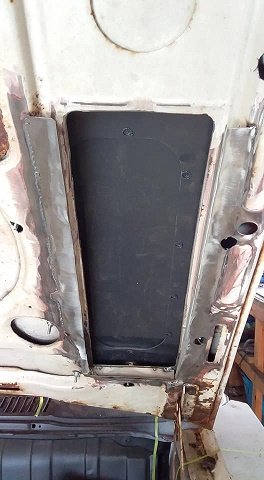
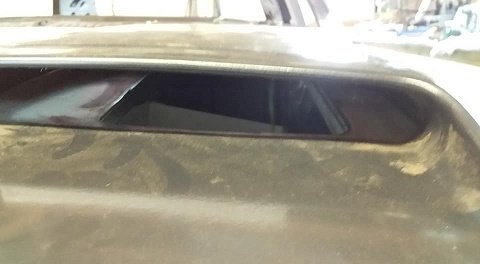
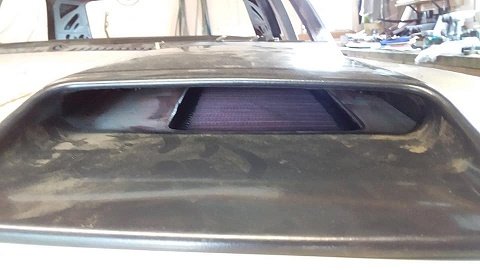
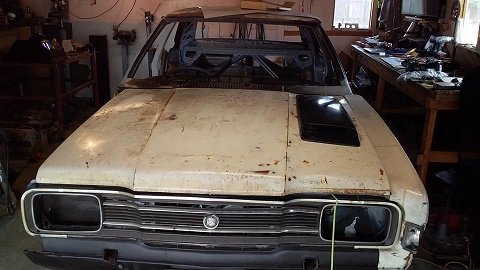
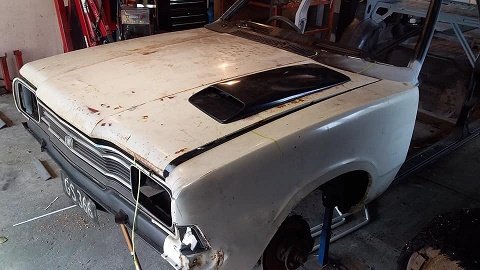
have been thinking about the air feed and was going to weld a recessed plate into the bonnet for the scoop but the bonnet has so many curves i think i might stuff it up.....so had a re think. made a card board airbox to see how much room i have to play with once i had marked out the area on the bonnet and drilled the holes for the scoop i took the bonnet off and flipped it over. the bonnet its self has indentations on both sides and they are almost perfect for the Porsche air filter.. i marked out the area needed for the filter and cut it out....needed to make a wee bit more room. trial fitted the filter again i then made some sides and back so that the filter can now slide in from the front and be held tight and sealed to the bonnet refitted the bonnet and checked the hole for placement filter in and scoop on. im pretty happy with it so far
4 points
-
Back in the game! a literal bootload of 18rg parts just turned up at work. purchased from a mates mates father up north. highlights include; a mint block, that has been professionally honedand surfaced. nearly all rebuild parts. a couple of really clean heads and a partly complete dismantled but complete one. the early "230" head has port work. but ill most likley use the very clean and resurfaced "270" efi head as they had bigger ports anyway and are much stronger with a lower compression, they just had wimpy cams, so the 230 cams may find there way in there too. a slightly lighted flywheel, which will probably be ideal for a street car. once the crown is shipped off to panel in the next week or so, ill hook into building this engine. i need to do alot of measuring and thinking about what combo of parts to run though.3 points
-
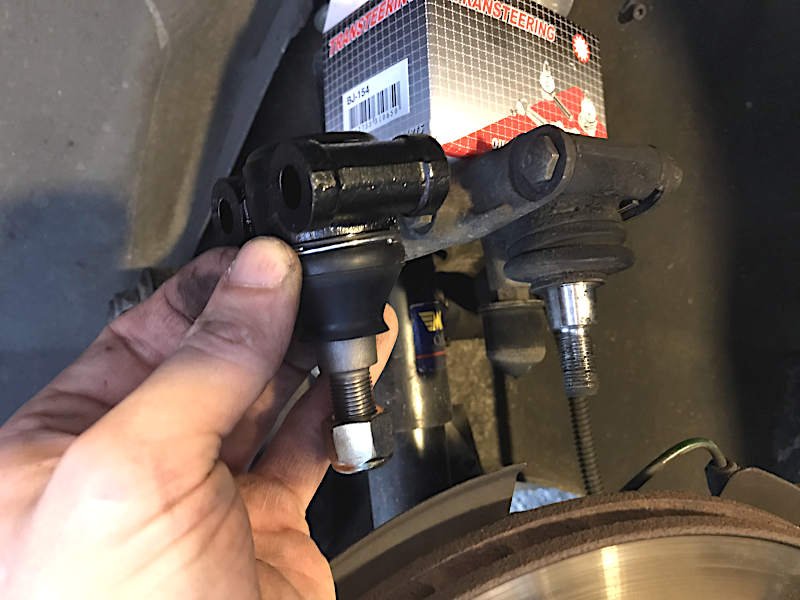
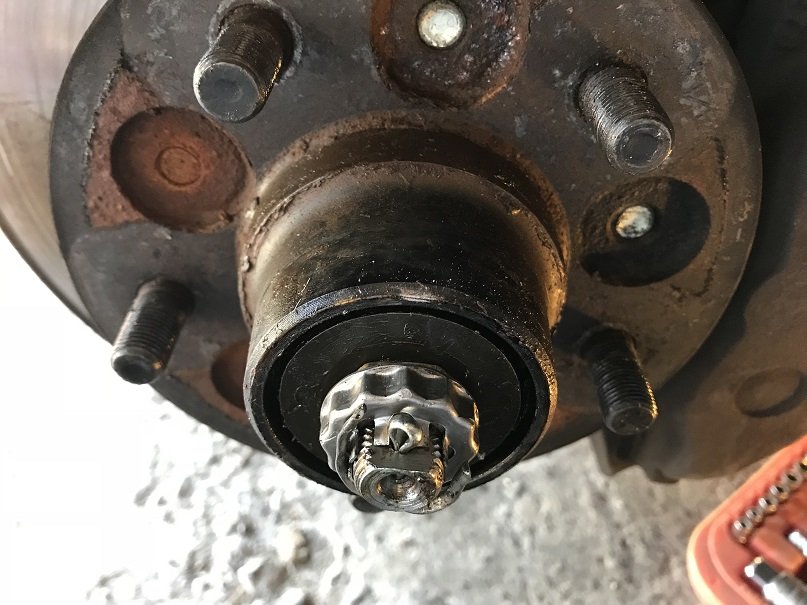
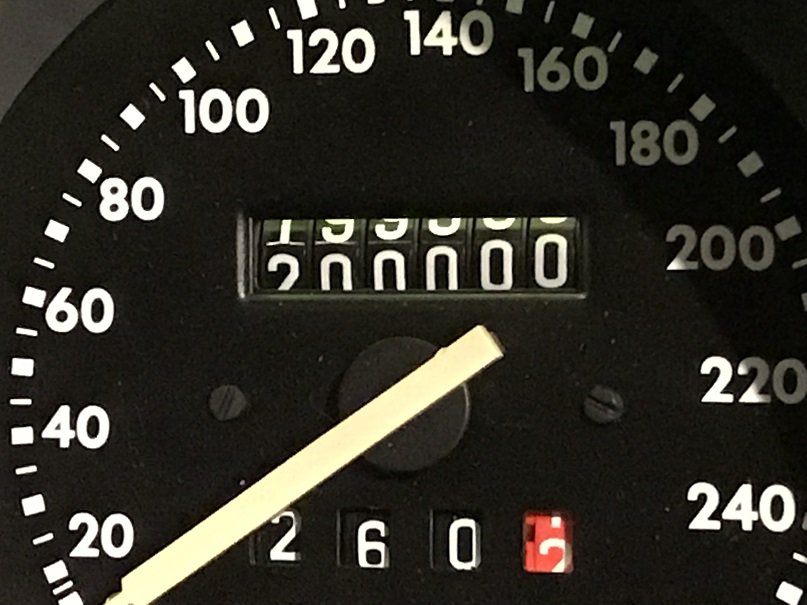
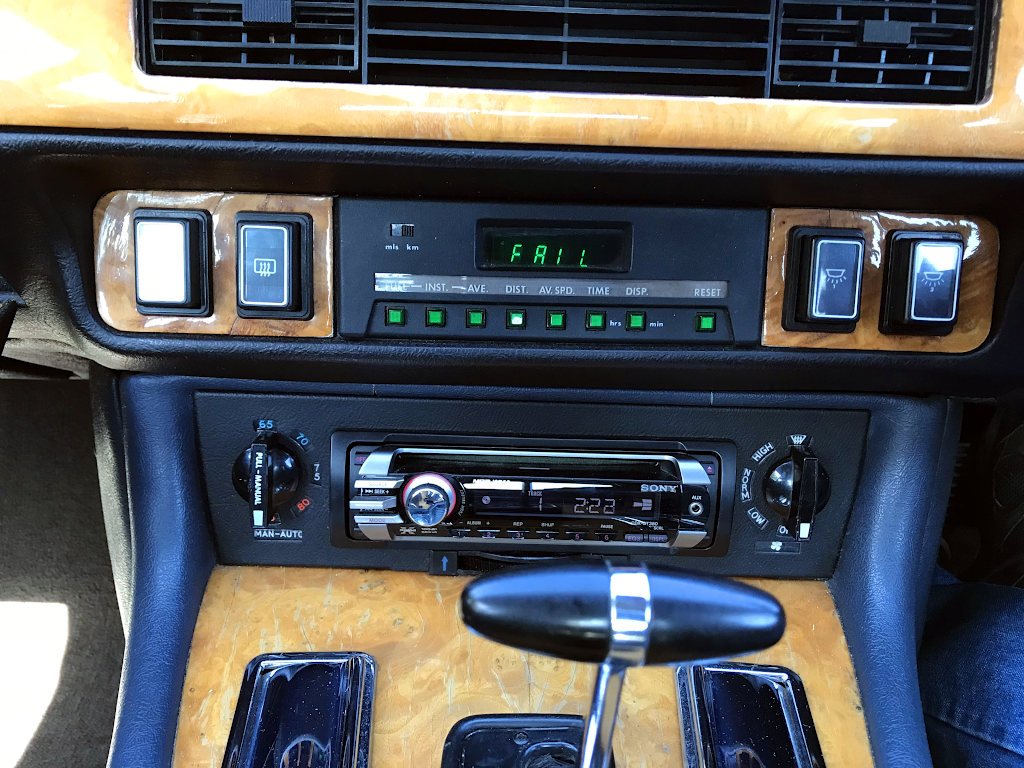
So I did the upper ball joints as well.. ..but it wasn't those. The push/pull play at 6 and 12 o'clock was still there. So I looked at how to adjust the wheel bearings.. I was expecting it to be horrible but it was easy, and now the play is gone. Should have done that first. Alas, the vibration is still not quite gone. It's probably just something I have to live with in a British car which has made it all the way to..... 200,000kms. So I got a new obsession instead. The engine doesn't run all that well - it has a random half-stumble at idle and low rpm.. You can see the misfires by watching the shaking of the motor, and although it appears to smooth out if you raise the rpm sufficiently, the higher engine speeds could possibly be disguising the problem. The car has also never really started that well from cold. I checked the spark plugs and they looked amazing to someone who has never owned fuel injection before. I looked for bad connections and vacuum leaks, since the ECU directly reads manifold vacuum (in V12 cars, the ECU is in the boot and its vacuum line has to run the whole length of the car, because why not... ). Nothing stood out though. Several tanks of fuel system cleaning pills didn't help either. Today I took off the airflow meter and cleaned it, and this did make an improvement. The raise in engine speed on startup is more pronounced, and the idle speed seems to have raised slightly which makes the car coast better / makes it not decelerate as aggressively when you lift off the accelerator. But just like my reduced 80kph vibration, the shaky running issue's still detectable. I'll try a compression test and then randomly change every ignition system part, idle valve, fuel pressure regulator and injector before giving up in 6 months from now. The Jag let me know what it thinks of my diagnostic skills:
3 points
-
so 1 x generic falcon tap and some cutting and welding and we're back in business. tap is in the engine bay and its fairly ugly but there isn't fuck all i can do about that. 2019-09-19_08-00-10 by sheepers, on Flickr 2019-09-19_08-00-03 by sheepers, on Flickr 2019-09-19_07-59-55 by sheepers, on Flickr 2019-09-19_07-59-47 by sheepers, on Flickr3 points
-
Those are very good reasons. I just work on the theory that accidents happen to other people and not me...so I should be sweet as:)2 points
-
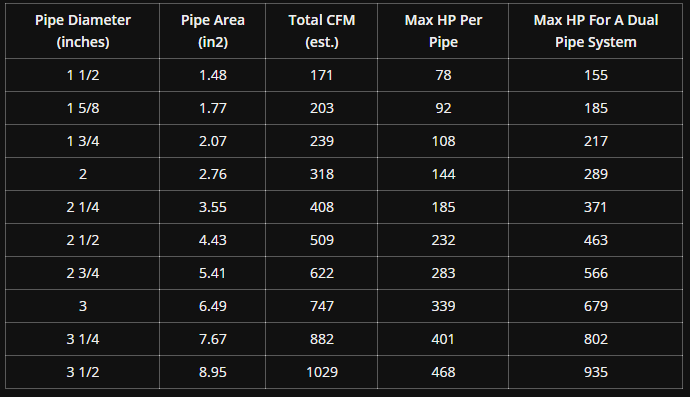
3" would likely be fine if you look at power output for a 5.0 LS. https://m.roadkillcustoms.com/determine-proper-exhaust-tubing-size/ this has a good chart.
2 points
-
I'd want belts in the rear A) for back seat passenger safety and just as importantly B.) for the front seat passenger safety. Guess that would mean cert time, but worthwhile IMO. /devils advocate2 points
-
2 points
-
2 points
-
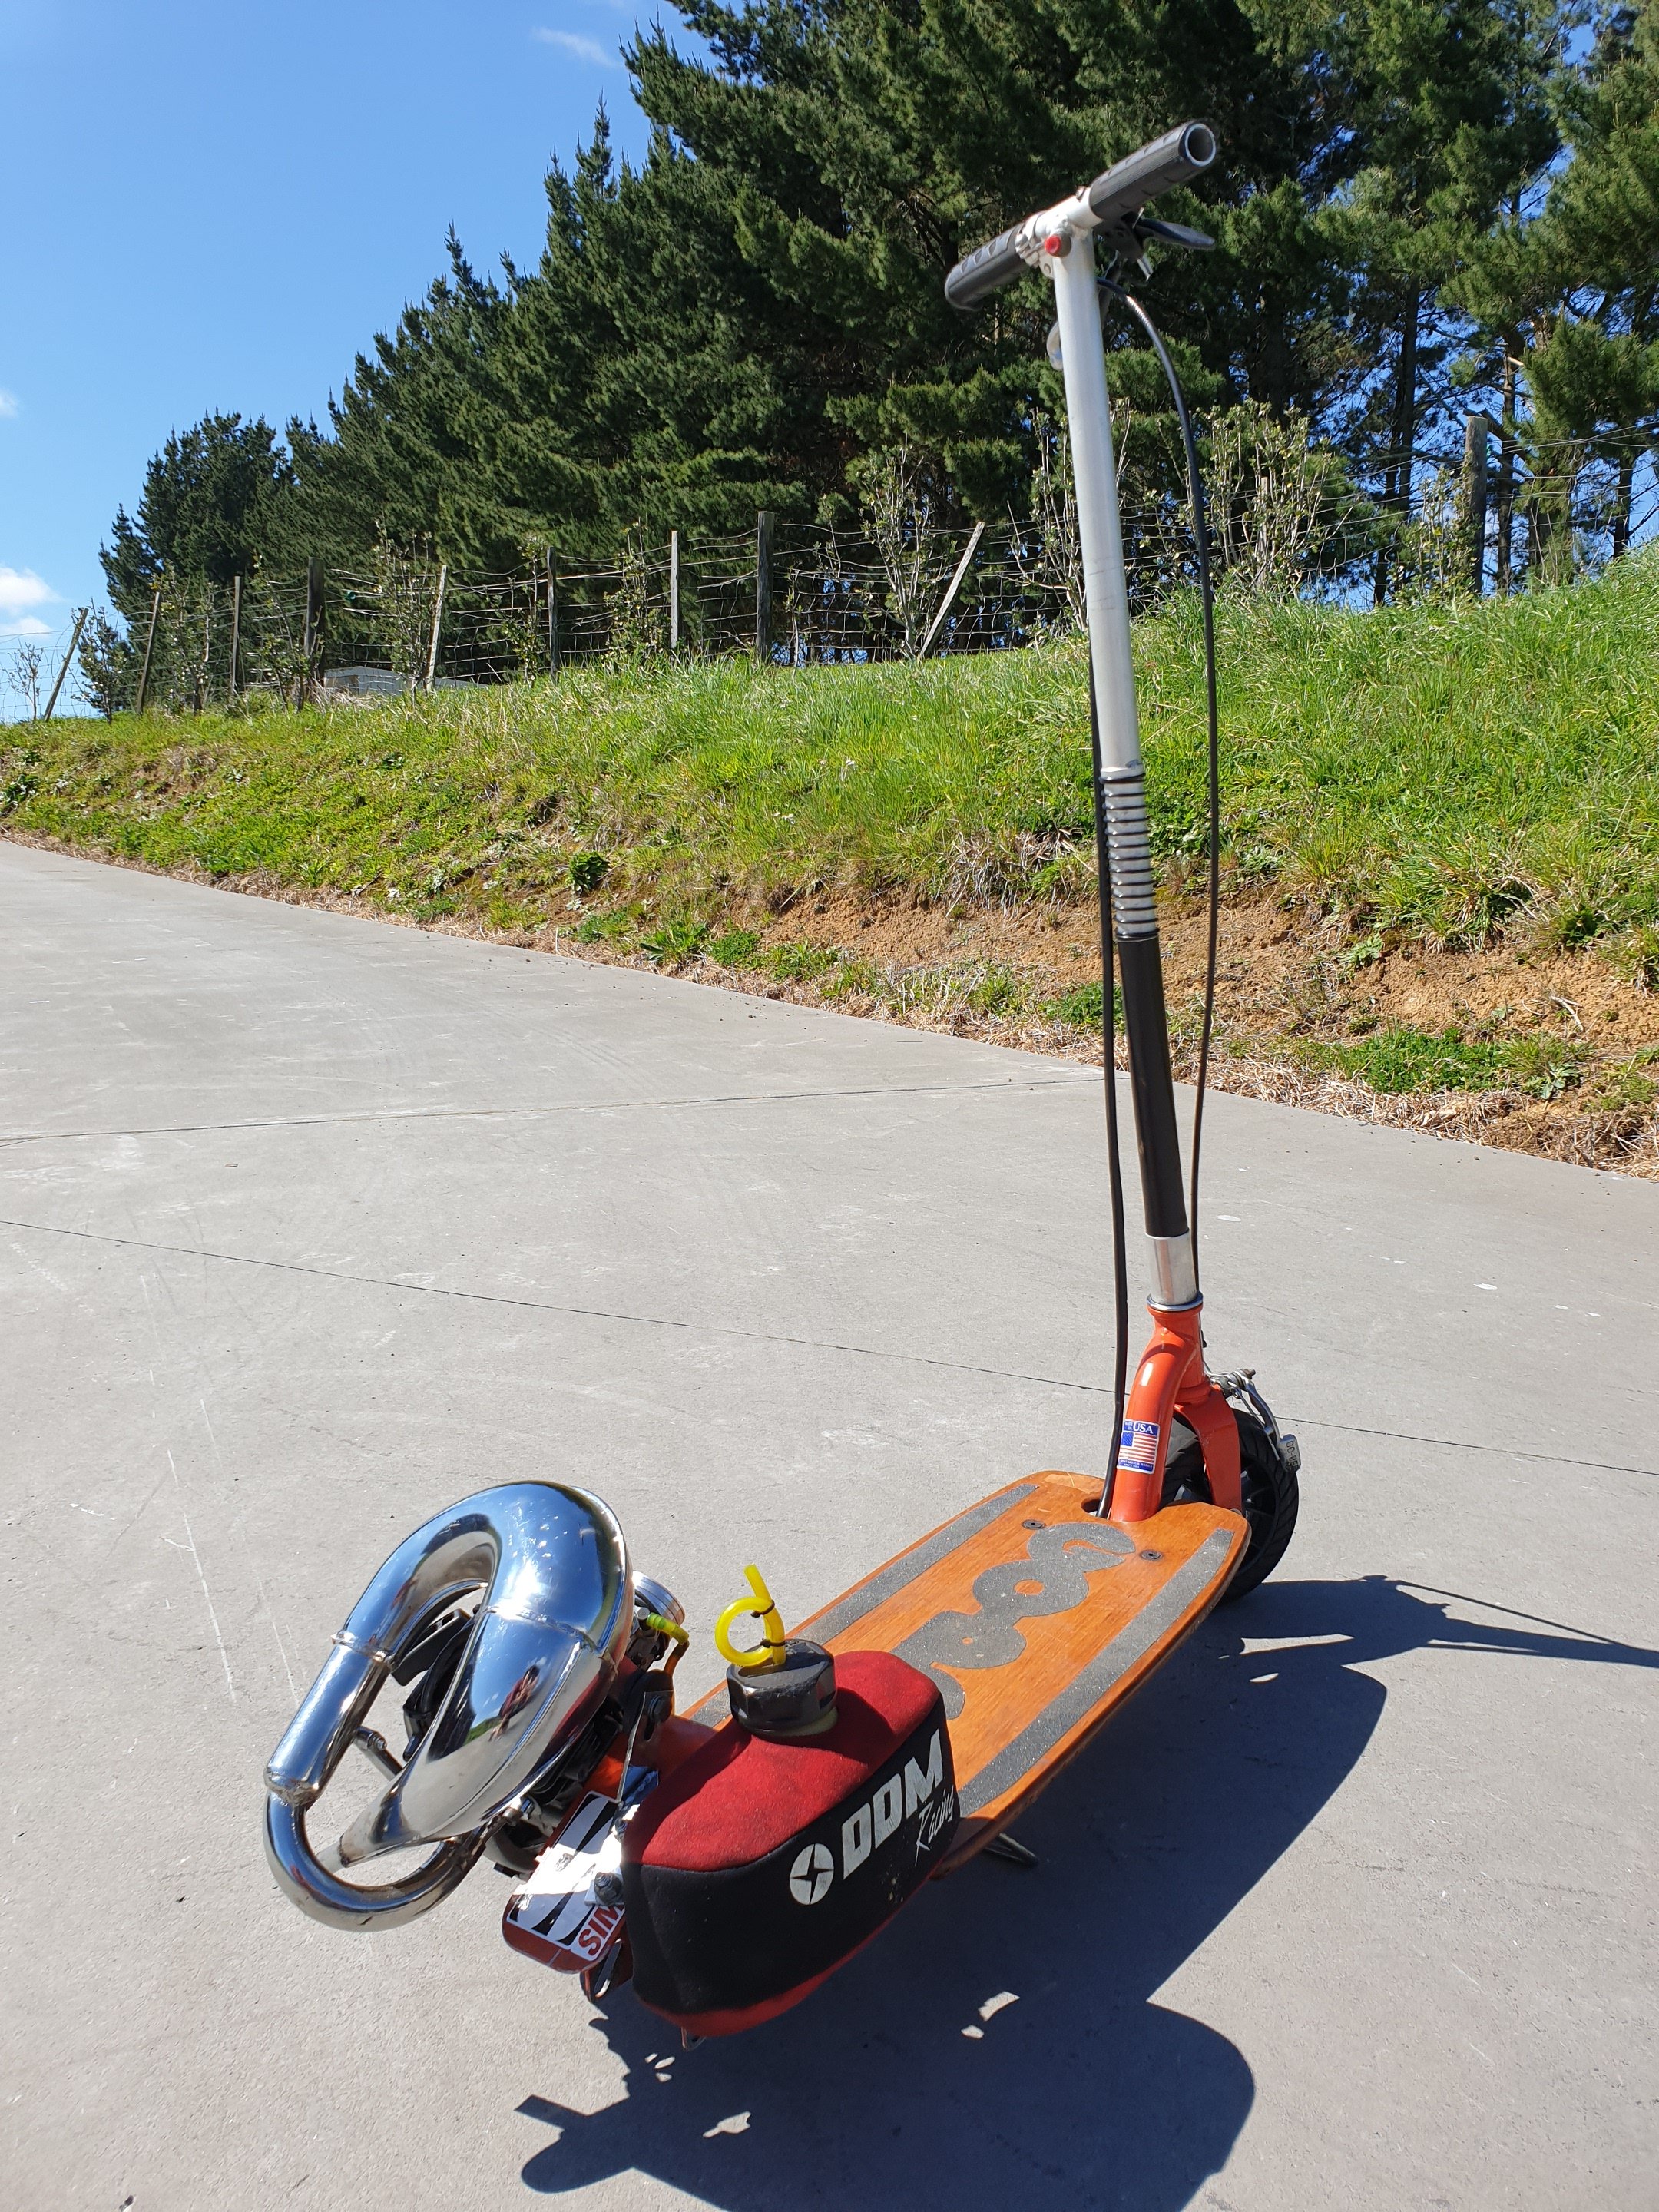
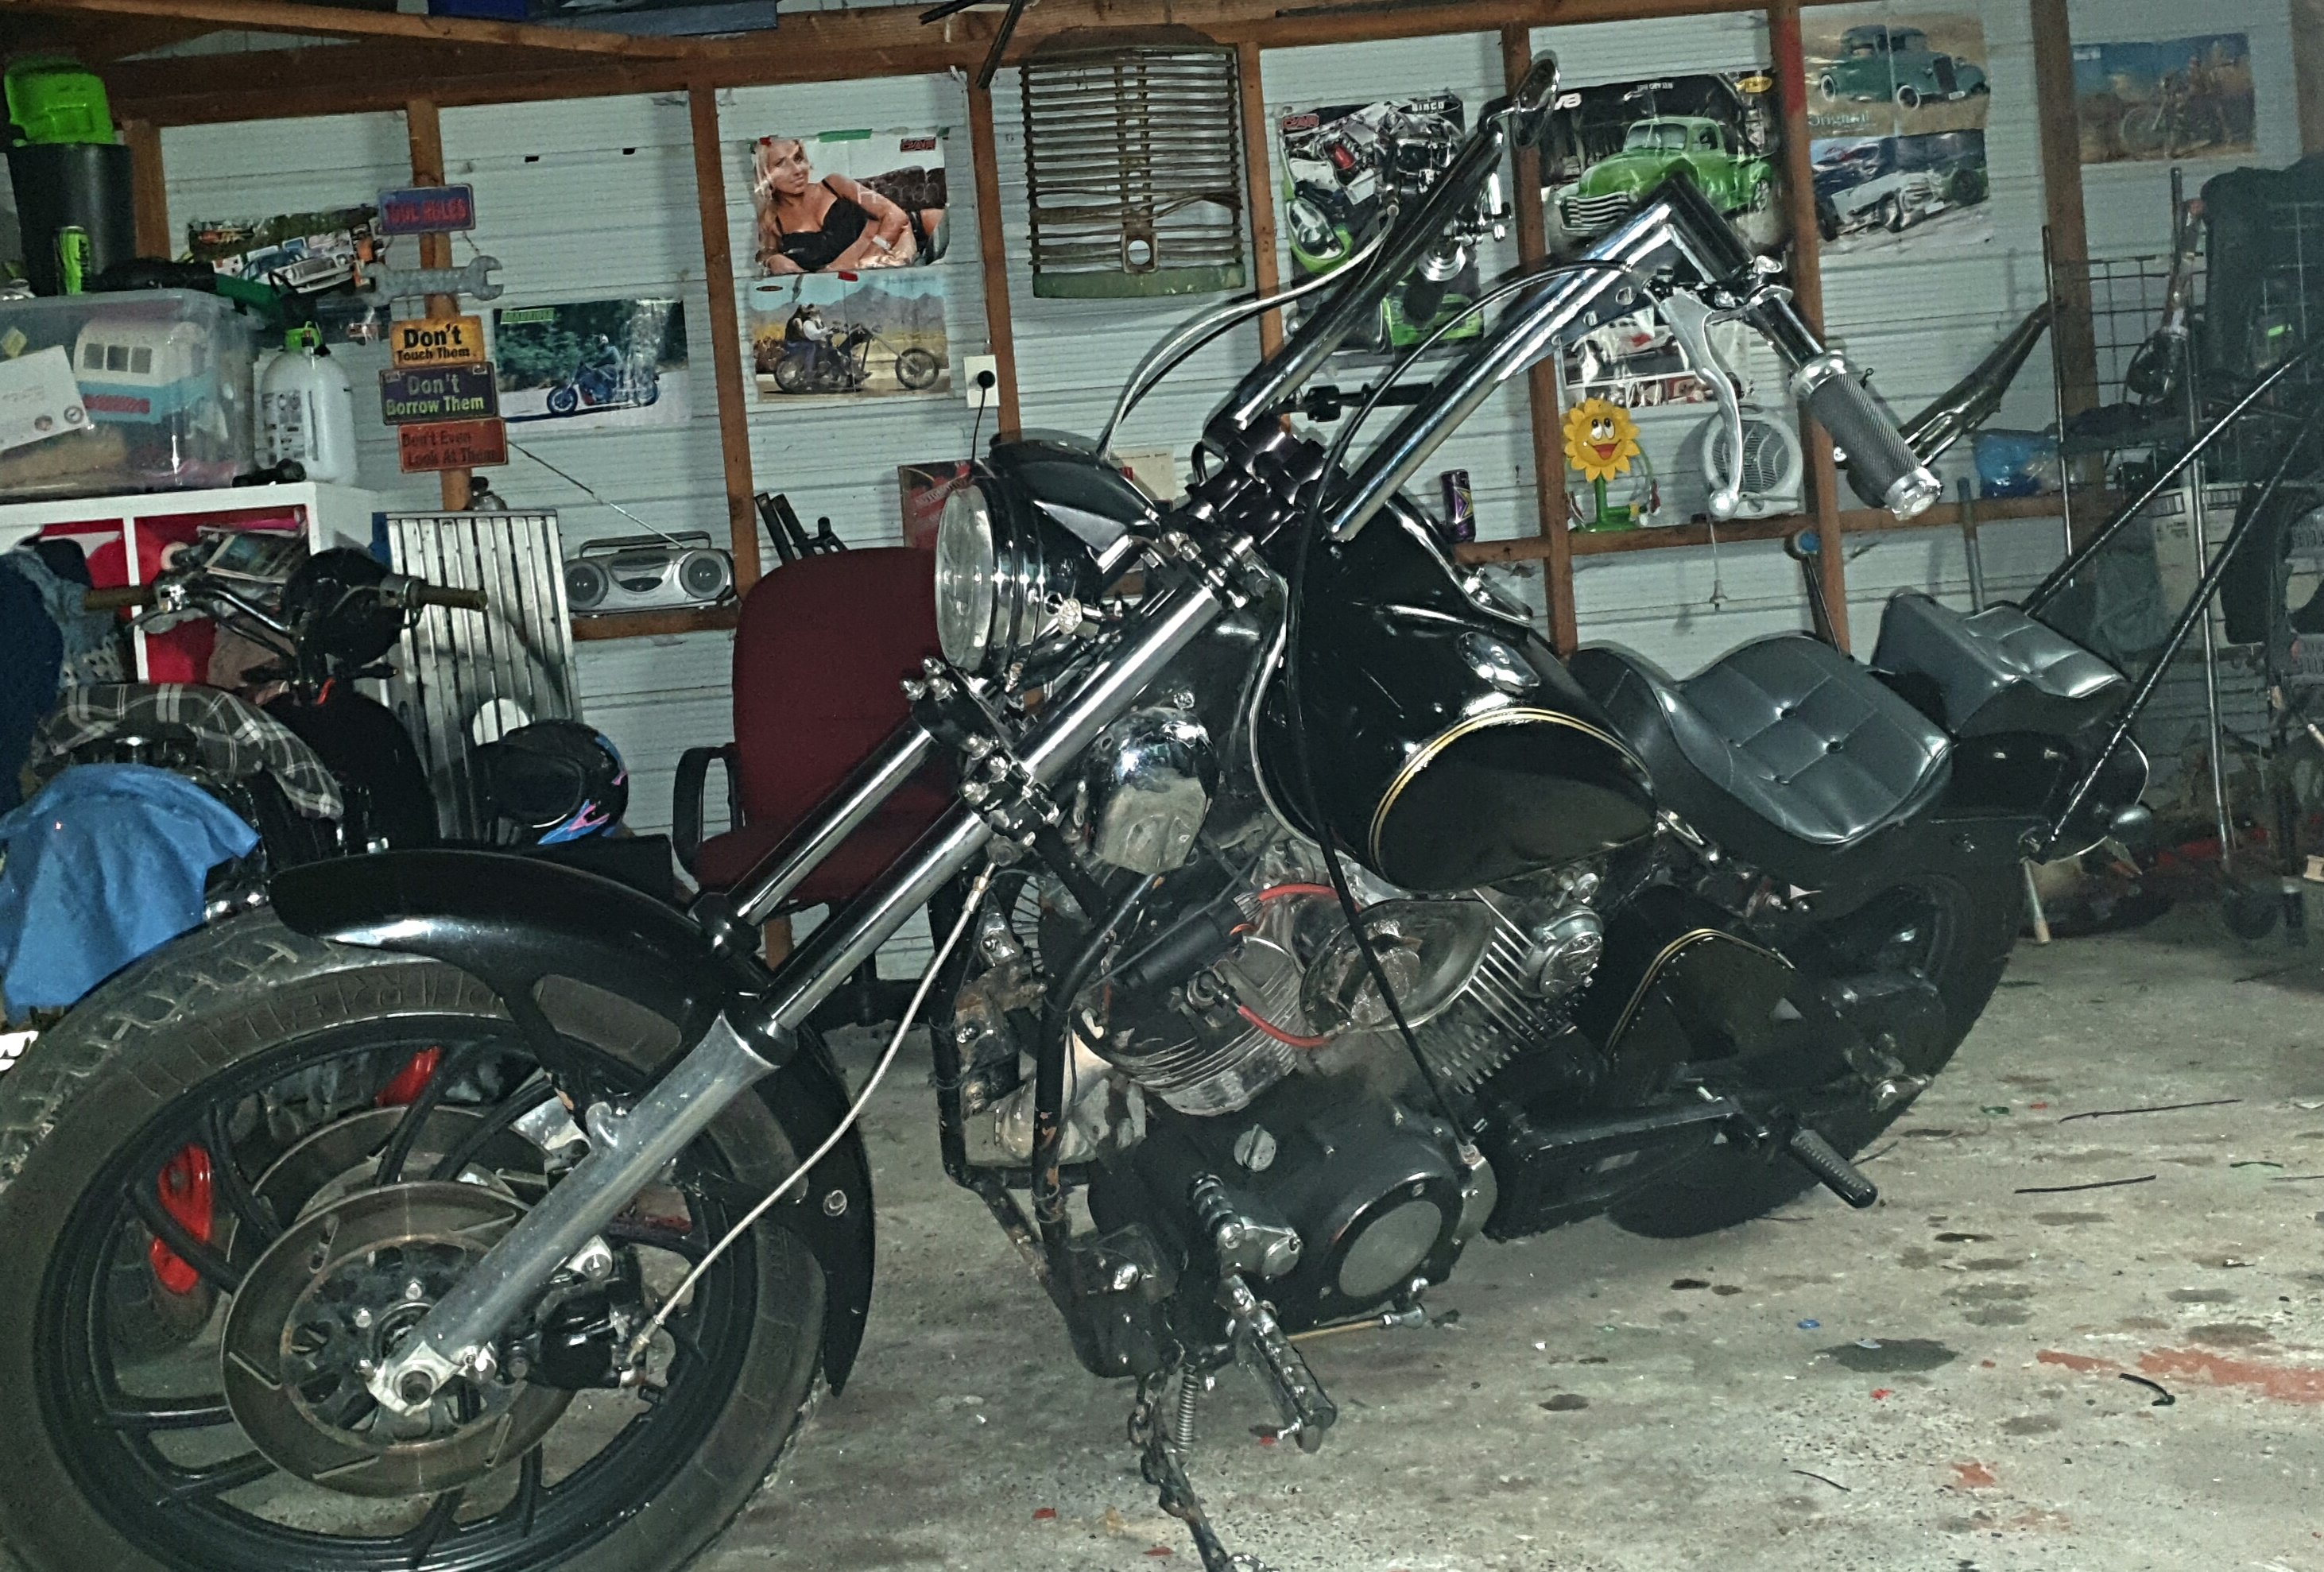
Made this today, put together out of left over parts that have accumulated over the years doing other projects. It's been sitting in a pile of bits for almost a year on my work bench getting in the way everytime I try to do something... Pretty happy with it, making something out of nothing. Still needs a rear wheel, but I started it up and it sounds wicked!
2 points
-
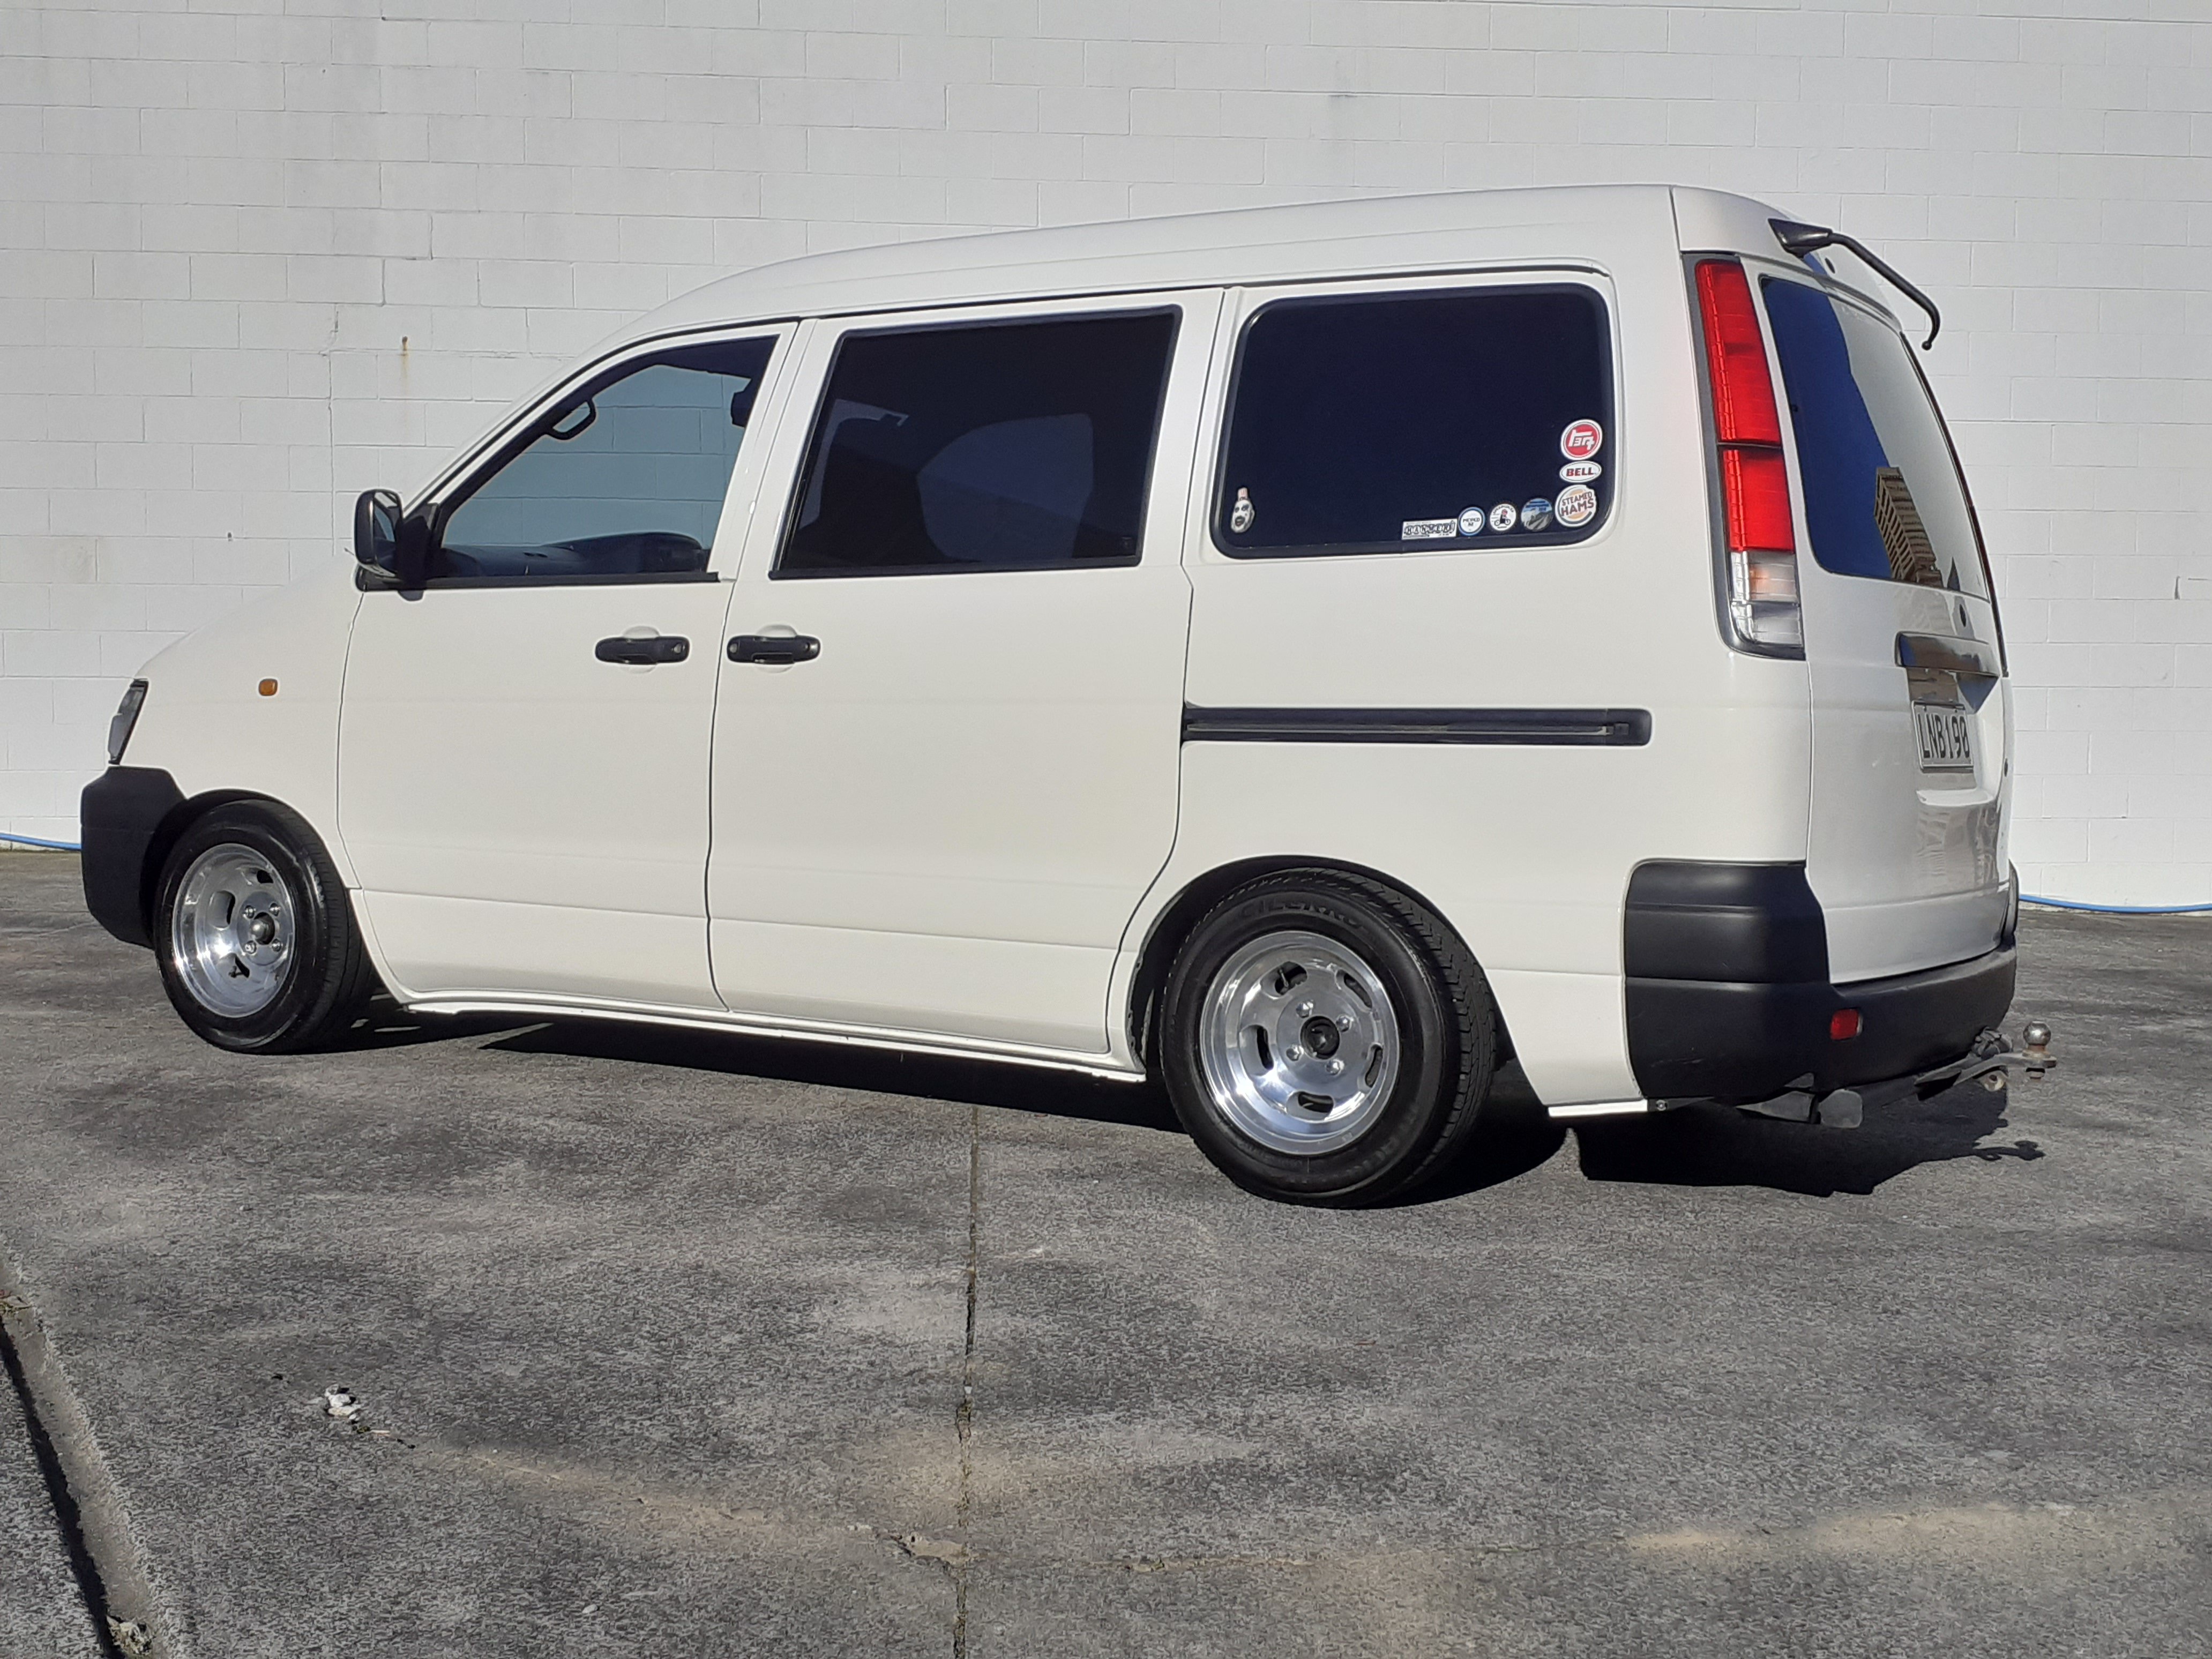
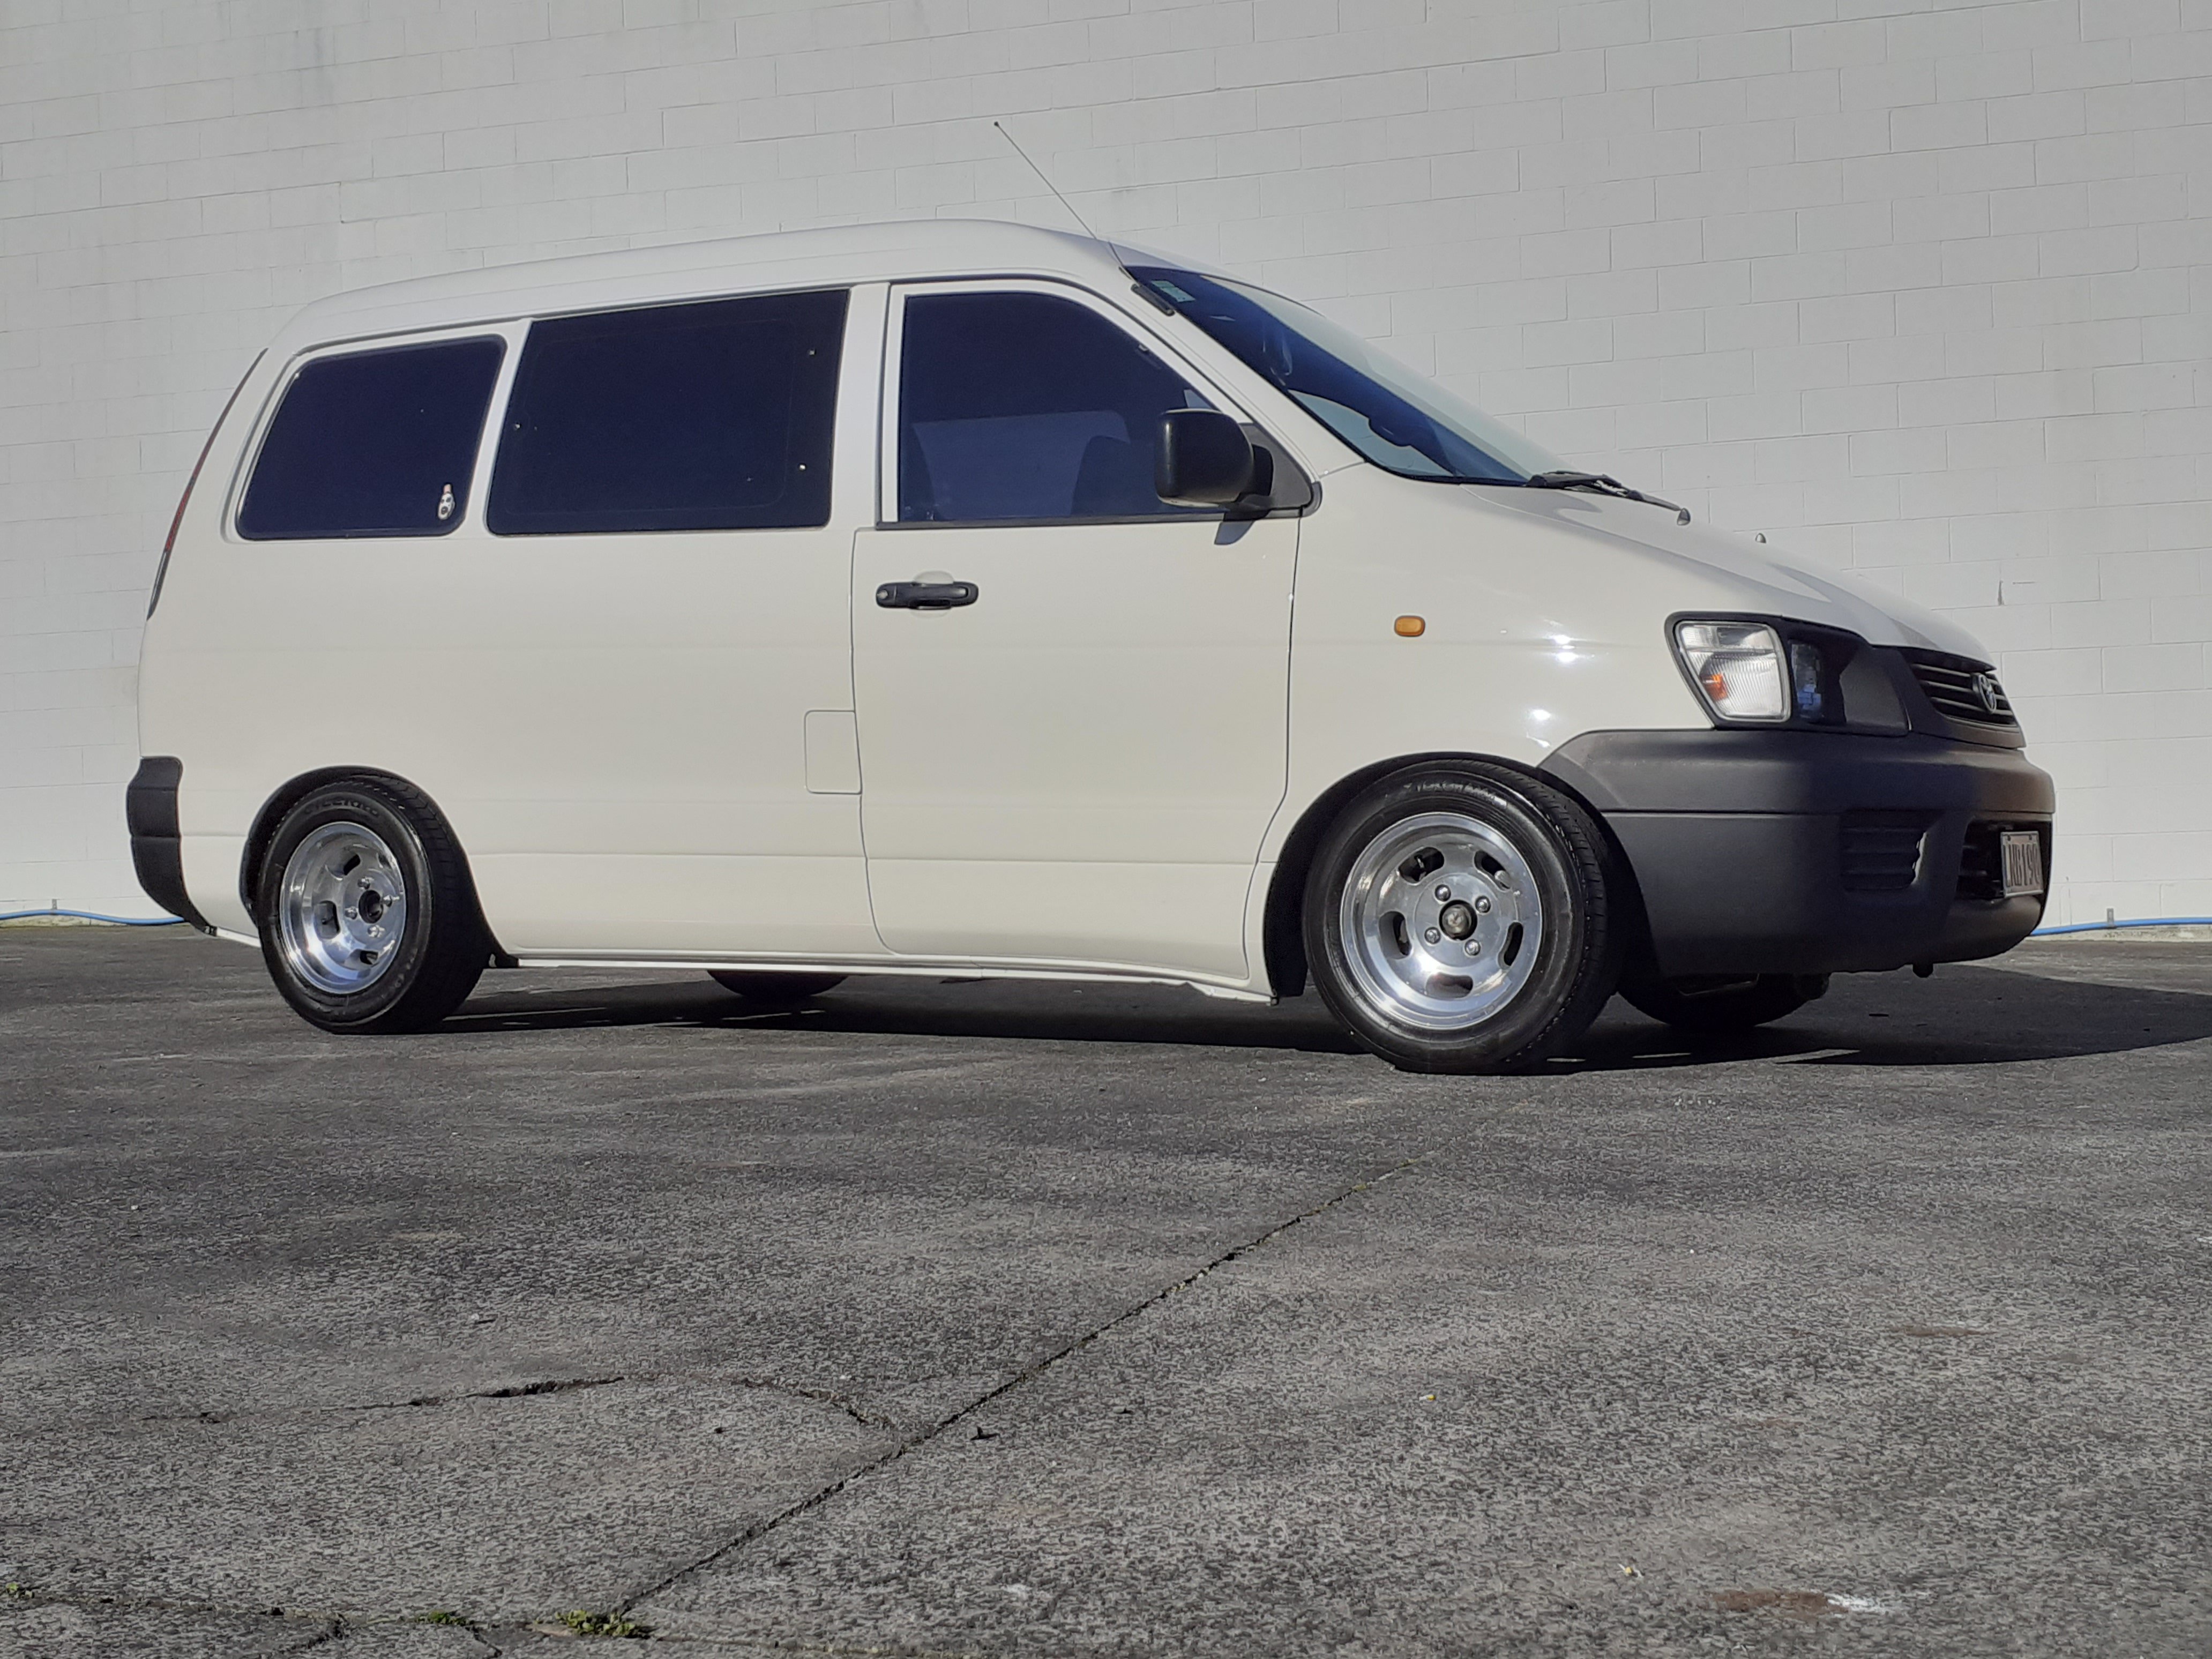
Gave it a wash and took some better pics to bore you all with.
2 points
-
2 points
-
i did think about that and looked at a lot of different pics. but i have had a picture in my head for a long time now of the look i want....and its getting there. i fully understand it wont be everyone's cut of tea but it will be the mk3 iv always wanted...1 point
-
Have made them out of a bit of everything over the years, inc pink bats i pinched from my oldies ceiling. But yeh, the above is a good idea for the .. above reasons. Have used straight chop strand fiberglass on a lot of them. they do burn out after awhile but not as fast as you would think. closer to the engine, the faster it will happen. the stainless wool around the perf first is a good idea. different sizes and shapes will be better at shutting up different tones. don't ask me what size does what because i don't know. but its the reason why its good to use at least 2 different size/ shaped mufflers in same system. for the ls1 3" will be fine if its stock. The time to ignore the above chart, is on na engine with big cams and overlap. Edit: yet another top fail1 point
-
The hole in the bonnet looks well done, neat setup but I can't help but think it would look a whole lot cooler if it had a louvred section instead like oldschool race bonnets? I mean, you've already cut the hole so it is what it is but maybe worth a look?1 point
-
I don’t think performance is that important. He did say it was somewhere around 150kw or something haha Have looked at a few mufflers but they’re all really expensive for something that looks alright or just looks terrible for cheaper. So really contemplating making my own like I usually do!1 point
-
Is performance important? I think a single 3" is far too small for an LS1, but it'll be OK if it's just a cruiser. AdrenalinR make the best mufflers, but if you can wait for USA shipping, Vibrant is a good option.1 point
-
Still got the gearshifters at all? These look far better condition than the last ones I saw in a paddock lol1 point
-
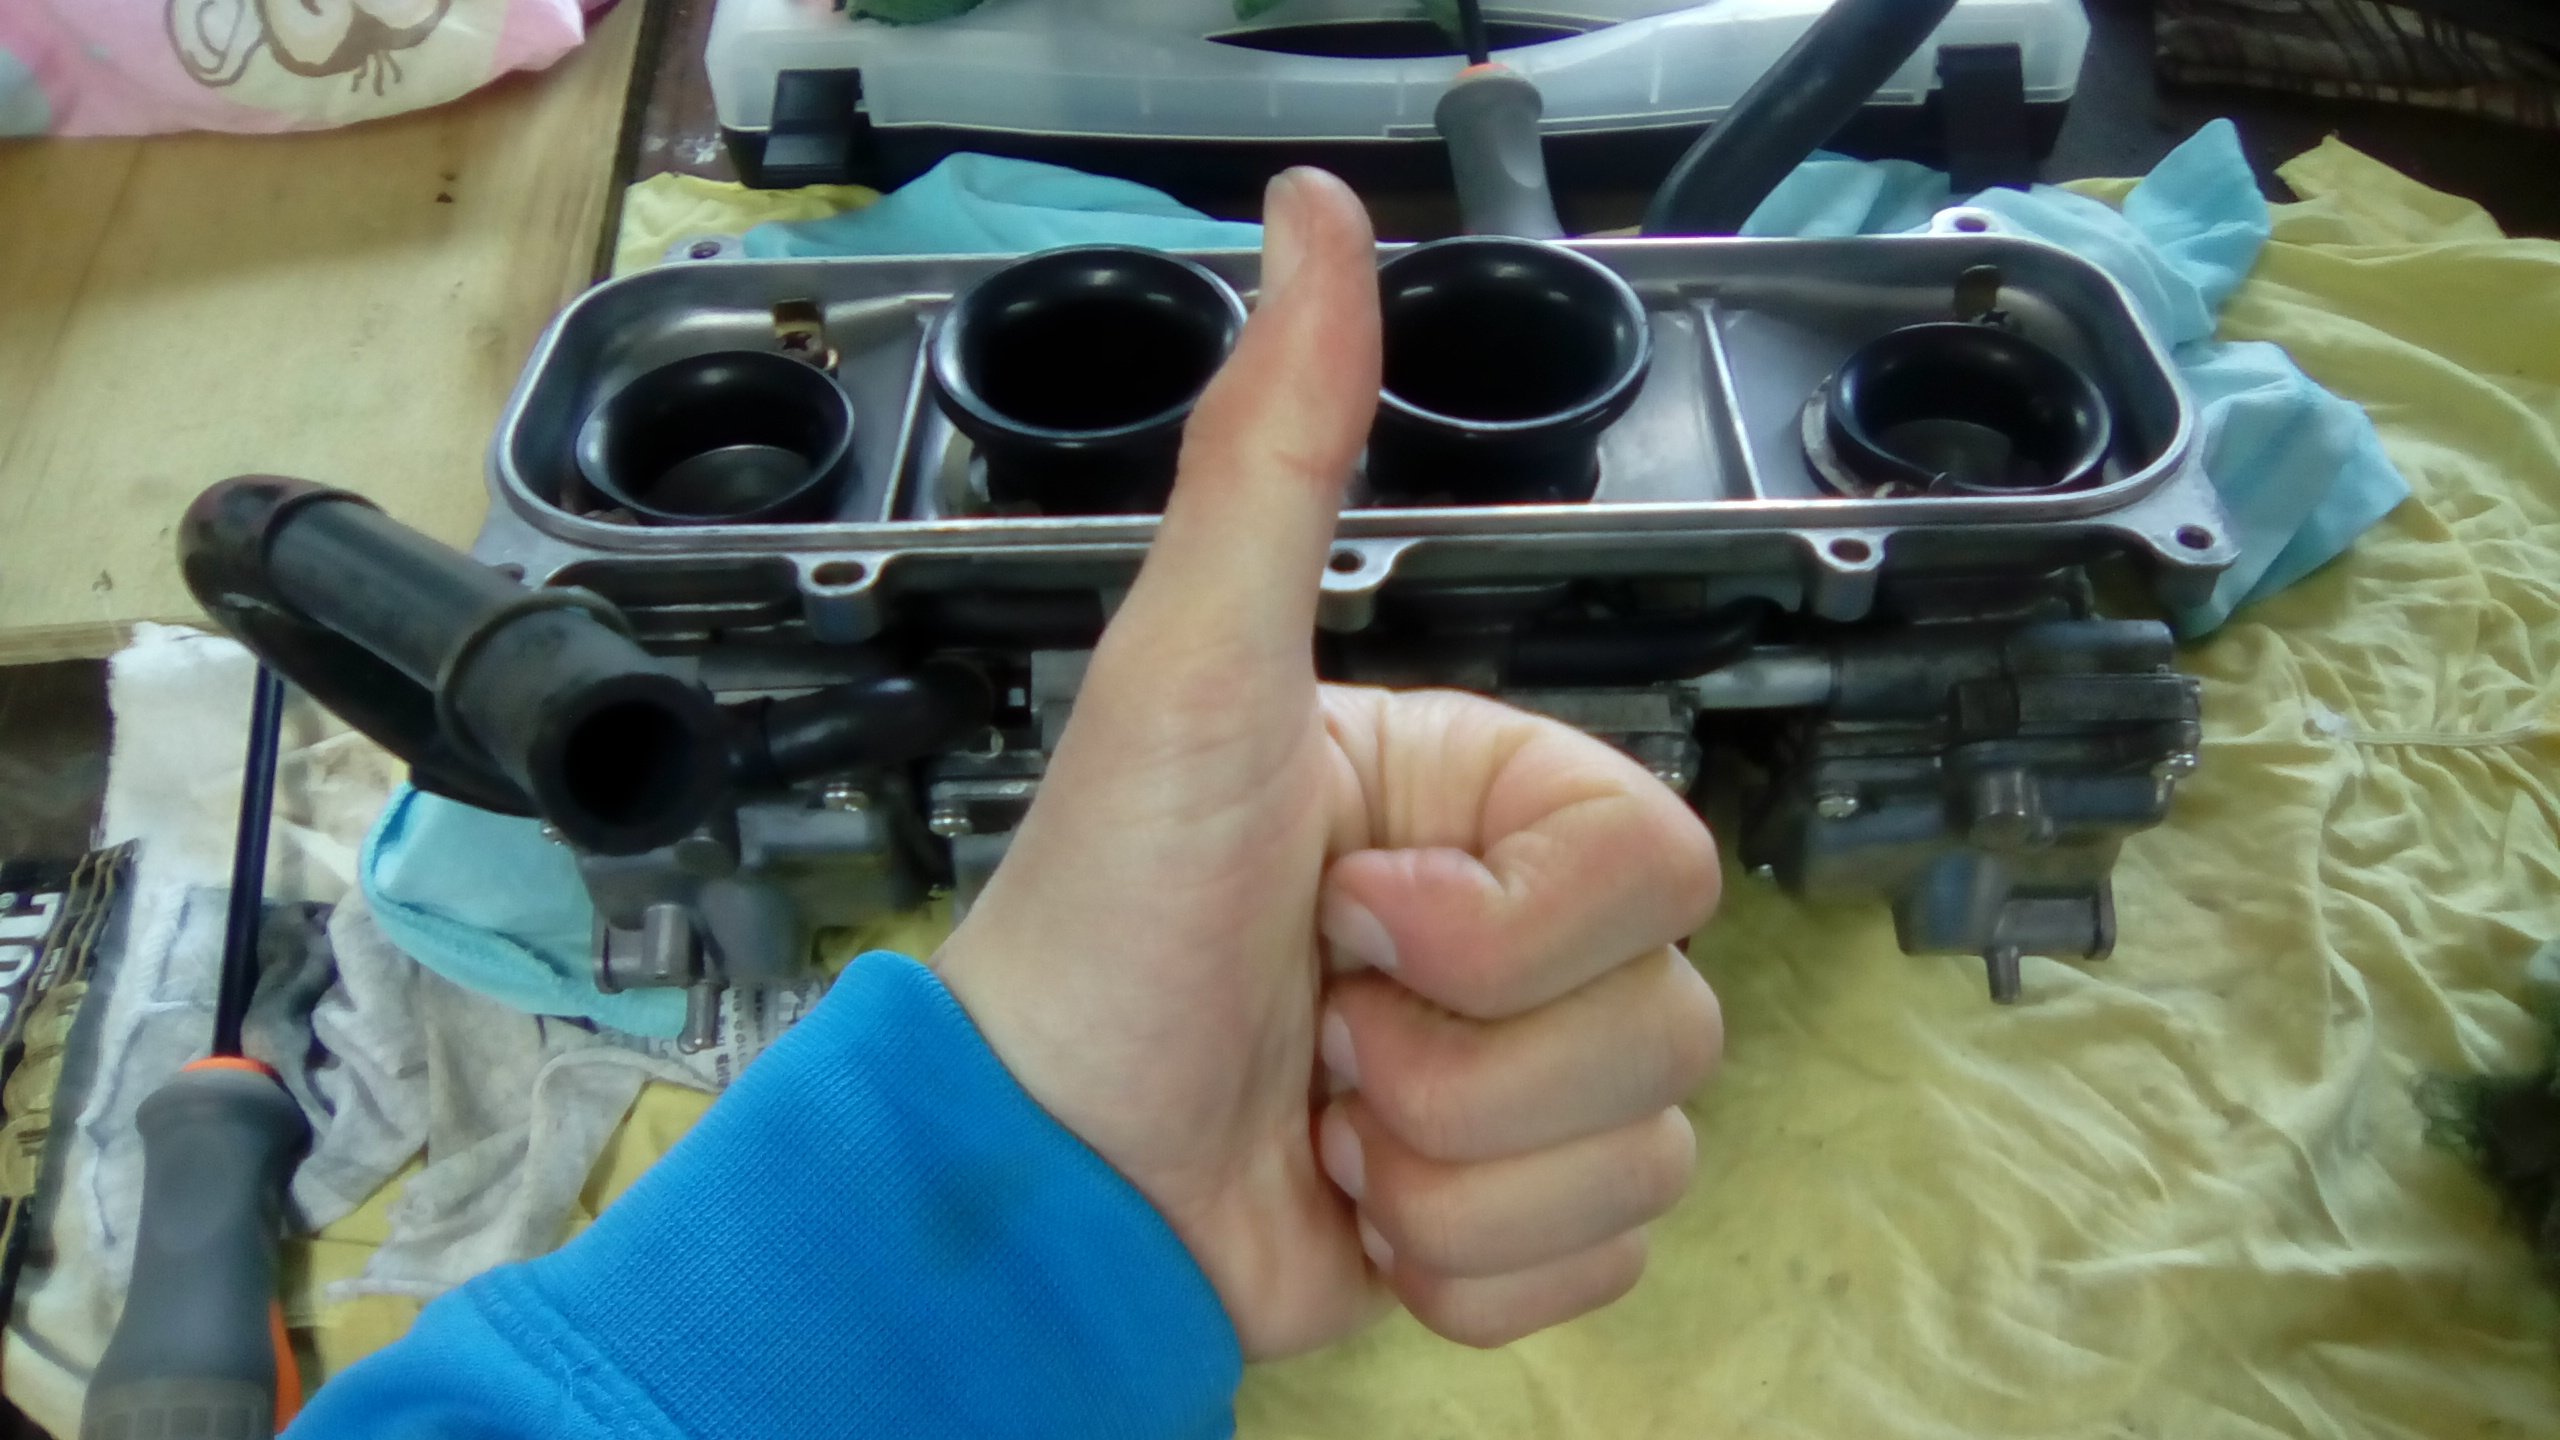
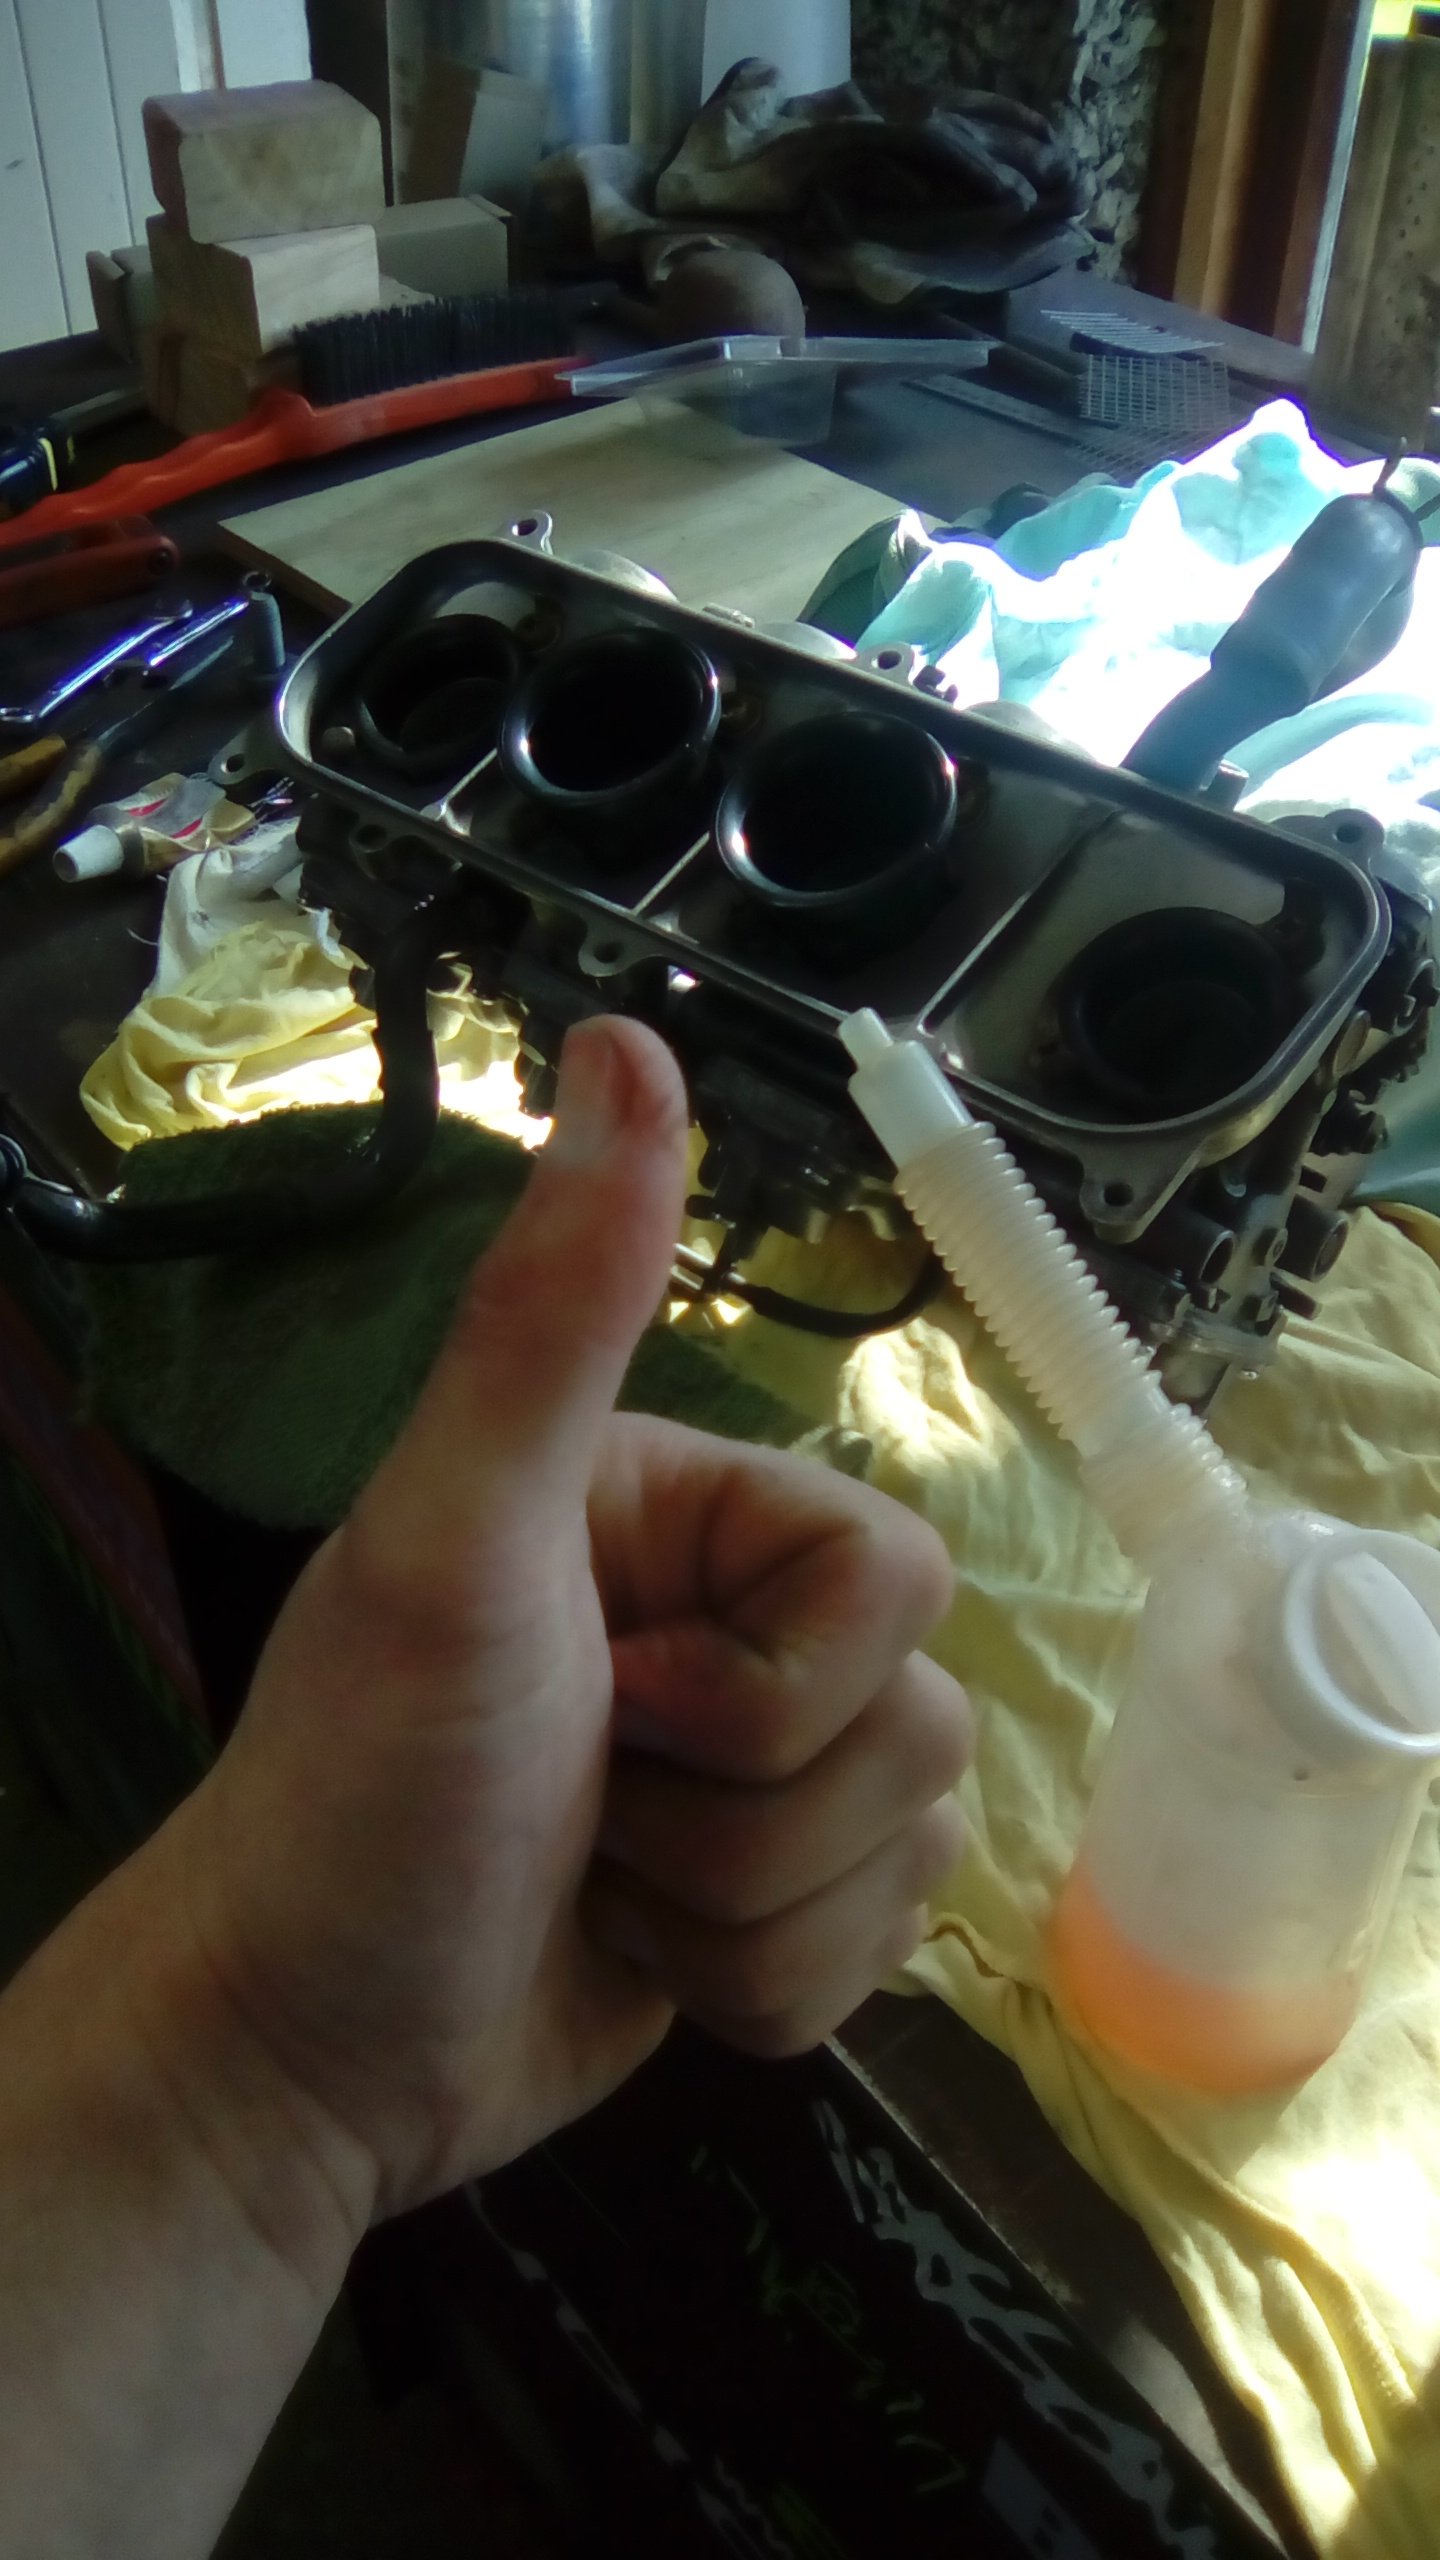
Wow its been a while. I took the stripped down carbs into work and gave them a good clean out, pulled the jets and got all the gunk out. Didn't take many pics because I was in the zone and getting shit done. Gave the little float valve thingys a polish to get the shit off them. All back together. Then 3 weekends later and I have time to make some decent progress. Should really tip some gas in to test for leaks, que nervous test. Yes, so relieved. Now the tank has been sitting since whenever with a bit of gas in it and no leaks, very happy. Gave it a good shake before draining to clean out any crap before chucking some fresh fuel in there. Hello, what's this? Fuck you with a pineapple. Fuel seeping out a tiny hole. A sensible person would stop here and sort this out.
1 point
-
Not much to report as I am still in the process of scraping together the funds for chassis coating. This is hampered by me spending quite a lot of the money I have been saving on frivolous new engines and such. This came about as I was alerted by many lovely people including @Willdat? That there was a cheap TD42 on FB marketplace. It turned out the chap was about 2 km from my house and was desperate to get rid of it as he had to move this weekend. I also bought a complete manual conversion kit off him that he had never installed and was going to scrap if he couldn't find a buyer, so I am selling this on as I don't need it, check the parts for sale if you want one. Overall this has worked out sweet as there were a number of things missing or toast off my engine, ie oil cap, exhaust shield, belt idler etc. I now have a spare alternator and fuel pump, plus he threw in a whole lot of other shit that will prove useful. The crank looks good, so I guess I could have passed on the Trundles stuff, but maybe I will build this one up properly for later... You might be able to see the snapped conrod in the second pic, he had driven into a river and hydraulic'd it, this is why it was in bits...1 point
-
1 point
-
Shit hot! Just carjamed it and first registration was 22 May 1964...sweet!!!1 point
-
It depends on when it was first registered in NZ: - before 1 January 1991 -> No rears required - between 1 January 1991 to 31 March 2002 -> Rears required - after 1 April 2002 -> No rears required https://vehicleinspection.nzta.govt.nz/virms/in-service-wof-and-cof/general/vehicle-interior/seatbelts-and-seatbelt-anchorages1 point
-
Can't remember the date but yup, if they weren't fitted from factory they don't need them. If however the car is being re-registered, you'll need to fit them.1 point
-
Impulse bought KE70 front lip resulted in this, of which I would call a win: 20 mins of cutting and marking and it's sitting pretty good. Just gotta make up some little stainless brackets for the corners, sand, prime, and paint body colour. I'll be painting the bottoms of the guards, and the lower panel to bring them back to life at the same time. I think it gives the car a little more of an aggressive look, and when I drop another 40mm or so out of the front it'll really come into its own and look the part. Time off work is coming up very soon which means I'm able to get across town and have my engine block dipped. Unfortunatley the need for a new phone sets my head rebuild back, but I'm not fussed. I won't be putting the 1G-GE in for quite some time yet, so I'm working more on the car itself. I've been thinking about my auto. I'm not keen to manual swap for a variety of reasons, but the old A42/3 automatics are awful. I had been thinking about adapting an altezza 1G-FE auto to fit, and I think the only hiccup I would encounter is the rear X member. I'm thinking that the late model auto's, especially if sourced from something low kms, would be far smoother. And for the price of them, it would be a far cheaper option than rebuilding what I already have. Let me know if this is a bad idea. Entered in OS Drags too, so hopefully the 1G-E and slushy auto can smash out a sub 30 second run1 point
-
I wanna 635CSi tbh1 point
-
stories from M lyfe. the heater tap started leaking. the heater tap is inside the passengers foot well. like any true M series connoisseur i know it was leaking within seconds of it happening because i smelt it. i knew, instantly, the the M was about to try and fulfill the prophecy of its lineage, and its tradition, and attempt to BHG. but old M masters like myself are made of sterner stuff than that, it'll take a better trick that that old chestnut to bring the prophecy to life. so, i caught it before it had a chance to get hot, no harm done. MS75 heater taps are vacuum operated, incorporate a 90 degree bend in them and just to really make sure there is no way of substituting it with something available its closed with no vacuum. all available vacuum operated taps that i have found are open with no vacuum. there are no taps available that event fit in the space available, let alone have the right vacuum configuration. so ill just have to buy a gates one, cut and weld the vacuum actuator to be on the other side of the lever and put in the engine bay somewhere. if i can stand up for long enough to do that job ill do that tonight. 2019-09-19_07-33-00 by sheepers, on Flickr1 point
-
Witchcraft! I just replaced the original fusebox with a new magical one from the future which isn't all hot and melty and gives me more than 9 volts at the headlights! Amaze. Represent. Another year of legality. And since all my thread images are poked, here's one so you and I don't forget what she looks like. <31 point
-
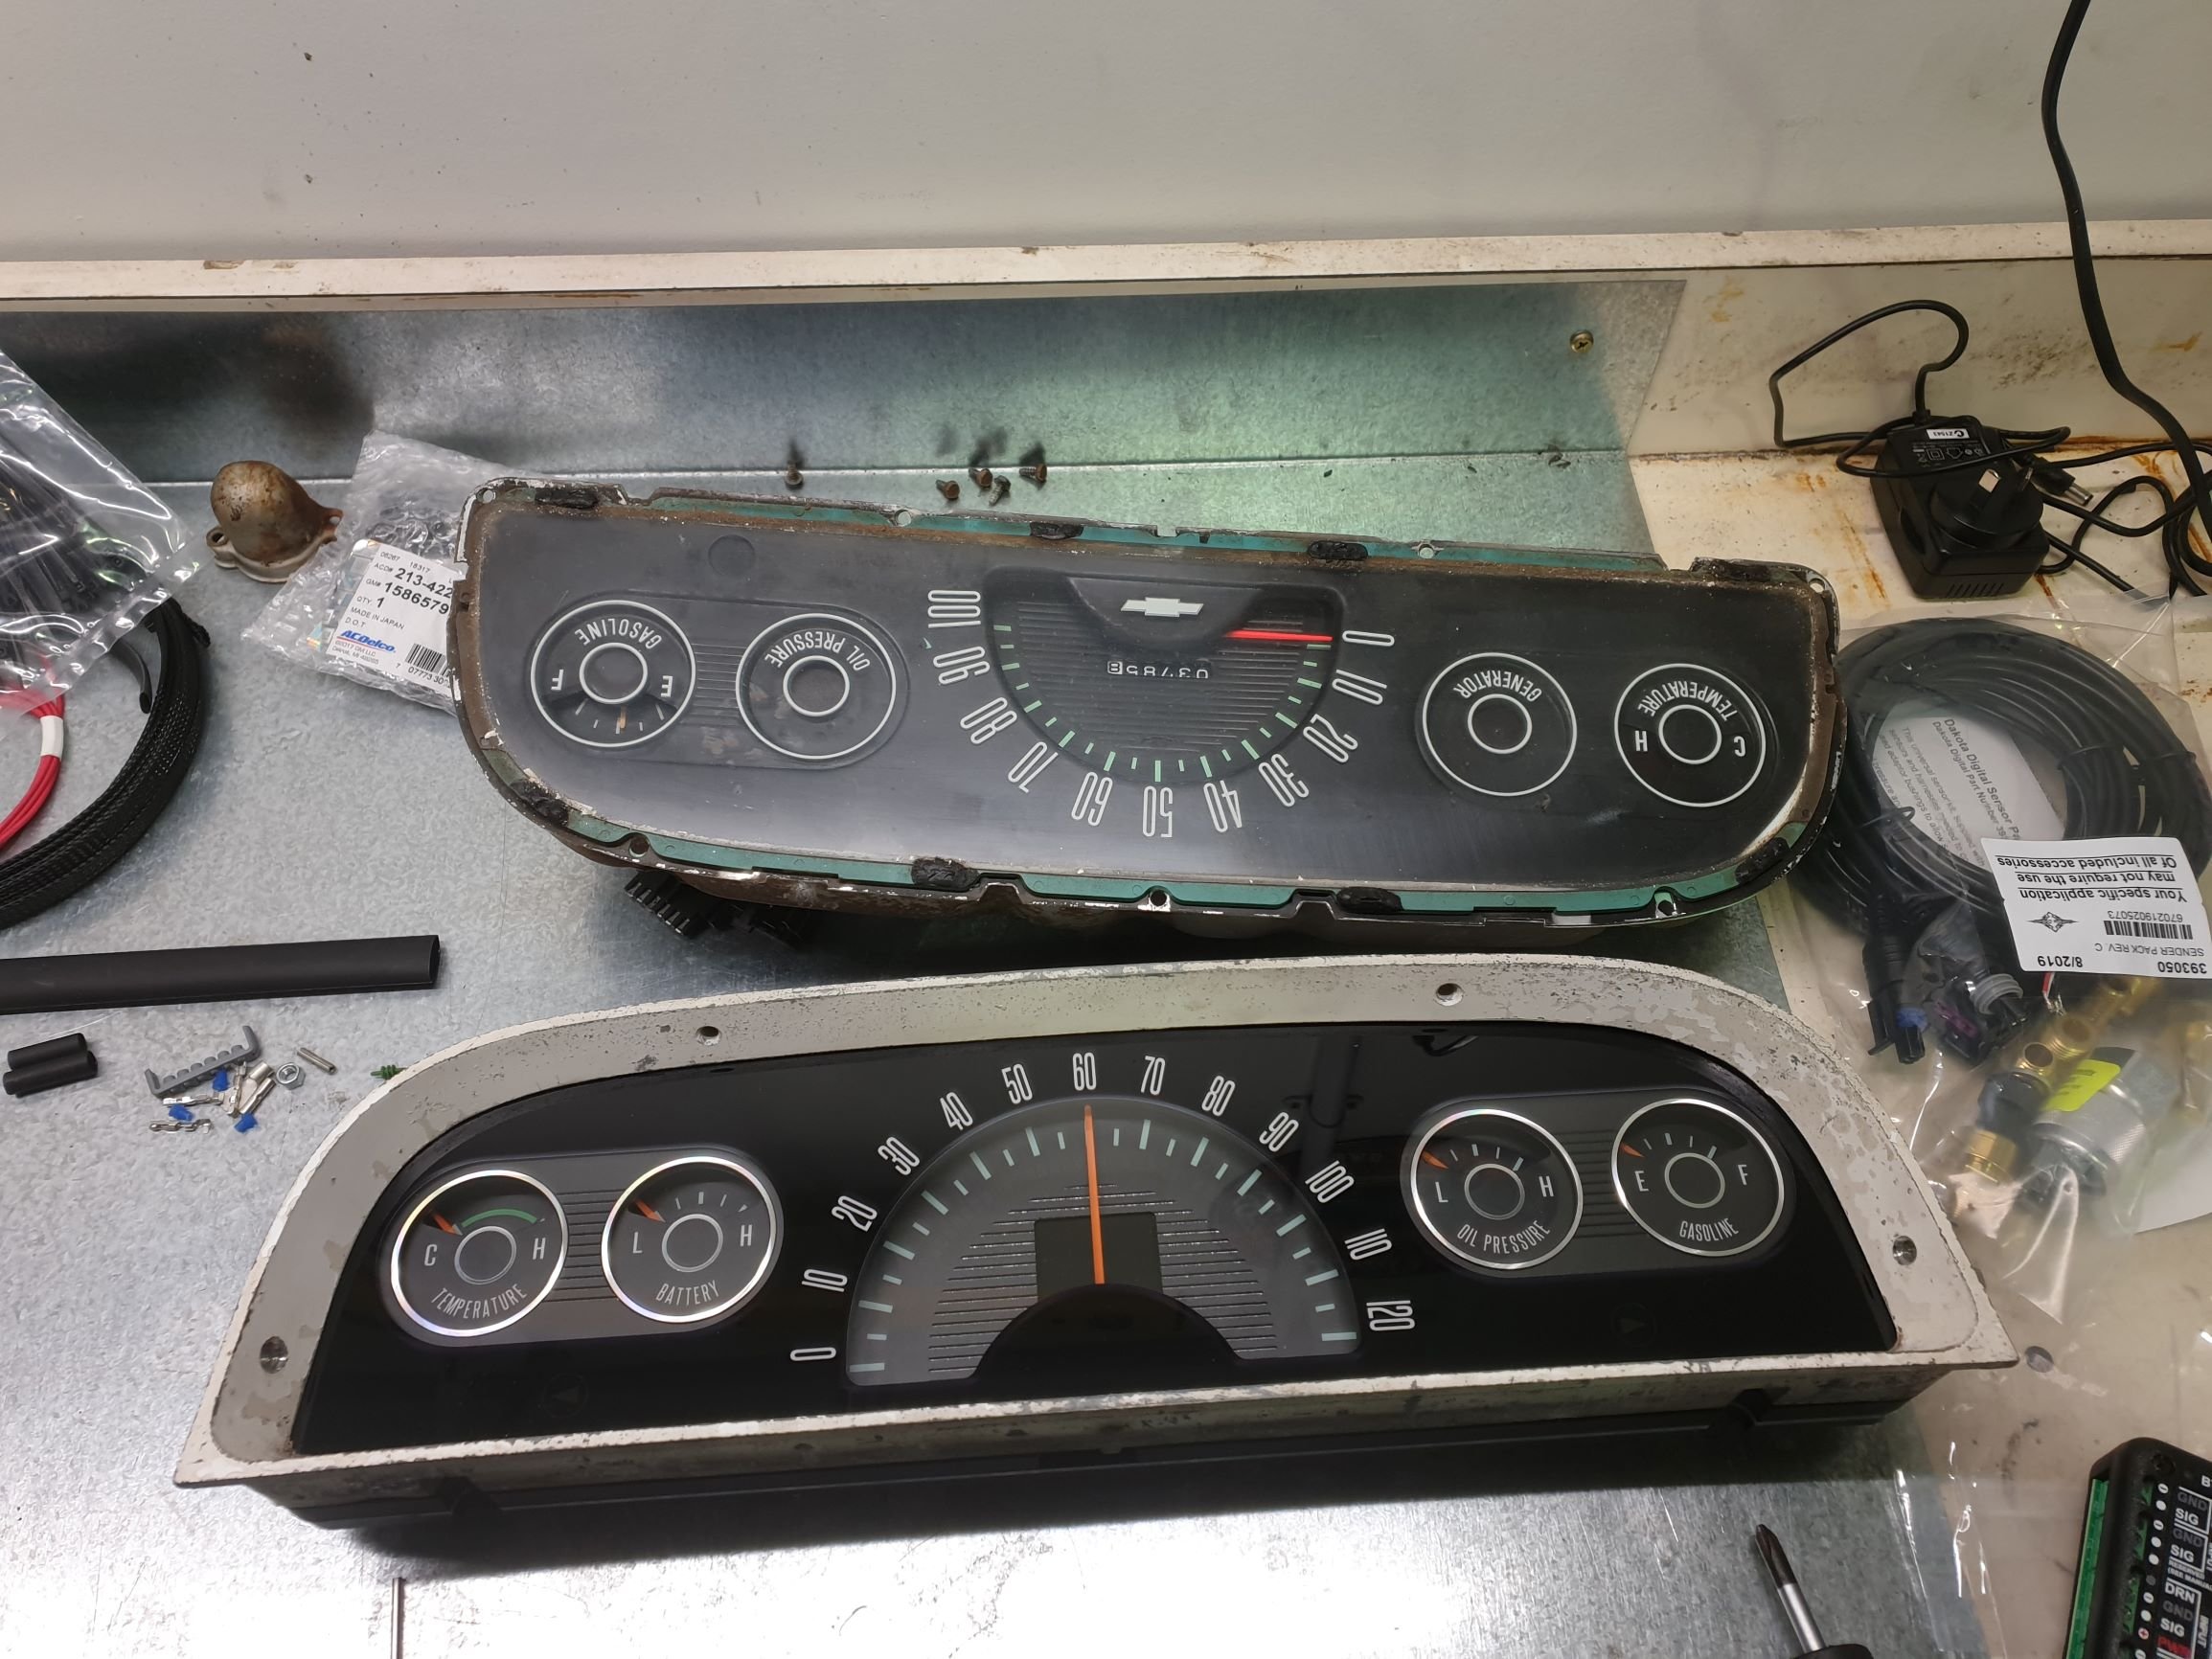
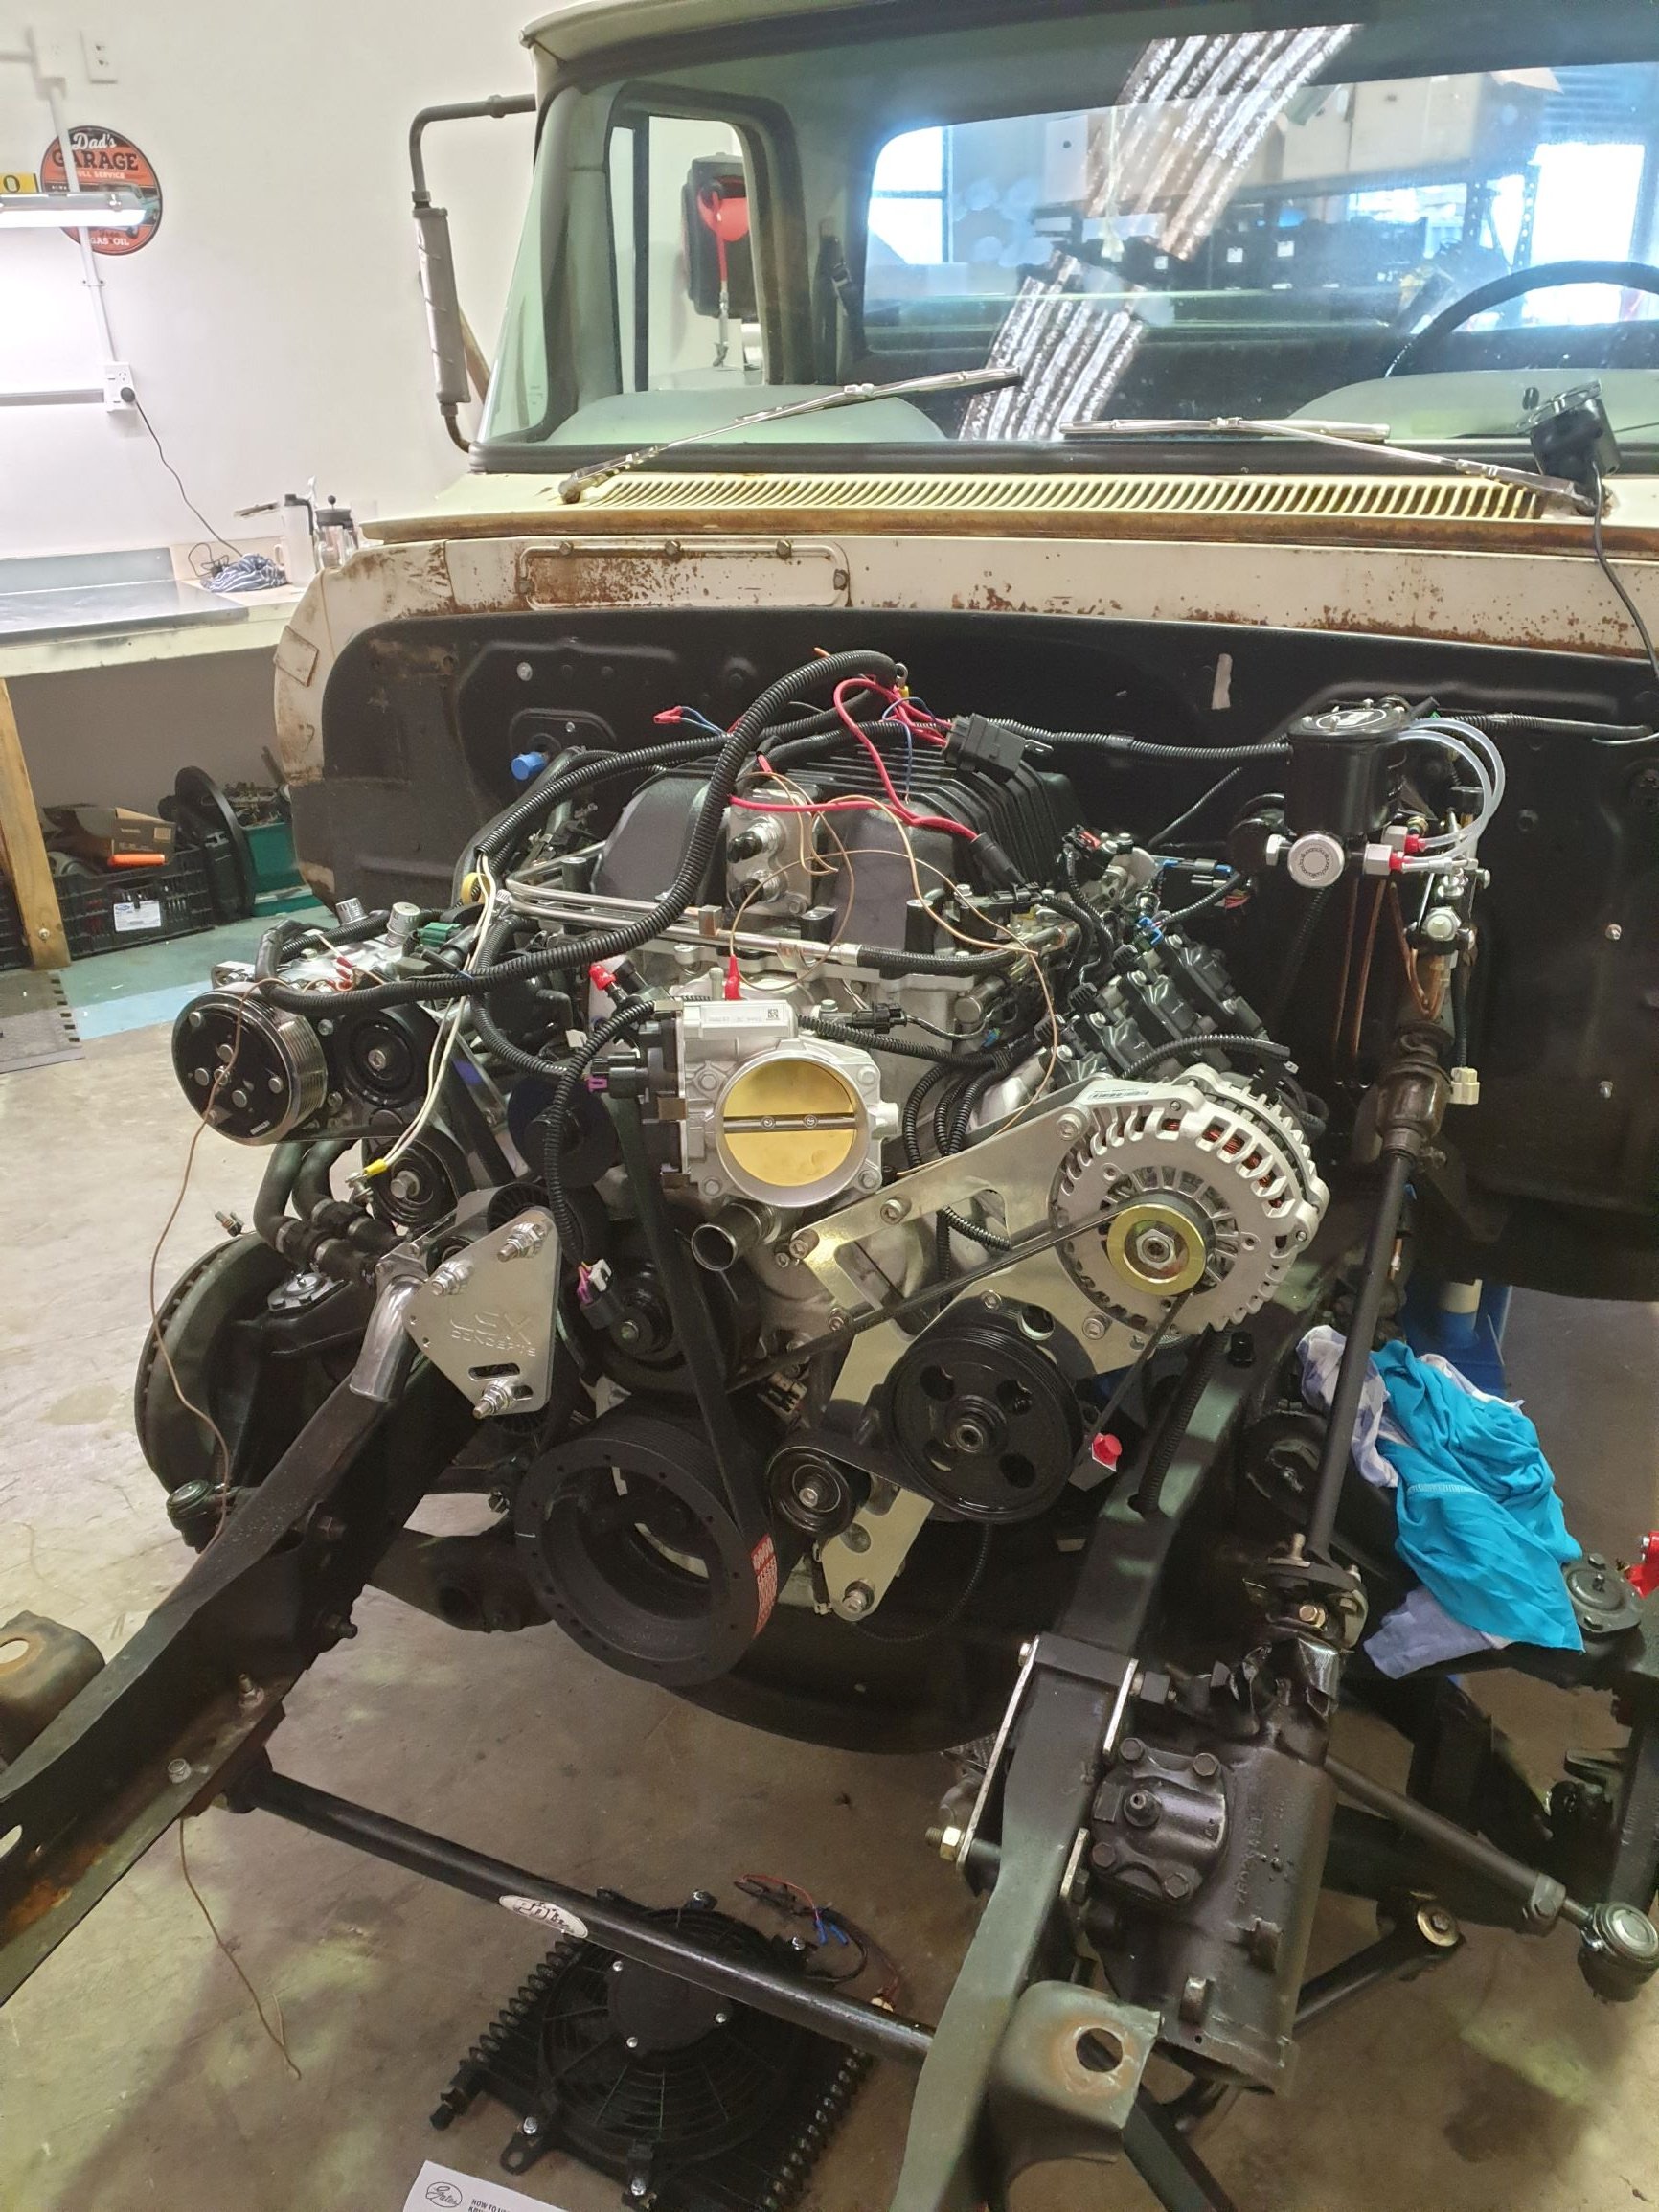
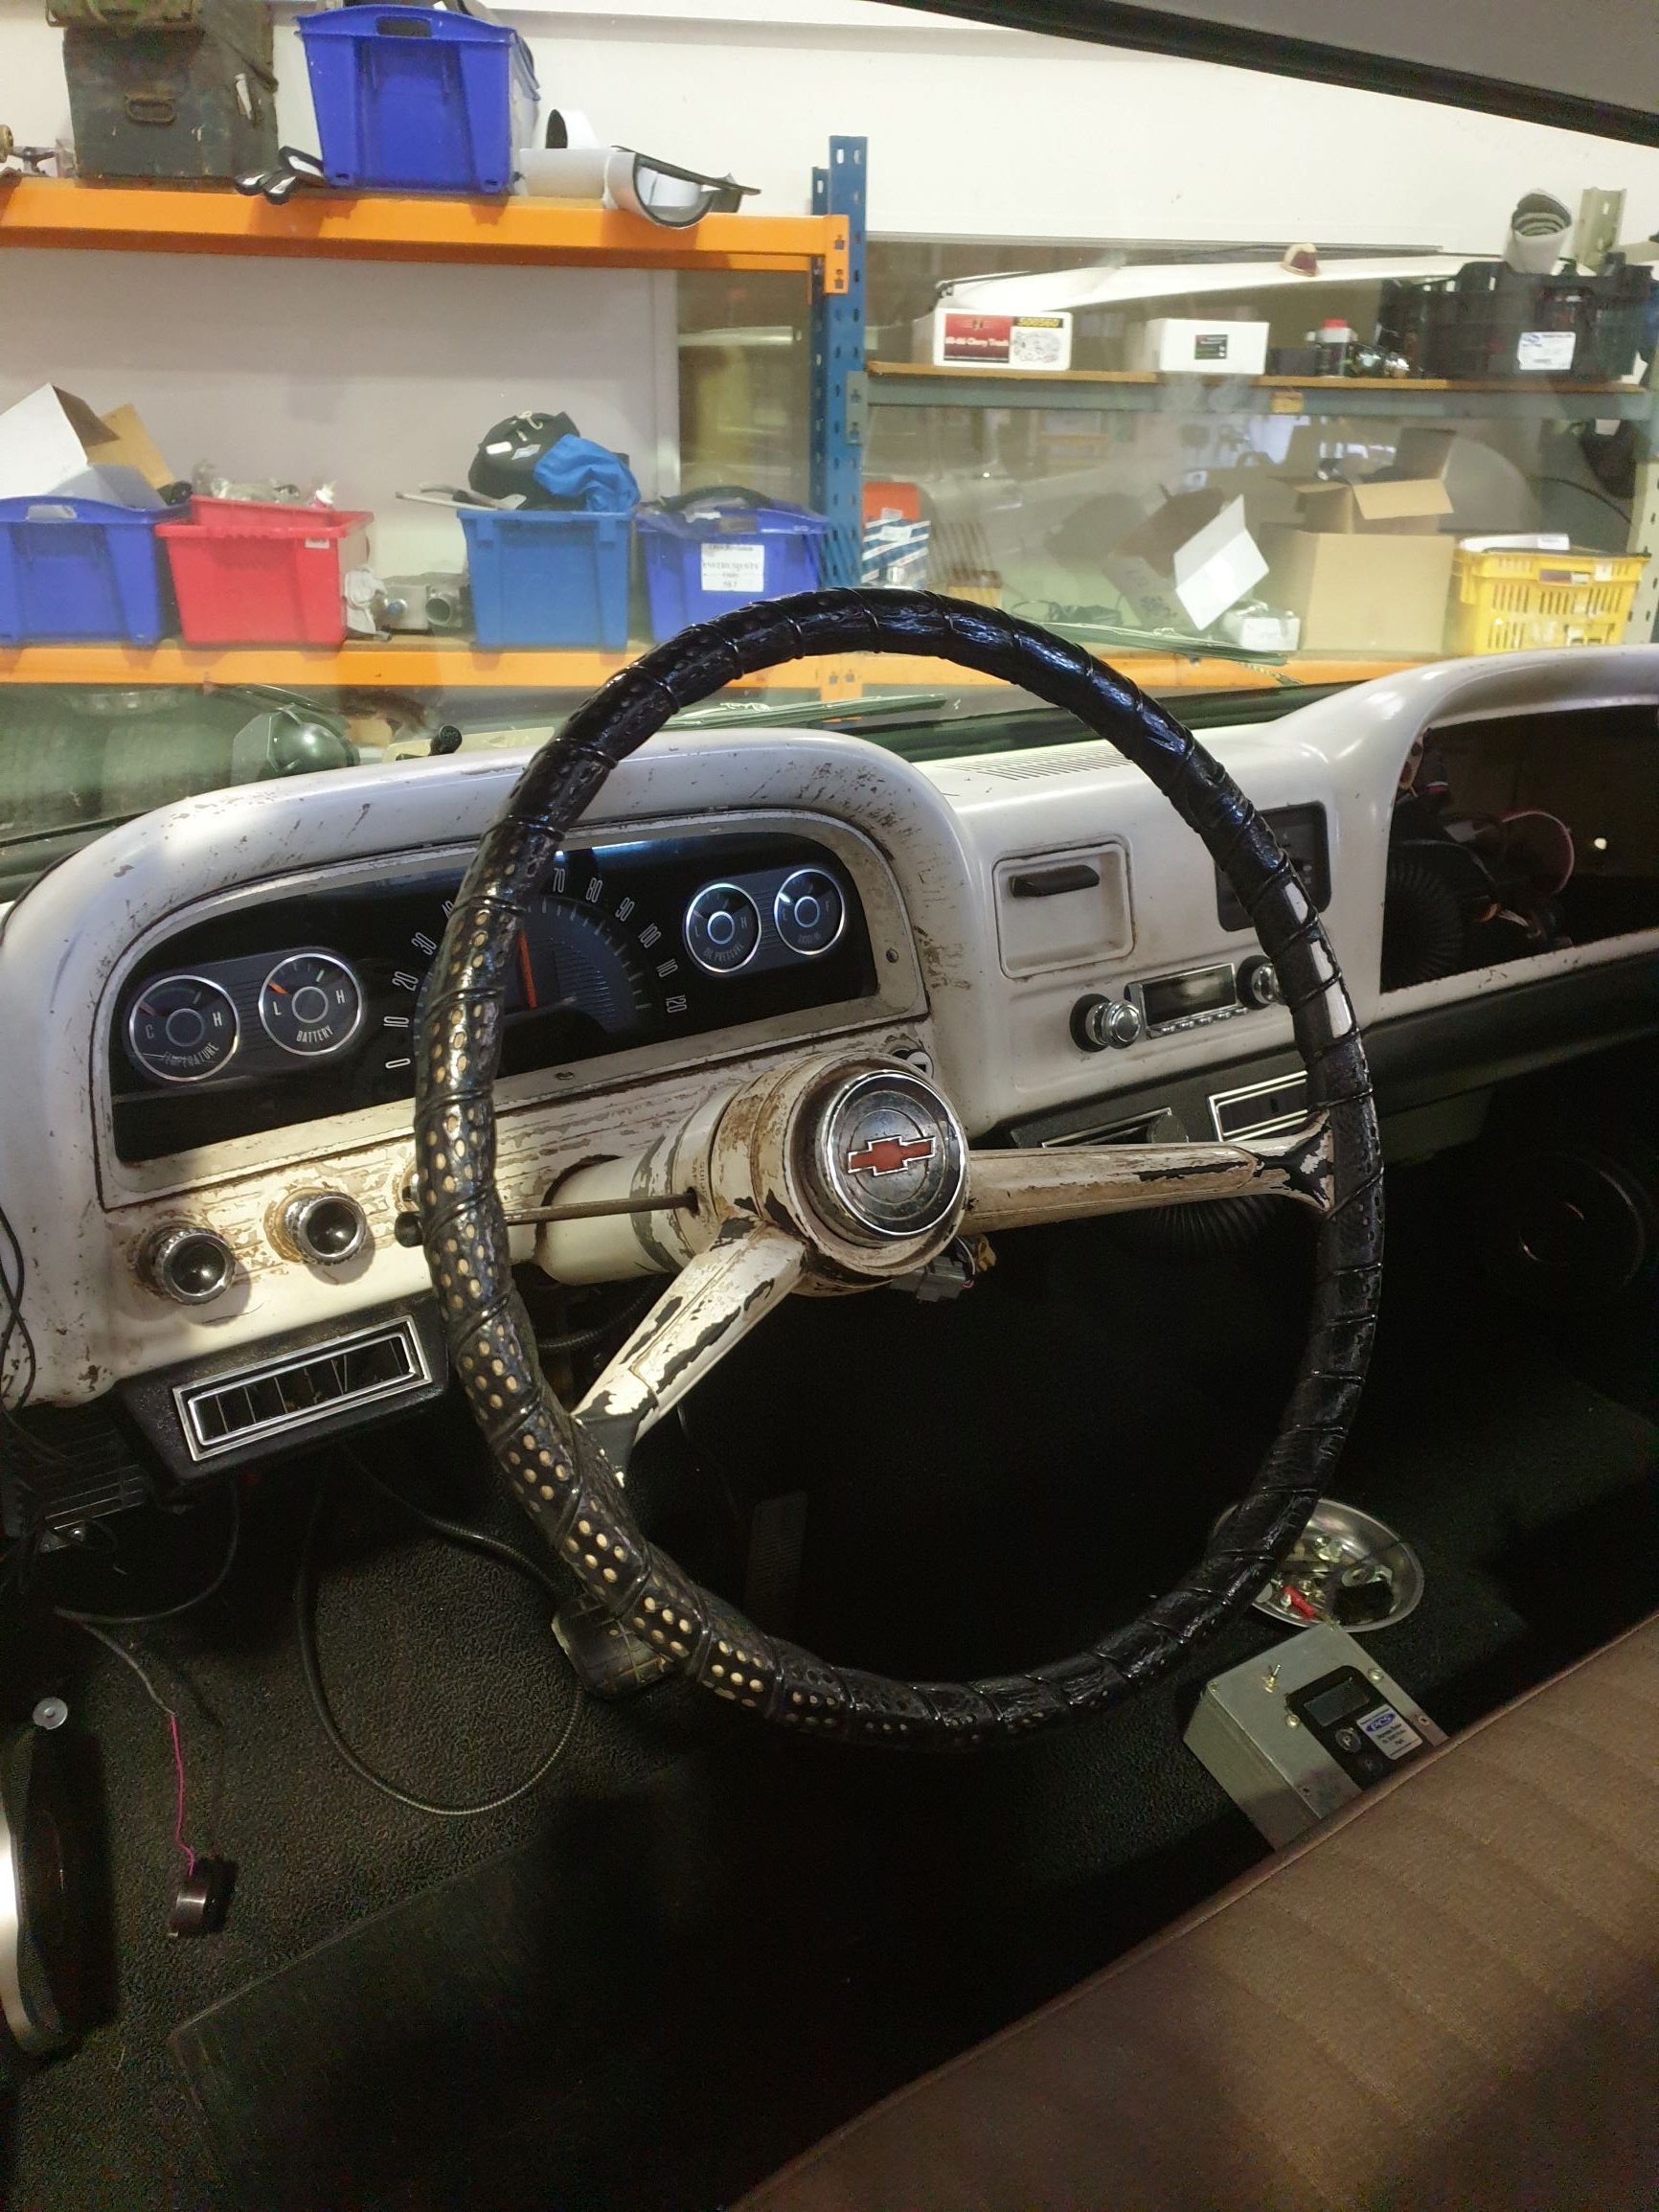
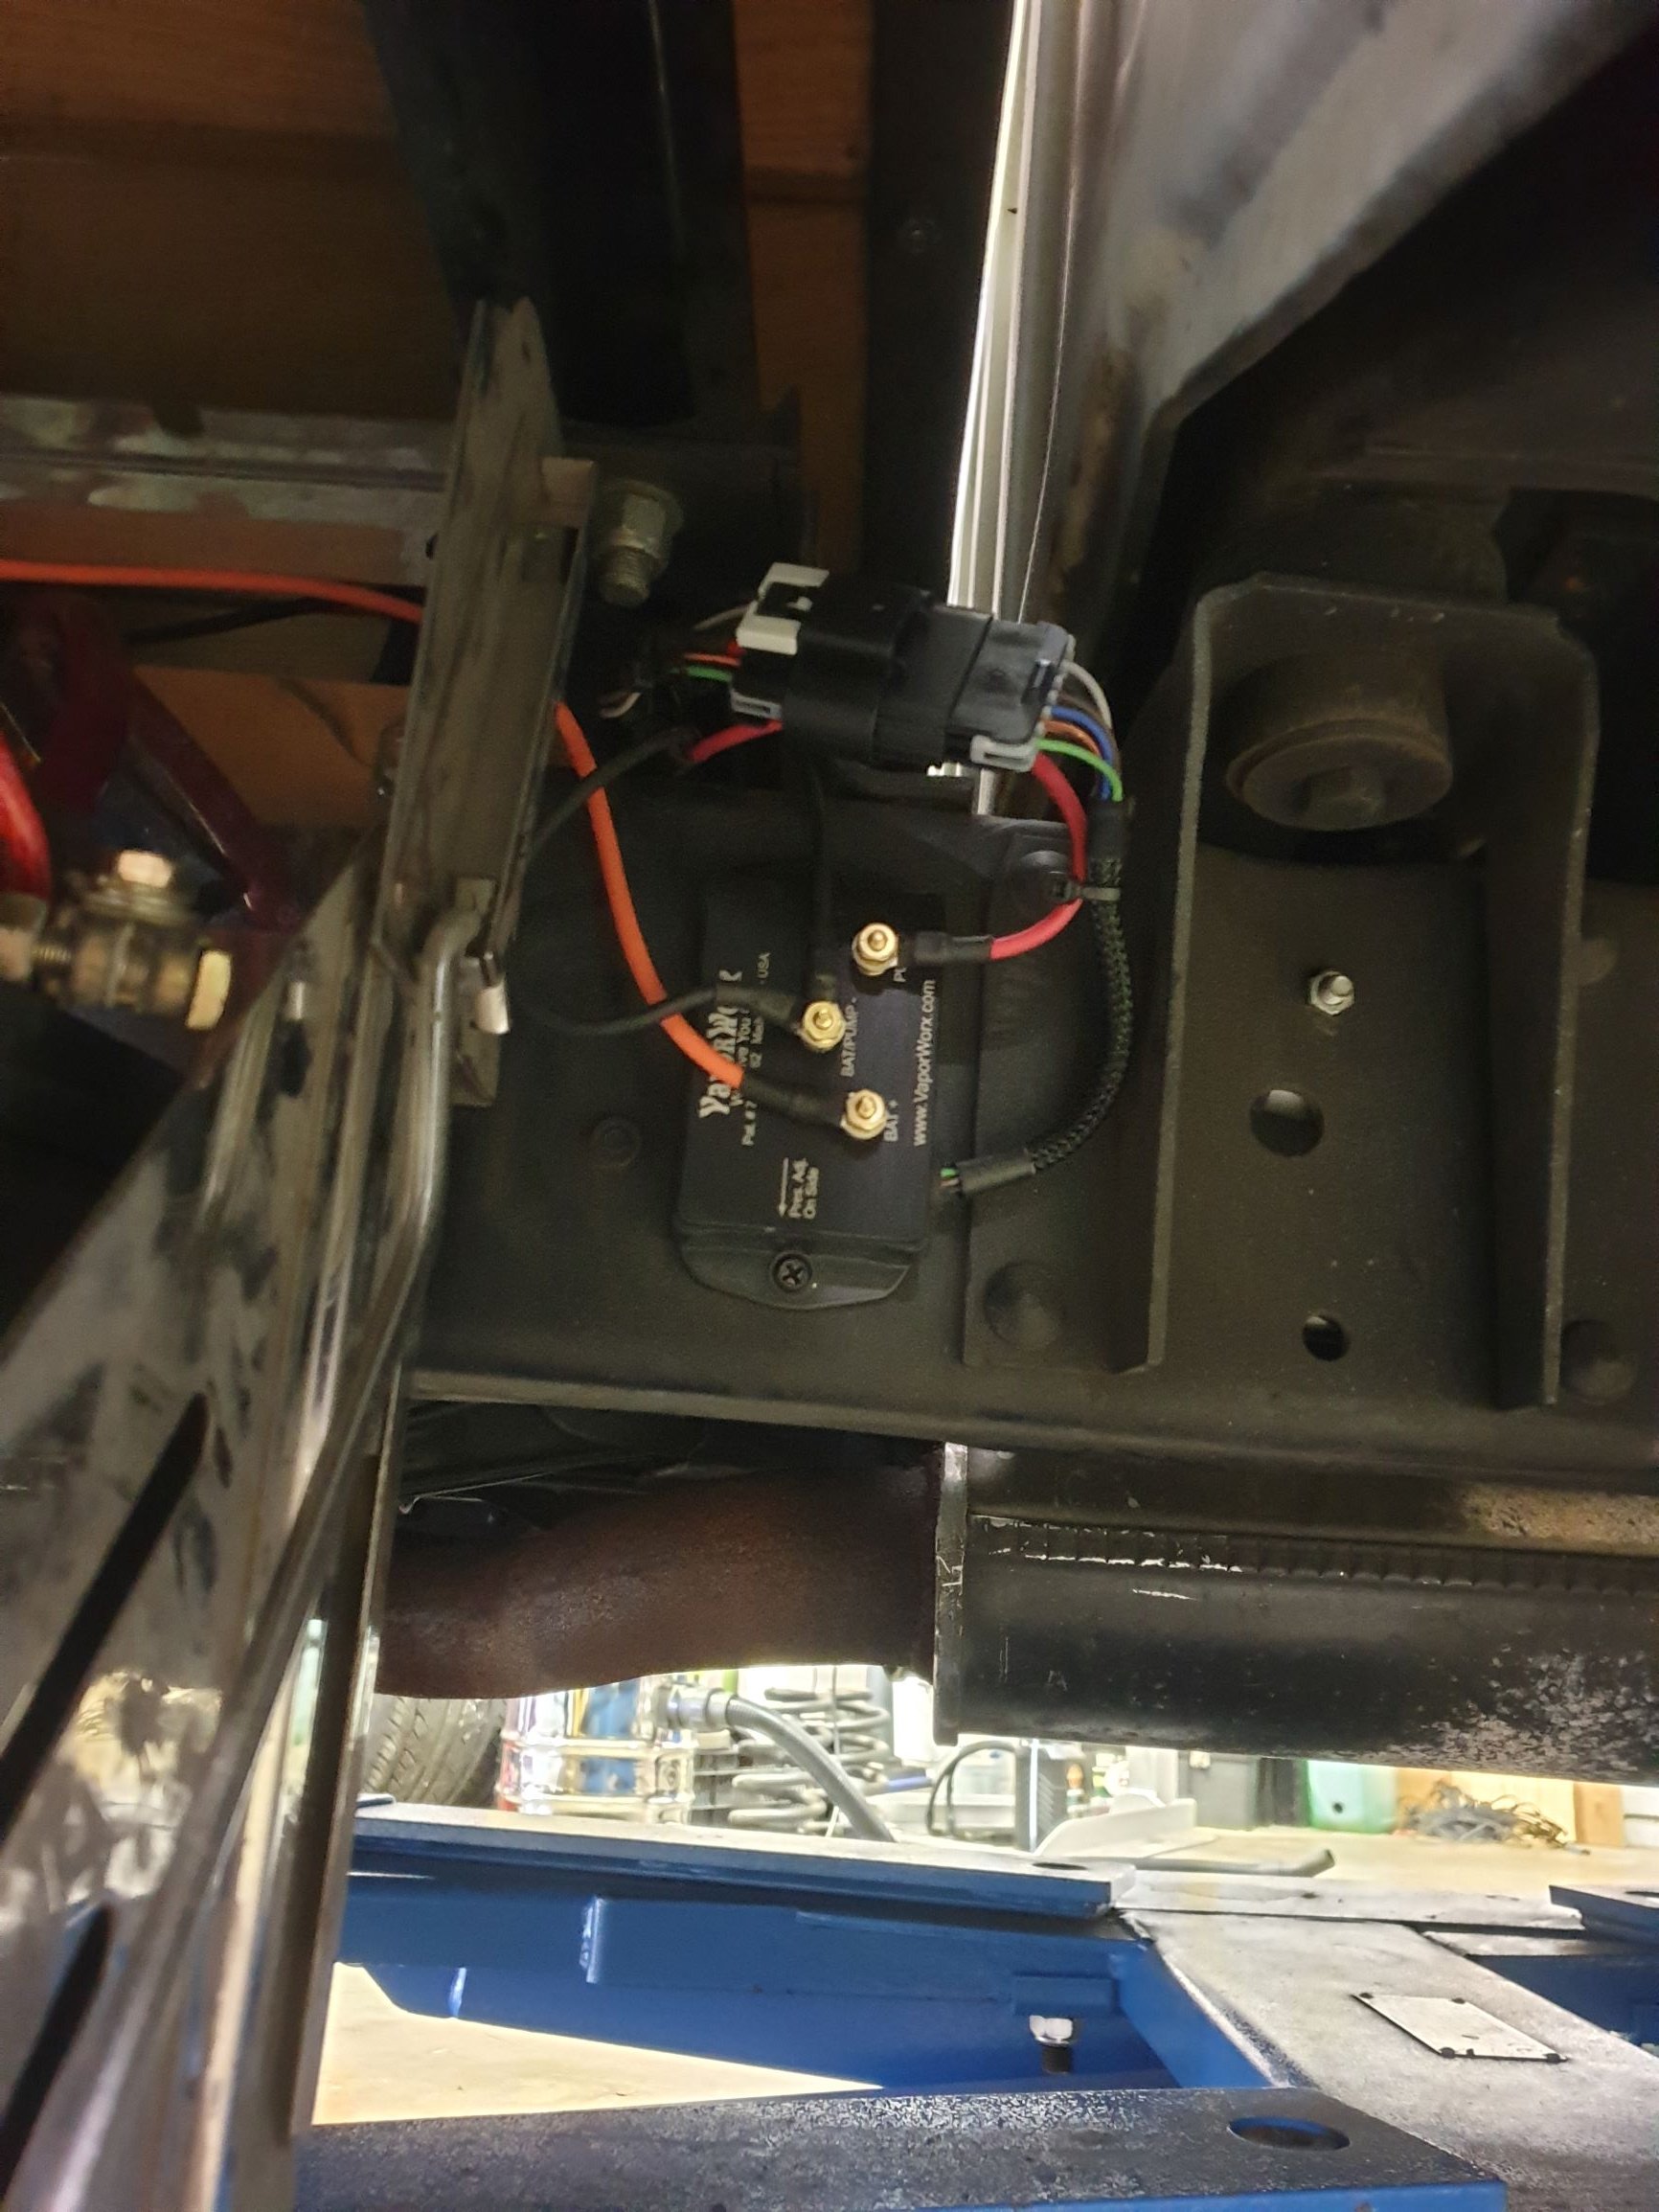
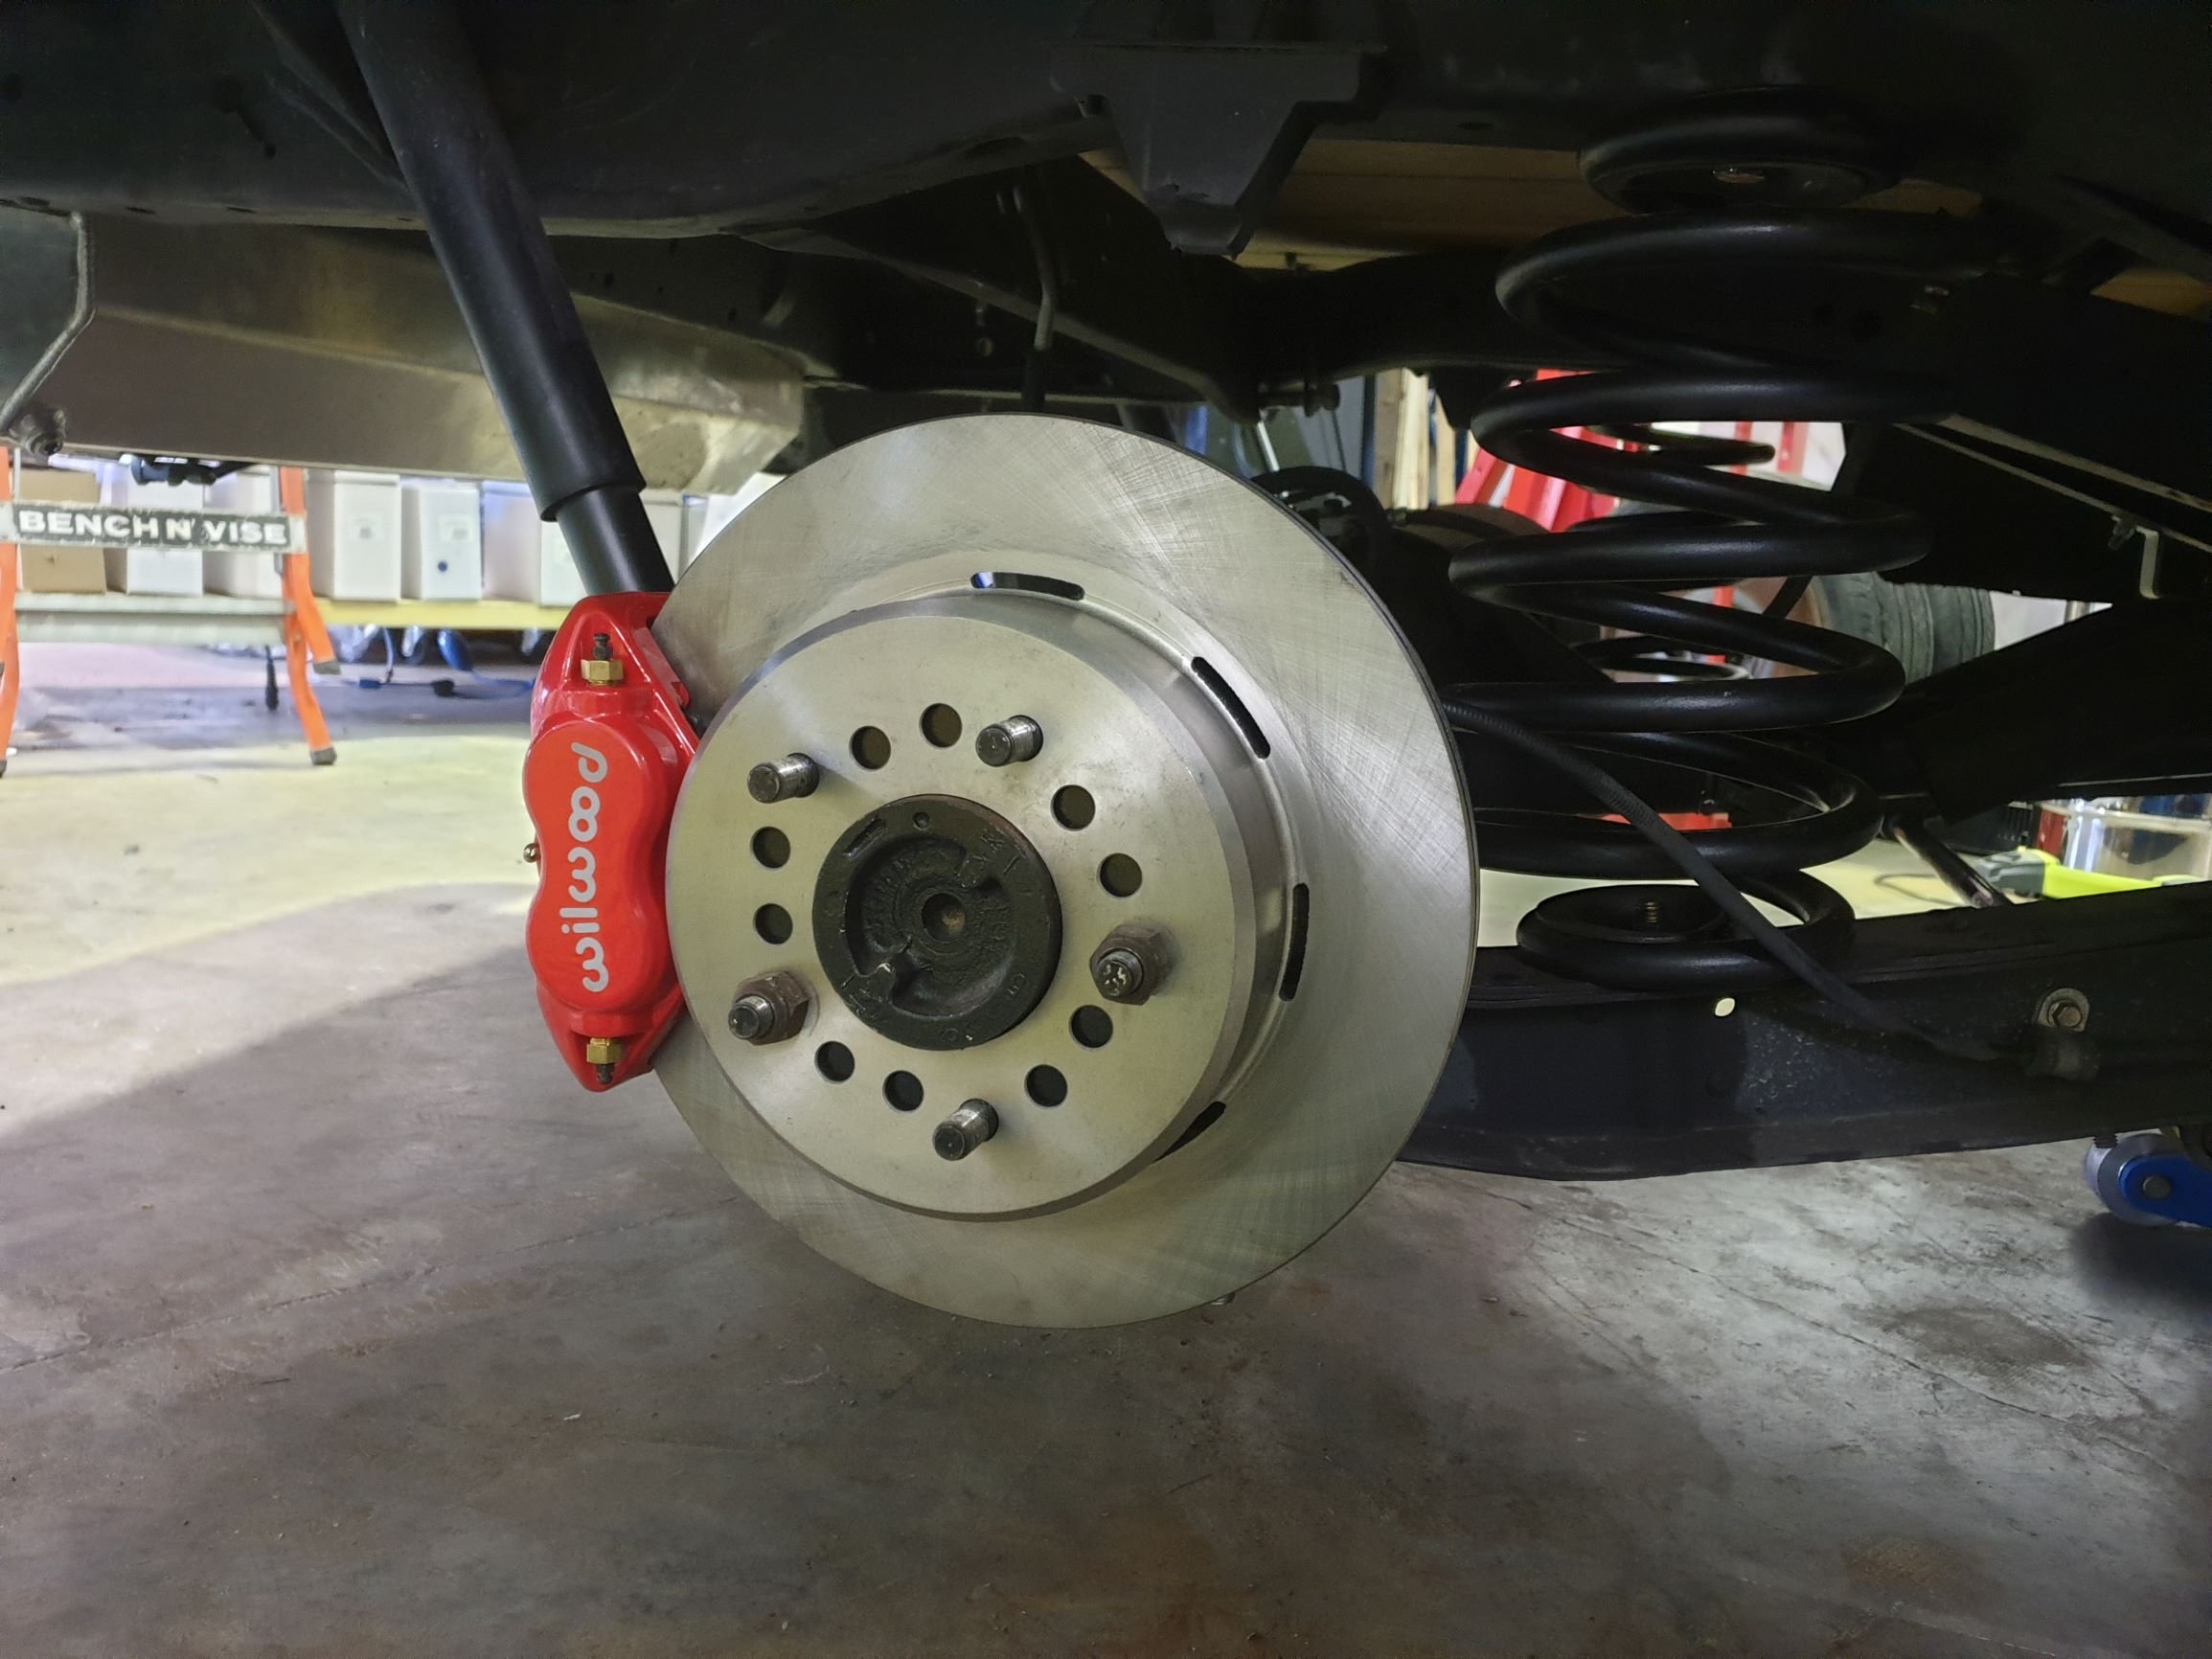
Donkey deep in the swap now. Finished up wiring on weekend, have put a vaporworx pwm set up on the fuel system. It gets fed fuel pressure, MAP, and ecu on off signal and makes the magic happen from there. I reran the fuel line in a 1/2" line, dead headed set up. Trans and engine are in, changed rear stoppers to disc, also changed pinion yoke to 1350 size, it was 1310. Remade all the front brake lines, replaced all ball joints, tie rod ends, basically all the steering/front end stuff is new. Changed the Instrument stuff to a Dakota digital set up that plugs into the Ecu for all the info. Cert check soon !!
1 point
-
Found this on a car recently / fab fuck ups
1 point
-
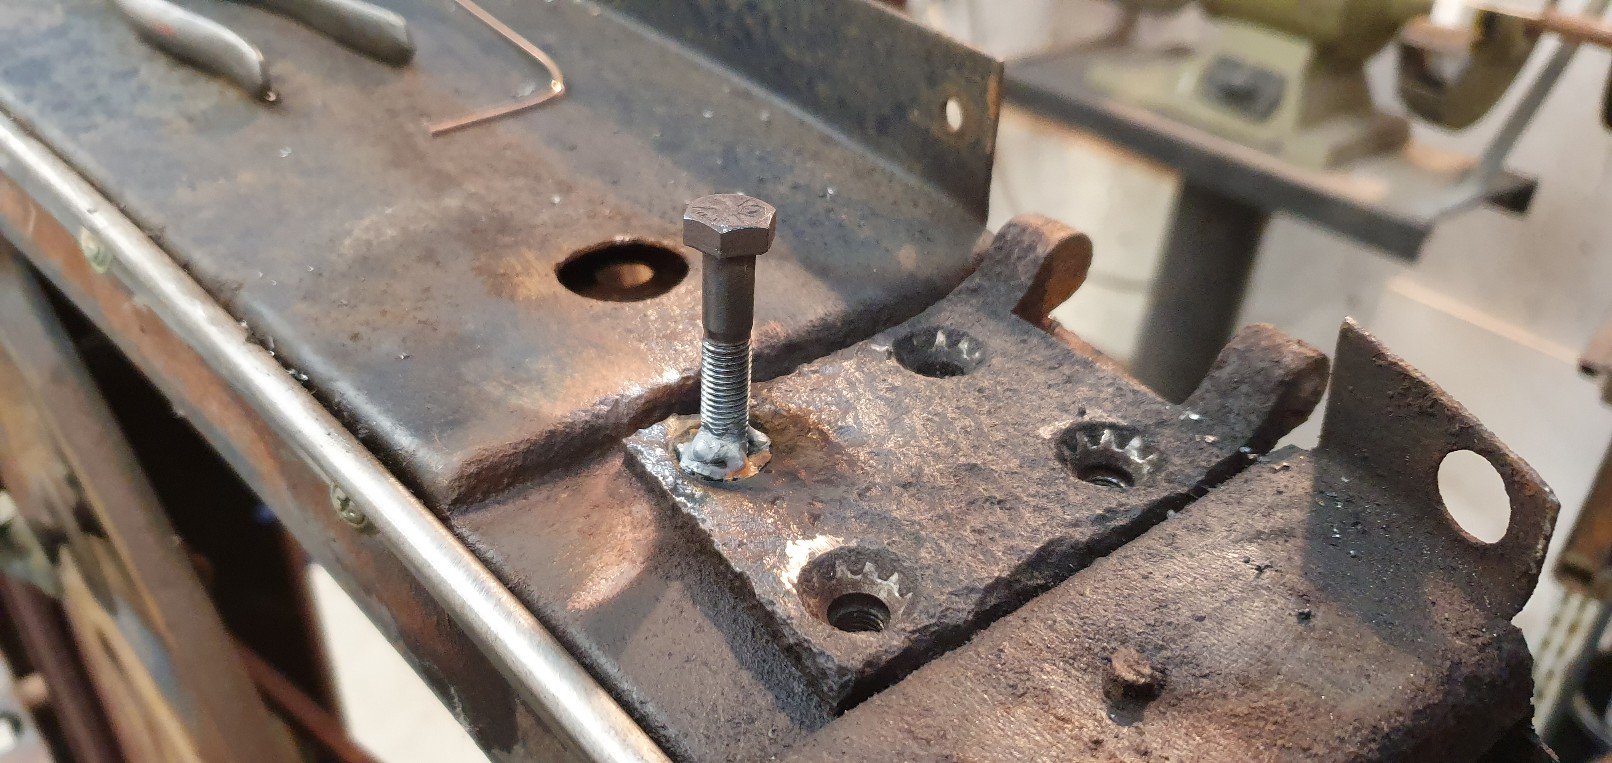
Been doing rusty screws this way lately
1 point
-
1 point
-
1 point
-
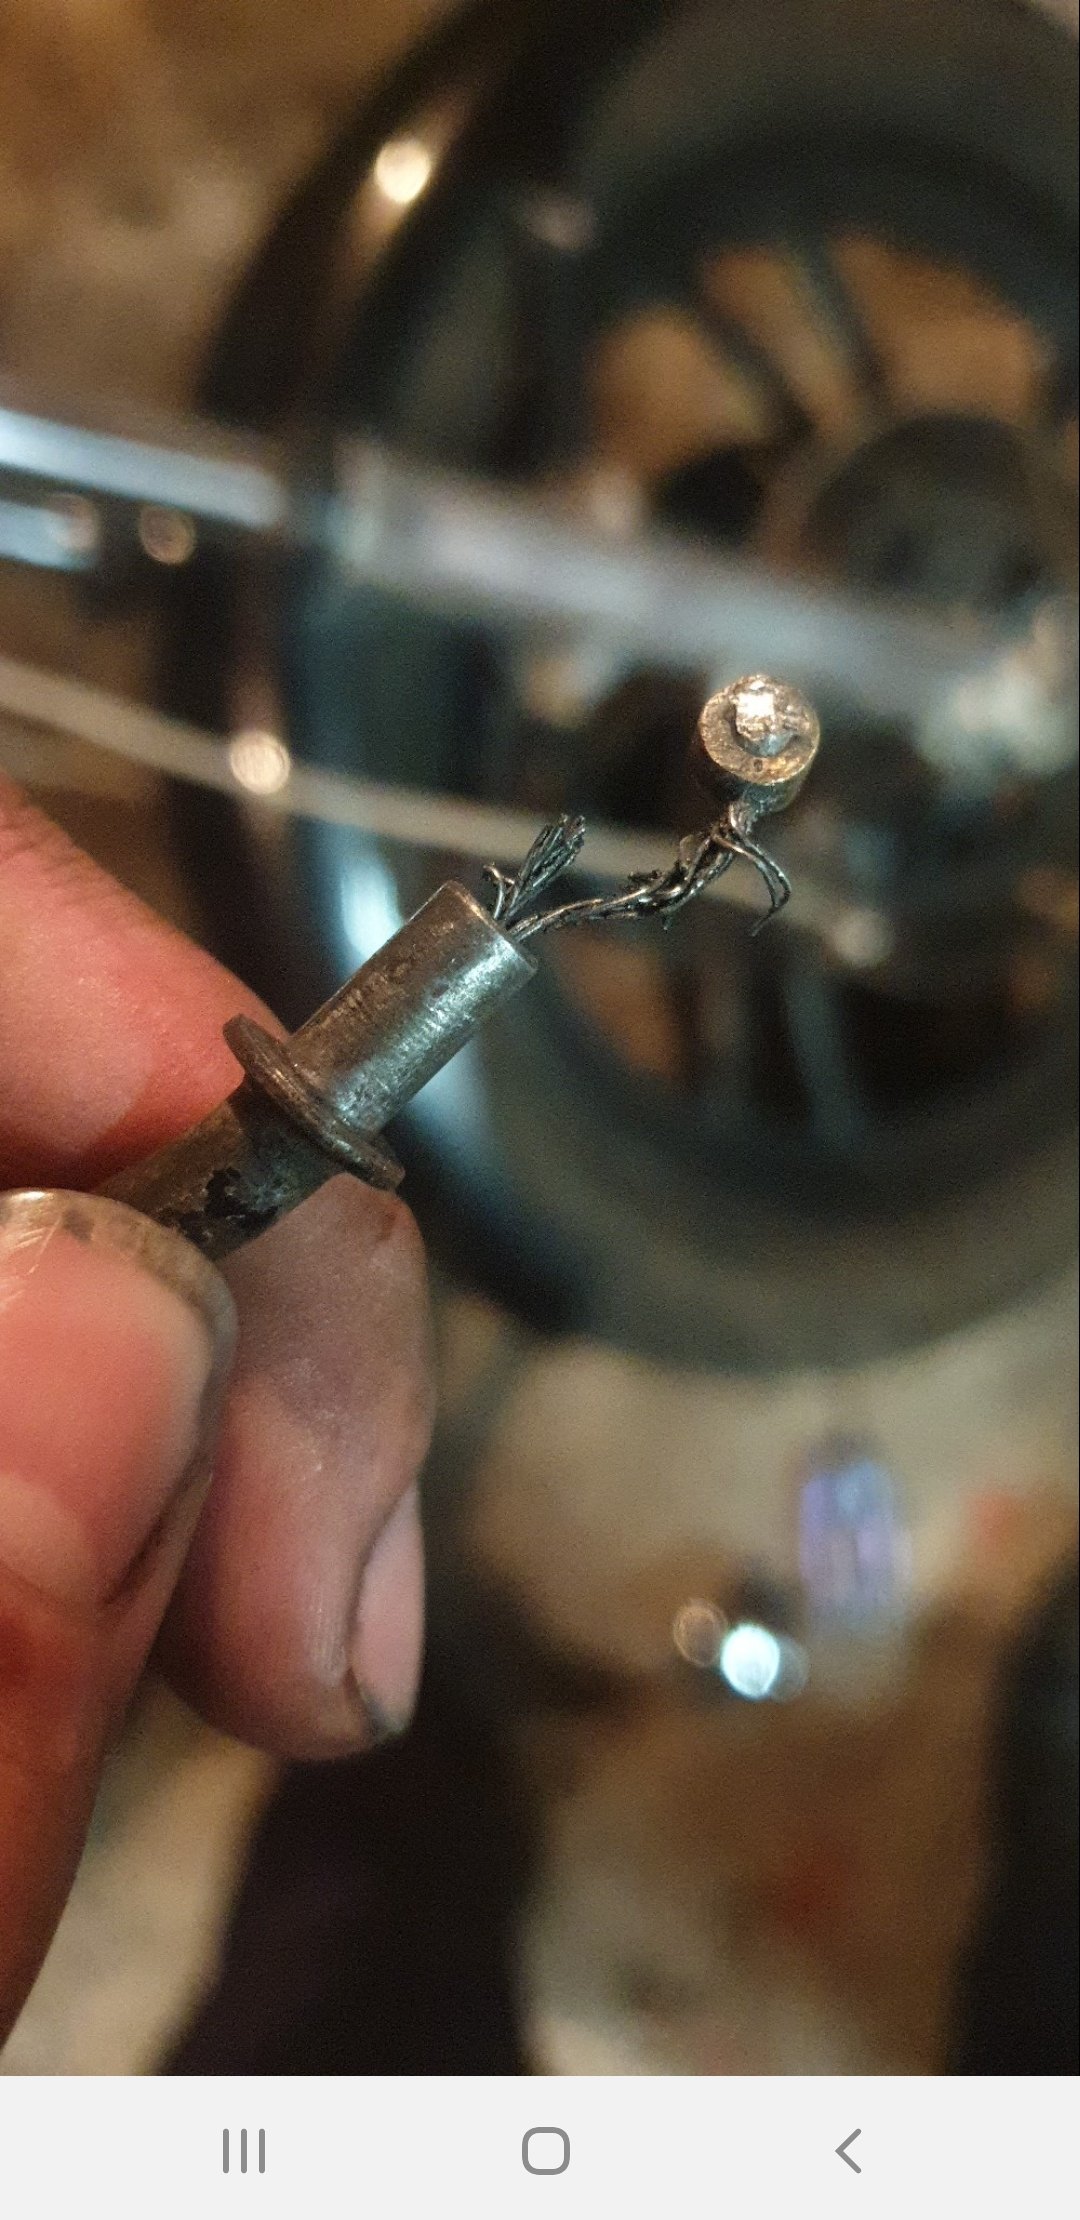
Can not make this shit up hahha ffs. Ah choppers.. yes thats a 80% snaped throttle cable might gotta steel one of my van if works for weekedn as away in truck till friday avo ffs
1 point
-
Finally finished off the twin carb set up. I made/modified the twin choke cable. Picked up a gyro splitter from a bike shop, pulled it apart and e,tended the tube for more throw, replaced the cables and outers and attached it to the stock cable and carbs... I do have a second w clip now to hold the cables to the carbs if the tape fails.. Then the second airbox finally turned up so I pulled the factory trumpet/ram tube out and mounted it to the carb with shorter bolts, fitted the unfilter socks and boom.. complete. I do want to order a different profile needle for the carbs. But that's all for now.. Just gonna send it
1 point
-
So all the parts are on new grips wich are metal with rubber grips. New seitch gear new bars on looks good just need to ride to dile in where i want bars
1 point
-
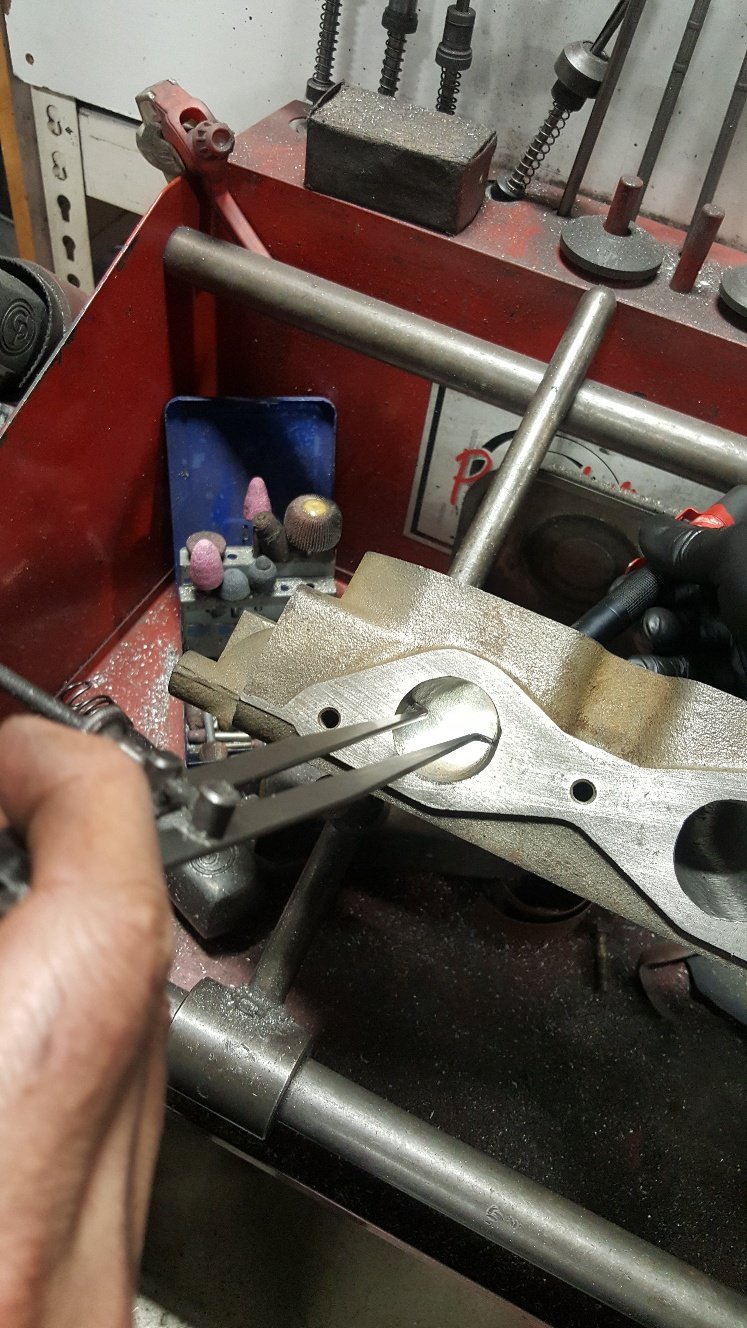
So I turned a Accumulator groove into my pistons. Its a groove machined into the ring land between the top and second ring. This groove accumulates residual gasses from combustion to stop ring flutter improving ring seal. I also added some Contact Reduction Grooves in the top land these limit piston to cylinder contact during high rpm and high temperature. They also disrupt detonation waves. Now I've pretty much got most of the bottom end machined except for the valve reliefs. But to machine these I need to figure out what size I want to make my valves. Here's a picture of standard valves vs some oversize valves. I won't be useing these particular valves. I will make some valves out of Mazda/Ford FE 8v valves. While the head was lying around my work mate Al decided he would do a little porting to open up the intake runner where it pinches down at the intake manifold face. You can see he has opened it up enough to be able to run the calipers down the runner to the bowl area without it pinching the calipers this tells him he's got it pretty evenly round. This should give good even area volume. So the intake flow stays at a even speed. Before hand you would expect the intake flow was speeding up through this area then slowing down before getting to the back of the valve. Hopefully I explained this ok. I'm no guru on porting. This is just rough cut off the burr. We will probably leave it that way as it can help in atomization.
1 point
-
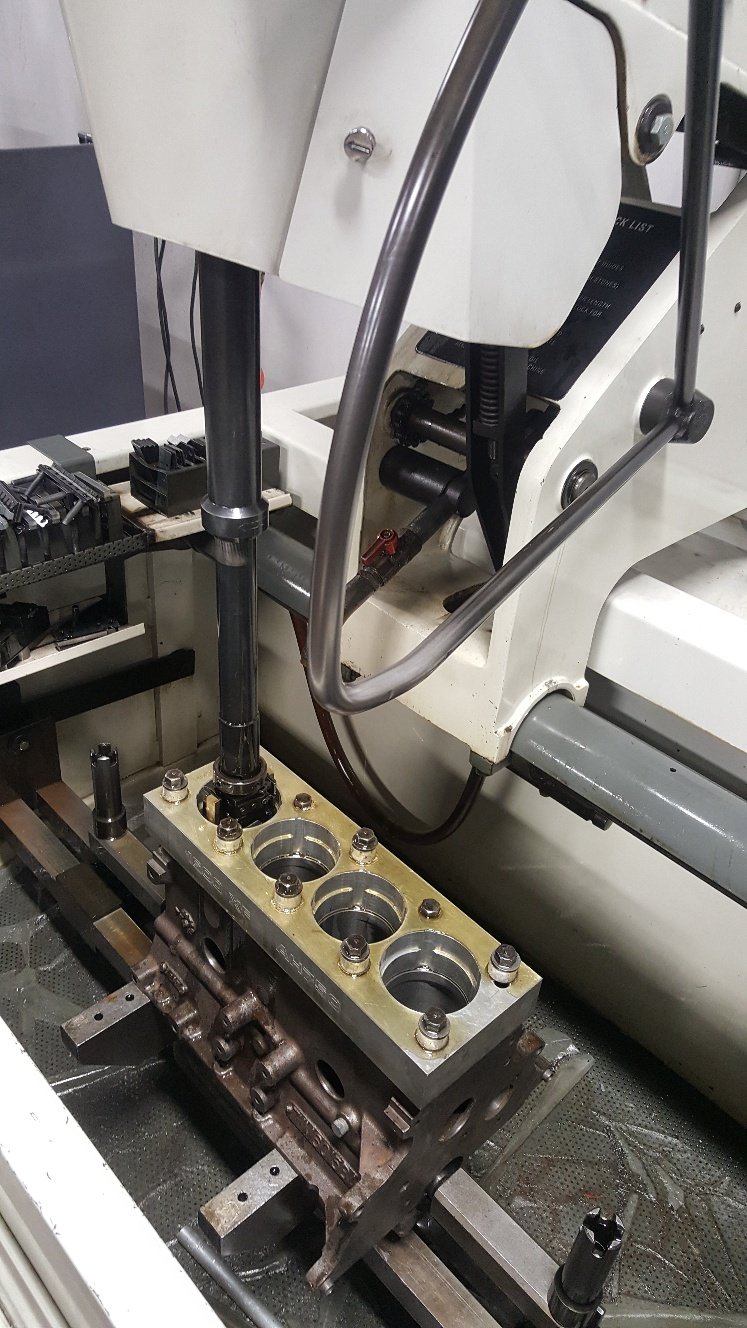
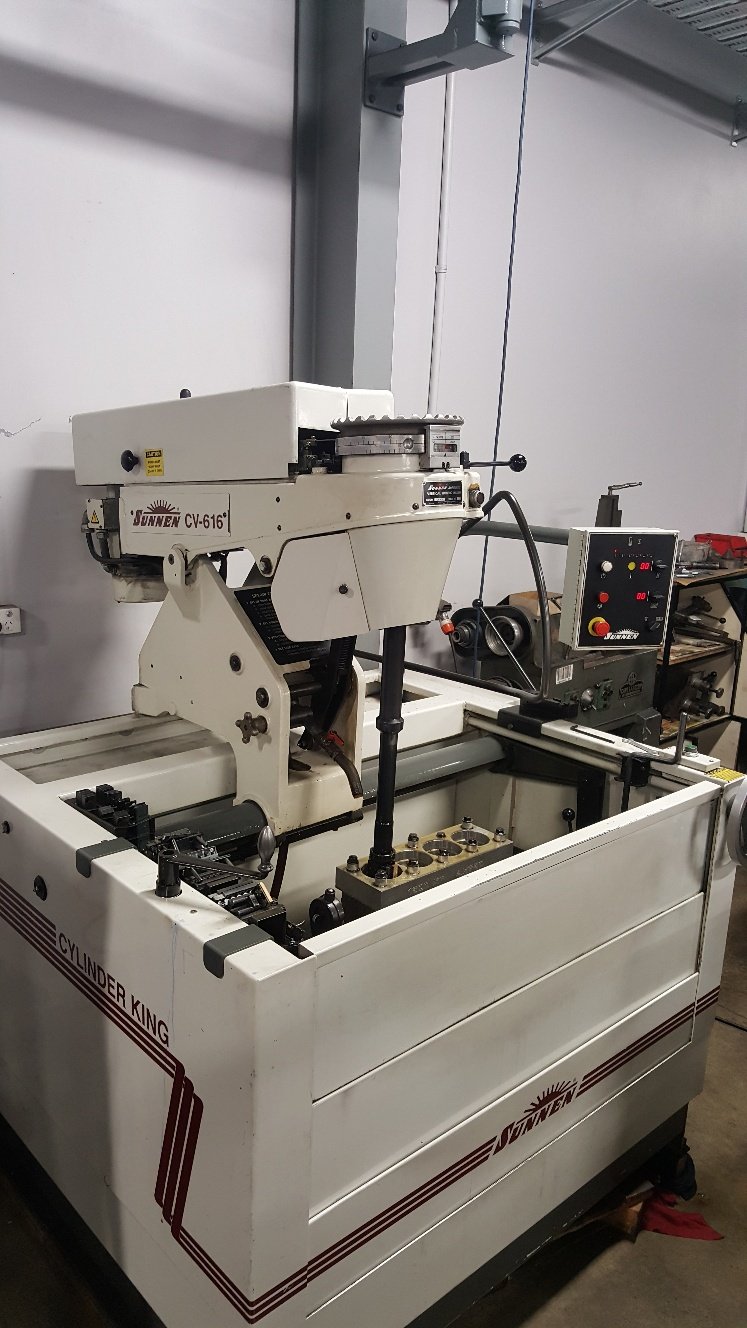
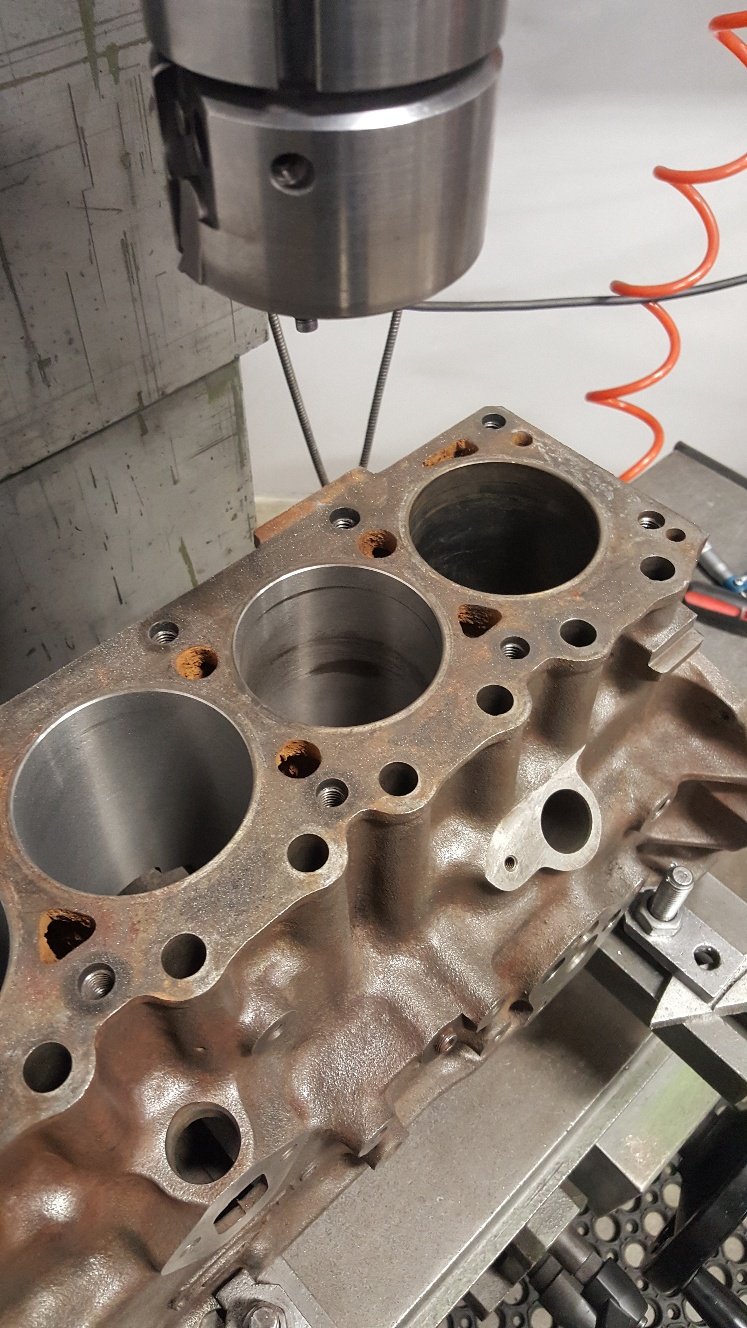
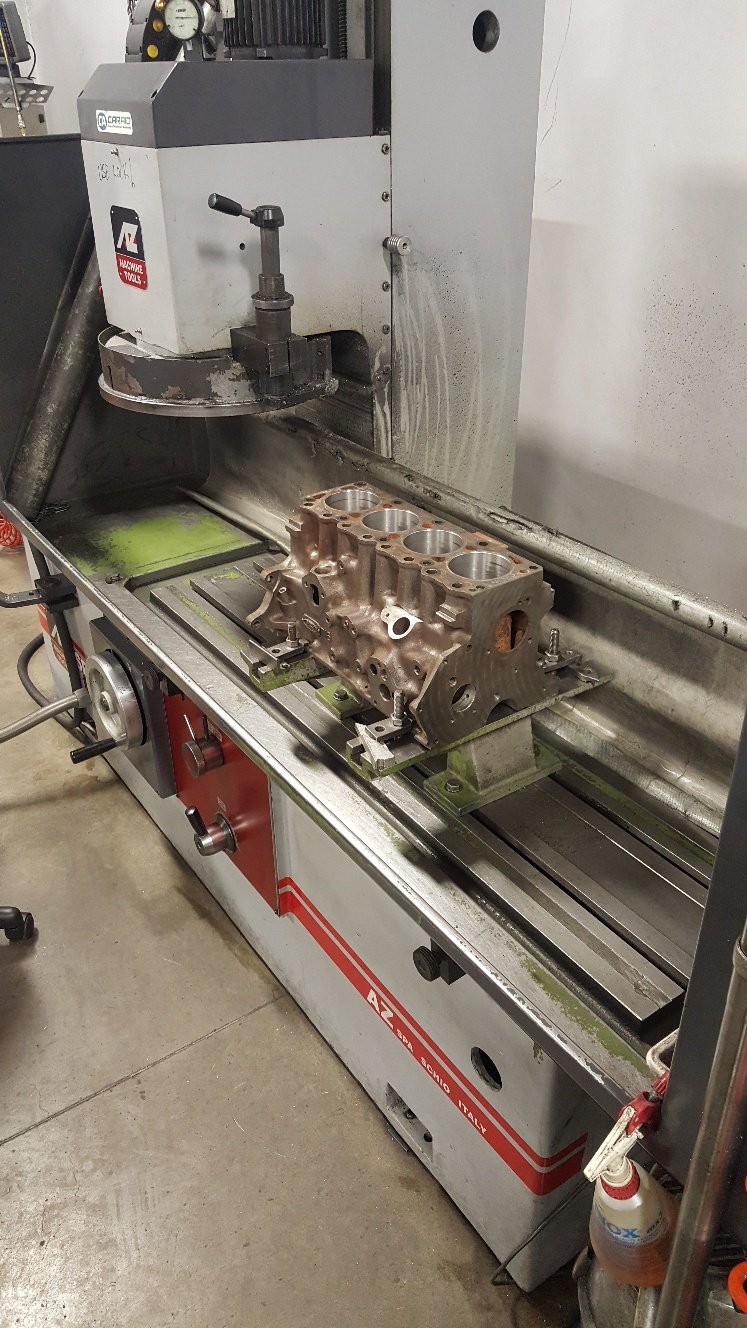
So i fitted the torque plate for the honing process. We only have torque plates for certain engine's. But lucky Ford xflow's are in formula Ford's so the boss saw the need to get one made. The torque plate allows you to simulate the tension of the cylinder being fitted to the block while honing. Some blocks move considerably from the head bolts being torqued up. This can distort the bore, sometimes up to 2 thou on various blocks. So it's like honing them in there assembled running state. I have heard stories of shops honing with hot coolant running through the water jackets to simulate total running conditions. All in the name of perfect ring seal you need a perfectly round and straight cylinder. We leave 4 thou of material to hone out as this gives us a good base to start achieving good rk rvk and there's another value aswell but I can't think of it right now. But we start off honing with a course stone which gives us a deep groves and removes material quickly. Once we've removed 3 thou we change stones to a smoother grit this removes the tops from the course stones while taking more material out. I'm also happy say I have removed all the bore wear marks after removing 2 thou of material. Now we move to a finer stone again same thing applies. Each different grade of stone removes material in different ways. Some stones will take more out of the bottom middle or top of the bore, so you have to measure the bore to make sure you're keeping it straight. The stones also react to load. Theres a round handle onto of the machine that applies load to the stones in the bore. If you wind to much load up it normally takes more material from the middle of the bore as there's no real strength there. Extra load can also create heat which will give you a false reading of size from the material expanding. Once we are at finish size we have what we call plateau stones. These are 800grit they don't really take much material out but smooth the tops off from the previous set of stones. Then we move to our cork stones. Which look nothing like cork. These are really good a removing left over honing material out of the cross hatch. We only give the bore a couple of strokes with these. Once a year we clean the machine out. It normally has about two 20 liter buckets fill of cast iron sludge sitting in the bottom of it. This machine runs 200 liters of honing fluid. Which is great as one of the jobs of the fluid is to keep the block cool as well as wash the honed material away from the honing head while honing. A drum of honing fluid isn't cheap at $2500 Then there's all the stones we burn through. So the honing process has one the highest consumables cost in the workshop per year. From start to finish it can take a hour to two hours to hone a block after a rebore. A deglaze or what we call a rering hone is normally about three quaters to a hour.
1 point
-
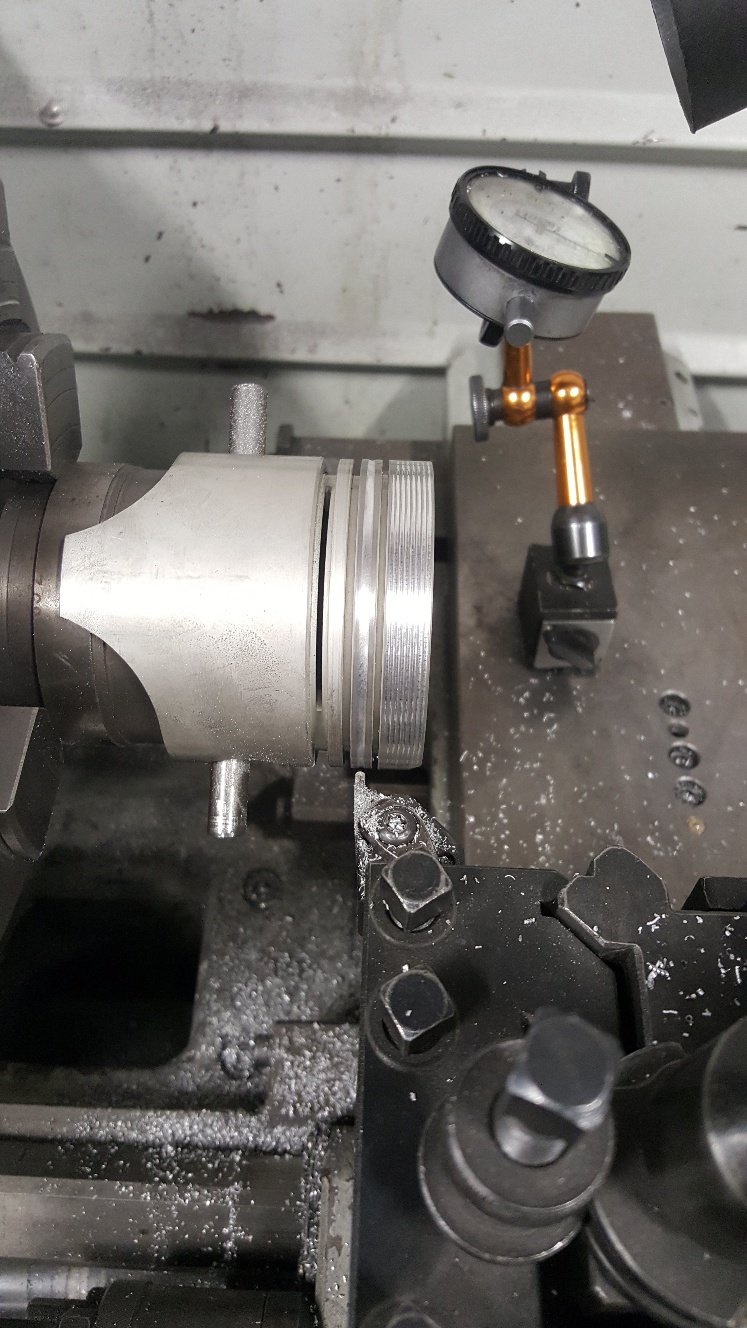
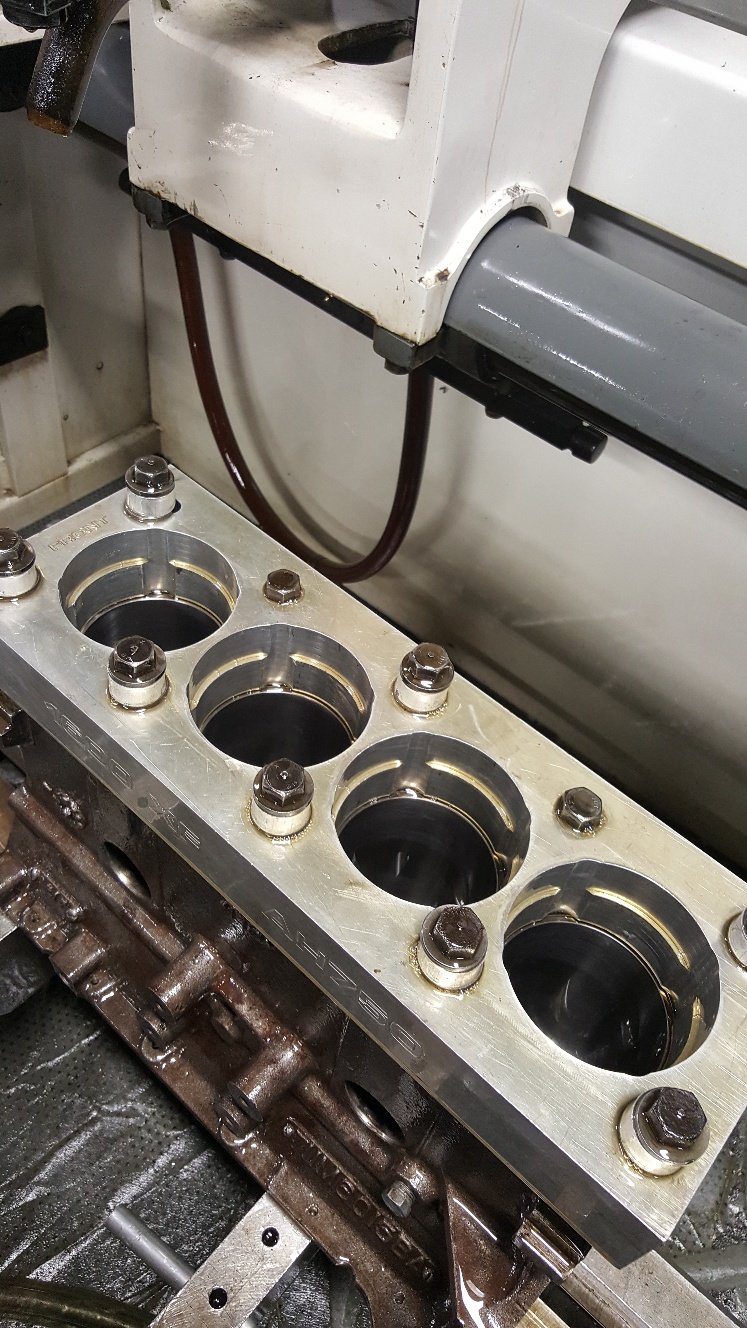
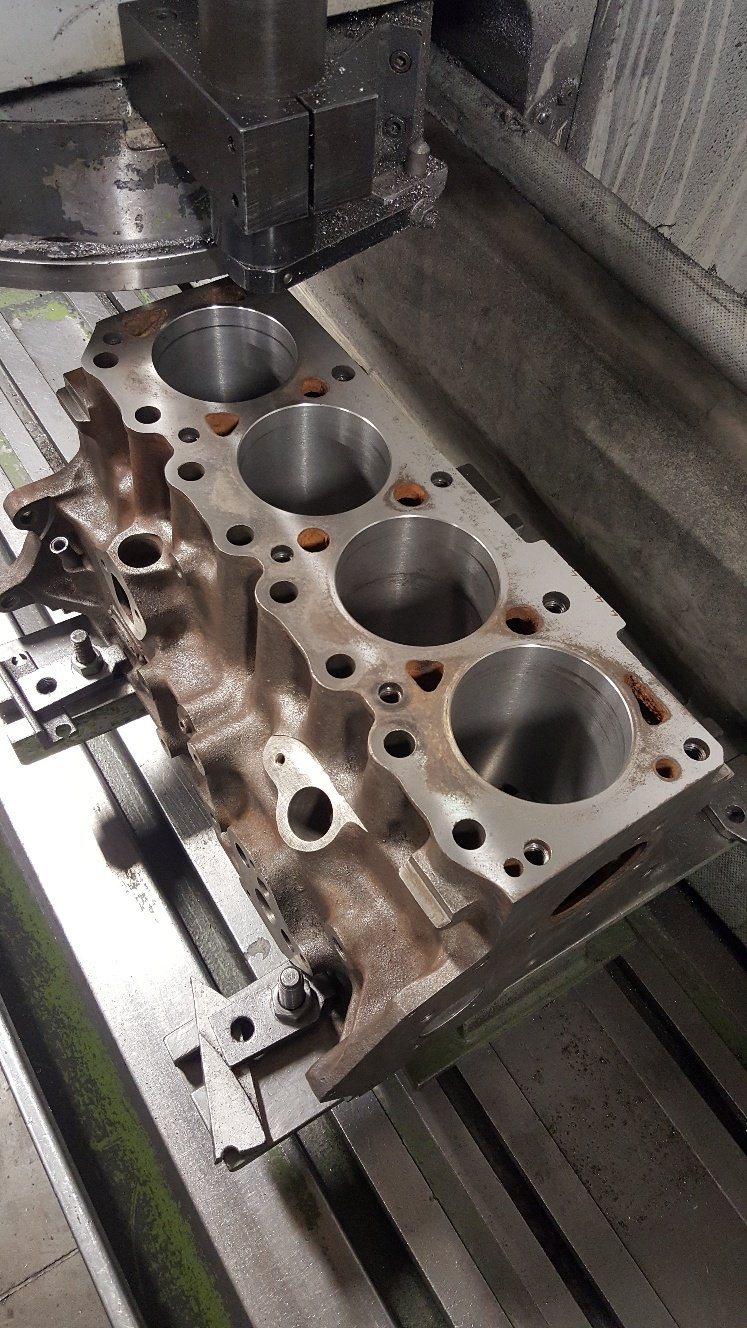
So I got the block into the boring bar. It's pretty straight forward boring a block. Doing a cylinder liner is a bit more involved as far as the boring bar is concerned. This block is at 30thou over or .75mm in metric. I have bought 40thou over or 1.mm pistons. It has a bit of wear. But hopefully it's should clean up once it's honed. This picture is of a test cut. So you dial the boring bar head into the bore. If you have a decent amount of wear it pays to slightly offset the bar towards the wear so you clean all going well at the next oversize. So in this picture you can see the boring bar hasn't totally cleaned with this size cut. I have only set the bar at 81.90mm. So I have .1mm or 4thou to hone out to get to our finished size of 82mm. We generally like to leave this amount to hone to achieve good rk rvk this is the depth of hone pattern. I'll go into that a bit more once we get to honing it. Once we've finished honing we normally go to the surface grinder. The top of the block is a little corroded so I'll probably take a few cuts to clean it up. So I've done a light cut to see how it looks You can see it still needs more off it. In this case it's not a issue to take more off the deck. When you are dealing with a late model diesel or performance engines that have been set up with good tight clearances it pays to watch how much your removing as you may have to detop your pistons as they may start getting to close to the head once assembled. Also valve reliefs can also need deepening. But this is more so a issue in extreme cases. This good old xflow should be fine. But i will be checking all this later once i can dumby the engine up
1 point
-
Good starter! https://barnfinds.com/monster-truck-1950s-fwd-cab/1 point
-
Woohoo! Just finished all 140 pages.. I recommend everyone do it, I learnt quite a bit - including that Clunt (new one?) is a ledge After all that, I am pretty sure I'm good, but I'll post it up in case anyone else is not quite sure on it.... RX2 with S3 12a and 5 speed. Gearbox mount is factory un modded - check Pedal box is factory - check Drive shaft is factory unmodded - check Engine same size/family/power - check Bit where it gets a tiny bit squiffy - mounted using RX3 factory Xmember so engine is forward - but bolted under sway bar where the RX3 (or RX2 S4?) units mount. Car is lowered, but higher than 100mm Exhaust is mix of factory bits and not loud Air filter is low restriction thing Electric fan Wheels vary as you can imagine Lastly - Car has been painted recently, but no major body work was done, never been registered in NZ before so how would they know repairs have been carried out to the correct standard? Think it had some rear quarter stuff done prior to it going off the road in 1981 as well. Any let off if the car is a personal import, and it is in every other way pretty tidy by all accounts - wiring neat, interior and body stock etc..? Or is it body strip back and repaint time..1 point

.jpg.2739ceea4562b1a4c9bc4bec0498464c.jpg)
.jpg.8457b1bcdd62d060a0169e5117ec3a54.jpg)
.jpg.78418e84f1243825758bab88a226bc27.jpg)
.jpg.f3bd77e0f27702cd07f897e06d2f1487.jpg)
.jpg.6e7fb716077b37ca5360f0280318290c.jpg)


This leaderboard is set to Auckland/GMT+12:00