
Leaderboard


Popular Content
Showing content with the highest reputation on 08/25/19 in all areas
-
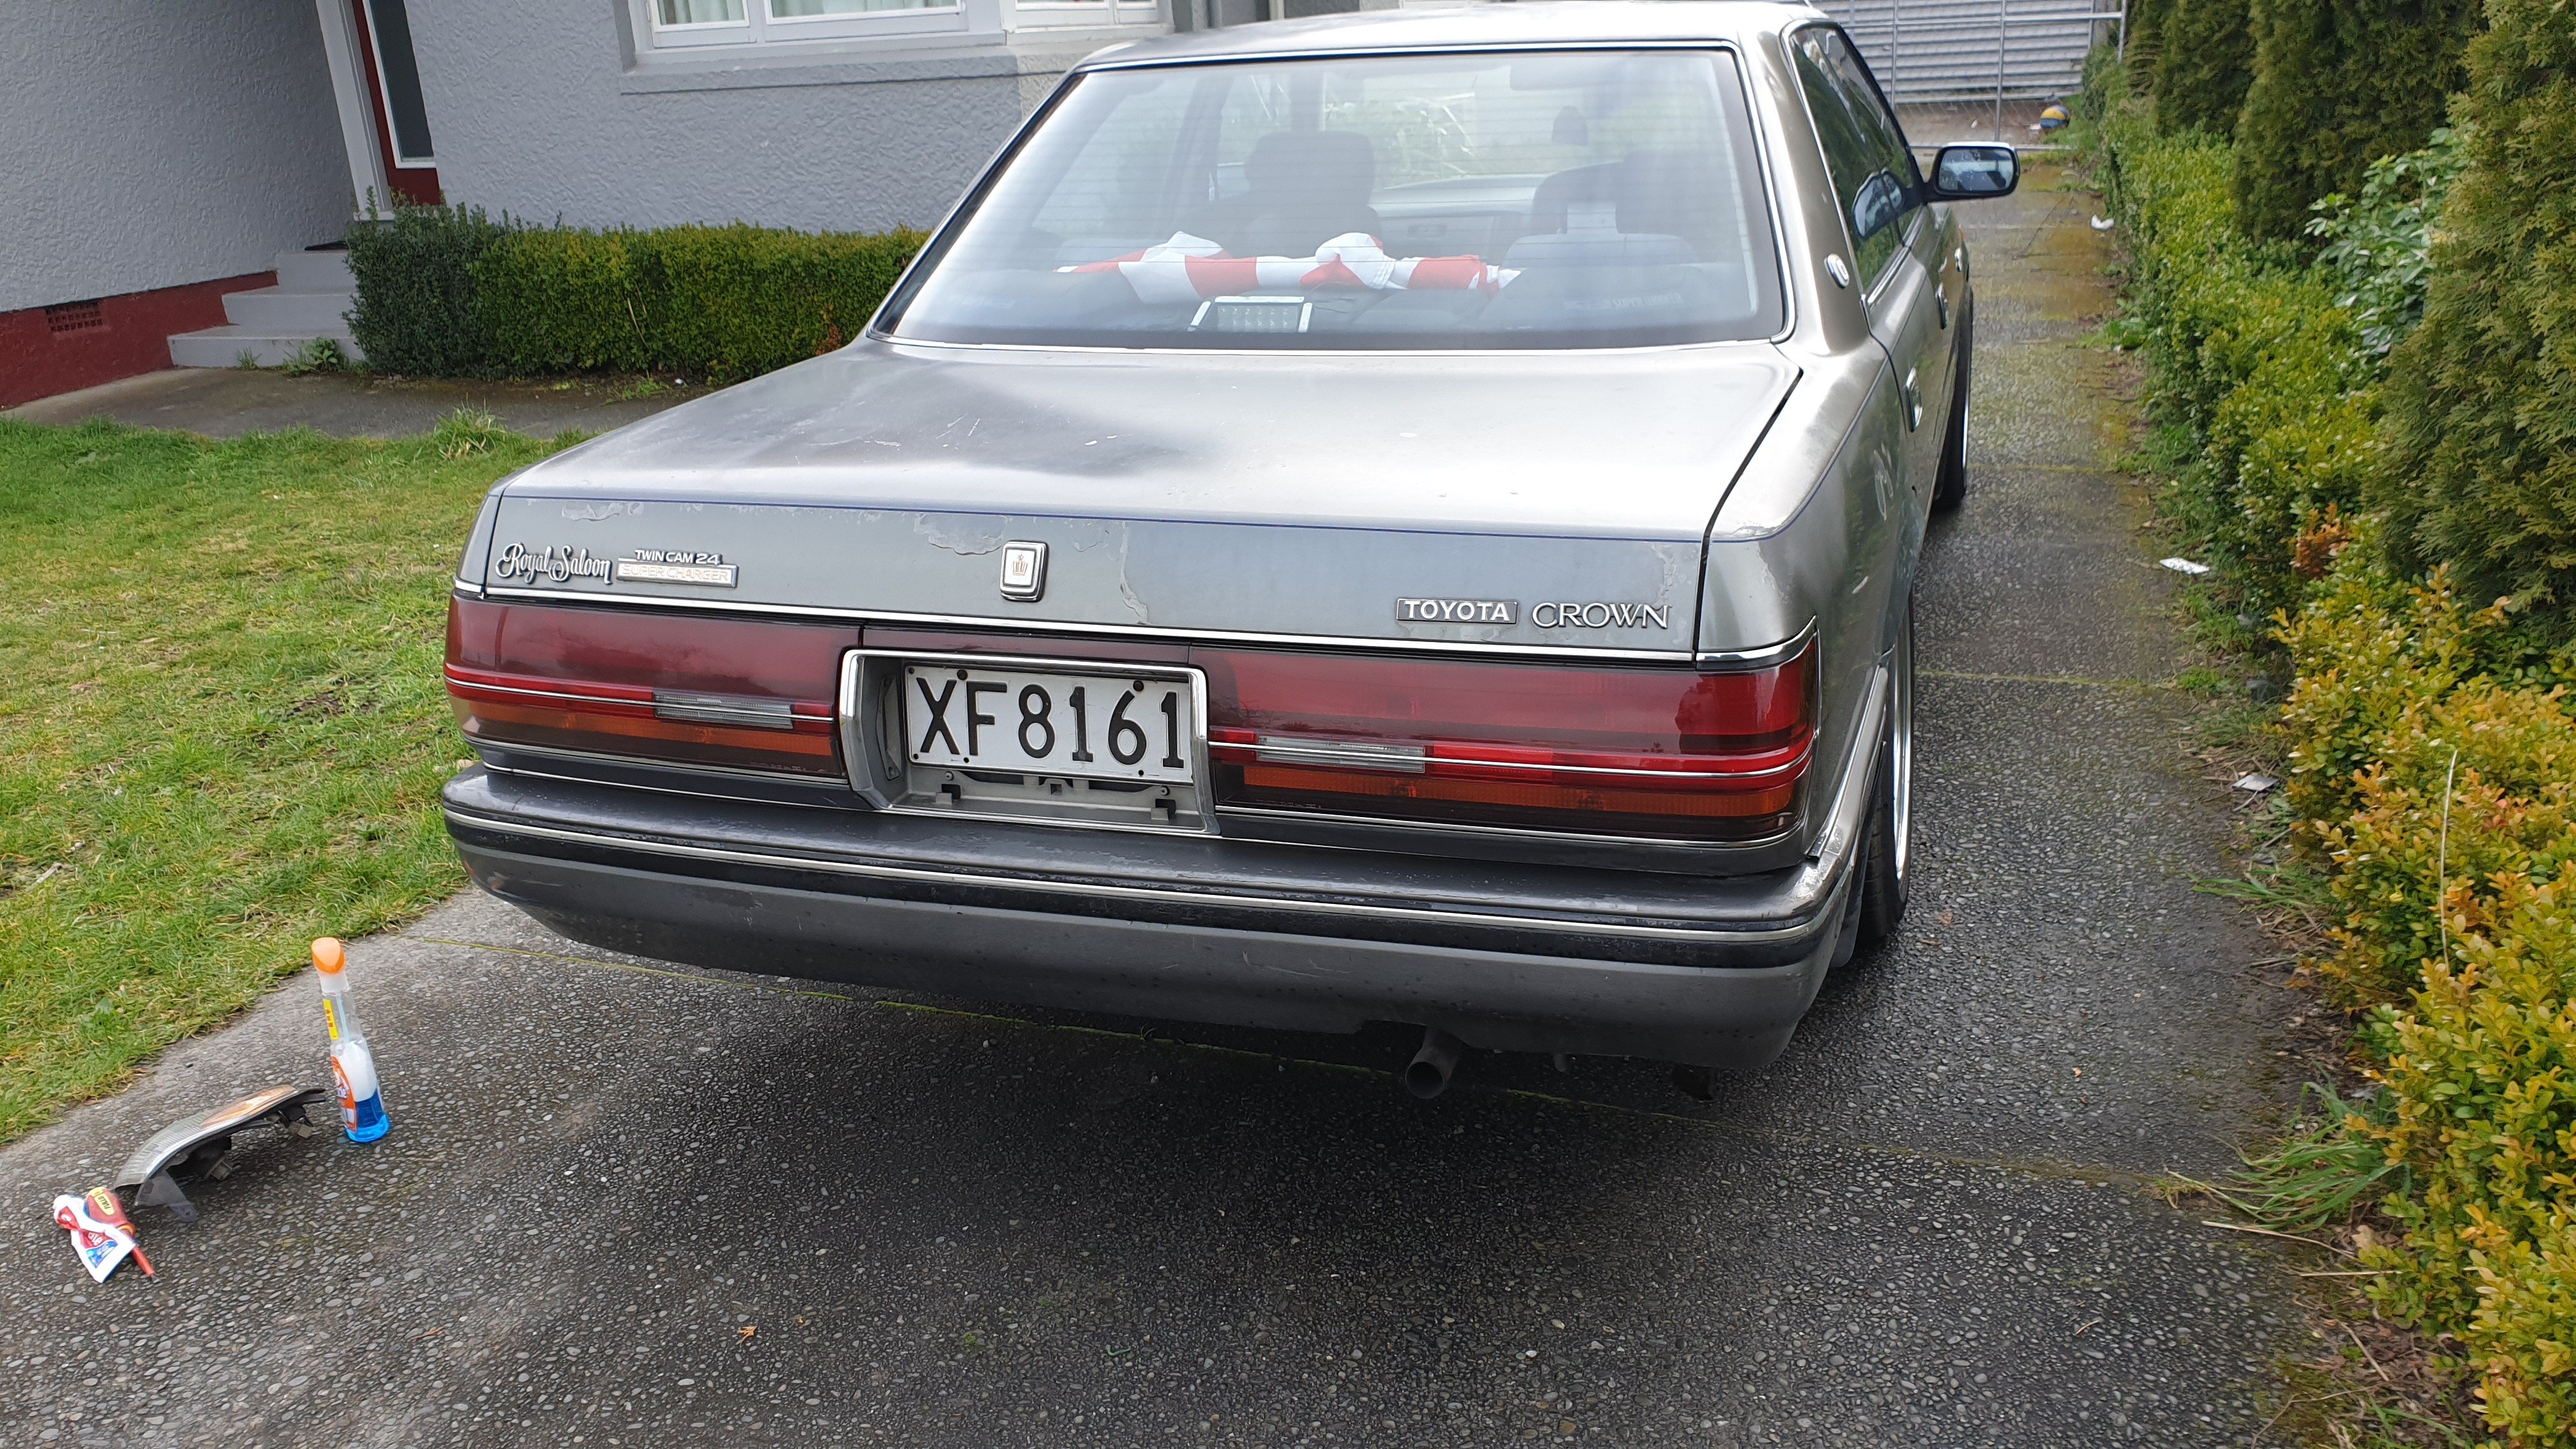
Chucked in the fresh triple electrode plugs and new leads.. hooked a few gears for a Sunday drive. Waiting for 1 last part to arrive. Will attempt a wof check this week. If it passes I'll attempt the hanmeet drive
 11 points
 -
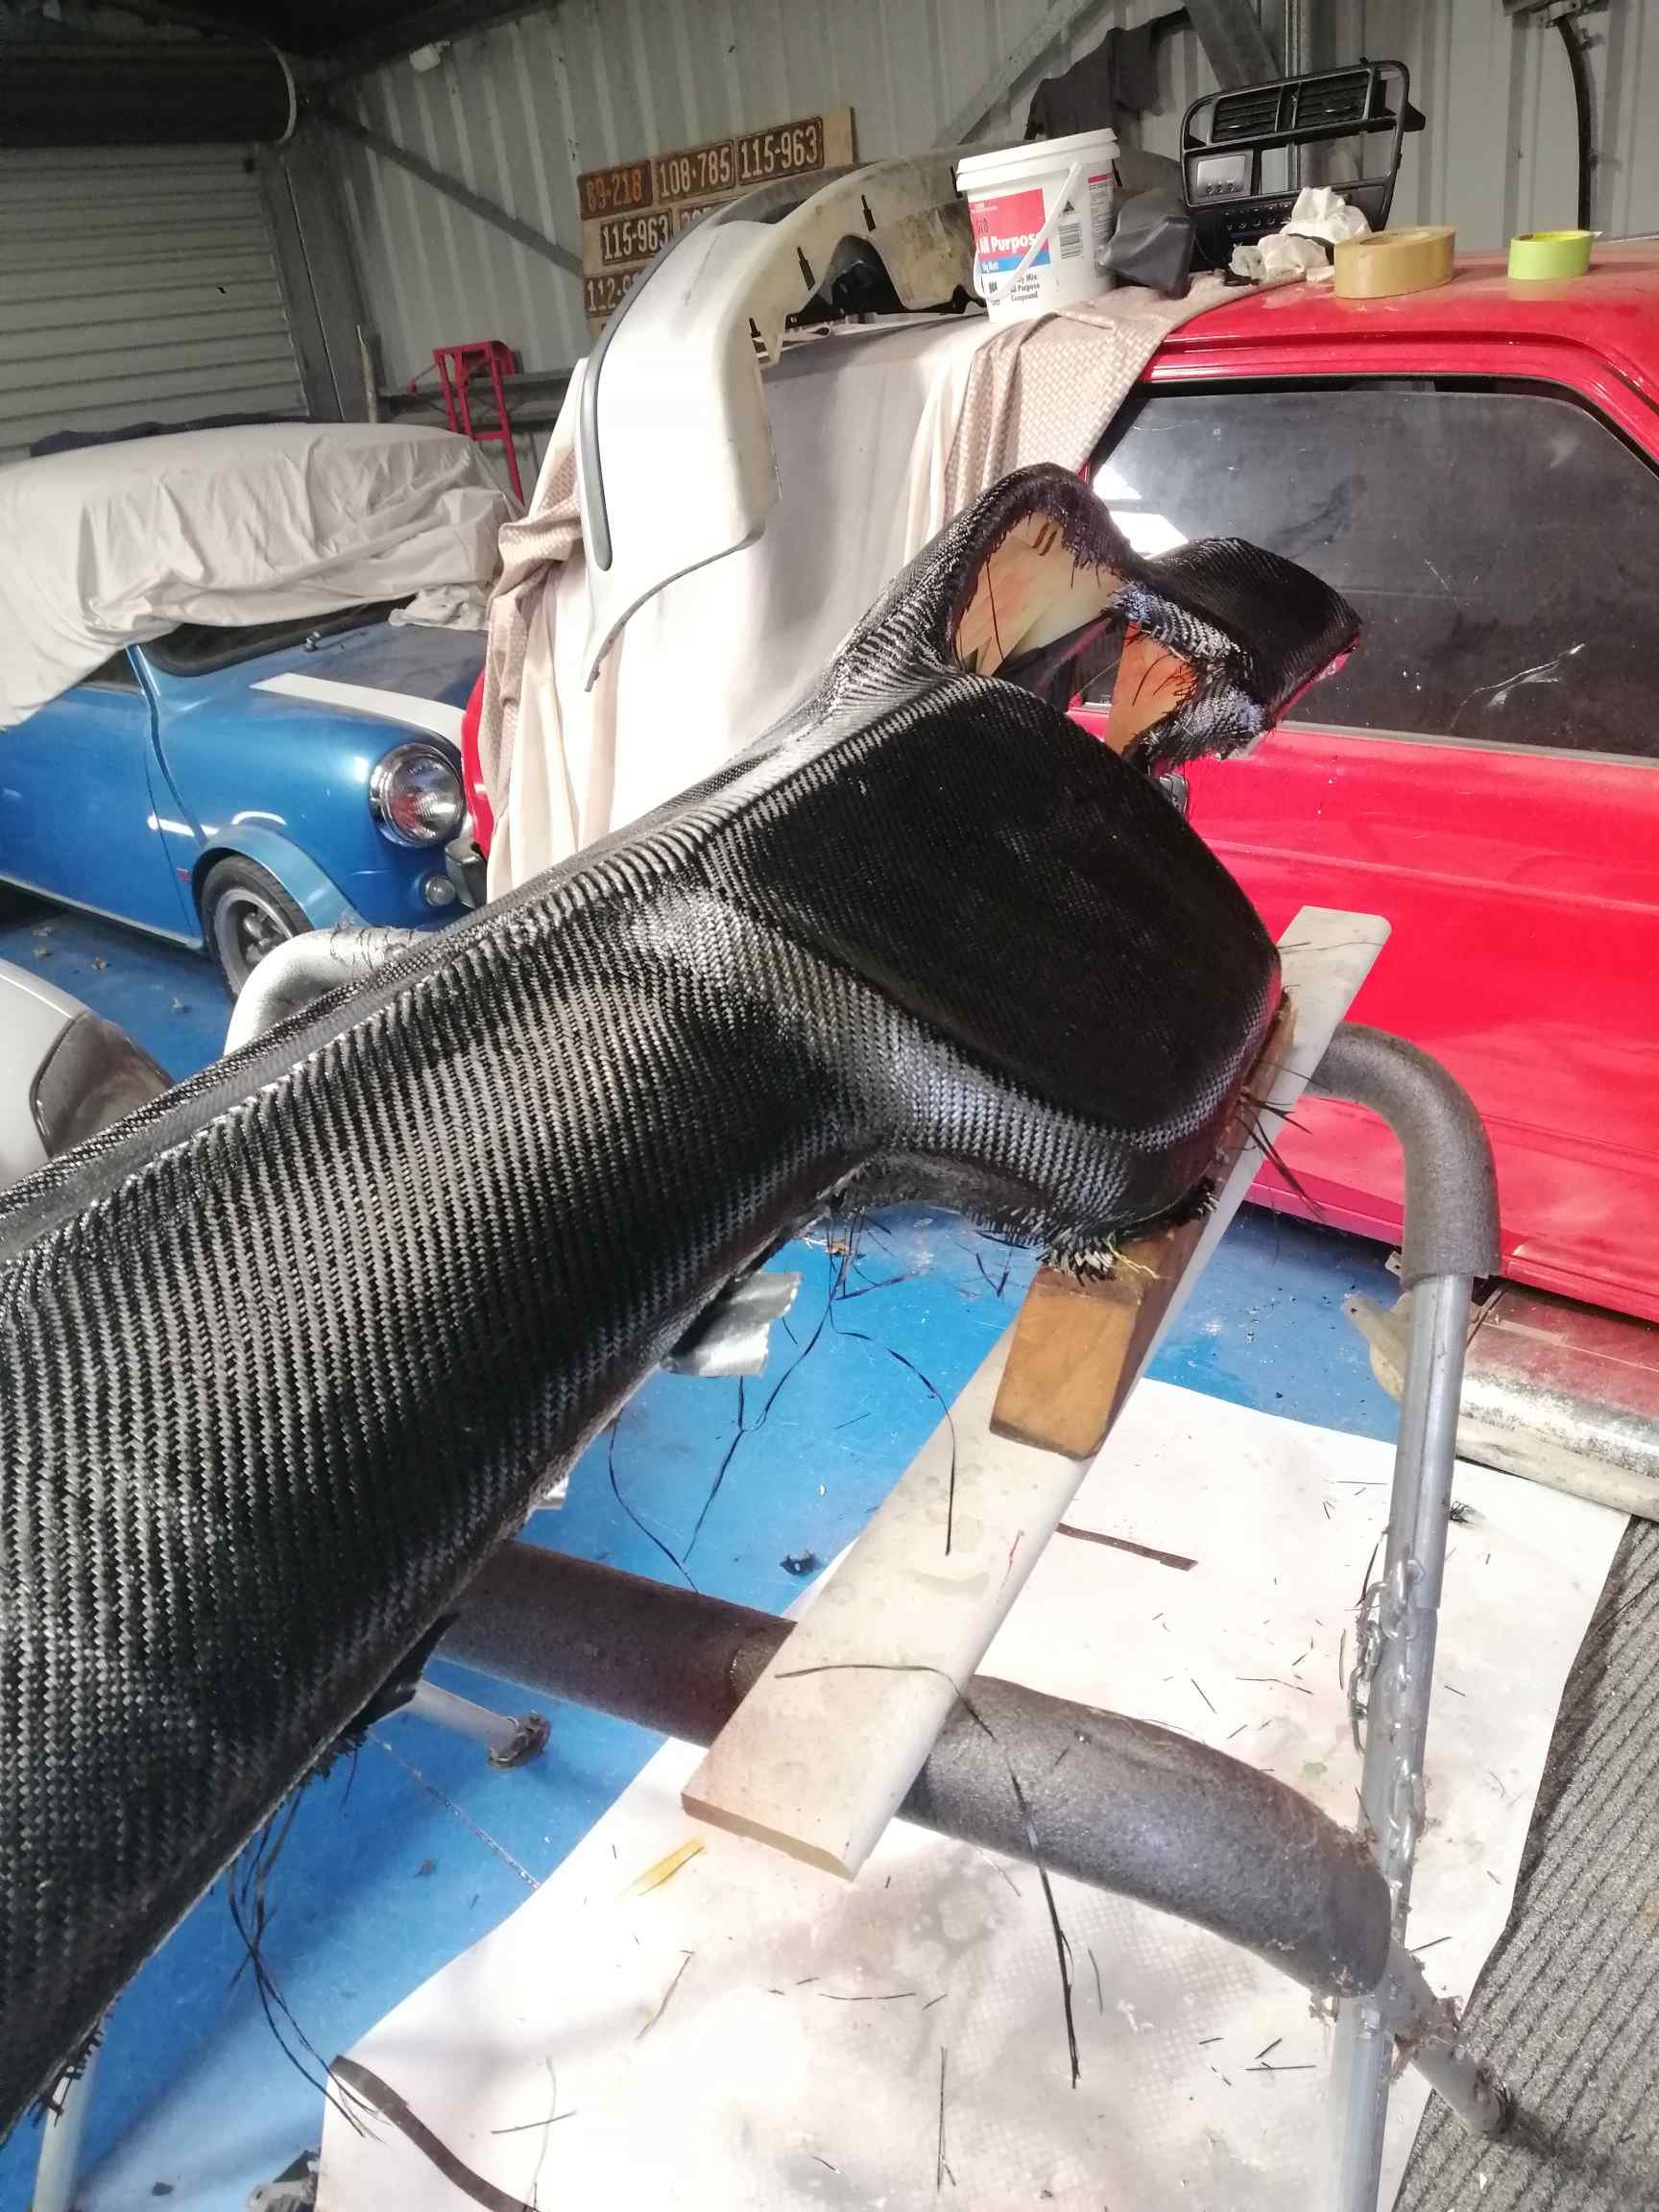
Some progress on the dash, it's not going to be an amazing show finish but damn it's light. I have stiffened up the under side with some bits of chopped strand. Once that's cured I'll continue on with mounting points (hopefully). At this stage I'll probably cover some of the top with black microsuede or something and satin clear the exposed carbon in an attempt to reduce glare. Open to suggestions for cutout for the demister. Plan is a 12v hairdryer plumbed to some sort of DIY ducting.
9 points
-
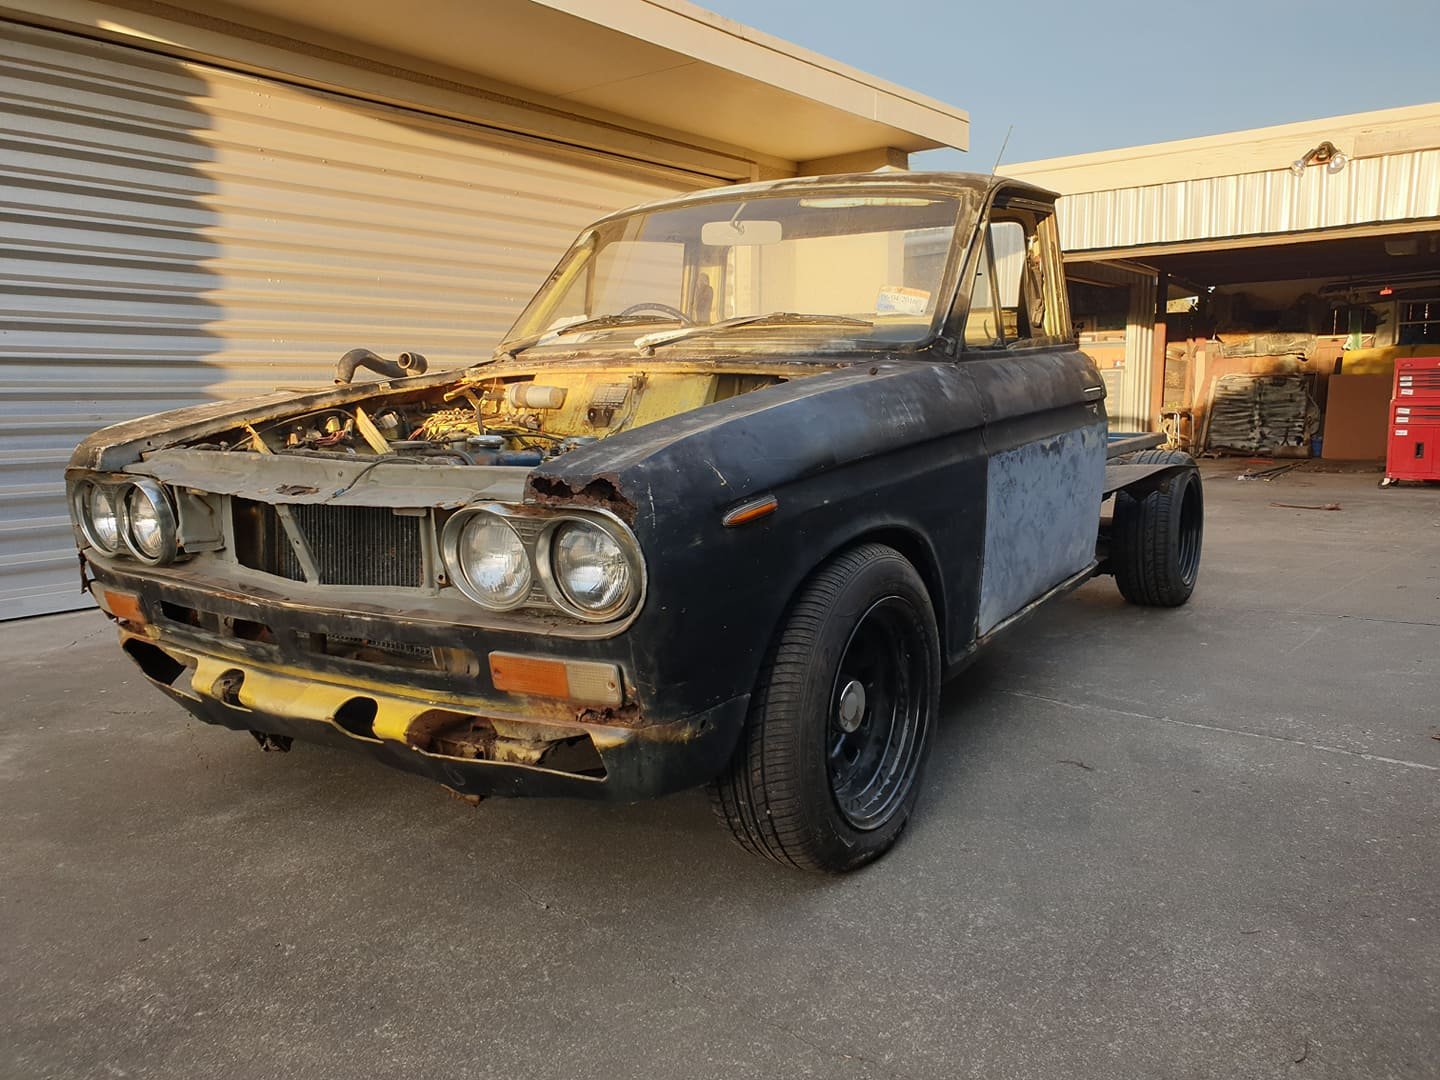
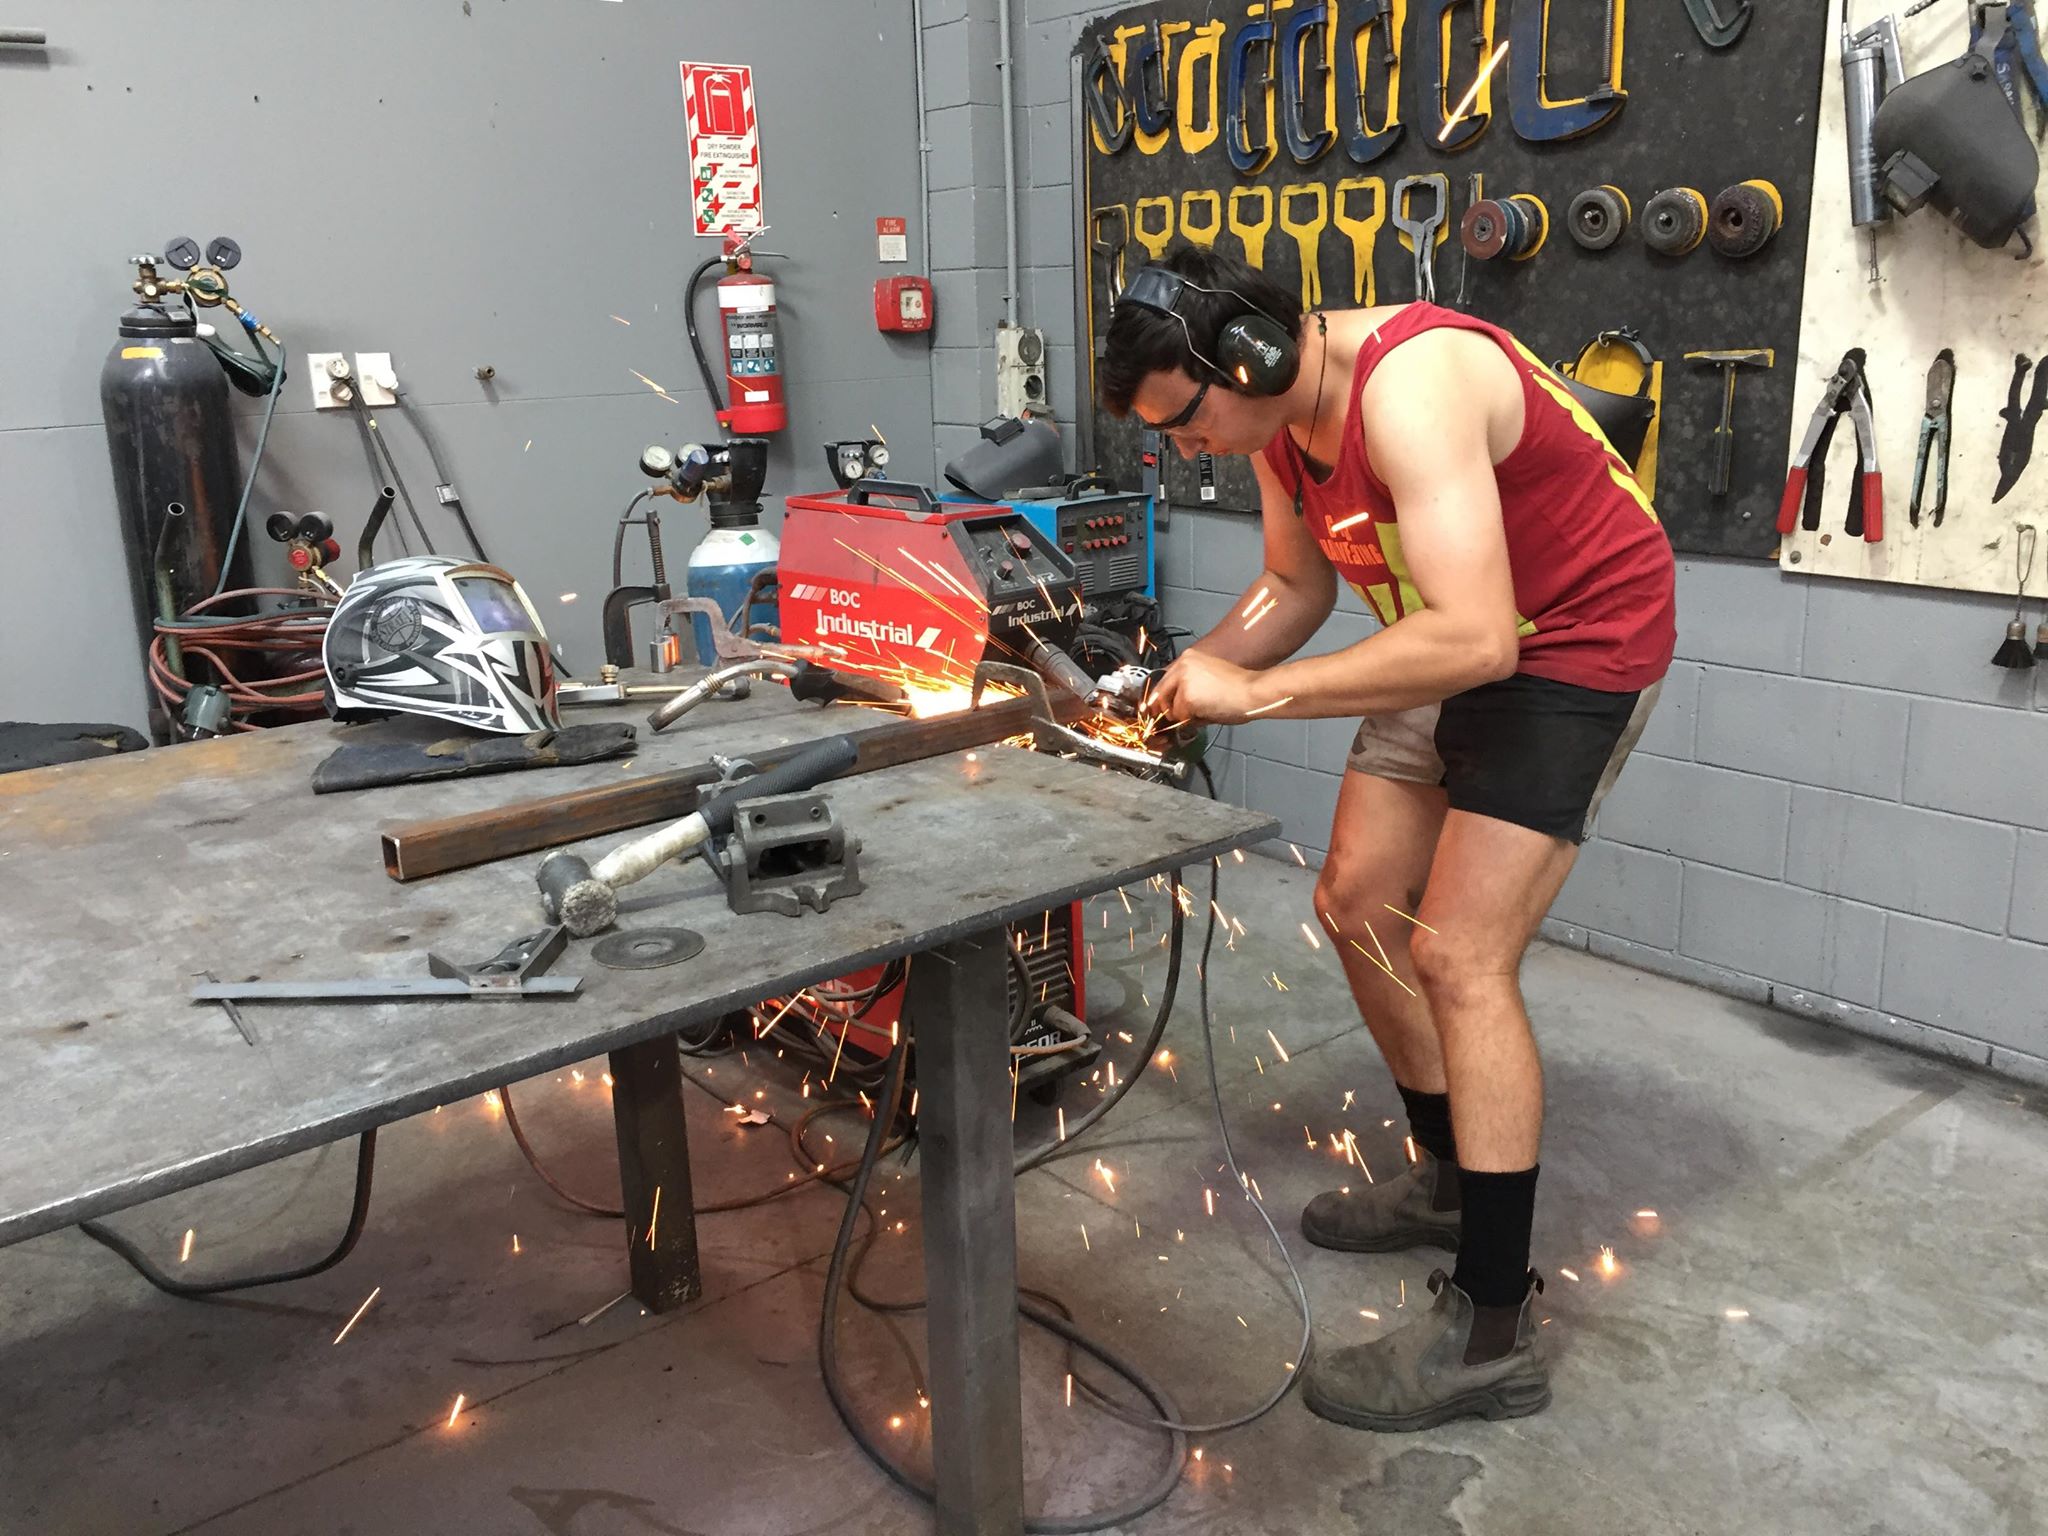
Yea so that engine... It actually only needs a crank and a conrod, plus bearings, seals and gaskets. Trundles have cranks for $250, con rods for 80. So I reckon for $500 - $600 I can sort it out. Everything else actually looked pretty good. The head had new frost plugs in it and it and the engine had obviously been apart previously. There was only about a liter of oil in it, and it had clearly been run with a spun bearing until it siezed. I will check everything else before ordering anything but that looks like a plan. I reluctantly put it to one side to strip the chassis, then spent today finishing off all the welding; All sorted, although to get through it all i had to tell my wife after tea that I had to 'tidy up' in the shed. This have me a sneaky extra half hour. I am getting this, the cab subframe and the deck zinc arc sprayed. This will be good cos then I can store that shit outside and free up valuable shed space. I have a few big jobs coming up, so I will need it.7 points
-
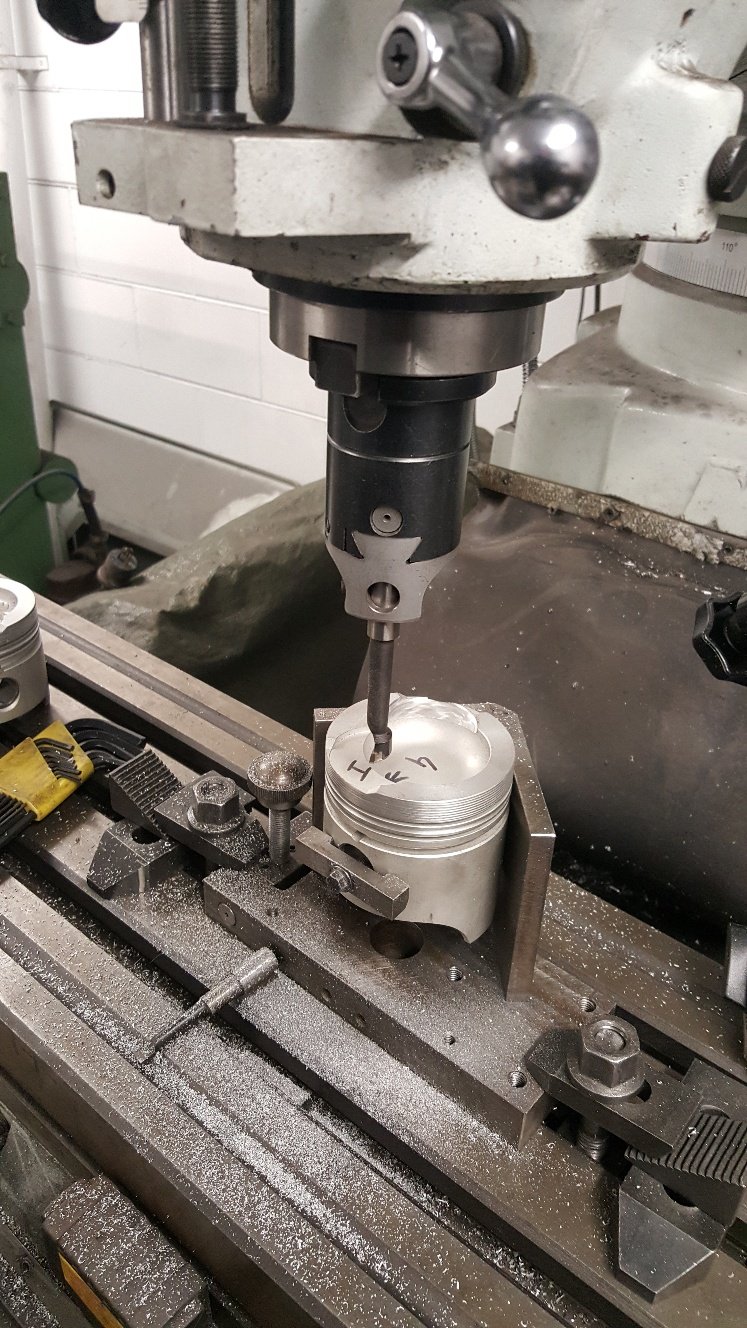
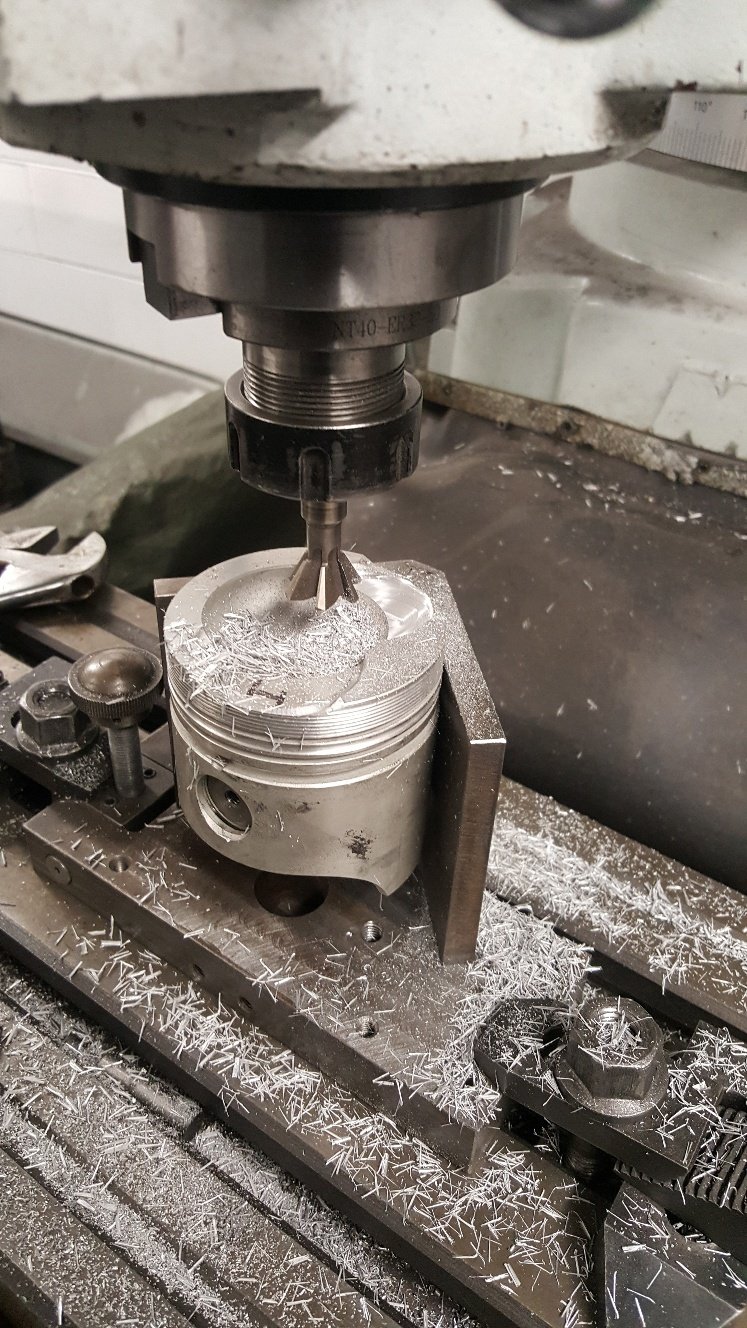
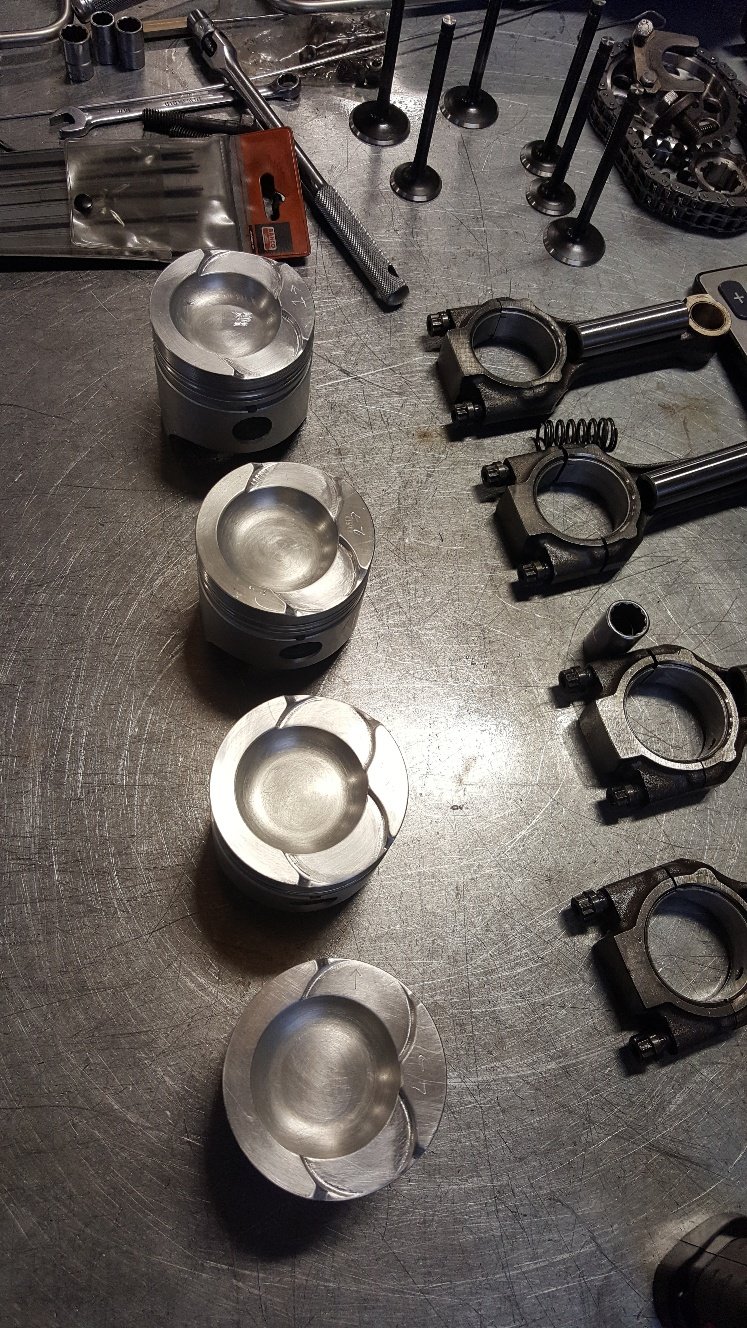
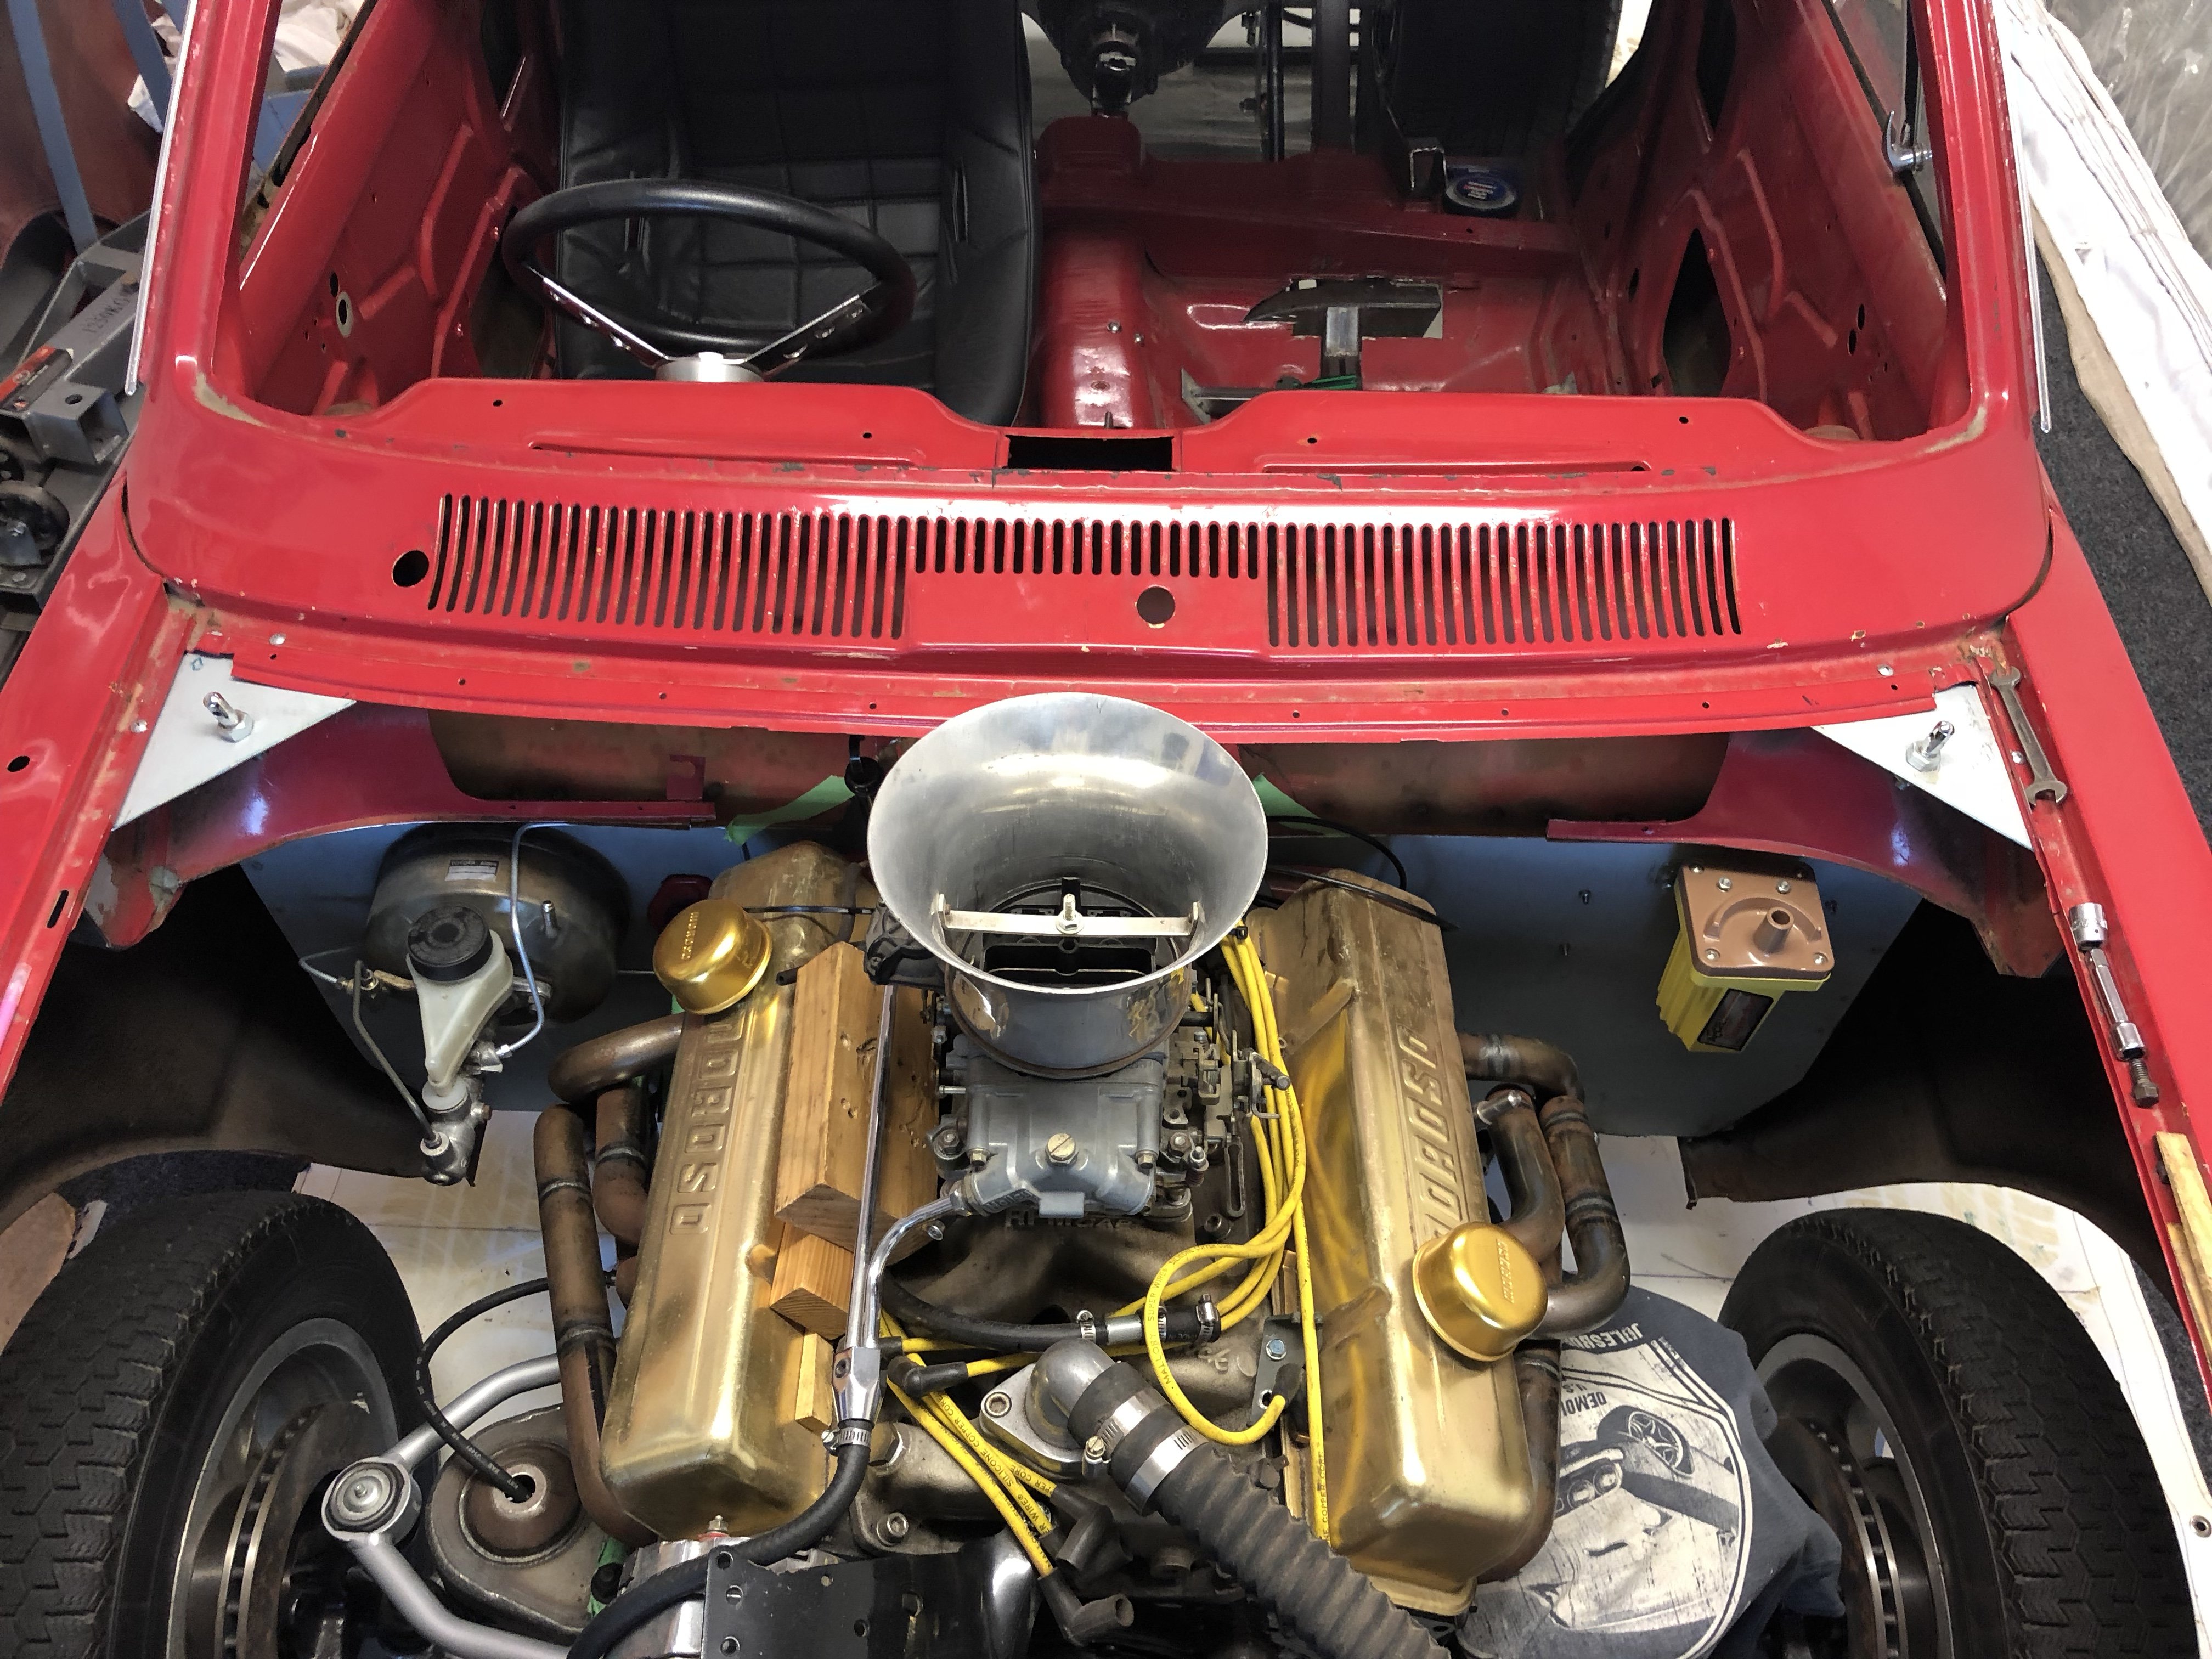
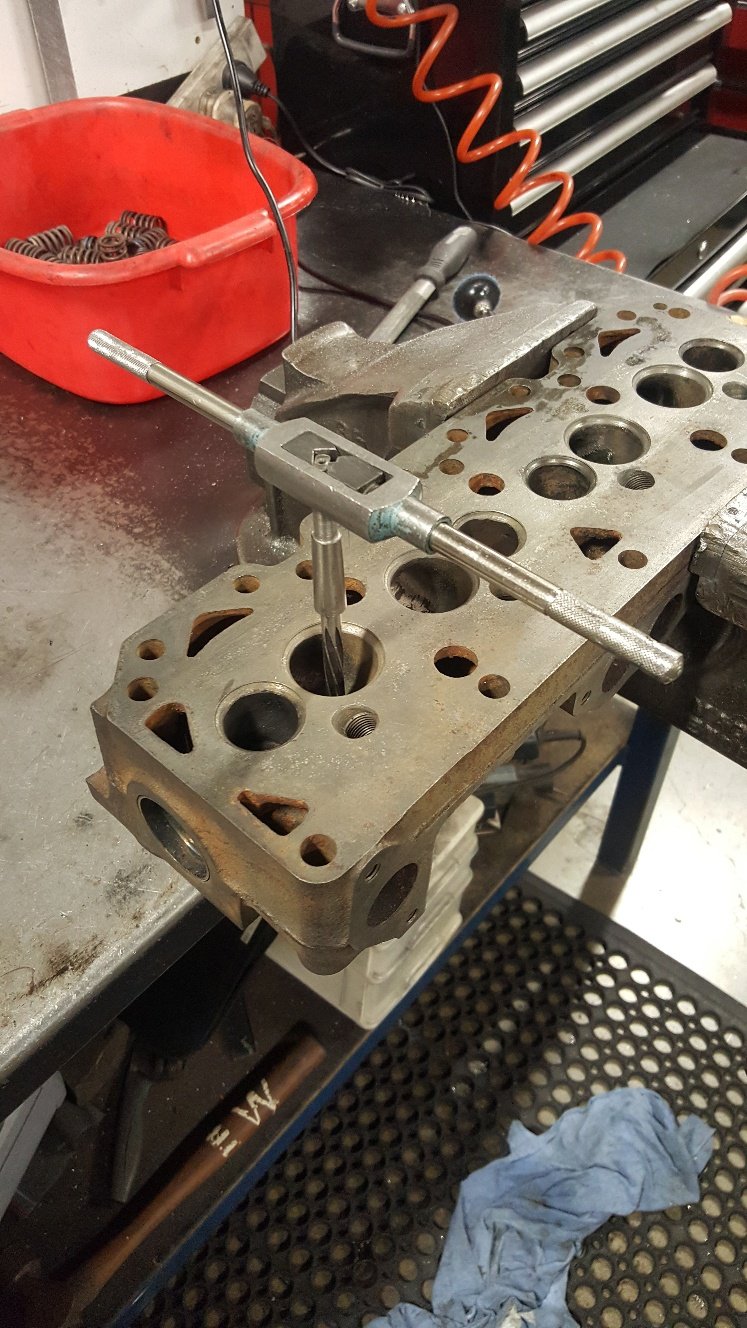
So now I know I definitely need to make the intake valve pockets bigger OD wise by 2mm. Which was no surprise as I've increased the valve size a good amount. I also found I need to deepen the exhaust pocket by 1mm. So I used a the mill to machine the pistons. We normally use a guy to do our valve pockets as we don't really have the gear to do a really nice job of it. But I'm doing this on a budget so I had a crack. This the tooling I used to take the OD out. Above And this for deepening. They came out ok. But we would normally out work this job. I gave them a tidy up with wet and dry and a small file. Tried to take the sharp edges off the top of the piston. Here's a pic of a few parts. I wasn't going spend $250 on the double row cam chain gear kit. But it had to happen.
6 points
-
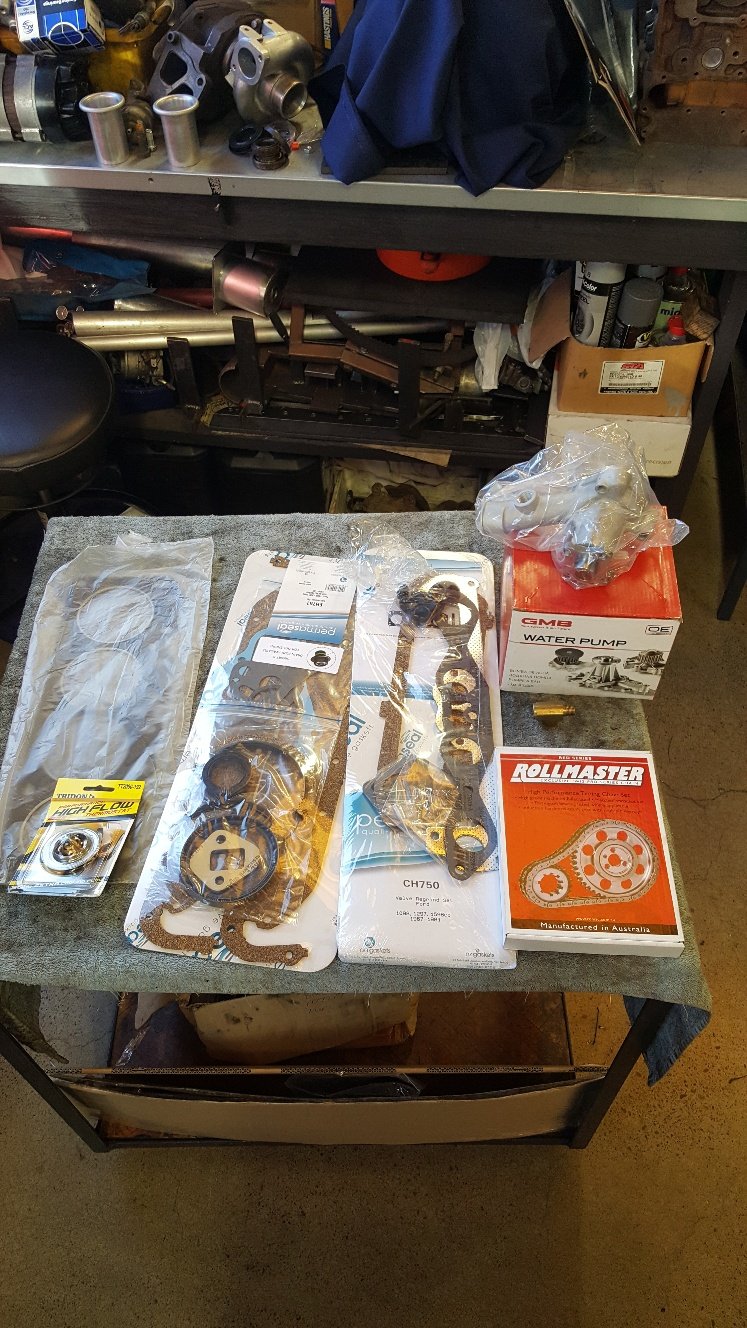
Some goodies arrived during the week, so it was time to get under the Tasmin and rip out some hose. Since working under cars on stands sucks, I had another go at getting the car up on the Quickjacks. This time I was much more successful. I had to use the jacks sideways (an approved method, and the same as I used on Snicket) The reason I wasn't so keen on this initially was that the exhaust hangs so low I wasn't sure it would clear the frames. It did. Just. With the Tasmin in the air, it was much easier to roll around under it on my creeper. I started to rip the old fuel hose from the tanks out. No photos of this process because it was messy.... First I disconnected the feed to the pump. This is from both of the tanks, so I had a 10L fuel can ready. I managed to spill a fair bit, but got it into the can in the end. I filled up with 10L the other day, and about 9L or so came out. Some of that difference would be on the ground (and my arms), but it confirms that the tanks were bone dry when I got the car. The hose came out easy enough. It was worse than I thought though, every section of hose was seriously perished, with cracking all over it. The hose also smelt like fuel on the outside. There were some nasty splits in the ends of the hoses from each tank too Bend the hose, and it isn't pretty The new hose is Continental J30R7 5/8" fuel hose. This is a low-pressure suction feed, so didn't need to be a high-pressure hose, it just needed to be high quality. The hose walls are thicker than the old Aeroflow 400 series hose. The old Tee piece is made from a bunch of Aeroflow bits. In the interests of simplicity, I replaced it with a 5/8" solid brass Tee Old mate wasn't too hot on cutting ends straight, so a couple of clamps were hanging over the edge. Not best practice. The new Tee section And installed into the car. The two tank outlets are very easy to access And the Tee hangs above the drive shaft (and there is evidence that the old setup had been in contact with the driveshaft at some point!). The zip tie is there to hold it up and clear of the shaft. The hose was routed slightly differently to simplify the route, and then cut to length and connected to the pump. The hose was zip-tied to the chassis in a couple of places to secure it, making sure not to pinch the hose as it had been With the tanks connected I want to replace the fuel filter and inspect the accumulator. The whole lot (pump, filter and accumulator) are mounted on a plate above the chassis, in front of the LH side rear wheel. On the later 280i the filter is mounted in the engine bay. The black one is the accumulator, and the silver one is the filter. The pump is out of shot to the left (with hose removed). This is the other side. Let me illustrate the fuel setup with some coloured arrows. Fuel comes into the pump from the tanks (orange), out of the pump and into the accumulator (blue), out of the accumulator and into the filter (yellow) and finally, once filtered, out of the filter and along hard lines to the fuel distributor in the engine bay (green). These hoses weren't too bad visually, but no point in leaving them there. One quick check for seeing if your accumulator is stuffed or not is to disconnect the vent hose from the back of it, and see if fuel comes out. Mine was full of fuel. This vent hose should be dry, because it's only to help equalise the air inside the accumulator, and shouldn't have any fuel contact. The fuel is (usually) separated from that side of the accumulator by a diaphragm. If the diaphragm splits, it lets fuel through and back into the tank instead of holding pressure. My accumulator is stuffed. Thankfully I had planned to remove it completely and will be using new fuel hose to bypass it and route the pump straight into the filter. The fuel filter has banjo fittings on it. The inlet converts to rubber hose, whilst the outlet is to a hard line. Some of the hose clamps on the fuel hoses had been installed by a scumbag and weren't accessible from the underside. I'm not too sure how they were even done up, unless it was off as a complete assembly and clamped whilst on the bench before fitting. Since I wasn't using the hose again I chopped it off, unbolted the accumulator and pump and removed the lot. The accumulator looks very old and probably original to the car. The filter had been replaced, but it had a date of 2005 on it. The receipts say that the "recently replaced" filter was leaking back in 2011, so either it wasn't that recent, or it was old stock when fitted. I ordered a filter online based on the original filter numbers I had, and even with triple checking, it's wrong. Yeah, that's not gonna fit. It's possibly the correct filter for a later car with the filter in the engine bay. Working off the number on the filter, I need a Ryco Z399 instead. One has been ordered, along with a Z71 oil filter. Unfortunately that leaves me at a standstill now. Hopefully the new filter will be here this week and I can fit it after work one day. In the meantime I had ordered a new air filter, so went about fitting that. I had previously checked the filter and noted it was dirty, and the wrong filter. The old filter had rounded corners, so left an unfiltered gap at each corner. The correct one for the early airbox is a Ryco A1345. No gaps Parts bin special I'll probably lose some +6hp gains from closing up those gaps, but at least I know its right, and won't be sucking in unfiltered air anymore. Sigh. Sometimes I just wish some people wouldn't touch cars. A little knowledge is dangerous.6 points
-
Ran out of time but got some stain on this. Im really enjoying this wood stuff!!
5 points
-
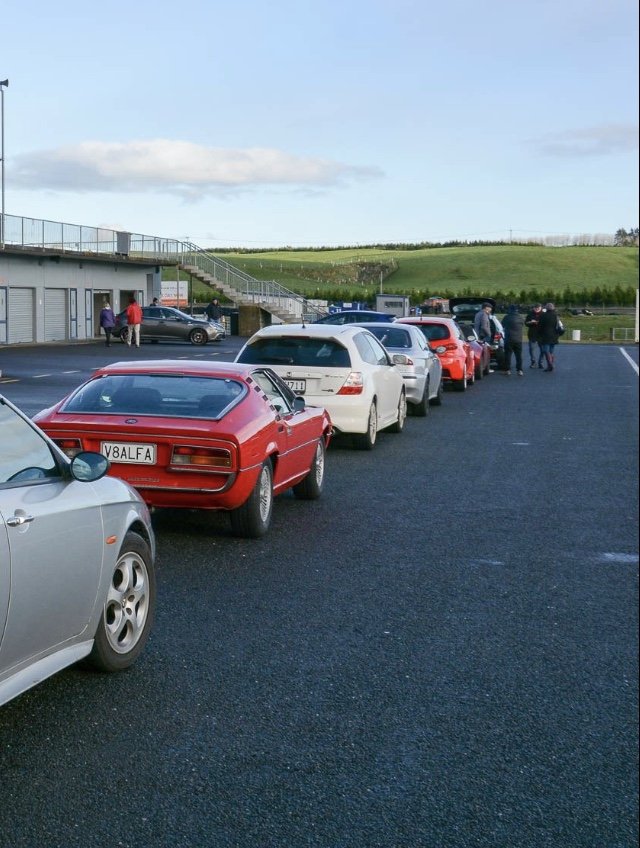
Update installed full “road/race” suspension package from classicalfa.com, incl bushes, shocks and springs. along with braided front brake lines, 4pot fronts and new rears. that sorted we hit a practice day at Taupo over the weekend run by the AROCNZ on Saturday. The result, far better handling and braking! The top trailing arm bushes were toast and now has no side to side knock and body roll is far less. Still has a bit of roll but it’s a classic car and it isn’t intended as a race car so we think it’s pretty well balanced now. new ride height has eliminated the rear tire gap and it looks far better. i drove it down from Auckland, on the track, and back again with very little issues. Now being slight exhaust knock due to ride height, a clutch that is on its way out (all though we knew this prior), and a small knock at take off and low speed. granted it’s had all new bushes, we’ll check the U joints and diff play. that, aside from much needed head room with a helmet on it ran really well! the LSD really hooks up, and even with the softish suspension you can throttle and stear it out to the outer boundary quite predictably, and ride 2nd gear out just passed 7k past the flag box. great day all round, and some small things to add to the white board ill add some track photos when the event photographers put them up
4 points
-
4 points
-
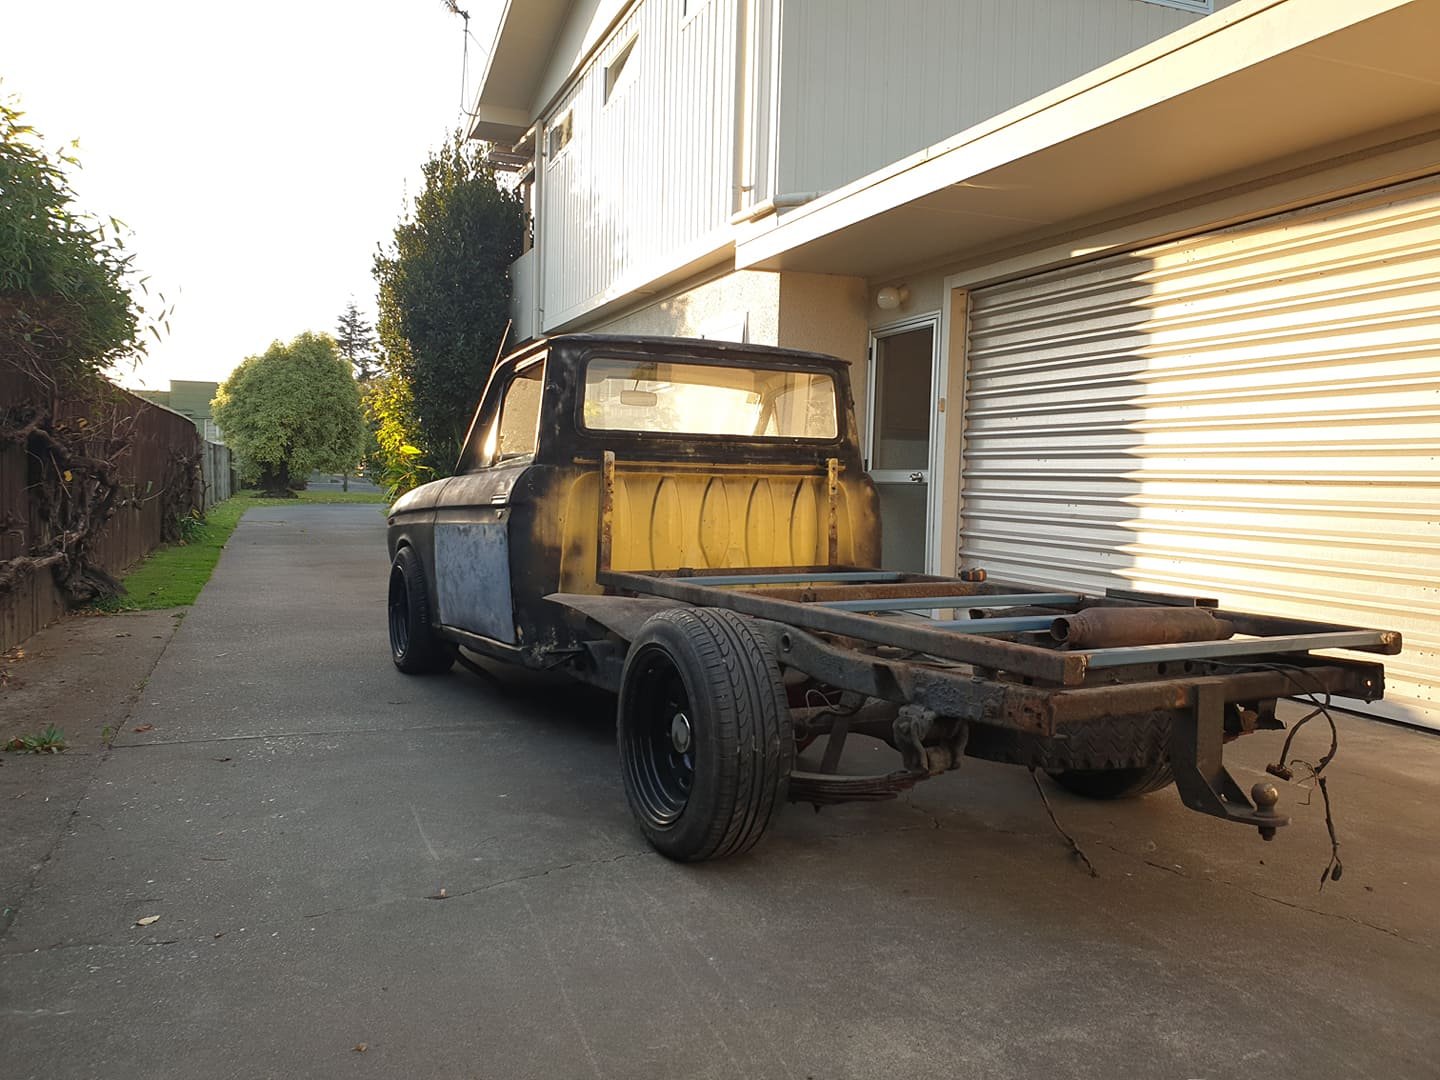
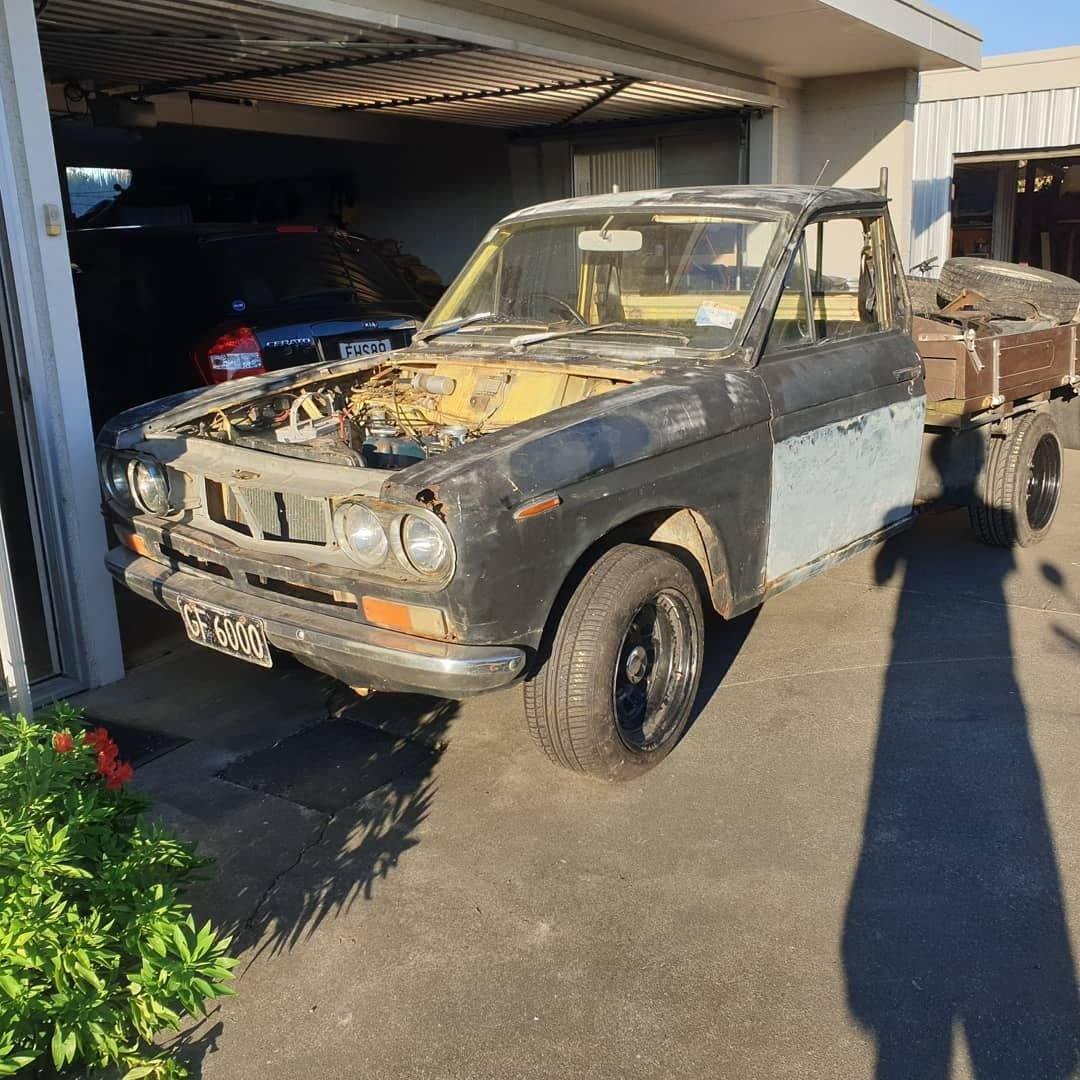
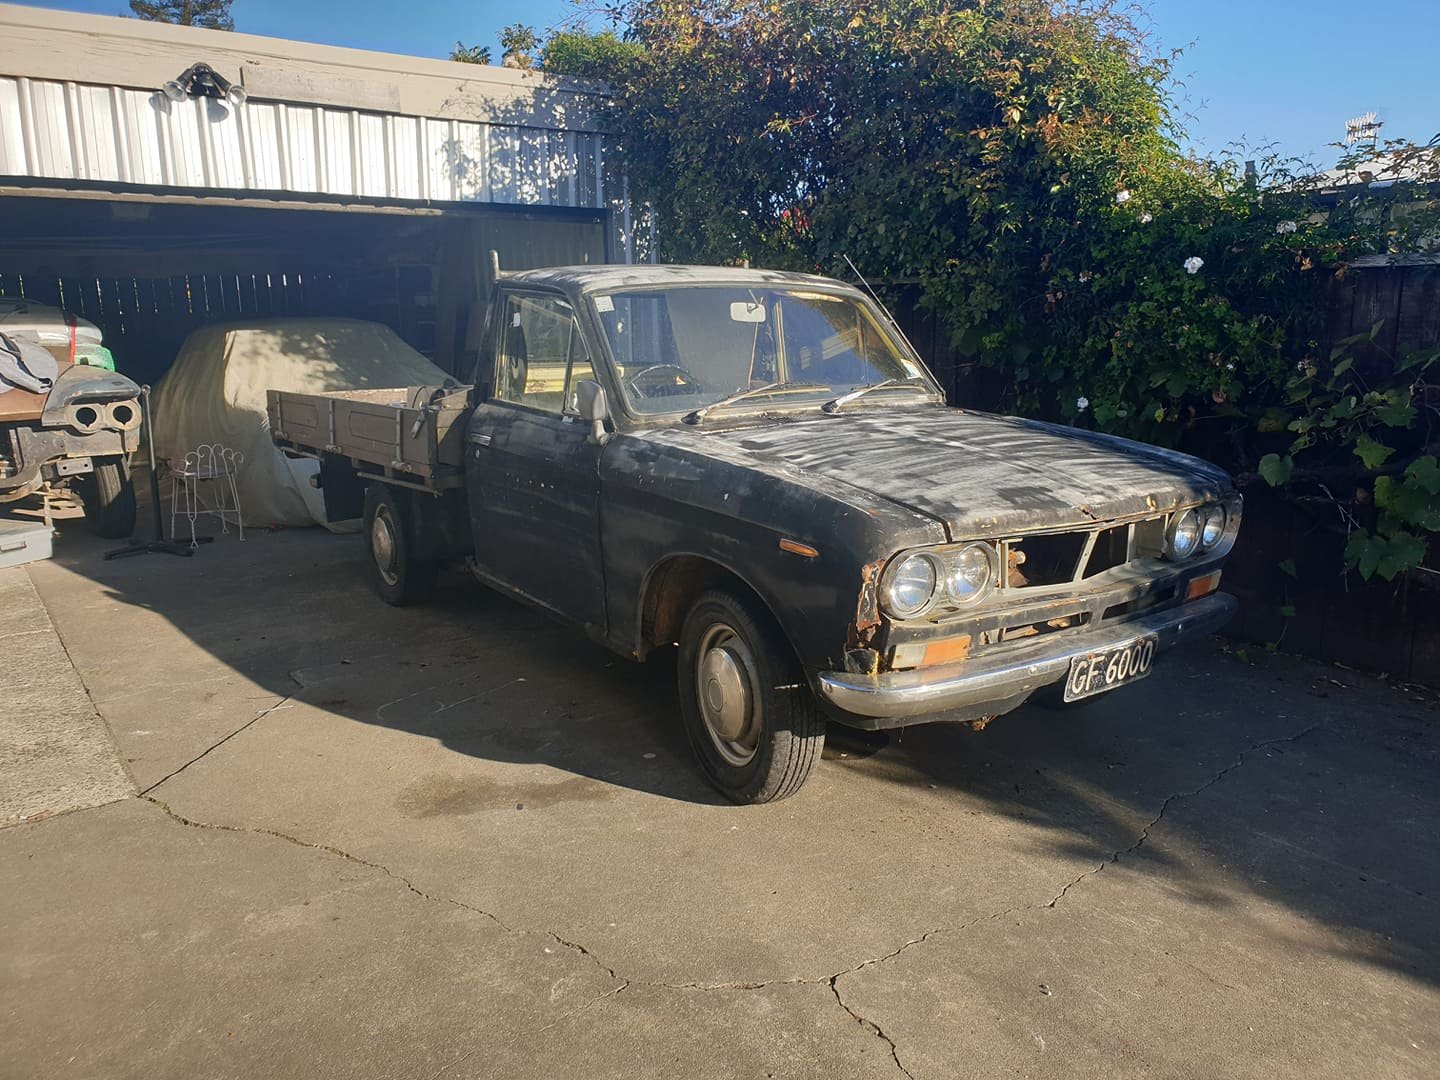
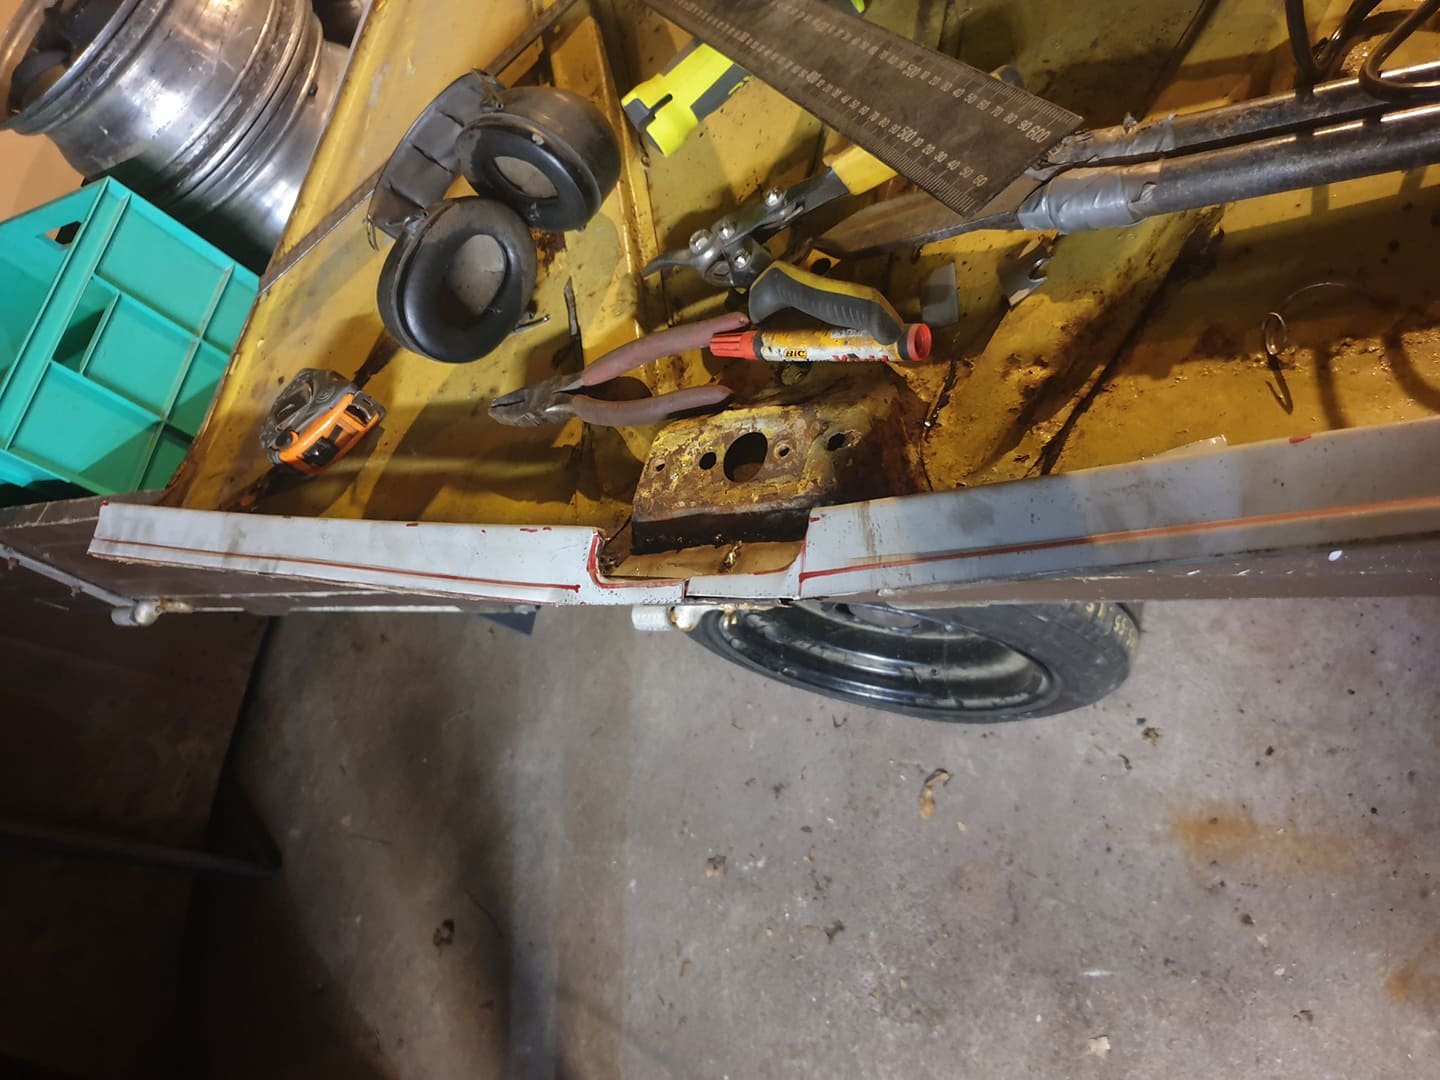
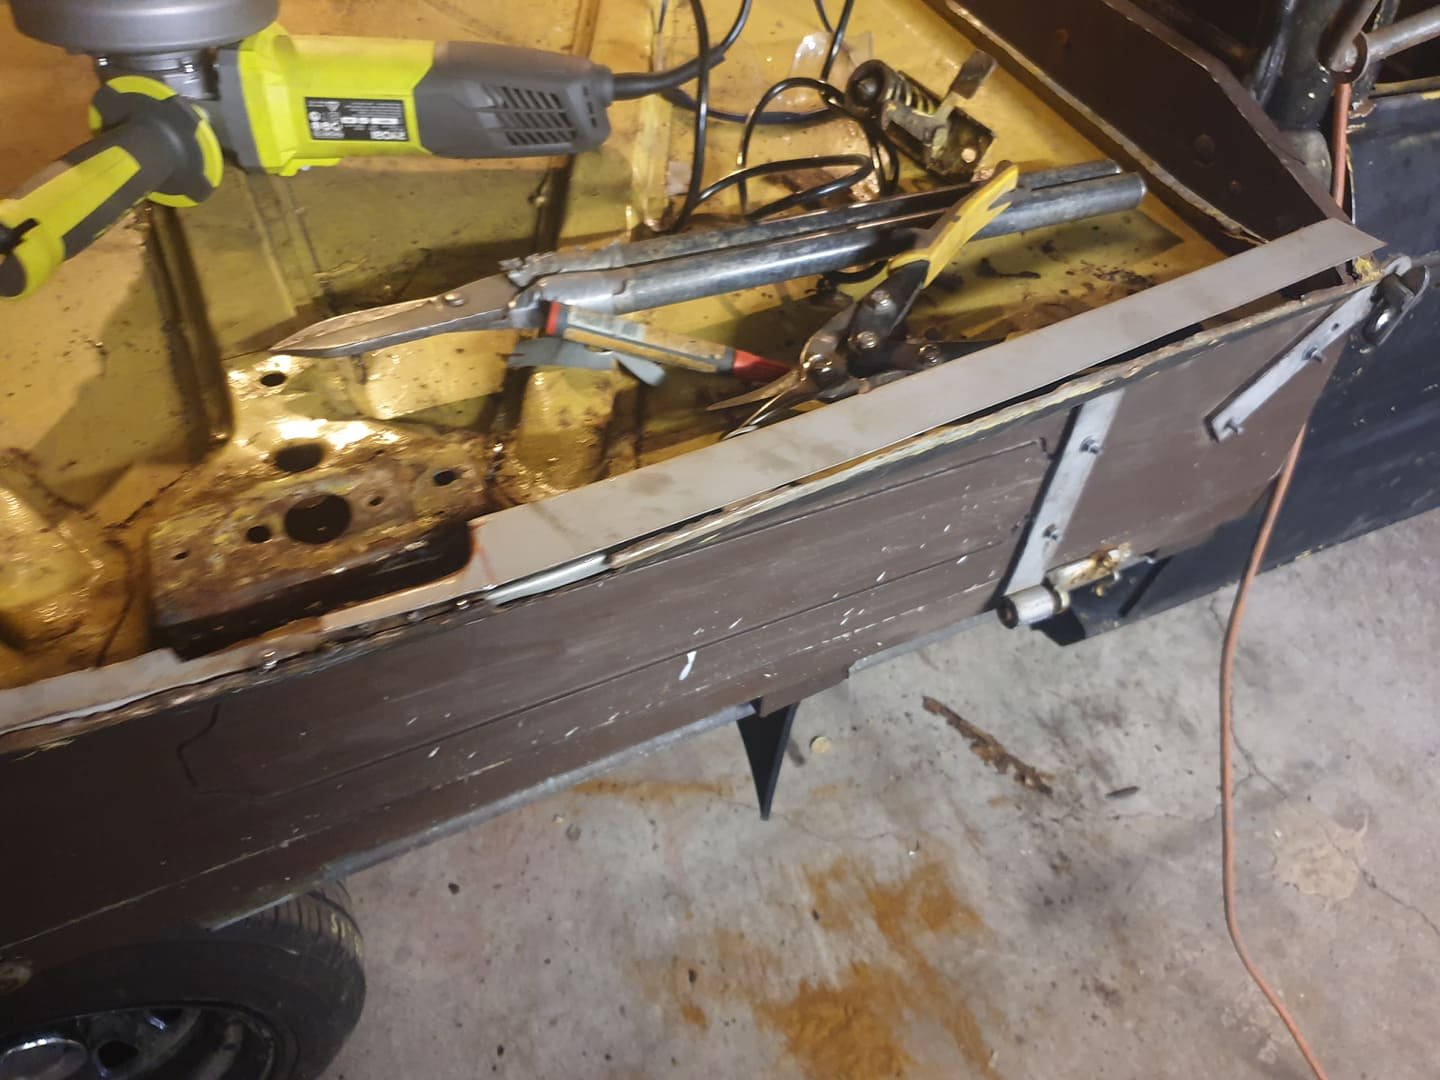
Brought this old girl earlier this year, done small things to it but she runs and has rego on hold. have lowered it and put new wheels on and currently making a new flat deck for her While waiting for my rear guards to be rolled been doing some rust on the bonnet with help from my old man
4 points
-
@bean.101 I couldn't find a discussion thread. So here goes. I'm loving all the engine machining stuff. It's bloody interesting and well appreciated I think by many on here. Please keep those posts coming and add even more info about! I like all the different machines and It's good too see where ones money goes when ya leave an engine at a reconditioners to be machined. Will you be adding stainless valve seats to help it cope with unleaded? Alex.3 points
-
Now painted blue
3 points
-
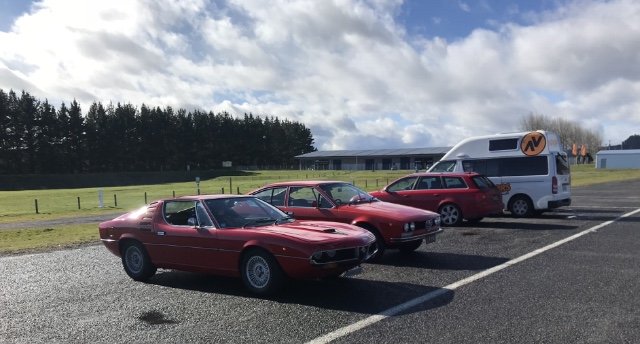
Some old photos of my first car popped up on Facebook. was a mk1 zephyr with 289 auto and Wolseley diff.
3 points
-
Aeroflow is the big bucks flash stuff, but that hose is scary as hell. There isn't a mm of that hose that doesn't have cracks in it. I expect it from cheap Chinese (or expensive knock off) hose, but not name brand stuff.3 points
-
HOW DO YOU WEIGH A BLOODY MILLENNIAL? IN INSTAGRAMS.3 points
-
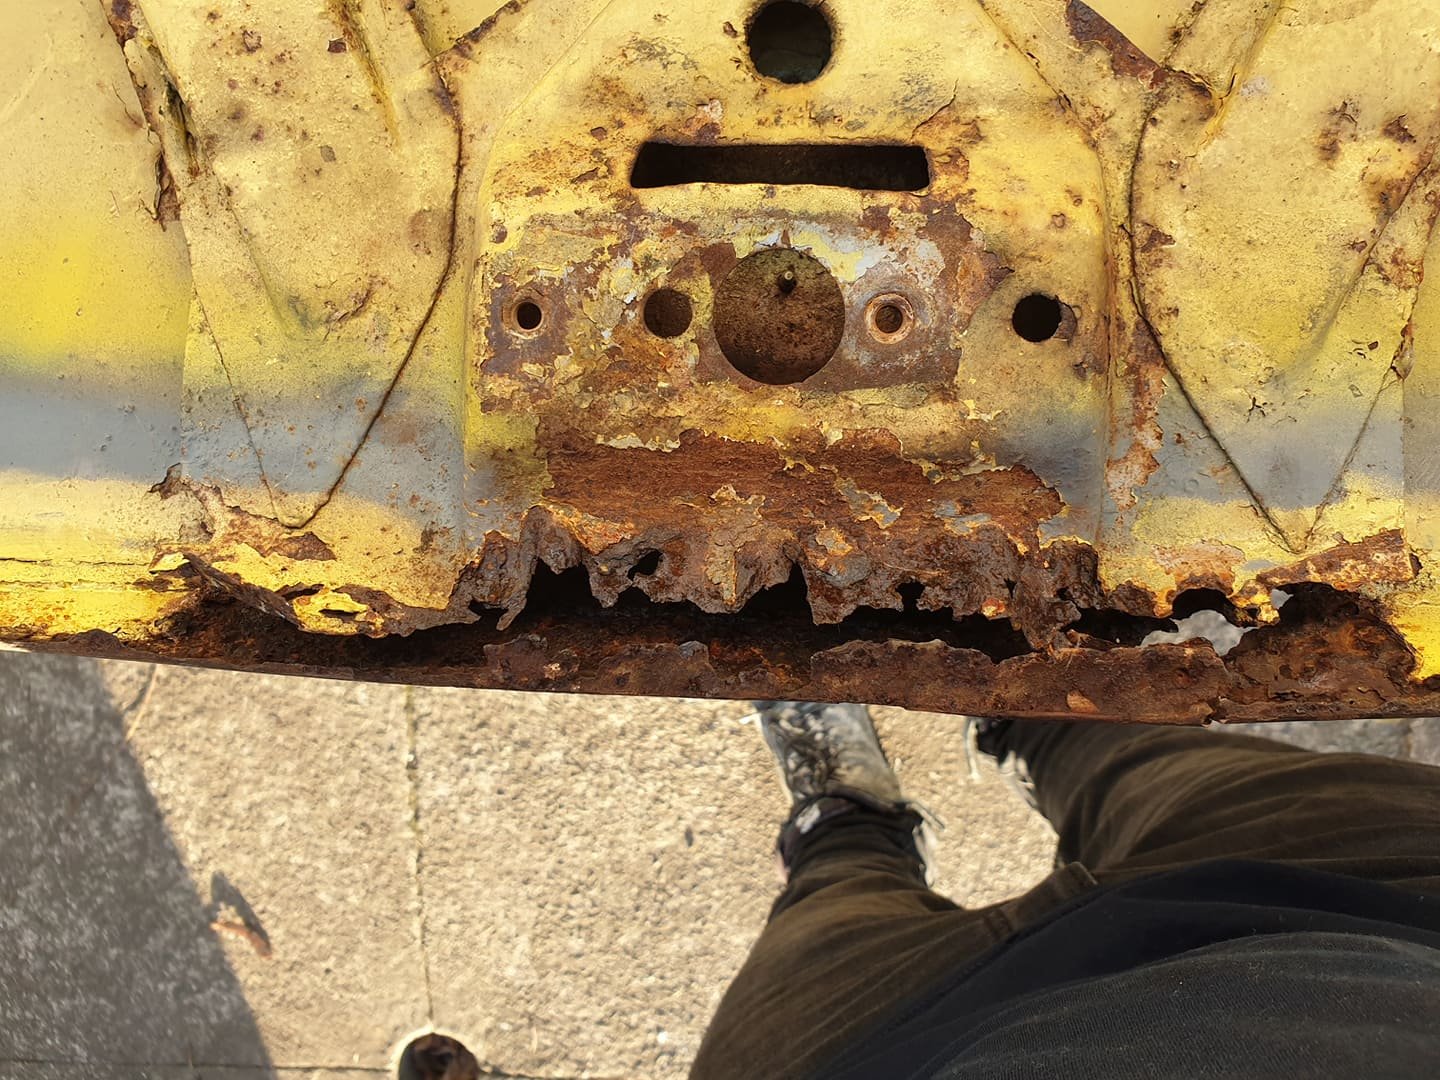
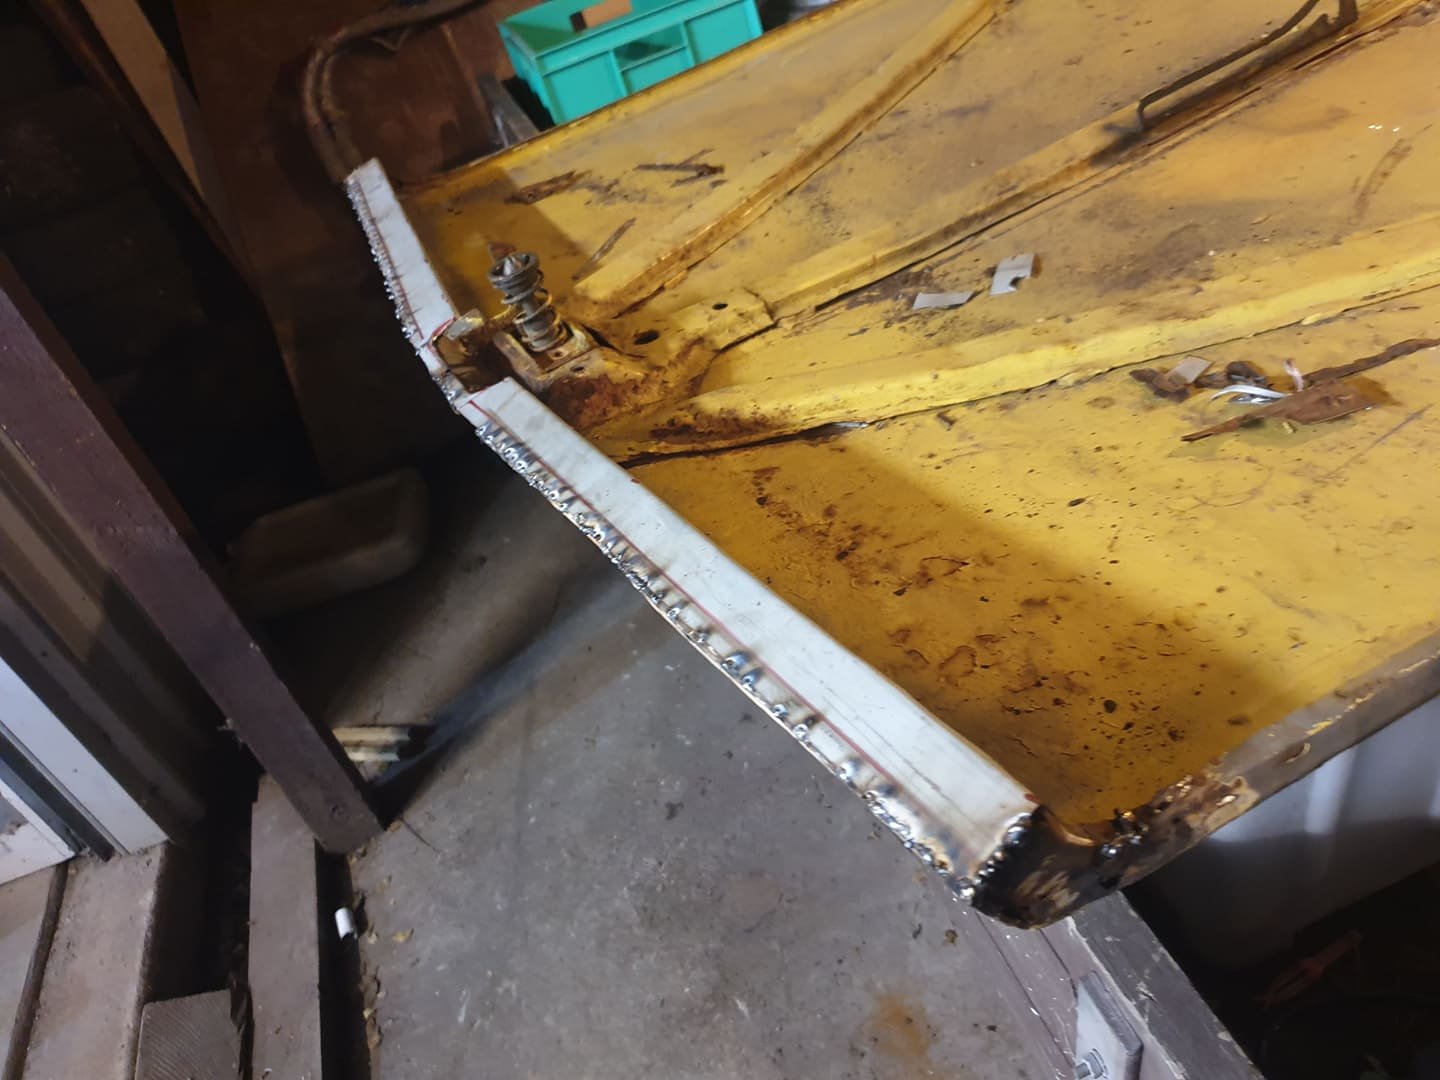
it is indeed I have access to the appropriate repair tools at work so shouldn't be many dramas. The damage isn't bad at all really. Tailgate needs the whole bottom reconstructed though, thats about the worst of it all haha. It's rusted pretty bad, but the entire rest of the car is close to perfect. Quite strange.2 points
-
Yup, I was trying to avoid answering that For a really by the words WOF person, they'd be able to fail the car at WOF. So if you want to be 100% argumentproof, keep it matching your plate. In reality, it's likely you'd keep on getting WOF's anyway.2 points
-
Is this the one with the punt in the butt?2 points
-
2 points
-
Finally got the bulk of the headers done down to the collectors. Just need to add a bend at the bottom to make them easy to blank off and flange further in. all brake lines also done.
2 points
-
Been distracting myself with some work on this. My Subaru was stolen on Monday sadly, and it has been a very eye opening experience in terms of the police, insurance companies and the shitty side of the world in general. While not an OS car, as some have mentioned- a classic regardless. Mine was a really tidy and original example, and I had some great restoration plans ahead. I am still hopeful I will get it back. Anyway, I decided to paint a few bits this week including the front bumper and the door tops- which are mostly made of rust now it seems. Surprisingly, Supercheap could mix me two cans of Spanish Olive without evening knowing the paint code. The lady commented on what an, "Interesting colour," it is. As you can see, my abilities to paint and retain a natural patina are astounding, and nothing to do with the fact that I am actually shit at painting... Finished bumper Sanded, then primed, then new colour Colour match is good, rest of the car is quite faded despite a polish earlier in the year. I think it will benefit from the wheels being powder coated black. Imagine it will be getting more attention now, and the Lotus isn't holding my attention much. Maybe things will change. I am going to daily this for awhile and see what happens.
2 points
-
Well it was a great day. All but one trike went flawlessly all day long. About 5hrs of redlining these poor motors with governors removed...and they just took all the abuse. The one trike that didn't go the distance was the Stu-trike. Weirdly it was a good problem I created...too much power! It just tears chains up... so I'm going to look into if there's something European made for these race engines? As the Ebay (Chinese) chain isn't strong enough to take the power of this trike. Anyway here's a quick cellphone vid: I spent the day riding, not filming so apologies for the lack of photos and vids.2 points
-
SMALL BIKE TRIPS SMALL BIKE TREPS AMALL MOTOCYCLE TRAVEL GOOGLE EAST CAPE MOTORCYCLE SOORY, IM NOT GOOD AT COMPUTERS. PICKED THIS LITTLE PUDDLE JUMPER UP AT THE FIELD DAYS THE NICE YOUNG SALES BOY WORKED OUT A PAYMENT PLAN THAT WORKS WITH MY PENSION, AND IT RUNS ON THE SMELL OF AN OILY RAG IL TELL YA. JUST A TUPPENCE TO WHIZ DOWN TO THE ORIENTAL TAKEAWAYS AND BACK AFTER BRIDGE CLUB. DID YOU HEAR MAYBLE AT THE CLUB BROKE HER HIP? HOPEFULLY THOSE DARK SKINNED FELLOWS DONT THINK IM RIDING WITH A GANG, ILL TELL YA SOME OF THEM ARE ALRIGJT BUT THESE YOUNG ONES. NEED TO SEND THEM OFF TO WAR TO LEARN SOME RESPECT, IN MY DAY WE KEPT TO OUR BUSINESS. HOW ARE THE KIDS?
2 points
-
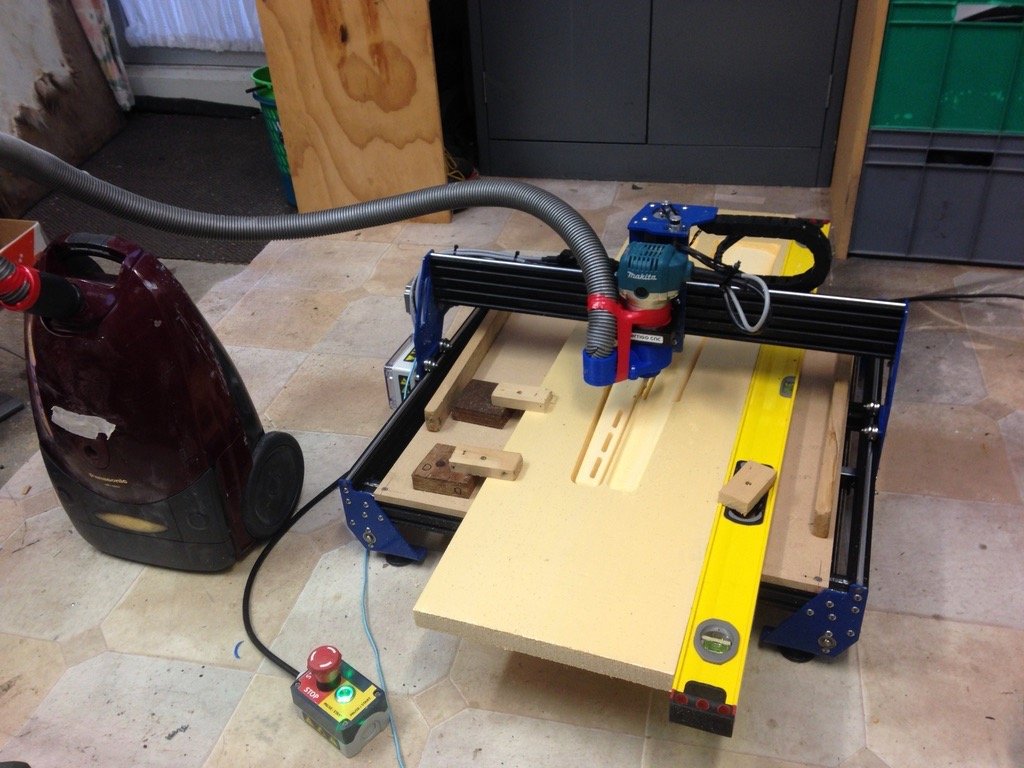
Asked a mate to carve out some foam core for a project, he declined as he didn't want the dust through his shed. He did however have a spare machine knocking about that I was welcome to make a mess in my own shed with! Gotta get me one of these toys, so simple and easy! Cores will be used for a carbon fibre rifle stock, hopefully pics to come.....
2 points
-
Wtf , how was this for luck.. Trolling trademe and this listing showed face.. immediate buy now damage was done Ported and polished head with new valves (to be assembled) and alloy rocker cover.. Guessing it's close to a holbay spec.. Funny this is I offered to buy this from this guy months ago when he was selling the racecar, but never gave a price...
1 point
-
Always go for broke or broken.1 point
-
That new wheel is real nice. That hose is sad, awroflow is supposed to be a decent brand- imagine if any cara had oem hose that failed that bad that quick!!1 point
-
1 point
-
1 point
-
Not sure about other peoples opinions but I am taking my FR50 with a top speed of exactly 70.0kph. Would love to have some people to hang with haha. Figured at least if someone is doing scooter speeds its more open to newcomers.1 point
-
yes on autoblast being expensive. got my car done somewhere else at half of there quote1 point
-
hi man give me a call. I have a blasting company and can help you out. my numbers 02267118551 point
-
hey also, here's a technical tip for those of you interested in the finer details of auto trans setup, if you want it to not leak fluid out the bottom, do up the drain plug. you got that?1 point
-
The crazys in the workshop have been at it again....
1 point
-
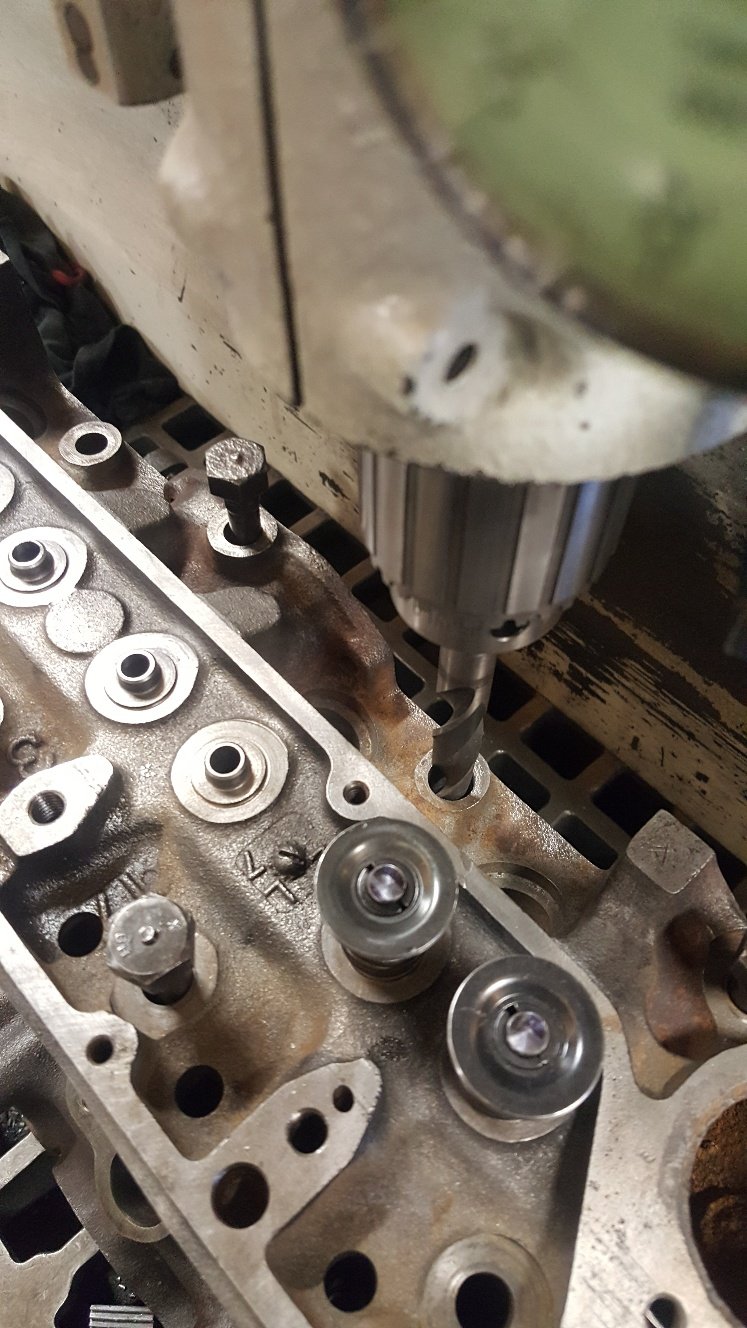
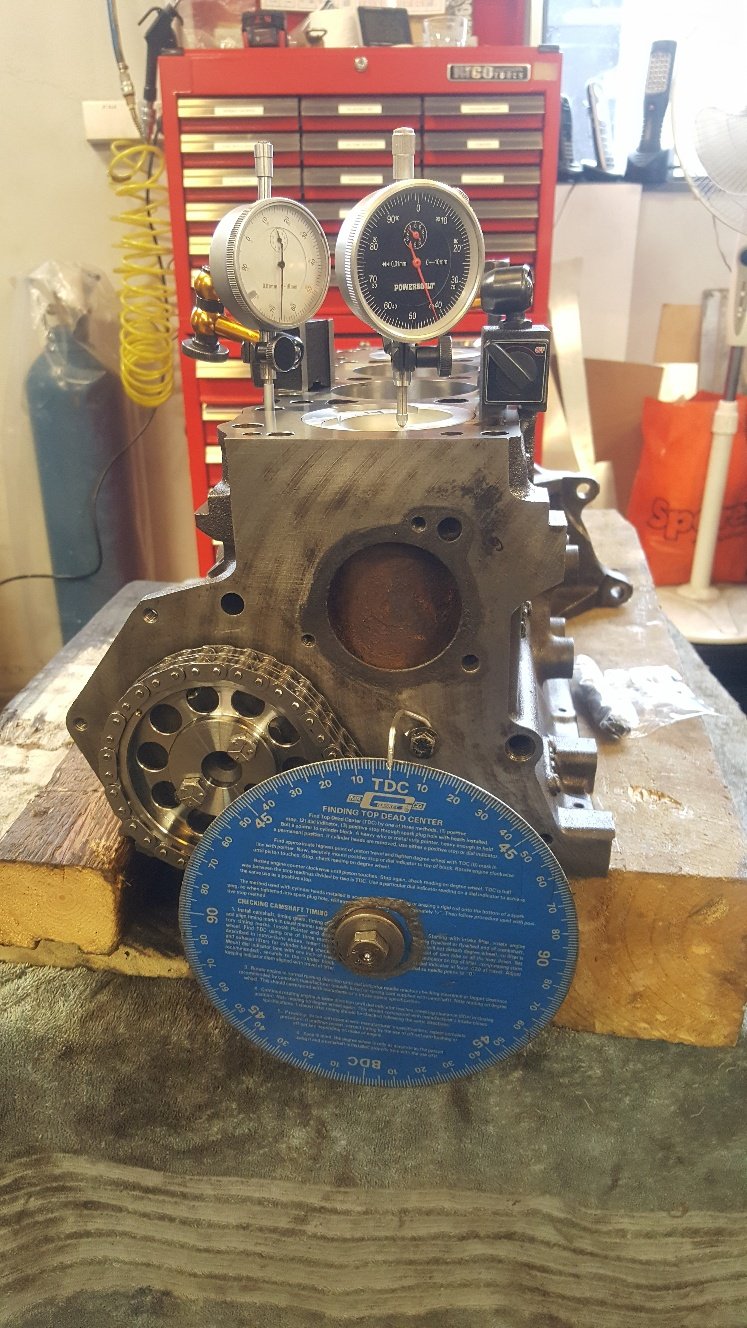
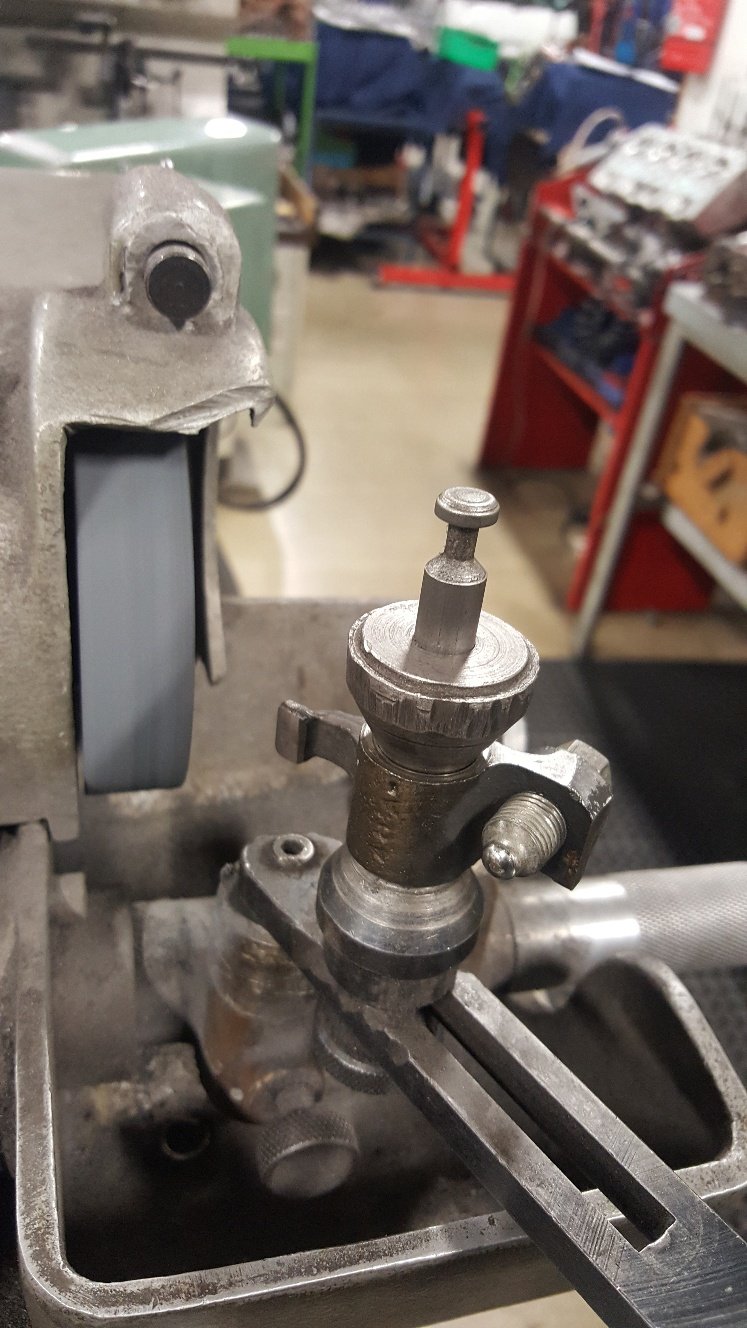
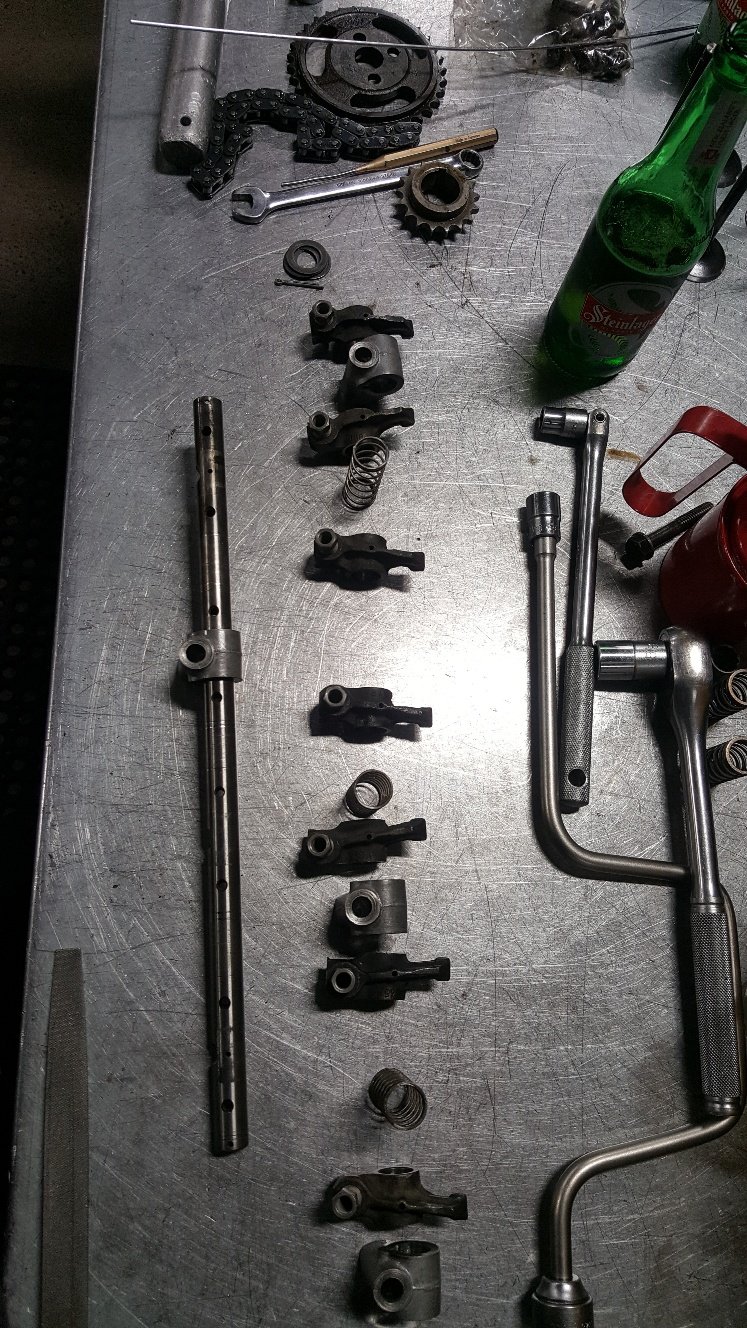
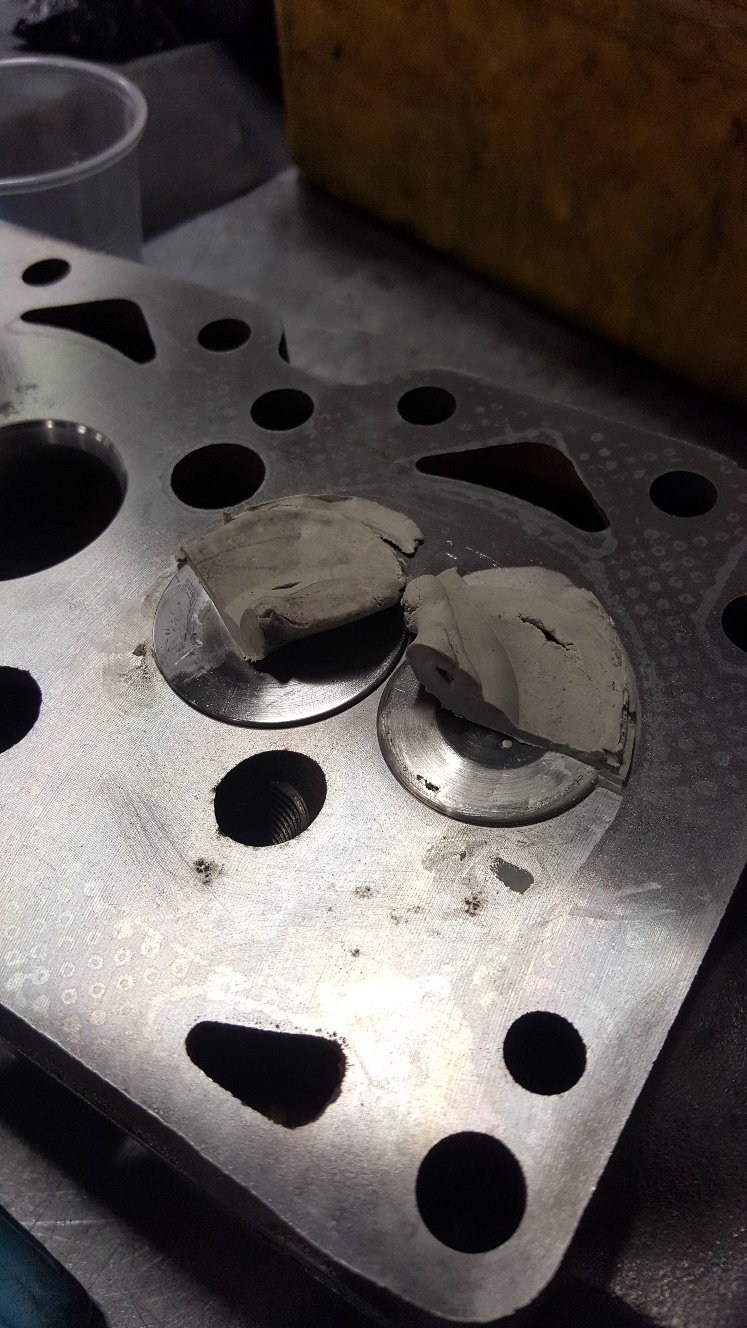
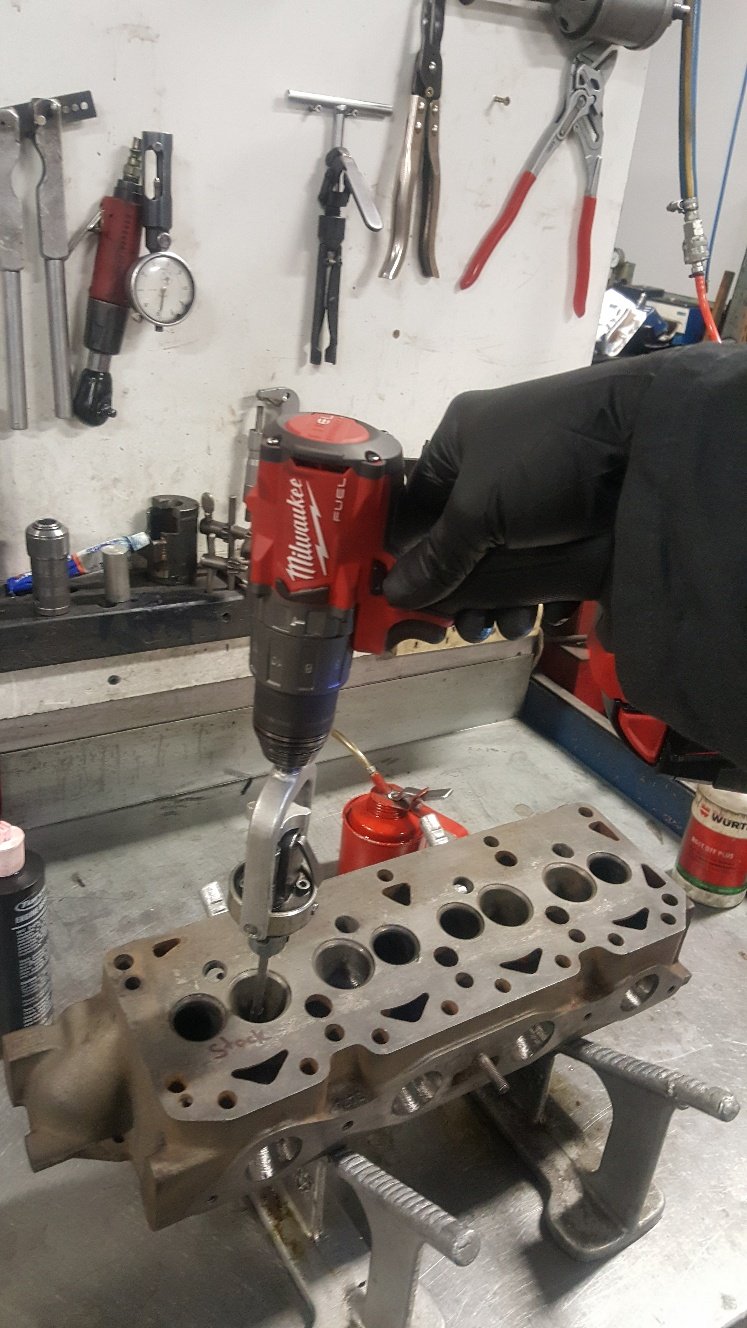
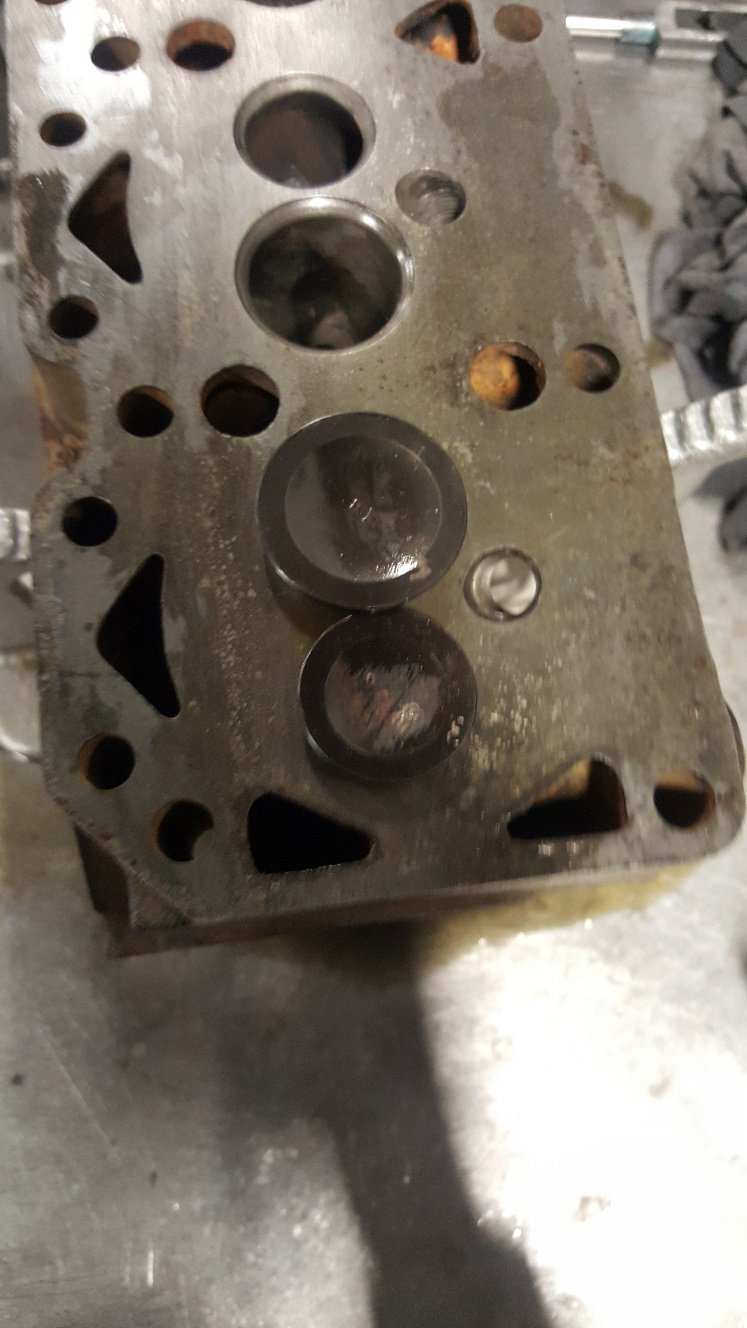
With the head sorted i can put the camshaft in and check piston to valve clearance. But first I need to dowel the head to the block. These old beast come from the factory without any location other than the head bolts. So I center off one of the head bolt holes and drilled it to 14mm. Then bolt the head one without moving anything and drill the head bolt hole out to 14mm. Then fit the head on the dowel and drill the other head bolt hole for the second dowl. So dialed the cam in. Then bolted the head on and found my rockers where a little worn so gave them a tidy up. Forgot to take pictures of the head fitted. But basically fitted the head, put two layers of plastersene on top of the piston in the valve cut outs. Then turned the engine over to get the valves to in print into the plaster. Then I cut half the plaster away to see how thick it is. This gives you a good indication of the piston to valve clearance.
1 point
-
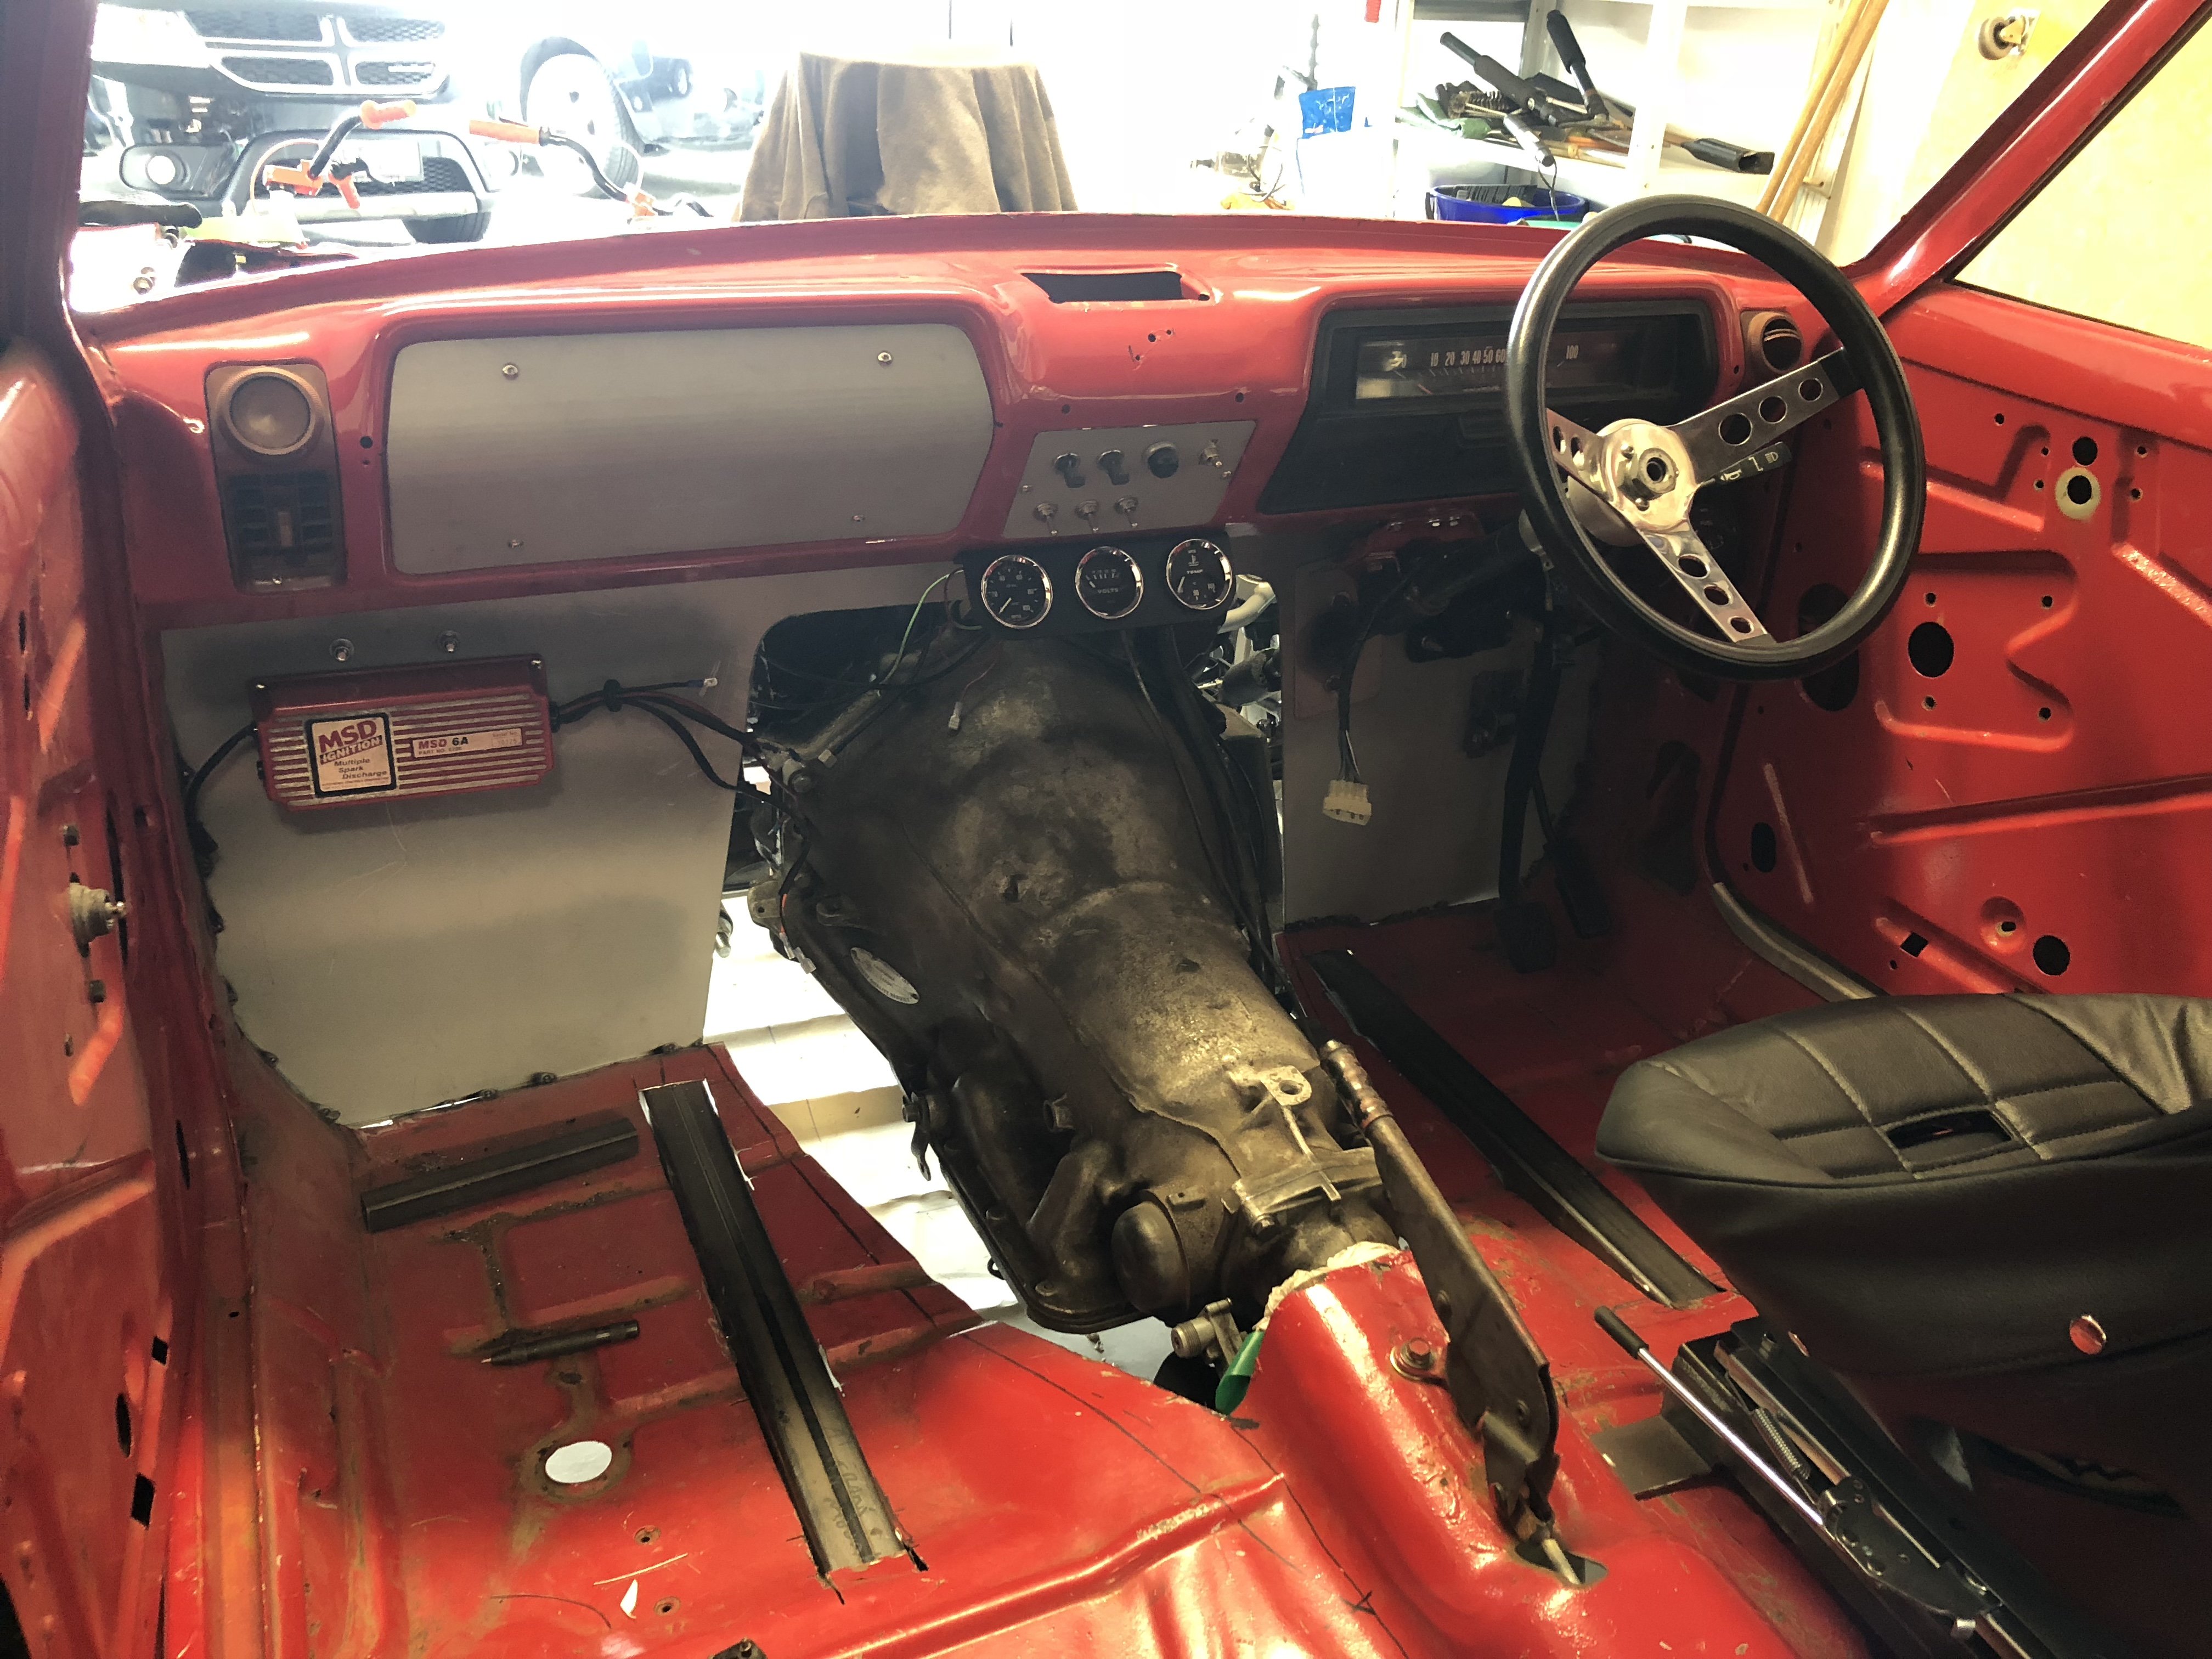
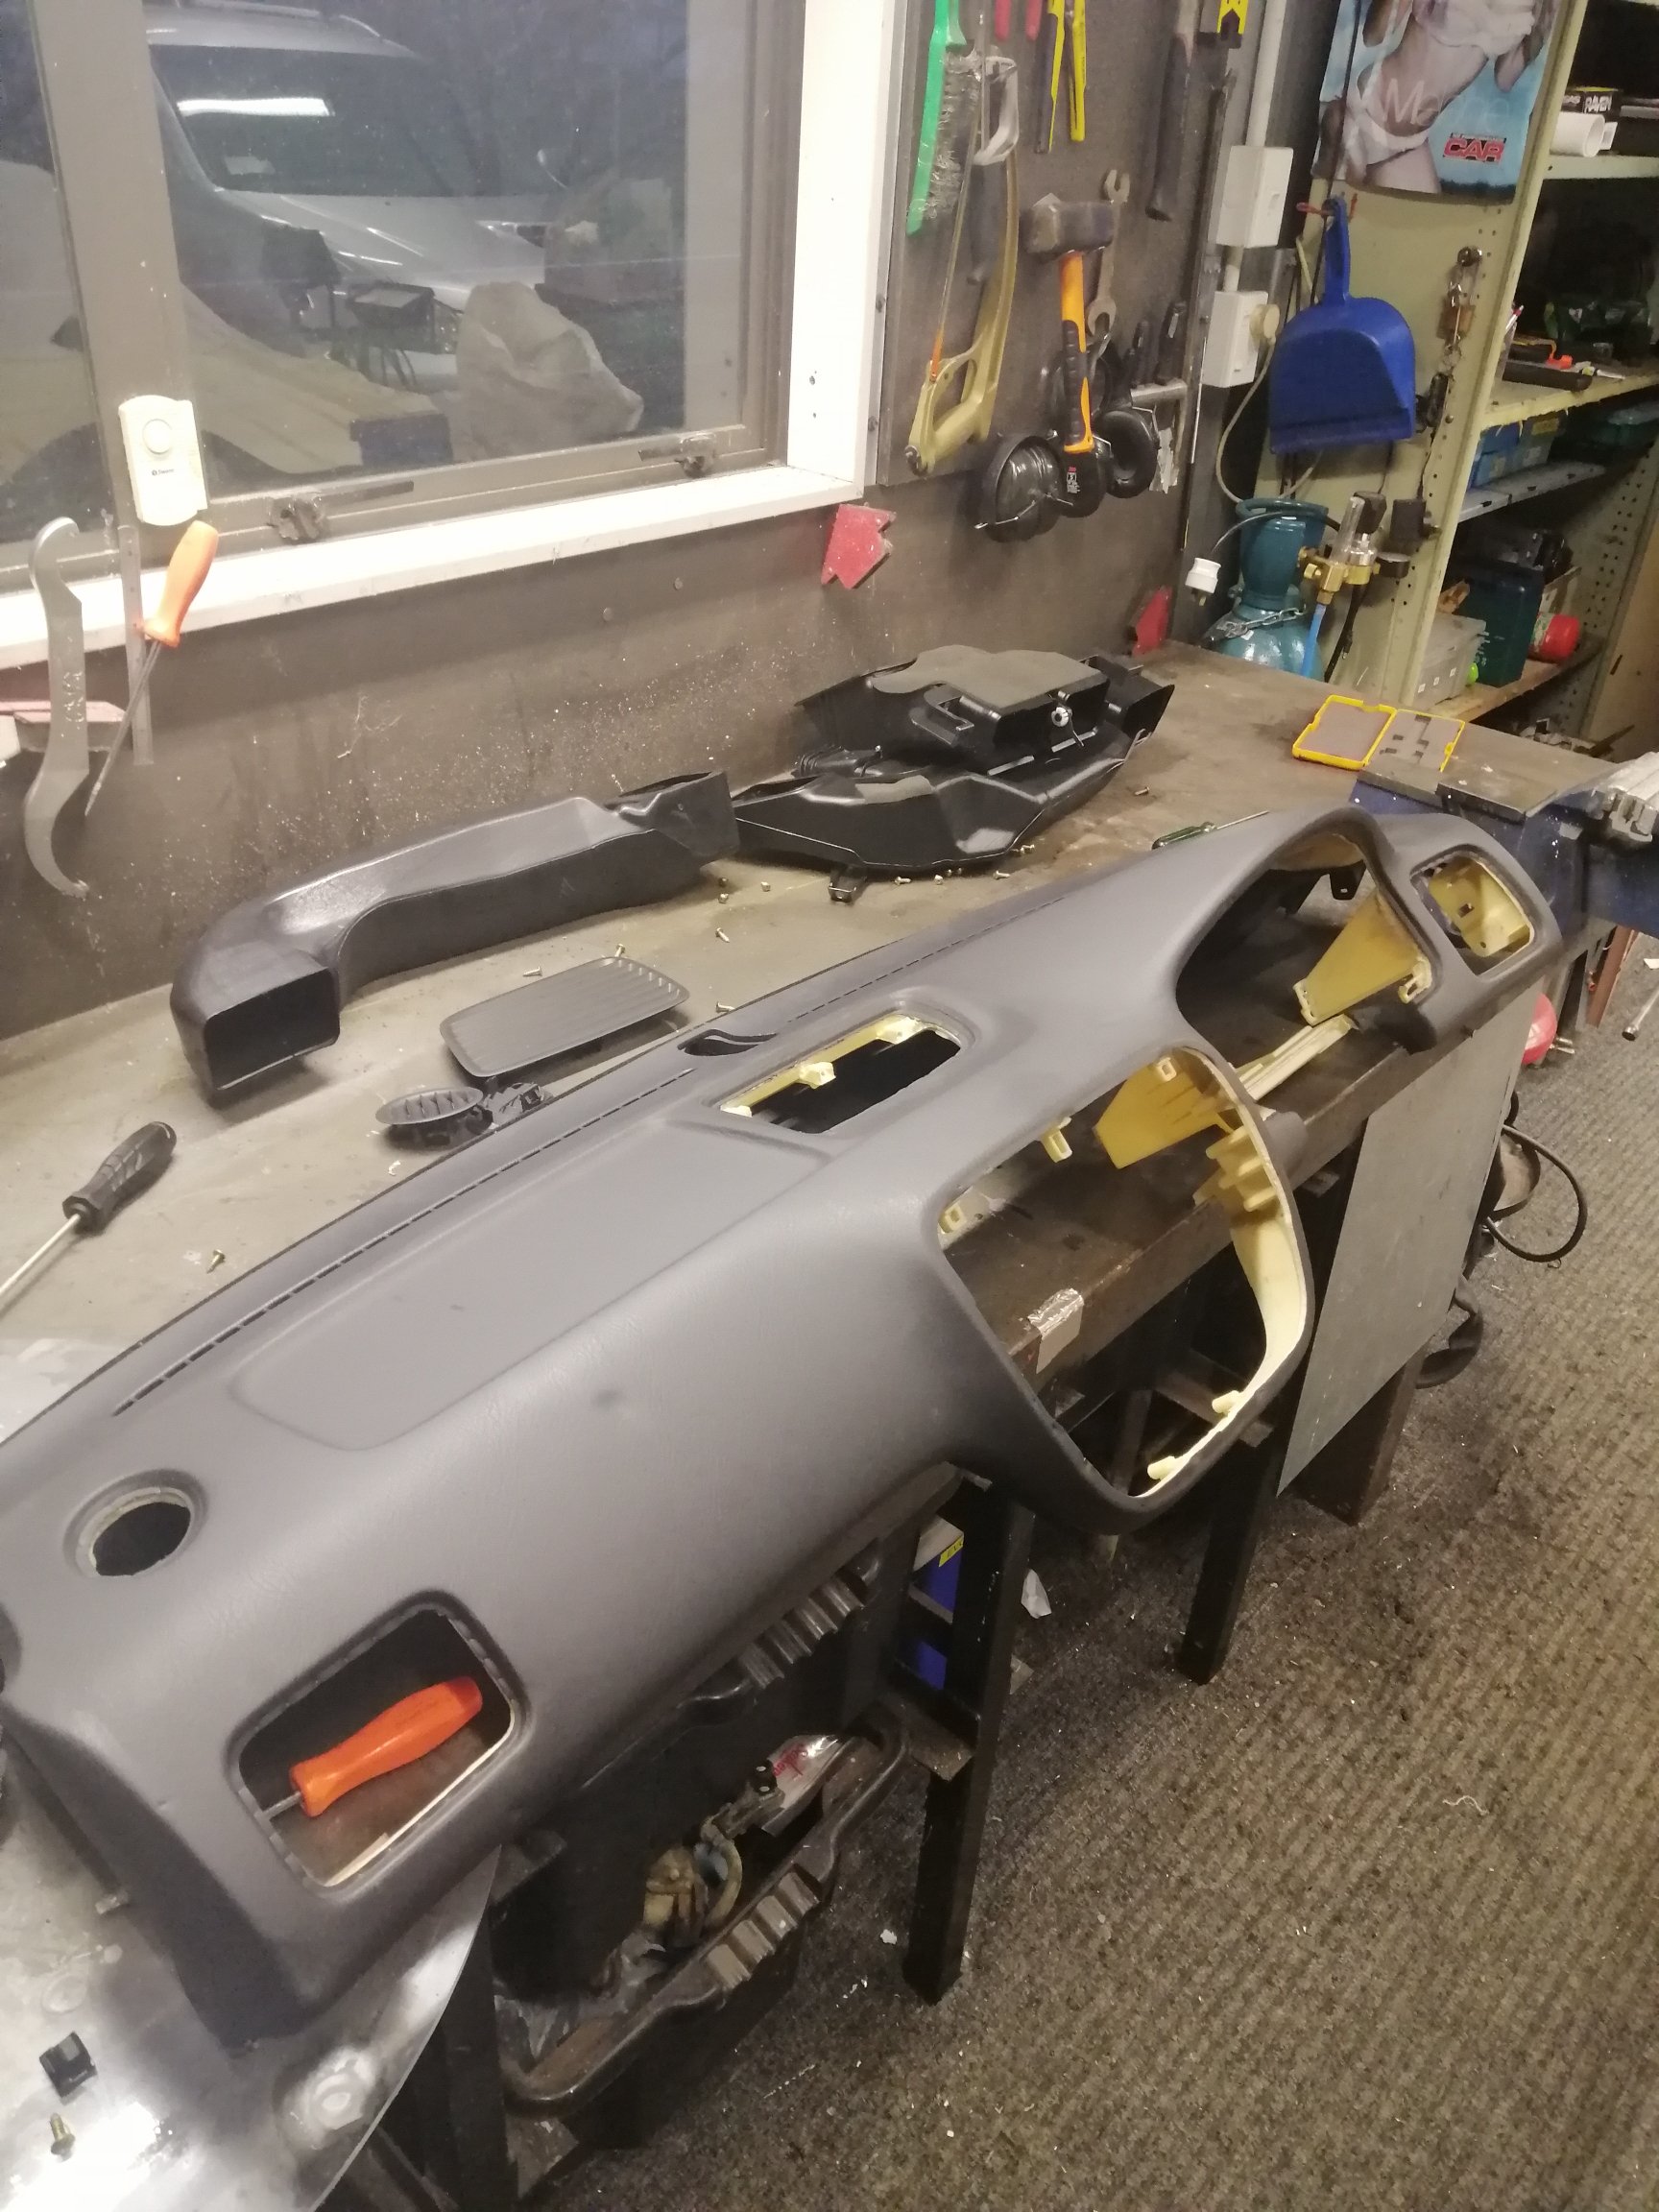
@flyingbrick am I likely to have luck attempting to build a carbon overlay version of this dash?
1 point
-
Fitted up the nearly brand new tail light, and had a few hours on polished the existing good one, 800/1500/2000 grit sand paper and then some cream polish, came up pretty close but there's still some in it I think. Will pick up some actual plastic polish. But if it gets no better than this I'm still stoked. Miles better from where it started. The tail lights are one of my favourite parts of the car so it's great to have them sorted and looking mint
1 point
-
So I guess this is where we start then. The first port of call today after having the car delivered was to work out why we had no power. I popped the bonnet, and yes there was a battery. Ok, let's remove the battery and see if I can throw some charge into it. Ctek says NO. With the charger connected to the battery, nothing. No lights on the charger, and if anything, the charger started acting weird. Guess that's no bueno then. Hope my charger is OK. A quick trip to Supercheap sorted out a battery for me. There is very little space for a battery, so a bit of digging in the Century Batteries catalogue yielded the biggest battery that would fit the same footprint, an NS60LSMF Connecting this up showed that we finally had power. The dash warning lights come on with the key, the driver's electric window is working, albeit slowly, and the central locking works. Strangely the headlights did not respond to the switch, but some wiggling of the wires behind the switch sorted that out (yeah, I'll need to look into that). The next obvious step was to see what was up with the fuel tanks. Now that I had power I could see the fuel gauge was reading empty. I decided to take a risk and try dumping some of BPs finest 98 and injector cleaner into the tanks and see what happens. I split the fuel and cleaner between the two tanks as evenly as I could. Since I had been told it was possible the accumulator had failed, there is a trick to work around this and still have the car start and run normally. The accumulator works to hold fuel pressure in the lines when the engine is off, but when it fails the lines no longer have pressure, and the fuel pump only runs when the engine is turning, so it takes ages to build that pressure back up. The trick to work around this is to have the pump run when the key is turned to ON so it primes the lines. The simplest way on early cars like mine is to disconnect one connector from the side of the fuel distribution unit. This causes the pump to run when the key is on. Easy. Its the blue connector in the top photo, and the green plug goes onto it (strangely... why arent they matched colours?) I connected the battery and turned the key. Sure enough, I heard the familiar whine of a pump turning, and then the woosh of fuel heading down the lines into the fuel distributor. Now it was the moment of truth. I turned the key, and the engine turned smoothly over. It spluttered a couple of times, but wouldn't start. What a tease. Eventually, this happened. It was rough, but running, and even idling. I ran it for a while, and everything looked good. No obvious signs of leaks, but blimey does it make a noise! The longer I ran it, the smoother it was getting I checked and it seems to have gears, and a clutch, so that's a big win. It still hesitates a bit, but that's to be expected for an engine that has been sitting around. I'll take the plugs out and give them a clean (or replace), and check the cap and rotor condition. If everything looks OK, it may even be time for a quick run around the block. One must wonder though; if I can get it running with little effort, why couldn't the "specialist" have it running for the truck? Oh well, best not to dwell on it I guess.1 point
-
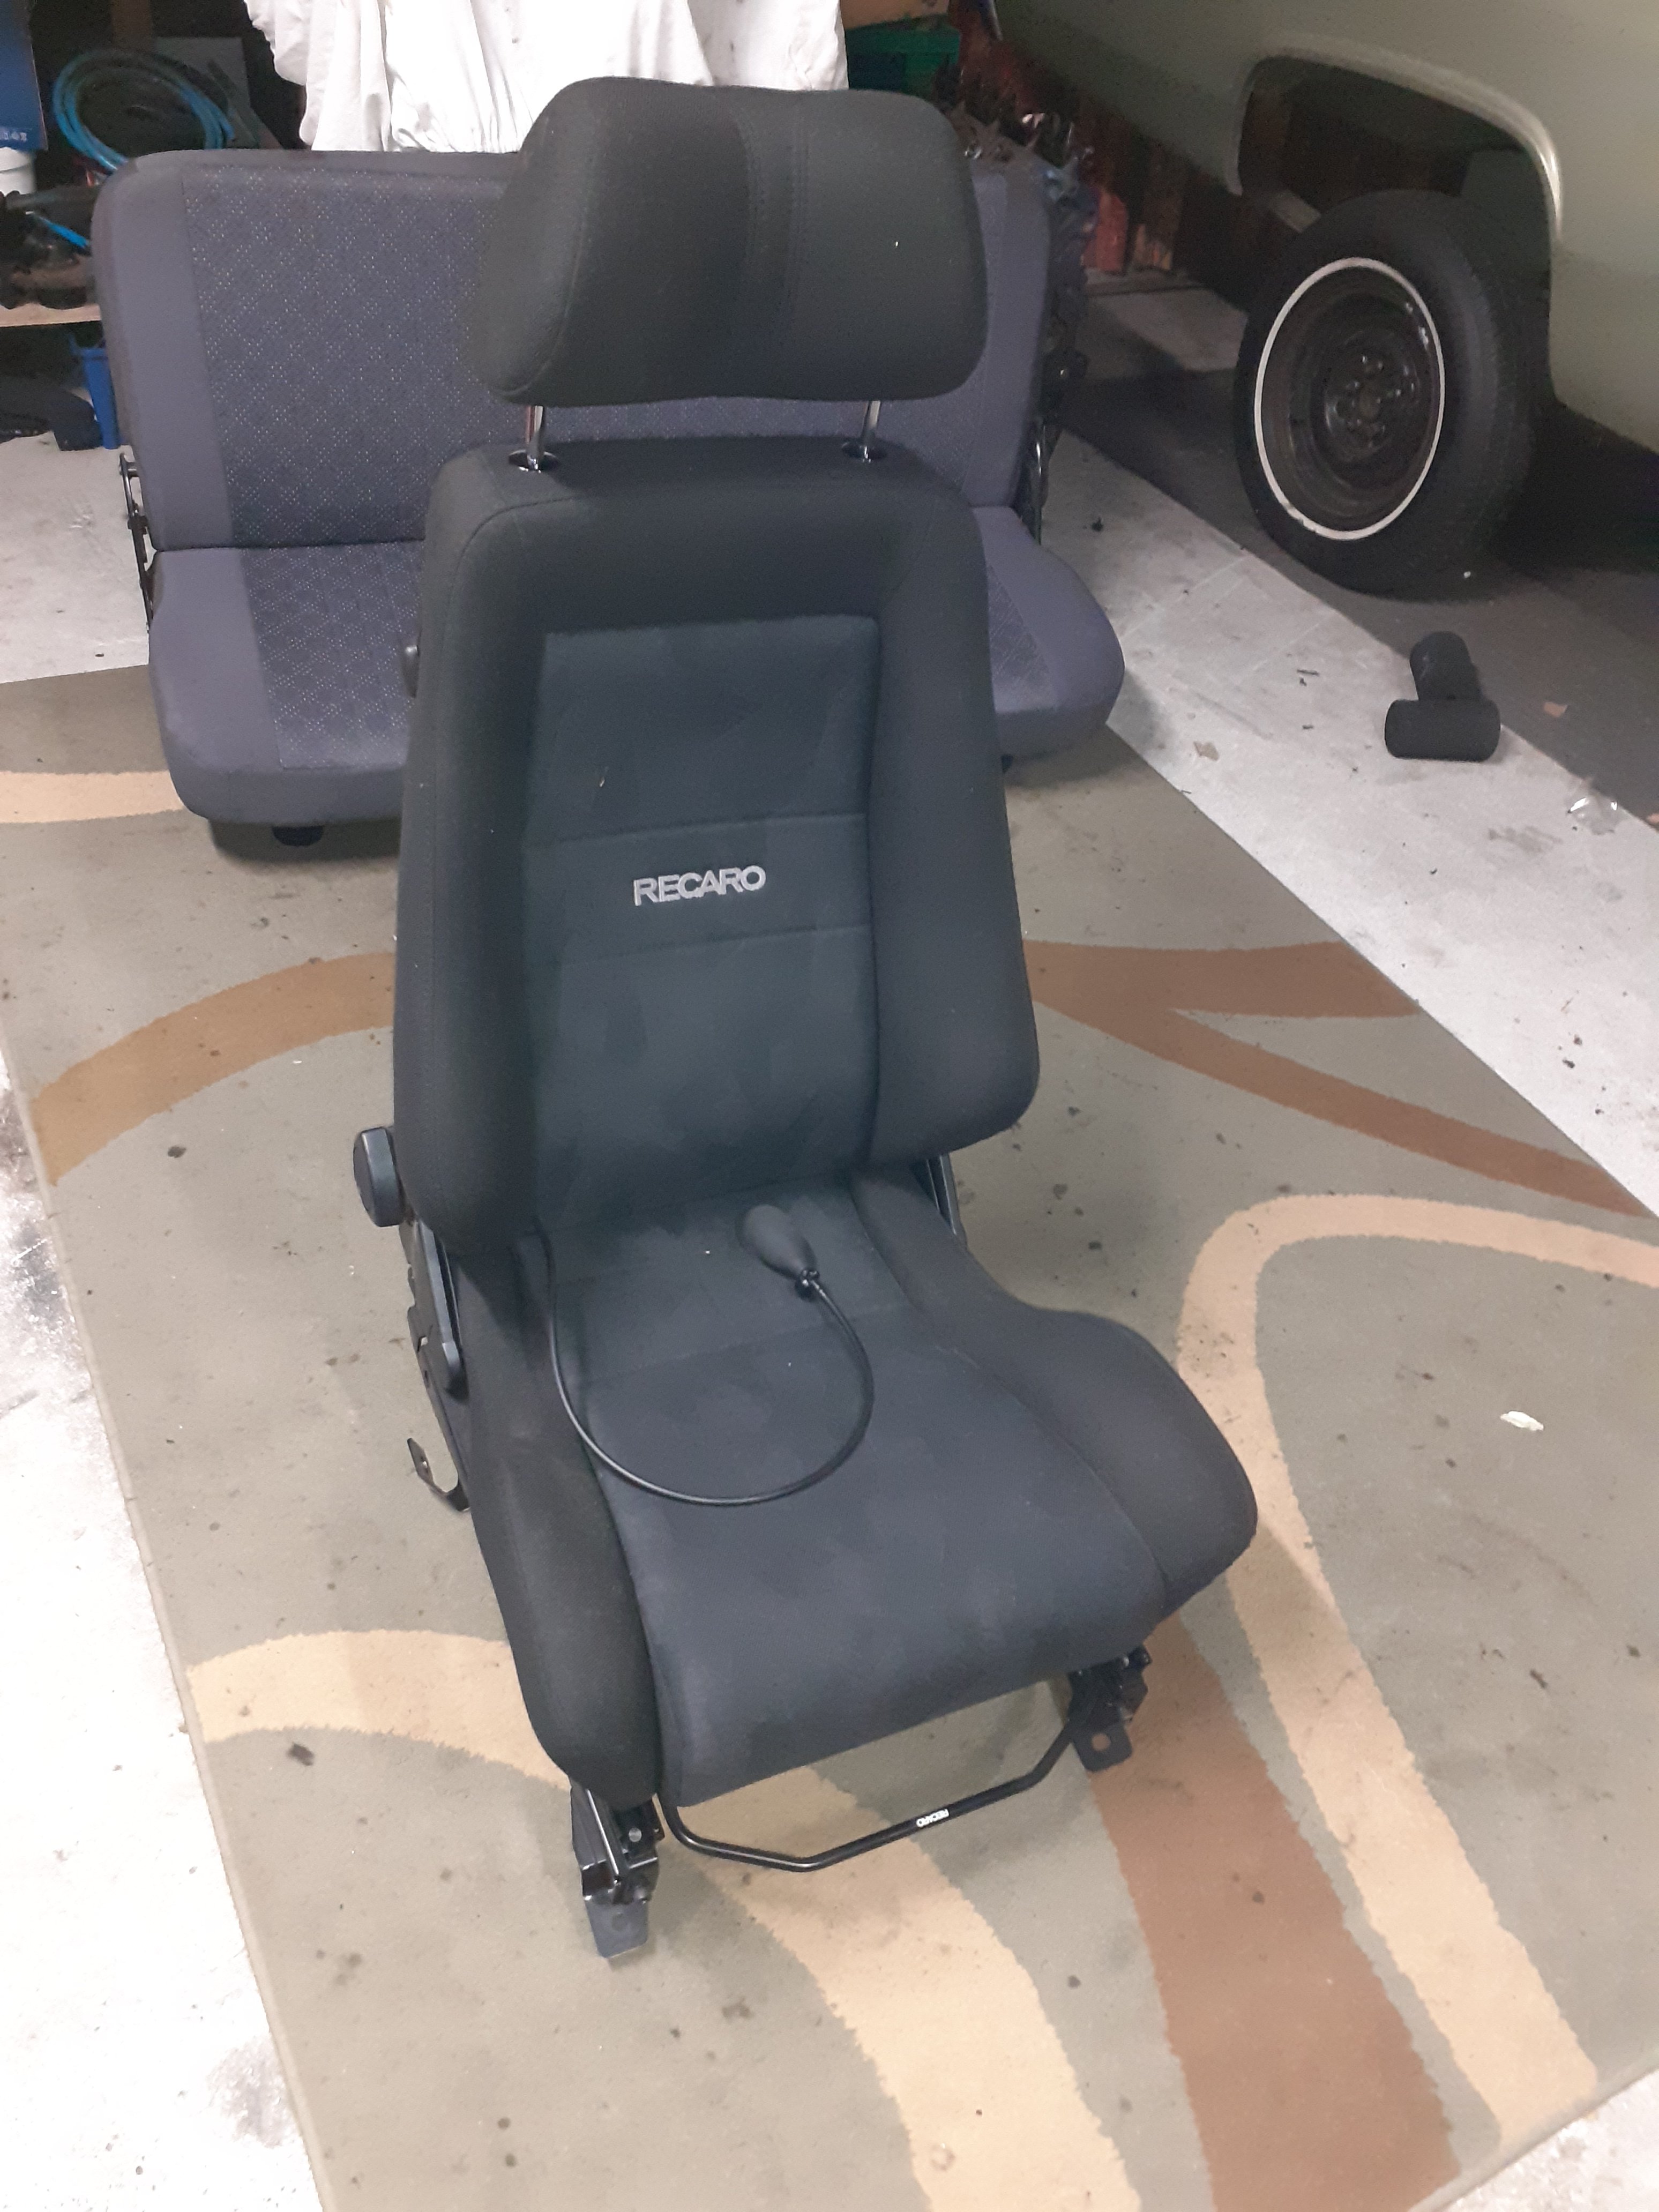
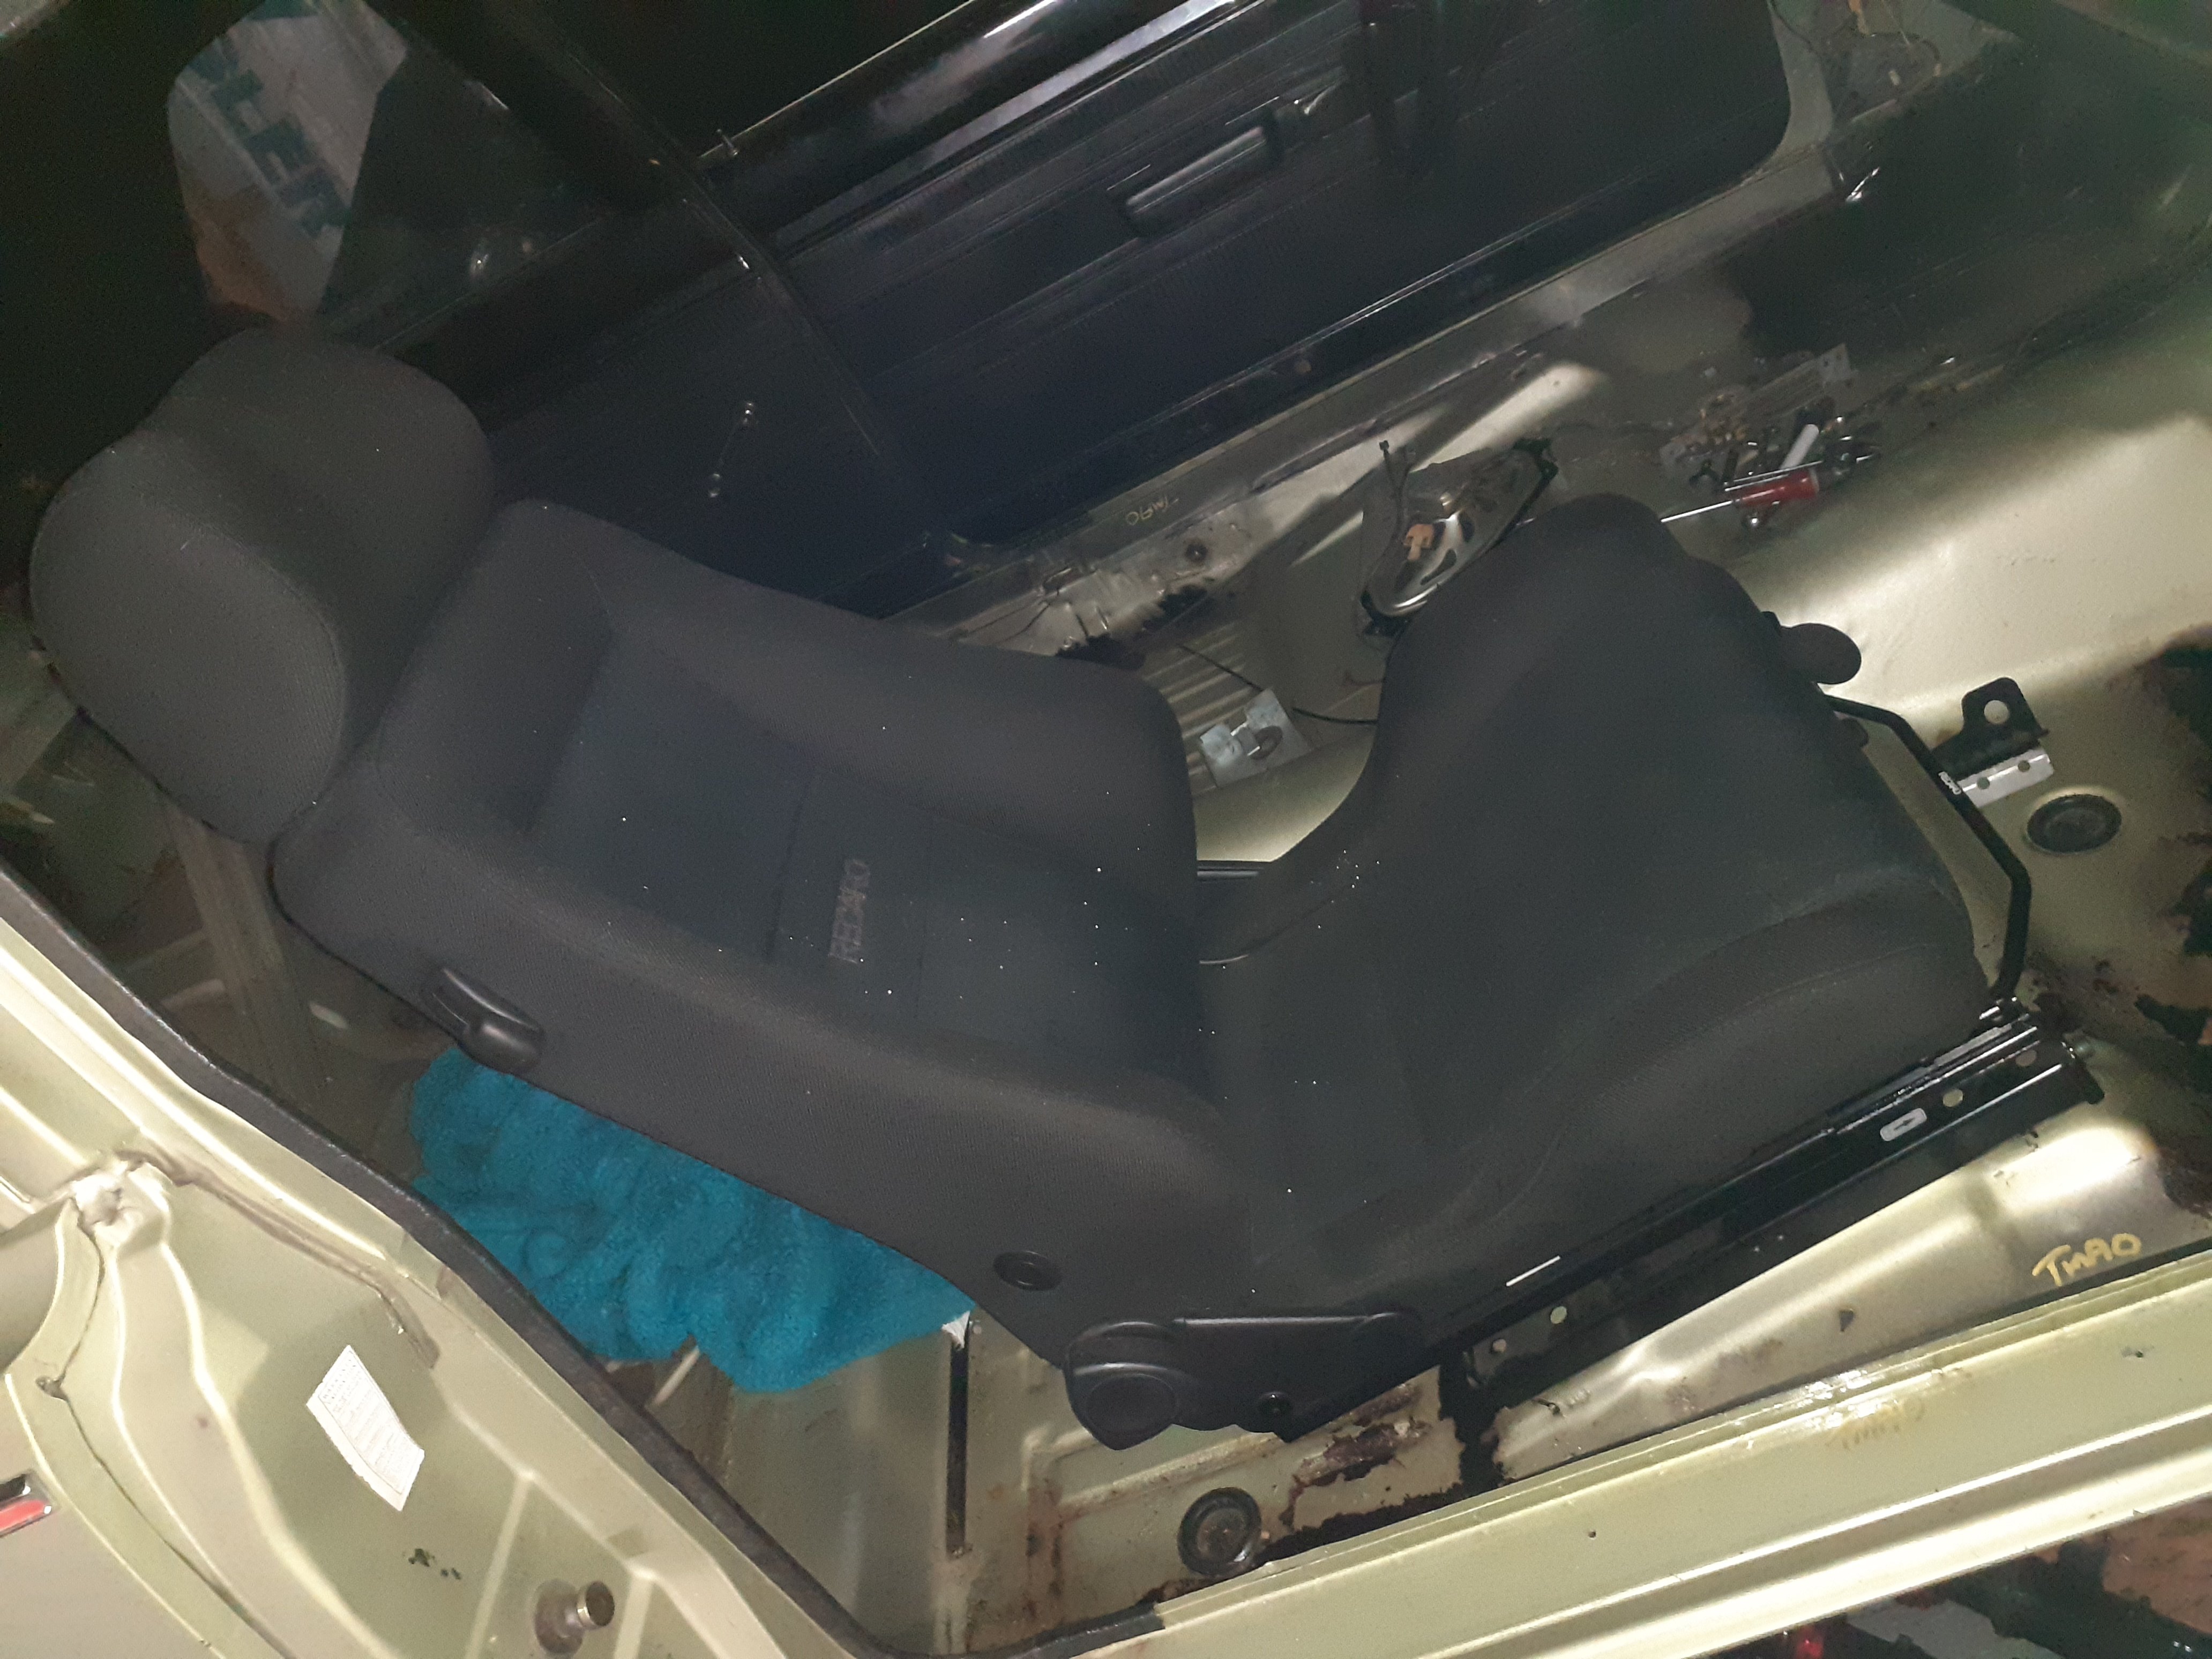
Was at a compliance center today and they had a pair of seats they had taken out of a Prius of all things... anyway I asked if they were for sale and now I own them. Head rests are a bit big, but they are very tidy with no rips and the foams in the base are good. I put one in the car and it looks like they are going to be very easy to fit, if I swap a couple of brackets side to side, the inside will bolt in with some doubler plates, and the outer will bolt on to the bench seat mounts. They even have a pump up lumbar thing so I can take old man @sheepers for a ride and his vertebrae will be suitably supported
1 point
-
Alrighty bitches, time for the drawers. Real drawer slides are really expensive, the ones I wanted would have set me back $450 ish even at trade prices, so I decided to make some rollers out of bearings and some extrusion from Ullrich. I had already sort of tried to do this with a round rail extrusion and some steel round but this was deeply unsatisfactory. Bearings mounted on a bit of drilled and tapped flat bar, tacked in place for now. Cut out the sides from some checker plate I had lying around, I wasn't too sure about it cos of the generic checker plate wankery that goes on but it looks pretty good. I had stealthily snuck a couple of sheets of 1.2mm electrogalv into the shed on Friday, I made some big patterns for the box and bent them with the finger bender. Then a shit load of weldy weldy, grindy grindy. Then creating the same thing for the other side. During these activities my 5" grinder let out a really considerable amount of smoke and ceased to function. This meant a trip to mitre 10 for a quite expensive replacement. During this I also ran out of gas so dragged out my big tank of co2, I pretty much immediately managed to knock this over onto the concrete and let out quite a lot of gas. This bent my regulator in unfortunate directions. Miraculously it still works so I replaced the snapped outlet and carried on. They are big drawers, 800 wide, 600 in, 350 deep. The extra shelfy bit at the back is for a secondary drawer that will sit on the top and slide away for access to the main box. Should be heaps of room. Here you can also see my modified super sized porta power pump. This now holds enough fluid for my crane to move through its entire possible range. Yay for me. In other news I mounted the fuel filler, this meant moving one of my battery trays, but this worked out ok. This will be covered with a lockable checker plate hatch in the near future. In other other news I made a place for the plate and light. Somehow my deck build calculations failed to take into account the size of the license plate, this meant I had to make a wee mod to the deck. Might buy another of those lights to make it even. Still no word from fucking engine man. @yoeddynz gave me the name of the local safari foamer, he reckoned to open up my engine and have a look to see how fucked it is. If it is at all salvageable I think I will use this. I also got the radiator dude around to check things before getting to carried away with the custom rad, but he was happy so will build it. He will mock it up for me first. This will be super expensive, it will be a 5 row triple pass beast. This is needed as the space is not super wide and I need proper cooling, particularly if I turbo it. Rather pleasingly he said it was the best project he had seen or words to that effect. Yay for me again.1 point
-
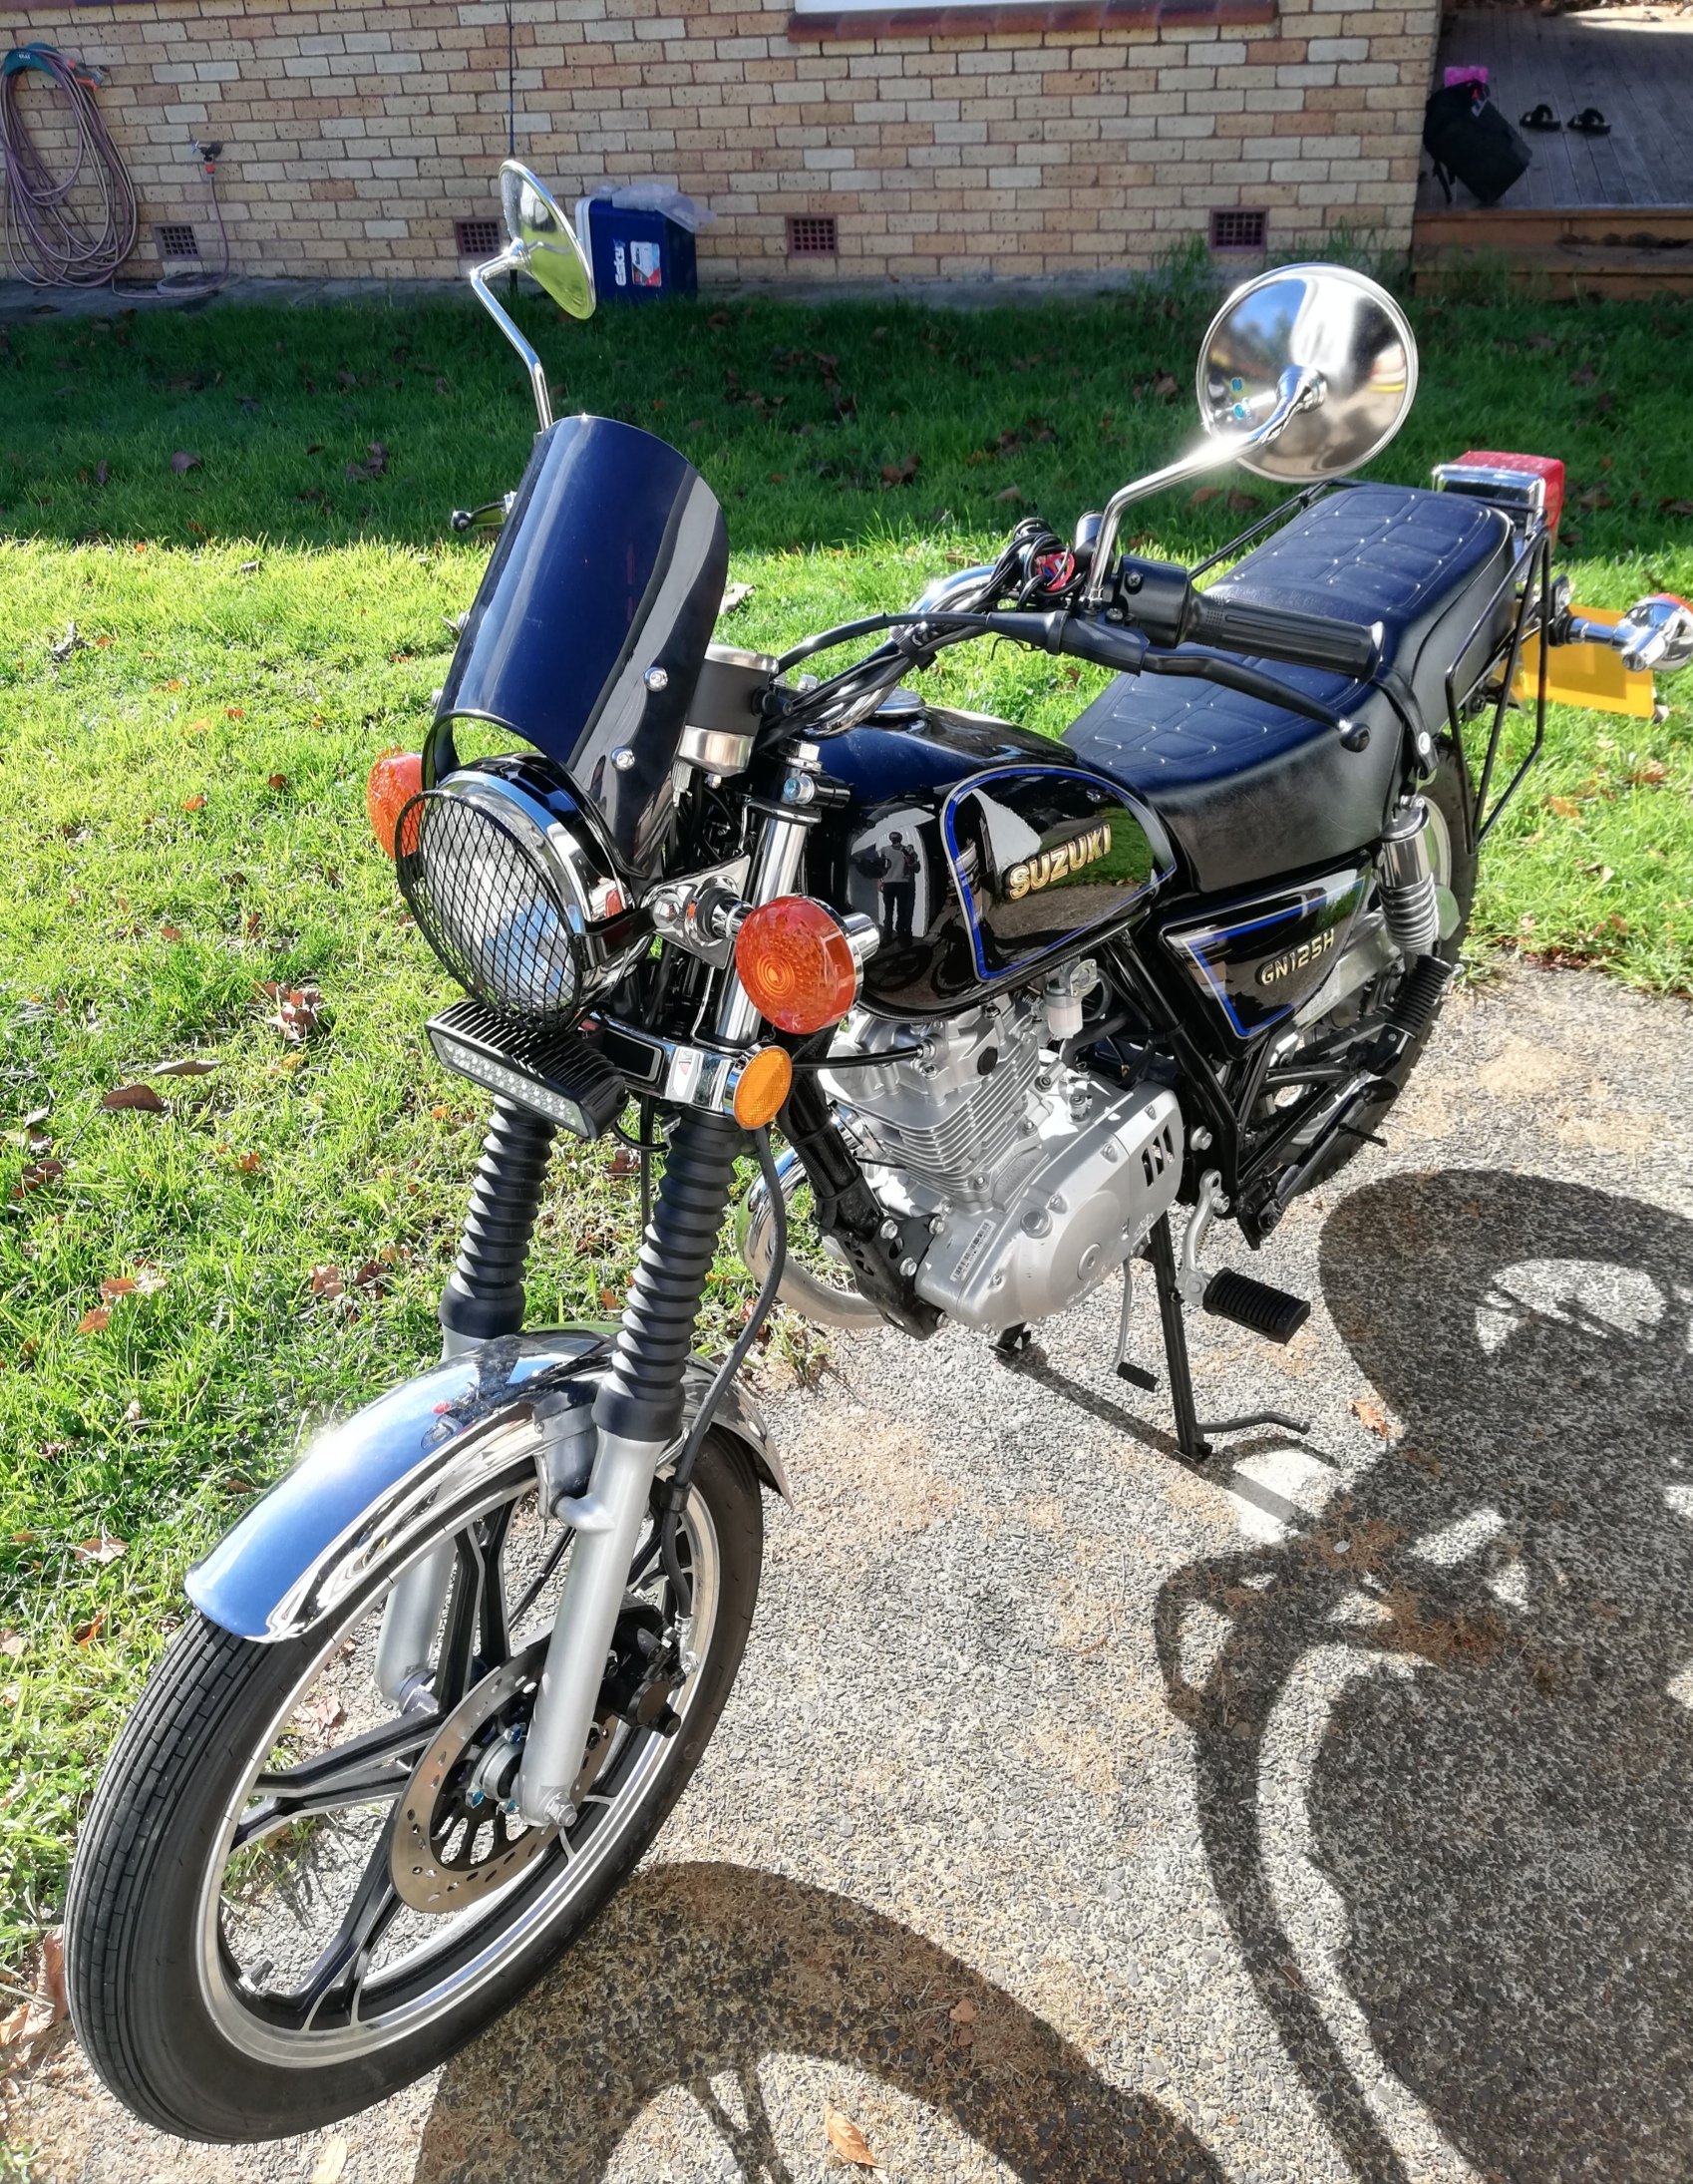
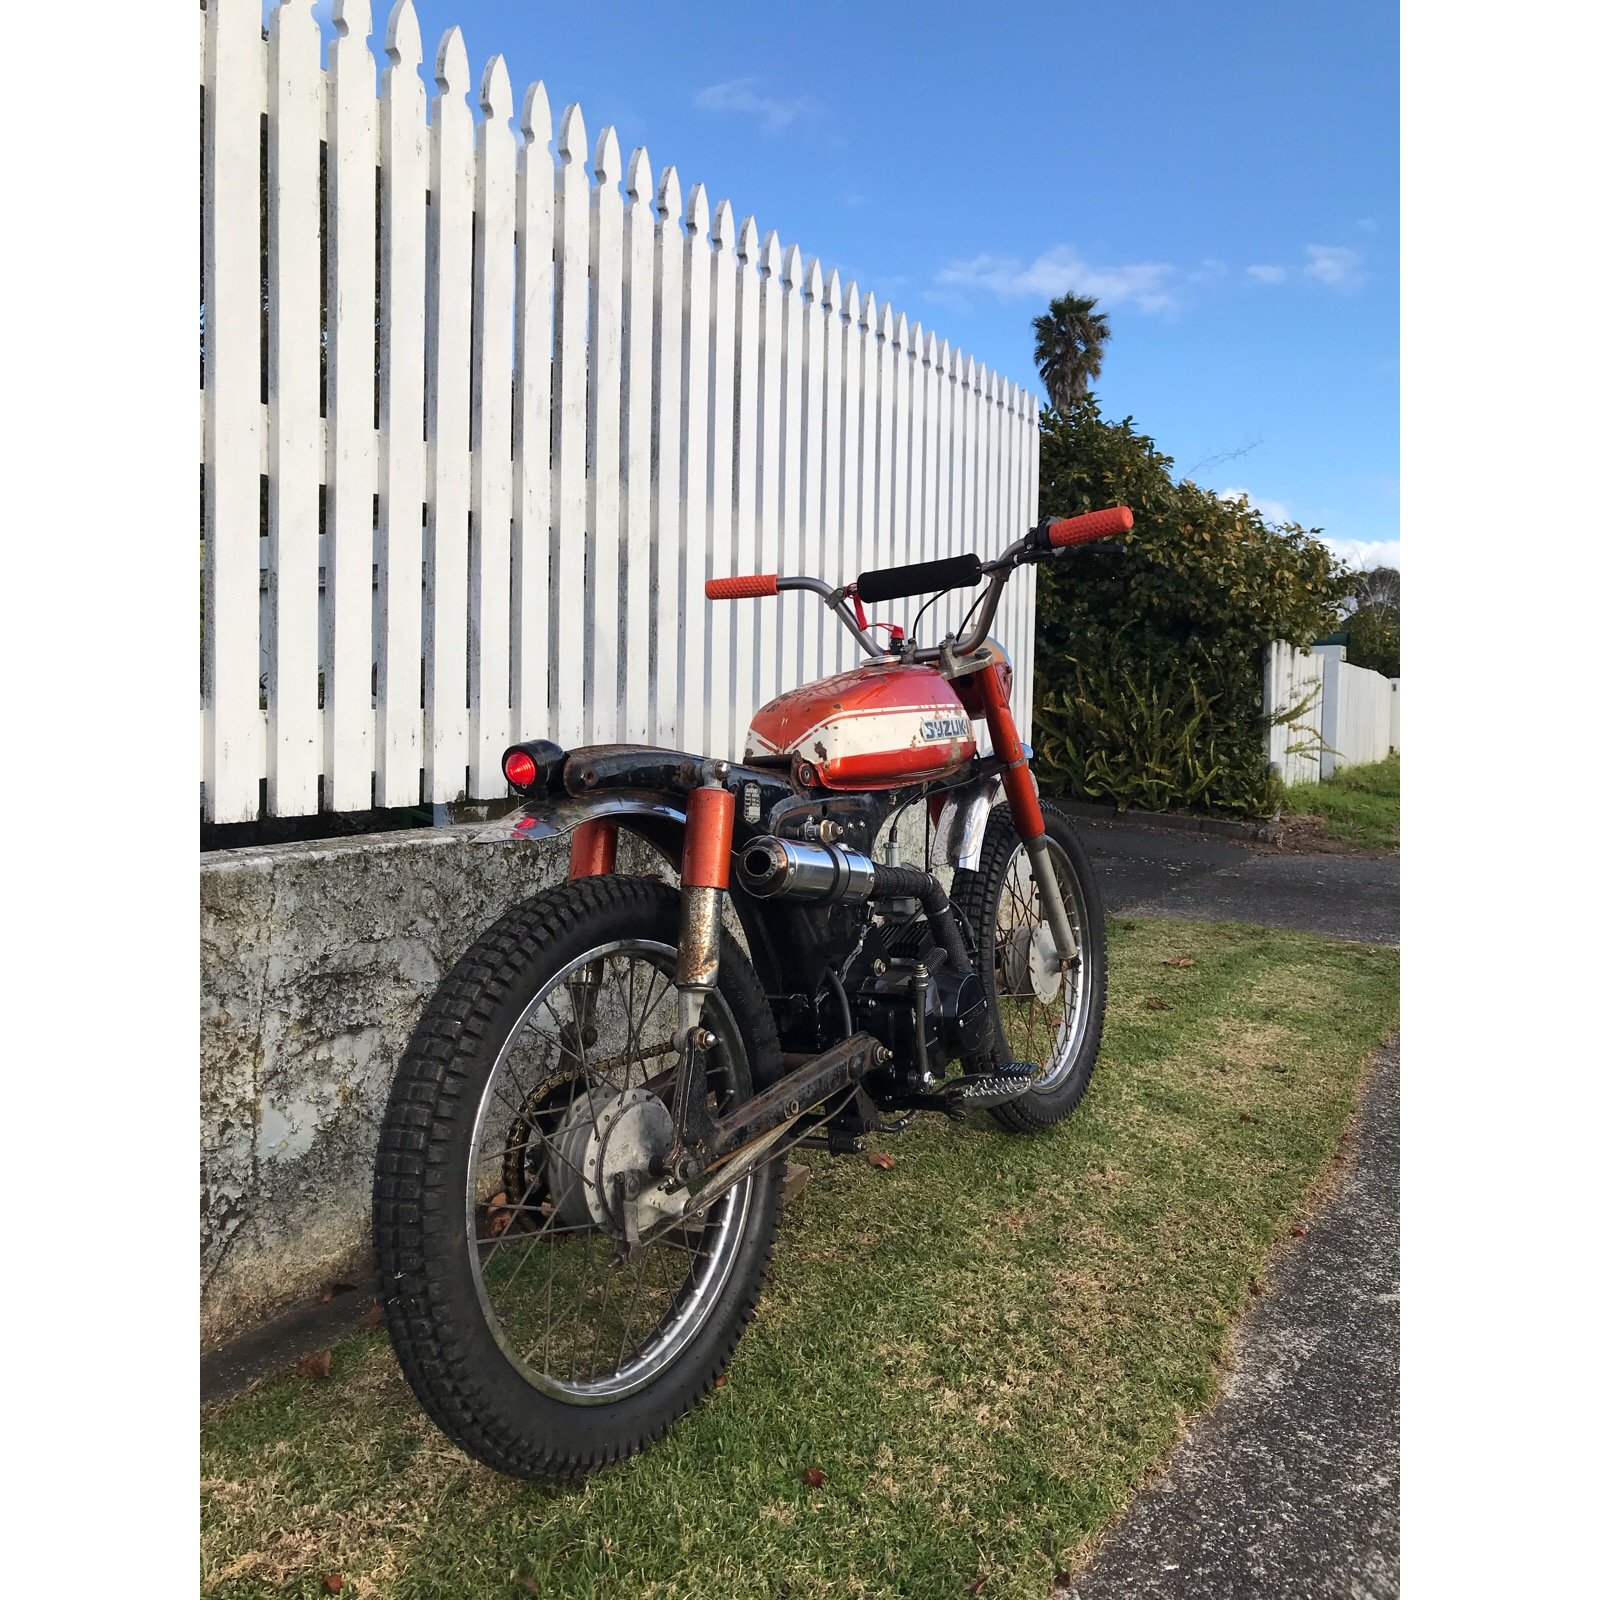
Suzuki Adventure50 builds coming along well.
1 point
-
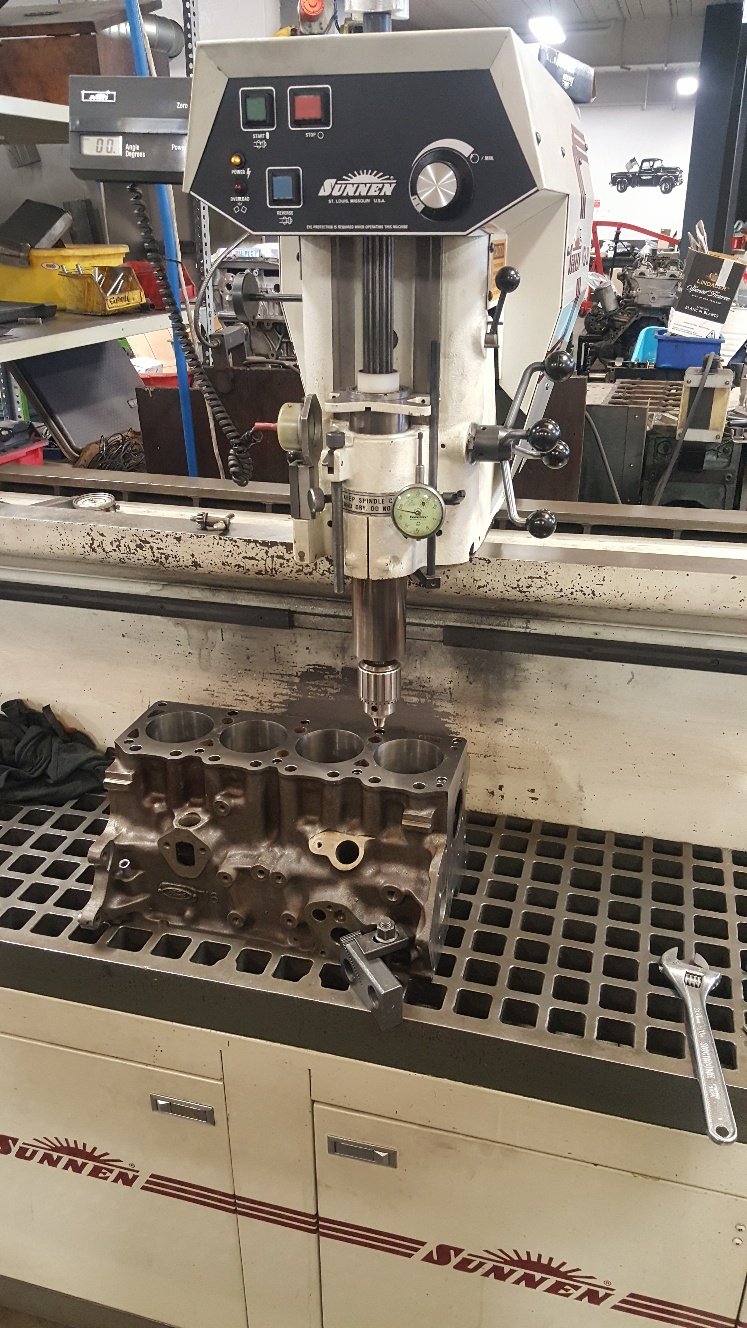
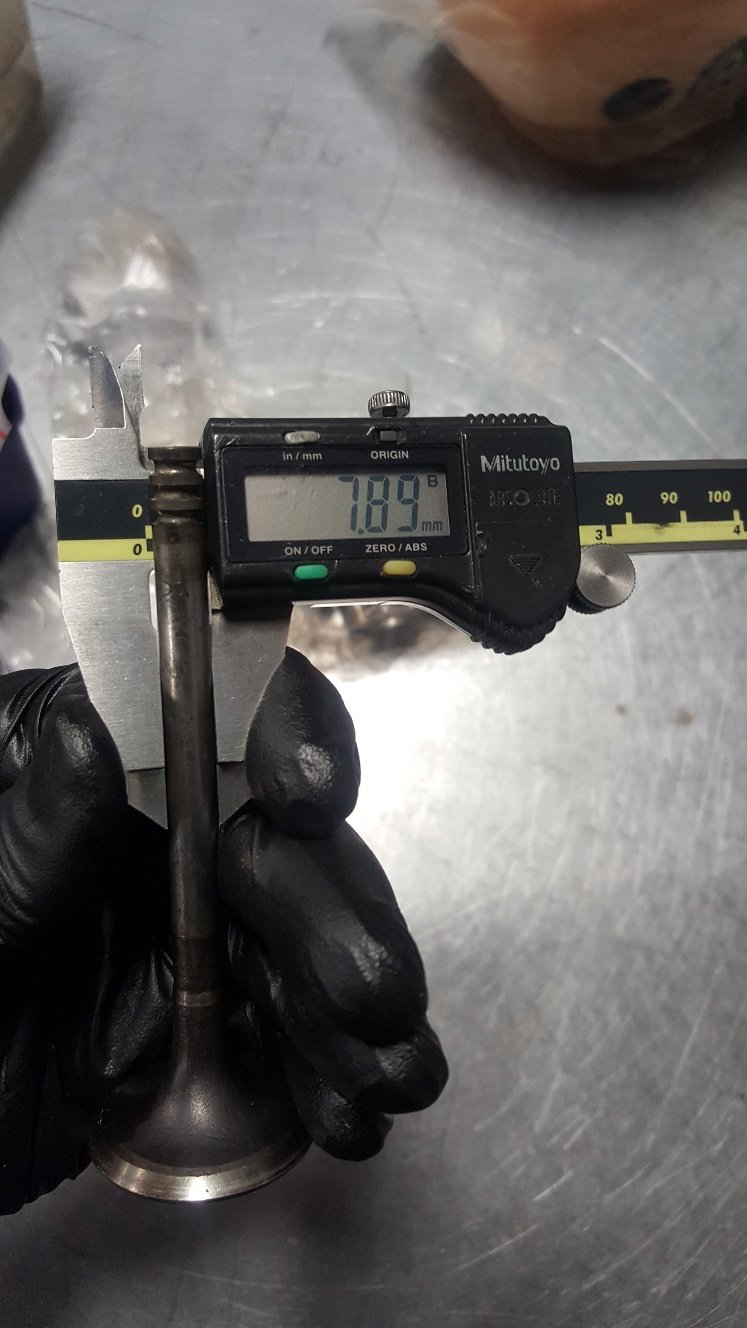
Here's a picture of the standard valve stem size Here's the Mazda FE valve stem size. So I need to open the guides up to accept the bigger stem size. This is also good because it means I don't need to fit a new valve guide. Its just a matter of reaming the guide hole the honing to finished size And now the guides are big enough to get the valves in. I will be machining these down to 42mm for the intake and 34.5mm for the exhaust.
1 point
-
Went for a blat today. looks really slow in the video haha and it’s probably only just as fast as a late model Camry, but it would have been pretty tops in the early 70’s its pretty boaty around corners. Hopefully the sport suspension and bushes turn up from alfaholics soon. couple other things too, like a high idle. And the clutch is all the way at the top so needs a bit of adjustment. not so sure about how to sort the idle as I’ve not had mech injection before so if anyone’s got and knowledge on it feel free to flick me a line1 point
-
1 point
-
Some good thoughts there but if its scraping with just the rack on then to get it high enough to have a trailer on and it not hit the rack it would be about the height of the bottom of the tail light, fouling the rear door when opening. Also welding them as so ___,------- is not as strong as a straight piece of box section and while it may not make much of a difference its piece of mind when thats all thats holding your bike there. The idea behind having the mesh in the bottom is that it creates a handy little place to store smelly dirty things that you dont want in your truck eg petrol, firewood, oil and the box section acts as a lip allowing for shit tying down efforts to said items. Also having the horiziontals underneath as you can see they go under where the wheels of the bike go so the weight is not actually resting on the mesh frame but on the horiziontals. Having the horiziontals running through the box section would be weaker as the weight is no longer being supported by the steel it is supported by the weld. All this is just my opinion I tried to make it as strong as possible and engineer it in a way so the weight is supported by steel not welds. Would rather is went overkill and could carry heaps of weight then it break because it was too hard to lift your bikes front wheel. I beleive he is using a piece of wood as a ramp atm. Cheers1 point
-
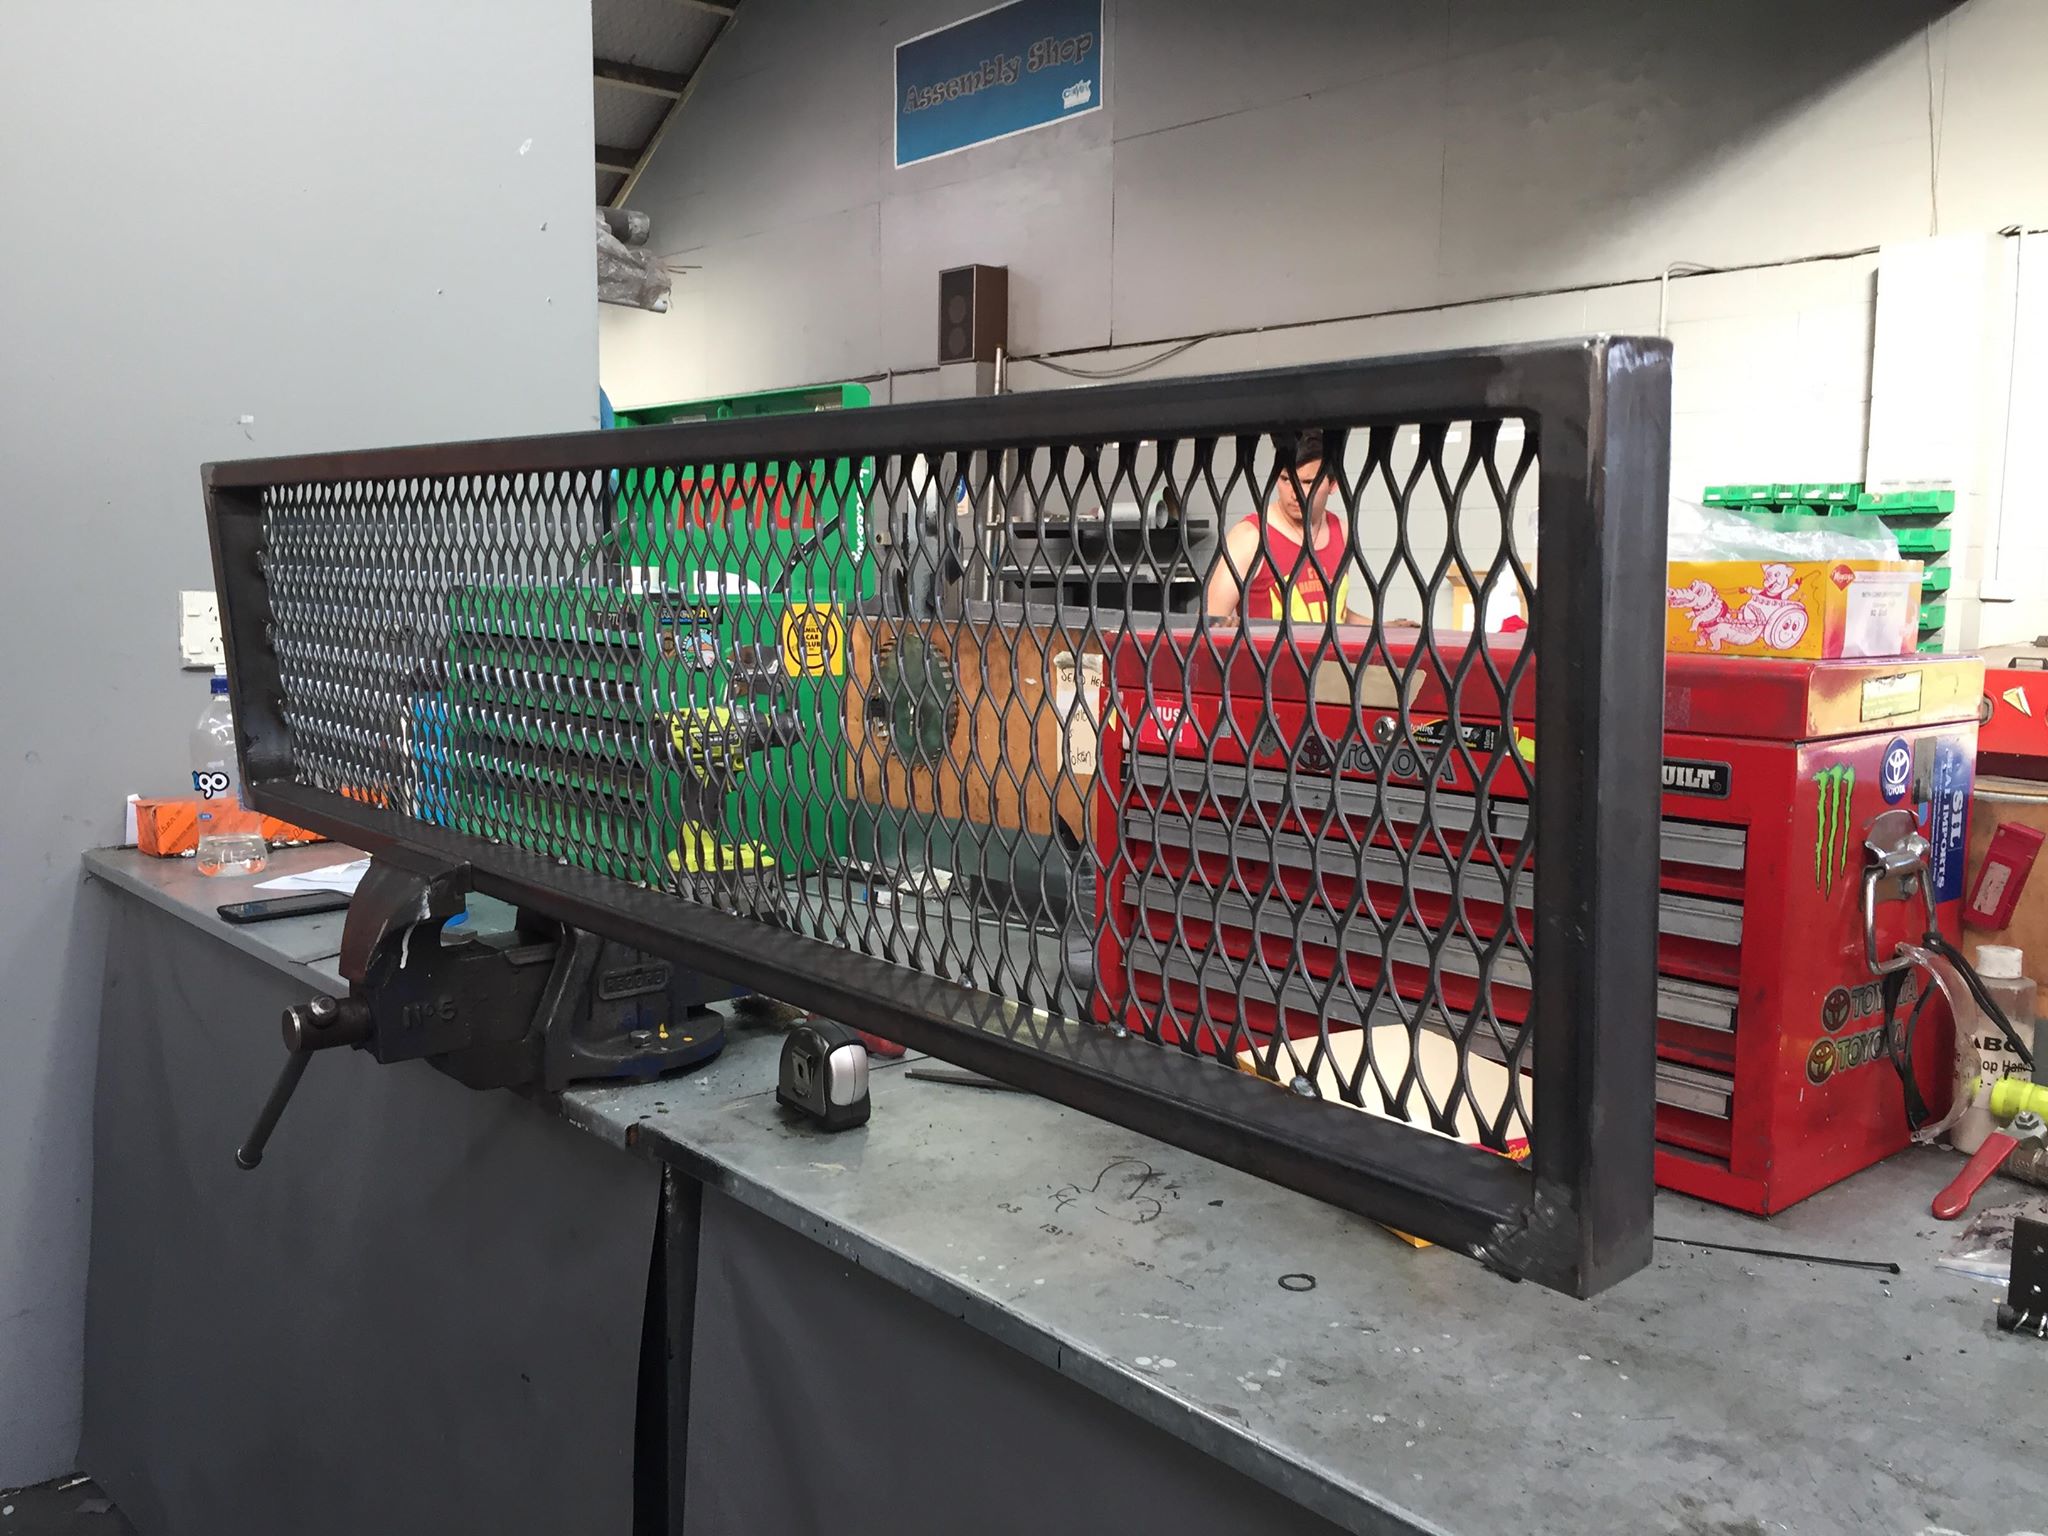
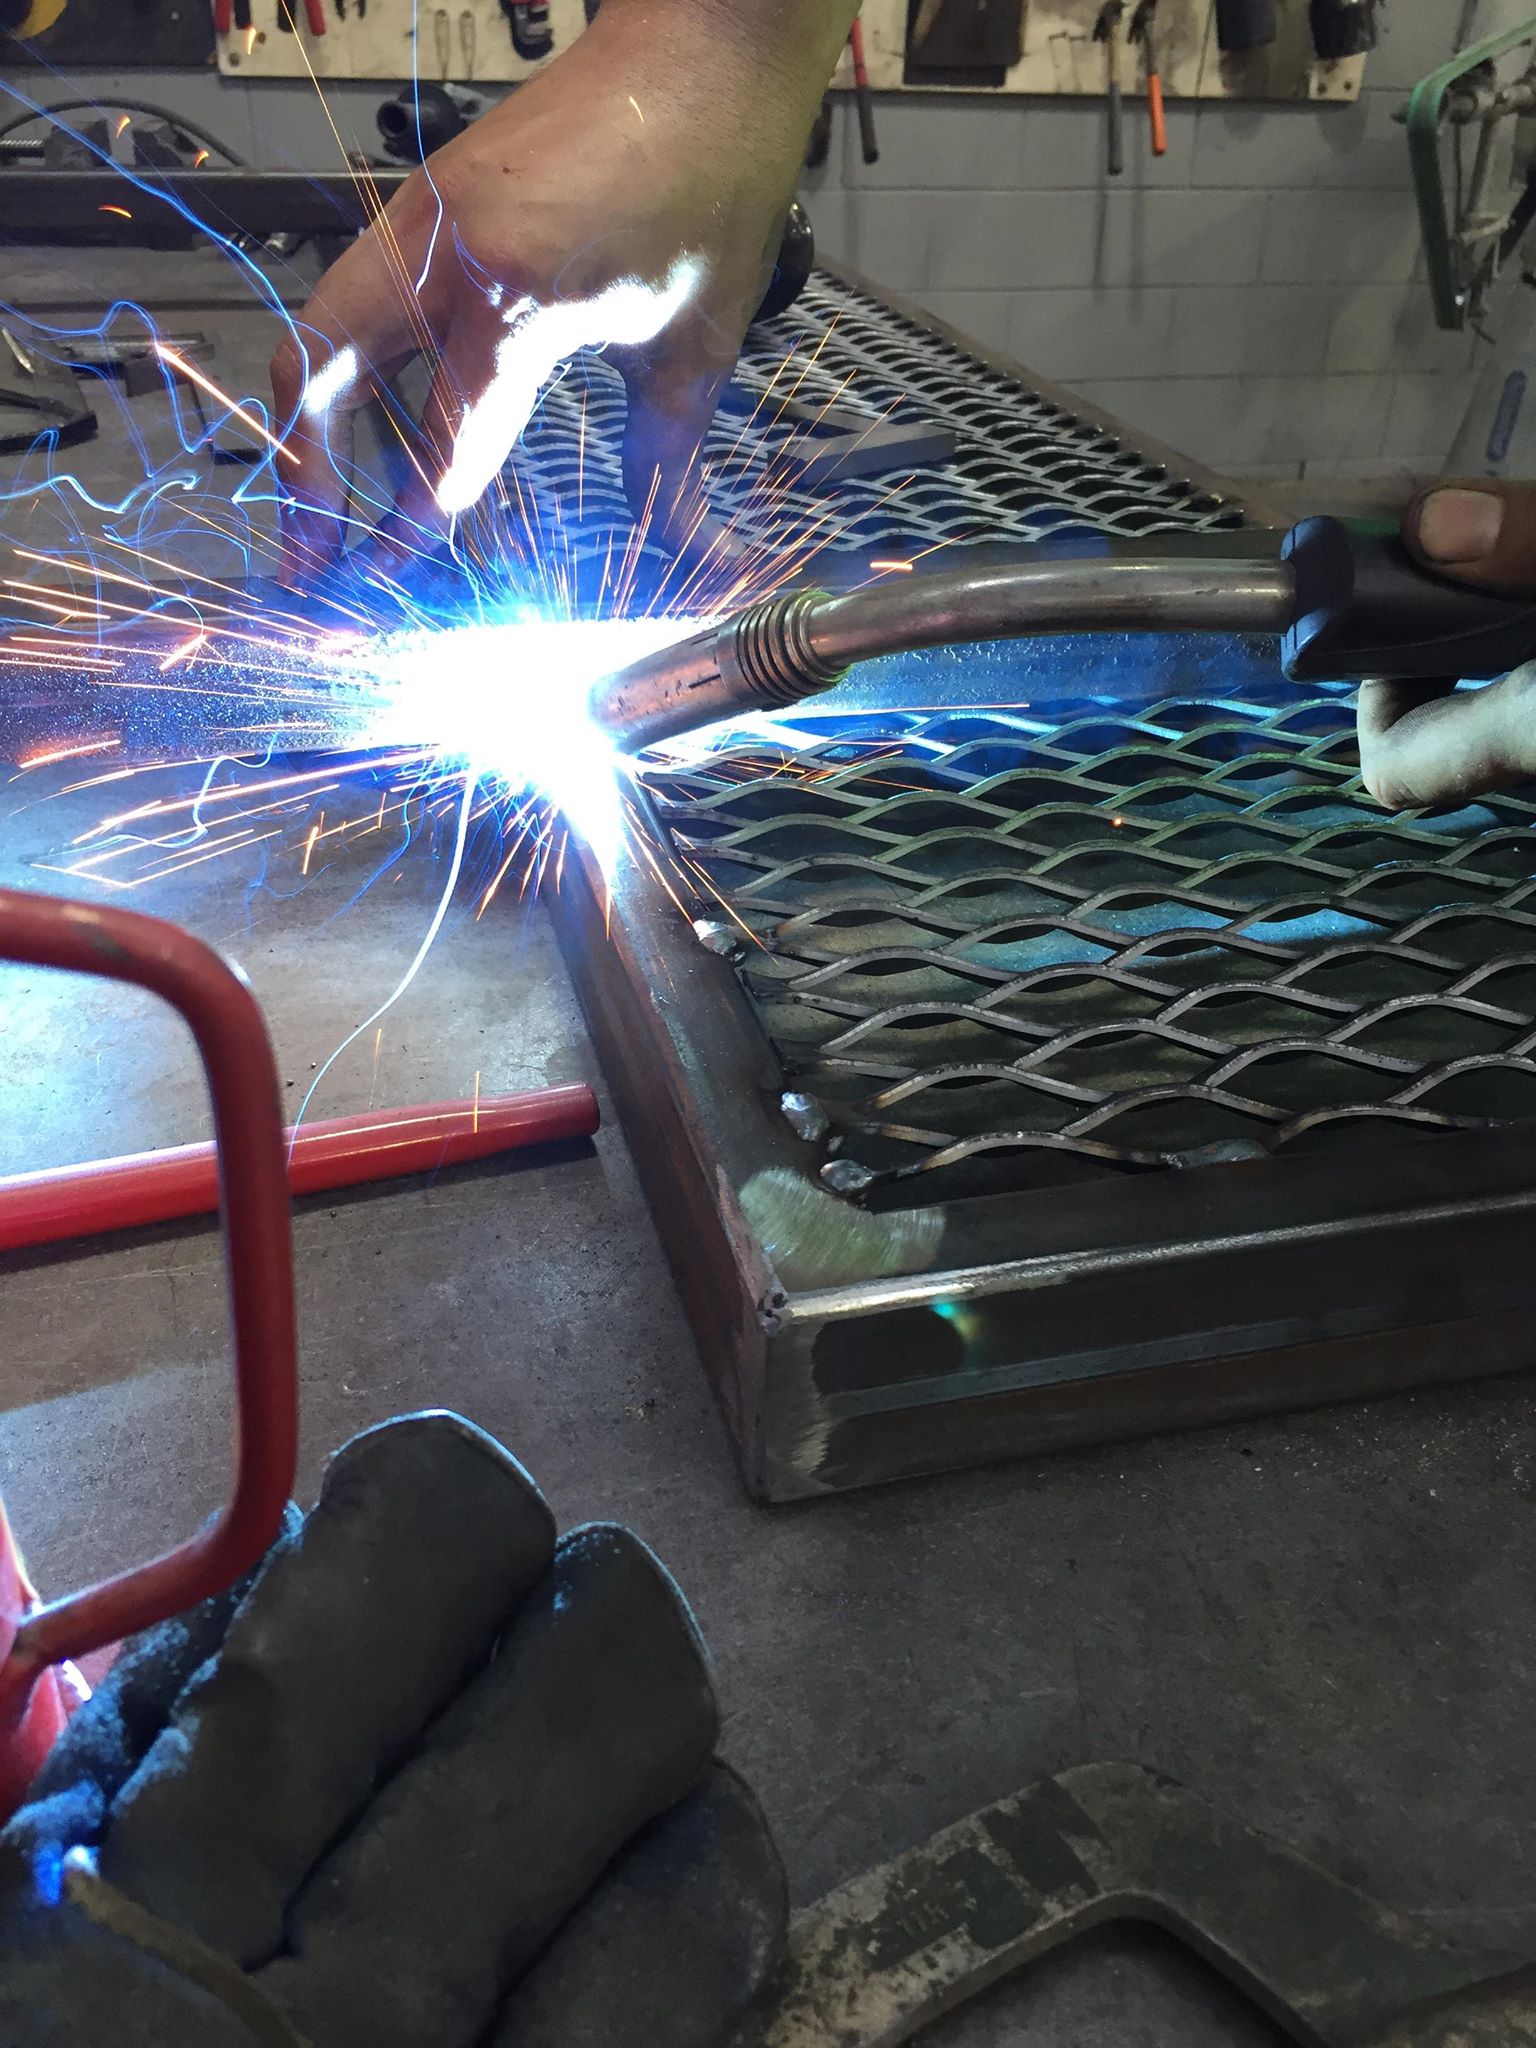
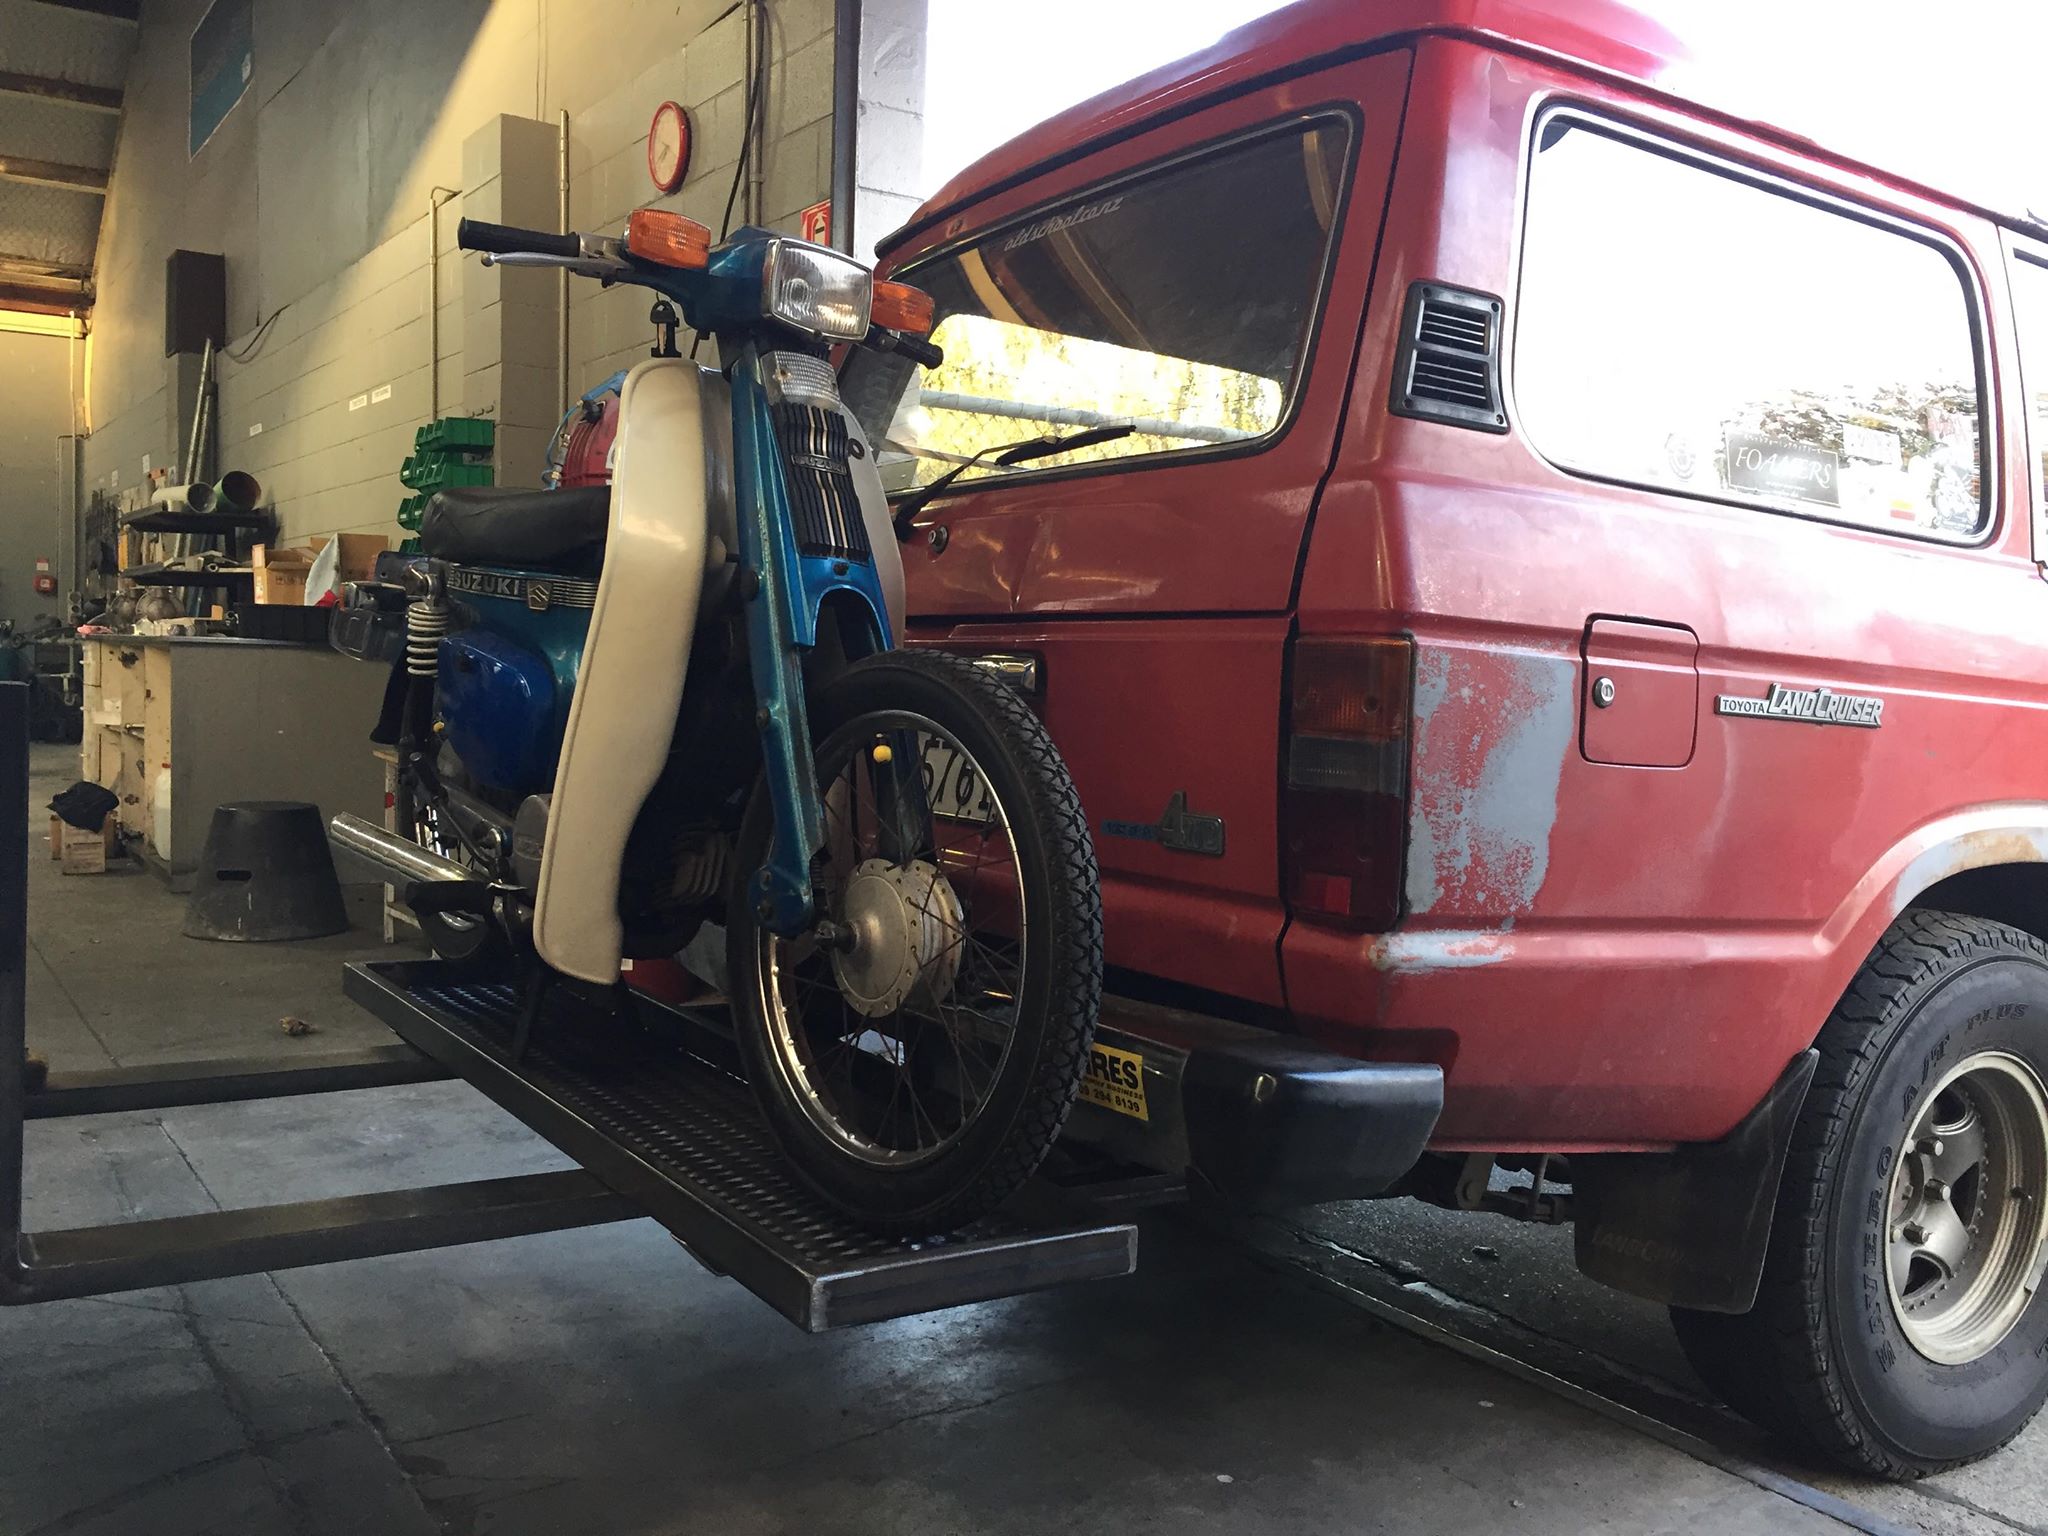
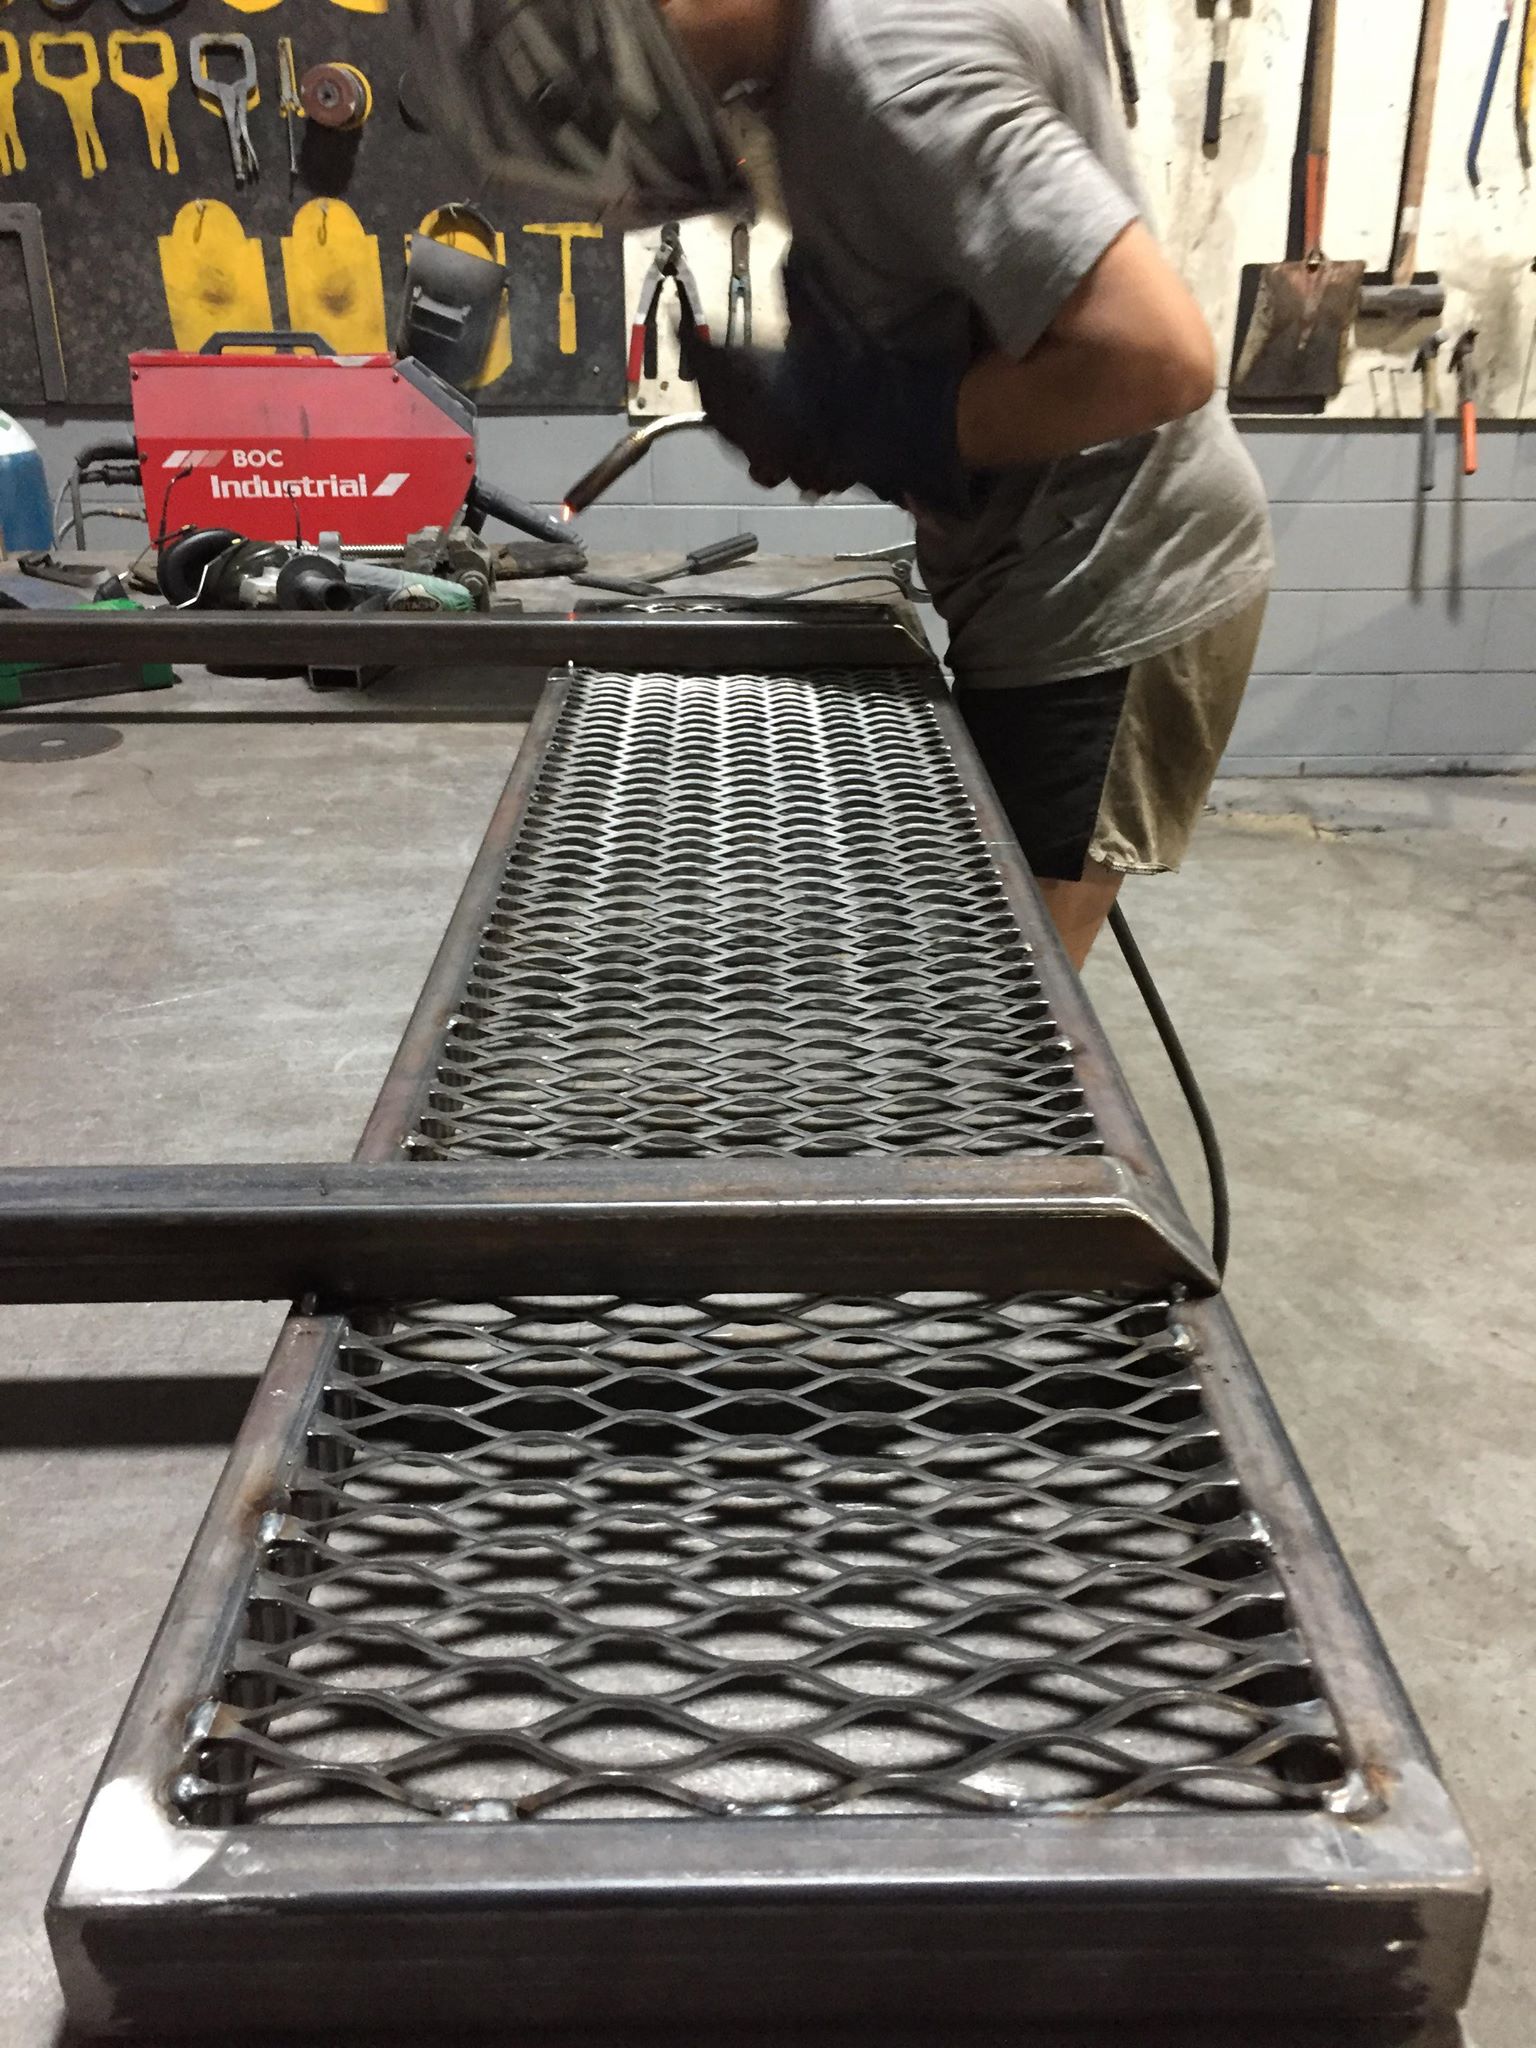
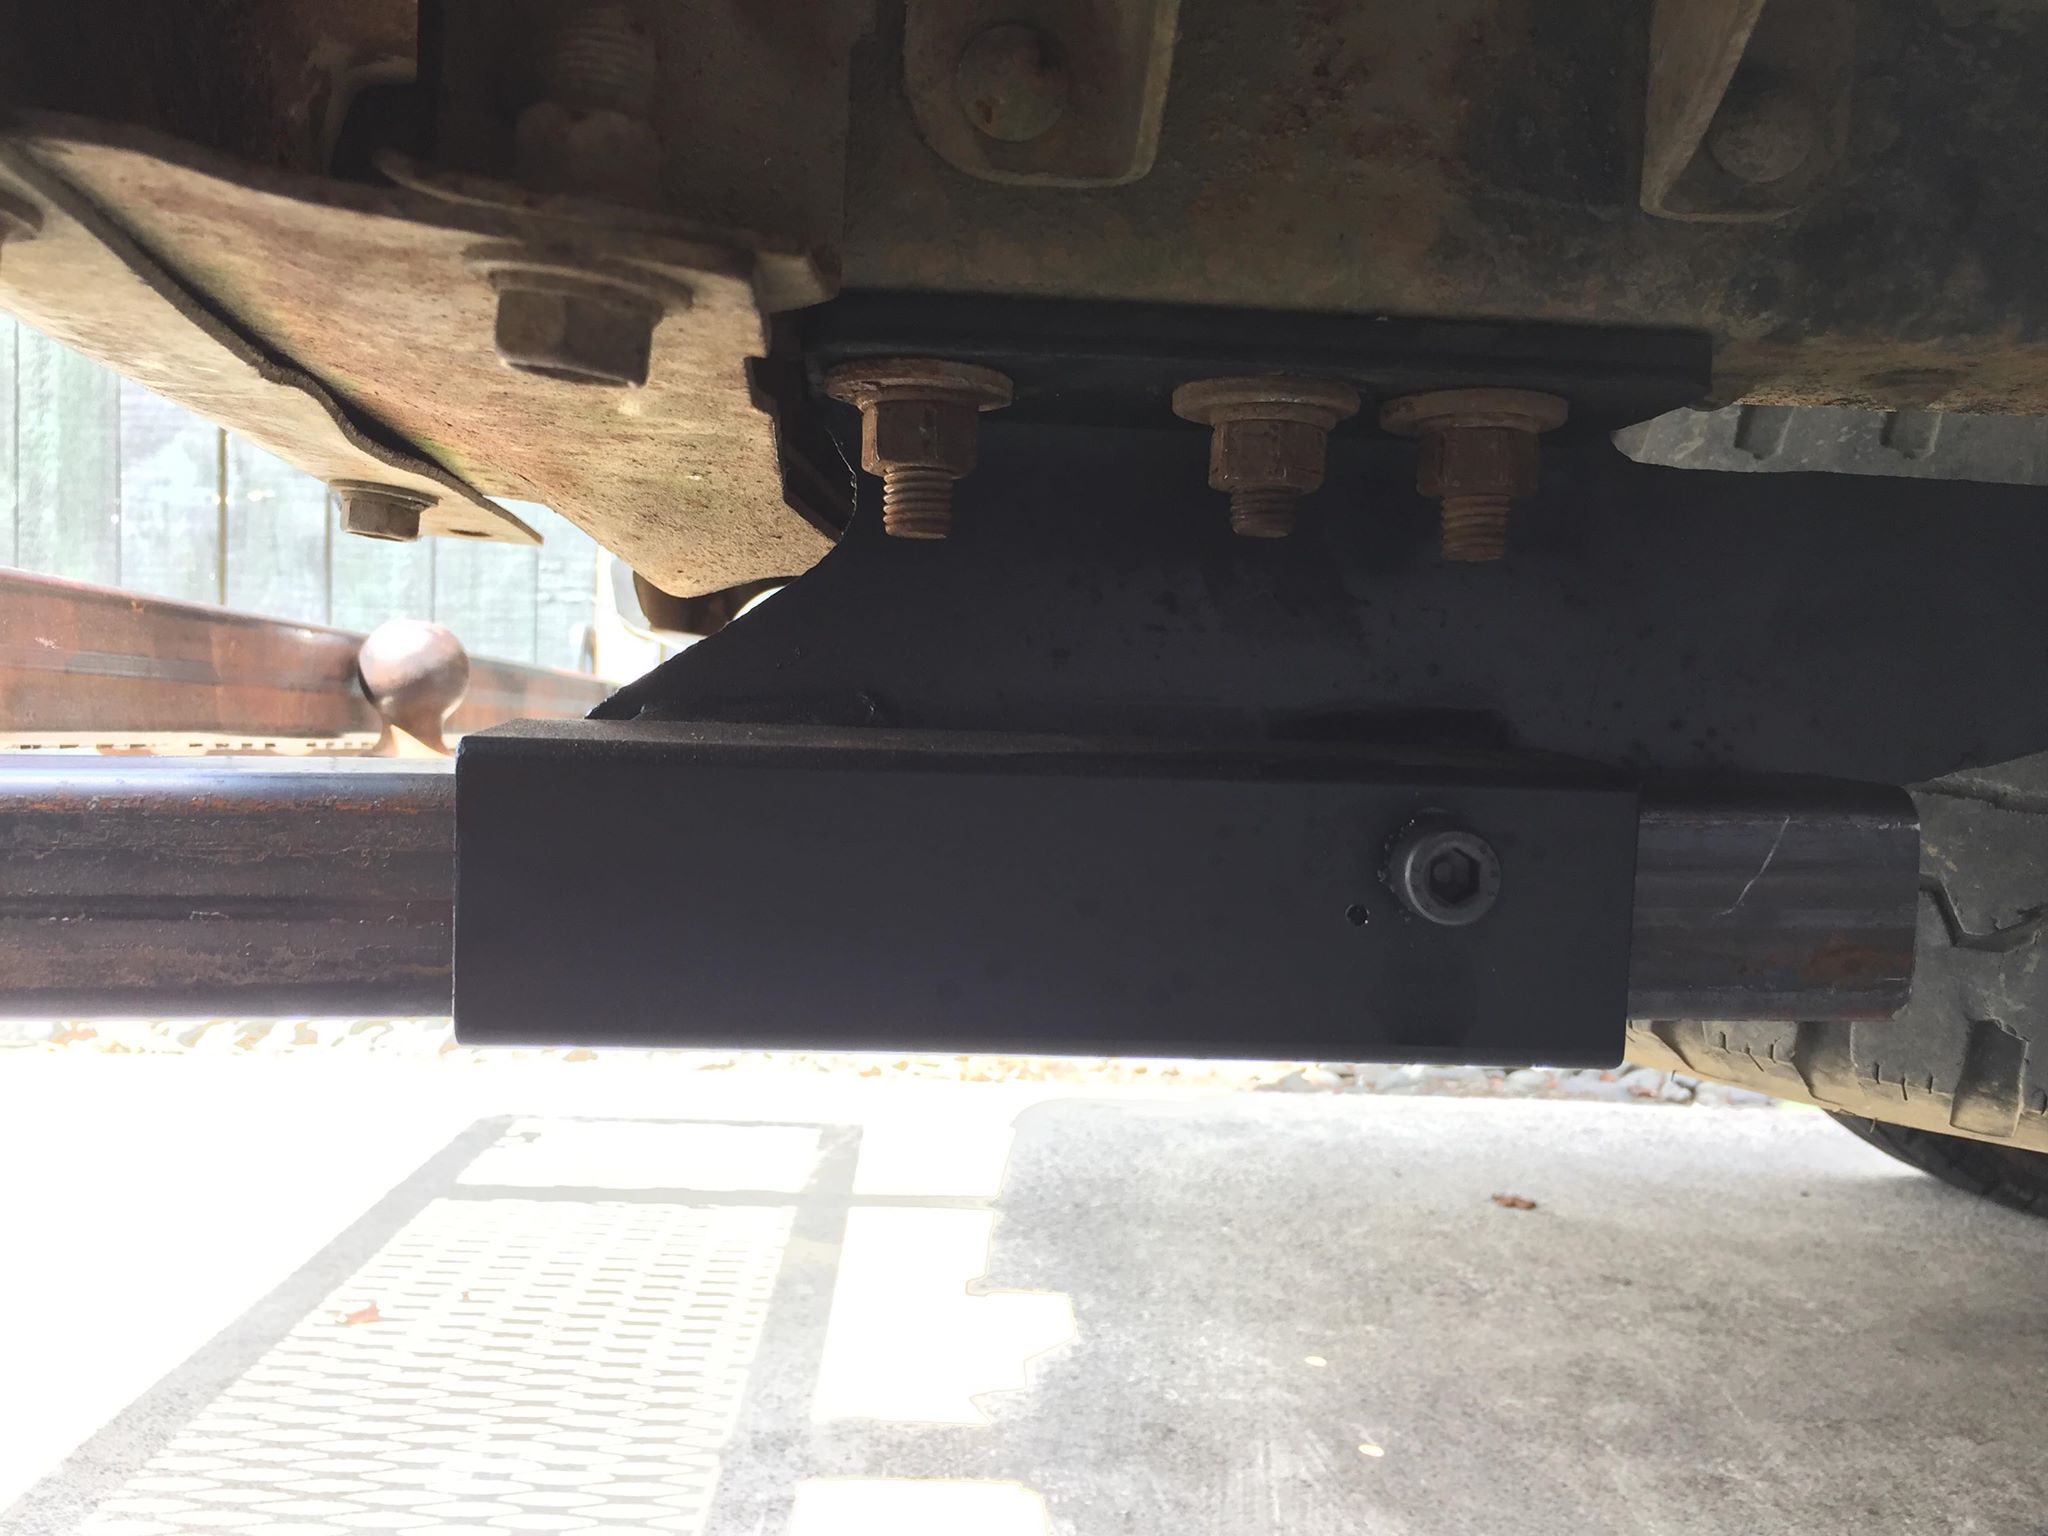
Here's a thing that @Geophy made for me. I've seen a few of these tyres of carriers around but none of them looked that skookum, either sitting on the tow ball or hitch mount. So much weight flopping all over the place. Sent Geophy some sketches then trucked down to Hamilton after work on Friday and he already had the majority of it welded up. Gave him a hand to finish it off and get it lined up with the truck. Used the most appropriate tool, forklift. We welded some box section to the outer of the towbar assembly and have it secured with bolts through there. It's strong! Had both of us jumping up and down on it (we aren't small dudes) and it didn't move.
1 point
-
By popular demand....1 point
-
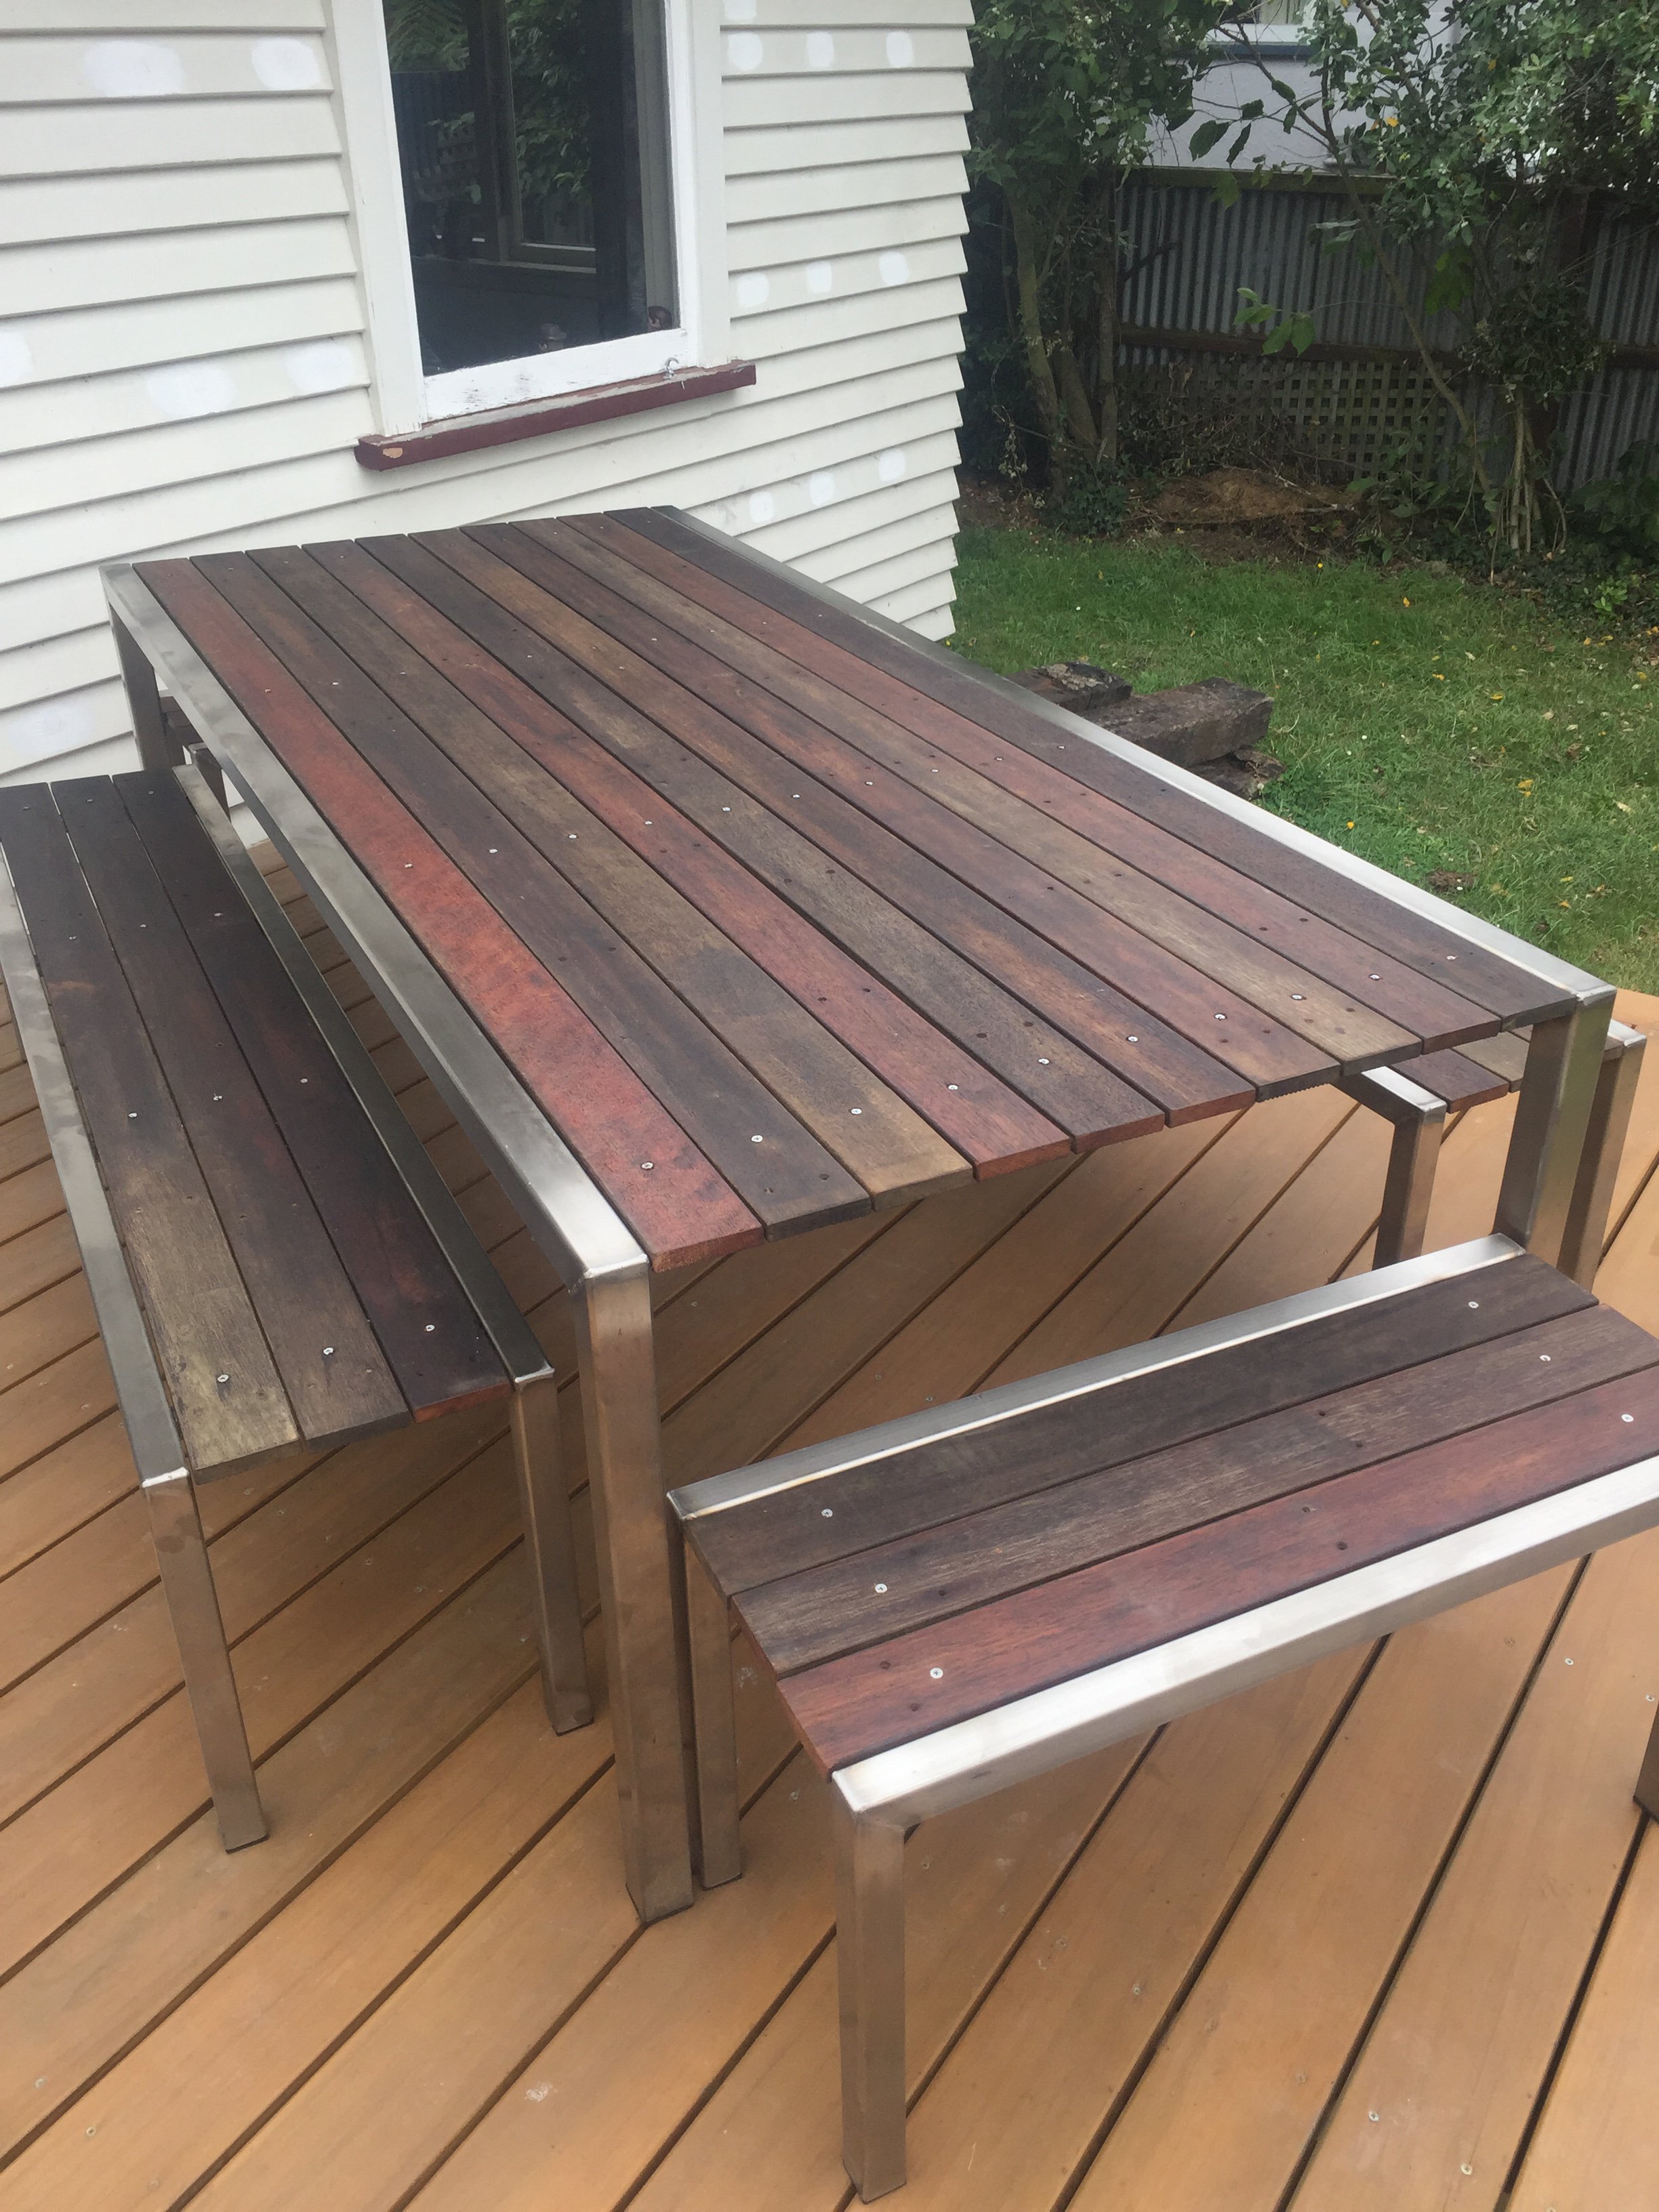
I made an outdoor table/chairs over the break.stainless frame with reused kiwla decking re oiled
1 point
-
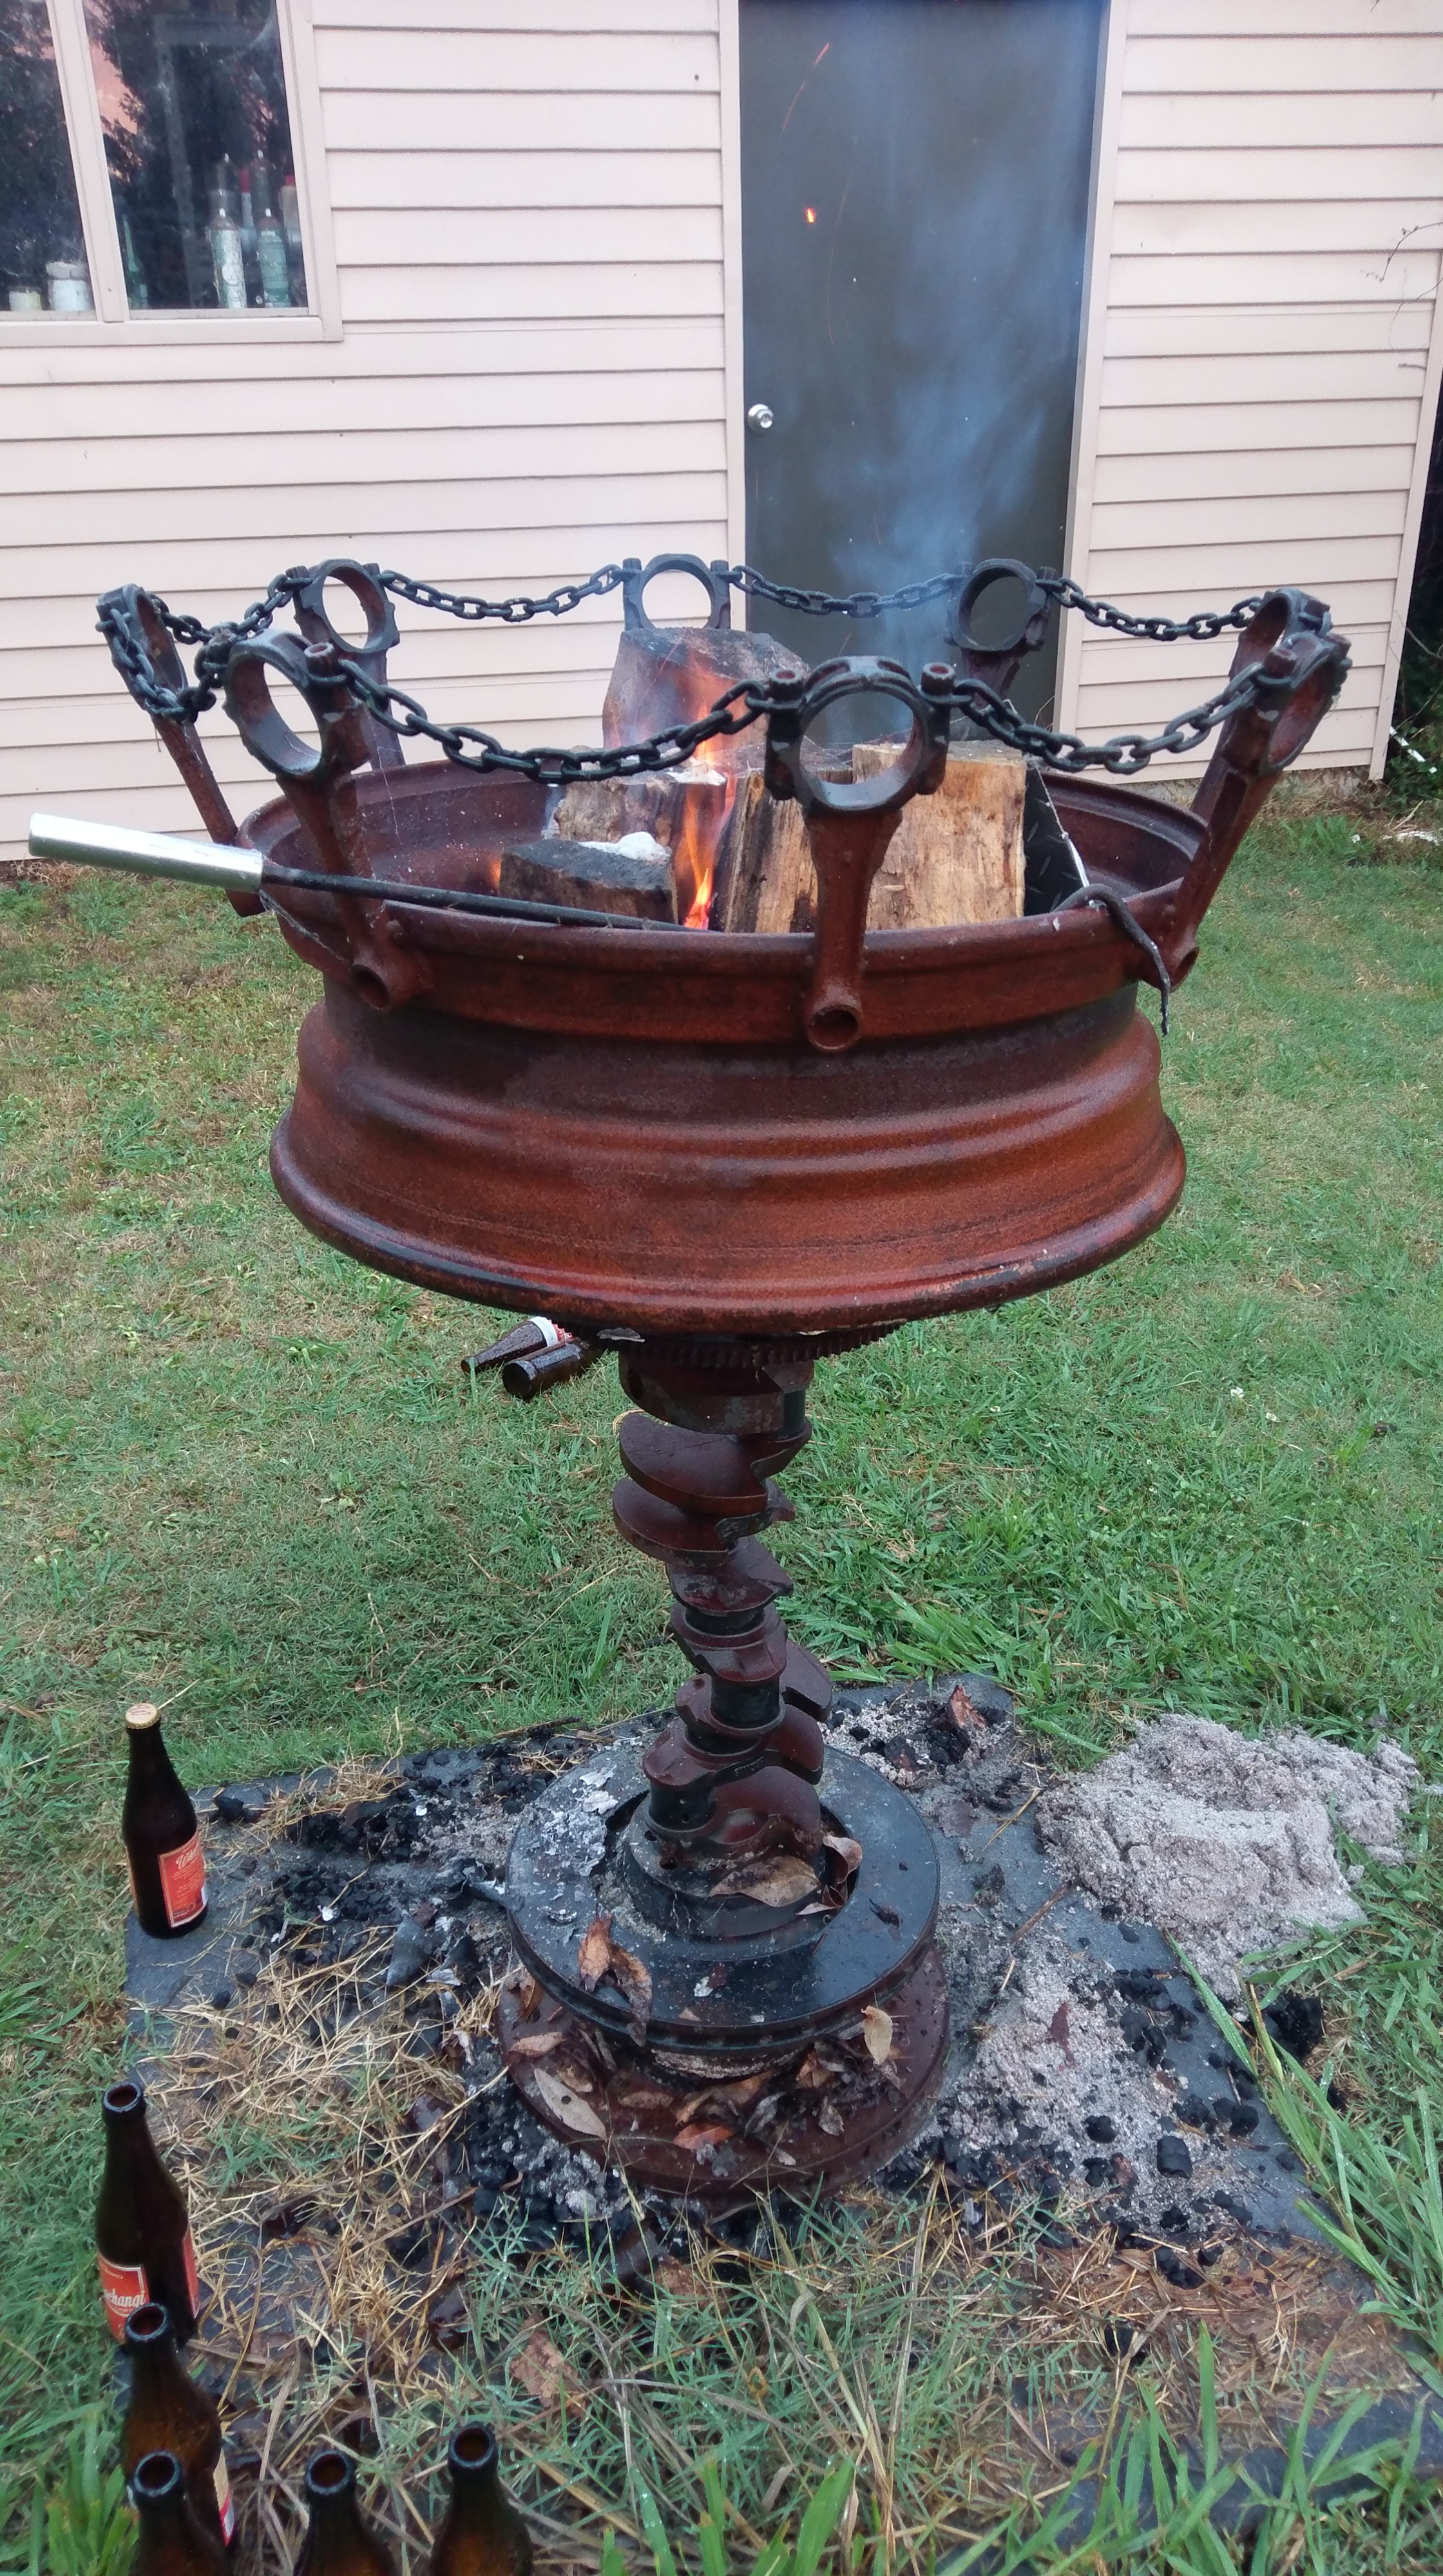
Thought I had already posted this but can't find it so here's my brazier. A lot of you already know it coz I took it to Wagnats last year
1 point
-
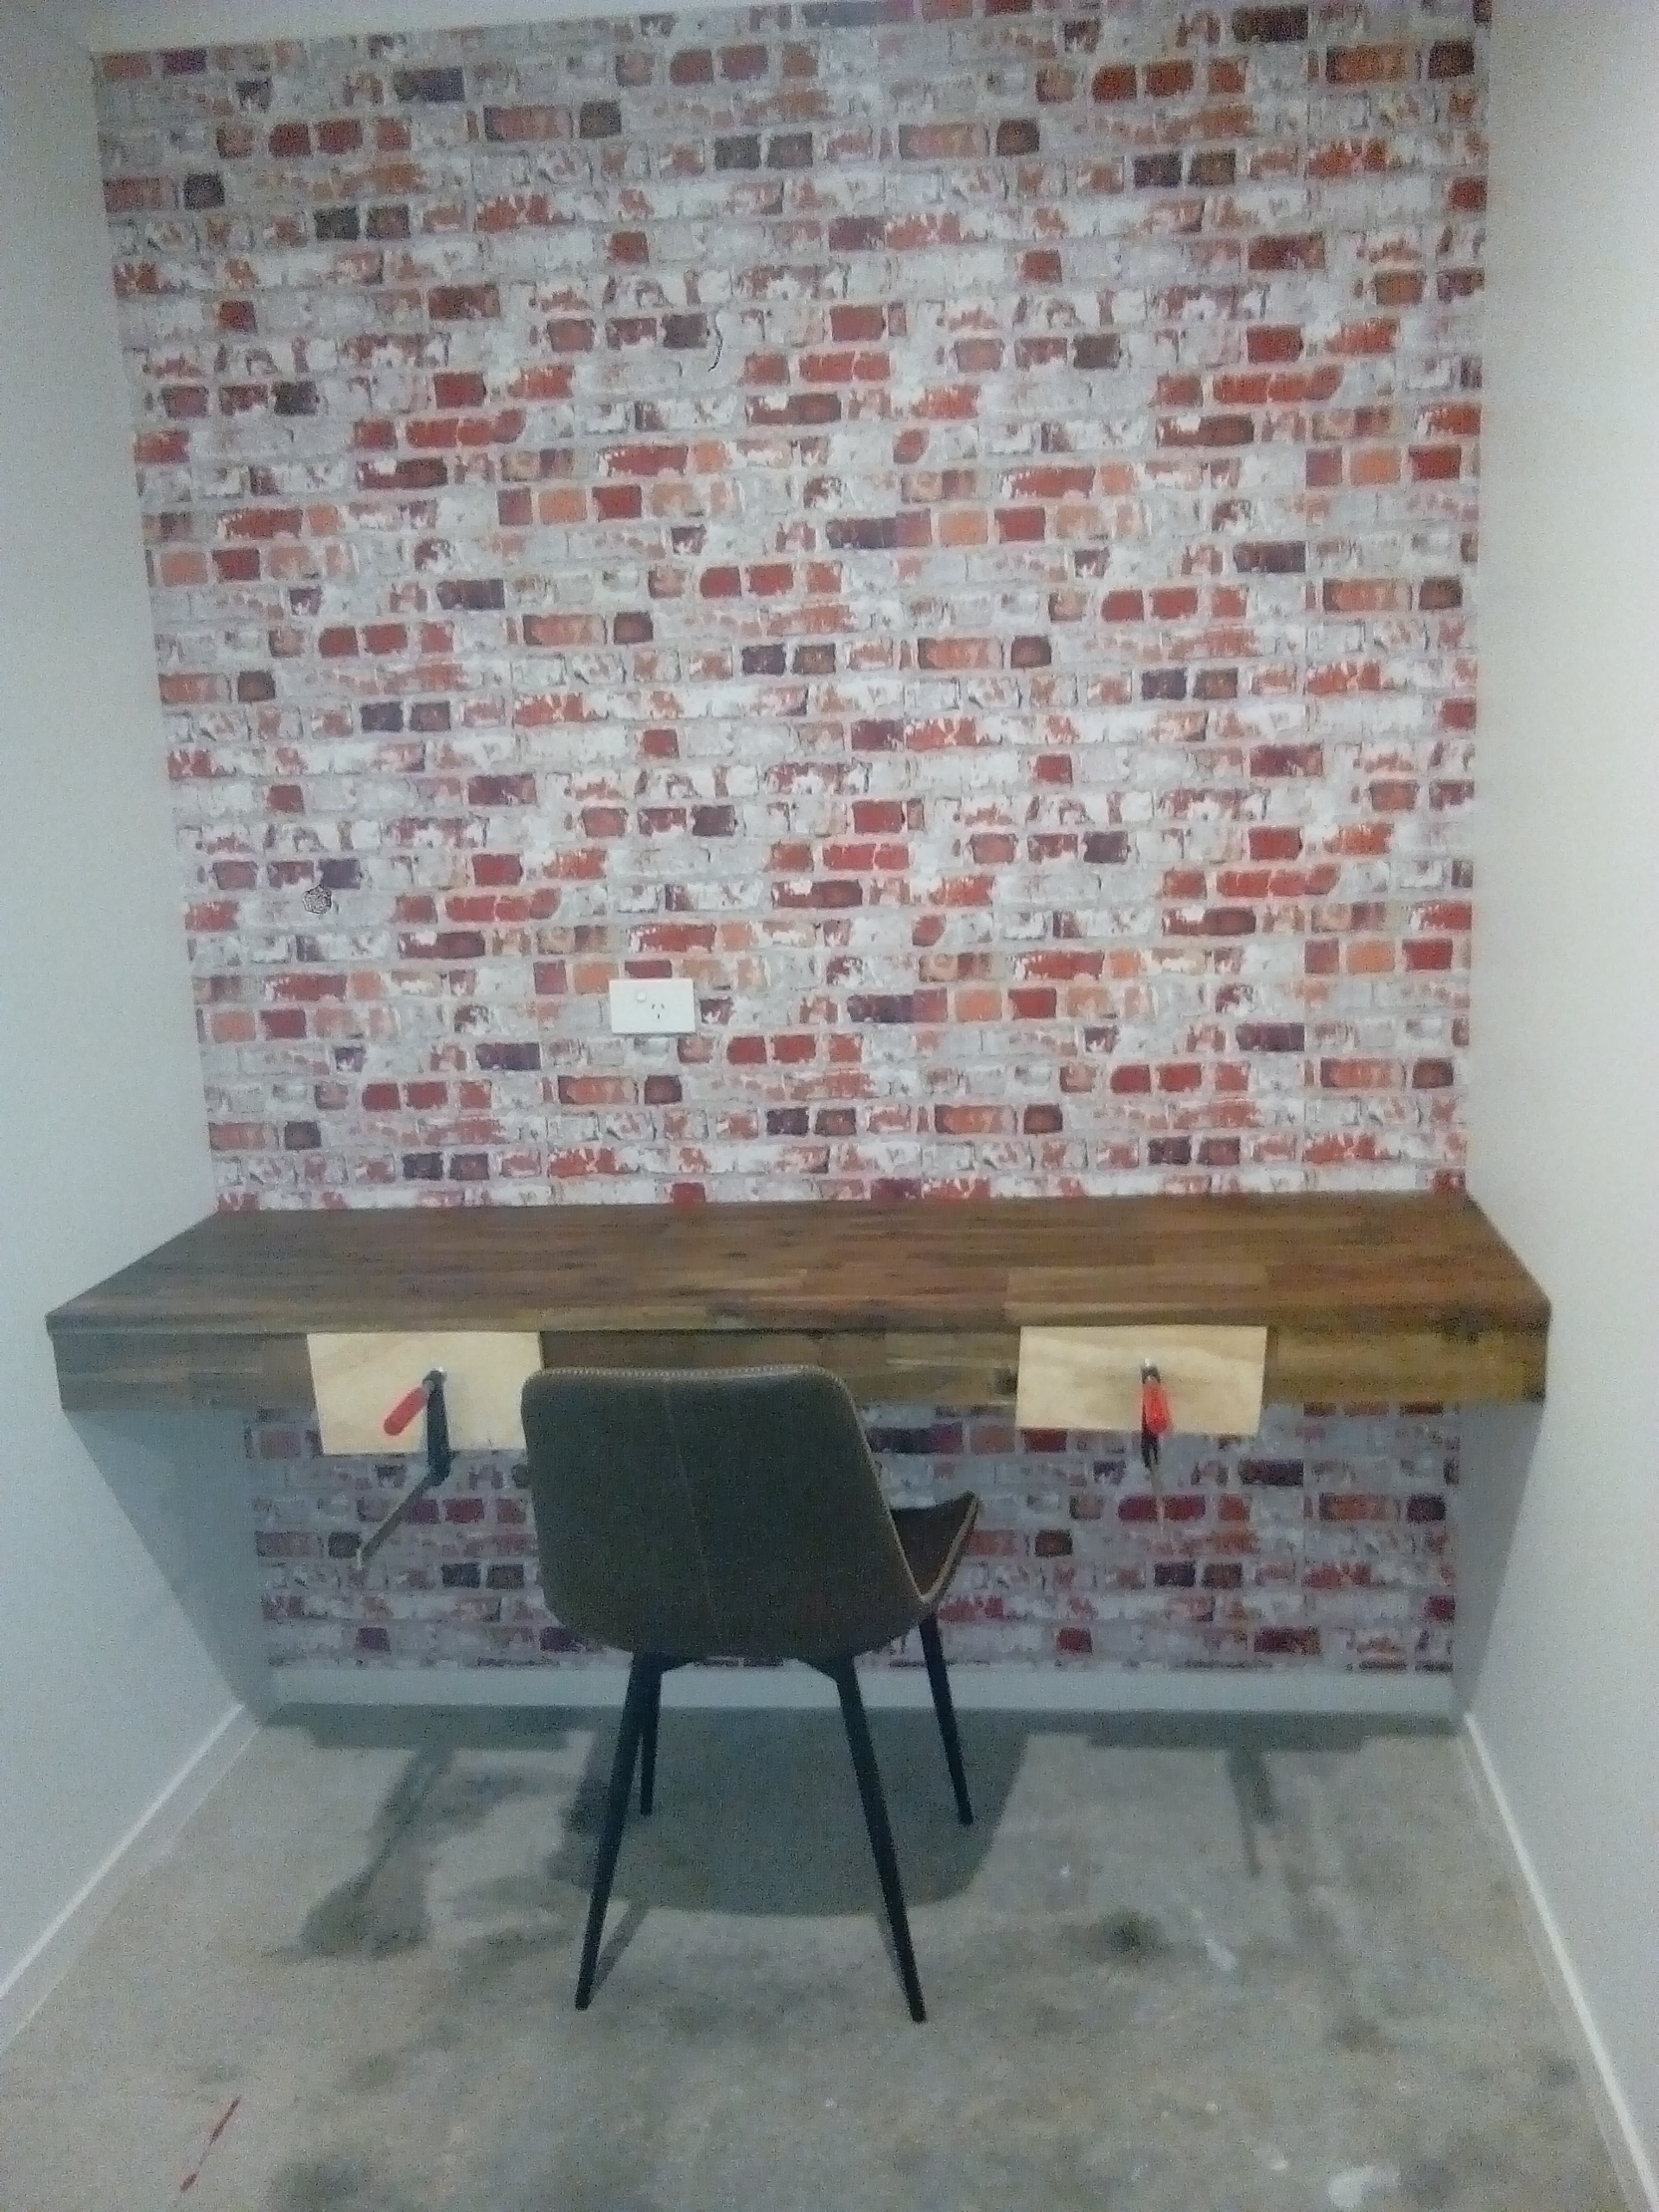
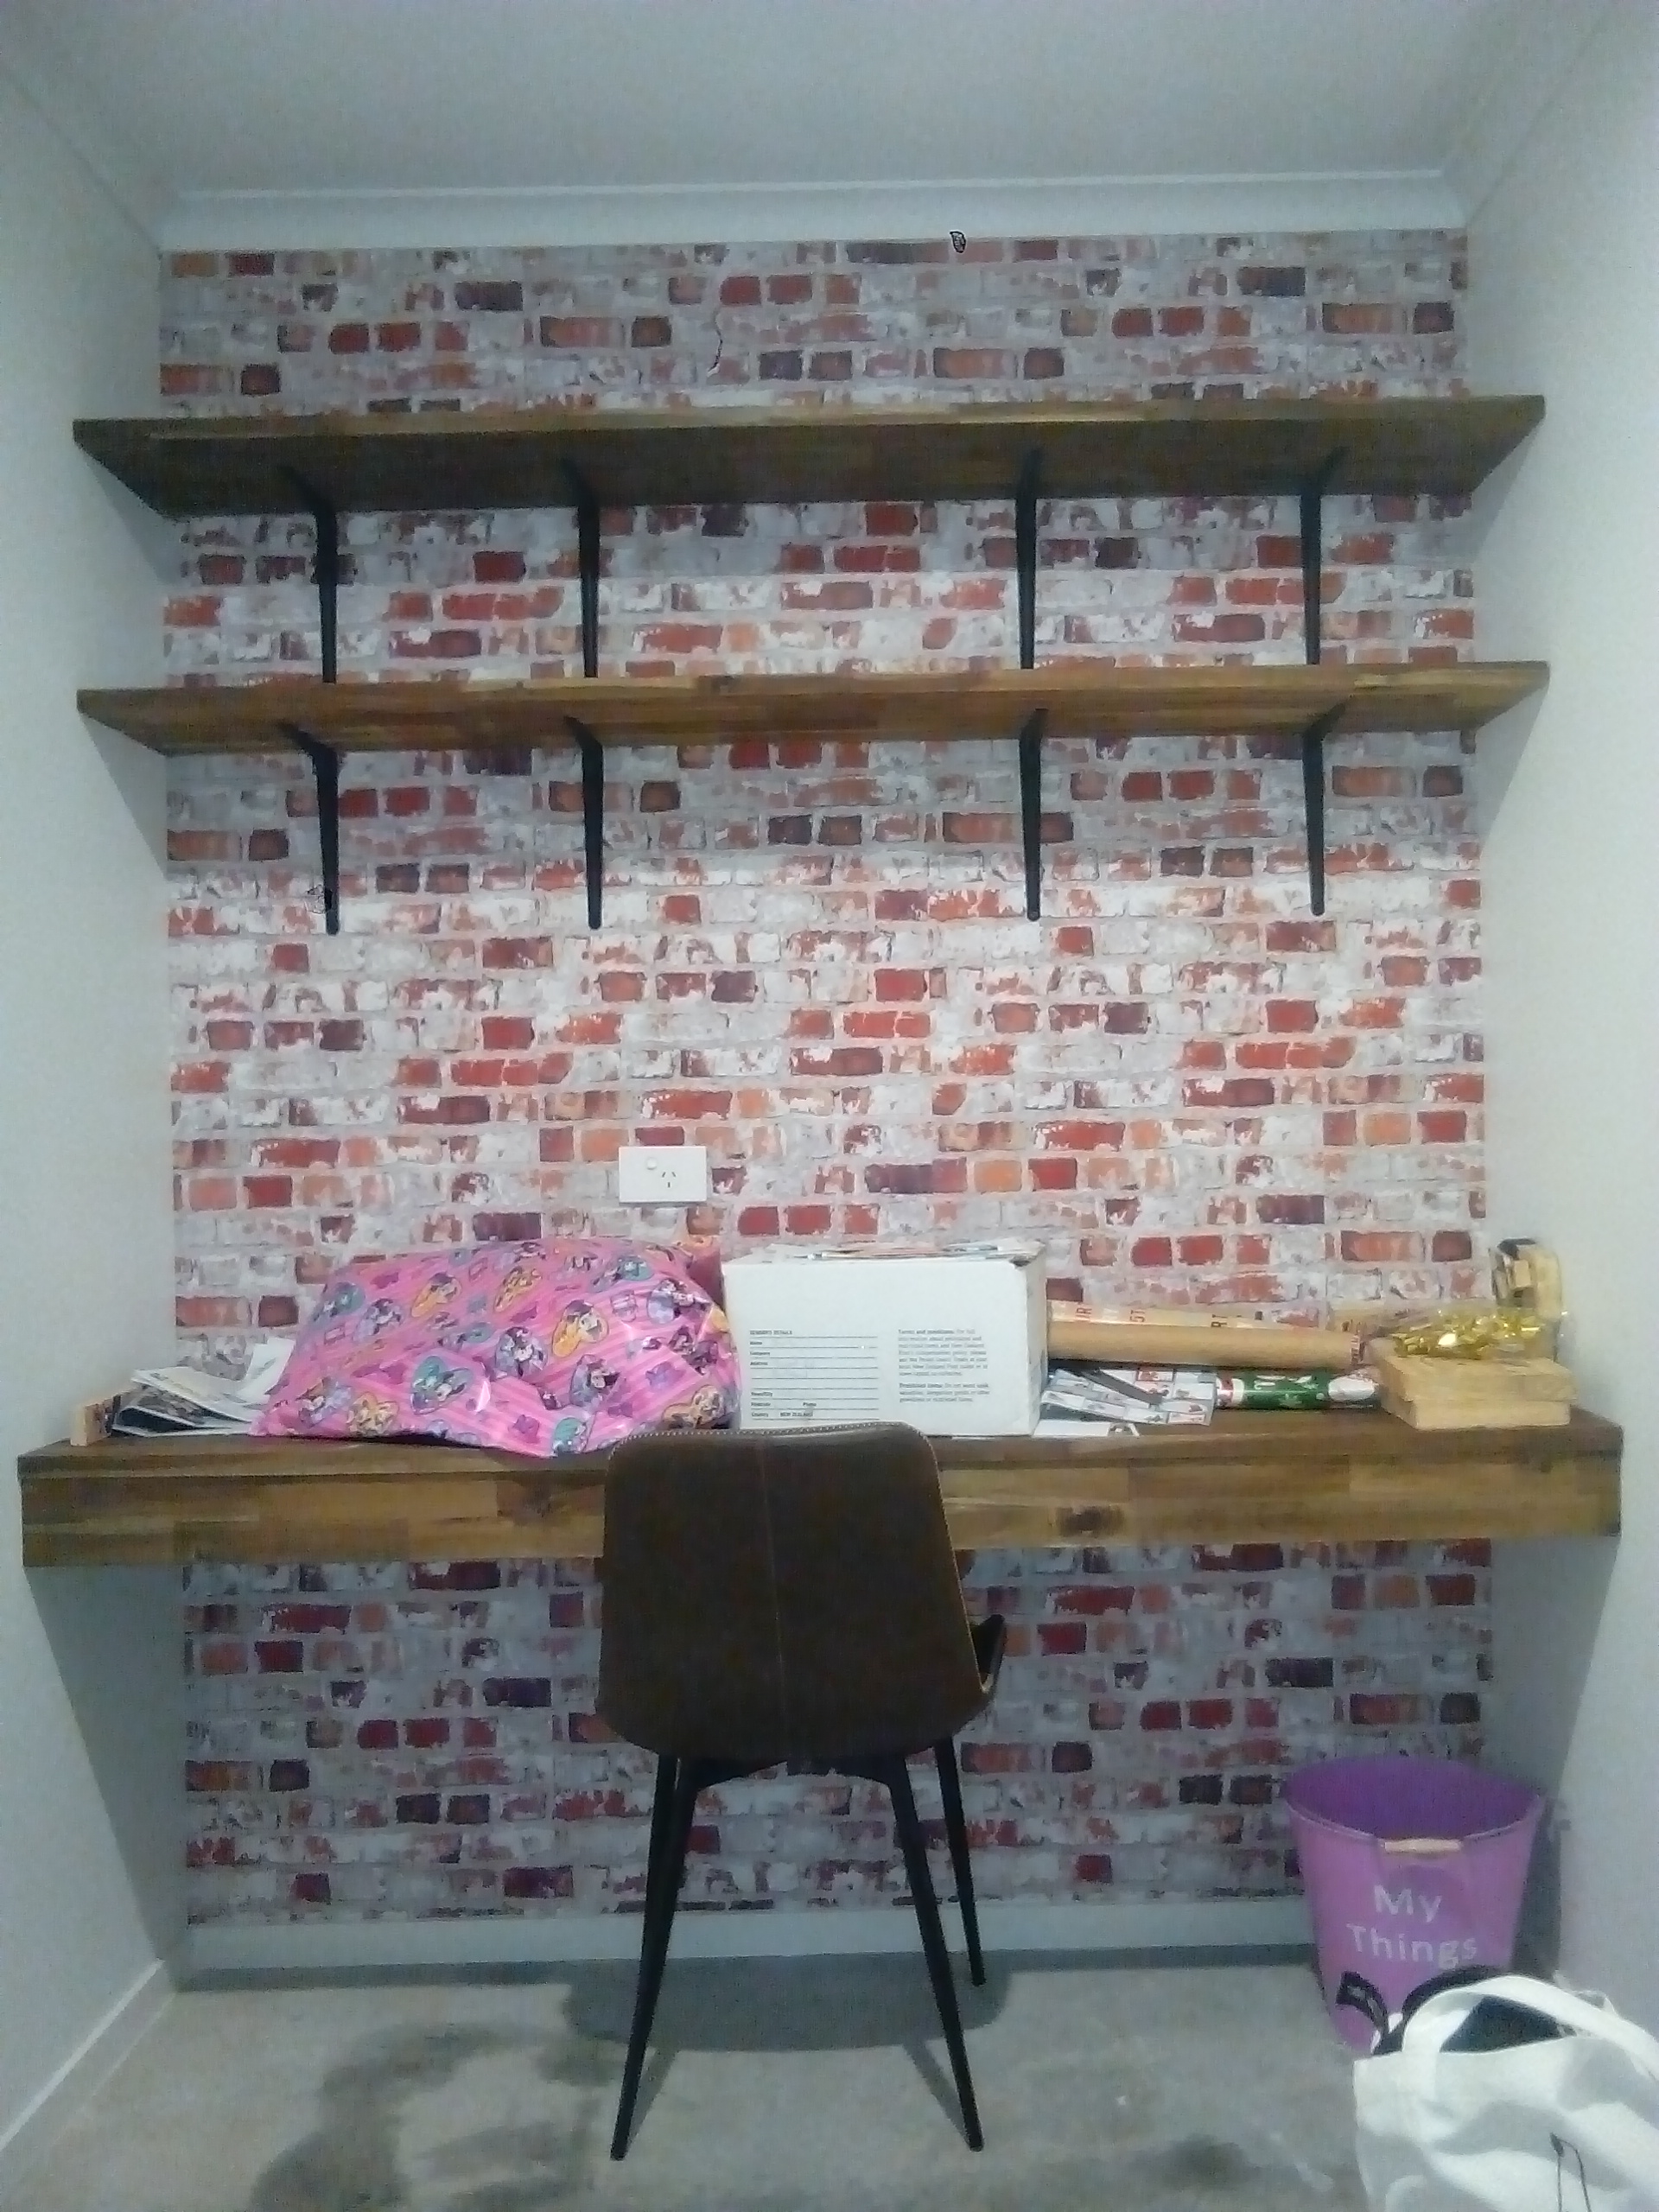
Then did wallpaper, a desk and shelves: She'll pretty it up with girly shit later when completely finished
1 point


.jpg.6d24e7395eb5c4984910ccb2609b8c87.jpg)
.jpg.2d7c9b6be762da76ed612a5b26de80ba.jpg)
.jpg.8a16b41ae776d9da49059bf2fe653055.jpg)
.jpg.38942535ce397155764cd5b08d8241eb.jpg)


This leaderboard is set to Auckland/GMT+12:00