
Leaderboard


Popular Content
Showing content with the highest reputation on 08/19/19 in all areas
-
Moving on with our leisurely pace, we removed the rear deck and lifted the cab off. So much wood in the body! It will make rot repairs easy, but I really hope we have no issues re-registering it. From memory if we can prove it was on nz roads long ago enough a wooden body will be fine?
 14 points
 -
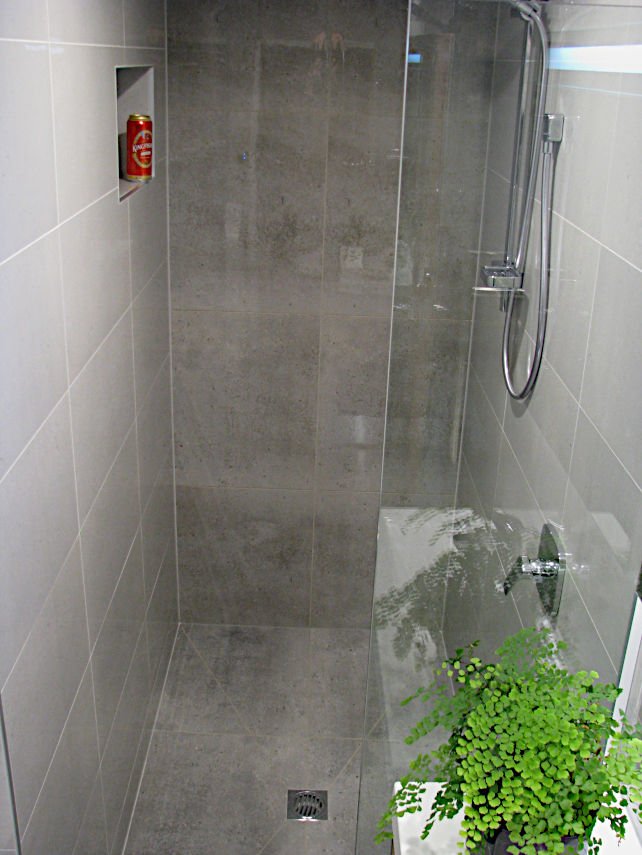
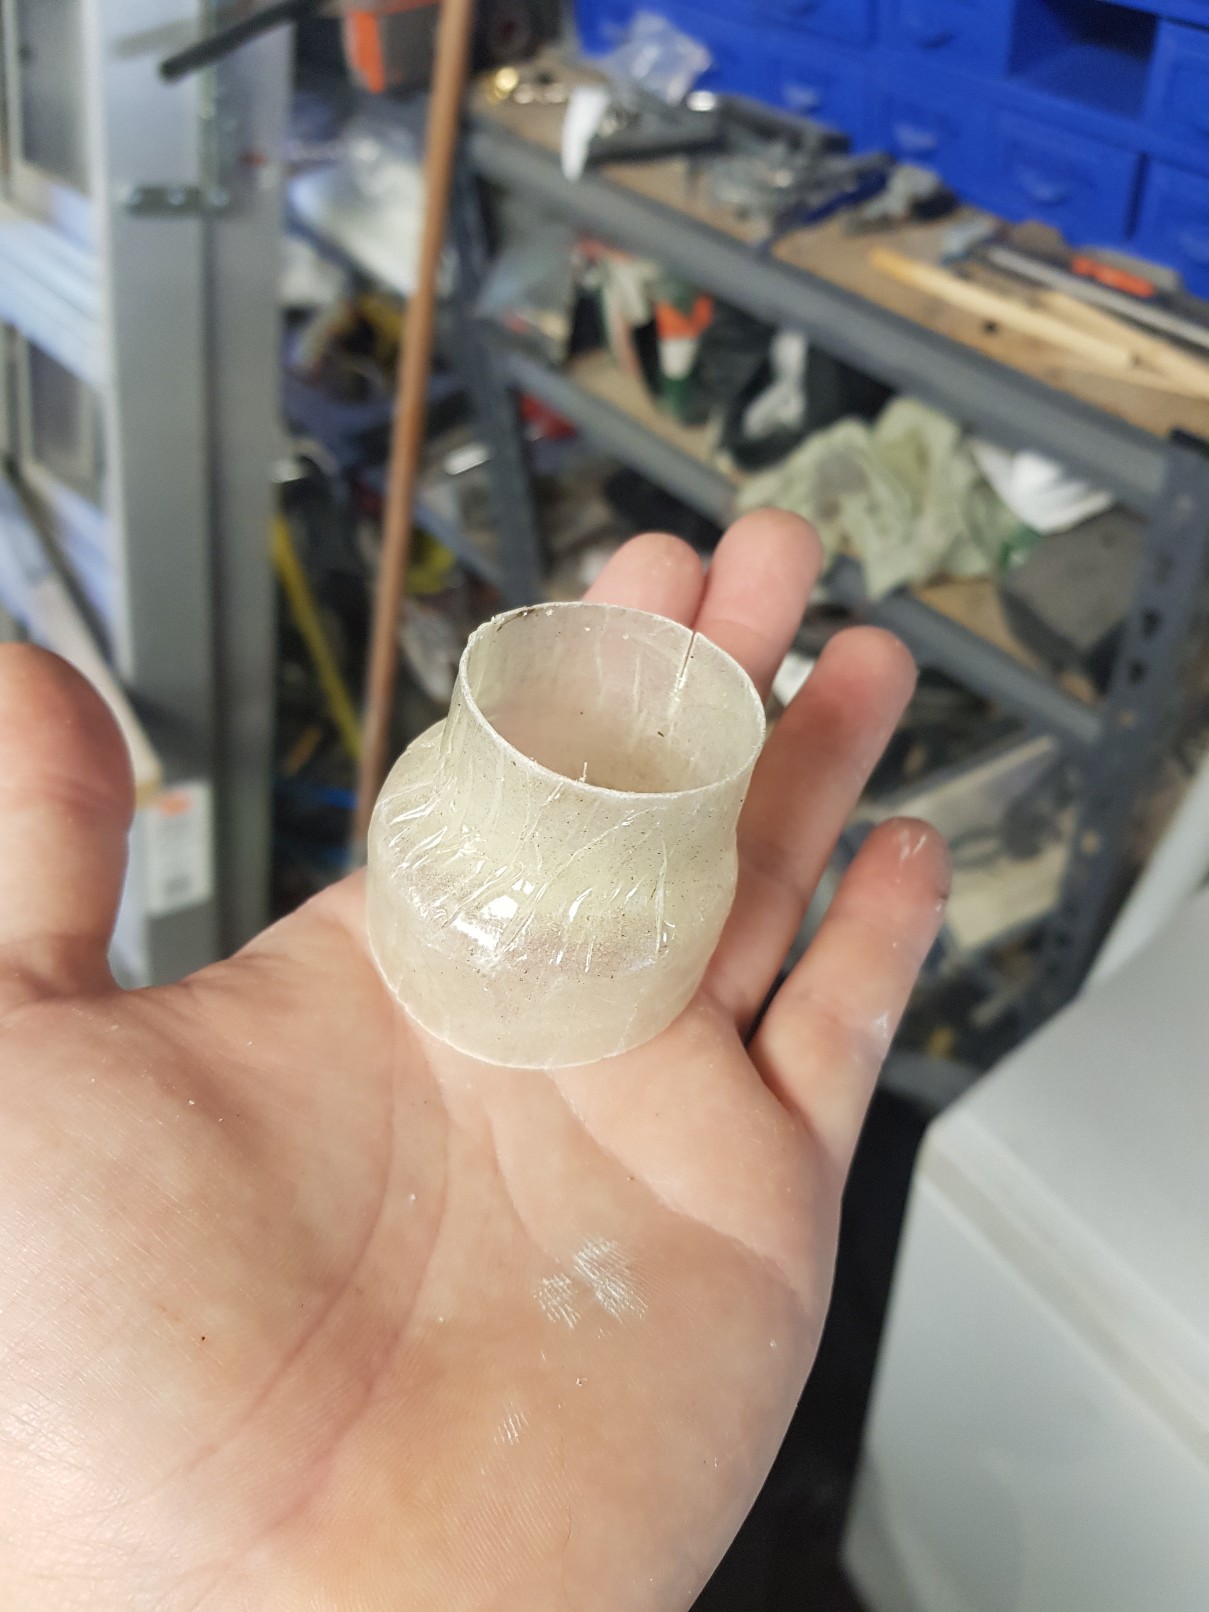
So yeah it's pretty much finished, except... Bathroom: First idea was to flatten out some copper cylinders we had to line the wall, so after scraping back all the insulation and probably getting a mystery disease in the process, then cutting them to tiles, we decided it didn't look great. So instead used one of the best looking pieces as a feature in the bathroom cupboard storage area. And subsequently lost the cupboard storage area as it looked too cool to cover up. Bought a concrete pot plant thing to use as a vanity, painted the inside black, but didn't like that either. Bought railway sleepers, but cutting them up seemed like you would lose the point of them being sleepers. So we have a sink, pot, and sleepers just hanging out here now. However, we did definitely want exposed pipework, so got the external copper pipe bent around which looks fantastic against the black wall, and my flattened copper. It finishes now where it will eventually be behind a "floating" mirror, and down into the valves and taps. The old stool is the makeshift bathroom shelf, it's helped paint and waterproof the place, oh and I have successfully managed to kill that plant now. Stephen even bent the original pipework from the bathroom into a towel rack which looks sweet And finally used some leftover pipe to create this vision I had of a hanging rack for my favourite rally jackets. Stephen's dad referred to the place now resembling a second-hand shop. Which is perfect by me. I want to end up wrapping the rack around the wall and including shelves for the huge collection of Mazda shit I own, but we are waiting for the concrete dudes to come back and coat the walls prior to making it a better fit. Other than copper pipework and my rally memorabilia, the interior has been gradually added to downstairs, but gets changed around a lot as things move on or come in. The plinth was made for the Sachs rotary bike, but has now ended up as the desk upstairs which is far easier. And that brings me to the rotary storage... it was meant to be for the RX2 Coupe as a priority. But I ended up storing my 808 here for a while, which was bloody cool to wake up to. However, we have managed to break Stephens 808 after a mission to the snow on Friday that ended with a tow truck from Smash Palace to Auckland, arriving at midnight on Saturday. So it's temporarily a piston workshop but it might need an engine upgrade so might sneak a rotary in while it's here as payback for dropping petrol on the concrete and stripping a circle of coating off. (have managed to get rid of most of that stuff on the left now so it's getting tidy) Also birds on tin roofs are hilarious. This little guy smashed his apple core on the clear-light but it bounced back and spooked him so he's left it for the rest of the bird bro community. Hopefully next time we will have a bathroom sink...8 points
-
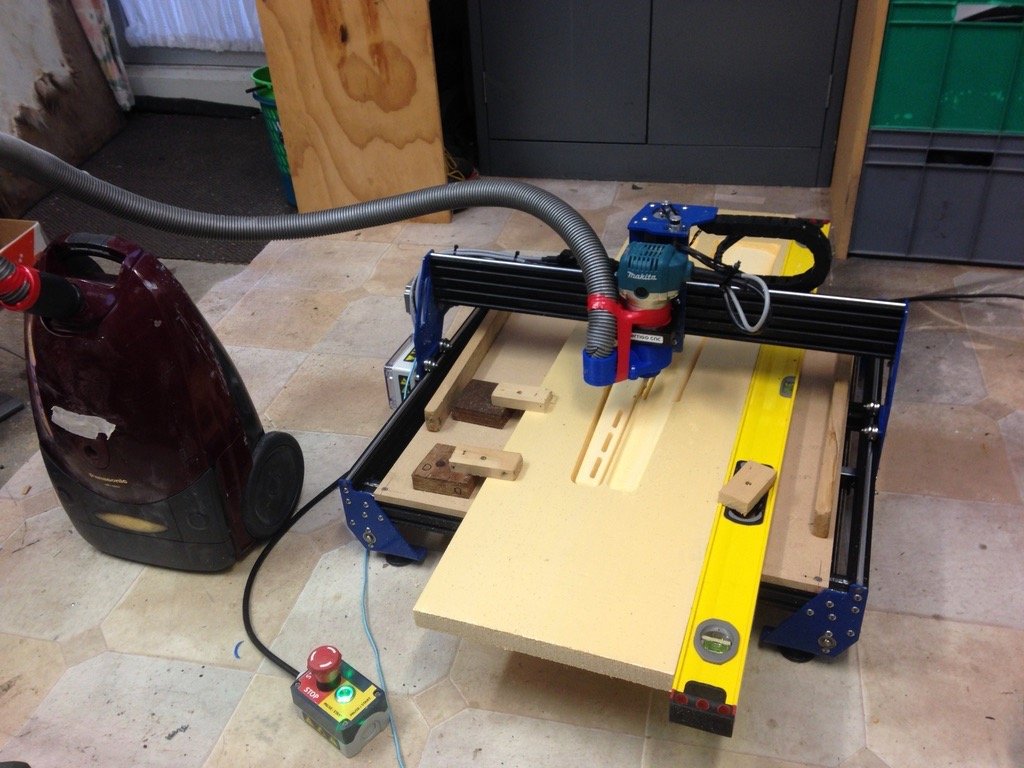
Asked a mate to carve out some foam core for a project, he declined as he didn't want the dust through his shed. He did however have a spare machine knocking about that I was welcome to make a mess in my own shed with! Gotta get me one of these toys, so simple and easy! Cores will be used for a carbon fibre rifle stock, hopefully pics to come.....
7 points
-
Hi everybody. I have just registered for the ride. My accommodation is sorted. I will be bringing Gemima which some of you will recognize.
7 points
-
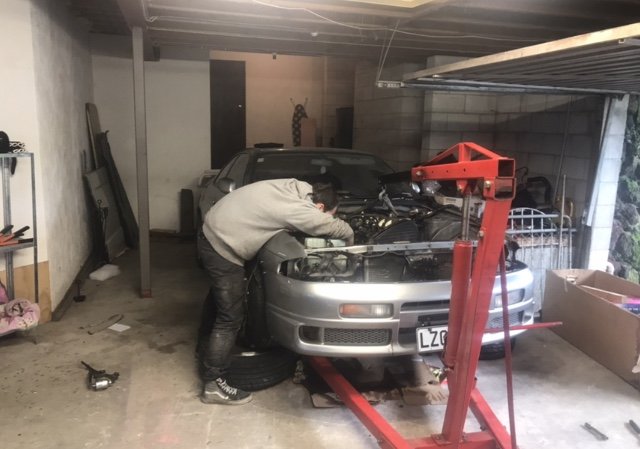
Update on the open chequebook: It has been up North getting work done for compliance, and so far has 15mm to go until the chassis is completely straight, and the front inner guard has been cut off to straighten out any creases caused by the impact. The creases were a fair bit more than thought, up under the strut tower and the engine bay was pretty bent, but it's had a massive weight attached to it and pulled the creases out where possible, and then will be softly hammered with Billy Mavs back into place. But the headlight surround area is too smashed, so a new piece will be made and welded in. Coming along nicely, it's just a shame to not have any control of it as a project at the moment. Most of pics go to Instagram as I forget to update here so much. Feel free to follow along @theamyable.7 points
-
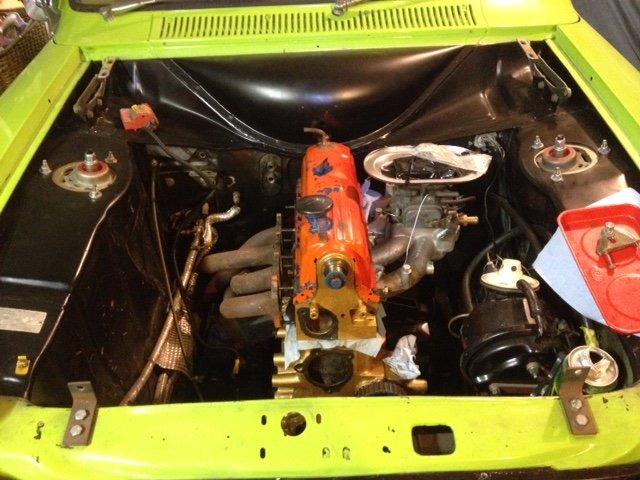
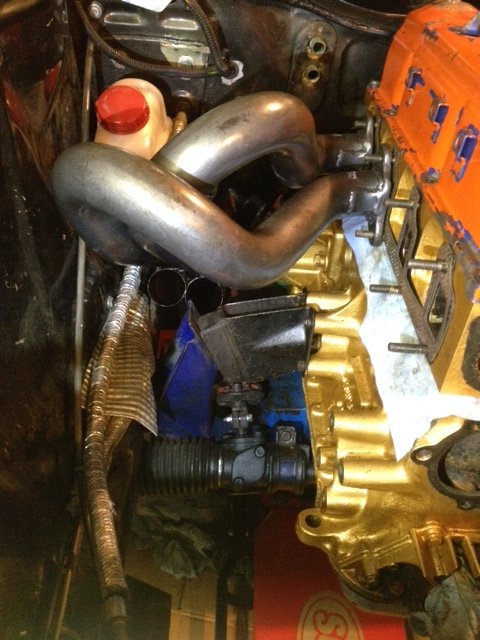
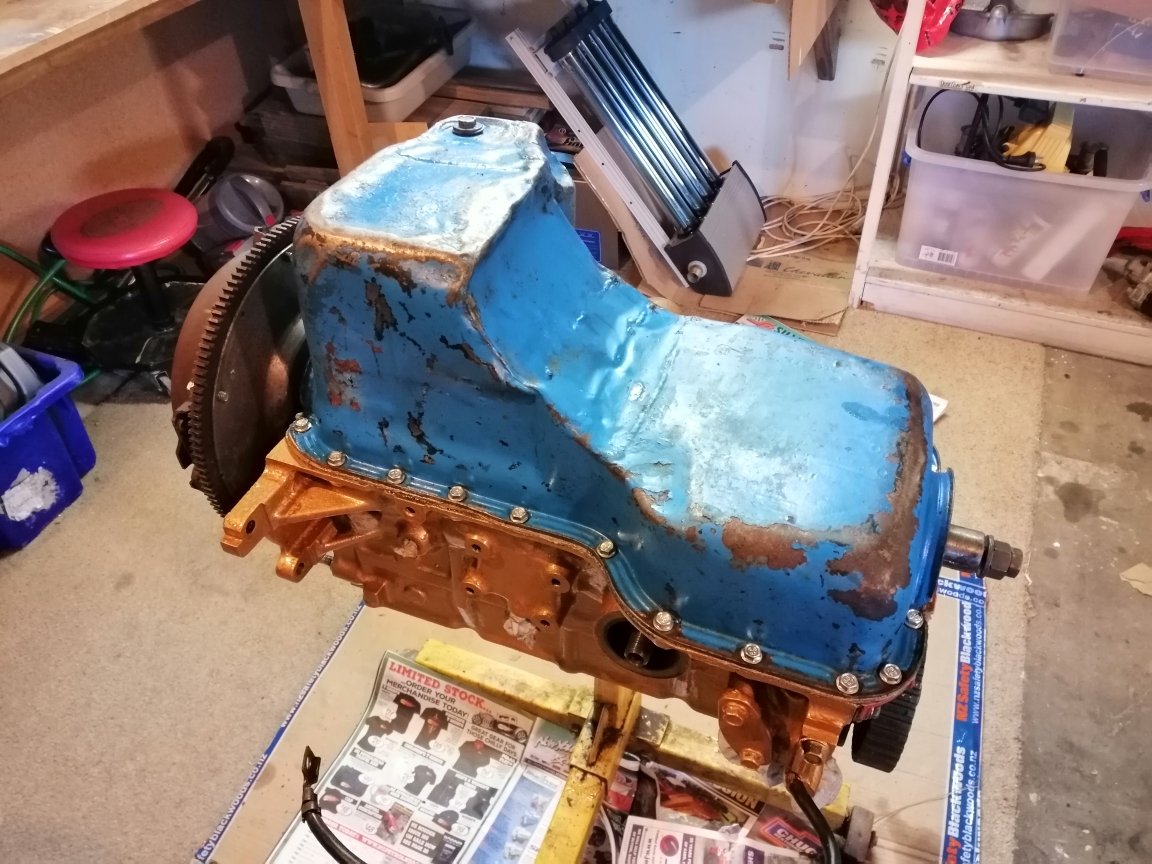
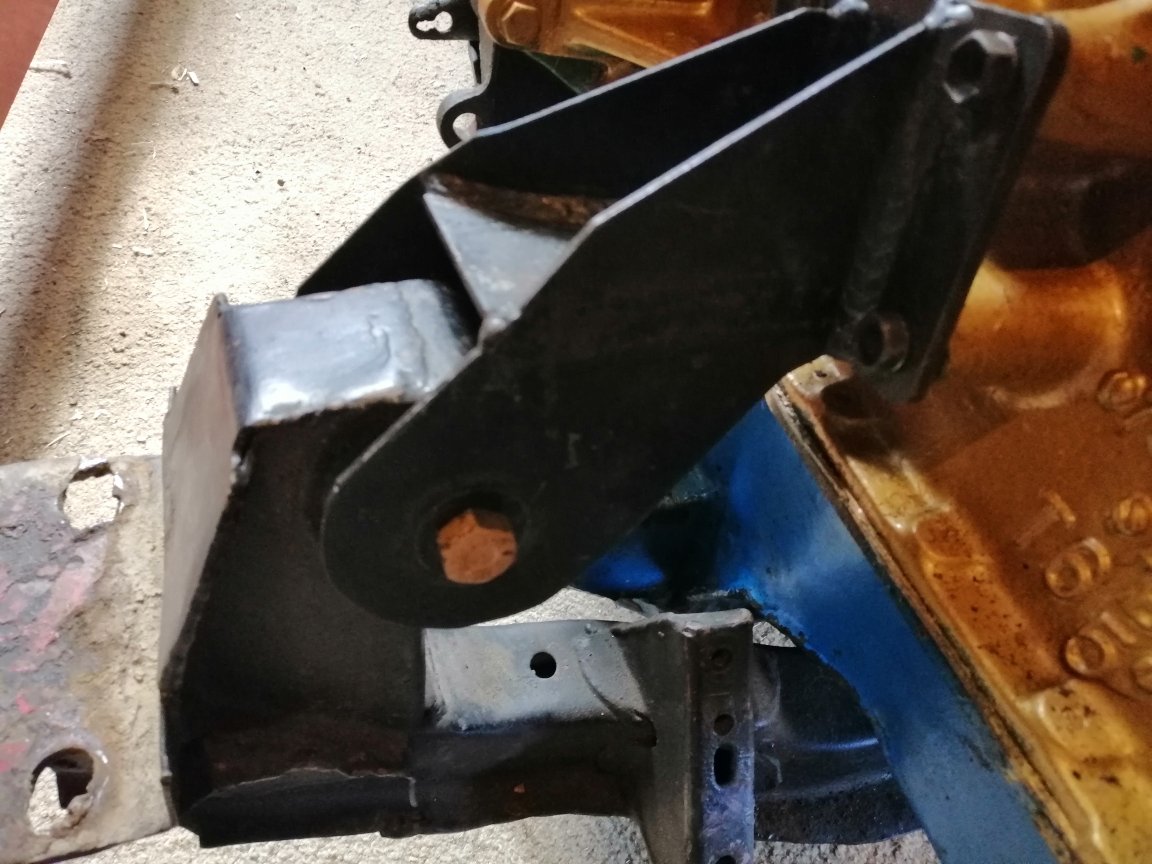
Gave myself a bit of a scare looking at the date of my last update and how young my kids look in the pics. When did this become an annual update...? Amelia has been promised to learn to drive in Felicity and is pretty keen so time to get it done. Wife wants to move house again which may not help progress. Anyway that's enough waffling for context, time for pictures. Spent some time trying to setle the mystery package pinto properly into the engine bay. Removed the brake master cylinder to give more access for trying to get the headers to fit. Be rude not to have a look inside as yes, it's been quite a while. Coby extractors were being difficult and anyway I am pretty keen to get the banananana headers in there. How hard can it be...? Hmmmm, that's not going to work. And the sump is hitting the cross member and steering rack. Even after replacing the square rubbers with taller round donuts it was still not a happening thing. The wish list has included a World Cup cross member for a while so when one came past I grabbed it. And what do you know, it works! We have clearance, Double bonus! Will tickle up the ragged holes which is how I managed to get it in the first place. Here is the beautiful customised sump. I think I'll blow some black paint over it and call it done.
6 points
-
Since selling off my other projects and dedicating most of my available time to this barge I figure it deserves a project log. Nobody wanted this, it was for sale on TM for aaaggeess until I thought to see if the seller wanted a ute. Thankfully, the answer was yes, and a deal was made to swap cars later that night. However, arriving to collect this, the bonnet refused to open, the exhaust was half falling off, the tires were low, and she ran on 5, but I had to have it. The deal was done and it chugged along to the nearest gas station on as many cylinders as it could, where no visible issues were present. Air in the tires, and a quick window clean saw us headed over the harbor bridge back home wondering if we'd even make it. Sure enough we made it back late that night. First thing out was the huge "fart cannon" muffler, and since it's my only functioning vehicle, I used it for the following two days until the warrant expired on Friday, and then went and got a fresh WOF on the Saturday. First Order of business was to clean it, and investigate the misfire. After a week of diagnosis I finally found the issue - the wires inside injector plug 2 didn't reach the injector after that was sorted it was relatively smooth (but far from quiet) sailing. At this point it looked like this : Although that didn't last long. Pulled the window tints due to not enjoying having window tints. Replaced weird wrong 5 stud spare wheel with a 4 stud one. Power steering pump seal quit life and shat oil across the entire engine bay, fan assisted. Replaced pump. Gearbox rear seal and sump pan gasket, rubber trans lines, along with the engine front main seal thought it would be fun to leak lots and drain the entire gearbox overnight. Lifter tick got annoying Removed whole engine and gearbox with pleasure Installed 1G-E and auto from later model cressida = success Problems = solved Problems left to solve = shitloads lots5 points
-
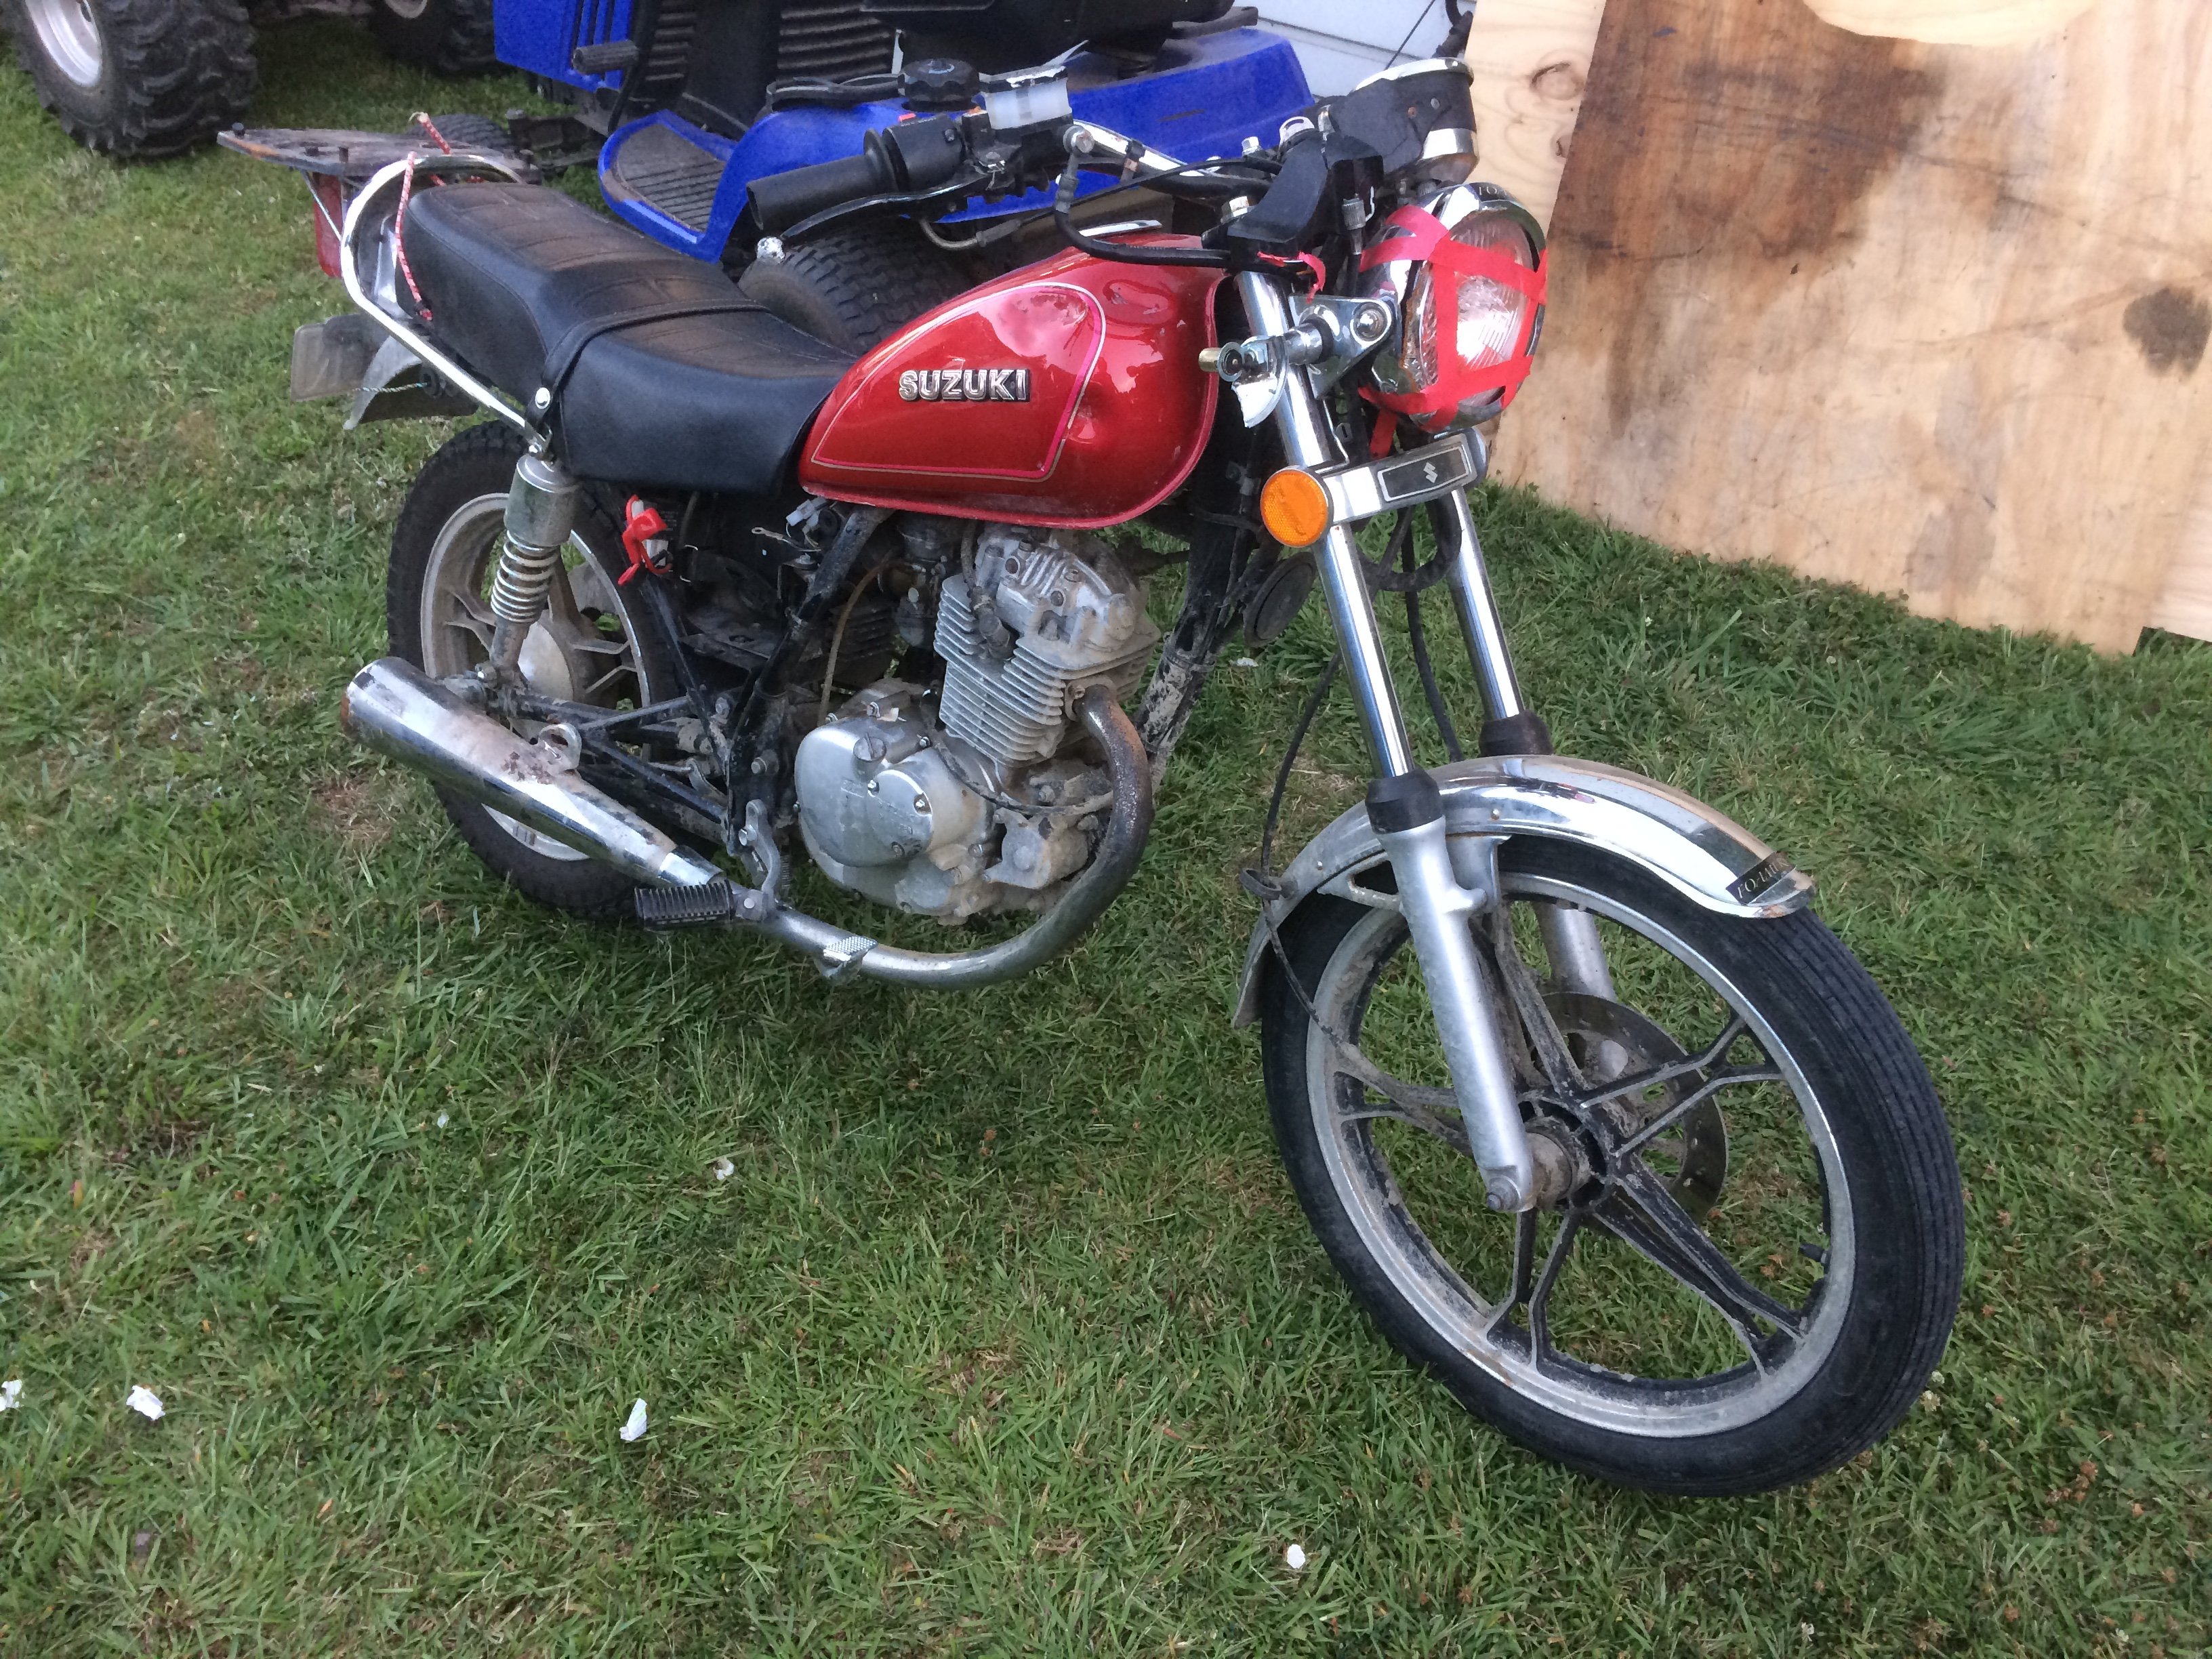
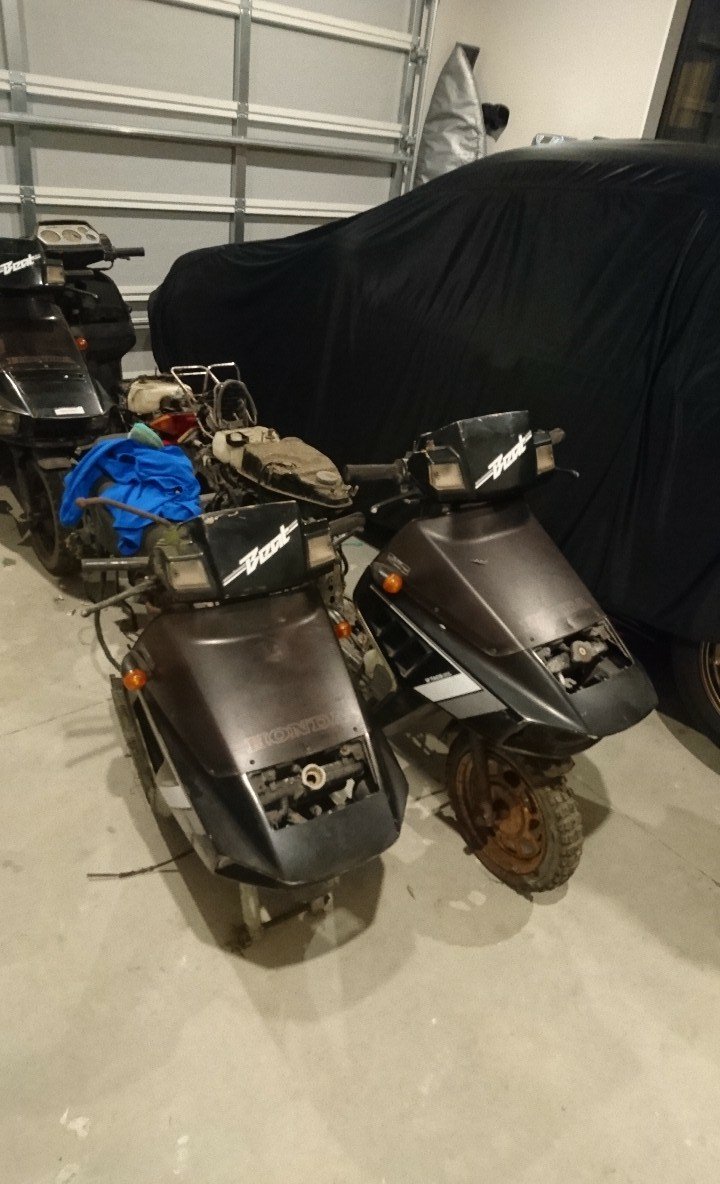
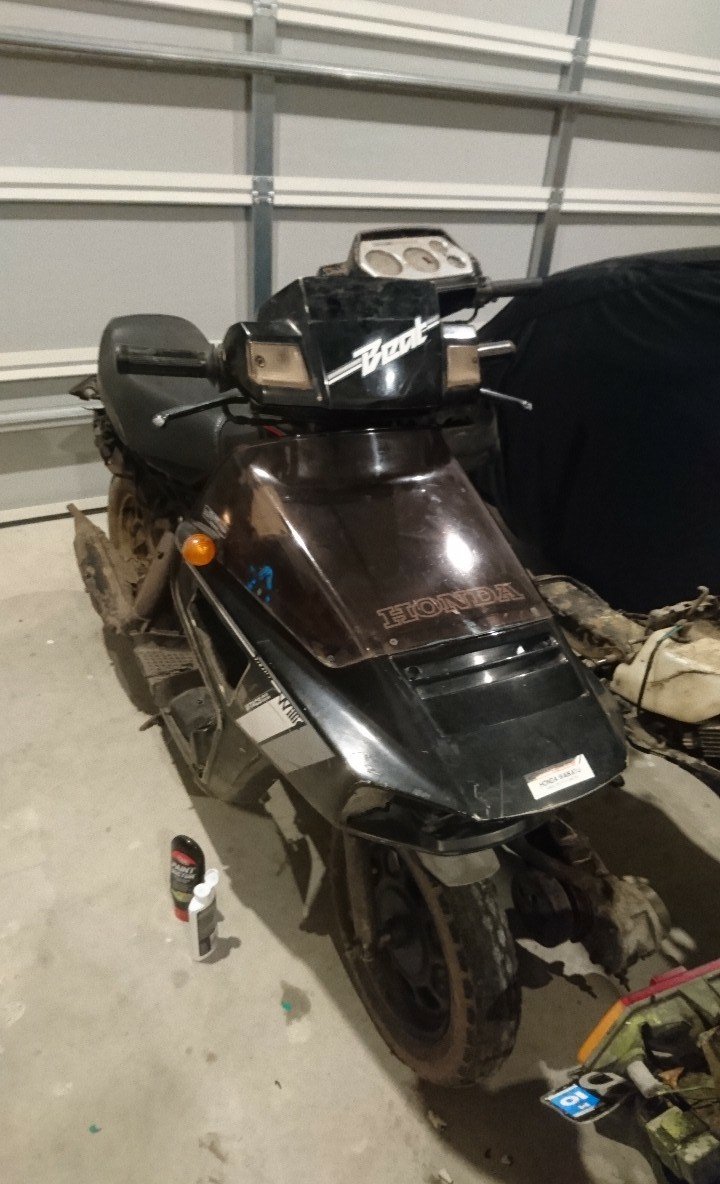
I have joined the beat club and bought that lot of bikes. I've also just joined the forum. They are very rough and not really complete, there might be enough parts to get one going... Maybe. Love your advan livery!
5 points
-
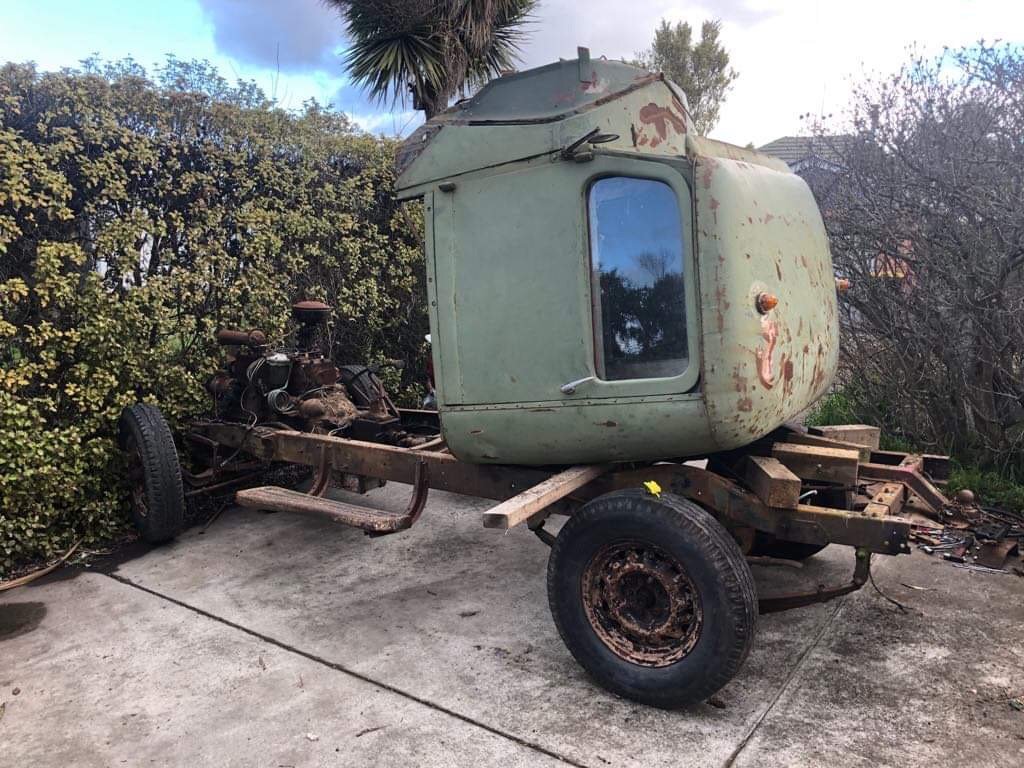
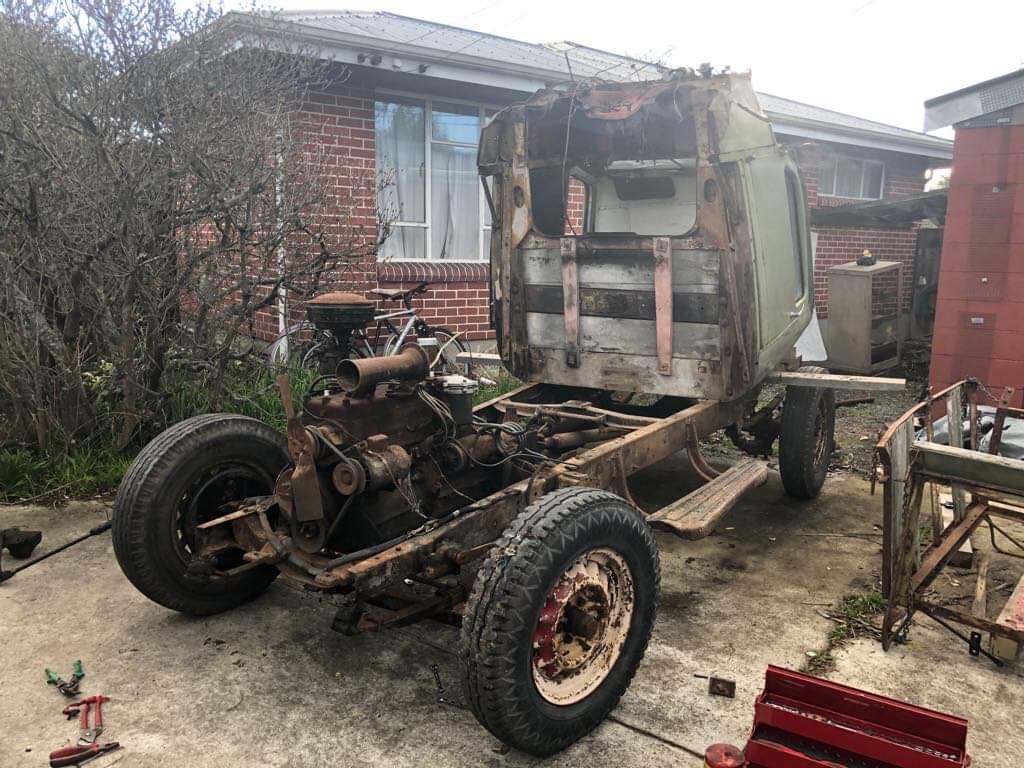
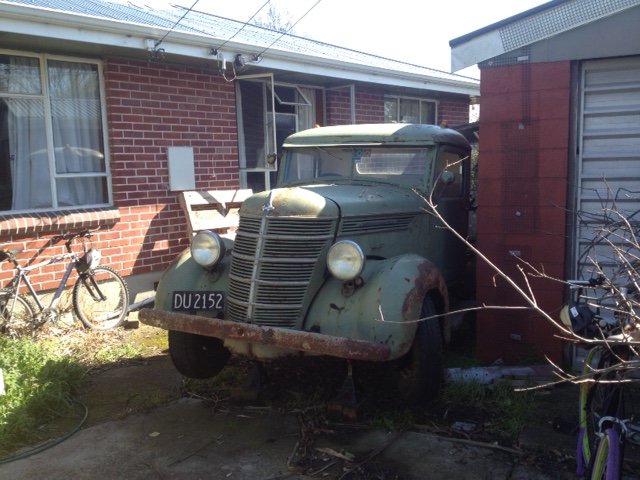
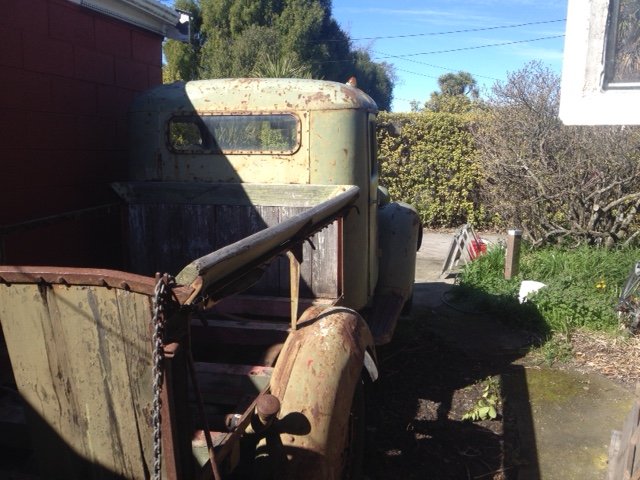
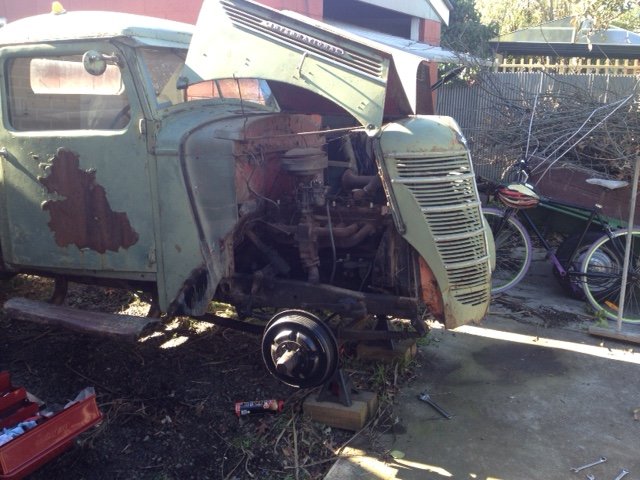
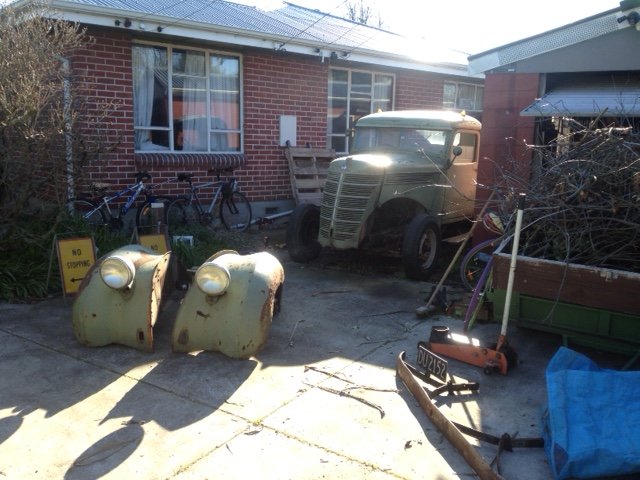
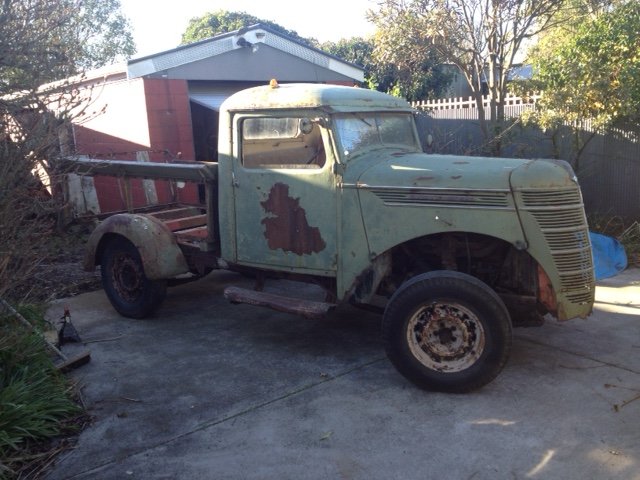
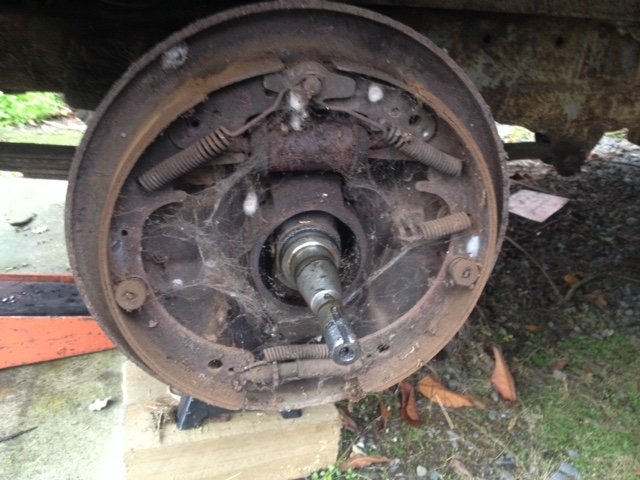
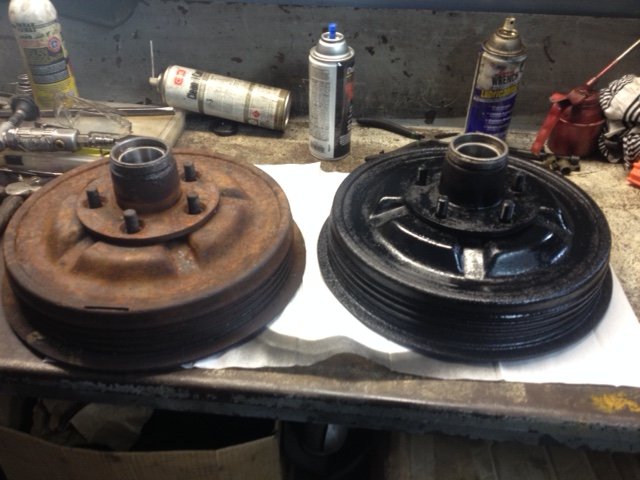
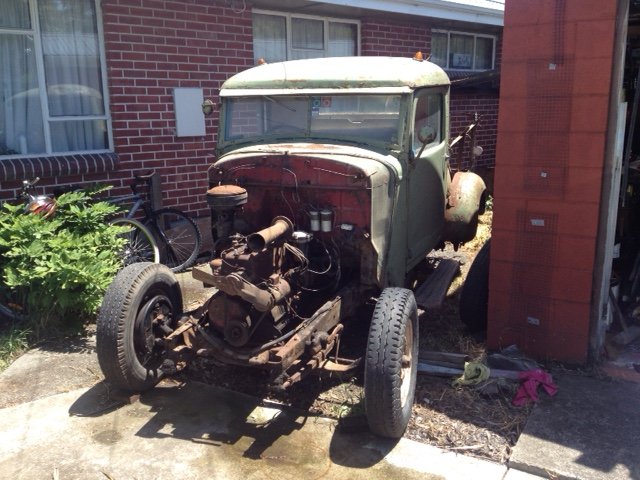
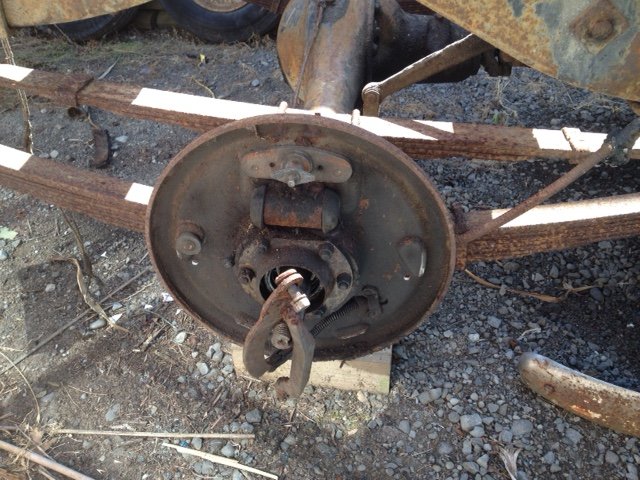
This old girl is an ex-military truck that has been in the family of a good friend of mine for a solid chunk of last century. It's only recently been pulled out from under the Macrocarpa it's called home for a few decades. The loose plan at this stage is to get it mechanically back to new, but keep it looking like it is now. Over the last few months I rebuilt the front brakes, replaced the wheel bearings & had the master cylinder re-sleeved. Today was a beaut day for getting more done. So many seized bolts though! Got both guards off & the steering linkages straightened/cleaned up. The front is back on the ground, next I'll tackle the rear brakes & fuel tank. It hasn't run in a bit, but does turn over by hand. I'll get the engine out for a look over after I get the body off. I do like the rat-rod look. We won't be going that way, but I can see the appeal. Anyone here play with these old things? Anything I should look out for? Cheers!
4 points
-
Eventually got tired of the high life and found some cheap Hayashi Street CR mags with good tyres. Found springs at zebra that fit result: I think I'd like to bring the front down some more, the back sits just a little lower. I found some unknown mitsi shocks for the rear, and had bushings machined to suit. Such a huge improvement from the boat-like handling characteristics it previously represented. I just installed standard front shock inserts to get the front stiffened up. New Nolathane went in all round, too. On the lookout for a diff, this one has done nearly 300K and it makes some pretty terrible noises, not to mention both wheel bearings need replacing. The plan here is to sort another replacement diff (E312), new brakes and bearings/seals/clean and then install. To keep me busy until I sort the diff, I went ahead and tracked down a 1G-GE, courtesy of a fellow GX enthusiast. Sold in an unknown cond. I didn't really know what to expect. This should be a big improvement from the asthmatic SOHC 1G, having double the valves, bigger ports, and a cross-flow head. Although it won't be as simple as cleaning it up and putting it in, as it turns out it ran bearing number 2 and churned the metal filings from said bearing around the engine. Thankfully, the leaky SOHC 1G I pulled out earlier has put its hand up to donate the crank and rods. They have the same sized mains, too. (later 1G engines had different sized main bearings). That's all for now. Once the SOHC motor is pulled down and the crank and rods are test fit I'll send the block off for a dip and the head to be machined.4 points
-
Finally got the Chaly running with new exhaust/carb/head Had got sidetracked when I only noticed one of the intake manifold threads was stripped after I swapped the head. So then ordered some threaded inserts off aliexpress that were M6 inner thread and M9 outer. Then once i had everything attached it just wouldnt start, no compression..... checked all the headgasket and things Id done and couldnt fault it but when kicking it over it would just chuff air and fuel back out the carb. Did some thinking and decided to check valve clearences (which id set before I put the head on) and dontcha know it, the intake valve was tight as. Loosened it up a bit and first kick it started. So now its running and have ridden it around the driveway, need to order some jets of ali to get it right, idle jet seems a bit big and a unknown size, main jet is a 75 at the moment which shouldnt be far off. Have been using the spacy as my daily for the last 7 weeks or so (probably should register it...) and apart from blocking the carb a couple times it been good. Quite fun to ride and offers a bit more wind protection on the cold mornings than the DJ1 ever did. Hopefully be able to commit some finances to getting the Dax finished by the end of the year4 points
-
.4 points
-
This weekend I decided to go ask about getting some carpet underlay to whip under neath the carpet in the cabin to make it a bit more homely. Ended up getting a big slab of it for free! Thank god for useless offcuts.. I am no professional fitter by any means. it didn't really come out nice in 3 cut sections but it will all fit in well when the carpet goes back in 20190817_181032 by phillipbaines, on Flickr I also got sick of the awful looking dirt ridden seats that are impossible to find in any sort of 'good' condition so the cheapest fix is to show down to Super Cheap and get some car covers. Which look 10000% better, 20190817_143241 by phillipbaines, on Flickr 20190817_152236 by phillipbaines, on Flickr After installed, got some snaps. List hasn't changed since last weekend but now it's a bit more respectable. 3 by phillipbaines, on Flickr 1 by phillipbaines, on Flickr 11 by phillipbaines, on Flickr 2 by phillipbaines, on Flickr 4 by phillipbaines, on Flickr 5 by phillipbaines, on Flickr 6 by phillipbaines, on Flickr 10 by phillipbaines, on Flickr 8 by phillipbaines, on Flickr 7 by phillipbaines, on Flickr Build Discussion:4 points
-
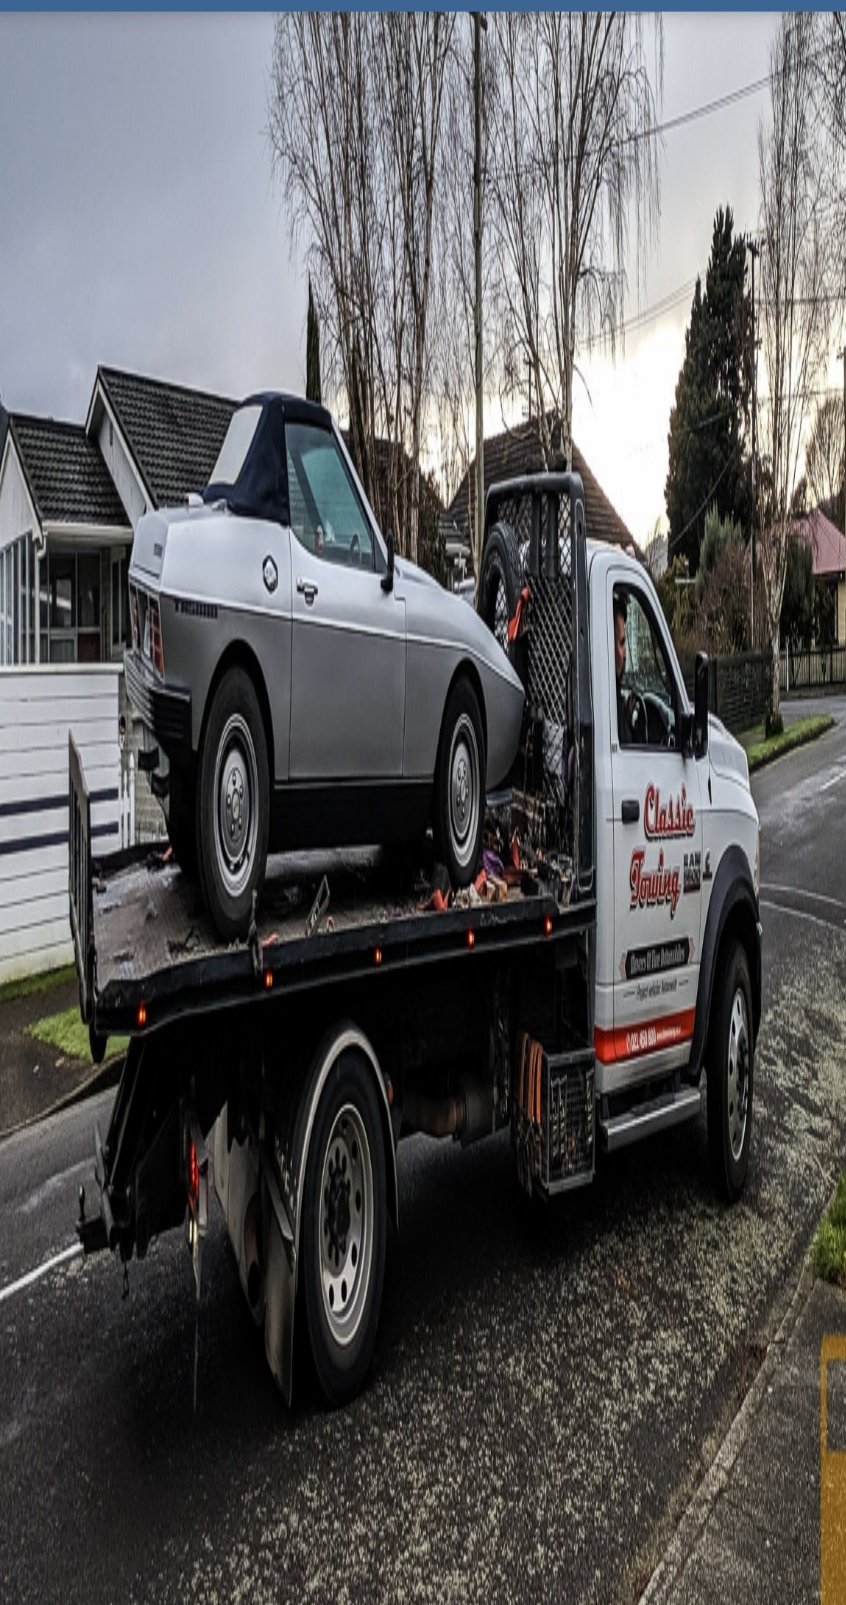
It seems like I'm stuck in a never-ending loop of dodgy fuel hoses. The TVR is no different. After I paid for the TVR and whilst waiting for the transporter to collect it, I was let in on a little... issue... the car had. This is what I was told, as a little "oh btw" side note "And last but not least – I never cured a petrol smell from the tank and guess he hasn’t either … I couldn’t leave the car in the internal access garage cos it stank the house out." Well, that could be interesting, since my only garaging is internal access, under the bedrooms, and my driveway is too steep to park a classic car on (not to mention uncovered). When the car arrived, there was no obvious smell. I suspect that was to do with the fact the tanks were empty. Once I added fuel, a noticeable smell was present at the rear of the car. It wasn't enough to stink the house out, or even the garage, but with only 10L in the tanks I can only imagine it gets worse the more full they are. I have receipts for one of the tanks being removed and repaired in 2011, along with all the fuel hoses as the "recently replaced" filter was leaking. This dashed my hopes that it might just be a simple case of dodgy old fuel hoses causing the issue, as they had been replaced (we'll see). Today I jacked the car up and had a look. Unfortunately I found that due to differences in early and late chassis, despite seeing this car up on QuickJacks, I cannot line mine up with the chassis tubes to safely lift it. The later cars have body mount plates on the chassis, where mine doesn't. Oh well, the old jack and stands come out to play again You can spot the silver fuel pump in the top left of the above photo, behind the exhaust. The tanks are more or less above the pump, on each side. A quick look around and I suspect I found at least one of the causes of the fuel smell. The main feed hose from the tanks to the pump has horrifically perished The way the hose has been run also causes issues too, with the hose being squished flat in at least two places as it goes over chassis tubes (top and bottom photos are good examples). It's not cheap hose either, being Aeroflow. The Tee piece between the tanks has been replaced with Aeroflow parts. The small hoses from the pump are showing signs of perishing too. All in 8 years, and minimal use. So surprise surprise, despite being done before, it's all dodgy looking and buggered. I have my suspicions about the filler and balance tube couplers, but I'll deal with them if replacing the under car hoses doesn't help. They looked ok from what I could see under the car. I have ordered new 5/8" fuel hose for everything to the pump, a new brass Tee piece (to replace the Aeroflow one), a new fuel filter, and I still have stock of good 8mm hose for the other hoses. Once it all arrives I'll drain the tanks, rip it all out and start again. Hopefully that sorts the fuel smell, and may even help the system run better if the hose isn't being crushed. One last little thing; I gave the other side of the rear window a polish today too. Now you can see through both sides. It's far from perfect, but much better. Interestingly, from the inside, I'm pretty sure the clearer spot on the left was my test patch. I'm going to buy a foam polishing cone and try polishing at a higher speed and see what happens, especially with that pitted yellowing. Just need to take care with the surface heat, not to cause more damage.4 points
-
It also depends which Barry went out and bought that days wiper arms3 points
-
Temps are surprisingly good, warmer than outside. Concrete seems to hold the heat well, and the clear-light pumps the sun through all day. If it's a good day (weekends) then the roller door goes up and traps the warmth in even more. depends if @Alistair is around or not3 points
-
Yeah, got that a while back. I love that they started the manual, got about half way through and then kinda just gave up on part listings, and even some diagrams. No one needs that half of the manual lol. Not that it matters, it's all tvr part numbers anyway, which doesn't correspond to the donor makes part numbers and there isn't really an official crossover guide. I do have a spreadsheet that someone created with a lot of crossover parts, which I'm adding to as I go, but otherwise Google is my friend. The wedge (especially the Billy basic looking Tasmin) is a very marmite car. You either love it, or hate it. I happen to love the weird boxy and wedge shaped cars of the 70s and 80s, so that's a win.3 points
-
Unfortunately 3 of these have had the engines taken apart and left open for many years by the look of it. Im not sure why either I only met the owners son and handed over the money and loaded them up. Picked them up in mamaku which is a fairly questionable area so hopefully they were aquired legitimately.3 points
-
Ive been fucking around with it so long now its been refined if anything its overbraked and cant spin a wheel on anything but gravel because its got so much traction. The 2 guys at work who have ridden it are motocross riders no way I'd let anyone with no handling skills near riding it.... ever What it does well is make heaps of noise and makes going fairly slow a heap of fun standing up your sense of self preservation kicks in pretty early.3 points
-
Anderson is common in industry. https://www.jaycar.co.nz/anderson-35a-sbs-mini-connector-grey/p/PT44843 points
-
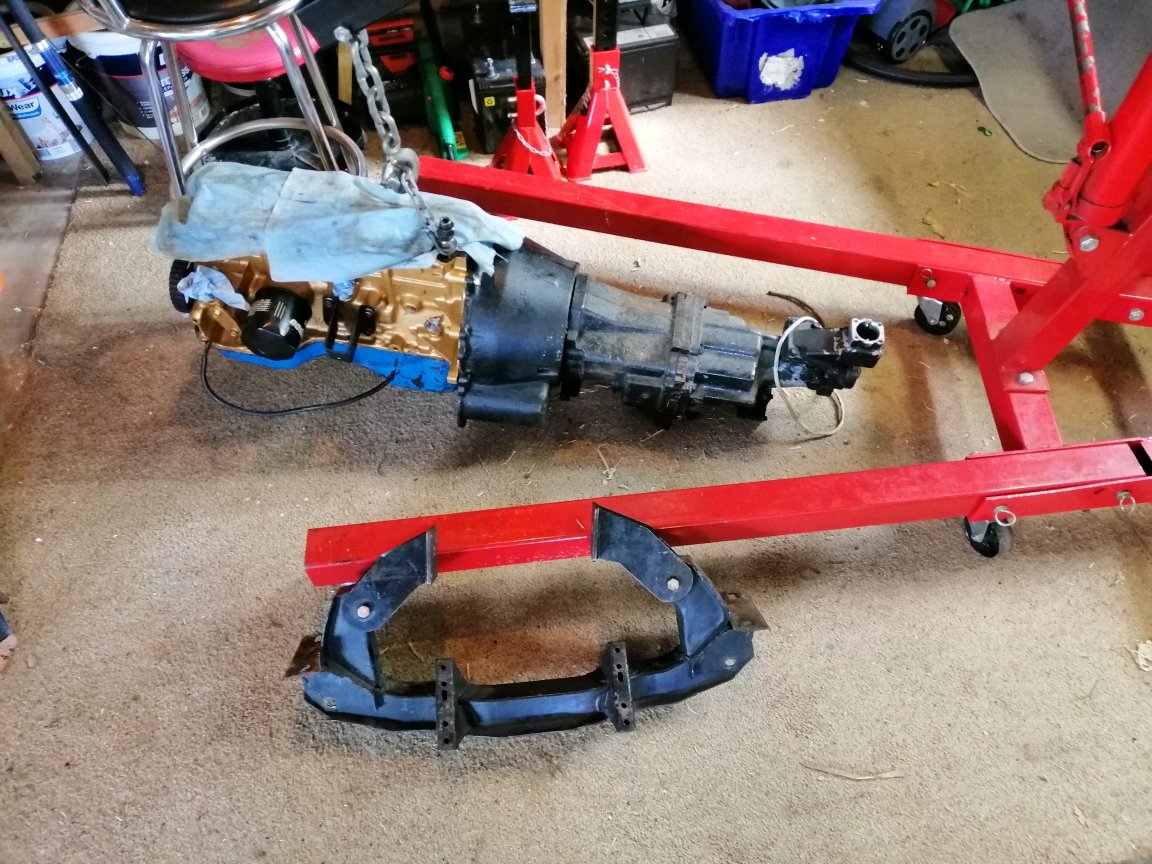
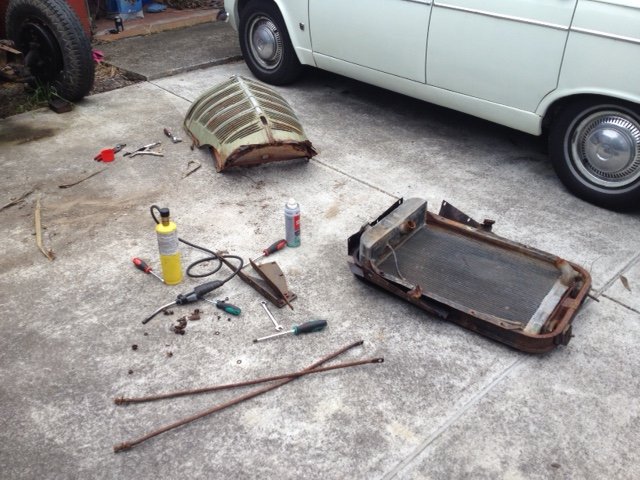
What a slack guy! I've been pretty busy over Christmas, but got a chance to put a few hours into this lately. We finished pulling the nose to bits and sent the panels away for a bit of love. Next step is getting the body off so I can fit this thing in my garage and crane out the engine. The radiator really fought us coming out, it's away getting a re-core priced up. And the rear brakes are also getting rebuilt. Once that's done we should be able to push it by hand, prob for the first time in 20 years!
3 points
-
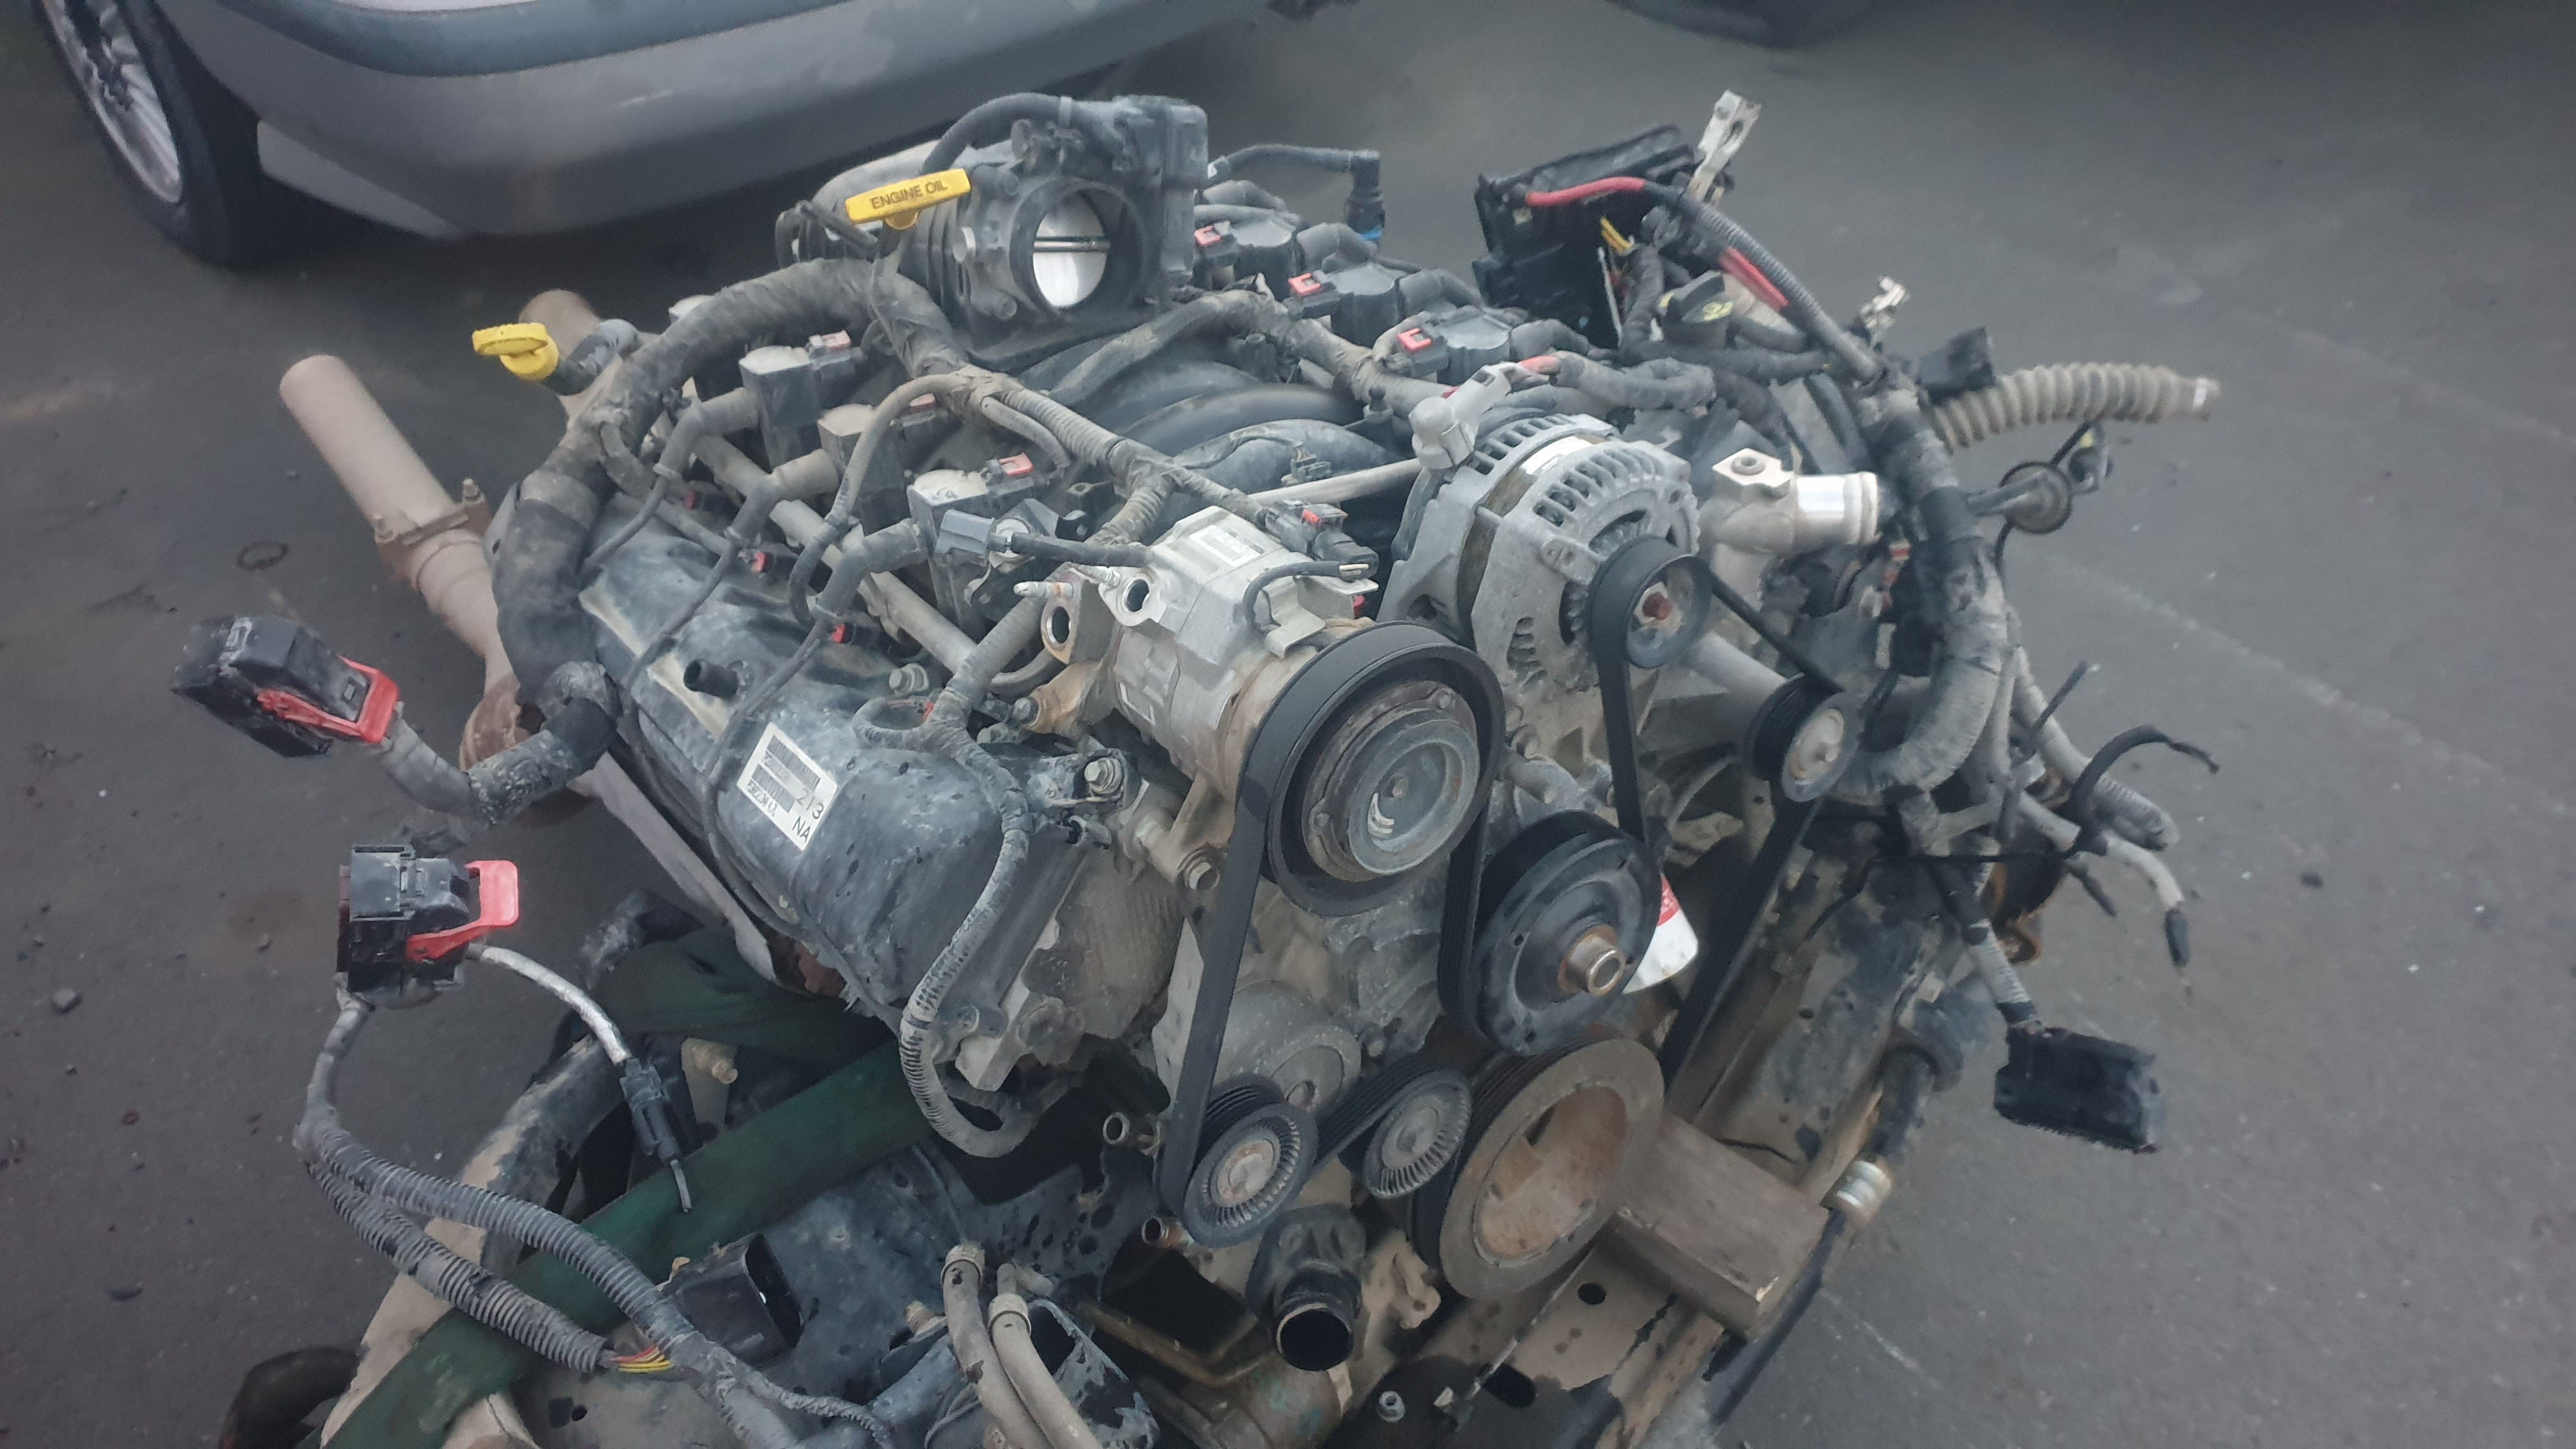
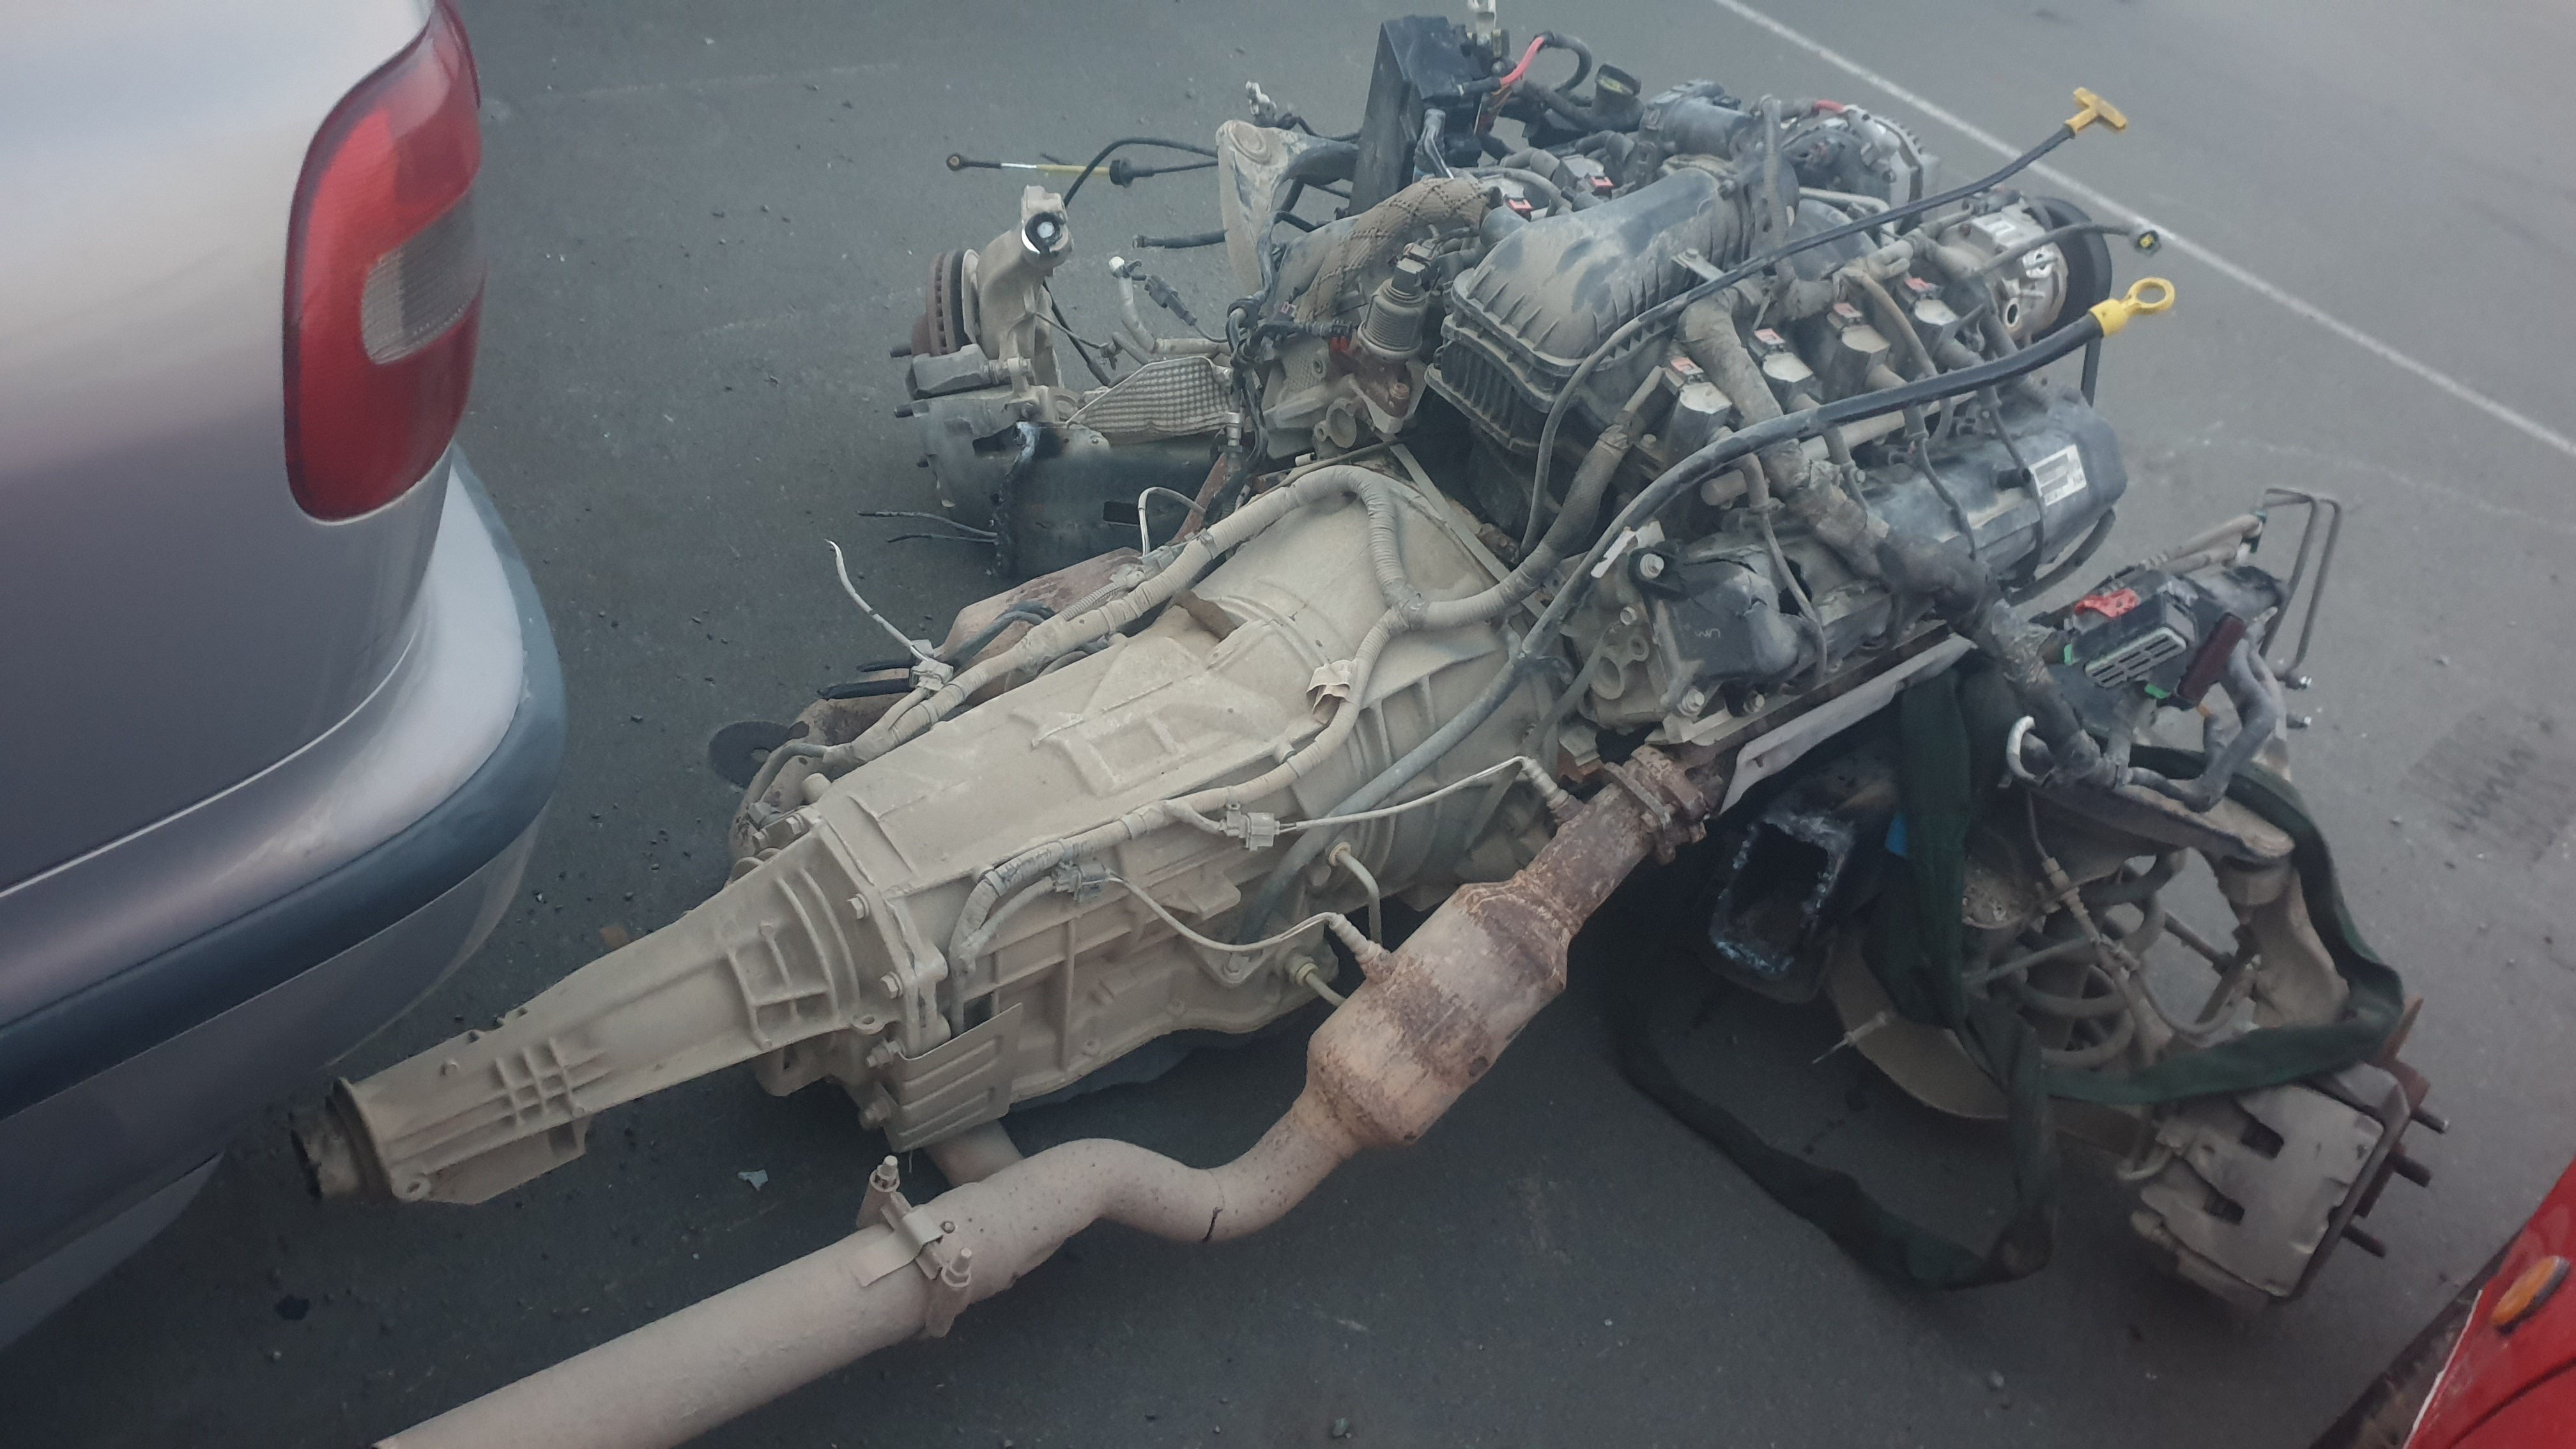
more progress during smoko and lunch today. building a race car at work rules. cut 100mm out of the top of the firewall and made two cuts down each side of the tunnel roof, pushing the tunnel up. once i know the engine fits the holes will be patched up. should make installs a breeze. came across the first real issue too. the exhaust manifold foul on the frame rails. i can notch these out enough to clear i think. however the drivers side manifold dumps right onto the steering shaft. flipping the manifold looks to be an option, and im contemplating the option of bringing the drives side exhaust around or under the engine and merging with the passengers exhaust, or crossing back under the trans. ill clearance the frame rails and see where that leaves me i think. not quite in, but its getting lower in the engine bay! should go down and back about 3" both ways any ideas, shoot them my way! gotta say, i thought id be swinging a sledge hammer pretty early on to make this fit, so im pretty stoked on how its fitting, and can see why LS swaps are so popular in the states.2 points
-
I love your dedication and perseverance with this thing, but I have one issue. Its one thing to maim and injure yourself on this thing, but was it family and co-workers now in danger now too?2 points
-
Nah bol, I’m away for my grandmas birthday.2 points
-
Been helping a mate all weekend. RD28 in small sea faring vessel, Huge hollset and plenty of boost.
2 points
-
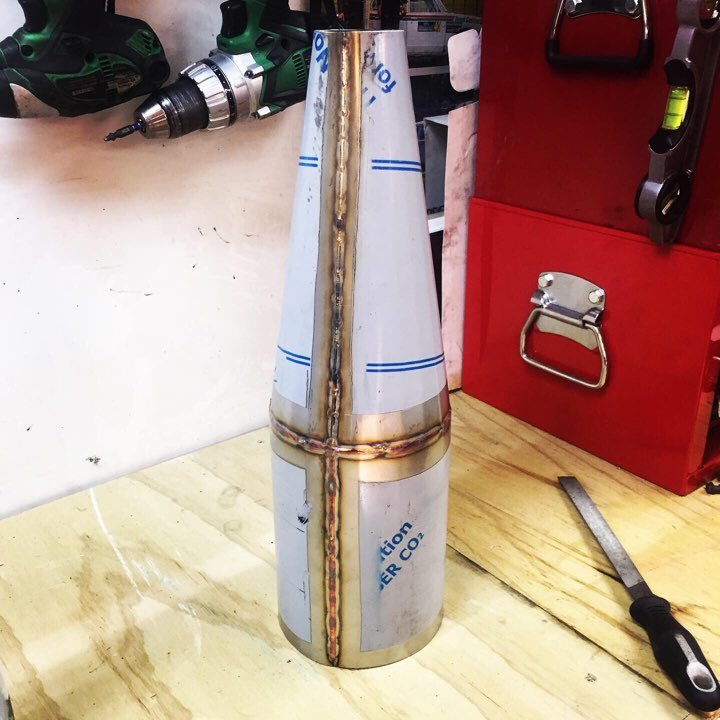
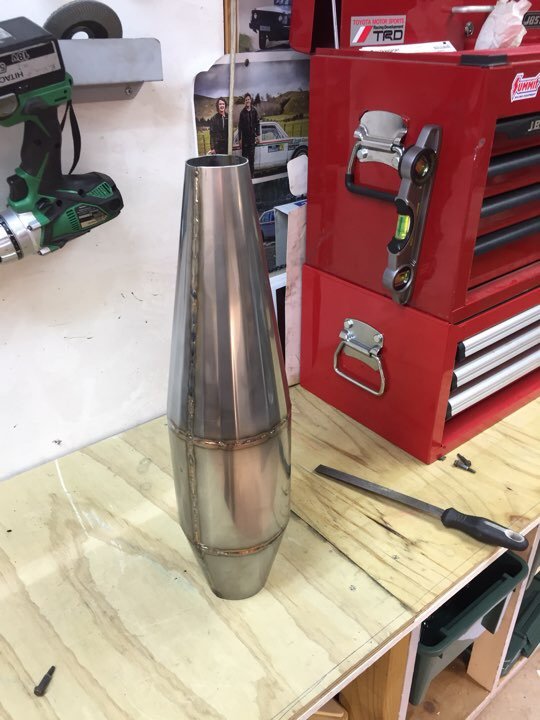
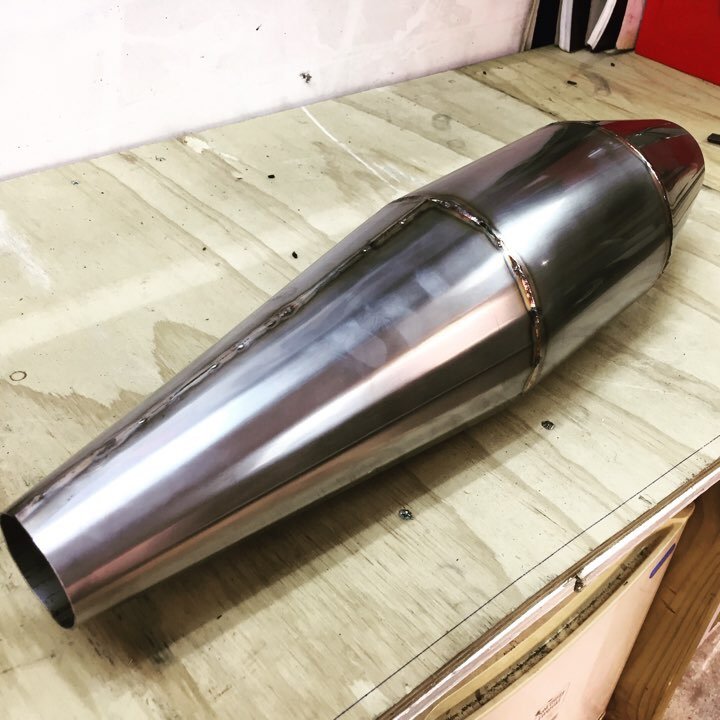
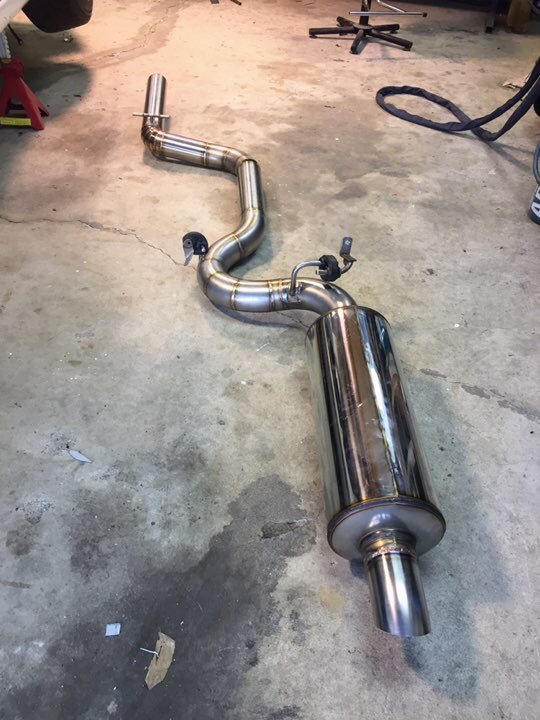
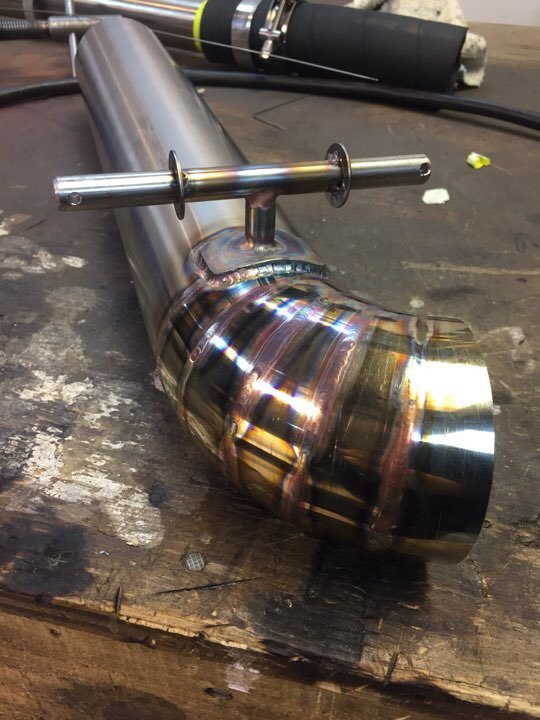
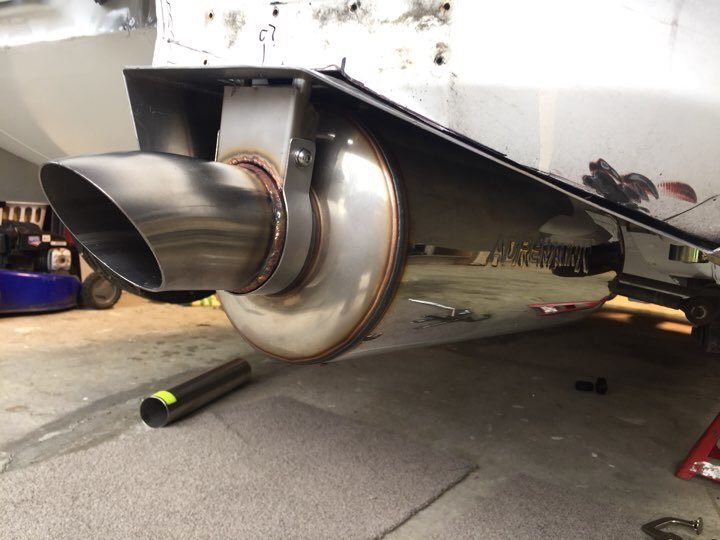
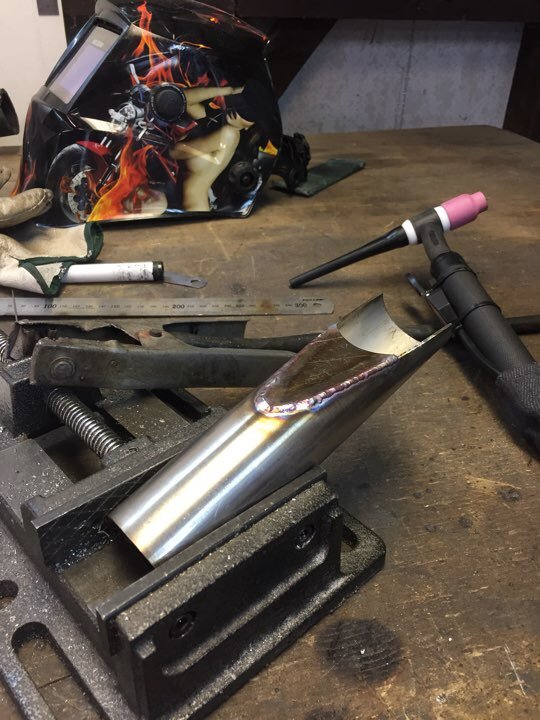
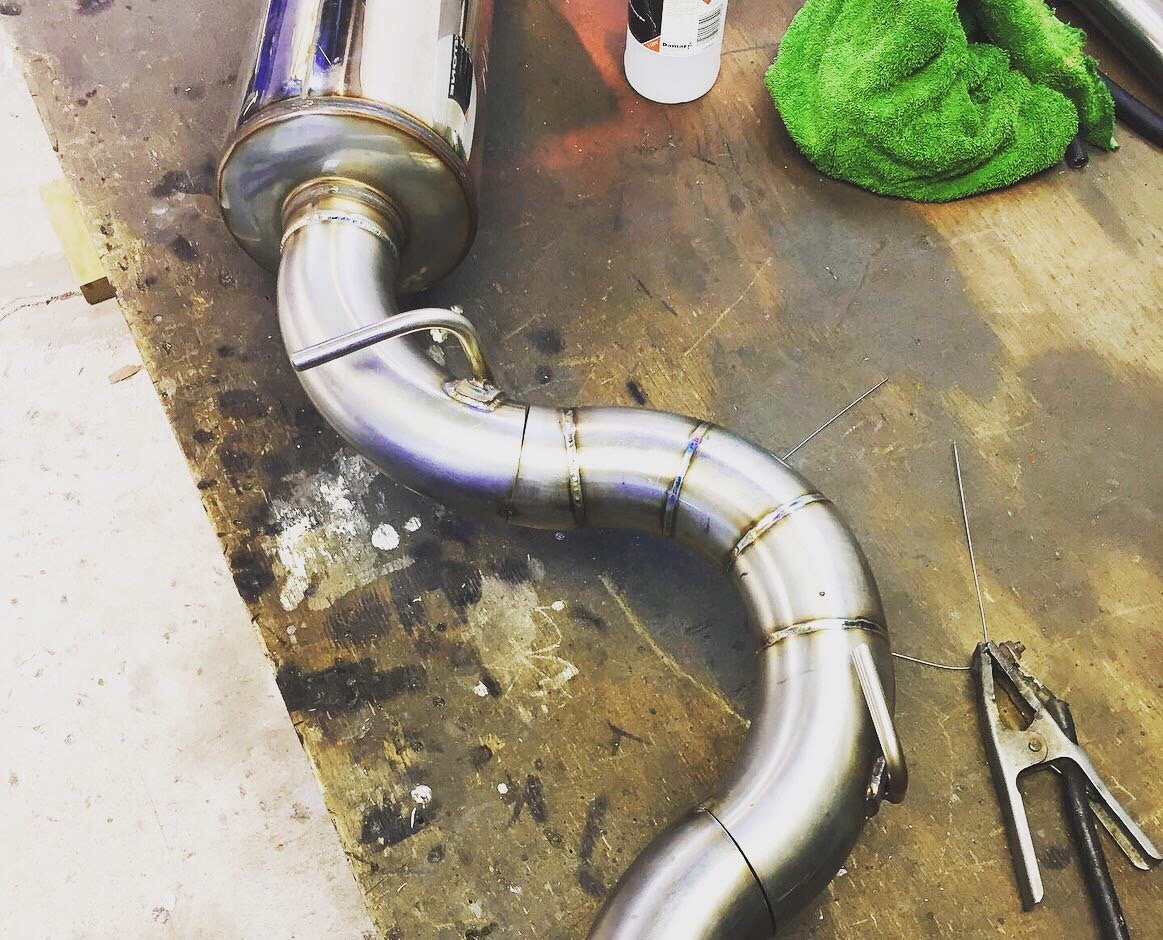
So finally got off my ass and finished this expansion chamber and my exhaust. I ended up rolling the belly section and rear cone of the expansion chamber. Should have done this for the front half too it was tricky but turned out way nicer! and gave it a polish up finished the tunnel end end of my exhaust off too. It’s a pretty tight gap to fit through hence the pie cuts and stupid amount of mounts heres the whole system complete just waiting to build headers and order a Flexi and I’ll be able to install it for good still trying to to find some 41mm od bends for the headers so might need to find something else to sort in the mean time!
2 points
-
An exciting day today! first test fit of the huge engine and trans into a mostly stock body mx5. first i started by cutting the 'ears' off the frame and firewall. forgot to grab a pic but its these parts. theyll need plates welded in to re-add the strength lost. this squares up the bay and allows the engine to sit close to the firewall then in goes the engine! its SO close to fitting in unmodified. infact if i was to unbolt the subframe, id be able to fit the sump bowl past the subframe and the engine could sit down properly. however, i dont really want to have to unbolt the subframe everytime i need to pull the engine. which hopefully wont be often, except for during the build, but even thats enough for me. if i want to slide the whole lot in, ill need to cut maybe 60-100mm out of the top of the tunnel. a pretty easy job for the massive benefit of easy install! trans hits here sump just doesnt quite get over the subframe its possible the unmodified hood may even close over it all! most of the bulk ontop is the wiring loom ect what a monster2 points
-
Discuss blindly buying cars and how good of an idea it is....1 point
-
Introducing the newest member to the rotary international auckland, in the form of a super project Mazda Rx2 Coupe straight outta somewhere near Compton but might take a while in the LA traffic. Back in February there was slight intoxication involved when this little red coupe showed up on a Facebook group, and thought 'yes this could be a nice daily'. Not overly reasonable considering it was in LA, and there was no garage space available, but no amount of sense-talking could stop the purchase and after being told our Mexican mate would sell it to another guy for double, I taught him a lesson by sending him money, chucked Stephen's RX7 out in the rain, and arranged shipment. Supposedly from the Arizona desert (yet with several crowbar dents around main entrance points) it has survived hot sun, a brick through the windscreen, and a seemingly nasty break up thanks to Jessica being a tramp and a too-timer: As far as we know it’s a 1973 RX2 S1/S2, with a poorly pulled apart factory 12a twin dizzy which fascinatingly was resting on the crossmember as an engine bracket, surviving a bumpy boat ride and several tow trucks. The list of what it has is far shorter than what it needs as it included the seats, engine and auto gearbox, couple of bits of chrome, old mates dad's truck rear view mirror, half of the Arizona desert in the doors, and a creepy Christmas doll decoration. Sorted: Thankfully don't have to invest in a paint job, as Jessica's ex has done the custom airbrushing. Got an extra windscreen as sadly the brick shattered the one in it. Plans: Not sure of engine yet as deciding between keeping original or moving to a 13B. Received an upholstery quote so that will be instead be mostly done by Rotorhoe's hobby shop. Widened steels, slam as per rules, get on road with guidance of supertrapp and jillyz music (cost effective as no radio required) Your kind thoughts and sympathy are appreciated1 point
-
I use the xt60 and xt90 connectors on my rc gear, the xt30 would be fine1 point
-
Not until you have to work.on them1 point
-
Tachometer on a drift trike anyone? Why sure...here we go. 1990's cool. Now I can see just how slow I'm going:)1 point
-
Picked up the injectors yesterday arvo. fitted them up just now. Car go VROOOOOOOM! /End thread.1 point
-
I quit my office job as a technical manager 8 months ago and am working on the tools as an engineer now. the quality of my work is going to go up with access to a proper workshop again.1 point
-
Well, it certainly makes proper British sports car noises and smells....1 point
-
Last week I gave the garage a good tidy up, an unintended consequence was sudden burst of motivation to pull this thing out and get stuck in. The shifter will go here with the hydraulic clutch attached. I have been working on the interior. I was given some aluminium sheet a while ago and used it for the floor. I need to get some more aluminium sheet to make the tunnel and dash... I’ll have a hunt on Monday. Hopefully this motivation lasts and I finish it off! Iv had to change the pedal position significantly as he is 7 now... She wasn’t even born when I started it!1 point
-
Enjoying the build thread. The whole 'accidentally bought a weird British thing now fixing it' is proper OS..1 point
-
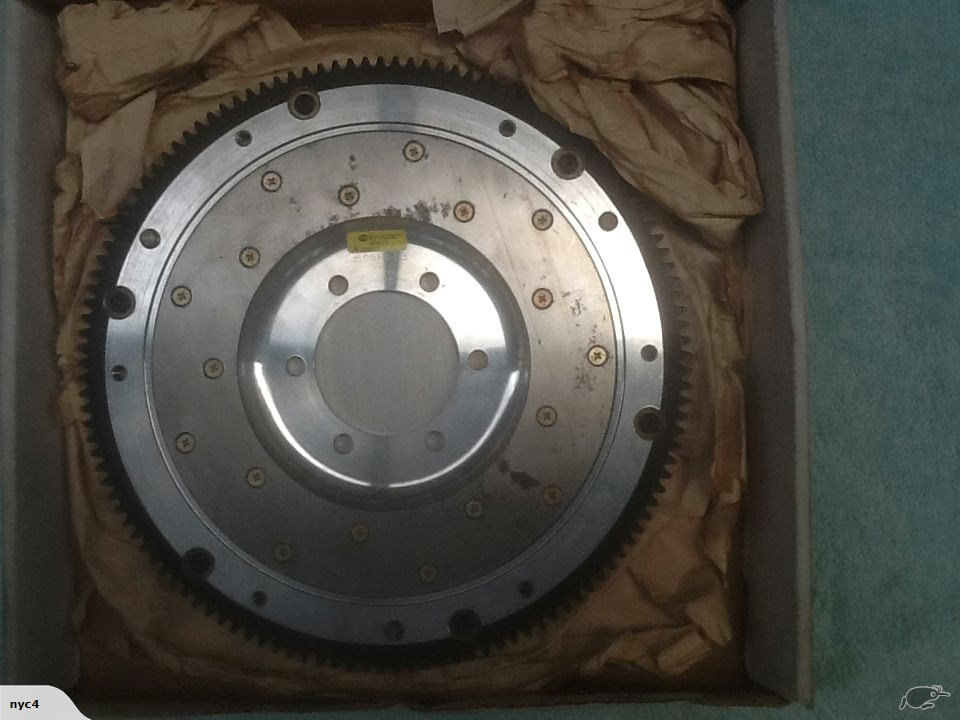
So now here we are six months later and I've come to my second of two one week holidays for the year. This whole time I've still been mentally working on the car, thinking through all sorts of different problems and making plans and drawings along the way. Now I've had some time off from school, I made a trip back up home and put one of these plans into practice. However, before I can get into that, we have to go through a little story time first... It's long been playing on my mind the fact that I'd still not fully completed the V6 RWD conversion. Sure I'd made the adapter plate, engine and box mounts, intake setup, and sump etc, but the actual connection between engine and gearbox was still missing. The flywheel and clutch situation has been through a few revisions, both in my head and in physical work. You may remember from these posts: that I planned to use the standard V6 flywheel with an extra ring added to increase the outer diameter to take an RX8 ring gear as well as a spacer to bring it out the correct distance to take run the RX8 clutch and pressure plate. After making the spacer (which if I'm honest now I wasn't particularly happy with my workmanship and tolerances anyway) I found that the RX8 friction disk wouldn't work with the V6 flywheel or pressure plate, meaning I would have to adapt the RX8 pressure plate to the flywheel. So upon taking it to the machinist to get his opinion on making the adaptations for the larger ring gear and pressure plate, we found that pressure plate bolt holes would end up directly on the junction between flywheel and adapter ring. This was doable but it was far from ideal. Also, the labour involved would have cost similar amounts to a fully custom flywheel anyway and thus the whole plan was put on hold for a while. You may indeed have noticed this in the complete lack of a mention of the clutch and flywheel in the following posts. And so came about my next plan. Ever since reading @yoeddynz's viva thread, I'd been pretty keen on using a lightened flywheel to help unleash the engine's propensity for revs. Luckily, this was going to let me kill two birds with one stone. I'd decided long ago that I wanted to keep everything inside the bellhousing exchangeable with standard RX8 parts. This will allow me plenty of potential clutch upgrade options in the future. With that in mind, I went looking for RX8 lightened flywheels. Almost exclusively, lightened rotary flywheels are designed to bolt up to the automatic counterweight, rather than using the integral counterweight cast into the standard flywheels. This made my life much easier. Now I could make an adapter that picks up the six holes in the flywheel, spaces it the correct distance to use the standard RX8 clutch and pressure plate, and bolts to the end of the crank like the normal V6 flywheel. Essentially I can make a counterweight emulator. The next step was to decide the material to make my adapter out of. I could of course just use any old steel billet lying around the shop but my fondness for my feet kind of convinced me not to go that route. So I looked at what material is usually used for steel lightweight flywheels and found that 1045 is common. I figure if it's strong enough to take the forces on a whole flywheel, then it should be well strong enough for my much smaller diameter adapter. Next, I had to take measurements of everything and design the actual adapter itself. And this is what I came up with. You'll have to thank the American's for building the majority of commercial aircraft in service for my use of imperial measurements. Almost all the tools used in the industry are in imperial and because of that, all the tools I had available at school are as well. Anyway, according to these dimensions, the ring gear should end up in the same position as the RX8 relative to the bell housing face and starter, and therefore the rest of the clutch system should work as normal as well. With all this done, I could finally go home and get stuck into it. Step one, of course, was to get the raw material into a useable state by facing it up and generally roughing it out. Thank god for power feeds and tungsten carbide tools. Next, I turned the recess that fits over the end of the crank concentric to the outer diameter of the material. With that done, I turned the piece end for end and dialed everything back up in the four jaw to turn the spigot that that flywheel runs on. This is also concentric to the outer diameter and, by extension, the recess as well. This is obviously crucial to avoid vibrations and undue wear on bearings and so forth. You'll also notice the stepped section on the front of the spigot. This is designed to fit the inside of the standard flywheel for reasons that will become clear later on. With those surfaces all machined, the crucial dimensions are done and I can have a nice big exhale. This means I can move on to less nail-biting procedures. One thing I did learn from the first spacer I made way back in the day is that measuring and drilling PCDs is a right royal pain and very difficult to do accurately with the tools I have available. So this time around I decided to forgo any and all measuring of PCDs entirely and use a far more analog method. I already have the PCD that I'm trying to match. Why would I not use it to guide my drill bit? So with that in mind, I made up some bushes to guide the pilot and tapping drill and protect the aluminium flywheel. Next, I clamped the flywheel and adapter together and shifted everything to the drill press. You can see the bush already in place in this photo. Once I had the first hole drilled to size, I tapped it to M10 x 1.25, which is the thread used by Mazda on the automatic counterweight that this flywheel is designed to bolt to. With the first hole tapped, I bolted the flywheel to the adapter, which let me get rid of the whole clamp setup and drill the subsequent holes much more simply. I used a similar setup for drilling the crank bolts too. I wasn't nearly as worried about damaging this flywheel since I won't be using it once it's done its jig job, so I only used a bush for the pilot drill and just threw the final drill through using the flywheel itself as the bush. Now that all the holes were drilled I decided I ought to check my tapped threads for strength now, rather than do all the rest of the work just to find that they strip as soon as I try to put any torque on them and junk the workpiece. So I throw the first bolt in and torque it to the high limit of the 32 - 45 ftlbs recommended by Mazda for the flexplate bolts. It goes tight, tight, tight, still tight, still turning, still turning, shit. I figure its stripped and fucked. So out it comes and sure enough, the bolt thread is gone burgers. However, the female threads are still pristine. Stoked. So in goes round two. Tight, tight, tight, still tight, still turning, still turning, shit. Again. So, out she comes and another bolt failure. This time it stretched the crap out of the bolt but still left the threads perfect. Third time was the charm though and all the threads eventually took the torque like champs. Guess that teaches me for using the first bolts I find lying around. Finally, I put everything back into the four jaw and faced something like 15mm off the spigot to bring it back to flush with the flywheel face and finalise the outside dimensions. Here you can see me checking the runout of the flywheel when mounted and it was well well within the 0.008" tolerance specified by the Mazda service manual. Finally I bored the recess for the spigot bearing. I decided to use the MX6 spigot bearing, mainly because I had one available, but also because it fits the RX8 input shaft perfectly, and it was much easier to machine the larger bore for than the much smaller stock roller bearing used on the RX8. It's a very light press fit, able to be tapped home with a mallet just like the fit in the original V6 flywheel it came out of. Finally, after two straight 14 hour days on this thing, I was ready for a dry fit. I used the longer crank bolts that I bought for the first spacer which gave me shed loads of thread engagement, as well as a couple of M10 bolts I had lying around for the flywheel itself. I'll get some proper high tensile ones later on. Next was the clutch and pressure plate which I eyeballed the alignment of and used some more M8 bolts I had lying around. Finally, I muscled the gearbox around and offered it up. With the engine and box somewhat leveled the input shaft slid right in and home over the adapter plate dowels. A couple of bolts later and I stood back to admire my handiwork. It is a beautiful thing indeed. I couldn't help myself at this point and threw a driveshaft in the back end and a ratchet on the front and low and behold we have drive!! I have to apologise for the photo quality at this point. I think there's a smudge on the inside of my lense somehow and it wasn't having a great time with the fluorescent lights at 1:30 in the morning. I ran it through all the gears and checked the disengagement with the BFC in the bottom of the frame, and it does indeed stop spinning the driveshaft with the clutch in while still having a small amount of wiggle to the arm when out. I also checked the starter engagement with some white paint pen and it looks to be exactly where the existing wear marks are on the starter gear. I'd have loved to hook up a battery and some jumper leads to spin it over with the starter but I did end up running out of time. With all said and done I am absolutely stoked with how everything worked out. My measurements and calculations were apparently right on the money, and my machining workmanship and tolerances are leaps and bounds ahead of the spacer I made initially. The final setup for my adapter situation comes out to this: Custom 12mm steel engine to gearbox adapter plate of my own design Custom 1045 steel flywheel adapter of my own design Aftermarket RX8/Turbo RX7 lightweight aluminium flywheel 6 speed RX8/Turbo RX7 clutch and flywheel MX6 spigot bearing Stock RX8 clutch arm/release bearing If you've made it this far though what was a whole afternoon of typing then thank you very much for reading. I'd appreciate any comments or feedback on my discussion thread which you can find here: That's it for now. Hopefully won't be another six months before the next update but we'll have to see what happens. Cheers.
1 point
-
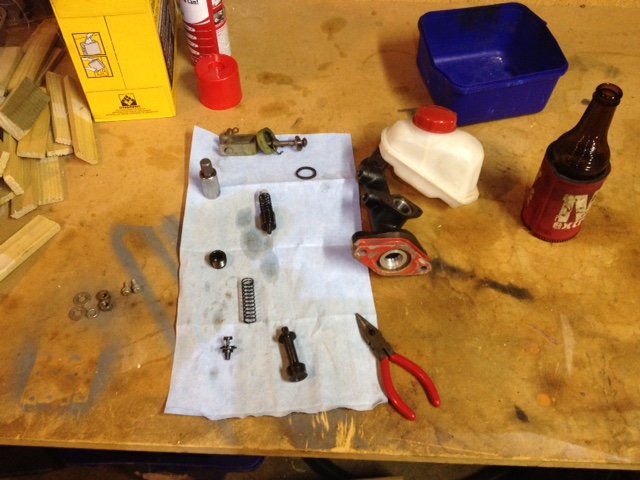
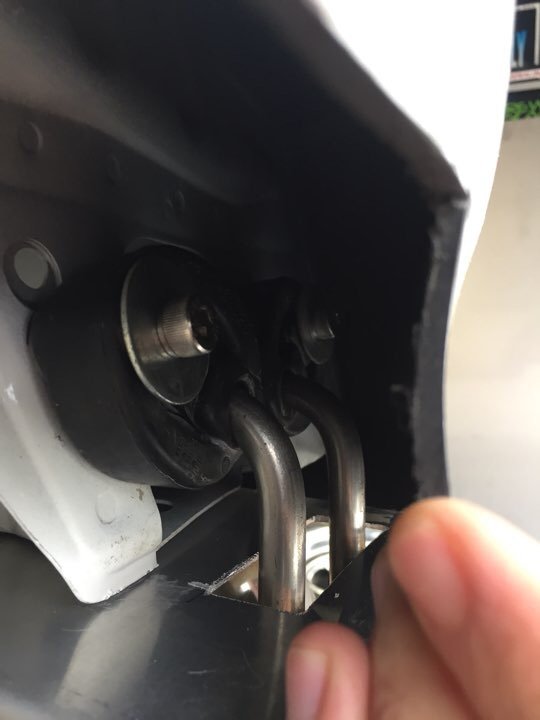
So I guess this is where we start then. The first port of call today after having the car delivered was to work out why we had no power. I popped the bonnet, and yes there was a battery. Ok, let's remove the battery and see if I can throw some charge into it. Ctek says NO. With the charger connected to the battery, nothing. No lights on the charger, and if anything, the charger started acting weird. Guess that's no bueno then. Hope my charger is OK. A quick trip to Supercheap sorted out a battery for me. There is very little space for a battery, so a bit of digging in the Century Batteries catalogue yielded the biggest battery that would fit the same footprint, an NS60LSMF Connecting this up showed that we finally had power. The dash warning lights come on with the key, the driver's electric window is working, albeit slowly, and the central locking works. Strangely the headlights did not respond to the switch, but some wiggling of the wires behind the switch sorted that out (yeah, I'll need to look into that). The next obvious step was to see what was up with the fuel tanks. Now that I had power I could see the fuel gauge was reading empty. I decided to take a risk and try dumping some of BPs finest 98 and injector cleaner into the tanks and see what happens. I split the fuel and cleaner between the two tanks as evenly as I could. Since I had been told it was possible the accumulator had failed, there is a trick to work around this and still have the car start and run normally. The accumulator works to hold fuel pressure in the lines when the engine is off, but when it fails the lines no longer have pressure, and the fuel pump only runs when the engine is turning, so it takes ages to build that pressure back up. The trick to work around this is to have the pump run when the key is turned to ON so it primes the lines. The simplest way on early cars like mine is to disconnect one connector from the side of the fuel distribution unit. This causes the pump to run when the key is on. Easy. Its the blue connector in the top photo, and the green plug goes onto it (strangely... why arent they matched colours?) I connected the battery and turned the key. Sure enough, I heard the familiar whine of a pump turning, and then the woosh of fuel heading down the lines into the fuel distributor. Now it was the moment of truth. I turned the key, and the engine turned smoothly over. It spluttered a couple of times, but wouldn't start. What a tease. Eventually, this happened. It was rough, but running, and even idling. I ran it for a while, and everything looked good. No obvious signs of leaks, but blimey does it make a noise! The longer I ran it, the smoother it was getting I checked and it seems to have gears, and a clutch, so that's a big win. It still hesitates a bit, but that's to be expected for an engine that has been sitting around. I'll take the plugs out and give them a clean (or replace), and check the cap and rotor condition. If everything looks OK, it may even be time for a quick run around the block. One must wonder though; if I can get it running with little effort, why couldn't the "specialist" have it running for the truck? Oh well, best not to dwell on it I guess.1 point
-
Mine are squished until I turn the phone landscape Looks cute tho
1 point
-
Some things arrived. The rad is just mocked up for now, I will add some mounts and change the lower outlet angle.. The driveshaft is sorted, I had some adaptors machined out of 7075 ally at Topliss (I am sure I have a pic somewhere), then dumped it all at marine and turbochargers to get shortened and balanced. The shortened extension (you wot mate???) Is a 2wd Hilux shaft. I bought a new hangar bearing for it as well, so that shit represents over a grand of accumulated investment. Gulp. After having a quick check to see that it basically fit (and damaging the fins and spending 20mins with a tiny screwdriver pushing them all into place again and taping some cardboard over the tiny little fucks so I didn have to do it again), I made a fake one out of rod to get the position roughly right. Cable tied in place. Tacked in place I removed the cab to make this bit easier, I have quite a few cab off jobs to get through anyway. I did some other shit but forgot pics so that's all you get for now.1 point
-
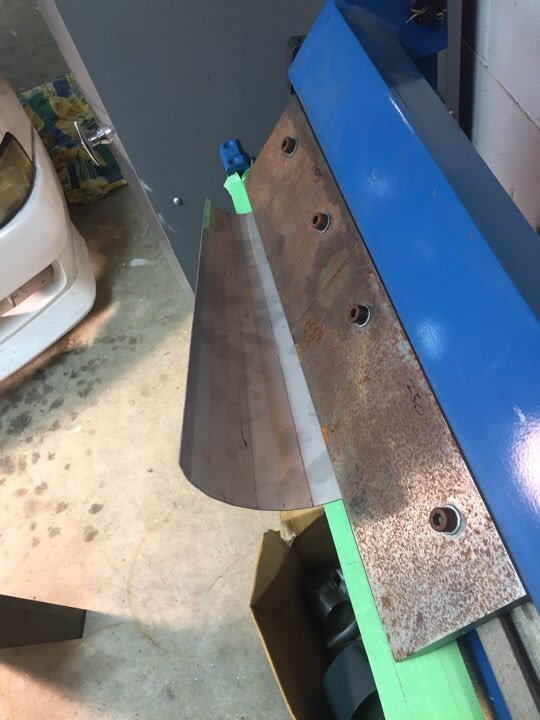
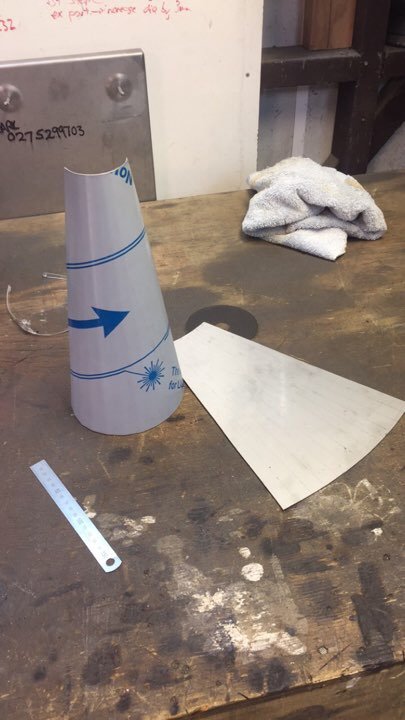
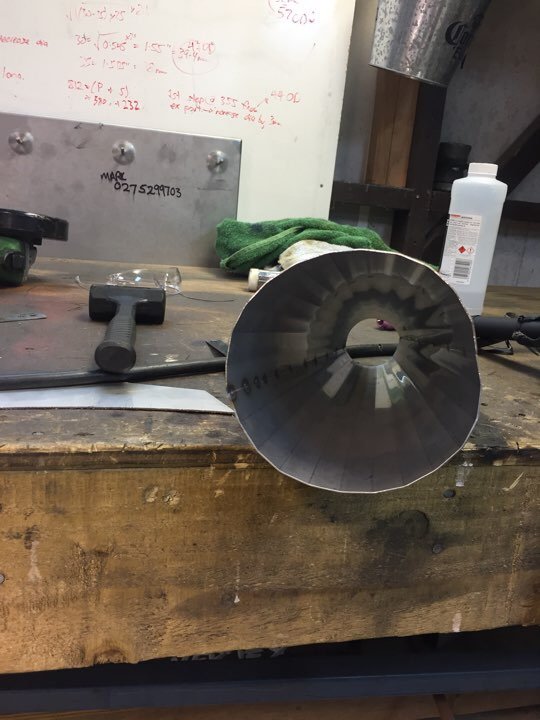
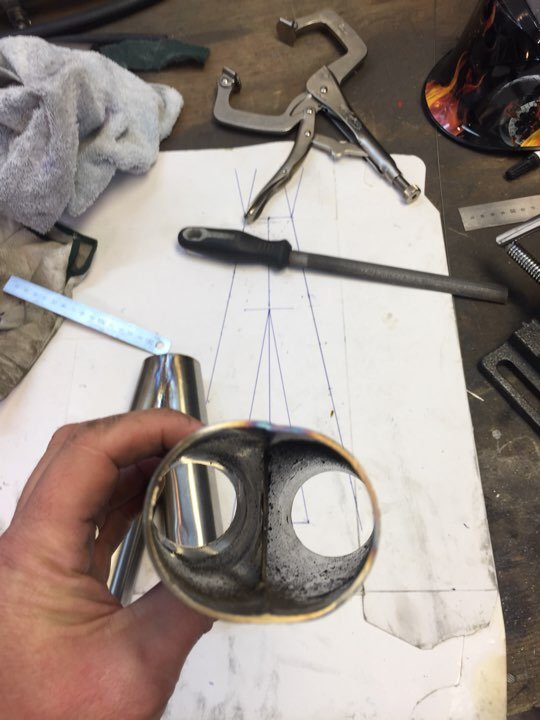
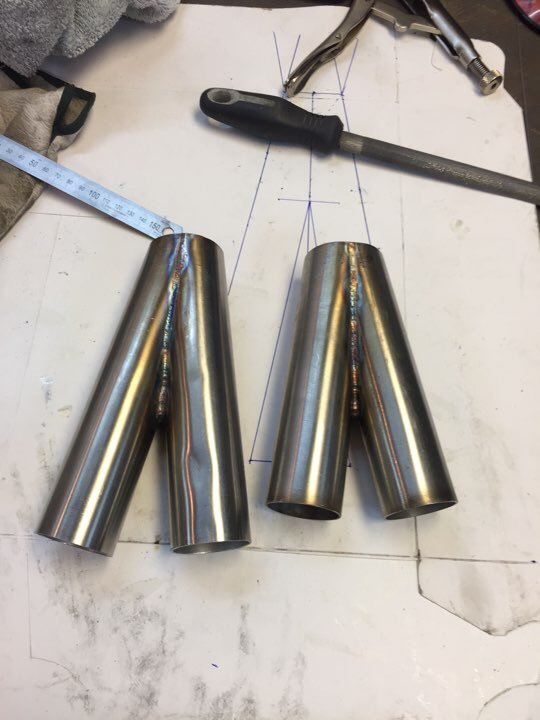
I have a bit of a tight spot at the end of my tunnel/fuel tank that required a tight bend. And I was being cheap so I bought some pie cuts from nzpiecuts on Facebook. showed up the next day A+ service! Turned out awesome no purging and bugger all penetration. Oh yeah and I over engineered the shit outa another exhaust mount.. I’ll post a pic of the finished product a bit later in the week! Full disclaimer I’ve got very limited fabrication skills I am a project manager who sits at a desk all day long. But I’ve been super enjoying making cool stuff so I thought I’d give an expansion chamber a go to test a few theories. Patterned it with the help of youtube I don’t have any rollers so just decided to use my small folder. due to there being 12 folds per half each fold is 180/12 = 15deg which is bloody hard at the best of times so I made a gauge so I could check on my progress as I went.. turned out not too bad got a bit of beating to do to get the seams to line up and make it round but not a bad start!
1 point
-
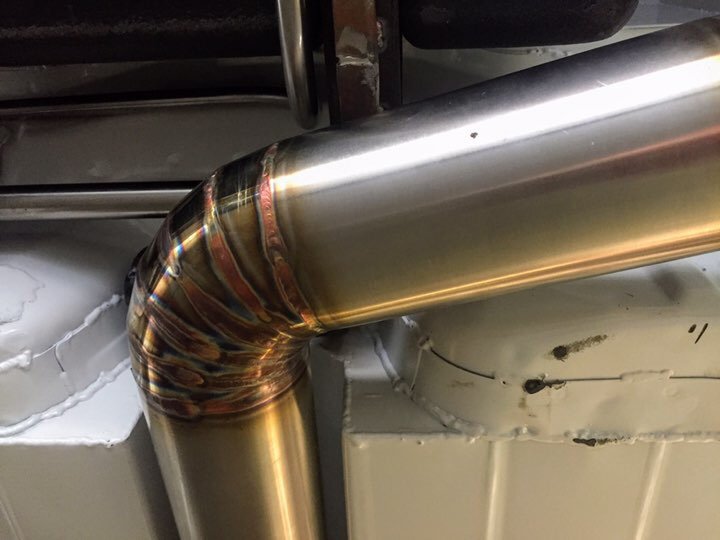
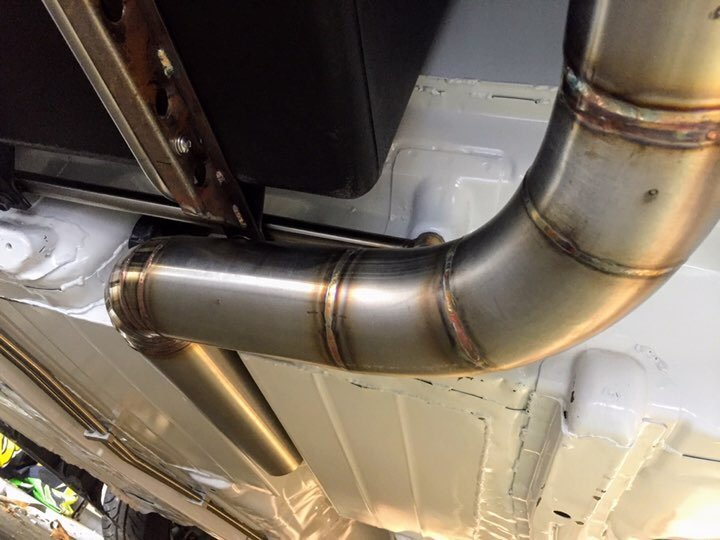
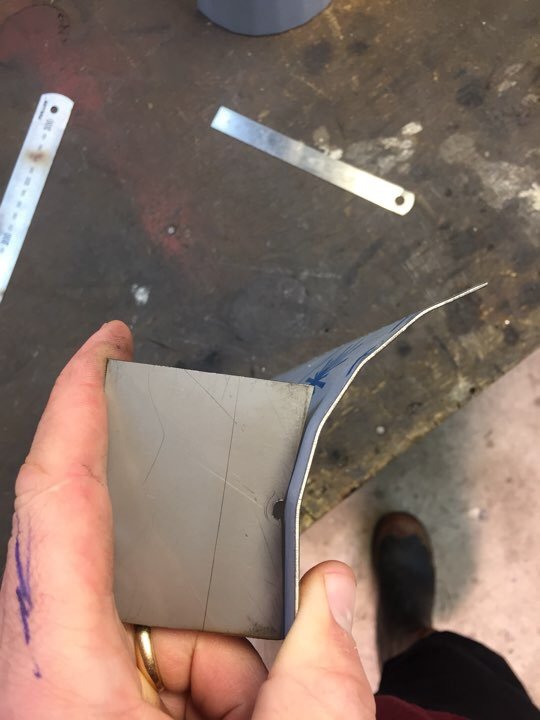
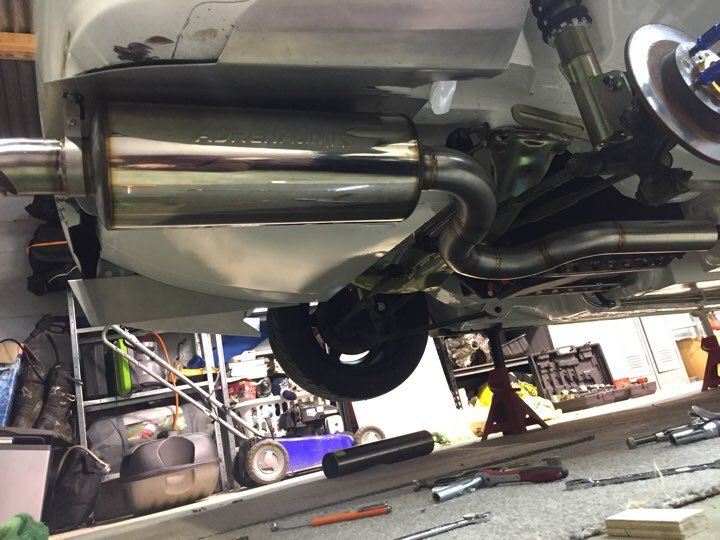
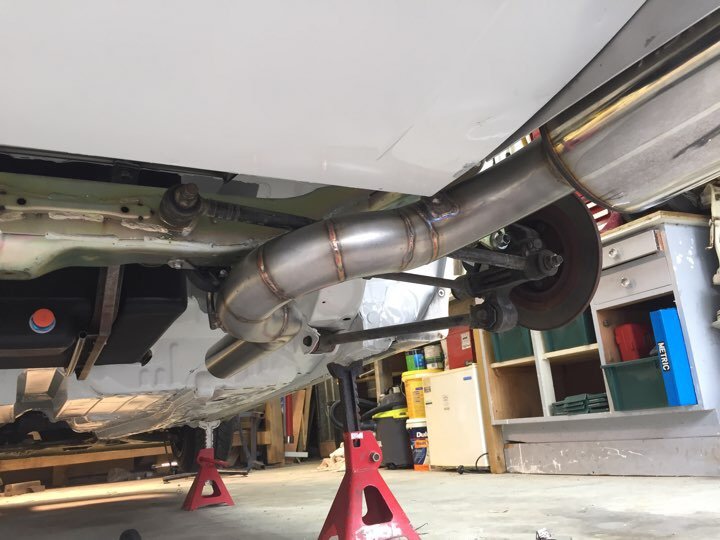
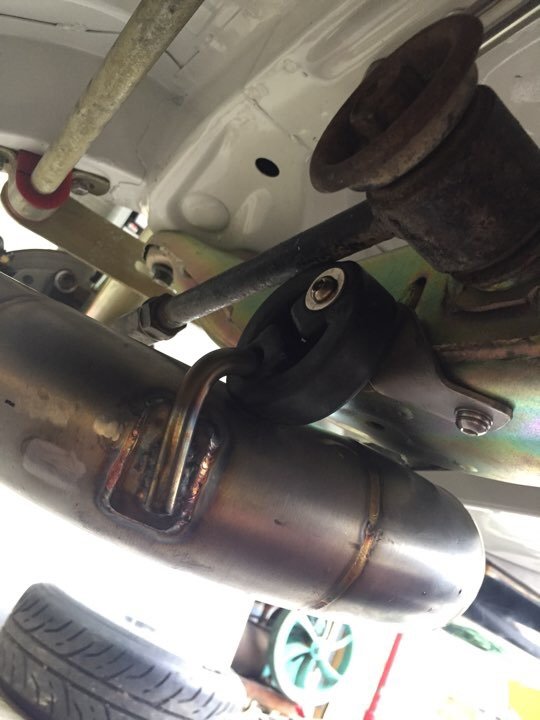
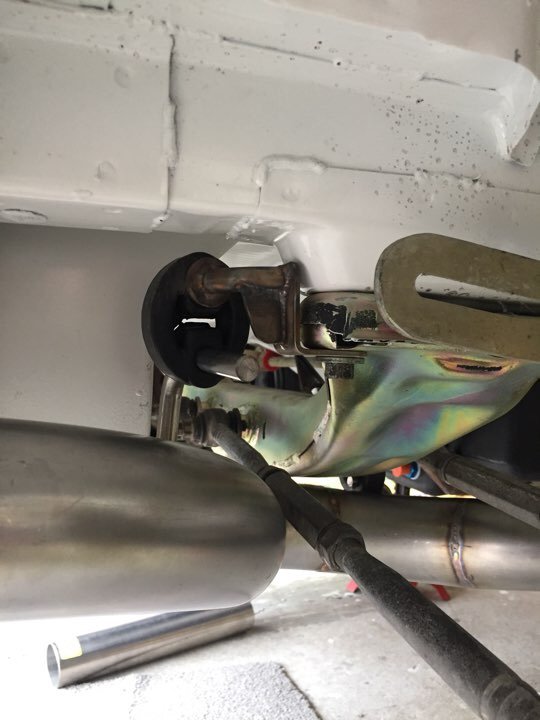
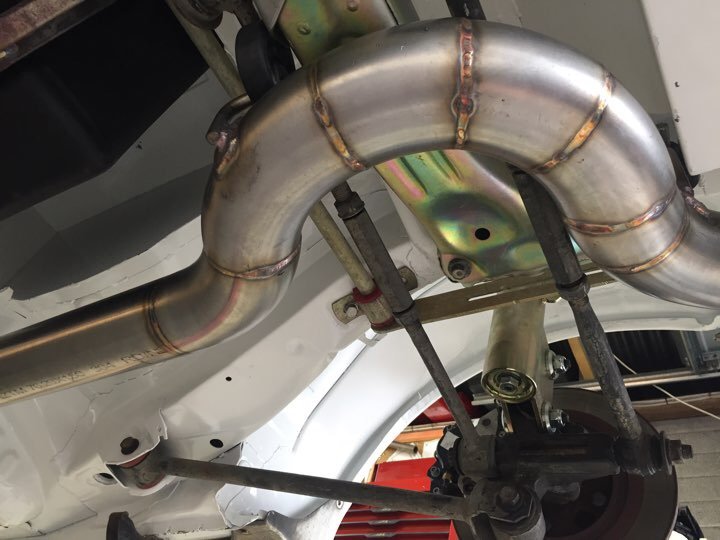
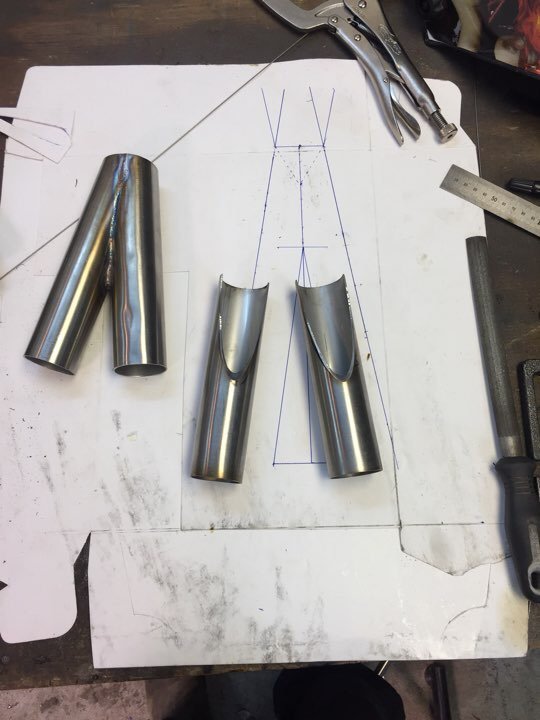
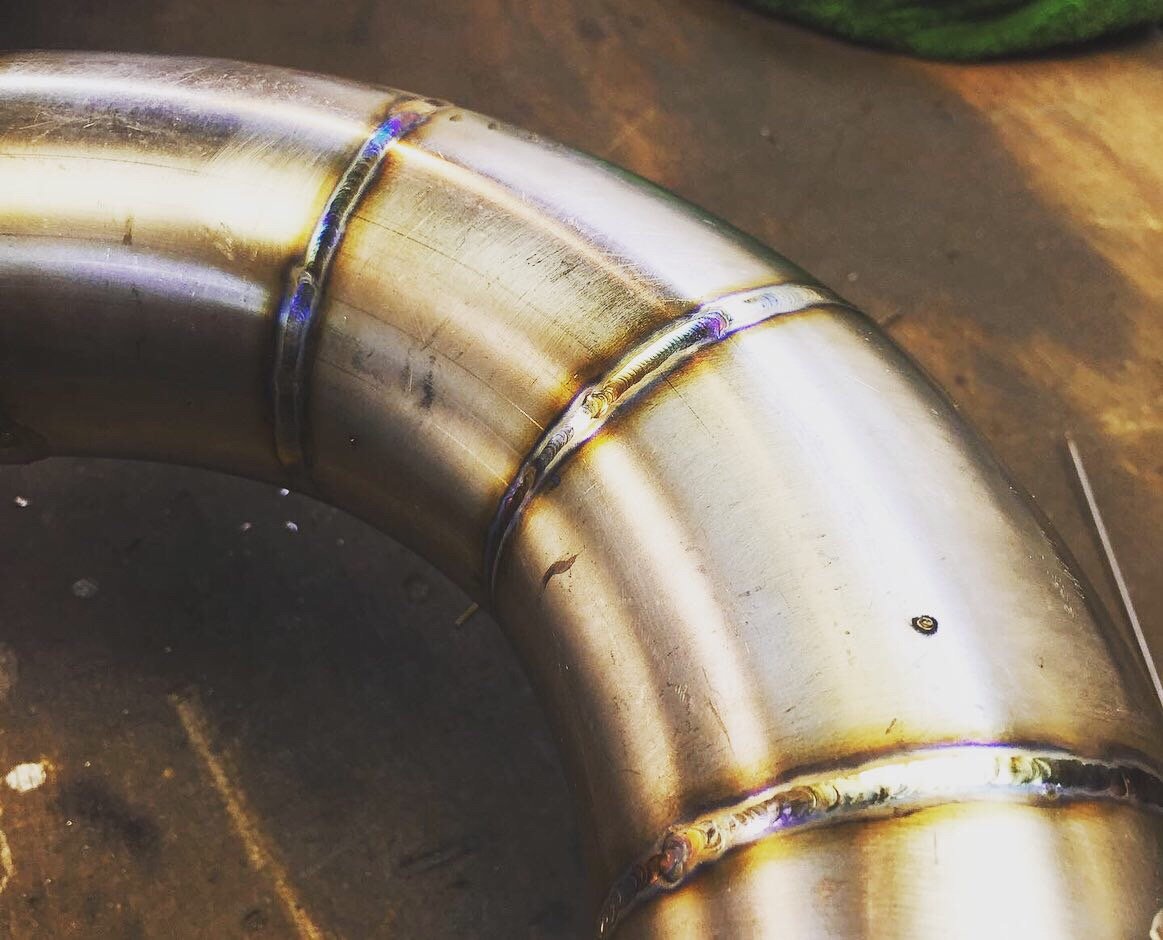
Been chipping away at the exhaust. Been working some big hours recently so took a few days off to reset my mental health and catch-up on some shed work. Finally finished the rear rear section of exhaust thanks to @Truenotch for helping out with another set of hands. Turned out to be a bit of a mission to fit a 3” zorst in a very tight space which required some unique solutions. So so here’s the end product which I’m very happy with. Can’t wait for it to make doorty noises! Bends weren’t quite tight enough so had to cut them up to make them tighter. Luckily the band saw and linisher made this task a dream leaving a nice flat surface to get some mint welds on; In order to get it fitting tight with no movement I over engineered the shit out of the mounting rear mount had double rubber mounts inside the chassis rail for max stealth Rear of muffler had this swanky mount to the subframe and under the subframe i added this rubber to keep it from hitting the subframe mainly as it’s only got 5mm clearance. Been working on building collectors for headers today also. Bit of a head fuck trying to work out how to construct these from the measurements I had but got there in the end. So I’ve decided to go with a Venturi style merge collector and a 4-2-1 header design mainly for packaging reasons. The idea is the gas speed increases momentarily accelerating it through the merge and it also amplifies the any acoustic resonance that we may or may not be able to create with the expansion chamber (standby for @Roman science in near future)... End product just looks like two bits of stainless welded together... Used a bit of card to make a template to get the angles right for the two halves They actually have a small plate/baffle welded in to restrict the area where the two flows merge. Normally (depends on merge angle) the area almost doubles which slows the gas flow and worst case can cause reversion at certain rpms. Welds came out pretty good with no purging only a few small spots of penetration that I’ve mostly been able to get rid of. Smashed through almost a whole d-bottle doing this and the exhaust though! heres the rough plan with my headers; My primaries are 41id stepping up to 44id then this Venturi is 47id before stepping up 56id secondaries and another 51id Venturi and tapering up to the expansion chamber. But that’s about as far as I’ve got sorted at this stage more to come on that next time...
1 point
-
The engine is a nothing flash 4.7l V8. making a reasonably flash for an mx5 310hp and 400 something nm filthy, but not an ugly motor which is nice. i plan to keep the automatic and manualise it. the trans computer should be able to to be programmed to behave like a sequential manual trans and ill make a big gear chopping stick. and the goal for this car is to be as fun as possible for as cheap as possible. it wont be a competitive race car. but it will be a stupid amount of fun
1 point
-
Living the dream people, this is what should be on Grand Small Space Designs!1 point
-
That looks so fucking lush compared to wait you started with. Il have to come have a beer when your all done1 point
-
Those are nice tiles! Yours looks better for being bolder and going full concrete, and the lighting seems more dramatic too. Also your tiler seems to have been smart enough not to put two tiles with corresponding patterns adjacent to each other and in the same orientation. Make the top of your vanity from something like rustic old rough-sawn timber planks so you barely have to clean it because rustic.
1 point
-
Been a busy two weeks of knick knacking and paddy whacking really. Had huge progress in the dismantling task, and now have it stripped back to a water blasted rolling body. This weekend I de-loomed it with various difficulties due to Japanese nimble fingers and Mexican wiring swept under holes, while Stephen dropped the fuel tank out which had 1 & 1/2 buckets worth of petrol still in… no auckland tax on that. The front windscreen didn't come out easy however as the rubber was baked more than a christmas pavlova made after a few breakfast rumballs. But with two rolls of $2 tape as support and bare fingers for guidance, we yanked the screen free and the began the painful process of smashing each little piece from the surrounding areas. Even dropped the engine out the bottom to check over if it's worth saving, and the exhaust which is definitely not worth saving. And finally on the progress, I spent a day last week softly caressing the old vinyl rear seats that crack into pieces in your fingers unless you find a 24 year old bottle of Johnsons baby oil at the back of a bathroom cabinet, and massage that into the fragile material until it's overwhelming in smell. Then I spent the remainder cleaning up plastics with thanks to rivalrx CRC suggestion, AKA the new best thing after Autosol. Note grubby handles. Got new door cards from Australia - $140 free shipping bloody impressed and awesome business card to match. Bonus items found hidden this week were a knife down the wheel arch in boot, an Escort window winder, and a monopoly house under the fuel tank. Kind regards, rotorhoe1 point
-
I made this air filter adaptor foe my scoot today. Was going to have david print me one buy that would take days.. this took around an hours labour. Not pretty but functions like it should.
1 point


_sedan_(23230030334)(1).thumb.jpg.34d765361d66c78db614bae6ea2c156a.jpg)


This leaderboard is set to Auckland/GMT+12:00