
Leaderboard


Popular Content
Showing content with the highest reputation on 06/11/19 in all areas
-
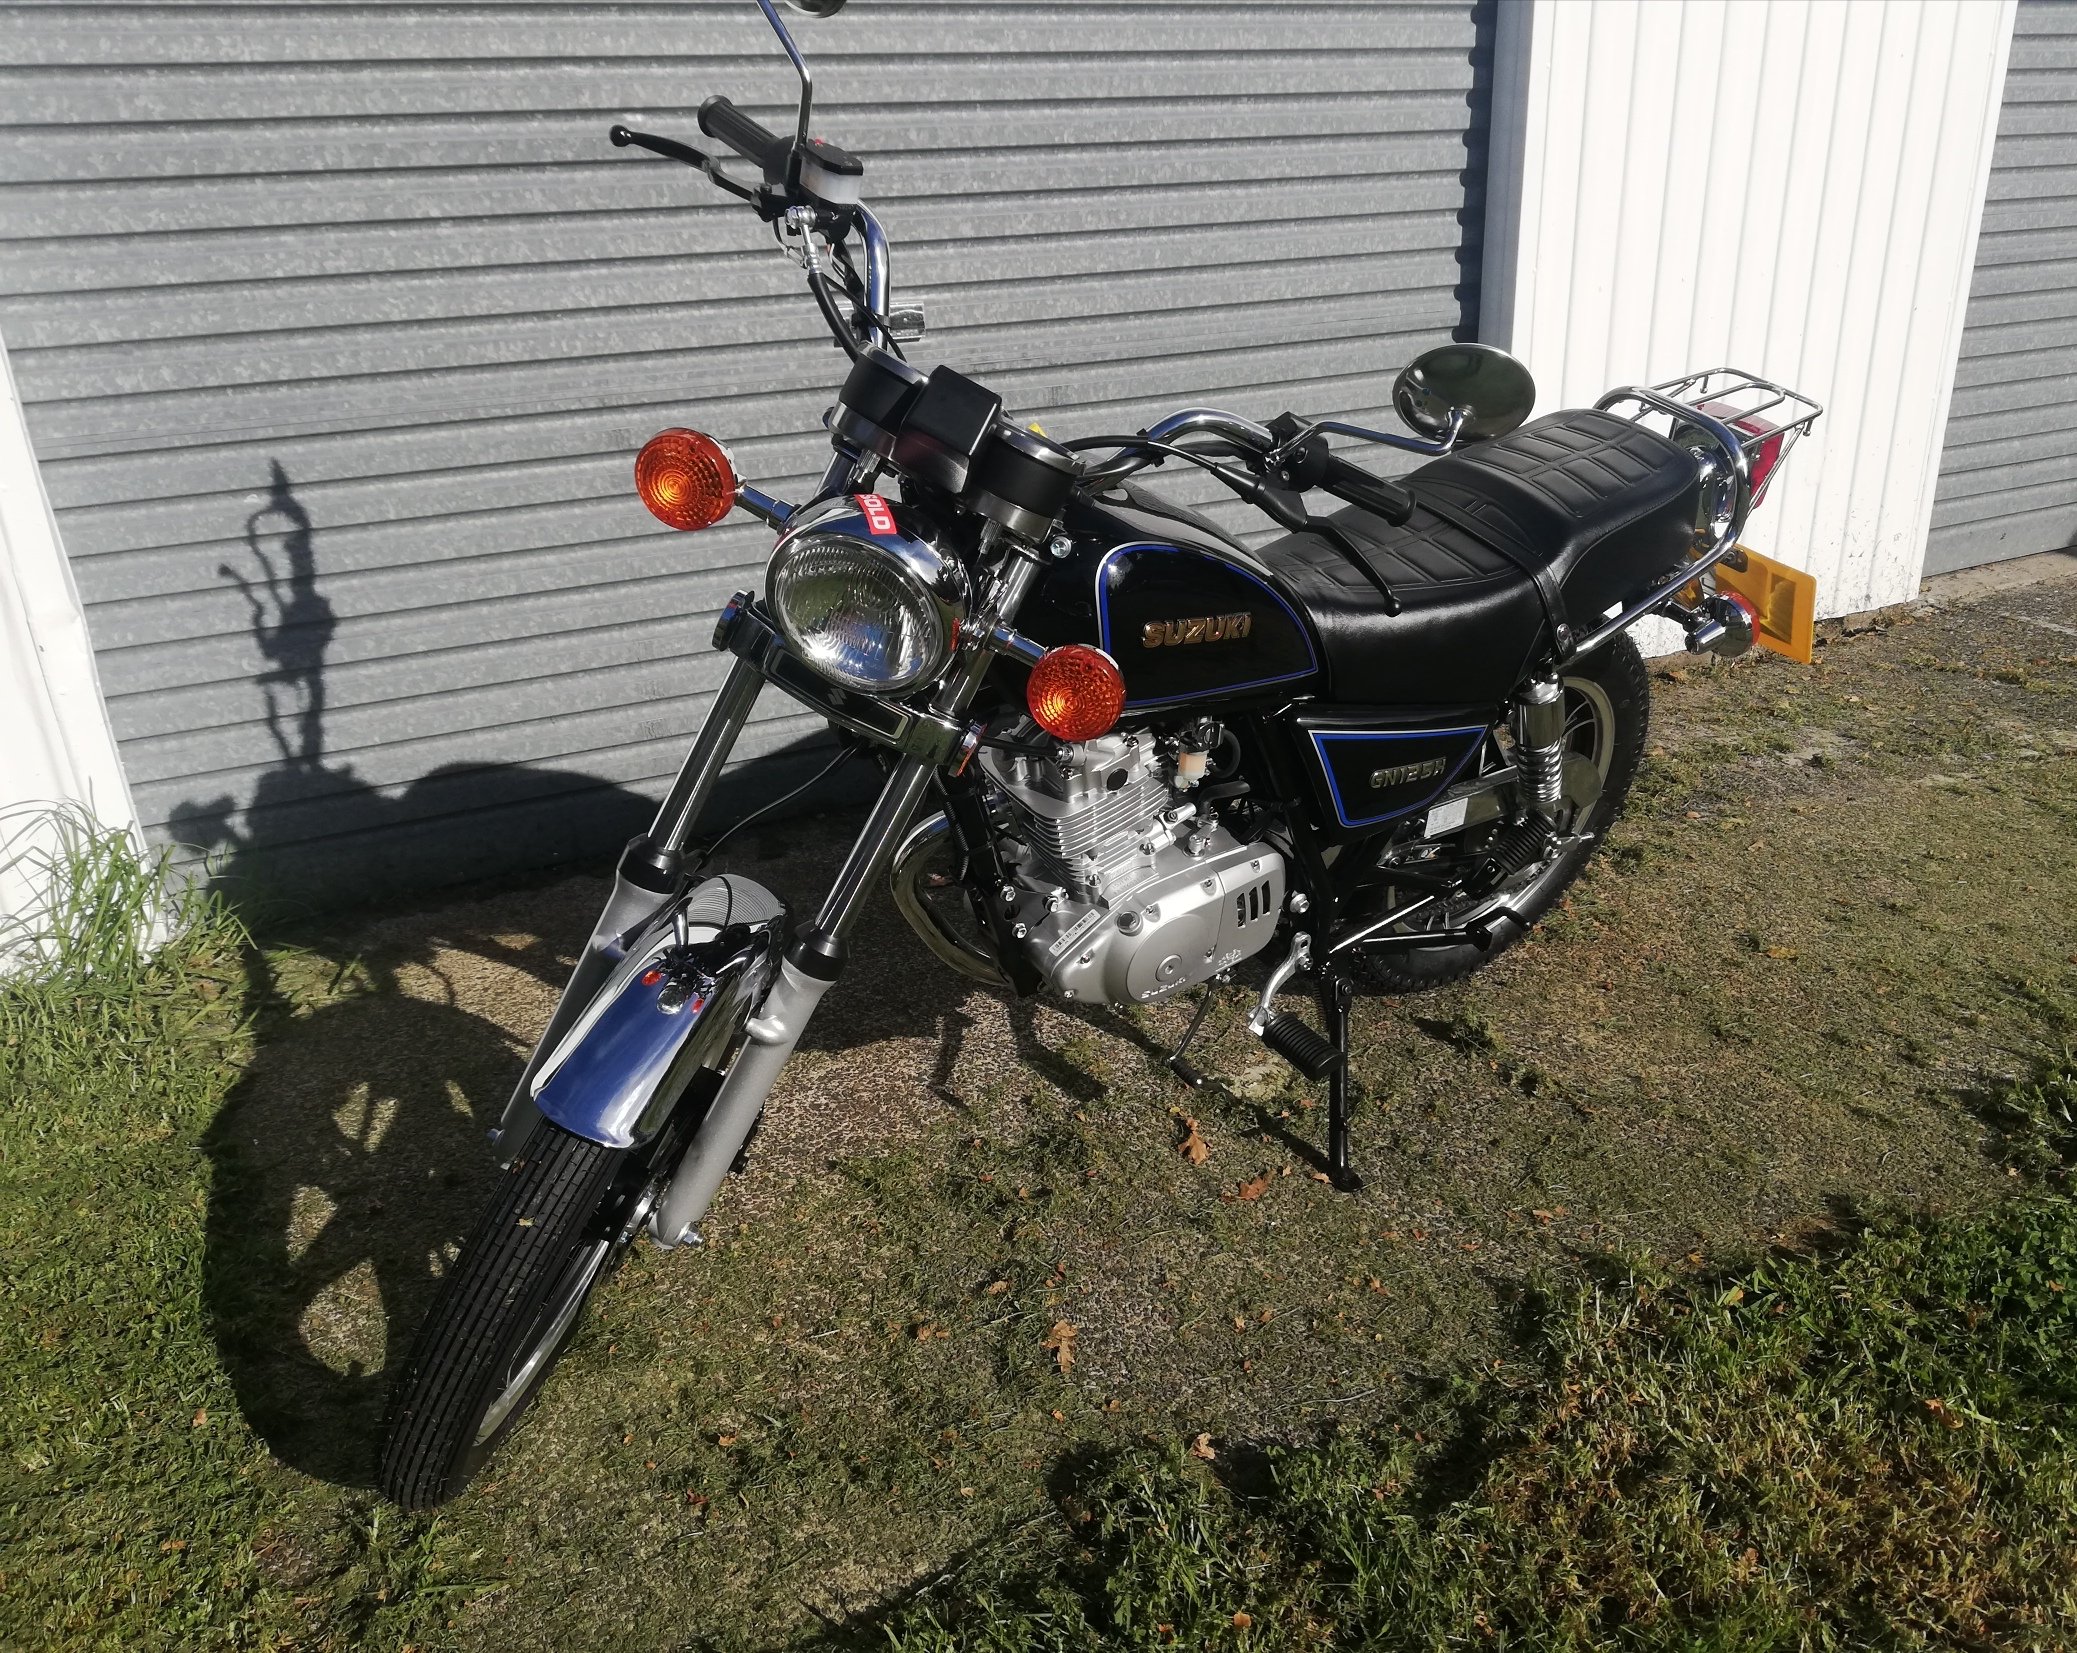
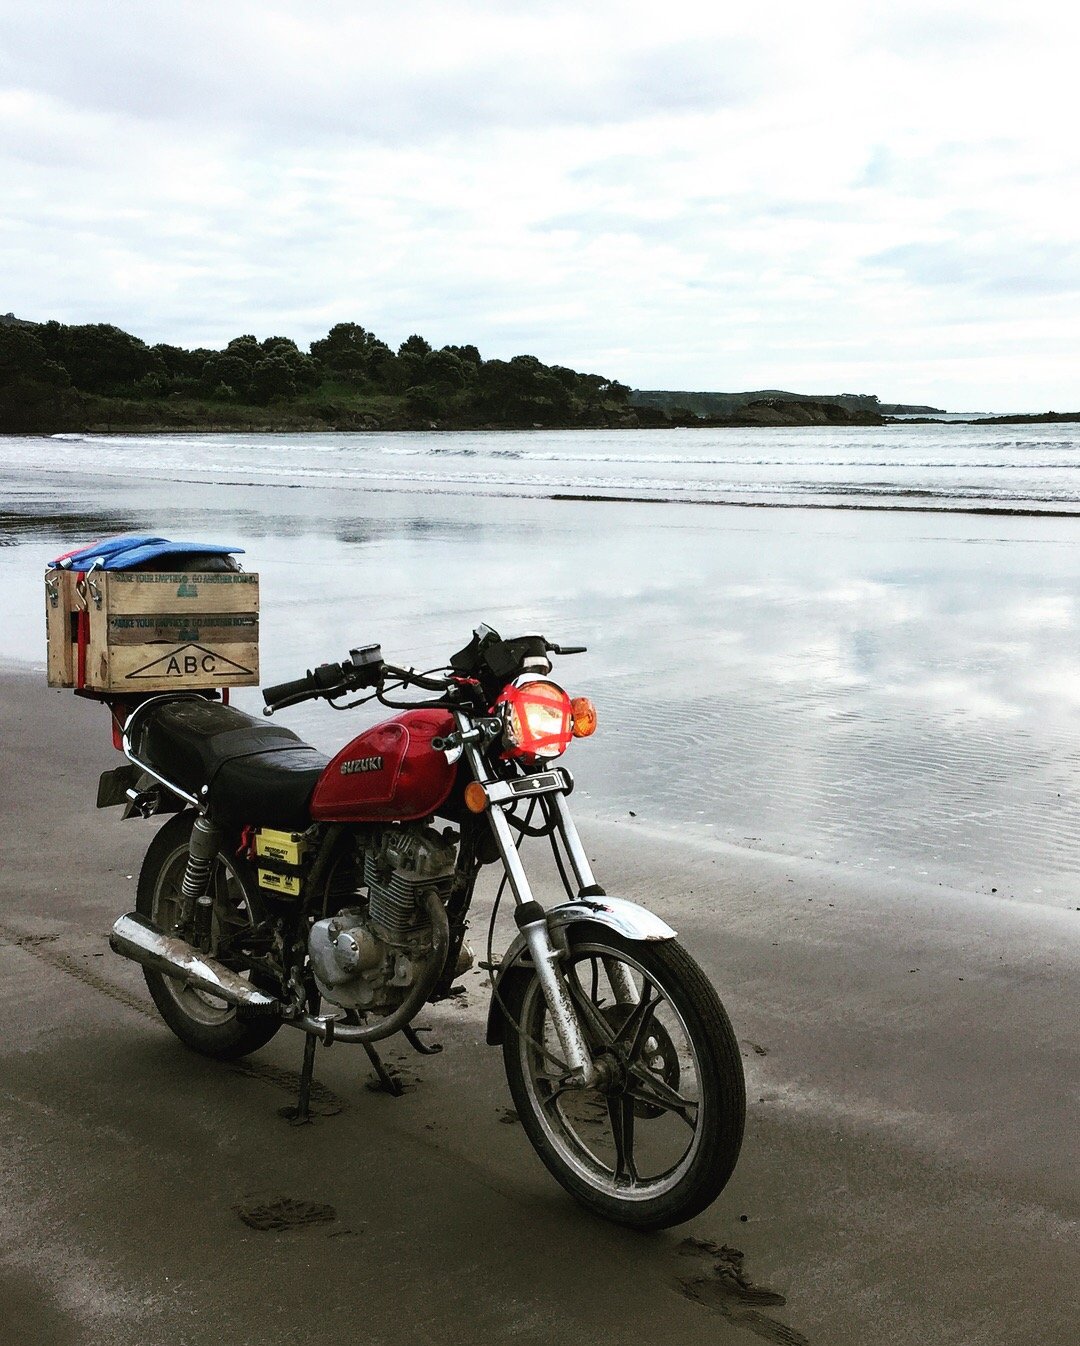
About 10 years ago I swore I would never own another GN250 So in saying that, here's my brand new GN125 Only just noticed there is blue flake through the black. Fancy. Also has a tool box, don't think my 250 had that. Frame welds could have done with some antispatter and some proper cleaning before paint.... Pretty boring Probably the only new vehicle I'll ever have though
 11 points
 -
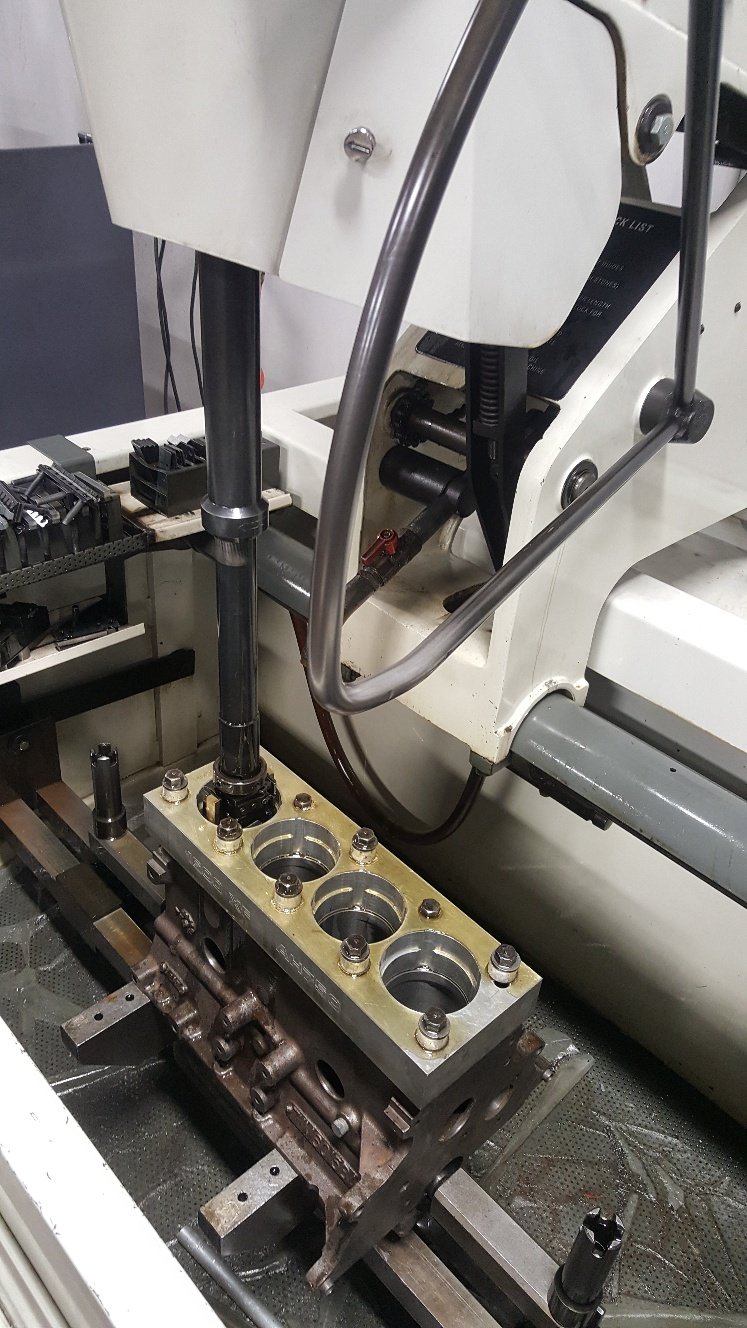
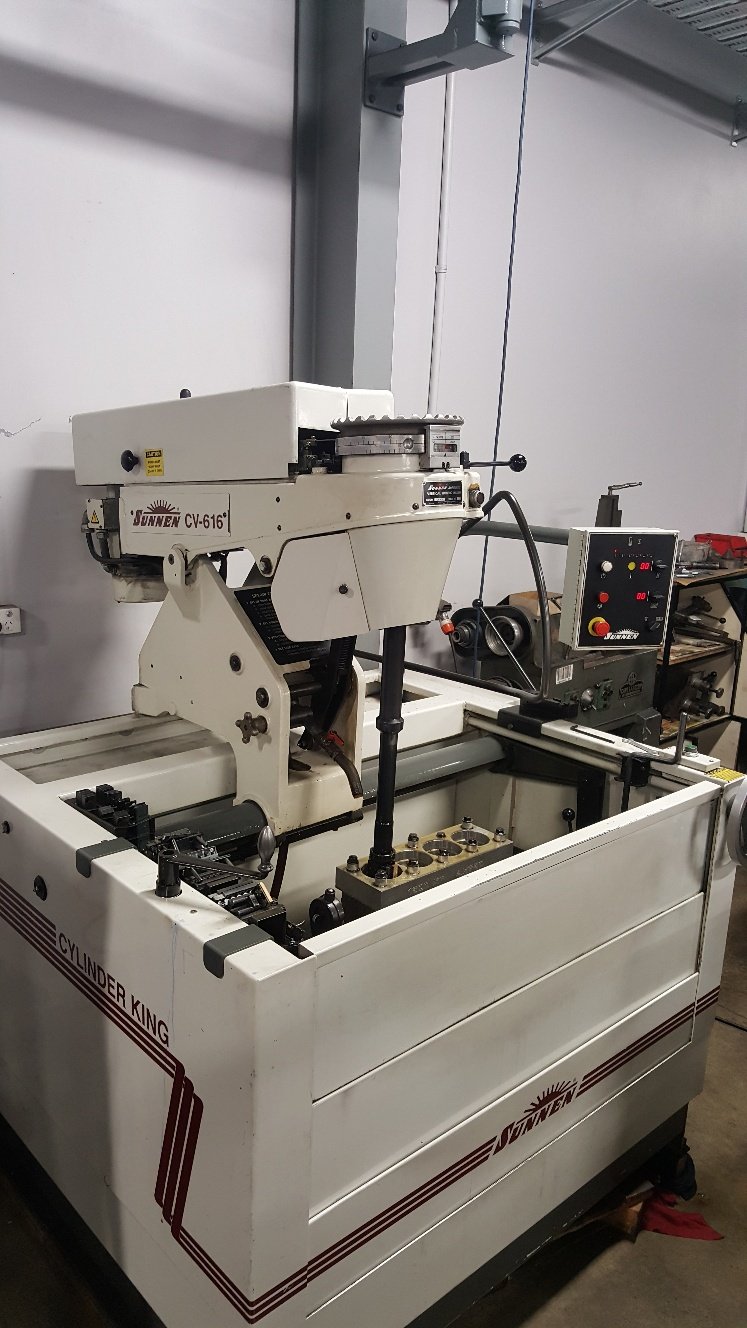
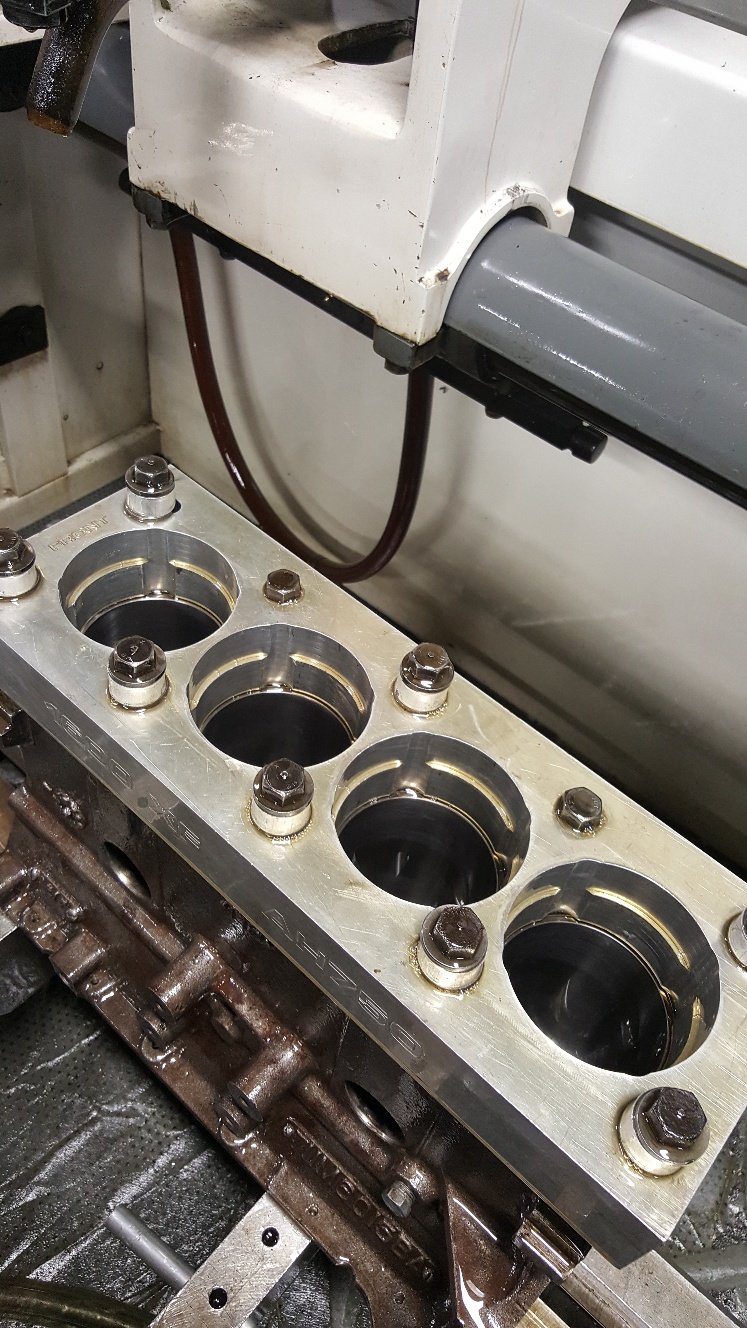
So i fitted the torque plate for the honing process. We only have torque plates for certain engine's. But lucky Ford xflow's are in formula Ford's so the boss saw the need to get one made. The torque plate allows you to simulate the tension of the cylinder being fitted to the block while honing. Some blocks move considerably from the head bolts being torqued up. This can distort the bore, sometimes up to 2 thou on various blocks. So it's like honing them in there assembled running state. I have heard stories of shops honing with hot coolant running through the water jackets to simulate total running conditions. All in the name of perfect ring seal you need a perfectly round and straight cylinder. We leave 4 thou of material to hone out as this gives us a good base to start achieving good rk rvk and there's another value aswell but I can't think of it right now. But we start off honing with a course stone which gives us a deep groves and removes material quickly. Once we've removed 3 thou we change stones to a smoother grit this removes the tops from the course stones while taking more material out. I'm also happy say I have removed all the bore wear marks after removing 2 thou of material. Now we move to a finer stone again same thing applies. Each different grade of stone removes material in different ways. Some stones will take more out of the bottom middle or top of the bore, so you have to measure the bore to make sure you're keeping it straight. The stones also react to load. Theres a round handle onto of the machine that applies load to the stones in the bore. If you wind to much load up it normally takes more material from the middle of the bore as there's no real strength there. Extra load can also create heat which will give you a false reading of size from the material expanding. Once we are at finish size we have what we call plateau stones. These are 800grit they don't really take much material out but smooth the tops off from the previous set of stones. Then we move to our cork stones. Which look nothing like cork. These are really good a removing left over honing material out of the cross hatch. We only give the bore a couple of strokes with these. Once a year we clean the machine out. It normally has about two 20 liter buckets fill of cast iron sludge sitting in the bottom of it. This machine runs 200 liters of honing fluid. Which is great as one of the jobs of the fluid is to keep the block cool as well as wash the honed material away from the honing head while honing. A drum of honing fluid isn't cheap at $2500 Then there's all the stones we burn through. So the honing process has one the highest consumables cost in the workshop per year. From start to finish it can take a hour to two hours to hone a block after a rebore. A deglaze or what we call a rering hone is normally about three quaters to a hour.
10 points
-
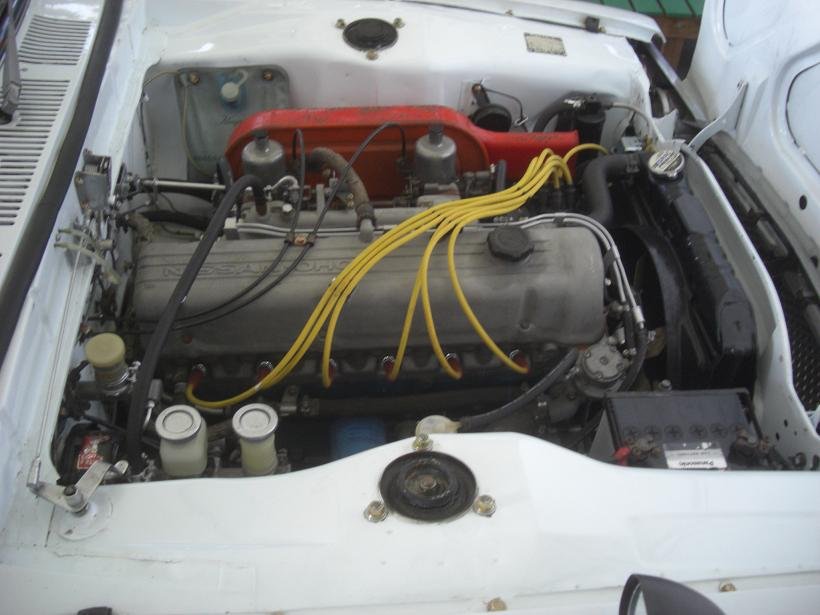
Konnichiwa. It's been a while. I've been using it quite a bit when the sun shines, but was aware that the worn water pump & tired brakes weren't going to mend themselves anytime soon. Thanks to wise words from @kyteler @sheepers @Spencer I've bought a pile of stuff off that internet... Calipers look close enough though I'll probably need too make up some pipes. I saw on 'Rubbersoul dot pricey' that they were offering Datto 510 wheel cylinders as an option for the hako so I got a pair off rockauto and they seem the same. I got the 510 shoes as well, they look to be the same from what I could gather but we'll see. Bit of a gamble but I can always sell them on. So once the weather chirps up a bit I'll get it on stands and crack on. Need to adjust the valves, it's a little rattly but nothing serious. Gonna do something with the cam cover while I'm in there, either polish it up or black crackle finish. Any thoughts gladly received, except a Japanese rising sun Kyokujitsu-ki thingy, thanks. Other little worry is the diff. Bit loose and clonky. Gonna have a good look at it see what's what. May well investigate the Subaru R180 modification, or see if I can get an LSD for mine. That's it for now, hopefully some progress soon.
10 points
-
It will sort of have the same style tray, but not the roll bars as this will make it way harder to get stuff actually on to the deck. Mostly cos I have a fucking great crane now;8 points
-
Completed the 57sc Sump Model. Moving onto the pattern making designs now. These should be a lot easier than the crankcase! Casting version with machine allowance and shrinkage compensation First cut of roughly what the sand cores would look like.8 points
-
fuck me, so they've done the compliance check all ready. failed on park brake warning light not working ( i stupidly forgot to plug it in) and rear brake imbalance. all the rear brakes are new so i should be able to fuck around with adjusters and sort it out. that's it. i am fucking stoked. i really needed some good news and this will do nicely. the other thing that happened is that Alex who runs Western compliance tried to buy the car off me, which is a complement i suppose. so ill go pick it up Wednesday night and take it from there.7 points
-
It lived on. #inspo #noregnowofnolicensenoworries
5 points
-
Hey guys, sorry I'm a bit late on the uptake on this one here! Shakotom has been talking to me about this ride and has gotten me fizzing for it, so will be there for sure if not too late? Also are there any spare accommodation spots left?5 points
-
ok, try this (i havent compiled it, so might have the odd error, but should give you an idea/starting point) #define TEMP_BAND 2 #define TEMP_MINOR 24 #define TEMP_GENERAL 28 #define TEMP_DIRE 32 #define INCR_MINOR (TEMP_MINOR + TEMP_BAND) #define INCR_GENERAL (TEMP_GENERAL + TEMP_BAND) #define INCR_DIRE (TEMP_DIRE + TEMP_BAND) #define DECR_IDLE (TEMP_MINOR - TEMP_BAND) #define DECR_MINOR (TEMP_GENERAL - TEMP_BAND) #define DECR_GENERAL (TEMP_DIRE - TEMP_BAND) enum warningStates_t {IDLE = 0, WARN_MINOR, WARN_GENERAL, WARN_DIRE}; warningStates_t curState, oldState; void loop() { thermoSensorNewVal = thermoSensor.readCelsius(); if (thermoSensorNewVal != thermoSensorOldVal) { Serial.print(" C = "); Serial.print(thermoSensorNewVal); thermoSensorOldVal = thermoSensorNewVal; } switch (curState) { default: curState = IDLE; /* should never happen, but good practice to have a default */ case IDLE: if (thermoSensorNewVal >= INCR_MINOR) curState = WARN_MINOR; break; case WARN_MINOR: if (thermoSensorNewVal <= DECR_IDLE) curState = IDLE; if (thermoSensorNewVal >= INCR_GENERAL) curState = WARN_GENERAL; break; case WARN_GENERAL: if (thermoSensorNewVal <= DECR_MINOR) curState = WARN_MINOR; if (thermoSensorNewVal >= INCR_DIRE) curState = WARN_DIRE; break; case WARN_DIRE: if (thermoSensorNewVal <= DECR_GENERAL) curState = WARN_GENERAL; break; } if (curState > oldState) { // Increased temp warnings switch (curState) { case WARN_MINOR: tempWarningMinor(); break; case WARN_GENERAL: tempWarningGeneral(); break; case WARN_DIRE: tempWarningDire(); break; default: break; /* should never happen, but good practice to have a default */ } } if (curState < oldState) { // Decreased temp warnings switch (curState) { case IDLE: /* Could do an 'all clear' message here */ break; case WARN_MINOR: tempWarningMinor(); break; case WARN_GENERAL: tempWarningGeneral(); break; default: break; /* should never happen, but good practice to have a default */ } } oldState = curState; delay(1000); } // end of loop So made a few changes for you. 1) the value being output by your serial debugger is the value actually used for the comparing (before you would re-read it) 2) it will only print out the temperature if it has changed 3) state machine based, so it will only fire each warning once 4) added some defines so you can easily change the values all in one place. How it works is when it's in a state (like IDLE) it will only look for one thing... and that is "Is it hot enough to fire a Minor warning?" and if it is, it sets the state to WARN_MINOR and will fire off that warning. Now the state is WARN_MINOR and now it does 2 things. "Is it cold enough to go back to Idle?" and "Is it hot enough to go to WARN_GENERAL?" If so, it changes the states accordingly. The warnings are sent using the oldState and the curState. So if they are ever different, it will fire a warning. And it checks to see if the state is going up or down, so you can do different warnings for going up and going down if you like5 points
-
Cheers guys! Will get my A into G and find some accom eh. Have purchased myself Shakotoms F50 to build something a little more gravel appropriate too - best be pulling my finger out!!4 points
-
Also I don't want to4 points
-
What happened was....... I hadn't put quite enough rtv on one rear corner so it leaked again. Shame really as it was spot on everywhere else. Pulled it off (fnaar) and re-did it with a fresh gasket, a smear of rtv and a very small ratchet. It's fine now. Put a new stat in as it wasn't getting up to temp, but apart from that it's been ace. Decided I'm definitely going to fancy it up with a bit of paint, it's looked like a Mad Max extra ever since I've owned it. Found the Rockauto do a bumper for 9 quid and a valance for 5. What a bargain. Postage ? £ 170.00 That's one hundred and seventy pounds. Flipping Nora. Going to start prepping and priming once it stops raining. /No pics for fred soz4 points
-
This was on TM a while ago; but i already had drawn some inspiration from the internets;4 points
-
Don't ride it near @RUNAMUCK they are attracted to him. Atleast of you crash it won't loose any value3 points
-
Also funnily enough the dude with the motor texted me back tonight to say the engine should be out this weekend, result.3 points
-
I know, it's fucking mint.2 points
-
that crane fits the width perfectly. A+2 points
-
Sad I sold my one piece race leathers. Would be ideal for 125 commuting2 points
-
Pull it apart to 'improve' it...2 points
-
That's why you go 3.12 points
-
2 points
-
Kakimoto valve cover, if you can find one2 points
-
id go crinkle black or red and file back the raised lettering2 points
-
Small update. Have rebuilt the front Callipers, new pistons and seals. And all painted up! Also pulled the PS pump apart ready to take to work to clean up then I’ll re-assemble and modify the pump to reduce the amount of assistance (common modification over in the states as it’s way too light at higher speeds) Again it feels good to be putting parts back together also spoke to a local sand blaster and they reckon a couple of hours should get the underbody all finished up so I’m going to make a couple of frames so I can lower the car onto a trailer and take it to be blasted soon.2 points
-
LS Engine Supplies in Perth. He’s a nice guy and the price was about 3500-4000 cheaper than what I could find here, but I can’t help but think he doesn’t understand his duty/gst requirements. Not really my problem and I’ll hold my judgement and cross my fingers that it all works out ok. I bought 2 engines and boxes from him so he better be a GC lol. L98 with aftermarket camshaft and pushrods etc installed + TR6060 box was $12500. A good chunk of that (maybe 2500) was cam and install which is something I’d normally do myself but atm I have waaay too much on so figured I’d be better off paying for it and just getting an engine I can slap straight into the car.2 points
-
New engine is alive Back on the 47mm throttles for run in as had good tune for them. trying some stuff hence wiring abortion. have wiring for multiple setups on same loom, so can swap between easy must of done something right, 150kw at wheels on the small extractors, most its ever made on same setup is 145kw, usually around 143kw. Note to self put mic further away; RIP mic and all speakers.2 points
-
Holy shit. Front spaghetti. Engine spaghetti. Inside spaghetti. Fusebox spaghetti. Currently (ha!) I have; Headlights high and low Indicators Hazards Park lights Brake lights Wipers and washers Heater blower Acc, main and start off the key A glow plug timer I have the glow loom stuff hacked out of the Safari loom. Things going surprisingly well, I have only blown 7 protection fuses during engagements.2 points
-
"Test Drive" turned into blasting around in it for large parts of the afternoon, reckon I've done about 45 miles or so. Brakes are fine and it goes pretty hard (for what it is). Handles really nice and is no way stock in the springs & shocks department. Tweaked the timing a bit and it's just rattling a little under heavy load, I'll try some octane booster tomorrow that will sort it out hopefully. It was blowing oil smoke for the first 5 miles but a couple of hot & cold cycles seems to have freed the rings up a treat. Haven't revved it beyond 4 grand yet but it feels pretty strong. Over all I'm pretty bloody chuffed with it, it's a really nice car. Bit of a clonk in the drivetrain but it only sounds like a UJ. Water pump bearing's a bit wobbly and it needs a new rad cap but it held temperature & oil pressure despite some enthusiastic driving. Vids for your entertainment... What ? Skid you say ? So, it's all good. Gonna do the wheels bronze and paint the rear panel black between the lights but apart from that, roll on summer.... * Also, side-sharn.... About 5 years ago I was chatting to the in-laws neighbour about cars. Started telling him about the Hako and he said " Fucking Japanese shit, I'm not interested in those useless bits of crap". We popped round to Carols folks earlier and the neighbour drove by as we were leaving. He fucking loved the Skyline, was all over it and asked if I wanted to sell it. I ignored him. Silly bugger.2 points
-
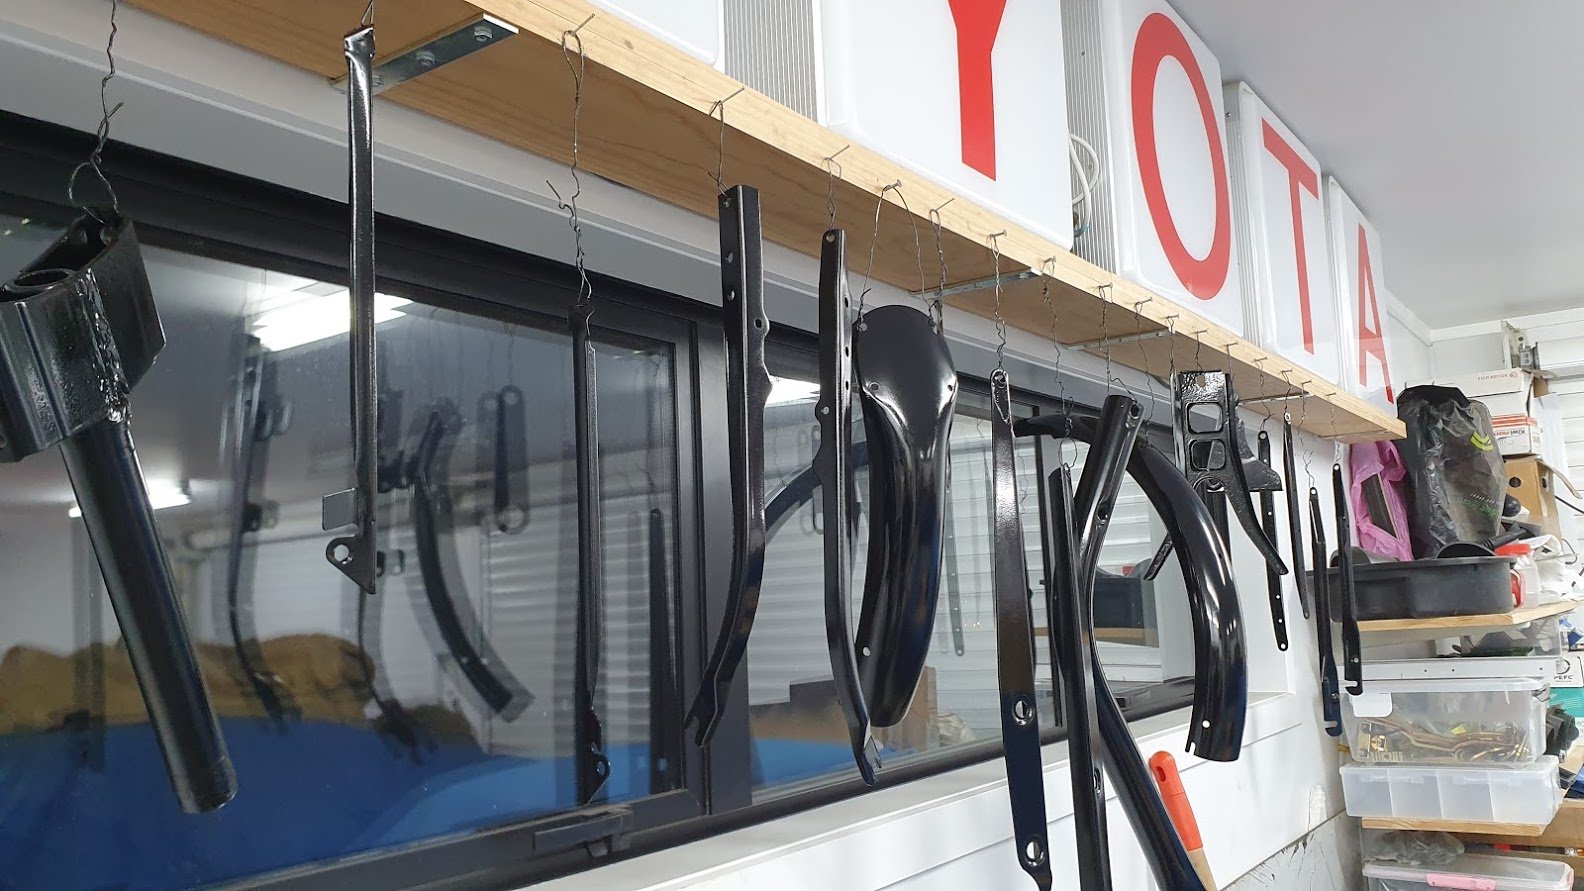
Hung the painting out to dry... glossy goodness. and a couple of bits needed a bit more fettling too
1 point
-
https://www.ebay.com/itm/Suzuki-GN-125-GN-250-NOS-Nitrous-Oxide-Kit-Boost-Bottle/332670336146?hash=item4d74b27c92:g:Jd4AAOxyn9BRZQ5p1 point
-
Wats an oil change Yeah nah I swapped about 3 engines into my 250. I'm Gona change the oil every month Was thinking of bombing it with plastidip to protect paint/chrome But I realised I genuinely don't care enough, IL just water blast it down occasionally1 point
-
mrs is gona learn on it might put some highway crash bars on it/trainer wheels1 point
-
Up the mighty GN1 point
-
Rocker cover - cleaned grey (maybe steam/vapour cleaned?) with the raised lines in black?1 point
-
i cant help too much, but i threw that fucking huawei router into the dump, lobbed it for distance even. i dunno if its a QC thing, but mine was the worst electrical thing ive ever delt with, replaced it with a reasonably flash TP Link item and haven't had an issue since. except with our vodafone tv which wasnt router related but they couldnt remote into it and snoop around, the overseas help desk guy got upset when i said i threw the router in the dump and asked if i could go retrieve it.... as i think hand was alluding to, hopefully your issues are fixed with a better quality router.1 point
-
Break up your composite deadband test into two parts. If (temp < old - deadband) { do stuff; } else { if (temp > old + deadband) { do other stuff; } }1 point
-
The internet has informed me you have not gone big enough1 point
-
Been super busy at work etc lately so it’s hard to finish it all off. Will keep you all posted on the progress. Winter cruising is just around the corner.1 point
-
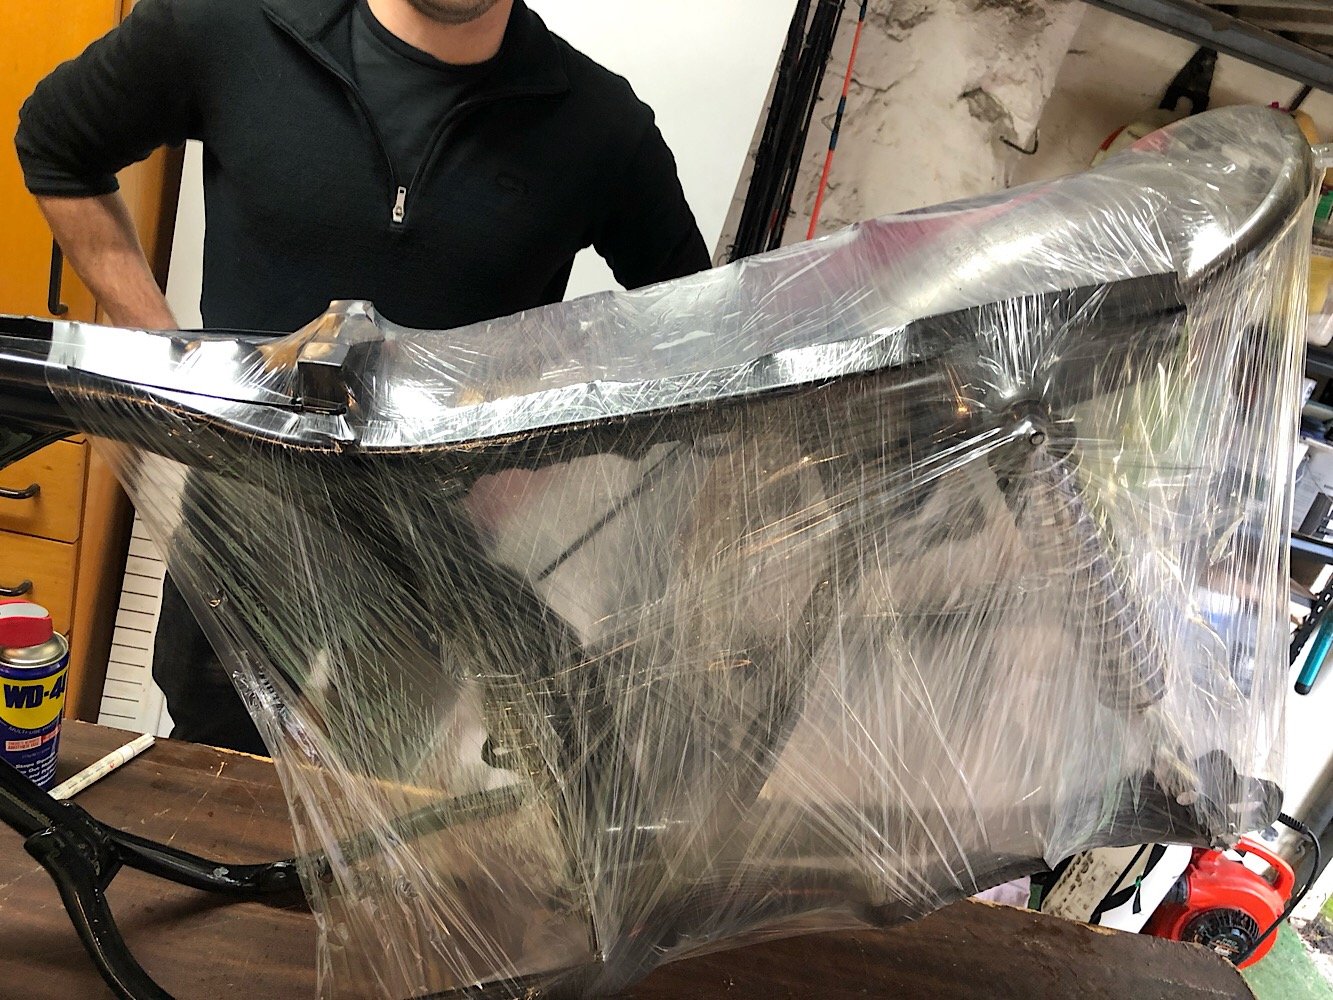
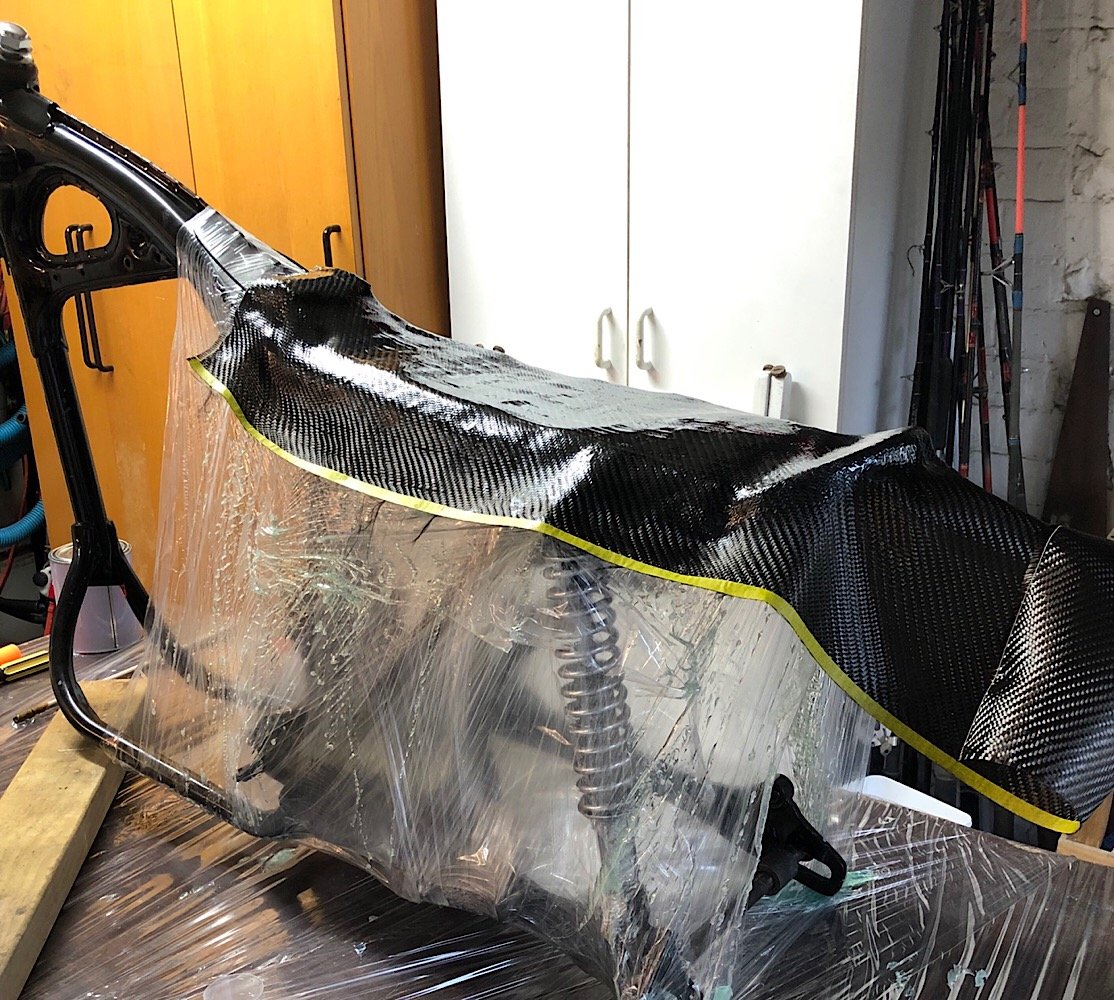
Carried on fitting the rear hoop, chucked on the rear wheel and measured clearances as the new shocks are 3cm shorter than factory. The rear of the hoop now sits just over an inch past the rear wheel centre point. IMO anything shorter and the bike looks stumpy. Once that was tack welded in we got started with the seat. Decided to create a mould out of pallet wrap. Layed down Polyester resin and rolled carbon fibre into the resin to set. Dream result is to have a nice carbon fibre look under the seat. We used white lithium grease as a release agent which may have left white streaks through the resin. So it could look shit house but we’ll see after it hardens off.
1 point
-
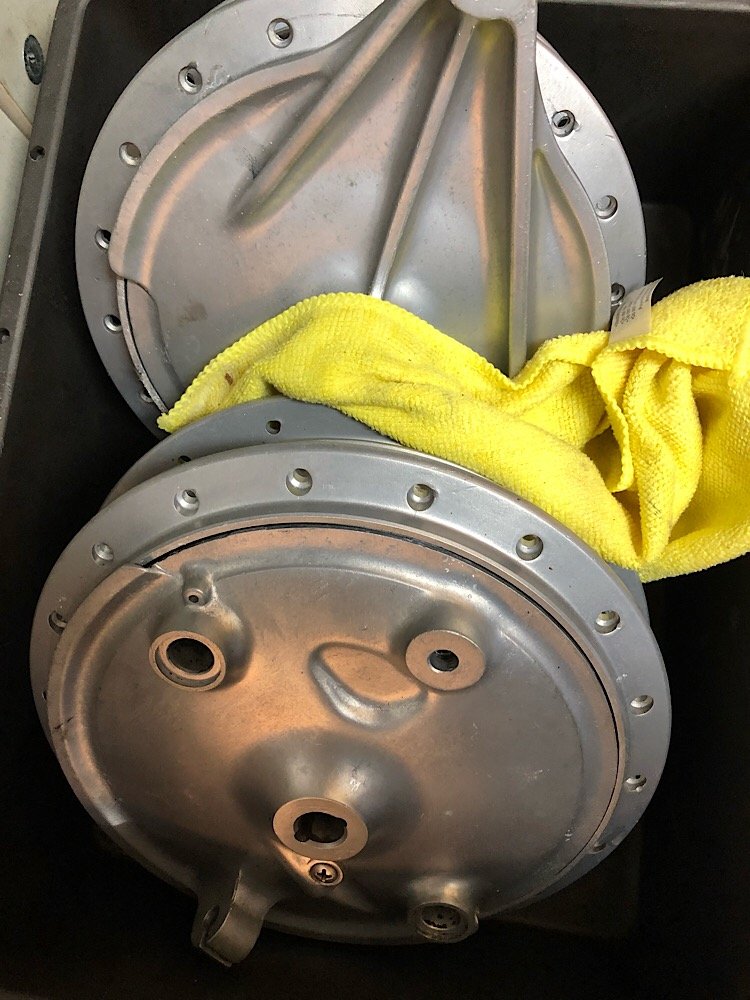
I need to flip this thing on it's lid, so I can finish welding up the frame. I got it running, to heat up the oil pre draining, it was running like a hat full of vagina's, but It's probably only run like 5 times in the last 18 years, so that's understandable. When I drained the oil it seemed to be mostly petrol, so I guess a float is stuck. Whipped the carbs off for a clean, hopefully that will help it run better. Regards, VG.1 point
-
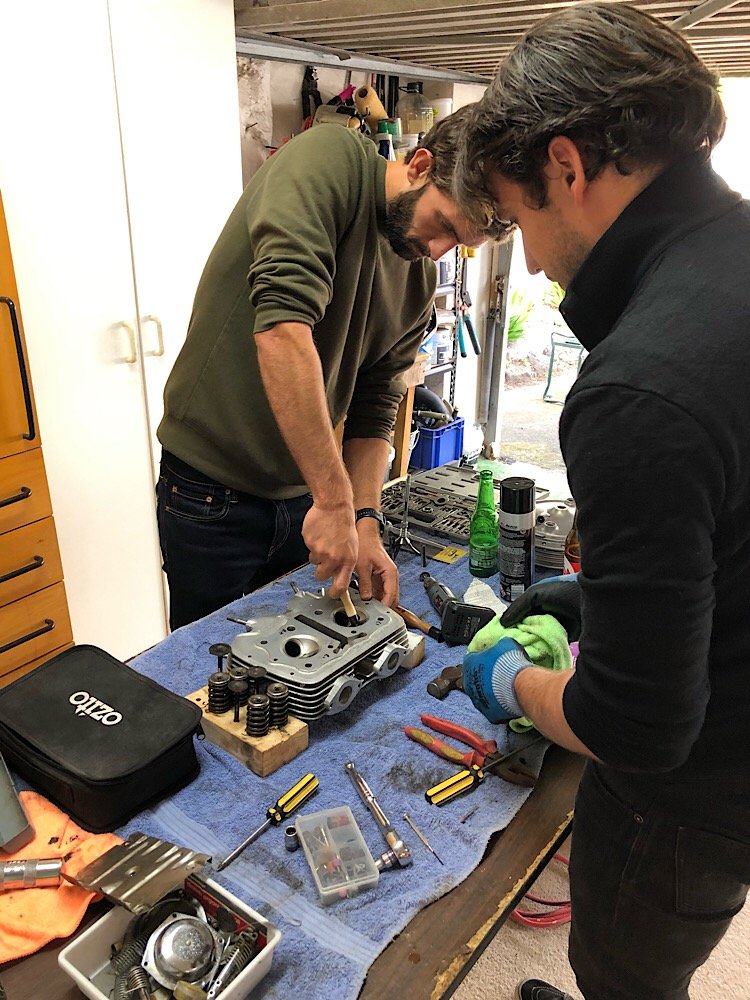
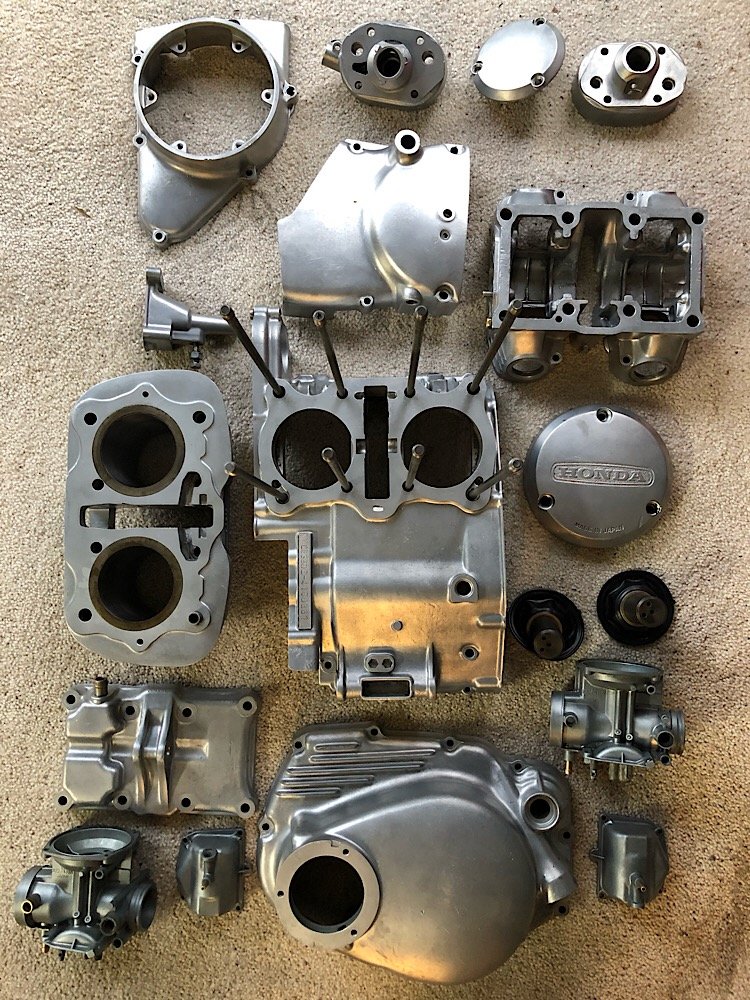
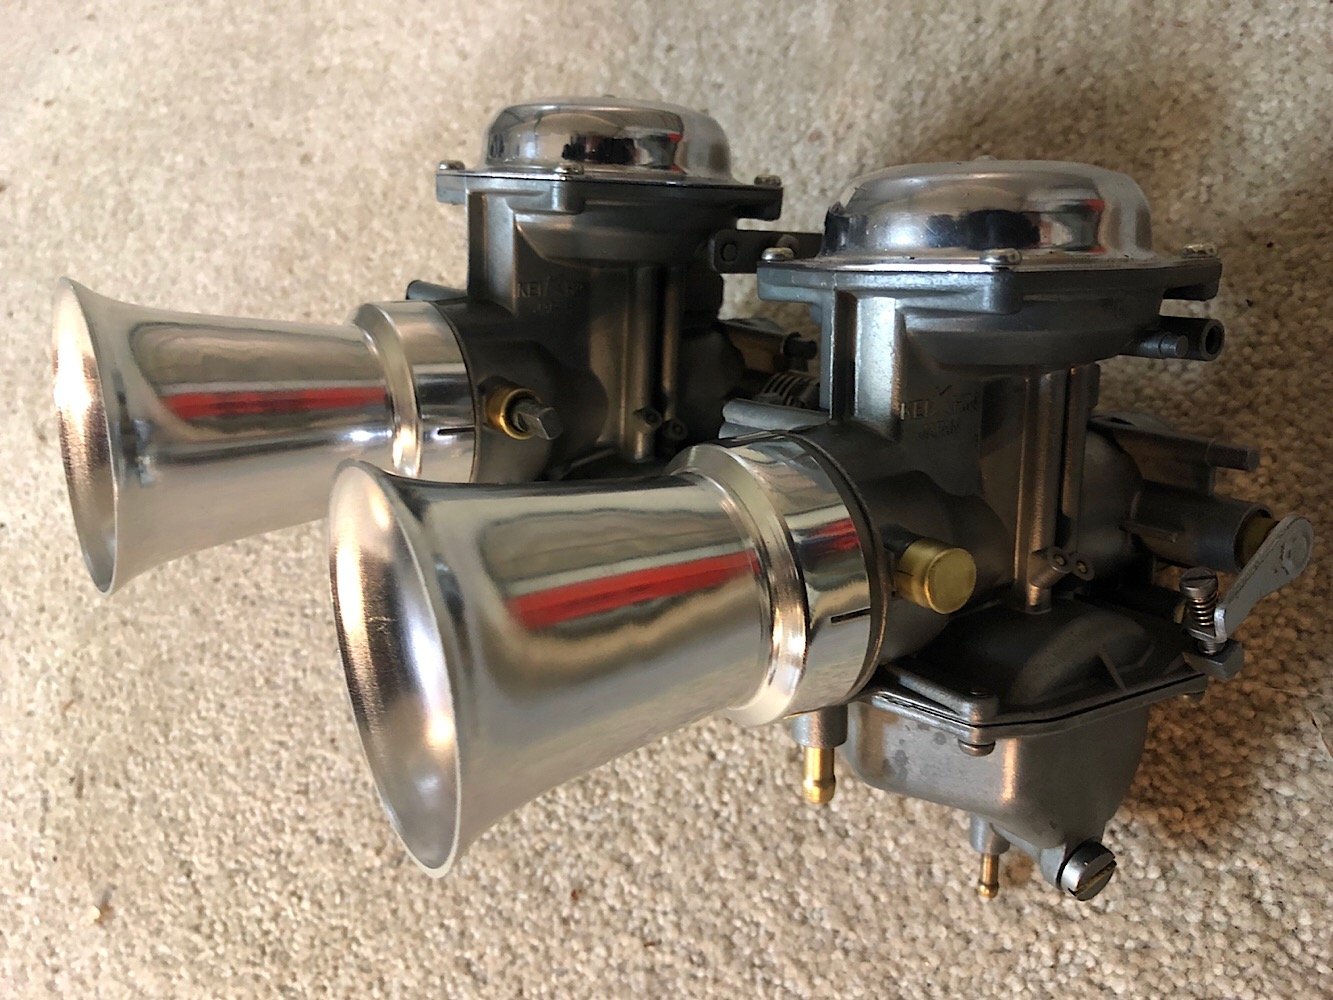
Work continues.... Got the motor back and it’s looking mint! Thanks @Mr Vapour!! Chopped the rear end to fit the rear hoop, just need to smooth off round where the steel pressed frame meets the tube steel. An order from 4 into 1 arrived which meant we could crack on with the carbs. Wicked rebuild kit which literally had everything, even included larger jets for the trumpets. Also made a start on the motor, had the bros round help lap the valves and reassemble the head. The lower casing had a oil pan fitted in the bottom which weirdly had two screws and three rivets holding it in. Had to drill out the rivets to remove it and clean the sump properly. Then drilled the holes and tapped a thread in each to add proper screws in.
1 point
-
Sunday I decided that I was sick of taking things apart so I decided to do a smaller job that I could finish up in the same day. I got my VJ Valiant disc brake conversion parts out of the shed. Broke it all down until I was left with the spindle, backing plate and hub. Made a makeshift petro-bath (using a petrol/diesel mix that we drained from a customers car) that plus a wire brush and all the grime was gone. Degreased everything and got it all etch primed. (Another great use for the hoist) Got it all painted black, fitted the new rotors (which have a black protective paint on them) to the hubs. Installed new wheel bearings and assembled everything to the spindle (ball joints are just sitting there temp for the picture) New piston and seal kits have been ordered for the Callipers, as has a new disc brake master cylinder (from Rockauto) Also ordered these. 4 1/4 star rating over 27 reviews so figured they were worth the punt. Plus at that price if I have to modify them then it’s not the end of the world. Summit wanted over $300usd to ship to New Zealand, so I had them free shipped to the guy I bought the car from (L.A Wellington Shipping on trademe) who will put them in a container and ship them over for less. Still haven’t been to get the explorer diff from Zebra yet. Hopefully can make it in the next couple of weekends (if it’s even still there haha)1 point
-
Sunday night update time. For a start it continues to look fucking banging. I mounted some trad looking but actually LED tail lights. I added a mount spot for a Ute crane, pretty sure I have found one cheap. Then I sucked in my gut and pretended I wasn't scared and started laying out the loom. It took all weekend to get to this stage lol. Mostly it was separating things out to where they need to head to and figuring out what wires did what for the steering wheel controls. I also broke the heater blower and wiper stuff out of the Dyna loom so I can feed them from a DC DC converter. @moparmuppet kindly dropped a convertor off to me and had a perv the other day, although it might not be chunky enough, it is rated at 8a continuous. I also pulled a whole lot of important looking shit to do with glow plugs and such out of the Safari loom. Interestingly it doesn't look like the new loom has relays to run the main lights, but I have pilfered those from the Safari setup as well. I am feeling surprisingly comfortable with all this which I was not expecting. Maybe tomorrow I will apply power to it and let the smoke out. That will be halarious.1 point
-
small update on this, new engine is still a work in progress. New block has been bored out for the toda pistons, new rings acquired ( was thinking about getting something higher compression but spent too much already) Crank; the crank out of the spare 4agze block was bent?! Was over old junk by this point and brought a new genuine crank thanks @CorollaGT Head had 2 bent exhaust valves, which had no signs of contact on the pistons when pulled the engine apart, unlike the inlet valves. guessing i may have got slightly aggressive on the exhaust cam timing at some stage. Otherwise its fine. Done a little work in the chambers while head is off. Hand finished the transition into exhaust seats. previously was a small lip, knocked that off into small radius. plus knocked off a few other little bits . Assembled with kelford beehive springs and ti retainers, top side is even lighter now due to the smaller diameter of the spring and retainer. engine guy has the last exhaust valve, as needs a little bit of a zing to get clearances correct. Going to ditch the oil cooler for now. First reason being, it probably has bits of rod bearing stuck in it. also suspect it even needs it, plus is more shit to go wrong and it weighs something. so yeh mostly the last too reasons.. have welded a bung in the sump to monitor oil temps. before the sensor was in the sandwich plate for the cooler. tl;dr : found more broken stuff. spent more money. should be running again sometime1 point
-
Spent over an hour reading through that, and was well worth it. If the ambitiousness of yer project is ever getting you down, a read of what that guy is doing should set you right1 point
-
16 in the clip and one in the hole, ktrips about to make some bodies turn cold Now they yelling their hybrid hate, but with climate change, ktrips had to conservate1 point
-
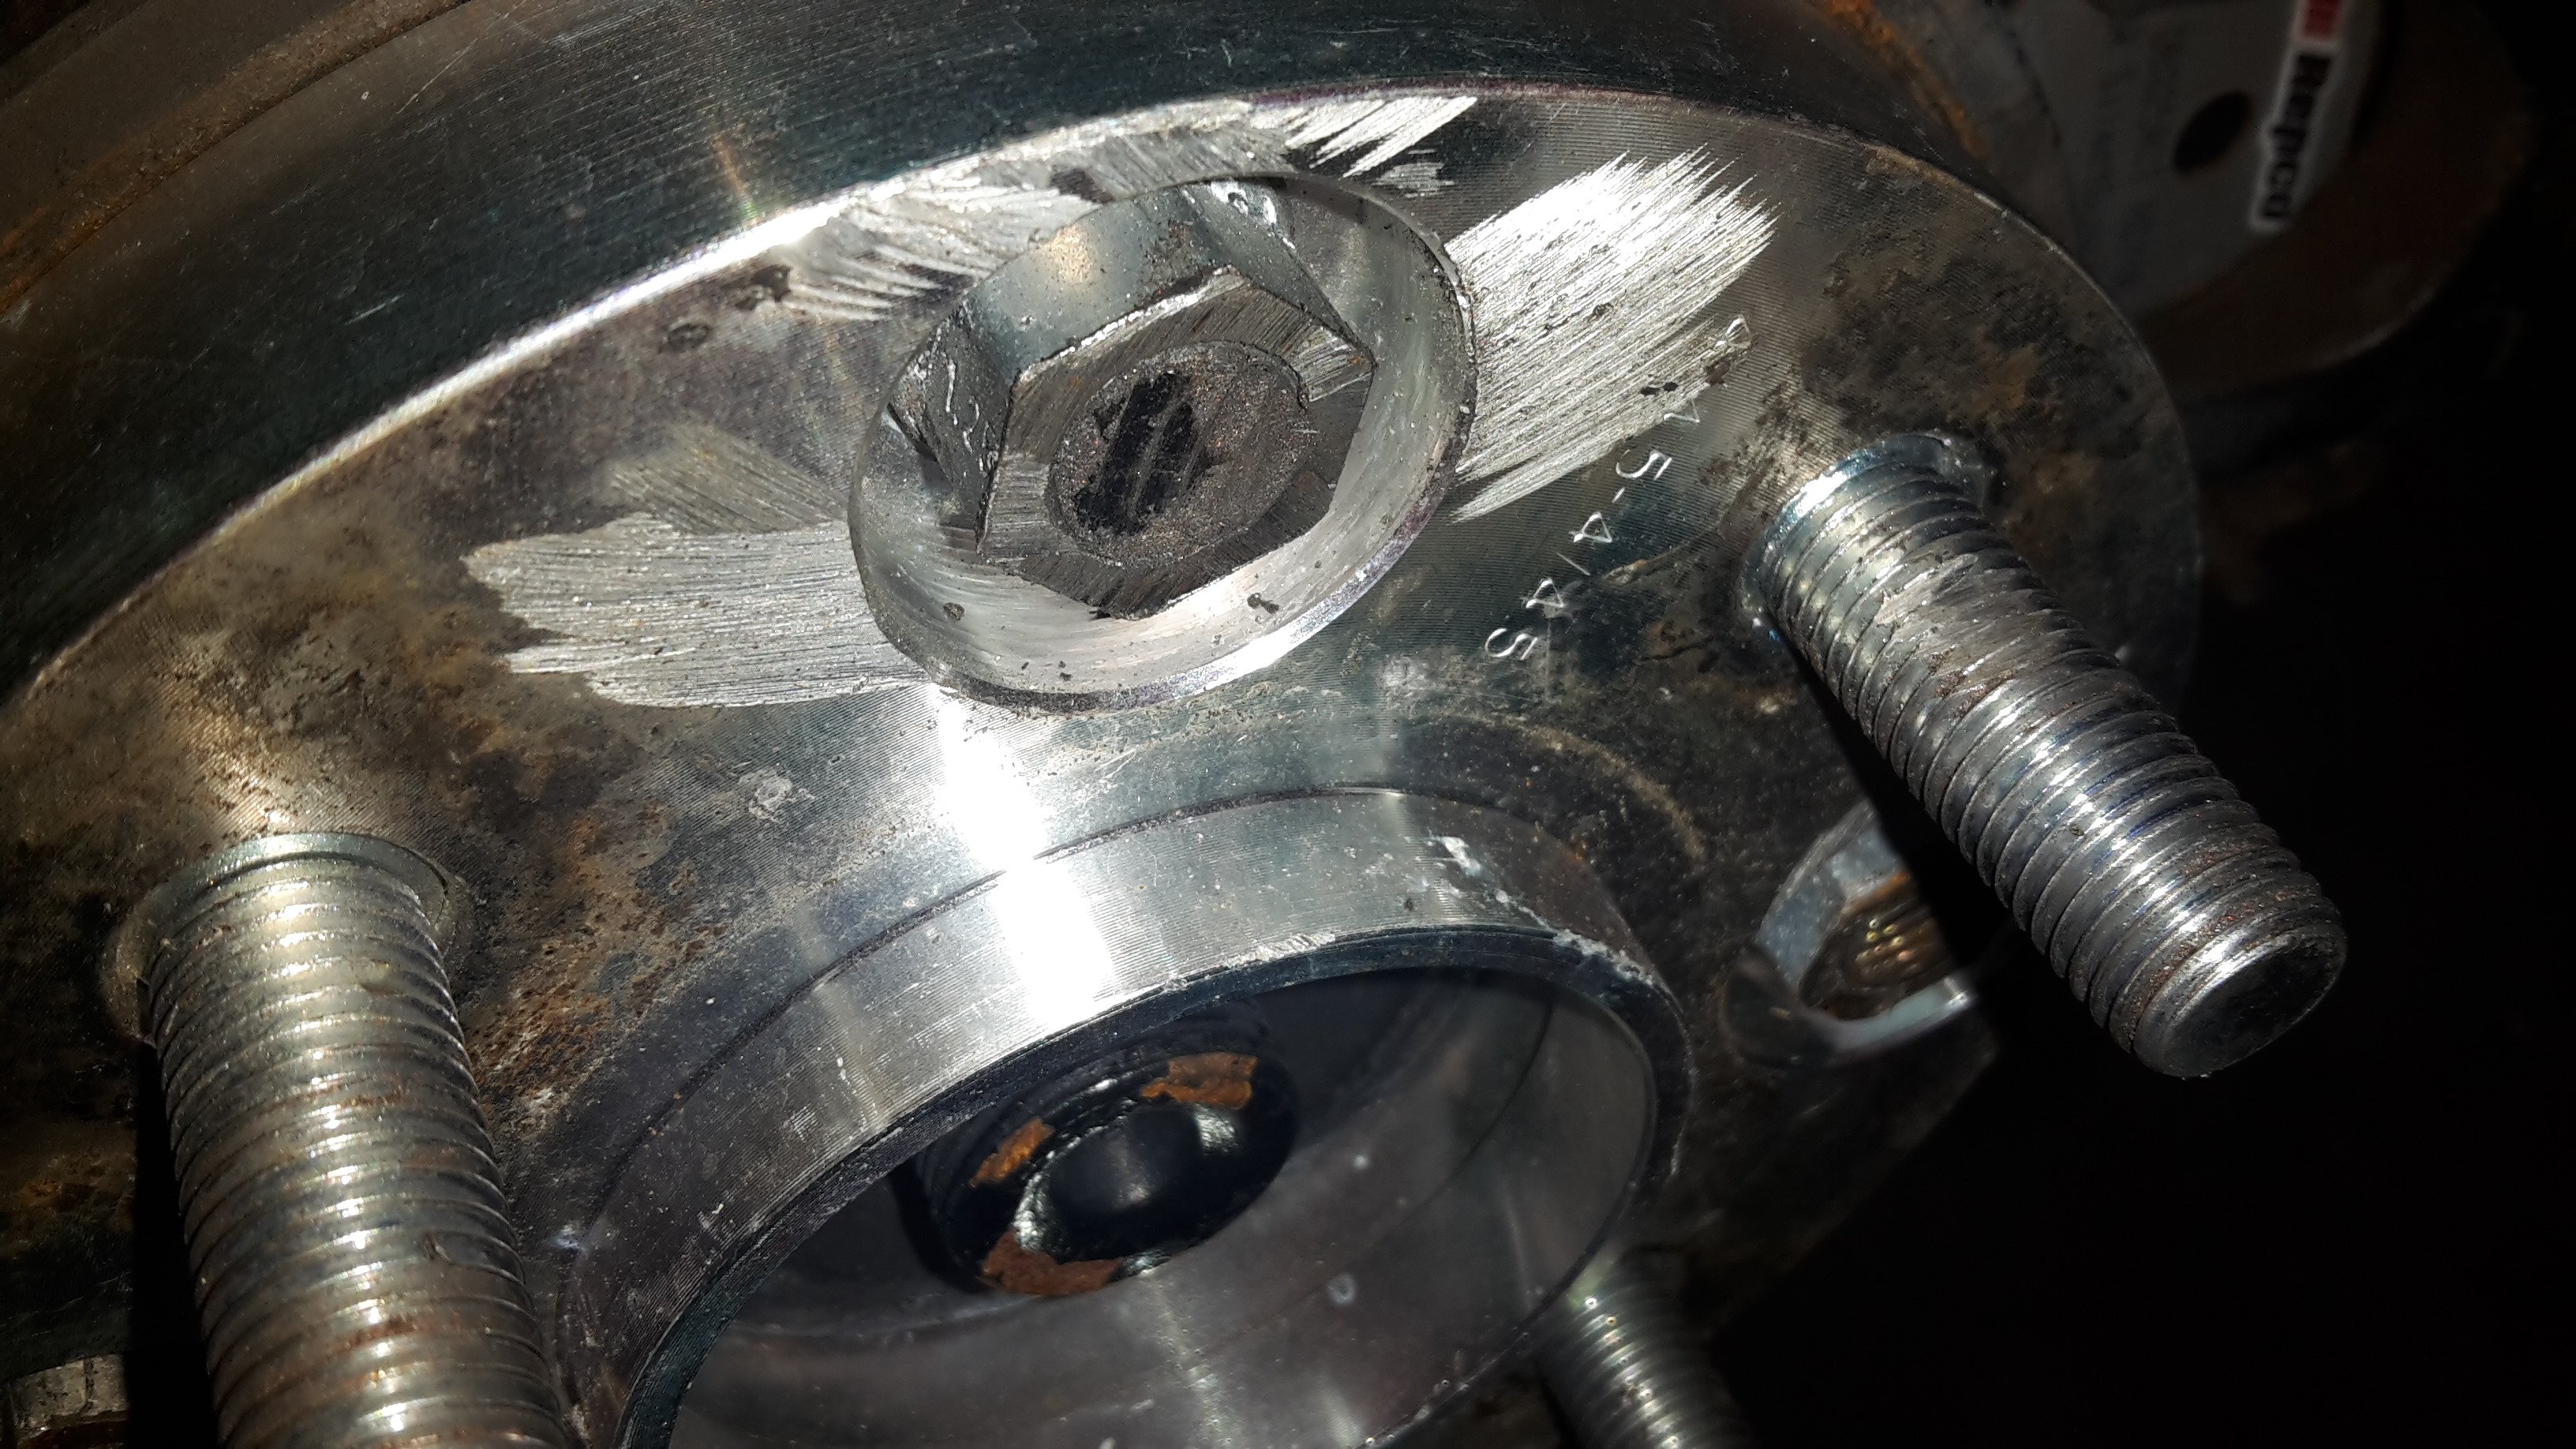
You trimmed the studs wrong there m8 You are meant to do it with the adaptor still on. Make sure you cut into the studs and mangle the face of the adaptor as well. Like this.
1 point
-
So yep, those are bmw 52mm throttles. I wouldn't suggest running out and fitting them to your average 4age. have had to do a lot of little mods, to get them close enough together for the port spacing. right down to having to anneal the throttle shaft, as i had to re-drill it and mr bmw hardened the shit out of one part where the bearing ran. Anyway attempted to teach my self how to cad. sent it to @niswhale who cut me a template/test run out of mdf Amazingly i drew it right first go. and i was about to resort to hole saws and angle grinder.. After a lot of dicking around all the throttles fit on the flange. Have half made a fuel rail for some massive 980cc injectors i brought when was going to try outboard injection. To start with they will be just there to bung the holes. later on if all goes well will switch to them and retune. but for now changing as little as possible other than throttles, in the name of proper @Roman science. Hello tempted to run with mdf.. but this part is on its way from @Stu (cheers cnt) Since metal isn't fun anymore, its made from acetal. aka fancy plastic.1 point
-
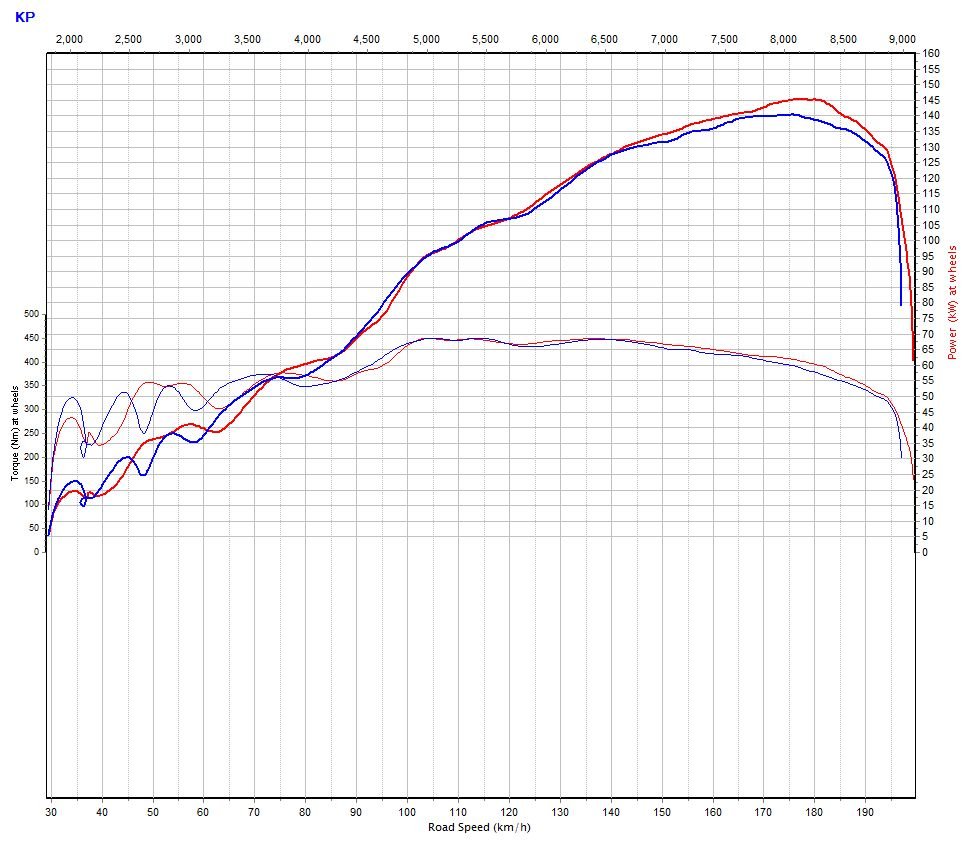
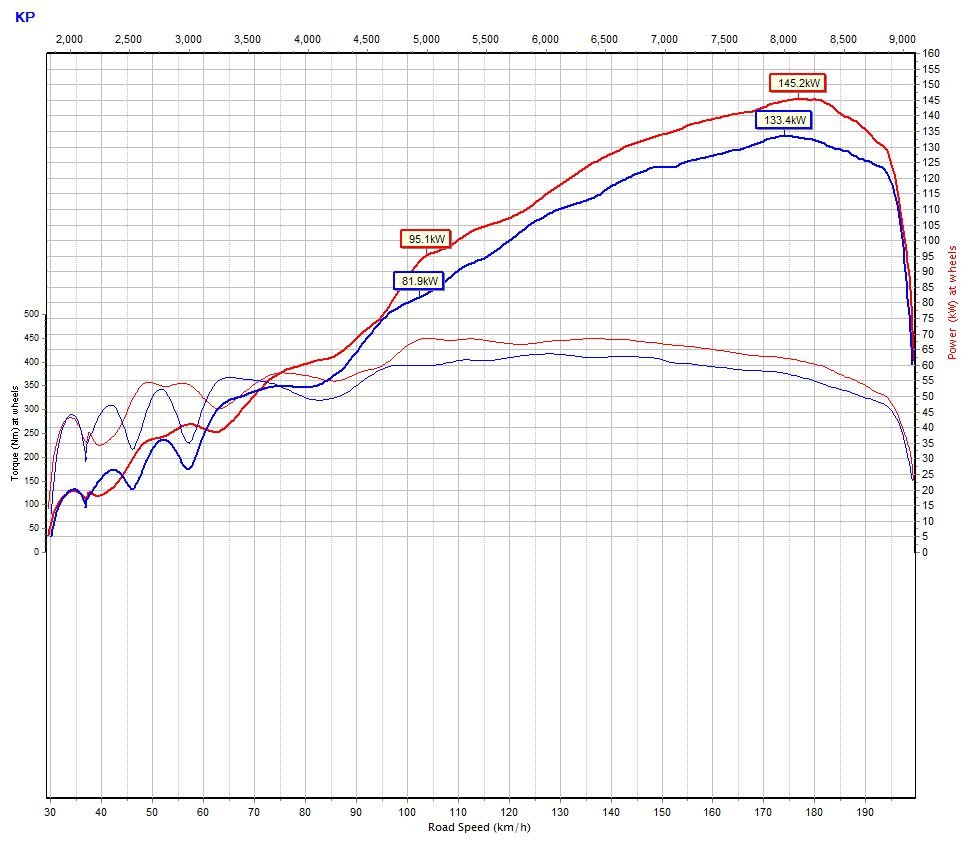
more dyno stuff.... Had to finish the tune after swapping to the small headers. Tried a few things while it was on there. First up; some time ago read something on the internet, that throttles may flow better/make more power just under 100% open rather than 100% open. Yeh nar; blue: 96% open, tried 98% as well same deal just a bit closer to red (100%) line. Maybe it needs even bigger throttles? they are 47mm Next is with the trumpets removed. the below removed all together was expecting some big losses, but not quite like this! over 10kw through the whole powerband.
1 point


.thumb.jpeg.384ff72c8d2b0ee0d34a7bdedb55bdcf.jpeg)


This leaderboard is set to Auckland/GMT+12:00