
Leaderboard


Popular Content
Showing content with the highest reputation on 11/01/18 in all areas
-
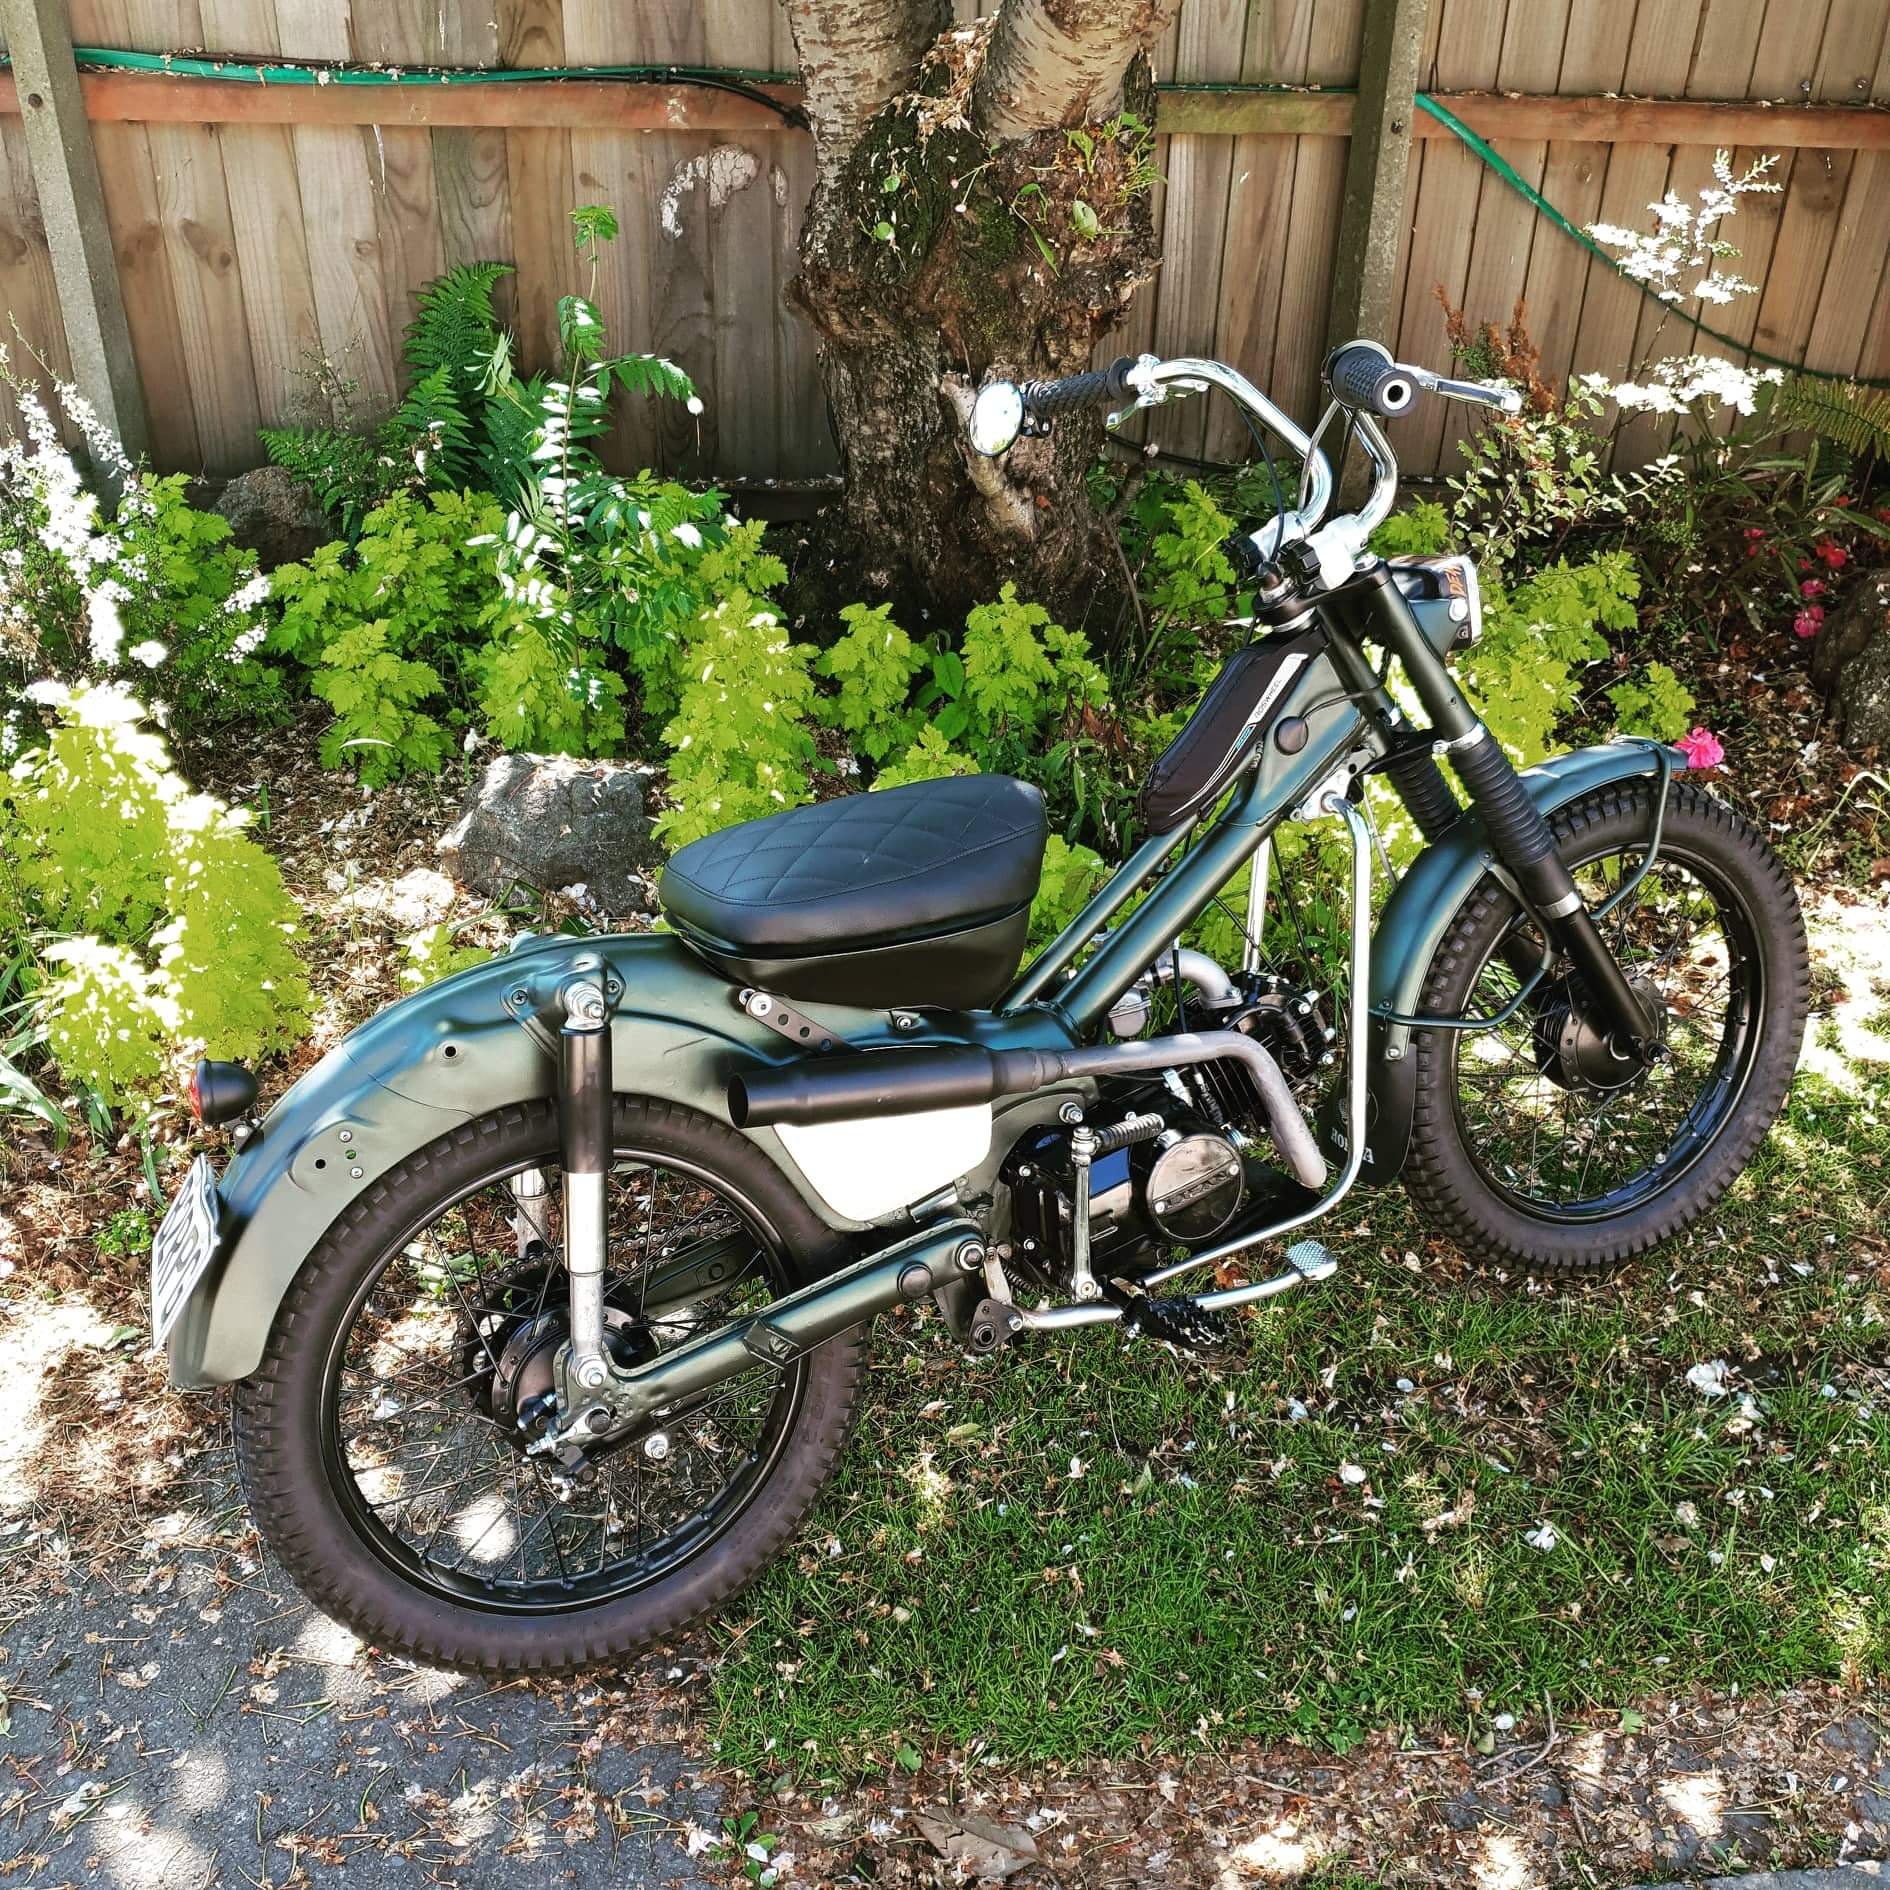
Seat is done. So stoked. Riding to work tonite
 13 points
 -
What have I done recently.... Fuck all! my mate scored a Ute so we stripped it out and as Payment for doing it and storing it at my place he gave me the diff. It’s an H165 which is a bit bigger and gruntier than the standard H145 in it now. Ill get around to swapping it in at some point. It’s not a straight bolt in affair but achievable in a day with some wee mods. its got a new 2in exhaust all the way through with 1 reasonably new muffler that was kicking around, made a decent difference to performance, has a great rasp to it and dosent hit the ground or body! It’s like, slightly too loud but acceptable. I farmed it out to a mate at pitstop cause I fucking HATE exhausts. i put new carb kits in it. I put it on the dyno and made 64hp at the wheels, I thought it would be closer to 80 but no.. power to weight is a wonderful thing! theres a track day this weekend so I whipped the discs off and got them skimmed, kitted the calipers and painted, new pads. Brakes were getting very manual. i finally got that proper wheel alignment done, booked at another local shop and they rang to say nay, and sent me to Tony’s tire service on Blenheim Rd. They have some fancy Hunter machine that can cope with low old cars with small profile tyres. It’s great now! Haven’t driven it much since, it was pissing down when I picked it up so couldn’t cane it properly.5 points
-
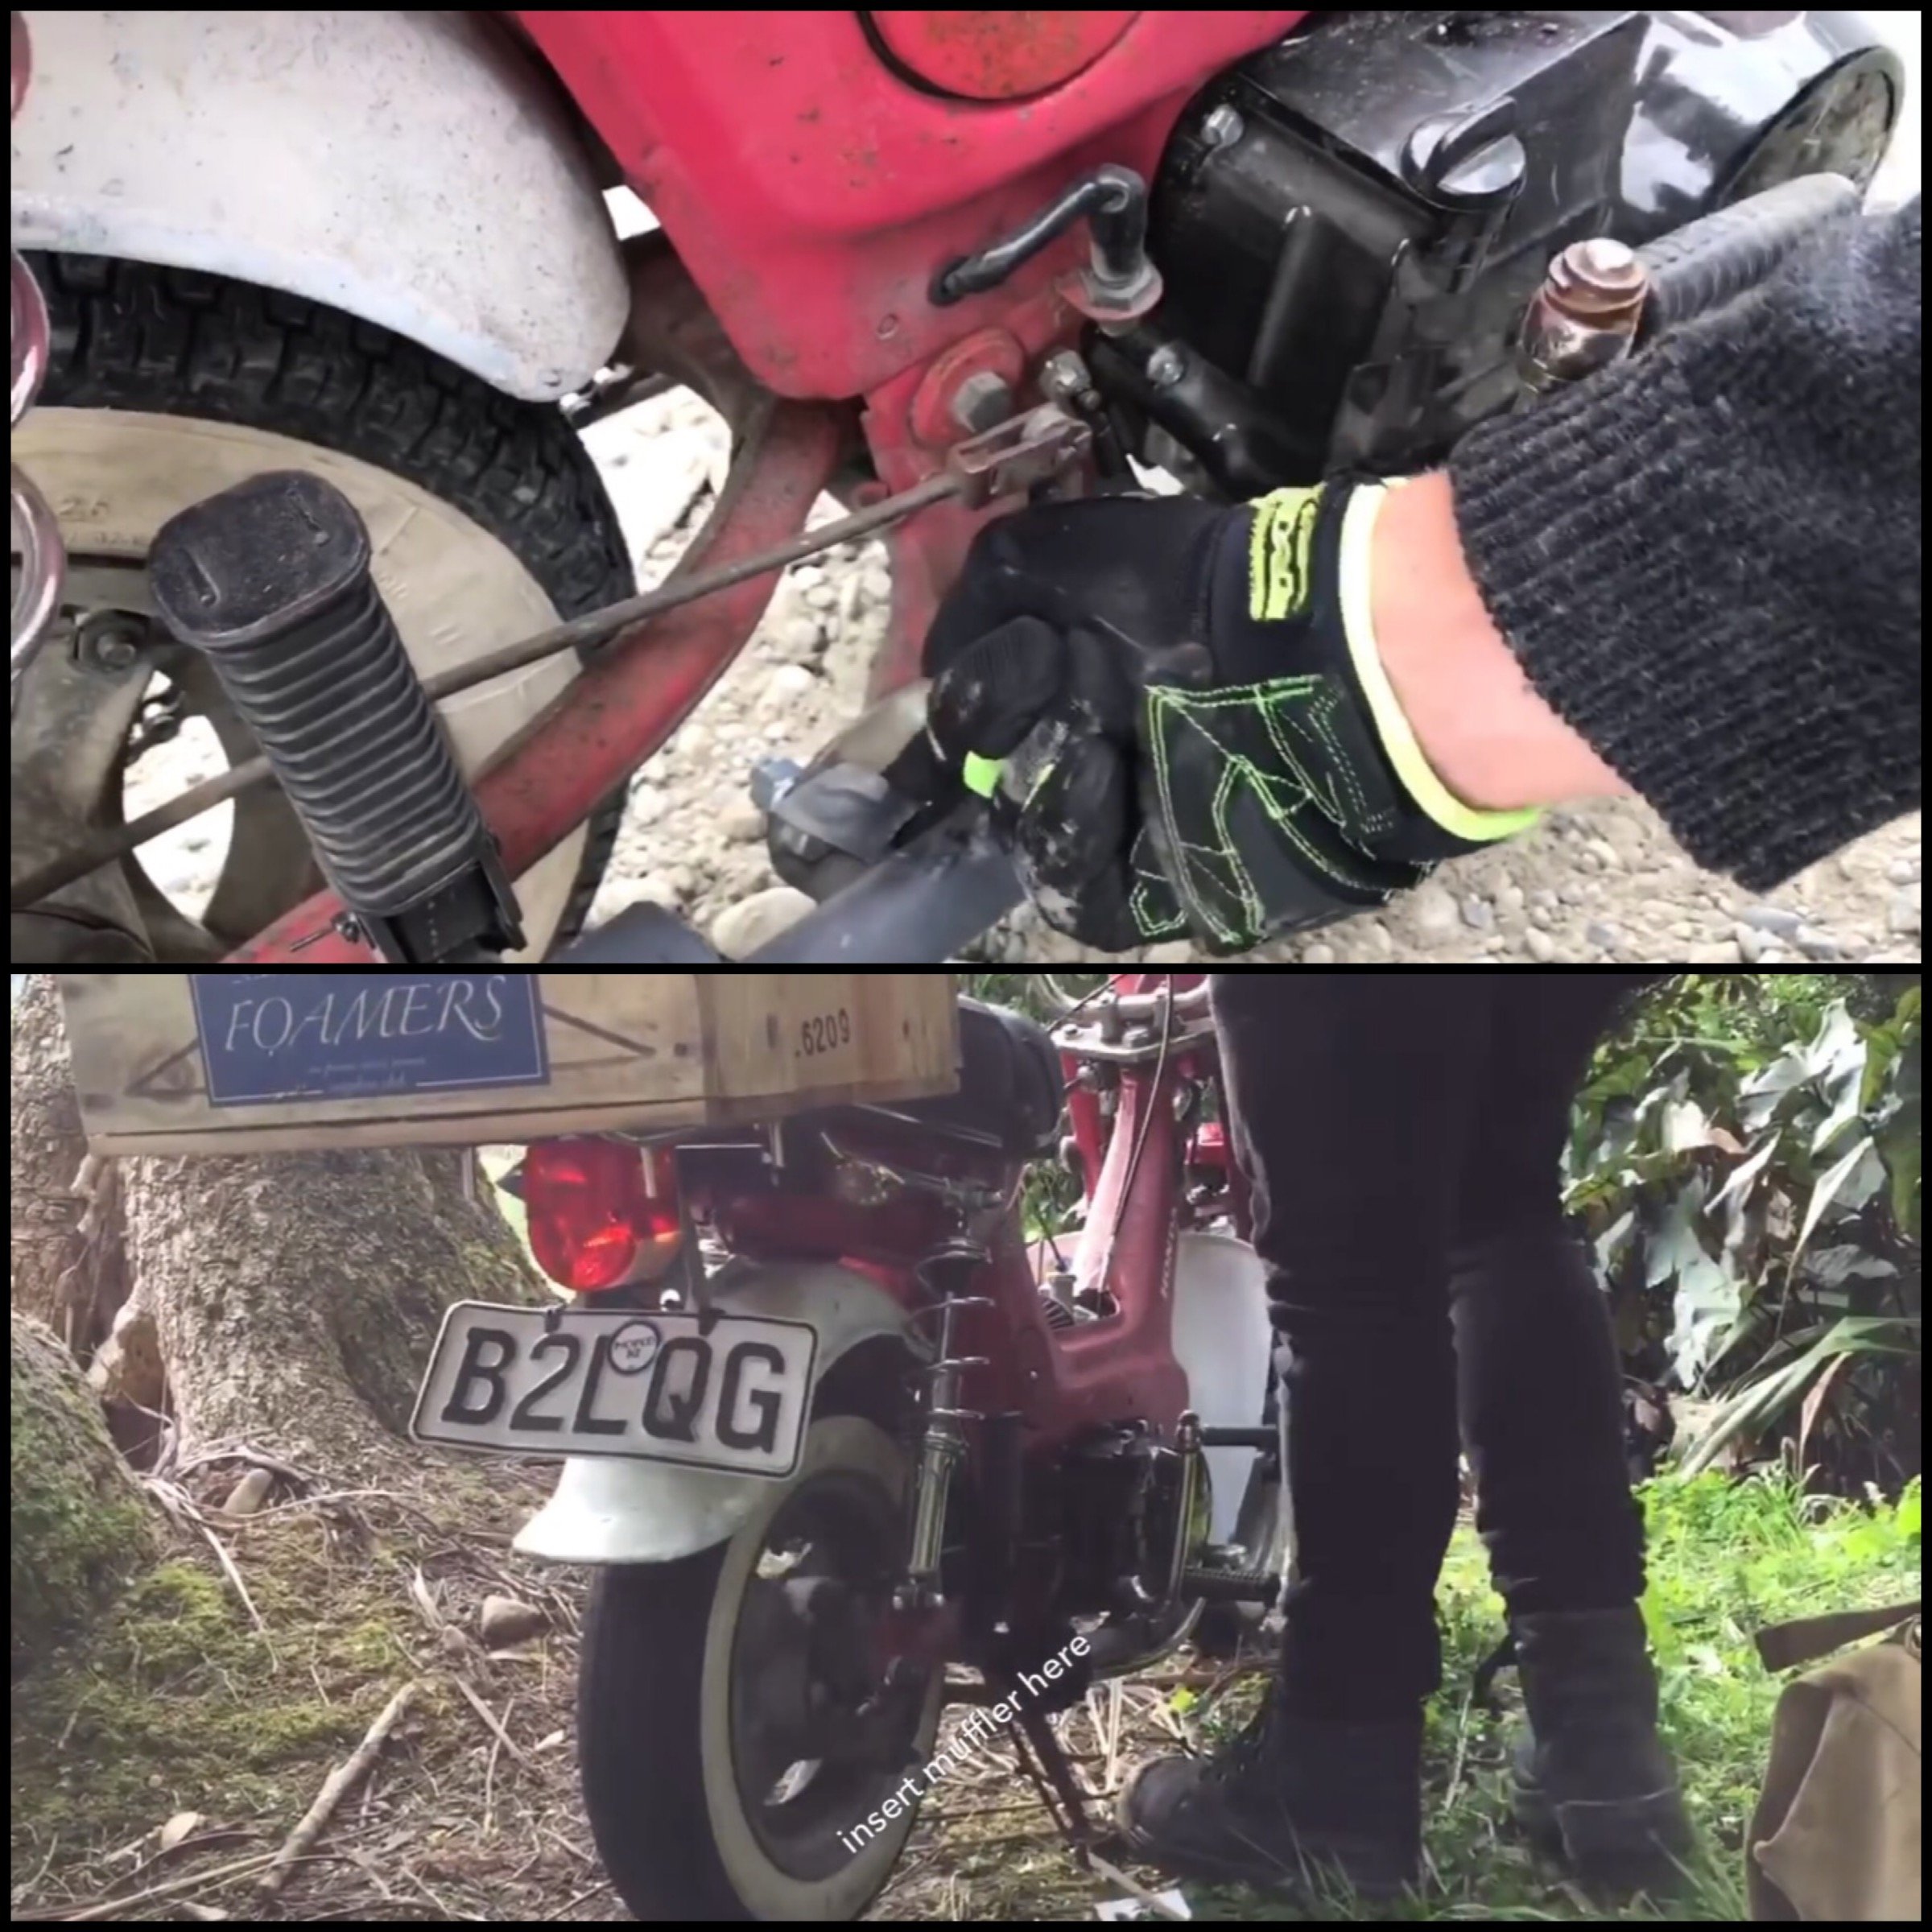
I'm thinking some before and after shots for the Motu rd could be in order.4 points
-
Today was the day; Recheck day. Everything had been building up to today. All the work done, all the money spent, it all comes down to a pass or fail today. First thing I needed to do was get the alignment sorted. I had booked for an alignment first thing this morning, so that I would have ample time to get that done and still make it to my recheck booking. They got onto it straight away And within no time, I had this sheet in my hands Yes, that is 21.5mm total front toe, when it should be 1mm total! No wonder it was scrubbing the front tires hard. With that sorted, the car drives much nicer now, and the steering wheel is finally straight when driving. After the alignment I shot home and refitted the front carpet. Its torn and ugly, but looks better than the bare floors. Remember, I'm trying to make an impression so the inspector plays nice I hooned in for my appointment. This confirms my suspicion that the car doesn't really suit 100kph motorways. It gets to, and holds, that speed OK, but it's pulling almost 4000rpm and there is some tasty shaking at times. Need to check the wheels for balance, which I may do next week. I suspect it's out. I may even paint the wheels while I have them off as they are a bit rusty. Looks good just sitting there I went away and killed some time and when I returned, lo and behold, this happened For the first time since 2012, Snicket is road legal! With the standard black plates still! This was a car that when I got it, barely ran, had no brakes, had no lights, leaked oil a lot, various things were loose and missing, and had been used as a parts mule. Now it runs like a champ, it's great fun to drive, and best of all, it's a viable classic car again. Others would have just scrapped it and we would be short one more awesome classic Mini, but now it's actually worth investing time and money into, and being able to enjoy it. I drove home the back way, arm out the window, enjoying the wind in my hair and the sun on my face, whilst listening to the sweet sound of a 998cc A Series purring away. I couldn't help but stop and grab a couple of quick pictures It's a great little car, and though for what I have spent I could have purchased a tidier one that was already on the road, I wouldn't have been able to save this car.4 points
-
Loud pipes save lives and weight3 points
-
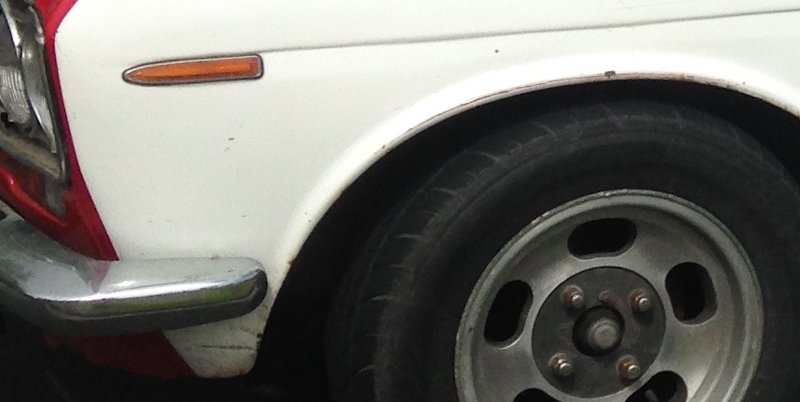
Looks like a Foamers spec tyre.3 points
-
Mate just weld them onto the rear rim and have max dually spec wheels over the Motu road.3 points
-
I've got a 12v compressor I can put in the support ute for communal use3 points
-
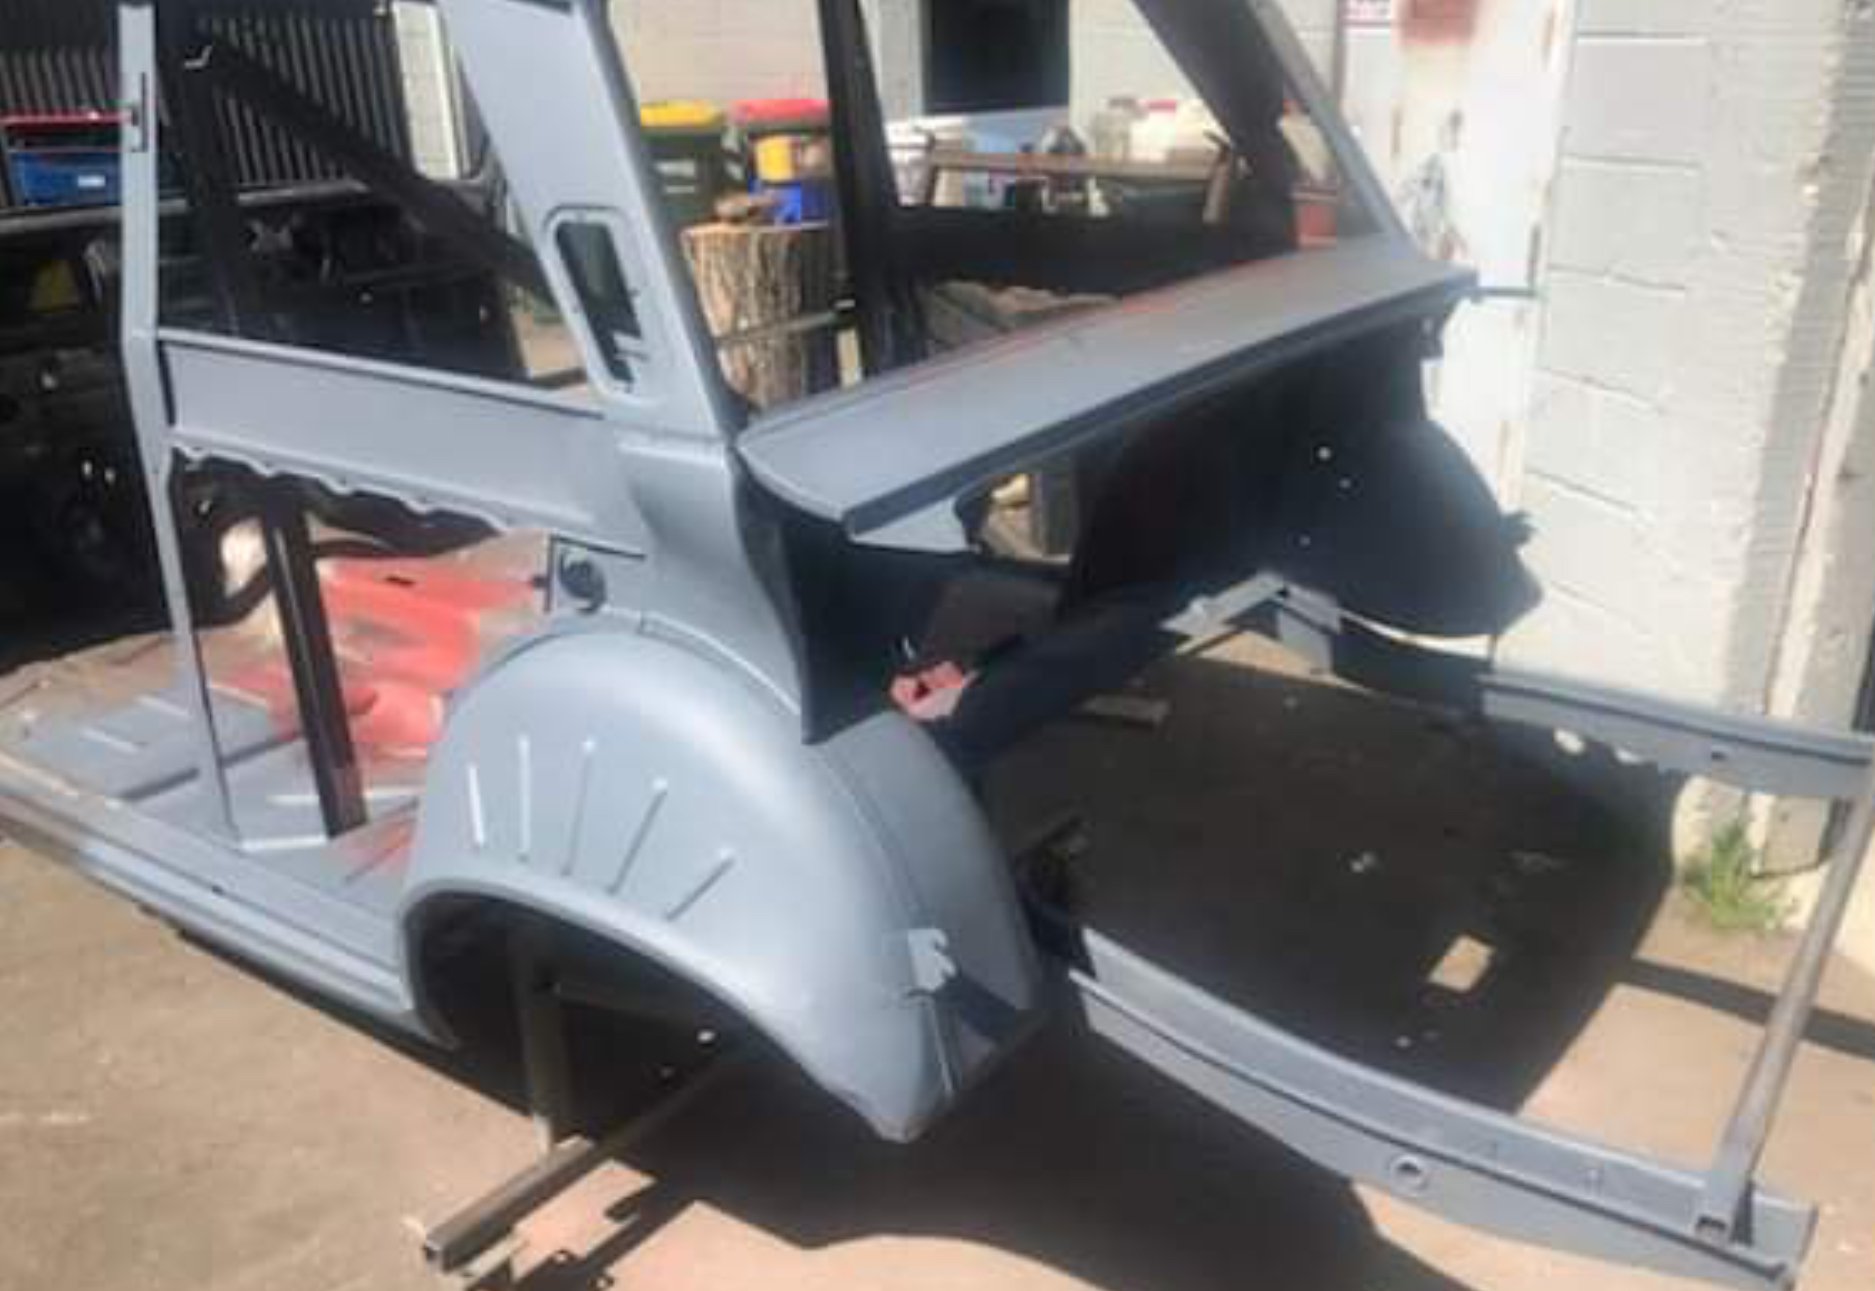
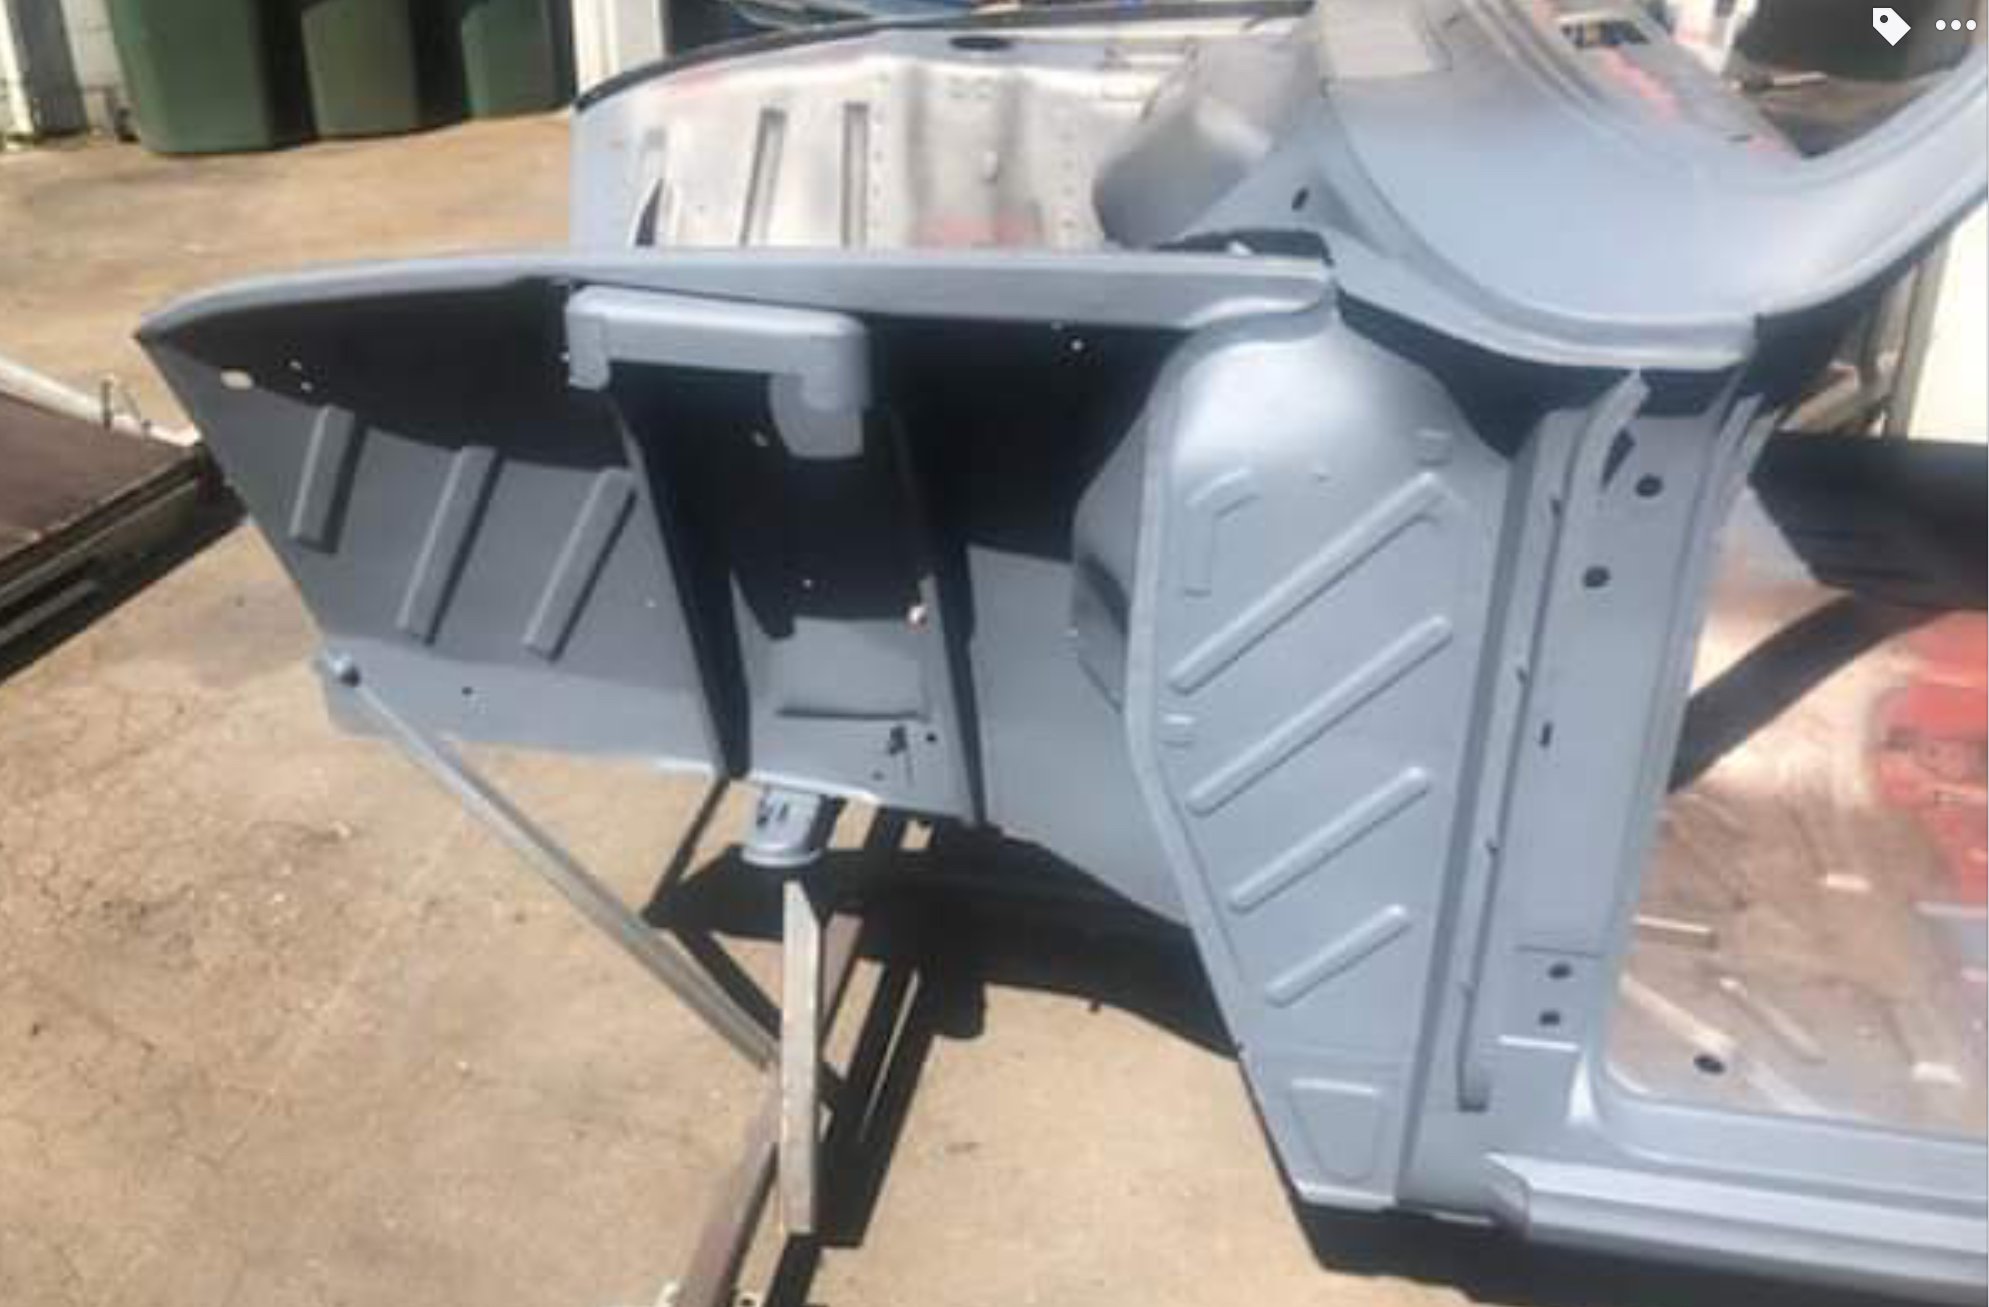
I got this diff from Dan for less than labeled after deciding the hilux diff was too heavy, the caliper conversion situation, handbrake creation and it wasn’t lsd. this is! easily available, inboard handbrake and disc brake already. The GT2871r I had was pronounced dead due to cost of repair. Then a mate popped up with this, got it for a song and will be a nice wee upgrade whizzer. Heres another escort with CA. The angled engine bugs me, it’s factory but I can’t handle it so I’m going to upright mine. I’ll have to change mounts anyway, tweak the shifter to suit. I have a brand new genuine oil pump as well. If she blows up we’ll try again. its well documented these days how to do this head drain mod so will do that. Today I sorted out lots of nuts/bolts/screws and put them into an organiser case for the first time in my life, reorganised the boxes, tore the front and rear ends out, front off, bumper off ready for the spit this week. Had a scotch with the dog while sitting in the back seat. She was more interested in the reflections3 points
-
Man the speedcocks wanted to go for a burn tonight and I said yes. Slapped my speedo cable down the hole and put a bolt in where it needed to go and off I went. But fuck me. My speedo actually works now! Supper smooth and steady. Seems when I'm doing about 100kms that it sits on the 60mph part. Pretty dam happy with slapping it together2 points
-
SPEEDO WORKS!! Don't even know how I fixed it. Successful ride this arvo with a few others Think I might even cover my seat now I have the speedo working.2 points
-
2 points
-
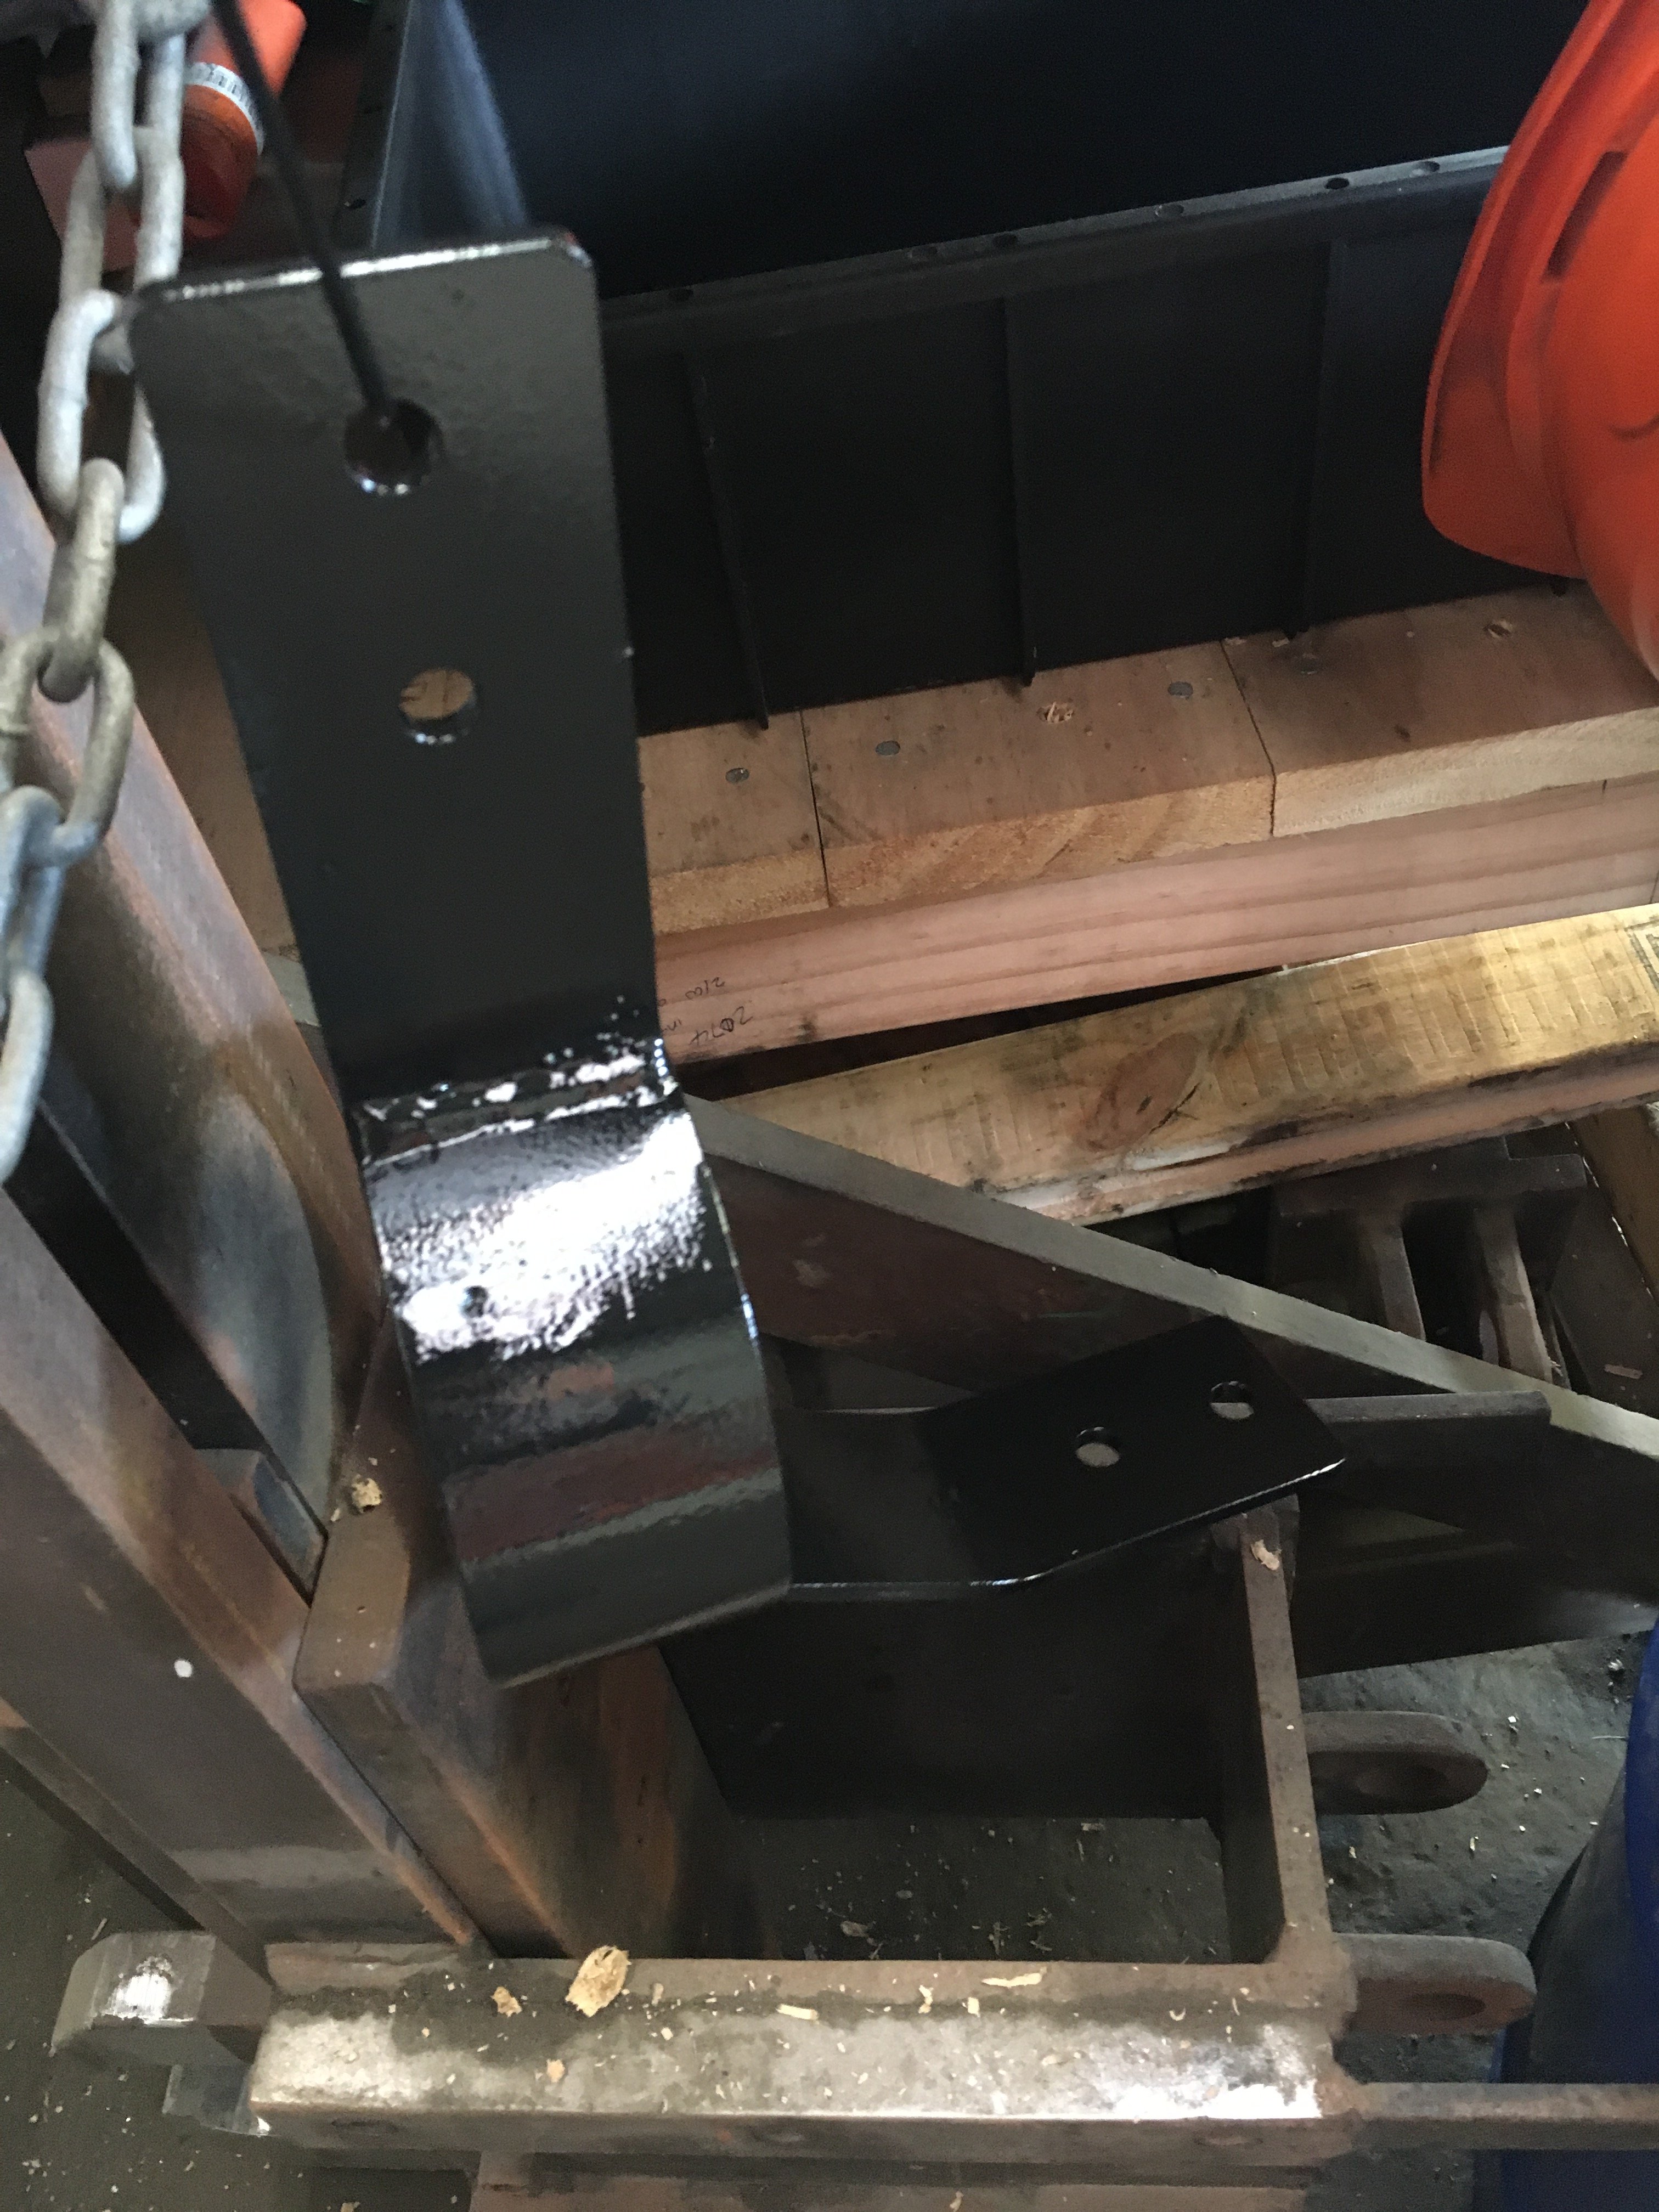
The drive shaft loop is all done awaiting final placement. Making it was a bit tricky due to the uneven floor pan and fuel/brake lines - nevertheless it came up really nice and it’s certainly solid as a rock Once the drive shaft loop is in place exhaust can be bolted together and put in place once and for all.2 points
-
Should be sipping a cold low bro and reflecting on a sweet afternoon of riding this time next week. Getting fizzed for this shit weather is currently cray cray so better sort its shit by Thursday2 points
-
Been there done that last Eastcape, those exhausts are utter balls. So ridiculously restricted by solid discs with tiny holes in the muffler that the stock exhaust probably gives better power.
2 points
-
FOAMERS RIDE BETTER DICK.2 points
-
It just has a Jamie in it ; )2 points
-
i read that as something completely different the first time! "10" dio"2 points
-
now sold.2 points
-
Yes there is plenty of room on support vehicle no.2 for gear. Full size flat dec and trailer, can also take spare bike that has been mentioned if needed. You will need to sort your gear out at night though cos I have no way of securing it during the dark hours. I will be staying at the Waikenae hotel in Gissy and I will prob just sleep in the trailer on sat night at the bach if thats cool? Will bring Bbq some tools and airbed pump2 points
-
Shell is back from the blasters and ready for the final weld off. Rear quarters been dipped and already to go back on. A.l going well it should be in the paint shop by Xmas....
2 points
-
Looks like the full toolkit is in there... And was going to put new set of points in, but may have to remove magneto...? Not keen to get too far into it if it's running tbh... And more bits for the TT arrived, no real excuse anymore just gotta pick something and get into it...2 points
-
Been a busy two weeks of knick knacking and paddy whacking really. Had huge progress in the dismantling task, and now have it stripped back to a water blasted rolling body. This weekend I de-loomed it with various difficulties due to Japanese nimble fingers and Mexican wiring swept under holes, while Stephen dropped the fuel tank out which had 1 & 1/2 buckets worth of petrol still in… no auckland tax on that. The front windscreen didn't come out easy however as the rubber was baked more than a christmas pavlova made after a few breakfast rumballs. But with two rolls of $2 tape as support and bare fingers for guidance, we yanked the screen free and the began the painful process of smashing each little piece from the surrounding areas. Even dropped the engine out the bottom to check over if it's worth saving, and the exhaust which is definitely not worth saving. And finally on the progress, I spent a day last week softly caressing the old vinyl rear seats that crack into pieces in your fingers unless you find a 24 year old bottle of Johnsons baby oil at the back of a bathroom cabinet, and massage that into the fragile material until it's overwhelming in smell. Then I spent the remainder cleaning up plastics with thanks to rivalrx CRC suggestion, AKA the new best thing after Autosol. Note grubby handles. Got new door cards from Australia - $140 free shipping bloody impressed and awesome business card to match. Bonus items found hidden this week were a knife down the wheel arch in boot, an Escort window winder, and a monopoly house under the fuel tank. Kind regards, rotorhoe2 points
-
Need to do updates more often so they're smaller! Put the tray on as I needed to see where I could run the fuel and brake lines. Also borrowed a pair of wheels off one of my parent's cars, to test the tire sizing. Bought a fuel filter and made a stainless steel bracket to hold it. Made some mounts for the rear bumper to bed brackets, as they were welded on before. Got out the LED tail lights that I've had for ages and made up some stainless brackets and polished them. Started running the brake line out of copper-nickel tube. Also got some 5/16" lines for the fuel lines. Made some stainless clamps to hold them all together and to the firewall and chassis. Made some bits for the column change linkage. Top middle piece mounts on the firewall around the column and has some little stoppers that make it so the gear stick needs to be pulled out to change from certain gears. Left bit is what goes over the stoppers and pivots with the gear stick to push the rod bit down, which then pushes the right piece down and change gear. Thought at first it would have to be some super complex system with cables and stuff but this way was actually pretty simple to make work. Then I needed to make up a indicator on the column to show which gear it was in. Drew on up in Solidworks and laser cut it out. The accelerator cable needed some modifying to work, it's wasn't quite long enough to reach the pedal, so made a new bracket that moved the housing closer to the throttle, which allowed for more cable out the pedal end. Then all it needed was a plate with a lot in it that bolted to the pedal to hold the little ball on the end. Have had some big train air horns for ages. Couldn't find anyway with enough space to fit them, as they were originally mounted together in a triangle shape. So pulled them apart, made some new brackets and bolted them up under the cab to the chassis. Need to just run some lines to them. Some boxes of stuff finally arrived from America. They included some front windscreen stainless trim, door panels and the surrounding trim. Might replace the door panels one day as they weren't as good as I thought they'd be for the "deluxe" spec ones. Also arrived were some wheels. 15x8 Artillery steel wheels with baby moons and beauty rings. Spent ages trying to figure out what colour to paint them, didn't really want to go red (what everyone does) or black (spent too much money on them for them to be hidden). Decided a bronze colour would look good and hopefully not too out of place. Then spent more time trying to find a nice bronze.2 points
-
The time has come! You only need to scroll up to see how dormant it’s been..got it trailered up in the weekend, time has taken its toll with rat piss and shit and surface rust in thin areas but she’s still great! after clearing it out and cleaning it, tucked it into garage. Then I cut the tubs out of this drum I’ve had in waiting. unfortunately the rotisserie is still down south so that halts progress, probably try score some steel and make another one.2 points
-
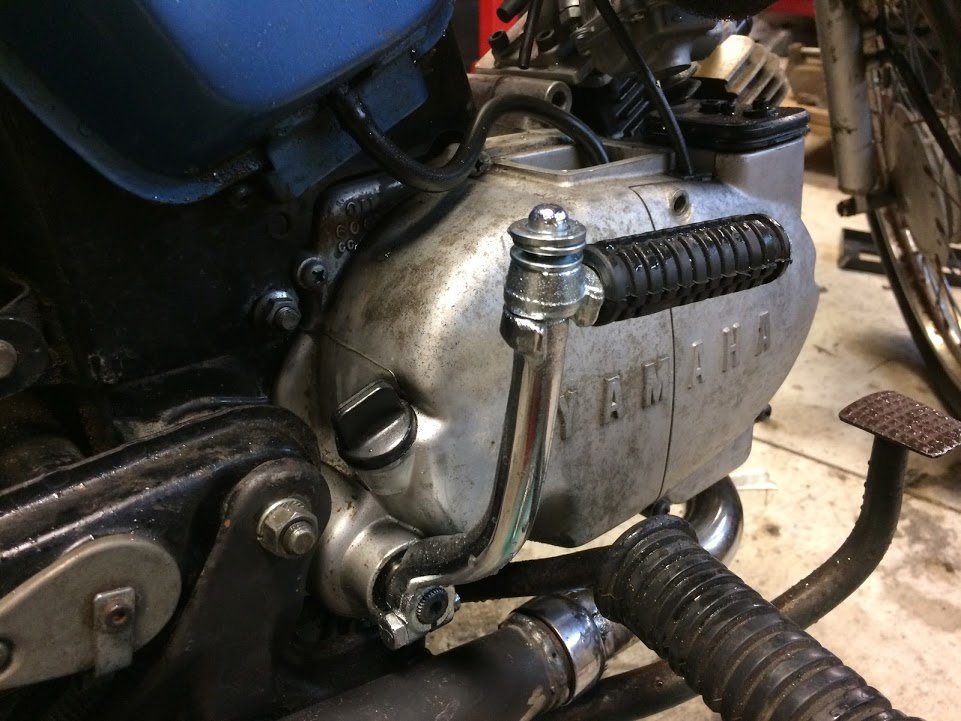
If you haven’t had a laugh today, read on. friday was a local holiday so I spent the day cleaning and sealing up the split I found in the gearbox.where the drain bung goes it has 2 vertical cracks, doesn’t leak till it warms up. Super couldn’t be assed pulling box out again so drained it, heated it up, brake cleaned,repeated, then RTV was applied. Then when it had tacked off added another layer. 24hrs later last smear and filled the box, added some ATF as it’s supposed to help keep things nice inside there. its held out mint so far. mint16 and I did some hoons and tunes on Saturday arvo with mixture and throttle, got it fairly good but lacked. Then I got him to drive home and he says ‘wow, you have have fuck all throttle...’ Had a look and it turns out THE GAS PEDAL IS BENT! he pressed, I watched the carb end and it was barely reaching secondary’s. i bent it up roughly half and achieved full swing. WELLL FUCK ME it was an Instant animal, I was fucking overjoyed! Pretty much what I was always aiming for but it just wouldn’t achieve. Has a twin carb sound to it, nothing on side draughts, but cool! Still had a quirk that we decided was def an air leak. so that nite I went out country for a mates party, car went great, 3300 at 100km, even has the torque to pass cars in 5th. On the way back I wound it off the clock but ran out of night vision at 150km. on Sunday I yanked the manifolds off, painted the flows again, replaced gasket, and zipped it up again. Then mint16 decided more tuning was better than doing other stuff so We went tuning again. Oddly it had developed a random, maybe every minute PSSST coming from the dizzy side or back. Sounded like compression when you turn an engine over with the plugs out. so we went to his lockup to get the vacuum gauge, car drove fine, didn’t really repeat the PSSST again. Vac gauge didn’t tell us shit. Also the fact we could pull the dizzy vac off and it wouldn’t stumble and die was very odd. Previously decided that cause it had an air leak it wouldnt stumble and die cause it was tuned to compensate because of a leak. then it struck me. Maybe we should take vac from the now useless choke/idle stability diaphragms..the 3rd port on the carb. the 2 on the right don’t appear to do shit, when on the mazda one was connected to vac hose and some was capped off. SUCCESS now we had vacuum, we had a stumble when we disconnected it and we had full dizzy advance when thrashing! So we had another tune hoon and pretty much ended up at the same idle and mixture we had before but with full throttle and advance to help.. wee bastard was proper singing. took it home, let it cool down and checked the head torque setting in case this was the reason for PSSSST. There was a very very minute amount on 2 of the dizzy-side studs but the rest were bang on. i then swapped in my HD crow valve springs, made a wee bracket to hold the throttle cable, tweaked the fuel hard line to tidy it up, re-positioned the vacuum lines, set the tappets and fire it up. All is good. Timing a little retarded. Advanced it a tad. then today I finally decided that after having my leads on backorder for months that they are likely discontinued from TopGun, so I wandered down the rack and found some bongo/econovan leads that looked like the go. tried them tonight and they are sweet, 2 a little long but very useable. I rage over leads that aren’t black. And one kept belting me so actioned a change. you can Also see a wee Shield I made to cover the alternator fan so I didn’t have to worry about it eating my timing light wires or hand. Now I just need the electronic dizzy, change coil and put the air box on, rack up some more miles and change the oil.2 points
-
To stop me filling up the tech spam thread with my questions, I thought it best to make a new thread. Hopefully this might help someone else that stumbles across this in future. First the back story, Which left me with the question, MIG or TIG?1 point
-
Seeing how that is pretty much all for shit british shit cars, shouldn't it just say "Any oil is better than no oil"?1 point
-
Fuck Yeah it should.1 point
-
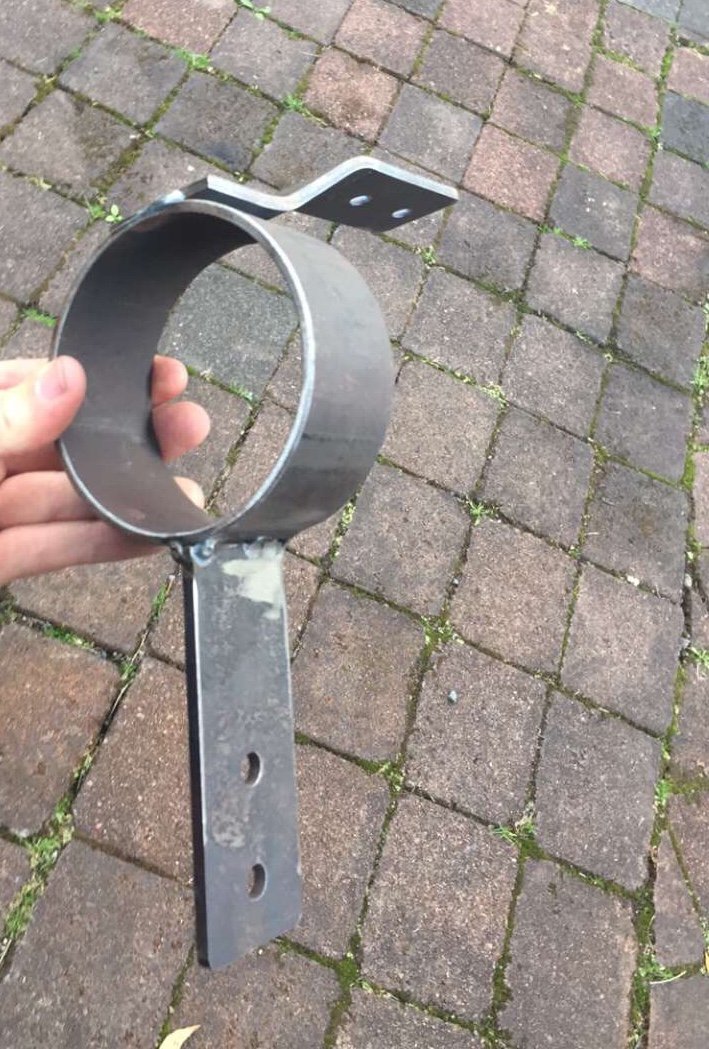
Haha I slipped it on and tested for noise, was far to quiet so gave the disk a Runamuck spec drill port then welded it on1 point
-
Tuatara shots in the spirit of the east coast1 point
-
You know what sucks? I have to endure four more days of work before the hard core shenanigans can hit 11.1 point
-
This is key.1 point
-
@Rookie Yeah gotta bed confirmed for ya on Friday night1 point
-
1 point
-
Still a small number of patches left fellas, get em while you can 03-0830-0461287-002 just put your OS name as reference. $8 ea. QCR lads - 5 patches Paid** Andrew paid ** Callum Paid** Tom Paid ** Chris R Paid ** Jamie Paid** Raizer Paid** VG Paid** Dorian Bart Paid** J5 Paid** Markku Paid** Greg Paid** Glen PAID INTO THE WRONG SUFFIX YOU DWEEB BUT YES YOU DID PAY ;-)*** Datlow Paid** Brent Paid** Russell Paid** Geophy Russel Paid** mark105 Paid ** Thats 4 patches left fellas1 point
-
Try again, should be alllll goooood. Excite for rides with you jokers. Got a WOF on a bike. Probably all I'll do.1 point
-
That exhaust mount makes me sad.1 point
-
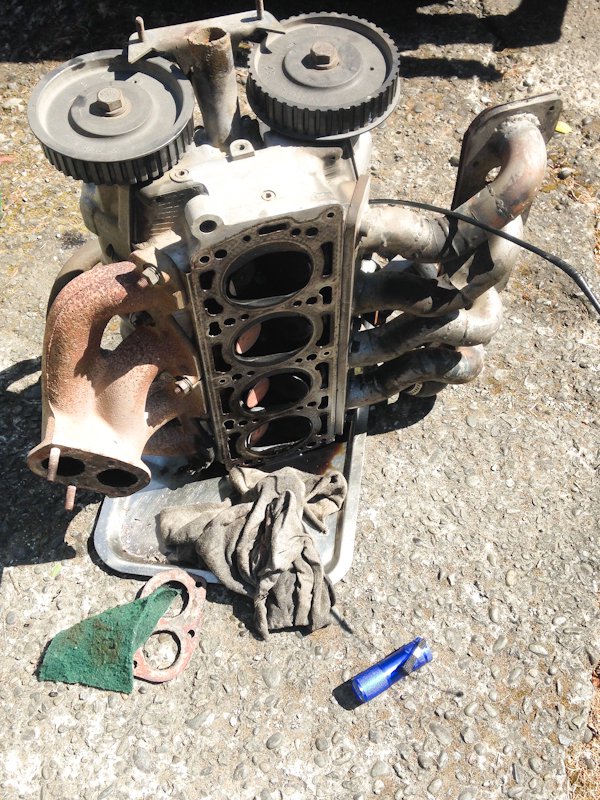
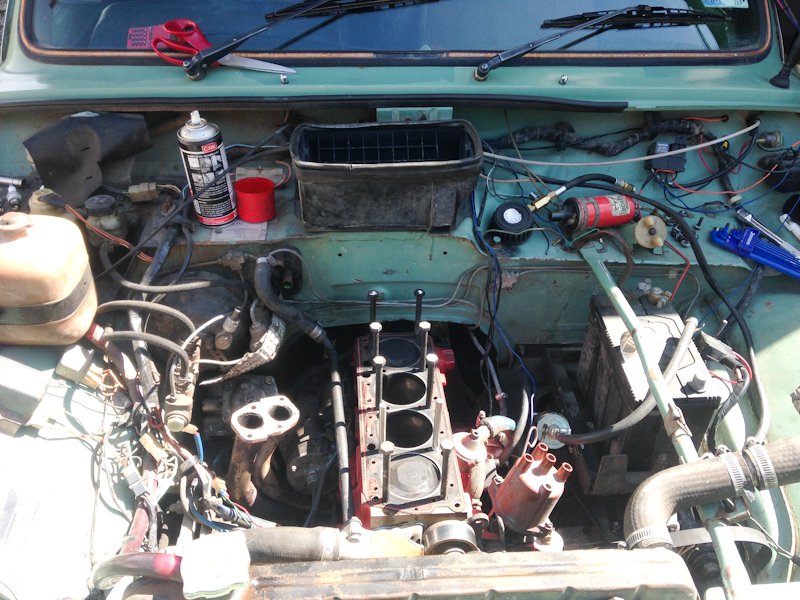
ditched normal standard good working carb for something a little more frisky couldn't stop myself from buying the B series MG inlet manifold online so now this happened and it looks much better + hopefully goes a bit harder next problem was that the original cast exhaust manifold didnt clear the inlet and had a large hole in the top of it so thats history talking nicely to a mate, I had a set of 10mm water jet cut exhaust manifold flanges no longer than a week later winning now I need to look at fabricating the tubing up and making those tricky 2 into one sections, and then combining all 3 pipes into one and finishing the rest of the exhaust when the motor goes in one day. panelwork is in full swing and I'm pushing through, but also going backwards. the more filler I dig out of places, the more horrible stories the truck has to tell. colour wise, I have decided to keep the truck white, and just throw in a wild accent colour for the wheels/engine bay/maybe roof.1 point
-
My recheck is booked for Wednesday, so with limited time to get it all sorted, I got the Mini back together. We left off the steering rack reinstalled, waiting on a new tie rod end, and about to have my rear radius arms inspected and reconditioned. The tie rod end arrived, so that went in and for the first time I could spin the wheel lock to lock on my new steering rack. It's a bit notchy as it hasn't worn in, but has no play in it at all. Should be fun. Having the tie rod end installed also allowed me to remove the steering wheel and reposition it so it isn't crooked. During testing I confirmed the alignment is way off, but I'll try to get that sorted Wednesday morning. Now.... the arms. So, remember that VTNZ failed my rear arms on having "excessive play". I dropped the arms in to the local Mini specialist, P D Automotive, and intended to have them recondition the arms with new pins/bushes, and fit new brake cylinders. They gave me a call the next day and basically told me that VTNZ are talking out their backside, because the arms have had new pins fitted recently, and there is little to no wear and certainly no play in the pins. They gave the arms a quick clean, removed the old nylon cups and fitted the new wheel cylinders to them and I picked them up ready to refit. Before fitting the arms I needed to remove the old joints from the ends of the trumpet and fit new ones. Mine were well seized into the trumpets, but I used a long screwdriver (longer than the trumpet) down the middle of the trumpet to drift it out, by bashing the end of the screwdriver against the concrete floor. Not a glamorous way to do it, but it worked. Fitting the new ones was a bit harder. I cleaned the hole they fit into, and using copper grease and WD40, carefully bashed them into the trumpet with a dead blow hammer, padding it with a rag. Remove the nylon cup first. Refitting the radius arms isn't rocket surgery, the pin goes into a hole in the subframe, and into a bracket that gets bolted onto the outside of the subframe. The hardest bit is keeping the oil seal on each end in place over the thrust washer and arm, and not having it pop out. Having a cordless ratchet was amazing for this job, as I could hold the arm with one hand, start a bolt with the other hand and then spin the bolt in with the cordless ratchet. If you didn't have one (but you should have), a second person to hold the arm up would work too. It's not light. In went the trumpet with new joint and the old cone. I used copper grease on the face where the trumpet and cone meet, so they don't seize together. The shock holds everything in place by limiting travel of the arm. I'm using a pair of the cheaper oil filled KYB shocks. Still better than the failed old ones, but not as good as the more expensive gas shocks. To fit the shock, slip it onto the stud on the arm first, and then extend the shock up into the arch. Fit the washer and bush and guide it into the arch hole. Now, holding the shock up with one hand, use your other hand inside the boot to slip the other bush, washer and then nut on top. I did the top nut up as far as I could with my cordless ratchet, and then gave it a final tighten by hand, as you need a tiny spanner on the top of the shaft to keep it from spinning. Now that the arm was in place and being held by the shock, it was time to start refitting the brakes on this side. First the new hose went in. I transferred the locking nut and washer over from the old hose, with a good helping of copper grease on the threads. The hardline to the cylinder was fitted next. I found it easiest to fit it into the cylinder first, loosely, and then fit it to the hose. Doing it the other way around limits movement to align the smaller fitting on the cylinder. Keeping the hose lock nut loose so the hose and move around a bit helps too. Speaking of cylinders, here's a nice new one. I confirmed the old ones were buggered by trying to turn the piston with a screwdriver. Its easy on the new ones (has to be, so you can line the slots up with the shoes), but none of the old ones would turn. Next I removed, cleaned and greased the adjuster screw and blocks. It's a very simple system, which would work well, if it had the means to auto adjust, but since it doesn't, it needs almost constant manual adjustment. The system works by screwing the screw in and out to push the blocks out. If you wind the screw completely out, the blocks aren't pushing on the shoes But you can see as the blocks move up the taper, by screwing the screw in (the blocks are held in place and can only move in and out). This pushes the blocks out further, which pushes the shoes out and closer to the drum You can also see that the taper isn't just a cone, it's actually squared off, which means there is some fine adjustment by turning the screw just a little bit either way off the flat. Moving off the flat, the rounded edges push the blocks out further again. I refitted the adjuster, and moved to the other side to refit the arm. Before I could though, I had to clear some grot out of the subframe. It was a combination of grease, dirt, and who knows what else. I started with this. And using a couple of large screwdrivers and a shop vac, I chipped away at it I found some surface rust under it all, so a brushed it back and sprayed on some rust converter before refitting the arm. Refitting was the same as the other side, but a lot quicker this time. Refitting the hand brake cable spring to the back plate sucks, but can be done with some brute force. I repeated the cleaning and greasing of the adjuster on this side too before fitting. Next was to fit the new shoes. Make sure your hands/gloves are free from grease, and refit the same way they came off. Take note of where the springs hook into, and which way around the shoes go. Each shoe has a leading (longer gap from the end of the metal shoe to the friction lining) and trailing edge (short gap from edge to lining) which needs be fitted the correct way around. The green arrows indicate direction of travel for the wheel when driving forward. The orange arrows show where the leading edges should be on the shoes. And on goes the drum. The drums were in decent shape, so I gave them a degrease and clean and reused them. I probably should have given the insides a light sanding to help bed the shoes in, but too late now. The other side was the same process Next was bleeding all four brakes. I have explained this is a previous post so I followed the same instructions and got as much air out as I could myself, but found that I could only get it all out with a helper holding pressure on the pedal as I opened the valve. I took the car out for a quick drive and it did not feel good at all. I think it was a combination of the alignment being too far out, the wheel bearing being a little on the loose side, and the shoes bedding in and being out of adjustment. I went back into the garage and tended to everything I thought it could be, and the car was much better to drive. The alignment was obviously still well out, but I'll get it properly aligned to fix that. The rear was the biggest difference though, going over bumps before, the whole car would bounce back and forth, now the rear is solid and going over bumps isn't an issue. The steering feels very tight and very direct with the new rack. So, other than the alignment, we are ready for the recheck.1 point
-
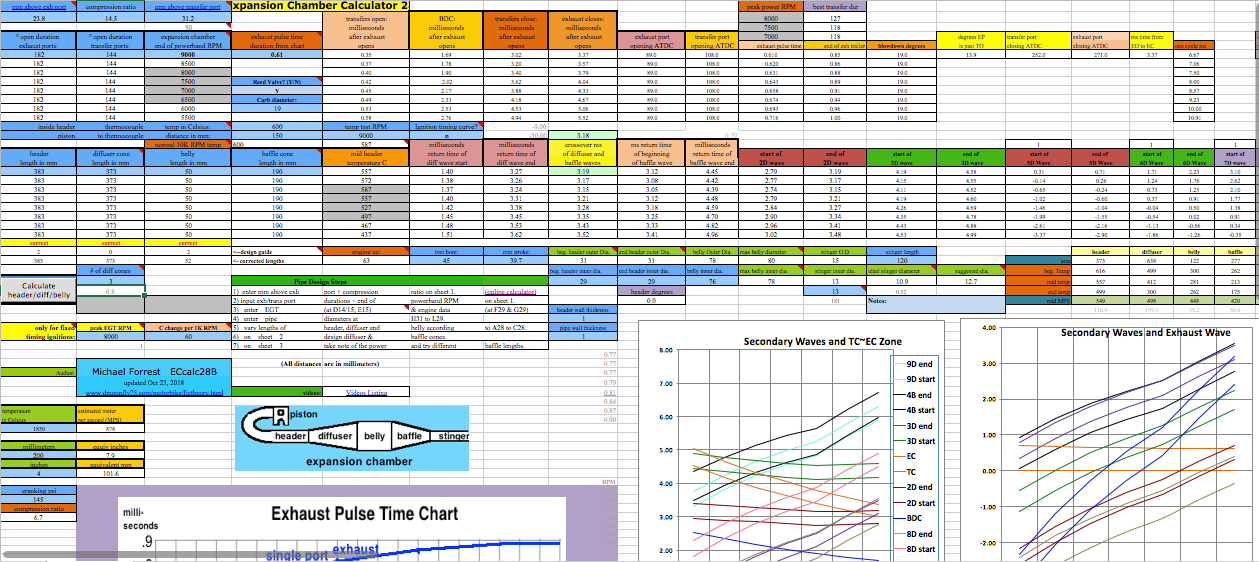
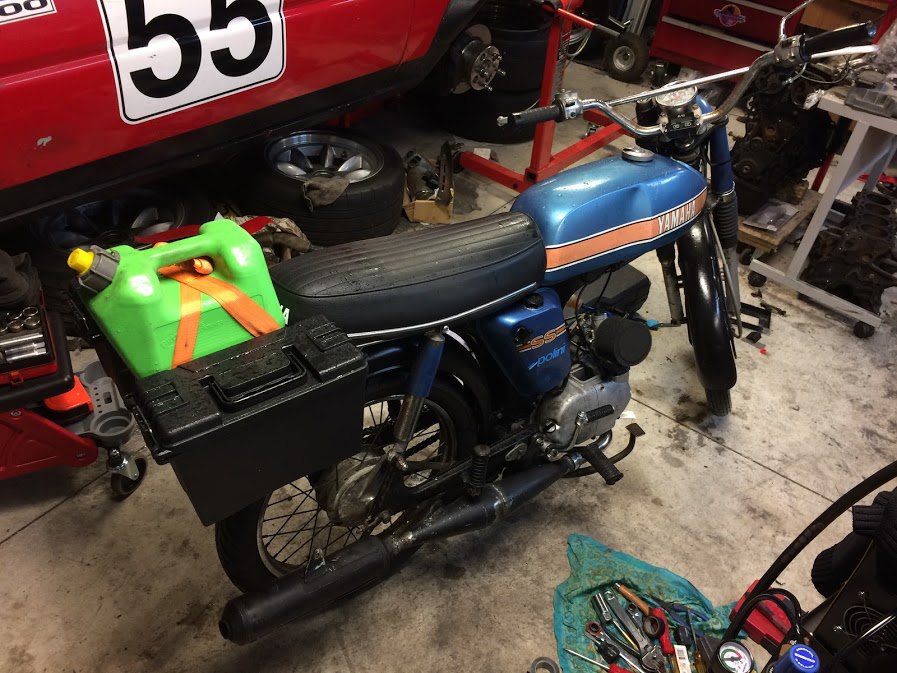
My brand new kickstart lever turned up from the Netherlands. It was a very reasonable price (16 euro) but the shipping was not! (I don't want to mention the shipping cost). Nevertheless, it's super nice to be able to start this without going for a run.... I got itchy toes and wanted to experiment with the pipe some more, so I spent waaaay to long mucking around with this expensive spreadsheet. The calculations gave me quite a long chamber length and kept the standard header length... But man it was long. I had to pull the muffler up on a 45° angle to avoid a tripping hazard for pedestrians. Took it for a few hoons like that, found no real benefit to performance and decided I didn't like it, so I chopped the whole thing up again and put it back to the old setup: Good way to waste a couple of days . Hopefully my sprockets turn up from Yambits this week. I'm keen to see how far I can gear it up!
1 point
-
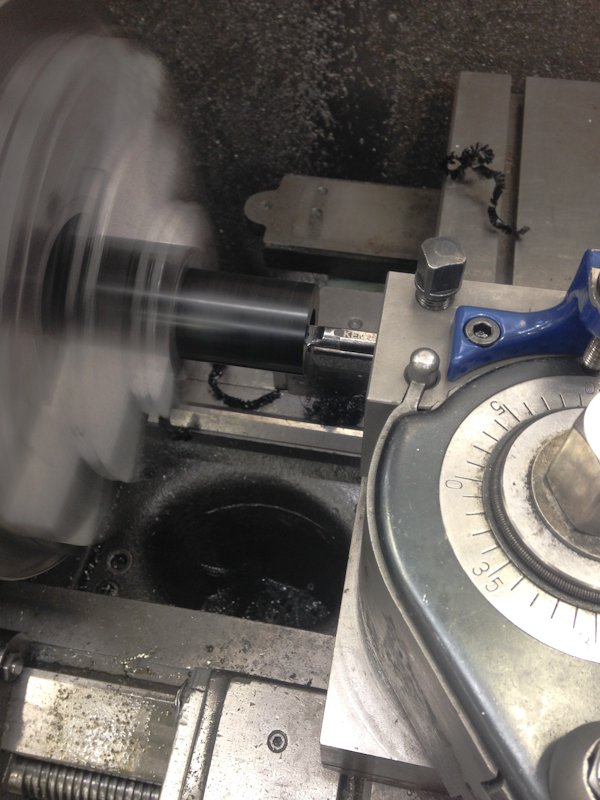
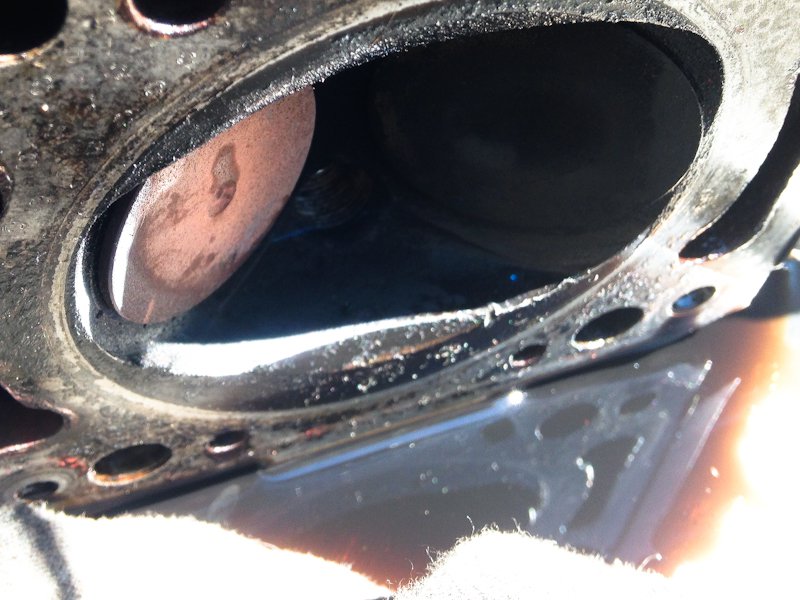
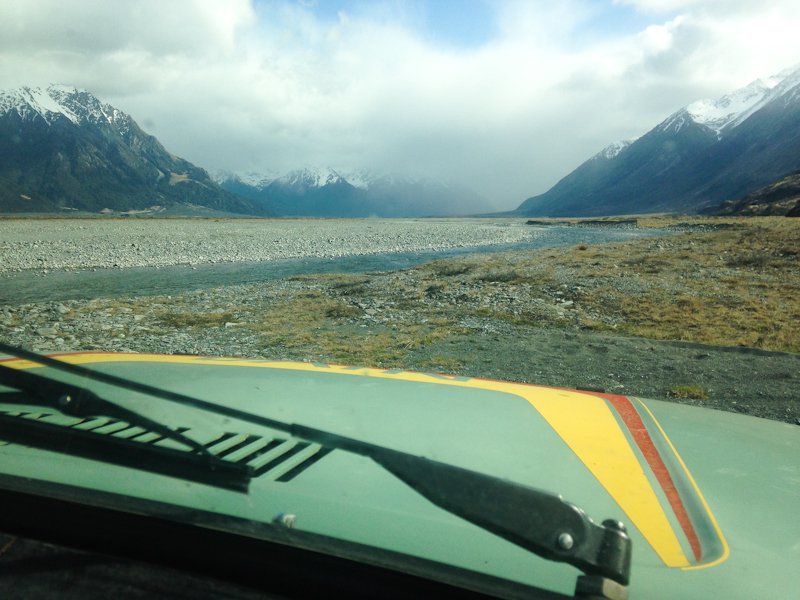
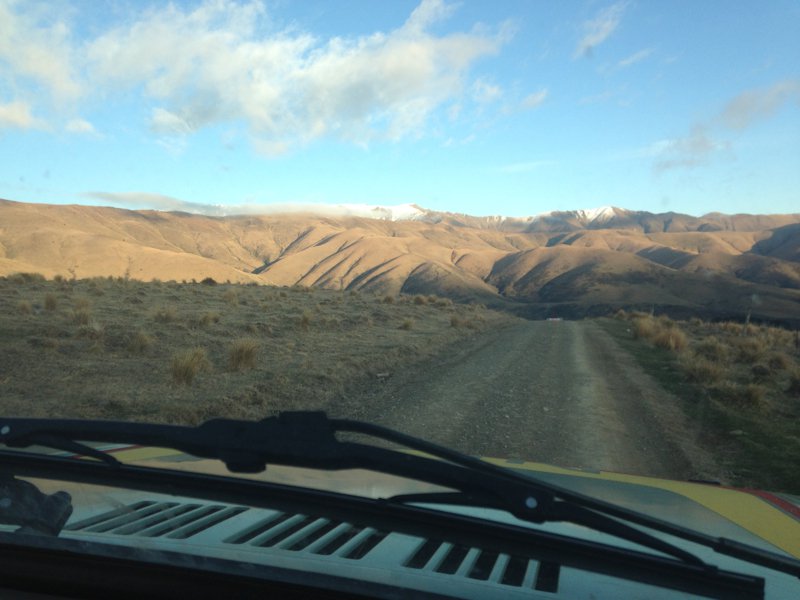
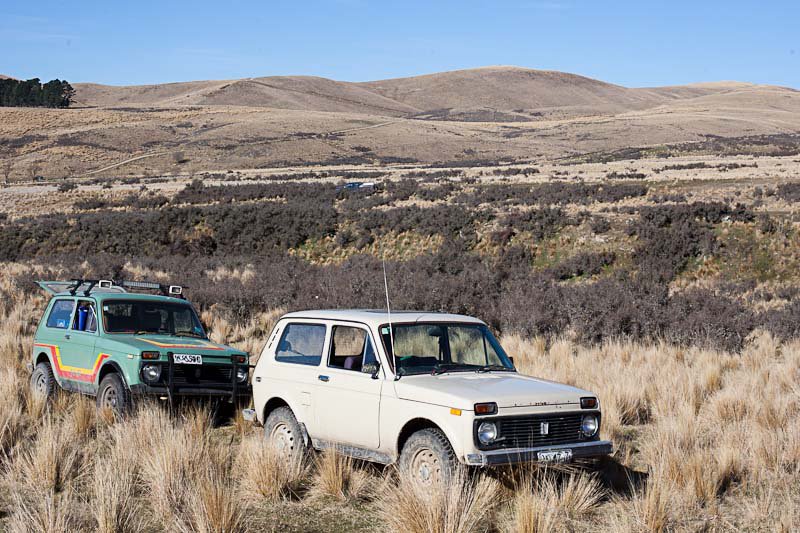
Had a generally good run out of the Niva recently, not that it really does much work, spends most of its life in the shed and then gets rolled out for weekends away. Went for a drive down south Canterbury way and found another Niva hiding away in daily use. Also had a look around a few of the high country valleys over winter: After this trip on rough river stones the steering idler once again slogged out, upon measure up I found the shaft is slightly undersize, that explains years of rapidly wearing out bushes! A quick call to a supplier and I had some nylatron through the lathe with much less clearance. And of course something big had to happen, on checking the car over before a trip I found a missing washer and screw in the intake, the screw was caught in the carb throat, the washer no where to be seen..... After trying the obvious, I made the call to strip the head in expectation of a gouged bore, but no, nothing seen but a few divots in the head and piston, it appears the washer made it to freedom via a brief beating in #4, once again, the gods seem to smile on me! Moving forward the Niva will keep hanging out in the shed with occasional weekends out, but come christmas improvements will slow...... This weekend I picked up part A of my legit black plated new project (cheers Greg!) while a few OS'ers know about my excitement, i'll wait till I pick it up to start the build thread, for now here's a teaser: And for those that don't identify as a drivetrain Barry....
1 point
-
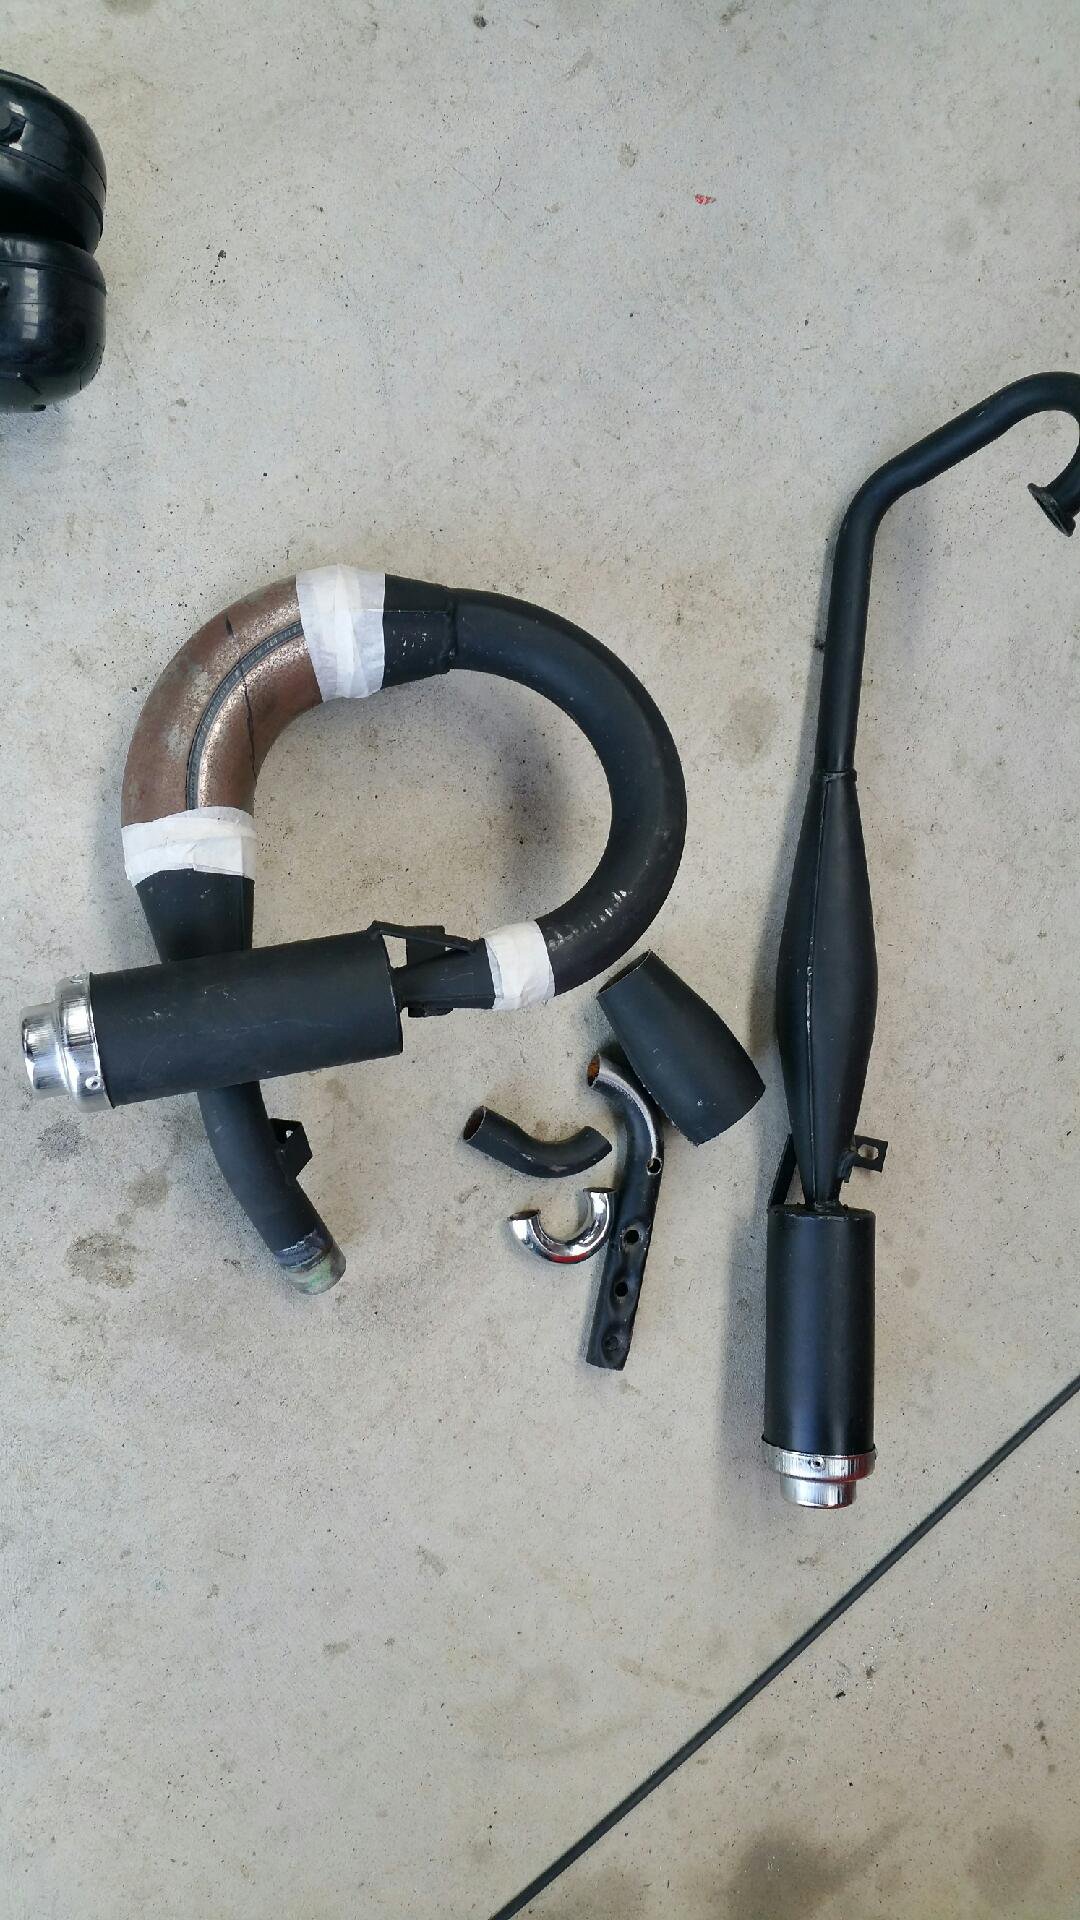
Bit of a lazy day. Mocked this exhaust up. I had something similar once, ugly as sin...but the midrange was unreal - pulled like a school boy! I'm trying to recreate it from memory and using bits I have on hand. I remember the long 180° u bend having a parallel profile ie just a tube and thinking it was unusual, not been the standard tapering style...but fuck it worked well. Only one way to find out?
1 point
-
I do them for $601 point
-
So yeah, I still haven't done the cooling system. Friday was the last day of classes at uni for the year, and still have exams coming up, but hoping to find some time for it soon. I did track down an annoying rattle to a loose exhaust mount (steel to steel hard mount). Rejetted a weber 32/36 I got off a forum member quite a while ago, the first carb I've jetted, so that was fun. It was all going well until I noticed that someone had disabled the accelerator pump. Bought a new one from Ebay, and it's now probably totally lost in the Italian postal system. cocknballs.jpg I've also found a guy who has Z20e efi gear and a Z22 head to suit the inlet ports, so hopefully at some point the carb will become redundant. Z24ET ahoy.
1 point
-
Mustangs for everyone!1 point
-
Have a read of this thread.1 point
-
I ain’t dead. My flatmate gave it a quick flat and buff while I was in ozzy so it looks a lot better now! Also shortened struts all painted and installed with mk1 golf shocks, cleaned up and under sealed the inner guards before that. ended up taking 2 coils off the Dobi springs to get it to where it needed to be. The ride is great, haven’t bottomed out or come close to it. i put the new 1/4 window rubbers in, they are great. Only thing was that they don’t stay open when hooning along, the rubbers too..rubbery and they spring closed. I could leave them open when it’s parked up to see if it helps mould. I drove to wanaka and back to be a wedding car with a couple of other 1200s. got a wheel alignment the morning I went down but they weren’t happy with it and didn’t charge me..blamed the steering box. (Which is fine and I’m sure has adjustment on the very centre of the top but oh well) Resulted in a pretty shit, bump steery, overcorrecty journey in the wind which was a shame, love that inland road. I’ll take it somewhere else. The trip back was better and with the radar detector on we had some good fangs some revolutions were pulled. Had shit gas in it for the journey but back to good stuff now. this weekend I got a mate at pitstop to chuck a full 2” free flow flanged at the headers with single basic sporty muff box I had laying around that was pretty new. I don’t usually farm out stuff I can do but I fucking rage over exhausts and he did a great job, cheap and quick. Now tucked up nice and tight, has a great rasp and crackle to it and goes better!1 point


.thumb.jpeg.384ff72c8d2b0ee0d34a7bdedb55bdcf.jpeg)


_sedan_(23230030334)(1).thumb.jpg.34d765361d66c78db614bae6ea2c156a.jpg)


This leaderboard is set to Auckland/GMT+12:00