
Leaderboard


Popular Content
Showing content with the highest reputation on 09/13/18 in Posts
-
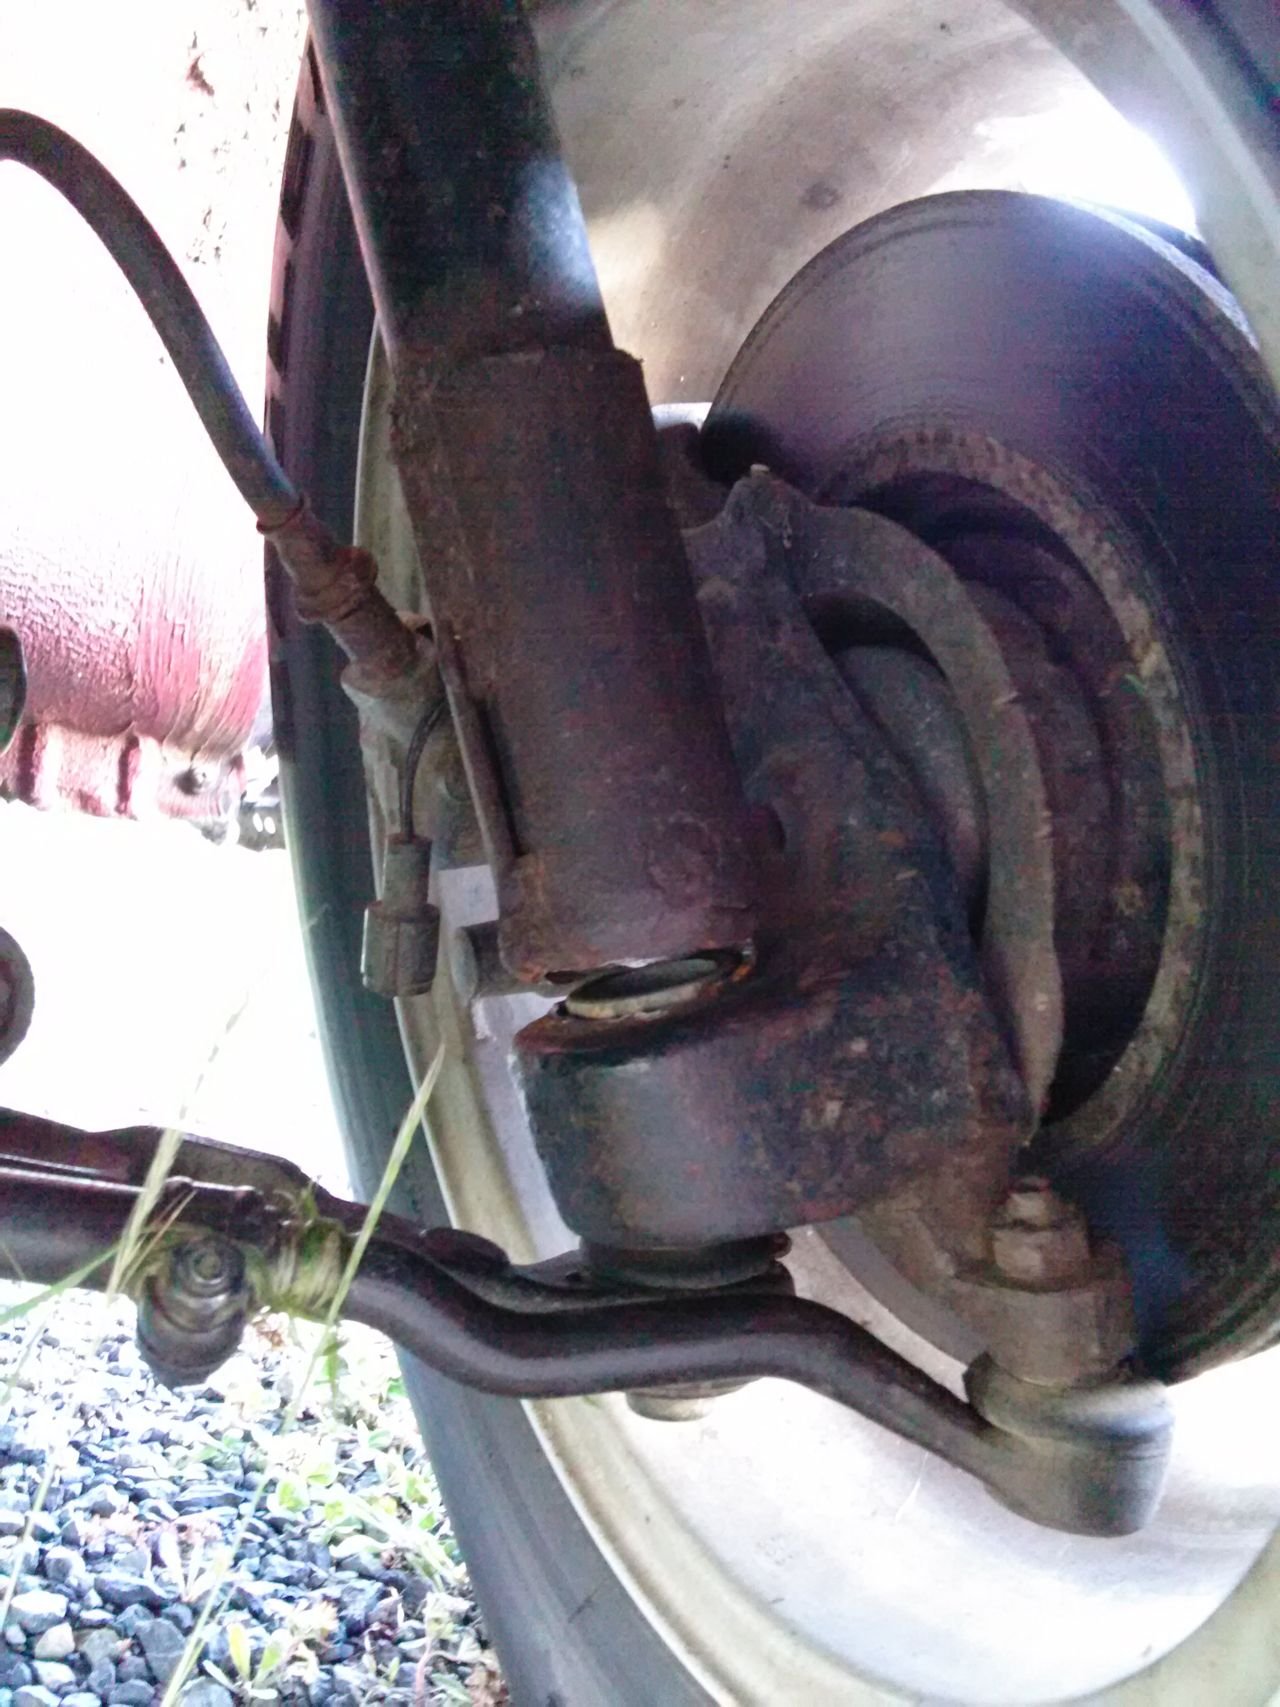
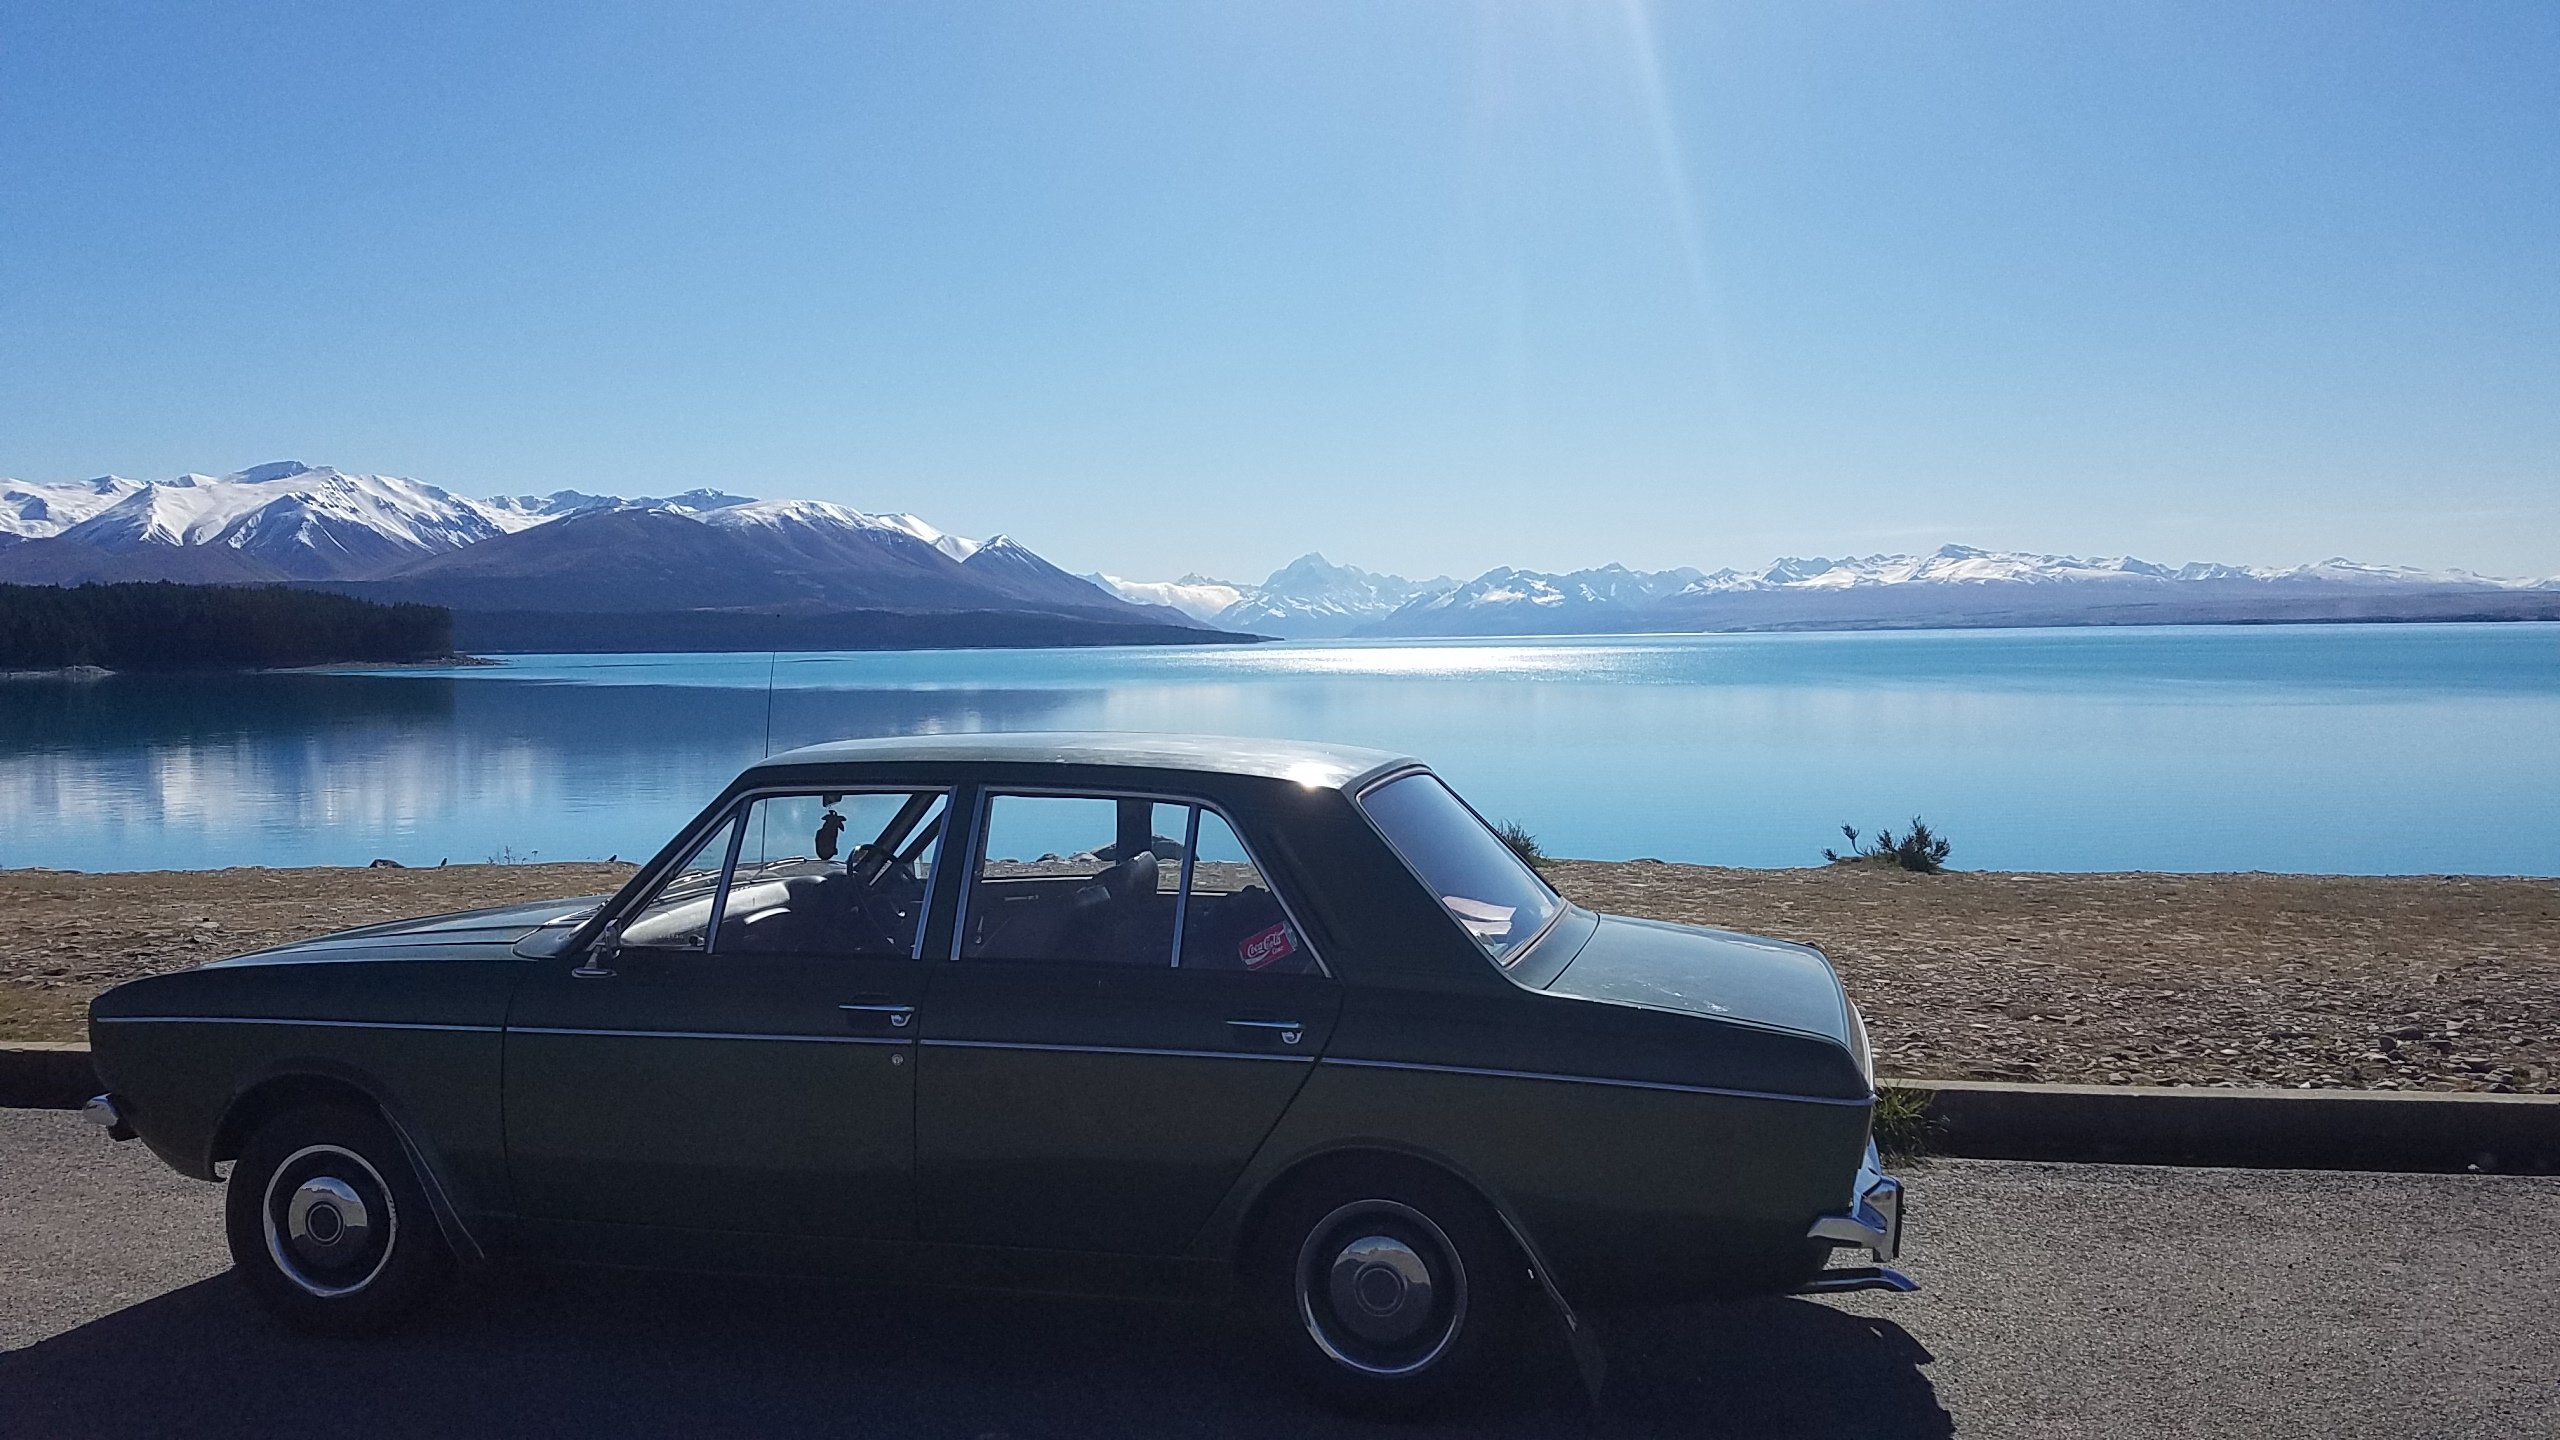
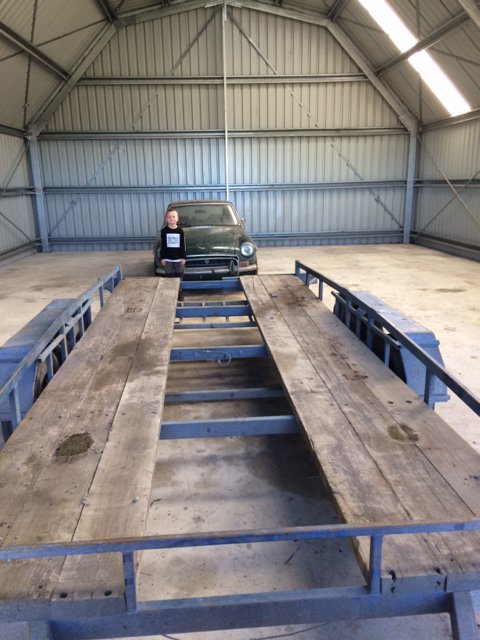
Tackled some wof issues.. :adjust steering box :headlight to operate :right rear indicator to operate :front brake imbalance 28% mrs picked up a headlight from auckland, an oem lucas fitment. Sorted. pulled the bulb of the indicator out and blew the dust out..sorted. bled the front brakes, everything else seems fine, if not then chuck in new pads. Sorted. there is no adjustment bolt of these steering boxes. So I Barry'd over the 5 different manuals I have for this and saw that the adjustment is via 2 internal Springs pushing on a thrust cap.. so I just chucked a couple of washers under the spring to take up some of the freeplay.. sorted. So this just happened, fresh as.. While at vtnz I heard of 3 different hillman hunter stories.
 13 points
 -
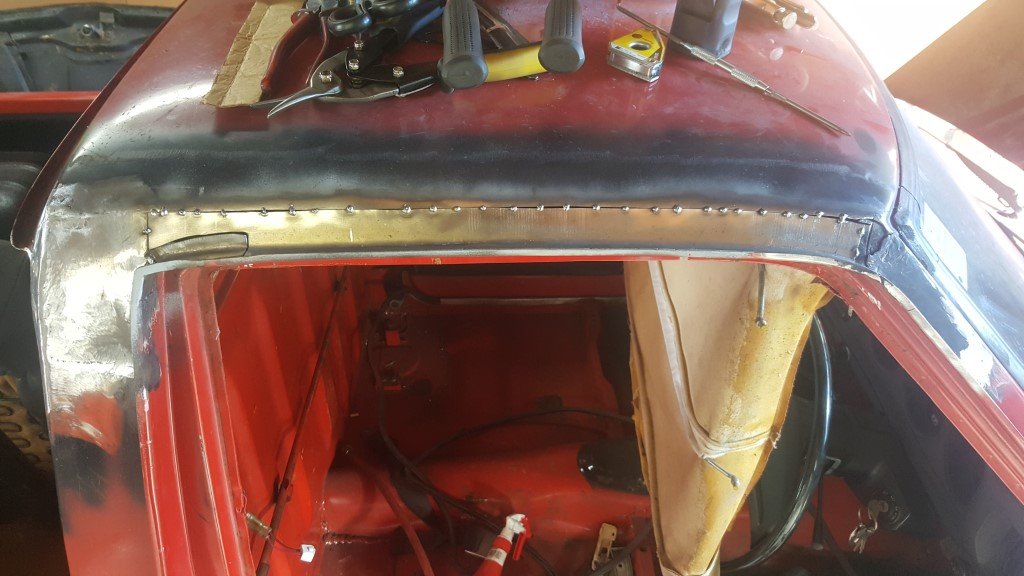
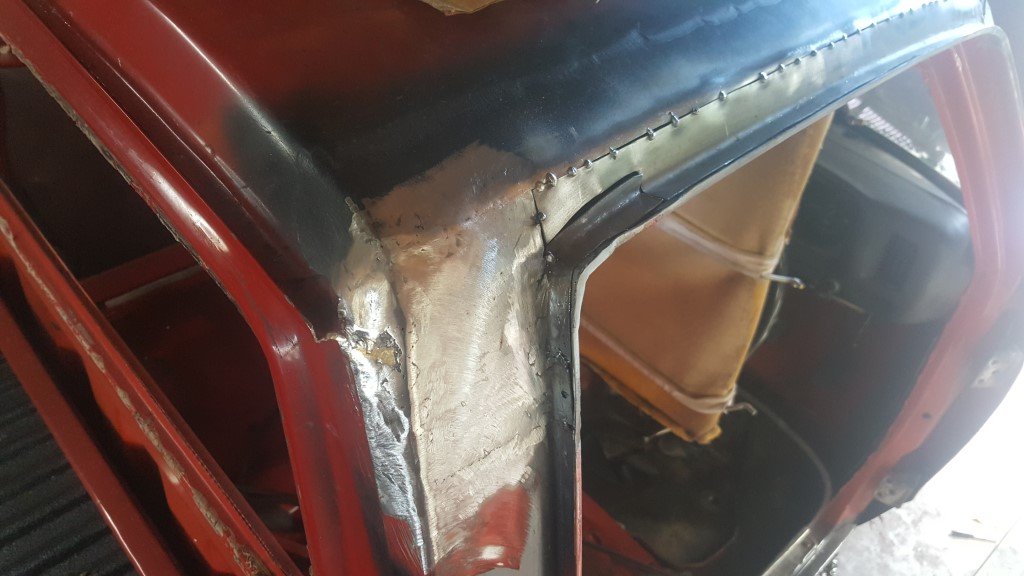
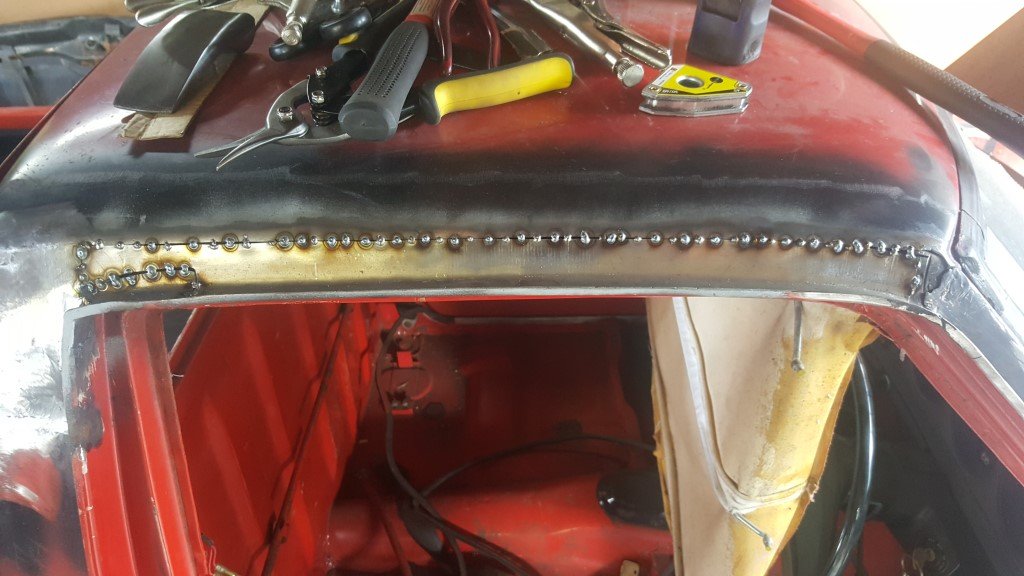
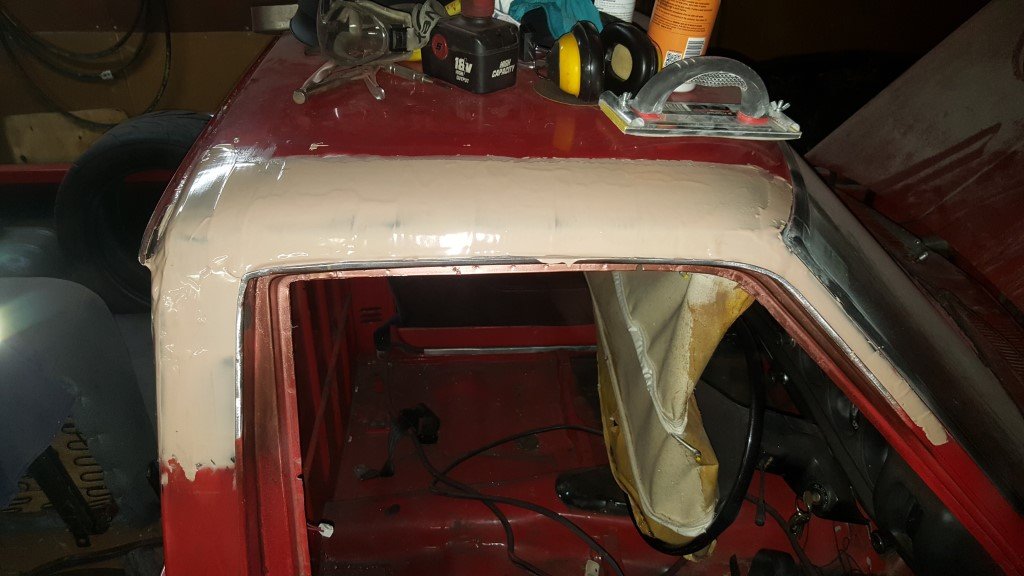
Configured the turn signals and headlights on the dash Made a small sub loom that connects up to the old instrument cluster wiring. The old dash only had one turn signal indicator so that made the wiring for that easy, the high beams were also easy. I had to do a little logic in the dash to get the low beam working the way I wanted it to, for the low beam I had to use the panel illumination which meant the little low beam light would stay on when I went to high beams. The dash lets you use If.. Then.. Else statments so I set it to use "If Low Beam = 12V and High Beam = 0V then turn on the light If else turn off the light" and for the high beam I just said "If High Beam = 12V then on Else off" so that way when there is 12V to the low beams then the low beam indicator will come on, but if there is 12V to both high and low beam then it will turn off the low beam light and turn on the high beam light. The dash really powerful like that. You can use conditional statements for any of the alarms or warning lights. Got some temporary wheels so I can get it on the trailer to get it dyno'd etc. I am still waiting on the proper wheels to arrive from Aussie. Hopefully they arrive soon. These are on the front with a 30mm spacer And the back, again with a 30mm spacer And it sitting down on the ground. I am still waiting on another set of spacers for the front wheels so I still have the front sitting on the dollies we made. Finished off the radiator, popped the trumpets back on, and added the sealing strip around the top of the air cleaner. It's starting to look real cool now. Just enough room for the radiator hoses. Installed the bonnet pins. They are a little higher up than I would have liked but I didn't want to cut in to the supports anymore than I already have in the middle of the bonnet. My other Avenger had a fibreglass bonnet so it's a bit easier to place the pins where you want them. I have to mould for the bonnet so I might make a fibreglass one further down the track, or maybe paint the bonnet pins body colour.12 points
-
Dishwasher packed up again yesterday. Same fault, different drawer. Home sick so had a look. Yep, same heater element relay had burnt off same pin. Must be a common fault given both mine have done it... De-soldered and pulled relay, couldn't be arsed getting another relay from eBay so thought I'd try repairing it... Drilled out board where the short pin was to make room for my bodge fix... And soldered copper wire to very short stub on relay, fed thru hole and re-soldered other pins to board... Laid wire along track and soldered at couple of points... Seems to have worked, just done a cycle ok. Might buy me a few more months...7 points
-
I hope to get close to this stance..just a little higher as it will be a street car after all.
5 points
-
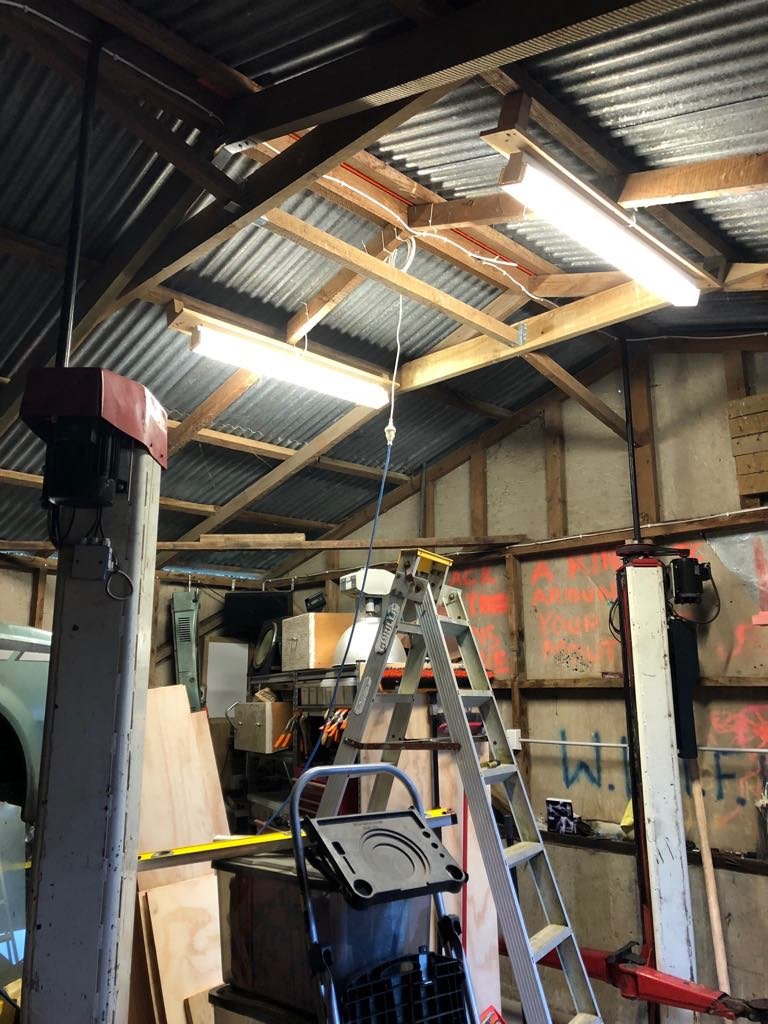
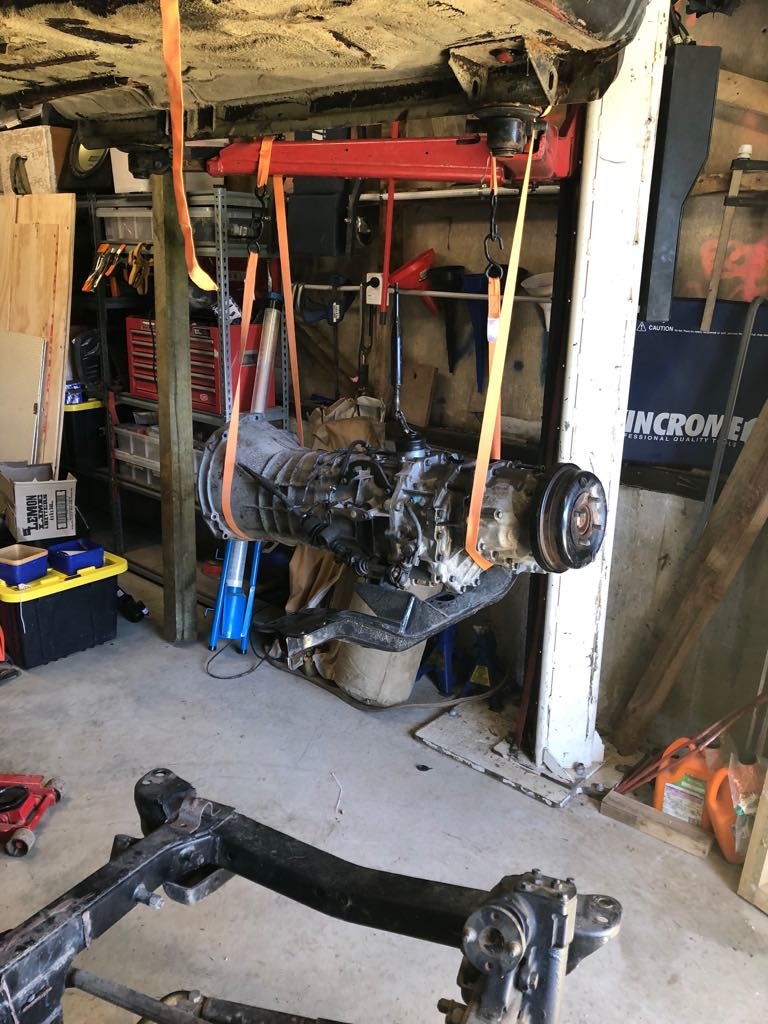
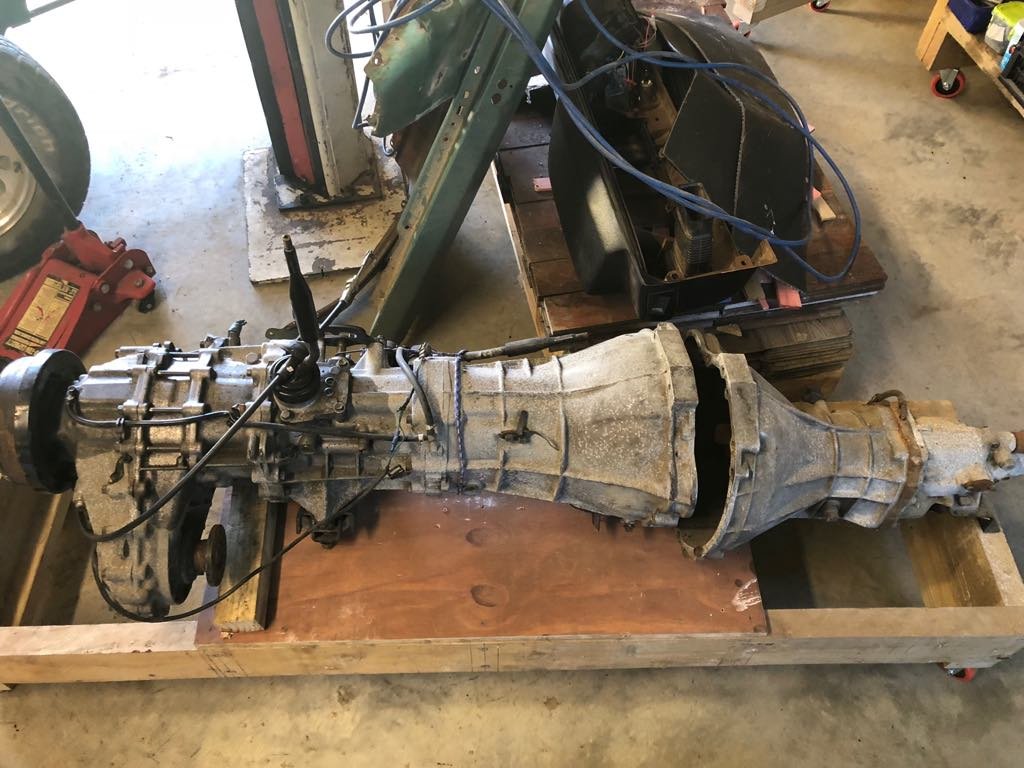
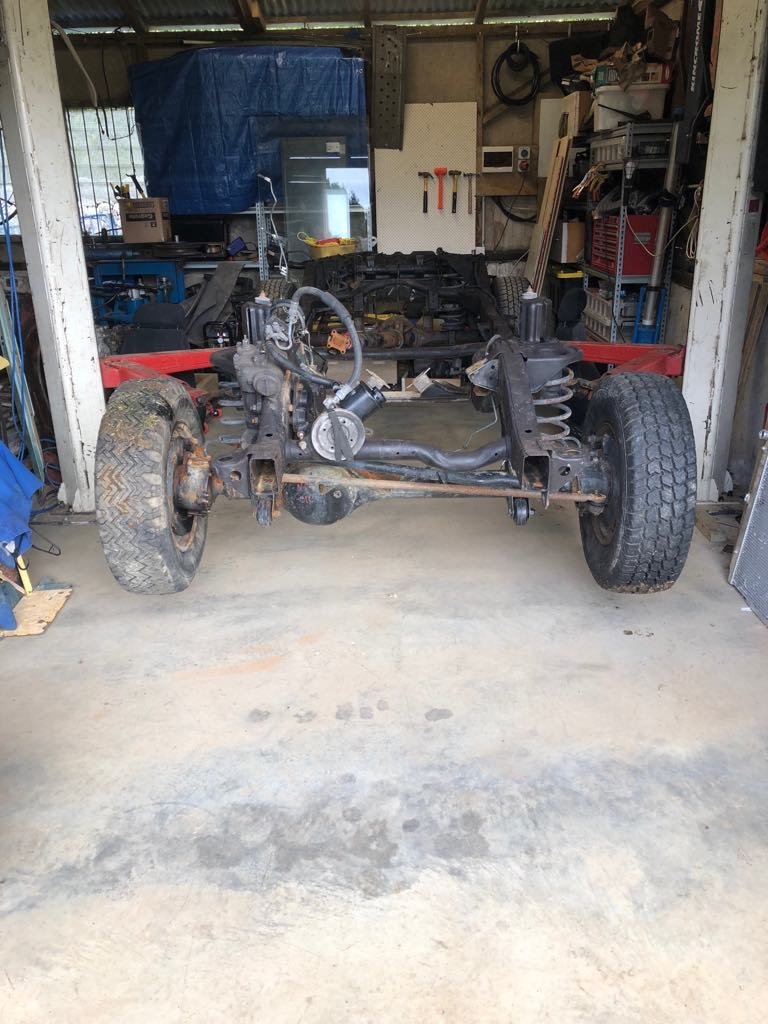
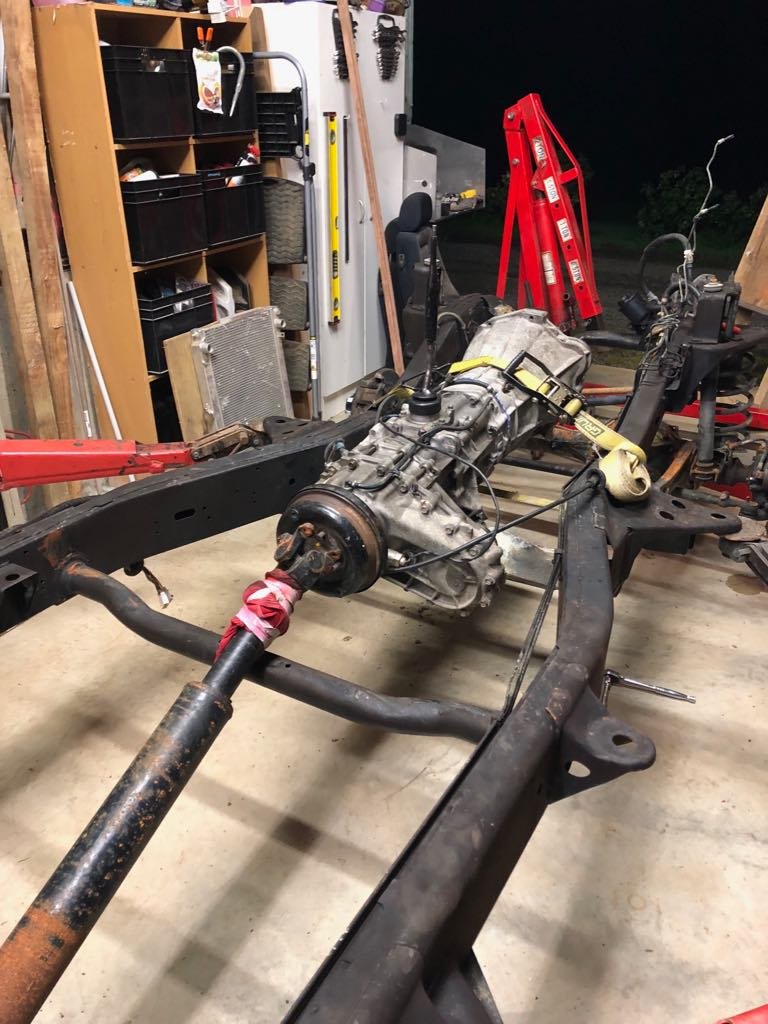
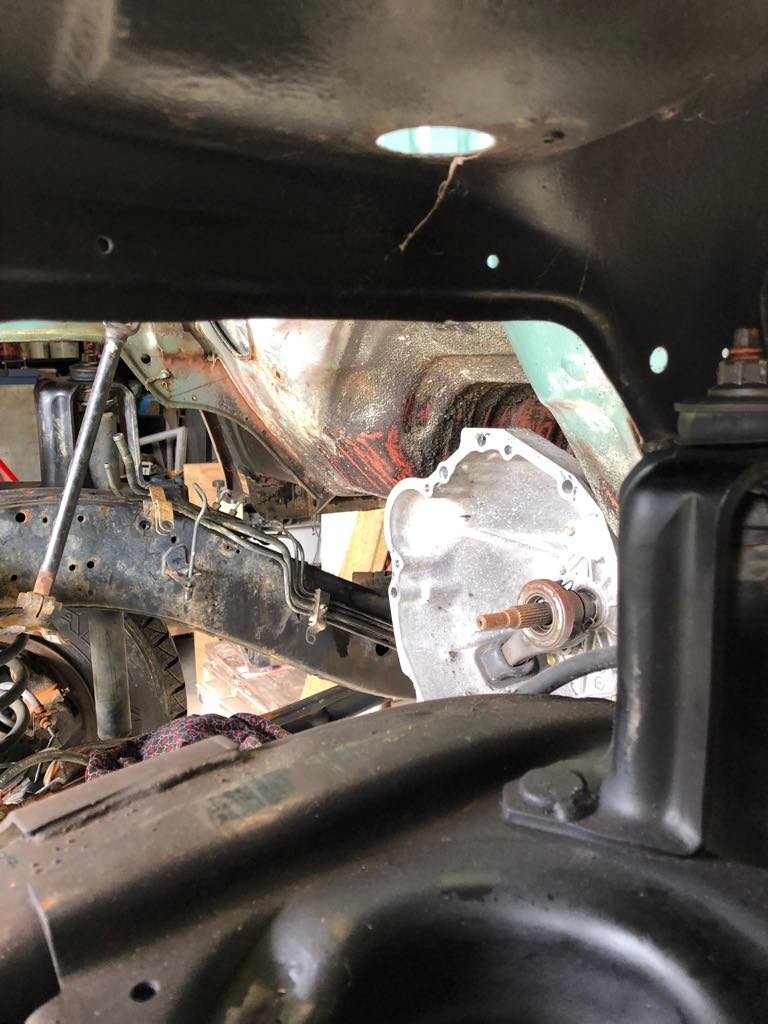
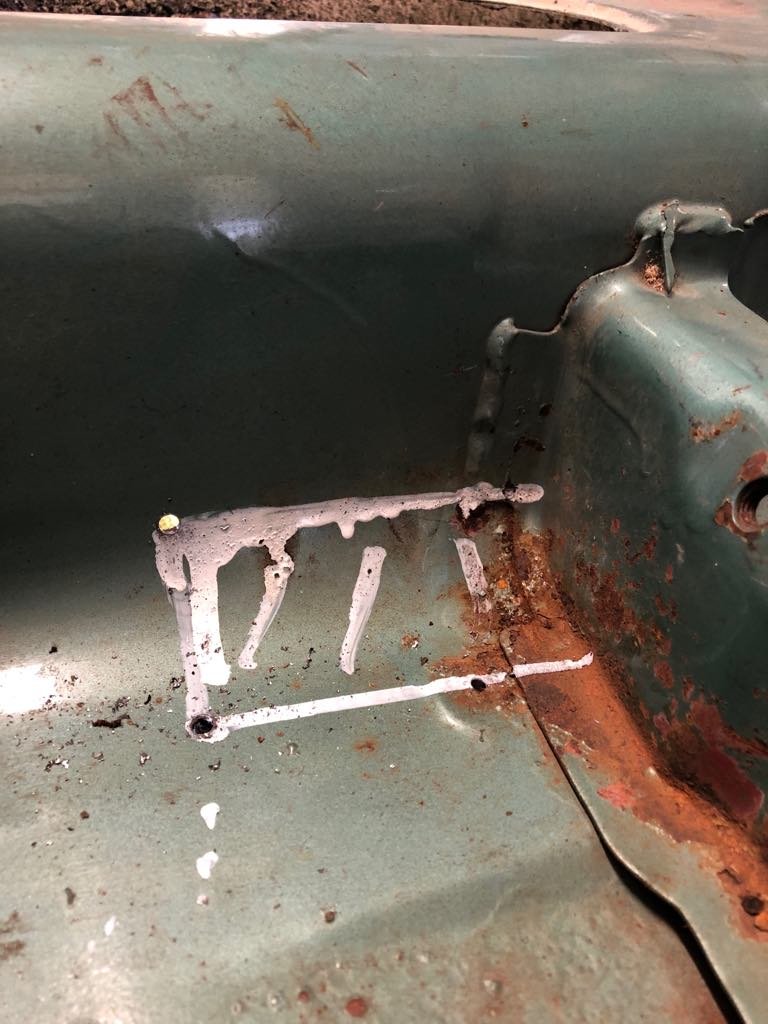
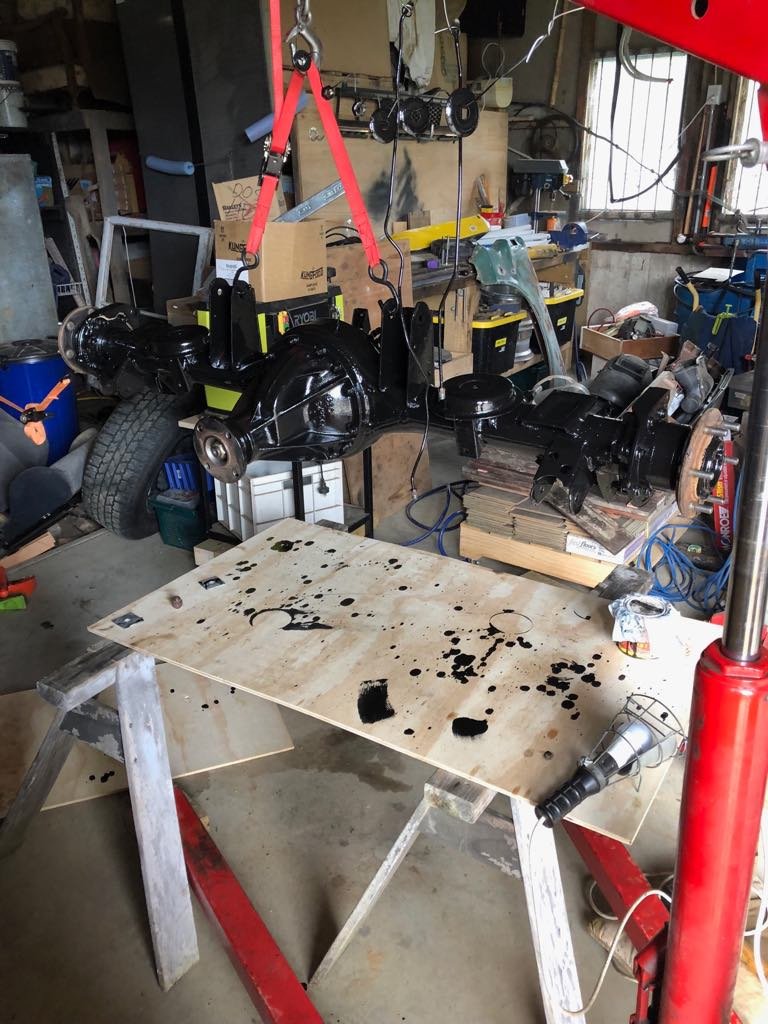
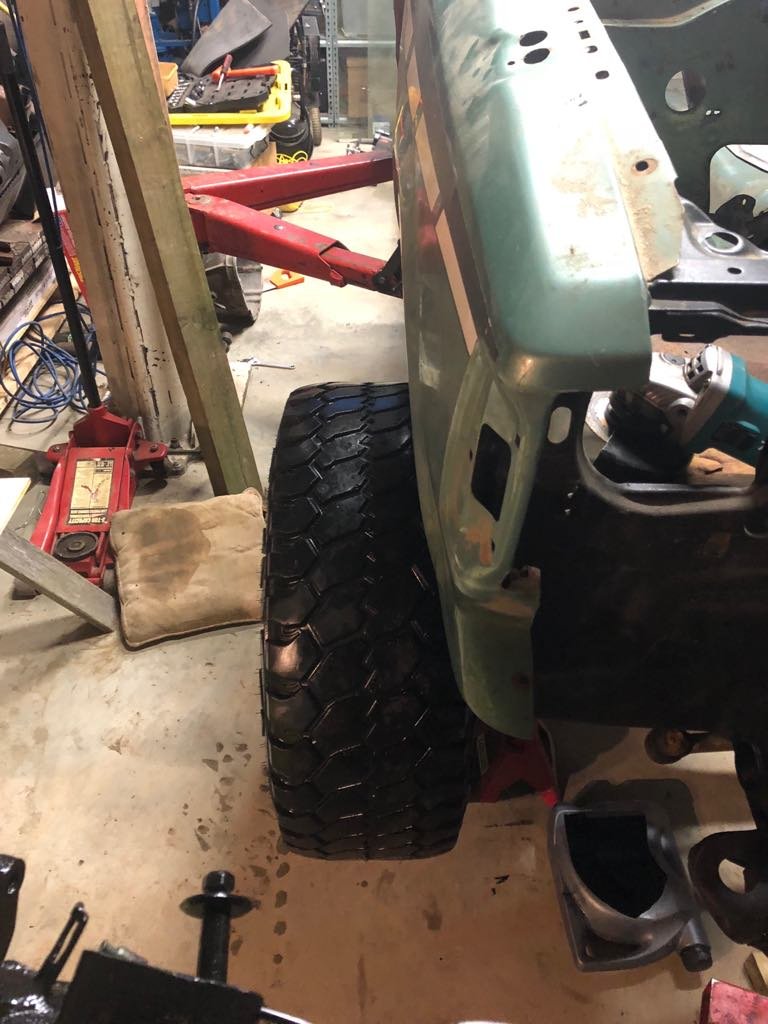
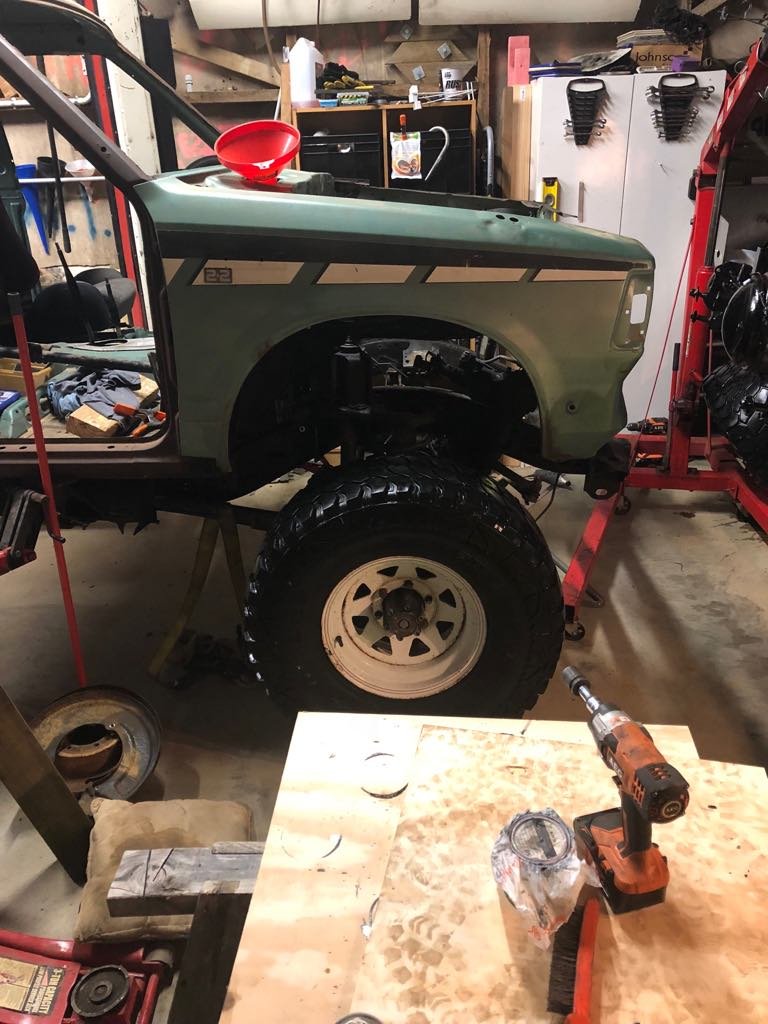
I did have a thread for this, but it didn't get worked on for several years, and I think it has gone. So, start again. (Picture here of Datsun when I first got it if I can find one) I have/had (depending how you look at it) a 1985 Datsun 720 4wd. It was gutless, it had rust, so it was a Datsun (not a Nissan haha). I thought I would pull it apart for some rust repairs and paint, that was (too) many years ago, it snowballed, I ended up disassembling the suspension, driveline, painting a lot of things, modifying the gearbox to accept an RB, bla bla bla. Then this year, I had been chipping away at it, I had finished study and finally had a decent job. And one day as I was doing something I looked at it and decided I wasn't going to be happy with it when it was done if I continued down the path I was on. I couldn't add too much power or things would explode. I couldn't get aftermarket parts to improve things like ride height and driveability (not easily or cheaply anyway). So I thought, "stuff it", and decided to just do what I wanted in the first place, and had always said I wouldn't do because of cost essentially, but yeah, now I'm just going to be irresponsible for a bit and throw money at this thing until it runs and drives and I am happy with it.. So the basic equation is: GQ/Y60 Patrol chassis and suspension, diffs etc. 4" suspension lift and all the goodies that go with that. + RD28 gearbox from RD28 factory patrol. + RB25DET from your friendly neighbourhood Ceffydrift/Skidline. + Datsun 720 King Cab body, with factory body mount points, adapt the chassis to suit. + 33x12.5 R15 tyres on -22 offset 15x8 steel wheels. + Flat deck because practicality (I do want to use this thing once it is done)/ease of adaptation to Patrol chassis, and adaptation to toolboxes etc. = Profit??? /more likely major losses. But profit in happiness. Have done some work so far, but a lot of time/money has gone into setting up my shed to make this project as easy/efficient as possible. I modified the roof in the shed: (Ignore thee strange writing on the walls, it's an old farm shed that has slowly been modified to be my garage, there are lots of .22 sized holes in the walls, and there were gas lines in the ground when we dug it out to put in the floor) So I could install a hoist, which has multiple uses: Lift it up to put it on a dolly, damn these things weigh a whole lot. On a dolly next to the gearbox from the Datsun with an RB25 front housing swapped onto it. Slight size difference. Patrol chassis in place. RD28 gearbox. Unfortunately this chassis originally had a TD42 (which it didn't come with, but there was no way I could use anyway as it was waaaaaaaaay too big), so the driveshafts don't work, but will have a look to see if Beattys Drivelines have any listings or if I can source replacement entire driveshafts to suit. Nissan Lego! With the body in about the only place it will go, i.e. engine will fit behind radiator support with radiator under the panel, gearstick in a useable position, etc. Will likely need to cut and box the firewall/tunnel. Had to cut out this bit as well as some of the seat support to let the transfer case shifter come through. With that cut out the shifter comes through the factory shifter hole, bit further back than normal, but still very useable, and with a slight tweak to the actual shifter the transfer case shifter will work fine and not rub on the passenger seat. The picture above is with the shifter in 4th so that is as close as it gets/have checked it in all gears. Currently tidying the rear diff: Painted in POR15, will get new rotors and rebuilt calipers shortly. Then will go back in once I buy the last pieces of the rear suspension lift, which will give me enough time to tidy/paint the rear of the chassis. Has an LSD which seems to be in good condition, which will do until it is on the road and then I can think about an air locker. Went to Auckland the other day, got some tyres from @Stu, bloody nice guy, nice to meet you in real life after all these years of seeing you on forums. Sharp price too. Pictured here with my parents flash new couch and a whole bunch of new free diving gear, was an expensive day all up haha. (Please excuse the twist in the tie down, I know, I'm embarrassed for me too) If you are thinking: "Gee, that looks like a fairly low offset wheel, and you are already putting them on a chassis that was designed for a significantly wider than the body than what is going back on it, are they going to fit?" Then the answer is "Yes?" Gonna have to make/buy (I don't know of any 200mm ish wide you can buy?) some fairrrrrrlllllllyyyy hectic flares, but I really don't want to reduce the offset, so that is what I am sticking with until such a time that I may be forced to do otherwise. They should be fine this way, will just be a case of trimming the sheet metal to suit. Look, honestly, if this were an exercise completely in practicality, then I would have failed. But mostly it's an exercise in "I do what I want", then deal with the fallout. So I call that a win! I get my new welder this week (HF TIG, MIG, Arc w/ spool gun) so looking forward to having a play with that, and potentially making a start on the design for the chassis to body mounts/posts, will make up something up then get them ok'ed by my local certifier and welded up fully by a mate I hope, my welds aren't up to crucial parts like this and I feel like there are better places to practice on. At the moment it is sitting on the hoist with the chassis on axle stands. I will make a discussion thread shortly and link to it at the top of this post, let me know your thoughts, constructive criticisms etc. I will try to keep this updated, I am good at taking photos of stuff usually as I do it, just terrible at actually putting those pictures up. Cheers, Hayden.
4 points
-
Got some gas sans snag from Bunnings so I can carry on with the zorst and front shock mounts too should be ideal noisy/burny goodness
4 points
-
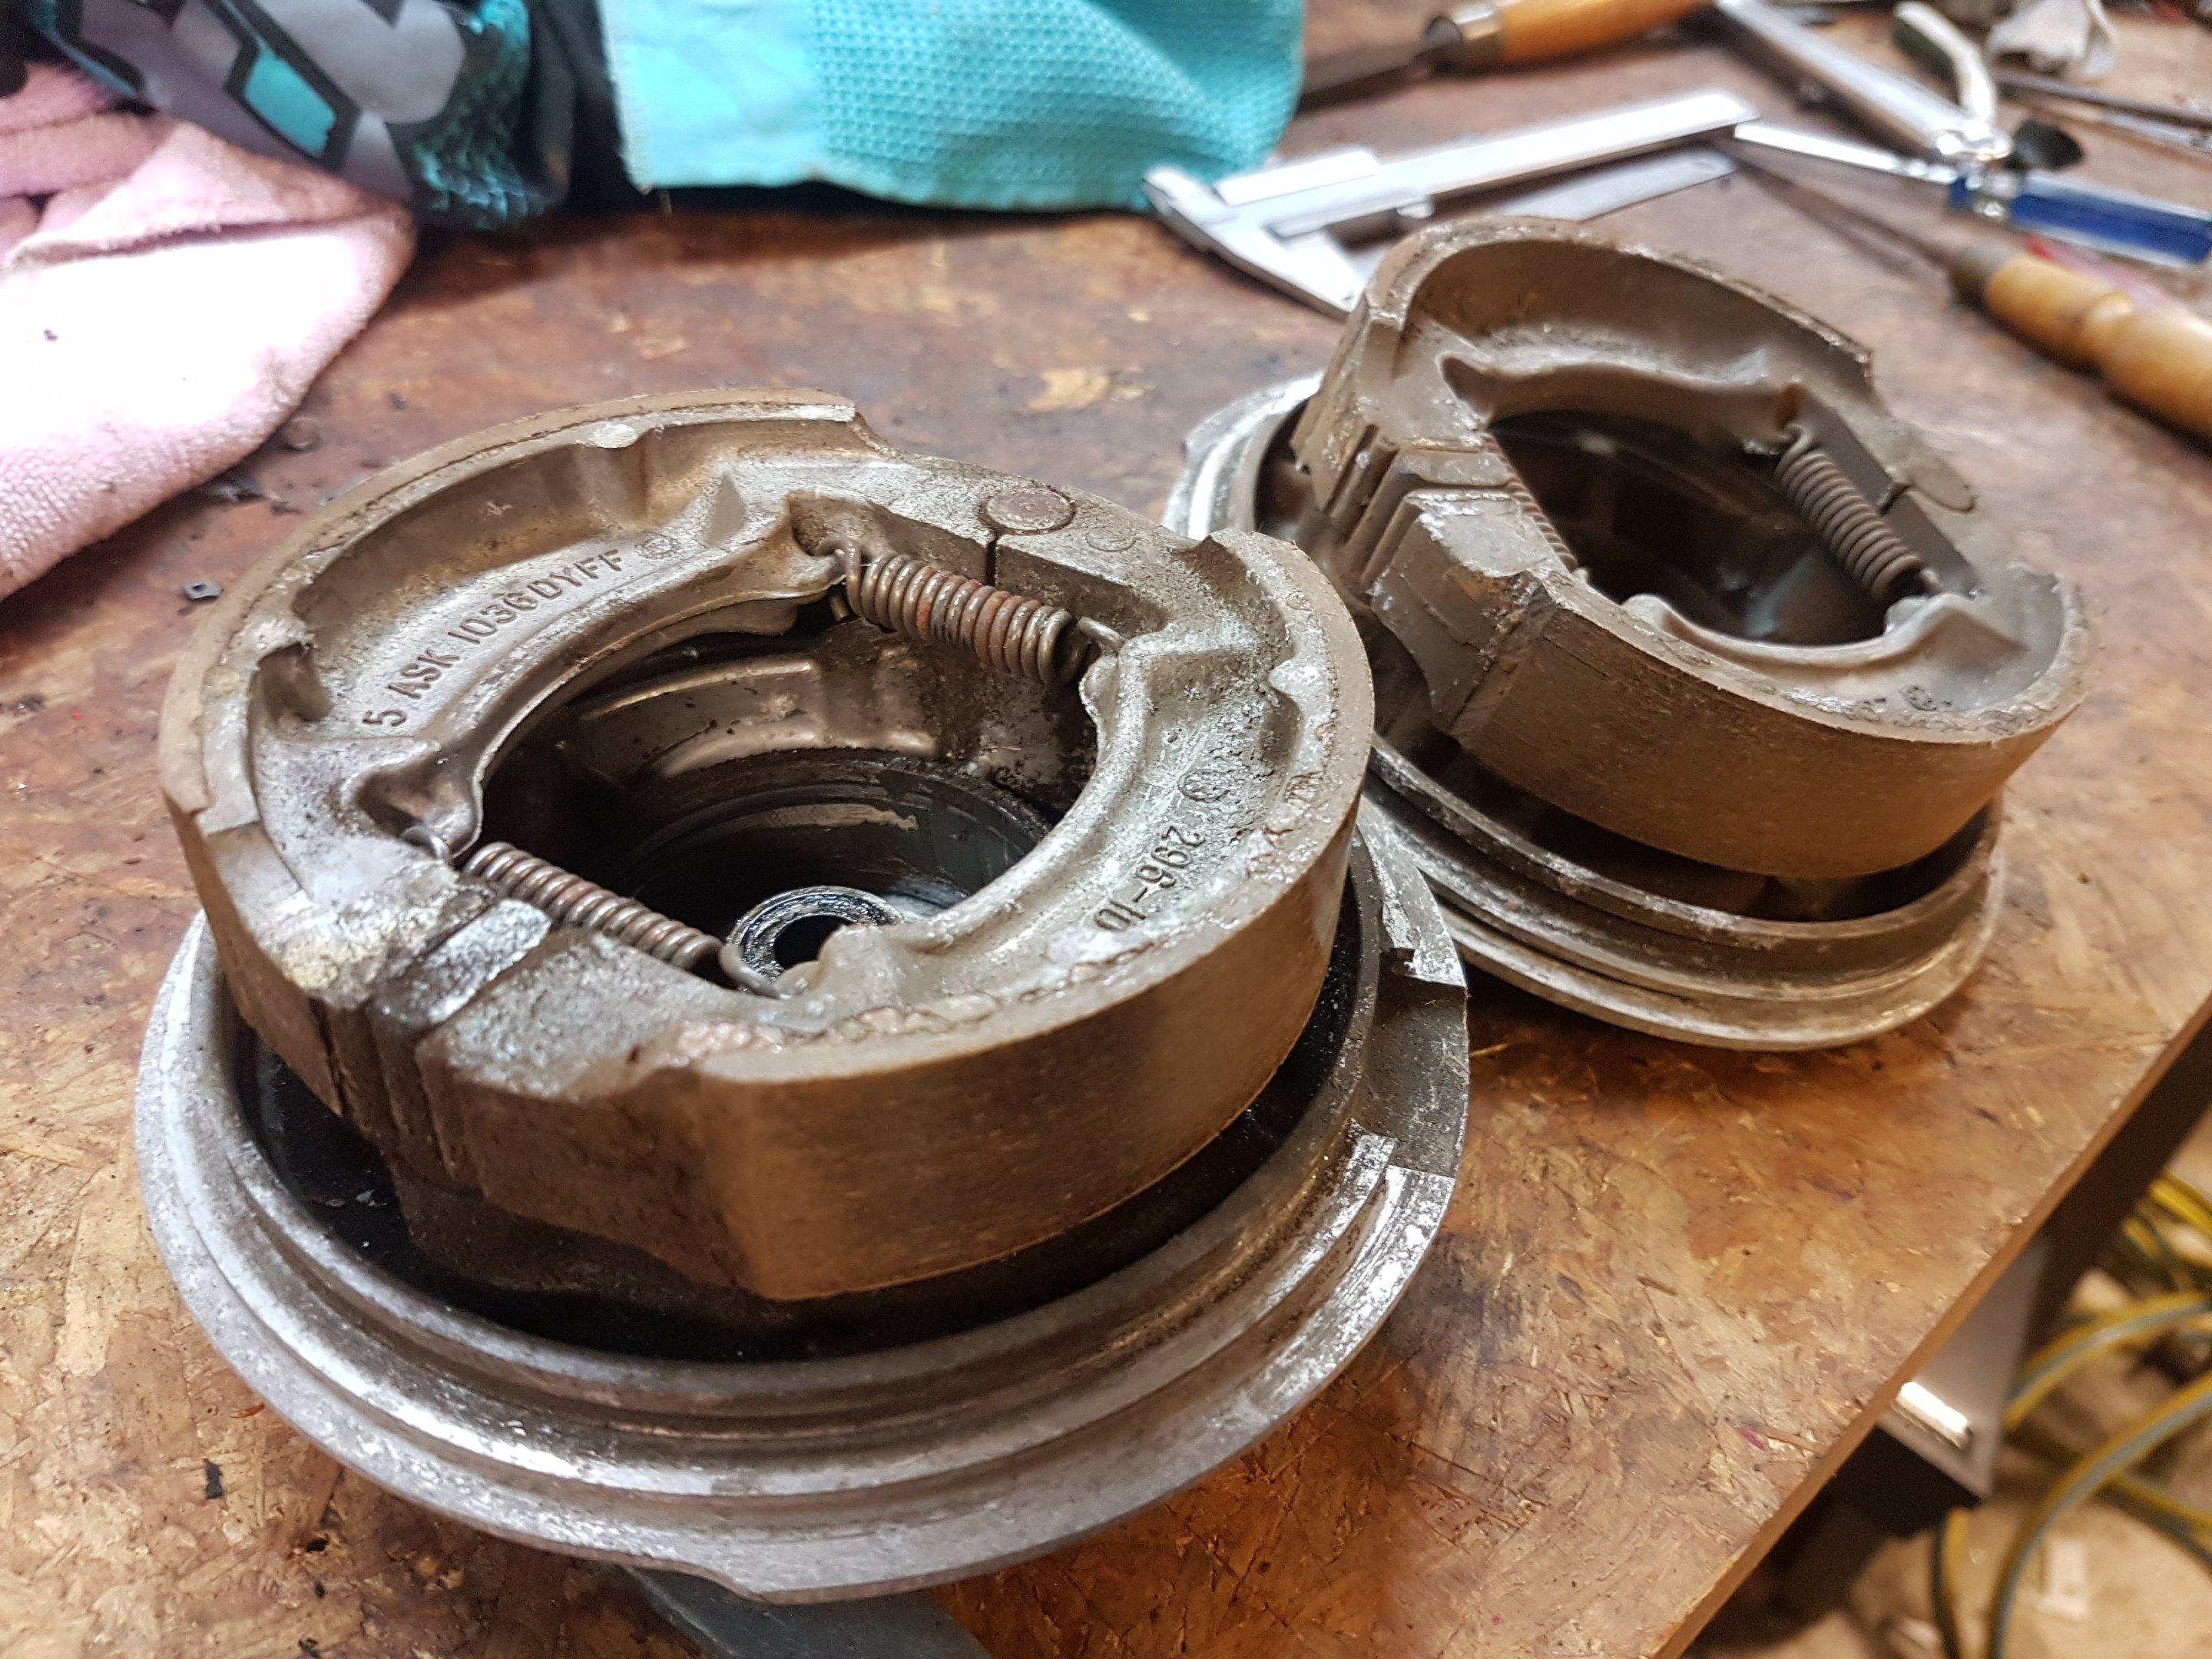
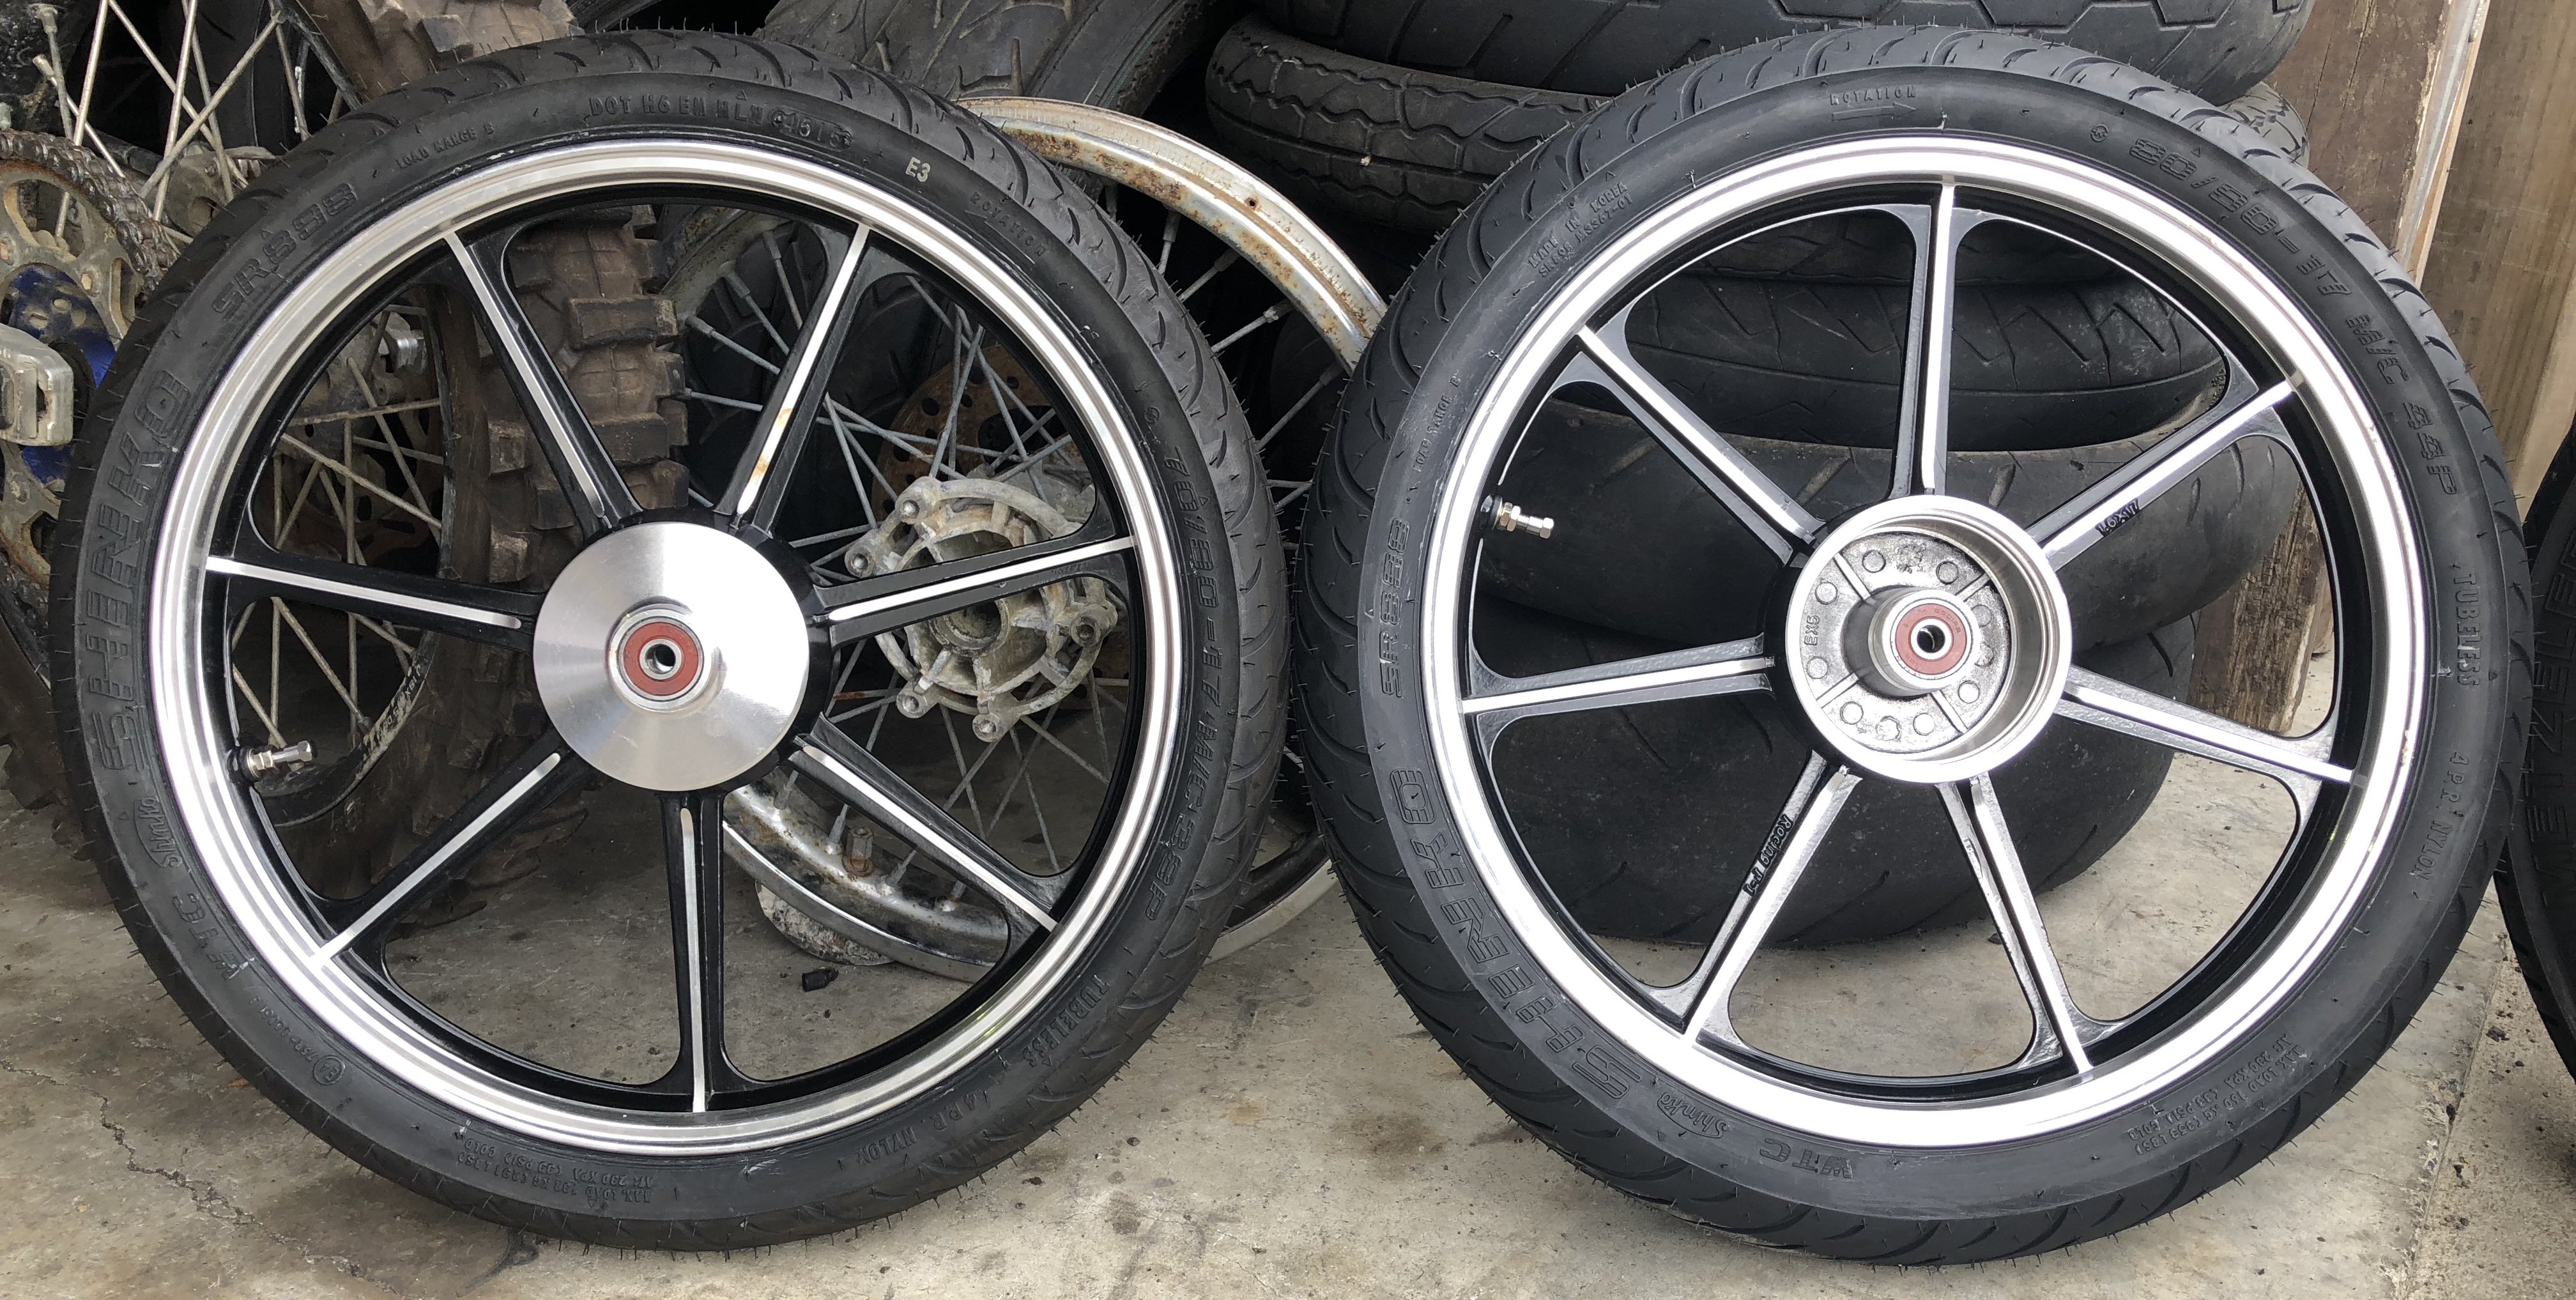
I need recommendations for tyres. The current ones are OLD Ching Beys or something. I'd like a sportier option, like what's on @Horse25's RD50. It's got 2.50 -17's at the mo and I'm wondering whether a 3" / 90 would fit. Also removed the wheels to check the brake shoes. They're pretty glossy and old! I've ordered a new set from @Raizer. Something tells me the rear brake lever isn't in the right place... It sits really high and quite far out to the right: Might need a gas torch to get it into the right place. Current state of affairs: It's pretty amazing how much you can do on a bike with minimal effort. Last night I removed the engine to check a couple of things. This required removing ONE BOLT (foot pegs were already off) and undoing 5 wires. I'd been trying to avoid removing the engine because it seemed like a hard job .
4 points
-
That ad is soooo unrealistic A female wof inspector at vtnz!4 points
-
got motivated (wifes friends were over) went to the shed and started welding my exhaust ran out of gas.....3 points
-
Entry form is in the works and will be incoming shortly thanks to @johnnyfive and the wicked help of @- i5oogt -. EVERY PERSON that is coming needs to fill it out. Regardless of rider or support crew. Last year John took details on the day, but it took a bit of time and this is a surefire way of crossing the i's and dotting the t's incase the unlikely happens. Chur bruddas. Better go put my bike together aye.3 points
-
very cool The trick with dirty aluminium is to clean it as well as possible then do your welds twice (seriously!) Do the weld as best you can- it will be spotted with impurities and shit bubbling out of the material. Grind all of that dirty material off and then do the weld again over the top. Worked for me with a used LS sump3 points
-
Yeah these shinkos are awesome. Can get them in easy as. We use them on most 17” small bike rims at work now.
3 points
-
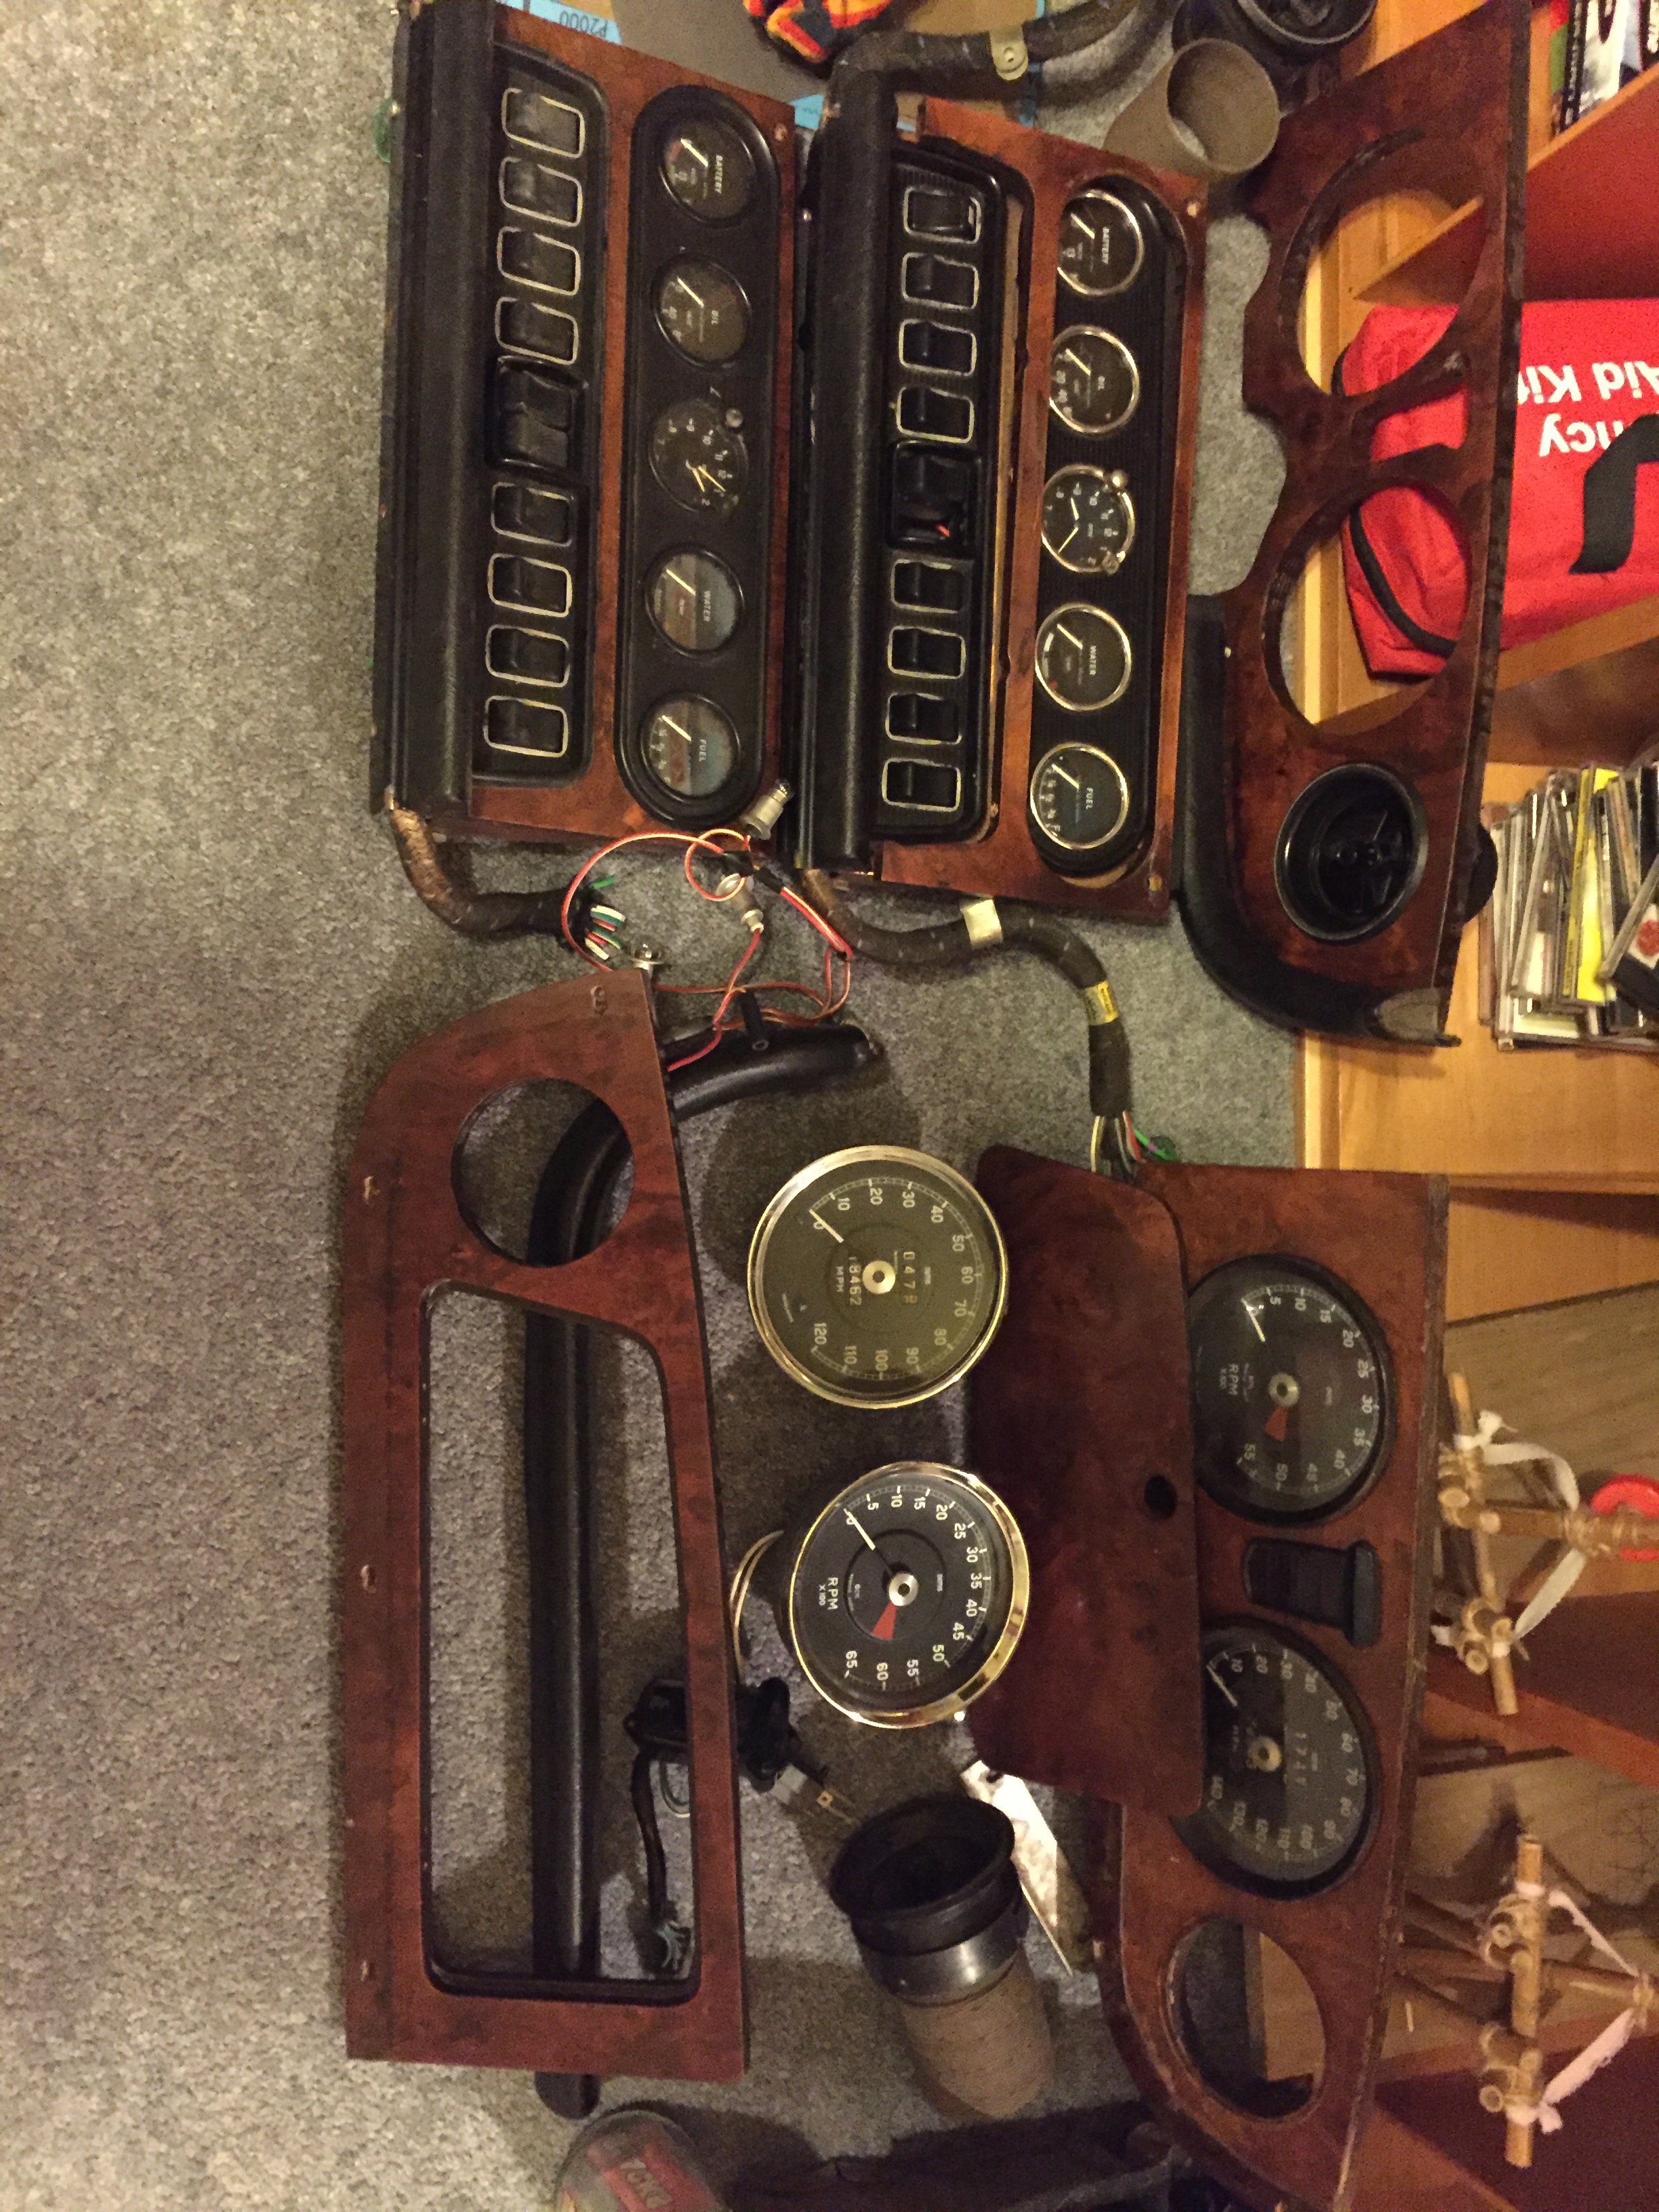
I moved the operation inside tonight and started to put the dash back together. I’ve got a spare for parts but will be using the sweet chrome rimmed dials. It’s got a v8 calibrated rev counter. I stated polishing the varnish which I originally applied more than 3 years ago now and it is looking sweet. I love the dash one these cars - kind of super marine spitfire mixed with your grandmas burr walnut hall table.
3 points
-
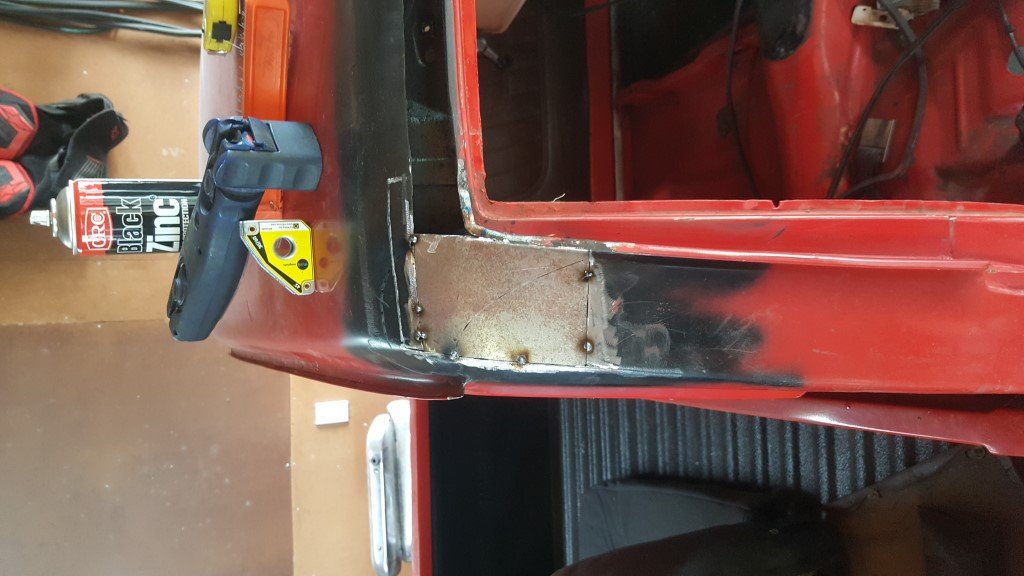
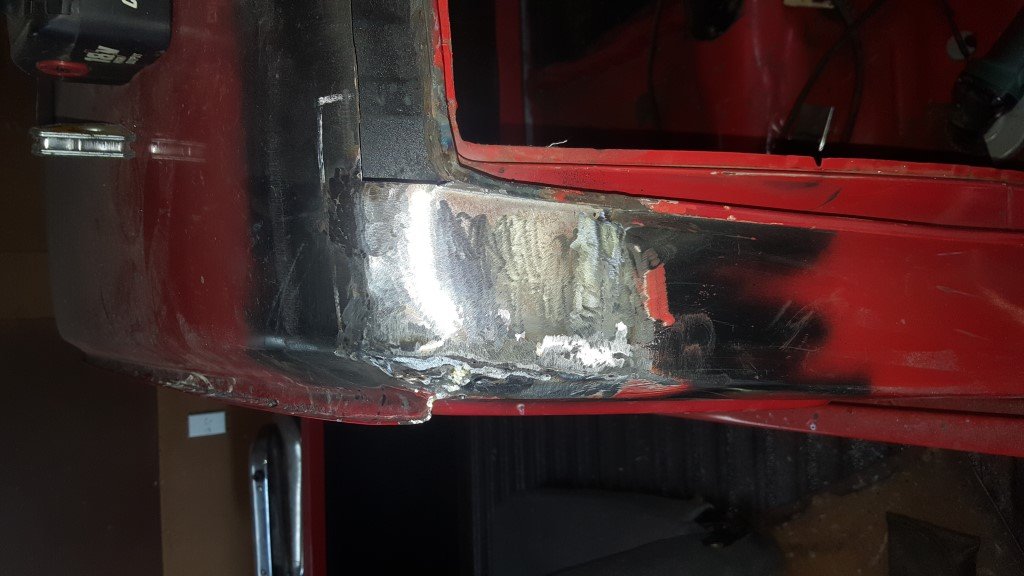
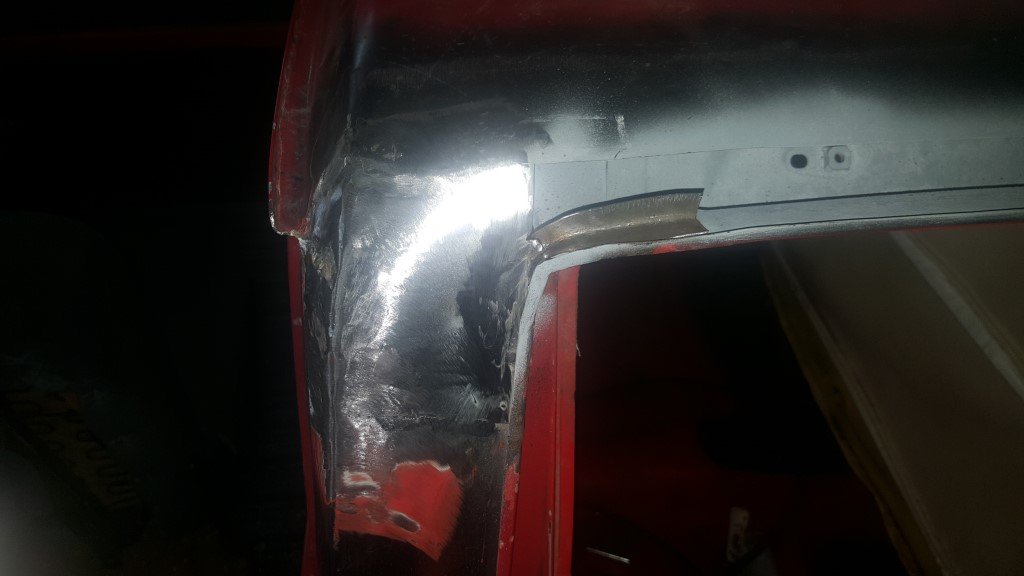
Welded in brace with all the middle cut out of it. Worth the effort.3 points
-
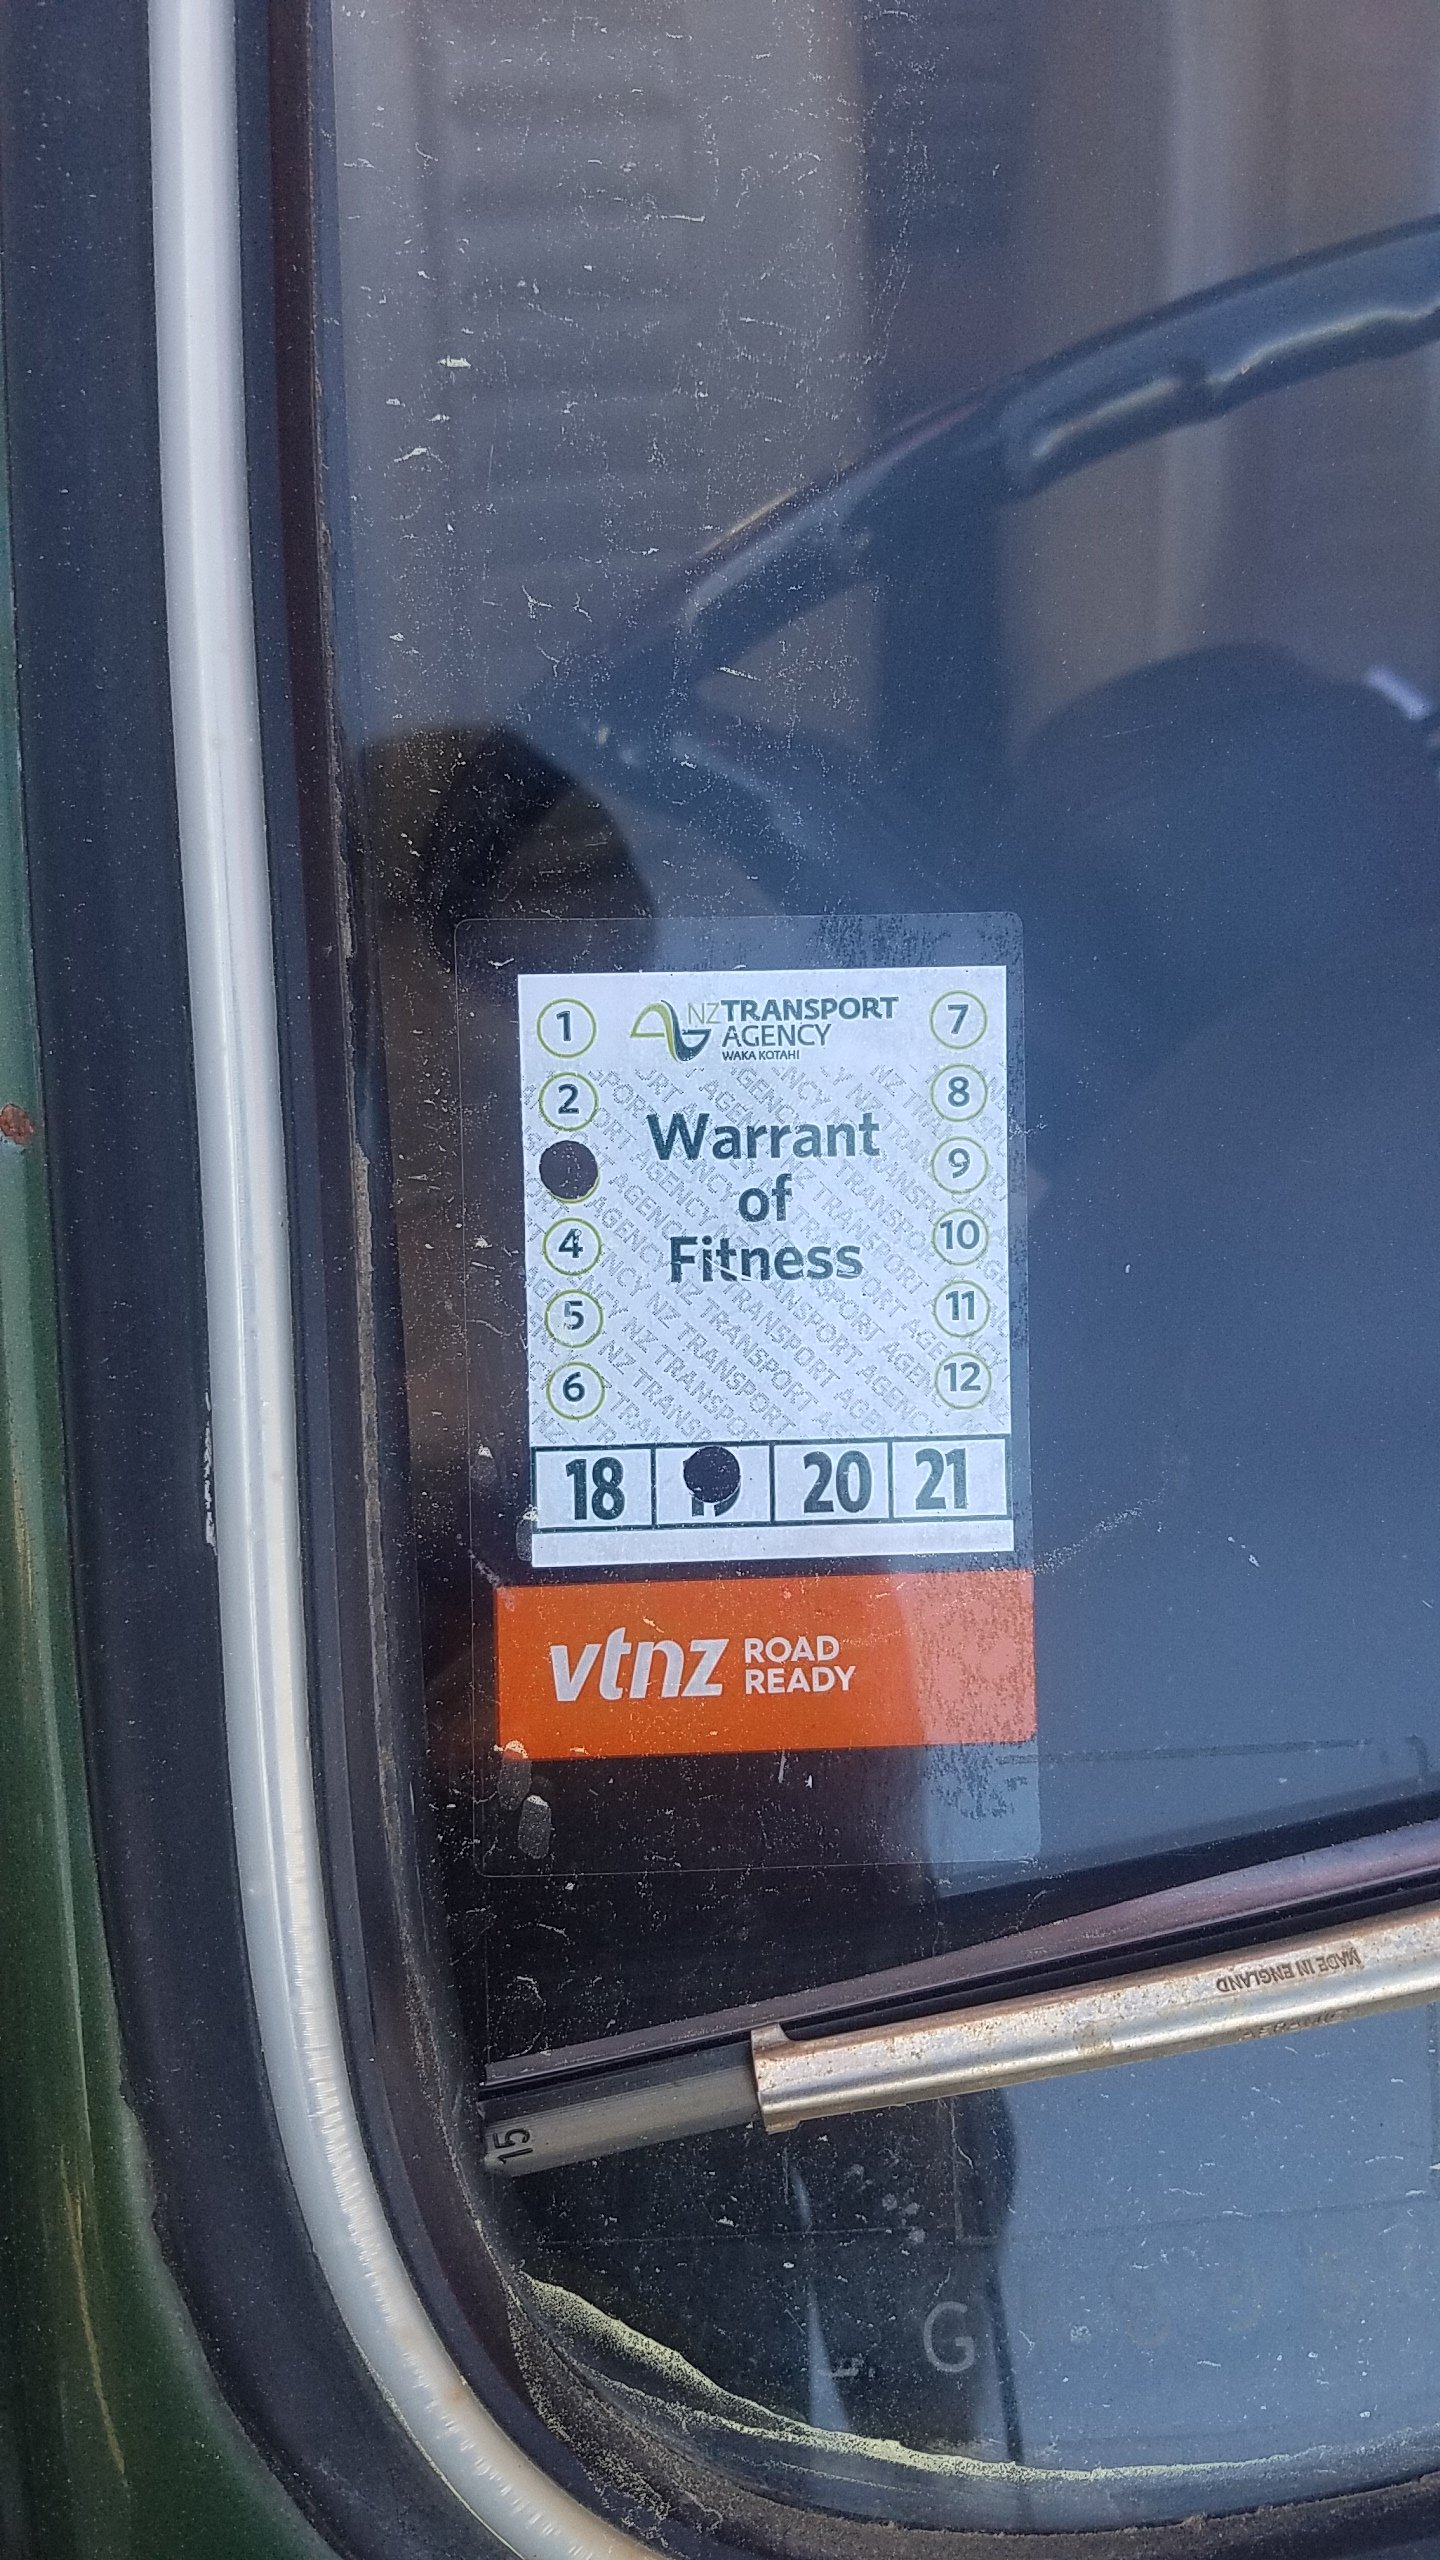
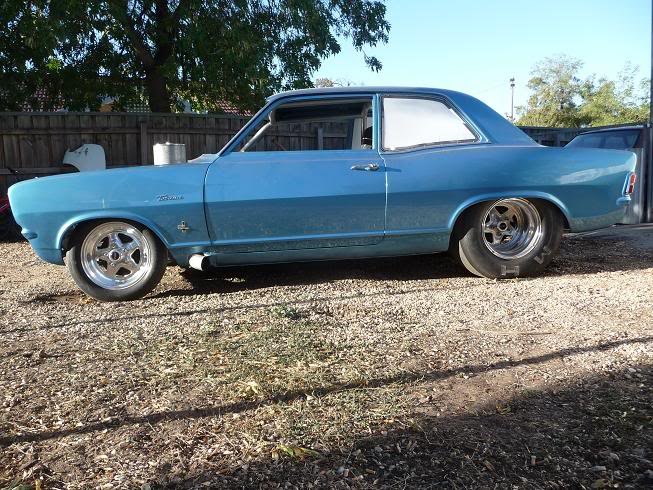
Hey just wondering if my chev would pass a warrant? Vtnz said yes but im not sure. Here's a pic for reference3 points
-
These were taken many years ago in the tunnel at the bottom of Ngauranga gorge Shits changed there abit but havn't been there a while. can only assume all the graffiti is long gone.2 points
-
Making some better (hopefully) front shocks
2 points
-
Now I'm having a panic attack! I need my overnight parts from Gizzy!2 points
-
It's on my to do list. I want to make it as sleeper as possible. I might have to wait until I get the rest of the outside repainted though. Thanks. I am rushing to get it ready for a mopar show that I am driving to in the South Island in October. I still have about a month to finish it, so I'm looking pretty good. The wheel are the only thing that I am waiting on now.2 points
-
LESS THAN 2 MONTHS TO GO GAIZ2 points
-
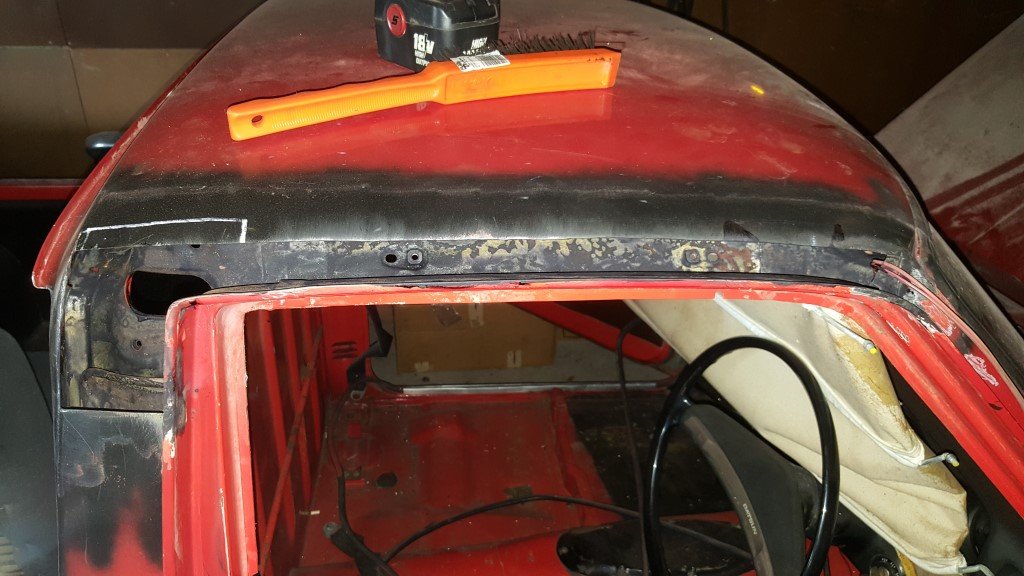
Rear screen is out and it’s good news, no significant rust, just a bunch of scale, it’s being cleaned up now (and any Pinholes being sorted) and then the roof can be painted and the screen refitted. Hanging out to have this home again so I can work on it. In other news The car sounds like it has a collapsed lifter, so today I ordered a comp cam/lifter/double row timing chain/valve spring kit from Summit racing. I hadn’t planned on it but if I was going to go to the effort of replacing lifters I may as well upgrade stuff.2 points
-
2 points
-
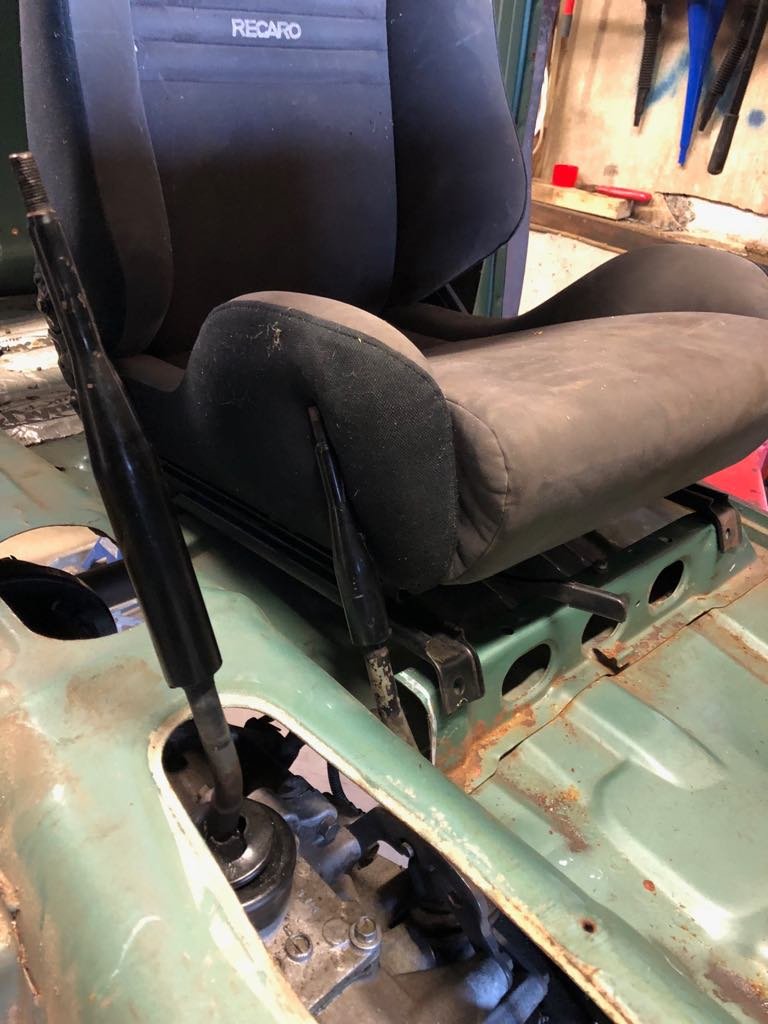
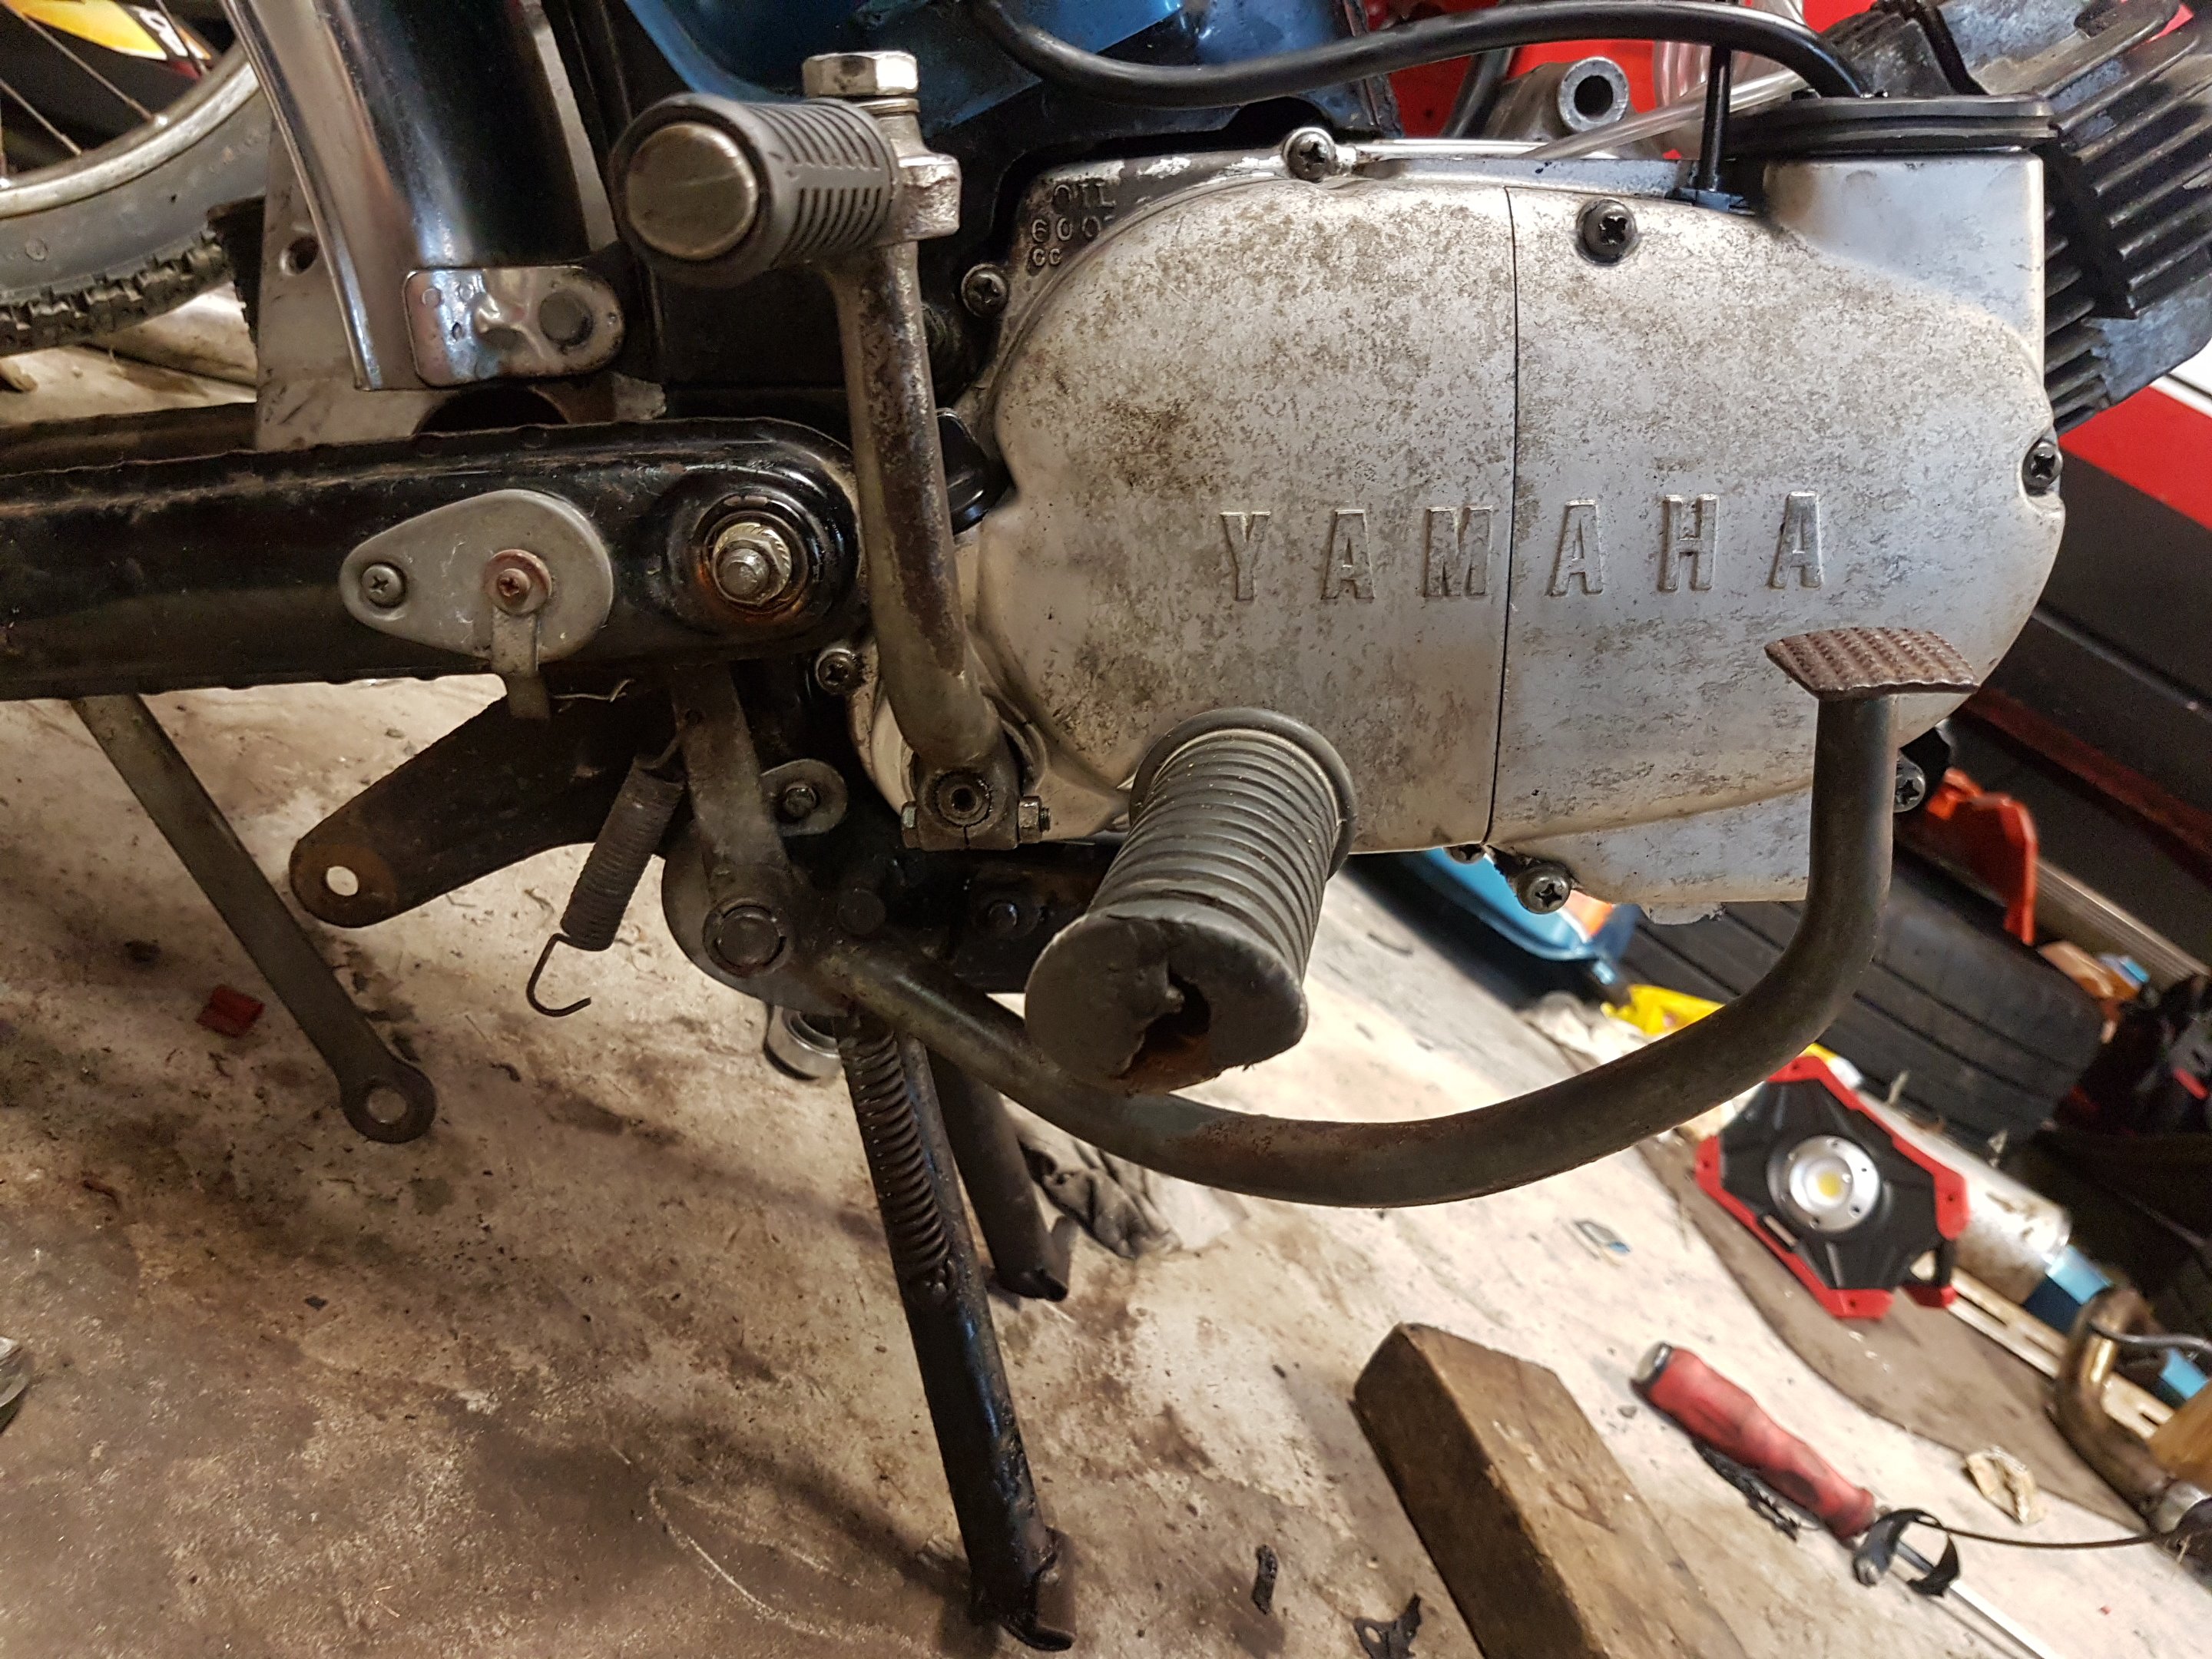
Big milestone. Fired the engine up for the first time. A few issues. The biggest problem is that the TPS doesn't work, The shaft on the throttle bodies spins the opposite way to the standard 1UZ TPS. Need to do some research to figure out what TPS I can run. In other news. Got the gearbox boot and gear knob. Tried this one but it was a little high for my liking. Swapped it out for a smaller knob which feels much better (Ladies!! See, a bigger knob doesn't always feel better) It also has the correct H pattern on the top which is cool because it is different to the 5 speed sierra gearbox in my 75 Avenger and the old standard Hillman 4 speeds, they both have reverse next to first instead of below 5th, so I'm sure I will forget where reverse is on this one if I didn't have the H pattern there. Also got the dash up and going. It still has the protective screen protector on it so it looks a bit fuzzy. I will take that off once it is all mounted in the car.2 points
-
allow me to present the "car-b-que", hope y'all like your steaks marina-ted
2 points
-
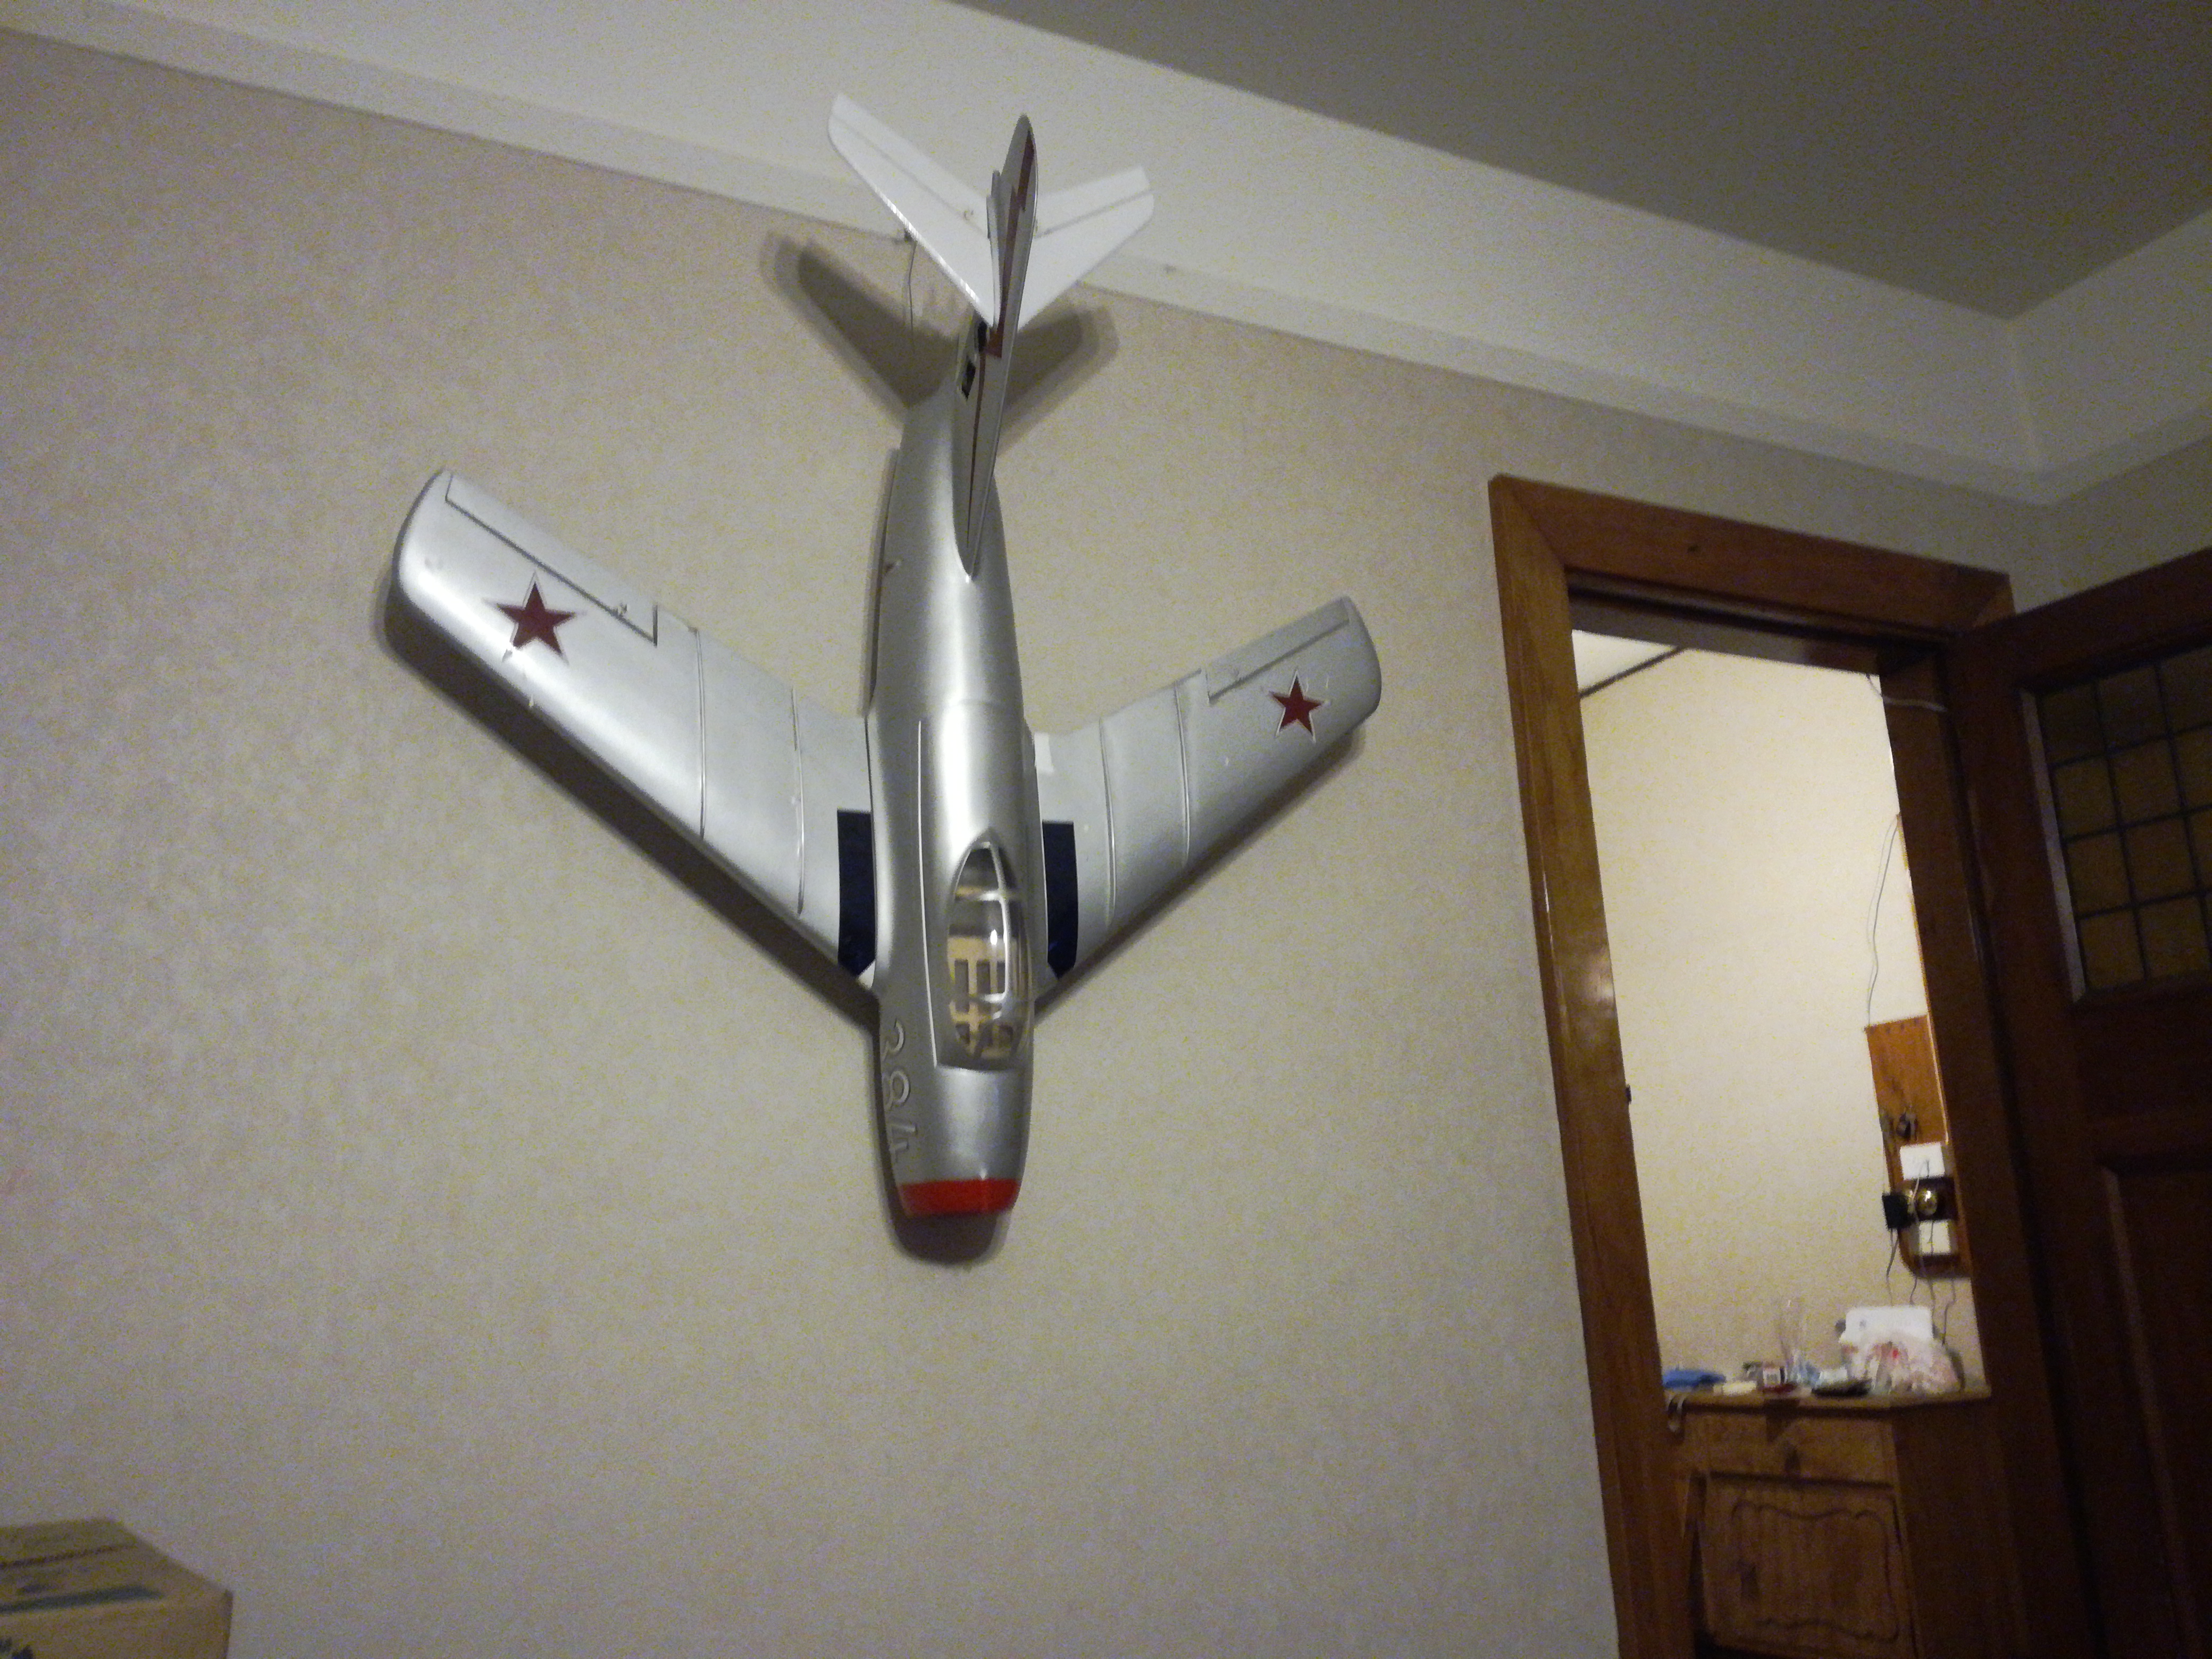
I wanted something to put on the wall in a blank spot, paintings are pretty pricey so thought a spitfire skeleton might look cool. I bought a wee balsa wood kit and did this... Cheap and fills the hole2 points
-
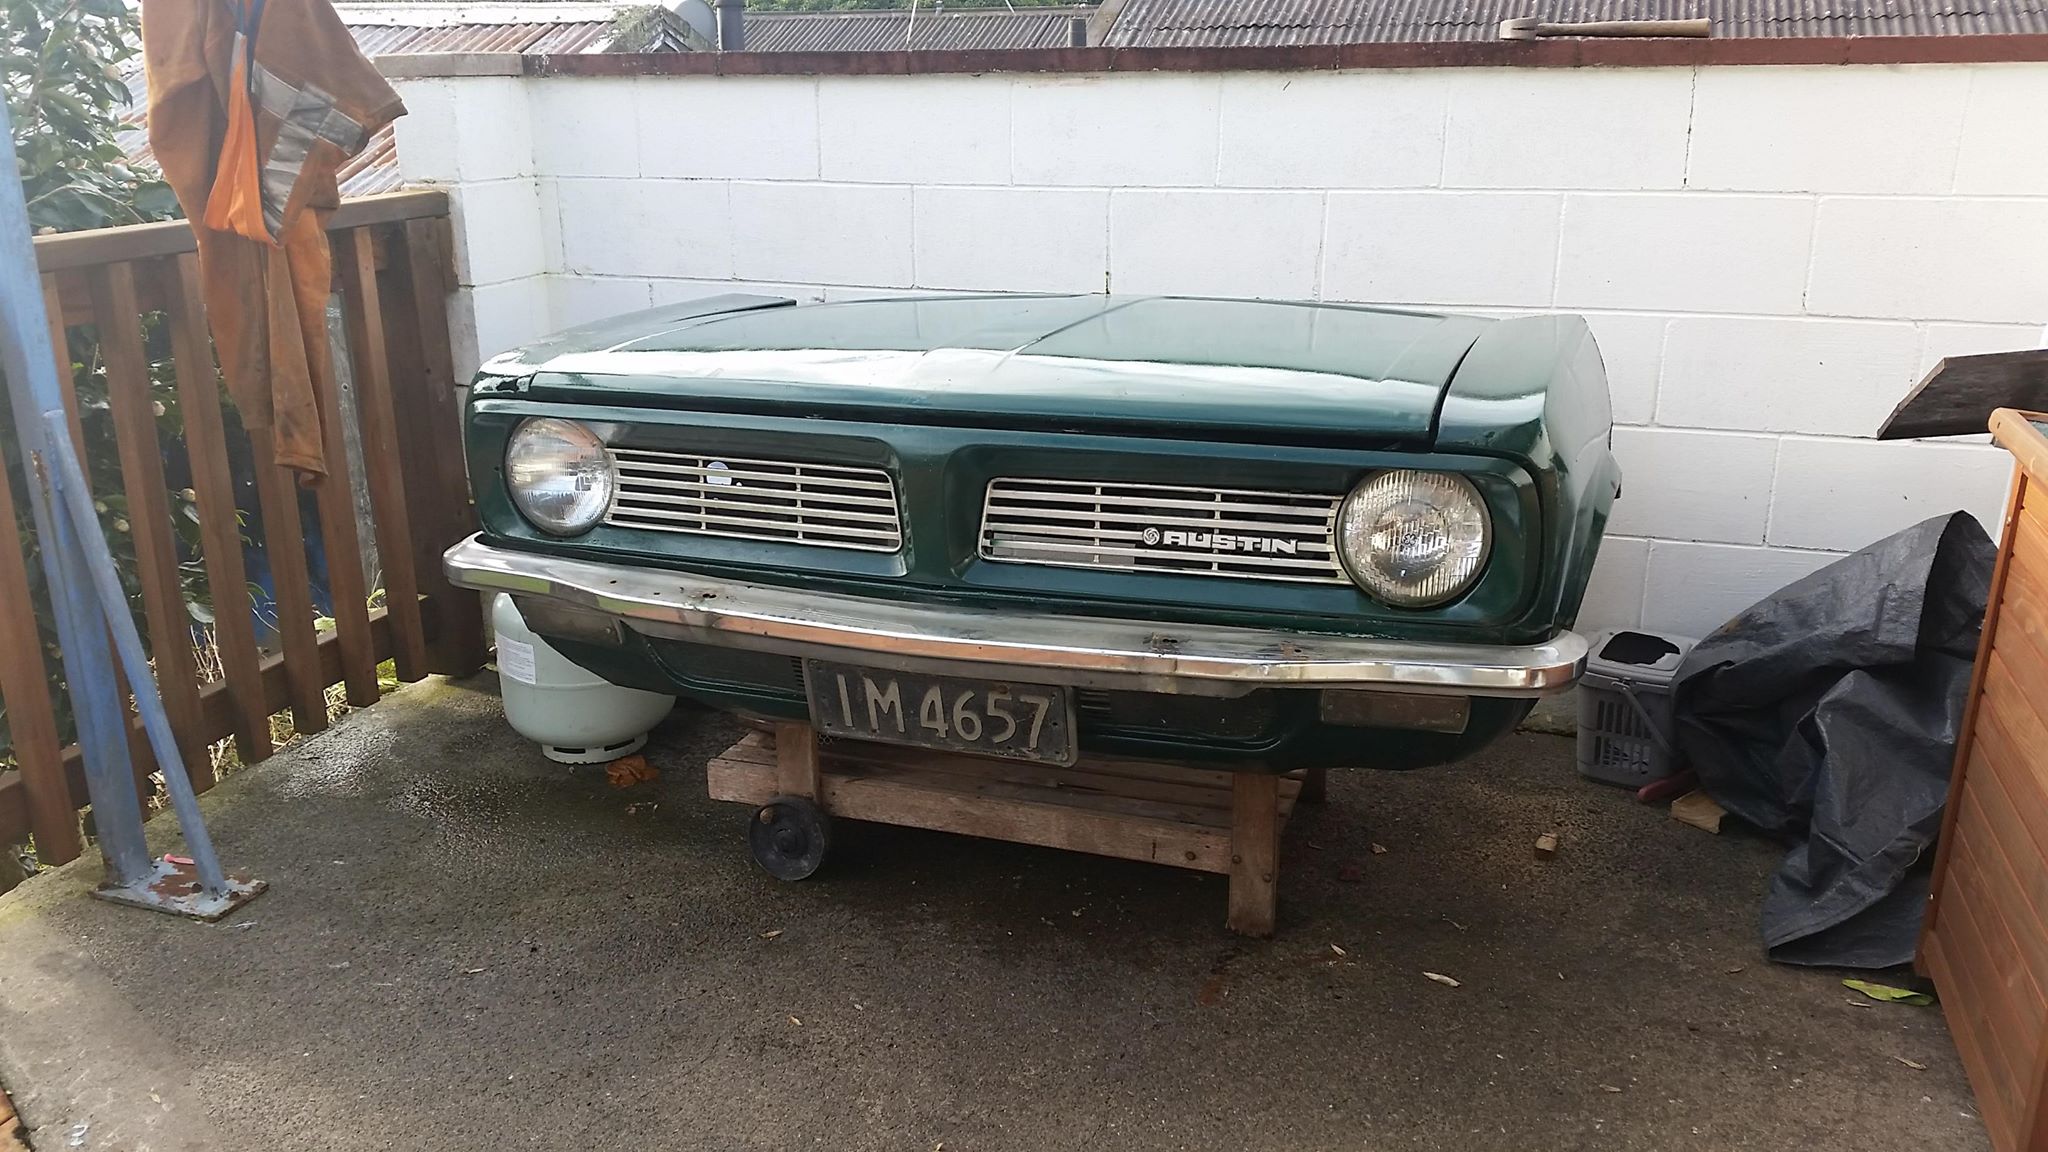
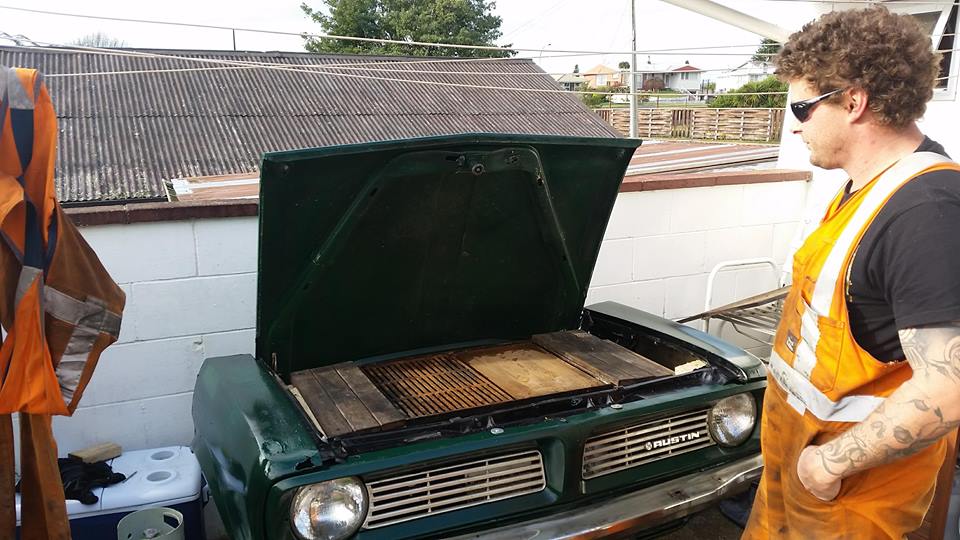
So this is the reason I sold my VL Calais. A while back (when the Calais has no trans in it) this popped up on the Tard, I looked at it and thought oh if only the Calais was sellable. It stayed on my watchlist and to my surprise just didn’t sell. The price dropped and still no sale, unfortunately by the time I finally had the Calais legal again, the seller had put the price up and stated he was putting it through vinning. However the seed was planted and I was casually on the lookout for a piece of American iron, in the meantime a post from a guy looking for a VL Calais popped up on my Facebook page, and I thought worth a try and Ended up selling the car. the seller of the scamp also had a 68 big block caprice for sale so I sent him a message and he sent me a heap more photos, ended up being too rusty for me but I got talking to him and i mentioned that I was interested in the scamp but was gutted I had missed out because he had started the vinning process but it turned out that he had only had a pre vin check done and was willing to do a deal unvinned It is currently being sent up from Wellington so I should have it here Wednesday or Thursday. Pics:1 point
-
Thought I'd throw up a few pics of me new cruiser, bit dangerous posting this in the projects section as really don't wanna start modding this thing (in the near future at least)... It's a 1984 BJ45 Landcruiser flatdeck, the very last year of the 40 series cruisers. Other than having a disc brake front end and a few cosmetic changes there's not a lot to separate this from the earlier 40 series trucks, is still bare inside and drives like a tractor. Dog is stoked to have a functioning ute again Even has a hitch pin linkage, need mo implements: I bought to daily drive and do a bit of work on the block so near term upgrades will be focused on making commute tolerable. Already has a bunch of window and door seals replaced but mostly steel in the interior so still makes a lot of noise at highway speeds. When I bought it the little spring mechanism on the indicator stem was shagged and would flick randomly to high beams every 10-60 seconds, made for an interesting first drive back up from wellies, managed to blind a few strangers and anyone I was following must've thought that I was looking for a fight. Pulled the stem to bits and managed to fix that, and replaced the exhaust manifold gasket today as that was also blown to bits and super noisy under acceleration. Is running the original 3B and 4 speed so thinking longer term upgrades will be 5 speed, turbo and front mount, power steering and maybe bigger brakes. Also keen to stocker up the interior as much as possible (has velour drivers seat outa who knows what in it), and some period steel wheels prolly also on the cards. Cher thanks for lookin1 point
-
this was the port. I suspect its none accessable now
1 point
-
Sorry about the delay, Aussie customs threw a fit about a battery in the parcel (never been a problem before) and sent the whole lot back to Europe, it was resent without the battery and left Belgium last week so should be here any day now. Will get it out to out overnight the day it arrives to me, sorry again! Edit: @RUNAMUCK the parcel arrived in NZ an hour ago, as long as customs don't hold it I'll have your parts Monday then you'll have them on Tuesday all going well.1 point
-
I'd paint those bonnet pins to match the car.1 point
-
when welding to the strut tube, does the weld have to be a certain distance away from the cast part? I created a sweet weak point, when i done some rangi mods on my paddock car. it wasn't welded to the cast part. (is now..)
1 point
-
Cool- you have clearance!!! I reckon silver top itbs would be a good match too. No injectors hole to plug and neat flanges to use. Given your impressive steel tig skills so far I reckon you'd be fine at having a go on Alloy. I jumped in at the deep end and my first proper go at alloy tig was my manifold. I just did a little practice first. I'd avoid trying to muck with the cam covers- I welded up a few holes on mine and they are pretty dirty casts- not so nice to weld really. Especially considering they are used. Mine were cleaned out but still had crap almost soaked into the alloy it seemed. In saying all this I still want to modify some covers for the next build- it has always bugged me that they dont match.1 point
-
Old mate having a fang. Super jelly of your bike @HighLUX.1 point
-
Hi all, We weren't back in the UK long before everything got a bit daft. The Starlet arrived from NZ, and Meg started craving a project car of her own. This popped up about an hour away from us, on FB marketplace. Low mileage, UK market S3 FB that had been (garaged) off the road for 12 years, following an MOT failure for rust (obviously). Here, have the shit picture that made me drive out to see it. Allegedly a runner, the chap couldn't get it running when I arrived. Had some nasty areas of rot, particularly on inner/outer sills, and some annoyingly crusty non-structural cosmetic holes, but the majority of it was not to bad for a UK-living 80's japper. Paid 1500pounds for it to be delivered to my door, and the detective work began. Body - tired and sad, but has potential. Interior - mint (brown velour!) Engine - managed to get it running nicely from a 12v pump/jerry can. Either needs a fuel pump or just filters changing. Result. Driveline - unknown, seems to work at low speed Brakes - fucked Suspension - probably quite fucked Wheels + tyres - bent and perished, respectively. Plan: Repair rust, fix brakes, fix fuel system, weld on coilovers or superlows, doorts. ======================== A few months pass ========================= Current progress: Meg loves rx7 Remove bad, add good Valance back on Fixed some pinholes in tank, rust repairing this week, outside protected More to follow.1 point
-
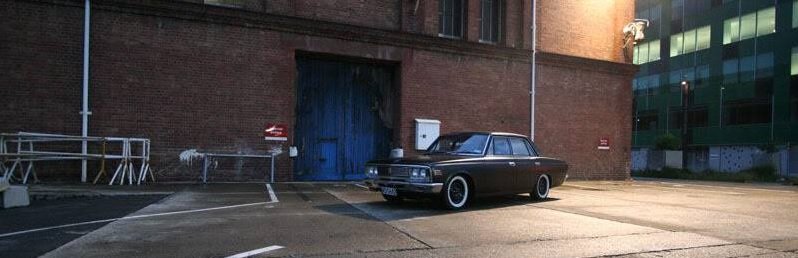
Matching pair Discussion thread:
1 point
-
i had booked this thing in for a warrant last friday but while i was driving it around here to make sure it would actually make it to the warrant place something changed and it started running like a pile of shit. i had to pull the pin on the warrant check and try and figure out what had happened. as it turns out two things went wrong at the same time. the fuel pump started loosing pressure and the weird arse diaphragm thnigo on the side of the carb shit itself. the carb is off a later model smog motor and it got all sorts of vacuum shit all over it. it was working mint, it started like a dream but its fucked now. i went through the pile of fucked carbs i have and surprisingly enough they're all fucked. couldn't make one that worked so i bit the bullet and bought a china copy off ebay. fuck knows when it'll turn up but i wont be able to get a warrant for it until then. gay. i did however send a pair of rear springs off to get compressed so the back will sit level.1 point
-
Small win... working headlights Surprisingly the mrs likes the hunter.. double win
1 point
-
1 point
-
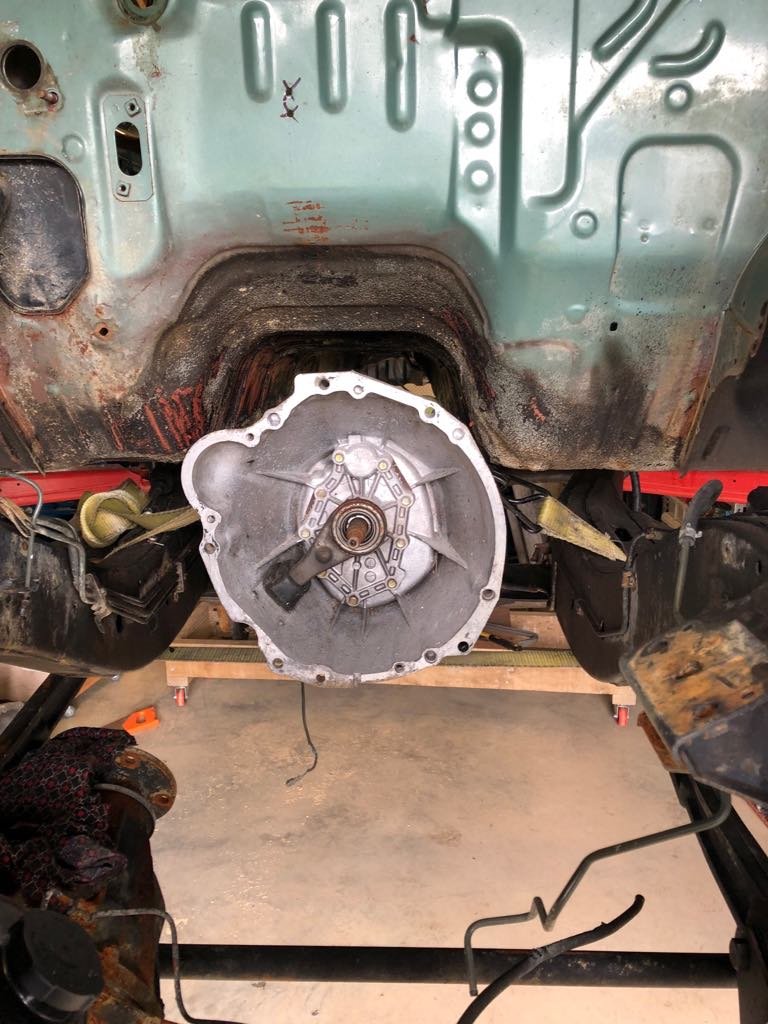
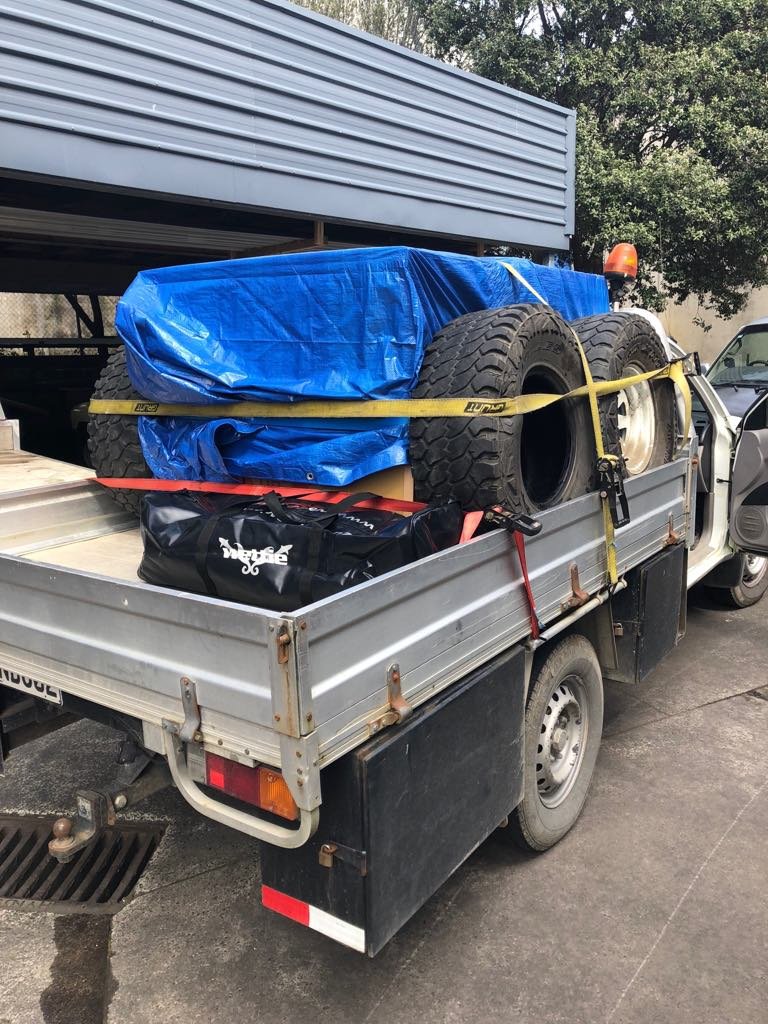
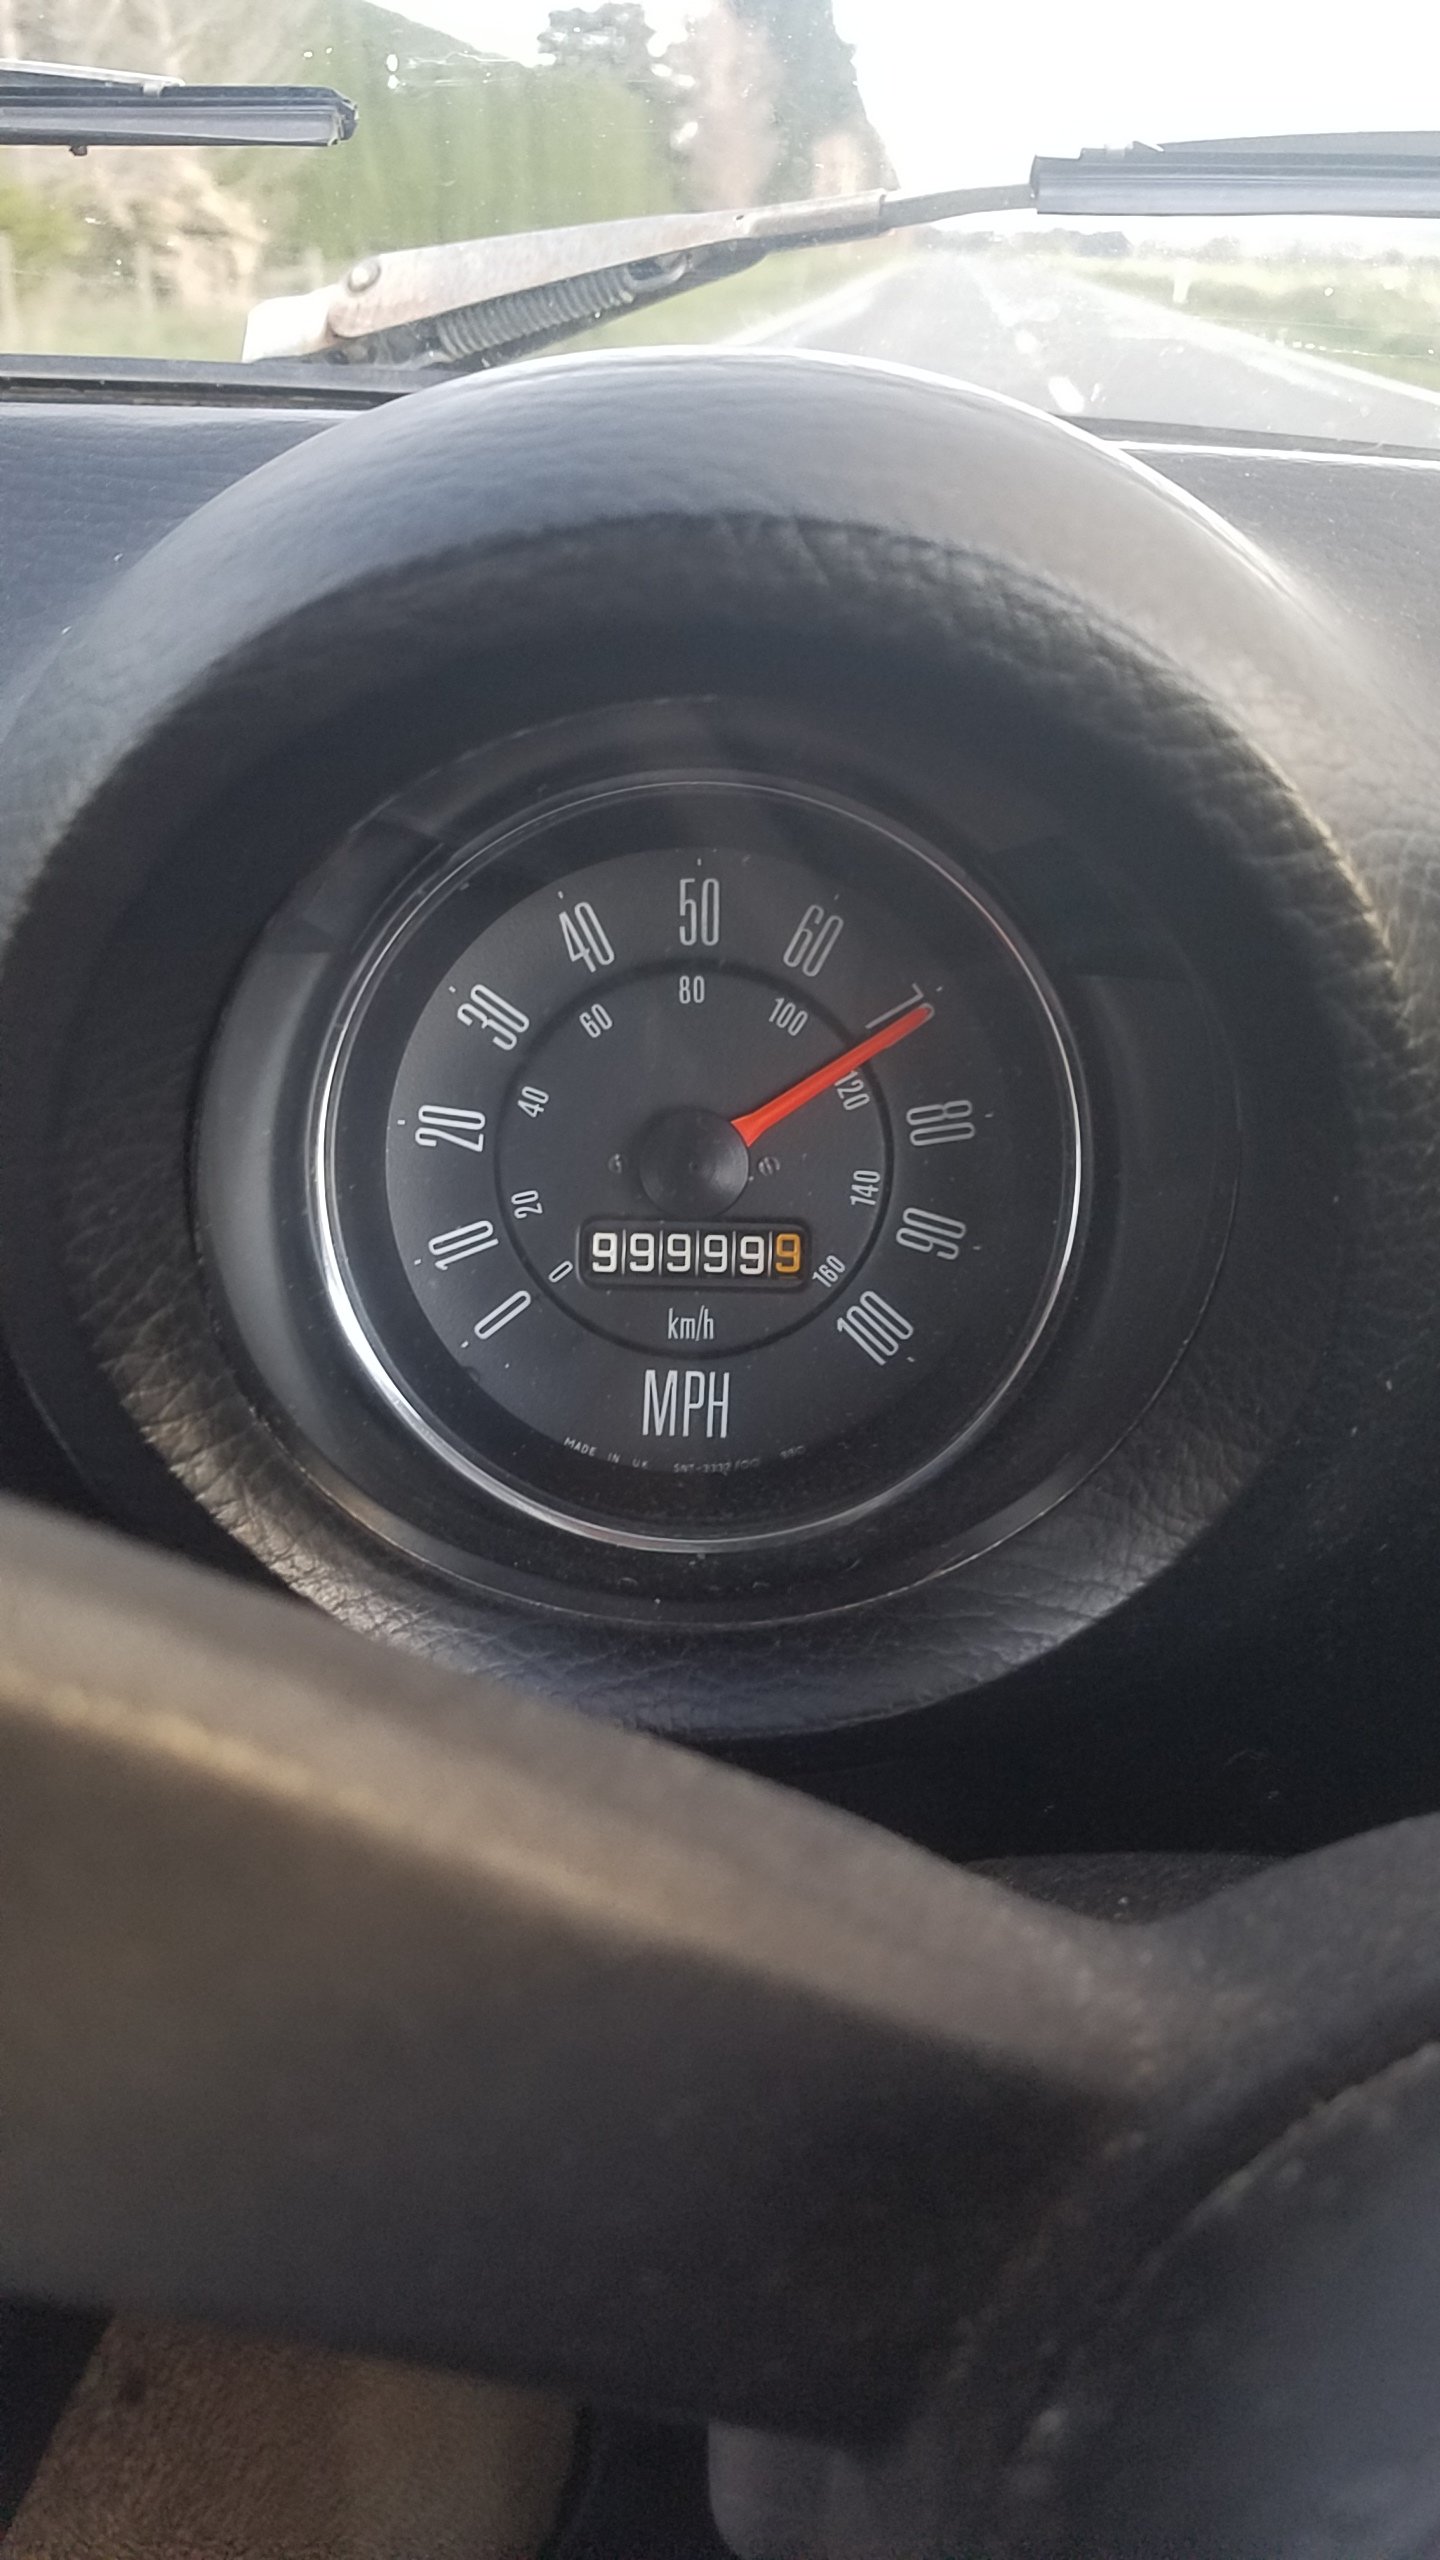
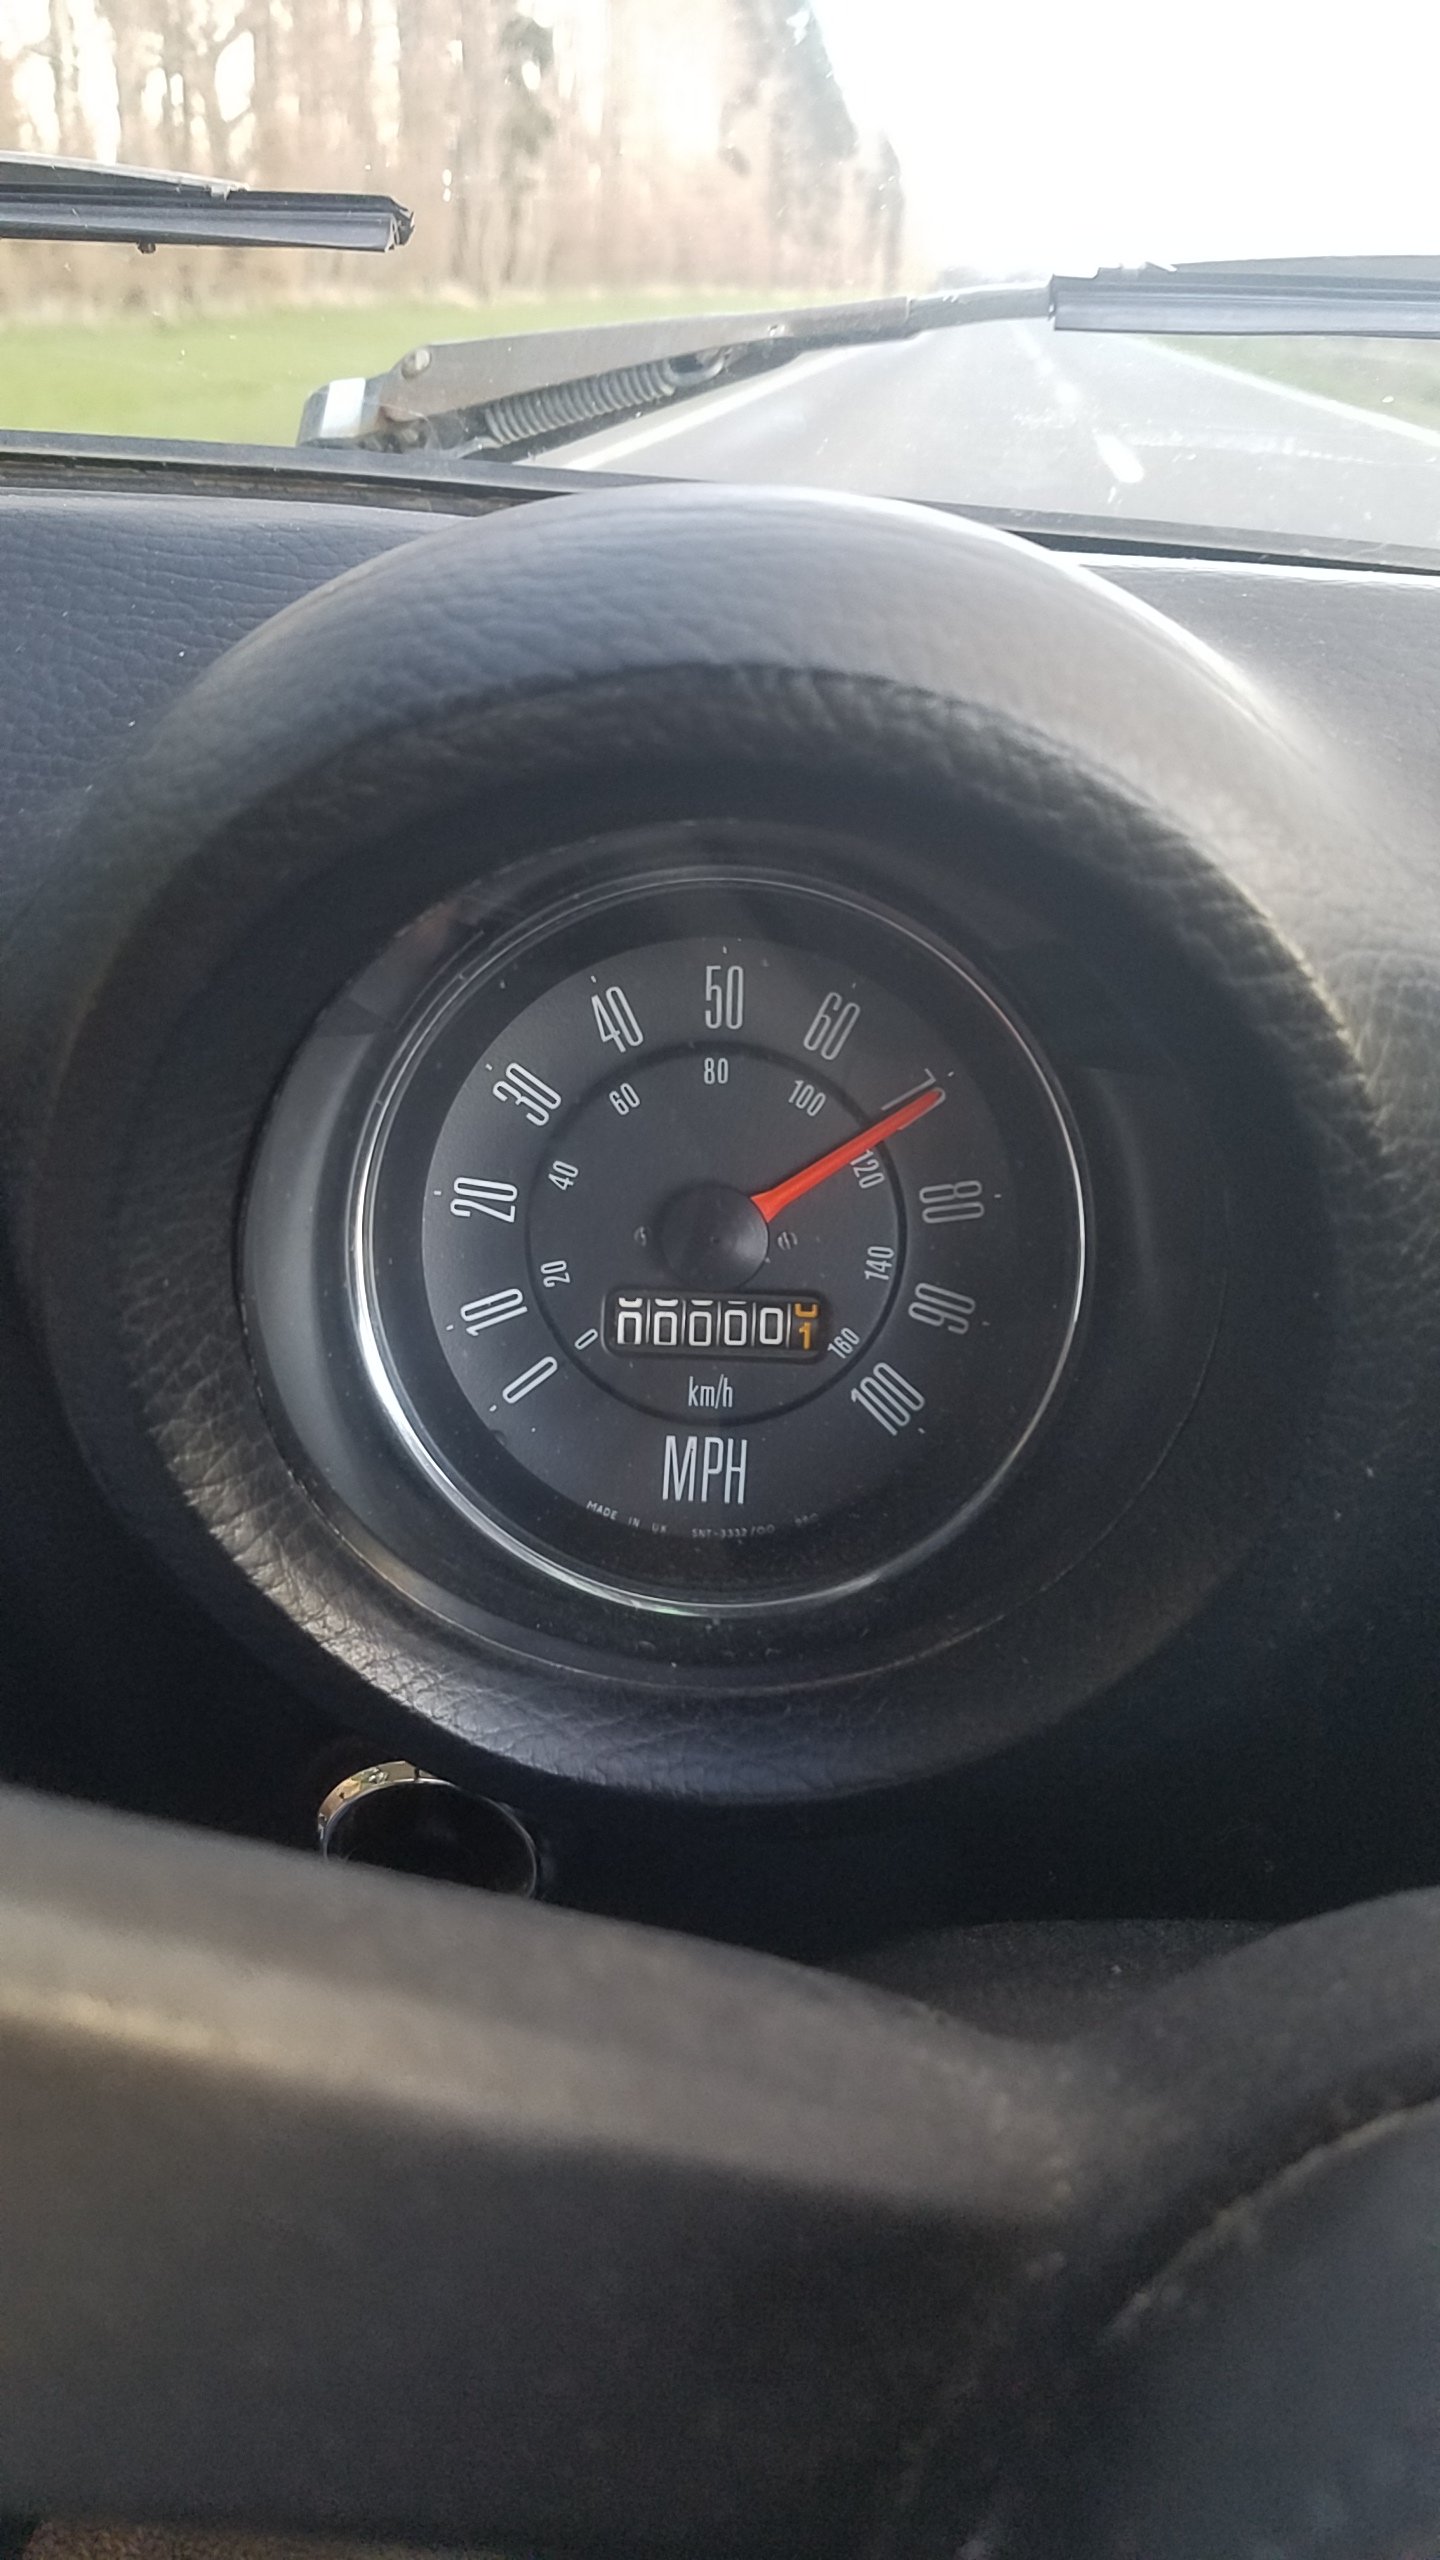
Had a blast driving from Hanmer.. Just out of Lumsden I managed to hit the factory reset on the odometer. On inspection oil the total loss oil system that developed, I found the bolts holding the fuel pump were planning a trip down the road.. as we're a few of the sump bolts. Tightened them up and sprayed around some Motomuck.. clean as. Mrs is picking up a headlight for me today to bring down tomorrow.. neat. The brake imbalance issue I want to try and rectify by swapping to escort M16 calipers.. the spare calipers I have for this are junk, bores are pitted and the pistons are gouged to he'll. So if anyone has a working pair of calipers, please send them my way. I know they bolt on, and only need an adaptor as the esky is metric and the hunter lines are imperial, or the other way round..
1 point
-
I also came back early from my xmas holidays specifically to work on the patio area, I managed one day on it then it rained for 5 fucken days.. used that time to hang a TV on the wall. Don't have a before shot as usual, well I kind of do.. Wanted to something with a whole lot of free bricks I got, decided on a herringbone style with a border, I ended up doing away with that particular corner style and just did a straight border no square, [/URL Filled it in with sand, out took me almost 6 months to get to this point such was my lack of motivation for paving.. I wasn't sure what I want to fill it in with, had a while lot of hinuera stone paving which is really nice to walk on but only had enough for 16 squares, I needed 24.. then doing a job for a client and he had a huge pile of crushed limestone which when got with a compactor goes pretty hard (fwii).. was sold. My little girl doing her bit, had to be on the rake.. that's her roller you can see in Wellington colours Came up quite a lot better than I had imagined There's also been quite a bit of planting going on as you can see by my partner.. some stuff I'm not so sure about.1 point
-
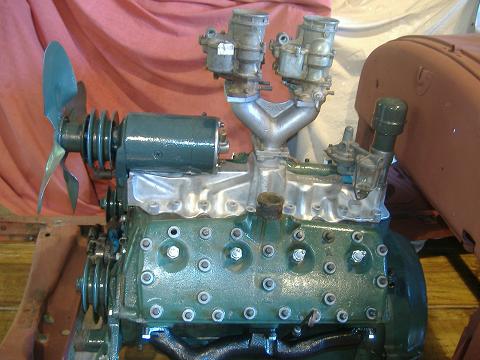
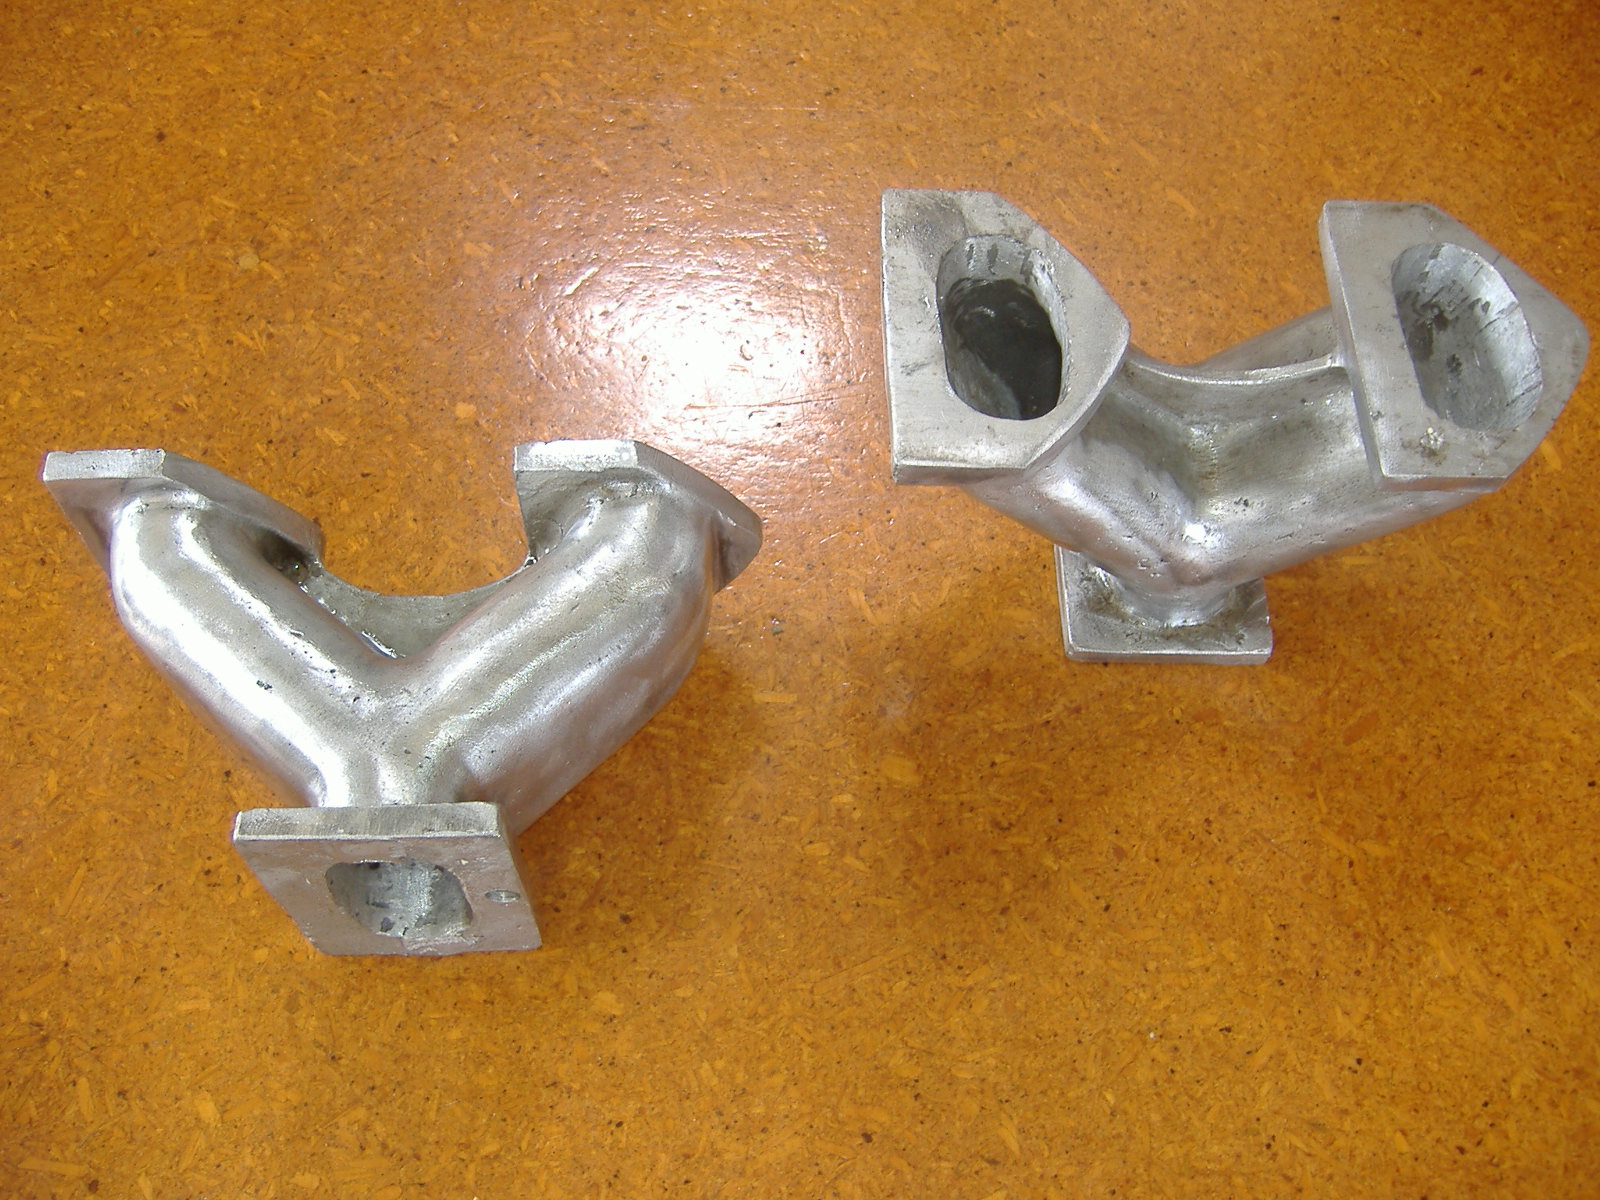
A pair of twin carb adapters I cast for a flathead V8.
1 point
-
Its running a 318 LA V8, recently rebuilt auto, AC, PS, it does have some rust but it’s an Arizona car so apparently a dry car. Floor pans look good, just general surface rust, Will need all the basics of Vinning: brakes, headlights, suspension bushes etc, rust: Suspension interior Needless to say I’m very excited and can’t wait for it to be delivered so I can work out what I need and start ordering parts from rock auto.1 point
-
@JR I did the same thing with a mig15 airframe I bought ages ago
1 point
-
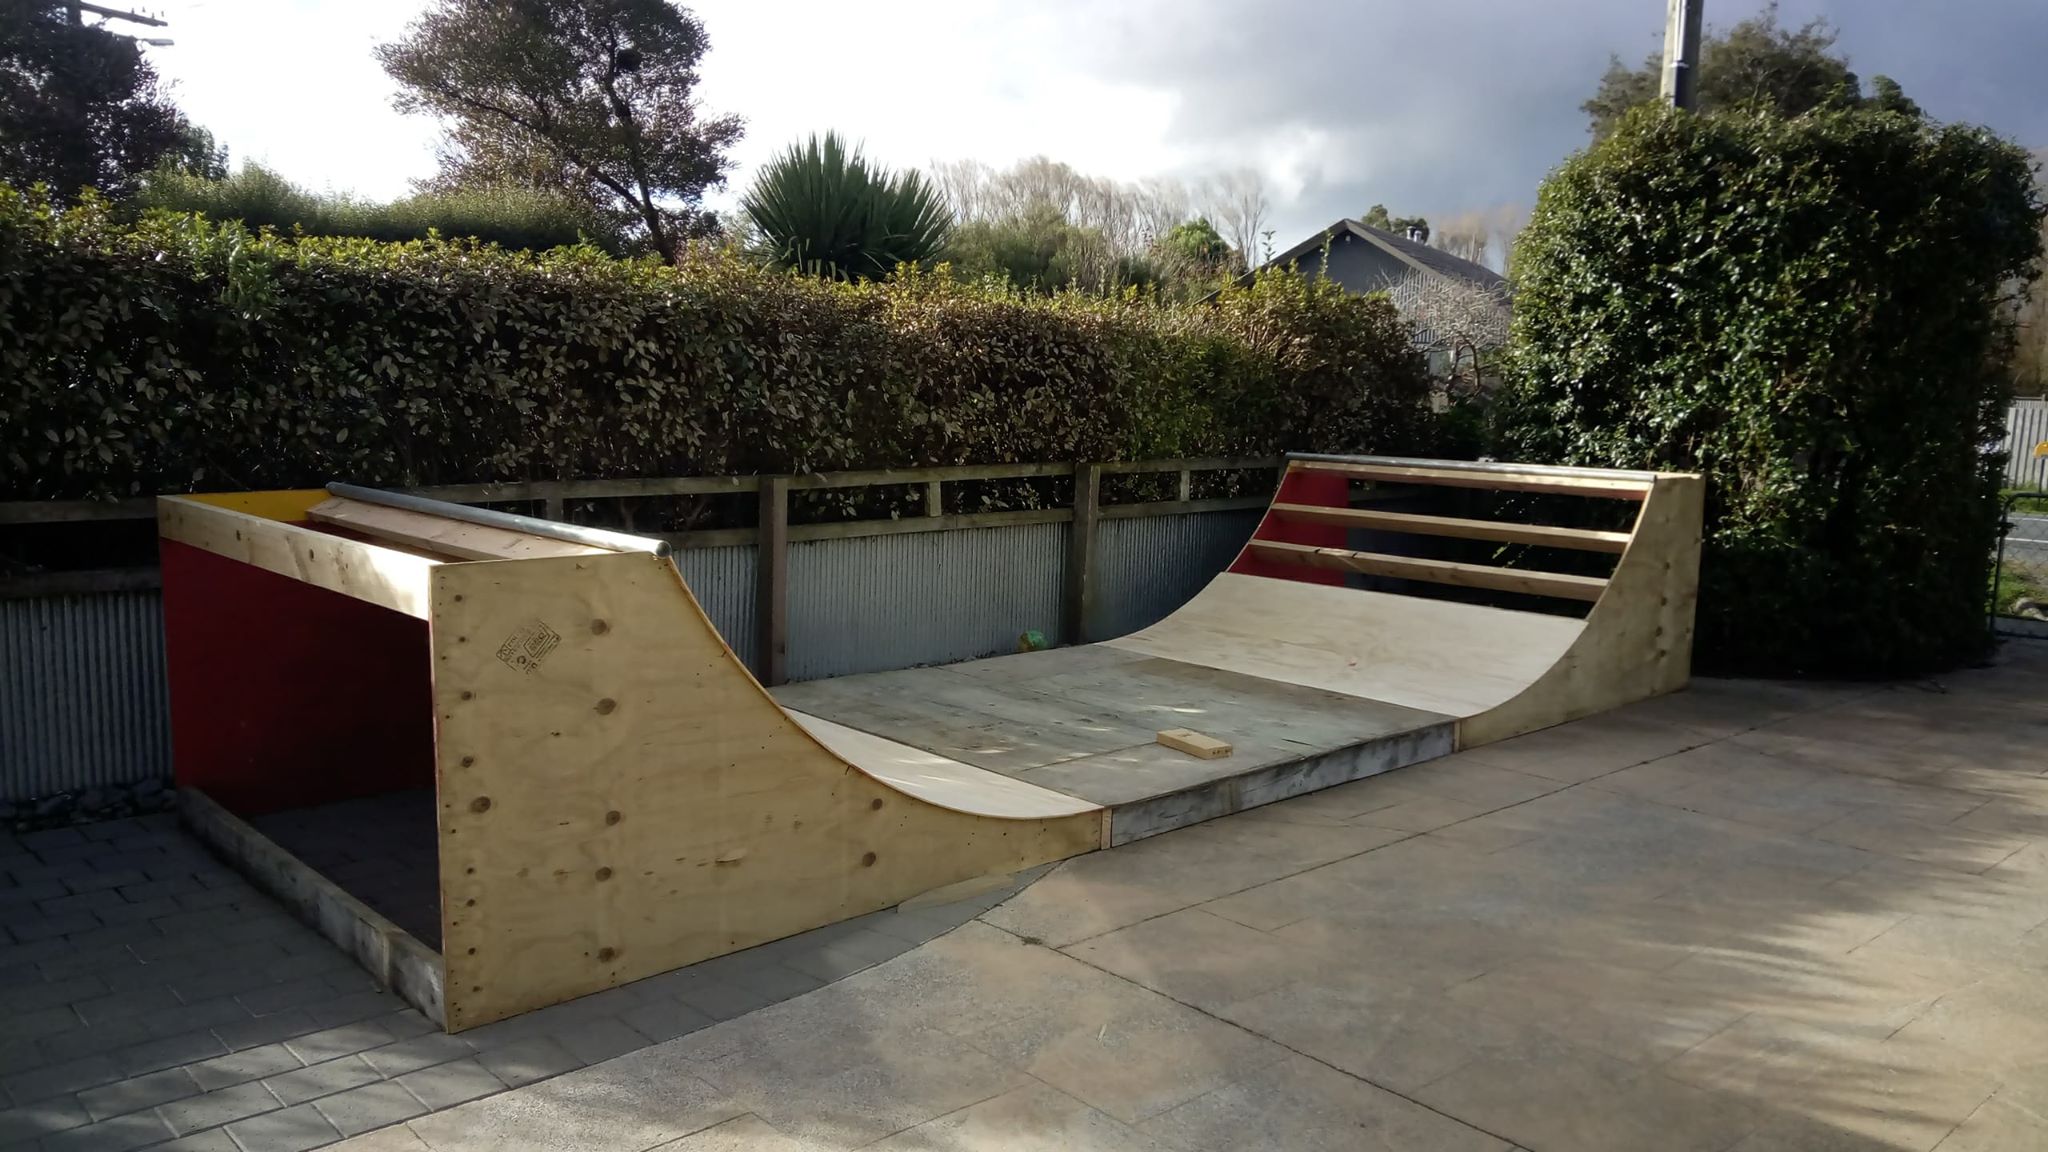
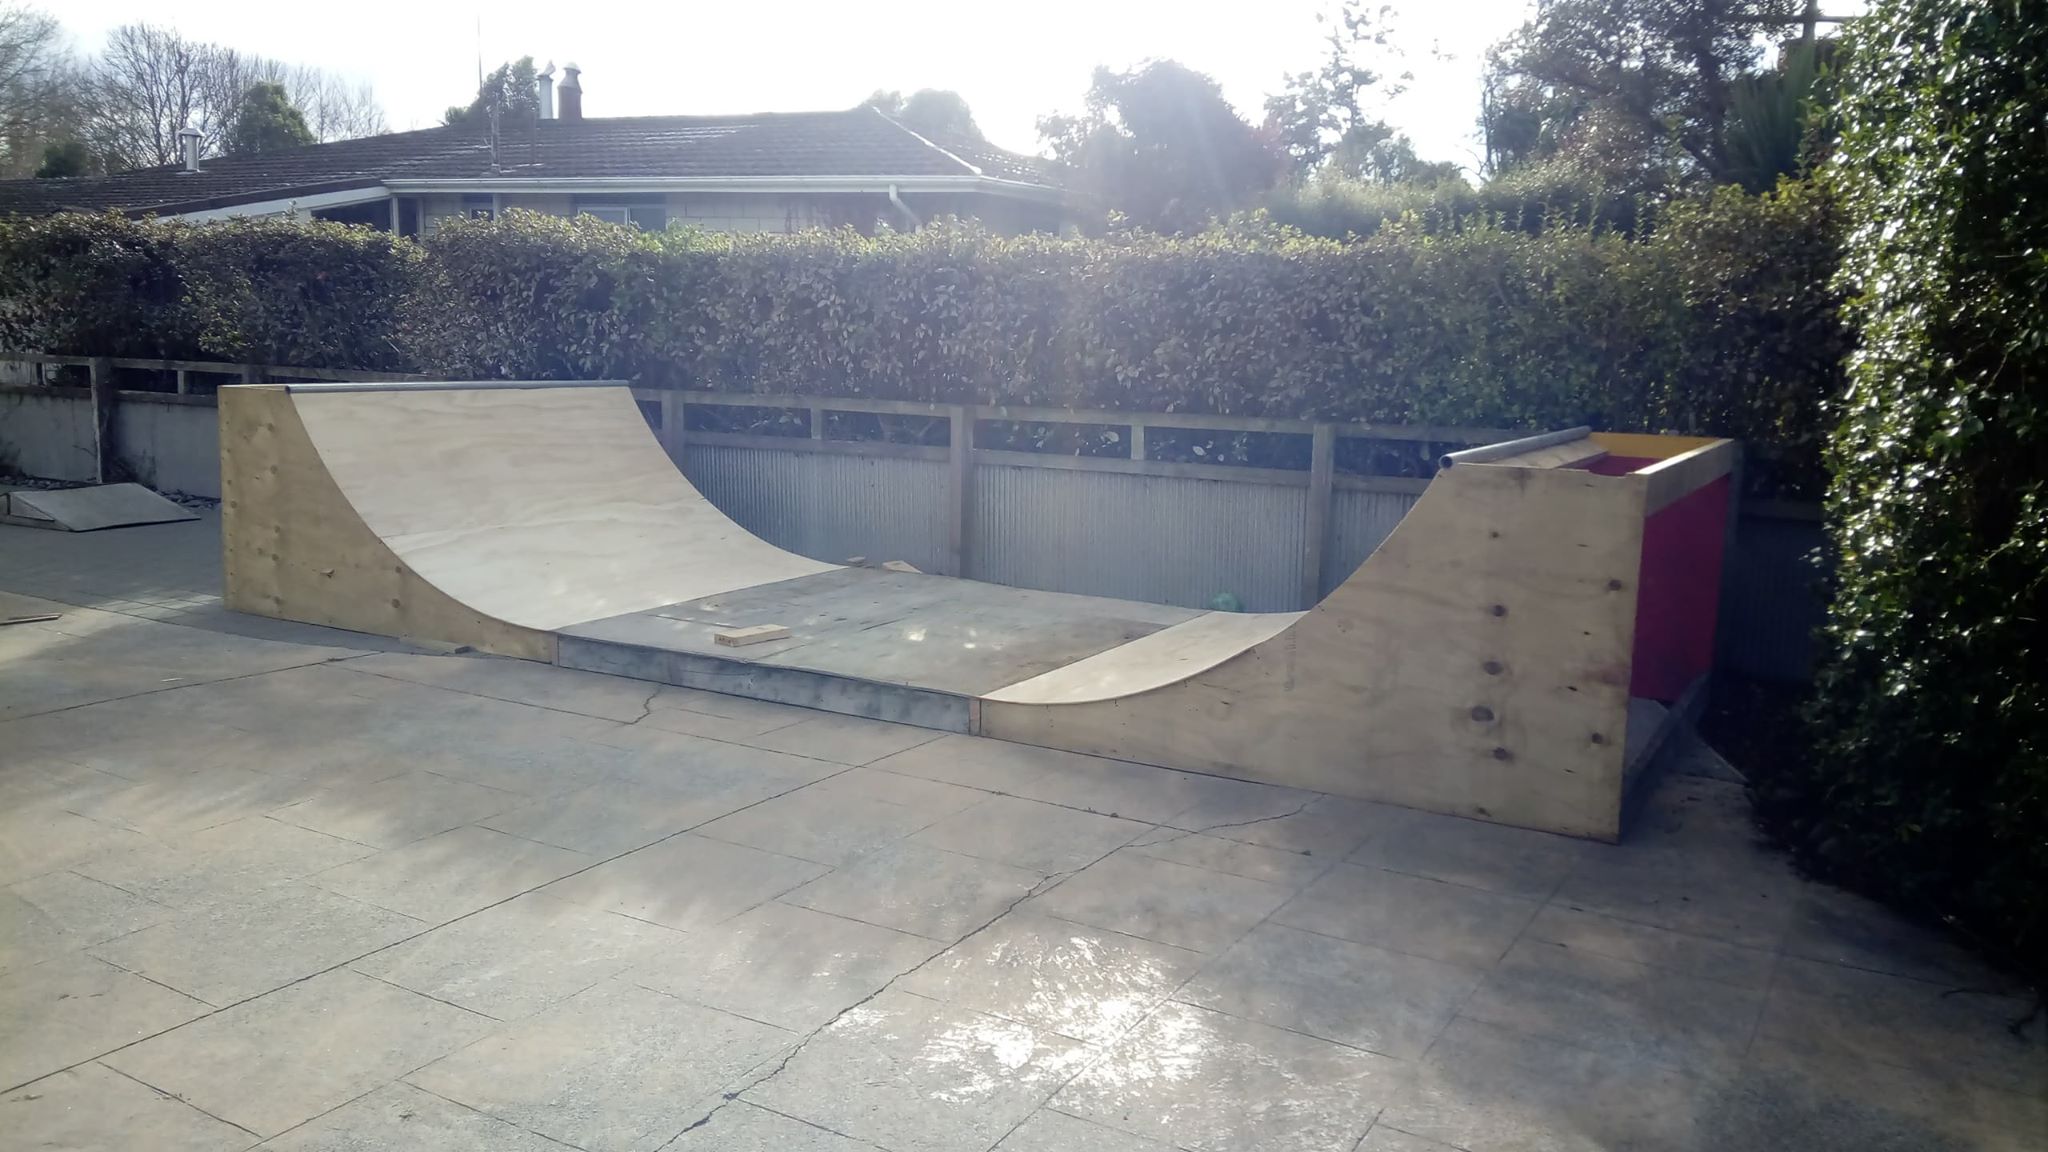
During the week I purchased 8 sheets of 7mm downgrade plywood for the curved sections. The flat was bits of 12mm I'd scrounged previously. Progress from this weekend. Looking good. Kids are excited.
1 point
-
Not sure what bent the rod. Pre ignition and over reving maybe? couple people have said maybe it's hydro locked? it sat for a while and the head gasket was mint, there wasn't any rust or difference in surface, so dont think it was water. someone suggested a cylinder flooded with fuel witch would seem like a reasonable answer?? see how goes, if it runs and lasts a month I'll be pissing my self with laughter. 6months of daily driving, and I'll be speachless and bragging of my hori engine building ways for years to come..1 point
-
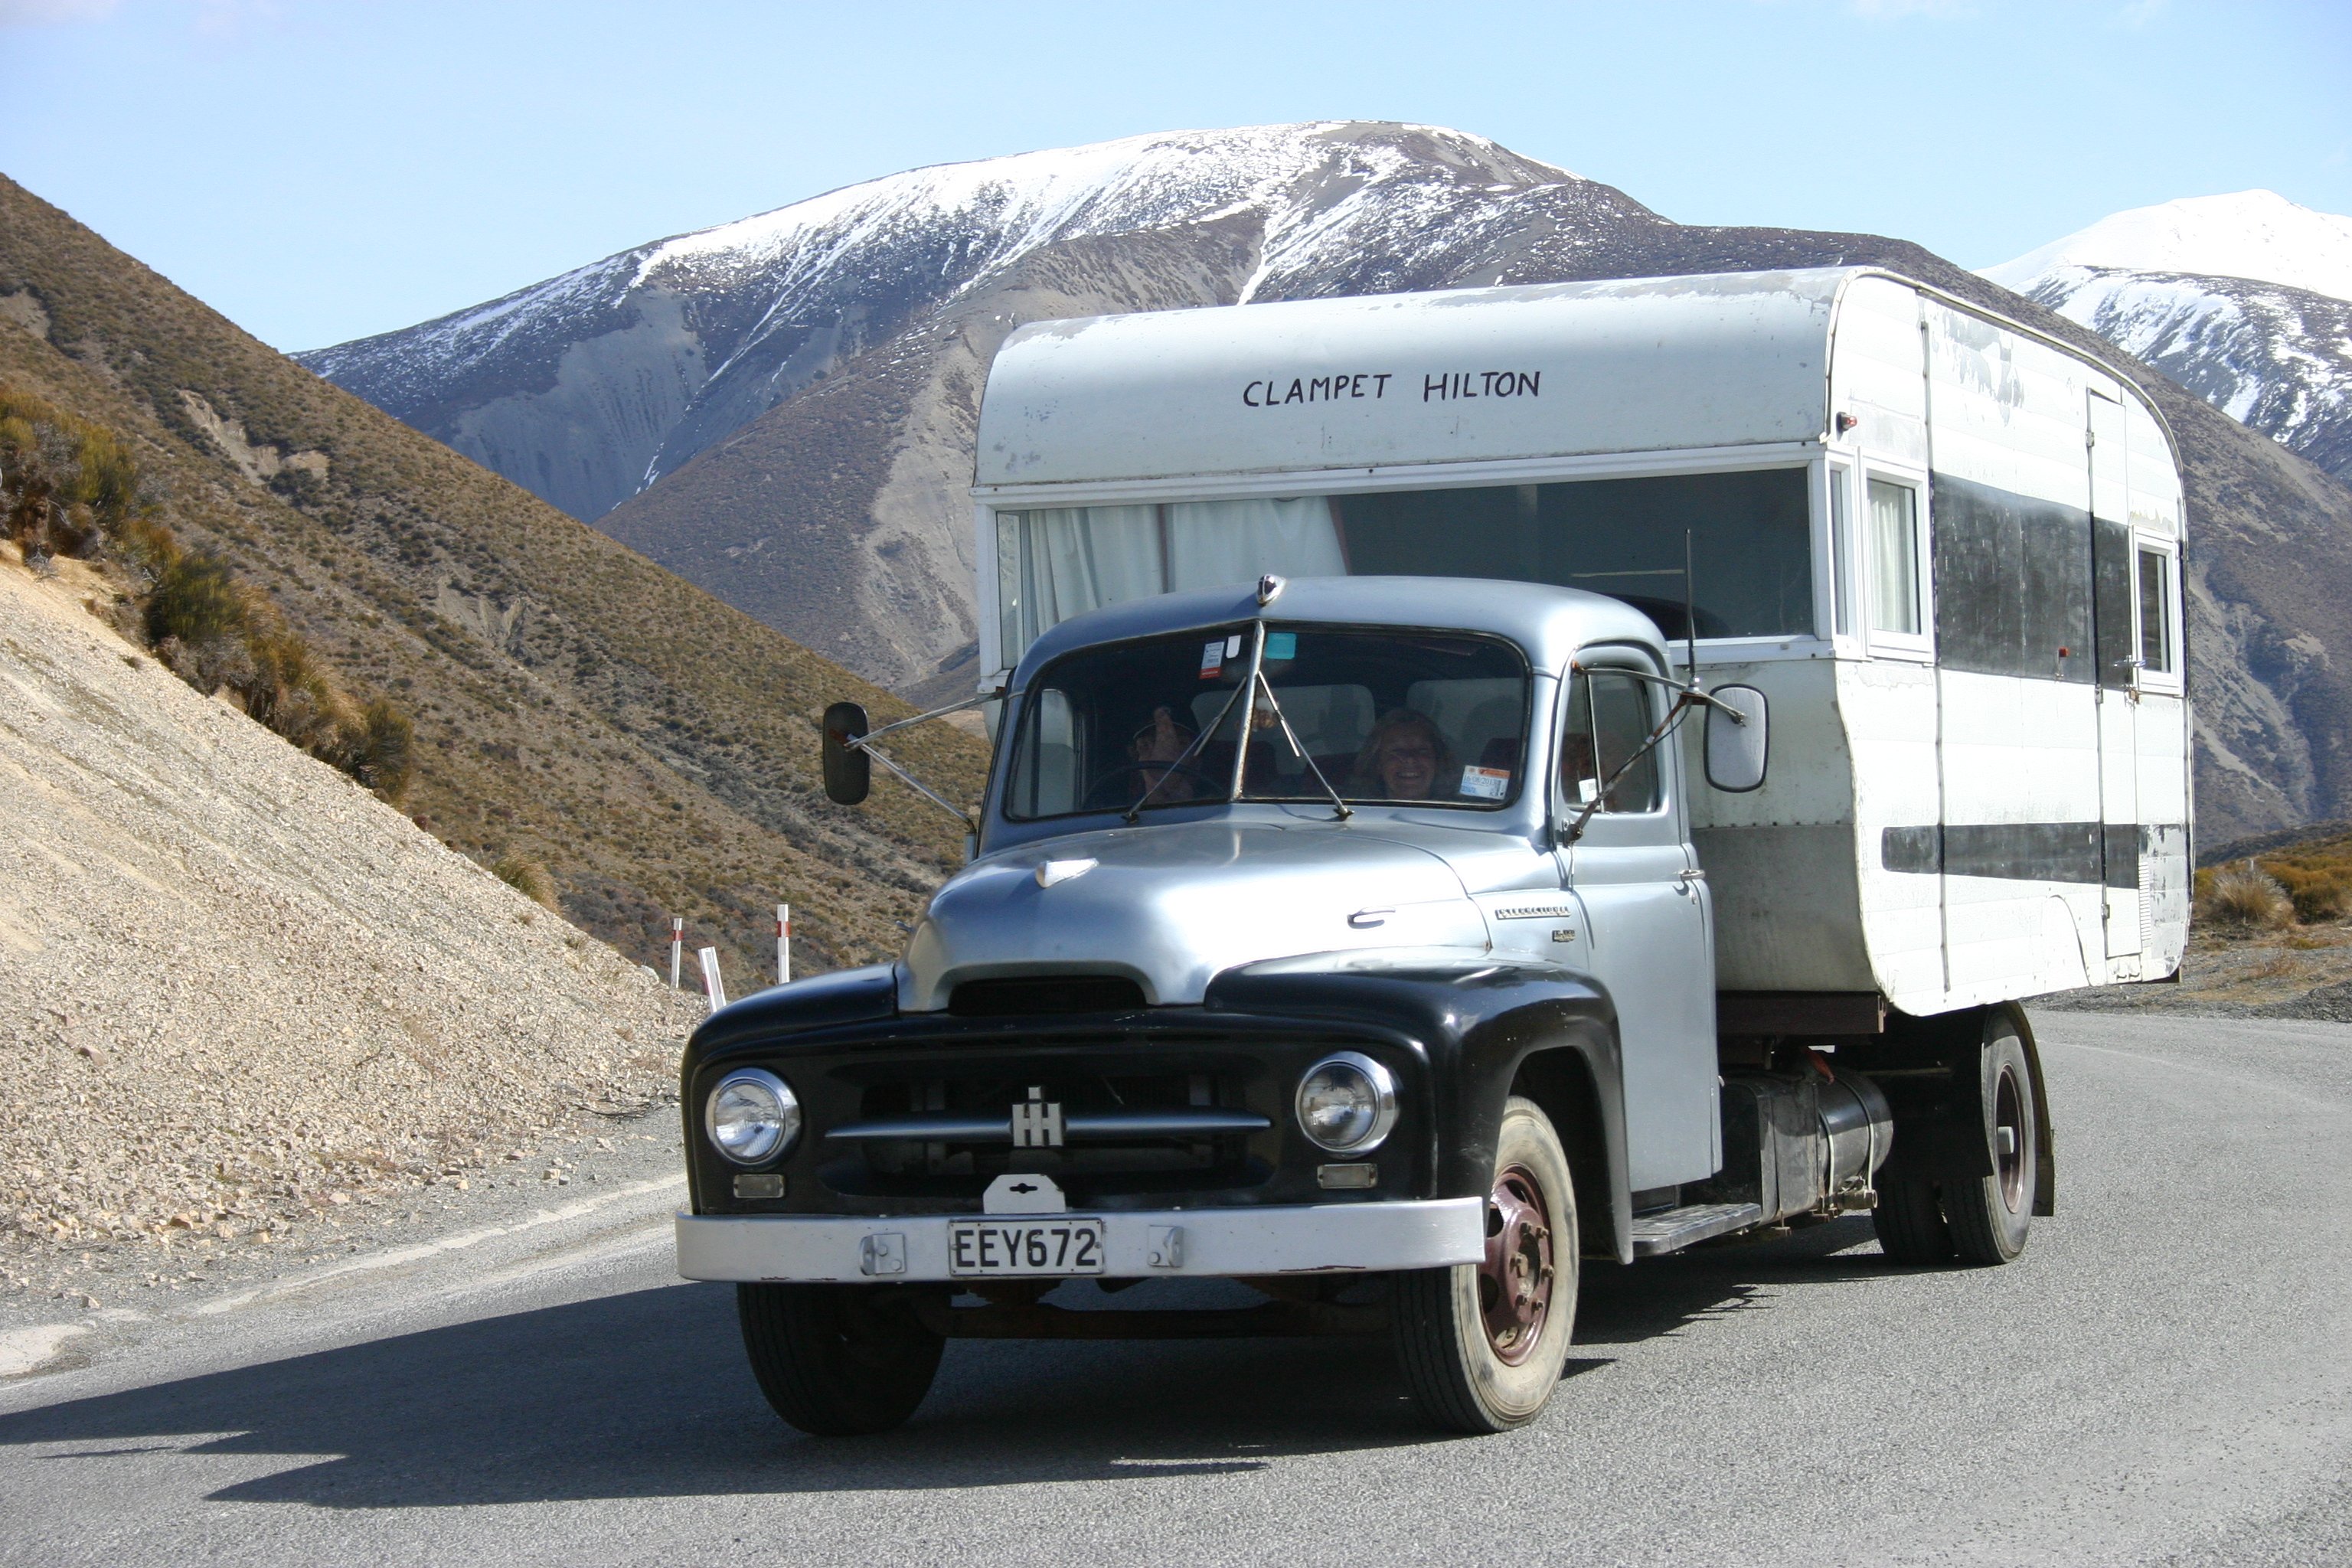
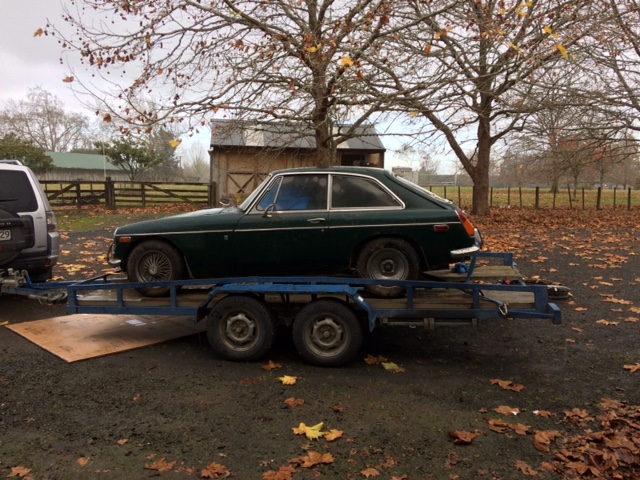
I have just returned from an epic roadie to collect a new toy. Actually I arrived 4 minutes before midnight Sunday, but mentally it's taken til today to catch up. Awesome trip, but I am reminded that I'm not 20 anymore. Did the drive from Clevedon to Rangiora in one day with a loaded tandem. I booked a cabin on the Ferry. I highly recommend. Dragged this out of a damp rotting dirt floored cow shed from where it hasn't moved for 19 years. Back story, yarning to work colleague while on layover in LA and somehow got talking about this MG he got out of North Dakota in 1993. The conversation ended with an offer of said MG in return for a box of craft IPAs. So, big hammer to smash the brake drums, a shot of air in the cracked tyres and onto the trailer... Many hours and litres of diesel later... to wind up here That's apprentice No 3 looking very excited in my NEW SHED!!! Bought a 10 acre block with this beauty on it. Upshot, no time or money for cars because house building. Anyway, this thread is about my Fiat, so, Relevance? Picked up a 5 speed box for the Fiat on the way.
1 point
-
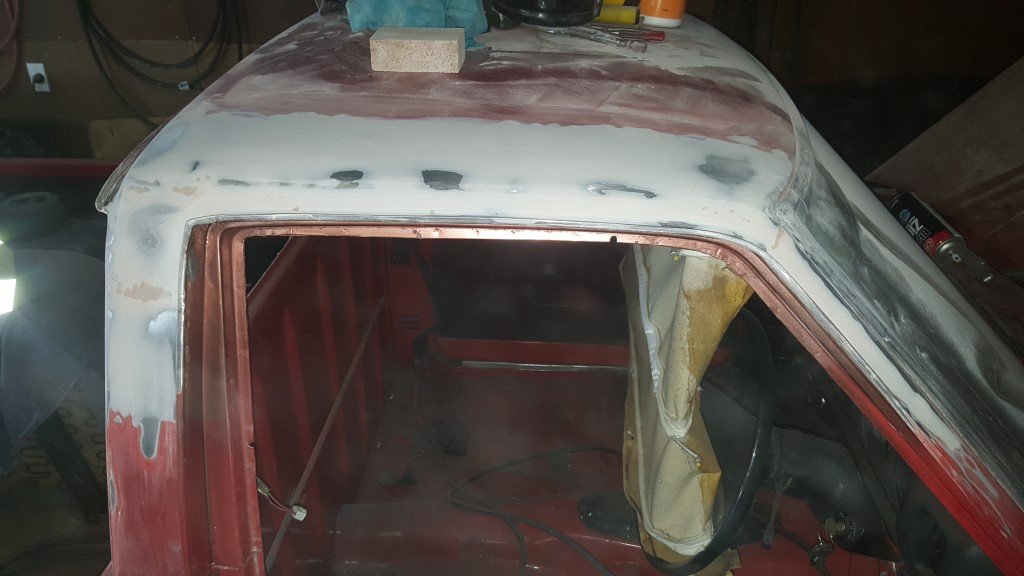
Good news, talked to the bossman at Laurie Forestry in Timaru and he knew exactly what I was after but it got lost somewhere between him and the yard and I ended up with decking.. thank fuck, I thought maybe I had only thought what I said and not said it. Anywhoo Allan's gonna sort of for me.. by god they're good to deal with I thoroughly recommended them if you need mac, quality product, quality service.. In other photographic news, plaster.. Freshly topcoated, and my it smells good.. Ready to sand, She's getting closer and closer.. booked the sparky to come back and do his fitout, gonna ring the floor sander tomorrow and hopefully start painting this week..1 point


.thumb.jpeg.e0a4bff61111e0c8c7396950fcc94da1.jpeg)

.JPG.bb031f1bda4b9573425cd10b7dcd0c2b.JPG)
This leaderboard is set to Auckland/GMT+12:00