
Leaderboard


Popular Content
Showing content with the highest reputation on 05/15/17 in all areas
-
Off the rotisserie. Sitting at Air out lowest height. Looking at assembling front clip this week at some point. Then from there its fabricating the new front ends rails etc and getting it all together.12 points
-
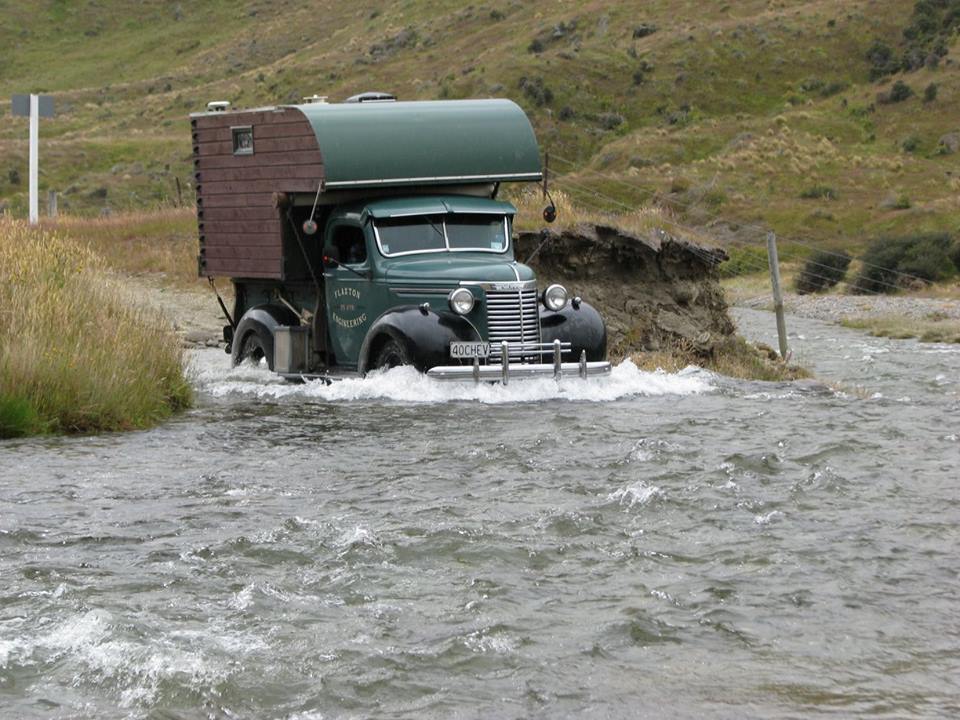
For inspiration January on the Nevis Road.
 8 points
 -
I really hope the other side is better7 points
-
still sanding....6 points
-
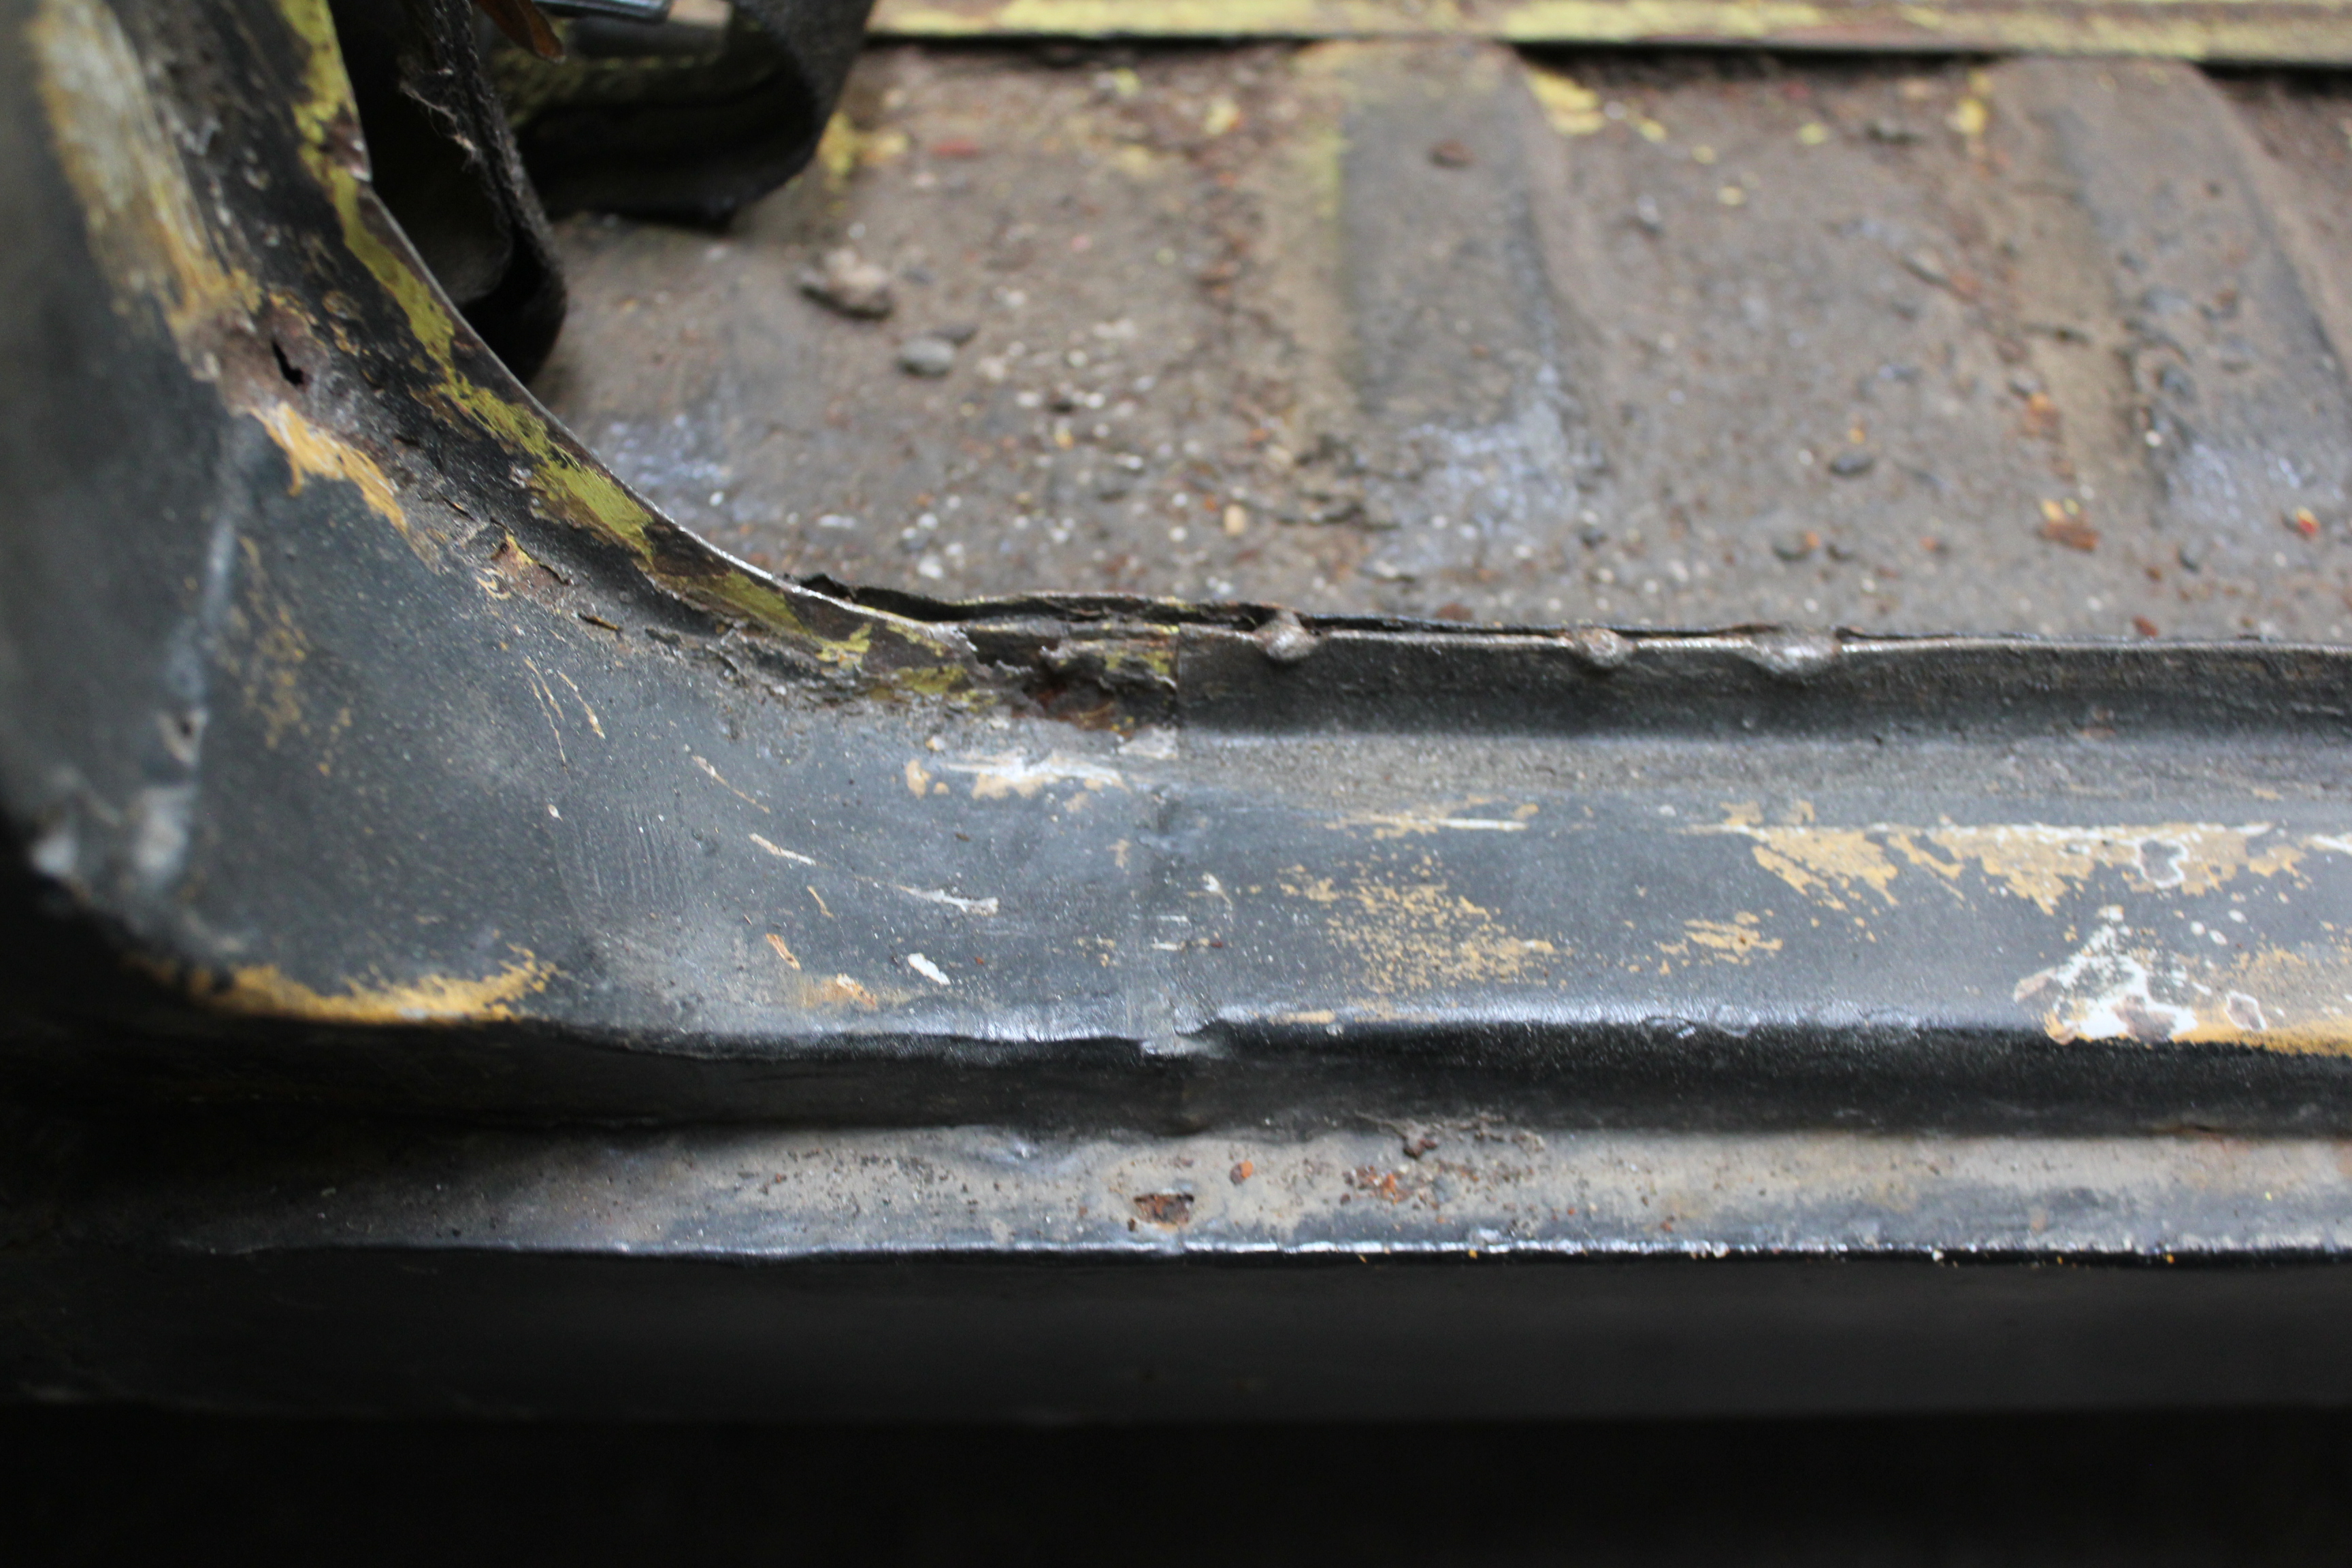
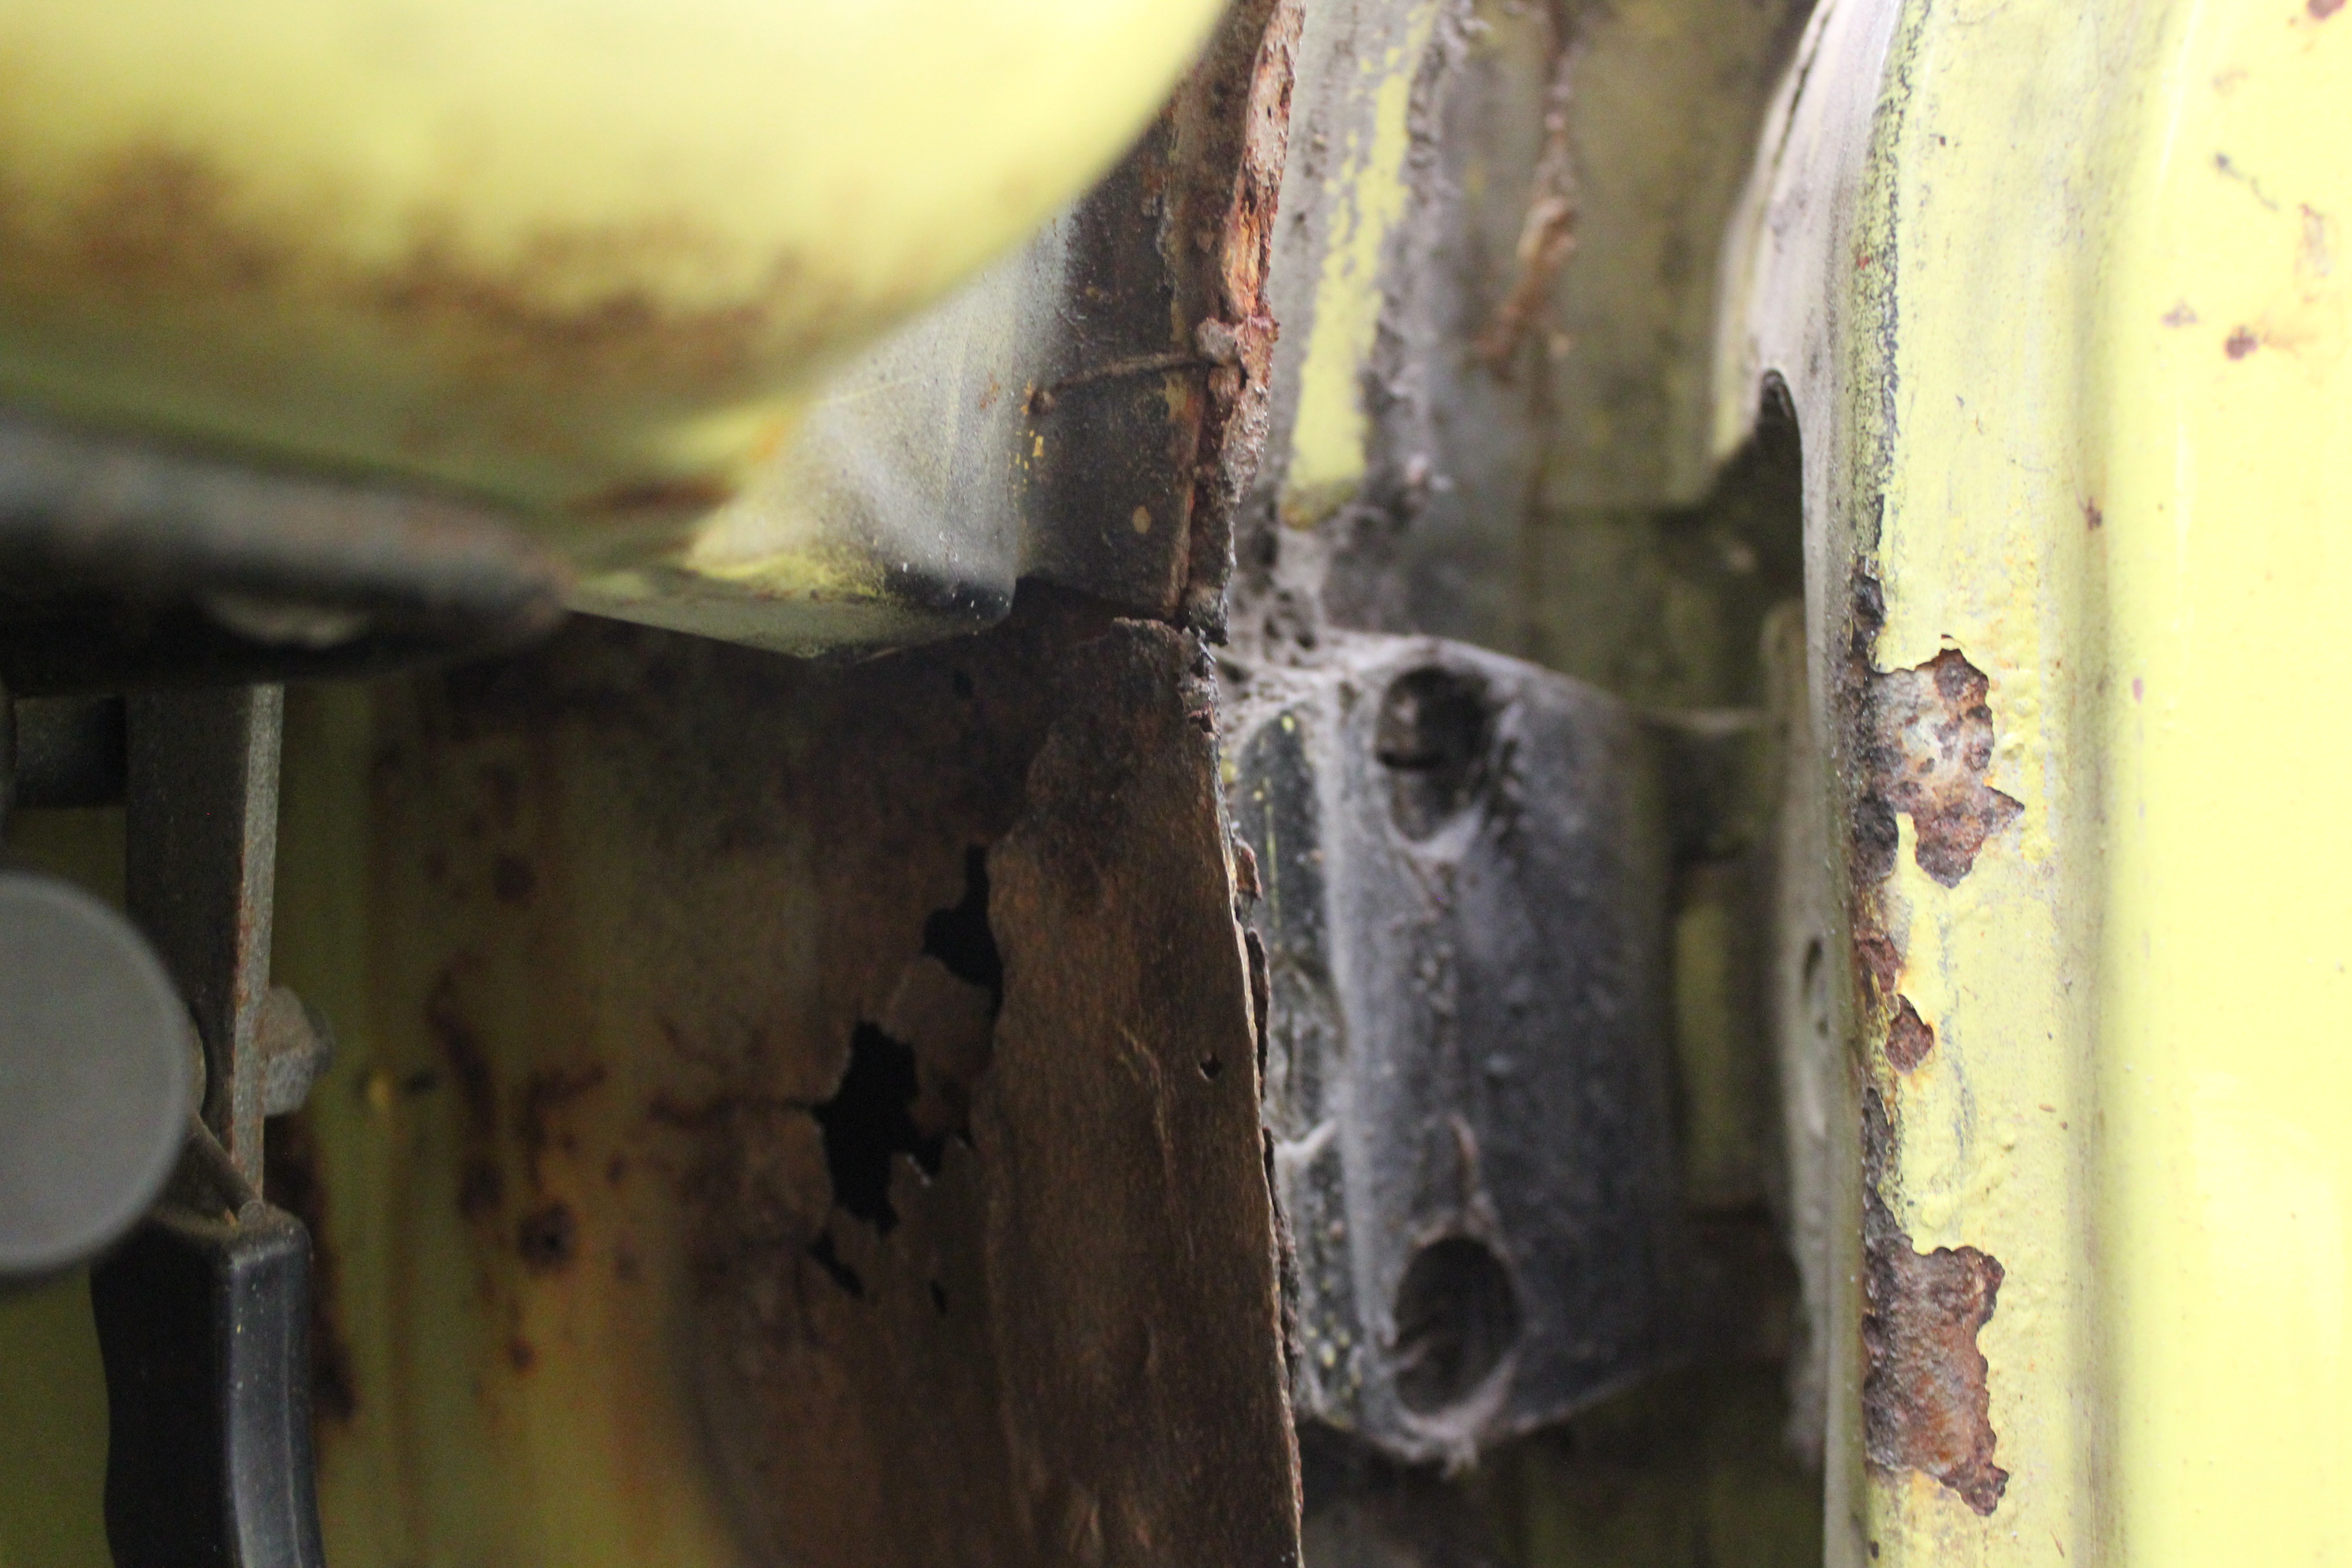
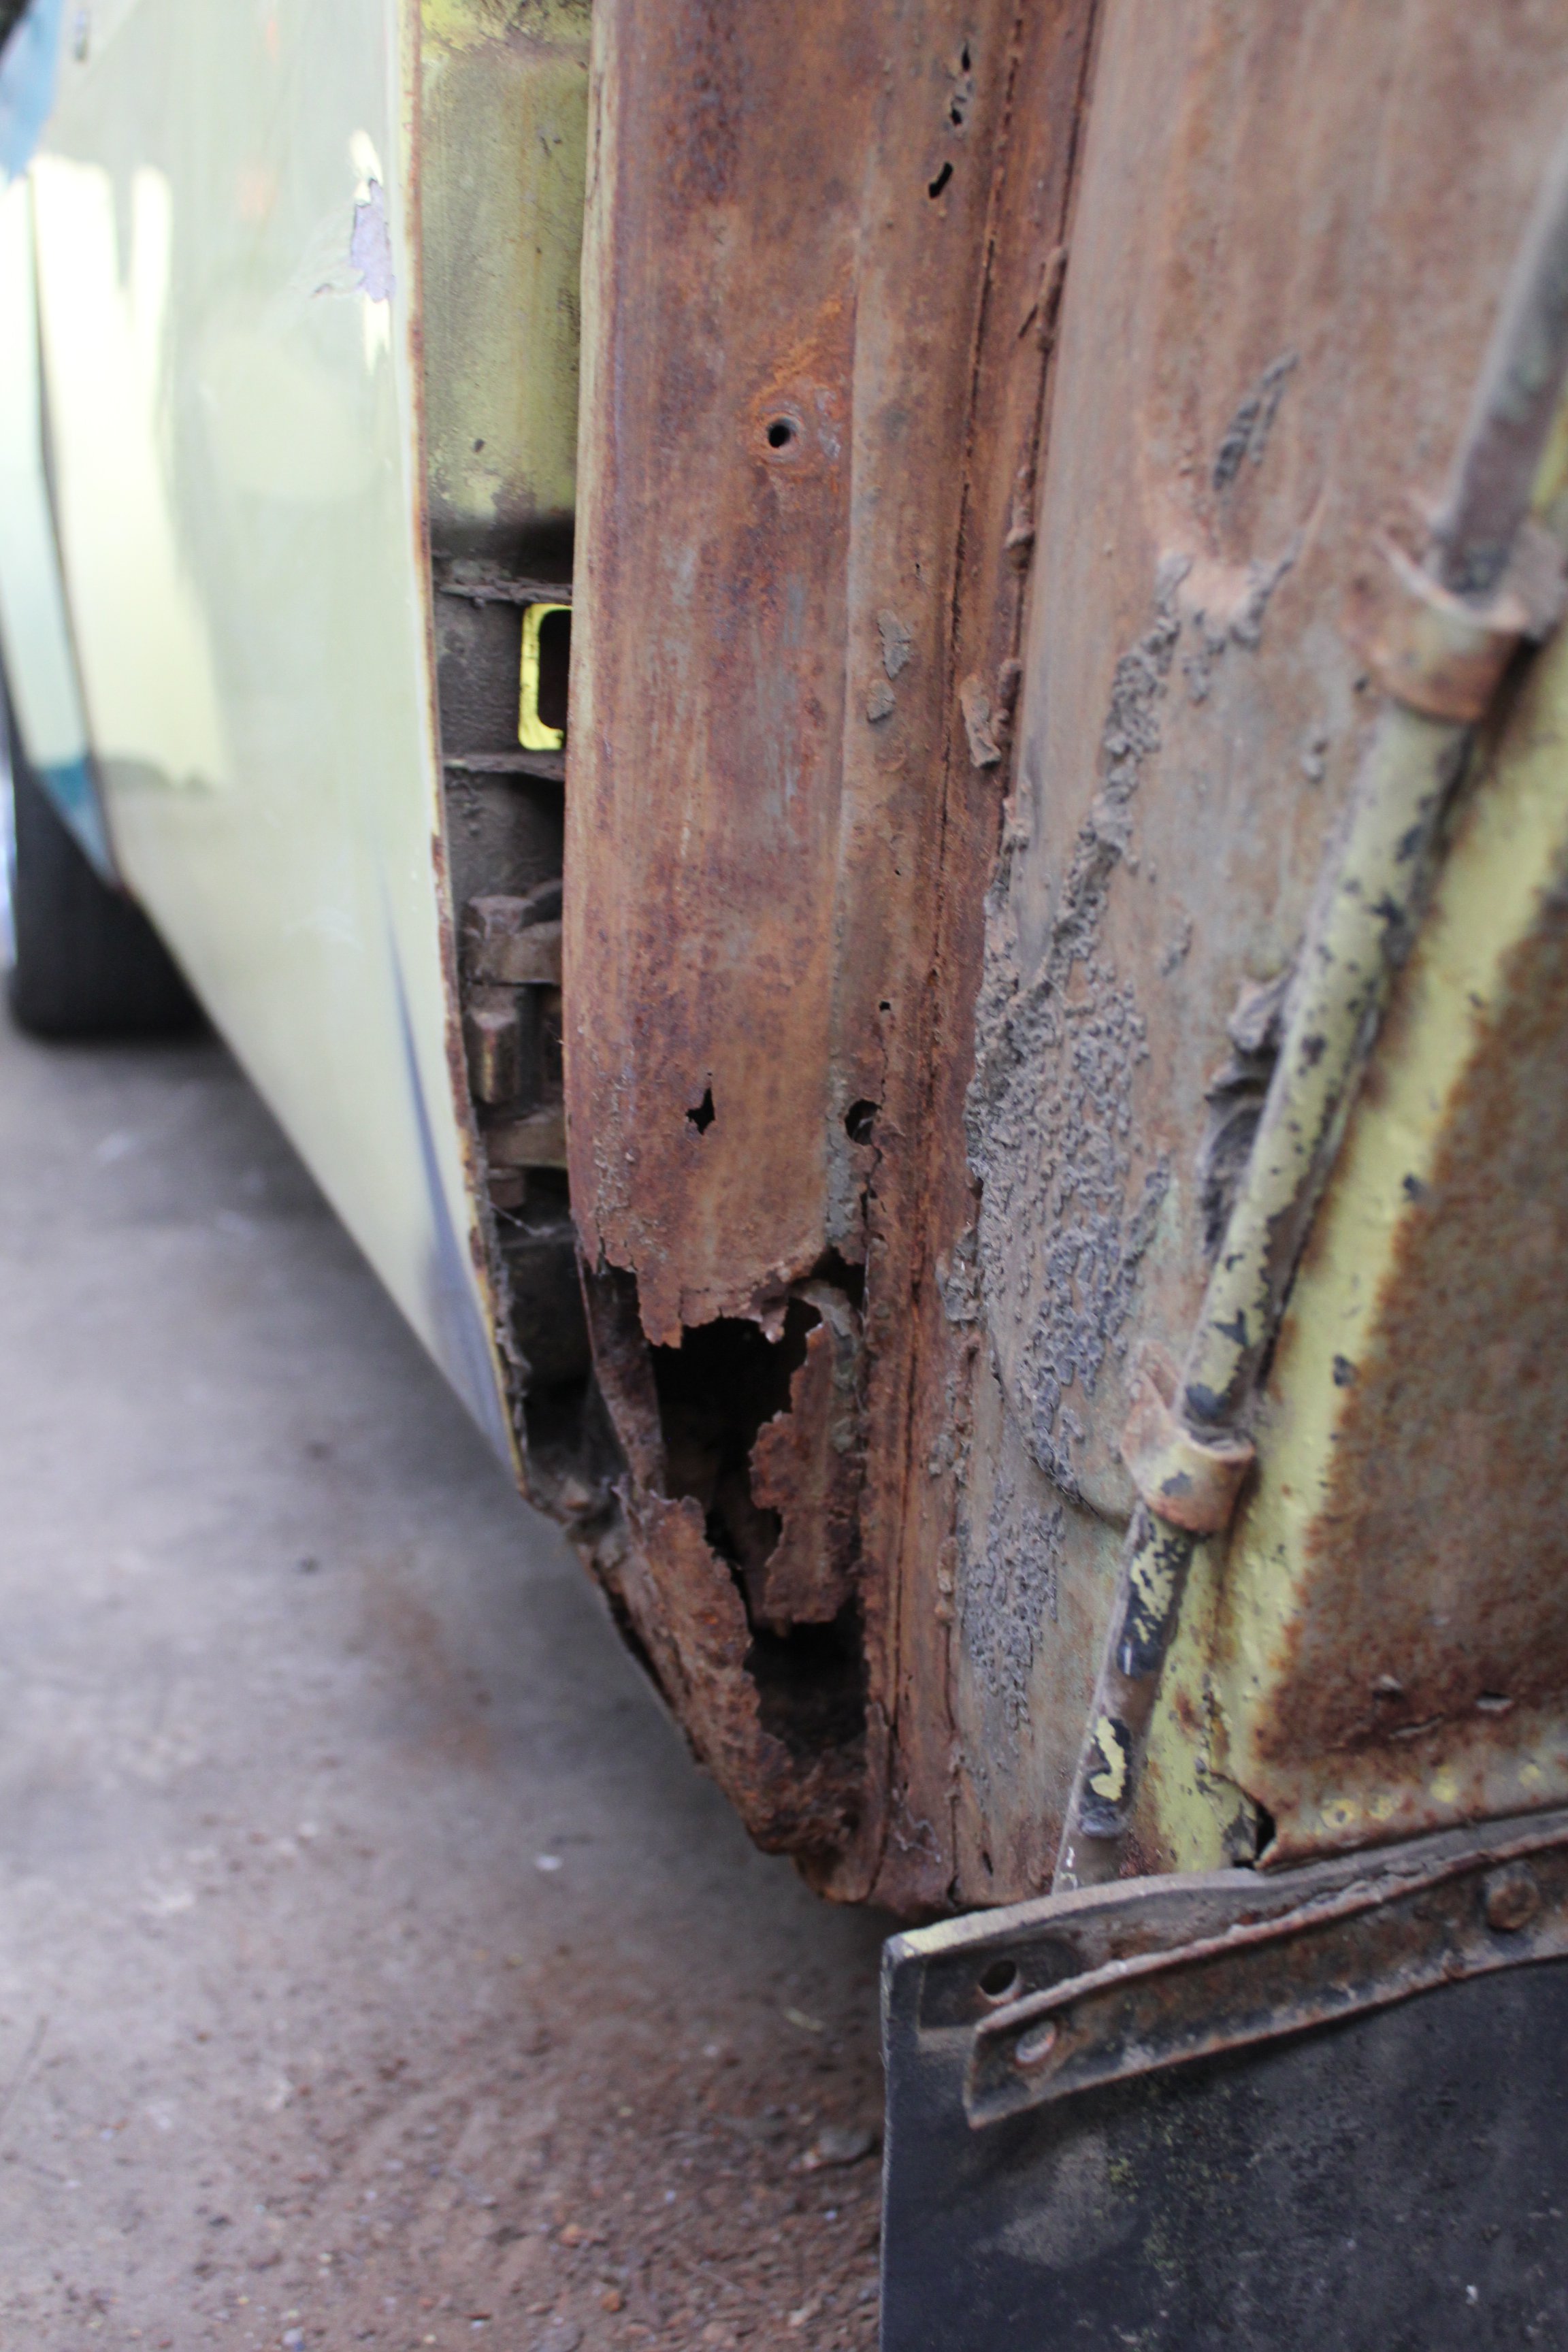
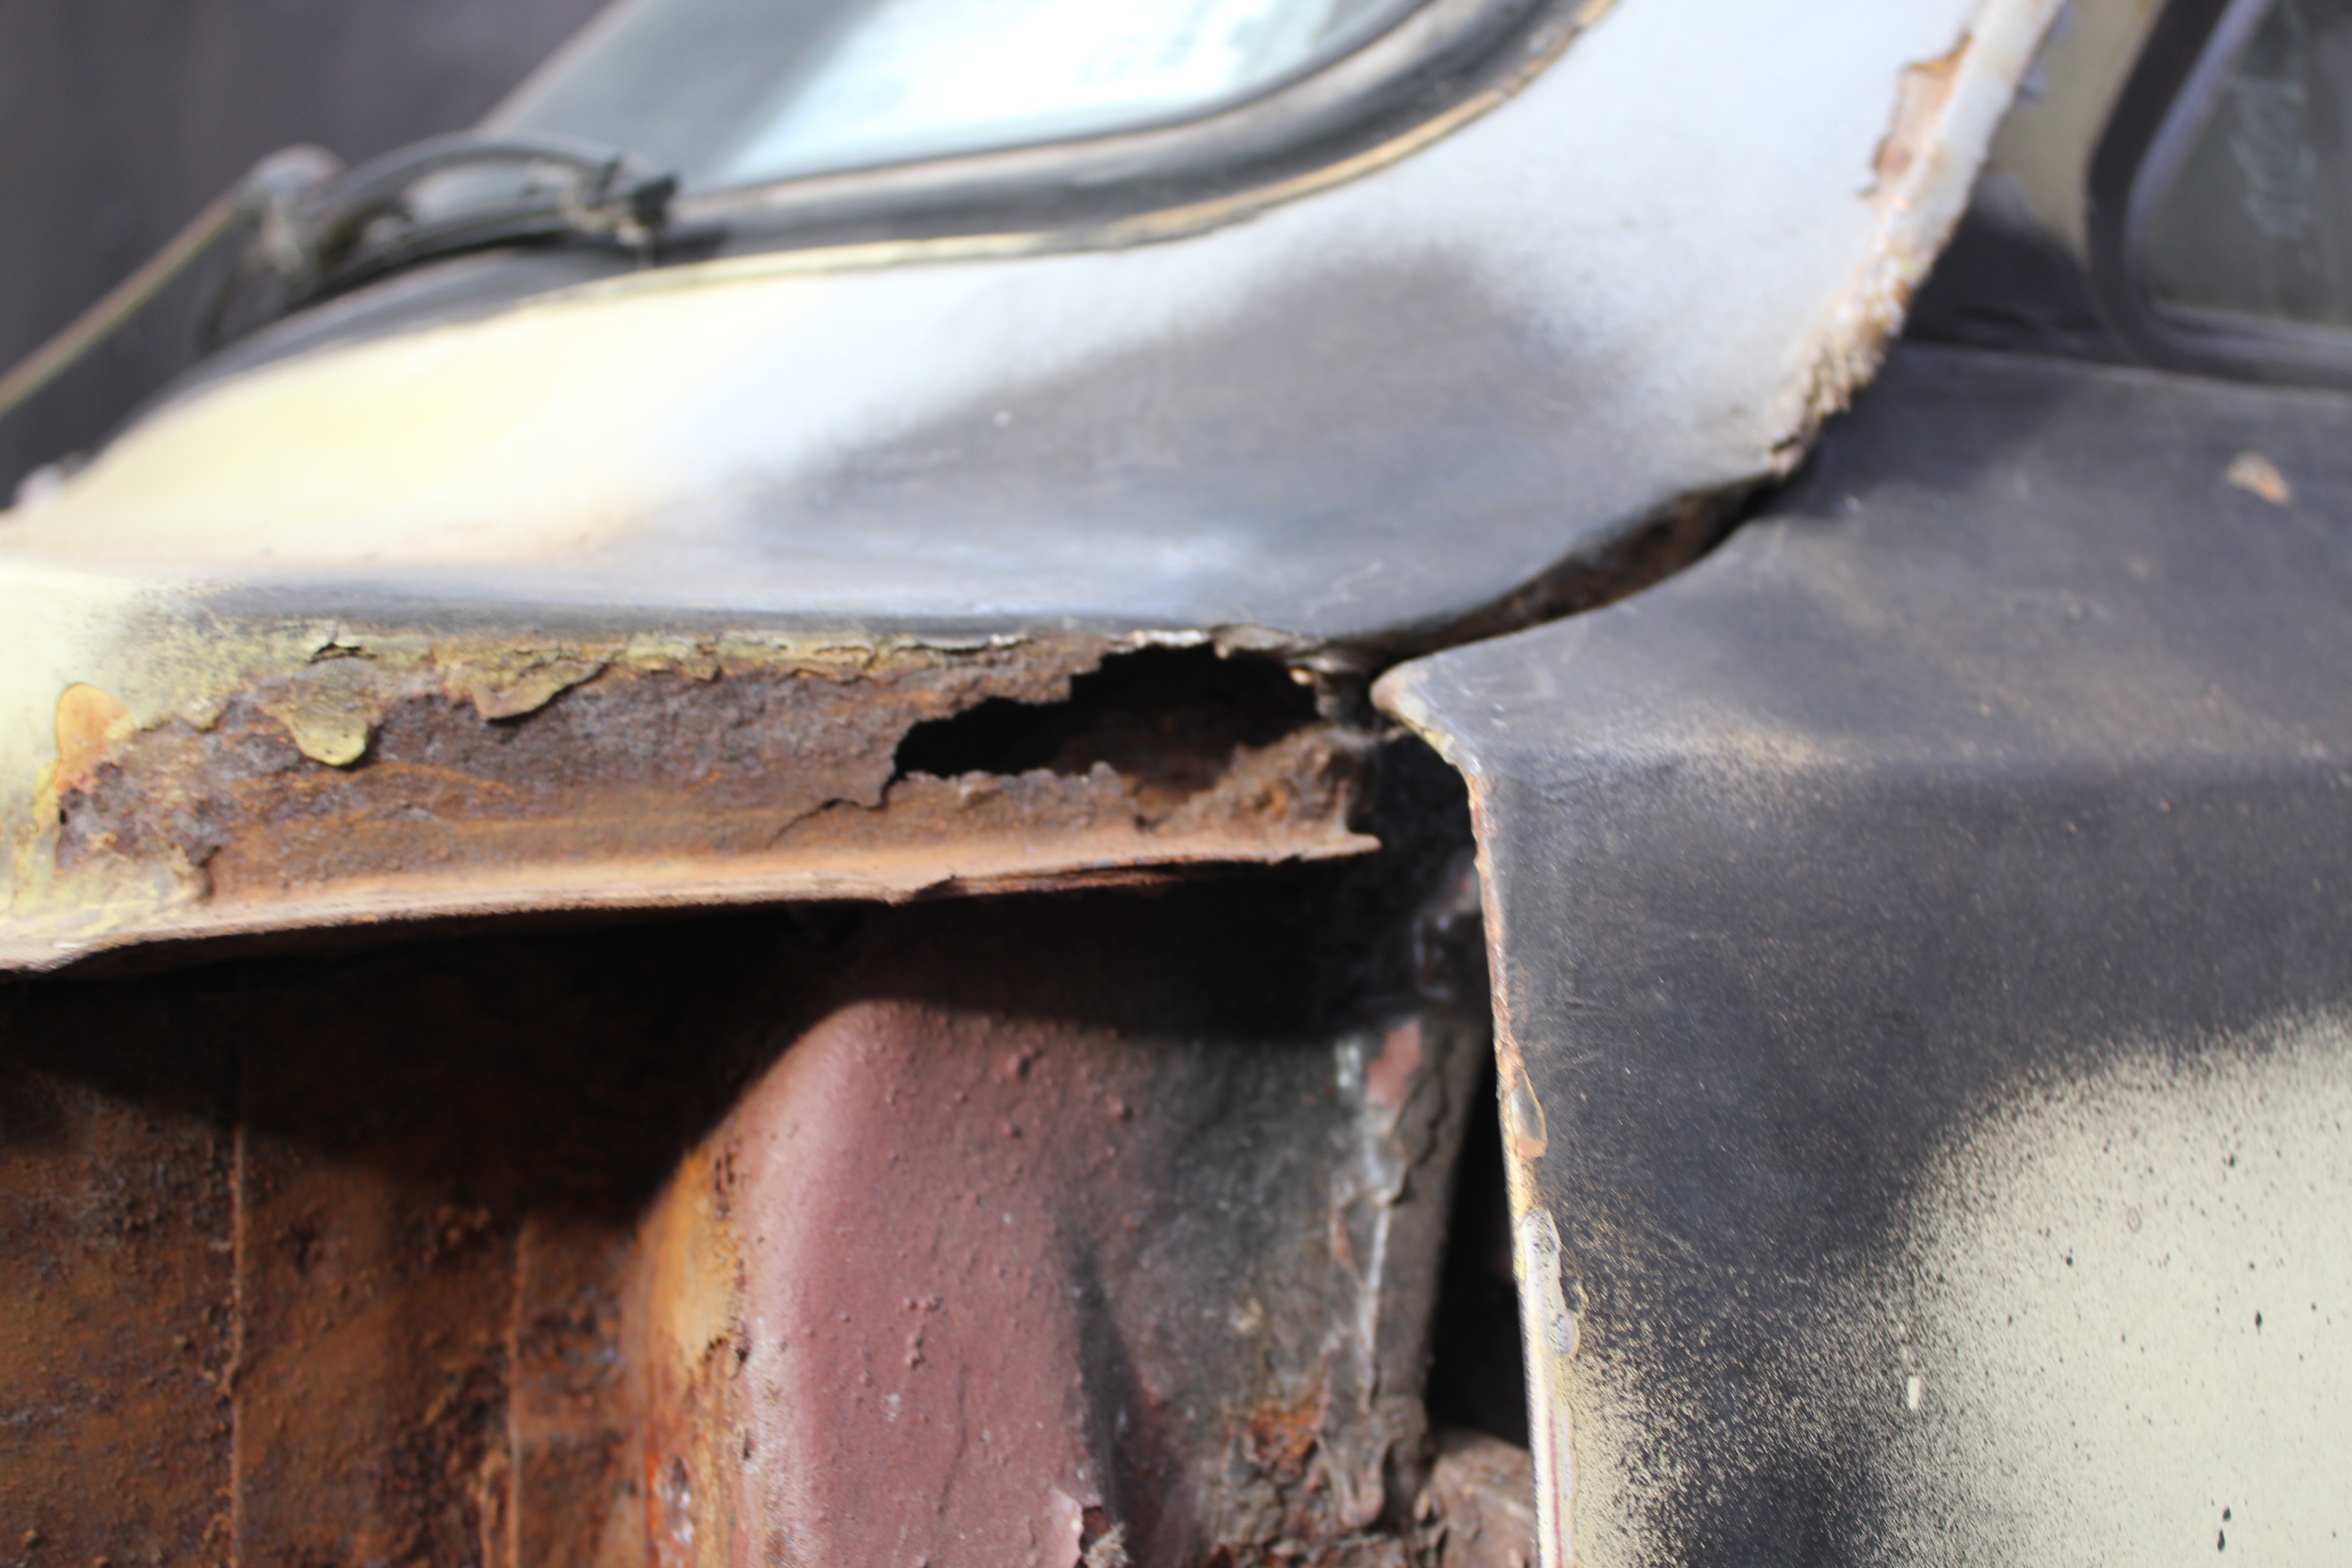
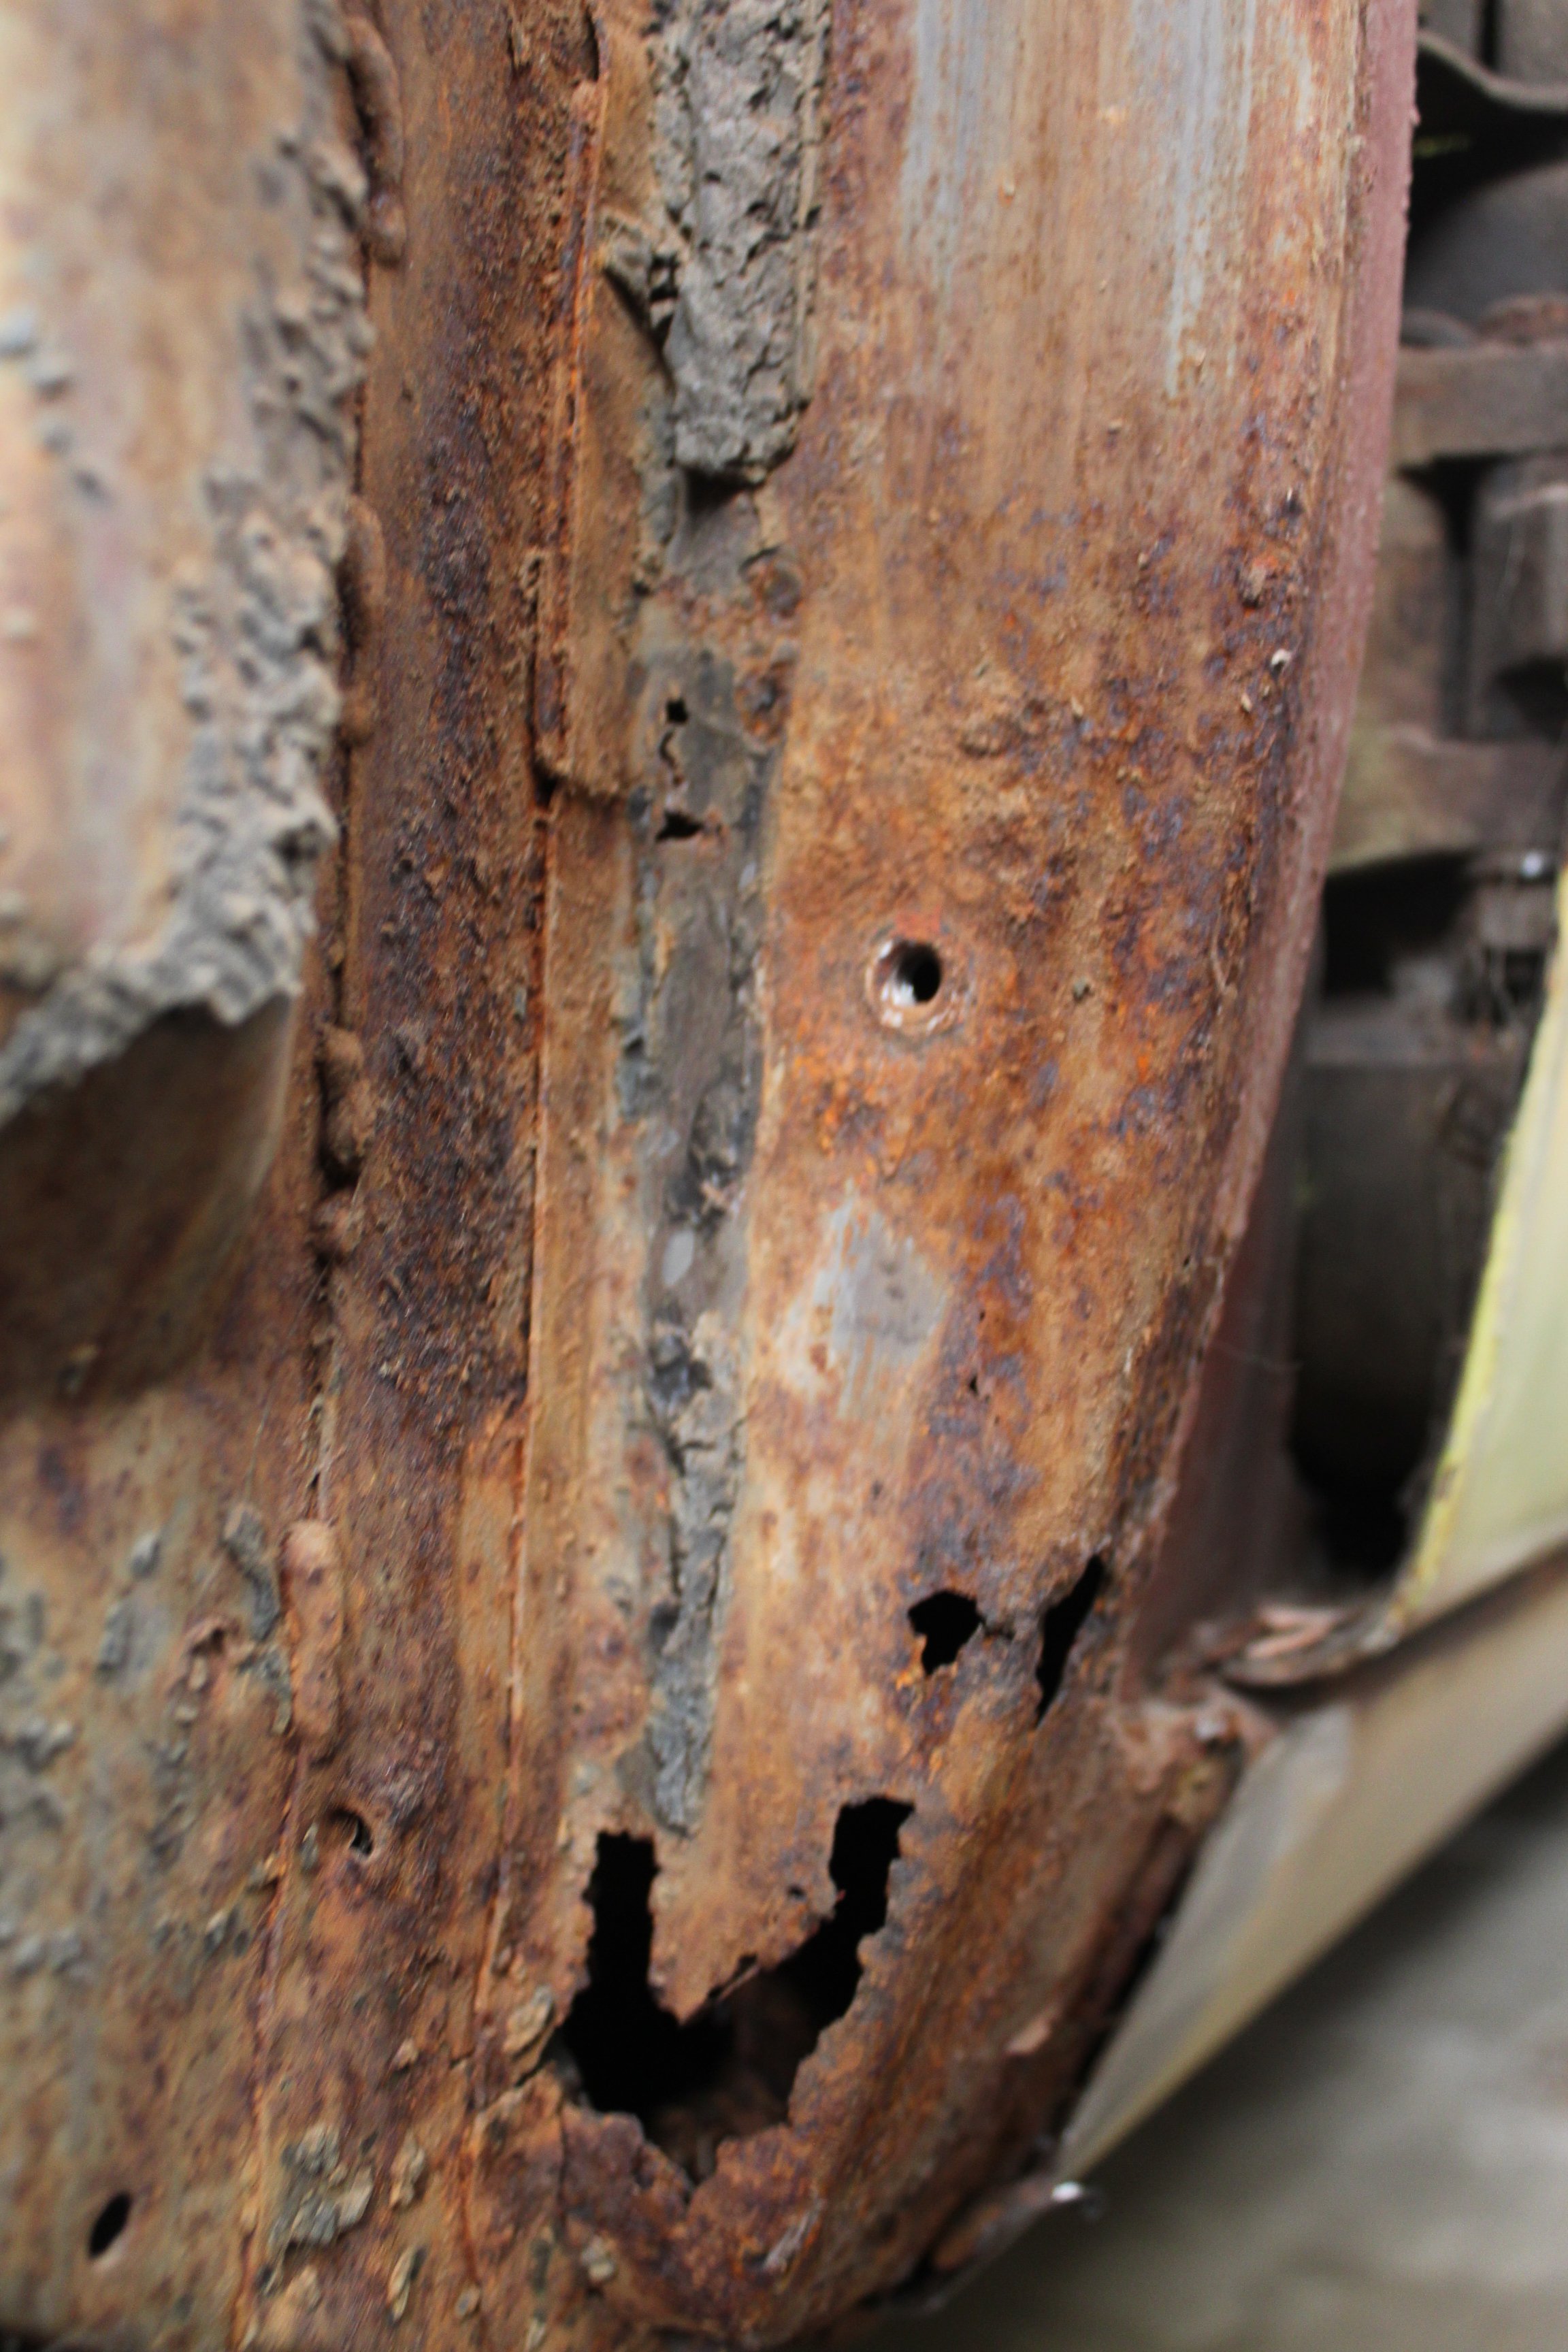
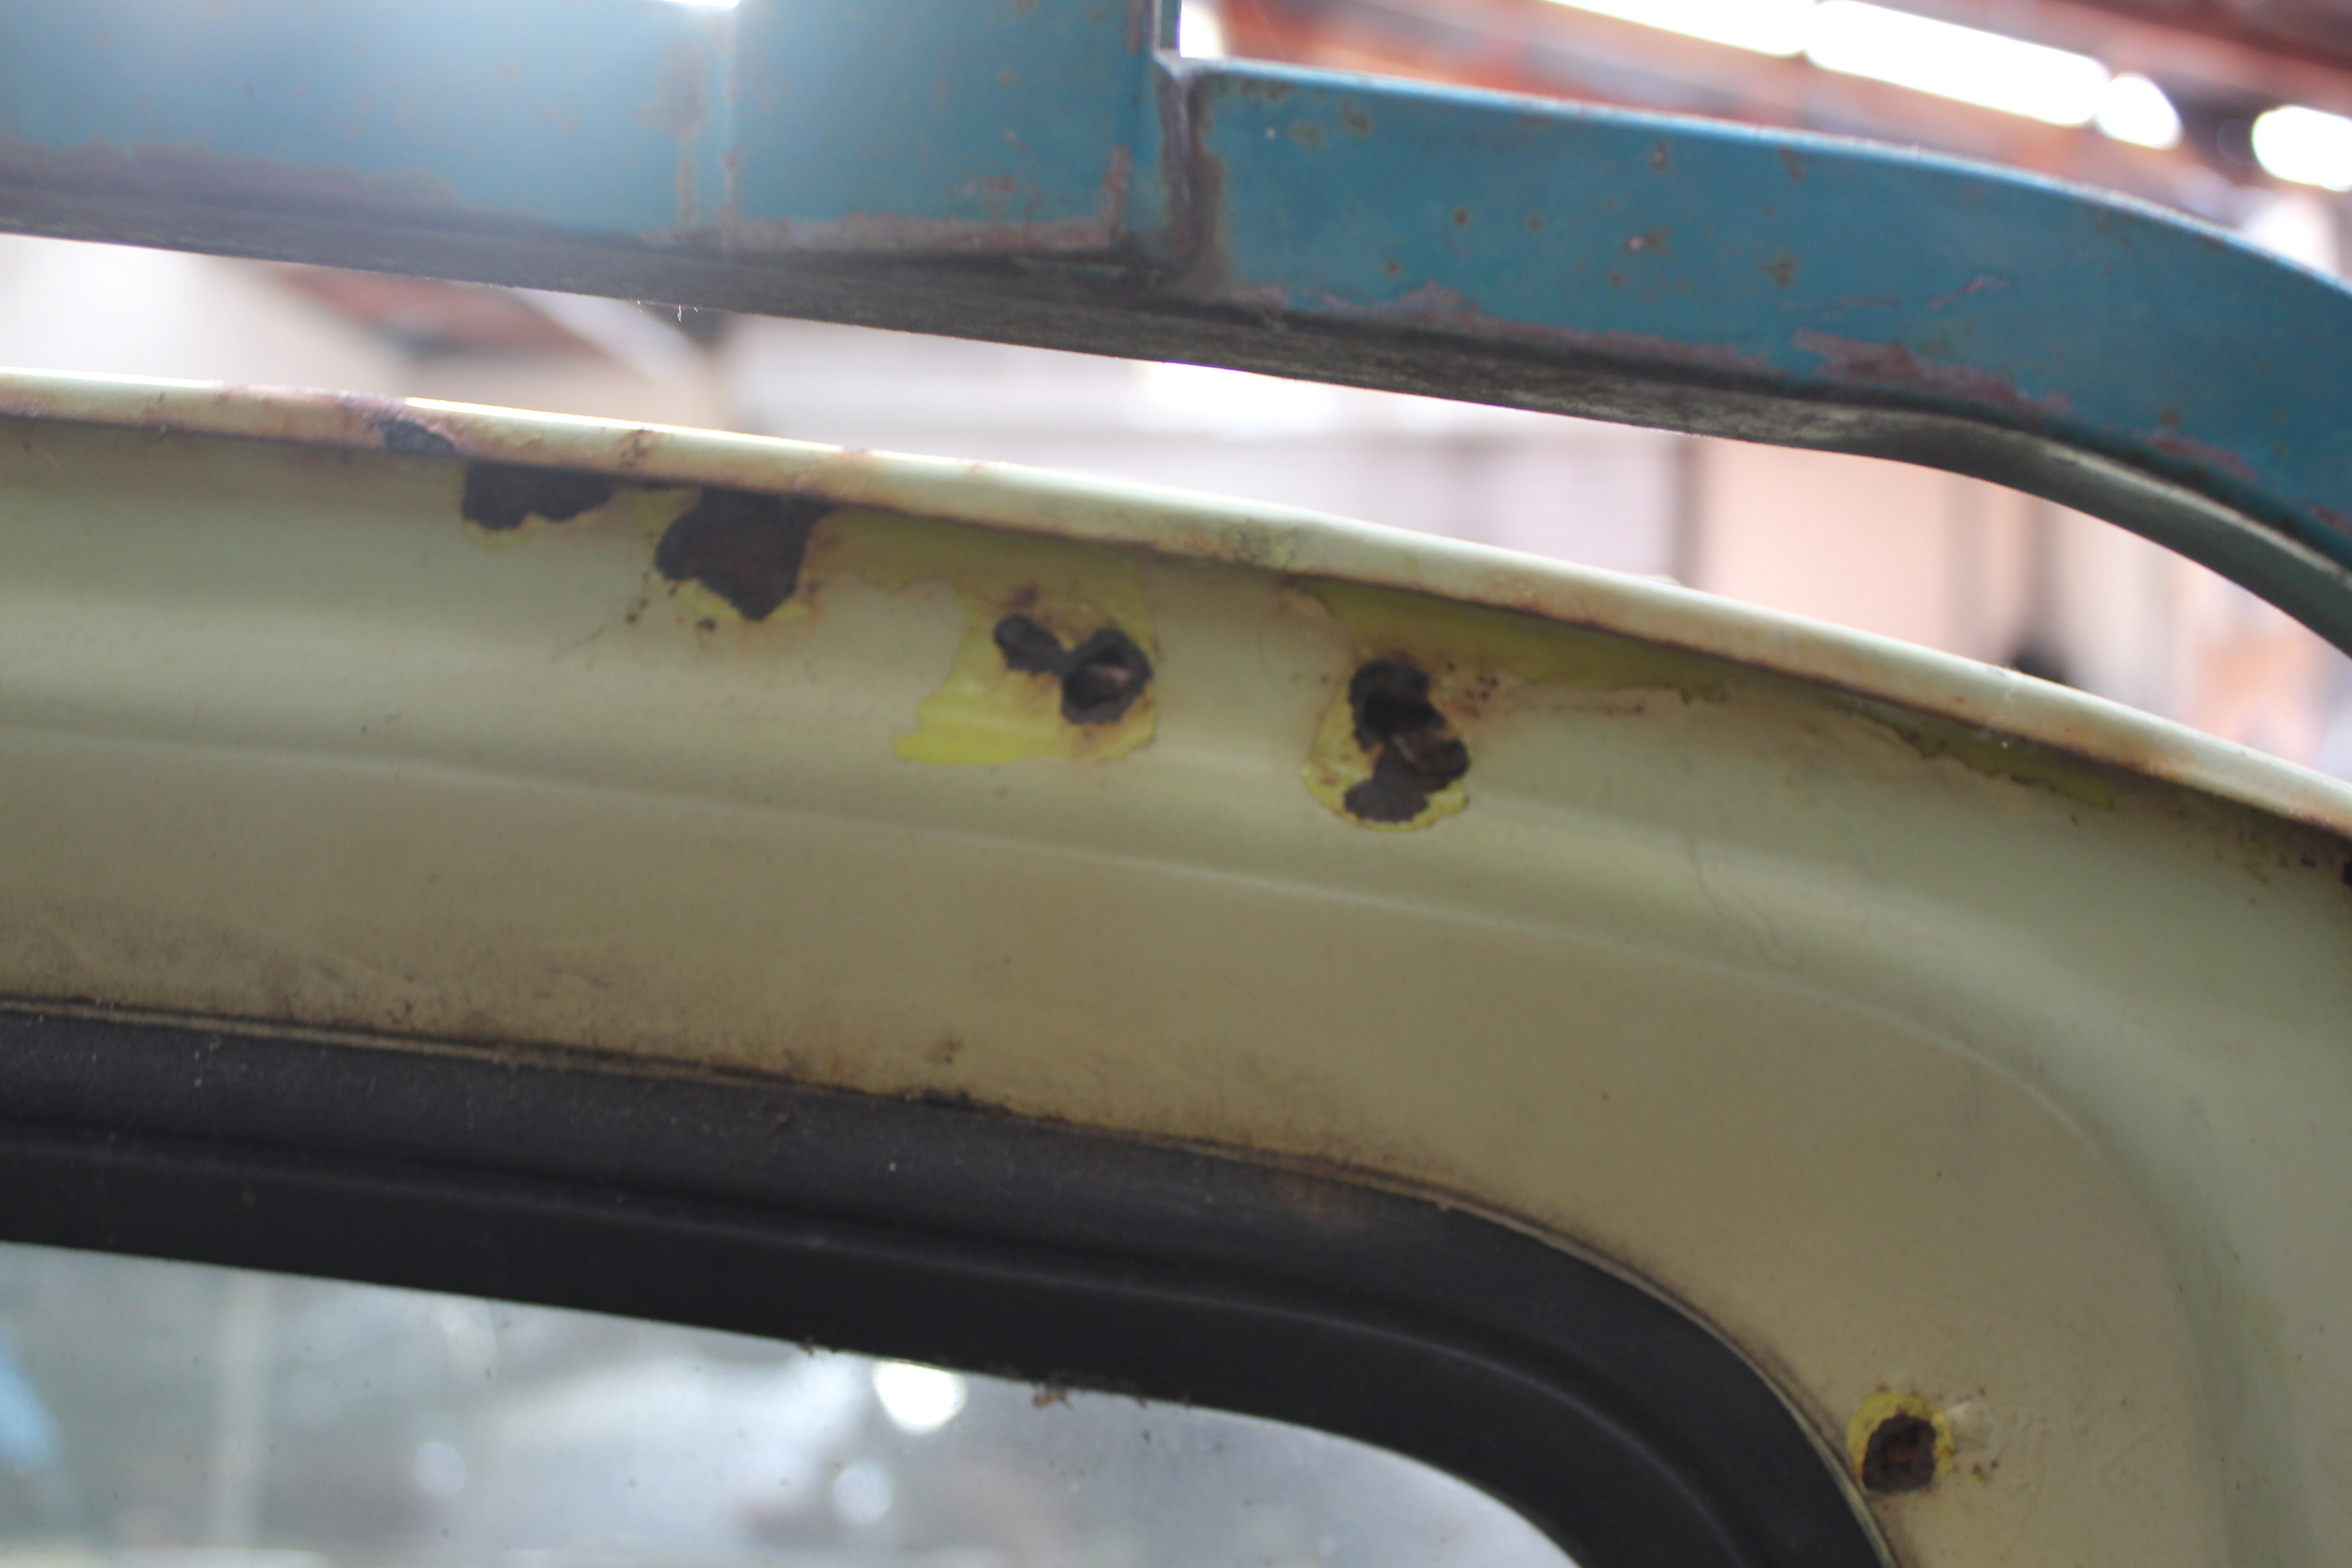
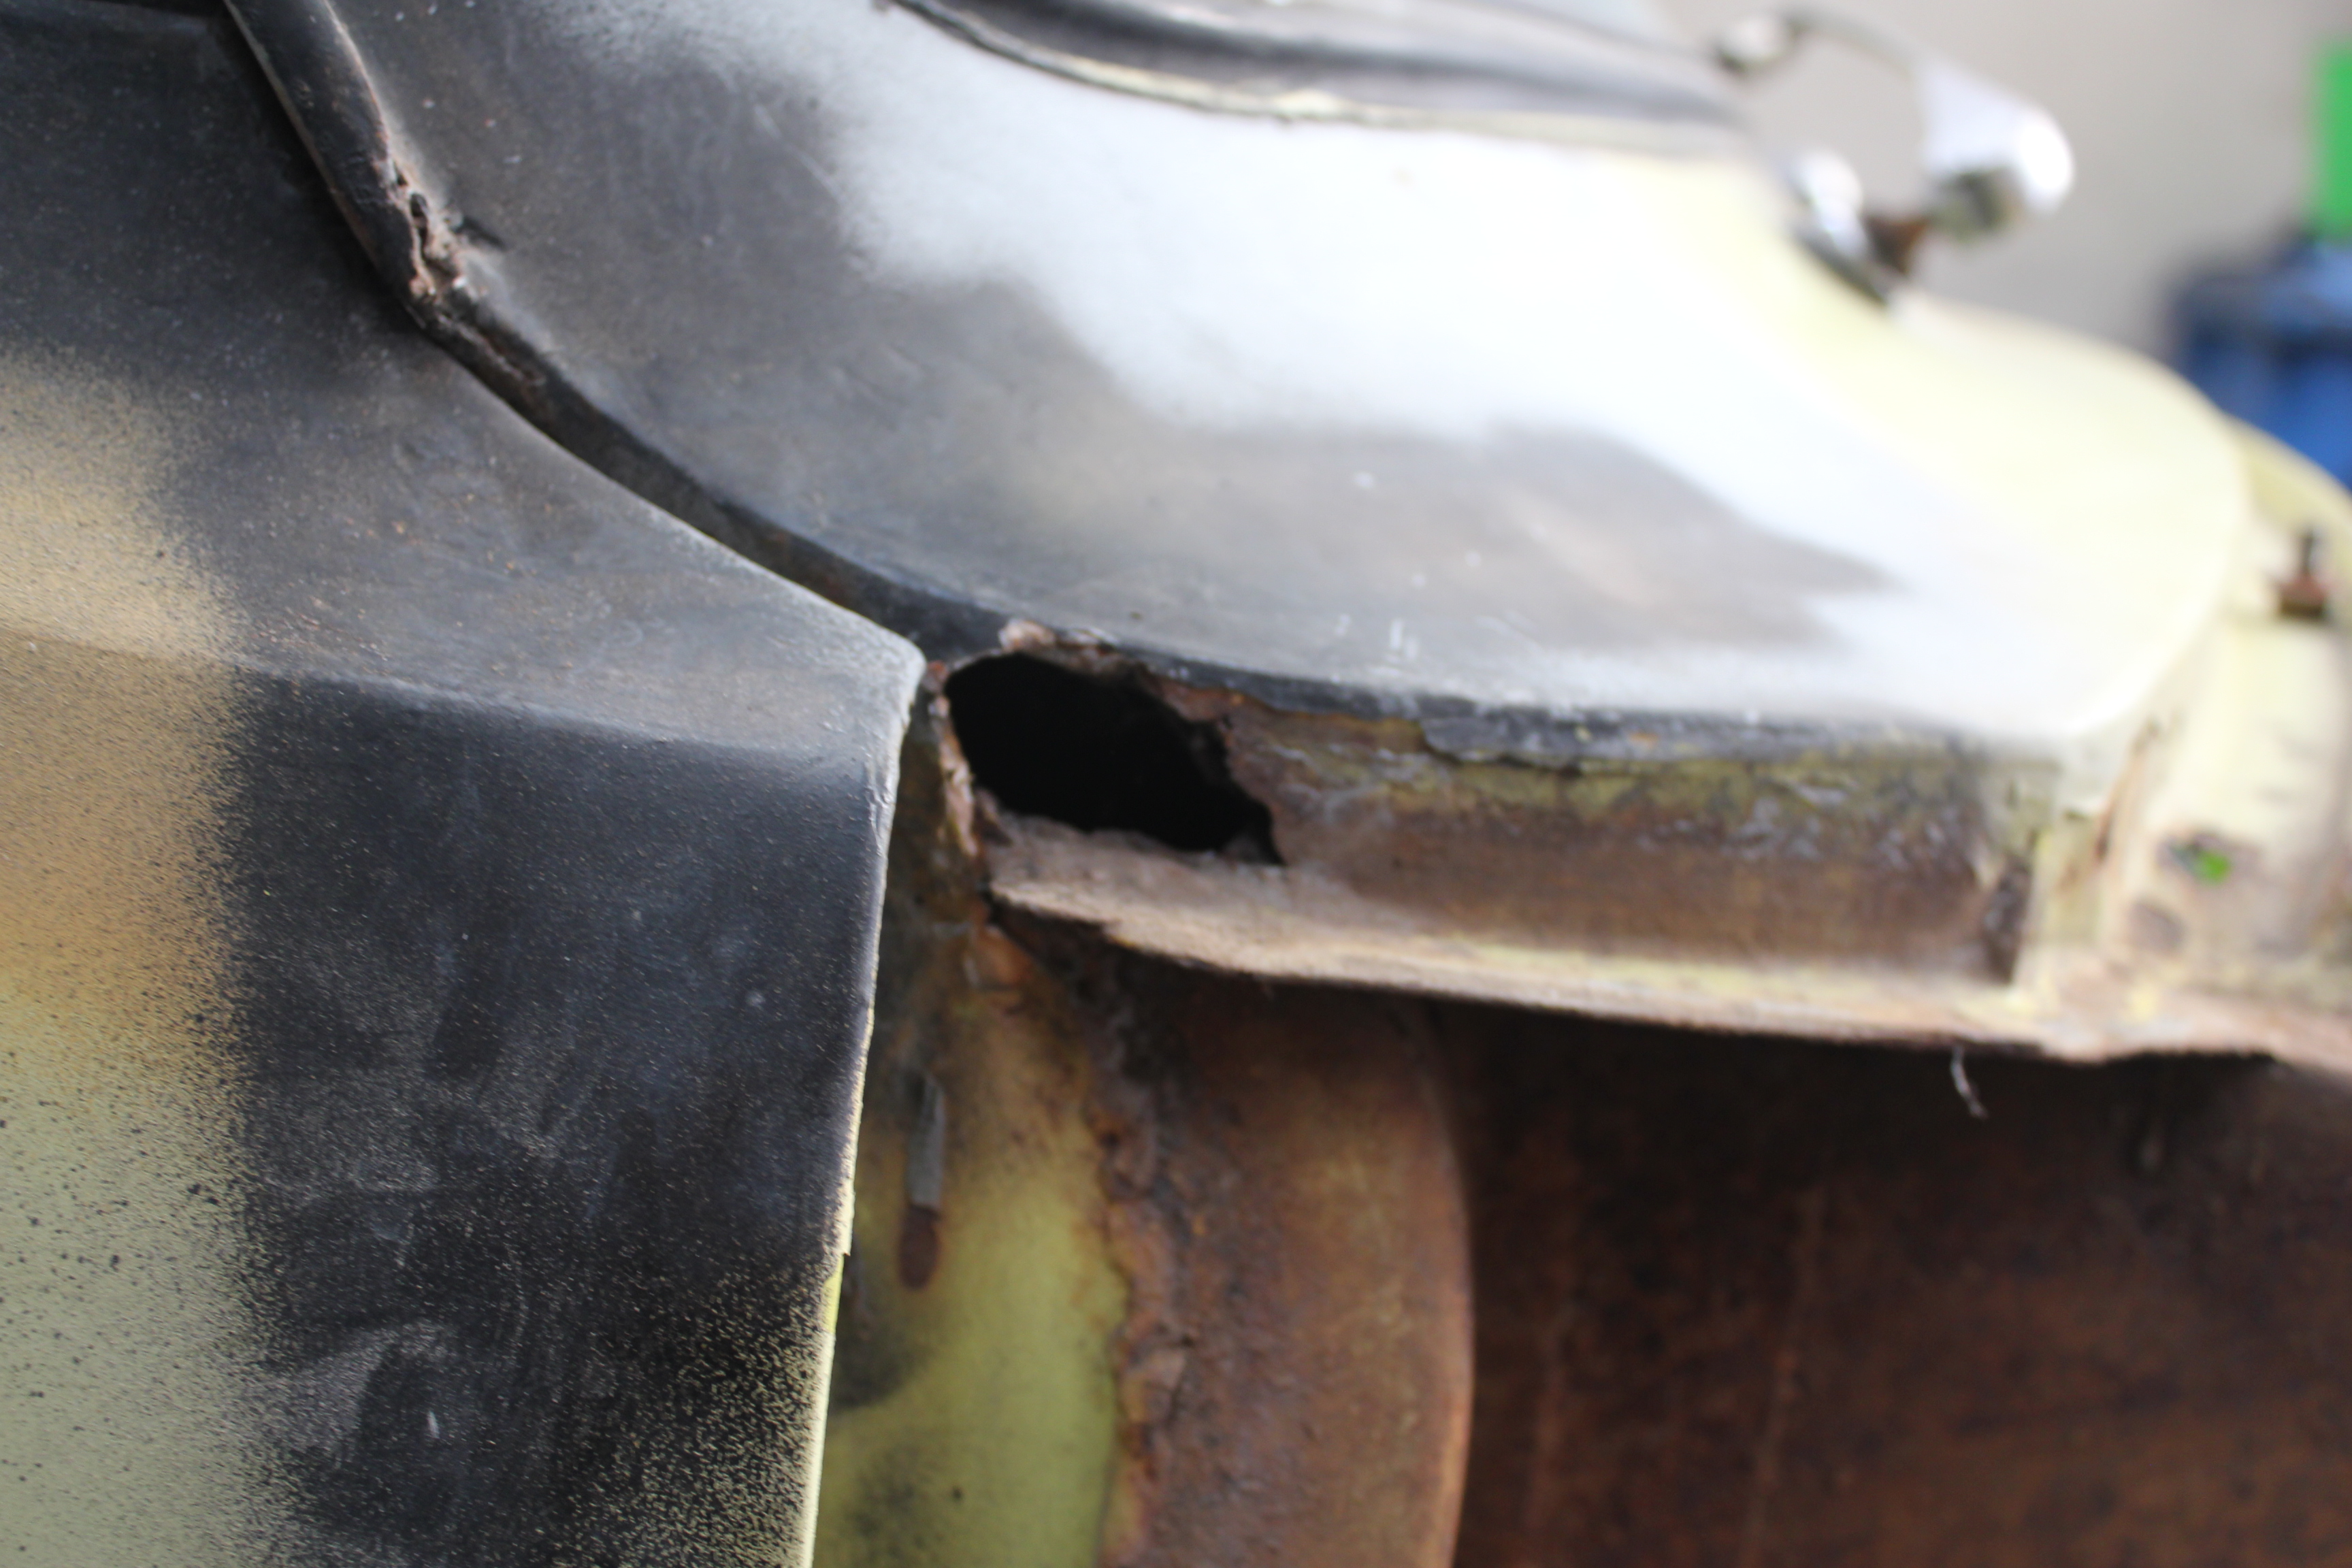
UPDATE! First things first, Who the fuck welds fenders to the sills??!! Yesterday I started by wire wheeling the sills to see how bad they were under all that paint. GOOD NEWS! Not as bad as I thought. A couple of rust holes here and there, but or the most part they're all gravy. That is unfortunately where the good news ended for the day. I removed the covers in the footwell next to the door and discovered a rather religious patch right where one of the drivers side hinges attaches. Less than ideal. Allan suggested removing the fenders to see what was hiding in there. After removing 5 of the bolts I discovered the bonnet had to come off to reach a 6th bolt. Ok, cool, after Allan worked out how to remove the weird-ass spring that's on there, bonnet was off followed swiftly by that sixth bolt. After 2 solid minutes of trying to remove a 7th bolt and it not moving I asked Allan for assistance, at which point we discover the welded to sill feature. What. The. Fuck. Allan very kindly cut them loose for me (I'm pretty sure he was scared I'd lose a finger or set fire to everything if i did it). Then YAY, fenders were off. Under which was a whole lot of caked on mud that is probably older than Ty and a shit load more rust. My favourite. The fenders themselves are not in very good shape (sorry, didn't take any pics of them) so I'm in the market to find some replacements. I also poked some more holes in the back of the cab. Who lets me have a screwdriver?!
6 points
-
manifold cleaned up and painted.. found an air cleaner off an 86 dodge truck which is perfect , 2280 holley looks great will try it out before i make a call on rebuilding it... #super65 points
-
trenches and shit. 2017-05-14_04-32-51 by sheepers, on Flickr5 points
-
Moo'ing out on the farm4 points
-
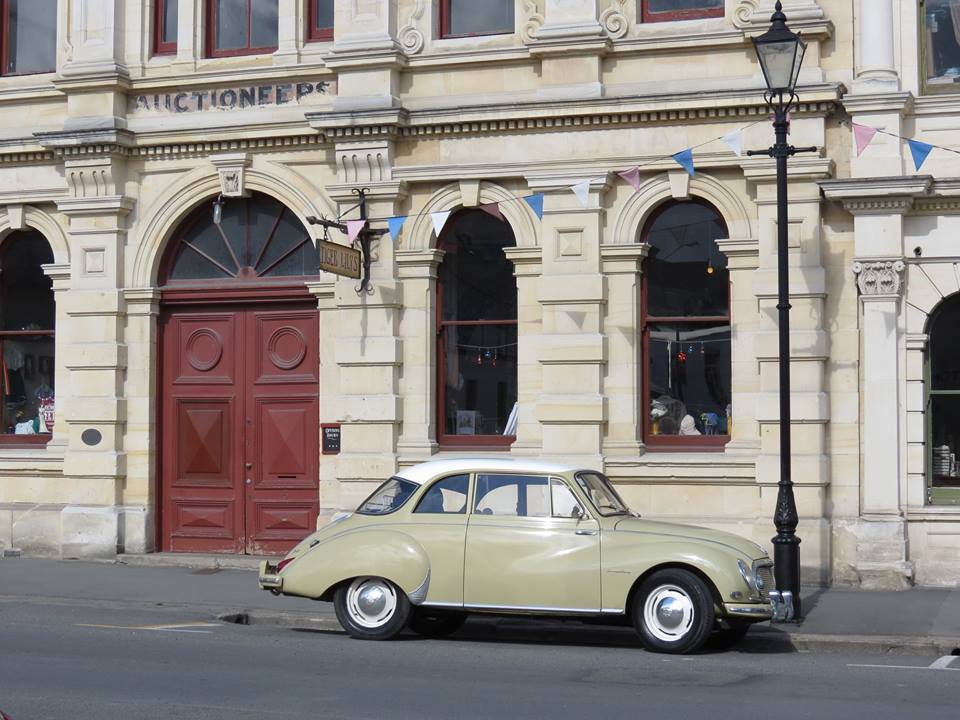
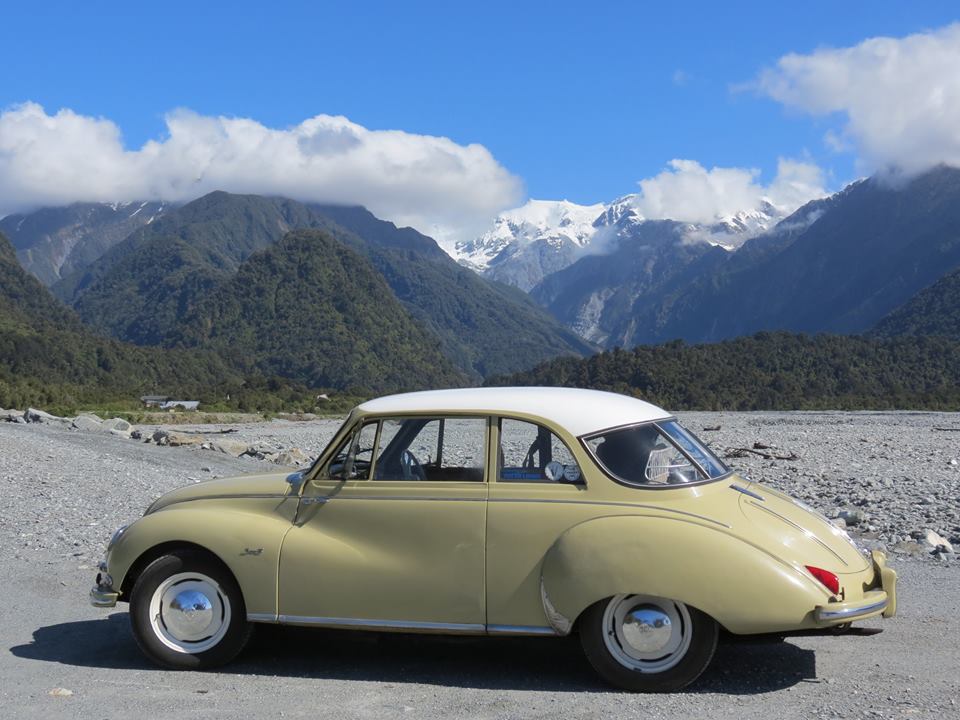
and this is my '57 DKW 3=6 F93 "Spezial" saloon (RHD drive for export);
4 points
-
No, that's one of the main reasons I've never got involved with them, there is very little in the way of rules for bikes. And trikes. I've only driven one and felt like it was going to kill me at any second. Yuck.3 points
-
Place in left hand. Fit steel cap boot on right foot. Drop from hand while swinging your right foot. Atempt to aim for a rubbish bin or out a door away from you and your car.3 points
-
I'd rather finish it first. but there will be a skid at some point.3 points
-
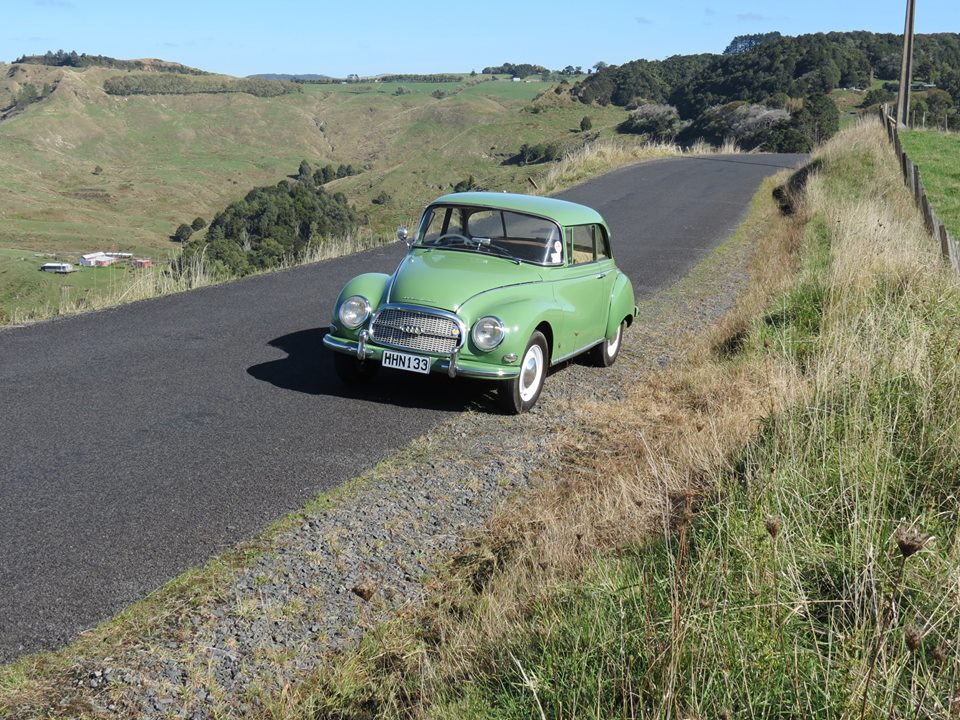
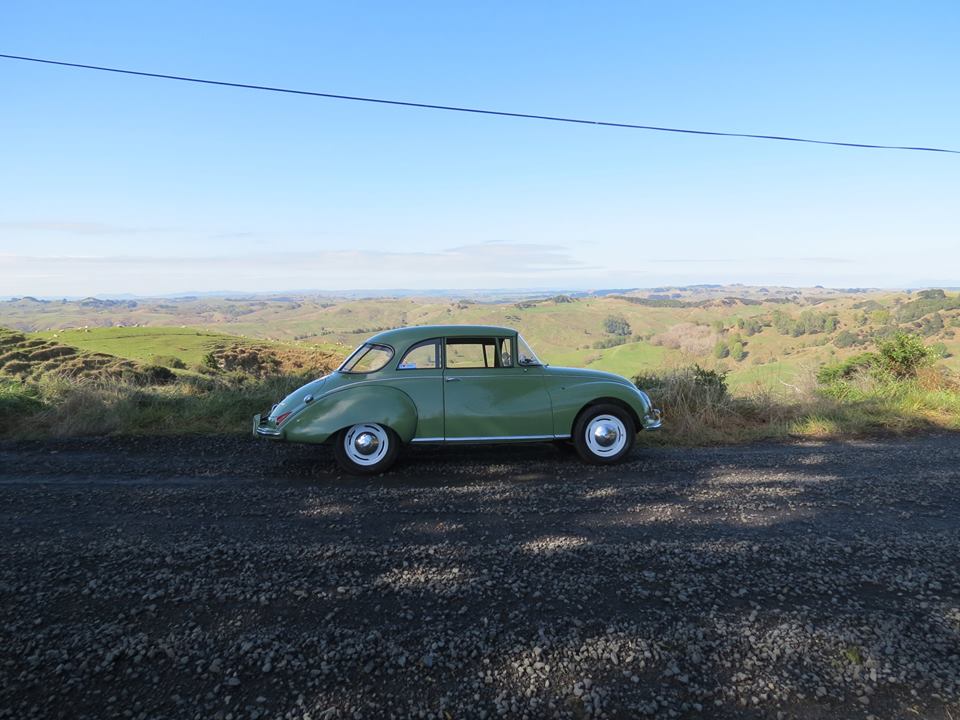
OK - it's been a bit quiet here - this is my 1959 Auto Union 1000. The 1000 is a rare sub-type - eclipsed by its much flasher brother, the 1000S, which had a lot more chrome, a few extra horses, duo tone paint as standard, interior clock, rear ashtray, stoneguards etc... This one is in its original colour of AU409 "Moosgrün", with a white interior, with green trim. Some of you may have seen me about with it.
3 points
-
Well, today the engine came out. I decided to check, if in fact I did have the original motor in the car. Yuss. Turns out I do! Fantastic. Very happy to be giving this KE a full makeover and put the original heart back into it. Just so I remember how all of this went. The rest of the bay is pretty self explanatory Also showcasing that, I really should have checked if the gearbox had oil in it. Turns out it did, and my efforts of adding an ice cream container 80% through the drainage process didn't really achieve much. #It'sTheThoughtThatCounts. And behold, the bare nude bay. Considering if I should get this entire shell bead blasted or something, just to get rid of all the rusty holes once and for all I will be going in tomorrow to get some stripper and strip they bay, and also some dry ice so I can get rid of the sound deadening.3 points
-
Finally, a good sunny morning for some photos. The first two are my bike with a 16" Cub that the kids ride from time to time. @d.p.n.s3 points
-
Now we are at present day. I have a track day on the 27th, and I wanted to make some changes. First was the diff ratio is way long for the torque of the car. So I bought a 4.3 ratio LSD to fit. I also bought a seat rail to take an old Racepro I have kicking around Some tow hooks And these: 18 x 8.5, 30th anniversary 350z Wheels, +30 offset To go with them I also got some 6.5kg/mm lowering springs. No Pictures of them but just the finished product from today: Car still has Wof, and rego and the objective is to keep it running as a daily. Idea is it will stop me from ripping the motor out to put a V8 in it, and to keep it running on the most reliable setup for as long as possible.2 points
-
Don't bother installing it btw, they were supposed to make your points last forever by not putting any current through them and only using them as a switch. In reality they were about 100x more likely to fail and leave you stranded. That's why they all have that switch to bypass the unit2 points
-
By the time you improve the shitty bits, is it worth buying,ie is it cheap? Or would you be better off adapting some pick a part type bits yourself The factory 'diagram' is lol, looks like I drew it2 points
-
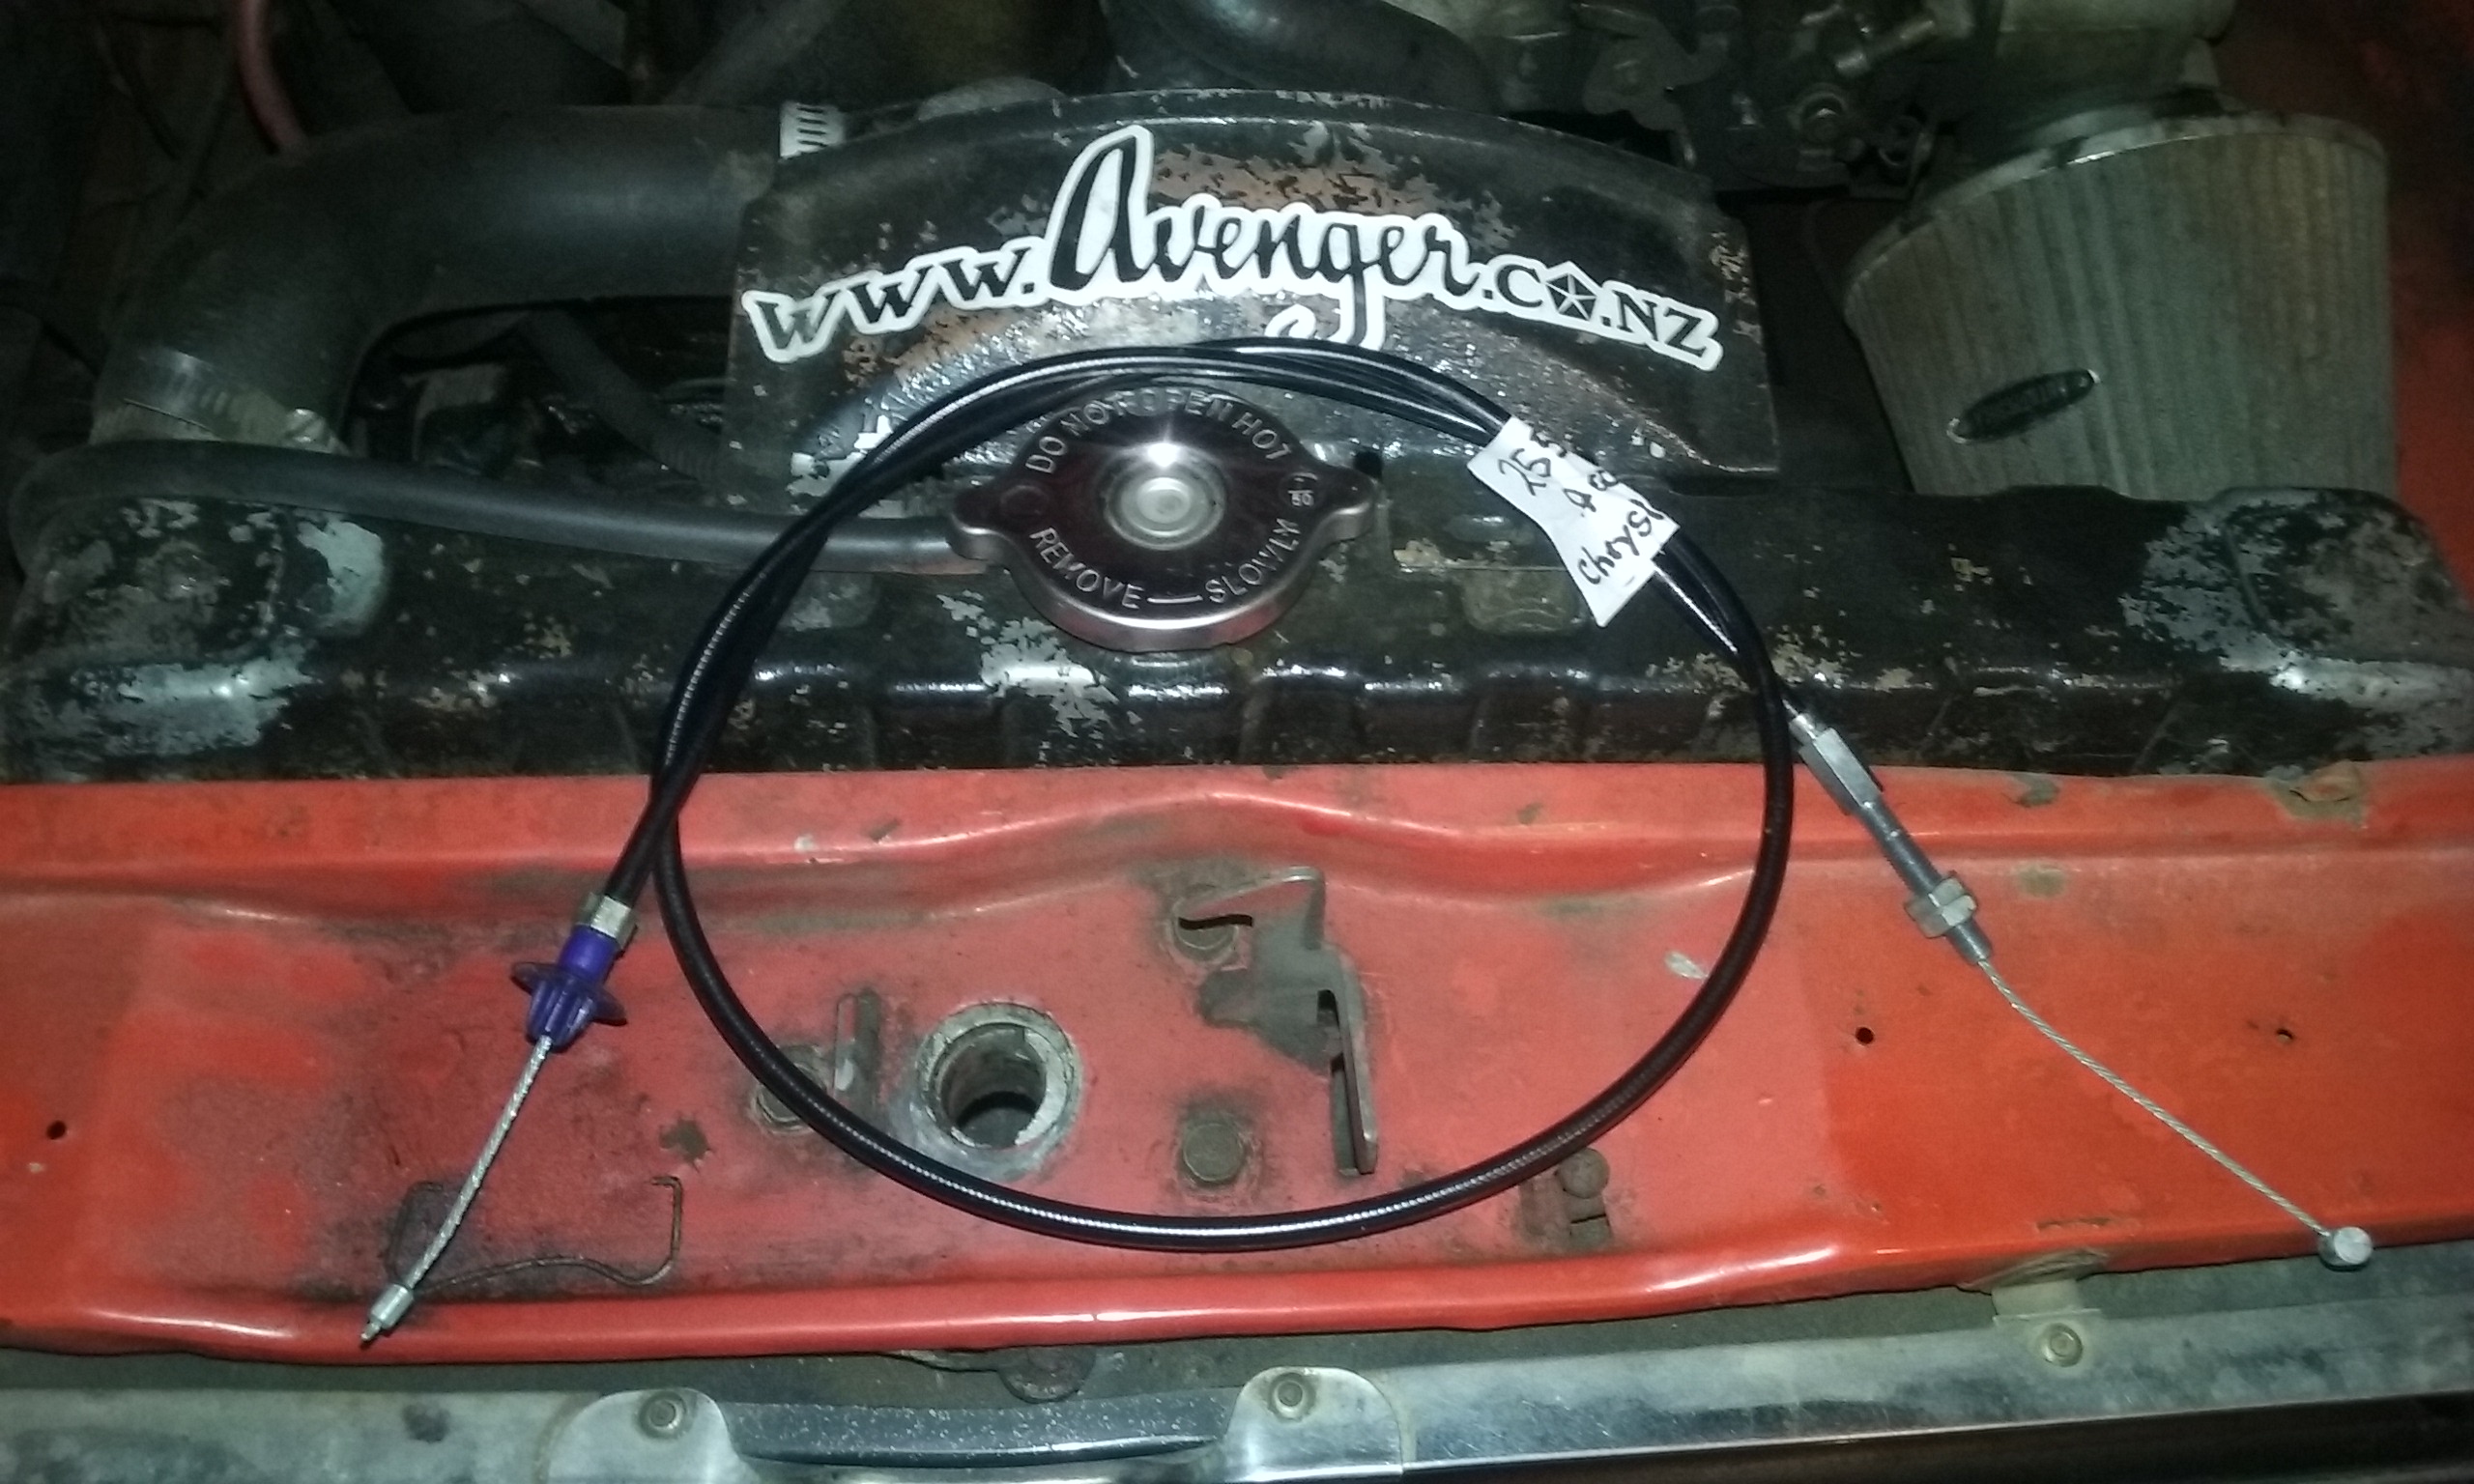
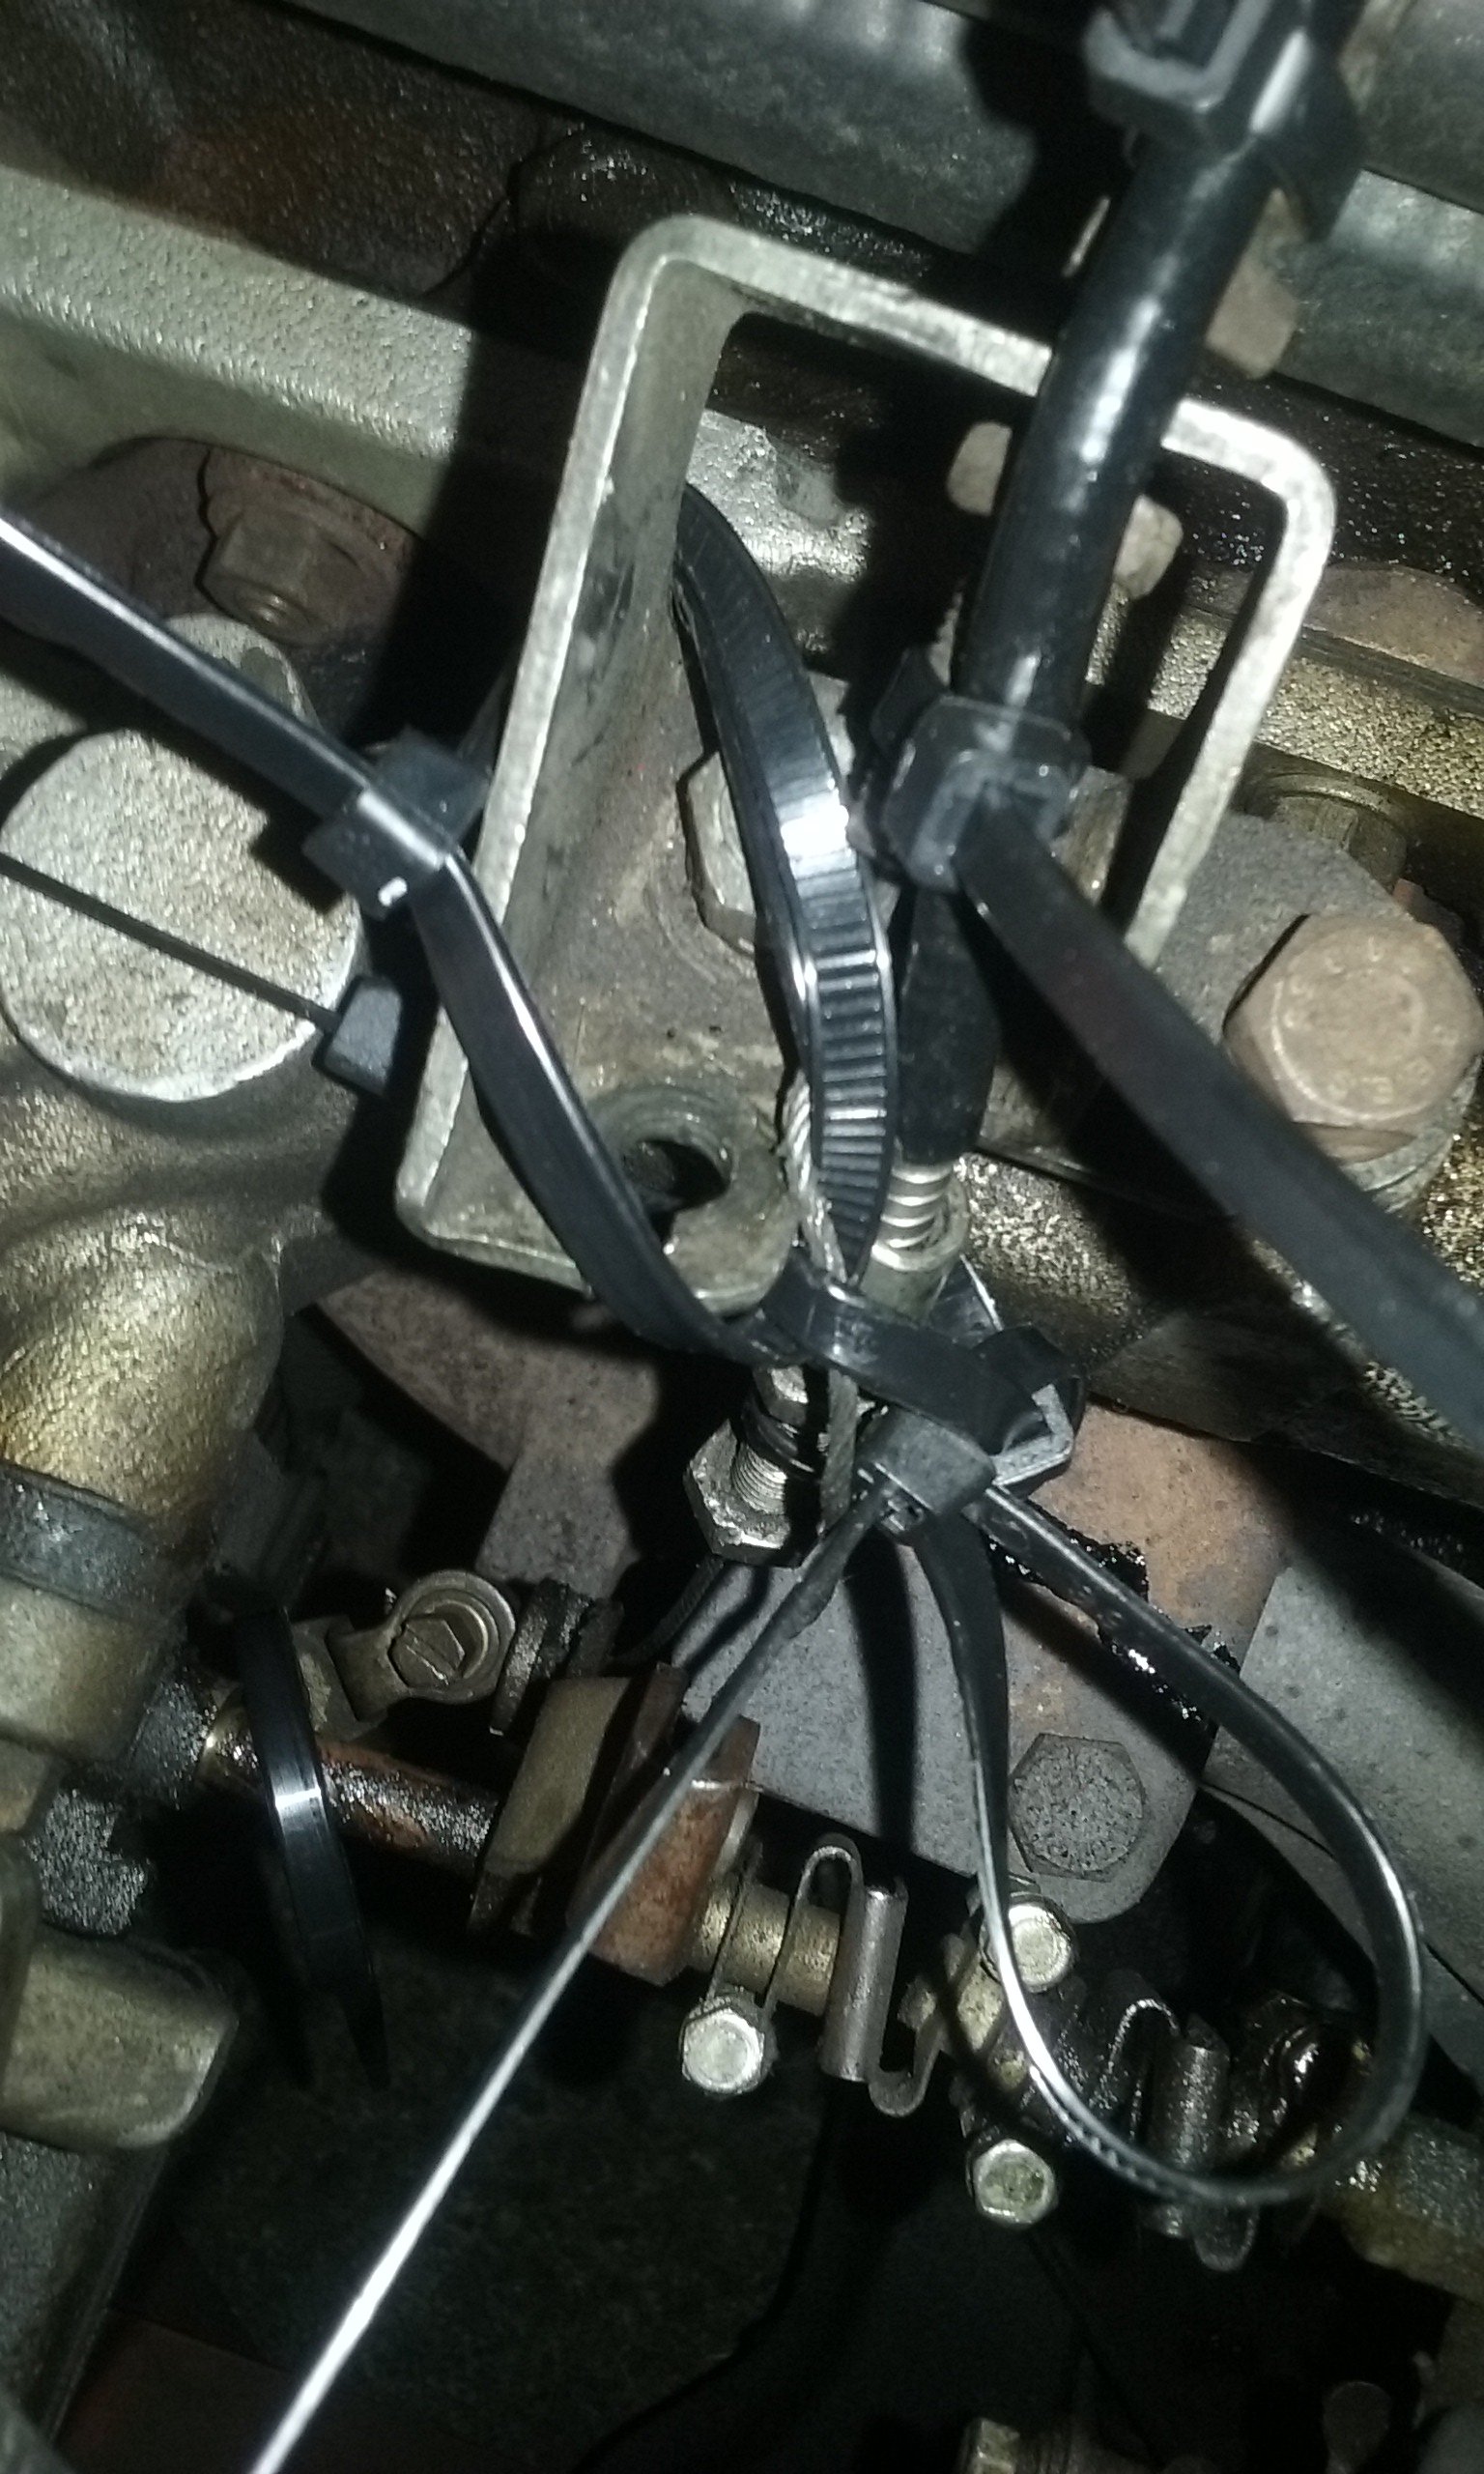
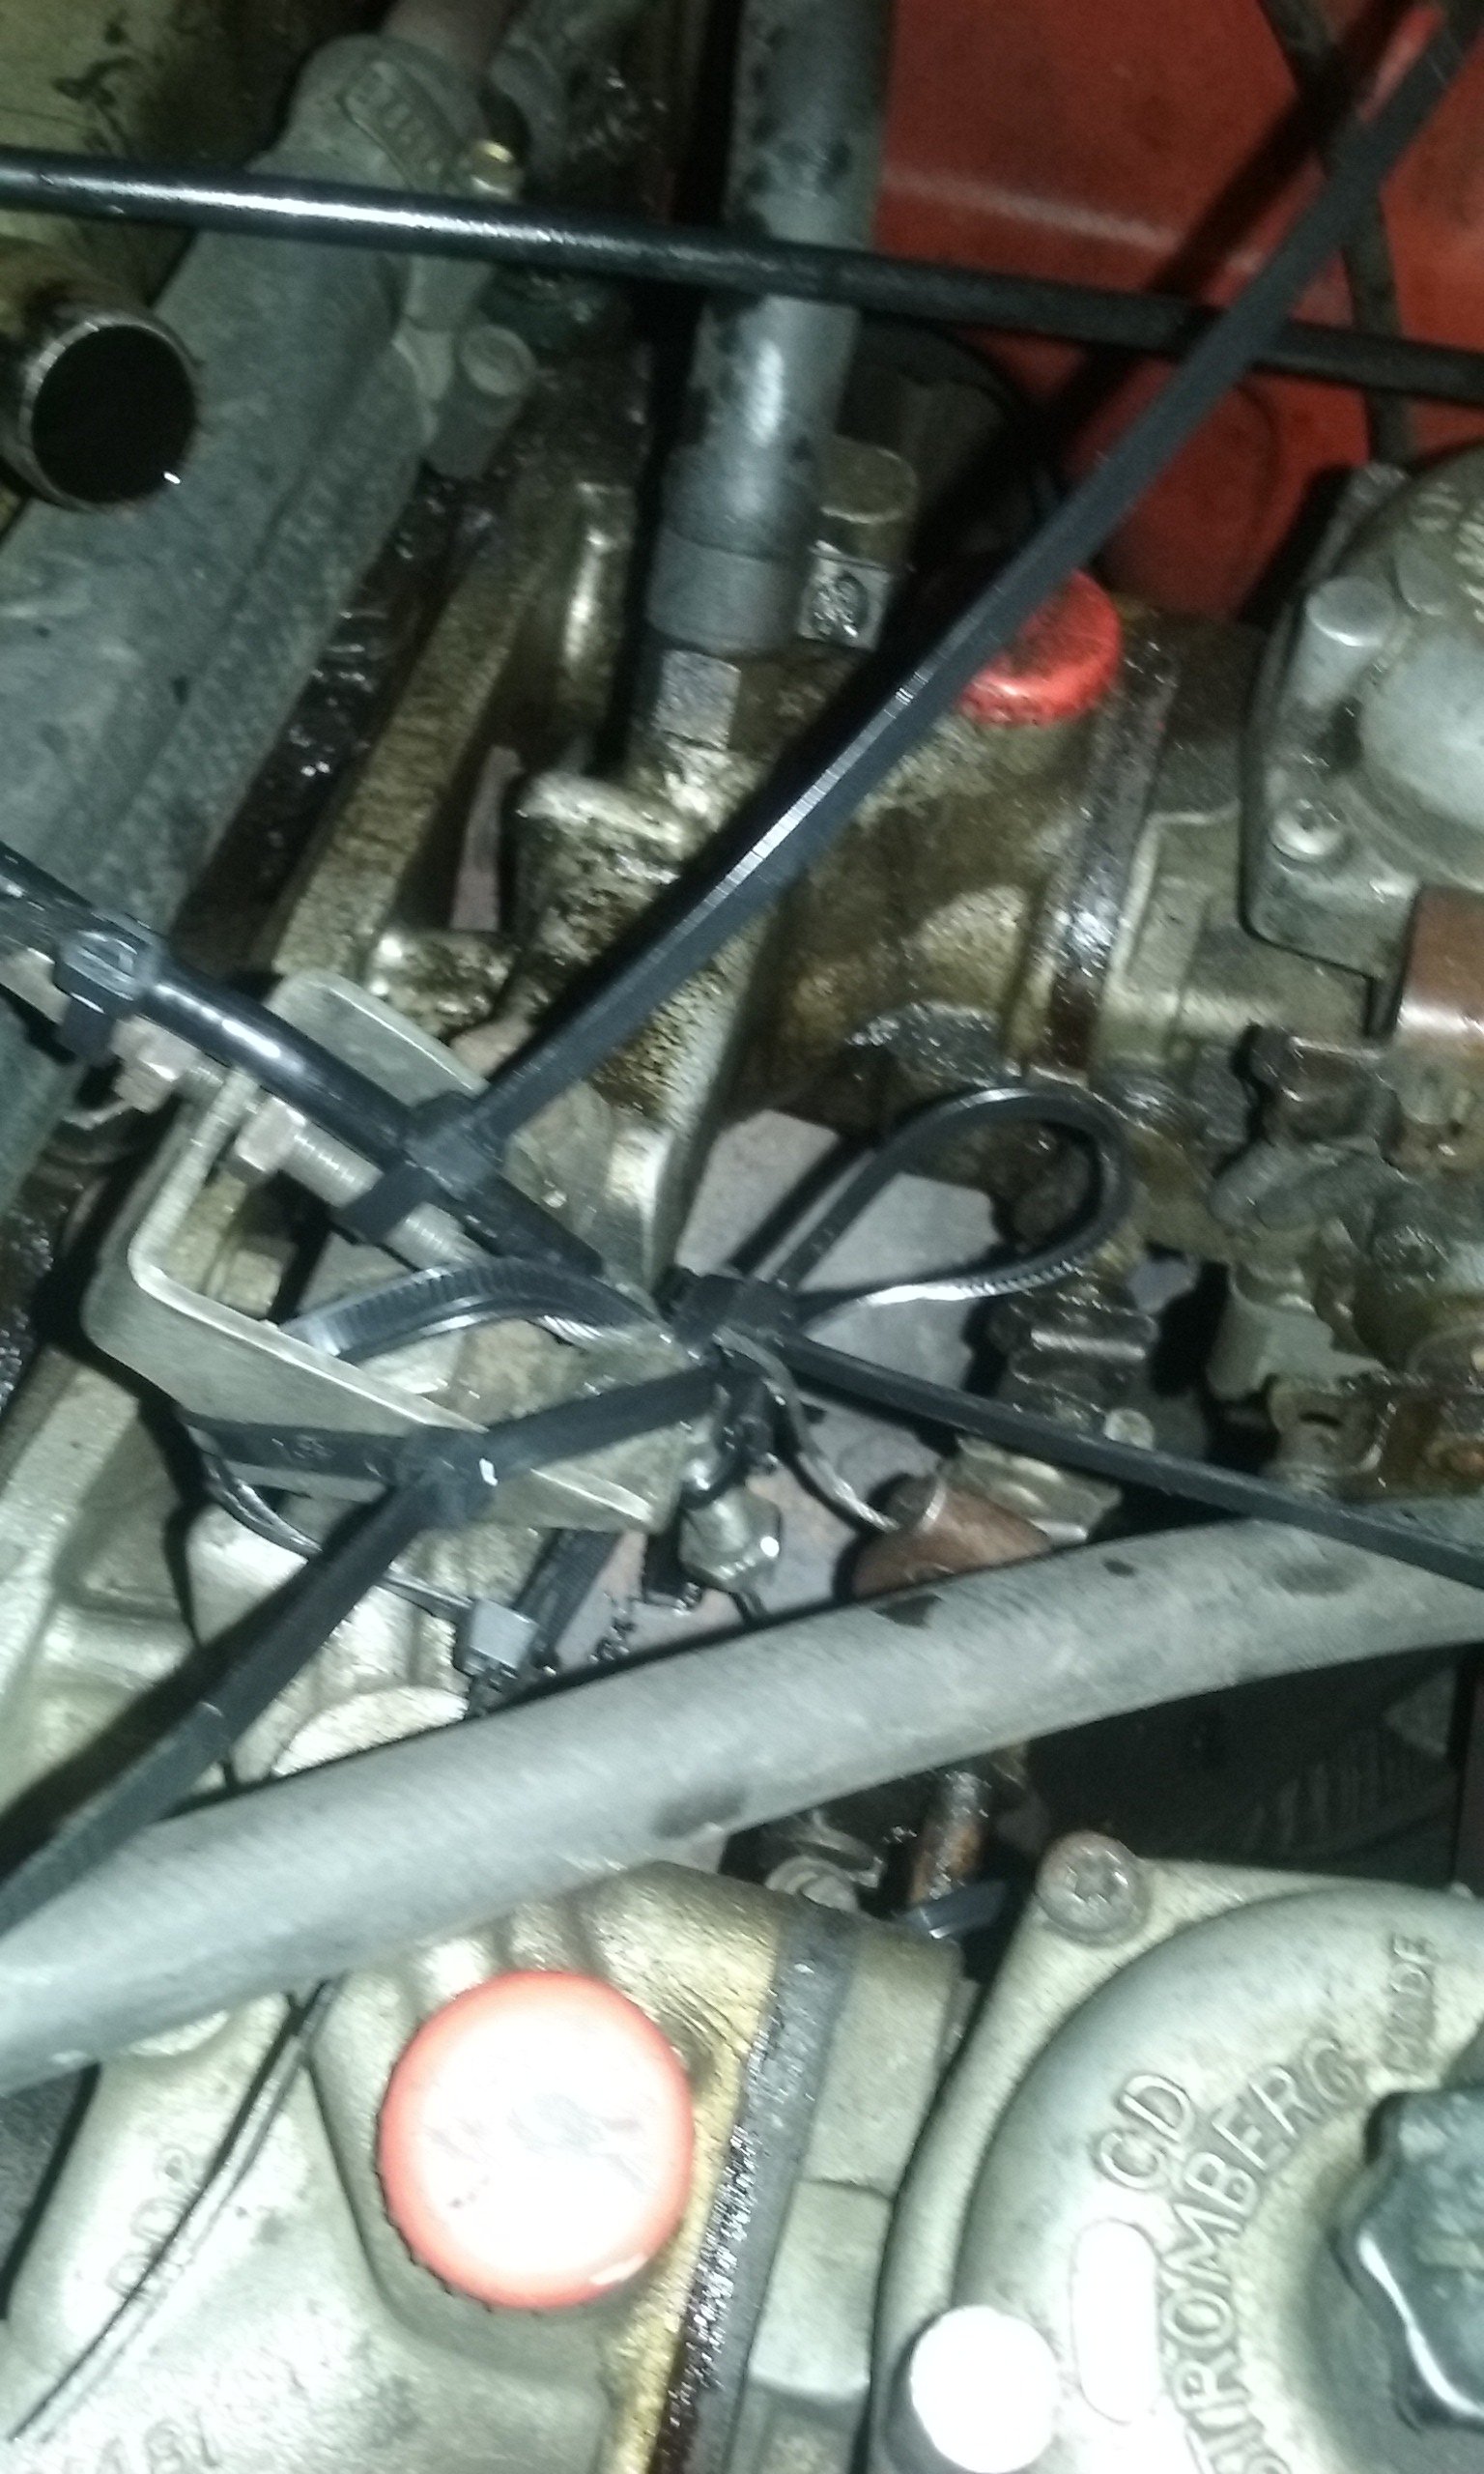
Managed to snap me accelerator cable coming over the Saddle Road tonight right at the tip just after passing a couple of slow pokes so I looked like a right chode coasting and pulling over and up onto a curb Bonnet up assess options and a helpy fellah pulls up and promptly gets stuck in the bog in front of me Think about the choke or kickdown cable.... Went with robbing the choke connection and a Brazilian zip ties we're good! Quick call to Graham Etkins and he's got a couple in stock for around $20 each! Zip into palmy a bingo, not quite what I need (didn't check till I got home but the man is the dude for parts Need a short motorbike cable with lead bit at each end for the setup I've got so should be able to get home and sort it tomorrow
2 points
-
Will try and document the more interesting things I thought this was a nice touch. Fuel cap IMG_20170513_144634 by John Bell, on Flickr Looks pretty normal, has a straining mesh in there IMG_20170513_144642 by John Bell, on Flickr It pulls out and locks in like a spout so you can fill your vehicle with roadside diesel from innapropriate vessels in Africa/Ruatoria IMG_20170513_144701 by John Bell, on Flickr2 points
-
How would shitting in it help?2 points
-
pointless photo.hung the front fenders, almost looks like a car!Started work on the front valance.2 points
-
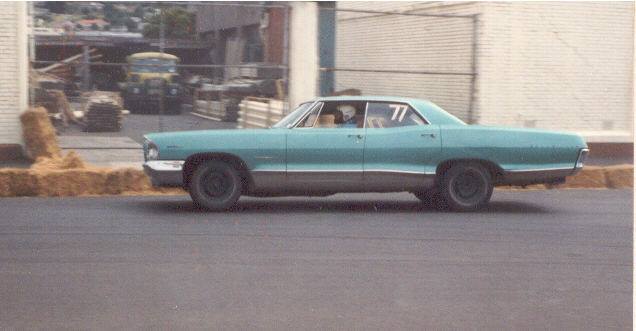
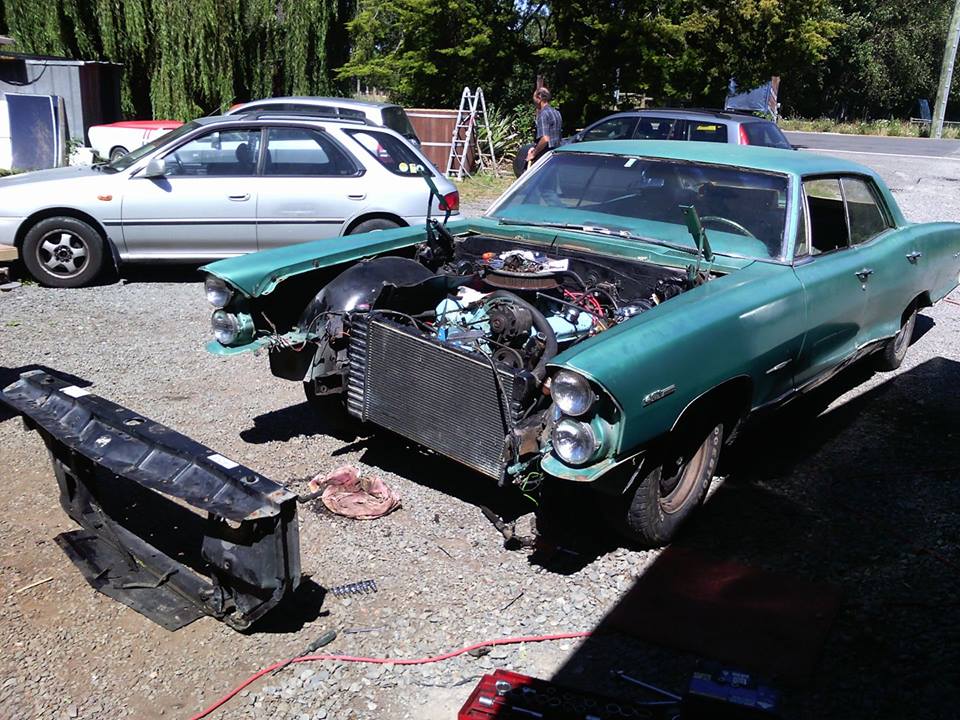
for those interested in an already involved project here is my dads 1965 Pontiac Bonneville when it was raced in the 80s it has beefyer swaybar in the front and one put in the rear. the front suspension has been lowered and aligned for racing and good turn in. disk brakes are installed in the front to replace the drums. along with a dual circuit holden hq master cylinder. the motor is the original matching numbers 389 couples with a th400 trans also original and untouched driving a 2.56:1 diff also original. the car is now just giong to be used as a awesome powerful cruiser. with some racing heritage. He has had the car 40 yeas this year. the last 20 of those it has resided in the garage in hibernation. during the new year i set about installing the 389ci v8 back into the car and making it run and drive.....stopping was another issue.....later though as typically an old car does it has some rust so that will need dealing with before i go for a wof nothing to bad just a little in the radiator support panel/cross member , both c pillers around guttering, right rear door shut area and the left rear dogleg . all fixable though. this is how i went about fixing the radiator support panel... just take the whole lot out and put it on the bench....... much easier drive down the road to wals... no bonnet....no reg..... no wof...no worries for those interested i have some old racing photos of the car from the 80s. i will try take more photos of what i do on the car.
1 point
-
This story starts 5 years ago when i finished rebuilding my AE85 and i was invited to a C's Garage day at Meremere. Inexperience and lack of a solid half throttle tune resulted in one toast car, a broken wrist and discouraged me greatly. I decided then that drifting wasnt my Jam. 4.5 years later and the Carina is running and I decided to throw a track day for my birthday for friends. I thought id have another go at sliding cars, I didnt crash but i was greatly frustrated. I wasnt very good. Still had a damn good time though. Frustrated I racked my brain, when a chance discussion with a client he introduced me to racing simulators. So i sold some wheels, took a chance and bought a G92 and Assetto Corsa. After Bashing around on AC, an opportunity came up for me to go and participate at Sky Zhaos srift day. I took it to see how; A.) A properly setup car feels B.)If the simulation is even close to real life. I had fantastic fun, highly recommend if it is something you are interested in. A month or so later i needed a new Daily, I had given up on fixing the ST141 Corona due to child raring and work and this popped up. Factory RS200 3SGE - BEAM 6 Speed Manual 3.9 Ratio Torsen LSD Working Aircon, and a spare set of wheels on snow tires. So i signed myself up for a drift day.1 point
-
Theres a small single phase plasma at work I could bring, will need compressed air1 point
-
Fuck was that 5 years ago. A mates one looked cool on 350 wheels
1 point
-
Ah good intentions.....lol any pics with the 350z wheels? They seems to look better on everything but a 350zs huge arches1 point
-
So over the past however long its been ive had some good progress on repainting it. The panels have been quite bad and i am working to get them perfect. Before i started the strip down i grabbed dads mags and chucked them on to see what they would look like, with a slight polish it should look good when its done. So i finally completed the two doors that were giving me the most heartache along with the bonnet and starting on the rear quarter panel. Both quarter panels were especially bad so im fairly happy with how close it is at the momment. And finally the other doors are undercoated and dont require alot of work.1 point
-
https://www.google.co.nz/url?sa=t&source=web&rct=j&url=https://people.eecs.berkeley.edu/~wkahan/TransIgn.pdf&ved=0ahUKEwiMsKXEofHTAhWEXbwKHTEfBUwQFggaMAA&usg=AFQjCNH9cpRDRbj-2DGPz4HQWuAvp88XZw&sig2=IFTOlWdR2Bw9U61tuiKwIw A PDF with a basic schematic to show how most of them are wired up, plus a bit of info on what they do1 point
-
Nothing too exciting to report. Changed the oil this weekend and then got called out just as I'd removed the oil filter. Gave it a wash and took a few photos. Discuss here. Or don't. You're all adults, make your own choices.1 point
-
Looking at that I'd say you'd want the plate which the sway bar stalk bolts to to pick up all four of the factory U bolts. (Looks like that one shown only grabs one?) And those saddles would want base plates between the saddle and the rail, and crush tubes where they bolt through the "rail".1 point
-
What a week. Everything was put on hold, because I got married! But now that I’m home again, and going back to work tomorrow, I thought I would have a quick catch up on the Zeal. Whilst I was away I left about a litre of white vinegar in the fuel tank to see if it would do anything to the rust. Unfortunately even after a week it had done very little. This is what I poured out. It had started to strip some of the lighter rust, but wasn’t working quick enough. I was going to try electrolysis, but it just seemed like a lot of faffing about to set up. I was doing some research and came across a product called Evapo-Rust. It’s safe for the environment, safe to touch, reusable and safe on paint… but it monsters rust. A few people have used it for tanks, and it seems to do a good job. So, I scoured the local Supercheap Autos, and picked up 15L of the stuff. Before I could pour it into the tank, I had to seal the fuel tap hole in the tank better than the leaking duct tape I had used with the vinegar. To do this I used some scrap aluminium, a drill and the old gasket. I smeared some sealant on both sides of the gasket, and bolted the plate to the tank. So far, touch wood, it’s sealed tight. With some strategic placement of some wood and a tub, I got the tank as flat as possible and filled with all 15L of the Evapo-rust. The tank has a 15L rated fuel capacity, but it didn’t quite fill the tank. Whilst I was away I also got some sweet packages from overseas. The first was a set of legit JIS screwdrivers from Japan. These are to Japanese standards, which is very slightly different to the Phillips cross profile. The difference is subtle, but enough that if you try to use a standard Phillips driver in a JIS screw, it’ll strip out like it’s made of cheese (as the screwdriver tries to “cam-out” by jumping out of the slots). JIS drivers will slot in and fit perfectly. The carbs on this bike (and most bikes) use JIS screws and are super common for stripping out when JIS drivers aren’t used. Revlimiter has an awesome write up on the differences between Phillips and JIS. Another package I got was the set of LiteTek carb and fuel tap gaskets. This means I can put my fuel tap back together, and start work on the carbs. I started putting the fuel tap together I used a small bit of 2000 grit wet/dry paper to smooth out the rough edges on the pitting, so it wouldn’t damage the new gasket. Happyface. And in goes the new gasket. Scaredface. Bits The completed fuel tap. So this has been stripped, ultrasonic cleaned, new seals, and the screws treated in Evapo-Rust (which worked really well for a couple of hours soaking. The screws where heavily rusted, with thick coating of crud). Now it’s ready to go on the tank again when that is done. And what it looked like before Next I took the carbs off the bike. Not hard to do, once the airbox is off it’s only 4 hose clamps and 3 cables to disconnect. So much grot by the starter that I need to clean out too. I tried draining the float bowls, and only liquid came from cylinders 1 and 2. And I say liquid, because you can’t call it fuel. It was yellow, and smelt like paint stripper. Using my awesome new JIS screwdrivers, I then removed the float bowls. Most of the screws cracked ok, but some needed a little help (and one needed the help of some vice grips). It turns out the flats on the driver are perfect for a spanner. With all of the bowls off it was easy to see why I was doing this. Cylinders 2 through 4 had gritty sandy stuff in the bowl, and cylinder 1? Well, that’s where all the fuel in the rail drained to when the bike was sitting (leans to the left on its stand). The carb jets will obviously need cleaning, and the bodies are filthy. They will need stripping and soaking in the ultrasonic for a bit. I need to work on my plan of attack. The LiteTek site has an awesome write-up on how to rebuild the carbs, so I’ll go over that and get cracking on it. I also need to work out what to do with the frame. I’m slightly leaning towards stripping the bike and getting the frame blasted and powder coated, but it’s a lot of work, time and money.1 point
-
Getting pretty far ahead of myself but I'm amazed and getting pretty excited by the variety of neat looking tyres for old 4x4 vehicles. Current pic of the bunch when the time comes will be Deestone D503 in 7.5-16 I think. Posting this here so I remember. Hopefully I get to this point.1 point
-
Good work man! I'm starting to think the bill for this is going to be a rude shock. But given market value when it's all done Vs what it owes me to date it's not really that big a deal.1 point
-
I chopped off the mounting tabs and moved them so they would bolt onto the fc rad. The swift fan is a pretty good fit I think, its a score for $20 Got my monies worth out of the cutting disc Welding is getting less bad Lovely, the wiring even comes out in a nice place. I didn't plan it that well it needs a bit more tweaking making the holes bigger & nicer for the hoses but I'm happy with fitment for how little work it needed I tried warming it up again but it decided to do a few backfires and run on one rotor. I suspect the injectors are gummed up again and the fuel pump wiring is still shit. I need to stop being impatient and sort out the running problems instead of trying to get it good enough to do a skid go for a test drive. There is what looks like a thermo switch in the bottom of the rad so I'll test it to make sure it works and actually is a thermo switch and wire it up with a relay. I figured out the fan wiring, it appears there are two sets of brushes in the motor, if you have either powered up it'll be low speed and have both connected in parallel it'll go full tit. Another option could be series/parallel them for extra low but thats for later. I've ordered some of these for the shroud so hopefully it'll prevent any vibration etc1 point
-
Clint came round today to have a look at the car. After much looking he said mainly happy. The only thing that I got wrong is the mounts for the traction bars are too low by 10mm. They will hit the ground if a back tire goes flat. Not major, a bit of cut, shut and paint to fix. The other things are a gusset on the rebate in the front chassis where space was made to fit the top A arm and a strong back on the engine mounting plates, all easy stuff. Plugging away with other bits, fuel tank is mounted, still have to figure out the filler, brake pedal support is on the pedal box, some more holes in the floor welded up, UJ fitted to the steering rack. The list of stuff to do has got shorter, must be time for a new list.1 point
-
old people sleep less1 point
-
well then. when i got home from work some vandals had tied string all over the place. i tried to shoo them away but they just laughed and said they would be back tomorrow!! and not only that! they said that on Thursday they were going to dig holes and then fill them up with concrete!! 2017-05-09_05-08-25 by sheepers, on Flickr 2017-05-09_05-08-39 by sheepers, on Flickr1 point
-
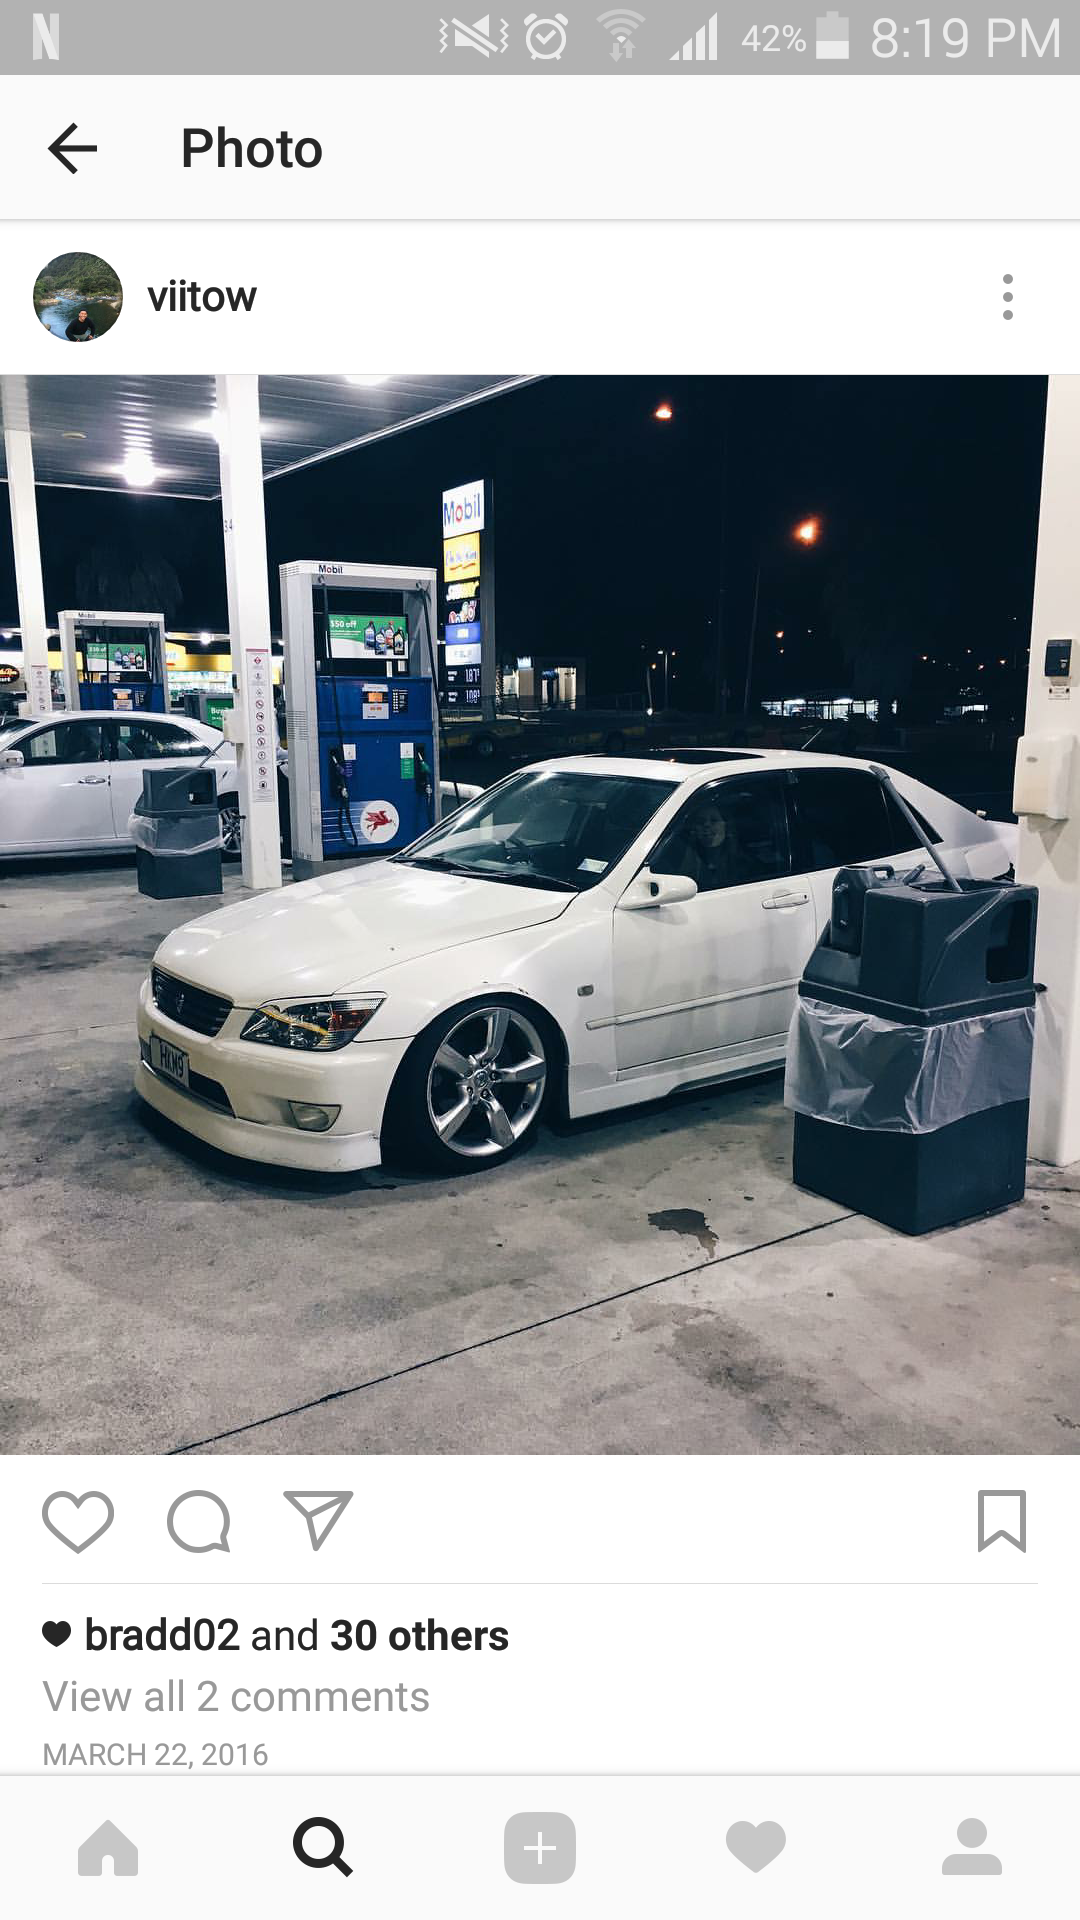
I bought it some new wheels because I've always disliked the ones on it. 18x9.5, +24 offset fits perfect, I re used the tyres that were on it already, 245-40-18 I also spent a few hours touching up all the paint chips and scratches. Looks tidier.
1 point
-
Paint a massive cock and balls on it please before you cover it up1 point
-
For those interested, this is an EA71 (1600cc) with no topside stuff attached. The carbs got a little freshen up, I figure I'm more likely to work on the rest of it if its running OK. Will try start chipping away at a bit more maybe.1 point
-
Home at last : I dunno how many miles I clocked up! Should do Clac's shortly since last Friday 27th DVK>AKL>Leadfoot>Whitianga x3>Napier>DVK Feb 8th Here's my last pic from Leadfoot, note they updated the Mobil 'livery' Car never missed a beat, used no water or oil that I could tell & a few of the other volunteers there also "used to have an Avenger once" half a tank of gas / 20L from Taupo via Napier to Dannevirke aint too bad i reckon edit : 1000 Miles or 1654km's round trip1 point
-
Since when do campers need aero? /lock thread.1 point
-
Okey, so the replacement window that came out of the Green car doesn't have a demister grid. The Green one must be poverty spec. I bought a demister kit online and applied it to the glass (it was terrible, and looks terrible, lets hope it functions better than it looks). The nice people at www.basisnz.co.nz sold me a length of rubber seal and chrome filler strip that was hopefully the same profile as the old stuff. http://www.basisnz.co.nz/Products/Window-rubber-seals/Rear-screen-seal/SEAL-(218-076) For anyone looking to do the same I needed 4meters of part #217.007(chrome strip) and #218.076(straight rubber) Basis were excellent to deal with, and very helpful in selecting the correct rubber and sending a sample etc. Sample rubber looks like this. The problem I faced was that there is a near 90degree corner to get around, and corner sections for the rubber weren't available. Did some testing with glue and wound up using Loctite 401 to glue the corners back together. This was an awful job, and the outcome is a bit average, but I was very impressed with the glue. So got chopping, needed to be pretty sharp, I used 6 or 7 blades. Not super flash, but OK Put the rope around, and with helpful Welsh assistant plopped it in the hole and pulled seal in with rope. Fitted the chrome strip, that was quite awful to do also, and looks a bit shit. Yet to know if its going to leak or not, the glued corners held up OK when putting the glass in, but got a bit knocked around. Overall it looks a bit crummy if you look too closely. But much of the car is like that. Still need to find something suitable for a boot lid seal. One step at a time. Talk shit about this Orange scumbag here //oldschool.co.nz/index.php?/topic/22150-waimaks-gsr/page-19 Also, if anyone knows of any of these coupes kicking around I'd be keen for some more parts/cars. Taillights specifically at this point.1 point
-
So, back in October 2015 a nice OS member from Wellington sent me this Snapchat of this glorious car, with all glass attached. In the mighty Taranaki/Midhurst. Got pretty excited, hoping I could get me a rear window, quarter window latch and well anything really. Did some streetview sleuthing® and google stalking™ and managed to track down the fella who possessed it. He reckoned he'd sold it some time ago, and the bloke was yet to pick it up. Fella reckoned he'd get in touch with the bloke to see if he still intended to take it, as he had already paid for it. Followed up every few weeks until recently with unsuccessful phone calls. Till a few weeks back he said that no, the bloke didn't want it anymore, and if I were to reimburse his purchase price I could take it. This is how I spent the most I ever have buying one of these, $200, robbery I tells ya. So yesterday I set off from the lovely sunny coastal eastern Bay of Plenty, and drove the width of the country to the also sunny coastal western Taranaki district. Was greeted by this mess, half a dozen cars deep and with a few more bits missing but it has the crucial window I need and hopefully some more is salvageable. Aired the tyres, managed to jack it up somehow and un-seize/disassemble the rear brakes and fit two OK rear wheels. Dragged it kicking and screaming onto the dolly and then drove back across the country. Made it home fairly uneventfully, although there will be a decent amount of debris trailing I think. Tell me about the sickness here. //oldschool.co.nz/index.php?/topic/22150-waimaks-gsr/page-181 point
-
Got this running and drove around a bit yesterday. Needs attention obviously so hopefully there hasn't been too much deterioration on the mechanical side of things. This mess Turned into this No matter how thorough clean up you think you're doing, goddamn chunks of glass everywhere/my feet. For the matters of public interest I have received a quote to make and fit a custom rear window by an Auckland company $850NZD + GST and I understand the car is needed for 2 weeks in Auckland. I don't think I'll go down this path, because well, $50 car, and I'm one broke mofoker.1 point
-
So yeah, I'll throw this piece in this thread incase it isn't worthy of its own project thread. Will give each car their own posts though incase it does become a project? (mods does this logic work?) Went to Ohaupo auction last weekend after learning of this thing, thought I'd go check it out. Was unsure about the rear window being the same as the GSR, and it is pretty rough/has the rot. So I bid on it anyway and won for a suitable price I thought. Reg on hold, last WOF in 2009. I found a photo and TM listings from '09 and '05 out of curiosity. http://www.trademe.co.nz/Browse/Listing.aspx?archive=1&id=38143743 http://www.trademe.co.nz/Browse/Listing.aspx?archive=1&id=248753609 '09 TM listing photo Headed back over next day and retrieved. Will endeavor to get GSR and GFT side by side and figure out which is best and which bits the same. Has orig engine which is 1400cc EA63 with twincarbs. Seems like it might run OK with some attention, has some melted charging circuits and no brakes. Different side windows and grill/taillights to GSR, and dope blue interior. But essentially the same. Pillarless wow, blue wow. Leone thing. Blue squiggles. Ruined and blue What is this logo/symbol? Question my condition here. //oldschool.co.nz/index.php?/topic/22150-waimaks-gsr/page-161 point
-
Todays update is bought to you by Nokia cellphone camera, fuck! Short video of the exhaust, poos I know. http://s8.photobucket.com/albums/a28/waimaks/GSR%20coupe/?action=view¤t=Video000.mp4 As it currently sits, no longer as beached on hoist as it was, still gets beached, but not so much. Currently ~80mm at front with adjusters wound 100% down. The inside of my boot with the cutdown and painted billboards removed, note braces and safety fuel tank location. The view from in the cabin with the rear seat squab removed, note safety fuel tank location pt2. Also please never crash into me, I like living. Fuel tank etc removed, view straight through. Rear end droop. Add some more of these into rear trailing arm inner mount = more camber, Techically I should probably have not put them back in to combat the camber I've gained by lowering, but my argument is that they would get lost, so back in they go! Pile of things sitting about. Have a great day!1 point
-
So i finally dragged my old girl back home today so i could put it back on the road so i got some thing to get around in wile im doing the engine swap in the Mazda.i first bought it about 6 years ago, fixed/boogied it up and drove it round for about three years in which time i think i painted it at least 5 times. got sick of it about three years ago and sold it to my dad but ive decided to claim it back anyway picks and what i got dun today. looked a bit rusty under the rocker cover so i thought lid whip the head off and have a qwik look as soon as i got the studs loose water started coming out around the bottom of the head, hopefully get the rest of the engine out tomorrow and i think there may be a spear metro engine to go in some were in the shed1 point
-
Some paint terms Flash time: How long a coat of paint must be allowed to dry before another coat of paint can be applied. Open time: How long a container of paint can be exposed to air before its integrity is compromised. Pot life: How long a mixed batch of paint can set before its integrity is compromised. Reducer: Thinners used with paint. There are different temperature ranges of reducer, so you have to pick the right one for the temperature range of the environment in which the paint will be applied. Activator: A catalyst added to paint which will cause the paint to set, or cure. Overspray: Paint that does not go where you intend it to. Primers Etching primer This is a primer specifically formulated for bare metal adhesion and is used on areas where unprimed metal are present. If you have small areas, smaller than a fist, you can probably get away without using this primer. This primer can be top-coated with one of the following primers prior to the color coat. Although it is possible to top-coat with color, you should follow the manufacturers recommendations for the primer and your color paint. High build primer High build primers are primarily used where extensive bodywork has been done, involving body fillers. The high build primers contain a lot of solids and will fill in a lot of voids, slight imperfections and sanding scratches in body filler and old paint. Most high build primers involve a 2 part system, paint and activator. The nice thing about this is that it’s easy to mix and since there are no reducers involved, the paint will lay down nicely over the top of other paints and bodywork without any adhesion issues. The drawback to high build primers is that you need a large orifice gun to shoot them, around 2mm, and unless they are laid down properly, will leave a rather rough finish which will require a lot of wet-sanding prior to receiving a top coat. The top coat for high build primer should be a primer sealer or epoxy primer, both of which are discussed later. Some high build primers can be mixed in a 3 part system with reducer on the final coat, and act as a primer sealer. You can also shoot color coats over the top of high build primers but you should follow the manufacturers recommendations for the primer and the color paint. Primer Sealer Primer sealer will act as a barrier between old and new, and keep the reducer in your paint from biting into your old paint, bodywork, etc. which can compromise adhesion. The difficult part about using a primer sealer is that is has to be painted over with your color coat during a specific window of time, otherwise the paint won’t adhere properly and will need to be sanded, and sanding the primer sealer compromises the sealing properties of the primer. This window of time will vary between manufacturers but is usually 6-8 hours. If you exceed that window, you’ll want to wet-sand using 600 grit, rinse and dry, and then shoot another coat of primer sealer on. Then shoot your color coat on after the paint has flashed, but before the time window has closed. Epoxy Primers This kind of primer is very durable and usually has a lot of solids in it. Epoxy primers can be formulated for bare metal adhesion and as a high build primer surfacer. Typically coupled with an activator, most can be reduced as well. They are generally more expensive than other primers but can be well worth the cost. Primer Surfacers Most primers are considered primer surfacers, in that they are applied to create a uniform, homogenous surface for a successive coat of another product. Flex additives, fish eye reducer, and adhesion to aluminum, yellow metals and plastics There are a lot of products available for this. Some are paint prep products, paint additives and others are a primer that is painted on. Flex agents are becoming a thing of the past, as are fish eye reducers, which were used when paints were lower solid content and involved lots of reducer. Most of the major market contenders in automotive finishes have excellent products to deal with these surfaces. Paint Guns and Compressors HVLP, siphon, gravity feed, pressure pot and airless HVLP stands for High Volume Low Pressure. HVLP guns cost more than others and involve an improved means of atomizing the paint which allows the operating pressure to be lower, while still applying a decent amount of paint, which reduces overspray significantly. There are HVLP guns that come in various configurations, although typically it is gravity feed. Gravity feed guns have the paint cup on top and use gravity as well as the venturi suction of the air coming into the gun, to mix the paint and air together. They operate on relatively low pressure and have less overspray. These are the easiest guns to clean, use, and are the least expensive. Siphon feed guns have the paint cup on the bottom and rely entirely on the venturi suction to pull the paint out and mix it with the air. Siphon feed guns require higher pressure to make this happen, and in turn, they typically have more overspray. Pressure pots basically remove the paint cup from the gun and utilize a hose from the gun to a large can where the paint is placed. This type of gun is expensive, requires a lot of cleanup and can limit mobility. Airless paint sprayers are typically not used for automotive paints. They use only the paint to propel itself out of the gun, use higher pressure than most and have a lot of overspray. As for Air Compressors, you need a large capacity, quick recovering one to paint a car. Each time the compressor runs, that's more hot air you've got to take the moisture out of, and the pressure at your gun will fluctuate significantly when the capacity isn't sufficient. So the higher the pressure capacity, and the higher the volume capacity, the more CFM of air it can deliver at the operating pressure of your gun without having to compress more air, and the easier it is going to be to paint since you won't constantly have to watch your pressure gauge and keep adjusting it. Sand paper Most sand paper is paper backed and is meant to be used dry for paint removal and for shaping of plastic body fillers. It ranges in grits from 36 to 320. Grits 400-3000 are typically meant to be used wet for preparation of paint for successive coats of paint. The water cleans the paper and the surface being sanded, which reduces sanding scratches which will transfer through the paint. I only use grits below 120 for shaping body filler and for removing rust. Grits above 120 and below 400, I use for feathering the edges of body filler and the edges of paint that meats bare metal. 400 and 600 I use for wet sanding primers and paint prior to application of another paint. Anything above 600 I use for sanding imperfections out of clear coats prior to buffing with compounds and a machine. Block sanding and guide coats Block sanding is very important to proper paint prep. All areas that have been repaired with body fillers must be block sanded. This is done with a hard rubber block that has nails embedded in the ends to hold the paper in. A person can also use a long wooden sander for larger areas or a pneumatic version of that. After a repaired area has had it’s first few coats of primer, it should be block sanded again to make sure the repaired area will not be visible once painted. An easy way to identify low and high spots is to apply what is referred to as a guide coat. This is usually accomplished by spraying a very light coat of a different color primer. It’s applied almost like a mist so that the paint has a peppered look. Then the whole car will be block sanded and the mist removed. Areas that are high the first coat of primer may be removed entirely, and in low areas both the primer and the guide coat will be visible. Those areas would be reworked and repainted with primer followed by a guide coat and block sanded again. When wet sanding, a soft foam pad should be wrapped with the paper for sanding inside and outside corners and curves. For large flat areas, a rubber pad is used. Wet sanding should be done with a large bucket of warm water and a sponge, constantly rinsing the area with clean water and rinsing the paper. You know you’ve gone far enough when the paint is dull. Use a large sponge and a bucket of water to keep the area very wet, and re-soak the area frequently, rinsing paint off and cleaning your paper out. Use moderate pressure and let the paper do the work, pressing hard just wears you and the paper out that much faster and also puts heavier scratches in the paint. When you’ve got the whole car wet-sanded you’ll want to rinse it with clean water several times and towel it dry, you don’t want any water to dry on the car, it’ll leave deposits. You’ll want to shoot the car with a few coats of an epoxy primer or a primer sealer prior to your color coat for a high quality repaint but if you’re on a tighter budget or just doing a quick repaint you can do it without. If the car is going to be repainted professionally and will be driven during the work, or repainted at a later date, a primer sealer would be a wise decision to keep the paint sealed. The sealer would need to be sanded and re-shot prior to color coating. Painting and paint prep Preparing for paint is the entire process we’re discussing here, but more specifically, what to do between coats, between different paints and before painting your color and clear coats. Masking I use masking tape and newspaper to mask off, as well as trash bags for wheels if they’re on the vehicle. You need to mask of everything you don’t want to get paint on because overspray gets everywhere, places you couldn’t imagine it going. There’s really no trick to this but it’s cut and dry, you either do a good job or you do a bad job. The biggest thing is making sure that what you’re putting your tape on is clean and dry. If you’re working on a spot repair on a panel, mask everything but that panel. When you’re done you’ll probably need to buff the overspray off that panel, but that beats wet sanding a paint edge where the primer met your masking tape. Overspray To keep overspray from being a big issue, I wet the floor down and I rewet it if it dries out. You can make a paint booth inexpensively by covering your garage walls with plastic sheeting and I’m not talking about that thin painters plastic, you want the heavy 3 mil or heavier stuff because you’re going to be blowing compressed air around and have air circulation, so the last thing you want is thin plastic flapping around, knocking overspray off itself into your wet paint, or the plastic itself getting into the paint. You can also make a paint booth by simply framing up a structure using lumber and stapling the plastic to that. Ventilation, respirators, paint suits, driers/filters and tack cloths. Ventilation If your garage has a window or outside door you can put a box fan in the opening to exhaust air as well as a cheap furnace filter to allow clean air in. You’ll need to make sure that only clean air can enter through the filter, so you might have to make baffles out of cardboard or plywood. If your overhead door is your only means of exhausting air and bringing in fresh, you can stop the door about 2’ off the floor. Tuck towels and old linens in the gap at the top, put your furnace filter on one end and your box fan at the other and fill in the middle with a frame covered with plywood or cardboard. Respirators You need to wear a respirator that fits properly and has filter(s) that are designed to filter out the chemicals in the paint. The mask should fit snug on your face and if you block the exhaust hole you should be able to pressurize the mask by exhaling and not have it leak. You should also be able to breathe in and not smell anything. To test this, you put the mask on and then go find something like perfume/cologne, aerosol air freshener, or something with a potent smell and make sure you can’t smell it. Paint Suits You can buy inexpensive paint suits at most paint suppliers. This will keep you clean and keep the paint clean of you. Driers/filters When an air is compressed it gets hot, which allows it to hold more moisture. To keep the moisture out of your paint you need to use a desiccant drier. The best place for a drier is as far away from the compressor as possible. This allows the air to cool, and the water will remove itself from the air, although it’s still trapped in the air hose. You can use a bucket of cold water and coil up a length of hose in it, and this will help to cool the air, and place your drier after that. You can also use a disposable desiccant drier right at the gun, as well as a filter. Tack Cloth You can buy Cheese cloth, which is just a really thin, soft cloth that won’t lint. You can also buy Tack cloth which is basically Cheese cloth with a resin applied to make it tacky. You have to be careful when using a tack cloth because if you press down on it it’ll leave the resin on the paint. So you want to ball it up and use a very light touch. You can use these between coats of paint if you allow enough flash time and you should always use them before applying your next stage of paint. Painting Most paints, be it primers or base and clear coats, say to use 2-3 medium wet coats. A medium wet coat is wet enough that it looks smooth and glossy but doesn’t run. You’re not going to cover on your first coat, so don’t try, and you might not even do so on your second, just make sure each coat is glossy with no runs and it’ll come out fine. I typically put 1/3 to ½ of my spray pattern into my previous pass, so that my coats overlap and it rewets the previous coat enough that the overspray doesn’t make it hazy. If you get a run in the paint, leave it alone, you can wet sand it out before you do your next coat, clear coat, or if you’re using a single stage, on you’re doing your clear coat, you can wet sand it out and buff the paint with some compounds. If you get a bug, lint or some other thing in the paint you can leave it alone or attempt to pull it out, it’s really got to be your call. To sand between coats, you need to wait until the paint is well past its flash time and feels dry to the touch. Then you’ll need to use a tack rag or cloth to clean the sanded area. You want to paint from the top down because as well all know, shit falls from the top down, and your overspray will do the same. You want to start your successive coats in the same general area that you started the previous one. Hold the gun as close to perpendicular to the surface as possible and move quickly on corners, paint builds quickly there. Don’t stop your spray flow until you’re past anything being painted. If you have lots of overspray, you can blow the car off with air before applying the second coat and if you’ve allowed enough flash time, you can lightly wipe the paint off with a tack rag.1 point


.thumb.jpeg.e0a4bff61111e0c8c7396950fcc94da1.jpeg)


.jpg.f8e94d8625df5fcaf9a9d629d0f9f023.jpg)
_sedan_(23230030334)(1).thumb.jpg.34d765361d66c78db614bae6ea2c156a.jpg)


.thumb.jpg.b5491dbec1053270a4d99ed376fc2c36.jpg)


This leaderboard is set to Auckland/GMT+12:00