
Leaderboard


Popular Content
Showing content with the highest reputation on 03/14/17 in all areas
-
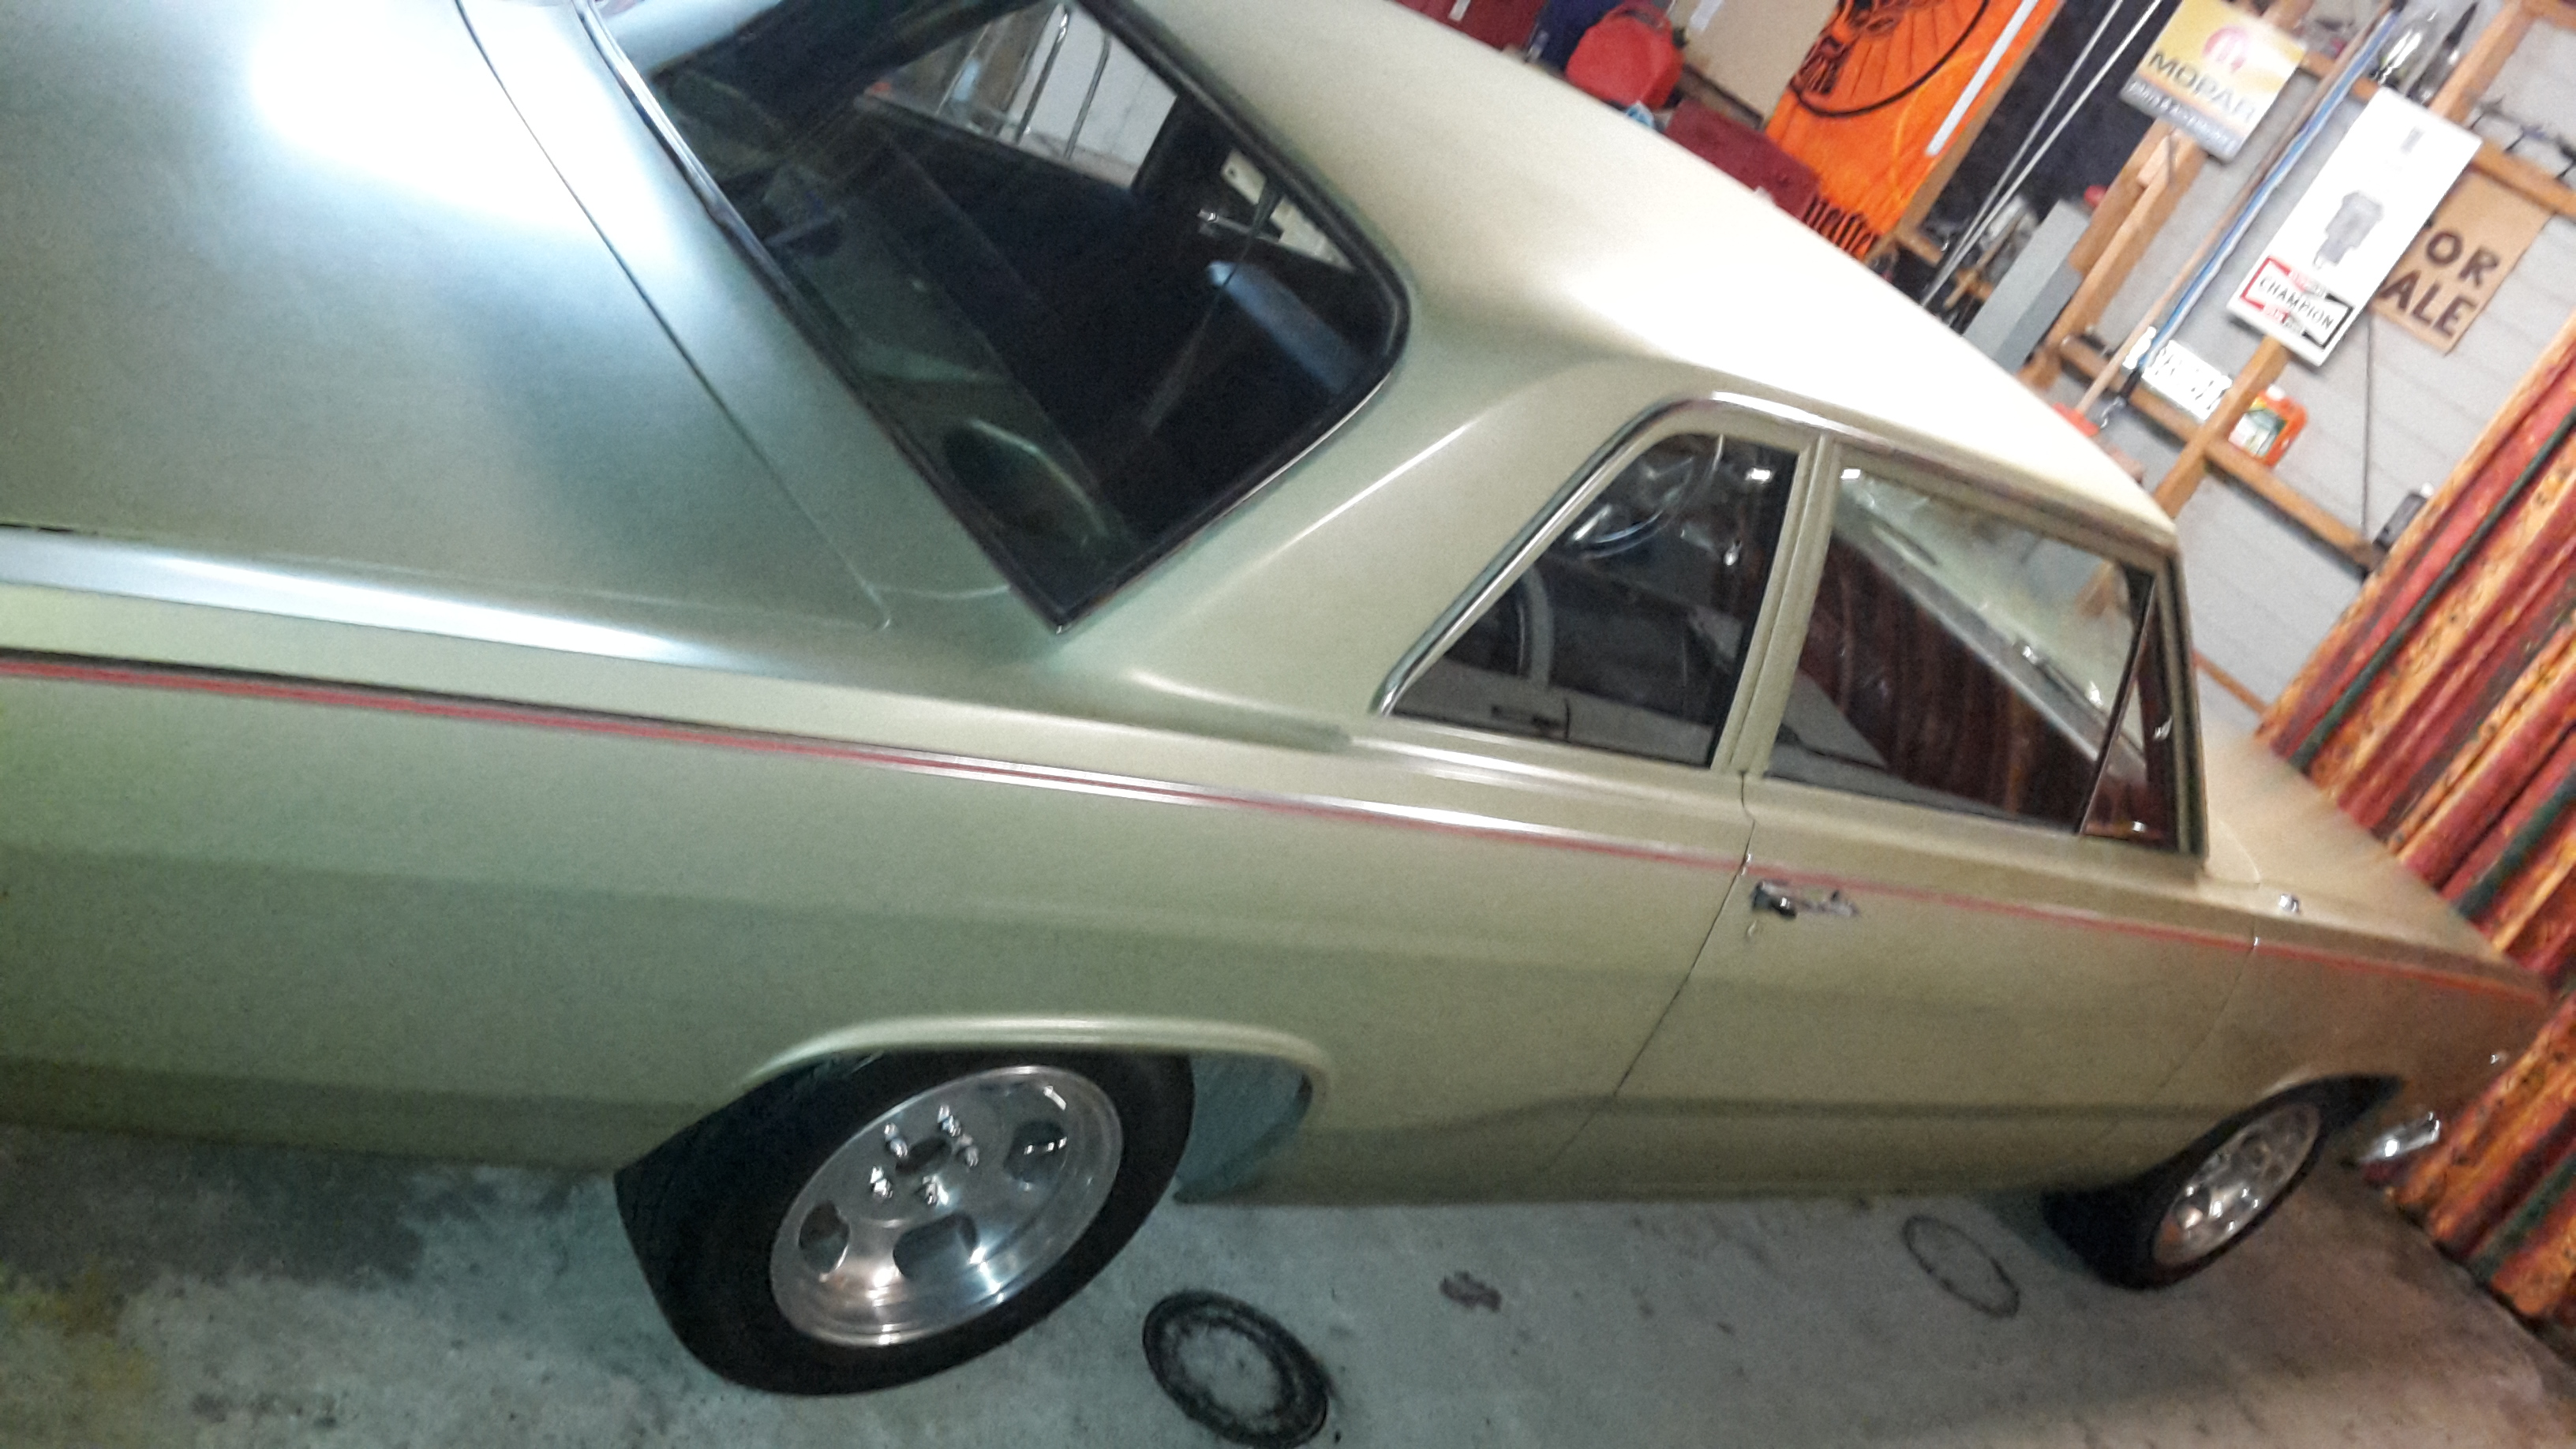
Brown car left on a trailer headed to dunedin on saturday, so spent the rest of the weekend cleaning out the garage and went and got the white one back from storage, so i could start getting this one ready for Nats. Had the radiator fixed, it had a couple of small leaks, I think the 16 pound cap probably didn't help, put a 7pound one on instead. Have ordered some new seatbelts from www.classicseatbelts.co.nz so just waiting for those to arrive. gave the brakes a once over, greased and checked the front end, and for now have borrowed the wheels off the vg, I didnt trust the tyres on a long trip. Also I thought it would be rude to not remove some of the height out of the front while it was jacked up, so I did.
 11 points
 -
Eggcelent! /lingling post5 points
-
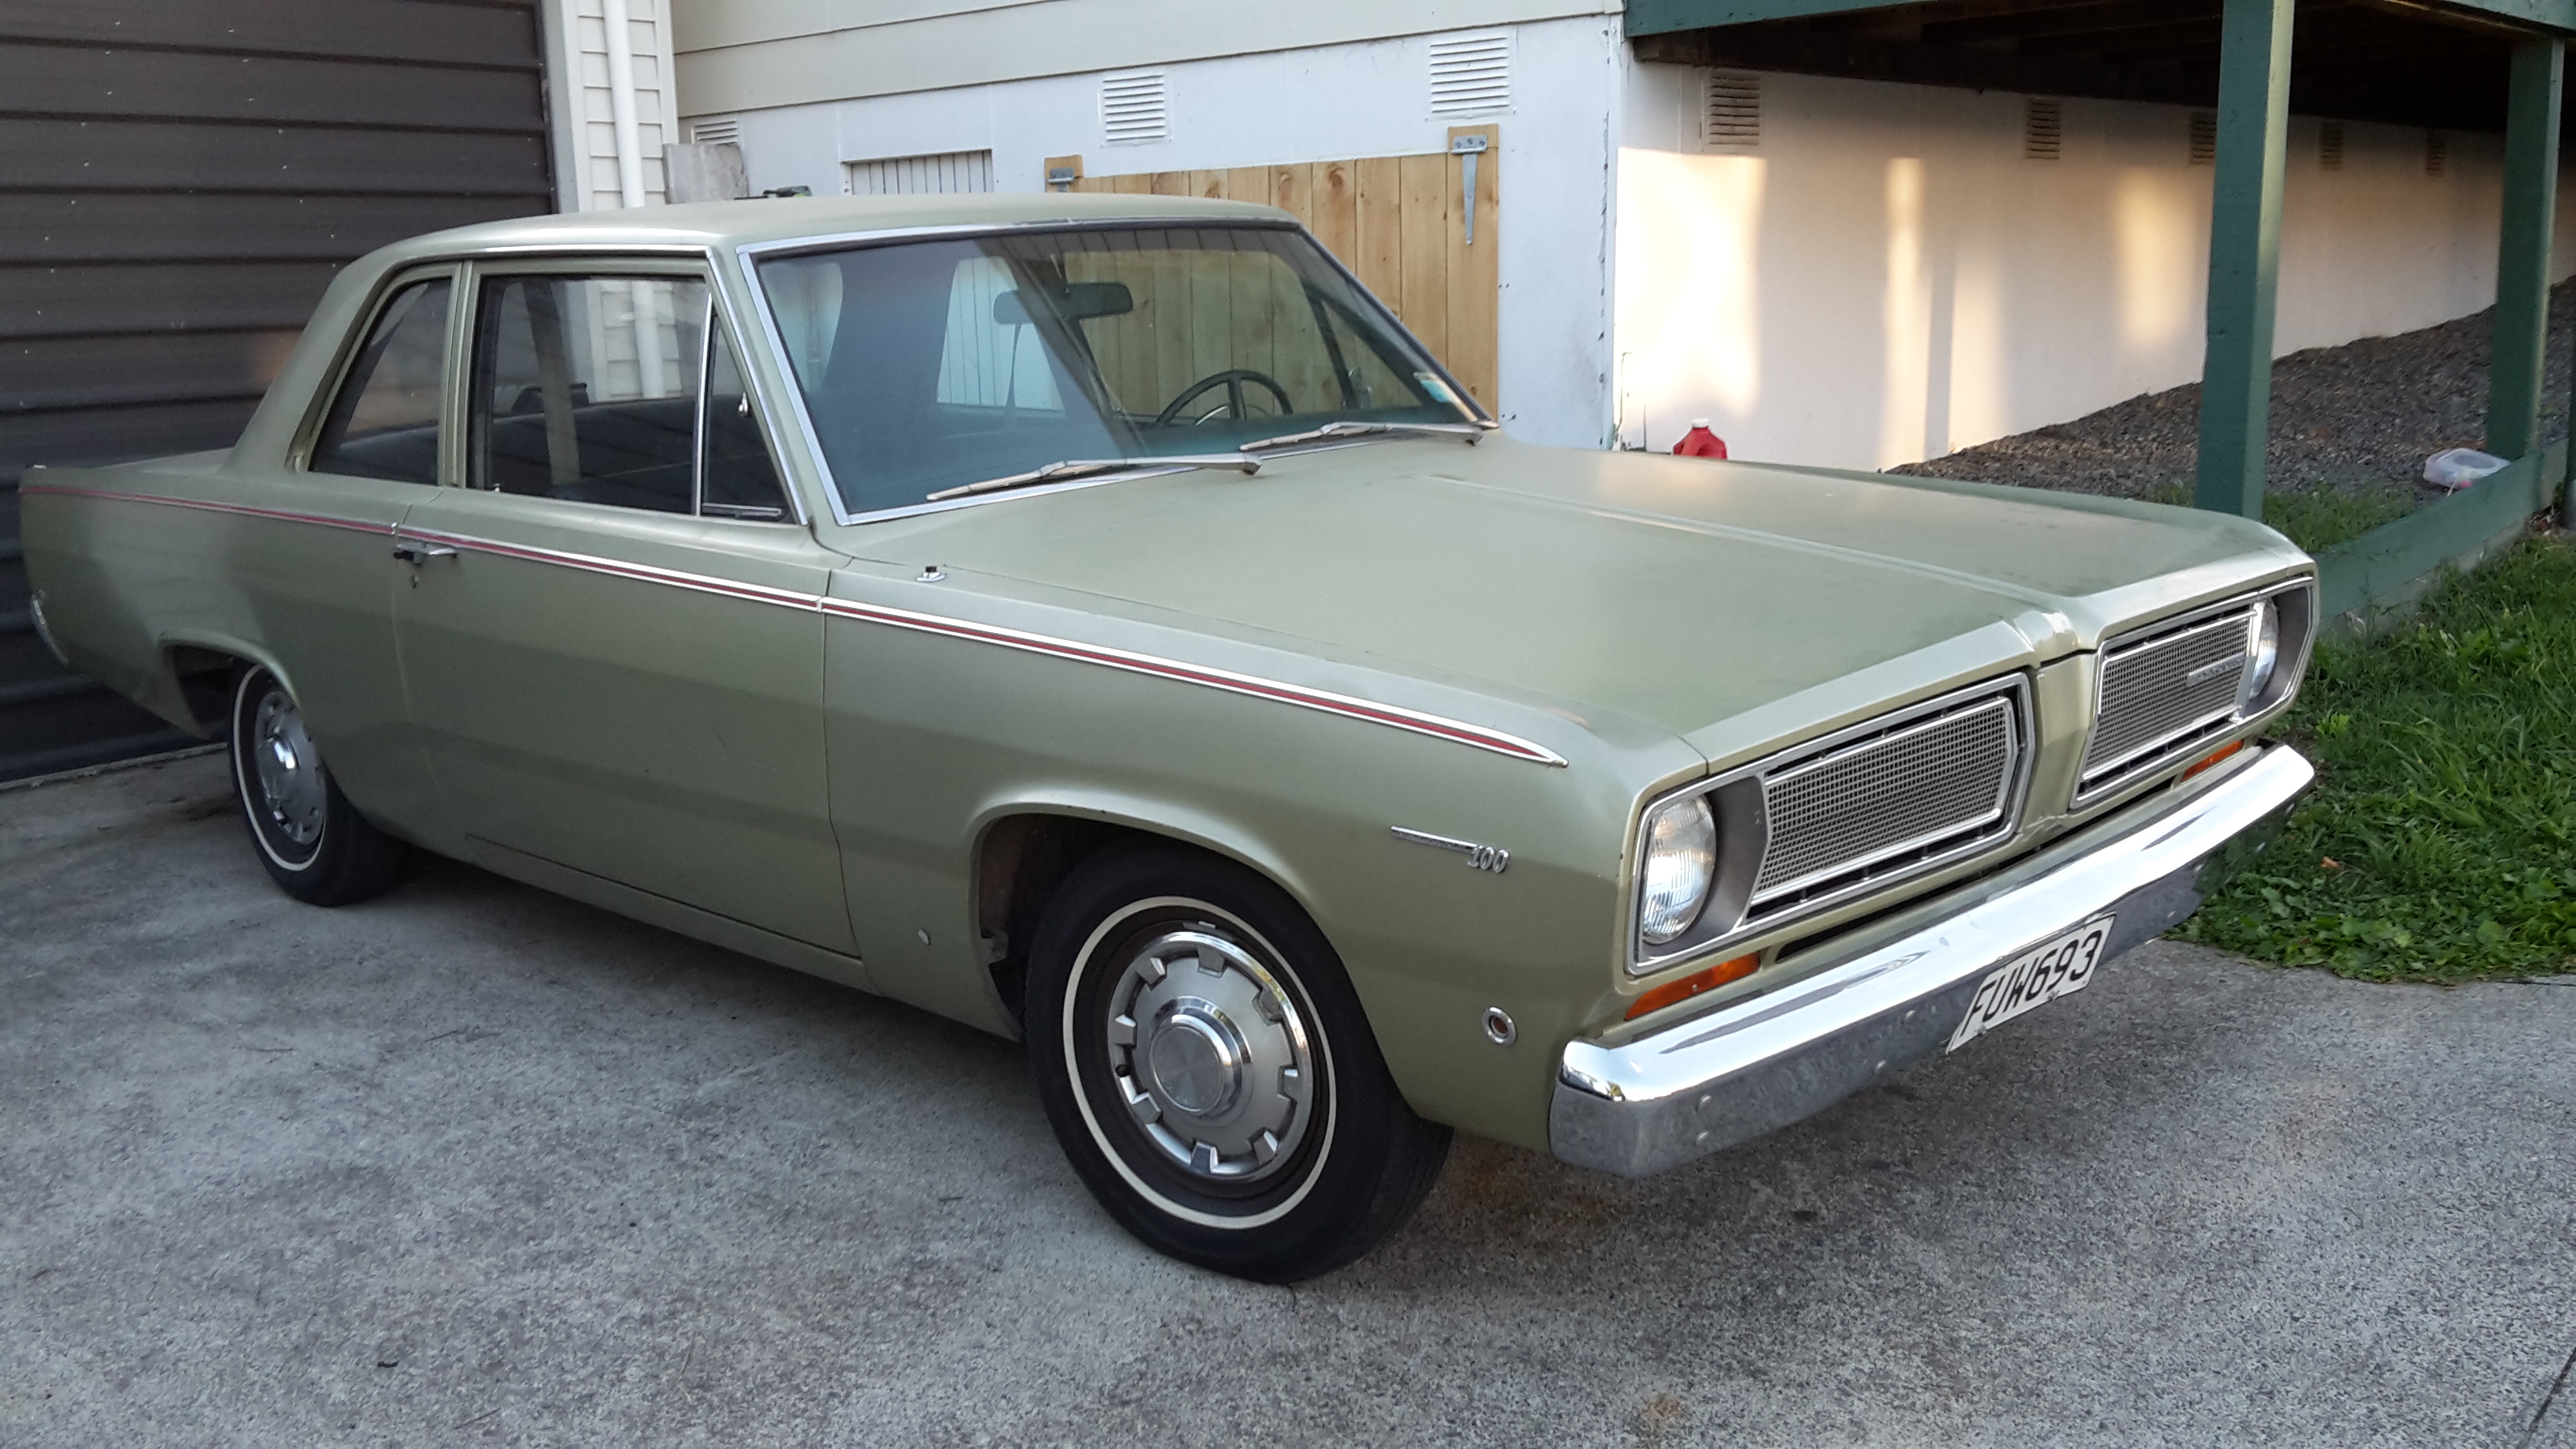
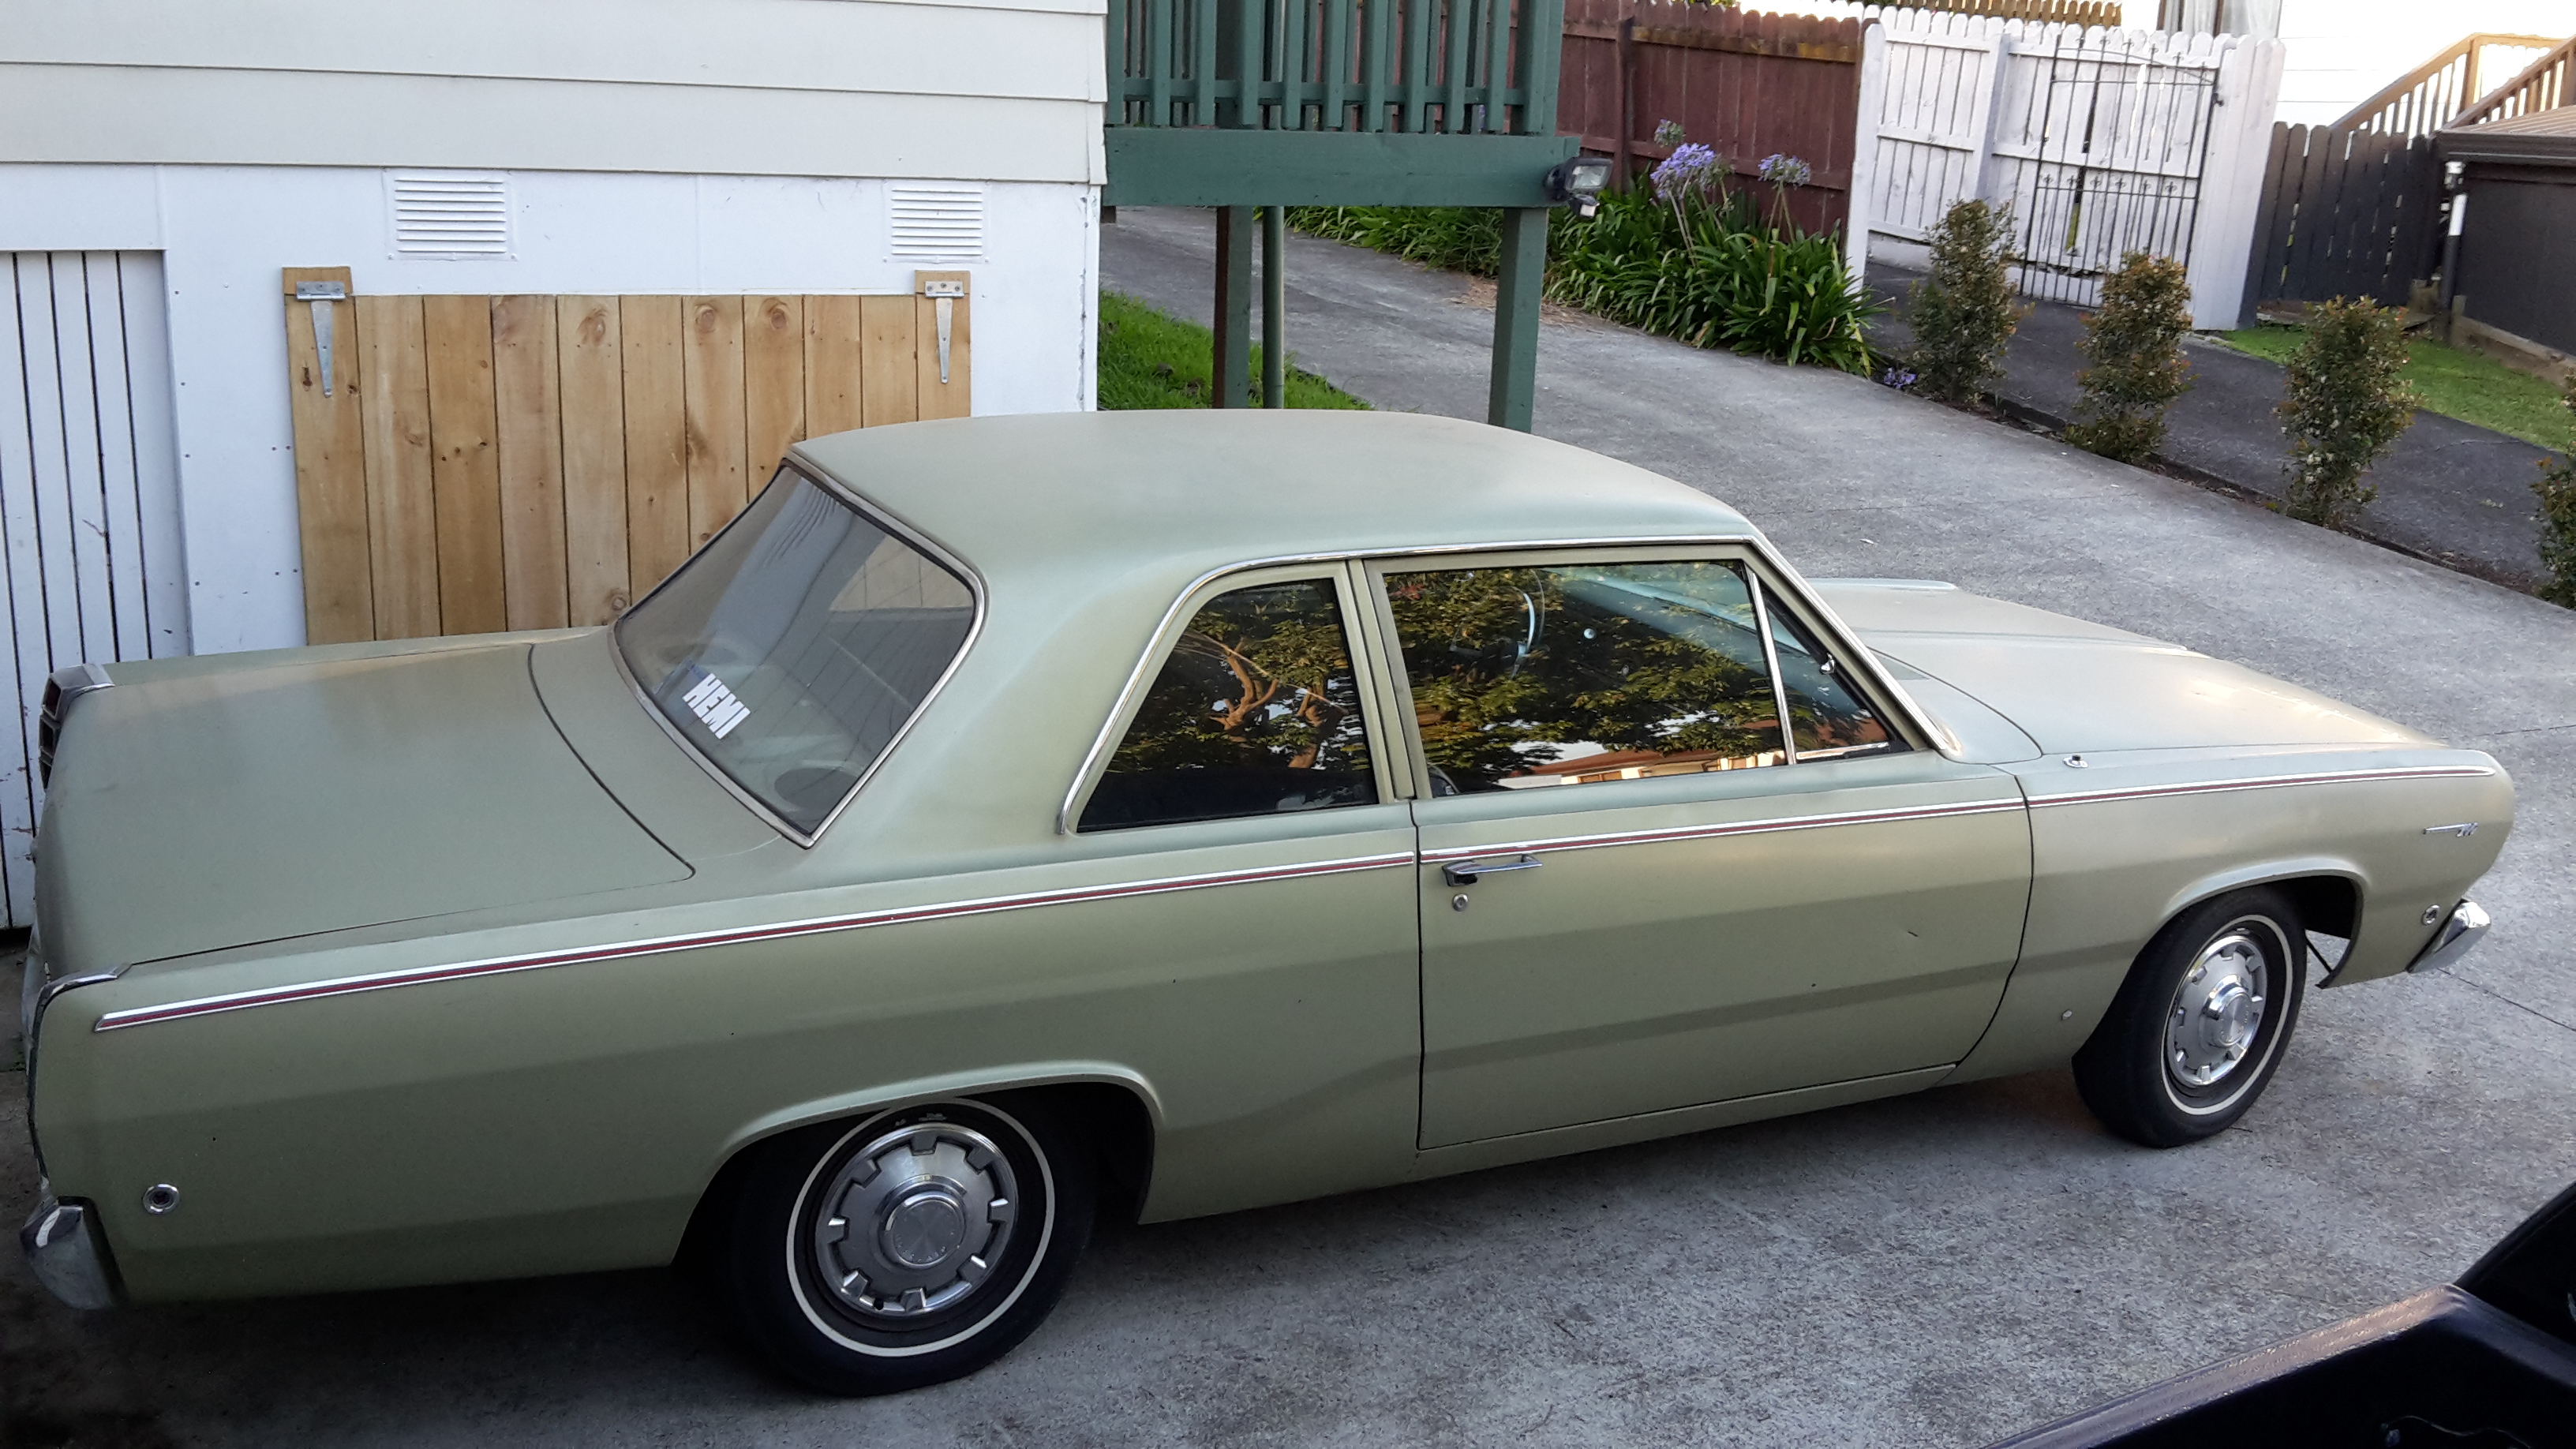
discussion Brought this home today, it's the reason for selling the hardtop. It's a 68 Plymouth Valiant, has a 'leaning tower of power' 225, auto, has power steer, 13" wheels hah, drums all round. Most of the paint is original, it has a couple of bits where it's been repaired that need touching up. I'll probably get it repainted in the same colour at some point. It belonged to a mate of mine that died in 2015. It's a bit special to me because of that, I went with him to have a look at it, had one of the sketchiest rides I've ever experienced when we went for a drive after he got out of hospital and was still on something. He always wanted to put a V8 etc in it but he ran out of time. His family kept it since but decided to sell it, and his mum rang me to give me first option on buying it. They are keen to see it get an 8 so it will get the turbo 318, 727 and 9" I was going to put in the hardtop. I'll drive it for a while till I've got everything ready then bolt it all in. Obviously this one will need a brake upgrade as well and I'll put some 15" wheels of some sort on it
4 points
-
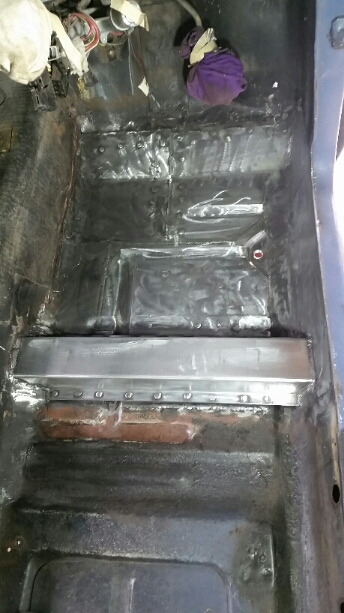
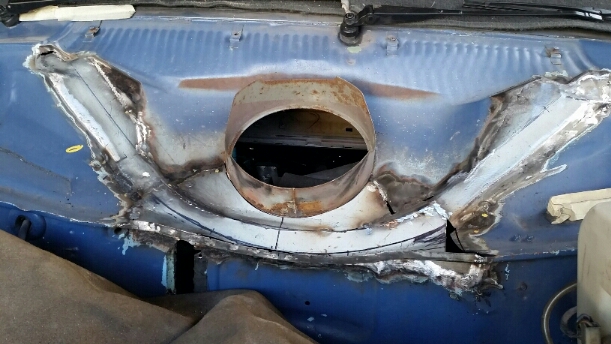
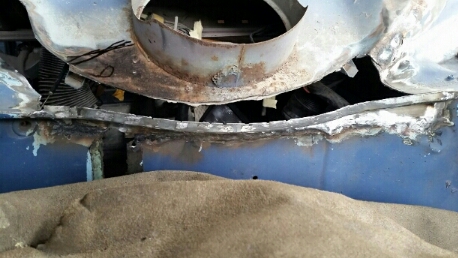
Cleaned up a better heater bubble I had cut off a wreck a few years ago. Plug welded this in, rattle canned it, seam sealed it and canned everything one more time. 100x better. Every new panel was painted inside and out, sprayed with this 2k epoxy everywhere and seam sealed where nessecary. Its so much more solid and the cunty repairs are now finished. Long story short, it failed a warrant and I changed chicken mesh into metal to gain road legal status. Stoked. Most of the garbage I replaced.
4 points
-
Its started, hours of grinding. Lower links. the tube adapters were for some usa spec "dom" tubing. machined them down a few mm to fit sch40 1 1/2 pipe. Have cut all the existing mounts off the diff and tacked the lower link mounts in place for test fit. will do the same with the top link before finishing and welding them. Lower link chassis mount, will be trimmed and braced more, as they will likely get a bit of a hiding Its kinda working. lower links look like they will be ok. still trying to find some more up travel. easy way would be to run the truck at a higher ride height, but want to make it work at stock height, to keep it stable as possible. current things spoiling the fun are: sump, alternator, engine mount and the floor..4 points
-
now the diff can leak electricity too4 points
-
Sigh* again, not as much as I wanted.. because Old mate from down the road brought his 1964 international round and did a bit of leveling.. in the rain for a bottle of bubbles for his missus. Not a bad job really, little high in some spots and a little low in others but I'm not complaining.. bit of rake work and she'll be all gravy. He bought it from vegas and drove it back to chch, took 5 1/2 hours..4 points
-
So thanks to Josh for his efforts in getting this tank ready, its now in my driveway. Couldn't really afford it but couldn't let the opportunity slip. Kinda surreal in that I have never bought a car before that I've been content with at time of purchase. So far I haven't even popped the bonnet. Just jumped in, thrown the chronic 2001 in the CD player and clocked up a few kms getting to know the way it drives (like a 6 yarder truck) But I love it. Thanks again Josh.
4 points
-
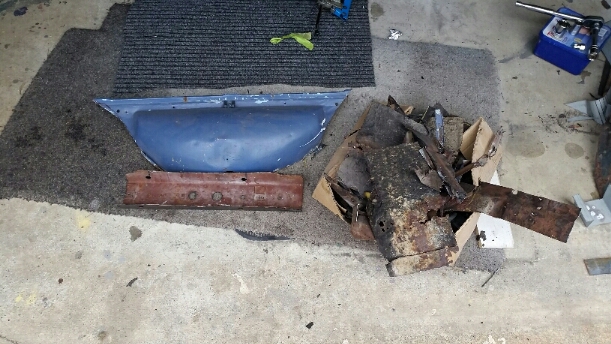
Got just a few flanges laser cut. Got most of the exhaust tacked together. Couldn't pull out the part with the resonators so they're going to need a couple more flanges welded on either side. Looks so good though! Will it need any flexi's up the front? I'm thinking it will be mounted at the front of the resonators and at the back where the shock mounting bar is with some quite stiff rubber mounts. A package finally arrived from America. New floor panels!4 points
-
Front sill section. I also made another piece behind this one after it was welded in. Floor pieces all welded in. This was made up in 4 sections. It made sense to replace everything at the time. I also made up a new seat rail since the old one was a tad rusty and splitting around the nuts on the underside.
3 points
-
Well then, i'll be sending the Promesh wheels away soon to be re-lipped (unsure on the terminology) Most likely all the way down to pine engineering, as he seemed to know what he's talking about, and was the cheapest. I just need to decide if I want them to be any wider. They are currently 7.5 and 8", and was thinking about just pushing them out 1/2 and inch all round. At the current height, with the 195 45's tyres there's no rub, but I would also like to run 205 50's as I like the more tyre look on these cars. I guess the 1/2" extra width wont really make much difference to rub, as its not that slammed/its more the width of the tread that matters. The other thing I was thinking about, is painting the centers gold. They are currently gun metal, and don't look bad, but was wondering peoples thought on going gold. As i'm photoshop impotent, you'll have to use your imagination. Current look ^ What ya'll reckon? Also, I got a pair of center caps from murica, so I now have 5x, which I will refurbish and apply to the rims. That 80'sness, yummy. Chur or nar: //oldschool.co.nz/index.php?/topic/25550-vintage-grumbles-ae86/&page=24 Regards, VG.3 points
-
The see me rollin – they hatin. So yesterday was a good day – aside from the mega flood out west Auckland….only the floor of my shed got wet which was super lucky. I secured the hubs to the struts and sat the struts in = rolling. I surprised myself with the guestimation of ride height at the rear as it was almost perfect – albeit without any actual weight in the car. The fronts seemed to be at a nice height too however I will need to see it with the engine, box, glass bla bla in. On a side note, I’ve been looking high and low for my gearbox cross member bush and basically turned the shed inside out over the past 2 months……I went to move the gearbox and reached under it and what do ya know……there it is, secured to the frikkin gearbox. This is the automotive world equivalent of looking for your glasses when they are on your head. Now to get the oil pick up extended so I can hoon on the sump and plonk the engine in the hole. Injectors are ordered for the custom quad throttle bodies – 4 x Bosch 630’s including pigtails. Once they arrive, I can have the top half of the throttle bodies fabbed up as it needs a custom rail to suit injectors and the velocity stacks need slight machining to fit on.3 points
-
I picked up this a bout a month ago from Penrose (not Wanganui!) Ended up getting it sent from Ralph Moore Autoglass in Sydney who had one in stock, and they shipped it with an MG one for some other bloke to halve our shipping. This week i finally got it installed. Cracking the parts cats screen has not only been a very expensive fuckup but also meant ive pretty much missed cruising this summer. I reused the old rubbers, i cleaned them pretty good but they are a bit cracked and stretched in the corners so i hope they dont leak Sorting out the best surrounds, and had just enough unbroken clips, less 2 And on Pretty happy about the close fit to the opening given all the work i did around the screen top and bottom (not so much about the runs, but thats what accessories to hide them are for!) And paint run hider back on Too much or? Nothing like a pending >1200km road trip to procrastinate on sorting the list of wee jobs to sort and a few miles to put on, before hopefully a WoF Next weekend! If not then id better get the brakes on the 125 sorted! Here is a pic to remind me why I aught to pull finger:3 points
-
Still chipping away. spare dash I got was still supple on every side but top. Will swap that over at Easter I think, could be a bitch to get in and out in a rush. managed to find a deluxe badge!! Was pretty decent so cleaned and painted. Will stick on this week. have another one, a script badge and some US spec red tail light lenses on their way over. scored a brand new carpet set for $150..its bright red but I'll dye it black. boot badge acquired and installed.3 points
-
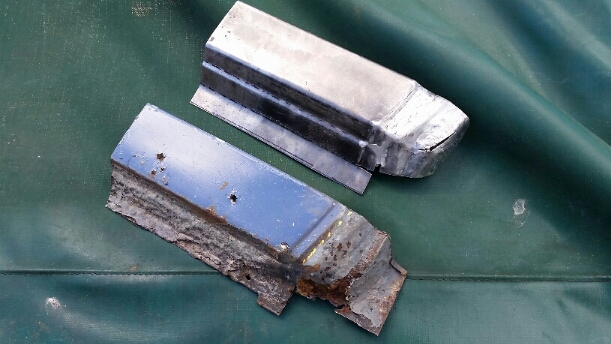
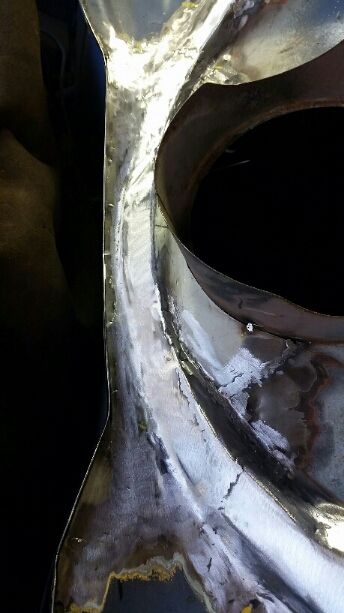
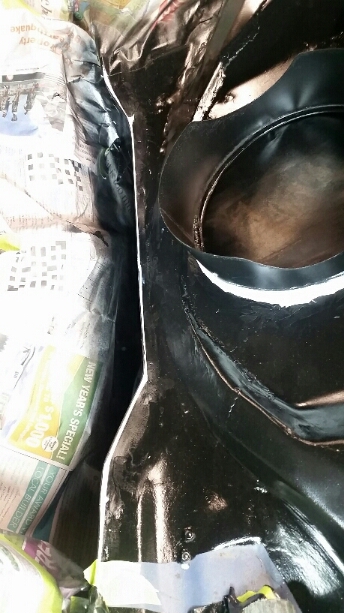
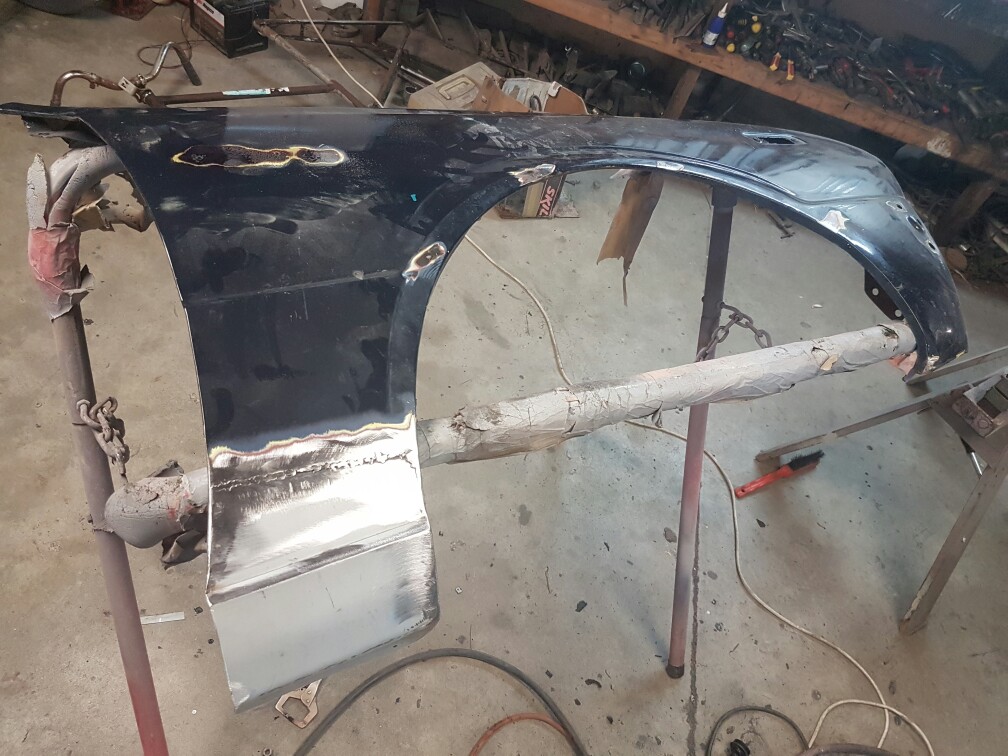
I cut out the top sections and made up repair panels. Then I made the awkward last piece. Lots of cutting and bashing to make it a good fit. Smoothed everything out. Gave it a couple coats of the rattle can and some sealer.
2 points
-
Had a call from tones today. Hes working at 2 on sundee arvo, but he will make it work for us. What a bloke. Get excited fellas2 points
-
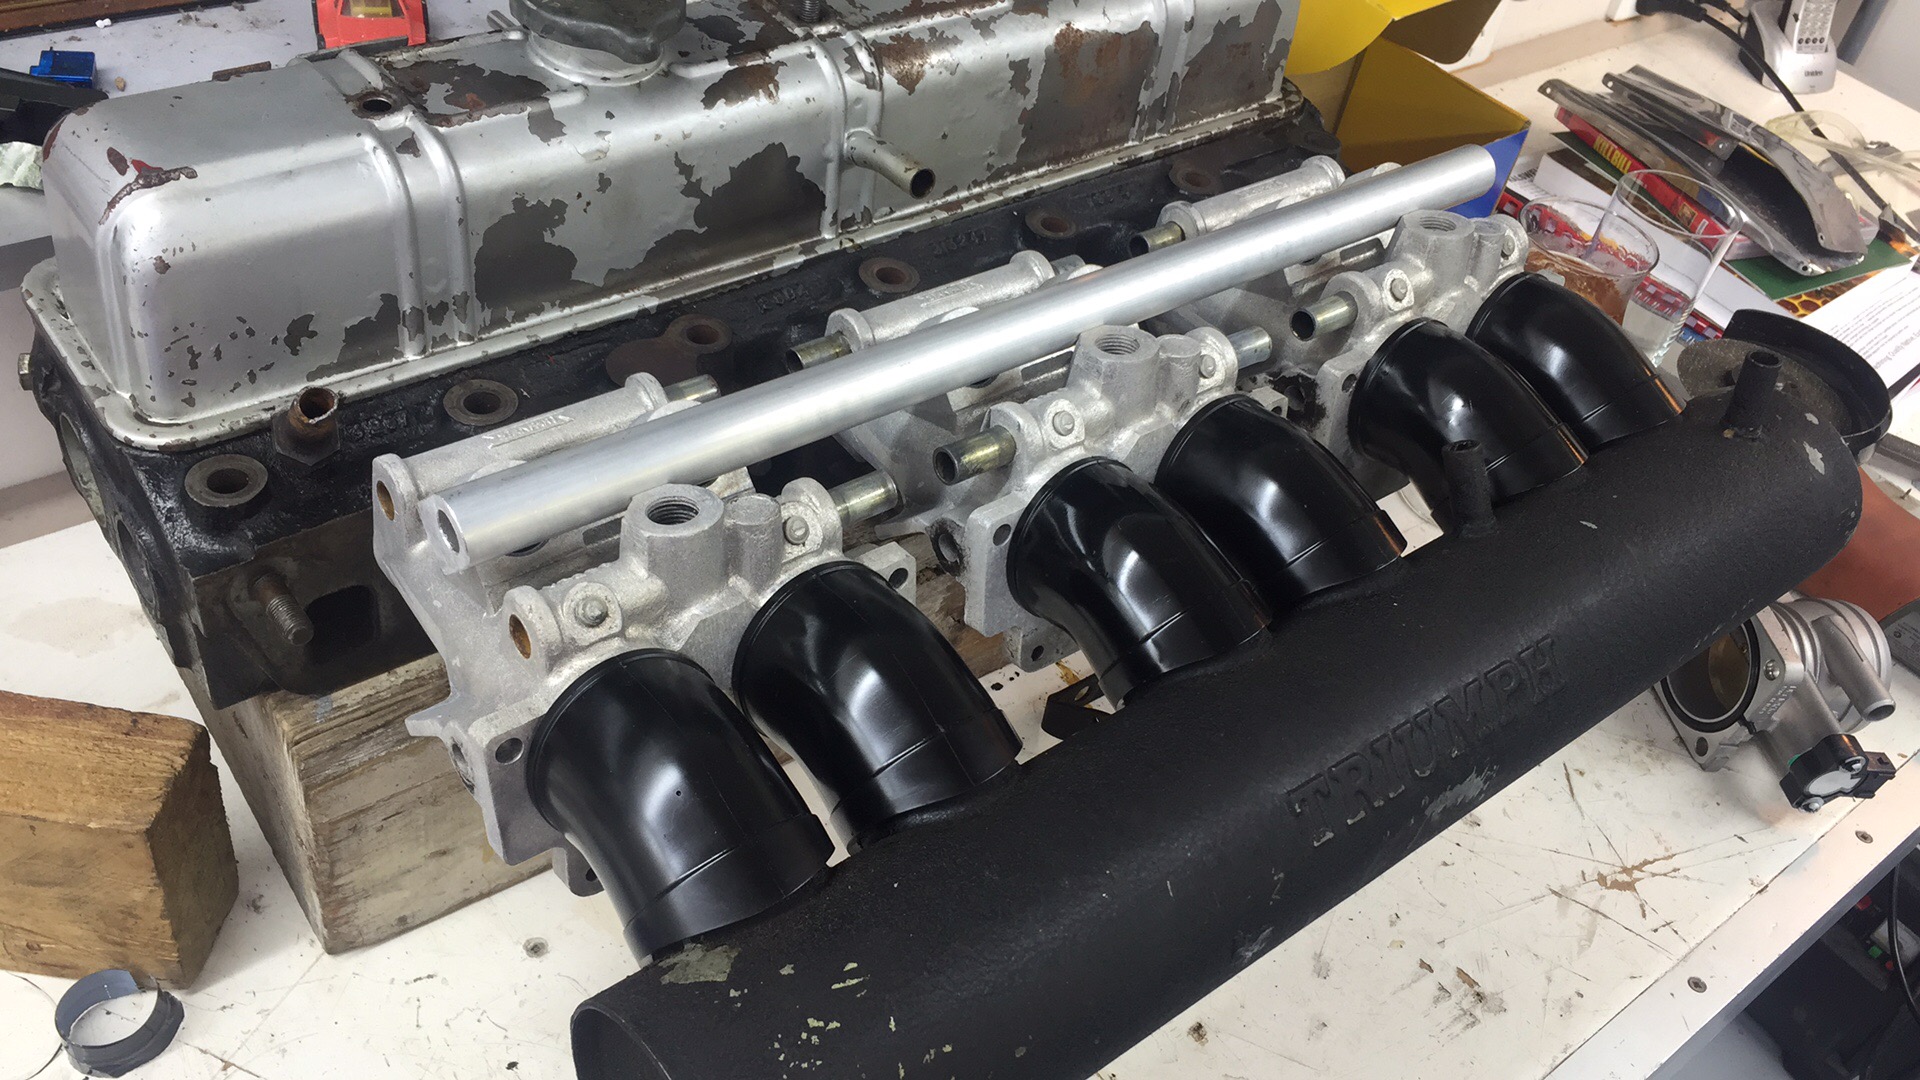
Been a while since I've posted anything up on my Trumpy but have been having heaps of fun with it. The OD gearbox has made a world of difference to how it goes on the open road so that was definitely a worthwhile excercise. Since I got it back on the road last June it's done about 4500 miles with no real faults to speak of. Been mostly just around Nelson and Mot but have been up the lake half a dozen times and once down to Westport which was a blast... I am really stoked at how it handles now compared to before the big upgrade but have been pining for a bit more grunt. For a little while now I've been collecting bits for a new donk and am just about ready to pull the trigger and get it built. Plan is a 2.5 bored out a bit, up the compression, EFI, cam, headers etc... Ive got most of the stuff together for the EFI setup and have been modding a set of PI manifolds to suit. As soon as this is done I'll get the engine itself underway....
2 points
-
Slant Sex2 points
-
Will hopefully be there in something exciting and new* If not, I will be there anyway in something not very exciting and newer (as in not attended before, its achully quite old)2 points
-
That was a fucking auto correct. Stupid phones.2 points
-
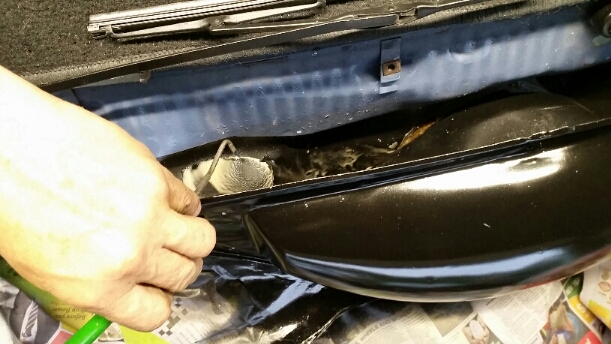
Had a similar issue many years ago , turned out there there was a pair of pliers inside the tyre , had almost completely rooted the inside of the tyre though the wire, we had the tyres balanced but the pliers where almost held in suspension by all the rubber fluff from the pliers spinning in the tyre2 points
-
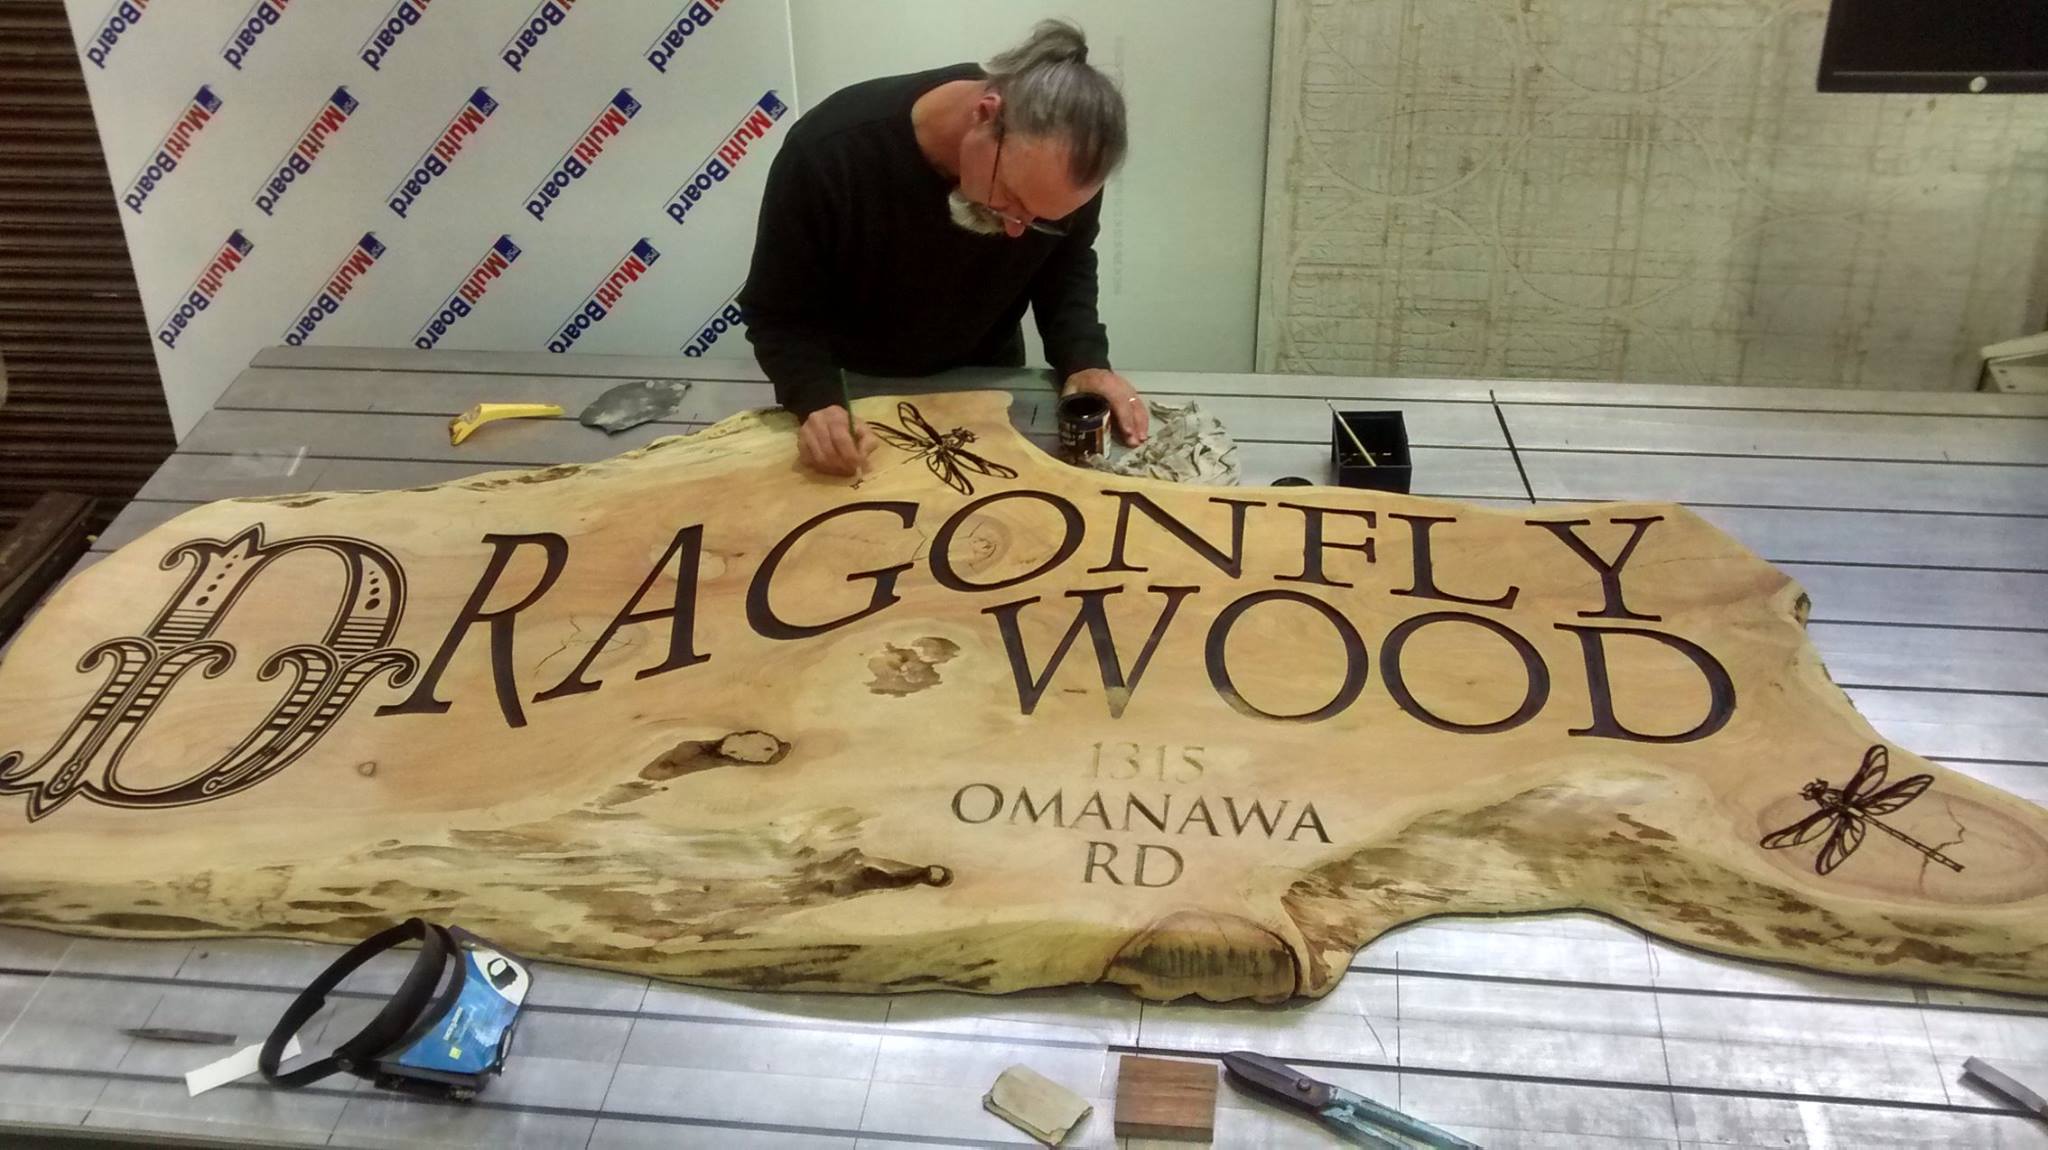
Thanks Mr V for organising a sweet shed tour as well as the providers of sheds and also to the other OS'ers who decided to brave the precipitation. Epic sheds coupled with many epic sharn's and epic cake. What he said about what he said!2 points
-
Fingers crossed for Nat-sing! Pretty sure all it needs for WoF is to get the windowwashers going, but the foot operated water pump thing is bung (still makes the wipers wipe 3x tho ). I have a Uno colostomy bag with an electric pump built in and a momentarty switch ill put on/in the same place Other things are - I don't have any door lock keys - radiator is a bit leaky - I have driven in total about 3km, this is also the total distance it has been driven in the last 25 years - its a 50 yo Italian car, with (for the time) fancy electrical doo dads, that im not 100% sure on ! - I have personally undid and done up almost every bolt (this is the worst worry TBH) what could go wrong2 points
-
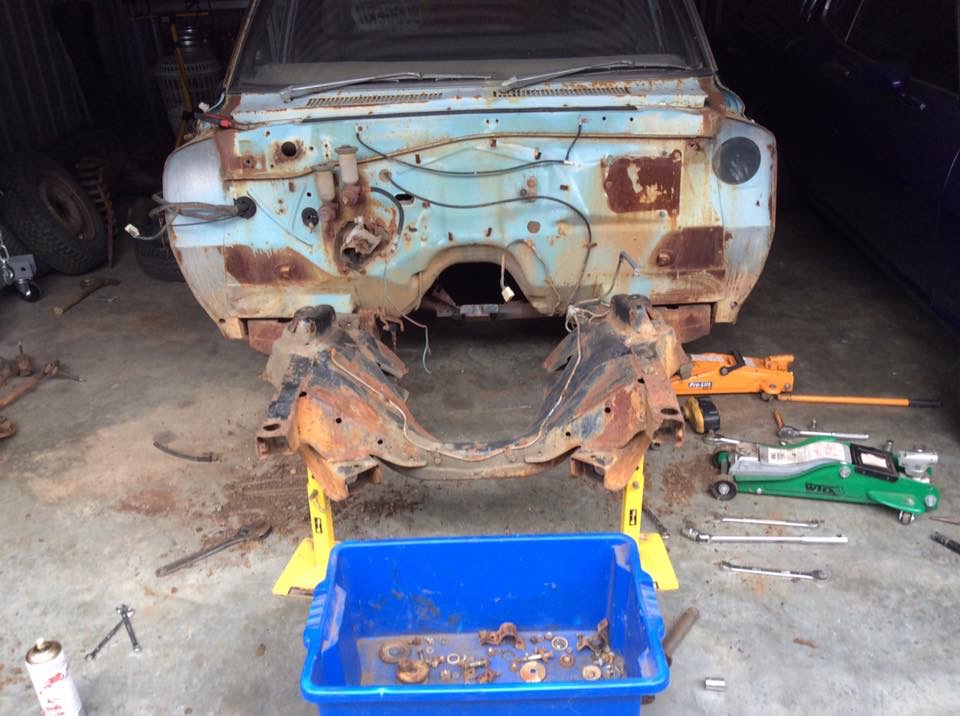
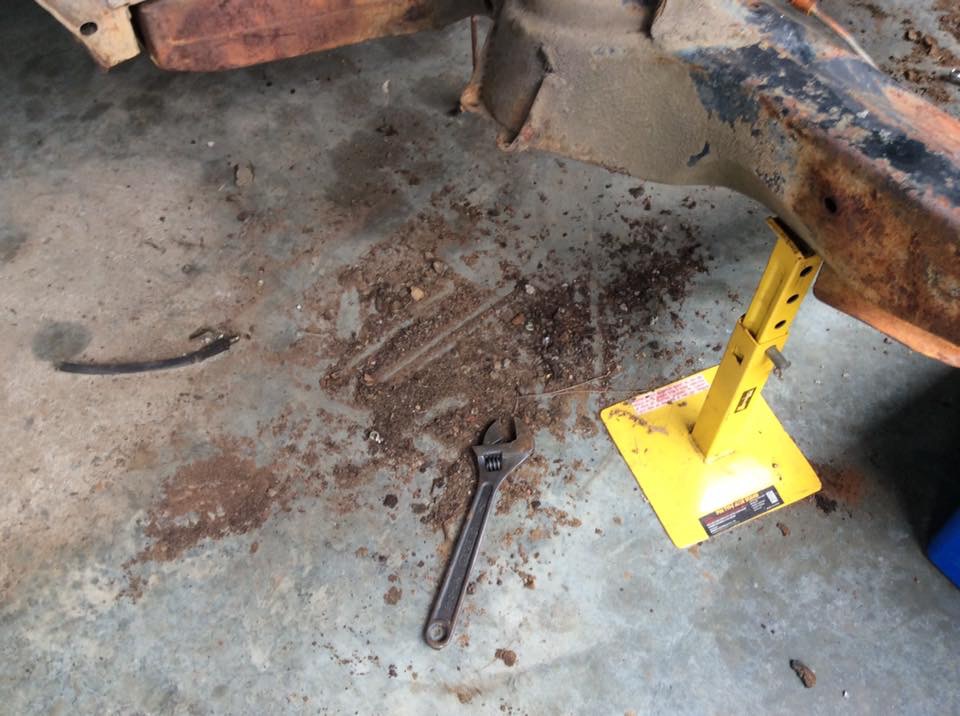
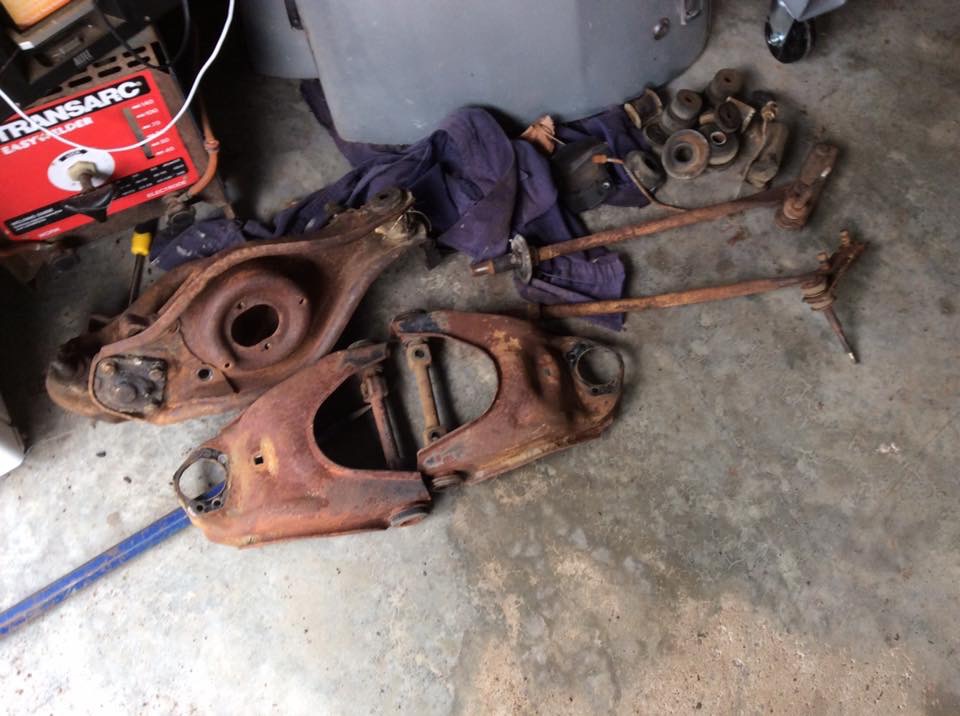
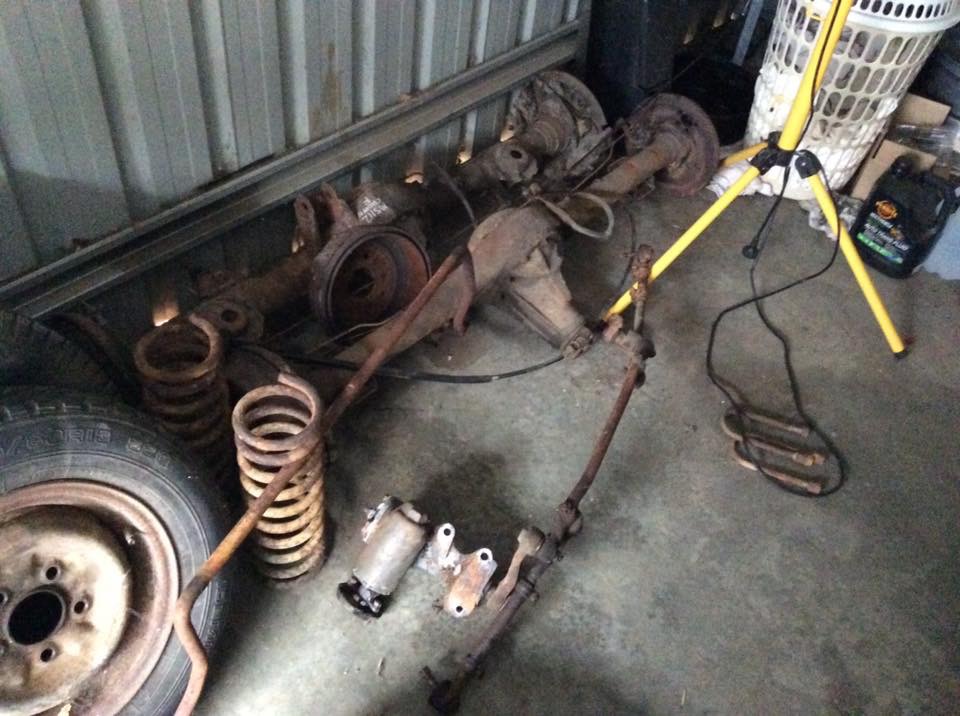
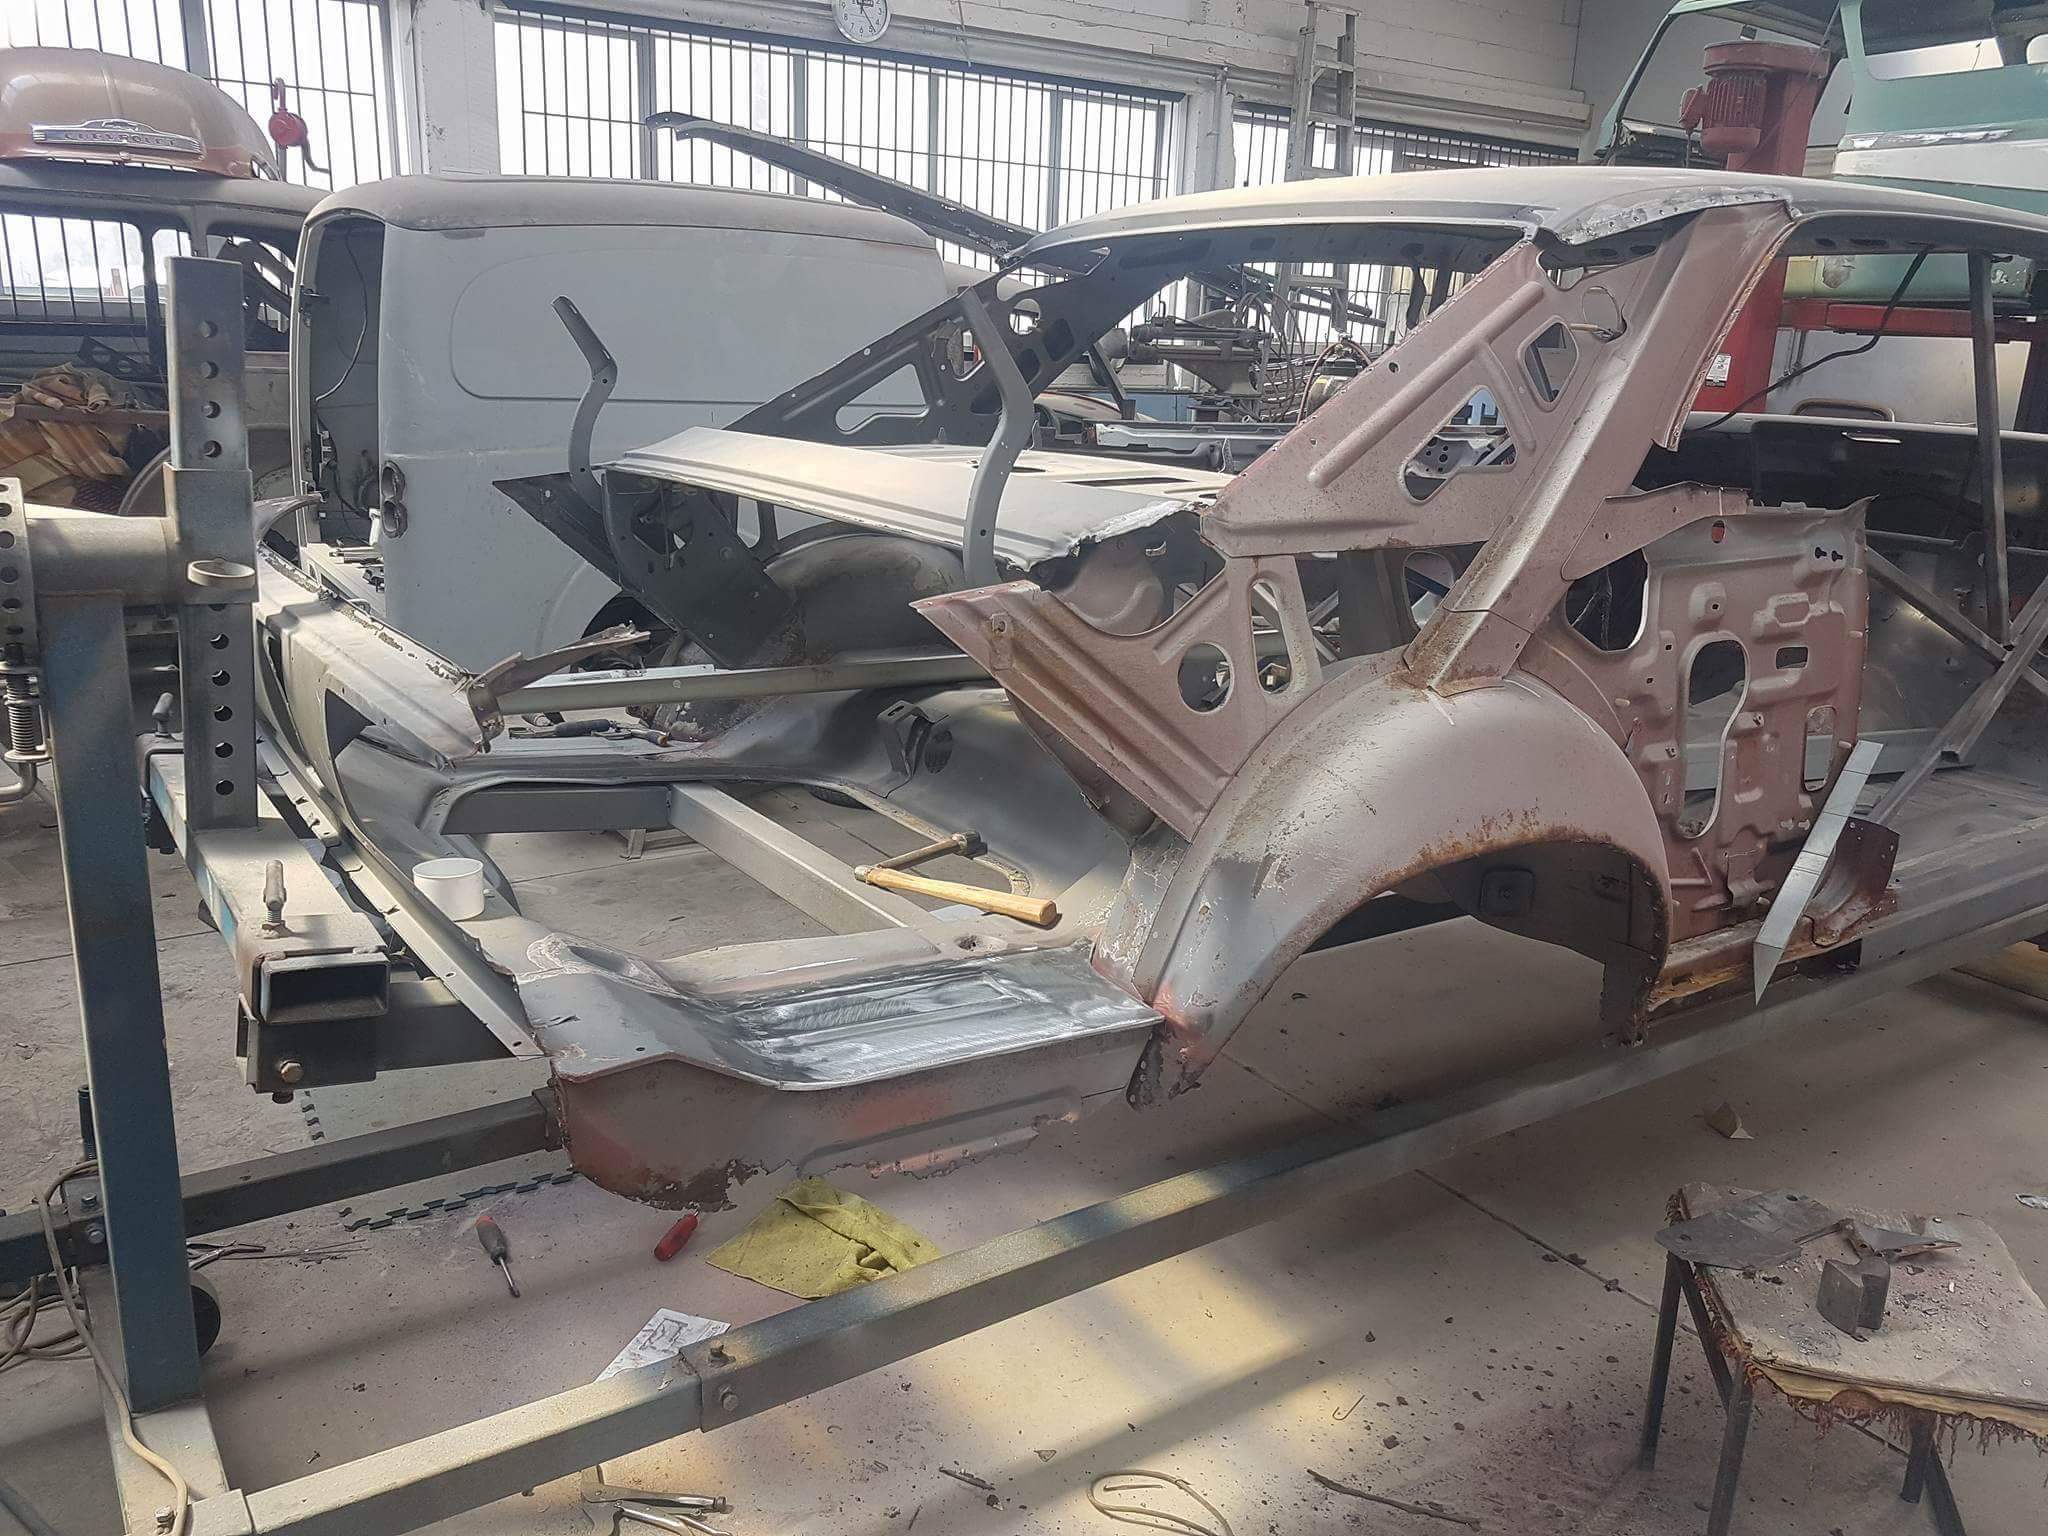
I've been pretty slack, Perth summers are way to fucking hot for being in the garage. Finished stripping the steering and suspension today, it's all fairly tidy under the dirt, grease and surface rust. Am buying the parts new that I can get, inner tie rod ends could be a mission but all the other steering stuff is available, UCA bushes also seem to be a questionable item but I'm not sure if it's just a listing issue. Will clean up and paint the control arms, strip and check out the steering box, then clean and paint the front of the frame. So much parts to take up space! I measured up my old sedan chassis, not bolt on, and it was way more fucked than I was hoping, so I'm keeping an eye out for something with better front panels to grab, partly because I am missing most of the front end bolts and lights and shit like that. cheers Matt
2 points
-
All of the diffs have some kind of issue so the the one with the least slop went in. I also parted with some cash for someone to make a new front piece of the driveshaft and balance it. Been burning around in it today to make sure there are no issues. Gearbox - check Driveshaft vibration - check Diff - hmmmm. I'll take some bananas Front end - not so good I pulled the front left apart and the outer wheel bearing has decided to shit the bed. Same bearing as 80 series cruiser kingpins and the 12 roller version that I have is prone to dying. Tomorrow is Taranaki anniversary so no shops open. I'll try and get some overnight parts from Japan from Auckland. Leaving for chch Friday with my 2 yr old son. Don't think he will be that keen on sitting on the side of the road for a day waiting for help. Maybe I should join the aa? No photos of bearings due to me being busy swearing at the fucking thing.2 points
-
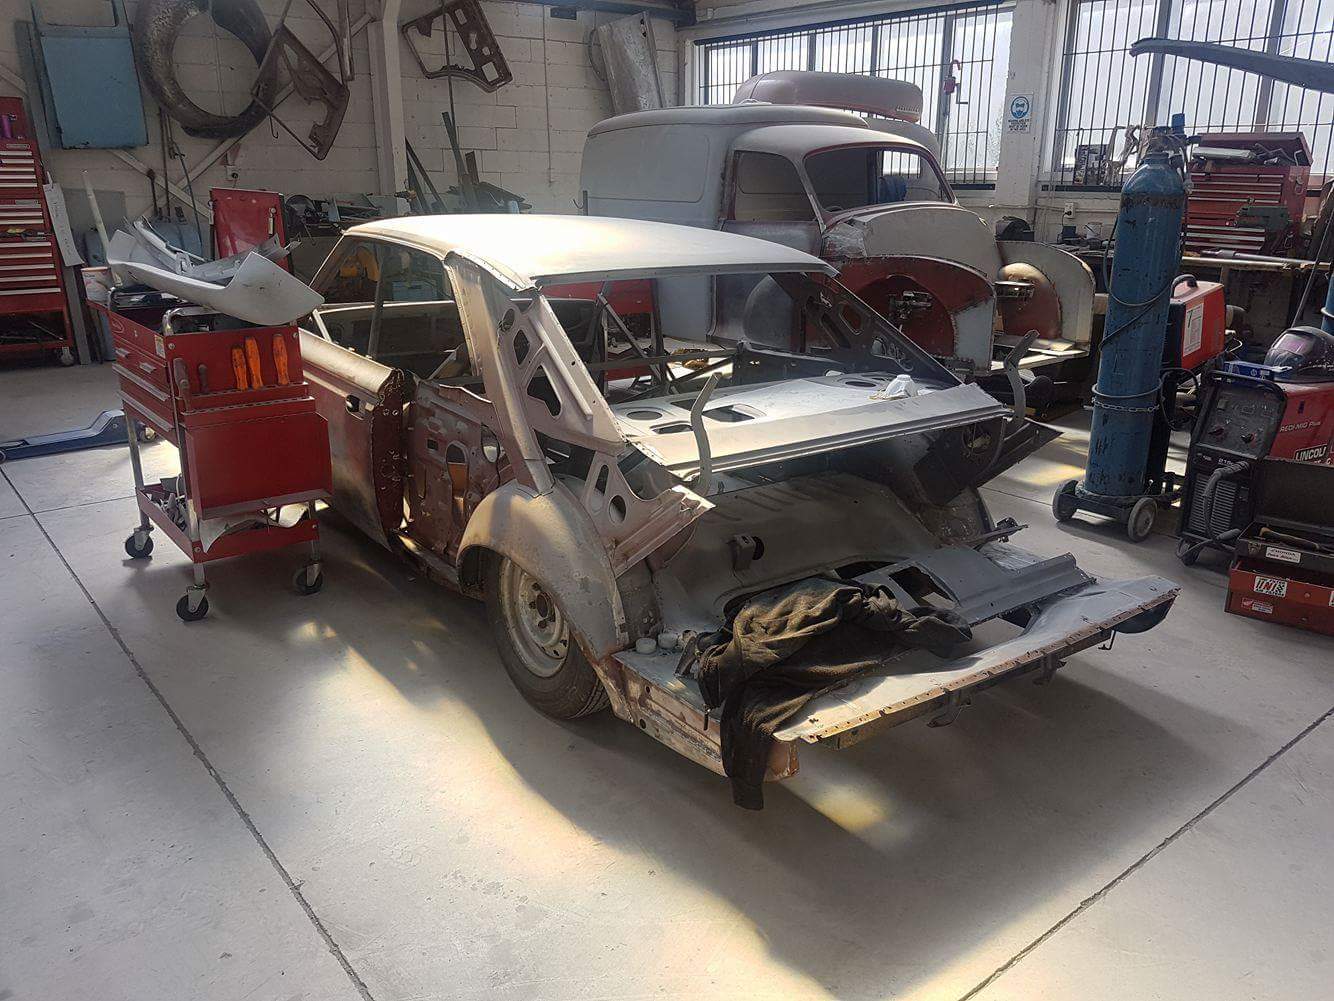
Think all the panels are finally off that need to come off . Might see them going back on in next few weeks
2 points
-
Well, it's the end of an era. she drove out of my life in a haze of smoke and a howl like a semi truck. Cant keep them all, would gladly do so but im sick of being poor. Dane has wanted it for ever so when I decided to cut it loose he was top of the list. Look forward to seeing what you do with it (wide steels?!) and how much of your sedan you borrow to flash it up!2 points
-
Just got this out of the workshop Friday.....
2 points
-
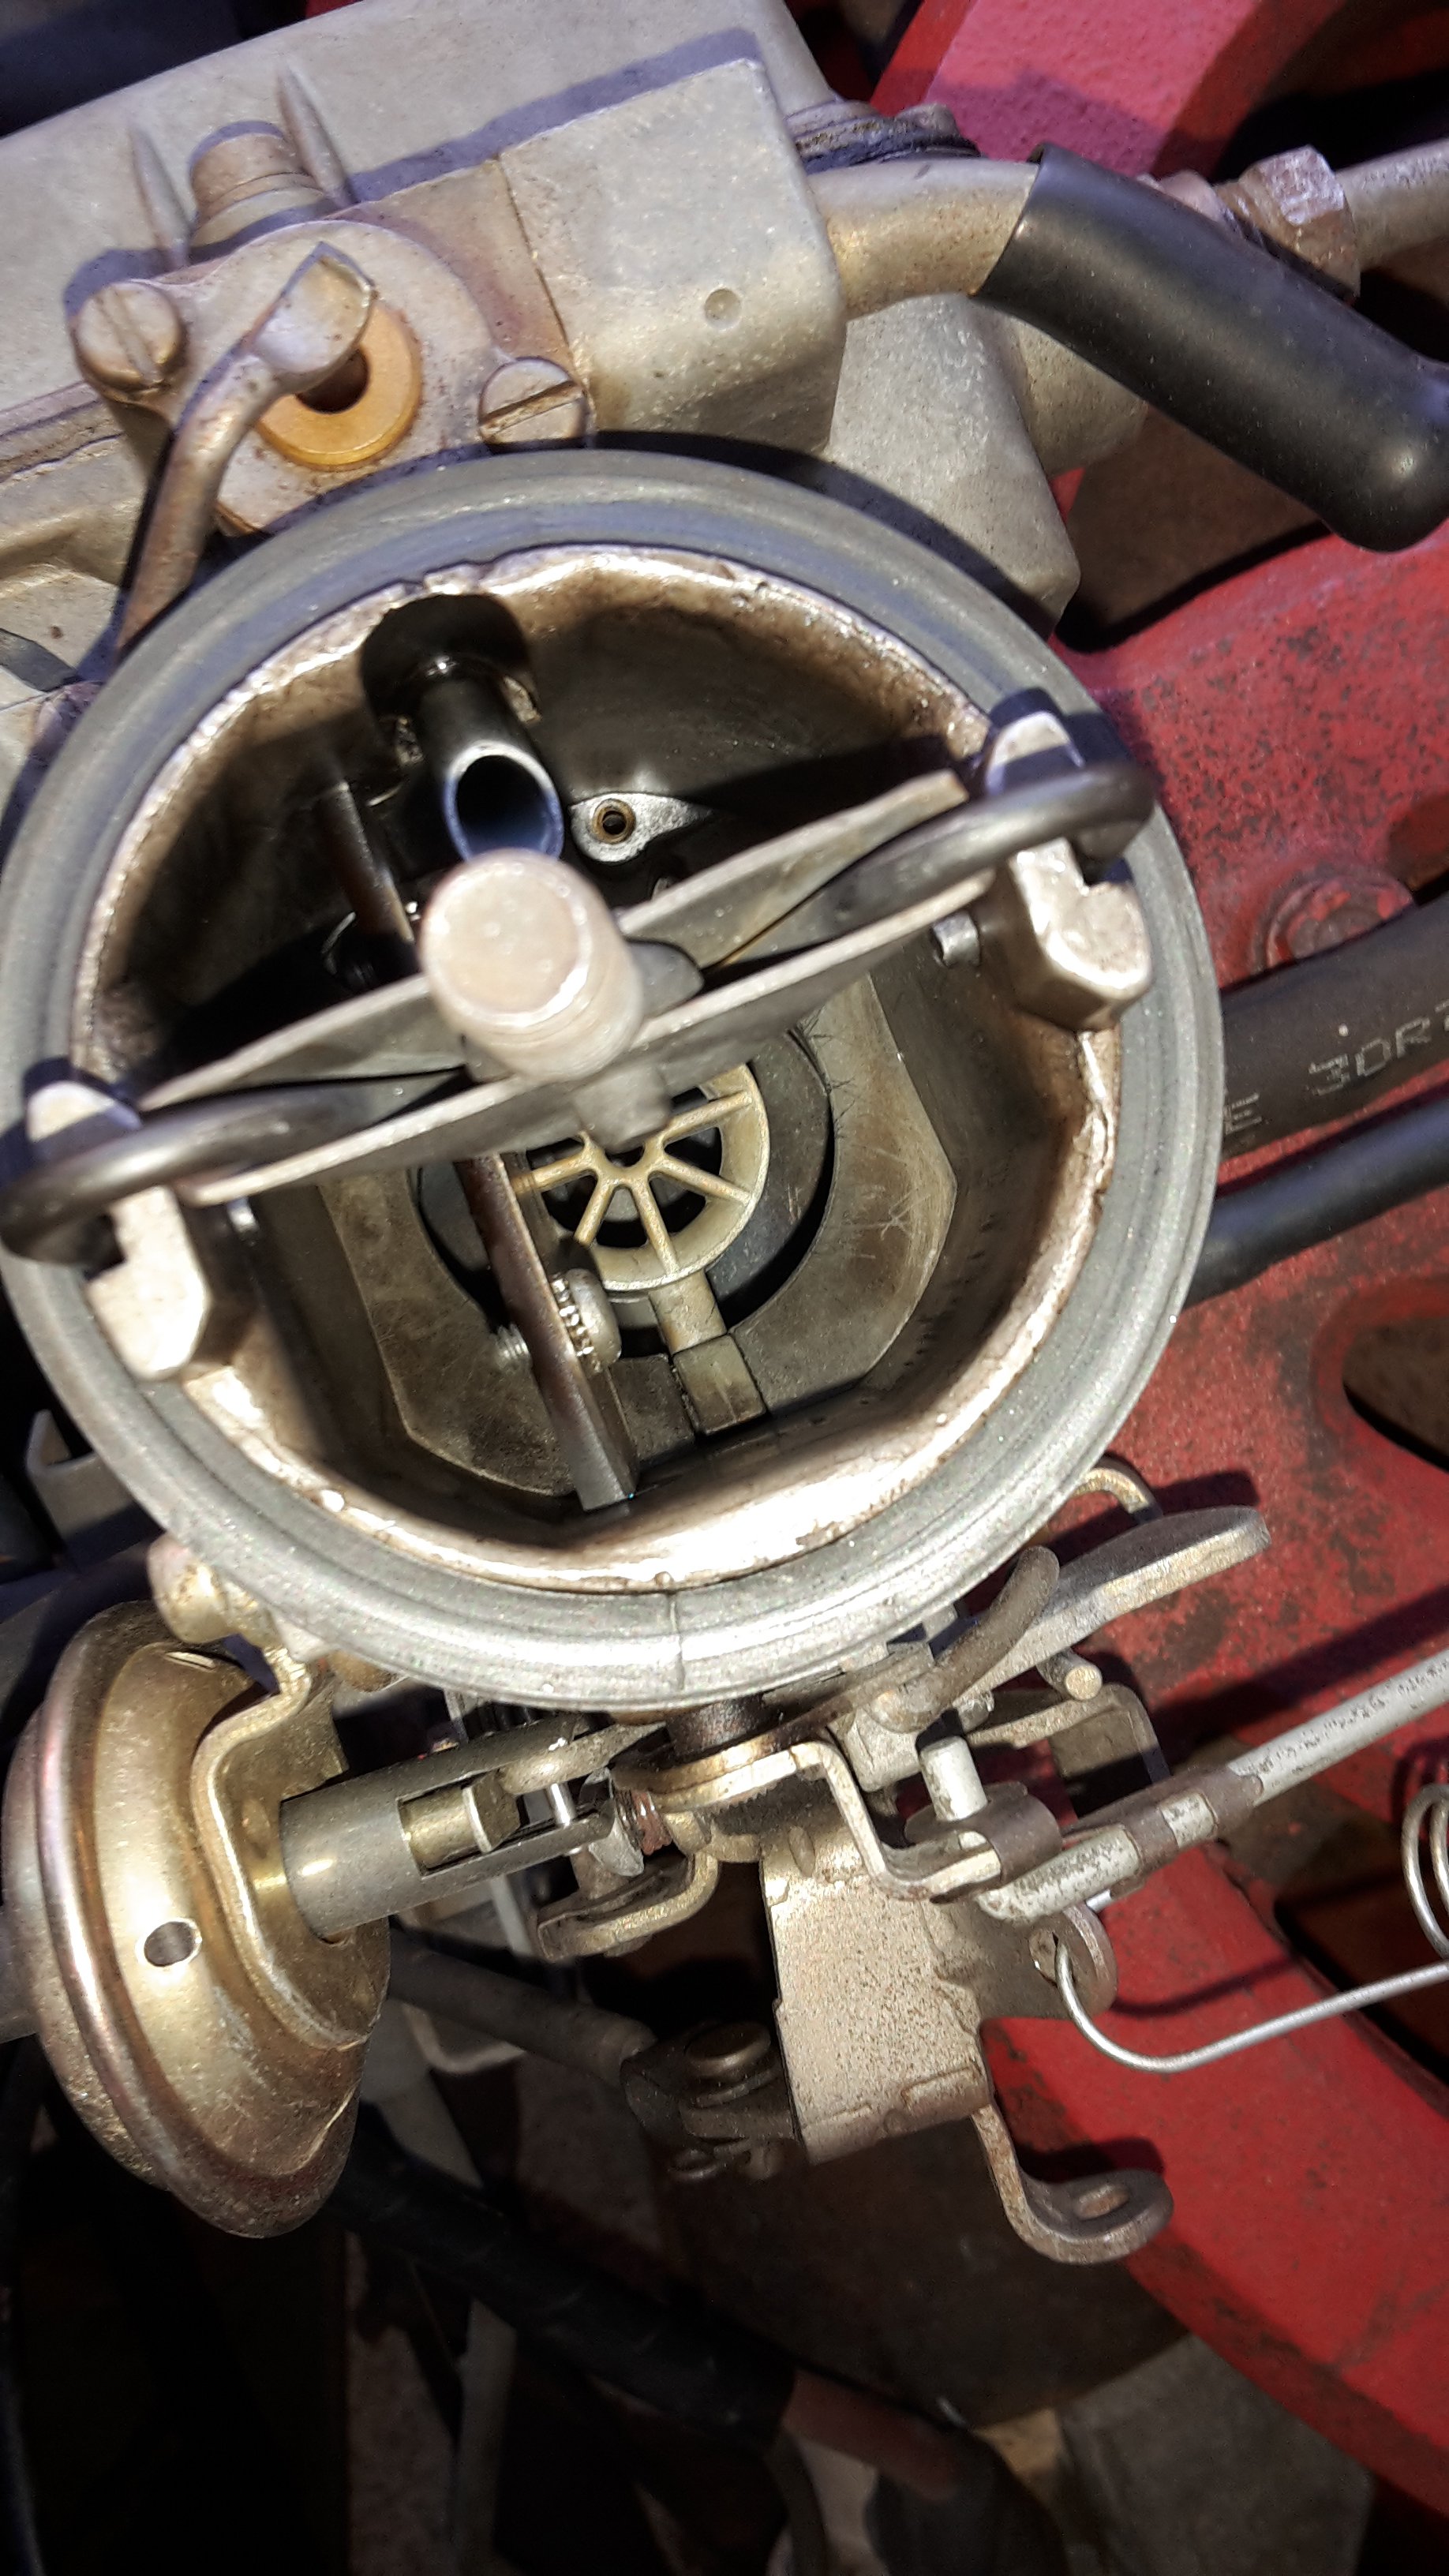
Also, look how tiny the carb is
2 points
-
Got her done over the labour weekend. When I was washing it before starting a big piece of roof lifted off, so that took a solid days worth to fix. Also popped the dents from the rear passenger door that have always been there. Picked a few scabs I shouldn't have but I'm happy with how it looks now. It was a bit of a squeeze in the garage but it was good to have cover.2 points
-
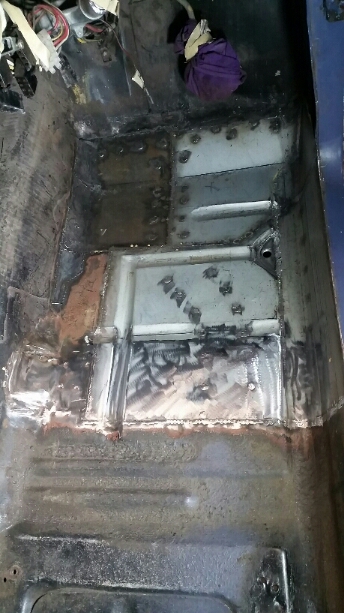
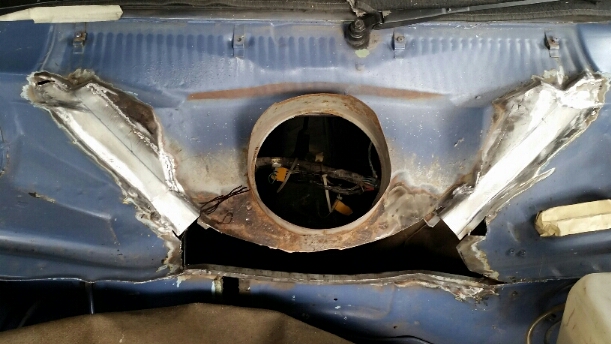
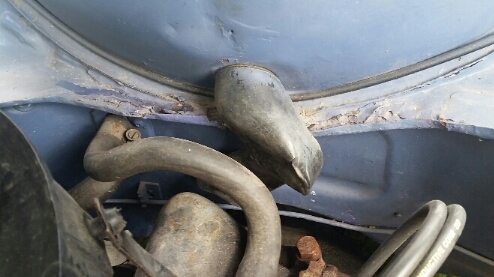
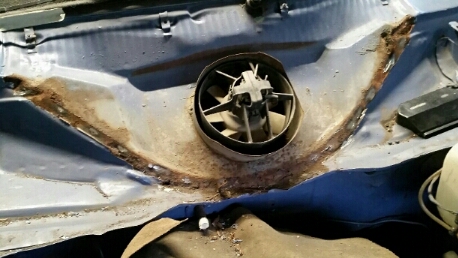
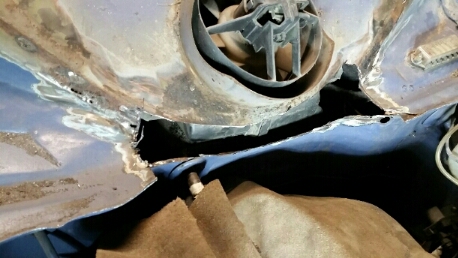
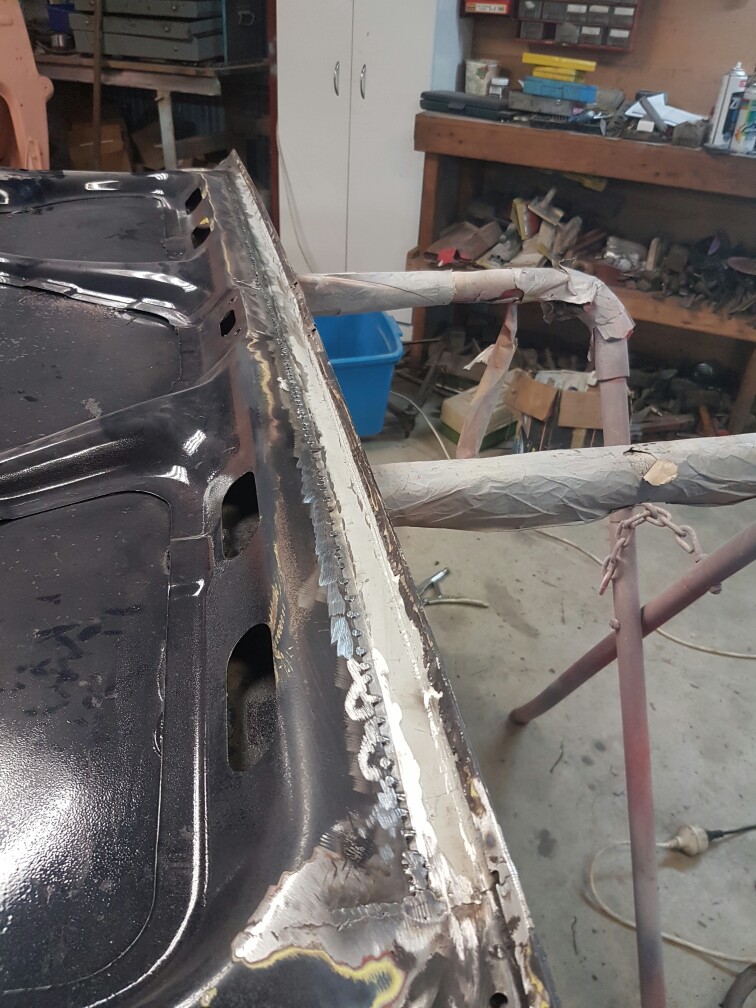
The second part of the rust work was done here. Bottom of the heater bubble, to of the firewall. EVERY escort rusts here. It's a prick of a place to fix and theres 3 layers of metal to replace. I felt comfortable fixing this though, having done the same repair on my other van. Took the heater bubble off to assess how much rot there is. There was a fair bit. It followed the join of the heater bubble quite far up. I started with the top of the firewall in the centre. Cut out as much as it needed. Replaced with a new lip I made up. The top of the lip was later trimmed to match the sides.
1 point
-
All the positive feed back has gone back to my wife. She will make cake again next year if my shed makes the list.1 point
-
I've swapped out the driveshaft to a spare off a friends mk1 that seemed nice and tight but had been sitting for a few years. I have now put brand new universals in my original driveshaft so will swap that back in this evening and see if that sorts it out. I've tried another pair of rear wheels to ensure its not those and it made no difference either so I believe the tyres aren't the issue.1 point
-
Sounds about right, being on an english truck from 1943 it can either start leaking its share of oil or gtfo1 point
-
I'm a bit over cleaning dirty/rusty bits of metal. Got lots of little bits cleaned up and chucked some paint on them Sunday arvo... and went home at lunchtime today for another coat... Still got control arms to pick up from blasters to paint but getting closer to putting it back together...1 point
-
What he said!1 point
-
1 point
-
SO picked up a spare pair of axles, chucked them in this evening and re measured. Drivers side has gone from 0.50mm to 0.10mm and the passengers from 0.40mm to 0.10mm hopefully that's going to help. I was 5 beers deep at the time i finished so decided to test drive tomorrow. I will report back!1 point
-
Nice new TRD oil filter Also scored some T3 castor arms and TE27 knuckles with RCA's. I will most likely be going with AE86 Blitz coil overs for this car I will also be going to Toyota Fest this year and will be picking up my head from Barry (MRP) then. Excited!! April 1st roll around already. //oldschool.co.nz/index.php?/topic/52401-pbaines-1971-toyota-corolla-ke25/1 point
-
Cool, yeah let me know. Am looking to buy a house at the same time so may end up not needed once it comes around. NIck1 point
-
These arrived in record time. 14" travel, thats about 900mm eye to eye fully extended. or about to the roof on your average oldschool.co.ng ride1 point
-
Well, I bought the wrong piston rings as didn't know that there were two different sizes (the top ring on most is 1.5mm where as the small port and late GZE use a 1.2mm top ring) Ordered some overnight and installed everything today. Short block complete, will next have an update once Barry has finished with the head1 point
-
1 point
-
Finally decided to do the coilover setup in the front, after forgetting how much work the rear was. But yeh the front is going to even more work, mostly because there is so much stuff that needs to be moved and shuffled around. Unless i was to do it half assed. Had to get in and chop a few things up before i could even order the coilovers, to make sure everything was going to fit, with the coilover length i want. Turbo was the first thing in the way. cut up manifold to relocate turbo closer to engine. Manifold is done. still need to finish sorting out the airbox and exhaust. After thinking the drivers side was going to be easy, turns out the brake master was going to be in the way. Had a wilwood reverse mount pedal box hanging around, i had brought for the trueno that didn't really fit. Looks like it will solve the problem in the hilux though. should fix the brake bias issue also. Still gotta make another bracket to mount to fire wall but this is where it will sit Ends for the link setup.1 point
-
Had this thing out a few times. Last time out managed to break the cross pin in the auto locker in the rear. broken pin at the bottom of pic. The short bit kept sliding out and the pinion was blending it, didnt loose all drive so managed to get home all good. Pretty sure there is nothing wrong with the auto locker. the pin is factory part and could just throw a new one in. but decided to run a welded center for now, so doesn't happen again. Enter Glitter special 4.88 diff, this one got the extra preload treatment on the side bearings to reduce crownwheel deflection before it went in. The driveshaft seals in the transfer case were a bit leaky. This kit came with the 2 seals i needed.. 4.7 ratio low range gears. stock is 2.28. most of the time the truck never made it out of 2nd gear, all the mud hole bashing was in 2nd gear which is near 60kph wheel speed. will now use 3rd or 4th. 4th will give a touch more wheel speed and 3rd should give a bit more response. plus it goes really slow in 1st for tricky stuff. only real draw back is reverse is bit slow, but no major drama to chuck it in 4wd high. Chucked my ali action cam (sound is bad) on to see what suspension is doing. seems to be legit, the lock out ring for the harder spring on coilovers seems to be in about the right place. At the end is some sweet spring wrap on front leaves1 point
-
after some more fiddling, this is from yesterday, bit busy at the beach in summer, so not too many opportunities for giving it some, but goes well enough now that the Mrs loves driving it. ive also had the alternator out (tightened a few things, cleaned paint from a few things, replaced some spade terminals) and back in with another regulator (gold one) and seems ok now, steady between 13.8v at idle and 14.8v when running. (was probably the regulator, but the other things cant have helped). For future reference (when the working for now charging system blows up) this is the difference between the OG big boy alternator (28 Amps!) and a for more common twin cam alternator, in this case a 55A Bosch one (incl internal regulator) from a late Delta, so a new engine mount would be also required. Possibly something like this (apparently from a 125P which runs a fiat 1500 derived engine with lada/twin cam style alternator). Just waiting on windscreen now, which i will hopefully pickup next week1 point
-
As of today, I've owned this old piece for ten years! HAPPY 10TH ANNIVERSARY CAR!! xoxoxox Regards, VG.1 point
-
Oh, and the other day Rob/slpery86 dropped in for a visit, we sharned and then went for a spirited tour of the local driving roads, it was rather enjoyable.1 point
-
Brake booster failed a while back, still Driveable but was hunting for something else to rebuild while driving, then discovered the warrant was out so parked it, sent booster to safe-r-brakes and she came back mint! 2 day turnaround, not badly priced. Then clean sheeted a warrant today, so much wrapt. BRING ON HANMER!1 point


.thumb.jpeg.384ff72c8d2b0ee0d34a7bdedb55bdcf.jpeg)


This leaderboard is set to Auckland/GMT+12:00