
Leaderboard


Popular Content
Showing content with the highest reputation on 07/23/16 in Posts
-
made an oil cooler mount. 2016-07-23_09-21-59 by sheepers, on Flickr7 points
-
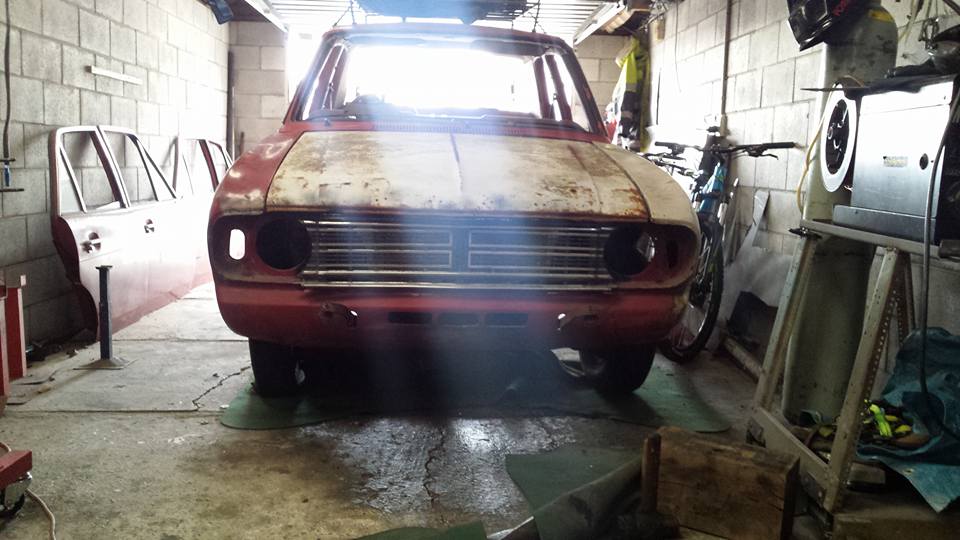
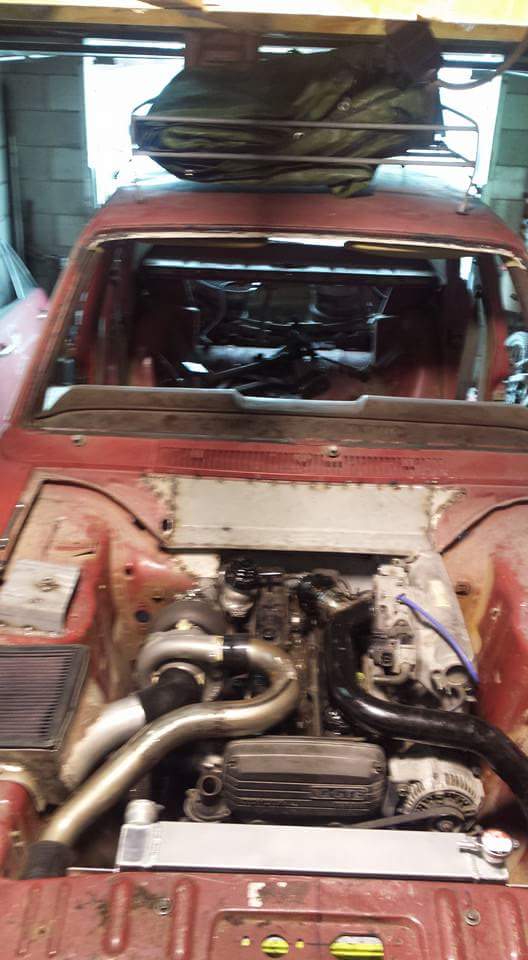
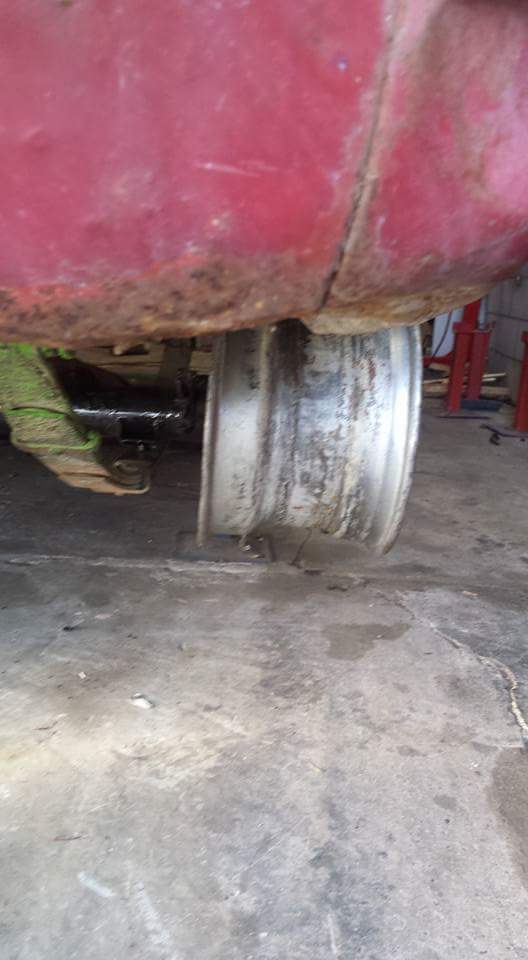
i put the front back together so i can make it a roller again. thought it might be time to see if a bonnet fits as well. what 6 cylinder turbo!! fuck me it fits and the bonnet is perfect just as it is and matches the passenger side gaurd and the front back on the ground
 6 points
 -
Oh, and the other day Rob/slpery86 dropped in for a visit, we sharned and then went for a spirited tour of the local driving roads, it was rather enjoyable.6 points
-
Shit vid of me making a cunt of myself at Nats track day.5 points
-
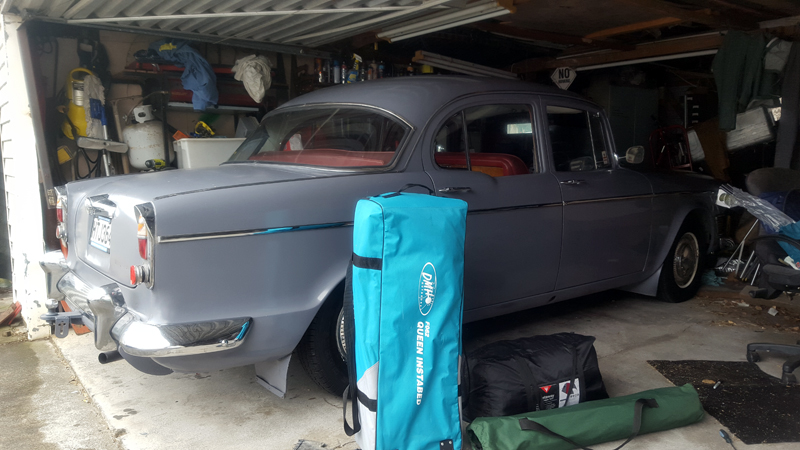
Granddad spec 1962 Super snipe purchased a few months ago. The 'ol Slumber is reasonably advanced for '62 with power assisted front discs, a hemi'ish head that makes casual observers by think there is more than one cam going on. Drive is through 3 on the tree. Plenty of torque - she can be left in top gear most of the time and pulls from pretty much standstill to motorway speeds. She's no lightweight track car though. 15ft 8" long, 1544 kgs and an oil change will take 15 pints or 8.5 litres. The paint looks like it's possibly house enamel, so I expect 40 seasons out of it, which is good as it has the usual 'nice from afar, far from nice' thing going on. There's minimal rust as the old boy I purchased it off seems to have sorted most of that out. Interior is glorious red stuff. Possibly leather but unlikely and lashings of walnut veneer. Picnic tables in the back for tea parties / lines of Raro etc. Since I've picked her up I've done a few things which I'll blog about with photos in the near future. So far : - Changed to negative earth so the pixies run the right way for radios and stuff. - Given her indicators on a stalk rather than the toggle switch that was cable tied under the dash - Found the horn relay (this took a lot of time...) and made it all horny - Re-upholstered the front seat to stop all the foam falling out from underneath and my ass sitting on the frame - Fitted a stereo, speakers and a sub - Made head and air come inside the cabin other than from that of the engine - Made it run on 6 cylinders - rebuilt the fuel pump Few other items on the agenda. Probably won't be slammed as it's quite nice to full her with 6 people and go for a cruise without loosing the exhaust. So, watch this space.
4 points
-
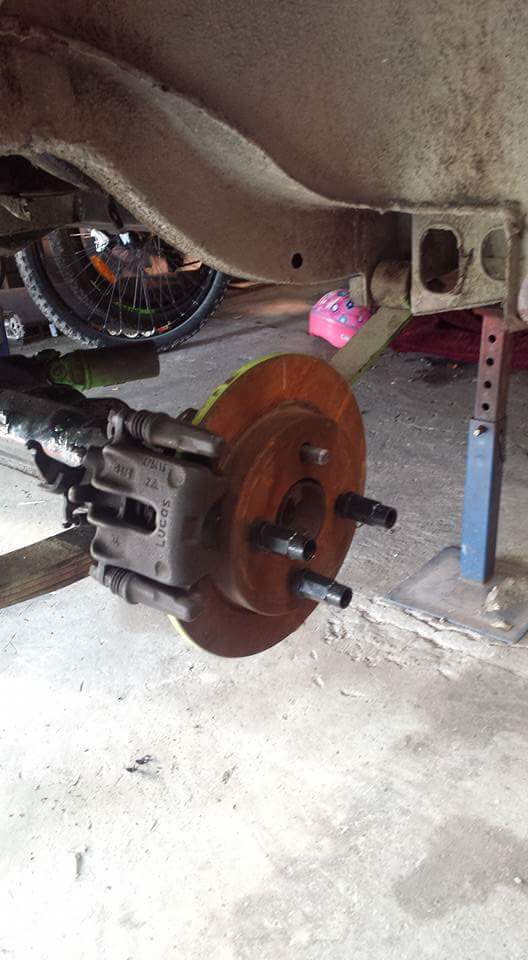
Couldn't find any front brake rotors the correct size, the smallest I could find was 226mm diameter ones whereas I needed 205mm ones. So we made a pattern and got some cast and then machined. Installed them today along with new pads and wheels bearings4 points
-
This is the first time since nearly forever the gorge has been open when I have a chance to use it.3 points
-
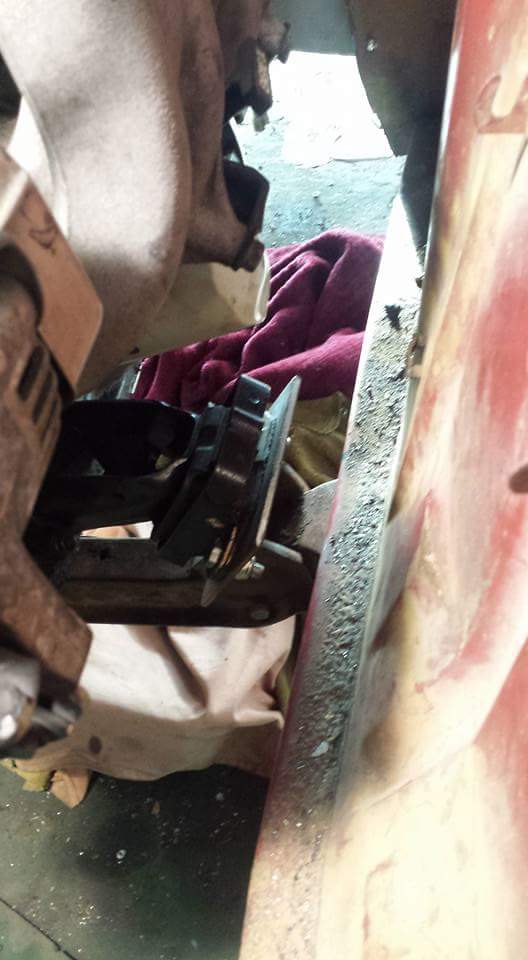
Patch work quilted up the original down pipe with a section of pipe with a joint already in it, welded the other joiner end (and some patches) into the parts car exhaust, and installed it. i installed the fuel tank from the parts car after a clean out and the sender from the original tank the other day so as its now down off the stands and away from the wall, I also connected up the fuel tank/pump piping in the engine bay incl with a filter but i have to get some gas and remember to prime it to see how slow and boring it sounds now */*/*/* Also cut my very first rust section out of the parts car for the very* last** rusty area on the project car. Rust traps! I wish i could say thats all done but ive got a few fiddly patches to make one good one out of two and a lot of careful measuring to do yet! Check out this area in behind the valance/bumper mount/radiator support. One bonus is its going to be easy to sort this properly with all the other bits out of the way. Guess which one is the parts car3 points
-
Here's it's mate in the shed...gzg50 1GZFE V123 points
-
Also like most of these wagons the rear wipers have been removed...am a fan of the dual wipers. have got some new wiper arms from Toyota, but the actual part that holds the blade are no longer available new... I bought some generic type that are supposed to suit a camry wagon, but they don't fit, will have to get a pic to explain it better, bottom line is I need dual rear wipers,,,,,2 points
-
last time I was back in NZ I pulled it out of the garage and gave it the clay bar then hand polished treatment..I have sourced a wiring diagram so will be getting the windows etc working. Also on Japan Yahoo I found the red missing badge for the boot lock latch ...2 points
-
Went round the mountain but never actually got to see it. Typical Taranaki.2 points
-
Getting a few small jobs done over winter. Wanted to build a new front diff mount as the Datsun factory setup is a pretty crap design that allows the diff nose to lift under load. I had hacked a factory mount up and doweled it (essentially making it sold mount) but that was not overly ideal so had another crack at it. Thanks to Mike for the idea on this style. Cut up the factory mount and built a jig to keep diff aligned. Welded in steel tube that fits a poly bush I had floating around. All mounted up. Holds the diff nice and solid with no lifting issues and also makes diff easier to remove as just slide out the main bolt. Next job was the exhaust. The car came with a nasty old press bent 2" system that I have always wanted to get rid of. It hung way low and looked shit. Decided to go with a 2.5 inch system which is way overkill for my engine but what the hell. Hoist makes this job 1 billion times easier than trying to do under the car. I wanted it tucked up as to the body as possible. The system that came with the car only had 2 hanging points and was one piece so wobbled like crazy and was a mission to get on and off. New system is to have multiple hanging points and be 3 piece to make removal easier. The headers I stole from Craig had a reducer taking the outlet pipe from 2.5 to 2 inch so I simply cut off the reducer and added a 2.5 inch flange to match the rest of the system. Started with a small straight through stainless rear muffler and added a angled tip that looked OK. The rear muffler has 3 mounting points so it is nice and solid. Then worked my way forward, trying to keep the piping as close to the body as possible Went with a basic straight through resonator mid system. Once happy with the layout I added flanges so that I can take out the middle section of exhaust to gain access to diff etc. Then cleaned up and painted, knowing it will burn off 30 seconds after starting the car. Came out OK and sounds better than the old one so I am calling it a win2 points
-
The brace I made to hold the motor in 1 place worked very well And the new cross member works well and uses all of the shelf Toyota mounts. Also a plus to see everything else fits back on. I bolted a set of leave spring back in and mounted the difg and it 2 fits....just need some long u blots now so I can make the blocks once its all back together. Slapped a 10" wide steelie on but it wouldnd clear the calipers but I think with the right size offset I will be able to get a 10" under the rear gaudes.
2 points
-
much fucking around waiting for parts and changing my mind on things has resulted in it still not going yet. however the motor is in the car for permanent (this time round) and the only major bit I'm missing at this point is the intake manifold. so, whats been done? modify and strengthen the gearbox crossmember mount to bring it up to current cert regs head has been hardness tested, cleaned and reassembled with new stem seals. valves re-seated and stage 2 BC cams fitted. powerhouse racing pulley kit ATI harmonic balancer titan adjustable cam gears gates blue cam belt NZ EFI ultra high output coils with built in igniters other things. the block came with no engine number so i thought id better put one on it so i can identify it if i need to for whatever reason. 2016-07-13_05-58-18 by sheepers, on Flickr 2016-07-13_08-41-27 by sheepers, on Flickr 2016-07-13_08-43-57 by sheepers, on Flickr 2016-07-13_08-44-10 by sheepers, on Flickr2 points
-
Made an arduino based carb balancer using an aliexpress pressure differential sensor, took all of 5 minutes to balance the dells Bar graph just tracks left or right depending on the pressure differential between the two inlets which are hooked up to the carb throats.2 points
-
motivation...well...not fast obviously but it moves along...1 point
-
ok so the car has had everything it failed on for VIN'ing replaced or repaired... I picked it from the mechanics on a weekend back in NZ, first time I have actually seen it in the metal.. I threw some factory alloys on for the next VIN attempt, Changing out the D windows for now. Pleased to find that the car is in very; very good condition, the paint and panel is virtually blemish free; quite impressive for a wagon that is 21 years old. Gave it a clean and it came up mint - Also fitted a later model grille. inside once again it's pretty mint. The carpet was covered in plastic, and the factory 'shag pile" floor mats were in the boot - unused. Typical toyota Brown Skylight sunroof with curtains Has most of the Royal Saloon extras, Electric front seats, dual air con with a drinks cooler in the rear, Dickie seats Versatile seating adjustments1 point
-
Got a floor, all the windows and a door now. Door swung first time too, must have done something right ?1 point
-
Totally fill to overflow as you screw the top on And cycle the damper rod first to get rid of the air bubbles Used to add a welded on nut and bleed screw on old triumph rear shocks to make them rebuild able easier Other way is to assemble them in a tub of fluid1 point
-
sooo close to the end now been doing a whole bunch of tidyup stuff thats not noteworthy after a talk with webber specialties he gave me some jetting advice on, when the carb was on blizzos car the jetting was 55 F8 idle F11 emulsion tubes 125 mains 170 air correctors his recommendations had the full setup but 50 F9 idle jets F16 emulsion tubes 150 mains 180 air correctors this was about 190$ worth of changes from nz and well that was just a bit too much for me this week so i got them in from the uk 105$ and was here in under a week I had had a hard starting issue with the new plugs from cold and a stumble when blipping the throttle and i couldn't tune it out, after talking to a friend that is much better at tuning carbs than me he asked my why i was still running my vac advance and that that could cause my issues with the stumble and just set it at 10deg at idle , so I changed my old plugs back today and found I hadn't tightened no4 so that is probably the hard starting issue haha . So today I removed the vac advance and tgb lent me his timing light and it was pretty much bang on 10 deg needed to wind in a bit more fuel as it was popping a bit so that was fine idling at 1100rpm quite fine (it isnt that smooth with the cam under that ) and the throttle response is much better than before . I have a lambda link afr gauge and a copy of a bosch lsm 11 semi wide band sensor to go in that ive had kicking round for years . so here is the result of todays efforts1 point
-
Its a zc cylinder head so from the same family as original, meets criteria does it not? I think hes pulling ya leg or someone is pulling his, they never came DOHC from factory. Rarest would be the shape before this 84-87 Shuttle GT with fuel injected single cam EW5 engine. There used to be one around town here but havnt seen it for a while1 point
-
Nah DOHC swap shouldnt need cert, same engine series, same cc, same aspiration, same mounts, not much more power. Chassis plate should say it has a zc, engine is a zc. Win1 point
-
I don't. Get that Makita out bwoy.1 point
-
Fill the shock you don't want air in there to go frothy, if the oil reeks that bad tip it all out and replace it. Conduit spacers should be legit as fuck.1 point
-
From memory AEG offer 6 year warranties on tools and 3 years on batteries. That's impressive. DeWalt is only 3 years on tools and 1 year on batteries. Makita is 30 days on tools and 30 seconds on batteries.1 point
-
Thanks to all that attended for such a great turnout. Especially to j.e.d who made the journey from Te Kauwhata and Gnarleydude who traveled all the way from Hamilton! The facebook publicity worked quite well. We had quite a few new faces and cars there and the atmosphere was just as good as it usually is at such events, if not better as people were really making an effort to talk to one another and make introductions. We have gained a few new members and potentially quite a few more cars for future events which is nothing but a good thing.1 point
-
Early request for mataura works pics1 point
-
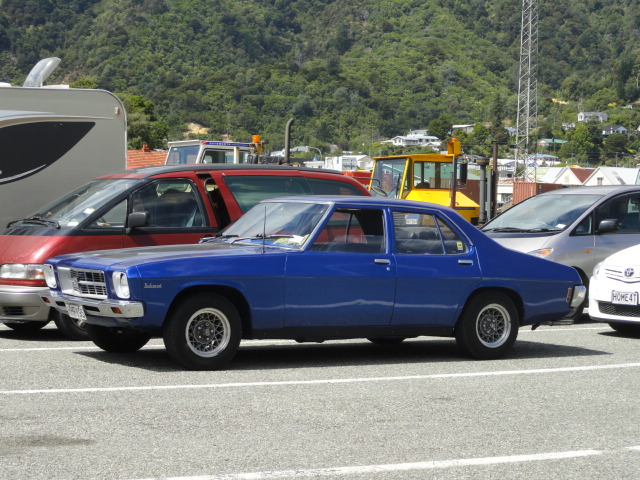
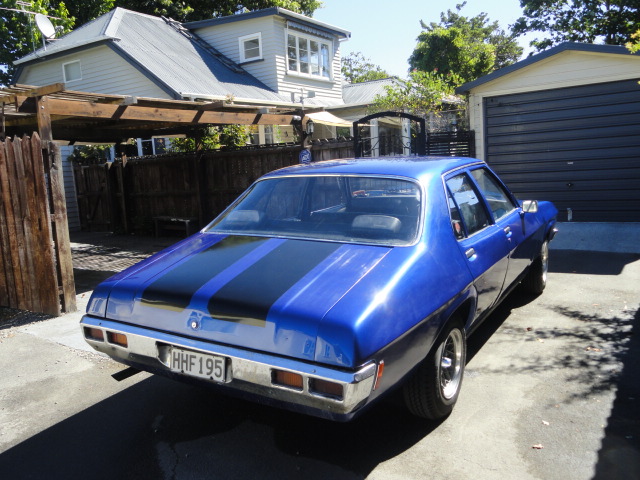
some pics of my hq
1 point
-
Time to recap what's been going on. So the next step of the process was to get the fuel system pretty much finished. Step one of this was to modify the factory 4AGE fuel rail, as in OEM configuration the inlet, regulator and outlet were all mounted on the top face of the rail extrusion, with each end capped off where it was cut from factory. As I was intending to run an aftermarket fuel pressure regulator (FPR), the plan called to lop off all of the attachments on the OEM rail, drill out the plugs from each end and weld on -6 AN fittings at either end. IMG_7025 by Richard Opie, on Flickr Which Sheepers completed for me. It's top rail in the photo above. Which was a spare with the box of gear that came with the 4AGE. Unbeknownst to me, this was a bluetop bigport rail, not a smallport rail which has different injector spacing, as the above image illustrates - after the fact of course. So we had to start all over again. Well, Sheepers did. I drank beers and offered unhelpful advice mainly. IMG_7043 by Richard Opie, on Flickr This is where the inlet and damper/regulator thing originally attached. They'll need to be filled. IMG_7078 by Richard Opie, on Flickr Since I super love taking welding pictures, here's Sheepers welding it all up. IMG_7104 by Richard Opie, on Flickr And this is what you're left with following stage one of the process. This rail welded heeeeaps nicer than the previous one, perhaps it had less contamination in the metal, or we got it to a more satisfactory temperature before welding. IMG_7039 by Richard Opie, on Flickr IMG_7128 by Richard Opie, on Flickr Fairly self explanatory here. With the plugs drilled out from either end and both end faces ensured true, Sheepers welded on $14.00 worth of Speedflow -6 AN weld on male fittings. Nice. IMG_7179 by Richard Opie, on Flickr A portion of the finished product. Obviously the weld which filled the holes was ground flat leaving the rail in a state ready to polish in the future. 0P4A7732 by Richard Opie, on Flickr The next step involved finishing off the rest of the fuel system. Brendan Duncker of Convert Ltd (who built my headers for me) was kind enough to agree to make fuel hardlines for under the car - I had a reasonably specific brief following some discussion with Clint about securing fuel lines, in that the lines needed to follow the factory path so I could pick up all of the factory clip points. This was done, there are now quite beautiful 5/16" hardlines under the car, with black -6 Speedflow fittings throughout, including a filter unit near the firewall. Pics later when it's not wet I guess. 0P4A7743 by Richard Opie, on Flickr Pretty self explanatory with the layout - inlet to the modified fuel rail, 180 degree fitting out, back along the top (may need to clip yet) in braided line to the Aeromotive FPR then back under the car. The remaining port of the FPR will be used for a fuel pressure sensor. 0P4A7734 by Richard Opie, on Flickr 0P4A7752 by Richard Opie, on Flickr Brendan was also able to mount my radiator for me. The Fenix AE86 units seemed to get a solid enough review from most 4AG people I know so I plonked down a moderate amount of folding for one of those. Yeah I know it's a China radiator, but the finish is good enough for the car. With some bolt in bottom brackets and OEM AE86 top brackets it's a perfect fit in the nose of the KP, with enough room for a slim 12" fan and using shortened AE86 radiator hoses. 0P4A7742 by Richard Opie, on Flickr 0P4A7736 by Richard Opie, on Flickr This sort of leads on to how the engine bay looks right now - this is really close to the final product as far as the aesthetic side goes, with really only the wiring plus some hoses for overflow and breather to go in and complete the picture. So yeah. We draw a little bit closer, money is a little low right now with purchase of a new camera gear so to progress I need to allow the bank account to rally a little and then it's time to hit the wiring with the assistance of Stu. Thanks must go to Sheepers, Brendan, Stu and Reuben from Fenix for helping me out with this stage of the build. Discuss the right way to go about chequebook building a car here - //oldschool.co.nz/index.php?/topic/18803-snoozins-1981-kpiz-starlet/1 point
-
Then the cross member. The factory part is crazily complicated becasue in the 'De luxe' version its a rear passenger foot warmer. My car is not deluxe, but has the heater and the vents just missing the section over the tunnel between them. Managed to reuse the factory 'airbox' parts It does make the part signiicantly stronger if nothing else. The factory contruction is 4 rectangular holse with 2 on the rear and 3 on the front covered by a plate spotted over them. WHy? I dont know, so i didnt do that. IT FITS! Then the tunnell strengthening plate. I dont have a bead roller but i do have hammers and a vice and a bit of rod to make the ribs. Flattened out and then bent the other way, plus drill a lot of holse in it. I made this a bit bigger than factory to pick up on the cross members instead of the middle of the floor. BAM! - and the rust is gone I did reuse the remains of the cover plate. Just the drivers headlight area to go and thats all the rust! I have yet to chop any sections off the parts car, other than the exhaust which I faffed around with this evening and is going on next.1 point
-
What's up old schoolers. I almost biffed the 618/616 gearbox X member - glad I didn't as it actually can easily be made to fit s4/5 rx7 gear boxes. The RX2 gear box X member is a short son bitch and the RX2 mounts come very close if a s4/5 box is fitted. I blasted it up yesterday ready to mod and paint. It's good to use as it has mounts already there attached to the chassis rails (616 not RX2) Next - header fab time. My mate knocked me up these headers - soooo stoked. I will be ordering the Adrenalin R resonators x4 and a dumpy soon. Watch this space. My mate has a jig for making a hilux diff suit RX2 - flanges have been laser cut and are now on the diff. Next step is to cut diff and mock up with wheels axles and brakes under my car to make sure it fits. It's going to be close. Next - making my RX2 struts fit the random Honda Odyssey fully adjustable units. My mate lathed them apart and interference fit them together = press fit. Tidy job and I owe him some bourbon!!! Top fella This is the original rx2 strut next to the new adjusties Hilux 6 stud axles are now turned down to fit the FC rx7 brake discs. Not the old holes haven't been filled....I was told that heating the hubs is not a great idea. There is loads of meat for re drilling 4x110 and this will get done when I get the axles cur and resplined. I want to have an extension added to the centre of the hub so that the rim can locate...how? Do I need one? And finally....I bought two of these off eBay as they are old from the 80s unused and cheap1 point
-
I needed some nails so I put together this nail reclaiming machine to salvage some from all the pallets lying around Porirua1 point
-
On the home straight of sanding now. One side done up to 600 grit, the other up to 120. Next up will be heat treatment. Still yet to build the legs for the mini forge, but the burner is now complete - also visible in the above pic. The non burny end of the burner has the following assembly - pretty much just a valve and a couple of brass bits fitted/brazed together to attach a standard BBQ hose and fit it to the 15mm steel pipe. Have a couple of oriface options with a 0.8mm and 1.0mm option. Can just buy more caps and have different sized holes drilled if necessary At the end of the day its just an oversized Bunsen Burner - hopefully enough to heat the forge up to the 800 degrees I need toe knife to reach before dunking it in oil1 point
-
Another angle of the sill closing shenaigans, also showing the outer sill less the end cap. No wonder they rust out here. 3 knife edge plug welded seams (triple thickness) all facing the rear of the tyre with a couple of pockets to collect grime. Just like it lest the factory... With the door off i can remove the rest of the sill and clean up everthing a bit sill outer test fitted to size up the end cap (i forgot to allow for the lip that plugs to the inner sill! ) a bit extra added to the patch including the end cap, mostly buzzed on and first grind back not bad! The fender on this side is a replacement , im guessing a fender bender based on the gobs of leading i melted from the repairs in the bottom front valance1 point
-
motor is coming together slowly. waiting on some parts to turn up before i can get the head finished and back on. should be able to assemble the sump and whatnot next week and hopefully my parts should turn up from the states next week too. 2016-06-18_03-25-35 by sheepers, on Flickr1 point
-
R154 was about 3K so not much difference in price to their listings on TM. would i still recommend swan? well, yes. I'm pretty fucked off with parts of the process but i can see where they are coming from and why things had to happen how they did. they are going to get reparation from the mongrel piece of shit that stole it so they had to document everything in a way that could stand up scrutiny in court. the third party mechanical assessor is the person who needs a fucking bullet. he "was a mechanic for years mayte so i know what I'm looking at" but i reckon theres a really good reason he's not a mechanic anymore. would you put a motor back together with a second hand cam belt? would you use a second hand clutch throw out bearing that had obviously had some serious abuse? especially if its going to cost you twice if you have to remove the whole engine to replace it if its fucked? lts of shit like that that really boiled my piss. was that swans fault? i suppose not but they did have the option to take precautionary measures with the mechanical damage which they chose not to. if anything goes wrong with the abused parts that i have been forced to reuse you can bet ill be nominating the most expensive workshop in this country to do the work required to replace it all and that will be solely at their expense.1 point
-
got this old bus running again after buttoning up the cooling system, and fitting the tow bar Then backed it out in to the sun for the first time in aaages. leetle bit of rake! will hopefully come down with interior etc installed then proceeded to pull the parts car out of its spot (which is over a bit of a hump and slighlty down hill) with it. YO DAWG! I HEARD YOU LIKE 2300 WAGONS SO...etc I had to get Mrs Azzurro to drive the tow car while I 'steered' the parts wagon (by kicking he wheels, as it has no steering box or steering wheel!) and controlled its forwards momentum with wooden blocks. Seems a shame to put an exhaust on it, but in other news, she said she likes driving it So now its in reach of my air hose and extension cord its dismantling time Unfortunately when emptying the boot out (so i can remove the fuel tank - the one that came in the nautilus has a massive dent in it,) the pane of spare hatch glass smashed lucky i have two more i guess.1 point
-
Trailer has been stealing most of my car time, but also been waiting on a couple of things. When i went to bleed the rear brakes after taking the shots above, one of the lines that joins the caliper halves together had a leak, i though it was some grit in the threads or the flare being over tightened, but no. Anyway, all back together now with new lines (shoulda got them made up first time around) Also pickup up a Civic Radiator from Zebra when i picked up the trailer to try, and it JUST fits. Dont look at my janky extened pulley! The nose of the waterpump shaft is only 45mm from the radiator and is pretty much bang in the middle of it This is all so i could remove the noisy, hp sapping and unreliable electromagnetic fan. It also has a shroud so might even suck some air though the radiator instead of just mixing the air in the engine bay with an assortment of fingers. I may swap it out for a bigger pusher fan on the other side eventually. Just need a top (and probably a bottom) hose so i can run it for longer than a few minutes, which i need to do when i use this to pull the spare car from its pit on the lawn. Next job is to clean up and refit the towbar to do just that.1 point
-
it looks nice but for its insulation qualities its an expensive joke wrap works 999999999x better i was super dubious but had it done after reading multiple people on the internet saying that it is as good as wrap it is not those people are liars1 point
-
So are you saying this isn't a Ford Capri with a pursuit 170 + blow through carb on it??? These pony cars all look alike to me!!1 point
-
You should have fitted a British engine. In fact you should have bought a British car full stop. Then they wouldn't have started it and upon trying to run away slipped up on the oil slick and knock themselves out against the proper British steel panels. I hope you have learned your lesson.1 point
-
Note to self - make underground carpark with steep as fuck driveway. Like 45 degree shit with a hidden winch at the top to get your cars in and out. Those crooks would never work it out lol On serious note - had accident with 120Y when with Swann and were awesome, even let me pic the panel beater and all. Hope you get paid for man hours - your the only one that knows your way around the thing and hopefully it doesnt take too long.1 point
-
When a drunk hit my trailer and broke my range rover they AA went nuts trying to help as the guy owned up and bills got paid. Once they got to 5 grand though he stopped paying. insurance gave my car back with issues that never fully got fixed I ended up selling it. My advice get stuck in fix everything as quick as possible while insurance are happy to pay up.1 point
-
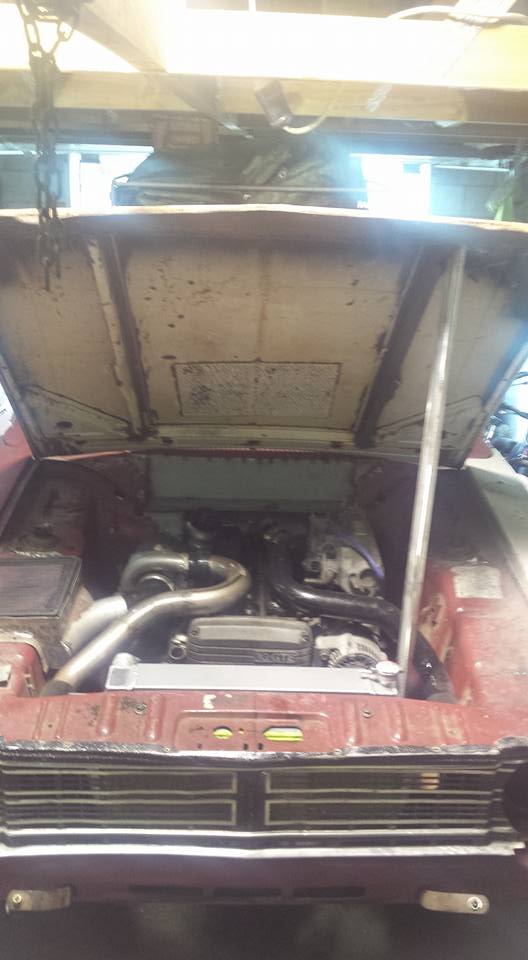
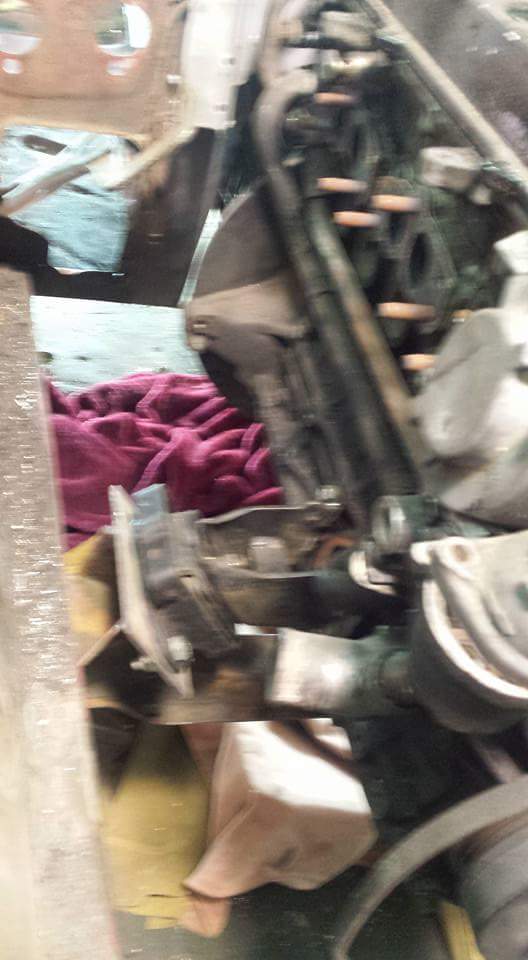
M M gave me a hand to yank the engine back out this evening. 1 hour from start to finish wasnt too bad we thought. https://youtu.be/JVyQWR-C_vE made a silly timelapse to go with it engine is back out to sort a few niggles and improve the downpipe design, and paint the engine bay to match the rest of the car now! also looking at a Turbo and injector upgrade kit that would hopefully net around 280hp when tuned, (double the current 140hp the car is running right now. fingers crossed my new contact comes thru)1 point
-
Also, bonus stolen pictures for no real reason. Thanks to those who's pictures I've nicked Regards, VG.1 point
-
Started giving the SSRs a tidy up.They had a bit of curbing on the lips and the clear coat had pitting in places. Should have sent them off to a polisher but thought i would have a crack at doing it myself. Split the centers and barrels Stripped off the old clear coat with rubber stripping disc. Then jacked up the back of the datsun and used as a poor mans polishing wheel. Bolt on wheel, throw in 3rd at idle and work your way through sandpaper grades. Stripped back the flaking paint of the centers and resprayed gunmetal. Also repainted all the cap screws black. All done and bolted back together Came out Ok for a rangi home job. Tyres going on this week fingers crossed.1 point
-
So this happened... SSR Formula Mesh, 16 x 9 -14 and 16 x 9.5 -16 Wasn't looking for wheels but opportunity came up. They will get a bit of a tidy and centres will be painted gun metal. Have to sort tyres for them now.1 point
-
1 point


.thumb.jpeg.384ff72c8d2b0ee0d34a7bdedb55bdcf.jpeg)


This leaderboard is set to Auckland/GMT+12:00