
Leaderboard


Popular Content
Showing content with the highest reputation on 07/22/16 in all areas
-
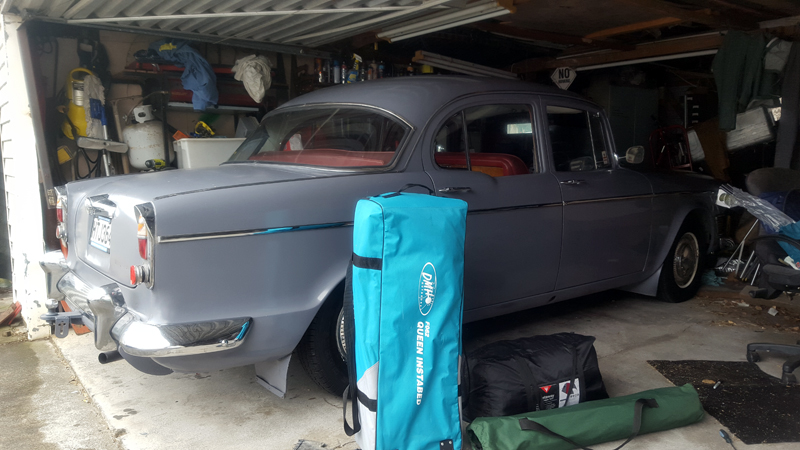
Granddad spec 1962 Super snipe purchased a few months ago. The 'ol Slumber is reasonably advanced for '62 with power assisted front discs, a hemi'ish head that makes casual observers by think there is more than one cam going on. Drive is through 3 on the tree. Plenty of torque - she can be left in top gear most of the time and pulls from pretty much standstill to motorway speeds. She's no lightweight track car though. 15ft 8" long, 1544 kgs and an oil change will take 15 pints or 8.5 litres. The paint looks like it's possibly house enamel, so I expect 40 seasons out of it, which is good as it has the usual 'nice from afar, far from nice' thing going on. There's minimal rust as the old boy I purchased it off seems to have sorted most of that out. Interior is glorious red stuff. Possibly leather but unlikely and lashings of walnut veneer. Picnic tables in the back for tea parties / lines of Raro etc. Since I've picked her up I've done a few things which I'll blog about with photos in the near future. So far : - Changed to negative earth so the pixies run the right way for radios and stuff. - Given her indicators on a stalk rather than the toggle switch that was cable tied under the dash - Found the horn relay (this took a lot of time...) and made it all horny - Re-upholstered the front seat to stop all the foam falling out from underneath and my ass sitting on the frame - Fitted a stereo, speakers and a sub - Made head and air come inside the cabin other than from that of the engine - Made it run on 6 cylinders - rebuilt the fuel pump Few other items on the agenda. Probably won't be slammed as it's quite nice to full her with 6 people and go for a cruise without loosing the exhaust. So, watch this space.
 14 points
 -
Potato says the 5D MKIII wielder haha. I was hoping you had a better picture of him leaning on the cop car, I was dealing with crop vs 70-200 standing too close. Dreamy. I'm digging this shot ft my arm; I can never get motion blur to not look garbage unless panning5 points
-
Patch work quilted up the original down pipe with a section of pipe with a joint already in it, welded the other joiner end (and some patches) into the parts car exhaust, and installed it. i installed the fuel tank from the parts car after a clean out and the sender from the original tank the other day so as its now down off the stands and away from the wall, I also connected up the fuel tank/pump piping in the engine bay incl with a filter but i have to get some gas and remember to prime it to see how slow and boring it sounds now */*/*/* Also cut my very first rust section out of the parts car for the very* last** rusty area on the project car. Rust traps! I wish i could say thats all done but ive got a few fiddly patches to make one good one out of two and a lot of careful measuring to do yet! Check out this area in behind the valance/bumper mount/radiator support. One bonus is its going to be easy to sort this properly with all the other bits out of the way. Guess which one is the parts car3 points
-
I did the same thing with copper tubing in the 53, plugs in, no leaks. I do that again but its pretty soft to have under the car. I got some runs of straight aircraft hydraulic tubing so that'll work (maybe), just have to get commercial fittings.3 points
-
3 points
-
A few of my potato pictures, click through for bigger sizes etc. Pining to get my actual old car back on the road now after seeing this turnout! _22A6917 by GuyWithAviators, on Flickr3 points
-
some pics of my hq
3 points
-
From memory AEG offer 6 year warranties on tools and 3 years on batteries. That's impressive. DeWalt is only 3 years on tools and 1 year on batteries. Makita is 30 days on tools and 30 seconds on batteries.2 points
-
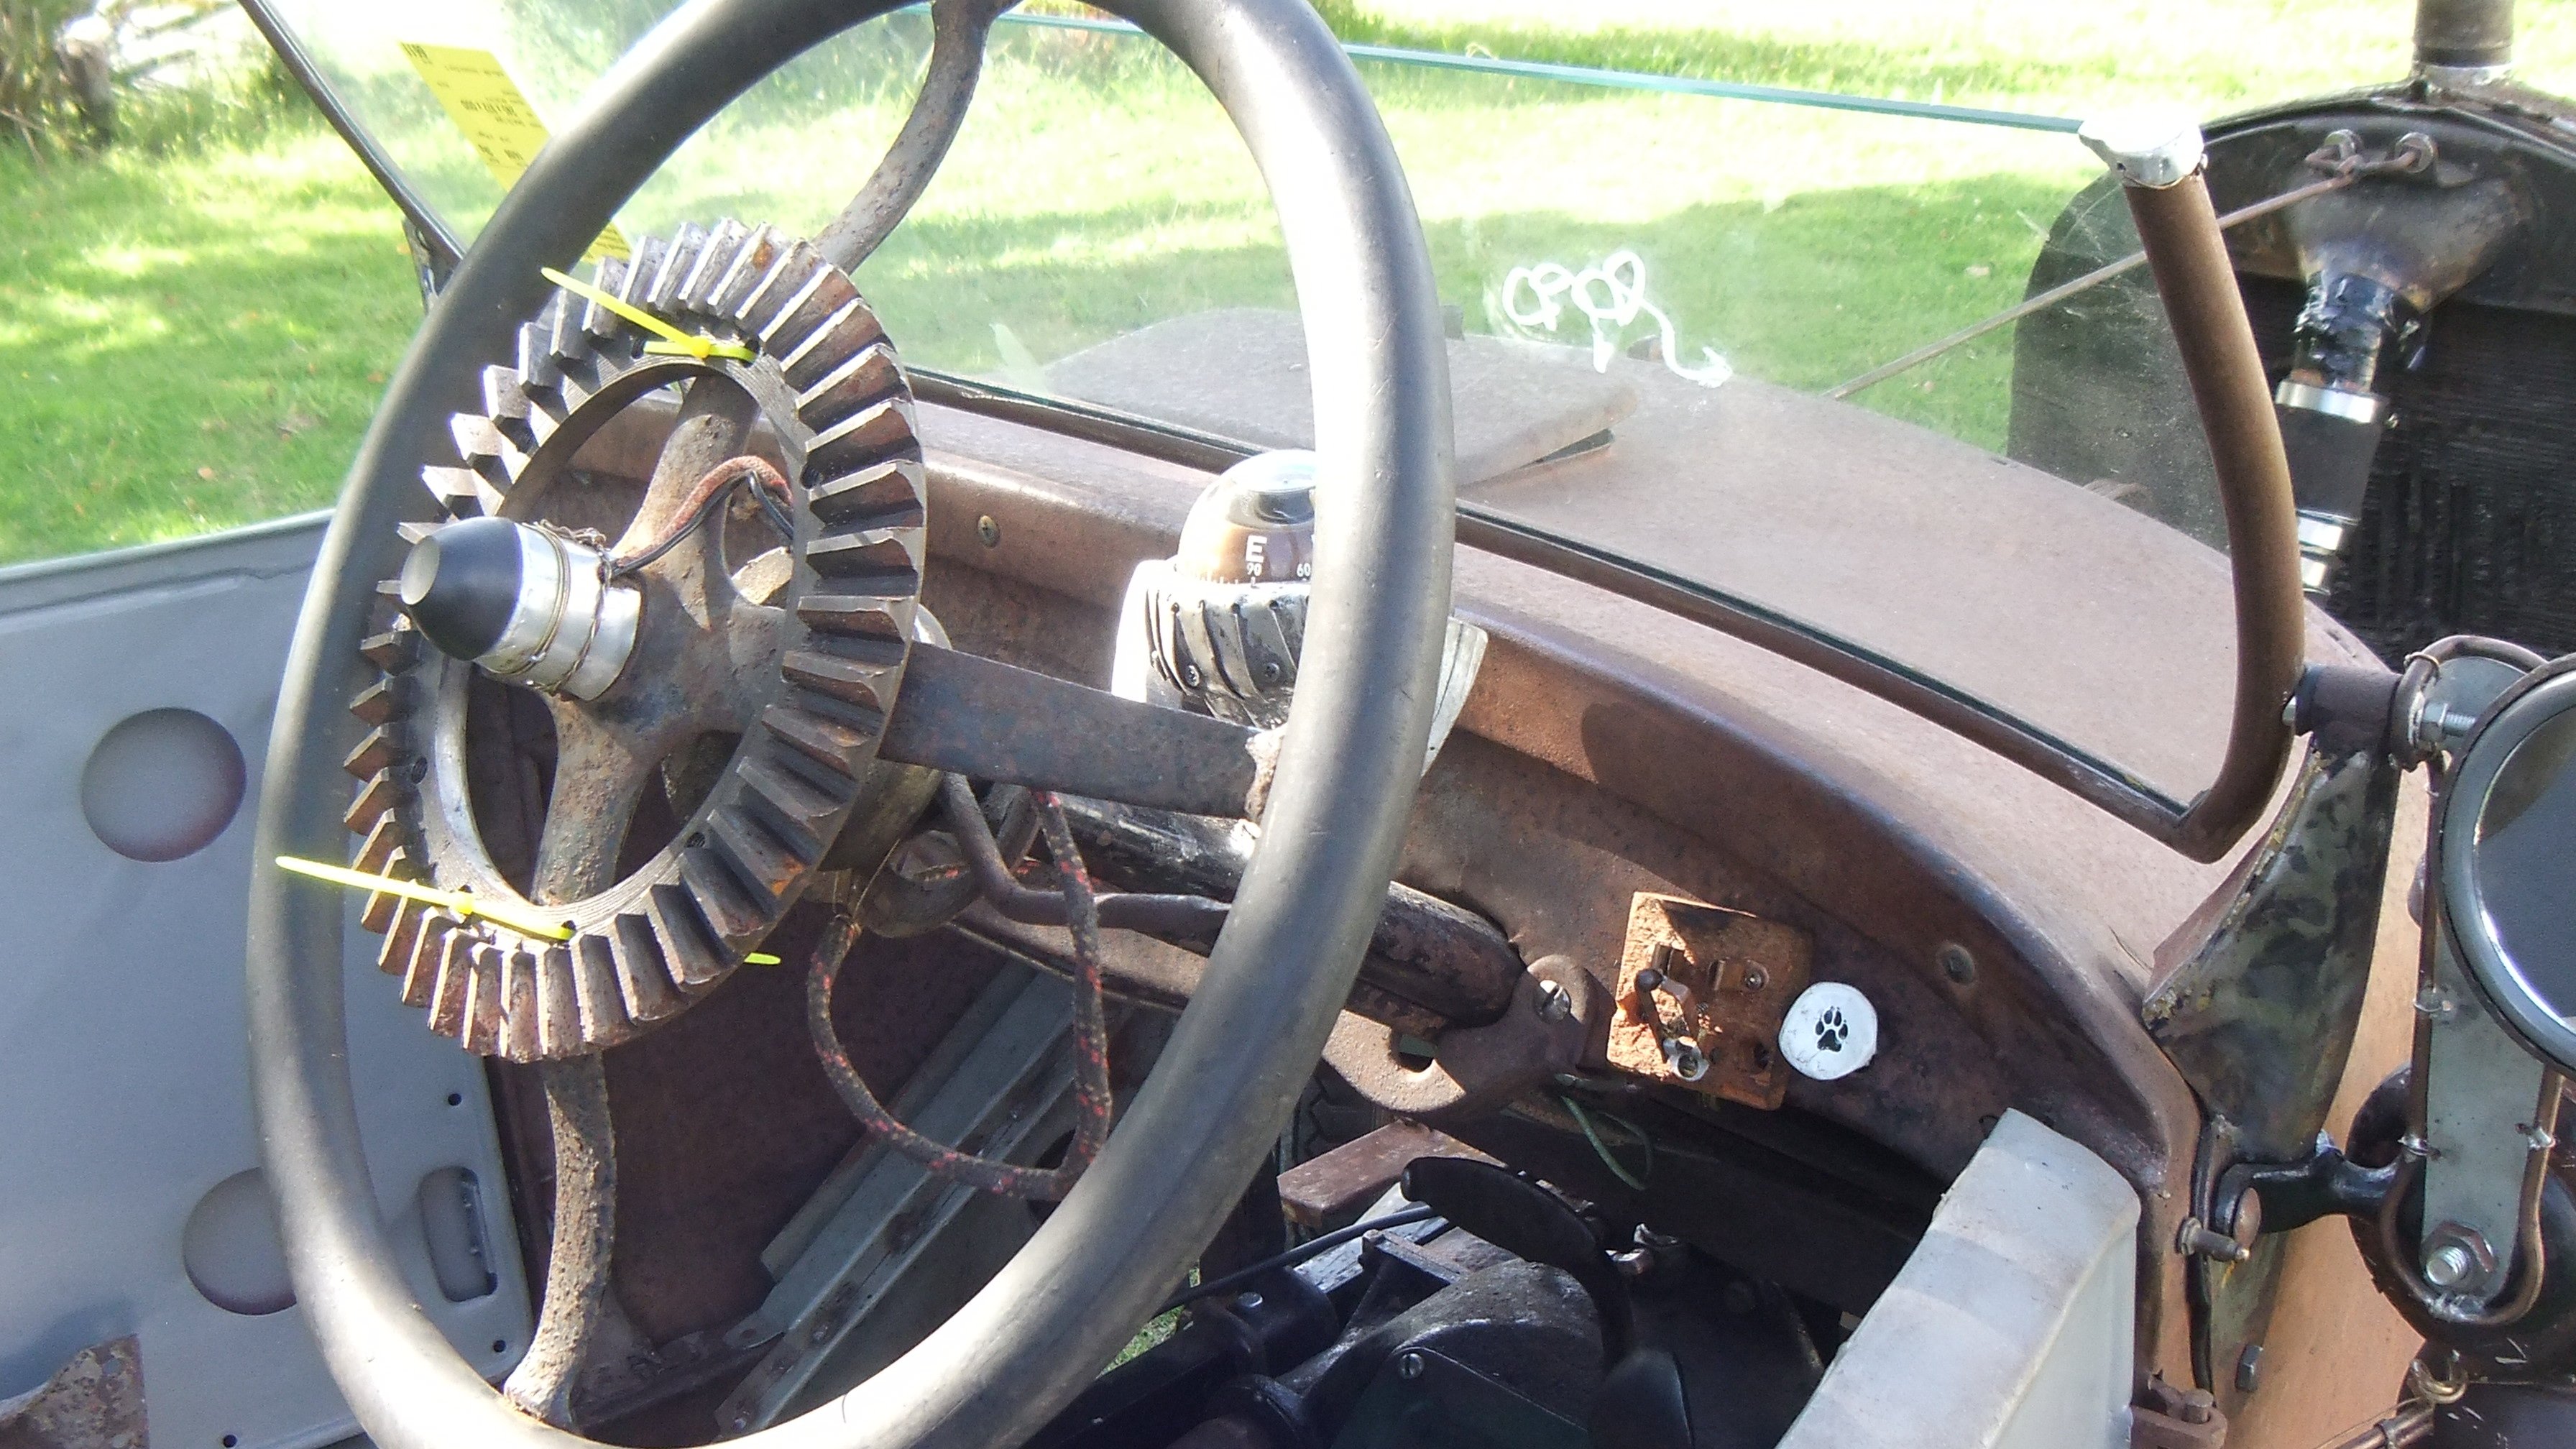
Always wondered how light this was. I always wanted it to be this light but never thought it would actually. Kinda explains why it hauls ass with relatively small amount of power.2 points
-
Thanks to all that attended for such a great turnout. Especially to j.e.d who made the journey from Te Kauwhata and Gnarleydude who traveled all the way from Hamilton! The facebook publicity worked quite well. We had quite a few new faces and cars there and the atmosphere was just as good as it usually is at such events, if not better as people were really making an effort to talk to one another and make introductions. We have gained a few new members and potentially quite a few more cars for future events which is nothing but a good thing.2 points
-
I just used some random alloy hard line from Ullrich, cut with pipe cutters and used pushed locks everywhere works a treat for a few years now Edit: see shitty old pic attached I found on my phone, wasn't that hard to do at all, just need patience and maths2 points
-
I'm for dewalt.. my pos nicad skillie out cuts my bosses Milwaukee even with a blade missing teeth.. impact drivers only slightly slower than his brand new one but 7 years older/more worn.2 points
-
*in your best Monty Python Yorkshire accent* you're lucky you turned up in a car, I had to come by train (and not an old school one either)2 points
-
So I owe Tumeke a blowie or something, he has scanned the complete manual to pdf for me, what a GC.2 points
-
Getting a little depressed at lack of progress so took the day off work to get some shit done. Re-torqued intake manifold, fitted carb, adjusted kick-down cable, tightened exhaust flange, rechecked header bolts etc. Then made up earth leads and attached to block and chassis (I always run a strap between engine/chassis) and knocked trans cooler clip back into shape - the top pipe has a bit of rubber round it as it was a little loose.. And put driveshaft back in, noticed diff has been leaking and should probably replace universal joints, but that can wait till I'm mobile. Shaft looks much better painted... Also fitted plugs (with anti-seize on threads) so I could look at routing the leads. Started by roughly placing them with cylinder numbers attached... Then fitted clamps on the loom bracket each side. These MSD leads are looking pretty good, like the bendable boot for clearing the headers... Didn't go too far as want to work out the neatest way to route them at the dizzy before cutting them... And fitted oil/fuel filters, fuel lines, and coil. Also tidied up oil pressure sender connector etc, and fitted alternator and brackets... And made up a bracket for the oil catch can, might need a couple of 90 deg fittings for neatest hose installation, but pretty happy where it sits... So really made some progress, much easier when you're not snatching the odd half hour before/after work in the dark. good to get a lot of the fiddly stuff out of the way, and also had a bit of a tidy-up in th'shed. Best day at work I've had in ages...2 points
-
Gave up on the eagers, even though I said I wouldn't! So got me some sweet 205 whitewalls. Got wheels sandblasted and painted silver.2 points
-
whanga pub lady lets ya know not to park under trees coz the pack of roaming feral goats in the township stand on them to reach the trees spec.2 points
-
This is the first time since nearly forever the gorge has been open when I have a chance to use it.1 point
-
Why do these American Supra things keep parking by me? Went to shiny thing. The White Horse appears to have gentrified significantly since I was last there. I remember the barman telling someone they couldn't smoke their joints inside. This would have been lush to see but unfortunately it wasn't on display1 point
-
For power steering fluid if you ever need to replace it, for whatever ever reason Honda uses different fluid. Can get it from repco etc, many brands make it, its reffered to as HPSO (honda power steering oil i assume) that was a job I had to do twice on mine. I changed pump and hard line though as Bseries pump is different1 point
-
Well reading this topic has just made me want to throw out my small collection of makita gear. Haters.1 point
-
Those hard lines look good. I may re-do some of my piping between the tank (in the trunk) and the VU4 (under the car) as the long radius bends of the plastic tube are annoying/messy.1 point
-
And, AND they tried to rip us off with no aioli. BASTARDS. I got my aioli.1 point
-
A wristie will be fine. Document scanner-feeder at work so not too much drama. You've inspired me to do a blog of my tank so I'll start one this weekend after i put electronic points in it or something - weather/beer dependent.1 point
-
I bought some alloy hardline also which you can buy in straight lengths cut to whatever length you want. Doing my boot install with hardline at the moment and just bought and bent up then used pushlocks like escortwags says.1 point
-
I'm digging this shot just cos its my car. I don't see many pics of this thing other than what I take so its nice to see another persons perspective. Cheers to you Mr Aviators1 point
-
He could come to a Mataura monthly meet?1 point
-
Just read your entire build thread, you have a great attention to detail and level of involvement with your car that makes me jealous I'm not as interested in putting in that level of effort in any of my own; good work. I look forward to reading about its fire-up. A couple of suggestions to perhaps save you some time/effort in the future - you don't have to baresteel everything to paint it unless existing paint is flaking or badly cracked. 120 grit sanded with a good 150mm orbital sander will give a great result in minutes (thinking how much time it looks like you must have spent on your sump!). I imagine you sanded it again after applying primer based on comments. You could have dust coated it with aerosol etch followed by thinned 2k primer and finished with color all at same time = no intermediary sand and quick start to finish time (total job should have been less than an hour if that helps to gauge?) - clean your spray guns out every time you use them! - for anything from the states, forget nzpost. Get a shipito.com account. They get awesome rates with dhl/FedEx etc due to their volume and you can fill in your own customs declaration after they bin all the actual invoices. Fast tracked through customs too. I get most orders 5 days after I place them (including a set of 17x10 wheels)1 point
-
Early request for mataura works pics1 point
-
Some cock robbed the joint last night. Thankfully didn't touch any of my stz.1 point
-
Pictureless update this time. So after the previous work I encountered some more problems engine-wise. The rumble ended up being the water pump letting go. So I replaced that with a new unit. When I replaced the water pump I discovered one of the pipes on the thermostat block was corroded past the point of being usable so I had to replace the thermostat block. I also replaced the thermostat and alternator belt. I replaced the ignition leads and distributor cap after getting a shock. I transplanted the vacuum advance unit off my old points distributor from the Sprint onto the 3K as the vacuum advance wasn't working. The choke now works properly. I made it half way down my road when the car just stopped. One of the LV wires on the ignition coil had fallen off, so I put it back on and screwed the nut on tight. The carburetor is still running the original 2K jets so it would be nice to track down a set of 3K jets as the car runs a little too lean when starting up from cold - needs more than two pumps of the accelerator before turning the key. I replaced the seal between the oil filter mount and engine block with a Genuine Toyota unit. It started leaking straight away, so something might not be flat (I scraped off all traces of the old pile of gaskets). I'm probably just going to smear a little goop on each surface and hope that will stop it from leaking. I straightened the back bumper and repainted it, but I will probably need to do it again and this time use as much bog as was originally on it as it looks pretty average up close at the moment. I probably faffed around and did other things that aren't springing to mind right now. But the car is currently running and driving well.1 point
-
Saw some Magnum PI looking dude driving up in an old cop car, thought I had turned up 30 years too early. Turns out it was in fact him turning up 30 years late, who knew.1 point
-
Supposed to be arriving tomorrow - fingers crossed - photo of me looking like a dick for thread1 point
-
Last winter I finally got the engine back together. I chucked a heater in the garage and got started prepping and painting the engine. The gearbox was worst because the paint was flaking off and it took ages to remove it. Did the whole lot with spray cans but it turned out pretty good. Plugging all the holes with silicone seemed like a good idea at the time, but was a nightmare to remove. What do you guys use to plug the holes? //oldschool.co.nz/index.php?/topic/53286-dodgypetes-1980-mini-1275gt-discussion/ Finally found a use for the old seatbelts. .....and ready to go back in the hole!1 point
-
So the last few days have been spent sorting out the brakes, funnily enough with the master cylinders switched over it now stops like a champ so pretty happy about that. Drove the neighbors crazy running the car up and down the street slamming on the brakes but it had to be done. I also got the new shorter springs and threw them in and there is no heaps of clearance on the tyre so that will be all good now. So it is already for it's retest now. I had some time today so I sorted out something that has been bugging me for a while, there is a small cover at the top of the bonnet that I took off a while back to get some paint colour matched and then I left it out as the engine generates a bit more heat than the old crossflow and I thought it would be a good idea to let it escape, anyway it is a reasonable sized hole and it looked a bit messy with nothing on it so I did this. First holesaw some holes Then swage them with the tool I made a while back And fit to car and here is the car now that I have raised the back up by 25mm I can now get out of the drive without scraping but it still looks good I reckon. Fingers crossed that the next post will be to say that I have cert1 point
-
The cylinder head needed new valve seats, guides, etc, so I decided to put it on the shelf and buy a ported big valve head. The rockers were pretty worn, so I also picked up some 1.5:1 roller tip rockers. The head sat around for about a year and a half before I fitted it. I had been grinding near the head (came wrapped in plastic) but it turned out the bag had a hole it, so the head ended up full of metal filings. When I finally noticed, I stripped it apart and gave it a good clean.1 point
-
So I finished off the last round of the sprint series run by Dannevirke car Club with Blizzo/Blake. Managed to beat him just in the end but the corolla was running like a massive pack of slimy balls and managed to slip the clutch too much on the last run and couldn't get it to hold 3rd. Placed second for the day but since he had done 1 (or 2?) more rounds than me and came 2nd to me each of the other events he was way too far in front to catch. Was happy with second in A class for the series as both Blake and myself were quite often towards the pointy end of the 1600cc class also. Day was wet and slippery and cold. I only had some crap old hard silverstones for the rear (they are rubbish when they are new yet along 5 years old!), and some very worn dunlops on the front. Was a narrow and short bit of road which I struggled to precisely attack without overcooking it. plenty of laughs were had though which is the important thing! Next on the list is rally Tauranga next weekend (17th July) at Tect park - come along if you're looking for something to do!. We DNF'd in this event 2 years ago when the engine expired completely so will be rewarding to get to the end of it. Seeded quite low so I imagine we are going to be doing quite a bit of passing - and hopefully no shunting! So since Nae Nae rd Nick organised a new Puk clutch for the exedy pressure plate to get rid of the slipping. Seems to work Ok but hasn't had a real test yet. Was also in need of a good service of new plugs, leads and some gearbox oil. The old plugs we were running were superseded and there was a resistor and non-resistor option. Got both and will see how each goes. Definitely running a lot smoother now and not coughing and farting like it was. Feels like we actually have all of the 88 horsepowers back now which is relieving! Also had questions over the strange behavior of the fuel reg. Would jump all over the place and generally just be unpredictable so ordered a new diaphragm and spring kit for $30 (they are only $6usd from summit GRRR) which did the trick nicely. When I took it apart there was fuel on the top side of the diaphragm also which explains the lack of functioning regulation. Its now super steady and runs like a dream very happy. New set of dunlops for the car too. Looking forward to having grip again! Looking forward to next weekend and not being hampered by how poorly it has been running. After that the car will head back to palmy into storage at Nicks for a while so I can focus on getting my AE101 racecar finished. Might aim to do one or two rallies next year maybe just to try beat Blake in the series this time.1 point
-
Nah subframe on efs is in two parts, engine bolts to both parts and also the chassis, out the top is easiest. If you think you have no room try a Shuttle with B18c in it, that is a tight fit1 point
-
Pulled back the carpet to check the floor for rust. Tidied it up a bit then sprayed on some rust convertor. My original plan with the front seats was to try and mounted them properly. I bought some seat frames designed for cobra seats, but they just weren't suitable for the mazda seats. At that point I decided to continue shoveling money into a hole and bought some cobra seats. The frames sat really high so I cut the brackets at the front down and the legs at the back. I also modified the brackets that bolt to the cross member. Discussion: //oldschool.co.nz/index.php?/topic/53286-dodgypetes-1980-mini-1275gt-discussion/1 point
-
Nothing is more satisfying than hearing those 8 cylinders fire up for the first time after a rebuild Keep going your almost there1 point
-
Heres a heap of assembly photos that i didnt put up during the build due to the colour being under wraps haha Final paint prep Out of the booth and first time in the sun! Off to fit up the chassis to the body Freshly painted underside Body going back on chassis1 point
-
Well finally got my wheels made up just before Christmas... Tyres fitted and balanced - went and did some domes, seems OK slight rubbing round corners but she'll be right! Hooked up van... drove 2 blocks down the road and had to turn round as both tyres were rubbing flat out. Gay. 1 white walled Eager So the consensus is, leafs too soft to tow van - put over rider spring back in and get them reset so I can keep it low & get rid of blocks. New bushes to minimise sideways movement. Re-weld rear wheels with a bit more backspace.1 point
-
By my deeds i honour him V8
1 point
-
More progress from the last couple of weeks, I got the rollcage all welded up It went together pretty well, I haven't made one before so lots of measuring and re-measuring but I got there in the end. So all this effort was pretty much for these little bits which are the bosses that make the upper seatbelt mounts that go into the main hoop here So all done and in place it looks like this I have a couple of things to finish on the mounting plates inside the car and then it is on to the exhaust.1 point
-
Bolts straight in, with only two hours of hammering, filing, mount shaving and manipulating. Please excuse the shoddy cell phone shots. So in summary, the Redline and Fenix radiators are identical, apart from the cap and drain bung, no other differences what so ever. I had to hammer the crap out of the steel either side of the radiator for clearance, which was hard on the right side, because of a mount that leads up to the headlight. I had shave down the bottom rubber mounts, and slot the holes in the top mounts, but it fits. Some pics of the problem areas, and how close the original radiator was to the frame for reference. It doesn't look like much, but it was a dick. And the original, Because of the extra thickness of the radiator, I have to space the oil cooler forward about 5/10mm, and then everything should be honky dory. Regards, V "smack it till it fits" G1 point
-
Few pics from the above show... Ditched the headlight covers after they fell off! Have to re-attach them betterer! Heaps of pics from the show here! http://southernaussiemuscle.co.nz/Event_Pages/150328_Muscle_Mania.html1 point
-
Removed the forementioned overload spring - didn't take any before/during photos due to being a useless prick... But here's how it's sitting now... Chucked in some mean sounds, subs amps and pissing the cunt up!1 point


.thumb.jpeg.384ff72c8d2b0ee0d34a7bdedb55bdcf.jpeg)


This leaderboard is set to Auckland/GMT+12:00