
Leaderboard


Popular Content
Showing content with the highest reputation on 07/19/16 in all areas
-
Need to get your one back on the road7 points
-
Last winter I finally got the engine back together. I chucked a heater in the garage and got started prepping and painting the engine. The gearbox was worst because the paint was flaking off and it took ages to remove it. Did the whole lot with spray cans but it turned out pretty good. Plugging all the holes with silicone seemed like a good idea at the time, but was a nightmare to remove. What do you guys use to plug the holes? //oldschool.co.nz/index.php?/topic/53286-dodgypetes-1980-mini-1275gt-discussion/ Finally found a use for the old seatbelts. .....and ready to go back in the hole!5 points
-
So have been busy getting through the cert list and nearly ready to go for a final check and hopefully a cert plate! Did a before and after comparison of the engine bay from when i bought to now: Massive thanks to Toby at BOP Polishers for the polishing, Mikey for the painting, Spun by Hutty for the trumpets, Eze Auto Electrics for the wiring job as well as Lakes Automotive in TGA for the hours at night helping me get shit sorted! Also Greg aka 64Valiant aka Midnight Upholstery was working for every hour possible before beach hop to get my car done amongst others, But wouldnt let me leave the shop till he gave the boot a quick trim. This is only temporary as have made a panel to go around the airbag tank and will trim this and the side panels to match the seats, Have bent up some 3/8 alloy hardlines for all lines going into the valve box to tidy that up and theyll be off to Toby for some polishing also. Should be sharp in theory! Talk among yourselfs http://oldschool.co....westpala/page-95 points
-
Save you the trouble of trawling...4 points
-
Cut em anyway?3 points
-
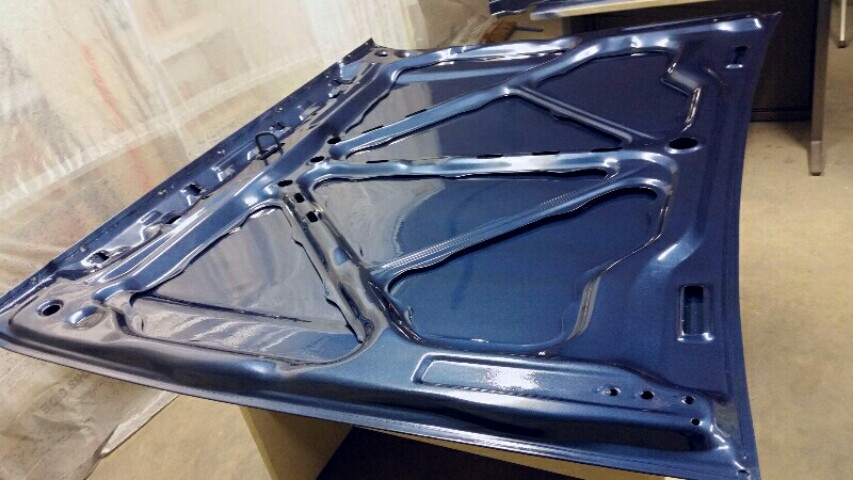
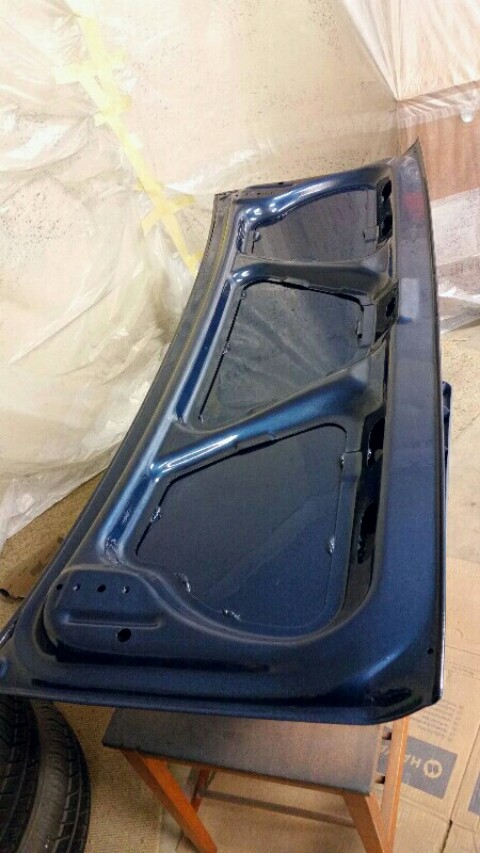
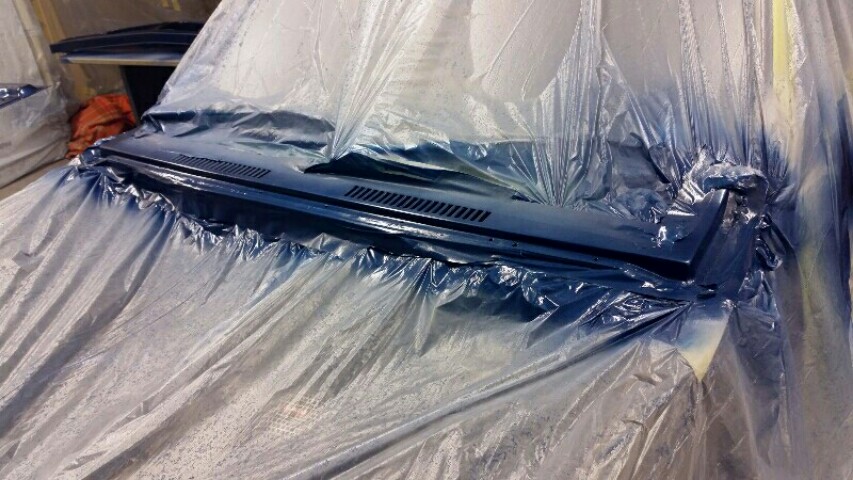
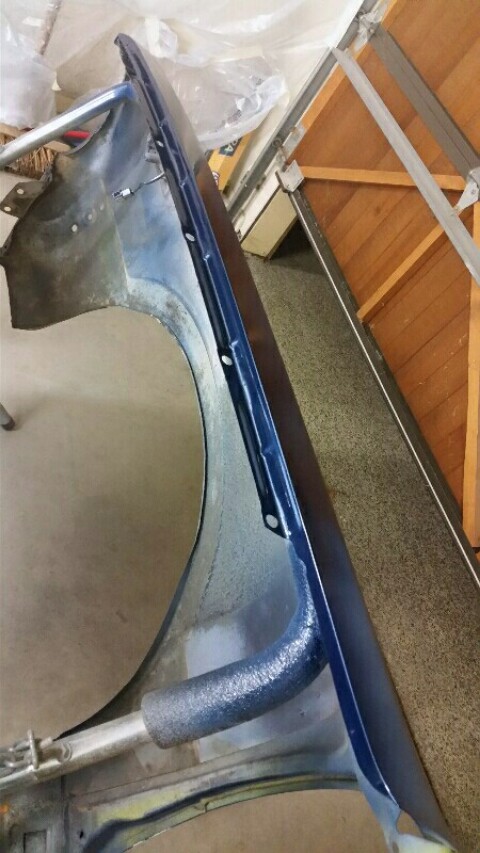
Painted everything needed for all panels to stay on the car until painted. Under side of bonnet and boot lid, boot weather channel, front and side edges of cowl, inside edges of front guards and the front valance. Can't be bothered painting the inside of the boot, old yellow paint is cracked and flaky, will take ages to get it paintable. I blue'd the underside of the parcel tray so that'll do, I'll just bomb the rest of the yellow with underseal. Come to think of it, I would have blue'd the underside of the 6x9s in the parcel tray haha Unfortunately striken by the joys of garage painting with some debris ending up on the bootlid. Might need to be done again if it can't be salvaged. No big deal! Not much more to do now.
 3 points
 -
Bit of a shit day rallying. Ran a bit wide into a tight blind left hander from top of 3rd gear. Turns out there was already another car in the same spot. Bounced into gutter which tipped us on the drivers side and slid into the back of their car. Rear tail light came through windscreen. Next step is to figure out how far we need to go to fix it. Will be getting a new cage but not sure how much of pillars etc is usable. First crash. Definitely a learning experience. Fun times. Will upload some videos later in the week of some of the good bits.3 points
-
Ran into Paul and Frank Radisich at the Speedshow today Paul signed the glovebox lid, which was cool. Had a bit of a yarn with them about Telstars, they reckon there were around 2000 cars made in three separate runs (which would explain the number of cars still turning up on TradeMe). Paul was backwards and forwards between here and his touring car commitments in the UK, choosing colours, trim, suspension options etc. They also have three Telstars, one of which is still only on dealership kms... And in other news, i'm still waiting for parts to arrive. So while the engine bay is comparatively empty, I can do some future-proofing and general maintenance stuff. Like the clutch master cylinder (which is leaking), CV boots (which have split), rear springs (to cure the Mexi-stance), brake fluid, polish, vacuum etc.3 points
-
Hi Ben, I'll need to know what car it's fitted to and then I can talk you through the correct diagnosis. Once that's established we can either fix the fault, buy a 2nd hand replacement part or pass the offending component to a local shop for repair. Cheers, Simon.2 points
-
Didn't end up running new trumpets in the end. Engine was running well for a change and didn't want to risk anything not being right with them - either not handling the heat or restricting airflow. Its something that we will have the R&D a bit further before we are comfortable to run in a rally situation. As you know during a rally the oddest things pop up as issues cause most racecars don't have to complete a couple hundred KM's at a time so better to be safer than sorry. Rollcage is pretty pooped. Bar above windscreen is bananna'd which has pulled the pillar bars in. We always knew the cage was pretty weak as its an oldschool bolt in design. Actually kinda glad to build a new one we always wanted to but didn't want to go through the hassle. As his day job, Nick builds a few cages and his engineering is really top notch these days so it will be the flashest cage you'll ever see in a ke20! Was all over in a matter of 1-2 secs from it being 'OK we are running a bit wide but will bounce back onto the road...' till the obligatory 'ahh fuck' moment. Wasn't super high speed or anything nasty like that.2 points
-
this distance can be summed up in one universal measurement by the way Your mum2 points
-
This is tomorrow night! Time to go and bolt the diff head back into the car and hopefully have a functioning vehicle.2 points
-
Have finished off my custom rocker cover. changed my design slightly once i was made aware i was not going to be able to cnc router my original design easily. still more than stoked with the outcome. this more or less concludes the amount of tidying up in the engine bay im going to do. bar some little thinks like paint strip and polish the oil cap, and try do something about the choke cable cutting across the engine now it has the nice cover. ill probably re tape the loom once its gone through cert and i dont need quick access to anything. wouldn't mine getting rid of the blue on the head at some point, but ill leave that for another day. the adapter for my new bosch coolant sensor arrived today, so i can fit that and actually have the ECU read a usable coolant value. not really much else to do i think before i roll it down for cert. link to discussion - //oldschool.co.nz/index.php?/topic/30375-flibois-1971-toyota-corona/page-72 points
-
Getting a few small jobs done over winter. Wanted to build a new front diff mount as the Datsun factory setup is a pretty crap design that allows the diff nose to lift under load. I had hacked a factory mount up and doweled it (essentially making it sold mount) but that was not overly ideal so had another crack at it. Thanks to Mike for the idea on this style. Cut up the factory mount and built a jig to keep diff aligned. Welded in steel tube that fits a poly bush I had floating around. All mounted up. Holds the diff nice and solid with no lifting issues and also makes diff easier to remove as just slide out the main bolt. Next job was the exhaust. The car came with a nasty old press bent 2" system that I have always wanted to get rid of. It hung way low and looked shit. Decided to go with a 2.5 inch system which is way overkill for my engine but what the hell. Hoist makes this job 1 billion times easier than trying to do under the car. I wanted it tucked up as to the body as possible. The system that came with the car only had 2 hanging points and was one piece so wobbled like crazy and was a mission to get on and off. New system is to have multiple hanging points and be 3 piece to make removal easier. The headers I stole from Craig had a reducer taking the outlet pipe from 2.5 to 2 inch so I simply cut off the reducer and added a 2.5 inch flange to match the rest of the system. Started with a small straight through stainless rear muffler and added a angled tip that looked OK. The rear muffler has 3 mounting points so it is nice and solid. Then worked my way forward, trying to keep the piping as close to the body as possible Went with a basic straight through resonator mid system. Once happy with the layout I added flanges so that I can take out the middle section of exhaust to gain access to diff etc. Then cleaned up and painted, knowing it will burn off 30 seconds after starting the car. Came out OK and sounds better than the old one so I am calling it a win2 points
-
the distance to the moon and back is equivalent to 50-hundred soccer pools filled with one tonne of elephants stacked up end to end. FACTOID2 points
-
Time to recap what's been going on. So the next step of the process was to get the fuel system pretty much finished. Step one of this was to modify the factory 4AGE fuel rail, as in OEM configuration the inlet, regulator and outlet were all mounted on the top face of the rail extrusion, with each end capped off where it was cut from factory. As I was intending to run an aftermarket fuel pressure regulator (FPR), the plan called to lop off all of the attachments on the OEM rail, drill out the plugs from each end and weld on -6 AN fittings at either end. IMG_7025 by Richard Opie, on Flickr Which Sheepers completed for me. It's top rail in the photo above. Which was a spare with the box of gear that came with the 4AGE. Unbeknownst to me, this was a bluetop bigport rail, not a smallport rail which has different injector spacing, as the above image illustrates - after the fact of course. So we had to start all over again. Well, Sheepers did. I drank beers and offered unhelpful advice mainly. IMG_7043 by Richard Opie, on Flickr This is where the inlet and damper/regulator thing originally attached. They'll need to be filled. IMG_7078 by Richard Opie, on Flickr Since I super love taking welding pictures, here's Sheepers welding it all up. IMG_7104 by Richard Opie, on Flickr And this is what you're left with following stage one of the process. This rail welded heeeeaps nicer than the previous one, perhaps it had less contamination in the metal, or we got it to a more satisfactory temperature before welding. IMG_7039 by Richard Opie, on Flickr IMG_7128 by Richard Opie, on Flickr Fairly self explanatory here. With the plugs drilled out from either end and both end faces ensured true, Sheepers welded on $14.00 worth of Speedflow -6 AN weld on male fittings. Nice. IMG_7179 by Richard Opie, on Flickr A portion of the finished product. Obviously the weld which filled the holes was ground flat leaving the rail in a state ready to polish in the future. 0P4A7732 by Richard Opie, on Flickr The next step involved finishing off the rest of the fuel system. Brendan Duncker of Convert Ltd (who built my headers for me) was kind enough to agree to make fuel hardlines for under the car - I had a reasonably specific brief following some discussion with Clint about securing fuel lines, in that the lines needed to follow the factory path so I could pick up all of the factory clip points. This was done, there are now quite beautiful 5/16" hardlines under the car, with black -6 Speedflow fittings throughout, including a filter unit near the firewall. Pics later when it's not wet I guess. 0P4A7743 by Richard Opie, on Flickr Pretty self explanatory with the layout - inlet to the modified fuel rail, 180 degree fitting out, back along the top (may need to clip yet) in braided line to the Aeromotive FPR then back under the car. The remaining port of the FPR will be used for a fuel pressure sensor. 0P4A7734 by Richard Opie, on Flickr 0P4A7752 by Richard Opie, on Flickr Brendan was also able to mount my radiator for me. The Fenix AE86 units seemed to get a solid enough review from most 4AG people I know so I plonked down a moderate amount of folding for one of those. Yeah I know it's a China radiator, but the finish is good enough for the car. With some bolt in bottom brackets and OEM AE86 top brackets it's a perfect fit in the nose of the KP, with enough room for a slim 12" fan and using shortened AE86 radiator hoses. 0P4A7742 by Richard Opie, on Flickr 0P4A7736 by Richard Opie, on Flickr This sort of leads on to how the engine bay looks right now - this is really close to the final product as far as the aesthetic side goes, with really only the wiring plus some hoses for overflow and breather to go in and complete the picture. So yeah. We draw a little bit closer, money is a little low right now with purchase of a new camera gear so to progress I need to allow the bank account to rally a little and then it's time to hit the wiring with the assistance of Stu. Thanks must go to Sheepers, Brendan, Stu and Reuben from Fenix for helping me out with this stage of the build. Discuss the right way to go about chequebook building a car here - //oldschool.co.nz/index.php?/topic/18803-snoozins-1981-kpiz-starlet/2 points
-
Yeah, I know, ewwww. Another 'this wasn't supposed to be a project' situation. A while ago I bought a cheap Telstar, because after having the odd blast in my brother's one they seemed fun. And they aren't worth much, so meh. The idea was that I could fang about in it, and maybe do the odd hillclimb, 'cos Radisich-tuned spenshuns means it's a racecar (in my head). However the one I bought only has two of it's original Bilstein struts, and the springs were replaced with generic Cobra lowering springs, which were shite. Also, it's 20 year old bushes probably aren't conducive to sporty handling. And it uses oil, 'cos the valve stem seals are poked and the rocker cover gaskets leak. It was fun for a while though. And the paint polished up alright. After doing a little research, it seems Ford did two runs of Radisich Telstars, to commemorate Paul's two WTCC titles (even though those were in a Mondeo, Telstars being the closest we had locally at the time). He did drive one occasionally in the local Production racing series though. By most accounts there were about 150 made in the 1994 run, and only 100 in the 1996 series, with the second lot having a numbered placard on the firewall (wow, special, right?). They tweaked the suspension settings, which apparently involved Paul thrashing one around Pukekohe for a day or two, and ended up with Bilstein inserts and stiffer springs. They all had 16" ROH Astrons, and some earlier cars had baffles deleted from the rear muffler, 'cos more noise means horsepower. Ford also decided (with these being a limited run) to trial fit them with Powerbeat batteries, most of which failed under warranty and had to be replaced. On the inside, they recieved a Momo steering wheel (with PR's signature in the middle) and leather gearknob/shift gaiter. Series I vehicles were specced as a GLEi, whereas Series II cars were based on the Eurosport, so they had front seats with fatter side bolsters (for all the g-forces through the sweeper at Pukekohe, or the local Foodtown). And in case you aren't sick of pointless facts about Telstars yet, here's another: all Series I cars had a steel spare wheel, whereas Series IIs had a matching 16" Astron. Yeah. Anyway, it was all going well, until one day the lifters started clattering. Really loud clattering. Uh oh, me thinks, it's lost oil pressure. . It sounded like all 12 lifters had collapsed, on the rear bank, just to make life difficult. So there was no option really but to pull the heads off to take a look. At this point I remembered why I chose to work on diesels, rather than having to deal with cramped modern engine bays all day... But after a little recreational swearing, this happened: Then this happened And then this happened At least it all looks fairly clean inside, suggesting it's been reasonably well serviced and had coolant in it for most of it's life. Can still see the hone marks in the bores, even after 260000-odd km. At this point it looks like the little oil supply/restrictor/valve seems to be at fault, will whip them out and see if the rear one is blocked. Couldn't poke anything down them, but it would sort of make sense that they are a one-way valve, so oil doesn't bleed back out of the galleries when the engine is stopped. Also, want to do something to the exhaust at some point, it's too quiet. Goals:1 point
-
Finally made progress with my HQs 186 motor.Ive had the head ported, put a weber manifold and a second hand ,34 ADM twin port weber carb on. had the cam machined, more lumpy ,fitted freeflow extractors ,removed the resonator muffler, so I can hear it all better and changed the tyres to 205 ,14s for better road handling. I really wanted a manual choke, but couldn't find one when I needed it, will need to fiddle with this ones auto choke to get it working better. We used the existing accelerator linkage to run the carb which still needs a bit of work to get it working 100 %. Over all I am happy with progress just needs some tinkering to get it all working better. Sounds like a v6 when its idling now. There is more useable power now ,with a bit more to tap into.1 point
-
I haven't yet trawled the record collection for the Kamahl LPs. Save that for next month.1 point
-
Looking forward to meeting some of you guys tomorrow! Will also be dragging along a friend who recently bought a AW11 MR21 point
-
I was going to ask how the new trumpets went but obviously not much chance to test them, How much damage was done to the cage ? glad you guys came out of it ok ive had my share of offs in the co drivers seat and know that feeling of just hanging on because you are just a passenger at that point waiting for it to stop. Keen to see this rise from the ashes so to speak and get going again.1 point
-
Cut the springs while you're at it tbh.1 point
-
This is awesome. I am happy for you!1 point
-
Up at 6 this morning to make a new fuel line connector to replace the one I munted getting off. I had only used the flaring tool on copper oil lines before, the fuel line was a bit harder and needed a bit more care, making sure all edges were de-burred and tools were square before starting... Came out ok though, once I remembered to put the fitting on before flaring the end... Another small job ticked off, love using things like this old US made tool kit I picked up on tardme...1 point
-
have put my A into G. Engine and box now mounted permanently1 point
-
About fucking time to be honest....... Now go and drop the pinto in the van1 point
-
Or VW Beetles parked end to end, bibles stacked on top of each other and the distance to the moon and back.1 point
-
yeah, olympic swimming pools and football fields are the only big things humans can fathom. or elephants1 point
-
Then the cross member. The factory part is crazily complicated becasue in the 'De luxe' version its a rear passenger foot warmer. My car is not deluxe, but has the heater and the vents just missing the section over the tunnel between them. Managed to reuse the factory 'airbox' parts It does make the part signiicantly stronger if nothing else. The factory contruction is 4 rectangular holse with 2 on the rear and 3 on the front covered by a plate spotted over them. WHy? I dont know, so i didnt do that. IT FITS! Then the tunnell strengthening plate. I dont have a bead roller but i do have hammers and a vice and a bit of rod to make the ribs. Flattened out and then bent the other way, plus drill a lot of holse in it. I made this a bit bigger than factory to pick up on the cross members instead of the middle of the floor. BAM! - and the rust is gone I did reuse the remains of the cover plate. Just the drivers headlight area to go and thats all the rust! I have yet to chop any sections off the parts car, other than the exhaust which I faffed around with this evening and is going on next.1 point
-
Brought a few smaller parts back from the USA recently, mostly carb kits and a better filter plus NPT fittings to re-do the fuel pump setup. Also intake gaskets and some PS rebuild parts. Rough plans are to re-do the fuel pump plumbing to include the filter and an adjustable regulator (although the Mr Gasket one I've got looks a bit crap). Also have an oil pressure cutout switch to add to the wiring to make it a bit safer. At some point the PS system needs work at is leaks even more than engine (and that is saying something!) Got a used heated spacer to work with the 4-barrell manifold, and a Autolite top to get the choke plates parts from. Shaggy Autolite 4100 on the left and shaggy Holley on the right. Picked up a new 620CCA battery today too, so hopefully will be a better starter now on.1 point
-
The cylinder head needed new valve seats, guides, etc, so I decided to put it on the shelf and buy a ported big valve head. The rockers were pretty worn, so I also picked up some 1.5:1 roller tip rockers. The head sat around for about a year and a half before I fitted it. I had been grinding near the head (came wrapped in plastic) but it turned out the bag had a hole it, so the head ended up full of metal filings. When I finally noticed, I stripped it apart and gave it a good clean.1 point
-
My neighbour over the road has them on his 350. He alwaysopens them when he backs up the drive to piss off the other neighbour who he dislikes.1 point
-
come over to my shed and look at things made by toyota. i have some.1 point
-
an ideal thing for those onramp lights would be a mental turbo v8 with a trans brake to do some commutering with well thats what comes to mind every time i go through one1 point
-
Giz a ride when you down here Peet1 point
-
Your bearing fucked out so bad that it caused you to lose control and spin across 3 lanes.. Then you drove it home? Jesus.1 point
-
1 point
-
yeah cook the engine and replace with K24...I'll show myself out1 point
-
"Not necessarily a good idea as the Vacuum is not controlled. In the HS type Carbs (and most others), the Vacuum take off for Vacuum Advance lines up with the Butterfly such that at Idle, there is next to no Vacuum for the Advance. This reduces the likelyhood of overheating while waiting at Traffic Lights and the like." Overheating vs bad fuel economy.. seems like its best to go for the lesser of two evils...?1 point
-
This might have been a good time to replace the bearings...1 point
-
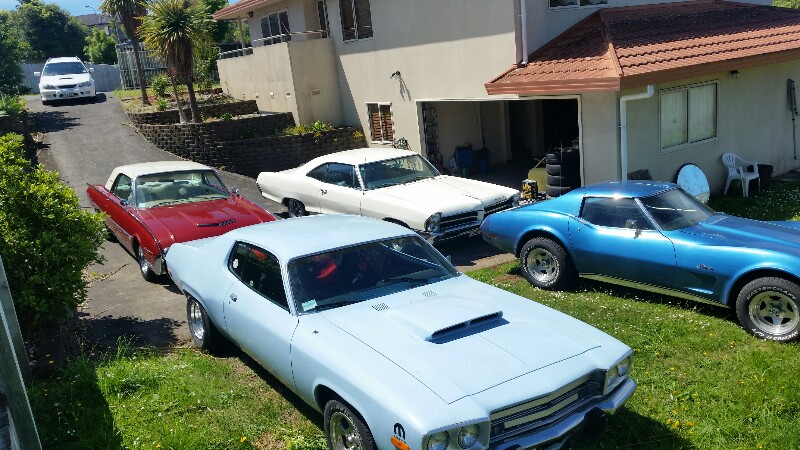
Pic from my last house before I sold the '61 Tbird. With all the cars I had to store outside, the bloody KE was the one in the garage. Moved to a better house and they all get shelter now
1 point
-
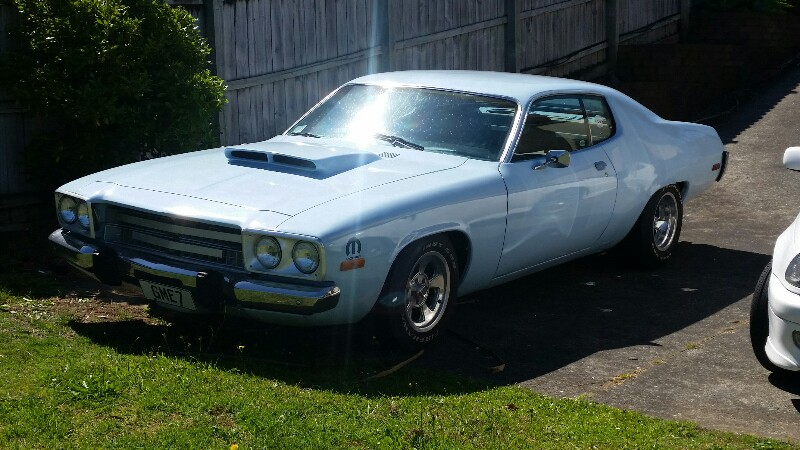
1973 Plymouth Satellite/Roadrunner Performance built mopar 360, pretty biffo little donk, peels out nicely. Console stick shift. Cragar 10 inch at rear with 275s. Haven't done much to this one yet. It has aftermarket race buckets in it, so I sourced some original buckets and recovered them and the rear bench too. Needs minor rust work then full panel and paint as it was painted by lazy American bogsmiths. It's a horrid color so I'm not phased.
1 point
-
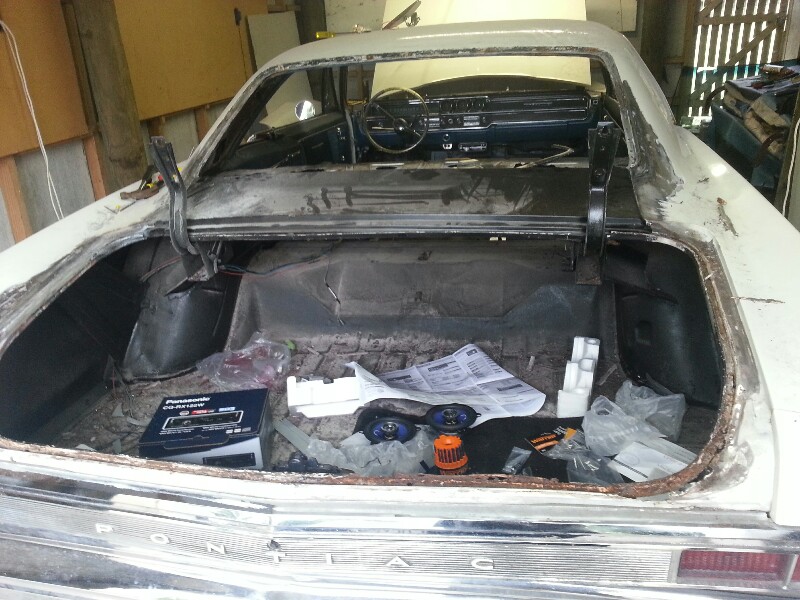
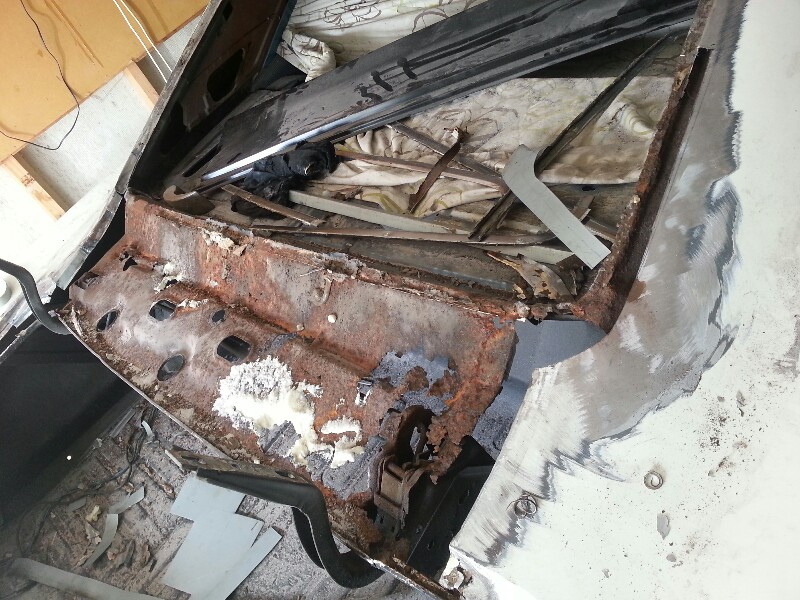
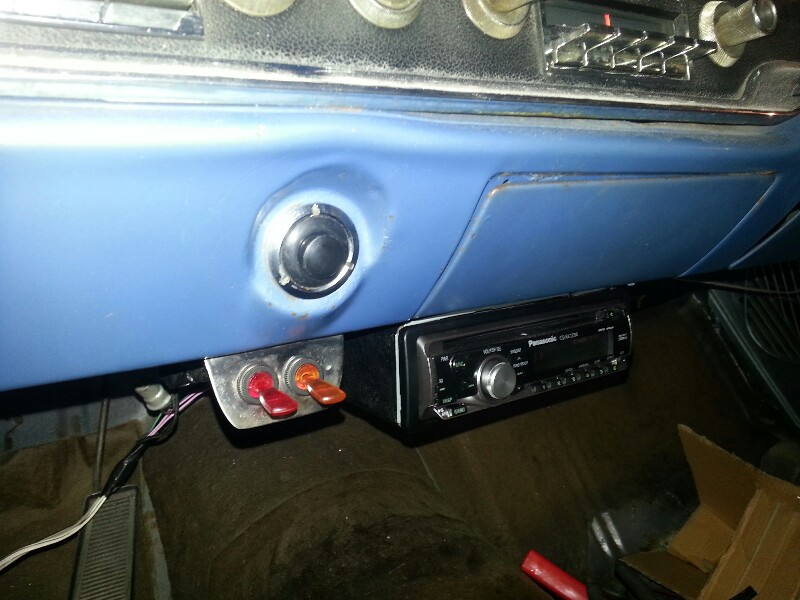
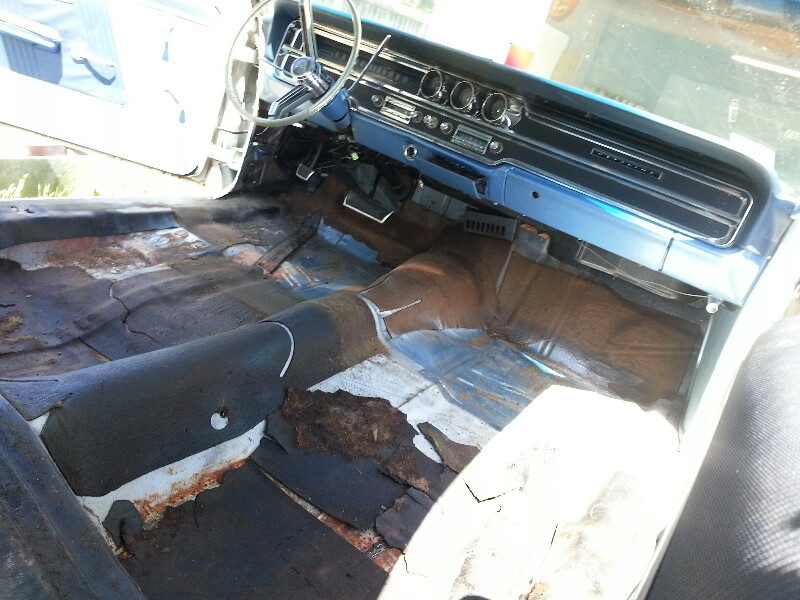
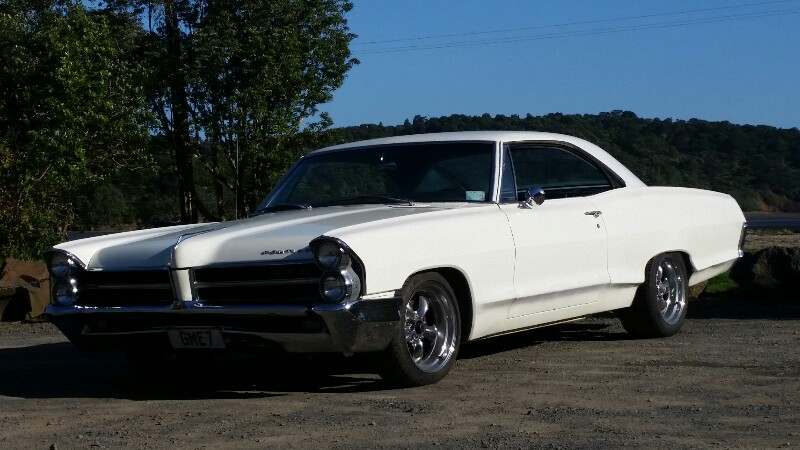
1965 Pontiac Catalina Ventura sports coupe. 389 big block 4bbl. Torque Thrust 2 with 10 inch at rear with 295s. Factory sagged "suspension". Was extremely rusty when I got it. All glass out, new steel around front and rear shields, complete new rear deck panel, entire weather channel around boot, boot floor, rear pillars, front guards blah blah Was missing ignition key so was being started south Auckland flat blade styles. Binned the ignition barrel and made it push button. Probably need better switches though Interior was naff so ripped it all out, recovered the seats, new carpet etc. Where's the finished pic??? Did a quick bog and paint and now it's wof'd and reg'd. Full panel and paint on the backlog!
1 point
-
Maybe it's dotcoms car and he hasn't got out yet?1 point
-
Drove the car over to Hamilton on Saturday to leave with Greg @ Midnight Upholstery for his shop open day. Couldnt make it on the day but looks like it was a good one! Few pics taken by Earl @ Popeye Pics Talk among yourselfs http://oldschool.co....westpala/page-91 point
-
3 more new posts above tonight ^ Fitment of the freshly chromed bumper and tail light bases, and rear trim etc First wedding for my mate, was best man so mrs drove the bridal party in it Talk among yourselfs //oldschool.co.nz/index.php?/topic/34313-the-westpala/page-91 point
-
Heres a heap of assembly photos that i didnt put up during the build due to the colour being under wraps haha Final paint prep Out of the booth and first time in the sun! Off to fit up the chassis to the body Freshly painted underside Body going back on chassis1 point
-
Bit of a saga with the headers, Any coating (incl ceramic) requires curing, and doing it on the vehicle doesn't work in with the running conditions to bed in a new cam. I debated leaving them as-is and doing a proper job later (priced ceramic coating with Elite in Ch'ch) but I can't really be arsed pulling them off again and didn't want to stick rusty old pipes on my shiny engine, so decided just to rattle can VHT on them to see how it goes... So a couple of weeks ago I dropped into the largest sandblasting place in Invers (a place I put a bit of work through incidentally) to ask about blasting them clean. 2 weeks later, despite me going in there twice plus leaving my details, hadn't heard a bloody thing. This disappoints me as I treat every job as a trial for bigger ones, and not being contacted pissed me off more than a little, this will be remembered when larger contracts come about... Anyways, did a google search for sandblasting Invergumboot, and Sievwright blasting/panel/paint popped up. Never knew anything about them but called past on the off chance to see what they could do. The GC there said sure, no probs, they boys had a window and as they were in the car I could get them done right then, and pick them up in an hr. Done... Crap pic but shit this saved some work, I'm over sanding stuff down and would happily pay for this service again. The bloke asked me how I found them as they don't advertise, and laughed when I said I had the arse with the normal outfit (Southern Industrial Coatings) and went looking... And I knocked off early and degreased, warmed and chucked a few coats of VHT black on 'em... These look pretty good now but I'm under no illusions it'll last, so I looked into curing them prior to bolting them up. I need to bake at: 120 degs for 30 mins cool 30 mins 204 degs for 30 mins cool 30 mins 315 degs for 30mins After my last shed cleanup I discovered I had 3 hot air guns (no idea how) so toying with the idea of using these plus an IR thermometer to give it a go. I know I can get the pipes to over 100 degs with one gun, so will be interesting to see what I can do, can always plumb in an lpg torch for bit of extra oomph. Worst case is I'll waste a bit of time trying it out, best case is it works and I have fun trying...1 point
-
Don't lie! For we all know here that New Zealands first proper supercar will be a DX 'Rolla with a bridgy and modgies.1 point
-
At work . That's not even the track, that's the testing ring. Down the hill, there is 2.3km of paved private glory. I'm not going to lie, I've managed to score about the best job, in the world, ever. Yesterday I fixed a Ferrari 458 Challenge racecar (minor electrical fault). Today I spent the day fitting aftermarket race suspension to a Lotus 340R. It's the bizzaro world, and I'm going to ride it out for all I can.1 point


This leaderboard is set to Auckland/GMT+12:00