
Leaderboard


Popular Content
Showing content with the highest reputation on 05/06/16 in all areas
-
Cool If you need any help with this just ask Al's mum, she has one next to her bed10 points
-
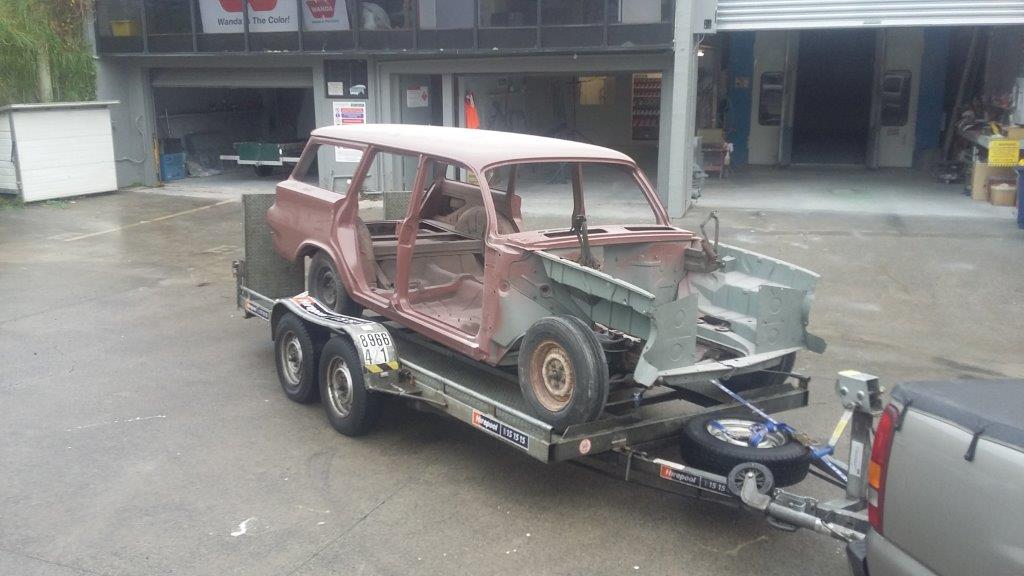
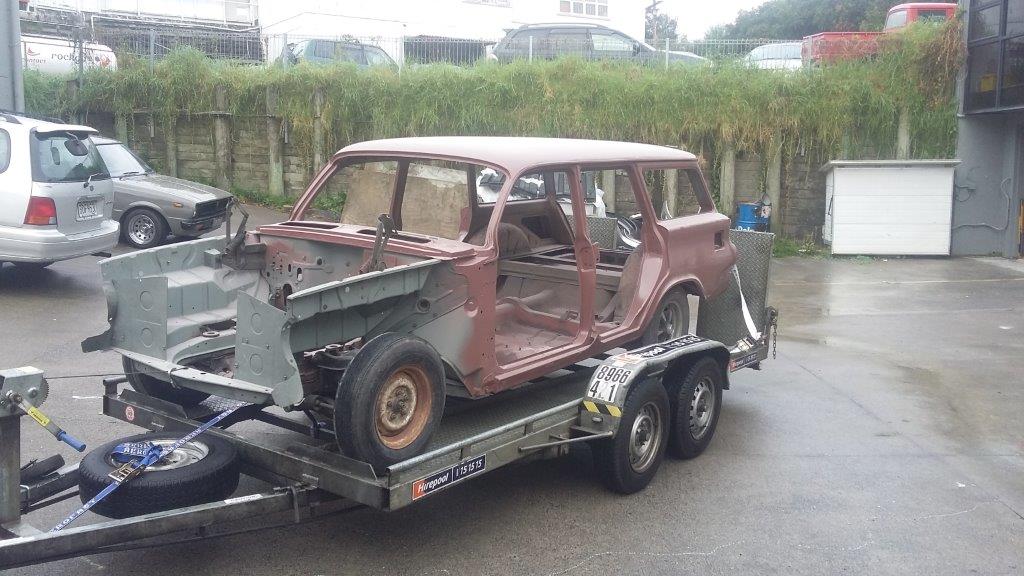
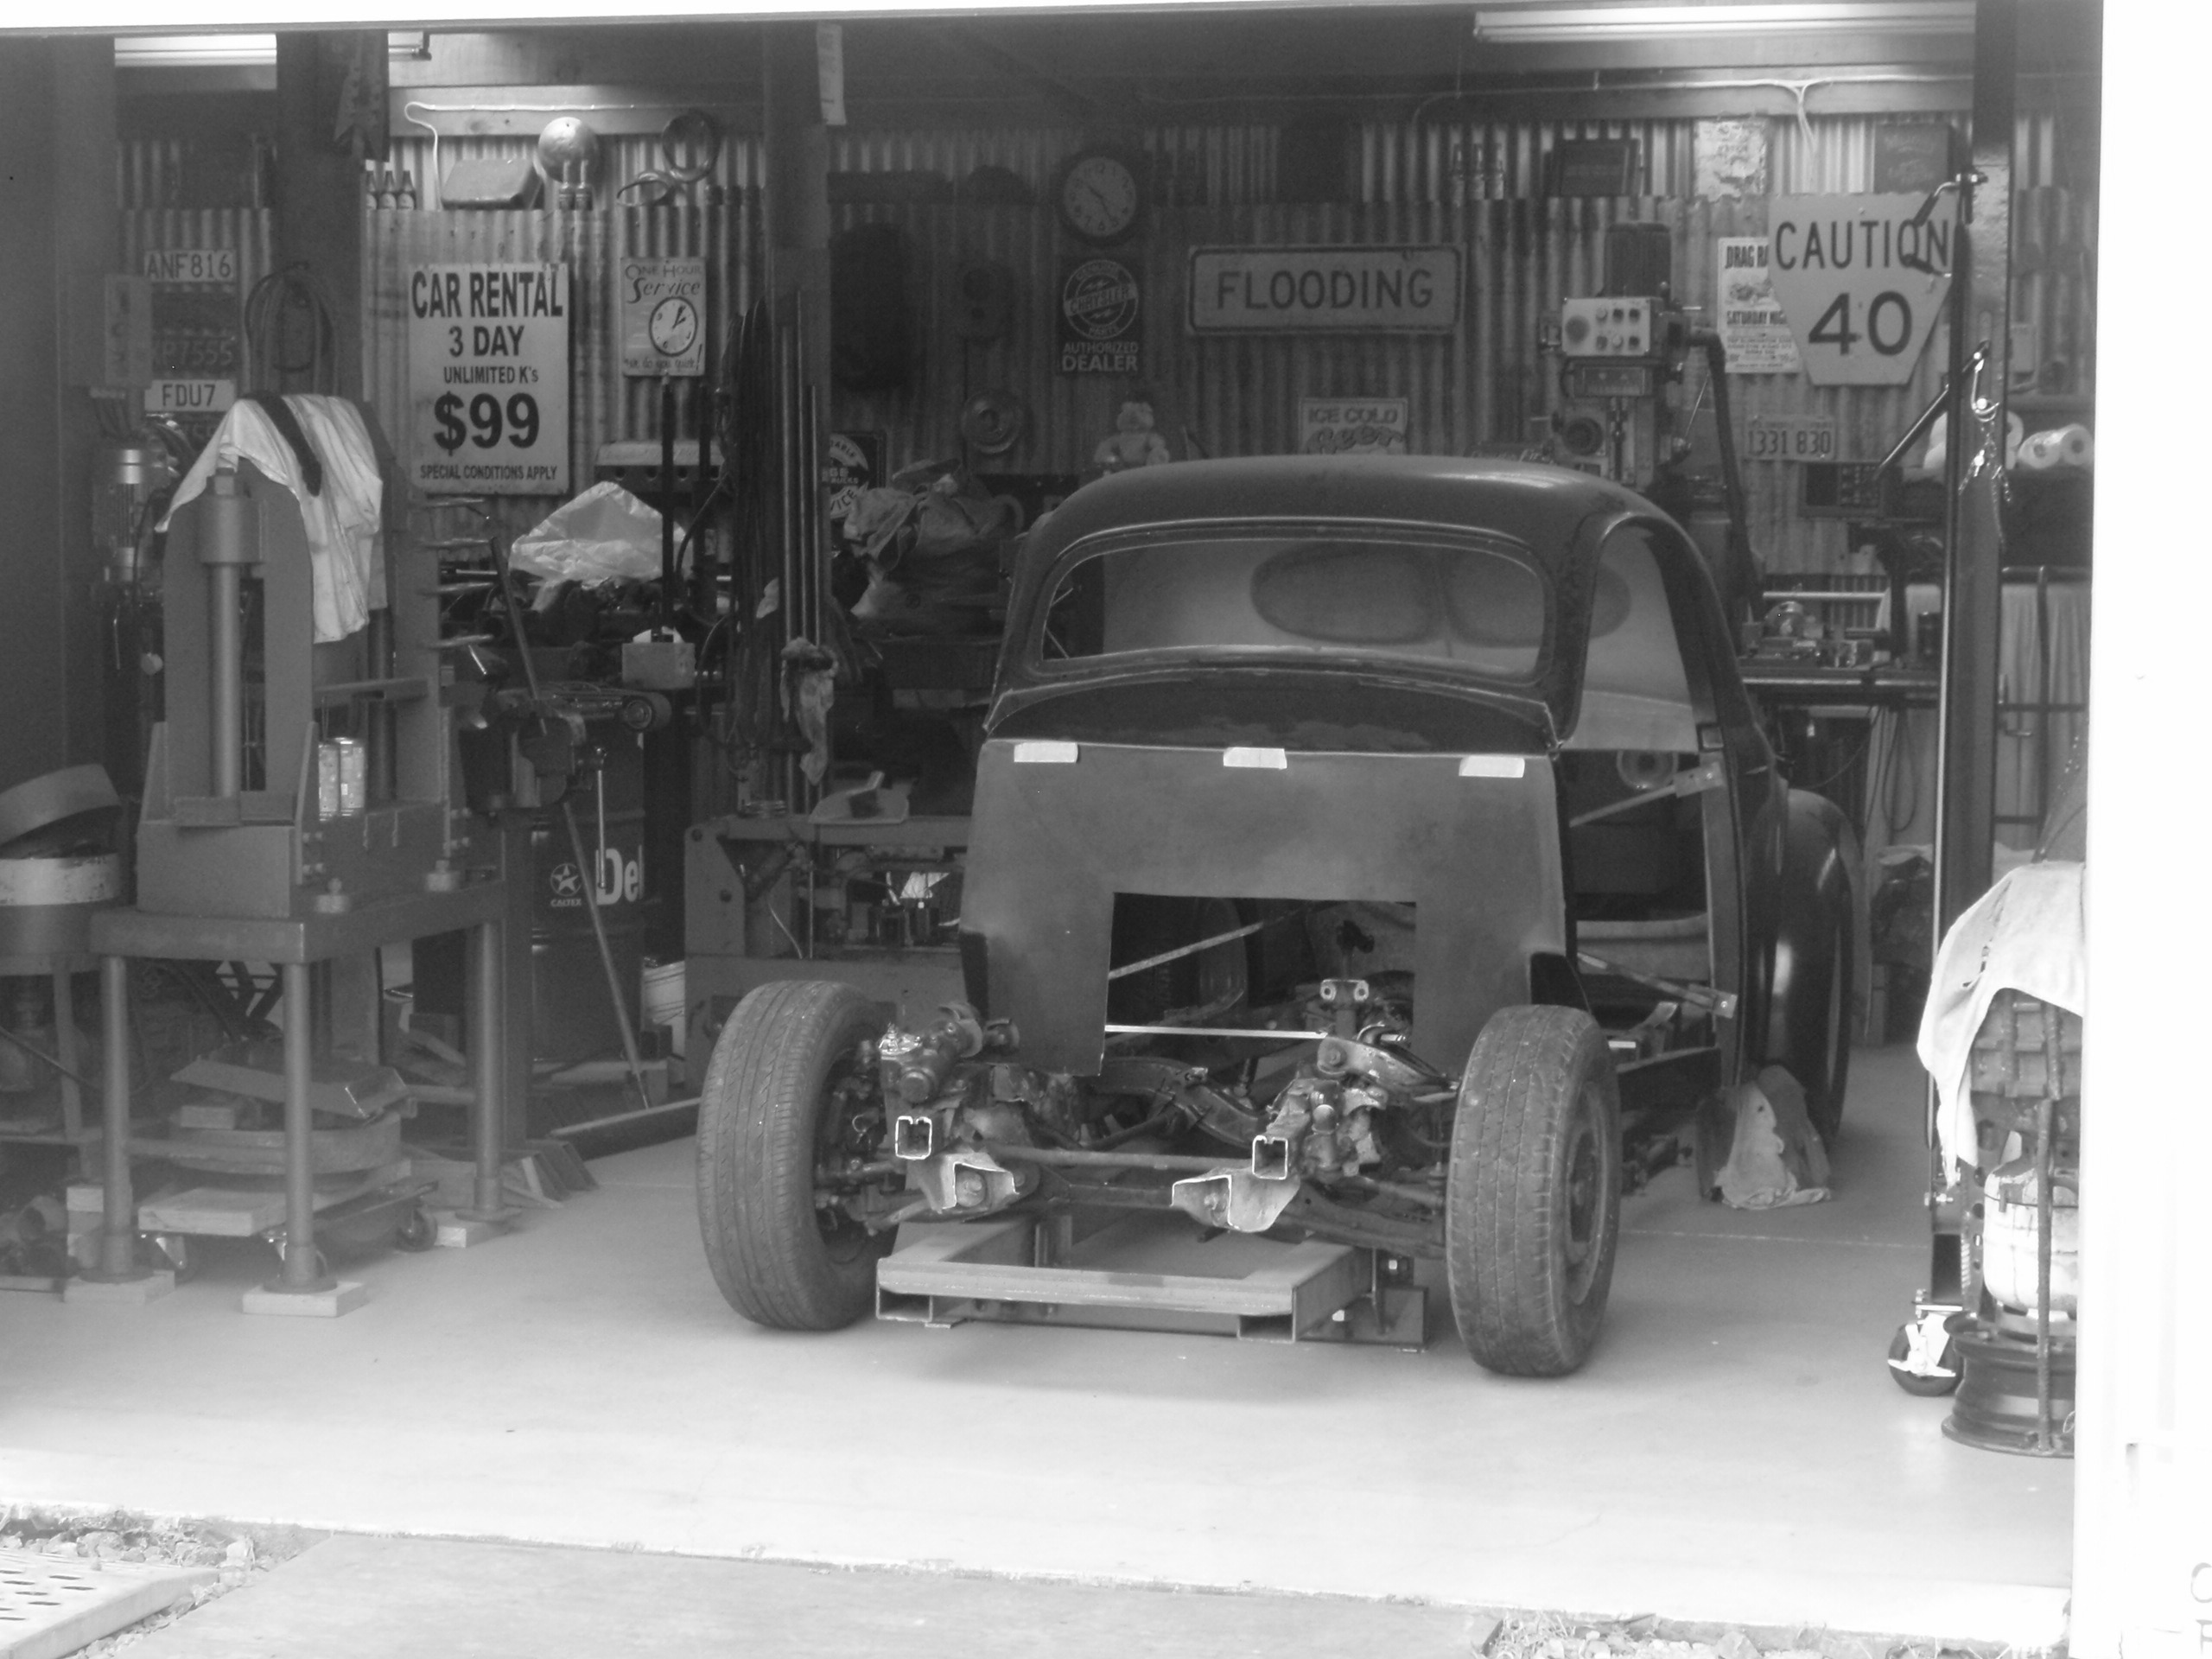
Cleaned everything up and started again. Tapped out the old 5/16" to M10. I was going to use a fine pitch but only had a taper tap, so used the 1.5 pitch thread. Did a lot of this sort of thing on the old ironhead, retapping fucked imperial to metric. There is usually a good metric size that is in between the imperial steps that doesn't require drilling out too much material... And drilled the housing out to 10mm, lots of meat on this as well... and it works well, although the lower bolthead looks huge... And repeated the intake manifold install, used NZ made Permaseal gaskets this time, they look pretty well made, I just put a very thin smear of RTV around the front and rear water passages, and used a bead of Permatex Ultra Black in place of the cork end gaskets... and a corresponding bead on the intake (all surfaces cleaned with Brakleen first). Around this much seemed perfect, and having studs on the corners makes it really easy to line everything up... And don't know if I actually achieved anything looking at it together, doubtful if I could get this lower bolt out without a lot of swearing, but at least I know the thread isn't boogered, and there is antiseize on all threads that future me will be thankful for... And quite like these, little stainless allen head studs for the rocker covers, all of $15 from Ebay, and arrived in a week... So I reckon I could get the engine in this weekend, can't quite see the opportunity arising however - 'Happy Mother's Day love, would you mind lying under the car and lining things up while I drop this engine in...?'9 points
-
Pretty girl is stood up by an HQ and chooses a KP on rebound They say opportunities like this are once in a lifetime, don't screw it up Antonio8 points
-
Copper shrimp I made from 45mm copper pipe and other copper scrap4 points
-
3 points
-
The first few pieces all sanded down then epoxy etched and then primed Also managed to free up the jammed buttons so the buttons work fine now and had a good look inside, it appears there is still a couple bits broken, the link that lets you change between no-sale/cash isn't there and there is another piece/arm/link thing on the other side that looksl ike it should have a lever attached to it that would come out to the user and I can't quite tell where it would join but that's just sitting loose in the unit which is a little bit of a shame as these things are probably past me being able to fix now but its still awesome you can ring up cash amounts and it makes the bell go, you can also turn on and off the bell. All the mechanical working of this thing are insanely awesome.3 points
-
So my mum is turning old this year! (happy Birthday mum) and she likes old things so im tidying up a old cash register for her Birthday present. So this is the Beast! Purchased it as 'was going... until kids pushed multiple buttons at once and it jammed and the draw won't stay closed anymore...' so it's a bit of a gamble hopefully I can get it to go again. Elsa stickers came free!2 points
-
Just collected this: One piece flip front. At some stage in it's past someone has bonded in an original steel grille and steel side-vents. I'll remove these and re-glass the holes as I'm aiming for a totally smooth look. I got it for a straight swap for the original tins, and both I and the swap-ee are more than happy.2 points
-
Whilst I find that awesome. Isn't it irrelevant without the rest of the surrounding vehicle?2 points
-
Time for the car to go for a ride. Picked up from the panel shop, off to go on a wheel alignment machine and then to A1 exhausts to get the chassis work done I forgot to take any photos from the wheel alignment. Amazingly the car was pretty close. The cross member will have to be rotated slightly to give 2 Degrees of castor. There is probably more than enough adjustment in the shims to sort it out but I want to get it as close as possible. Also got my wheels back from being powder coated. I had put the other 3 away so that is why there is only one.
 2 points
 -
Paint stripper is no match for the 40 year old paint the panels are coated in. Gona have to stripdisk it all off. Welp2 points
-
UPDATE I finally fucking finished the fuel system. / Just need to wire in the cable I have run to the relay which is yet to make it onto the car. So pump is mounted, rubber hoses all changed, and shit like that Oh and I rebuilt the clutch master cylinder today, so that went in along with the clutch pedal, exciting right? Pictures pump wiring Master and mounted
2 points
-
2 points
-
low added. front still needs to come down a bit more but thats almost right. 2016-05-04_05-11-01 by sheepers, on Flickr 2016-05-04_05-12-30 by sheepers, on Flickr2 points
-
Shedrat Engine plate construction RB Chrysler/A833 in Hilux chassis Front sparkplug behind front axle CL Fabricated rear torsion mount and crossmember Diff works Co owner and assistant
1 point
-
As it stands at the moment... Will be updating the interior Seats, Dash, etc and other things as they come to mind.. Would be great to hear what seats would fit (and how you fitted them).. Let me know your ideas! Will keep you posted1 point
-
I built this Homocycle a couple of weeks back Richard aka Big Value Buddy gave me this, very small, KHS road bike. I already had an old 70s road bike that was probably the right size for me, but the frame was too big for my liking, and after some googling I found out it is worth a few pennies to the right person, anyway........ 01 by Hayden Rowe, on Flickr In all her glory. I already had the seat, I use to ride BMX, and really small mountain bike frames (like 13.5/14 inch frame small) so found I didnt really like big/correct size road frames. 02 by Hayden Rowe, on Flickr I also didnt really like road bars aswel, and to come full hipster circle, flat bars are where its at 03 by Hayden Rowe, on Flickr 04 by Hayden Rowe, on Flickr Got some wider flats pedal, Note how small the frame is by how close the pedal comes to the front wheel 05 by Hayden Rowe, on Flickr To give it a slightly more modern/custom look, I ground the rear brake external cable runs off and drilled holes to run it internal 06 by Hayden Rowe, on Flickr 07 by Hayden Rowe, on Flickr quick sand.. 09 by Hayden Rowe, on Flickr 2K primer 10 by Hayden Rowe, on Flickr 11 by Hayden Rowe, on Flickr De-Golding 12 by Hayden Rowe, on Flickr BAM! and the gold is gone 13 by Hayden Rowe, on Flickr Got some sram levers, and brown grips to match the seat 14 by Hayden Rowe, on Flickr Green down, and brush painted the black on, also paint pen'ed the gold pinstripe on 15 by Hayden Rowe, on Flickr turned out pretty good 16 by Hayden Rowe, on Flickr 17 by Hayden Rowe, on Flickr then 2K clear 18 by Hayden Rowe, on Flickr Melted the gold abit, but i kinda dont mind how it looks 19 by Hayden Rowe, on Flickr 20 by Hayden Rowe, on Flickr 21 by Hayden Rowe, on Flickr I brought some new brakes aswel, bit more meat/ braking force to them, also got a head set that was wrong... 22 by Hayden Rowe, on Flickr .....so just mocked up for photo..... 23 by Hayden Rowe, on Flickr 24 by Hayden Rowe, on Flickr and with the bars and seat in/on 26 by Hayden Rowe, on Flickr 27 by Hayden Rowe, on Flickr 28 by Hayden Rowe, on Flickr Then I made some stickers 29 by Hayden Rowe, on Flickr 31 by Hayden Rowe, on Flickr 33 by Hayden Rowe, on Flickr ....swapped heatset for the correct item, fitted new chain and finished assemble. 34 by Hayden Rowe, on Flickr 35 by Hayden Rowe, on Flickr 36 by Hayden Rowe, on Flickr 38 by Hayden Rowe, on Flickr want to get new wheel levers and spray the seat post ans maybe seat rails black aswel 39 by Hayden Rowe, on Flickr 01 by Hayden Rowe, on Flickr 37 by Hayden Rowe, on Flickr Pretty happy with the end results. even if it is a homocycle.1 point
-
Please generate a 3D model of the 110 that is my avatar and tell me whether I would be wasting my time with that kit/totally irrelevant, I'm just curious as to how the air would react.1 point
-
Absolutely! A very crude approximation of the wheel well etc is in the model, I've just hidden it for sake of pics.1 point
-
1 point
-
Julian Edgar is the man. Read one of his books back in the day, first time I'd seen anyone try to quantify changes for anything to do with modifying cars.1 point
-
There is some commentary here on wheel deflectors http://www.autospeed.com/cms/article.html?&title=Modifying-UnderCar-Airflow-Part-2&A=1131821 point
-
(Disclaimer: Below rambling is for sake of interest, not necessarily that I need extra airflow to brakes at this stage) Last night I drew a fairly accurate model of one of my front wheels, the hub, and the disc, and a big slab of "ground" No caliper or suspension yet but just for interests sake looking at the basics of how air flows around the disc / spokes / etc when its rotating. It seems that when the wheel is travelling forwards at 120kph, (and rotating...) There's virtually zero air flow through the centre of the wheel or near the disc. The tire builds a big wake that seperates at the leading edge of the tire and thats the last airspeed that the wheel or disc pretty much ever sees. Even with a crude representation of the front of the car covering upper half of the front of the wheel. The flow around the wheel only changes things ever so slightly because it's the high pressure zone down low under the front of tire which intiates the wake that then spills upwards. I was sort of expecting the spokes of the wheel to be stirring up some air in a semi meaningful sort of way, but doesnt look like it acheives anything useful. What's interesting to see is that without supporting aero mods ahead of the wheel. Aerodynamic wheel covers, despite looking sleek likely acheive next to nothing as there's no air speed going past them. Which is probably why they were last seen in the 80s. Even if they stuck out by say 40-50mm it wouldnt make any difference currently. I can now see the rationale behind "speed flaps" ahead of the tire mounted to the lower gaurd. Which are there to disrupt airflow before it gets to the tire, so it flows more uniformly around it. I'm not taking the above results as gospel but it was certainly a lot different to how I imagined flow in and around a wheel would work. Will post some pictures later so this rambling makes more sense.1 point
-
Do you know the operating temp range of the compound you're running and have you measured the brake temps to see where you are in comparison?? Yes incorrect temps can affect the wear rate but I wouldn't think that much, are you massively overheating the pads regularly? We can get a whole season out of a set of pads on a TL Falcon (1470 Kgs), we've got temp sensors which help alot and I just tune the ducting over the weekend to keep them in range we want... From my reading I think too low a brake pad temp can cause excessive wear and high disc abrasion (do not quote me on this, my memory is hazy at best) I high brake pad temp causes brake fade and then material fracturing, the V8 utes are underbraked and I basically have to manage fracturing brake pads all weekend. Are you seeing that? Also brake technique affects pad temperatures dramatically... Those are all of my cents, and my currency has a very poor exchange rate.1 point
-
You're a wizard, harry.1 point
-
you maggot i just picked out that colour for mine yesterday 90's road frames went though a "compact" phase where everything is smaller than it says too1 point
-
So pulling it apart was all imperial which was fun Also someone had been in here before as a couple fasteners weren't matching1 point
-
I made this when I was 11 from 2 solid chunks of wood and a DIY kit steam engine1 point
-
the best bit is , with the stretched tyre's i've no rub in the front lock to lock and gallons of room in the rear and haven't rolled guards!!!1 point
-
More importantly, when are you lowering it?1 point
-
Mazda BT50?1 point
-
Pics of friend1 point
-
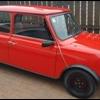
Day 1! 21st November 2014 Picked up this little beautie for $3200 NZD. The local mini club owner who was selling it gave me a $400 discount purely for my squeeling on arrival, I'd never seen so many mini's in my life! First thing i brought - new gear knob! Cheers Aliexpress! Got central locking for a Christmas gift with the key remotes installed! Accidentally locked the keys and remote in the car.... Took 5 people to break into my tiny car! Central locking sadly didn't get re connected after painting of the car... but hasn't been anymore lock outs since! She turned out to be suuuuuper rusty! Time for some repairs.. and a broken windscreen. "No don't take it out yourself you'll break it!" "No I promise I won't!" ...20 minutes later see my ex boyfriend post on the NZ mini facebook group that he's looking for a replacement windscreen. Damn it. Thank god for insurance! Hello kitty hanging in there during my repairs. 1 floor pan and new windscreen later... it was time to get ready for a new colour! Colour! I literally took in my nail polish and a picture to the paint shop for inspiration and walked away with this! We have some paaaaint! Need to get some better pictures in the light.. or not use my phone camera! She's feeling a little blue Picked her up some new bits in exchange for a box of bourbons hahaha. Goodbye ugly rice steering wheel that someone has friggin welded in place! More new editions? HAHA Interior battles Thought i'd get all fancy and refurbish my door cards with some vinyl and fabric. The door cards that came with my mini were horrible to say the least!! Refurbishing them didn't turn out much better. Manged to make some back ones but have given up on front and dash and thinking of getting some laser cut and then powder coated the same color as little blue! Sitting a bit crooked but will sort it out! I've fallen in love with another mini... I hope this guy doesn't mind me sharing his pics but I found this little beauty on Instagram! https://www.instagram.com/jacktubbsey/ Really want black flares now!! What I really love is the headlights! Found some tint off ebay here super cheap and now just waiting for it to arrive! Totally illegal here in New Zealand but i'm sure i'll be okay with all the cars with blacked out ones I see driving around Some treats for little blue! The sound system in her wasn't that bad when I got her but the speakers were literally put into plastic containers from the warehouse ($6.99 price tag still attached omfg) that you take your lunch in HAHA. Then covered in vinyl!! Kiwi ingenuity. Thinking of doing some colour changing led rings around the speakers like this: Will update once I've finished it! Also wanting to replace the switches inside with illuminated push button type switches. Here's some examples: First pic is a pre made one that is sold by Marcos Controls if anyones after some! Second some switches on Aliexpress I like. Just put in my new brake hose, got my new headunit & sub going. 2016: Finally got a WOF and current rego! But also feeling lazy, need to CAD up my dash and door cards to get laser cut already! Discussion Thread: //oldschool.co.nz/index.php?/topic/51794-samanthamannells-1978-mini/1 point
-
XOXO1 point
-
I was fucking about in the shed and was looking at the bars and decided to swap them out for a set i had in box and had been humming and harring over for a while. I payed $5 i think at the mcleans island swapmeet. Pretty happy with them and theyre staying on. Next up is to mount the mudguard and mount an oil tank.1 point
-
All the way though this project I've been conscious of being overwhelmed with the size of the task at hand, attacking one mini project at a time, ticking them off, moving on to the next one. Looking though my photobucket the other day I noticed how few of the photos actually look anything like a car, just red,brown, grey metal shapes, every now and then it's great for the motivation to mock up a few panels, sit back with a beer and bong, and picture the day it's all back together and rolling the streets again. photoshop is also great for this. hell yeah.1 point
-
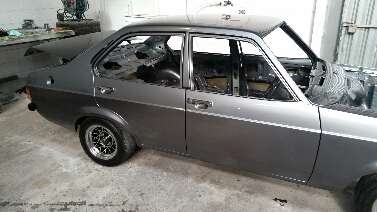
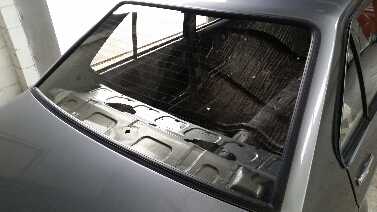
Got the door rubbers on along with the latches, strikers and handles. Then a couple more hours lining it all up properly( new rubbers make this a mission) The problem with a build like this that's gotten out of hand is everything that goes back on has to be new or made look new, so is taking a lot longer than expected. Rear window in Side windows,regulators and new belt moulds and clips Starting to look the business with the new grill in Scored a mint bonnet so that's that sorted and also sent the exhaust manifold,turbo housing, bonnet hinges and latches off to be hpc coated. Engine rebuild bits should be here tomorrow...
1 point
-
This looks Fucken ace and the workmanship looks top notch good jerb!1 point
-
New page finally! Woo! Took the engine apart finally. Looks like someones been trying to run this thing on water (not me) Can anyone recommend someone in Hawke's Bay / Manawatu that's a good bugger at tickling heads?1 point
-
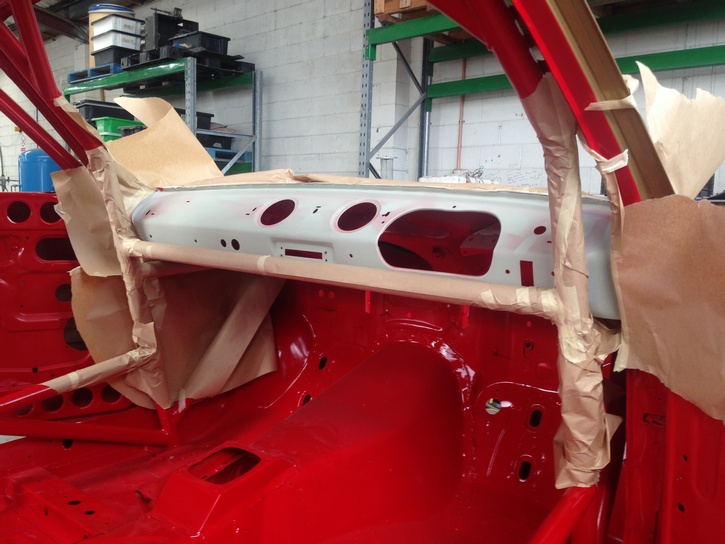
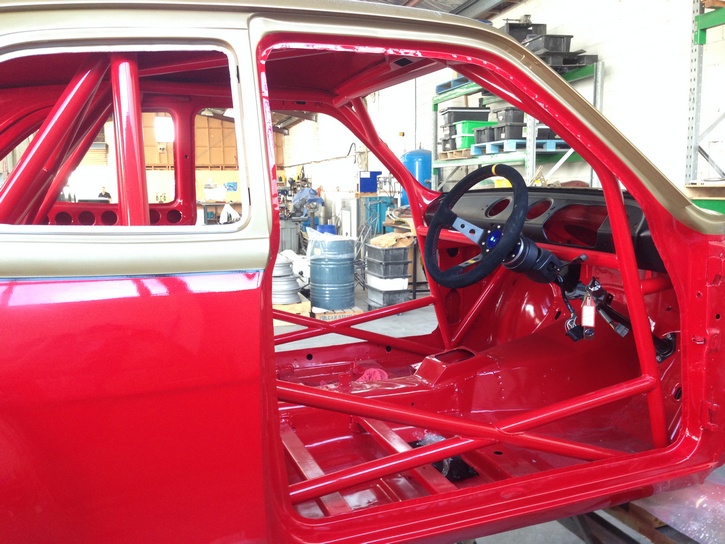
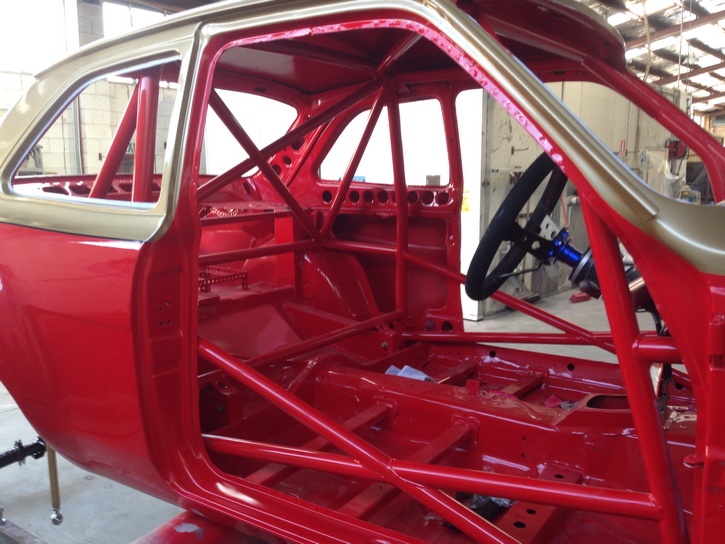
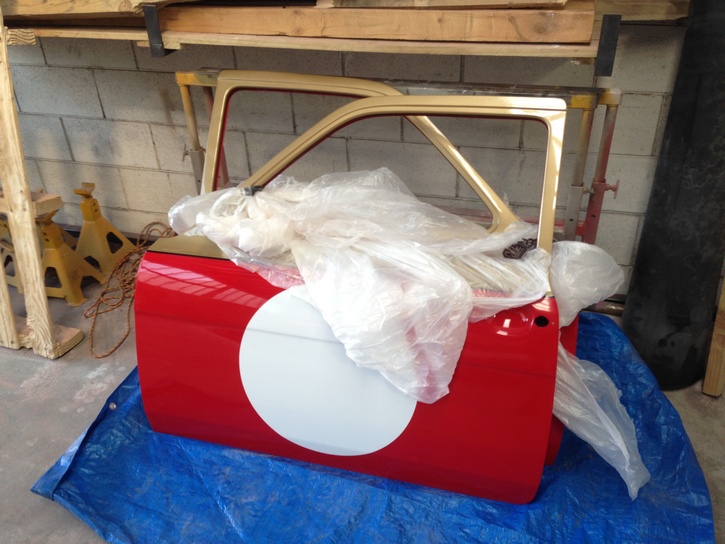
CheeRS for all the interest and comments on the car Prepping dash area Matte Black applied and steering column back in Stickers for race number applied
1 point
-
Howdy, Went to the Kumeu show on Saturday for the first proper road test and she drives suuuuper smooth. Sits at 60-65mph no problem, quiet as with nice temp and oil pressure. Suspension and steering are awesome but gearbox is a bit heavy and crunches going to first or reverse sometimes. Picked up Evan on the way and tried to beat the heat. Met up with the other oldschoolers, managed a park a couple of cars away. Because nobody likes a picture-less update: Photo cred to Karljsw from the Z club. Got heaps of different folks oogling even at a more V8/American/Muzz event (more than I expected anyway). My folks also got a new pup so I thought I'd get the token "bitches love datsuns" photo: Also got time off and signed up for nats so SEE YOUS THERE AYE1 point
-
Howdy Pard'ner A few more bits and pieces of progress: Powder Coated goodness. It's a nice feeling looking underneath and not thinking damn son, you nasty. Also replaced the front wheel bearings because yuck Had the front rotors skimmed. Looked like the pads have worn down at some point, I wonder what song they would play on an old record player. Also found an old WOF in the sun visor. Might be good proof for the plates? And the ones I know you're probably here for... All complete and ready for re-reg just waiting to hear from LTSA about the plates. Hasta la Vista, BABY Hoping to be ready to potentially take her to Nats if time off is approved1 point
-
Part 2: the mangling. Right, so the spindle pins go in the control arm, through the strut base and back out the control arm. What happens when the pins decide to stay home? We get physical. Then we get angry. then we say "nah stuff it just buy new ones" The trusty Hack saw has been pulled out too many times... Sad face. It took a ten ton press to get that bastard pin out. BUT while the rear was out, we could have some hypothetical fun... tee hee Yeah these are the wheels I am going with. I got some centre-cap stickers too and likey-a-lot BREAK for refreshments...1 point
-
Aloha, I thought it might be time to update this thing since the last post was... July? damn. Much work has been done however! - Bumpers re-chromed and all the little rubber bits replaced (in hindsight, the cost versus snazz factor here was not great but hell, it's done now). - New Tokico Illumina adjustable gas shock inserts front and rear. - New Eibach "performance" progressive springs front and back. - New Ball joints in the front. - New Tie-rod ends and boots on rack in the front. - Full black polyurethane bushing kit installed with plenty of swearing and grease. - New Spindle pins for the rear control arms. (because we had to cut the old bastards out). - Sent front control arms, rear control arms, mustache bar, diff mounts, front cross member to powder-coaters for cost effective snazz factor and protection. - Bought a set of 16" Konig Rewinds with tyres (yeah yeah not OG but were cost effective and I like them lots). - Scrubbed the exhaust and painted with heat paint stuff so the VIN man doesn't see the ugly weld job so much. (will replace eventually) - New exhaust manifold studs to try fix the leak at the gasket. Righto, that's enough for now... have some Pics: Le shock inserts Uh oh shocks need SHIMS to fit snug... nothing in the packaging... time to go see Hayden! Hayden has a magical Shim machine All safe and snug for another 40 years. That was the front suspension, but the back was a bit trickier I will break these posts up since I have a few more pics for y'all...1 point
-
i cleaned up the windscreen channels and brushed some primer onto them. i didn't take a picture of the back because I'm a bit useless. 2015-10-19_07-50-42 by sheepers, on Flickr i had some paint left over so i splashed it about as best as i could inside the rear quarters until it ran out the bottoms. i did both sides and there is paint all over the floor. 2015-10-19_07-50-25 by sheepers, on Flickr 2015-10-19_07-50-34 by sheepers, on Flickr1 point
-
Ordered some seat covers from the states and got Greg (64 Valiant) to fit and trim them to the seats. Before in not too bad condition considering. Vinyl was really brittle and hard. After! The lighting isn't great but you get the idea. Make-shift solutions are often the most comfortable... okay maybe not this one. I'm really happy with the colour match. Big ups to Greggles for his work.1 point
-
Good line up so far. Suns out. What a cool mix. image hosting 30 mb [/url http://postimage.org/]post image capture free photo hosting how to take a screen shot1 point
-
Oh yeah, Boot lid has been shined up mildly, the rest of car looks like shit still. Is hard work, CBF.1 point
-
Todays update is bought to you by Nokia cellphone camera, fuck! Short video of the exhaust, poos I know. http://s8.photobucket.com/albums/a28/waimaks/GSR%20coupe/?action=view¤t=Video000.mp4 As it currently sits, no longer as beached on hoist as it was, still gets beached, but not so much. Currently ~80mm at front with adjusters wound 100% down. The inside of my boot with the cutdown and painted billboards removed, note braces and safety fuel tank location. The view from in the cabin with the rear seat squab removed, note safety fuel tank location pt2. Also please never crash into me, I like living. Fuel tank etc removed, view straight through. Rear end droop. Add some more of these into rear trailing arm inner mount = more camber, Techically I should probably have not put them back in to combat the camber I've gained by lowering, but my argument is that they would get lost, so back in they go! Pile of things sitting about. Have a great day!1 point
-
no mufflers etc, imagine how mean that would sound fangin past at 100000000kmph1 point


This leaderboard is set to Auckland/GMT+12:00