
Leaderboard


Popular Content
Showing content with the highest reputation on 03/21/16 in all areas
-
For those not on FB heres tonights post, Proper photos and engine bay/interior to come but for now: Talk some shit! //oldschool.co.nz/index.php?/topic/34313-the-westpala/page-723 points
-
//oldschool.co.nz/index.php?/topic/52296-uteruss-kp60-pantay-dropper/#entry1676022 BRAP BRAP BRAP BRAPPED THE SPLINE OFF DASH HOLE HOLE FILLER THEN WE CHEECHED17 points
-
Does anyone remember that law, where you werent allowed a bonnet cutout unless you were over 18? I got pulled over and the cop said "Hey bro I'm gonna have to see your IDA"16 points
-
hi guys thought i would get back on this stuff and show u a little of my project im planing on finishing up this year.... i have a 1982 datsun 1200 ute running standard motor with a few small tweaks to get her motoring abit more all adjustable suspension front and back with also rear independent suspension i have modified to sit nicely under the ute. i used a 510 sedan rear set up which made it easier all the diff bolts straight up to the drive shaft which is pretty cool makes things easier... alot of tweaking and slight mods to make it work in it..... i chose the 510 simply because i wanted the ute to still be era correct (ish) and the single arm can get my truck lower to the ground haha.... with a s14 set up theres alot more shorting of the subframe more weight as well... and the top wishbone arm will hit the chassis so yea... if the 510 xmember etc can work well in the race cars and dominate on the race track in its day y shouldnt it be able to do the same in my ute. couple of pics of her Discussion: //oldschool.co.nz/index.php?/topic/52317-anton-fs-datsun-1200-with-irs/8 points
-
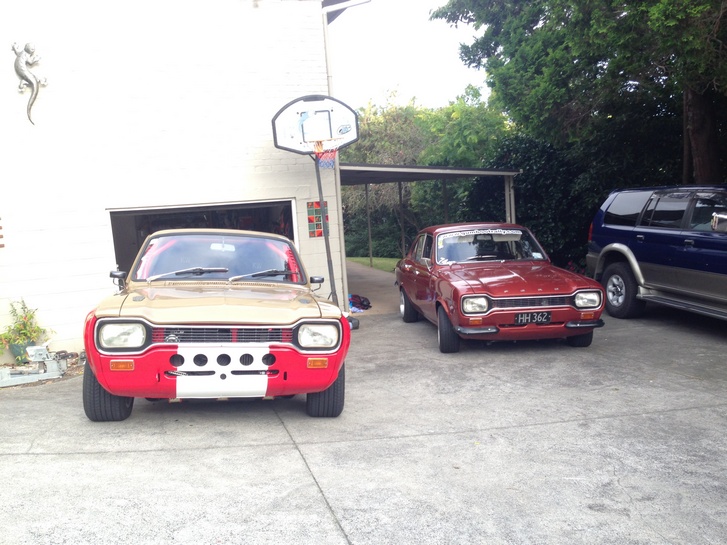
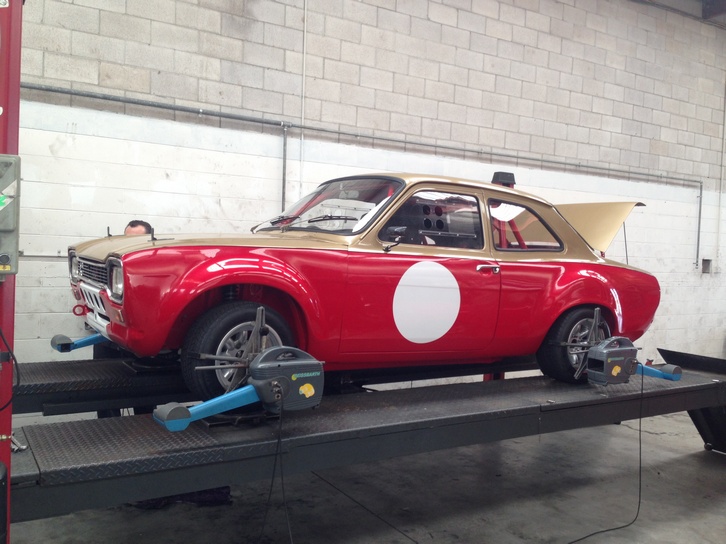
Both the Escorts should be making it to oldschool this month
 8 points
 -
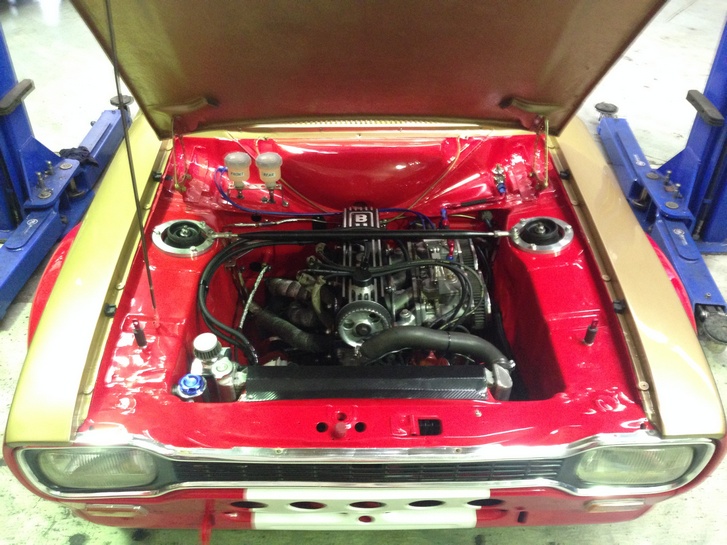
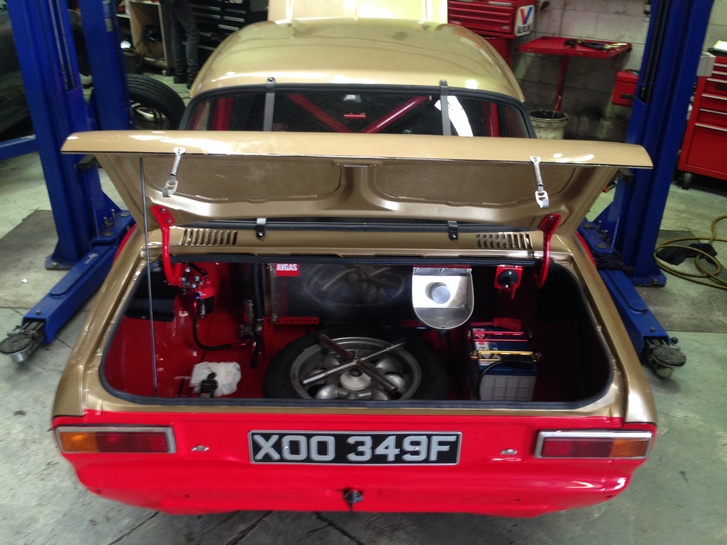
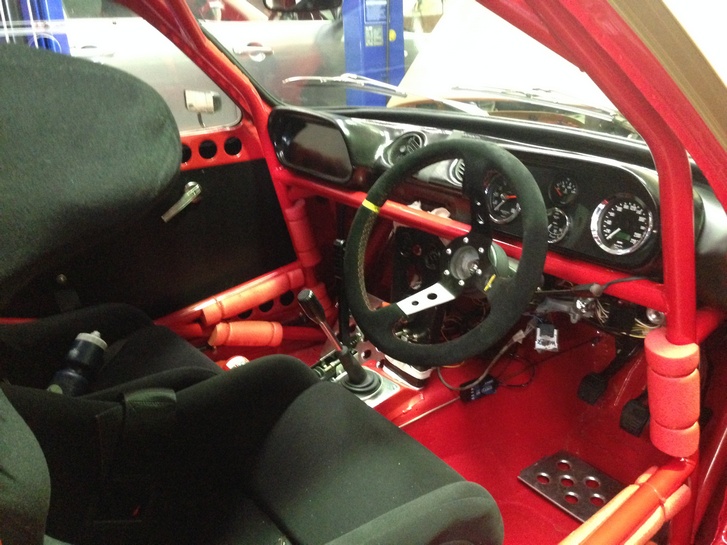
many hours later.... Its all back together and running
8 points
-
They're already in there, can't you see them? ;P7 points
-
Last bits of setup If all goes to plan , its coming to the monthly oldschool meet on Wednesday
6 points
-
6 points
-
In between paint coats I thought I'd check out my torque wrenches before reassembly (both Sidchrome clickers, one newer than the other). Last time I used the newer one I could have easily boogered a thread but I realised it was WAY out of spec doing it up (just didn't feel right) so I backed off and borrowed another tool. Then I picked up an older one (long story, but basically me taking stuff as part reparation from a loser who owed money) and thought I'd compare them to get some confidence in my tools... Testing these together the older one clicked at much less effort, so something was wrong, I thought mine may have siezed up through lack of use, but couldn't see any way to get it apart without drilling out the rivet, then I realised I had lent it out, and that someone may have overwound the setting dial. Sure enough, turning it as high as it would go, and keeping going resulted in a click as it overwound. I did this twice and tested it again - felt much better... So calibration - I asked at our depot (where the proper workers live) but they send theirs out, so looked into doing it myself. Basically did maths to see what the torque relation was to weight applied at a certain distance from the socket... Torque = force applied x distance of lever arm 1 kilogram-force metre = 9.80665 N·m (actually easier to work on kg-cm) Calculate for Newton metres then convert to foot pounds So with a handy dandy excel chart and some test weights I marked distances on some tape and set to, basically hanging 10kg, 20kg and 30kg weights at certain points to see where it operated. It was still out on the first try so overwound it another click, and it went bloody well at the 10kg settings (15, 18, 20 ft-lbs were right on the button). Changing to 20kg it was correct at 30 and 40 ft-lbs, but seemed out any higher, but at 30kg it was spot on at 60 and 90 ft-lbs. So a little confused but much happier. Initially (doing some reverse maths) it was operating around 1.5 times the setting so seems some ham-fisted lunk overwound it when returning to zero, not once, but 3 times over. (lending tools - Gah)... I'll redo the tests with both wrenches as I'm not sure why some readings seem out, could just be the vagaries of hanging weights along the shaft (or my dodgy maths). Ideally, hanging a known weight from the middle of the handle should coincide with the expected setting, it seemed ok across a fairly wide range though and if I get some consensus between the 2 tools I should be pretty much right...5 points
-
After not working on the car for a good year or so there has finally been some progress. First job is to tidy up the rest of the inside of the car, so I can paint it all up and then start thinking about wiring. Joe was awesome enough to donate some time and give me a hand with the long shitty job of stripping out the entire inside of the car. This includes stripping out the underseal in the boot as it never quite went off properly and I've decided to keep the boot white now. Anyway, pics: Stay tuned for more updates. Matt5 points
-
Oh and here are some pics I was given of it 20 odd years ago5 points
-
Back to making 'pssh woboboble' noises.5 points
-
I believe it does... ...for what it is.4 points
-
Did some stuff.. Prob the only bit of bog, regards Gary A Smith.. prob shouldn't say that, hmm I might try and resurrect this engine, only had 40km on a rebuild. Took these just to show you what I'm dealing with conditions wise in brotown.. this is just from the air out here. Merry Easter..4 points
-
4 points
-
Must be reaching their apex by now.3 points
-
Not as bad as Rotary puns, which just keep on going around.3 points
-
Good to go for this!3 points
-
i keep clicking on this thread hoping there'll be something good in it but it's all circa 2004 rotary jokes..3 points
-
Might bring the bike no registration no wof no worries right?3 points
-
Some people are lobbying to have bike summit in new Plymouth this year btw3 points
-
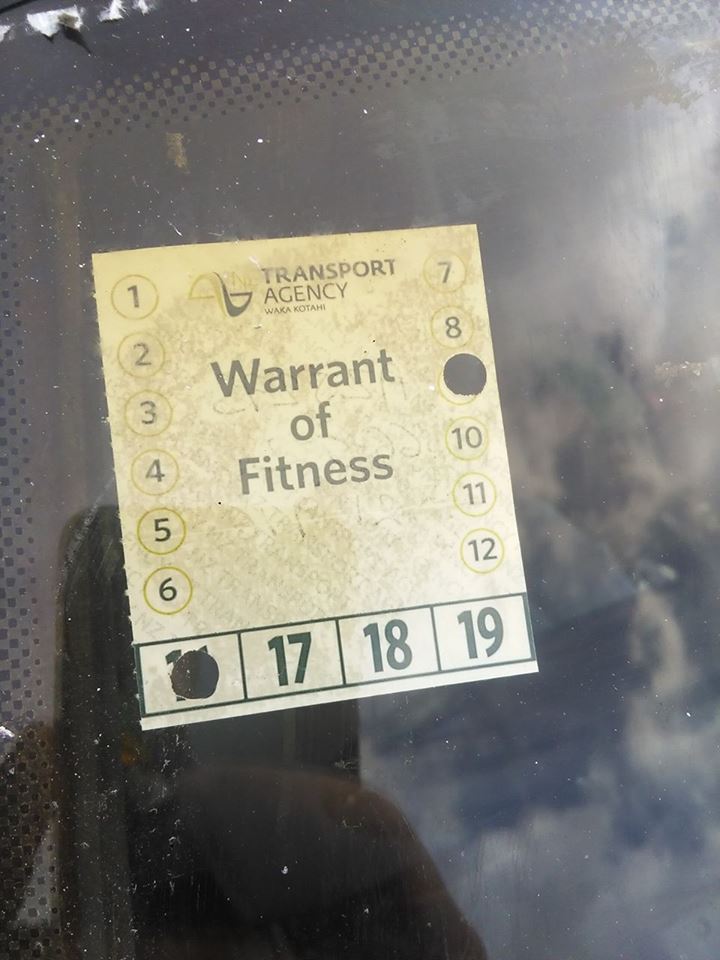
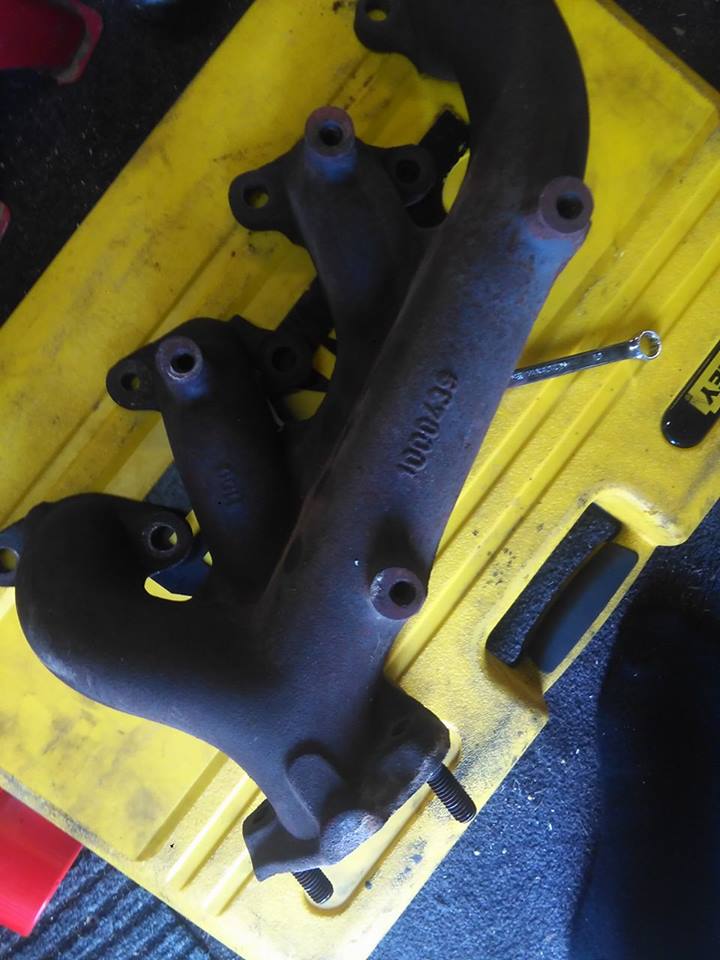
today was a good day! the owner of the vtnz station was there today, he noticed me straight away, gave a nod and got the sticker jaws are finished on the sides, and im loving it! the bloody thing is soooo high you could fit a bus underneath but will consider putting the cutties back in untill i find some legit ones. also, to find some of the parts for the wof i located a 940 wagon over in Riwaka so travelled over there to find that it was a 7 seater! so grabbed the back seat, seatbelts and trim to match for $100, Fu*king score!!! also got the exhaust manifold for $50 which i will be welding a straight to the ground pipe via electronic valve. Pics:
3 points
-
So busy day yesterday, got a bit more painting done. I looked at getting the brake booster out, but from memory these are a bastard to get at, so painted it in situ... Came out pretty well, not perfect, but far better than it was, I'll paint the master cyl cover grey when I do the grille surround... And got lots of fiddly bits done... And the front end looks pretty good with the masking removed (did this at 5:30 this morning, visions of overspray on the guards were keeping me awake)... And it'll be nice to put this together when the paint has hardened a bit... Quite pleased with the durepox finish, although I have no idea how it'll last - should be ok under the bonnet as it won't be exposed to UV, although I expect I'll scratch it to buggery lifting the engine back in...3 points
-
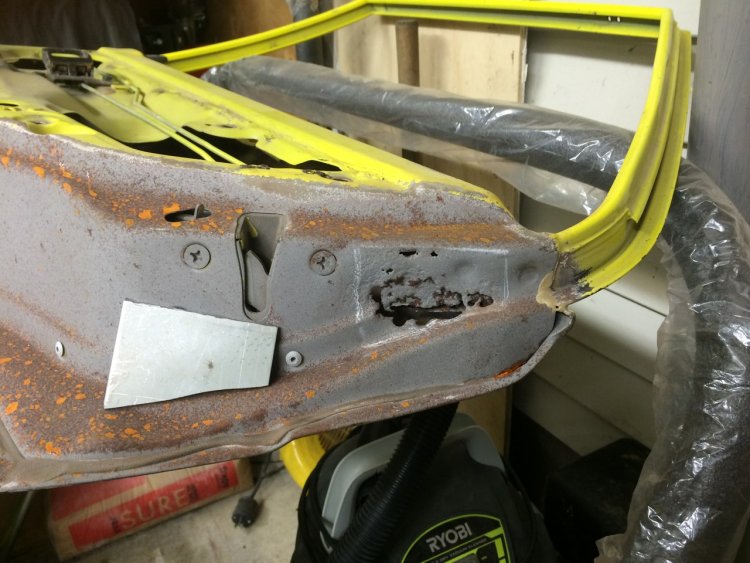
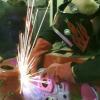
Thought I better start doing some real work done on this car Like rust repairs Started out by making some patches for one of the doors so they can Be welded in One of the tricks I found on how to create a radius No screwdrivers were harmed in this event Got my Ol mate Jim to keep me going
3 points
-
made a ply floor and put some lino stuff i scabbed for free on it. have to wait for it to flatten out (it was rolled up under the house for a year) then i can glue it down. ill do that when i paint the inside to get rid of all the painters mess in the back. its got tiedowns as well for tying down my 24 piece family bucket of chicken or other things.3 points
-
http://www.trademe.co.nz/motors/car-parts-accessories/wheels-tyres/nonalloy-wheels/auction-1054547357.htm3 points
-
That's the best part2 points
-
No pics of exhaust... Is is a supertrapp, or a dumpy?2 points
-
Living The Dream2 points
-
Had Toyota Festival last weekend. Alternator is making some pretty nasty sounds (ticking) when under load now so I'm going to have to pull that apart as soon as possible and put some new bearings in. This must be pretty much what the 90's looked like (it's a shame I wasn't paying any attention to cars in the 90's...): Here's a pile of pictures from the event: https://www.facebook.com/media/set/?set=a.10154072541147049.1073741835.618967048&type=32 points
-
Hey man. I have asked the boss. Told him it would take 30min to machine. He's said $40 total. He would have to order some material in. PM me if interested just do ur homework first as someone else may have them on the shelf for ten bucks lol2 points
-
I used dashboard restorations . Perfect job. Looks factory. Even redid it for free after the courier snapped it. Wasn't cheap, even for a simple rx2 dash , but I had previously had one retrimed in leather and it looked very average. I'm sure a rx4 dash wouldn't be cheap , but they are the best looking dashboard ever.2 points
-
when are the camo door card going in?2 points
-
Cheers guys super stoked with how its turned out, Will get some more pics later in the week once 64valiant/midnight gets his part done! If your at Beach Hop come say hi!2 points
-
About 1370mm from recent memory.2 points
-
There is a company in Auckland called dashboard restorations. I have always wondered what their work was like and if they could restore a cracked early dash and make it look factory again. I also hear they are expensive. http://www.dashboardrestorations.co.nz /uselesspost#35342 points
-
FUCK YES! can't wait to that engine bling.2 points
-
as always, thank you for your advice. We all here appreciate that your always helping this community out . i wil be getting stuck into some more plumbing joyfulness today : )2 points
-
2 points
-
oh man you are going to get chlamidiya so bad2 points
-
I have an old style Gas Station/Playhouse for the kids on the go. Building it mostly from a demolished house that belongs to my F.I.L. I have a couple of old Bowsers to go out the front.2 points
-
This week, - ive ordered some diff/axle seals from Italy, they should turn up soon - dropped of my handbrake pads to get rebonded + new diff hard lines for the brakes - searched but did not find a spring place to have the rear leaves reset 2" lower - better luck next time maybe - fitted the brand new KYB eye-eye shocks i picked up for cheaps from the Kumeu Hot Rod show - they are perfect except for being slightly longer (~20mm) at extension and compression than the factory ones, but at least they move and they pretty much bolted up (swapped the crush wasters for the Fiat ones) also continued with fixing rust. Lower valance all back together Boot seal plugged on Ground back slop some primer on So thats the boot area except for the chassis rail 'lid' which ill leave off for now - i want to install some sort of crush tube/gusset thing for the tow bar to stop it fucking out like the original set up did.2 points
-
I've had an annoyance for a while where my tacho and speedo are in accurate. As in, if they're accurate at 100kph they arent accurate at 60. I couldnt replace the tacho and speedo functions with a general purpose PWM because it only adjusts PWM (at a static frequency) rather than variable frequency which is how they both work. So asked Link to put that on the to-do list, and they've just sorted it with recent firmware. I've now calibrated them both super accurate at 500rpm intervals and 10 or 20kph intervals. Previously the problem was that once you get to 6000rpm or ~140kph, after that they would both zing right off the clock. Now they sweep through beautifully. Awesome! Will be a lot more useful at trackdays and a lot more interesting to watch for in car video. I've now been thinking that it would be cool to do similar for the factory oil pressure sensor / gauge. Instead of just having a dumb reading from the sensor straight to gauge. I could now have the sensor going into the ECU (more datalogging, yusss) and then output a 3D table to the gauge, so that it shows that "good" oil pressure is the same point on the gauge through the rpm range and also through engine temp. (oil temp would be better, but cbf plumbing in my temp sensor yet) Then from here I can have one my conditions on a warning light to be whenever the gauge goes into the "bad" area of the 3D table. Which is seems especially useful in my case because I'm always banging my sump into the ground. <3 EFI stuff2 points
-
so after spending more hours on a radiator shroud than anyone in history i fixed it. what a fuck around, but the end result looks good and thats the aim of the game i suppose. in other news the "rego on hold" letter came in the post and it expires at the end of this month so i might try and get a warrant on it before the end of the month. that might be a bit optimistic. 2016-03-20_01-08-06 by sheepers, on Flickr 2016-03-20_01-07-57 by sheepers, on Flickr 2016-03-20_01-06-15 by sheepers, on Flickr 2016-03-20_01-06-07 by sheepers, on Flickr 2016-03-20_12-23-53 by sheepers, on Flickr2 points
-
Chassis out in the sun for the first time. Stage one on it's journey home to meet the body.2 points
-
I must finish the wagon, I must finish the wagon, I must finish the wagon, I must finish the wagon, I must finish the wagon, I must finish the wagon, I must finish the wagon, I must finish the wagon…… Its been put on the back while over the last couple of months while things like family visit, jobs that pay get done, land work gets sorted, swimming in the summer sun happens. Bur I have managed to sneak in a few bits here and there. I did a bit more welding repairs to the rear boot/arch corner and I started on the brakes plus I have sorted out the wheels! Its been a little Vivatastic in our workshop recently too. I had Andre's lovely genuine GT in for repairs and I also have a Firenza that has come down from Auckland for much rust removal and repairs including fitting a wide arch body kit. Its going become a 70's V8 powered road going racecar replica. For us Viva fans the workshop was looking pretty spiffy.. Firstly the welding. Pretty easy to see from photos so here we go. Where I left off on the last post was about here… Then this scabby bit.. So the rear end is pretty much done but for a couple of little bits. Lets just ignore the elephant in the room that is the very frilly tailgate (or hatch as Hannah likes to point out..) Next rust area is around the bulkhead so I can put the brake servo and master back in place. Then I can finish the brakes. So those brakes.. Well they were all knackered. I took all the bits off and evaluated their mankyness.. Luckily the calliper pistons freed up and slide out revealing good chrome and seals. So just a clean for them. The pads are still thick and dry so result. Moving to the back. I cleaned up and honed out the wheel cylinders. Usable but not perfect and for the money of new ones not worth fitting seals into. But then I discovered that new cyclinders in NZ were either non- existent or cost moon beams. So I looked to dear old Blighty. There you could get all new old stock parts for the price of a terrible greasy spoon bacon sarnie. Luckily my older brother lives in the land of greasy bacon sarnies and he was coming home to NZ for a holiday. So I started buying up old Viva bits and getting them posted to his house in Wales. He was so grateful.. and brought them over for me (along with several classic car magazines J ) Here’s some bits… Typically after these bits arrived I had been looking through my boxes of bits and discovered not one but two sets of brand new brake shoes. But they probably don’t have the real deal inside them like these beautys… So the rear end is all fresh and daisy. New cylinders, new shoes and new brake lines. I found a new master cylinder seal kit in my stash of parts and that’ll go in place once the rust is done. Wheels next. The wagon came on a lovely set of classic Cheviot Turbos. Lush! Swoon. Two had slight kerbing damage to the outer rim edge. I could have left it but it looked pretty yuck. So I tigged them up and filed them neat again. Quite satisfying. Then since the wheels were in motion…. and I was on a roll…. I gave them all a good wire brush and removed the horrible build up of oxide. That was a nice job on a sunny afternoon. They look a lot better for it. Then the wheel stud holes needed tidying up/remachining because someone in the past had used the wrong nuts, tapered, and it wasn’t very good really. This was going to be bloody tricky with just files etc. So I whipped up this little fly cutter to reface the washer face. It worked a treat and they pull up great on the hubs now. Now many, many yonks ago some might remember the nice set of Dunlop D1 alloys I had bought for my other Viva. I never ended up using them because I had discovered cracks across the hub faces on two of them. But not before I had spent some time machining up nice new stainless washers to suit the new nuts I had bought for those wheels. I found these stashed away and they are a perfect fit on the Turbos. So that was nice. A few weeks back I spent some time welding up Andres Viva GT where it had failed its WOF and he returned the favour by gifting me a set of 185/65 13 tyres he had left over. I had them fitted yesterday and they look good… Sadly one has a pin hole through the sidewall so hopefully I can get it repaired/patched inside. So next step is finish the rust in front and the tailgate (hatch) , finish the brakes and then fix the leaky Stromberg carb. I’ll swap the screen out for one I have that is not covered in scratches and then it’ll be close to going for a WOF ! Simple………. Oh yeah.. we can all discuss the merits of Cheviot Turbos here... //oldschool.co.nz/index.php?/topic/44200-yoeddynz-and-hannahs-hb-viva-wagon-discussion/2 points
-
Can donate distinctly average projector.2 points
-
Wife's father passed away and most of his tools "disappeared" what was left was pretty naffed and my wife isn't really the DIY type so I bought one of these for 12 from Kmart stripped it cut it in half And put an old hand drill to good use (missing handle and the chuck was naffed)2 points
-
More Guard Modification One side of the car is done and in primer. Next up is the other side, then the front air-dam. Once those are on then it can finally get painted and get the sports striping on it. Made the right decision by going with the 55ml wide flares, wheels will fit perfectly in there. Should look great once its sitting down at the right height.2 points


This leaderboard is set to Auckland/GMT+12:00