
Leaderboard


Popular Content
Showing content with the highest reputation on 03/15/16 in all areas
-
Belated, but part two of the trip to Sheeper Garage Pty. Co. Ltd Inc. included the smashing together of a gearbox crossmember to hold the T50 in where the K40 used to live. Project_KP61_4AGE (1347) by Richard Opie, on Flickr Project_KP61_4AGE (1330) by Richard Opie, on Flickr You can see the pickup points for the original crossmember, and the gearbox mount on the trans itself pretty easy. So we need to make that, bolt up to over there.... Project_KP61_4AGE (1320) by Richard Opie, on Flickr By the time I arrived Sheepers had already fashioned up a jig of sorts and started on the modifications to the TE71 crossmember that came with the gearbox. The mount points on the KP floorpan are at different heights, so the new pieces needed to accomodate this. Project_KP61_4AGE (1314) by Richard Opie, on Flickr Project_KP61_4AGE (1299) by Richard Opie, on Flickr Then the extensions/whatever were glued onto the crossmember. I quite enjoy taking photos of welding... Project_KP61_4AGE (1155) by Richard Opie, on Flickr Project_KP61_4AGE (1207) by Richard Opie, on Flickr Project_KP61_4AGE (1189) by Richard Opie, on Flickr Then simply chop up some pieces of steel for gussets, weld the gussets to the crossmember, and after finishing one side it should look something as per the example above. Project_KP61_4AGE (1180) by Richard Opie, on Flickr Project_KP61_4AGE (1167) by Richard Opie, on Flickr This was the other side being checked for size before final welding. Project_KP61_4AGE (1144) by Richard Opie, on Flickr Then once it's all stuck firmly together, the end result after a few hours work was this fine looking specimen here. Solid as a rock. Project_KP61_4AGE (1120) by Richard Opie, on Flickr Engine and gearbox is firmly mounted! This crossmember will get some further strengthening but for now all is super! Thanks again Sheeper!!! Thanks for reading.7 points
-
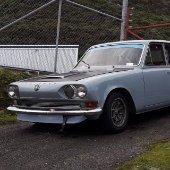
SPRING UPDATE ( Brace for disappointment ). Hello Campers. Winter's nearly gone and while you lot have been getting sun burn, partying hard, hanging 10, flicking ollies and moaning about the humidity; we've been freezing our knackers off. Wheels never happened, not sure why, but whatever. May just go bigger Watanabe's or TOPY steels. 280Z distributor and Blaster coil on their way. Upgraded the 1/3 scale battery and leads to UK spec, spins and starts much better now. I also dumped the rear light trims for that ready-to-race look. This has now made me want to lose the bumpers, add a big single tailpipe, some headlight covers and a roll cage. This aggressive look will be backed up with the stock as a rock L20, obviously... Sun came out, took some pitchers.6 points
-
you fool! it cracked because that poor lonesome cam had to do all the work by itself. your cam is an emo loner and started self harming because its lonely and misunderstood. if you had two cams they could work together to overcome the modern day pressures of bigger turbos. two cams don't turn emo and two cams don't self harm. this is knowledge gained by years of 4M ownership.5 points
-
New head.4 points
-
Yeap, twin cam bolts on. Buuuuut, I would need a heap of fab work. Intake, exhaust manifolds, possibly new turbo, power steering pump bracketry, miscellaneous little things that take forever. So, new single cam head (minus those pesky Jet Valves) and i'm back to doing skids.4 points
-
this is why i have air shocks on there way. sadly its a huge event and a good place to do some advertising for the business so its kinda silly for me not to attend. time will tell. (i risk that sticker where ever i go)4 points
-
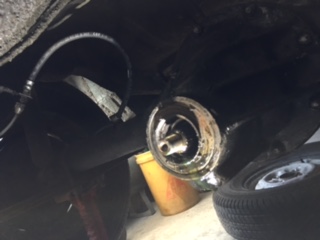
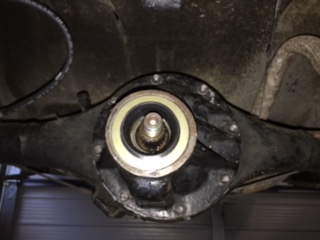
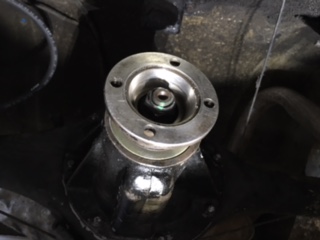
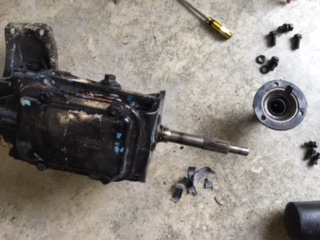
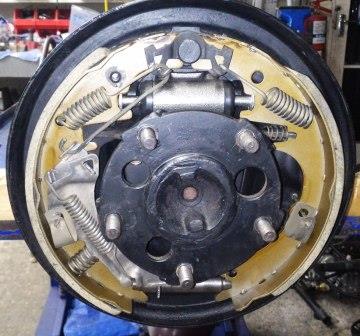
Got a bit of motivation on Saturday morning so climbed under the Cortina and got to work replacing the leaking diff pinion seal. Managed to get a couple of seals from a ford supplier on eBay and they came with very good instructions for replacing the seal without upsetting the backlash which was awesome. Took a while to smack the old seal out and I got a free oil shower when it finally came free. New seal fit perfectly and so far leak free! Next step was to find out what was leaking oil around the engine. I had assumed rear main seal as Im used to working on RWD Nissans and these are always the culprit. In this instance I found a bone dry flywheel and clutch and the leak was in fact the input shaft on the gearbox. 7 bolts later I had the seal out and went in yesterday and luckily Pacific Seals had one on the shelf. Refitting the gearbox will be tonight's job and hopefully that will be the end of the puddles of oil on the garage floor!
 4 points
 -
Danny was well and truely ready, even had time to redo the decals on his hog 20151209_080134 by Hayden Rowe, on Flickr this is just a test mock up to see if it worked, hense the rough job 20151209_080120 by Hayden Rowe, on Flickr 20151210_103712 by Hayden Rowe, on Flickr WOF time 20151219_124158 by Hayden Rowe, on Flickr Both passed, my was a very friendly pass.4 points
-
I also sprayed the fork trees before polished rockers as i had to do the fork seals anyway 20160310_171826 by Hayden Rowe, on Flickr 20160311_192919 by Hayden Rowe, on Flickr 20160311_192926 by Hayden Rowe, on Flickr 20160311_192935 by Hayden Rowe, on Flickr look alot nicer, finishes it off. however i slipped witha flat blade screw driver and chipped the tank!! was pretty happy about that as you can imagine. Probaly cant even see it in any of the photos, but just sucked being the first scratch and the nicest thing Ive painted haha anyway look more used i guess3 points
-
Ride up was pretty fun. Was still abit of a shake down....... If you Zoom in, very very far, you can just see my hog... 20151225_173634 by Hayden Rowe, on Flickr .....had to walk back fro this.. 20151225_173644 by Hayden Rowe, on Flickr I went to change from 4th to 5th, and it felt abit different, luckily I wasnt in 5th, could have been anywher0. Carried on to palmy to meet up with a couple of other mates, then noticed my number plate had vibrated off aswel, taking along with it the number plate light bolts and an indicator bahaha but made it in the end 20151225_203512 by Hayden Rowe, on Flickr was lucky enough that a mate staying with us at the hotel had a drill in his boot, only thing was, it was a cord power drill, so got my old man to back it up into the hotel room to put on a number plate we had made out of a house for sale sign and a vivid haha 1930085_10153797167473728_827603240295643631_n by Hayden Rowe, on Flickr Racing was very cool aswel, my brother (crispyMk2/ the guy with the camera) was over from ozzie, he was pretty barred up on my hog and the racing. 20151226_154118 by Hayden Rowe, on Flickr this was cool 20151226_132153_001 by Hayden Rowe, on Flickr and that was that.3 points
-
So I went to Marton and picked this Gemini coupe up on Saturday for $1000. It's 99% complete and not completely rust fucked. Even drove it on and off the trailer. G200z It now looks like this. I'm going to build a rotisserie for it in my spare time. I'm meant to be working on my shed/home so progress will be a bit slow to start with!2 points
-
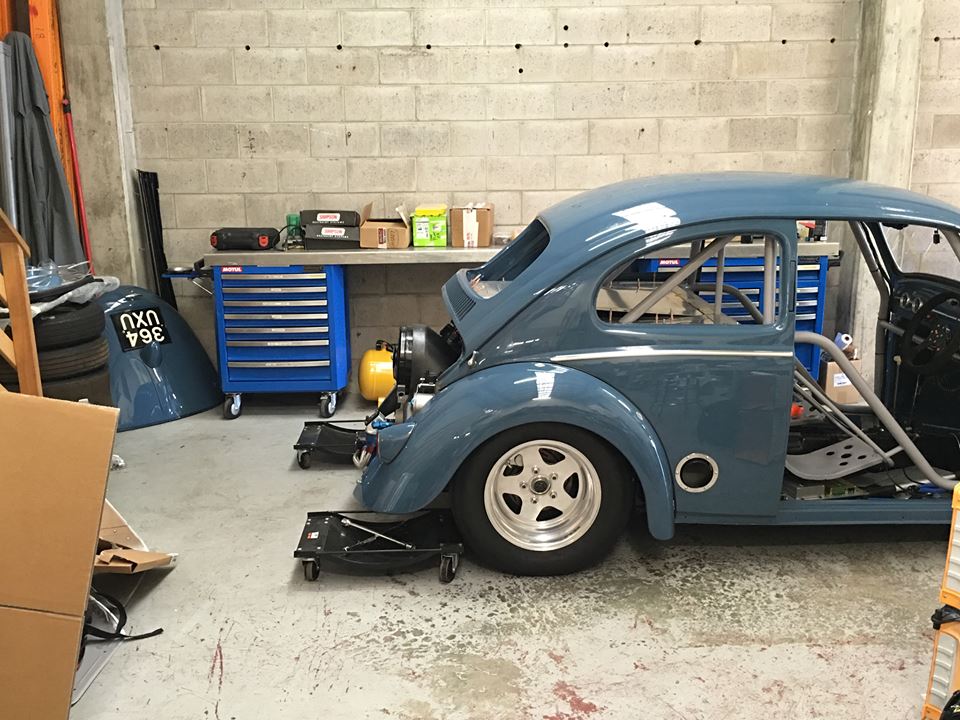
unlike. just bring beetle cause yolo. il let you know how air ride goes so you can install it cause FTP and john key and all. flick a message il be down there by myself if ya want to come for a roll/i need hands to push when i brake down2 points
-
in case it takes two days to get there.2 points
-
Mayte. Put those surrounds back on, you plonker. Maybe even get a rear garnish for shits and or giggles. Also, yay for summer. That said, I did one step far from nothing to mine during the summer months. Nice to see you've popped your head back in.2 points
-
Discuss how a head can crack is so many places. //oldschool.co.nz/index.php?/topic/28333-poo-mans-1981-mitsubishi-sigma-turbo/page-92 points
-
Oh and I picked up the headlight buckets. I grabbed these off the Bay as they were cheap enough for a punt (came to around $35 delivered). Donated from a F100 of unknown vintage (picking mid 70s) and arrived 90% blasted clean and very sound... And just needed a slight mod to fit, cut a shaped slot, tapped in a recess with a punch and drilled it for spring attachment... and ready for paint... They will sit around 5mm further out than the originals but that won't be noticable, and I quite like the thought of these things travelling from Robinson, Crawford County, Illinois (pop. 7000) to Invergumboot (pop. slightly more) to be used again...2 points
-
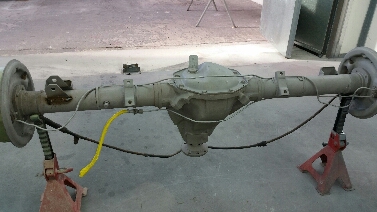
Narrowing the halfshafts: I've only got a small-ish lathe to use, so had to come up with an plan that would work without me killing myself with flying shafts! So stuck shaft 1 into the lathe and turned these two areas. The left-hand side is turned to 32mm, the centre to 28mm: Then hack it into bite size lumps: Then turn the short yoke internal diameter to a nice interference fit on 28mm: Cut off the 32mm diameter revealing the 28mm internal bore, then press the yoke onto the shaft: This took around 10 tons of pressure, so it's a proper interference fit. Not sure I needed to weld it, but I did anyway: And here it is next to it's unmodified brother: The other shaft will be shortened the same way.2 points
-
this was from our work doo 20151217_162104 by Hayden Rowe, on Flickr2 points
-
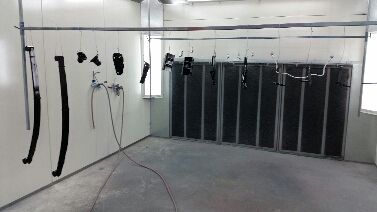
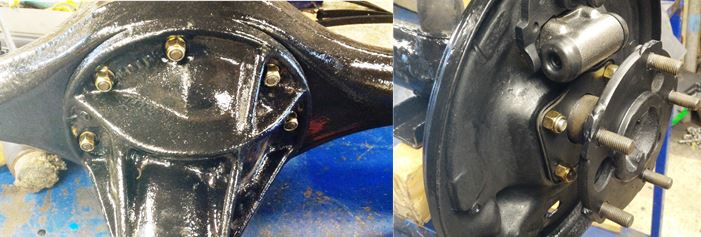
And whattaya know the phone rings and it's Logan telling me my sandblastings done. So keen as a keen thing I'm off to pick it up. With it all back to the shop firstly hit it with the air to blow out all the sand and setup in the booth And hey presto with a coat of epoxy and a couple coats of satin 2k black and silver we're done and looking good Sunday rolls around and off to brads engineering shop to borrow his press,out come the old bushes from the springs and swaybar mounts and in go the new ones, all ready for refitting.... Real happy with the underneath now, all clean tidy and tight. Next will be the big block down and topcoats... stay tuned lol
1 point
-
New page finally! Woo! Took the engine apart finally. Looks like someones been trying to run this thing on water (not me) Can anyone recommend someone in Hawke's Bay / Manawatu that's a good bugger at tickling heads?1 point
-
Probably true. I asked why Nissan didn't have any of their sports cars at the Field-days (As other companies did.) "Only Auckland get's the GT-R and the 370Z only comes down to CHCH" Get the fuck out. What a fucking waste of a dealer network. So they had Pathfinders and Patrols.1 point
-
That's the one. Wayne and I are taking the Wagon, Tim's borrowing the Delivery, The owner of the Delivery is taking his '33.1 point
-
That's the South Island way. They'll probably put signs up to advertise it the day after it finished, then moan because not many people came.1 point
-
oh never you mind! bought a whip and put it straight into storage.. it'll come out later in life. yeah this all seems to be the case, having been registered on later plates, post black plates, has rendered the black plate useless. yep same experience KY, pplate site says it's taken but some phone calls would probably sort it out.1 point
-
coolest GN ever!1 point
-
1 point
-
Cause it's fucked1 point
-
Show us ya crack/s1 point
-
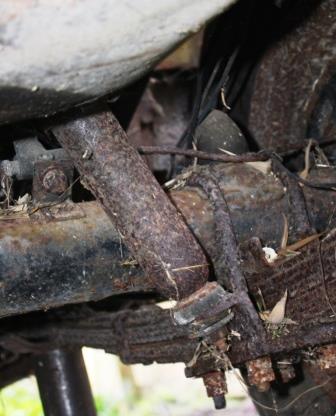
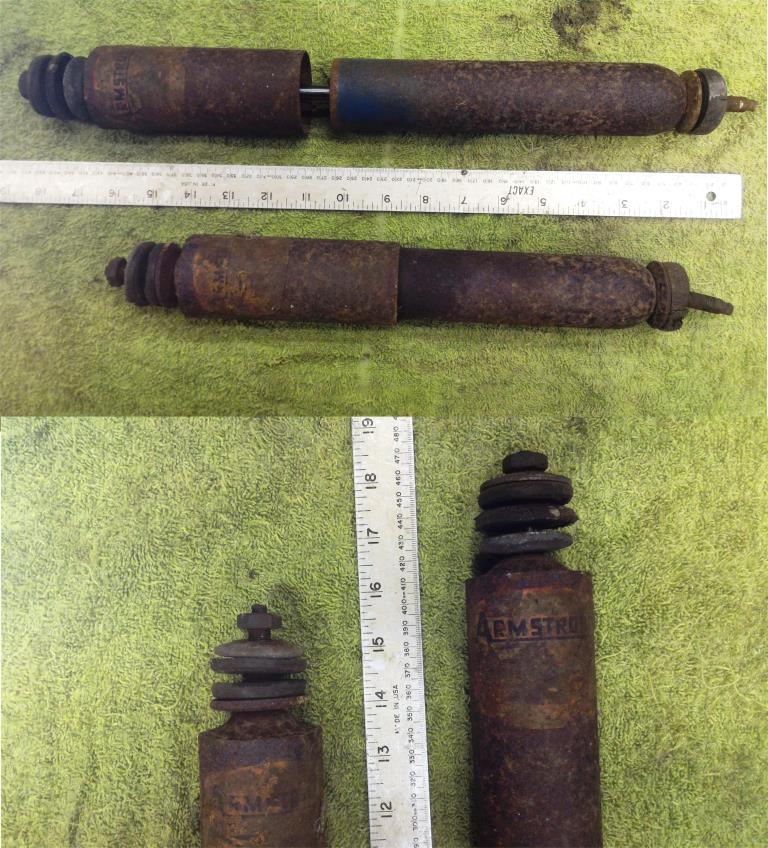
As stated earlier I’d ditched the original rear lever action shocks and replaced them with a somewhat over engineered set of angle iron brackets to convert to telescopic shocks. (All the better for performing Rigamortice’s legendry “one wheeler peelers”!)…. On closer inspection when removed, the brackets were very rusty; steadfastly resisting the temptation to fabricate a new set I gave them a few days in the phosphoric acid bath (this is supposed to be a restoration project after all). With all the rust removed they looked not only serviceable but had a cool interesting grainy texture to them, a bit of rust proofing and they’ll live again….. The only challenge now is to identify the shocks. Fitted during the 70’s I’m simply at a loss to remember where they came from, (both Rigamortice and I are living proof that if you can remember the 70’s you weren’t there!). We now offer up a free, slightly sat on chocolate fish to anyone who can identify them or suggest a suitable replacement. //oldschool.co.nz/index.php?/topic/49843-sr2%E2%80%99s-1947-vauxhall-%E2%80%9Crigamortice%E2%80%9D-discussion-thread/
1 point
-
like like like like like like!1 point
-
Been a big last couple months prepping the 120y for 4 & R Jambo, polishing, cleaning and tiding the little bits and bobs that you never have time to do. Cheers to Supreme and Autopaint Wairarapa for their support Headed up to Auckland for the Nats so entered in the Jambo this year thinking that the Nats may be cool to enter next year. Picked up the Peoples Choice award so pretty stoked with that!! Few photos of the day, courtesy of the photographers. Discussion //oldschool.co.nz/index.php?/topic/48815-120whys-75-datsun-120y/1 point
-
so that trip gave me a new list of things to fix, crossed most of them off and took it up to polished rockers this weekend been 1973318_10156754193195725_9006159733284398785_o by Hayden Rowe, on Flickr 12473963_10156754212185725_2946742543813812523_o by Hayden Rowe, on Flickr that is all, thanks for reading1 point
-
You have become famous from this car, everyone recognized you1 point
-
Well that worked out well! I've just been for the first ever hoon in this car with NO driveline vibration. 240z's are renowned for vibrations as the diff is set too far forward in the car so the axles have to bend in two axes; up-down and front-back. Datsun fixed this in the 260z by moving the diff farther back. So no amount of replacing UJs or making new diff mounts ever seemed to help. Until now! And I hate replacing UJs anyhow so it's great to get rid of them, and get a much stronger axle. There's a couple of little niggles; one of the old Commie CV's is leaking and a steel band popped off another. Also hard on the gas in tight left-handers I think something is interfering with the axle.1 point
-
IIRC. you can get a focus sump that was steel rather than alloy like sumps found on other zetecs. just a bit of cutting, welding & hammering you'd be away1 point
-
I have started assembling the engine. I've done the crank and spark plug seals, fitted the head studs ,gasket and head. I've started fitting the water pump pipe and thermostat housing. Put the vtec solenoid on. I'll get some assembly lube next week and put the valve train in. The crank girdle needed a bit of grinding so the rod ends will not hit it. I shouldn't be bending/damaging those rods any time soon. I've dummy fitted the churbo (still need to sort out gaskets for it). TOmorrow I'll clean the oil lines and figure out that plumbing. I'll dig up a service manual and check out the oil pump clearances and give it a port. I have two oil pumps so I'll practice on one first.1 point
-
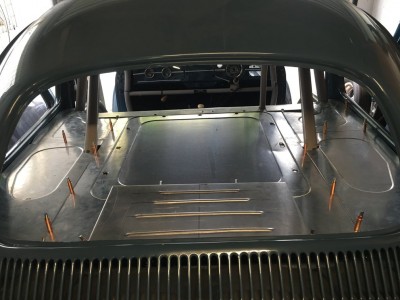
second after slam in importance, was clean it, as its filthy. every bit of trim i pulled off had cockroaches and spiders under it. so i stripped the whole interior, put a bug bomb in it, and waterblasted the whole inside and ''fixed'' the seat, with 2 t-shirts and some duct tape1 point
-
yes ........ but the death happens either way ! as for original question , its part of the oil crisis , we have used up all of the thick dinosaurs so we have been forced to develop cars which can use the oil from the remaining thinner dinosaurs . its science , science is always right1 point
-
North, south, east, and west. I do it all baby This is made from part of an old house in Te Awamutu. Must be native, the sides are rather hard. The rest I ripped down from beams using a circular saw1 point
-
Car is now at work which is a good/bad thing - less work more car... Tin is pretty much there barring holes in the firewall for wires and such things... Still a bit of a list but not far off
1 point
-
So an offer has been extended from the old GC Graeme at my work who has a collection of vintage machinery tractors trucks stationary engines and general cool old stuff to come look round for a few hours if we are keen for a cruise to Tauranga. Highlights include a 70s mack v8 with a 5 inch straight pipe and a commer TS3 2 stroke supercharged engine both on stands which he will fire up for us.1 point
-
THE WORST THREAD UPDATE EVER. Just thought I'd say that before anyone got too excited. My new rims are nearly here. Techno Phantoms at a good price. Having second thoughts tho. Weather is supposed to be OK on Saturday (dry, 10 degrees Celstigrade). Will get car out for a little blast through the lanes and a clean. I may even post a vid. However, it may snow so I might not bother. Thank you for 20 seconds of your life.1 point
-
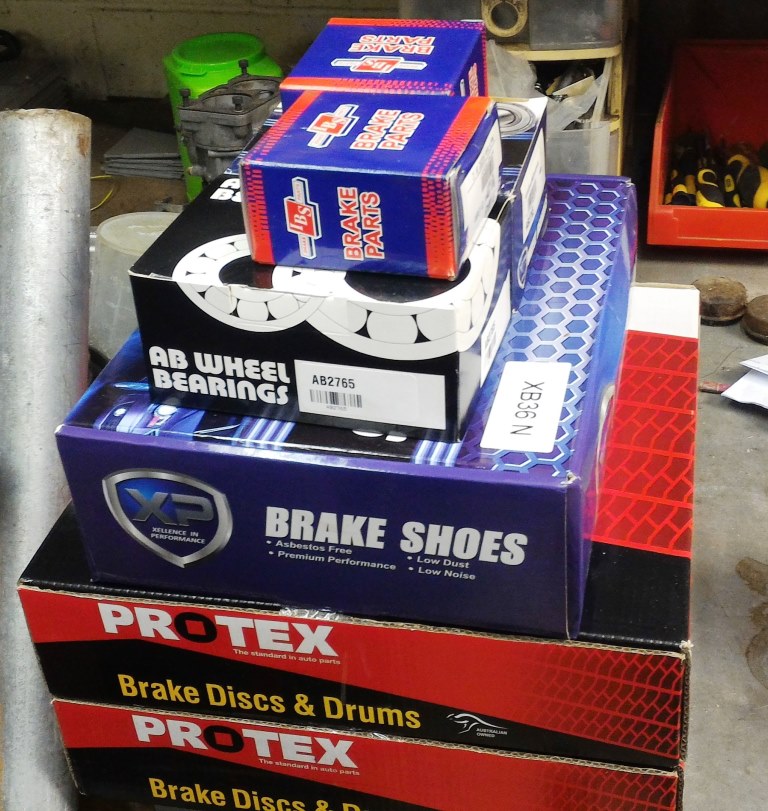
More painting……. And a stack of new parts……. Why does assembly always feel like Christmas…. Some new brake lines…….. And it’s done……
1 point
-
so, usually I post up stuff when I thinks it's coming together well, but most of the time I've got no idea what I'm doing, like the last two days. start with this. I have not been looking forward to trying to seperate these. take a not quite as stuffed example. this panel was on the old baja I cut up, seems the short baja fibreglass bonnet needed some clearance. spot the diff this side is rough! started hammering it into shape. than I chopped this out, just past the old welds still trying to suss out the best way to stick it all back together. tried to save the dash side of the lip, but as you see.... so I guess I'll have to make a new one? I also sprayed some primer on the roof, for now, and cut out and patched the holes. trimmed the new panel up and had it blasted by the same crowd on henderson valley road. pulled the dash out, thought about cutting the lip off it as a doner. so now I've just got to make this all fit back together again. oh, and I welded up about 15 holes under the dash from radios and stuff over the years. was hoping to have this finished and back on the spit soon to finish up the sills. ah well!1 point
-
Got one line nearly off the A4, mounted filter, got speed sensor mounted, and finalised all oil water and fuel hoses, barring three. and also worked on hydration centre, note the beer shifter Bought an enclosed trailer a while ago, did a bit of wiring on it today. Its getting wrapped in a couple of weeks. Im actively involved in hydration after a full Saturday.1 point
-
I finally got the ride height of this badboy sorted last week! Rear leaves were reset 3" by Bellamy and East- Ive used these guys a number of times and always happy with their workmanship, turnaround and cost. Cant recommend them enough! The front springs got were modified for race application by the formidable Mr Milwaukee. I was told taking off a single coil would probably be enough, but after having to drop the lower control arms out to remove the springs, I decided that i didnt really want to do it twice. If it was too low, then I'd add blocks to even it out. A whopping coil AND A HALF! made their way to the scrap bin. I do like to live dangerously, but thankfully it was the perfect amount to match the rear. Big thanks to #AndyGal for pulling his hungover tired self out of bed on Sunday to help me roll the guards. They may look a little rough, but we weren't exactly working with straight guards. IMO they match the rest of the truck perfectly. Next up, sort the steering out. Vent your anger and frustrations here.. //oldschool.co.nz/index.php?/topic/48611-gomaxgos-b1600-yarn/1 point
-
Well, Oldschool Nationals 2015 weekend was a hoot. Those that were there will know. Those that weren't there missed a long weekend of good mates, sweet roads (including gravel), hooning, boozing, yahooing. Holy hell was I surprised when prize-giving rolled around on Saturday night and the Eterna picked up Best Sedan. Shit the bed! There was a heap of other sweet Sedans there and it is honor to get the award. After driving the hell out of the car here is how it sits in the garage.1 point
-
So the bumpers on the car have always been tatty, with the chrome strip broken in places and painted over with matty B. The rest of the paint on the bumpers was cracked and there was a few dents. The lower sections of the front quarters has also taken a hit, so off they came. Upper and lower valances were peppered with stone chips....... ^^ Surprisingly there was no rust hiding under here ^^ The bumpers have had work done on them before. Nothing major, just some glue and a slim of filler hiding under there. Now, theres a metal strip that runs over the top of both front a rear bumpers. I was as careful as I could be to get the clips to disengage, but the plastic was far to brittle and most crumbled and cracked between my finger tips. Karl BDA780 to the rescue again. He printed off some clips from a sample old clip I gave him. Perfect fit first time. I've still got to put the grill and park lights back in. I will have to give the rest of the car a decent cut and polish now. That can be next weekends job.1 point


This leaderboard is set to Auckland/GMT+12:00