
Leaderboard


Popular Content
Showing content with the highest reputation on 01/10/16 in all areas
-
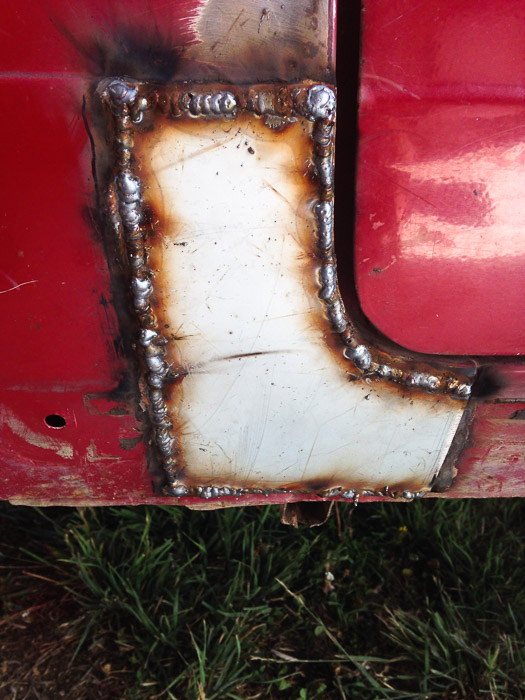
i did a few more bits and pieces on the car today. i lengthened the lower control arms on the diff to get a bit more clearance between the driveshaft and the floor and a few other little things. then i lowered the car off the jack and realized that the car was sitting lower on one side than the other. a quick measure confirmed it was 20mm lower on the right rear. i jacked it up and took the rear wheels off and found that the right rear spring perch had unwound itself and was 20mm lower that the left side. all of a sudden all of the weird things the car had been doing made sense. when i moved the tunnel up at the back to clear the bigger diff i left lots of room so the driveshaft/diff nose would never hit the floor. but somehow a couple of months ago it did. that was really strange at the time. i couldn't understand how it had done that given how much room id made for everything. there was other stuff too, like I've been adjusting the panhard bar to stop the outside wheel from rubbing but i seemed to be moving it backwards and forwards and not getting a consistent result. it always touched on the outside. i don't know how long its been like this but given the amount of crap in the threads id say a long time, perhaps over a year. its been hitting the bump on the right side almost constantly which explains its weird feeling turning left. i also wonder if the weird experiences i had with the T1Rs weren't exasperated by this? who knows. i can't believe I've never noticed it before. once i measured it it was obviously on the piss. i guess I've been fairly focused on getting the red car done and not really paying much attention to fuck all else. anywho, its fixed now and feels like a completely different car. a better one for sure.8 points
-
Overdue update Fuel system mostly done, went a bit overboard here. 3/8'' stainless tube, made the surge tank out of a used cal gas cylinder from work, bosch 044 pump etc Drive shaft made. 900mm of tube Really needed a hoist to make a proper job of these lines. Had to slide out from under car to make every bend. Managed to do each line in one piece which i'm stoked with even though there a bit kooked. Going over the diff was most painful Need some flexible lines to go here to the fuel rail Gearbox cross member mk2 And I've been working on the intercooler and piping Wanting to mount these coils on the cam cover so i can run short leads. Made up a bracket out of 3mm flat bar, its a bit flimsy under the weight of these coils so might have to beef it up a bit3 points
-
I've been researching a new axle conversion, and have been collecting some parts. I've heard of people using these axles but not this combination before. This is where I'm at: On the right is the stock 240z axle with the twisted Wolf Creek R180 side axles. And on the left is the 4 cylinder D21 axle with factory inner CV and a VX Holden Commodore outer CV. The side axle is from an S14 I think and plugs straight into my R180 diff. If I measure the length from the side axle circlip groove to the outer face of the CV/UJ flange the stock axle is 489mm and the Terrano one is 458mm which means I have 31mm to play with without being any worse off. I had no binding issues in the past - i think, guys running R200 diffs might struggle thou. The Commodore CV is a knock off of a 108mm Porsche 930 CV, and they use it on the big heavy V8s so it must be solid. So now all I need to do is mate the Commodore CV to the 240z companion flange. There're two options: These adapters which are a measly $92USD Or these replacement companion flanges which are a whopping $700USD I'm trying to do this on the cheap so I'm going to order the adapters. I have the 240z 25-spline stub axles anyhow so the companion flange wont work, but if in future I upgrade to the 280z stub axles then it's an option. If this works out I've managed to convert to CVs for really cheaps: D21 Axles: $200 Commodore CVs: $60 Adapters: $200-ish YAY3 points
-
Righteo. We're gonna whack another one of these through if people are keen. Ruddy ol' valentines day cruise. 14 Feb. Bring ya Middy, bring ya mum. Will be a few more km than last time. This is jsut a place-holder for now. will update in a wee while.2 points
-
Some years ago I bought this tractor to use on my small holding. Drove it home and parked it on the drive.2 points
-
Some updated pictures I took this morning. Unfortunately a bunch of water got under the clear on the trunk lid and now looks horrible. Luckily it can't be seen on the photos so you guys can just pretend you didn't read that. Coming sideways soon in a hood near you.2 points
-
red car got painted the other day so i decided to take a break and work on a different car. this one. i took the BMW seat out and removed most of the mounting rails that i made for it. (insert picture of floor when next i take to seat out) then i set about making the race seat fit. it was one of those days where everything fought me, you know, when you should just shut the door and go inside, well it was one of those. also the humidity today was a billion percent which made it worse. anyway i stupidly kept going and now the seat is in. i have used the "doubler plate" method to mount 3 of the 4 points but its just wasn't practical to mount the 3rd that way so i made a thing that i welded to the seat support crossmember. there is no fucking way that will break. 2016-01-08_06-31-40 by sheepers, on Flickr 2016-01-08_06-32-03 by sheepers, on Flickr 2016-01-08_06-32-21 by sheepers, on Flickr2 points
-
Bought a set of new bronze valve guides which I have turned down and Installed and honed ready for the head to be mocked up.
 2 points
 -
Quiet times here, an update is in order. Both rams were different shades of blue, now they are dark green and blend in much better. I made a mistake when I built the log splitter and brought right angle hydraulic fittings and found they cost a fortune. This time I've brought black steel right angles and plain 3/8s nipples, much cheaper! Did a deal at work and scored a nice battery, it's perfect fit in the chassis, I made a nice base and clamp to hold it safely. The suction side of the pump needed to be redirected, done. This needed some thing to rev the engine. It would have had a hand throttle but it was long gone, when I got it it had a lawn mower throttle which was a pile of crap. I've made a foot throttle, it seems to work well, and it mounts to the hand throttle bolt holes. Return springs look a bit average. Meh. Luckily this MX5 fan I had floating about in the garage was a nice width to fit the radiator. The hydraulic tank is finished, mounted and connected to the pump. It looked too new though so I splashed some paint and a bit of salt water at it. It's better but not a perfect colour match. Put the control valve on it too. That was where things got really exciting! This thing runs! I got it going this afternoon. Drove it out of the garage, up the drive, on a little adventure down the road and back. Wow, yeah. It feels great to drive, I put the auxiliary gear box in first and the dozer box in third and it pulls away easily from idle, first/first is very very slow which will be great when I get the blade on. The steering works nicely, PTO engages easily, all the tractor gears are there and engage easily. It starts and runs well, not very loud but nice and tractor sounding. I'm so pleased. And the bad news. I think it has a blown head gasket. I got it warm, shut it off and went inside for tea. When I restarted it some water came out the exhaust. I took it for a drive anyway and it overheated big time, whistling like a kettle. No problem, I'll pull the head off soon.2 points
-
So i've given up on cars (hard to do when over the last 33 years i've owned 207 lol) and decided to get back into doing up bikes. Don't care what bikes, be it pushie, moped or full size. Have been looking for a "project" for a couple of weeks with some interesting finds (which still may end up in my shed much to swmbo's disgust haha) So, this morning i check FB and on one of the local free pages this thing popped up, and even better it was only ten k's away. Haven't decided on final plans but it will be re-powered with something between 150cc & 200cc.1 point
-
Hi guys, I have acquired a 1981 Mitsubishi Sigma Super Saloon and I'm currently building up the factory engine to try and squeeze as much as I possibly can out of it while keeping it NA. It has got the mighty 4G63a 8 Valve SOHC engine in it. Any advice or information on this engine will always be greatly appreciated, however here is my current plan: Upon removing the engine from the car and timing it in on an engine stand I found the engine to be non-interference (The stock valve motion has 10.3mm of lift and 212 degrees duration @ 1mm" and my piston to valve at TDC is almost 11mm, I double checked this by rotating the cam with pistons and TDC and they did not touch). This gives me heaps of room for modifications both to valve motion and compression ratio. The stock head runs a 43mm intake valve and 35mm exhaust valve and the stock ports flow 178 CFM and 122 CFM respectively. I have calculated the stock compression ratio to be 8.99 : 1, which matches the factory number of 9 : 1 for these engines. I am currently planing to run a custom camshaft, with 13.5mm valve lift and 256 degrees @ 1mm. This will require some machining of valve guides and retainers to be able to fit this much lift but shouldn't be too difficult. I will be porting the head to maximise CFM on the intake side with the stock 43mm valve. I then plan to run Toyota 22R exhaust valves which are 37mm diameter, same length, same stem size followed by a port of the exhaust port. The stock engine comes with an intake manifold that is just awful. When I pulled the head from my engine it was very plain to see that the inner two cylinders had been running rich while the outer cylinders had been much leaner. For this reason I have purchased a set of Yamaha YZF R1 carburetors. (If anyone has installed these on this head before and found a good way to re-route the water cooling that used to go through the inlet manifold I am all ears). Upon stripping the block I discovered a bit more wear than I had hoped for, Including a seized balance shaft which had spat out a bearing into the sump. I don't plant to run the balance shafts anyway but this does indicate that the engine has probably been run very low on oil at some point. The bores are also pretty scraped up and the crank journals will need polishing. I am going to get the block bored to run oversize 85.5mm pistons, not sure which pistons to get yet though. After this I will time the engine back in on the new camshaft, check my new valve to piston numbers and see how much material I can safely take of the block and head to increase my compression ratio. Finally I plan to make a a custom exhaust manifold. 4 into 1, 36mm primary into 2.5 inch, or there about. Feel free to let me know any thoughts people have about this project. Also, if anyone has one of these engines and would like me to check any other measurements or values, let me know and I will see what I can do.1 point
-
Let me have it, comment away. Link to build thread: //oldschool.co.nz/index.php?/topic/48066-m-ms-bmw-e28-525e/1 point
-
saturday morning will be too late for swaps! when we used to borrow the mrs boss coffee cart and make neds, dudes would be there from wednesday and swap the good shit amonst themselves then sell all the other shit to the 'townies' on saturday. Still roll out on sunday with huge overloaded trailer loads of stuff tho, i dunno how they CBF to do it. (ps see you saturday morning for swaps and maybe friday for beersies!)1 point
-
Gonna head up Friday after work to party and geeze at swapmeet Saturday morning1 point
-
Yeah it is, thats what they seem to use in non-bonded rubber windscreen seals so they can easily be removed and re-sealed, bonded all use urethane sytle cured high adhesion sealants so they don't fall out obviously.. I'm quite suprised to find it this hard to find the right stuff, I mean someone's supplying panel/glass shops.. it may be that I actually have to go into smith & smith or novus and buy a tube off them.1 point
-
For future reference neither sca nor miter10 have anything..1 point
-
I have touched this car in dirty places.1 point
-
Bostik 5614 mastic is great stuff1 point
-
100% whitworth Do you have access to whitworth dies?1 point
-
Its pretty important to swage it correctly. We find so much stuff on the plant where I work that has been done by lazy cunts or dudes who have no clue. I was working on some shit and a tube let go next to me because someone hadn't swaged it right. Next thing there's 100 bar of steam venting to atmosphere, I'm lucky I didnt get my face burnt off lol But yea its good stuff1 point
-
More likely to borrow an old lady than a motorcycle!!!! Haha Last time I lent my bike it came back in pieces! And the piss wizard didn't cop up a dime to get her fixed up. Hope you nab a ride, temperature is good atm, my soft contis are working really well! Good bit of rain after the main crowds to wash the roads down too Happy motoring!1 point
-
Thanks bro, Landau's last on the list of cars so theoretically 10 years away haha..1 point
-
I've used paint stripper before on old paint spray guns and they came up mint1 point
-
Massive shed day today, repaired a few bits, stripped heaps more parts and got the first layer of paint on while the weather was good. You make good progress without the wife and kids interrupting you every hour or so, the only break was when fat Jim (Southern Scoot) came round with beer... Worked on my brazing skills on the brake cable cover. And got the stripping down to a fine art now - hit parts with Tergo strip, scrape first layer off when it starts to bubble and repeat, wire brushing off what is left. Then a selection of brass wire brushes in the drill on the rust, and get what is left in the blast cabinet. Only problem is that stripper is pretty violent, it eats nitrile gloves and I lost most of my fingertips as the skin came off in great chunks after being exposed. At least I assume it was the chemicals, not my soft office worker hands rebelling at doing real work... should get a couple more coats on tomorrow if the weather behaves...1 point
-
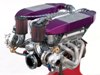
And now onto the top dog CA I just picked up today, the long term plan with going CA was always to future prof everything by doing things properly around a built up long block that someone has given up on, and that day came allot sooner than i expected, and sooner than my bank account expected. Specs; 4 Port head Tomei .75 oversized forged pistons Shot peened rods with brass bush fitted to small ends ACL race bearings (Crank, mains, caps) Heavy duty valve springs Permaseal full gasket set Cometic steel headgasket ARP studs and rods Decked block Crack tested head Machined bore Cut valve seats and valves in head Balanced and knife edged crank Ported and polished head Gates race cambelt New water pump etc etc1 point
-
rust proofed and cleaned.. Masked.. Key coat.. my mate who's a prof painter did the initial then got me to do the rest. I ended up getting a white epoxy with the veiw to leaving it till I'm ready to do the rest of the car.. So my sister had decided that since I have a bench seat that they want to use this as a wedding car for the bridesmaids, my mate bought his buffing gear round to show me how good the paint would come up with a proper buff.. I was mildly impressed.. He's gonna give the primer a buff too to bring it up as its a medium sheen at this point but he reckons he can get it a bit more glossy.. stoked with how good it looks..1 point
-
If y'all ever decide on a Saturday meet, I'll mission up from the South.1 point
-
Makes it look a bit like Bob the Builder's tractor with the lights up there eh? The original owner did that to avoid conflict with the loader. I'm only the fourth owner. A neighbour bought it new in 1957. He turned up here one day when I was working on it and recognised it. Somewhere along the line he gave it to his brother who used it for many years to drive a pump. Then a young guy bought it as a project, realised he had too many projects, and sold it to me.1 point
-
made some slip joints today weak update so heres a skid1 point
-
Couple more photos My custom parcel tray cover, made by Flat Out Engineering in Balclutha - definitely a talking point of the car! Still possibly one of the hardest parts to find with this build was the RH fuel tank. When I bought the car it already had the hole, but the tank had been lost years ago. I had been getting a LH one converted but was proving to be more than what it was worth to do. The hunt was on to find either a genuine or repro one for a reasonable price, luckily Minibitz had this second hand original one that needs a minor repair done to it which I got for an absolute score. My motor that is in the car now has an interesting back story. The engine has been a bit of an urban legend in Dunedin, purely down to the fact that it was a 180bhp fuel injected turbo 1275. It was raced out at Beachlands Speedway where it dominated the races it was entered into. There is a video on Youtube of it on the dyno "Ewoks Turbo Mini" Coincidentally the motor was built and part owned by the guy who was to be building my motor anyway, so when it became available at a very good price I jumped at the chance to own it. He has told me I should expect to get around 150bhp with the SC12 on it. The photo is from the night I picked it up. Since putting the SC12 gear on, I've run into issues with bonnet clearance. The blower came off a mate's Mini, which was an 1100. The 1275 is slightly taller in the block than the 1100, hence why i would clear. The solution - made up a set of alloy bonnet lift brackets which are adjustable. Haven't metal finished them yet but they work perfectly1 point
-
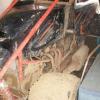
Removing the brakes: The brakes looked pretty neat, but I had to press the cylinders out with a grease gun. Totally jammed. In the meantime I am testing derusting objects with electrolysis. Derusting objects with electrolysis works above expectations must I say1 point
-
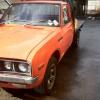
Finally organised shipping at a reasonable price. Turned up today (over night delivery!!!) Was pretty stoked. Theres definitely a bit of damage from when we tried to bring it back on the trailer but oh well, shit happens. Also the shape isn't as nice as Sparkles, I was using that as a guide to go off of. The top of the tray doesn't flow in as nicely and the tailgate says Nissan which is a bummer. i am planning on getting another tailgate and either doing some sheetmetal magic and putting Datsun on there or shave it and get a decal made. Will see. My thoughts are its a cross between the 720 and 620. For now the plan is to remove the damage at the bottom, shape it/remove some small imperfections and then paint it. while the painting is going on i will do the drivers door properly and the driver front guard is ready for colour. Hopefully have the whole ute painted soonish. Also... quite obviously.. needs LOW. Look below and share opinions here Note tray is just sitting there1 point
-
S13 BC Reds in, front now close enough to the ground. New T3 steering arms test fitted, will permanently install after my next wof. Pick up 2JZ GE set up this weekend . Can't wait to get to the track again, should feel like a racecar now.1 point
-
Screw you guys i'm going to the moon1 point
-
Change of plans. ..... This is happening1 point
-
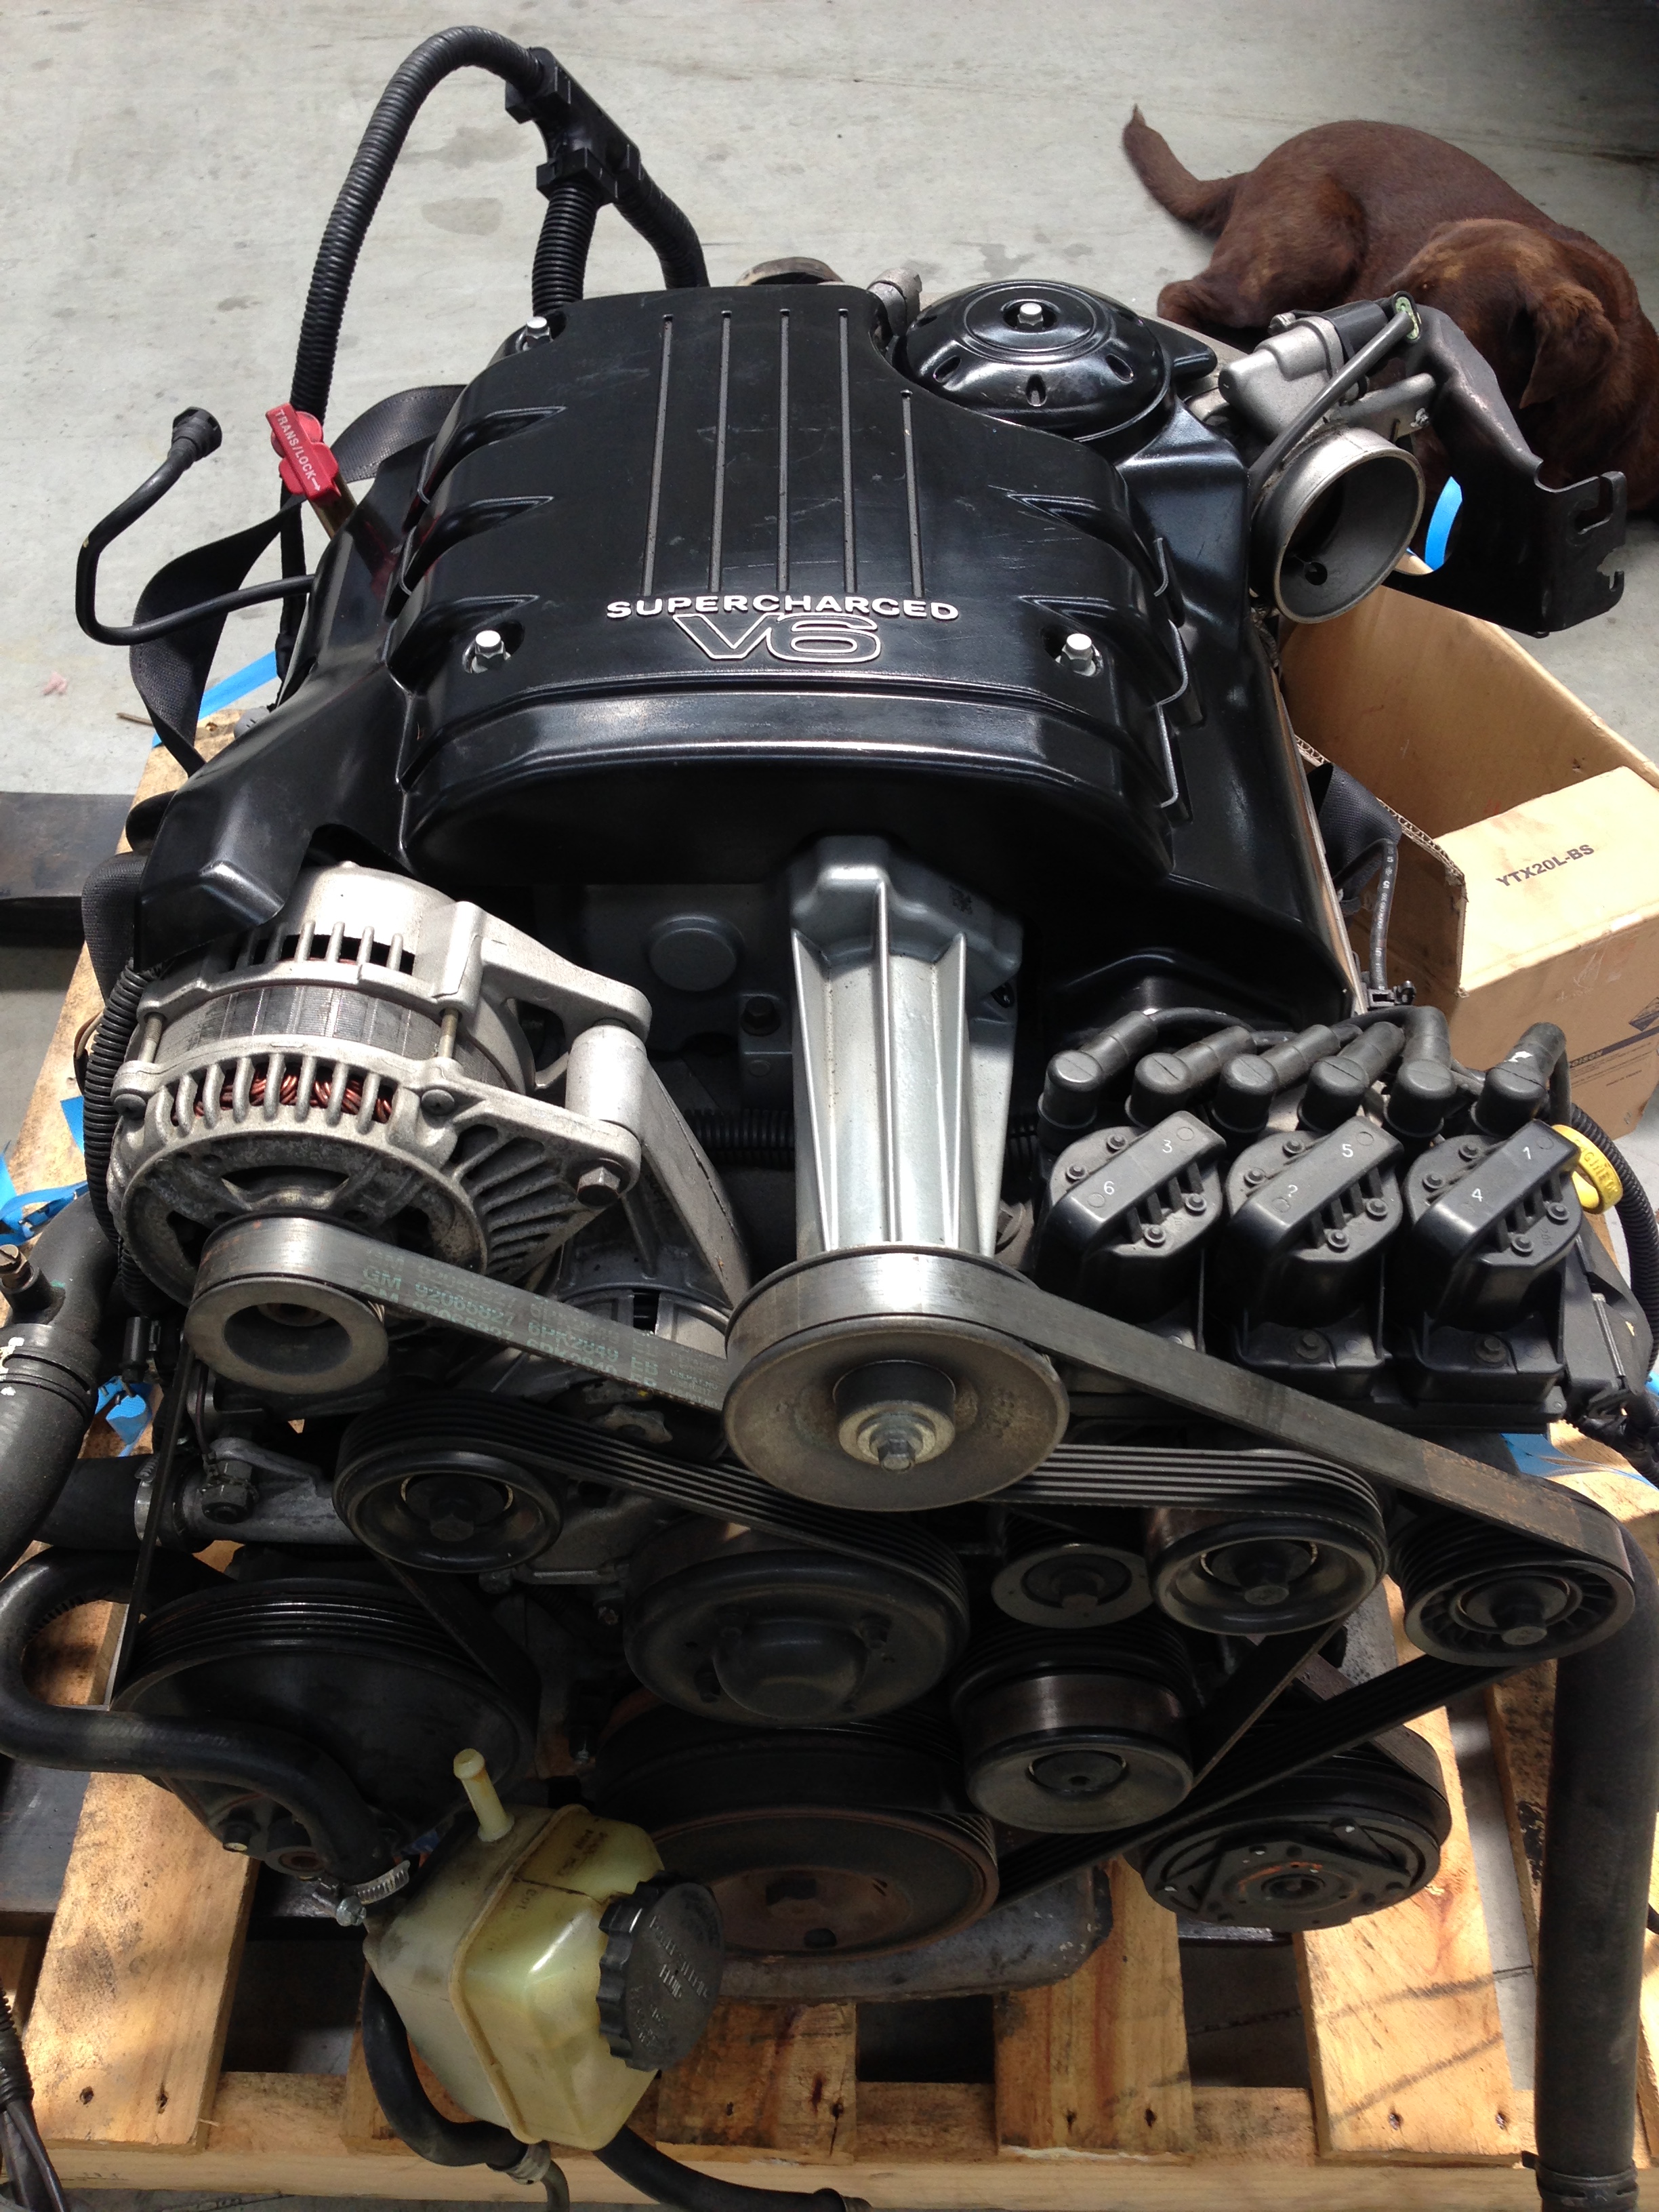
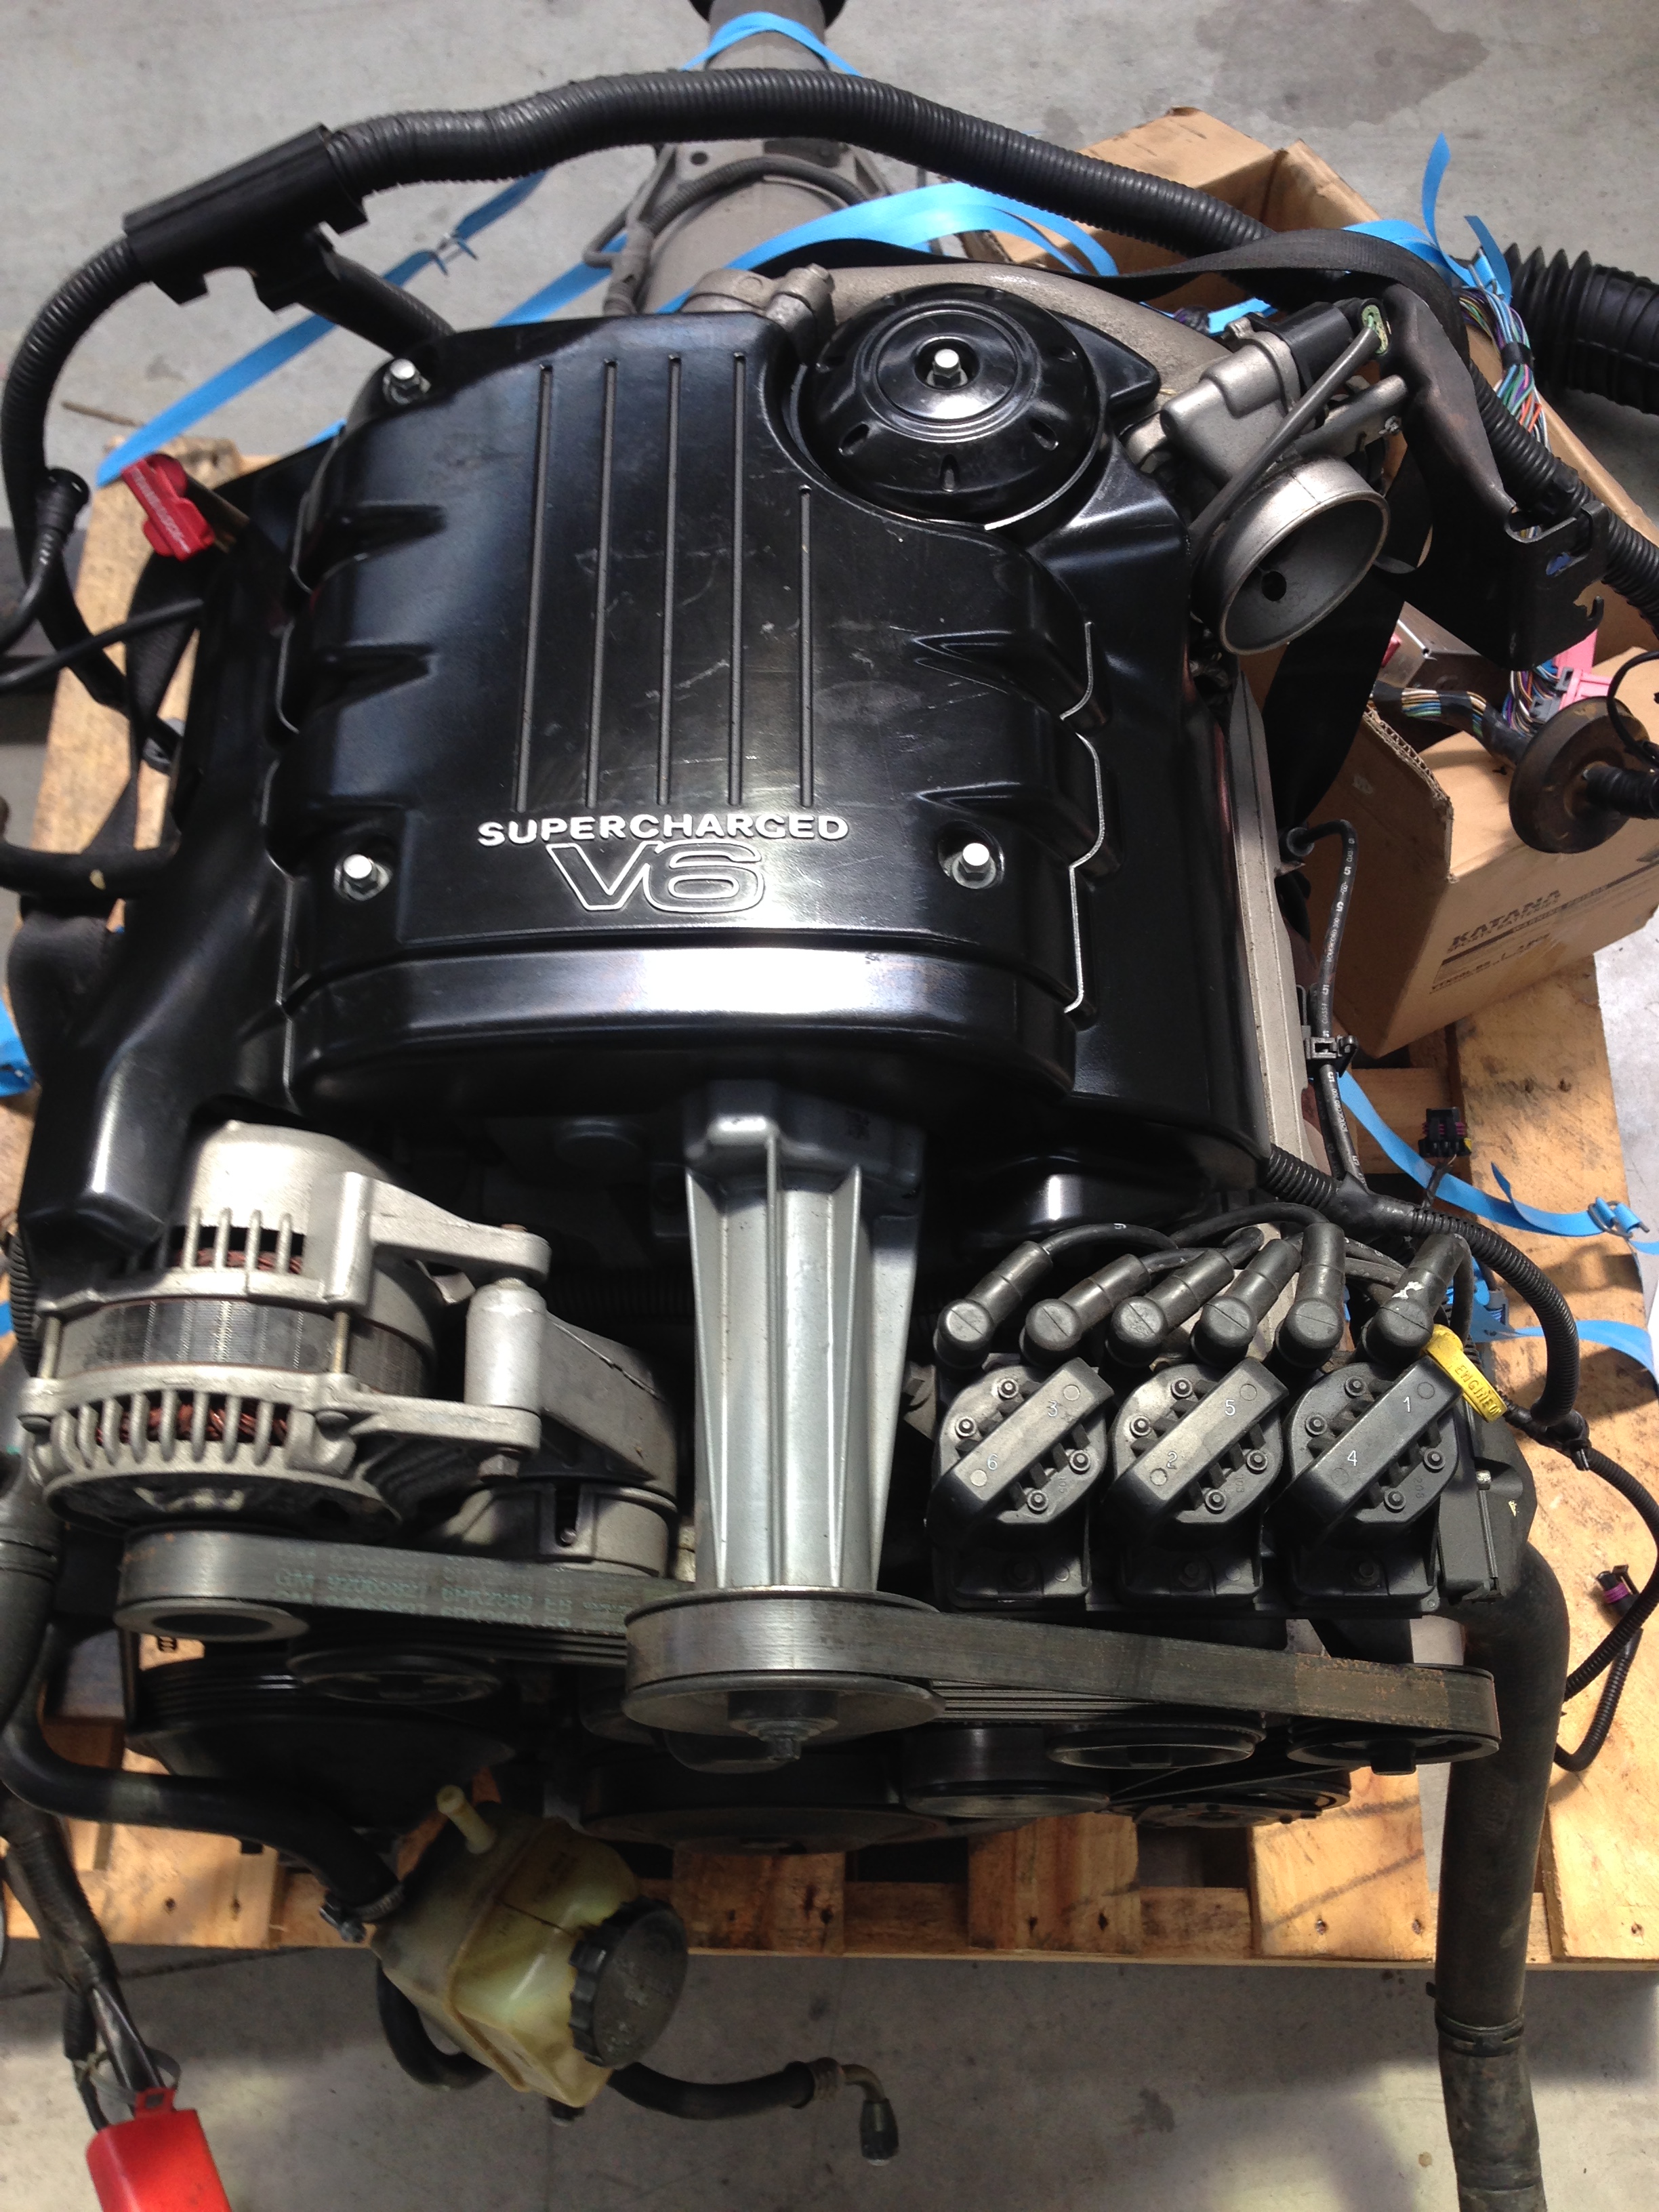
christmas pressie arrived today on a pallet, looks really good That will make the old girl boogie!
1 point
-
Back on the hunt again ! I emailed loads of Importers but almost all of them were vague about pricing, time scales and duties I would be liable for once it landed here. One firm gave me a complete break down of costs at both ends and were recommended by someone I knew so they got the job. Once everyone had got in touch it was all systems go ! They gave the car a tidy-up. A nice man arrived at CCN with a transporter. Vid-Yo ! He then drove to the sea side and put it on this. Then started it's 8 week voyage to the UK. However sad it may sound I tracked it all the way back and checked for webcams on the way. I missed it through the Suez Canal and past Gibraltar but caught a look in Calais. ( that's in France...). Eventually it landed, went through customs and was on a Transporter to my house. This is the first look I got at my Hako (or any Hako actually). Very excited. I backed it out of the transporter and looked at it in the pissing rain. They are so much better looking in the flesh, lots of subtle styling I'd never noticed in pictures and wider than they appear. I was well pleased. Gave the driver a cuppa and some of Carols baking, talked about cars for a bit and then he pissed off. That was it then, happy bunny. Sent some pics to David and the boss of CCNagoya put them on his blog. It was the first car they had sold abroad and I think they were even more excited than me. http://www.nccmeeting.blogspot.jp/2012/04/blog-post_29.html Roughly translated..... It's all great, Hako got to the UK, everyone's happy. etc... Next time.... More pics and drivel.1 point
-
Someone finally got a video from the outside when I was drifting on the rally tyres and makings dort noises.1 point
-
Sick of my good engine getting covered in so much crap. Filled the holes between chassis and body with some rubber and ali where the rubber would melt, by drop pipe etc. Along with the under tray, should stop most of the crap going on front half of engine at least. Made a heat shield. Goes here It heat soaked pretty bad when driving around slow/parked up, when 4wding/waiting for geezers having a chat and 12 lunch breaks. I had thought about mounting the radiator under the tray. but feeding it air and not mud was too much drama. plus half the problem is heat from manifold and turbo. heat wrap would turn into a big mess. so rather elaborate heat shield it is. seems to work pretty sweet so far. These things are pretty squishy at 4psi. have something on the way to sort that.1 point
-
Then on the first or 2nd run at Manfield. BHG Bores were fucked #1 and #3 spark plugs had melted electrodes. So I did this It's the 4 port head It needed a rebuild though1 point
-
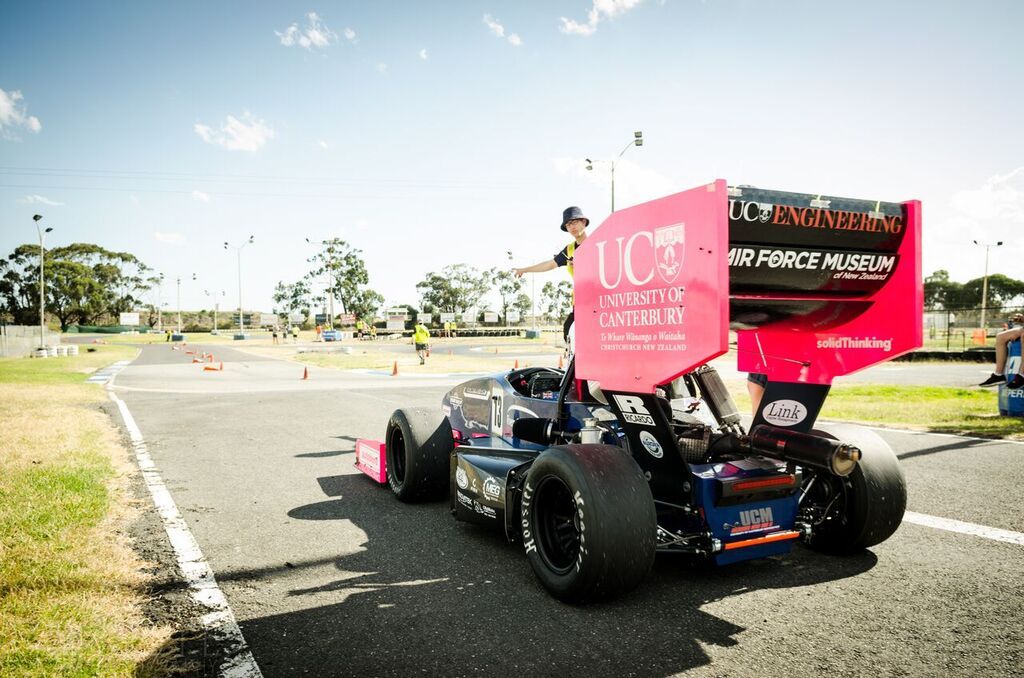
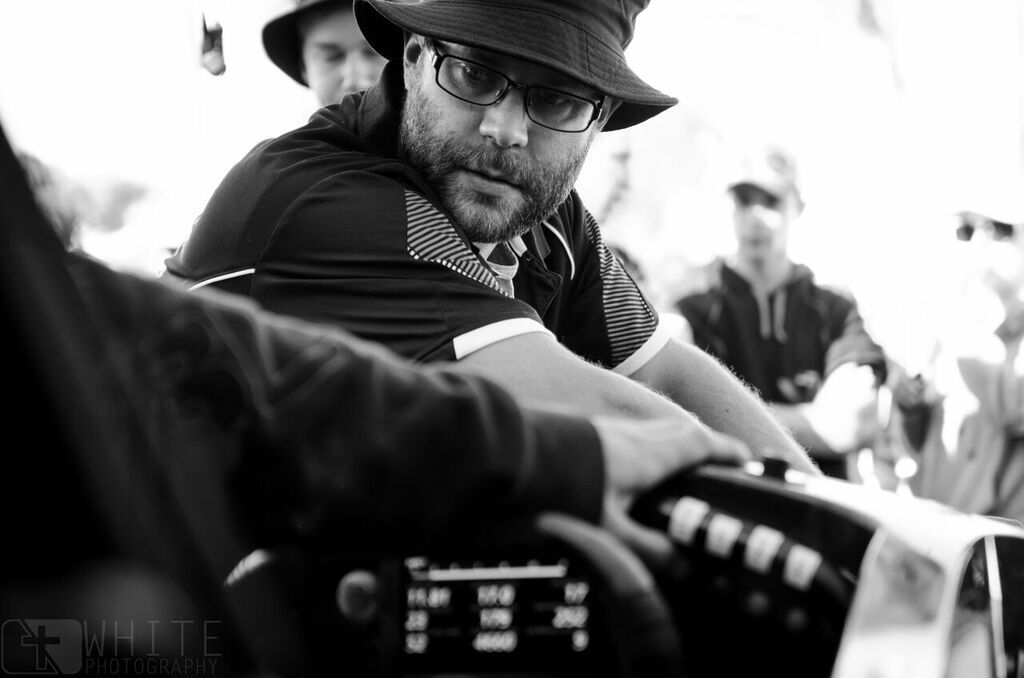
Whoa, a whole new year! 2016 is shaping up to be a pretty exciting one, automotive wise. Just want to put down the thoughts here on 2015, and what I'll be doing with the RX7 in 2016. The end of 2015 was pretty awesome. We took our FSAE car to Melbourne for the Australasian competition, kicked some ass, and had a bloody good time. We came third overall, which for a team that has only been competing for three years, is unprecedented. I'm a bit biased, but I reckon we had the fastest car on the day, just not quite enough luck! But that's racing. That's me, getting my hands dirty fixing up a slight issue with the brake over-travel switch. My role in the project was the electrical system, I ran a Link Fury ECU, a Nautech PDM, and a MoTeC C185 Dash/Logger. I designed, spec'd and constructed a fully sealed and shrunk loom using all the good gear, as it was on the universities dime . The electrical system was rock solid reliable, which was my own personal goal for my part of the project. I also undertook a lot of the engine tuning... Tuning a turbocharged single cylinder raciing dirtbike motor with an aggressive cam is not something I'm looking forward to ever having to do again. Very very pulsey and lots of challenges to overcome. We got a great result in the end though, with lots of mid-range to top end grunt which is what we really needed to meet our goals. Shame it still sounds like a lawnmower, hah. Car is a full carbon monocoque, with a very effective aero package. Weighed just shy of 200kg's, made just over 40kw's (all the air has to pass through a 19mm restrictor). If anyone out there reading this is at uni, and has an opportunity to become involved with FSAE. Do it. It's a massive commitment, a huge time-sink and extremely addictive, but I met some awesome guys, and got two fantastic job offers out of it. The one I've taken is a real unicorn job, I wont say much about it, as I don't start till the 11th, but it's automotive related, and will provide opportunities that I wouldn't have dreamed of a year ago. On to the RX7! I've been using it as a daily fore the last three months, and it's been great. Not as thirsty as I was expecting, better than my old 81 L200 sport (but that really needs another tickle up). I've replaced a few interior pieces to tidy it up further; new door skins, speakers, stereo, steering wheel, etc. Reverting as much as I can back to stock mazda stuff as I find tidy pieces. It's got a pretty decent oil leak from the rear of the sump. It's on my immediate list to fix this week. The turbo's are also on the way out, particularly the secondary, as it's a bit smokey. Something has gone wrong in the sequential setup, and the boost pattern is a bit intermittent, I'll hunt down that issue too. I've got a couple of good condition spare turbos pulled apart, and will get some rebuild kits for them on the way. They have a different type of front seal to the other hitachi turbos, so the kits are a bit more expensive than I'd like, but still not massively expensive. I've got a replacement downpipe to go on, and I'll build a decent exhaust for it while I've got the turbo's off. I bought a cheap shitty stainless muffler off the tard a few months ago, because it has awesome twin tips on it. I'll cut them off and use them on a decent muffler. Will make the exhaust look pretty factory from the back, but with slightly larger tips. Should look cool . According to teh interwebzzz I can expect boost control issues once I modify the exhaust. I'll port out the factory wastegate system, and hopefully that will help out. Cross that bridge when I come to it . Happy new year, 2016 is going to be a kickass one .
1 point
-
Borrowed a mig today and did this: Still waiting on the box of bits from the Ukraine, pweeease Mr Postman!
1 point
-
Finished work after a casual day, managed to steal the work welder, so figured I would get this chassis done so I can actually get the motor sitting in place. So welded in the piece I was missing, ground it back, sanded it down, painted iron oxide and then a bit of Black, then covered it with oil and a bunch of dirt, looks ok, alternator sits over the area anyway so hopefully no one really suspects anything lol and yeah, hopefully from here I can now just do motor stuff.1 point
-
my seat turned up today. 2015-12-16_04-09-50 by sheepers, on Flickr1 point
-
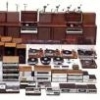
So yeah, the Oldschool drag day today was dope! I didn't do great times; worse than last year. But the LSD was sweet and I did 2nd gear skidz up the strip which was awesome. I was having so much fun I monged out and snapped an axle during my staging skid trying to grab 2nd gear. But as luck would have it I had some similar Datsun axles in my shed and managed to cobble together a complete axle, so I'm back up and running, JEAH! The one in the middle is the one I made out of the broken one and one similar to the bottom one.1 point
-
Almost forgot the most important feature:1 point
-
Long time coming, but, more updates! Wheels are now fitted, I have extractors and a 12G940 cylinder head on the way, some new problems have been identified and some more little issues have been fixed. In the last month I have bought: Lumenition HT leads Battery Cooper S studs K&N filter New Lucas alternator Extractors 12G head (negotiating) Chrome trim strips Been plodding away slowly, current alternator is on its last legs so that'll be replaced tomorrow morning (y) Here's what I've been up to the last few weekends: Battery was stuffed due to a failing alternator, so out it came, and in went the new: Minispares order First up, filter, new vs. old Leads were next, discovered my dizzy cap had been loose and my no.2 plug had also loosened about 3 turns too :/ Old earth cable was removed, and replaced: Removed all my old electric fan loom: Also got the carb apart, gave it a clean and look over, replaced the oil in the dashpot with lighter genuine SU oil and drove it around for a week, until today, where the drums and wheels were finally fitted Big thanks to Glenn Lawrence for his time and the use of his workshop space. Few issues have been found, pretty much all the wheel bearings need to be done at some stage and the left rear arm has play, so will need to be kitted. CV's are also completely knackered. Anyway, pressing on with far more fun stuff New drums: One on All on! It was then off home for a good clean before a thrash over Three Mile Hill, what a difference they've made to the handling never mind the looks! Needing flares unfortunately So stoked with it1 point


This leaderboard is set to Auckland/GMT+12:00