
Leaderboard


Popular Content
Showing content with the highest reputation on 12/21/15 in all areas
-
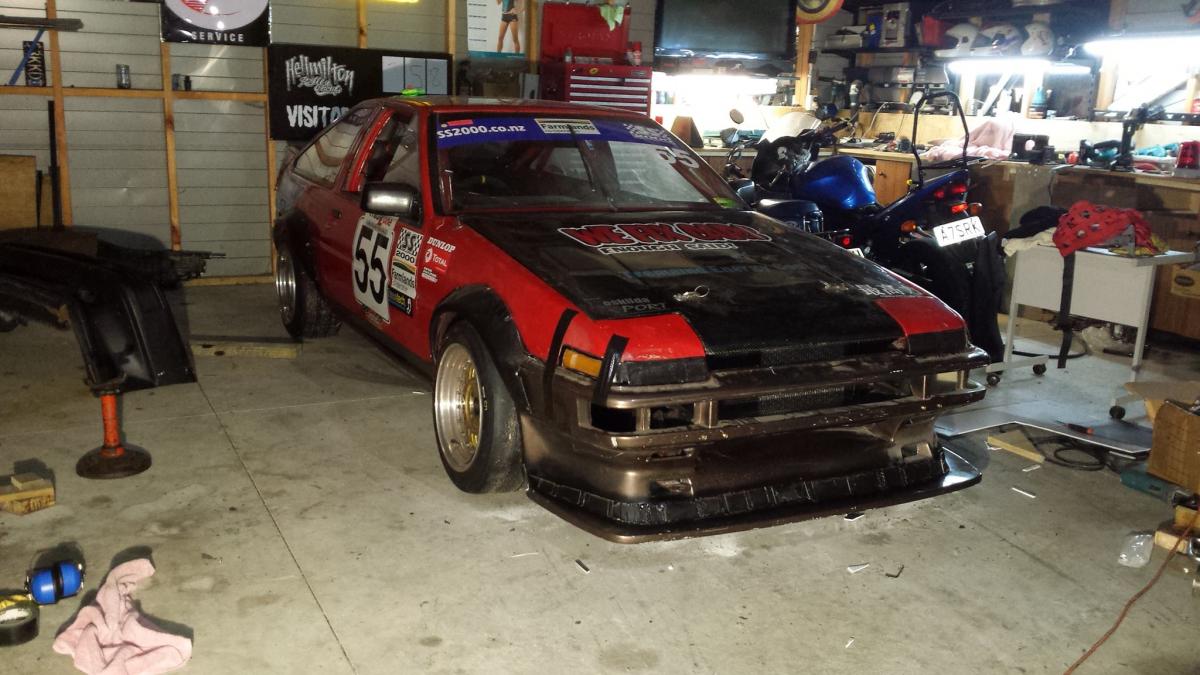
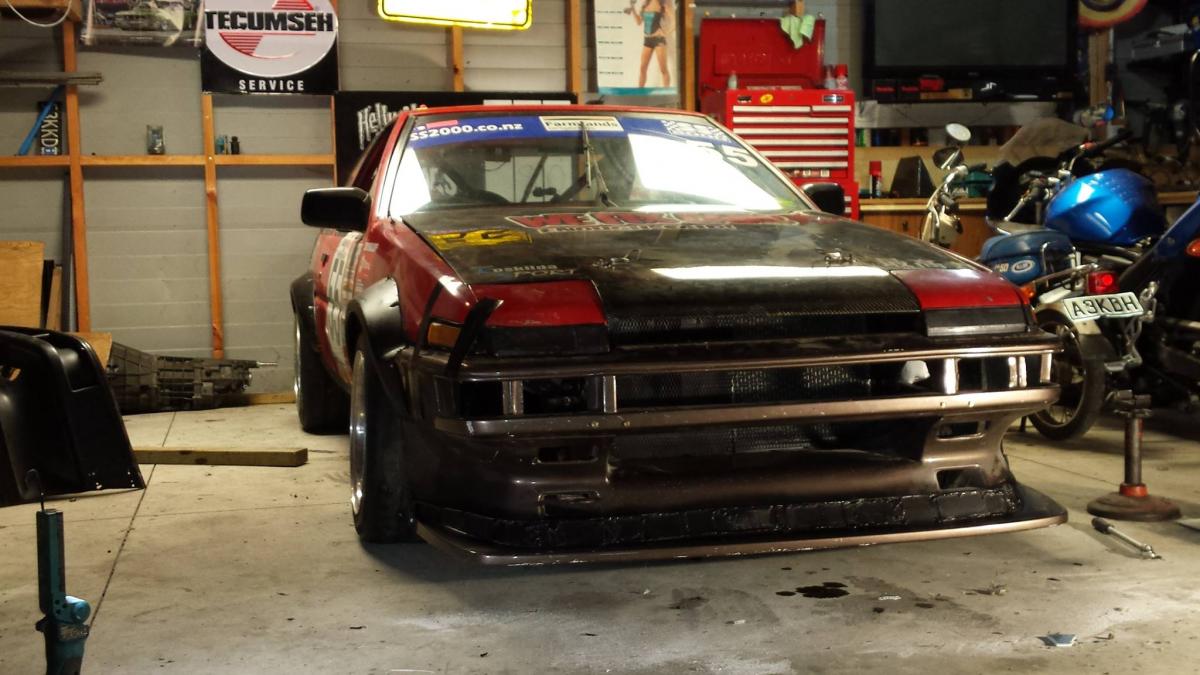
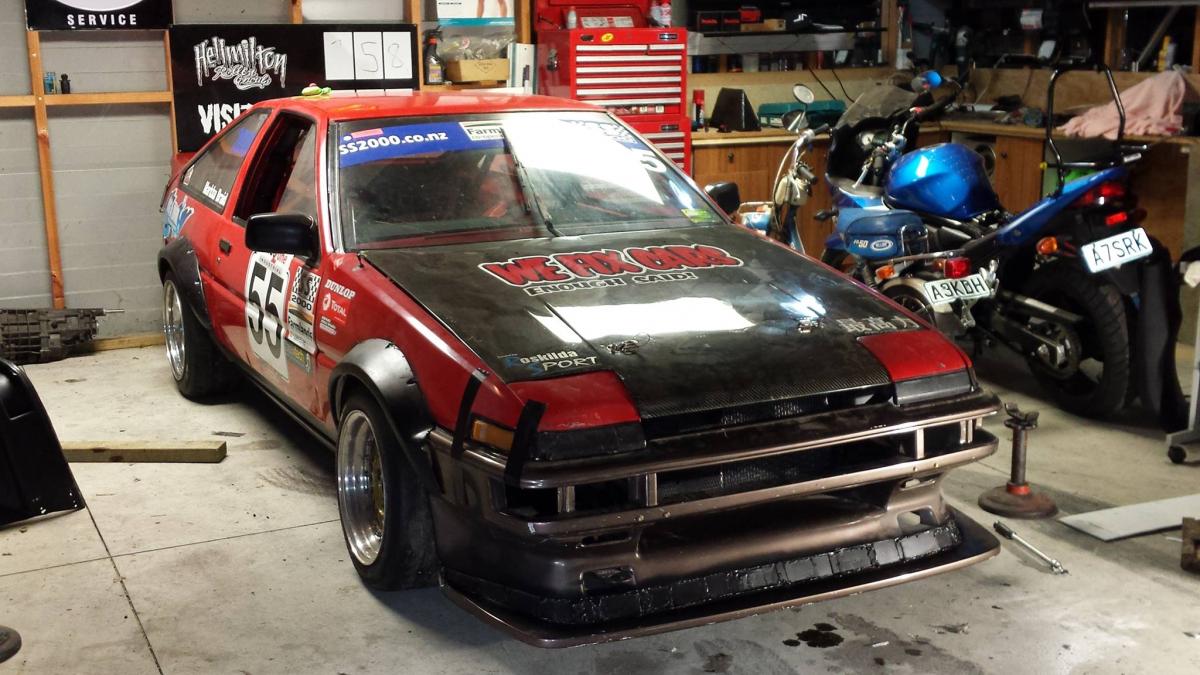
After swapping in my new axle I was getting hella shakes around 70kph, so on Sunday I went in search of the cause and found I had two twisted side axles Butts. I'm not 100% sure if it's the cause but it can't be good and I'm not gonna piss about with it. So now I'm gonna convert to CVs and rear disc brakes while I'm at it. I have a plan for the discs but not so much for the CVs, I'm gonna track down some OEM side axles that're compatible with my diff and then some short axles and will have to make an adapter for my companion flanges. Here's a few radical photos MichaelJFox took from the drag day:17 points
-
Wow! Six months or so since I last wrote about the Viva. This is not because nothing has happened. Things have happened but nothing big. Lots of little jobs, some of which have made a huge improvement. First off. The brake master cylinder started weeping out the back and down the front of the servo taking all my carefully applied spray can finish with it. Damn. So I ordered another seal kit and stripped the master. Right in the very first bit of the bore was a little bit of surface rust. enough that it had been wearing away at the last seal and it lost its edge. I gave the bore a hone, fitted new seals and applied rubber grease inside the bore at the end after it was assembled. Hopefully no more wearing. So that was exciting. Here's some photos of the excitement... see that seal edge all rounded off... Next up was to replace the front control arm bushes. The original ones were knackered. All squishy and deformed out of shape. These take all the loading when the brakes are applied. They stop the wheels ending up in footwells under hard braking plus they set the amount of castor. Quite important things. I should have replaced them years ago. I had the bush kit sitting in the boot for ages but it was just one of those jobs... always on the back of my mind, knowing full well it will be easy and make a difference. Instead I did an engine swap or two. Oh well.. better replace them then. The decision to finally get around to replacing them was made much easier by finally having a hoist. So up the car went and fueled with a cup of tea and a big dose of enthusiasm it was off with the control arms. The state of these!... But the new bushes were the wrong size!!! Listed for an Viva HB but blatantly much bigger in all dimensions. Not even a chance of fitting. So back on with the old ones and ring the suspension place I got them from, then the distributors. The bushes are for a Torana! Same designed front end but bigger to take more weight. Oh. But they located a set the right size internally and I'll have to turn down the outers. They can send them and I just swap the bits over. Off the phone, car off the hoist and my tea was cold A week or two later I finally picked up the bushes. Country life now dictates I don't go to the big smoke that is Nelson as often. Once home I hoisted the Viva up again, off with the arms, another cup of tea and remove the dust sheet from the old colchester lathe. I have not machined poly for maybe 20 years since doing my apprenticeship. Very sharp tooling was needed. I had to use some old thing called HSS! I even had to grind the edge on this oldschool tooling. The result was smooth and the size was now right. Here's some soft swarf.. Then in with the new bushes. Down with the tea. Still warm. Yay! While the car was up I noticed the front tyres were unevenly worn beyond salvage (Actually noticed ages ago but was ignoring due to $$$). So with car now armed with a lovely new pair of bushes I drove to Nelson, had some lovely new Falken tyres in 185/60 13 size installed and then got a full wheel alignment done. The fella at the new place I took it is well known through the Nelson car club for knowing his onions and he spotted as I turned up an excessive amount of toe out. That will be the cause of the scrubbing. I was also running a touch too much negative camber on the front. I couldnt get it any less so before I took the car out I took another mm out of the slots on the top arm allowing him to adjust it. Also a bit less castor was ordered as I felt I wanted nicer turn in, less weighty steering and I would deal with the old car/side wind float. When I picked the car up it was instantly better! He said the wheels needed 20-30mm of pulling in via the tierods to correct the Toe out!!! I could tell when I lifted off the accelerator in town and the car would roll further that there was a heck load less drag now. Sweet. This will equal better economy- not only fuel but tyre wear! Job two I have been putting off... This.. Doesnt look so bad and Ive happily ignored it. But no longer. I did this.. Then it was all gone. This made me happy. Third job I have put off. This one has been bugging me, and Hannah even more, for a long time. Self cancelling indicators. Or lack of. Ever since I fitted a new steering wheel boss for my uncles old Motolita wheel I have not had self cancelling indicators. Because I never did that 20 minutes extra work in fitting a little ring. I had kept the ring from an old Viva steering wheel. I cut it down, drilled two holes in the current wheel boss then glued the ring in place with JJ quickweld epoxy. Just in case. Hey wow. A throughly modern car. No more telling every single person who jumps in to drive the Viva that the indicators don't self cancel. Its often those little things in life eh. Here's some photos of the proceedings.. Oh and I did this too. I gt sick of the slightly sticky throttle body. The butterfly gets sort of jammed shut and makes it hard to squeeze the throttle open gently when pulling away. I added an adjustable stop to the pulley so I could crack the butterfly open ever so slightly avoiding the jam.. That is all for now. Im going to have a play with the ignition timing table that I had retarded a while back trying to chase that low speed vibration which I now know is the long single piece driveshaft. With the ignition timing back to where it should be my quest for better economy will improve. I did an oil change last month and went through the my Scottish book of mileage and fuel usage. I have some stats here.. 7374 miles I drove with the 2.0 litre KF V6. Over those miles it had averaged 29.14 MPG. Not bad at all considering how much of a thrashing that engine has had. Then I swapped in the 2.5 litre KL v6. I have since done 5689 miles with this engine and overall it has averaged 28,1 MPG!!! So with the extra 50 or 60 bhp that bigger engine offers I was pleasantly surprised at that. I figure it being its not having to work so hard to shift the car. I am still chasing more economy from the engine but realise it will never be modern car amazing when I am trying to push a brick through the air. But its fun trying..12 points
-
Brendan Duncker, of Niteparts/Convert Motorsport notoriety kindly agreed to build a set of his super nice headers for me. These are a 4-1 type, 38.1mm diameter primary (I haven't got the lengths yet but will be getting this info) with his own collector and a V-band flange for connection to the exhaust. They are gorgeous things and I am extremely happy with them. 2015-12-20_06-39-01 by Richard Opie, on Flickr Sorry, only a phone shot for now but will elaborate further when I pop together some more photos of all the garbage I have been accumulating for the car for the next update on SH. Thanks for looking!10 points
-
todays efforts. shelled out another 500 on paint supplies. 2015-12-21_04-38-21 by sheepers, on Flickr put some underseal on the insides of the front guards. 2015-12-21_04-39-06 by sheepers, on Flickr then i put the doors and guards back on the car and re-aligned the panels. they're not perfect yet but they are pretty close so I'm happy with that for now. 2015-12-21_08-04-24 by sheepers, on Flickr and after that i sanded he back of the boot and gave it a coat of colour and clear so thats done now. 2015-12-21_08-25-47 by sheepers, on Flickr7 points
-
7 points
-
I reallyed enjoyed the use of graph to provide further evidence to your claim "it got hotter when I started the car". I was really struggling to grasp this concept until I saw the graph.5 points
-
Did a small modification yesterday ;D Click to see vid... edc15 launch control Full strip down commenced for the up and coming panel and paint glass out... doors off etc etc for a yet to be determined colour xo xo Wagengirl5 points
-
did some more today. 2015-12-20_01-11-51 by sheepers, on Flickr 2015-12-20_01-11-42 by sheepers, on Flickr4 points
-
Had a bit of time to play on this today. Still smells like rat piss, but now it goes. And like a fucken gem too. clutch was stuck, but nothing a crash start couldn't fix. So stoked with how smooth it runs. In it's new home.4 points
-
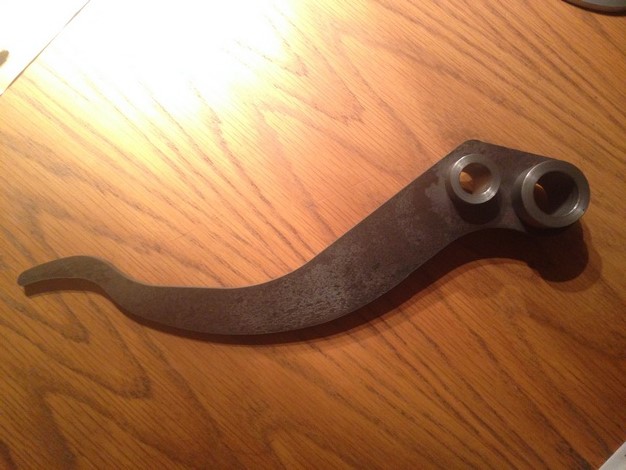
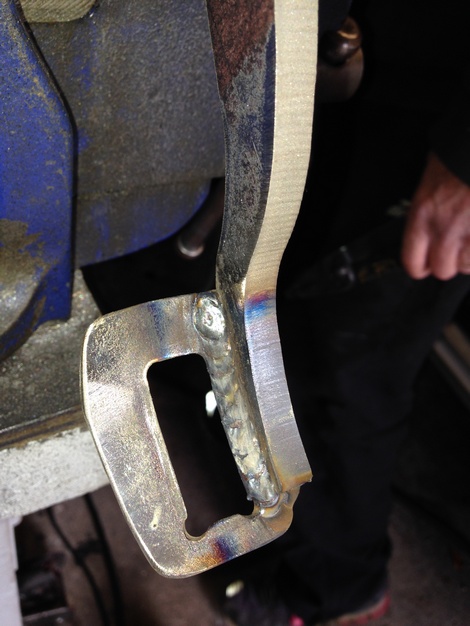
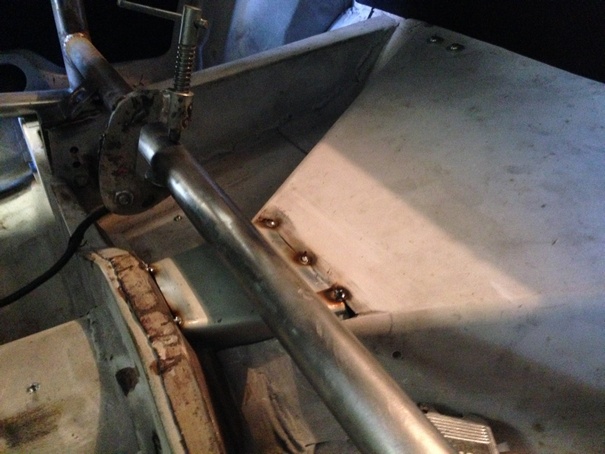
Got some bushes machined up to press into the pedal Should be cert worthy now Tunnel extension to stop the drive shaft touching the floor
 3 points
 -
Lowered the back and put the pair of 9j MK3s i have on for a test fit, look quite good. Then got it ready for Keisuke's Xmas Bash. Had a real rad time, all the things i have done since the last track day have made a massive improvement, was able to manji pretty consistently down the track. Tried my hand at some entries which failed miserably. Around mid day made a rookie error and hit the front against one of the concrete barriers, bashed it out so i could drive home, but nearly ready for paint. A bit bummed about the damage but overall pretty happy with how i went, just need more seat time which is my goal for next year.2 points
-
This is probably true. However if my idea was right it would be awesome. And I had pictures.2 points
-
I am now in the final adjustment and tweak mode with the car, I tried the 13" rims and they wouldn't fit over the rear disc callipers so made them fit today. The offset puts them just outside the rear guards but my calculations they should hit the stop before they rub. A few other minor things needed.2 points
-
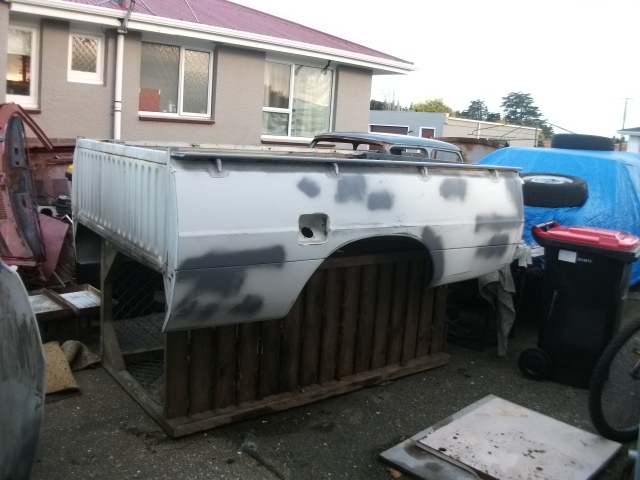
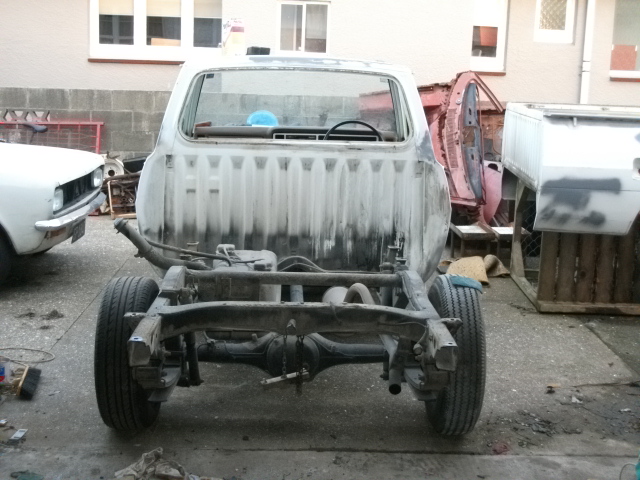
I got this recently as the avenger is slightly less capable offroad getting to some of my fishing spots. Someone elses project they gave up on, was complete when i picked it up- drove it home- plans are to fix couple of rusty spots & repaint. Slowly getting there in between all the other stuff that needs doing, its a 1600 with column shift, memory lane stuff & the kids are keen to drive something so 'vintage'. Most of my photos of it are too big to upload & im still getting the hang of what i can do with this laptop
2 points
-
Finally got the ITB setup in So got the ITBs and new head in, not much power difference in figures but peak power and torque have moved up in the rev range. Peak power is at nearly 8000 and torque is flat from about 5000-7000 before it slightly drops off. So took it to a drift day on friday and had lots of fun making heaps of Dooort noises everywhere. And heres a few of the clips I got, gearbox isnt the happiest at the moment but it fine for high speed. Just doesnt like low speed changes at high RPM like the 5 speed did. https://youtu.be/EioroBzzrW82 points
-
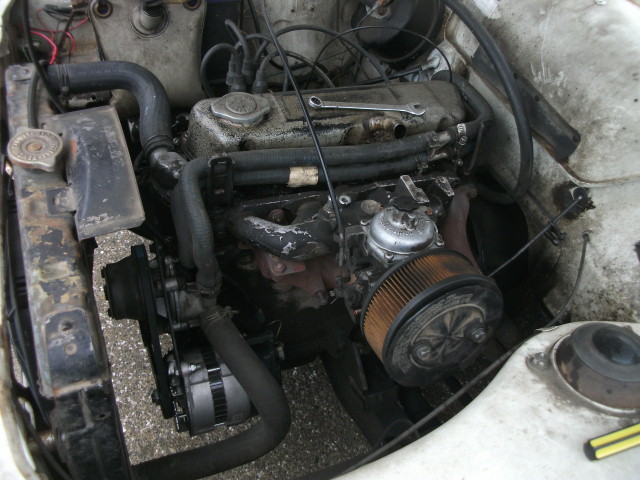
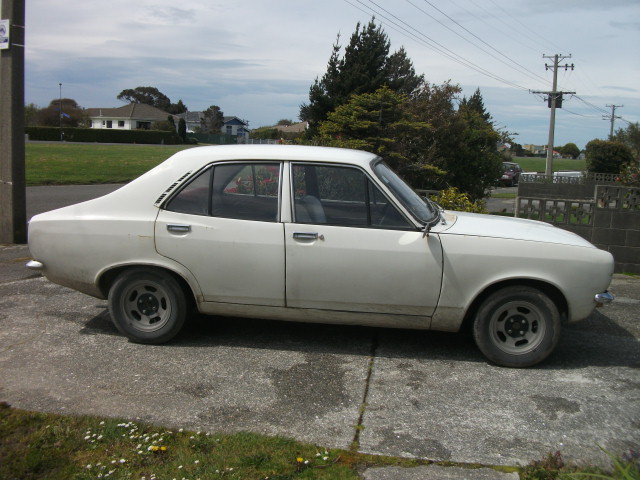
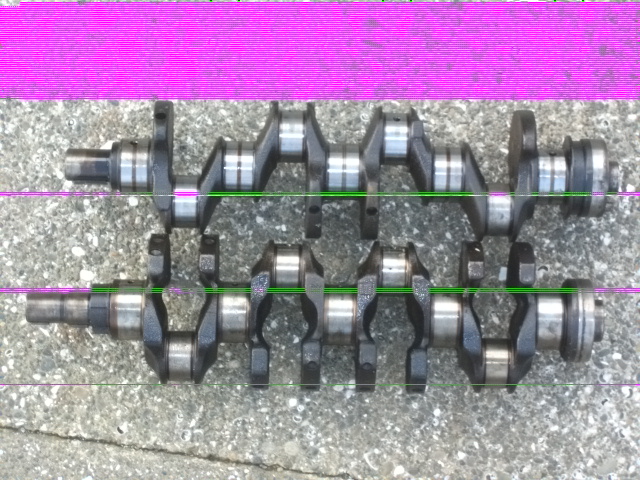
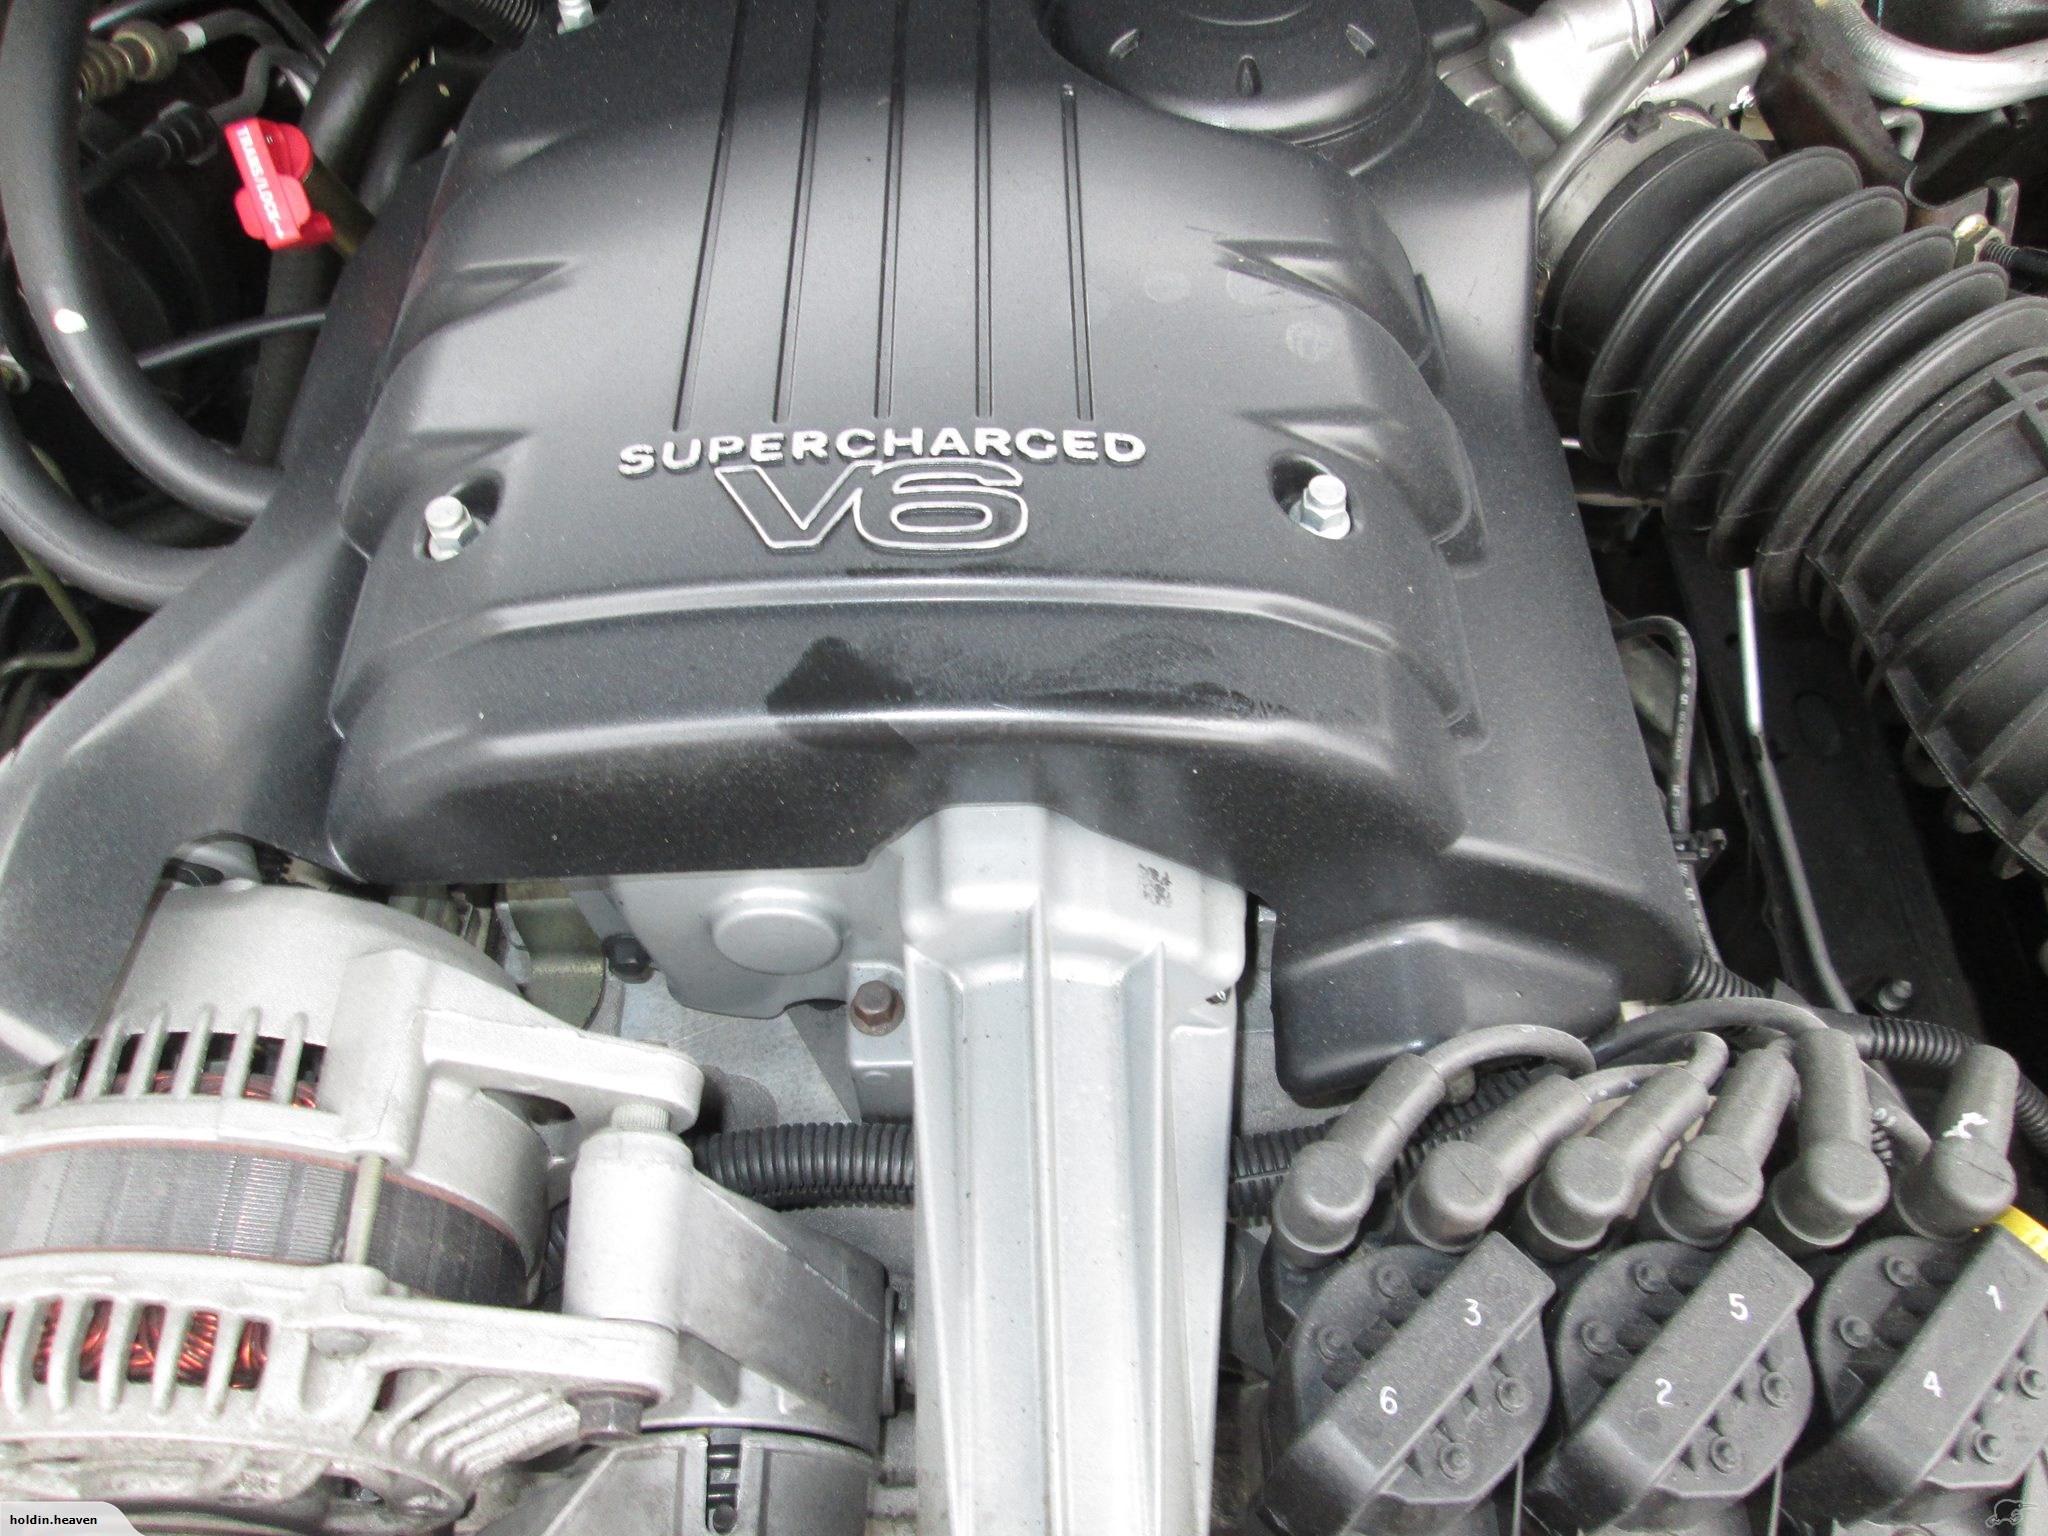
Hi, figured i better get some pics up of the daily hack, (to brokenarse poor to get something 'respectable).Spending most of the time & money driving & fixing it- + buying random shit i may not end up using in it. A pic of the weedy little slug that motivates it, a rousing 45 ponies @ 5000 revs when it was on the rollers a while ago, has a wee bit more coz i've been fiddling @ a pic of what we want to stuff inside it, top crank is avenger bottom is........ toyota. Why? why not i like the idea of it looking relatively standard, AND its a 20mm stroke increase- 1500 out to @ 2L is the plan Discussion Thread
1 point
-
So my friend Aaron is a bit of a honda nut (life, scamp, little 2 cylinder truck, S2000, monkey, dax, C90, S600 are all currently in various states of resto) and he's been trying to talk me into sharing his craziness for a while. He was going to check out a dax and C70 the other night and the missus was driving me nuts and I wanted to get out of the house so I went along and ended up owning the C70 for the princely sum of $200. Basically everything was seized, engine won't turn over, both brakes stuck on etc but I've always liked the super Cubs and I wasn't super interested in the stock running gear anyway. So far I've just been stripping everything off and working out a plan for what I want to do with it. Pics More pics and info to come when,photobucket catches up Cheers Matt1 point
-
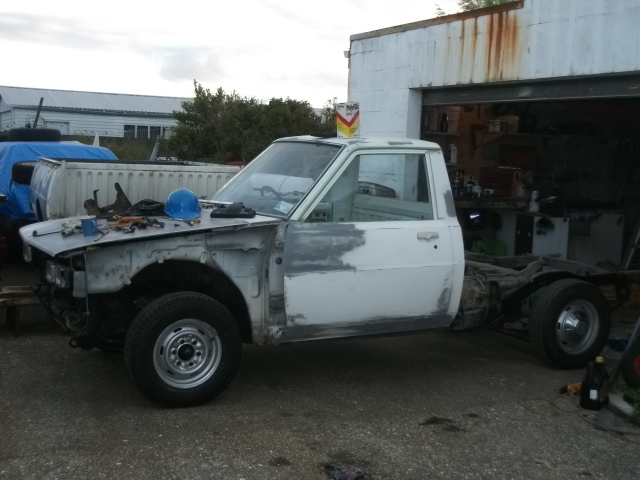
Right. not sure if this should be in here or in other projects. I'm sure the mods will move it if it doesn't belong here. After the sale of the family farm in Kaikoura , I managed to get the farm ute . So last weekend my good lady and I shot up on Sunday and picked it up . It's a 1985 L200 , Grandad was the second owner from about 88, and it has a massive 75,000 kms . Thats the only 2 good points, as rust and rats have moved in, and fuck me does it stink inside. Not sure on the plans for it at the moment. A big part of me is thinking about trying to find a wellside for it and slamming it. not sure how well that would work with it being 4wd. Or fully restore it as a bit of a dedication to my grandad . //oldschool.co.nz/index.php?/topic/51221-wldrx2s-85-l200/1 point
-
I know! I'm gutted i missed out on that forum and club. That and all the juicy pages are missing! Yeah I've got 3 e58's sitting here. One of witch I picked up for $80 So I'll pull them apart, add a new 2nd and 3rd synchro and bearings and leave it at that. Barry Manon said I'll shread them running huge power so if that happens I'll rebuild the 51 with a kazz1 point
-
So I mentioned briefly in a previous post about modifying by the tension strut. What I ended up doing cause it worked was taking an escort rally tension strut kit an flipping the bar to go over the rack/tie rod ends rather than under it as is normal. Because I've done this I'll need to weld a pickup on the rod for the sway bar drop link to attach to. I haven't done that yet as I'm still waiting for my bar to turn up. Standard one in the kit is only 16mm. I'll also have to use a lock nut on top of the control arm 'bush' bolt that holds the rod as its threaded for the bolt to go through from the top in normal configuration or I'll drill out the threads and drop the bolt through from the top but either way I'll need a nut on it. Because I've got a low car and the rods upside down it sits way more level than it's designed to be so has pushed the wheel back in the arch. I ended up cutting about 15mm off to pull the wheels forward again and get some decent castor. Will see how much there is when o get it in for a wheel alignment soon. Mine. Minus the sway bar bits. Standard rally kit. (Tarmac ones are different (shorter and less angled) but still go under the steering so no good for me) Fitted as its supposed to be.1 point
-
reverse skids/launches1 point
-
Have you checked all the fuses? Not just in the in-car fuse box but also under the bonnet fusebox? Not knowing what car it is - I am merely assuming it has two fuse boxes. LOL1 point
-
I will charge the battery and then test the alternator and see where the issue lies tomorrow after work. Im not sure if the welding did any damage, other than make my dash LCD clock work again....1 point
-
Dunno yet, the guy i got the kelford cam from reckons its a bit hairy for road use not much good round town. We'll give a whirl & see how it goes. Its an f 12 grind i think At the moment we're figuring out what rod/piston combos will work with the bigger stroke1 point
-
just bought another engine for SV2. Very similar to the one already fitted, but has an extra pulley on top
1 point
-
1 point
-
This. also applied to myself for last night's non-effort1 point
-
Photo from the drag day (thanks Mrs OnTheTree): Finished the wheels earlier this week. Got some tyres and put them on. As a side note, does anybody else see a face in the drivers window on the first photo? Excuse the bit rubbish photos. I'm going to lower the rear by a notch later and take some better ones with a real camera.1 point
-
It's called old age mate. Get used to it.1 point
-
You could learn a thing or two from these guys: Based solely on their precise haircuts, they know how to (w)rap1 point
-
So I read on the internets there was such a thing called a colourtune, made by Gunson. Its a spark plug with a sight glass essentially which lets you see the colour of the flame. I was pretty interested so I had a play last night and made myself one. Smashed all the porcelain and other innards out of an old plug. Taped over the top and poked a bit of wire through the tape that will be the new electrode, then mixed up some epoxy and filled it up to what I thought looked right. I let it cure overnight then put some heatshrink over the electrode and soldered the old plug top to the end. Just put it in one of my cylinders before and what do you know I can see the combustion. Pretty far out concept and I'm surprised I haven't heard of it before now. Vid: http://tinypic.com/r/16i5q9/9 Only tested it for a tick, you can see the spark is arcing across the top a bit but I already have ideas on how I'd make version 2 better. Main problem now is I need to get a screw driver short enough to actually get under the carbs and adjust the pilot screws while it's running hah1 point
-
Quick teaser. Need to finish two more of the lips then paint the centers and caps. All going well these should be on in 2 weeks.1 point
-
So I've gotten pretty carried away. Current state: Stripped completely down to the frame to prepare for some fabrication work. Planning on making a rear hoop, electronics tray, seat pan & de-tabbing the frame. Also thinking of sourcing a new tank. Have found CG125 tanks reasonably cheap on Aliexpress that I quite like the shape of. I'm hoping they mount very similarly to my current tank.1 point
-
This thing is so fucking awesome, shit im envious!1 point
-
Well its been a little while since a update, purely because of my lack of time. - Engine is back in, starts and runs too... exhaust is too quiet... despite no mufflers... lol - Cable shifter mounted - Braking system (new lines) - Fuel Pre supply pump installed - Wiring (integration) of factory EDC15 Management complete - Interior carpets pulled out and cleaned thoroughly - Central Locking installed - 2.5 inch Downpipe and Straight pipe exhaust system made. - engine bay painted - cheers tyler. Downpipe Carpets stripped out Door cards painted.1 point
-
Some recent photos I took: Also scored some 15x7 ABT wheels with all center caps and tyres for really cheap so I will be restoring those to go on. I will be polishing the lips and painting the centers the same anthracite grey that the wheels on my E28 are. Currently on the 180 grit stage.1 point
-
just going to stick this here, I like this. a lot.1 point
-
Yes motivation is peaking!! nice to see a car again, nice to be able to walk around the shed without having to move something first. Back window time, Started unfolding the gutter. previous repair left a little to be desired. decided to just cut the whole thing out. there wasn't really much holding the panel in at window frame, the sides are buggered anyway and when I took the donor car apart the spot welds under the vents where right bastards, this must be one of the few area's were the spotwelds could actually be seen on the car, but they are so well finished that they are completely invisible from the top/outside, making drilling them out tricky. sorted. I'll go back and clean up the scrappy bits on the weekend and remove whats left of the window frame. here's the old one with it's replacement. this is the inside, I had thought about just cutting patches out of the new panel and patching the holes, but after seeing this side, I'm glad I've removed it completely. I'm also going to remove the second vent panel that the engine lid hinge's attach to, as there is rust stains running out of there, only time to do it, so might as well! yeah yeah yeah!1 point
-
Some more new tings. Got some wheels off Cul8r (yes, I got all 4 before someone asks): Stripped the paint: Now I'm sanding: The plan is to polish the spoke faces and lips and paint the center bits around the bolt holes and the spokes sides black. Also put in my Wolfsburg steering wheel. And check my new radio, how's that for period correct? I've got my ticket to the twilight session at Hampton on Wednesday which should be good fun. However the car has had a bit of an idle issue for a while and in an attempt to diagnose it the other day I started unplugging and replugging things and now it's worse. Haha. Let's hope a throttle body calibration at least puts it back to how it was, as that was what I unplugged when it when worse. Bloody new school electrics, I do miss a throttle cable. I'll be going regardless but would be nice if it's running ok.1 point
-
Today, was a good day. To summarise. No barking from the dog. IMG_2329 by Richard Opie, on Flickr No smog. IMG_2343 by Richard Opie, on Flickr Bex cooked a breakfast featuring zero bacon. IMG_2378 by Richard Opie, on Flickr Went to $hort Dog's house, they was watching Yo MTV Raps. IMG_2392 by Richard Opie, on Flickr Rolled a seven, seven-eleven, seven-eleven and picked up the subsequent cash flow. IMG_2429 by Richard Opie, on Flickr Took another sip of the potion and hit the four-trumpet motion. IMG_2487 by Richard Opie, on Flickr No helicopter looking for murder, purchased fat burger at around 2am. IMG_2482 by Richard Opie, on Flickr Today I didn't even have to use my AK - instead we installed a four-age. IMG_2463 by Richard Opie, on Flickr1 point
-
Shit's getting out of hand!1 point
-
Played with hot glue, core flute and fibreglass tonight: I was getting sick of the old rubber lip that's mounted to my other bumper and have been meaning to do this for ages. The lowest part is ~90mm from the ground (which is the same as the old bumper) but it's all one piece and will be much easier to add an undertray/splitter to. The idea is to get this tidy enough to take a mould off it and produce a couple of bumpers so I have spares. The only part that I'm unsure about is the brake ducts - normally they sit just above the lip rather than 50mm higher up. I could move them down, but that'll be a lot of work, so I'm going to stick with it as is for now. Any opinions? I'm quite keen for some feedback: Discussion
1 point
-
Wheels I bought at the same time as the car have arrived ex Japan on Friday.. 15x7 35p Sparco Racing Dont really fancy the gold and polished look, So I promptly sandblasted them all. Decisions on colour? - Was thinking quite a dark gunmetal/anthracite sort of colour, no polished lip. That or Matte black centres with gloss black lip.. Unfortunately it wasnt to be, didnt manage to get it running for the Worktrack day. Instead drove a Avenger and Camry wagon as hard as I could lol. Intermittent problems with lift pump. Then I worked out the replacement fuel pump Id bought was from a Digifant - too low in the pressure - although I managed to get the car running for roughly 10-15mins with it, it wasnt right. Put another high pressure pump in and could only cough and splutter - I believe the metering head/injectors are shot as you can crank it over and the fuel is heavily misting out the cylinders with the spark plugs out. Won't "stancenation" the car, but I will add spacers to get them sitting where I want them. 195/45r15 I think will be the order of the day.. Deciding which set of bike carbs I like the most, Mitchfromhillcrest kindly drew up in autocad the inlet flange for me. Another good Friend will be able to get the flange cut within the next few weeks and I can make a start... Discuss; http://oldschool.co....ith-added-moss/1 point
-
Small update. Lowered the back of the car a while back by a notch. Sits much better now, much more even. Today, after many, many hours of sanding and spending a few hours polishing today, I finished my intake manifold: Will try put it on within the next week. More to come. Also, my front tyres are almost bald.1 point
-
Hard on the heels of the 175/50/13 failure, I bought a set of 175/60/13 Yokohama A539. Now order is restored, and (I think) it looks really good. Plan is to add a TRD style hatch spoiler, I think it should have a proper little Japanese street hooner vibe about it! IMG_6862 by Richard Opie, on Flickr IMG_6868 by Richard Opie, on Flickr Much more snug in the guards, closed up the guard gap. Added some camber to the front end and clearance is plenty! IMG_6874 by Richard Opie, on Flickr IMG_6877 by Richard Opie, on Flickr Hoonable. Thanks for looking!1 point
-
Waterblasted the whole car, removed all the moss, did the door shuts etc. Greased all the latches along with wd40 in the locks. Fuel pump is dead, so pulled that out - replacement on its way. Replaced distributor rotor and cap -but still no spark as of yet. Oil & Filter have also been replaced. Had it cranking, and have cleaned the plugs up. Nastiness.. If you look closely here, you can see someone had done a bodge repair - hadn't cut the rust out, rather just overlapped with tin (not even panel steel) - Which no doubt caused sweating and further rusting.. Made a big hole All done, its sitting in primer now. Fully welded, Seam sealed, Fish Oiled, Etch primered and have undersealed the underside. Didn't have a chance to photograph the primer whilst I was packing up - and the weather packing in! Need to let the paint dry, sand back the inside - Will get a can paint matched with the fuel flap and finish it this week - weather permitting Discuss; //oldschool.co.nz/index.php?/topic/48778-chriss-1987-mkii-golf-eurocup-racer-car-with-added-moss/1 point
-
1 point
-
Fastest lap of the weekend - 1.15.21 point
-
After taking this thing to the Taupo track and driving my brother-in-law's super sweet '69 911T, I realised it needs a bit of love. The track day went well buuuuuut, it's just kinda annoying to drive; it needs some finishing. I done a list: Install LSD Come up with a better front diff mount Convert from drums to disk brakes in the rear Seal filler neck Get alternator serviced (yet again) Move alternator to the left side of engine for better cooling Find more exhaust clearance Add some heat shielding to the firewall/tunnel to keep cabin temps sane Install carpet underlay So, today I removed the R180 VLSD, it's a Subaru thing and waaaay back on post numero ono I made the mistake of installing it. It puts the "slip" in LSD. So I have a some other CLSD thing which I'll get Steelie Gears to setup for me, I just have to source some 27 spline stub axles to suit Datsun half shafts (about $500USD, which is actually a lot cheaper than what it took to get the VLSD to work). While it's out I'm gonna change the way the front diff mount works. The factory setup sucks because it allows the nose of the diff to lift when you put the foot down and the whole car starts shaking because of the hinky uni-joint angles. It probably makes sense to convert to disks at the same time. I'm sure it's just me but drums seem awfully difficult to maintain and keep adjusted. I think I have all the bits I need to make this happen except some custom calliper bracket thing I'll have to make. These pics for fred are from when the car was in NZPC last year:1 point
-
Being a shithead. So much rev-limiter! After the above hooliganism it was time for new tires and go a bit wider. The old ones were 225 60 R16, so I tried 255 50 R16 semi slicks, which looked baddass but they'd foul on the flares. So I think I'll try 245 50 R16, but can't get those semi's in that size so will have to just be a street tire. I'm still not sure they'll fit either, so I may have to go to a 235! There's bugger all options in 16x9.5 really.1 point


This leaderboard is set to Auckland/GMT+12:00