
Leaderboard


Popular Content
Showing content with the highest reputation on 12/10/15 in all areas
-
had a few spare hours today...14 points
-
rosso red. not sure. its a bit dark (it has like one drop of black in it) but it might be to bright if i take it out . undecided. 2015-12-10_05-11-21 by sheepers, on Flickr 2015-12-10_05-11-31 by sheepers, on Flickr7 points
-
Rolling shot from Cullen last night7 points
-
long night was long. 2015-12-09_09-10-54 by sheepers, on Flickr not prefect yet but its getting there. i reckon ill block this back with 180 and then maybe 1 more coat of primer.7 points
-
So apparently, two years ago, I was getting this ready for a revin and cert. Well, that moist certainly has not happened, as I do keep changing my mind a tad on how far I want to go with this car. So I have been looking at buying another wagon, as wag nats is coming up in just under two months, and I need something And then, Like a bat out of hell, old Nathan puts up an Meu engine with factory clutch stuff etc. boom, that's my ticket. So out the 2jz is coming, and in is going a factory engine, so I can atleast attempt the shit out of trying to get a revin, and worry about cert on an engine and slam etc at a later time. So the plan, get car to my lock up, remove front, bumper, rad support etc remove 2jz, carefully remove and label wiring, remove 2jz bell housing, fit m motor stealing a bunch of shit off my crown sedan (is going to be my saving grace) jack it back up to factory, and attempt a revin at the very start of next year. I have a fuck load to do in reality So I'm planning on getting wagon down to garage before Monday next week (going camping this weekend) start on above list, picking up engine on sunday the 20th, so should give me a bit of time to get it in there, get an exhaust sorted out etc. I would like to have the car ready for engine fit by the 20th if possible, including having the suspention jacked to shit again. Just reminded me, I need to find some factory wheels or tires....... Anyway, so that's whats happening heres some silly pics from last time I abused this thing6 points
-
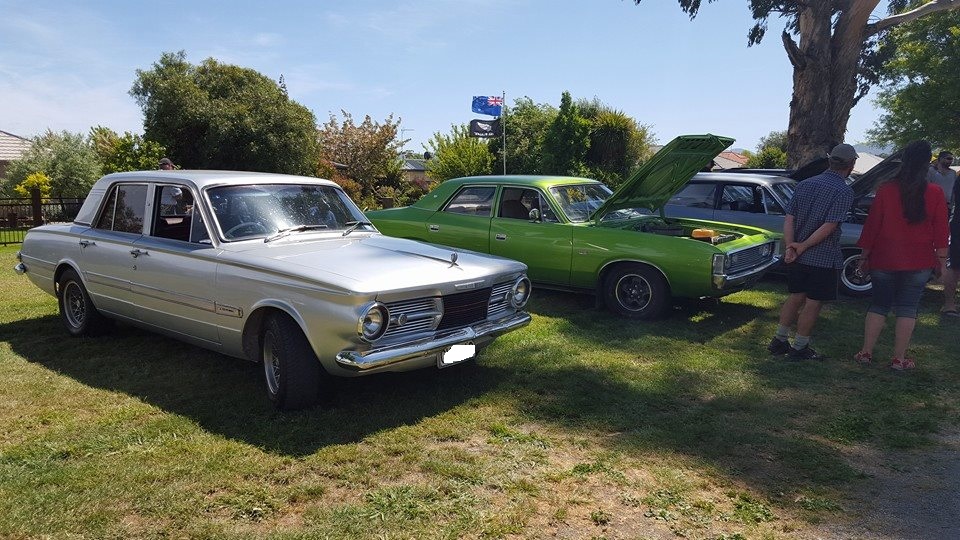
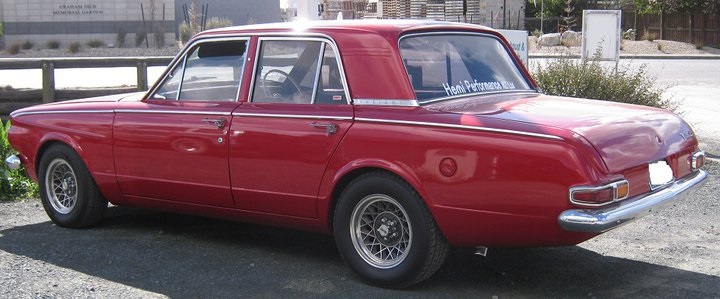
my 1965 AP6 Regal at the last Mopars in the South gathering - Blenheim - owned it for 10 years now, needs work but don't want it off the road got another AP6 shell as back up if body swap required but im greedy and I want to V8 the spare The Red one was the 1964 AP5 - 318 I used to have. VC Wagon on the trolley getting glass blasted after panel work
 6 points
 -
So 11 months on and a Trailer built as well I am nearing completion, hopefully ready to test sometime next week or week after if I can hook up the oil gauge. Waiting on a phone to turn up so i can make it my obd2 logger system.5 points
-
So as I've always been keen to jump on any old bandwagon, I too have decided to get myself a little scoot for some summer cruising. Picked myself a bargain from Kicker and it was kindly dropped off to my lockup a month or so back by the lovely Joe and Jeremy. I was busy with other things up until now but found myself with a spare hour or two on Wednesday and ripped into getting it running which was extremely easy. Having not ridden a motorbike for several (read 20) years I went for a quick jaunt up and down the road reminding myself about clutchless 3 speeds and how smooth they are not to ride. That will come with time though. Plans are Change the handlebars to a bicycle type. Run a digital bike speedo. Mount a headlight nice and low on the forks. Tidy up the leg guard cracks with a few coloured cable ties and a JDM shopping list Build up a thicker seat for me bum. Tidy up the rust with a bit of a combination of rust killer, paint or part replacement. Some new rear shocks with a higher spring rating for my fat ass. Change the gear shifter into an up-down toe shifter rather than heel and toe cos my big feet seem to make it difficult. Also want to change the rear brakes to a left hand control. I'm used to it on pushbikes and also will satisfy my symmetrical OCD requirements. Not sure if parts are available to do all of these things or if I need to fabricate but will start scouring round the internet now - unless someone else has seen these parts and can put me in the right direction. Pic for thread... and another This is the kinda look I want to go for - but narrower bars. (I know its a Yamaha)3 points
-
VW is booked in with roger on staurday for a wof, tires are getting collected to today, hopefully it makes it over the haywards lol3 points
-
So finally got round to getting my seat idea made up, i had a pile of pieces sitting in the shed for ages so its good to see it worked out!! I used strips of seatbelt from the wreckers over a foam and ply base. Pretty stoked with how it came together. Just have to get a hinge sorted3 points
-
So, I put the poost controller on, it seems to be a very well made little unit, and it do what it do, so happy with that. The lowest I can go ATM is 12PSI, as that's what the waste gate spring is set to, so may replace that in the future so I can get the poost a bit lower. I also whipped the air flow meter guts out, and cleaned it, as they can cause trouble in these, but hasn't made any noticeable difference. SO clean now though. Also, I took the oxy sensor out as it's not being used, due to it being lungey. It was shorting out on the housing, and one of the wires is near on cut through. The bro-in-law popped over last night, and we put the wide band in. First thing we noticed is even though it sounds and smells rich as shit at idle, it was running lean (likely raw fuel going through unburnt). It was also slightly lean the whole way through the rev range. SOOOO we slapped a gauge on the fuel regulator (duct taped it to the out side of the windscreen, lols) and discovered it had basically no pressure at idle. We cranked the pressure up to around 40 PSI, and boom, idles way, waaaaaay better, is way smoother and drivable down low, and is not leaning out through the rev range. We can safely go up to 16-17ish PSI poosts without it leaning out, but the injectors get to 90% duty cycle, and then go no higher, so we decided not to take it over 15 PSI just to be safe. Not 100% sure why the injectors wont go higher? Maybe some sort of inbuilt safety thing in the ECU? But any ways, good to know its fairly safe at 15 PSI, and its bloody ripper that it idles and runs a shit ton better down low. NEAT. Ready for drag day, zeow! Regards, VG.3 points
-
Bit of progress made this arvo! First tip, remove the plastic bungs in the inlet if you want them not to melt in the oven. Engine bay coming together nicely. Before and after pics to show.3 points
-
had a fettle with series one tonight.. filled it with water. jumper leads on 20+ year old battery. picked up the piece of firewall that's fallen down that contains ignition switch and gauges (wasn't expecting much) turned key on and push starter button. turr rurrr rurrrr. let it wind over a bit to splash oil round. no spark. points grubby and dead coil. sorted that. big hole in fuel tank (rust) so just squirted a whole lot of crc down the carb, then brake cleaner in the float chamber breather tube thing. turr rurr rurrr vrrommm!!! runs pretty good. started on 5cyl then promptly picked up number six. only a small puff of smoke from the crc i reckon. mean. seems to run a lot quieter than the engine in my good one. whipped three plugs out once it'd run a few minutes and did a compression check. 165-170 on all three. I'm happy with that. while it's out of this thing coz it's easy: - whip the head off and get ol' mate jim to give it a lick with the die grinder. -smash a bit nicer cam at it to give a little more pep and new lifters -play with the dizzy -metal timing gears if not already fitted (this engine was rebuilt and only had a few thousand miles on it apparently so maybe it already has them. was quite whiney up front compared to others) -check bigends and oil pump. -chuck a new water pump etc on and give it a pretty basic tidy up. pretty hilarious. the gearbox crossmember pretty much broke away completely from the chassis while all this was going on. i'm pretty much not gonna try cut a lap round the block in this one haha.2 points
-
china 125 so you have a clutch with left hand plz you'll get used to foot brake pretty quick/use it bugger all anyway prolly. i need another scoot. i'll be the beaner on a vespa again someday2 points
-
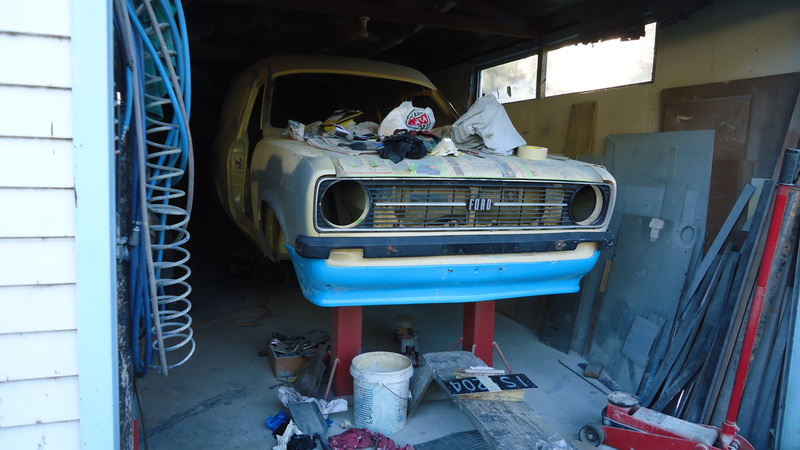
Also purchased this a while ago, an original rubber sport spoiler. Was trying to find where to put the number plate holes so it was time to get the spoiler out and try it. Thoughts? Obviously would be colour matched to the body. Also have the other type of grill, and chrome and sport bumpers to play with as well. //oldschool.co.nz/index.php?/topic/43995-bmxnz11s-mk2-escort-van/
2 points
-
When will the weather go/no-go call be made? As for presents - I'll bring 12 of them but drink 11 of them myself.2 points
-
It's looking a bit better. Not ideal, but better.2 points
-
Lower boost? What a douche2 points
-
Shut up. You'll ruin the surprise.2 points
-
Thanks for all the info guys, I was looking at making rear suspension leaf spring bushes for the latest project. Just found out Basis have them new in stock, bloody amazing for a 70 year old car!2 points
-
oh jesus. What've I done? Blake hooked me up with the dealz on this. 1953 series one 80". 80s are apparently super SUPER rare now, and this one's an ex army one which is pretty cool. His mate Dazza's old man has had this in his backyard for about 20 years. last wof was 1995/96? anyways, sorted a deal and collected it tonight. left a trailer of rust from wanganui (literally, this thing is rainin' rust from teh chassis) everything's fucked. engine is a 186 holden that'd had a full rebuild and covered about 6000miles on CNG before parked. Run a few times since then but whatevz Pretty much that's all I want from it. Will do a few bits and pieces on it then slot it into the 109 when I get to the end of the clutch in that thing's life (slips a little now and then now so will prolly be toward winter next year) has widened steels and super lush (albeit perished a little) 750-16 crossply wranglers. must've been some super rowdy tyres back in the day. hilarious!2 points
-
bit of bog and we're good. well, its not finished yet but its pretty close, just got the sides to finish off yet but the top is all done. 2015-12-08_08-14-01 by sheepers, on Flickr 2015-12-08_08-14-10 by sheepers, on Flickr 2015-12-08_08-14-21 by sheepers, on Flickr2 points
-
2015-12-05_01-56-19 by sheepers, on Flickr 2015-12-05_01-55-59 by sheepers, on Flickr 2015-12-05_01-55-44 by sheepers, on Flickr 2015-12-05_01-55-35 by sheepers, on Flickr 2015-12-05_01-55-28 by sheepers, on Flickr 2015-12-05_01-55-19 by sheepers, on Flickr 2015-12-05_01-55-03 by sheepers, on Flickr 2015-12-05_01-54-54 by sheepers, on Flickr2 points
-
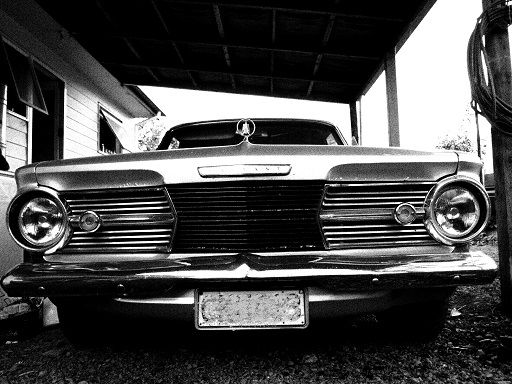
Discuss: //oldschool.co.nz/index.php?/topic/30773-sp450andles-dads-daimler-sp450/ So I've been putting off starting this thread for a while, as not much has been happening with Dad's Dart. But recently I've had a boost of enthusiasm, and have started doing more bits and pieces on it. So here's the specs... >Originally an auto 1962 Daimler SP250 Dart. >Engine converted (by Hans Ording from Mangonui) to the 4.5 V8 from the Daimler Majestic Major. These produces around 260 bhp from the factory, and 384nm of torque. But the the bhp is officially stated as being 220, because the Daimler dynamometer only went up to 220 bhp! >Toyota Celica 5-speed gearbox >Ford 9" rear diff >XJ6 hubs in the rear >14" steelies up front, 15" steelies at the rear The car was raced by the previous owner (Jim Gilchrist from Birkdale) at Meremere, and used to get mid 12's to low 13's on street crossplies, and in full street trim, and would drive it to and from the track. Recently I have been tidying it up, replacing all the yucky old bits, and we are getting closer to getting the engine started now. I cant be bothered typing up what I have done so far, so I will leave you with some pics and a vid of the car... G3BXDDwSDYo1 point
-
link : //oldschool.co.nz/index.php?/topic/51101-ap6chick-1965-ap6/ WICKED!!!!!!!!!!!!!!!! ive seen photos of your wagon on the mopars in the south group. keen to see more of the wagon.1 point
-
Sorry guys, just moved so I have been without internet for the last few weeks! I have decided to put this off until January, as Christmas is expensive.. It will definitely be happening! And I'm sure the owner of the workshop wouldn't mind if a few extra people came to watch, too!1 point
-
i had a bagged truck for a few years converted a stock ac pump, that turned into a electric engine brake pretty quick- not enough lube ran a scuba tank for a while- that was a pain in the ass. ran out of air a couple of times converted a york ac pump- that was good, fast, plenty of air then i had to go to 2 viair 380s because no room with 1uz from memory it had a 5 gal tank, from laid out to all up was enough for the pumps to start1 point
-
Good looks governor! Don't change the bike to suit OCD; change the OCD to learn the bike. You don't need to use the rear brake as much as a push bike, so leave it as foot spec. I ride BMX, MTB, road bike, CB750 and AX100, and they all have different combinations of brakes and gear shift. It becomes second nature when you get on each steed. I heel and toe change on the AX100 with my size 12.5. But on the flip side of that, folks I know will saw off the back half of the gear leaver, if you leave your bike unattended for too long! Cool that this bike has gone from one GC to another!1 point
-
Yeah that kit is the way to go. I've always used my toe to kick down and both sides of the gear lever to select gears based on the size of my foot and how low these things are to the ground in regards to changing it to toe under lever to select up1 point
-
Bags are for fags, and you know I love the diddle.... /I'll have something on juice when you twin charge the 323, deal?1 point
-
So I read on the internets there was such a thing called a colourtune, made by Gunson. Its a spark plug with a sight glass essentially which lets you see the colour of the flame. I was pretty interested so I had a play last night and made myself one. Smashed all the porcelain and other innards out of an old plug. Taped over the top and poked a bit of wire through the tape that will be the new electrode, then mixed up some epoxy and filled it up to what I thought looked right. I let it cure overnight then put some heatshrink over the electrode and soldered the old plug top to the end. Just put it in one of my cylinders before and what do you know I can see the combustion. Pretty far out concept and I'm surprised I haven't heard of it before now. Vid: http://tinypic.com/r/16i5q9/9 Only tested it for a tick, you can see the spark is arcing across the top a bit but I already have ideas on how I'd make version 2 better. Main problem now is I need to get a screw driver short enough to actually get under the carbs and adjust the pilot screws while it's running hah1 point
-
well got offered a good deal so the dodge had to go and what replaced it was this its a 1966 Pontiac parisienne 4 door pillar less will be a long term project but will be cool1 point
-
after what seemed like owning the pontiac forever and not doing a lot to it ive traded it for a 1969 dodge coronet running driving car need paint and revin ill upload pics when I get it home this weekend by Pontiac u were the dream car but not enough time for such a big project1 point
-
Till i read about the fuel filler was thinking that is one impressive groove to rest your junk in.1 point
-
Looks great dude !1 point
-
Looks good! Is difficult to do a nice looking seat with that filler location. mine looks like a toilet seat.1 point
-
Nah bro, this is a bomb!1 point
-
^^ Is that a bomb Neal?1 point
-
I've been putting aside some surprise gifts in anticipation for this. Hope everybody else has too. Get them wrapped, in whatever you have laying around and bring them down next Wednesday. Wrap it up like fush and chups puhuhuhu1 point
-
Quite possibly, although I might have to pedal back if it's late, bit noisey1 point
-
haha thanks guys, I may well have a few working bees going on. Will need to get an extension lead to get the fridge up and running, I see a few late nights in the future. but yeah rad, Hopefully its not to bad to bust out. But ASAP is the aim of the game.1 point
-
I will be bringing my gas BBQ for people's meat at the meet.1 point
-
How about we do it like this. Gift wrap your "gift" and on the night your gift will be assigned a number, as will you (so have two piles of numbers). Put all the gifts in a pile and your number is drawn, and that's the gift you get. Just gotta be careful that you don't get assigned the same number as your gift. Also makes it super easy to organise. Also, I'm in for secret santa.1 point
-
I finally found some time to make some bench seats and get it all home. We had 20 people sitting at it for lunch on Saturday. It was awesome1 point
-
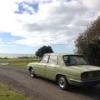
nothing new here just a photo of a valiant in a container i have got myself a welder now so i may start playing around with this turd and try get a wof on it now that the vw is going.1 point
-
and then i painted it. got rid of all the shit that was on the roof jut to make sure there was no nasties hiding under there. found a couple of patches of bog straight on the steel that were rusting so i got rid of that. then, paint. 2015-12-06_12-33-39 by sheepers, on Flickr 2015-12-06_01-26-47 by sheepers, on Flickr 2015-12-06_01-26-57 by sheepers, on Flickr 2015-12-06_01-27-06 by sheepers, on Flickr1 point
-
Carb bodies didn't come up as mint as I had aimed for but good enough for now, soaked them in gun wash then ultrasonic bath in simple green & hot water. Carbs back together, went up a size on the main jets, bench synced And after heaps of waiting, exhaust arrived. Great look and sounds vastly better.1 point
-
Righto, here is a summary of the last few weeks of dicking around. The arse end has sagged a bit over the years as you can see, so I thought I would lower the front first, then the back to suit. The front has these convenient spring platforms, spacing those off will lower it somewhat; So I made some things out of high tensile steel; The flat is so I can wind them on to the studs in the lower A arm, they are threaded all the way through with a 3/8th 24t thread. The spacers are 30mm long, which by my back of the envelope calculations would give a 50mm drop. So all that took a bit of dicking around over the last few weeks, the main holdup was the lack of motor in the lathe, making it extremely difficult to turn things. And today I had all these things together - including some high tensile bolts to suit. The spring platform dropped with very little fuss, I was a bit worried about it pinging out, but it was easy. Then wind on the spacers and bolt the plates back up - this was tedious, getting the bolts aligned was way harder than it should have been. Drop that fucker back on the ground, and whaddayaknow 50mm worth of drop, bang on the money. Fuck its a weird looking wagon from some angles... So that is the front, I will see how much drop it needs in the back by getting your mum to sit in the boot puhuhuhu! Also here is the first cookup on my outdoor cooking setup, this will get some use this summer I reckon; Fuck yea.1 point
-
Did some stuff. Removed all this pointless crap, ^ This is about a 3rd of the steel removed. Then bent a few bits, and welded this bit in, Set the seat down a shit load lower and back a bit, Cut some more stuff off, Made up some carbon blanks, to cover starter and oiler holes. Made up some flat handle bars, Have started on the gas tank, which will fit under the seat, and have started sorting the lights and so on also. Much excite!1 point


.thumb.jpeg.384ff72c8d2b0ee0d34a7bdedb55bdcf.jpeg)


This leaderboard is set to Auckland/GMT+12:00