
Leaderboard


Popular Content
Showing content with the highest reputation on 07/28/15 in all areas
-
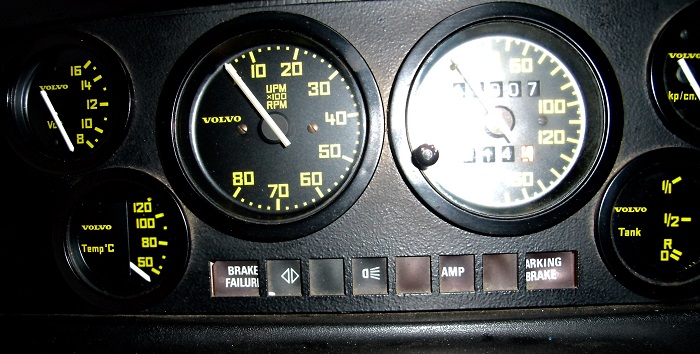
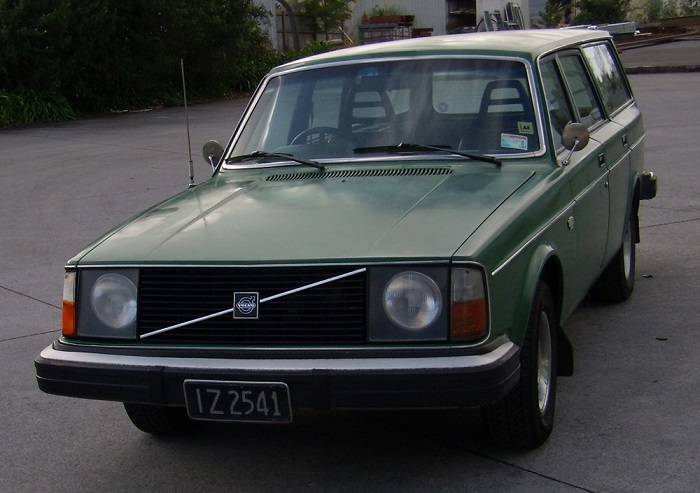
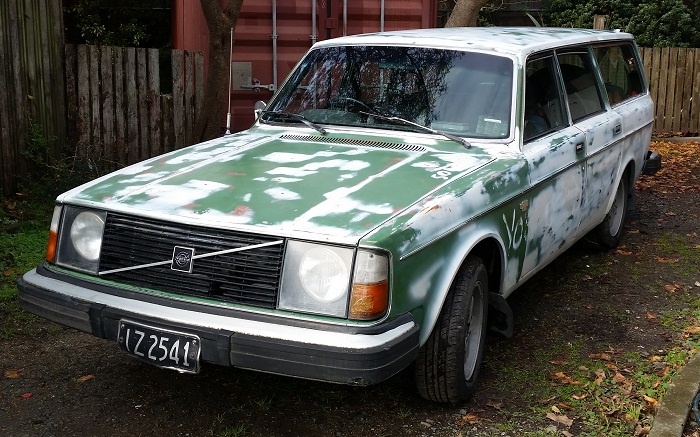
Eight years ago I purchased this car from a local Volvo enthusiast who had upgraded to a later model. Before that it was purchased new in Singapore by a NZ army officer who subsequently bought it back with him. At the time I had very little knowledge of Volvo’s (and cars in general) but needed a daily that would fit surfboards and drum kits etc. Over the next couple of years of really fell in love with it, travelled around the Coromandel, Raglan and across to Gisborne regularly when the surf was good. At this time it was in fairly good condition. For the Volbros it’s a B21(carb) with an M40 (4 speed) box. In my opinion the best looking of the 200 series. This car has a couple of unusual additions such as the plastic headlight covers, R-Sport Rally dash: and a compressor that raises the rear suspension, presumably for heavy loads. Not sure how it works or if factory installed. Investigation pending. Due to a change of circumstances I was no longer in a position to be able to keep the car. I ended up selling it to a young guy who drove it down to Otago to attend uni and regretted it ever since. Fast forward a several years and three Falcons and I was never able to shake the Volvo bug. I restored a very tired 1995 850 and then a 1988 240 (below) but I still missed my bug eyed green monster. 1988 240, B230E, M47, Black leather, Heated seats etc: In a desperate move try and find the car in 2014 I uploaded a photo to carjam with the following comment: “I would like to buy this car back, text me 022XXXXXXX” A year or so later, to my amazement someone text me. That someone turned out to be Nelson Oldschool Rep Sidewayssickness. He was kind enough to save it from a demo derby and even kinder to dismiss his sleeper build plans to sell it to me. I will be forever grateful to this fine specimen of a man. Unfortunately the last eight years have not been kind to the old girl: With the car being in Nelson in myself residing in Tauranga, Sidewayssickness had a good look over it to determine wof eligibility/roadworthiness and I decided to put it on a transporter. At this moment its still in Nelson. The plan is to get it transported to my parents house in Feilding. I have been waiting for the weather to clear and before doing so as I want to drive down to be there when it arrives to ensure its stored well. Once there a friend has offered to bring it up on a trailer in October. Known issues: Gauges don’t work Not running awesome Brakes not awesome Clutch not awesome Exhaust Leak No Drivers door glass (have replacement) Numerous electrical issues Rust to be determined I'm sure everyone reading this has regretted selling a car at some stage, but how often do you get the opportunity to get it back? Discuss://oldschool.co.nz/index.php?/topic/49418-jeezys-1976-volvo-245/
 16 points
 -
Well, the bug bit again. I guess you could also call this thread "I lost my marbles and imported another shitty old car from Japan! Ask me (almost) anything!" Originally I wasn't planning on buying another AW11 for a couple of years... if at all. After owning five of them over the course of the last ten years and getting sick of repairing botch jobs on hacked-up local examples I firmly told myself not to bother anymore unless it was a truly tidy one, which meant most likely having to import one from Japan. Then a series of fortunate events including a career change, the sale of my Mazdaspeed Axela to a family member earlier this year (which freed up garage space and capital), and a strong dollar to yen ratio at the time all led me to engage Ewan from Stacked to check out a few nice looking AW11s on my behalf. Yeah, I'll admit that six months after selling my last AW11 the itch inevitably came back, so I'd been keeping a surreptitious eye on the car sites over in Japan for the last year to see what the market was like! After a few hits and misses I settled on a midnight blue hardtop from a yard near Tokyo called Marumi Auto which had low kms, very little rust, one careful owner, and had been quite well looked after. It wasn't cheap, and blue was never my first choice of colour (I was angling for either a Sherwood tone, white/grey, or white/gold example this time), but for the price nothing in NZ came close in terms of quality and condition, and after owning my last one the colour eventually grew on me. By some stroke of luck, this particular one had been specced with the much more aesthetically pleasing black interior instead of the default eye-watering blue that 99% of the midnight blue cars had! It arrived at Stacked's yard in Osaka around mid-May, having made its way across the country from Tokyo on a transporter, and Ewan made arrangements to load it on a RORO carrier departing in late May. Around the end of June the export certificate and some other documentation arrived, followed by a notification from Stacked's NZ based customs brokers in Tauranga that the car would be arriving on 11th July. The AW11 then spent the next week and a half on the wharf while Customs, MPI, MAF, and Land Transport NZ all poked around and carried out their various inspections in the name of bureaucracy. I was heartened by the fact that during the border check the car wasn't flagged for rust issues nor underbody damage! Then, finally, once all the Is were dotted, Ts crossed, and palms greased in the form of invoices paid, the car left the wharf on a transporter headed to North Shore Compliance and spent a few days there before I drove it a short distance up the road to the panelbeater where it now currently sits, and will undergo further inspection to pass a Repair Cert. Compliance revealed that the left rear quarter had been subject to a minor impact in the past (20 years ago or thereabouts), and because you could still buy replacement TGP panels at the time the entire section had simply been replaced. There are no marks to indicate the chassis had to undergo straightening, there isn't any cancer creeping in around the seams, and all the spot welds look good - but there are a couple of areas where surface rust has started bubbling (the join around the left hand tail light, for example) that will need to be cleaned up once the repair certifier completes his check. I've had very limited time to spend foaming over the car because of other commitments, so it was a nice surprise today to discover that it already sports a set of incredibly rare TRD lowering springs. I'd bid on some in Japan as the car was making its way over here and just barely lost the auction, so had been feeling a bit despondent about ever finding another set. So where to from here? I'm not all that interested in making the AW11 stupidly fast, but will eventually perform a few judicious tasks such as sprucing up the suspension further, now that I know it has TRD springs (some good Bilstein struts and a rear swaybar would be nice), adding a LSD, fitting a set of extractors I did manage to win ex-Japan, transplanting a few bolt-on bits I'd hung onto after selling the first '80S KID, and tidying up all of the little interior and exterior blemishes I come across. May even pull my Buddyclub P-1s out of storage, paint them a nice shade of bronze, and fit them to the car, and also hit up Yahoo Japan for any oddball accessories such as driving lights and roofracks that might pop up. Still undecided whether I want to go for a full period-1980s look similar to what I'm planning to do with squid (my Skyline sedan) but overall I'm hoping for a nice "clean-slate" build - not concourse spec but tastefully tidy and done up without a hundred things wrong or fucked with! Stay tuned for more. Discuss: //oldschool.co.nz/index.php?/topic/49412-80s-kid-part-ii-eds-aw11-sc-chit-chat/13 points
-
Ok i have made a fair bit of progress since the last update. First of all i have drilled the holes in the rims for the spokes, all 400 of them! I painted the rims gloss black with base and clear. Then it was the job of cutting and threading the spokes and lacing all the bits up. All 4 wheels are done now which i am very pleased with because they are definitely the trickiest bit of the build. This was the tool my mate lent me for rolling the threads on the spokes. Its pretty old and i imagine it has done a few thousand spokes in its life. Rolling the thread takes less than 10 seconds. Here are some pics of lacing up one of the big wheels, i didn't take any of the small wheels as they are pretty standard. Put all the spokes in the hub The first side in with the nipples loosely on The other side going in I found the perfect jig to true them up in the scrap at work so i just tacked the bearing carriers on top of it. Truing up the wheels was a long job and the big ones took around 4 hours each to do with the 72 spokes to tighten up. And all done with the tyres on Mock up..... Next job is making up the front forks12 points
-
an anti-lag system would be great at getting the turbo up to heater temp in the morning.7 points
-
6 points
-
Well she is still cruising around in this most weekends at netball, at heaps of car shows and the odd trip to the shops. I still havent gotten around to sorting out a nicer push pole or a gear lever and the lake pipes are still sitting in the garage somewhere too! She loves cruising around in it and her typical driving style is one foot on the wheel, kicking back and people watching. Few things to note if you are going to make one. Be prepared to be stopped constantly to be asked "where did you buy that from?" or "so cute, can I take a photo?" Because it is so low to the ground my daughter sometimes gets bored and decides she wants to pick up random crap of the ground or drag her hands through the dirt. Watch out in crowds, retards wont notice it despite being bright pink and could end up tripping over it and sitting on your child. Castor wheels are not that flash on rough ground. She rattles like a bitch sometimes. Might try to rubber mount the front castor but most places we take it are nice and smooth. Women think it is the cutest thing ever and flock to it, Dad's usually look very jealous and grandparents ask if she is wearing her seat belt or has she got a drivers licence. Few shots out and about Greeting Dodgy Uncle Hayhole and Auntie Laura on his trip to Australia Spotted at car shows:6 points
-
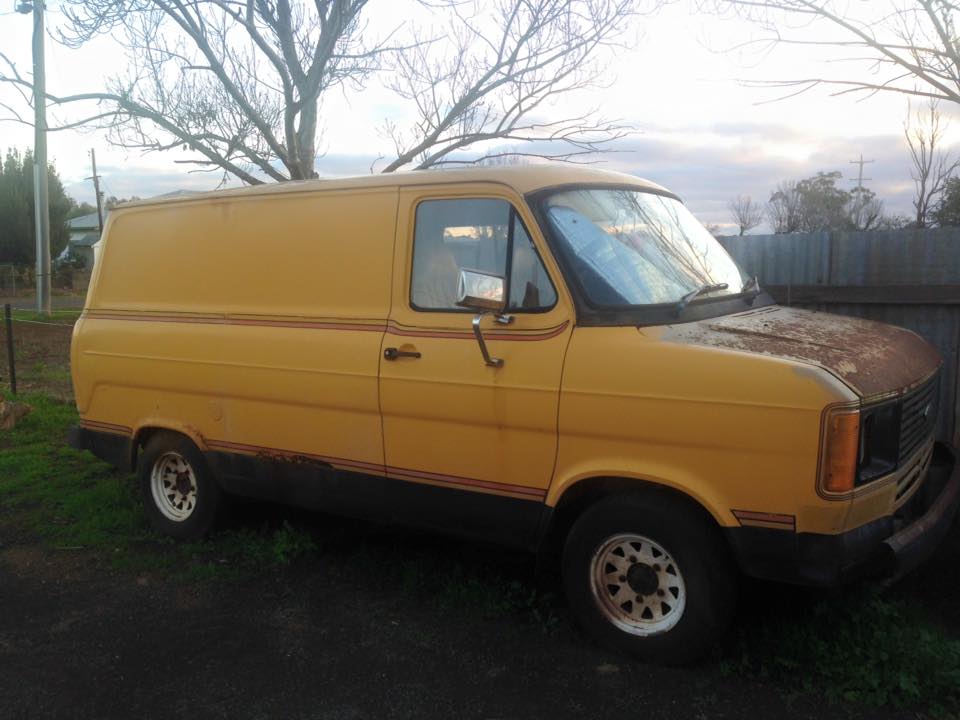
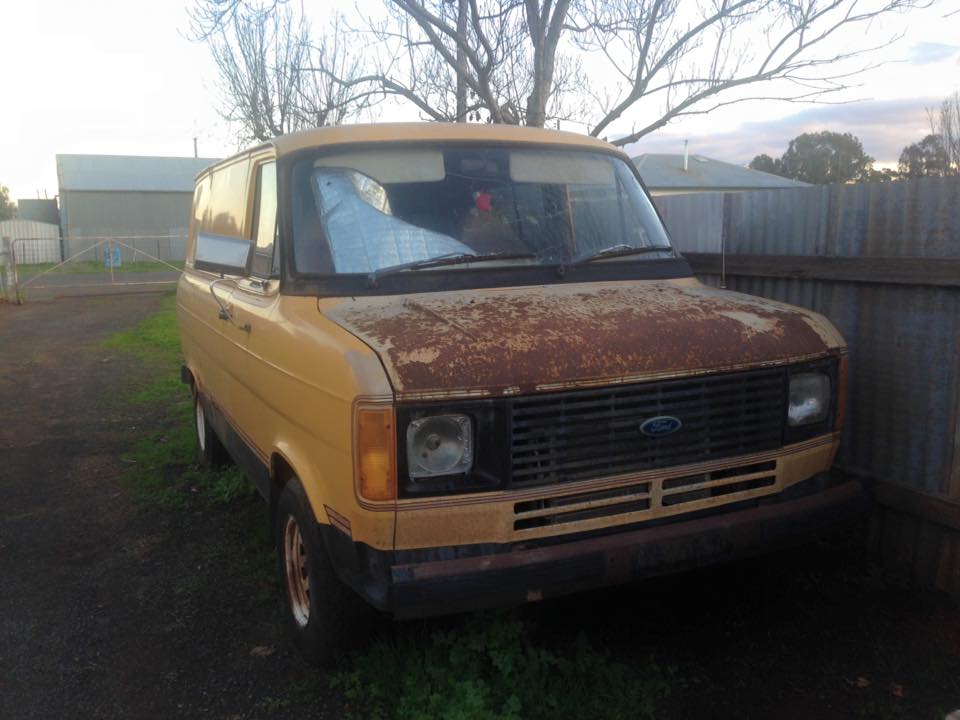
It's a bit like waiting for a bus (or a minibus in this case!) you wait for ages and ages, then two come along at once! I had been looking for a Transit Sundowner for several years, and had pretty much given up on finding one, then a friend pointed one out to me for sale on another forum in Adelaide, and I bought it. I have only done a little bit of work on it so far, but still plan a stripdown and full resto. Then two weeks ago someone else pointed this one out to me, and I just had to have it. It is a 1979 build, in a colour called Marigold, and is very original, even down to the stripes. It has been parked up for about 20 years, and the person I am buying it off purchased it 3 months ago from the first owner, with a view to restoring it. Things changed, and he advertised it for sale. I saw some pics and had to have it Originally a 3 speed manual, it has been converted to auto. It had power steering fitted from new by a dealer, as well as air conditioning. The power steering box looks like a Ford Bronco one, it is quite a good conversion. The vendor is just getting the brakes working, as the shipping company won't move it on only the handbrake, which is all that works at the moment. The engine runs okay though. Anyway, I am just arranging to get it shipped back to NZ, and it should be here in a few weeks. Discuss here: //oldschool.co.nz/index.php?/topic/49414-browndogs-1979-ford-transit-sundowner-yes-another-one/
5 points
-
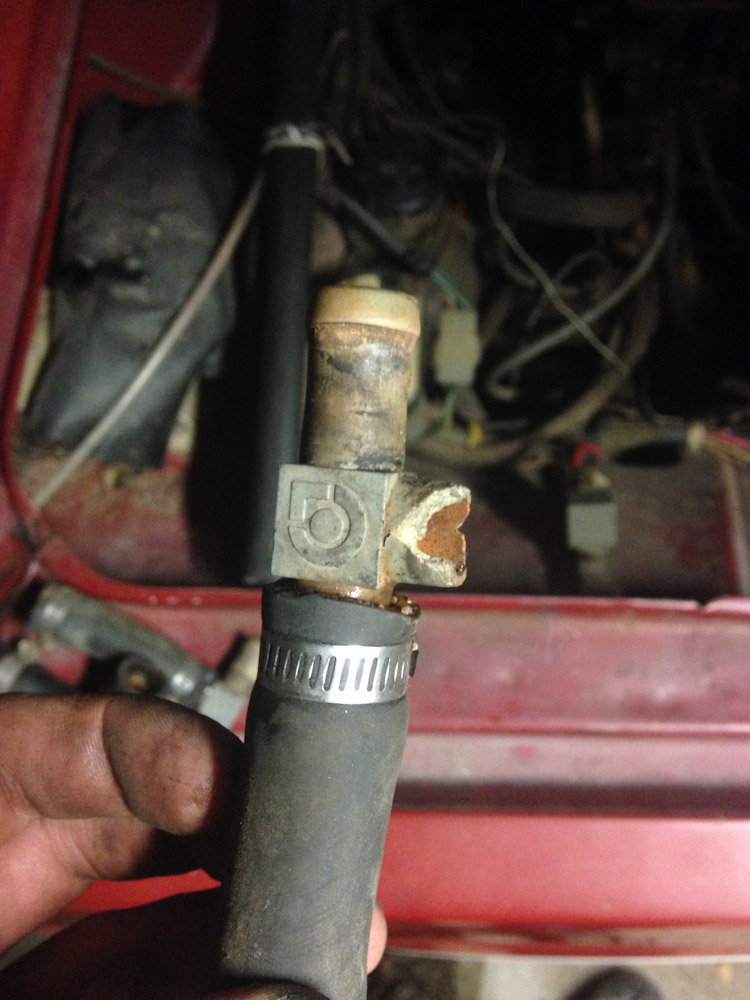
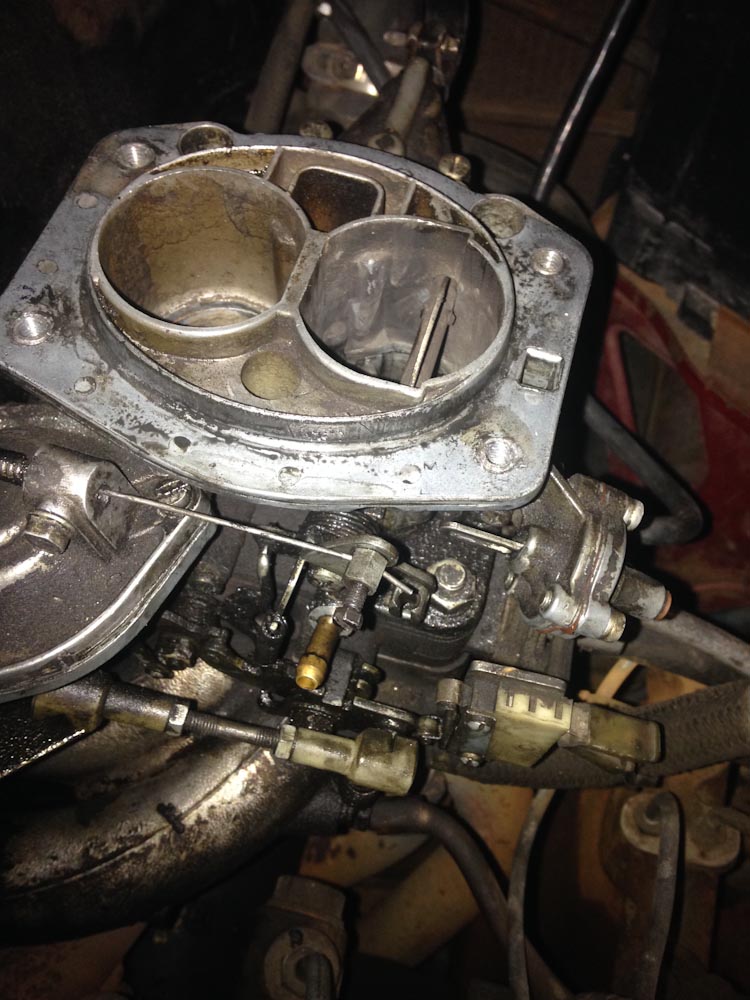
As previously mentioned, Id been having issues with the carb, It was at the point where It would drip more gas out the overflow than the thing would use when being ridden! A while ago whilst browsing Aliexpress, I had come across a listing for a FA-50 carb and though that was going to be the endall of my problems. but alas, The image on the internet looked slightly different to the carb fitted to the FA50 and with an expected eta of 20-30 days for shipping (because im cheap and didnt want to pay more for shipping than the carb) I wasn't entirely convinced. Then I remembered that on one of my rides back when this was running mint, I had scootered past a bunch of old bikes outside a dimly lit workshop. I jumped in the bug, and cruised on out the that area and came across the shop. Wandered in and had a chat to the old long haired guy that works in the shop with a majestic beard to see if he knew where I could get a rebuild kit for the carb. After a long conversation about the awsomeness of FA-50s, He said he wasnt sure where to get a rebuild kit, but if I dropped him the carb, he could probably sort the issues with it out. I asked what that would cost me... He told me an approximate price, My jaw dropped.... I raced home, removed the carb and dropped it back to him. Later on that week I received a phone call from him apologizing that it took so long to remedy, But hed got side tracked and forgot about my carb. (still talking about 3 days after I dropped him the carb so I wasnt bothered) He told me what I owed him and "Bring cash, I dont have that new fandangled EFTPOS" More FA-50 yarns and an exchange of less cash than quoted, I had one freshly rebuilt FA-50 carb with new a needle valve and seat. pressure tested and all set up ready to fit back to the bike! Got home, fitted carb, Kick started and started first kick! jumped on and went for a hoon round the 'hood. PERFECT. DSC_0349 by OR4NGE, on Flickr JUST PERFECT.4 points
-
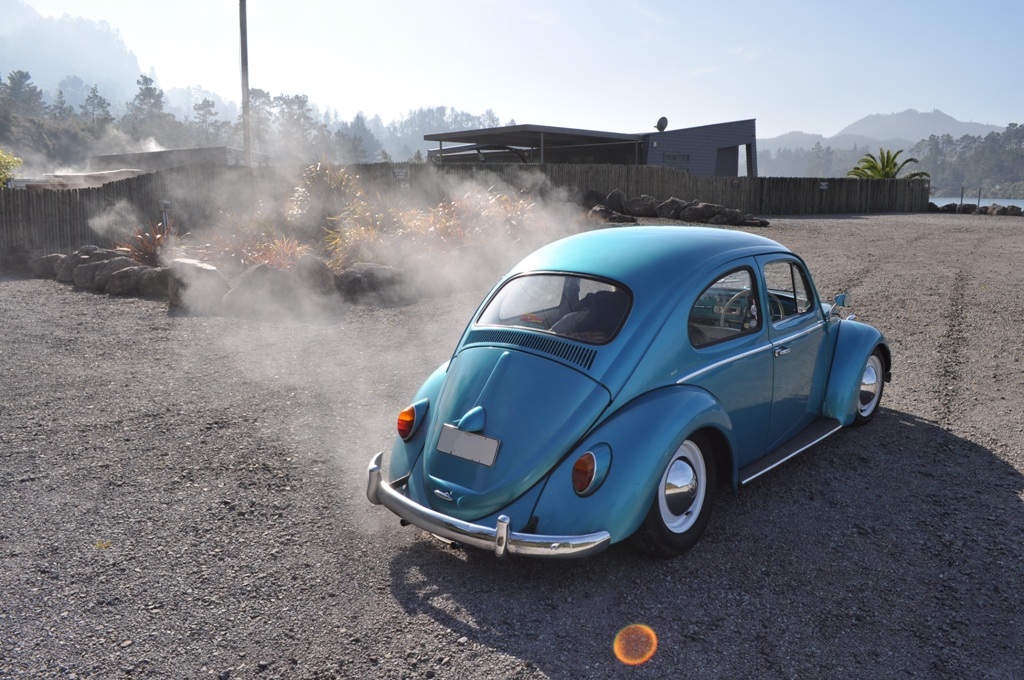
SO HOT ITS STEAMING? not really, I parked over a geothermal vent Been on a couple of club night town cruises with DMFV
4 points
-
After the flywheel warped we mucked around for quite a while trying to figure out what to do. After talking to some old guys from down south decided to down rate the clutch from the 4age 200mm paddle clutch to a standard 4k size exedy heavy duty. Main reasoning for this was the overall clutch/flywheel assembly weight ends up about the same but with a lighter clutch all the weight is in the flywheel where it should be so drivability is much better. Works a charm and drives much better now. Friend machined a standard flywheel down from 11 kg to approx 5kg still has plenty of meat left in all areas. Sandblasted a set of wheels so we can paint them silver. Should look much better than the white.. Done some panel work to tidy up the dent I put in it at daybreaker last year. Turns out that corner has been repaired before but still turned out pretty good. True test will be once its painted. Still waiting for painter availability.4 points
-
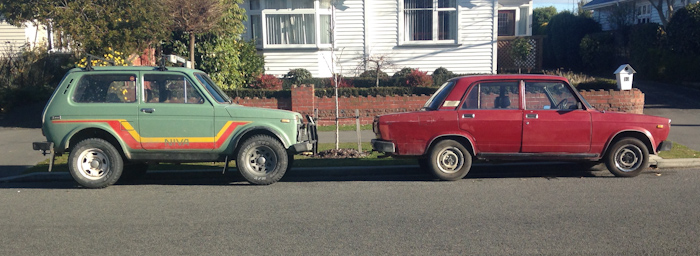
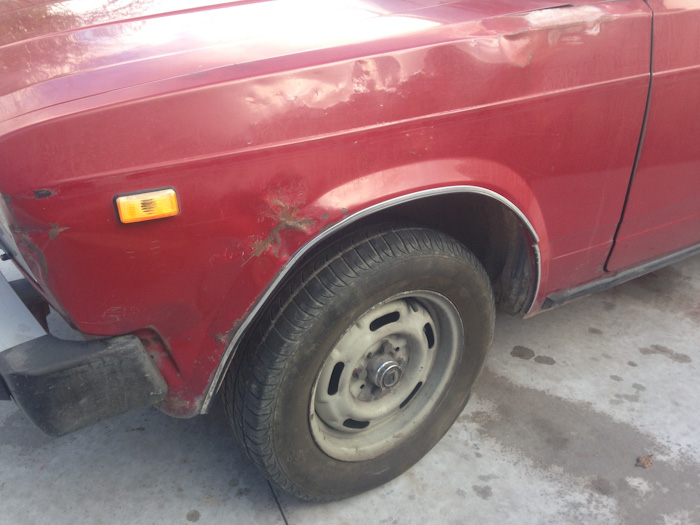
I'm going to be sleeping on the couch for a while for buying this but hey, Lada lyfe! As uni is a touch busy progress will be slow, I plan to have her back on the road in 6 months when the Niva wof runs out, then daily it as the Niva is relatively expensive around town. With help from ajg193 we picked up the car on sunday and drove it home leaking plenty of water on the way. Once home I got stuck into making a list of issues, water leak being pretty high up there, stripping back the air filter the heater pipes became a likely target; Somehow plastic fittings have found a way in and broken, easy as to fix that! With the air filter off, another issue made itself known, the vacuum secondary doesn't look like its opened for a while, easy few ponies to rein in there; Added to that, one choke linkage is missing and the other is broken meaning the choke butterfly hasn't moved for a while either, manually holding it back she fired into life first pop, bonus! The running gear seems to be in great order, even with the issues it seems to drive ok, after a tune & tickle I have high hopes. Hardest of all will be the panel work, there are alot of dents all over, mainly the passengers side, this is the part i'm really keen for, will be good to learn a bit of panel bashing! Worst of the damage; A whole new guard is 40usd so if I fail miserably, I'll just import a new one! I'd really love a touch of low and some wider rims but 4x98 is not so common and the amount of low needed is most likely in cert territory, time will tell........ Discussion: //oldschool.co.nz/index.php?/topic/49397-nickjs-1989-lada-2105/
3 points
-
Bit of progress has happened over the weekend. Bought and installed some new door and boot rubbers from Basis cost $180 for 2 door and boot which i thought was cheap! Installed some mud guards, cause I'm a practical kind of guy Rewired my headlights through relays and installed new bulbs, 100x brighter! installed a bonnet strut so i can chop the front plate out of the chevette so i can gain some much needed engine bay room This is my steering rack CUL8R, have never seen the casing with the ribs before? maybe its gemini?3 points
-
Some slow progress. I have been looking for a VS commodore fuel tank. I ended up getting a damaged one to use to mock up the boot floor, Thanks Zebra Dude. This means that the panel work can carry on. The tank is going in backwards so the filler ends up on the right side. If any one has a VR or VS tank I need one. I had the wells off the Firebird so I took a couple down to try for size. The one off the back fitted OK, 8 inches wide 245 tires, some smaller tires will be the trick. The 7 inch ones off the front with 205 tires looked lost. Photos below sorry about the crappy phone photos And the 7 inch Might be better lowered a couple of inches
3 points
-
I cant see why it wouldnt work, annnnnddddddd A prius (There's one at Zebra, at last check) has good parts for this idea. They need to keep the heater going even when the motor is off, in the engine bay there's a thermos tank for hot coolant, and a 12v electric water pump designed to pump the heater circuit. So you could use the pump from that, and then any old water based heater core, and lines in between.3 points
-
Tig welded up some zorsts today at lunch hoping to weld them in place after work tomorrow I'll have to push Pontiac350 around to give me a hand.3 points
-
7 years ago i bought and rebuilt a mini buffalo which turned out to have a bridgestone 60cc engine fitted (rotary valve 2 stroke single) wtf bridgestone as in the tyres guys??? yep. duning the 60's and 70's they made and competed very sucessfully with motorbikes read the history and demise of the bike division here http://bridgestonemotorcycleparts.com/index.php?topic=149.0 anyway its taken me 8 years to find another bridgeston. ive now moved to scotland and managed to find a mkII rs that had been imported from the states along with a bunch of rd350's the guy who bought it over had no interest in it so sold it to me, it was produced in december 1968. (1 of 7800 built) mk11 rs200 dual rotary valve induction, twin cylinder 2 stroke, pics so the good bits are its pretty much complete, its only done 2900 miles. paint is ok and has a cool patina frame is in excellent condition bad bits are, its been sitting for 40 odd years its seized solid, all the rubber bits are perished or missing front brake lever is busted, my plan is to get it running, by doing as much of a rebuild that is necessary, i wont be touching the paint, as i dont want a show bike, replace any missing bits, get it registered over here in scotland and ride it. im guessing im going to need: rings for both cylinders top and bottom bearings, new conrods, and new crank pins, piston pins, all new internal bearings new chain and sprockets, rubber carb boots (carb to airbox) tanks rubber knee pads, new tyres, and probably a rebore/re-chome depending on barrel type . i'll post photos as things happen (which may be a while, in the midst of moving house at the moment)2 points
-
I can probably manage this in the weekend if you'd like?2 points
-
WHO SAYS BEETLES ARENT PRACTICAL Did a Semi freight run on the way down to gang summit as an excuse to cruise round and see some places/meet OS peeps. Had three bikes on the roof, A set of alloys and tyres on the backseat/trunk area for Mjrstar to drop off in hamilton aswell as stopping at gregs to foam my roofrack and tighten the bolts. THANKS GREG! Cruised on through to Taupo to pick up two stationary engines (that were alot larger that I thought) off Testament for Seedy Al. Took the passenger seat out to put them in Thats about all....
2 points
-
Hi Ed. Yes it looks to be in great condition. Nice find! I'll be tuned in to follow your progress. How many kms on it? Here's an updated pic of your last one by the way .... it's coming along ok. Sorry I don't mean to hijack your thread!2 points
-
If you can be bothered id give it a crack. If the 12v options are only 150w in my head it must be easy to get more than that as heat output via the churbro. Assuming 6degC temp splits on both water and air thats 0.004l/s flow needed in water and 20l/s needed for air (ie both fuck all) Reality will be a bit different but cbf going into the physics via phone. Assuming you can get at least 40degC water off the turbo on the flow side of your water you should be able to get like approx30degC air off the heater element which will certainly help things in winter. Might not overcome youe heat losses in an old car but if you can direct the air to your face/hands/toes/balls it should help2 points
-
keep your turbo and wrap exhaust manifold with copper tubing, run water through that? would also look cool too2 points
-
The old Chevy Corvairs had little petrol burning heaters, I recommend one of them.2 points
-
just run your turbo harder2 points
-
/water jacketed exhaust.2 points
-
Just get a electric heater like they use on hot rods2 points
-
I think it's a good idea, but I just wonder how much heat the turbo will generate, especially under light throttle/cruise conditions? The pipework to the core is usually quite small, 6-8mm usually, so not going to be a huge amount of flow, and it is just the central housing that the water flows around, not the exhaust housing. There will be some losses of heat as the water is piped forwards too. A water cooled turbo does not necessarily need the water cooling, they will operate okay without it, as the oil cooling will do the job on its own, so no need for diverters etc. It will still get a lot of cooling with the pump going, and the heater flap closed shut anyway. Another option might be to double skin the turbo downpipe, and blow air between the two skins, much like the original Porsche/VW heat exchanger. Should be plenty of available heat there. The only downside to this is that if you develop an exhaust leak between the two skins, it will kill you with carbon monoxide poisoning. But as a VW owner you probably knew that anyway2 points
-
Was it this one Jonny? Not this actual one but one of these... You can build one of your own...2 points
-
So I drove this around a bit in the weekend, my man warned me that it will attract old men like flies on shit. Literally the first time I stop in a public venue an old man in his eighties wanders up. They are like fucking zombies attracted to fresh meat... not very fast but extremely intent on the purpose at hand. They love them old Humbers for sure. No issues so far, it runs like a dream. The steering is probably the worst bit, it needs a fair amount of positive input. My mate reckons that it is just how it is, but i imagine some loving to the steering box and checking the geometry might help. It is not that bad really, but it would be nice to improve things. Intent this week is to fix up the rust under the bumper and the gearbox mounts then try for a wof. That is all.2 points
-
Time for a different approach?2 points
-
The complexity of this problem man. Mind blown. Reminds me why I drive an escort.2 points
-
Hi all... Had a sweet plan originally to build something epicly rad but that fell through so went to the local dump shop, looked around and saw a MASSIVE pile of weed eaters and decided that getting 2 or 4 of them running together would be ace so asked the guy how much. $15 How much if i buy a few? $10 if buying 10+ Ok, giz 10! So got 11 of them for $100 as one had no compression so got it for spares. Turns out is missing a spark plug Now this is what the work workshop looked like this weekend (we do electronic engineering) so lawn mower motors, weed eaters, 4AGE blocks, raleigh 20, 3" LS400 exhaust etc Got a couple motors running, 1 quite well, but decided i should give them a cleand (thanks for offering the use of the work parts washer John!) and clean out the carbs and bake the carbs clean before seeing what i can get going. So here is a pile of shit i don't need anymore Box O carbs Ignition (to be tested and maybe replaced by sweet shit? who knows) Exhausts, heat shields and intake covers to be cleaned and, of course, 10 little motors lined up Will flip one bank upside down and weave a chain through some sprockets that i'll somehow magically mount onto the flywheel... some thinking to be done here! Also, anyone thinking of doing the same? DON'T! everything is quite costly... because you need 10 of everything! Sure, sprocket isn't too costly... but 10? same as new gaskets or spark plugs etc etc... all adds up lol1 point
-
ive got prettymuch the whole handlebar setup leftover from my build if you need -mines the model before with round headlight. crustywhips the man to see re; exhaust chambers etc. dying could be carb not refilling? check fuel/vac lines and fuel tap bowl ps. sweet score1 point
-
Tried a new track over the weekend and my new rear swaybar. Even made some smoke And a vid https://youtu.be/g-6SIrj--fQ1 point
-
Picked up one of these tonight, should come in handy.
1 point
-
Wear a turbo beanie1 point
-
1 point
-
was really just an idea... but might start hording parts.... though my turbo was reconditioned only a few hours ago...1 point
-
so it finally arrived today.... (nothing post to give the false impression of progress)1 point
-
After making 100s of CAD drawings and cardboard mockups After making Dozens of CAD drawings and cardboard mockups After making about 6 CAD drawings and cardboard mockups, I've got the final shapes for everything. The finalised design shows about 0.1kpa pressure drop across the whole thing when stationary. If moving forward at 100kph it gets positive pressure right to the bellmouth when drawing 170 grams/sec. Notbad.jpg Time will tell if I'll ever see positive pressure at the map sensor though, not holding my breath on that one. I should have some lasercut bits turning up for part of it this week. Then when the car's going again, that's the exciting part! (Posting meaningless graphs about pressure readings while nodding authoritively)1 point
-
Had POOMAN swing round today and help pull trans away from motor. We pulled the bent flex plate off anf swung down to segedins who were more then happy to replace the flex plate and also upgrade me to the more expensive one free of charge. Everything was hard work but came apart and went back together without to much swearing and cussing. Also mounted radiator properly. Went for a burn in it was super stoked with everything. Also bought some straight through mufflers and made a few dump pipes which I'll tig weld up this week at work1 point
-
Spent weekend again working on this lemon. Installed new alloy radiator which doesn't quite fit so will tig weld a few brackets on tomorrow at work. Had a bit of a fck around with the new flex plate now that everything's bolted in. Testament tom and I have found that the flex plate has a 4mm wobble from one side to the other.... Unsure if I've damaged it putting motor in or if Ching wing shitty flex plate! I've had to shim starter motor over more so it misses the ring gear but I'm thinking I might have to drop the trans and replace te flexolate again!!!!!!!!!1 point
-
Not very much progress has happened in the past months; Gave the Jag front end a good clean, cut off a few bits and decided how to mount it. Goes low enough with out cutting chunks out of the chassis or front end, which is good. Bought an engine this week as well. A lot of people won't be too happy with the choice but it was really cheap and already has been rewired to suit a project like this. It's a Nissan VH41. Gave it a steam clean today and come out much better. Was covered in dust. Test fitted it and it seems to fit quite nicely, except the inner guards might need some work. Keen to get rid of that ugly spider looking thing and get some ITB's on there. Tell me how I should have bought a LS and spent ~10x as much to get it going: //oldschool.co.nz/index.php?/topic/47317-matts-1951-chevy-pickup-discussion/1 point
-
Washing the accumulated storage grim off Felicity revealed her lovely condition. Oh she looks good and I must admit a few caresses were shared as she was tucked back into the garage... With inspiration flowing the W50 gearbox and Pinto bellhousing was trial fitted. Success! As it came together nicely. Then I left my rubber arm a bit too close to the guys and ended up accidentally buying something... Why chose this jellybean shape of '90's excess...? Because YB Turbo. Hmmmm a little distraction, again. Thank goodness I have an understanding wife as I dragged this home.
1 point
-
if ur over that way il pay u $25 ea for two good identical ones that go. i wanna make a twin prop something1 point
-
How about you drive all 10 radially around a giant ring gear? It would be quite big but your fuel tank etc could all live on the inside of the circle. Edit: You could use a ring gear from a smaller concrete mixer or similar and find enough drive gears to make it work.1 point
-
This POS is staying in Auckland for Hawkes Boes. Needs more work and WON'T run. Would take it to show peeps, but it's not running so kinds pointless. Need to pull one of the flywheels off again (which takes an hour), machine it, and put it back on (another hour) as its catching and is stopping the whole thing from going. Pretty sure the shafts are on quite well now though as they didn't come undone when trying to start it into essentially a seized motor. So, don't have machining gear here and still need to pack for hawkes boes so stuff it!1 point
-
That is a good point guys, and cheers Fred for the nice words Me and cam were assuming you would pick a trillion holes in it Name; open to suggestions. Will likely be named 'the widdow maker' when it blows up this weekend haha. No pics, as i'm lazy, but got the output shaft on and the front sprocket on too. Will have to get fuel and chain sorted tomorrow, and then i can fire it up! don't have throttle just yet but thats ok for now. Dave; you are my hero! I have done sweet fuck all to this thing myself to be honest. Just spun some spanners and drilled some holes while Dave did all the real work. Wish i had enough game to do all this shit myself1 point
-
I'd be keen to don my leathers and attempt a multi smoke land speed record. Learnt me lesson in scabs and other injuries at OS events during first vinegar hill...1 point


This leaderboard is set to Auckland/GMT+12:00