
Leaderboard


Popular Content
Showing content with the highest reputation on 06/19/15 in all areas
-
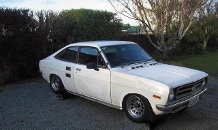
It's ALIVE! After sending the Z to Speedwell in Hamilton to get the carbs looked at, she's purring like a kitten. The old boy said all the needles were gunked up from stale fuel and the slides were stuck. Looking all snazzy in the fresh air. Also gave the radiator a proper flush and got a nice tray of gunk out. Might have been helpful to jack her up to get the tray under a bit more... Tinkle time! I really like this photo haha a little accident. To do list: -Shocks -Windscreen rubber -Exhaust and muffler -High stop light? -Sort out slow voltage discharge6 points
-
woo. got a randum plate. and some $100 buck custom cam gears off a FB page. And my Focus Racing Spokes's split and new lips. 14x8/9 A type specs. woo. Going to face the centre and get the centre mirror polished also.5 points
-
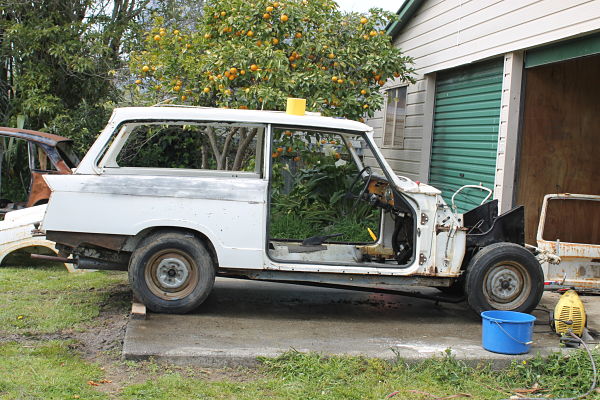
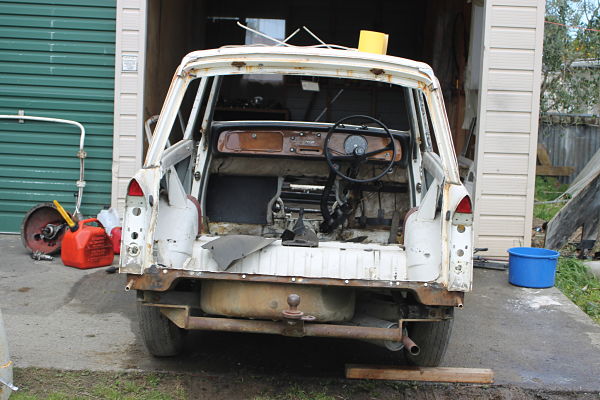
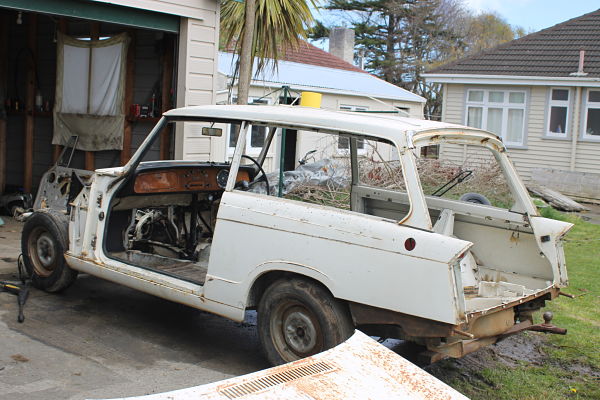
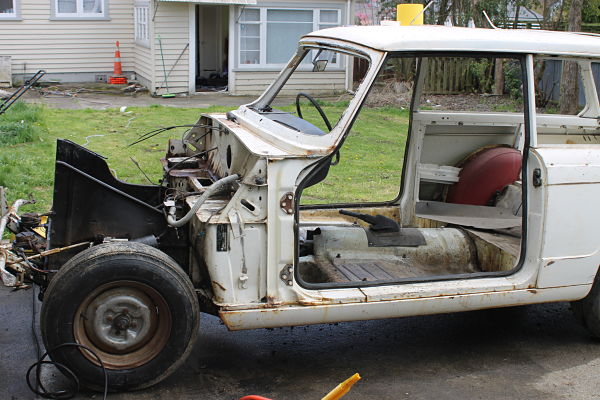
Shes now looking quit naked, i have stripped heaps of it down, i am so surprised how solid it is, i have not found any rust or repairs.
 3 points
 -
3 points
-
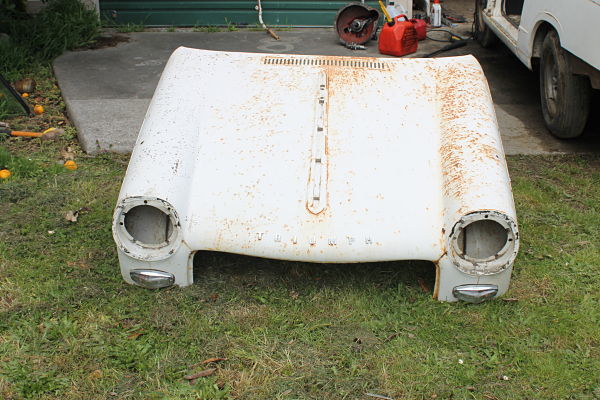
All i got sorry. Here are a couple of others... (spent more time looking than shooting)3 points
-
i get what falls over in bad weather, or is in the way of a new thing - the perfect wood!3 points
-
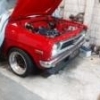
Been on here for years so thought id better make my own thread. Its a Datsun 1200 coupe. Its been through many changes but finally got it pretty much how i want,minus a few small exceptions. Its running a rebuilt A15+T. The turbo is a small garrrett blowing through twin dellorto sidedrafts. Currently running at 9PSI via a Tial external wastegate. Wheels are 13x7 and 13x7.5 SSR Starsharks wrapped in 175/50r13 Yokohamas. The only other plans at this stage are some adjustable coilovers for the front, S13 brake conversion and getthing the front rims widened to 13x8 and moving them to the rear, then putting the rear rims on the front.
2 points
-
Unfortunately no, as it would have been a wonderful death I did win an award which was pretty sweet2 points
-
depends how far round the de crotching goes. we've seen this in real life even crotchless assless pants might just be leg warmers and a garter-pocket belt2 points
-
Slutbags, we have some broken down pallet wood at work if you want it.2 points
-
took this 5 mins ago2 points
-
2 points
-
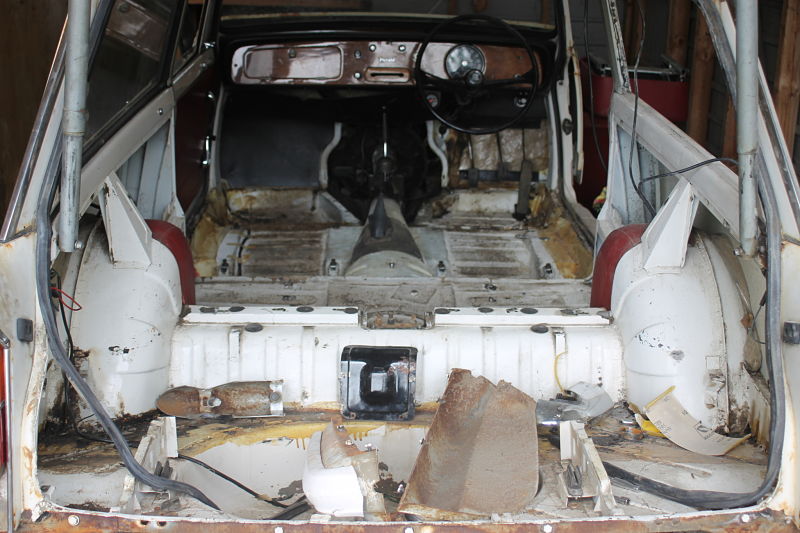
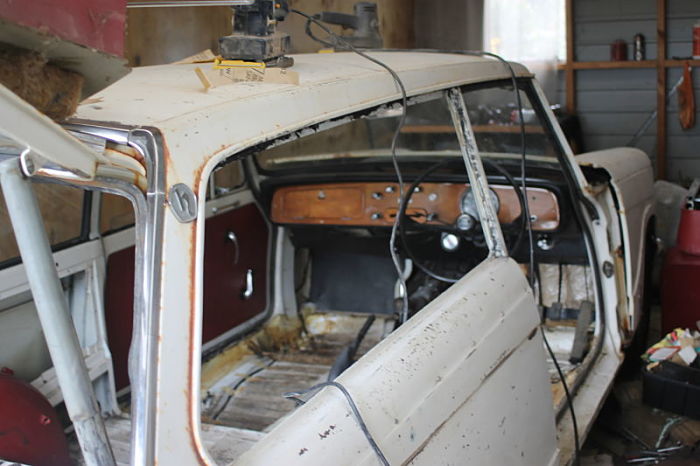
Hi everyone, I recently acquired the car of my dreams and Greg (64Valiant) has told me to share it with you. I'm pretty new to forums but here we go: She's a 1972 Datsun 240z in off-white/cream. The previous owner had her since 1976. The Z was driving around 20 or so years ago, but has been parked up in a garage with a cover since around 1995. He passed away four years ago and the family decided to sell it through the Z Club to find an enthusiast to bring her back to glory. Luckily, I was the first serious buyer and the rest is history. NZ new car 85000 original miles I'm the third owner Interior is near mint (no cracks in the dash and factory radio still installed) Minimal rust (no such thing as a no-rust 240 haha) She runs but clutch won't engage, so is probably fused to the flywheel which should be interesting. The rego has lapsed and I'm trying to keep the black plates naturally, so anyone familiar with this process please shout out! Currently assessing what needs doing for Re-vin and looking at options after that. I will keep her mostly stock, only changing the suspension to something a bit stiffer and throwing on some 15 or 16" Minilites or Watanabes a bit later on in the piece. She's a real darling so I'm not going to deflower her with flares or an Airdam. I've probably forgotten something else important but I'm sure you'll all point it out. Looking forward to chatting and meeting everyone. Thanks for reading, -Reubin First fresh air for 20 odd years! Discussion Thread1 point
-
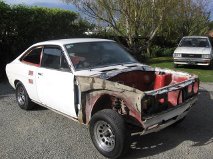
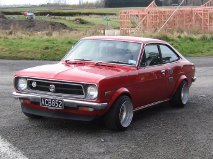
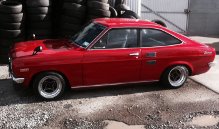
Discuss here - //oldschool.co.nz/index.php?/topic/48697-blizzos-83-kp-starlet-rally-car/ Right boes, a dream of mine over the last few years of lurking in the corner of my father in laws rally career has finally come true. Yesterday I took ownership of am 83 Kp rally car. I have been wanting to get on the gravel for a while, and have had a go co driving for my father in law in his escort. Now its time to get into the hot seat myself. He gave me a bit of cash towards this starlet under the priviso that he sits in the co pilot seat and teaches me with the occasional drive, pretty good deal IMO. So dont get excited, this thing isnt that flash, hasn't been used in about 6 years and needs a fair bit of TLC, but thats all good fun anyway. good bits - - "worked" 4k, still unsure how worked, has 45mm sidedraught and quite a high duration cam, still waiting to hear from the bloke who built it for more info. - rego on hold - MSNZ hologated cage, i just need to finish getting my R2 license and get authority card in my name. - different struts with good stiff rate springs bad bits - -a fair bit of bog hidden rust - a bit gutless ATM, gunna investigate a few things (buggered mech fuel pump) and poss pull head off - a ghey colour scheme and average paint - VERY FUCKED DOORS (bottoms are very rusty) photos! bad bits - what it used to look like - what it could look like-1 point
-
ratios were designed around high speed autobahn touring the motors like revs and economy doesn't suffer too badly on nz roads1 point
-
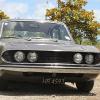
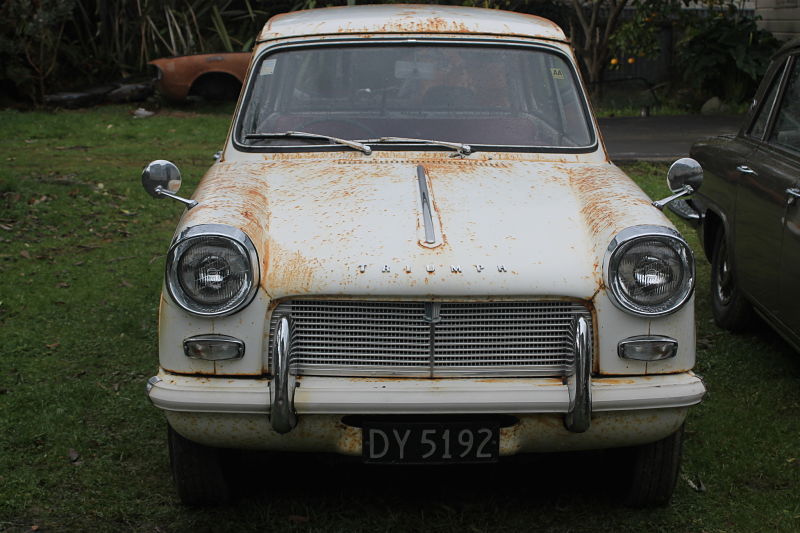
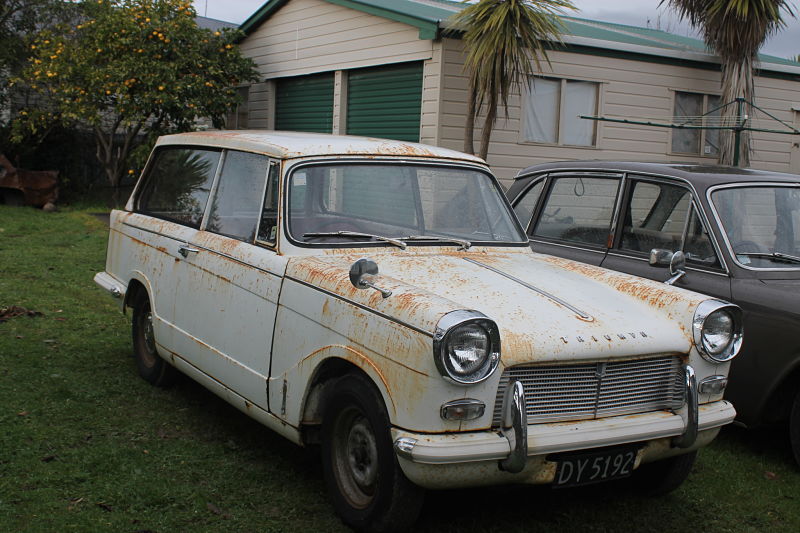
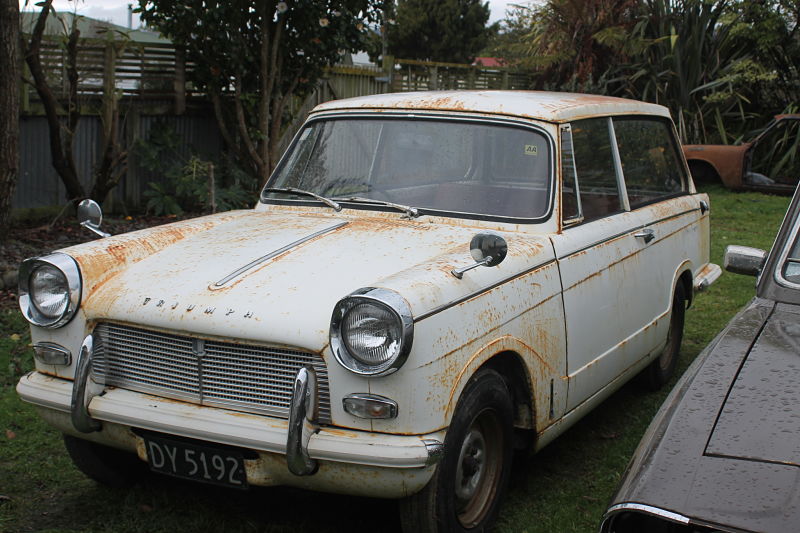
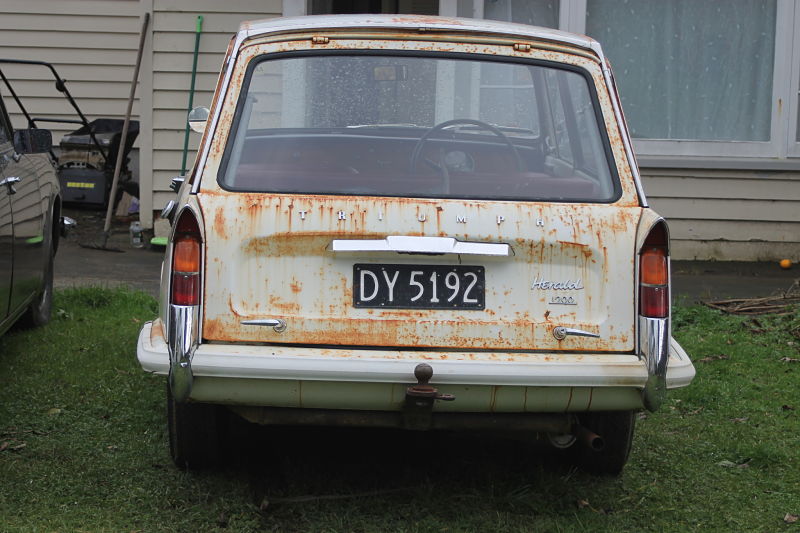
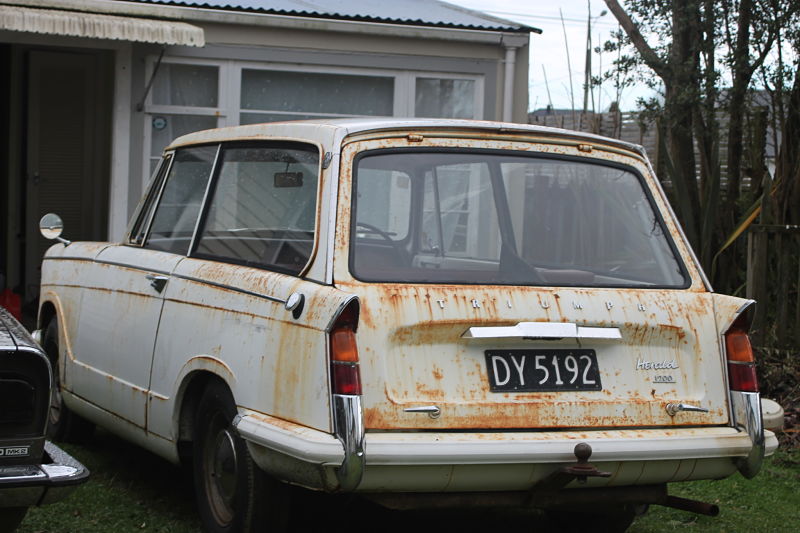
That is a cool little wagon. I wouldn't sell it, not many good ones left.1 point
-
I always forget when this is on. Even though it is always the same time each month. I guess I should get my smart fone to remind me in future.1 point
-
http://www.dragonfly75.com/motorbike/AXpipedesign.html this is the guy rickee got the dimensions from. hes done alot of experimenting1 point
-
come on now, we've been through this. assless chaps are chaps assless pants are chaps assful chaps are pants pants are pants an assless can am is a segway1 point
-
So Im pretty much up to date with where the car is at right now, managed to summarize four years into a single page haha. Car has been running great with the new motor and Link G4+ Atom, could not be happier with it at this stage. Had another drift day at Meremere again in September (2014), car went well, I was struggling to get the hang of the ever changing weather, and first time back in the seat drifting with a turbo. Managed to get a couple okay runs done at the end of the day. After looking over the car after the drift day I noticed the brace for the intake manifold had lost a bolt which caused the manifold to crack through the first runner again. Decided this time I would make a good, 3 point, triangulated brace, to really support it properly. So intake manifold off, cleaned, weld prep’d the crack and welded inside and out, cleaned up the port with die grinder to keep the flow smooth. I also welded another tapped boss onto the first runner to use as my third point for the bracing. Last step was to set the intake manifold up in the mill and face the flange to ensure that its nice and flat for a good gasket seal. With the intake fitted back up, it was time to make a brace. Was also tired of the lack of rear brakes and handbrake its always had. Did some research on the rear calipers I was using, turns out they were early Corona stuff, with S13 rotors, quite an odd combination. I had some Nissan S15 rear calipers lying around for a while now so I figured Id put them to use, as they are much easier to source brake pads for. Dug up the S15 Calipers, stripped them, cleaned them and a fresh coat of high temp paint (Dulux stuff, same paint I have been using on my manifold and exhaust, holds up really well). Decided to cross drill the rear rotors too, mostly because racecar, but it may serve a purpose on the track. Had to draw up and machine some new caliper mounts to suit the S15 calipers, made from 10mm mild steel plate. Project Mu pads turned up, so started to re-assemble everything so I could get some measurements for brake lines. Was really happy with how it all turned out! Although it wasnt over yet…! Quick test run on the hoist and I noticed that the calipers were moving back and forth on their slides as the wheels spun around. Brought my DTI home from work to see where the run out was coming from. Long story short, both rear axles were slightly bent (would have always been this way since Ive owned it), one had 0.3mm run out on the bearing diameter when held between centers. Managed to straighten them and get down to 0.01-0.02mm run out, then took a light skim off the hub face to ensure a true running brake rotor and wheel. Installed some new bearings while they were apart, put them back together, new brakes back on and everything was mint! Got to test the new handbrake at Meremere again in December, it was perfect! Project Mu pads work crazy good. The rain held out. and it was a mint day at Meremere, first time I really felt comfortable in the car, and pretty stoked not to have single mechanical fault for a change!1 point
-
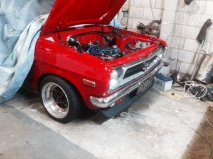
So i cracked into the rather large amount of rust on the lower a panel last weekend. Shes not pretty but meh, rally car. Cutty cutty ( a lot more acutally got cut out, but forgot to photopotato that) Someone had done the good old sheet of tin and some jbweld trick, yea little johnny! Weldy weldy have since seam sealed and painted it. Im just gunna fix pieces in between events so it doesn't become a garage ornament. Once all visible bad bits are fixed up ill give it a new coat of jam. Currently have front struts out, am banging new brake lines and cleaning the calipers etc, will buff pistons and jam them back in, fill standard shocks with 20 weight oil for stiffies. gunna look into possible strut upgrades soon to get bigger brakes, but i want to be able to still run 13 inch wheels, as i have a constant supply of cheap 13" rally tyres. Anyone have any ideas here, richie? Ned etc also on the look out for some old rims to bang road tyres on for tarmac events, don't want jap spec, just awesome ham 80s nz spec. Anyone got some tridents / turbos / hotwires around they wanna sell? Churrr1 point
-
Look, if I can drive a supercharged V8 interceptor and blow shit up on the Auckland motorway I will be a very happy motorist.1 point
-
Hear hear, good show It was good to show Geoff the documentary on Auckland traffic before he moves there.1 point
-
I had to have a high stop light in my 240z when It got registered. I Still have it around somewhere if you want it? I took it out after getting registered and wofd.. Three wofs so far and no one had asked.1 point
-
Glad to see you're toasty now. We've been burning old gorse. Shit that burns hot! You're welcome to pop over anytime, cut some down then take it away.....1 point
-
My final post until i find some more pics on my 6 phones I've had in two years. They just don't make them like they used to. On that note i bought something they certainly don't make like they used to...... Warning: Photo taken with potato while drunk Working and usable with the newer autofill/autostopfillingsoitdoesntfloodmybathroom valves. Its cast so is heavier than Adelles lyrics on all her songs. Its got minor surface rust inside but nothing a quick buff couldn't sort out. Gave it a paint with some galv it rust protecting shit since it'll sit in my shed for months until cash comes up for bathroom renos. (coming soon) it'll be wall hung for that old feel. Which will suit the house to a T. Not bad buy for $32 bucks. Even came with a fancy pull chain and cast ring moulded for perfect comfort for two finger operation.1 point
-
A few months go by and I finally get pissed off enough with my kitchen. Mainly the cupboards. Pictures describe my problems with them. So out they came. Before: My sweet oven After: My sweeter oven As we removed them, we were forced into either keeping the louvred window or blocking it. Now since I'm lazy as fleck but enjoy a challenge (conflicting, right?) i decided to have a go at framing a window. I hate working with wood. You can just 'build it up with the welder' if you cut it short or on the piss. But it came out mint. Straight enough for me. Replaced a few of the tongue and groove boards too since Mr Bora Beetle made refuge in them.1 point
-
More on "rusting my wall" later. For now ill just show one of two side tables i made while money was short and used up the rest of the material from the hallway cupboard. They weigh a ton and have Strayan red wood (i think) tops. Ive oiled them since the pics so are much darker nowadays. Used for seats when people hit the piss at mine too.1 point
-
Since we got rid of our only storage other than in our kitchen, I decided to make my first set of cupboards. Got some steel through work, Cut up an old bench seat that we got with the house. A little bit of magical dust and voila. Test fitting: (as if it wouldn't hahah) And final Think it cost me like 120 bucks all up? Cheapskate or costsaver? Heres it in action while we prepped out wall for "rusting". Literally.1 point
-
Ive had steering rams rust and pit the hardening/chrome off. ive sent them to be rekitted only to be told they cant repair/ rbuild the ram and have smoothed it up as much as the can. i have never had an issue after that. i spose so long as the chrome has be smoothed nicely and not cutting the shit out of the seal it should be ok? But yeah if it s ajob you dont want to do again might aswell do it properly.1 point
-
Thought that was you. Glasses made you look like a taller retep1 point
-
Pete? Dunno. I walked into burgerfuel and everyone looked at me with this look like Oh fuck, this guy. Expected really.1 point
-
Found a pair of spectacles inside my jacket pocket (it was a freebie from Nickrock, had never worn it) and this made the whole night worthwhile. Was cool saying hi to a bunch of ppl I kinda knew but had never seen before. The variety of cars was very cool!1 point
-
And something rather special I found at Upick (it's a genuine one):1 point
-
Just under a month to go til this1 point
-
Ever had that feeling where you know you shouldn't have started messing with something? I thought I'd give the cooling system a birthday as it looks all rusty and shitty inside and its running at just over half way on the temp gauge. climbing to 3/4 when under heavy load. Hotter than I would like. Then i pulled the fan assembly off the radiator. Lots of lovely black water came out. So I sent the radiator off to Motueka Radiators to have a good clean up. I thought I better locate the thermostat and see if that is part of the issue....couldn't find it.....Surely its not in that weird canister with hoses coming off it. Oh wait yes it is because Soviet Russia! I cleaned all the shit out, tested it, and it seems to open at about 88-90 degrees. So I'll roll with that for now. Bit hotter than I'd like though. And all the hose clamps are single use only! Similar design to CV boot clamps. Almost like you were never meant to take it apart. mmmm gunky Radiator came back all clean and like new...or so I thought So I cleaned up the engine bay, smashed it all back together and filled it with coolant as quickly as possible to attend this months Nelson meet in Takaka. Total disaster!!!! Jane and I made it 3/4 up the Takaka hill and noticed the temp gauge creeping up again. Then I noticed a green substance leaking onto my left foot from the heater core. Uh oh... So we pulled over, popped the bonnet and there was green water everywhere. Dobbie at the Radiator shop must have had one to many doobies that day and forgot to re solder the inlet pipe onto the radiator properly! So that was our trip over. We coasted back down the hill, topped up the water at the bottom and went home. Out with the radiator again. Ugh. Lada life.1 point
-
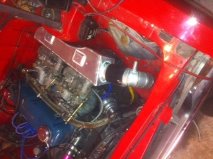
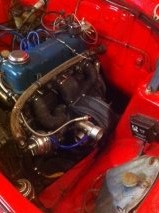
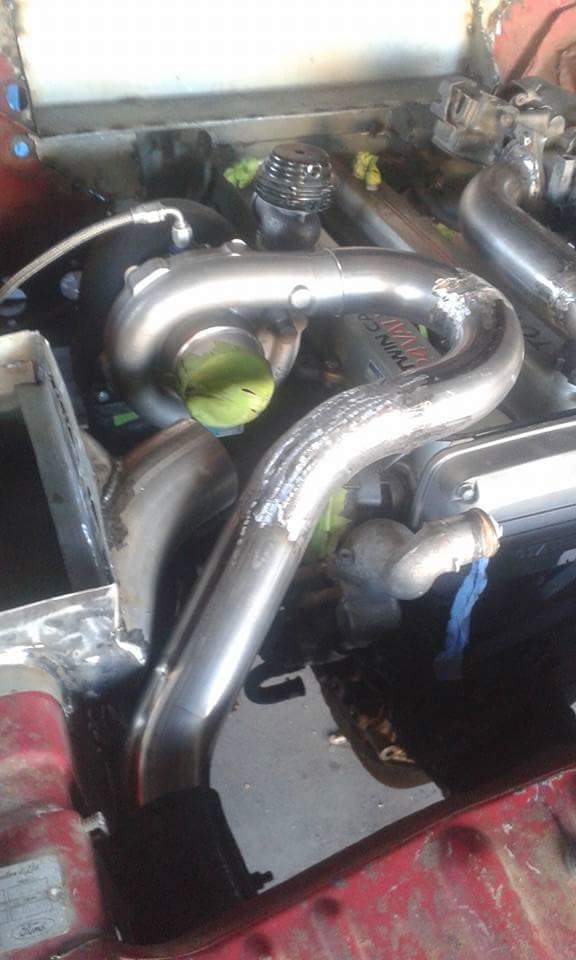
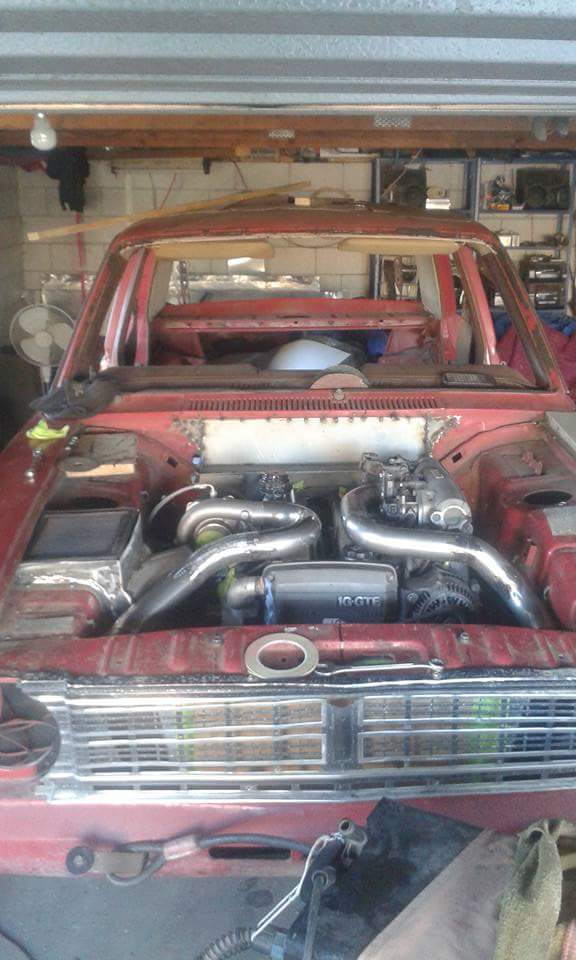
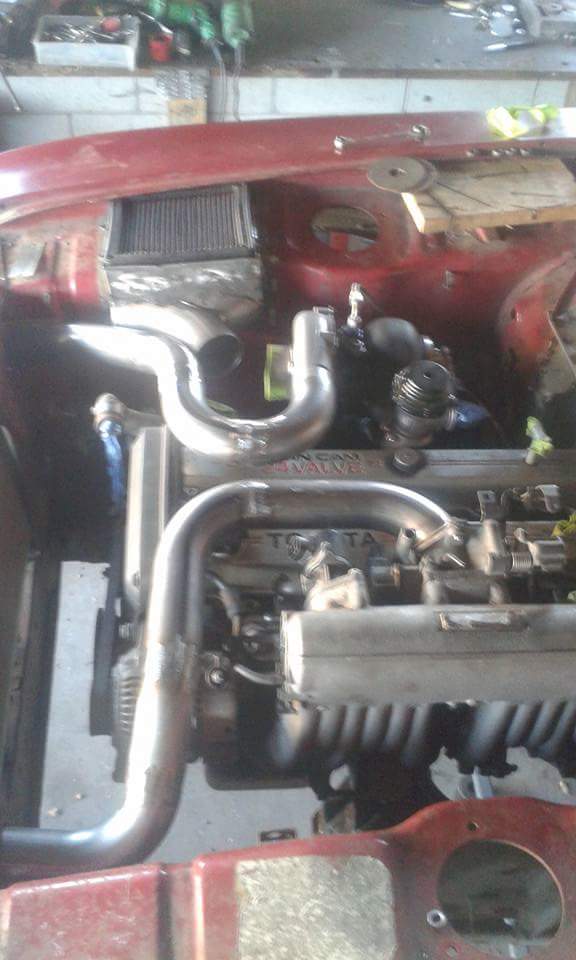
I finished making the hot side intercooler piping today and also made the brackets to bolt the air box to the engine bay. All in all I'm pretty happy with it so far. And only need to use 4 silicon joiners in the whole set up from air box the intake fannymold.
1 point
-
A workmate just bought a turbo DC2 running one of the eeeaaarrrlllllyyy links. I'm pretty sure that the scratches on the casing are from when Moses tried to chisel the ten commandments into it. His engine has been running a bit rough so I was all "sweet lets just datalog it" Oh nah, turns out you need a serial board and all this other junk to plug it in, and there's possibility that it's not laptop tunable anyway. Heh. *back away slowly*1 point
-
So got that airflow meter cleaner and gave it a good clean, dried it and put back in, check engine light back on and seemed to run worse, decided to rip into it today so took throttle body off and gave it a good clean along with the IACV, put it back together and no check engine light and seems to be running sweet now! fingers crossed it stays that way haha.1 point
-
Oh what a day! Next up is to lengthen the swing arm.1 point
-
Just need to fix the motor and I can go trail riding Oh I got this KX250, just need to rebuild the motor, this bring the total number of my motorcycle collection to 10 bikes.1 point
-
I got the Skylark and BSA bikes around 2 months ago and started tinkering "i aint ridin no lady bike" so I cut of the top bar and moved it up Gave it some new paint, bar tape and cables, then decided i was too lazy to hook up cables to the gears so converted it into a simple single speed1 point
-
Ordered New Outer Barrels for Focus Racing. Have organised purchase of Camber adjustable subframe also. Thanks to a gingerminge speciman. Question. Once the wheels are split i want to powdercoat the centre and spokes, then skim 0.5-1mm off the face of the centre to bring it back to new metal and remove pitting, while keeping the sides of spokes powdercoated. Will the powdercoating chip if i lathe the face? Am i better to paint rather then powdercoat. Whats the benefits of powdercoating over spraying them? Answer here ---> //oldschool.co.nz/index.php?/topic/47514-ants-tc24-gx71/1 point
-
Some more pictures
1 point
-
i went away for a week and I've been working on my scooter a bit but now its time to do some more work on this. i made the new part for the inner guard and welded that in. its way to big on the outer edge but ill fix that latter when i know what shape it has to be. Untitled by sheepers-ra28, on Flickr so then i had to fix the rust in the bottom of the inner and outer at the bottom of the guard. first cut out the rusty bits. Untitled by sheepers-ra28, on Flickr then make a new piece for the inner guard. Untitled by sheepers-ra28, on Flickr then weld that in. Untitled by sheepers-ra28, on Flickr i made a few bits to fix the bottom part of the arch but i forgot to take photos of that so you'll have to take my word for it. then i made a patch for the outer skin and welded it in. you can see around the edges that all the insides were primed with weld through copper primer before i welded the outer skin on. Untitled by sheepers-ra28, on Flickr all cleaned up. Untitled by sheepers-ra28, on Flickr still a bit to go on this guard but i should have all the rust repairs finished tomorrow and i can start finalizing the flare and stitching the skins back together.1 point
-
D-day/week, second week of January and the mission was on had a week to fit engine/box, get the car rolling, panels on and packed up with parts to roll into a 40ft container with the Mrs' ke20 for their journery to Auckland with all our other crap. Borrowed some ae85 struts off a mate as the coil overs still aren't finished and fitted them up with ke35 top hats to get the car rolling. Quickly primered the insides of the doors/boot/bonnet to fit up and painted up the block with engine paint as well as the rear half of the box. Reassembled gearbox and fitted some ta22 engine mounts to the motor (the shorter ones) that I had picked up a while back. Also finished brake/fuel lines under the car etc and fitted tidied up genuine toyota brake master and clutch master/slave. Engine went in like a dream, the ta22 mounts put the engine nice and low in the factory position on the te3# x member and the factory te3# gearbox x member lined up perfectly with the rear pair of the 2 lots of x member holes in the body, forward position shifter also came straight through the factory hole in the floor. Just had to dig some factory filler stuff out of them and it bolted straight inreally happy everything fitted together with factory sourced parts and I didn't have to hack anything up, I also have three T series drive shafts of different lengths, I haven't tried yet but hopefully one goes straight in and I don't have to worry about modifying one. Engine cleared the added rack and pinion perfectly too which was awesome because I really didn't have the time for big backwards steps. The only real set-back was I had originally fitted a larger 3t corona front sway bar which fitted together on the subframe sweet but fouled on the castor arms when I slammed the car back down so it was swapped out for a factory ke35 one for now, motor still clearances it fine but it looks a little funny as its tiny and offset for the lean over K motor. I'm hoping to find something to replace it at some stage but I'm not sure yet, either find and try an ta22/ra28 one and see if it fits or hunt out a te3# one from the states. Anyway most importantly plenty of room either side for dellorto's and high rise headers With that the car was ready to be packed with parts and loaded up, both cars made it safely to Auckland without any damage and it's good to have them up here! Still mucking around with my track car but that'll be out of the way soon so getting back into this in a big way. Aiming to finish the car this year, really have to stay motivated and get it done!1 point


This leaderboard is set to Auckland/GMT+12:00